A good mural can flip the whole mood of a space in one weekend, like you suddenly gave the room a brand-new personality. Here are my favorite mural ideas—starting with the classics everyone loves, then drifting into the more unexpected, studio-level fun.
Oversized Botanical Wall Garden

Transform a plain white wall into a lush, oversized garden sanctuary using muted earth tones and vintage-inspired forms. This mural captures the elegance of old scientific illustrations, blending soft watercolor washes with crisp line work for a sophisticated, nature-infused living space.
Detailed Instructions
Materials
- Interior latex paint (Eggshell finish: Cream/Off-white for base)
- Acrylic paints (Soft Sage, Olive Green, Hunter Green, Dusty Rose, Terracotta, Ochre)
- Glazing medium
- Pencil and large eraser
- Projector (optional but recommended for layout)
- Various brushes (large flat brushes for filling, fine liner brushes for details, round brushes for shading)
- Painter’s tape
- Drop cloth
- Ladder
- Mixing palettes or plastic plates
- Water cups and paper towels
Step 1: Preparation and Layout
-
Prepare the Canvas:
Begin by clearing the wall area completely. Patch any holes, sand them smooth, and clean the wall surface with a damp cloth to remove dust. Tape off your baseboards, ceiling line, and adjacent walls with painter’s tape, and lay down your drop cloth. -
Apply the Base Coat:
Roll on a fresh coat of warm, creamy off-white latex paint. This particular mural relies on the negative space looking crisp and intentional, so don’t skip this refresh even if your wall is already white. Let it dry for at least 4-6 hours. -
Sketch the Composition:
Using a pencil, lightly sketch the outlines of your botanical elements. Start with the largest leaves first—like the giant Monstera-style leaf on the left and the broad leaf on the right—to anchor the composition. If you aren’t confident freehanding, project an image of vintage botanical prints onto the wall and trace the main silhouettes. -
Draw the Connections:
Connect your main elements with long, sweeping stem lines. Ensure these lines curve naturally, mimicking the organic growth of wildflowers. Keep your pencil pressure very light so graphite doesn’t smudge into your paint later.
Watercolor Wall Hack
To get that soft, transparent look with acrylics, mix 1 part paint to 2 parts clear glazing liquid. It extends drying time and allows layers to show through.
Step 2: Painting the Foliage
-
Mix Your Greens:
Prepare three different green mixtures: a pale sage for background leaves, a medium olive for mid-ground foliage, and a deeper forest green for shadows. Mix each with a small amount of glazing medium to increase transparency, giving that watercolor effect. -
Block in Large Leaves:
Using a large flat brush, fill in the biggest leaf shapes. Don’t worry about perfect coverage; a little streakiness adds texture. For leaves that fold or turn, paint the ‘underside’ sections with a slightly lighter shade of your green mix. -
Add Decorative Ferns:
Switch to a medium round brush to paint the fern-like fronds. Use a single, confident stroke for each leaflet, starting at the stem and flicking outward to create a tapered point. -
Paint the Stems:
Use a long liner brush loaded with thinned olive green paint to trace over your pencil stem lines. I find that pulling the brush toward you rather than pushing it away yields a smoother, steadier line.
Fixing Wobbly Lines
If a stem line goes astray, don’t wipe it! Wet a clean brush with water and gently ‘scrub’ the edge to fade it into the background, creating a soft shadow.
Step 3: Florals and Details
-
Create the Pink Blooms:
Mix a dusty rose color with plenty of water or glaze. Paint the petals of the large focal flower, starting from the center and sweeping outward. Let the paint pool slightly at the edges to create a natural, darker rim as it dries. -
Add Secondary Flowers:
For the smaller bud-like flowers (like the reddish one on the right), use a terracotta mix. Keep these shapes simpler and silhouette-based to avoid distracting from the main bloom. -
Define the Flower Centers:
Once the pink petals are dry, mix a dark ochre or brown. Dapple this color into the center of the main flower using the tip of a stiff brush to simulate pollen texture. -
Layering Transparency:
Paint the background ‘shadow’ leaves—the ones that look faded—using a very watery, pale grey-green wash. Paint these right over or behind existing stems to create depth.
Step 4: Refining and Sealing
-
Add Leaf Veins:
With a fine liner brush and a dark green-brown mix, paint the veins on the large leaves. Keep these lines extremely thin and broken in places; they shouldn’t look like harsh outlines. -
Enhance Contrast:
Step back and look at the mural as a whole. Use your darkest green to deepen the shadows where stems meet leaves or where leaves overlap one another. -
Erase Guidelines:
Once the paint is completely bone-dry (wait at least 24 hours), gently erase any visible pencil marks. Be careful not to scrub the paint itself. -
Protective Coat (Optional):
In high-traffic areas, apply a clear, matte water-based polycrylic over the entire wall using a roller. If it’s a low-traffic bedroom wall, the paint itself is usually durable enough.
Now step back and admire your personal indoor garden that requires absolutely no watering


Soft Cloudscape for a Calm Room
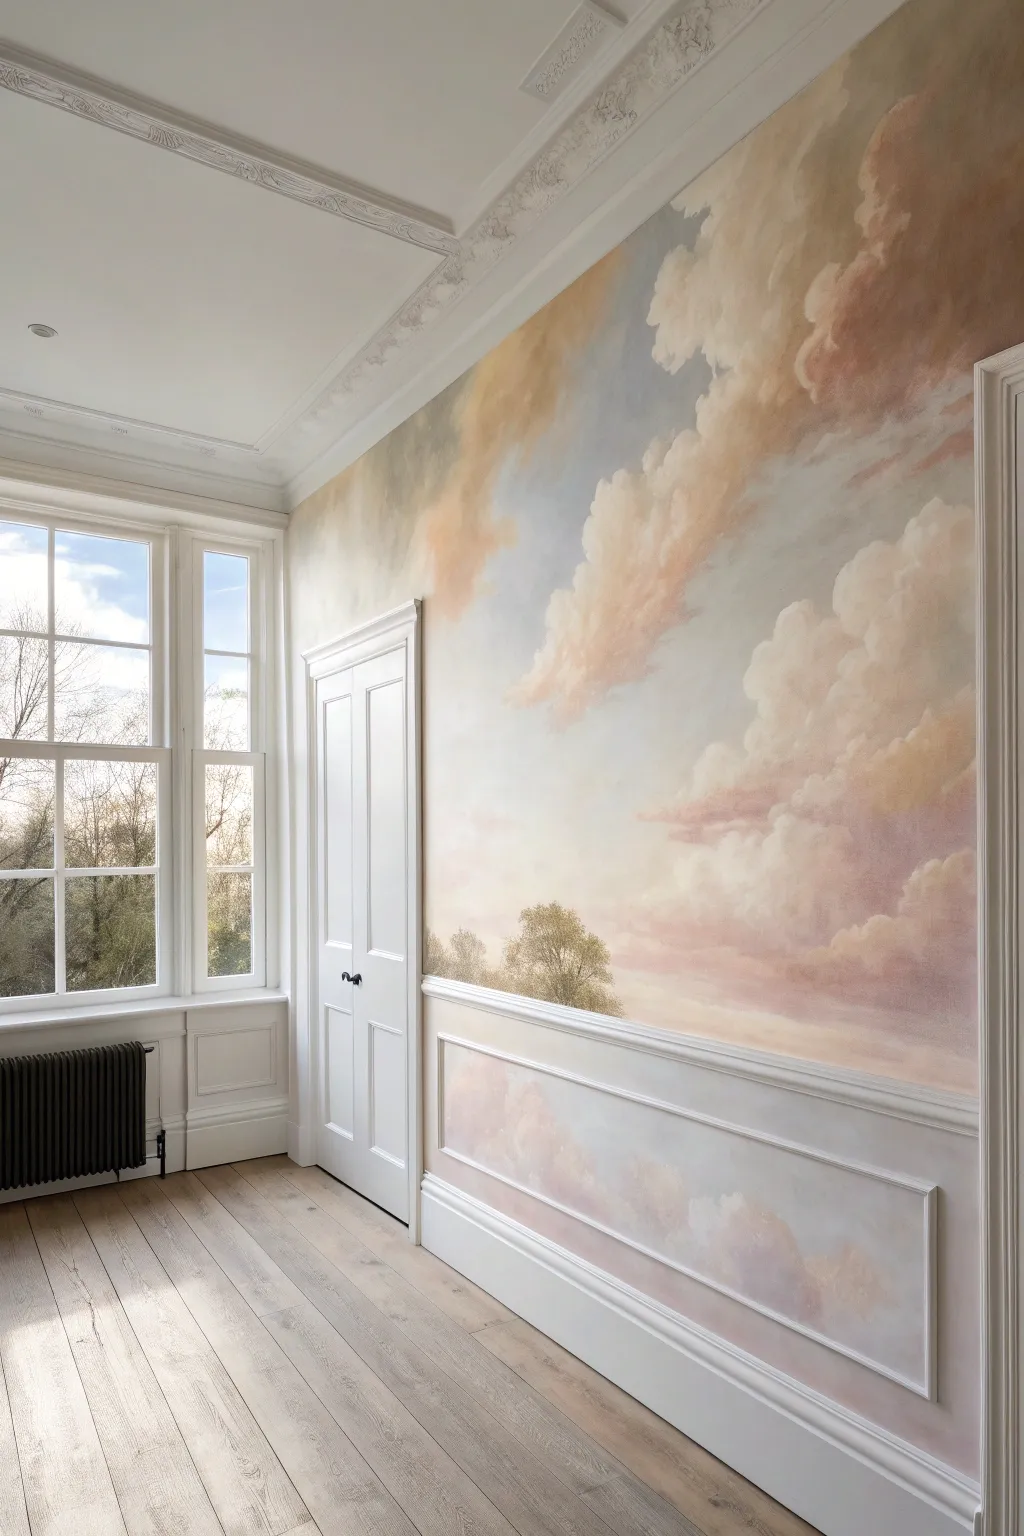
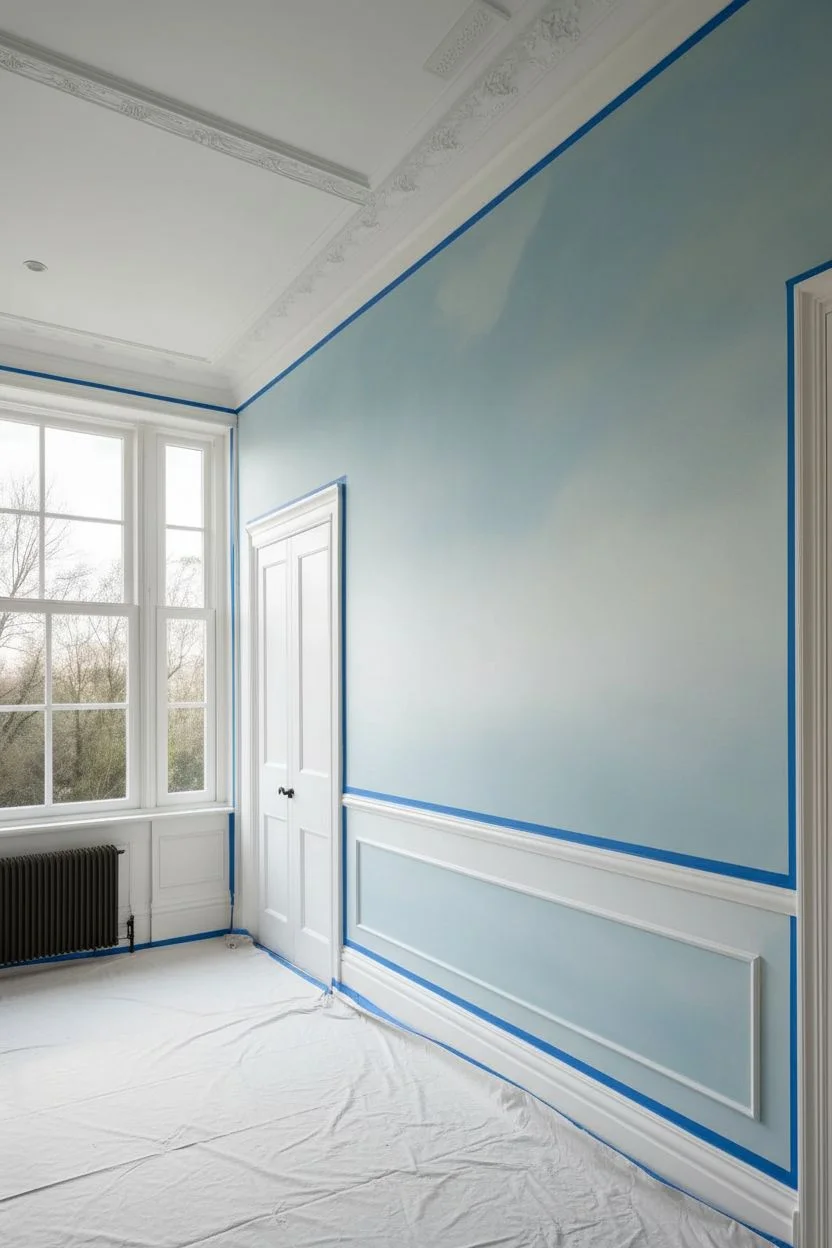
Transform an ordinary wall into a sweeping Romantic-era sky with this soft, painterly mural technique. By layering translucent glazes of pastel pinks, moody blues, and warm creams, you’ll create a dreamlike atmosphere that feels expansive and serene.
Step-by-Step
Materials
- Matte interior latex paint (White base)
- Acrylic glazing liquid (slow-drying)
- Acrylic paints (Colors: Cerulean Blue, Burnt Sienna, Raw Umber, Alizarin Crimson, Titanium White, Yellow Ochre)
- Large blending brushes (soft synthetic or badger hair)
- Assorted chip brushes (2-3 inch)
- Sea sponge (natural)
- Lint-free rags
- Painter’s tape
- Drop cloth
- Mixing buckets or trays
- Step ladder
Step 1: Preparation & Base Coat
-
Protect the space:
Begin by clearing the room and laying down a drop cloth. Tape off the ceiling line, floor trim (if not painting over it), and adjacent walls to ensure crisp edges. -
Prime the wall:
Apply a coat of quality white primer if the wall isn’t already white. A clean, bright white background is crucial because the subsequent layers will be semi-transparent, relying on this white base for luminosity. -
Mix the sky blue:
In a bucket, mix a pale, muted blue using white latex paint, a touch of Cerulean Blue, and a tiny dot of Raw Umber to desaturate it. You want a soft, atmospheric blue, not a bright nursery blue. -
Apply the background gradient:
Paint the upper portion of the wall with your blue mix. As you move lower towards the horizon line (about chair-rail height), mix in more white to create a fading gradient. The bottom third should be nearly white.
Cloud Edges Too Hard?
If your clouds look like cutouts, your paint is drying too fast. Mist the wall lightly with water before blending, or add more slow-dry medium to your mix to keep it workable longer.
Step 2: Blocking in Forms
-
Draft the composition:
Once dry, stand back and lightly sketch the major cloud formations using faint chalk or a very diluted grey paint. Follow the diagonal composition seen in the image, sweeping from high corners down towards the center. -
Mix the cloud colors:
Prepare three glaze mixtures: a warm peach (White + Yellow Ochre + touch of Alizarin), a dusty rose (White + Alizarin + Burnt Sienna), and a shadow grey (White + Raw Umber + Cerulean). Use about 1 part paint to 4 parts glazing liquid for translucency. -
Apply the first warm masses:
Using a large chip brush, loosely apply the peach glaze in the center and upper highlighted areas of your sketched clouds. Use a scumbling motion—scrubbing the brush in circles—to create irregular, organic shapes. -
Add the rose tones:
While the peach is tacky but not wet, introduce the dusty rose glaze into the mid-tones and undersides of the main cloud structures. Let these colors overlap slightly to create new orange-pink nuances.
Step 3: Refining & Blending
-
Soften the edges:
Immediately use a dry, soft blending brush to gently feather the edges of your colored patches into the blue background. This is the key to that fluffy, ethereal look; no hard lines should remain. -
Deepen the shadows:
Apply the shadow grey glaze to the bottoms of the clouds and the ‘valleys’ between the billows. I find it helpful to squint while doing this to see the overall volume rather than the details. -
Create the wainscoting effect (Optional):
If you have molding panels like the photo, treat the area inside the molding as a continuation of the sky. Paint the molding itself bright white, and ensure the ‘sky’ inside the frame matches the color values of the wall directly above it. -
Add the tree line:
Mix a muted olive-brown using Raw Umber and a touch of Yellow Ochre. Using an old, splayed brush or sea sponge, gently tap in the silhouette of treetops along the lower horizon line, keeping them soft and distant. -
Highlight the billows:
Mix a thicker, more opaque highlight color using Titanium White with a tiny tint of warm yellow. Using a smaller round brush, dab this onto the top-left edges of the cloud puffs where the imaginary sun would hit. -
Blend the highlights:
Take a clean, dry badger hair brush and lightly whisk over the highlights to melt them into the surrounding colors. Do not over-blend, or you will lose the definition of the cloud tops.
Level Up: Golden Hour
For a magical glowing effect, use iridescent gold acrylic medium mixed scantly into your final white highlights. It will catch the light beautifully in the evening.
Step 4: Final Atmosphere
-
Glaze for unity:
Once the cloud layers are fully dry, mix a very watery, barely-there glaze of warm pink. Apply this over large sections of the mural to unify the colors and warm up any blue areas that feel too cold. -
Check detailed areas:
Step back to the other side of the room. Look for any areas that feel flat or too sharp. Use a rag with a tiny bit of glaze to dab out harsh spots or add depth where needed. -
Paint the lowest section:
Inside the lower wainscoting panel, ensure the clouds are softer and more purple-grey, mimicking the atmospheric perspective where things near the horizon look hazier. -
Seal (Optional):
Art murals generally don’t need sealing if using high-quality acrylics, but if this is a high-traffic hallway, apply a clear, matte water-based varnish for protection. -
Remove tape:
Carefully peel away the painter’s tape while the final varnish or touches are still slightly tacky to prevent peeling dry paint.
Enjoy the peaceful ambiance of your new eternal sunset every time you walk into the room


Modern Mountain or Desert Landscape
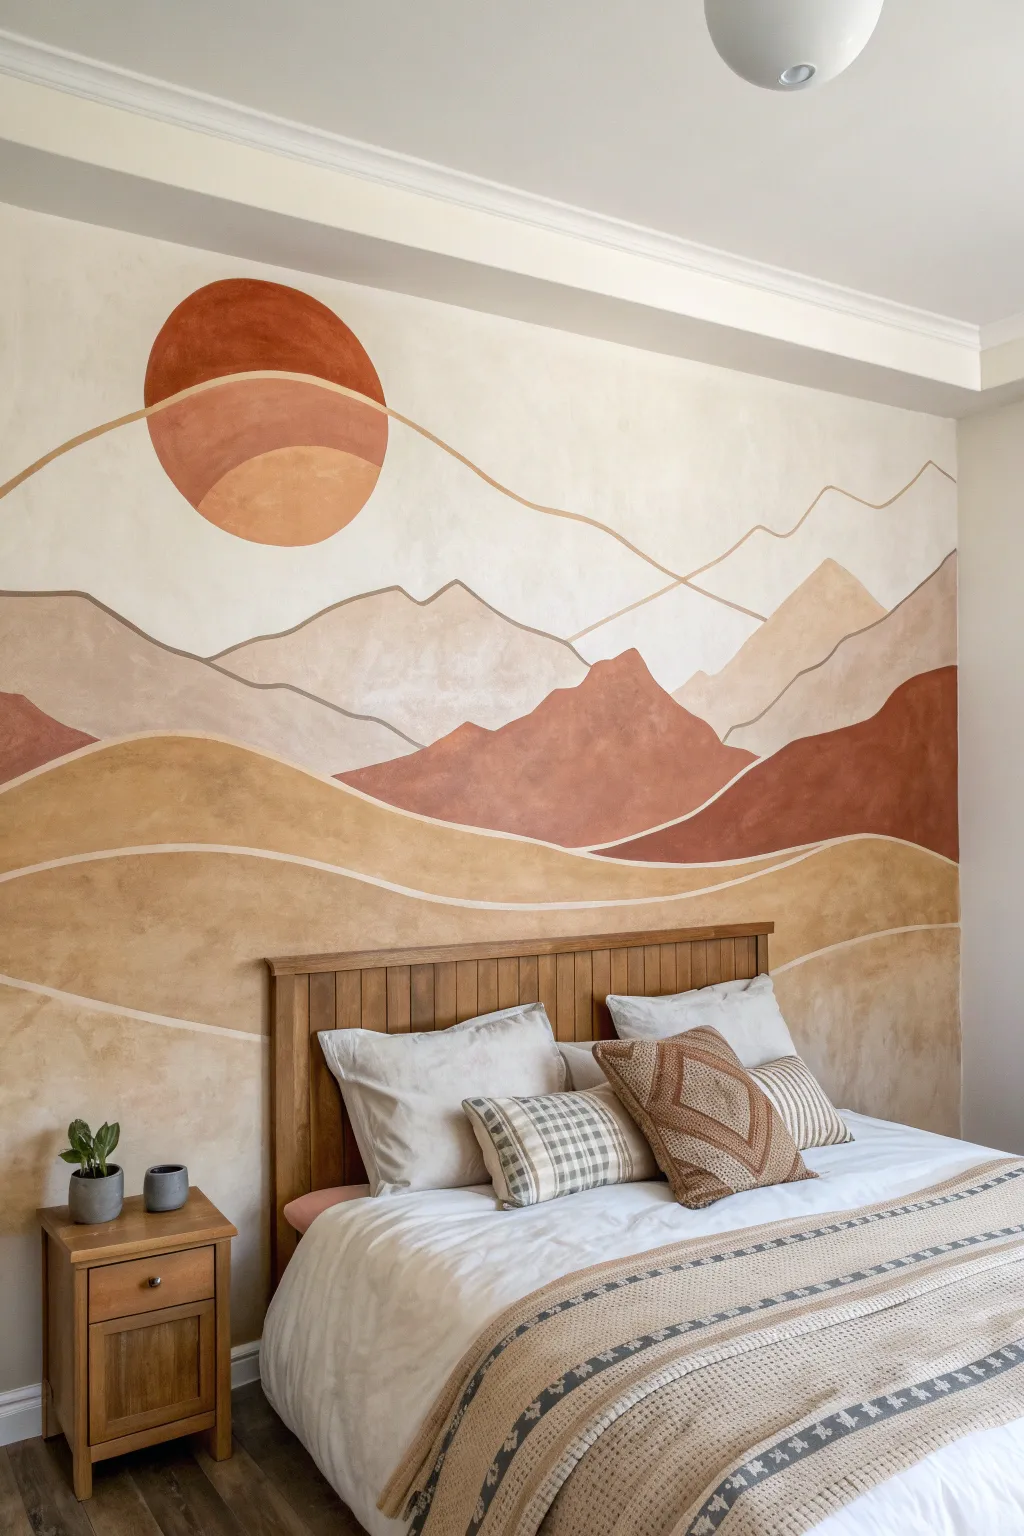
Transform a blank wall into a warm, inviting oasis with this minimalist mountain landscape mural. Featuring soft earth tones and organic shapes, this project brings a calming desert sunset vibe directly into your bedroom.
Detailed Instructions
Materials
- Interior latex paint (Eggshell finish: White/Base coat)
- Interior latex paint (Flat or Eggshell finish: Terracotta, Tan, Dark Beige, Light Beige, Rust)
- Pencil and eraser
- Painter’s tape or chalk line (optional)
- Assorted paintbrushes (medium sash brush, small detail brush)
- Small foam roller and tray
- Drop cloths
- Ladder or step stool
- Damp rag
Step 1: Preparation & Planning
-
Prepare the canvas:
Clear the wall completely and remove any hardware or outlet covers. Lay down a drop cloth to protect your flooring. If the current wall color is dark, prime it or paint a fresh coat of warm white or cream to serve as your sky and negative space background. -
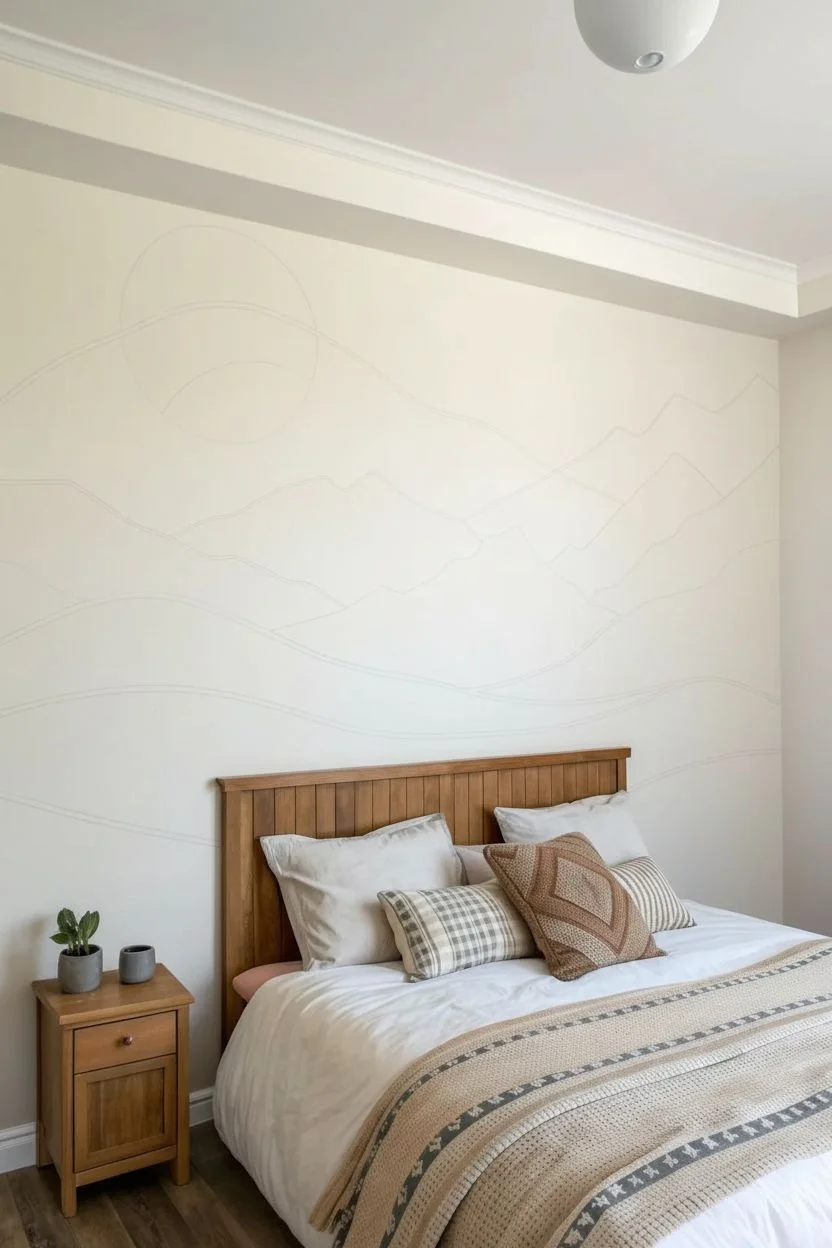
Sketch the sun:
Start with the focal point: the sun. Use a pencil to lightly sketch a large circle in the upper left quadrant. It doesn’t need to be perfectly round—a slightly hand-drawn look adds charm—but you can trace a large round platter or use the string-and-pin trick for guidance. -
Divide the sun:
Draw two slightly curved horizontal lines across your sun circle to divide it into three distinct segments. These will eventually be painted in gradient shades. -
Map the landscape:
Sketch your mountain ranges. Start from the bottom and work your way up. Draw flowing, wavy lines that span the entire width of the wall. Let the lines dip and peak naturally, ensuring they aren’t perfectly symmetrical. -
Create depth:
Ensure you have at least three or four distinct ‘layers’ or hills. The bottom layers should be larger and flatter, while the peaks in the middle ground can be sharper to mimic mountains. -
Add separation lines:
Notice the thin white lines separating the colors in the inspiration photo? You can either leave a gap while painting later (which is tricky) or, for easier execution, sketch the shapes with a distinct gap now so you know exactly where to stop your brush.
Wobbly Lines?
Don’t panic if your freehand lines aren’t perfect. Simply wait for the paint to dry, then cut back in with the white background color to sharpen the edges.
Step 2: Painting the Landscape
-
Mix your palette:
Pour small amounts of your earth tones into trays. You want a distinct gradient: a deep rust/terracotta for the middle mountains, a medium tan for the foreground, and lighter beige for the distant peaks. -
Paint the sun top:
Using a medium angled sash brush, carefully paint the top segment of the sun in your darkest rust color. Keep your hand steady to maintain a crisp edge against the white background. -
Complete the sun gradient:
Paint the middle segment of the sun a medium terracotta and the bottom segment a lighter orange-tan. I like to keep a tiny sliver of white wall exposed between these segments to define them, rather than painting them touching. -
Start the lowest layer:
Move to the bottom of the wall. Use a roller for the large expanse of the lowest hill, filling it in with a warm, medium-brown beige tone. Use a brush to cut in the top wavy edge carefully. -
Paint the foreground hills:
Paint the next layer up in a golden tan shade. Remember to leave a consistent 1/4-inch to 1/2-inch gap between this color and the layer below it to create that white definition line. -
Add the dramatic peaks:
Paint the most prominent, jagged mountain range in the middle with your darkest terracotta or rust color. This dark band anchors the design and draws the eye across the room. -
Fill the background:
For the mountains highest up on the wall (behind the rust range), use your lightest beige or sand color. This mimics atmospheric perspective, where distant objects appear lighter.
Pro Tip: Custom Colors
To save money, buy one gallon of deep terracotta and one of white. Mix them in different ratios to create all your lighter pinks and beiges.
Step 3: Refining Details
-
Review the gaps:
Step back and check your white separation lines. If paint accidentally crossed into a gap, wait for it to dry completely, then use a small detail brush and your white base wall paint to touch it up and re-establish the line. -
Smooth the texture:
The inspiration photo shows a fairly matte, soft finish. If your paint looks too streak-free and perfect, you can lightly dry-brush a slightly lighter shade over the dry mountains to add subtle depth and limestone-like texture. -
Erase guidelines:
Once the paint is fully cured (usually 24 hours), gently erase any visible pencil marks that weren’t covered by paint, particularly around the lighter sun sections.
Step back and admire the warm, tranquil atmosphere you have created in your space


Abstract Color-Block Shapes
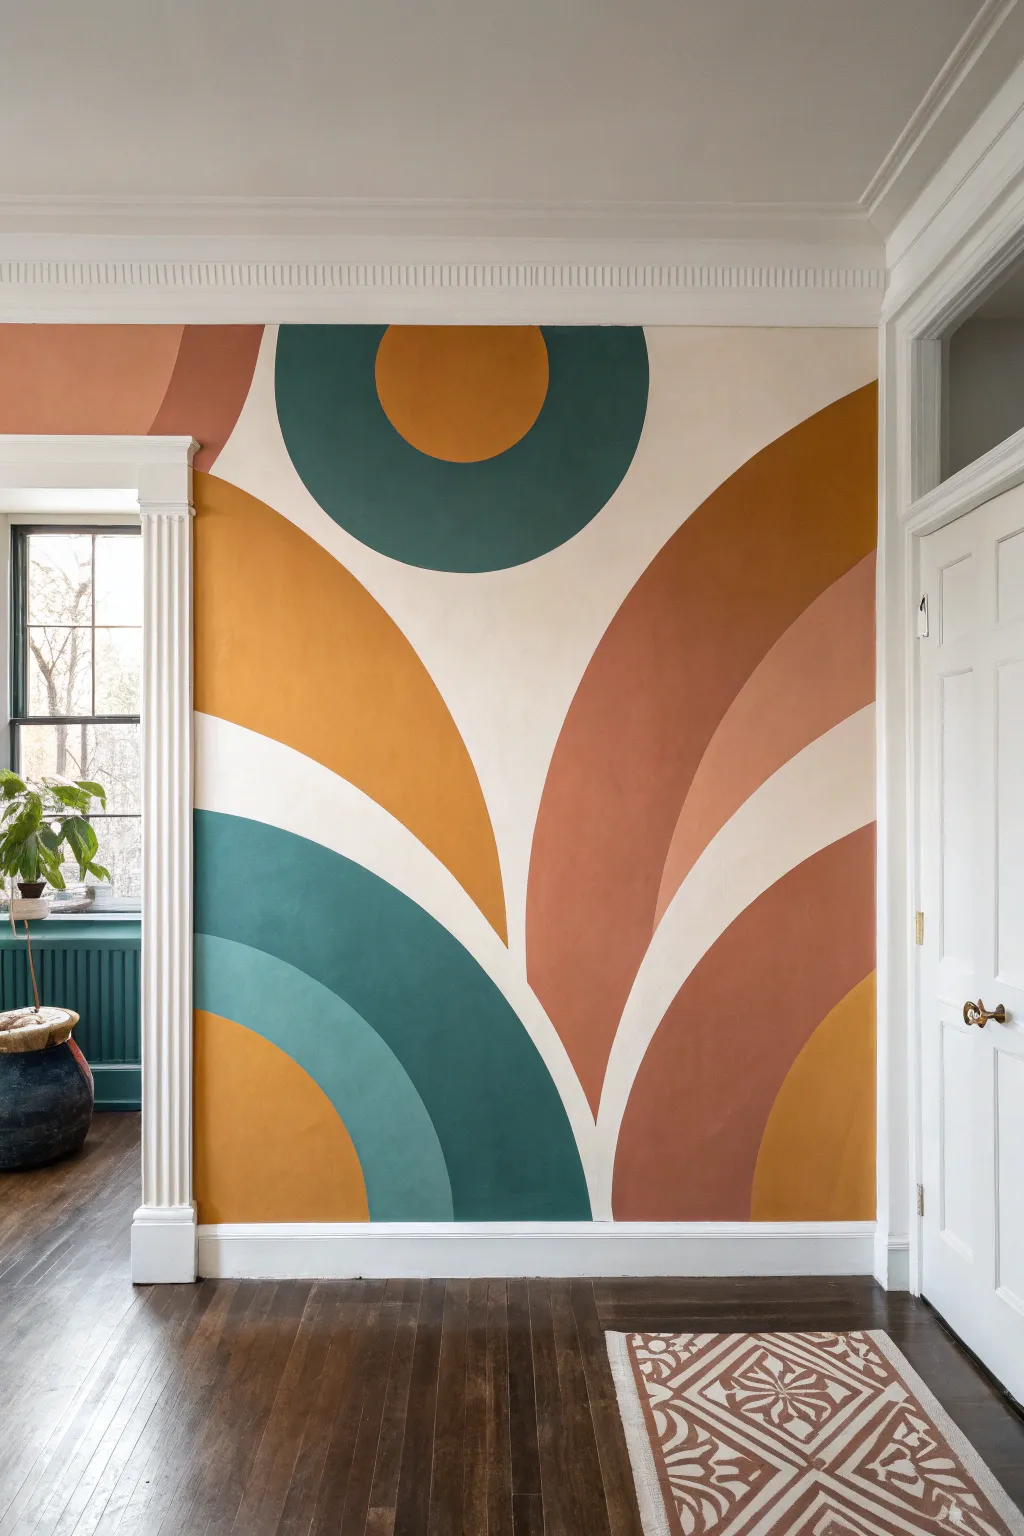
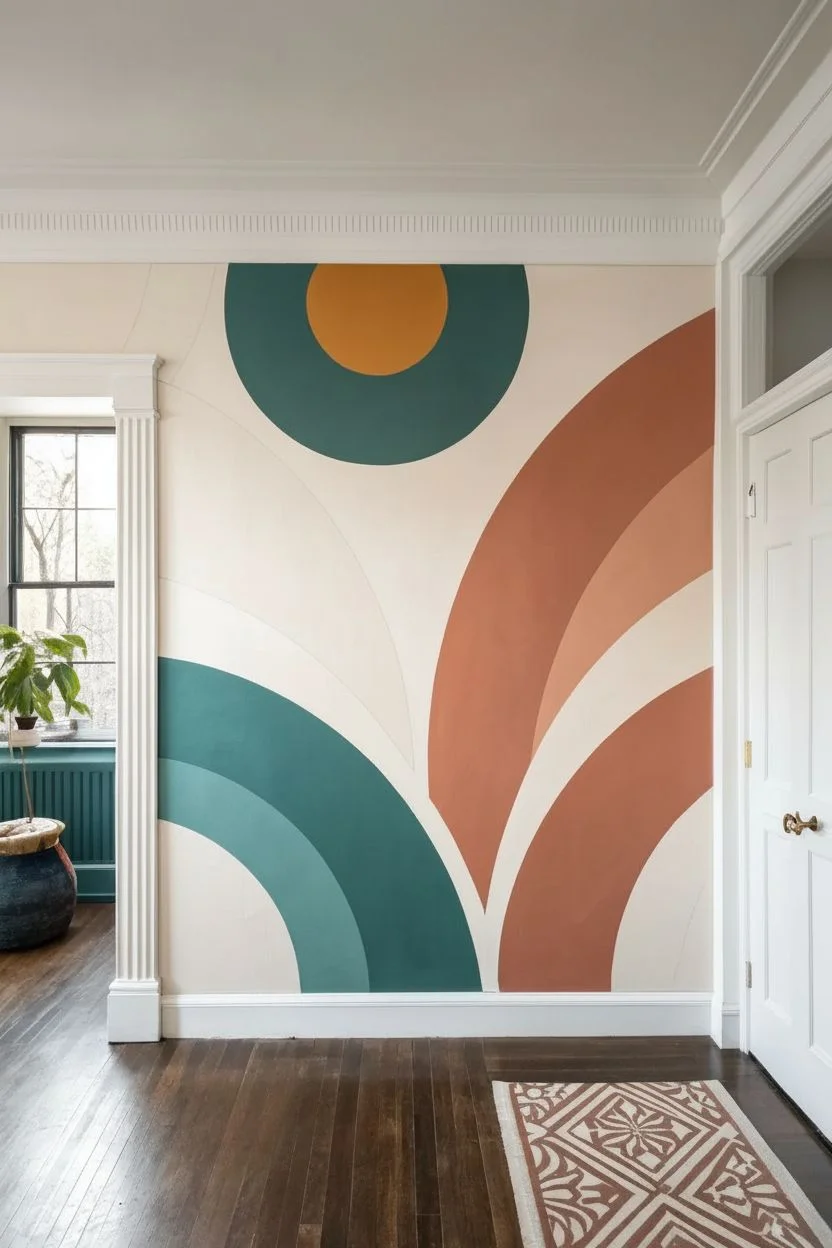
Transform a plain wall into a mid-century masterpiece with this large-scale abstract mural featuring bold arches and floating circles. The warm, earthy palette of mustard, terracotta, and teal brings a cozy yet modern energy to any living space or hallway.
Step-by-Step Guide
Materials
- Interior latex paint (Mustard Yellow, Terracotta, Deep Teal, Light Teal, Cream)
- Small roller brushes (4-inch)
- Angled sash brush (2-inch)
- Round artist brushes (various sizes for touch-ups)
- Pencil
- String or twine
- Thumbtacks or small nail
- Painter’s tape
- Drop cloth
- Step ladder
- Eraser or damp cloth
Step 1: Preparation & Mapping
-
Prepare the canvas:
Start by clearing the wall area and laying down a drop cloth. Ensure the wall is clean, dry, and free of dust. If your base wall color isn’t the cream shade you want for the negative space, apply two coats of your cream base paint first and let it cure for at least 24 hours. -
Plan your layout:
Visualize the wall as a grid. The design relies on large sweeping curves that originate from specific points. Identify where the ‘center’ of each circle or arc would be located—some points might actually be on the floor or the ceiling trim. -
Create a compass tool:
To draw perfect large-scale curves, cut a piece of non-stretchy string to the length of your desired radius. Tie a pencil securely to one end and create a loop for a tack on the other. -
Draw the lower left arcs:
Secure the string’s tack point at the bottom left corner (or slightly off the wall) to create the lowest teal curve. Swing the pencil to mark the arc. Shorten the string and repeat from the same anchor point for the smaller inner curves. -
Sketch the right-side arches:
Move your anchor point to the bottom right. Lengthen your string significantly to create the massive sweeping terracotta arch that reaches almost to the ceiling. Adjust the string length to draw the parallel inner curves. -
Add the upper elements:
For the top circle and upper shapes, you may need a ladder. If drawing a full circle, pin your tack in the center of the desired shape and rotate the string 360 degrees. Use a straight edge to connect any shapes that don’t rely solely on curves. -
Refine the lines:
Step back and inspect your pencil marks. The lines should flow organically. Erase any mistakes lightly so they don’t show through the paint later.
Wobbly Arches?
If your hand isn’t steady enough for cutting in curves with a brush, try bending flexible molding or a thin plastic strip along your pencil line and using it as a guide while you paint.
Step 2: Painting the Shapes
-
Outline the edges:
Starting with your darkest color (the deep teal), use an angled sash brush or a flat artist brush to carefully cut in along your pencil lines. A steady hand is key here, as tape won’t work well on these curves. -
Work outward-in:
Once the sharp edge is established, broaden the painted line to about two inches wide. This creates a safety buffer for when you switch to the roller. -
Fill with the roller:
Use a 4-inch roller to fill in the main body of the teal shapes. Two thin coats are always better than one thick coat to prevent drips and uneven texture. -
Move to warm tones:
Switch to a fresh brush and roller for the mustard yellow sections. Be mindful of where shapes touch; if two colors abut, ensure the first color is completely dry before painting the edge of the second. -
Paint the terracotta arches:
Apply the terracotta paint to the large sweeping arches on the right. Because these shapes are so large, keep a ‘wet edge’ by working in manageable sections to avoid visible lap marks as the paint dries. -
Detail the circle:
Paint the central circle element. I find it easiest to use a smaller artist brush for the entire circumference of circles this size to keep them looking perfectly round, filling the center last. -
Second coat application:
Allow the first layer of all colors to dry for 2-4 hours. Apply a second coat to ensure rich, opaque coverage, especially for the mustard yellow which can sometimes be translucent.
Step 3: Finishing Touches
-
Touch up edges:
Inspect the meeting points between colors and the white negative space. Use a small square-tipped artist brush and the cream base color to ‘erase’ any wobbles or paint bleeds for a crisp finish. -
Erase pencil marks:
If any pencil lines are still visible at the edges of your paint, gently erase them. Wait until the paint is fully cured (dry to the touch isn’t enough) to avoid smudging. -
Final inspection:
Remove the drop cloth and painter’s tape from the baseboards. Step back to admire your work.
Level Up: Texture
Add depth to the mural by mixing a texture additive (like suede or sand finish) into just one of the colors, like the terracotta, for a tactile, plaster-like effect.
The result is a stunning, gallery-worthy feauture wall that completely redefines the room’s atmosphere
BRUSH GUIDE
The Right Brush for Every Stroke
From clean lines to bold texture — master brush choice, stroke control, and essential techniques.
Explore the Full Guide
Geometric Grid and Pattern Play
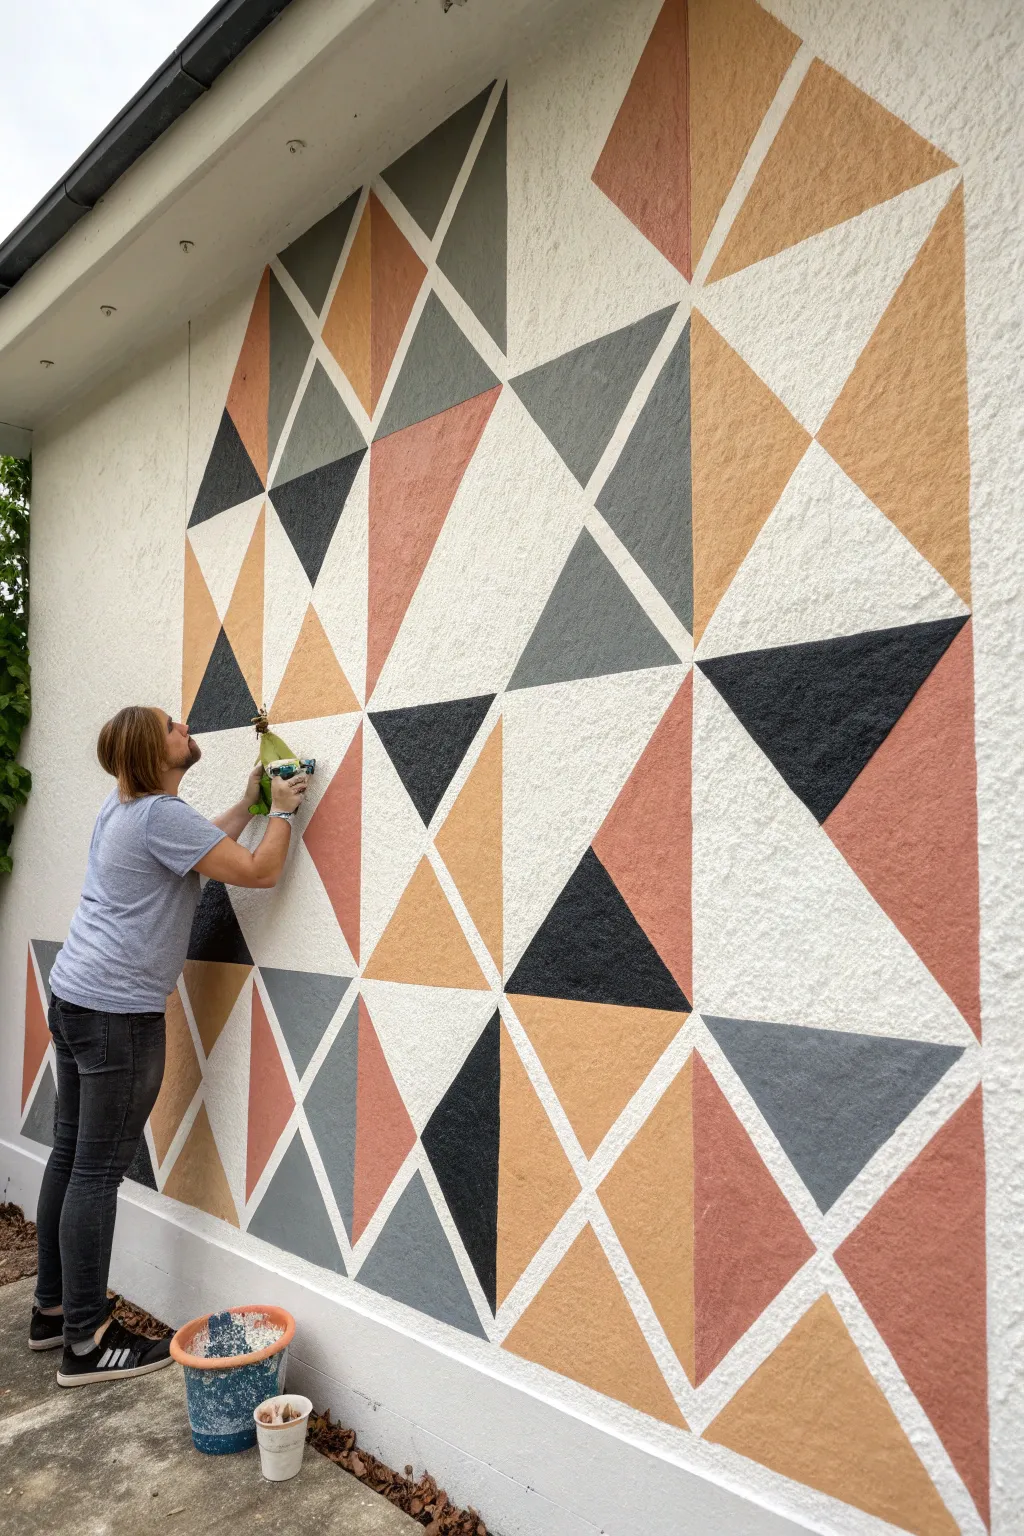
Transform a plain exterior wall into a striking piece of modern art with this large-scale geometric triangle design. The interplay of warm earth tones like terracotta and mustard against cool charcoal grays creates a sophisticated grid that adds depth and movement to any outdoor space.
Step-by-Step
Materials
- Exterior masonry paint (White/Base color)
- Exterior paint samples (Terracotta, Blush Pink, Mustard/Tan, Dark Teal/Grey, Black)
- Painter’s tape (high-quality, multi-surface width approx. 1 inch)
- Level (long spirit level or laser level)
- Long ruler or straight edge
- Pencils or chalk
- Assorted paintbrushes (angled sash brushes work best for corners)
- Small rollers with trays (optional, for larger filled areas)
- Drop cloth
- Rag and water for cleanup
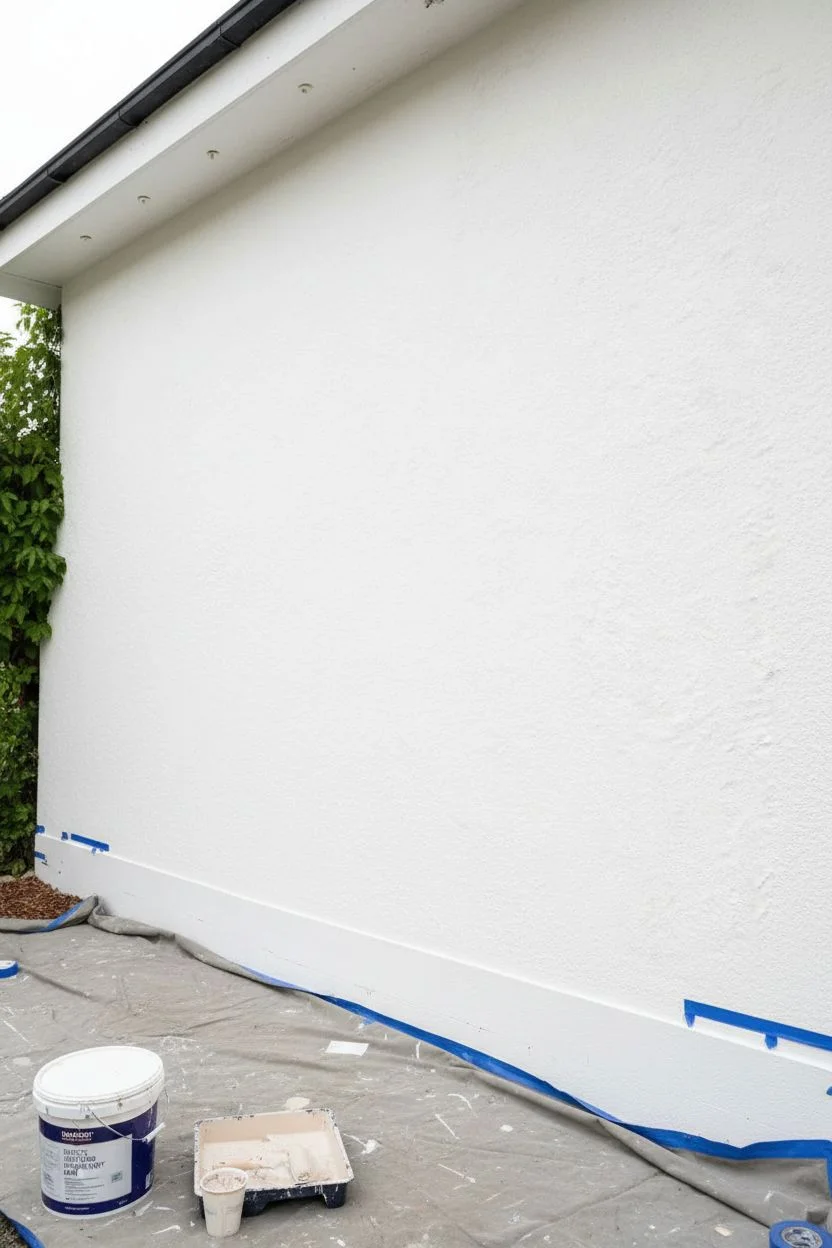
Step 1: Preparation and Base Coat
-
Clean the surface:
Begin by thoroughly cleaning the wall to remove dirt, cobwebs, and loose debris. If the stucco is particularly dirty, a gentle pressure wash or scrubbing with a stiff brush and soapy water is essential for good adhesion. -
Protect the area:
Lay down a drop cloth at the base of the wall to catch any drips or spills. Tape off any adjacent trim, soffits, or floor edges that need to stay clean. -
Apply the base coat:
Roll on your base coat of white exterior masonry paint. This white background acts as the ‘mortar’ lines between your colorful shapes, so ensure you have solid, even coverage. Let this dry completely, ideally for at least 24 hours to prevent the tape from peeling it off later.
Bleed-Through Blues?
If paint bleeds under tape on rough stucco, don’t panic. Wait for it to dry fully, then use a tiny artist brush with the white base paint to ‘erase’ the error carefully.
Step 2: Mapping the Grid
-
Mark vertical guides:
Using your level and measuring tape, mark vertical lines spaced evenly across the wall. The width between lines will determine the width of your triangles. -
Mark horizontal guides:
Mark horizontal lines to create a grid of squares or rectangles. Light pencil marks or chalk lines work best here so they can be easily covered or wiped away. -
Create diagonal lines:
To form the triangles, draw diagonal lines connecting the corners of your grid boxes. Vary the direction of the diagonals (some leaning left, some right) to create a random, faceted look rather than a uniform pattern. -
Tape the design:
Apply painter’s tape along your pencil lines. Crucially, tape on the *outside* of the shapes you intend to paint so the lines remain the white base color. Press the tape edges down firmly to prevent bleed, especially on textured stucco. -
Seal the tape edges:
For crisp lines on textured walls, I like to lightly brush a thin layer of the base white paint over the tape edges first. This seals any gaps; if paint bleeds, it’s just the white, not your color.
Step 3: Painting the Colors
-
Plan your color distribution:
Before opening paint cans, step back and mark each triangle with a small dot of the color you intend to use (e.g., ‘B’ for black, ‘P’ for pink). This helps ensure a balanced distribution of light and dark tones. -
Paint the lightest colors:
Start with your lightest shades, like the blush pinks and mustard tans. Use an angled brush to cut in the corners near the tape carefully. -
Fill the shapes:
Fill in the rest of the triangle using the brush or a small roller. Apply two thin coats rather than one thick one for better durability and color richness. -
Move to darker tones:
Proceed to the mid-tones like terracotta, and finally, the darkest hues like charcoal and black. Be mindful not to accidentally brush wet paint onto adjacent masked areas. -
Double-check coverage:
Inspect the wall from different angles. Texture often hides small holidays (missed spots), so dab extra paint into deep crevices if necessary.
Pro Tip: Batch Painting
Paint all triangles of one color at the same time. It saves immense time washing brushes and ensures consistent color mixing if you are blending custom shades.
Step 4: Finishing Touches
-
Remove tape:
Peel off the tape while the final coat of paint is still slightly tacky, or wait until fully dry. Pull the tape slowly at a 45-degree angle away from the painted area to ensure a crisp line. -
Touch up lines:
On highly textured walls, you may have small bleeds. Use a small artist’s brush and your base white paint to carefully touch up these spots and sharpen the grid lines. -
Clear guide marks:
Gently erase any visible pencil marks or wipe away chalk lines that weren’t covered by paint.
Enjoy the graphic impact your new mural brings to your outdoor space
Whimsical Nursery Storybook Scene
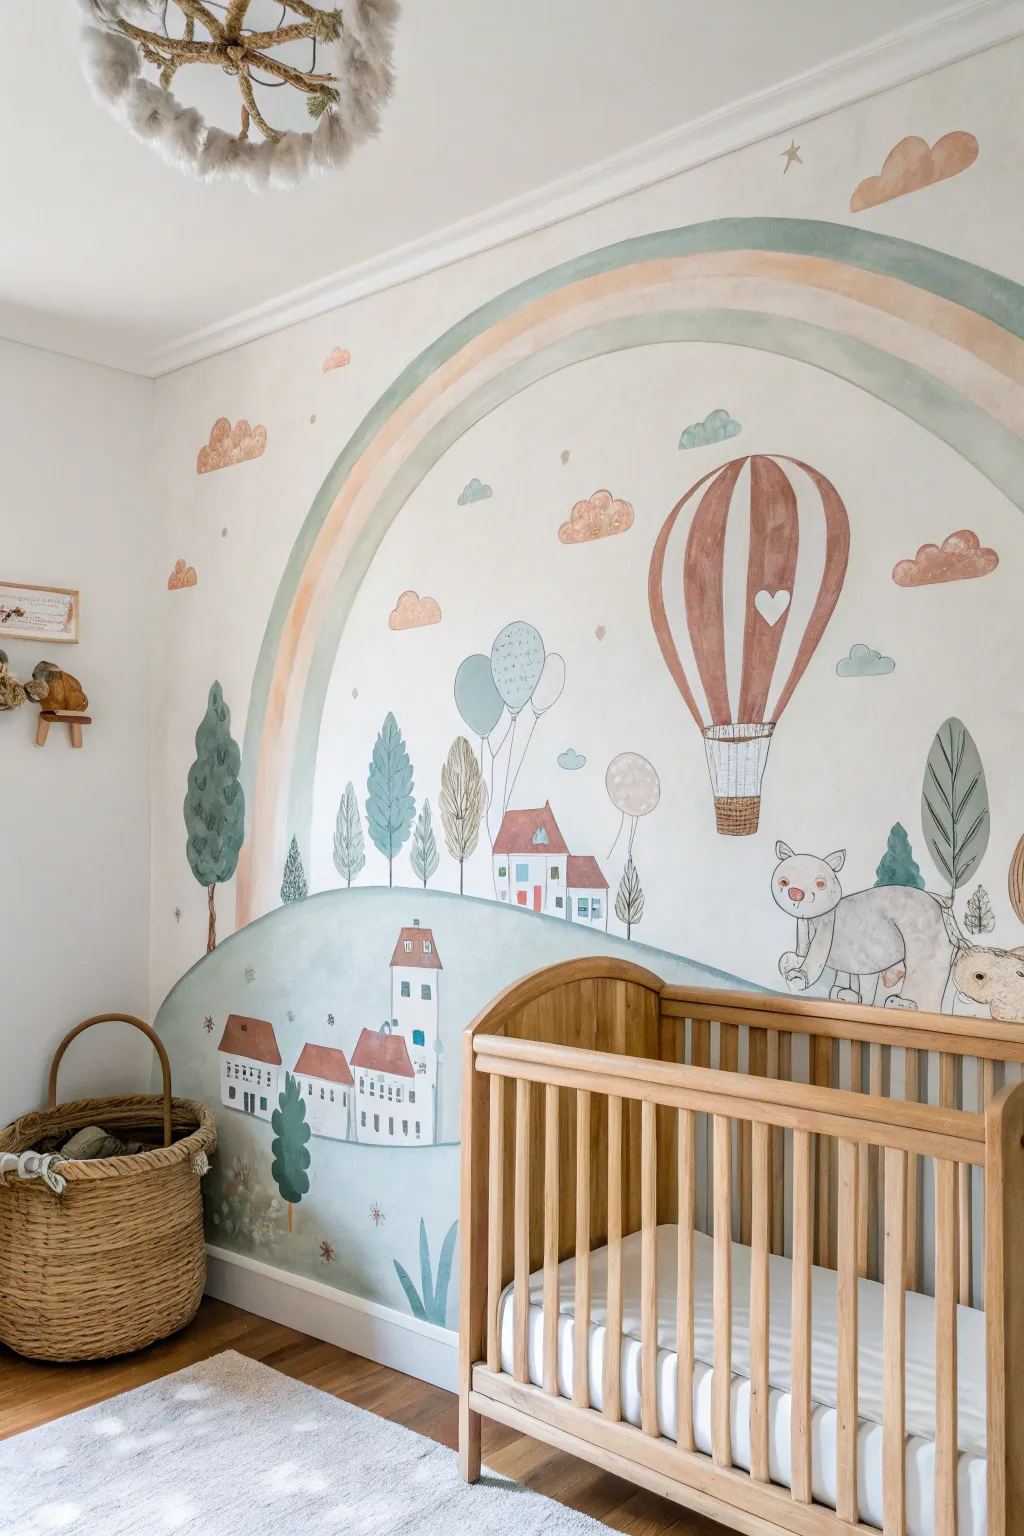
Transform a nursery wall into a storybook dreamscape with this gentle, illustrative mural featuring rolling hills, a cheerful hot air balloon, and friendly animal companions. The muted color palette of sage, terra cotta, and soft beige mimics a watercolor effect for a calming atmosphere.
Step-by-Step Tutorial
Materials
- Latex interior wall paints (white base)
- Acrylic craft paints (sage green, terra cotta, beige, brown, slate blue)
- Glazing medium or water (to dilute paint)
- Large synthetic sponges
- Assorted paintbrushes (1-inch wash brush, round sizes 4, 8, and 12)
- Pencil and eraser
- Painter’s tape
- Drop cloth
- Step ladder
- Palette or small containers for mixing
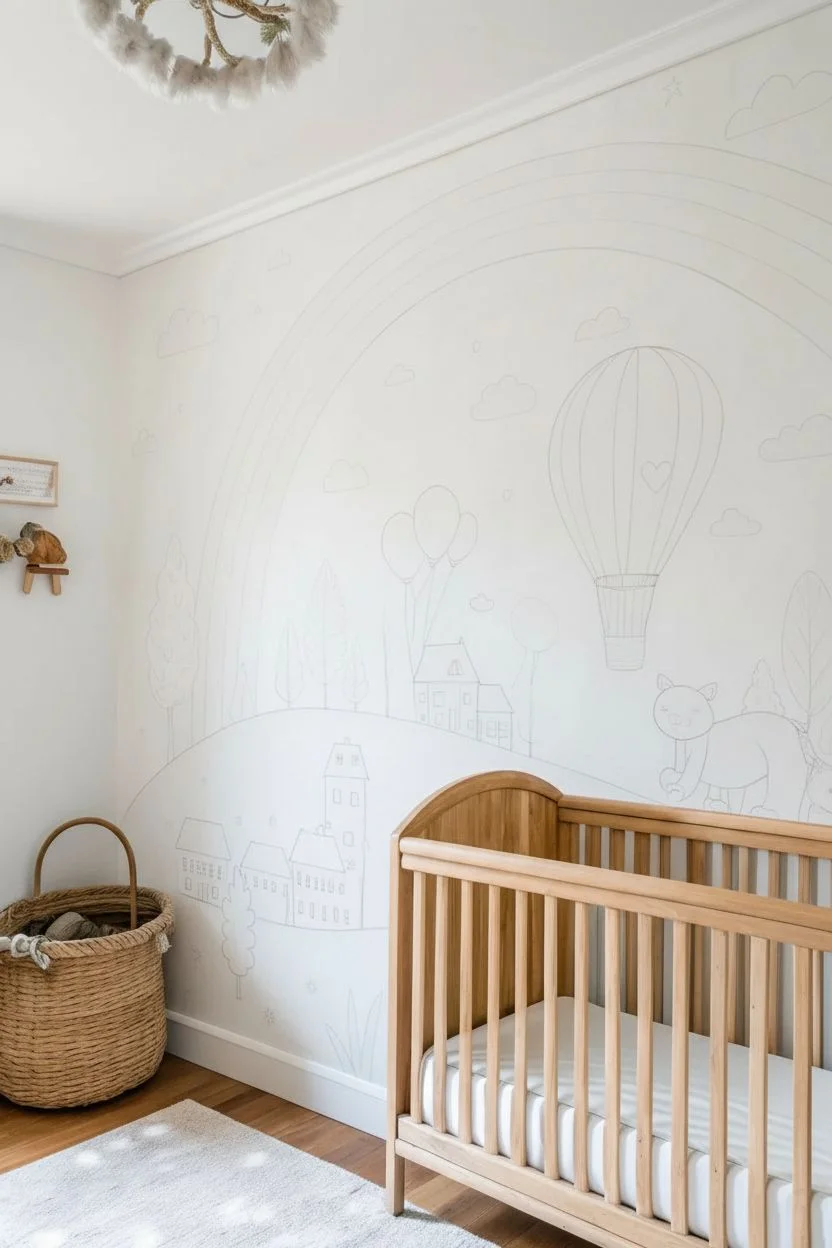
Step 1: Preparation and Sketching
-
Prepare the surface:
Begin by cleaning the wall thoroughly to remove dust and oils. If the wall isn’t already white or off-white, apply a fresh base coat of matte interior paint to provide a blank canvas for the watercolor effect. -
Draft the layout:
Lightly sketch the main composition on the wall using a pencil. Start with the large rainbow arch to define the upper boundary, then sketch the rolling hill horizon line about one-third up from the floor. -
Add scene details:
Sketch the placement of the hot air balloon on the right side and the cluster of houses on the left hill. Outline the trees and the animal figures near the crib area, keeping the lines faint so they don’t show through the translucent paint.
Watercolor Effect
To get that soft, paper-like texture on a wall, mix 1 part paint to 3 parts glaze. Apply quickly and don’t overwork it—let the brushstrokes show.
Step 2: Painting the Landscape and Sky
-
Mix the hill color:
Create a wash for the hills by mixing sage green acrylic paint with a generous amount of glazing medium or water. The aim is a consistency that is thin but not dripping. -
Wash in the hills:
Using a large sponge or wide wash brush, color in the rolling hills. Apply the paint in sweeping, horizontal motions, allowing for some unevenness to replicate a hand-painted watercolor look. -
Create the rainbow arch:
Mix three distinct washes: a muted terracotta, a soft sage, and a dusty beige. Paint the rainbow arch stripes freehand with a medium brush, letting the edges wobble slightly for organic charm. -
Add clouds:
Using the terracotta and slate blue washes, paint simple cloud shapes floating inside and outside the rainbow arch. Keep the paint translucent so the white wall influences the final tone.
Step 3: Detailed Elements
-
Paint the hot air balloon:
Fill in the balloon’s stripes with the terra cotta wash and a creamy white. Use a smaller round brush (size 8) to capture the curve of the balloon and the details of the basket below. -
Construct the village:
Paint the houses using the terra cotta for roofs and a very pale blue or white for the walls. Use a fine liner brush to add tiny windows in a dark slate grey. -
Add trees and foliage:
Paint the various trees using different shades of green and brown. Use vertical strokes for the tall poplars and rounded dabbing motions for the fuller deciduous trees. -
Illustrate the animals:
Mix a warm grey wash for the cat and bear figures. Outline their shapes first, then fill them in gently, adding facial features like eyes and noses with a fine point brush once the base layer is dry. -
Draw whimsical balloons:
Paint the smaller cluster of balloons held by the house chimney using soft blue and grey washes. Add thin, wavy lines for the strings connecting them.
Starry Night
Add tiny gold or silver star decals—or paint them with metallic acrylics—scattered around the balloon and clouds for a magical bedtime sparkle.
Step 4: Finishing Touches
-
Outline and define:
Mix a watery dark brown or charcoal paint. Using your finest brush (size 4 or smaller), loosely outline key elements like the balloon, houses, and animals to make them pop against the background. -
Add texturing:
For the basket and tree trunks, create texture by cross-hatching or stippling with a mostly dry brush to simulate woven wicker and bark. -
Review and refine:
Step back to view the mural as a whole. I find this helps identify any spots that need a second layer of wash to deepen the color or any pencil marks that still need erasing.
Enjoy the peaceful ambiance created by your custom storybook wall art

PENCIL GUIDE
Understanding Pencil Grades from H to B
From first sketch to finished drawing — learn pencil grades, line control, and shading techniques.
Explore the Full Guide
Vertical Vine Mural for Narrow Hallways
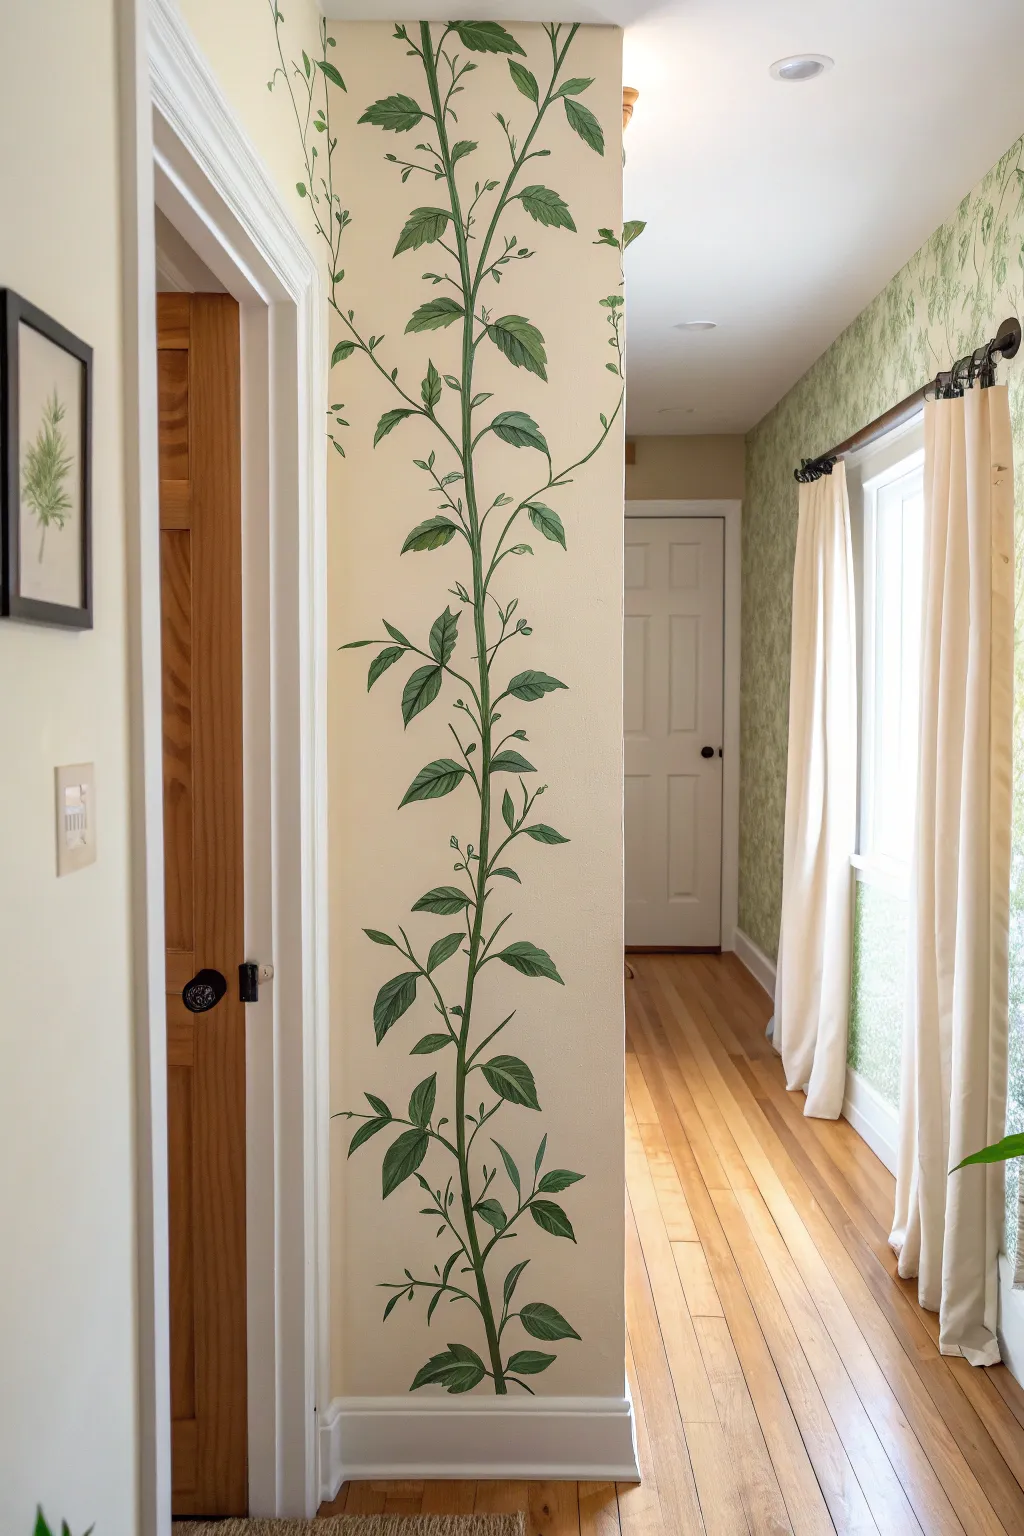
Transform a blank, narrow strip of wall into a lush focal point with this elegant, hand-painted climbing vine mural. Its vertical orientation draws the eye upward, making soaring hallways feel grounded yet airy with its botanical charm.
How-To Guide
Materials
- Wall paint (base coat, if needed)
- Pencil
- High-quality eraser
- Dark green acrylic or latex paint (main stem and leaves)
- Lighter olive green acrylic or latex paint (highlights/new growth)
- Round synthetic brushes (sizes 4, 6, and 8)
- Small liner brush (size 1 or 0 for details)
- Artist palette or paper plate
- Paper towels
- Reference image of a vine (real or illustrated)
- Stepladder
- Painter’s tape (to protect baseboards)
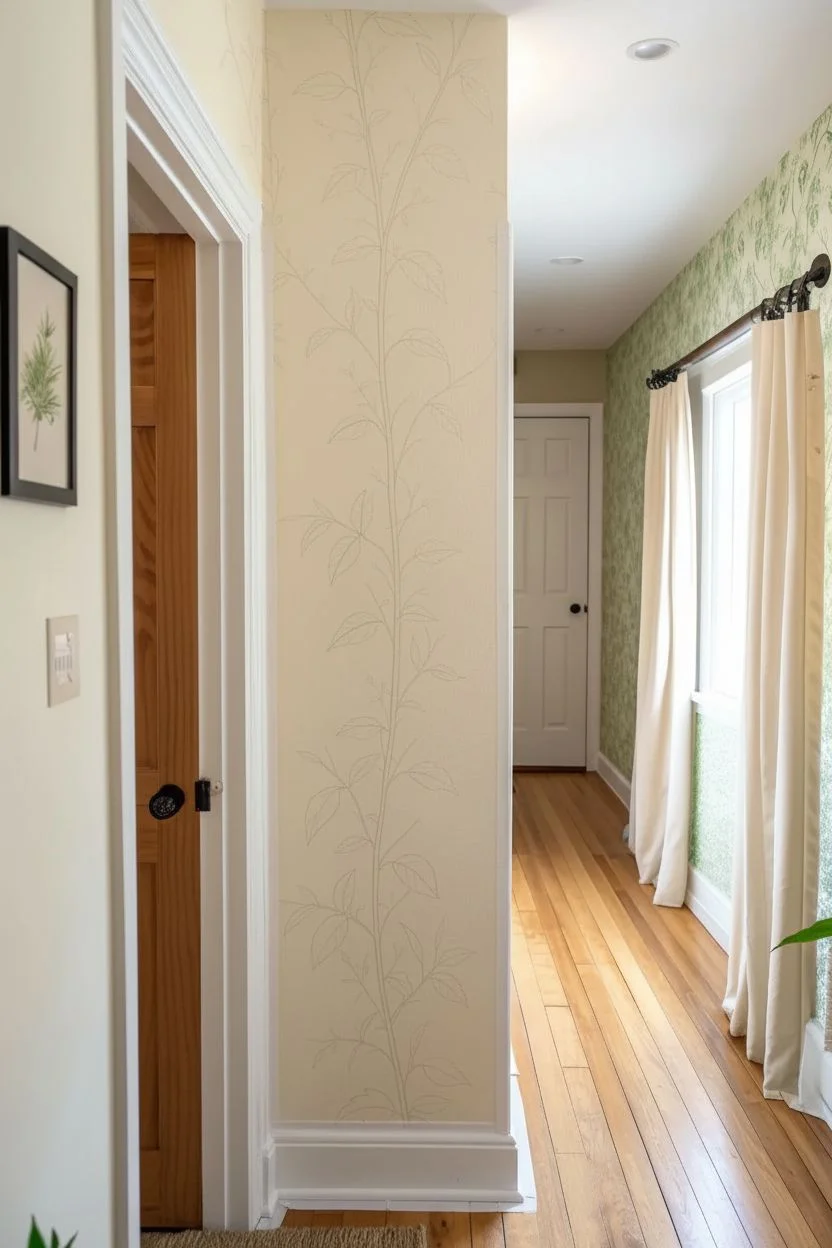
Step 1: Preparation and Sketching
-
Prep the surface:
Begin by ensuring your wall is clean and dust-free so your paint adheres smoothly. If your current wall color is dark or distracting, apply a fresh coat of a warm, neutral cream paint—this provides a soft, vintage backdrop for the greenery. -
Protect the edges:
Mask off your trim, baseboards, and any adjacent door frames with painter’s tape to keep your lines crisp and prevent accidental smudges on your woodwork. -
Sketch the central spine:
Using a light pencil hand, draw the main stem of the vine starting from just above the baseboard. Create a gentle, meandering S-curve line that travels all the way to the ceiling, keeping it roughly centered but organic. -
Add main branches:
Branch off from your main stem at alternating intervals. Sketch these secondary stems curving upwards and outwards, aiming to fill the width of the wall section without crowding the edges too much. -
Draft the leaves:
Sketch basic leaf shapes along the branches. Vary the sizes—larger leaves near the bottom and middle, and smaller, delicate buds near the top. Don’t worry about perfect detail yet; just get the placement right.
Fixing Wobbly Lines
If your vine stem looks shaky, don’t panic. Wait for it to dry, then use the wall color to ‘cut in’ and smooth the edge, effectively erasing the wobble.
Step 2: Painting the Base Structure
-
Mix your base green:
Load your palette with your darker green paint. If the green feels too vibrant or artificial, dull it slightly with a tiny drop of red or brown to achieve that classic botanical illustration look. -
Paint the main stem:
Using a size 8 round brush, paint over your pencil line for the main stem. Use slightly more pressure at the bottom for a thicker trunk, and lighten your touch as you move upward to taper the vine. -
Extend the branches:
Switch to a size 6 brush for the secondary branches. Connect them smoothly to the main stem, thickening the joint slightly where the branch meets the trunk to mimic realistic plant anatomy. -
Add twisting tendrils:
For those whimsical, curly tendrils modeled in the photo, switch to your liner brush. Use a very fluid paint consistency and a confident, quick stroke to create spirals that reach out into the negative space.
Add Visual Depth
Mix a tiny drop of water into a darker green shade to create a transparent glaze. Paint simplistic shadows behind a few leaves to make them pop 3D.
Step 3: Adding Leaves and Detail
-
Block in the leaves:
Using the dark green and a size 6 or 4 brush, fill in the leaf shapes. Paint from the stem outward toward the leaf tip, lifting the brush at the end to create a sharp point. -
Create variation:
While the dark green is still wet on your palette, mix a small amount with the lighter olive paint. Paint a few random leaves with this slightly lighter blend to create natural tonal variety. -
Let it dry:
Allow the base layer of the leaves and stems to dry completely to the touch. This usually takes about 20-30 minutes for acrylics. -
Add veins and stems:
With the liner brush and your darkest green, paint a thin central vein down the middle of the larger leaves. Connect the leaves firmly to the main branches with tiny stems. -
Highlighting:
Dip your clean liner or size 4 brush into the lighter olive green. Add subtle highlights to the tops of the leaves and the side of the main stem where the light source would hit. -
Final touches:
Step back from the wall to view the composition as a whole. If any area looks too sparse, use the liner brush to add small buds or tiny extra leaves to balance the visual weight. -
Clean up:
Once the paint is fully cured, carefully erase any visible pencil marks and peel off the painter’s tape.
Now you have a stunning, persistent garden feature that brings life to your hallway without taking up any floor space
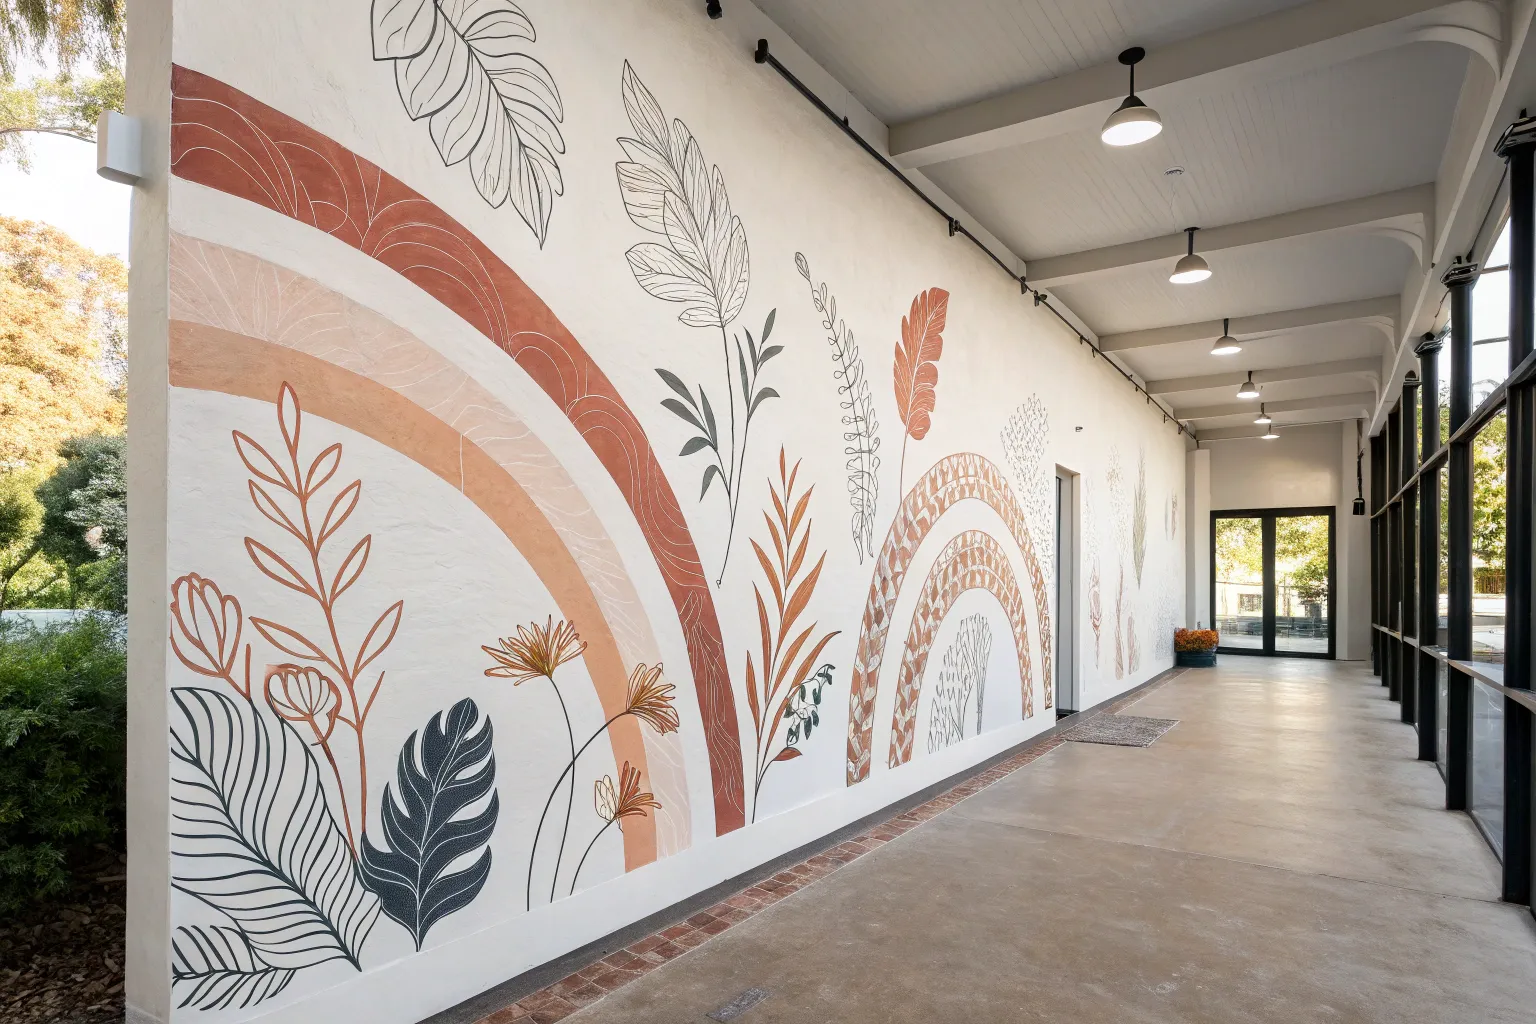
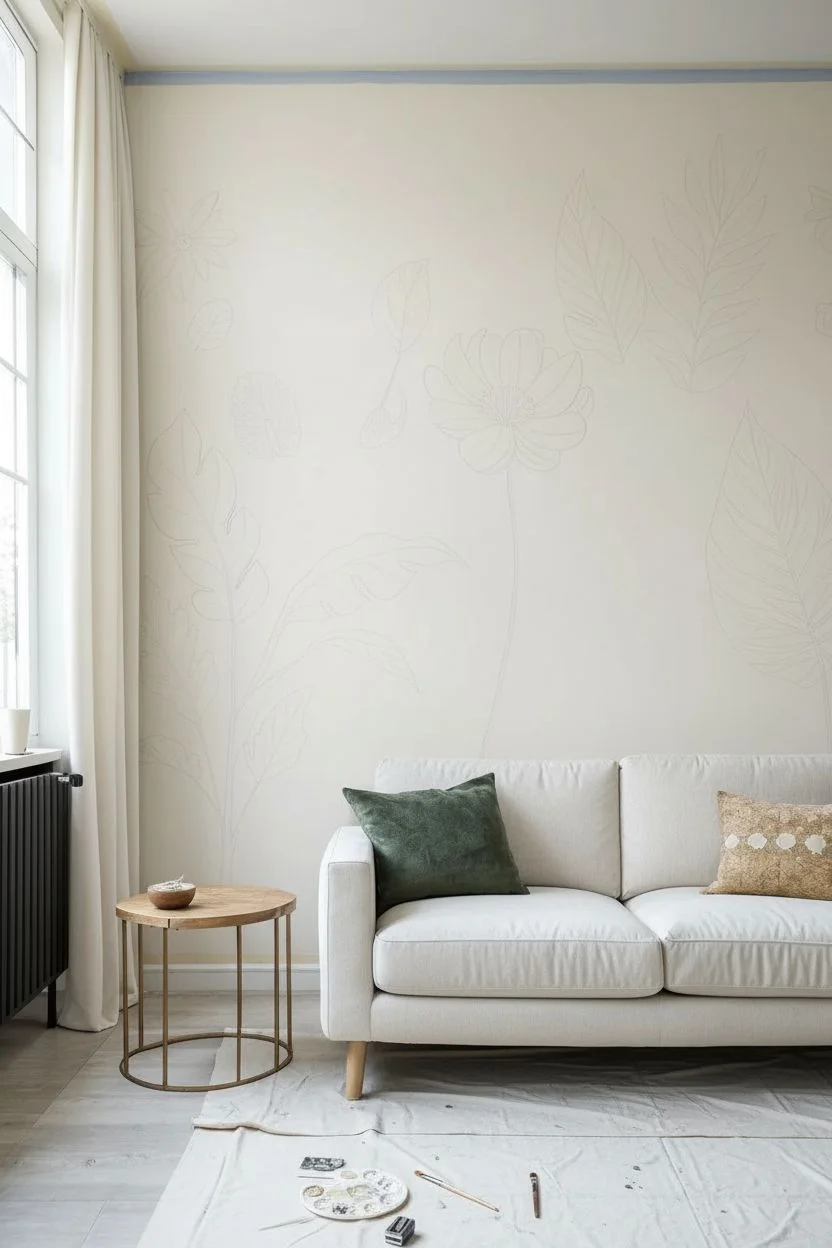
Minimalist Line-Art Botanicals
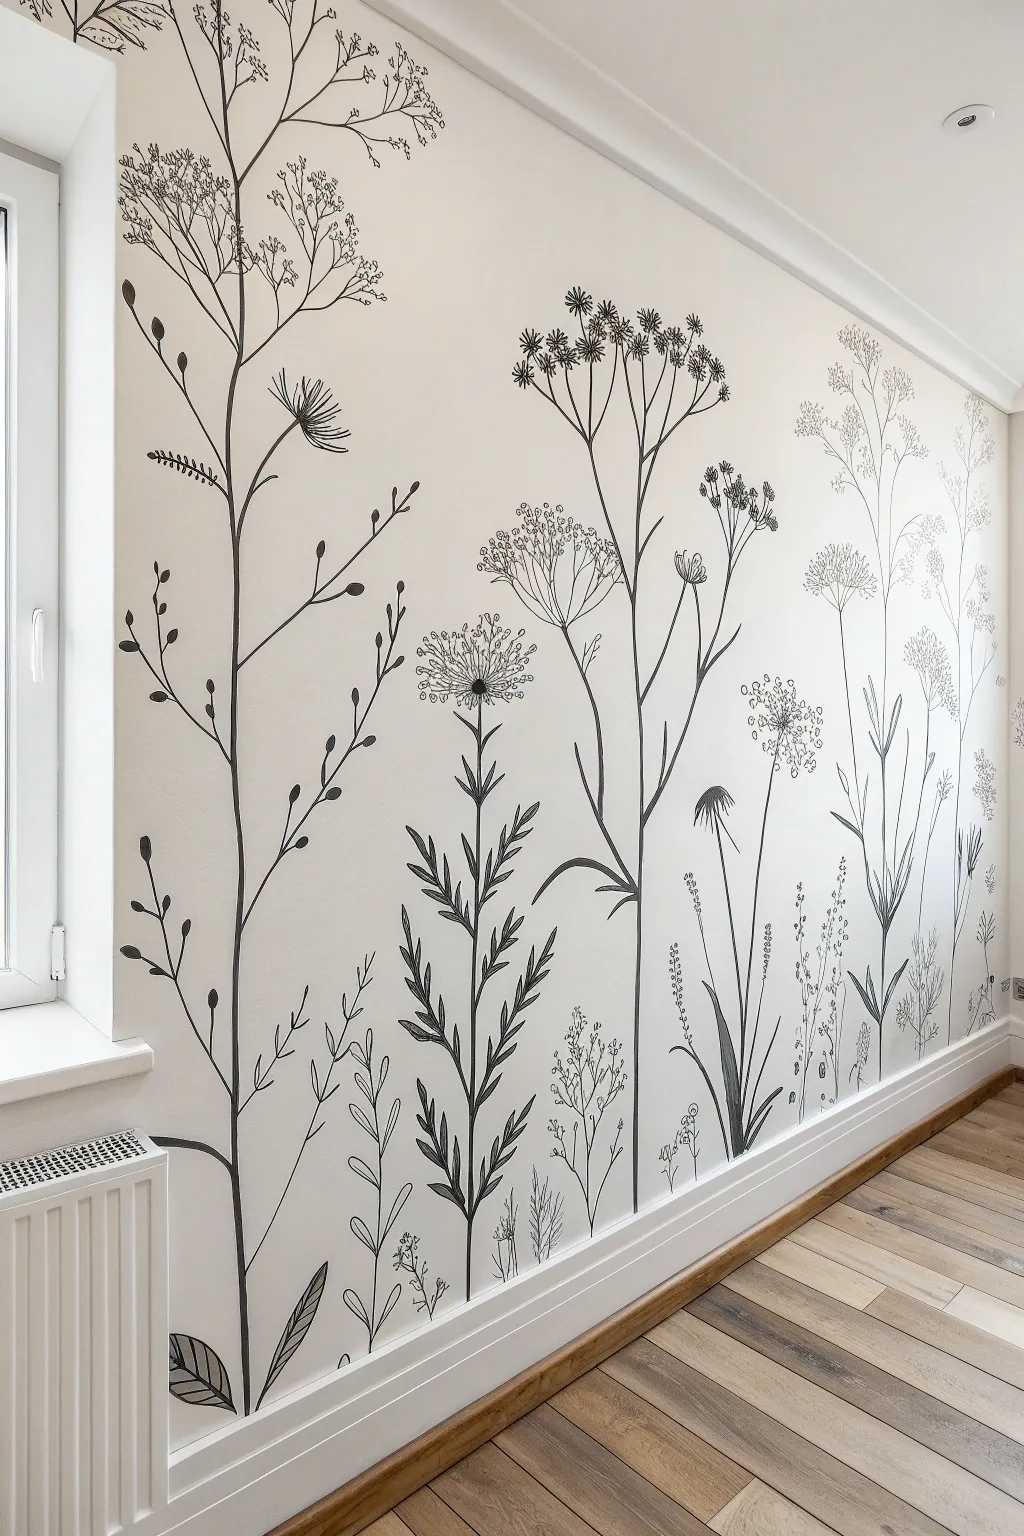
Transform a plain wall into a serene meadow with this minimalist line-art mural featuring oversized botanical illustrations. The high contrast of black ink-style lines against a neutral backdrop creates a sophisticated, calming atmosphere perfect for a hallway or bedroom.
Detailed Instructions
Materials
- Interior latex paint (eggshell finish, warm cream/off-white)
- Black acrylic paint or high-quality interior latex paint (matte or satin)
- Pencil (HB or lighter)
- Eraser (kneaded)
- Artist brushes: Round #4, Liner #1 or #2, and a small flat brush
- Projector (optional but recommended)
- Painter’s tape
- Drop cloths
- Ladder or step stool
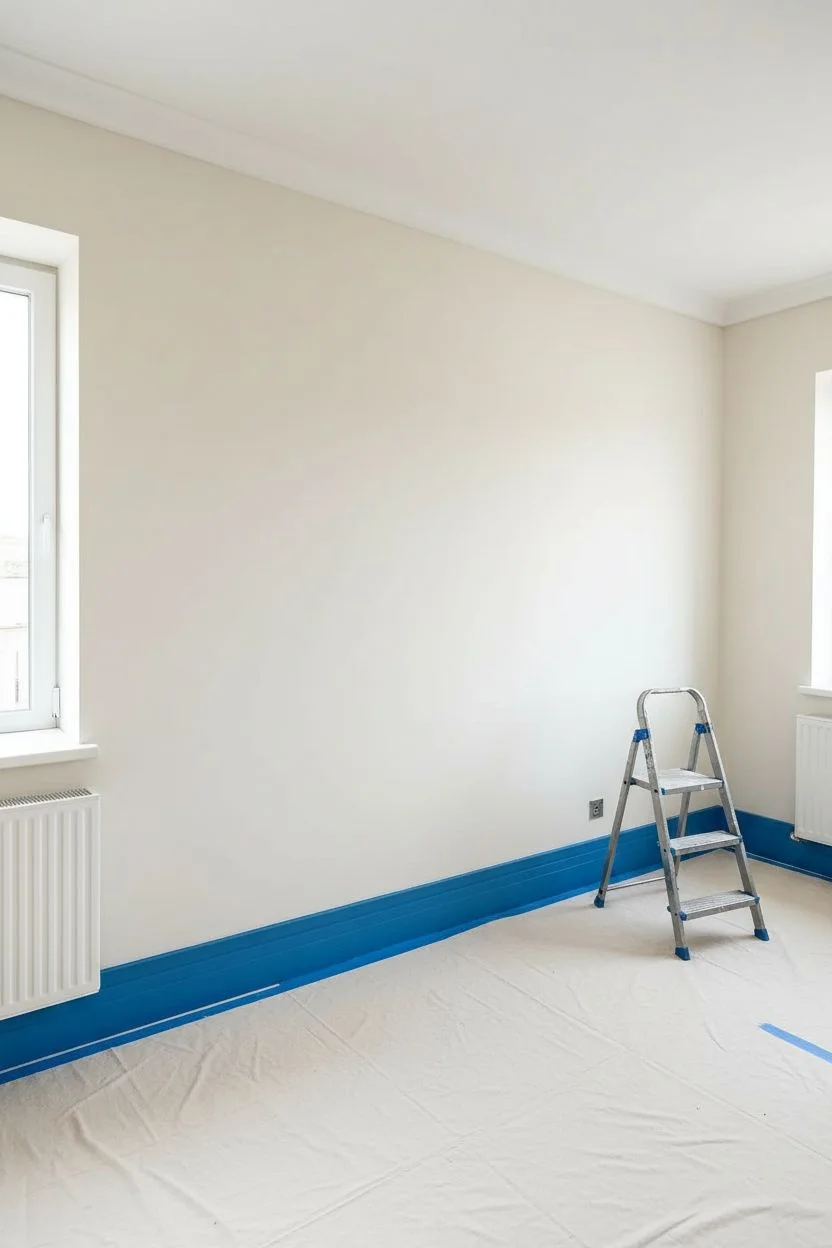
Step 1: Preparation and Background
-
Clear and prep the space:
Begin by moving furniture away from the wall and thoroughly masking off the baseboards, ceiling line, and adjacent walls with painter’s tape. Lay down drop cloths to protect your flooring. -
Establish the base color:
Apply two coats of your chosen warm cream or off-white interior latex paint. Allow the first coat to dry completely—usually 2-4 hours—before applying the second to ensure a smooth, opaque canvas for your artwork. -
Plan your composition:
While the wall dries, sketch out a rough plan on paper. Aim for variety in height and plant types—mix tall, spindly grasses with fuller seed heads and leafy stems. The goal is an organic, asymmetrical rhythm rather than a uniform pattern.
Step 2: Drafting the Design
-
Project or sketch the outline:
If you are using a projector, cast your reference images onto the wall and lightly trace the main stems and flower heads with a pencil. If drawing freehand, start by marking the vertical lines of the main stems to establish spacing. -
Refine the pencil sketch:
Flesh out your pencil guides by adding the structural details: branching stems, leaves, and the general shapes of the flower heads. Keep the pencil pressure very light so it doesn’t show through the paint later or indent the drywall. -
Vary certain elements:
Step back frequently to check the balance. Ensure some plants are significantly taller than others, and overlap a few stems slightly to create depth, just like a real field.
Wobbly Lines?
Don’t panic about shakes! Nature isn’t perfect. If a line goes rogue, widen it slightly or turn the mistake into a new leaf or bud branching off the stem.
Step 3: Painting the Botanicals
-
Prepare your black paint:
Squeeze your black acrylic or latex paint into a small cup. If the paint feels too thick or draggy, mix in a few drops of water or flow improver until it has an ink-like consistency that glides smoothly off the brush. -
Paint main stems first:
Using a #4 round brush, paint the primary vertical stems starting from the baseboard and working upward. Apply steady pressure for a consistent line width, tapering off slightly as you reach the top. -
Switch to a liner brush:
For the delicate branching stems and fine grasses, switch to your #1 or #2 liner brush. I find that holding the brush further back on the handle helps create more natural, less rigid lines. -
Detail the seed heads:
T tackle complex shapes like the cow parsley or dandelion-style heads, use a stippling motion or small, quick dashes. Don’t try to draw every single seed; suggest the texture through clusters of dots and short strokes. -
Add leaves and weight:
Go back to the lower sections and add leaves using the round brush. Press down to widen the stroke for the leaf belly, then lift up to create a sharp point. Fill in any solid black areas, like the dense centers of certain flowers. -
Check for consistency:
Ensure the ‘weight’ of the lines feels balanced across the wall. If a flower head looks too heavy, balance it by thickening the stem slightly so it doesn’t look like it will snap.
Add Dimension
Mix a dark charcoal grey for some background stems. Painting these in a lighter value than pure black makes them recede, adding instant visual depth.
Step 4: Finishing Touches
-
Let the paint cure:
Allow the black paint to dry for at least 24 hours. Acrylics dry to the touch quickly, but you want them fully hardened before cleaning up. -
Erase visible guides:
Gently gently use your kneaded eraser to lift any visible pencil lines. Avoid standard pink erasers, which can sometimes leave smears on flat wall paint. -
Remove tape and clean up:
Slowly peel off the painter’s tape at a 45-degree angle to ensure clean edges along the ceiling and baseboards.
Enjoy the peaceful view of your everlasting indoor garden.


Ocean or River Waves in Flowing Brushstrokes
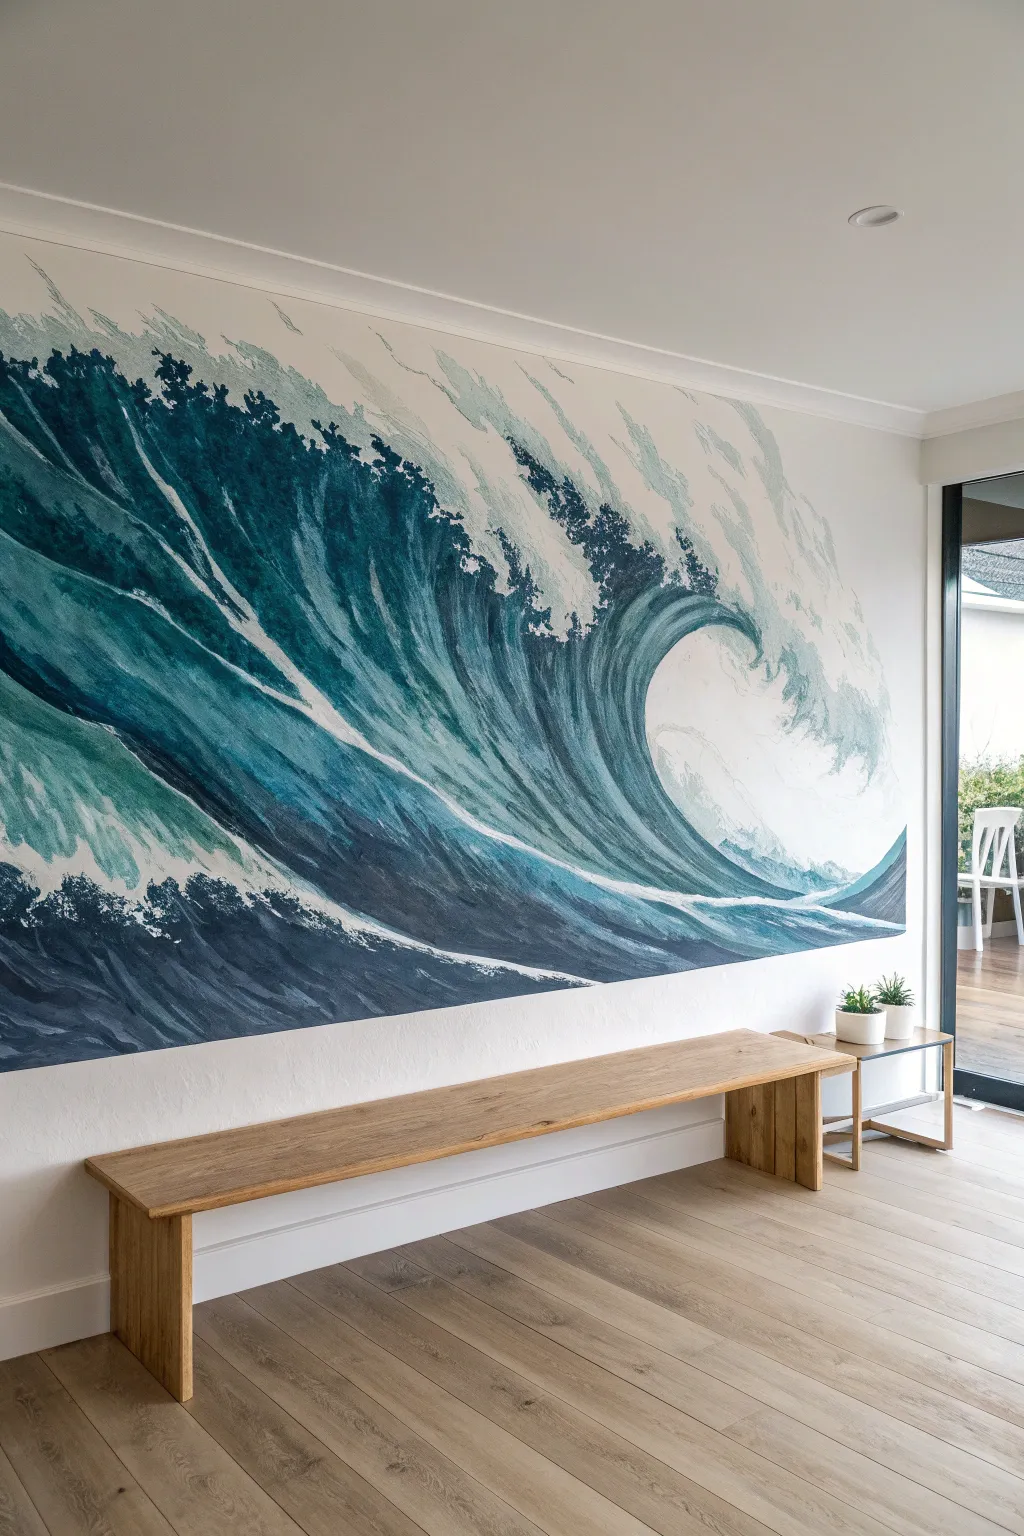
Transform a plain white wall into a dramatic seascape with this sweeping mural that captures the power and movement of the ocean. Using a limited palette of teals and blues applied with loose, confident strokes, you will create a focal point that feels both energetic and serene.
Step-by-Step Guide
Materials
- Latex interior wall paint (White base)
- Acrylic paints or mural paints: Phthalo Blue, Teal/Turquoise, Navy Blue, and White
- Pencil and eraser
- Large synthetic flat brush (3-4 inch)
- Medium filbert brush (1-2 inch) for blending
- Small round brush for details
- Paint rollers and tray
- Painter’s tape
- Drop cloths
- Ladder or step stool
- Projector (optional but recommended)
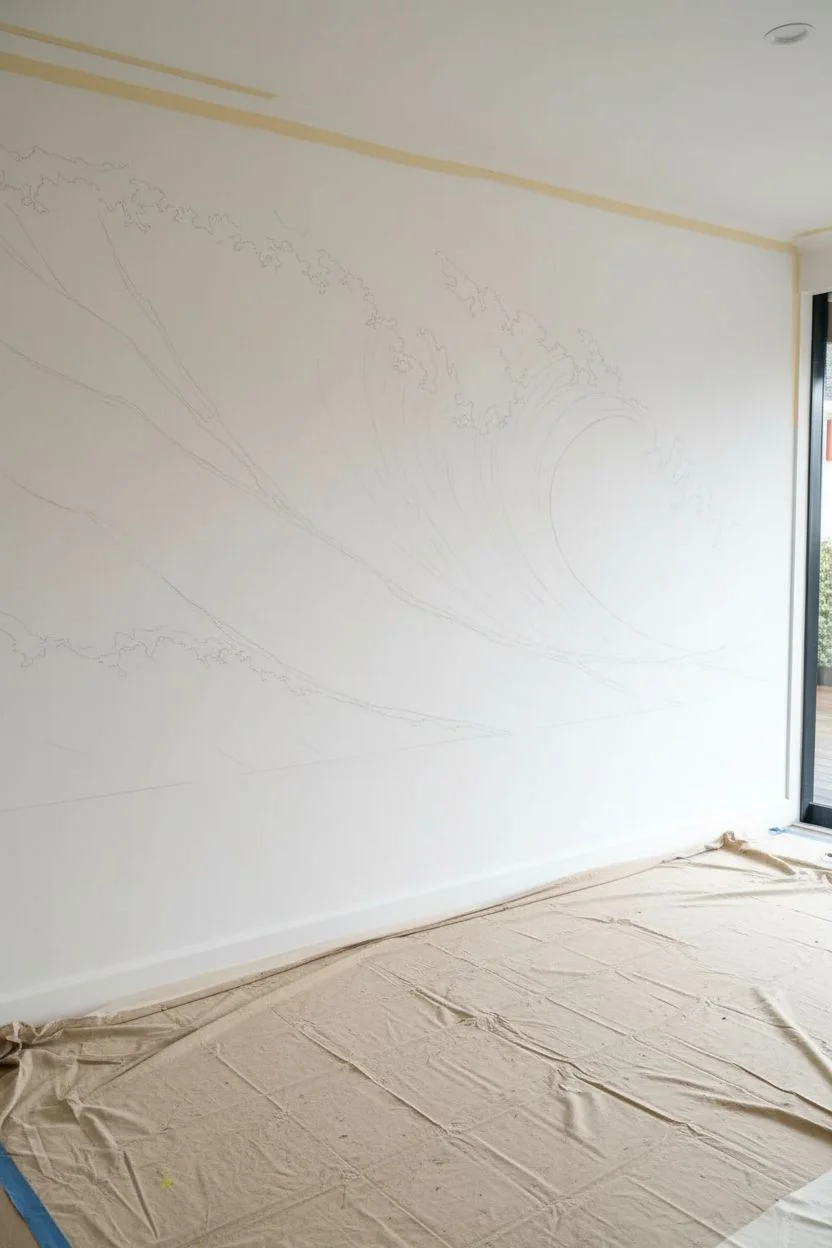
Step 1: Preparation and Sketching
-
Prepare the workspace:
Clear the area against the wall, removing any furniture like benches or tables. Lay down drop cloths to protect your flooring, as mural painting can get drippy. Apply painter’s tape to the trim, ceiling line, and adjacent walls to ensure crisp edges. -
Prime the surface:
Ensure the wall is clean and dry. If the wall isn’t already white, apply a coat of white interior latex paint. This serves as the background for the wave’s foam and spray, so a clean, bright white is essential. -
Map out the wave:
Using a pencil, lightly sketch the large C-shape of the wave. Start low on the left, swoop up high towards the right, and curl back inwards. Don’t worry about perfect details yet; just focus on getting the flow and composition proportional to the wall size. -
Refine the sketch:
Add the internal contours where the water layers overlap. Draw the jagged, claw-like shapes for the cresting foam at the top of the wave. If you aren’t confident freehanding, projecting an image of a wave onto the wall and tracing the major lines works perfectly.
Flow Mechanic
Stand back frequently! Since this mural is massive, you can lose perspective up close. View it from 10 feet away every 20 minutes to ensure the motion of the wave feels correct.
Step 2: Painting the Deep Tones
-
Mix the darkest shade:
Create a deep navy or midnight blue by mixing your Phthalo Blue, Navy, and a touch of black if needed. It needs to be quite dark to ground the bottom of the wave. -
Apply the base currents:
Paint the bottom-most section of the wave using the large flat brush. Use long, sweeping strokes that follow the curve of your pencil lines, moving from left to right. Leave gaps of white space between these heavy strokes to suggest movement and foam. -
Add deep shadows:
Use this same dark navy to paint the underside of the curl at the top right. This shadow creates the 3D effect of the water looming over itself.
Step 3: Layering Mid-Tones
-
Create a teal mixture:
Mix a vibrant teal or turquoise color. You want this to stand out against the navy, appearing like sunlight filtering through the water. -
Build the wave body:
Paint stripes and flowing sections of teal above the navy sections. I find it helpful to slightly overlap the wet edges of the navy paint to encourage soft blending, but keep the strokes distinct enough to look like rushing water. -
Feather the edges:
Where the teal meets the white background (the ‘foam’), use a slightly dryer brush to feather the edges out. This creates a splattery, misty texture rather than a hard line.
Metallic Accent
Mix a small amount of pearlescent mixing medium into your teal paint or add thin veins of silver leaf along the crest for a shimmer that catches the daylight.
Step 4: Detailing and Highlights
-
Soft blue wash:
Dilute some Phthalo Blue with water or glazing medium to make it semi-transparent. Apply this wash in the upper sections of the wave to connect the teal strips without covering the white background completely. -
Define the crest:
Using a smaller round brush and pure white paint (or just carefully painting around the existing white wall), sharpen the jagged edges of the wave’s crest. Add small dots and detached strokes flying off the tip to resemble sea spray. -
Enhance contrast:
Step back and look at the mural from a distance. If the water looks too flat, go back in with your darkest navy and deepen the crevices between the teal currents to add volume. -
Add final texture:
Use a dry medium brush with a small amount of white paint to scumble (lightly scrub) over the transition areas between blue and teal. This simulates the churning, aerated water in the middle of a crashing wave.
Step 5: Cleanup
-
Remove tape:
While the paint is tacky but not fully cured, carefully peel off the painter’s tape at a 45-degree angle to reveal crisp borders. -
Touch up:
Check the edges where tape was removed. If any blue bled through, use a small brush and white wall paint to tidy up the perimeter.
Place a simple wooden bench beneath your mural to complete the serene, gallery-like atmosphere
Ceiling Sky or Constellation Mural
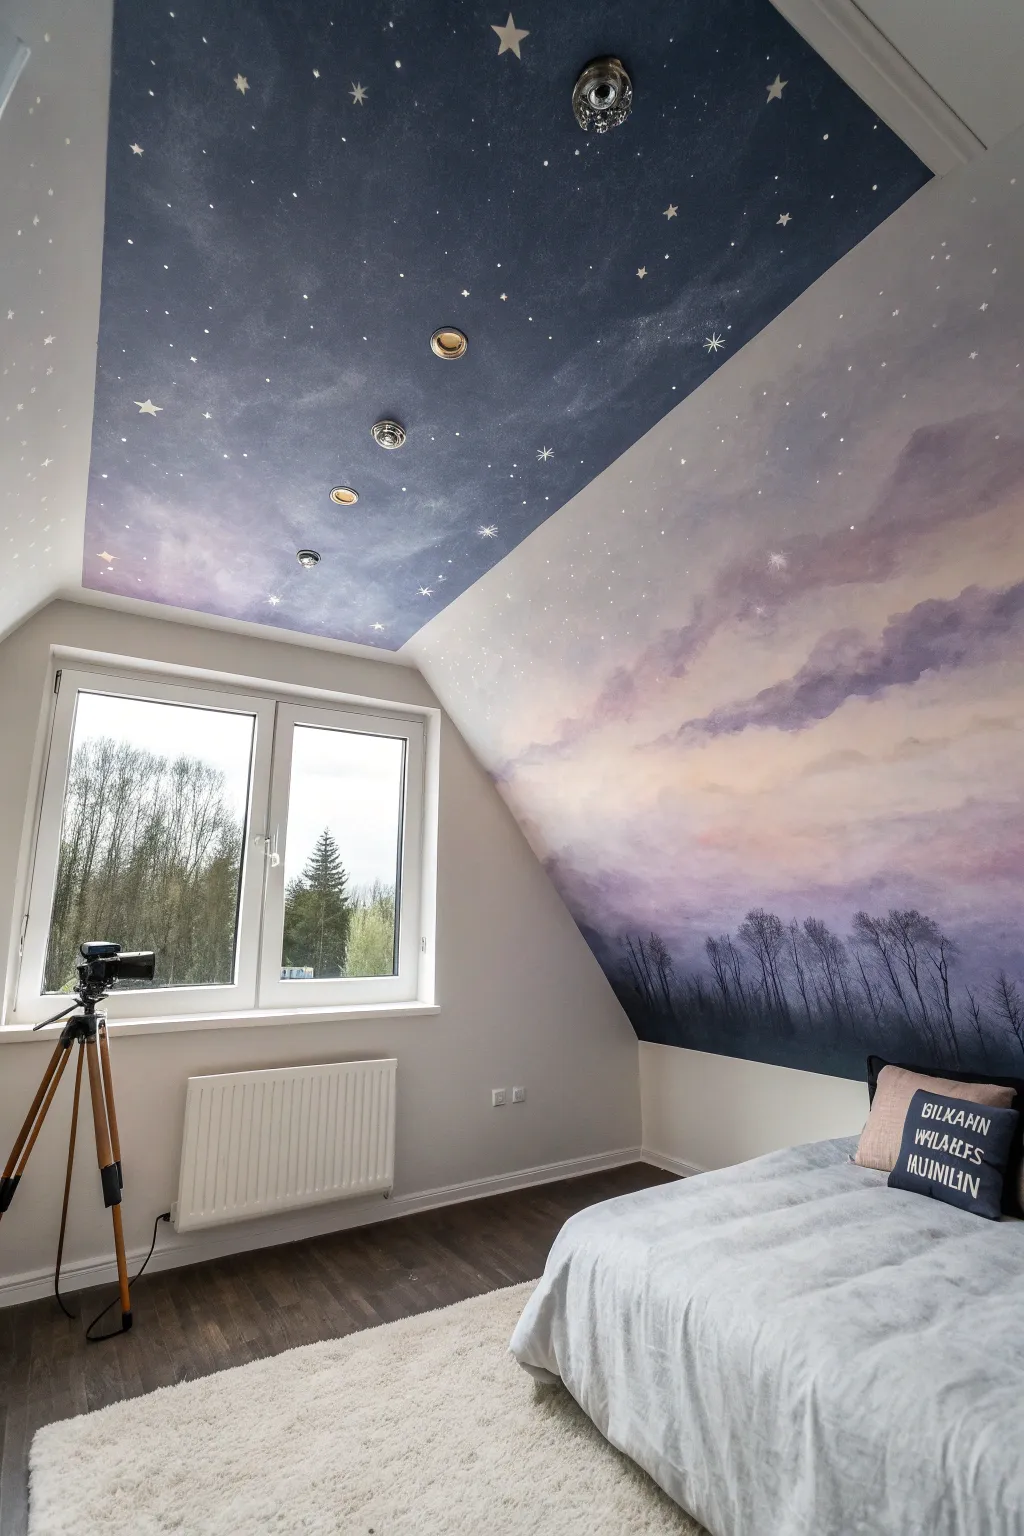
Transform an ordinary bedroom into an ethereal escape with this wrap-around sky mural that blends a deep cosmic ceiling into a dreamy twilight horizon. By using soft blending techniques and layered silhouettes, you can create a seamless transition from night to dusk that feels expansive and magical.
How-To Guide
Materials
- Interior latex wall paint (Deep Midnight Blue, Indigo, Lavender, Pale Pink, White, Dark Grey/Black)
- Acrylic paints (Titanium White, Glow-in-the-dark medium – optional)
- Large and medium paint rollers with extension pole
- Assorted synthetic brushes (2-inch sash brush, fan brush, small detail rounds)
- Natural sea sponges or lint-free rags
- Painter’s tape and drop cloths
- Mixing trays and buckets
- Ladder
- Chalk or pastel pencil (light color)
- Spray bottle with water (for blending acrylics)
Step 1: Setting the Celestial Stage
-
Prep the canvas:
Clear the room and cover all floors and furniture with drop cloths. Use painter’s tape to mask off adjacent walls, window frames, and baseboards that won’t be part of the mural. If your ceiling has recessed lighting, tape carefully around the trim. -
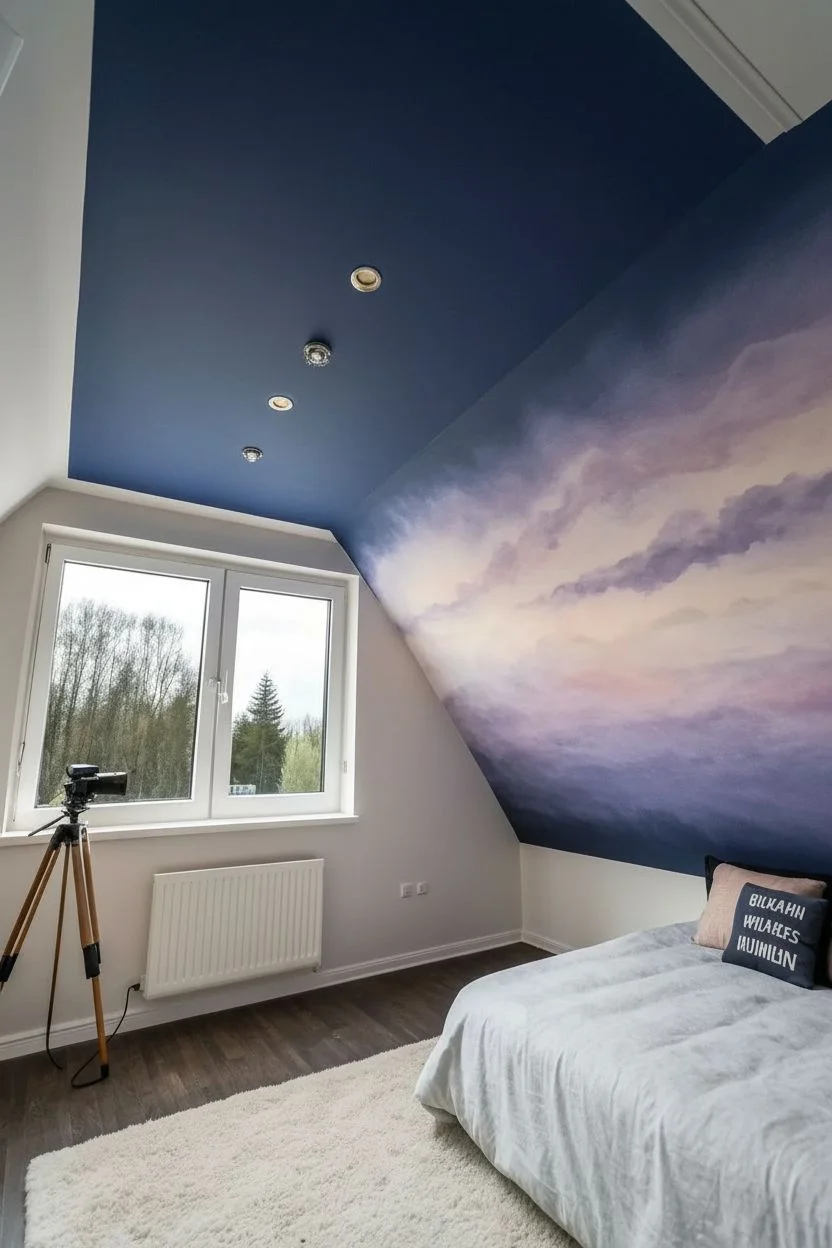
Base coat the deep sky:
Start with your deepest midnight blue paint. Using a roller on an extension pole, cover the flat ceiling area entirely. Bring this dark color just over the crease where the ceiling meets the slanted wall to start the transition. -
Establish the gradient:
While the midnight blue is still slightly wet at the edges, begin rolling your Indigo and Lavender shades onto the upper third of the slanted wall. I like to work in irregular, horizontal patches rather than straight lines to keep it organic. -
Blend the transition:
Using a clean, dry brush or a damp sea sponge, vigorously blend the edge where the midnight blue meets the indigo. The goal is to eliminate hard stripes; keep the blending soft and misty.
Cloud Control
If your clouds look too solid or cartoonish, don’t panic. Let them dry, then apply a thin glaze of your background sky color over them. This pushes them back and softens the edges instantly.
Step 2: Painting the Cloudscape
-
Create the horizon glow:
On the middle and lower sections of the slanted wall, apply the pale pink and white paints. Use a wide brush to sweep these colors horizontally, simulating the last light of the sunset. -
Form soft clouds:
Mix a small amount of lavender with your pinks. Using a rag or a sponge, dab cloud shapes softly over the transition area. Keep the edges hazy by lightly pouncing over them with a dry brush. -
Layering depth:
Add darker purple/grey streaks to the undersides of the clouds to give them volume. This shadow suggests the light is coming from below the horizon. -
Smooth the final gradient:
Step back to check the overall flow. If any areas look too choppy, mist them lightly with water and use a large, soft brush to feather the colors together until the shift from dark ceiling to light horizon is seamless.
Step 3: Adding the Stars
-
Map major stars:
Once the ceiling is dry, use a small round brush and pure Titanium White to dot larger stars. Vary the sizes slightly—some pinpricks, some pea-sized. -
Create starbursts:
Select a few feature stars (perhaps a specific constellation) to turn into 4-point or 5-point stars. Use a liner brush to drag paint outward from the center dot to create the points. -
Splatter the galaxy:
Thicken white paint with a little water until it’s inky. Dip a toothbrush or stiff bristle brush in it, and run your thumb across the bristles to flick tiny specks of paint onto the dark ceiling. Practice on cardboard first to control the spray. -
Add faint nebulae:
Mix a very watery white or pale blue glaze. Use a sponge to barely whisper this across parts of the dark blue ceiling, creating faint ‘milky way’ dust trails behind the stars.
Hidden Magic
Mix glow-in-the-dark medium into your white star paint. Use this mixture to paint ‘invisible’ constellations over the scenic ones that will only reveal themselves when the lights go out.
Step 4: The Forest Silhouette
-
Sketch the treeline:
At the very bottom of the slanted wall, use a light pastel pencil to faintly outline the tops of trees. Vary the heights to make it look natural. -
Paint the background trees:
Mix a dark grey-purple (not solid black yet). Paint the trees that appear further away using this lighter shade. They should look slightly hazy, like they are in the mist. -
Detail the foreground trees:
Now use your darkest grey or black. Paint the foreground trees over the misty ones. Use a fan brush turned vertically or a detail liner brush to create thin, intricate branches reach upwards. -
Ground the bottom:
Fill in the solid area at the very base of the wall with the darkest color to anchor the mural. Ensure the transition from the solid base to the delicate branches is gradual.
Now you have a breathtaking vista that invites stargazing right from the comfort of bed
Checkerboard or Tile Illusion for Small Spaces
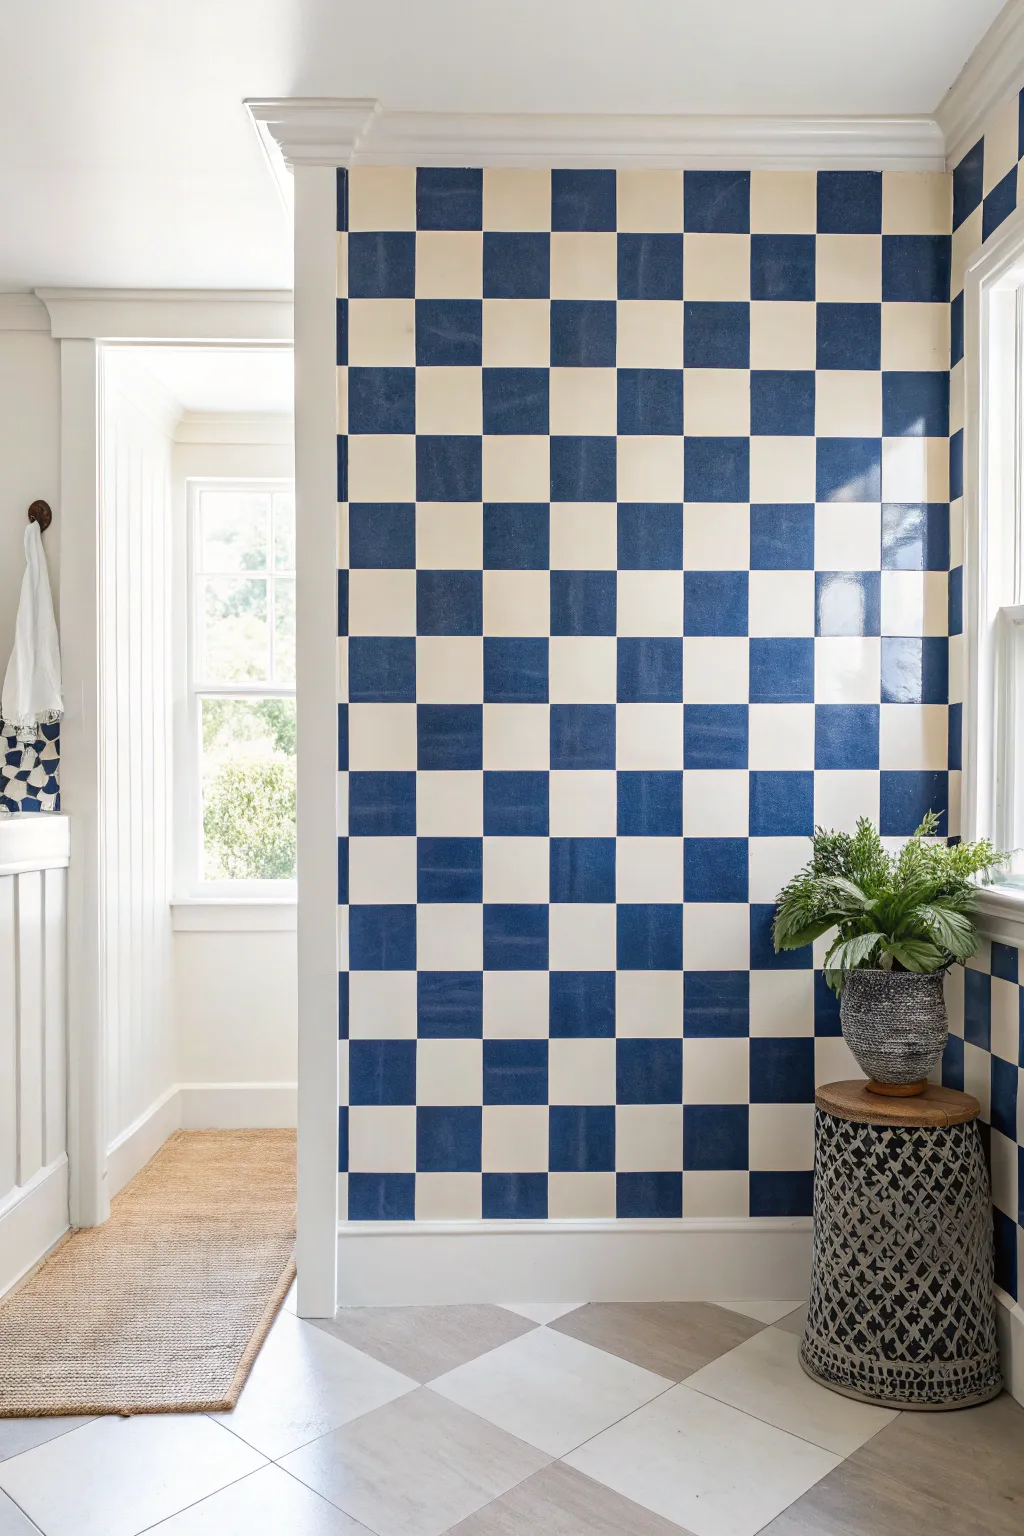
Transform a plain wall into a sophisticated statement piece with this clever paint technique that mimics the look of hand-glazed Moroccan zellige tiles. By layering high-gloss glaze over a matte base, you achieve the beautiful depth and imperfection of ceramic without the mess of grout.
Step-by-Step Tutorial
Materials
- Painter’s tape (1-inch width)
- Laser level
- Measuring tape
- Pencil
- Cream latex paint (eggshell or satin finish)
- Deep indigo blue latex paint (eggshell or satin finish)
- Clear high-gloss glaze or polyurethane
- Small foam roller
- 2-inch angled sash brush
- Small artist brush
- Drop cloth
- Sea sponge or rag (optional for texture)
Step 1: Preparation & Mapping
-
Prep the surface:
Begin by cleaning your wall thoroughly to remove dust and grease, ensuring the best possible adhesion for your base coat. -
Apply the base color:
Paint the entire wall with your cream-colored latex paint. This will serve as the ‘light’ squares in your checkerboard. Apply two coats for full coverage and let it dry completely, preferably overnight. -
Calculate your grid:
Measure the width and height of your wall. Decide on a square size (e.g., 6×6 inches) that divides relatively evenly into your dimensions to minimize awkward slivers at the edges. -
Set the vertical lines:
Using your laser level as a guide, mark vertical lines across the wall with a pencil at your determined intervals. Keep the pencil marks light so they are easy to cover later. -
Mark horizontal rows:
Repeat the process horizontally, creating a perfect grid of squares across the entire surface.
Pro Tip: The “Wobbly” Look
Zellige tiles aren’t perfect! Don’t stress if your lines aren’t laser-sharp. Slight bleed or unevenness actually makes the “tile” illusion more convincing and organic.
Step 2: Taping the Pattern
-
Tape vertical columns:
Apply painter’s tape along the OUTSIDE of the vertical lines for every other column. You are essentially isolating specific vertical strips to work on first. -
Tape horizontal rows:
Now tape along the horizontal lines, again being mindful which side of the line you tape on. The goal is to isolate individual squares for painting. -
Seal the edges:
Run a credit card or putty knife firmly over all tape edges. I like to do this twice to ensure no paint bleeds under, which is crucial for crisp ’tile’ lines. -
Mark the blue squares:
Place a tiny piece of tape or a light ‘X’ made of tape inside every square that needs to remain cream. It’s surprisingly easy to get confused once you start painting.
Troubleshooting: Peeling Paint
If paint lifts when removing tape, your base coat likely wasn’t cured enough. Score the edge of the tape with a sharp craft knife before pulling to cut the paint film cleanly.
Step 3: Painting the Texture
-
Mix the faux glaze:
In a paint tray, mix your deep indigo paint with a small amount of clear glaze if you want a more translucent, ceramic look. If you want solid color, use the paint straight. -
Paint the first set of squares:
Using the foam roller, apply the blue paint to the exposed squares. Don’t aim for perfect opacity; slight variations add to the hand-made tile effect. -
Remove tape while wet:
Carefully peel back the tape before the paint fully dries to prevent peeling. Pull the tape at a 45-degree angle away from the fresh paint. -
Let it dry:
Allow these squares to dry completely. Since the pattern is a checkerboard, you likely have to tape and paint in two phases to avoid taping over wet squares. -
Tape the second phase:
Once the first batch is cured, re-tape the grid to expose the remaining squares that need to be painted blue. Protect the already painted blue squares carefully. -
Paint remaining blue squares:
Apply the blue paint to the remaining squares, remove the tape, and let the entire wall cure for at least 24 hours.
Step 4: Adding the Glazed Finish
-
Create the sheen:
To mimic the glossy surface of zellige tiles, apply a clear high-gloss glaze or polyurethane over every single square (both blue and cream). -
Brush for texture:
Apply the gloss with a brush rather than a roller. Subtle brushstrokes mimic the waviness of fired clay tiles. -
Hand-paint the edges:
For an extra realistic touch, use a small artist brush to add a tiny, uneven line of the gloss just slightly over the edge of the squares, mimicking a rounded tile edge. -
Final inspection:
Step back and check your work. Use the artist brush to touch up any cream squares that got blue smudges, or to sharpen corners.
Now you have a stunning, durable feature wall that brings global character to your space
Vintage-Inspired Map and Wayfinding Wall
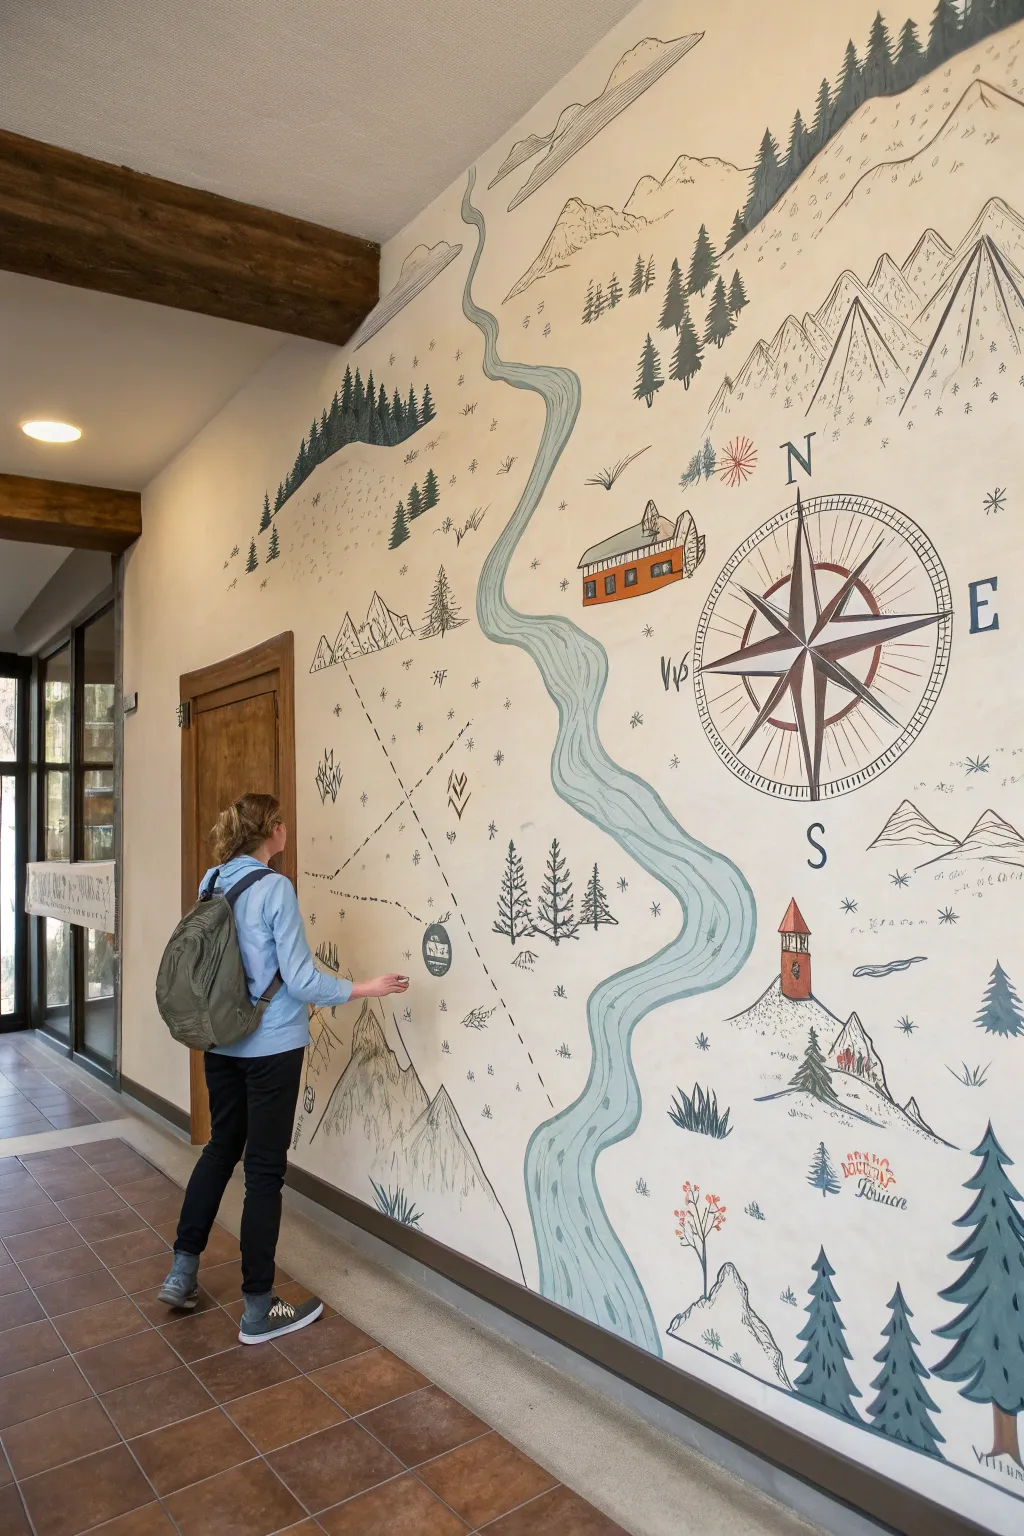
Transform a blank hallway or feature wall into an adventurous landscape with this charming, hand-drawn style map mural. Featuring classic cartography elements like a compass rose, winding river, and sketch-style topography, this project adds whimsy and wanderlust to any interior.
Step-by-Step Guide
Materials
- Interior latex wall paint (cream or off-white for base)
- Pencil and large eraser
- Acrylic paints (pale blue, burnt orange, dark green, black, brown)
- Projector (optional but recommended)
- Painter’s tape
- Assorted brushes (flat 2-inch, medium round #8, fine liner #1 or #2)
- Yardstick or long straight edge
- Compass tool (large drafter’s sketching compass or string and tack)
- Matte clear coat sealer (optional)
Step 1: Planning and Base Work
-
Prepare the canvas:
Begin by ensuring your wall is clean and smooth. Apply two heavy coats of a warm cream or off-white latex paint to serve as your parchment-colored background. Let this cure for at least 24 hours. -
Draft the composition:
Sketch your map design on a piece of paper first. Decide on the placement of key elements: the large winding river running vertically, the compass rose on the right, and mountain ranges at the bottom and top. -
Transfer the design:
If you have a projector, project your sketch onto the wall and lightly trace the main outlines with a pencil. If working freehand, draw the river first to anchor the composition, then block in large shapes. -
Create the compass rose:
For the compass rose, use a pencil attached to a string (anchored by a tack or tape at the center) or a large drafting compass to draw the perfect outer circles. Use a yardstick to draw the intersecting directional lines.
Steady Hand Technique
For long, shaky lines like the river borders, use a ‘mahl stick’ or simply rest your pinky finger against the wall to stabilize your hand while painting detail work.
Step 2: Painting the Landscape
-
Paint the river:
Mix a pale, watery blue acrylic paint. Using a 2-inch flat brush, fill in the winding river shape. The color should be fairly solid but matte. -
Add river details:
Once the blue base is dry, take a slightly darker blue-grey mix and your fine liner brush to add thin, wavy contour lines running parallel inside the river’s path to suggest flow. -
Outline the mountains:
Using a thin brush and black or dark charcoal paint, outline your mountain ranges. Keep the lines sketchy and slightly broken to mimic an ink-drawing style rather than solid cartoons. -
Shade the topography:
Dilute a bit of grey or brown paint with water to create a wash. Lightly paint one side of the mountains to give them dimension and form without making them heavy. -
Paint the evergreens:
Using deep forest green, paint clusters of pine trees. Start with a central vertical line, then use quick, downward strokes to create the branches, getting wider at the base. -
Create variation in flora:
Vary the size of your trees—make foreground trees (at the bottom) larger and distinct, while background trees near the top should be smaller silhouettes.
Localize It
Customize the map to your actual location! Add landmarks that represent your favorite local hiking spots, your home, or significant places in your family’s history.
Step 3: Adding Landmarks and Details
-
Paint the structures:
Fill in your specific landmarks, like the cabin or lighthouse shown, using burnt orange for roofs to create a pop of contrast. Keep shapes geometric and simple. -
Detail the compass rose:
Return to your compass circle. Carefully paint the star points, alternating between dark brown and the cream wall color to create a 3D effect. Trace the outer rings with a steady hand. -
Add directional text:
Paint large serif letters (N, S, E, W) at the compass points. You can print these out in a classic font and use transfer paper to trace them onto the wall for crisp edges. -
Draw the paths:
Using a black paint marker or fine brush, create dotted lines to represent hiking trails connecting your landmarks to the mountains. -
Sprinkle in small details:
Fill empty negative spaces with tiny drawn elements like tufts of grass, small stars, waves near the lighthouse, or simplified birds. -
Add final text labels:
If desired, write small, whimsical names for your locations (e.g., ‘Pine Ridge’) in a handwritten script near the landmarks. -
Erase and touch up:
Once the paint is fully dry (I usually wait overnight to be safe), gently erase any visible pencil lines. Use your original wall color to clean up any smudges.
Step back and enjoy the journey you’ve created right in your own home
Cultural Motif Patchwork Mural
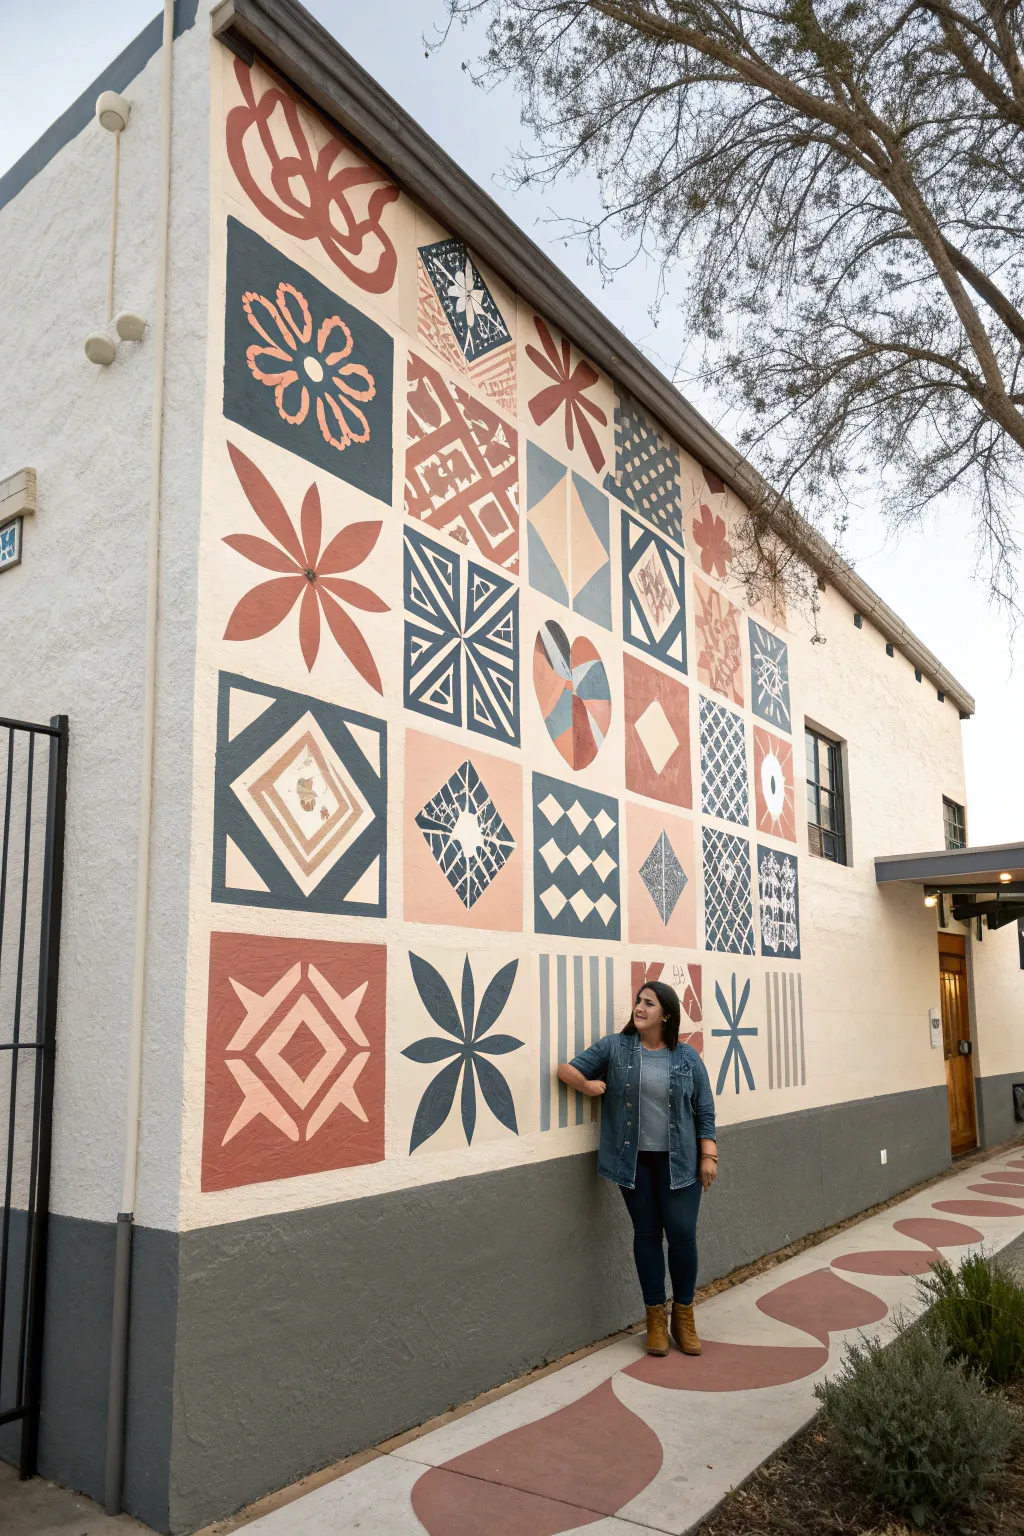

Transform a plain exterior wall into a stunning tapestry of geometric art with this grid-style mural. Featuring earthy terracotta, deep slate blue, and warm cream tones, this patchwork design mimics the cozy, eclectic feel of handmade tiles or a woven quilt.
Step-by-Step
Materials
- Exterior masonry primer
- Exterior latex paint (Warm White/Cream for base)
- Exterior latex paint (Terracotta/Rust Orange)
- Exterior latex paint (Slate Blue/Deep Teal)
- Painter’s tape (1-inch and 2-inch widths)
- Chalk line or laser level
- Measuring tape
- Pencil or chalk
- Assorted brushes (2-inch sash brush, 1-inch flat brush, fine liner brush)
- Small foam rollers and tray
- Ladder (if needed)
- Reference sketch of geometric patterns
Step 1: Preparation & Grid Layout
-
Prime the Surface:
Begin by cleaning your wall surface thoroughly to remove dirt and debris. Apply a coat of quality masonry primer to ensure your paints adhere properly and last through the seasons. -
Apply the Base Coat:
Roll on two coats of your warm white or cream exterior paint. This will serve as the background color for many of the tiles and the ‘grout’ lines between them. Allow this to dry completely for at least 24 hours. -
Measure the Grid:
Decide on the size of your square ’tiles’—for a wall this scale, 24×24 inches works well. Measure the total height and width of your mural area to determine how many rows and columns fits. -
Snap the Lines:
Using a chalk line or a laser level for guidance, mark out your horizontal and vertical grid lines. Light pencil marks are best here so they don’t show through lighter paint colors later. -
Tape the Gutters:
Apply painter’s tape over your grid lines to preserve the cream background as the border between tiles. Press the edges of the tape down firmly to prevent paint bleed.
Step 2: Drafting the Patterns
-
Sketch the Designs:
Lightly sketch a different geometric pattern into each square using pencil. Use the reference photo to copy motifs like stylized flowers, diamonds, concentric squares, checkerboards, and sunbursts. -
Map Your Colors:
To keep the patchwork balanced, I like to mark each section with a tiny letter (‘B’ for Blue, ‘T’ for Terracotta) before I start painting. This prevents two identical heavy blocks from sitting right next to each other. -
Tape Internal Shapes:
For the sharp, straight-lined designs like the concentric diamonds or split triangles, use additional tape within the squares to mask off the shapes. For organic shapes like the petals, you will freehand them.
Bleeding Lines?
If you have textured stucco, tape alone won’t seal perfectly. Paint a thin layer of the *base* color over the tape edge first to seal the gap before applying the accent color.
Step 3: Painting the Tiles
-
Paint the Terracotta Blocks:
Start with your rust/terracotta color. Use a small roller for solid backgrounds and a sash brush for the intricate shapes like the flower petals and grid lines. -
Paint the Slate Blue Blocks:
Move on to the slate blue sections. Be sure to check your color map so you don’t accidentally paint a section meant to remain cream. -
Detail Work:
For the more intricate patterns, such as the white cross-hatching over the blue background or the small dots in the flower centers, switch to a fine liner brush or a 1-inch flat brush for control. -
Create Texture:
Some squares in the original design have a ‘stamped’ or distressed look. You can achieve this by dry-brushing a little cream paint over a solid colored block while it’s still slightly tacky, or by lightly sanding it after it dries. -
The Organic Leaf Motif:
For the flowing, organic shapes at the top left (the large knot-like design), focus on smooth, confident brushstrokes rather than rigid lines. This contrast softens the overall geometric feel. -
Let it Dry, Then Peel:
Allow the paint to set until it is dry to the touch but not fully cured. Carefully peel away your grid tape and internal masking tape at a 45-degree angle to reveal crisp lines.
Make It 3D
Add a faint drop shadow using a thinned gray glaze on the bottom and right side of each ’tile’ create a trompe-l’œil effect that makes the squares look like real ceramic tiles.
Step 4: Finishing Touches
-
Touch Up:
Inspect the ‘grout’ lines (the cream borders). If any color bled under the tape, use a small artist’s brush and your base cream paint to neaten the edges. -
Clean Up Edges:
If your mural doesn’t cover the entire wall, ensure the outer perimeter is clean. You might want to frame the whole piece with a slightly wider border of the cream base color. -
Seal (Optional):
If your wall faces harsh direct sun or heavy weather, consider applying a clear UV-resistant exterior sealer over the entire mural to protect the colors from fading.
Step back and admire how your collection of geometric patterns comes together to form a cohesive, culturally rich statement piece on your wall.
Community Portrait Collage Wall

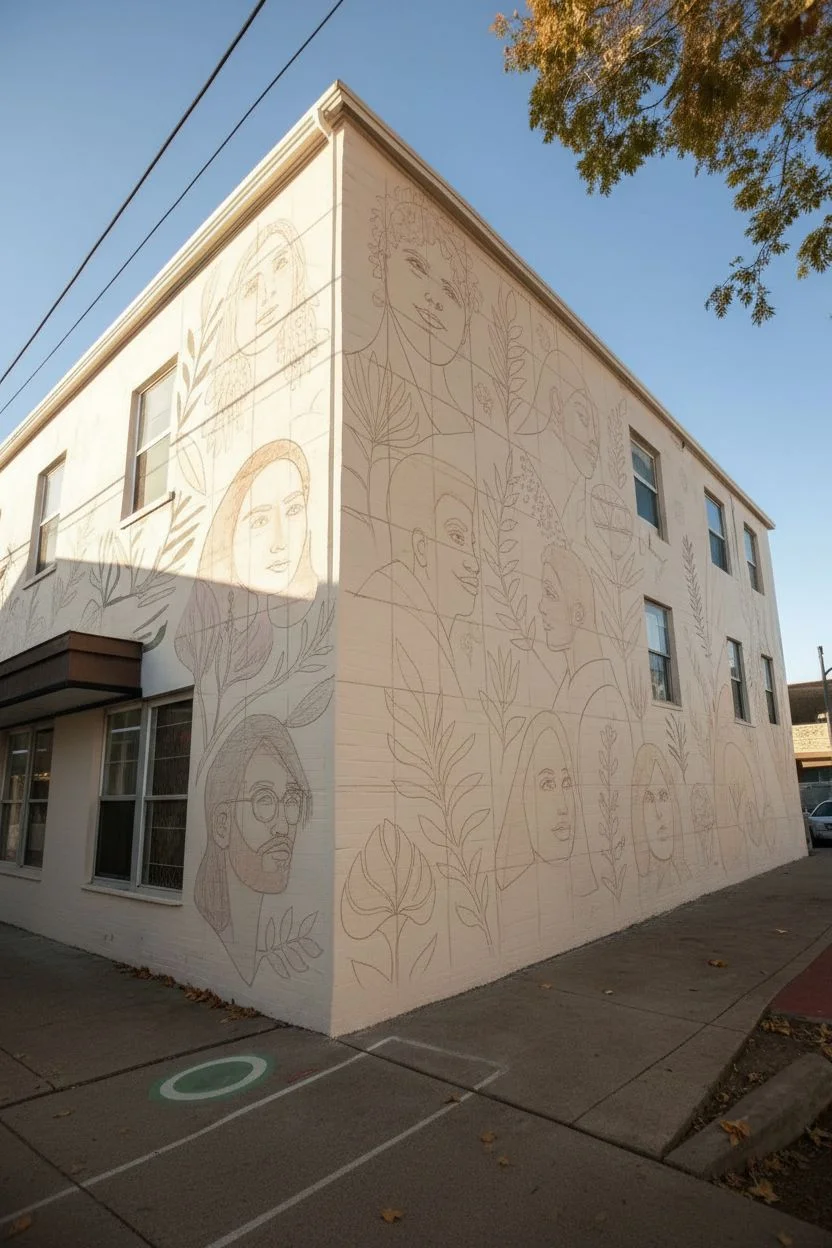
Transform a blank exterior corner into a celebration of diversity with this large-scale mural featuring stylized portraits intertwined with flowing botanical elements. The warm, earthy color palette combined with simplified, illustrative faces creates a welcoming and cohesive community portrait.
Step-by-Step Guide
Materials
- Exterior masonry primer
- Exterior latex or acrylic mural paints (Beige, Terracotta, Sage Green, Forest Green, Ochre, Brown, Black, White)
- Scaffolding or sturdy ladders
- Chalk or charcoal sticks for grid sketching
- Paint rollers (various sizes) and extension poles
- Assorted brushes (3-inch flats for filling, 1-inch rounds for details, liner brushes for fine lines)
- Painter’s tape
- Drop cloths
- UV-resistant clear topcoat (matte or satin)
Step 1: Planning and Surface Prep
-
Assess and clean the wall:
Begin by power washing the brick or masonry surface to remove dirt, moss, and loose paint. Allow the wall to dry completely for at least 24-48 hours before proceeding. -
Apply the base coat:
Roll on a high-quality exterior masonry primer. Follow this with your background color—a warm, creamy beige or off-white works best to make the earthy tones pop. You’ll likely need two coats for opaque coverage. -
Design the layout:
Create your design on paper or digitally first. Aim for a mix of profiles and frontal views for the faces, intersected by large, leafy vines that connect the figures. Ensuring the vines wrap around the corner helps integrate both sides of the building.
Paint Drips?
If paint drips on the rough brick, don’t wipe it immediately as it will smear into the texture. Let it dry completely, scrape off the excess, and touch up with background paint.
Step 2: Sketching the Composition
-
Create a grid:
Use a snap line or chalk to create a large-scale grid on the wall corresponding to your reference design. This is crucial for keeping facial proportions accurate on such a large scale. -
Rough in the shapes:
Using charcoal or a light wash of diluted burnt sienna paint, sketch the outlines of the heads, hair figures, and main botanical stems. Step back frequently to check proportions, especially how the images wrap around the building’s corner. -
Refine facial features:
Tighten up the sketches of eyes, noses, and mouths. Keep the style illustrative and slightly simplified rather than hyper-realistic, as shown in the inspiration image.
Step 3: Blocking in Color
-
Paint the skin tones:
Mix a variety of skin tones using your brown, ochre, white, and terracotta paints. I find it helpful to paint the mid-tones first, filling in the face shapes with flat, solid color. -
Fill the hair and clothing:
Use darker browns and blacks for hair silhouettes, and muted yellows or ochres for clothing elements. Keep the edges crisp where the figures meet the background. -
Paint the botanicals:
Using sage green and forest green, block in the leaves and stems. Paint the large flower shapes in terracotta and pinkish-brown hues. Let the plants overlap the figures slightly to create depth. -
Add secondary details:
Once the base layers are dry, go back in with lighter shades to add highlights to the hair or patterns to the clothing, like the polka dots seen on one figure.
Interactive Element
Paint a specific element near the ground, like a flower or a vine handle, at human height. This invites passersby to ‘hold’ the object for fun photo opportunities.
Step 4: Defining and Detailing
-
Outline facial features:
Use a smaller round brush and a darker shade of the skin tone (or a soft brown) to define the eyes, eyebrows, nose bridges, and lips. Avoid harsh black outlines on the faces to keep the look soft. -
Detail the eyes:
Paint the whites of the eyes and the irises. Add a tiny dot of white reflection in each pupil to bring the portraits to life. -
Refine the plants:
Use a liner brush to add veins to the leaves and definition to the flower petals. Sharp, fluid lines help clearly separate the botanicals from the portraits. -
Clean up edges:
Go back with your background beige color to cut in and sharpen any edges that became messy during the painting process.
Step 5: Sealing the Work
-
Check for consistency:
Walk around the corner to ensure the colors transition smoothly and the style remains consistent across both walls. -
Apply varnish:
Once the paint has cured (check manufacturer instructions, usually 48-72 hours), apply a UV-resistant clear topcoat. This protects the colors from fading and makes the mural weather-resistant.
Step back and admire how art can turn a simple building corner into a vibrant community landmark


Have a question or want to share your own experience? I'd love to hear from you in the comments below!