Baby painting is all about sensory play—those squishy, swirly, color-mixing moments that feel like pure discovery. I’m sharing my favorite baby-safe painting ideas that keep things simple for you and genuinely fun for your little artist.
Mess-Free Zip-Top Bag Smush Painting
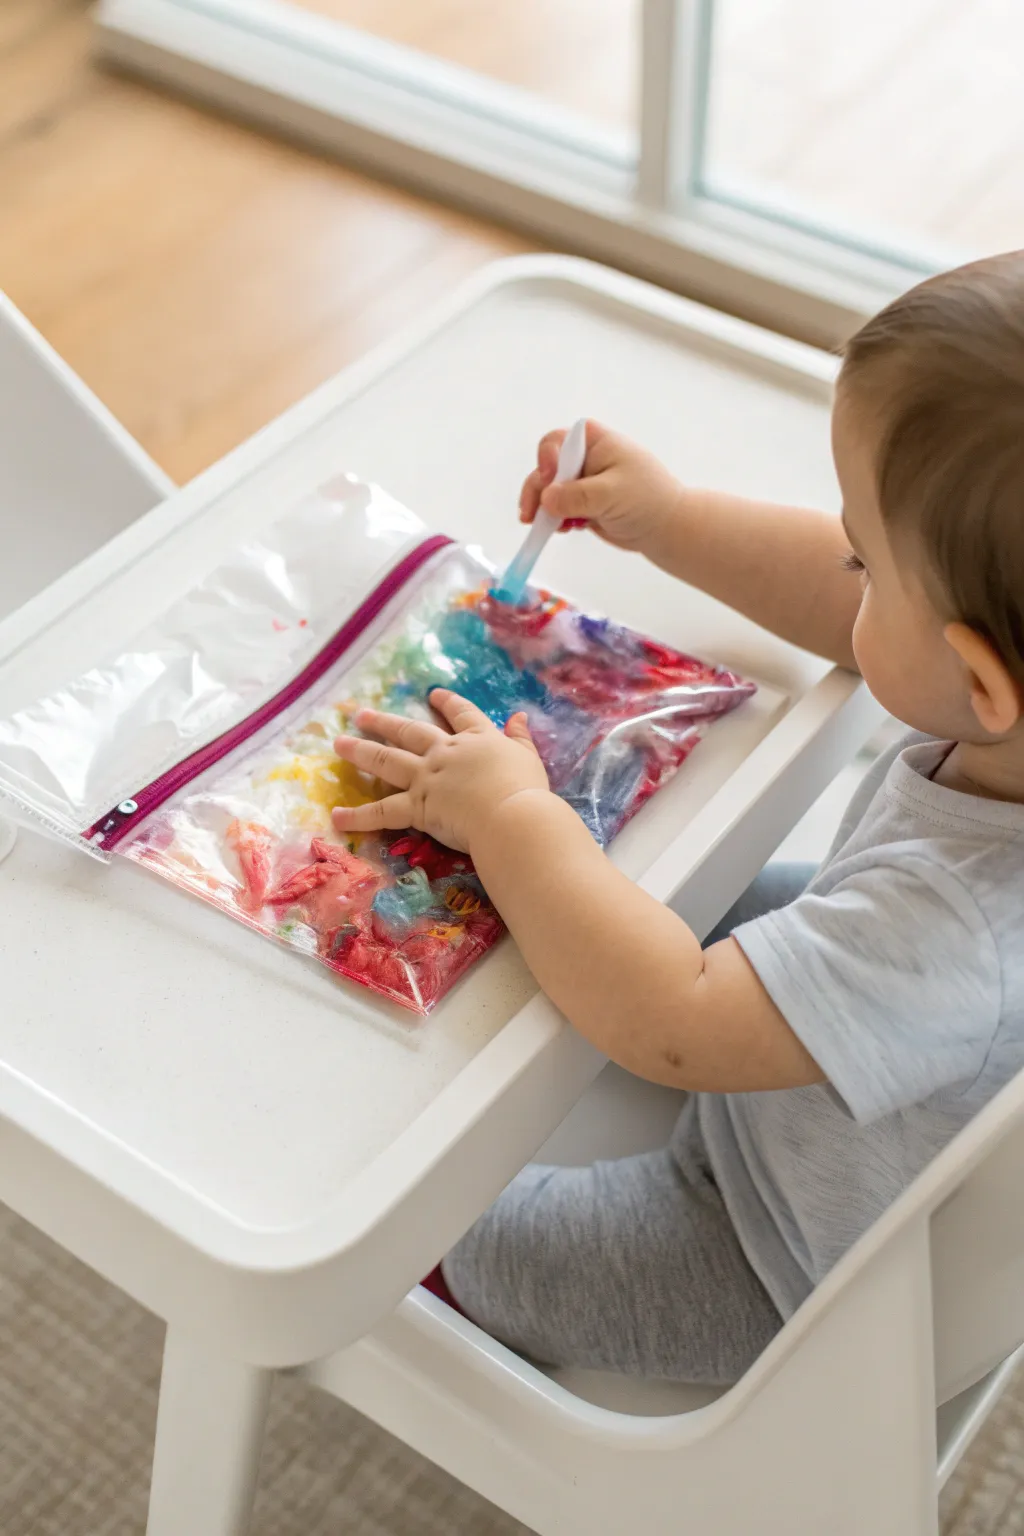
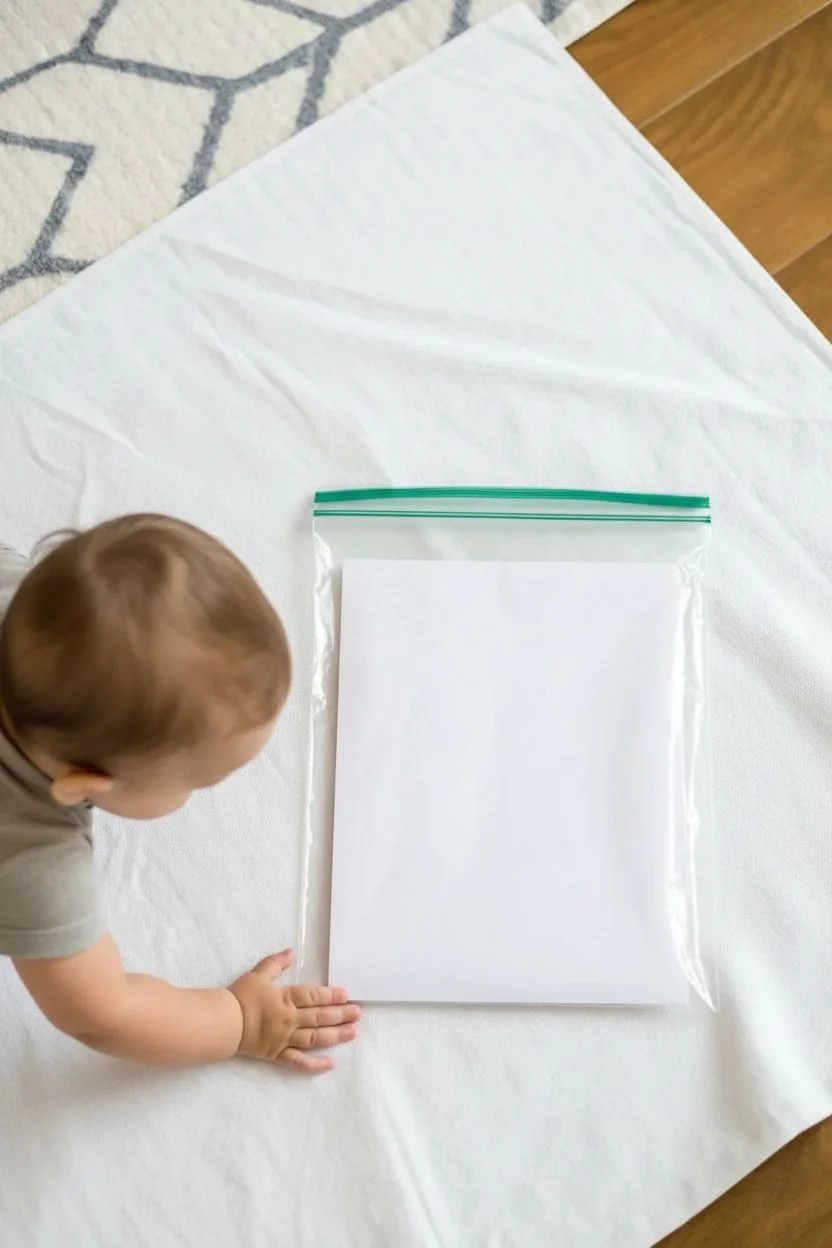
This mess-free sensory painting activity is perfect for tiny hands that love to squish and explore colors without the clean-up. The result is a vibrant, swirled masterpiece safely contained within a sturdy zip-top bag.
Detailed Instructions
Materials
- Heavy-duty freezer zip-top bag (Gallon or Quart size)
- Non-toxic washable tempera or finger paints (Red, Blue, Yellow, White)
- White cardstock paper or thick construction paper
- Scissors
- Wide clear packing tape or painter’s tape
- Cotton swabs or a small plastic spoon (optional, for tool exploration)
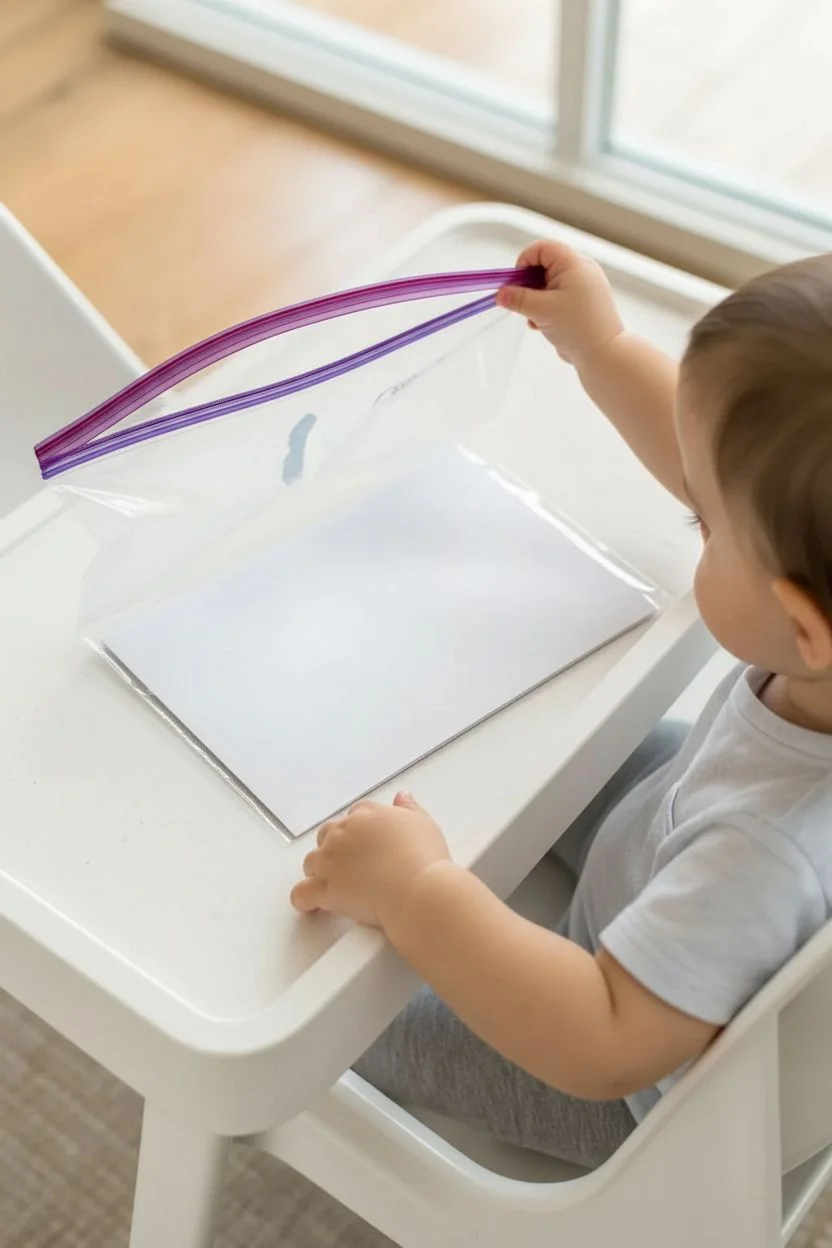
Step 1: Preparing the Canvas
-
Paper selection:
Choose a piece of white cardstock or thick construction paper. Standard printer paper tends to get soggy too quickly, so the heavier weight helps the artwork last. -
Trim to fit:
Hold the zip-top bag up to your paper. If the paper is larger than the bag, trim the edges with scissors so it slides easily inside without bending. -
Insert the paper:
Slide the blank white paper into the empty zip-top bag, ensuring it sits flat against the bottom layer of plastic.
Step 2: Adding the Color
-
Primary dollops:
Squeeze a generous dollop of red paint onto the paper inside the bag. I find that placing it near a corner encourages spreading later. -
Blue splash:
Add a similar amount of blue paint in a different area of the paper, leaving some white space between the colors. -
Yellow brightness:
Place a dollop of yellow paint in a third spot. Keeping primary colors somewhat separated at the start allows the child to see new colors emerge as they mix. -
White highlights:
Add a few smaller drops of white paint. This helps create beautiful pastel swirls and adds dimension to the darker primary colors. -
Check paint volume:
Ensure you have enough paint to cover most of the page when spread, but not so much that the bag feels like a water balloon. About 3-4 tablespoons total is usually plenty.
Air Bubble Control
Use a straw to suck out the last bit of air before sealing the very edge of the zipper. Less air means better contact between fingers and paint.
Step 3: Sealing and Securing
-
Remove excess air:
Carefully press the bag flat to push out as much air as possible before sealing. Trapped air bubbles make it harder for little fingers to move the paint around. -
Zip it shut:
Firmly close the zip-top seal. Run your fingers over it twice to ensure it is completely engaged from end to end. -
Tape the seal:
For extra peace of mind, place a strip of clear packing tape or painter’s tape over the zipper seal. This prevents curious hands from accidentally prying it open. -
Optional tape-down:
If your child gets frustrated by the bag sliding away, you can tape the corners of the bag directly to the table or high chair tray.
Glitter Upgrade
Add a sprinkle of biodegradable glitter or a squirt of hair gel into the bag before sealing for extra sparkle and varied sensory texture.
Step 4: Sensory Painting Time
-
Initial squish:
Place the bag in front of your child. Demonstrate how to press down on a paint blob to make it move. -
Finger tracing:
Encourage the child to use their index finger to draw lines through the paint, mixing the colors together. -
Hand smushing:
Let them use their whole palm to smash the colors flat, blending the red and yellow to make orange, or blue and yellow to make green. -
Introduce tools:
Offer a cotton swab (Q-tip) or the back of a plastic spoon. Show them how to push the tool against the plastic to create negative space lines or specific shapes in the paint. -
Mix and swirl:
Continue the activity until the paper is covered to your child’s satisfaction or the colors have turned a uniform muddy hue.
Step 5: Preserving the Art
-
Remove the paper:
Once finished, carefully cut the sides of the bag open with scissors. Peel back the plastic top layer gently to avoid smearing the design too much. -
Slide it out:
Slide the wet painting out and lay it flat on a drying rack or newspaper. -
Final drying:
Allow the heavy paint to dry completely, which may take up to 24 hours depending on thickness.
Once dry, you can frame this abstract creation or cut it into shapes for greeting cards


Taste-Safe Finger Painting on the High Chair Tray
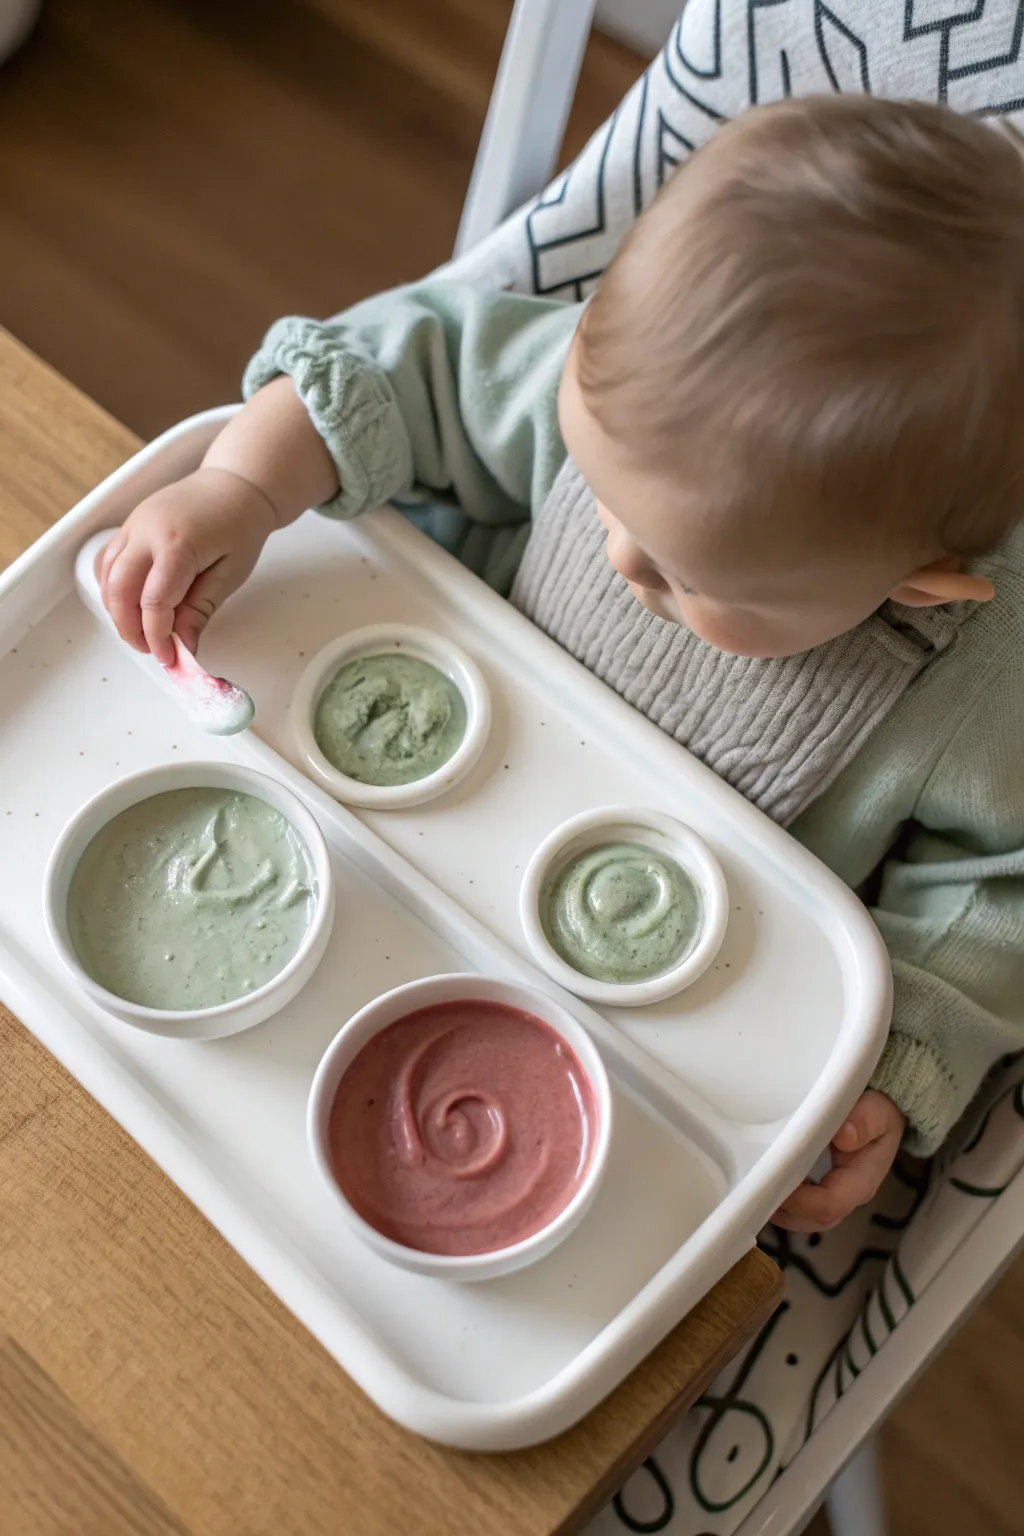
Transform mealtime into a creative sensory experience by whipping up a palette of taste-safe paints using simple kitchen ingredients. This project creates four creamy, soft-hued colors that are perfect for little fingers to explore without any worry if they end up in a tiny mouth.
Step-by-Step Guide
Materials
- Plain Greek yogurt (thick consistency)
- Baby spinach or matcha powder (for green)
- Strawberries or raspberries (for pink/red)
- Blueberries (optional for variation)
- Blender or food processor
- High chair with a clean tray
- 4 small, shallow dipping bowls or ramekins
- Baby spoon (silicone preferred)
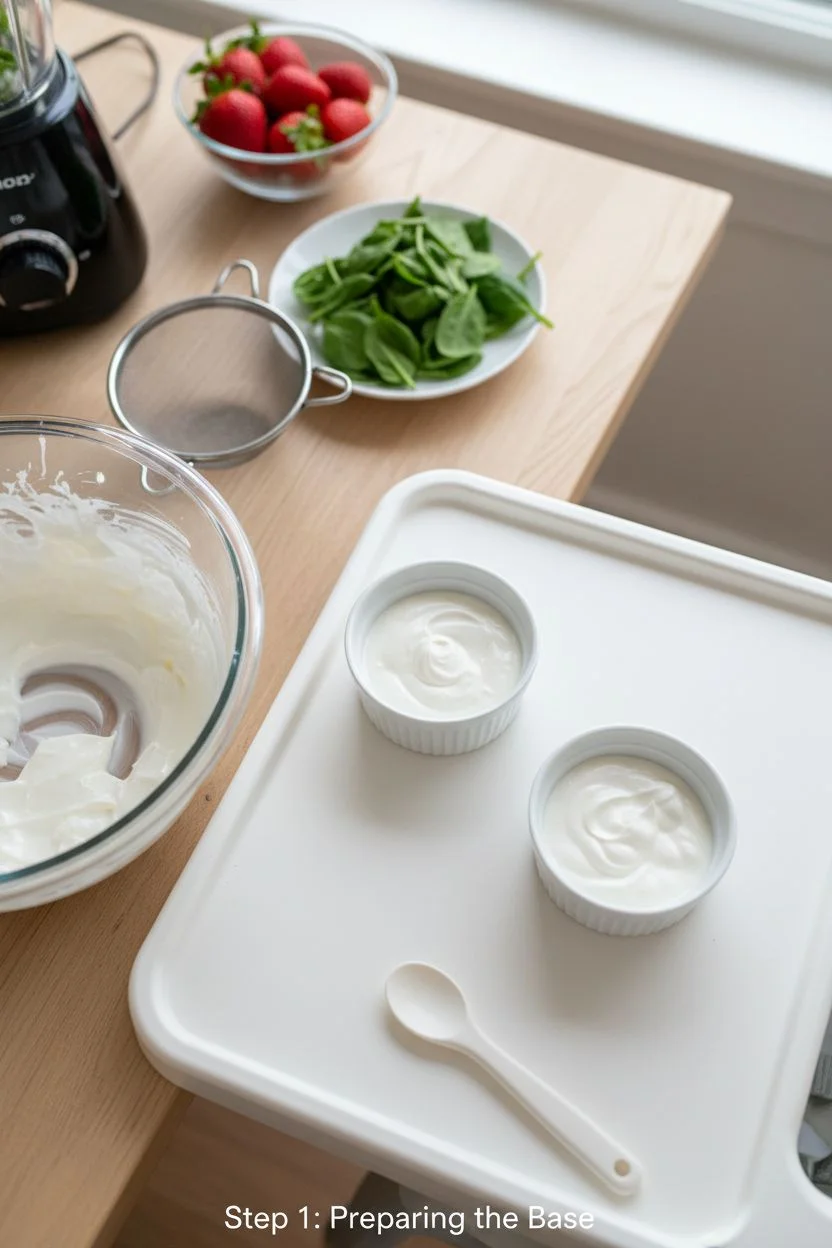
Step 1: Preparing the Base
-
Select your yogurt:
Choose a thick, plain Greek yogurt as your base. The thicker texture holds its shape better for finger painting and doesn’t run off the tray as easily as regular yogurt. -
Portion the base:
Scoop about half a cup of yogurt into two separate mixing containers. We will be blending these separately to create our two primary color groups.
Too Runny?
If the yogurt paint is too thin after blending with fruit, let it sit in the fridge for 20 minutes or stir in a teaspoon of baby oat cereal to thicken it.
Step 2: Creating the Colors
-
Blend the green paint:
Take a handful of fresh baby spinach and add it to your first portion of yogurt in a blender. Pulse until completely smooth and the mixture turns a soft, sage green. -
Adjust the green shade:
For the darker green seen in the image, add more spinach leaves and blend again. If you want a lighter pastel green, simply stir in a spoonful of plain white yogurt to dilute the color. -
Blend the pink paint:
Rinse your blender, then combine fresh or thawed strawberries with the second portion of yogurt. Puree until you achieve a rich, berry-pink hue. -
Strain if necessary:
I define the texture by checking for large seeds or chunks. If the berry mixture is too chunky, press it through a fine-mesh sieve to make it silky smooth for painting.
Flavor Tip
Add a sprinkle of cinnamon or vanilla extract to the berry mix for scent stimulation, enhancing the sensory experience beyond just sight and touch.
Step 3: Setting the Scene
-
Prepare the tray:
Wipe down the high chair tray thoroughly. It acts as both the easel and the canvas, so you want it spotless and dry. -
Fill the bowls:
Spoon the mixtures into four small, shallow bowls. Fill one with the pink berry mix and the other three with variations of the green mix. -
Create color variations:
To mimic the image exactly, make sure one green bowl has a slightly darker, more textured mix (pure spinach paste), and the others are creamier yogurt blends. -
Arrange the palette:
Place the four bowls directly onto the high chair tray. Many high chair trays have specific indentations for cups or bowls; fit the bowls snugly into these spots if available to prevent tipping. -
Add texture swirls:
Take the back of a spoon and gently swirl the surface of the paint in each bowl. This creates an inviting spiral pattern that encourages the baby to touch. -
Provide the tool:
Dip a baby-safe silicone spoon slightly into the pink mixture so it’s ‘pre-loaded’ with color. -
Place the spoon:
Set the spoon onto the tray near the baby’s dominant hand, inviting them to grab it and start their artistic exploration. -
Secure the baby:
Place the baby in the high chair and fasten the safety harness. We want them secure while they get messy. -
Start the fun:
Guide the baby’s hand to the bowls if they are hesitant, showing them that the ‘paint’ is safe to touch and taste.
Now you can sit back and watch your little artist enjoy a colorful, healthy, and totally mess-approved painting session


Baby Handprint and Footprint Keepsake Painting
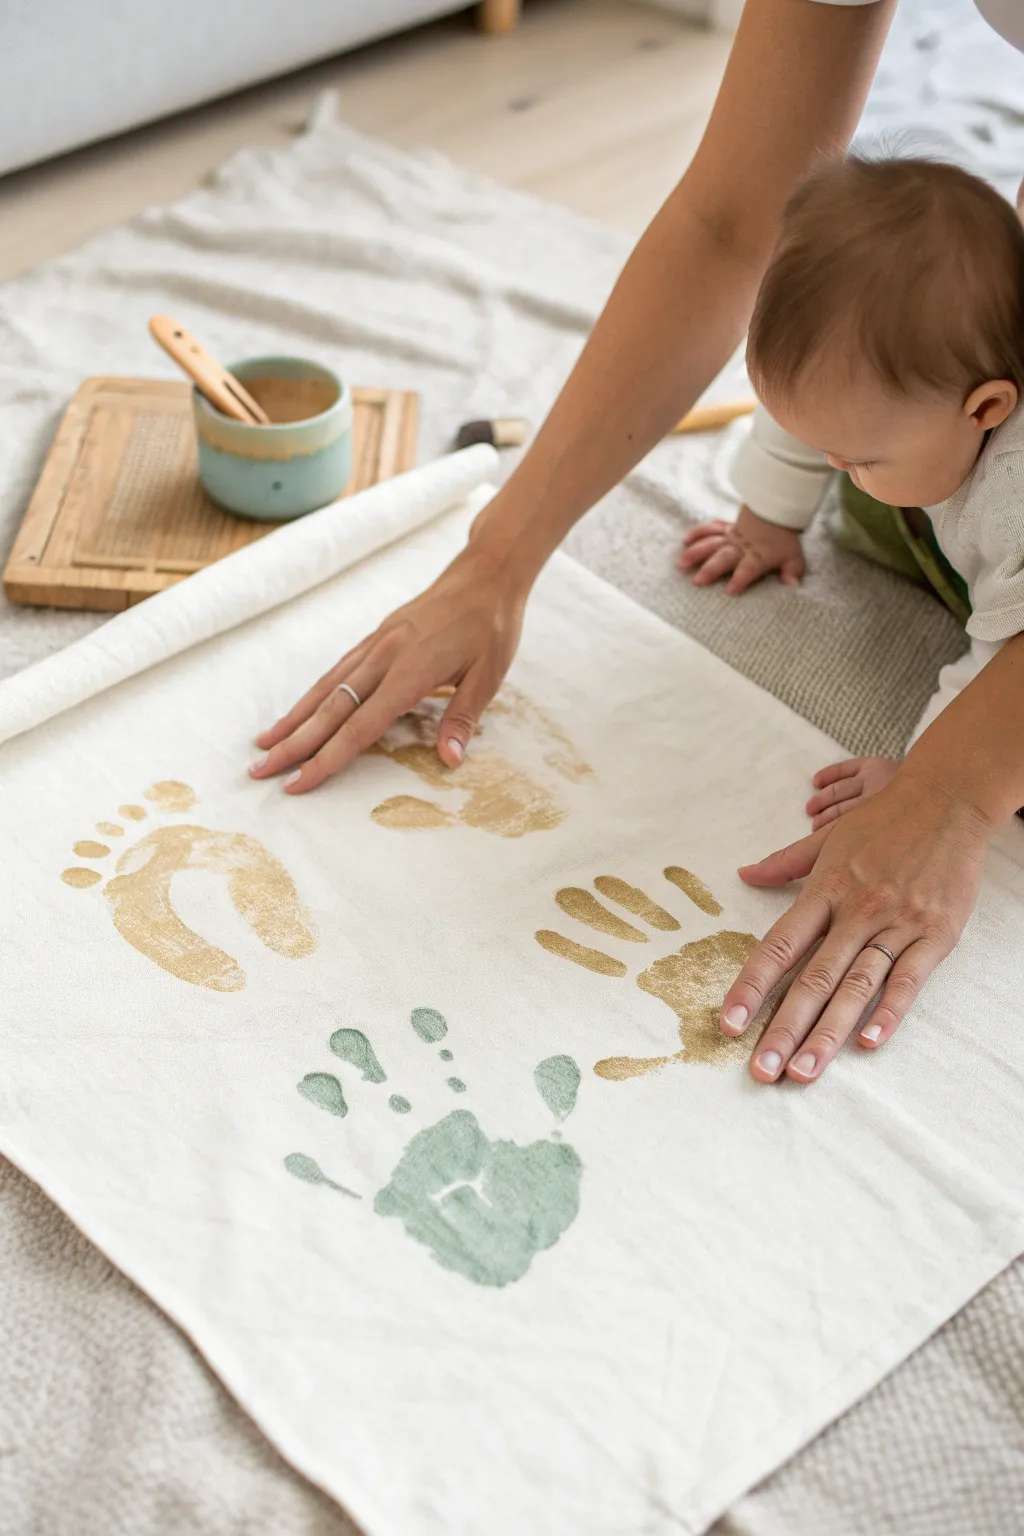
Create a timeless memory with this elegant fabric banner featuring your baby’s handprints and footprints in sophisticated shades of gold and sage green. This minimalist layout turns simple prints into display-worthy wall art that captures just how tiny they once were.
Step-by-Step
Materials
- White or cream canvas fabric (or a heavy cotton tea towel)
- Non-toxic, baby-safe fabric paint (Gold)
- Non-toxic, baby-safe fabric paint (Sage Green)
- Foam paint brush or soft bristle brush
- Painter’s tape or weights
- Paper plate or palette
- Baby wipes or damp cloth (essential for quick cleanup)
- Wooden dowel and string (optional, for hanging)
Step 1: Preparation
-
Prepare the fabric:
Ideally, wash and iron your canvas fabric beforehand to remove any wrinkles or sizing chemicals. Lay it out flat on a hard, smooth surface like a floor or low table. If the fabric is thin, place a piece of cardboard or plastic underneath to prevent paint from seeping through to the surface below. -
Secure the workspace:
Tape down the corners of your fabric with masking tape or place heavy objects on the edges to keep it from shifting while you work. This is crucial when wrangling a wiggly baby. -
Set up your palette:
Squeeze a generous amount of the metallic gold paint onto your palette or paper plate. Do the same with the sage green paint, keeping the colors separated. -
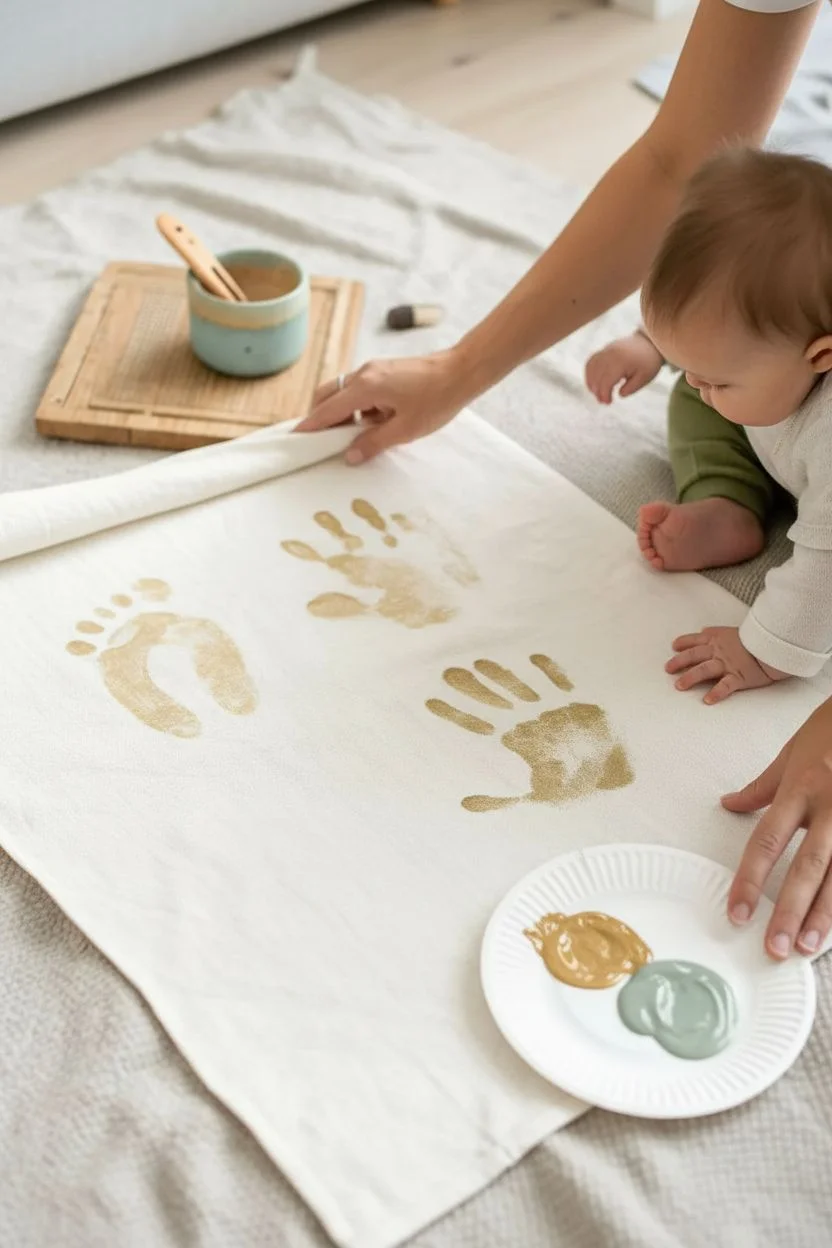
Plan your layout:
Before painting, visualize where you want the prints to go. The example uses a scattered but balanced composition: a gold footprint on the left, two gold handprints in the center and right, and a green handprint at the bottom. You can use light pencil marks to guide placement if you wish.
Sleepy Artist Trick
For the clearest prints with minimal squirming, try this project while your baby is asleep or very drowsy after a feed. Their hands are naturally more relaxed and open.
Step 2: Creating the Gold Prints
-
Apply gold paint to the foot:
Start with the footprint, as babies are often less wiggly with their feet than their hands. Use the foam brush to apply an even, thin layer of gold paint to the bottom of your baby’s left foot. Make sure to coat the toes and heel well, but avoid globbing. -
Stamp the footprint:
Gently but firmly press the painted foot onto the left side of the fabric. Press down on the toes and the heel to ensure a complete transfer. Lift the foot straight up to avoid smudging. -
Clean and reset:
Immediately wipe the baby’s foot clean with a wet wipe or damp cloth. Let the baby wiggle for a moment before moving to the hands. -
Paint the first hand:
Apply the gold paint to the baby’s right hand. Ticklish babies might clench their fist, so gently stroke the back of their hand to encourage them to open it. -
Stamp the right handprint:
Position this handprint on the right side of the fabric, roughly aligned with the footprint but slightly lower. Press the palm and each finger down onto the fabric. Lift straight up. -
Paint the second hand:
I prefer to clean the first hand immediately before painting the next one. Now, apply gold paint to the left hand. -
Stamp the center handprint:
Place this print somewhat centrally, near the top of the fabric or slightly overlapping the imaginary line between the first two prints. Press and lift carefully.
Smudged Print Rescue
If a print smudges badly, don’t panic. Turn it into a creative abstract element or, once dry, paint a small heart or star over the smudge in a contrasting color.
Step 3: Adding the Green Accent
-
Switch colors:
Ensure all gold paint is wiped off the baby’s hands. Now, dip your clean foam brush into the sage green paint. -
Apply green paint:
Coat the baby’s left hand with the sage green paint. A thin, even coat works best for capturing the detailed lines of the palm. -
Position the green print:
Place this handprint near the bottom center of the composition, below the gold prints. This creates a grounded, colorful anchor for the artwork. -
Execute the final stamp:
Press the hand firmly onto the fabric. If the baby moves a finger, don’t worry—smudges add character and authenticity to the piece. Lift the hand away cleanly.
Step 4: Finishing Touches
-
Clean up baby:
Thoroughly wash the baby’s hands and feet with warm soapy water to remove any remaining paint residue. -
Allow to dry:
Let the fabric sit undisturbed for at least 24 hours. If you used thick fabric paint, it might need a bit longer to cure completely. -
Set the paint (Optional):
Once dry, you may need to heat-set the paint if the manufacturer instructions suggest it. Usually, this involves ironing the back of the fabric on a low heat setting without steam. -
Display:
You can now frame the fabric, or sew a simple channel at the top to insert a dowel for a hanging tapestry look.
Hang your beautiful new keepsake in the nursery and admire those precious little prints for years to come


Sponge Swipe Painting for Easy Grips
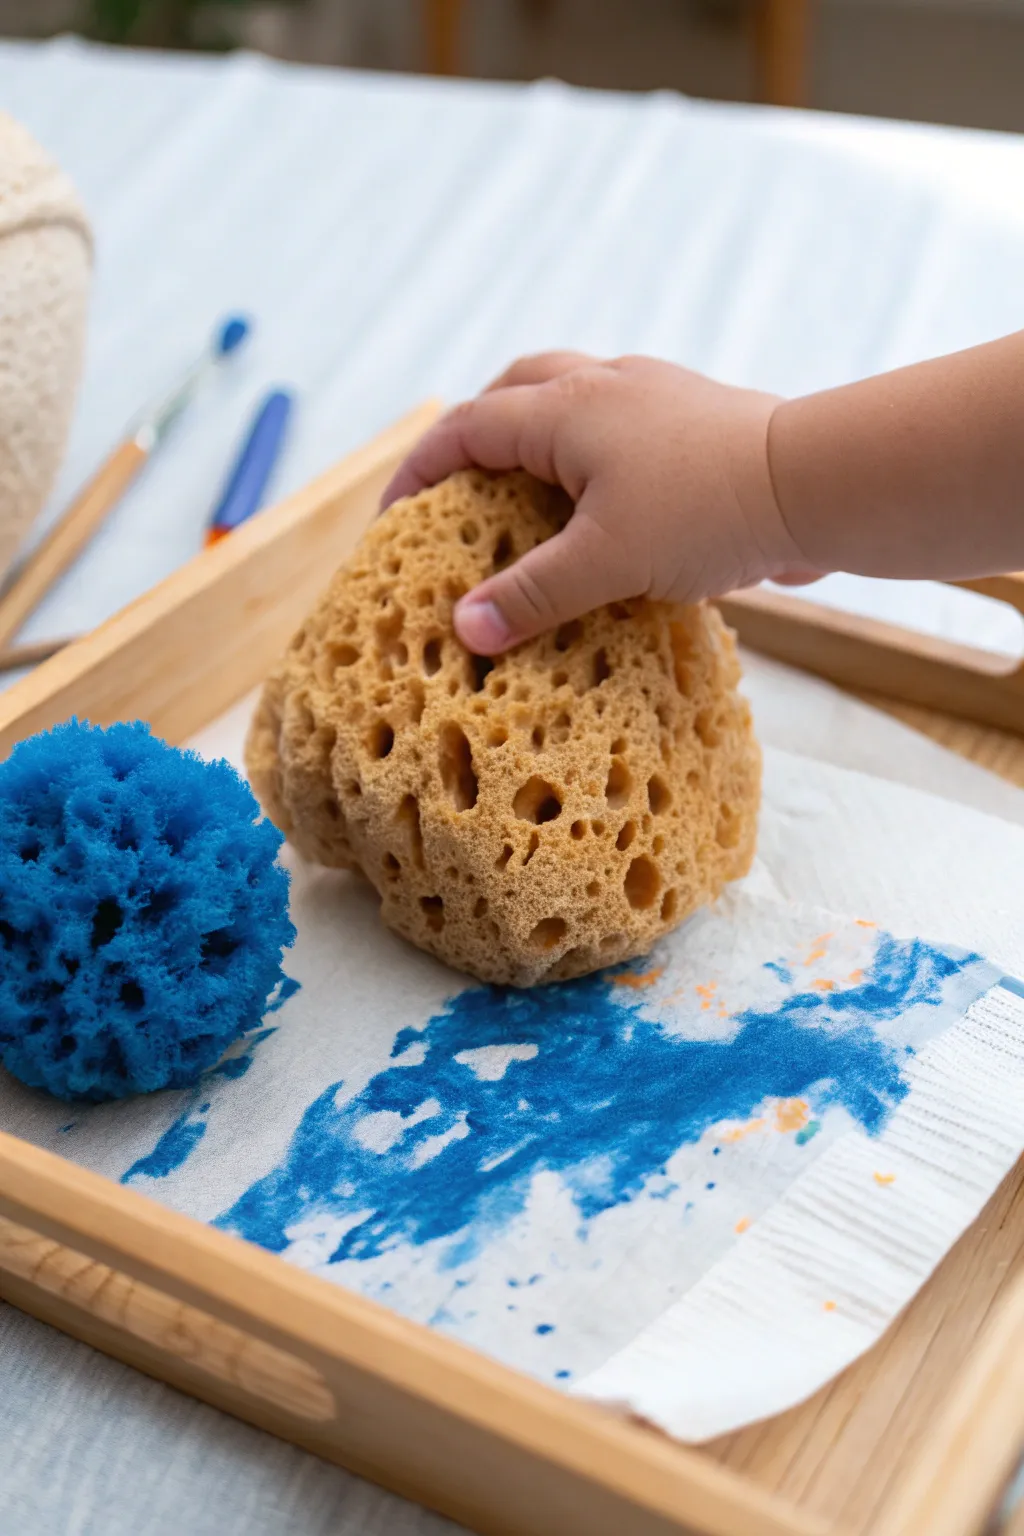
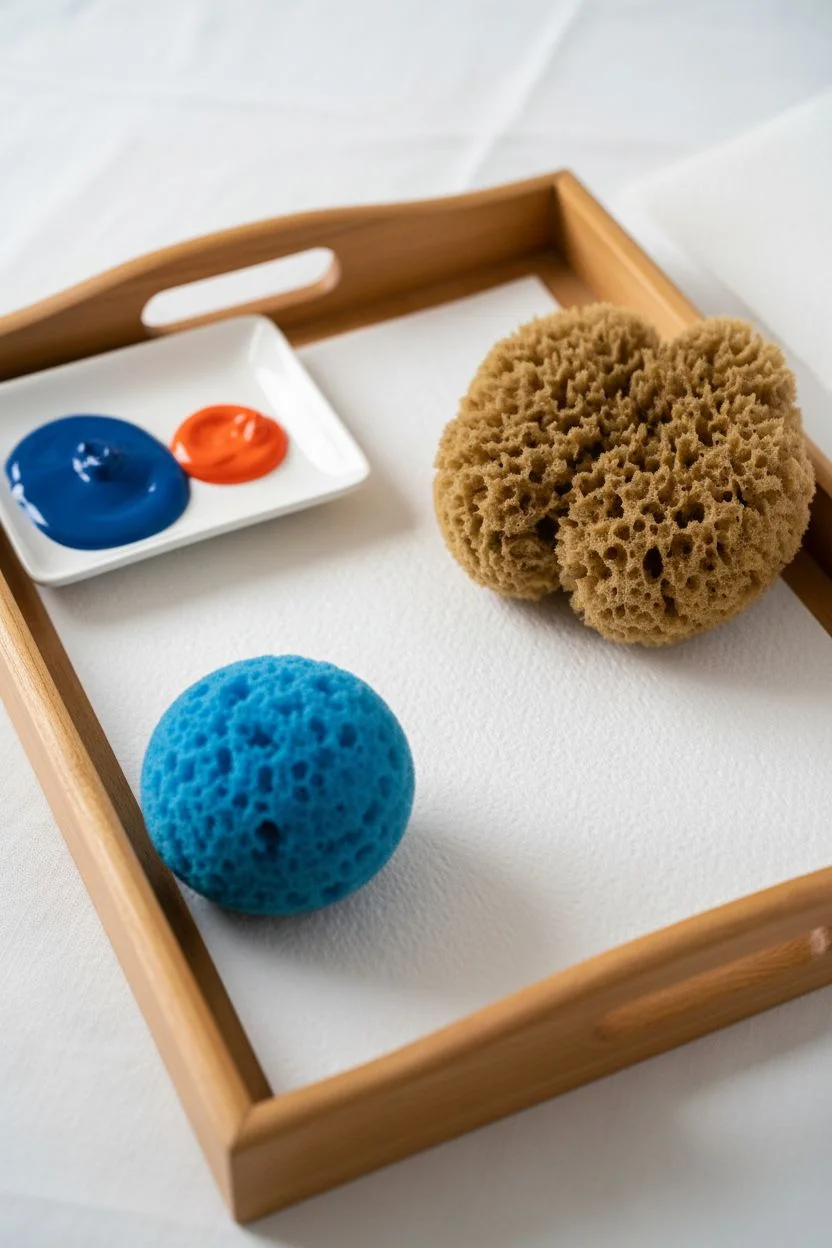
Let your little artist explore textures and sweeping motions with this hands-on painting activity. Using large, natural sea sponges creates beautiful, organic patterns and encourages confident, broad strokes perfect for developing motor skills.
How-To Guide
Materials
- Large natural sea sponge (easy for small hands to grip)
- Synthetic textured sponge ball (blue)
- Small wooden serving tray with handles
- Heavyweight construction paper or white cotton cloth
- Washable tempera paint (blue and orange)
- Paper towels for blotting
- Paint palette or shallow dish
Step 1: Setting the Stage
-
Prepare the tray:
Place a sheet of heavyweight paper or a small white cotton cloth directly into the center of your wooden tray. The tray’s edges will help contain the mess while your baby works. -
Dampen the sponges:
Before introducing paint, run the natural sea sponge and the blue textured sponge under water. Squeeze them out thoroughly until they are just slightly damp; this softens them and helps the paint transfer more smoothly. -
Setup the palette:
Squeeze a generous amount of blue washable tempera paint into a shallow dish. Add a smaller, separate dollop of orange paint if you want to introduce a secondary color for contrast.
Step 2: Applying the Paint
-
Load the sponge:
Dip the bottom face of the large natural sea sponge into the blue paint. You don’t need to saturate the whole thing—just enough to cover the bottom surface. -
Blot excess:
Tap the painted sponge once or twice on a spare paper towel or the side of the paint dish. This prevents big blobs and ensures the unique pore texture of the sponge shows up clearly. -
Position the sponge:
Hand the sponge to your child or guide their hand to place the sponge onto the paper in the tray. The large size makes it easy for them to grab with a whole-hand grip.
Sponge Life Extension
Natural sea sponges are durable but delicate. Rinse them thoroughly after every use and let them air dry completely in a ventilated area to prevent mold.
Step 3: Creating the Swipes
-
Encourage movement:
Encourage your child to drag the sponge across the paper. The movement should be a slide or a swipe rather than a stamp to create those long, textured streaks shown in the example. -
Observe the texture:
Point out the white spaces left behind by the holes in the sponge. I find this is a great moment to talk about ‘bumpy’ vs ‘smooth’ textures with little ones. -
Add secondary texture:
Introduce the blue synthetic sponge ball. Dip it lightly into the blue paint and let your child roll or press it alongside the initial swipes to add a different kind of pore pattern. -
Incorporate color pops:
Using a clean corner of the natural sponge or a fingertip, pick up a tiny bit of orange paint. -
Dab the orange:
Gently dab small spots of orange sporadically over the blue swipes. The goal is just a hint of color to break up the blue monochrome. -
Layering swipes:
If the paper isn’t full yet, encourage another pass with the large sponge. Overlapping a fresh swipe over a drying one creates depth and interesting color variations. -
Check saturation:
Watch the paper carefully; if it becomes too soggy from the wet sponges, it might tear. It’s usually time to stop once broad strokes cover most of the center.
Ocean Theme Twist
Since sea sponges create water-like textures, cut the finished dry paper into fish shapes or glue on seashell cutouts to turn the abstract art into a seascape.
Step 4: Drying and Display
-
Remove carefully:
Lift the wet paper or cloth out of the wooden tray gently, supporting it from underneath so it doesn’t rip. -
Air dry flat:
Lay the artwork flat on a safe surface to dry completely. Because sponge painting can be thick, this may take a few hours. -
Clean the tools:
Immediately rinse the natural sponge with warm water to prevent the paint from hardening inside the deep pores, which keeps it soft for next time.
Once dry, you’ll have a beautifully textured abstract piece that captures the energy of your toddler’s movements
BRUSH GUIDE
The Right Brush for Every Stroke
From clean lines to bold texture — master brush choice, stroke control, and essential techniques.
Explore the Full Guide
Bubble Wrap Press Painting for Instant Texture
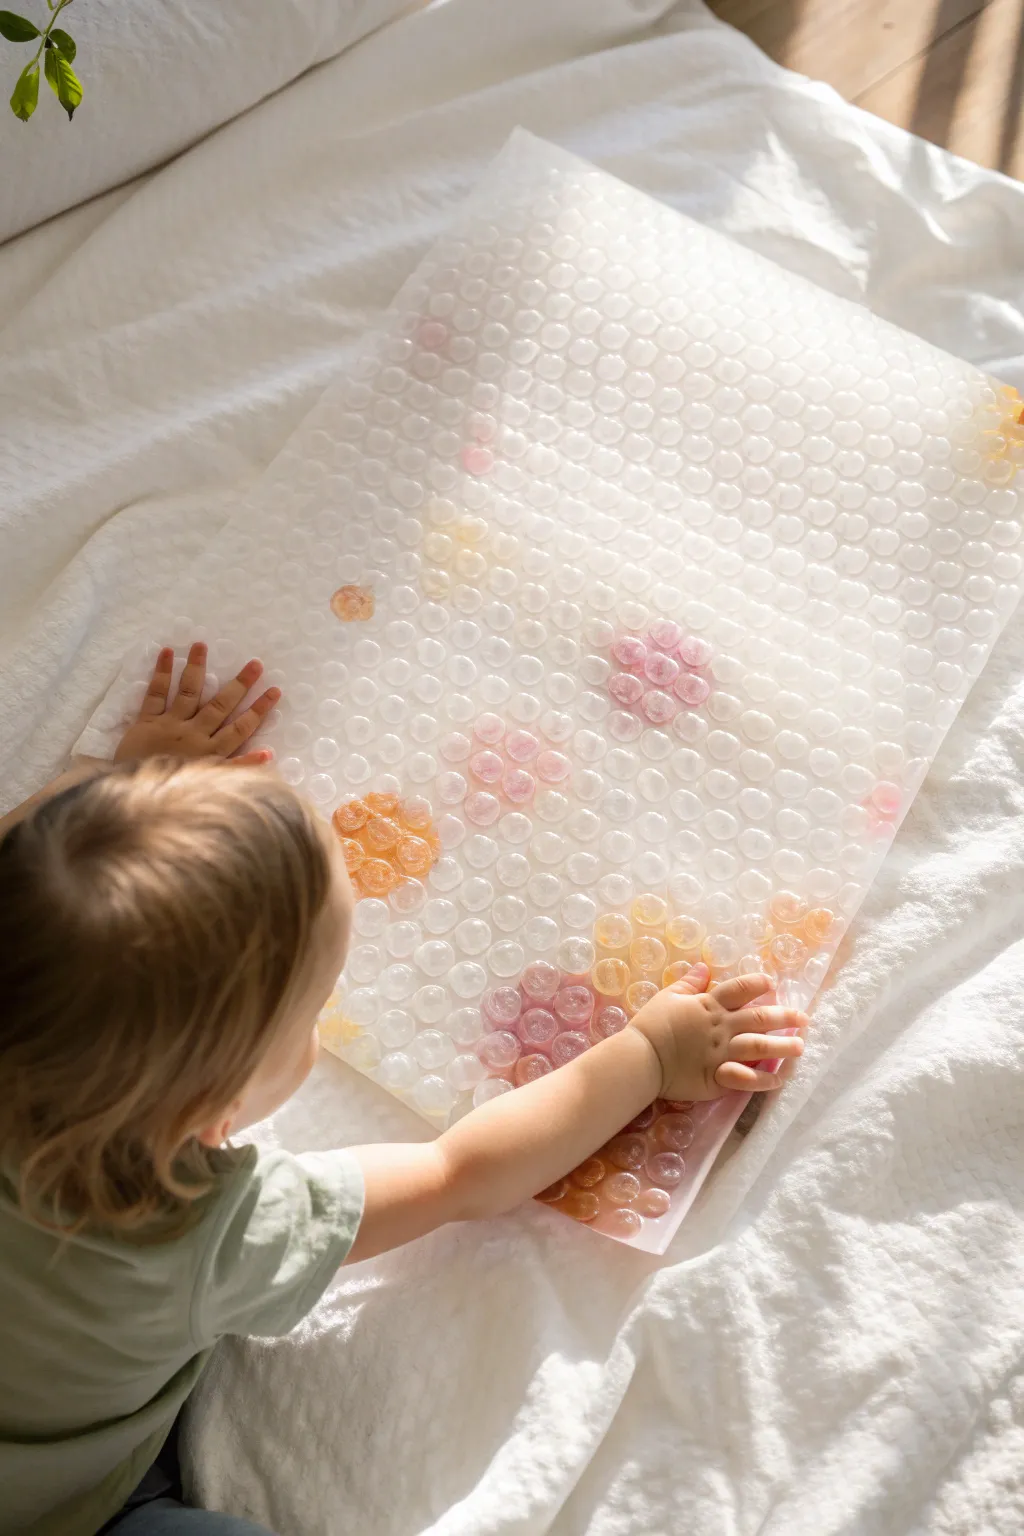
This sensory-rich art project transforms a common packing material into a canvas for your baby’s explorations. The result is a soft, dreamy print featuring playful geometric patterns and the distinctive honeycomb texture of bubble wrap.
Detailed Instructions
Materials
- A large sheet of bubble wrap (clean)
- White cardstock or heavy mixed-media paper
- Non-toxic, washable finger paints (pink, orange, yellow, and red)
- Painter’s tape or masking tape
- Wide paintbrush or foam sponge brush
- A flat surface like a table or floor
- Optional: A damp cloth for quick cleanups
Step 1: Preparation & Setup
-
Prepare the surface:
Choose a space where you and your baby can move freely. If working on the floor, you might want to lay down a drop cloth or old sheet first. -
Cut the bubble wrap:
Cut a sheet of bubble wrap that is slightly larger than your piece of paper. You’ll need enough excess to comfortably handle it without getting messy fingers immediately. -
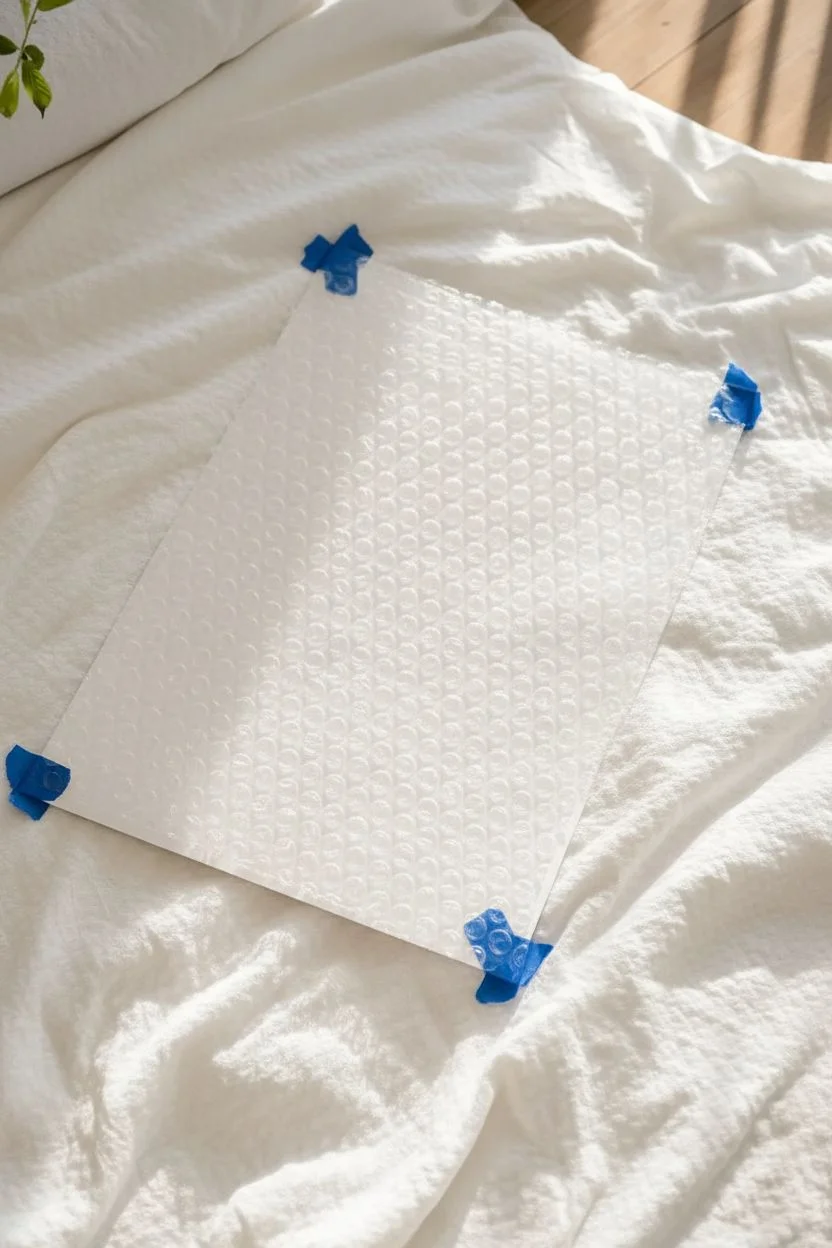
Secure the paper:
Place your sheet of white cardstock or heavy paper onto your work surface. Use loops of painter’s tape on the back of the paper to stick it down firmly so it won’t slide around during the energetic painting process.
Clearer Prints
For more defined circles, use less paint. If the paint is too thick or runny, the bubbles will squish together and loose their shape. A thin, even coat works best.
Step 2: Painting the Texture
-
Apply the paint:
Lay the bubble wrap flat on a separate surface, with the bubbly side facing up. Using your fingers or a brush, apply dabs of paint directly onto the raised bubbles. -
Create color clusters:
Focus on creating flower-like clusters or random abstract patches. Use pinks and reds for one area, and oranges and yellows for another to mimic the warm palette seen in the example. -
Keep layers distinct:
Try not to over-blend the colors on the bubble wrap itself. The goal is to keep distinct patches of color so the final print has definition rather than turning muddy. -
Check coverage:
Ensure there is enough wet paint on the bubbles to transfer, but not so much that it drips into the valleys between the bubbles, which could blur the pattern.
Pop-Art Variation
Use neon paints on black construction paper. The bubble wrap texture creates a cool, pixelated effect that looks incredibly modern against a dark background.
Step 3: The Press & Reveal
-
Flip the bubble wrap:
Carefully pick up the painted bubble wrap. Turn it over so the paint-covered bubbles are facing down towards your clean paper. -
Position the wrap:
Align the bubble wrap over the paper and gently lower it down. Once it touches the paper, try not to shift it sideways. -
Invite baby to help:
This is the fun part. Encourage your baby to press down on the back of the bubble wrap. Let them pat, smoosh, and rub their hands all over the surface. -
Engage the senses:
Talk to your baby about the texture they feel—the bumps and the smoothness. I love seeing their reaction when they realize they are moving the paint underneath. -
Ensure full transfer:
Guide your baby’s hands to any corners or spots they might have missed to ensure the paint transfers evenly across the whole sheet. -
Peel back to check:
Lift one small corner very gently to see if the paint has transferred. If it looks faint, lay it back down and press a bit harder in that area. -
Remove the wrap:
Once satisfied, peel the entire sheet of bubble wrap off the paper in one smooth motion to reveal the textured print. -
Dry properly:
Remove the tape from the back of your paper and set the artwork aside in a safe, flat place to dry completely.
Now you have a unique piece of textured abstract art that captures a moment of playful discovery
Tummy-Time Bag Painting for Pre-Walkers
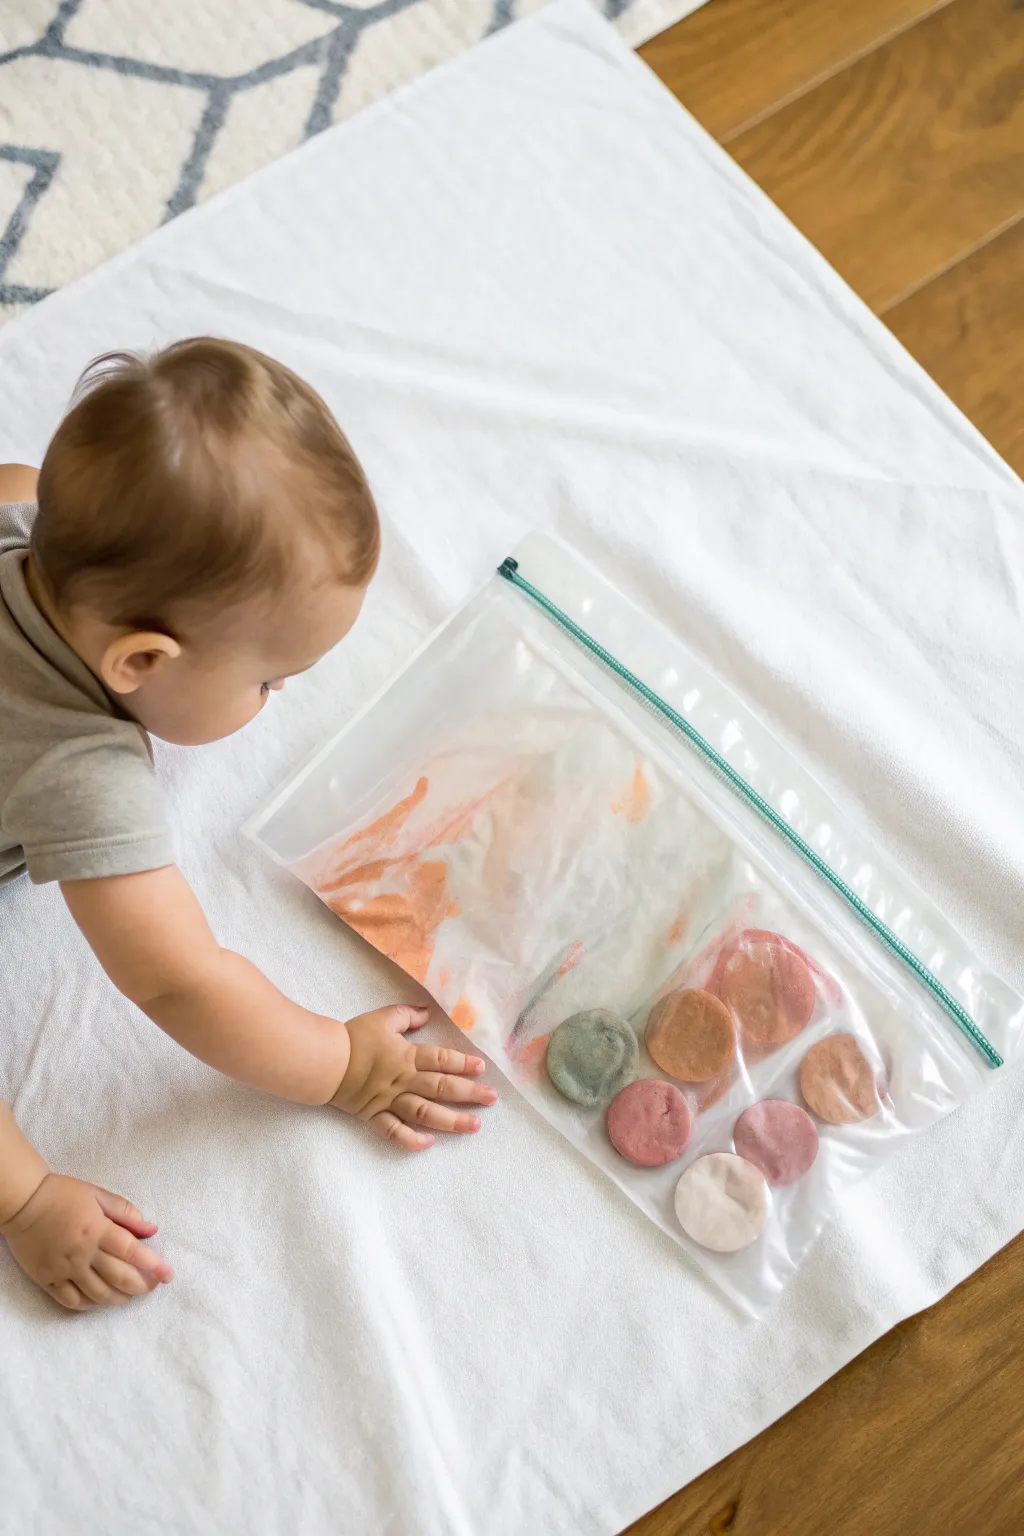
This genius tummy-time activity lets your little one explore color and texture without leaving a single stain on your carpet. By sealing dollops of paint inside a durable bag, you create a squishy, interactive canvas that keeps pre-walkers engaged and entertained.
Detailed Instructions
Materials
- Heavy-duty clear zipper storage bag (gallon size)
- White cardstock or heavy paper (cut to fit the bag)
- Non-toxic paints (acrylic or tempera in dusty pink, terracotta, sage green, mauve, and cream)
- Scissors
- Painter’s tape or masking tape (optional)
Step 1: Setting the Stage
-
Prepare the paper insert:
Start by selecting a piece of sturdy white cardstock. I recommend using cardstock over regular printer paper because the paint heavy blobs can make thin paper soggy too quickly. -
Trim to size:
Measure your zipper storage bag and trim the cardstock so it slides easily inside, leaving about an inch of clearance on all sides to accommodate the paint movement. -
Slide it in:
Place the blank white paper flat inside the empty zipper bag, smoothing out any wrinkles.
Step 2: Adding the Colors
-
Select your palette:
Choose a soft, earthy color palette to match the look in the photo. Think muted tones like sage green, terracotta, dusty rose, and off-white. -
Apply the first dollop:
Squeeze a generous quarter-sized dollop of the dusty pink paint onto the paper inside the bag, aiming near the bottom edge. -
Add contrasting tones:
Next to your first color, add a dollop of terracotta paint. Leave a small gap between the colors so they don’t mix immediately. -
Incorporate neutrals:
Squeeze a blob of cream or white paint. This is crucial for lightening the other colors as they eventually swirl together. -
Finish the row:
Complete your row of paint blobs with the sage green and mauve colors. You want a line of about 5-6 distinct blobs across the bottom or middle of the paper. -
Double check volume:
Ensure you have enough paint to cover the paper eventually, but not so much that the bag feels like a water balloon. A total of 2-3 ounces is usually perfect.
Double Bag It
Worried about leaks? Place the entire project inside a second zipper bag with the seal facing the opposite direction. It keeps the mess contained even if the first seal fails.
Step 3: Sealing and Securing
-
Remove excess air:
This is the most critical step: carefully press as much air out of the bag as possible without squishing the paint dots yet. -
Zip it shut:
Seal the zipper mechanism tightly. Run your fingers over the seal twice to ensure it is completely closed. -
Add a safety seal:
For extra peace of mind, especially with enthusiastic scratchers, place a strip of clear packing tape or painter’s tape over the zipper closure. -
Secure to the floor:
If you want the bag to stay stationary during tummy time, use painter’s tape to tape the comers or edges of the bag directly to your floor or play mat.
Wrinkly Paper?
If the paper crumples inside the bag while painting, tape the corners of the cardstock to the inside of the bag with a tiny loop of tape before sliding it in.
Step 4: Playtime and Cleanup
-
Introduce the activity:
Place your baby in a tummy-time position in front of the bag. Encourage them to reach out and touch the colorful blobs. -
Demonstrate the action:
Gently press on a paint blob with your own finger to show how it smooshes and spreads color across the paper. -
Watch the art happen:
Let your little artist mix the colors. The paint will drag and blend, creating a unique abstract design similar to the marble effect seen in the photo. -
Extract the masterpiece:
Once the paper is fully covered or playtime is over, carefully cut the sides of the bag open with scissors. -
Dry the art:
Peel the plastic back and lift the wet painting out. Lay it flat in a safe area to dry completely, which may take 24 hours depending on paint thickness.
You now have a beautiful abstract keepsake and a happily exhausted baby who enjoyed a sensory adventure.

PENCIL GUIDE
Understanding Pencil Grades from H to B
From first sketch to finished drawing — learn pencil grades, line control, and shading techniques.
Explore the Full Guide
Water-Only Painting for Zero-Mess Practice
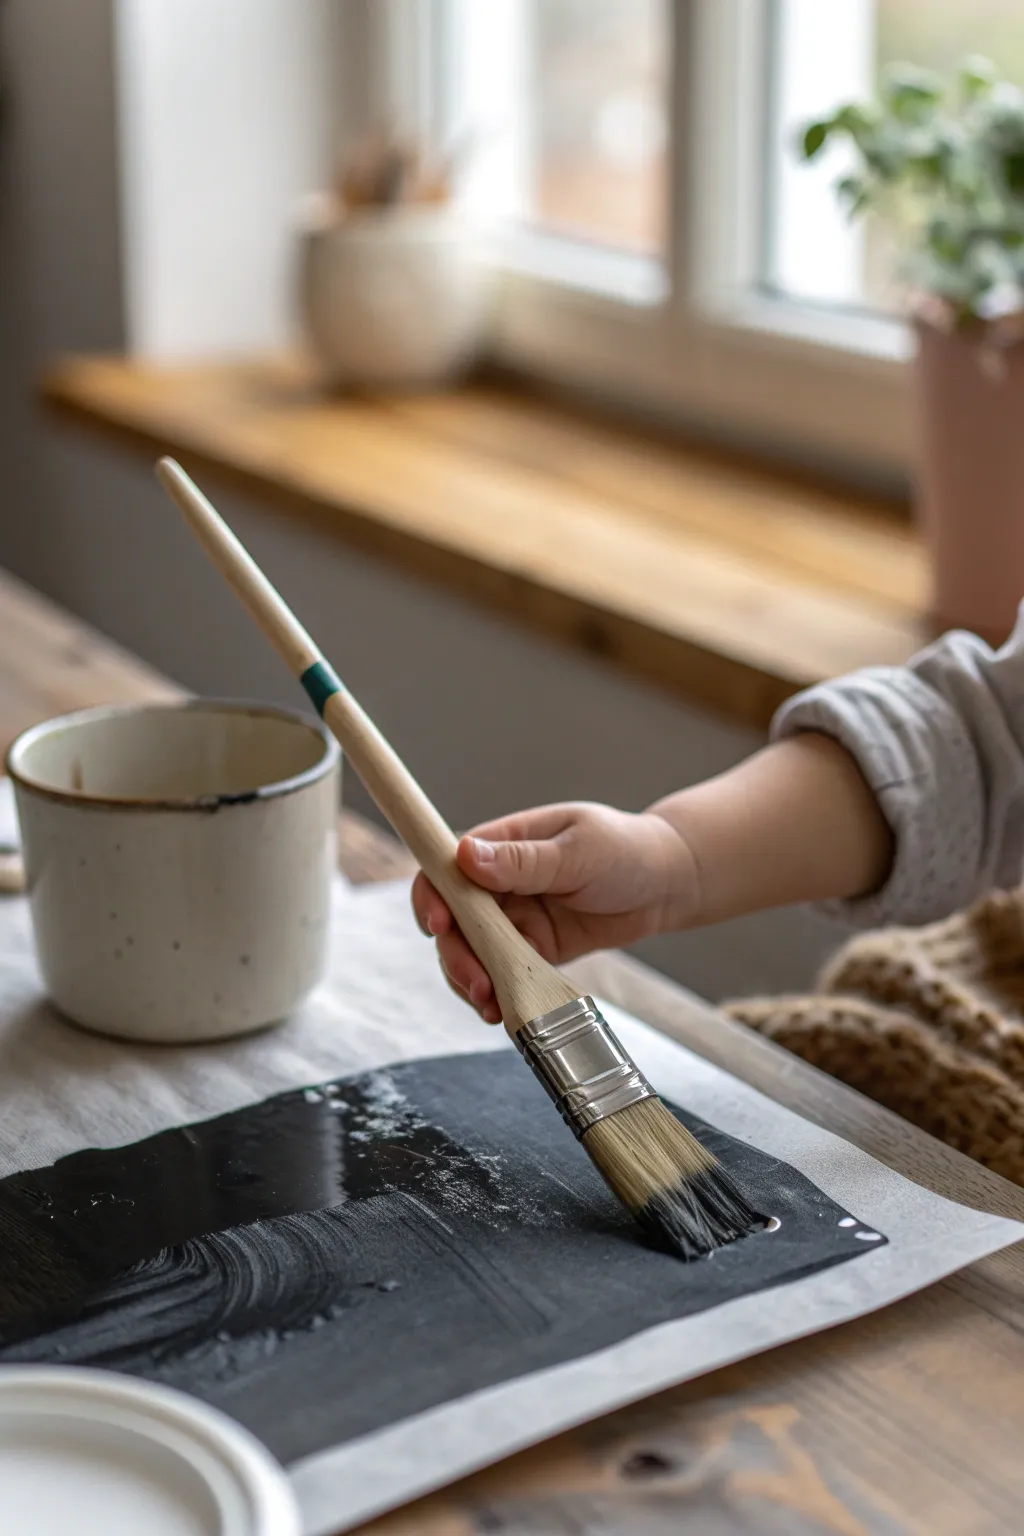
This incredibly simple activity allows babies and toddlers to experience the joy of painting without a single drop of pigment. By brushing plain water onto specialized paper or a dark chalkboard surface, they can watch satisfying dark strokes appear and then magically fade away as they dry.
Step-by-Step Guide
Materials
- Construction paper (black or dark grey) OR a chalkboard slate
- Clean water
- Sturdy cup or mug for water
- Large round paintbrush (size 10-12 or similar)
- Painter’s tape (optional, for securing paper)
Step 1: Setting the Scene
-
Select your surface:
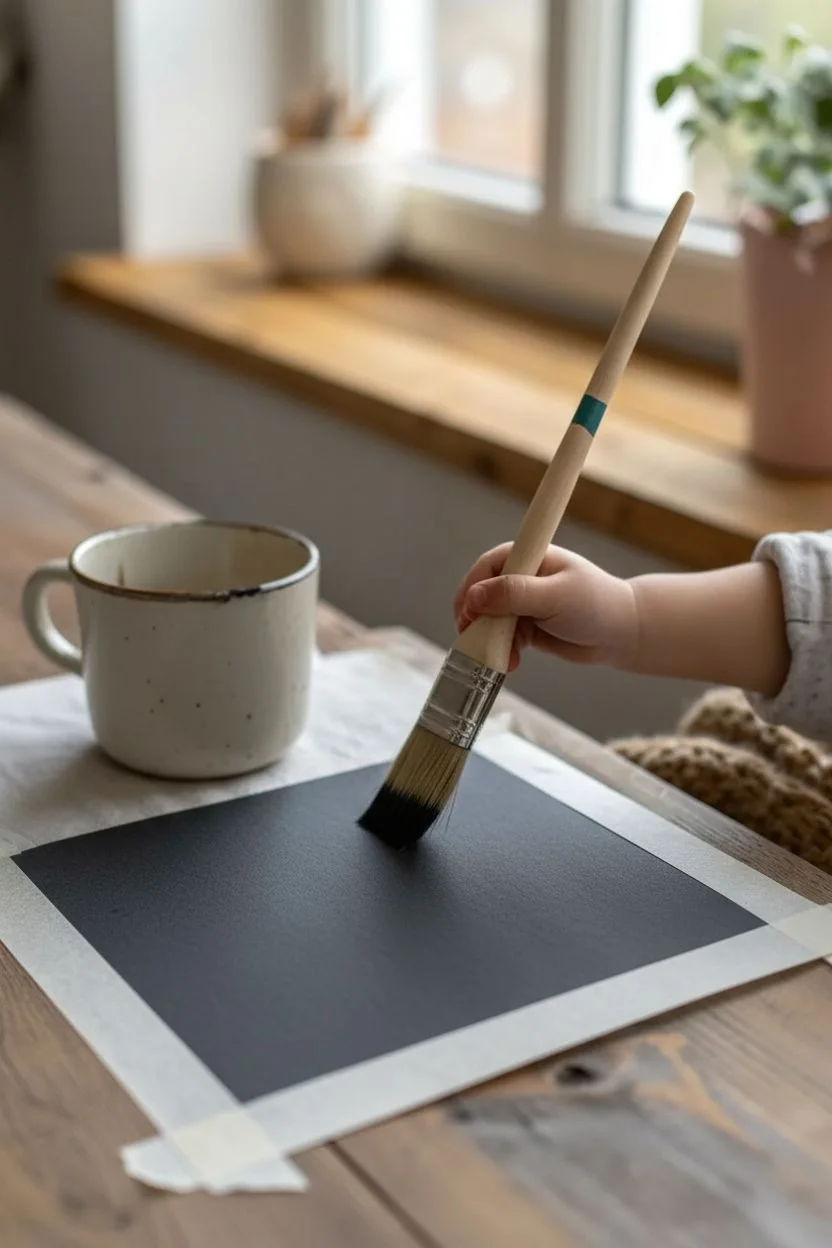
Choose a sheet of heavy-duty black construction paper or a small chalkboard slate. The surface needs to be dark and matte so the water creates a high-contrast ‘wet’ look. -
Secure the workspace:
If you are using paper, tape the corners down to the table or high chair tray using painter’s tape. This prevents the paper from wrinkling excessively or sliding away while your little artist works. -
Prepare the water:
Fill a heavy ceramic mug or a spill-proof cup about halfway with clean tap water. A heavier vessel is harder for enthusiastic hands to knock over. -
Tool selection:
Offer a paintbrush with a nice, thick handle that is easy for small hands to grasp. A brush with soft bristles works best to glide over the paper texture.
Use a Chalkboard
For a truly infinite reusable canvas, swap the construction paper for a mini slate chalkboard. It dries faster and won’t warp.
Step 2: Painting with Water
-
Demonstrate the magic:
Dip the brush into the water and make a single, slow stroke across the paper to show your child how the dark line appears. -
Hand over the brush:
Let your child take control of the brush. Encourage them to dip it into the water cup frequently to keep the bristles saturated. -
Experiment with saturation:
Watch as they apply more water; puddles might form, creating very dark, shiny patches. If the paper gets too soaked, you can gently blot it with a paper towel. -
Observing textures:
Notice how the brush strokes reveal the grain of the paper. Going against the grain might create a rougher look, while following it keeps lines smooth. -
Broad strokes:
Encourage using the full width of the brush. Pressing down harder will fan out the bristles, creating wide, bold swathes of ‘paint’. -
Drying time observation:
Point out areas that were painted first. As the water evaporates, the paper will return to its original lighter gray color. -
Layering wet on wet:
Allow your child to paint over existing wet lines. They will see the shapes merge into larger abstract blobs of darkness.
Step 3: Cleanup and Reuse
-
Empty the water:
Once the painting session is done, simply pour out the remaining water. There is no need to scrub brushes since no paint was used. -
Drying the artwork:
Leave the paper flat on the table to air dry completely. If the paper has curled slightly from moisture, you can press it under a heavy book once it is bone dry. -
Ready for round two:
The best part of this project is its reusability. Once the paper is dry and the marks have faded, it is ready to be painted on all over again.
Add Outdoor Texture
Take this activity outside on a warm day and let your child ‘paint’ smooth river stones or the sidewalk pavement with water to see the colors deepen.
Enjoy the peaceful simplicity of watching transitory art appear and vanish right before your eyes
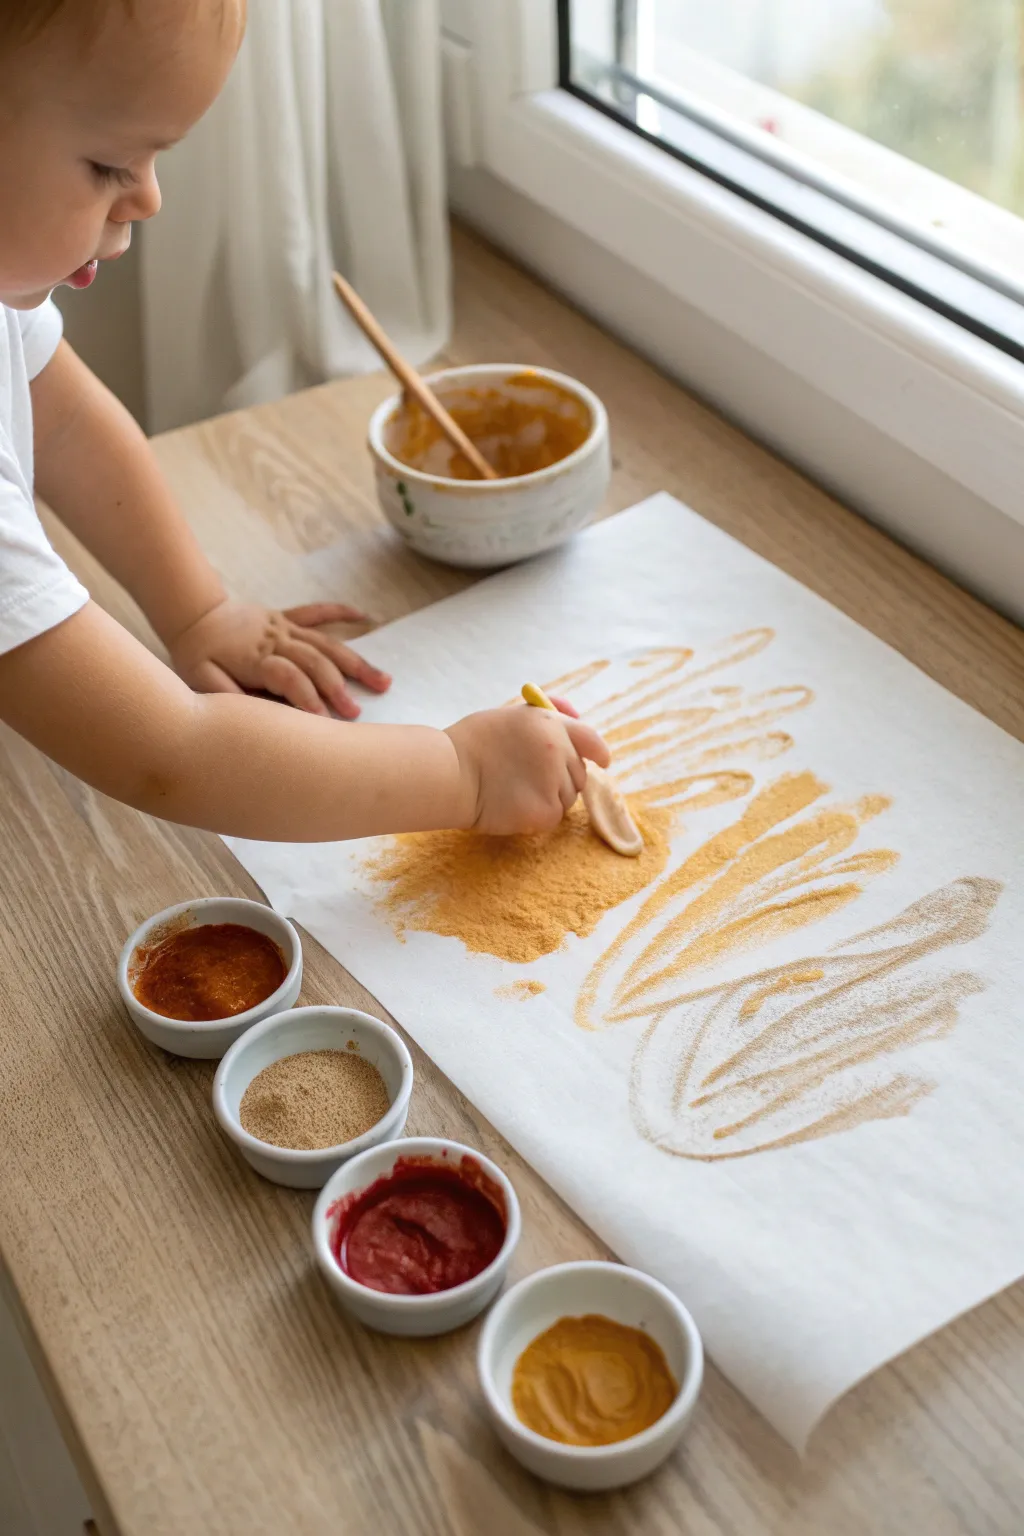
Gentle Scented Spice Painting for Multi-Sensory Play

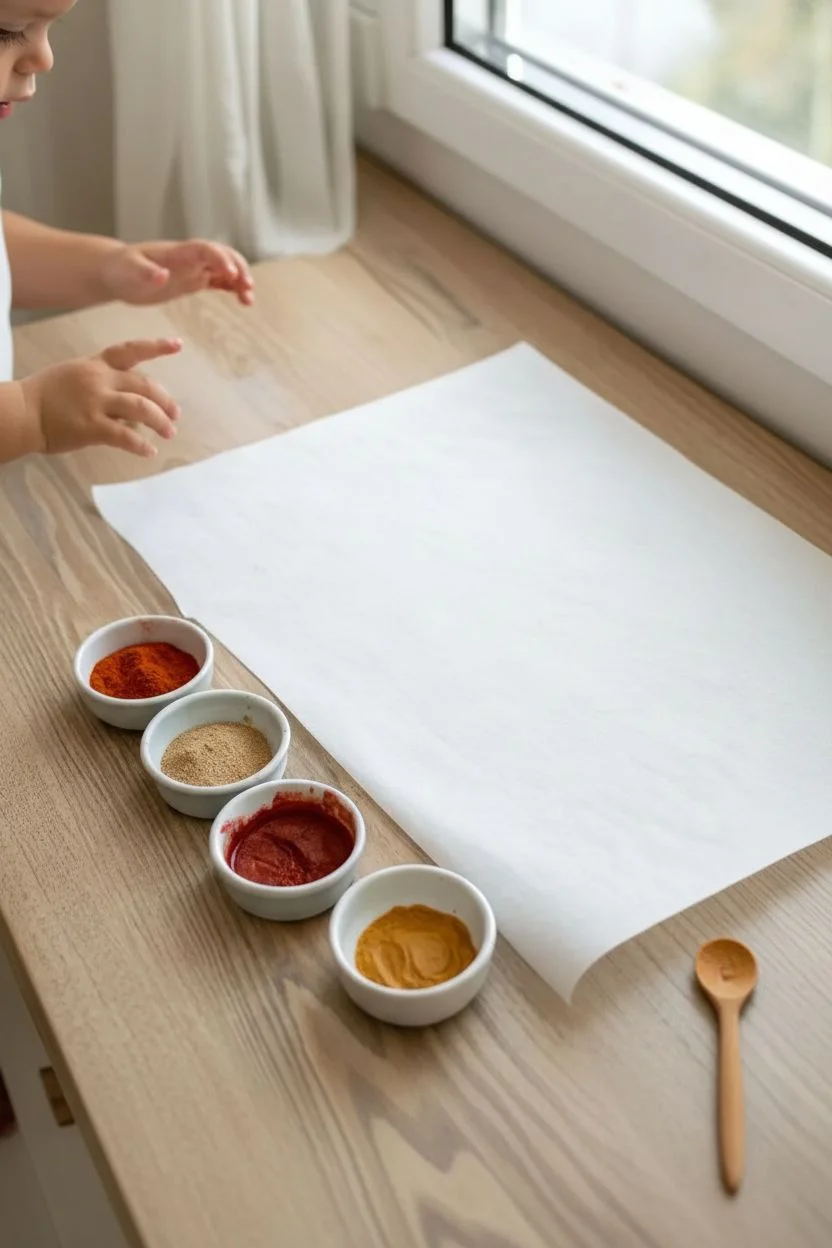
Transform your kitchen spices into a vibrant, scented art supply for a truly multi-sensory experience. This simple activity uses warm-toned spices like turmeric and paprika to create gentle, textured strokes on parchment paper that smell as lovely as they look.
Detailed Instructions
Materials
- Ground turmeric
- Ground paprika
- Ground cinnamon
- Cardamom or dried ginger (for lighter tones)
- Small ceramic dipping bowls or ramekins
- Small amount of water
- Small wooden spoons or droppers (for mixing)
- Wide sheet of white parchment paper or butcher paper
- Small paintbrush (or a baby-safe easy-grip brush)
- Masking tape (to secure the paper)
Step 1: Preparation
-
Secure the workspace:
Begin by selecting a smooth surface, preferably near natural light like a window ledge or low table. Tape down a large sheet of white parchment paper to prevent it from sliding around while your little artist works. -
Gather the spices:
Select your palette from the pantry. Choose spices with distinctive colors and safe, pleasant aromas—turmeric provides a brilliant yellow, paprika offers a deep brick red, and cinnamon creates a warm brown. -
Portion out the powders:
Scoop approximately one tablespoon of each spice into separate small ceramic ramekins. Using heavier bowls like ceramic helps prevent accidental tipping during the painting process.
Flavorful Binders
Mix spices with plain yogurt or baby food puree instead of water. This creates a creamy, thicker finger paint that is tastier if it ends up in a mouth.
Step 2: Mixing the Paints
-
Add the liquid base:
Slowly add water to each spice bowl, starting with just one teaspoon. You can also use a tiny bit of vegetable oil if you prefer a glossier finish, but water is easiest for quick cleanup. -
Stir to consistency:
Mix the spice and water with a small spoon. You are aiming for a paste-like consistency—thick enough to hold texture but loose enough to spread easily with a brush. -
Adjust the texture:
If the mixture looks too clumpy, add a few more drops of water. I like to keep the turmeric slightly thicker so it creates a nice texture on the paper. -
Create a lighter wash (optional):
For one of the bowls, perhaps the ginger or cardamom, add extra water to create a thinner, more translucent wash that will contrast with the thicker pastes.
Stain Warning
Turmeric is a potent natural dye. Ensure your child wears an old smock or diaper only, and wipe surfaces immediately to avoid permanent yellow staining.
Step 3: Painting Process
-
Introduce the materials:
Place the lined-up bowls within easy reach of the child. Encourage them to smell the bowls first to engage their olfactory senses before painting begins. -
First strokes:
Dip the paintbrush into the yellow turmeric paste. Demonstrate how to drag the brush across the parchment paper to create a long, sweeping stroke. -
Layering colors:
Encourage applying the red paprika paste next to the yellow. Notice how the grainy texture of the spices leaves a unique, organic pattern on the paper distinct from traditional paints. -
Exploring texture:
Let the child dab the brush to create concentrated spots of color. The spice mixture will likely bead up slightly on parchment paper, creating interesting tactile mounds. -
Using fingers:
Since these are edible spices, painting with fingers is perfectly safe and adds another sensory layer. Smearing the cinnamon paste creates a soft, shadowed effect. -
Continuing the pattern:
Continue filling the page with broad, abstract strokes. The goal isn’t a specific image, but an exploration of movement and overlapping distinct spice colors.
Step 4: Finishing Up
-
Observe the drying:
Allow the painting to sit undisturbed. As the water evaporates, the spices will revert to a dry, textured state, leaving a beautiful, dusty residue on the paper. -
Handling the art:
Once fully dry, handle the parchment carefully. The spice ‘paint’ is more powdery than acrylics, so consider snapping a photo or displaying it flat to preserve the design.
Enjoy the lingering warm scents of your creative session long after the painting is done


Have a question or want to share your own experience? I'd love to hear from you in the comments below!