If you’ve got a 10-year-old who’s ready to move beyond quick doodles, these drawing ideas are the perfect sweet spot: fun, doable, and still super impressive. I picked prompts that build real skills like observation, shading, and character design while keeping the vibe playful.
Cute Pet Portrait With Big Personality

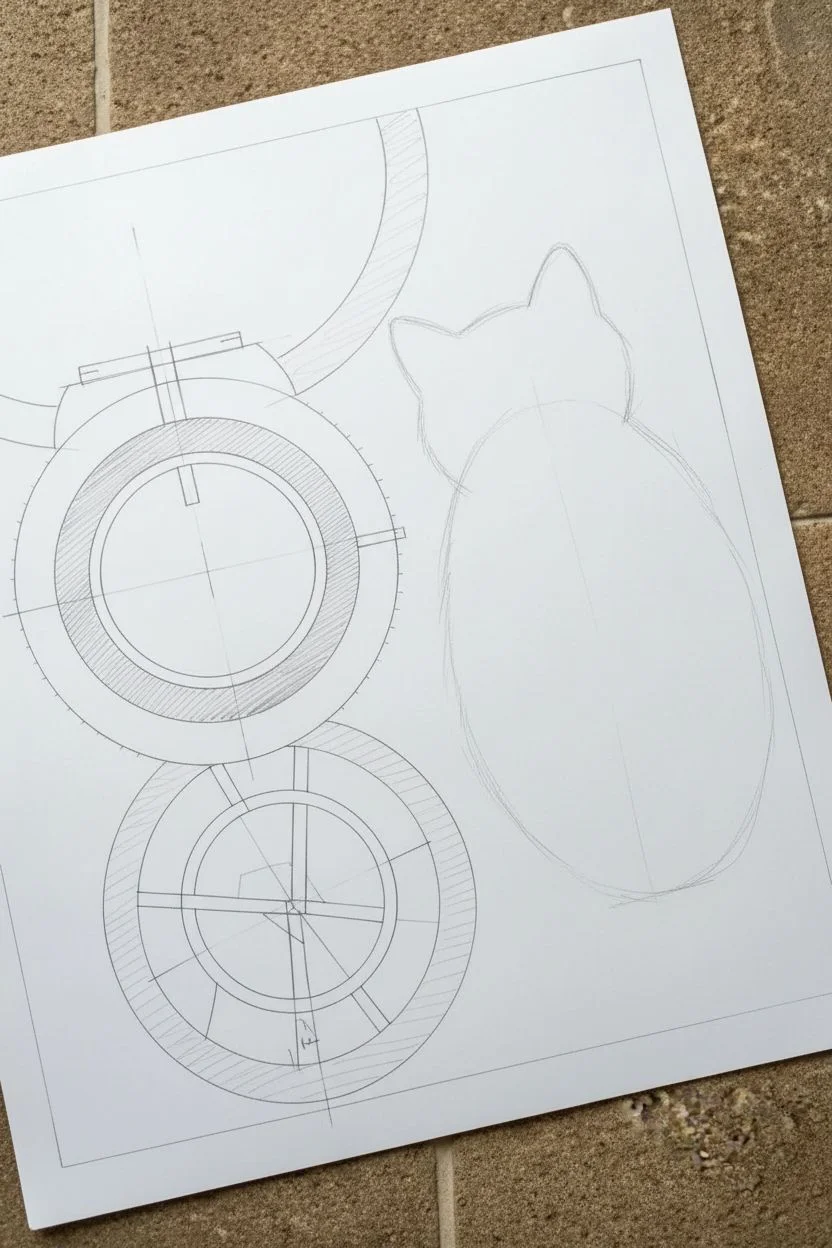
This project combines technical drawing elements with realistic animal portraiture for a charming, unexpected composition. You’ll create a precise pencil schematic of circles and gears, then draw a fluffy, lifelike kitten ‘interrupting’ the work.
How-To Guide
Materials
- High-quality white drawing paper (heavyweight)
- Graphite pencils (HB for sketches, 2B/4B for shading, 6B for dark eyes)
- Compass for drawing circles
- Ruler
- Mechanical pencil (fine tip) for technical lines
- Kneaded eraser
- Blending stump or tortillon
- Reference photo of a kitten looking up
Step 1: Drafting the Technical Blueprint
-
Lay out the circles:
Begin by using your compass to draw two large, interlocking circles on the left side of your paper. These don’t need to be perfect machine parts, but keep the lines clean and confident. -
Add concentric details:
Inside your main circles, draw smaller concentric circles to create the rim of a wheel or gear. Use your ruler to draw faint guidelines dividing the circles into sections like spokes. -
Create texture with hatching:
Using a mechanical pencil or sharp HB, add diagonal hatching lines inside the rims of the wheels. This gives them a technical, engineering-drawing look. -
Sketch the structural lines:
Draw straight lines intersecting the circles to represent axles or connecting rods. Keep the graphite pressure consistent so the lines look deliberate and diagrammatic. -
Position the ‘interruption’:
Lightly sketch a large oval shape on the right side of the paper, overlapping slightly with your technical drawing. This will be the main body of the kitten sitting on your work.
Furry Edges
If the kitten looks like a cutout, use a kneaded eraser to tap lightly along the outer edges. This softens the outline and creates a realistic ‘fluffy’ transition.
Step 2: Drawing the Kitten
-
Outline the features:
Sketch a smaller circle for the head above the body oval. Mark light crosshairs on the face to position the eyes, nose, and ears symmetrically. -
Draw the eyes:
Draw two large, round almond shapes for the eyes. The pupils should be dilated but show a clear reflection highlight—this is crucial for that ‘alive’ look. Use your darkest 6B pencil for the pupils, avoiding the highlight completely. -
Shade the iris:
Fill in the iris with a medium tone (2B), leaving it lighter near the bottom. Add faint radial lines extending from the pupil outward to mimic the texture of an eye. -
Define the nose and mouth:
Draw a small, soft triangle for the nose and a tiny inverted ‘Y’ shape for the mouth. Shading here should be very subtle to keep the kitten looking young and soft. -
Build the fur texture:
Starting from the nose bridge, used short, feathery strokes radiating outward to simulate fur. Use an HB pencil for the white areas, focusing on shadow shapes rather than individual hairs. -
Darken the markings:
If your kitten has tabby markings (like the one shown), use a 4B pencil to add darker patches above the eyes and on the ears. Follow the direction of hair growth with your strokes. -
Soften the edges:
Around the outline of the kitten, keep your pencil strokes loose and broken. Fur isn’t a solid line; it’s a series of tufts. I find lifting a bit of graphite with a kneaded eraser helps create fluffy flyaway hairs. -
Add the whiskers:
With a sharp pencil, use quick, confident flicks to add long whiskers. Ensure they originate from the whisker pads on the muzzle.
Colored Pencil Pop
Make the eyes truly captivating by using colored pencils instead of graphite. A touch of amber or green in the iris adds a stunning focal point to the monochrome piece.
Step 3: Final Touches & Shadows
-
Cast the shadow:
To make the kitten sit *on* the paper, add a soft, diffuse shadow underneath its paws and chest using a 2B pencil and a blending stump. -
Place the prop:
Draw a long, slender pencil lying diagonally across the foreground. Include the silver ferrule and the dark tip. -
Add realism to the prop:
Add a crisp, dark shadow directly next to and under the drawn pencil to ground it. This creates a trompe-l’œil effect where the drawn pencil looks like a real object. -
Refine the blueprint overlap:
Go back to where the kitten’s paws satisfy the technical drawing. Erase the technical lines *inside* the paws so it looks like the cat is physically blocking the view. -
Final assessment:
Step back and check your values. Deepen the darks in the kitten’s eyes and the cast shadows to increase the contrast against the white paper.
You now have a delightful artwork that captures the playful struggle of trying to work with a pet around


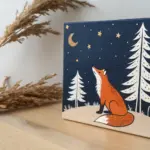
Favorite Wild Animal With Easy Fur Texture
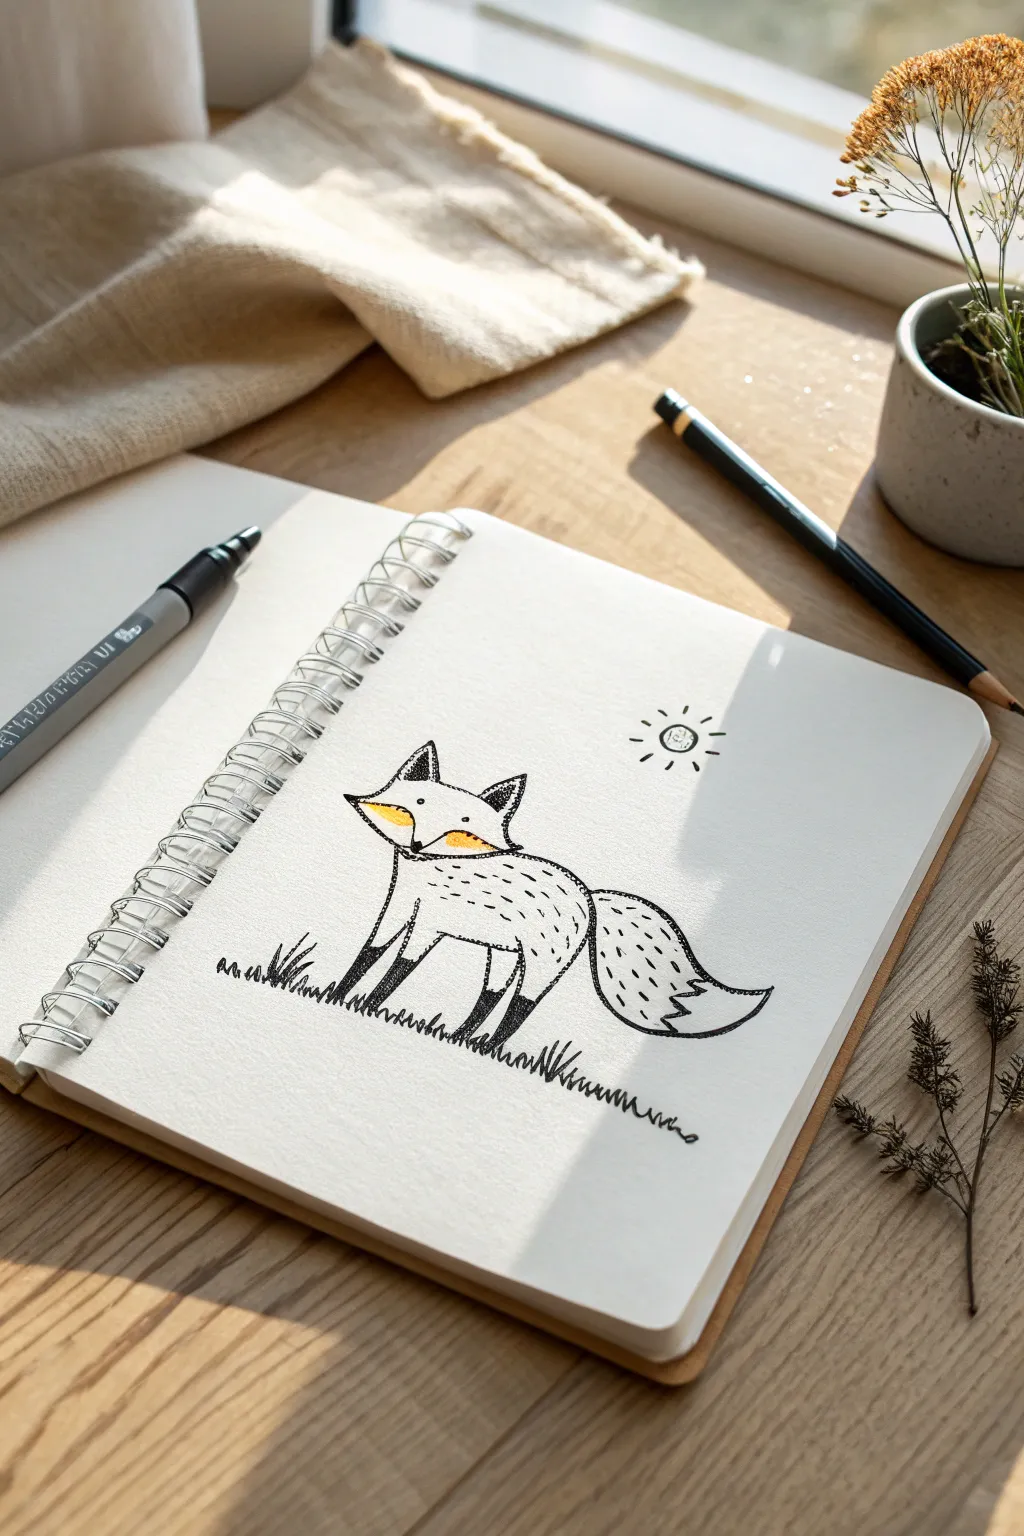
Create a charming, stylized fox illustration that captures the essence of a wild animal without needing complex anatomy skills. This project focuses on simple shapes and uses an easy “dot” texture to suggest fur, making it perfect for a relaxing afternoon sketch.
Step-by-Step Tutorial
Materials
- Spiral-bound sketchbook or drawing paper
- Fine-tipped black drawing pen (0.3mm or 0.5mm)
- Pencil for sketching (HB or lighter)
- Eraser
- Yellow-orange colored pencil or marker
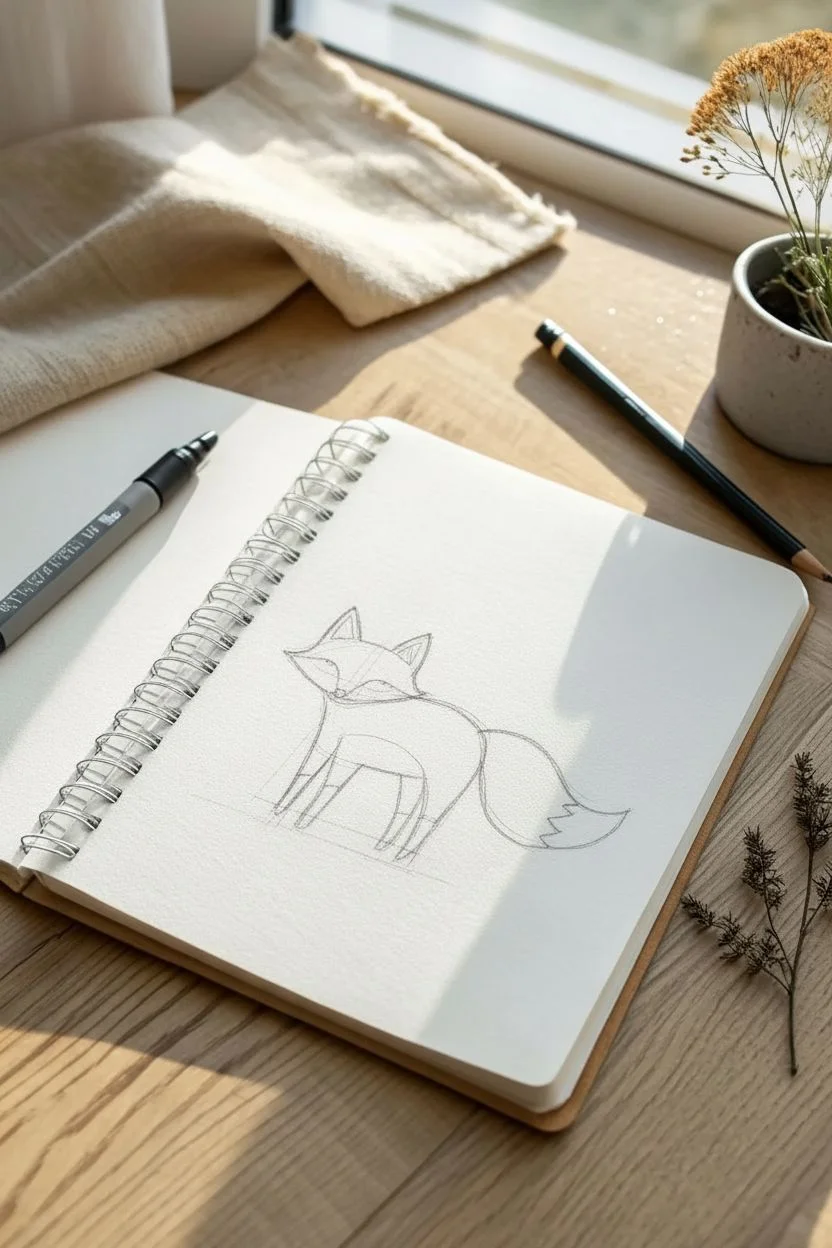
Step 1: Sketching the Shape
-
Outline the head:
Start by lightly sketching a wide diamond or flattened triangle shape for the fox’s head. The top should be flatter, and it should point downwards to form the nose. -
Add the ears:
Draw two large triangles on top of the head. Make them slightly uneven or tilted to give the fox a curious expression. -
Draw the body:
From the bottom of the head, sketch a curved line downwards for the chest and back. Think of a simple bean or kidney shape that is standing on four legs. -
Sketch the legs:
Add four stick-like guides for the legs. The front legs should be straight, while the back leg shows a slight bend at the knee. -
Form the tail:
Draw a large, bushy tail shape curving upwards from the rear of the body. It should be almost as big as the body itself.
Variation Ideas
Try changing the ear position—one flopped down makes the fox look shy. You can also swap the sun for a crescent moon and stars for a night scene.
Step 2: Inking and Detailing
-
Ink the main outline:
Using your black fineliner, trace over your pencil lines. I like to keep the lines slightly loose rather than perfectly rigid to maintain that hand-drawn charm. -
Define the face:
Draw two small swoops inside the face shape to separate the cheeks from the snout. Place two small dots for eyes and a small triangular nose at the bottom point. -
Darken the ear tips:
Inside the ear triangles, specificially near the tips, use your pen to color them solid black or use heavy hatching. -
Add the leg ‘socks’:
Draw a horizontal line halfway up each leg. Color the bottom half (the paws) solid black, leaving a tiny bit of white space if you want to suggest glossy claws. -
Draw the tail tip:
Draw a zig-zag line near the end of the tail to separate the white tip. This classic fox marking makes it instantly recognizable.
Level Up: Shadow Play
Add a simple cast shadow under the fox using diagonal hatching lines. This anchors the character to the ground and adds dimension to the flat doodle style.
Step 3: Adding Texture and Surroundings
-
Stipple the body:
Instead of drawing individual hairs, create texture by tapping your pen to make small dots and short dashes across the fox’s back and sides. Keep the belly area mostly clear. -
Texture the tail:
Repeat the dotting process on the main part of the tail. Use slightly denser dots near the base of the tail to suggest shadow and volume. -
Ground the fox:
Draw sketchy, jagged grass tufts under the fox’s feet. Vary the height of the grass blades and extend the line horizontally so the fox isn’t floating. -
Add the sun:
In the upper right corner, draw a small circle with short rays radiating outward to create a simple sun icon. -
Erase pencil lines:
Wait a moment for the ink to fully dry, then gently erase all your initial pencil sketches. -
Pop of color:
Take your yellow-orange pencil and gently color in the cheek areas on the face. Keep the pressure light to maintain a soft look.
Now you have a clever little fox friend ready for your sketchbook collection


Best-Friend Duo Drawing (You and a Buddy)
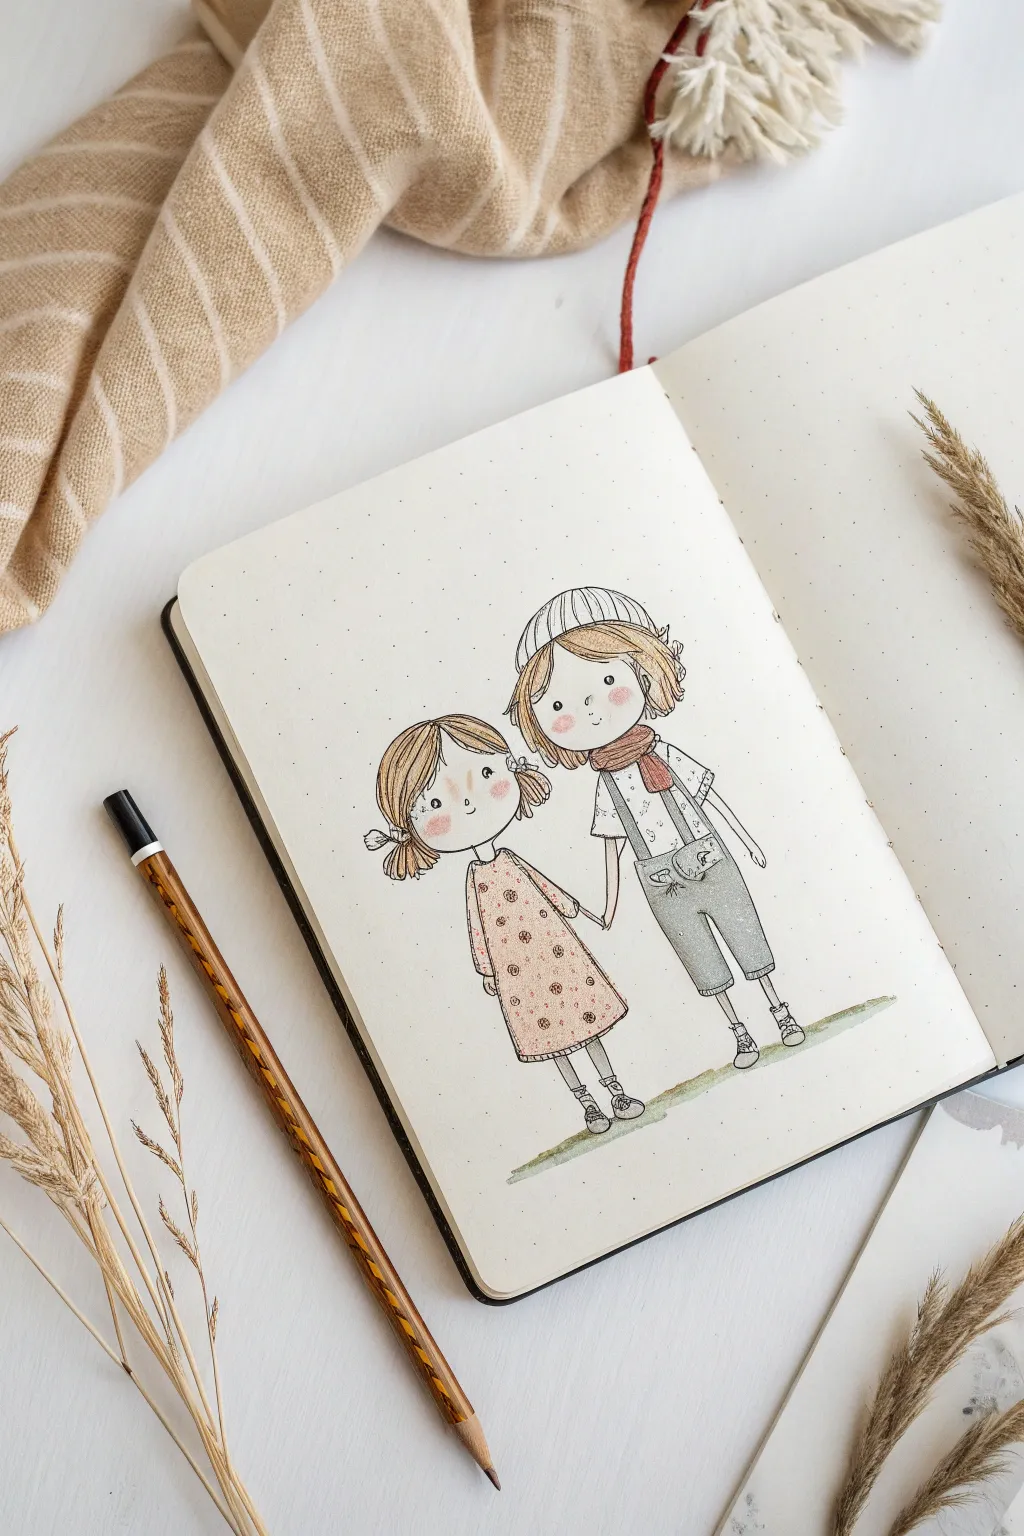
Capture the bond of friendship with this adorable, stylized illustration of two friends holding hands. Using simple shapes, clean ink lines, and soft watercolor accents, you’ll create a charming keepsake perfect for a bullet journal or sketchbook.
How-To Guide
Materials
- Dotted or blank journal (heavy paper preferred)
- HB pencil
- Eraser
- Fine liner pen (black, waterproof, size 01 or 03)
- Watercolor set or watercolor pencils
- Small round paintbrush (size 2 or 4)
- Cup of water
- Paper towel
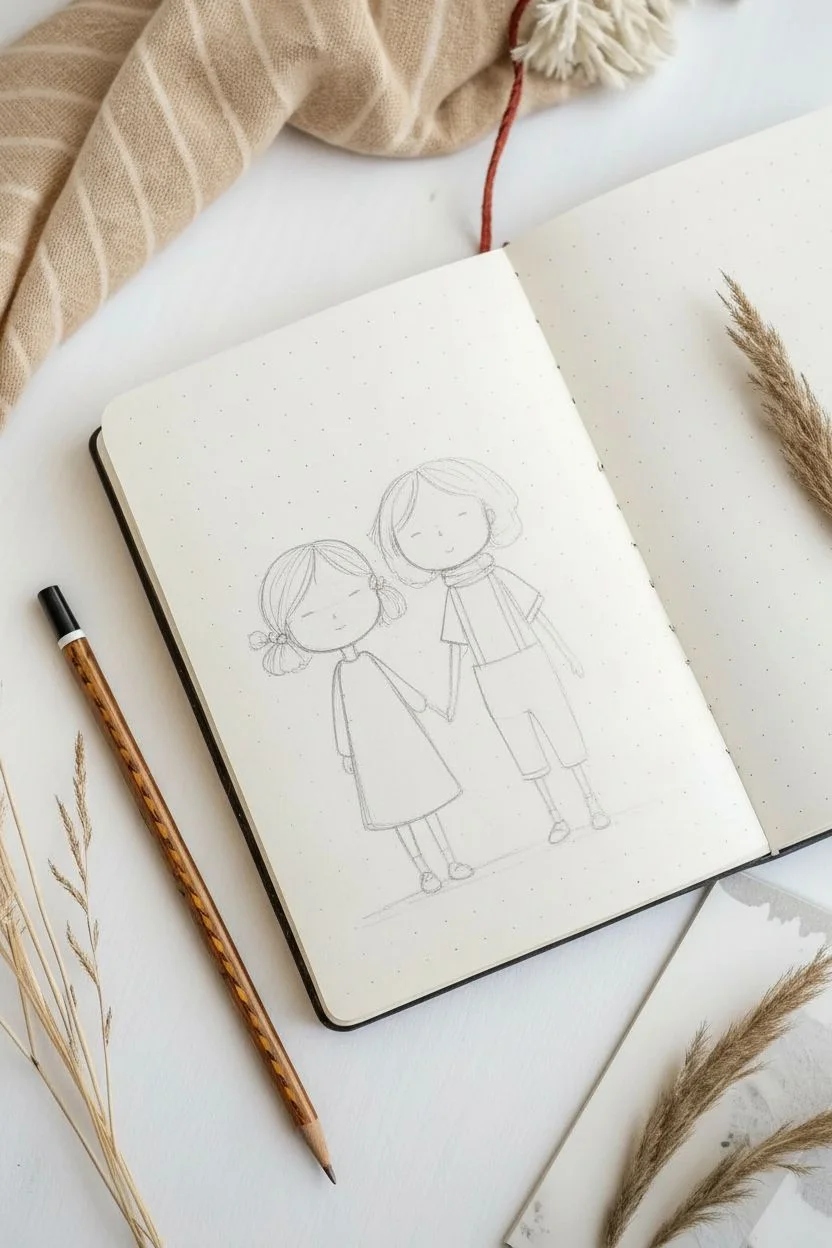
Step 1: Drafting the Shapes
-
Map out the heads:
Start with your pencil. Lightly draw two oval shapes side-by-side, leaving a small gap between them. The head on the right should be slightly higher than the one on the left. -
Sketch the bodies:
Below the left head, draw a simple bell shape for a dress. Below the right head, draw a rectangle for the torso and two smaller rectangles for legs to create overalls. -
Add the limbs:
Draw simple stick lines for arms and legs first to get the positioning right. Make sure the inner arms meet in the middle so they can hold hands. -
Refine the hands and feet:
Flesh out the stick lines into thin arms and legs. Add small oval shapes for shoes at the bottom of the legs, pointing slightly outward. -
Outline the hair:
For the left friend, sketch pigtails sticking out sideways. For the right friend, draw a bob shape that hugs the face.
Smudge Alert?
If your black ink bleeds when you paint, your pen isn’t waterproof. Switch to coloring with colored pencils instead of paint to save the drawing.
Step 2: Adding Details
-
Draw the faces:
Keep it minimal. Place two small dots wide apart for eyes on each face. Add a tiny curved line for a nose and a sweet, small smile. -
Accessorize the outfits:
Draw a collar on the dress. For the friend on the right, add a beanie hat on top of the hair and a cozy scarf around the neck. -
Add clothing texture:
Sketch suspender straps and a pocket on the overalls. Don’t worry about the polka dots on the dress yet; we’ll do those later. -
Ground the figures:
Lightly sketch a horizontal line intersecting their feet so they aren’t floating in space.
Match Your Style
Make it personal by changing the hairstyles or outfit colors to match you and your real-life best friend. You can even add glasses or specific jewelry.
Step 3: Inking the Lines
-
Trace with pen:
Take your waterproof fine liner. Carefully go over your pencil lines. I prefer to use quick, confident strokes rather than slow, shaky ones. -
Texturize the hair:
Instead of outlining the whole hair block, use broken, sweeping lines to suggest strands and movement. -
Detail the beanie:
Add vertical lines to the hat to make it look knitted or ribbed. -
Erase pencil marks:
Wait at least five minutes for the ink to dry completely to avoid smudges. Then, gently erase all the underlying pencil sketches.
Step 4: Coloring and Finishing
-
Paint the skin:
Dilute a peach or light brown watercolor heavily with water. Wash it over the faces and hands for a soft, transparent look. -
Color the hair:
Use a light brown or blonde shade for the hair. Keep the color loose; it doesn’t have to stay perfectly inside the lines. -
Dress up the outfits:
Paint the dress a soft dusty pink. For the overalls, use a diluted grey or blue-grey wash. -
Add the accessories:
Paint the scarf a warm rust or red color. Use a very light grey for the beanie, leaving some white paper showing for highlights. -
Rosy cheeks:
Once the face paint is dry, dab a tiny bit of pink on the cheeks to make them look flushed and cute. -
Pattern time:
When the pink dress is fully dry, stick your brush or a colored pencil into darker pink or red and add small clusters of dots for a floral pattern. -
Grounding shadow:
Paint a thin strip of green or grey under their feet along your horizon line to create grassy ground.
Now you have a sweet portrait of friendship preserved on the page
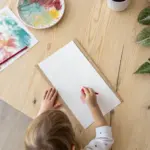


Stylized Self-Portrait With Hobbies Around You
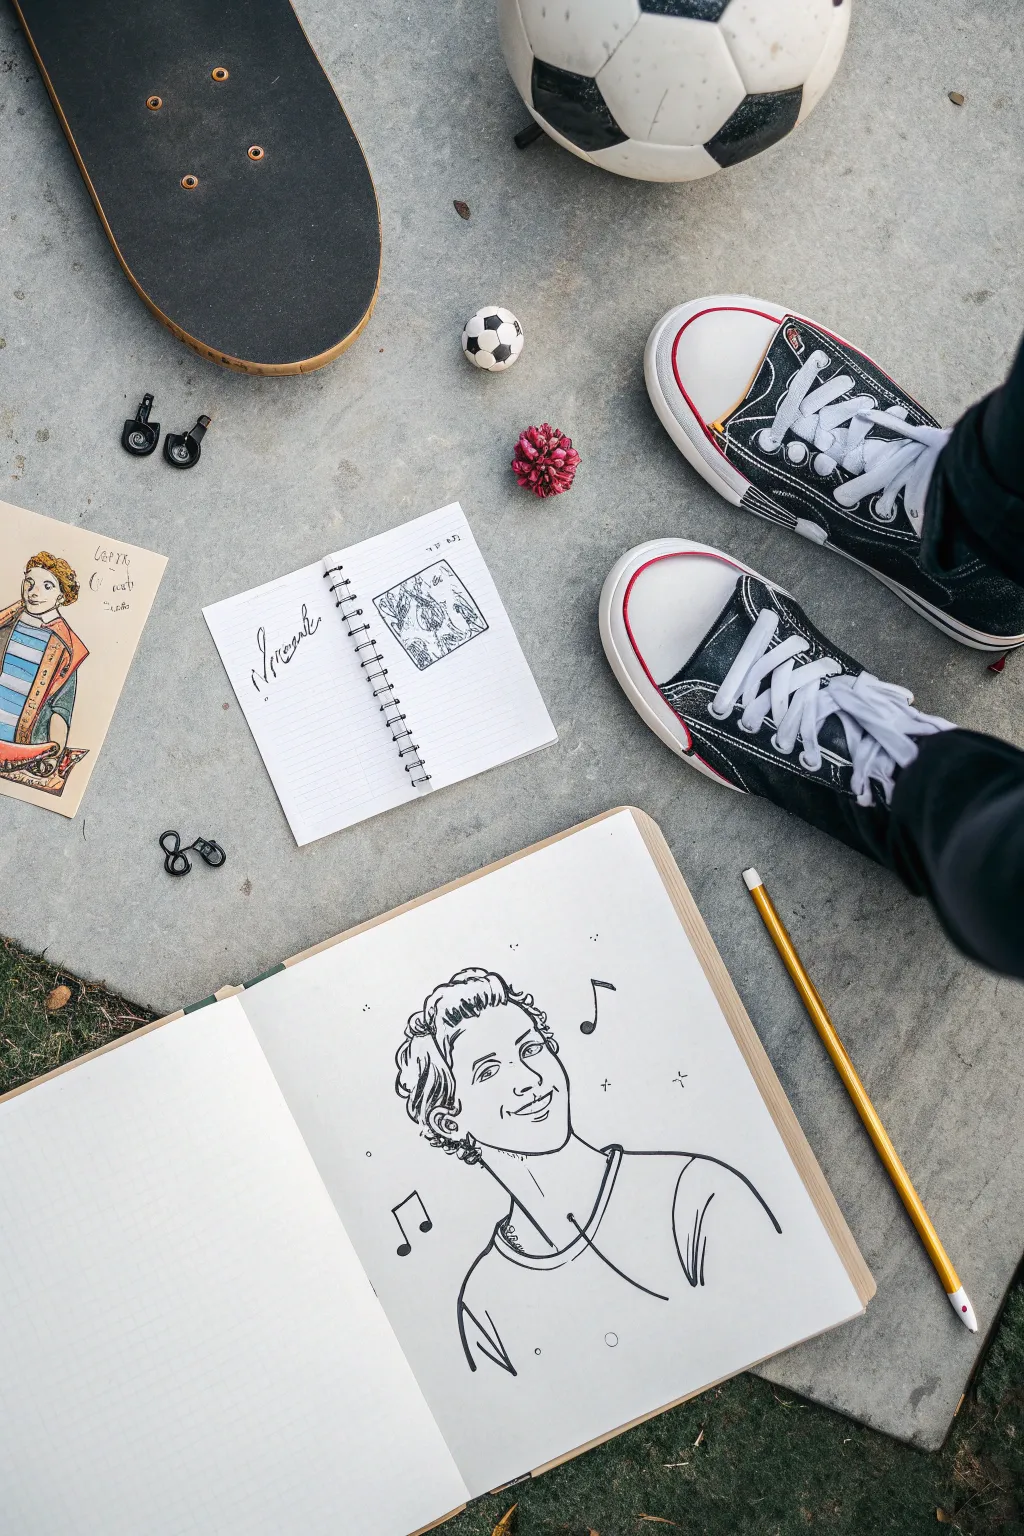
Capture your personality on paper by surrounding a stylized drawing of yourself with real-life objects that tell your story. This mixed-media layout combines sketching with creative photography, making it a perfect project for documenting your current favorite things.
Step-by-Step Guide
Materials
- Large sketchbook (A4 or bigger)
- Black fine-liner pens (various thicknesses)
- Pencil and eraser
- Your favorite shoes (Converse or sneakers work great)
- Hobby items (skateboard, soccer ball, etc.)
- Small trinkets (mini soccer ball, flowers, clips)
- Second smaller notebook
- Reference photo or mirror
Step 1: Drawing the Stylized Portrait
-
Light scaffolding:
Begin with your large sketchbook open to a fresh page. Using a pencil, lightly sketch a simple oval for the head and a loose rectangle for the neck and shoulders. Keep these lines very faint so they can be erased later. -
Mapping the face:
Draw faint guidelines across the face to place the eyes, nose, and mouth. For this stylized look, simplify the features—think cartoon-style rather than photorealistic. -
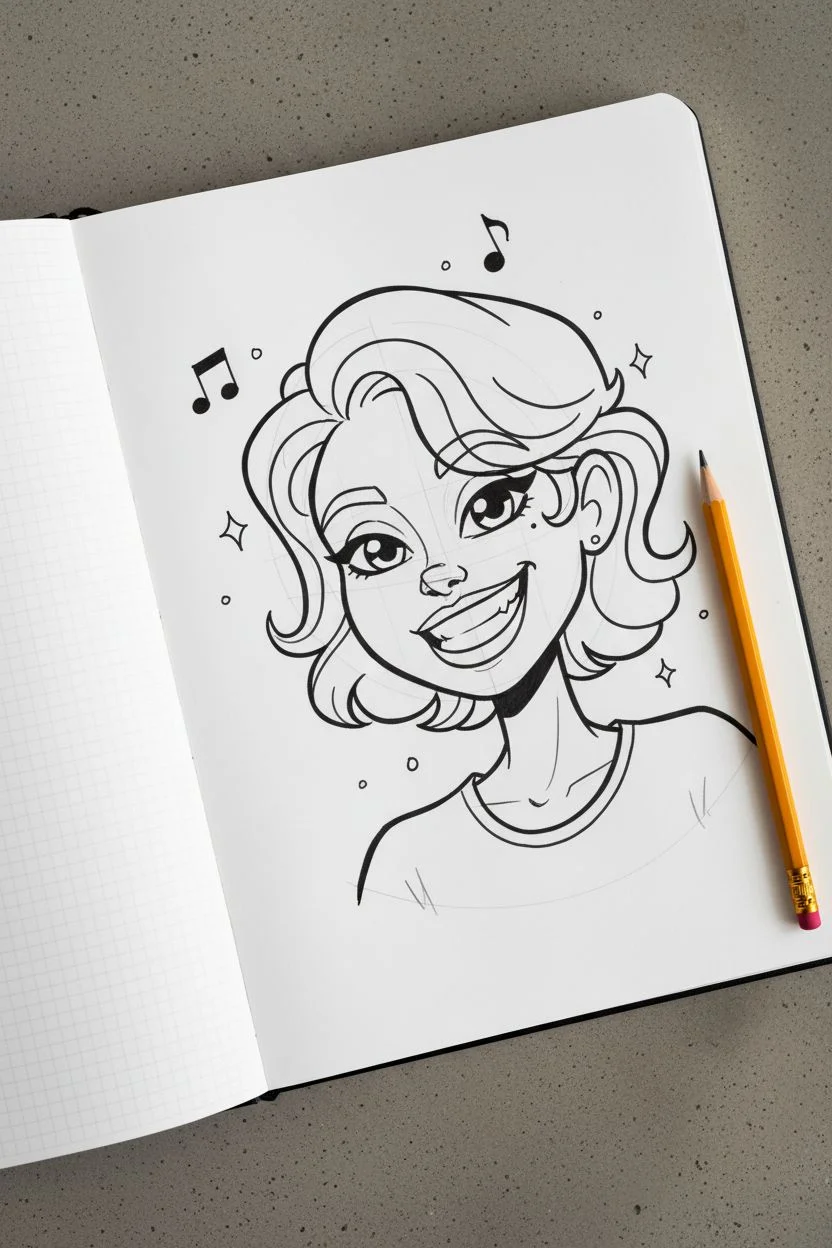
Adding joyful features:
Sketch in the eyes, a simple nose, and a wide, confident smile. Tilt the head slightly to give the portrait a relaxed attitude. -
Hair with personality:
Draw the hair using wavy, confident strokes. Focus on the overall shape and texture rather than individual strands. If you have curly hair like the example, use looping lines to suggest volume. -
Clothing outlines:
Sketch the neckline of a t-shirt or jersey. Keep the clothing lines clean and simple, focusing on how the fabric drapes over the shoulders. -
Inking the lines:
Switch to a black fine-liner or brush pen. Trace over your pencil lines with confident, smooth strokes. Vary the line weight—make the jawline and outer shirt lines slightly thicker than the facial details. -
Cleaning up:
Once the ink is completely dry (wait at least a few minutes to avoid smudges), gently erase all the underlying pencil marks. -
Adding musical vibes:
Draw a few floating music notes around the head to show personality or a love for music. Add small sparkles or dots to fill empty space.
Keep it personal
Swap the sports gear for art supplies, gaming controllers, or books depending on what you actually love. Authenticity makes it better.
Step 2: Creating the Mini-Sketches
-
Prep the small notebook:
Open a smaller spiral-bound notebook. On the left page, write a simple signature or a stylized word in cursive. -
Thumbnail sketch:
On the right page of the small notebook, draw a tiny, rough sketch inside a small box. This could be an abstract scribble or a mini version of your main drawing. -
Character card:
On a separate small piece of paper or cardstock, draw a colorful character or use a printed image that inspires you. Place this nearby.
Step 3: Arranging the Scene
-
Setting the stage:
Find a clean, textured surface like concrete (outdoors) or a neutral rug. This background adds grit and contrast to the clean paper. -
Placing the main book:
Position your large sketchbook at the bottom center of your frame, angled slightly. -
Adding the footwear:
Place your shoes near the top right of the sketchbook. I find that angling them as if someone is standing there makes the photo feel more alive. -
Big props placement:
Position larger items like a skateboard or soccer ball at the top left and top center edges. Let them go slightly out of frame to imply a larger world. -
scattering details:
Arrange the smaller items—the mini notebook, the character card, a tiny toy ball, a flower, or clips—in the empty spaces between the large objects. Aim for a balanced ‘organized chaos’ look. -
Final adjustment:
Look at the composition through your camera lens or phone. Nudge items until the spacing feels even and the portrait remains the clear focal point. -
Capture:
Take a photo from directly above to capture your finished ‘Hobby Hero’ composition.
Add dimensionality
Place an actual pencil or pen on top of the open sketchbook. It bridges the gap between the 2D drawing and the 3D objects.
You have now immortalized your current self and your favorite hobbies in a single creative snapshot
BRUSH GUIDE
The Right Brush for Every Stroke
From clean lines to bold texture — master brush choice, stroke control, and essential techniques.
Explore the Full Guide
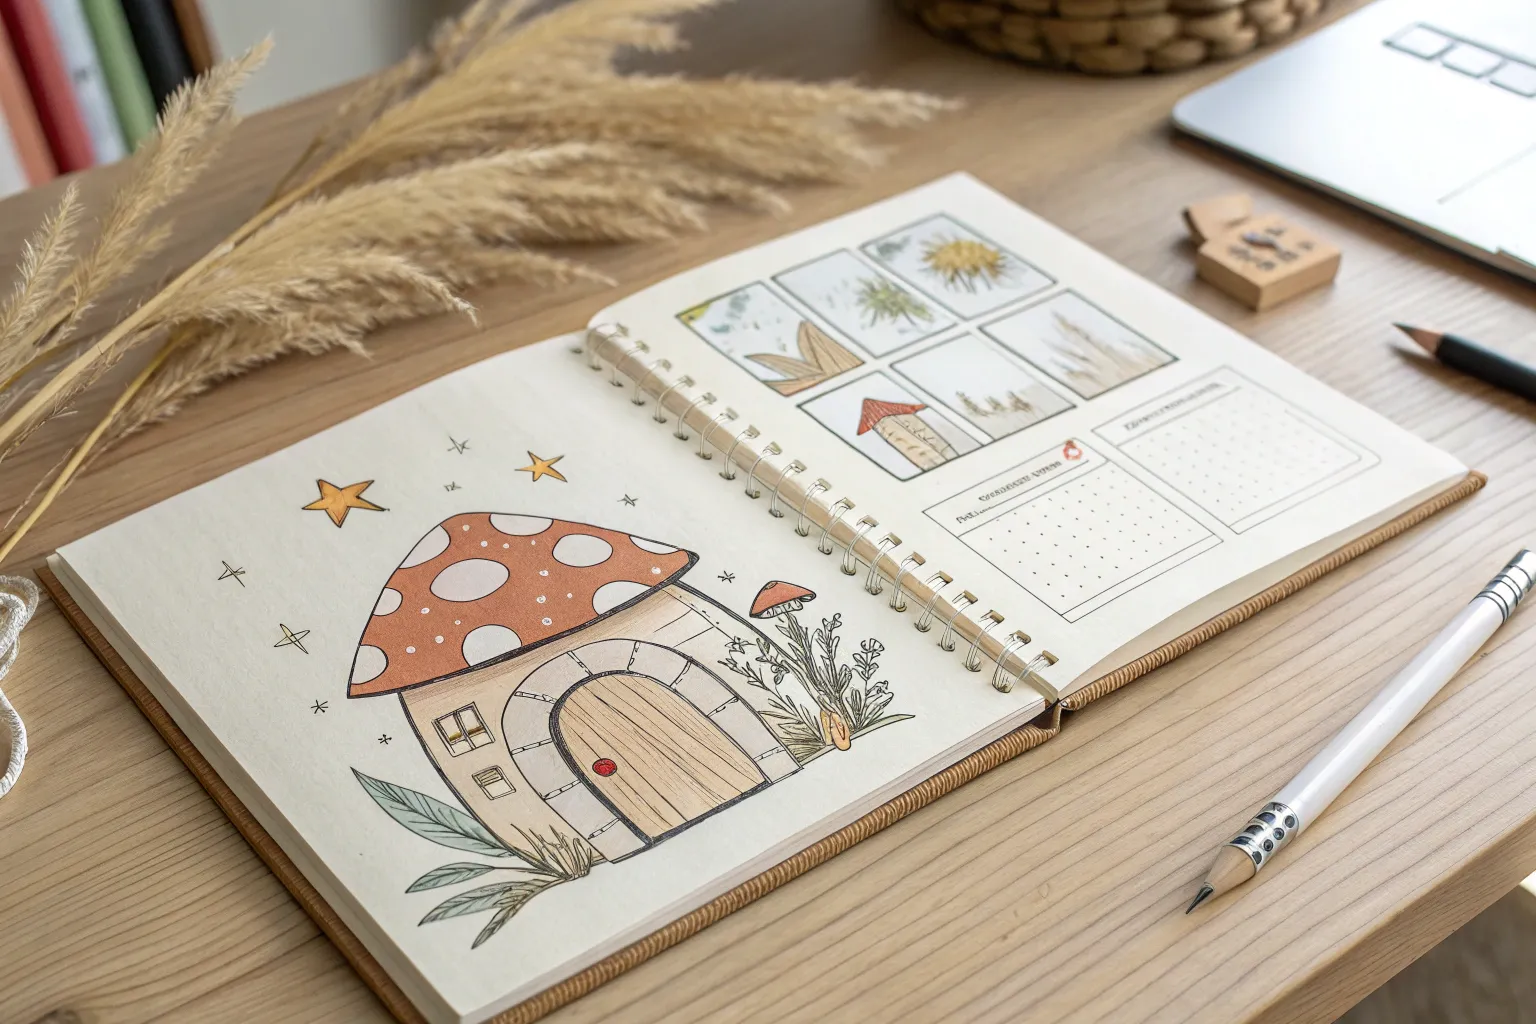
Dream Bedroom Redesign Sketch
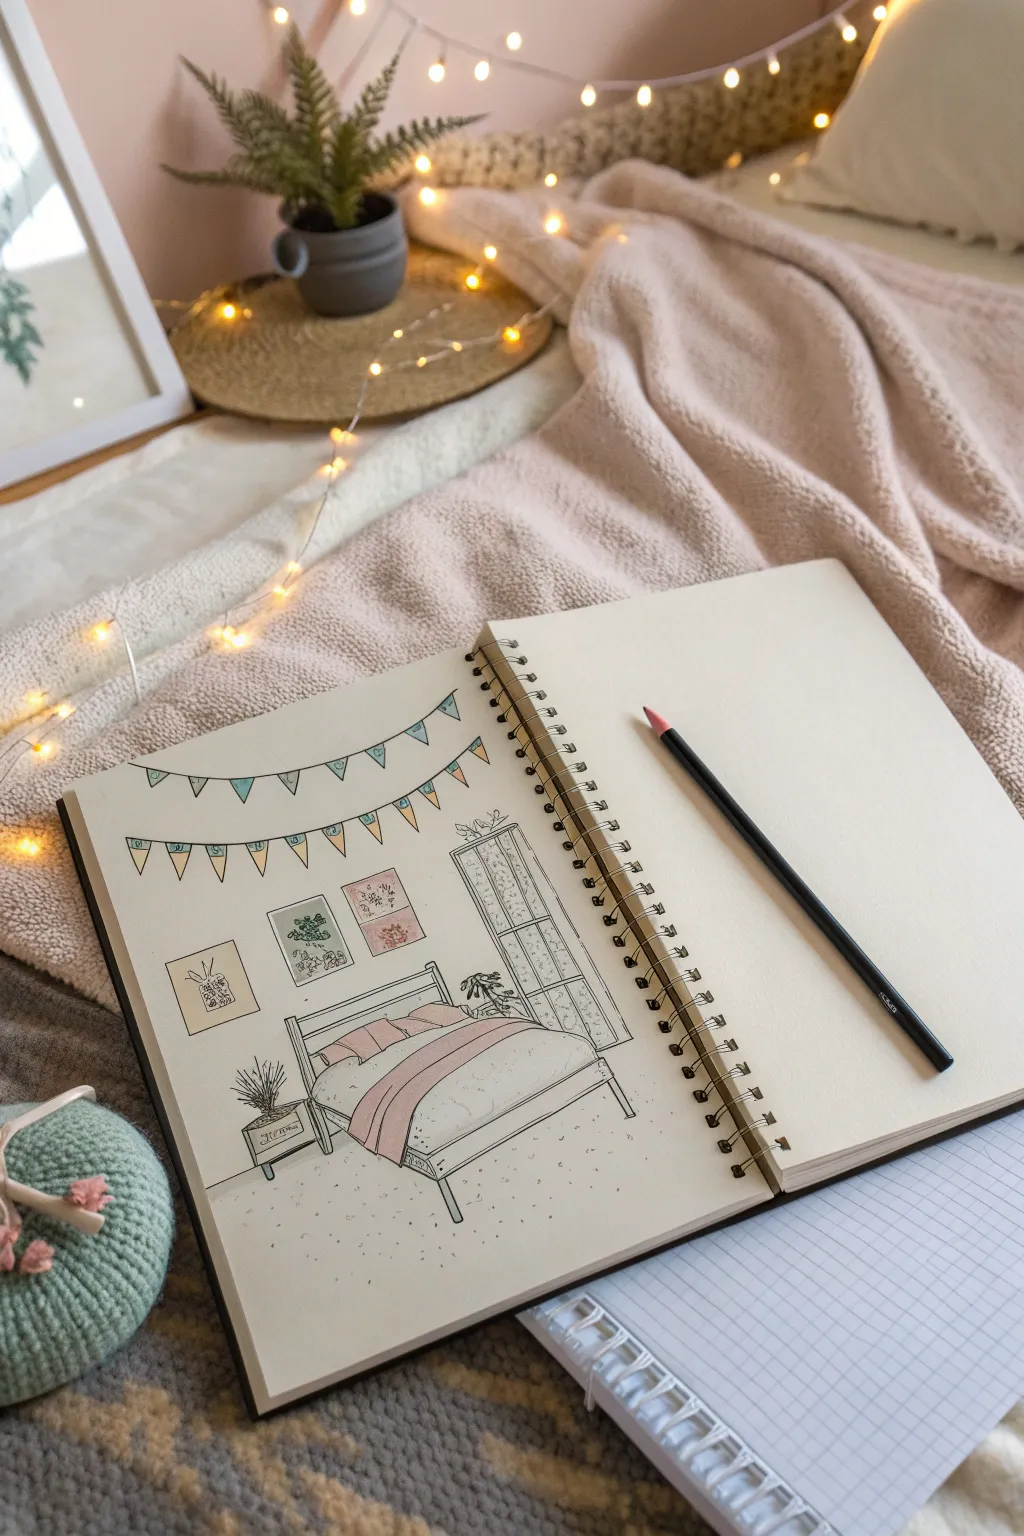
This cozy sketching project invites you to redesign your personal space on paper using clean lines and soft pastel accents. It captures a charming bedroom scene complete with festive bunting and framed art, perfect for visualizing decor ideas in a sketchbook.
Step-by-Step Guide
Materials
- Sketchbook with smooth, thick paper (A4 or A5)
- Black fine liner pen (0.3mm or 0.5mm)
- Pencil (HB) for initial sketching
- Eraser
- Colored pencils (muted pink, teal, sage green, grey)
- Ruler (optional, for furniture lines)
Step 1: Planning the Layout
-
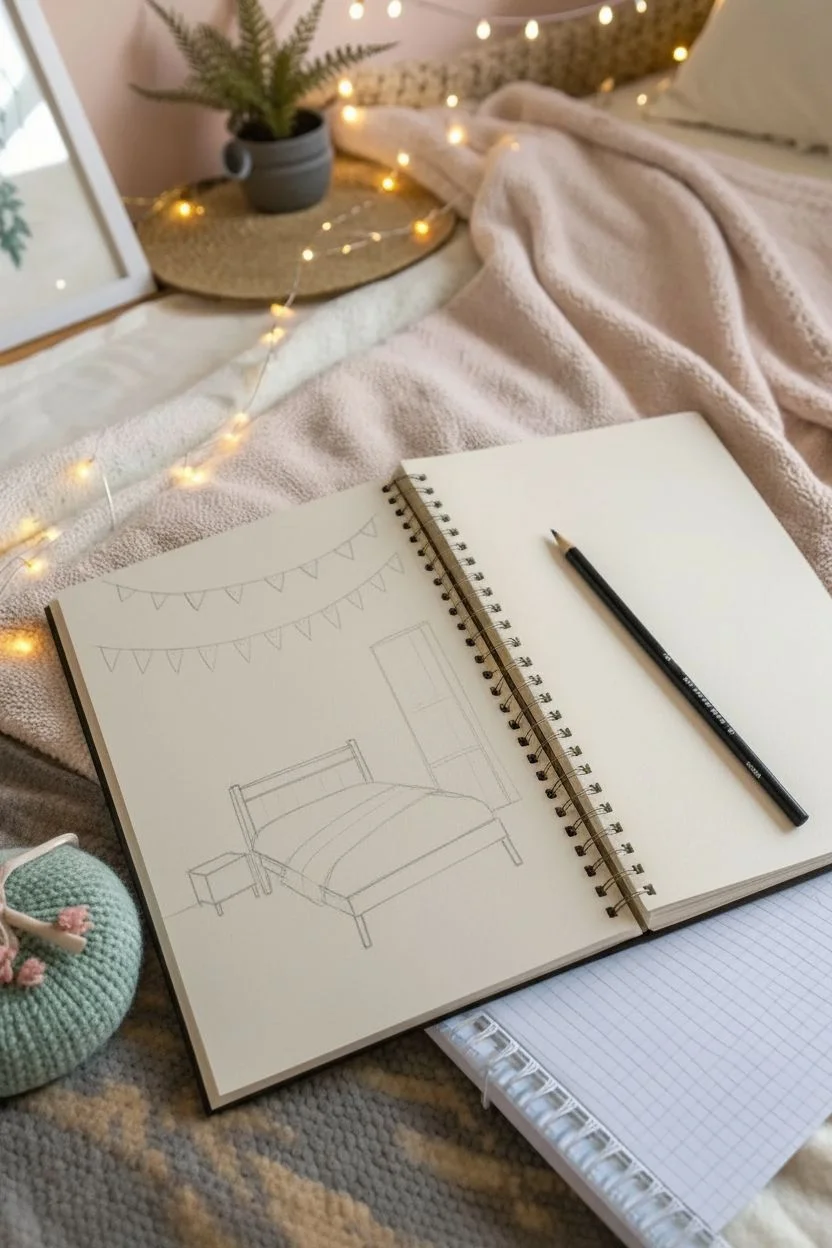
Establish the horizon line:
Start lightly with your pencil. Draw a faint horizontal line about one-third of the way up the page to represent where the floor meets the wall. -
Block in the bed:
In the center of the lower section, sketch a simple rectangle for the bed frame. Add a slightly raised headboard at the back and angled legs at the front to give it dimension. -
Add structure to the room:
To the right of the bed, lightly sketch a tall, narrow rectangle for a wardrobe or floor-to-ceiling window. To the left, draw a small cube shape for a nightstand. -
Sketch the bunting strings:
Draw two sweeping curves across the top third of the page. Let them drape naturally, with the lower string hanging slightly deeper than the top one.
Keep it Light
When coloring with pencils, apply very little pressure. You want a soft, pastel aesthetic, not deep saturation. You can always add a second layer if needed.
Step 2: Adding Details
-
Define the bunting flags:
Along your curved lines, draw small triangles pointing downward. Try to keep them evenly spaced, though slight variations add hand-drawn charm. -
Create the gallery wall:
Above the bed, sketch three rectangular frames. Make the center one slightly higher or larger to create a balanced composition for your artwork. -
Furnish the bed:
Draw two fluffy pillows propped against the headboard. Add a curved line across the mattress to suggest a duvet cover, and a second line for a folded throw blanket at the foot of the bed. -
Accessorize the space:
Draw a spiky plant sitting on the nightstand. Inside the wall frames, sketch simple shapes like leaves or abstract patterns. Add a trailing plant on top of the wardrobe/window frame if you like.
Step 3: Inking and Coloring
-
Outline the furniture:
Switch to your black fine liner. Carefully trace over your pencil lines for the bed frame, nightstand, and tall cabinet. Keep your hand steady but don’t worry about perfection; a little wobble adds character. -
Ink the decorations:
Trace the bunting triangles and the picture frames. use quick, short strokes for the plant leaves to make them look organic. -
Erase guidelines:
Wait a moment for the ink to fully dry, then gently erase all the underlying pencil marks to reveal a clean illustration. -
Color the bunting:
Using your colored pencils, color the flags in an alternating pattern. I like to use soft teal and muted yellow here to keep the look gentle. -
Add warmth to the bed:
Color the throw blanket and the pillows in a soft dusty pink. Leave the main duvet white or shade it very lightly with grey to show volume. -
Fill in the artwork:
Add touches of pink and green to the little pictures in the frames above the bed. -
Ground the floor:
Take a grey or beige pencil and add tiny dots or speckles on the floor around the furniture to suggest a carpet texture without coloring the whole space solid.
Smudged Ink?
To avoid smearing your fine liner when erasing pencil marks, ensure the ink is totally dry. If you smudge, turn it into a shadow with a grey colored pencil.
Now you have a charming interior design sketch that captures a peaceful dream bedroom
Your Own Original Superhero Costume Design
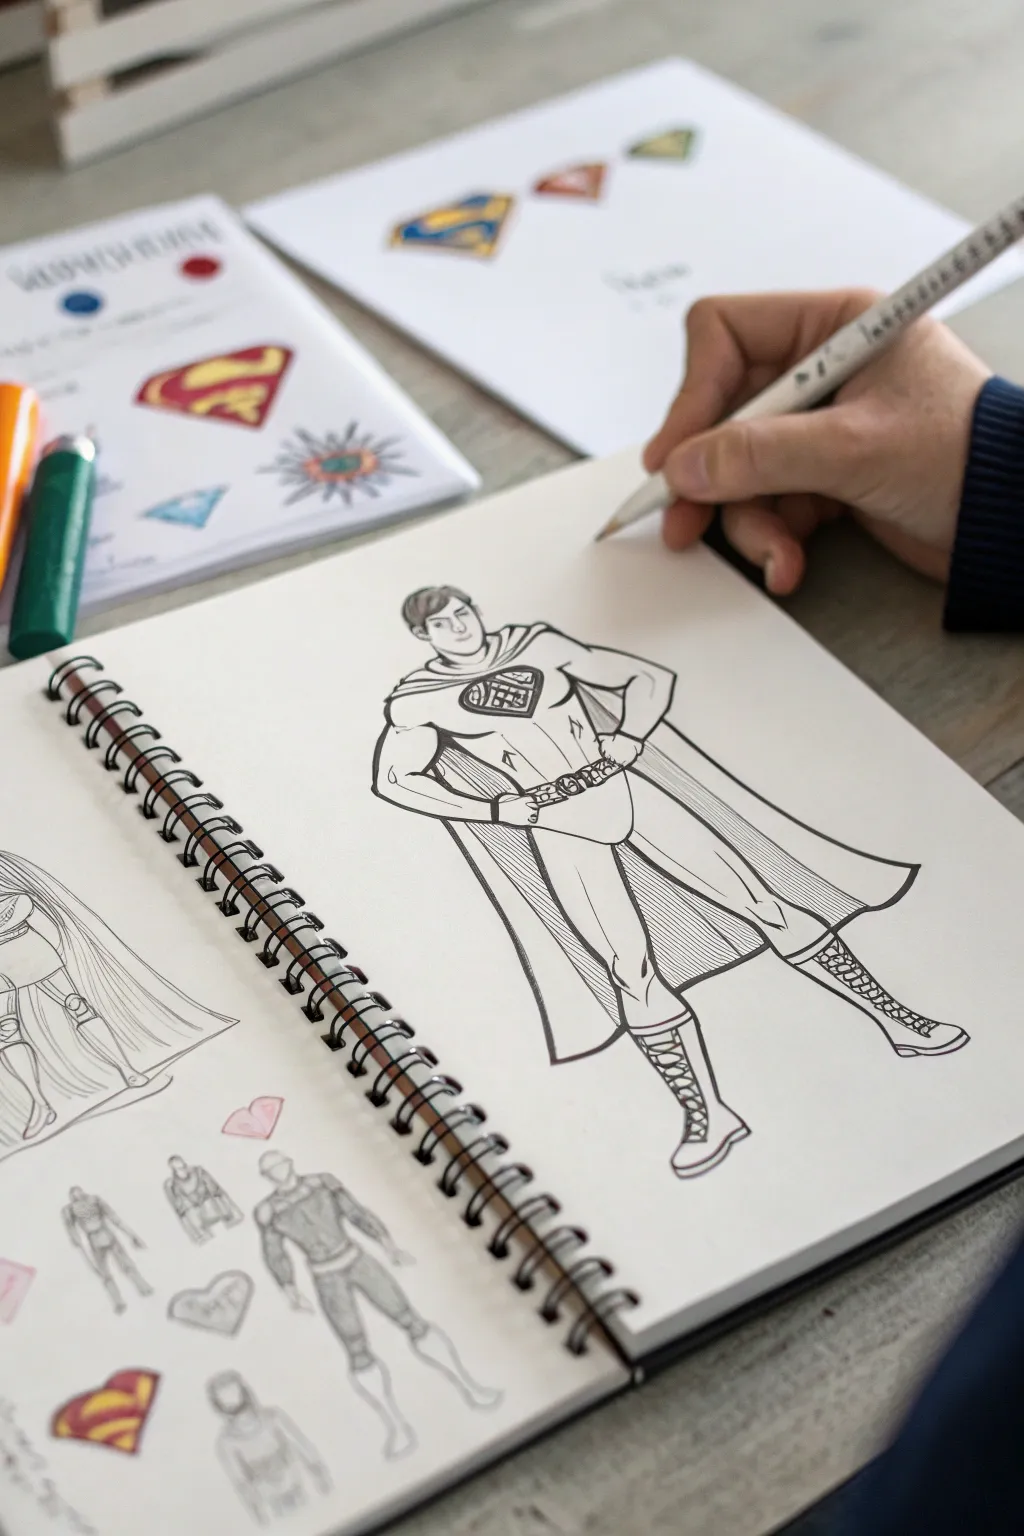
Unleash your inner comic book artist with this classic superhero character design activity. Using clean lines and bold posing, you’ll create a timeless brave figure complete with a flowing cape and custom emblem.
Step-by-Step Tutorial
Materials
- Spiral-bound sketchbook (heavyweight paper preferred)
- Graphite pencil (HB or 2B)
- Fine-point black ink pen or liner (0.5mm)
- Reference sheet with logos (optional)
- Colored markers or pencils (bright primary colors)
- Eraser
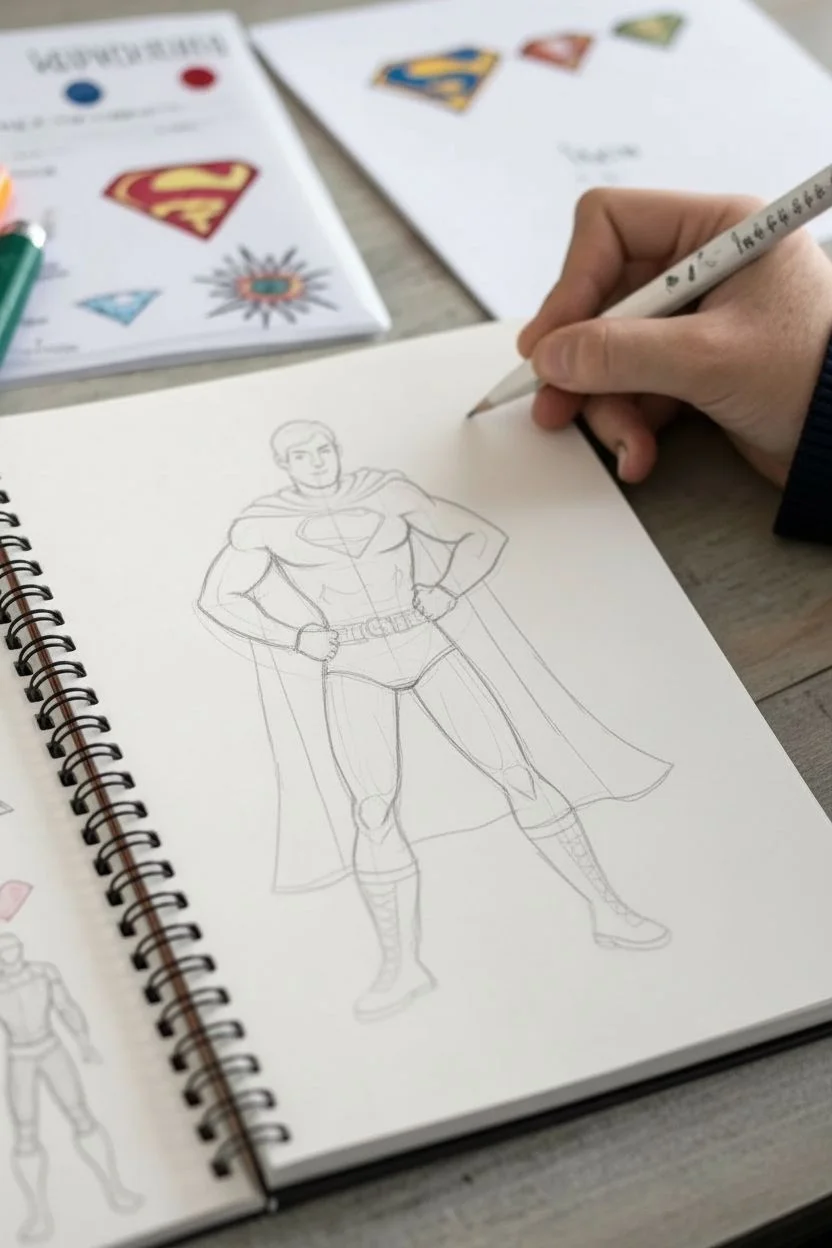
Step 1: Drafting the Pose
-
Establish the skeleton:
Start with a very light stick figure to determine the pose. For this classic hero stance, draw the legs apart for stability and place the hands on the hips to convey confidence. -
Flesh out the torso:
Draw a broad, inverted triangle for the chest and taper it down to the waist. This V-shape is essential for that powerful superhero build. -
Shape the limbs:
Add cylinders for the arms and legs around your stick figure guide. Keep the thighs and calves muscular but streamlined, especially where the boots will go. -
Sketch the head and neck:
Place an oval for the head. Add a strong, square jawline and a thick neck connecting to the shoulders to emphasize strength.
Pro Tip: Dynamic Stance
To make the hero look stronger, draw the chest very wide at the top and the waist narrow. This exaggerated ‘V’ shape instantly communicates power.
Step 2: Costume Details
-
Define the boots:
Draw a horizontal line mid-calf to mark the top of the boots. Add a small ‘V’ dip at the front center of each boot top for extra style. -
Add laces:
Sketch crisscross patterns going up the front of the boots. This gives the costume a slightly more tactical or retro look compared to slip-on boots. -
Draw the belt:
Create a belt with rectangular pouches or links. Add a buckle in the center; keeping it simple helps the chest emblem stand out more later. -
Create the cape:
Draw the cape attachment at the shoulders. Let the cape drape heavily behind the legs, using long, vertical lines to suggest fabric folds and weight. -
Design the chest emblem:
In the center of the chest, draw a diamond or shield shape. Inside, sketch a unique symbol or initials. I like to keep the internal design geometric for a modern feel.
Troubleshooting: Smudged Ink
If your hand drags ink while drawing, place a scrap piece of paper under your drawing hand to act as a shield between your skin and the wet ink.
Step 3: Inking and Refining
-
Ink the main outlines:
Using your fine-point black pen, carefully trace over your graphite lines. Use smooth, continuous strokes for the long lines of the legs and cape. -
Vary line weight:
Thicken the lines on the underside of the arms and the outer edge of the cape. This simple trick adds faux shadow and depth to your drawing. -
Detail the face:
Ink the eyes, nose, and mouth. Keep the features simple: a small line for the mouth and focused dots for eyes work well for this scale. -
refine the hair:
Ink the hair with a classic side-part style. Add a small ‘S’ curl on the forehead if you want to pay homage to the most famous superhero of all. -
Add texture to the cape:
Use thin, closely spaced parallel lines (hatching) on the inside sections of the cape to make it look darker than the outside. -
Clean up:
Once the ink is completely dry, gently erase all the underlying pencil sketches so only your crisp black lines remain.
Now you have a dynamic, original character ready to save the day in your comic strip

PENCIL GUIDE
Understanding Pencil Grades from H to B
From first sketch to finished drawing — learn pencil grades, line control, and shading techniques.
Explore the Full Guide
Mythical Creature Mashup (Pick Two and Combine)
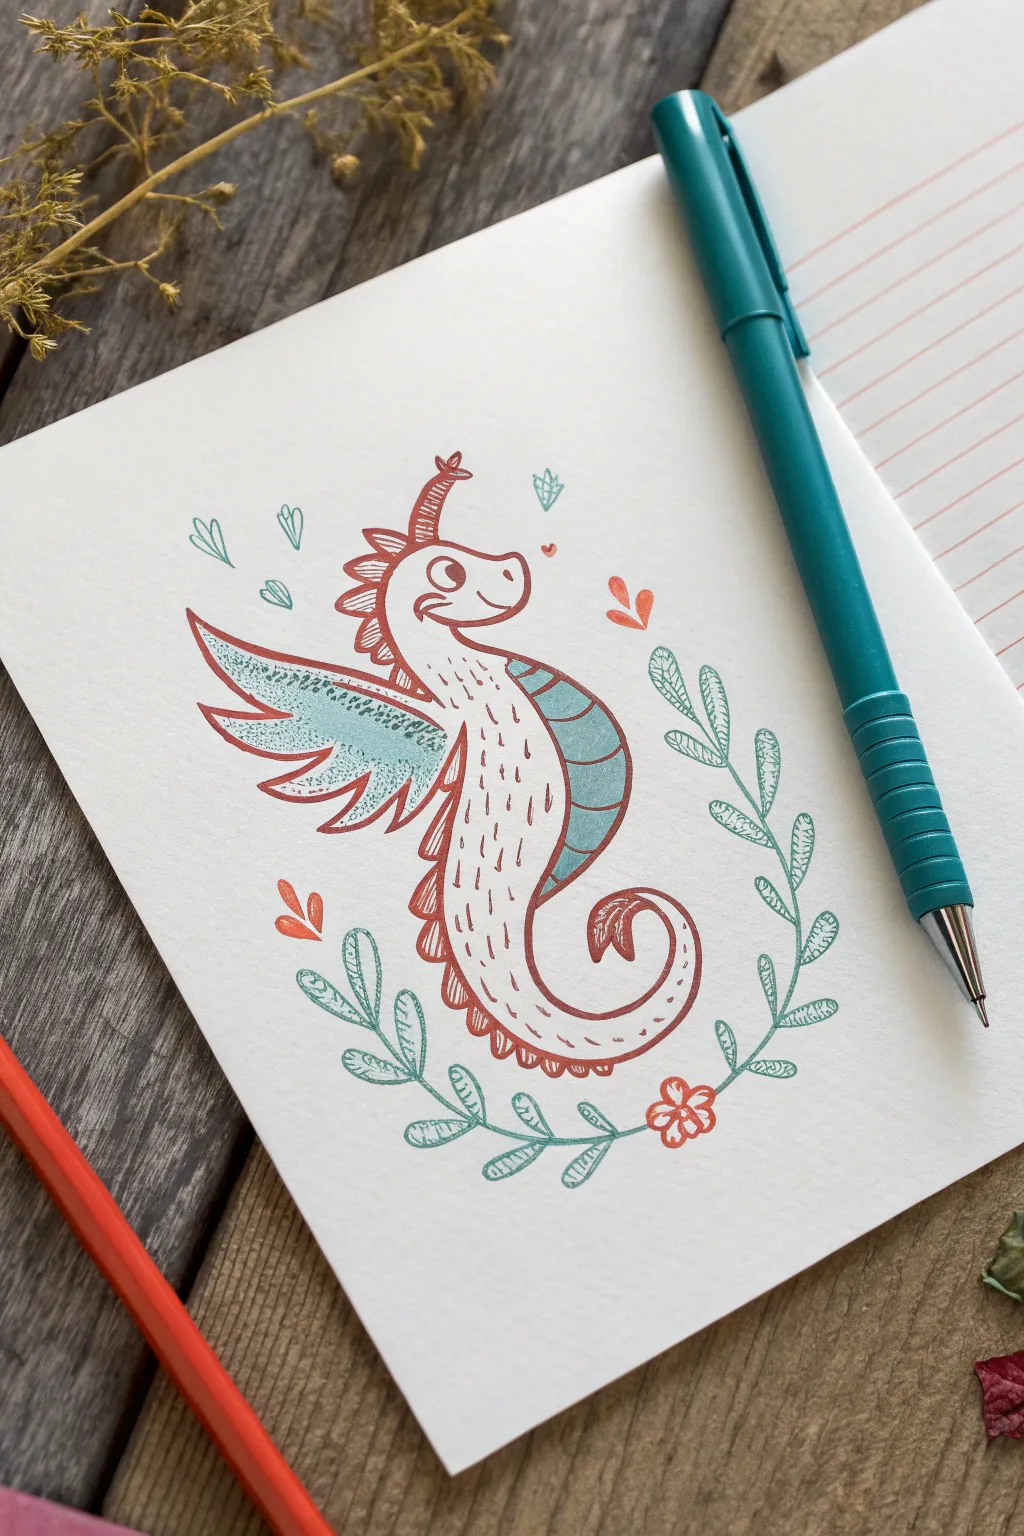

Dive into clear waters with this whimsical mashup of a seahorse and a dragon. This simple line-art style uses just two colors to create a charming mythical creature perfect for decorating notebook corners.
Detailed Instructions
Materials
- White paper or sketchbook
- Pencil (for initial sketching)
- Eraser
- Teal or turquoise fine-liner pen
- Rust-orange or terracotta felt-tip pen
Step 1: Drafting the Shapes
-
Head and Neck:
Start lightly with your pencil. Draw a small circle for the head and extend a curved ‘S’ shape downwards to form the neck and upper body. -
Curling the Tail:
Continue that ‘S’ shape, curving it all the way around at the bottom into a spiraled tail, just like a seahorse. -
Adding the Snout:
On the head circle, sketch a rectangular snout pointing to the right. Give it a gentle curve for a friendly expression.
Step 2: Inking the Outline
-
The Main Rust Outline:
Switch to your rust-orange pen. Trace over your pencil sketch for the head, snout, neck, and the curly tail. -
Facial Features:
Draw a large circle for the eye with a smaller dot inside for the pupil. Add a small curved smile and a tiny nostril dot. -
Dragon Spikes:
Using the same orange pen, add a row of small, jagged triangles running down the back of the neck. I like to make the ones near the head slightly larger. -
Belly Detail:
Draw a curved line inside the body, following the outer shape, to separate the belly from the back. -
Belly Scales:
Inside that belly section, draw small, vertical dashed lines or tiny ‘u’ shapes to create a scaly texture.
Steady Hands
Work slowly with the hatching lines inside the leaves and wings. Quick strokes can look messy, but deliberate, slow lines look like professional shading.
Step 3: Adding the Teal Accents
-
The Wing Shape:
Pick up your teal pen. From the unicorn’s back, draw a wing shape extending outwards. It should look a bit like a sturdy leaf. -
Wing Outline:
Go back over the wing’s top edge with the orange pen to define it, then add jagged ‘feather’ shapes along the bottom edge. -
Wing Texture:
Fill the inside of the wing with tiny teal stippling dots. Keep the dots more concentrated near the base of the wing for shading. -
Back Plates:
Draw three or four semi-circles along the back curve of the body using the teal pen. Add horizontal hatch marks inside them. -
Unicorn Horn:
I almost forgot the best part—add a spiraled horn on the forehead using the orange pen, then add tiny teal triangles floating near it for magic sparkles.
Make it Metallic
Swap the teal pen for a gold or silver gel pen for the wing and leaves. This adds a shimmering, magical quality perfect for a mythical beast.
Step 4: Floral Flourishes
-
The Leafy Wreath:
Using the teal pen, draw two long, curved stems starting from the bottom near the tail and curving upwards around the creature. -
Adding Leaves:
Along these stems, draw small oval leaves. To give them texture, draw hatching lines inside each leaf instead of coloring them in solid. -
The Tiny Flower:
Where the two stems meet at the bottom right, draw a simple five-petal flower using the orange pen. -
Floating Hearts:
Finish the piece by drawing a few tiny floating hearts or leaf shapes around the head in both teal and orange to fill the empty space. -
Cleanup:
Once the ink is completely dry, gently erase any visible pencil lines from your first phase.
Now you have a unique creature that is ready to swim or fly off the page
Simple Mountain Landscape Inside a Circle
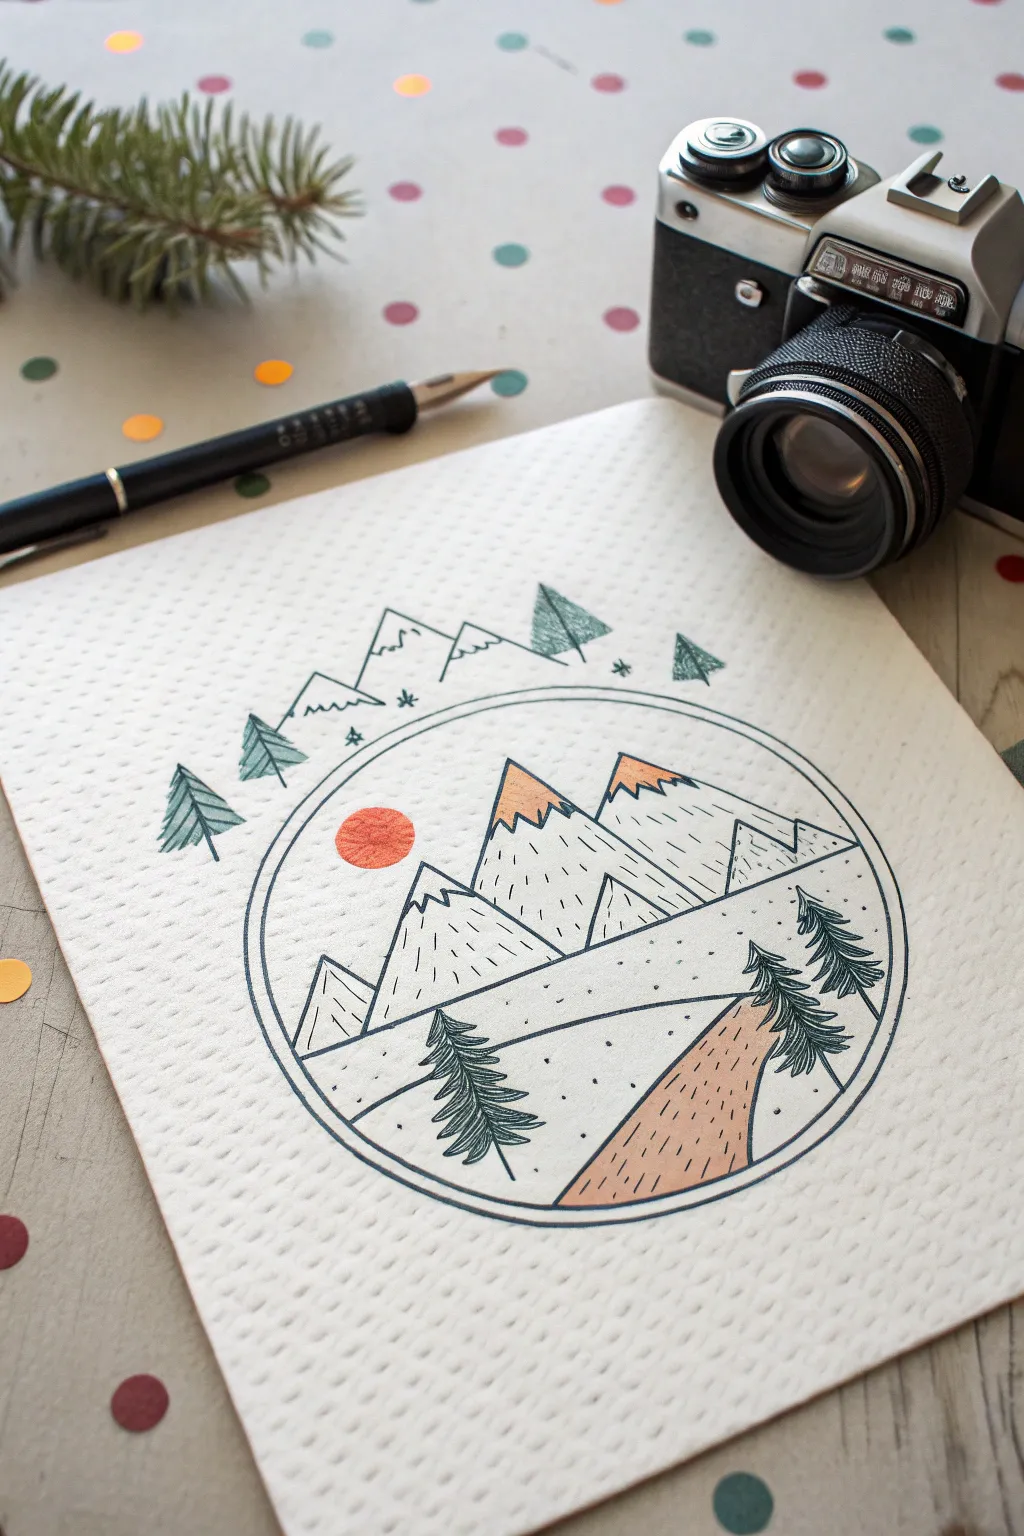
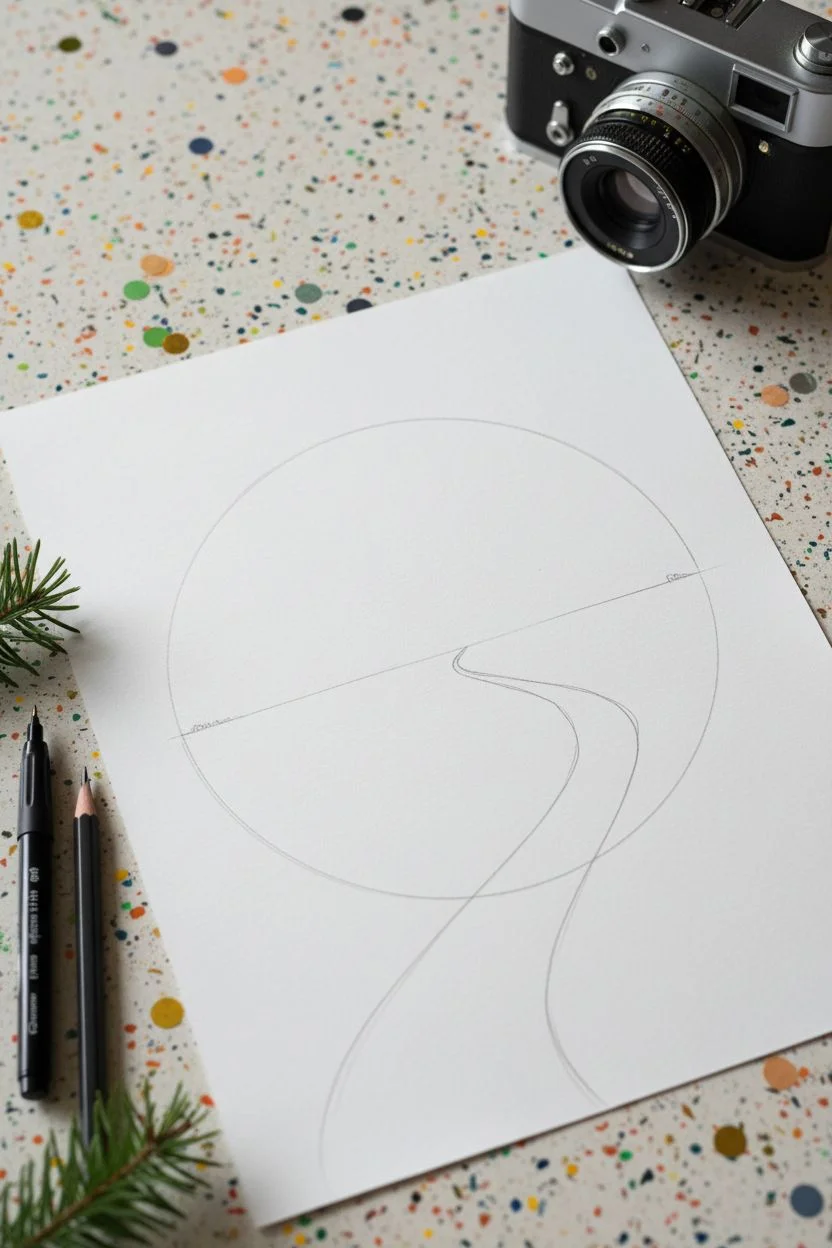
Create a charmingly structured landscape within a perfect circle, featuring snow-capped peaks and a winding path. This drawing combines crisp ink lines with subtle pops of copper and orange for a warm, adventurous feel.
Step-by-Step Tutorial
Materials
- Textured white drawing paper or cardstock
- Compass or a circular object (like a roll of tape) to trace
- Fine-tip black ink pen (0.3mm or 0.5mm)
- Black fountain pen or calligraphy pen (optional, for varying line weights)
- Metallic copper or bronze marker/pen
- Orange marker or colored pencil
- Pencil
- Eraser
Step 1: Setting the Scene
-
Draw the boundary:
Start by drawing a perfect circle in the center of your page using a compass or by tracing a round object. Use a pencil lightly so you can adjust it if needed. -
Create the horizon line:
About one-third of the way up from the bottom of the circle, draw a slightly curved line across the circle. This separates your foreground path area from the mountain range in the back. -
Sketch the path:
Draw two curved lines starting wide at the bottom right edge of the circle and meeting at a point on the horizon line on the right side. This creates perspective for your walking trail.
Step 2: Drawing the Mountains
-
Outline the main peaks:
Above your horizon line, draw three main triangles for mountains. Make the middle one the tallest, and let them overlap slightly to create depth. -
Add snow caps:
Draw jagged, zigzag lines near the top of each mountain peak to separate the snowy summit from the rocky base. -
Add background peaks:
Tuck a smaller, simpler mountain peak on the far left and another on the far right to fill out the range.
Clean Lines
For the crispest circle, trace a jar lid or roll of tape first with pencil, then ink it. It’s much easier than freehanding!
Step 3: Inking the Landscape
-
Trace over the circle:
Go over your main circle outline with your black ink pen. Depending on the pen you use, you can make this line slightly thicker than the others to frame the artwork. -
Ink the mountains and ground:
Carefully trace your pencil lines for the mountains and the ground. Don’t worry if the lines aren’t perfectly straight; a little wobble adds organic character. -
Add texture lines:
On the non-snowy parts of the mountains, draw short, vertical dashes. Keep them loose and scattered to look like rocky texture. -
Detail the ground:
Add tiny dots or speckles in the snowy areas and the foreground to make the ground look interesting.
Inking Oops?
If a line goes crooked, don’t scribble it out. Turn that mistake into a new rock, bush, or textural bump in the ground.
Step 4: Pine Trees and Color
-
Draw the foreground trees:
In the bottom right corner near the path, draw two pine trees. Start with a vertical line for the trunk, then add downward-slanting zigzag strokes for branches. -
Add a lone tree:
On the left side of the foreground, draw a single pine tree to balance the composition. -
Draw the sun:
In the upper left sky area, draw a small circle for the sun. -
Color the path:
Use your copper or light brown marker to fill in the path. Add small dashes of black ink on top to suggest dirt or gravel texture. -
Color the peaks:
Use the copper or orange marker to color just the very tips of the mountains (the snow caps) on two of the peaks, or color the shadows of the snow caps depending on your preference. In the reference, they used a warm copper tone for the rocky tops. -
Fill the sun:
Color in the sun with a bright orange marker to make it pop against the black and while landscape.
Step 5: Final Touches
-
Add decorative elements:
Outside the top of the circle, draw a loose, floating mountain range and a few tiny pine trees. These don’t need a heavy outline; keep them light and sketchy. -
Erase pencil lines:
Wait until the ink is completely dry to avoid smudging, then gently erase all your initial pencil sketches.
Now you have a neat, graphic landscape that looks ready for a travel journal


Underwater Scene With Patterned Fish
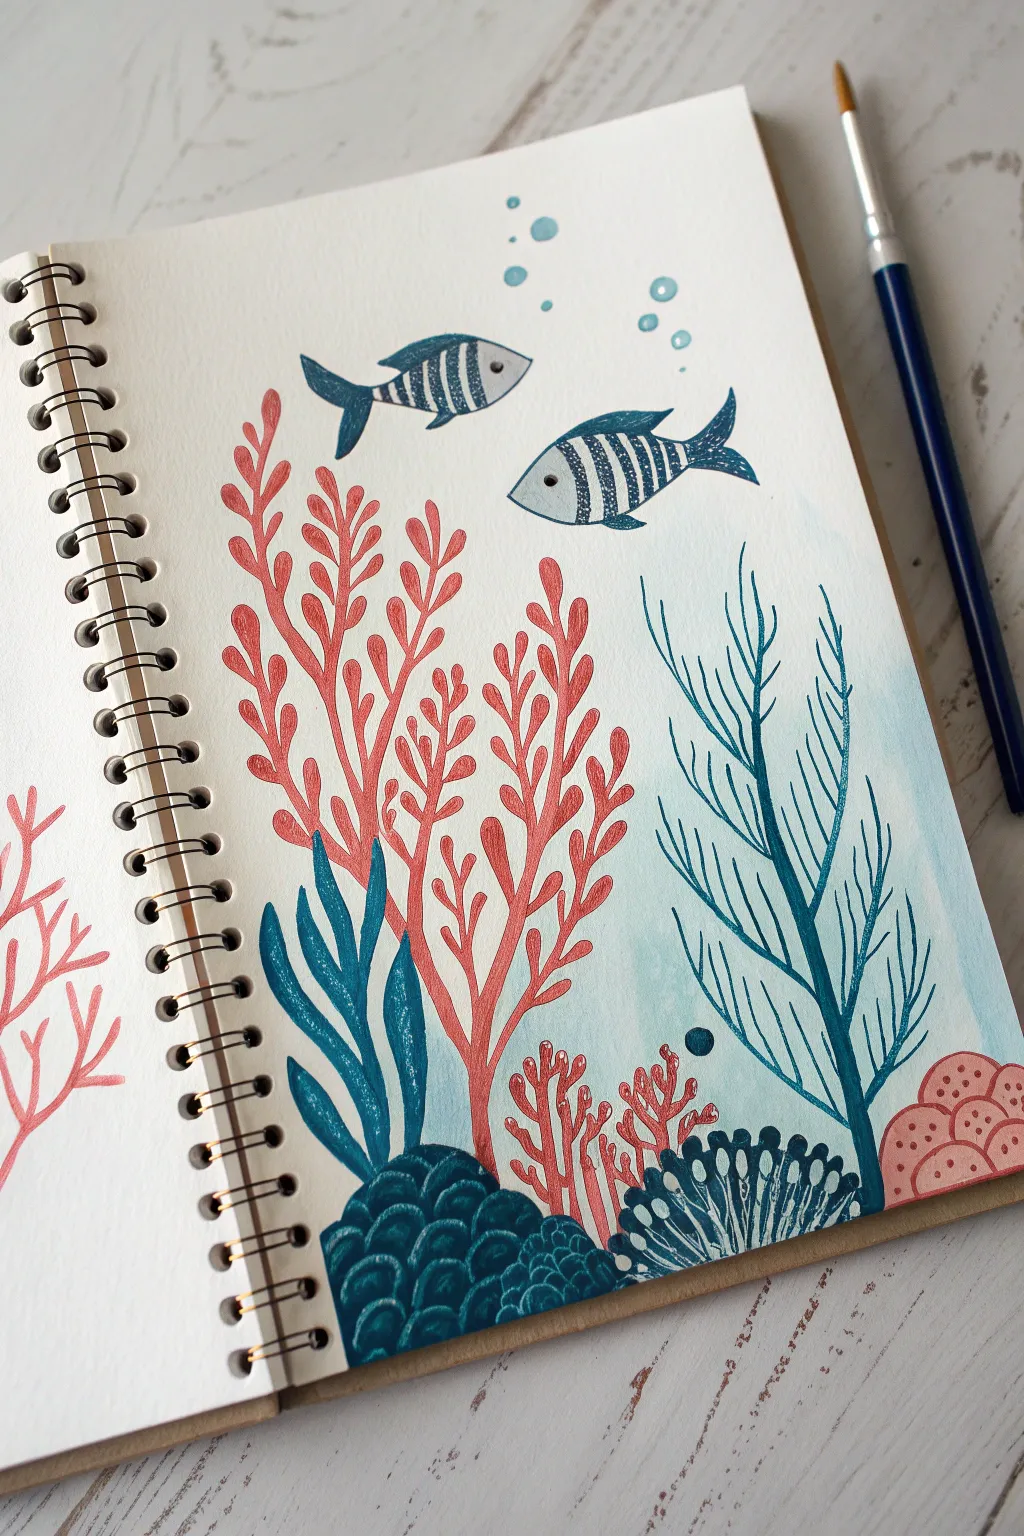
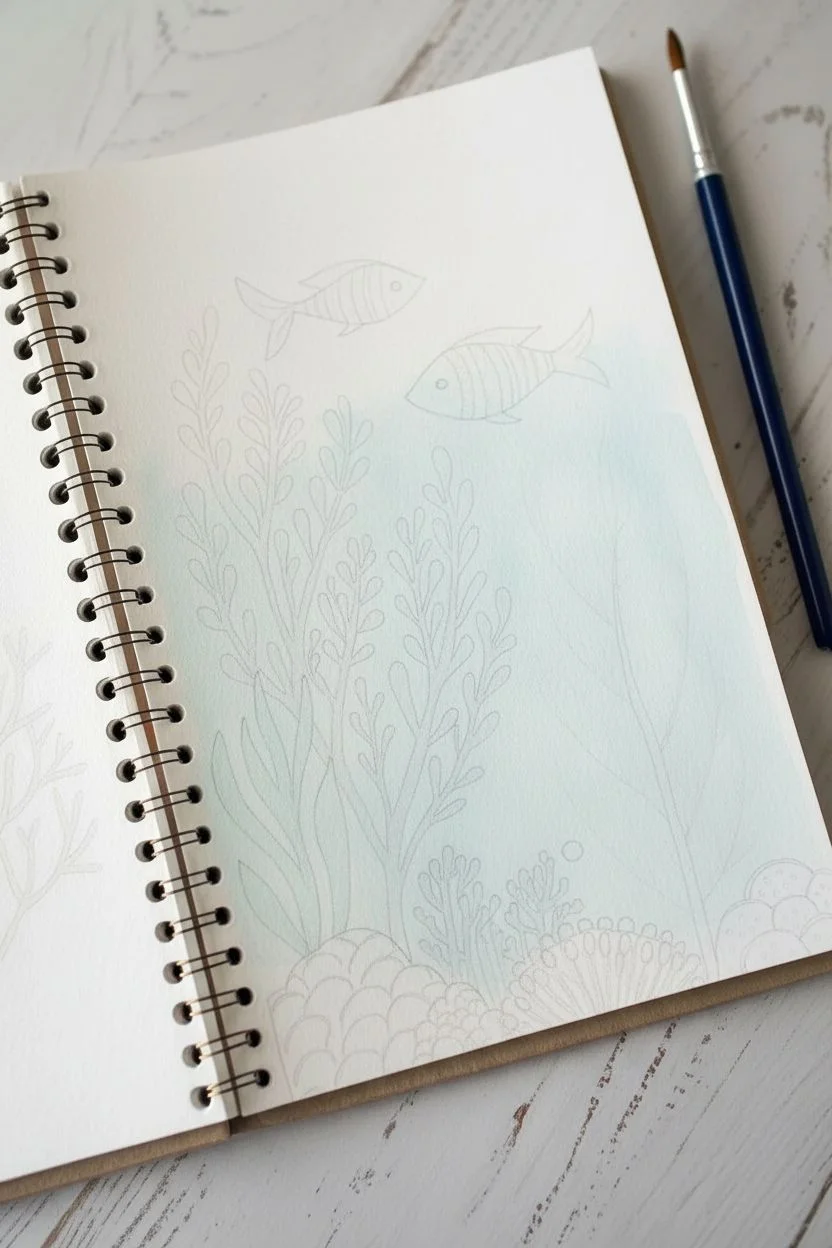
Dive deep into creativity with this vibrant underwater illustration featuring playful, stripy fish and flowing sea plants. This project combines simple watercolor washes with bold details to create a page that looks like it came straight from an explorer’s journal.
How-To Guide
Materials
- Spiral-bound sketchbook (heavy watercolor or mixed media paper)
- Watercolor paints (pan set or tubes)
- Round paintbrush (size 4 or 6)
- Detail paintbrush (size 0 or 1)
- Mixing palette
- Jar of water
- Paper towels
- White gel pen
- Pencil and eraser
Step 1: Planning and Background
-
Lightly sketch the layout:
Start with a dull pencil to very lightly map out where your coral and plants will grow from the bottom of the page. Then, sketch the outlines of two fish swimming near the top, making one slightly larger than the other. -
Prepare a watery wash:
Mix a very diluted light blue watercolor on your palette. You want it to be mostly water with just a drop of pigment. -
Paint the water background:
Using your larger round brush, sweep this pale blue connect-the-dots style behind the plant area. Don’t cover the whole page—just create a soft, uneven wash behind where the plants will go, leaving the paper white at the very top. -
Let the background dry:
Wait for the blue wash to dry completely. If the paper feels cool to the touch, it’s still damp.
Step 2: Painting the Sea Life
-
Mix your coral red:
Create a salmon-pink or coral color by mixing red with a little bit of orange and plenty of water so it isn’t too dark. I like to keep this color fairly transparent. -
Paint the main branching coral:
Starting from the bottom left, paint thick stems that grow upward and branch out into rounded tips. Make the branches slightly wavy like they are moving in the current. -
Paint the smaller coral:
Use the same coral color to paint a smaller, bushier plant near the bottom right corner. -
Mix a deep teal green:
Combine blue and green to make a rich teal color. -
Paint the wavy seagrass:
On the bottom left, paint three broad, wavy leaves rising up with pointed tips using the teal mix. -
Create the seaweed tree:
Using a slightly more blue-toned teal, paint the tall, thin seaweed structure on the right side. Use long, confident strokes that flick upward to create thin branches. -
Paint the dark rock formations:
Mix a dark prussian blue or navy. Paint two mound shapes at the bottom: one anchoring the seagrass and one near the bottom right coral. -
Base coat the fish:
Use a light grey-blue to fill in the body shapes of your two fish. Let this layer dry completely before moving to the next step.
Brush Control Tip
For the thin seaweed branches, lift your brush as you reach the end of the stroke. Less pressure equals a thinner line, giving you that tapered, pointy look.
Step 3: Adding Details and Patterns
-
Detail the fish stripes:
Switch to your smallest brush and mix a concentrated dark blue. Carefully paint vertical stripes along the fish bodies. The stripes should curve slightly to show the fish are round. -
Define fins and faces:
Use the same dark blue to outline the fins and tails. Add a small dot for the eye on each fish. -
Add bubbles:
Dip your clean brush into light blue paint and dab small circles rising from the fish toward the surface. -
Pattern the dark mounds:
Once the dark blue mounds at the bottom are dry, use a lighter blue or white paint (if opaque enough) to add texture. For the left mound, paint overlapping scallops like fish scales. For the right mound, paint radiating lines like a fan. -
Add white highlights:
Take your white gel pen and add tiny highlights to the bubbles to make them look shiny. -
Final scallop details:
If you have a pinkish-brown rock in the corner, use a fine tip pen or brush to add small ‘U’ shapes for texture. -
Erase pencil lines:
Check one last time that everything is bone dry, then gently erase any visible pencil marks from your initial sketch.
Level Up: Hidden Treasure
Make the scene mysterious by hiding something in the seagrass! Paint a tiny key, a gold coin, or a small crab peeking out from behind the rocks.
Now you have a peaceful ocean scene captured right inside your sketchbook
Space Page: Planets, Rings, and a Starry Background
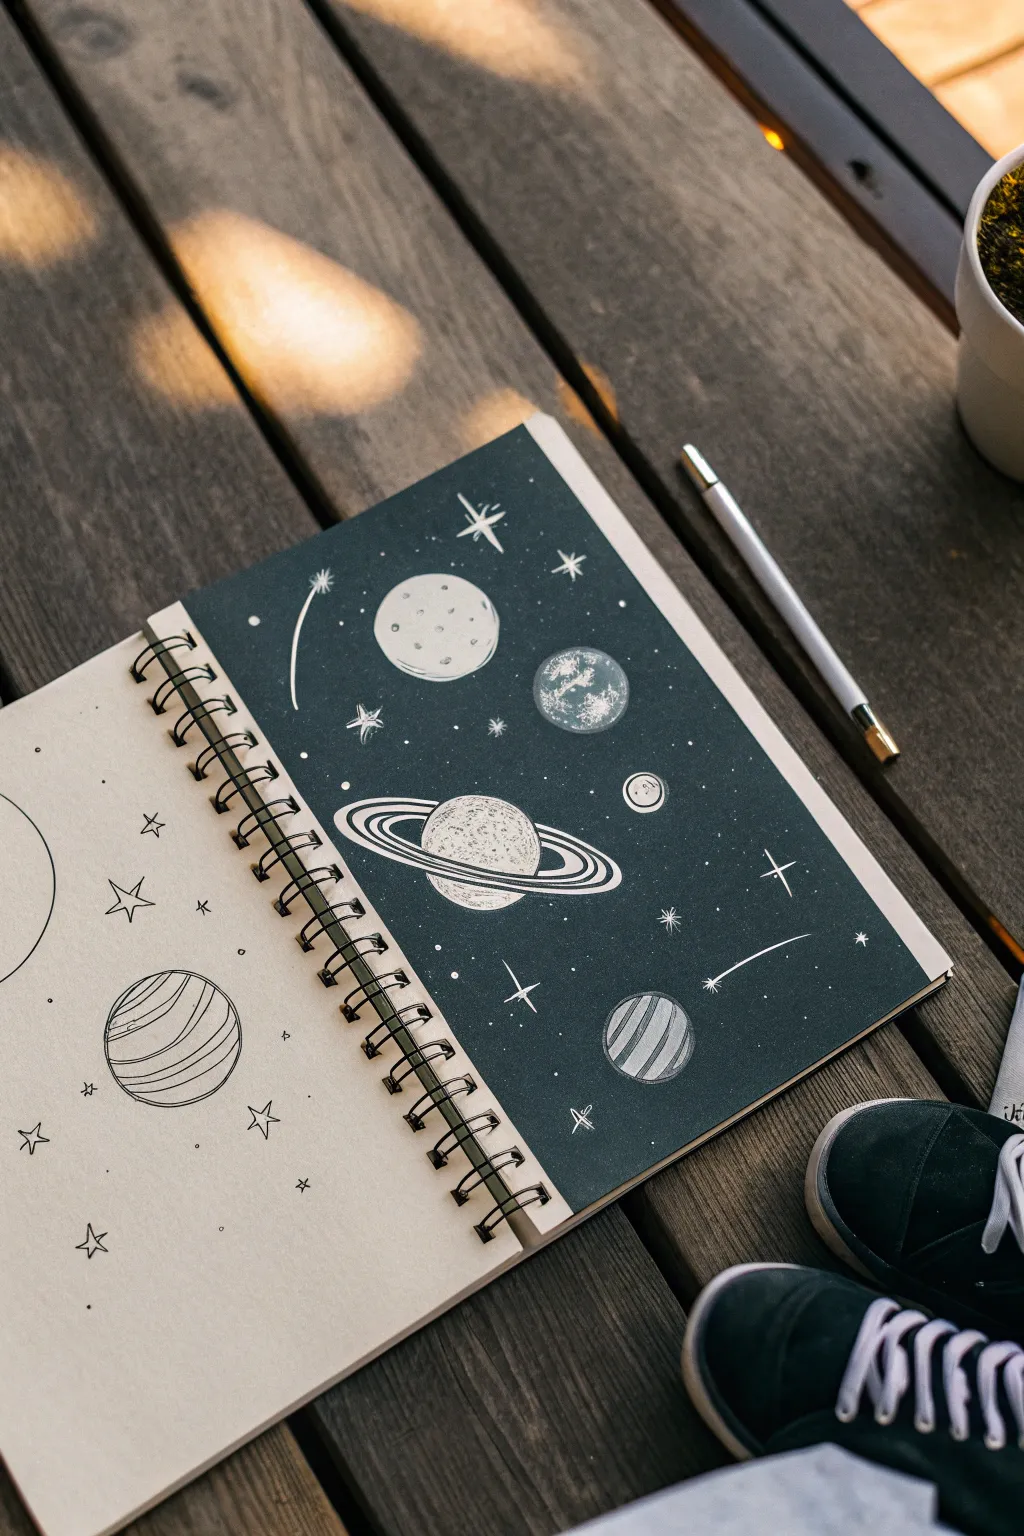
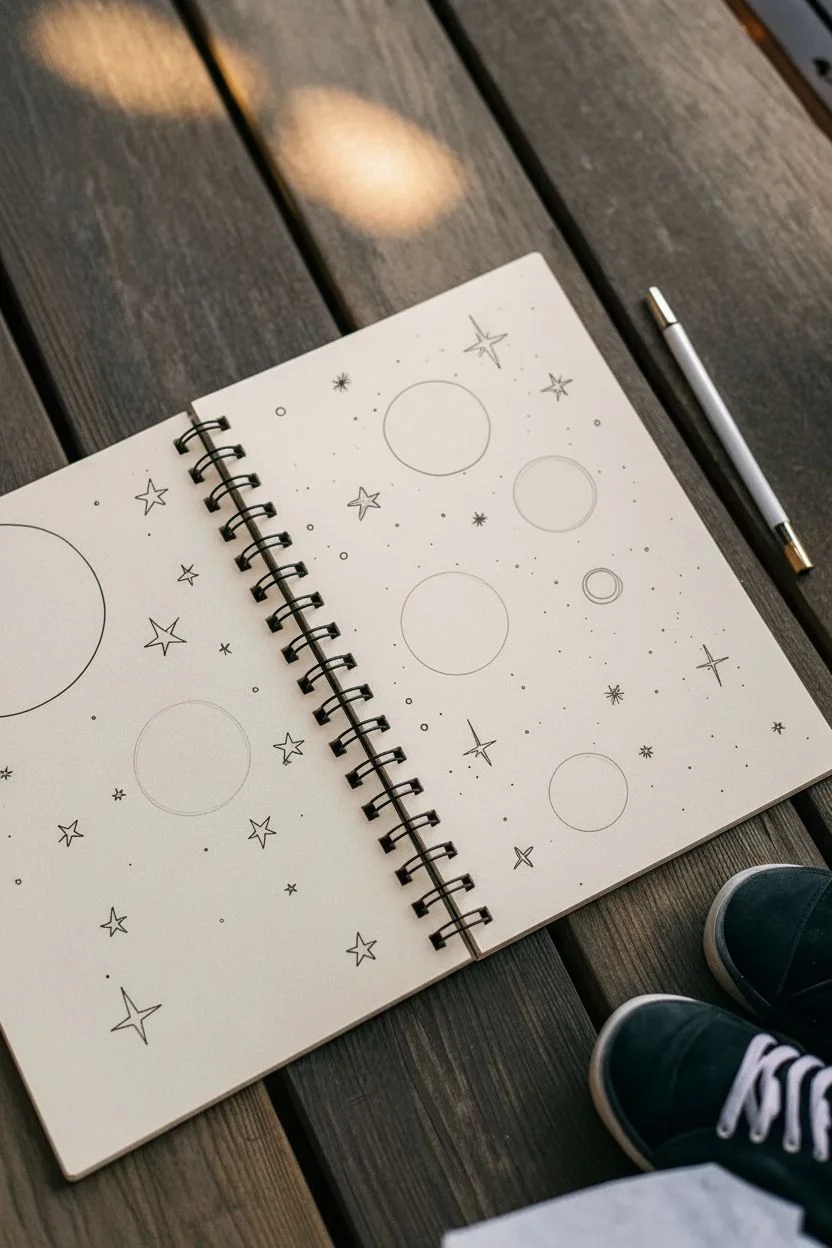
This striking sketchbook spread plays with contrast by placing minimal black line art on a light page next to glowing white celestial bodies on a deep, dark background. It’s a fantastic exercise in negative space and simple doodling that looks incredibly professional when finished.
Detailed Instructions
Materials
- Spiral-bound sketchbook with mixed paper (cream and black) or separate tan and black artist paper
- Fine-point black fineliner pen (0.3mm or 0.5mm)
- White gel pen (opaque ink like Gelly Roll or Posca paint pen)
- Pencil and eraser for sketching
- Circle stencils (optional, jar lids work too)
Step 1: The Light Side (Left Page)
-
Plan the composition:
Start on the light-colored or cream page. Lightly sketch a few large circles using a pencil. Place them randomly, allowing some to go off the edge of the page for a dynamic look. -
Inking the large planet:
Choose one of your larger pencil circles near the bottom left. Carefully trace the outline with your black fineliner. If your hand shakes, don’t worry—wobbly lines add organic character. -
Adding texture:
Inside this first planet, draw slightly curved horizontal lines to mimic gas bands like Jupiter. Vary the spacing slightly, leaving more room between lines in the center to suggest spherical volume. -
Drawing the partial planet:
On the far left edge, outline a large semi-circle that runs off the page. Leave the interior empty for a clean, minimalist aesthetic. -
Scattering stars:
Fill the empty space around the planets with hand-drawn stars. Draw simple five-pointed outlines ranging in size. -
Micro-details:
Add tiny four-pointed ‘sparkle’ stars (just a cross with tapered ends) and small dots between the larger elements to make the galaxy feel dense.
Step 2: The Dark Side (Right Page)
-
Prepare the night sky:
Move to the dark paper page. If your sketchbook doesn’t have black paper, you can paint a sheet with matte black acrylic or gouache and let it dry completely. -
Sketching the layout:
Using a white colored pencil or just pressing lightly with a regular pencil, map out where your main celestial bodies will go. This page is denser, so plan for 3-5 main focus points. -
The ringed planet:
With your opaque white gel pen, draw a central sphere. Draw a long, thin ellipse around it for the rings. Add detailing to the rings by doubling the lines. -
Highlighting the equator:
Color in the planet’s surface using stippling (tiny dots) or rough scratches, leaving the area near the rings slightly darker to create depth. -
The cratered moon:
Identify a spot for a moon. Draw a perfect circle and fill it with small ‘C’ shapes and dots to represent craters. Keep the outline slightly thicker than the interior details. -
Adding atmospheric planets:
Draw another circle for a textured planet. Fill this one with messy, scribbly patches of white ink to look like swirling clouds or landmasses compared to the stark moon. -
Striped gas giant:
Create a smaller planet with distinct diagonal stripes. Color in every other stripe completely white to create a bold, high-contrast pattern. -
Shooting stars:
Add motion by drawing one or two comets. Start with a small star shape and drag a long, curved tail behind it, tapering off into a thin line. -
Starlight filler:
Just like the left page, fill the void. Use single white dots, four-pointed crosses, and tiny open circles to create a rich starry field. -
Final touches:
Check the opacity of your white ink. I often go back over the main outlines a second time once the ink is dry to make the drawings really pop against the black background.
Ink Flow Tip
White gel pens can be finicky. Scribble on a scrap piece of paper or your thumbnail first to get the ink flowing smoothly before touching the black paper.
Add Some Color
For a magical twist, use metallic gold or silver pens for the stars, or add a subtle wash of watercolor over the white ink sketches after they dry.
Enjoy the satisfying contrast of your finished day and night space spread
Emotion Faces Sheet (Happy, Angry, Nervous, Proud)
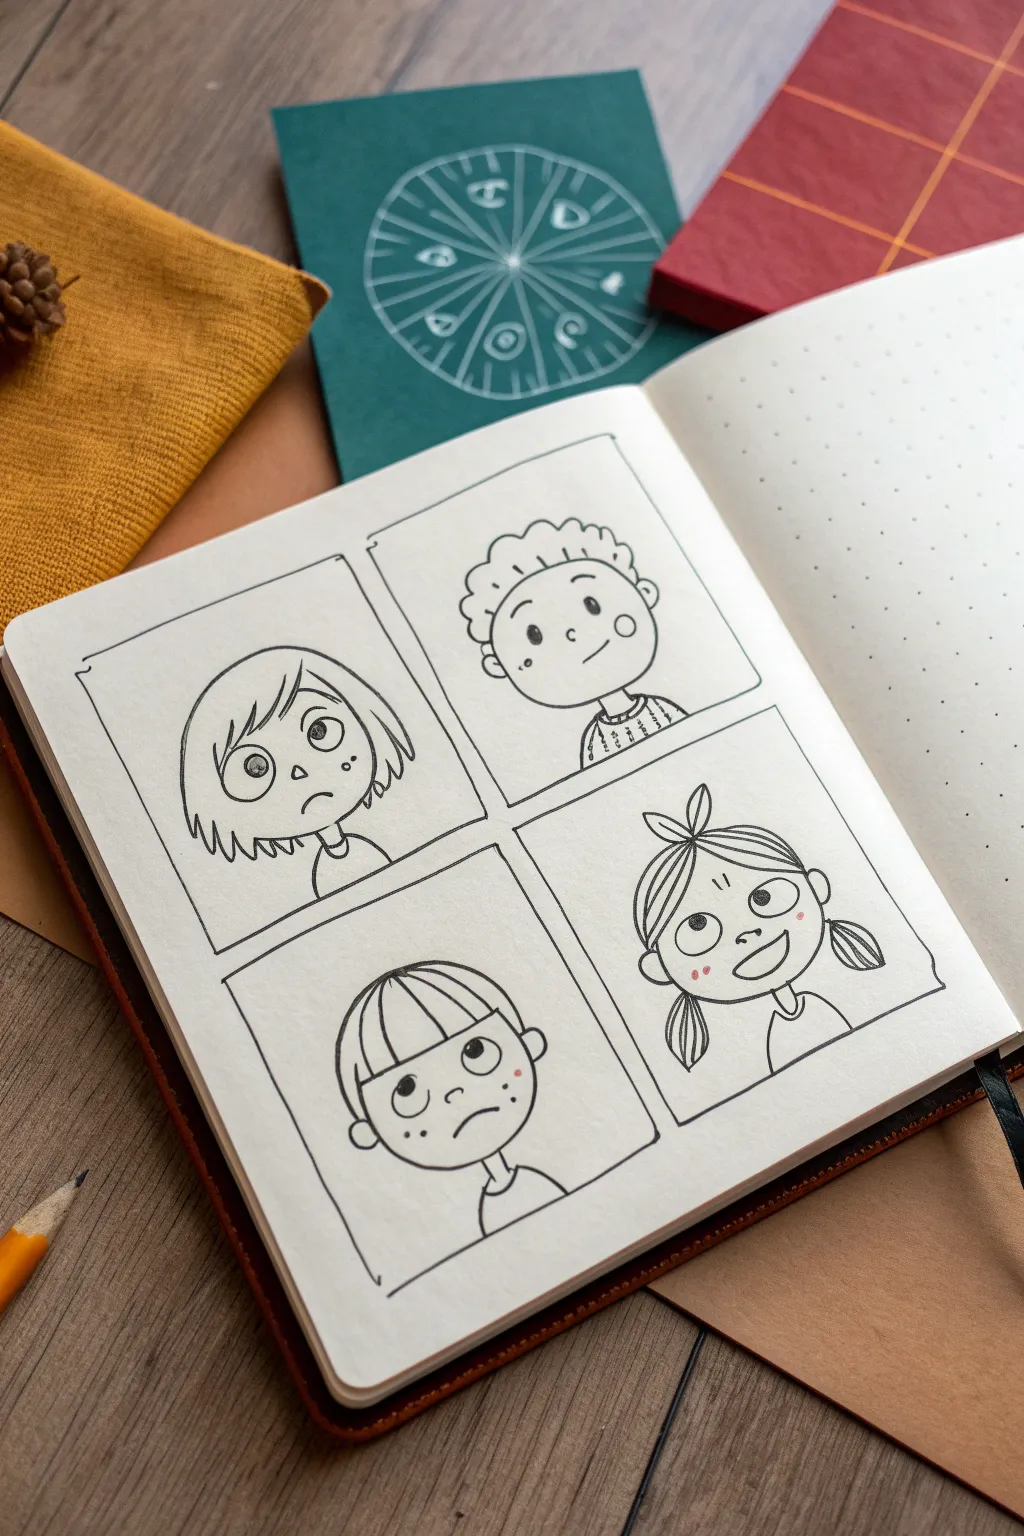

Practice capturing feelings with this fun four-panel character study. Using simple linework and expressive features, you’ll create a lively grid of personalities that range from nervous to joyful.
How-To Guide
Materials
- Dotted or blank sketchbook
- Fine liner pen (0.3mm or 0.5mm, black)
- Pencil (HB or 2B)
- Eraser
- Ruler
Step 1: Setting the Grid
-
Mark the corners:
Start by identifying a large rectangular area on your sketchbook page. Use the dots on your paper as a guide to ensure your spacing is even. -
Draw the frame:
Using a ruler and your fine liner, draw a large outer rectangle. Don’t worry about the lines being perfectly rigid; a little hand-drawn wobble adds charm. -
Divide the space:
Draw both a vertical and a horizontal line through the center of your large rectangle, creating four equal smaller boxes. -
Add detail lines:
Go over your panel borders once more if you want a sketchier look. Notice how the top left corner has a tiny decorative bracket detail—add that small flourish now.
Uneven Eyes?
If eyes rarely match, draw a faint horizontal line in pencil across the face first. Place both circles on this line to keep them level before inking.
Step 2: Top Left: The Nervous Girl
-
Outline the head:
Sketch a round shape for the head, keeping the chin slightly pointed. -
Create the hair:
Draw medium-length hair with jagged, nervous-looking ends. Let the bangs swoop across the forehead from right to left. -
Draw wide eyes:
Draw two large circles for eyes. Place tiny pupils right in the center to give a staredown look. -
Add nervous features:
Draw a small, downward-turned curve for the mouth and add three little freckles on one cheek. A small triangle nose completes her worried expression.
Color Pop
Use a single colored pencil (like bright pink or orange) to add blush to cheeks or color in the shirts. This limited palette look is very professional.
Step 3: Top Right: The Calm Boy
-
Head and ears:
I like to start this one with a wide U-shape for the jaw and two C-shapes on the sides for ears. -
Curly hair texture:
Draw a cloud-like, bumpy line across the top of the head for curly hair. Add a second bumpy line inside for the hairline. -
Friendly face:
Draw two small dots for eyes, set wide apart. Add a small ‘c’ for the nose and a simple upward curve smile. -
Finishing touches:
Draw two circles for rosy cheeks and sketch a textured sweater collar below his chin.
Step 4: Bottom Left: The Uncertain Boy
-
Bowl cut shape:
Draw a smooth, round curve for the top of the hair (like a helmet) and straight lines coming down for the bangs. -
Looking up:
Draw large oval eyes, but place the pupils at the very top, looking upward. -
Frown and freckles:
Add a distinct downward curve for a frown. Scatter a few dots on the cheeks for freckles. -
Shoulders:
Draw a simple neck and rounded shoulders, suggesting he is shrugging or slumping slightly.
Step 5: Bottom Right: The Joyful Girl
-
Wide face shape:
Draw a wide oval face. This character needs plenty of room for a big smile. -
Excited hairstyle:
Draw hair tied up in pigtails. Add a little bow on top resembling rabbit ears, and two ponytails sticking out the sides. -
The happy expression:
Draw wide, open eyes looking slightly up. Create a large, open D-shape mouth to show a big grin. -
Final details:
Add small cheek marks (blush) and brief eyebrows raised high to emphasize her excitement.
Now you have a dynamic set of character emotions ready to inspire your next comic strip
Three-Panel Seasons Tree (Same Tree, Different Weather)
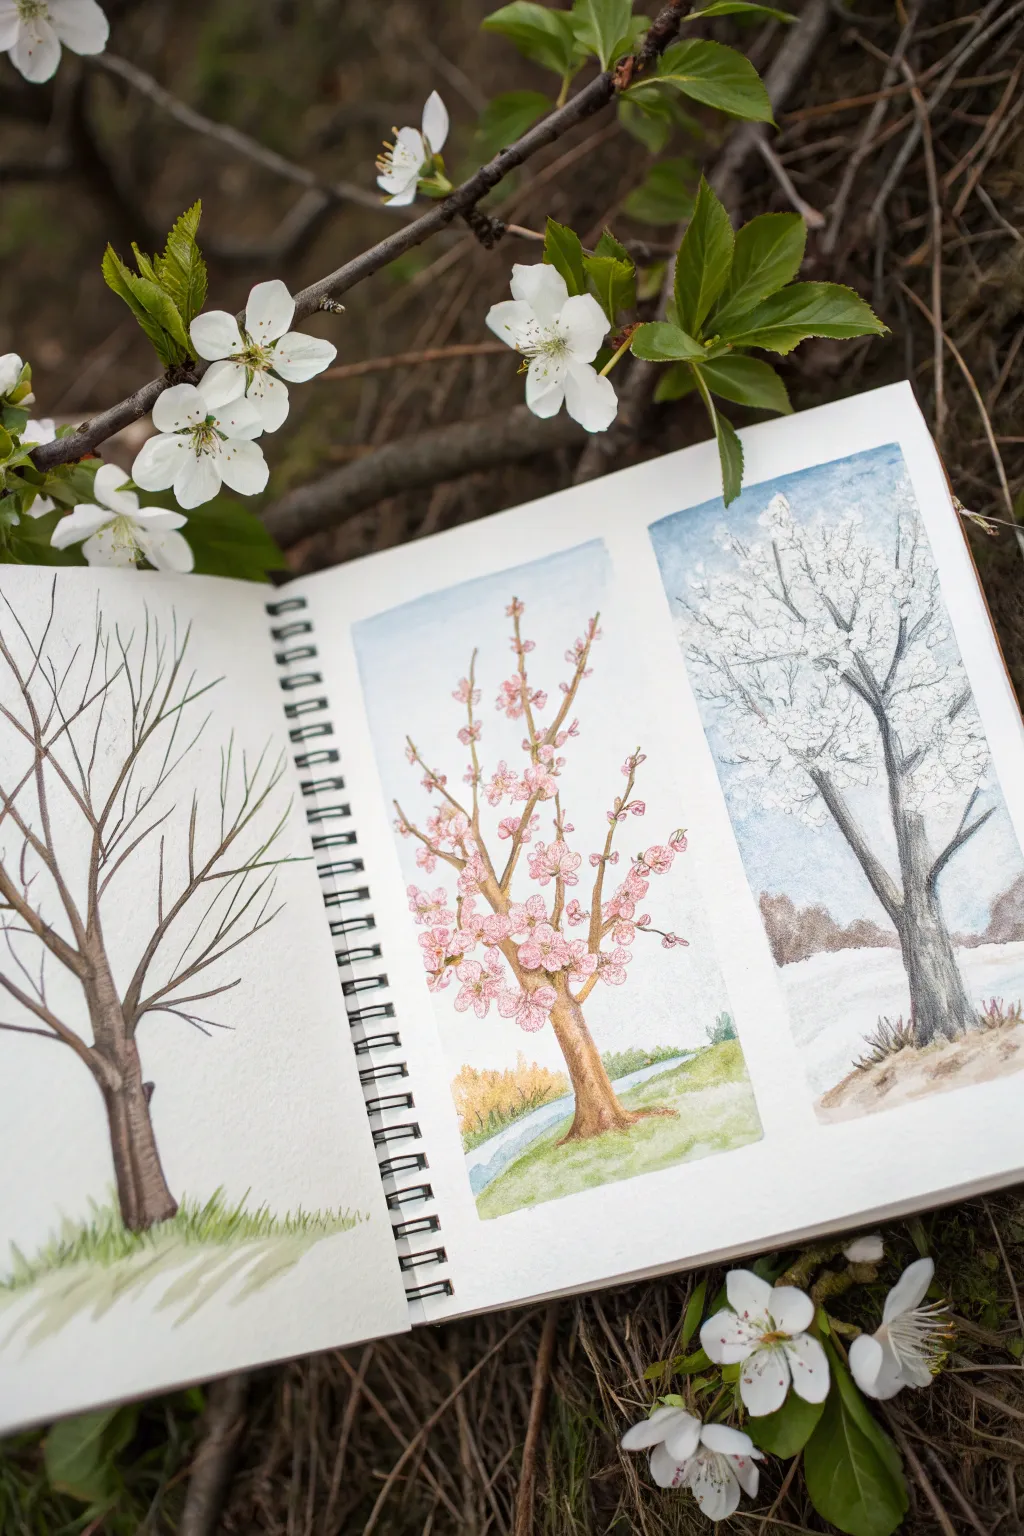
Capture the magic of nature’s cycle by illustrating a single tree across three distinct panels. This watercolor and ink project teaches observation skills while creating a beautiful triptych of bare branches, spring blossoms, and snowy silence.
Step-by-Step
Materials
- Watercolor paper sketchbook (ring bound works best)
- Pencil (HB) and eraser
- Fine liner pen (brown or black, waterproof)
- Watercolor paints (pan set is fine)
- Small round brushes (size 2 and 4)
- White gel pen or gouache (for snow details)
- Masking tape (optional, for clean edges)
- Water cup and paper towel
Step 1: Setting the Scene
-
Paper preparation:
Begin with an open sketchbook. You will need the full left page and the right page. If you want crisp edges around your paintings like in the example, use masking tape to create rectangular borders for the middle and right panels. -
Sketch the left tree:
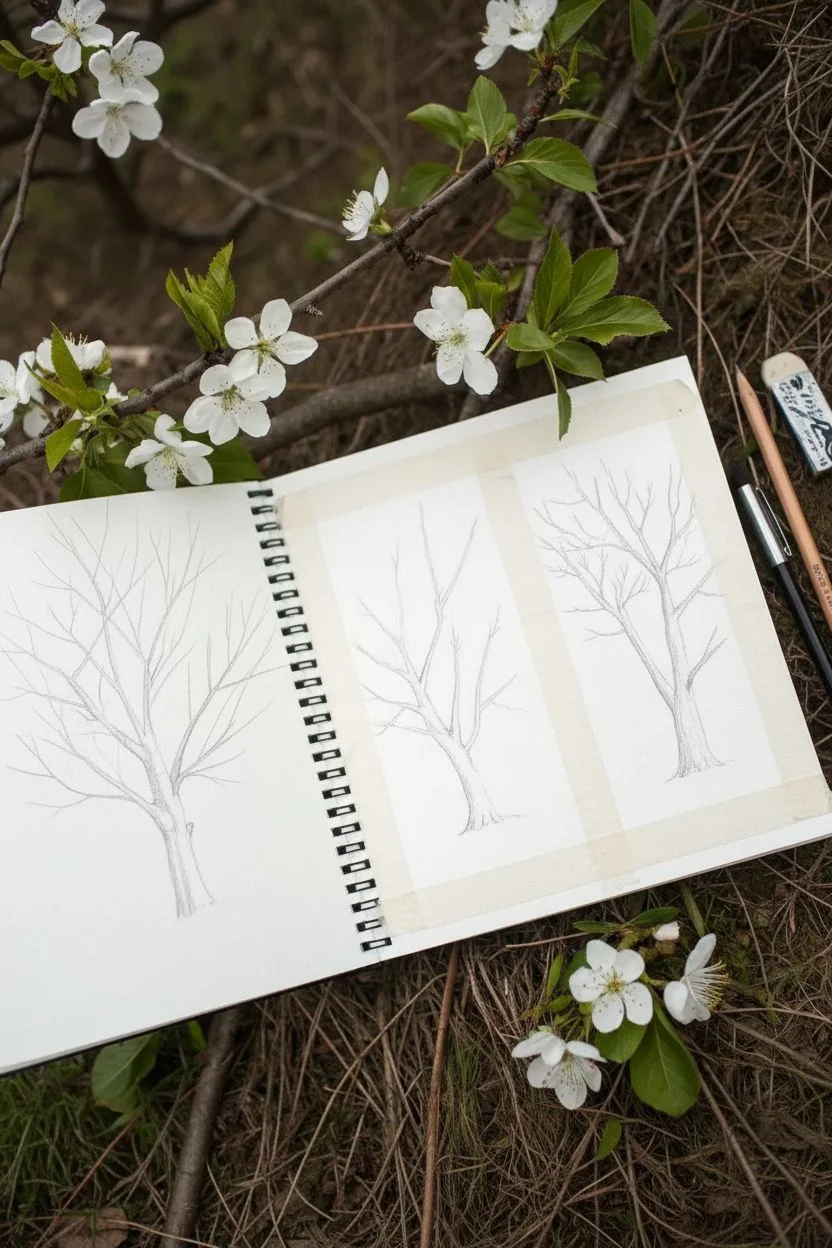
On the left page, lightly sketch a large, bare tree. Focus on the Y-shapes of the branches. Make the trunk sturdy at the bottom and let the branches thin out as they reach upward. -
Sketch the middle tree:
In the first rectangular panel on the right page, draw a similar tree shape, but slightly smaller to fit the frame. This one will be your spring tree. -
Sketch the right tree:
In the final panel on the far right, sketch the same tree structure again. Don’t worry if they aren’t identical clones; nature is organic.
Tape Removal Tip
Peel your masking tape slowly and at a 45-degree angle away from the painting. If the paper starts to tear, use a hairdryer to warm the tape gently, which softens the adhesive.
Step 2: The Winter & Spring Panels
-
Inking the bare tree:
Going back to the left page, go over your pencil lines with a brown fine liner or a very fine brush with brown paint. Add texture to the trunk by using short, vertical strokes. -
Painting the bare tree:
Use a diluted brown watercolor to fill in the trunk and branches. Add a slightly darker brown to the right side of the trunk to show shadow. -
Grass foundation:
Mix a fresh green and paint a simple grassy patch at the base of the left tree using upward flicking motions to mimic blades of grass. -
Spring sky wash:
Move to the middle panel. Wet the sky area with clean water first, then drop in a very pale blue. Let it fade to white as it gets closer to the horizon. -
Spring tree trunk:
Paint the trunk of the middle tree using a warm, golden-brown hue. I find that adding a tiny touch of orange makes it look sun-drenched. -
Blossom base:
Dab small spots of pale pink paint all over the branches of the middle tree. Keep the paint watery so it looks soft. -
Blossom details:
Once the pale pink is dry, use a slightly darker pink to add tiny dots or ‘C’ shapes within the light pink blobs to create depth in the flowers. -
Spring landscape:
Paint a green hill behind the tree, perhaps adding a stripe of light blue for a distant river. Add touches of yellow ochre for a field in the background.
Add a Summer Panel
Extend the project by adding a fourth panel for summer! Use lush dark greens for full leaves and mix a bright, sunny yellow-green for the grassy hill underneath.
Step 3: The Snowy Panel
-
Winter sky:
For the rightmost panel, paint a cool blue sky. You can make this blue slightly deeper or grayer than the spring sky to suggest cold weather. -
Winter trunk:
Paint the trunk of the third tree with a grayish-brown, possibly charcoal color. It should look darker and stark against the white snow. -
Snowy ground:
Leave the ground mostly white paper. Add very faint shadows with diluted blue-grey paint to show uneven snow drifts. -
Adding snow to branches:
Use white gouache or a white gel pen to draw snow piling up on the top edges of the branches. This ‘accumulates’ on the upper side of the limbs. -
Snow texture:
Dab opaque white paint clustered around the smaller twigs to simulate heavy clumps of snow clinging to the tree. -
Final touches:
Add a few brown tufts of dead grass poking through the snow at the base involving tiny, quick flicks of your brush. -
Reveal:
Once everything is completely dry, carefully peel away the masking tape to reveal your crisp, framed seasonal portraits.
You now have a lovely visual story of how a single tree transforms throughout the year
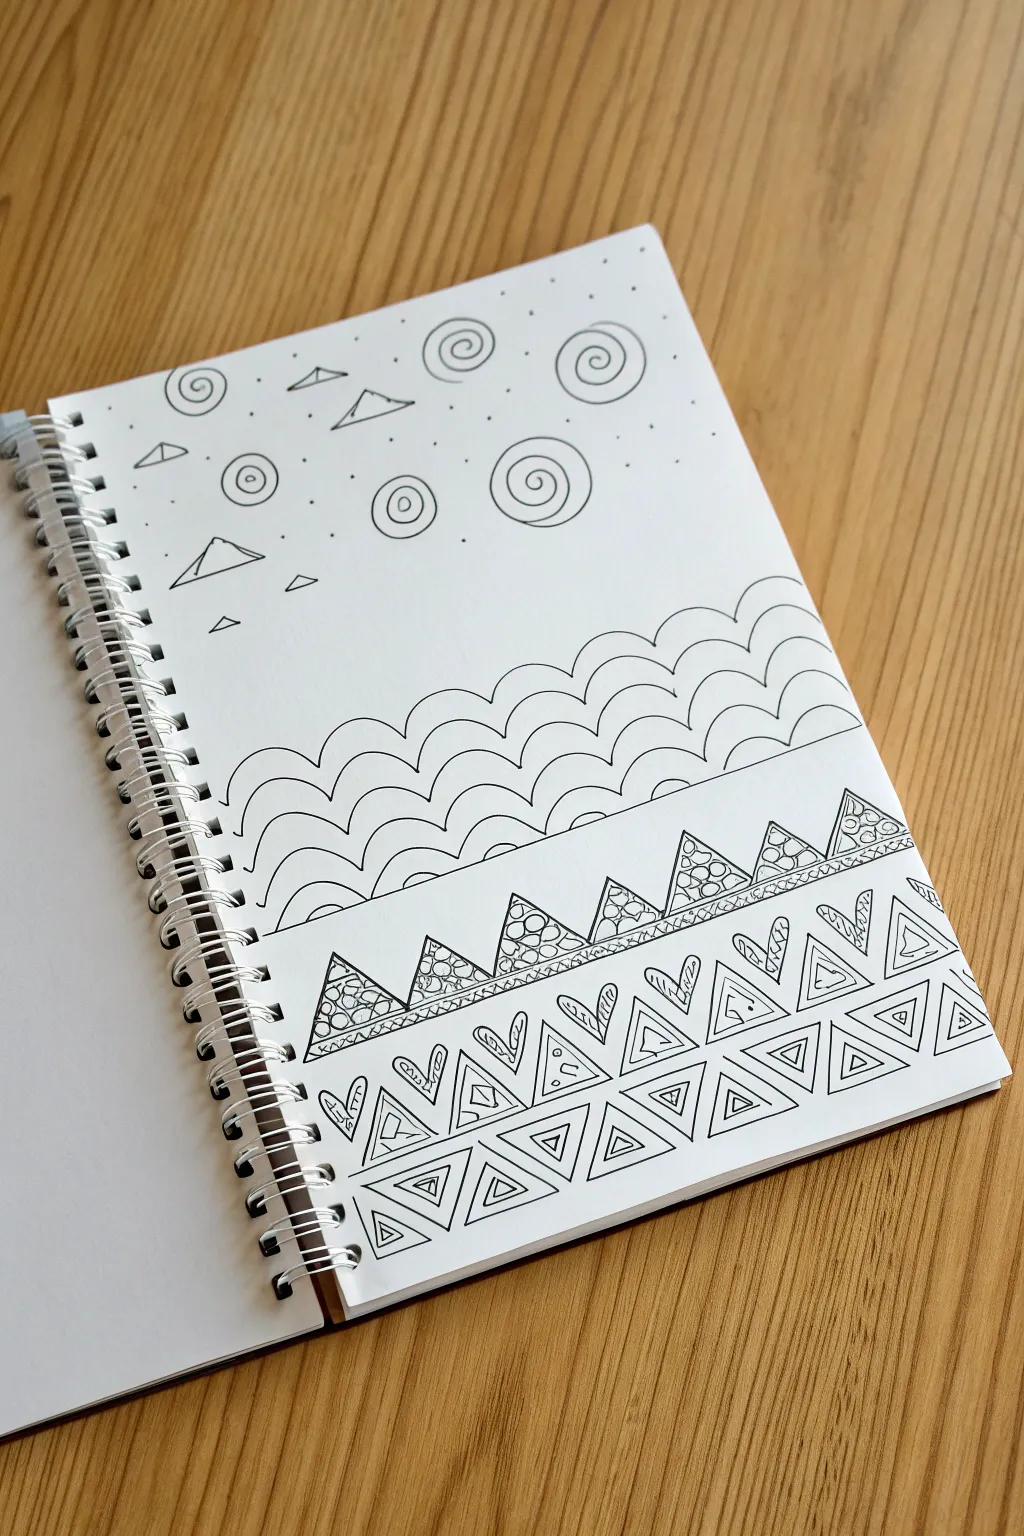
Doodle-Pattern Landscape (Sky, Mountains, and Zentangle Marks)
Create a calming, structured landscape using nothing but simple lines and repeating patterns. This project breaks a scene down into layers of clouds, mountains, and geometric shapes for a satisfying zentangle-inspired result.
Detailed Instructions
Materials
- Spiral-bound sketchbook or white drawing paper
- Fine-point black pen (0.5mm is ideal)
- Ruler (optional but helpful for straight lines)
- Pencil and eraser (for initial layout)
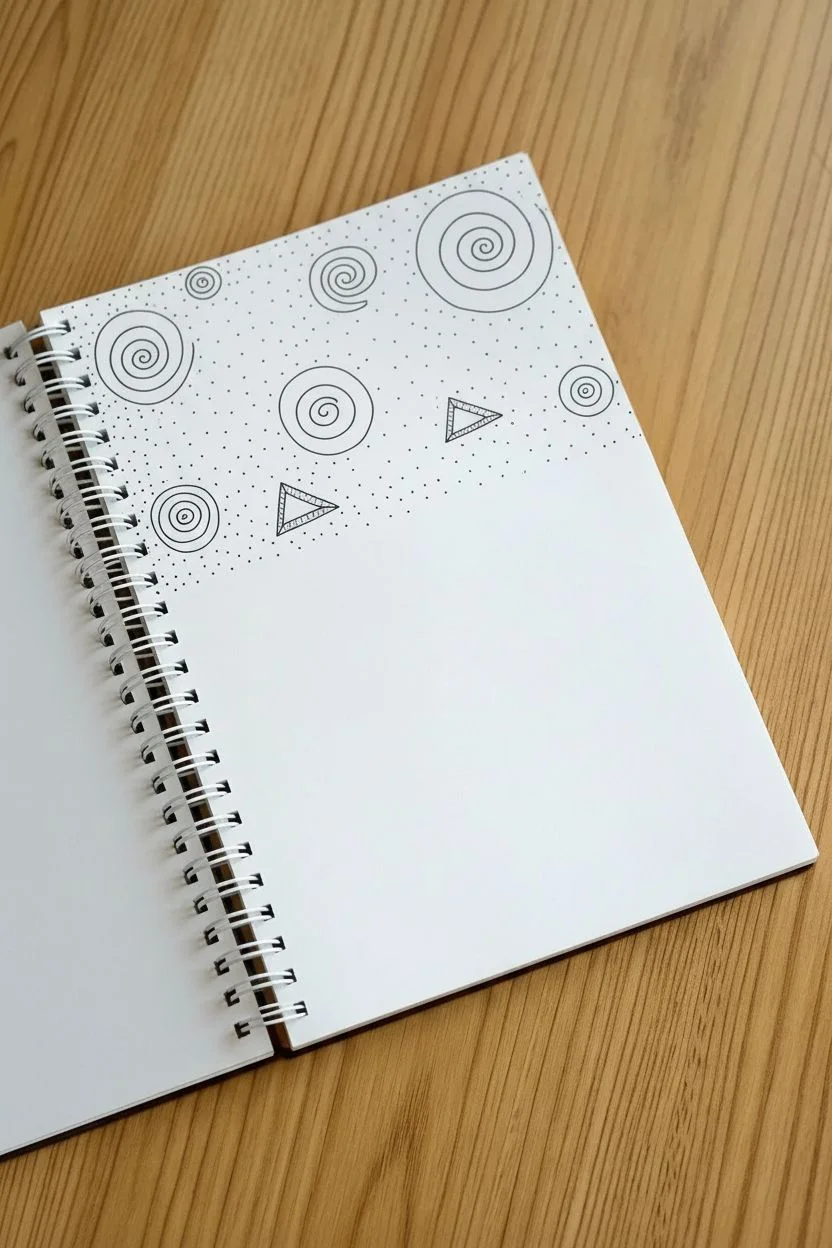
Step 1: Setting the Scene: The Sky
-
Draw the spirals:
Start near the top right of your page. Draw a few medium-sized spirals to represent stylized clouds or wind. Vary their sizes slightly, keeping them open and flowing. -
Add floating circles:
Scatter a few circle motifs around the upper left and middle area. Draw a small circle, then outline it with a larger circle to create a target-like shape. -
Sketch the floating triangles:
In the open spaces of the sky, draw small, flattened triangles. Give them an extra line inside to make them look like distant, 3D kite shapes or paper airplanes. -
Fill the empty space:
To finish the sky texture, gently tap your pen to create stippling dots. concentrate them loosely around the spirals and triangles, leaving plenty of white space for an airy feel.
Wobbly Lines?
Don’t stress if your lines aren’t perfectly straight. In Zentangle-style art, imperfections add hand-drawn character. Just keep your spacing consistent.
Step 2: Layer 1: The Rolling Cloud Bank
-
Draw the first wave line:
About halfway down the page, draw a horizontal line made of connected bumps or scallops. These should look like the top of a fluffy cloud bank. -
Echo the wave:
Draw a second scalloped line directly beneath the first one. Try to offset the bumps so the peak of one bump sits below the valley of the one above it. -
Continue the pattern:
Repeat this scalloped line process for two or three more rows. I find it relaxing to maintain a steady rhythm here, creating a textured band that separates the sky from the geometric layers below. -
Close the section:
Draw a straight horizontal line right underneath your last row of scallops to create a clean border for the next section.
Level Up: Pop of Color
Once the black ink is totally dry, use colored pencils to shade just one element, like the tiny circles in the mountain caps, for a cool accent.
Step 3: Layer 2: The Patterned Mountains
-
Outline the peaks:
In the new section below the straight line, draw a row of connected triangles representing mountain peaks. Make them wide and fairly large. -
Create the snow caps:
Draw a smaller triangle near the top tip of each mountain. This separates the ‘snow cap’ from the base of the mountain. -
Fill the caps with bubbles:
Inside those small tip triangles, draw tiny, tightly packed circles. This ‘pebble’ texture contrasts nicely with the straight lines elsewhere. -
Texture the mountain bases:
For the bottom part of the mountains, draw another internal triangle and fill the space with random scumbles, scribbles, or tiny shapes to make them look rocky. -
Double the borderline:
Draw a second straight horizontal line beneath the mountains, leaving a narrow gap, and fill that gap with small diagonal hatching marks or zig-zags.
Step 4: Layer 3: Geometric Base
-
Draw the heart row:
Beneath your hatched border, draw a row of simple, floating hearts. Space them out evenly across the width of the page. -
Add triangle dividers:
Between each heart, draw a tall, thin triangle pointing upward. Add an inner triangle inside each one for detail. -
Create the bottom row:
For the final layer at the bottom of the page, draw a row of large, upside-down triangles. These should mirror the mountain shapes above. -
Add interior triangles:
Inside each large upside-down triangle, draw a series of smaller triangles, getting smaller and smaller until you reach the center. -
Final touches:
Look over your whole drawing. If any lines look too thin or faint, go over them again to make the black ink pop against the white paper.
Now you have a structured, peaceful landscape that looks complicated but was built one simple line at a time
Shading Challenge: A Single Apple With Realistic Shadow
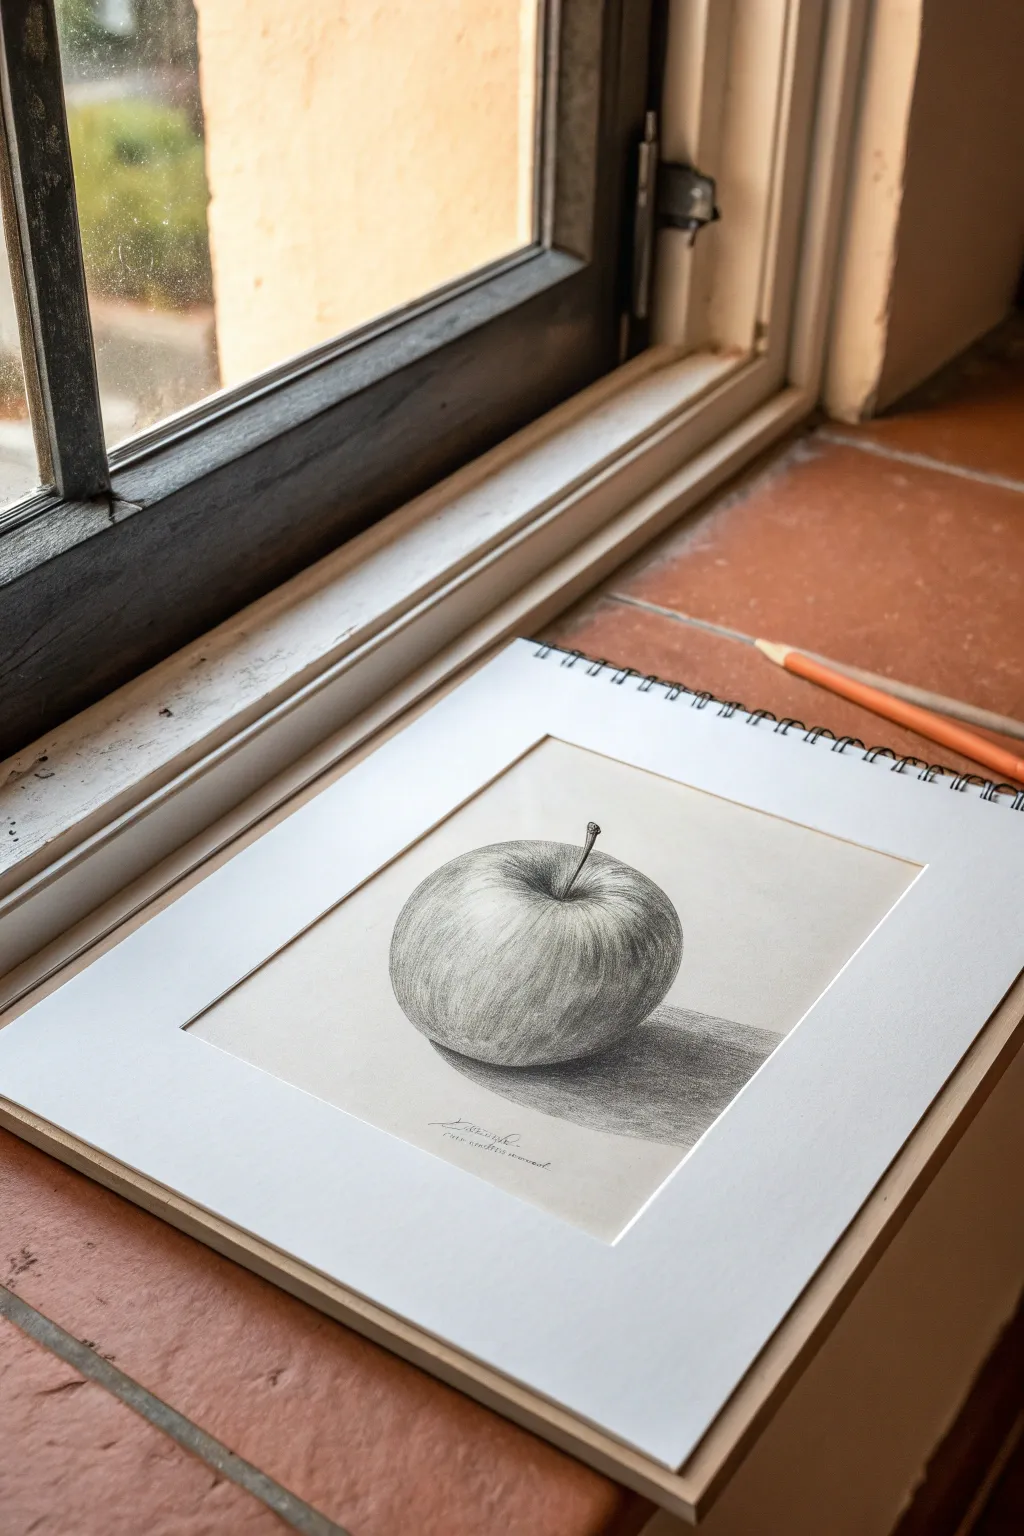
Master the art of realistic shading with this classic still life subject that transforms a simple circle into a 3D object. You’ll learn how to build up layers of graphite to create volume, texture, and a convincing cast shadow that anchors your apple to the page.
Step-by-Step Guide
Materials
- Sketchbook or drawing paper (medium tooth)
- Set of graphite pencils (HB, 2B, 4B, 6B)
- Kneaded eraser
- Blending stump or tortillon (optional)
- Pencil sharpener
- White mat board frame (optional, for display)
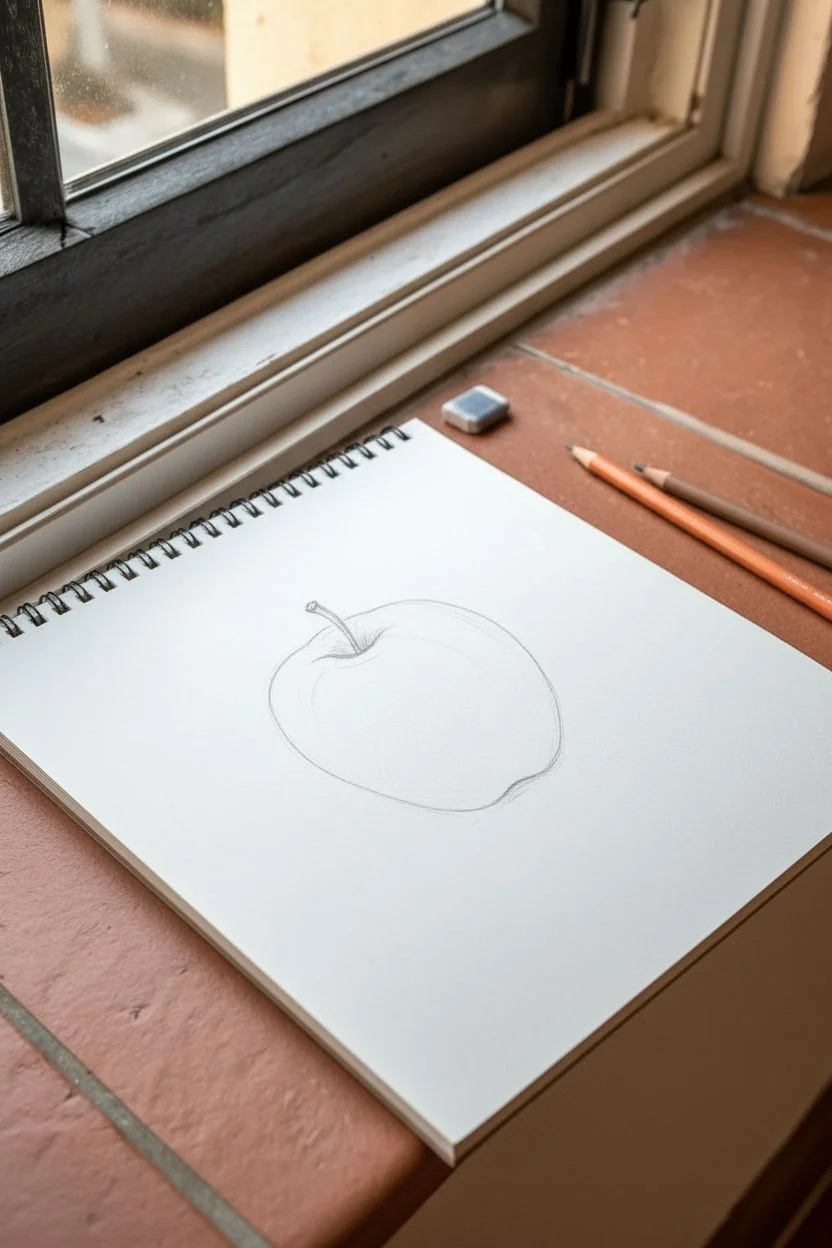
Step 1: Sketching the Form
-
Observe the shape:
Begin by looking closely at your reference or a real apple. Notice it isn’t a perfect circle; it’s likely slightly wider at the top and tapers gently toward the bottom. -
Lay down the outline:
Using your HB pencil with very light pressure, sketch the basic round shape of the apple. Keep your wrist loose and use multiple light strokes rather than one heavy line. -
Define the dip:
At the top of your circle, draw a small, specialized curve to indicate the depression where the stem sits. This dip is crucial for making the fruit look three-dimensional. -
Add the stem:
Draw the stem emerging from that dip. Make it slightly curved and thicker at the base, tapering as it goes up. -
Clean up lines:
Use your kneaded eraser to gently lift away any messy sketch lines, leaving only a faint, clean outline to guide your shading.
Step 2: Shading for Volume
-
Determine the light source:
Decide where the light is coming from (in the example, it’s coming from the top left). This means the highlight will be on the upper left shoulder of the apple. -
Start the mid-tones:
Switch to a 2B pencil. Begin shading the side opposite the light source (the shadow side) using curved hatching lines that follow the contour of the apple’s skin. -
Build darker values:
Layer more graphite on the shadowed side, gradually getting darker as you move away from the light. I like to cross-hatch lightly here to build density without scratching the paper. -
Deepen the stem area:
Use a 4B pencil to darken the dip around the stem. This area is usually quite dark because it’s steep and hidden from direct light. -
Create the core shadow:
Enhance the darkest part of the apple itself, which isn’t right at the edge but slightly inside the outline. This is the ‘core shadow’ and gives the object its roundness. -
Reflected light:
Leave a very thin, lighter strip right at the bottom edge of the shadowed side. This represents light bouncing off the table back onto the apple. -
Highlight management:
Keep the area on the top left almost white. If you accidentally shaded it, gently dab it with your kneaded eraser to reclaim the brightness.
Smudge Patrol
Is your hand smudging your work? Place a scrap piece of clean paper under your drawing hand. This protects the graphite you’ve already laid down while you work on other areas.
Step 3: Anchoring the Shadow
-
Map the cast shadow:
Lightly sketch the shape of the shadow falling on the table. It should stretch out opposite the light source (to the right). -
Fill the shadow base:
Using a 4B or 6B pencil, fill in the cast shadow. Press firmly to get a rich, dark tone, especially right underneath where the apple touches the surface. -
Soften the edges:
As the shadow stretches away from the apple, let it fade slightly and become a bit fuzzier at the edges, rather than having a razor-sharp outline. -
Final blending (optional):
If you want a smoother look like the example, use a blending stump to gently smudge your pencil marks, following the round curve of the apple. -
Add signature:
Sign your name lightly near the bottom of the drawing in pencil. -
mount your work:
Place a pre-cut white mat board over your drawing to frame it professionally, centering the apple in the window.
Level Up: Texture
Apples aren’t perfectly smooth. Add tiny imperfections using a sharp eraser edge to lift small speckles, or add very fine lines with a sharp H pencil for skin texture.
With your shading complete and framed, your apple looks ready to pick right off the page
Three-Panel Mini Comic Strip With a Twist Ending
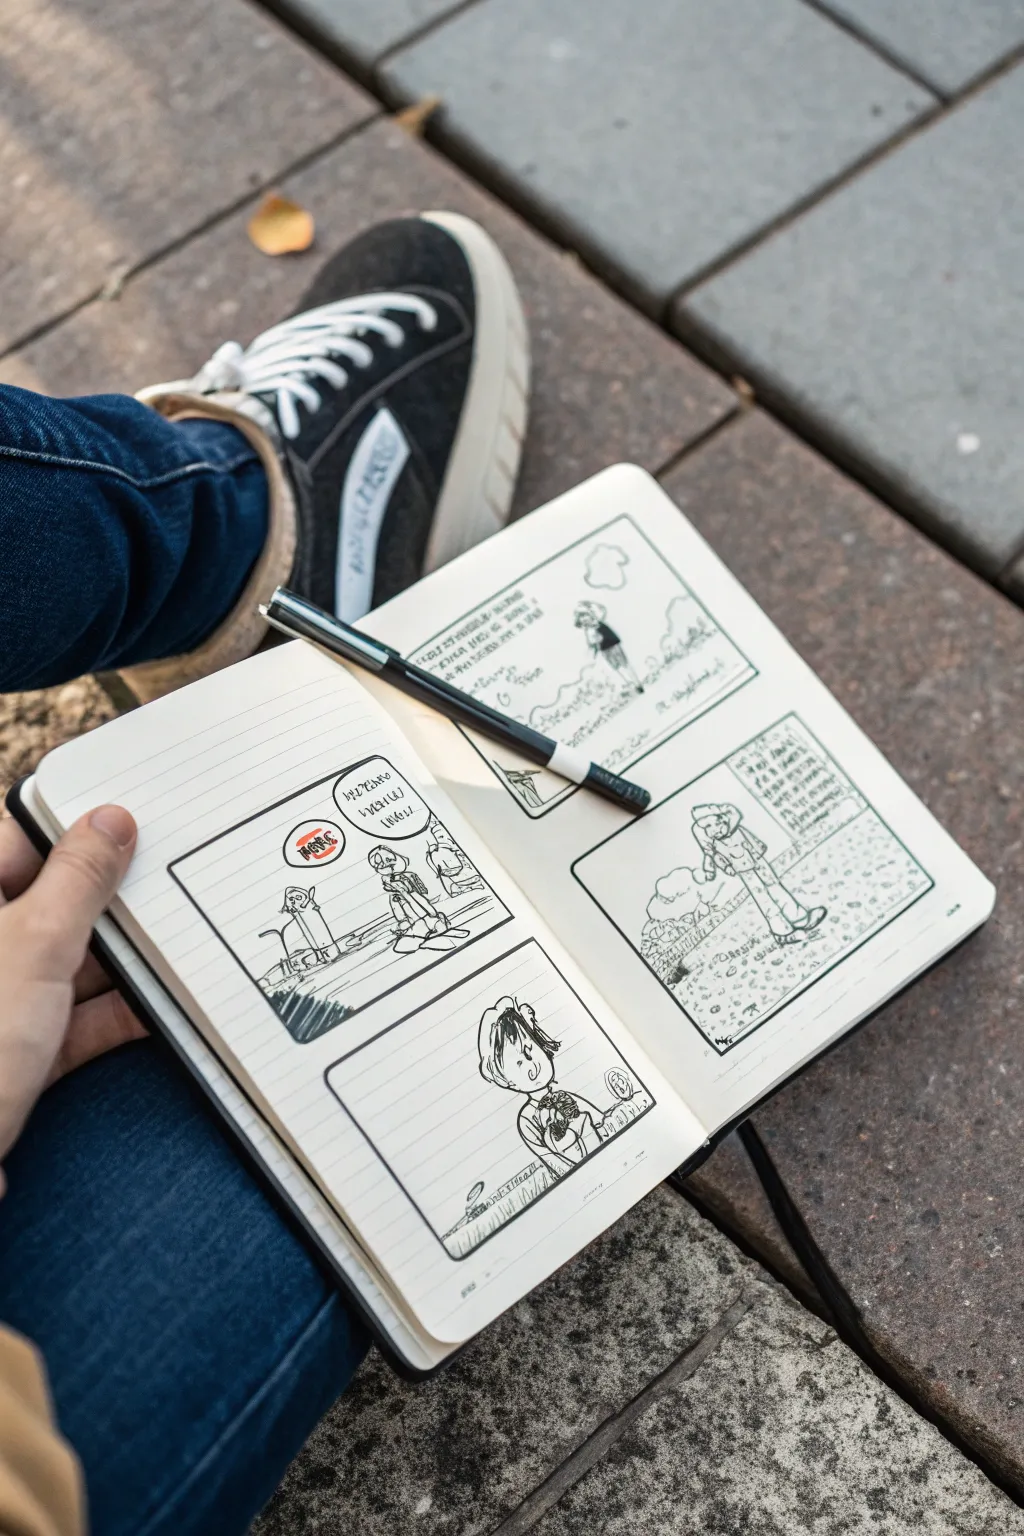
Capture the charm of storytelling with this loose, expressive mini-comic drawn directly onto lined notebook paper. It features simple ink lines and a distinct framed layout that makes creating a narrative fun and approachable for young artists.
How-To Guide
Materials
- Lined A5 notebook or sketchbook
- Fine-point black fineliner pen (0.3mm or 0.5mm)
- Ruler (optional, freehand is fine)
- Pencil and eraser for initial sketching
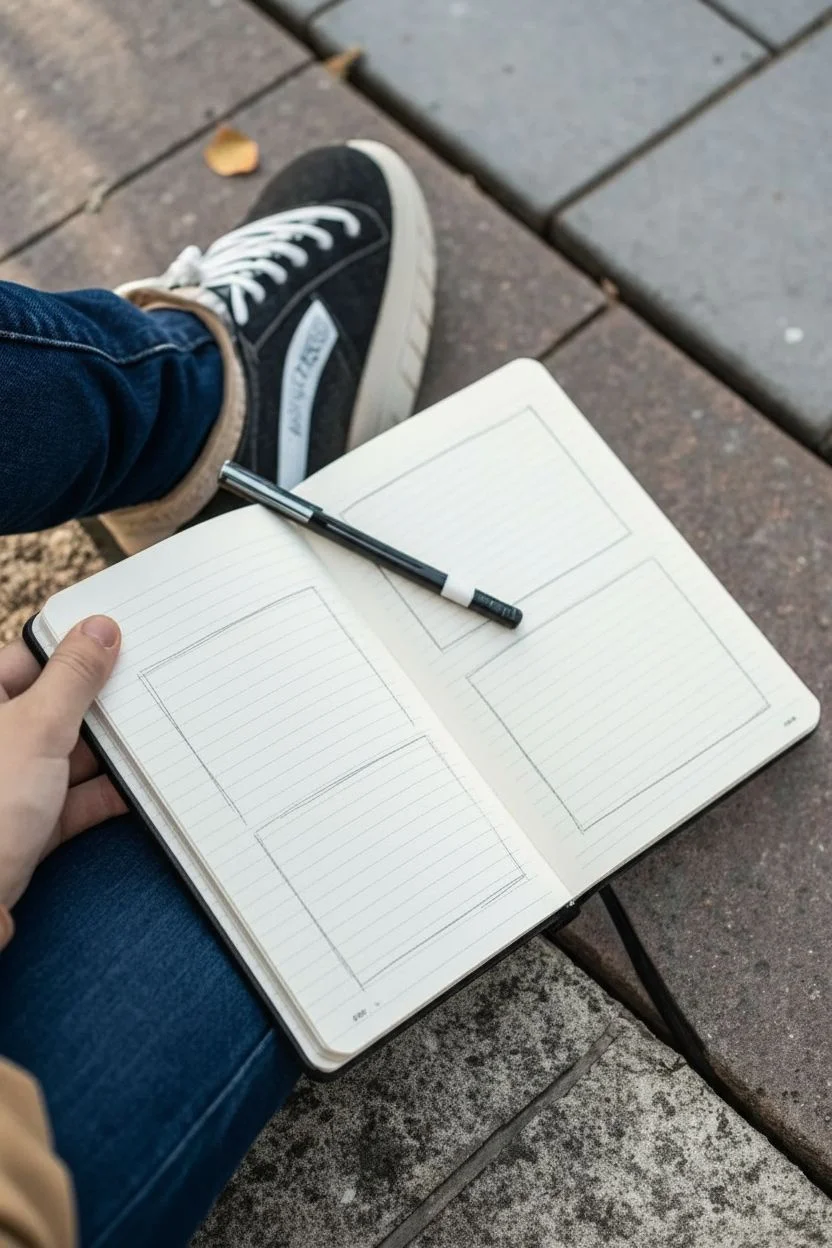
Step 1: Planning the Layout
-
Open the spread:
Open your notebook to a fresh two-page spread. This comic utilizes both the left and right pages to tell a longer story, so press the binding flat to make drawing easier. -
Define panel one:
On the left page, draw a rectangular frame near the top half. You can use a ruler for crisp edges, but a slightly wobbly hand-drawn line adds character to this style. -
Add panel two:
Directly below the first frame on the left page, draw a second rectangular frame of similar size. Leave a bit of breathing room between them. -
Create the right page layout:
Move to the right-hand page. Draw a wide, larger panel at the top that spans most of the width. Below that, draw a final square panel in the bottom right corner to conclude your sequence.
Smudged Ink?
If you accidentally smudge wet ink, transform the smudge into a shadow, a cloud, or a texture on the ground. Mistakes are just unexpected details in disguise.
Step 2: Sketching the Narrative
-
Rough out the figures:
Using a light pencil touch, sketch stick figures or simple shapes to position your characters within the frames. Keep the heads large and round for a cute, expressive look. -
Draft the dialogue bubbles:
Lightly sketch ovals or clouds where the characters are speaking. Place these high in the panels so they don’t cover the artwork. -
Detail the first scene:
In the top left panel, flesh out your character. Draw a simple figure holding a stick or object, adding a horizon line behind them to ground the scene. -
Develop the interaction:
In the bottom left panel, draw a close-up of the character. Focus on facial expressions—large eyes and a simple mouth convey emotion well. -
Set the scene:
For the large top panel on the right page, draw a background interaction. Sketch a second character or element approaching from a distance to build the story. -
The twist ending:
In the final bottom-right panel on the right page, sketch the conclusion. Keep the background simple to focus on the character’s final reaction.
Add Pop Color
Use a single colored marker (like red or blue) to highlight just one element, like a sound effect or a shirt, to make the black and white drawing pop.
Step 3: Inking and Finalizing
-
Ink the frames:
Take your black fineliner and trace over the panel borders. Go over the lines creating the speech bubbles now as well, ensuring the text will fit inside. -
Lettering the dialogue:
Write your dialogue inside the bubbles using the pen. If you want a specific word to stand out, like the ‘HEY!’ in the first panel, thicken the letters or put a small circle around it for emphasis. -
Outline the characters:
Trace your pencil sketches with the fineliner. Use quick, confident strokes rather than slow, shaky ones to keep the drawing looking energetic. -
Add texture:
Use small scribbles or hatching lines to create shadow on the ground or texture on clothing. For example, add little dashes for grass or scribbles for hair. -
Erase and clean:
Wait a moment for the ink to truly dry so it doesn’t smudge. Then, gently erase all your underlying pencil marks to reveal the crisp black ink comic.
Now you have a charming, hand-drawn comic strip ready to share with friends or keep as a memory.


Have a question or want to share your own experience? I'd love to hear from you in the comments below!