If you’ve been staring at a blank canvas and thinking, “Okay… but what should I actually paint?”, I’ve got you. These acrylic canvas painting ideas are meant to feel doable and still give you that wow moment when you step back and look at what you made.
Sunset Gradient With Silhouette Trees
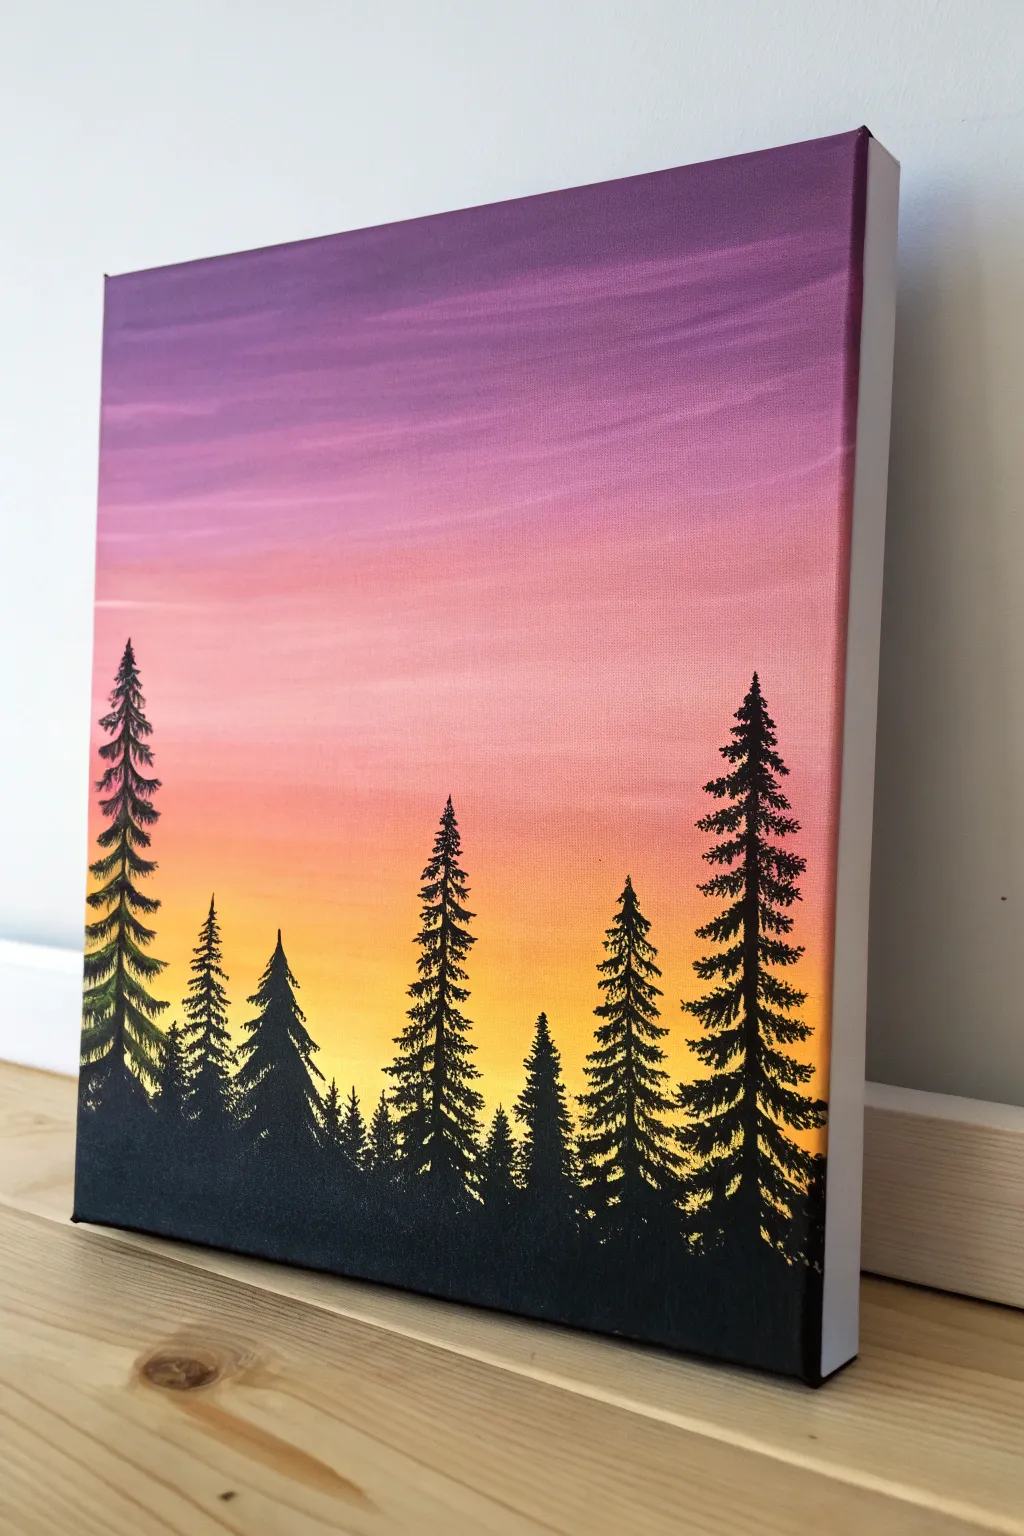
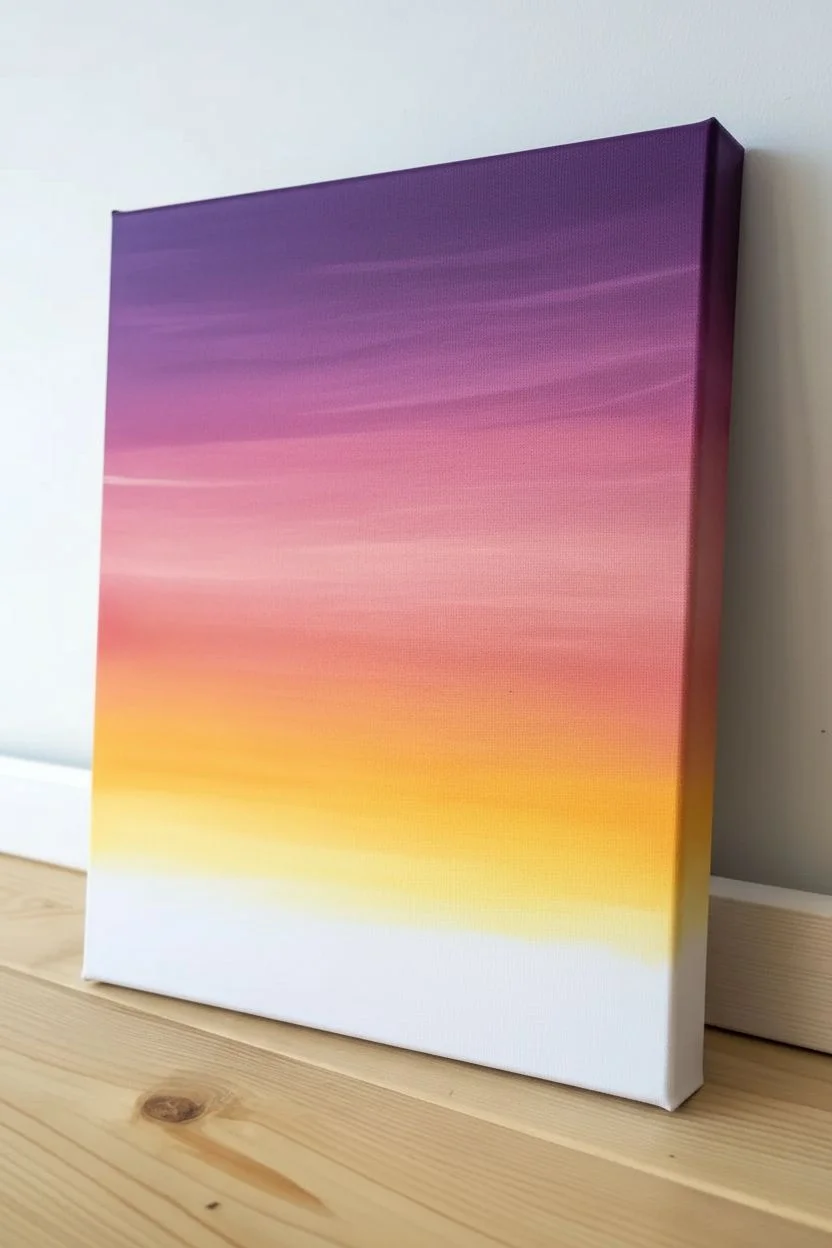
Capture the serene beauty of dusk with this vibrant gradient landscape. You’ll master smooth blending techniques to create a stunning transition from royal purple to glowing yellow, framing a striking black forest silhouette.
Step-by-Step Guide
Materials
- Stretched canvas (rectangular, e.g., 11×14 or 16×20 inches)
- Acrylic paints: Violet, Magenta/Deep Pink, Orange, Yellow, Titanium White, Carbon Black
- Large flat wash brush (1-2 inch)
- Medium flat brush
- Small round detail brush or liner brush (size 0 or 1)
- Cup of water
- Paper towels or rag
- Palette or paper plate
- Easel or flat work surface
Step 1: Painting the Gradient Sky
-
Prepare the canvas:
Start by ensuring your canvas is clean. If you want an ultra-smooth sky, apply a thin coat of white Gesso first and let it dry completely, then sand it lightly. This helps the paint glide. -
Arrange your palette:
Squeeze out your sky colors in order: Violet, Pink, Orange, and Yellow. Keep White nearby to soften transitions and Black separate for later. -
The purple layer:
Using your large flat brush, pick up the Violet paint. Start at the very top edge of the canvas and paint horizontal strokes across the full width, covering about the top 20% of the surface. -
Transitioning to pink:
Without cleaning the brush perfectly, pick up the Pink paint. Apply it below the purple band. While the paint is still wet, brush back and forth over the line where they meet to blur them together. -
Creating the coral zone:
Wipe your brush on a paper towel to remove excess dark pigment, then load it with Orange. Paint the next horizontal band below the pink. -
Blending the mid-tones:
Work the orange paint upward into the pink section with long, sweeping horizontal strokes. Add a tiny touch of White if the colors are too muddy to help them cream together smoothy. -
The golden horizon:
Clean your brush thoroughly. Load it with bright Yellow and paint the bottom section of the sky, leaving about two inches of blank canvas deep at the bottom for the tree line. -
Final blend downward:
Blend the yellow upward into the orange section. I like to keep the brush distinctively horizontal here to mimic atmospheric layers. The yellow should be brightest just above where the trees will sit. -
Adding texture:
While the paint is tacky, you can drag a slightly dry brush with a lighter shade (like a pale pink) lightly across the upper sections to create faint, wispy cloud streaks. -
Let it dry:
Allow the background to dry completely. It must be dry to the touch so the crisp black trees don’t smear into the sunset colors.
Step 2: Designing the Silhouettes
-
Establish the ground:
Switch to your medium flat brush and load up Carbon Black. Paint a solid, uneven undulating line across the very bottom of the canvas to establish the forest floor. -
Fill the base:
Fill in everything below that ground line with solid black paint. Ensure it’s opaque; you may need two coats if the white canvas peeks through. -
Mark tree positions:
Using a small round brush, paint thin vertical lines extending upward to mark the trunks of your trees. Vary their heights—make some tall (reaching halfway up the pink) and some shorter. -
Start the pine branches:
Starting at the very tippy-top of your tallest trunk, use the corner of a flat brush or a detail brush to dab small, downward-slanting strokes. Keep the top very narrow/pointy. -
Widen the trees:
Work your way down the trunk, making the branches slightly wider as you go. Use a zig-zag or tapping motion to create a natural, irregular needle texture. -
Connect to the forest:
As you reach the bottom third of the tree, allow the branches to merge into the black ground layer, making the base look dense and shadowed. -
Add tree variety:
Repeat the process for the other trees. Change up the shape slightly for each one—some can be skinnier, some fuller. Don’t make them identical solders. -
Fill the gaps:
Use the smallest brush to add tiny baby trees or little vertical spikes in between the large trees to create depth and a thick forest feel. -
Refine the edges:
Look at the tips of the trees. Use your liner brush to add a few loose, singular branches sticking out to break up any perfect triangular shapes. -
Paint the sides:
Carry the painting around the edges of the canvas. Extend the sunset stripes and the black ground onto the sides for a professional, frameless look.
Muddy colors?
If your blends turn brown or grey, stop! Let the layer dry. Clean your brush well. Apply a thin glaze of the fresh color over the dry mistake to brighten it up.
Add a Starry Night
Before painting the trees, use a toothbrush to flick tiny speckles of white paint onto the purple section for a starry effect.
Step back and admire the vibrant contrast of your personal sunset forest


Beach Sunset With Foamy Waves
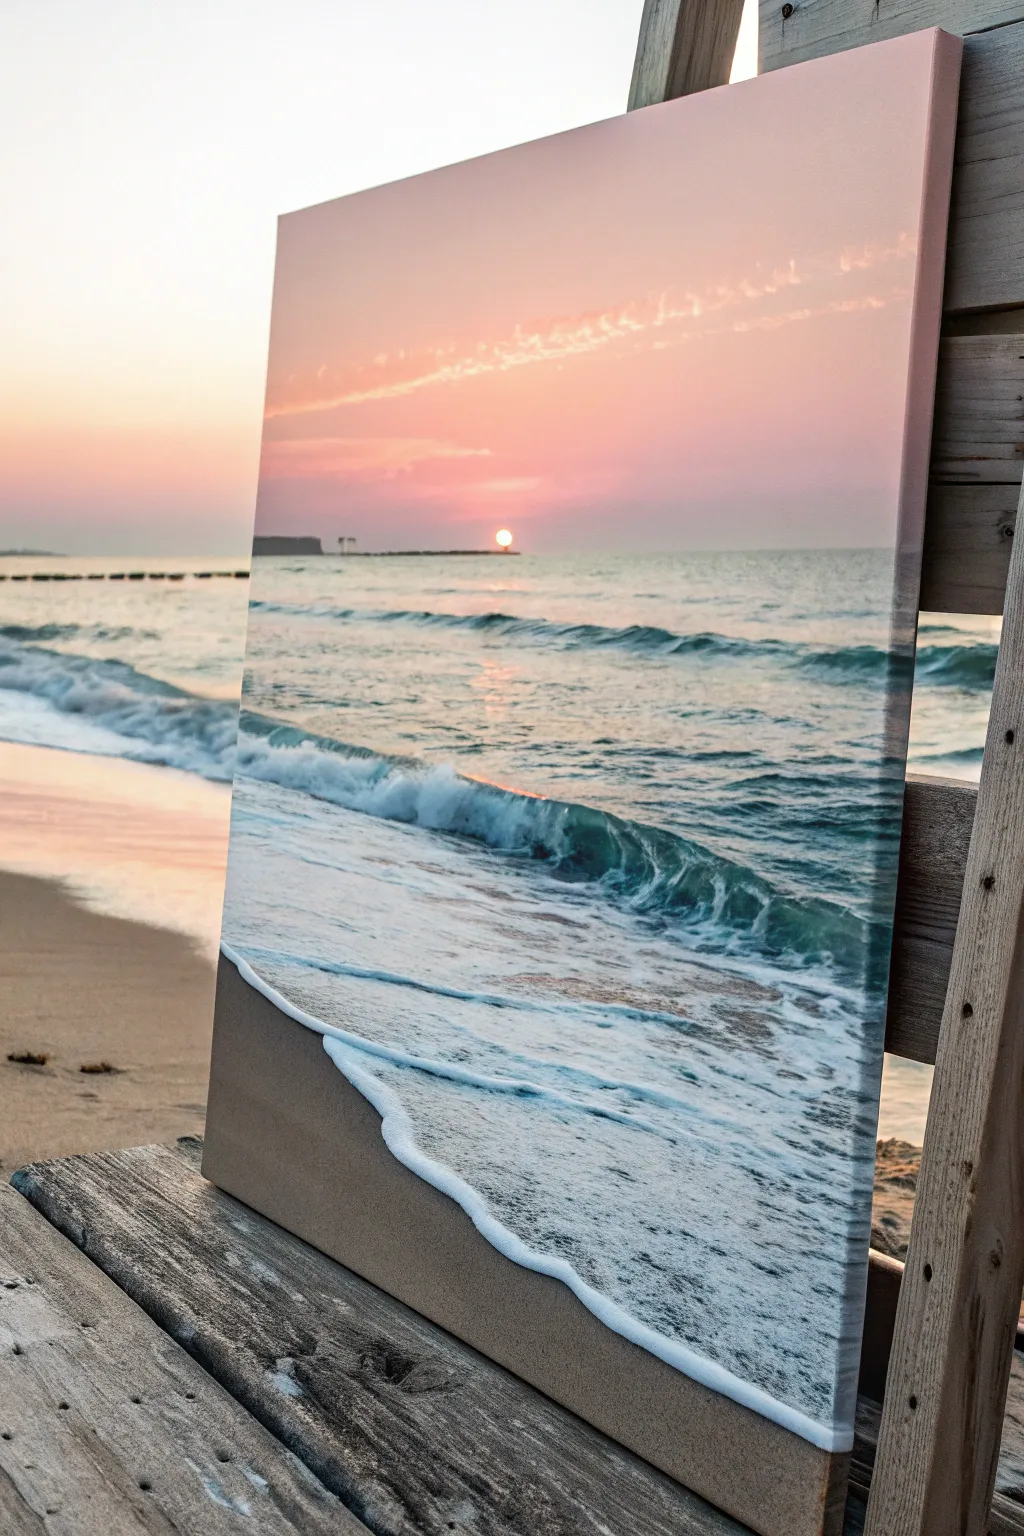
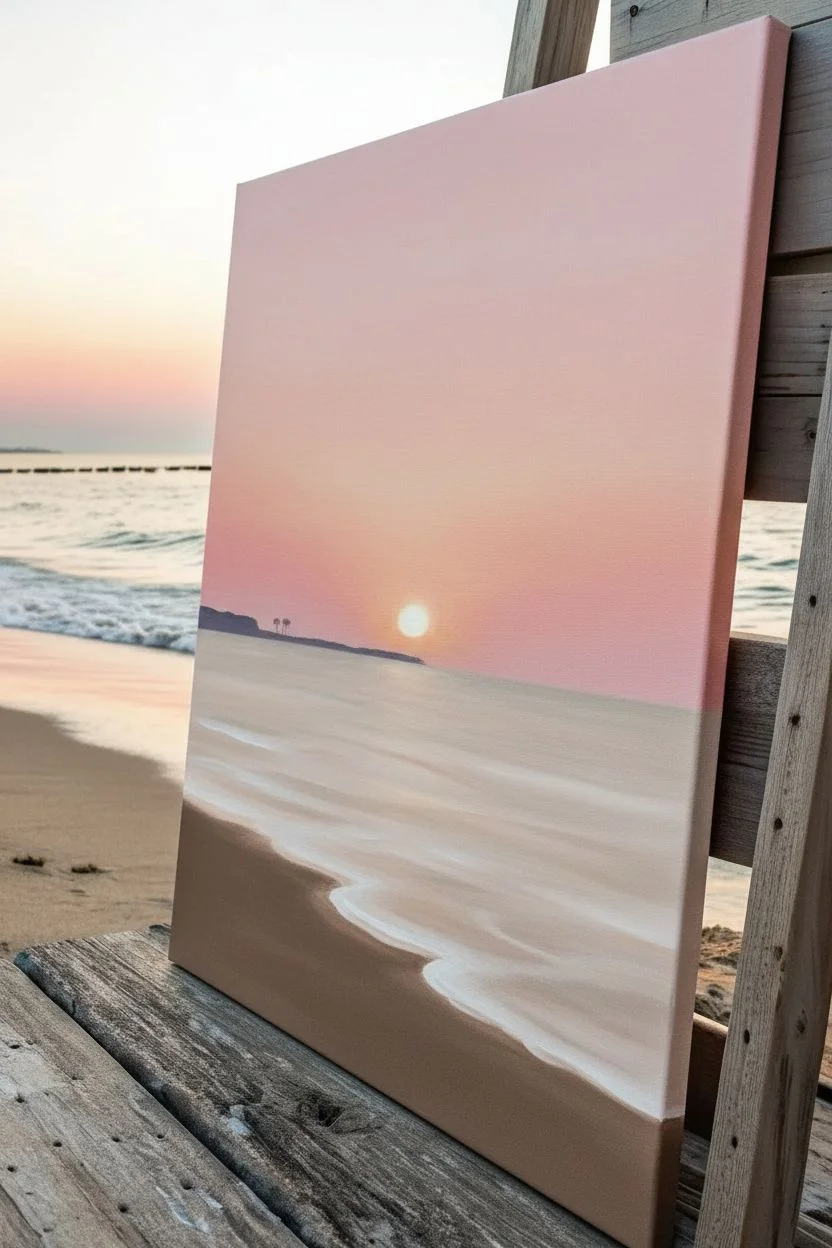
Capture the magic of golden hour with this stunning vertical landscape that features soft pink skies meeting rolling teal waves. The focal point of this piece is the incredibly realistic, textured sea foam that seems to glide right off the canvas.
How-To Guide
Materials
- Rectangular stretched canvas (e.g., 16×20 inches)
- Acrylic paints: Titanium White, Phthalo Blue, Turquoise, Burnt Umber, Yellow Ochre, Alizarin Crimson, Cadmium Yellow, Unbleached Titanium
- Large flat brush (1-2 inch) for blending
- Medium filbert brush
- Small round detail brush
- Fan brush (optional)
- Palette knife
- Cup of water and paper towels
- Slow-drying blending medium or water mist bottle
Step 1: Setting the Sky and Sand
-
Prime the horizon:
Visualize a line about one-third of the way down from the top of your canvas. This will remain straight as your horizon line. Lightly mark it with a pencil if needed. -
Blend the upper sky:
Mix a soft, pale pink using Titanium White and a tiny touch of Alizarin Crimson. Apply this to the top portion of the sky area. while the paint is wet, blend downwards. -
Create the sunset glow:
Near the horizon line, mix in a bit of Cadmium Yellow to your pink mixture to create a peachy orange. Blend this upward into the pink using horizontal strokes to create a seamless gradient. -
Paint the distant land:
For the far-off landmass on the horizon, mix a dark grey-purple using Blue, Crimson, and a touch of Burnt Umber. Using a small flat brush, paint a very thin, uneven strip just above the water line on the left side. -
Establish the sand base:
For the bottom third of the canvas, mix Unbleached Titanium, Burnt Umber, and a hint of White. Paint the sand using a large brush, making the area near the bottom edge slightly darker to suggest wet sand.
Foam Too Flat?
If your sea foam looks flat, don’t just use white paint. Add a shadow of light grey-blue underneath the bottom edge of the white foam to give it 3D volume.
Step 2: The Deep Blue Sea
-
Block in the water:
Mix Phthalo Blue, Turquoise, and a touch of the sky pink to desaturate it slightly. Paint the ocean area from the horizon down to where the waves will break. -
Darken the depths:
As you move painting closer to the foreground (the middle of the canvas), add less white and more blue to your mix. The water should be darkest right before the white foam begins. -
Add horizon reflections:
Using a dry brush and the peach color from the sky, lightly glaze horizontal streaks across the distant water to mimic the sun reflecting on the ripples. -
Paint the sun:
Place a small dab of pure white mixed with a speck of yellow right on the horizon line. Keep it small and circular.
Step 3: Waves and Sea Foam
-
Form the crashing wave:
Using a filbert brush and dark darker teal color, paint the curved shape of the main wave rolling over. The top lip of the wave should catch the light, so paint that translucent green-blue. -
Base layer of foam:
Mix a light grey-blue (White plus a tiny dot of Blue and Umber). Map out the messy, churning water behind the crashing wave and the foam rolling onto the sand. -
Highlight the wave crest:
Take pure Titanium White on a loaded brush. Dab along the top edge of the crashing wave where it breaks, pulling the paint down slightly to show movement. -
Create the shoreline foam:
This is crucial for realism. Paint a thick, jagged white line where the water meets the sand. I find using a palette knife here creates a lovely raised texture. -
Enhance water transparency:
Behind the thick white foam line on the sand, create a glaze of very watered-down brown-grey. Paint this over the sand to make it look like thin, receding water. -
Pattern the surface foam:
Using a small round brush or a fan brush, create ‘webbing’ patterns on the ocean surface. These are interconnected ovals and diamond shapes of white paint that follow the curve of the water. -
Add wispy clouds:
Returning to the sky, use a dry brush with a tiny amount of peach-white paint to scumble in a long, diagonal distinct cloud formation stretching across the upper sky. -
Final highlights:
Add the brightest white highlights to the thickest part of the sea foam and a vertical reflection line under the sun on the water.
Shadow Play
Mix a transparent dark glaze (water + burnt umber) and paint a thin shadow line on the sand directly under the leading edge of the white foam to lift it off the beach.
Step back and admire your personal slice of coastal paradise.


Colorful Birch Trees on an Ombre Sky
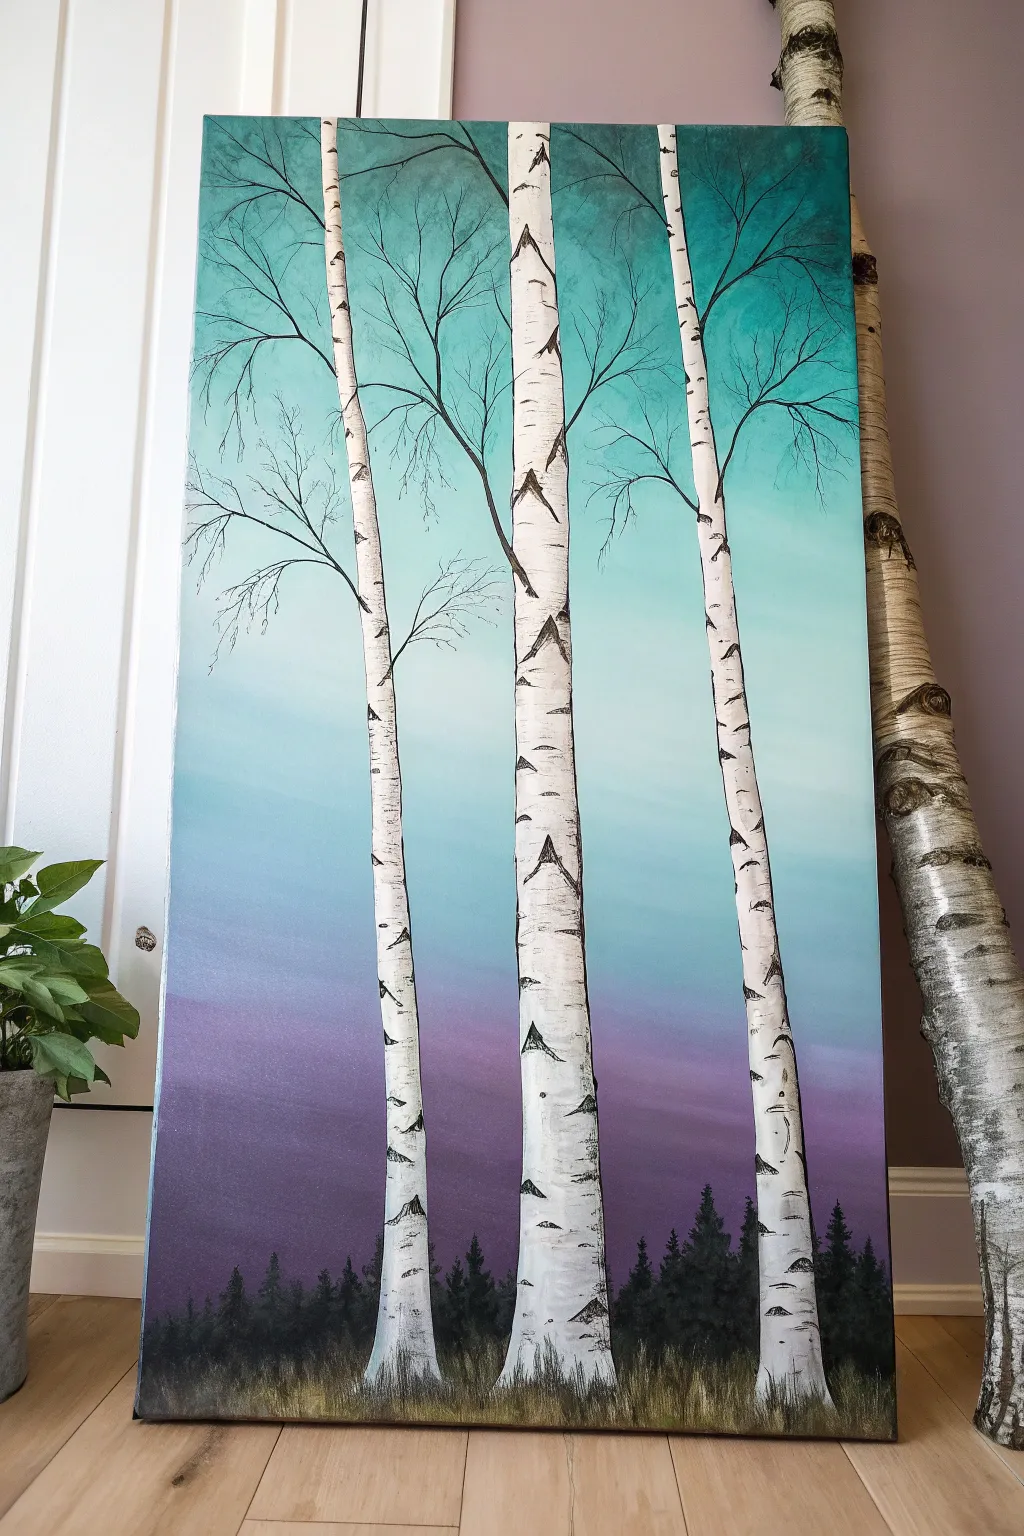
Create a striking landscape featuring stark white birch trees set against a dreamy, gradient sky. This project blends smooth blending techniques with crisp linework, resulting in a modern piece that captures the serene beauty of a winter twilight.
Step-by-Step
Materials
- Tall rectangular canvas (e.g., 12×24 or 10×20 inches)
- Acrylic paints: Titanium White, Mars Black, Deep Violet, Turquoise or Teal, Phthalo Blue
- Large flat brush (2-3 inch) for blending
- Medium flat brush (1/2 inch) for tree trunks
- Small round detail brush or liner brush for branches
- Palette knife (optional for texture)
- Pencil for sketching
- Cup of water and paper towels
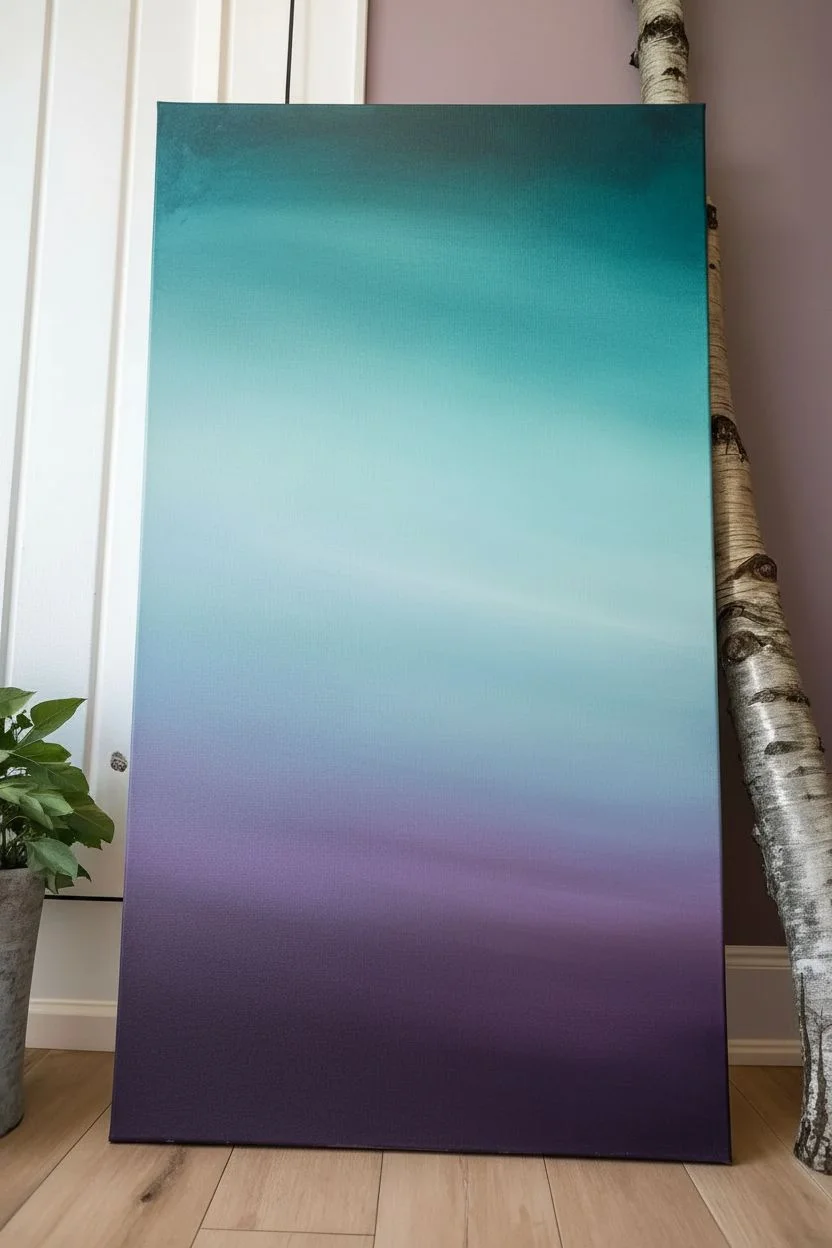
Step 1: Creating the Ombré Sky
-
Prepare the palette:
Squeeze out generous amounts of Deep Violet, Turquoise, Phthalo Blue, and White onto your palette. Mixing a mid-tone purple and a light blue beforehand can help with the transition. -
Start at the top:
Using your large flat brush, apply the teal or turquoise paint across the top third of the canvas. Use long, horizontal strokes to ensure smooth coverage. -
Blend downwards:
While the teal is still wet, mix a little white into it to lighten the color as you move down the canvas. This creates the hazy upper atmosphere. -
Introduce the purple:
Clean your brush thoroughly. At the bottom third of the canvas, paint a band of deep violet. Work quickly so the paint remains workable for blending. -
Create the transition zone:
In the middle section, blend the lighter teal down and the purple up. You may need to use a clean, dry brush to feather the area where the two colors meet to avoid creating a muddy brown line. I like to use very light pressure here to seamlessly marry the hues. -
Dry thoroughly:
Let the background dry completely. This is crucial because you want crisp white lines for the trees later, not smudges.
Step 2: Painting the Foreground
-
Paint the distant forest:
Mix a very dark shade using black and a touch of deep violet. Using a smaller brush, dab in a silhouette of a distant treeline along the bottom edge. Keep the tops jagged to resemble pine trees. -
Sketch the birch placement:
Lightly use a pencil to mark the position of your three main birch trees. Make them slightly curved rather than ruler-straight for a more organic feel. -
Block in the trunks:
Using the medium flat brush and pure Titanium White, paint the long vertical trunks. You may need two coats to ensure the purple background doesn’t show through. -
Add the grassy base:
At the very bottom, paint short, vertical strokes using a mix of black, brown (mix red+green if needed), and ochre to create grassy undergrowth anchoring the trees.
Muddy Middle?
If purple and teal mix into gray, let the layer dry. Glaze a thin layer of white over the middle, dry again, then re-blend the transition with fresh colors.
Step 3: Adding Details and Texture
-
Create birch bark markings:
Using a small flat brush or the edge of a palette knife, scrape or paint horizontal black dashes across the white trunks. Focus heavier markings near the bottom and lighter ones higher up. -
Add characteristic eyes:
Paint small, triangular ‘eye’ shapes on the trunks where branches might have fallen off. These are signature marks of birch trees. -
Draft the branches:
With your finest liner brush and thinned black paint (add a drop of water to make it flow like ink), drag fine lines extending from the top of the trunks. -
Refine the branches:
Let the branches split into smaller and smaller twigs as they reach outward. A slightly shaky hand actually helps here to make the twigs look natural and woody. -
Highlight the grass:
Use a fan brush or an old, splayed brush with a tiny bit of light yellow or white to dry-brush the tips of the grass at the bottom, giving it dimension. -
Final touches:
Check the edges of your white trunks. If the background paint made them fuzzy, carefully touch up the white edges for a crisp pop against the colorful sky.
Use Metallic Paint
Swap the plain white grass dry-brushing for metallic silver or gold. It adds a magical, shimmering frost effect to the forest floor.
Step back and admire your serene, colorful forest scene


Loose Flower Bouquet With Dabbed Petals
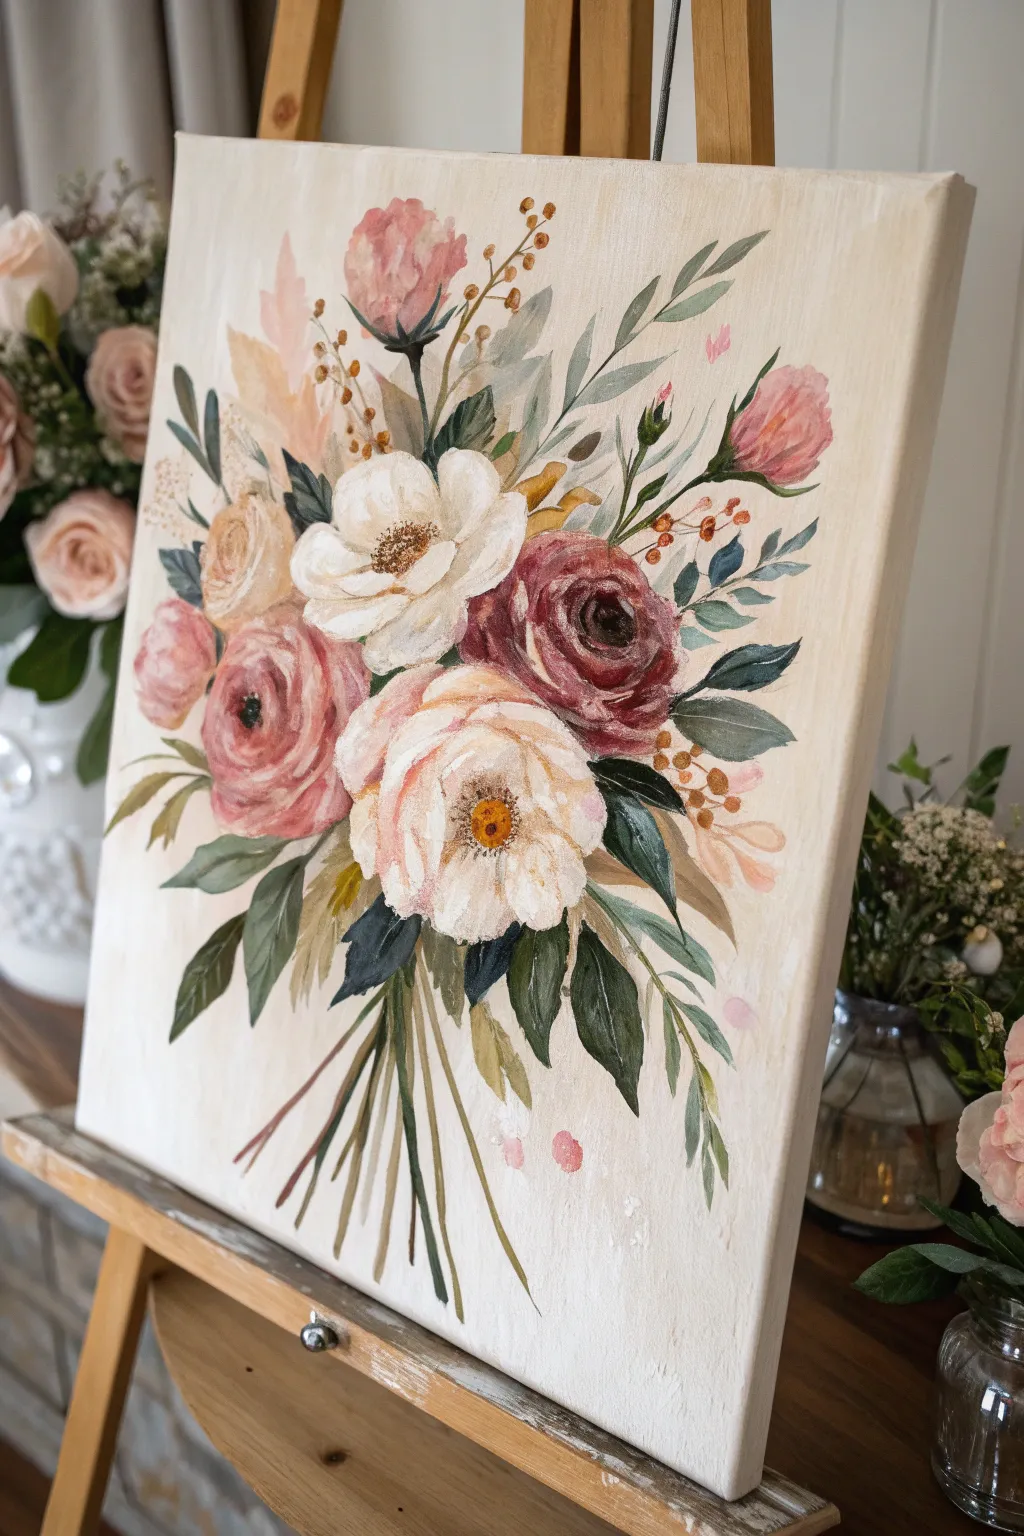
Capture the delicate charm of a hand-gathered bouquet with this loose acrylic painting that mimics the soft transparency of watercolors. You will learn to layer thin washes and precise dabbed strokes to create a romantic, vintage-inspired composition on a neutral background.
How-To Guide
Materials
- Canvas (stretched and primed, approx. 12×16 or 16×20 inches)
- Acrylic paints: Titanium White, Burnt Umber, Yellow Ochre, Alizarin Crimson, Sap Green, Phthalo Blue, Peach/Flesh tint
- Soft synthetic brushes: Large flat brush (1 inch), medium filbert (size 6-8), small round brush (size 2-4)
- Palette
- Water cups (two: one for clean water, one for rinsing)
- Paper towels
- Fine mist spray bottle (optional, for keeping paints wet)
- Glazing medium or matte medium (essential for transparency)
Step 1: Setting the Stage
-
Background wash:
Begin by creating a soft, warm background color. Mix a large amount of Titanium White with a tiny dot of Yellow Ochre and a whisper of Burnt Umber to create a creamy, off-white hue. Using the large flat brush, cover the entire canvas. I like to keep the strokes slightly uneven to give it a vintage, textured feel rather than a flat wall. -
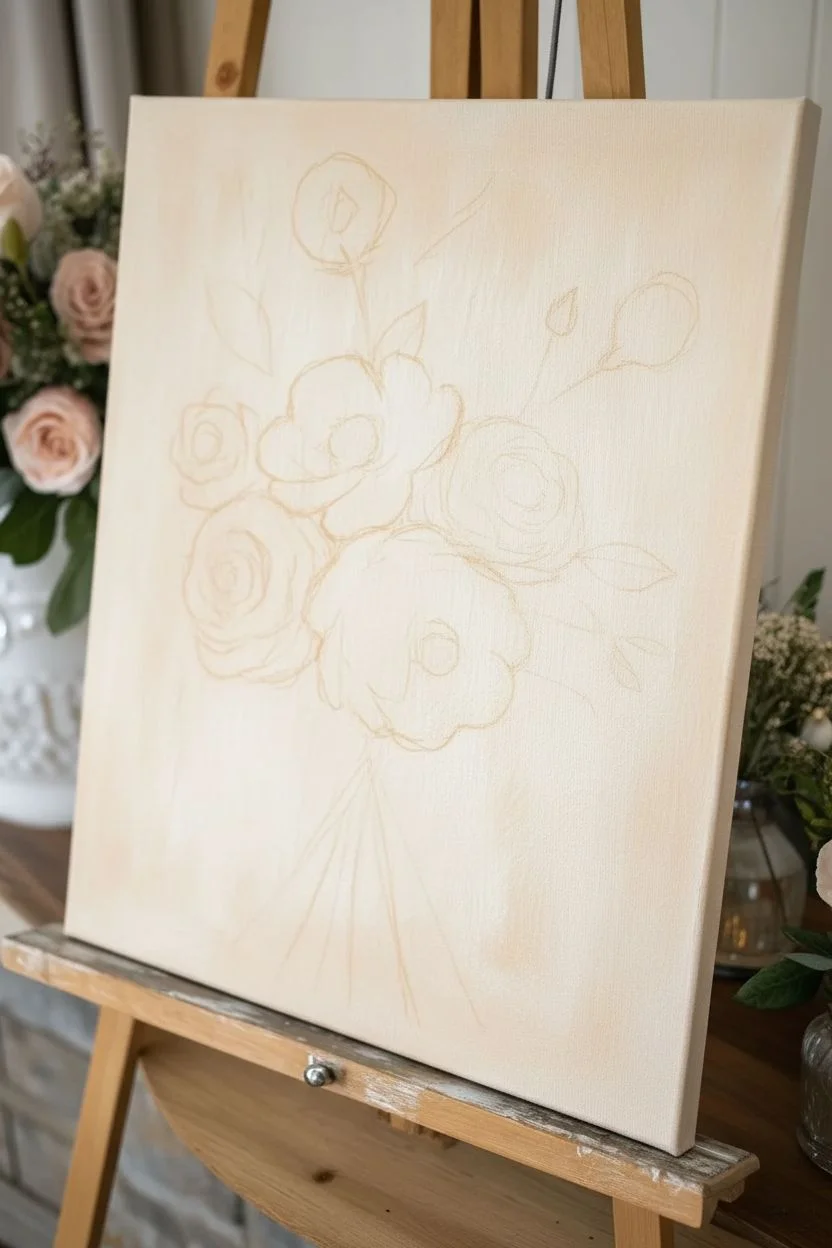
Mapping the bouquet:
Once the background is dry to the touch, use a very watery wash of Burnt Umber and your small round brush to lightly sketch the placement of your main flowers. Draw loose circles for the blooms and faint lines for the stems gathering at the bottom. Don’t worry about perfection; these lines will mostly be covered.
Step 2: Painting the Focal Blooms
-
Mixing the main white bloom:
Start with the large white flower in the center. Mix Titanium White with a small amount of glazing medium to make it slightly translucent. Using the filbert brush, press and pull outward from the center to create curved, cupped petals. -
Adding shadow to white petals:
While the white is still tacky, mix a tiny bit of Yellow Ochre and Burnt Umber into a glaze. Gently dab this into the base of the white petals to create depth and a ‘cup’ shape. -
The burgundy rose:
Moving to the right, create a deep red mix using Alizarin Crimson and a touch of Burnt Umber. With the filbert brush, paint C-curve strokes that hug each other, starting small in the center and getting larger as you move outward to form the rose shape. -
The soft pink peony:
For the pink flower on the left, mix White with Alizarin Crimson and a touch of Peach. Use broad, sweeping strokes to create a fluffy, open bloom. Use a darker mix of this pink for the center area. -
Creating the creamy ranunculus:
Painted above the main white bloom, use a blend of Titanium White and Yellow Ochre. Use short, dabbed strokes to create tight layers of petals, keeping it distinct from the bright white flower below it. -
Highlights and definition:
Return to your burgundy rose and add highlights by mixing a little White into your red tone. Apply thin, curved strokes to the top edges of the petals to make them pop.
Muddy Colors?
If your flowers look muddy, let the first layer dry completely before adding shadows or centers. Wet-on-wet mixing can turn gray quickly if you overwork it.
Step 3: Greenery and Texture
-
Mixing varying greens:
To achieve a natural look, you need more than one green. Mix Sap Green with White for a sage tone, Sap Green with Phthalo Blue for a deep emerald, and Sap Green with Yellow Ochre for an olive shade. -
Broad leaves:
Use the medium filbert brush and the deep emerald mix to paint the larger leaves near the base of the bouquet. Press the brush down firmly to widen the stroke and lift up as you drag to create a tapered point. -
Wispy foliage:
Switch to your small round brush and the sage green mix. Paint long, slender stems extending outward from the bouquet, adding tiny, almond-shaped leaves along the stems. -
Adding the stems:
At the bottom of the bouquet, paint the gathering of stems using a mix of Burnt Umber and Sap Green. Ensure they originate from a logical center point so the bouquet looks held.
Add Gold Leaf
Apply small bits of gold leaf to the centers of the flowers or drifting in the background for a luxurious, shimmering detailed finish.
Step 4: Details and Final Touches
-
Flower centers:
For the large white flower, use the small round brush to stipple (dot) a dark brown center. Once dry, add tiny dots of Yellow Ochre on top for pollen texture. Do the same for the pink flower. -
Filler sprigs:
Using a thin, watery mix of Burnt Umber, paint delicate twig-like branches poking out from the arrangement. Dot the ends with Yellow Ochre or tiny bits of pink to suggest berries or buds. -
Loose buds:
Paint a few small, tight buds near the top right using your pink mix. Add a quick stroke of green at the base of each bud for the sepal. -
Drifting petals:
To enhance the ‘loose’ feel, add a few stray dabs of pink or pale yellow near the edges of the bouquet, as if petals are drifting away or catching the light. -
Splatter texture:
Step back from the canvas. Dilute a tiny bit of pink or diluted brown paint with water. Flick the bristles of your brush to send a few tiny speckles onto the background for an artistic, spontaneous finish.
Allow the textured center dots to dry fully before hanging your beautiful piece
BRUSH GUIDE
The Right Brush for Every Stroke
From clean lines to bold texture — master brush choice, stroke control, and essential techniques.
Explore the Full Guide
Starry Night Sky With Splattered Stars
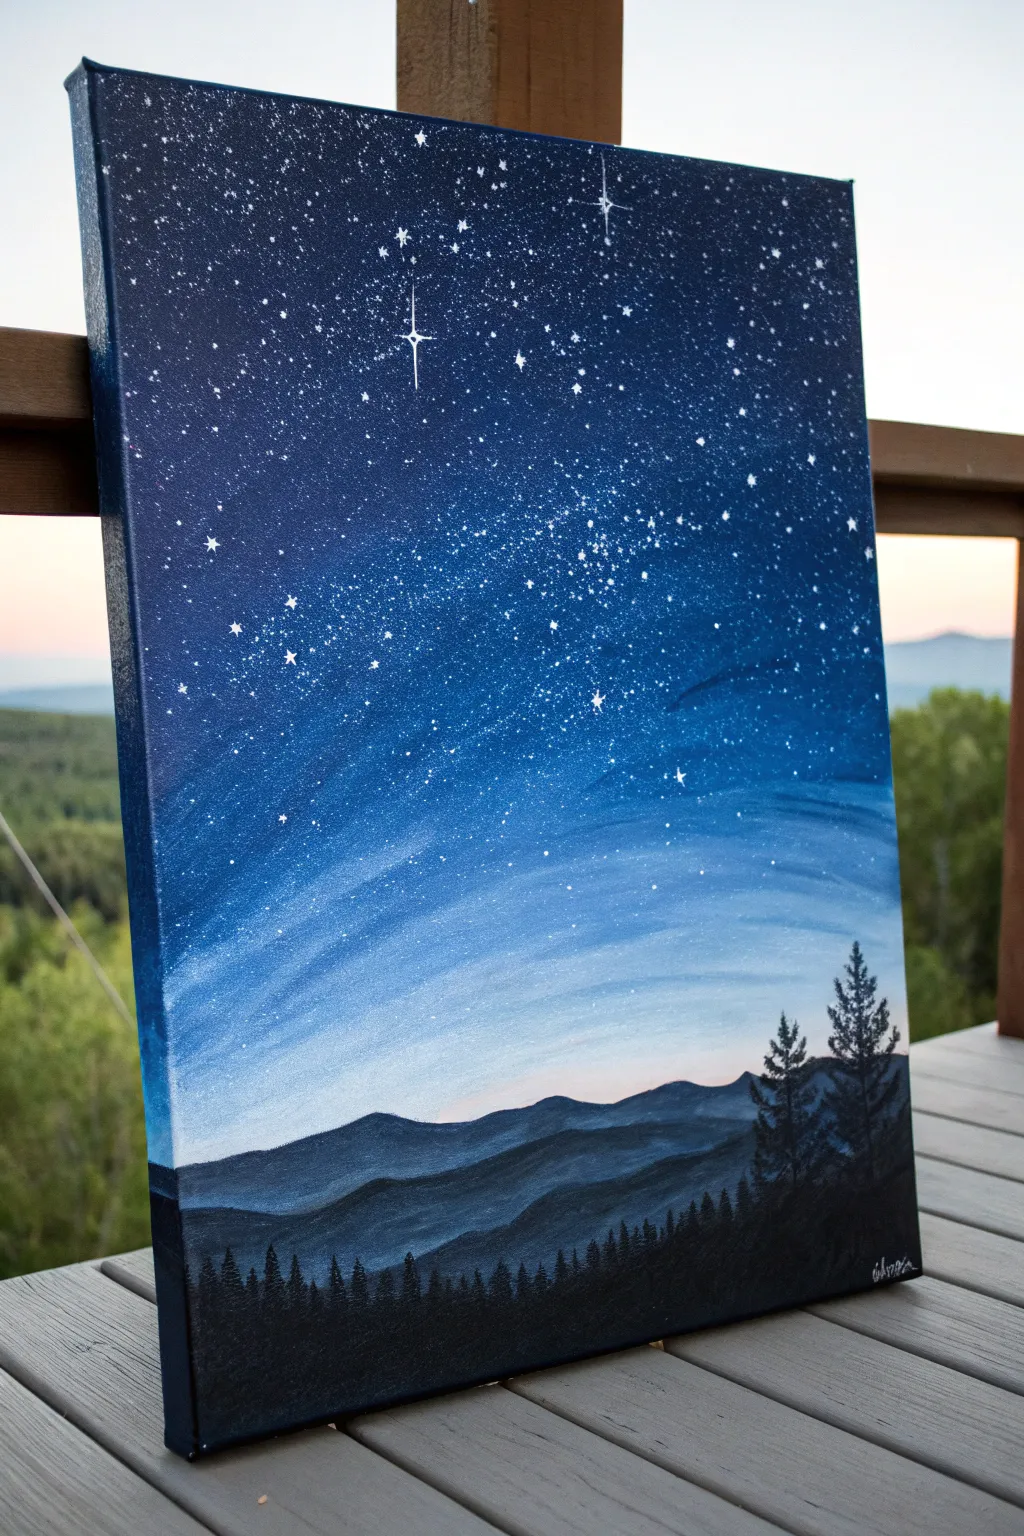

Capture the breathtaking transition from sunset to deep space in this vertical acrylic landscape. This project layers silhouetted mountains against a radiant blue gradient, topped with a dazzling galaxy of splatter-painted stars.
Step-by-Step
Materials
- Stretched canvas (vertical orientation, e.g., 12×16 or 16×20)
- Acrylic paints: Carbon Black, Titanium White, Phthalo Blue (or Prussian Blue), Violet, and a touch of Ultramarine
- Large flat brush (1-inch or wider)
- Medium flat brush
- Small round detail brush
- Fan brush (optional, but helpful for blending)
- Old toothbrush or stiff bristle brush
- Water cup and palette
- Paper towels
Step 1: Painting the Sky Gradient
-
Start at the top:
Begin by loading your large flat brush with a mix of Phthalo Blue and a tiny amount of Black to create a very deep, midnight blue. Paint the top quarter of the canvas using long, horizontal strokes. -
Transition to mid-tones:
Clean your brush slightly. Mix pure Phthalo Blue with a touch of Violet. Blend this into the bottom edge of your midnight blue section, working your way down the canvas. -
Lighten the mixture:
As you reach the middle of the canvas, start incorporating small amounts of Titanium White into your blue mix. The color should shift from deep space blue to a vibrant medium blue. -
Create the horizon glow:
For the bottom third of the sky area, mix a pale blue using mostly White with just a hint of your blue paint. Blend this upwards into the medium blue to create a smooth, glowing transition near where the mountains will be. -
Final smooth:
While the paint is still slightly tacky, use a clean, dry brush (a soft fan brush works wonders here) to gently sweep back and forth over the transition lines, softening any harsh stripes.
Splatter Control
Accidentally splattered stars onto your mountains? Keep a damp paper towel handy. You can quickly wipe wet acrylic off dry layers without ruining the painting underneath.
Step 2: Creating the Stars
-
Prepare the splatter paint:
Dilute a small amount of Titanium White paint with water on your palette. You want a consistency similar to heavy cream or melted ice cream—thin enough to fly off bristles, but thick enough to stay opaque. -
Test the consistency:
Test your splatter on a scrap piece of paper first. If the drops are too big, the paint is too thick; if they are translucent, it’s too watery. -
Splatter the galaxy:
Dip an old toothbrush or stiff brush into the thinned white paint. Hold it above the dark upper portion of your canvas and run your thumb across the bristles to flick tiny specks of paint onto the sky. -
Add focal point stars:
Once the splatter is dry, use your smallest detail brush to manually paint a few larger, brighter stars. Cross two thin lines to create a twinkling ‘cross’ star effect for visual interest.
Step 3: Layering the Mountains
-
Mix the distant mountain color:
Create a hazy blue-grey color by mixing White, a touch of Black, and Blue. It should be darker than the sky glow but much lighter than black. -
Paint the furthest range:
Using a medium flat brush, paint the undulating silhouette of the furthest mountain range about one-third of the way up from the bottom. Fill in the shape down to the bottom of the canvas. -
Let it dry:
Allow this first mountain layer to dry completely. This creates a crisp separation between the layers. -
Paint the middle range:
Darken your mountain mixture by adding more Blue and Black. Paint a second mountain range slightly lower than the first, ensuring the peaks don’t align perfectly with the range behind it. -
Add depth shading:
While the middle range is wet, I like to mix a slightly lighter version of that color and streak it gently on just the tops of the ridges to suggest moonlight hitting the mist. -
Establish the foreground:
Mix pure Carbon Black with a tiny drop of Blue (to keep it cool). Paint the closest, lowest mountain range at the very bottom, filling it in solid black.
Milky Way Magic
Sponge a very faint, translucent line of white and violet diagonally across the sky before splattering. This adds a subtle nebula effect behind your stars.
Step 4: Silhouetted Trees
-
Start the treeline:
Using the pure black mixture and a small round brush or a specialized fan brush, begin dabbing in a line of tiny pine trees along the ridge of the foreground mountain. -
Detail the large pines:
On the right side of the canvas, paint two or three distinct, taller pine trees. Draw a straight vertical line for the trunk first. -
Add the branches:
Starting at the top of the trunk line, tap your brush side-to-side in a zig-zag motion, getting wider as you move down the tree to create the iconic triangular pine shape. -
Final touches:
Fill in the treeline with varying heights to look natural, ensuring the bottom of the trees blends seamlessly into the black mountain base. Sign your name in white in the bottom corner once dry.
Step back and admire how the layers of simple colors create a deep, atmospheric night scene perfect for any wall
Glowing Moon Over Pink Clouds
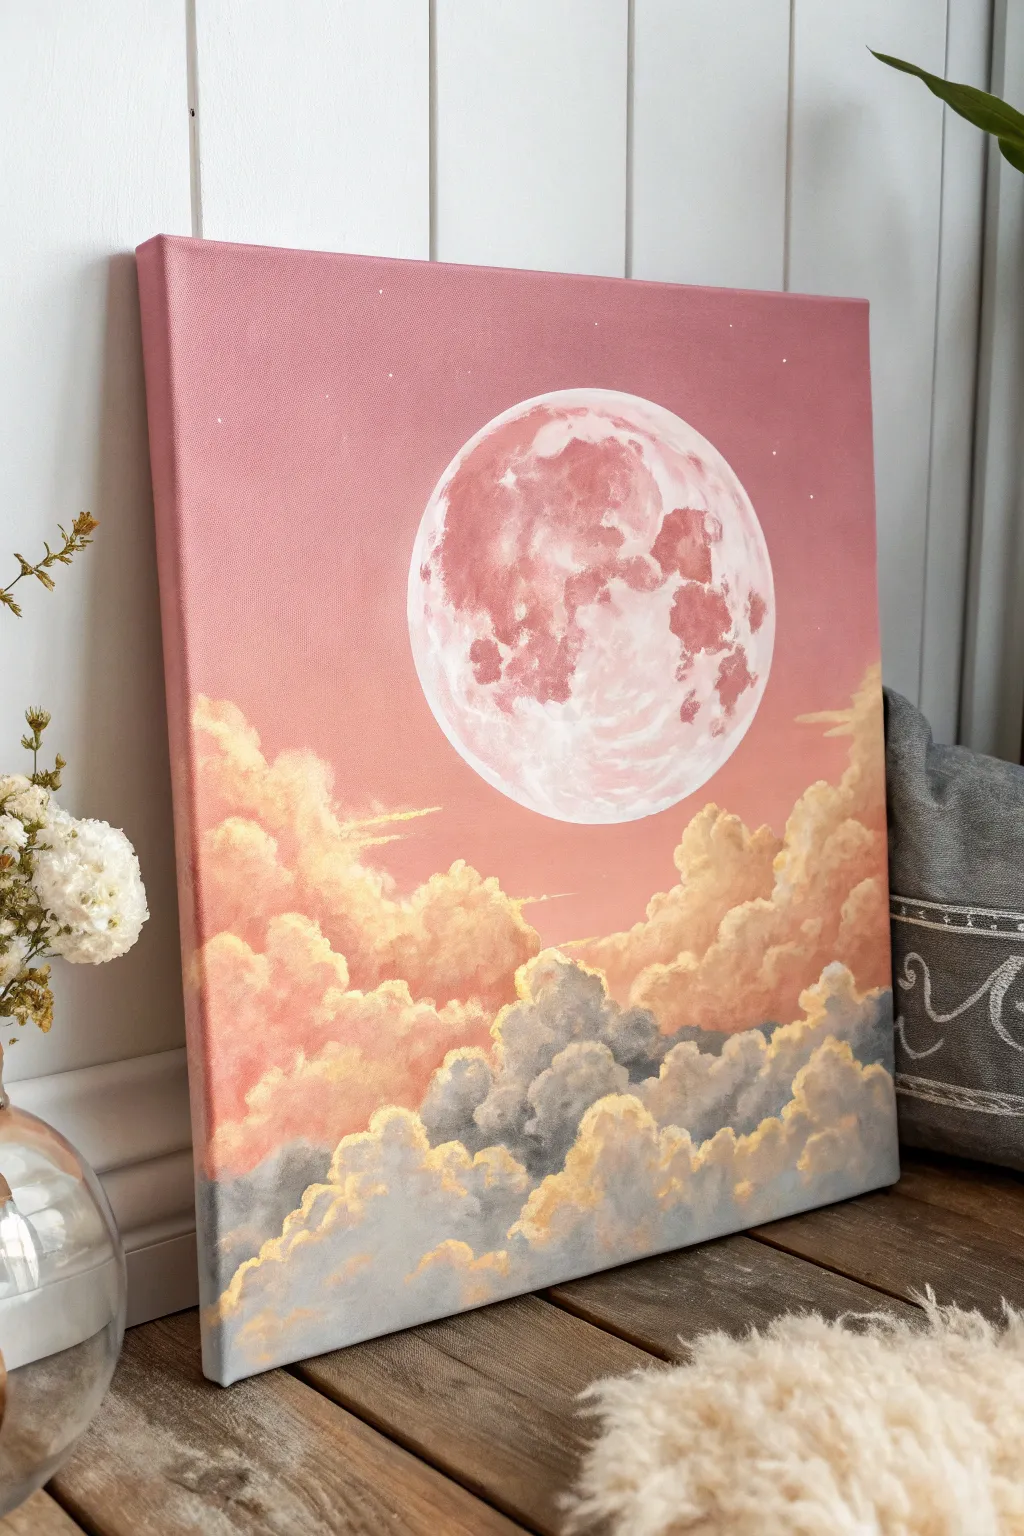
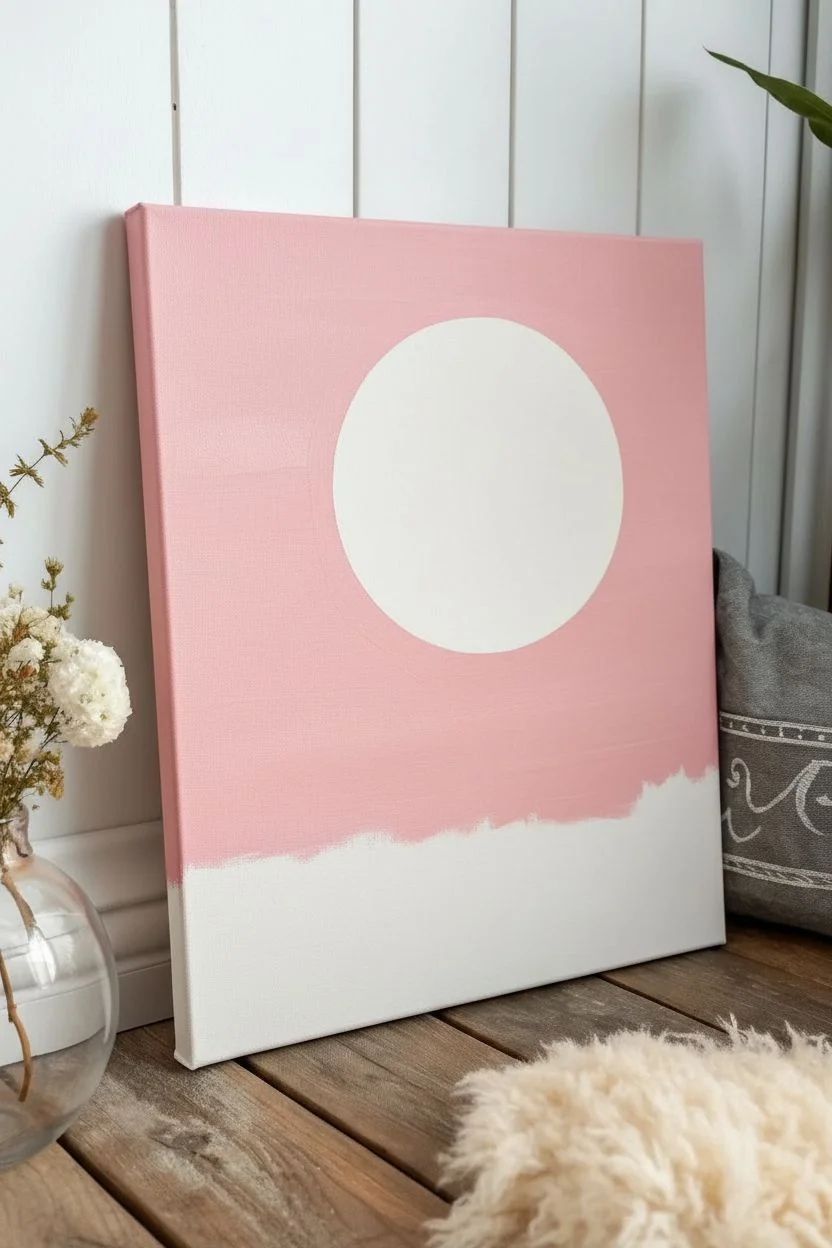
Capturing the serene beauty of a twilight sky, this acrylic painting features a large, detailed moon hovering above layers of fluffy, illuminated clouds. The soft transition from rose-gold clouds to cool grey shadows creates a dreamy atmosphere perfect for bringing a bit of magic into your home.
Step-by-Step Tutorial
Materials
- Square stretched canvas (12×12 or similar)
- Acrylic paints: Titanium White, Magenta or Alizarin Crimson, Cadmium Yellow, Ultramarine Blue, Burnt Umber
- Flat shader brushes (large and medium)
- Filbert brushes (sizes 4 and 8)
- Small round detail brush (size 0 or 1)
- Circular object for tracing (faintly) or a compass
- Mixing palette
- Water cup and paper towels
- Circular sponge or sea sponge (optional for texture)
Step 1: Setting the Sky and Moon Base
-
Mix the background gradient:
Begin by creating a soft, dusty pink. Mix a large amount of Titanium White with a very small touch of Magenta and a tiny speck of Burnt Umber to desaturate it. You want a consistent, opaque color. -
Paint the sky:
Using your largest flat brush, cover the top two-thirds of the canvas with this dusty pink mixture. Use horizontal strokes to ensure a smooth, distinctive sky, bringing the color down to where your clouds will eventually sit. -
Establish the moon shape:
Once the pink background is completely dry, position a circular object in the upper center of the canvas. Lightly trace the outline with a pencil or white chalk. A 5-6 inch diameter works well for a focal point. -
Fill the moon base:
Mix a very pale off-white using Titanium White with the tiniest hint of your pink sky color. Fill in the moon’s circle completely with this solid base coat to block out the background color.
Pro Tip: Soft Edges
For fluffier clouds, keep your brush relatively dry. A ‘dry brush’ technique allows the textured canvas to show through slightly, creating a natural, airy look.
Step 2: Detailed Moon Texture
-
Mix moon shadow colors:
Prepare a darker dusty rose color by adding a bit more Magenta and a touch of Burnt Umber to your white base. You want this to be visibly darker than the moon’s surface but still harmonizing with the sky. -
Create lunar craters:
Using a small filbert brush, dab this darker mixture onto the moon to create craters and ‘seas’. Focus the texture towards the left side and top, leaving the bottom right brighter to suggest illumination. -
Soften the edges:
While the paint is still tacky, use a clean, slightly damp brush to gently blot the edges of your darker patches. This blends them into the white base, making the surface look organic rather than stamped on. -
Add bright highlights:
Take pure Titanium White on a small round brush. Add jagged, bright highlights along the bottom right rim of the moon and on the edges of the craters to simulate light catching the lunar landscape.
Step 3: Building the Cloud Layers
-
Mix the cloud highlight color:
Create a warm, golden peach color. Mix Titanium White with a drop of Cadmium Yellow and a speck of Magenta. This will be the color of the sun hitting the tops of the clouds. -
Block in upper clouds:
Using a size 8 filbert brush, paint the ‘tops’ of the highest cloud formations just below the moon. use a circular, scumbling motion to create fluffy, rounded shapes. -
Create the mid-tone pinks:
Mix a slightly darker salmon pink. Apply this directly below your golden peach highlights, blending the wet edges together slightly so the clouds have volume and shadow. -
Mix the grey shadow tone:
For the heavy lower clouds, mix Titanium White, Ultramarine Blue, and a tiny bit of Burnt Umber or Black to create a cool, slate grey. It should contrast beautifully with the warm pinks. -
Paint the lower cloud mass:
Fill the bottom third of the canvas with this grey mixture. Use a scumbling technique (circular scrubbing) to create a dense, puffy texture that looks like heavy storm clouds. -
Define the grey cloud tops:
While the grey is still workable, mix a lighter grey (add more white) and dab it onto the top edges of the grey cloud billows. This separates the individual cloud shapes from the main mass.
Level Up: Metallic Touch
Mix a tiny amount of iridescent medium or pearl white paint into your highlight colors. The moon and cloud edges will shimmer beautifully when the light hits the canvas.
Step 4: Final Highlights and Glow
-
Add golden lining:
Return to your golden peach mixture (White + Yellow + tiny Magenta). Using a small round brush, paint a thin, broken line along the very top edges of the grey clouds where the light would catch them. -
Enhance the puffiness:
Apply pure white highlights to the absolute distinct peaks of the upper pink clouds. Keep your paint thick here for a bit of impasto texture. -
Add floating wisps:
Using a dry brush with very little paint, lightly drag some horizontal streaks of pink mist across the moon’s face or just below it to integrate the moon into the atmosphere. -
Paint subtle stars:
Dilute some white paint with water until inky. Dip a stiff brush or toothbrush into it and lightly flick it over the upper pink sky area to create faint, distant stars.
Step back and admire your dreamy skyscape as the layers dry into a cohesive, glowing scene

PENCIL GUIDE
Understanding Pencil Grades from H to B
From first sketch to finished drawing — learn pencil grades, line control, and shading techniques.
Explore the Full Guide
Cozy Campsite Under a Deep Blue Sky
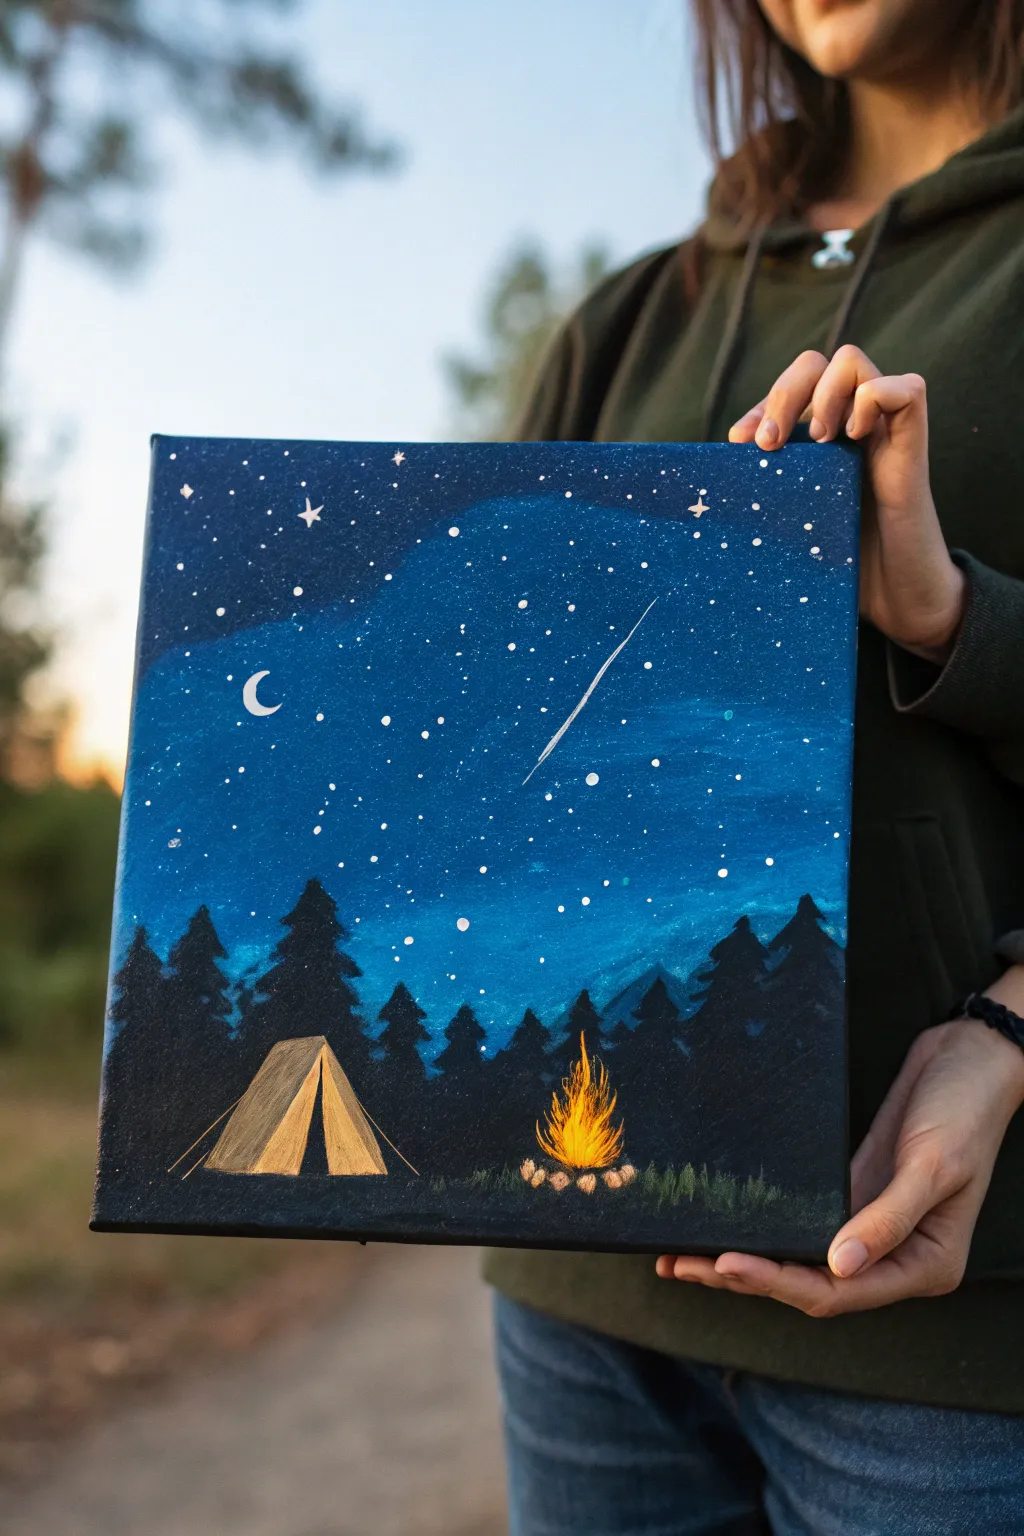
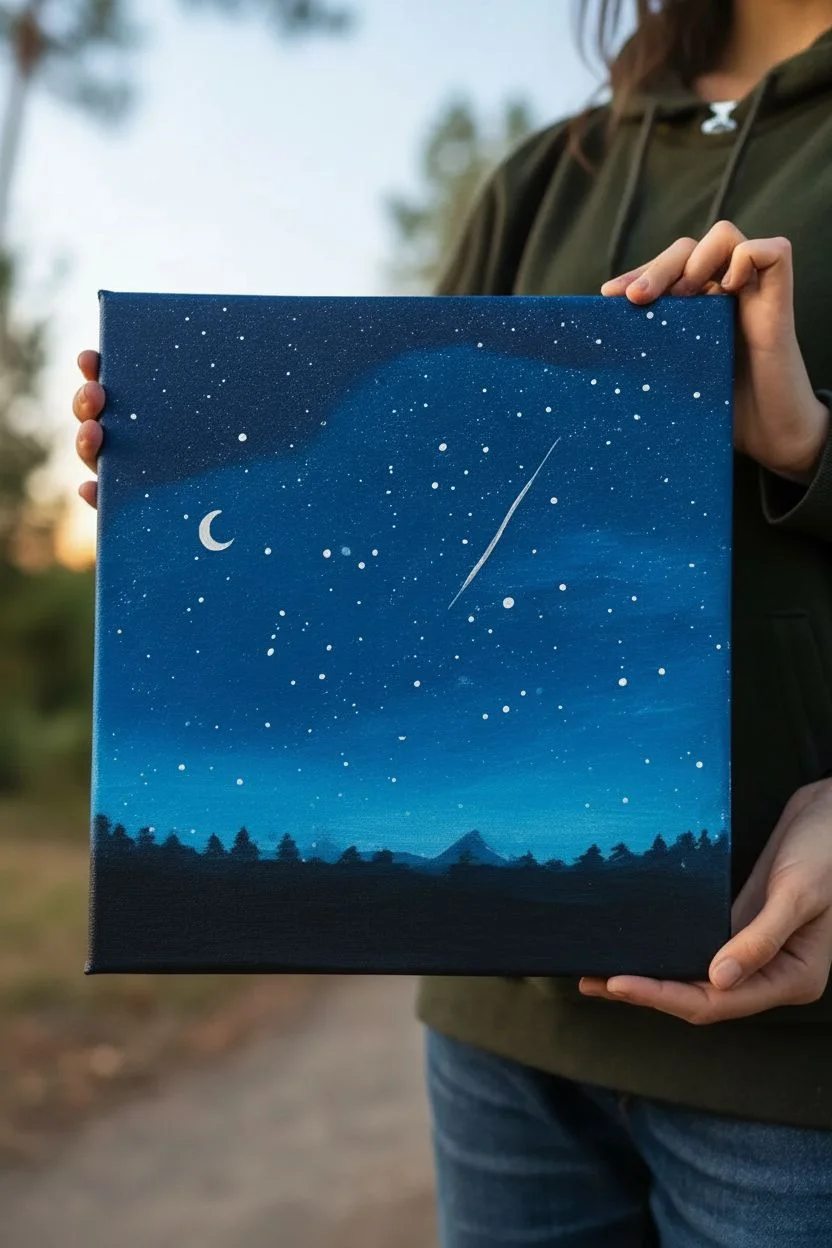
Capture the magic of an evening in the wilderness with this serene acrylic painting featuring a glowing campfire and a vast, starry sky. The deep blues and striking silhouettes create a cozy atmosphere that is perfect for beginner artists looking to practice blending and detailing.
Step-by-Step
Materials
- Square stretched canvas (e.g., 10×10 or 12×12 inches)
- Acrylic paints: Phthalo Blue (or Prussian Blue), Black, White, Burnt Sienna, Yellow Ochre, Cadmium Yellow, Orange
- Large flat brush (for the sky)
- Medium flat or angled brush (for trees)
- Small round detail brush (size 0 or 1)
- Old toothbrush (optional, for stars)
- Palette
- Water cup and paper towels
- Pencil
Step 1: The Celestial Background
-
Base gradient:
Begin by loading your large flat brush with dark blue paint. Start painting the top third of the canvas with this intense, deep shade, ensuring you cover the edges as well for a polished look. -
Lightening the sky:
Without cleaning your brush, pick up a tiny bit of white paint to mix on the canvas with the blue. As you move down towards the middle section, the blue should become slightly lighter and brighter, creating a atmospheric glow. -
Horizon glow:
For the bottom third (before the tree line), mix even more white and perhaps a touch of teal or just lighter blue to create the brightest part of the sky where the horizon will be. Blend the transition areas smoothly while the paint is still wet. -
Starry textures:
Once the background is dry, dilute a small amount of white paint with water until it has an inky consistency. Dip a toothbrush or stiff brush into it and flick the bristles with your thumb to spray tiny stars across the upper sky. -
Specific stars:
Use your smallest detail brush to manually add a few larger, brighter stars. Add a thin crescent moon on the left side and a striking diagonal line for a shooting star on the right.
Step 2: Forest Silhouettes
-
Mixing the darks:
Create a near-black mixture by combining your black paint with a little bit of the dark blue. This makes the color feel richer and more cohesive with the sky than flat black. -
Tree placement:
Using a medium brush, paint a solid undulating line across the bottom quarter of the canvas to establish the ground. From this base, pull upward vertical lines to mark where your pine trees will stand. -
Forming the pines:
Switch to a smaller flat or angled brush. Starting at the top of each vertical line, dab paint in a zig-zag motion, getting wider as you move down, to create the shaggy silhouette of evergreen trees. -
layering depth:
Vary the heights of your trees. Paint the taller, more distant-looking trees first, and overlap them with slightly darker, distinct trees in the foreground to create depth.
Star Flicking Tip
cover the bottom area of your canvas (where the ground will be) with a piece of paper before flicking paint to keep stars out of your forest.
Step 3: The Campsite Details
-
Drafting the tent:
Allow the black layer to dry completely. Use a pencil to lightly sketch a simple triangular tent shape in the clearing on the left. -
Painting the tent:
Fill in the tent shape using a mix of Yellow Ochre and White. Use jagged strokes at the bottom to simulate grass overlapping the fabric. -
Tent shadows:
Paint a dark triangle in the center of the tent for the opening. Add a slightly darker shade of beige (mix in a dot of Burnt Sienna) to the left side of the tent to suggest a shadow cast by the fire which will be on the right. -
Building the fire:
Paint small, rounded stones in a semi-circle using grey or light brown on the right side. Within the stones, paint vertical flicking strokes of Orange, then layer Yellow, and finally tiny touches of White at the hottest center point to create flames. -
Final highlights:
Add thin white lines for the tent ropes and stakes. Gently dry-brush a faint yellow glow on the ground near the fire and on the tips of the grass surrounding the campsite.
Make It Metallic
Use metallic gold paint for the tent highlights and the shooting star. It catches the light beautifully when the painting is hung on a wall.
Step back and admire your peaceful night in the woods
Autumn Tree With Falling Leaf Confetti
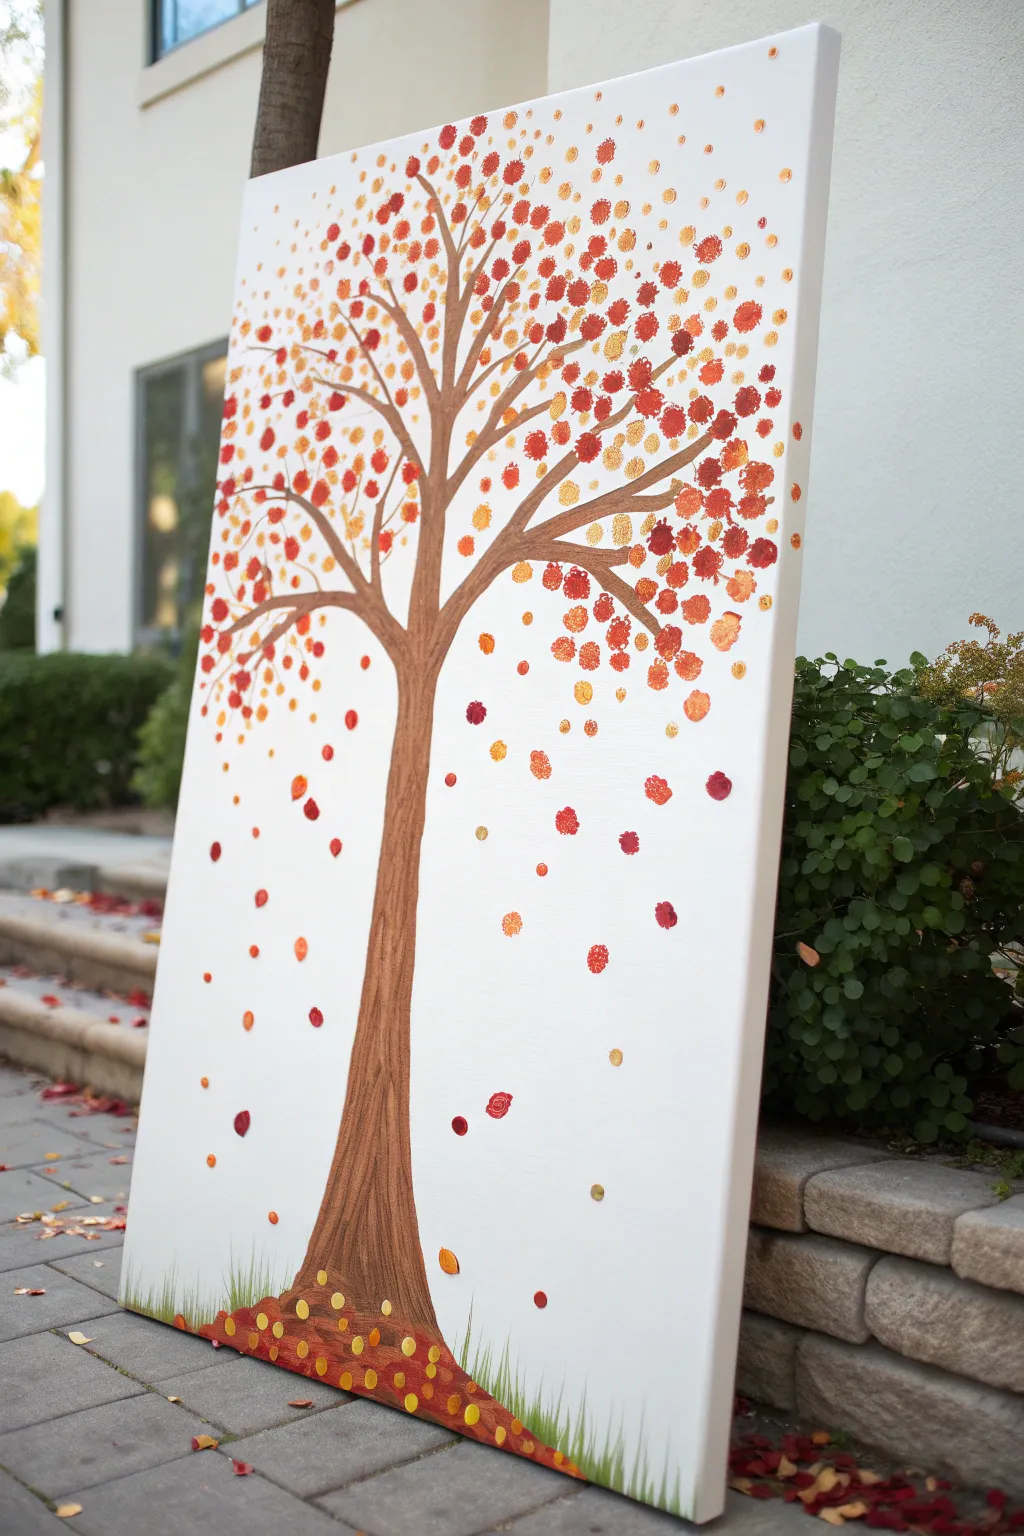
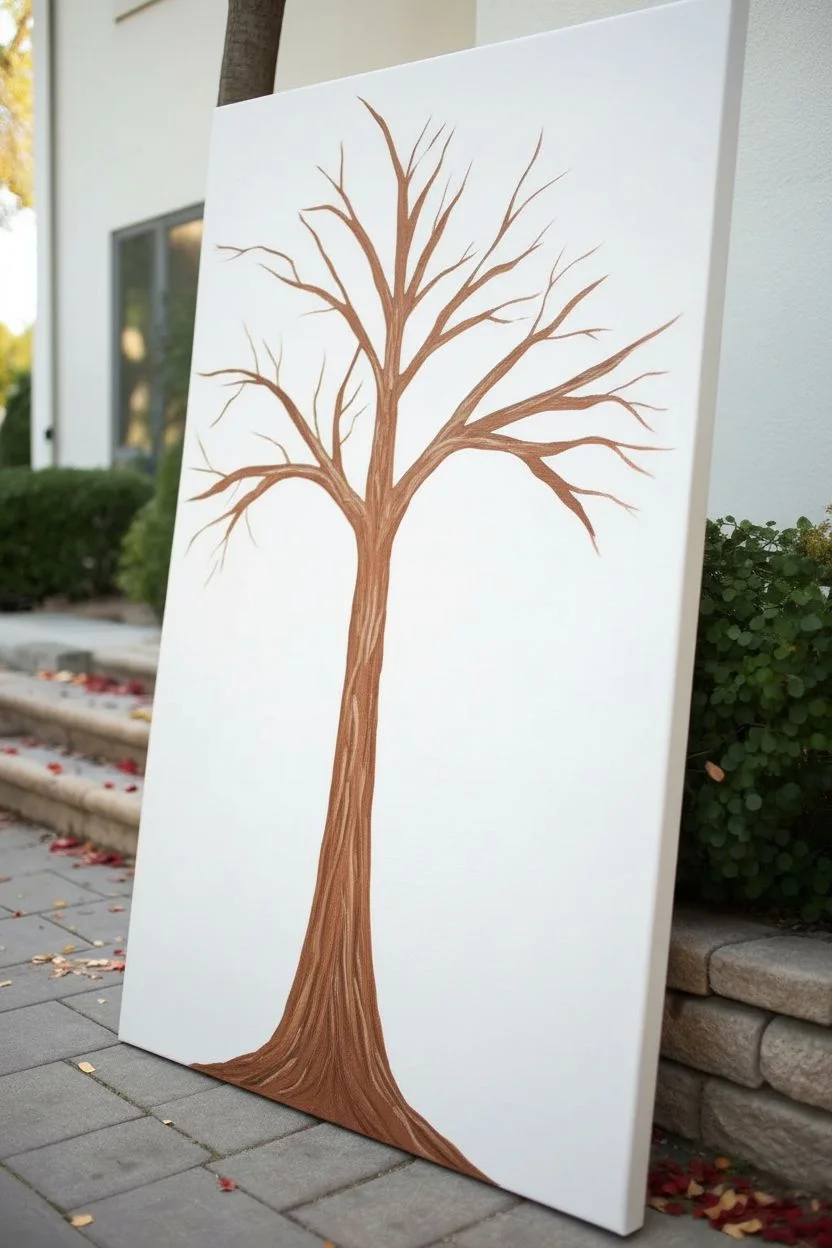
Capture the essence of fall’s gentle descent with this vibrant, vertical canvas piece. Using simple dabbing techniques and a warm, inviting palette, you’ll create a stylized tree shedding its colorful foliage in a shower of confetti-like leaves.
Step-by-Step Guide
Materials
- Large rectangular stretched canvas (e.g., 24×36 or similar ratio)
- Acrylic paints: Burnt Umber, Raw Sienna, Cadmium Red, Cadmium Orange, Yellow Ochre, Gold Metallic, Sap Green, Titanium White
- Paintbrushes: Flat brush (1/2 inch or 3/4 inch), Round brush (size 4 or 6), Round sponge pouncer or q-tips (optional for leaves)
- Palette for mixing paint
- Pencil for sketching
- Paper towels
- Cup of water
Step 1: Painting the Tree Structure
-
Prepare the canvas:
Begin with a clean white canvas. If your canvas isn’t primed, apply a coat of gesso and let it dry. For this composition, orient the canvas vertically to emphasize the falling leaf effect. -
Sketch the trunk outline:
Lightly sketch the tree trunk with a pencil. Start the base at the bottom center, roughly 1/3 of the canvas width, and taper it gently as it rises. Around the vertical center of the canvas, split the trunk into two or three main large branches that reach upward and outward. -
Mix your base trunk color:
On your palette, mix Burnt Umber with a touch of white or a tiny bit of red to warm it up. This will be your base bark color. -
Fill in the trunk:
Using a flat brush, paint the entire trunk area with your brown mixture. Use long, vertical strokes to mimic the direction of wood grain. Don’t worry if the coverage isn’t perfectly opaque in one coat; slight variations add texture. -
Add bark texture:
While the base coat is still slightly tacky or just dry, take a smaller round brush with a darker brown (Burnt Umber pure) and paint thin, wavy vertical lines up the trunk. Then, mix a lighter tan color (Raw Sienna + White) and add highlight streaks on the left or top edges of the branches to suggest a light source. -
Extend the branches:
Using a smaller round brush, extend thinner branches from your main boughs. Let them weave and curve naturally, reaching towards the top corners of the canvas. Keep the branch tips thin and delicate.
Uneven Dots?
If your brush dabs look too streaky, try using the handle end of a paintbrush or a cotton swab. Dip it in paint and press straight down for a perfect circle.
Step 2: Creating the Foliage
-
Prepare your leaf palette:
Squeeze out puddles of your fall colors: Red, Orange, Yellow Ochre, and Metallic Gold. Keep them distinct but close enough on the palette that you can easily grab different shades. -
Start with the canopy center:
Using a small round brush (or a q-tip if you want very uniform dots), dip into the orange paint. Begin dabbing small, irregular circles or ovals around the upper branches. Group them densely near the branches, leaving gaps to see the sky. -
Layering reds and golds:
Clean your brush and switch to red. Add red dots interspersed with the orange, focusing some heavier clusters near the tips of the branches. I find that layering the wet paint slightly can create beautiful marbling within individual ‘leaves’. -
Adding yellow highlights:
Introduce the Yellow Ochre and Metallic Gold dots. Place these towards the top of the tree canopy to simulate sunlight catching the upper leaves. The metallic paint adds a lovely shimmer that changes as you walk past the painting. -
Fill the canopy:
Continue dabbing until the upper third of the canvas is delightfully crowded with color. Ensure the leaves sit *on* and *around* the branches, not just floating above them.
Step 3: The Falling Effect and Ground
-
Begin the leaf fall:
Start adding dots of color below the main canopy. Place them closer together just under the branches, and gradually space them out further as you move down the canvas. -
Creating movement:
Vary the size of these falling dots slightly. A mix of tiny specks and larger, full thumbprint-sized spots creates a sense of depth and movement, as if some leaves are closer to the viewer. -
Scatter widely:
Let the leaves drift quite far down. Place random, solitary dots of red or gold in the vast white space of the middle-lower canvas. This negative space is crucial for the ‘confetti’ look. -
Paint the ground base:
At the very bottom of the canvas, paint a shallow mound around the base of the trunk using your brown bark mixture, blending it out softly into the white background or creating a defined hill shape. -
Add fallen leaves:
Dab a dense collection of red, orange, and gold dots along the bottom edge of the canvas and on top of the brown mound. Cluster them thickly to look like a pile of leaves gathering at the roots. -
Add grass details:
Mix a light Sap Green with a little white. Using your smallest round brush or a fan brush turned on its side, flick quick, short upward strokes from the bottom edge to create tufts of grass poking through the fallen leaves. -
Final metallic touches:
Once most paint is dry, go back with your Metallic Gold. Add fresh, crisp dots on top of the fallen pile and a few extra ‘falling’ ones in the white space to ensure the shimmer isn’t lost under other layers.
Dimensional Texture
Mix a little modeling paste or heavy gel medium into your leaf colors. This will make the dots stand up off the canvas for a tactile 3D effect.
Hang your painting where it can catch natural light to really show off those metallic accents


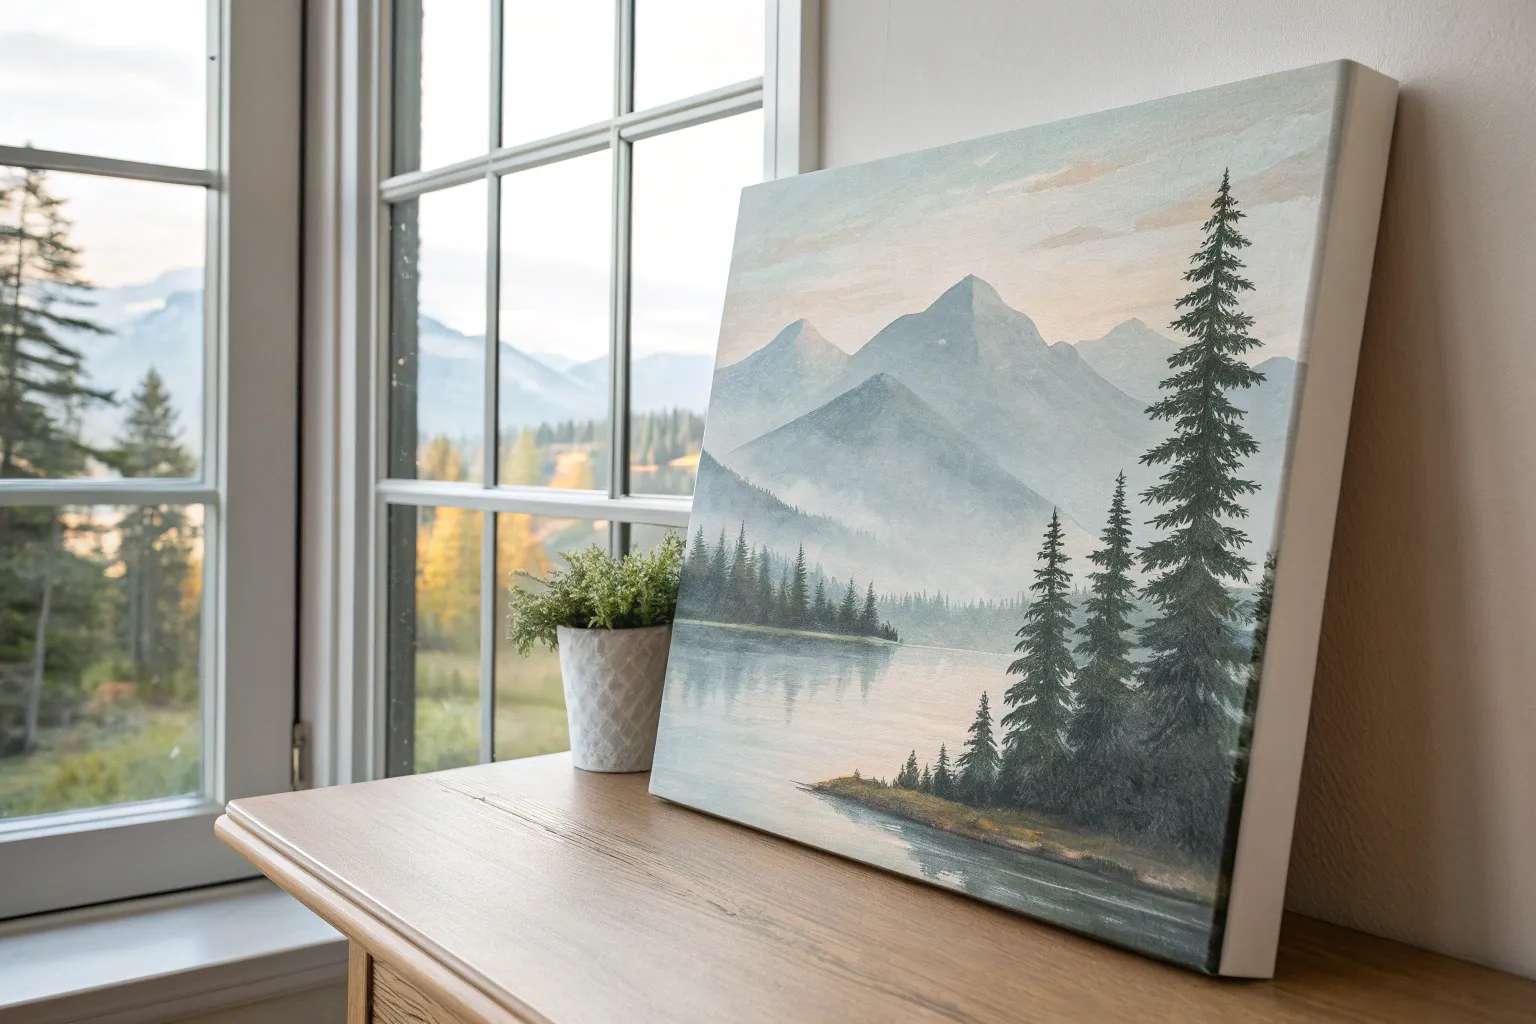
Winter Forest With Snowy Highlights
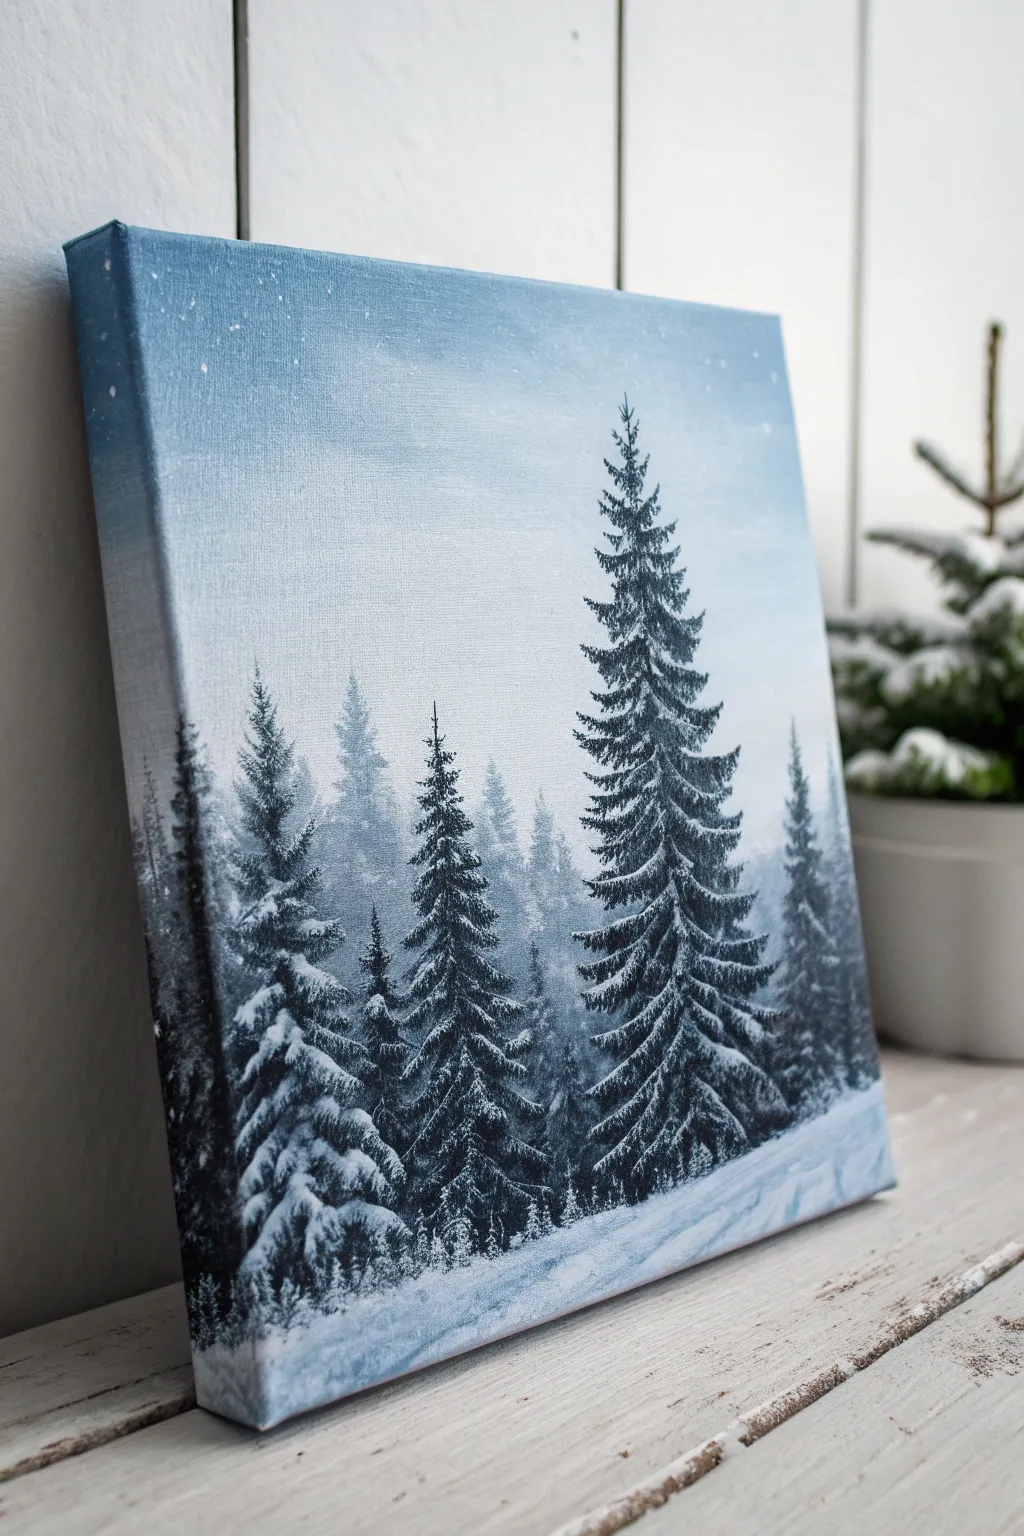

Capture the serene silence of a snowy forest with this acrylic painting tutorial. By layering deep greens against a soft, misty background, you will create a stunning depth that feels like a chilly winter morning.
Detailed Instructions
Materials
- Stretched canvas (e.g., 8×10 or 11×14 inch)
- Acrylic paints: Titanium White, Mars Black, Phthalo Blue (or Prussian Blue), Sap Green
- Large flat brush (1 inch)
- Medium angle brush
- Small round brush or liner brush
- Fan brush (optional but helpful)
- Palette
- Cup of water
- Paper towels
Step 1: Setting the Atmospheric Background
-
Mix the sky gradient:
Begin by mixing a pale blue-grey on your palette. Combine a large amount of Titanium White with a tiny touch of Phthalo Blue and the smallest dot of Mars Black to desaturate it. You want a color that looks like cold winter air. -
Paint the upper sky:
Using your large flat brush, apply this pale blue mixture to the top third of the canvas. Use horizontal strokes to ensure smooth coverage. This will be the clearest part of your sky. -
Create the misty horizon:
Without cleaning your brush, pick up more White. Blend this onto the canvas starting from the middle and working upwards into the blue, creating a seamless gradient where the sky gets lighter and foggier as it moves down. -
Add background trees:
While the background is dry to the touch, mix a very pale, transparent grey-blue (more white than pigment). Using a medium brush, paint faint, ghostly silhouettes of pine trees in the distance. These should be blurry and lack detail to create atmospheric depth. -
Layering the mid-ground:
Mix a slightly darker shade of blue-grey. Paint a second row of trees slightly lower than the first layer. Make these a bit more distinct but still soft, keeping them looking ‘far away’ by avoiding harsh lines.
Natural Chaos
Don’t make your pine trees perfectly symmetrical triangles. Nature is messy. Intentionally paint some branches longer on one side or leave small gaps to make the tree look organic.
Step 2: Painting the Dark Foreground Trees
-
Mix the pine color:
Create a deep, dark forest green. Mix Sap Green with Mars Black and a touch of Blue. It should look almost black on the palette but will reveal green tones when applied. -
Establish the main tree lines:
Using the edge of your angle brush or a round brush, paint vertical lines to mark the trunks of your main foreground trees. Position the tallest, most prominent tree slightly off-center to the right side. -
Form the branches:
Starting from the top of your main tree, tap the brush in a downward zigzag motion. As you move down the trunk, make the branches wider and fuller. Use the dark mixture to create the dense shadows of the pine needles. -
Populate the forest:
Repeat this process for the other foreground trees on the left. Vary their heights and thickness so they don’t look like identical soldiers. I find it helps to overlap some branches slightly for realism. -
Anchor the trees:
At the base of the trees, stipple (tap repeatedly) the dark paint into the white bottom area to suggest bushes or low vegetation buried in shadow.
Step 3: Adding Snow and Highlights
-
Prepare the snow paint:
Clean your brush thoroughly. Squeeze out fresh Titanium White. If your paint is very thick, add a drop of water so it flows, but keep it opaque. -
Highlight the treetops:
Using a small round brush, gently tap pure white onto the very tips of the upper branches. Imagine the light coming from above; the snow sits on top of the dark clumps you painted earlier. -
Build heavy snow layers:
Moving down the main tree, apply thicker blobs of white paint to the top edges of the sweeping branches. Don’t cover all the dark green—preserve those shadows to maintain contrast and volume. -
Detail the surrounding trees:
Add snow to the other foreground trees. Be mindful of the direction of the branches; pine branches often droop under the weight of heavy snow, so paint your white highlights with a slight downward curve. -
Create the snowy ground:
Use the large brush with white and a tiny hint of blue to paint the ground. Use sweeping, horizontal strokes that curve slightly to mimic drifts and uneven terrain. -
Add ground shadows:
Mix a very watery pale blue. Glaze thin shadows under the trees on the snow to ground them, pulling the shadow color diagonally across the bottom right corner to lead the eye. -
Falling snow effect:
Dilute some white paint with water until it’s inky. Load a brush (or an old toothbrush) and gently flick the bristles to splatter tiny dots across the canvas, creating the effect of falling snow. -
Final touches:
Step back and assess your values. If the snow looks too flat, add a tiny touch of bright white to the areas most exposed to light on the heavy branches.
Sparkle Effect
While the white snow highlights are still wet, sprinkle a tiny pinch of iridescent fine glitter onto the canvas. It will catch the light like real frost without looking tacky.
Now you have a tranquil winter scene that brings a hush to any room it hangs in
Cherry Blossom Branch Close-Up With Texture Dots
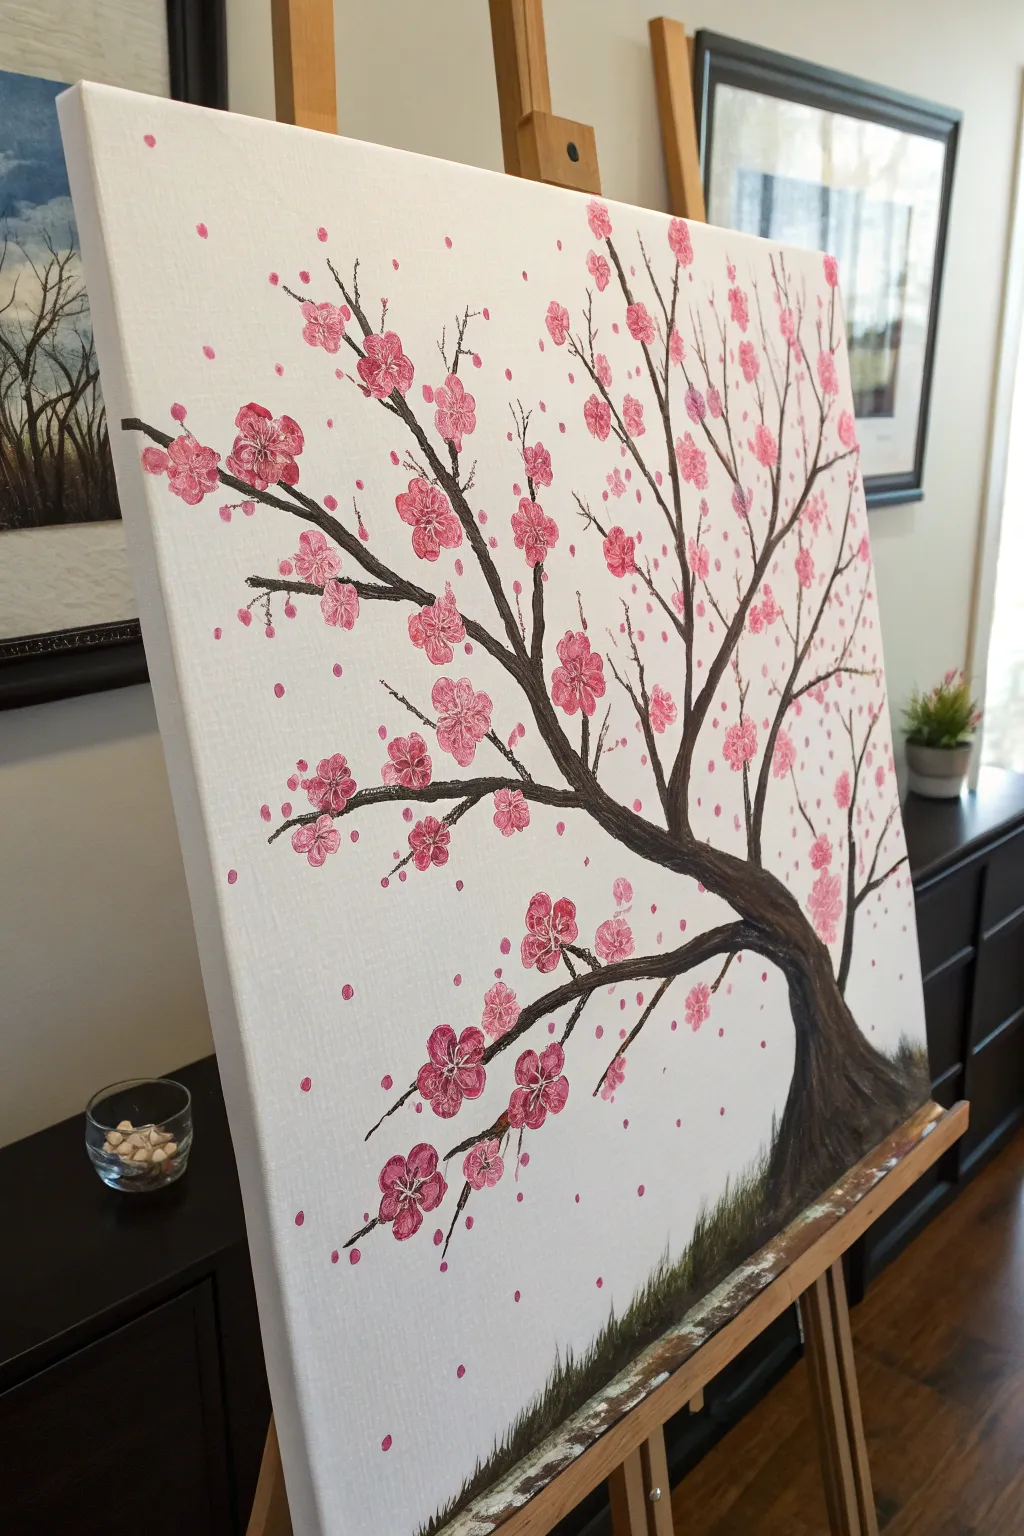
This elegant cherry blossom painting uses simple techniques to create a beautiful, airy composition perfect for beginners. The star of the show is the clever use of Q-tips to create uniform, textured petals that seem to float off the canvas.
Step-by-Step Tutorial
Materials
- Stretched canvas (e.g., 16×20 inches)
- Acrylic paints: Dark Brown, Black, White, Bright Pink, Light Pink
- Round brush (size 6 or 8)
- Small liner brush (size 1 or 2)
- Bundle of 4-5 Q-tips (cotton swabs)
- Rubber band
- Single Q-tip
- Palette or paper plate
- Jar of water
- Paper towels
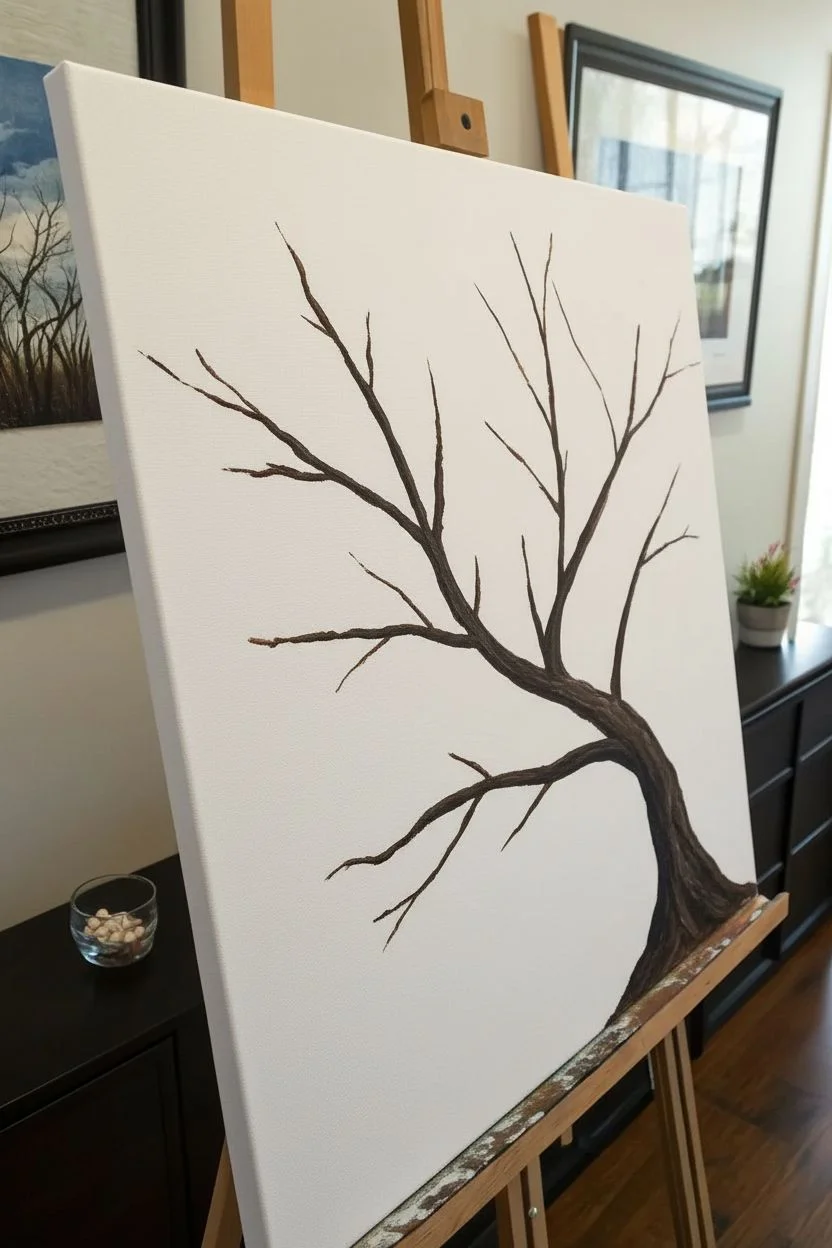
Step 1: Painting the Tree Structure
-
Prepare the Background:
Since this painting relies on a stark, clean look, you can leave a pre-primed white canvas as is. However, if you want a subtle warmth, paint a very thin wash of white mixed with the tiniest dot of pink over the whole surface and let it dry completely. -
Mix the Trunk Color:
On your palette, mix a dark brown with a small amount of black. You want a deep, rich earth tone that provides strong contrast against the white background. -
Outline the Trunk Base:
Using your medium round brush, start at the bottom right corner of the canvas. Paint a wide, curved base that tapers as it reaches upward toward the center, creating the main anchoring point of the tree. -
Extend the Main Branches:
Continue extending the trunk upwards, splitting it into two or three primary thick branches. Let your hand wobble slightly as you paint; tree branches are organic and rarely perfectly straight. -
Add Secondary Branches:
Switch to your smaller liner brush for better control. Paint thinner branches growing off the main ones, ensuring they reach out in different directions to fill the canvas space while leaving gaps for the flowers. -
Paint the Twigs:
Using the very tip of the liner brush with slightly thinned paint (add a drop of water), add delicate, wispy twigs coming off the ends of the branches. These should be very fine lines. -
Ground the Tree:
At the very bottom right where the trunk meets the edge, use upward, flicking brushstrokes with your dark mixture to simulate blades of grass growing around the base of the tree. -
Add Trunk Texture:
While the brown paint is still slightly tacky, mix a tiny bit of white into your brown to make a lighter shade. Run a few streaks along the curve of the trunk to give it a bark-like texture and dimension.
Stamp Testing
Before touching the canvas, test your Q-tip bundle stamp on a scrap piece of paper. This ensures the cotton tips are aligned correctly and prevents ‘blobby’ flowers.
Step 2: Creating the Blossoms
-
Prepare the Blossom Tool:
Take 4 to 5 Q-tips and bundle them together tightly. Secure them with a rubber band so the cotton heads are aligned in a flower-like cluster. -
Load the Paint:
Pour two puddles of pink paint: one bright/dark pink and one soft pastel pink. Dip your Q-tip bundle into the darker pink first, ensuring all tips have paint, then lightly tap into the lighter pink for a two-tone effect. -
Stamp the First Flowers:
Firmly press the Q-tip bundle onto the canvas near a branch tip. Lift straight up to leave a perfect five-point flower shape. Repeat this process around the main branches. -
Vary the Pressure:
As you continue stamping flowers, vary your pressure slightly. Some stamps can be heavy and opaque, while others can be lighter to look more delicate. -
Fill the Canopy:
Continue stamping clusters of flowers. I like to group some tightly together to create dense areas of bloom, while leaving other branches more sparse. -
Add Falling Petals:
Using a single Q-tip (not the bundle), dip it into the pink paint and dab single dots floating in the empty white space below the branches to simulate falling petals. -
Detail the Flower Centers:
Once the pink stamps are dry to the touch, use your smallest liner brush with a tiny bit of white paint. Add 3-4 very small, thin lines radiating from the center of the larger flower clusters to mimic stamens. -
Add Single Buds:
Use the single Q-tip to add individual pink dots directly on the thin twigs. These represent buds that haven’t fully opened yet. -
Final Grass Accents:
If you like, add a gentle wash of watered-down dark green or black near the grass area at the bottom to soften the transition between the tree and the canvas edge.
Fixing Smudged Petals
If a flower stamp smudges or looks messy, let it dry completely. Then, simply paint over it with white paint (your background color) and re-stamp it once dry.
Step back and admire the lovely depth and texture of your cherry blossom tree as it brightens up the room
Minimal Birds on a Wire Against a Soft Gradient
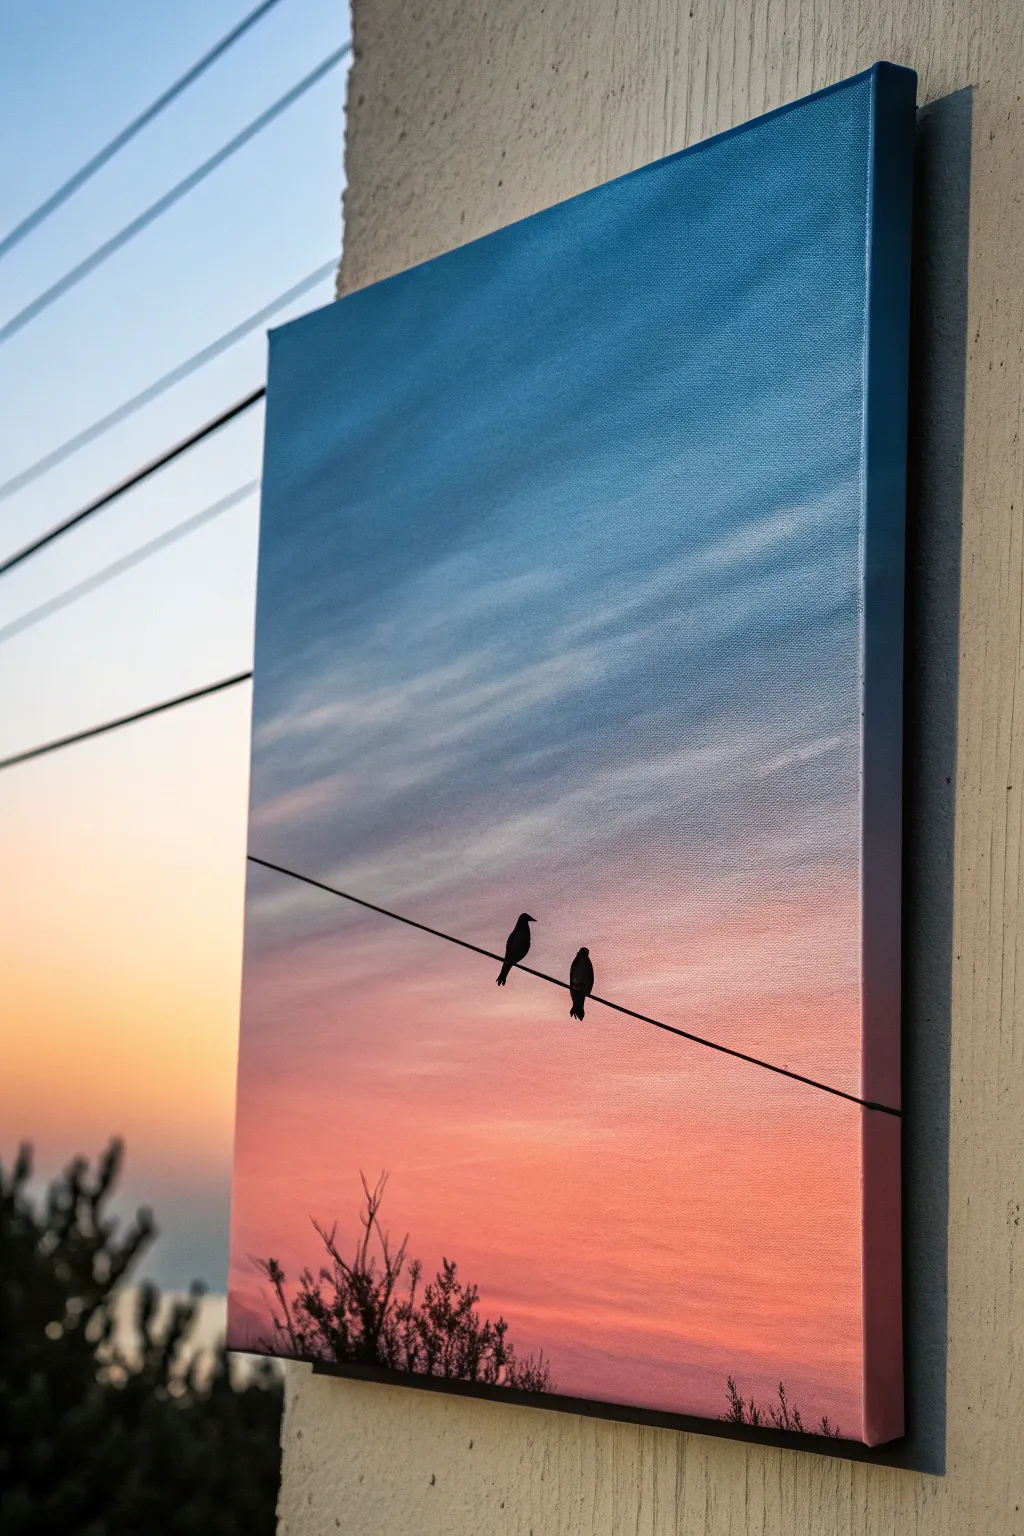
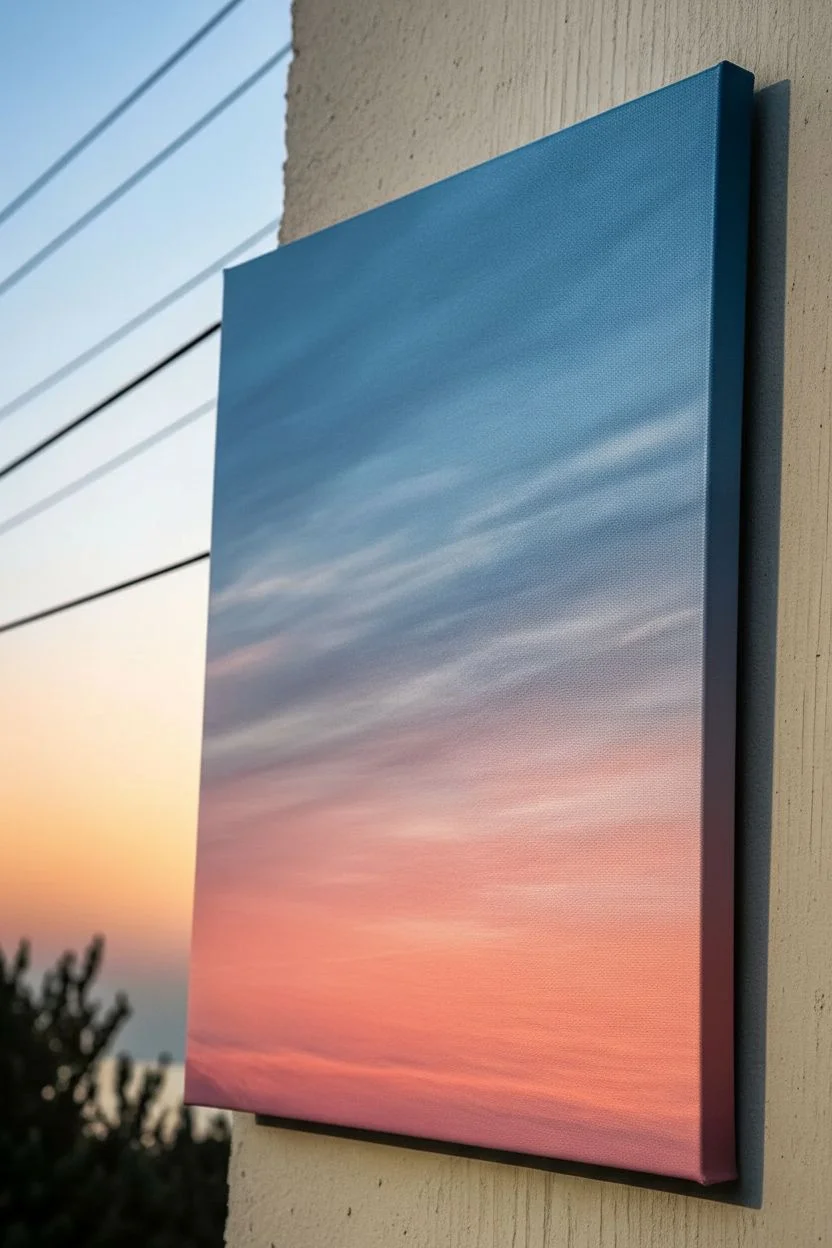
Capture the serene beauty of dusk with this gradient-based acrylic painting. By blending soft blues into warm oranges and adding a stark black silhouette, you’ll create a minimalist piece that looks professional but is surprisingly beginner-friendly.
How-To Guide
Materials
- Stretched canvas (rectangular format favored)
- Acrylic paints: Phthalo Blue, Titanium White, Magenta or Alizarin Crimson, Cadmium Yellow, Mars Black
- Wide flat brush (1-2 inch) for background
- Round liner brush (size 0 or 1) for details
- Small flat brush
- Palette or mixing plate
- Cup of water and paper towels
- Ruler or straight edge
- Pencil
Step 1: Creating the Sunset Gradient
-
Prepare your palette:
Squeeze out generous amounts of blue, white, magenta, and yellow. You will need more white than any other color to create the pastel transitions. -
Start with the sky blue:
Mix a light blue using Phthalo Blue and plenty of Titanium White. Using your wide flat brush, paint the top third of the canvas with horizontal strokes. -
Ensure edge coverage:
Don’t forget to wrap the paint around the sides of the canvas frames for a polished, frameless look. -
Transition to soft purple:
Without cleaning your brush, pick up a tiny bit of magenta and more white. Blend this into the bottom of the wet blue section to create a soft lavender transition area. -
Introduce the warmth:
Clean your brush thoroughly. Mix a pale pinkish-orange using magenta, a touch of yellow, and white. Apply this below the lavender area, blending upward while the paint is still wet. -
Paint the horizon glow:
Mix yellow with a tiny dot of magenta and white to make a warm peach color. Paint the bottom third of the canvas with this vibrant hue, blending it smoothly into the pink section above. -
Add wispy clouds:
While the background is still slightly tacky, wipe your brush almost dry. Pick up a small amount of white and lightly dry-brush horizontal streaks across the blue and purple sections to suggest thin, transparent clouds. -
Let it dry:
Allow the entire background to dry completely. This is crucial—if the background is wet, your sharp black lines will blur.
Smooth Blends
Work quickly on the background! Acrylic dries fast, so keep a mister bottle handy to lightly spray the canvas if the paint drags.
Step 2: Painting the Silhouette Details
-
Plan the wire placement:
Using a ruler and a light pencil touch, draw a diagonal line across the lower third of the canvas. I prefer slightly offsetting the angle so it isn’t perfectly horizontal, adding visual interest. -
Paint the wire:
Load your liner brush with Mars Black thinned slightly with water (to an ink-like consistency). Carefully paint over your pencil line with a single, steady stroke. -
Sketch the birds:
Lightly sketch two small oval shapes resting on the wire. Place them off-center to maintain good composition. -
Fill the bird silhouettes:
Using the small round brush and undiluted black paint, fill in the bird shapes. Add small details like beaks and tail feathers pointing downward. -
Add the foliage:
At the very bottom edge of the canvas, use your small brush to dab irregular black shapes representing treetops or bushes peeking into the frame. -
Create fine branches:
Switch back to the liner brush to pull thin, jagged lines upward from the bottom foliage, mimicking twiggy growth against the sunset. -
Final touches:
Check your black areas for opacity; if the sunset shows through, apply a second coat of black once the first is dry.
Level Up: Optical Illusion
Paint the background gradient on the SIDES of the canvas, but continue the black wire line straight across the edges for a 3D effect.
Now step back and enjoy the peaceful simplicity of your twilight scene
Lighthouse on a Rocky Coast With a Light Beam
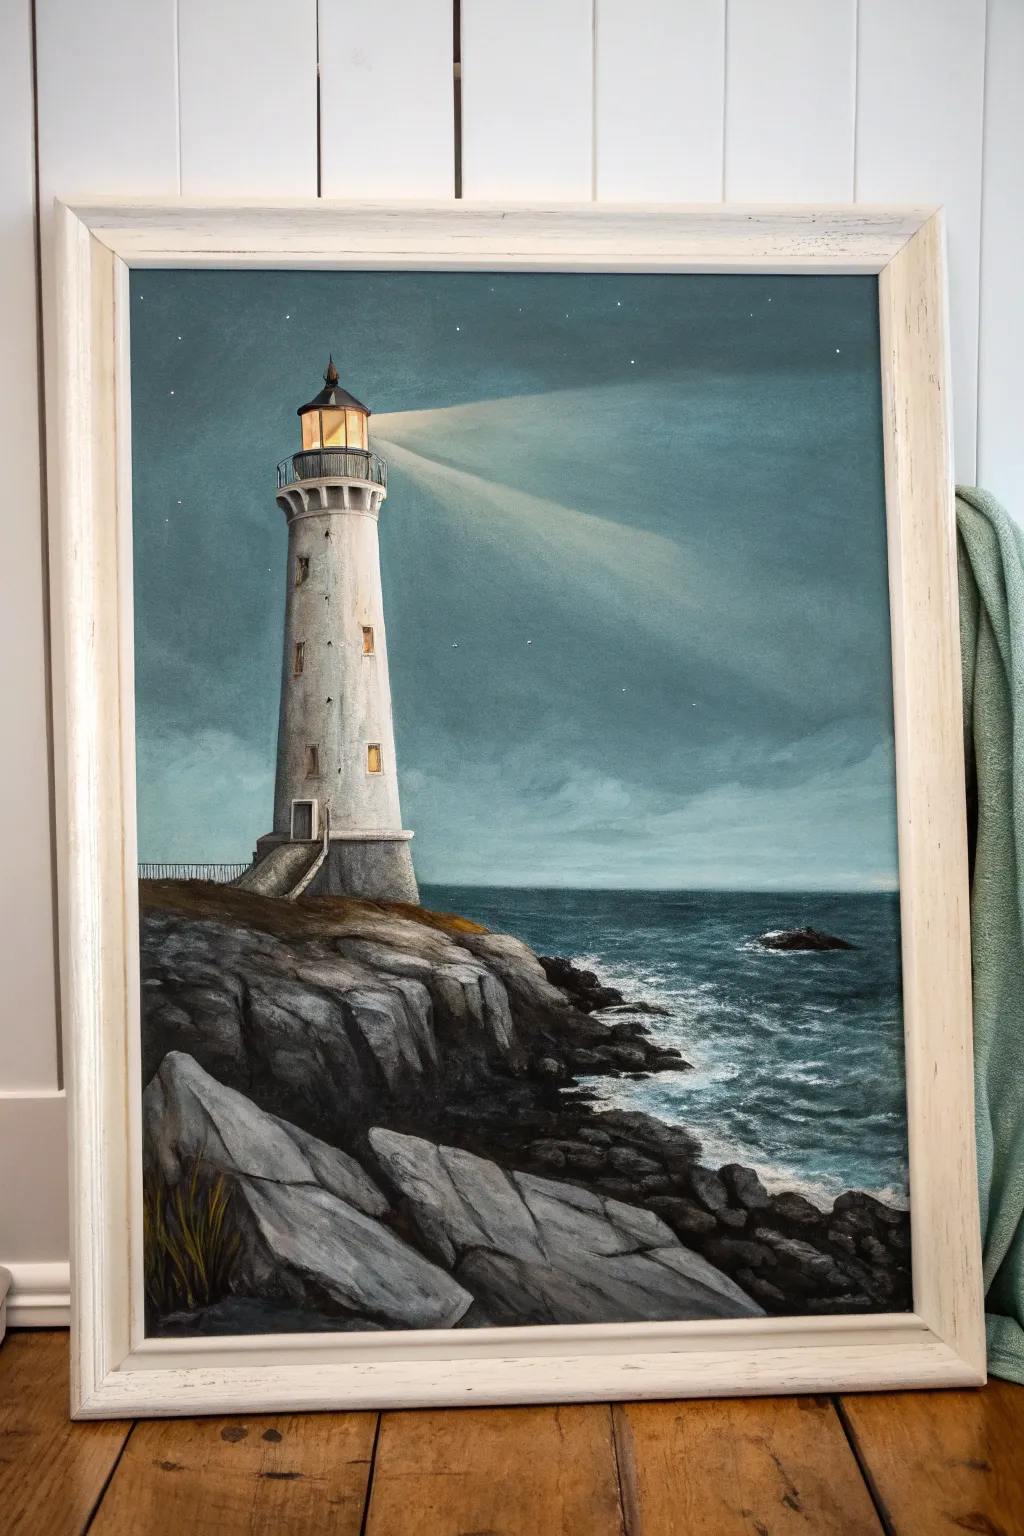
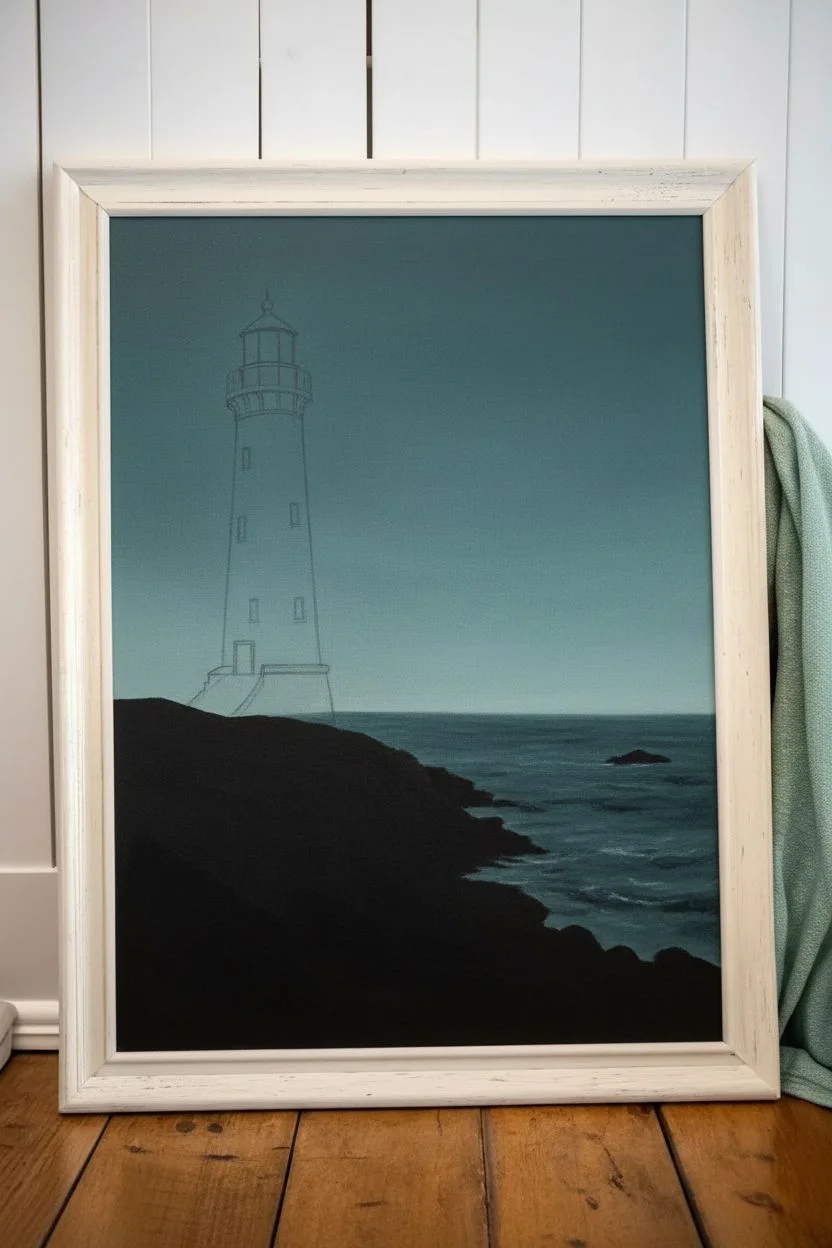
Capture the solitary beauty of a lighthouse standing guard against a moody twilight sky with this acrylic painting tutorial. You will learn how to build up rocky textures and create a convincing, hazy light beam that cuts through the darkness.
Step-by-Step
Materials
- Stretched canvas (e.g., 16×20 inches)
- Acrylic paints: Titanium White, Mars Black, Phthalo Blue, Burnt Umber, Yellow Ochre, Cadmium Yellow
- Flat brushes (large and medium) for sky and water
- Round brushes (small and detail liner) for the lighthouse
- Fan brush (optional, for rock texture)
- Palette knife
- Cup of water and paper towels
- Chalk or pencil for sketching
- Ruler
Step 1: Setting the Scene
-
Sketch the composition:
Begin by lightly sketching the horizon line about one-third of the way up the canvas. Use a ruler to ensure the lighthouse stands perfectly straight on the left side, sketching its tapered cylinder shape, lantern room, and the rocky cliff base. -
Block in the sky gradient:
Mix a dark teal using Phthalo Blue, a touch of Mars Black, and a little White. Paint the top portion of the sky, gradually adding more White as you work your way down to the horizon to create a seamless Ombré effect. -
Paint the base water layer:
Using a slightly darker version of your sky color, fill in the sea area. Use horizontal strokes to mimic the flow of water, keeping the color deepest near the horizon line. -
Establish the rocky masses:
Mix Mars Black with Burnt Umber to create a dark, near-black silhouette for the rocks in the foreground. Block in the shape of the cliff and the shoreline rocks, completely covering the canvas in those areas.
Beam Looks Too Solid?
If your light beam looks like a solid cone, dip a clean brush in water and scrub the edges gently to dissolve the hard line. You can also dry-brush a bit of the sky color back over the edges.
Step 2: Constructing the Lighthouse
-
Base coat the structure:
Paint the lighthouse tower with a mix of Titanium White and a tiny drop of Burnt Umber for a weathered, off-white look. It doesn’t need to be perfectly solid yet; some transparency adds texture. -
Add shadows for roundness:
To make the tower look cylindrical, glaze a thin, watery grey mixture along the left side of the tower (away from the light source). Blend this softly into the white center. -
Detail the lantern room:
Switch to your smallest liner brush. Use black to paint the railing, the roof cap, and the framing of the glass at the top. Be steady and precise here. -
Illuminate the windows:
Mix Cadmium Yellow with Titanium White. Carefully paint the glass area of the lantern room and the small windows going down the tower. Add a tiny dot of pure white in the center of the yellow for intense brightness. -
Add texture to the tower:
Using a dry brush or sponge with very little grey paint, dab gently on the tower’s surface to simulate aging stucco or concrete.
Straight Lines Trick
For the perfectly straight sides of the lighthouse tower, apply two strips of painter’s tape to the canvas. Paint between them, let it dry, and peel for crisp, clean edges every time.
Step 3: Atmosphere and Beams
-
Create the main light beam:
Mix a very transparent glaze of Titanium White with a hint of Yellow Ochre and a lot of water (or glazing medium). Using a flat brush, sweep a broad, widening stroke from the lantern room out to the right. -
Soften the edges:
Before the glaze dries completely, use a clean, dry brush to feather the edges of the light beam so it looks hazy and atmospheric rather than like a solid object. -
Add the secondary beam:
Paint a fainter, second beam below the main one using an even more watered-down mixture to suggest scattered light. -
Paint the stars:
Dip a toothbrush or stif bristle brush in watered-down white paint and flick it gently to create distant stars. Use a liner brush to add a few brighter, specific stars.
Step 4: Texturing the Coast
-
Highlight the rocks:
Mix a light grey. Using a palette knife or a fluted paintbrush, drag the paint horizontally across the tops of the black rock shapes. The texture of the canvas will help catch the paint, creating natural-looking ridges. -
Define the foreground boulders:
For the large rocks at the very bottom, paint distinct facets using shades of grey. Paint the top planes lighter and leave the side planes dark to show volume. -
Paint the sea foam:
Use pure Titanium White on a small brush to stipple foam around the base of the rocks where the water meets the shore. I find dragging the brush slightly helps mimic the movement of crashing waves. -
Add grassy details:
Mix sap green or yellow ochre with black. Use a liner brush to flick upward strokes in the bottom left corner, suggesting dry coastal grass growing from the rock crevices. -
Final touches:
Add a crisp white highlight to the railing of the lighthouse and the edge of the stairs leading up to the door to make them pop against the dark background.
Step back and admire how your light cuts through the darkness, guiding imaginary ships to safety
Underwater Scene With Fish Silhouettes and Bubbles
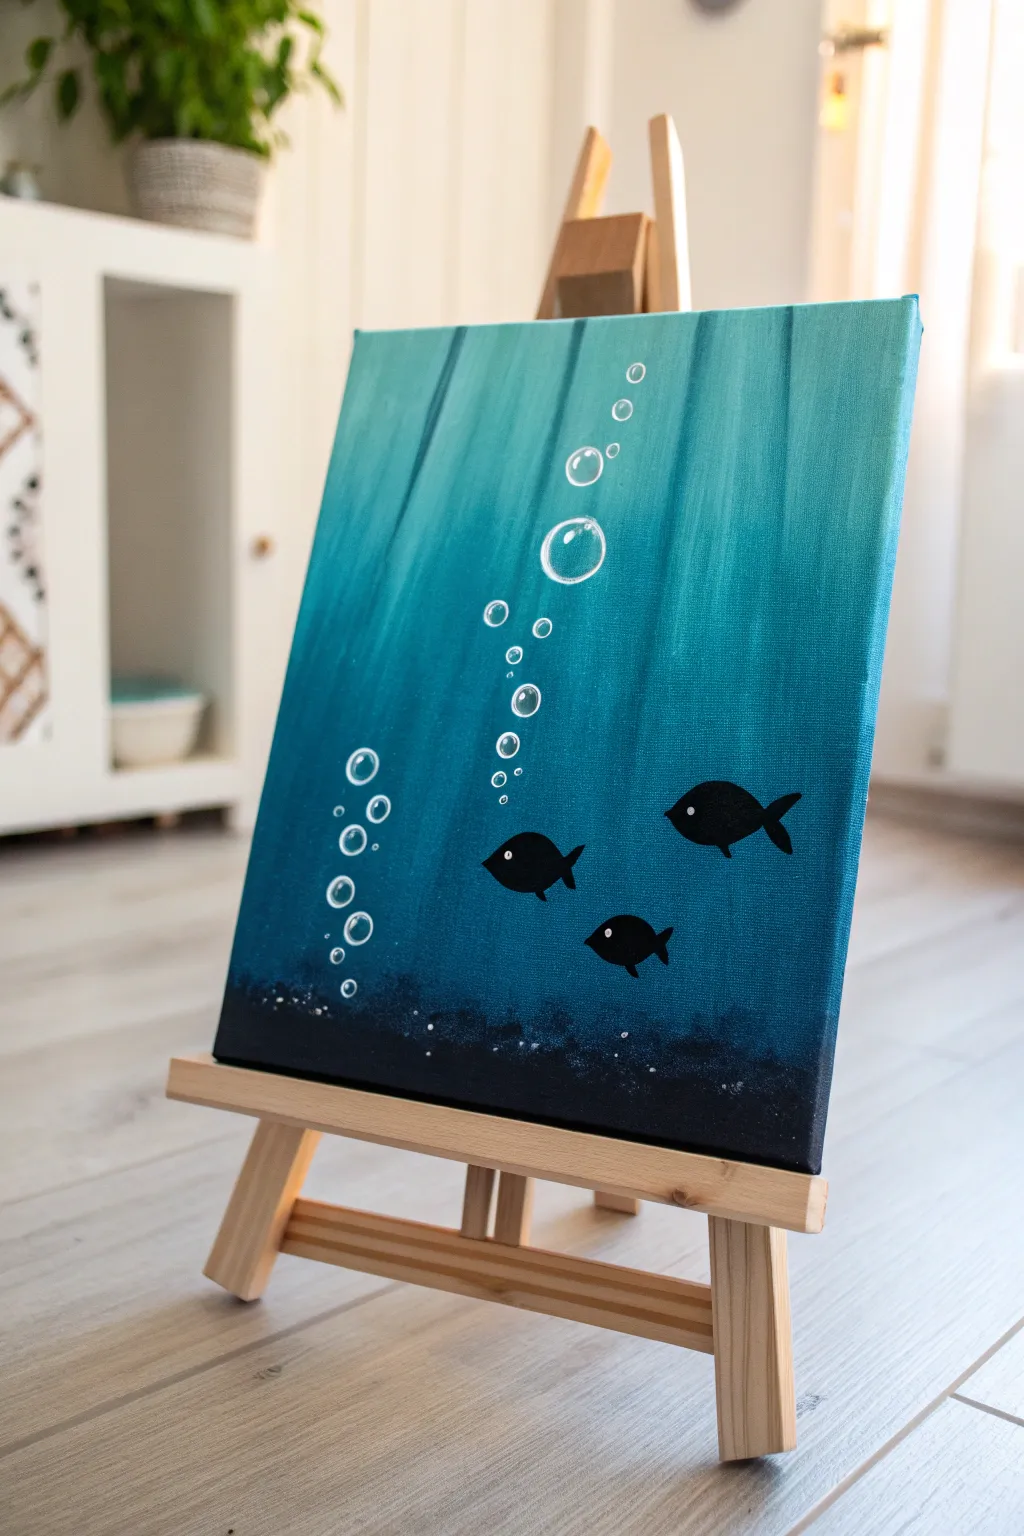
Capture the serene mystery of the ocean depths with this simple yet striking acrylic study. By blending vertical strokes of teal and navy, you’ll create a watery abyss perfect for these playful fish silhouettes and suspended bubbles.
Step-by-Step Tutorial
Materials
- Small rectangular stretched canvas (e.g., 8×10 or similar)
- Acrylic paints: Phthalo Blue (or Teal), Ultramarine Blue, Black, Titanium White
- Flat shader brush (approx. 1 inch width)
- Small round detail brush (size 1 or 2)
- Medium round brush
- Cup of water
- Palette or paper plate
- Paper towels
- Tabletop easel (optional, but helpful)
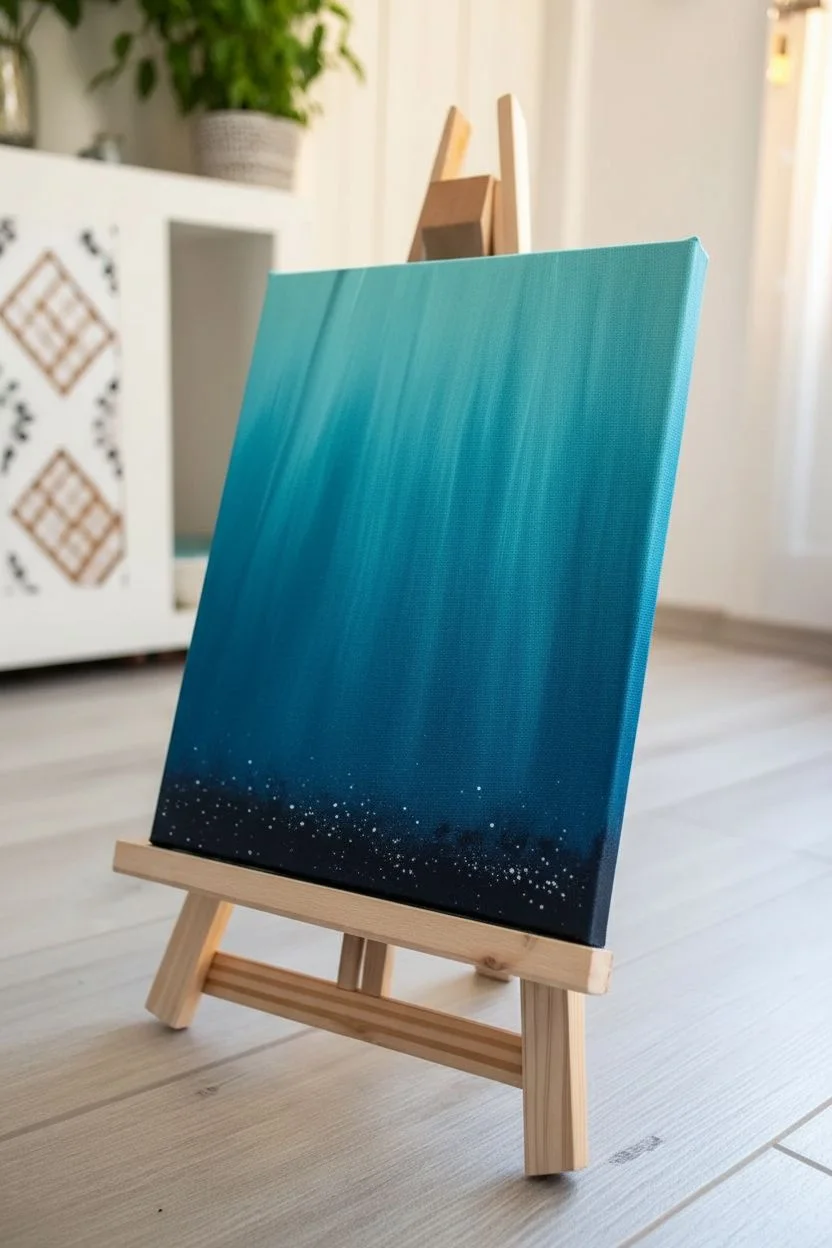
Step 1: Creating the Ocean Depth
-
Prepare the gradient palette:
Squeeze out generous amounts of Teal, Ultramarine Blue, and Black onto your palette. You will also need a bit of White, but keep it separate for now. -
Start with the darkest tones:
Using your flat shader brush, mix a small amount of Black into the Ultramarine Blue to create a deep navy. Apply this horizontally across the bottom 2 inches of the canvas to establish the deep seabed. -
Transition to mid-tones:
Without cleaning the brush entirely, pick up pure Ultramarine Blue. Paint the section just above the dark bottom, blending the wet edges where they meet to soften the transition. -
Introduce the teal:
Clean your brush thoroughly. Load it with the Teal or Phthalo Blue paint. Start painting from the top of the canvas downwards, using long, vertical strokes. -
Blend the vertical light rays:
To create the effect of light filtering down, mix a tiny bit of White into your Teal. Add vertical streaks into the wet teal paint at the top, pulling them down towards the darker middle section. -
Merge the layers:
Where the teal section meets the darker blue middle, use vertical brush strokes to feather the colors together. You want vertical streaks, not a horizontal line, to simulate water columns. -
Darken the seabed texture:
Switch to a medium round brush. Dip it into pure Black and stipple (dab repeatedly) along the very bottom edge of the canvas. This creates a rough, sandy texture for the ocean floor. -
Add floating sediment:
While the black texture is wet, use an old toothbrush or a stiff brush to flick a tiny amount of white speckles near the seabed. Keep this very subtle to represent kicked-up sand. -
Let the background set:
Allow the entire background to dry completely. This is crucial so your crisp fish silhouettes don’t blend into the blue water.
Step 2: Fish and Bubble Details
-
Draft the fish shapes:
If you aren’t confident painting freehand, lightly sketch three simple almond shapes with tails using a pencil or chalk. Place one higher on the right, and two lower on the left. -
Paint the silhouettes:
Using a small round brush loaded with Black paint, carefully fill in your fish shapes. Make the bodies solid opaque black. Add small triangular fins on the top and bottom of each fish. -
Add the eyes:
Wait for the black silhouettes to dry to the touch. Dip the handle end of a small brush into Titanium White paint and dot a single eye onto the front of each fish. -
Refine the pupil:
Once the white dots are dry, use a toothpick or the very tip of your smallest brush to add a tiny black dot inside the white eye for focus. -
Start the bubble columns:
Mix a watery wash of White paint (50% water, 50% paint). Using a small round brush, paint outline circles of varying sizes rising from the seabed up towards the surface. -
Create bubble highlights:
I like to go back over the top-right curve of each bubble with pure, undiluted White paint. This creates a crisp highlight that makes the bubble look spherical. -
Vary the bubble sizes:
Ensure you have a mix of large bubbles and tiny dots. Cluster them in two main vertical columns to balance the composition against the fish placement. -
Final inspection:
Check the edges of your canvas. Painting the sides with the dark blue or black gives the piece a finished, professional look without needing a frame.
Fixing Smudged Silhouettes
If your black fish paint bleeds into the blue background, let it dry fully. Then, re-paint the blue water around the edge of the fish to sharpen the outline again.
Pro Tip: Glowing Bubbles
For translucent bubbles, wipe your brush almost dry after dipping in white, and gently scumble the center of the bubble, leaving the inside mostly the background color.
Place your canvas on a small easel to enjoy your peaceful underwater view everyday
Hot Air Balloons Floating Through Pastel Clouds
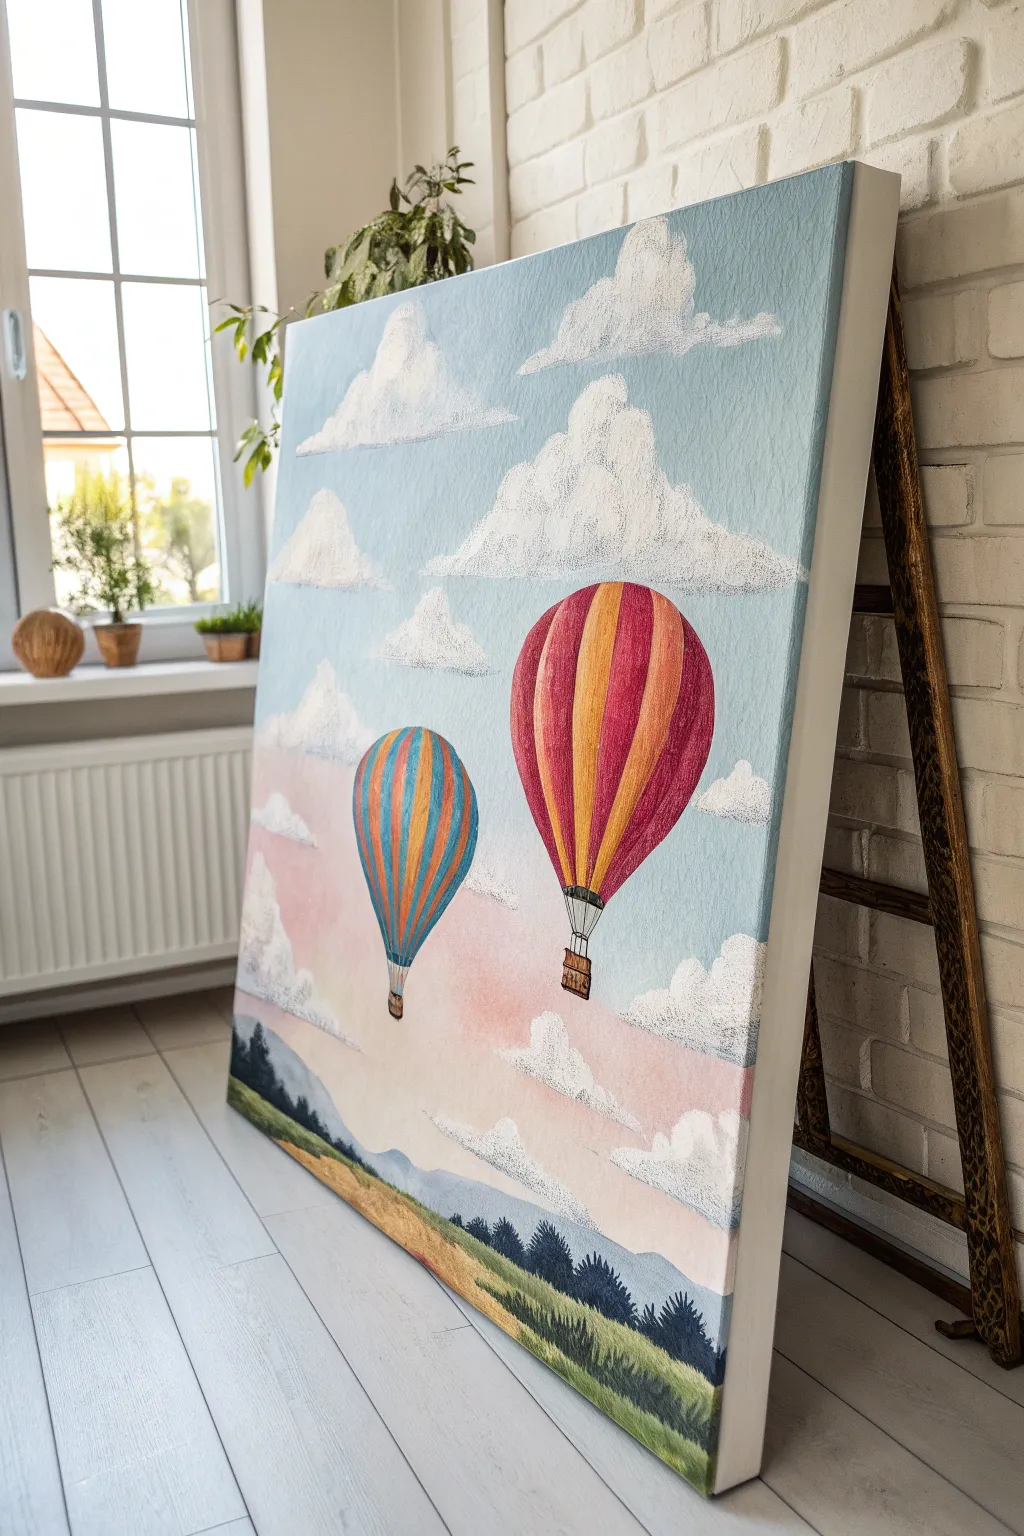
Capture the feeling of a serene morning flight with this layered acrylic canvas project, featuring textured clouds and soft color gradients. The illustrative style brings a charming, storybook quality to any room, blending pastel skies with vibrant pops of balloon color.
Step-by-Step Guide
Materials
- Large stretched canvas (e.g., 24×30 inches)
- Acrylic paints: Titanium White, Sky Blue, Magenta, Cadmium Yellow, Orange, Burnt Sienna, Hooker’s Green, Phthalo Blue
- Large flat brush (2 inch)
- Medium filbert brush
- Small round detail brush
- Texture paste or heavy body white acrylic paint
- Old stiff bristle brush or stencil brush
- Palette knife
- Water cup and paper towels
- Pencil for sketching
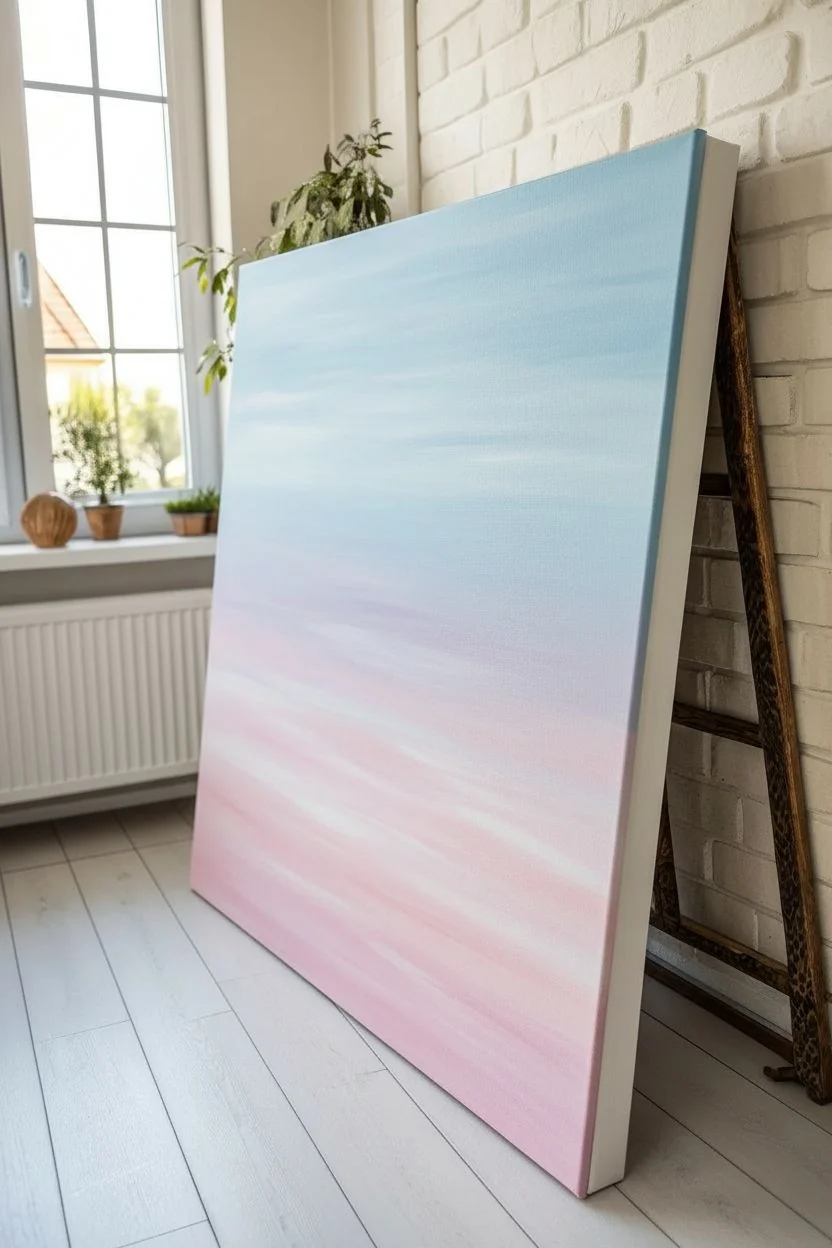
Step 1: Sky Gradient Base
-
Prepare the Sky Palette:
Mix a large amount of light blue using Sky Blue and plenty of Titanium White. Separately, mix a soft pastel pink using a tiny touch of Magenta with White and a hint of Yellow to warm it up. -
Apply the Blue Upper Sky:
Using your large flat brush, start at the very top of the canvas with the light blue mix. Painting in horizontal strokes, cover the top two-thirds of the canvas, gradually adding more white to the brush as you move down to lighten the hue. -
Blend the Horizon:
Switch to a clean brush and pick up your pastel pink mix. Start painting from the bottom third (just above where the ground will be) upward to meet the wet blue paint. -
Create the Gradient:
Where the pink meets the fading blue, gently blend the two colors together using horizontal strokes. The goal is a seamless transition, creating a dreamy lavender-grey tone where they overlap. Let this base layer dry completely.
Step 2: Landscape & Balloons
-
Sketch the Composition:
Lightly sketch the outlines of two hot air balloons—one large main subject on the right and a smaller companion on the left. Also, mark out the horizon line and rolling hill shapes at the bottom. -
Paint the Distant Mountains:
Mix a hazy blue-grey color and paint the furthest mountain range along the horizon line. Keep this layer semi-transparent or watered down slightly to push it into the distance. -
Block in the Fields:
Paint the foreground fields using sweeping strokes of Yellow Ochre (mix Yellow with a dot of Burnt Sienna) and varied greens. Don’t worry about perfect blending here; visible brushstrokes add to the grassy texture. -
Add the Forests:
Using a dark mix of Hooker’s Green and a touch of Phthalo Blue, dab in the tree lines along the horizon and hills. Use a dabbing motion to simulate the tops of pine trees.
Cloud Control
If your clouds look too flat, wait for the first white layer to dry, then dry-brush a very light grey on the bottom curves before restippling pure white on top.
Step 3: The Balloons
-
Base Coat the Balloons:
Paint the main body of the large balloon white first to ensure the colors pop. Do the same for the smaller balloon. -
Stripe the Large Balloon:
Once the white is dry, paint alternating vertical stripes on the large balloon using bold Red (mix Magenta and Orange) and bright Orange. Curve the stripes outward to mimic the round volume of the balloon. -
Stripe the Small Balloon:
For the smaller balloon, use alternating stripes of Blue and Orange. Keep the pigment slightly thinner or softer to show it is further away. -
Add Balloon Details:
Use a small round brush with dark brown or black paint to draw the fine lines of the ropes and the woven texture of the baskets hanging below each balloon.
Make it Sparkle
Mix a tiny amount of iridescent medium or glitter glaze into the final white highlight coat for the clouds. It gives a magical morning shimmer.
Step 4: Textured Clouds
-
Mix Texture Paste:
Mix heavy body white paint or modeling paste with a tiny drop of your sky blue to create a cool white tone. You want a thick consistency that holds its shape. -
Stipple the Cloud Shapes:
Load an old, stiff bristle brush with the thick mix. Using a pouncing or stippling motion (tapping vertically), create fluffy cumulus cloud shapes. Start with the large clouds near the top. -
Refine the Cloud Bottoms:
While the paint is wet, flatten the bottom edges of the clouds slightly with a clean brush to give them weight. I like to keep the tops very distinct and fluffy. -
Create Depth:
Add smaller, wispier clouds lower down near the pink horizon. Use less texture paste here so they appear softer and more distant. -
Final Highlights:
Once the clouds are dry to the touch, add a pure titanium white highlight to the top right of each cloud puff to suggest a light source.
Step back and admire your peaceful sky adventure.
Rainy Umbrellas With Shiny Street Reflections
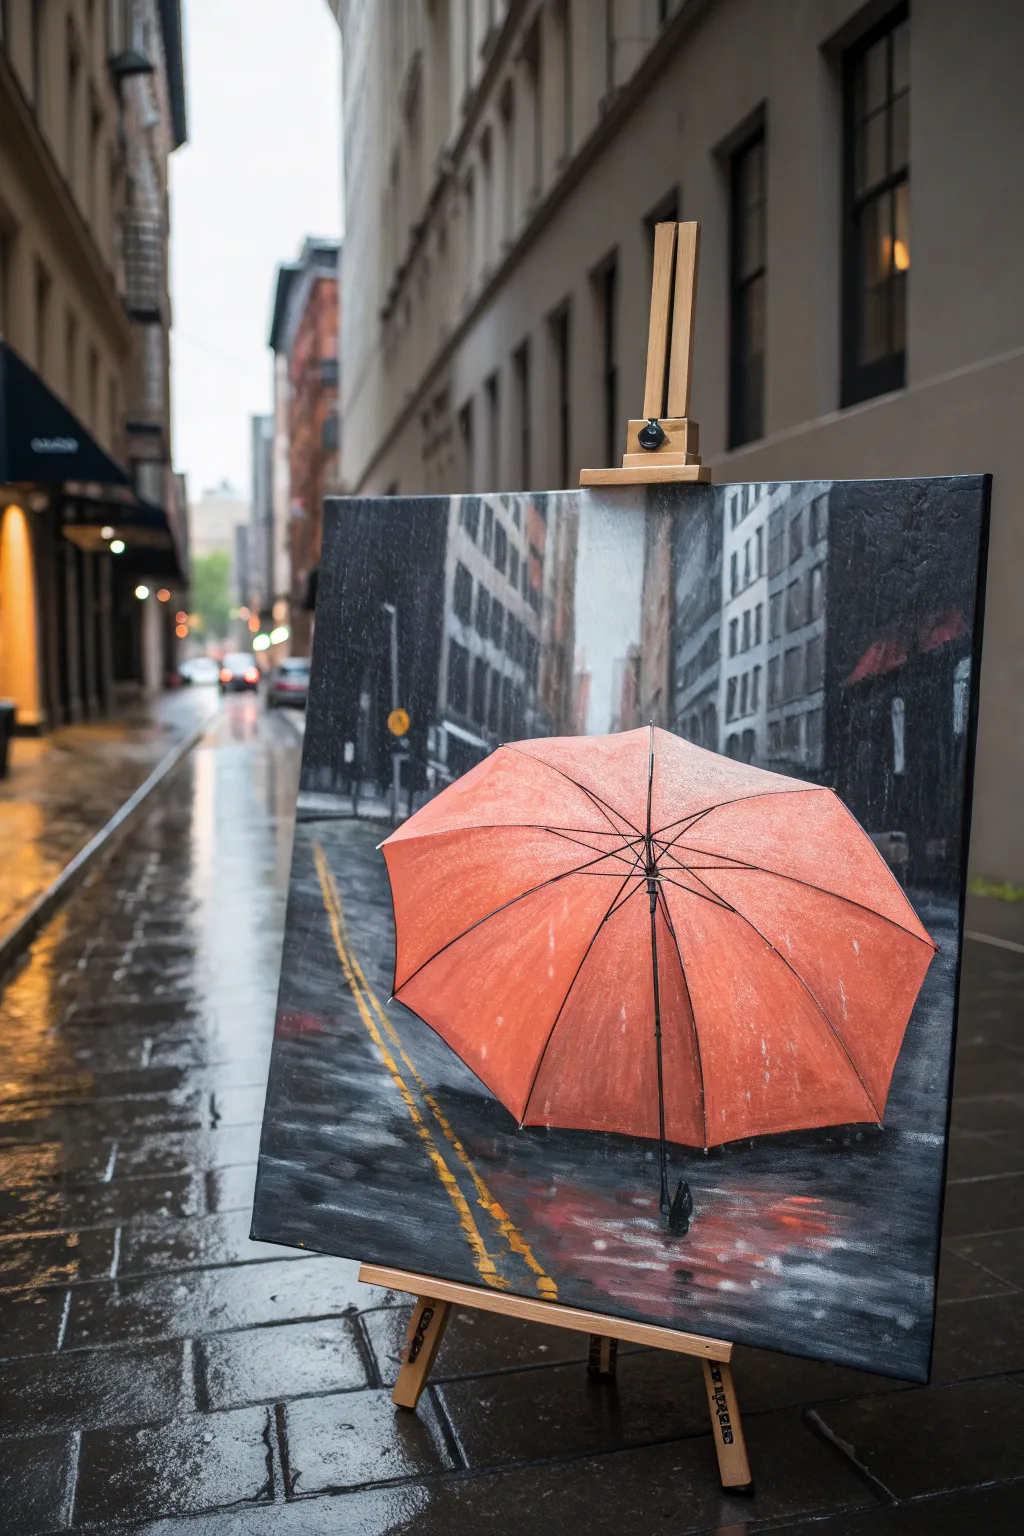
Capture the moody romance of a rainy city day with this striking acrylic painting featuring a vibrant orange umbrella. You will learn to create depth through atmospheric perspective and master the art of painting wet, reflective pavement.
Step-by-Step Tutorial
Materials
- Stretch canvas (approx. 16×20 inches)
- Acrylic paints: Titanium White, Lamp Black, Burnt Umber, Payne’s Grey, Cadmium Orange, Red Ochre, Yellow Ochre
- Assorted flat brushes (large for background, medium for street)
- Round liner brush (size 1 or 2)
- Palette knife (optional for texture)
- Ruler or straight edge
- Water cup and paper towels
- Chalk or pastel pencil for sketching
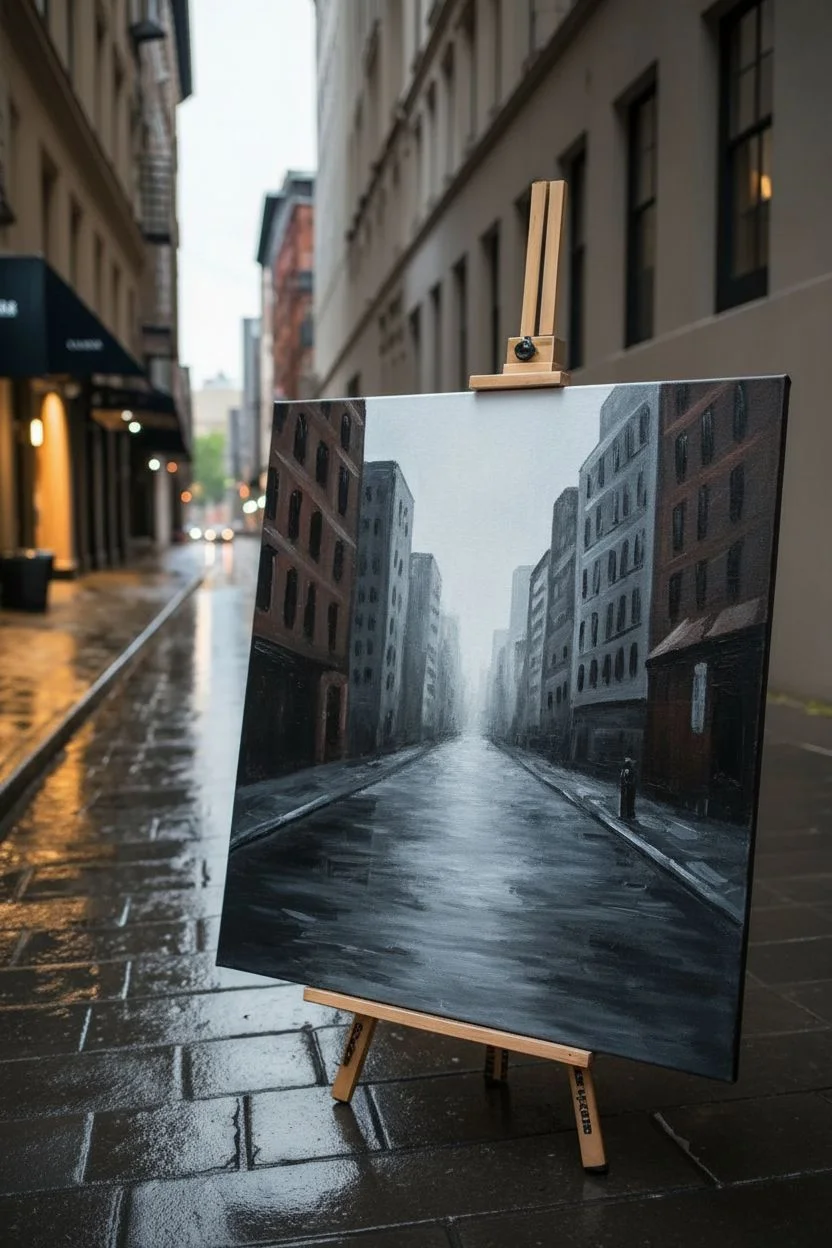
Step 1: Setting the Urban Scene
-
Establish the Perspective:
Begin by lightly sketching your composition with a chalk pencil. Draw a horizon line about one-third up from the bottom. Sketch vertical lines for the buildings on both sides, making sure they angle inwards towards a vanishing point in the center to create depth. -
Block in the Buildings:
Mix a dark grey using Payne’s Grey and a touch of Burnt Umber. Using a large flat brush, paint the shapes of the buildings. Keep the buildings further in the distance lighter and hazier (add more white and water) to simulate atmospheric perspective. -
Add Building Details:
Once the base layer is dry, use a smaller flat brush to add suggestions of windows. Don’t be too precise; just use vertical and horizontal strokes of black and slightly lighter grey to indicate architecture. -
Paint the Sky and Distance:
Fill the narrow strip of sky between the buildings with a pale, misty grey-white. Blend this downwards into the distant street level to create a foggy, rainy atmosphere.
Muddy Reflections?
If your street reflections look muddy, let the dark base layer dry completely first. Then apply the reflections as a thin glaze rather than mixing wet-on-wet.
Step 2: The Wet Pavement
-
Base Layer for the Street:
Paint the entire street area with a dark, cool grey mix (Black + White + touch of Blue/Grey). Use horizontal strokes near the horizon and gradually switch to diagonal strokes following the perspective lines as you move closer to the bottom. -
Create the Shine:
While the street is distinct, wet asphalt reflects the sky. Glaze over the dark street with a very watery, translucent white-grey, focusing on the center and left side where the light hits. -
Yellow Road Lines:
Mix Yellow Ochre with a tiny bit of White. Using your straight edge as a guide, paint the double yellow lines on the left side. Break up the lines occasionally to make them look worn and wet. -
Reflecting the Lines:
Immediately beneath the solid yellow lines, drag your brush downwards with a zigzag motion using the same yellow color but watered down. This creates the reflection of the lines on the wet road.
Step 3: The Hero Umbrella
-
Sketch the Umbrella:
Draw the large, octagonal shape of the umbrella in the lower center foreground. It should be tilted slightly towards the viewer. -
Base Color Application:
Fill the umbrella shape with a mix of Cadmium Orange and a touch of Red Ochre. Apply this flatly first to establish the silhouette. -
Defining the Ribs:
Use a liner brush with dark brown/black to paint the thin lines radiating from the center tip to the edges. These are the structural ribs of the umbrella. -
Adding Volume with Shadows:
I like to mix a bit of purple or dark red into the orange for shadows. Paint these darker tones in the triangular sections of the umbrella, specifically near the ribs and the bottom edges, to make the fabric look curved. -
Highlights and Raindrops:
Mix a pale peach or light orange. Dry brush highlights on the top curves of each umbrella section where the light hits. For rain texture, splatter tiny specks of white paint over the umbrella surface using an old toothbrush or stiff brush. -
The Shaft and Handle:
Paint the central shaft extending downwards using absolute black. Add the curved handle at the bottom.
Pop of Color
Make the orange umbrella really glow by underpainting that specific area with bright white first. This ensures the translucent orange pigment stays vibrant.
Step 4: Final Reflections and Atmosphere
-
Umbrella Reflection:
Beneath the umbrella, paint a blurry, distorted reflection using the same orange tones but muted with grey. Use loose, horizontal brushstrokes to make it look like it’s rippling in a puddle. -
Deepen the Contrast:
Go back in with pure black to darken the deepest shadows in the corners of the street and the base of the buildings. This high contrast makes the wet surfaces pop. -
Rain Streaks:
To enhance the rainy mood, take a dry brush with very faint white paint and drag it vertically down the canvas in a few select spots to suggest falling rain.
Step back and admire how the simple addition of reflections transforms a grey street into a vibrant, wet world.
Masking Tape Geometric Abstract With Clean Edges
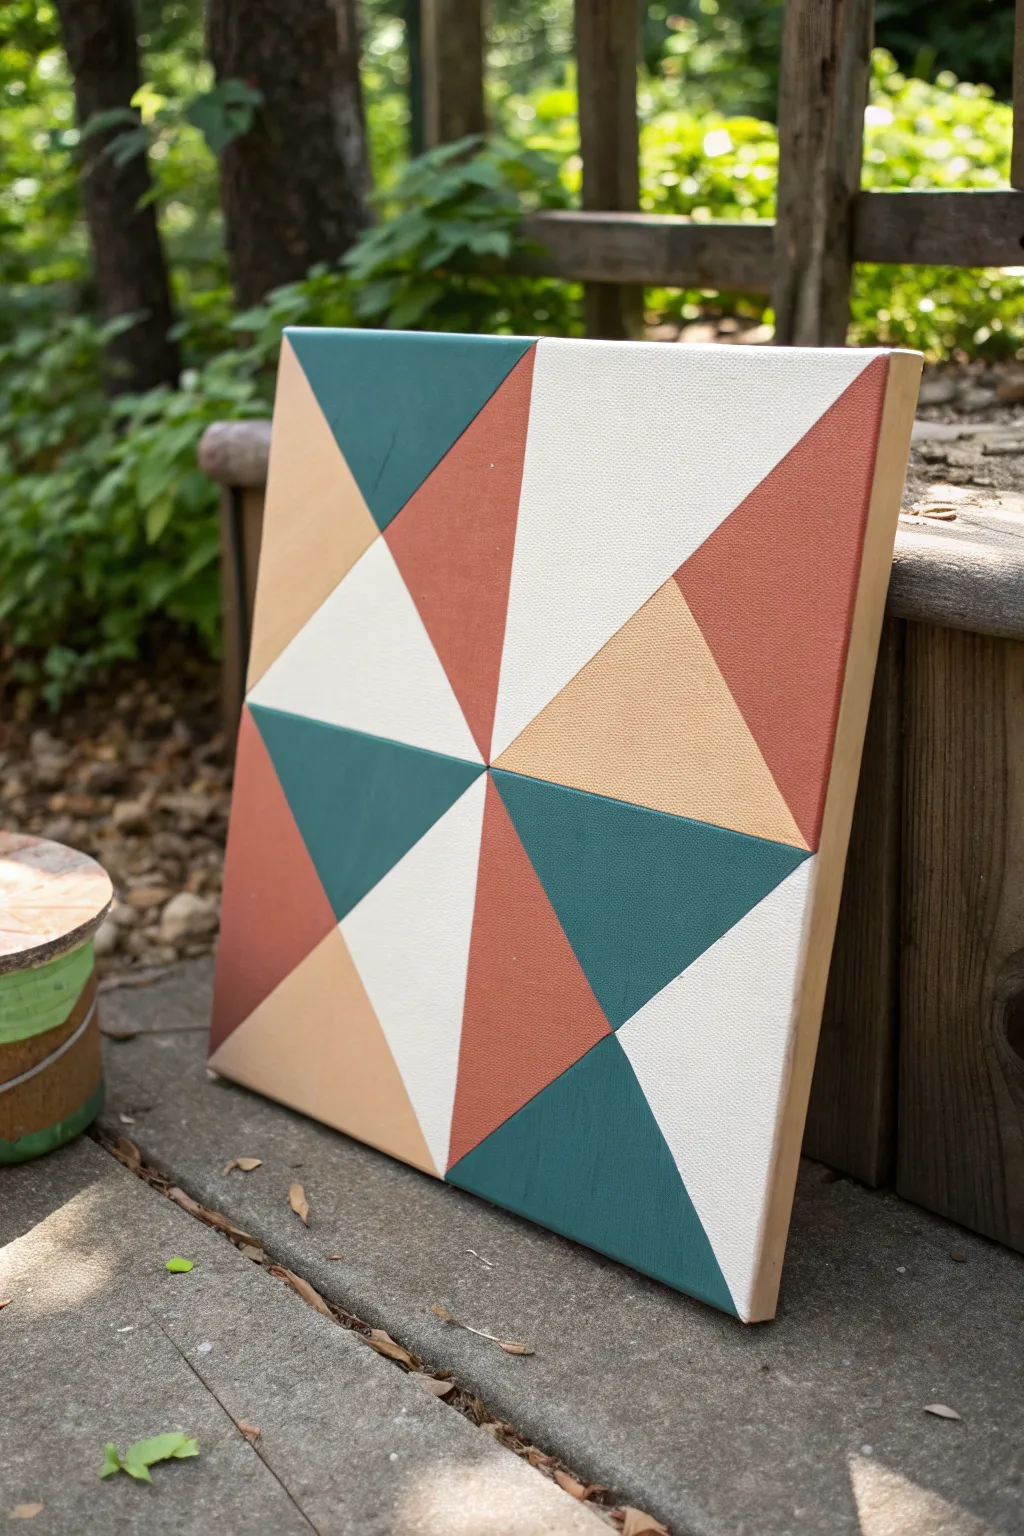
This striking geometric design relies on crisp lines and a modern color palette to create a mesmerizing pinwheel effect. By strategically masking off triangles, you can achieve professional-looking, razor-sharp edges without needing advanced painting skills.
How-To Guide
Materials
- Square stretched canvas (12×12 or similar)
- Acrylic paints: Teal green, terra cotta/rust, light peach/beige, titanium white
- Painter’s tape or dedicated masking tape (0.5 to 1 inch width)
- Flat synthetic paint brushes (medium and small sizes)
- Ruler or straight edge
- Pencil
- Pencil eraser
- Palette or paper plate
- Matte or satin varnish (optional for finish)
- Paper towels and water cup
Step 1: Planning and First Layer
-
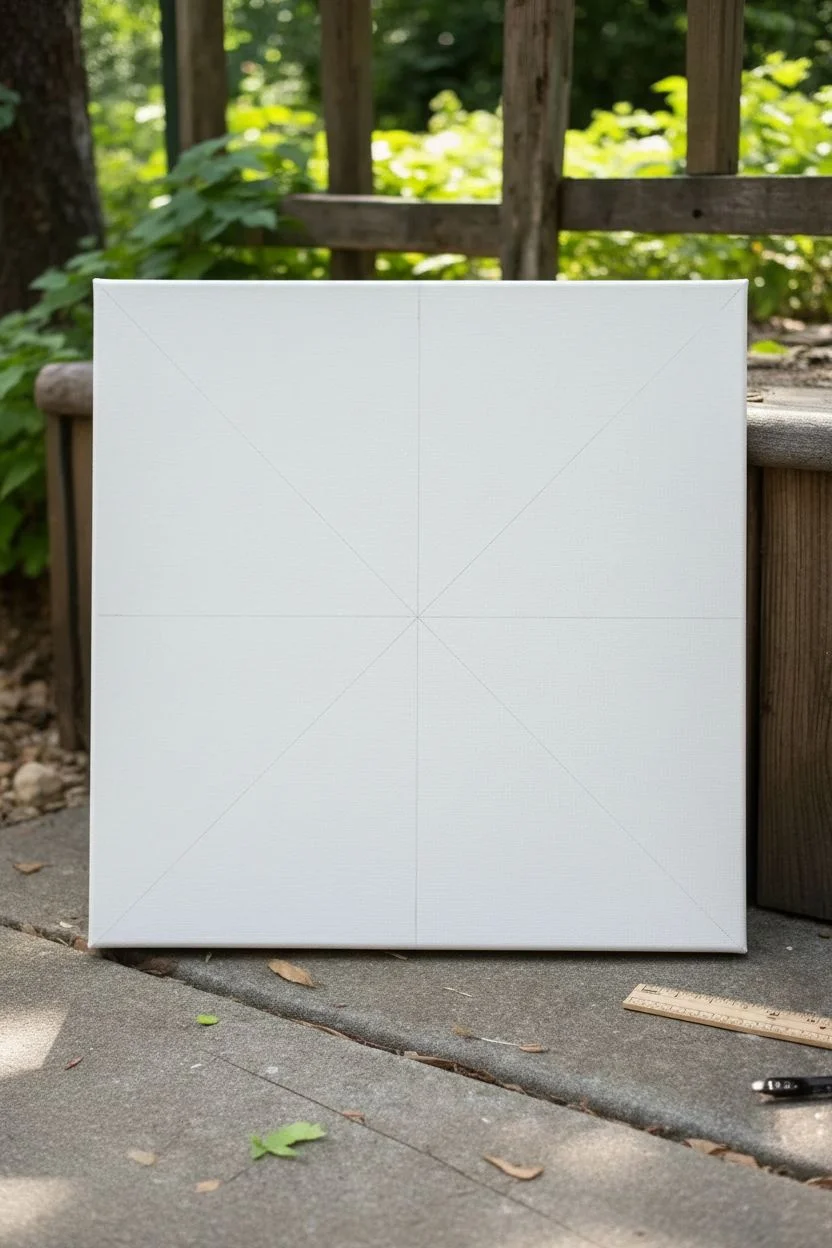
Base coat application:
Begin by painting the entire canvas surface with titanium white acrylic paint. This ensures your background triangles are perfectly opaque and bright. -
Drying time:
Allow the white base coat to dry completely. It must be bone-dry so the tape doesn’t peel it up later. I usually wait at least an hour or use a hair dryer to speed things up. -
Marking the grid:
Using a ruler and a pencil, lightly mark the exact center of the canvas. Draw a vertical line and a horizontal line through the center to divide the canvas into four equal quadrants. -
Drawing diagonals:
Now, draw diagonal lines from corner to corner, passing through the center point. You should now have eight equal triangular sections radiating from the center.
Bleeding Lines?
If paint bleeds under the tape, wait for it to dry completely. Then, use a flat brush with a tiny amount of the *base* color to paint over the bleed, cutting a straight line back in.
Step 2: Masking and Painting
-
Masking the first set:
Apply your painter’s tape along the pencil lines. The goal is to isolate specific triangles to paint first, leaving others covered or empty. Tape off every *other* triangle section to start. -
Sealing the tape edge:
Press the edges of the tape down firmly with your thumbnail or a credit card. For extra crispness, paint a very thin layer of titanium white over the tape edge to ‘seal’ it against bleeds. -
Section 1: Teal Green:
Identify the top-left outer triangle (in the pinwheel logic). Paint this section with your teal green acrylic. Use smooth strokes parallel to the tape edge. -
Section 2: Terra Cotta:
Move clockwise to an adjacent open section that fits the pattern (referencing the photo, this might be the rust color). Apply your terra cotta paint liberally. -
Removing tape while wet:
Carefully peel back the tape while the paint is still slightly wet. Pulling at a 45-degree angle away from the paint helps maintain that sharp line. -
Let it cure:
Allow these first painted sections to dry completely. Do not apply new tape over them until they are fully cured to touch.
Texture Twist
Mix sand or modeling paste into just one color (like the teal) before painting. This creates a tactile, raised surface that contrasts beautifully with the flat geometric shapes.
Step 3: Completing the Pattern
-
Masking the second round:
Once the first shapes are dry, re-apply tape. This time, you will tape *over* the dried painted areas to protect them while you paint the neighboring white and peach triangles. -
Protecting finished work:
Be gentle when pressing tape onto the freshly painted teal and rust sections. You want a seal, but not so tight that it rips paint upon removal. -
Painting the peach tones:
Mix or pour your light peach/beige paint. Fill in the designated triangles that sit opposite the teal or rust sections. -
Refreshing the white:
If your white triangles got smudged or look thin compared to the colors, give them a fresh coat of white paint now within the masked area. -
Final peel:
Remove all remaining tape slowly. This is the satisfying moment where the full geometric design reveals itself. -
Touch-ups:
Check your lines. If any paint bled under the tape, use a small angled brush and a tiny bit of the background color (or adjacent color) to tidy up the edge. -
Erasing guidelines:
Once the painting is 100% dry, gently erase any visible pencil lines that weren’t covered by paint, particularly in the white sections. -
Painting the sides:
Don’t forget the edges of the canvas. You can wrap the design around the sides or paint them a solid neutral color like white or raw wood beige for a framed look. -
Varnish application:
Finish simply by brushing on a coat of matte varnish to protect the acrylics and unify the sheen across all colors.
Hang your new geometric creation in a spot that gets plenty of light to show off those impeccable lines
Pour-and-Swipe Acrylic Marble With a Focal Shape
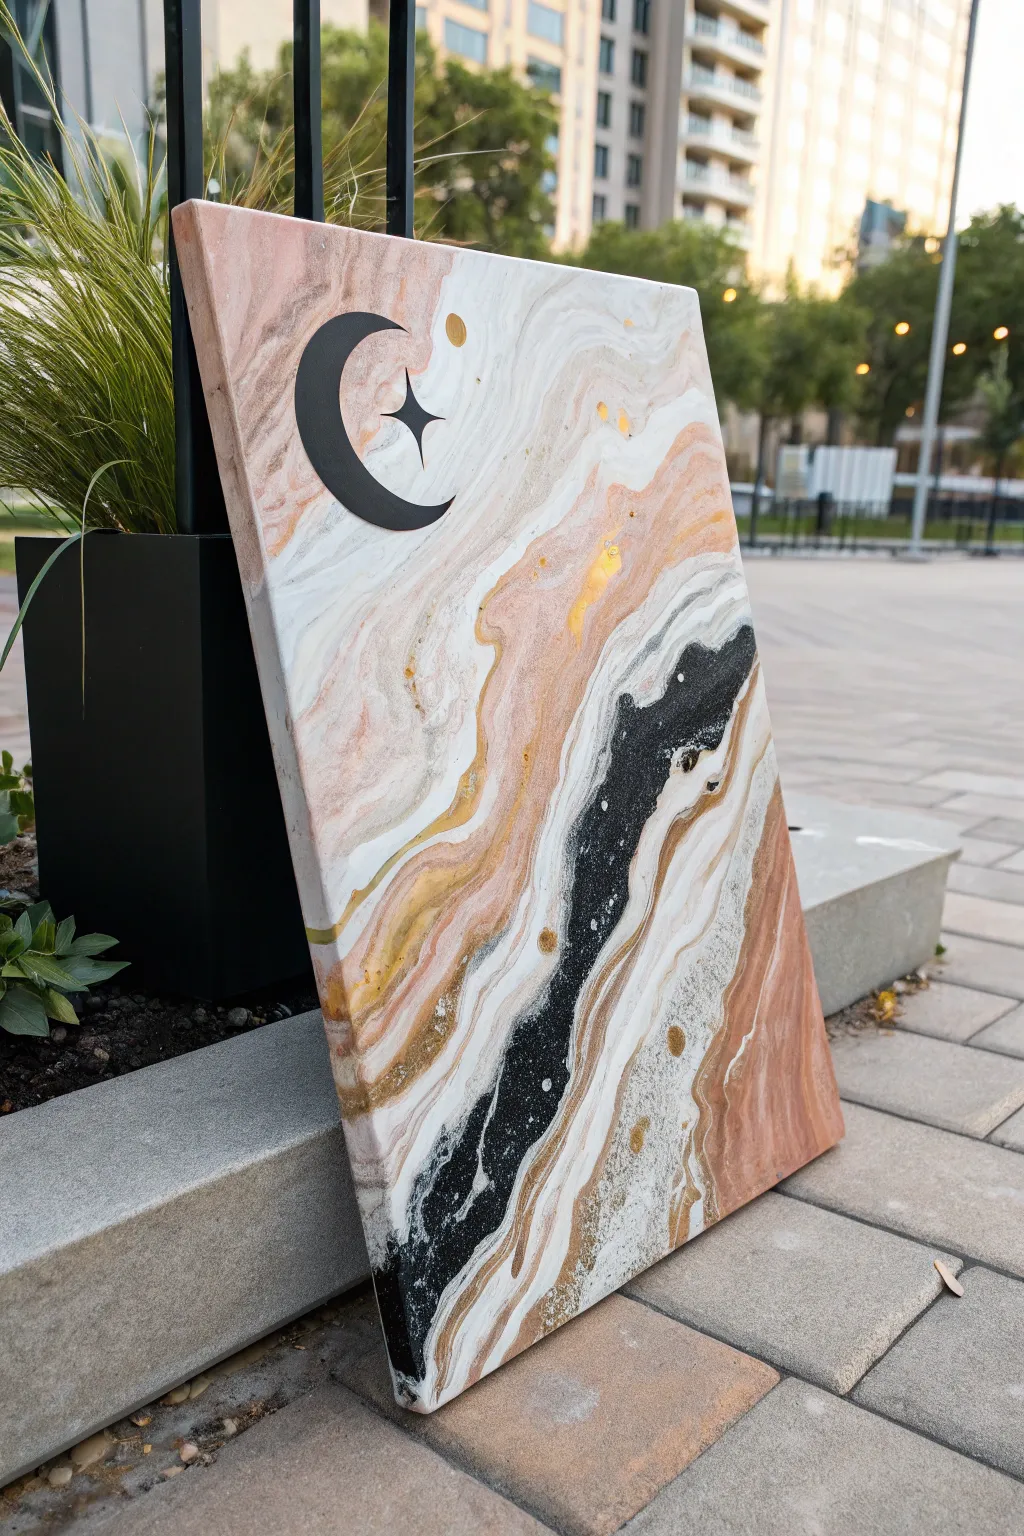
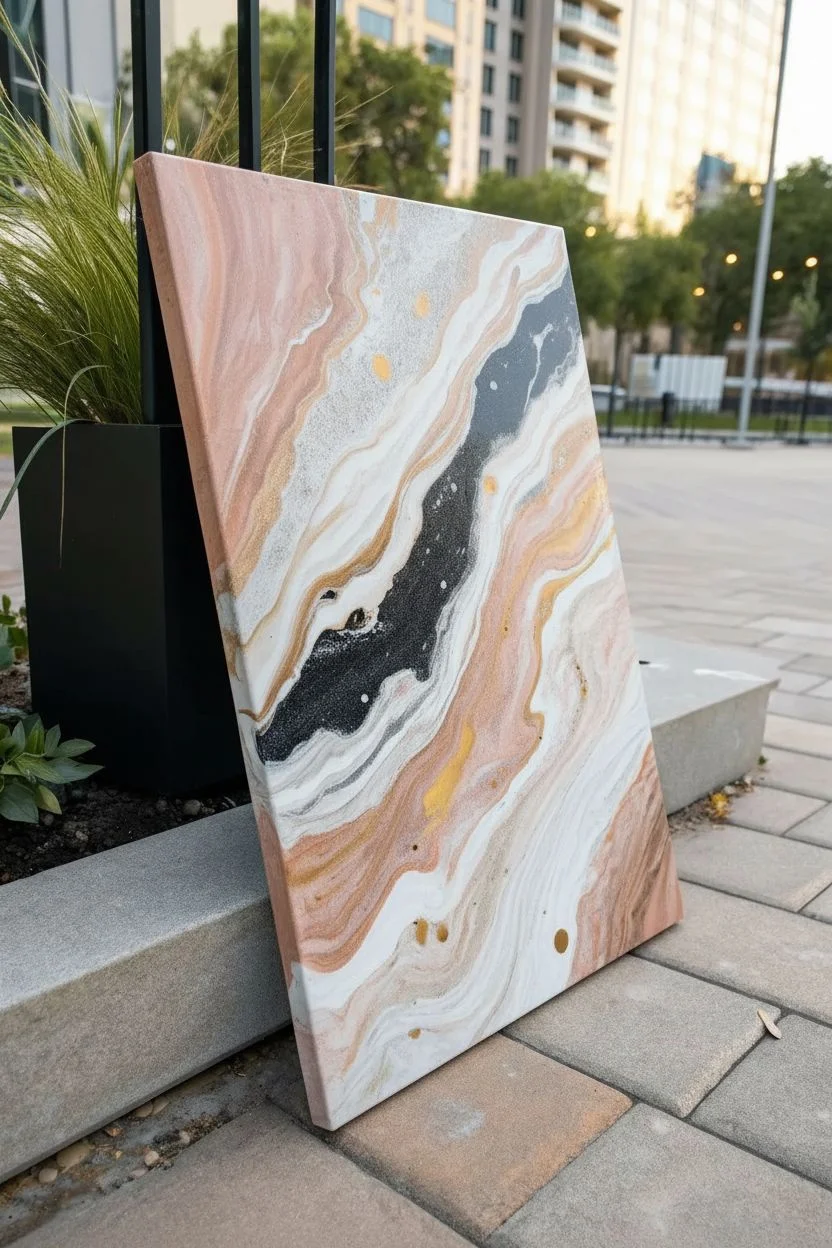
Capture the magic of a starry night sky with this elegant fluid art project that blends soft marble textures with bold graphic elements. The technique uses a ‘dirty pour’ or ‘flip cup’ method combined with delicate swiping to create organic strata of peach, white, gold, and black, topped with a striking vinyl decal.
Step-by-Step
Materials
- Rectangular stretched canvas (e.g., 18×24 inches)
- Acrylic paints: Titanium White, Peach/Salmon, Gold Metallic, and Carbon Black
- Pouring medium (Floetrol or Liquitex)
- Silicone oil (optional, for cells)
- Plastic cups for mixing (4 small, 1 large)
- Wooden stir sticks
- Cardstock or flat plastic tool for swiping
- Black vinyl sheet or stencils
- Cutting machine (Cricut/Silhouette) or X-Acto knife
- Glazing liquid or Varnish (High Gloss)
- Adhesive gold foil/leaf (optional accents)
Step 1: Preparation & Mixing
-
Prepare your workspace:
Fluid art is messy, so lay down a large drop cloth or plastic sheet. Elevate your canvas on four upside-down cups to allow paint to drip off the edges freely. -
Mix the paints:
In separate cups, mix each acrylic color with your pouring medium. A standard ratio is 1 part paint to 2 parts medium, but follow the bottle instructions. The consistency should resemble warm honey. -
Add glitter or metallic accents:
For the gold paint, ensure it’s well-mixed to bring out the shimmer. You can add a drop of silicone oil to the black or peach cups if you want small cellular structures, but this piece relies mostly on linear flow.
Muddy Colors?
If your colors are blending into grey instead of distinct bands, your paint might be too thin. Add a bit more heavy-body acrylic to thicken the mixture before pouring.
Step 2: The Pour Technique
-
Create a dirty cup:
Take your large clean cup and begin layering the colors. Start with white, then pour in peach, a drizzle of gold, and finally the black. -
Repeat the layering:
Continue layering paints into the same cup without stirring. Repeat the pattern—White, Peach, Gold, Black—until the cup is nearly full. Vary the amounts; use less black to keep it from overpowering the pastel tones. -
Apply to canvas:
You can do a ‘flip cup’ (flip the cup onto the canvas and lift) or a ‘traveling pour.’ For the look in the image, pour the paint in a diagonal line from the top left to bottom right of the canvas. -
Tilt the canvas:
Gently tilt the canvas back and forth. Encourage the paint to stretch diagonally. Allow the bands of color to elongate and flow over the edges. -
Refine the marble effect:
If the colors are too blocky, take a piece of cardstock or a damp paper towel. Gently swipe the edge of the cardstock over specific areas (like the white and black transition) to feather the colors together. -
Add gold veins:
If the gold got lost in the pour, dip a stir stick into your gold paint cup and drizzle fine lines through the wet paint to reinstate those metallic veins. -
Check the edges:
Walk around the canvas and touch up any corners or sides with excess paint that has dripped onto the table to ensure full coverage. -
Let it cure:
Leave the painting to dry on a level surface. This usually takes 24 to 72 hours depending on humidity and paint thickness.
Step 3: Focal Shape Application
-
Create the moon design:
While the paint dries, design your crescent moon and star shape. You can cut this from a sheet of matte black adhesive vinyl using a digital cutter or trace a template and cut it by hand. -
Prepare the surface:
Once the painting is fully cured (bone dry to the touch), wipe it gently with a microfiber cloth to remove any silicone oil residue or dust. -
Place the focal point:
I find the upper left quadrant works best for composition. Peel the backing off your vinyl moon and position it carefully. Press down firmly to adhere it to the textured surface. -
Add small details:
Cut small circles or stars from gold vinyl or use a gold paint pen to add the celestial dots near the moon shape, mimicking the image. -
Seal the artwork:
Apply a coat of high-gloss varnish or resin over the entire piece, including the vinyl sticker. This embeds the design and gives the marble effect a polished, stone-like depth.
Level Up: Resin Finish
Instead of varnish, use a two-part epoxy resin for the final coat. It creates a glass-like surface that makes the metallic gold paint pop and protects the vinyl decal permanently.
Hang your celestial masterpiece in a spot where the light catches the gold accents and enjoy the serene atmosphere it creates


Have a question or want to share your own experience? I'd love to hear from you in the comments below!