Fall is basically an endless mood board for face painting—all those crisp leaves, cozy colors, and harvest shapes just beg to be painted. I pulled together my favorite fall face painting ideas that range from quick cheek designs to full-on autumn masks you can really show off.
Simple Oak Leaf and Acorn Cheek Duo

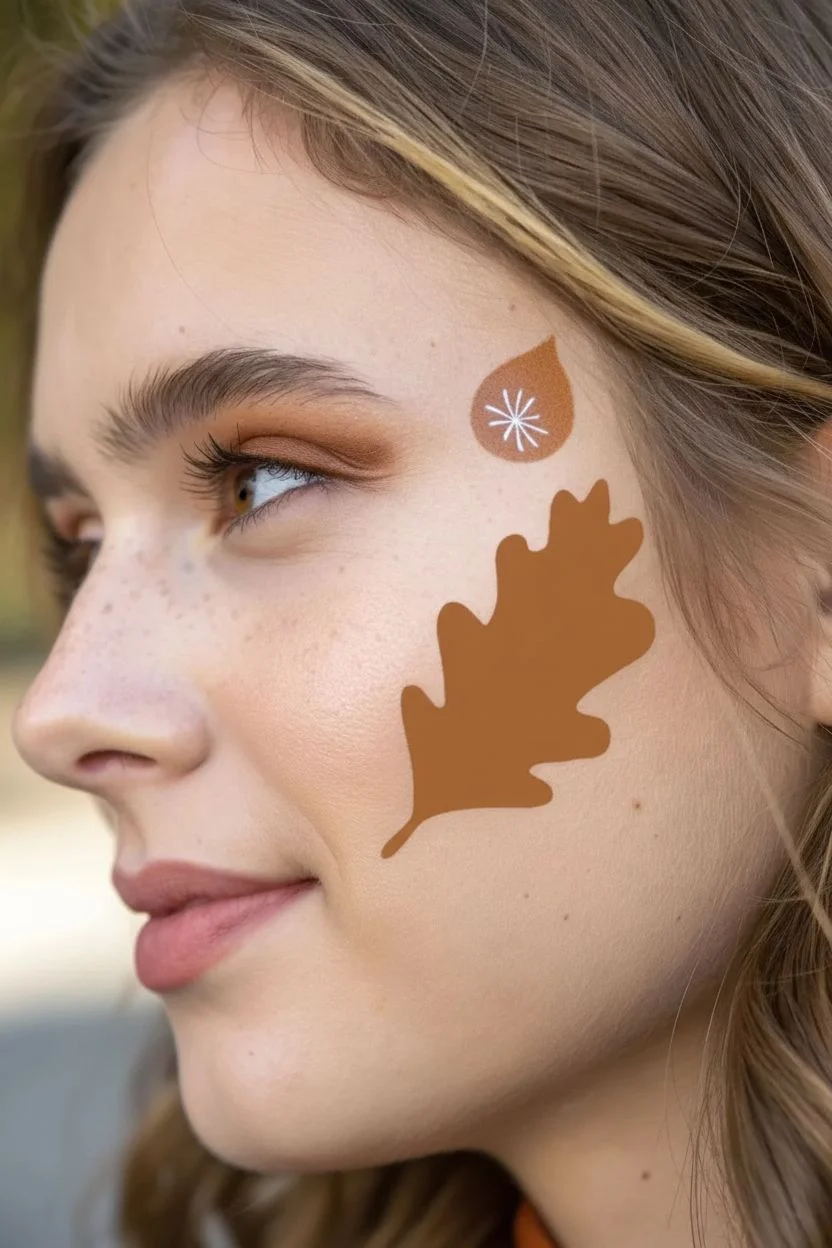
Embrace the crisp autumn air with this minimalist yet striking cheek design featuring a golden brown oak leaf accompanied by a tiny acorn. This look pairs perfectly with warm, earthy eye makeup and relies on clean lines and white accents for a modern finish.
Detailed Instructions
Materials
- Warm brown face paint (water-activated)
- White face paint (water-activated)
- Dark chocolate brown face paint (for outlining)
- Round brush (size 2 or 4)
- Fine liner brush (size 0 or 00)
- Small cup of water
- Makeup sponge (optional, for skin prep)
- Paper towels
Step 1: Painting the Base Shapes
-
Load your brush:
Begin by dampening your size 2 or 4 round brush and loading it with the warm brown face paint until you have a creamy consistency. -
Position the leaf:
Visualize where the leaf will sit on density of the cheekbone. The stem should point towards the jawline, angling diagonally upwards towards the hairline. -
Outline the leaf shape:
Using the tip of your round brush, sketch a wavy, lobed outline of an oak leaf. Aim for about three to four rounded lobes on each side. -
Fill the leaf:
Fill in the entire leaf shape with the same warm brown paint, ensuring solid, opaque coverage without streaks. -
Create the acorn:
Above the leaf, slightly closer to the eye, paint a small, rounded teardrop shape using the same brown color. The pointed end should face upward. -
Let it dry:
Wait about a minute for the brown base layer to dry completely to the touch so your next layers don’t muddy the color.
Smudge Patrol
If your fine lines are bleeding into the base color, your brush is too wet. Blot the bristles on a paper towel to remove excess water before picking up more paint.
Step 2: Adding Details and Definition
-
Mix the liner color:
Clean your brush thoroughly. Load a fine liner brush with the dark chocolate brown paint. The consistency should be inky and fluid for smooth lines. -
Draw the central vein:
Starting from the bottom stem of the leaf, draw a thin, curved line all the way up the center to the top tip. -
Add side veins:
Flick very delicate lines branching out from the central vein into each of the rounded lobes on both sides. -
Outline the full leaf:
Carefully trace the entire outer edge of the oak leaf with the dark brown liner to make the shape pop against the skin. -
Stem detail:
Extend the dark brown line slightly past the bottom of the leaf to create a distinct, thin stem.
Add some Sparkle
While the paint is still slightly tacky, tap a tiny bit of gold cosmetic glitter onto the center of the leaf or the acorn for a festive autumn shimmer.
Step 3: White Accents and Highlights
-
Switch to white:
Rinse your fine liner brush completely or switch to a fresh one. Load it with white face paint. -
Acorn cap detail:
On the brown acorn shape, draw a simple starburst or snowflake pattern. A central vertical line crossed by an ‘X’ works perfectly to mimic the texture or reflection. -
Add whimsical twigs:
Surround the main oak leaf with stylized white sprigs. Paint a thin central line, then add tiny V-shapes branching off it. -
Placement of white accents:
Place one white sprig near the top right of the leaf, one near the bottom left stem area, and perhaps a tiny hint of one near the acorn. -
Final check:
Step back and check the balance. If any white lines look too faint, carefully go over them once more after the first layer dries.
Now you have a charming autumnal accent that captures the essence of the season perfectly


Friendly Scarecrow Face Paint (Kid-Friendly)
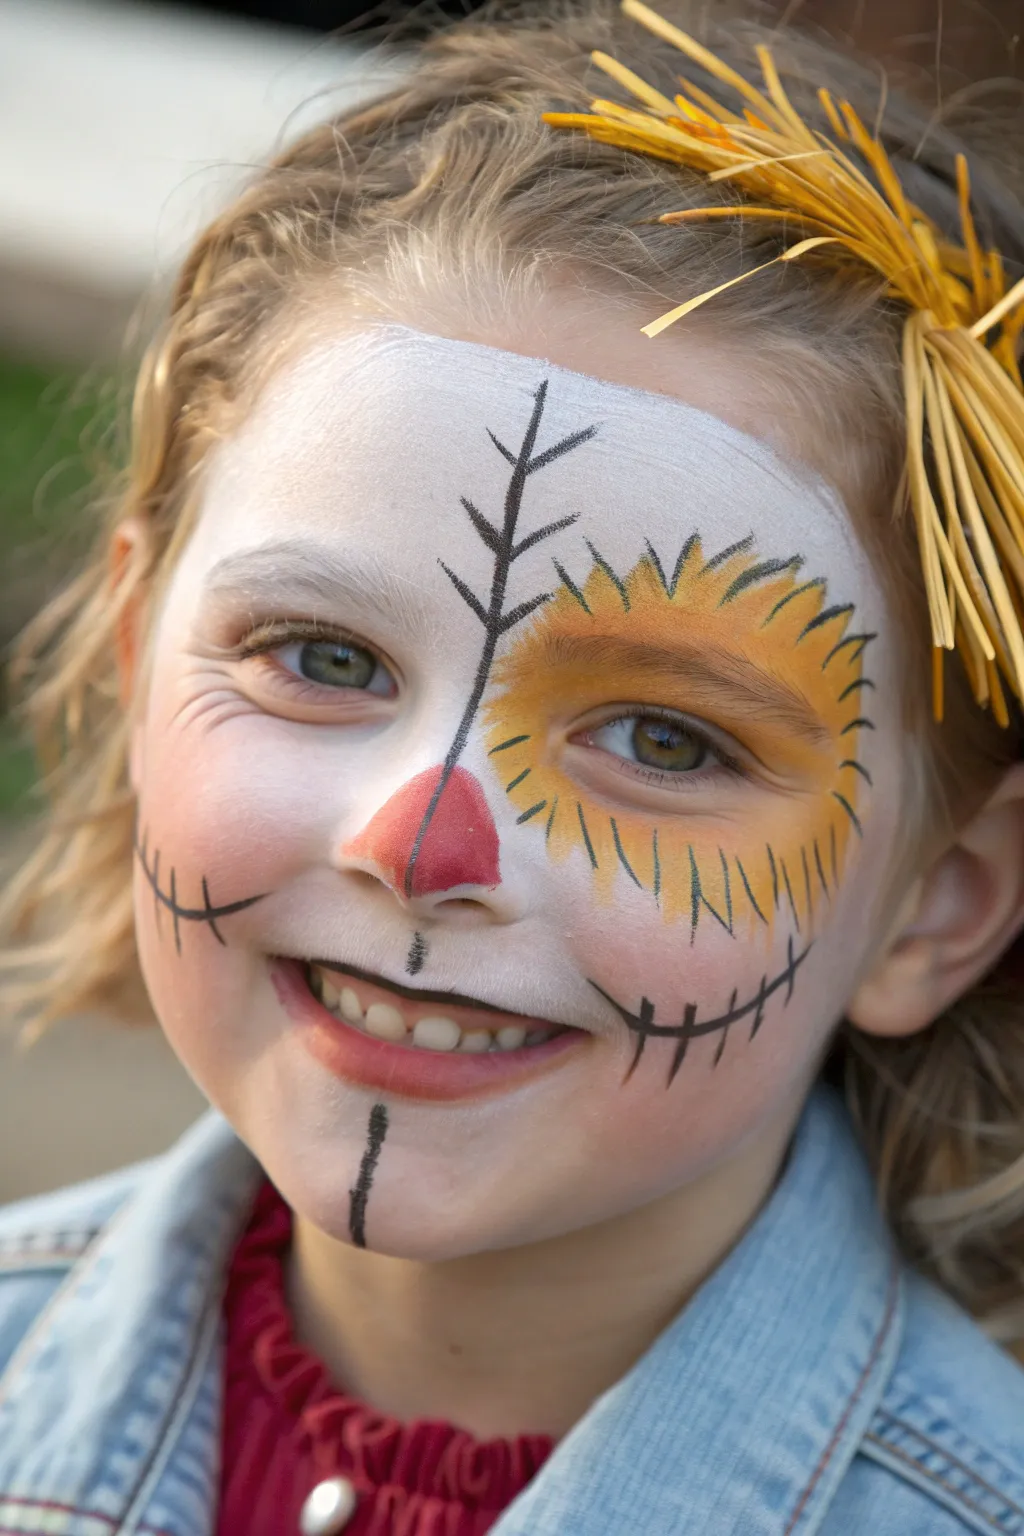
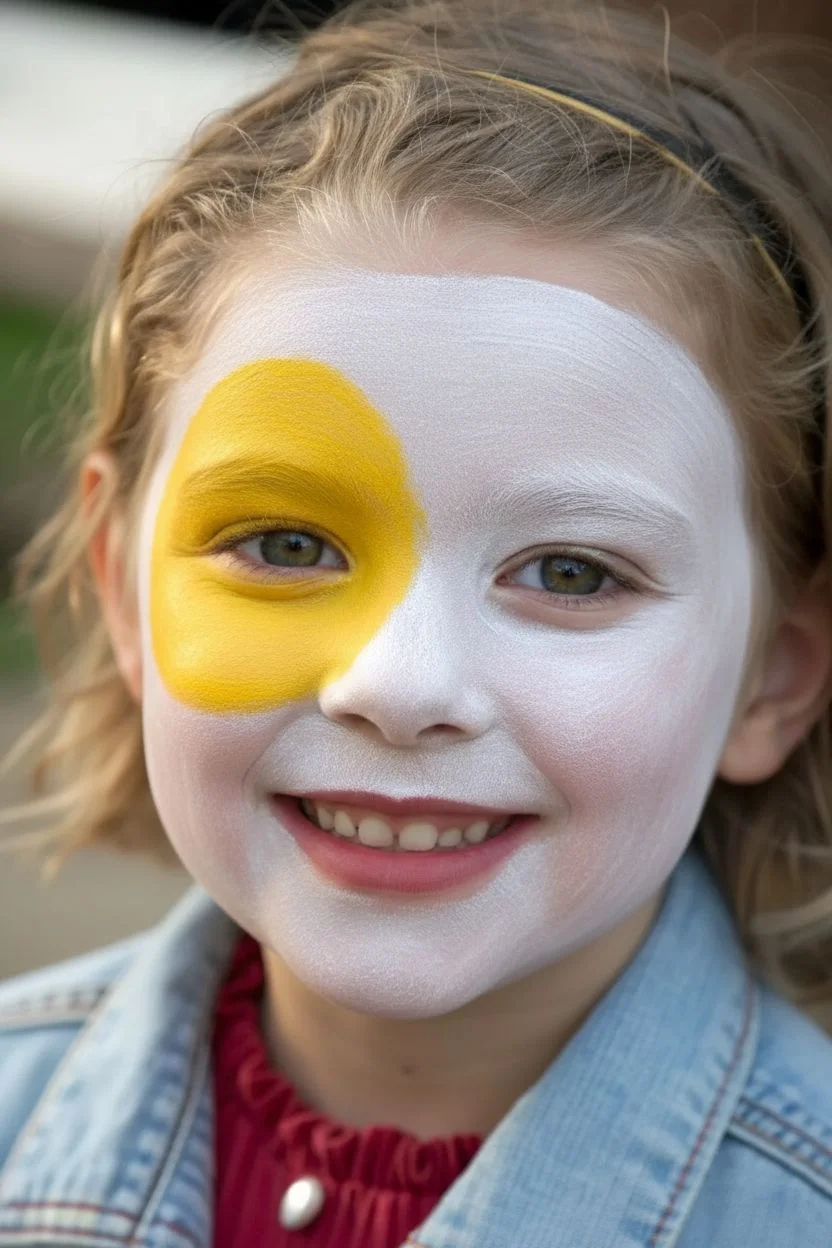
Brighten up any autumn festival with this cheery twist on a classic scarecrow design. Combining a soft white base with a vibrant yellow eye patch and charming stitch details creates a look that is more sweet than spooky.
Step-by-Step
Materials
- High-quality face paint (white, bright yellow, orange, red, black)
- Face painting sponges (high-density)
- Round brushes (size 2 or 3 for details)
- Flat brush (small, for the nose)
- Cup of water
- Paper towels
- Optional: Setting spray
Step 1: Setting the Base
-
Load the Sponge:
Begin by dampening a face painting sponge and loading it thoroughly with white face paint. The sponge should be moist enough to pick up pigment but not dripping wet to avoid streaks. -
Apply White Base:
Gently stipple or dab the white paint onto the forehead, extending down the center of the nose, and covering the cheeks and chin. You don’t need full opacity; a soft, somewhat translucent layer works perfectly for this weathered look. -
Create the Eye Patch:
While the white is drying, take a fresh sponge (or clean side) and load it with bright yellow paint. sponge a large, soft circle over the left eye, extending up to the eyebrow and down to the cheekbone. -
Blend the Edges:
With a very slightly damp sponge, lightly dab the edges where the yellow meets the white skin to soften the transition, creating a glowing effect rather than a hard line.
Step 2: Adding Vibrant Details
-
Paint the Nose:
Using a small flat brush or the tip of a round brush, paint a soft red triangle on the tip of the nose. I like to keep the edges slightly rounded so it looks like a soft fabric patch. -
Outline the Sunburst:
Load a round brush (size 2 or 3) with orange paint. Carefully paint short, flicking strokes radiating outward from the yellow eye patch to mimic the look of straw or flower petals. -
Define the Petals:
Go over a few of your orange strokes with a slightly darker orange or mix a tiny bit of red into your yellow to create depth in the sunburst pattern.
Smudged Lines?
If black lines smudge, wait for them to fully dry. Then, use a damp Q-tip to lift the mistake before dabbing a bit of white base over the area to conceal it.
Step 3: Stitching it Together
-
Start the Center Line:
Switch to your fine round brush loaded with black paint. Draw a thin vertical line starting from just above the bridge of the nose, going up into the forehead. -
Cross-Hatch the Forehead:
Add small horizontal hash marks across the vertical forehead line to create the classic ‘stitched’ scarecrow appearance. -
Outline the Patch:
Using the same thin black brush, add defining lines around the yellow eye patch. Do not outline the entire circle; instead, use broken, sketchy lines to suggest rough fabric edges. -
Detail the Smile:
Draw a thin horizontal line extending from the corners of the mouth outward onto the cheeks. Curve them slightly upward to ensure a happy expression. -
Stitch the Mouth:
Add vertical stitch marks across the mouth lines you just drew. Varying the length of these stitches slightly adds to the whimsical, handmade character. -
Cheek Details:
If there is negative space on the cheeks, add a small, standalone cross-hatch or ‘patch’ outline to balance the design. -
Chin Stitching:
Draw a short vertical line on the center of the chin and cross it with two or three horizontal stitch marks to finish the structural look.
Add Sparkle
Before the yellow eye paint dries completely, tap a little cosmetic-grade gold glitter onto the center of the eyelid for a magical, shimmering finish.
Step 4: Finishing Touches
-
Check for Gaps:
Step back and look at the overall symmetry. If the black lines look too stark, you can lightly stipple a tiny bit of white over the dried black paint to make it look faded. -
Highlight the Nose:
Add a tiny dot or comma of white paint to the red nose patch to give it a shiny, dimensional look. -
Add Texture Lines:
For extra detail, use a dry brush method with very little black paint to add faint ‘fabric texture’ lines on the white areas of the face. -
Accessorize:
The look isn’t complete without straw! Clip some raffia or artificial straw into the hair on the side opposite the eye patch to balance the visual weight.
This adorable scarecrow design is now ready for a day of hayrides and pumpkin picking

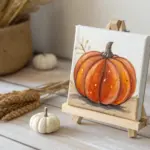


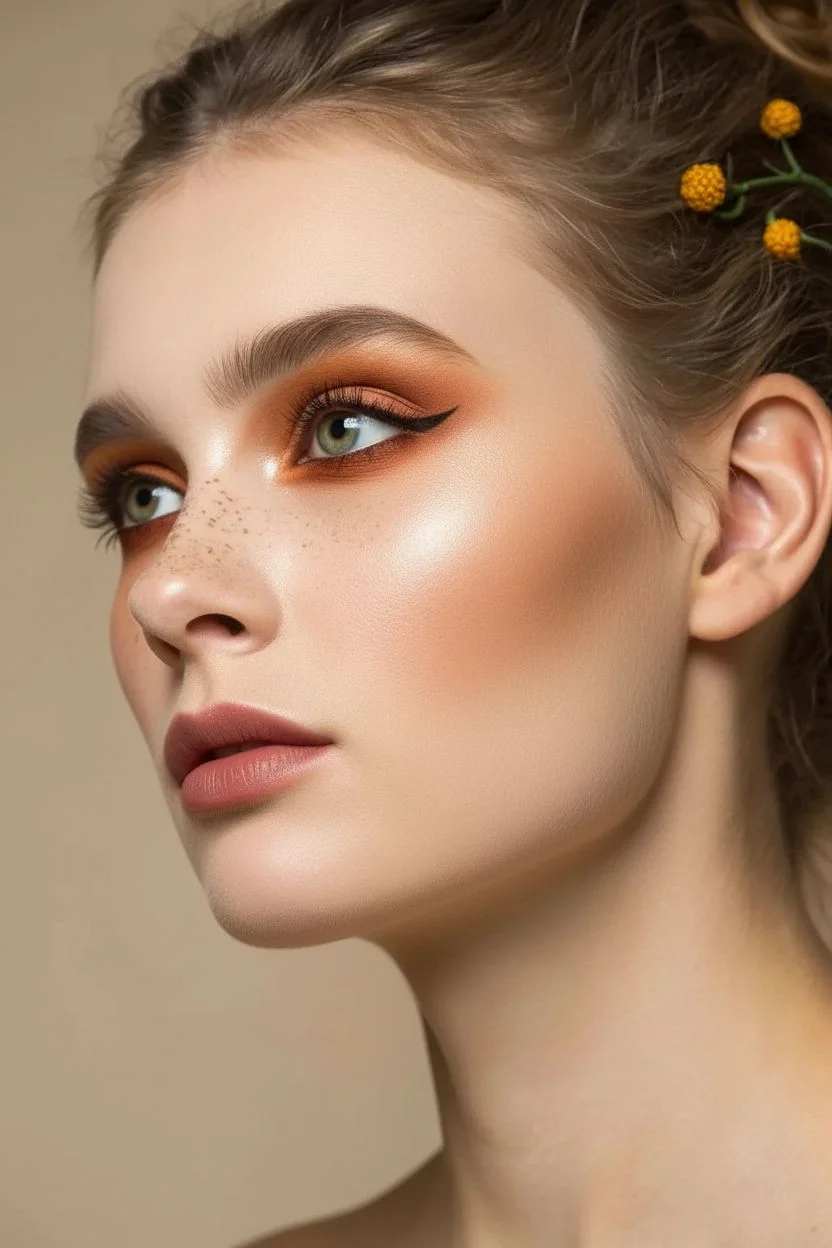
Thanksgiving Turkey Feather Fan
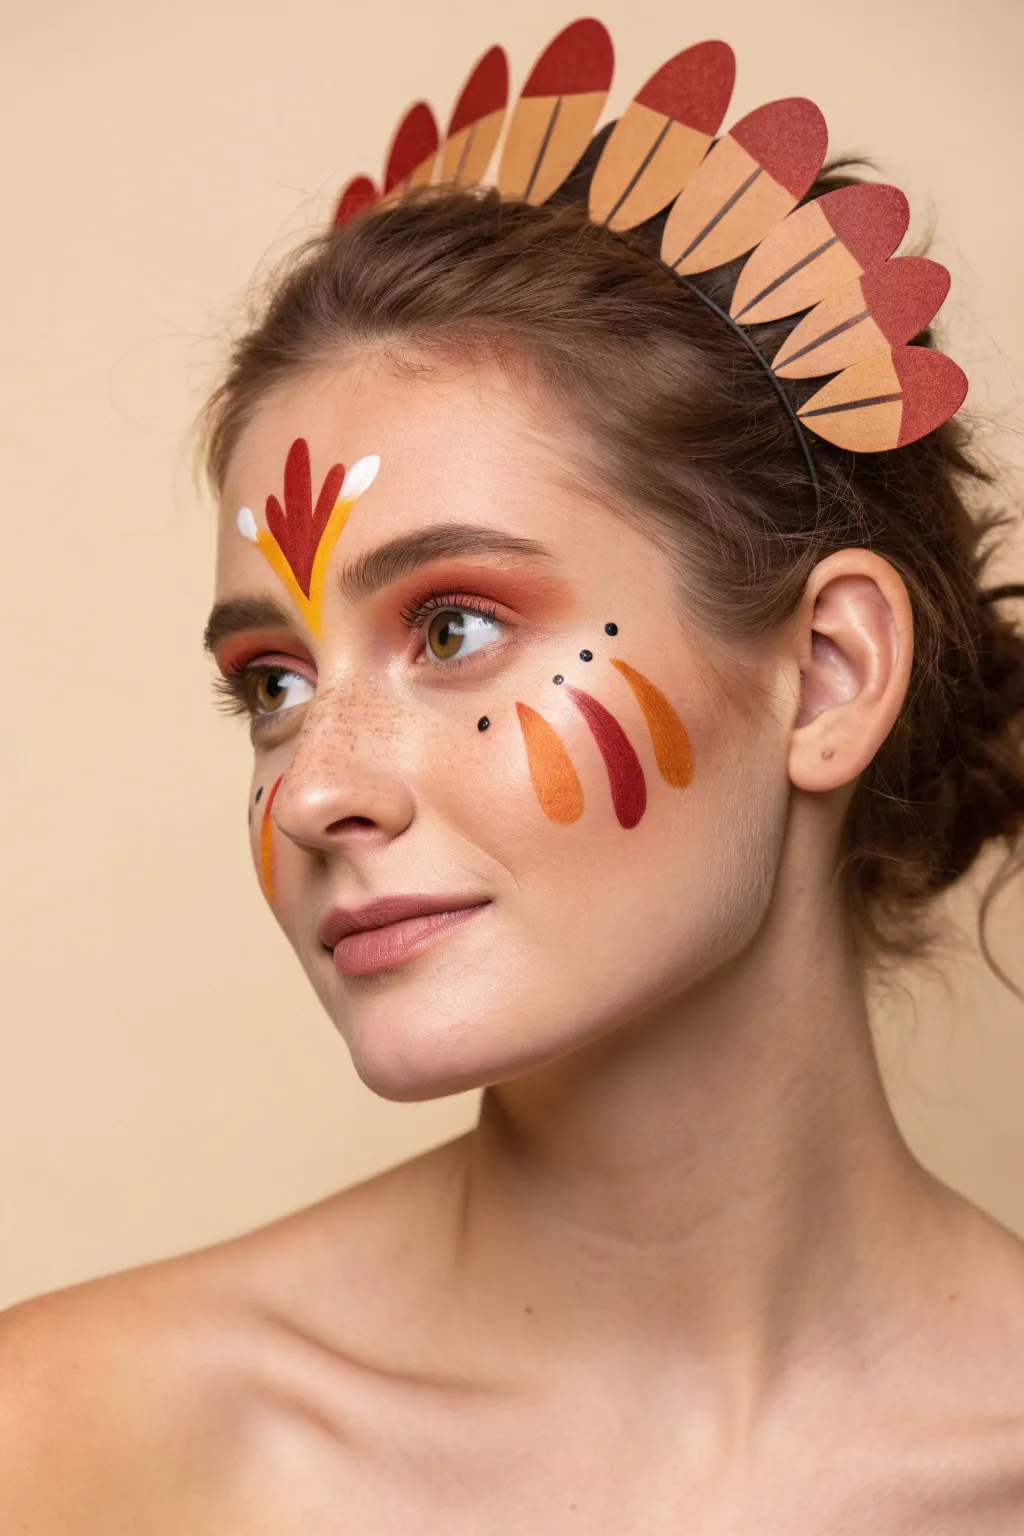
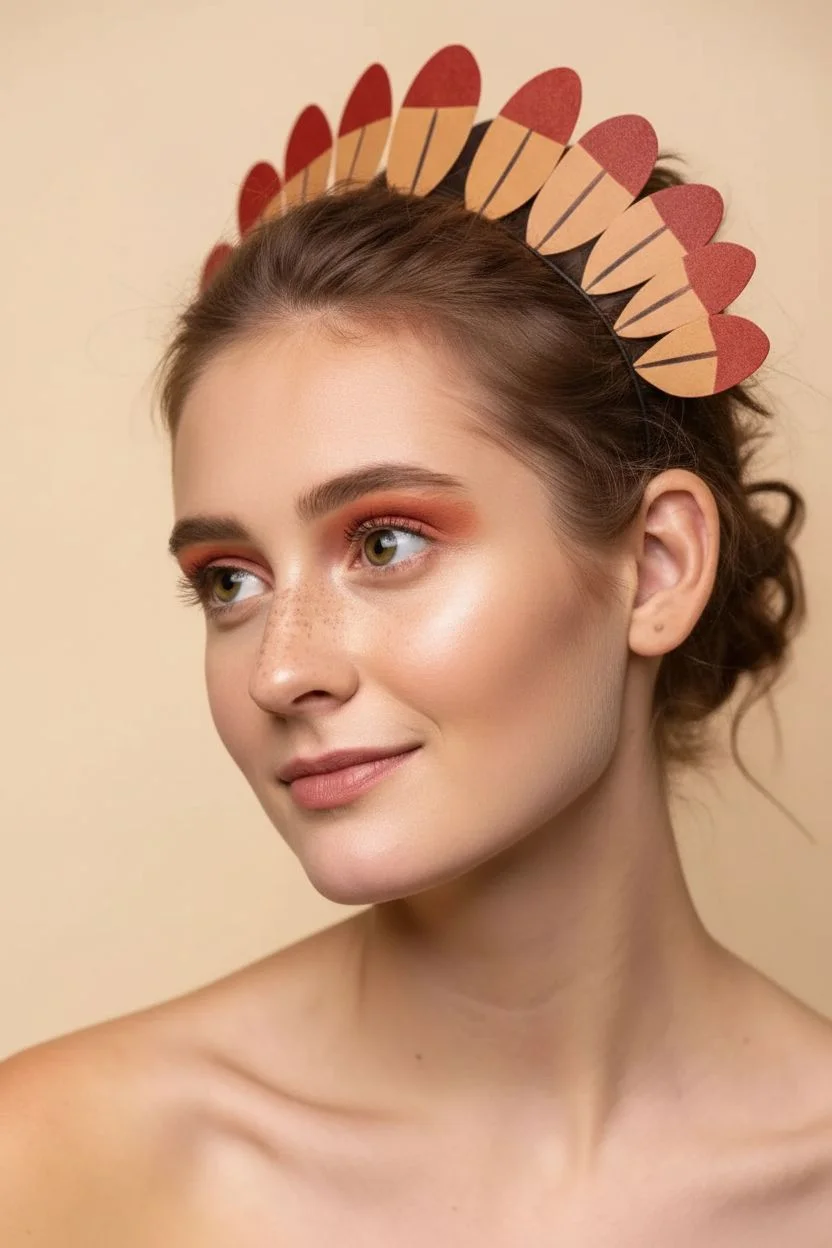
Transform a simple look into a harvest celebration with this delicate turkey-inspired face paint design accompanied by a charming handmade paper headband. The warm autumn tones of burnt orange, deep red, and gold create a sophisticated yet festive aesthetic perfect for Thanksgiving gatherings.
How-To Guide
Materials
- Face paint palette (mustard yellow, burnt orange, dark red, white)
- Round brushes (sizes 2 and 4)
- Small blending sponge
- Eyeshadow palette (warm browns and oranges)
- Black eyeliner or fine detail brush with black face paint
- Construction paper or cardstock (tan, dark brown, red)
- Scissors
- Glue stick or craft glue
- Thin black headband
- Black permanent marker
Step 1: The Feather Headband
-
Cut the bases:
Start by cutting about 9-11 elongated oval shapes from tan or light brown cardstock. These should be roughly 3-4 inches tall and resemble the shape of a feather. -
Add colored tips:
Cut smaller oval tips from red construction paper that match the curve of your tan feathers. Glue these to the very top of each feather base. -
Draw the details:
Using a black permanent marker, draw a straight line down the center of each feather to create the quill. -
Add veining:
From the center quill line, draw angled lines upward and outward to simulate the barbs of the feather. Keep these lines clean and fairly symmetrical. -
Assemble the fan:
Glue the feathers onto your thin black headband in a fan arrangement. Start with the center feather standing straight up, then layer the others slightly overlapping and tilting outward as you move down the sides.
Step 2: Face Paint Base
-
Prep the eyes:
Apply a warm, burnt orange eyeshadow across the entire eyelid, blending it softly up toward the brow bone to create a warm background glow. -
Deepen the crease:
Use a darker brown eyeshadow in the crease and outer corner of the eye to add depth and definition. -
Add freckles:
With a very fine brush or a freckle pen, dot tiny brown speckles across the nose and cheeks for a natural, sunkissed autumn look. -
Forehead centerpiece:
In the center of the forehead, use a round brush to paint a yellow leaf or feather shape pointing downward toward the nose. -
Layer the forehead design:
Paint two smaller red leaf shapes flanking the yellow center one, creating a tri-color fan effect. -
Add highlights:
Add small white teardrop shapes or accents to the tips of the forehead design to make the colors pop.
Uneven Strokes?
If your teardrop shapes look shaky, try pressing the belly of the brush down firmly at the start of the stroke and lifting up quickly as you drag to create a smooth, tapered tail.
Step 3: Cheek Details
-
Paint the first feather:
On the left cheekbone (or both if desired), use a medium round brush loaded with orange face paint to create a teardrop shape that curves slightly upward towards the ear. -
Add the second feather:
Load your brush with deep red paint. Create a similar curved teardrop shape right next to the first one, mirroring its direction. -
Paint the third feather:
Finish the trio with a mustard yellow or light orange stroke next to the red one. I like to keep the starting points of these three strokes close together. -
Apply decorative dots:
Using the back of a paintbrush dipped in black paint (or a dotting tool), place three small dots in a line leading from the outer corner of the eye toward the feather shapes. -
Final accent dots:
Add a few stray black dots near the tops of the painted feathers for an artistic finish. -
Lip color:
Complete the look with a matte lipstick in a dusty rose or brownish-pink shade that complements the warm face paint tones.
Add Some Sparkle
For a glamorous twist, outline the painted feathers with thin gold glitter gel or replace the black decorative dots with small stick-on rhinestones.
You are now ready to show off this chic seasonal artistry at your next fall festival


Woodland Fox with Leafy Crown
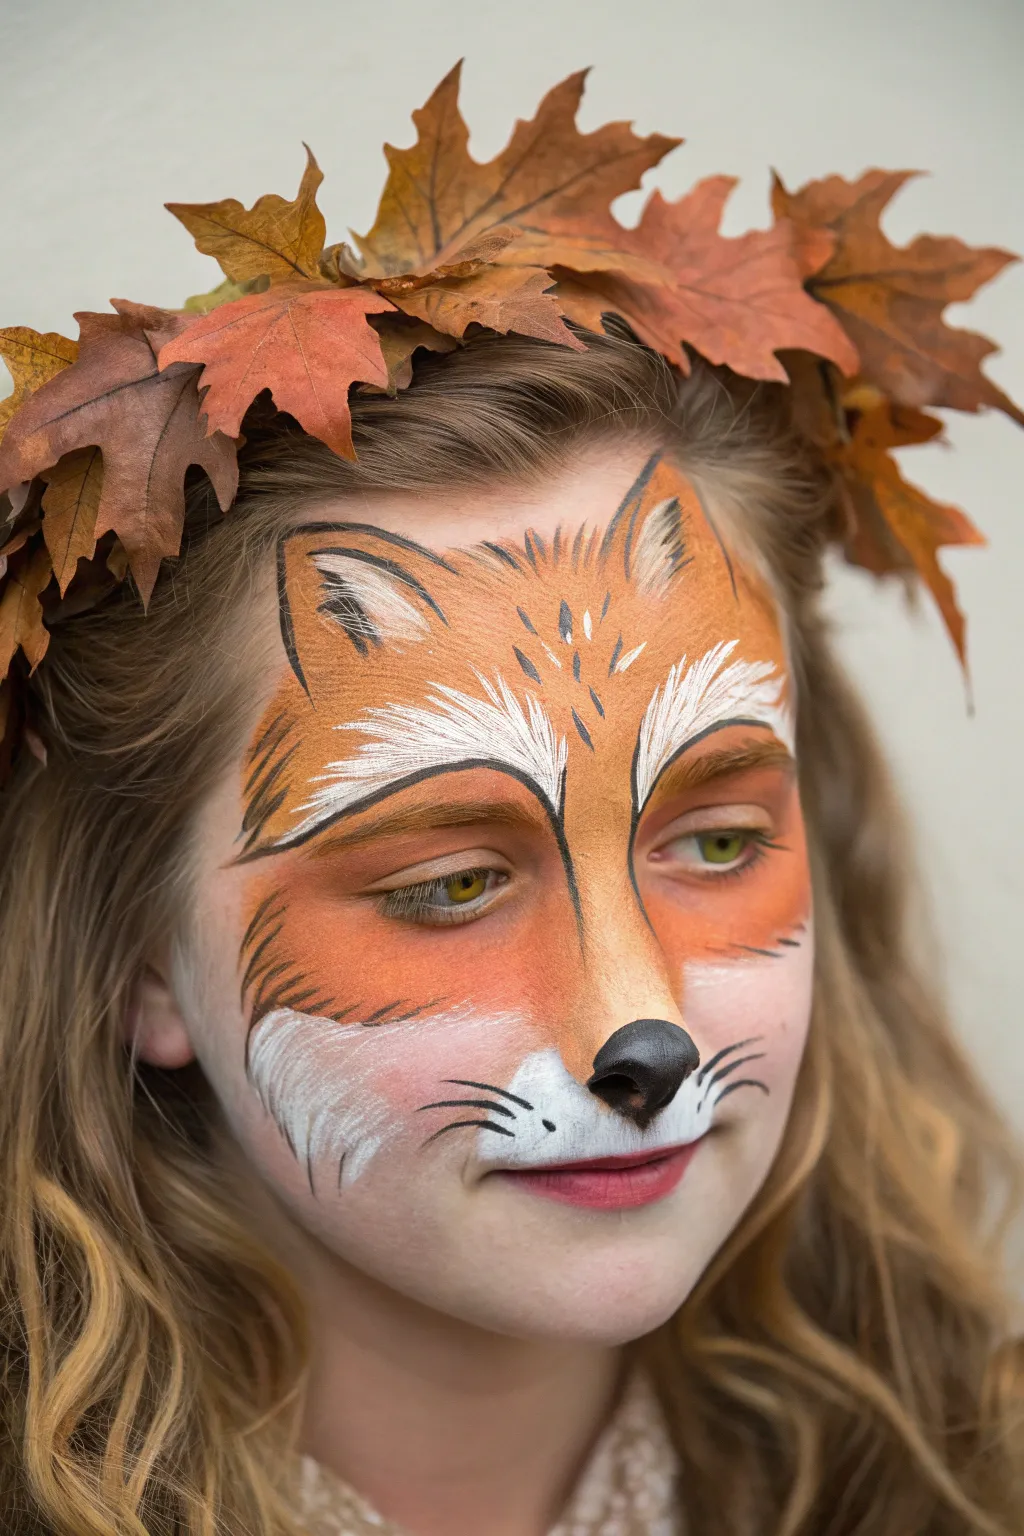
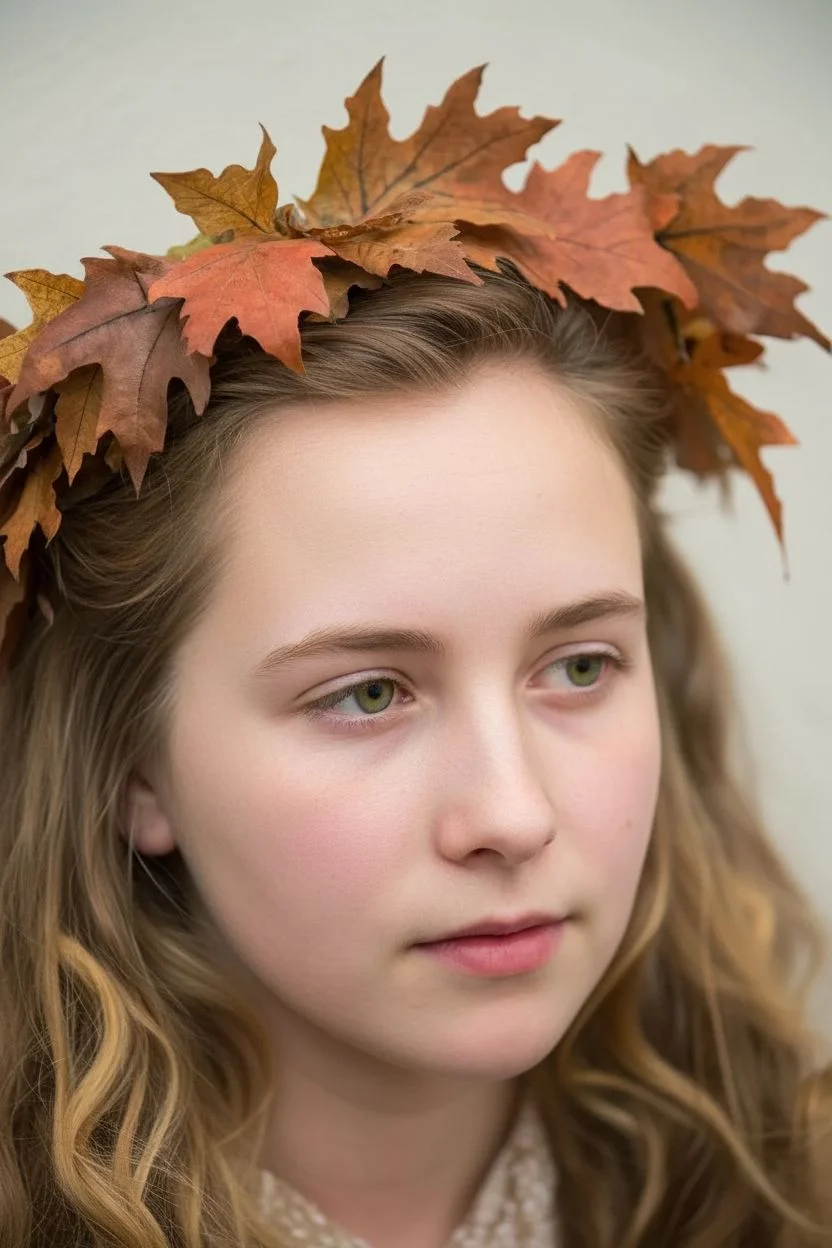
Transform into a clever woodland creature with this highly detailed fox makeup tutorial. By combining warm orange tones with sharp, illustrative linework and a natural leaf crown, you’ll create a look that feels both enchanted and earthy.
Step-by-Step Guide
Materials
- Face paint palette (orange, white, black, brown)
- High-density face painting sponges (or wedges)
- Round brush (size 2 or 3 for details)
- Flat brush (size 6 or 8 for broad strokes)
- Fine liner brush (size 0 or 1 for whiskers)
- Dried or faux autumn oak leaves
- Floral wire or a flexible headband base
- Floral tape (brown)
- Makeup setting spray (optional)
- Translucent powder
Step 1: Crafting the Leaf Crown
-
Prepare the base:
Measure a length of floral wire that fits comfortably around the crown of the head. Twist the ends together to secure a loop, ensuring it sits just above the ears. -
Sort your foliage:
Gather your dried or faux oak leaves. Look for darker brown and rusty red tones to contrast beautifully with the bright orange face paint. -
Attach the leaves:
Using floral tape, wrap the stem of each leaf onto the wire base. Overlap them significantly so the wire is completely hidden and the crown looks full and dense. -
Shape directionality:
Arrange the leaves so they fan outwards and slightly upwards, mimicking the wild, unkempt nature of a forest floor. Set the crown aside while you paint.
Stay Fuzzy
For realistic fur texture, always flick your wrist at the end of each brush stroke. This lifts the brush off the skin, creating a tapered hair point rather than a blunt line.
Step 2: Laying the Fox Base
-
Sponge the orange base:
Load a damp sponge with bright orange face paint. Dab the color across the forehead, down the bridge of the nose, and over the cheeks, tapering off near the temples. -
Create the white muzzle:
Using a clean sponge loaded with white paint, cover the upper lip area, extending slightly onto the cheeks and down to the chin. -
Highlight the eyes:
Dab white paint over the eyelids and extend it upwards into the inner corners of the eyebrows. Keep the edges soft where the white meets the orange. -
Blend the transition:
While the paint is still slightly tacky, use a clean, dry sponge to gently pat the border between the white and orange areas, creating a soft, blurry gradient rather than a harsh line.
Step 3: Defining the Features
-
Outline the nose:
Load a round brush with black paint. Paint the tip of the nose black, extending a small line downwards to connect to the upper lip. -
Draw the muzzle cleft:
Paint the very center of the upper lip black and gently flick the brush upwards to create the philtrum line. -
Shape the fox ears:
On the forehead, use a thin brush with black paint to outline triangular ear shapes. The tips should point upwards towards the hairline. -
Fill the ear depth:
Inside the ear outlines, add small strokes of white paint to represent inner ear fur, then blend a tiny amount of diluted brown or orange at the base for depth. -
Define the brow ridge:
Use a darker orange or reddish-brown paint on a flat brush to create shadows above the eye sockets, giving the face a more sculpted, animalistic structure.
Golden Gaze
Enhance the fox effect by painting the eyelids with a shimmering gold powder or eyeshadow. When the eyes blink, it mimics the amber glow of real fox eyes.
Step 4: Fur Details & Whiskers
-
Add forehead fur texture:
With a fine liner brush and black paint, flick tiny, quick strokes upwards from the bridge of the nose into the orange forehead area. This mimics the direction of fur growth. -
Create white tufts:
Rinse your liner brush and load it with stark white. Add similar flicking strokes over the eyebrows and on the muzzle transition zone to make the ‘fur’ look layered. -
Whiskers and final dots:
Paint three or four delicate whisker spots on either side of the white muzzle area. Carefully drag long, thin whiskers outwards using a very light hand. -
Contour the cheeks:
I usually take a dry brush with a tiny bit of dark brown powder or paint and lightly sweep it under the cheekbones to emphasize the fox’s angular face shape. -
Set the look:
Place the leafy crown on the head. If the paint feels tacky, a light dusting of translucent powder will keep everything smudge-proof all day.
Now you are ready to prowl the autumn woods with your enchanting new look
BRUSH GUIDE
The Right Brush for Every Stroke
From clean lines to bold texture — master brush choice, stroke control, and essential techniques.
Explore the Full Guide
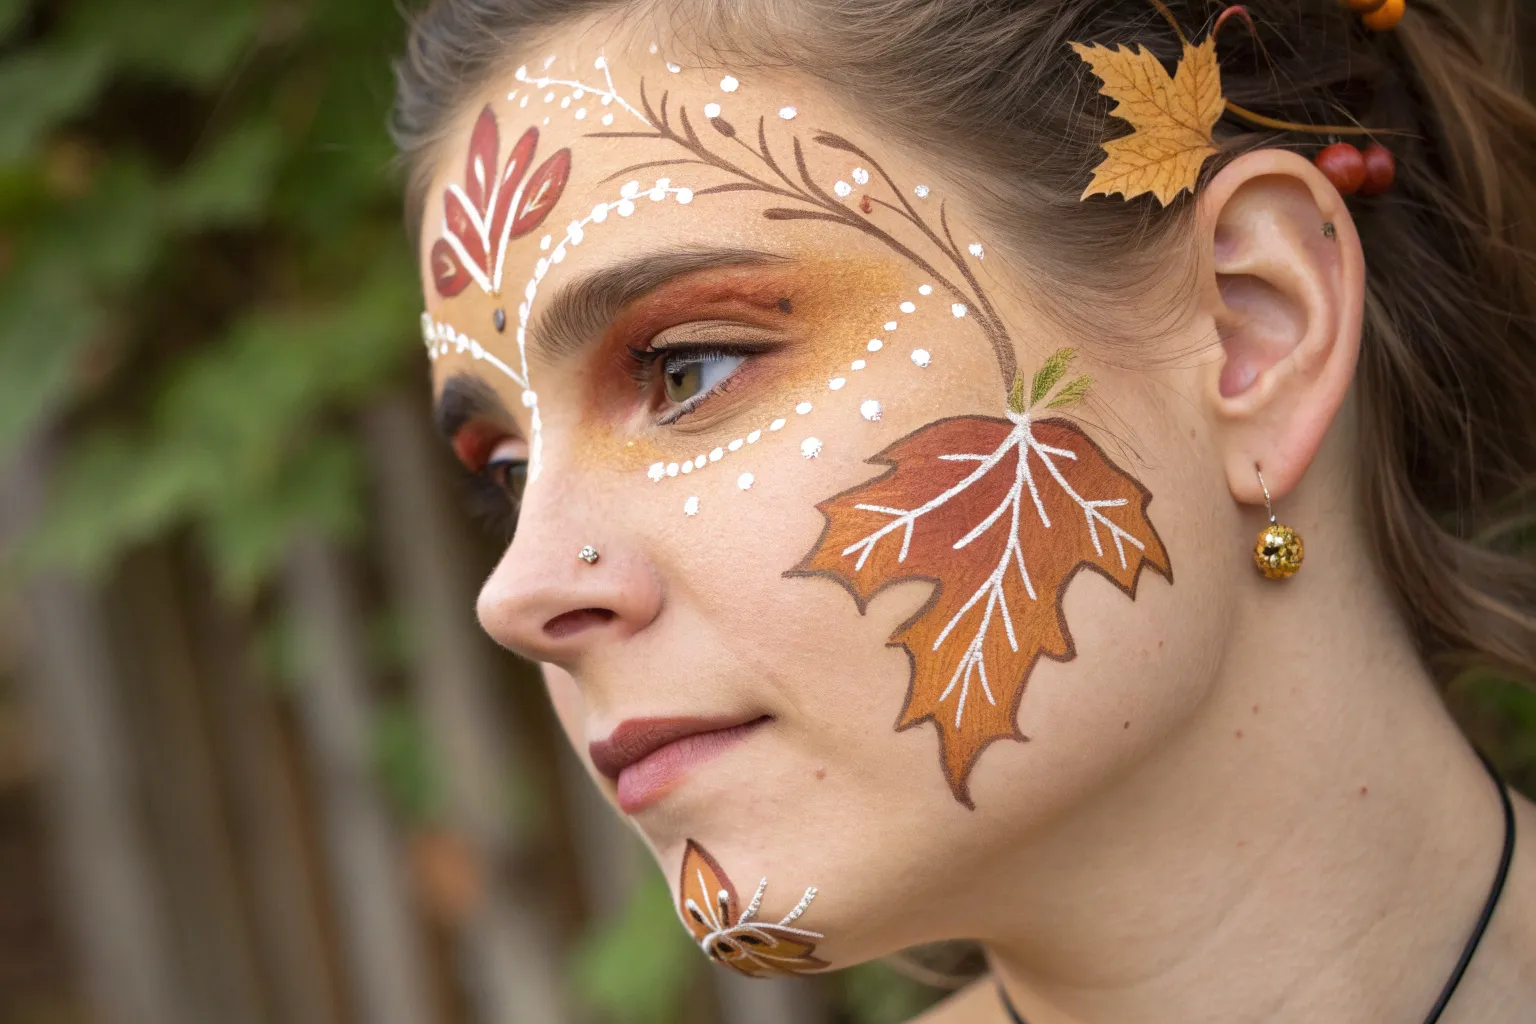
Cozy Owl Eyes with Amber Highlights
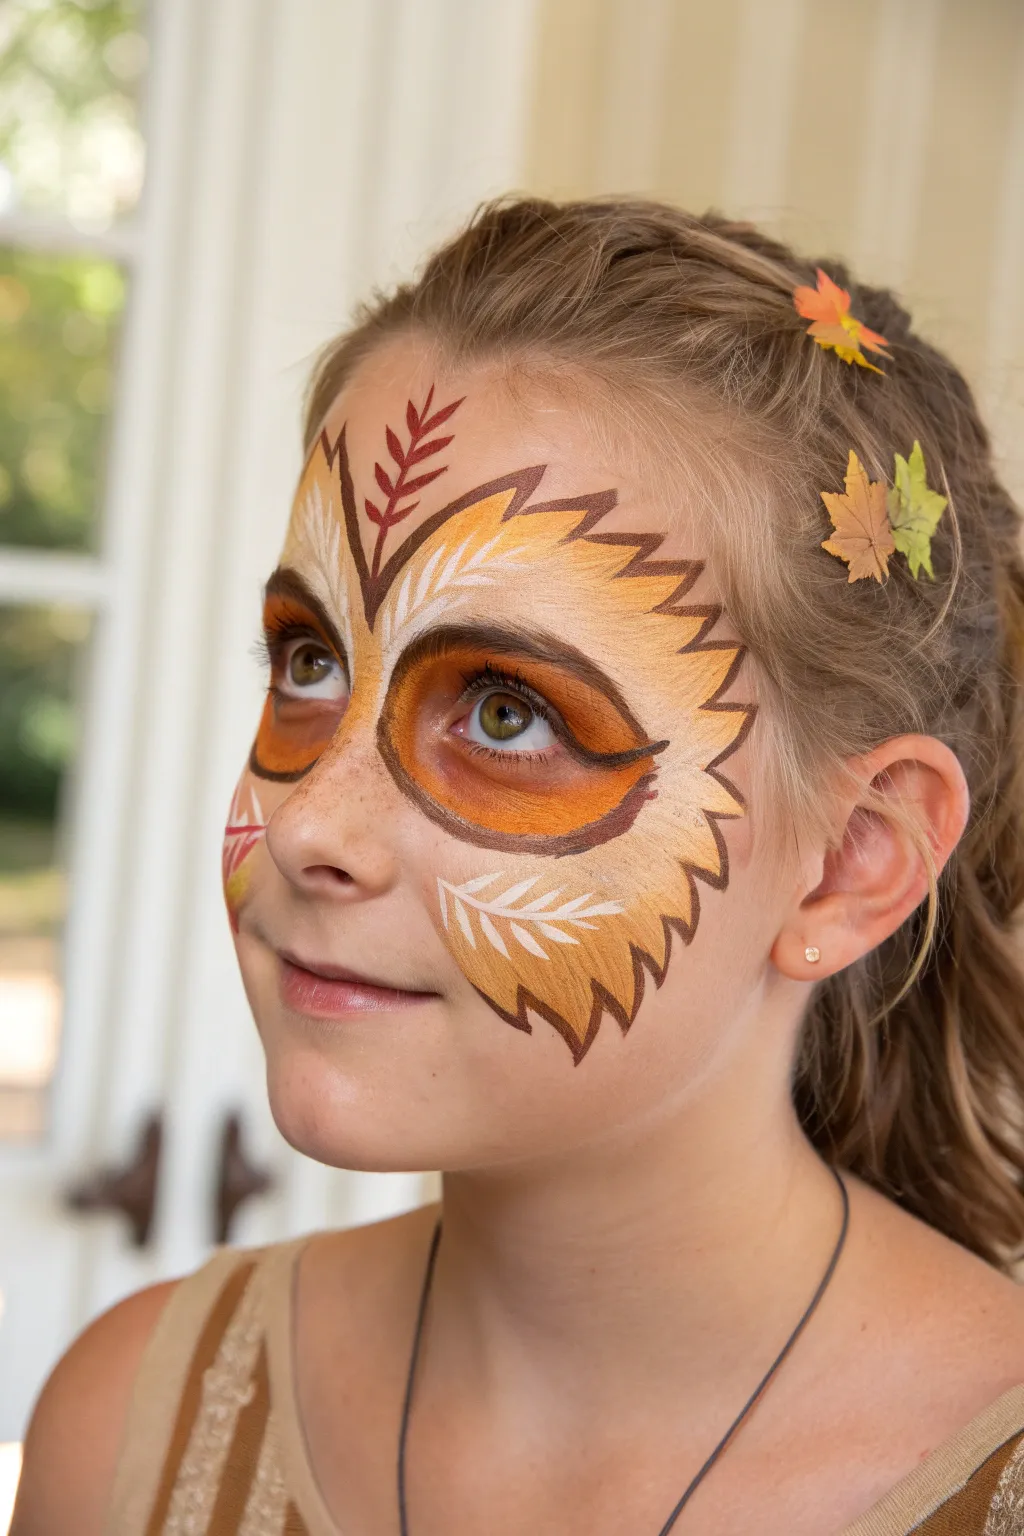
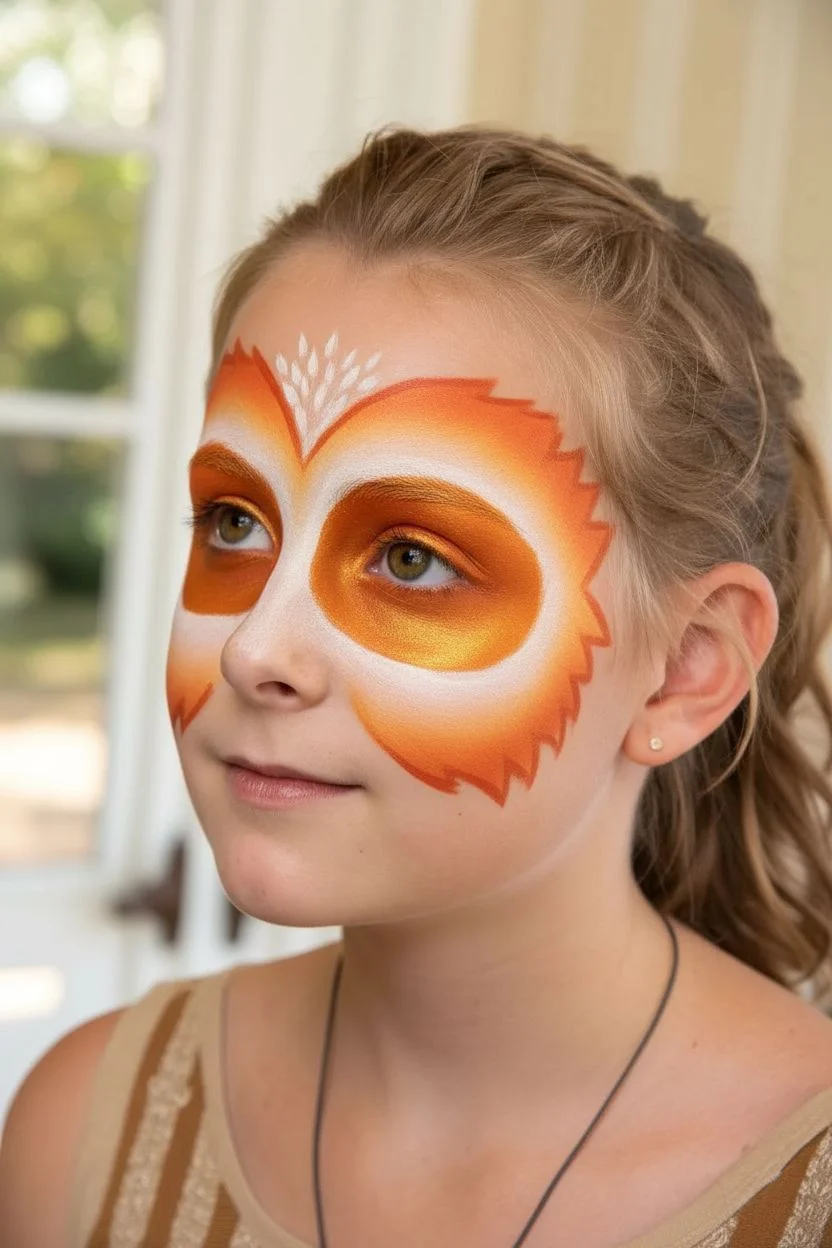
Transform into an enchanting woodland creature with this warm, autumn-inspired design. Featuring fierce amber eyes surrounded by feathery leaf patterns, this look perfectly captures the cozy and mystical vibe of the fall season.
Step-by-Step
Materials
- High-density face paint sponges (at least 2)
- Round brush (size 2 or 3 for outlining)
- Round brush (size 1 for fine details)
- Fan brush (optional, for blending)
- Face paints: Bright orange/amber, shimmery gold, deep chocolate brown, creamy white, burgundy/dark red
- Small artificial fabric leaves (autumn colors)
- Skin-safe cosmetic adhesive or eyelash glue
- Spray bottle with water
Step 1: Creating the Base Layer
-
Load the amber base:
Start by dampening a high-density sponge and loading it generously with a mix of bright orange and a touch of gold shimmer. You want a warm, glowing base color. -
Define the eye sockets:
Gently stipple the sponge around the eyes, creating large, rounded patches that cover the eyelids and swoop down onto the upper cheeks. Keep the coverage opaque, especially near the lash line. -
Extend the wings:
While the paint is still tacky, use the edge of your sponge to pull the color outwards from the temples toward the hairline, creating the initial flared shape for the owl mask. -
Add lighter highlights:
Load a fresh sponge edge with creamy white paint. Dab this onto the center of the forehead (between the eyebrows) and blend it slightly downward onto the bridge of the nose to add dimension. -
Blend the transition:
Softly blend the white highlight into the orange eye sections so there are no harsh lines, creating a gradient that looks like sunlit feathers.
Stay Symmetrical
Work on both eyes simultaneously rather than finishing one side completely. Paint a stroke on the left, then immediately repeat it on the right to keep the mask balanced.
Step 2: Detailed Outlining & Texture
-
Outline the mask shape:
Using a size 3 round brush loaded with chocolate brown paint, create the outer boundary of the mask. Instead of a smooth line, paint jagged, saw-tooth spikes that point outward to mimic feathers or leaf edges. -
Frame the eyes:
With the same brown paint, carefully draw a sweeping line under the eye, curving upward at the outer corner to create a cat-eye effect. This defines the ‘owl’ look. -
Contour the nose:
Lightly shade the sides of the nose bridge with a diluted brown to connect the eye designs, leaving the tip of the nose distinct and cute. -
Add freckles:
I prefer to flick a slightly wet toothbrush or use the very tip of a small brush to dot tiny brown speckles across the nose and cheeks for an organic, earthy texture.
Glitter Glam
While the brown outline is wet, lightly poof some cosmetic-grade iridescent gold glitter over the jagged edges. It catches the light beautifully creates a magical feel.
Step 3: Decorative Linework
-
Paint the center vein:
Switch to a burgundy or dark red paint on a fine liner brush. Draw a stylized fern or leaf spine starting from the top of the forehead, pointing down toward the nose bridge. -
Add white feather details:
Clean your fine brush and load it with opaque white. Paint delicate, curved lines inside the orange sections above the eyebrows, mimicking the veins of a leaf or the rachis of a feather. -
Detail the cheeks:
Repeat the white vein pattern on the cheek sections of the mask, ensuring the lines flow outward in the same direction as your jagged brown outline. -
Highlight the eyes:
Add a tiny dot of white to the inner corner of each eye to make the gaze look bright and alert.
Step 4: Adding the 3D Elements
-
Prepare the leaves:
Select two or three small artificial fabric maple leaves. If they still have plastic stems attached, snip them off so the leaves lie flat. -
Apply adhesive:
Place a small dot of skin-safe cosmetic glue (eyelash glue works perfectly) on the back of each leaf. Wait about 30 seconds for it to become tacky. -
Position the accessories:
Press the leaves gently onto the hair near the temples or pinned into a braid. This integrates the hairstyle with the face paint for a complete forest spirit aesthetic.
Now you are ready to flutter through the autumn leaves with this striking woodland design
Pumpkin Patch Vine Swirls Around One Eye
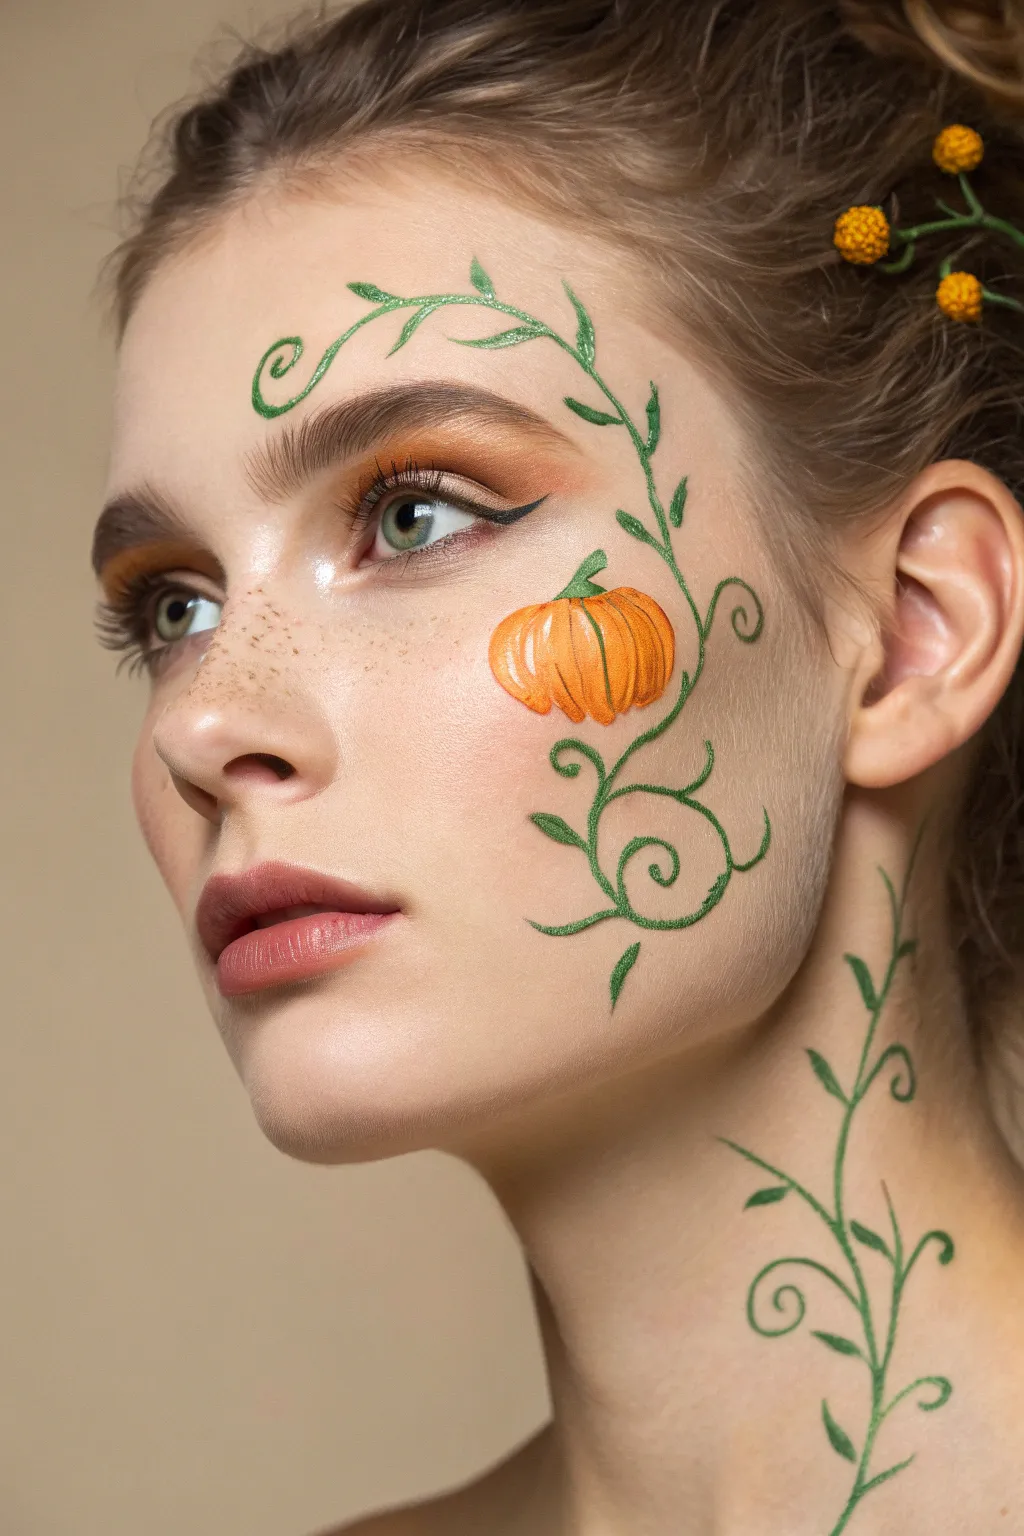
Embrace the harvest season with this delicate, asymmetrical face painting design that weaves organic vines around a petite pumpkin centerpiece. The look combines warm autumnal eyeshadows with precise linework to create an elegant rather than scary Halloween aesthetic.
Detailed Instructions
Materials
- Matte foundation (skin tone matching)
- Warm orange and brown eyeshadow palette
- Water-activated face paints: bright orange, light orange, forest green, light green, white
- Fine liner brush (size 0 or 00)
- Medium round brush (size 2-4)
- Fluffy blending eyeshadow brush
- Black liquid eyeliner
- Mascara
- Setting spray
- Optional: faux freckle pen or brown face paint
Step 1: Base and Eye Makeup
-
Prep the Canvas:
Start with clean, moisturized skin. Apply a matte foundation to even out the skin tone, creating a neutral base that will make the orange pop. -
Warm the Eyelids:
Take a fluffy brush and sweep a matte, warm sienna or burnt orange eyeshadow across the entire eyelid, blending upward toward the brow bone. Keep the edges soft and diffused. -
Deepen the Crease:
Using a smaller blending brush, apply a deeper brown shade into the outer V and crease of the eye to add dimension. I like to drag a little of this color under the lower lash line for balance. -
Define the Eyes:
Create a sharp, classic cat-eye wing using black liquid eyeliner. Finish the eyes with a coat of mascara on top and bottom lashes. -
Add Sunkissed Freckles:
If your model doesn’t have natural freckles, dot a few across the nose and cheeks using a freckle pen or diluted brown face paint. Tap them gently with a finger to soften the look.
Restoring Vine Flow
If a vine line looks shaky, don’t wipe it off! Thicken the line slightly in that spot to smooth it out, or turn the mistake into the base of a new leaf to hide it completely.
Step 2: Painting the Pumpkin
-
Outline the Shape:
Load a round brush with light orange face paint. On the high point of the cheekbone, paint a wide oval shape that is slightly flattened at the top and bottom. -
Create Segments:
While the base is still slightly damp, take a darker orange paint to define the pumpkin’s segments. Paint curved vertical lines following the roundness of the fruit. -
Adding Highlights:
Mix a tiny bit of white with your light orange. Add highlights to the center of each pumpkin segment to make it look plump and 3D. -
Stem Detail:
Using your fine liner brush and forest green paint, create a small, crooked stem sitting atop the pumpkin.
Brush Control Secret
For the crispest vine swirls, thin your face paint with water until it has an inky consistency. This creates long, unbroken lines without the brush dragging on the skin.
Step 3: Weaving the Vines
-
Forehead Vine Placement:
Load your fine liner brush with forest green paint. Starting from the pumpkin stem, draw a flowing, serpentine line curving upward over the eyebrow and onto the forehead. -
Adding Spirals:
At the end of your main vine stroke, curl the brush inward to create delicate fern-fiddlehead spirals. Pressure control is key here: press down for thickness, lift up for thin tips. -
Cheek and Neck Extension:
Draw a mirroring vine extending downward from the pumpkin, flowing over the jawline and down the side of the neck. Keep the movement fluid and organic. -
Painting Leaves:
Along the main vine stems, paint small, teardrop-shaped leaves. Press the belly of the brush down and pull away quickly to get a sharp point. -
Variation in Green:
To add depth, mix a lighter green shade and add subtle highlights to the top edges of the vines and the centers of the leaves. -
Texture Detail:
Use a very dry brush or a sponge with a tiny bit of green to stipple a ‘mossy’ texture lightly over parts of the vine for a more organic feel.
Step 4: Finishing Touches
-
Final Highlights:
Take a clean liner brush with pure white paint. Add tiny reflection dots to the shiny part of the pumpkin and the very tips of the freshest leaves. -
Set the Look:
Mist the entire face with a setting spray to prevent the water-activated paint from cracking or smudging throughout the day.
Now you are ready to show off your sophisticated autumn artwork at any seasonal gathering

PENCIL GUIDE
Understanding Pencil Grades from H to B
From first sketch to finished drawing — learn pencil grades, line control, and shading techniques.
Explore the Full Guide
Harvest Sunflower and Fall Leaves Side Sweep
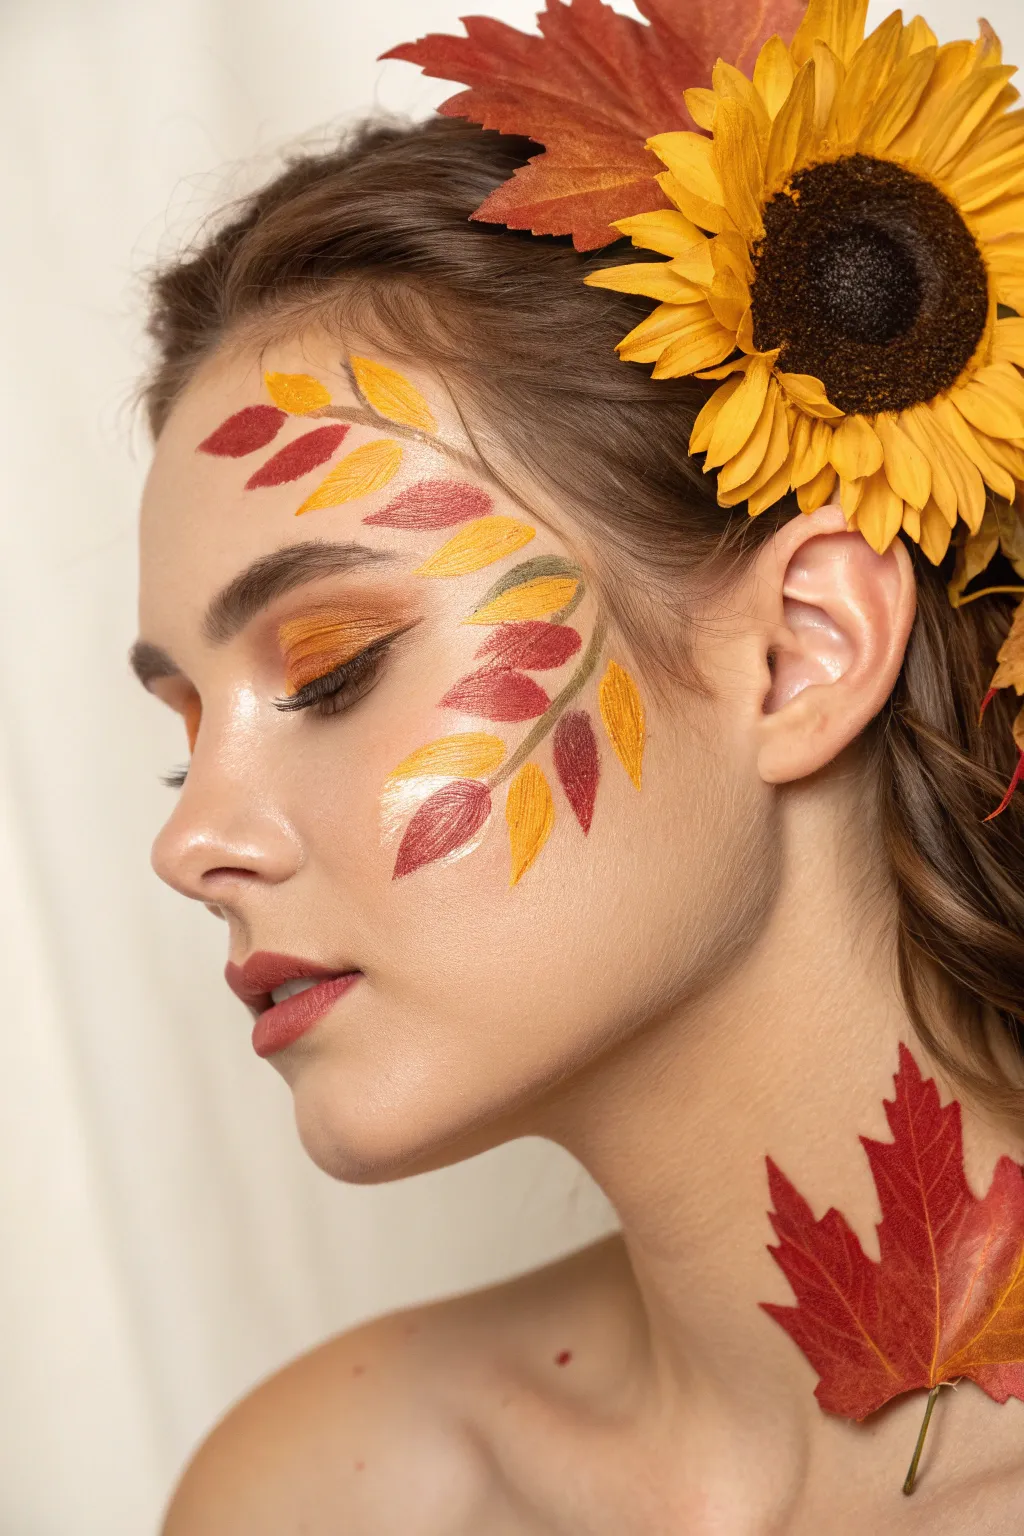
Embrace the warmth of autumn with this elegant and earthy face painting design. Featuring a stylized branch of painterly leaves in crimson and gold paired with a bold sunflower hairpiece, this look captures the essence of the harvest season perfectly.
Step-by-Step
Materials
- Face primer (matte finish)
- Foundation and concealer (skin-matching)
- Contour powder
- Highlighter (champagne or gold tones)
- Cream eyeshadows (burnt orange, copper, deep brown)
- Powder eyeshadows (brick red, terracotta)
- Face paint or highly pigmented cream makeup (yellow, crimson red, metallic gold, olive green)
- Fine liner brush
- Small flat angled brush
- Small round detail brush
- Makeup sponge
- Setting spray
- Matte lipstick (brick red/terracotta)
- Large artificial sunflower clip
- Artificial maple leaves (fabric or preserved)
- Skin-safe adhesive (spirit gum or lash glue)
- Black mascara
Step 1: Base and Eye Makeup
-
Prep and Prime:
Begin with a clean, moisturized face. Apply a matte primer to ensure the face paint adheres well, followed by your regular foundation and concealer routine to create a flawless canvas. -
Soft Contouring:
Use a warm-toned contour powder to gently define the cheekbones and jawline, adding warmth without creating harsh lines. -
Eye Base Color:
Apply a burnt orange cream eyeshadow across the entire lid, blending it slightly upward into the crease for a soft, diffused look. -
Deepen the Crease:
Take a terracotta powder shadow and blend it into the outer corner and crease to add dimension. Keep the blending soft and hazy. -
Liner Definition:
Using a dark brown shadow or pencil, smudge a soft line close to the upper lash line. This creates definition without the sharpness of liquid liner. -
Finishing the Eyes:
Apply two coats of black mascara to top and bottom lashes. Add a touch of champagne highlighter to the inner corner of the eye to brighten.
Pro Tip: Textured Strokes
Don’t aim for perfect, flat color on the painted leaves. Let the brush bristles create streaks; this mimics natural leaf veins beautifully.
Step 2: Painting the Leaf Branch
-
Mapping the Branch:
With a fine liner brush and olive green face paint, lightly sketch a thin, curved central stem starting from the temple above the eyebrow, curving down the cheekbone toward the center of the cheek. -
First Leaf Layer – Yellow:
Use a small flat angled brush loaded with yellow face paint. Press the brush down and lift while twisting slightly to create leaf shapes. Place a few near the top of the stem and one near the bottom. -
Second Leaf Layer – Red:
Clean the brush or switch to a fresh one. Load it with crimson red paint. Add leaf shapes interspersed with the yellow ones, ensuring they point outward from the central stem. -
Adding Dimension:
While the paint is still slightly tacky, mix a tiny bit of metallic gold into the yellow leaves and a deeper burgundy into the red leaves to create subtle veins and texture. -
Highlighting the Leaves:
I like to take a tiny detail brush with white or very pale gold paint and add very thin highlights to the tips or edges of a few leaves to make them pop against the skin. -
Connecting the Stems:
Go back with your olive green liner brush and ensure all the individual leaves are connected to the main central branch with tiny, delicate stems.
Troubleshooting: Smudging Paint
If the leaves smudge, wait for them to dry completely, then use a clean angled brush with a tiny bit of concealer to sharpen the edges.
Step 3: Lips and Accessories
-
Lip Application:
Fill in the lips with a matte brick red or terracotta lipstick. Blot with a tissue to keep the finish soft and natural. -
Highlighting the Face:
Apply gold highlighter generously to the nose bridge, brow bone, and just above the painted leaves on the cheekbone to create a glowing complexion. -
Securing the Sunflower:
Take the large artificial sunflower and clip or pin it securely into the hair on the same side as the face paint, positioning it just above and behind the ear. -
Adding Neck Detail:
Apply a small amount of skin-safe adhesive to the back of a large artificial maple leaf. Press it onto the neck or collarbone area for an artistic continuation of the theme. -
Final Set:
Mist the entire face with a setting spray to lock the makeup and paint in place for long-lasting wear.
Step back and admire your stunning, nature-inspired transformation
Candy Corn-Inspired Color Block Cheeks
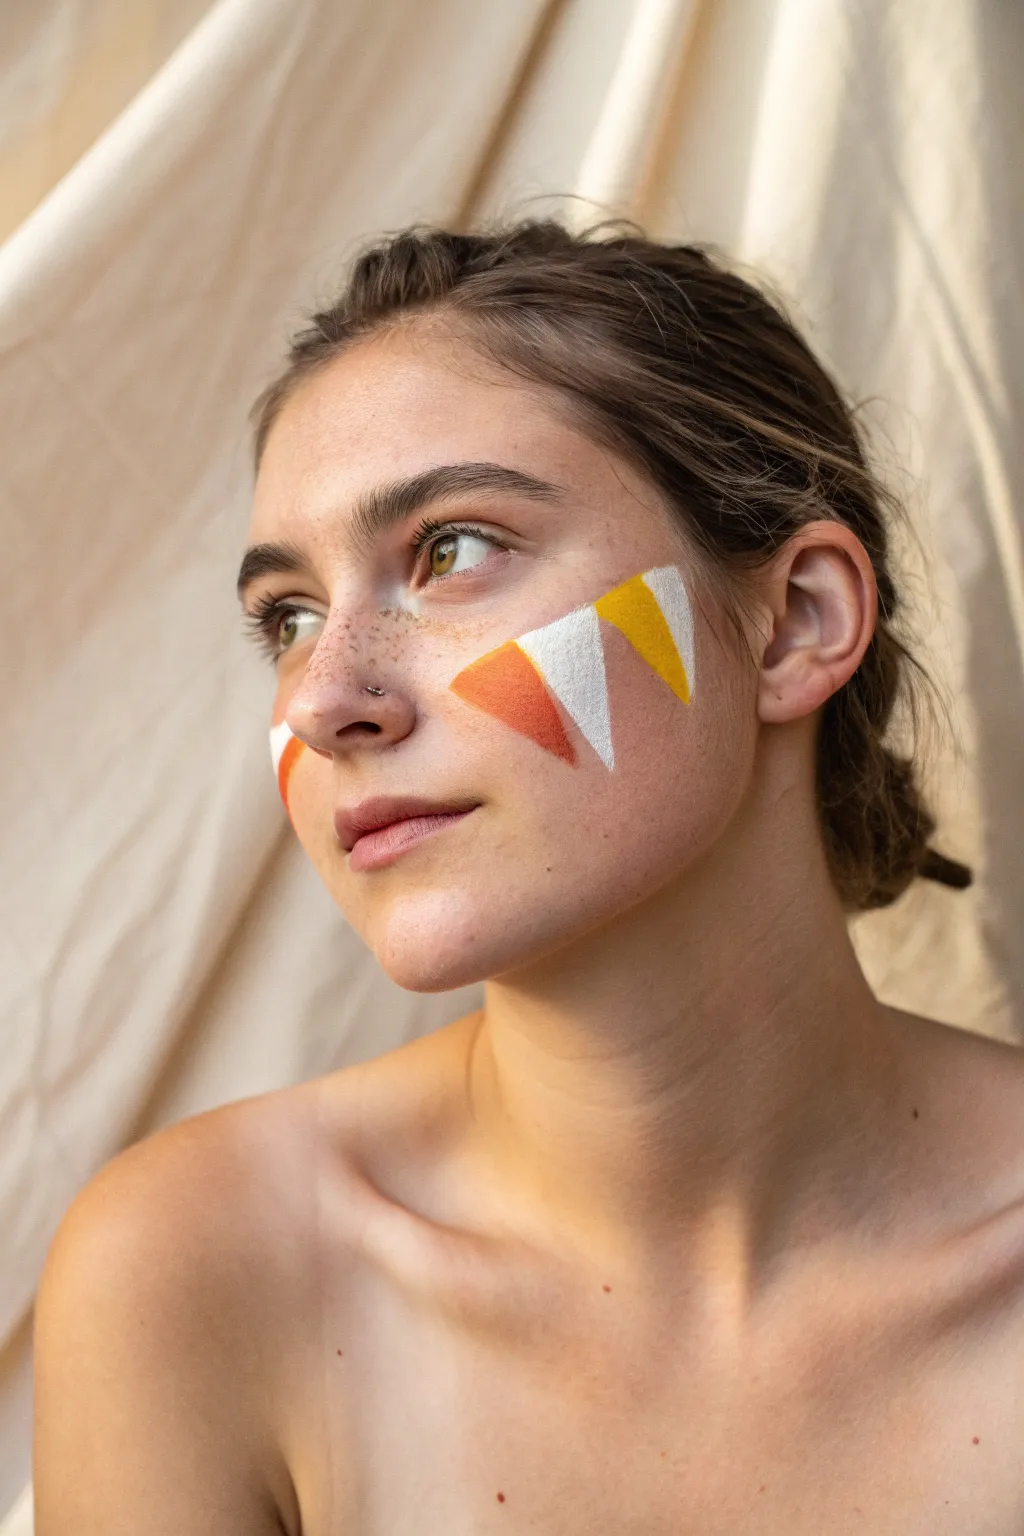

Embrace the spirit of Halloween without the full costume commitment using this subtle yet striking candy corn-inspired look. Sharp geometric triangles in classic fall tones create a modern, minimalist design that beautifully complements natural skin textures and freckles.
Step-by-Step
Materials
- White cream face paint or high-pigment eyeliner
- Yellow cream face paint or eyeshadow base
- Orange cream face paint or blush
- Small flat angled brush
- Fine detail brush
- Makeup sponge
- Setting powder
- Small blending brush
- Micellar water (for cleanup)
Step 1: Base Preparation
-
Prep the canvas:
Start with clean, moisturized skin. Apply a light layer of sheer foundation or tinted moisturizer if desired, but keep the texture natural to let any freckles show through, just like in the inspiration photo. -
Set the base:
Dust a very light layer of translucent powder over the cheek area where you’ll be painting. This provides a ‘grip’ for the cream paints and prevents them from slipping on natural facial oils.
Step 2: Mapping the Shapes
-
Visualize the placement:
Identify the high point of your cheekbone. You will be creating a row of three inverted triangles following the natural contour of the cheekbone towards the ear. -
Mark the first triangle:
Using a very fine brush dipped in the orange paint, lightly outline the first triangle shape closest to the nose. The point should be facing downward, resting on the apple of the cheek. -
Outline the center shape:
Next to the orange triangle, outline an inverted triangle using white paint. Leave a tiny sliver of negative space (bare skin) between the shapes to keep the look crisp. -
Mark the final triangle:
Outline the third and final triangle using yellow paint, positioning it highest on the cheekbone near the temple. This creates an upward lifting effect for the face.
Tape Hack For Sharpness
For ultra-crisp lines without a steady hand, place small pieces of skin-safe tape on your cheek to form the triangle stencils before painting.
Step 3: Filling and Refining
-
Fill the orange:
Load your flat angled brush with orange cream paint. Fill in the first triangle outline, using the straight edge of the brush to keep the lines incredibly sharp. -
Saturate the color:
For a bold look, pat a second layer of orange over the first once it’s tacky. This ensures the skin tone doesn’t dull the vibrant candy corn hue. -
Clean the brush:
Thoroughly wipe your brush clean or switch to a new one to avoid muddying the pristine white section. -
Fill the white:
Carefully fill in the middle triangle with opaque white paint. I find that stamping the product on rather than dragging it helps maintain opacity. -
Fill the yellow:
Using a clean brush, fill in the final yellow triangle near the hairline. Ensure the top edge aligns generally with the other two for a cohesive flow.
Patchy White Paint?
White face paint can be tricky. If it looks streaky, let the first layer dry completely, then stipple on a second layer instead of brushing it.
Step 4: Finishing Touches
-
Clean up edges:
Dip a small cotton bud or a clean angled brush into micellar water. Gently run it along the outside edges of your triangles to sharpen any fuzzy lines. -
Feather the freckles:
If you have natural freckles, let them shine. If not, use a fine brown eyebrow pencil to dot a few faux freckles across the nose bridge and sparsely around the painted shapes. -
Soft press:
Take a clean finger and gently press (don’t rub) the scattered faux freckles to make them look lived-in and natural. -
Set the paint:
Use a fluffy brush to gently tap—not swipe—translucent setting powder over the painted triangles. This locks the cream product in place for long-lasting wear.
Now you have a festive, geometric look that celebrates the season with artistic flair


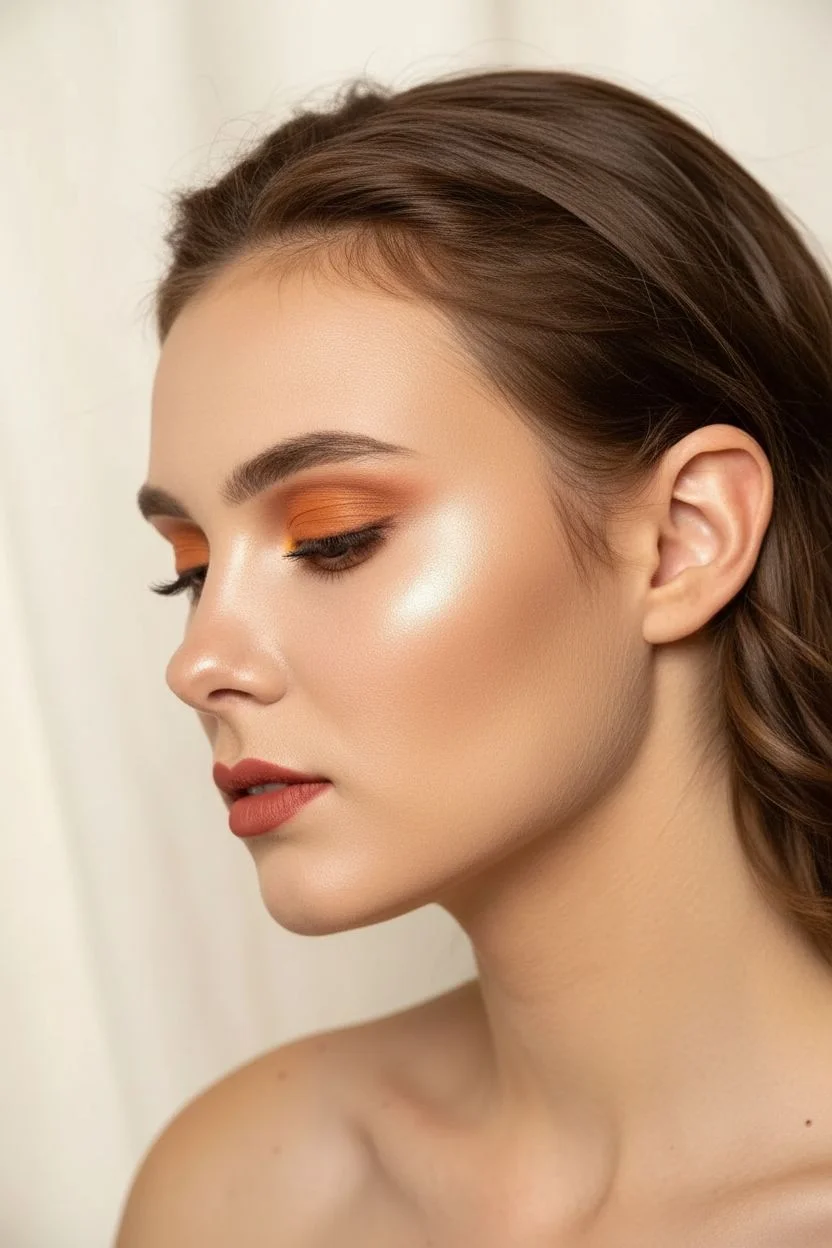
Golden Harvest Freckles and Leaf Sprinkles
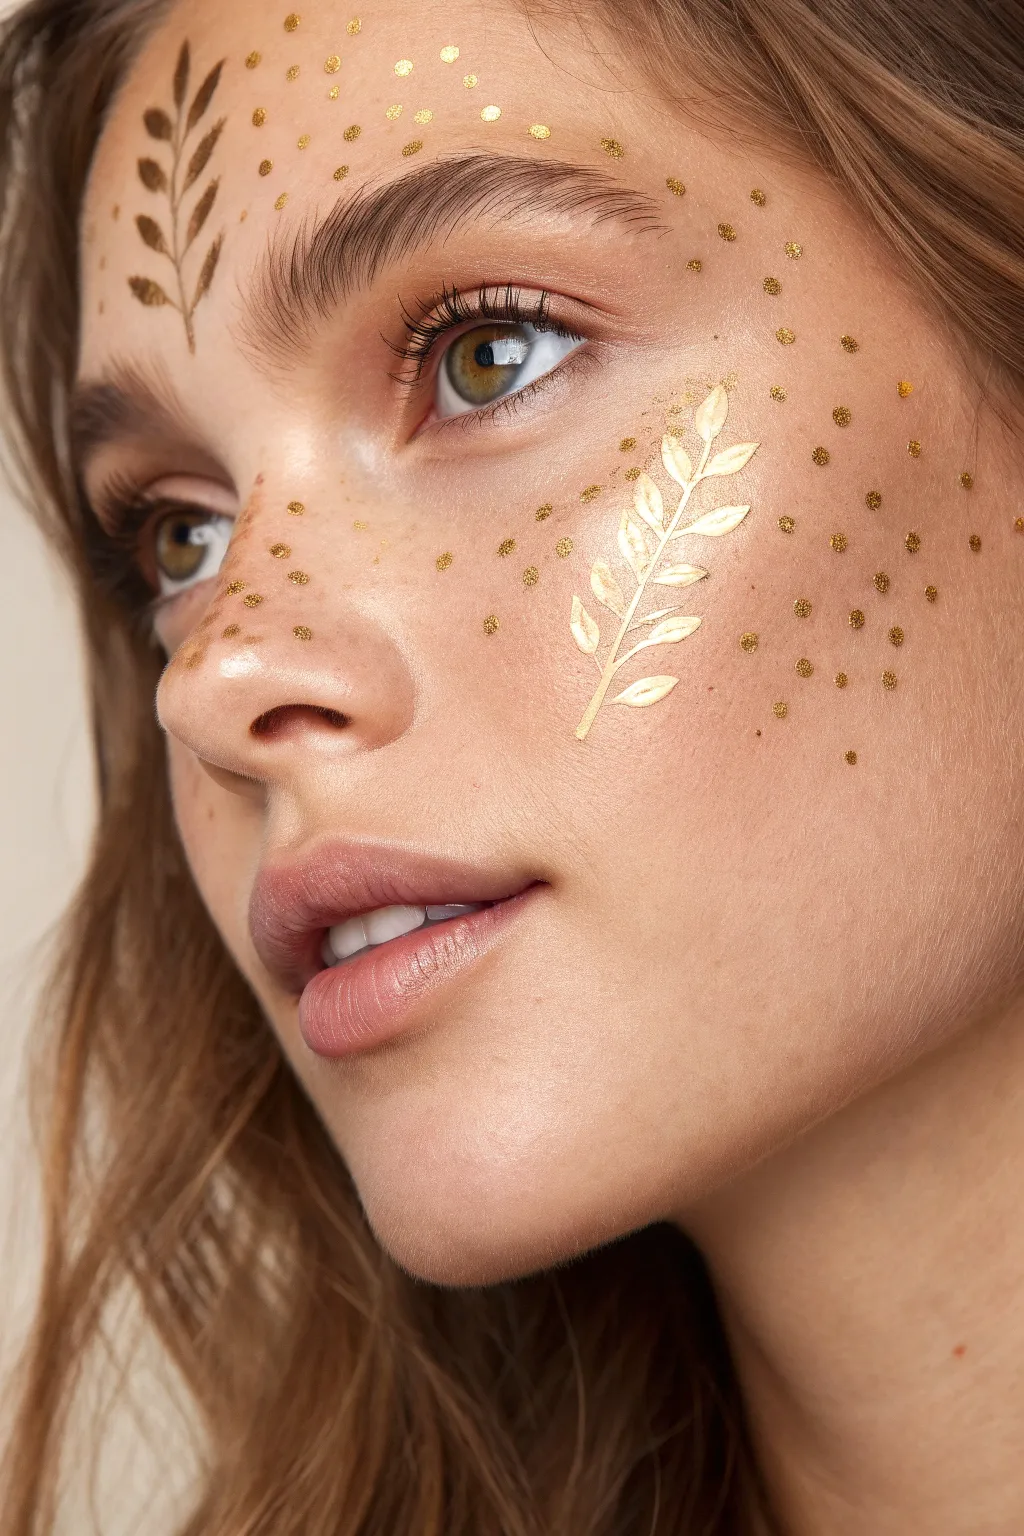
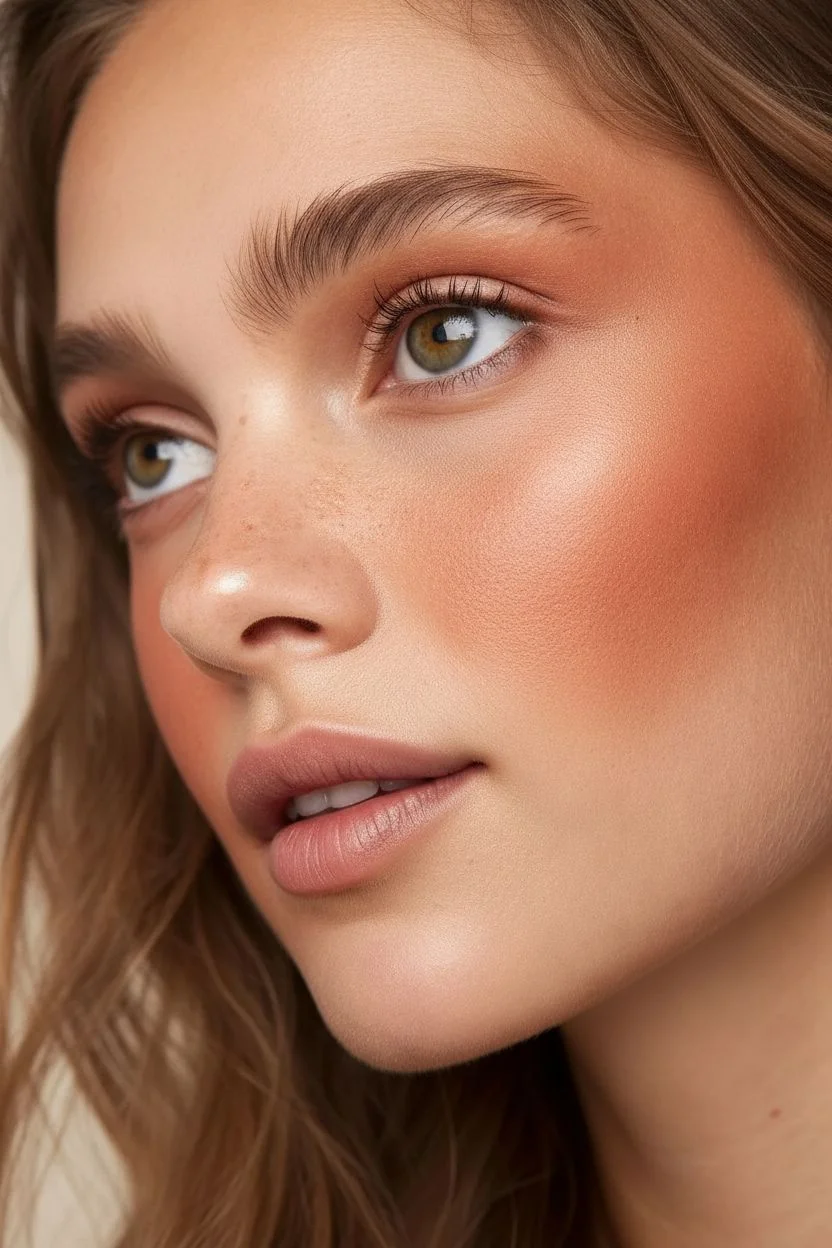
Embrace the warmth of autumn with this ethereal face painting design that combines delicate metallic foliage with a scattering of golden stardust. This look mimics the gentle fall of autumn leaves and adds a whimsical, sun-kissed glow perfect for festivals or seasonal photoshoots.
How-To Guide
Materials
- liquid gold face paint (metallic)
- fine-tip detail brush (size 0 or 00)
- cosmetic biodegradable chunky gold glitter
- clear lash glue or skin-safe glitter adhesive
- dotting tool or end of a bobby pin
- setting spray
- warm-toned blush/bronzer for base
Step 1: Base Preparation
-
Clean and Prep:
Begin with a clean, moisturized face. Apply a light base of foundation or tinted moisturizer if desired to even out the skin tone. -
Add Warmth:
Dust a warm terracotta or peach blush across the cheeks and bridge of the nose to create a flushed, autumnal base for the gold accents. -
Groom Brows:
Brush eyebrows upward with brow gel to frame the face neatly, keeping the canvas open for the forehead design.
Step 2: Painting the Foliage
-
Load the Brush:
Shake your liquid gold face paint well. Dip your fine-tip detail brush into the pigment, ensuring it’s saturated but not dripping. -
Cheek Stem:
Starting near the center of your left cheek, paint a thin, slightly curved line moving upwards towards the temple. This is the main stem for the leaf sprig. -
Add Cheek Leaves:
Paint small, marquise-shaped leaves extending from the stem. Press the brush down gently and lift while pulling away to create a tapered point at the leaf tip. -
Symmetry Check:
Ensure the leaves are spaced evenly, alternating sides as you move up the stem. -
Forehead Stem:
Reload your brush. On the opposite side of the forehead (above the right eye), paint a vertical stem starting near the hairline and curving slightly downward. -
Add Forehead Leaves:
Repeat the leaf painting technique on the forehead stem. These leaves can be slightly larger at the top and smaller as they descend, mimicking natural growth. -
Detailing:
Go back over your leaves if necessary to sharpen the tips or fill in any patchy areas with more gold paint.
Sharpen Your Tips
If your leaf tips look blunt, wipe your brush clean and drag a tiny amount of concealer along the edges to refine the shape.
Step 3: Applying the Glitter Freckles
-
Create Adhesive Bases:
Using the back of your brush or a dotting tool, dab tiny spots of lash glue or skin adhesive across the nose bridge, cheeks, and forehead. -
Scatter Formation:
Focus the densest cluster of dots across the nose and upper cheeks, dispersing them more sparsely as you move toward the hairline. -
Apply Gold Dots:
While the glue is tacky, press chunky gold glitter or sequins onto the adhesive dots. I find using a slightly damp finger or wax pencil works best to pick them up. -
Paint Faux Freckles:
Dip your dotting tool directly into the gold face paint. Add varying sizes of painted gold dots in between the glitter pieces to add dimension. -
Forehead Sprinkle:
Extend the painted gold dots up onto the forehead, surrounding the leaf design to create a floating pollen effect. -
Outer Edges:
Place a few stray dots further out on the temples and cheekbones to soften the edges of the design. -
Final Set:
Once all paint and glue is fully dry, mist the face lightly with a setting spray to lock the metallic pigments in place for the day.
Paint Cracking?
Mix a tiny drop of mixing medium or contact solution into your gold paint if it feels too thick or begins to crack on the skin.
Now you are ready to glow with the golden spirit of the harvest season
Plaid Flannel Cheek Pattern with Leaf Accent
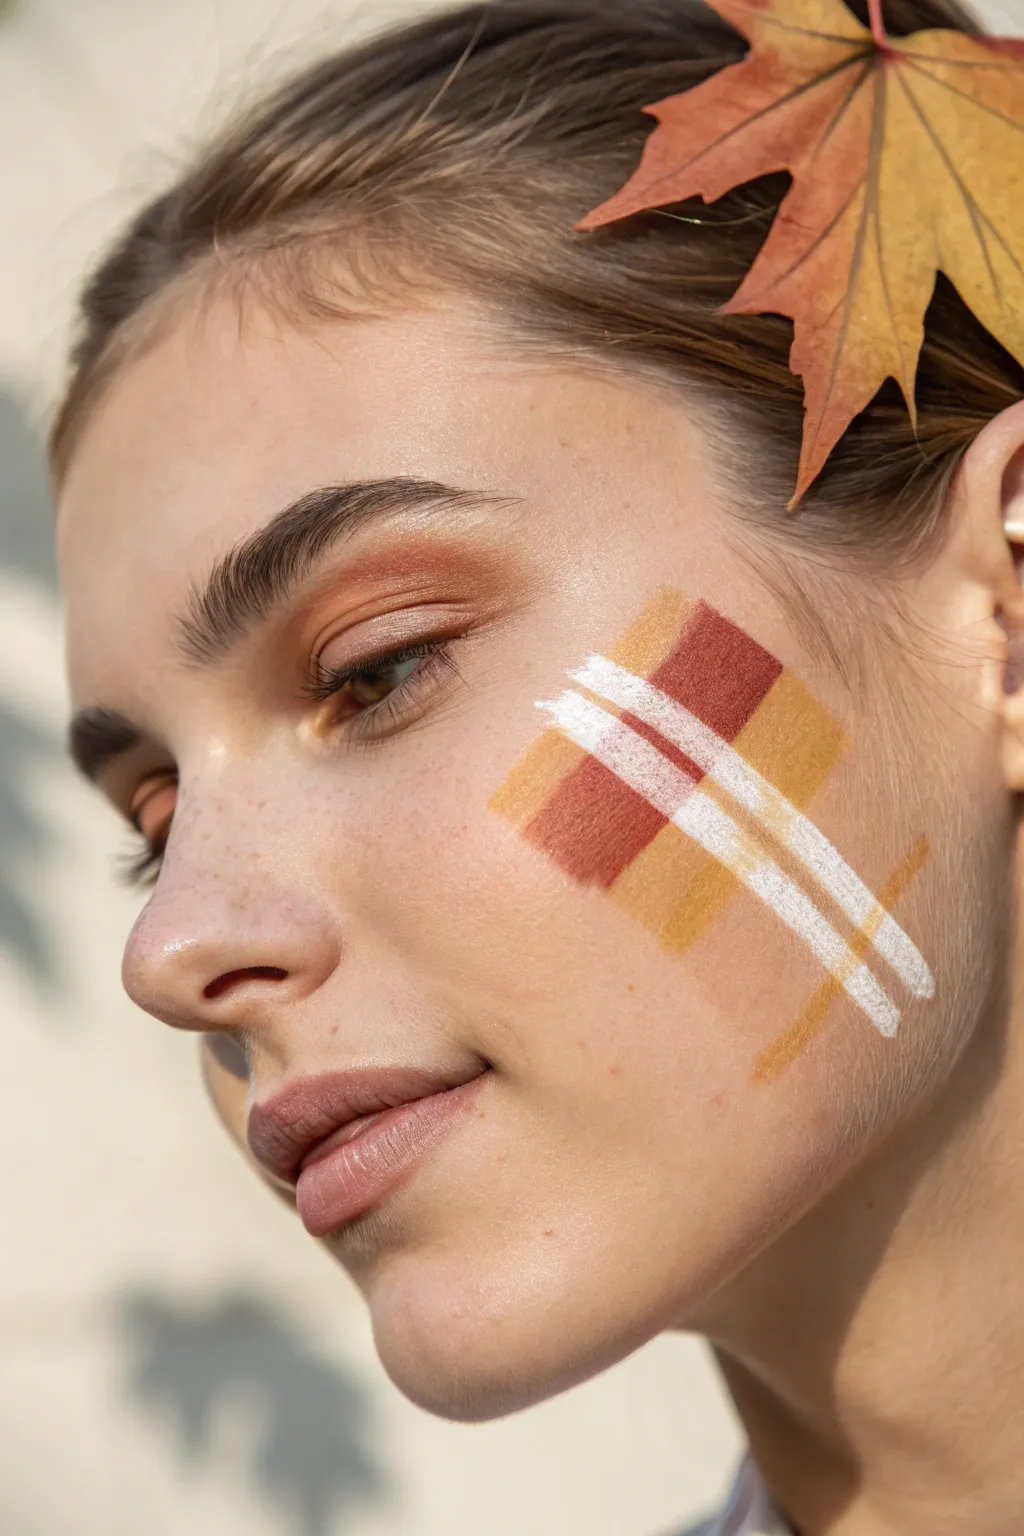
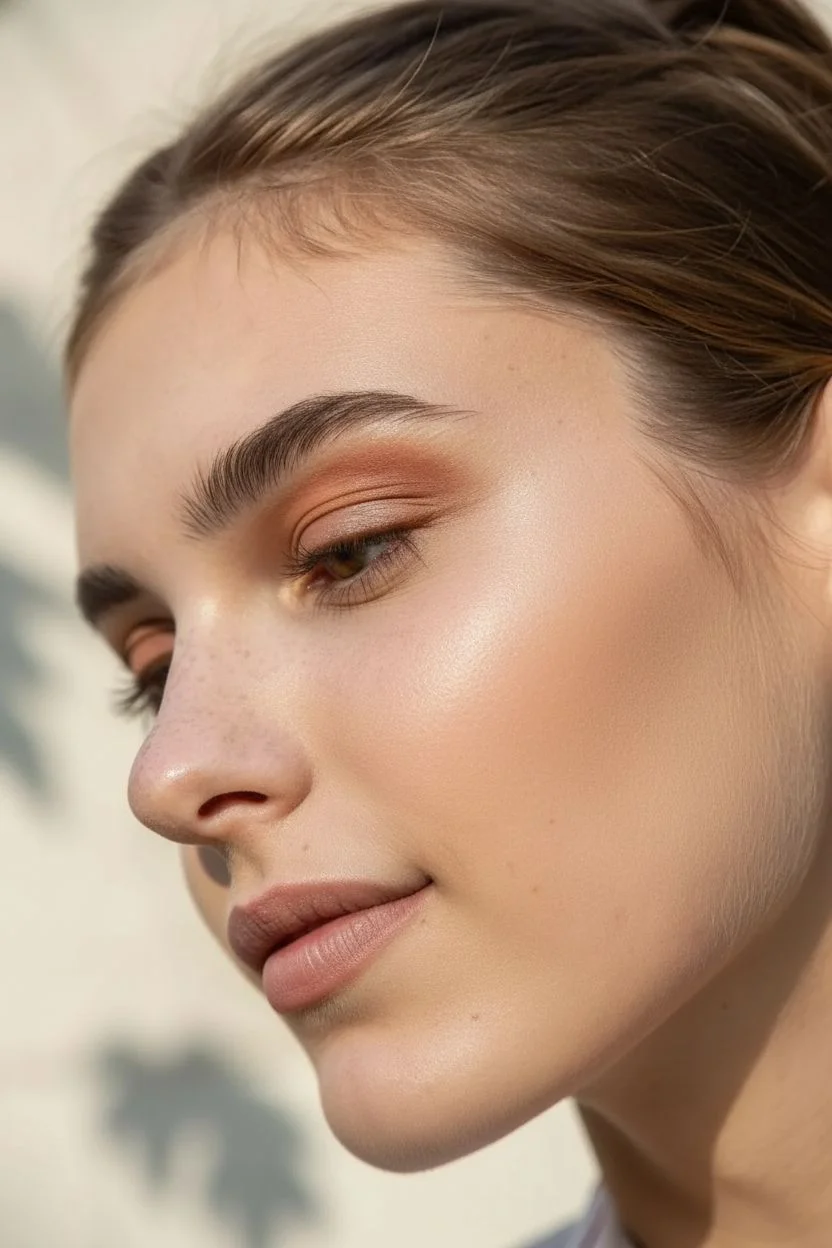
Capture the spirit of crisp autumn days with this unique plaid cheek design. Pairing warm, earthy makeup tones with a graphic flannel pattern creates a sophisticated yet festive look perfect for seasonal gatherings.
Step-by-Step Guide
Materials
- Matte foundation or concealer (skin tone appropriate)
- Terracotta eyeshadow (matte)
- Fluffy blending brush
- Flat shader brush
- Cream face paint or gel liner in Maroon/Burgundy
- Cream face paint or gel liner in Mustard Yellow
- Cream face paint or gel liner in White
- Small flat definer brush (synthetic)
- Fine detail liner brush
- Setting spray
- Real or faux maple leaf (for hair accessory)
- Bobby pins
Step 1: Base and Eyes
-
Prep the canvas:
Begin with clean, moisturized skin. Apply a light layer of foundation or concealer to even out the skin tone, paying special attention to the cheek area where we’ll be placing the main design. -
Apply lid color:
Dip a fluffy blending brush into your matte terracotta eyeshadow. Sweep this color across the entire eyelid, starting from the lash line and blending softly upward into the crease. -
Soften the edges:
Take a clean blending brush and diffuse the edges of the eyeshadow so there are no harsh lines. The goal is a soft, warm wash of color that complements the cheek design without overpowering it. -
Lower lash definition:
Using a smaller flat brush, gently smudge a tiny amount of the same terracotta shadow along the lower lash line to balance the eye look.
Clean Lines Only
If your square edges get messy, don’t wipe! Wait for the paint to dry completely, then use a flat brush with a tiny bit of concealer to ‘cut’ the edge back into a sharp line.
Step 2: Painting the Plaid Pattern
-
Map the central square:
Load a small flat definer brush with the maroon cream paint. press the brush onto the high point of the cheekbone to create the central square of the pattern. -
Add first mustard block:
Clean your brush thoroughly or switch to a new one. Pick up the mustard yellow paint and place a square block directly above and to the right of your maroon square, ensuring the corners touch. -
Create the lower mustard block:
Place a second mustard yellow square directly below and to the left of the central maroon square. You should now have a diagonal line of three alternating color blocks. -
Second maroon placement:
Add another maroon square below the first mustard block you painted (the top right one), creating a checkerboard effect. -
Complete the grid:
Fill in the remaining spot above the bottom-left mustard block with your final maroon square. The shape should look like a tilted 2×2 grid or a elongated diamond arrangement. -
Blend edges slightly:
If the edges of the squares look too perfect or rigid, gently tap them with a clean fingertip to soften the texture, mimicking fabric weave.
Step 3: Detailing and Finishing
-
Main white stripe:
Switch to a fine detail liner brush loaded with white face paint. Draw a bold, continuous diagonal line that cuts straight through the center of the pattern, traveling from the top left to the bottom right. -
Secondary white stripe:
Draw a second, parallel white line right next to the first one. I find it helpful to make this one slightly thinner or broken in places to look more like woven thread. -
Cross-hatching lines:
Paint two perpendicular white lines crossing the first set, going from top right to bottom left. These should intersect the yellow squares specifically. -
Add texture:
Using a very dry brush with a tiny amount of white paint, lightly drag it over the colored squares in the direction of your lines to create a ‘fabric’ texture. -
Mustard accent line:
Clean your liner brush and dip it into the mustard paint. Add a very thin, faint line parallel to your white cross-hatching to add dimension to the plaid pattern. -
Highlight the face:
Apply a touch of liquid highlighter to the bridge of the nose and the inner corner of the eyes to keep the skin looking fresh and dewy. -
Set the makeup:
Mist the face lightly with a setting spray to lock the cream paints in place and prevent smudging throughout the day. -
Place the leaf:
Take your autumn leaf and tuck the stem behind your ear or pin it into your hair on the same side as the cheek design. Secure it with a bobby pin if needed.
Pro Tip: Cream to Powder
To make the cheek design last longer without smearing, gently pat a translucent setting powder over the cream paints before drawing the final white lines.
Now you are ready to show off your sophisticated fall style
Mushroom and Forest Floor Mini Scene
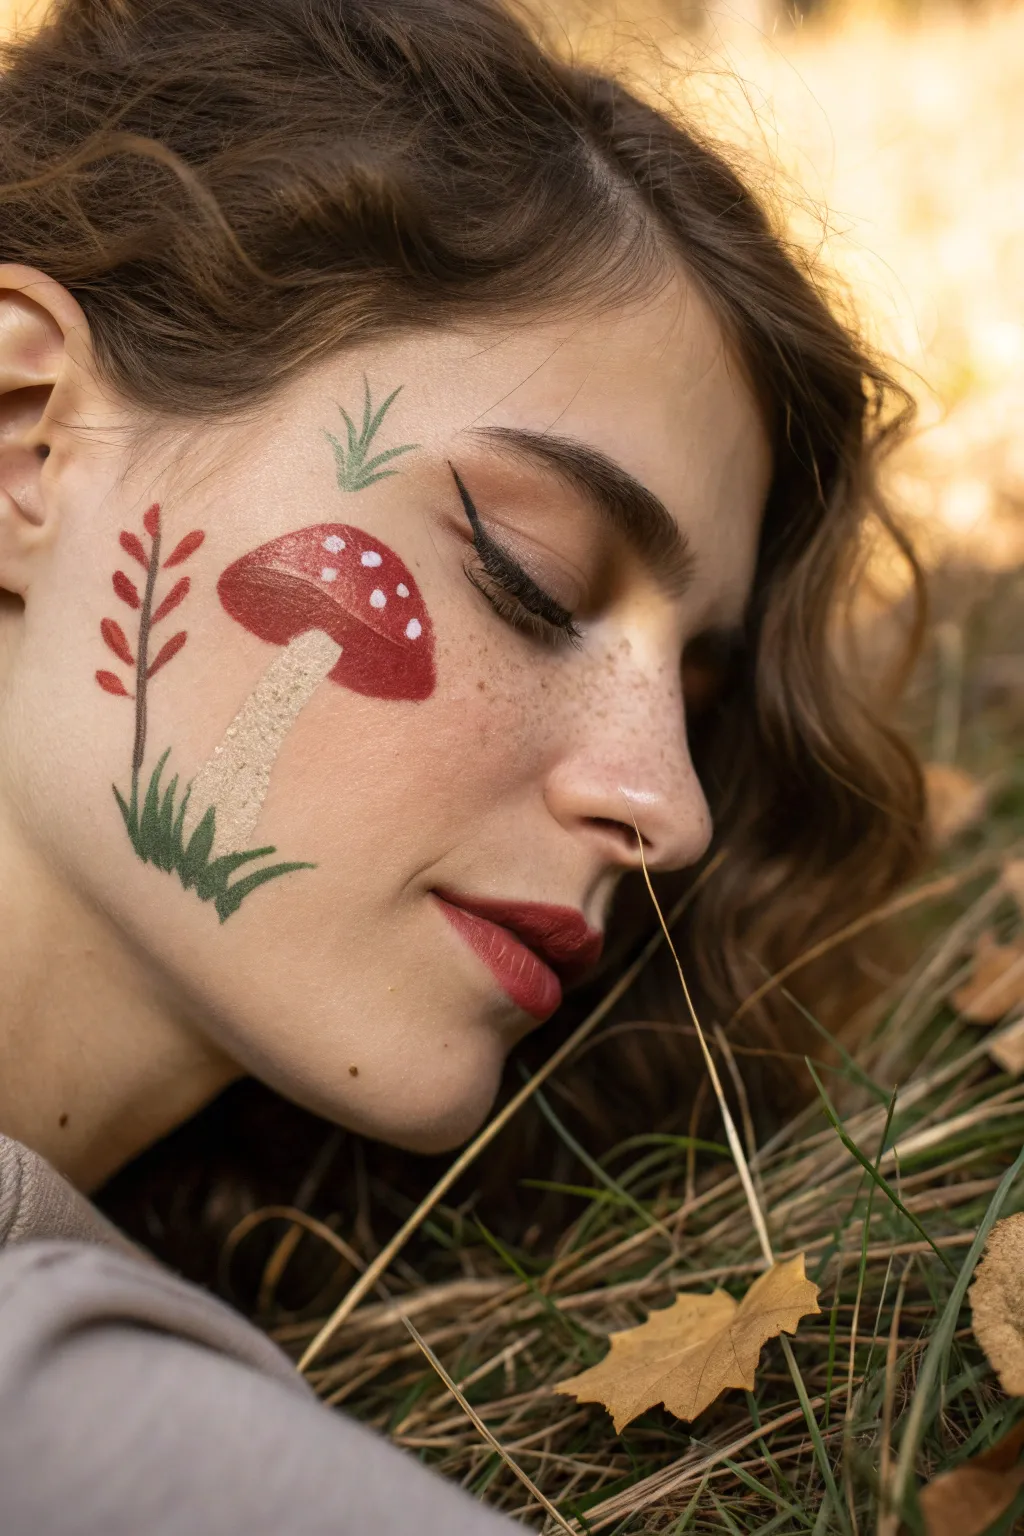
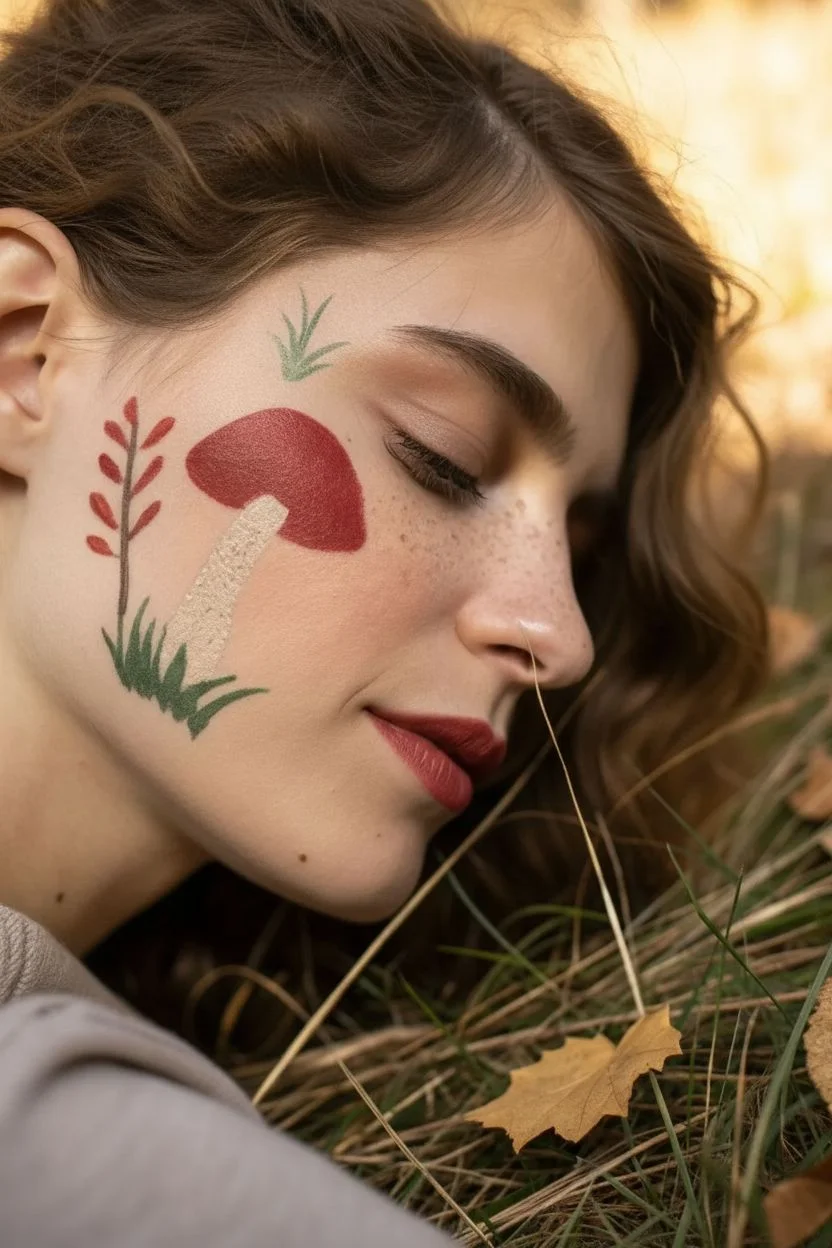
Capture the magic of an autumn forest floor right on your cheek with this delicate mini-scene. Featuring a classic red-capped mushroom nestled among grass and falling leaves, this design combines earthy tones with precise linework for a charming, cottagecore-inspired look.
Step-by-Step Guide
Materials
- High-quality face paints (red, white, beige/cream, light green, dark green, brown, rust-orange)
- Round brush (size 1 or 2) for details
- Flat brush (small) for filling shapes
- Fine liner brush for grass and stems
- Setting spray (optional)
- Water cup and paper towels
- Makeup sponge (optional for base prep)
Step 1: Painting the Mushroom Base
-
Outline the Cap:
Load a small round brush with dark red face paint. Starting on the apple of the cheek, draw a curved, semi-circle shape for the mushroom cap. Keep the top rounded and the bottom edge slightly flatter. -
Fill the Cap:
Using the same red paint, fill in the cap shape completely. Ensure the opacity is solid; if it looks streaky, wait a few seconds for the first layer to dry and add a second coat. -
Create the Stalk:
Switch to a creamy beige or light tan color. Paint a thick stalk extending primarily from the center of the cap’s bottom edge, curving it slightly to the left for a natural, organic look. -
Connect Cap and Stalk:
Where the stalk meets the red cap, carefully blend or paint the beige slightly up into the red area to suggest the gills underneath, or simply ensure a clean meeting point between the two colors. -
Add Stalk Texture:
I like to take a predominantly dry brush with a tiny bit of darker brown or taupe paint and stipple it gently over the beige stalk to give it that porous, earthy texture.
Clean Lines Tip
Rest your pinky finger on the chin or cheekbone while painting fine details like the grass blades. This anchors your hand and prevents shakiness.
Step 2: Adding Flora Details
-
Paint the Base Grass:
Load a liner brush with dark green paint. At the base of the mushroom stalk, flick the brush upward in short, quick strokes to create tufts of grass grounding the mushroom. -
Layer Lighter Grass:
Mix a lighter green or add a touch of yellow to your green paint. Add a few more grass blades over the dark ones to create depth and dimension. -
Draw the Leaf Stem:
Using brown paint and a fine liner brush, draw a thin, vertical line to the left of the mushroom. This will be the stem for your autumn leaf embellishment. -
Add Leaf Shapes:
Load a small round brush with a rust-orange or brick-red color. Press the brush down gently along the brown stem to create small, oval-shaped leaflets on either side. -
Top Grass Accent:
Move to the space just above the mushroom cap. Using a light, muted green, paint three small, sprouting blades of grass or a tiny fern frond to balance the composition.
Level Up: Glitter
Before the paint fully dries, tap a tiny amount of cosmetic-grade biodegradable glitter onto the white spots of the mushroom for a magical, fairy-like finish.
Step 3: Highlights and Finishing Touches
-
Dot the Mushroom Cap:
Clean your small round brush thoroughly or grab a dotting tool. load it with opaque white paint. Place several dots of varying sizes onto the red mushroom cap. -
Highlight the Cap:
Add a thin, subtle line of white or very light pink along the upper curve of the mushroom cap to make it look three-dimensional and shiny. -
Freckle Construction:
To integrate the design with the face, create faux freckles. Flick a stiff brush loaded with watery brown paint lightly over the nose and cheek area, or dot them on manually. -
Refine Edges:
Check the edges of your mushroom cap and leaves. If any lines look fuzzy, use a clean, slightly damp brush to tidy them up. -
Eye Definition:
Complement the face paint with a sharp black winged eyeliner to draw focus to the eyes without overpowering the delicate cheek art.
Now you have a charming piece of forest art ready for any autumn festival or costume party
Harvest Moon and Night Sky with Leaf Silhouettes
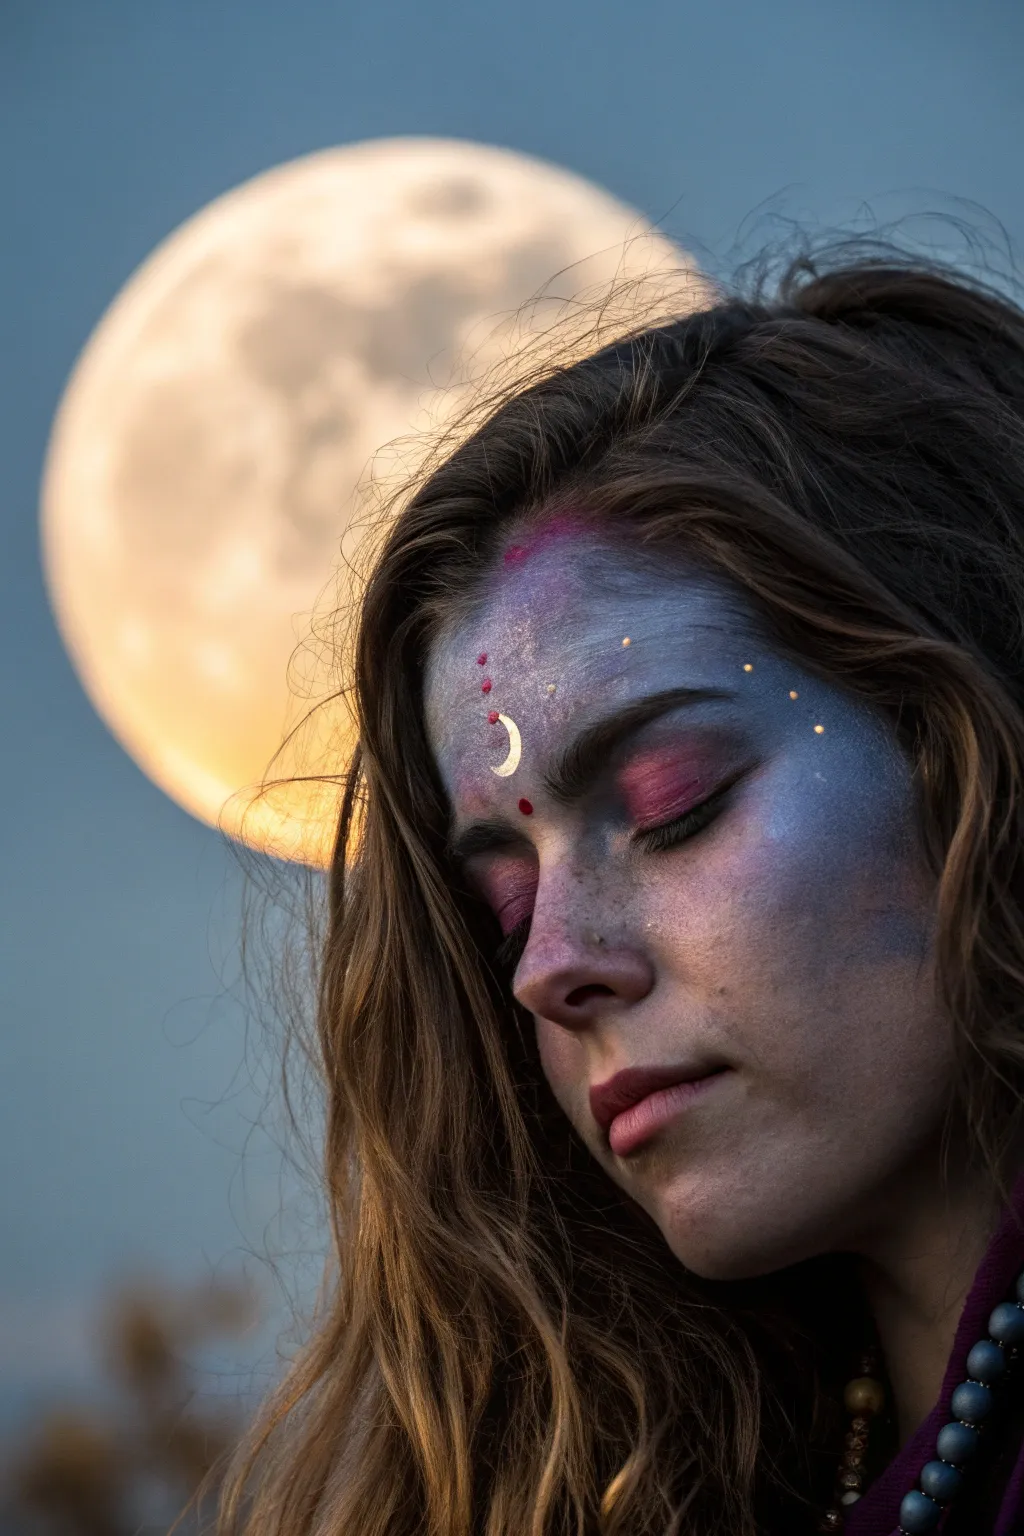

Channel the mystical energy of the night sky with this ethereal face painting design, featuring a soft, galaxy-inspired base and delicate metallic accents. The look combines cool blues and warm pinks to create a dreamy, dimensional effect that perfectly complements the glow of a harvest moon.
Detailed Instructions
Materials
- White or pearl face paint base
- Light blue face paint (water-activated or cream)
- Deep blue/indigo face paint
- Magenta or berry-pink face paint
- Cosmetic sponge wedges
- Metallic silver or gold face paint
- Small rhinestones or face gems (gold/silver)
- Eyelash glue or skin-safe adhesive
- Fine detail brush (size 0 or 00)
- Small round brush (size 2)
- Translucent setting powder
- Shimmering highlighter (optional)
Step 1: Creating the Ethereal Base
-
Prep the canvas:
Begin with a clean, dry face. Tie back hair to keep the forehead and temples completely clear, which is crucial for this expansive design. -
Apply the highlight base:
Load a slightly damp sponge with a mix of white and pearl face paint. Dab this onto the center of the forehead, the bridge of the nose, and the tops of the cheekbones to create illuminated high points. -
Introduce the blue tones:
Flip your sponge or grab a clean one, picking up a light blue shade. Gently stipple this color starting from the temples and blending inward toward the center of the forehead, overlapping slightly with your pearl base. -
Deepen the galaxy effect:
Using a deep indigo or darker blue, stipple around the hairline and outer edges of the face. This creates a vignetted look that mimics the depth of a night sky. -
Add warmth with pink:
Load a sponge with magenta or berry-pink paint. Gently press this color onto the eyelids, extending it upward into the brow bone and blending it softly into the blue on the forehead. -
Blend the transitions:
With a clean, slightly damp sponge, tap over the areas where the blue and pink meet. I find that bouncing the sponge lightly preserves the texture while removing harsh lines. -
Contour the nose:
Take a small amount of the pink shade on a fluffy brush or the edge of a sponge and lightly dust it across the tip and sides of the nose for a ‘cold weather’ flush. -
Set with powder:
Lightly dust the painted areas with a translucent setting powder to prevent creasing, especially around the eyes.
Patchy Paint?
If your blue base looks streaky, your sponge might be too wet. Squeeze out excess water so it’s barely damp, and try patting (stippling) the color on rather than dragging it.
Step 2: Celestial Details
-
Paint the crescent moon:
Dip a fine detail brush into metallic silver or pale gold paint. paint a small, sharp crescent moon shape directly in the center of the forehead. -
Add the bindi accents:
Using the same metallic color or a reddish-pink for contrast, paint a series of ascending dots above the crescent moon, getting smaller as they go up. -
Create scattered stars:
With your finest brush and white or silver paint, add tiny dots and four-pointed stars randomly on the forehead and upper cheekbones. Vary the pressure to make some stars larger than others. -
Sponge on texture:
For a ‘nebula’ texture, take a very porous sponge with a tiny bit of white paint and lightly texture the blue areas on the temples. -
Prepare the adhesive:
Squeeze a small dot of skin-safe adhesive or eyelash glue onto the back of your hand and let it get tacky for about 30 seconds. -
Apply the larger gems:
Using tweezers, place small gold or silver rhinestones scattered near the painted stars, focusing on the temple area and above the eyebrow arch. -
Layer fine glitter:
If desired, tap a small amount of iridescent cosmetic glitter over the blue sections of the forehead while the paint is still slightly tacky. -
Finish the lips:
Apply a soft pink or berry lip color that matches the tone used on the eyes. Use a finger to blot the edges for a diffused, soft-focus look. -
Final highlight:
Brush a shimmering powder highlighter over the tops of the cheekbones and the tip of the nose to make the high points pop against the darker galaxy colors.
Starry Night Glow
For a truly magical effect, mix a tiny pinch of loose shimmer pigment directly into your blue face paint before applying it. This gives the ‘sky’ an inner glow.
Step back and admire your celestial creation, ready for a night under the stars


Have a question or want to share your own experience? I'd love to hear from you in the comments below!