If you’ve been itching to paint a snowman but want options beyond the same old sketch, you’re in the right place. I pulled together a mix of classic snowman painting ideas and fresh twists, so you can pick what fits your mood (and your skill level) today.
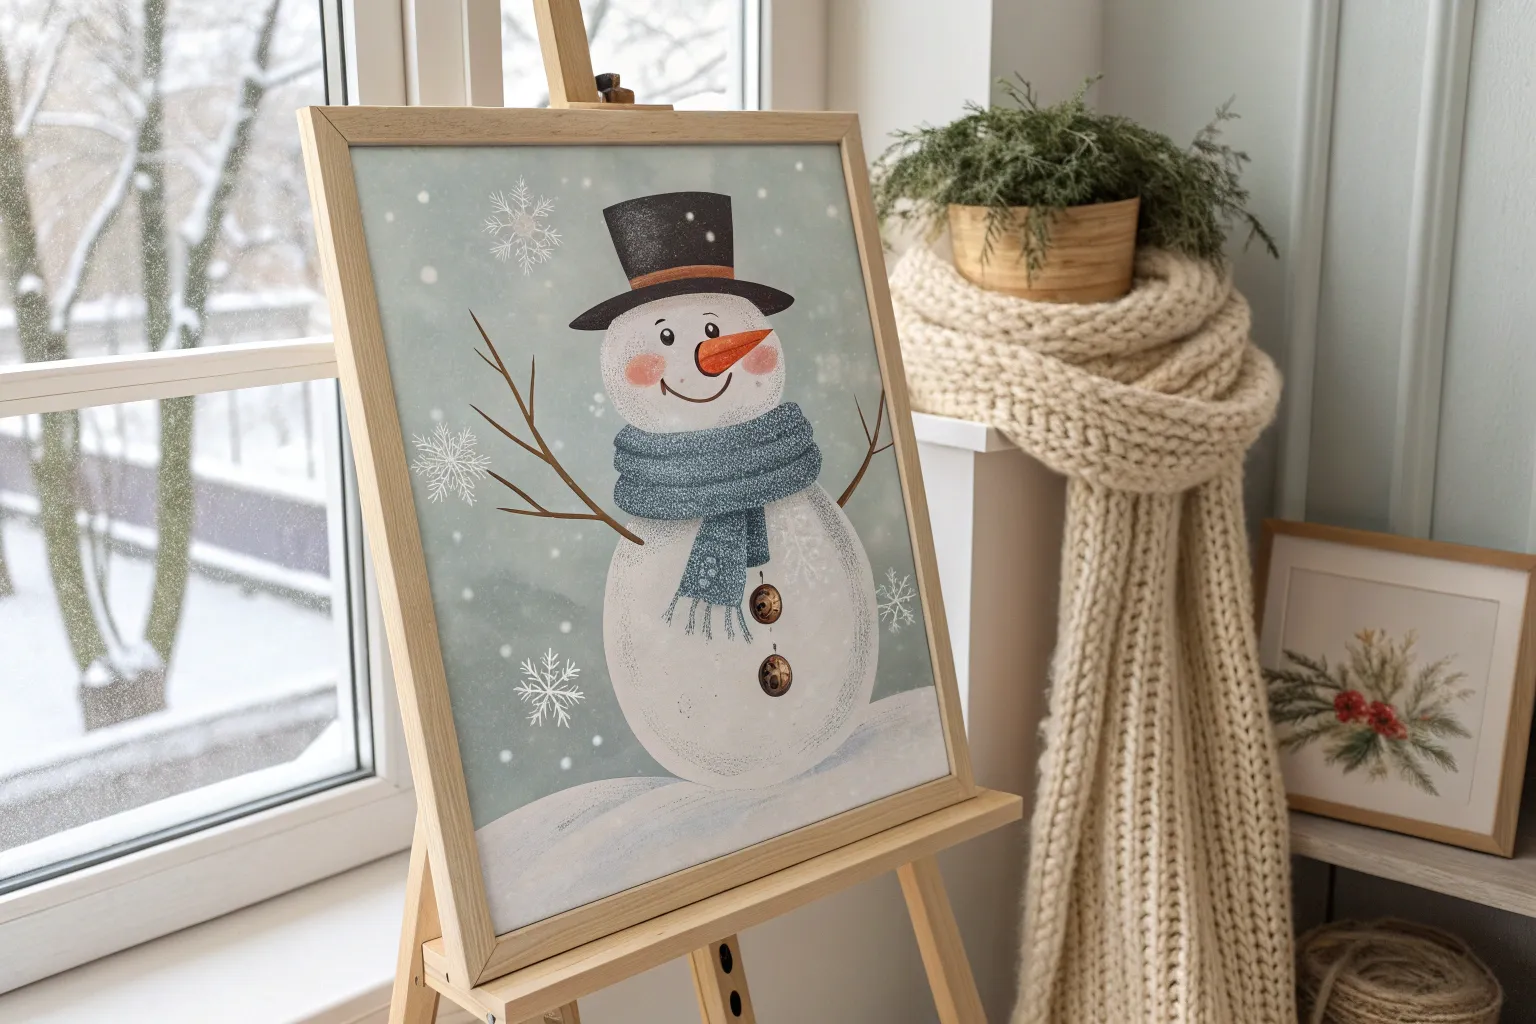
Snowman Under a Whimsical Winter Night Sky
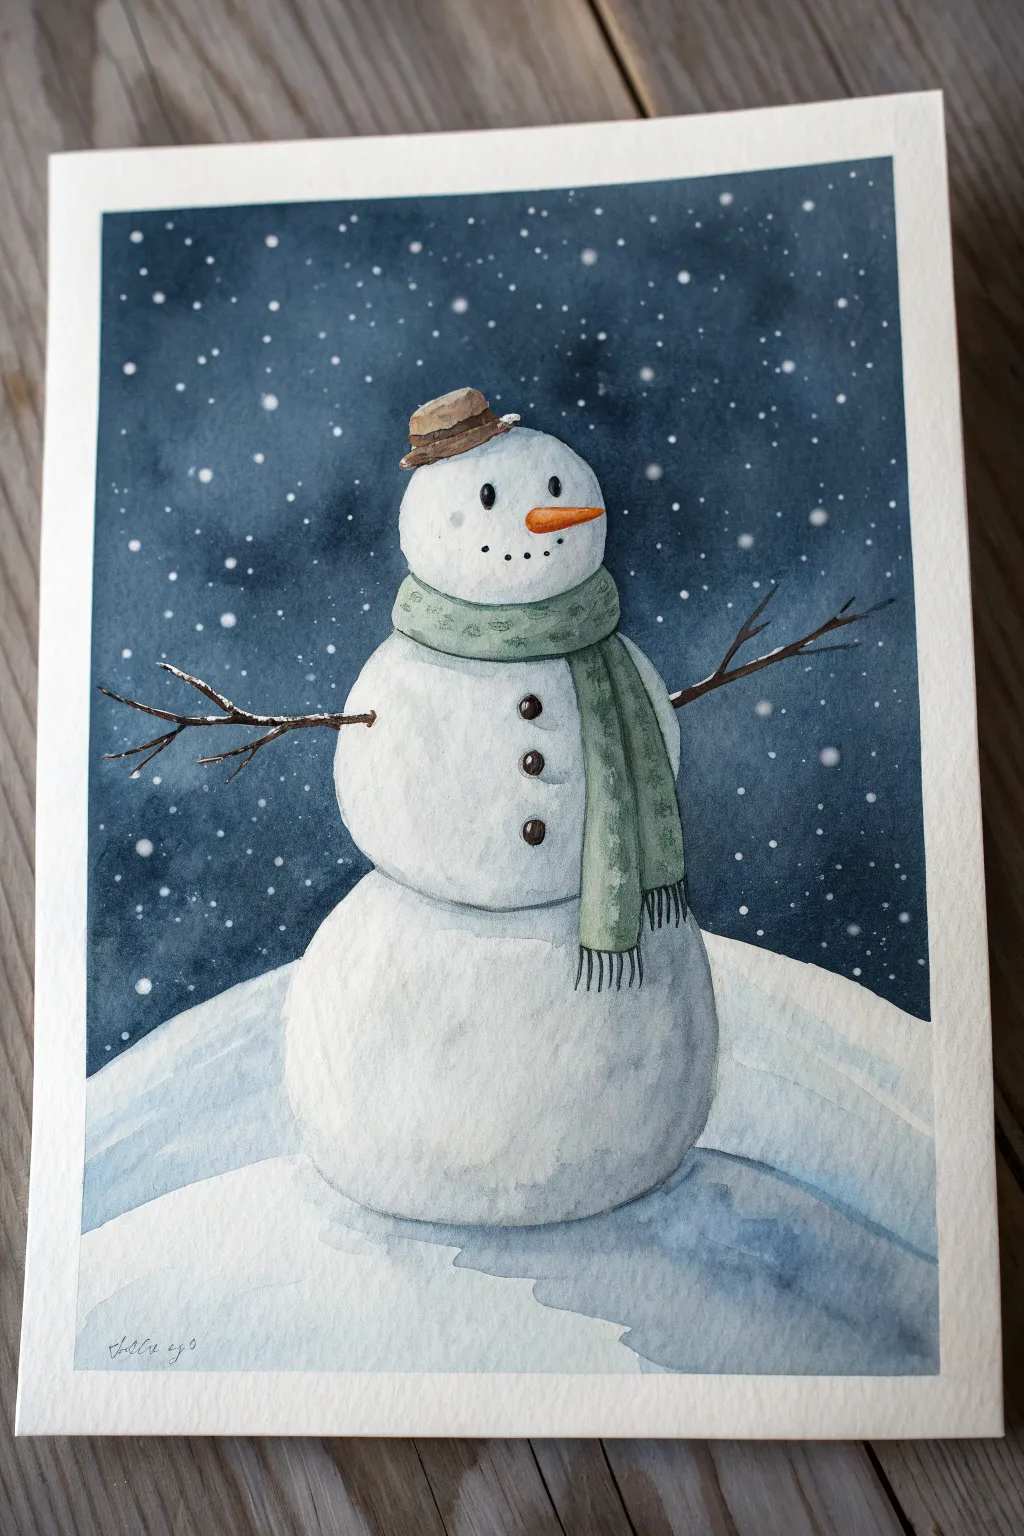

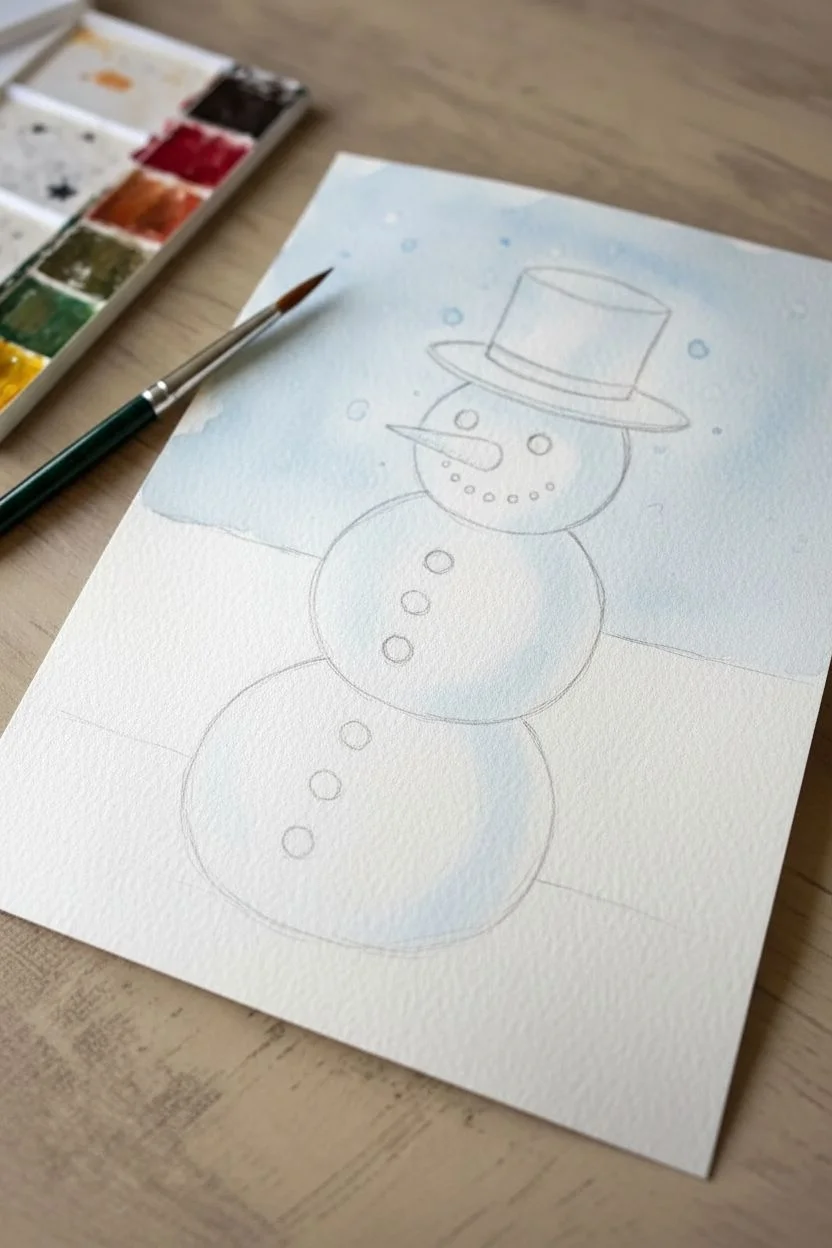
Capture the magic of a silent winter night with this charming watercolor tutorial featuring a classic snowman bundled up in a cozy green scarf. The deep indigo sky provides a stunning contrast to the crisp white snow, making your subject pop right off the page.
Detailed Instructions
Materials
- Cold press watercolor paper (300 gsm)
- Watercolor paints: Indigo (or Payne’s Grey), Burnt Umber, Sap Green, Orange, Black
- Round brushes: Sizes 2, 6, and 10
- Fine liner brush (size 0 or 00)
- White gouache or white gel pen
- HB Pencil
- Kneaded eraser
- Painter’s tape or masking tape
- Two jars of water
- Paper towels
Step 1: Sketching and Masking
-
Prepare the paper:
Begin by taping down all four edges of your watercolor paper to a board. This ensures clean white borders like the reference image and keeps the paper flat while wet. -
Lightly sketch the form:
Using your HB pencil, lightly draw three stacked circles for the snowman’s body. The bottom circle should be the largest and slightly flattened, the middle medium-sized, and the head the smallest. -
Add the accessories:
Sketch a small, jaunty hat tilted on the head. Draw a thick scarf draped around the neck with tails hanging down the right side. Mark positions for the twig arms, carrot nose, and button eyes. -
Define the horizon:
Sketch a gentle, curved horizon line behind the snowman. It should dip slightly in the middle to suggest he is standing on a snowdrift. -
Refine lines:
Gently roll a kneaded eraser over your sketch to lift excess graphite until the lines are barely visible. Heavy pencil marks are hard to hide under watercolor.
Pro Tip: Sky Technique
Work quickly on the sky background. If the paper starts to dry while you are still painting, you might get ‘backruns’ or cauliflower blooming effects. Keep the edge wet.
Step 2: Painting the Backdrop
-
Wet the sky area:
Using your size 10 brush and clean water, carefully wet the sky area around the snowman. Be very precise near the edges of the snowman so the paint doesn’t bleed into his white body. -
Drop in the color:
Load your brush with a rich, dark Indigo or Payne’s Grey. Start applying color at the top of the sky, making it darkest at the top and slightly lighter as you approach the snow horizon. -
Add texture:
While the sky is still damp, dab in concentrated drops of dark blue randomly to create cloudy, atmospheric depth. Let this layer dry completely. -
Paint the snow base:
Dilute your Indigo paint significantly so it’s a very pale, watery blue-grey. Paint the shadows on the snowy ground, focusing on the bottom right and under the snowman to root him to the ground.
Step 3: Bringing the Snowman to Life
-
Shadow the body:
Using the same very pale blue-grey mix, paint the shadowed side of the snowman’s body balls. Keep the light source consistent, generally shading the right side and bottom of each sphere to create roundness. -
Soften the edges:
With a clean, damp brush, gently soften the edge of your shadows into the white of the paper. This creates a smooth, rounded gradient rather than a hard line. -
Paint the scarf:
Mix a muted Sap Green with a touch of grey. Paint the scarf using the size 6 brush. Once dry, use a slightly darker mix of the same green to add fold lines and fringe details. -
Detail the hat:
Paint the hat with Burnt Umber. Use a darker concentration of brown for the hat band and the shadow under the brim. -
Add the face and buttons:
Using a small round brush, paint the carrot nose with bright Orange. Use Black for the eyes, mouth dots, and the three buttons down the chest. A tiny highlight can be left unpainted in the eyes for sparkle. -
Draw the arms:
Switch to your liner brush. Mix dark brown with a little black and paint delicate, spindly twig arms extending outward. Vary the pressure to make the twigs look natural and organic.
Level Up: Texture Trick
Sprinkle a tiny pinch of table salt onto the wet indigo sky paint while it’s still very damp. Let it dry completely for a crystalized, frosty texture effect.
Step 4: Snowy Final Touches
-
Add falling snow:
Once the sky serves as a completely dry background, use white gouache or a white gel pen to dot snowflakes all over the sky. Vary the sizes—some tiny dots, some slightly larger fluffy flakes. -
Accumulate snow:
I like to add tiny touches of white gouache on the top of the hat brim, the shoulders of the scarf, and the tops of the twig arms to show snow is actively falling. -
Final clean up:
Wait until the paper is bone dry, then carefully peel away the masking tape at a 45-degree angle to reveal your crisp, clean edges.
Sign your beautiful winter scene in the snowdrift corner and get ready to send warm wishes


Top Hat Snowman With Coal Buttons and Carrot Nose
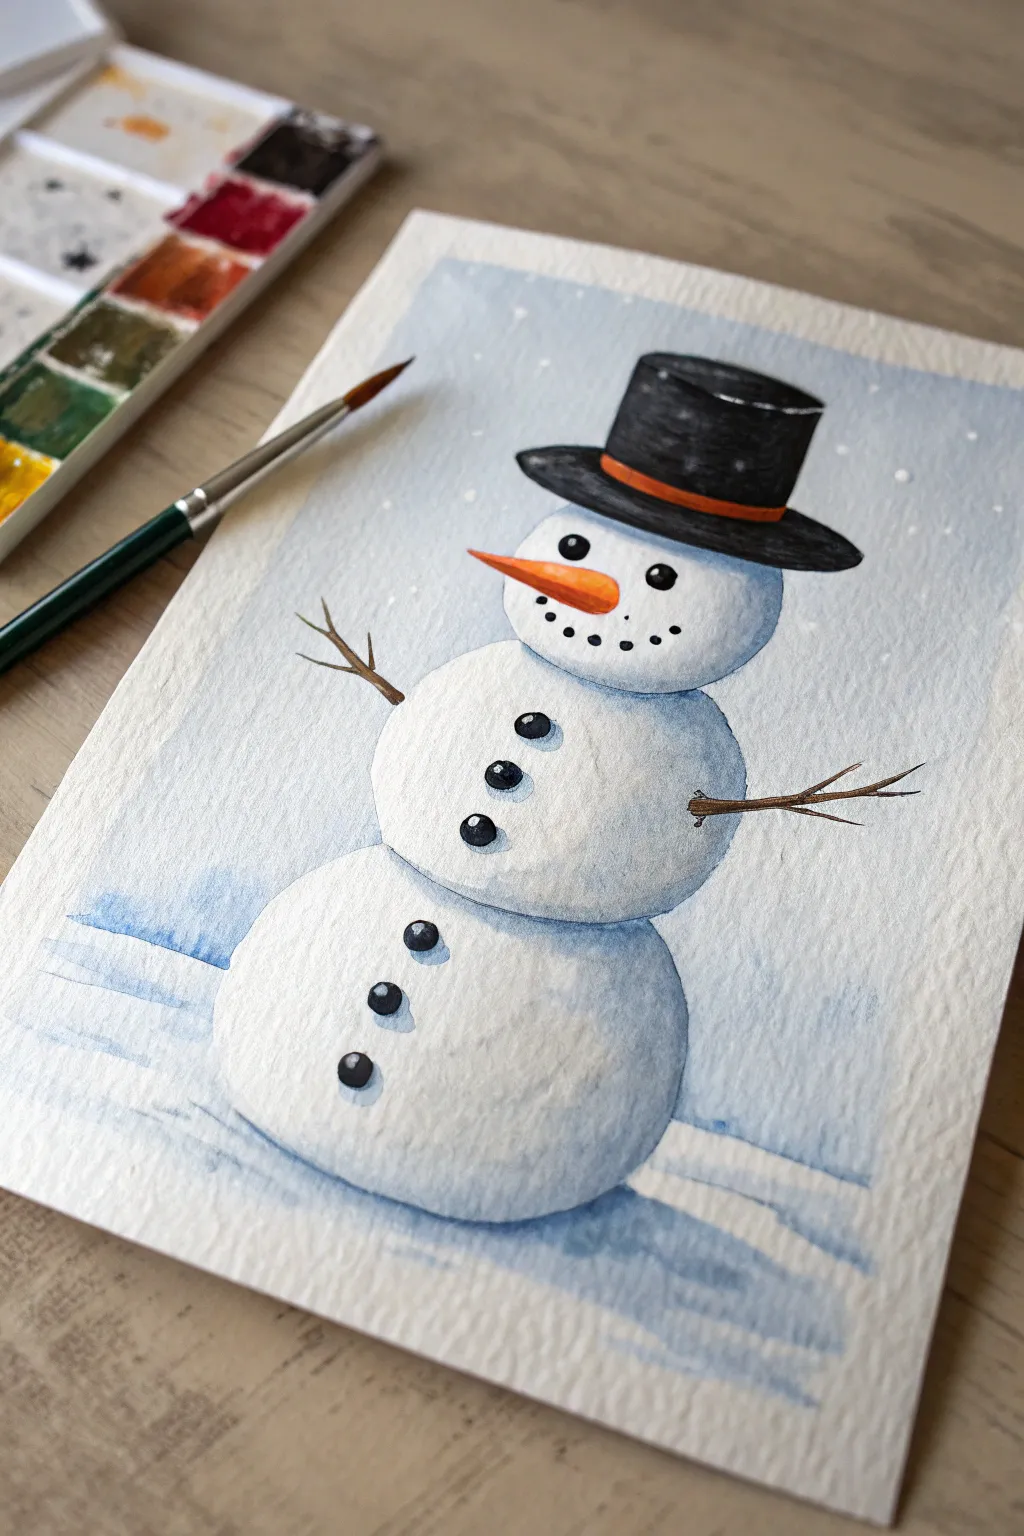
Create a charmingly classic winter scene with this watercolor snowman, featuring a jaunty top hat and cozy snow-shadows. This tutorial guides you through building up layers to give your frosty friend real volume and personality.
Step-by-Step
Materials
- Cold press watercolor paper (300 gsm)
- Watercolor paints (Payne’s Grey, Indigo, Orange, Burnt Sienna, Burnt Umber)
- Round watercolor brushes (sizes 2, 4, and 6)
- Pencil (HB) and kneaded eraser
- Clean water jar
- Paper towels
- White gouache or white gel pen (optional for details)
Step 1: Sketching and Background
-
Outline the shapes:
Begin by lightly sketching three stacked circles for the snowman’s body, making the bottom one largest and slightly flattened. Add the top hat sitting at an angle on the head, the carrot nose pointing left, and stick arms extending outward. -
Refine the details:
Mark small circles for the eyes, mouth, and buttons down the front. Sketch a horizon line behind the snowman to ground him in the scene, just below the bottom snowball. -
Paint the sky:
Mix a diluted wash of Indigo or a cool blue-grey. Carefully paint around the snowman and hat, filling the background with an even wash. While the paint is still wet, you can lift out tiny spots with a clean, damp brush to suggest falling snow.
Shadow Softness
To get that fluffy snow look, use a clean, damp brush to ‘feather’ the edges of your blue shadows before they dry. Hard lines kill the illusion of soft snow.
Step 2: Building the Snowman’s Form
-
First shadow layer:
Mix a very watery, pale blue-grey using a touch of Indigo. Paint the right side and bottom of each snowball to create a curved, spherical look, softening the edges with clean water as you move toward the light source on the left. -
Deepening the shadows:
Once the first layer is dry, add a slightly more saturated blue-grey to the deepest shadow areas on the right side and underneath each segment where the snowballs stack. This enhances the 3D effect. -
Ground shadows:
Paint a horizontal shadow on the ground extending to the right of the snowman. Keep the edges soft and wavy to mimic the texture of uneven snow.
Festive Flair
Customize your snowman by painting a plaid pattern on a scarf, adding a red cardinal on one of the stick arms, or giving him a pipe.
Step 3: Bringing Him to Life
-
Painting the hat:
Use a rich black or concentrated Payne’s Grey for the top hat. Leave a tiny sliver of unpainted white paper on the top rim and crown to act as a highlight, giving the hat a shiny, structured look. -
Adding the hat band:
Mix a bright orange with a little brown and paint the ribbon band on the hat. Let the black paint dry completely before doing this to avoid bleeding. -
The carrot nose:
Paint the nose with Vibrant Orange. Add a tiny line of darker orange or red on the bottom edge for shadow, making it look round and tapered. -
Stick arms:
Using a fine liner or size 2 brush, paint the spindly arms with Burnt Umber. Add little forks at the ends for fingers, varying the pressure to make the twigs look natural and uneven.
Step 4: Final Details
-
Coal features:
With thick black paint, dab in the eyes, the dotted smile, and the three large buttons on the body. Leave a tiny white spec in the eyes for a sparkle, or add it later with gouache. -
Button shadows:
Paint a tiny crescent of grey shadow underneath each black button and coal piece. This small detail lifts them off the surface of the snow. -
Texture and snow:
Use a dry brush technique with pale blue to add subtle texture to the snowman’s body, suggesting packed snow. -
Falling snow:
Load a brush with white gouache (or use a gel pen) and flick tiny specks over the background sky area for a fresh snowfall effect. -
Final touches:
Assess the contrast. If the snow looks too flat, I like to add one last glaze of cool blue to the darkest shadow side to really verify the roundness.
Allow your painting to dry completely before framing your frosty masterpiece


Snowman Family Trio in One Sweet Scene
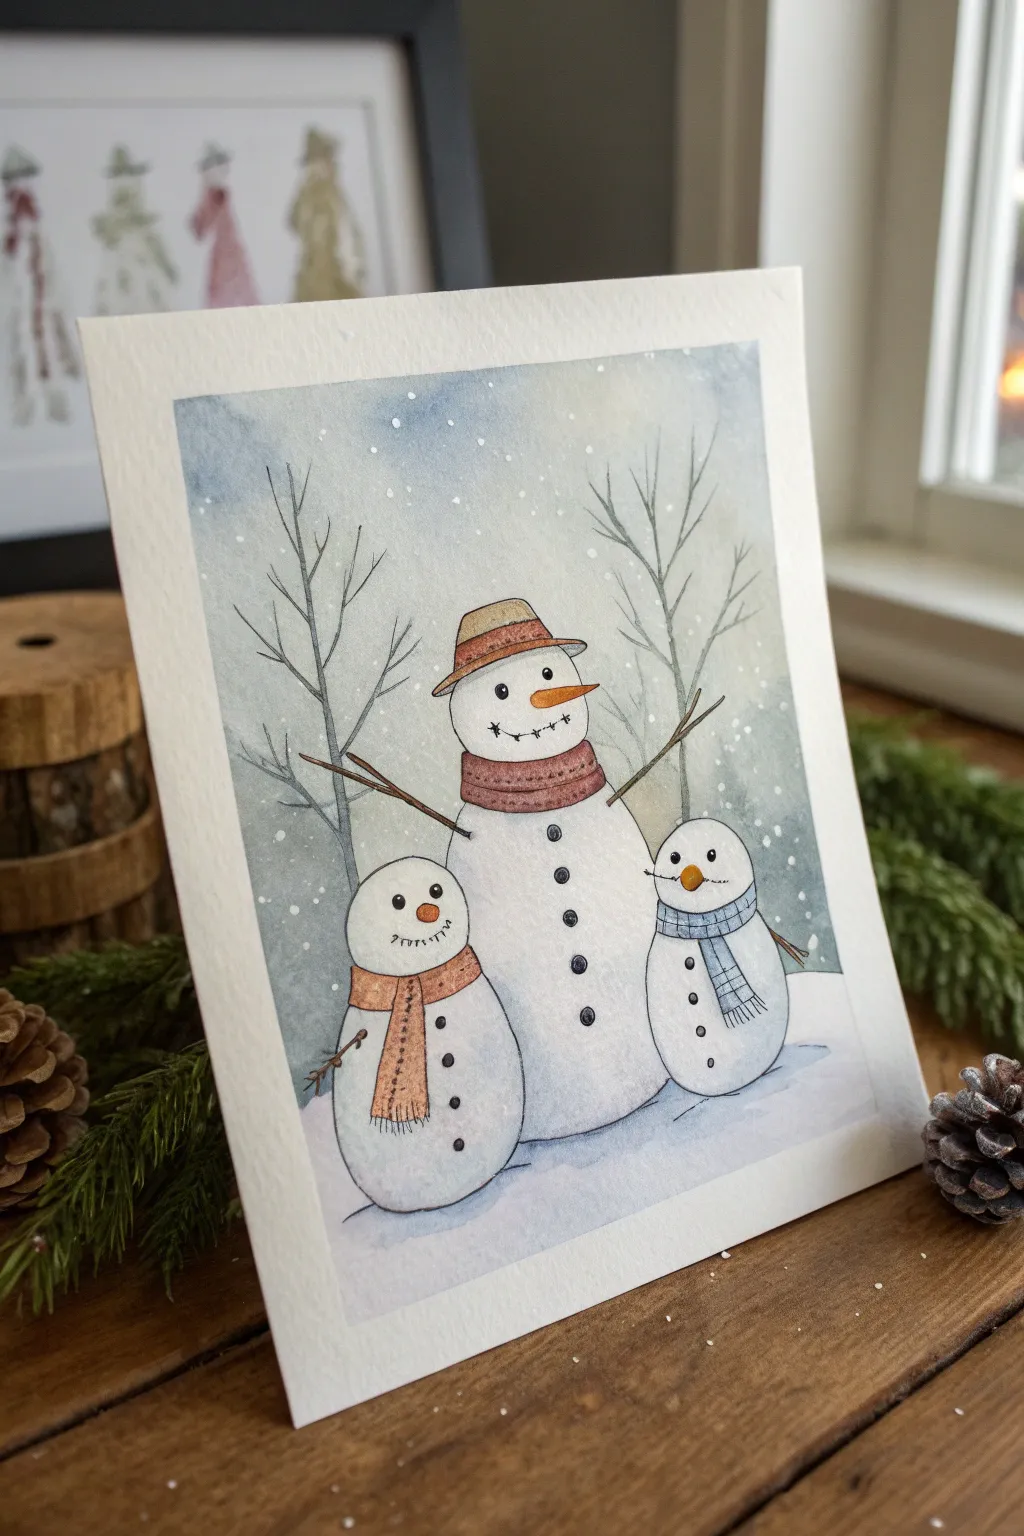
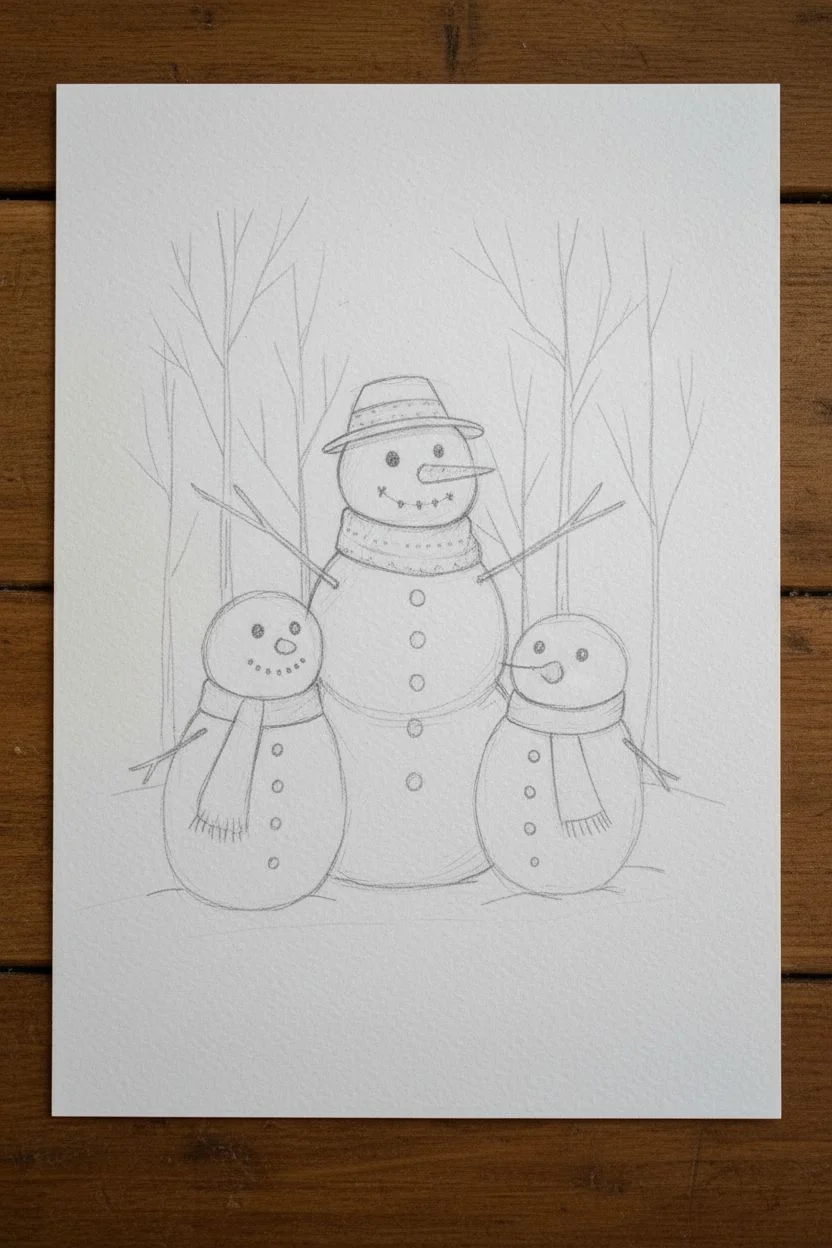
Capture the warmth of winter with this charming watercolor illustration of a snowman trio nestled in a snowy landscape. The delicate ink outlines and soft washes create a classic storybook feel perfect for holiday cards or seasonal decor.
Step-by-Step Guide
Materials
- Cold press watercolor paper (140lb/300gsm)
- Watercolor paints (Indigo, Burnt Sienna, Burnt Umber, Orange)
- Fine liner waterproof pens (0.1mm and 0.5mm, black)
- White gouache or white gel pen
- Round watercolor brushes (Size 4 and Size 8)
- Pencil (HB) and kneadable eraser
- Cup of water and paper towels
Step 1: Sketching the Composition
-
Draft the shapes:
Begin by lightly sketching three snowman figures with your pencil. Place the largest snowman in the center, formed by three stacked snowball shapes, slightly flattening the bottom where it sits on the snow. -
Add the companions:
Sketch two smaller snowmen on either side of the central figure. Make them slightly shorter, using just two stacked spheres for a cute, varied look. -
Map the features:
Lightly indicate positions for the carrot noses, coal eyes, and stick arms. Add the central snowman’s hat and wrap scarves around all three necks. -
Refine the background:
Draw faint vertical lines behind the trio to represent bare winter trees. Keep the branches spindly and reaching upward.
Step 2: Inking the Outlines
-
Trace with precision:
Using your 0.1mm waterproof pen, carefully trace over your pencil lines. For the snowballs, use a slightly broken, jittery line rather than a perfect circle to suggest the texture of packed snow. -
Detail the accessories:
Switch to a slightly thicker 0.3mm or 0.5mm pen to outline the hat, scarves, and stick arms to make them pop against the white bodies. -
Draw facial features:
Fill in the small circles for eyes and buttons with solid black ink. Add simple stitched lines for their smiles and texture lines on the carrot noses. -
Ink the trees:
Go back to the 0.1mm pen to ink the delicate tree branches in the background, keeping the lines thin and organic. Once the ink is completely dry, erase all pencil marks.
Broken Line Technique
Don’t connect your ink lines fully when drawing the snowmen. Leaving small gaps in the outline makes the snow look fluffy and soft rather than rigid.
Step 3: Watercolor Washes
-
Paint the background sky:
Wet the area around the snowmen and trees with clean water. Drop in a diluted wash of Indigo or a cool grey-blue, letting the color fade as it reaches the bottom horizon line. -
Add tree shadows:
While the sky is still slightly damp, touch a slightly more concentrated grey-blue to the edges of the tree branches to give them foggy definition. -
Color the accessories:
Paint the central snowman’s hat and scarf with a mix of Burnt Sienna (reddish-brown). Use a lighter wash for the hat’s brim and a saturated mix for the scarf folds. -
Paint the side scarves:
For the left snowman, use an orange-brown mix. For the right snowman, use a cool blue that harmonizes with the sky but is distinct enough to stand out. -
Brighten the noses:
Use a vibrant Orange watercolor to fill in the carrot noses. Leave a tiny sliver of white paper on the top edge of each carrot for a highlight.
Add Some sparkle
While the white gouache snow dots are still wet, sprinkle a tiny pinch of iridescent glitter over the sky area for a magical, frosty shimmer.
Step 4: Shading and Snow
-
Shadow the bodies:
Mix a very dilute, watery purple-grey. Paint a crescent shape along the bottom and right side of each snowball segment to give the bodies roundness and dimension. -
Ground the figures:
Apply a wash of that same cool shadow color underneath the snowmen to create cast shadows on the ground, anchoring them to the scene. -
Enhance texture:
Once the scarf paint is dry, use your fine liner to add small vertical hatch marks or patterns (like plaid or knitting lines) to the fabric for extra detail. -
Create the snowfall:
Load a small brush with opaque white gouache (or use a white gel pen). Tap the handle of the brush to splatter tiny white dots across the sky and over the snowmen for a magical falling snow effect. -
Final dry:
Let the entire piece dry completely flat to ensure the snow effect stays crisp and the paper doesn’t buckle.
Now you have a cozy winter scene ready to be framed or sent as a heartwarming greeting card


Snowman With Evergreen Trees and Falling Snow
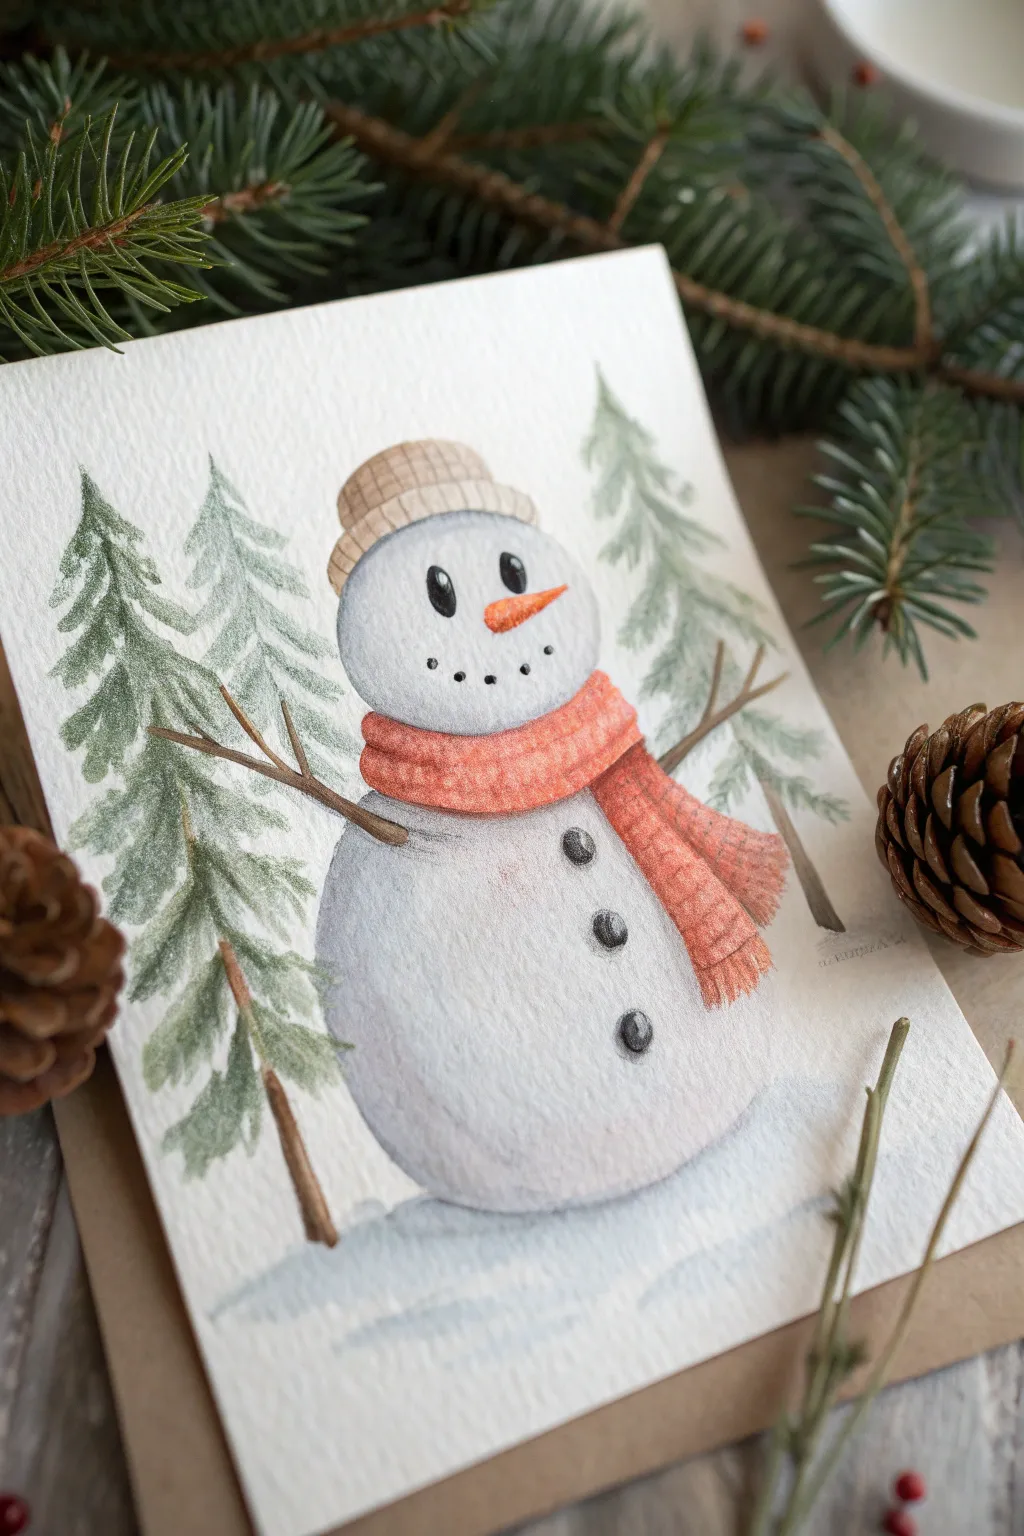
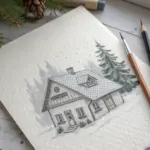
This charming winter scene combines soft watercolor textures with precise colored pencil detailing to create a card-ready masterpiece. The gentle expression of the snowman and the misty, faded evergreen trees in the background evoke a peaceful snowy day in the forest.
Step-by-Step
Materials
- Cold press watercolor paper (300 gsm)
- Watercolor paints (Payne’s Grey, Sap Green, Burnt Umber, Cadmium Orange, Burnt Sienna)
- Colored pencils (White, Black, Dark Green, Orange, Brown)
- Round watercolor brushes (sizes 2, 4, and 6)
- Pencil (HB or H for light sketching)
- Kneadable eraser
- Paper towels
- Jar of clean water
- White gouache or white gel pen (optional for highlights)
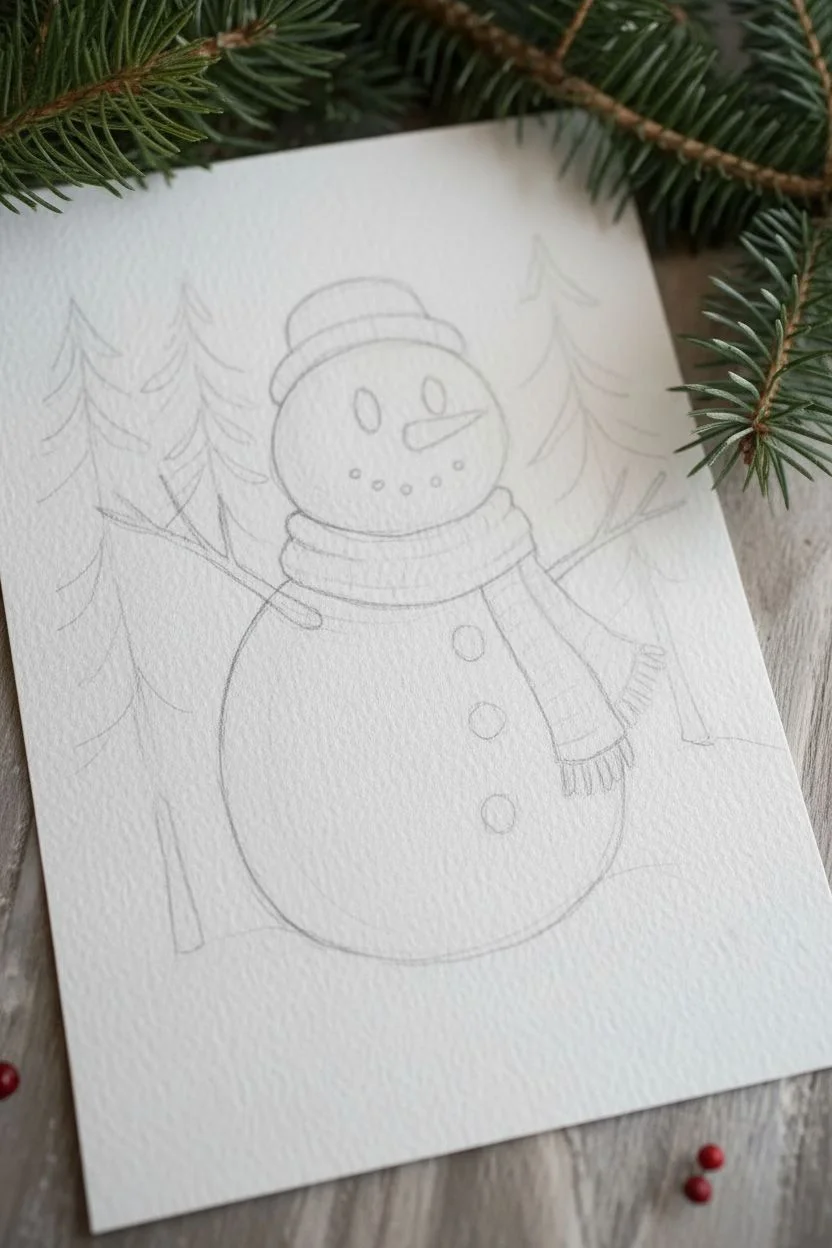
Step 1: Sketching and Foundation
-
Outline the shapes:
Begin by lightly sketching two large overlapping circles for the snowman’s body using an H pencil. The bottom circle should be significantly larger and slightly flattened at the base to suggest weight. -
Add accessories:
Sketch a simple rounded beanie hat sitting snugly on the head. Draw the scarf wrapped around the neck, letting the ends drape down the right side of the body. -
Suggest the trees:
Lightly indicate the positions of three or four evergreen trees in the background. Don’t draw individual needles; just sketch rough triangular shapes to guide your painting later. -
Refine the sketch:
Add the stick arms extending outward and mark simple dots for eyes, buttons, and a mouth. Once happy with the composition, use a kneadable eraser to lift most of the graphite, leaving only faint guidelines.
Step 2: Watercolor Washes
-
Paint the snowman’s body:
Mix a very dilute wash of Payne’s Grey with plenty of water. Paint the snowman’s body, keeping the center of the balls almost white and concentrating the grey pigment along the edges to create a 3D spherical effect. Let this layer dry completely. -
Create the background trees:
Mix a watery Sap Green with a touch of Payne’s Grey for a muted forest tone. Using a size 6 brush, paint the evergreen trees using loose, dabbing strokes to mimic pine branches. Keep the edges soft and slightly uneven. -
Detail the tree trunks:
While the green is still slightly damp, drop a tiny amount of dilute Burnt Umber into the center bases of the trees to suggest trunks blending into the forest floor. -
Paint the scarf base:
Mix a vibrant Cadmium Orange with a hint of red. carefully fill in the scarf area, ensuring the color is solid but somewhat transparent to show the paper texture. -
Paint the hat base:
Use a light wash of Burnt Sienna or a tan color to fill in the hat shape. Keep the wash even and flat for now. -
Ground the scene:
Paint a very faint blue-grey wash under the snowman and trees to represent the snowy ground, feathering the edges out into the white paper so there are no hard lines.
Muddy Colors?
If your snowman’s shadow looks dirty, you likely mixed too much brown into your grey. Stick to a simple mix of blue and black, or just clear water to soften edges.
Step 3: Adding Texture and Detail
-
Enhance the scarf texture:
Once the watercolor is bone dry, use an orange colored pencil to draw small cross-hatching or vertical lines on the scarf to mimic a knit fabric texture. Darken the folds where the scarf wraps around the neck. -
Detail the beanie:
Use a brown colored pencil to draw vertical curved lines on the hat, creating a ribbed knit effect. Add a slightly darker rim at the bottom of the hat for dimension. -
Deepen the trees:
Focusing on the trees closest to the snowman, use a dark green colored pencil to selectively scribble over the watercolor branches. This adds a specific texture that looks like pine needles without needing to paint them individually. -
Draw the stick arms:
With a fine brush or a brown colored pencil, draw the stick arms. Add little ‘Y’ shapes at the ends for fingers. Adding a secondary line of dark brown on the underside of the branches gives them volume. -
Add the face and buttons:
Using black paint or a charcoal pencil, fill in the coal eyes, mouth dots, and buttons. Leave a tiny speck of white paper in the eyes for a reflection, or add it later with white gouache. -
Paint the carrot nose:
Paint the carrot nose with a saturated orange. Once dry, use a fine brown pencil or pen to add tiny horizontal tick marks on the top of the carrot for texture. -
Finishing touches:
Inspect the shadows on the snowman. If they look too flat, lightly shade the bottom left curve of each snowball with a grey pencil to deepen the rounded form. Add fringing to the end of the scarf using fine pencil strokes.
Make it Sparkle
Mix a tiny pinch of iridescent medium into your grey shadow wash or sprinkle ultra-fine clear glitter on the wet snow beneath the snowman for a magical frost effect.
Now stepping back, you can admire how the mixed media approach brings warmth and texture to your snowy friend
BRUSH GUIDE
The Right Brush for Every Stroke
From clean lines to bold texture — master brush choice, stroke control, and essential techniques.
Explore the Full Guide
Close-Up Snowman Face Study With Expressive Features
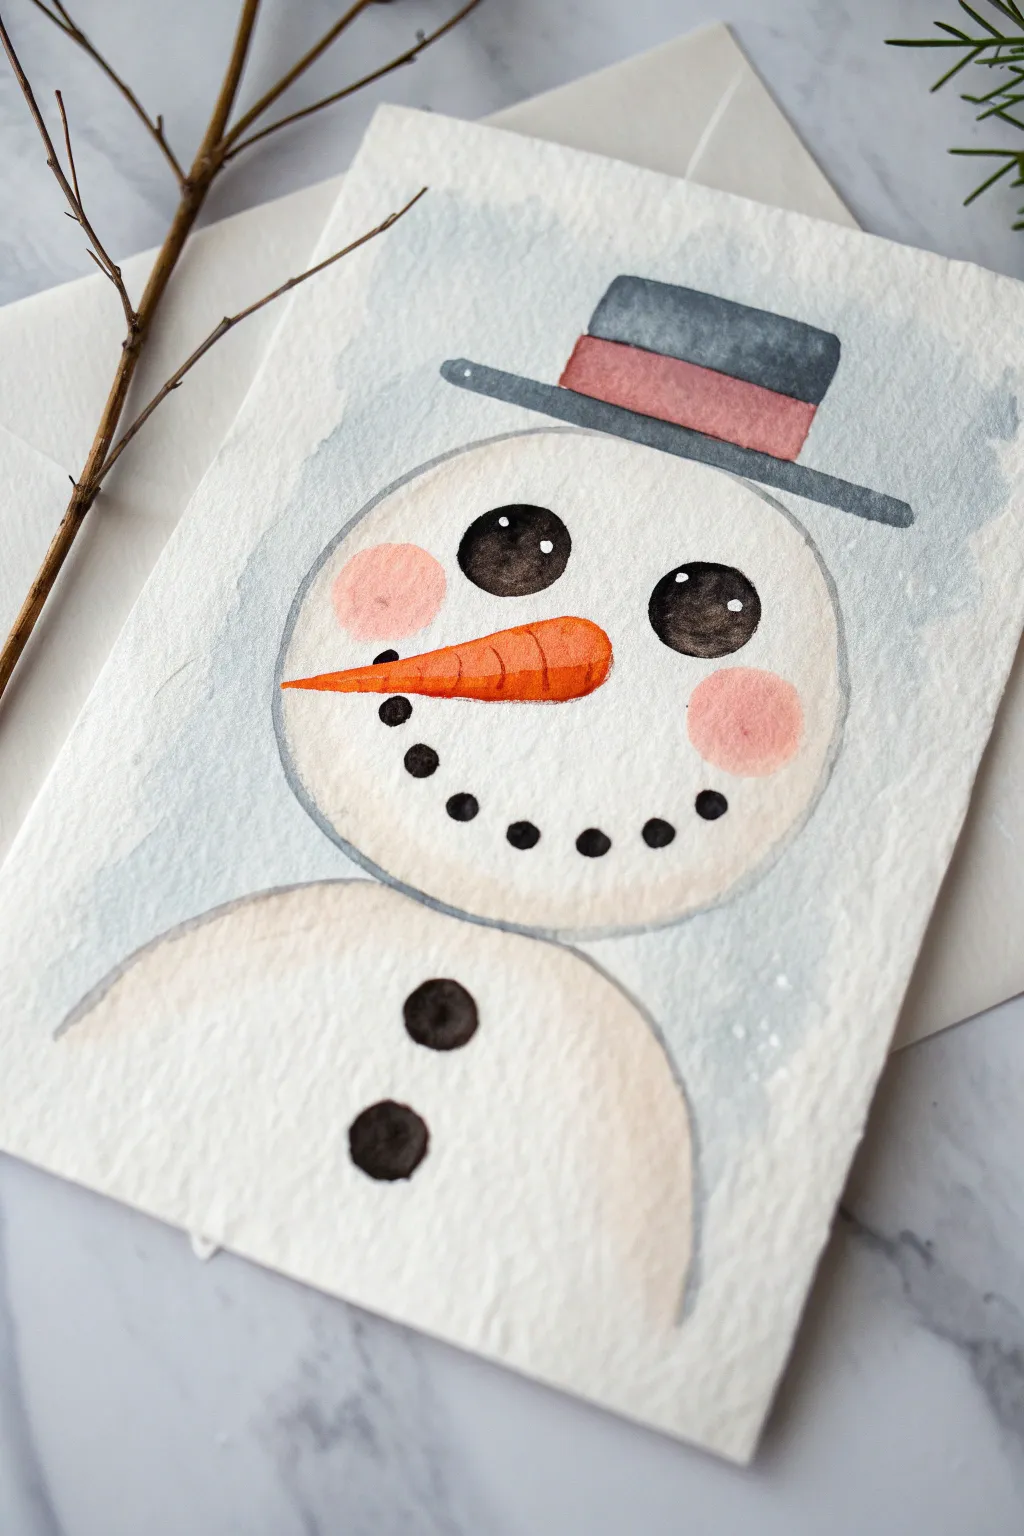
Capture the magic of winter with this charming close-up study of a snowman’s face. Using simple watercolor techniques, you’ll create textured snow effects and expressive features that make this frosty friend come to life.
How-To Guide
Materials
- Cold press watercolor paper (textured)
- Watercolor paints (Payne’s Grey, Burnt Sienna, Orange, Alizarin Crimson)
- Round watercolor brushes (size 4 and 8)
- Pencil and eraser
- White gel pen or gouache
- Clean water
Step 1: Sketching the Snowman
-
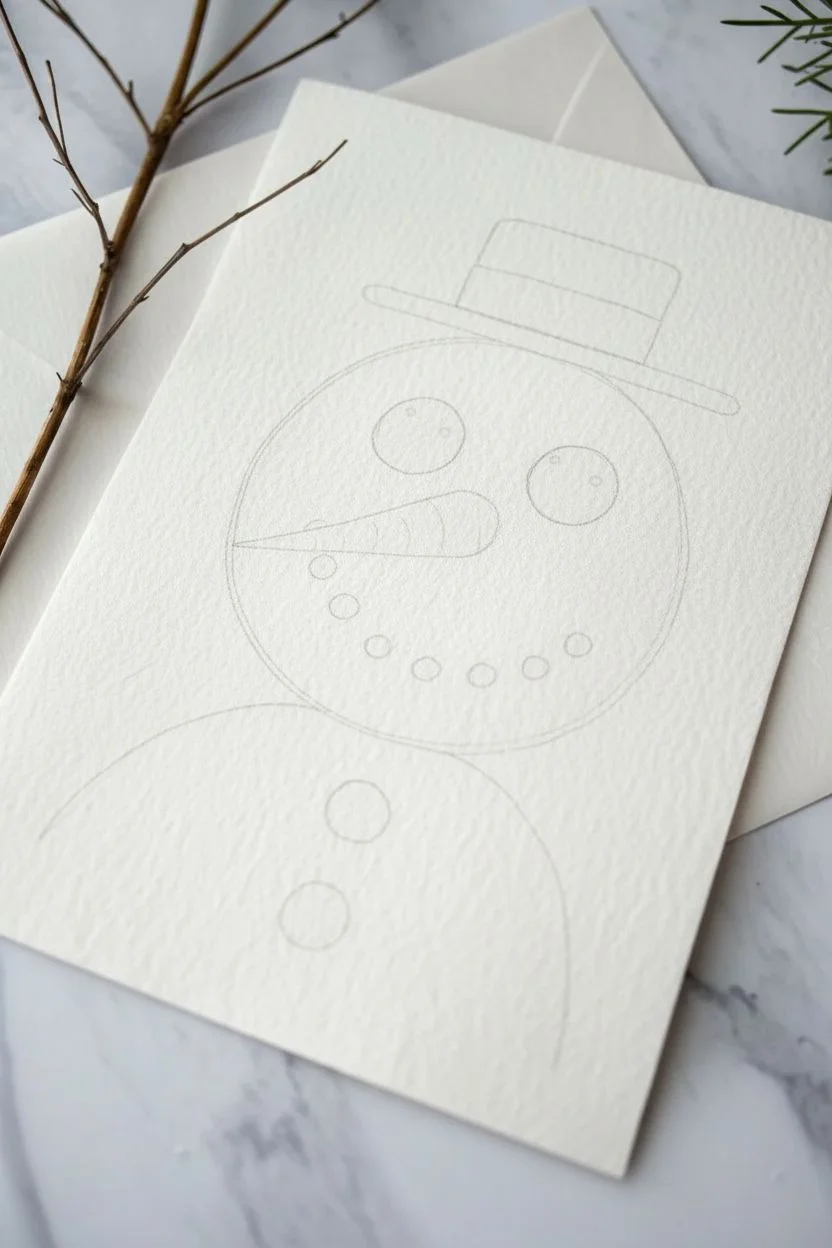
Outline the head:
Start by lightly sketching a large, slightly squashed circle in the upper center of your paper for the snowman’s head. It doesn’t need to be perfectly round; a little irregularity adds character. -
Add the body:
Draw the top curve of the body section at the bottom of the page, connecting directly to the bottom of the head creates a cozy, huddled look. -
Position the hat:
Sketch a brim sitting jauntily on top of the head circle, slightly tilted. Add a rectangular top section for the hat’s crown and a small band across it. -
Map the features:
Lightly mark the placement for two large circular eyes, a triangular carrot nose pointing left, and a gentle curve of dots for the smile.
Wet Edge Control
For the softest cheek blush, paint the pink circle first, then immediately run a clean, damp brush around the outer edge to blur the paint into the paper.
Step 2: Painting the Snow Shadows
-
Mix a shadow color:
Create a very watery wash of Payne’s Grey or a mix of blue and a tiny touch of brown to create a soft, neutral grey-blue. -
Define the head shape:
Using a clean, damp brush, wet the area just inside your pencil line on the left side of the face. Drop in your grey wash along the edge and let it bleed inward softly. This creates dimension without filling the whole face. -
Shadow the body:
Repeat this process on the left side of the body curve. I find that leaving the center and right side largely unpainted suggests bright, reflected light. -
Background wash:
Paint a very loose, pale blue-grey wash around the outside of the snowman to help the white paper of the snow stand out. Let the edges be rough and organic.
Step 3: Adding Features
-
Paint the carrot nose:
Fill the nose shape with a bright orange. While it’s still damp, drop a tiny bit of darker reddish-orange along the bottom edge to give it roundness. Add subtle texture lines once dry. -
Rosy cheeks:
Dilute some Alizarin Crimson or pink until it is very transparent. Paint two soft circles on the cheeks. Soften the edges with a clean, damp brush immediately so there are no hard lines. -
Darken the eyes:
Using a darker mix of Payne’s Grey or black, fill in the large eye circles. Creating these solid dark shapes instantly gives the face personality. -
Paint the smile:
Use the tip of a smaller brush to paint the individual coal pieces for the mouth. Vary their size slightly for a natural, hand-built look. -
Add the buttons:
Paint two large, irregular circles on the body section for buttons using the same dark grey mix as the eyes.
Make It Sparkle
Sprinkle coarse salt onto the wet background wash before it dries. Brush it off later to create a magical, crystallized frost texture around the snowman.
Step 4: Accessories and Details
-
Paint the hat brim and top:
Fill the hat brim and the very top of the crown with a medium-strength grey. It should be lighter than the eyes but darker than the snow shadows. -
Color the hat band:
Once the grey sections are dry (be patient here so colors don’t bleed), paint the band in a muted red or rust color. -
Add the sparkle:
This is the most crucial step. -
Highlights:
Use a white gel pen or a dot of white gouache to add two small reflections in each eye—one larger, one smaller. This “catchlight” brings the snowman to life.
Now you have a cheerful winter companion perfect for holiday cards or seasonal decor
Snowman With Raised Stick Arms and a Friendly Wave
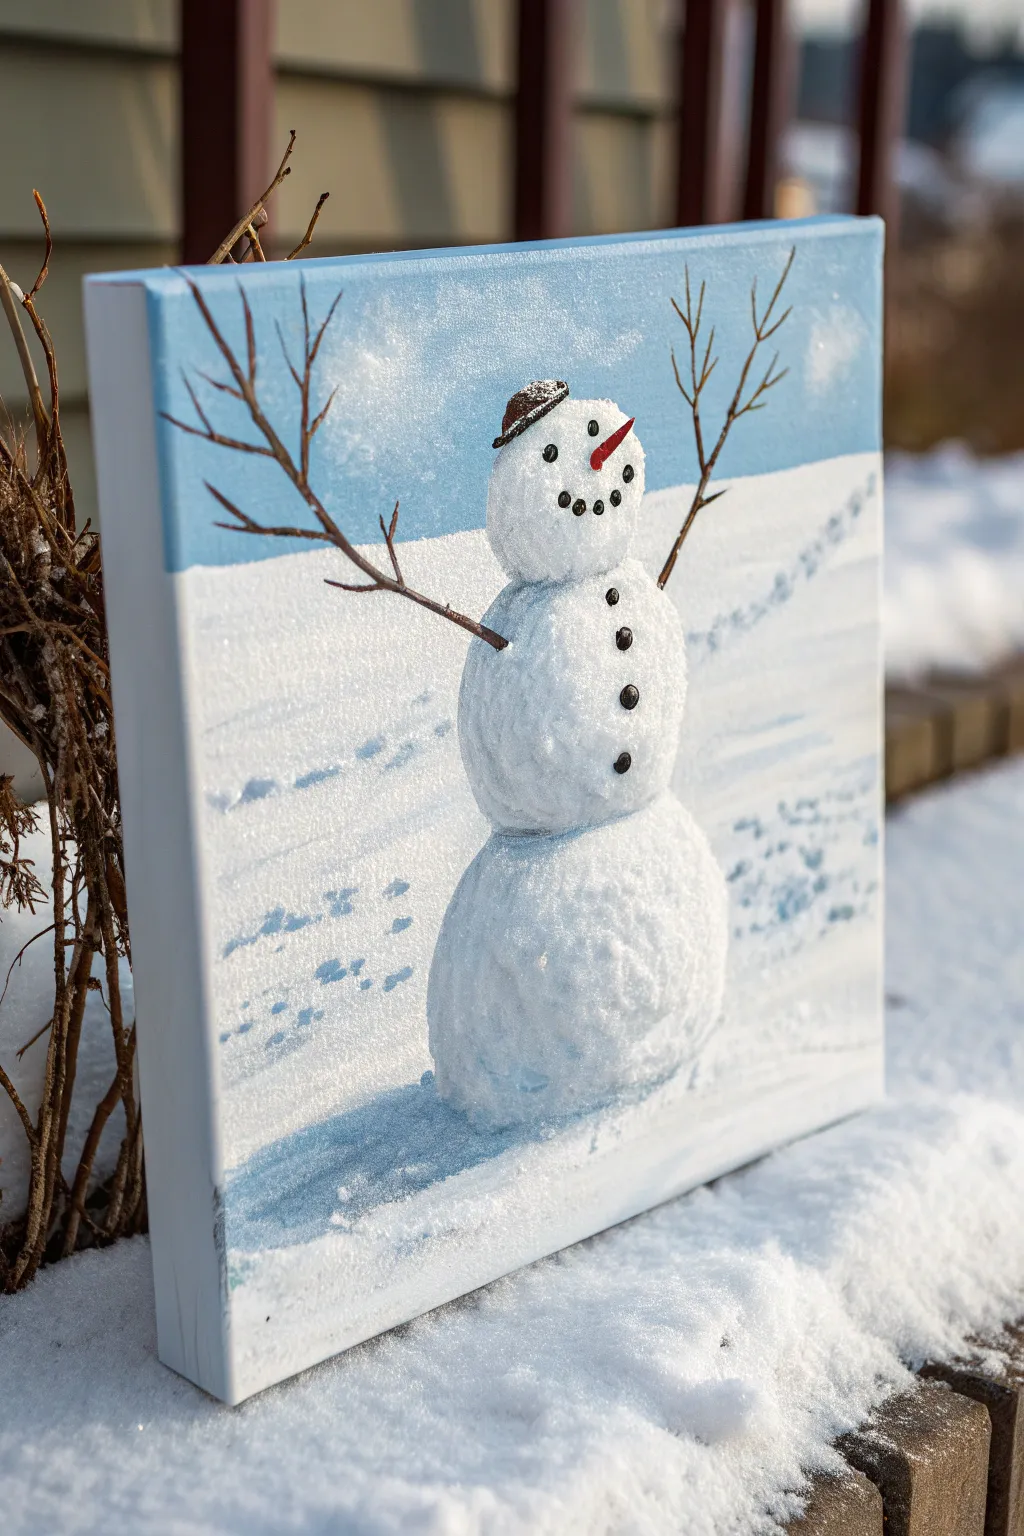
Bring your winter scene to life with this tactile project that literally pops off the canvas. Using texture paste or thickened acrylics creates a delightful 3D effect for the snowman’s body, contrasting beautifully with the smooth painted background.
Step-by-Step Tutorial
Materials
- Stretched canvas (rectangular or square)
- Acrylic paints: Sky Blue, Titanium White, Burnt Umber (brown), Black, Orange
- Texture paste (modeling paste) or heavy body acrylic medium
- Palette knives (one rounded for shaping, one flat for smoothing)
- Set of brushes: 1-inch flat wash, small liner brush, medium round brush
- Pencil for sketching
- Palette or mixing plate
- Cup of water and paper towels
Step 1: Preparing the Background
-
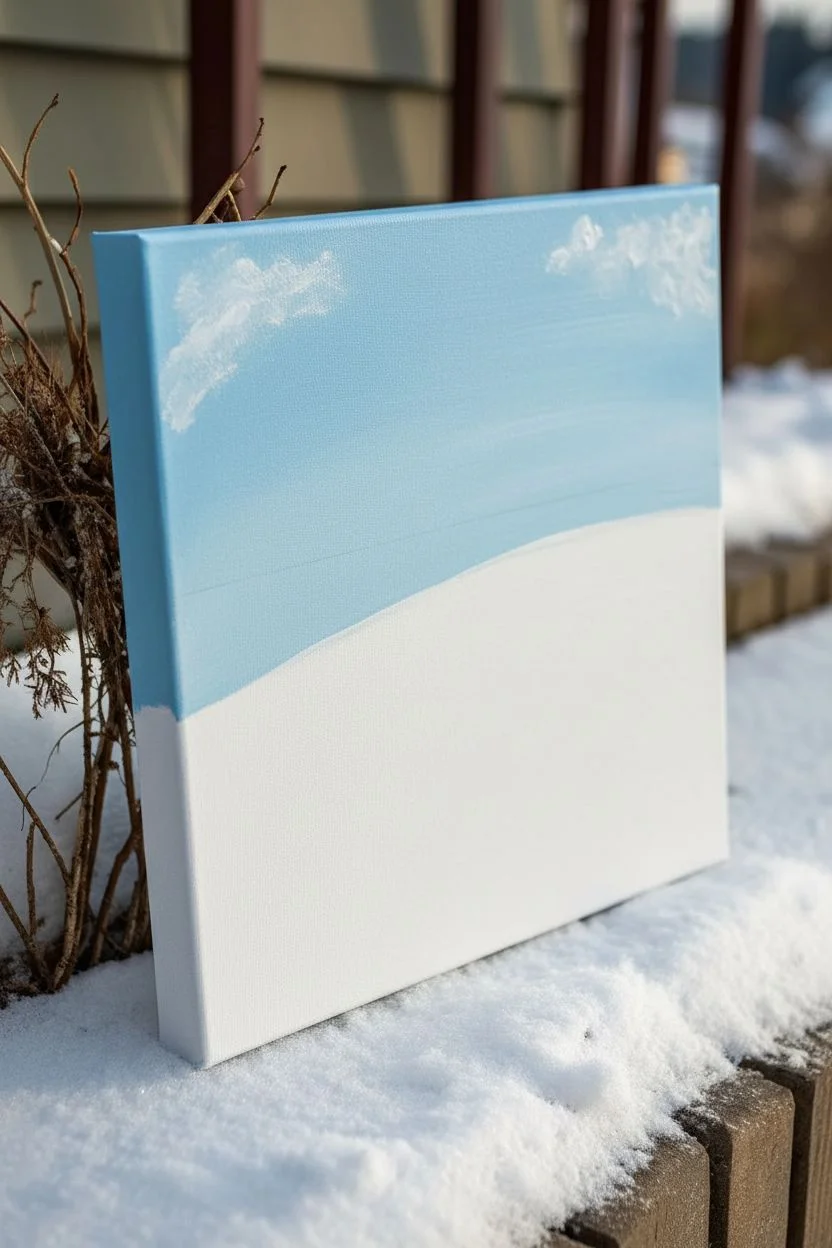
Sketch the horizon:
Lightly draw a horizon line about one-third of the way down from the top of the canvas. It doesn’t need to be perfectly straight; a slight slope adds realism to the snowy hill. -
Paint the sky:
Mix a soft Sky Blue with a touch of White. Using your flat wash brush, paint the area above the horizon line. I like to keep the strokes horizontal and smooth to contrast with the texture we’ll add later. -
Add subtle clouds:
While the blue is still slightly wet, dab a little pure White in the upper corners and blend softly for wispy clouds. -
Paint the snow base:
Paint the bottom two-thirds of the canvas with Titanium White. This serves as the underpainting for the snow. Let the entire background dry completely before moving on.
Paste sliding down?
If your texture paste is sliding down the canvas while wet, lay the canvas flat on a table to dry. Heavy applications fight gravity until they harden.
Step 2: Building the Snowman
-
Sketch the snowman outline:
Lightly draw three stacked circles in the center of the canvas. Make the bottom circle the largest, the middle slightly smaller, and the head the smallest. -
Mix the texture paste:
If you want your snow to sparkle, mix a pinch of white glitter into your texture paste. Otherwise, use plain white modeling paste. -
Apply the bottom sphere:
Scoop a generous amount of paste with your palette knife and fill the bottom circle outline. Build it up so it’s roughly 1/4 inch thick in the center and tapers slightly at the edges. -
Texture the snow:
Use the tip of the palette knife or an old stiff brush to stipple the wet paste, creating a rough, snowball-like surface. -
Create the middle and top sections:
Repeat the application and stippling process for the middle body section and the head. Ensure the paste overlaps slightly where the snowballs meet to connect them. -
Dry the structure:
This is the patience step. texture paste can take several hours (or overnight) to dry completely. It must be hard to the touch before painting details.
Step 3: Adding Details and Shadows
-
Paint the shadows:
Mix a very watery wash of Blue and a tiny drop of Black. Paint a shadow on the left side of the snowman’s body (assuming the light comes from the right) and cast a shadow on the ground to the left. -
Add ground texture:
Use the side of a dry brush with a little blue-white mix to create footprint trails or uneven snow patches on the white ground around the snowman. -
Paint the arms:
Using a thin liner brush and Burnt Umber mixed with a little water, paint the branch arms. Make the lines jagged and varied in thickness, extending upwards in a wave. -
Add the twig fingers:
Paint smaller Y-shaped offshoots on the ends of the main branches for fingers. -
Paint the facial features:
Use the small round brush or the end of a paintbrush handle dipped in Black to dot the eyes and the coal mouth. -
Create the nose:
Paint a small, elongated triangle in Orange for the carrot nose. Add a tiny white highlight on top to make it look dimensional. -
Add the buttons:
Paint three black imperfect circles down the middle section for coal buttons. Add a tiny highlight of white or grey to the top right of each button for shine. -
Top it off with a hat:
Paint a small, tilted oval in Dark Brown or Black on top of the head for the hat brim, then add a small rounded square shape above it for the crown.
Make it sparkle
While the white paint on the ground or the texture on the snowman is still wet, sprinkle ultra-fine iridescent glitter over it for a fresh-fallen snow look.
Once fully dry, display your dimensional winter creation on a shelf or hang it to bring some snowy cheer indoors

PENCIL GUIDE
Understanding Pencil Grades from H to B
From first sketch to finished drawing — learn pencil grades, line control, and shading techniques.
Explore the Full Guide
Snowman Holding a Lantern With Warm Glow
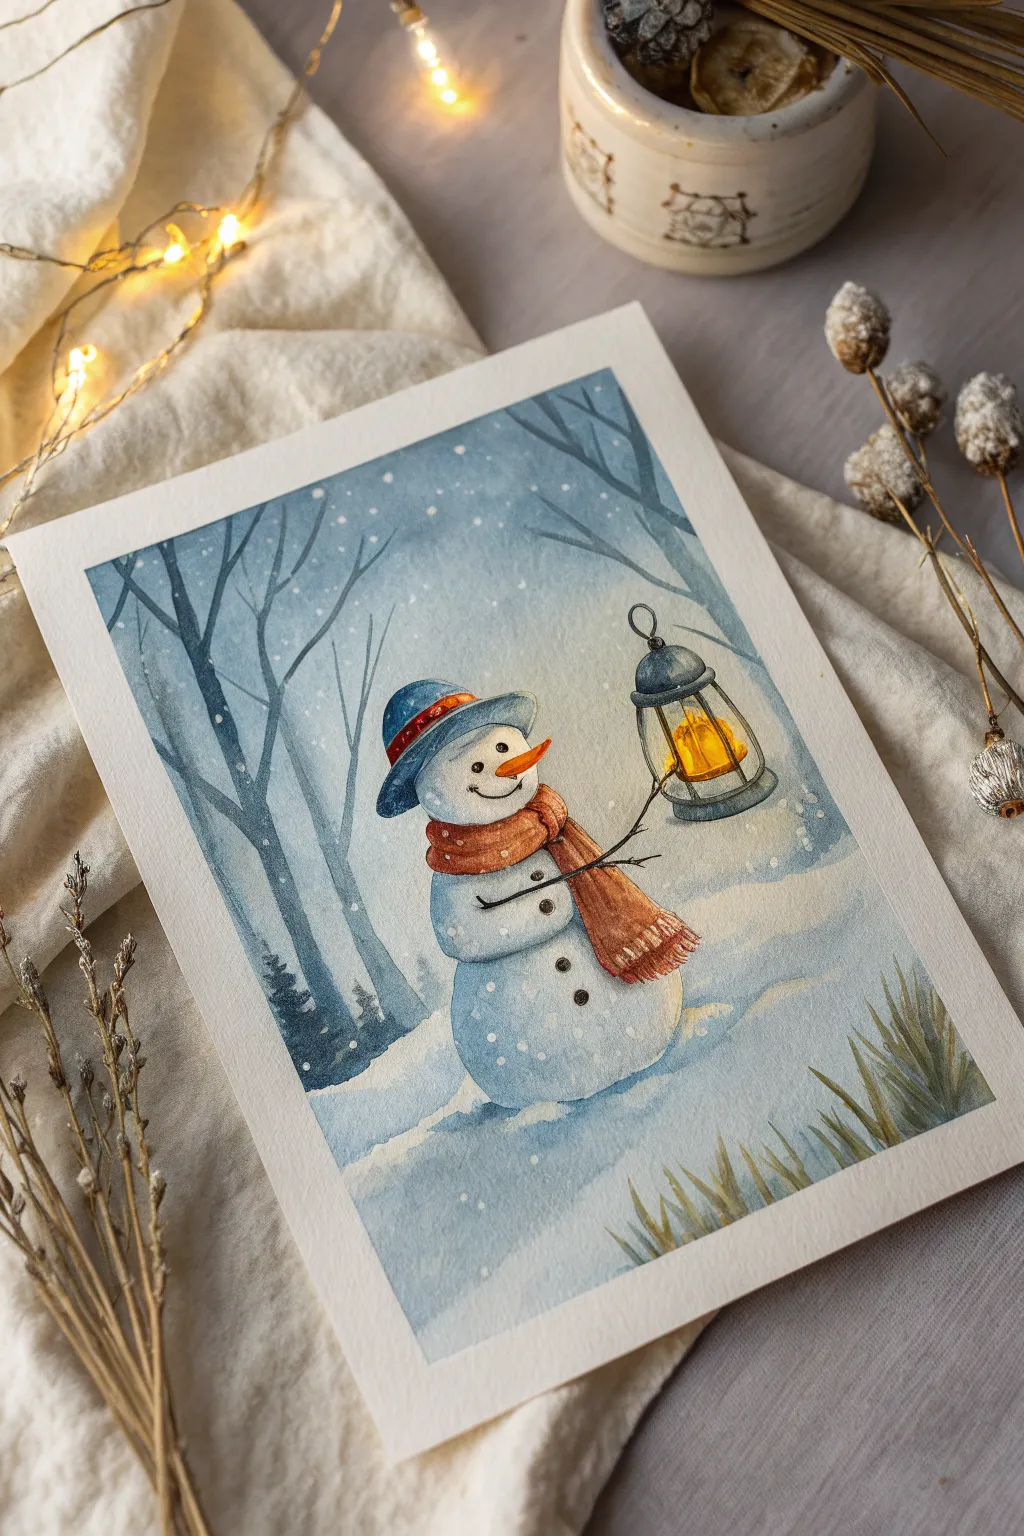
Capture the magic of a snowy evening with this charming watercolor tutorial featuring a cheerful snowman lighting his way through a blue forest. You’ll work with cool winter tones and contrasting warm light to create a cozy, whimsical scene.
Step-by-Step Guide
Materials
- Cold press watercolor paper (140 lb/300 gsm)
- Watercolor paints (Indigo, Payne’s Grey, Cerulean Blue, Burnt Sienna, Cadmium Orange, Lemon Yellow)
- White gouache or white gel pen
- Round watercolor brushes (sizes 2, 6, and 10)
- Pencil and kneaded eraser
- Two jars of water
- Paper towels
- Masking fluid (optional)
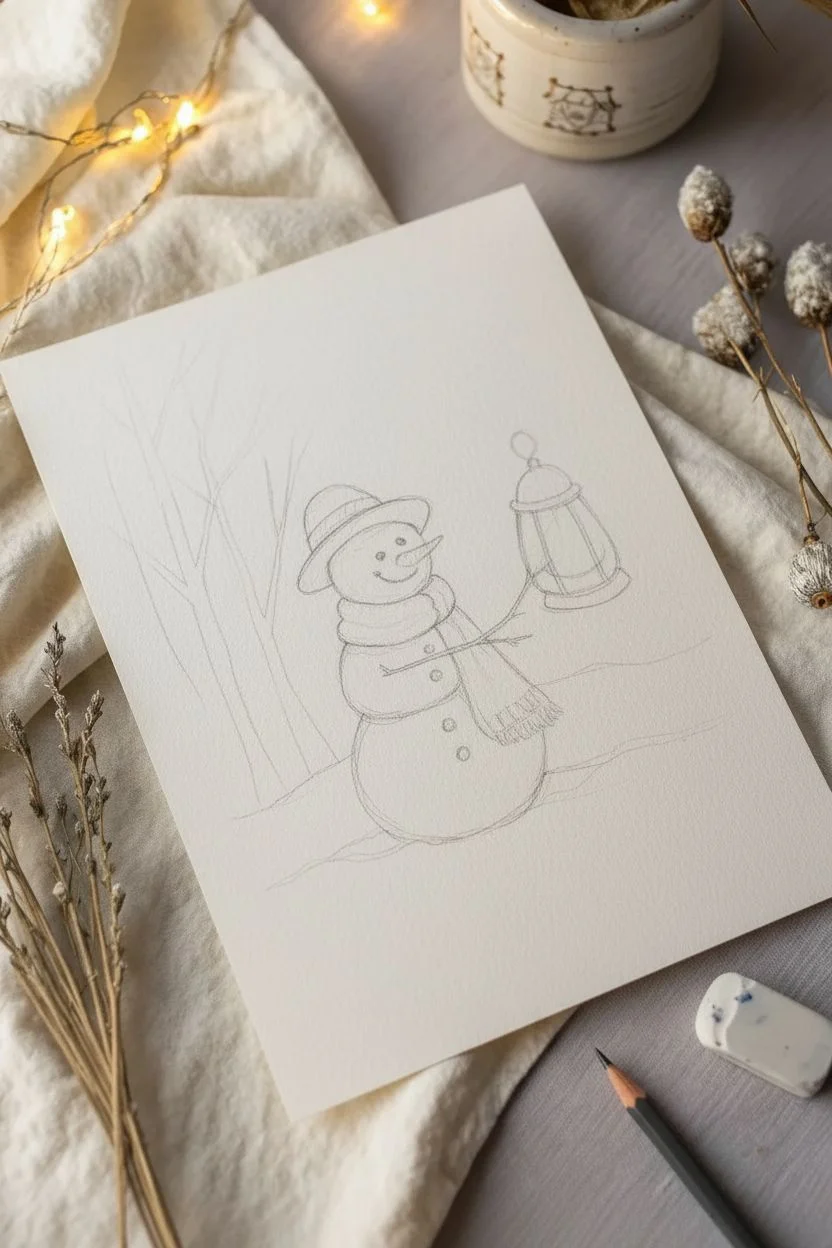
Step 1: Sketching the Scene
-
Outline the Snowman:
Begin by lightly sketching three stacked circles for the snowman’s body. The bottom circle should be the largest, tapering up to the smallest for the head. Keep your pencil lines faint so they disappear under the paint. -
Add Clothing and Props:
Draw a jaunty hat angled slightly on the head and a thick, wrapped scarf around the neck. Sketch stick arms, with the right arm extending out to hold a lantern. -
Detail the Lantern and Background:
Carefully draw the lantern hanging from the stick hand, ensuring it has a distinct glass center for the light. I prefer to sketch a few vertical tree trunks in the background now to guide my painting later.
Pro Tip: Luminosity
To make the lantern glow, keep the center pure white paper or very pale yellow. The contrast between the bright center and the dark frame creates the illusion of light.
Step 2: Painting the Snowy Atmosphere
-
First Background Wash:
Mix a watery wash of Cerulean Blue with a touch of Indigo. Wet the background area (avoiding the snowman and lantern) and paint the sky, letting the color fade slightly as you move toward the bottom of the paper. -
Define the Trees:
While the background is still damp but not soaking, use a size 6 brush and a mix of Indigo and Payne’s Grey to paint the tree trunks. The damp paper will soften the edges, making them look further away in the distance. -
Deepen the Forest:
Once the first layer is dry, add thinner, sharper branches in the foreground using a darker mix of Payne’s Grey. Let the branches overlap to create density. -
Snowman Shadows:
Using a very diluted mix of Cerulean Blue, paint the shadowed side of the snowman (the side away from the lantern). Leave the paper white on the side facing the lantern to represent the highlight.
Step 3: Adding Life and Warmth
-
The Warm Scarf:
Paint the scarf with Burnt Sienna mixed with a little orange. Use a size 2 brush to follow the curve of the fabric, leaving tiny gaps or lifting color to suggest texture. -
Painting the Hat:
Use Indigo for the hat, keeping the top darker and the brim slightly lighter. Add a band of red or orange to coordinate with the scarf. -
The Glowing Lantern:
Wet the glass area of the lantern and drop in Lemon Yellow at the center. Surround it immediately with Cadmium Orange, letting the colors bleed together without mixing into mud. Paint the lantern’s metal frame with Payne’s Grey. -
Reflected Light:
Use a very watered-down yellow-orange mix to glaze the side of the snowman facing the lantern. This subtle step ties the figure to the light source. -
Facial Features:
Use a liner brush or fine tip marker to dot the eyes and the coal smile. Paint the carrot nose with bright orange, ensuring it points toward the lantern.
Level Up: Salt Texture
While the blue paint on the snowman’s body is still wet, sprinkle a few grains of table salt on the shadow side. Brush it off when dry for a magical, icy crystal texture.
Step 4: Finishing Touches
-
Foreground Grass:
Mix a greenish-grey tone and use swift, upward strokes at the bottom corners to create dry winter grass poking through the snow. -
Falling Snow:
Using white gouache or a white gel pen, add snowflakes throughout the scene. Make the dots denser around the light source and sparse in the foreground. -
Texture on the Snowman:
Stipple tiny dots of white gouache or watered-down blue on the snowman’s body to give it a textured, packed-snow appearance. -
Scarf Details:
Add a fringe to the end of the scarf using your smallest brush and dark brown paint. You can also add a simple stripe pattern to the scarf if you wish. -
Final Contrast Check:
Deepen the shadows directly under the snowman and behind the grass with your darkest Indigo mix to ground the figure.
Now you have a serene winter scene that perfectly captures the quiet joy of a snowy night
Snowman With a Little Red Bird Companion
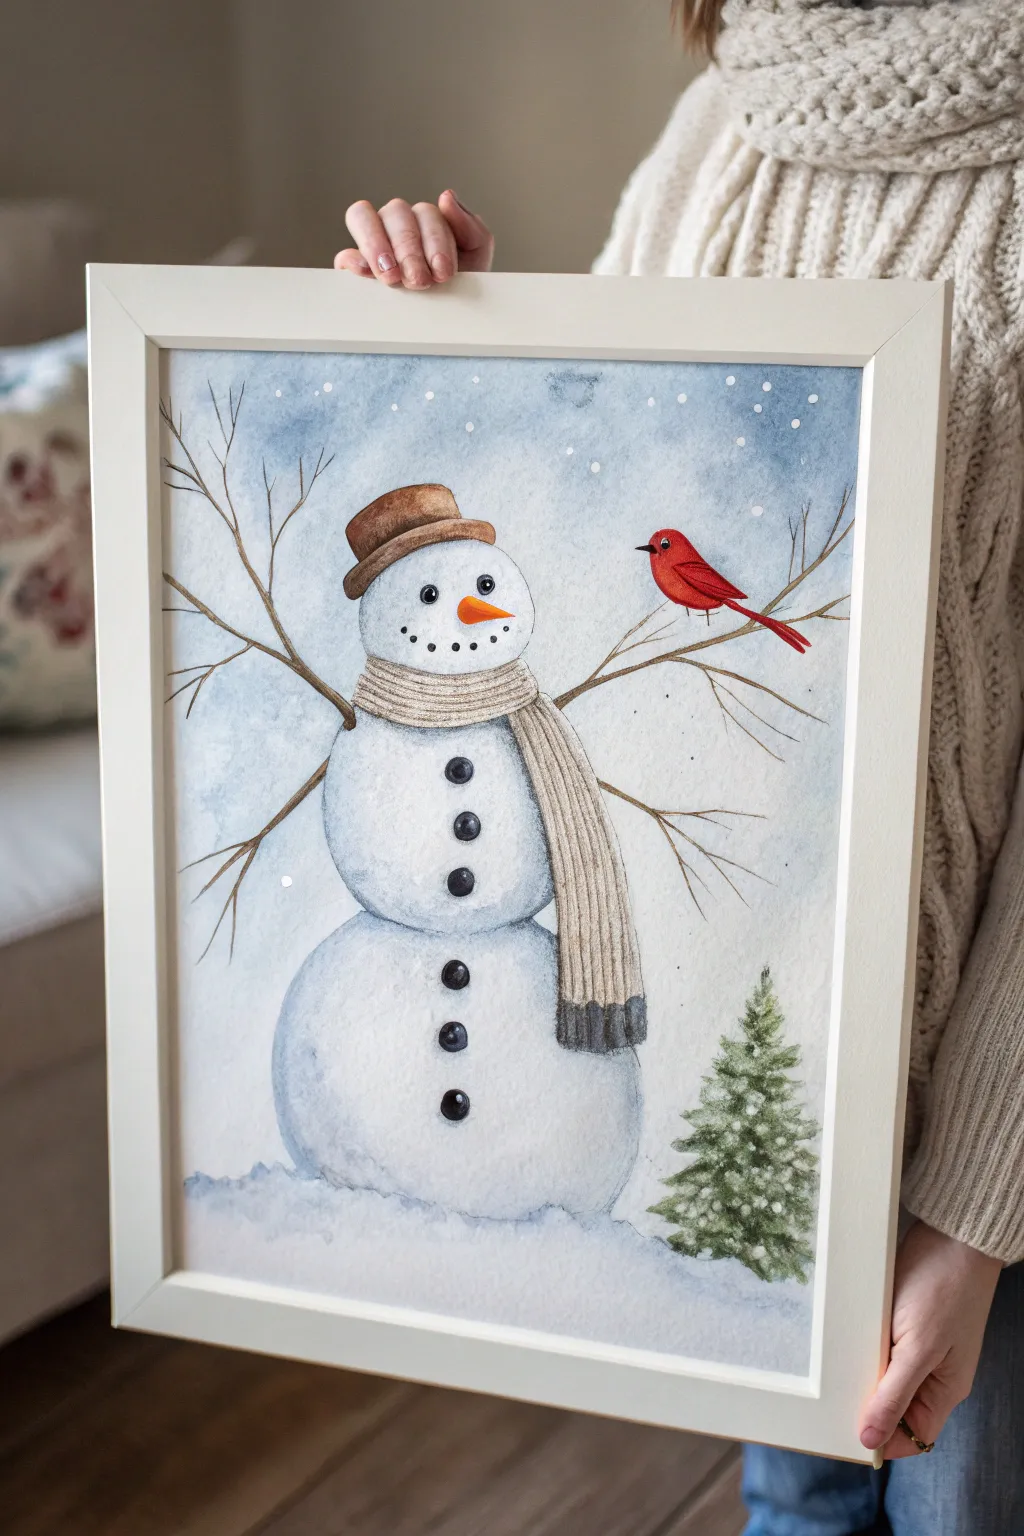
This charming watercolor painting captures the serene beauty of winter with a classic snowman greeting a vibrant red cardinal friend. Soft, layered washes create a fluffy snow texture, while precise details bring the cozy knit scarf and twig arms to life.
How-To Guide
Materials
- Cold press watercolor paper (140lb/300gsm)
- Watercolor paints (Indigo, Burnt Umber, Payne’s Grey, Cadmium Red, Hooker’s Green, Orange)
- Round brushes (sizes 2, 6, and 10)
- Fine liner brush (size 0 or 00)
- White gouache or white gel pen
- Masking fluid (optional)
- Pencil and kneaded eraser
- Two jars of water
- Paper towels
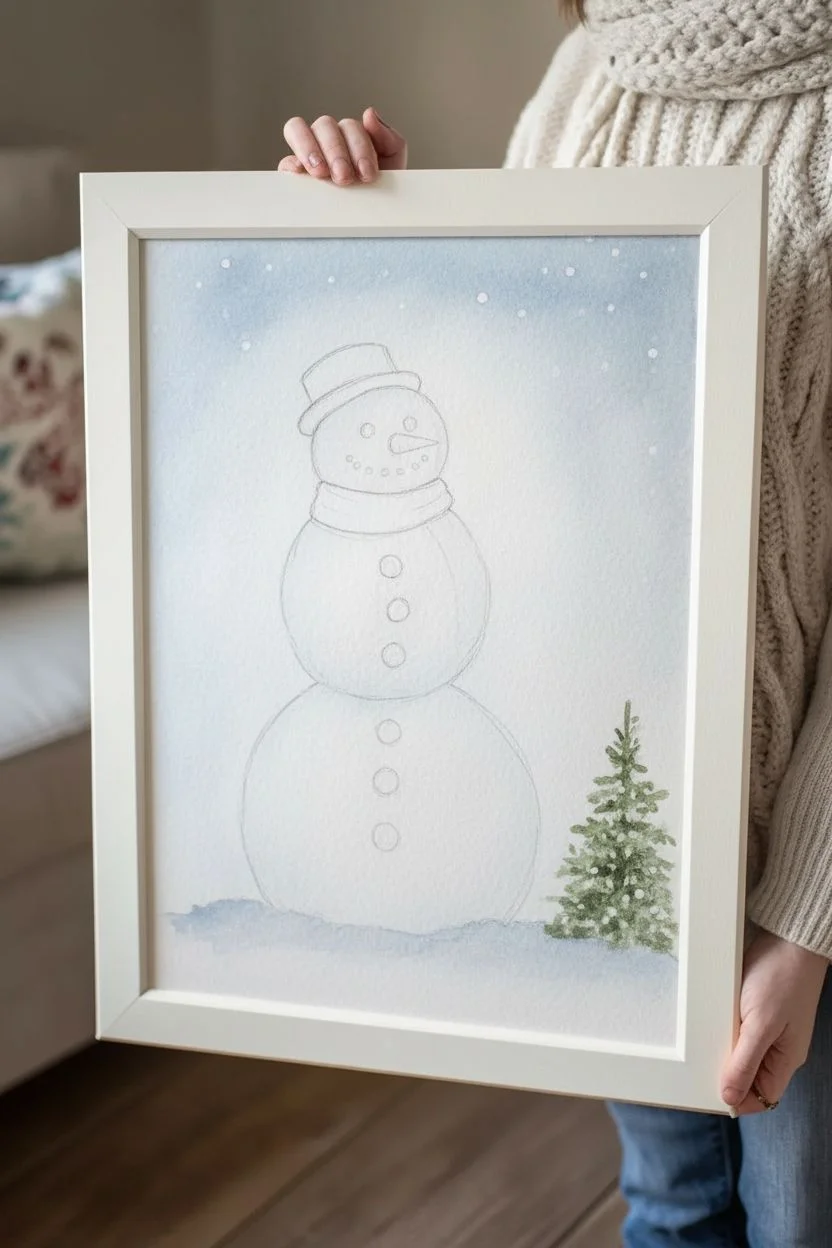
Step 1: Sketching and Background
-
Light sketch:
Begin by lightly sketching three stacked circles for the snowman’s body, making the bottom one largest and slightly flattened. Add the hat, the scarf draped around the neck, the twig arms extending outward, and a rough outline of the small pine tree on the right. -
Masking snow:
If you want crisp white snowflakes, dot masking fluid randomly across the sky area and let it dry completely. Alternatively, you can skip this and add white gouache later. -
Sky wash:
Wet the sky area around the snowman with clean water. Drop in a diluted mix of Indigo and Payne’s Grey, letting the color bloom softly. Keep the area near the snowman’s head lighter to create a subtle glow. -
Tree base:
While the background is still slightly damp, paint the pine tree using Hooker’s Green mixed with a touch of Burnt Umber. Use a tapping motion with your brush to create texture, allowing the edges to blur slightly into the snow.
Wet-on-Wet Softness
For the softest looking snow texture on the body, wet the paper inside the circle first, then touch your blue-grey paint only to the shadowed edge, letting it flow naturally inward.
Step 2: Snowman and Accessories
-
Body shading:
Mix a very watery wash of Indigo and a tiny touch of Purple. Paint shadows on the right side and bottom of each snowball to give them form, softening the edges with a clean, damp brush so there are no hard lines. -
Hat base:
Paint the hat with a light wash of Burnt Umber. Once dry, add a second, darker layer to the hat band and the underside of the brim for dimension. -
Scarf texture:
Fill the scarf shape with a creamy beige or diluted Raw Sienna. Once dry, use a size 2 brush or fine liner to paint vertical stripes and knit patterns using a darker brown mix. -
Scarf fringe:
Paint the bottom edge of the scarf with a dark grey or black, adding small vertical strokes to mimic the hanging fringe. -
Twig arms:
Using a liner brush and dark brown paint (Burnt Umber mixed with Payne’s Grey), carefully paint the thin, branching twig arms. Make the lines slightly jagged to look like natural wood.
Make It Sparkle
Mix a tiny pinch of cosmetic-grade iridescent glitter or shimmer medium into your white gouache for the falling snow. The flakes will catch the light subtly when framed.
Step 3: Details and Finishing
-
The cardinal:
Paint the bird’s body with bright Cadmium Red. Once dry, add a tiny black mask around the beak and define the wing feathers with a deeper red blend. -
Face features:
Use a pointed round brush to add the coal eyes, mouth, and buttons down the front using concentrated Payne’s Grey or Black. Leave a tiny speck of white paper in the eyes for a highlight, or add it later with white gouache. -
Carrot nose:
Paint a sharp, triangular carrot nose using bright Orange. Add a tiny line of brown on the underside for shadow. -
Snow highlights:
If you used masking fluid, rub it off gently now to reveal the white snow dots. If not, spatter white gouache over the painting or use a white gel pen to draw snowflakes. -
Tree details:
Dab small spots of white gouache onto the branches of the pine tree to make it look dusted with fresh powder. -
Ground shadows:
Strengthen the blue-grey shadows on the ground directly underneath the snowman and the tree to anchor them to the scene.
Once completely dry, pop your winter masterpiece into a simple frame to bring a touch of snowy joy indoors


Minimalist Snowman Silhouette Using Negative Space
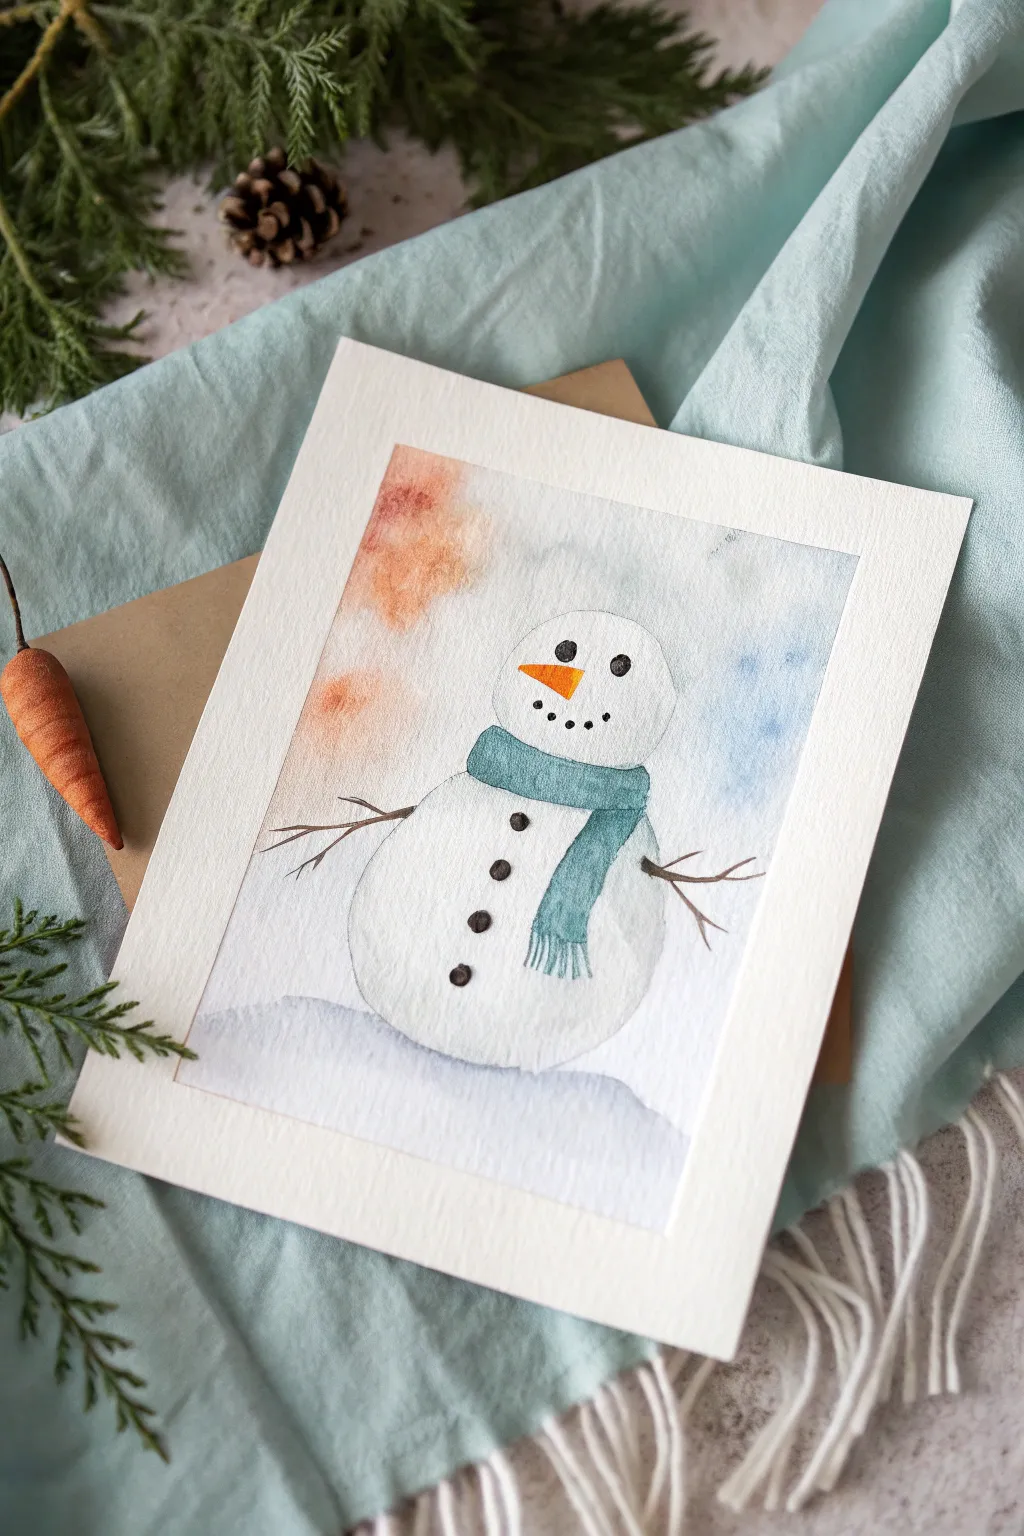

This charming winter project uses watercolor techniques to create a soft, friendly snowman that looks perfect on a holiday card or framed on a mantle. The beauty lies in the subtle shading and the distinct pop of the teal scarf against the crisp white snow.
Step-by-Step
Materials
- Cold press watercolor paper (cut to 5×7 or desired card size)
- Watercolor paints (Indigo/Payne’s Grey, Teal/Turquoise, Orange, Burnt Sienna)
- Round watercolor brushes (size 4 and size 0 or 1 for details)
- Pencil (HB or lighter) and kneaded eraser
- Clean water and paper towels
- Masking tape (optional, to secure paper)
Step 1: Sketching and Background
-
Outline the shapes:
Begin by lightly sketching two large circles stacked on top of each other. Make the bottom circle slightly wider and flatter at the base to give the snowman weight. Add a simple carrot nose shape and the outline of a scarf wrapped around the neck. -
Prepare the background wash:
Mix a very watery wash of burnt sienna (for a warm glow) and a separate watery wash of indigo (for a cool sky). Wet the paper around the snowman with clean water, being careful not to get water inside your pencil lines. -
Drop in color:
While the paper is still wet, touch your brush loaded with the warm burnt sienna to the upper left area. Rinse your brush, then add the cool indigo to the right side. Let the colors bleed softly into the wet paper, keeping the background extremely pale and ethereal. -
Define the snow base:
Mix a very dilute violet-grey using indigo and plenty of water. Paint a soft, undulating line at the bottom of the paper for the ground, letting it fade upward slightly to suggest a snowbank.
Muddy Background?
If your background colors are mixing into a brown mess, let the first color dry completely before wetting the paper again for the second color. Patience is key in watercolor.
Step 2: Defining the Snowman
-
Shadowing the body:
Once the background is completely dry, mix a clean, watery grey. Paint a crescent moon shape along the bottom and right side of both snowballs to create dimension. I like to soften the inner edge of this shadow with a clean, damp brush so there are no hard lines. -
Painting the scarf base:
Switch to your teal or turquoise paint. Fill in the main shape of the scarf around the neck. Use a medium consistency of paint so the color is solid but still transparent. -
Adding scarf details:
Paint the tail of the scarf hanging down the front. While the paint is still slightly damp, drop a tiny bit of darker teal into the folds to create shadow depth. -
The carrot nose:
Paint the carrot nose with a bright orange. Leave a tiny sliver of white paper on the top edge if you can; this acts as a highlight and makes the nose look 3D.
Step 3: Final Details
-
Painting the coal features:
Using a small detail brush and concentrated black or indigo paint, make small dots for the eyes. Add five smaller dots for a cheerful smile. -
Adding buttons:
Paint three distinct buttons down the center of the body. Keep them slightly irregular so they look like chunks of coal or stones. -
Twig arms:
Mix a dark brown using burnt sienna and a touch of black. With your finest brush and a very light hand, paint thin, branching lines extending from the sides of the body for the arms. -
Scarf fringe:
Once the main scarf area is dry, use the tip of your small brush to paint vertical lines at the bottom of the scarf tail to mimic fringe. -
Final shadow check:
Look at your painting from a distance. If the snowman feels too flat, you can add a second, very faint layer of grey glaze to the shadowed side to increase the contrast.
Add Sparkle
Once the painting is 100% dry, add tiny dots of white gouache or a white gel pen to the background to simulate falling snow, or add a highlight to the coal eyes.
Allow your painting to dry flat before erasing any visible pencil marks to complete your winter scene
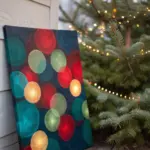
Textured Impasto Snowman for Chunky Snow Effects
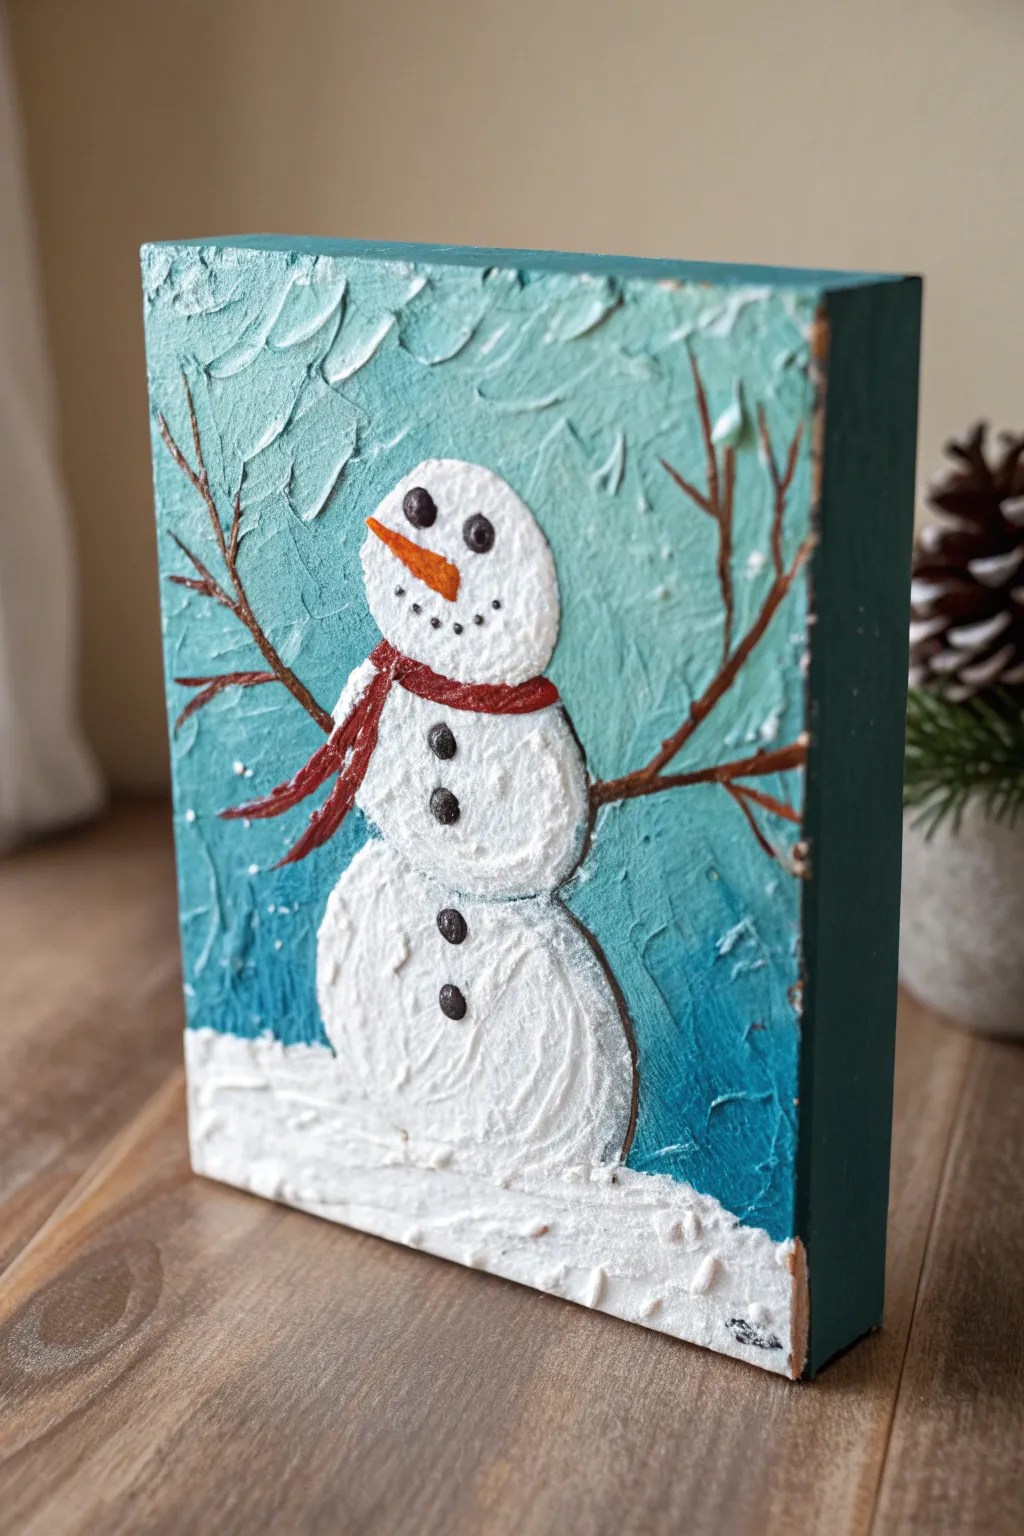
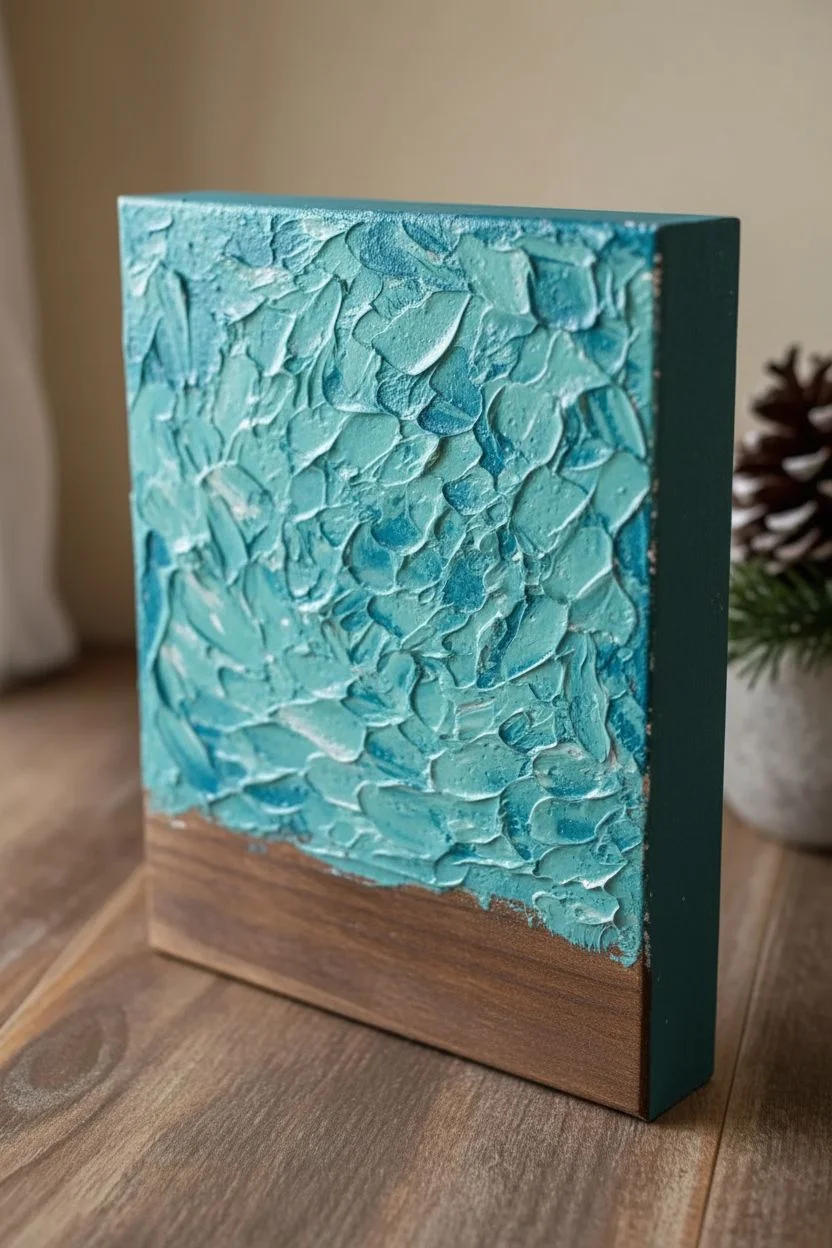
Bring the magic of winter indoors with this charmingly rustic snowman painting that features rich, tactile textures you can actually feel. Using modeling paste creates chunky, realistic snow effects against a swirling teal sky, making this piece perfect for a mantle or shelf display.
How-To Guide
Materials
- Deep wood panel or 1.5-inch gallery wrapped canvas (approx. 5×7 or 6×8)
- White texture paste, modeling paste, or heavy structure gel
- Acrylic paints: White, Teal/Turquoise, Dark Blue, Red, Orange, Burnt Umber (Brown), Black
- Palette knife (small trowel shape represents works best)
- Small round brushes (sizes 2 and 4)
- Liner brush (size 0 or 00 for details)
- Palette or paper plate for mixing
- Cup of water and paper towels
Step 1: Creating the Textured Foundation
-
Prepare the Background Mix:
Start by mixing a lovely winter sky color. Combine your teal acrylic paint with a small amount of white texture paste on your palette. You want the consistency to be thick like frosting, but tinted with that cool blue-green hue. -
Apply the Sky Texture:
Using your palette knife, spread the teal mixture onto the wood block. Don’t try to make it smooth! Use short, curving strokes to create swirls and ridges that mimic a blustery winter wind. Cover the top two-thirds of the block, leaving the bottom area bare for the snow. -
Add Depth to the Sky:
While the teal paste is still wet, dip just the tip of your palette knife into a tiny bit of darker blue or white paint. Gently drag this through the wet texture in random spots to create natural variation and highlights in the atmosphere. -
Paint the Edges:
Don’t forget the sides of your deep canvas or wood block. I like to paint the sides a solid, dark teal or navy blue to frame the artwork and give it a finished, professional look. Let the entire background dry completely—this may take a few hours depending on the thickness of your paste.
Step 2: Building the Snowman
-
Form the Base Snow:
Mix a large amount of pure white paint with your texture paste. Using the palette knife, apply a thick, uneven layer across the very bottom of the canvas to create the snowy ground. Pull the paste slightly upward to create little drifts. -
Sculpt the Body:
Now for the snowman itself. Load your palette knife with the white paste mixture and form a large, rounded mound near the bottom center for the base. It should be visibly raised from the background. -
Stack the Snowballs:
Add a slightly smaller medium-sized circle of paste directly on top of the base for the torso. Finally, place a smaller, round dollop on top for the head. Use the tip of the knife to tap the surface of the wet paste, creating a fluffy, packed-snow texture. -
Dry Time:
This is crucial: Let the white snowman structure dry completely until it is hard to the touch. Because the paste is thick, leaving it overnight is often the safest bet to prevent smudging.
Frosting Technique
Treat the modeling paste exactly like cake frosting. If peaks are too sharp, dip your palette knife in water and gently smooth them down.
Step 3: Adding Personality and Details
-
Shadowing:
Once dry, use a small brush with a watery wash of grey or very light blue paint. Gently glaze the bottom curves of each snowball to give them dimension and roundness. -
Paint the Stick Arms:
Mix brown paint with a tiny touch of water to help it flow. Using a liner brush, paint thin, branching stick arms extending from the middle section of the snowman. I prefer to have them reach upward and outward in a welcoming gesture. -
Add the Carrot Nose:
With a small round brush and bright orange paint, create a triangular carrot nose on the head. Make it clearly visible by pointing it slightly to the left or right. -
Create the Coal Eyes and Buttons:
Dip the handle end of a paintbrush into black paint to use as a stamp. Dot two eyes on the face and three buttons down the torso. This ensures perfect, round circles. -
Detail the Smile:
Using your finest liner brush or a toothpick, add tiny black dots in a curve to form the coal smile beneath the carrot nose. -
Wrap the Scarf:
Paint a red stripe across the neck area where the head meets the torso. Bring one end down across the chest to look like the scarf is draped. You can add a darker red shadow under the fold for realism. -
Final Snow Highlights:
For a finishing touch, lightly dry-brush pure white paint over the highest points of the texture on the sky and the snowman to make the details pop.
Sparkle Finish
While the white snow paste is still wet, sprinkle ultra-fine iridescent glitter over the base and snowman body for a majestic, glistening ice effect.
Display your chunky, cheerful snowman on a favorite shelf and enjoy the winter vibes all season long
Abstract Snowman Built From Bold Shapes and Unexpected Colors
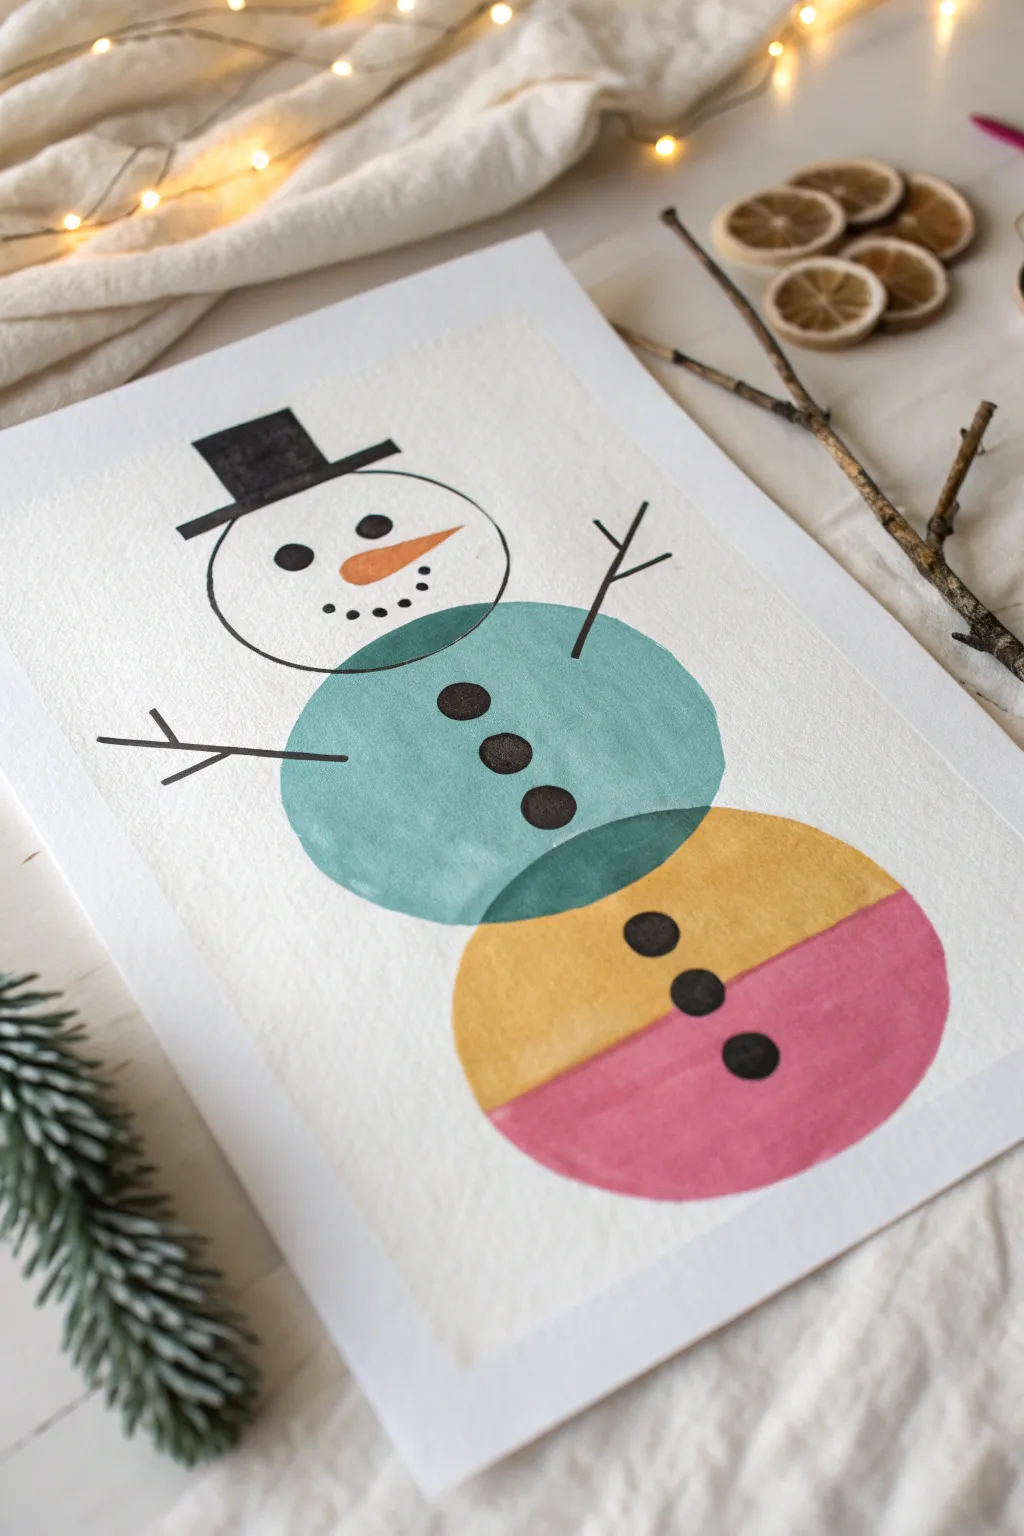
This project deconstructs the classic winter icon into bold, overlapping geometric forms and a surprising color palette. The transparency of the watercolors creates a beautiful layering effect where the shapes intersect, giving the piece a contemporary, graphic feel.
Step-by-Step
Materials
- Heavyweight cold-press watercolor paper (300gsm)
- Watercolor paints: Teal, Mustard Yellow, Magenta/Pink, Black
- Round watercolor brushes (size 6 or 8 for shapes, size 0 or 2 for details)
- Pencil and eraser
- Compass or three circular objects of varying sizes
- Black fine-liner pen or black ink
- Ruler
- Cup of water
- Paper towels
Step 1: Planning the Structure
-
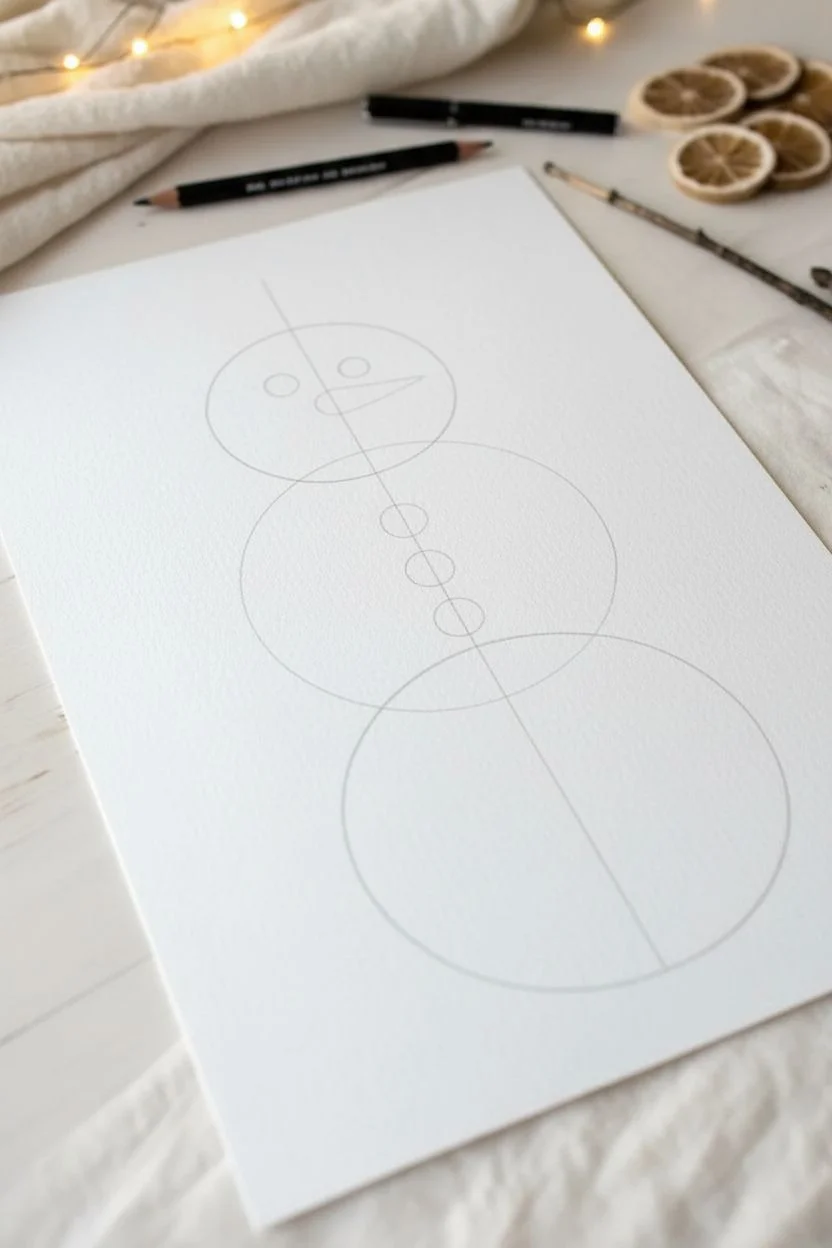
Establish the centerline:
Begin by lightly sketching a vertical line down the center of your paper using a ruler. This will act as an invisible spine to keep your snowman’s body segments aligned perfectly straight. -
Draft the bottom circle:
Using your largest circular object or compass set to a wide radius, draw a circle near the bottom of your page. Center it on the vertical line you just drew. -
Draft the middle circle:
Draw a slightly smaller circle directly above the first one. Position it so the bottom of this new circle overlaps the top of the base circle by about half an inch. This overlap is crucial for the transparent effect later. -
Draft the head:
Draw the smallest circle on top for the head. Similar to the previous step, ensure the bottom of the head overlaps the top of the middle circle slightly.
Bleeding Lines?
If your colors are running into each other uncontrollably, your paint is too wet. Blot your brush on paper towel before touching the paper to control the flow better.
Step 2: Painting the Body Shapes
-
Divide the base:
Take a ruler and draw a horizontal line right through the middle of the bottom circle. This divides the base into two distinct color zones. -
Paint the yellow semi-circle:
Load your medium-sized brush with a warm mustard yellow watercolor. Paint the top half of that bottom circle carefully. Keep the edges crisp, but let the color pool slightly for texture. -
Paint the pink semi-circle:
Clean your brush thoroughly and pick up a vibrant magenta or pink. Paint the lower half of the bottom circle. Where the pink meets the yellow line, careful brushwork is key to avoid muddy bleeding, though a tiny bit of bleed adds charm. -
Paint the middle section:
Once the bottom circle is mostly dry (it can be slightly damp for soft edges, or fully dry for sharp ones), mix a watery teal or turquoise. Paint the entire middle circle. Notice how the teal changes color where it overlaps the yellow half-circle below it. -
Let the body dry:
Allow these colorful sections to dry completely before moving on. The paper should feel room temperature to the touch, not cool.
Step 3: Adding the Graphic Details
-
Outline the head:
Unlike the body, the head remains unpainted white paper. Use a black fine-liner or a very steady hand with black paint to trace the pencil outline of the top circle. -
Draw the hat brim:
Draw a straight, thick black line diagonally across the top of the head for the hat’s brim. It should tilt slightly for a jaunty look. -
Fill the hat:
Sketch a simple rectangle on top of the brim and fill it in with solid black ink or paint. Keeping this shape geometric and flat emphasizes the modern style. -
Add facial features:
Inside the white head circle, dot two solid black eyes. Below them, create a curved smile using smaller, staccato black dots. -
Paint the carrot nose:
Use a small brush and orange watercolor to paint a sharp, triangular carrot nose pointing off to the right. I like to let this overlap the outline of the face just a tiny bit. -
Add the stick arms:
Using your fine brush or pen, draw straight, thin lines for arms sticking out of the teal body circle. Add little ‘Y’ shapes at the ends for fingers. -
Paint the buttons:
Paint three solid black circles down the front of the body. Place one in the center of the teal circle, one near the overlap, and one on the yellow section. -
Paint the bottom buttons:
Continuing the line, paint two more black buttons on the bottom circle—one connecting the yellow/pink divide, and one firmly in the pink section.
Make It Sparkle
Once the painting is 100% dry, add tiny dots of white gouache or a white gel pen to the black buttons and eyes to create little highlights that make the shapes pop.
Now you have a stylish, gallery-worthy piece of winter art that feels fresh and modern


Have a question or want to share your own experience? I'd love to hear from you in the comments below!