If you love that classic storybook-animation vibe but want projects that feel totally doable, you’re in the right place. These easy cute Disney-style painting ideas lean on simple shapes, bold color blocks, and little “magic” details that make your art instantly recognizable.
Three-Circle Mouse-Ear Silhouette With a Sunset Gradient
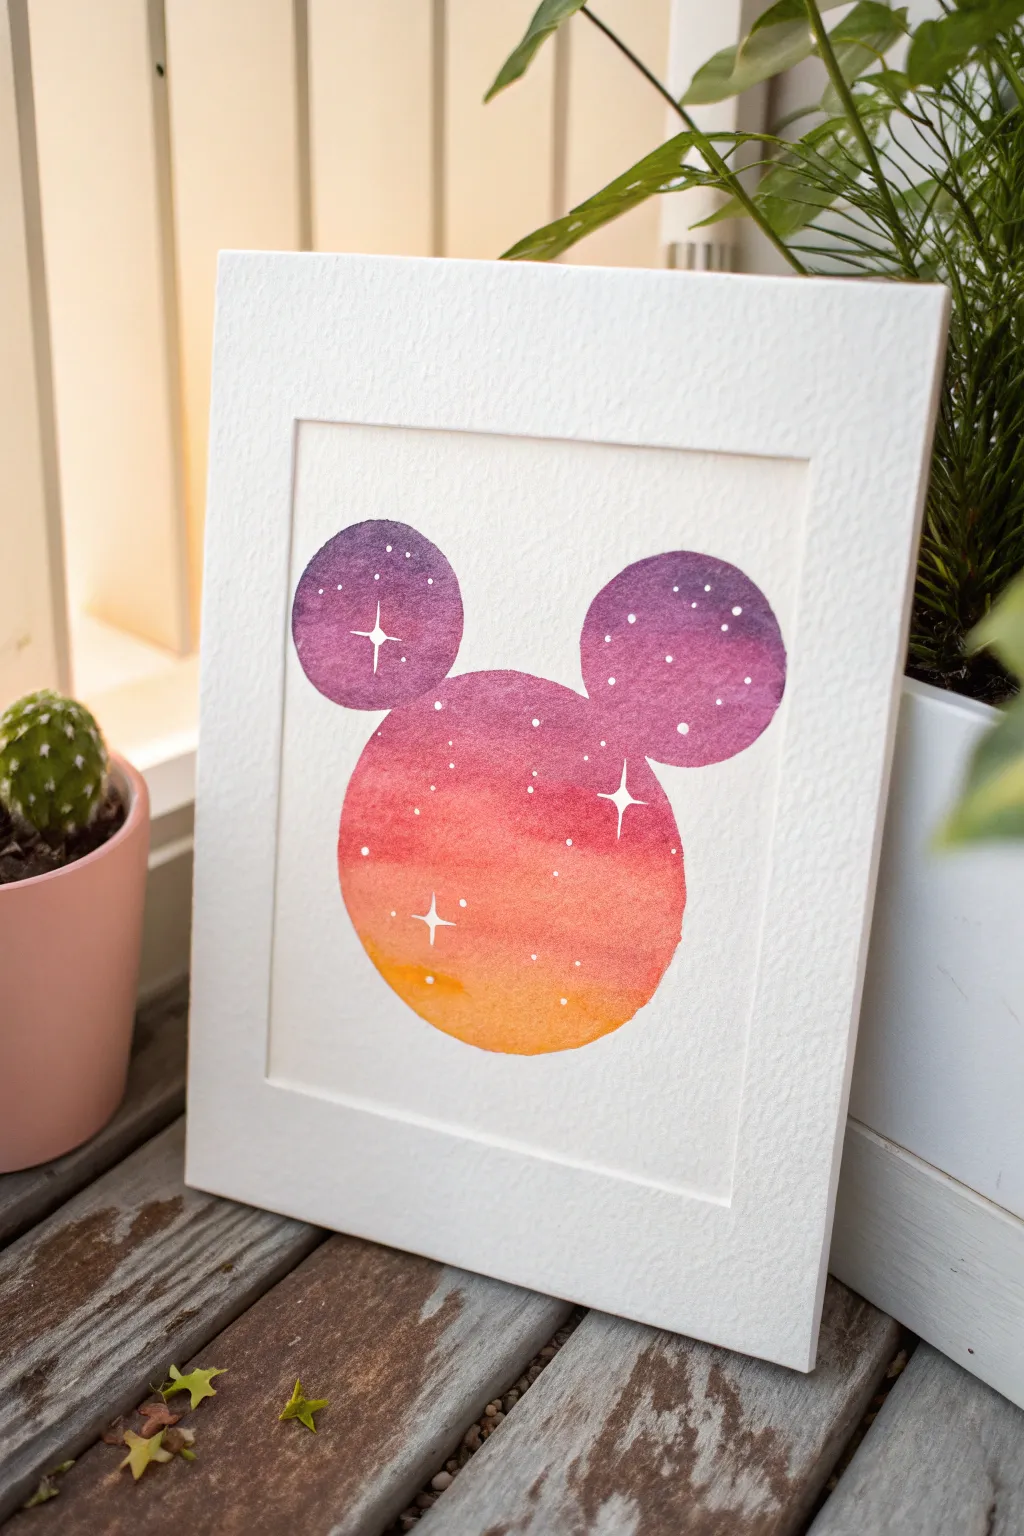
Capture the magic of twilight skies contained within a classic, recognizable shape. This beginner-friendly watercolor project uses a wet-on-wet technique to create a seamless gradient from deep violet to warm orange, accented with sparkling white stars.
Step-by-Step Tutorial
Materials
- Cold press watercolor paper (cut to desired frame size)
- Pencil
- Compass or three circular objects (small and medium sizes)
- Watercolor paints (violet, magenta/red, warm orange, yellow)
- Round watercolor brush (size 6 or 8)
- Small detail brush (size 0 or 1)
- White gouache or white gel pen
- Clean water jar
- Piece of paper towel
- Painter’s tape or masking tape
- Mat board and frame (optional)
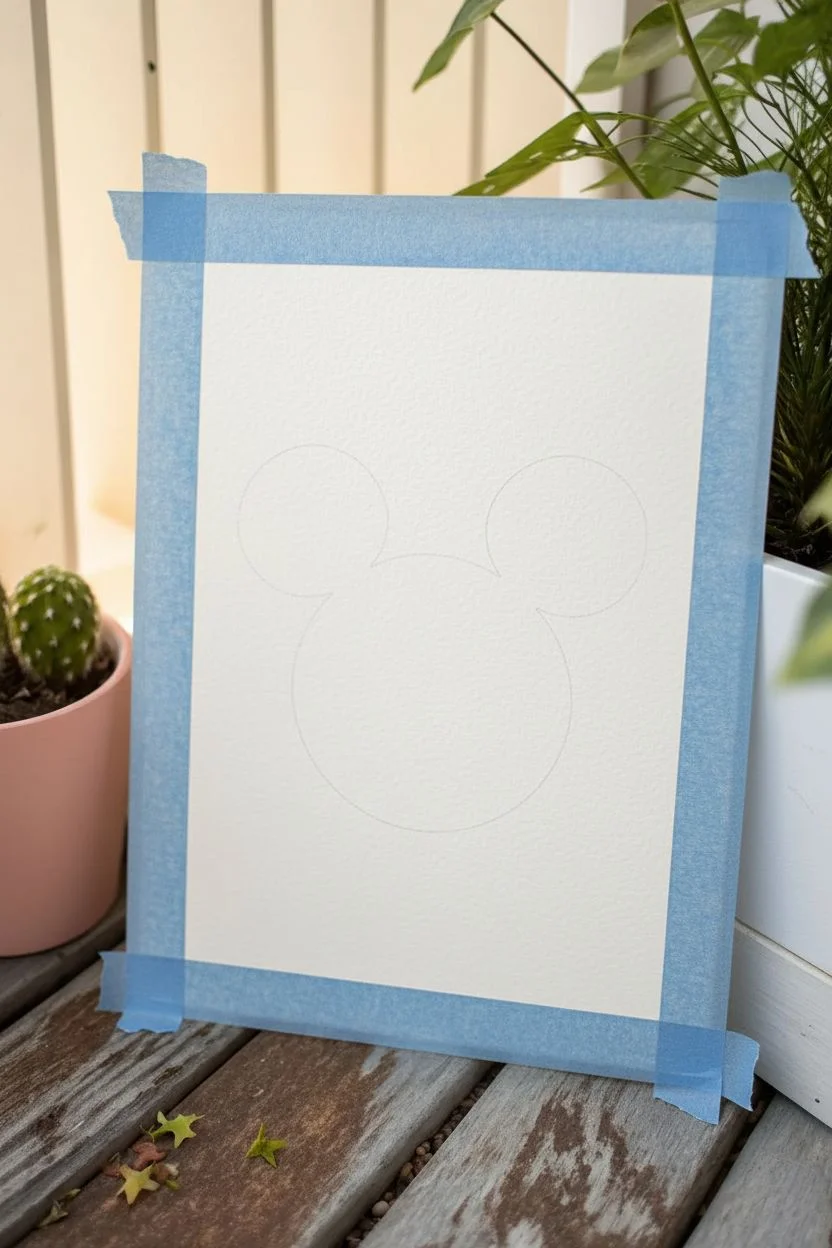
Step 1: Preparation & Sketching
-
Secure the paper:
Tape your watercolor paper down to a hard surface or board using painter’s tape. This prevents the paper from buckling when it gets wet and creates a clean border if you paint to the edge. -
Draw the main circle:
Using a compass or a medium-sized circular object (like a mug rim), trace a circle in the lower-center of your paper. Keep your pencil lines very faint so they won’t show through the lighter yellow paint later. -
Add the ears:
Use a smaller circular object or adjust your compass to create the two ears. Place them at the top left and right of the main circle, ensuring they overlap slightly with the head to create a connected silhouette. -
Clean up lines:
Use a kneaded eraser to gently lighten the pencil sketch until it is barely visible. Erase the intersecting lines where the ears meet the head so you have one continuous outline.
Step 2: Painting the Gradient
-
Pre-wet the shape:
Dip your clean round brush into water and carefully fill in the entire three-circle shape. You want the paper to be damp and glistening, but not so wet that puddles form. -
Start with violet:
Load your brush with a deep violet hue. Tap the pigment into the very top curves of the ears. Let the water on the paper help pull the paint downward slightly. -
Transition to magenta:
Rinse your brush slightly and pick up a magenta or cool red tone. Apply this just below the violet, letting the colors bleed into each other where they meet. -
Blend the middle:
Continue painting down the shape, blending the magenta into the upper part of the main circle. If the blend looks harsh, use a clean, slightly damp brush to soften the transition line. -
Add the warmth:
Switch to a vibrant orange. Paint the middle section of the main circle, allowing it to mix with the red above to create lovely coral tones. -
Finish with yellow:
For the very bottom curve of the main circle, use a warm yellow. Blend it upward into the orange. The wet-on-wet technique should create a smooth sunset effect from top to bottom. -
Refine the edges:
While the paint is still damp, carefully check the edges of your silhouette. If the water has spread outside your pencil lines, or if the edge is ragged, use a damp detail brush to clean it up or nudging paint to fill the shape perfectly. -
Dry completely:
Let the painting dry fully. This is crucial before moving to the next step. I prefer to let it sit for at least an hour, or use a hairdryer on a low, cool setting if you are impatient.
Bleed Control
If the paint keeps flowing outside your lines, your brush is too wet. Blot it on a paper towel before picking up paint to regain control of the edges.
Step 3: Adding the Sparkle
-
Mix white gouache:
Mix a small amount of white gouache with a tiny drop of water to get a creamy, opaque consistency. Gouache works better than watercolor white because it sits on top of the dark colors. -
Paint major stars:
Using your smallest detail brush, paint a few four-pointed stars. Start with the vertical line, then cross it with a horizontal line, tapering the ends to sharp points. -
Place the stars strategically:
Place one large star in an ear and another in the main face area for balance. Don’t overdo the large stars; 2-3 are usually enough. -
Add stardust dots:
Dip the tip of your brush (or a toothpick) into the white paint and gently dot the paper to create small stars. Vary the pressure to create different sized dots, clustering them slightly around the larger stars. -
Final touches:
Once the white accents are dry, erase any remaining pencil marks carefully. Remove the tape, place your artwork behind a mat board, and frame it to make the colors pop.
Cosmic Cloud Texture
While the purple paint is still wet, drop in tiny spots of clear water or salt. This pushes the pigment away and creates a cool, blooming texture like a nebula.
Now you have a glowing piece of silhouette art ready to brighten up any corner of your room


Simple Fairytale Castle Skyline on a Starry Night
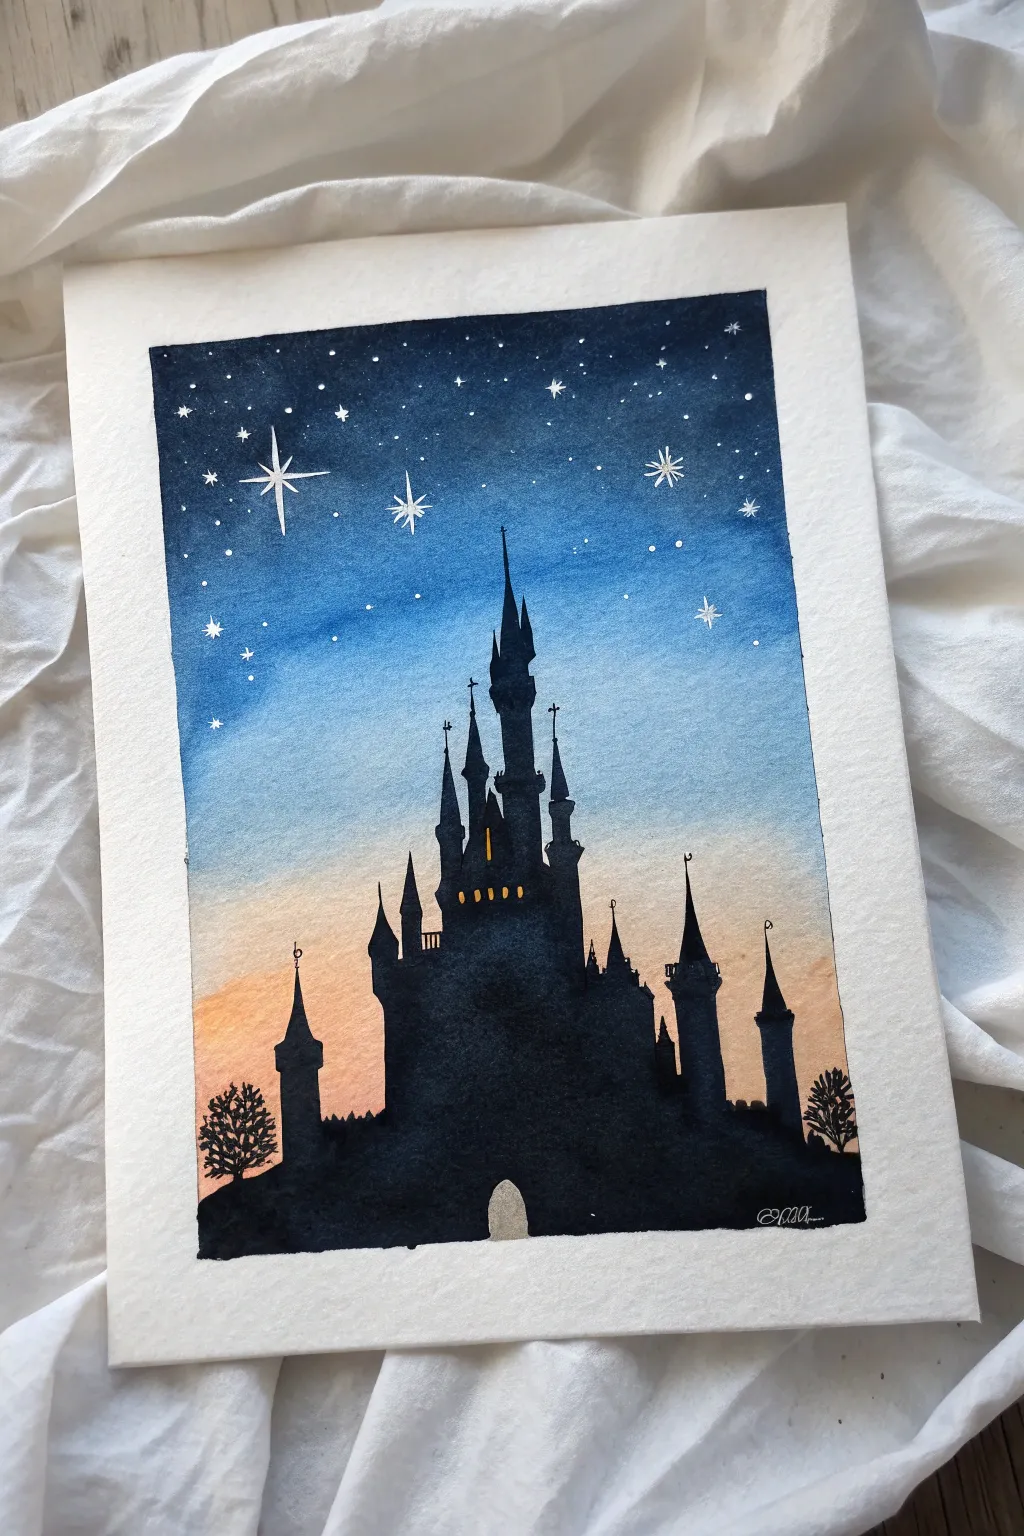
Capture the magic of a timeless storybook castle silhouetted against a brilliant twilight sky. This project combines a simple, beginner-friendly watercolor gradient wash with crisp details for a dreamy, professional-looking result.
Detailed Instructions
Materials
- Watercolor paper (cold press, at least 140lb/300gsm)
- Painter’s tape or masking tape
- Watercolor paints (Indigo/Dark Blue, Phthalo Blue, Sky Blue, Orange/Pink)
- Black gouache or black acrylic paint (opaque)
- White gel pen or white gouache
- Large flat wash brush
- Small round detail brush (size 0 or 00)
- Pencil and eraser
- Paper towels
- Clean water jar
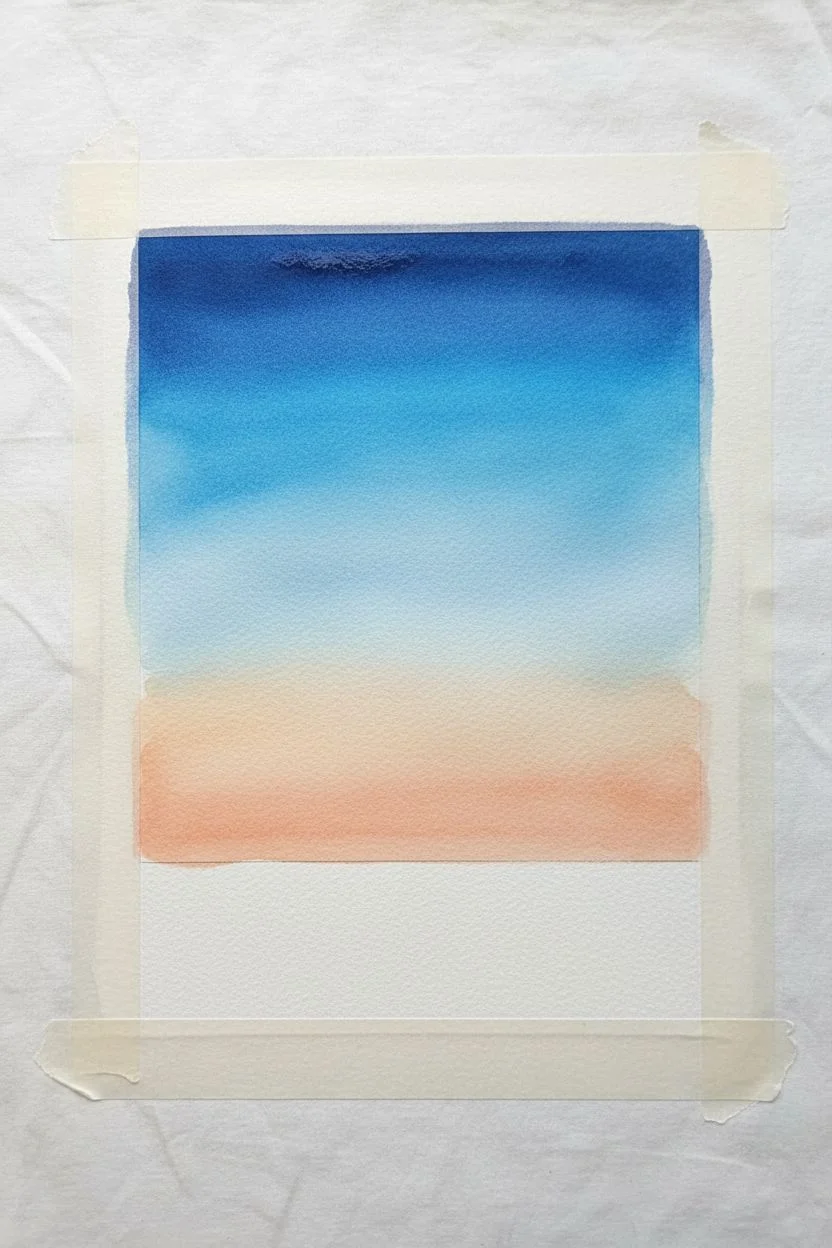
Step 1: Preparing the Sky Gradient
-
Secure the Paper:
Begin by taping down all four edges of your watercolor paper to a board or table. Press the tape firmly to ensure clean borders later. -
Establish the Horizon Line:
Lightly sketch a straight horizontal line about one-quarter of the way up the page. This marks where your castle silhouette will sit and where the sky colors will end. -
Wet the Sky Area:
Using your large flat brush, apply clean water to the entire area above your horizon line. The paper should be glisten with a sheen but not have puddles. -
Apply the Warm Glow:
Start at the very bottom near your horizon line with a diluted mix of soft orange or peach. Gently blend it upward about an inch. -
Transition to Blue:
While the paper is still wet, introduce a light sky blue just above the orange. Let the colors touch and fuse naturally. -
Deepen the Colors:
Moving upward, switch to a mid-tone blue like Phthalo. Apply this from the middle of the sky upwards, using horizontal strokes. -
Create the Night Sky:
At the very top edge, use your darkest indigo or a mix of dark blue and black. Blend this downward into the mid-blue for a seamless ombré effect from space to sunset. -
Let it Dry Completely:
Allow the background to dry fully. This is crucial; if the paper is damp, the black castle silhouette will bleed into the sky.
Uneven Gradients?
If your sky dries with hard lines (blooms), re-wet the entire sky area very gently with a large soft brush and just water, then lightly smooth the transition while wet.
Step 2: Painting the Silhouette
-
Sketch the Outline:
With a light pencil touch, draw the outline of the castle. Focus on a tall central spire, flanked by smaller turrets and towers. Don’t press too hard. -
Outline with Black:
Switch to your small detail brush and opaque black paint (gouache works nicely here). Carefully trace the outer edges of your castle towers and rooftops. -
Fill the Mass:
Fill in the main body of the castle with solid black. Ensure the coverage is opaque so no background color shows through. -
Add Architectural Details:
Using the tip of your smallest brush, add tiny flags to the peaks of the towers and small crenellations (the square notches) along walls. -
Paint Side Trees:
On the far left and right edges of the horizon, dab in small, textured tree silhouettes using a stippling motion to mimic leaves. -
Create the Gate:
Leave a small arch shape unpainted at the very bottom center for the castle gate. You can paint this a light grey or simply leave the paper bare. -
Add Windows:
Once the black paint is semi-dry, use a tiny amount of yellow or orange paint to add small rectangular windows. If the black is too wet, it will muddy the yellow.
Step 3: Adding the magic
-
Splatter Stars:
Load a brush with white gouache or acrylic watered down slightly. Tap the handle against another brush over the dark blue section to create a mist of tiny stars. -
Design Major Stars:
Use a white gel pen or a fine brush with white paint to draw a few larger, four-pointed ‘compass’ stars in the upper sky. -
Final Highlights:
Add tiny white dots or sparkles near the castle spires for extra magic. Once everything is bone dry, carefully peel off the tape.
Sharp Silhouettes
For the castle, opaque medium is key. If your black watercolor is too transparent, mix in a tiny drop of black ink or use acrylic paint for a solid matte finish.
Step back and admire your enchanting kingdom as it glows against the settling dusk


Princess Ballgown Silhouette in Flat Color Blocking
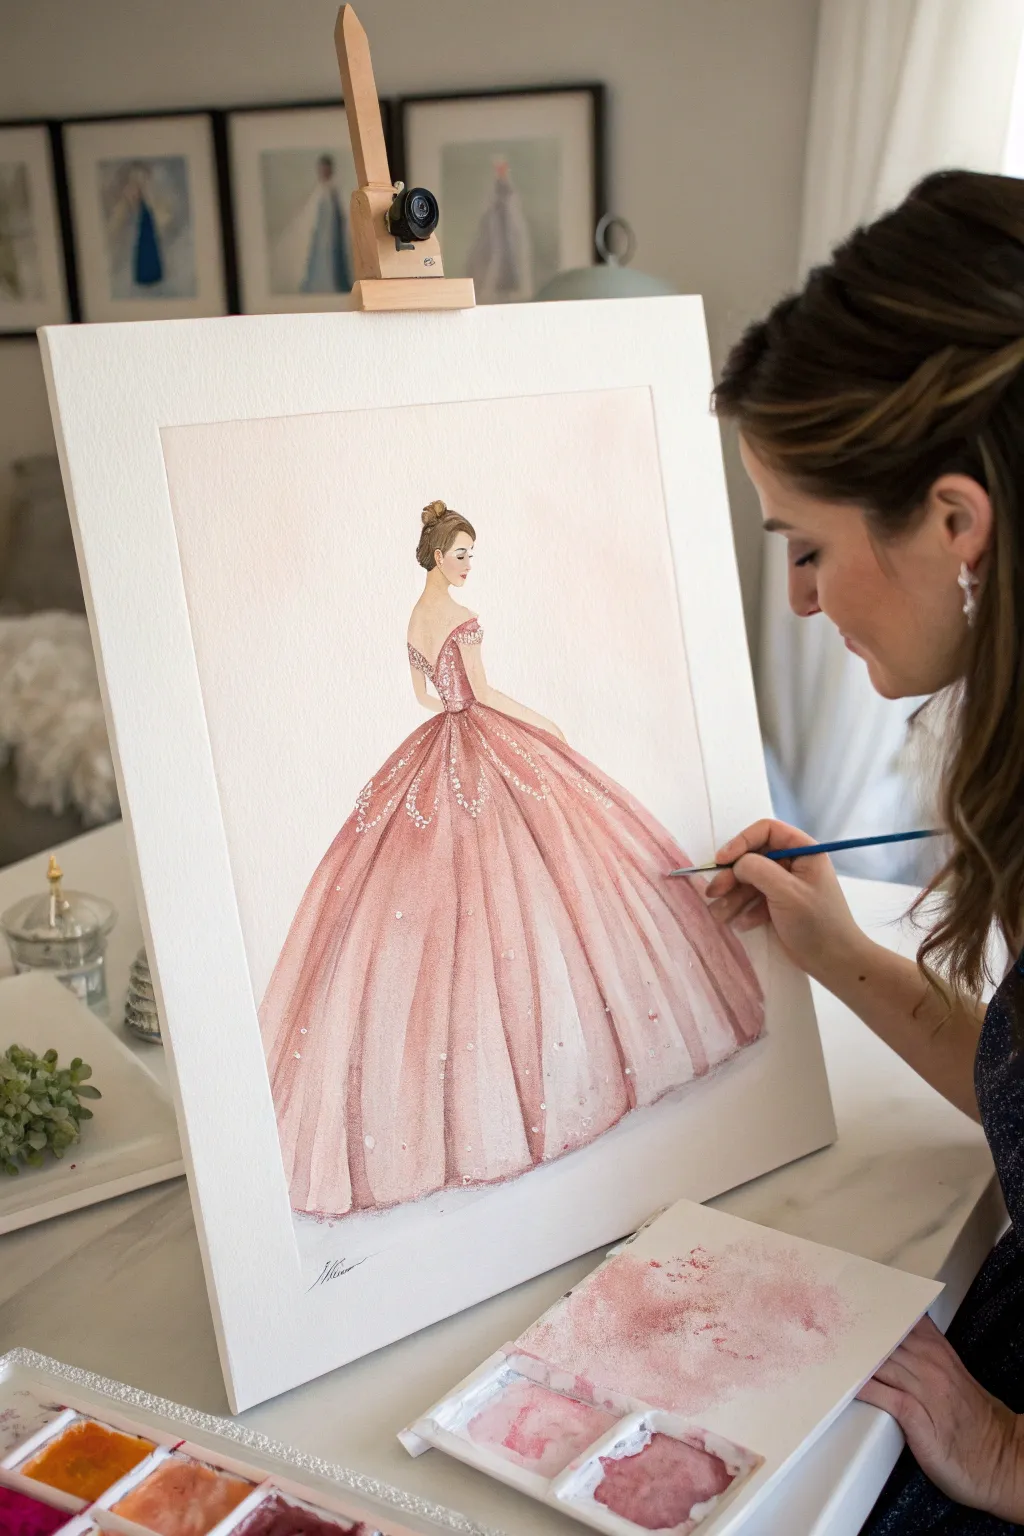
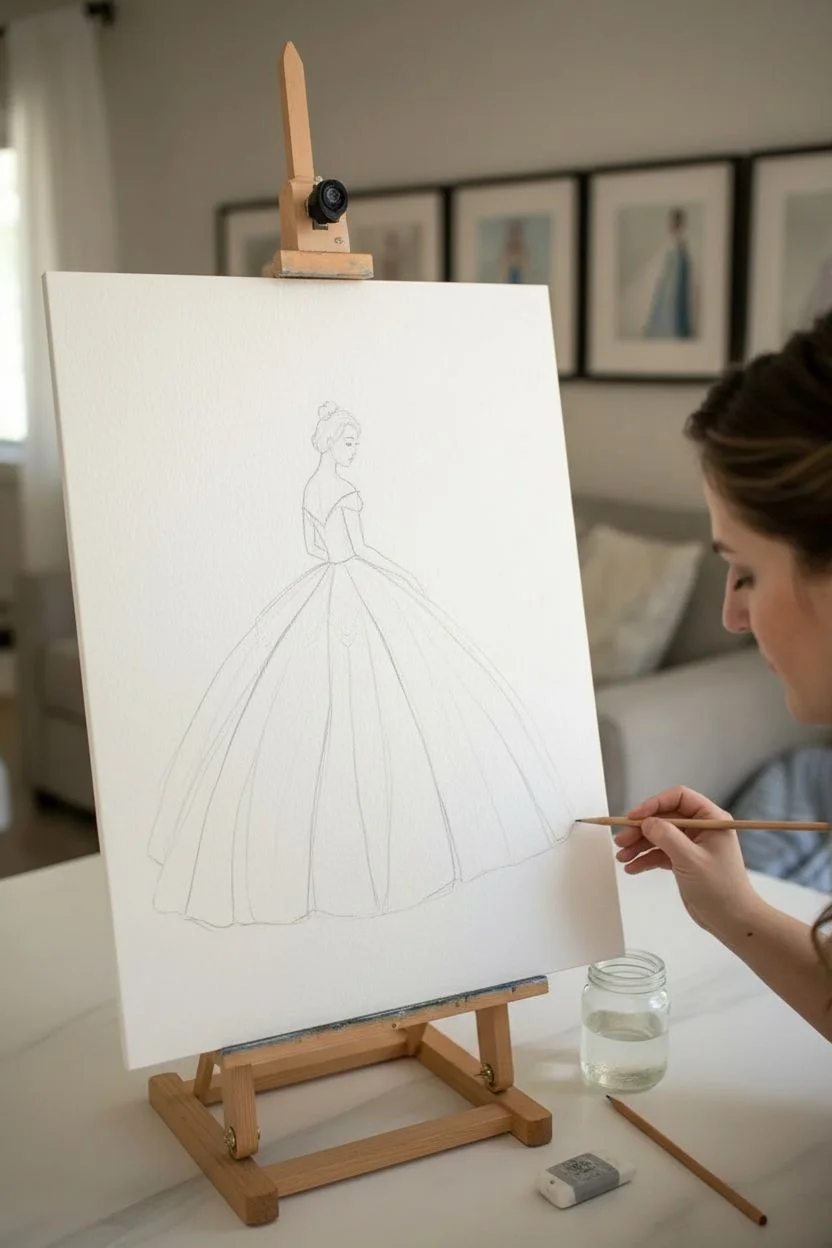
Capture the elegance of a classic fairytale moment with this stunning watercolor princess gown illustration. This project focuses on building layers of soft pink hues to create a voluminous, sparkling dress that looks like it stepped right out of a storybook.
How-To Guide
Materials
- High-quality watercolor paper (cold press, at least 300 gsm)
- Watercolor paints (shades of pink, red, brown, skin tone)
- White gouache or white ink for highlights
- Round watercolor brushes (sizes 2, 6, and 10)
- Pencil (HB or H for light sketching)
- Kneaded eraser
- Palette for mixing
- Jar of water
- Paper towels
Step 1: Sketching the Silhouette
-
Initial outline:
Begin by lightly sketching the figure of the princess. Start with the head and torso to establish proportions before drawing the large, sweeping skirt. -
Refining the pose:
Position the figure slightly turned away, showing the back of the dress. Ensure the waist is narrow and the skirt flares out dramatically into a bell shape. -
Detailing the dress folds:
Sketch long, vertical lines down the skirt to indicate where the deep folds of the fabric will be. These pencil lines will guide your shading later. -
Hair and features:
Lightly draw the hair in an elegant updo, perhaps a bun, and gently suggest the profile of the face. Keep facial details minimal to maintain the fashion illustration style. -
Clean up:
Use your kneaded eraser to lift any heavy graphite lines. You want the sketch to be barely visible so it doesn’t show through the translucent watercolor.
Step 2: Painting the Skin and Hair
-
Base skin tone:
Mix a light, watery skin tone using ochre and a touch of red. Apply this wash to the back, neck, face, and arm. Keep it very pale. -
Adding dimension:
While the skin wash is still slightly damp, drop in a slightly darker, warmer mix near the hairline and under the arm to create soft shadows. -
Painting the hair:
Using a small brush (size 2), paint the hair with a light brown wash. Once dry, add darker brown streaks to clearer define the strands and the bun shape.
Keep it Clean
Keep a separate jar of water for rinsing brushes after using white gouache. White pigment clouds water instantly and will make your fresh pinks look muddy and chalky.
Step 3: Creating the Ballgown
-
First wash of pink:
Mix a generous amount of diluted pink paint. Using your largest brush, lay down a clear water wash over the skirt area first, then drop in your pale pink paint (wet-on-wet technique) to create a soft, even base. -
Building the folds:
Once the base layer is completely dry, mix a slightly more saturated pink. Paint vertical stripes following your initial pencil guides to represent the shadowed folds of the dress. -
Softening edges:
I like to immediately use a clean, damp brush to soften the edges of these shadow stripes, blending them into the lighter base so the fabric looks round and soft, not striped. -
Bodice details:
Switch to a smaller brush to paint the bodice. Use a more concentrated pink to give it structure and create a contrast with the airy skirt. -
Deepening contrast:
Mix a deeper rose or crimson color. Add this into the deepest crevices of the skirt folds and right at the waistline to emphasize the volume of the gown.
Make it Shine
Mix a tiny amount of iridescent medium or pearl watercolor paint into your final pink glaze. The dress will shimmer subtly when it catches the light.
Step 4: Sparkle and Finishing Touches
-
Adding sparkles:
Using opaque white gouache or white ink and a very fine brush or stylus, dot small points of light onto the bodice and the upper part of the skirt. -
Creating patterns:
Connect some of these dots with delicate swooping lines on the skirt to mimic draped crystals or embroidery. -
Highlighting folds:
Add thin, dry-brush strokes of white along the highest ridges of the skirt folds to make the silk fabric appear shiny and reflective. -
Final assessment:
Step back and look at your painting. If the dress needs more volume, add another glaze of pink to the shadowed areas once everything is dry.
Frame your beautiful illustration with a wide white mat to showcase the delicate colors


Classic Glass Slipper on a Sparkly Background
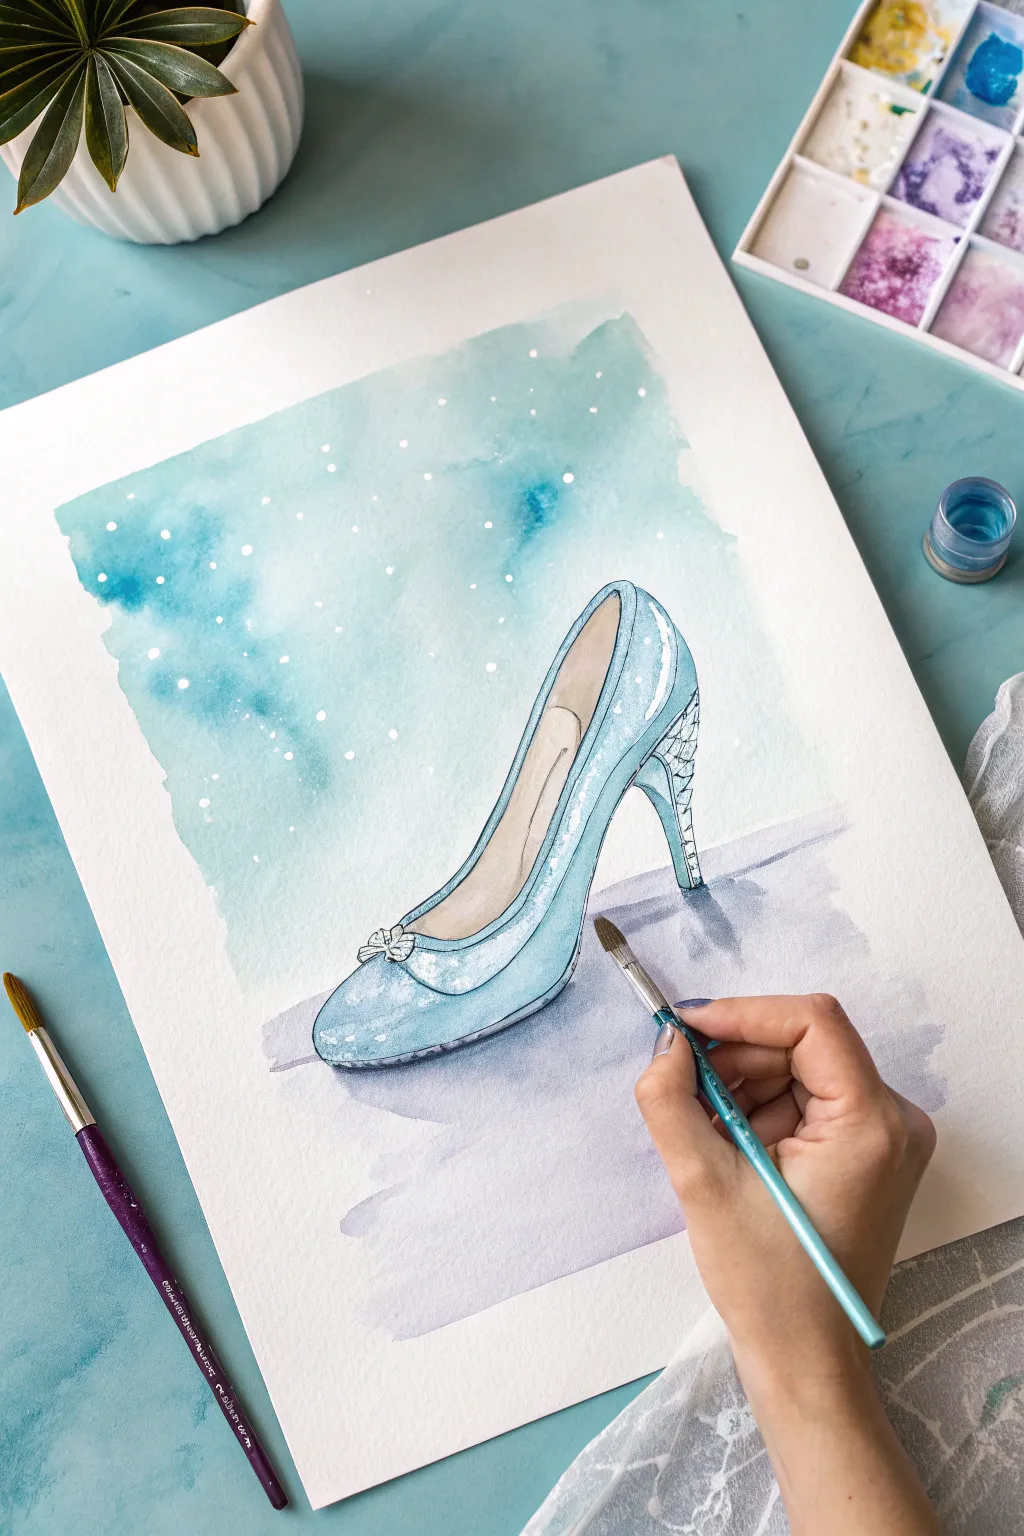
Capture the magic of a fairytale with this delicate watercolor painting of the iconic glass slipper. Set against a dreamy, snowy blue background, this piece radiates elegance and makes for a perfect addition to any Disney lover’s collection.
Step-by-Step Guide
Materials
- Cold-pressed watercolor paper (A4 or similar size)
- Watercolor paint set (focus on shades of cyan, turquoise, royal blue, tan/beige, and purple)
- White gouache or white gel pen
- Round watercolor brushes (size 4 and 8)
- Fine liner brush or detail brush (size 0 or 1)
- Pencil (HB or lighter)
- Eraser
- Two jars of water (one for rinsing, one for clean water)
- Paper towels
- Masking tape (optional, to secure paper)
Step 1: Sketching the Outline
-
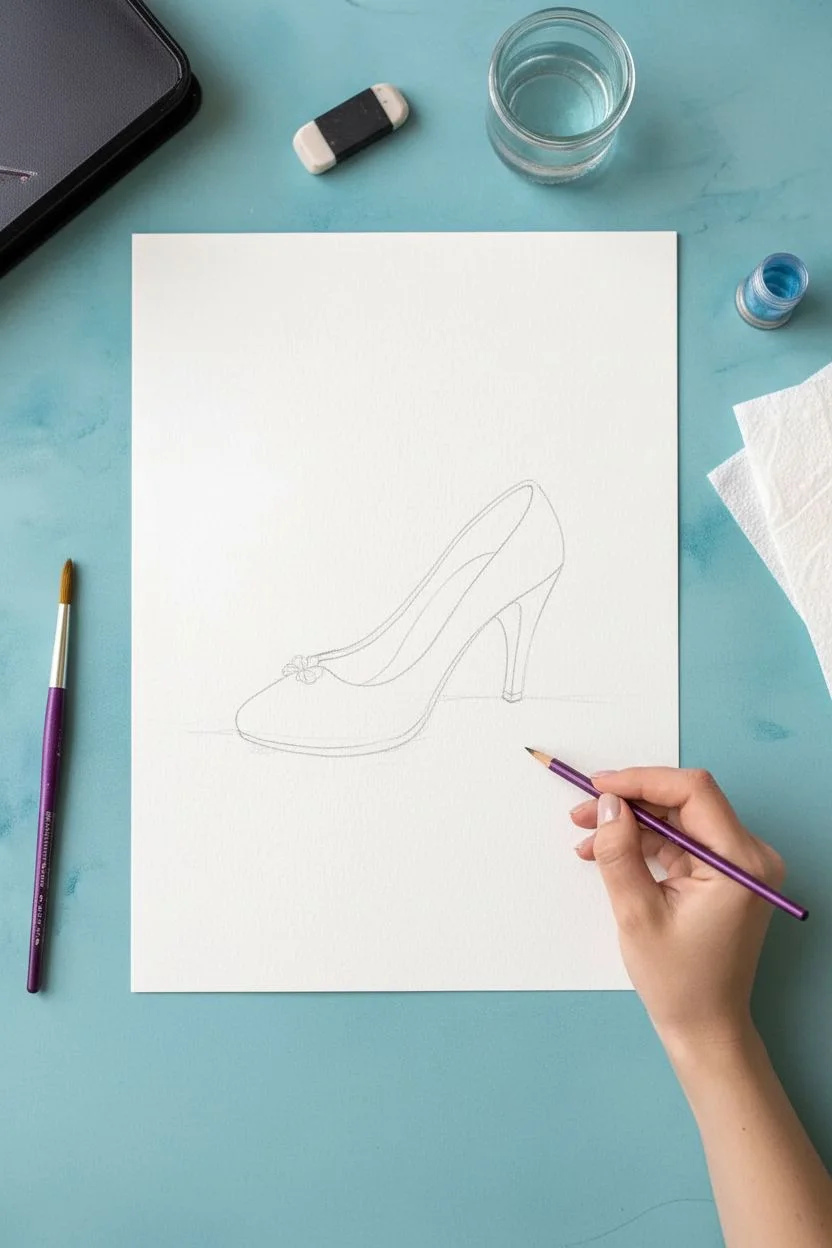
Draw the basic shape:
Begin by lightly sketching the silhouette of a high-heeled shoe in the center of your paper using an HB pencil. Aim for a classic pump shape with a slightly pointed toe and a sleek, curved heel. -
Refine the heel:
Refine the heel shape to be slightly thicker at the top where it meets the sole, tapering down to a slender point. Add the inner sole line to give the shoe dimension. -
Add details:
Sketch a small, butterfly-shaped bow or crystal embellishment near the toe box. Lightly mark where the shadow will fall beneath the shoe. -
Lighten the lines:
Take a kneadable eraser and gently dab over your sketch. You want the graphite lines to be barely visible—just enough to guide your brush without showing through the translucent paint.
Step 2: Painting the Background
-
Prepare the background wash:
Mix a watery wash of turquoise and cyan blue. You want this to be quite transparent. -
Apply the wash:
Using your larger round brush (size 8), paint a loose rectangular field of color behind the shoe. Don’t worry about perfect edges; a slightly ragged, organic edge adds charm. -
Deepen the color:
While the paper is still damp, drop in slightly concentrated blue paint in random spots—especially near the top left—to create a cloudy, magical texture. Let this layer dry completely.
Keep it transparent
Glass is see-through! Leave plenty of white paper showing on the shoe itself to represent the highest highlights, and keep your blue paint layers very watery and thin.
Step 3: Painting the Slipper
-
Base layer for the shoe:
Mix a very pale, watery blue. Carefully fill in the body of the shoe, avoiding the inner sole which should remain the color of the paper for now. -
Inner sole warmth:
Mix a diluted tan or beige color. Paint the inside of the shoe (the lining) to distinguish the interior from the glass exterior. -
Define the edges:
Once the base blue is dry, switch to a smaller brush. Use a slightly darker blue to outline the rim of the shoe and the curve of the toe cap. -
Create glass reflections:
Use the darker blue to paint curved streaks along the side of the shoe and the heel. These hard edges mimic the way light refracts through cut glass. -
Detail the heel:
For the heel, paint a geometric, almost diamond-like pattern using fine lines. This suggests faceted crystal. I like to keep these lines very delicate to maintain the elegance.
Add some real magic
Mix a tiny pinch of silver mica powder or iridescent medium into your final white highlights. The shoe will actually shimmer when the light hits the paper.
Step 4: Shadows and Sparkles
-
Cast the shadow:
Mix a soft purple-grey wash. Paint a horizontal shadow beneath the heel and toe, extending slightly to the right to ground the object. -
Soften the shadow:
Immediately run a clean, damp brush along the bottom edge of your purple shadow to fade it out into the white paper, creating a soft, dreamy look. -
Add the bow detail:
Outline the bow on the toe with your detail brush and a darker blue mixture, leaving the center pale to show highlights. -
Create the snowy effect:
Load a small brush with opaque white gouache (or use a white gel pen). Dot white specks all over the blue background wash to resemble falling snow or magic dust. -
Highlight the glass:
Add sharp white highlights to the highest points of the shoe—the rim, the bow, and the curve of the heel—to make the ‘glass’ shine. -
Final touches:
Step back and assess your painting. If the shoe needs more definition, darken the very bottom outline slightly to separate it from the ground.
Allow your masterpiece to dry completely before framing it to display your fairytale creation
BRUSH GUIDE
The Right Brush for Every Stroke
From clean lines to bold texture — master brush choice, stroke control, and essential techniques.
Explore the Full Guide
Cute Snow Buddy Made From Three Easy Circles
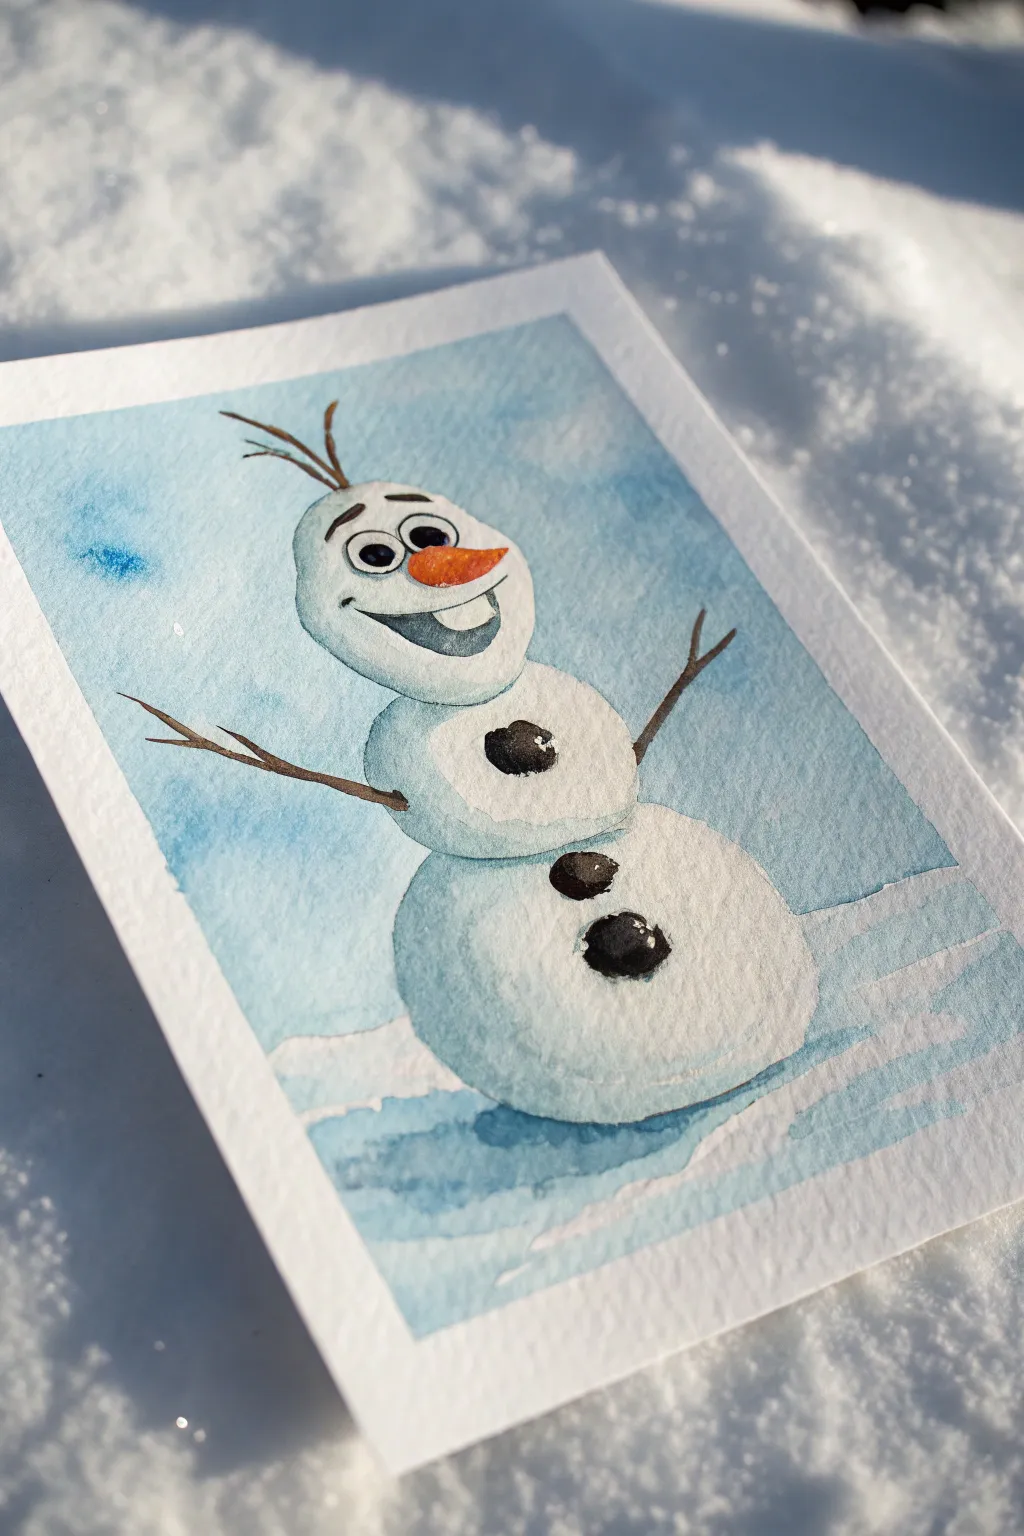
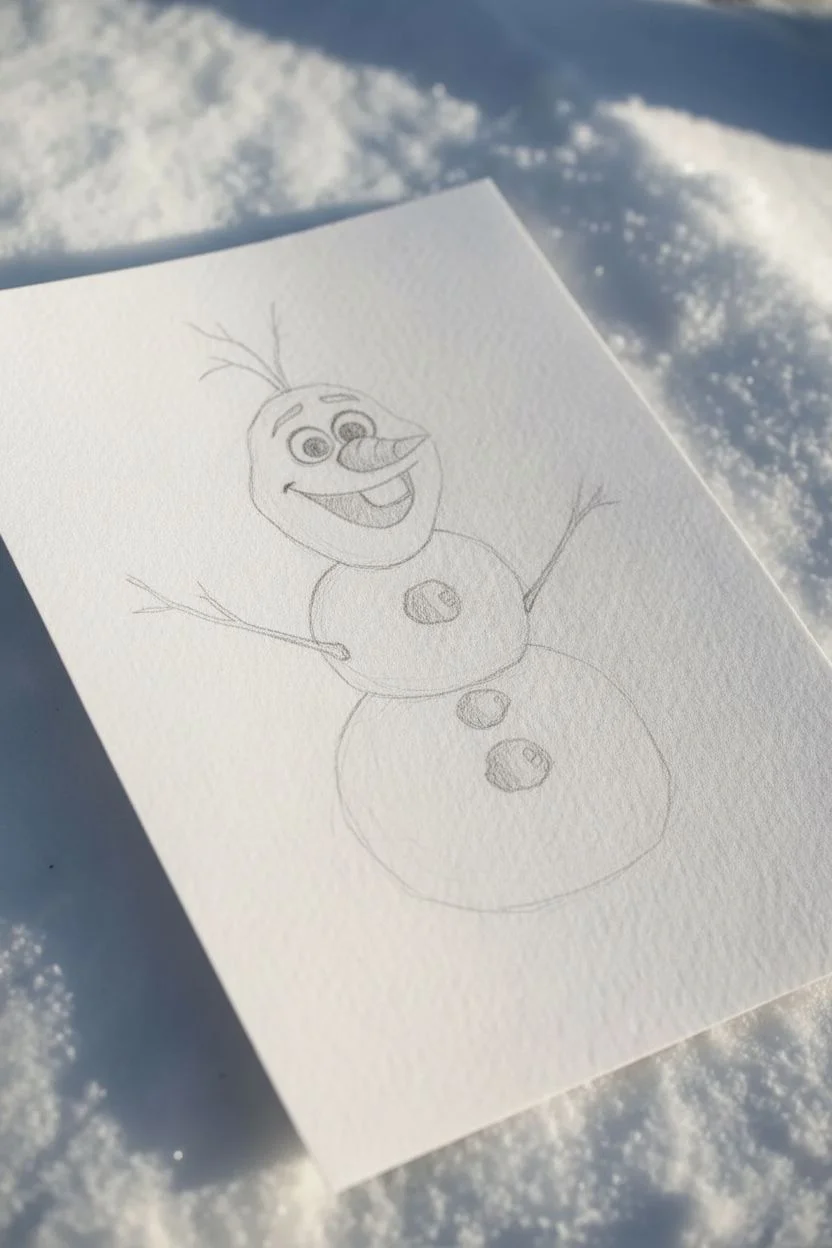
Capture the whimsical spirit of everyone’s favorite snowman with this charming watercolor project. Using simple shapes and gentle shading, you’ll bring Olaf to life on paper, ready to enjoy his own personal snow flurry.
Step-by-Step Tutorial
Materials
- Cold press watercolor paper (approx. 5×7 inches)
- Watercolor paints (Cerulean or Pthalo Blue, Burnt Sienna, Lamp Black, Orange)
- Round watercolor brushes (size 4 for filling, size 0 or 1 for details)
- Pencil (HB or lighter) and eraser
- Jar of clean water
- Paper towels
- Masking tape (optional, to secure paper)
Step 1: Sketching the Snowman
-
Draw the head:
Start near the top third of your paper by lightly sketching an elongated, slightly irregular oval for Olaf’s head. It shouldn’t be perfect—a little wobbliness adds character. -
Add the body segments:
Draw a smaller, squashed circle directly beneath the head for the middle section. Follow this with a larger, wider circle at the bottom for his base, making sure all three shapes connect. -
Sketch faint details:
Lightly pencil in the facial features: two large round eyes, eyebrows, a carrot nose pointing up, and a wide, open smile with his signature buck tooth. Don’t forget the three ‘coal’ buttons on his body and stick arms. -
Lighten lines:
Gently roll a kneaded eraser over your sketch to lift up excess graphite. You want the lines barely visible so they don’t show through the transparent paint later.
Keeping It Cool
Make your shadow color interesting by mixing a tiny dot of purple into your blue. This makes the snow look colder and more magical.
Step 2: Applying the First Washes
-
Paint the background:
Mix a very watery wash of Cerulean Blue. Carefully paint around Olaf’s body, filling the sky area. Let the blue be slightly uneven to mimic the texture of an icy atmosphere. -
Add texture while wet:
While the blue background is still damp, you can drop in tiny hints of darker blue or lift color with a dry brush to create soft cloud-like shapes. -
Shadowing the white snow:
Olaf is white, so we are painting his shadows, not his skin. Mix a very pale, watered-down grey-blue. Paint a crescent shape along the bottom and right side of each snowball segment to give him 3D volume. -
Define the ground:
Use a slightly stronger mix of your shadow blue to paint the messy, uneven ground beneath him, suggesting he is sitting in a snow pile. Let all layers dry completely.
Step 3: Adding Details and Contrast
-
Paint the nose:
Mix a bright orange and fill in the carrot nose. Once dry, add a tiny line of darker orange or rust along the bottom edge for dimension. -
Fill the mouth:
Use a dark grey (not pure black yet) to fill the inside of the mouth, being careful to leave the large tooth pure white. -
Paint the buttons and eyes:
Switch to your smallest brush. Using thick, concentrated black paint, fill in the pupils and the three coal buttons on his chest and belly. Leave tiny specks of white paper showing on the buttons for highlights if you can. -
Create the arms and hair:
Mix Burnt Sienna with a touch of black to create a dark brown. Paint the thin stick arms extending outward and the twiggy ‘hair’ on top of his head.
Muddy Colors?
If the background blue bleeds into the white snowman body, stop immediately. Let it dry 100%, then lift the mistake with a clean, wet brush.
Step 4: Final Touches
-
Deepen the shadows:
Once your first shadow layer is dry, I like to go back in with a slightly more pigmented blue-grey to deepen the crevices between the snowballs and right under his base. -
Outline gently:
Using a very fine liner brush and watered-down grey paint, loosely outline parts of the body to define the edges against the background without making it look like a cartoon drawing. -
Add sparkle:
If you lost your highlights on the eyes or buttons, use a tiny dot of white gouache or a white gel pen to bring back that sparkle.
Now you have a frosty friend ready to hang on the wall or turn into a holiday greeting card
Gentle White Robot With Two-Dot Face (Ultra Beginner-Friendly)
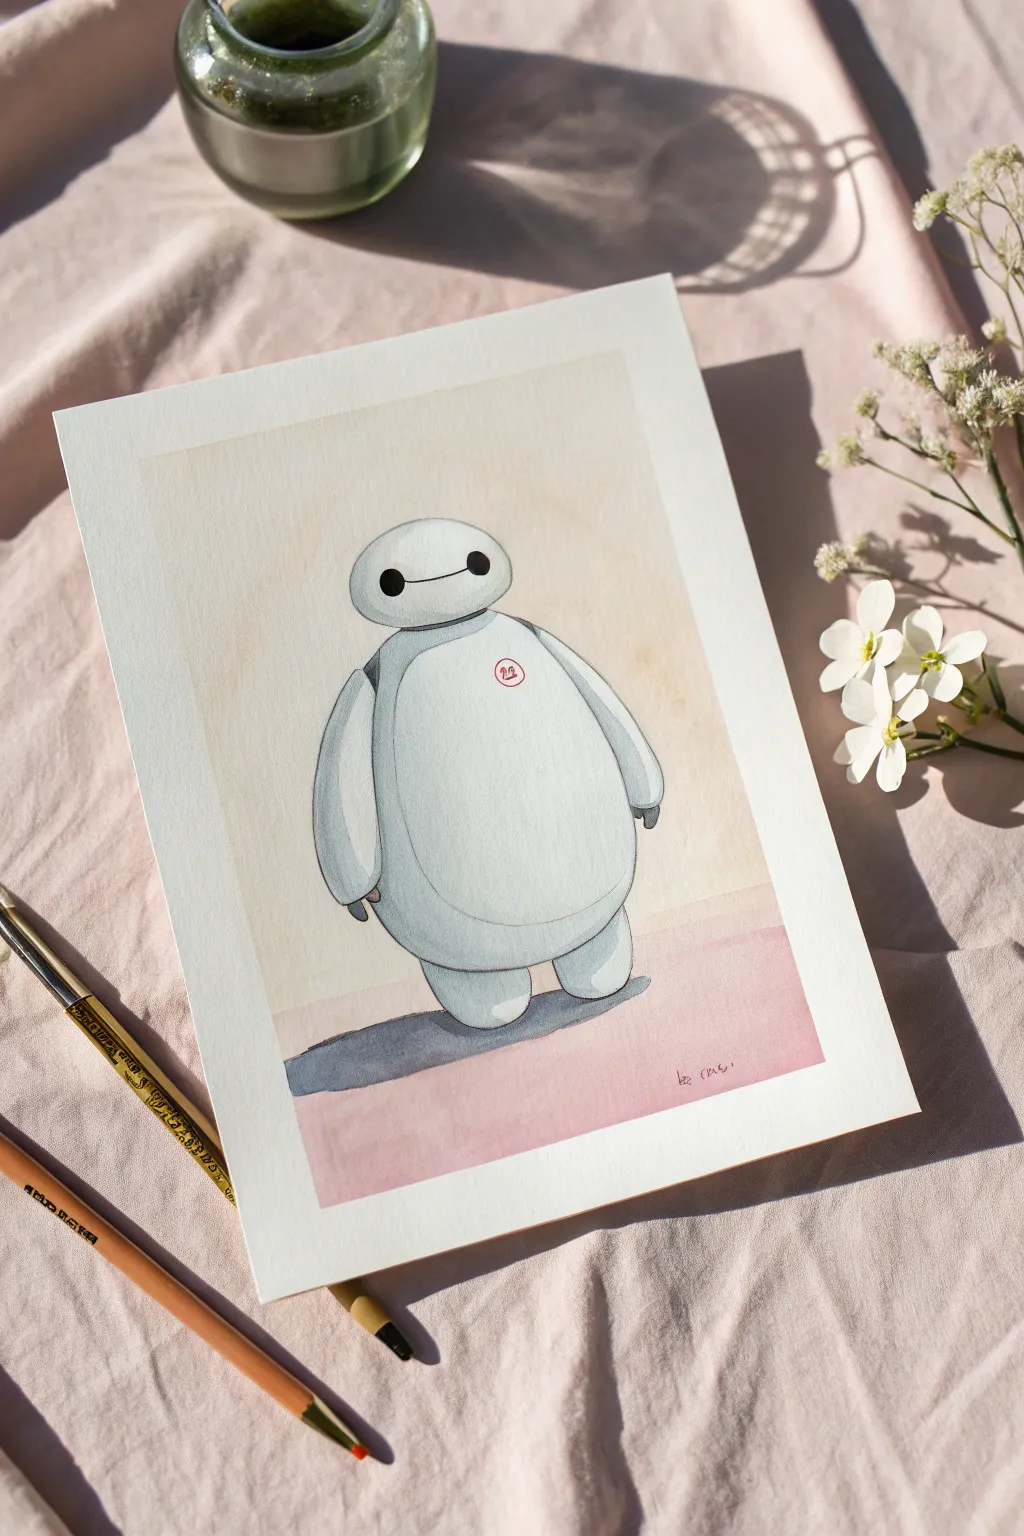
Capture the huggable charm of everyone’s favorite healthcare companion with this soft, minimalist watercolor study. The painting features clean lines, subtle shadows to create volume, and a warm, inviting background that radiates peaceful energy.
Detailed Instructions
Materials
- Cold press watercolor paper (A5 or similar size)
- HB Pencil and eraser
- Watercolor paints (Indigo/Payne’s Grey, Burnt Sienna, Alizarin Crimson, Yellow Ochre)
- Small round brush (size 2 or 4)
- Medium round brush (size 6 or 8)
- Fine black liner pen (waterproof) or very fine brush with black ink
- Two jars of water
- Paper towels
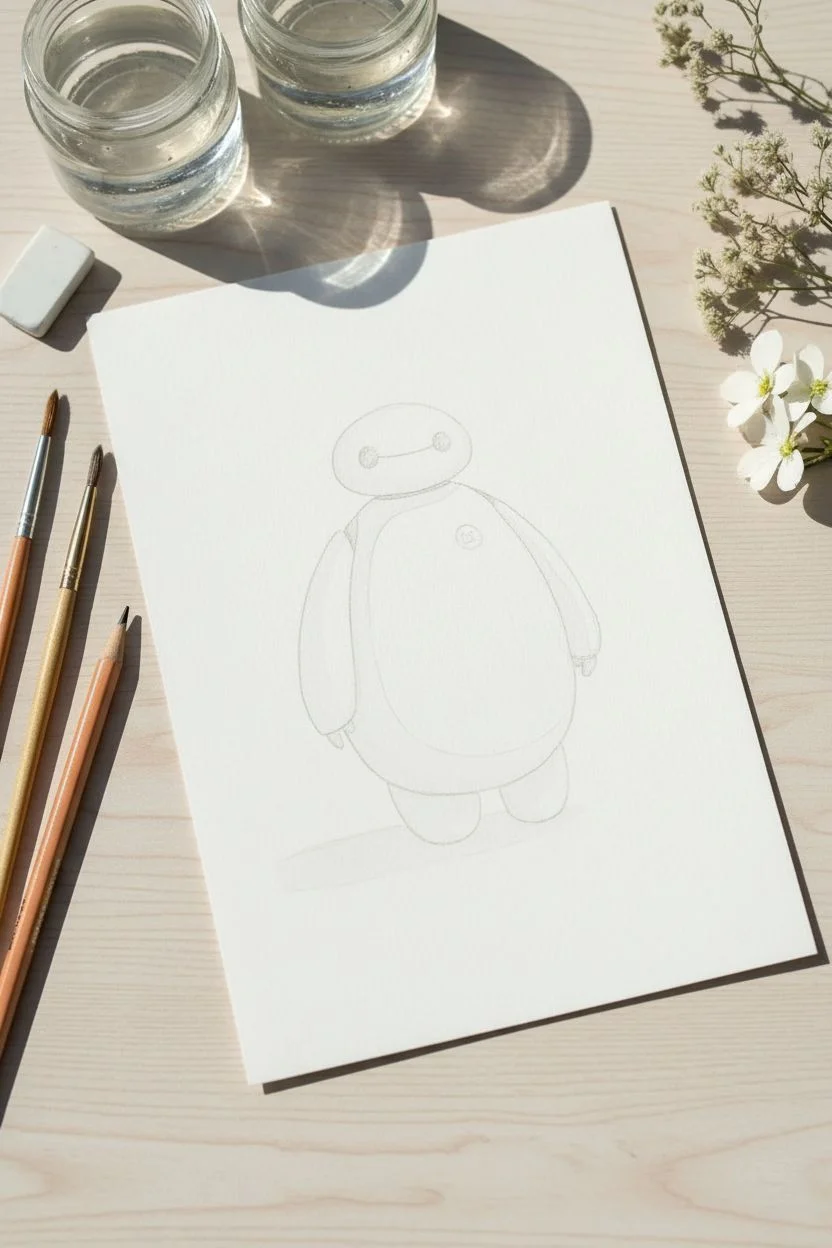
Step 1: Sketching the Shape
-
Basic geometric forms:
Start by lightly sketching a horizontal oval for the head near the upper third of your paper. Below it, draw a large, distinctive pear shape for the body. -
Adding limbs:
Attach two long, curved sausage shapes to the sides for arms. At the bottom, add two sturdy, stump-like legs. -
Refining the silhouette:
Connect the head to the body with a very subtle neck indication. Soften any sharp corners on the limbs so the entire figure feels inflated and rounded. -
Face and details:
Draw the signature face: two small circles connected by a thin horizontal line. On the upper left chest, sketch a small circle for his access port/logo. -
Clean up:
Gently erase your sketch lines until they are barely visible, leaving just a faint guide for your paint.
Step 2: Creating the Background
-
Mixing the wash:
Prepare a very dilute mix of Yellow Ochre and a tiny touch of Burnt Sienna to create a warm, creamy beige tone. -
Upper background:
Using your medium brush, paint a rectangular area behind the figure, stopping about two-thirds of the way down. Keep the edges slightly uneven for an artistic look, but try not to paint over the robot. -
Lower background transition:
While the beige is still damp near the bottom, mix a soft pinkish-purple using Alizarin Crimson and a dot of blue. Paint the bottom third of the background, letting it blend slightly where it meets the beige. -
Let it dry:
Allow this background layer to dry completely before touching the main character to prevent bleeding.
Clean Edges Technique
To keep the robot purely white, use masking fluid on the character before painting the background. Rub it off only when the background is 100% dry.
Step 3: Painting the Robot
-
Mixing shadow grey:
Mix a very watery, pale grey using Indigo or Payne’s Grey. Since the character is white, we are only painting the shadows, not the whole body. -
Body volume:
Apply this pale grey to the curved edges of the body—specifically the left side of the belly and under the arms—to create roundness. soften the inner edges with a damp brush so the shadow fades into white. -
Limb shadows:
Paint the underside of the arms and the inner sides of the legs with the same pale grey. This helps separate the limbs from the torso visually. -
The red detail:
Using your smallest brush, carefully paint the small circle logo on the chest with a diluted red. -
Cast shadow:
Mix a stronger, darker purple-grey. Paint a cast shadow on the ground extending to the left from under his feet to anchor him to the surface.
Level Up: Texture
Add a ‘vinyl’ texture by lifting out a tiny highlight on the dark grey eyes with a wet brush or white gel pen to make them look glossy.
Step 4: Inking and Definition
-
Checking dryness:
Wait until the paper is bone dry. If it feels cool to the touch, it’s still damp. -
Outlining:
Use a waterproof fine liner or a very steady hand with black ink to trace the outer silhouette. Keep the line thin and delicate. -
Facial features:
Fill in the two eye circles completely black and draw the connecting line. This simple step instantly brings his personality to life. -
Deepest shadows:
Use a slightly darker grey watercolor mix to add tiny accents of contrast, specifically right where the arms meet the body and between the legs. -
Final logo touch:
If you have a red pen or very fine brush, add the tiny inner details to the red chest circle. -
Signature:
Sign your name small in the bottom right corner with a fine pen.
Now you have a serene, minimal piece of fan art ready to be framed

PENCIL GUIDE
Understanding Pencil Grades from H to B
From first sketch to finished drawing — learn pencil grades, line control, and shading techniques.
Explore the Full Guide
Mermaid Tail Splash in Pastel Ombre


Capture the magic of the deep blue sea with this enchanting watercolor mermaid tail, featuring a dreamy ombre gradient from coral pink to seafoam green. Simple outlines and stylized waves make this an approachable project for beginners looking to practice wet-on-wet blending techniques.
How-To Guide
Materials
- Cold press watercolor paper (A5 size recommended)
- Watercolor paints (magenta/coral pink, turquoise/teal, aqua green)
- Round watercolor brushes (size 4 for filling, size 0 or 1 for details)
- Black waterproof fine liner pen (01 or 03 size)
- Pencil (HB or H)
- Eraser
- Clean water and paper towels
Step 1: Sketching the Shape
-
Outline the tail:
Begin by lightly sketching a curved, elongated tear-drop shape for the main body of the tail. The bottom should be rounded where it enters the water. -
Add the fin:
At the top of the tail, draw two sweeping fin shapes that fan out. Think of them like large leaves or petals branching from the center point. -
Sketch the wave base:
At the very bottom, draw stylized, swirling waves masking the tip of the tail. Use S-curves and spiral shapes to mimic splashing water. -
Mark the scale pattern:
Lightly pencil in a grid or diamond pattern across the main body of the tail to guide your painting later, but keep these lines extremely faint so they don’t show through the paint.
Step 2: Painting the Tail
-
Prepare the ombre gradient:
Mix a watery coral pink and a light turquoise on your palette. You want the colors to be transparent and pastel. -
Wet-on-wet base:
Clean your size 4 brush and apply clear water to the main body of the tail (excluding the fins). The paper should be glisten, but not form puddles. -
Apply the pink:
Drop the coral pink paint into the middle and bottom section of the wet area. Let it bloom naturally. -
Blend into turquoise:
While the pink is still wet, introduce the turquoise color at the very top of the tail body, allowing it to bleed slightly down into the pink to create a soft violet transition. -
Paint the fins:
Move to the fins at the top. Paint the outer edges with turquoise and blend inward with pink. I like to keep the center of the fins lighter to suggest transparency. -
Let it dry completey:
This is crucial—wait until the paper is bone dry before adding details, or the ink will bleed.
Muddy colors?
If the pink and green mix too much, they turn brown. To fix this, leave a tiny gap of white paper between the colors or wait for one color to dry slightly before adding the next.
Step 3: Adding Scales and Details
-
Outline the scales:
Using a slightly more concentrated mix of the coral pink (or a dark magenta), paint U-shaped scale outlines over your dry ombre base. Use your finest brush (size 0) for this delicate work. -
Deepen the contrast:
Add a second, darker layer of the scale pattern near the shaded right side of the tail to give it dimension and roundness. -
Detail the fins:
Use the fine brush to paint thin, curved lines extending from the base of the fin to the tips, mimicking the ribbed texture of a fish fin.
Shimmer Effect
After the paint is dry, use a metallic gold or silver gel pen to trace over some of the scale outlines or add highlights to the bubbles for extra sparkle.
Step 4: The Waves and Final Touches
-
Paint the waves:
Load your brush with a watery aqua or mint green. Fill in the wave sketches at the bottom with swift, fluid strokes. -
Add bubbles:
While you have color on your brush, paint small floating circles around the tail in various sizes using both pink and aqua shades. -
Create speckles:
Tap a wet brush loaded with diluted paint against another brush handle to splatter tiny droplets around the composition for a magical effect. -
Apply ink outlines:
Once the painting is 100% dry again, use your waterproof fine liner to loosely outline the tail scales and the wave shapes. Keep the lines sketchy and broken rather than rigid. -
Finishing clean up:
Gently erase any visible pencil sketch marks that fall outside your painted areas.
Now you have a whimsical piece of ocean art ready to be framed or turned into a greeting card
Lion Cub Face in Chibi Style Using Basic Shapes
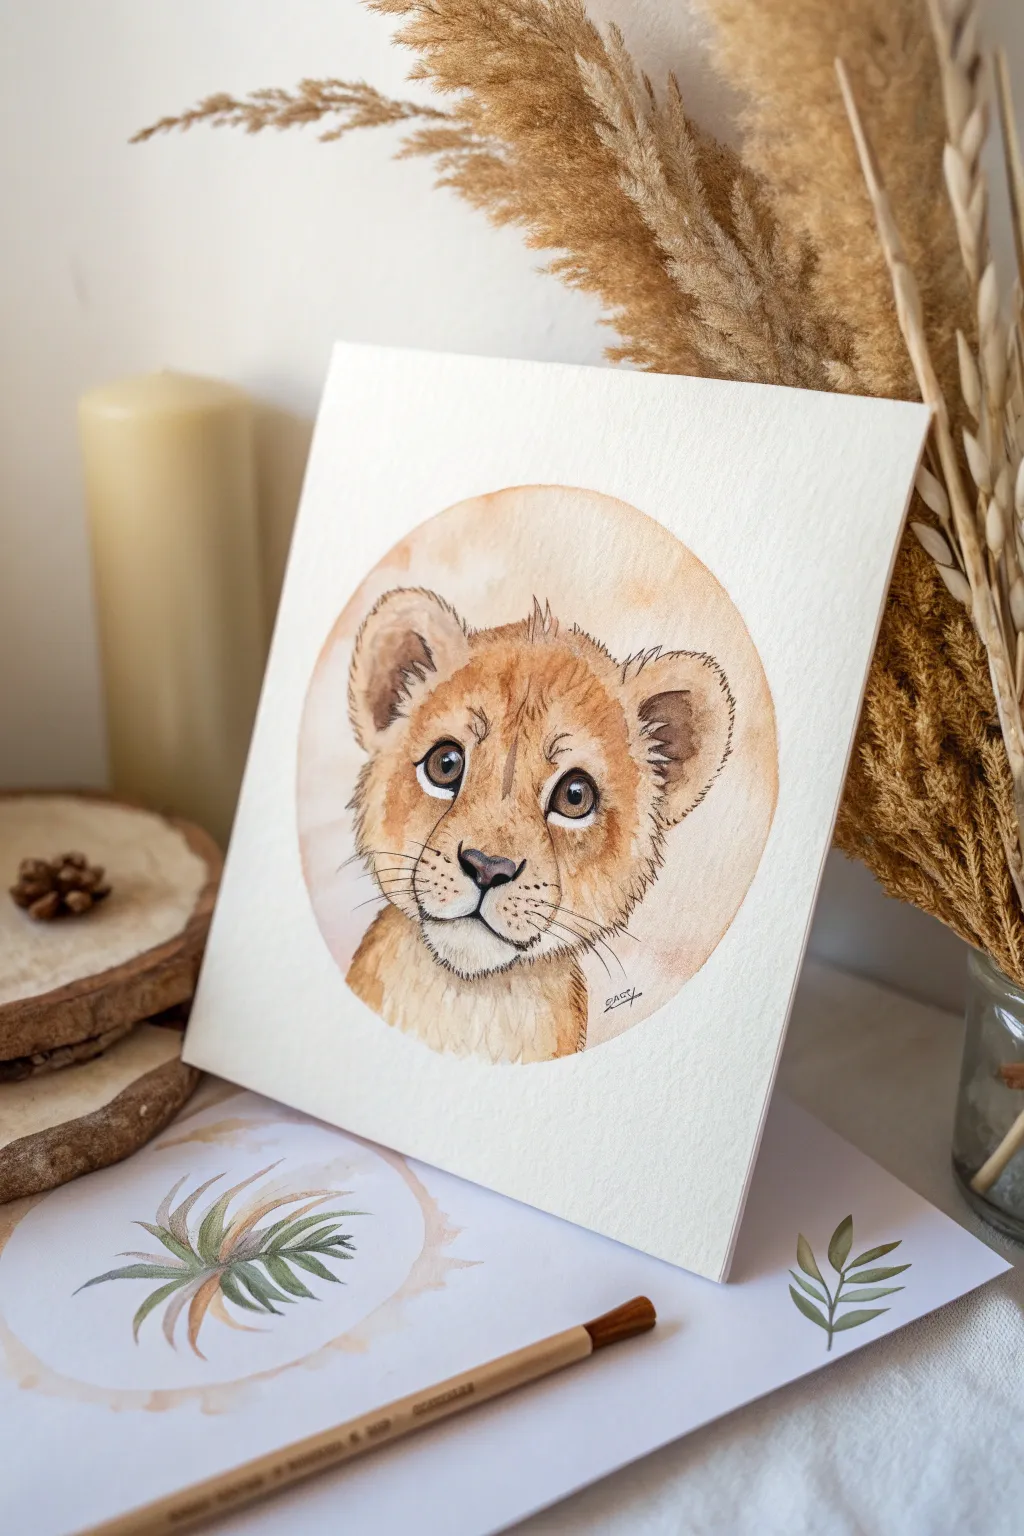
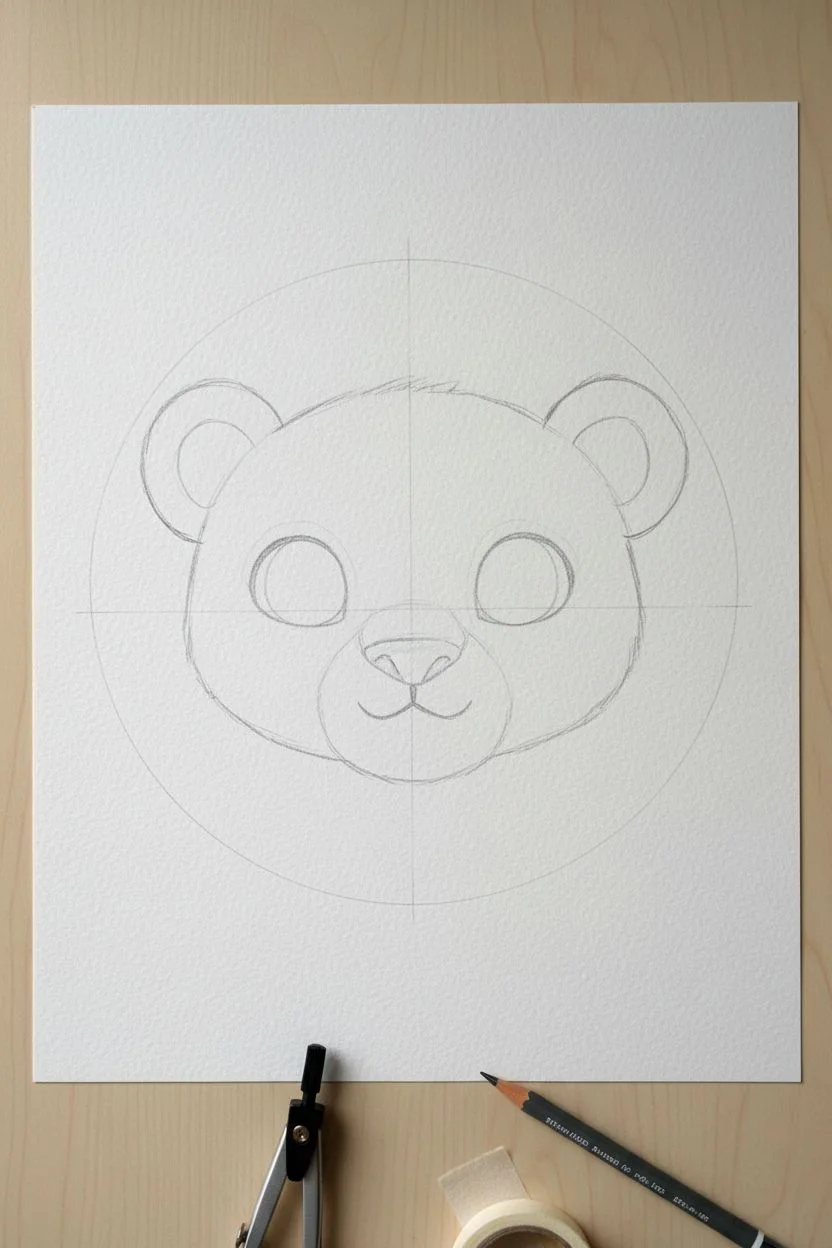
Capture the innocence of a young lion monarch with this warm, soft-edge watercolor painting. This circular composition focuses entirely on the cub’s expressive eyes and fluffy mane, creating a charming piece of nursery-style art.
Step-by-Step Tutorial
Materials
- Cold-pressed watercolor paper (heavyweight, textured)
- Watercolor paints (Yellow Ochre, Burnt Sienna, Burnt Umber, Ivory Black, faint Pink)
- Round watercolor brushes (Size 2 for details, Size 6 for washes)
- HB Pencil for sketching
- Compass or circular object (masking tape roll works well)
- Micron pen or very fine black liner (optional)
- White gouache or white gel pen
- Paper towels and water cup
Step 1: Sketching the Foundation
-
Draw the boundary:
Begin by lightly tracing a perfect circle in the center of your watercolor paper using a compass or a round object as a guide. This circular vignette gives the piece a soft, finished look. -
Outline the head shape:
Inside the circle, sketch a wide, rounded heart shape for the face. Add two large, rounded triangle shapes for the ears, keeping them relatively big to achieve that cute ‘chibi’ proportion. -
Map the features:
Draw faint guidelines to place the eyes low on the face. Sketch large almond shapes for eyes, a wide triangular nose, and the classic ‘w’ shape for the mouth muzzle.
Step 2: The First Wash
-
Wet-on-wet background:
Lightly wet the area inside the circle found *behind* the lion’s head with clean water. Drop in a very dilute mix of Burnt Sienna or warm beige to create a soft, glowing halo background. -
Base fur tone:
Mix a watery wash of Yellow Ochre with a tiny touch of Burnt Sienna. Paint the entire face and ears with this mix, leaving the muzzle and under-eye areas white or extremely pale. -
Let it settle:
Allow this initial layer to dry completely. If the paper feels cold to the touch, it’s still damp.
Muddy Fur Fix
If fur colors look muddy, you’re likely working too wet. Let the paper dry fully between layers so distinct hair strokes sit on top rather than bleeding into the base.
Step 3: Building Depth and Fur
-
Darkening the ears:
Using a slightly thicker mix of Burnt Sienna and Brown, paint the inner shadows of the ears, flicking the brush outward to suggest tufts of hair. -
Forehead texture:
With a size 2 brush and a Golden Brown mix, paint short, vertical strokes starting from the center of the forehead moving up. This mimics the growth direction of the fur. -
Cheek contouring:
Add subtle shading under the cheekbones and around the muzzle using a watered-down light brown. This prevents the face from looking flat. -
The nose:
Paint the nose pad with a mix of Burnt Umber and a hint of Pink. Keep the top edge slightly lighter to show a highlight, or lift pigment out with a dry brush.
Golden Hour Glow
Make the background glow by glazing a transparent layer of bright orange-yellow over the top half of the background circle once everything else is dry.
Step 4: The Expressive Eyes
-
Iris base:
Fill the irises with a warm, medium brown color. While still wet, drop a tiny dot of darker brown at the top of the iris for a gradient effect. -
Pupil definition:
Once the brown is dry, paint the pupils jet black. Leave a tiny white spot unpainted for the reflection, or add it later with white gouache. -
Eyeliner:
Outline the eyes carefully with black paint or a fine liner pen. Extend the outer corners slightly for that classic feline almond shape.
Step 5: Final Details
-
Fine fur details:
Switch to your smallest brush. Using a ‘dry brush’ technique with dark brown paint, add distinct hair strokes along the outer edges of the ears and the top of the head to break the clean outline. -
Muzzle spots and whiskers:
Dot the whisker pads lightly. Then, with a quick, confident hand, sweep long, thin black or dark brown lines outward for the whiskers. -
Highlighting:
Use a white gel pen or gouache to add the final ‘sparkle’ to the eyes and a few tiny white hairs on the chin or ears for dimension. -
Signature:
Sign your name small near the bottom curve of the circle to balance the composition.
Display this charming cub on a shelf alongside natural textures like dried grass or wood for a cozy aesthetic


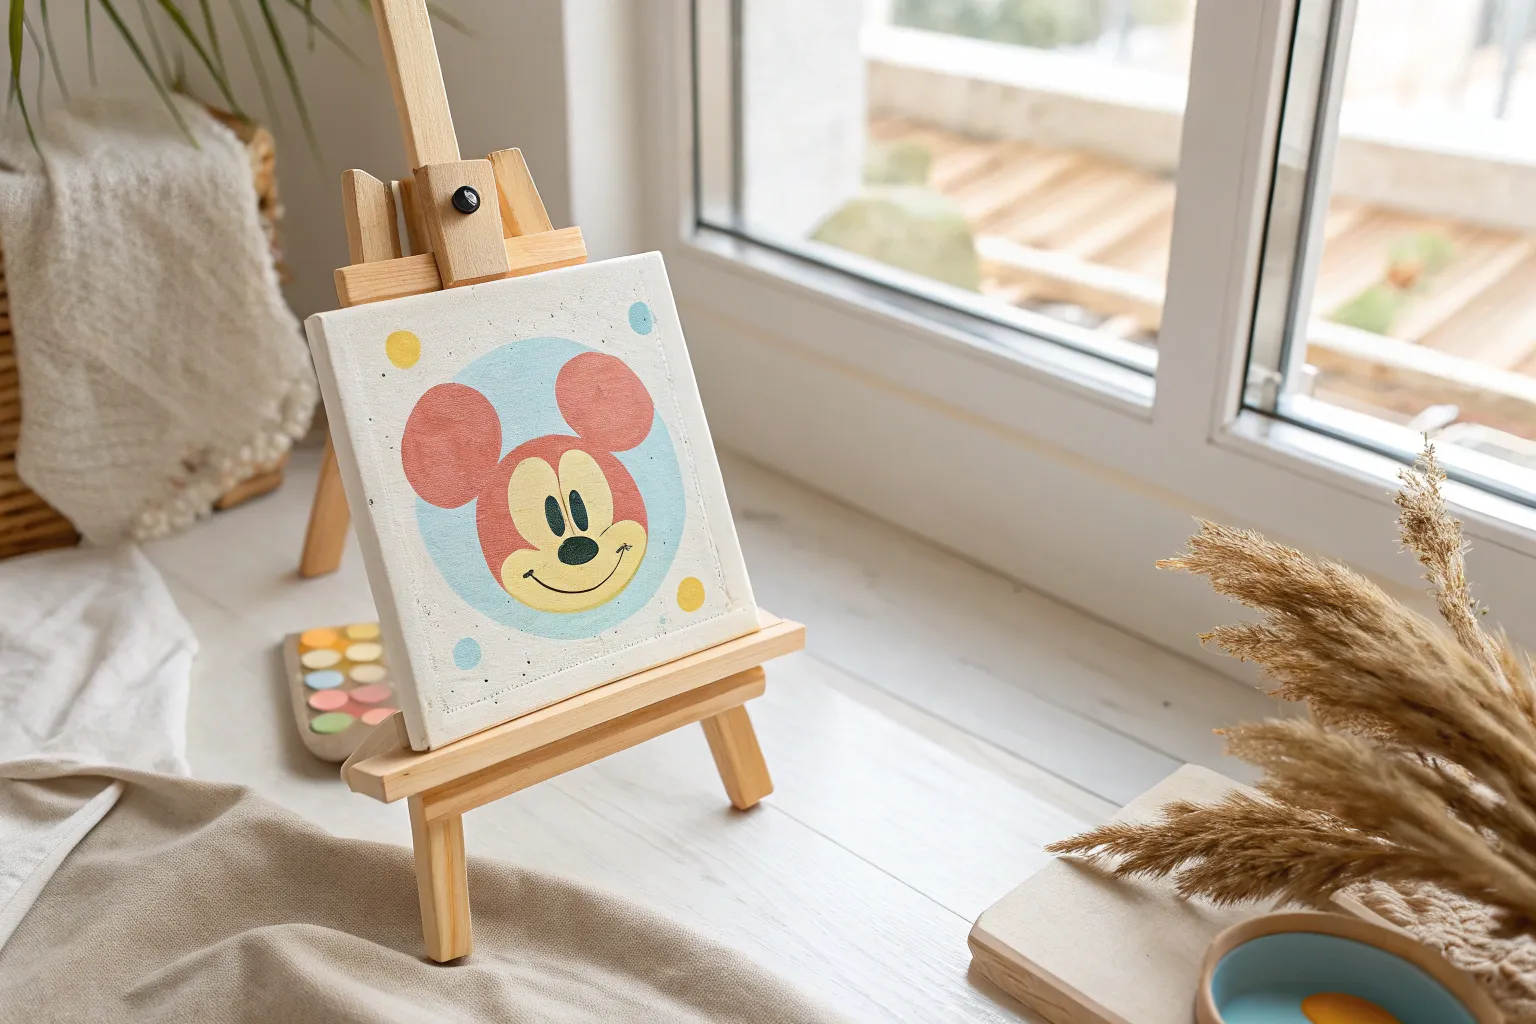
Polka-Dot Bow and Mouse-Ear Combo in Candy Colors
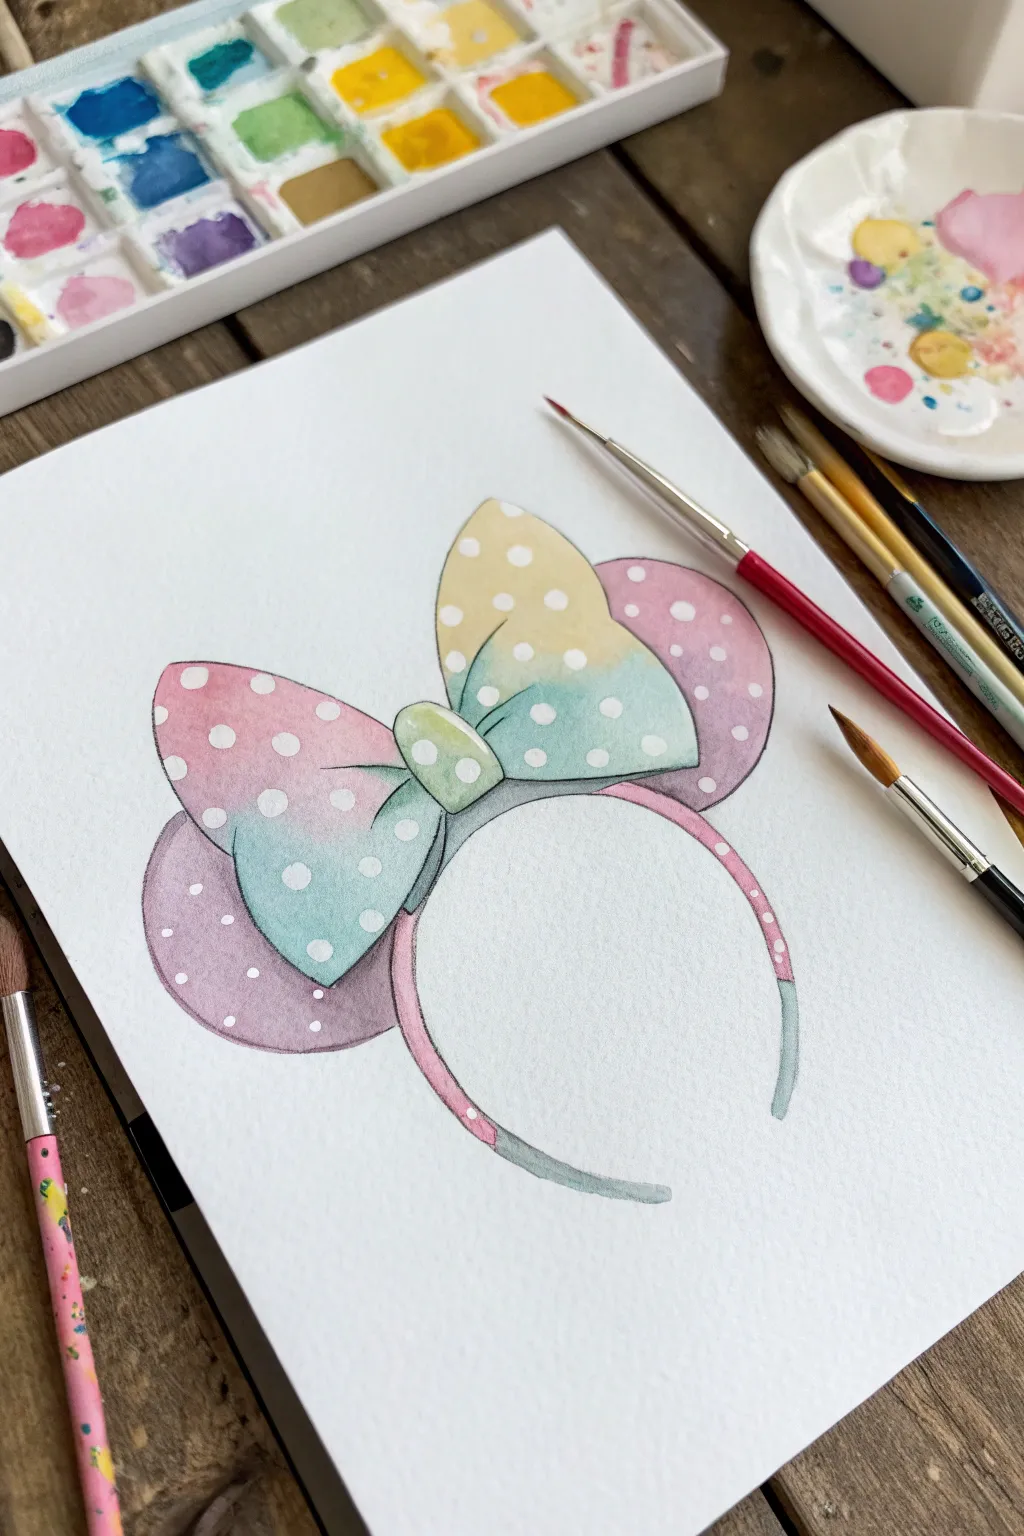
This whimsical watercolor project captures the magic of Disney with soft, candy-colored gradients and playful polka dots. It’s a perfect beginner-friendly piece that combines gentle washes with crisp detailing for a professional illustrative look.
Step-by-Step
Materials
- Watercolor paper (cold press, at least 140lb/300gsm)
- Watercolor paints (pan set with pink, purple, yellow, and turquoise)
- Round watercolor brushes (size 4 and 8)
- Fine liner brush (size 0 or 1)
- White gouache or white gel pen
- HB pencil for sketching
- Eraser
- Two jars of water
- Paper towel
Step 1: Sketching the Shape
-
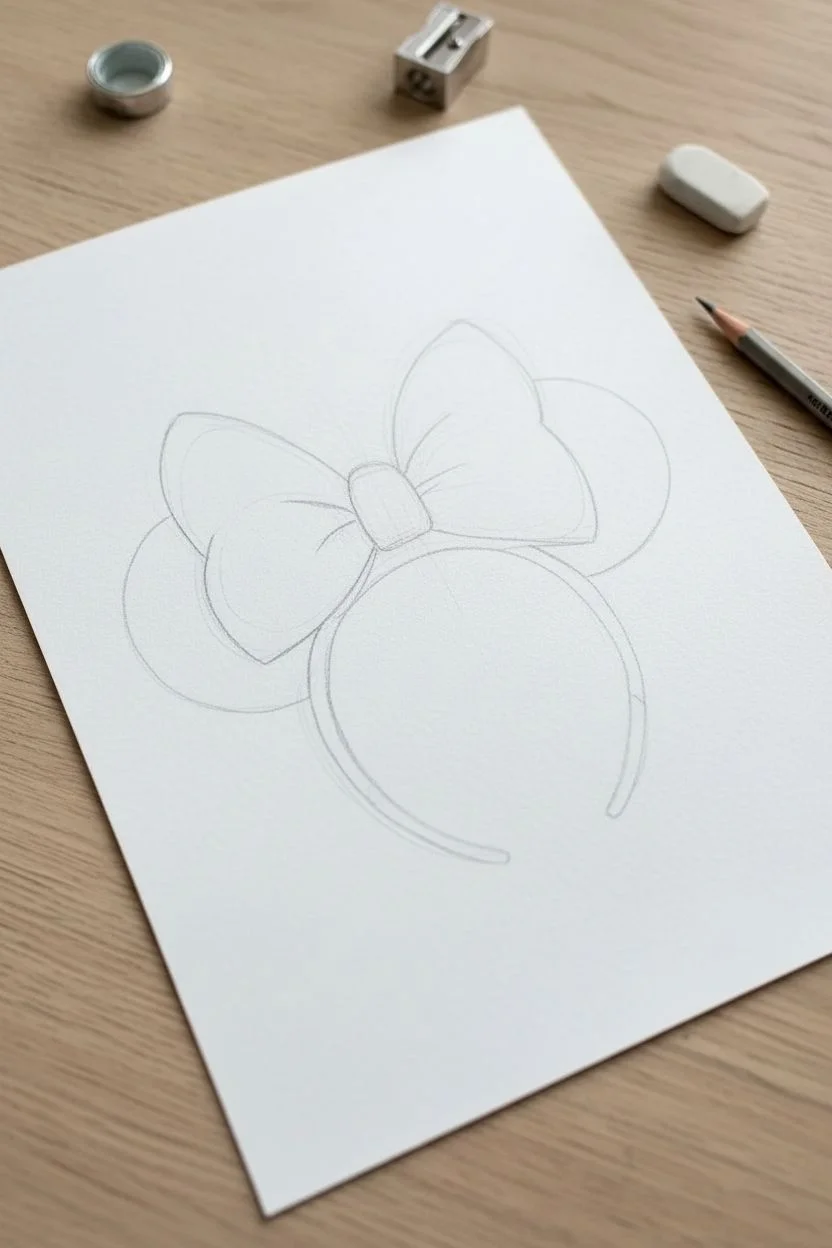
Draft the Headband:
Start by lightly sketching a simple rounded ‘U’ shape for the headband base. Keep your pencil pressure very light so the graphite doesn’t show through the transparent watercolor later. -
Add the Ears:
Draw two large circles attached to the top of the headband curve. They don’t need to be perfect circles; slightly oval shapes often look more natural. -
Outline the Bow:
Sketch a fluffy bow right in the center, overlapping the ears slightly. Draw the center knot first as a rounded rectangle, then add two large, billowy loops on either side. -
Detail the Folds:
Add crease lines radiating from the center knot into the bow loops to give the fabric some dimension and volume.
Step 2: Painting the Base Washes
-
Wet-on-Wet for the Bow:
Start with the left side of the bow. Wet the area with clean water first, then drop in a soft pink at the top edge and a turquoise or mint green at the bottom. Tilt the paper slightly to let them blend in the middle. -
Gradient for the Right Loop:
Repeat the wet-on-wet technique for the right bow loop. This time, try starting with yellow at the top, blending into turquoise at the bottom for a rainbow sherbet effect. -
Center Knot:
Paint the center knot with a mix of lime green and yellow, keeping the center slightly lighter to suggest a highlight. -
Base Color for Ears:
Moving to the mouse ears, wet the paper and apply a wash of soft lavender or purple. I like to keep the color more saturated near the bottom where the ear meets the headband. -
Headband Color:
Paint the headband strip pink, leaving the very ends a cool grey or blue to represent the tips. -
Let it Dry:
Allow the entire painting to dry completely. If the paper feels cool to the touch, it’s still wet.
Muddy Colors?
If your bow gradients turn brown where they meet, let the first color dry completely before adding the second, glazing it over top instead of mixing wet-on-wet.
Step 3: Adding Polka Dots & Details
-
Lifting Color (Optional):
If you want soft, subtle dots, use a clean, damp brush to ‘lift’ small circles of paint while the wash is still slightly damp. If the paint is already dry, skip to the next step. -
White Gouache Dots:
Using white gouache with a creamy consistency throughout, paint crisp white polka dots over the dry bow and ears. Vary the placement so they look random and playful. -
Shadowing the Bow:
Mix a slightly darker version of your bow colors (turquoise and pink). Glaze this sheer shadow color near the center knot and under the folds to make the bow pop. -
Deepening the Ears:
Add a second, darker layer of purple to the bottom edge of the ears to simulate the shadow cast by the bow.
Pop Those Dots
Use full-strength white gouache straight from the tube for the polka dots. Typical watercolor white is too transparent and will vanish when it dries.
Step 4: Outlining & Refining
-
Prepare the Outline mix:
Mix a dark grey or charcoal color using your darkest blue and brown. Avoid pure black, as it can look too harsh against the pastel colors. -
Fine Liner Work:
Using your smallest detail brush (size 0 or 1), carefully outline the pencil sketch. Keep your hand loose; broken or varying line weights add character to the illustration. -
Define the Creases:
Go back into the bow folds with your fine liner to accentuate the fabric wrinkles radiating from the center knot. -
Final Cleanup:
Once the outlines are bone dry, gently erase any visible pencil marks that weren’t covered by paint.
Now you have a sweet, candy-colored accessory painting ready to frame or turn into a greeting card
Blue Alien-Cute Character as a Simple Head-and-Ears Portrait
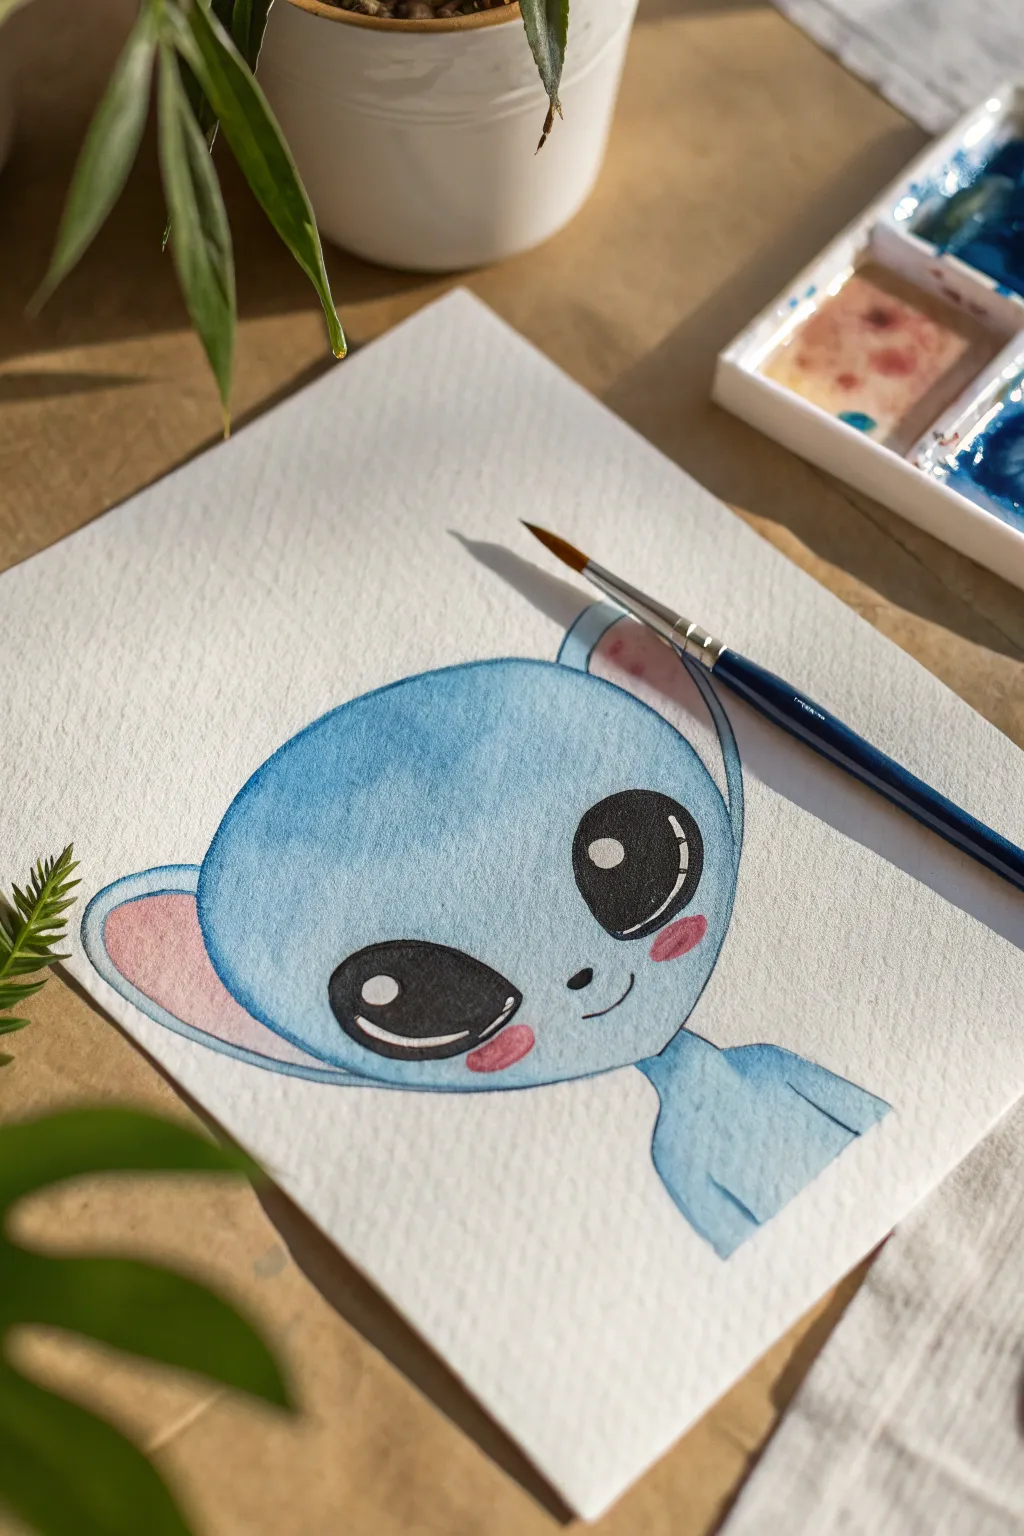
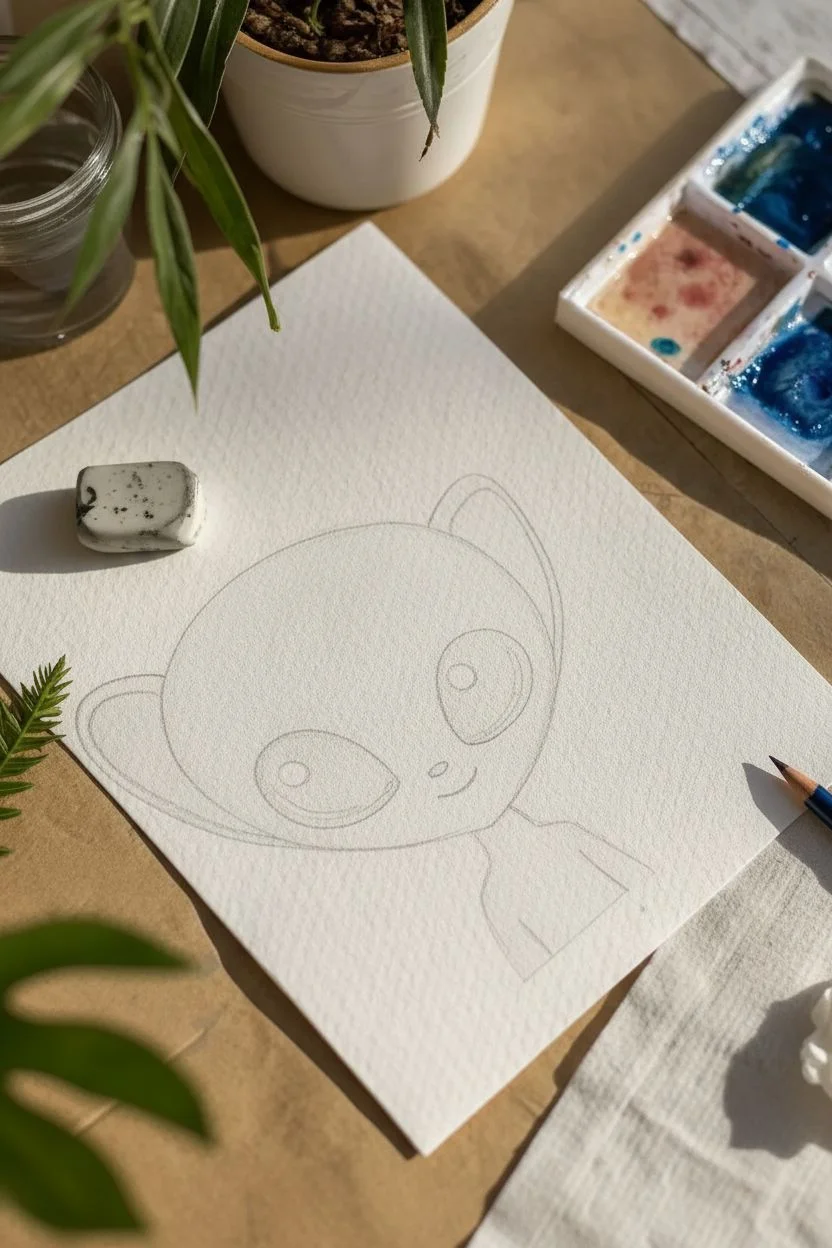
Capture the charm of intergalactic friendship with this sweet and simple blue alien portrait. Using soft watercolor washes and bold outlines, you’ll create an adorable character with big, expressive eyes that pops right off the textured paper.
How-To Guide
Materials
- Cold press watercolor paper (300 gsm recommended)
- Watercolor paints (Cerulean or Phthalo Blue, Rose/Pink, Black)
- Round watercolor brushes (size 4 and size 0/1 for fine details)
- HB pencil for sketching
- Kneaded eraser
- Jar of clean water
- Paper towel
Step 1: Sketching the Character
-
Map out the head shape:
Start by lightly sketching a wide, slightly flattened oval shape for the head. It should be wider than it is tall, almost like a kidney bean but smoother. -
Add the oversized ears:
Draw two large, looped ears extending from the sides of the head. Position them relatively high up; the left ear (viewer’s left) should droop slightly while the right one points upward, giving a playful expression. -
Draft the facial features:
Pencil in two very large, oval eyes that tilt slightly inward towards the nose. Place them wide apart. Add a tiny dot for the nose and a small, curved smile just below it. -
Define the neck and shoulders:
Sketch a thin, small neck leading into simple, sloping shoulders. Keep the body quite small compared to the head to emphasize the ‘chibi’ cute aesthetic. -
Clean up the lines:
Use your kneaded eraser to gently lift the pencil lines until they are faint guides. Just enough so you can see them, but light enough that they won’t show through the transparent watercolor.
Smooth Washes
To avoid streaks in the blue skin, mix more paint than you think you need. A larger puddle prevents you from having to mix more mid-wash, ensuring a consistent color.
Step 2: Painting the Base Layers
-
Mix your main blue hue:
Prepare a watery mix of Cerulean or Phthalo Blue. It should be transparent and light for the first wash. -
Wash the face and body:
Using a size 4 brush, fill in the entire face, neck, and shoulders with the blue mix. Work quickly to keep a wet edge, but carefully avoid painting inside the large eye ovals—keep those paper white for now. -
Paint the outer ears:
Continue using the blue mix to paint the outer rim and back of the ears, leaving the inner ear shapes blank. -
Add the pink accents:
While the blue is drying (or if you are careful not to touch the wet blue edges), mix a soft watery pink. Fill in the large inner sections of both ears. -
Let it dry completely:
Wait for the paint to be bone dry. If the paper feels cool to the touch, it’s still damp. Painting wet-on-damp here might result in muddy blooms.
Step 3: Adding Depth and Details
-
Deepen the blue tones:
Mix a slightly more saturated version of your blue. Gently glaze over the top left of the head and the right side of the body to create subtle shadows and dimension. -
Create the cheeks:
Dilute a bit of red or pink paint. Dab two small, soft oval blushes right under the outer corners of the eyes. Soften the edges with a clean, damp brush so they blend into the blue skin. -
Paint the eyes black:
Switch to a smaller brush and load it with concentrated black watercolor (or black ink). Carefully fill in the large eye ovals. -
Preserve the highlights:
IMPORTANT: Leave two distinct white circles unpainted inside the black eyes—one large shine in the upper section and a curved sliver at the bottom. This reflection makes the character look alive. -
Outline the features:
Using the very tip of your smallest brush (size 0 or 1) and a dark mix (dark blue or black), carefully outline the nose dot and the smile line. -
Refine the ear shadows:
I like to add a tiny touch of darker pink or light purple at the base of the inner ears where they meet the head to suggest depth. -
Final outlines:
Optionally, you can use a fine liner pen or a very steady hand with dark blue paint to outline the entire head and ears for a crisper, cartoon look to match the reference image.
Make It Sparkle
Once the painting is totally dry, use a white gel pen to add tiny stars or extra highlights in the eyes for an even more magical, celestial look.
Now you have a charming little alien friend ready to frame or give as a delightful gift
Enchanted Rose Under a Glass Dome (Simplified Shapes)
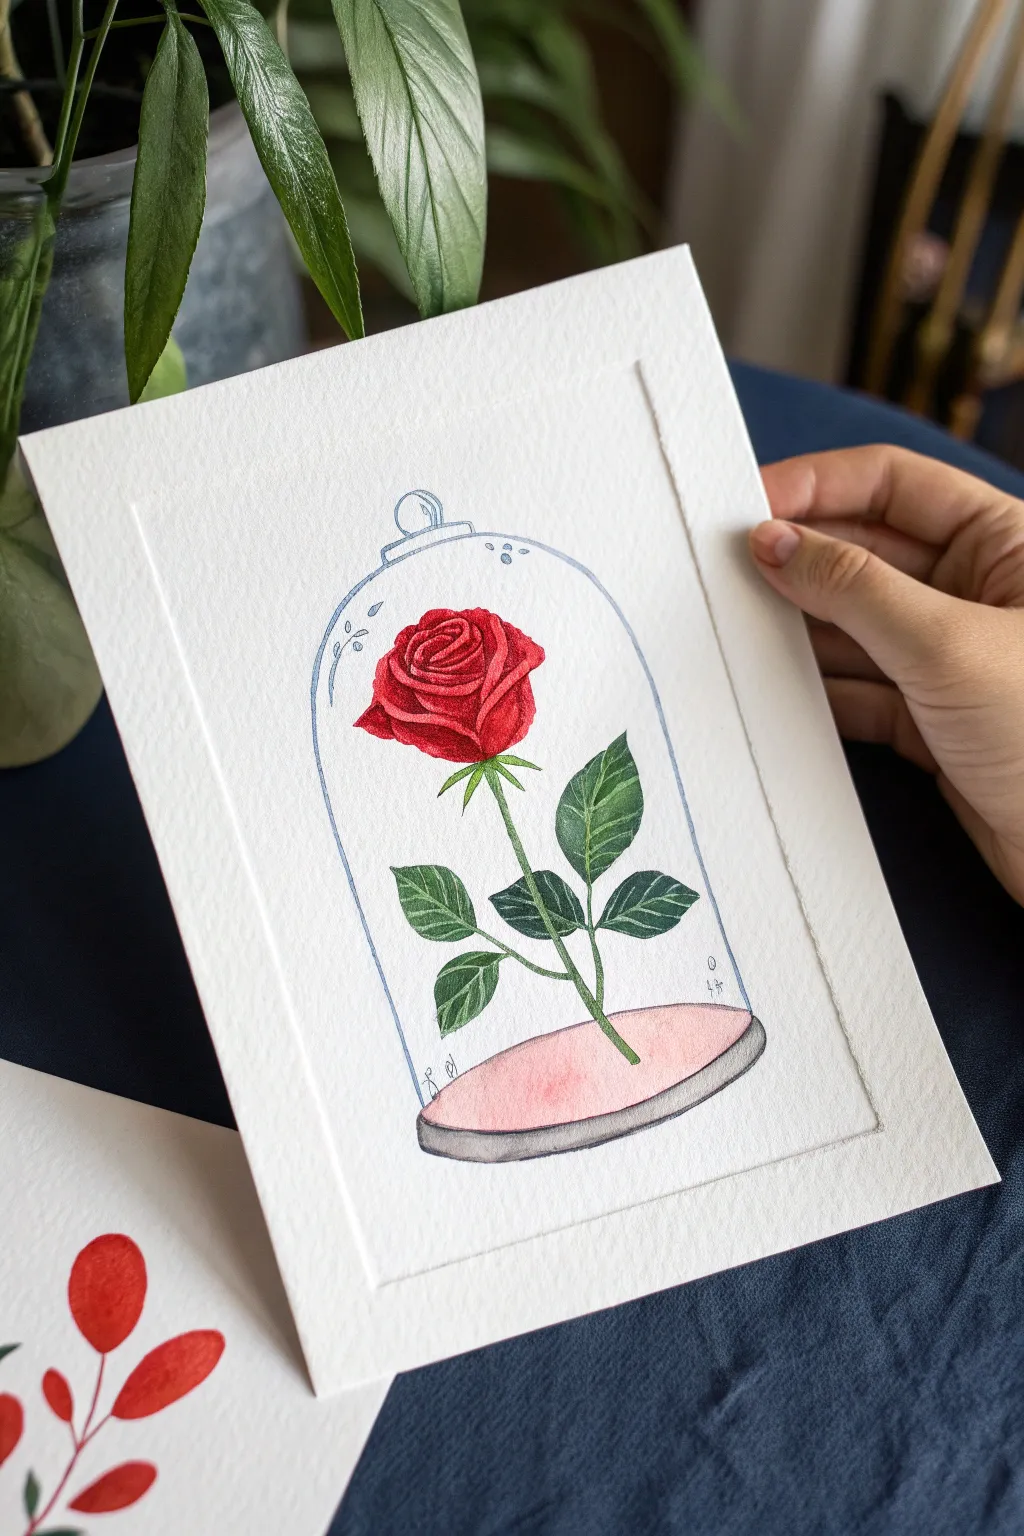
Capture the magic of a classic fairytale with this delicate watercolor illustration featuring a vibrant red rose enclosed in a simple glass dome. The contrast between the bold, textured flower and the airy, minimalist jar creates a charming piece of art perfect for beginners.
How-To Guide
Materials
- Cold press watercolor paper (heavyweight, 300gsm recommended)
- Pencil (HB or similar for sketching)
- Fine liner pen (grey or very light blue)
- Watercolor paints (Alizarin Crimson/Deep Red, Sap Green, Light Pink, Payne’s Grey/Black)
- Small round watercolor brushes (sizes 2 and 4)
- Very fine detail brush (size 0 or 00)
- Clean water jar and paper towels
- Ruler
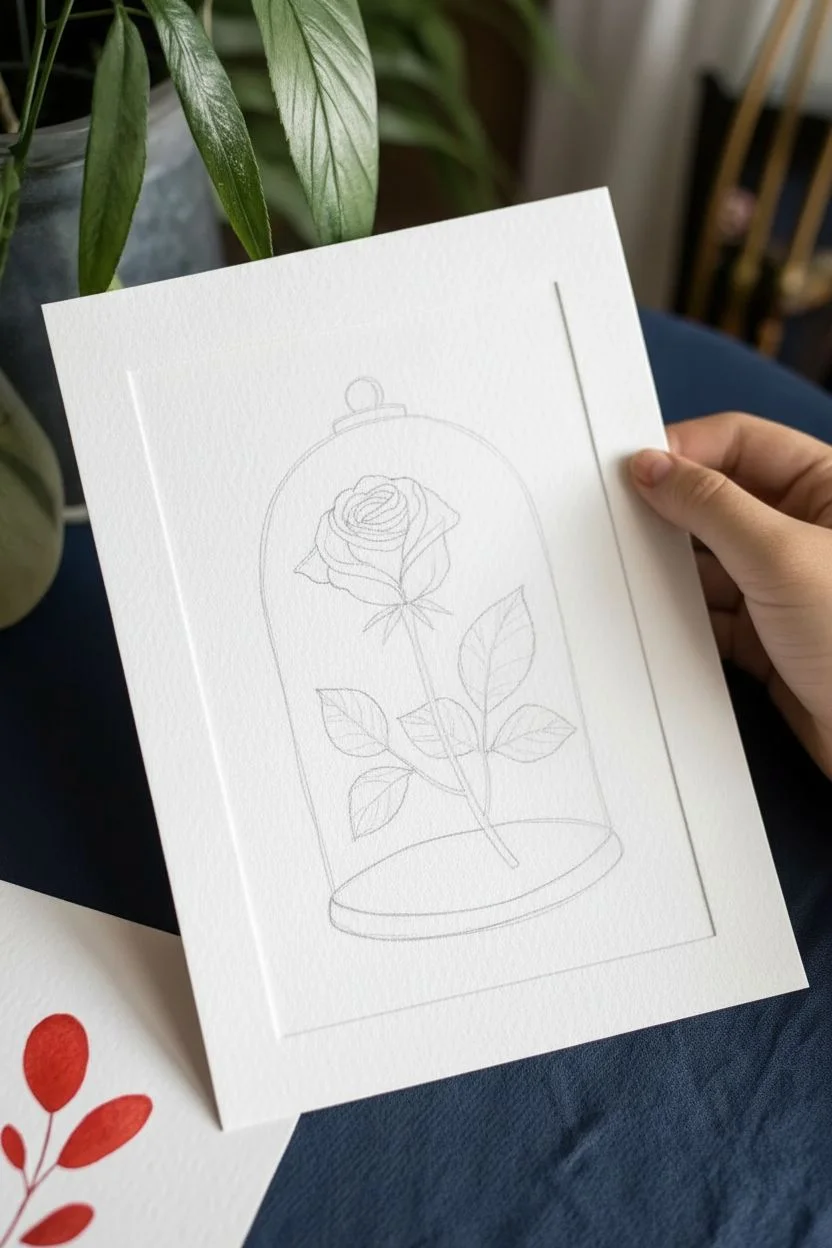
Step 1: Sketching the Outline
-
Set your composition:
Begin by lightly marking the center of your paper. With a ruler, draw a vertical line that will serve as the stem’s guide to ensure your rose stands upright. -
Outline the dome shape:
Lightly sketch a tall arch shape representing the glass dome. Make sure the bottom connects with a gently curved, flattened oval to form the base. The top should have a small decorative knob or handle. -
Sketch the rose bloom:
Near the top third of the dome, sketch a loose spiral for the center of the rose. Add overlapping, petal-like curves radiating outward from this center to build the bloom’s volume. -
Add stem and leaves:
Follow your vertical guide line down from the rose base. Draw a thin stem that ends at the base of the dome. Add spiky sepals right under the rose head, and sketch three or four jagged leaves branching off the stem. -
Refine the base:
Draw a thin rim at the very bottom of the jar structure to create the wooden or stone foundation the glass sits on. -
Ink the dome:
Using a grey or very light blue fine liner, carefully trace over your pencil lines for the glass dome only. Keep the lines thin and delicate to mimic transparent glass. Erase the pencil marks for the dome once dry.
Pro Tip: Clean Edges
For the crispest lines on the rose, let each petal section dry slightly before painting the neighbor. This prevents colors from bleeding into one blob.
Step 2: Painting the Rose
-
Base layer for the rose:
Mix a vibrant red watercolor. Paint the entire rose shape with a light, watered-down wash of this red. This initial layer ensures the rose has a warm glow underneath. -
Building petal depth:
Once the first layer is barely damp, switch to a smaller brush. Load it with more saturated red pigment and paint the shadows between the petals, starting from the center spiral and working outward. -
Intensifying shadows:
While the red is still workable, drop a tiny bit of darker crimson or a touch of purple into the deepest crevices of the petals to create dramatic contrast. -
Painting the greenery:
Mix a sap green with a touch of blue for a cool, natural tone. Fill in the stem, sepals, and leaves with a solid wash of color. -
Adding texture to leaves:
Let the green paint dry completely. Using your finest detail brush and a darker, more concentrated green mix, carefully paint the tiny veins on each leaf.
Step 3: Finishing Touches
-
Coloring the base:
Paint the flat surface inside the dome base with a very pale, watered-down pink wash. This adds a soft reflection of the rose on the surface below it. -
Painting the rim:
For the bottom rim of the dome base, use a diluted mix of black or grey. Paint it solidly but keep it somewhat transparent to maintain the watercolor aesthetic. -
Adding glass details:
Using your light blue or grey fine liner (or a very dry brush with blue paint), add tiny decorative details like small leaves or dots near the top arch of the dome glass. -
Emphasizing the spine:
I like to take a white gel pen or opaque white gouache here to add tiny highlights on the most prominent curves of the rose petals and leaf tips to make them pop. -
Borders and framing:
To mimic the embossed paper look in the reference, you can use a bone folder or the back of a butter knife to gently score a rectangle frame around your artwork, or simply draw a faint pencil line.
Level Up: Sparkles
After the painting is fully dry, add tiny dots of gold watercolor or metallic ink floating around the rose inside the dome to represent magical dust.
Now your enchanted rose is preserved forever in its delicate glass home
Floating Lantern Sky With Soft Blending and Tiny Light Dots
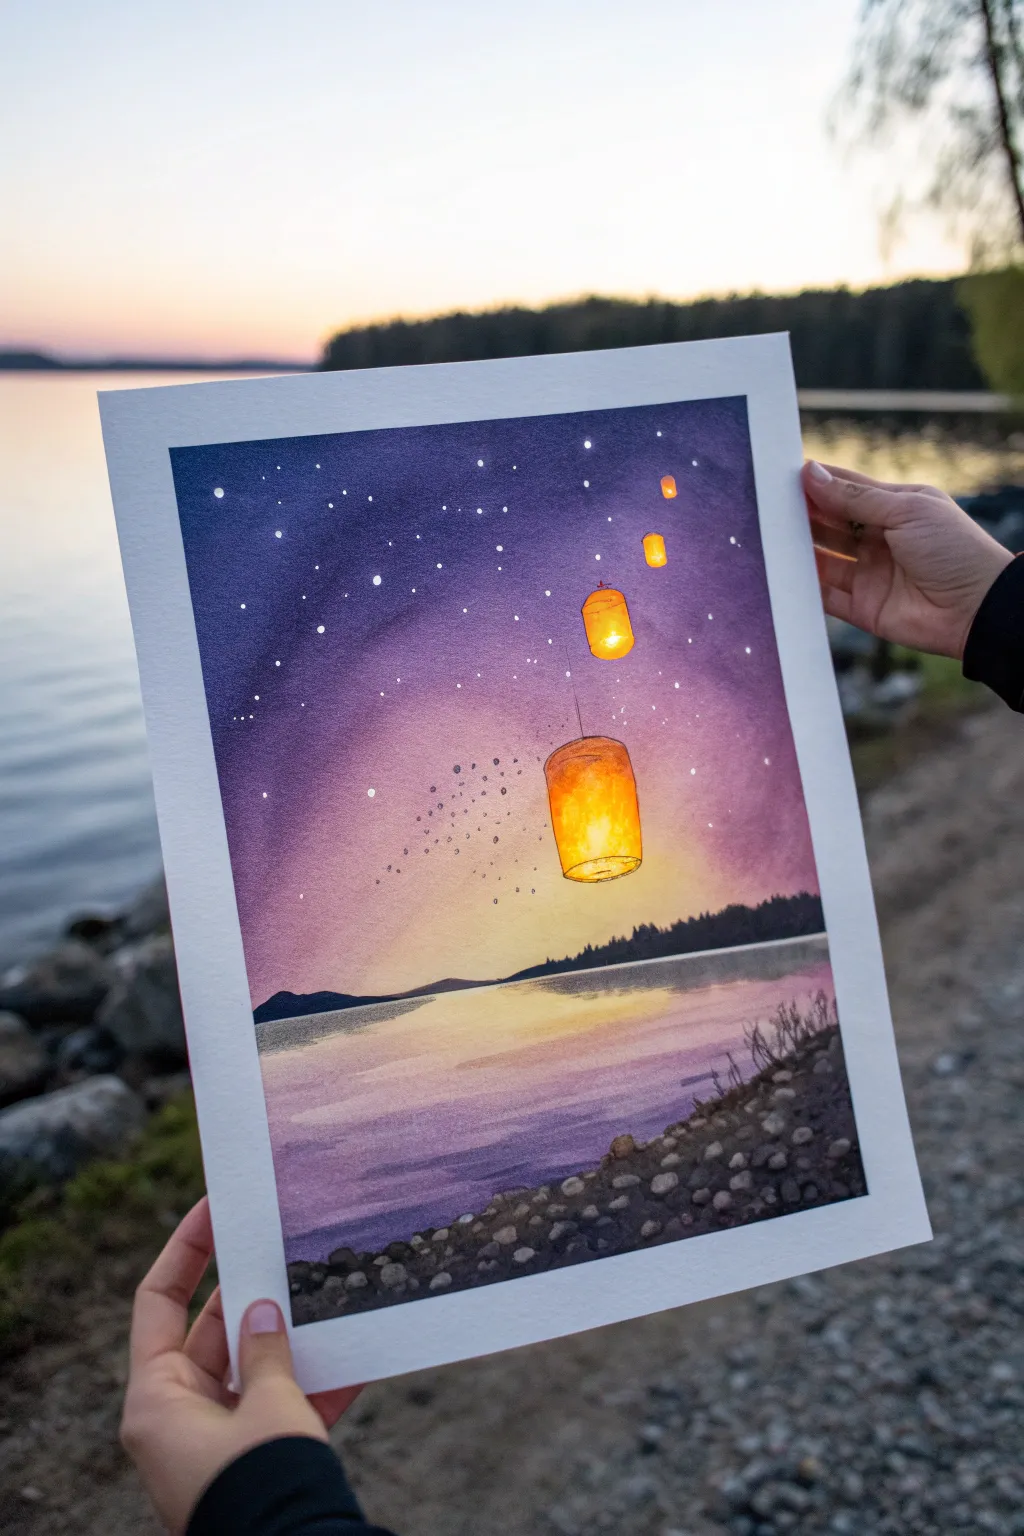
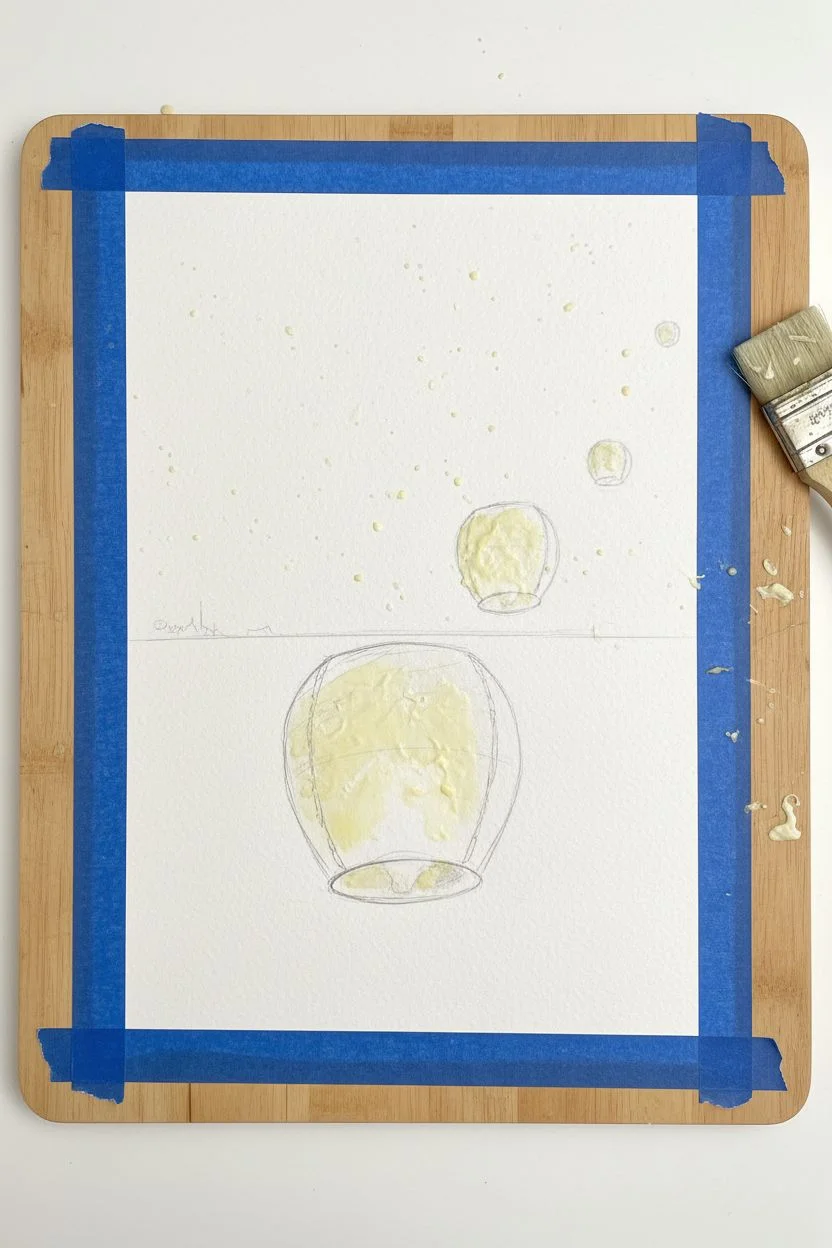
Capture the magic of floating lights with this dreamy watercolor tutorial, featuring a glowing gradient sky and delicate paper lanterns. The soft blending creates a stunning evening atmosphere that perfectly mirrors that iconic movie moment.
Step-by-Step
Materials
- Cold press watercolor paper (300 gsm)
- Watercolor paints (Indigo, Purple, Magenta, Cadmium Yellow, Orange)
- White gouache or white gel pen
- Masking fluid (drawing gum) and old brush
- Round watercolor brushes (sizes 4, 8, and 12)
- Pencil and eraser
- Painters tape
- Two jars of water
- Paper towels
Step 1: Preparation & Sketching
-
Secure the paper:
Tape down all four edges of your watercolor paper to a board or table. This creates that crisp white border seen in the photo and prevents the paper from buckling during heavy washes. -
Sketch the composition:
Lightly sketch the horizon line about one-third up from the bottom. Draw the outlines of several cylindrical lanterns, making the lowest one the largest and the higher ones progressively smaller to show distance. -
Protect the lights:
Apply masking fluid carefully inside the lantern shapes and dot tiny specks across the sky for future stars. Let this dry completely before touching it with paint.
Pro Tip: Radiant Glow
To make the lanterns really pop, keep the yellow center almost white and darken the orange edges significantly. High contrast equals high glow.
Step 2: Painting the Sky Gradient
-
Wet the sky area:
Using your largest brush, apply clean water to the entire sky area above the horizon line. The paper should be glisten but not have puddles. -
Start with the glow:
Near the horizon line, drop in diluted Cadmium Yellow. While it’s wet, blend in a soft Orange just above it, keeping the colors brightest where the lantern ‘light’ would reflect. -
Transition to dusk:
Move upwards into Magenta or a pinkish-purple hue. Allow it to touch the wet orange edge so they bleed together softly. -
Deepen the night:
At the very top, apply a rich mix of Purple and Indigo. Bring this dark color down to meet the magenta, tilting the board slightly if needed to help gravity blend the gradient. -
Dry completely:
Wait for the sky to differ completely dry. I usually use a hairdryer on a low setting here to speed things up, but be careful not to melt the masking fluid.
Step 3: Reflections & Landscape
-
Paint the water base:
Wet the water area below the horizon. Mirror the sky colors: yellow near the horizon, fading into purple and then indigo at the very bottom edge. -
Add water texture:
While the water wash is still damp (not soaking), use a slightly drier brush with darker purple paint to make horizontal strokes. This creates the illusion of ripples on the lake surface. -
Paint the distant land:
Once the sky and water are dry, paint the silhouette of the distant mountains and treeline using a dark mix of Indigo and a touch of brown. Keep the bottom edge sharp against the water. -
Create the foreground shore:
At the very bottom right, paint the rocky shoreline. Start with a gray-brown wash, and once dry, dab in darker gray spots to suggest individual pebbles and stones. -
Add foreground vegetation:
Use a fine liner brush and black or dark brown paint to flick up tiny, thin lines from the rocky shore to represent dry grass reeds.
Level Up: Galaxy Dust
Use an old toothbrush dipped in white gouache to flick a fine mist of ‘stardust’ over the darkest blue section of your sky for a magical depth.
Step 4: Glowing Lanterns & Stars
-
Reveal the whites:
Gently rub away all the masking fluid with your finger or a rubber pickup tool to reveal the clean white paper underneath. -
Paint the lanterns:
Fill the lantern shapes with a gradient of yellow (center) to orange (edges). Outline the top and bottom rims with a thin line of brown to give them structure. -
Enhance the glow:
If the lanterns look too flat, add a very faint wash of yellow on the sky immediately surrounding the largest lantern to simulate a glowing aura. -
Brighten the stars:
Check your masked stars. If they aren’t bright enough, dot over them with white gouache or a gel pen. Add a few more tiny dots in the darkest part of the sky for extra magic. -
Final touches:
Add faint reflection lines in the water directly under the largest lantern using diluted orange paint. Peel off the tape carefully at an angle.
Now you have your own magical scene ready to frame or gift to a fellow fairy tale fan
Balloon House Inspired Scene With Dot Balloons and a Tiny Roof
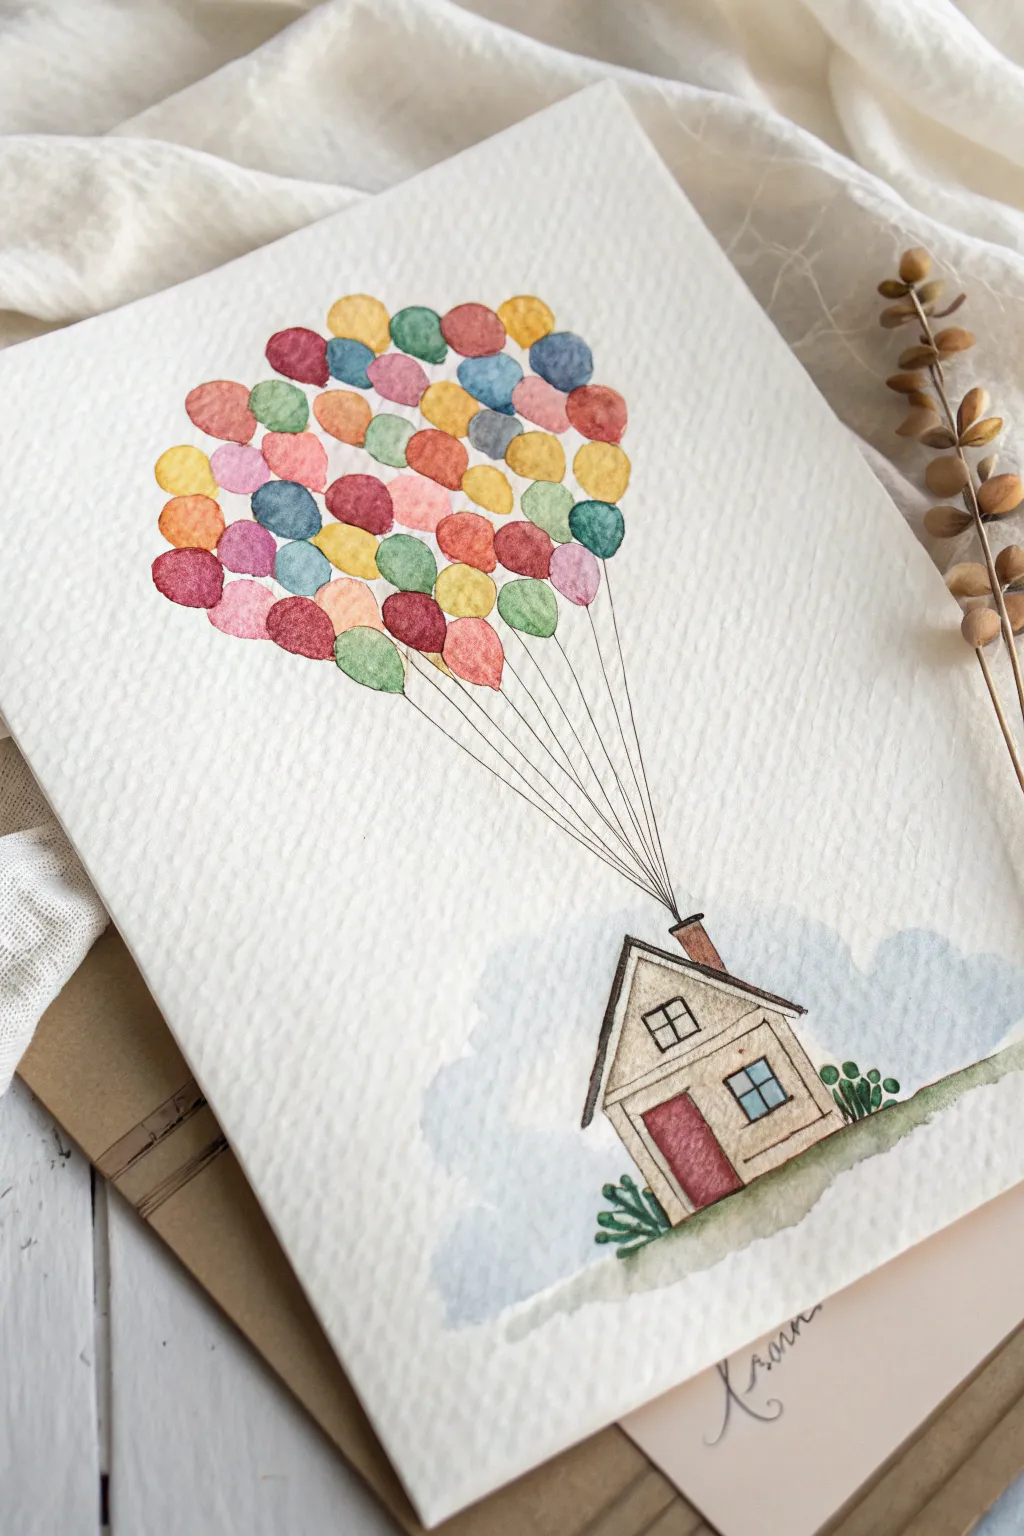
Capture the magic of adventure with this delightful watercolor painting inspired by a beloved animated classic. Using simple shapes and vibrant colors, you’ll create a charming house floating away beneath a cloud of joyful balloons.
Step-by-Step Guide
Materials
- Cold press watercolor paper (textured, 300gsm ideally)
- Watercolor paint set (pan set or tubes)
- Fine liner pen (black, waterproof, size 0.1 or 0.3)
- Small round watercolor brush (size 2 or 4)
- Pencil (HB) and eraser
- Jar of clean water
- Paper towel
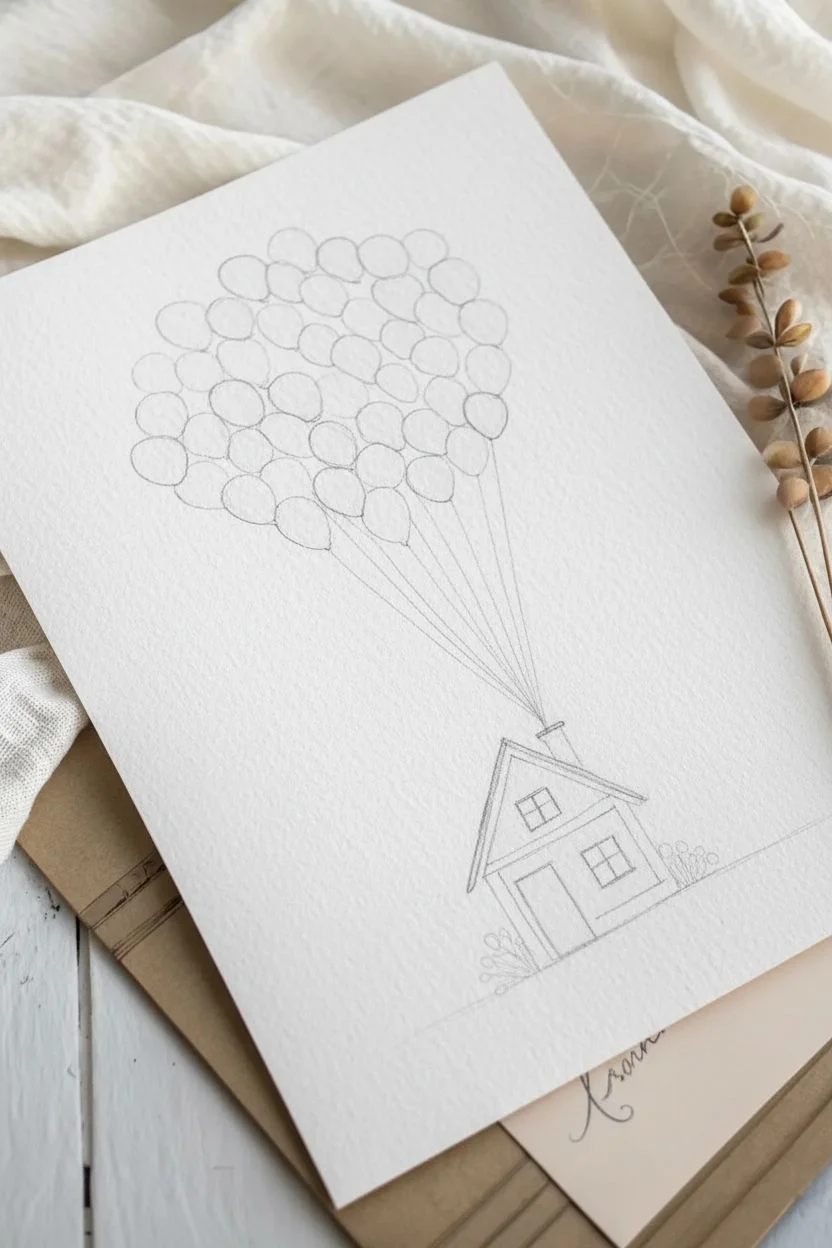
Step 1: Sketching the Outline
-
Draw the house shape:
Begin near the bottom right corner of your paper. Lightly sketch a small house with a simple peaked roof and a chimney on the right side. Keep it tiny to leave plenty of room for balloons above. -
Add architectural details:
Sketch a small square window on the upper floor and a larger window on the ground floor. Draw a rectangular door next to the lower window. -
Outline the balloon cluster:
Instead of drawing individual circles immediately, sketch a large, inverted tear-drop or heart-like shape floating high above the chimney to guide where your balloons will go. -
Connect the strings:
Draw faint, straight lines connecting the chimney area to the bottom of your balloon guide shape. These will be your guidelines for the strings later. -
Refine the balloons:
Fill your guide shape with many small, overlapping circles and ovals. Vary their sizes slightly, but keep them roughly consistent like grapes in a bunch.
Muddy colors?
If your balloons turn brown where they touch, let each color dry fully before painting the next one adjacent to it. Patience keeps colors crisp!
Step 2: Painting the House & Ground
-
Paint the walls:
Mix a very watery, pale beige or cream color. Fill in the siding of the house, keeping the paint light to mimic wood. -
Color the roof and chimney:
Use a diluted brown for the roof trim and a slightly reddish-brown (sienna) for the chimney. -
Add the door and windows:
Paint the door a muted red. For the windows, use a very pale blue wash to suggest glass. -
Create the grassy base:
Mix a muted green and paint a small, uneven patch of ground beneath the house. Add tiny brushstrokes on the sides to suggest small bushes. -
Add a sky wash:
While the house dries, mix a very watery blue-grey. Paint irregular, cloud-like blobs around the base of the house and the bottom right corner to give the impression of floating through the sky.
Add Sparkle
Once the paint is totally dry, use a white gel pen to add tiny reflection dots on the top right curve of each balloon for a shiny, 3D effect.
Step 3: Painting the Balloons
-
Select your palette:
Choose a variety of cheerful colors: reds, yellows, blues, greens, oranges, and pinks. I prefer to pre-mix small puddles of these on my palette so I can work quickly. -
Paint the first layer:
Start filling in random balloons within your cluster. Paint every third or fourth balloon to prevent wet colors from bleeding into each other immediately. -
Fill the gaps:
Once the first set is damp but not soaking wet, fill in the neighboring balloons with different colors. It’s okay if they touch slightly; the bleeding creates a lovely watercolor effect. -
Layer for depth:
For balloons that appear ‘behind’ others, use slightly more pigment or a darker shade of the same color to create depth and shadow. -
Let it dry completely:
Wait for the paint to be totally dry before moving to the ink stage to avoid smudging.
Step 4: Inking the Details
-
Outline the house:
Using your waterproof fine liner, trace over your pencil lines on the house. Go over the roof, walls, door, and windows. Add little lines in the windows for panes. -
Draw the strings:
Carefully draw straight ink lines from the chimney up to the bottom layer of balloons. They should fan out slightly as they reach the cluster. -
Connect the balloons:
Draw tiny triangle ‘knots’ at the bottom of the lowest balloons where they meet the strings. -
Add texture:
Add tiny little scribbles or dots on the bushes next to the house to give them volume. -
Final touches:
Erase any remaining pencil marks gently. If you want, write a small name or date in calligraphy at the bottom.
This charming piece makes for wonderful wall art or a heartfelt greeting card.
Dapper Mouse-Ear Outline Filled With Floral Doodles

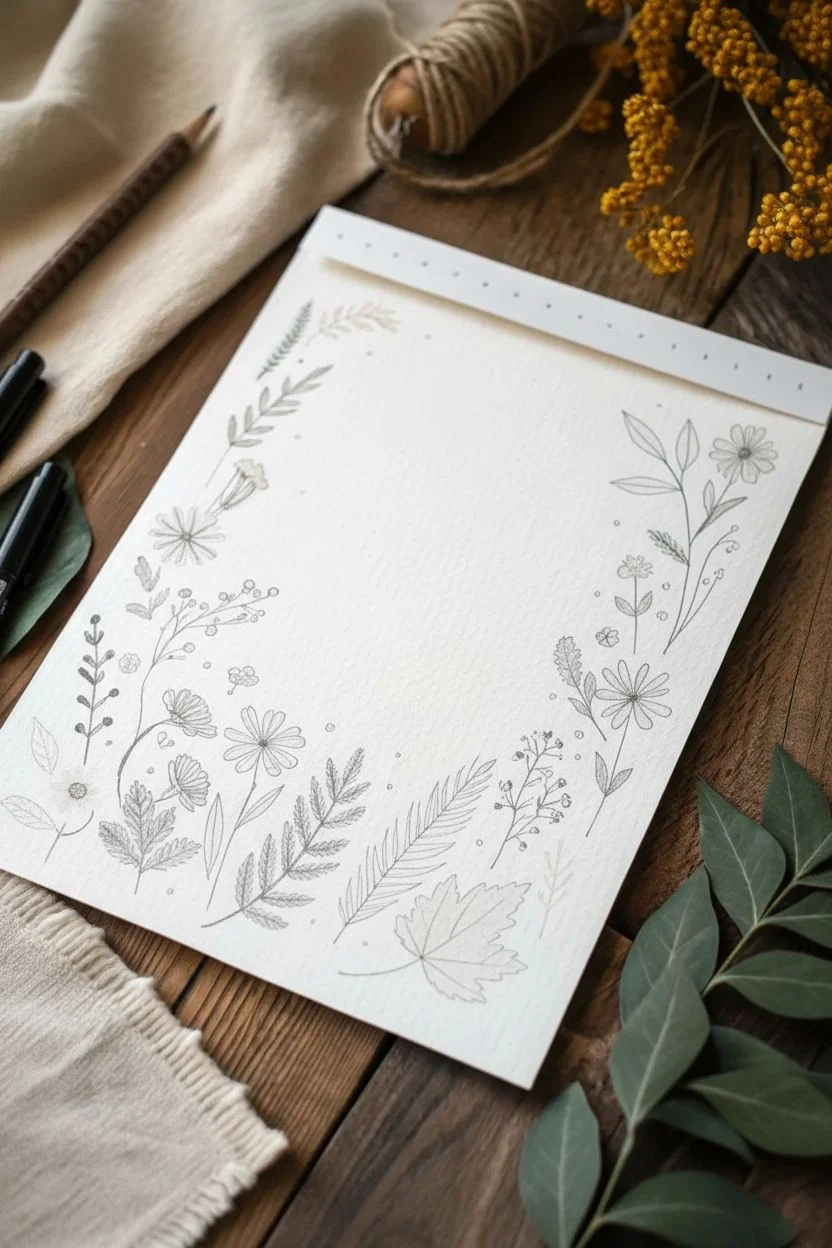
Capture the cozy essence of fall with this delicate wildflower border that frames your favorite quotes or memories perfectly. Using fine liners and soft watercolors, you’ll create a U-shaped arrangement of autumn leaves, daisies, and ferns that feels both rustic and refined.
Step-by-Step
Materials
- Hot press watercolor paper (A5 size)
- Pencil (HB or 2H)
- Kneaded eraser
- Fine liner pens (Black, 0.1mm and 0.3mm)
- Watercolor paints (Burnt Sienna, Yellow Ochre, Sap Green, Olive Green)
- Small round brushes (Size 0 and 2)
- Ruler
Step 1: Sketching the Layout
-
Define the frame:
Start by lightly marking the boundaries of your border with a pencil. Leave a large, open rectangular space in the center, focusing your drawing energy on the bottom edge and creeping up the sides about two-thirds of the way. -
Anchor the bottom center:
Sketch the largest element first: a single, playful maple leaf at the bottom center, slightly tilted to the right. -
Add secondary blooms:
Draw three simple daisy-like flowers on the left side: one near the corner, one slightly higher, and one facing downward. Repeat with two similar flowers on the right side to create visual balance without perfect symmetry. -
Fill with foliage:
Sketch long, fern-like leaves extending from the bottom center outward. Add a prominent fern curving up the left side and a leafy sprig climbing the right. -
Detail with filler stems:
Fill the gaps between your main flowers with tall, thin stems featuring tiny buds or berries. These should look airy and light, reaching higher than the main blooms.
Keep it Organic
Avoid perfect symmetry. If you place a large flower on the left, balance it with a cluster of leaves or smaller buds on the right for a natural look.
Step 2: Inking the design
-
Outline the main shapes:
Switch to your 0.3mm fine liner. Carefully trace over your main maple leaf and the larger daisy petals. Don’t worry if the lines aren’t perfectly smooth; a little wobble adds character. -
Detail the leaves:
Use the finer 0.1mm pen to add veins to the maple leaf and the fern fronds. Use short, flicking strokes for the fern textures to keep them looking organic. -
Add dainty stems:
Ink the thin, tall filler stems with the 0.1mm pen. Add tiny circles for berries or small seeds at the tips. -
Erase guide lines:
Wait at least ten minutes for the ink to fully dry to prevent smudging. I prefer to wait closer to twenty just to be safe. Then, gently remove all pencil marks with the kneaded eraser.
Ink Bleeding?
Ensure your fine liner is waterproof before painting. Test it on a scrap paper with water first. If it smears, paint first and ink last.
Step 3: Adding Watercolor
-
Paint the focal leaf:
Mix a warm Burnt Sienna. Paint the large maple leaf, letting the color be slightly uneven to mimic the texture of a dried leaf. -
Color the blooms:
Use a diluted Yellow Ochre or light orange for the flower petals. Keep the centers white for now. -
Greenery variations:
Paint the fern leaves using Sap Green. For the other leafy stems, switch to a more muted Olive Green to create depth and variety in the foliage. -
Deepen the details:
Once the flower petals are dry, dot the centers with a concentrated brown or dark orange. Add tiny dots of color to the filler berries. -
Final touches:
Sprinkle a few tiny dot accents around the border using the tip of your brush and leftover orange or brown paint to give the piece a magical, floating feeling.
Now your beautiful botanical border is ready to frame a handwritten note or special photo
Simple Magic Wand Trail Using Splatter and White Ink Highlights
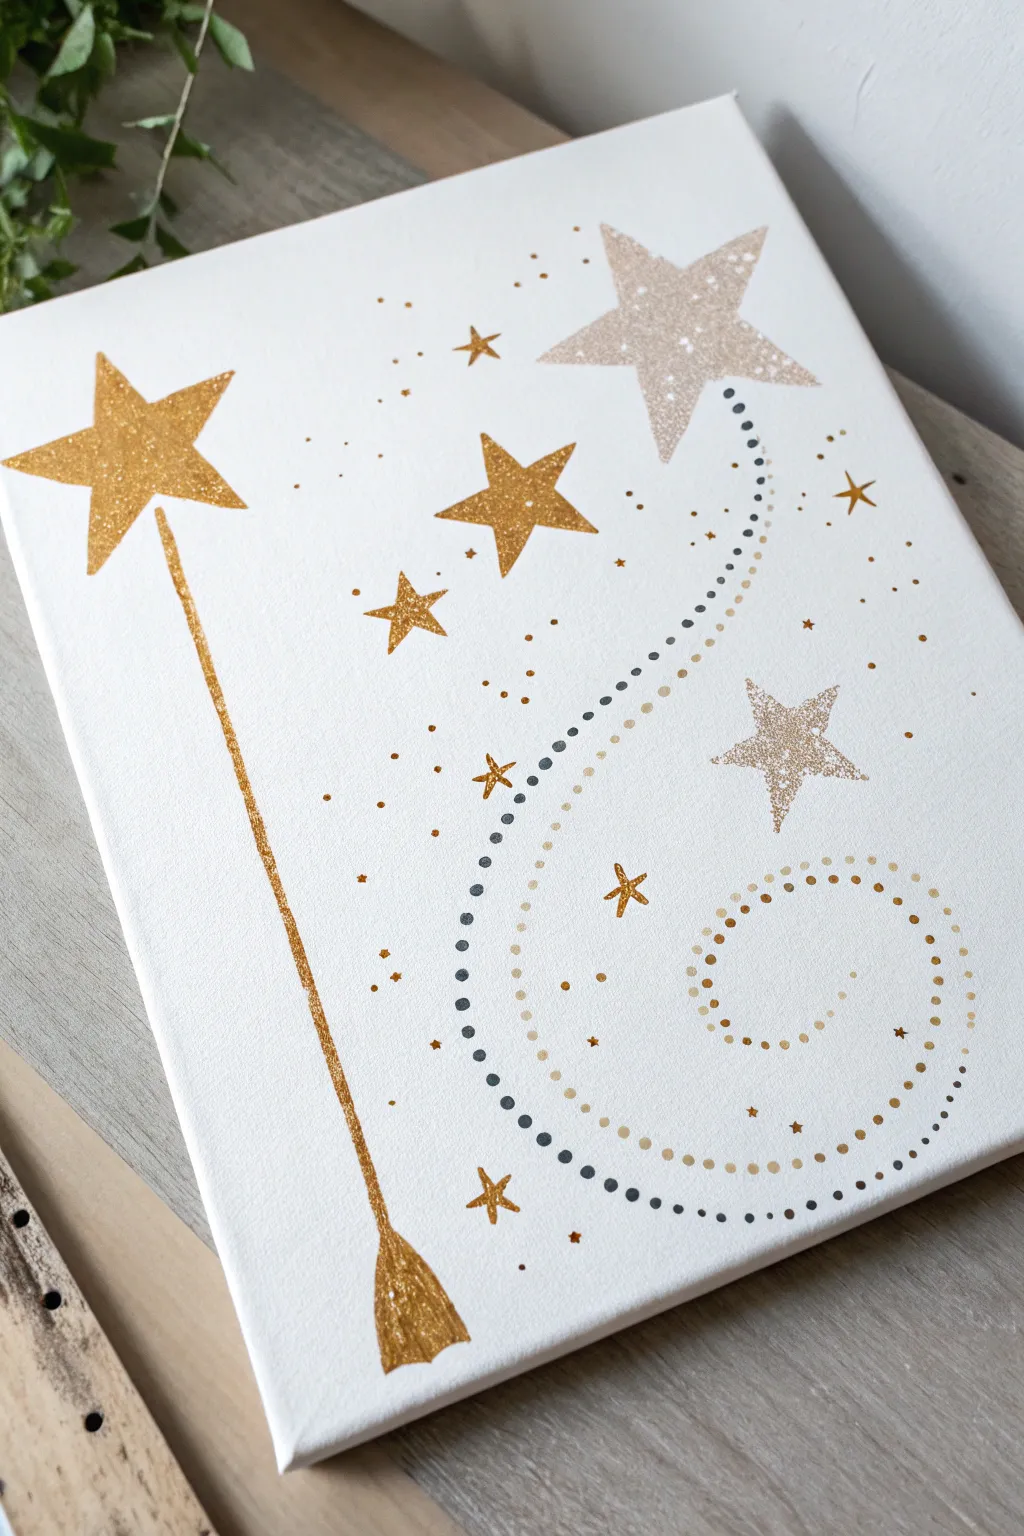
Capture a bit of Disney magic with this clean, minimalist canvas art featuring a glittering gold wand casting a spell of stars and swirling dust. The textured glitter effect against the stark white background creates an elegant look perfect for a nursery or fairytale-themed bedroom.
Step-by-Step Tutorial
Materials
- Small white stretched canvas (e.g., 8×10 or 9×12)
- Pencil
- Gold glitter paint (or gold acrylic paint + fine loose gold glitter)
- Champagne or rose gold glitter paint
- Grey acrylic paint (light to medium shade)
- Tan or beige acrylic paint
- Detail brushes (liner brush and small round brush)
- Dotting tools (or the back end of paintbrushes)
- Ruler
- Star stencils (optional, but helpful for crisp lines)
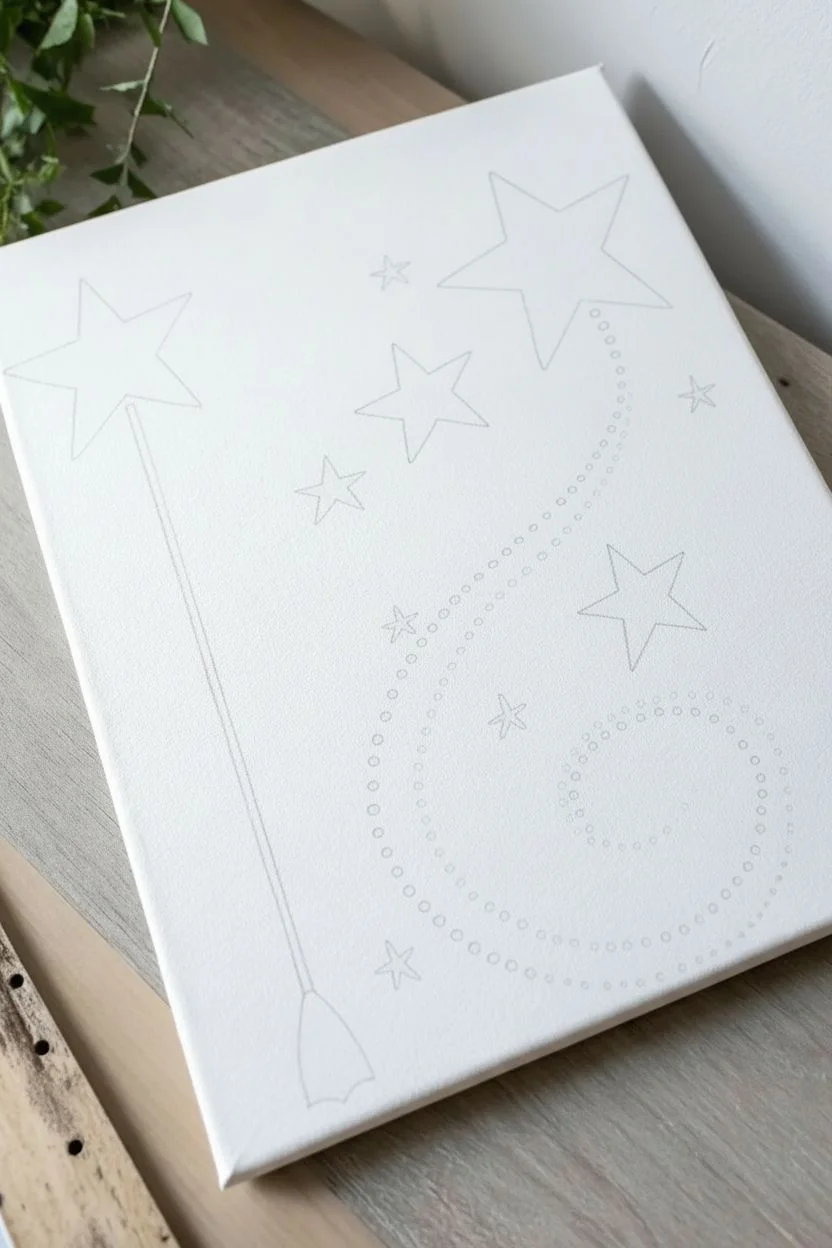
Step 1: Drafting the Design
-
Sketch the wand:
Begin by lightly drawing the wand’s stick on the left side of the canvas. Use a ruler to ensure the handle is straight, angling it slightly so the top tilts toward the canvas edge. -
Draw the star tip:
At the top of your stick, sketch a classic five-pointed star. This is the main focal point, so take your time getting the proportions right. -
Map out the swirl:
Lightly sketch a large, sweeping ‘S’ curve or spiral starting from the wand’s star and looping down towards the bottom right corner. This will be the guide for your magical trail. -
Placement of floating stars:
Sketch a few additional stars along the magical trail. Vary their sizes—one large one near the top right, and smaller scattered mid-sized stars throughout the curve.
Fixing Wobbly Stars
If your star points aren’t sharp, wait for the paint to dry completely. Then, use a white paint pen or white acrylic with a flat brush to ‘cut back’ into the edges and sharpen them up.
Step 2: Painting the Gold Elements
-
Paint the main star:
Fill in the main star atop the wand with your gold glitter paint. If you are using standard acrylic, paint a solid gold base layer first, let it dry, and then apply a glitter topcoat for maximum sparkle. -
Detail the handle:
Using a liner brush and the same gold paint, carefully trace the handle. Don’t forget the small, teardrop-shaped detail at the very bottom of the handle. -
Fill secondary gold stars:
Identify the medium-sized stars in your sketch (like the ones in the middle cluster) and paint them with the gold glitter mixture. -
Add tiny twinkle stars:
Using your smallest brush, paint tiny four-pointed ‘twinkle’ stars scattered randomly around the main spiral. These don’t need to be perfect; simple cross shapes work beautifully.
Make It 3D
Instead of just paint, glue actual flat-back rhinestones or sequins onto the dot trail. Place them sporadically among the painted dots for a texture that catches the light.
Step 3: Adding Dimension and The Trail
-
Paint the accent stars:
Switch to your champagne or rose gold glitter paint. Fill in the large star at the top right and the medium star on the right side of the curve to create a lovely color variation. -
Start the dot trail:
The magical swoosh is made entirely of dots. Select a dotting tool or use the back of a paintbrush dipped in grey paint. Start creating a dotted line that follows the inner curve of your pencil sketch. -
Mix dot sizes:
For a dynamic look, graduate the size of your grey dots. I prefer to make them slightly larger near the top of the curve and smaller as the trail dissipates near the bottom. -
Add the tan trail:
Clean your dotting tool and dip it into the tan or beige paint. Create a second dotted line that runs parallel to the grey one, sometimes crossing over or mixing in to create depth. -
Fill the spiral volume:
Continue adding rows of dots to widen the magical trail. Use the tan paint to create the wider, outer sweep of the spiral at the bottom right. -
Scattered magic dust:
Add a few stray dots of both grey and tan floating away from the main path to make the magic look like it’s drifting into the air. -
Erase guidelines:
Once you are absolutely certain all paint is 100% dry, gently erase any visible pencil marks from your initial sketch.
Hang this enchanting piece on the wall to add a sprinkle of fairy dust to your daily life
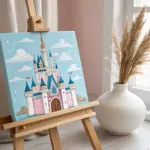
Cute Character Grid: Four Mini Disney-Style Icons on One Canvas
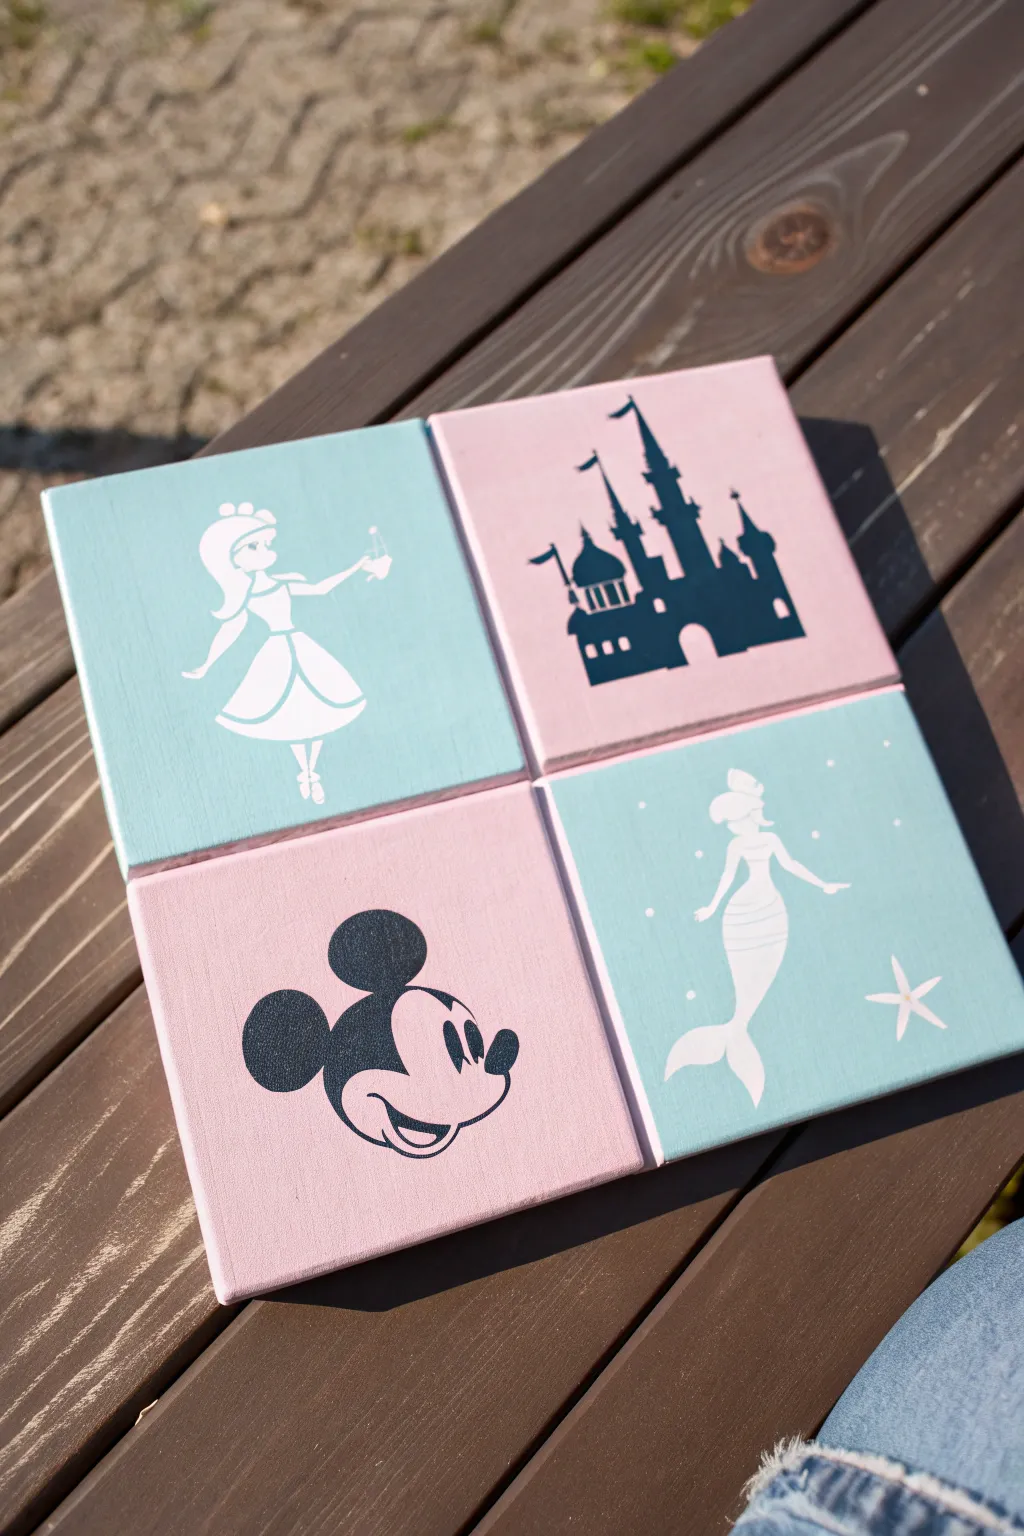
Create a charming gallery wall in miniature with these adorable Disney-inspired silhouette paintings. Using a soft pastel color palette of baby pink and minty blue, this four-piece set features classic icons like Mickey, a castle, and favorite princesses in a clean, modern style.
Detailed Instructions
Materials
- 4 small square canvases (4×4 or 6×6 inches) or wood blocks
- Acrylic paint: Baby Pink
- Acrylic paint: Mint or Light Turquoise
- Acrylic paint: White
- Acrylic paint: Black or Dark Navy Blue
- Flat brush (1-inch width)
- Small fine-liner brush (size 0 or 00)
- Stencil vinyl or contact paper (optional but recommended)
- Hobby knife (X-Acto)
- Cutting mat
- Pencil
- Carbon transfer paper
- Matte finish spray sealer
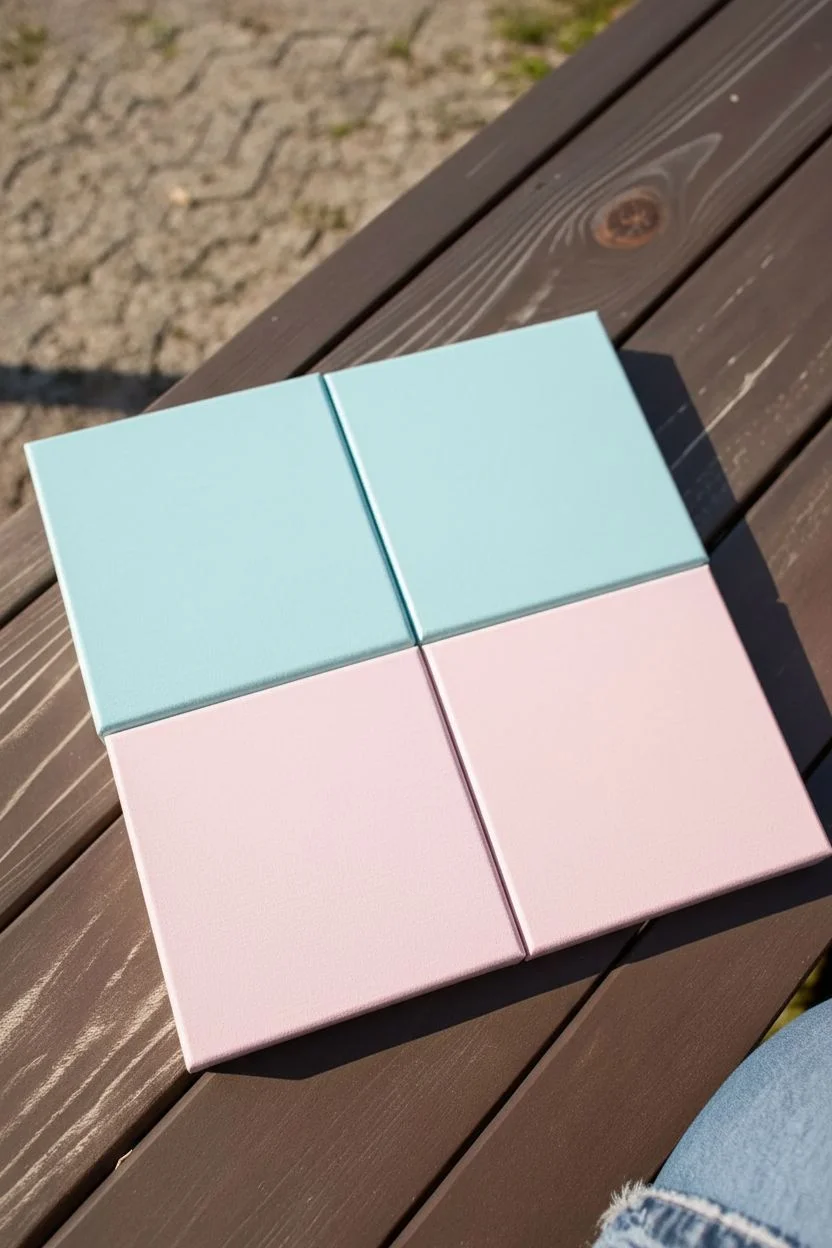
Step 1: Preparing the Base
-
Surface Prep:
Begin by wiping down your four canvases or wood blocks to remove any dust. If using raw wood, give them a quick sanding with fine-grit sandpaper for a smooth painting surface. -
Mixing Pastels:
Pour out your baby pink and mint turquoise paints. For a softer look, mix a small amount of white into each color to achieve a creamy, chalky pastel tone. -
Base Coating:
Paint two of the squares with the pink mixture and the remaining two with the mint blue. Use your flat brush and long, even strokes to minimize brush marks. -
Second Coat:
Allow the first layer to dry completely (about 20 minutes). Apply a second coat to ensure simple, solid coverage without streaks. -
Edge Detailing:
Don’t forget to paint the sides of the canvases or blocks. This gives the finished project a polished, professional look when hung on the wall.
Step 2: Creating the Designs
-
Sourcing Silhouettes:
Find simple silhouette images of Cinderella, a Disney castle, Mickey’s face, and Ariel the mermaid. Resize them on your computer to fit comfortably within the dimensions of your squares. -
Transfer Method Choice:
You can either cut stencils from vinyl using a die-cutting machine (like a Cricut) or print the images on paper to trace manually. For this tutorial, we will use the tracing method. -
Tracing the Design:
Place a sheet of carbon paper over the dry canvas, then tape your printed design on top. Gently trace the outline of the character with a pencil to transfer the guide onto the paint. -
Alternate Tracing:
If you don’t have carbon paper, scribble heavily on the back of your printed paper with a pencil, flip it over, and trace firmly to push the graphite onto the canvas.
Crisp Lines Hack
If you struggle with shaky hands, use a white paint pen instead of a brush for the Cinderella and Ariel silhouettes. It offers much more control.
Step 3: Painting the Icons
-
Painting Cinderella:
On a blue canvas, use your fine-liner brush and white paint to fill in the Cinderella silhouette. Use two thin coats of white to ensure it pops against the blue background without looking clumpy. -
Painting Ariel:
On the second blue canvas, paint the Ariel silhouette in white. Be careful with delicate details like her outstretched arm and the fin tips. Add a few small white dots for bubbles and a simple star shape. -
Painting the Castle:
Switch to a pink canvas. Use black or very dark navy paint for the castle. Start by outlining the turrets and flags with your finest brush, then fill in the larger central areas. -
Painting Mickey:
On the final pink canvas, paint Mickey’s head using the black paint. Pay close attention to the curve of the ears and the smile line to capture his classic expression accurately. -
Refining Edges:
I usually go back with the background color (pink or blue) and a tiny brush to ‘erase’ any wobbles or mistakes in the silhouette outlines for a crisp finish. -
Sealing the Work:
Once all designs are fully dry (give it at least an hour), take the squares outside and spray them with a matte clear coat to protect the paint and unify the sheen.
Add Sparkle
Mix a tiny pinch of ultra-fine glitter into your white paint for the princesses, or add a single rhinestone to the top of the castle spire.
Arranging these four squares in a grid creates an instant focal point for a nursery or playroom
Stained-Glass Look Castle Window With Black Outlines
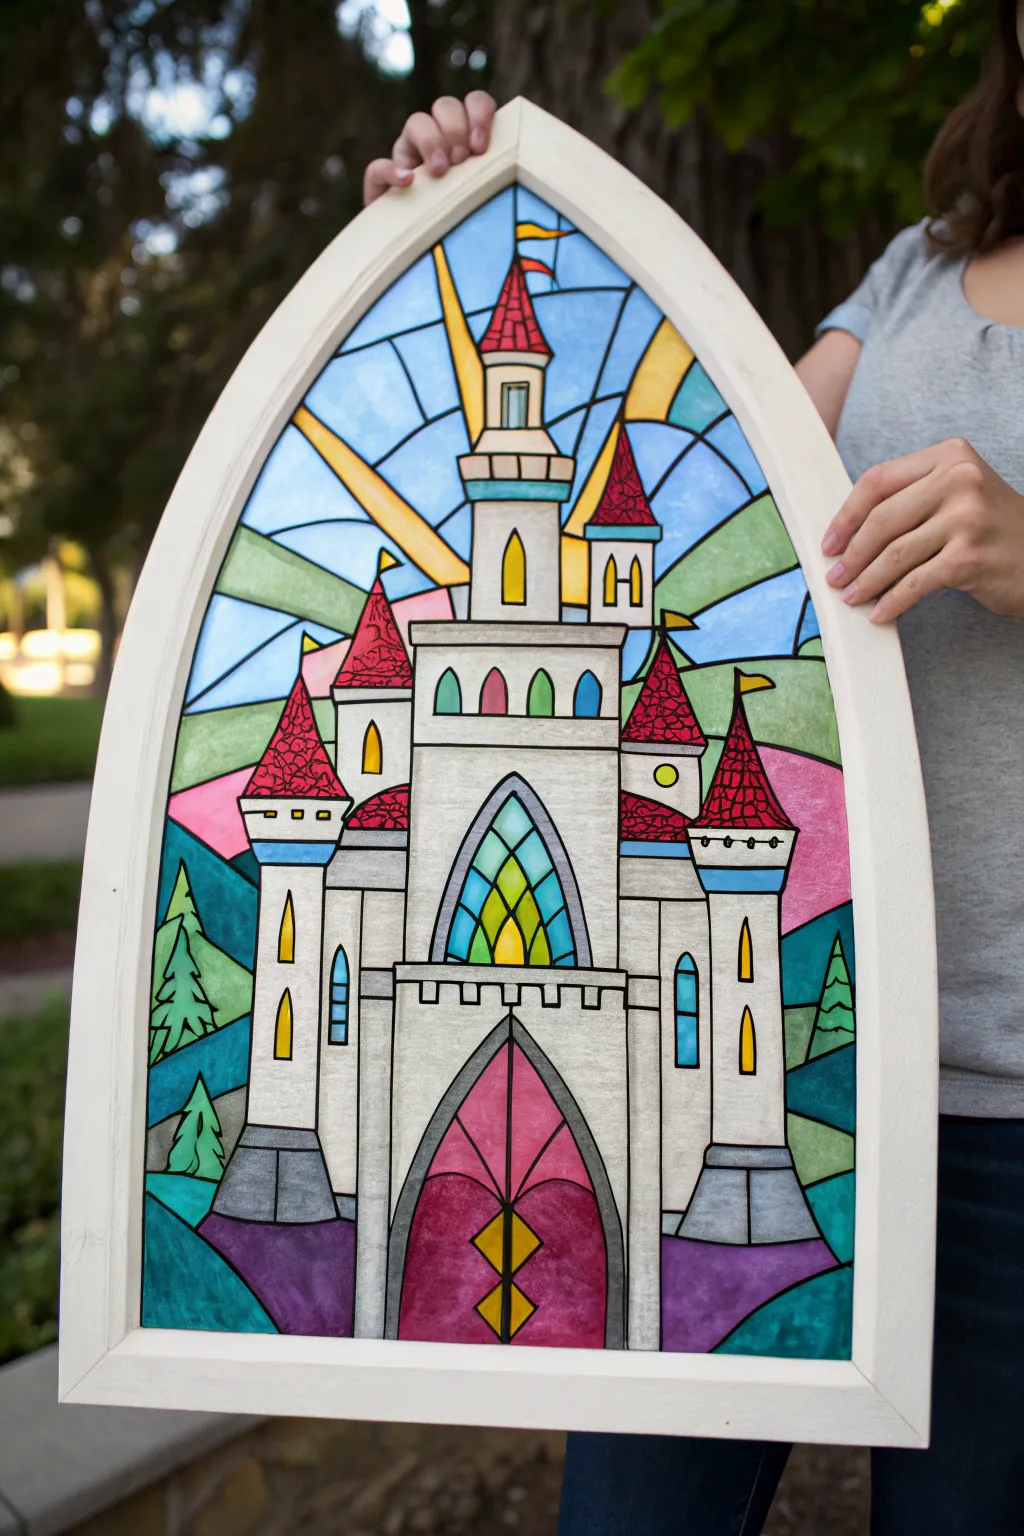
Bring the magic of a storybook castle into your home with this stunning faux stained-glass window project. By combining bold black outlines with vibrant, translucent paints on a clear surface, you’ll create a glowing masterpiece that captures the light beautifully.
Step-by-Step Tutorial
Materials
- Large arched wooden frame (or wood to build one)
- Clear acrylic sheet or plexiglass cut to fit frame
- Liquid leading (black) or thick black relief paint
- Glass paints or gallery glass colors (various jewel tones)
- White or light grey glass paint (for castle walls)
- Printed castle pattern/template sized to your frame
- Masking tape
- Small round paintbrushes
- Toothpicks (for popping bubbles)
- Glass cleaner and paper towels
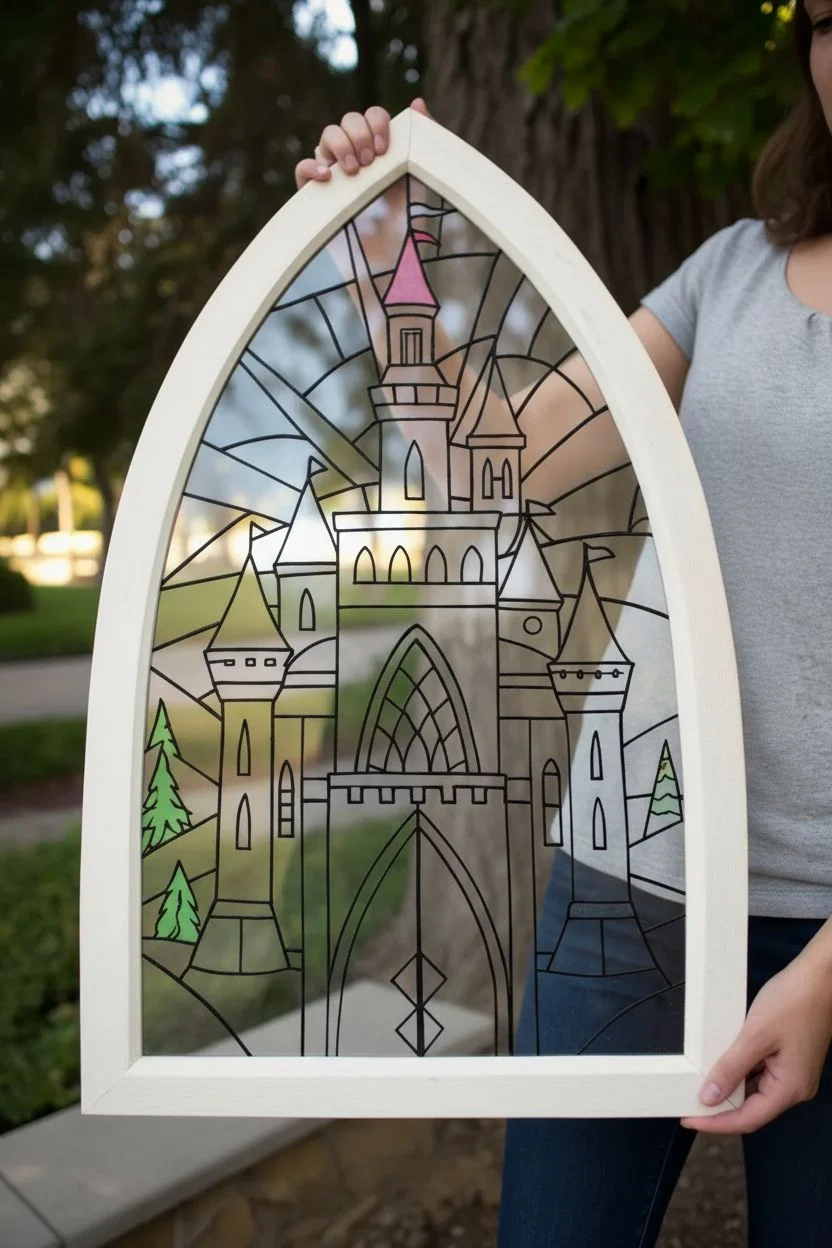
Step 1: Preparation & Outline
-
Prepare the surface:
Clean your acrylic sheet or glass thoroughly with glass cleaner. Any fingerprints or dust will be permanently trapped under the paint, so ensure it is spotless before beginning. -
Secure the template:
Place your printed castle pattern flat on your work surface. Lay the clear acrylic sheet directly on top of it and tape the corners down securely so nothing shifts while you work. -
Trace the leading lines:
Using the bottle of black liquid leading, carefully trace every line of the castle design directly onto the acrylic. Hold the bottle nozzle slightly above the surface and let the line drape down for the smoothest curves. -
Check your connections:
Ensure all lines connect firmly to create closed shapes. If there are gaps, your colorful paint layers might bleed into each other later. I like to double-check intersection points specifically. -
Cure the outlines:
Allow the black leading to dry completely. This usually takes 8 to 12 hours depending on the brand; the lines should feel firm and not tacky to the touch.
Step 2: Adding the Color
-
Fill the castle walls:
Start with the main structure. Squeeze or brush white or very light grey glass paint into the wall sections. Use the tip of the bottle or a brush to push the paint all the way to the black leading edges. -
Texture the stone:
While the wall paint is wet, use a toothpick to gently swirl or stipple the paint. This creates a subtle stone-like texture rather than a perfectly flat color. -
Paint the turrets:
Fill the turret roofs with deep red or magenta glass paint. Apply it generously enough that it settles into a smooth, jewel-like pool of color. -
Detail the stained glass feature:
For the central arch window within the castle, use bright blue, yellow, and green paints. Because these sections are small, apply very small drops and guide them into corners with a toothpick. -
Add landscape elements:
Paint the stylized trees and hills in the background with various shades of teal and emerald green. Varying the shades helps create depth behind the castle. -
Create the sky:
Working on the sky sections last prevents your hand from smudging the wet castle. Use varying shades of blue for the sky panes and bright yellow for the sun rays. -
Pop air bubbles:
Inspect your wet paint closely for tiny bubbles. Pop them immediately with a sharp pin or toothpick to ensure the final finish is clear and glass-like. -
Dry flat:
Leave the project flat to dry for at least 24 to 48 hours. Moving it too soon can cause the liquid paint to pool unevenly.
Smooth Flow Trick
Keep your leading tip wiped clean every few inches. A buildup of dried gunk on the nozzle causes shaky, uneven lines.
Step 3: Assembly
-
Check opacity:
Once dry, hold it up to the light. If any colors look too pale or streaky, apply a second coat directly over the first for richer saturation. -
Prepare the frame:
While the paint cures, ensure your wooden frame is painted white and fully dry. If you built custom framing, sand the edges smooth first. -
Mount the artwork:
carefully place the painted acrylic sheet into the routed groove of your frame. Secure it with framing points or a strong adhesive like E6000 along the back edges. -
Final clean:
Wipe down the front (unpainted) side of the acrylic to remove any smudges from handling, revealing your crystal-clear castle view.
Crystal Sparkle
Mix a tiny pinch of fine iridescent glitter into the blue sky paint before applying it for a magical, shimmering effect in sunlight.
Hang your new castle window where it can catch the morning sun and fill your room with color
Galaxy Night Mouse-Ear Silhouette With Glittery Star Texture
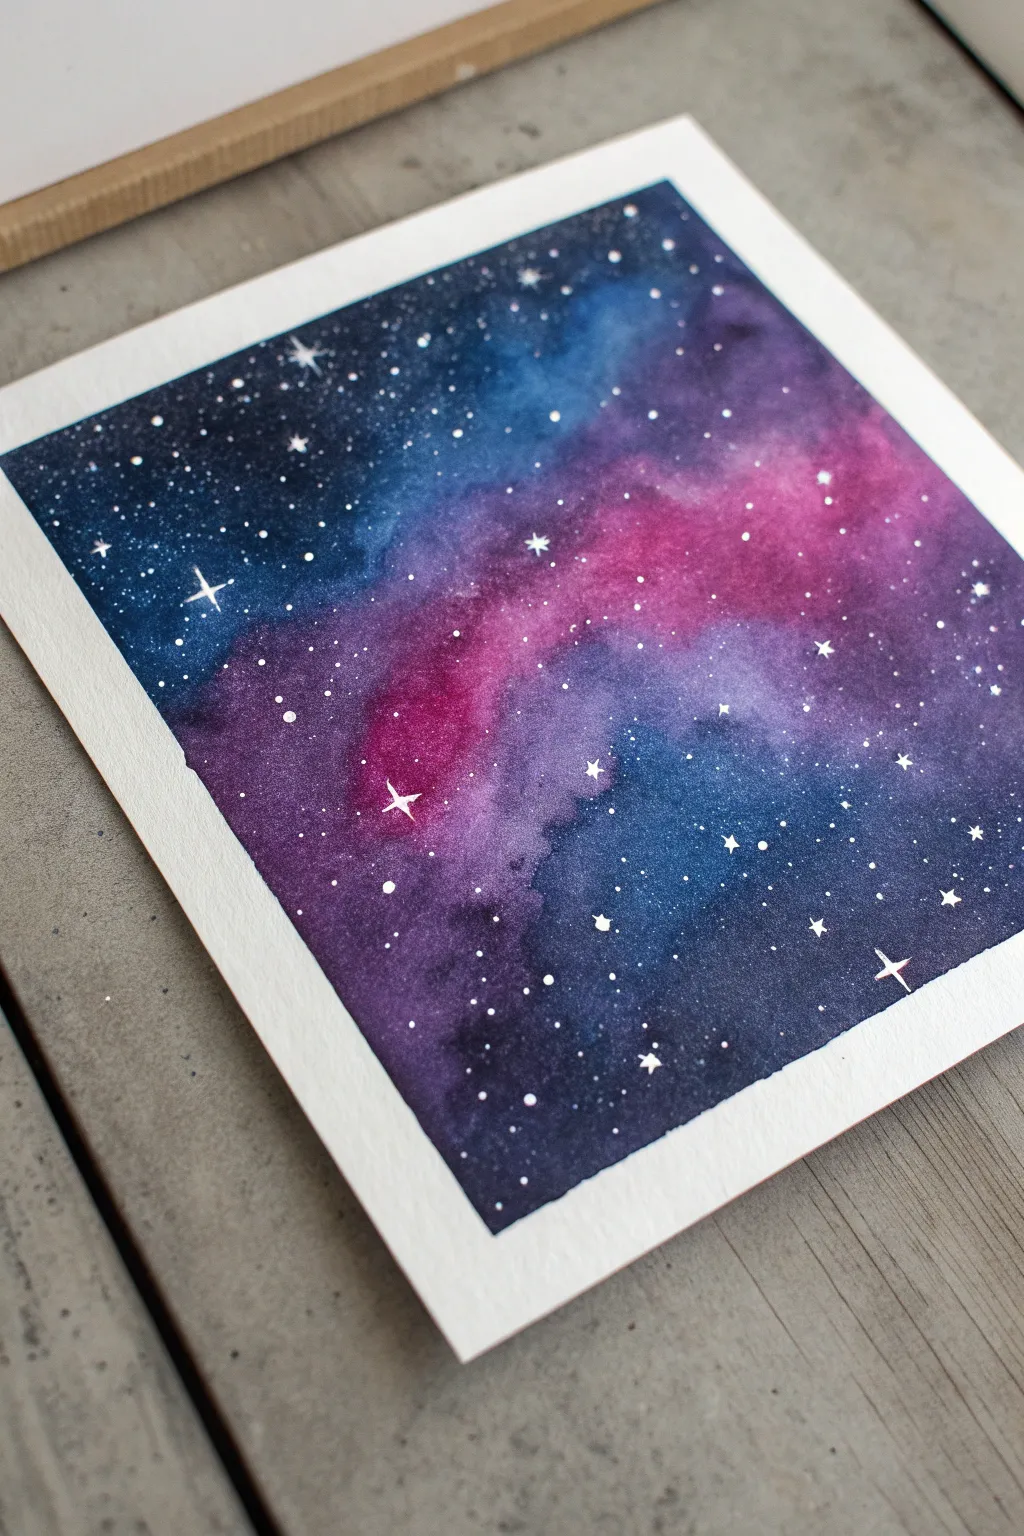
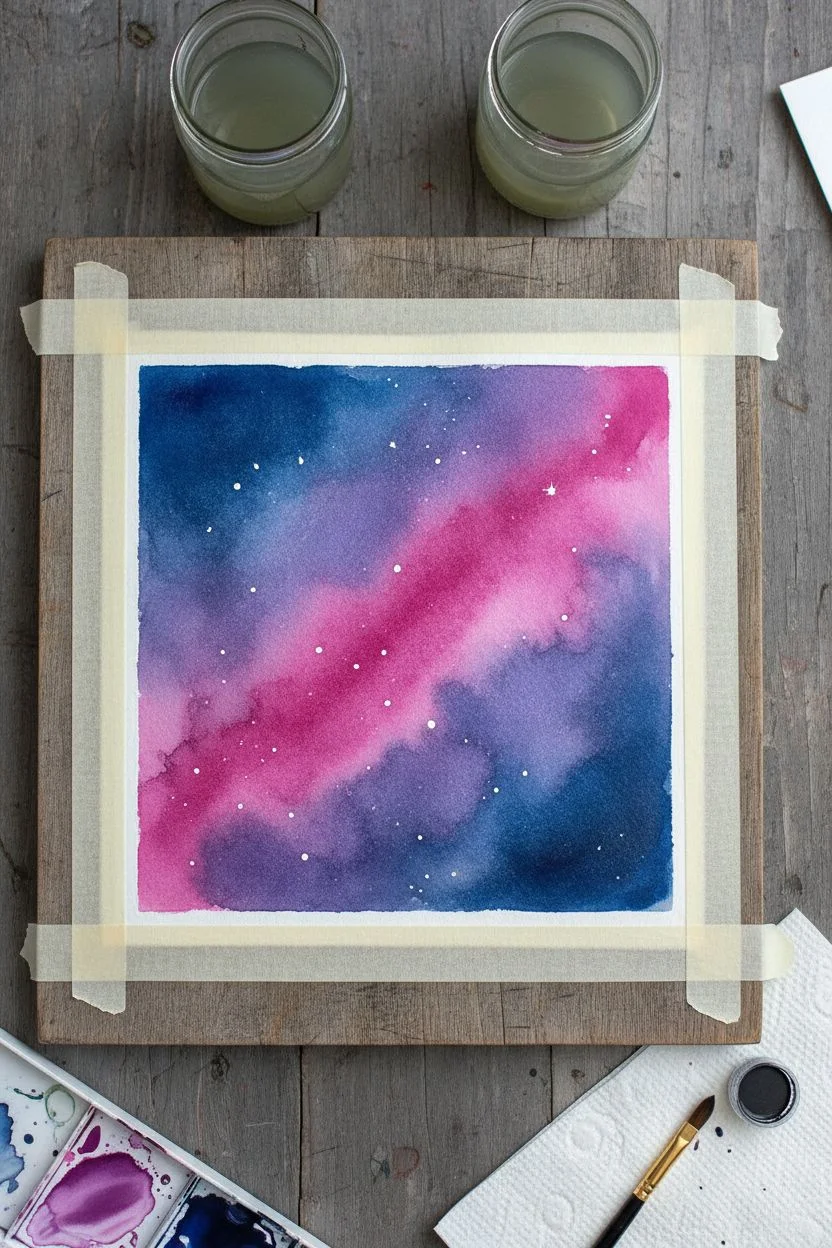
Capture the magic of deep space with this vibrant watercolor galaxy painting featuring swirling nebulas of indigo, violet, and magenta. The beauty of this project lies in its unpredictability, as the wet-on-wet technique allows colors to bloom and blend into unique cosmic patterns.
Step-by-Step
Materials
- Cold Press Watercolor Paper (300gsm/140lb)
- Painter’s Tape or Washi Tape
- Watercolor Paints (Indigo, Prussian Blue, Violet, Magenta, Black)
- White Gouache or White Gel Pen
- Round Watercolor Brushes (Size 8 and Size 2)
- Two Jars of Water
- Paper Towels
- Toothbrush (optional for splatter)
Step 1: Setting the Stage
-
Tape the Edges:
Begin by securing your watercolor paper to a board or table using painter’s tape. Create a crisp square border, pressing the tape down firmly to ensure no paint bleeds underneath. -
Prepare Your Colors:
Pre-mix your paints in a palette. You’ll want a very saturated puddle of Indigo, Prussian Blue, Violet, and Magenta. Having these ready to go is crucial for the wet-on-wet work.
Muddy Colors?
If your pinks and blues are turning grey where they meet, let the first color dry slightly before adding the next, or wash your brush more often between picking up colors.
Step 2: Creating the Nebula
-
Wet the Surface:
Using your larger brush, coat the entire square area with clean water. The paper should be glisten evenly but not have pools of standing water. -
Lay the Brightest Colors:
While the paper is wet, drop in your Magenta paint diagonally across the center. Allow it to bloom outward organically. -
Add Secondary Tones:
Place Violet paint around the edges of the Magenta, letting them touch and blend slightly on the paper. I find gently tilting the board helps them mix naturally. -
Deepen the Edges:
Load your brush with Indigo and Prussian Blue. Apply these dark colors to the outer corners and remaining white spaces, working your way inward toward the purple sections. -
Intensify the Void:
For the darkest parts of space, drop touches of Black or highly concentrated Indigo into the very corners while the paint is still damp. -
Blend the Transitions:
Clean and dampen your brush slightly to soften any harsh lines where the blue meets the purple, ensuring a smooth, smoky transition between the colors. -
First Drying Phase:
Allow this initial layer to dry completely. The paper must be bone-dry before proceeding, or the next steps will muddy your vibrant colors.
Step 3: Building Depth
-
Second Layer Glazing:
Once dry, re-wet specific dark areas slightly and add another layer of Indigo to intensify the contrast against the brighter center nebula. -
Lift Highlights:
If your center became too dark, use a clean, damp brush to gently lift some pigment from the magenta area, revealing the paper’s brightness. -
Final Drying:
Let everything dry thoroughly again. Use a hairdryer on a low setting if you need to speed up the process.
Silhouette Magic
Before splattering white stars, paint a solid black silhouette of a forest line or mountain range at the bottom for a landscape effect.
Step 4: Adding the Stars
-
Splatter Stars:
Dilute a small amount of white gouache with water until it’s a milky consistency. Dip a toothbrush or stiff brush into it and flick the bristles to spray fine mist droplets across the galaxy. -
Paint Larger Stars:
Using a size 1 or 2 brush (or a white gel pen), dot varying sizes of white stars manually onto the darker blue areas for variety. -
Add Shining Stars:
Choose a few brighter dots and carefully paint small crosses or four-pointed shapes over them to create a twinkling ‘lens flare’ effect. -
The Reveal:
Wait for the white highlights to dry completely. Then, slowly peel away the painter’s tape at a 45-degree angle to reveal those satisfying crisp white edges.
Enjoy the peaceful process of watching your miniature universe come to life on the page


Have a question or want to share your own experience? I'd love to hear from you in the comments below!