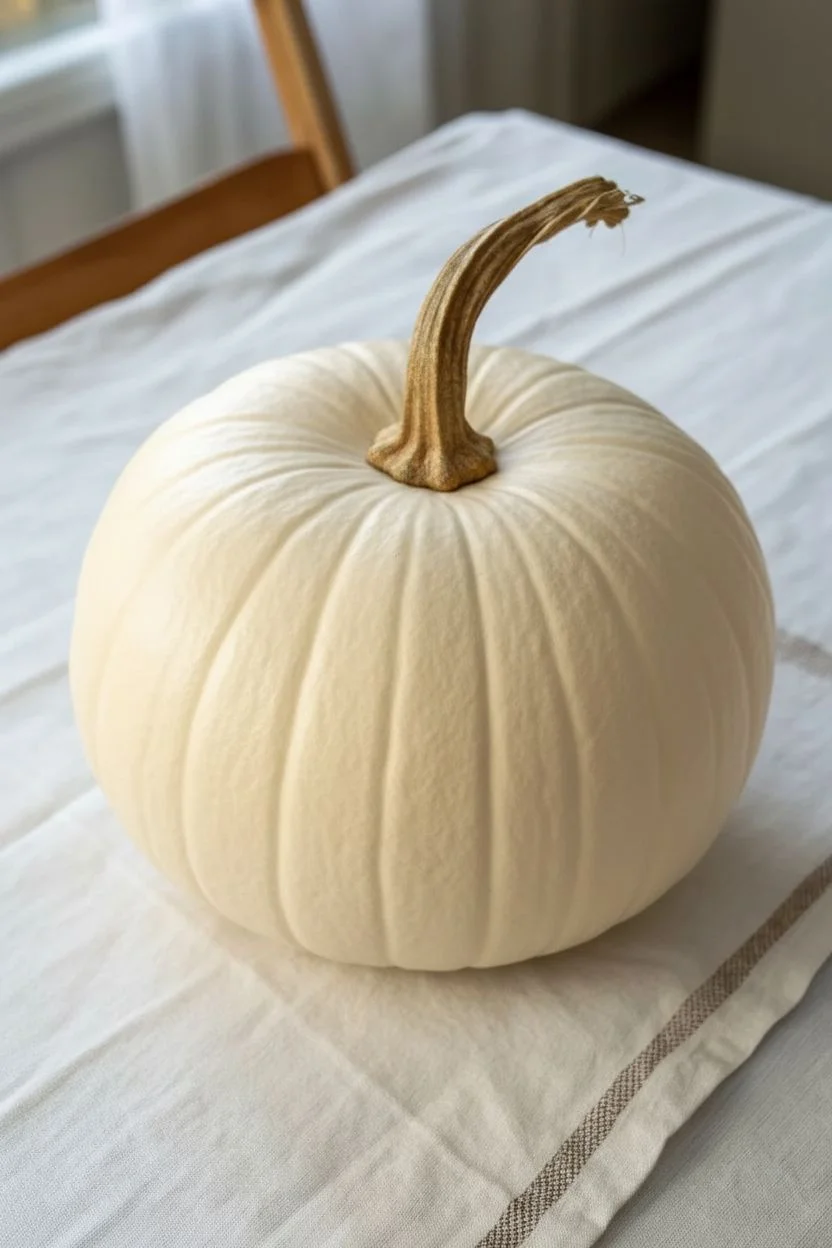
If you’re craving a Thanksgiving look without carving, painted pumpkins are the coziest little canvas you can set out this season. I love how a few harvest tones and the right motifs can turn any pumpkin into instant gratitude-filled decor.
Classic Harvest Leaf Garland Pumpkin
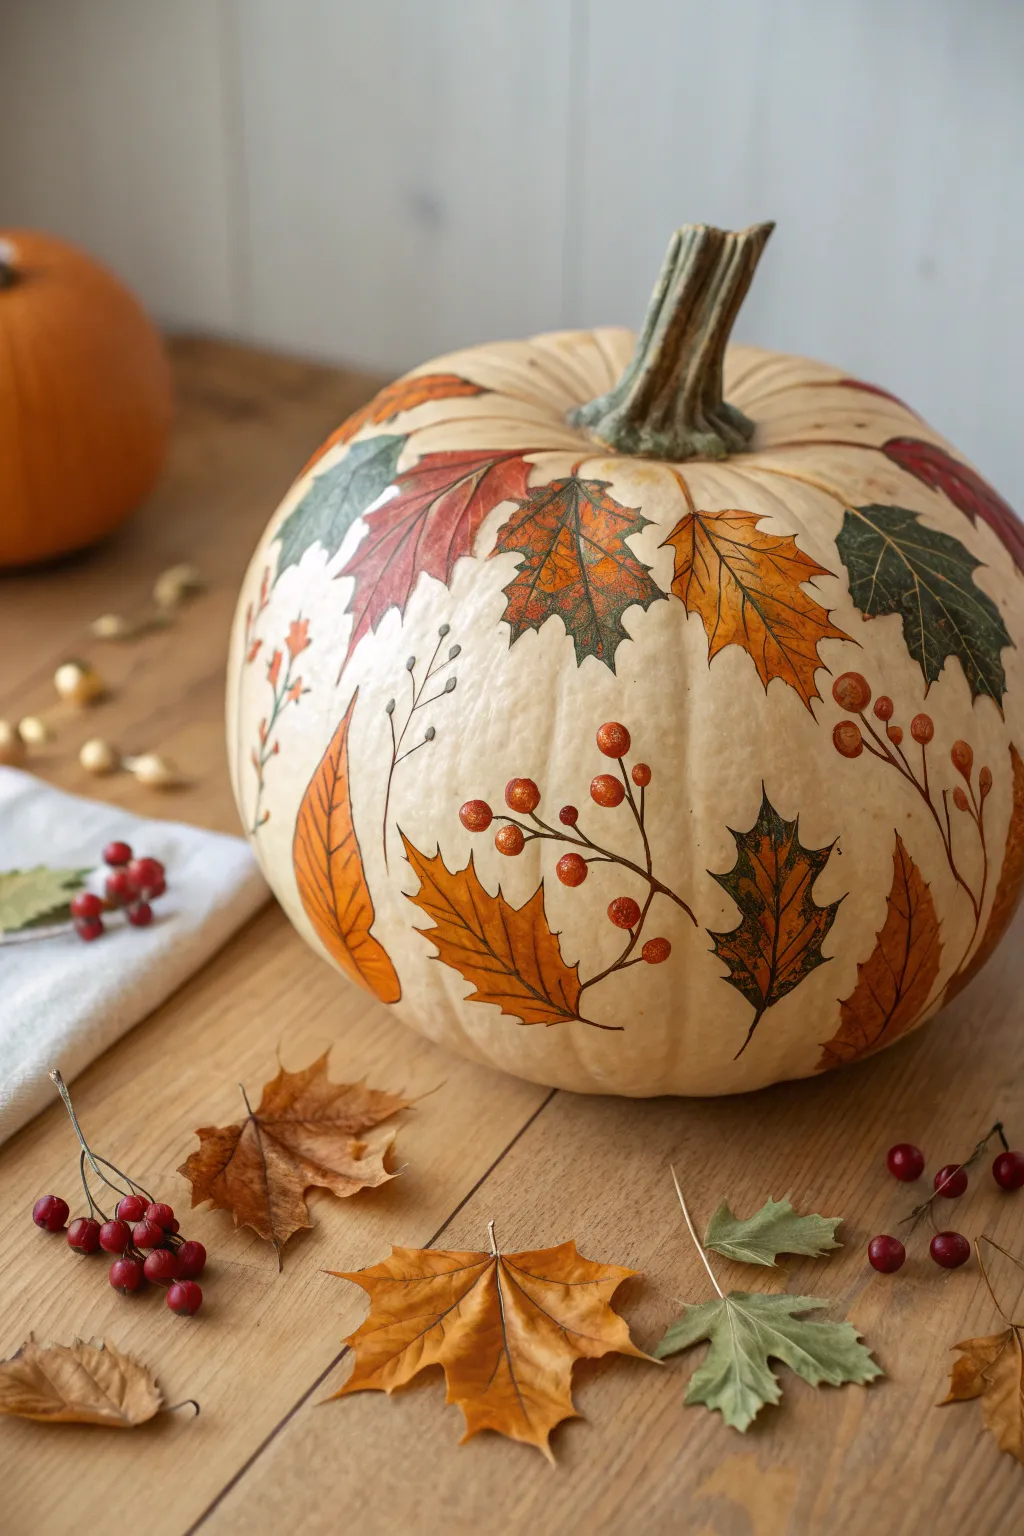

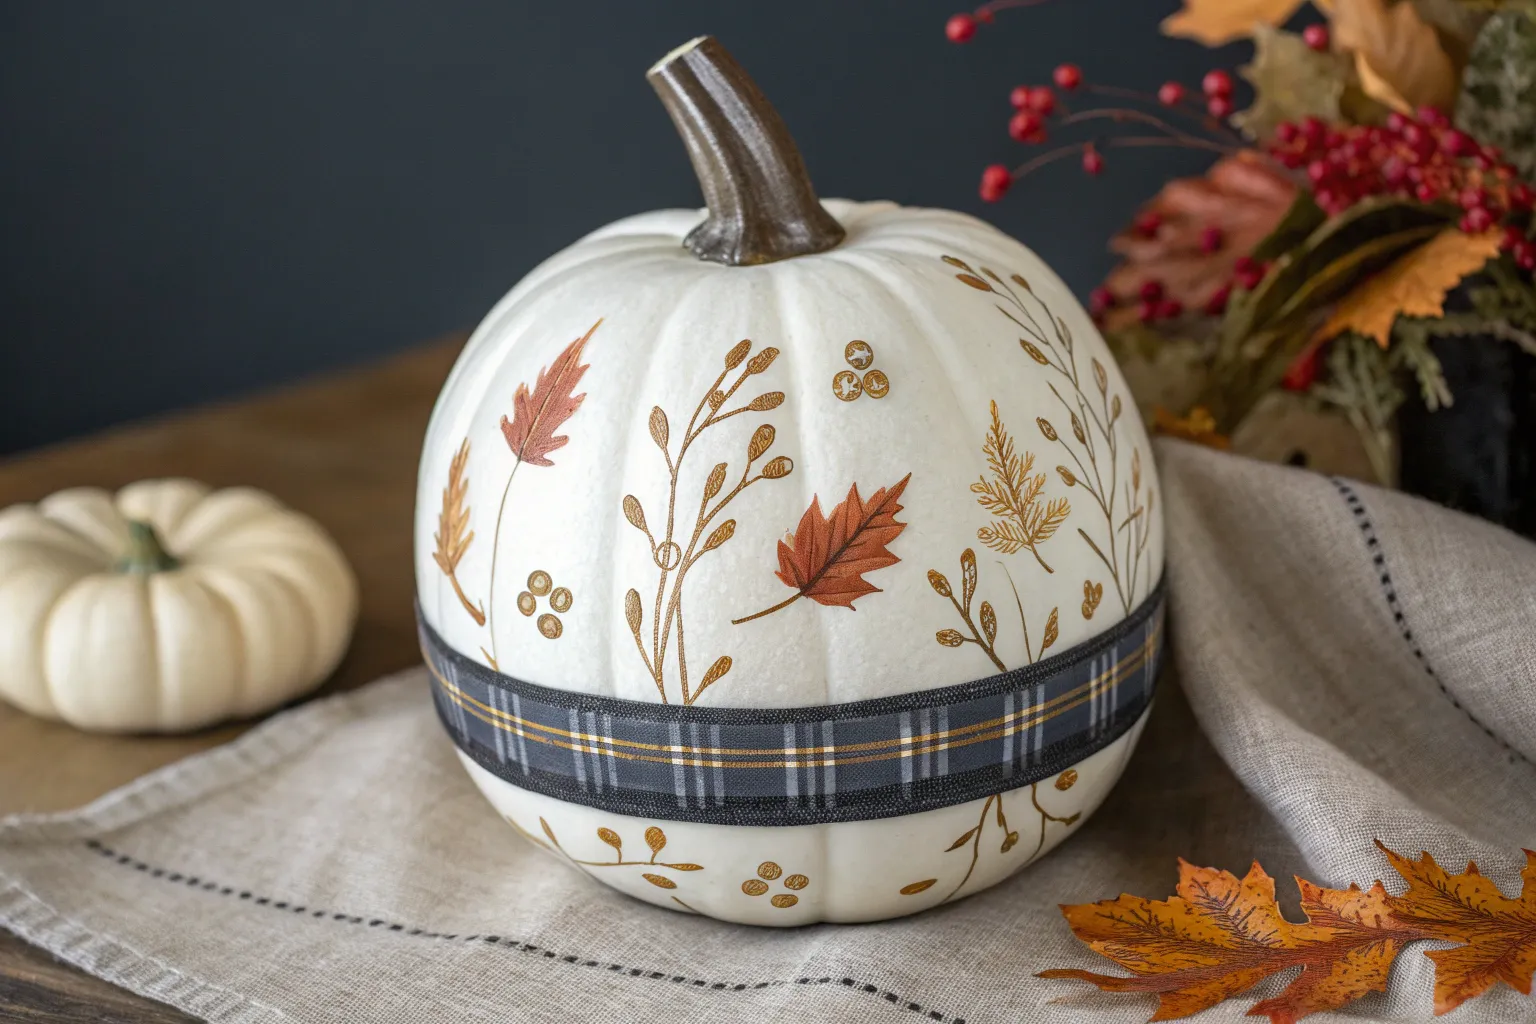
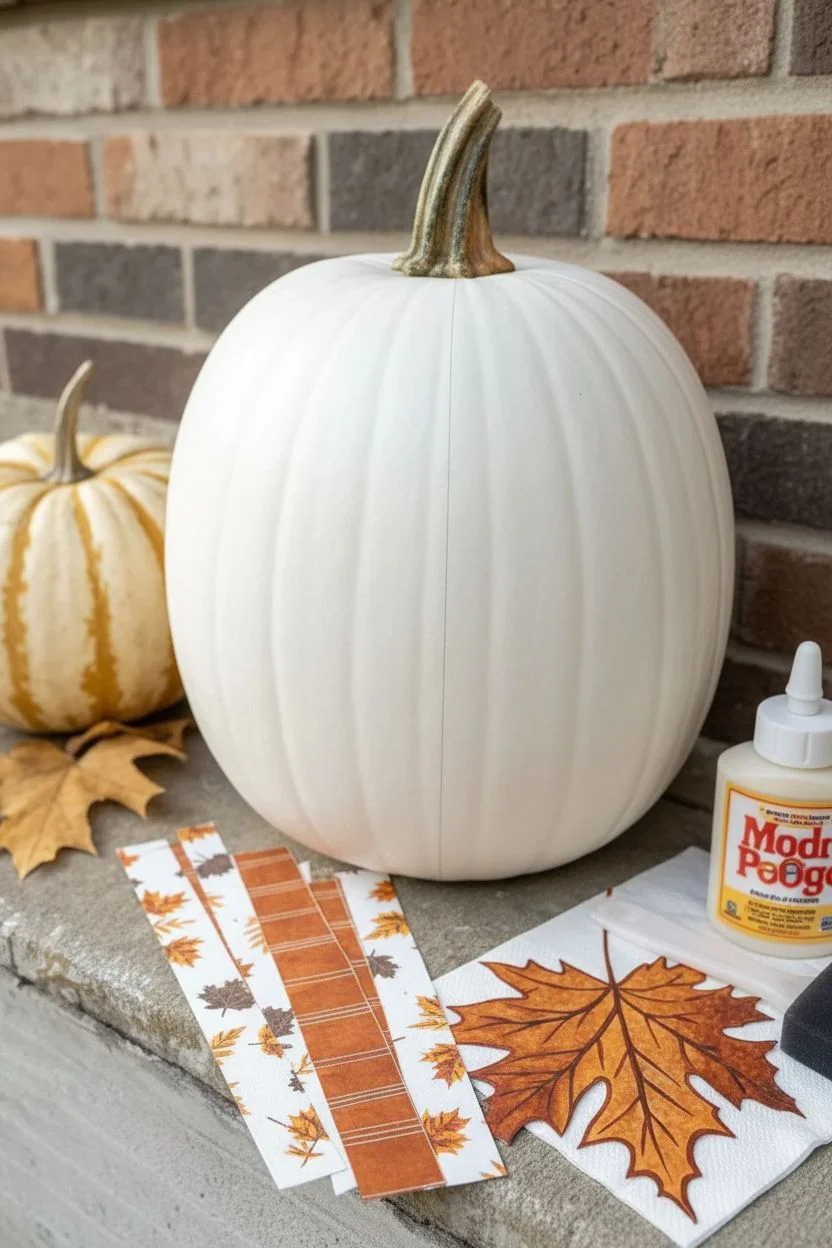
Bring the crisp beauty of autumn indoors with this elegantly detailed pumpkin project. By combining decoupage techniques with delicate hand-painted accents, you can create a centerpiece that looks like a botanical illustration come to life.
Detailed Instructions
Materials
- Medium-sized white or cream pumpkin (real or high-quality faux)
- Paper napkins or decoupage paper featuring realistic autumn leaves and berries
- Mod Podge (Matte finish)
- Small sharp scissors (embroidery scissors work best)
- Soft flat brush (for decoupage)
- Fine liner brush (size 0 or 00)
- Brown and burnt orange acrylic craft paint
- Matte acrylic sealer spray
Step 1: Preparation & Paper Work
-
Clean the surface:
Start by thoroughly wiping down your pumpkin with a damp cloth to remove any dirt or oils. If you are using a real pumpkin, a solution of one part bleach to ten parts water helps it last longer. -
Dry completely:
Ensure the pumpkin is completely dry before beginning any work. Moisture can prevent the adhesive from bonding correctly. -
Separate napkin layers:
If you are using decorative napkins, carefully peel away the white backing layers until you are left with only the single, printed top ply. This is crucial for a seamless, painted-on look. -
Fussy cut the motifs:
Using your small sharp scissors, cut out individual leaves, berry clusters, and twigs. Cut as close to the design edge as possible, removing any white background paper. -
Plan the layout:
Before gluing, dry-fit your cutouts on the pumpkin. I like to arrange the larger maple leaves near the top, draping slightly downward, and fill the gaps with smaller oak leaves and berries.
Wrinkle-Free Tip
Use the ‘cling wrap method’: place plastic wrap over the wet image and smooth with your fingers. The plastic glides without tearing the delicate wet paper beneath.
Step 2: The Decoupage Process
-
Apply base medium:
Taking your flat brush, apply a thin, even layer of Mod Podge to the specific spot on the pumpkin where your first leaf will go. -
Place the leaf:
Gently lay the paper cutout onto the wet medium. Start from the center of the leaf and lightly tap it down towards the edges. -
Smooth it out:
Dip your finger in a tiny bit of water or Mod Podge and very gently smooth out any wrinkles or air bubbles. The paper will be fragile, so work carefully. -
Seal the motif:
Once the leaf is flat, apply another thin layer of Mod Podge directly over the top to seal it. stroke from the center outward to secure the edges. -
Repeat the pattern:
Continue this process, working your way around the pumpkin. Allow leaves to slightly overlap or change orientation to mimic natural falling leaves. -
Add berry accents:
In the spaces between the larger leaves, adhere your berry sprig cutouts. Position them so the stems seem to tuck behind the larger foliage.
Step 3: Hand-Painted Details
-
Extend the stems:
To make the design look cohesive, mix a little brown paint with water to create an inky consistency. -
Connect the elements:
Using your fine liner brush, paint thin, trailing vines or extend the stems of your cutout leaves so they connect elegantly, rather than floating in space. -
Enhance shading:
If your paper cutouts look a bit flat, add tiny touches of burnt orange or brown paint to the very edges of the leaves to create depth and shadow. -
Let it cure:
Allow the entire pumpkin to dry for at least 24 hours. The glue needs to fully cure to lose any tackiness. -
Final protection:
Take the pumpkin outside or to a well-ventilated area and spray it with a clear matte acrylic sealer. This protects the delicate paper and unifies the finish.
Edges Lifting?
If edges curl up after drying, dip a brush in hot water to re-soften the crisp glue, press the paper down again, and apply a fresh top coat of sealer immediately.
Place your finished masterpiece on a bed of real dried leaves for a seamless harvest display


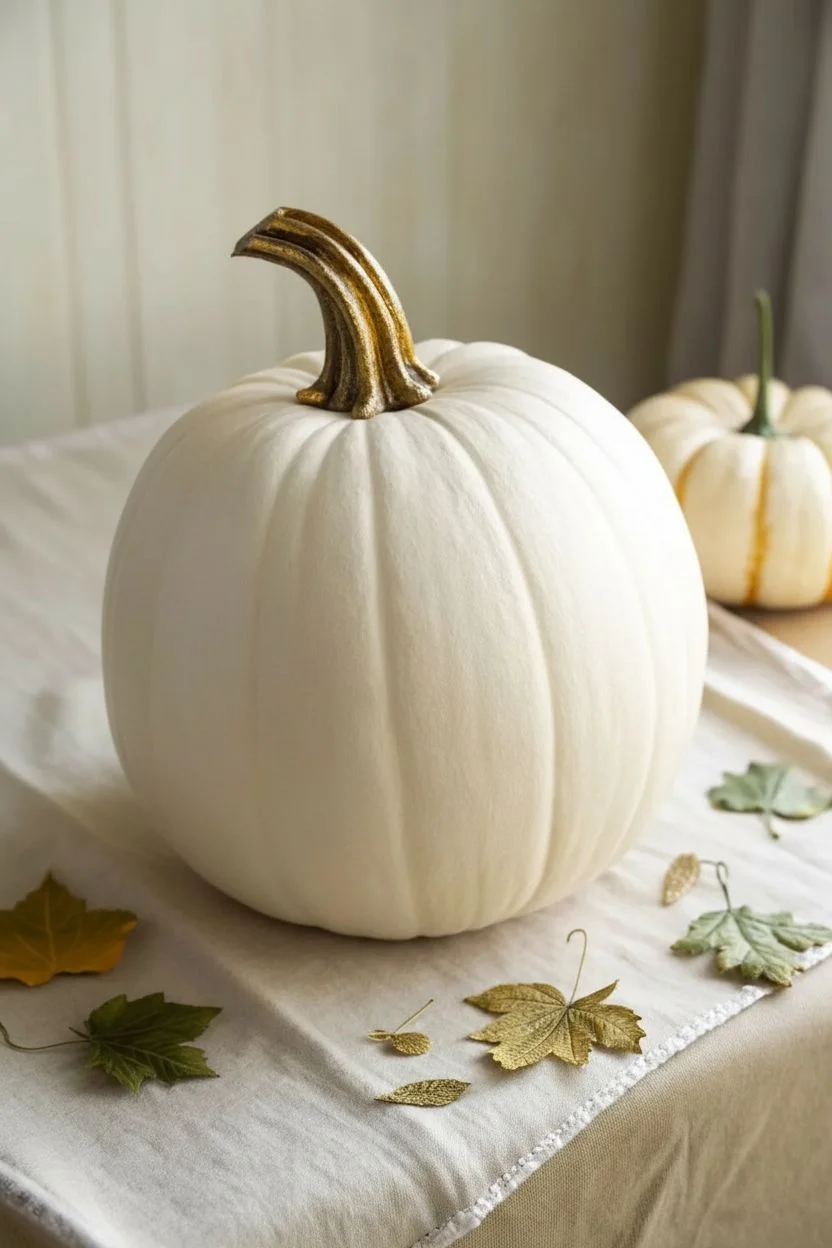
Gratitude Script Pumpkin in Cream and Gold

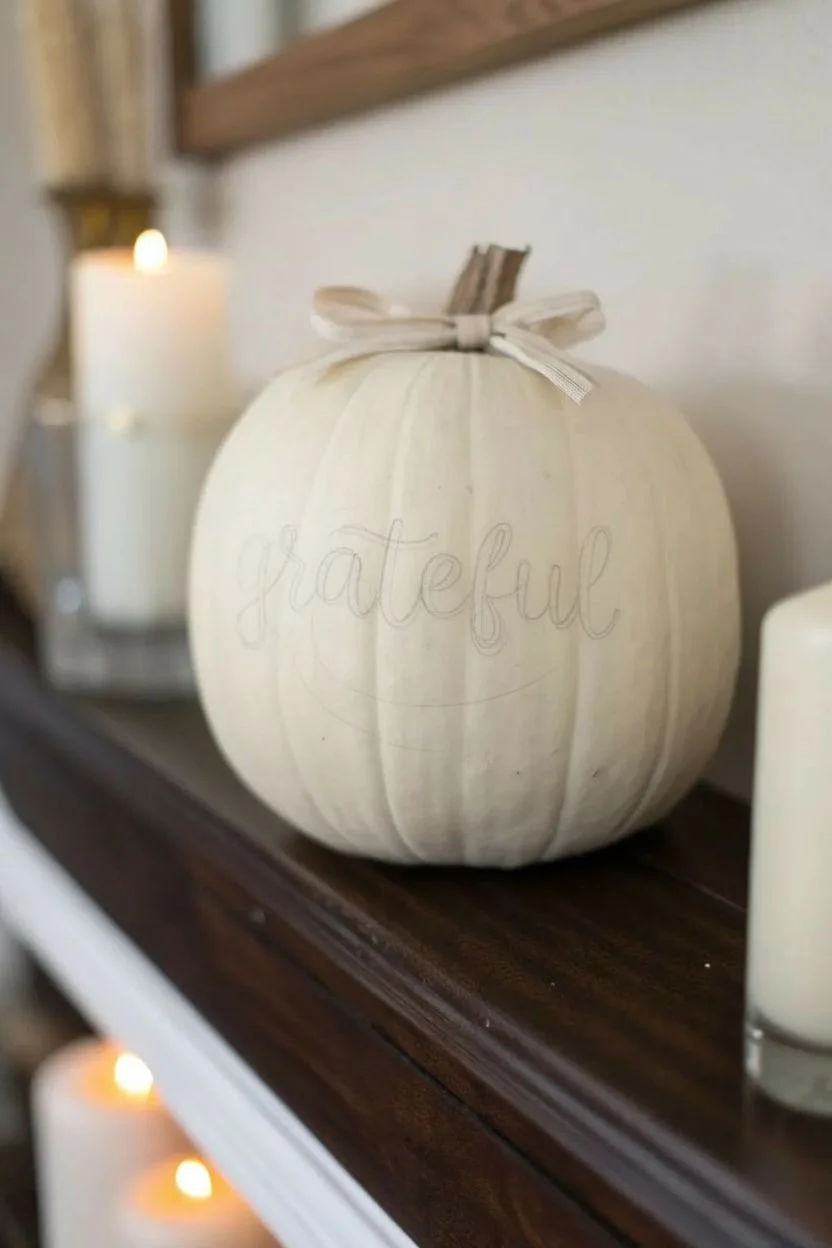
Elegant simplicity defines this project, pairing a creamy white pumpkin with sophisticated gold script for a timeless Thanksgiving centerpiece. The raised, embossed look of the lettering adds a professional finish that belies how easy it is to achieve.
How-To Guide
Materials
- White craft pumpkin (medium size)
- Gold paint marker (medium tip)
- Pencil (HB or lighter)
- Small beige or cream ribbon (grosgrain or velvet works well)
- Scissors
- Hot glue gun and glue sticks
- Eraser
- Optional: Mod Podge or clear sealant
- Optional: Printed script font for tracing
Step 1: Preparation & Planning
-
Clean surface:
Begin by wiping down your pumpkin with a slightly damp cloth to remove any dust or oils. Let it dry completely to ensure your marker adheres properly. -
Choose your script:
Decide on the calligraphy style for the word ‘grateful.’ I find it helpful to look up ‘modern calligraphy fonts’ online for inspiration, or you can simply use your own handwriting if you are comfortable with cursive. -
Lightly sketch:
Using a pencil, very faintly sketch your word across the center of the pumpkin. Don’t press too hard, as you want to avoid denting the pumpkin’s skin. -
Check alignment:
Take a step back and look at your pencil sketch. Ensure the word is centered horizontally and that the letters flow nicely over the pumpkin’s ribs.
Step 2: Lettering
-
Activate marker:
Shake your gold paint marker well and press the tip on a scrap piece of paper until the paint flows smoothly. -
First pass:
Trace over your pencil lines with the gold marker. Focus on getting a clean, single line for each letter first; don’t worry about thickness yet. -
Thicken downstrokes:
To create the faux-calligraphy look, identify every part of the letter where your pen moved *downward*. Go back and draw a second line next to these strokes to thicken them. -
Fill in spaces:
Carefully color in the space between your original line and the thickening line on the downstrokes. This creates that beautiful contrast between thick and thin lines. -
Refine edges:
Look closely at the edges of your letters. Smooth out any shaky areas with the tip of the marker to make the script look crisp and intentional. -
Let dry:
Allow the paint to dry completely. This usually takes about 15-20 minutes depending on the brand of marker used.
Smudge Fixer
Gold marker smeared? Dip a Q-tip in a tiny bit of rubbing alcohol or nail polish remover (for faux pumpkins) to carefully wipe away mistakes.
Step 3: Finishing Touches
-
Clean up sketch lines:
Once the gold paint is 100% dry, gently erase any visible pencil marks. Be very light with the eraser to avoid scratching off the gold paint. -
Prepare the bow:
Cut a length of your beige ribbon, approximately 8-10 inches long. -
Tie the bow:
Tie a simple shoelace bow. Adjust the loops so they are even and stick out slightly, similar to the photo. -
Trim ends:
Trim the tails of the ribbon at an angle or in a V-shape for a polished look. -
Attach bow:
Apply a small dot of hot glue to the base of the pumpkin stem. Press the knot of your bow into the glue and hold for a few seconds until secure. -
Final inspection:
Place your pumpkin on its display surface and check from a distance, adjusting the ribbon loops one last time if needed.
Level Up
For a 3D effect, trace the gold letters with liquid puff paint or use embossing powder and a heat gun for raised, textured text.
Place your finished pumpkin on a mantel alongside soft candlelight to enjoy the warm, thankful atmosphere you have created


Buffalo Plaid Pumpkin in Cozy Fall Tones
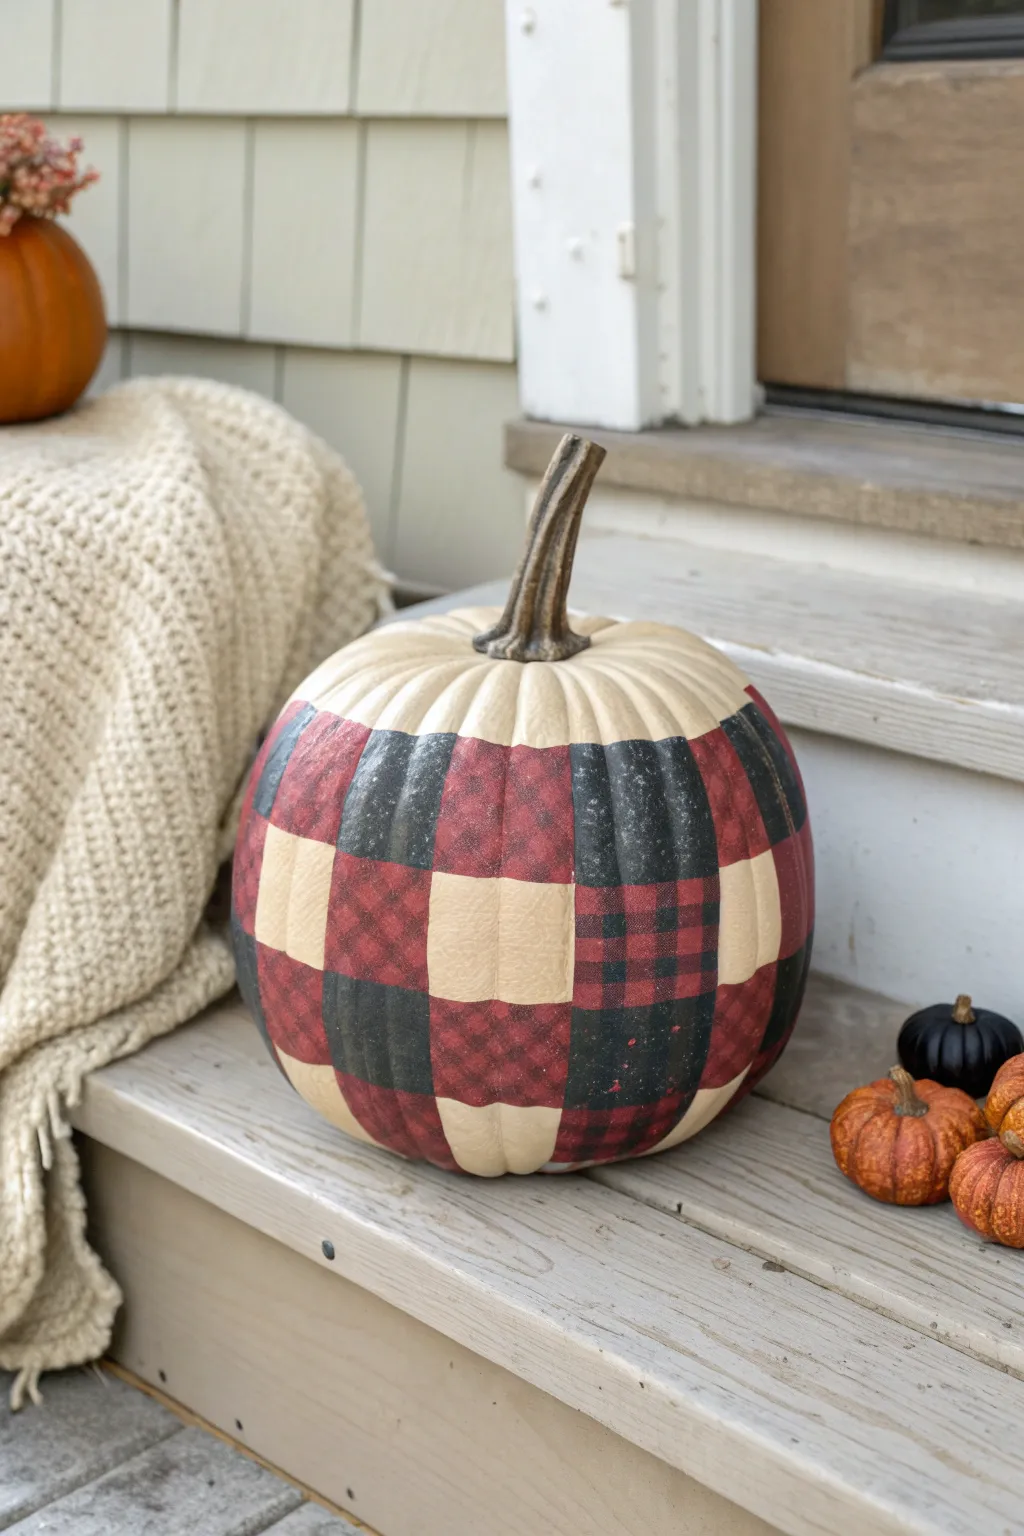
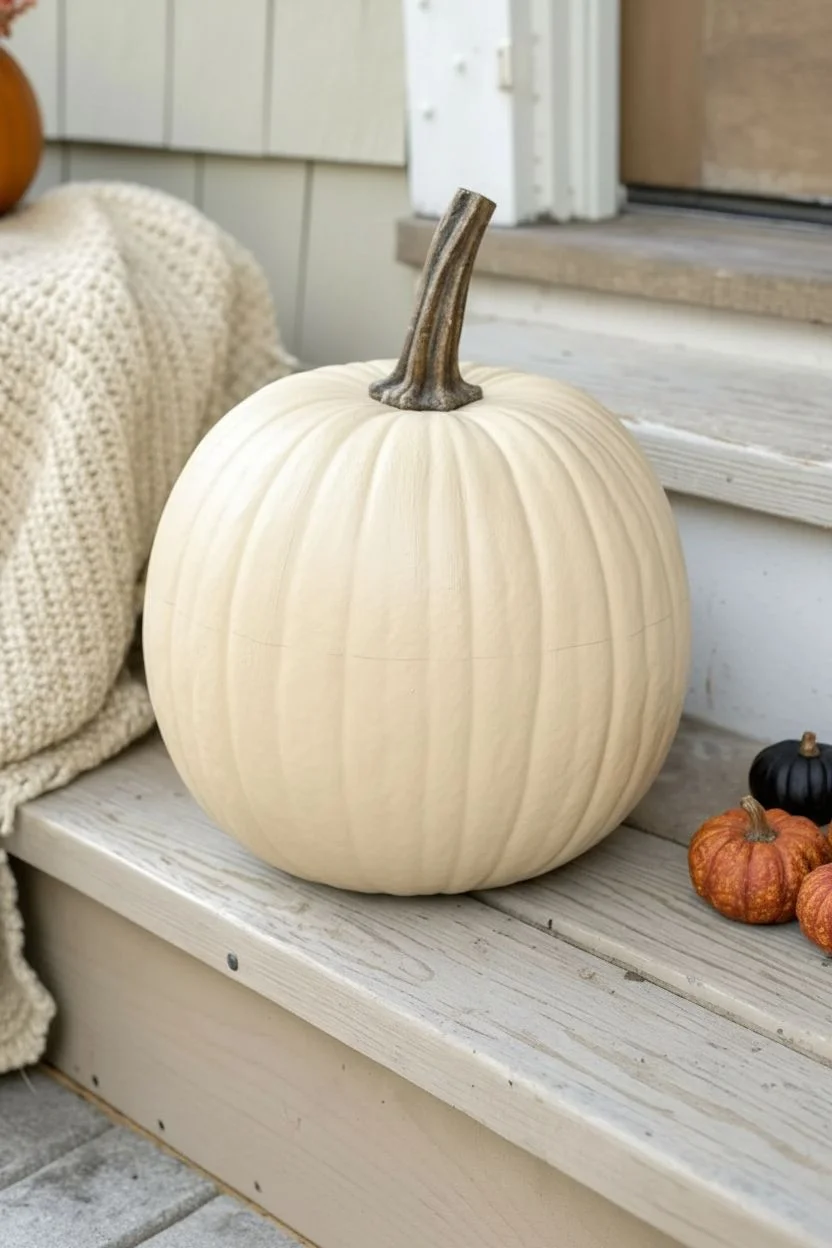
Bring the warmth of a flannel shirt to your front porch with this charming buffalo plaid pumpkin project. The intersection of creamy beige, deep red, and charcoal black creates a rustic, textured look perfect for autumn decorating.
Step-by-Step
Materials
- Large faux or real pumpkin (white or cream)
- Acrylic craft paint: burgundy or deep red
- Acrylic craft paint: black or charcoal
- Acrylic craft paint: cream or beige (if pumpkin isn’t already this color)
- Painter’s tape or masking tape (1-inch width)
- Medium flat paintbrush
- Small detail brush
- Pencil
- Flexible measuring tape
- Matte clear sealant spray
Step 1: Preparation & Base Coat
-
Clean the surface:
Wipe down your pumpkin carefully to remove any dirt or oils. If using a real pumpkin, ensure it is completely dry before starting. -
Apply the base color:
If your pumpkin isn’t naturally cream or beige, paint the entire surface with your cream acrylic paint. I like to apply two thin coats for opaque coverage, letting the first coat dry fully before adding the second. -
Plan your horizontal bands:
Visualize the pumpkin divided into horizontal stripes. Use a pencil to lightly mark tick marks around the circumference where your bands will go, spacing them roughly according to the width of your painter’s tape.
Bleeding Lines?
If paint bleeds into the pumpkin ribs, don’t panic. Once dry, use a small stiff brush and scrape the excess gently, or paint over the error with the base cream color.
Step 2: Creating the Grid
-
Tape horizontal lines:
Apply painter’s tape horizontally around the pumpkin, following your pencil marks. Press the edges down firmly, especially in the grooves of the pumpkin ribs, to prevent paint bleed. -
Paint horizontal stripes:
Paint the exposed horizontal bands with your deep red acrylic paint. Don’t worry about complete perfection in the coverage; a slightly distressed look adds character. Let this dry completely. -
Remove horizontal tape:
Carefully peel off the tape to reveal neat cream and red horizontal stripes. -
Tape vertical lines:
Once the red stripes are fully dry, apply vertical strips of painter’s tape from the stem down to the base. Space these strips evenly, aiming for squares that are roughly the same width as your horizontal bands.
Step 3: Painting the Plaid
-
Paint vertical stripes:
Paint the exposed vertical areas with the same deep red paint. This will create a grid effect where the vertical red stripes cross the cream base. -
Define the intersections:
This is the magic step. The areas where your *new* vertical red stripe crosses over a *dried* horizontal red stripe needs to be darker to create the plaid illusion. -
Apply black squares:
Dip your flat brush into the black paint. While the vertical tape is still on, carefully paint black *only* onto the squares where the vertical red stripe intersects with an existing horizontal red stripe. -
Dry and peel:
Allow the paint to sit until it’s just tacky but not wet, then slowly peel off the vertical tape strips.
Rustic Texture Trick
Before the black paint fully dries, lightly scuff it with a dry paper towel or coarse brush. This removes patches of pigment, making the buffalo check look like worn flannel fabric.
Step 4: Finishing Touches
-
Touch up edges:
Use your small detail brush and a bit of cream or red paint to tidy up any spots where paint might have bled under the tape, especially deep in the pumpkin’s ribs. -
Add texture (optional):
For a worn, fabric-like appearance, use a dry brush with a tiny amount of black paint to feather slight strokes onto the red squares, mimicking woven thread. -
Seal the artwork:
Take the pumpkin to a well-ventilated area and spray it lightly with a matte clear sealant. This protects the paint from chipping and weather if displayed outside.
Place your warm plaid creation on a step or mantle to instantly cozy up your space for the season


Gingham Pumpkin for a Warm Farmhouse Look
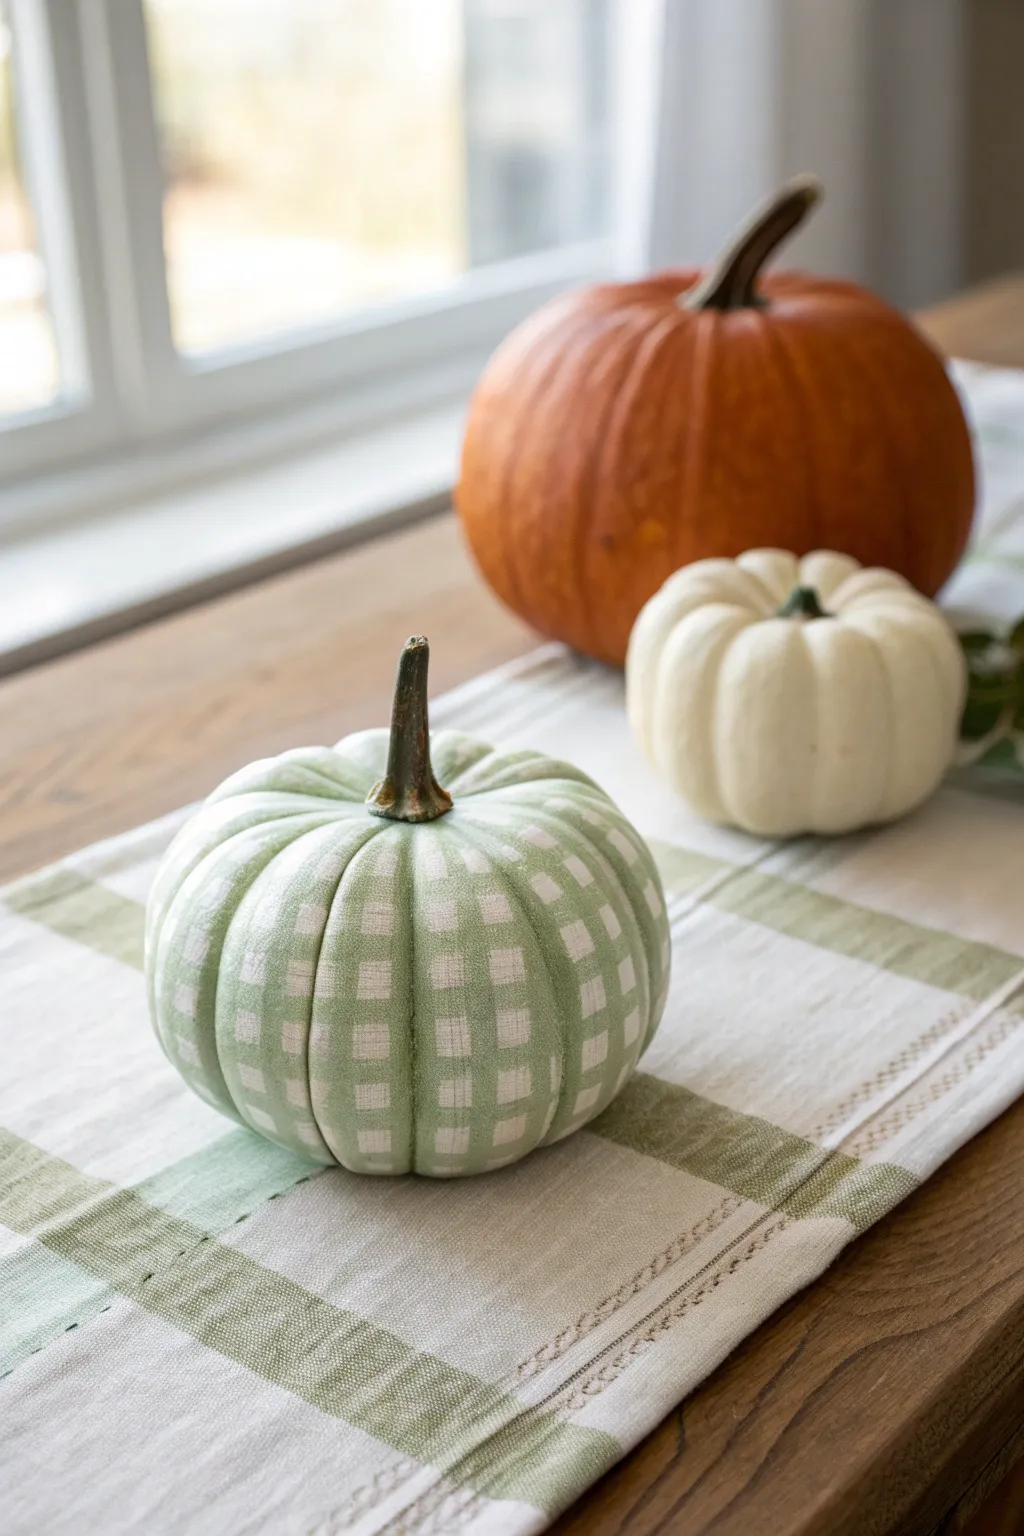
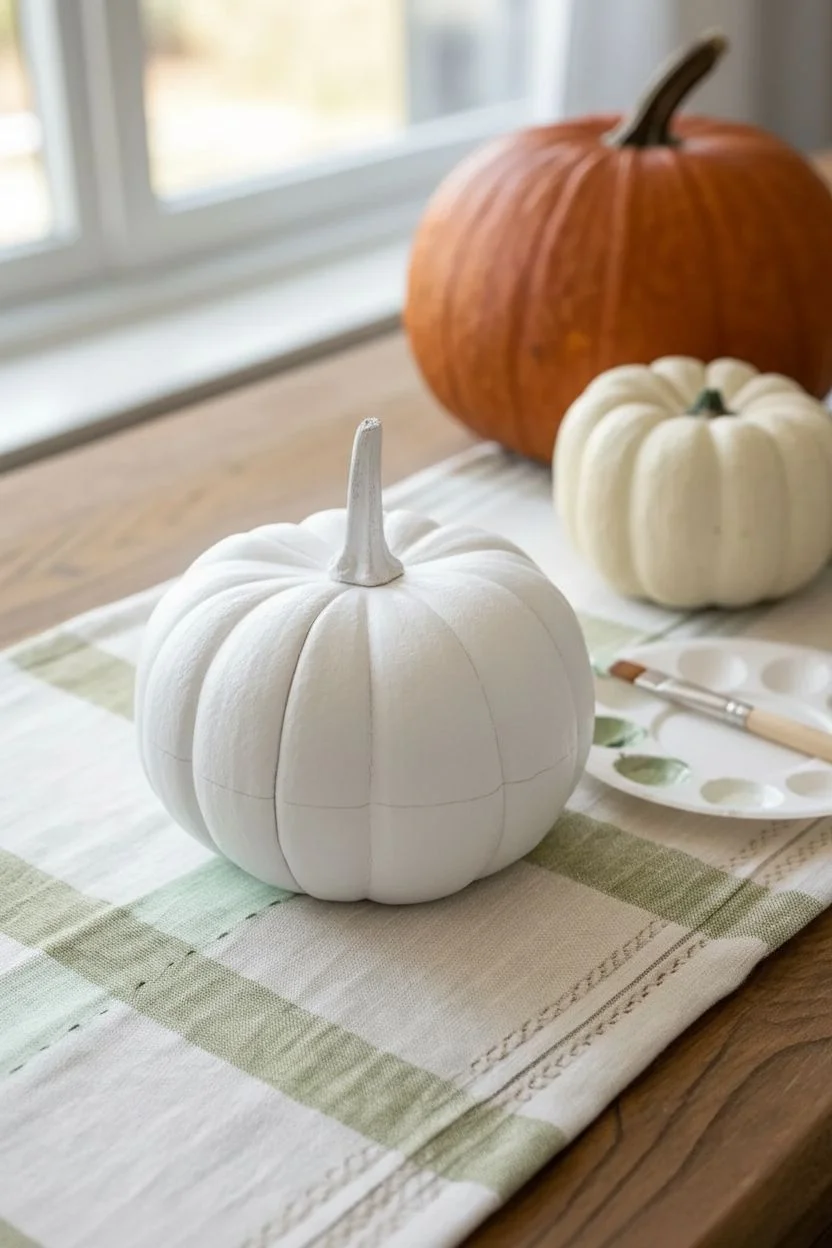
Bring a cozy, rustic touch to your autumn table with this calming green gingham pumpkin design. The soft sage tones and classic checkered pattern create a sophisticated farmhouse look that feels handmade yet timeless.
How-To Guide
Materials
- Medium-sized craft pumpkin (white or cream)
- Sage green acrylic paint (matte finish)
- White acrylic paint (matte finish)
- Medium flat brush (approx. 1/2 inch wide)
- Small flat brush (approx. 1/4 inch wide)
- Fabric measuring tape
- Pencil
- Paper plate or palette
- Painter’s tape or masking tape (optional)
- Clear matte sealant spray
Step 1: Preparation and Base Coat
-
Clean the surface:
Before you begin, wipe down your pumpkin with a damp cloth to remove any dust or oils that might prevent the paint from adhering properly, then let it dry completely. -
Apply the base color:
Since the background is white, you can either use a naturally white pumpkin or paint a standard orange pumpkin with two coats of matte white acrylic paint. Ensure the base is solid and opaque. -
Mix your medium wash:
On your palette, create a custom mix for the lighter gingham stripes. Mix roughly equal parts of white paint and your sage green paint. Usually, I like to add a tiny drop of water to improve flow, creating a semi-transparent ‘wash’ effect rather than a thick acrylic layer.
Natural Curves
Don’t fight the pumpkin’s shape! Painting the vertical stripes inside the natural grooves or ribs creates a cleaner guide than trying to paint straight lines over a bumpy surface.
Step 2: Painting Vertical Stripes
-
Mark vertical guides:
Using a flexible measuring tape, lightly mark vertical lines down the pumpkin’s ridges with a pencil to guide your brushstrokes. Following the natural ribs of the pumpkin is the easiest way to keep things straight. -
Paint the first set of stripes:
Using your medium flat brush and the lighter sage mix, paint vertical stripes following the natural curves of the pumpkin. -
Space the stripes evenly:
Isolate the segments you want painted versus the white negative space. Aim for stripes roughly the same width as your brush for consistency. -
Smooth out the strokes:
Use long, continuous strokes from the stem down to the base to avoid choppy stop-and-start marks in the paint. -
Allow to dry:
Let this vertical layer dry completely. The paint must be touch-dry before you start the horizontal lines to prevent the colors from muddying or smearing.
Textured Finish
For a true linen fabric look, try dry-brushing the paint on lightly in different directions. The subtle streaks will mimic the weave of cloth better than solid opaque color.
Step 3: Painting Horizontal Stripes
-
Mark horizontal guides:
Lightly mark horizontal rings around the pumpkin with your pencil. While painter’s tape can be tricky on a round surface, freehanding guided by pencil marks usually yields a beautiful, organic look. -
Paint the horizontal bands:
Using the same light sage mixture and your brush, paint horizontal stripes around the circumference of the pumpkin. -
Skip the gaps:
Ensure you leave white space between these horizontal bands equal to the width of the painted bands. -
Refine the intersections:
As you paint over the vertical stripes, you will see a subtle grid forming. Don’t worry about the overlap looking darker yet; we will accentuate that later. -
Let it set:
Allow the horizontal stripes to dry completely before moving to the final detailing phase.
Step 4: Detailing the Dark Squares
-
Prepare the dark green:
Use the pure sage green paint straight from the tube without mixing in any white. This will be the darkest tone in your pattern. -
Identify the overlaps:
Look for the squares where the vertical and horizontal painted stripes cross each other. This is where real fabric would appear darker due to the double layer of thread. -
Fill the intersections:
Use the smaller flat brush to carefully paint filled-in squares of the dark sage green exactly where the lighter stripes intersect. -
Sharpen the edges:
If your lines feel a bit too wobbly, use a very small detail brush with white paint to touch up the edges and square off the corners of your checks. -
Seal the artwork:
Once all paint layers are fully cured (give it a few hours), spray the entire pumpkin with a clear matte sealant to protect the finish from chipping.
Place your charming plaid creation alongside natural gourds for a warm display
BRUSH GUIDE
The Right Brush for Every Stroke
From clean lines to bold texture — master brush choice, stroke control, and essential techniques.
Explore the Full Guide
Pumpkin Pie Palette Ombré Pumpkin
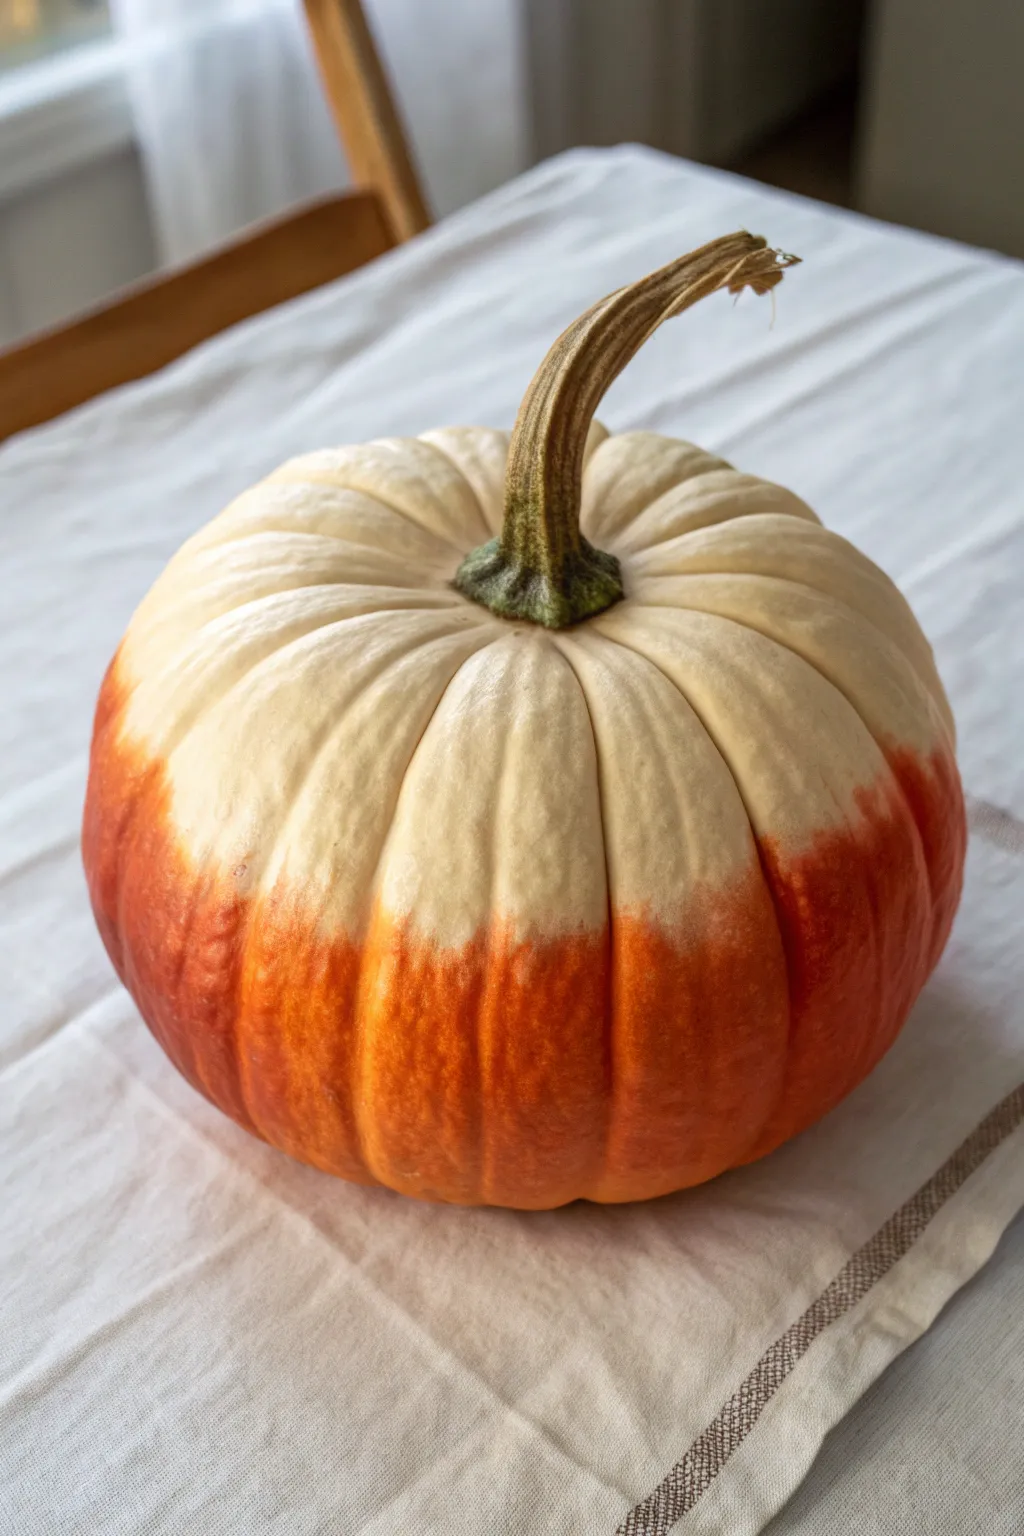
Bring the warm, comforting hues of a Thanksgiving dessert table to your centerpiece with this elegant two-tone design. By blending a rich, crust-like rust orange into a creamy white top, you create a sophisticated ombré effect that mimics a dollop of whipped cream on a slice of pumpkin pie.
Step-by-Step Tutorial
Materials
- Medium-sized white crafting pumpkin or real white pumpkin (cleaned and dried)
- Acrylic craft paint: Burnt Orange or Rust
- Acrylic craft paint: Warm dark orange (optional, for depth)
- Acrylic craft paint: Cream or Off-White (if using an orange pumpkin)
- Makeup sponge wedges or a round sponge pouncer
- Painter’s tape (optional)
- Paper plate or palette
- Clear matte acrylic sealer spray
Step 1: Preparation & Base Coat
-
Clean surface:
Begin by wiping down your pumpkin with a damp cloth to remove any dirt or glossy residue, as this helps the paint adhere better. -
Ensure dryness:
Dry the surface completely with a paper towel or let it air dry for about 10 minutes. -
Assess base color:
If you are using a real white pumpkin or a pre-white faux pumpkin, you can skip painting the top half; however, if you are using a standard orange pumpkin, you will need to paint the entire pumpkin with two coats of cream acrylic paint first. -
Dry base coat:
Allow the base coat to dry fully—usually about 20-30 minutes—before moving on to the color application.
Uneven Fade Fix
If the transition looks too harsh, dab a bit of white/cream paint on a clean sponge and tap it downwards over the orange edge to soften the blend again.
Step 2: Creating the Ombré Effect
-
Prepare palette:
Squeeze a generous amount of the Burnt Orange or Rust acrylic paint onto your paper plate. -
Load the sponge:
Dab the flat end of a makeup sponge into the orange paint, then tap it off slightly on a clean part of the plate so it isn’t dripping wet. -
Start at the bottom:
Begin applying the paint at the very bottom of the pumpkin using a dabbing motion, covering the base completely and working your way up about one-third of the pumpkin’s height. -
Build opaque coverage:
The bottom section should be solid color, so if the first layer looks streaky, let it dry for a few minutes and dab on a second layer for full opacity. -
Begin the transition:
As you move upward toward the middle section of the pumpkin, start pressing lighter with your sponge. -
Clean sponge technique:
For the blending area, I find it helpful to switch to a fresh, clean sponge wedge with very little paint on it. -
Feather the edge:
Lightly tap the clean sponge along the upper edge of your orange paint line to soften the distinct line, dragging small amounts of pigment upward into the white space. -
Refine the fade:
Continue dabbing gently until the harsh line disappears and becomes a soft, misty transition between the orange and the white. -
Check for consistency:
Rotate the pumpkin to ensure the gradient height is roughly consistent all the way around, making adjustments with your sponge as needed.
Step 3: Final Touches
-
Dry time:
Let the ombré paint dry completely to the touch, which should take roughly 30 to 45 minutes. -
Seal the work:
Take the pumpkin to a well-ventilated area and apply a light coat of clear matte acrylic sealer to protect the finish and prevent fading. -
Clean stem:
If you accidentally got paint on the stem, carefully wipe it off with a damp cloth or touch it up with a bit of brown paint for a natural look. -
Display:
Place your finished piece on your table runner or mantel.
Level Up: Metallic Twist
Mix a drop of metallic copper paint into your rust color for the bottom layer. It adds a subtle shimmer that glows beautifully by candlelight.
Now you have a stunning, pie-inspired decoration that looks good enough to eat
Cornucopia-Inspired Pumpkin Cluster Set
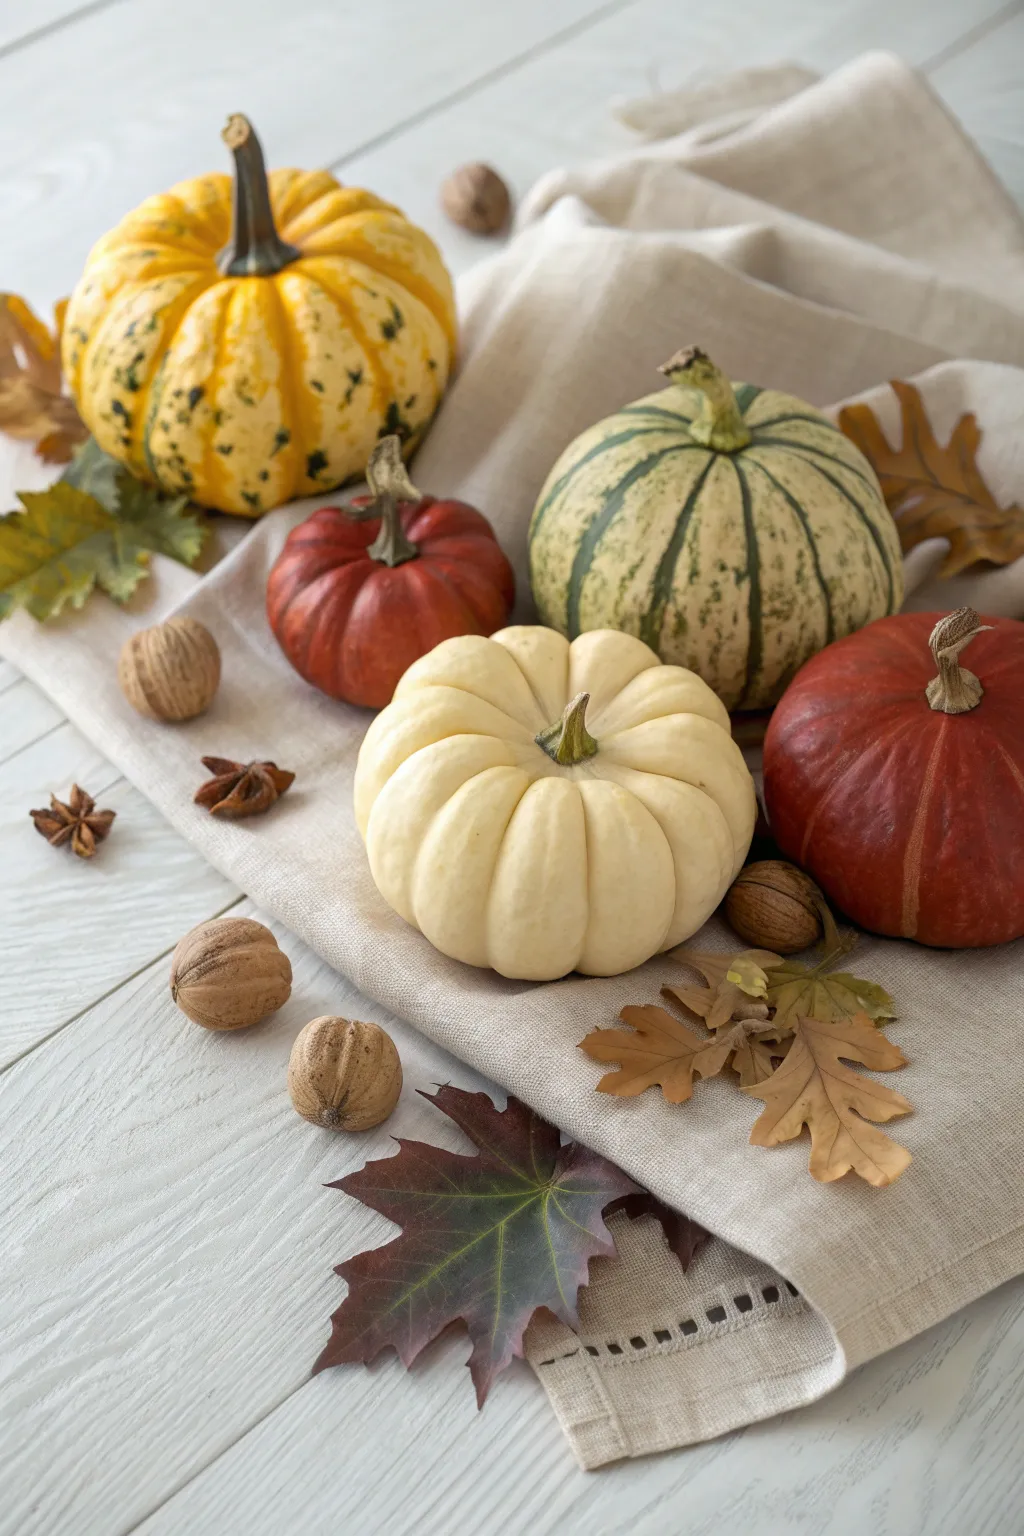
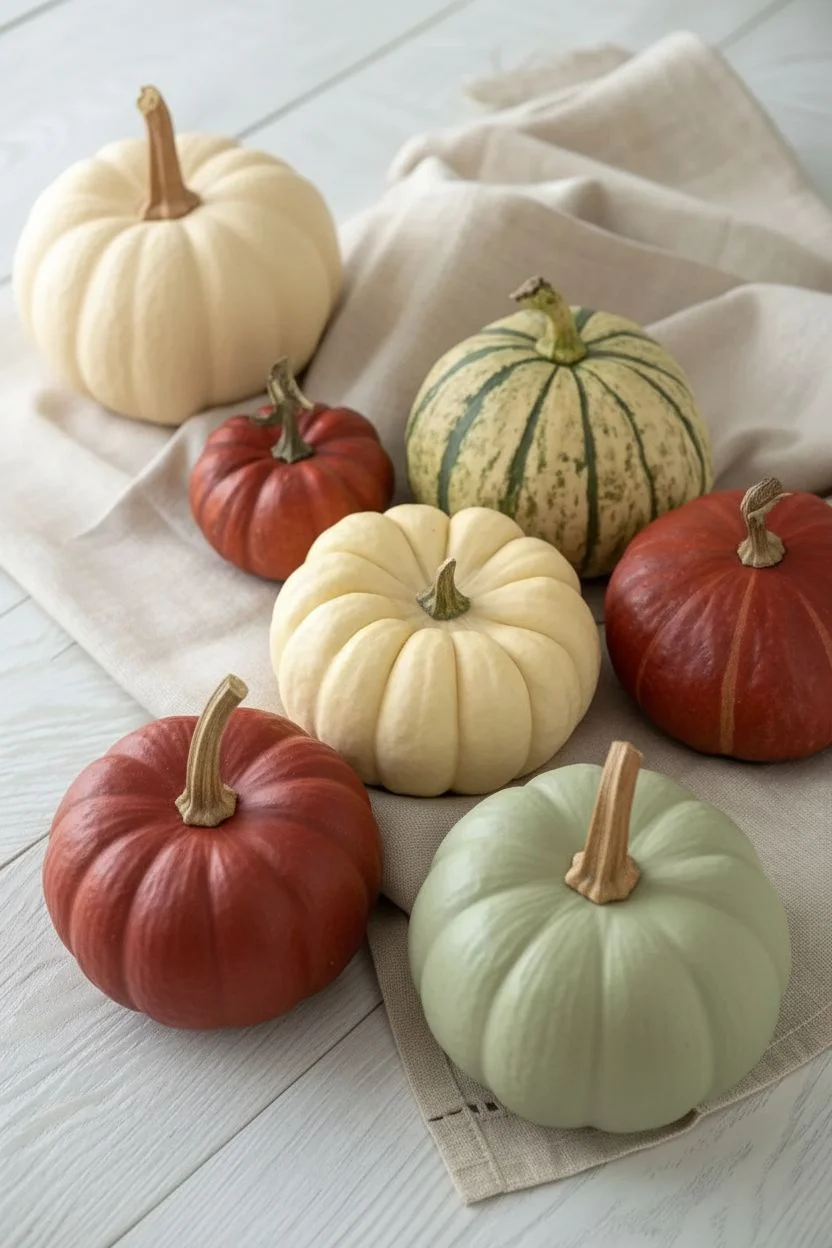
This project transforms a set of faux craft pumpkins into an elegant, hyper-realistic autumn display perfect for a Thanksgiving centerpiece. By using subtle glazing techniques and natural props, you’ll create a sophisticated arrangement that captures the variety of the harvest season without the mess of real produce.
How-To Guide
Materials
- 5 Faux craft pumpkins (assorted sizes/shapes: small round, medium flattened, gourd shape)
- Acrylic paints: Titanium White, Burnt Umber, Yellow Ochre, Cadmium Orange, Sap Green, Deep Red
- Matte medium or glazing liquid
- Assorted paintbrushes (medium flat brush, small detail round brush, fan brush)
- Natural linen or burlap fabric runner
- Faux or real autumn leaves (dried)
- Whole walnuts and star anise pods
- Matte spray varnish
- Hot glue gun (optional)
Step 1: Prepping the Base Pumpkins
-
Base Coating:
Begin by painting your five faux pumpkins with a solid base coat. Paint the largest round one a creamy yellow-white, the central fluted one a pure cream, two medium ones a deep brick red, and the final round one a pale sage green. -
Stem Work:
Paint all stems with a mix of Burnt Umber and a touch of Sap Green. Use a small round brush to add vertical streaks of lighter tan to simulate the woody texture of a dried vine. -
Drying Time:
Allow the base coats and stems to dry completely before moving on to the detailed patterns. This usually takes about 20-30 minutes for acrylics.
Step 2: The Speckled Yellow Pumpkin
-
Adding Rib Shading:
Mix a glaze using Yellow Ochre and a drop of orange. Paint into the deep crevices (ribs) of the yellow-white pumpkin to create depth. -
Creating Speckles:
Dilute Sap Green paint with a little water until it’s inky. Using an old toothbrush or a stiff bristle brush, flick tiny droplets of green paint onto the pumpkin’s surface, concentrating them near the bottom. -
Painting Larger Spots:
Hand-paint larger, irregular green spots using a small round brush among the speckles to mimic the natural variegation of a gourd.
Pro Tip: Realistic Stems
Real pumpkin stems are rarely just brown. Dry brush a tiny bit of mossy green near the base of the stem where it connects to the fruit for an ultra-realistic ‘freshly picked’ illusion.
Step 3: The Green Striped Gourd
-
Drafting Lines:
On the pale sage green pumpkin, lightly sketch vertical lines following the natural ribs using a pencil. -
Painting Stripes:
Mix a dark forest green. Using a liner brush, paint jagged, uneven stripes down the pencil lines. The key is to make the edges rough, not perfect. -
Feathering:
While the green stripes are wet, use a clean, slightly damp brush to feather the edges outward slightly, softening the transition into the pale background.
Level Up: Texture Pop
Mix baking soda into your base coat paint for the white pumpkin. This creates a gritty, chalky texture that mimics the matte skin of real white pumpkins perfectly.
Step 4: The Rusty Red Pumpkins
-
Creating Texture:
For the two red pumpkins, mix Deep Red with a tiny bit of Burnt Umber. Dry brush this darker color vertically over the surface to give it a slightly weathered, leathery look. -
Highlighting Ribs:
Mix a thin wash of lighter orange-red. Run this along the highest points of the pumpkin ribs to make them pop against the darker crevices.
Step 5: The Cream White Pumpkin
-
Soft Shading:
This pumpkin relies on subtlety. Mix a very dilute wash of beige or light tan. Paint this only in the deepest recessed lines. -
Blending:
Immediately wipe the surface with a lint-free rag to remove excess paint, leaving shadow only in the cracks for a pristine ‘Baby Boo’ pumpkin look.
Step 6: Final Assembly
-
Sealing:
Once all paint is bone dry, spray each pumpkin with a matte varnish to remove any plastic sheen and protect your paint job. -
Draping the Fabric:
Crumple your linen runner onto your display surface. Create deliberate folds and hills to nestle the pumpkins into. -
Arranging the Cluster:
Place the pumpkins in a tight semi-circle. I like to tilt the green striped one slightly on its side to make the arrangement feel casual and rolled. -
Adding Natural Elements:
Scatter the walnuts, star anise, and dried leaves around the base. Tuck some leaves partially under the pumpkins to ground them in the scene.
Step back and admire how realistic your hand-painted harvest looks on the table

PENCIL GUIDE
Understanding Pencil Grades from H to B
From first sketch to finished drawing — learn pencil grades, line control, and shading techniques.
Explore the Full Guide
Thanksgiving Table Menu Pumpkin


Elevate your Thanksgiving tablescape with a sophisticated yet simple framed menu board that leans perfectly against your centerpiece pumpkin. This project combines classic chalkboard aesthetics with metallic lettering for a warm, inviting touch that guides your guests to their seats.
Detailed Instructions
Materials
- Small wooden picture frame (5×7 or 8×10)
- Black chalkboard paint
- Flat paintbrush (1-inch width)
- Small foam brush
- Fine-grit sandpaper (220 grit)
- Metallic copper or gold paint marker (fine tip)
- Pencil and eraser
- Ruler
- Large white pumpkin (for display)
- Matte black spray paint (optional for frame)
Step 1: Preparing the Frame and Backing
-
Disassemble the Frame:
Begin by removing the glass, backing board, and any paper inserts from your wooden picture frame. Set the glass aside as you won’t need it for the final chalkboard look. -
Sand Surfaces:
Lightly sand both the wooden frame and the smooth side of the frame’s backing board. This roughs up the surface just enough to help the paint adhere properly. -
Paint the Frame:
Using the matte black spray paint or black acrylic paint and a foam brush, coat the wooden frame entirely. I like to do two thin coats to ensure the original wood grain doesn’t peek through unintentionally. -
Create the Chalkboard Surface:
Apply chalkboard paint to the backing board using your flat paintbrush. Use long, smooth strokes in one direction for the first coat. -
Apply Second Coat:
Allow the first coat to dry completely (check your paint bottle for times), then apply a second coat of chalkboard paint ticking in the opposite direction (perpendicular) to the first. Let this cure fully, ideally overnight. -
Reassemble:
Once everything is bone-dry, place the painted backing board back into the painted frame. Secure the tabs on the back to lock it in place.
Clean Lines Pro Tip
Rest your hand on a clean paper towel while lettering. This prevents oils from your skin from transferring to the matte black surface and keeps the paint smudge-free.
Step 2: Lettering the Menu
-
Prime the Pens:
Shake your metallic paint marker vigorously. Press the tip down on a scrap piece of paper until the ink flows smoothly and consistently. -
Sketch Guidelines:
Use a ruler to lightly mark horizontal baselines on your chalkboard surface where you want your text to sit. Keep these pencil marks extremely faint so they are easy to remove later. -
Draft the Design:
Lightly sketch the words ‘Thanksgiving’ in a cursive script and ‘MENU’ in block capital letters using a pencil. Center your design carefully. -
Letter ‘Thanksgiving’:
Carefully trace over your pencil sketch with the metallic marker. For the cursive script, use light pressure on upstrokes and slightly firmer pressure on downstrokes to mimic calligraphy. -
Letter ‘MENU’:
Moving to the second line, trace the block letters for ‘MENU’. Keep the lines thin and clean for a modern, minimalistic look. -
Thicken Downstrokes:
Go back over the ‘Thanksgiving’ script and manually thicken the downstrokes (the parts of letters where your pen moved downward). This faux-calligraphy technique adds elegance without needing special nibs. -
Clean Up:
Allow the metallic ink to dry for at least 30 minutes. Once set, gently erase any visible pencil guidelines with a clean eraser. -
Final Styling:
Position your finished chalkboard menu by leaning it against a large white pumpkin on your table. You can tuck fresh eucalyptus sprigs around the base for an organic finish.
Wobbly Text Help
If you make a mistake with the paint pen, quickly wipe it away with a damp Q-tip before it sets. If it dries, just dab a little black chalkboard paint over the error.
Your sophisticated menu sign is ready to greet guests and set a festive tone for the meal
Place Card Name Pumpkins for Each Guest
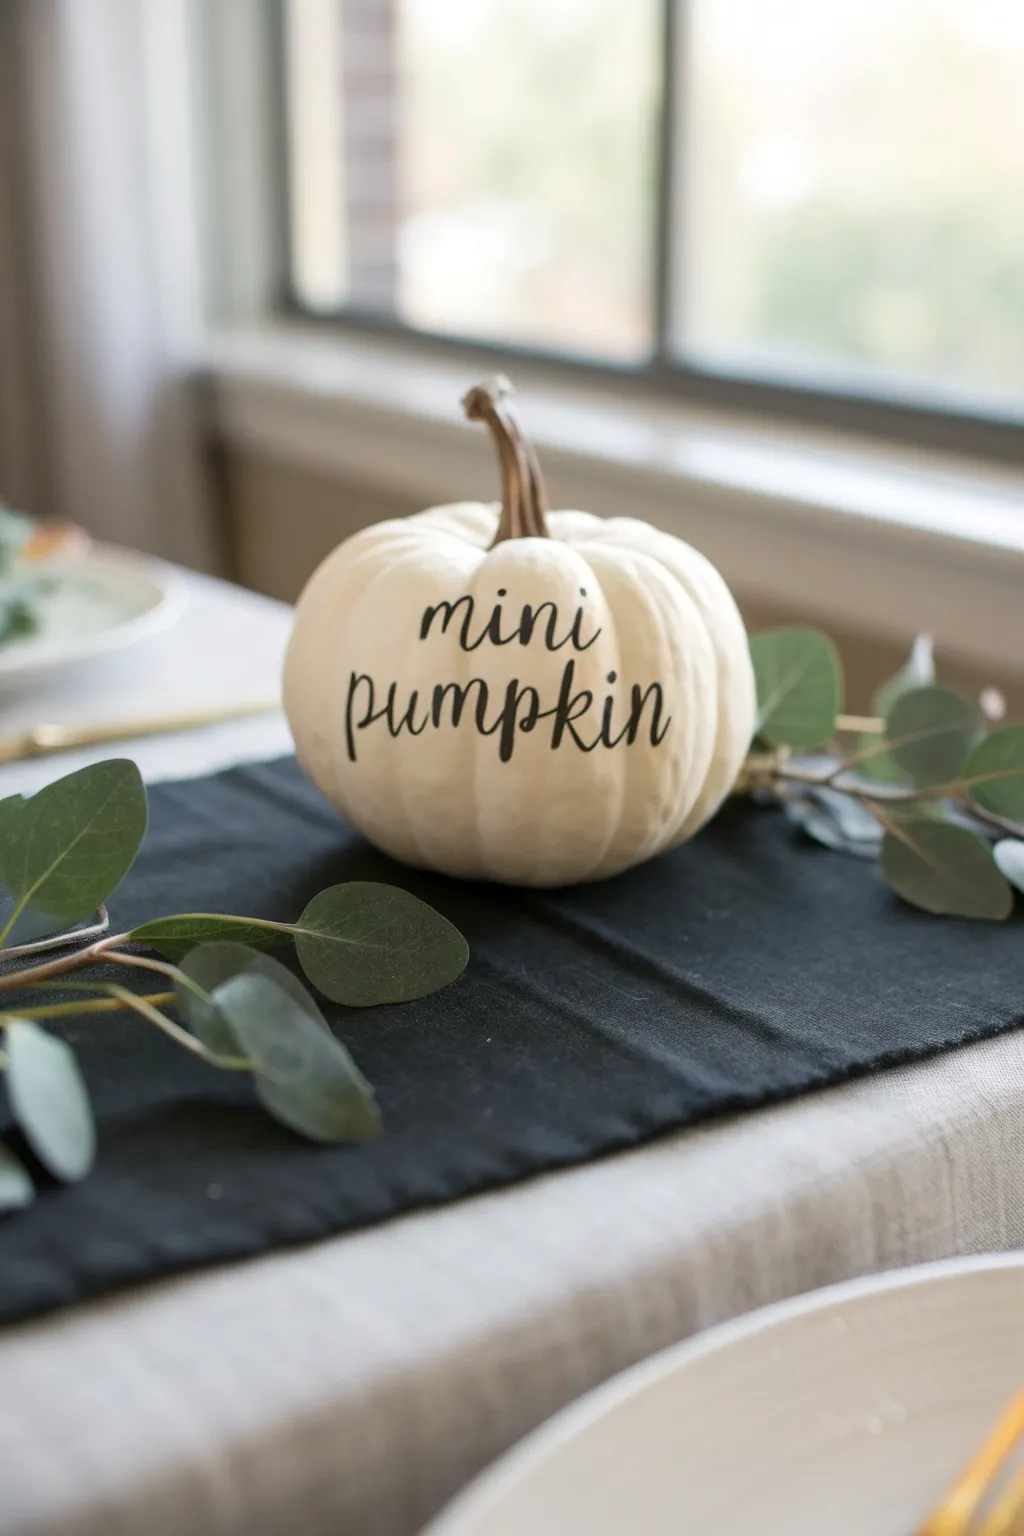

Add a sophisticated touch to your Thanksgiving table with these charming, personalized mini pumpkins. The sleek black lettering against the creamy white skin creates a modern, minimalist look perfect for guiding guests to their seats.
How-To Guide
Materials
- Small white pumpkins (real or faux)
- Rubbing alcohol
- Cotton balls or paper towels
- Pencil
- Fine-point black paint pen or permanent marker
- Needle eraser or standard white eraser
- Paper plate or scrap paper (for testing)
Step 1: Preparation
-
Clean surface:
Begin by wiping down your pumpkin thoroughly with a cotton ball soaked in rubbing alcohol. This removes natural oils, dirt, or wax from faux pumpkins, ensuring the ink adheres properly. -
Dry completely:
Allow the pumpkin to air dry completely for just a minute or two. The surface needs to be bone-dry before you attempt any writing. -
Test placement:
Hold the pumpkin in your hand and determine the best ‘face’ for your text. Look for the smoothest side with the fewest bumps or deep ribs to make lettering easier.
Faux Pumpkin Tip
Using faux pumpkins? Lightly sand the writing area with high-grit sandpaper first. The texture gives the paint pen something to grab onto for cleaner lines.
Step 2: Drafting the Design
-
Sketch lightly:
Using a soft pencil, very lightly sketch your guest’s name (or in this case, the phrase ‘mini pumpkin’) onto the chosen side. Don’t press hard, or you might dent the skin. -
Center the text:
Aim to have the text centered vertically on the pumpkin’s curve. If writing two lines, stack them neatly, keeping the spacing between lines fairly tight. -
Check alignment:
Step back and look at your sketch from a few feet away to ensure the text looks straight and isn’t slanting too much to one side.
Ink Bleeding?
If the ink feathers or bleeds into the pumpkin grooves, switch to an oil-based permanent marker instead of liquid paint pens. It dries faster and bleeds less.
Step 3: Inking the Lettering
-
Prime the pen:
Shake your paint pen well and depress the nib on a scrap piece of paper until the ink flows smoothly. Do not do this directly on the pumpkin to avoid blobs. -
Trace the outline:
Trace over your pencil lines carefully with the black paint pen. Use a light touch to keep the lines crisp and thin initially. -
Thicken downstrokes:
To achieve that calligraphy look, go back over the ‘downstrokes’ (any line where your pen moved downward). I like to make these slightly thicker while keeping the upstrokes thin. -
Let dry:
Allow the first layer of ink to dry for about 5 to 10 minutes. Paint pens can smudge easily on waxy pumpkin skins if rushed. -
Second coat:
If the black looks a bit transparent or streaky, carefully apply a second layer of ink directly over the first to make the letters bold and opaque. -
Connect letters:
Ensure distinct letters have smooth connections if you are using cursive. Bridge any gaps where the pen might have skipped over a pumpkin rib.
Step 4: Finishing Touches
-
Erase guidelines:
Once you are absolutely certain the ink is dry (give it at least 20 minutes to be safe), gently erase any visible pencil marks. -
Check coverage:
Inspect the lettering for any tiny pinholes or missed spots, touching them up with just the very tip of the pen. -
Clean up edges:
If you made a small mistake, dip a Q-tip in rubbing alcohol and carefully wipe away the error before it cures completely. -
Final cure:
Let the pumpkins sit undisturbed for an hour before placing them on your table to ensure the paint hardens fully.
Now you have a stunning set of custom place cards ready to welcome your friends and family


Handprint Turkey Keepsake Pumpkin
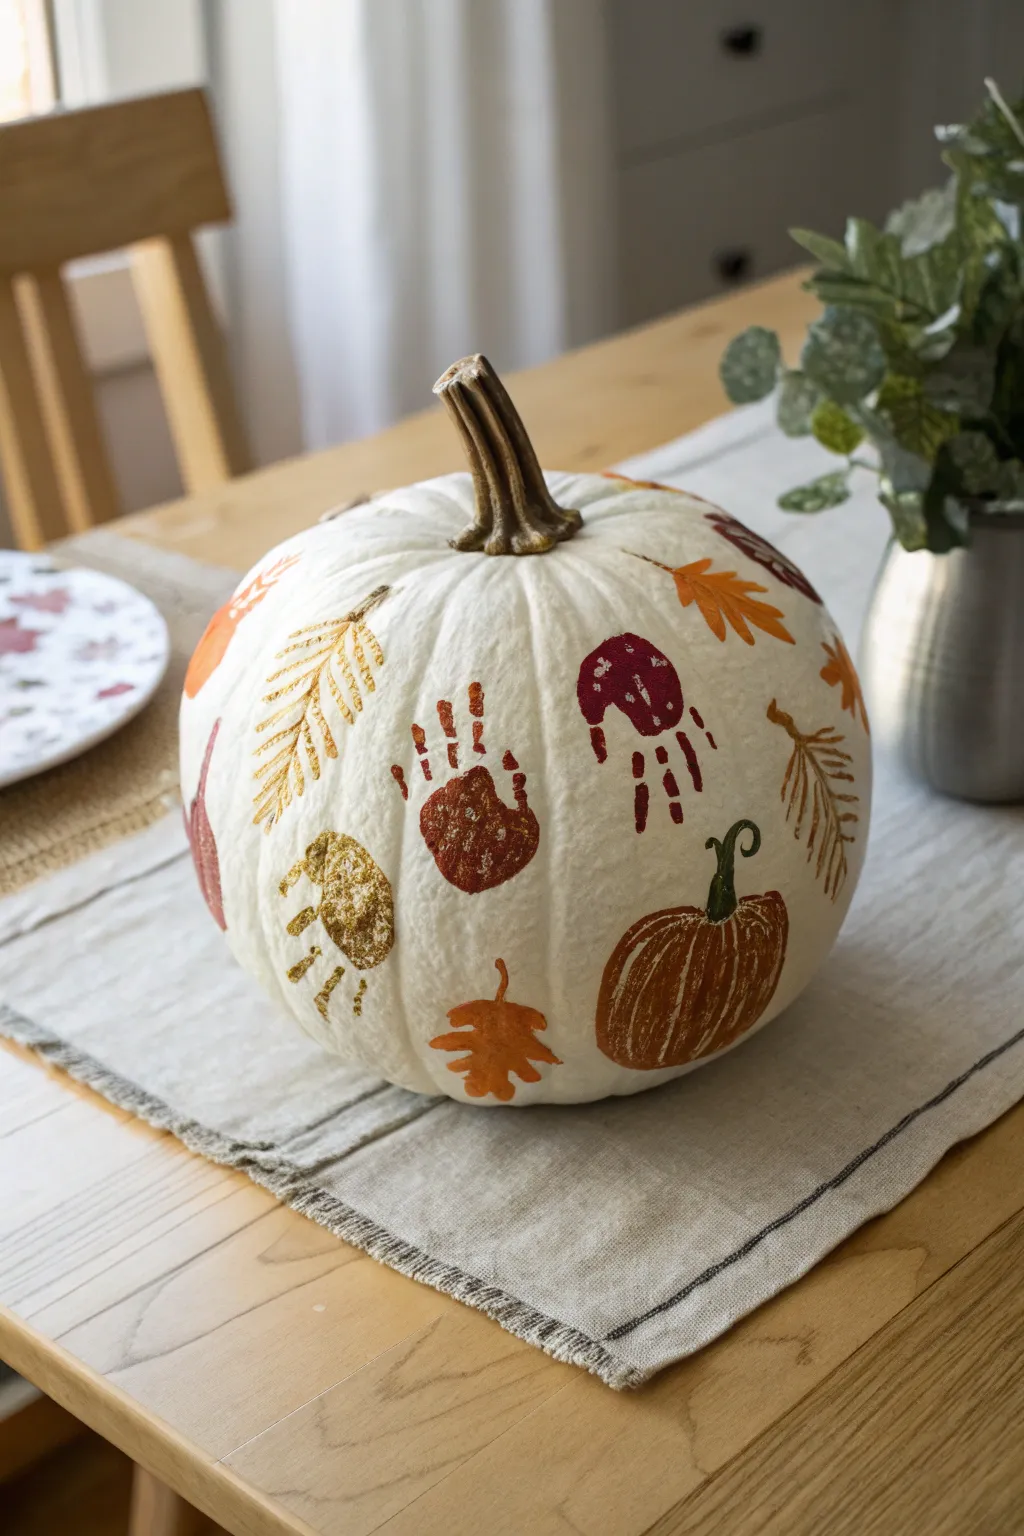
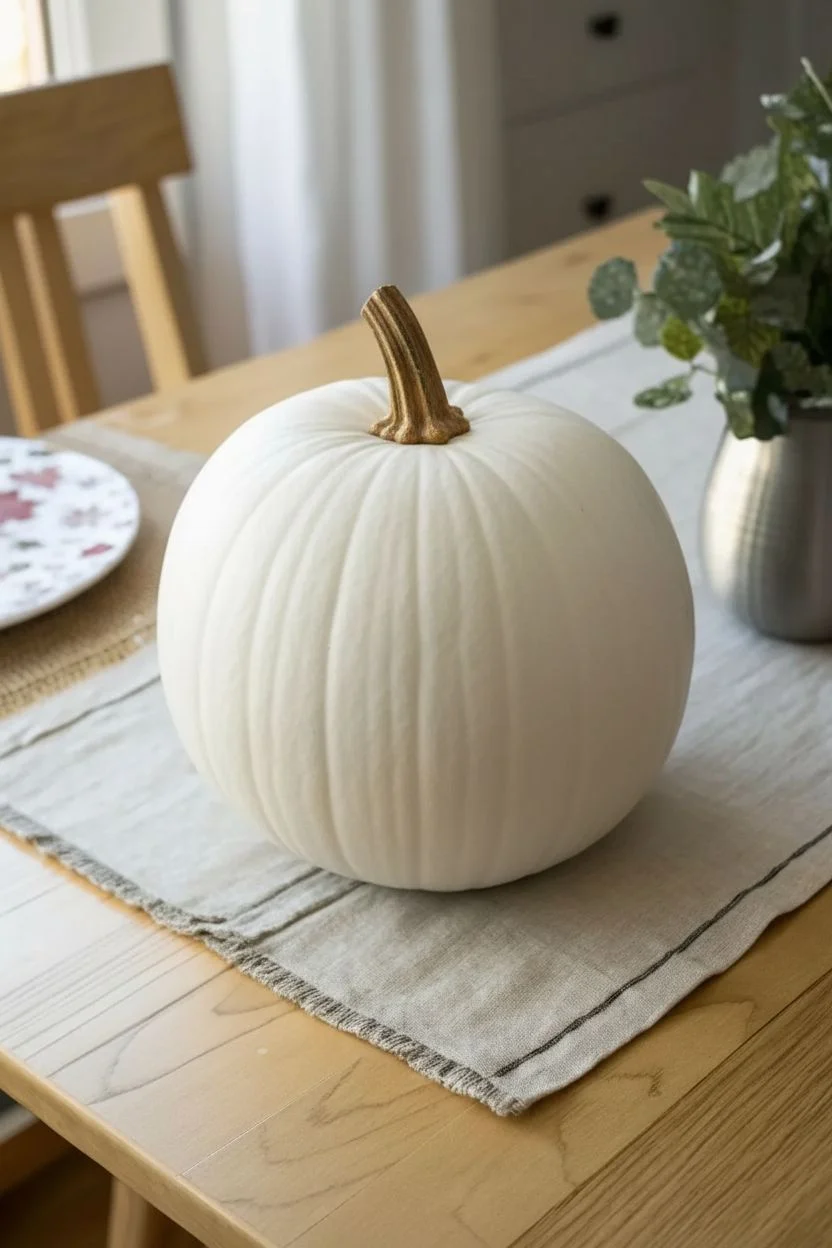
Capture the magic of autumn and the fleeting size of little hands with this nostalgic keepsake pumpkin. Featuring a charming array of stamped leaf motifs and playful handprints on a clean white gourd, this project doubles as sophisticated rustic decor and a sentimental family treasure.
Step-by-Step Guide
Materials
- Large white craft pumpkin (faux) or real white pumpkin
- Acrylic craft paints (burnt orange, deep maroon, mustard yellow, gold)
- Sponge brushes or cosmetic wedges for stamping
- Small round detail brush (size 2 or 4)
- Clear matte or satin sealant spray
- Paper plate or palette
- Baby wipes or damp cloth (essential for clean-up!)
- Optional: Mod Podge (matte finish)
Step 1: Preparing the Canvas
-
Clean surface:
Begin by wiping down your pumpkin with a damp cloth to remove any dust or oils. If using a real pumpkin, ensure it is completely dry before starting; for faux pumpkins, a quick wipe with rubbing alcohol helps the paint adhere better. -
Map the layout:
Visualize where your main elements will go. The handprints are the stars of the show, so plan for two or three spots around the pumpkin’s equator where they will sit prominently without being too crowded.
Stamp Success Secret
Are the pumpkin ridges making stamping hard? Place a folded towel inside the pumpkin (if hollow/carvable) to provide resistance, or roll the child’s hand slightly.
Step 2: Stamping the Handprints
-
Apply paint to hand:
Squeeze a generous amount of maroon or burnt orange acrylic paint onto your paper plate. Using a sponge brush, dab the paint evenly onto the palm and fingers of a child’s hand. Avoid globs, as they transform into smudges. -
Make the impression:
Guide the hand to the pumpkin’s surface. Press the palm down firmly first, then gently press each finger individually to ensure contact with the pumpkin’s curved ridges. Hold for just a second. -
Lift carefully:
Lift the hand straight up and away from the pumpkin surface to avoid dragging the paint. Immediately clean the hand with baby wipes before the paint sets. -
Repeat with colors:
Rotate the pumpkin and repeat the process with a different fall color, like a deep mustard or dark red, spacing the handprints evenly around the gourd.
Step 3: Adding Foliage and Accents
-
Stamp fern leaves:
For the fern-like leaves, I find it easiest to freehand these with a small brush to get that stamped look. Mix gold and yellow paint. Paint a thin, curved central line first. -
Detail the fern:
Using quick, short strokes, paint angled lines firmly outward from that central stem, tapering them slightly as you reach the tip of the leaf to mimic a fern’s texture. -
Paint oak leaves:
Dip your brush in burnt orange. Paint free-form oak leaf shapes—think of them as elongated blobs with wavy edges. Don’t worry about perfection; the rustic style benefits from loose shapes. -
Create the mini pumpkin:
In the lower empty spaces, paint a round, slightly squat oval using the dark orange paint. Let the brush strokes follow the curve of the shape to simulate the pumpkin’s ribs. -
Texture the pumpkin:
While the orange is still slightly tacky, mix a tiny bit of white or yellow into your brush and streak it lightly over the pumpkin shape to add dimension and highlight the ridges. -
Stem details:
Once the orange pumpkin shape is dry, use a dark green or brown paint to add a small, curly stem at the top.
Date It
Use a metallic gold paint pen to write the year and the child’s name in small script near the stem or underneath the base so you never forget when those hands were that small.
Step 4: Finishing Touches
-
Check for gaps:
Look at the overall composition. If there are large white spaces, fill them with smaller, simple leaf shapes in contrasting colors like gold or maroon. -
Dry completely:
Allow the pumpkin to sit undisturbed for at least an hour. Acrylics dry fast, but thicker globs from the handprints might need extra time. -
Seal the work:
To protect your keepsake, take the pumpkin to a well-ventilated area and apply a light coat of clear matte sealant spray. This prevents the paint from scratching off over time.
Place your finished pumpkin on a entryway table or mantle to enjoy a custom piece of fall art that freezes time for just a moment
Whimsical Turkey Face Pumpkin
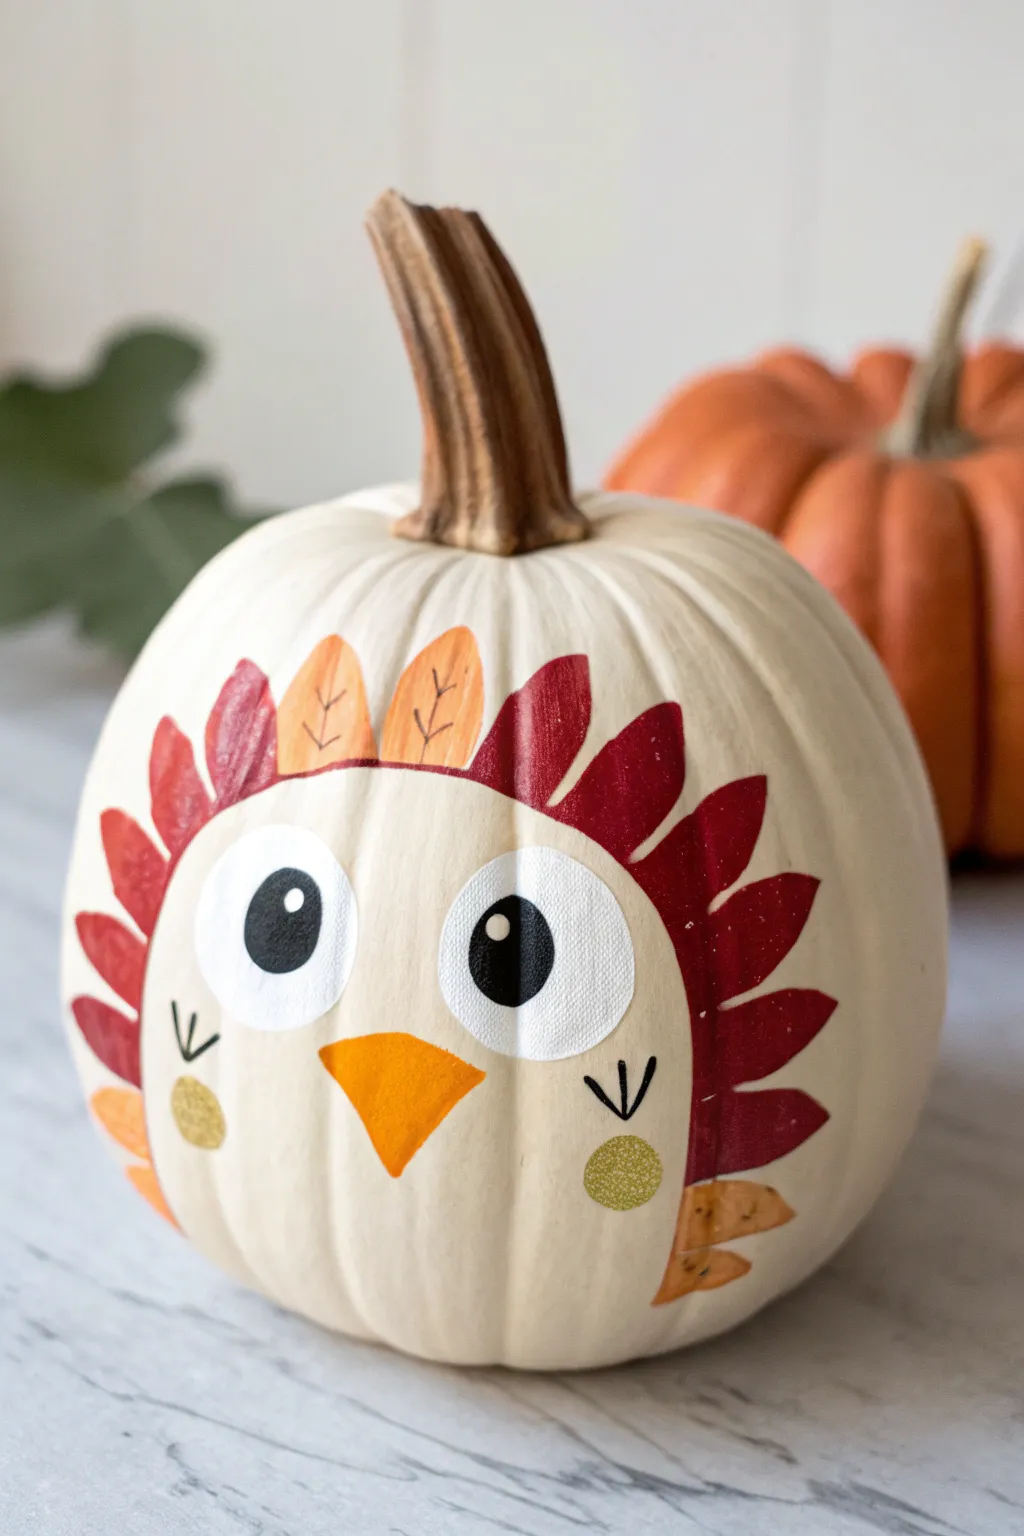
Transform a simple white pumpkin into an adorable Thanksgiving greeter with this easy-to-follow turkey face design. Featuring bright eyes, leafy feathers, and a playful expression, this no-carve project is perfect for adding a touch of charm to your holiday decor.
How-To Guide
Materials
- Small to medium white craft pumpkin (or a real pumpkin painted cream/white)
- Acrylic craft paints: Deep red, burgundy, orange, ochre yellow, black, and white
- Pencil for sketching
- Various paintbrushes: small round brush for details, medium flat brush for feathers
- circular foam pouncer or circle stencil (optional)
- Small cup of water
- Paper towels
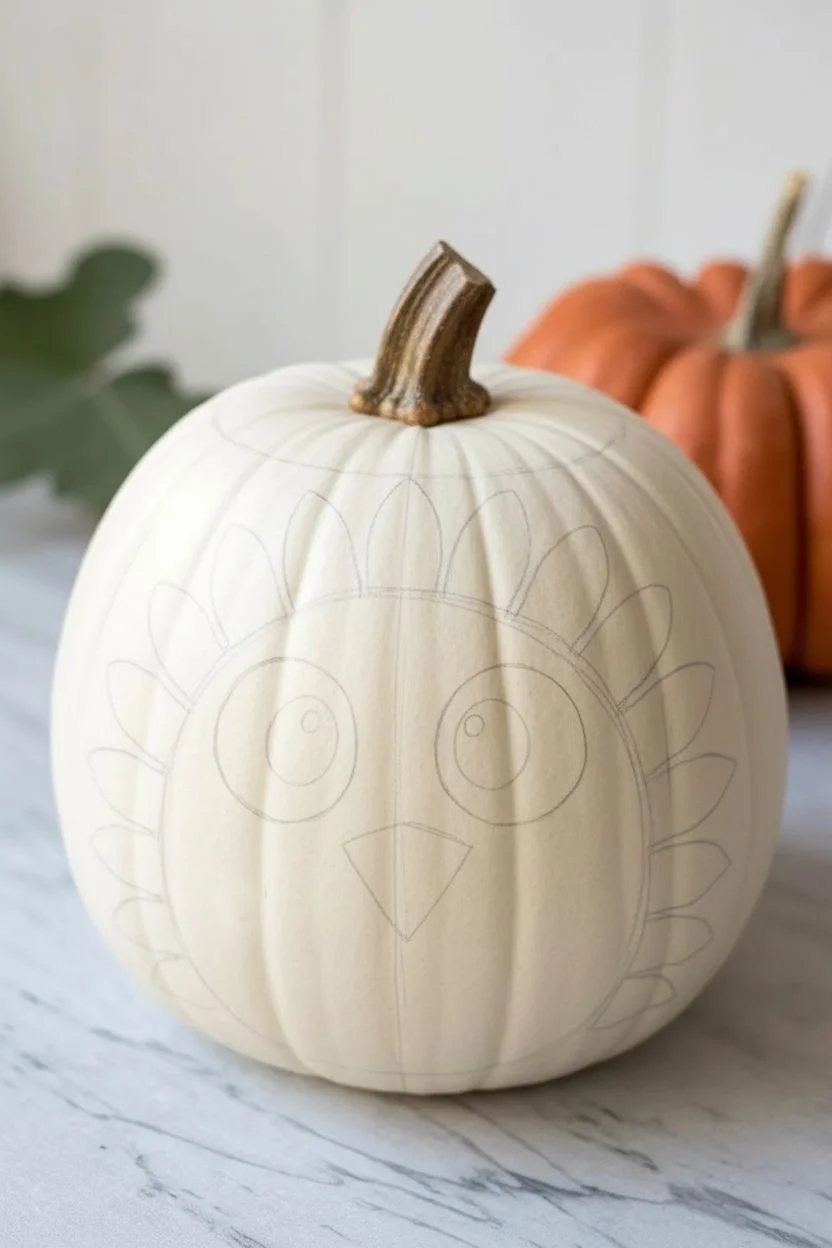
Step 1: Planning the Face
-
Prep the surface:
Ensure your pumpkin is clean and dry. If you are using a real pumpkin that isn’t naturally white, give it two solid coats of off-white acrylic paint and let it dry completely before starting. -
Map out the features:
Using a light pencil, gently sketch two large circles for the eyes about a third of the way down the pumpkin. They should be close together but not touching. -
Define the feathers:
Draw the outline of the feather arrangement. I find it easiest to start from the outer corners of the eyes and trace a large semi-circle shape that frames the face, leaving the bottom chin area open.
Step 2: Painting the Features
-
Base coat the eyes:
Fill in the large eye circles with bright white paint. You will likely need two or three thin layers to get solid, opaque coverage against the pumpkin’s texture. -
Create the beak:
Between and slightly below the eyes, paint a downward-pointing triangle using bright orange paint. Curve the sides slightly outward to soften the look. -
Add the pupils:
Once the white paint is fully dry, paint two smaller black circles inside the white areas. Place them slightly cross-eyed or looking sideways to give the turkey a goofy, friendly personality. -
Highlight the eyes:
Dip the handle end of a paintbrush into white paint and dot a tiny speck onto the upper right side of each black pupil. This little ‘catchlight’ brings the character to life instantly.
Clean Lines Tip
Use a circle stencil or trace a small condiment cup to get perfectly round shapes for the eyes and cheek spots. It makes the face look much neater.
Step 3: Adding the Feathers
-
Start the red feathers:
Using a medium brush and deep red paint, create leaf-like shapes along the sides of the face area you sketched earlier. These should look like elongated teardrops pointing outward. -
Fill the top gap:
Leave a small gap at the very top center of the head (above the eyes) for a contrasting color. Continue painting the red feathers down the sides until they frame the ‘cheeks’. -
Paint the top feathers:
In the gap you left at the top, paint two or three feather shapes using orange or ochre paint to create a little crest. -
Add bottom feathers:
At the bottom ends of your feather arc, switch to the ochre or light orange paint again to finish the frame. This creates a nice gradient effect around the face. -
Detail the crest:
When the top orange feathers are dry, use a very thin brush and brown or deep red paint to add a central vein line and tiny V-shapes branching off it, making them look like autumn leaves.
Level Up
Give the turkey texture by gluing real dried autumn leaves or craft feathers around the painted face instead of painting the feather border.
Step 4: Final Details
-
Rosy cheeks:
Below the eyes and slightly to the outside, paint two small circles using ochre or metallic gold paint to simulate rosy cheeks. -
Add eyelashes:
Using your finest brush and black paint, draw three tiny lines stemming from the bottom of the eye area, just above the cheek circles. These serve as cute lower lashes or decorative accent lines. -
Clean up sketch lines:
Check for any visible pencil marks. If the paint is fully cured, you can gently erase them, or simply touch up the background with a bit of off-white paint to cover them. -
Seal the work:
If you plan to display this outdoors or keep it for next year, apply a clear matte acrylic sealer spray over the entire pumpkin to protect your artwork.
Set your cheerful turkey pumpkin on the porch or table to greet your Thanksgiving guests with a smile
Elegant Botanical Pumpkin With Fall Florals
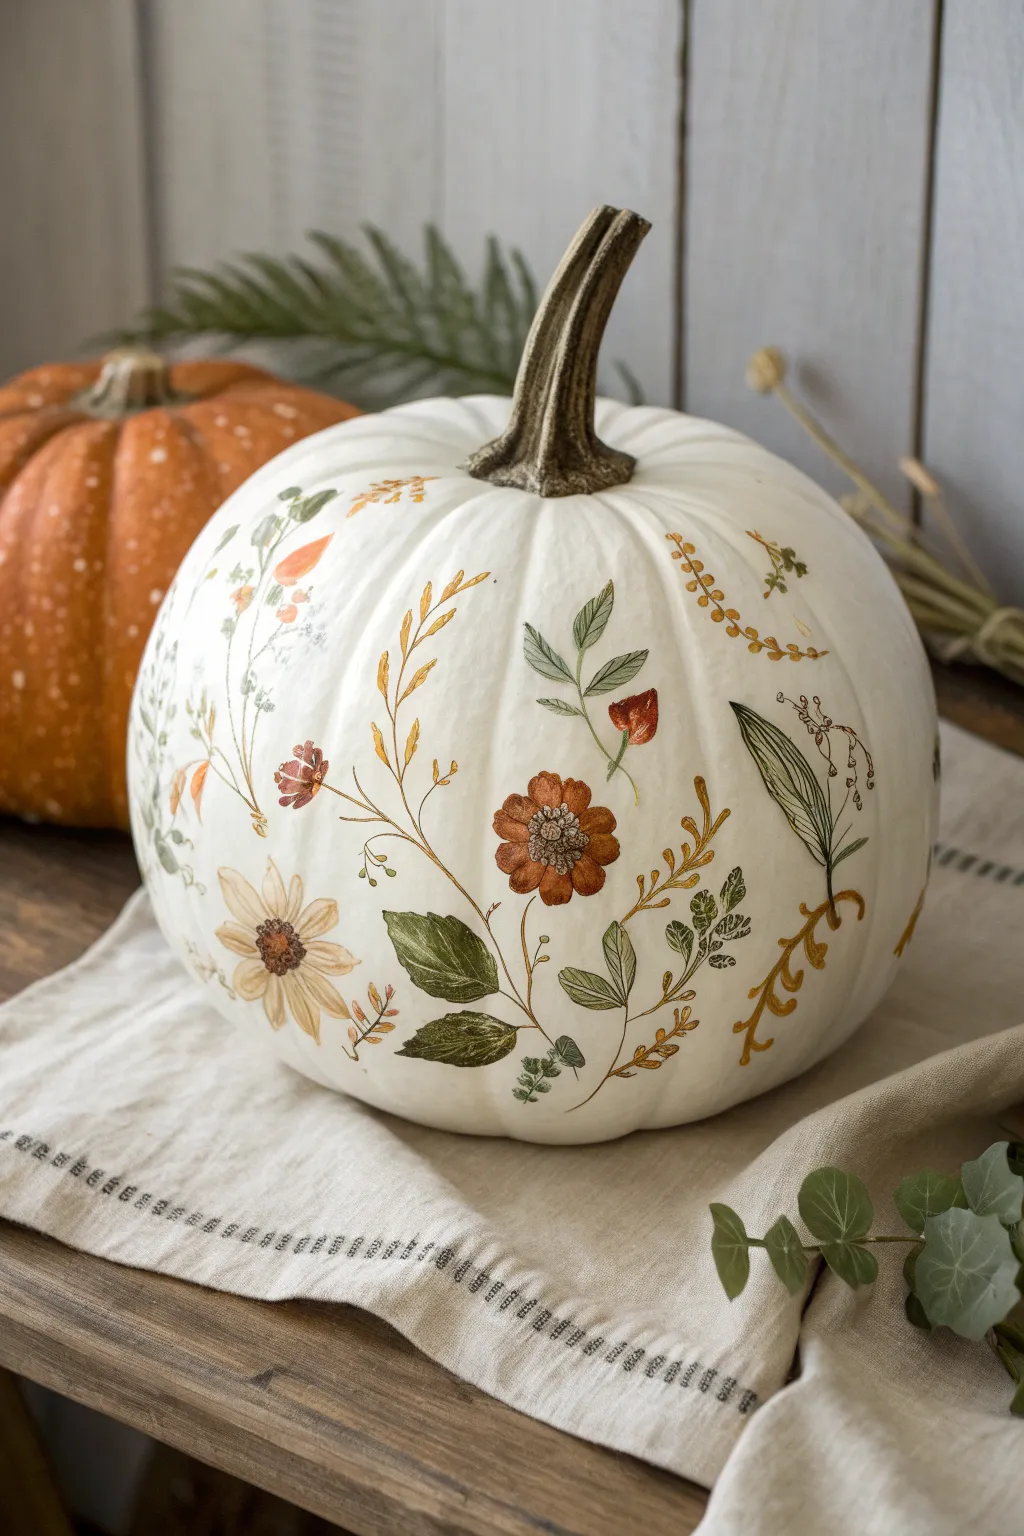
Bring the delicate beauty of a fall meadow to your holiday table with this sophisticated alternative to traditional orange gourds. Using fine brushwork and a muted autumnal palette, this project transforms a simple white pumpkin into a canvas for rust-colored zinnias, fading ferns, and delicate seed pods.
Step-by-Step Guide
Materials
- White or cream pumpkin (real or faux)
- Acrylic craft paints (burnt orange, mustard yellow, olive green, deep brown, cream)
- Detail brushes (sizes 0/00 liner and size 2 round)
- Matte finish clear sealant spray
- Paper plate or palette
- Water cup and paper towels
- Pencil (optional)
Step 1: Preparation & Planning
-
Clean the surface:
Ensure your pumpkin is completely dirt and oil-free. If working with a real pumpkin, wash it gently with mild soap and dry thoroughly. For a faux pumpkin, a quick wipe with isopropyl alcohol helps the paint adhere better. -
Visualize the layout:
Before painting, look at the pumpkin’s natural ribs. You want your stems to flow vertically with the curve of the pumpkin, rising from bottom to top, rather than fighting the natural shape. -
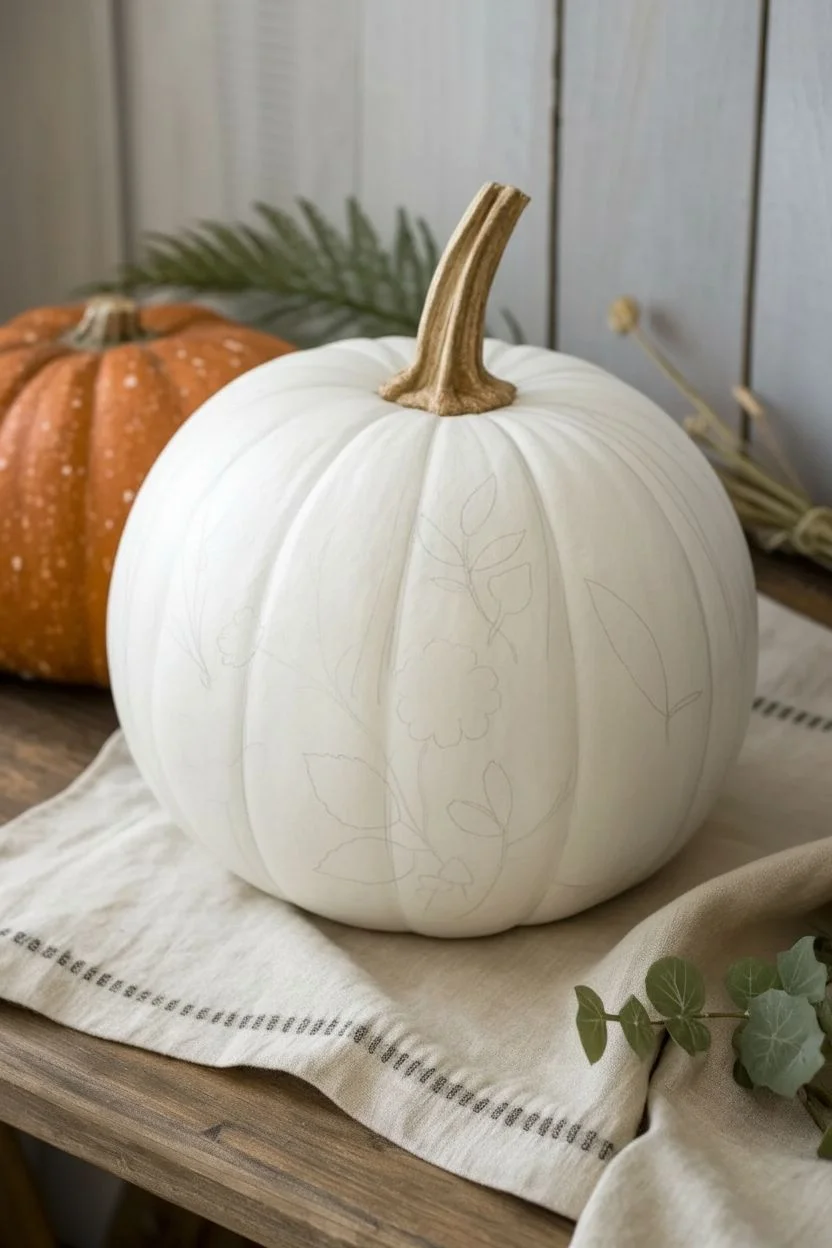
Sketch lightly (optional):
If you are nervous about freehanding, use a very light pencil touch to map out the main stems. Keep the lines faint so they don’t show through the lighter flower petals later.
Paint Slipping?
If paint beads up on the pumpkin skin, the surface is too waxy. Lightly buff the painting area with fine-grit sandpaper or apply a clear matte primer first.
Step 2: Painting the Foliage
-
Mix your greens:
Create an olive green by mixing a standard green with a tiny amount of brown or ochre. You want an earthy, dried-leaf tone rather than a bright spring green. -
Paint main stems:
Using your liner brush, paint thin, wavy lines starting from the bottom third of the pumpkin, reaching upwards. Vary the lengths so the composition feels organic and wild. -
Add broad leaves:
Switch to a size 2 round brush to paint the larger, broader leaves near the base. Press the brush down to widen the stroke and lift up as you reach the leaf tip to create a point. -
Add detail to leaves:
While the green is still slightly wet, I like to drag a tiny bit of lighter yellow-green through the center of the leaf to suggest veins and dimension. -
Create wispy fronds:
Using the liner brush again, paint delicate, fern-like branches. Use quick, light flicks of the wrist to create the tiny leaflets along the stem. -
Incorporate dried stems:
Mix a mustard yellow or light brown shade. Paint several stems that curve dramatically, adding tiny ‘beads’ or dots along them to mimic dried seed heads or grain stalks.
Vintage Patina
Mix a glaze of water and a drop of brown paint. Wash it over the dried design and quickly wipe it off with a paper towel for an aged, antiqued look.
Step 3: Adding Florals
-
Base the main blooms:
Identify a few focal points for your larger flowers. Mix a rust-orange color and paint the circle of petals for the zinnia-style flowers, leaving the center empty for now. -
Layering petals:
Once the base orange is dry, mix a lighter peach tone. Paint a few smaller petal strokes on top of the rust layer to give the flower volume and make it pop. -
Painting centers:
Dip the tip of your round brush into dark brown paint. Stipple (tap repeatedly) the center of your flowers to create a textured, seed-like look. -
Detailing the centers:
Add tiny dots of cream or white on top of the brown centers to catch the light and add realism. -
Add secondary buds:
Paint smaller, closed buds using the rust and mustard colors on the tips of some of your green stems. Simple teardrop shapes work perfectly for this. -
Paint delicate white fillers:
Using your finest liner brush and watered-down cream paint, add sprigs of tiny wildflowers or ‘baby’s breath’ style dots to fill empty negative spaces without overcrowding.
Step 4: Finishing Touches
-
Review and refine:
Step back and look at the pumpkin from a distance. If an area looks too sparse, extend a vine or add a floating leaf. If a line looks shaky, thicken the stem slightly to smooth it out. -
Let it cure:
Allow the paint to dry completely. Since acrylic dries mostly plastic-like, it shouldn’t take long, but give it at least an hour to be safe. -
Seal the artwork:
Take the pumpkin outside or to a well-ventilated area. Spray it with a light coat of matte sealant. This protects your delicate brushwork from chipping and moisture.
Place your finished botanical masterpiece on a linen runner to complete your elegant harvest display
Eucalyptus and Berry Wreath Pumpkin
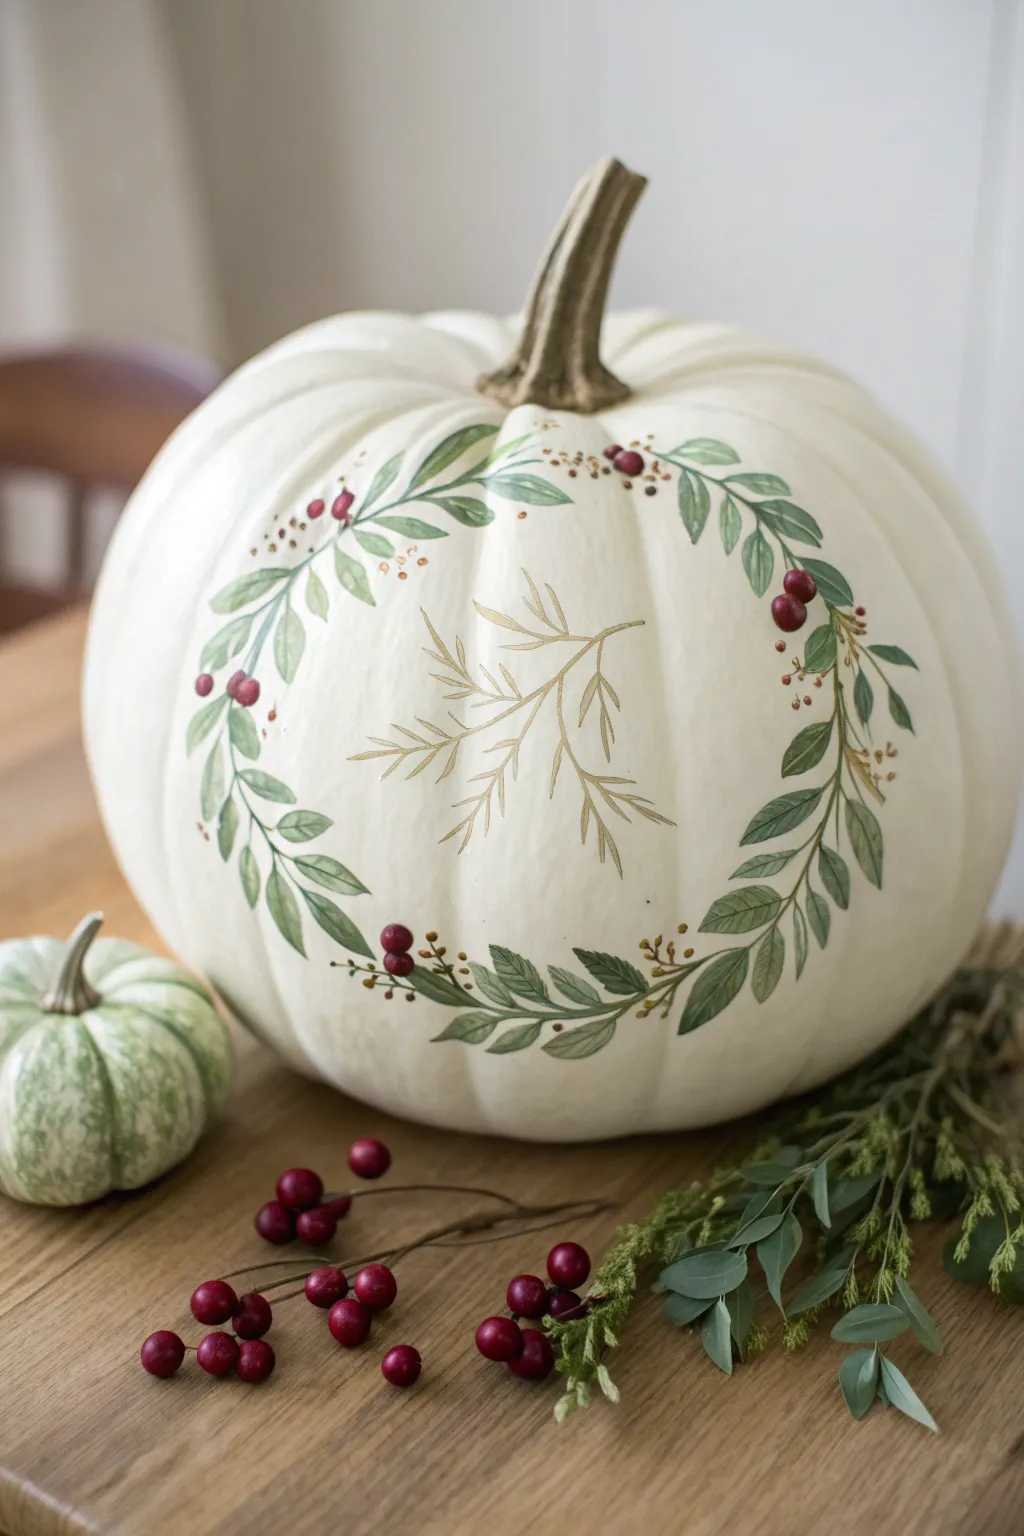
Transform a simple white pumpkin into an elegant centerpiece with this delicate wreath design. Featuring soft sage green eucalyptus leaves and vibrant cranberry-red berries, this painted motif brings a sophisticated botanical touch to your Thanksgiving decor.
Step-by-Step Tutorial
Materials
- Large white artificial or real pumpkin (cleaned)
- Acrylic paints: Sage Green, Deep Forest Green, Burgundy/Crimson, Metallic Gold, Warm Brown
- Detail brushes: Script liner (Size 0 or 00), Round brush (Size 2 and 4)
- Palette or paper plate
- Pencil (light graphite)
- Paper towel
- Cup of water
- Clear matte acrylic sealer spray (optional)
Step 1: Preparation & Mapping
-
Clean and prep surface:
Begin by wiping down your pumpkin with a damp cloth to remove any dust or waxy residue, ensuring the paint adheres properly. If using a real pumpkin, make sure it is completely dry before starting. -
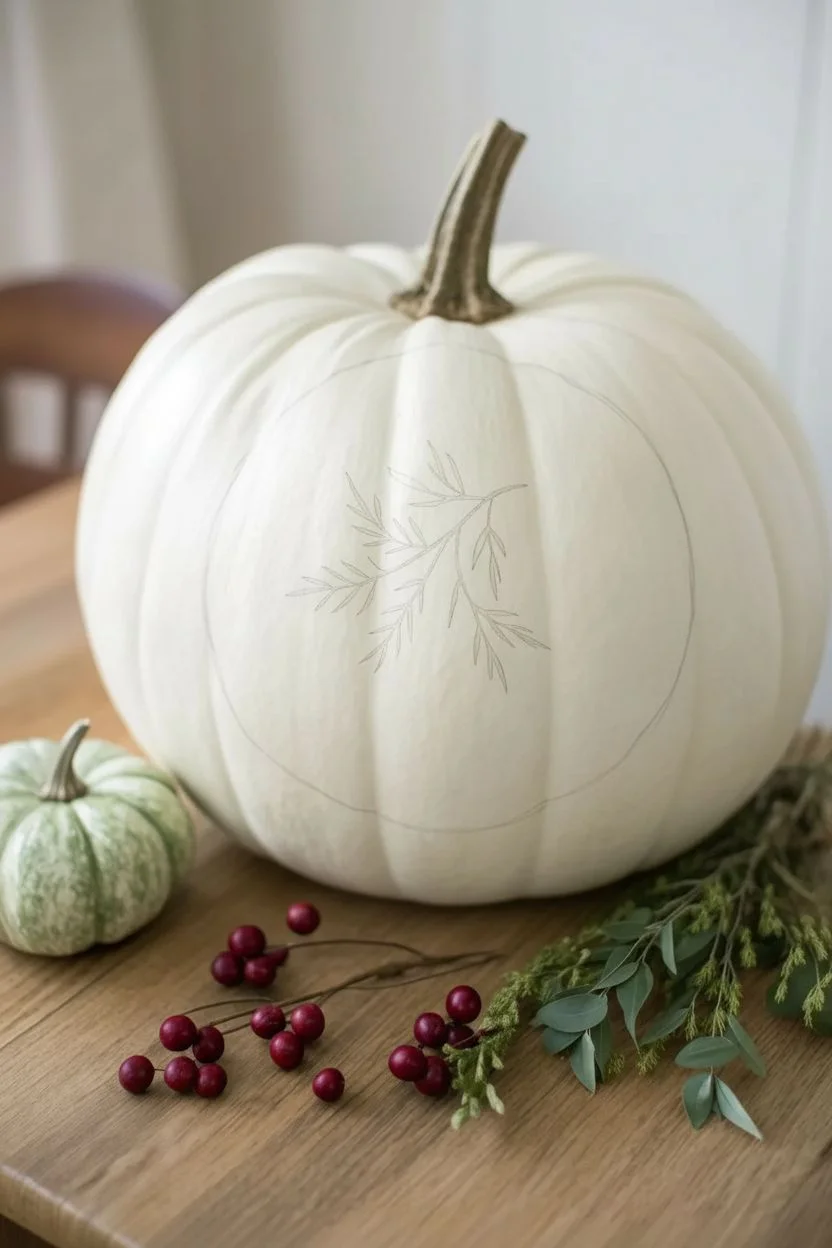
Sketch the wreath shape:
Using a light pencil, very faintly sketch a large circle on the face of the pumpkin. This doesn’t need to be perfect; it just serves as a guideline to keep your wreath symmetrical. -
Outline the central motif:
In the center of your circle, lightly sketch a sprawling branch shape. Draw a central stem that splits into three delicate offshoots, resembling a fern or fir branch.
Leaves lack detail?
If your leaves look flat, mix a tiny drop of water into your dark green paint. A thinner consistency flows better for painting sharp, crisp veins on top of the base coat.
Step 2: Painting the Greenery
-
Paint the main vines:
Load your script liner brush with watered-down brown paint mixed with a touch of green. Paint a thin, winding line following your circular pencil guide. Let the line break occasionally; it shouldn’t be a solid, heavy ring. -
Start the base leaves:
Switch to the size 4 round brush and load it with Sage Green. Starting at the bottom center of the wreath, press and lift your brush to create almond-shaped leaves that point outward along the vine. -
Vary the leaf direction:
As you move up the sides of the wreath, ensure the leaves flow naturally in the direction of growth—upwards and slightly outwards. I find it helpful to rotate the pumpkin on the table rather than twisting my wrist. -
Add depth with darker green:
While the sage leaves are still slightly tacky or just dry, mix a little Deep Forest Green. Paint smaller, thinner leaves tucked behind or between the sage ones to create volume and shadow. -
Detail the leaf veins:
Using your finest script liner brush and the dark green paint, add a single, very harsh hairline vein down the center of the larger sage leaves for a realistic botanical illustration look. -
Paint sparse twigs:
Using the brown paint again, add tiny, thin twig extensions coming off the main vine in empty spots. These will serve as anchors for your berries later.
Gold Paint Tip
Metallic acrylics can be sheer. Paint the center branch with a pale yellow ochre first as a primer, then layer the metallic gold on top for maximum opacity and shine.
Step 3: Adding Accents & Center
-
Create the berries:
Dip the handle end of a brush (or use a size 2 round brush) into your Burgundy paint. Dot clusters of 2-3 berries onto the twigs you just painted. Group them unevenly for a natural appearance. -
Add berry highlights:
Once the red dots are dry, pick up a tiny amount of white or pale pink paint. Add a microscopic dot (highlight) on the top right curve of each berry to make them look spherical and glossy. -
Paint tiny gold seeds:
Using Metallic Gold paint and the tip of your smallest brush, add clusters of tiny dots around the berries and ends of the vines. These mimic pollen or small seeds and add a festive shimmer. -
execute the center branch:
Now, tackle the center design. Using the Metallic Gold paint and a liner brush, trace over your central sketch. Use long, confident strokes to create the fern-like fronds. -
Refine the gold lines:
If the gold looks too transparent, let the first coat dry completely and apply a second layer. Keep the lines very fine and feathery.
Step 4: Finishing Touches
-
Review and fill gaps:
Step back and look at the wreath from a few feet away. If the circle looks disjointed, add a few small floating sage leaves or gold dots to bridge any awkward gaps. -
Clean up sketch lines:
Once the paint is 100% bone dry (give it at least an hour), use a clean eraser to gently remove any visible pencil marks from your initial sketch. -
Seal the artwork:
To protect your work, especially if placing the pumpkin outside, spray a light coat of clear matte acrylic sealer over the painted face.
Place your finished pumpkin on a bed of fresh eucalyptus to echo the painted design
Golden Vines on a White Pumpkin Canvas

Transform a simple gourd into an elegant centerpiece with this sophisticated white and gold design. The raised, textured vines create a luxurious feel that mimics expensive ceramic decor, perfect for an upscale Thanksgiving table.
How-To Guide
Materials
- Large white artificial or real pumpkin (smooth surface is best)
- Gold dimensional fabric paint (puffy paint) in a squeeze bottle
- Metallic gold acrylic paint (for the stem)
- Small flat paintbrush
- Pencil or disappearing ink marker
- Paper towels
- Gold leaf adhesive (optional for extra shine)
- Gold leaf sheets (optional)
Step 1: Preparation and Base
-
Clean surface:
Begin by thoroughly wiping down your pumpkin with a damp cloth to remove any dust or waxy residue. If using a real pumpkin, dry it completely before starting. -
Prime the stem Base:
Using your small flat brush, apply a base coat of metallic gold acrylic paint to the entire stem. Don’t worry about complete opacity yet; just get the color coverage started. -
Layer stem color:
Once the first coat is dry to the touch, add a second layer of metallic gold paint to the stem. Use vertical strokes to emphasize the natural ridges of the stem texture. -
Create a dry brush effect:
Ideally, apply a tiny amount of darker bronze or brown paint to a dry brush and lightly sweep it over the crevices of the gold stem. This adds depth and creates that aged, realistic metallic look seen in the photo.
Step 2: Drafting the Pattern
-
Map the vines effectively:
With a pencil or disappearing ink marker, lightly sketch your main vine lines. Start from the bottom third of the pumpkin and curve upward in varying S-shapes. Avoid straight lines to keep the organic feel. -
Add spiral flourishes:
At the ends of your vine lines, sketch tight spirals. Add smaller offshoot branches that also curl into spirals, alternating directions for visual balance. -
Placement of leaves:
Sketch leaf outlines along the main vine stems. Space them somewhat irregularly to look natural—some single leaves, some pairs. The leaf shape should be a classic pointed oval. -
Review the composition:
Step back and look at the pumpkin from a few feet away. Ensure the design wraps nicely around the visible curve and isn’t too clustered in one spot. Erase and adjust lines as needed before painting.
Steady Hands Pro-Tip
Keep your elbow resting on the table while piping the vines. This anchors your arm and allows you to use your wrist for smoother curves, preventing shaky lines.
Step 3: Creating the Gold Relief
-
Test paint flow:
Before touching the pumpkin, squeeze a test line of gold dimensional paint onto a paper towel. You want a smooth, consistent flow without air bubbles. -
Pipe the main vines:
Holding the bottle like a pen, trace your sketched vine lines. Apply steady, even pressure to create a beaded, rope-like line. If a gap appears, gently overlap the new line with the end of the old one. -
Detail the spirals:
Carefully pipe the spiral ends. For the tight inner curls, release pressure on the bottle slightly as you reach the center to taper the line thickness. -
Outline the leaves:
Pipe the outer perimeter of each leaf shape. Connect the base of the leaf firmly to the main vine line so the design looks interconnected. -
Fill leaf interiors:
Inside each leaf outline, pipe a central vein line. Then, create angled veins branching from the center. I find that leaving small gaps of white showing between these gold lines adds better definition than filling it solid. -
Add decorative dots:
For extra whimsy, place small dots of dimensional paint along the vines or in negative spaces near the spirals. Keep the dots uniform in size by using a quick ‘dot-and-lift’ motion.
Unclogging The Tip
If the dimensional paint stops flowing smoothly, don’t squeeze harder or it may explode. Use a sewing needle or paperclip to clear the dried plug from the nozzle tip.
Step 4: Finishing Details
-
Clean up errors:
If you make a mistake or smear a line, immediately use a damp Q-tip to wipe away the wet paint. Repaint the line once the spot is dry. -
Dry completely:
This is crucial: Let the pumpkin sit undisturbed for at least 24 hours. Dimensional paint takes a long time to cure, and touching it too early will flatten the beautiful raised effect. -
Erase guidelines:
Once fully cured, check for any visible pencil lines. Gently erase them, being careful not to rub vigorously over the gold paint.
Place your gilded creation on a linen runner and enjoy the warm metallic glow it brings to your holiday table
Stenciled “Thankful Words” Pumpkin Collage
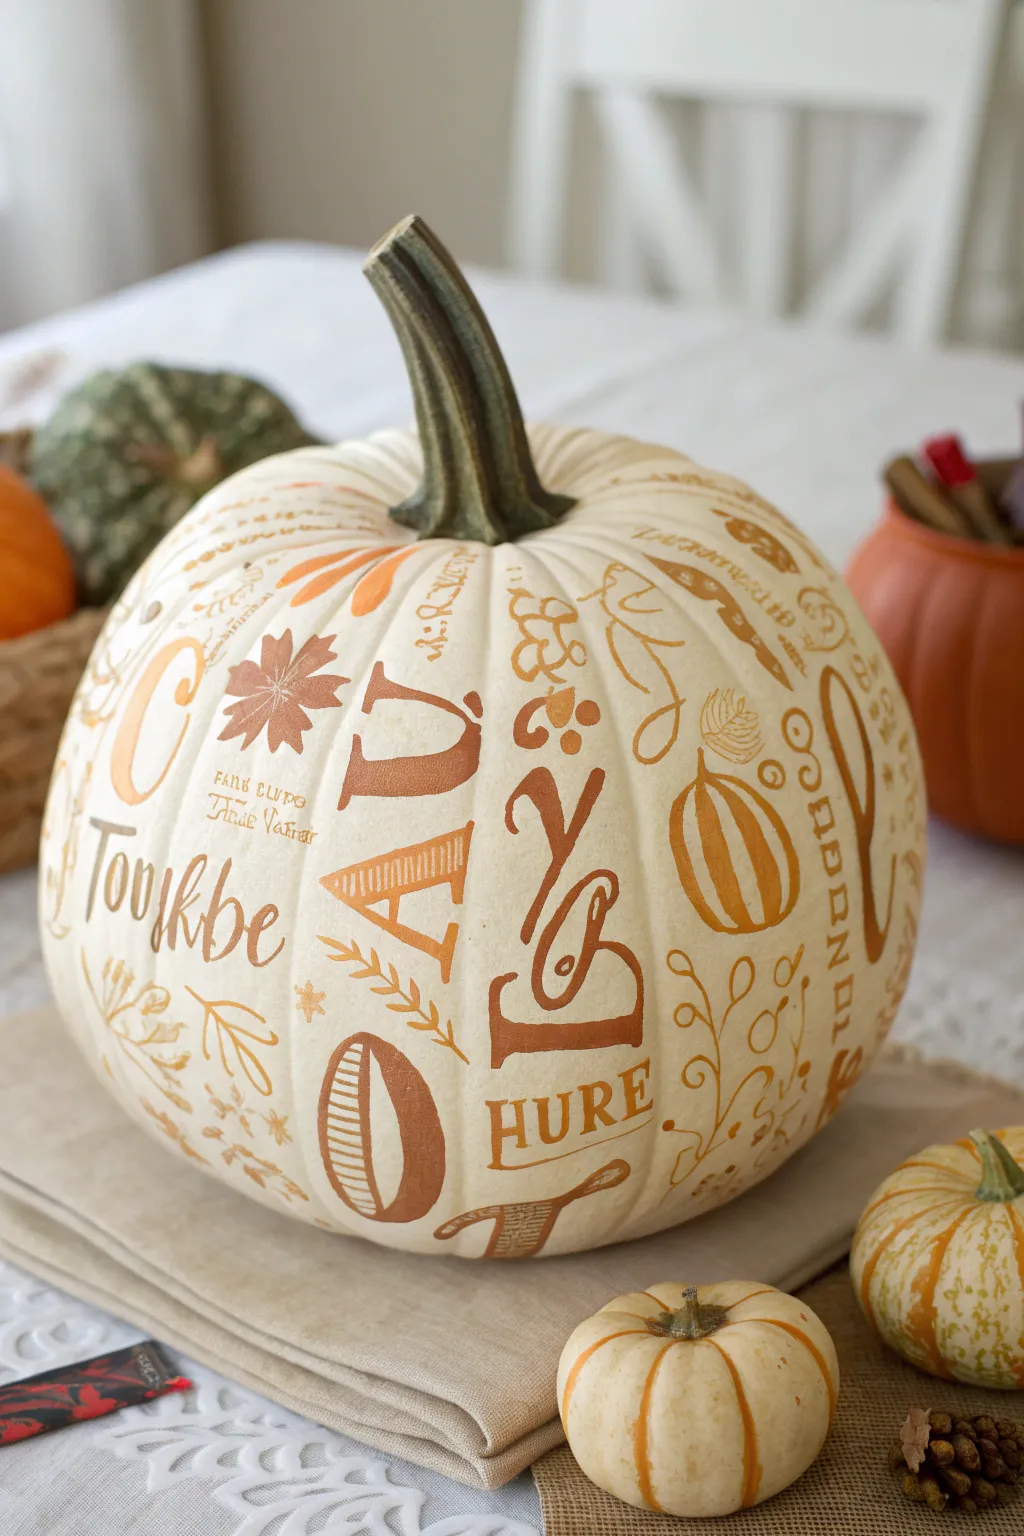
Transform a simple cream pumpkin into a sophisticated centerpiece featuring a collage of fall-inspired typography and botanical motifs. The monochromatic palette of copper and bronze against white creates an elegant, eclectic look perfect for the Thanksgiving table.
Detailed Instructions
Materials
- Large white artificial or real pumpkin (matte finish)
- Adhesive stencil film or vinyl sheets
- Craft knife and cutting mat (or Cricut/electronic cutter)
- Copper and bronze acrylic craft paint
- Spouncers (round foam pouncers) in various sizes
- Fine-point metallic paint marker (copper)
- Assorted leaf and botanical rubber stamps (optional)
- Small stencil brush
- Painter’s tape
- Paper plate or palette
- Matte clear sealer spray
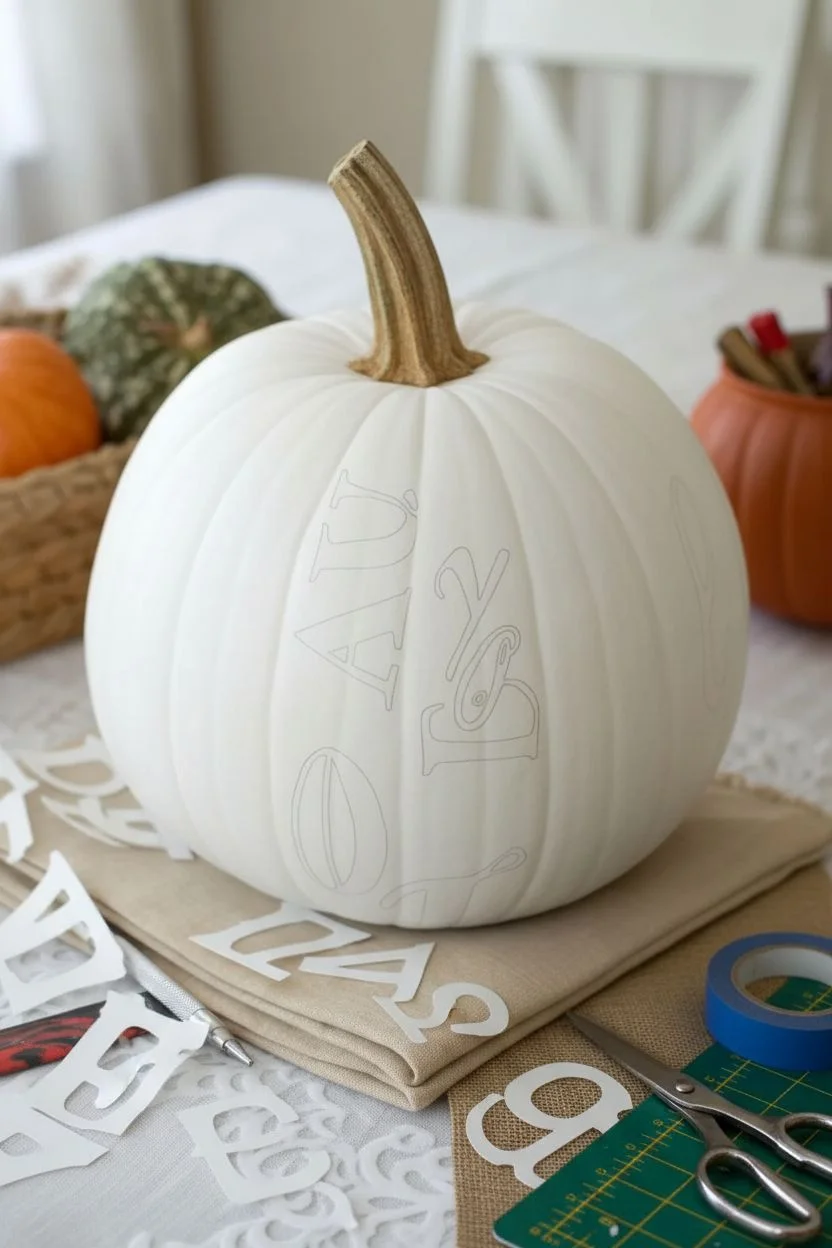
Step 1: Preparation & Design Planning
-
Clean the Surface:
Begin by wiping down your white pumpkin with a damp cloth to remove any dust or waxy residue. If using a real pumpkin, ensure it is completely dry before proceeding. -
Map Your Layout:
Visualize where your largest letters will go. The design relies on a scattered, collage-like effect, so don’t worry about perfect lines. Lightly mark key spots with a pencil if you need a guide. -
Prepare Stencils:
Cut out your letter stencils and fall shape stencils. You’ll want a mix of large serif fonts (like the big ‘C’, ‘A’, and ‘O’) and smaller script or block text. An electronic cutter works best here, but hand-cutting vinyl works too.
Adhesion Trick
On deep pumpkin ridges, use a hairdryer on low heat to warm the vinyl stencil slightly. Rub it firmly into the groove while warm for a perfect seal.
Step 2: Applying the Large Motifs
-
Position Large Letters:
Peel the backing off your largest letter stencils (like the ‘A’ and ‘B’) and adhere them to the pumpkin’s surface. Smooth out any air bubbles, especially focusing on the ridges of the pumpkin to prevent paint bleed. -
Load the Pouncer:
Squeeze a dollop of copper acrylic paint onto your paper plate. Dab your foam pouncer into the paint, then tap it repeatedly on a clean part of the plate to offload excess—you want a very dry application. -
Stenciling the Base:
Gently pounce the sponge over the stencil using a straight up-and-down motion. Avoid sweeping or brushing, which forces paint under the edges. -
Add Dimension:
While the copper paint is still tacky, mix a tiny bit of darker bronze into your sponge and tap it lightly near the bottom of the letters to create a subtle ombre or shadowed effect. -
Peel and Reveal:
Carefully peel away the stencil while the paint is still slightly wet. This helps ensure crisp edges. Let these main elements dry for about 15 minutes.
Bleeding Lines?
If paint seeps under the stencil, wait for it to dry completely, then gently scrape the excess away with a toothpick or cover it with white paint.
Step 3: Adding Detail & Filler
-
Incorporate Botanical Shapes:
Place stencils for leaves, acorns, and branches in the negative spaces between your large letters. Tape down the edges securely. -
Stenciling Botanicals:
Using a smaller stencil brush or pouncer, apply the bronze paint to these shapes. Vary the opacity—some leaves look great fully opaque, while others can be lighter and more distressed. -
Stamping Textures:
If you have rubber stamps with fall patterns or tiny text, lightly coat them with paint and press them onto the pumpkin’s curves. Rock the stamp gently to catch the uneven surface. -
Fill the Gaps:
Use stencils for smaller words (like ‘HURE’ or ‘Tobke’) to fill larger gaps. Orient them vertically or at angles to enhance the collage feel.
Step 4: Freehand Drawing & Finishing
-
Freehand Vines:
Take your fine-point metallic paint marker and draw delicate vines connecting the stenciled elements. I find that keeping these lines loose and whimsical ties the whole look together. -
Outline for Emphasis:
Use the marker to add thin outlines or shadow lines to some of the painted letters, giving them sharper definition against the white background. -
Add Micro-Details:
Draw tiny berries, dots, or small sprigs in any awkward empty spaces to balance the composition. -
Dry Time:
Allow the entire pumpkin to dry for at least one hour to ensure the paint marker and acrylics are fully set. -
Seal the Work:
Take the pumpkin to a well-ventilated area and apply a light coat of matte clear sealer. This protects the design from scratching and keeps the finish uniform.
Place your typographic masterpiece on a linen runner or burlap square to complete your festive display
Plaid-and-Leaves Half-and-Half Pumpkin
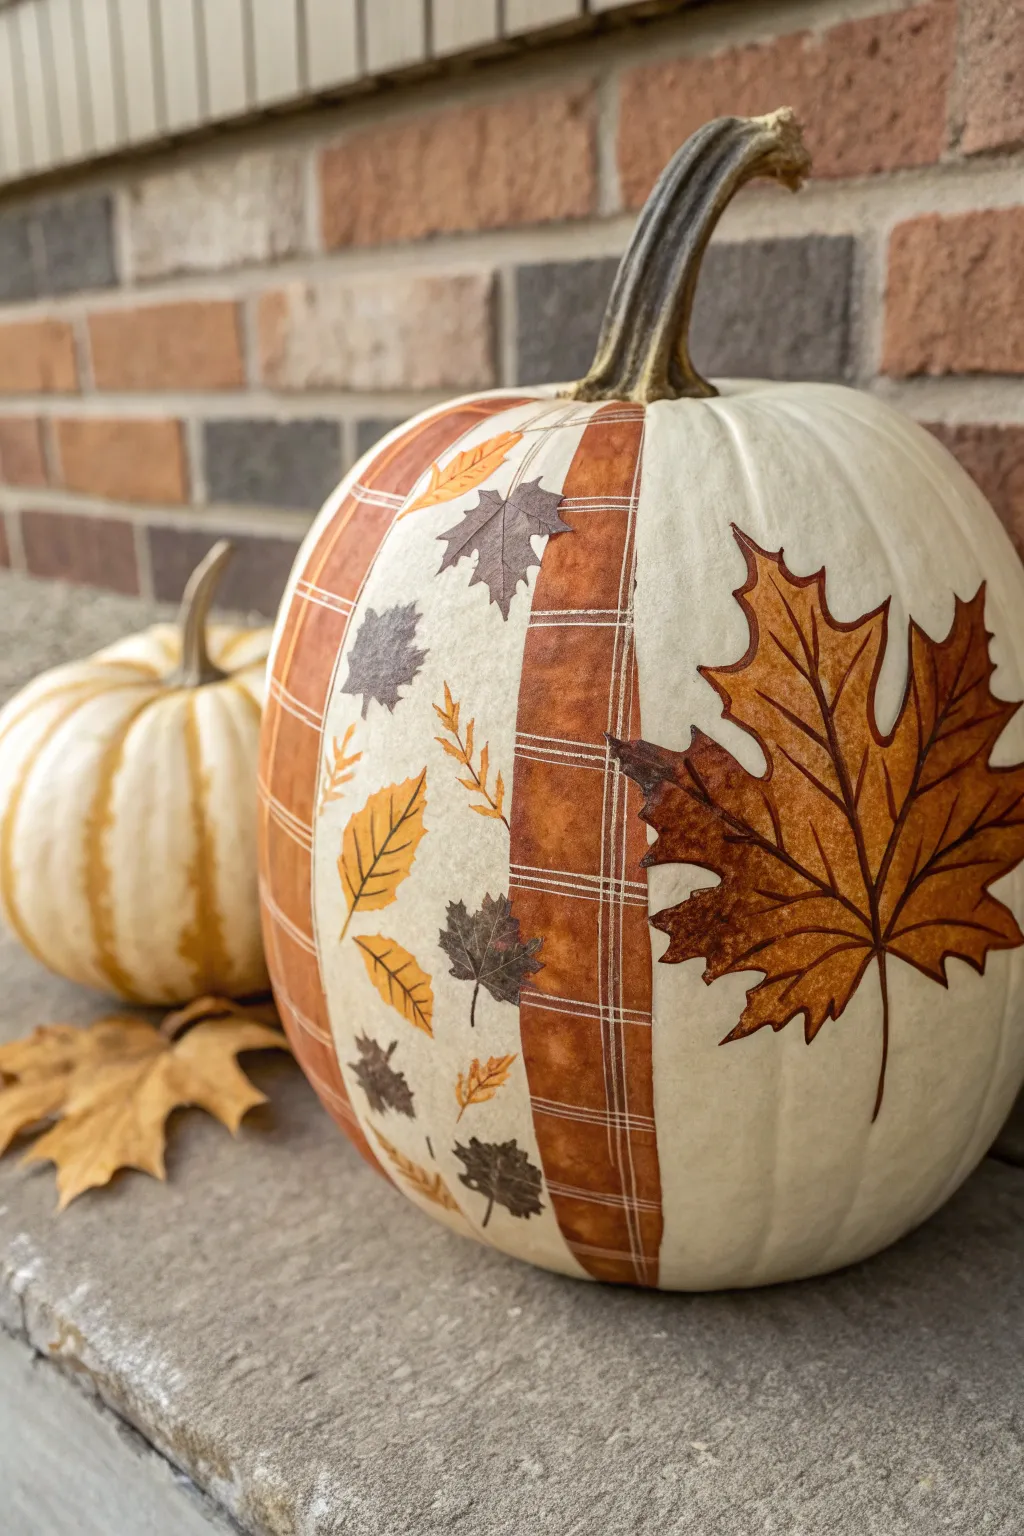
Embrace the rustic charm of autumn with this unique mixed-media pumpkin design. By combining decoupage techniques with bold paper patterns, you can create a centerpiece that perfectly balances cozy plaid with elegant fall foliage.
Step-by-Step Guide
Materials
- Large white craft pumpkin (or a real white pumpkin)
- Plaid patterned scrapbook paper or decoupage paper (orange/rust tones)
- Leaf patterned tissue paper or napkins (white background with small leaves)
- Large maple leaf image or decal (translucent or sticker)
- Mod Podge (Matte or Satin finish)
- Foam applicator brushes
- Soft bristle brush
- Pencil
- Scissors
- Painter’s tape (optional)
- X-Acto knife
Step 1: Planning and Preparation
-
Clean surface:
Begin by wiping down your pumpkin with a damp cloth to remove any dust or oils. If using a real pumpkin, ensure it is completely dry before starting. -
Plan the division:
Visualize a vertical line splitting the pumpkin into roughly two halves. This project uses an asymmetrical design where the patterned section takes up a little more than a third of the visible front side. -
Select paper sections:
Cut your plaid paper into vertical strips that are approximately 1.5 to 2 inches wide. Cutting them into strips rather than one large sheet allows the paper to contour to the pumpkin’s curve without excessive wrinkling.
Wrinkle Rescue
Paper wrinkling on the curves? Use thinner paper like tissue or napkins, or cut occasional horizontal slits in your paper strips to let them overlap and conform to the round shape.
Step 2: Applying the Plaid Section
-
Apply adhesive foundation:
Using a foam brush, apply a medium coat of Mod Podge to a vertical section of the pumpkin where your first plaid strip will go. Don’t cover the whole pumpkin yet; work in sections. -
Place first strip:
Lay your first plaid strip down vertically. Smooth it out gently with your fingers, working from the center outward to push out air bubbles. -
Add spacing strips:
Cut a strip of your leaf-patterned paper (white background with small falling leaves) to the same width as your plaid strips. -
Create the pattern:
Apply the leaf-patterned strip next to the plaid one, leaving a very small gap or slightly overlapping depending on your preference. In the image, we alternate: plaid, leaf pattern, plaid. -
Seal the edges:
Once the strips are in place, lightly brush a thin layer of Mod Podge over the edges to secure them down. Be careful not to tear thin paper.
Step 3: Adding the Focal Leaf
-
Isolate the white space:
Identify the large blank white section of the pumpkin next to your last plaid strip. This creates a clean, negative space for your focal point. -
Prepare the large leaf:
Cut out your large maple leaf design. If using a printed image on regular paper, intricate cutting around the jagged edges is key. If using a sticker or decal, peel the backing halfway. -
Position the leaf:
Place the leaf so that one of its side points overlaps slightly with the last plaid strip. This connects the two design elements visually. -
Adhere the leaf:
Glue the leaf down thoroughly. If using traditional decoupage, coat the back of the leaf with adhesive, press it to the pumpkin, and smooth it down with a soft brush. -
Ensure smooth contact:
Pay special attention to the leaf stem and tips. I find using the back of a spoon to gently burnish these small details helps them stick perfectly to the pumpkin’s ribs.
Pro Tip: Vintage Tint
For that aged look, lightly sponge a tiny amount of diluted brown acrylic paint or distress ink over the bright white areas of the paper before sealing.
Step 4: Finishing Touches
-
Clean up edges:
Use an X-Acto knife to trim any excess paper at the very top near the stem or at the very bottom of the pumpkin for a crisp finish. -
Apply top coat:
Cover the entire decorated area—both the strips and the leaf—with a final layer of Mod Podge. This seals everything and unifies the sheen. -
Check for bubbles:
While the top coat is wet, inspect for any stubborn air bubbles. Prick them with a pin and smooth them down if necessary. -
Dry completely:
Allow the pumpkin to sit undisturbed for at least 24 hours to let the adhesive cure and harden fully.
Place your warm and inviting creation on the porch or mantle alongside some dried leaves for the full effect
Marbled Pumpkin in Autumn Neutrals
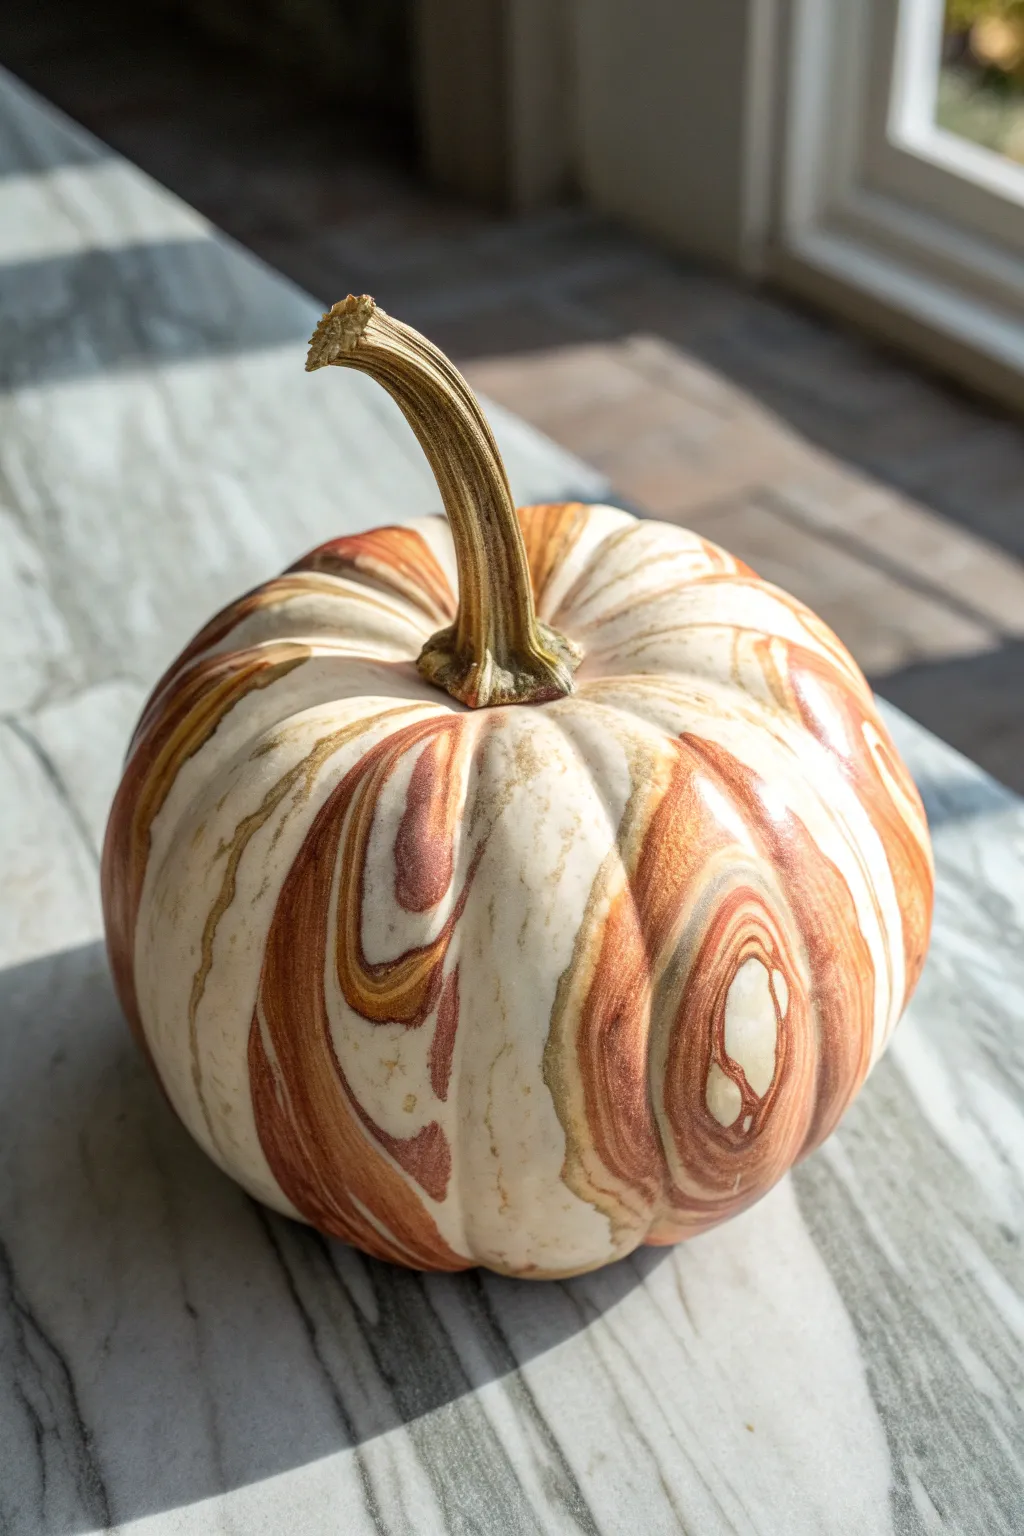
Achieve this sophisticated, high-end look using a simple hydro-dipping nail polish technique that creates organic swirls resembling marbled stone. The mesmerizing blend of rust, cream, and gold transforms an ordinary pumpkin into an elegant Thanksgiving centerpiece.
Step-by-Step
Materials
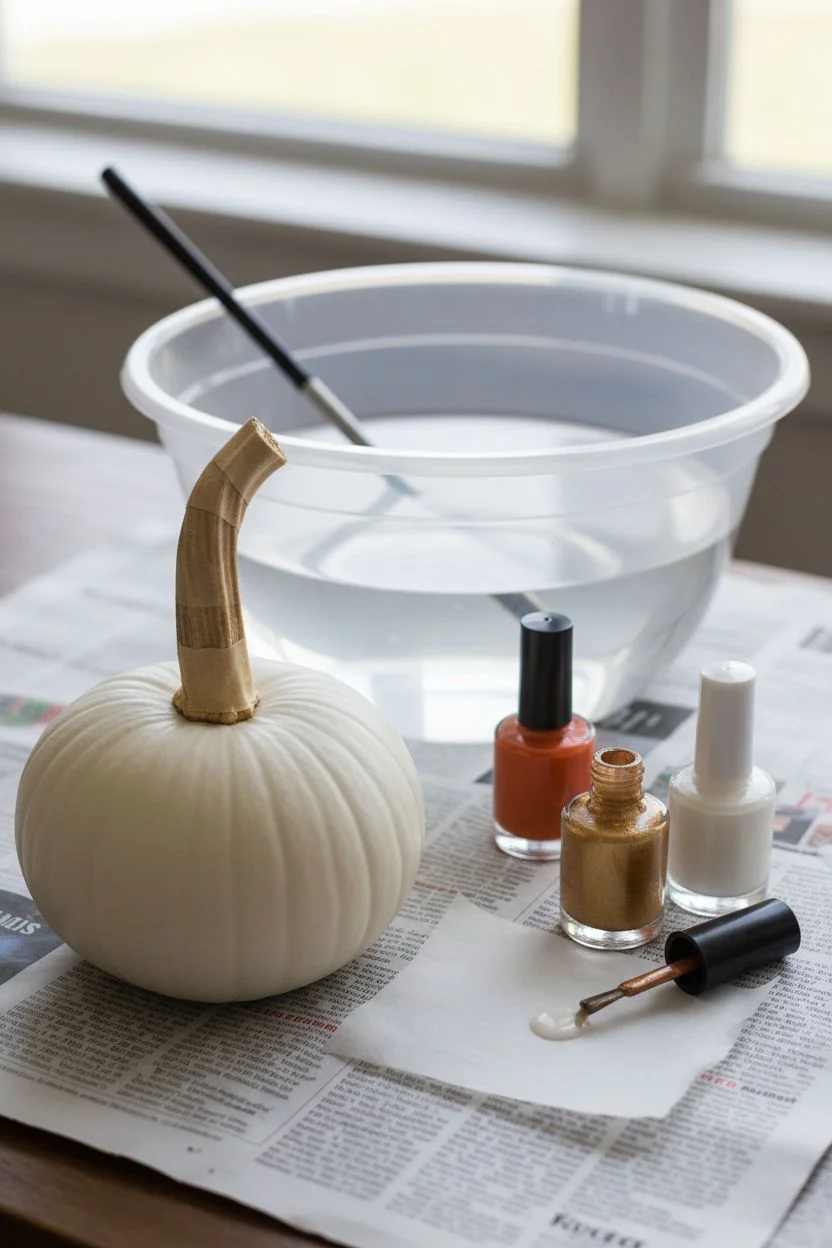
- Small to medium white pumpkin (real or faux)
- Nail polish – Burnt orange/rust/terracotta
- Nail polish – Metallic gold
- Nail polish – Cream or opaque white
- Nail polish – Metallic bronze or chocolate brown (optional)
- Large plastic bowl or disposable container (deep enough to submerge half the pumpkin)
- Room temperature water
- Toothpicks or wooden skewers
- Painter’s tape
- Wax paper or drying rack
- Newspaper or drop cloth
- Clear acrylic sealer spray (optional)
- Nail polish remover and cotton swabs (for cleanup)
Step 1: Preparation
-
Clean surface:
Begin by thoroughly washing your pumpkin to remove any dirt or oils. Dry it completely with a clean cloth. -
Protect the stem:
Wrap the pumpkin stem tightly with painter’s tape. This ensures the stem retains its natural woody texture, providing a nice contrast to the glossy marbled paint. -
Set up the workspace:
Lay down newspaper or a drop cloth to protect your table. Place a sheet of wax paper or a drying rack nearby where the wet pumpkin can rest. -
Prepare the water bath:
Fill your plastic container with room temperature water. It is crucial that the water is clearly not too cold or too hot, as extreme temperatures can cause the polish to sink or clump immediately.
Step 2: Creating the Marble Effect
-
Open polishes:
Unscrew the caps of all your selected nail polish colors before you start pouring. You need to work quickly, so having them ready and open is essential. -
The first drop:
Hold the brush close to the water’s surface and let a drop of the cream or white polish fall onto the water. It should spread outward into a thin film. -
Layering colors:
Quickly drip your next color, perhaps the burnt orange, directly into the center of the white circle. Watch it push the first ring outward. -
Adding metallics:
Drop the metallic gold into the center of the bullseye you are forming. The metallics often spread differently, creating beautiful, shimmering veins. -
Continue the pattern:
Repeat the dripping process, alternating colors (rust, bronze, cream, gold) until you have a multi-ringed bullseye covering most of the water’s surface. -
Draw the design:
Take a toothpick and gently drag it through the paint rings. Start from the outer edge and draw inward, or swirl gently to create the marbled patterning seen in the photo.
Paint Sinking?
If the polish sinks to the bottom instead of floating, your water is likely too cold. Try refilling with tepid tap water to help the polish spread into a film.
Step 3: Dipping and Finishing
-
The dip:
Grasping the pumpkin firmly, possibly by the taped stem if it’s sturdy enough, slowly submerge the pumpkin into the water. Aim for the center of your design. -
Full coverage:
Push the pumpkin down until the water line reaches the stem area to coat the sides fully. I find a slow, steady plunge works best to avoid air bubbles. -
Clear surface:
While the pumpkin is still submerged, use a loose toothpick or skewer to swirl away the excess paint remaining on the water’s surface so it doesn’t double-coat the design when you pull it out. -
Remove and rest:
Lift the pumpkin out of the water. Shake off excess droplets gently and place it on the wax paper or drying rack. -
Touch ups:
If there are any bubbles, gently tap them out with your finger while the polish is still tacky. -
Dry well:
Allow the pumpkin to dry completely. This usually takes about 20 to 30 minutes, but depends on the thickness of the polish layers. -
Clean stem:
Once dry, carefully peel away the painter’s tape from the stem. -
Cleanup:
Use a cotton swab dipped in nail polish remover to clean up any stray paint marks near the base of the stem for a crisp edge. -
Seal (Optional):
To preserve the glossy finish and prevent chipping, you can lightly mist the pumpkin with a clear acrylic sealer spray.
Gilded Stem
Instead of keeping the stem natural, use liquid gold leaf on the stem after the marbling dries to make the pumpkin look even more luxurious.
Group several of these marbled creations together on a mantel or table runner for a sophisticated seasonal display
Crackle-Paint Pumpkin With Falling Leaf Accents
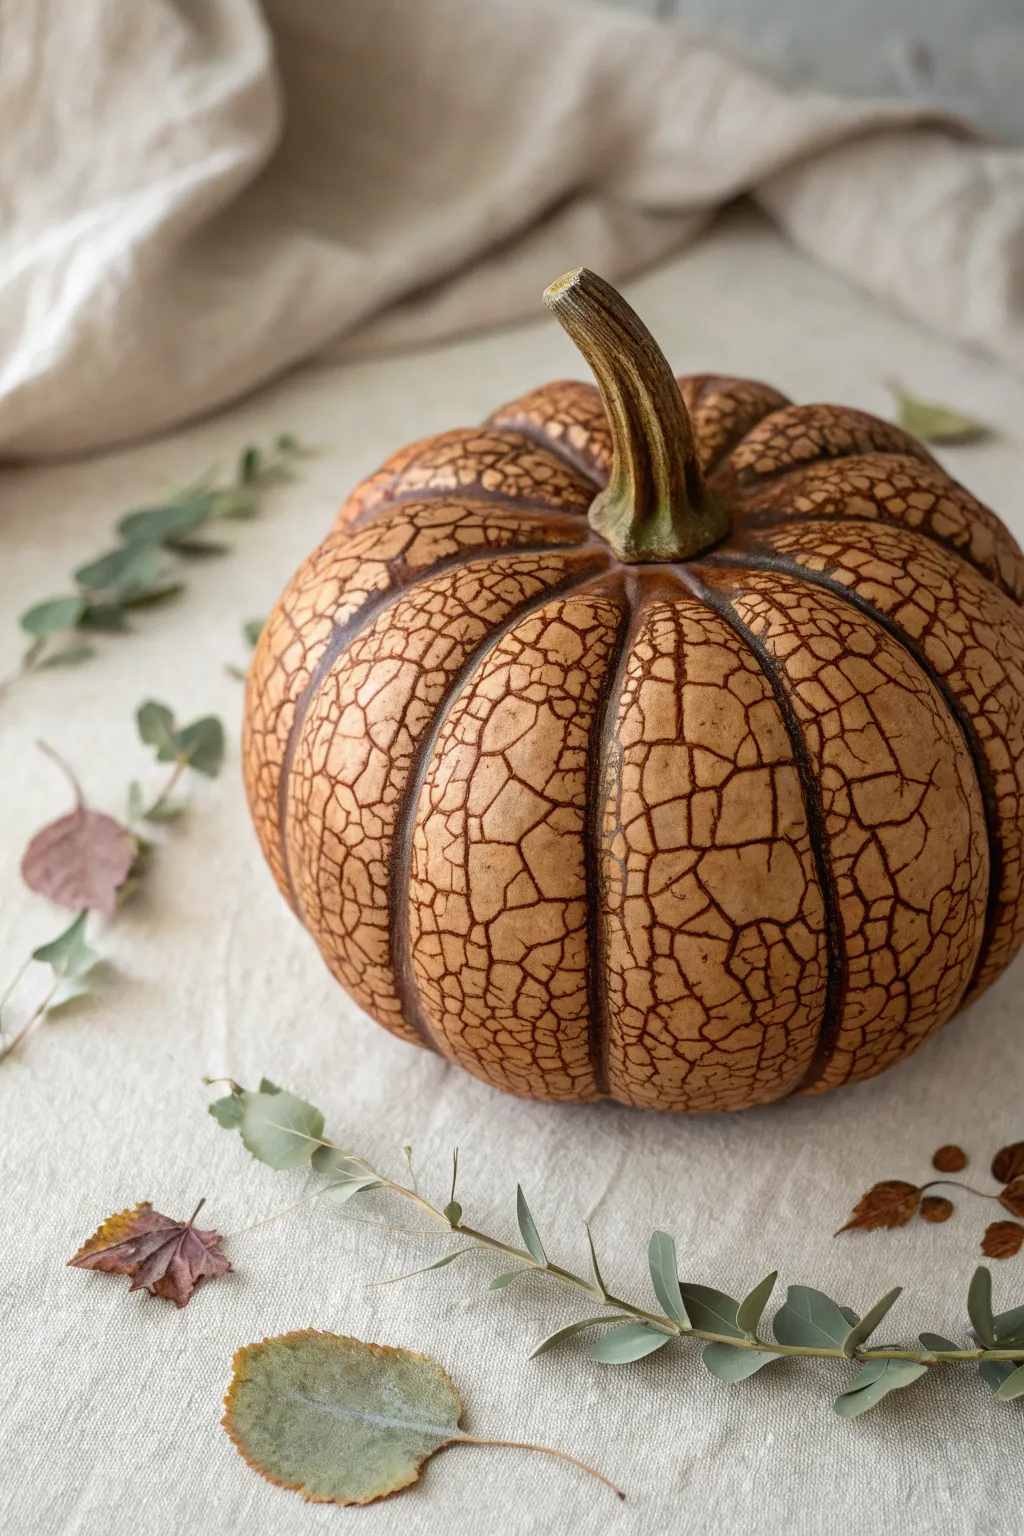
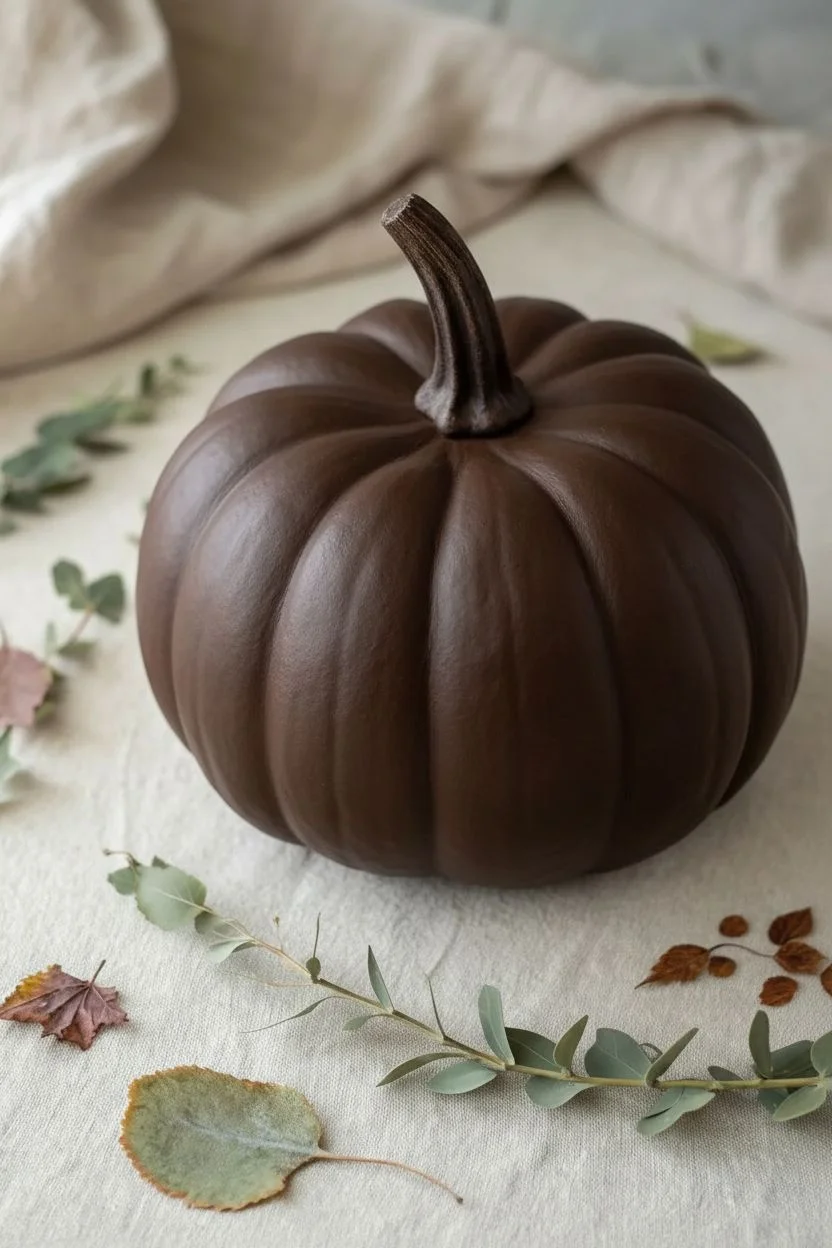
Transform an ordinary pumpkin into an antique stoneware masterpiece with this fascinating crackle technique. The resulting web of faux fractures creates a sophisticated, earthy centerpiece perfect for a neutral Thanksgiving tablescape.
How-To Guide
Materials
- Faux pumpkin (smooth surface works best)
- Dark brown acrylic paint (base coat)
- Beige or oatmeal-colored creamy acrylic paint (top coat)
- Crackle medium (clear)
- Foam brushes or soft flat brushes
- Paper plate or palette
- Paper towels
- Matte finish sealant spray
- Dried eucalyptus and autumn leaves (for styling)
Step 1: Base Coat Application
-
Clean surface:
Begin by wiping down your faux pumpkin with a damp cloth to remove any dust or oils. Let it dry completely. -
Apply dark base:
Squeeze a generous amount of dark brown acrylic paint onto your palette. -
Paint the pumpkin:
Using a foam brush, cover the entire pumpkin with the dark brown paint. This color will be what shows through the cracks later. -
Dry completely:
Allow this base coat to dry thoroughly. It must not be tacky to the touch before moving to the next phase.
Step 2: Crackle Medium Technique
-
Apply medium:
Brush a layer of clear crackle medium over the dark brown base coat. Ensure you get into the grooves of the pumpkin ribs. -
Coverage thickness:
Keep in mind that a thicker layer of medium generally produces larger cracks, while a thin layer creates fine, spiderweb cracks. -
Monitor drying:
Let the crackle medium dry according to package instructions. Usually, it should be tacky but not wet. Do not let it dry completely hard.
Cracks not appearing?
If the paint isn’t splitting, you likely brushed over the same spot twice. The top coat must be applied in a single pass while the medium is still tacky.
Step 3: Top Coat & Cracking
-
Prepare top color:
Load a clean soft brush with your beige or oatmeal acrylic paint. -
Single stroke application:
Apply the top coat over the tacky medium. The most critical rule here is to use single, confident strokes. -
Avoid reworking:
Do not brush back over wet paint you’ve just applied, as this will disturb the crackle process and create muddy patches. -
Work in sections:
Paint one rib at a time, moving from the stem down to the base, to maintain a natural directional flow. -
Stem detail:
For the stem, I prefer to dry-brush a little green and brown paint rather than using the crackle effect, giving it a realistic, woody look.
Direction Matters
Brush your top coat vertically (top to bottom) following the pumpkin’s ribs. Cross-hatching strokes will make the cracks look chaotic rather than natural.
Step 4: Finishing Touches
-
Watch it split:
Set the pumpkin aside. As the top coat dries, the chemical reaction will cause the beige paint to shrink and split, revealing the dark brown underneath. -
Patience is key:
Allow the pumpkin to sit undisturbed for several hours until the crackle effect has fully developed and the paint is hard. -
Seal the work:
Spray the entire pumpkin with a matte sealant to protect the finish and prevent the paint flakes from chipping over time. -
Arrange the scene:
Place your finished pumpkin on a linen cloth. -
Add nature:
Scatter dried eucalyptus sprigs and fallen leaves around the base to complete the organic, autumnal aesthetic.
Enjoy the timeless charm of your new stoneware-inspired pumpkin decoration
Woodland Scene Pumpkin for a Cozy Harvest Storybook Feel
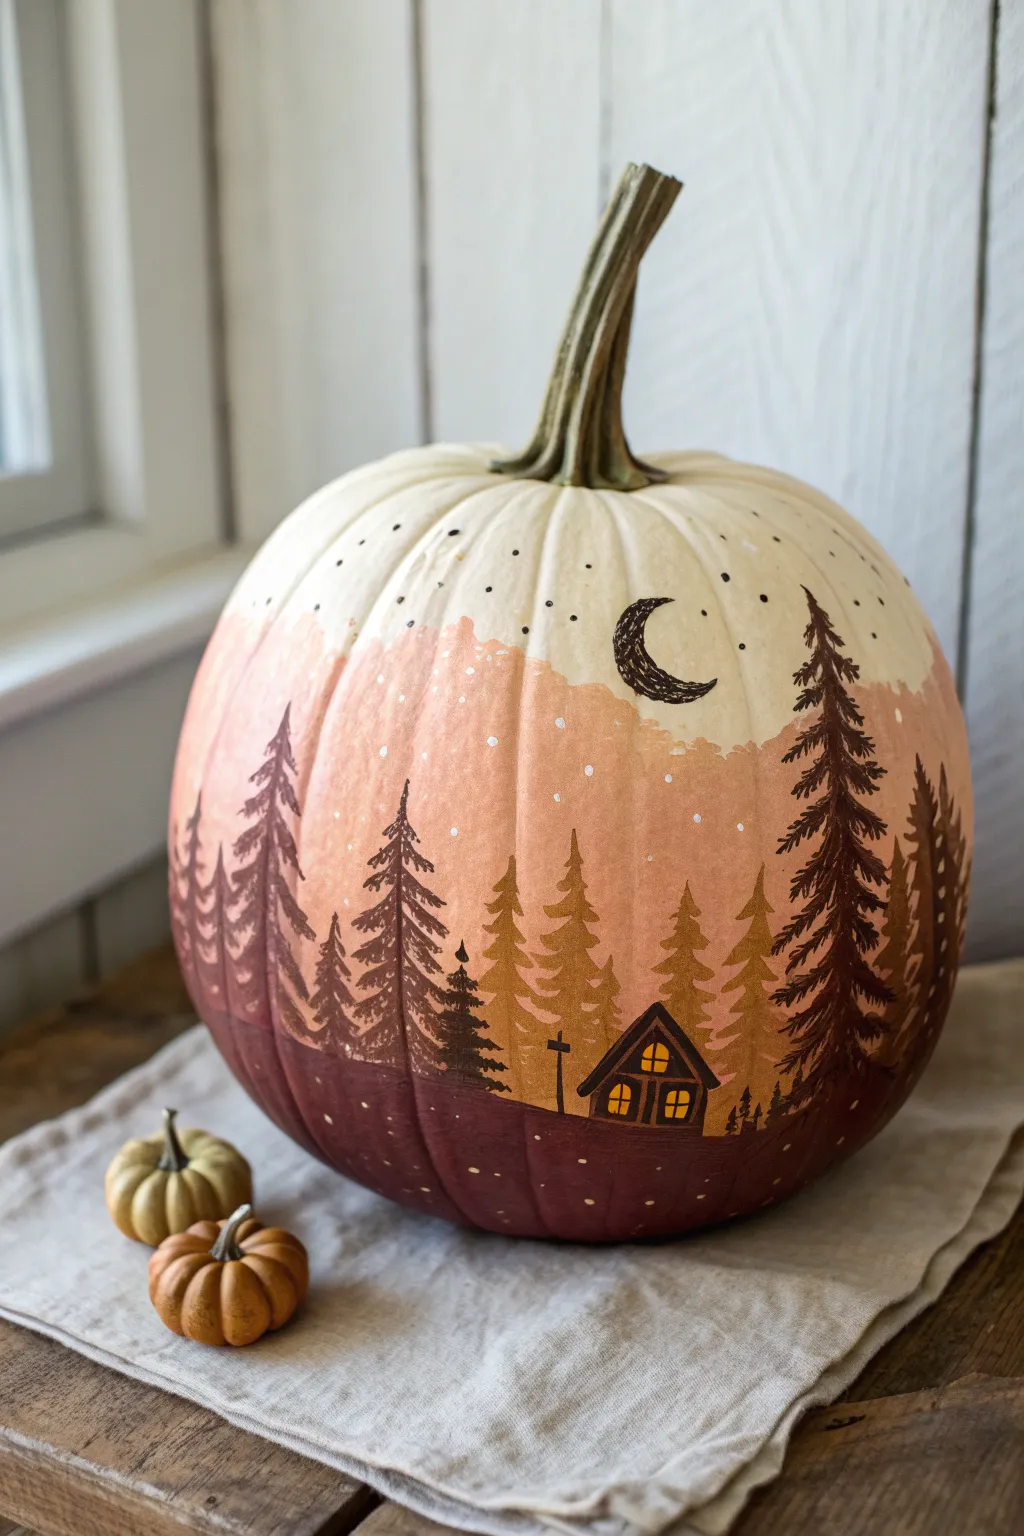

Bring the quiet mystery of a woodland evening into your home with this serene painted pumpkin project. The soft ombre sky and layered pine trees create a dimensional, storybook effect that feels both nostalgic and modern.
Step-by-Step Guide
Materials
- Large white pumpkin (real or faux)
- Acrylic craft paints: Cream, warm beige/peach, terracotta, dark brown, black, yellow
- Medium flat brush (approx. 1/2 inch)
- Small round detail brush
- Angled shader brush
- Paper plate or palette
- Cup of water and paper towels
Step 1: Creating the Ombre Sky Background
-
Establish the horizon line:
Begin by deciding where your ground will sit. Using dark brown paint mixed with a tiny drop of red to warm it up, paint a solid, wavy band across the bottom third of the pumpkin. This doesn’t need to be perfect; uneven hills look more natural. -
Mix your twilight hues:
Prepare your sky palette. You will need a gradient of three colors: the dark brown from the base, a warm terracotta, and a soft beige-peach tone. -
Paint the middle ground:
Apply the terracotta shade immediately above your dark ground line. While the paint is still wet, use a clean, slightly damp flat brush to gently blend the line where the terracotta meets the dark brown, creating a soft, hazy transition. -
Add the upper sky:
Paint the next section upwards using your beige-peach tone. I like to drag this color quite high up, leaving the very top of the pumpkin natural white (or painting it cream if your pumpkin isn’t white already). -
Blend the sky gradient:
Use soft, horizontal brushstrokes to feather the beige into the terracotta below and the white above. The goal is a dreamy, soft-focus look, so don’t worry about hard edges here. -
Let it cure:
Allow the entire background to dry completely. This is crucial—if the background is wet, your sharp tree details will turn muddy.
Muddy Sky Fix
If your sky colors turn muddy while blending, stop and let it dry. You can add a fresh layer of the lighter color on top once the mistakes are dry to regain brightness.
Step 2: Painting the Foreground Forest
-
Start the background trees:
Mix a lighter golden-brown shade by combining your brown and beige paints. Using a small round brush, paint simple vertical lines for tree trunks in the terracotta ‘distance’ area. -
Add foliage to distant trees:
With the same lighter brown, use quick, downward-flicking strokes starting from the top of the trunk to create the pine branches. These trees should look slightly faded to create depth. -
Paint the foreground giants:
Switch to your darkest brown or black paint. Paint tall, bold vertical lines on the far left and right sides of the pumpkin, extending almost to the top curve. -
Detail the large pines:
Stipple or dab the dark paint onto these foreground trunks to create dense, heavy branches. Make the base of the trees wider and taper them to a fine point at the top. -
Fill the middle ground:
Add medium-sized trees in a mid-tone brown between the foreground giants and the distant golden trees. Overlap them slightly to reinforce the feeling of a dense forest.
Step 3: Adding Charming Details
-
Sketch the cabin shape:
Nestled near the bottom right, paint the silhouette of a small A-frame cabin using your darkest brown/black shading. Keep the shape simple: a triangle roof and a small chimney. -
Light the windows:
Once the cabin silhouette is dry, use a tiny detail brush with bright yellow paint to add two small squares for windows. This creates that inviting ‘lights on’ look. -
Add window panes:
After the yellow dries, paint extremely thin black crosses over the yellow squares to create window panes. -
Paint the crescent moon:
In the clear upper sky area, use dark brown or black to paint a slim crescent moon shape. Use a very light hand to keep the points sharp. -
Scatter the stars:
Dip the back end of your paintbrush handle into black or dark brown paint. Dot it gently onto the upper sky to create stars. Vary the pressure to make some stars larger than others. -
Add falling snow (optional):
If you want a snowy feel, add tiny dots of white or cream paint over the dark trees and ground, suggesting a light first snowfall.
Glow Up
Mix a tiny bit of metallic gold paint into your yellow window color. When the candlelight hits the pumpkin, the cabin windows will have a genuine, warm shimmer.
Place your masterpiece on a mantle or table and enjoy the tranquil woodland vibe all season long
Abstract Brushstroke Pumpkin in Cranberry and Sage
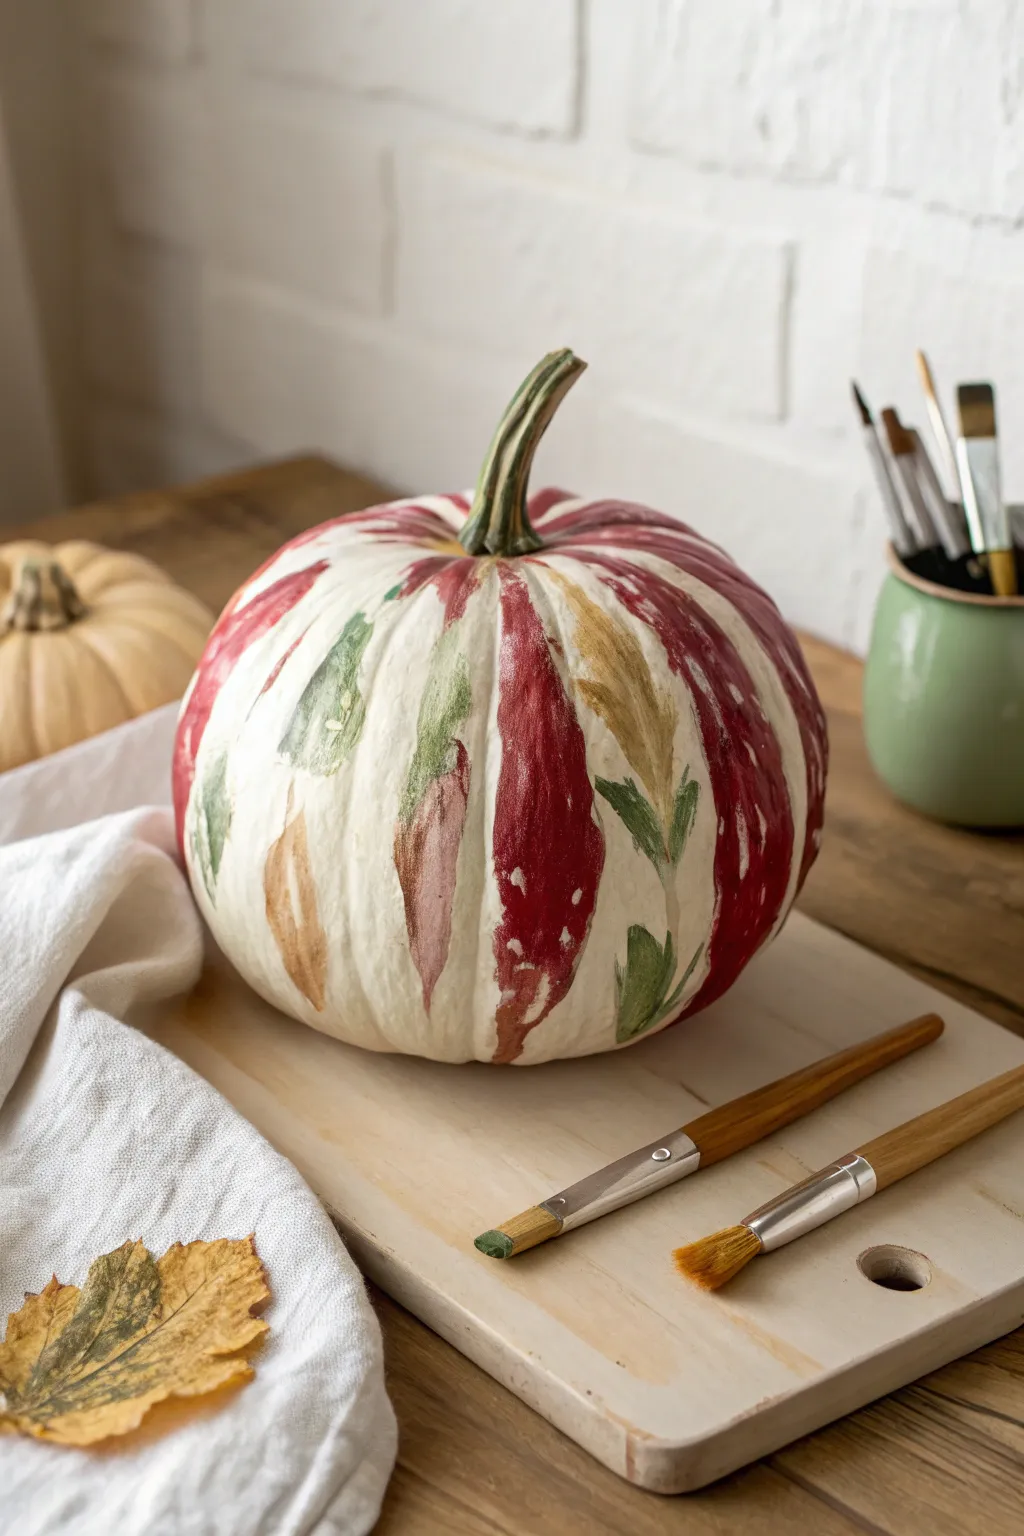
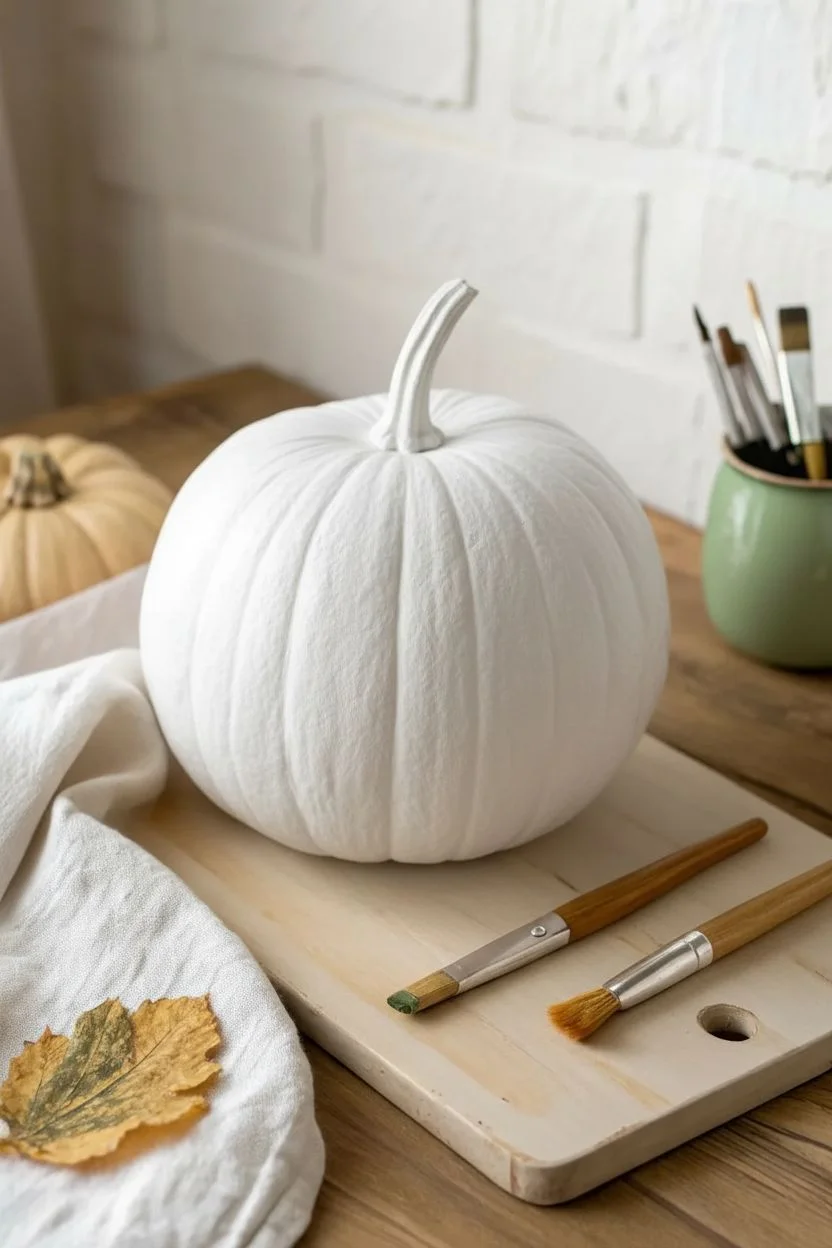
Embrace the imperfect beauty of autumn with this painterly pumpkin design. Using loose, downward strokes in rich cranberry and muted sage, you’ll create a sophisticated centerpiece that feels both modern and rustic.
Step-by-Step Tutorial
Materials
- Medium-sized pumpkin (real or faux)
- White matte acrylic craft paint (or chalk paint)
- Cranberry red acrylic paint
- Sage green acrylic paint
- Tan or ochre acrylic paint
- Blush pink acrylic paint
- Two flat artist brushes (approx. 1/2 inch width)
- Small round detail brush
- Palette or paper plate
- Water cup and paper towels
- Clear matte sealant spray (optional)
Step 1: Preparation & Base Coat
-
Clean the surface:
Begin by wiping down your pumpkin with a damp cloth to remove any dirt or oils that might prevent the paint from adhering properly. Dry it completely with a paper towel. -
Prime the pumpkin:
Even if your pumpkin is naturally white, apply a base coat of matte white acrylic or chalk paint. This creates a uniform canvas and gives the subsequent colors a better ‘tooth’ to grip onto. -
Let it cure:
Allow the white base coat to dry fully. This is crucial—if the base is wet, your colored strokes will turn muddy and mix with the white rather than sitting boldly on top.
Master the Dry Brush
To get that scratchy, rustic texture, wipe 80% of the paint off your brush onto a paper towel before touching the pumpkin.
Step 2: Painting the Ribs
-
Load the brush:
Squeeze a generous amount of cranberry red paint onto your palette. Dip your flat brush in, ensuring the bristles are coated but not dripping. -
Start the main strokes:
Identify the natural vertical grooves (ribs) of the pumpkin. Starting from the top stem area, drag your brush down one of the main ribs about halfway. Don’t worry about clean edges; a rough, dry-brush look is desirable. -
Vary the stroke length:
Paint another cranberry stroke on a non-adjacent rib, perhaps making this one longer, reaching almost to the bottom. I like to leave some ribs empty for now to space out the dominant color. -
Introduce the sage:
Clean your brush or switch to a fresh flat brush. load it with sage green paint. Apply shorter, choppy strokes on a few of the white spaces between the red lines. -
Layer the green:
Try overlapping a little bit of the green onto the edges of the red in one or two spots. This creates depth but keep it minimal to avoid making brown.
Too Much Paint?
If a paint stroke looks too heavy or solid, wait for it to tack up slightly, then scrape through it gently with a dry, stiff paintbrush.
Step 3: Adding Detail & Texture
-
Add warmth with tan:
Using the tan or ochre paint, fill in some of the remaining white gaps. Use a ‘dry brush’ technique here—wipe most of the paint off on a paper towel first—to tackle the texture shown in the reference. -
Soften with blush:
For a gentle highlight, add streaks of blush pink near the sage green strokes. This lighter color helps bridge the gap between the dark red and the bright white background. -
Create texture:
Go back with a nearly dry brush and white paint. Drag it lightly over the thickest parts of the red paint to create a distressed, weathered appearance. -
Refine the edges:
The charm of this design is the ‘feathered’ edges of the paint. If any line looks too solid or blocky, use a clean, slightly damp brush to gently feather the paint outward before it dries. -
Paint the stem:
Using a small round brush, paint the stem with a mix of sage green and a touch of tan. Add thin vertical stripes of white to highlight the stem’s texture.
Step 4: Finishing Touches
-
Check for balance:
Step back and look at the pumpkin from all sides. If one side feels too white, add a small floating stroke of red or green to balance the composition. -
Add abstract dots:
Looking closely at the style, you can dot a few tiny specks of white onto the dense red areas using the tip of your smallest brush to mimic natural speckling. -
Dry completely:
Let the pumpkin sit undisturbed for at least an hour. Thick acrylic ridges can take longer to dry than the flat areas. -
Seal the work:
If you plan to display this outdoors or keep it for next year (using a faux pumpkin), mist it lightly with a clear matte sealant spray.
Place your finished pumpkin on a wooden board or woven runner to complete the cozy autumn vibe
Metallic Constellation Pumpkin With Thanksgiving Glow
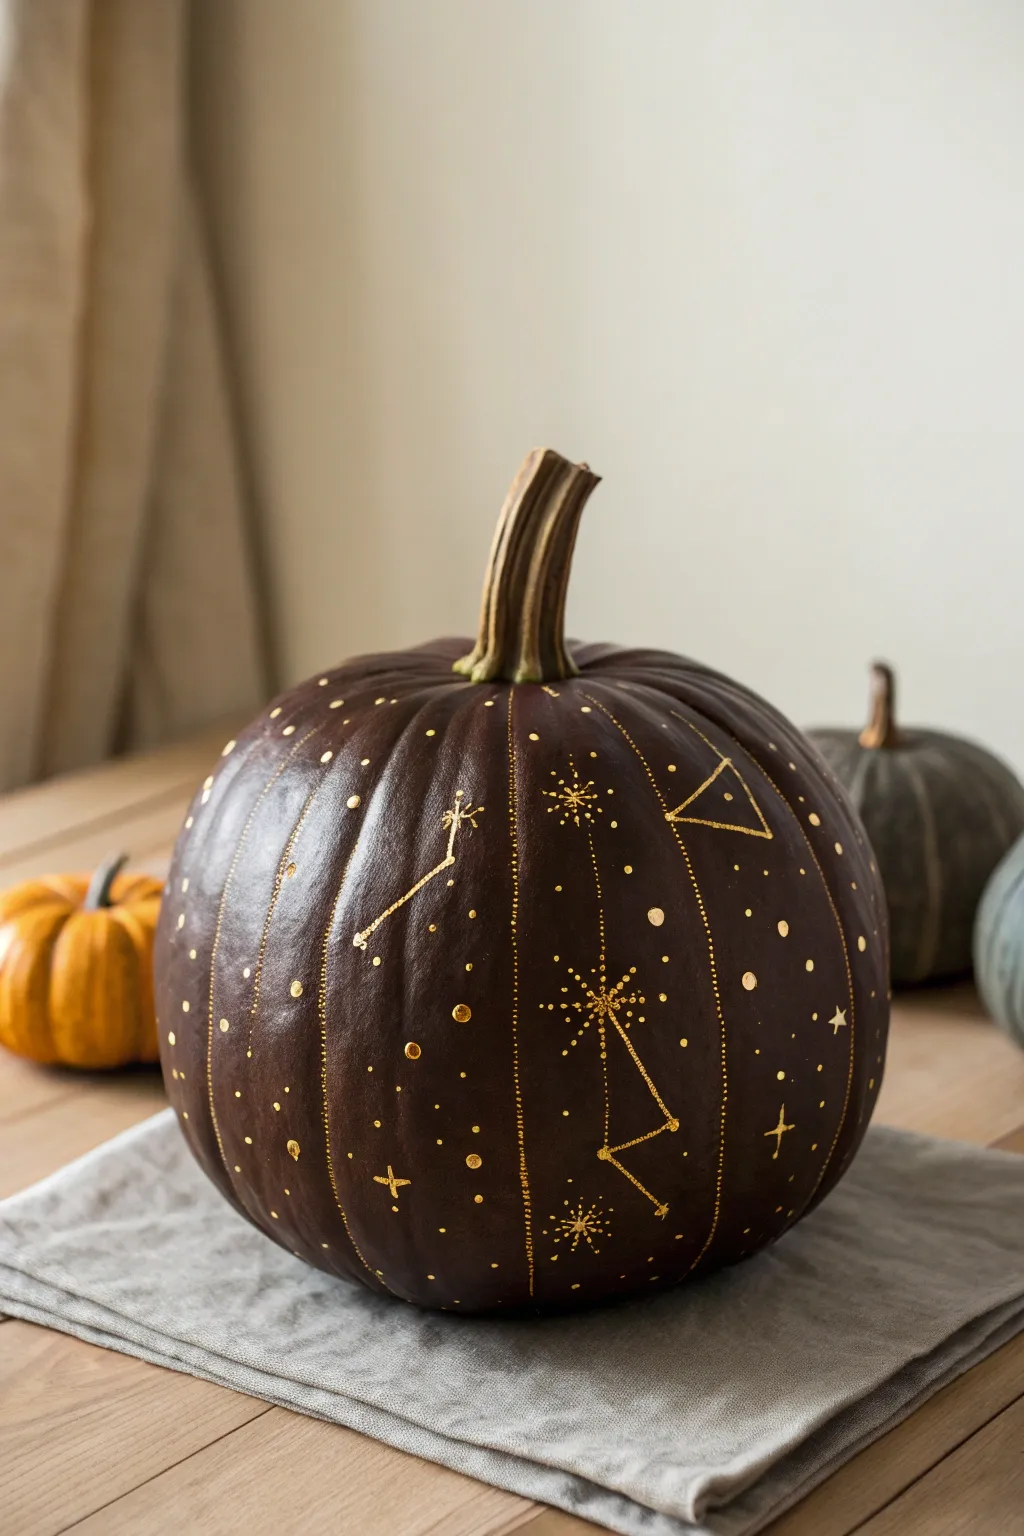
Bring the night sky to your Thanksgiving table with this elegant twist on traditional decor. The deep, chocolate-brown base creates a striking contrast against delicate metallic gold constellations, offering a sophisticated centerpiece that feels both cosmic and cozy.
How-To Guide
Materials
- Medium-sized pumpkin (real or faux)
- Deep chocolate brown or espresso acrylic paint (matte finish)
- Metallic gold paint pen (fine tip)
- Metallic gold paint pen (medium tip)
- Metallic gold acrylic paint
- Small fine-detail paintbrush
- Pencil or white chalk pencil
- Sponge brush or wide flat brush
- Clear matte sealant spray
- Ruler (optional)
Step 1: Creating the Night Sky Base
-
Clean the surface:
Begin by wiping down your pumpkin with a damp cloth to remove any dirt or oils. If you are using a real pumpkin, ensure it is completely dry before moving on to painting. -
Apply the base coat:
Squeeze a generous amount of deep chocolate brown acrylic paint onto a palette or paper plate. Using your sponge brush or wide flat brush, apply a smooth, even coat over the entire surface of the pumpkin, avoiding the stem. -
Let it dry completely:
Allow the first coat to dry for at least 30 minutes. The dark pigment needs to be opaque, so patience here prevents streaks later. -
Add a second coat:
Once dry to the touch, apply a second layer of the dark brown paint. This ensures a rich, solid background that will make the gold pop intensely. Let this layer cure fully for an hour or more.
Smudge Savior
If you smudge wet gold ink, wait for it to fully dry, then carefully paint over the mistake with a tiny bit of your dark base color. Trying to wipe it wet usually just makes a bigger, glittery mess.
Step 2: Mapping the Heavens
-
Plan your constellations:
Using a pencil or a faint white chalk pencil, lightly sketch your desired constellations onto the pumpkin’s surface. You can look up real star charts or simply create geometric patterns that resemble them. -
Mark the vertical dividers:
Identify the natural vertical grooves of the pumpkin. Lightly mark a dotted line following one or two of these ribs to break up the space, just like the image shows. -
Dot the vertical lines:
Take your fine-tip gold paint pen and carefully create a line of small, tight dots following the vertical rib you marked. Keep the spacing consistent for a clean, stitched look. -
Paint the main stars:
Switch to the medium-tip gold marker or a small brush dipped in gold paint. Create the ‘anchor’ stars of your constellations by drawing six- or eight-pointed starbursts. -
Connect the constellations:
Use the fine-tip pen to draw thin lines connecting your main starbursts. I find that breaking the line slightly near the stars makes it look more delicate and less like a geometry diagram. -
Add solid circles:
Scattered around your starbursts, paint solid gold circles of varying sizes. Some should be tiny pinpricks, while others can be the size of a peppercorn to create depth in your galaxy.
Gilded Stem
For a more luxurious finish, paint the pumpkin stem in solid gold or brush just the ridges of the stem with gold paint to tie the whole look together.
Step 3: Adding Metallic Flares
-
Draw geometric accents:
To mimic the astrological feel, add a floating triangle symbol or other simple geometric glyphs near the top of the pumpkin using the fine-tip pen. -
Create directional crosses:
In the empty negative spaces, draw simple four-point sparkling clover shapes (like a North Star symbol) to fill gaps without cluttering the design. -
Vary the star brightness:
Go back over the centers of tour largest starbursts with a second layer of gold paint. This builds up texture and makes the primary stars catch the light better. -
Sprinkle the stardust:
Using the absolute finest tip available, dot tiny clusters of ‘stardust’ randomly around the larger constellations. This softens the look and merges the designs together. -
Review vertical symmetry:
Check your vertical dotted lines. If they look too faint compared to the bold stars, re-dot them to ensure they stand out as a structural element. -
Seal the artwork:
Once all gold ink is completely dry (give it at least 2 hours), take the pumpkin outside and lightly mist it with a clear matte sealant spray to protect your galaxy from smudging.
Now you have a stunning piece of cosmic decor ready to anchor your holiday table


Have a question or want to share your own experience? I'd love to hear from you in the comments below!