
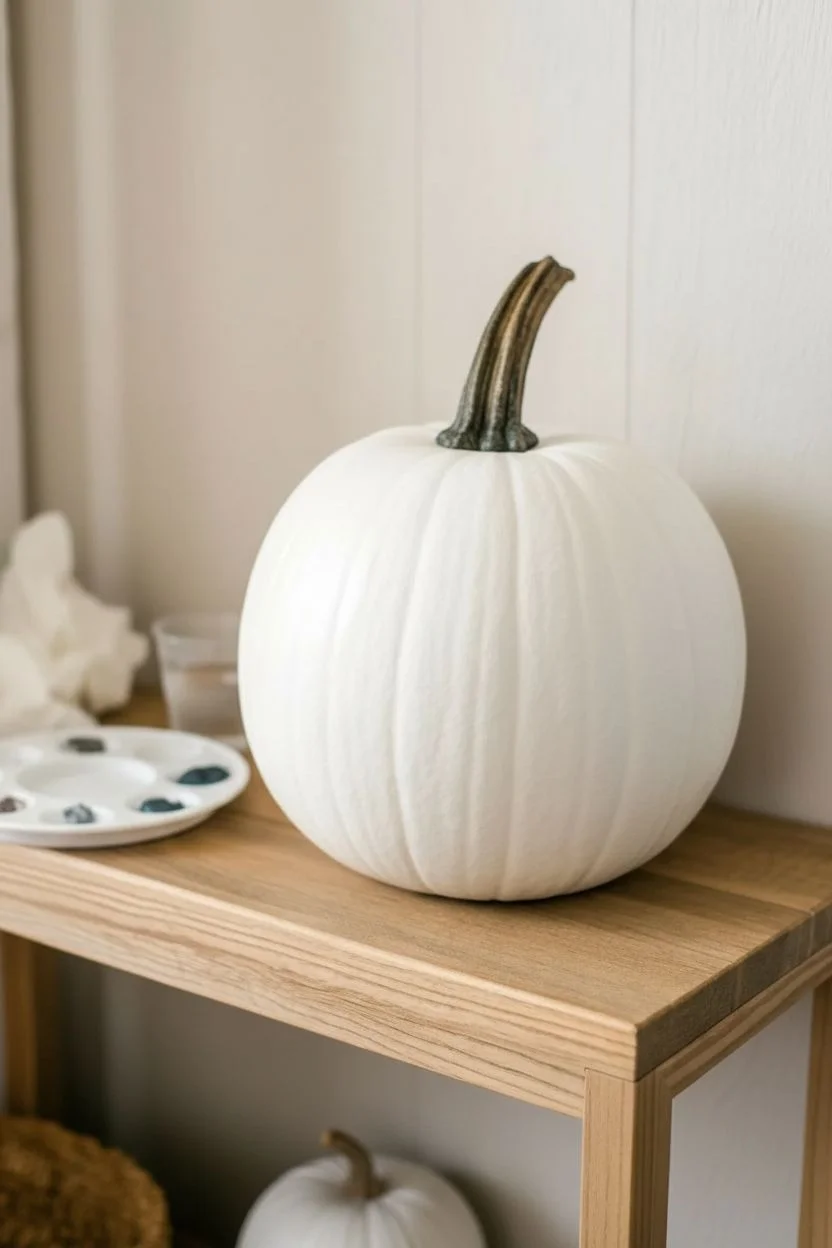
A white pumpkin is basically a perfect little 3D canvas—clean, bright, and ready for whatever vibe you’re craving. I’m sharing my favorite painting white pumpkin ideas that range from classic black-and-white Halloween looks to artsy designs you’ll want to keep up all season.
Classic Black Ghost Face on a White Pumpkin

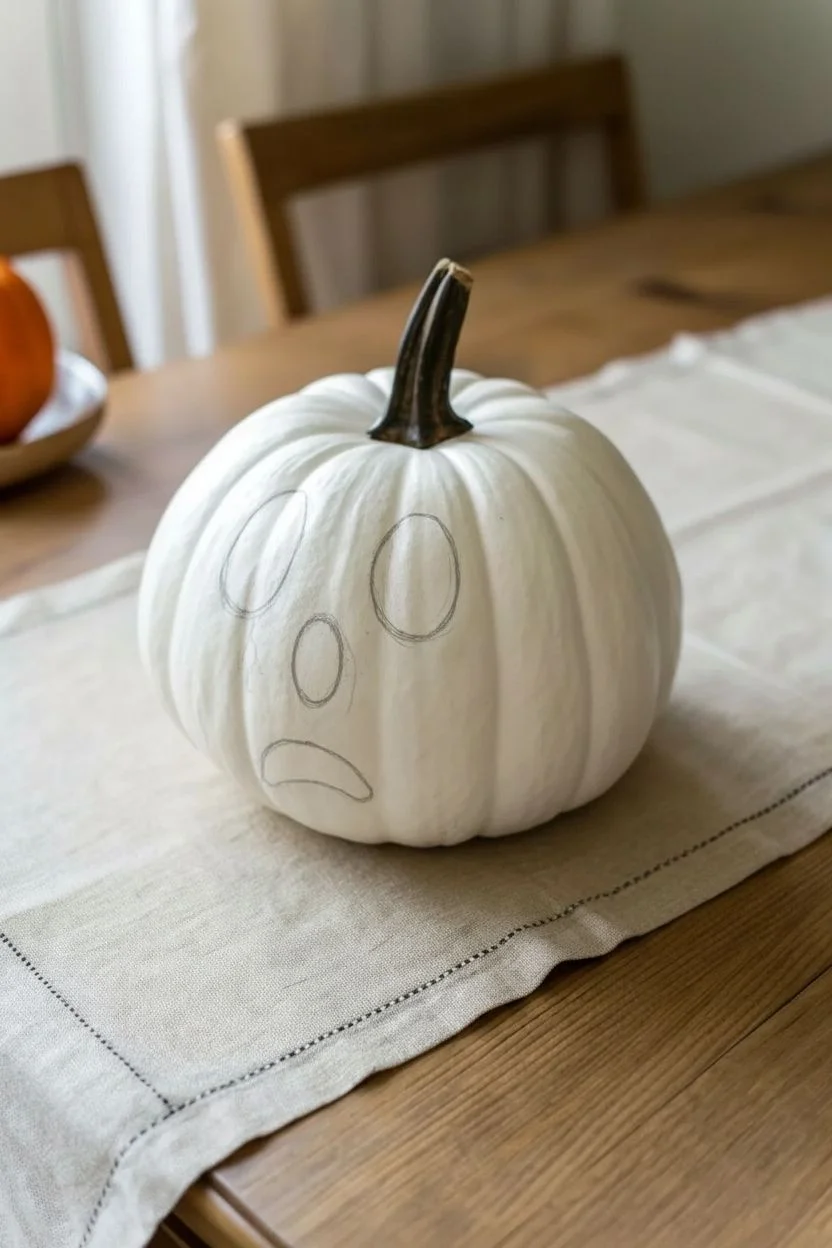
Transform a simple white pumpkin into a hauntingly cute decoration with this classic ghost face design. The stark contrast of matte black paint against the white rind creates a striking, minimalist look that is perfect for a modern Halloween aesthetic.
How-To Guide
Materials
- Medium-sized white pumpkin (real or faux)
- Black acrylic paint (matte finish)
- Pencil or chalk pencil
- Medium round paintbrush
- Small detail paintbrush
- Damp cloth or paper towel
- Clear spray sealant (optional)
Step 1: Preparation and Sketching
-
Clean the surface:
Before starting, wipe down your pumpkin with a damp cloth to remove any dust or dirt. -
Dry completely:
Ensure the surface is fully dry, as moisture will prevent the paint from adhering properly. -
Visualize the face:
Look at the natural ridges of the pumpkin; identifying the center ‘panel’ will help you center the face symmetrically. -
Sketch the left eye:
Using a pencil, lightly draw a large, vertical oval on the upper left side of your chosen center area. -
Sketch the right eye:
Draw a matching oval on the right side, slightly angled outward to give it a mournful expression. -
Add the nose:
Draw a small, vertical oval centered below the eyes, roughly one-third the size of the eye shapes. -
Draft the mouth:
Sketch a downward-curved crescent shape near the bottom, creating that classic sad ghost mouth. -
Review the expression:
Take a step back and look at your sketch; lightly erase and adjust the shapes until the expression feels just right.
Smooth Surface Trick
If using a real pumpkin, choose the side with the shallowest ridges. Deep grooves distort the face shapes and make painting straight lines much harder.
Step 2: Painting the Features
-
Outline the left eye:
Dip your small detail brush into the black acrylic paint and carefully trace the pencil line of the left eye. -
Fill the left eye:
Switch to the medium round brush to fill in the shape, using smooth strokes to avoid ridges in the paint. -
Outline the right eye:
Return to the detail brush and outline the right eye oval. -
Fill the right eye:
Fill in the right eye with the medium brush, ensuring the black is opaque and solid. -
Paint the nose:
Carefully fill in the small nose oval using just the detail brush for better control. -
Outline the mouth:
Trace the upper and lower curves of the mouth shape with your fine brush. -
Fill the mouth:
Fill the interior of the mouth curve with black paint, sharpening the corners slightly. -
Touch up edges:
I look closely at the edges of all shapes now to smooth out any wobbly lines with the detail brush. -
Let it dry:
Allow the paint to dry completely for at least an hour; if the black looks streaky, apply a second coat. -
Seal (Optional):
If this pumpkin will be outside, lightly mist it with a clear matte sealant to protect your work.
Make It Glow
Mix glow-in-the-dark medium into your white paint and coat the pumpkin first. When the lights go out, the ghost face will float in the dark.
Set your new ghostly friend on a table runner or porch step to greet visitors with a mournful stare.


Minimal Bat Silhouettes in Matte Black
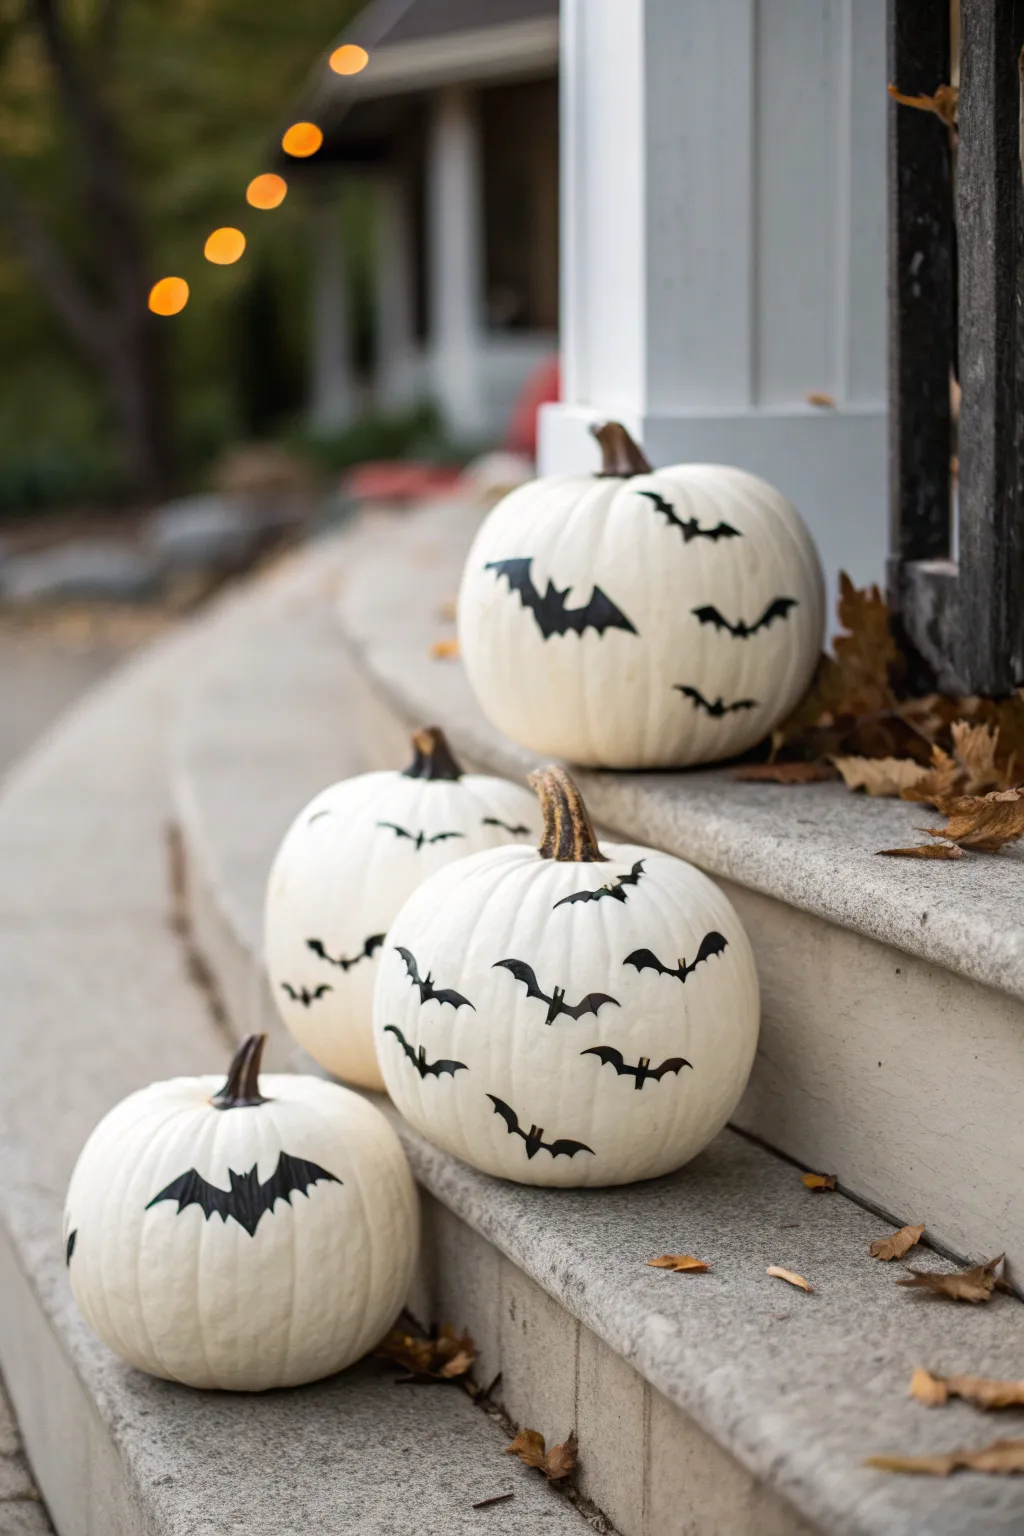
Embrace a minimalist Halloween aesthetic with these sleek, bat-adorned white pumpkins. This sharp contrast between the creamy white gourds and matte black silhouettes creates a modern, sophisticated look that is remarkably simple to achieve.
Step-by-Step Guide
Materials
- Real or faux white pumpkins (various sizes)
- Matte black craft paint (acrylic) or permanent vinyl
- Small detail paintbrushes (Sizes 0 and 2)
- Pencil
- Bat stencil or cardstock for template making
- Scissors
- Paper towels
- Rubbing alcohol
- Matte scuff-resistant sealer (optional)
- Black fine-tip paint marker (optional)
Step 1: Preparation and Planning
-
Clean the surface:
Before doing anything, ensure your pumpkins are perfectly clean. Wipe the surface down with a paper towel dampened with rubbing alcohol to remove oils, dirt, or sticker residue. -
Create your templates:
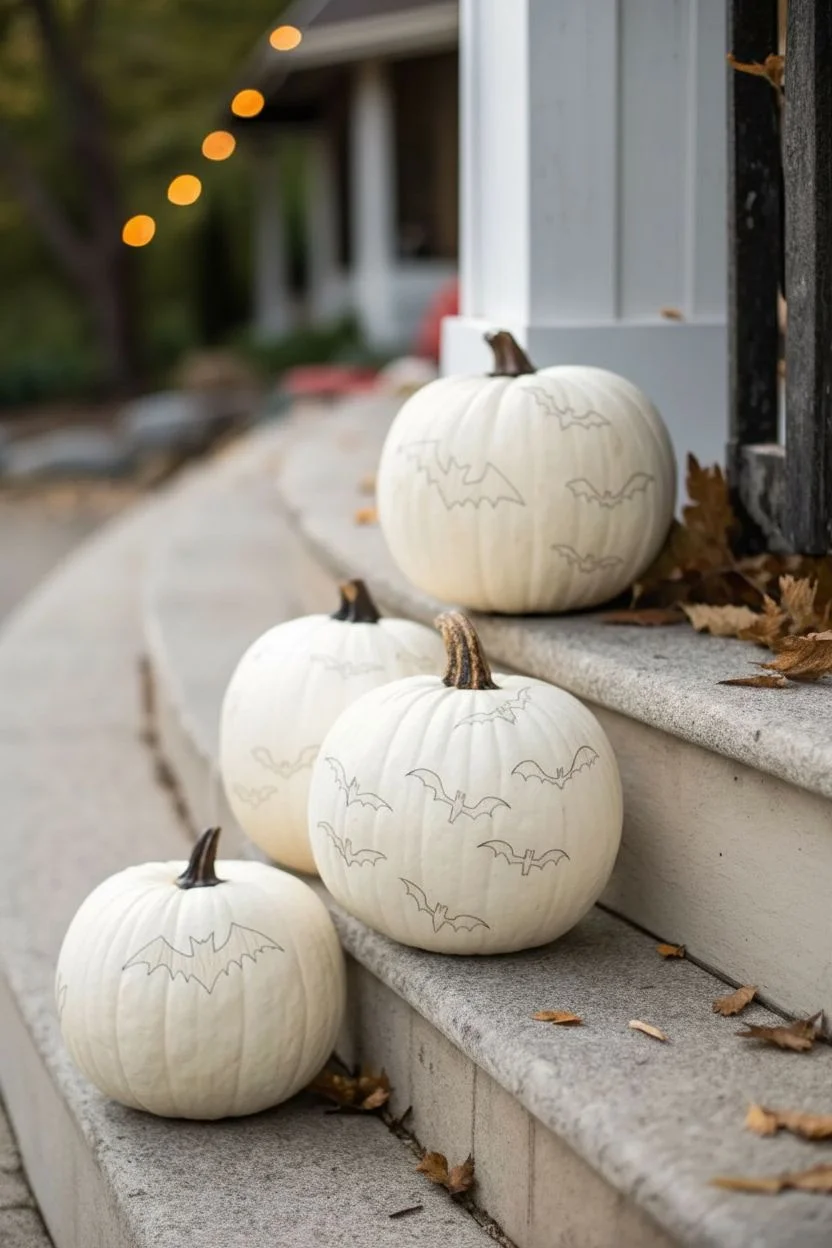
Draw or print simple bat shapes onto cardstock in at least three different sizes (small, medium, large). Cut these out carefully with scissors. -
Mock up the design:
Hold your paper cutouts against the pumpkins to visualize the scatter pattern. Moving them around before committing lets you find the most pleasing arrangement. -
Trace the outlines:
Using a soft pencil, lightly trace around your templates directly onto the pumpkin skin. Press gently so you don’t dent real pumpkins or leave heavy graphite marks on faux ones. -
Vary the angles:
I always make sure to tilt the bats in different directions—some flying up, some banking left or right—to create a dynamic sense of movement.
Uneven Edges?
If your hand shakes or the paint bleeds, wait for it to dry fully. Then, use a white paint pen or a small dab of white acrylic to ‘erase’ the mistake and reshape the line.
Step 2: Painting the Silhouettes
-
Outline first:
With your smallest brush (size 0) or a fine-tip paint marker, carefully trace over your pencil lines. This creates a barrier that keeps the inner paint from bleeding outside the shape. -
Fill in the base:
Switch to a slightly larger brush (size 2) to fill in the body of the bat with matte black acrylic paint. Don’t worry about complete opacity usage yet; just get the shape filled. -
Sharpen the wing tips:
Go back with your finest brush to pull the paint out into sharp points on the wing tips and ears. Crisp edges are crucial for that clean, modern look. -
Let the first coat dry:
Allow the paint to dry completely, usually about 15-20 minutes. It will likely look streaky or slightly transparent after one pass. -
Apply the second coat:
Apply a second layer of black paint to ensure a deep, solid matte finish. This is what gives the silhouette its sticker-like appearance. -
Spot check edges:
Inspect the edges for any wobble. You can use the paint marker or a steady hand with the small brush to neaten any lines that aren’t perfectly smooth.
Use Vinyl Instead
Short on time? Skip the paint. Cut the bat shapes out of matte black permanent adhesive vinyl and stick them on like decals for an instant, mess-free finish.
Step 3: Finishing Touches
-
Clean up stray marks:
Once the paint is fully cured, check for any visible pencil lines. Gently erase them with a white artist’s eraser, being careful not to rub the black paint. -
Seal (if displaying outdoors):
If these will sit on a porch, lightly brush or spray a matte sealer over the painted areas to prevent the acrylic from peeling in the damp autumn air. -
Group and arrange:
Place your finished pumpkins on steps or a display table. Stagger the sizes and rotate them so the bats appear to be swarming together as a colony.
Enjoy the dramatic flair these simple silhouettes add to your seasonal decor


Spiderweb Lines With a Tiny Painted Spider
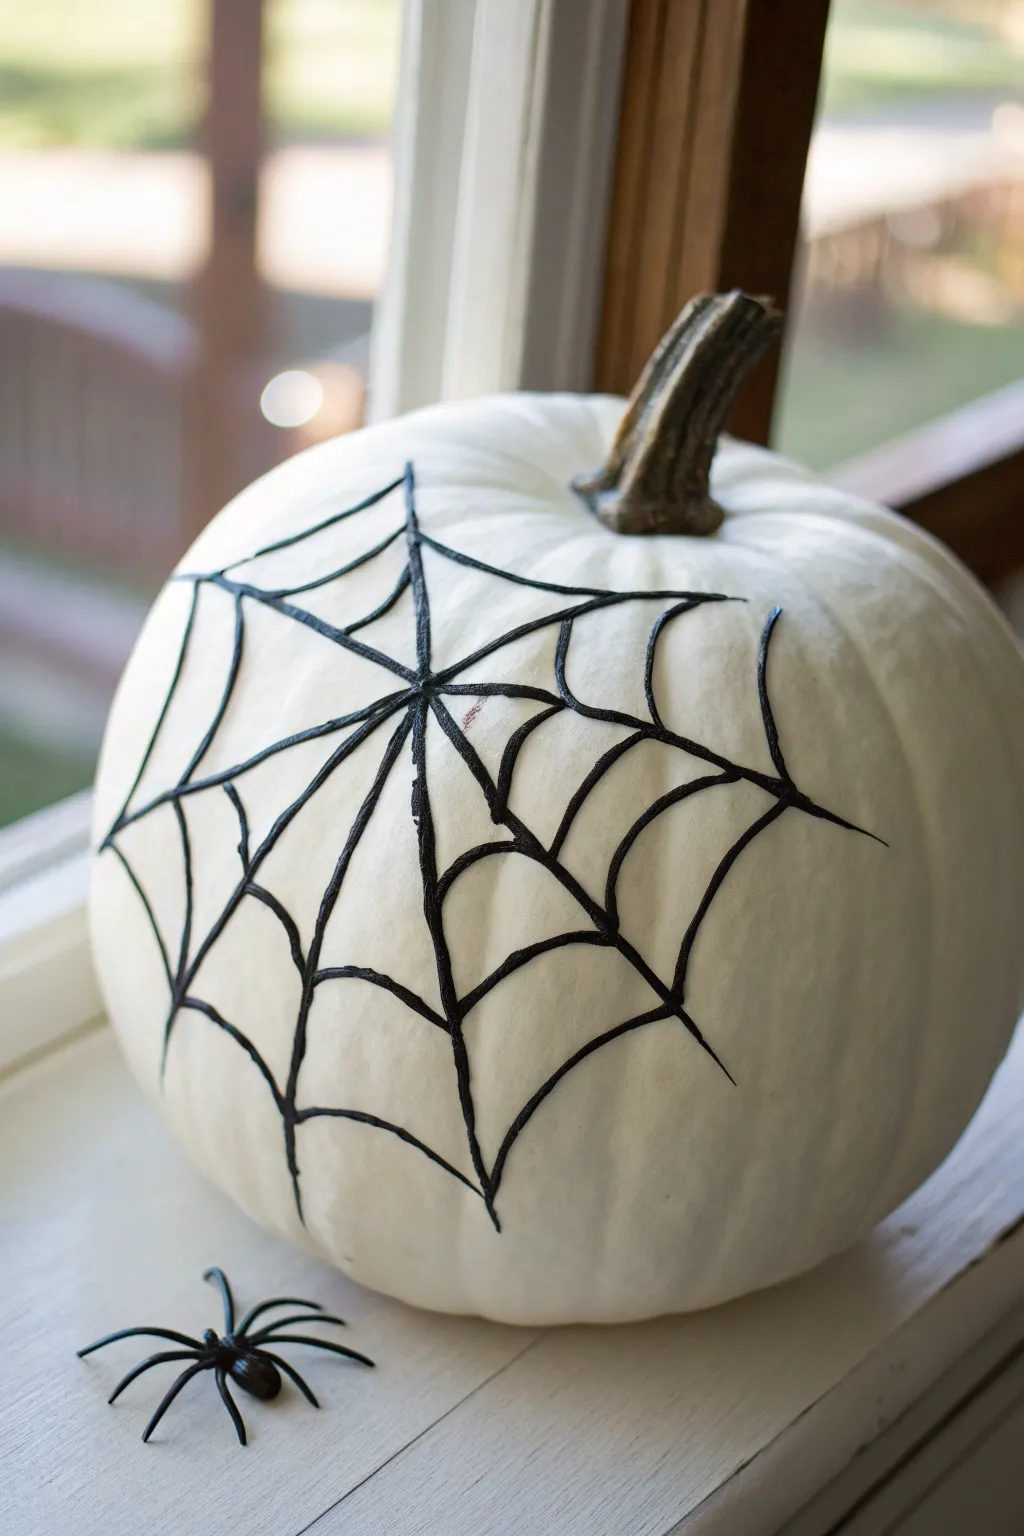
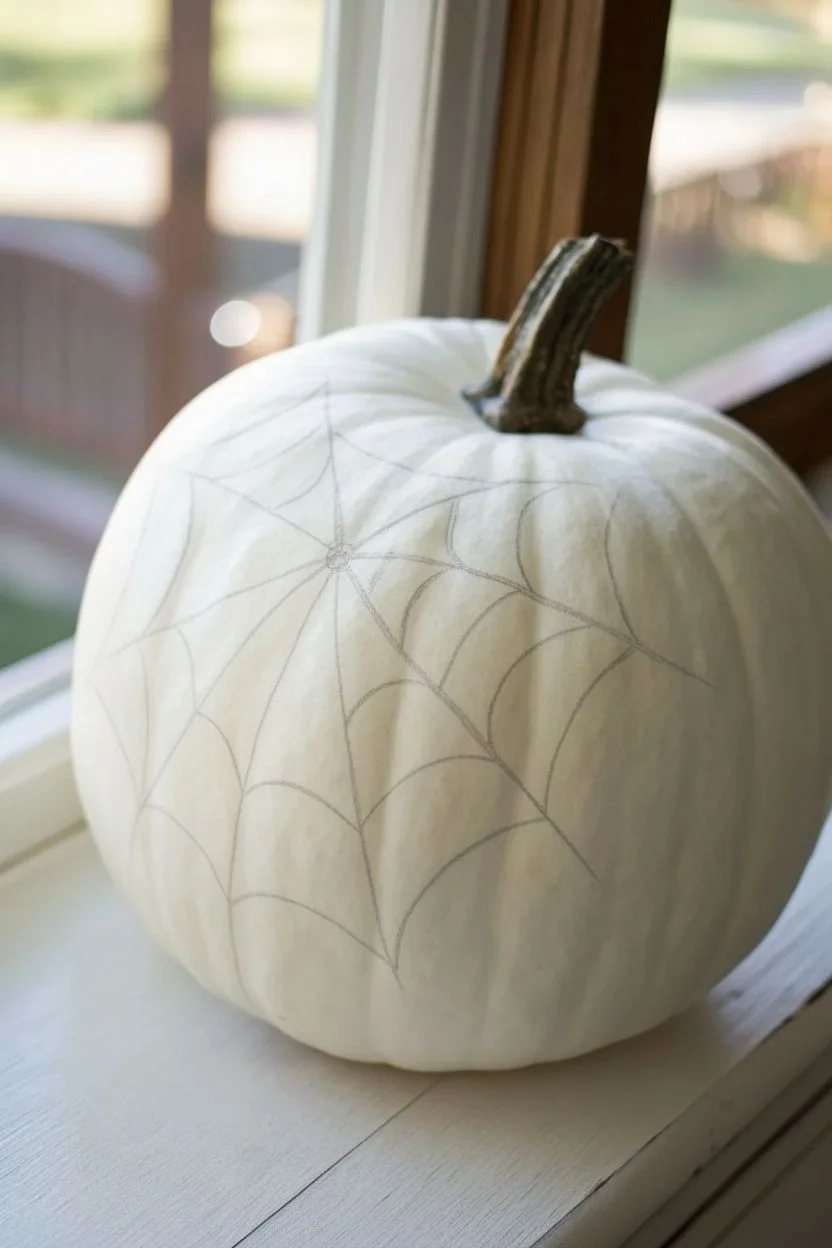
For a minimalist yet striking Halloween decoration, transform a simple white pumpkin with sleek black web lines that pop off the surface. This project uses dimensional paint to create a tactile, raised texture that looks great on a window sill or front porch.
Detailed Instructions
Materials
- White pumpkin (real or faux)
- Black dimensional fabric paint (puff paint) with a fine tip applicator
- Pencil
- Damp paper towel
- Small plastic spider accessory
- Hot glue gun (optional, for the spider accessories)
- Rubbing alcohol (if using a faux pumpkin)
Step 1: Preparation
-
Clean surface:
Before you begin, wipe down your pumpkin thoroughly. If you are using a faux pumpkin, a quick wipe with rubbing alcohol removes any oily manufacturing residue that might repel the paint. -
Dry completely:
Ensure the pumpkin is bone dry before moving on. Moisture will prevent the puff paint from adhering properly. -
Plan the center:
Look at your pumpkin and decide where the center of the web should be. Slightly off-center often looks more organic and interesting than dead center.
Fixing Smudges
Accidentally dragged your hand through wet paint? Wait for it to dry completely, pick it off with a fingernail, and repaint the line.
Step 2: Drafting the Design
-
Sketch radial lines:
Using a pencil very lightly, draw 6 to 8 straight lines radiating outward from your chosen center point, like the spokes of a wheel. -
Draw connector curves:
Sketch the ‘webbing’ by connecting the spokes with curved, U-shaped lines. Start close to the center and work your way outward in concentric circles. -
Create variation:
Don’t worry about making the spacing perfectly even. I find that varying the distance between rings makes the web look creepier and more realistic. -
Check the layout:
Step back and look at your pencil guide. If you don’t like a section, gently wipe it away with a damp paper towel and redraw it.
Step 3: Applying the Paint
-
Test paint flow:
Squeeze a small amount of the black dimensional fabric paint onto a scrap piece of paper first to remove air bubbles and get a feel for the flow rate. -
Paint radial lines:
Starting from the center, trace over your pencil ‘spokes’ first. Keep even pressure on the bottle to create a consistent, round line. -
Trace the curves:
Next, trace the curved webbing lines connecting the spokes. Move slowly to prevent the line from breaking or getting too thin. -
Mind your hand:
Be incredibly careful where you rest your hand. Work from top to bottom or left to right (depending on your dominant hand) to avoid smudging the wet paint. -
Fix mistakes immediately:
If a line blobs or drips, use a Q-tip or a clean edge of a paper towel to lift the wet paint immediately, then retry that section. -
Check for gaps:
Inspect the intersections where lines meet. Add tiny dots of paint if needed to ensure all web strands are fully connected visually.
Add Some Sparkle
While the black lines are still wet, lightly dust ultra-fine glitter over the web. It will catch the light and look like morning dew on a real web.
Step 4: Finishing Touches
-
Extended drying time:
Set the pumpkin in a safe place where it won’t be bumped. Dimensional paint is thick and can take 24 hours or more to cure completely hard. -
Check for shrinking:
Puff paint sometimes shrinks as it dries. If any lines look too flat after an hour, you can carefully go over them with a second layer. -
Clean up pencil:
Once the paint is rock hard, look for any visible pencil marks. You can erase them gently or wipe them with a damp cloth. -
Add the spider:
Place a plastic spider near the base or glue it directly onto the web for added effect.
Enjoy displaying your creepy yet elegant creation as part of your seasonal decor


Hand-Lettered Quote in Bold Black Script
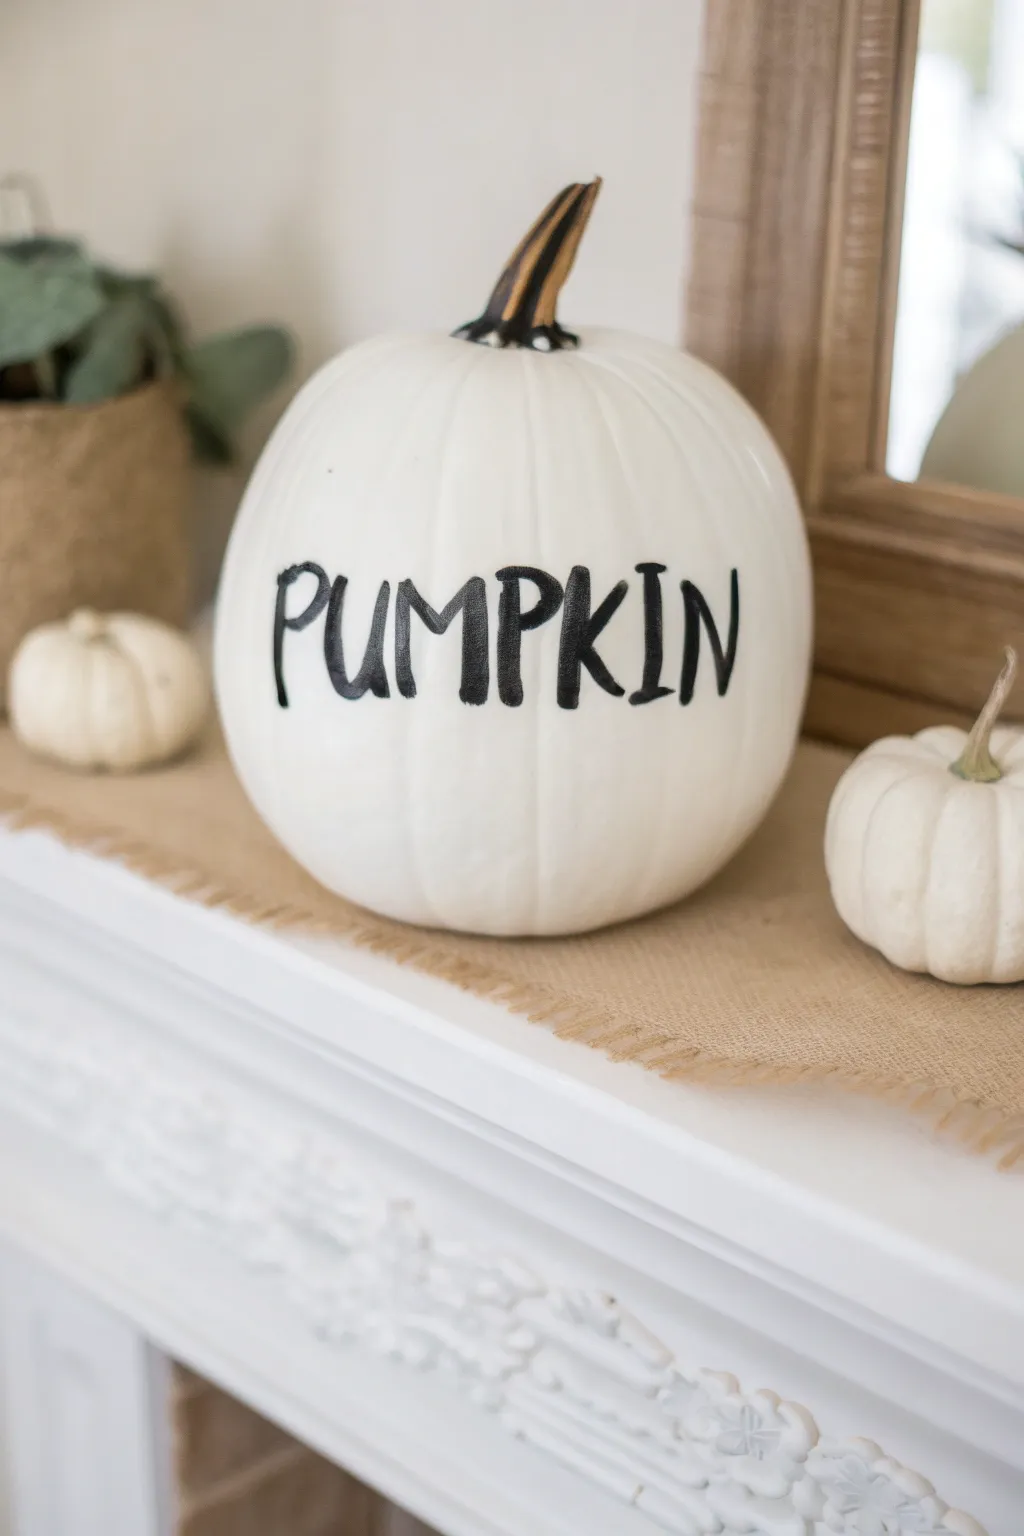
Sometimes the simplest statements make the biggest impact, and this minimalist project proves exactly that. With its stark white base and bold black lettering, this pumpkin adds a modern, graphic touch to your fall decor without overwhelming your space.
Step-by-Step
Materials
- White artificial pumpkin (medium size)
- Black acrylic paint or a broad-tip black paint pen
- Pencil
- Eraser
- Small round paintbrush (if using acrylic paint)
- Ruler or soft measuring tape
- Paper towel or rag
- Matte finish spray sealant (optional)
Step 1: Preparation and Planning
-
Clean surface:
Begin by wiping down your faux pumpkin with a slightly damp paper towel to remove any dust or oils that might repel the paint. -
Choose your word:
Decide on your text. While the image uses the literal word ‘PUMPKIN’ for a tongue-in-cheek look, you could also choose ‘GRATEFUL,’ ‘HARVEST,’ or ‘AUTUMN.’ -
Determine placement:
Look at the pumpkin’s ribs and valleys. For the most legible text, identify the ‘front’ side that has a relatively smooth curve. -
Find the center point:
Using your soft measuring tape, find the horizontal center of the pumpkin to ensure your word sits comfortably in the middle, not too high or low.
Step 2: Drafting the Design
-
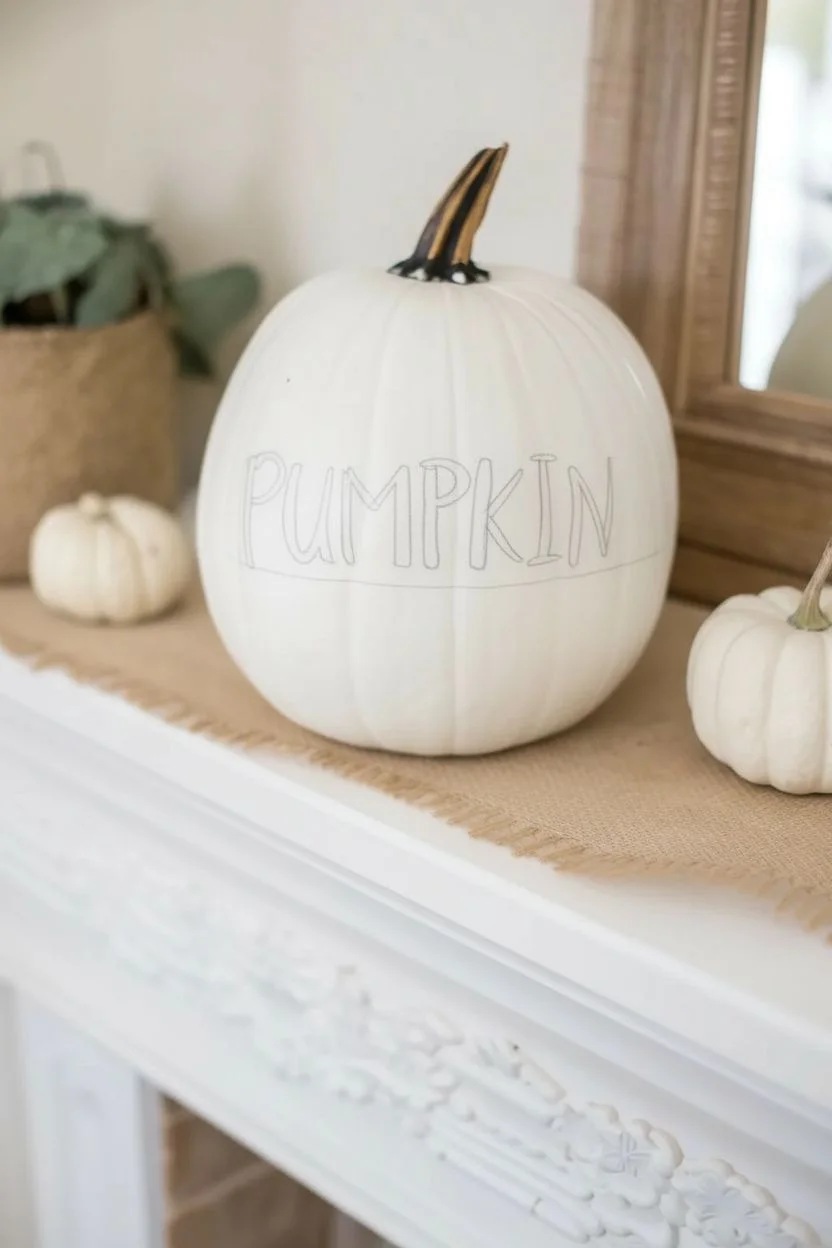
Sketch the baseline:
Lightly sketch a guideline with your pencil where the bottom of your letters will rest. This helps keep the word straight despite the pumpkin’s curves. -
Draft the center letter:
Count the letters in your word (e.g., ‘PUMPKIN’ has 7 letters, so ‘P’ is the middle). Sketch this center letter directly in the middle of your chosen face. -
Sketch outward:
Work outward from the center letter to the left and right. This ensures the word remains centered rather than skewed to one side. -
Adjust letter width:
Step back and look at your pencil markings. Since the pumpkin is curved, outer letters might look distorted; widen them slightly to compensate for the curve. -
Refine the font style:
Thicken your pencil lines to mimic the final look. Aim for a loose, hand-written sans-serif style where the vertical strokes are thicker than the horizontal ones.
Pro Tip: Steady Hand
Rest your pinky finger against the pumpkin surface while painting. This anchors your hand, giving you much smoother control over curves.
Step 3: Painting the Lettering
-
Prepare your paint tool:
Shake your paint pen vigorously to mix the ink, or load your small round brush with black acrylic paint. I find a paint pen offers slightly more control for beginners. -
Outline the letters:
Carefully trace over your pencil outlines. Use smooth, confident strokes rather than short, sketchy ones to get clean edges. -
Fill in the strokes:
Go back and thicken the vertical lines of each letter. This creates that ‘brush script’ look even if you are just using a standard marker. -
Touch up edges:
Check for any wobbly lines. You can carefully smooth them out by adding a tiny bit of thickness to the line. -
Let it dry completely:
Allow the paint to dry undisturbed for at least 30 minutes. Wet paint smudges easily on the non-porous surface of a faux pumpkin.
Level Up: Shadow Effect
Once dry, use a gray paint pen to add a thin ‘shadow’ line to the right of each black stroke for a cool 3D pop.
Step 4: Finishing Touches
-
Erase guidelines:
Once you are 100% certain the paint is dry, gently erase any visible pencil marks. Be very light with the eraser to avoid dulling the black paint. -
Clean up smudges:
If you made any small errors, a Q-tip dipped in a tiny bit of rubbing alcohol or water can usually clean up the faux pumpkin surface. -
Seal the work (Optional):
If you plan to use this pumpkin on a porch, give it a light coat of matte spray sealant to protect the lettering from moisture.
Place your sleek new creation on a mantle or entryway table for an instant touch of seasonal charm
BRUSH GUIDE
The Right Brush for Every Stroke
From clean lines to bold texture — master brush choice, stroke control, and essential techniques.
Explore the Full Guide
Modern Black Geometric Shapes and Angles
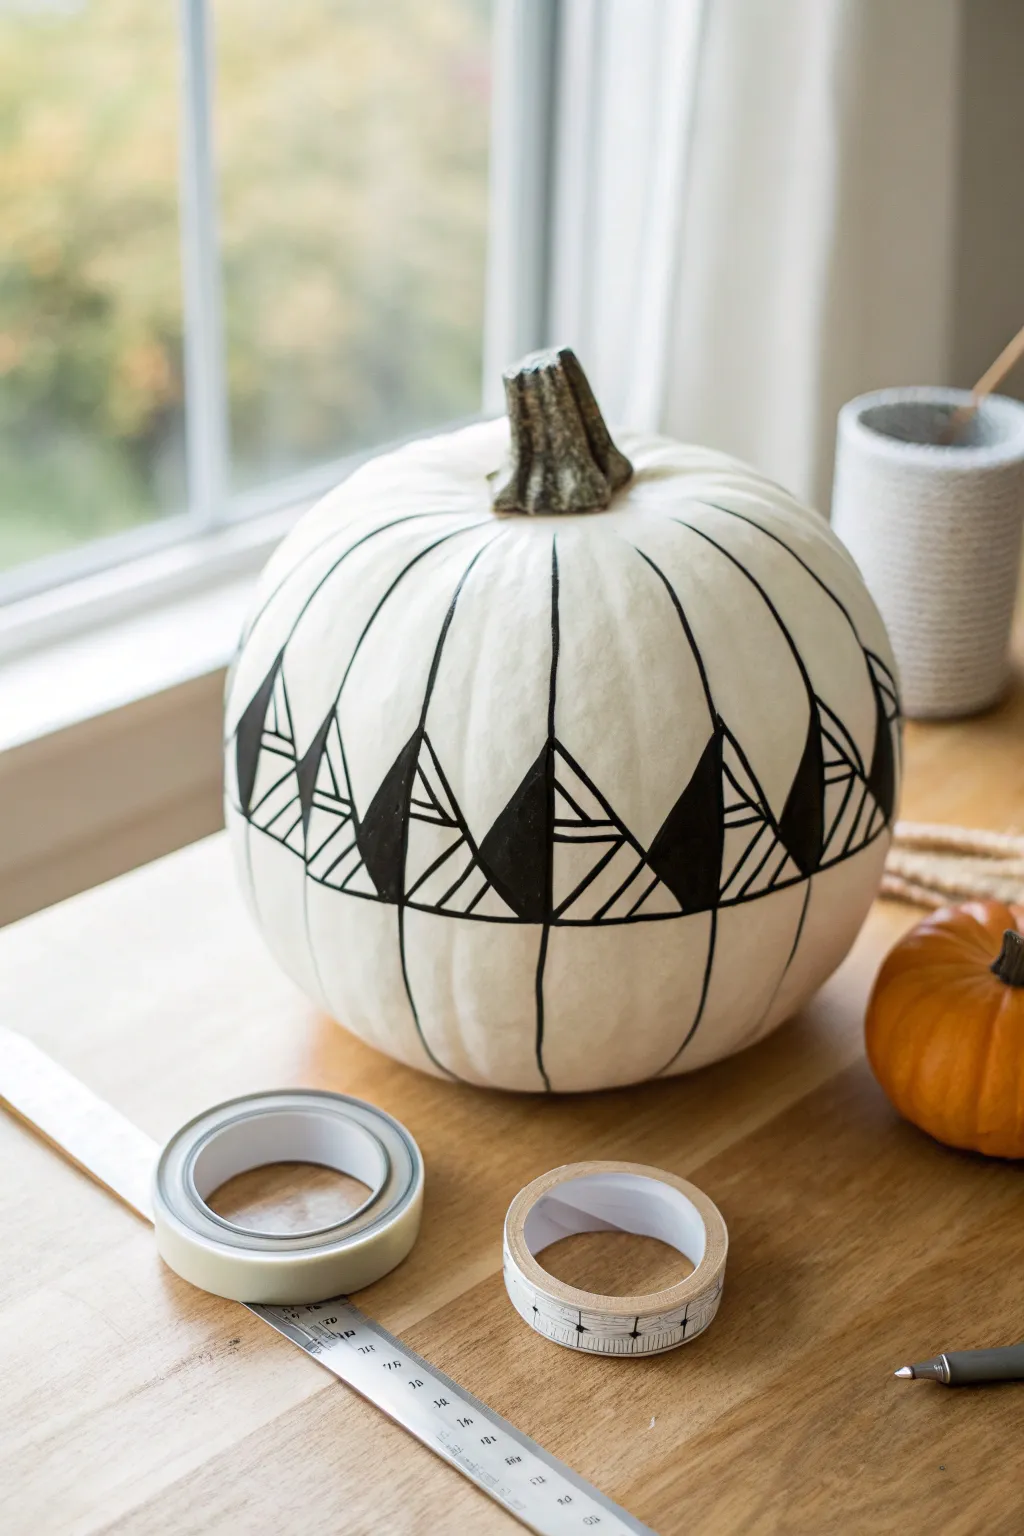
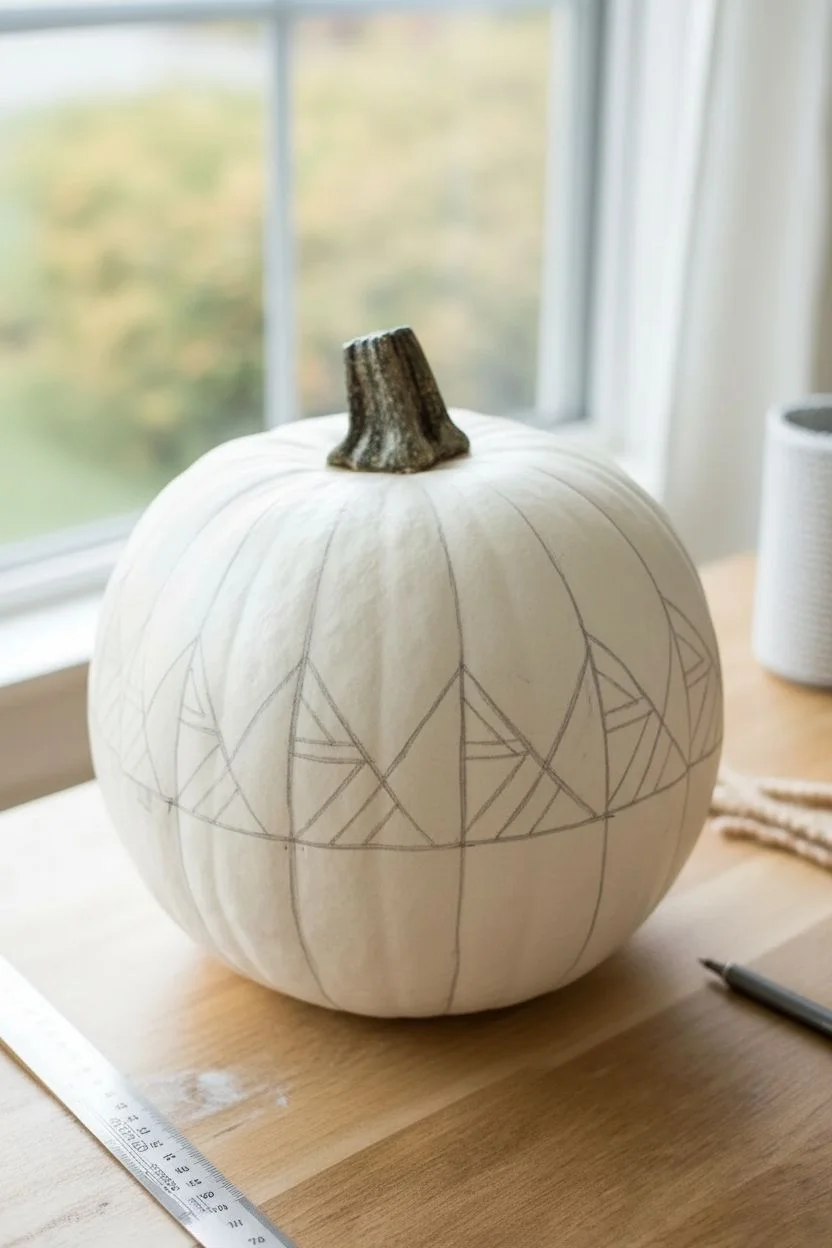
Transform a simple white pumpkin into a modern art piece with crisp black lines and striking contrast. This project uses a clever combination of washi tape and paint to create a clean, geometric design that feels both sophisticated and playful.
How-To Guide
Materials
- Medium-sized white craft pumpkin (real or faux)
- Black acrylic paint
- Fine-grit sandpaper (optional)
- Thin washi tape (approx. 1/4 inch width)
- Flat shader brush (small size)
- Fine tip liner brush
- Ruler or measuring tape
- Pencil
- Black permanent marker (fine tip)
Step 1: Preparation & Mapping
-
Clean surface:
Wipe down your pumpkin with a damp cloth to remove any dust or waxy residue. If using a faux pumpkin with very shiny seams, giving it a light sanding can help the paint adhere better. -
Mark vertical guides:
Using the pumpkin’s natural ribs as a guide, lightly trace vertical lines from the stem down to the base with a pencil. These don’t need to be perfect yet, just placeholders for your final design. -
Establish the horizon:
Measure about halfway down the pumpkin’s height. Make small pencil ticks on each rib at this same height to create a level ‘equator’ line around the pumpkin. -
Create the zigzag peaks:
Decide on the height of your triangles. Measure roughly 2 inches above and 2 inches below your equator ticks on alternating ribs. Connect these dots with a ruler to sketch a continuous zigzag pattern around the circumference.
Clean Lines Secret
Before painting black, seal your tape edges with a tiny bit of matte medium or white paint. This blocks gaps so the black line stays perfectly crisp.
Step 2: Taping the Design
-
Apply vertical tape:
Run strips of thin washi tape along your vertical rib lines. This acts as a stencil for the black dividing lines, so press the edges down firmly to prevent bleed-under later. -
Mask the horizontal band:
Apply tape along the distinct straight line running horizontally through the middle of your design. This helps keep the bottom and top halves of your geometric shapes aligned. -
Define the triangles:
Use shorter pieces of tape to outline the large triangular shapes you sketched earlier. Ensure the tape intersects cleanly at the points of the triangles.
Step 3: Painting & detailing
-
Fill solid triangles:
Identify which triangles will be solid black—in this design, they are the smaller inner triangles pointing upward. Using your flat shader brush, carefully fill these shapes with black acrylic paint. -
Paint interior lines:
For the open triangles, use your fine tip liner brush or a black permanent marker to draw the nested geometric lines inside. I find a marker gives more control for these straight, sharp angles. -
Apply second coat:
The solid black areas may need a second coat of paint to achieve full opacity. Let the first layer dry to the touch before adding the next to avoid lifting the paint. -
Dry thoroughly:
Allow all painted and drawn sections to dry completely. This is crucial before removing any tape to ensure crisp lines.
Wobbly Lines?
If your hand shakes while painting lines, rest your pinky finger on the pumpkin surface as an anchor. It creates stability for smoother strokes.
Step 4: Finishing Touches
-
Peel the tape:
Slowly peel off the temporary washi tape at a 45-degree angle. This reveals the untouched white space underneath. -
Freehand the main lines:
Now, take your black paint brush or marker and go over the main vertical rib lines. Make them bold and deliberate, connecting the stem to the base right through your geometric band. -
Connect the pattern:
Add the horizontal line that runs through the center of the zigzags, connecting the pattern all the way around the pumpkin. -
Touch up edges:
Inspect your geometric shapes. If any paint bled under the tape or lines look shaky, use a tiny bit of white paint to clean up the edges for a razor-sharp look.
Place your striking monochrome pumpkin near a window or entryway to show off those crisp modern angles
Polka Dots in Black for Easy Graphic Pop
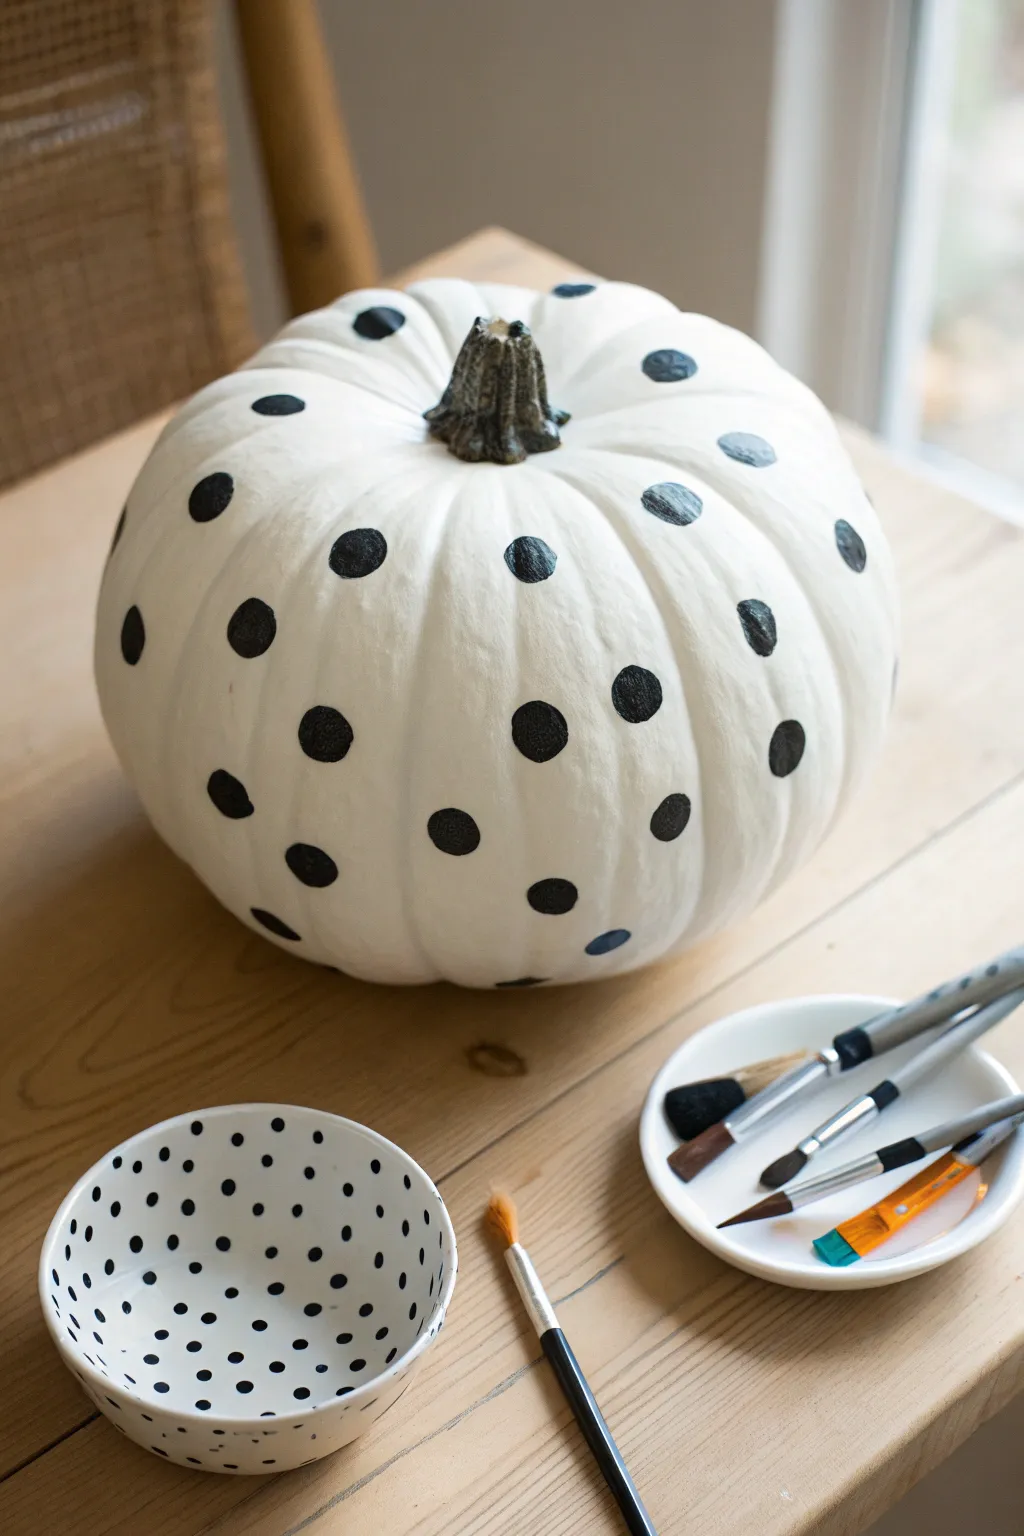

Achieve a chic, high-contrast look with this incredibly simple yet striking project. By covering a pristine white pumpkin with evenly spaced black circles, you create a modern decoration that feels both playful and sophisticated.
Step-by-Step Tutorial
Materials
- Medium-sized white pumpkin (real or faux)
- Black acrylic craft paint
- Round foam pouncer (medium size)
- Small round paintbrush (detail work)
- Flat shader brush (for cleanup)
- Paper plate or painting palette
- Damp paper towels
- Pencil (optional)
Step 1: Preparation
-
Clean surface:
Begin by wiping down your pumpkin thoroughly with a damp cloth to remove any dirt or dust. A clean surface is crucial for the paint to adhere properly and look crisp. -
Dry completely:
Let the pumpkin air dry fully or wipe it down with a dry towel. Ensure no moisture remains in the crevices between the ribs. -
Setup workspace:
Cover your painting area with newspaper or a drop cloth. Squeeze a generous amount of black acrylic paint onto your palette or paper plate.
Step 2: Painting the Dots
-
Load the tool:
If you are using a round foam pouncer, dab it into the black paint, twisting slightly to ensure even coverage without soaking it too heavily. -
Initial placement:
Start near the top of the pumpkin, close to the stem. Press the pouncer straight down firmly, twist slightly, and lift straight up to create your first clean circle. -
Freehand technique:
Alternatively, if using a round brush, paint the outline of a circle about the size of a quarter. Fill in the center carefully, using smooth strokes to keep the paint flat. -
Establish spacing:
Move down the rib of the pumpkin, leaving about two to three inches of white space before placing your next dot. Visual estimation usually works best for an organic look. -
Alternate rows:
Rotate the pumpkin slightly to work on the next vertical section. Instead of placing dots directly next to the previous ones, offset them (like a brick pattern) to create diagonal interest. -
Fill the gaps:
Continue working your way around the pumpkin. I find it helpful to step back occasionally to check the overall distribution and ensure no area looks too crowded or too sparse. -
Stem area:
Add smaller partial dots peeking out near the stem base to make the pattern feel continuous, as if the dots wrap all the way under the stem. -
Bottom edge:
Don’t forget the bottom curve of the pumpkin. Add dots low enough that they disappear underneath, grounding the design.
Clean Circle Hack
Use round sticker labels as stencils! Stick them on, paint over the hole, and peel away immediately while wet for perfect edges.
Step 3: Refining and Finishing
-
Check edges:
Examine your dots for messy edges. Use a small detail brush dipped in black paint to round out any lopsided circles. -
Correct mistakes:
If you slipped or a dot smudged, use a damp Q-tip or a brush with a tiny bit of white paint to clean up the perimeter of the black dots. -
Improve opacity:
Some acrylics can streak on the first coat. If the black looks distinctive gray or streaky, let it dry and carefully apply a second coat just to the centers of the dots. -
Protect the stem:
Be careful not to get black paint on the natural stem, as keeping that original texture provides a nice rustic contrast to the modern graphic pattern. -
Final drying:
Allow the pumpkin to sit undisturbed for at least an hour until the thickest parts of the paint are dry to the touch. -
Sealant (optional):
For a glossy finish or outdoor protection, spray a clear acrylic sealer over the entire pumpkin once the paint is fully cured.
Accessorize It
Paint a matching ceramic bowl or vase with the exact same pattern to create a cohesive vignette for your table centerpiece.
Place your new graphic pumpkin on a wooden table or mantle for an instant touch of modern autumn style

PENCIL GUIDE
Understanding Pencil Grades from H to B
From first sketch to finished drawing — learn pencil grades, line control, and shading techniques.
Explore the Full Guide
Gingham Checks for Cozy Farmhouse Style
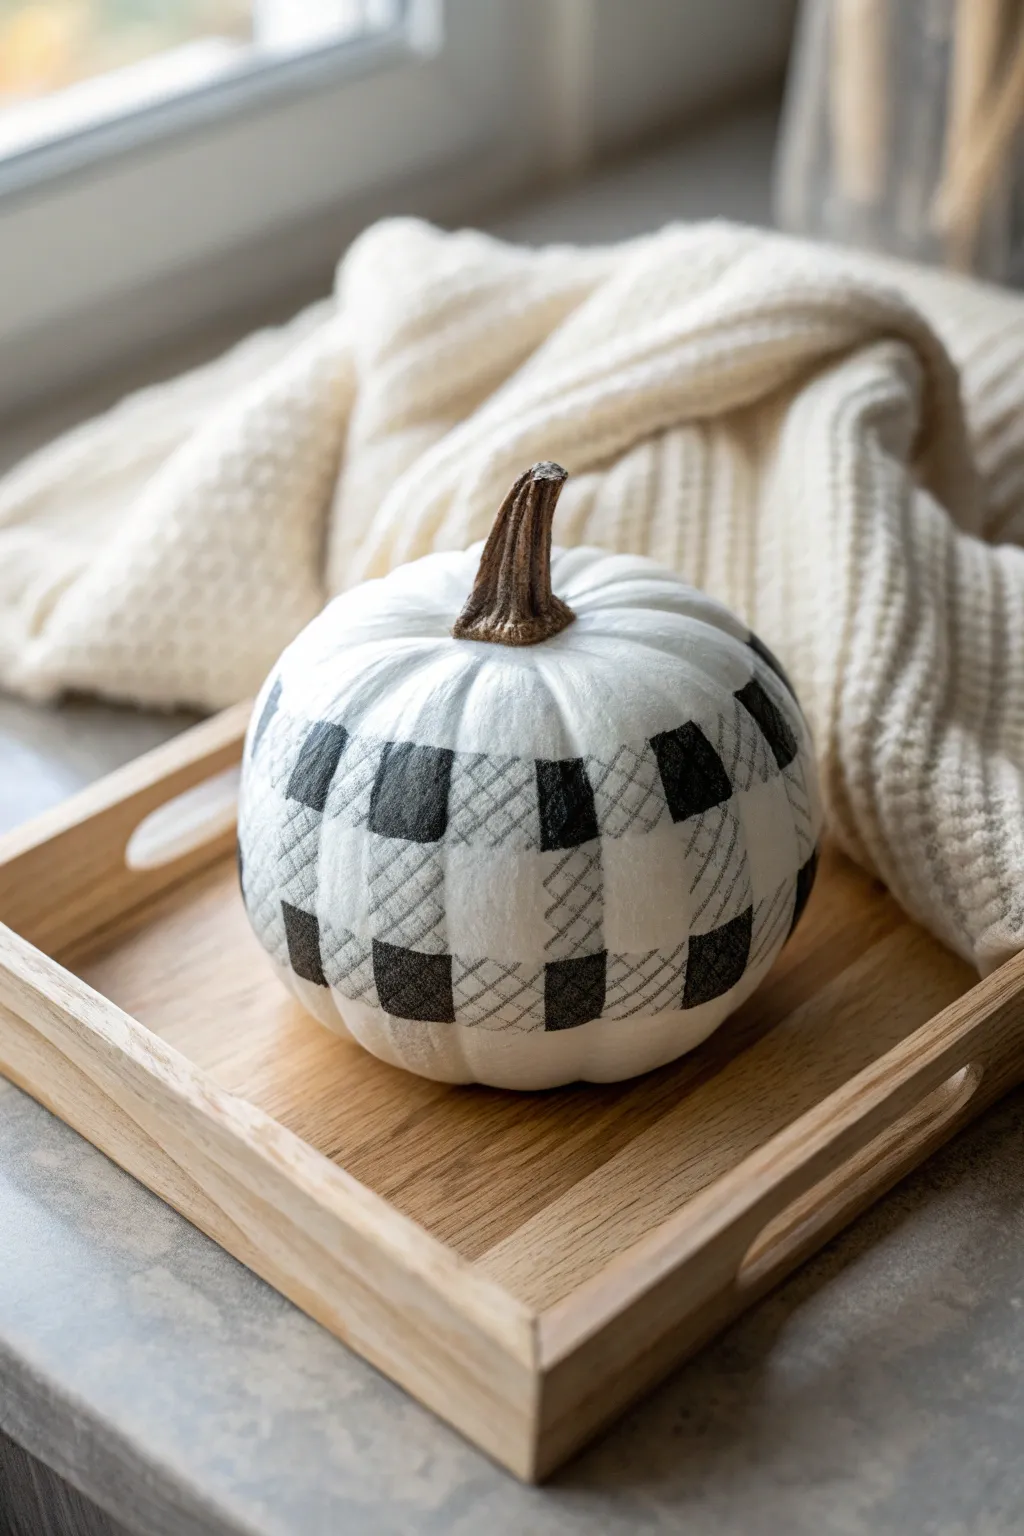
Embrace the cozy farmhouse aesthetic with this delightful gingham painted pumpkin, featuring crisp black and grey checks on a clean white base. This simple yet striking pattern transforms an ordinary pumpkin into a stylish autumn accent perfect for your coffee table or porch.
Step-by-Step
Materials
- Faux or real white pumpkin (medium size)
- Black acrylic craft paint
- Grey acrylic craft paint (or mix black and white)
- Flat shader brush (approx. 1/2 inch to 3/4 inch width)
- Small fine liner brush
- Pencil
- Flexible measuring tape
- Palette or paper plate
- Paper towels
- Cup of water
- Matte finish sealer (optional)
Step 1: Preparation & Mapping
-
Clean the surface:
Wipe down your pumpkin with a damp cloth to remove any dust or oils. If using a real pumpkin, ensure it is completely dry before starting. For best results on a faux pumpkin, give it a quick wipe with rubbing alcohol. -
Plan your vertical lines:
Using the natural grooves of the pumpkin as a loose guide, visualize vertical stripes running from the stem to the base. Use your flexible measuring tape to lightly mark even intervals around the circumference with a pencil. -
Sketch the grid:
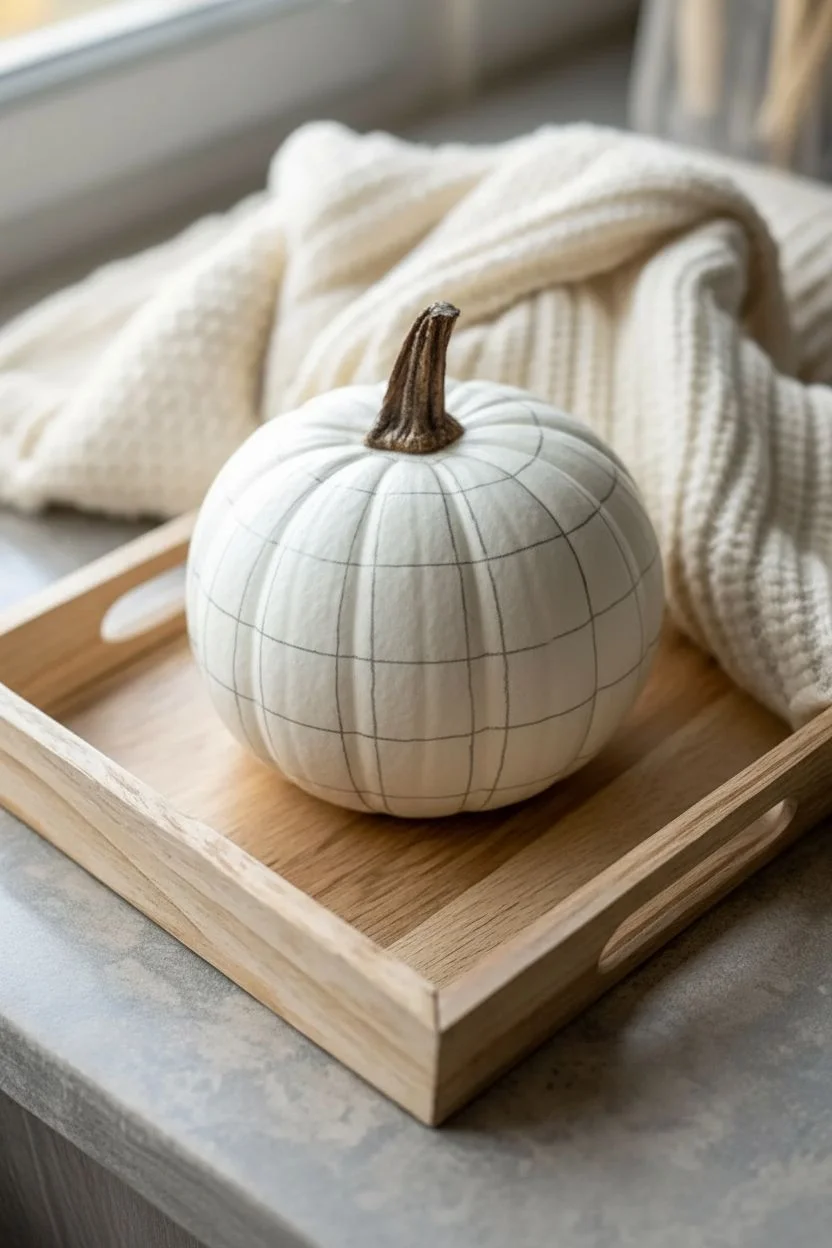
Lightly sketch vertical lines down the pumpkin’s sides. Then, draw horizontal rings around the pumpkin, keeping the spacing roughly equal to the width of your intended checks (about 1.5 to 2 inches squares usually look best).
Step 2: Painting the Base Stripes
-
Load the grey paint:
Squeeze out your grey acrylic paint. You want a medium charcoal tone—not too dark, or it will blend with the black later. Load your flat shader brush evenly. -
Paint vertical grey stripes:
Paint every other vertical column with the grey paint. Follow the curve of the pumpkin carefully. I find it helpful to start at the top near the stem and pull the brush smoothly downward. -
Feather the edges (optional):
For a more rustic, fabric-like look as seen in the photo, you can dry-brush the edges slightly or create faint cross-hatch strokes within the grey stripes instead of filling them solid. -
Allow to dry:
Let these vertical stripes dry completely. Acrylics dry fast, but give it 15-20 minutes so you don’t smudge your work.
Straight Line Secret
Struggling with curves? Use thin washi tape or painter’s tape to mark off your grid before painting. It flexes over the pumpkin’s bumps better than standard masking tape.
Step 3: Creating the Check Pattern
-
Paint horizontal grey stripes:
Now, paint horizontal rings of grey around the pumpkin, skipping every other row just like you did with the vertical lines. Where these new horizontal grey lines cross the white spaces, paint them in solid grey. -
Identify the intersections:
You will notice that where your horizontal grey stripe crosses a vertical grey stripe, you have a square intersection. This is the magic spot for the gingham effect. -
Fill the darker squares:
Switch to your black paint. Paint ONLY the squares where the vertical grey stripe and horizontal grey stripe overlap. This creates the illusion of overlapping translucent fabric layers. -
Refine the edges:
Use the edge of your flat brush to tidy up the corners of your black squares. They should look crisp and distinct against the lighter grey.
Color Twist
Try a different palette! Swap the black and grey for deep orange and lighter pumpkin yellow, or navy blue and light blue for a coastal autumn vibe.
Step 4: Adding Texture & Detail
-
Simulate fabric weave:
This is the secret to the realistic look in the photo. Take a very dry brush with a tiny amount of black paint and lightly drag it through the grey squares. Create tiny cross-hatch marks to mimic thread texture. -
Detail with the liner brush:
For extra definition, use your fine liner brush with thinned black paint to add very subtle, scratchy lines along the edges of the checks, enhancing that woven appearance. -
Check for consistency:
Rotate the pumpkin and look for any spots where the pattern breaks or looks uneven. Touch up gaps with the appropriate color. -
Paint the stem (optional):
If your pumpkin’s stem looks plasticky, give it a coat of dark brown paint mixed with a touch of black for a realistic, dried stem look. -
Seal the work:
Once fully dry (give it an hour), apply a clear matte sealer spray. This protects the paint from chipping and unifies the sheen, making it look like a high-end store-bought decoration.
Place your warm and inviting pumpkin on a wooden tray with a cozy knit blanket to complete the scene
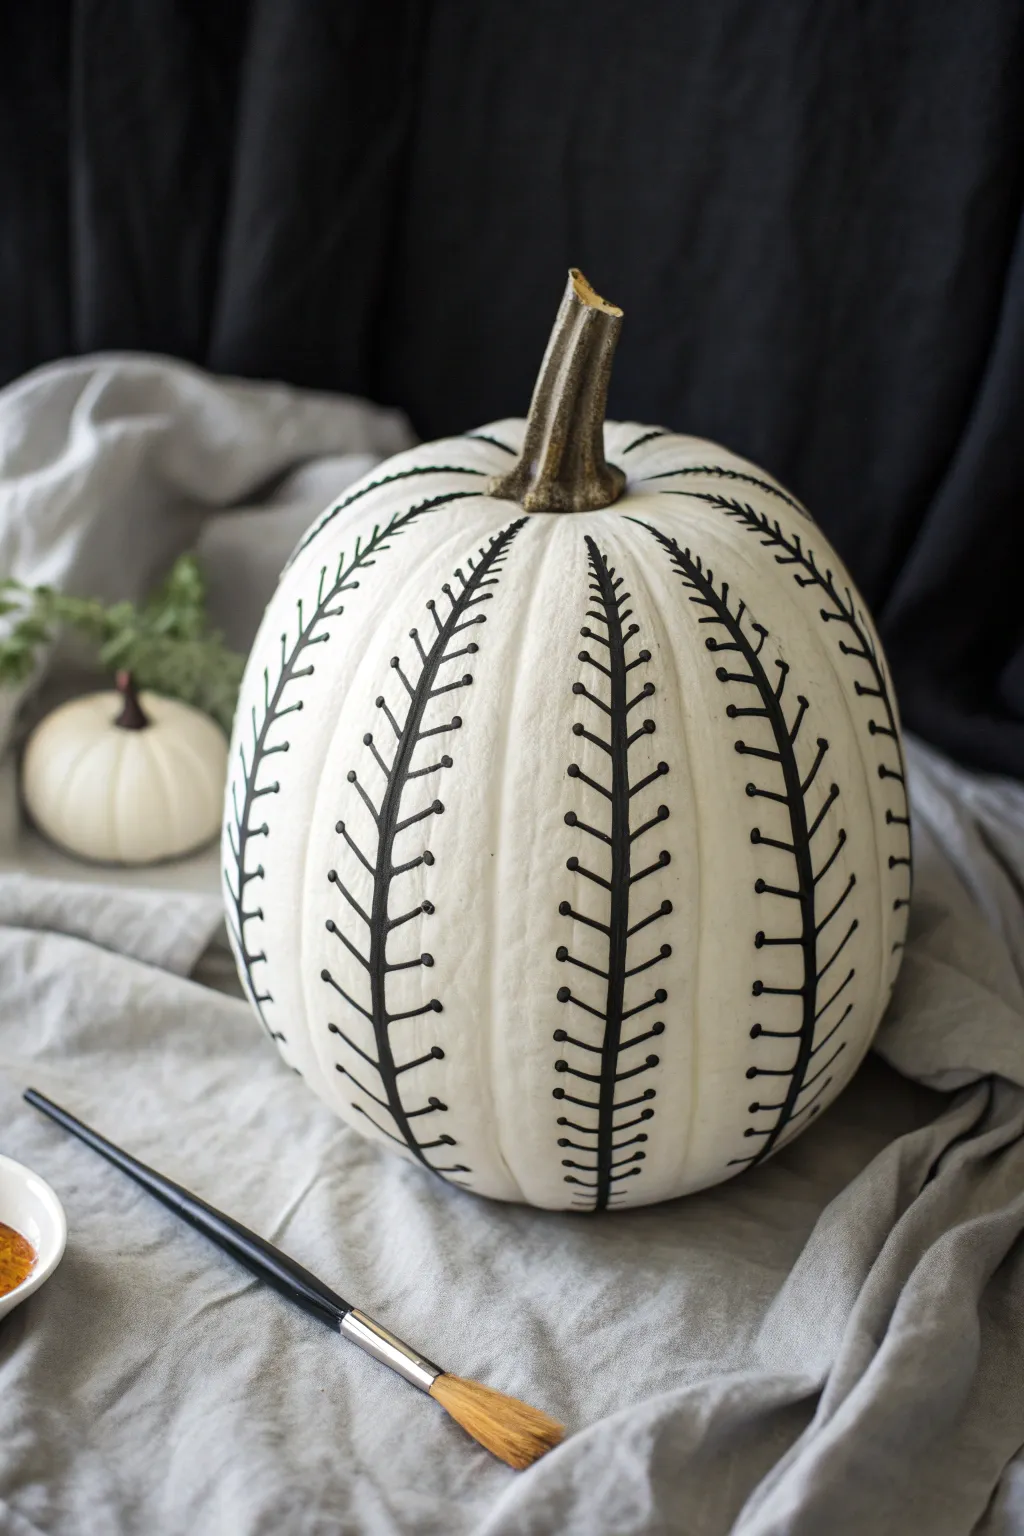
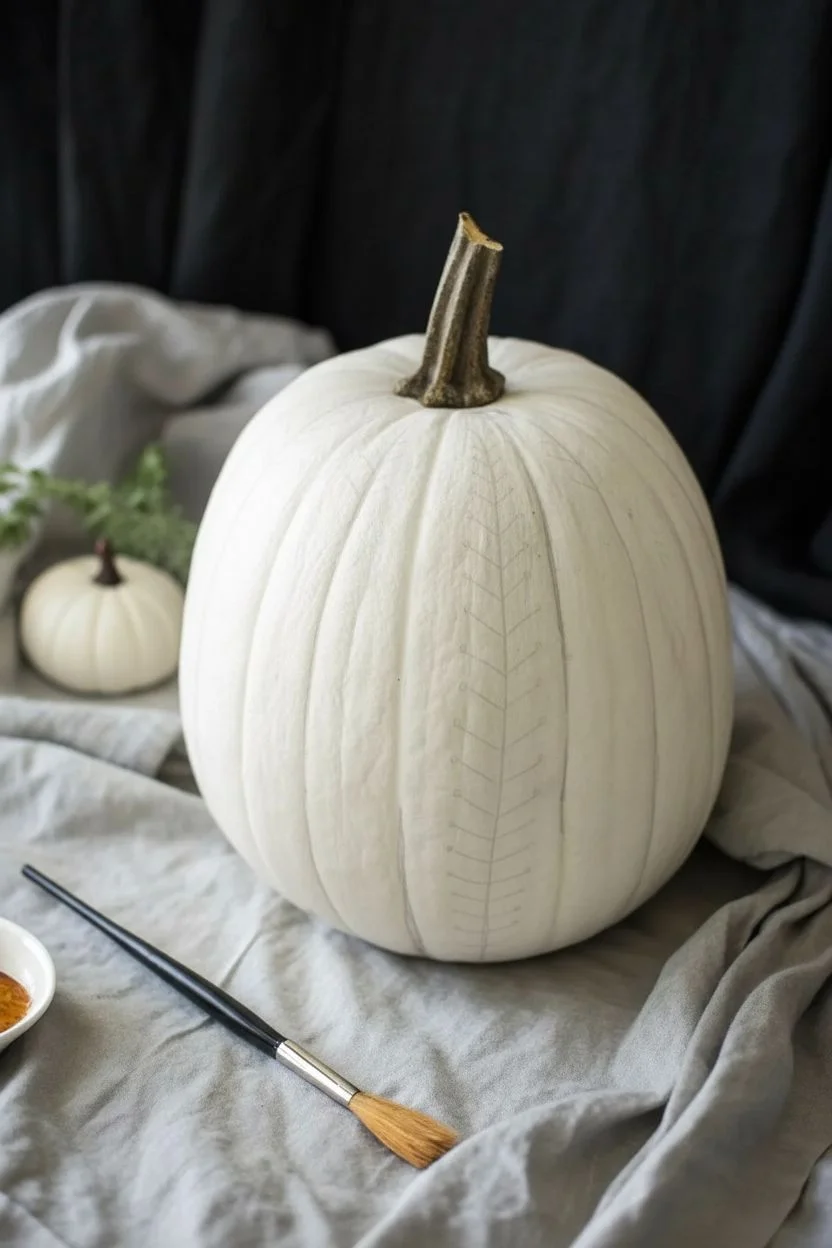
Herringbone Pattern for Clean, Classic Texture
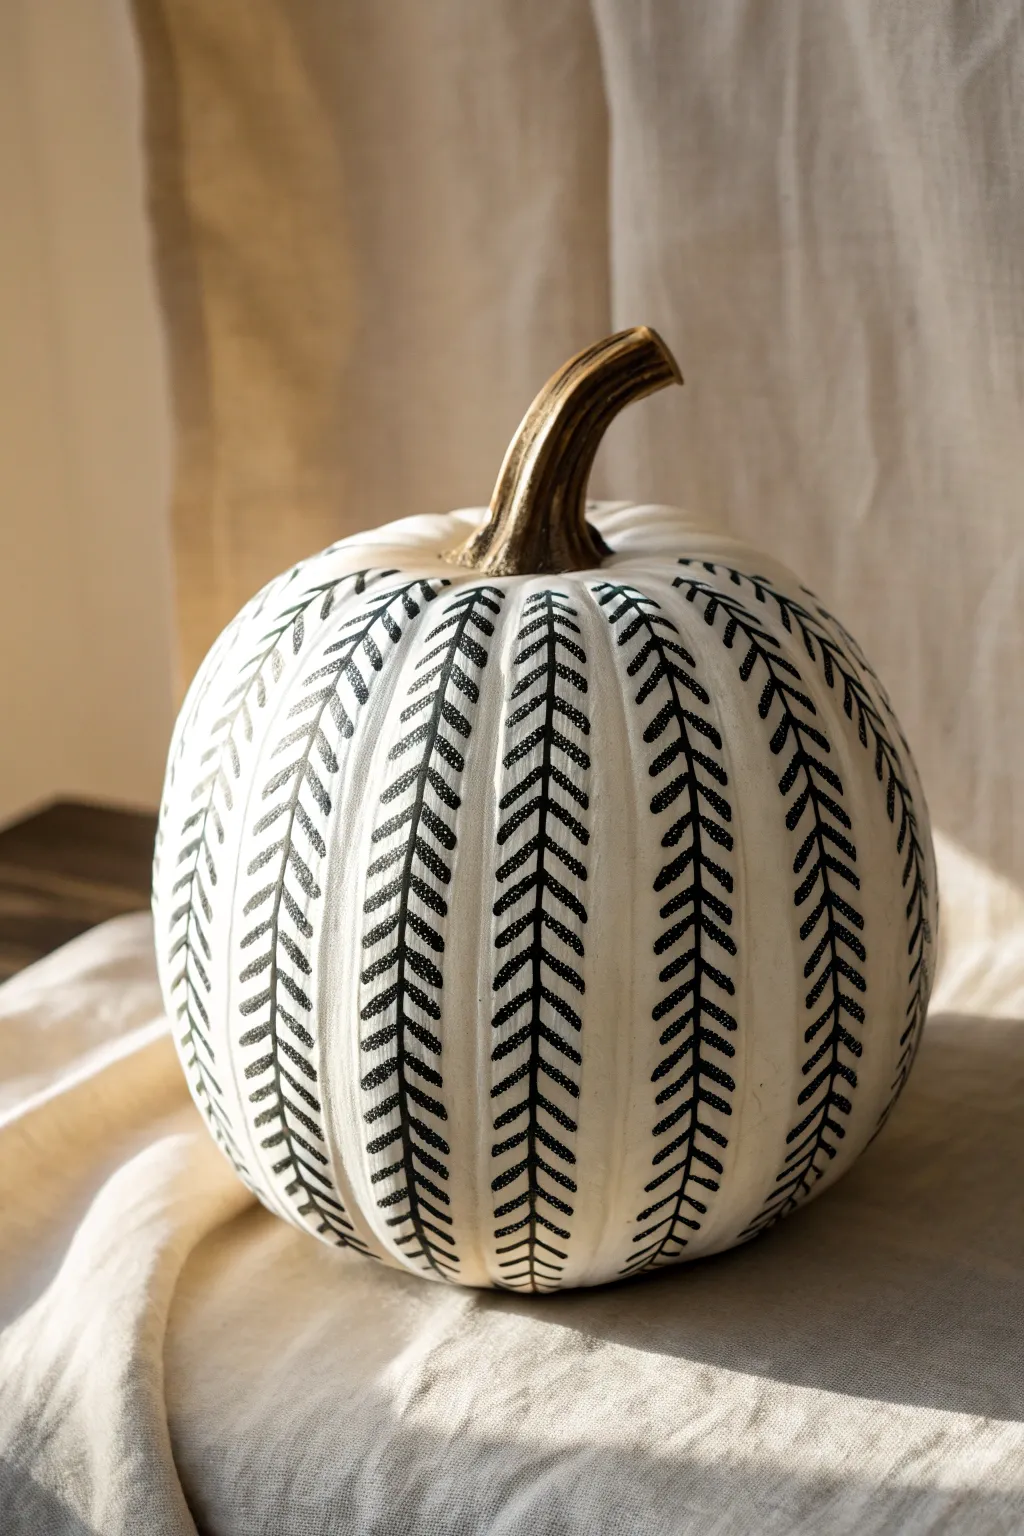
Achieve a sophisticated, modern farmhouse look with this striking black and white design. The repetitive herringbone pattern follows the pumpkin’s natural ribs, creating a mesmerizing texture that feels both organic and structured.
Detailed Instructions
Materials
- Medium-sized faux pumpkin (white)
- Black oil-based paint pen (medium tip)
- Pencil
- Gold metallic paint
- Small flat paintbrush
- Damp cloth or eraser
- Matte spray sealant (optional)
Step 1: Preparation and Base
-
Clean surface:
Before starting, wipe down your faux pumpkin with a damp cloth to remove any manufacturing dust or oils that might repel the paint pen. -
Check the ribs:
Examine the natural vertical grooves (ribs) of your pumpkin. These indentations will serve as the spine for your herringbone pattern, so identify the deepest part of each groove to guide you. -
Paint the stem:
Using a small flat brush and gold metallic paint, carefully coat the entire stem. Use vertical brush strokes that follow the stem’s grain for a realistic finish. -
Add a second coat:
Allow the first layer of gold to dry completely, then apply a second coat if needed to ensure opaque, rich coverage. Let this dry fully before moving on.
Smudge Patrol
Work left to right (or right to left if left-handed) to avoid resting your palm on wet ink. If you smudge, wipe immediately with a damp Q-tip.
Step 2: Drafting the Design
-
Mark the spines:
Lightly trace a faint pencil line down the center of each vertical rib indentation. This doesn’t have to be perfectly straight; following the organic curve of the pumpkin looks better. -
Sketch guides (optional):
If you’re nervous about freehanding, sketch a few V-shapes lightly with a pencil at the top, middle, and bottom of one rib to establish your spacing.
Level Up: Ombré Effect
Create an ombré density effect by drawing the V-shapes very close together near the top and gradually spacing them out further as you reach the bottom.
Step 3: Creating the Pattern
-
Start the first column:
Position your pumpkin so you are looking directly at one rib. Shake your black paint pen well and depress the nib on scrap paper to get the ink flowing. -
Draw the center line:
Draw a solid black line down the center of the first groove, tracing over your pencil guide. I find it easier to draw this line in 2-3 inch segments rather than one long continuous stroke. -
Begin the V-shapes:
Starting at the very top near the stem, draw short, diagonal dashes extending outward and downward from the center line. Imagine you are drawing the veins of a leaf. -
Mirror the strokes:
For every diagonal dash on the left side of the spine, draw a corresponding dash on the right side. They should meet at the center line. -
Maintain spacing:
Keep the spacing between your V-shapes tight and consistent—roughly 1/8 to 1/4 inch apart. Consistency is key to the texture effect. -
Complete the column:
Continue this pattern all the way to the bottom of the pumpkin. Don’t worry if the strokes get slightly wider as the pumpkin becomes more bulbous in the middle. -
Work in sections:
Rotate the pumpkin and repeat the process on the next rib. Be careful not to smudge the wet ink from the previous section with your hand. -
Adjust for width:
On wider sections of the pumpkin, you can make your diagonal dashes slightly longer so fill the space, but try to keep the angle consistent.
Step 4: Final Touches
-
Check for gaps:
Once all ribs are complete, scan your work. If any center lines look too thin or faint, go over them again to darken the spine of the herringbone. -
Clean up:
Allow the paint pen to dry for at least an hour. Then, gently erase any visible pencil marks with a soft white eraser. -
Seal (optional):
If you plan to display this outdoors, apply a light coat of matte spray sealant to protect your handiwork from moisture.
Place your sleek new pumpkin on a mantel or table runner to enjoy its clean, geometric charm all season long


Creepy-Cute Monster Faces on Mini White Pumpkins

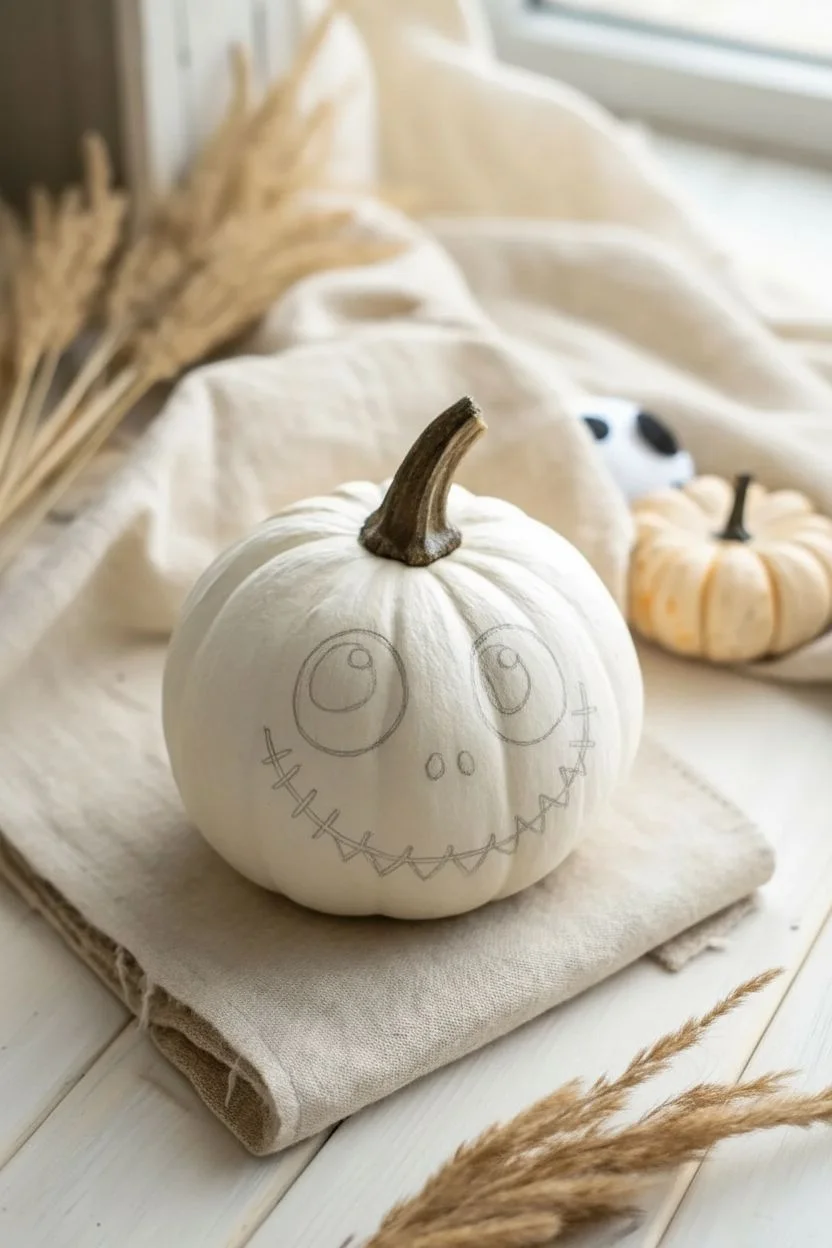
Transform a simple mini white pumpkin into a character filled with spooky-sweet personality using just a few basic supplies. This design features large, expressive eyes and a classic stitched grin that strikes the perfect balance between creepy and cute.
Step-by-Step
Materials
- Mini white pumpkin (real or faux)
- Black acrylic paint or paint pen (fine tip)
- White acrylic paint or paint pen
- Pencil with a soft eraser
- Small round paintbrush (size 0 or 1)
- Paper towel
- Cup of water
- Clear matte sealant (optional)
Step 1: Preparation & Sketching
-
Clean surface:
Begin by wiping down your pumpkin with a damp cloth to remove any dirt or oils. If you are using a real pumpkin, ensure it is completely dry before proceeding. -
Test the stem:
Check the stem to make sure it’s secure; avoid lifting the pumpkin by the stem while painting to prevent accidental breakage. -
Map the eyes:
Using a pencil, lightly sketch two large ovals for the eyes. Position them on the upper third of the pumpkin face, slightly angled away from each other for a whimsical look. -
Add pupils:
Draw large circles inside the eye ovals for the pupils. I like to have them looking upward and slightly to the left to give the pumpkin a curious expression. -
Sketch the nose:
Mark two tiny teardrop shapes or simple dots right in the center of the face, just below the eyes, to serve as the nostrils. -
Plan the smile:
Lightly draw a wide, curved line for the mouth. Extend it well past the width of the eyes on both sides to create that classic wide grin.
Step 2: Inking the Features
-
Outline the eyes:
Using your black paint pen or a fine brush loaded with black acrylic, carefully trace the outer ovals of the eyes. -
Add thicker outlines:
Go over the eye outline a second time to thicken the line slightly, which helps the cartoon style pop against the white skin. -
Fill the pupils:
Paint the large circular pupils solid black. Be careful to stay within your pencil lines. -
Paint the nostrils:
Fill in the two small nostril shapes with solid black ink or paint. -
Trace the smile:
Go over your penciled mouth line with the black marker or brush. Use a steady hand to create a smooth, continuous curve. -
Add the stitches:
Draw short vertical lines crossing the main mouth line. Space them relatively evenly, but slight irregularity adds to the ‘stitched’ charm. -
Triangle details:
Along the bottom edge of the smile, add small triangle shapes between the stitches to simulate the look of teeth or fabric puckering.
Smooth Operator
Drawing on bumpier pumpkins can be tricky. Use a paint pen with a felt tip rather than a plastic nib; felt glides over the bumpy ridges much easier without snagging or splattering.
Step 3: Bringing it to Life
-
White of the eyes:
If your pumpkin isn’t perfectly white, or if you sketched heavily, use white acrylic paint to fill in the space around the pupils inside the eye ovals. -
Dry time:
Let the black pupil paint dry completely. This is crucial before the next step to avoid smudging gray into the highlights. -
Add reflections:
Dip the handle end of a paintbrush into white paint and dot a small highlight onto the upper right side of each black pupil. This brings the character to life. -
Final clean up:
Once all paint is totally dry, gently erase any visible pencil marks that weren’t covered by the paint. -
Seal:
If desired, apply a light coat of matte sealant spray to protect your artwork, especially if the pumpkin will be displayed outdoors.
Glow Up
Use glow-in-the-dark acrylic paint for the whites of the eyes. During the day it looks normal, but at night your pumpkin’s gaze will eerily glow green in the darkness.
Place your finished pumpkin on a cozy linen cloth or near some dried wheat to complete the autumnal vignette
Black Cat Face With Whiskers and Pointed Ears Painted On
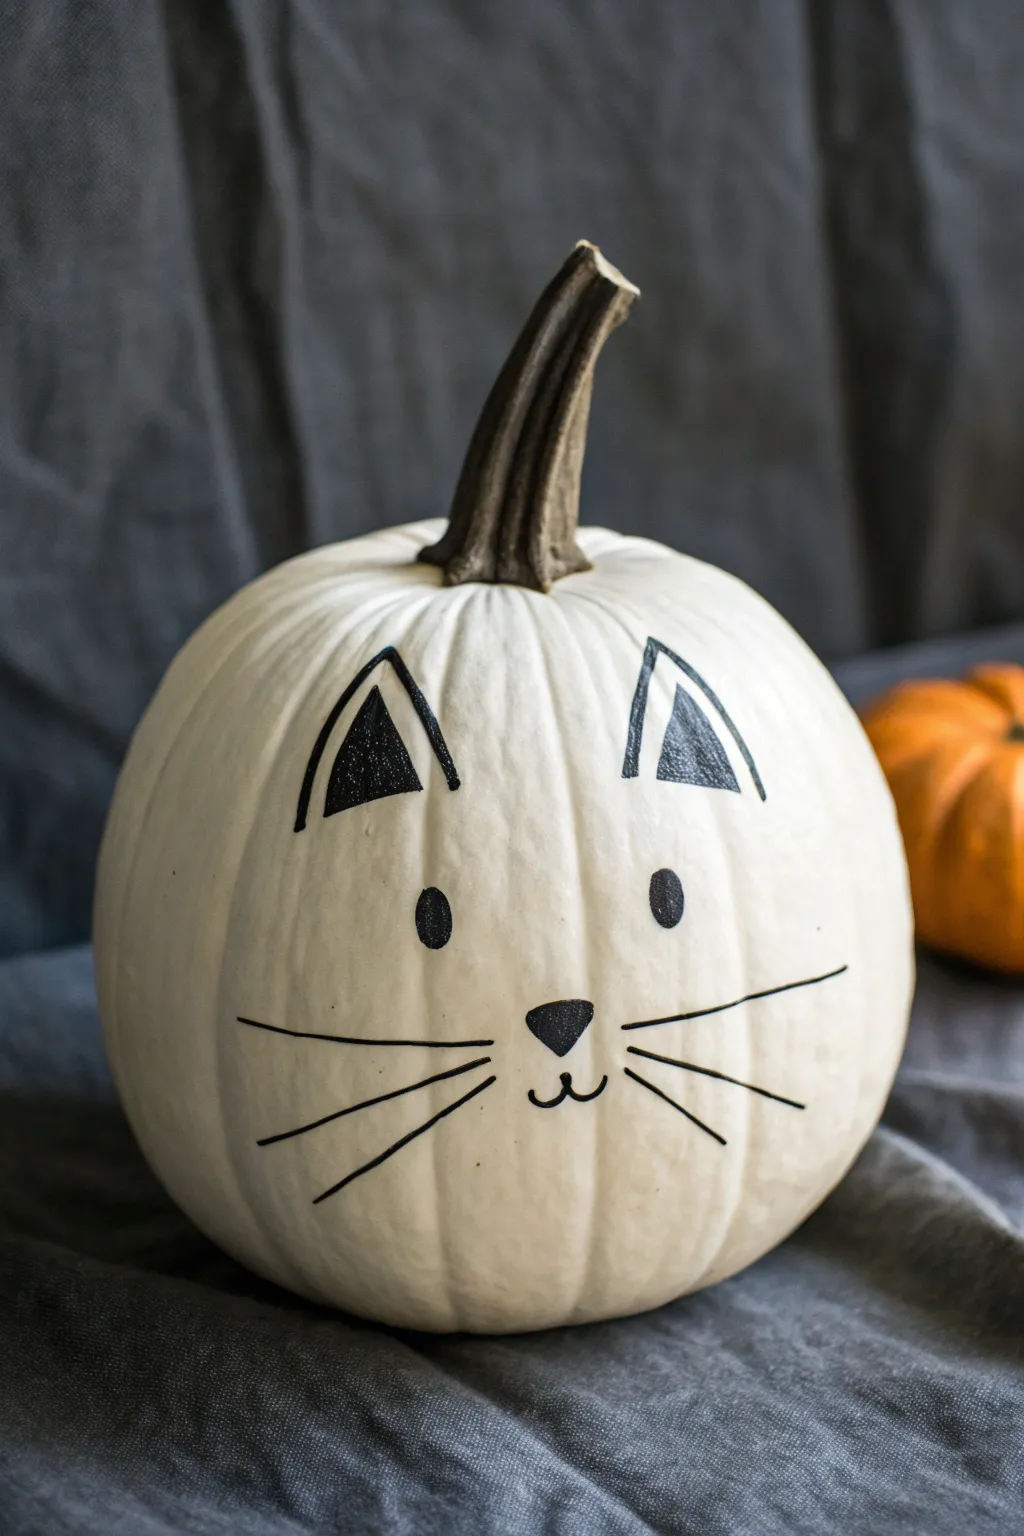
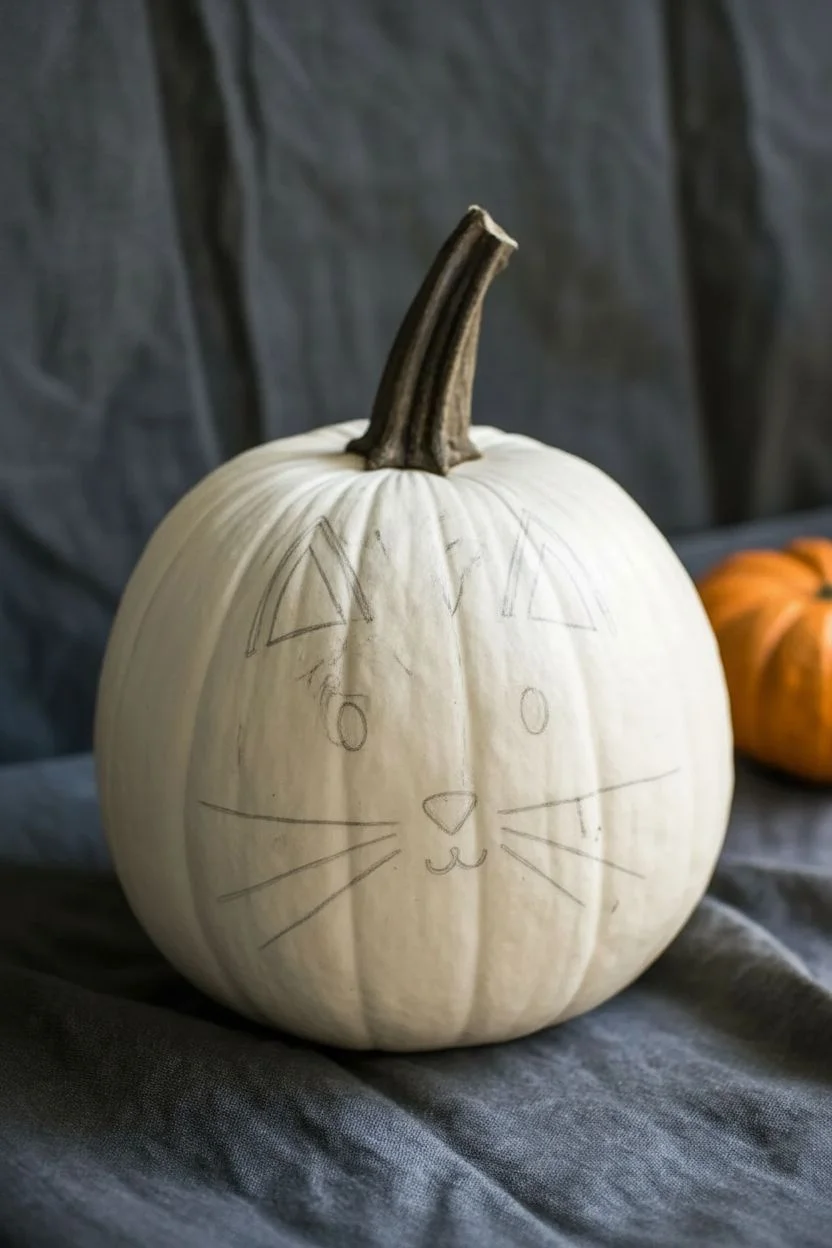
Transform a simple white pumpkin into a charming feline friend with just a few bold strokes of black paint. This minimalist design focuses on crisp lines and geometric shapes to create a playful, modern decoration perfect for Halloween.
How-To Guide
Materials
- Medium-sized white pumpkin (real or faux)
- Black acrylic craft paint
- Fine-tipped round paintbrush (size 0 or 1)
- Medium round paintbrush (size 3 or 4)
- Pencil or disappearing ink fabric marker
- Paper towel
- Small cup of water
- Matte spray sealer (optional)
Step 1: Preparation and Planning
-
Clean surface:
Begin by wiping down your pumpkin with a damp cloth to remove any dirt or dust. If using a real pumpkin, ensure it is completely dry before proceeding. -
Remove stem debris:
Check the area around the base of the stem. If there are any stray bits of vine or dirt, gently brush them away so you have a clean canvas near the top. -
Determine placement:
Look at your pumpkin and choose the ‘face’ side. You want a side that is relatively smooth and free of deep gouges or warts that might interrupt your drawing. -
Sketch the ears:
Using a pencil, lightly sketch two large triangles near the top of the pumpkin. The base of the triangles shouldn’t be drawn; instead, simulate the gap where the ears connect to the head. -
Sketch the face features:
Lightly mark the positions for the oval eyes, the small triangle nose, and the small ‘w’ shape for the mouth. Ensure they are centered below the ears.
Fixing Wobbly Lines
If your hand shakes while painting delicate lines like whiskers, brace your pinky finger against the dry surface of the pumpkin to stabilize your hand while you work.
Step 2: Painting the Outline
-
Load the liner brush:
Dip your fine-tipped brush into the black acrylic paint. You want the paint to be fluid but not watery; if it’s too thick, add a tiny drop of water to improve the flow. -
Paint ear outlines:
Trace over your pencil lines for the outer triangle shapes of the ears. Use a steady hand to keep the lines crisp. -
Add inner ear detail:
Inside each ear outline, paint a smaller, solid black triangle. This creates the illusion of depth and makes the ears look perky. -
Draw the eyes:
Switch to your medium round brush if desired, or stick with the fine tip to fill in the two vertical oval eyes. I find dabbing the paint in creates a better shape than dragging it. -
Create the nose:
Paint an inverted triangle shape for the nose, slightly rounded at the corners for a softer, cuter look. -
Paint the mouth:
Using the very tip of your fine brush, paint a small anchor shape or a rounded ‘w’ attached to the bottom point of the nose.
Make it Sparkle
While the black paint is still wet on the inner ear triangles or the nose, sprinkle a tiny pinch of black extra-fine glitter over it for a subtle, festive shimmer.
Step 3: Adding Whiskers and Finishing
-
Position the whiskers:
Visualize where the whiskers will go. You need three on each side, radiating outward from the cheek area, not directly from the nose. -
Paint the top whiskers:
Start with the top whisker on the left. Press lightly and flick the brush outward quickly to get a tapered end. -
Complete the whisker set:
Paint the middle and bottom whiskers on the left side, keeping the spacing roughly equal. -
Mirror the right side:
Repeat the previous steps on the right side, trying to match the length and angle of the left whiskers for symmetry. -
Clean up edges:
Wait about ten minutes for the paint to become tacky. If you see any uneven edges on the ears or eyes, carefully touch them up with a tiny bit more paint. -
Erase guidelines:
Once the paint is 100% dry (give it at least an hour), use a clean eraser to gently remove any visible pencil marks. -
Seal the work:
If this pumpkin will be outside, apply a light coat of matte spray sealer to protect your artwork from moisture.
Now you have an adorable, no-carve pumpkin decoration that is ready to greet your guests
Elegant Skeleton Ribcage Lines in Fine Black Detail
Transform a simple faux pumpkin into a striking piece of modern decor with this high-contrast botanical design. The crisp black lines mimic both skeletal ribcages and delicate fern fronds, creating a sophisticated look that fits perfectly in minimalist or gothic-chic displays.
Step-by-Step Guide
Materials
- Medium-sized white faux pumpkin (smooth or textured skin works)
- Black acrylic paint (high pigment or heavy body)
- Fine liner brush (size 0 or 1)
- Round detail brush (size 2)
- Palette or small dish
- Pencil (light grey or H-grade)
- Paper towel
- Cup of water
- Matte clear sealer spray (optional)
Step 1: Preparation & Mapping
-
Clean the surface:
Before starting, wipe down your faux pumpkin with a slightly damp cloth to remove any manufacturing dust or oils. This ensures the paint adheres properly and prevents beading later on. -
Identify the ridges:
Study the natural vertical grooves of your pumpkin. The pattern will follow these valleys, so visualize where your main spine lines will go. You want to work with the pumpkin’s shape, not against it. -
Sketch the spines:
Using a very light touch with a pencil, draw faint vertical lines starting from the base of the stem all the way down to the bottom center. Do this inside the deepest part of each vertical groove.
Oops, Smudged It?
Don’t panic! While the paint is wet, use a damp Q-tip to wipe away the mistake. If dry, paint over the smudge with white acrylic, let it set, and try again.
Step 2: Painting the Spines
-
Load the liner brush:
Squeeze a small amount of black acrylic paint onto your palette. Dip your fine liner brush in, rolling it slightly to create a sharp point. You want the paint to be fluid but opaque. -
Paint the central stems:
Carefully trace over your pencil lines, painting a solid, thin black line down every vertical groove. Keep the pressure consistent for an even line width. -
Refine the thickness:
If your initial lines look too wispy, retrace them gently to thicken them just slightly. They should serve as a sturdy anchor for the side details. -
Dry the base structure:
Let these vertical stripes dry completely for about 10-15 minutes. It’s crucial they are dry so you don’t smudge them while adding the delicate side strokes.
Gothic Glamour
Instead of matte black, use metallic gold or copper paint for the ribcage lines. This creates a luxurious, gilded effect suitable for an elegant dinner spread.
Step 3: Adding Ribbed Details
-
Plan the spacing:
Mentally divide one of your vertical stripes into small, even segments. The rib lines should be spaced about a half-inch apart, moving symmetrically down the spine. -
Paint the first stroke:
Starting near the top top of a spine, place your brush tip on the central black line. Pull the brush outwards and slightly upwards in a curve, lifting pressure at the end to taper the line. -
Mirror the stroke:
Immediately paint a matching curved line on the opposite side of the spine at the same height. This creates a V-shape or wishbone effect. -
Add the end dots:
At the very tip of each curved rib line, gently press the tip of your round brush to create a small, definitive dot. This softens the sharp ends and adds a skeletal joint appearance. -
Continue down the spine:
Work your way down the vertical line, repeating these paired strokes. I find it helpful to rotate the pumpkin on a lazy susan or towel as I work to keep my hand steady. -
Adjust direction:
As you move past the pumpkin’s ‘equator’ and toward the bottom, slightly flatten the angle of your strokes so they hug the curve naturally.
Step 4: Refining & Finishing
-
Complete all sections:
Repeat the ribbing process for every vertical groove on the pumpkin. Take breaks if your hand gets shaky to maintain precision. -
Check for consistency:
Step back and look at the overall pattern. If some black dots look too small compared to others, carefully dab a little more paint on them to uniform the sizes. -
Paint the stem:
For a cohesive look, dry brush a tiny amount of black/brown paint mix onto the stem to antique it, referencing the darker stem in the photo. -
Erase guidelines:
Once the paint is 100% bone dry (give it an hour), use a clean eraser to gently remove any visible pencil marks peeking out from behind the paint. -
Seal the work:
If you plan to place this outdoors or store it for years, apply a light mist of matte clear sealer to protect the acrylic from chipping.
Enjoy displaying your sophisticated and spooky creation as a centerpiece for the season
Spooky Eyeball Iris Design on a White Pumpkin
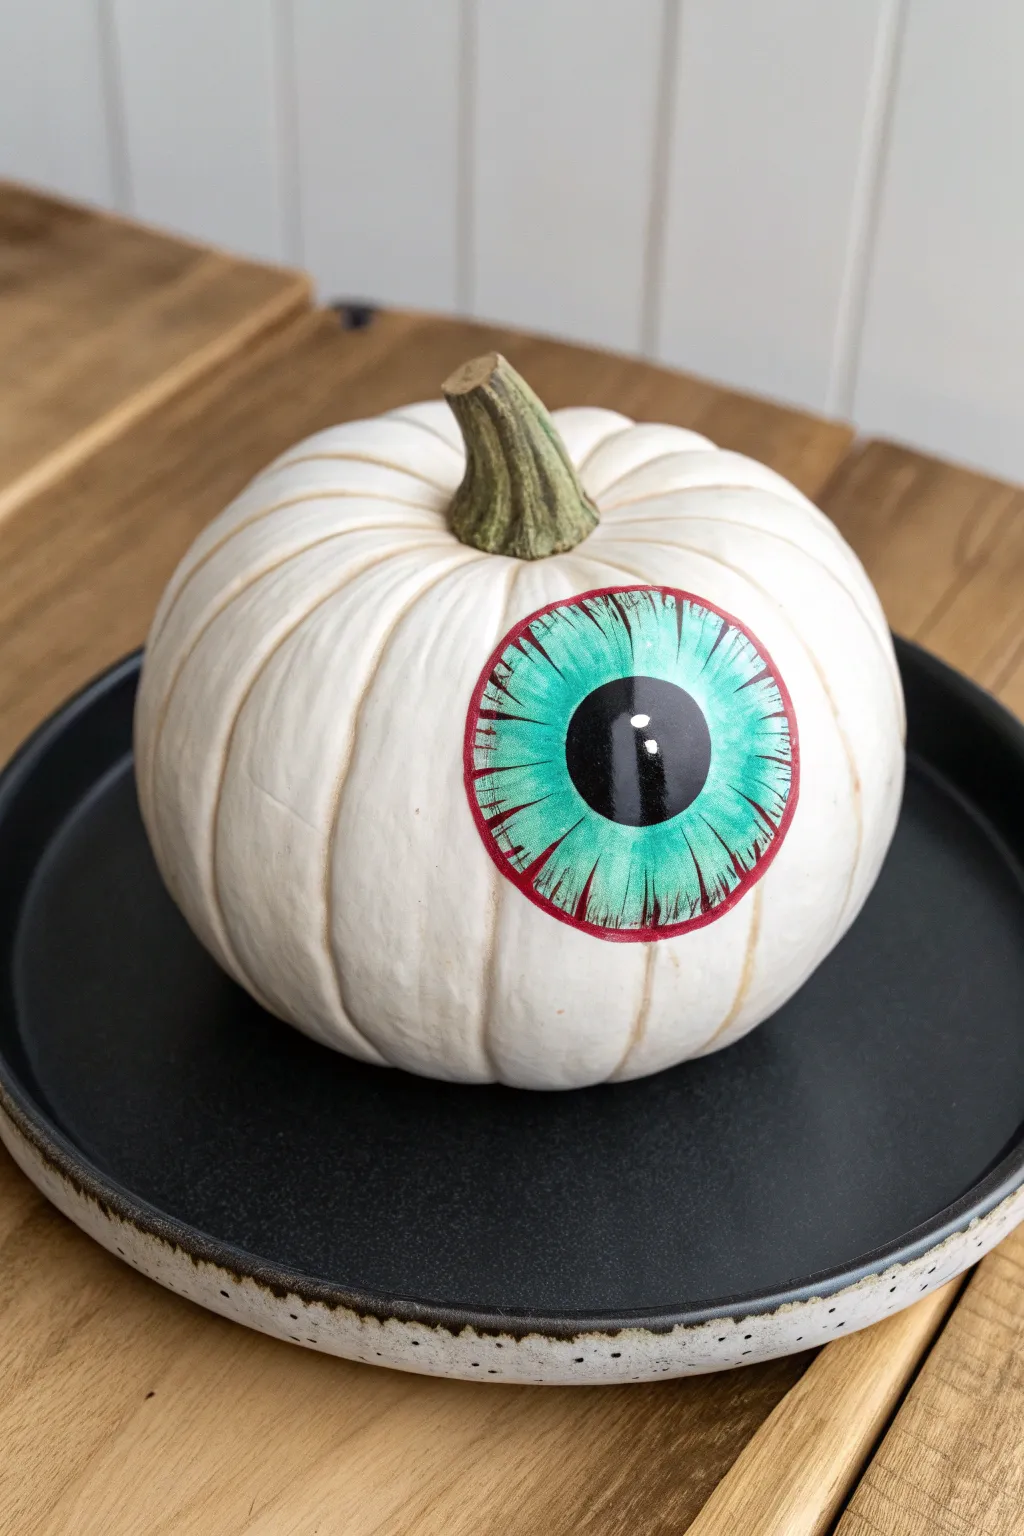
Transform a simple white pumpkin into an eerie, unblinking creature with this spooky eyeball design. The bright teal iris and realistic bloodshot details create a striking contrast against the pale skin, making for a truly eye-catching Halloween decoration.
Step-by-Step
Materials
- Small to medium white pumpkin (Lumina or Casper variety)
- Acrylic craft paints (bright turquoise, black, white, deep red)
- Medium round paintbrush
- Fine liner paintbrush
- Pencil for sketching
- Palette or small plate
- Clean rag
- Cup of water
- Matte or satin sealer spray (optional)
Step 1: Preparation & Mapping
-
Clean surface:
Begin by wiping down your pumpkin with a damp cloth to remove any dirt or oils from the field. Dry it completely to ensure the paint adheres properly to the waxy skin. -
Outline the iris:
Using a light pencil, sketch a large circle on the flattest, most prominent side of the pumpkin. This will be the outer edge of your iris. Don’t worry if it spans across the pumpkin’s ribs; the bumps add natural dimension. -
Mark the pupil:
Sketch a smaller circle directly in the center of your large circle. This will serve as the black pupil. Keep it proportionate—roughly one-third the diameter of the iris usually looks best. -
Define the boundary:
Lightly trace just outside your main iris circle to create a guide for the red outline later, ensuring you have a clear roadmap before paint touches the pumpkin.
Uneven Coverage?
If the pumpkin skin is too waxy and repels paint, lightly buff the area with fine-grit sandpaper or wipe with rubbing alcohol before repainting.
Step 2: Painting the Eye Structure
-
Base coat the iris:
Load your medium round brush with bright turquoise paint. Fill in the ring between the pupil and the outer circle carefully. -
Iris second coat:
Allow the first layer of turquoise to dry to the touch, then apply a second coat for solid opacity. White pumpkins can be slightly translucent, so this extra layer makes the color pop. -
Fill the pupil:
Switch to clean black paint and fill in the center circle. Be very deliberate with your brushstrokes to keep the edge sharp and circular. -
Add the red rim:
Using a steady hand and the medium brush, paint a bold, red ring around the outside of the turquoise iris. This acts as the irritated tissue connecting the eye to the pumpkin ‘body’. -
Dry break:
Pause here and let all your main blocks of color dry completely. If the paint is wet, your detail lines might bleed, ruining the crisp effect.
Step 3: Adding Spooky Details
-
Feather the iris:
Pick up your fine liner brush with a tiny amount of black paint. Starting from the outer edge of the pupil, flick very short, delicate lines outward into the teal to simulate depth. -
Create texture:
With the same liner brush, mix a darker shade of teal (or mix a dab of black into your turquoise) and add thin radial lines stretching from the outer edge of the iris inward, mimicking flexible muscle fibers. -
Paint the veins:
Dip your fine liner into the deep red paint. Starting from the red outer rim, drag the brush inward over the teal iris. Press down at the start and lift up as you go inward to create tapered, vein-like spikes. -
Vary the lengths:
I like to vary the length of these red veins—make some short and others longer—to create a more organic, distinctively bloodshot appearance. -
Add the highlight:
The crucial step for life: Take a clean brush or dotting tool with pure white paint and place a distinct reflection dot on the upper right or left quadrant of the pupil. Overlap it slightly onto the teal area for a glossy look. -
Final clean up:
Check your edges. If any lines look wobble, use your liner brush to gently correct them with the appropriate background color. -
Seal:
Once fully dry (give it at least an hour), you can lightly spray the painted area with a clear matte sealer to prevent scratching, especially if the pumpkin will be displayed outdoors.
Add Extra Gloss
After the matte paint dries, apply a high-gloss varnish or clear nail polish ONLY to the eyeball area to make it look permanently wet and slimy.
Set your watchful pumpkin near the entryway to keep a close eye on arriving trick-or-treaters.
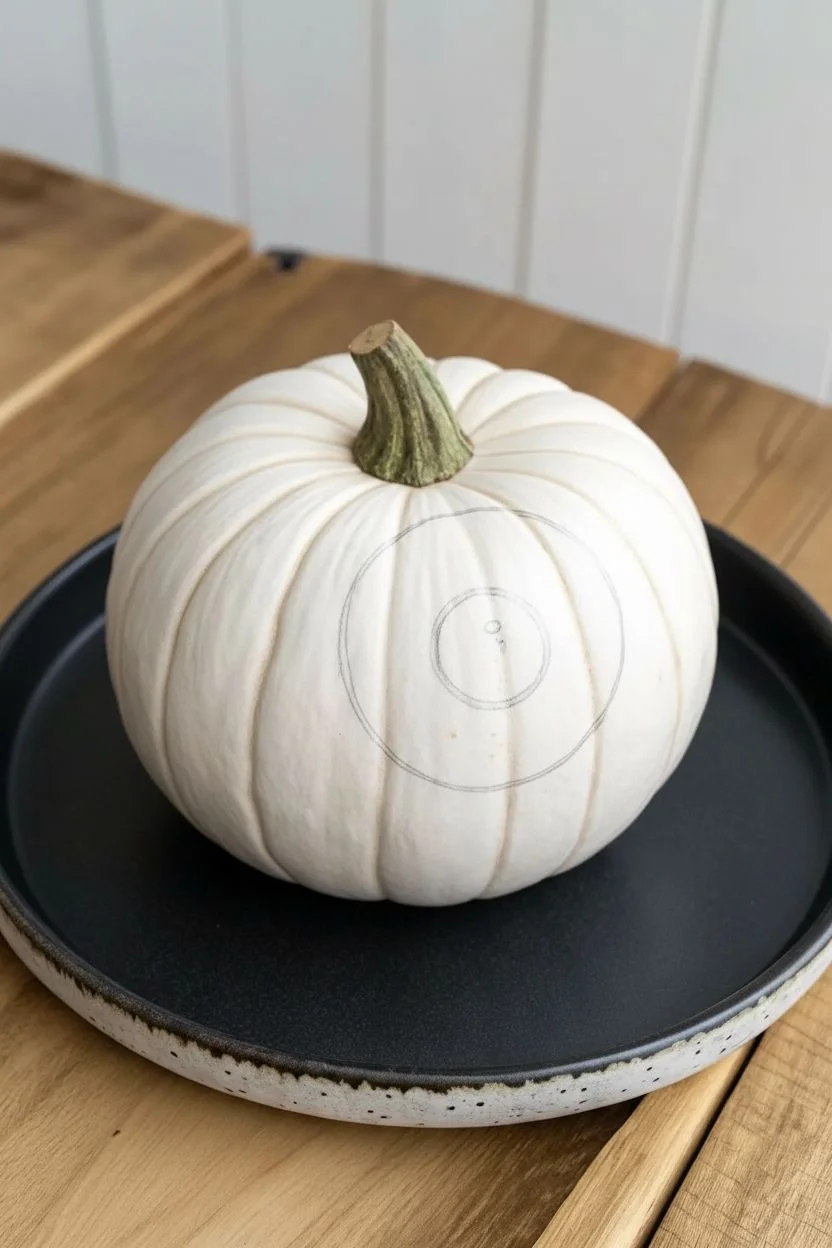
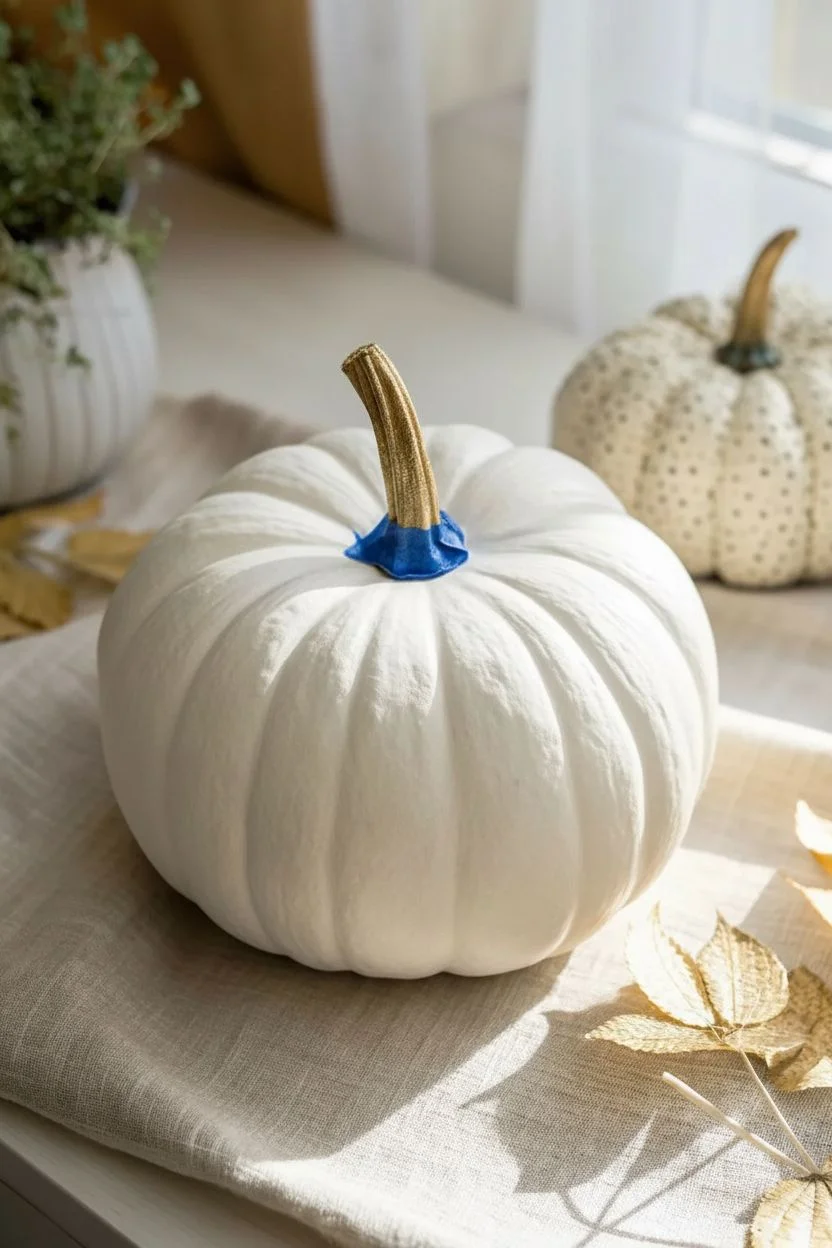
Blue-and-White Porcelain-Style Florals
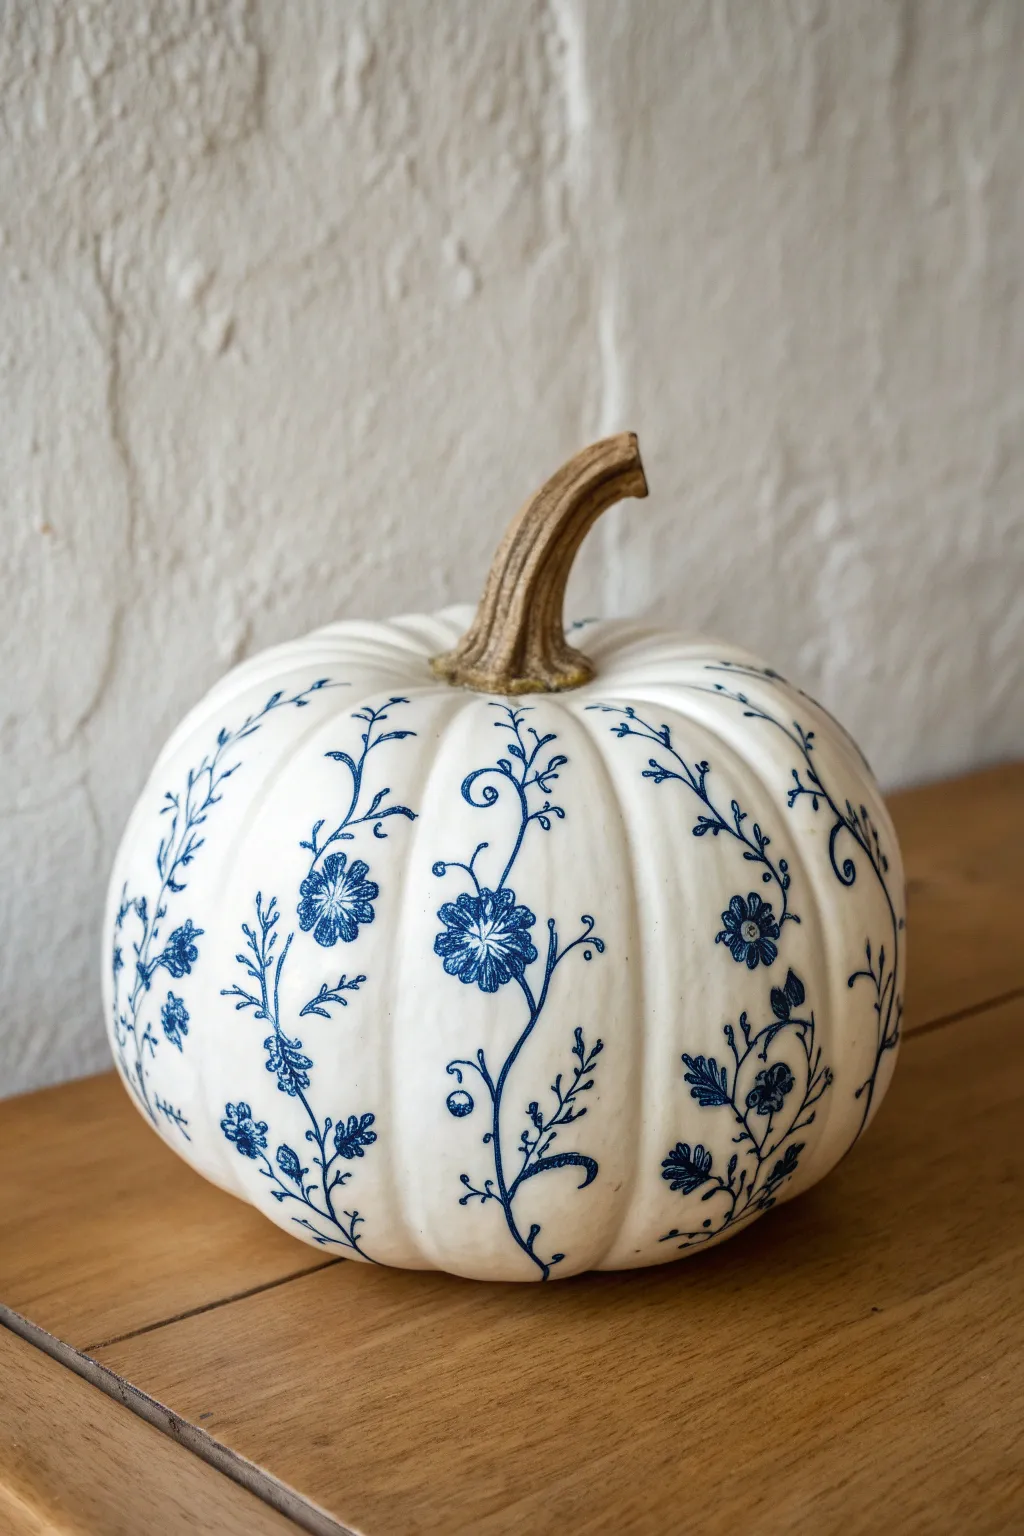
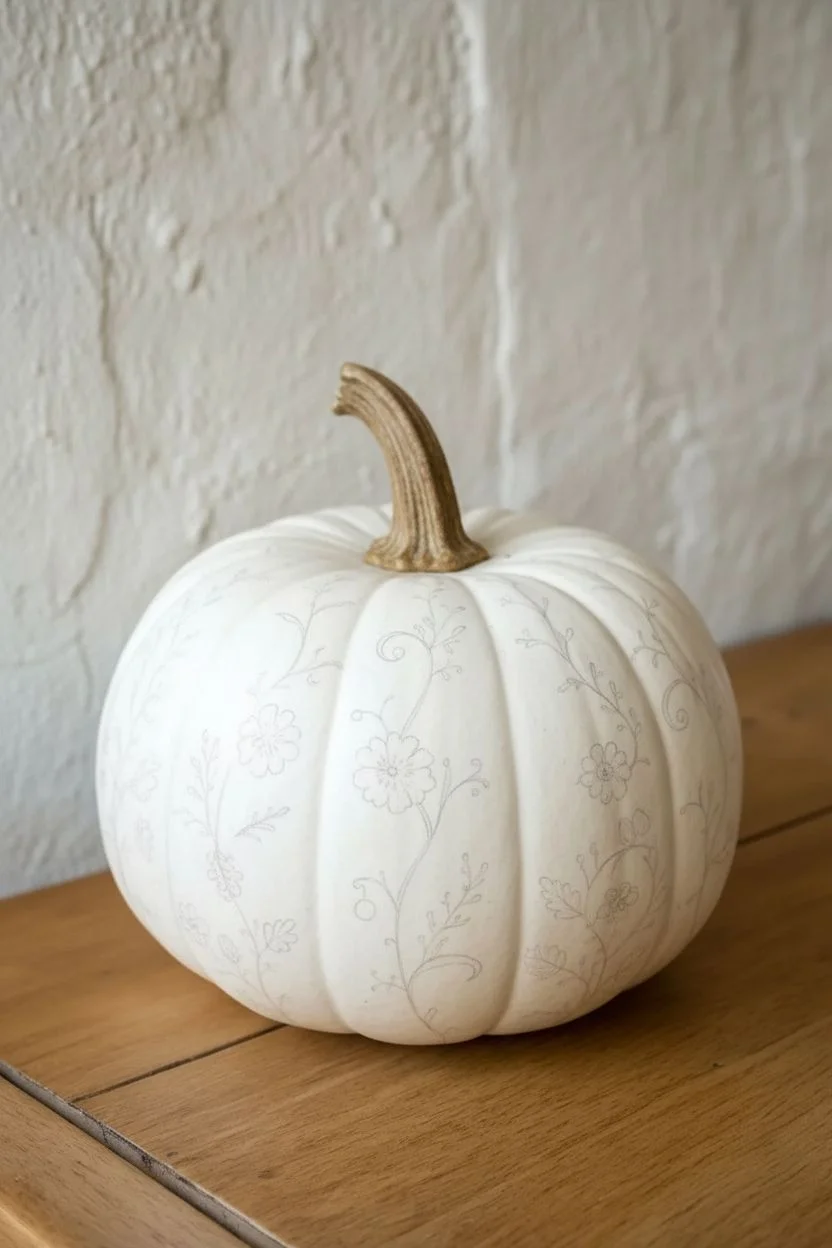
Transform a simple white pumpkin into a piece of faux porcelain with this elegant blue-and-white design. This tutorial guides you through sketching and painting delicate floral vines to achieve that classic, timeless chinoiserie aesthetic.
How-To Guide
Materials
- Medium-sized white craft pumpkin (faux) or a real white pumpkin (cleaned)
- Fine-point blue permanent marker (like a Sharpie)
- Ultra-fine point blue permanent marker
- Blue acrylic paint (navy or cobalt)
- Fine liner brush (size 0 or 00)
- Pencil and eraser
- Clear matte or satin sealant spray
- Paper towel
- Cotton swabs (for cleanup)
Step 1: Preparation & Sketching
-
Clean surface:
Before starting, wipe down your pumpkin with a slightly damp cloth to remove any dust or oils. If using a real pumpkin, dry it thoroughly. -
Plan the vines:
Using a pencil, very lightly sketch trailing vertical lines down the ribs of the pumpkin. These will serve as the main stems for your floral design. -
Add curvature:
Don’t make the lines perfectly straight; add gentle S-curves that follow the natural contour of the pumpkin’s segments to make the vines look organic. -
Sketch flower placement:
Mark small circles along your vine lines where you want your main blossoms to sit. Stagger them so they aren’t all at the same height on every vine. -
Leaf rough-in:
Lightly sketch the direction of leaves and smaller sprigs coming off the main stems, ensuring they curve elegantly outward.
Don’t Smudge!
Permanent marker can smear on smooth pumpkin skin until fully set. Work from the top down or rotate the pumpkin carefully to avoid resting your hand on fresh ink.
Step 2: Drawing the Base Design
-
Trace main stems:
Take your fine-point blue permanent marker and carefully trace over your pencil lines for the main stems. Keep your hand steady but fluid. -
Draw flower centers:
For the main flowers, draw a small circle or dot with the marker, then add tiny radiating lines to create the center texture. -
Create petals:
Draw the petals around the center. For the look in the photo, simple rounded outlines work best. I find it helpful to group them in fives or sixes. -
Add leaves:
Draw small, slender leaves along the stems. Vary the shapes slightly—some single leaves, some small clusters of three—to keep it interesting. -
Incorporate tendrils:
Switch to the ultra-fine point marker. Add delicate curling tendrils at the ends of the vines or near the flowers for that whimsical porcelain detail.
Metallic Touch
For a luxe twist, outline the blue flowers with a very thin gold paint pen, or paint the pumpkin stem gold to mimic a high-end vase handle.
Step 3: Painting & Refining
-
Fill the flowers:
Using a fine liner brush and your blue acrylic paint, carefully fill in the petals of your larger flowers. The paint provides a richer, more opaque finish than marker alone. -
Add definition:
Once the paint is tacky or dry, use the ultra-fine marker to add hatching or shading lines inside the petals to simulate depth. -
Thicken select lines:
Go back over the main stems with your fine-point marker or brush to vary the line weight. Making the bottom of clear curves slightly thicker adds a calligraphy-style elegance. -
Detail the leaves:
Use the ultra-fine marker to draw a central vein in the larger leaves. You can also shade one half of the leaf slightly for a 3D effect. -
Erase guidelines:
Wait until everything is completely dry to the touch. Gently erase any visible pencil marks, being careful not to smudge the ink. -
Touch-ups:
Inspect the design from a distance. If any areas look too empty, add small dots or tiny floating petals to balance the negative space. -
Seal the work:
In a well-ventilated area, spray the pumpkin with a clear matte or satin sealant. This protects the marker from fading and prevents the paint from chipping.
Display your new porcelain-inspired pumpkin as a sophisticated centerpiece or on a mantle for a touch of classic elegance
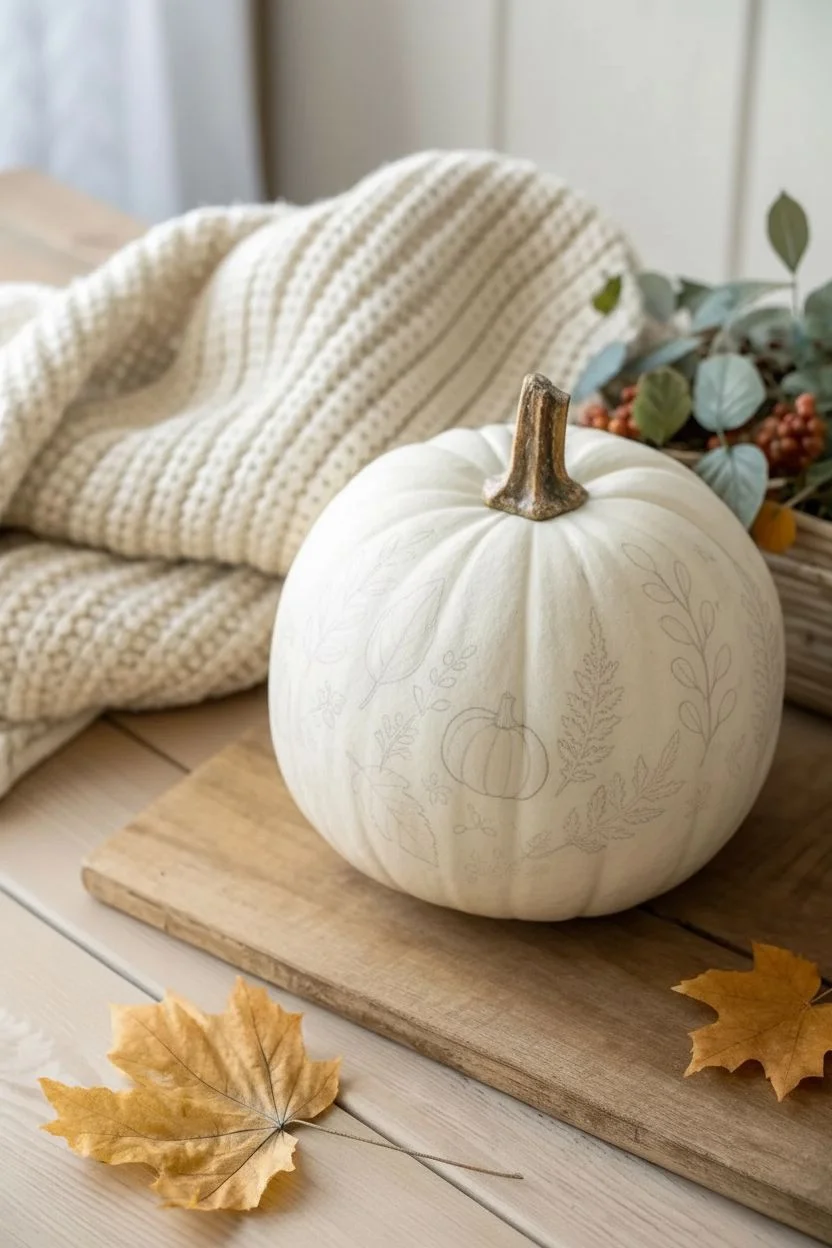
Soft Wildflower Bouquet Painted Around the Sides
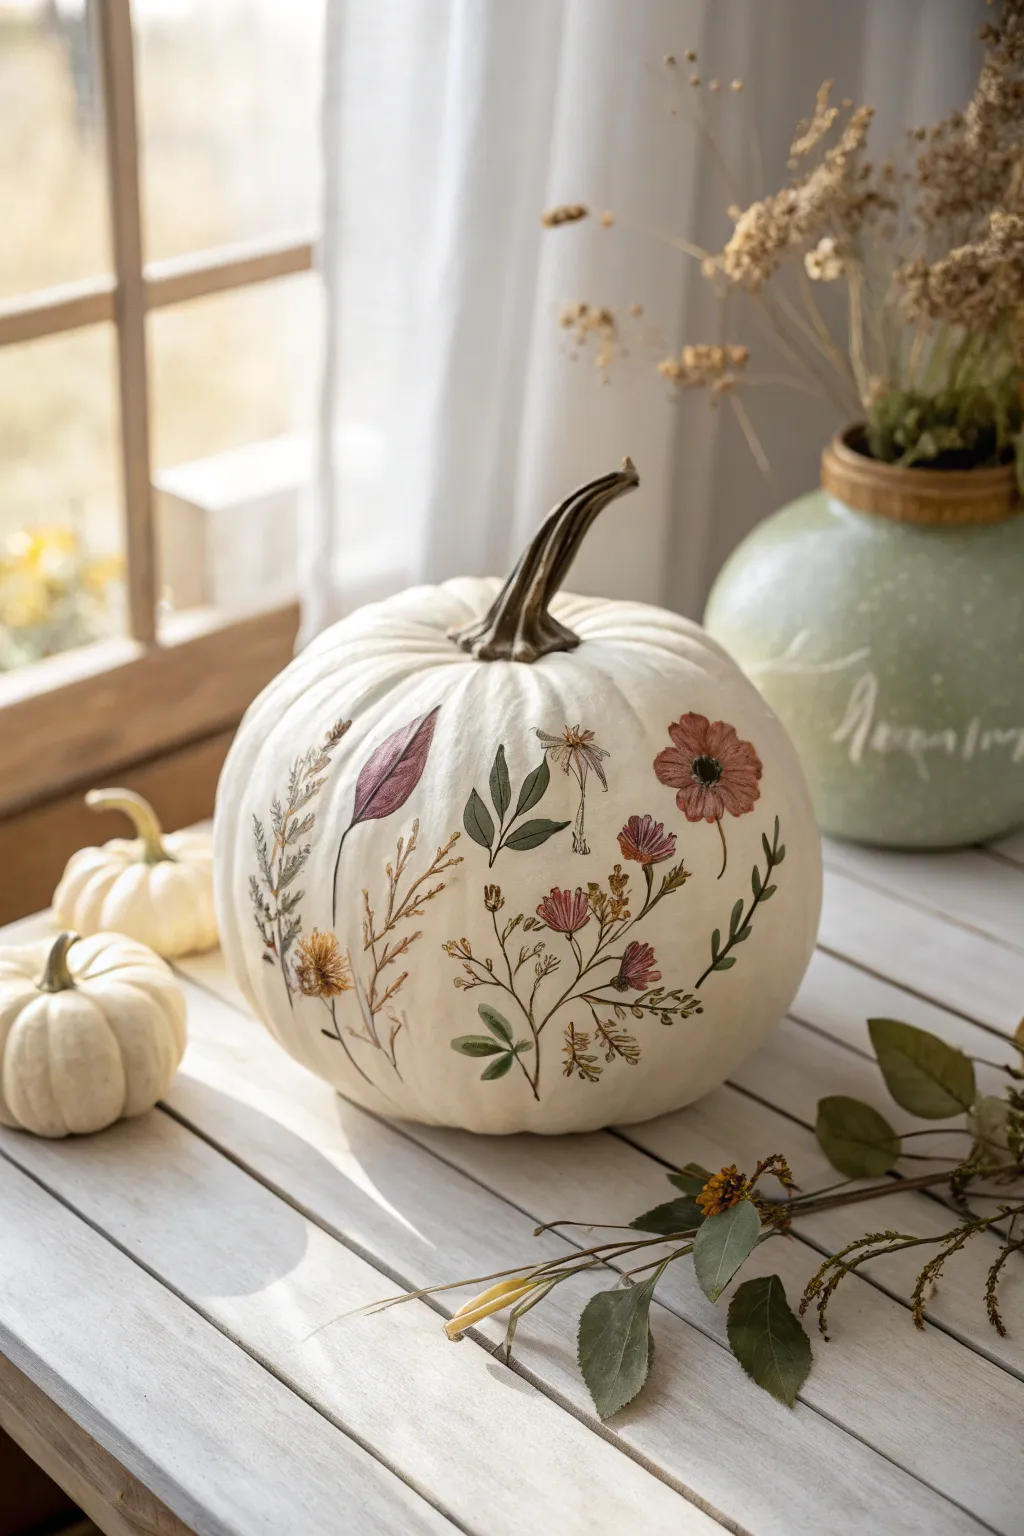
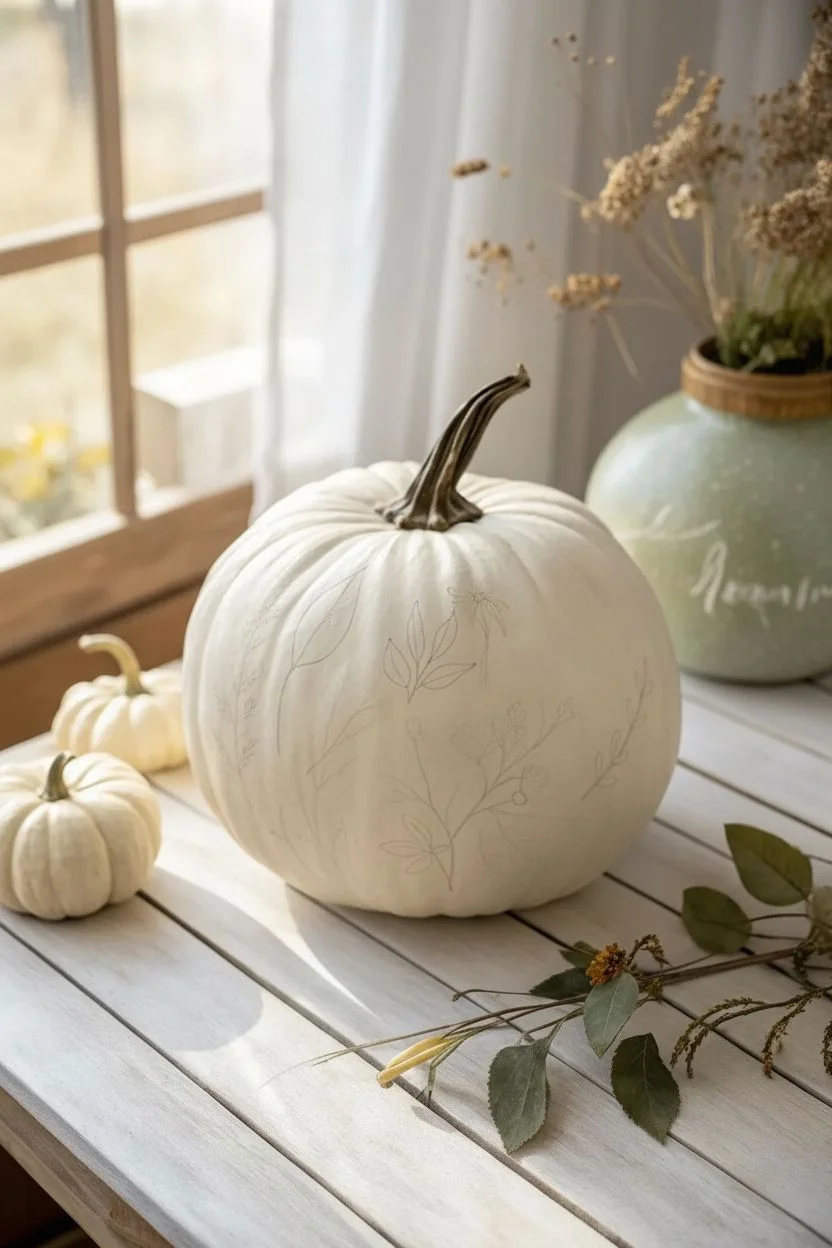
Transform a simple white pumpkin into a piece of fine art with this delicate wildflower design that mimics vintage botanical charts. The finished piece features wispy grasses, rusty-red cosmos, and sage green foliage that feels both organic and elegant.
Step-by-Step Tutorial
Materials
- Medium-sized white pumpkin (can be real or faux)
- Acrylic paints (Titanium White, Olive Green, Burnt Sienna, Yellow Ochre, Deep Red, Raw Umber)
- Fine detail brushes (sizes 0, 00, and 1)
- Pencil (H or HB for light lines)
- Palette or small plate
- Paper towels
- Water cup
- Matte spray varnish (optional)
Step 1: Preparation & Planning
-
Clean the surface:
Before you begin, wipe down your white pumpkin with a damp cloth to remove any dust or waxy residue. If you are using a real pumpkin, ensure it is completely dry before painting. -
Study botanical shapes:
Take a moment to look at the reference image or real dried flowers. Notice how the stems aren’t perfectly straight; they have gentle curves and natural bends. -
Sketch the main stems:
Using a very light touch with your pencil, sketch the primary curved lines for your bouquet directly onto the pumpkin skin. Create a flowing composition where stems originate from a lower central area and fan out naturally.
Brush Control Tip
For the thinnest stems, add a drop of water to your acrylics to make them inky. Roll the brush tip in the paint to sharpen it before touching the pumpkin.
Step 2: Painting Foliage & Stems
-
Mix your greens:
On your palette, mix Olive Green with a tiny touch of Burnt Sienna to create a muted, earthy sage color. If it’s too dark, add a small dot of White. -
Paint the main stems:
Load a size 1 brush with thinned paint (inky consistency) and trace over your pencil lines. Keep your hand steady but allow for natural variation in line thickness. -
Add broad leaves:
For the larger, almond-shaped leaves, press the belly of the brush down and lift up as you drag to create a tapered point. Use your mixed sage green for these. -
Create wispy grasses:
Switch to your smallest liner brush (size 00). Mix Yellow Ochre with a bit of Raw Umber. Paint very fine, feather-like strokes branching off lighter stems to mimic dried wheat or tall grasses. -
Detail the ferns:
Using a darker green mix, paint a central vein for the fern-like leaves. Then, add tiny, rapid dashes on either side of the vein to create the fronds.
Step 3: Adding Blooms & Details
-
Mix the floral colors:
Create a rusty pink shade by mixing Deep Red with a touch of Burnt Sienna and White. You want a color that looks like a faded autumn flower. -
Paint the cosmos petals:
Paint the main flowers using simple, slightly uneven oval shapes radiating from a center point. Don’t make them perfect circles; the irregularities add to the vintage botanical look. -
Add a darker bloom:
For variety, paint one or two smaller buds in a deeper burgundy or plum shade. This adds visual depth to the arrangement. -
Paint the flower centers:
Once the petals are dry, use a dark brown (Raw Umber) to dab small textured dots in the center of your flowers. -
Highlight the centers:
Add a tiny speck of yellow or white to the dark centers to make them look dimensional and pollen-covered. -
Add a focal leaf:
As seen in the reference, paint one large leaf in a contrasting color, like a deep reddish-brown or plum, to break up the greenery.
Botanical Vibe
Make it look like an old textbook! Paint small, neat Latin names or numbers next to specific flowers in a grey, cursive script for a scientific look.
Step 4: Finishing Touches
-
Refine the lines:
Go back with your finest brush and neaten up any connections where stems meet leaves. You can also add tiny thorns or bumps to stems for realism. -
Add texture marks:
Mix a very watery brown wash. I like to lightly stipple or flick tiny specks around the base of the bouquet to simulate pollen or natural imperfections. -
Erase pencil lines:
Once the paint is thoroughly dry (give it at least an hour), gently erase any visible pencil marks. -
Seal the artwork:
If you plan to display this outdoors or want to keep a faux pumpkin for years, mist it lightly with a matte spray varnish to protect the paint.
Now you have a stunning, hand-painted centerpiece that captures the quiet beauty of an autumn meadow
Autumn Leaf Garland in Warm Earth Tones on White
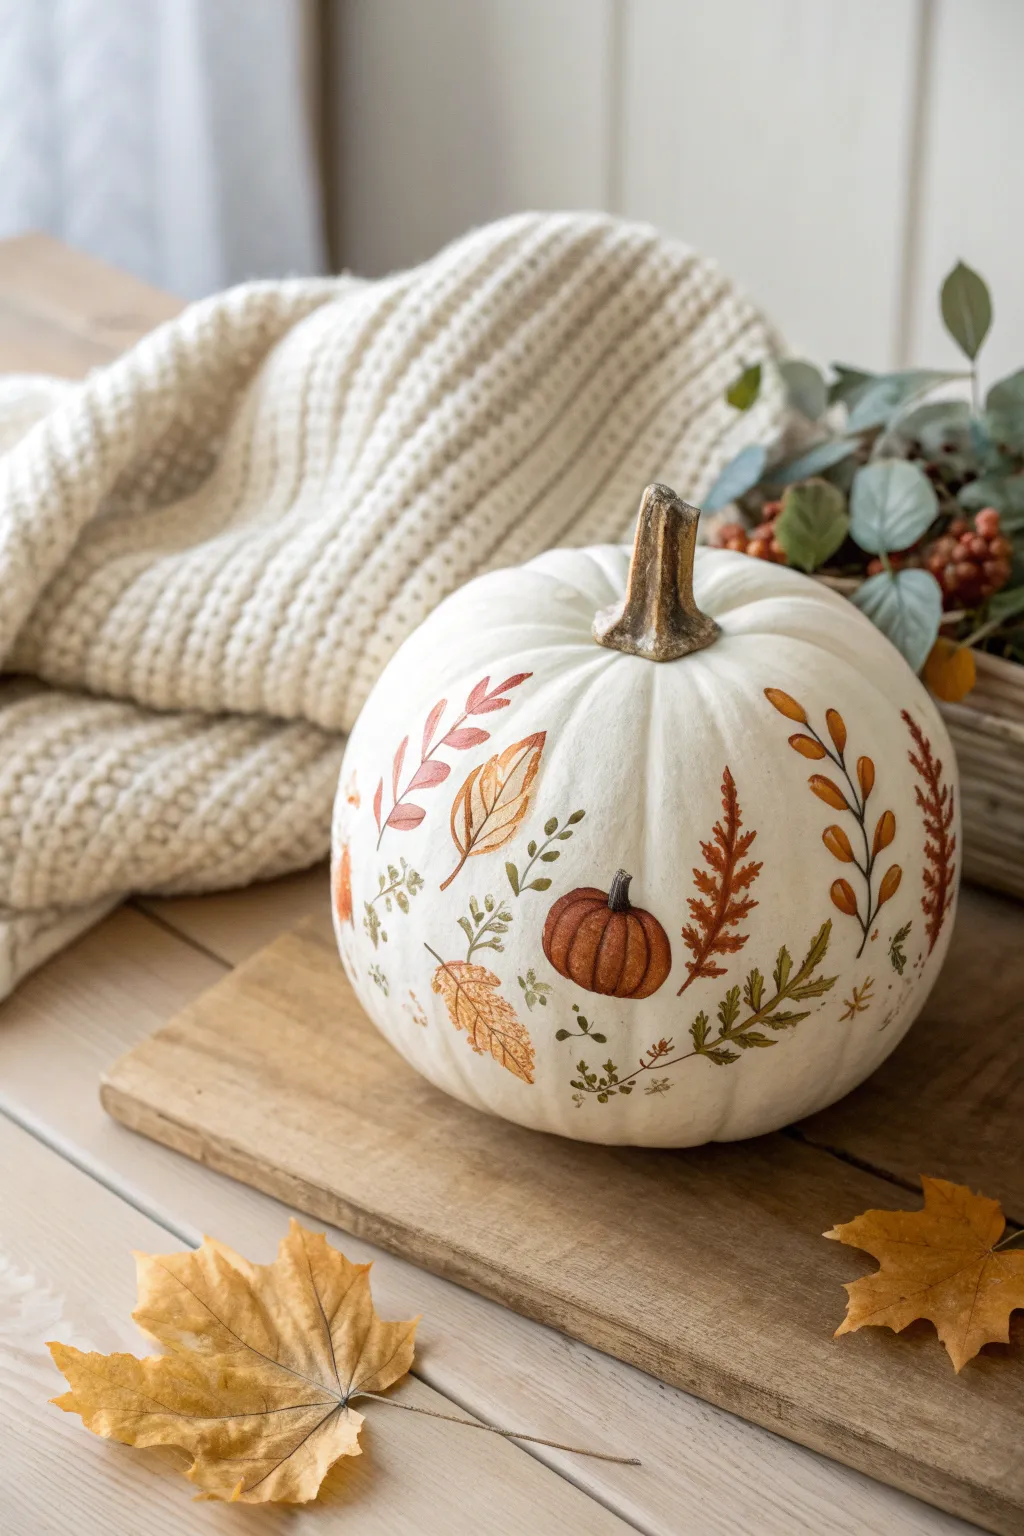
Transform a simple white pumpkin into an elegant autumn centerpiece with delicate botanical illustrations. This project features hand-painted sprigs, rusty ferns, and miniature pumpkins in a warm, earthy color palette that mimics the gentle turn of the season.
Step-by-Step
Materials
- Medium-sized white pumpkin (real or high-quality faux)
- Acrylic paints (burnt sienna, raw umber, olive green, yellow ochre, terracotta)
- Fine detail paintbrushes (sizes 0 and 00)
- Small round brush (size 2)
- Pencil (light H or HB)
- Palette or small plate
- Paper towels
- Cup of water
- Clear matte acrylic sealer spray
Step 1: Preparation and Planning
-
Clean the surface:
Before you begin, wipe down your pumpkin gently with a damp cloth to remove any dust or waxy residue. If using a real pumpkin, ensure it is completely dry; for a faux pumpkin, a quick wipe with rubbing alcohol helps the paint adhere better. -
Plan your composition:
Visualize where you want your main botanical elements to flow. The design works best if it follows the natural vertical ribs of the pumpkin. You want a loose, organic look rather than a tight, repeating pattern. -
Sketch lightly:
Using your pencil, very faintly sketch the main stems of your foliage. Don’t worry about drawing every single leaf; just mark the curved spines of the ferns and the placement of the larger leaves to guide your brushwork later.
Step 2: Painting the Foliage
-
Mix your base greens:
On your palette, mix olive green with a tiny touch of raw umber to dull it down. You want an earthy, dried-herb green rather than a bright spring green. -
Paint the fern stems:
Using your finest liner brush (size 00), carefully trace over your pencil lines for the fern stems. Keep your hand steady but allow the lines to have a natural, slight waver. -
Add fern fronds:
With the same green mix, paint tiny, short strokes extending from the stem to create the fern leaves. Start with slightly longer strokes at the base of the stem and make them progressively shorter as you reach the tip. -
Introduce rust tones:
Clean your brush and switch to a burnt sienna or terracotta shade. Paint a second style of branch—perhaps a taller, vertical sprig—using small, teardrop-shaped brushstrokes to represent small leaves attached to the main stem. -
Layering colors:
I prefer to mix a little yellow ochre with the terracotta for a variegated look on some leaves. Paint a few broad, flat leaves that look like dried oak or beech leaves, letting the colors blend slightly on the pumpkin surface. -
Painting the focal pumpkin:
Choose a prominent spot on the pumpkin’s side to paint a miniature orange pumpkin. Use the size 2 round brush to paint a small oval shape in terracotta, adding vertical curved lines in burnt umber to create the ribs and dimension. -
Adding the stem:
Once the miniature pumpkin shape is tacky or dry, use the 00 brush and dark brown paint to add a tiny, twisted stem on top of it. Give it a small highlight with a dot of ochre.
Oops! Paint Slipped?
If you make a mistake, don’t panic. Simply use a damp cotton swab (Q-tip) to quickly wipe away the wet acrylic paint. If it has dried, paint over it with white.
Step 3: Adding Detail and Depth
-
Create fine twigs:
Mix a watery brown ink consistency using raw umber and a drop of water. Use the liner brush to add very delicate, bare twigs and sprigs filling in the gaps between your main leaves. -
Add tiny berries:
Dip the tip or back end of your brush handle into the burnt sienna or deep red paint. Dot small clusters of berries near the ends of some of your green leafy stems for a pop of contrast. -
Highlight the leaves:
Mix a pale beige or cream color. With a mostly dry brush, gently whisk a small highlight onto the center of the larger dried leaves and the tops of the fern fronds to give them a sun-kissed appearance. -
Review the balance:
Step back and look at the pumpkin from a distance. If a spot looks too empty, add a small floating leaf or a tiny sprig of greenery to balance the negative space. -
Let it cure:
Allow the paint to dry completely. Acrylics on a smooth pumpkin surface can take a bit longer than on paper, so give it at least an hour to be safe. -
Seal the artwork:
If you plan to display this outdoors or want it to last for years, take the pumpkin to a well-ventilated area and apply a light coat of clear matte acrylic sealer.
Add Metallic Flair
For a glamorous touch, mix a tiny amount of metallic gold paint into your yellow ochre. It will make the dried leaves shimmer beautifully under candlelight.
Place your finished masterpiece on a wooden board or next to a cozy knit blanket to fully embrace the season
Metallic Gold Confetti Sprinkles Over a White Base
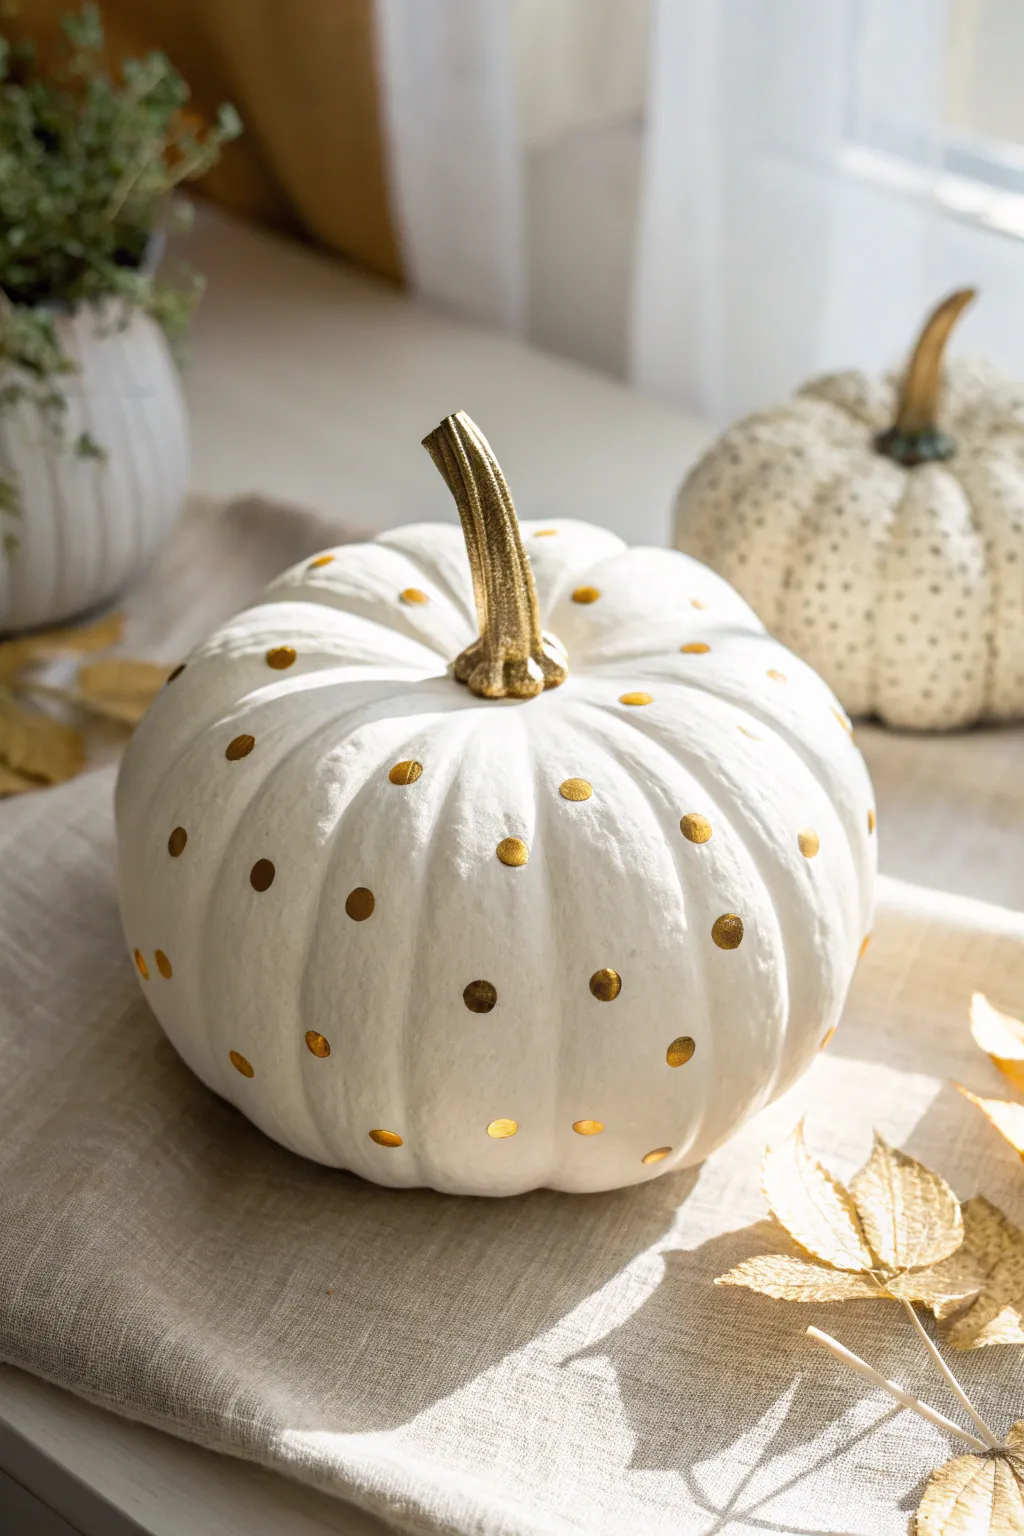
Transform a simple white gourd into a chic centerpiece with this easy yet sophisticated design. By combining a crisp white base with shimmering gold accents, you create a festive look that mimics elegant falling confetti.
Detailed Instructions
Materials
- Faux or real pumpkin (medium size)
- White matte acrylic paint or chalk paint
- Metallic gold acrylic paint (high shine)
- Small round sponge pouncers or cotton swabs
- Medium flat paintbrush
- Small detail paintbrush
- Painter’s tape (optional)
- Clear sealant spray (matte or satin)
- Paper plate or palette
Step 1: Preparation & Base Coat
-
Clean the surface:
Before starting, wipe down your pumpkin with a damp cloth to remove any dust, dirt, or oils. If using a real pumpkin, ensure it is completely dry before proceeding. -
Protect the stem:
If you want to keep your painting neat, wrap a small strip of painter’s tape around the very base of the stem where it meets the pumpkin skin. -
Apply the first white coat:
Using your medium flat brush, apply a smooth layer of white matte paint to the entire body of the pumpkin. Long, vertical strokes following the pumpkin’s ribs usually look best. -
Let it dry:
Allow the first coat to dry completely. This usually takes about 20-30 minutes for acrylics, though chalk paint dries faster. -
Add a second coat:
Apply a second layer of white paint to ensure opaque, solid coverage. You shouldn’t see any of the original pumpkin color peeking through. -
Paint the bottom:
Don’t forget to flip the pumpkin over once the top is dry to paint the bottom surface for a professional finish.
Perfect Polka Tip
For perfectly uniform circles, dip the eraser end of a standard pencil into the paint. It acts as a surprisingly sturdy stamp that creates crisp edges every time.
Step 2: Gilding the Details
-
Paint the stem:
Remove the painter’s tape if you used it. Using a smaller brush, carefully paint the entire stem with metallic gold paint. I find that dabbing the paint into the crevices creates a richer texture. -
Dry the stem:
Let the stem dry fully. You may need a second coat of gold to get that solid, heavy metal look shown in the photo. -
Prepare the confetti tools:
Pour a small amount of gold paint onto your palette. Depending on the size of dot you want, select either a cotton swab or a small round sponge pouncer. -
Test your technique:
Practice making a few dots on a piece of scrap paper to gauge how much pressure you need to apply for a perfect circle. -
Start at the top:
Begin applying gold dots near the top of the pumpkin, closer to the stem. Make these dots slightly denser to mimic the start of a confetti shower. -
Cascade down:
Work your way down the pumpkin, spacing the dots further apart as you reach the middle and bottom sections. This creates a falling effect. -
Vary the placement:
Try not to place dots in perfect rows. Random, organic placement looks much more natural and playful. -
Touch up irregularities:
If a dot looks uneven or transparent, wait for it to dry slightly and carefully add a tiny dab of extra gold paint on top with a detail brush. -
Allow final drying time:
Let the gold polka dots cure completely, which might take longer than the base coat due to the thickness of the paint. -
Seal the project:
Finish by spraying the entire pumpkin with a light coat of clear matte or satin sealant to protect your work from chipping.
Glitter Glam
While the gold paint is still wet on the stem or the dots, sprinkle a tiny pinch of ultra-fine gold glitter over it to add extra dimension and sparkle.
Place your shiny new creation near a window to catch the autumn light
Gold Leaf Cracks for a Kintsugi-Inspired Look
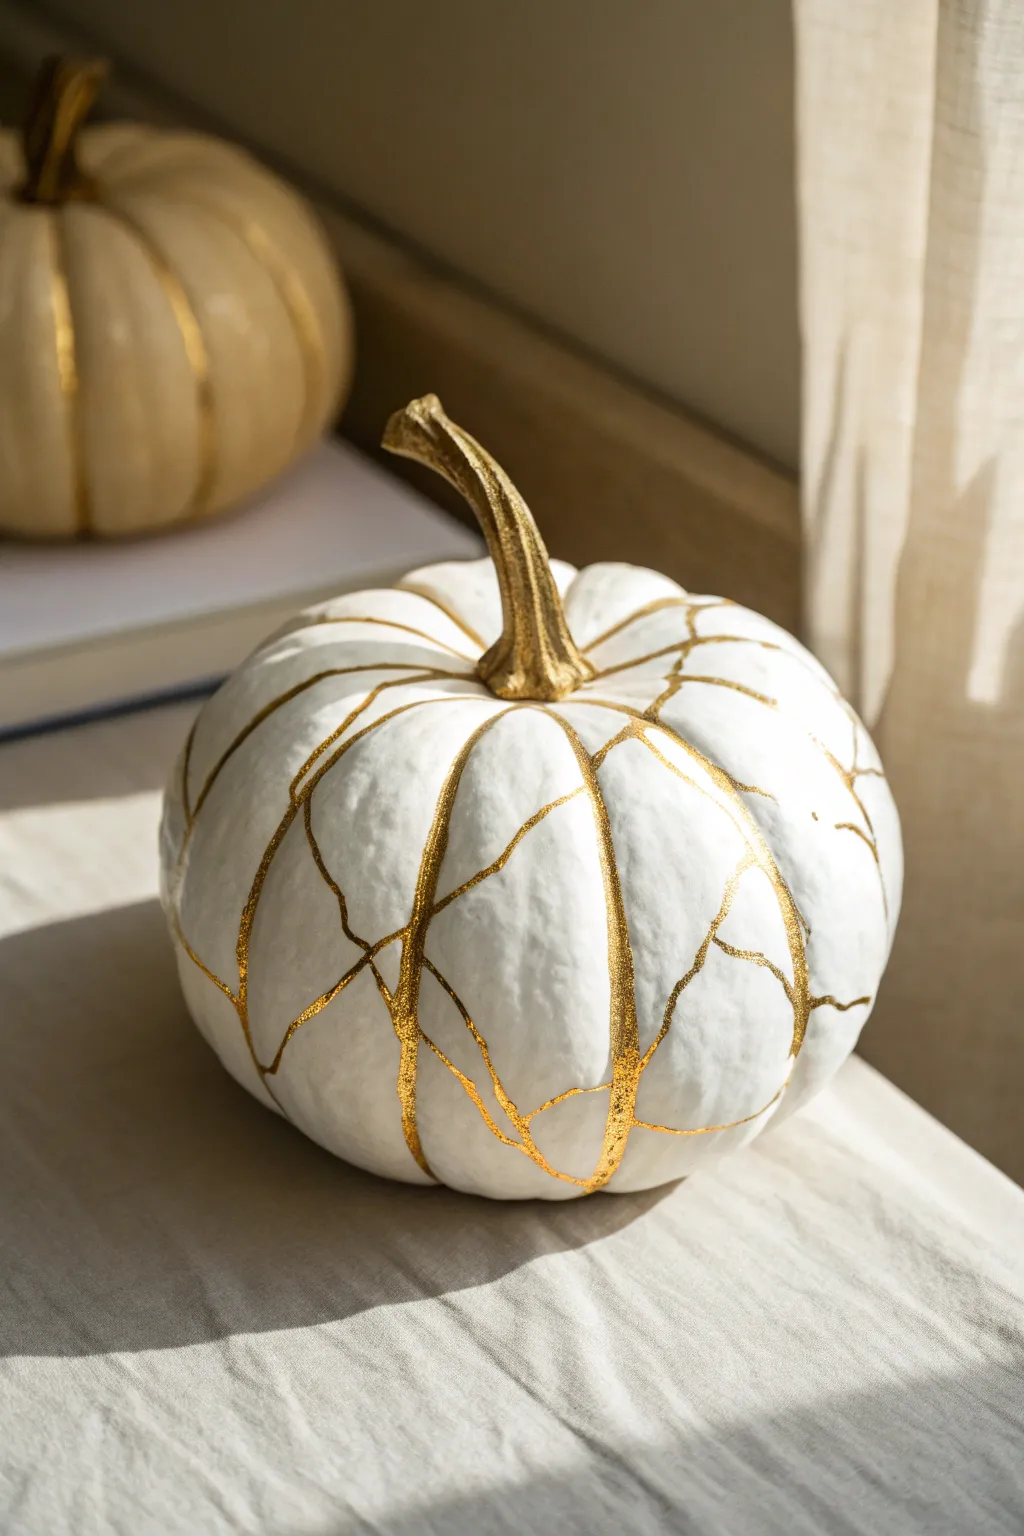
Transform a simple white pumpkin into an elegant piece of art inspired by Kintsugi, the Japanese philosophy of repairing pottery with gold. This technique uses delicate gold leaf lines to highlight the pumpkin’s natural contours and mimic beautiful, lightning-like fissures.
Step-by-Step
Materials
- Faux or fresh white pumpkin (smooth surface is best)
- Gold leaf adhesive size (metal leaf glue)
- Imitation gold leaf sheets
- Small round paintbrushes (sizes 0 and 2)
- Soft, fluffy dry brush (like a makeup brush)
- Clean, dry cloth
- Gold acrylic paint (optional, for the stem)
- Spray sealer (glossy or satin finish)
Step 1: Preparation & Mapping
-
Clean the Surface:
Begin by thoroughly cleaning your pumpkin. If you are using a real pumpkin, wash off any dirt with mild soapy water and dry it completely. For a faux pumpkin, a quick wipe with a slightly damp cloth removes any dust or factory residue that might interfere with the adhesive. -
Study the Grooves:
Examine naturally occurring ribs and indentations on your pumpkin. These vertical lines will serve as the main ‘arteries’ for your gold design. Visualize where you want smaller, breaking cracks to branch off, creating that shattered pottery effect. -
Paint the Stem:
To match the elegance of the metallic cracks, paint the pumpkin stem entirely gold. Use an opaque gold acrylic paint and a small brush, ensuring you get into all the nooks of the stem texture. Let this dry completely before moving on.
Adhesive Tip
Brush strokes show through gold leaf. Use a quality, soft-bristle brush for the adhesive to ensure the final gold lines look smooth and metallic, rather than textured and messy.
Step 2: Applying the Adhesive
-
Load a Fine Brush:
Dip your smallest round brush (size 0 or fine liner) into the gold leaf adhesive size. You don’t need a heavy glob; a controlled amount allows for sharper, more refined lines. -
Trace the Ribs:
Starting from the base of the stem, carefully paint thin lines of adhesive down the natural vertical valleys of the pumpkin. You don’t need to fill every single groove, but defining the main ones adds structure to the design. -
Create the Branches:
This is the artistic part where I usually get creative. From those main vertical lines, paint jagged, lightning-bolt style lines branching outward horizontally across the smooth sections of the pumpkin skin. Vary the thickness slightly to make the cracks look organic. -
Wait for Tackiness:
This step is crucial and requires patience. Let the adhesive sit until it becomes clear and tacky. Refer to your specific bottle for times, but it usually takes about 15 to 30 minutes. If you apply the gold too soon while the glue is wet, it will slide right off.
Step 3: Gilding the Cracks
-
Prepare the Leaf:
While waiting for the glue to tack up, carefully separate a sheet of gold leaf. Handle it gently, as the sheets are incredibly fragile and can tear if you breathe too heavily on them. -
Apply the Gold:
Once the glue is tacky, lay the sheet of gold leaf directly over the painted areas. Don’t worry about precision here; just cover the glue lines completely. Press the sheet down gently using the backing paper or your fingertips. -
Press into Grooves:
Use a dry, soft brush to gently pat the gold leaf down, ensuring it makes contact with the adhesive deep inside the vertical grooves and fine crack lines you painted. -
Burnish the Gold:
Using a slightly firmer motion with your soft brush, rub over the gold leaf in circular motions. This ‘burnishes’ the foil, making it shine brighter and adhere firmly to the glue lines.
Level Up: Gem Details
For added luxury, glue tiny clear Swarovski crystals sporadically along the gold cracks. They will catch the light and make the pumpkin look like a jeweled Faberge egg.
Step 4: Finishing Touches
-
Dust Off Excess:
Take your large fluffy brush and sweep it vigorously over the pumpkin. The gold leaf that isn’t stuck to glue will flake away, magically revealing your clean cracking pattern underneath. Save the larger flakes for future projects. -
Clean Up Edges:
If there are tiny specks of gold sticking where you don’t want them (often due to static), use a piece of painter’s tape to gently lift them off the white surface. -
Inspect the Pattern:
Check your design for any gaps. If you missed a spot, simply dab a tiny dot of adhesive, wait for it to tack, and re-apply a scrap of gold leaf. -
Seal the Artwork:
To prevent the gold leaf from tarnishing or flaking over time, spray a light, even coat of clear glossy or satin sealer over the entire pumpkin. This also gives the white pumpkin a porcelain-like finish.
Now step back and admire how a simple technique has turned ordinary fall decor into a stunning centerpiece
Paint Splatter in Black for a Studio-Style Pumpkin
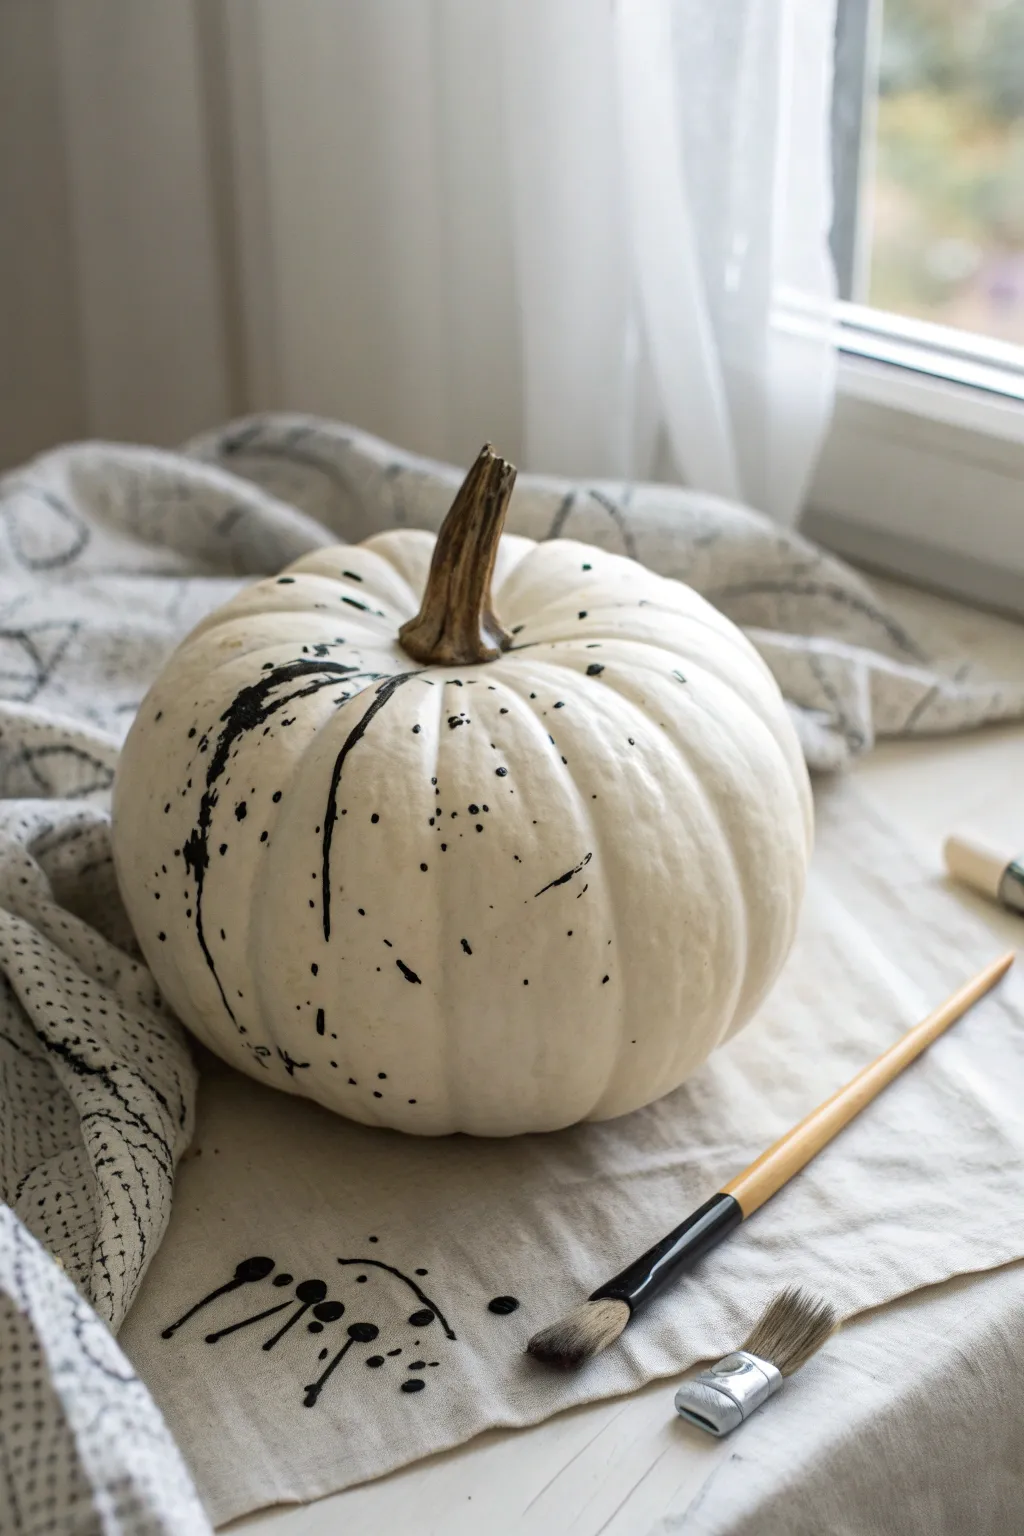
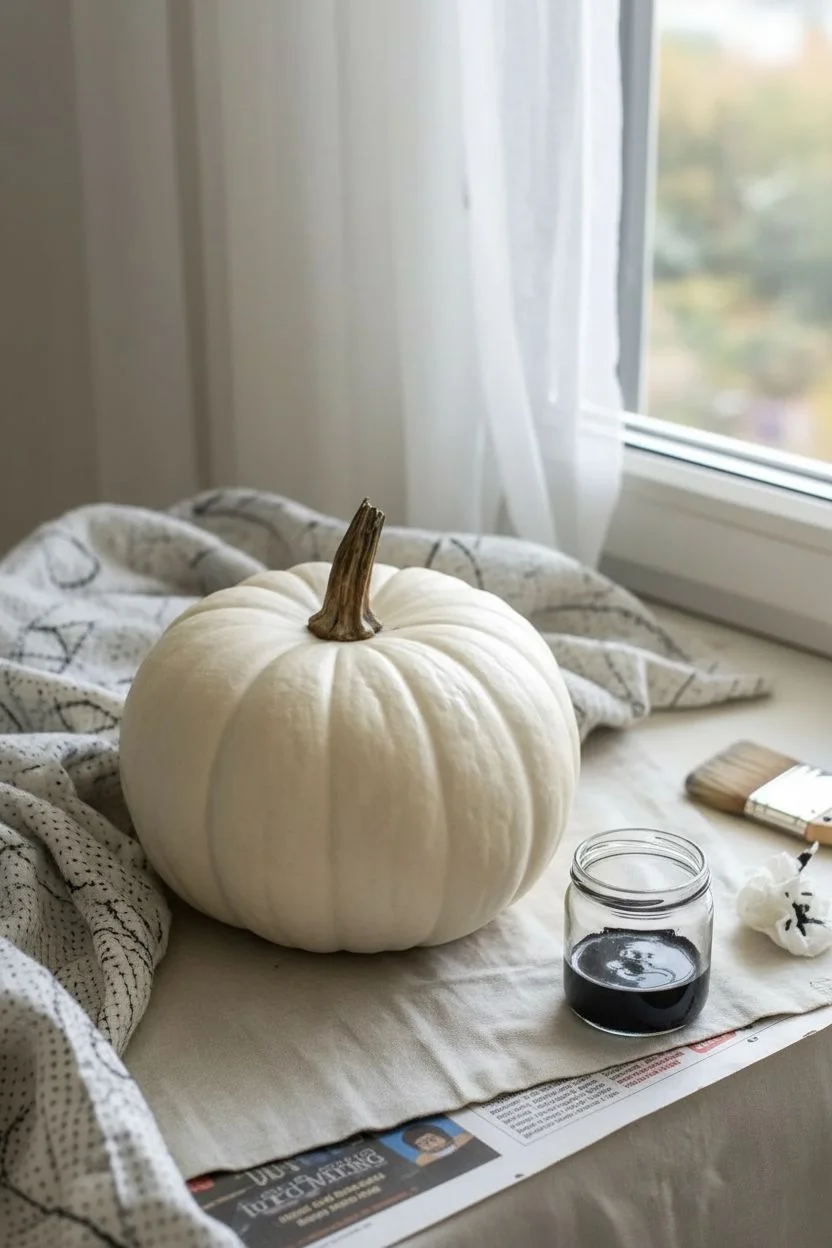
Embrace the sleek, modern aesthetic of an artist’s studio with this striking black-and-white pumpkin design. The high-contrast splatter effect turns a simple gourd into a sophisticated piece of abstract decor.
Step-by-Step Guide
Materials
- Real or faux white pumpkin (medium size)
- Black acrylic paint (matte or satin finish)
- Stiff-bristled paint brush (size 6-8 round or flat)
- Small cup or palette for water
- Drop cloth, old aesthetic linens, or newspaper
- Paper towels
- Matte clear sealant spray (optional)
Step 1: Preparation
-
Clean the Surface:
Begin by thoroughly wiping down your white pumpkin with a damp cloth to remove any dirt, dust, or oils. If you are using a real pumpkin, ensure it is completely dry before proceeding. -
Set the Scene:
Lay down your protective covering. Since splattering is inherently messy and unpredictable, cover a work surface significantly larger than the pumpkin itself to catch errant flying droplets. -
Prepare the Paint:
Squeeze a dollop of black acrylic paint onto your palette or into a small cup. The paint straight from the tube is likely too thick for a good splatter. -
Thining Consistency:
Add water to the black paint drop by drop, mixing constantly. You are aiming for an inky consistency—think melted ice cream or heavy cream—that flows easily off the brush but holds its black opacity.
Pro Tip: Directional Art
For the long, trailing lines seen in the image, use a wrist-flick motion aimed diagonally across the pumpkin rather than just spraying straight on.
Step 2: Creating the Splatter
-
Load the Brush:
Dip your stiff-bristled brush into the thinned paint mixture. Saturate the bristles fully, but give it a quick tap on the edge of the container so it isn’t dripping uncontrollably. -
Test Run:
Before hitting the pumpkin, do a quick test splatter on a piece of scrap paper or paper towel. This helps you gauge if the paint is too thick (clumpy spots) or too thin (watery gray spots). -
The Flick Method:
Hold the brush about 6 to 10 inches away from the pumpkin. Using your index finger, pull the bristles back towards you and release them quickly to flick the paint forward onto the surface. -
The Tap Method:
Alternatively, hold the loaded brush over the pumpkin and tap the handle firmly against a second brush handle or a stick. This creates more uniform, round droplets compared to the directional lines of the flick method. -
Targeting Areas:
Aim for asymmetry. Focus your splatters heavily on one side or quadrant of the pumpkin, letting the density fade out as you move around the curve. This creates a composed, artistic look rather than just a messy object. -
Adding Variety:
Vary your distance as you work. Splattering from close up creates dense, larger spots, while stepping back creates a fine, airy mist. I personally like to add one or two larger, deliberate drips for dramatic effect. -
Rotate and Review:
Slowly turn the pumpkin. Ensure the design wraps around naturally, but leave some negative white space to maintain that clean, minimal aesthetic. -
Correcting Mistakes:
If a splatter lands weirdly or runs too much, quickly dab it with a damp paper towel or q-tip while wet. If it stains, you can touch it up with white paint later.
Troubleshooting: Runny Paint
If drops are running down instantly, your mix is too watery. Add a tiny bit more raw paint to thicken it up, let the runs dry, and paint over them with white.
Step 3: Finishing Up
-
Stem Detailing:
Keep the stem natural for contrast, or if you accidentally got black spots on it, wipe them off immediately to keep the organic wood tone visible. -
Drying Time:
Allow the pumpkin to sit undisturbed for at least an hour. Thinner paint dries faster, but thick blobs might need extra time. -
Sealing (Optional):
If this pumpkin will be placed outdoors or handled frequently, spray a light coat of matte clear sealant over the entire surface to lock in the design.
Place your new art piece near a window or on textured linen to highlight the studio vibes
Abstract Brushstroke Bands in Neutral Grays
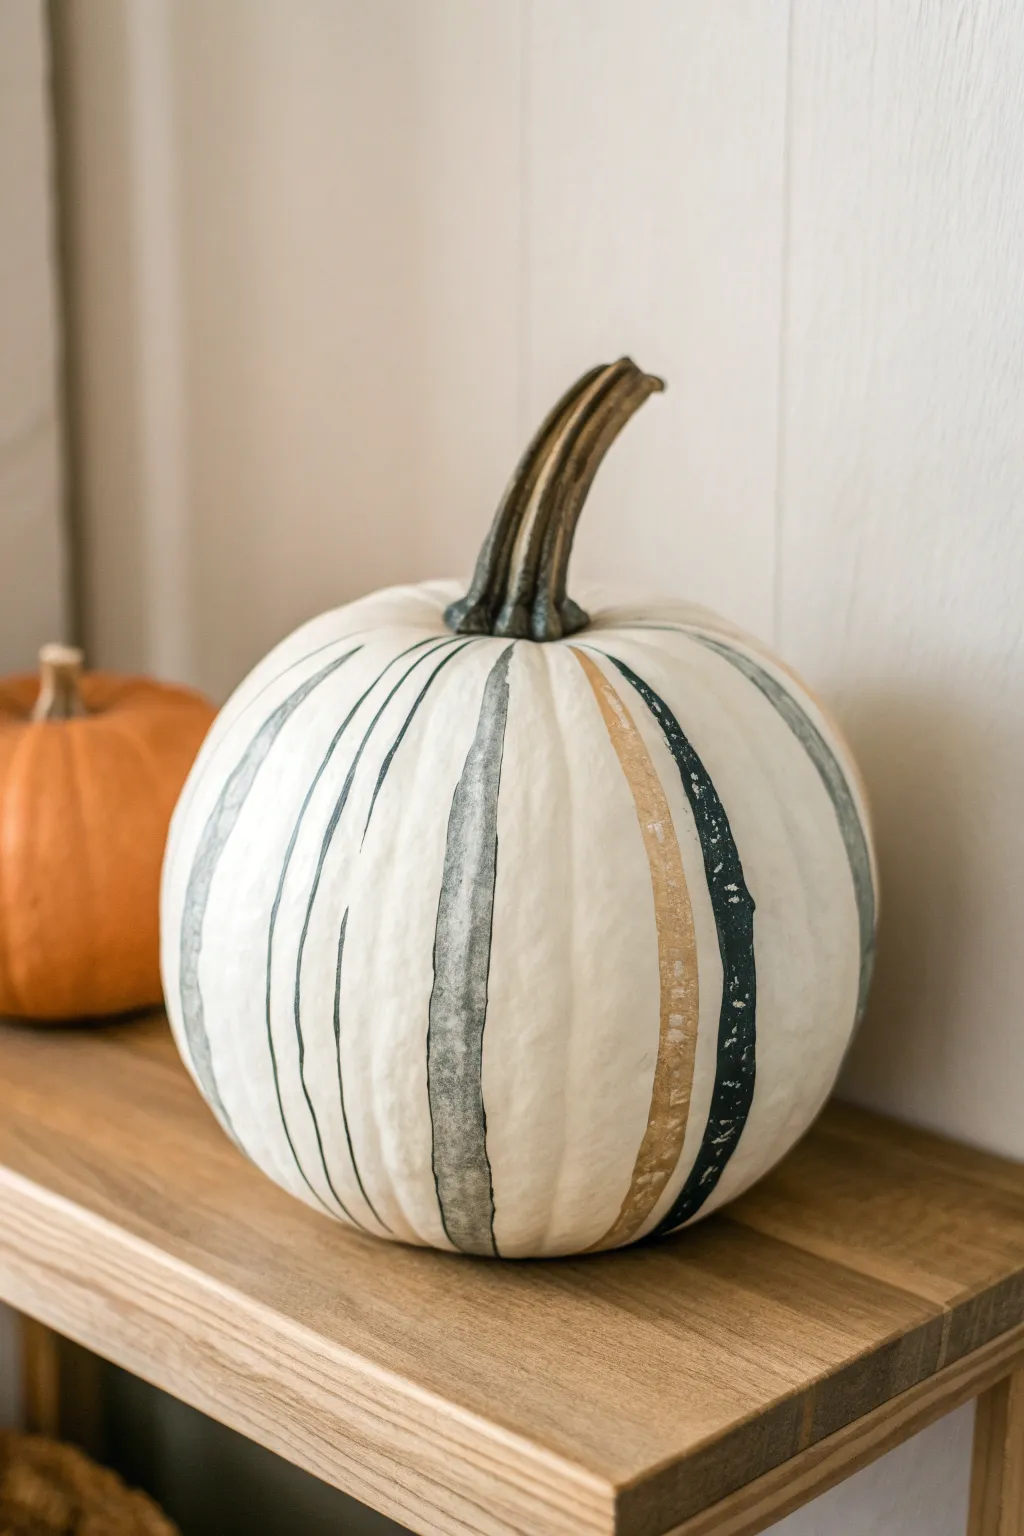
Elevate your fall decor with this sophisticated take on pumpkin painting, featuring organic vertical bands in soothing neutral tones. The imperfect, painterly lines give this white pumpkin a modern, artistic feel that fits perfectly into a Scandinavian or farmhouse aesthetic.
Detailed Instructions
Materials
- White craft pumpkin (synthetic) or real pumpkin painted white
- Gray acrylic paint (medium shade)
- Dark charcoal or slate blue-gray acrylic paint
- Metallic mute gold or tan acrylic paint
- Flat shader brush (approx. 1/2 inch)
- Small round detail brush
- Palette or paper plate
- Water cup and paper towels
- Matte finish spray sealant (optional)
Step 1: Preparation
-
Clean surface:
Begin by wiping down your pumpkin with a damp cloth to remove any dust or oils. If you are using a real pumpkin, ensure it is completely dry before proceeding. -
Base coat check:
If your pumpkin isn’t a bright, clean white, apply a base coat of white acrylic paint or matte spray paint. Let this dry completely so your gray stripes pop against the background. -
Plan the palette:
Squeeze a small amount of your medium gray, charcoal, and gold paints onto your palette. I like to add a tiny drop of water to the acrylics to improve their flow, making long strokes easier.
Wobbly Lines?
Don’t panic! Embrace the shake. If a line goes crooked, simply widen it slightly or dry-brush over the mistake with white paint to blur it out.
Step 2: Painting the Stripes
-
Start with the main gray:
Load your flat shader brush with the medium gray paint. Choose a ridge on the pumpkin to follow as a guide. -
First stroke technique:
Place your brush near the stem (but not touching it) and drag it down towards the bottom in one continuous motion if possible. It’s okay if the line wavers; organic imperfections are key to this look. -
Add texture:
Allow the paint to run slightly dry on the brush near the end of the stroke to create a rustic, distressed texture where the white shows through. -
Adding the charcoal accent:
Switch to the dark charcoal paint. Select a groove adjacent to your first stripe or skip one ridge over. -
Varying width:
Paint this darker stripe slightly thinner than the gray one. You can turn your flat brush on its side or use a smaller round brush to achieve variation in lines. -
Integrating the gold:
Introduce warmth by painting a stripe with the gold or tan color. Place this near a charcoal line for high contrast. -
Create clusters:
Instead of evenly spacing the colors 1-2-3 all around, try grouping them. For example, paint two gray lines close together, then a gap, then a bold charcoal line. -
Working around the curve:
Continue rotating the pumpkin, adding stripes in your three colors. Follow the natural vertical ribs of the pumpkin, but don’t feel obligated to paint every single groove. -
Leave negative space:
Remember to leave plenty of white space between some of the clusters. The white background is just as important as the painted bands. -
Feathering edges:
If a line looks too blocky or perfect, use a slightly damp, clean brush to gently feather the edges while the paint is still tacky, softening the look.
Metallic Magic
For a luxe upgrade, apply gold leaf foil over the tan painted stripes. The texture of the foil adds incredible dimension and catches the light beautifully.
Step 3: Finishing Touches
-
Stem maintenance:
Check the base of the stem. If you accidentally got paint on it, wipe it off quickly with a wet paper towel. -
Highlight the stem (optional):
To tie the look together, you can dry-brush a tiny amount of the dark charcoal paint into the crevices of the realistic stem to give it more depth. -
Review and refine:
Step back and look at the pumpkin from a distance. If a specific area looks too empty, add a very thin, faint gray line to balance it out. -
Drying time:
Let the pumpkin sit undisturbed for at least an hour to ensure the thicker parts of the acrylic paint are fully set. -
Protect the art:
If you plan to display this outdoors or on a porch, spray the entire surface with a clear matte sealant to prevent chipping and weather damage.
Place your new striped centerpiece on a wooden console or mantel for an instant touch of modern autumn elegance
Pour-Paint Drips Over a White Pumpkin for a Marbled Effect
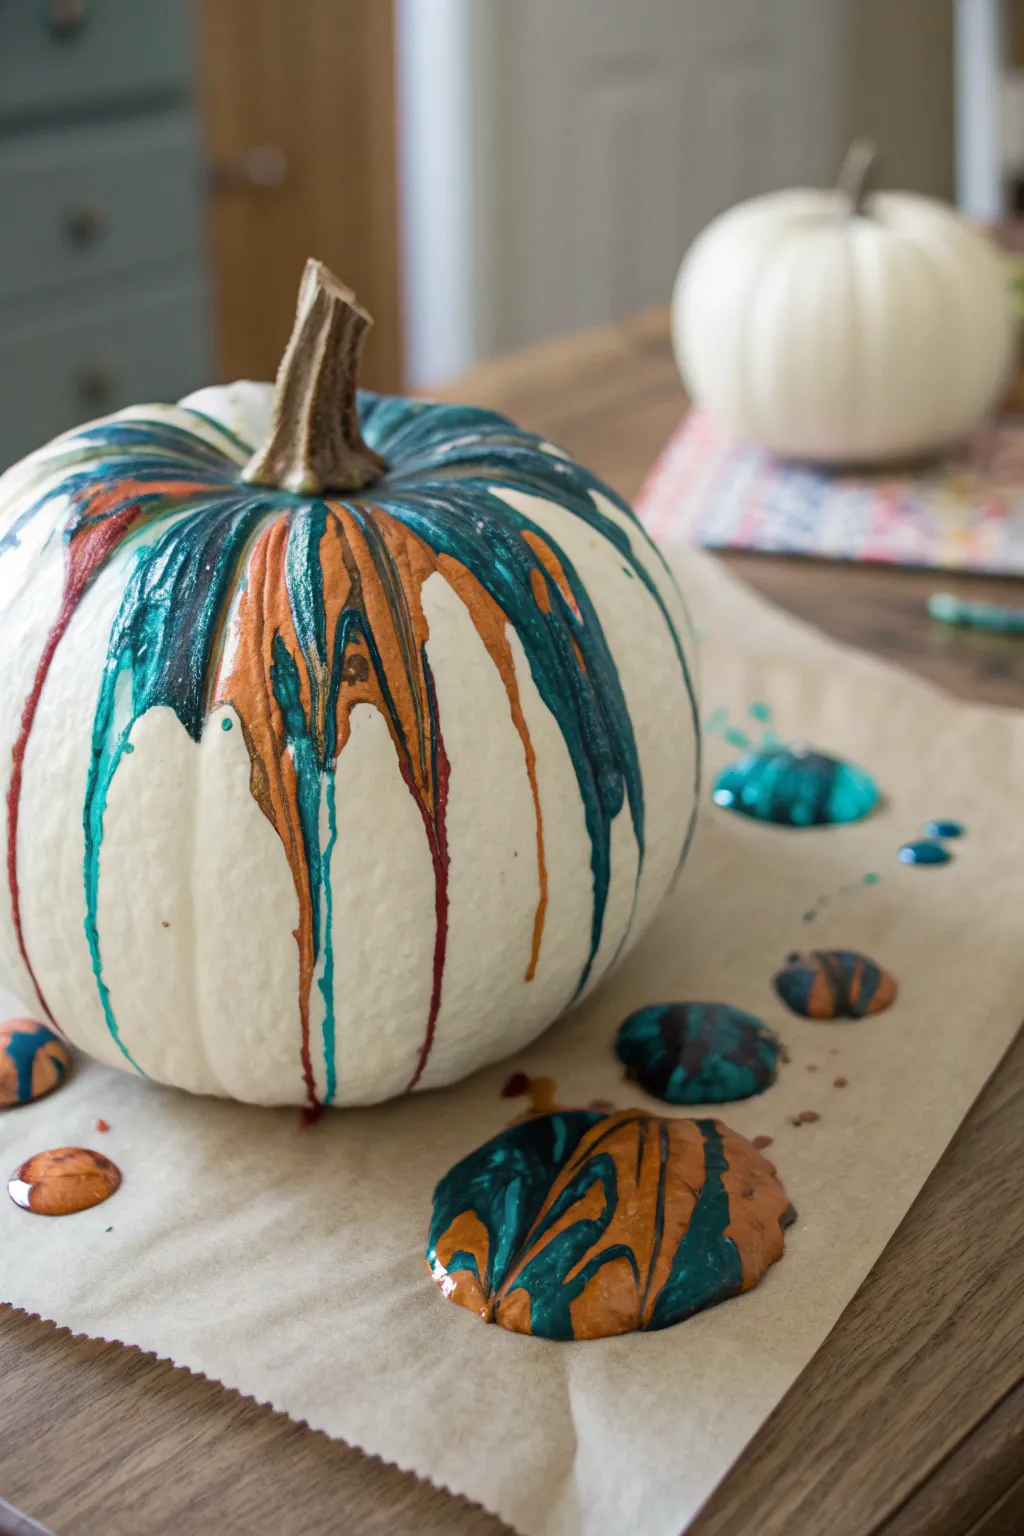
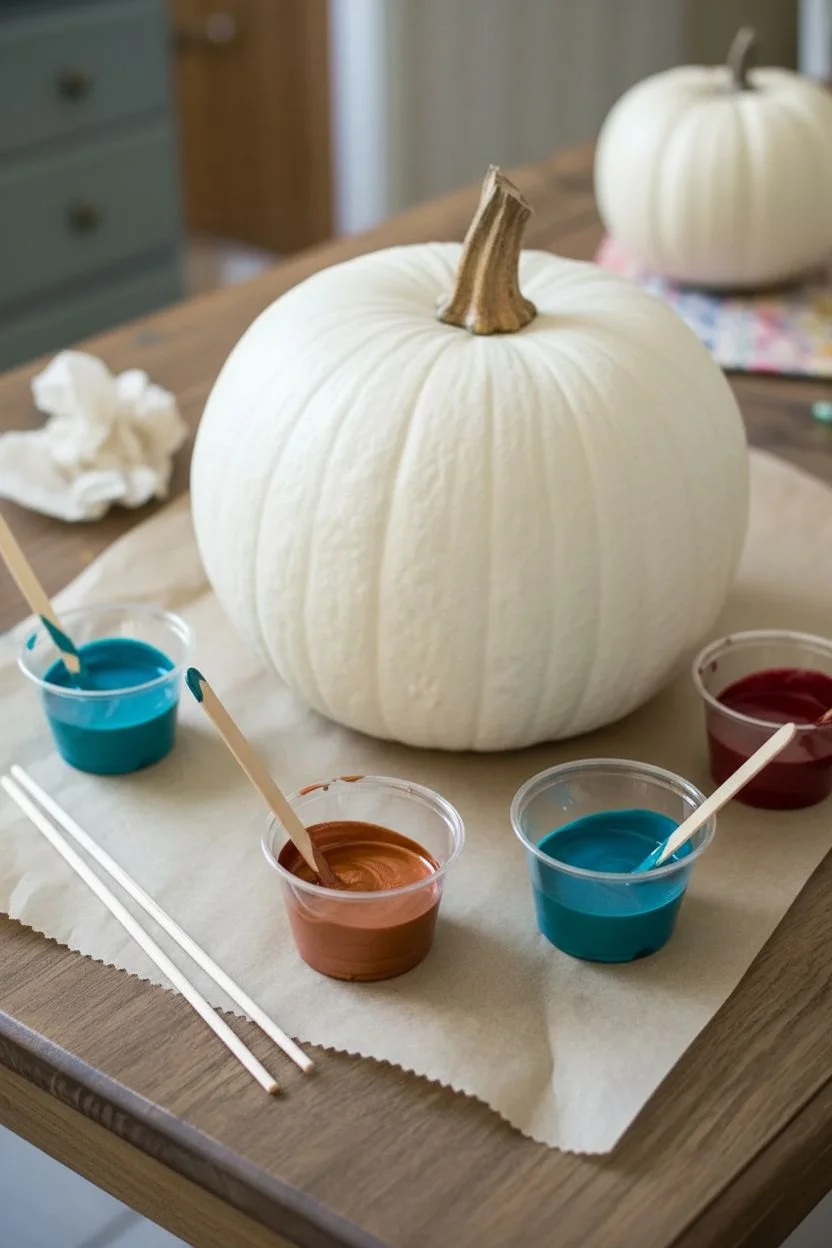
Transform a plain white pumpkin into a stunning piece of modern fall decor using a simple pour-paint technique. This method creates elegant high-contrast drips in teal, metallic copper, and deep red that look complicated but are effortlessly achieved with gravity.
Step-by-Step
Materials
- White craft pumpkin (synthetic)
- Acrylic paints (teal, metallic copper/orange, deep red)
- Pouring medium
- Small disposable cups (one for each color)
- Parchment paper or wax paper
- Stir sticks or popsicle sticks
- Paper towels
- Protective surface cover
Step 1: Preparation and Mixing
-
Set the Stage:
Begin by covering your work surface completely with a large sheet of parchment paper or wax paper. This project can get messy, and the drips will pool at the base of the pumpkin, so ensure you have plenty of covered space around your centerpiece. -
Clean the Pumpkin:
Wipe down your white craft pumpkin with a slightly damp paper towel to remove any dust or oils. This ensures the paint adheres properly and flows smoothly down the sides. -
Prepare the Teal:
Squeeze a generous amount of teal acrylic paint into a small disposable cup. Add an equal part of pouring medium to the paint to thin the consistency without losing opacity. -
Prepare the Metallic Copper:
In a second cup, mix your metallic copper or orange paint with the pouring medium. Metallic paints tend to be a bit thicker, so I find adding just a drop or two of water helps get that perfect fluid consistency. -
Prepare the Deep Red:
Mix the deep red paint with the pouring medium in a third cup. Aim for a consistency similar to warm honey for all your colors—fluid enough to run, but thick enough to cover well. -
Stir Thoroughly:
Use clean stir sticks to mix each color vigorously. Ensure the medium is fully incorporated so there are no streaks or clumps, which could interrupt the smooth flow of the drips.
Step 2: The Pouring Process
-
Position the Pumpkin:
Place your clean pumpkin directly in the center of your parchment paper. Check that it sits flat and stable so it doesn’t wobble while you are pouring. -
First Pour – Teal:
Starting near the stem (but not directly on it), slowly pour a small puddle of the teal paint mixture onto the top shoulder of the pumpkin. -
Encourage the Flow:
Watch as the teal paint naturally begins to run down the ridges of the pumpkin. If it needs help, gently tilt the pumpkin slightly or use your stir stick to guide a drip over the edge. -
Add Metallic Accents:
While the teal is still wet, pour the copper mixture right next to or slightly overlapping the teal puddle. The colors will start to run into each other, creating that beautiful marbled effect seen in the photo. -
Introduce Contrast:
Pour small amounts of the deep red paint into the gaps between the teal and copper. Allow this darker color to streak through the metallic and bright tones for dramatic contrast. -
Work Around the Stem:
Continue pouring small amounts of alternating colors around the entire base of the stem. Be careful not to get paint on the stem itself; keeping it natural wood or brown provides a nice visual anchor. -
Layering the Drips:
Don’t be afraid to pour a new color directly over an existing drip. This layering creates depth and causes the colors to swirl together spontaneously as they travel down. -
Handling the Base Puddles:
As the excess paint reaches the bottom, it will pool on the parchment paper. Let these pools form naturally as shown in the image; they can dry into beautiful ‘skins’ that you can actually peel off and use for other crafts later. -
Check for Coverage:
Walk around your table to view the pumpkin from all angles. Add tiny drops of paint to any large white gaps near the top if you want a fuller look, or leave negative space for a lighter feel. -
Let Gravity Work:
Stop touching the paint once you are happy with the distribution. The paint will continue to move slowly for several minutes, settling into distinct, smooth lines. -
Drying Time:
Leave the pumpkin completely undisturbed for at least 24 hours. Because the paint is thick and mixed with medium, it takes significantly longer to dry than a standard coat of acrylic.
Clean Stem Tip
Wrap the pumpkin stem tightly in painter’s tape before you start pouring. This ensures your stem remains perfectly clean and rustic-looking, even if your pouring gets a little enthusiastic.
Use The Leftovers
Don’t throw away the colorful dried puddles on the paper! Once fully cured, peel them off and cut them into shapes to glue onto greeting cards or use as mixed-media embellishments.
Display your new marbled masterpiece on a dining table or mantle for a sophisticated seasonal touch
Negative-Space Silhouette Scene Painted Around the Base
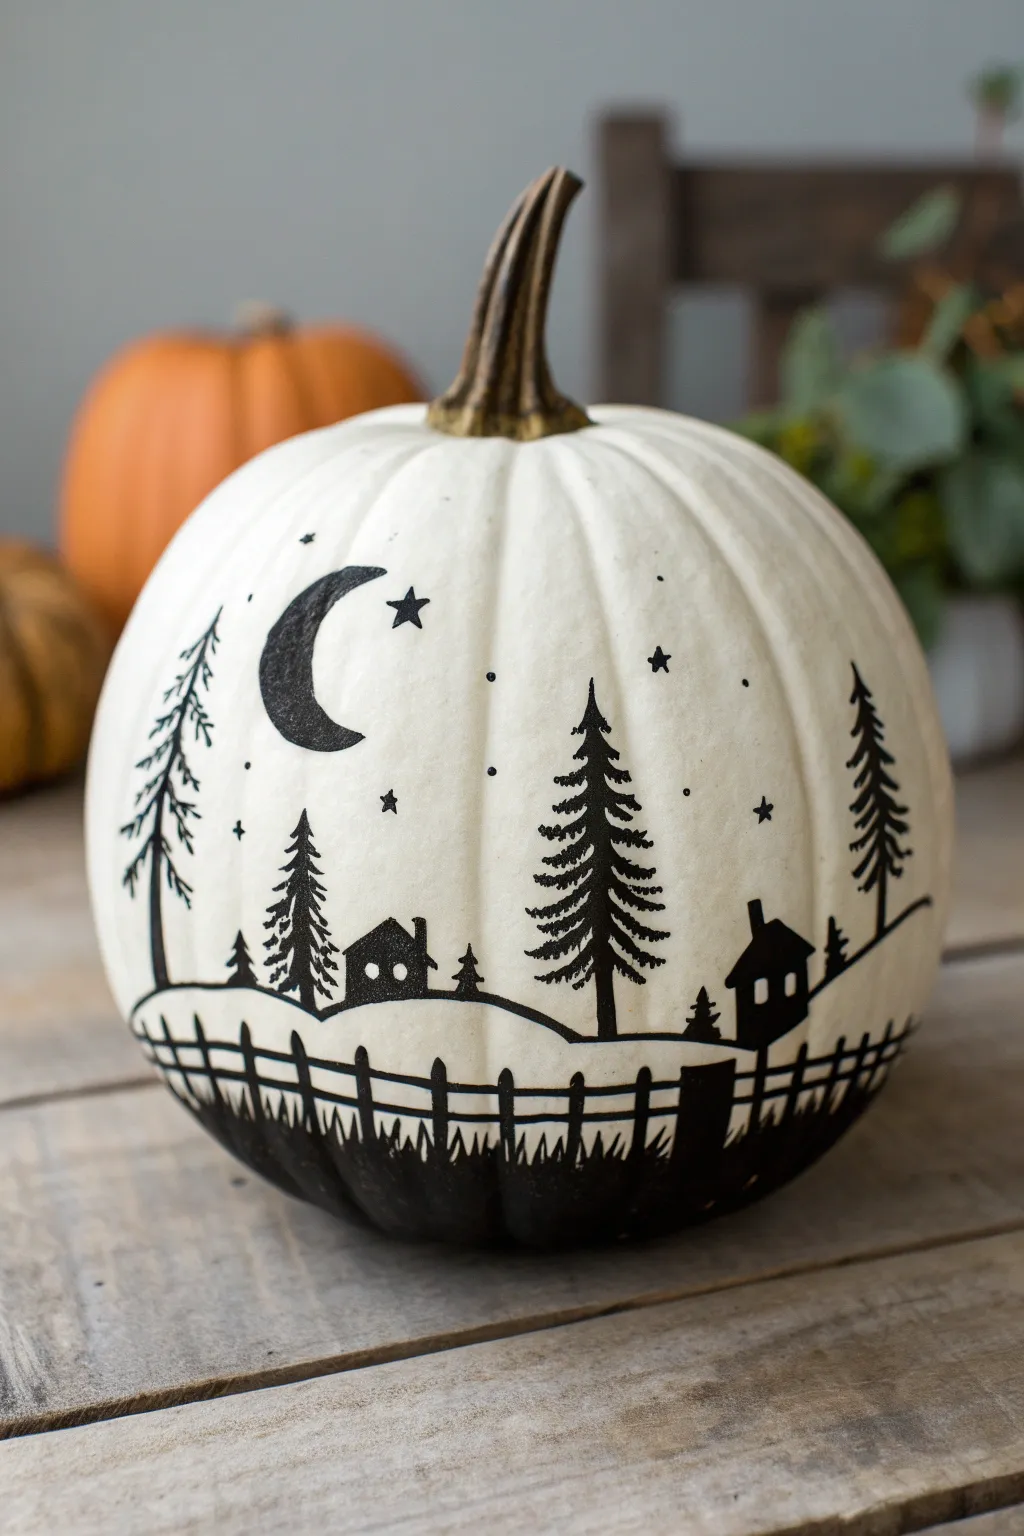
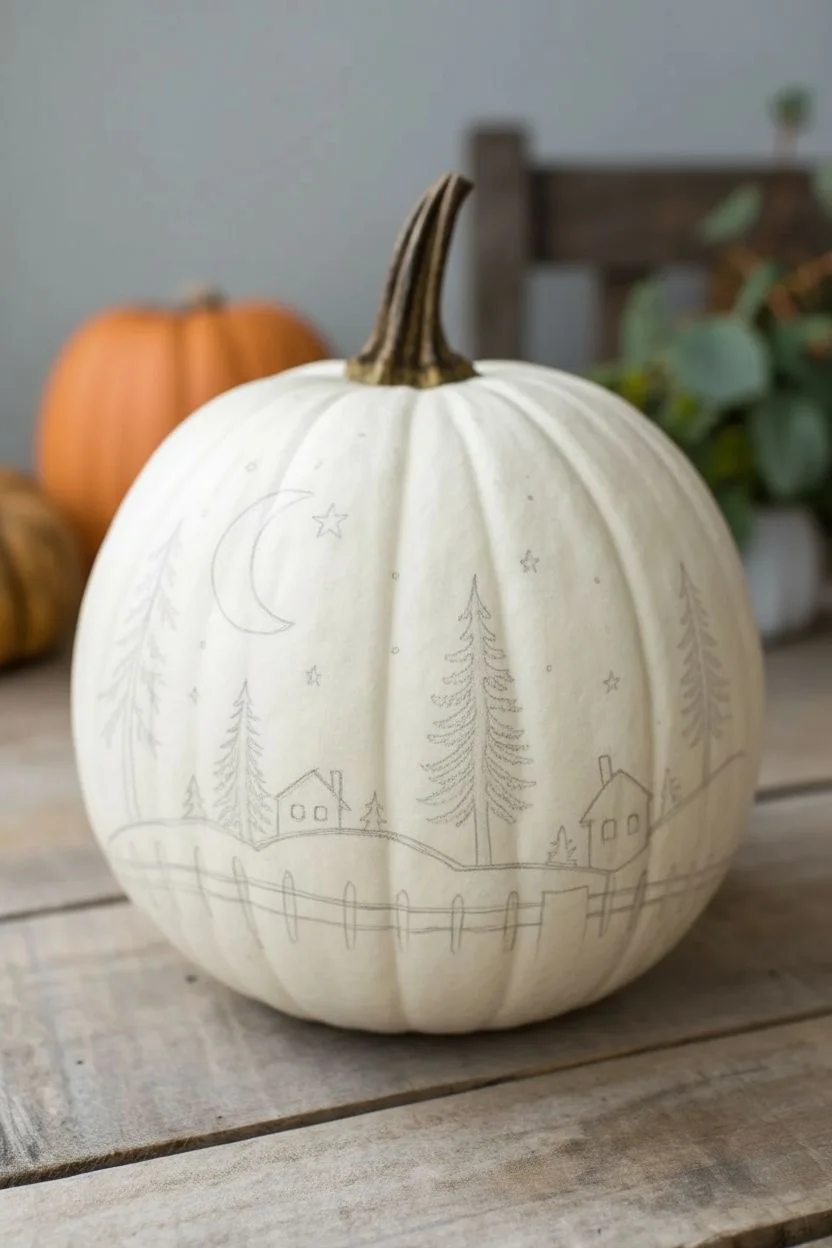
Transform a simple white pumpkin into a serene winter night with this high-contrast painting technique. Using bold black acrylics against the natural white rind creates a striking silhouette that feels both spooky and cozy.
Detailed Instructions
Materials
- Medium-sized white pumpkin (real or faux)
- Black acrylic paint (matte finish works best)
- Fine liner brush (size 0 or 00)
- Small flat brush (size 2 or 4)
- Pencil (light H or HB)
- Paper towel
- Water cup
- Clear matte sealant spray (optional)
Step 1: Preparation & Sketching
-
Clean the surface:
Before you begin, wipe your pumpkin down with a damp cloth to remove any dust or dirt. If using a real pumpkin, ensure it is completely dry so the paint adheres properly. -
Plan the horizon line:
Using your pencil, lightly sketch a rolling horizon line around the lower third of the pumpkin. It doesn’t need to be straight; gentle hills add character to the landscape. -
Map out the scene:
Lightly sketch the placement of your houses and trees along the horizon line. I like to space larger trees on opposite sides to balance the composition visually. -
Add the fence detail:
Draw vertical posts below your horizon line, connecting them with horizontal rails. Keep the perspective simple—just stick figures for now to guide your brush later. -
Sketch the sky elements:
Place a crescent moon high on the pumpkin’s shoulder. Add tiny dots or small star shapes scattered around the upper area to fill the negative space.
Step 2: Painting the Landscape
-
Establish the ground:
Load your small flat brush with black acrylic paint. Begin filling in the very bottom section below your sketched fence line, creating a solid dark base for the pumpkin. -
Define the fence rails:
Switch to your fine liner brush. Carefully paint the horizontal rails of the fence, keeping your hand steady to maintain consistent line thickness. -
Paint the fence posts:
Paint the vertical posts over the rails. Extend the posts slightly into the solid black base you painted earlier to anchor them grounded. -
Add grassy texture:
Using quick, short upward strokes with the tip of the liner brush, add grass blades rising from the solid black base, overlapping the bottom of the fence. -
Paint the house silhouettes:
Fill in the shapes of your houses. Paint them solid black, but leave tiny unpainted squares for windows to let the white pumpkin show through as ‘light’.
Uneven Lines?
If your lines feel shaky, rest your pinky finger on a dry part of the pumpkin to stabilize your hand while painting fine details.
Step 3: Adding Trees & Sky
-
Paint the tree trunks:
Draw thin vertical lines extending upward from the hills for your pine trees. Taper them slightly so they are thinner at the top. -
Create pine branches:
Starting at the top of a tree trunk, use small, dabbed strokes that flick outward and downward. Widen the branches as you move down the trunk to create that classic Christmas tree shape. -
Detail the moon:
Outline the crescent moon shape carefully with your liner brush. Fill it in with solid black, ensuring the edges are crisp and sharp against the white skin. -
Paint the stars:
Paint the larger stars first using a simple five-point shape. For the distant stars, just touch the very tip of your brush to the pumpkin to create tiny dots. -
Review and touch up:
Step back and look at the pumpkin from a distance. If any black areas look patchy, apply a second coat of paint to make the silhouette completely opaque. -
Seal the artwork:
Once the paint is fully dry—usually after an hour—you can lightly mist the pumpkin with a clear matte sealant to protect your design from scratching.
Add Dimension
Mix a tiny drop of white into your black paint to create a dark grey. Use this to add subtle highlights to the tree branches for depth.
Now you have a stunning, high-contrast decoration that looks sophisticated on any autumnal table display


Have a question or want to share your own experience? I'd love to hear from you in the comments below!