If you’ve been itching to paint the iconic cannabis leaf but don’t want every piece to look the same, I’ve got you. Here are my favorite weed painting ideas—starting with the classics and sliding into the weirder, more “how did you even think of that?” territory.
Botanical Watercolor Cannabis Leaf Study
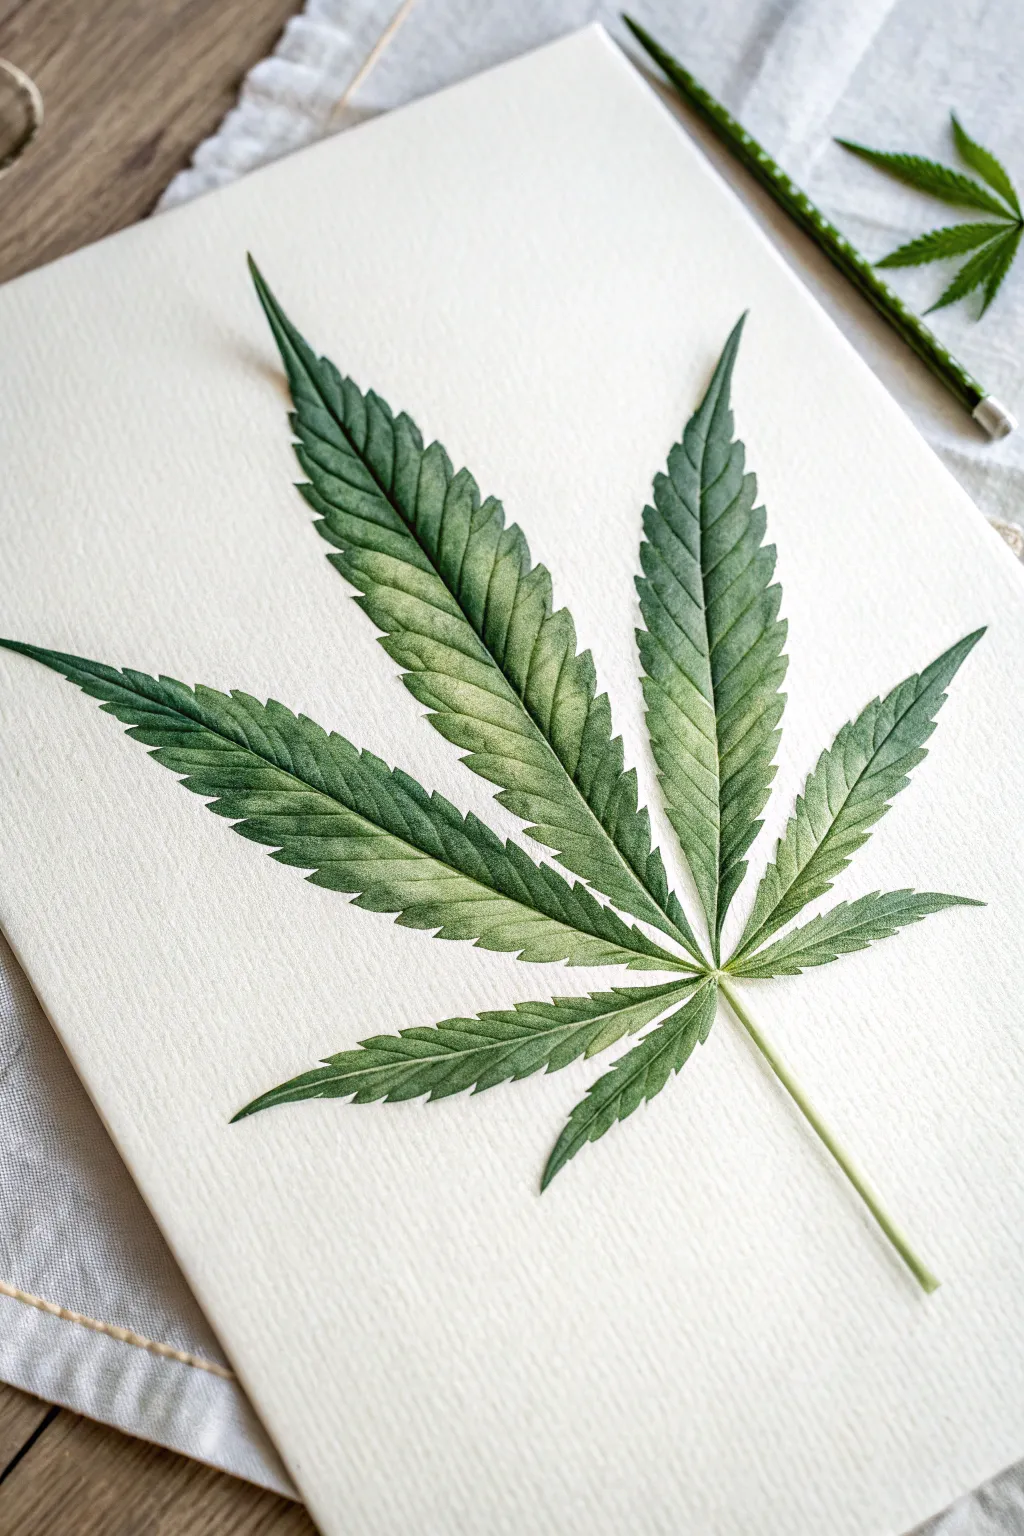
This project captures the delicate serrated edges and subtle variegation of a cannabis leaf using botanical watercolor techniques. By layering translucent greens and yellows, you’ll create a lifelike study that highlights the natural beauty and complex structure of the plant.
Step-by-Step Guide
Materials
- Cold press watercolor paper (300 gsm)
- H or HB graphite pencil
- Kneaded eraser
- Watercolor paints (Sap Green, Hooker’s Green, Lemon Yellow, Burnt Umber)
- Round brushes (size 2, 4, and 0 for details)
- Clean water jar
- Paper towels
- Mixing palette
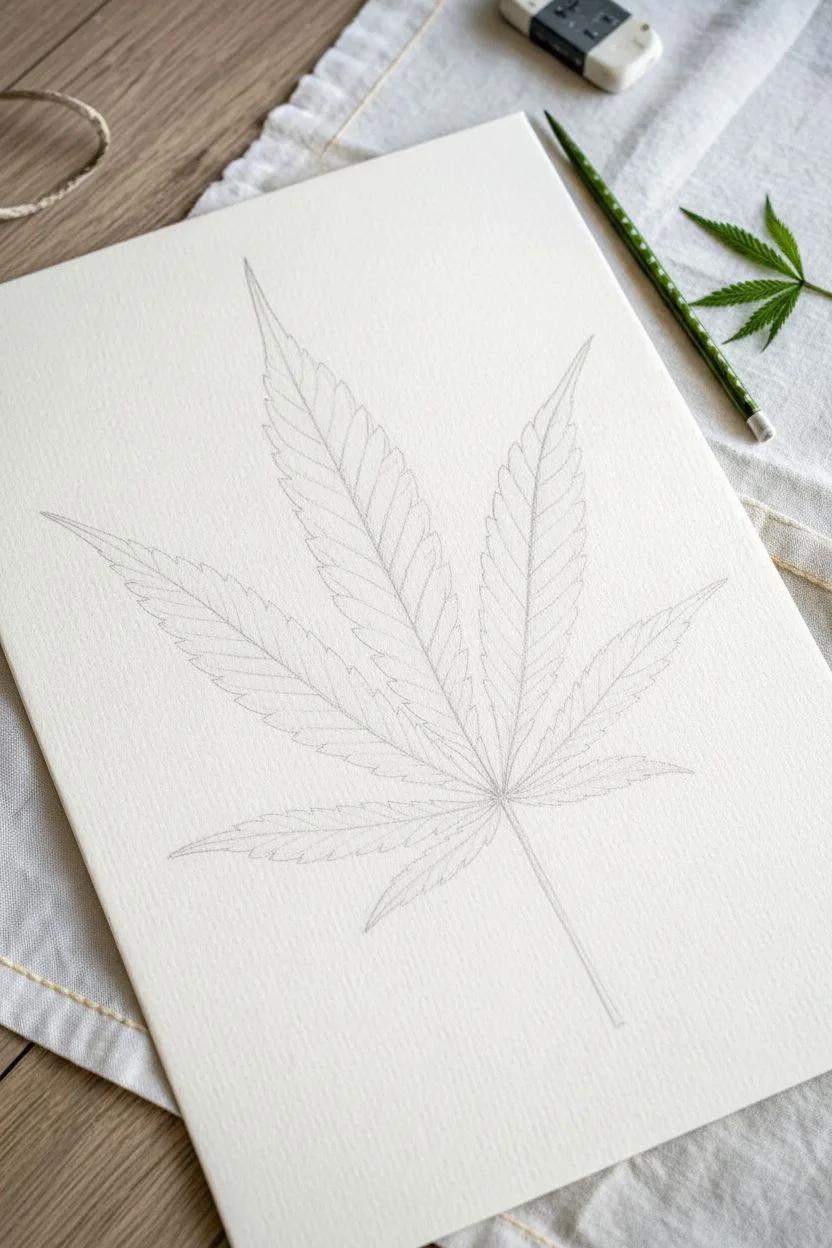
Step 1: Sketching the Structure
-
Establish the Center Point:
Begin by marking a small, faint dot near the bottom center of your paper where all leaflets will converge. This is the junction where the stem meets the leaf palm. -
Draw the Central Veins:
Lightly sketch the primary vein (midrib) lines radiating outward from your center point. Draw one long vertical line for the main leaflet, two angled slightly outward for the side leaflets, and two shorter lines angled downward for the bottom pair. -
Outline the Leaflets:
Sketch the general lanceolate (spear-like) shape around each vein line. Keep your pencil pressure extremely light so the graphite doesn’t show through the transparent watercolor later. -
Add Serrated Edges:
Refine the outline by drawing the characteristic serrated or ‘toothed’ edges. Notice that the teeth generally point toward the leaf tip, not straight out. I find it helpful to vary the size slightly to verify the organic look. -
Clean Up the Sketch:
Use a kneaded eraser to lift away any heavy graphite lines, leaving only a ghost image to guide your painting.
Don’t Overwork the Green
Cannabis leaves have complex texture. Avoid painting completely smooth, solid green blocks. Leave tiny micro-gaps of white paper to suggest surface texture and sparkle.
Step 2: Base Washes and Color
-
Mix Your Base Green:
On your palette, mix a generous amount of Sap Green with a touch of Lemon Yellow. This creates a fresh, vibrant spring green for the underpainting. -
First Wash – Left Leaflets:
Using a size 4 brush, apply a wet-on-dry wash to the left-side leaflets. Paint the entire shape carefully, ensuring you stay within the jagged lines. -
First Wash – Right Leaflets:
While the left side is wet, repeat the process on the right leaflets. If the paint pools, dab it gently with a dry clean brush to manage the water load. -
Lifting Highlights:
Before the base wash dries completely, use a thirsty (clean, slightly damp) brush to lift pigment down the center of each leaflet. This creates a soft highlight where the central vein will be. -
Variating the Tone:
While arguably the most fun part, drop tiny hints of pure Lemon Yellow into the center wet areas and diluted Hooker’s Green near the tips to create a natural gradient. -
Let it Dry:
Allow this base layer to dry completely. The paper must be bone dry before adding details, or lines will bleed.
Muddy Colors?
If your greens look dull or brown, you likely mixed red or too much brown into the shadow. Stick to mixing dark blues (like Indigo) into your green to darken it without losing vibrancy.
Step 3: Detailing and Texture
-
Defining the Central Vein:
Switch to a size 2 brush and a darker mix of Hooker’s Green with a tiny dab of Burnt Umber. Paint precise, thin lines down the exact center of each leaflet to define the midrib. -
Painting Lateral Veins:
Using the same dark green mix, paint fine lines extending from the midrib out to the tip of each serrated tooth. These lines should curve slightly upward. -
Glazing Shadows:
Once the veins are dry, apply a very watery glaze of Sap Green over the darker outer edges of the leaves, leaving the pale yellow-green centers untouched to enhance the 3D effect. -
Sharpening the Edges:
With your size 0 brush and highly concentrated green pigment (very little water), carefully trace the jagged perimeter of the leaf to make the serrations crisp. -
Stem Work:
Paint the main stem (petiole) extending downward. Use a pale yellow-green on one side and a darker green shadow on the other to give it a cylindrical form. -
Final Contrast Adjustment:
Assess the painting for depth. If the leaf looks too flat, add small touches of the darkest green mix right where the leaflets meet at the base to deepen the recessed shadow.
Once dry, gently erase any remaining pencil marks to reveal your crisp botanical study


Bold Pop Art Weed Leaf in Four Panels
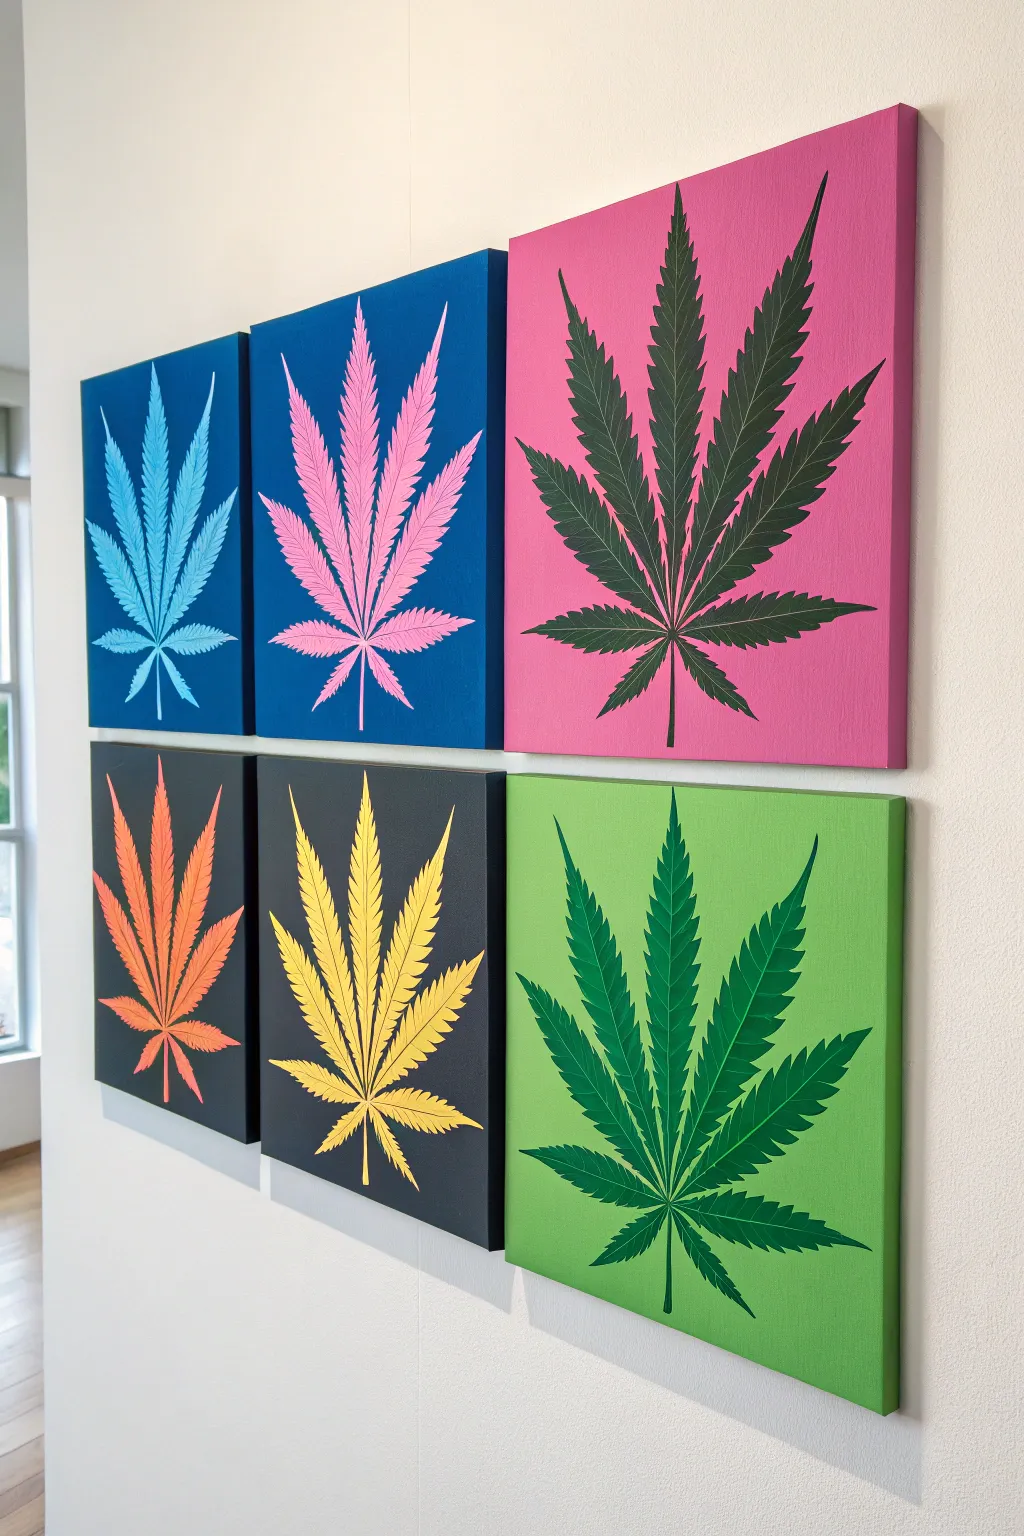
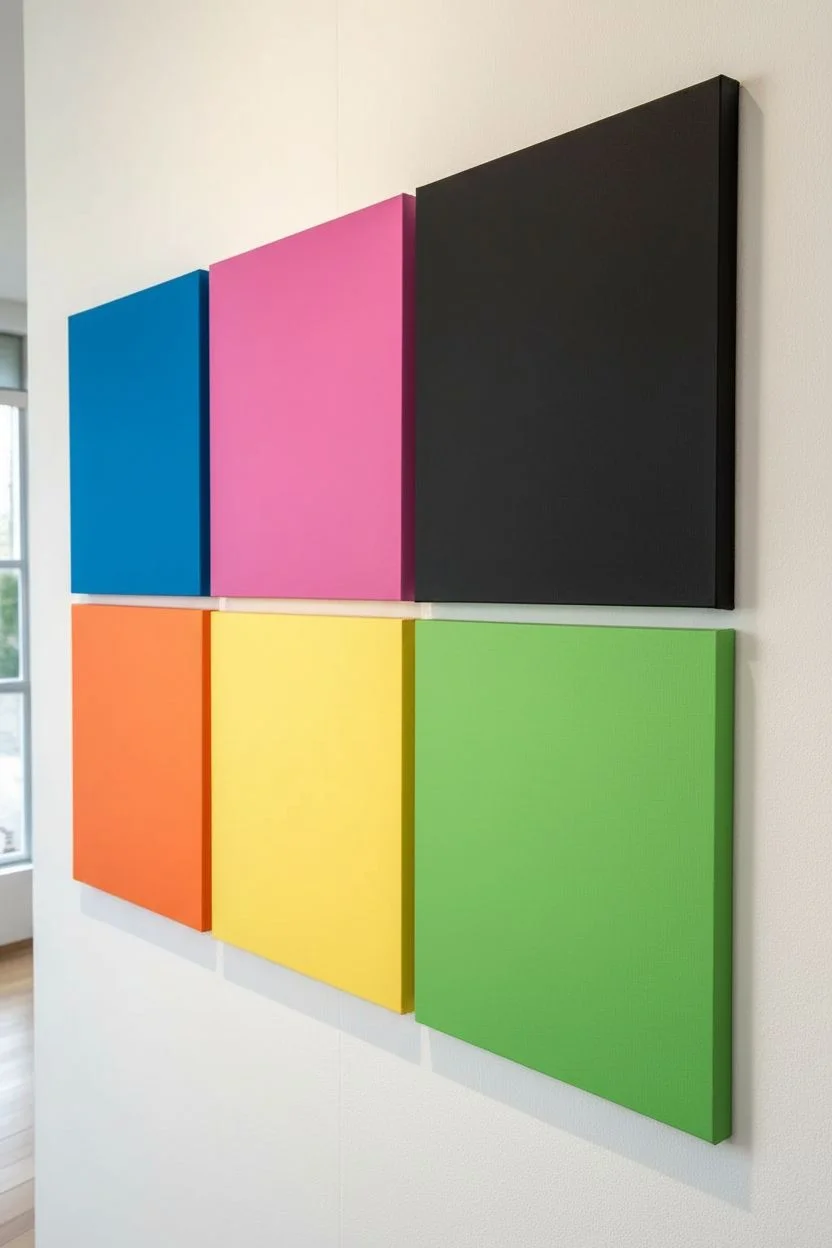
Create a stunning focal point with this multi-panel artwork that celebrates vibrant pop art aesthetics. By combining flat, saturated background colors with contrasting leaf silhouettes, you’ll achieve a gallery-worthy display that feels both modern and retro.
Detailed Instructions
Materials
- Six square stretched canvases (e.g., 12×12 inches)
- Heavy body acrylic paints (Cyan, Magenta, Yellow, Black, White, Lime Green, Bright Orange, Dark Green)
- Large flat brush (for backgrounds)
- Medium filbert brush or angle brush
- Fine liner brush (for details)
- Pencil and eraser
- Cardstock or stencil sheet (optional but recommended)
- Scissors or craft knife
- Masking tape or painter’s tape
- Spray adhesive (optional)
- Acrylic matte or gloss varnish
Step 1: Preparation & Backgrounds
-
Prepare your workspace:
Lay down a drop cloth or old newspaper to protect your surface. Set out your six canvases in the 2×3 grid pattern you intend to hang them in later to visualize your color palette. -
Select your palette:
Choose six distinct, high-contrast background colors. In the reference, we see deep blue, bright magenta, black, and lime green. Mix your paints on a palette to ensure you have enough volume of each custom shade to cover an entire canvas. -
Paint the first coat:
Using your large flat brush, paint each canvas a solid, single color. Keep your strokes long and even, going from edge to edge to minimize texture. -
Paint the edges:
Don’t forget the sides of the canvas! Extending the color around the edges gives the piece a professional, finished look without needing frames. -
Apply a second coat:
Once the first layer is touch-dry (usually 20-30 minutes), apply a second coat. This ensures the colors are opaque and vibrant, eliminating any streaky patches.
Clean Lines Hack
If you have shaky hands, don’t paint freehand. Use heavy cardstock for your stencil, hold it down firmly, and use a sponge dabber to apply paint. Lift straight up to avoid smudges.
Step 2: Creating the Stencil
-
Design the silhouette:
Draw a large, symmetrical seven-point leaf shape on a piece of cardstock. Alternatively, find a ‘pot leaf silhouette’ online, print it to the size of your canvas, and cut it out. -
Refine the edges:
Use scissors or a craft knife to carefully cut out your template. The serrated edges of the leaves are crucial for that realistic look, so take your time cutting the little jagged teeth. -
Test the fit:
Place your cutout on a dry canvas to check the scale. You want the leaf to fill roughly 80% of the surface area for maximum impact.
Level Up: Gradient Pop
Instead of a single solid color for the leaf, paint a subtle gradient (ombre) inside the stencil, fading from light to dark green, to give the flat art some surprising 3D depth.
Step 3: Painting the Motifs
-
Trace the design:
Center your template on the first canvas. Lightly trace the outline with a pencil. If you struggle with the template slipping, a light mist of spray adhesive on the back of the paper works wonders to hold it in place temporarily. -
Repeat for all panels:
Trace the leaf onto all six canvases. Ensure they are all oriented straight up and centered vertically. -
Mix leaf colors:
Mix the contrasting colors for the leaves. You want combinations that pop—like a light blue leaf on a dark blue background, or a dark green leaf on magenta. I like to test the color combination on a scrap piece of paper first to ensure enough contrast. -
Outline the shape:
Using a fine liner brush and your chosen leaf color, carefully paint over your pencil lines, defining the sharp tips and serrated edges of the leaf. -
Fill the interior:
Switch to a medium filbert or angle brush to fill in the body of the leaf. Paint carefully to avoid going over your crisp outline. -
Add definition (optional):
For the darker leaves, you might add a subtle lighter vein line down the center of each leaflet to add dimension, though a flat silhouette works perfectly for a pop-art look. -
Refine the second coat:
Colors like yellow or bright orange often need a second coat over a dark background like black. Apply another layer to the leaf shape once the first is dry.
Step 4: Finishing Touches
-
Clean up edges:
If you made any mistakes or the background color shows through unevenly, use a small brush and the original background color to touch up the edges around the leaf. -
Erase pencil marks:
Once the paint is completely bone-dry (wait at least overnight), gently erase any visible pencil marks from your initial tracing. -
Varnish the set:
Apply a coat of varnish across all canvases. A gloss varnish emphasizes the pop-art plastic feel, while matte looks more contemporary. Ensure you use the same finish on all six panels for unity.
Hang your new grid creation with even spacing between the canvases for a bold statement wall that is sure to spark conversation


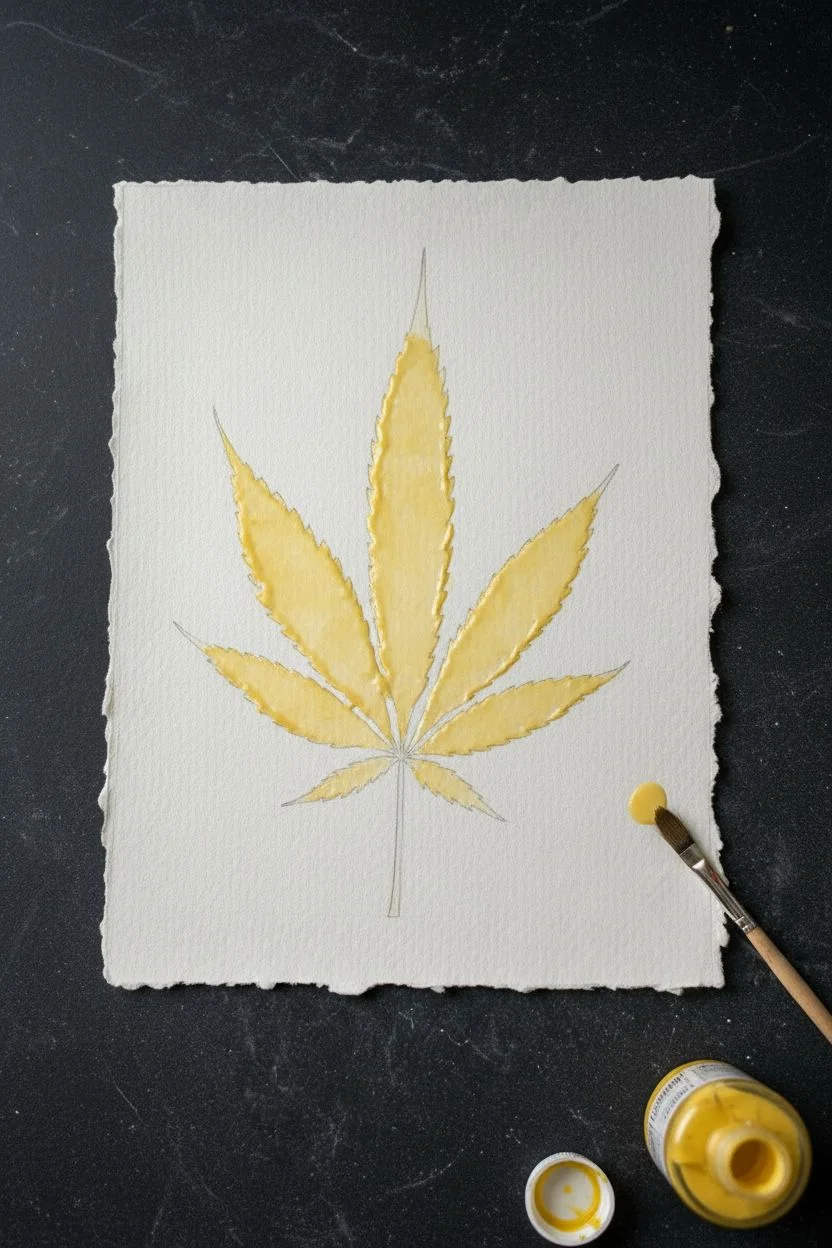
Rainbow Gradient Cannabis Leaf Silhouette
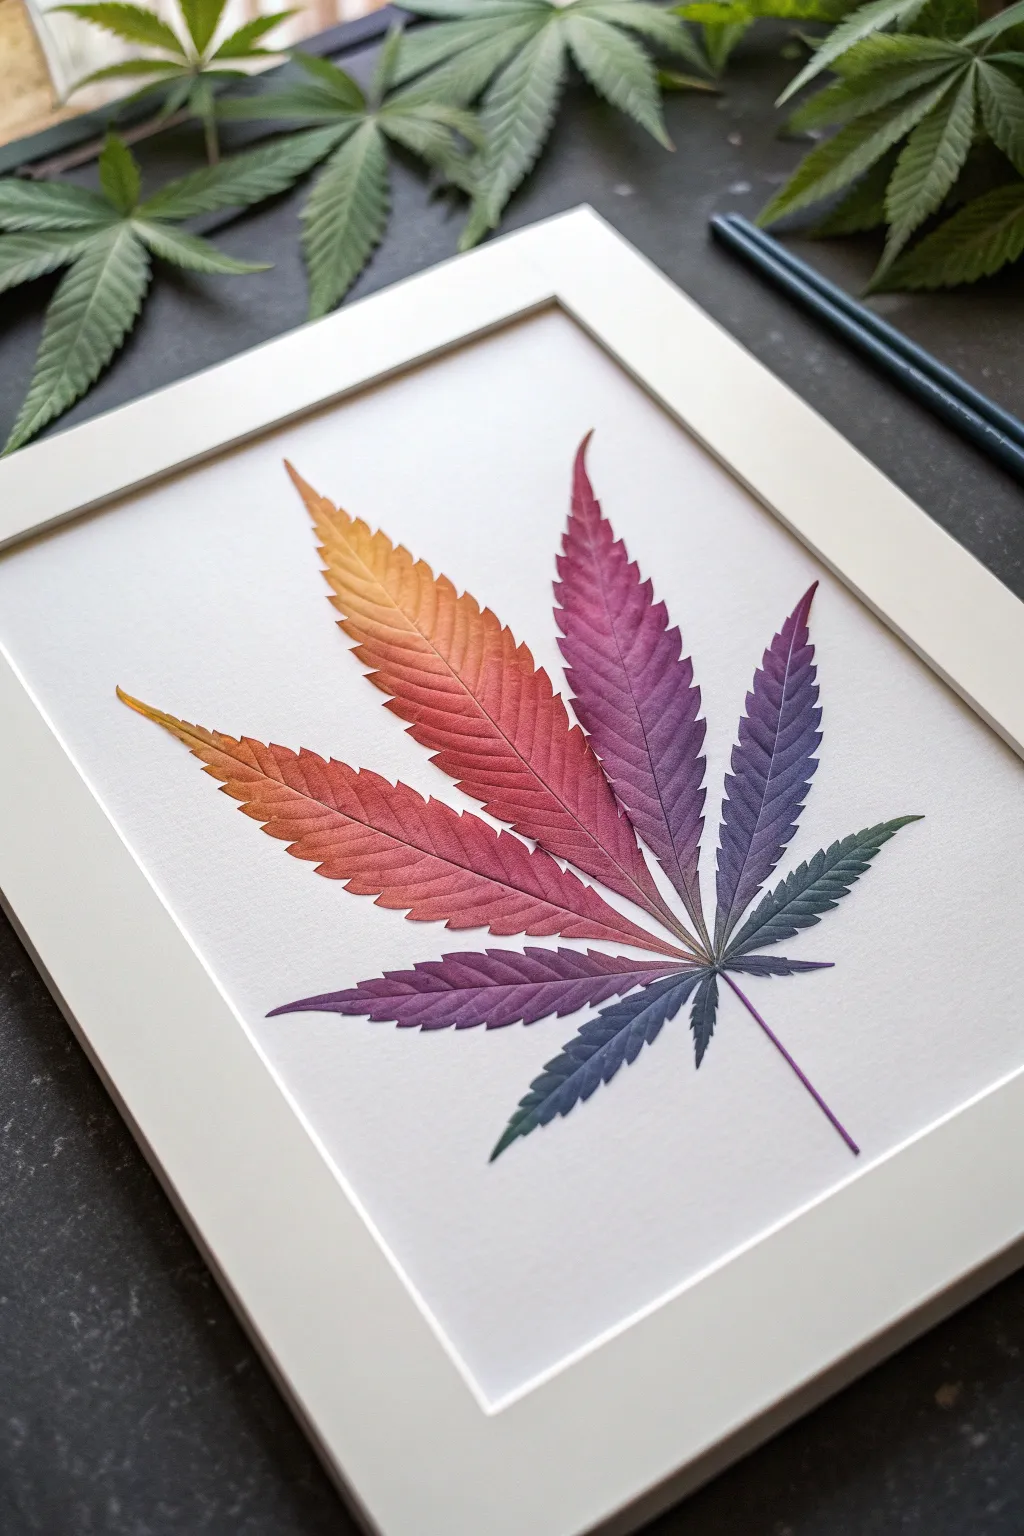

Capture the natural beauty of a spectrum with this vibrant watercolor-style leaf painting. By blending sunset hues from warm ambers to cool indigos, you’ll create a striking piece of botanical art that offers a sophisticated and colorful twist on traditional greenery.
How-To Guide
Materials
- Heavyweight watercolor paper (300gsm, cold press)
- Watercolor paints (Yellow Ochre, Alizarin Crimson, Dioxazine Purple, Phthalo Blue, Viridian Green)
- Pencils (HB or H for light sketching)
- High-quality synthetic round brushes (Size 4 and Size 0)
- Clean water jar
- Paper towel
- White picture frame (8×10 or A4)
- Masking tape
- Real or artificial cannabis leaf for tracing (optional)
Step 1: Preparation & Sketching
-
Secure the paper:
Begin by cutting your watercolor paper to fit your chosen frame. Tape the edges of the paper down to your work surface using masking tape; this prevents the paper from buckling when it gets wet and creates a clean border. -
Create the outline:
Lightly sketch the cannabis leaf shape in the center of the paper. You can freehand this if you’re confident, but tracing a real leaf or a printed template ensures you get those iconic serrated edges just right. -
Refine the details:
Go over your sketch to ensure the stem connects cleanly to the leaflets. Keep your pencil pressure very light so the graphite doesn’t show through the translucent watercolor later. -
Clean up the sketch:
Use a kneadable eraser to gently lift any excess graphite, leaving just a faint ghost of an outline to guide your painting.
Wet-on-Wet Magic
For smoother transitions, lightly wet the paper inside the leaf outline with clean water before applying paint. The pigments will flow and blend automatically for a dreamy look.
Step 2: Creating the Rainbow Gradient
-
Mix your palette:
Prepare your five key colors on your palette: yellow ochre, crimson, purple, blue, and green. Add enough water to create a milky consistency, ensuring the pigment flows easily. -
Start with warmth:
Dip your Size 4 brush into the yellow ochre. Begin painting the top left leaflet, working from the tip downwards. Keep the paint wet. -
Transition to red:
While the yellow section is still damp, rinse your brush and pick up the crimson. Paint the middle section of the left leaflets, letting the red touch the wet yellow to create a soft orange transition. -
Introduce the purple:
Moving towards the large central leaflet and the right side, switch to your purple hue. Paint the tips of the central leaflet, blending it downwards into the red areas you’ve just established. -
Cool down the tones:
For the leaflets on the far right, start introducing blue and teal tones. Allow the purple to bleed into the blue naturally on the paper rather than over-mixing on the palette. -
Finish with deep green:
Paint the lowest, smallest leaflets on the right side with a mix of blue and viridian green. This grounds the image and completes the cool end of the spectrum. -
Define the stem:
Now, switch to your Size 0 detail brush. Using a dark purple or blue mix, carefully paint the thin stem and the point where all leaflets converge.
Blooms & Backruns
If you see ‘cauliflower’ jagged watermarks forming, your brush was too wet when adding new paint. Dab excess water on a paper towel before touching the drying paper.
Step 3: Veining & Detailing
-
Allow to dry:
Let the base layer dry completely. The paper should feel room temperature to the touch, not cool. Patience here prevents muddy colors. -
Add subtle structure:
With the Size 0 brush and a slightly more concentrated pigment (less water), paint the central vein running through each leaflet. -
Create lateral veins:
From the central vein, paint tiny, hair-thin lines extending towards the serrated edges. I like to use a hue slightly darker than the leaflet’s base color—red veins on yellow, blue veins on purple. -
Sharpen the edges:
If any edges of your leaf look fuzzy or uneven, use the fine brush with a bit of concentrated paint to carefully crisp up the serrated points. -
Final inspection:
Step back and look at the overall balance. If any area looks too pale, you can add a second transparent glaze of color to boost saturation.
Step 4: Framing
-
Remove the tape:
Once the artwork is 100% dry, peel the masking tape away slowly at a 45-degree angle to avoid ripping the paper surface. -
Mount the artwork:
Center your painting inside the white frame. Ensure the glass is clean on both sides before closing the backing. -
Display:
Place the frame in an area with good lighting to let the gradient colors pop.
Hang your colorful creation proudly and enjoy the peaceful vibe it breaks to your space


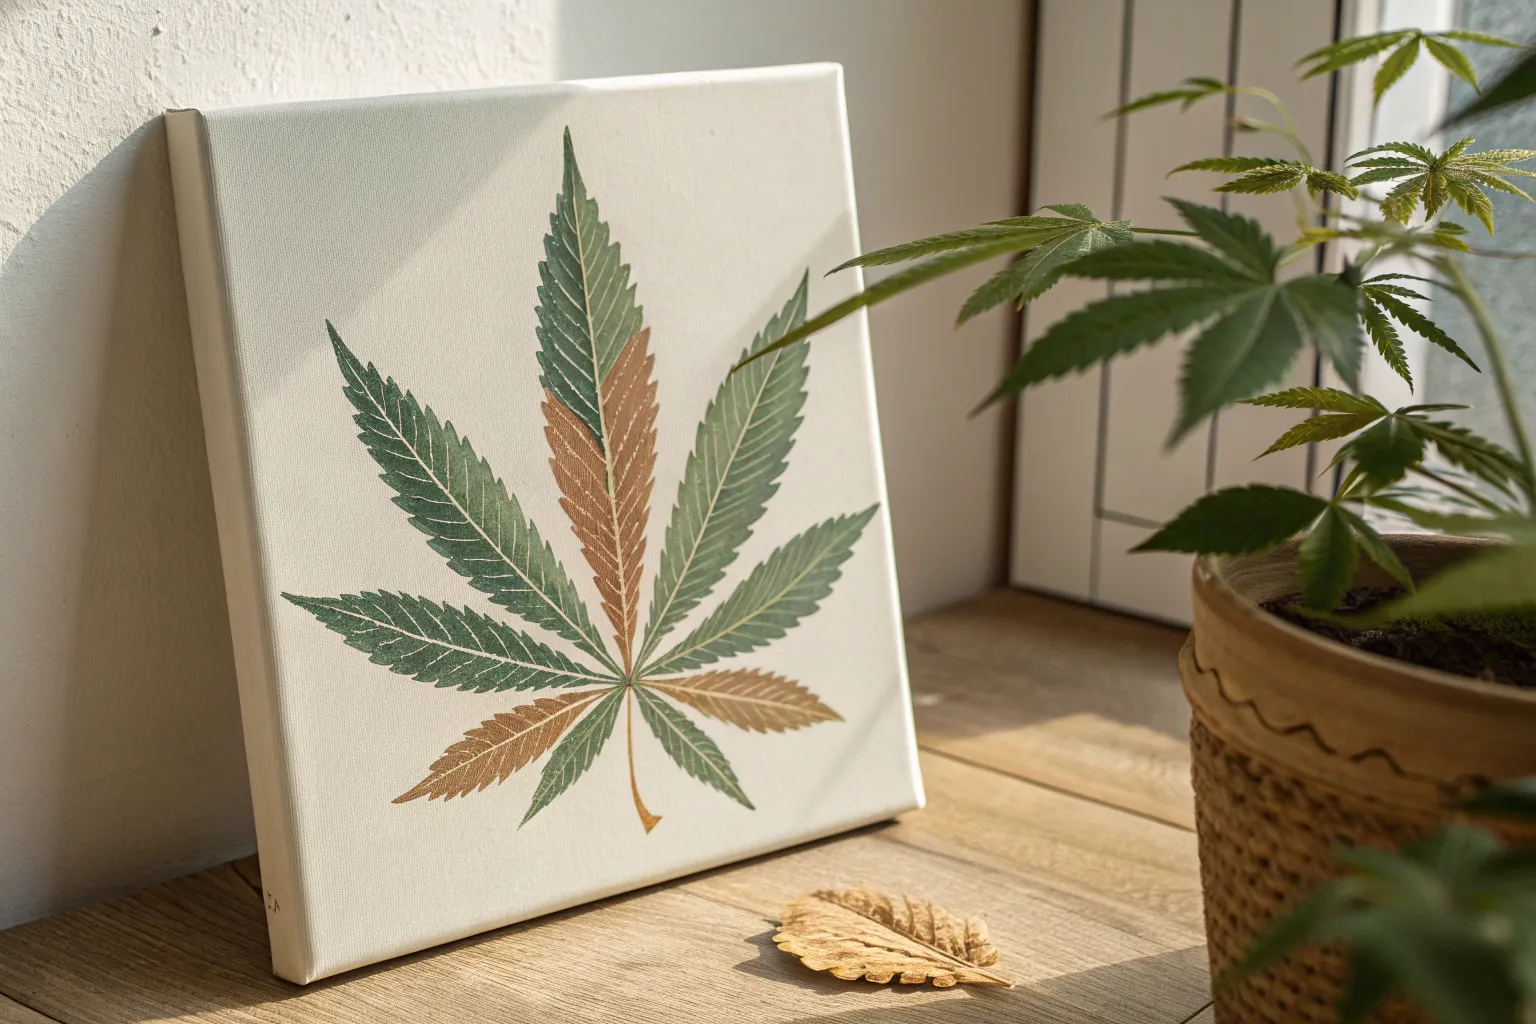
Smoke Swirls Framing a Weed Leaf Emblem
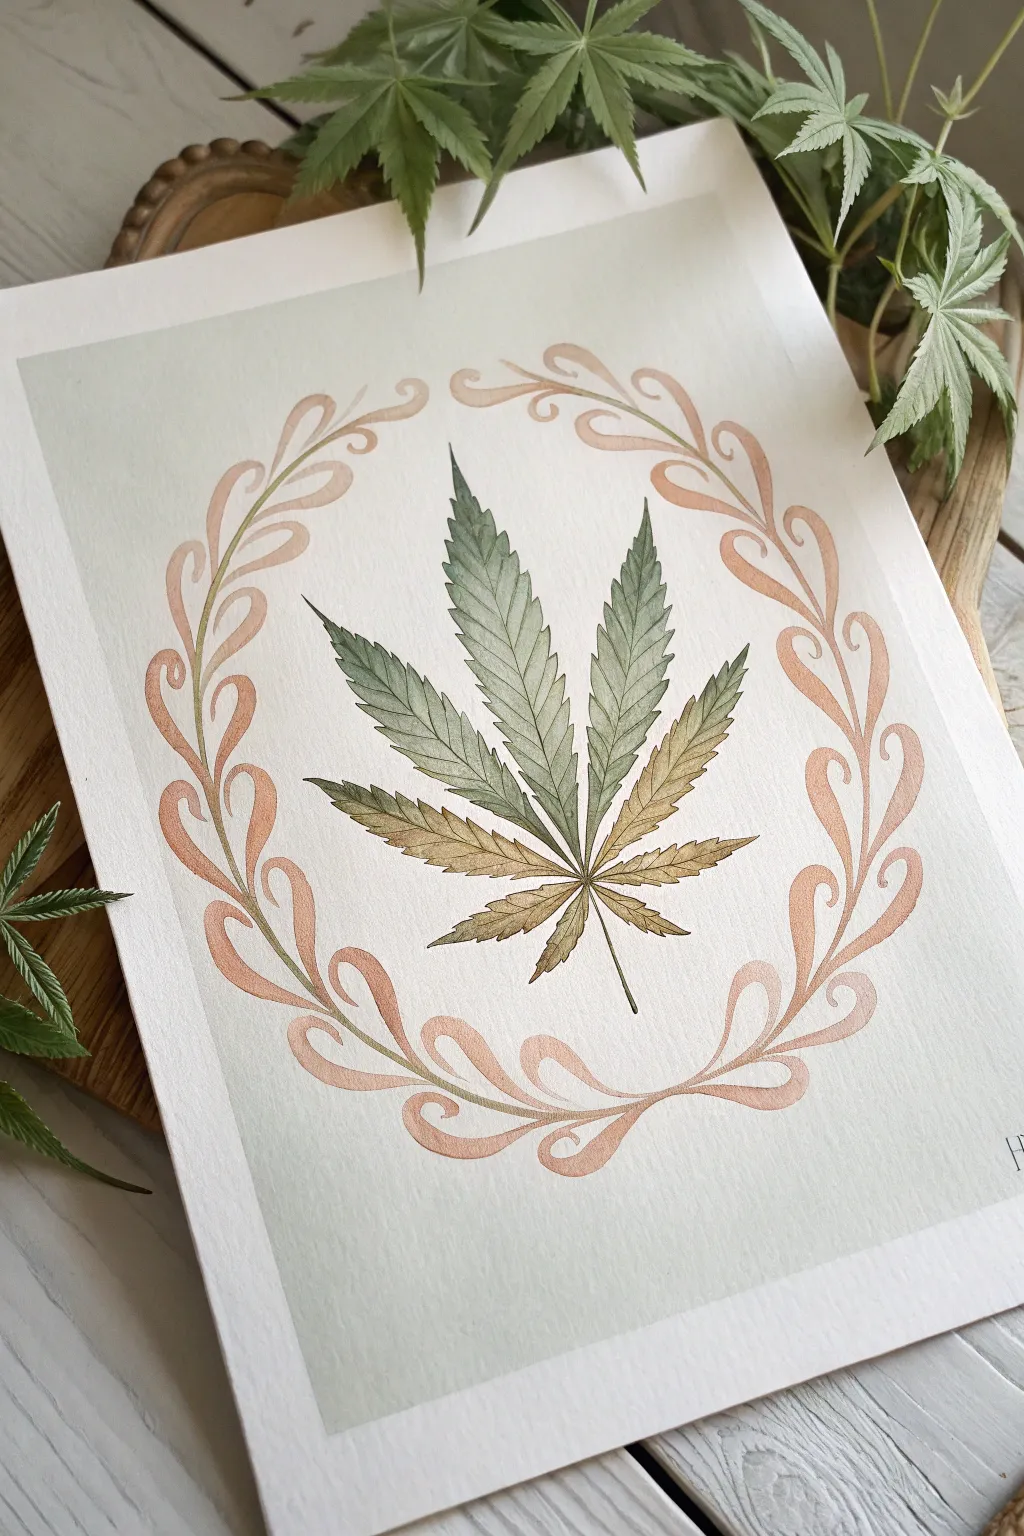
Capture the elegance of botanical illustration with this delicate watercolor piece, featuring a realistically shaded leaf encircled by a flowing, ornamental border. The soft color palette combines earthy greens and warm coral tones for a sophisticated, vintage-inspired look suitable for wall art or greeting cards.
Detailed Instructions
Materials
- Cold-press watercolor paper (300 gsm recommended)
- H pencil (for light sketching)
- Kneaded eraser
- Watercolors: Sap Green, Hooker’s Green, Yellow Ochre, Burnt Sienna, Terra Cotta (or a mix of Red/Orange)
- Round watercolor brushes (Size 2 and Size 4)
- Mixing palette
- Two jars of water (one for clean, one for dirty)
- Paper towels
- Compass or circular object (for tracing guide)
- Painter’s tape or masking tape (optional)
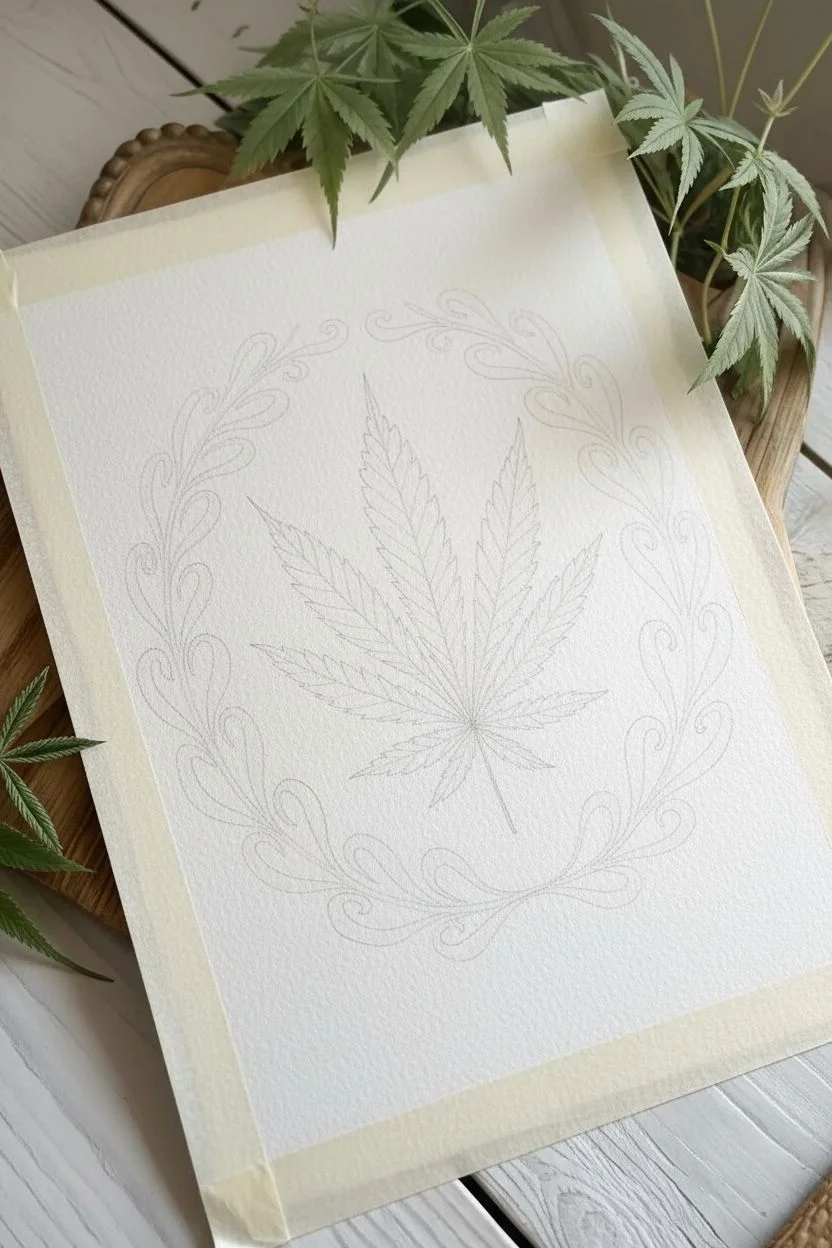
Step 1: Preparation & Sketching
-
Prepare the workspace:
Begin by taping down your watercolor paper to a hard board if you prefer a bordered look, though this piece works beautifully as a floating illustration. Ensure your paper is clean and free of oils. -
Establish the center:
Find the visual center of your paper. Using your H pencil, very lightly draw a vertical line to act as the stem guide for the central leaf. -
Outline the circular border:
Use a compass or trace a circular object (like a bowl or plate) to lightly pencil a perfect circle around your central point. This line won’t be inked; it’s just a boundary guide for your scrolling vines. -
Sketch the leaf structure:
Draw the central leaflet first along your vertical guide. From the central point where the stem meets the leaflets, sketch three additional leaflets fanning out on each side, making each pair progressively smaller as you go down. -
Detail the leaf:
Refine the leaf shapes by adding serrated edges (the little saw-tooth jagged lines) to each leaflet. Keep your pencil pressure extremely light so it doesn’t show through the final paint. -
Draft the scrollwork:
along the circular guide, sketch a series of flowing, S-shaped curves that connect to form a wreath. Imagine these shapes like stylized smoke or vines, with teardrop-shaped loops curling inward and outward. -
Clean up the sketch:
Use your kneaded eraser to lift up any heavy graphite. Roll the eraser over the entire drawing until only faint ‘ghost lines’ remain visible to guide your brush.
Uneven Watercolors?
If you get ‘blooms’ or cauliflower edges in the leaf, your brush was too wet when adding the second color. Let it dry, then gently scrub with a damp stiff brush to soften, or embrace the texture!
Step 2: Painting the Central Leaf
-
Mix the green gradient:
Prepare a gradient on your palette. On one side, mix a fresh Sap Green. On the other, mix Yellow Ochre with a tiny touch of Burnt Sienna for the lower, dried tips of the leaf. -
Base wash – Top half:
Using a size 4 brush, wet the top three leaflets with clean water (wet-on-wet technique). Drop in the Sap Green, letting it flow naturally towards the bottom. -
Base wash – Bottom half:
While the green is still damp near the middle, introduce the Yellow Ochre mixture to the bottom leaflets. Allow the colors to bleed into each other where they meet for a seamless transition. -
Detailing the veins:
Wait for the base layer to dry completely. Switch to your size 2 brush and mix a slightly darker, more concentrated version of your green. Carefully paint the central vein lines down the middle of each leaflet. -
Adding serration depth:
Use the very tip of the size 2 brush to darken the unsuspecting edges of the serrations. This adds crispness and makes the leaf look sharper and more realistic. -
Painting the stem:
Draw a thin line for the stem extending downward, using a mix of green and brown to ground the leaf in reality.
Add Metallic Flair
Once the painting is bonedry, trace the very edge of the coral scrollwork with a gold shimmer watercolor or a gold gel pen. It adds a luxurious, illuminated manuscript vibe.
Step 3: Creating the Decorative Border
-
Mix the coral tone:
Create a watery mix of Terra Cotta or a soft diluted orange-red. You want this color to be semi-transparent and much lighter than the leaf to serve as a frame. -
The first stroke:
Load your size 4 brush with the coral mix. Start at the bottom center of the wreath. Apply pressure to widen the stroke for the belly of the curve, then lift pressure as you taper the line into a point. -
Building the scrolls:
Work your way up one side of the circle, painting the S-curves. I find it helpful to rotate the paper physically as I go, so my hand is always pulling the brush in a comfortable direction. -
Mirroring the design:
Repeat the process on the other side, trying to keep the loops roughly symmetrical, though slight organic variations add to the hand-painted charm. -
Refining the tips:
Go back with your fine brush to sharpen the tips of the flourishes if any look too blunt. The elegance of this smoke-swirl design relies on those delicate, tapered ends. -
Final assessment:
Step back and look at the composition. If the leaf looks too flat, add a tiny bit of darker green glaze to the shadows between the leaflets.
Allow your beautiful botanical study to dry flat before framing it to preserve those delicate edges.
BRUSH GUIDE
The Right Brush for Every Stroke
From clean lines to bold texture — master brush choice, stroke control, and essential techniques.
Explore the Full Guide
Minimal Line Art Weed Leaf on a Neutral Wash
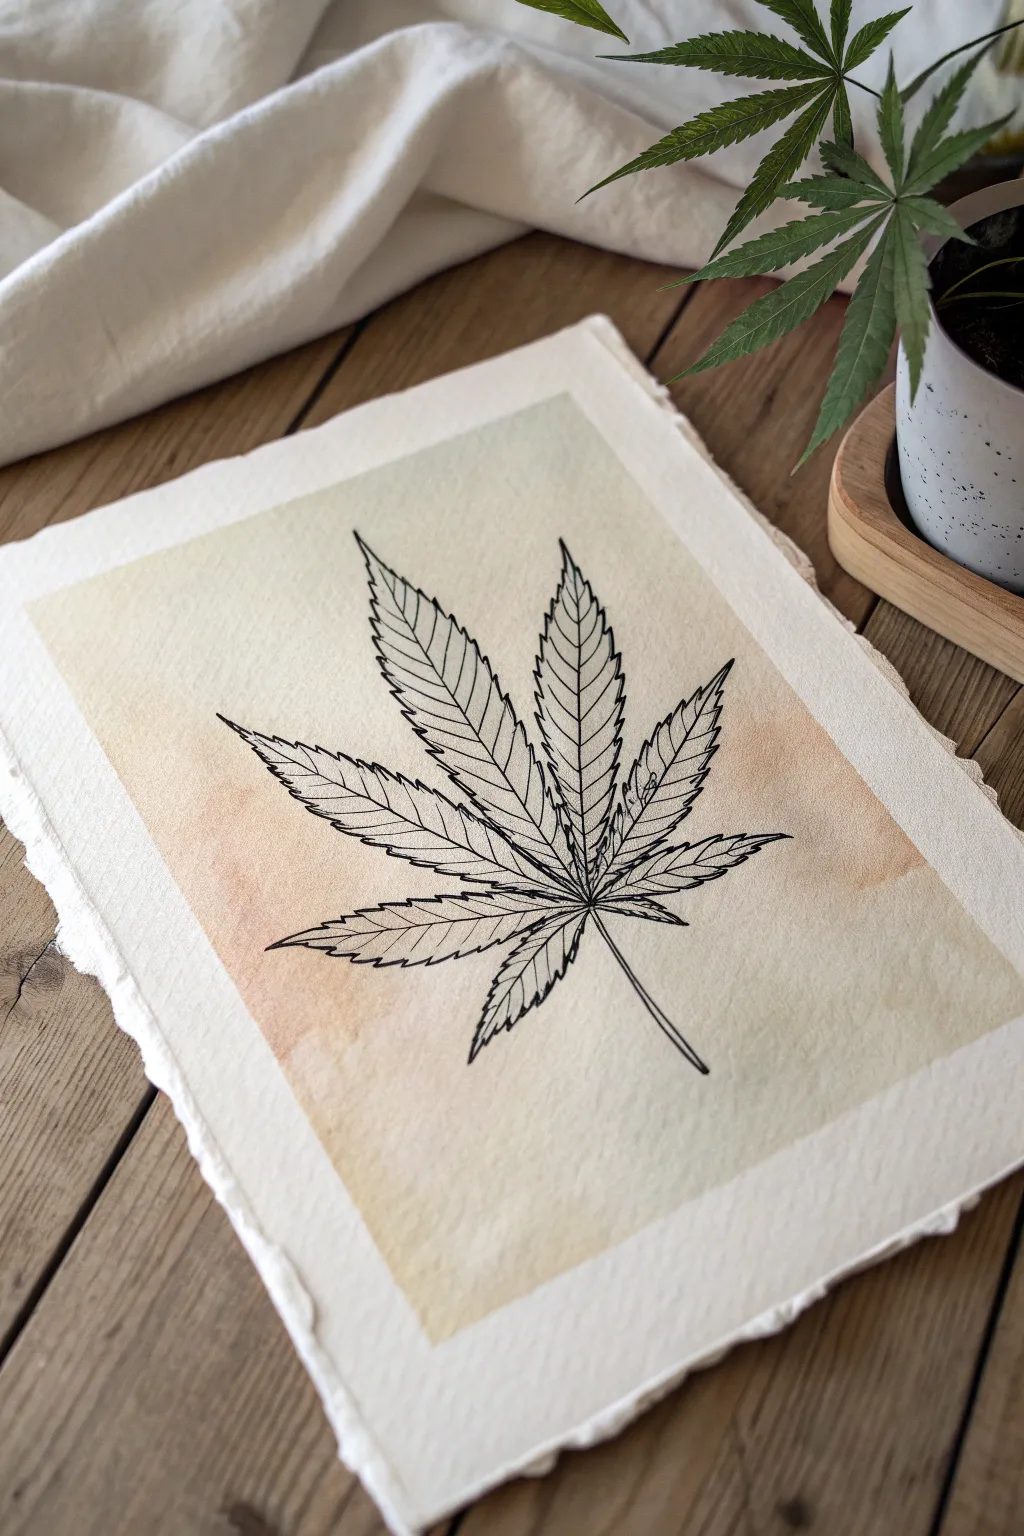
This elegant project combines the loose, organic feel of a watercolor wash with the crisp precision of fineliner ink. The result is a modern botanical illustration featuring warm, earthy undertones that contrast beautifully against the sharp black leaf structure.
Step-by-Step Guide
Materials
- Cold press watercolor paper (deckle edge preferred)
- Watercolor paints (Yellow Ochre, Burnt Sienna, and a touch of Sap Green)
- Large flat brush or wash brush
- Water cups and paper towels
- Pencil (HB or lighter) and eraser
- Black archival fineliner pens (sizes 0.3, 0.5, and 0.8)
- Masking tape (optional)
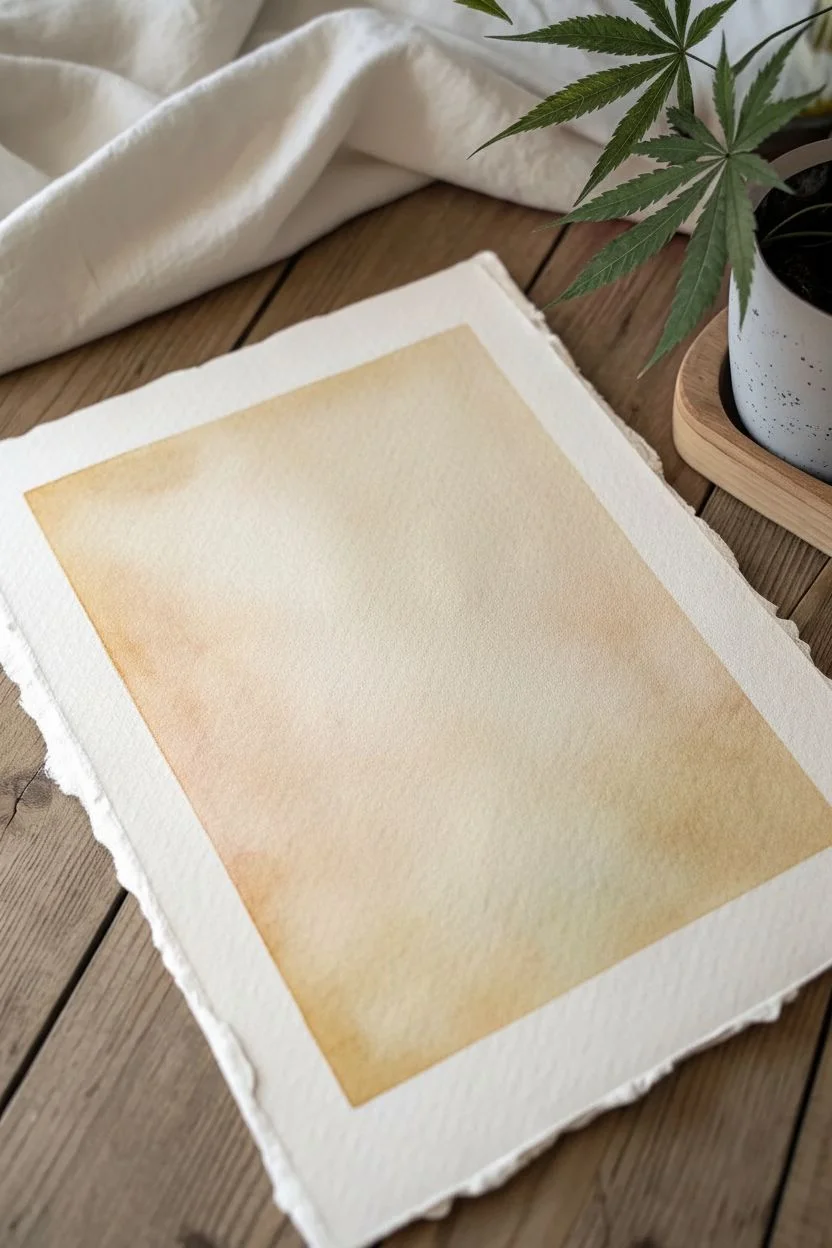
Step 1: Creating the Background Wash
-
Prep your paper:
If your paper doesn’t have a deckle edge and you want one, you can tear the edges carefully against a ruler. Otherwise, tape your paper down to a board to prevent warping, leaving a border of white space around the edges. -
Mix the wash color:
Create a watery, tea-stained hue. Mix plenty of Yellow Ochre with a generous amount of water. Add a tiny drop of Burnt Sienna to warm it up, and the smallest hint of Sap Green to dull the brightness just slightly. -
Wet the paper:
Using clean water and a large brush, wet the central rectangular area of your paper where the background color will go. Avoid soaking the outer white margins. -
Apply the wash:
While the paper is still damp, brush your mixed color into the wet area. Let the pigment bloom and settle unevenly—this creates that lovely texture seen in the reference. -
Add variance:
While wet, drop a slightly more concentrated mix of the Burnt Sienna near the bottom left or corners to create subtle gradients. -
Wait for complete drying:
This is crucial: allow the background to dry completely. If the paper is cool to the touch, it’s still damp. I often use a hair dryer on a low setting to speed this up.
Bleeding Lines?
If ink feathers into the paper, the background wasn’t dry enough. Wait longer or use waterproof archival pens which resist moisture better on soft paper.
Step 2: Drafting the Leaf Structure
-
Mark the center point:
Find the rough center of your colored background. Lightly mark a dot with your pencil; this will be the convergence point where all leaflets meet. -
Draw the central leaflet:
Draw a faint vertical line extending upwards from your center dot. Sketch the serrated outline of the main center leaflet around this axis. -
Sketch side leaflets:
Add two diagonal lines acting as spines for the leaflets on the left and right. Sketch their serrated shapes, making them slightly shorter than the central one. -
Add lower leaflets:
Sketch the final two smaller leaflets pointing downwards and outwards. Keep the serrated edges roughly symmetrical but organic. -
Refine the shape:
Lightly erase and re-sketch until you are happy with the proportions. The leaf should look balanced but not mathematically perfect.
Gold Leaf Accent
For a luxe touch, apply size and gold leaf to just the central vein lines after inking. The metallic shine pops against the matte watercolor.
Step 3: Inking the Details
-
Outline the main shape:
Using a 0.5mm pen, carefully trace over your pencil outlines. Use confident strokes for the serrated edges to keep them sharp. -
Draw the main veins:
Switch to a slightly thicker 0.8mm pen (or press harder with the 0.5mm) to draw the central spine of each leaflet, extending down to form the stem. -
Add secondary veins:
Using a thinner 0.3mm pen, draw the veins branching off from the spine to the tips of the serrated edges. These lines should curve slightly upward. -
Texture the leaf:
Add very fine internal details. Draw tiny, broken lines parallel to the veins to suggest texture and surface dimension. -
Thicken intersection points:
Go back to the center point where the leaflets meet. Slightly thicken the lines here to create visual weight and depth. -
Final clean up:
Once the ink is 100% dry, gently erase any visible pencil marks. Be careful not to scuff the watercolor wash.
Frame this minimalist piece in raw wood to complement the earthy aesthetics.
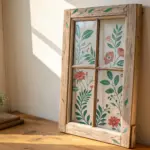
Stained-Glass Style Cannabis Leaf With Dark Outlines
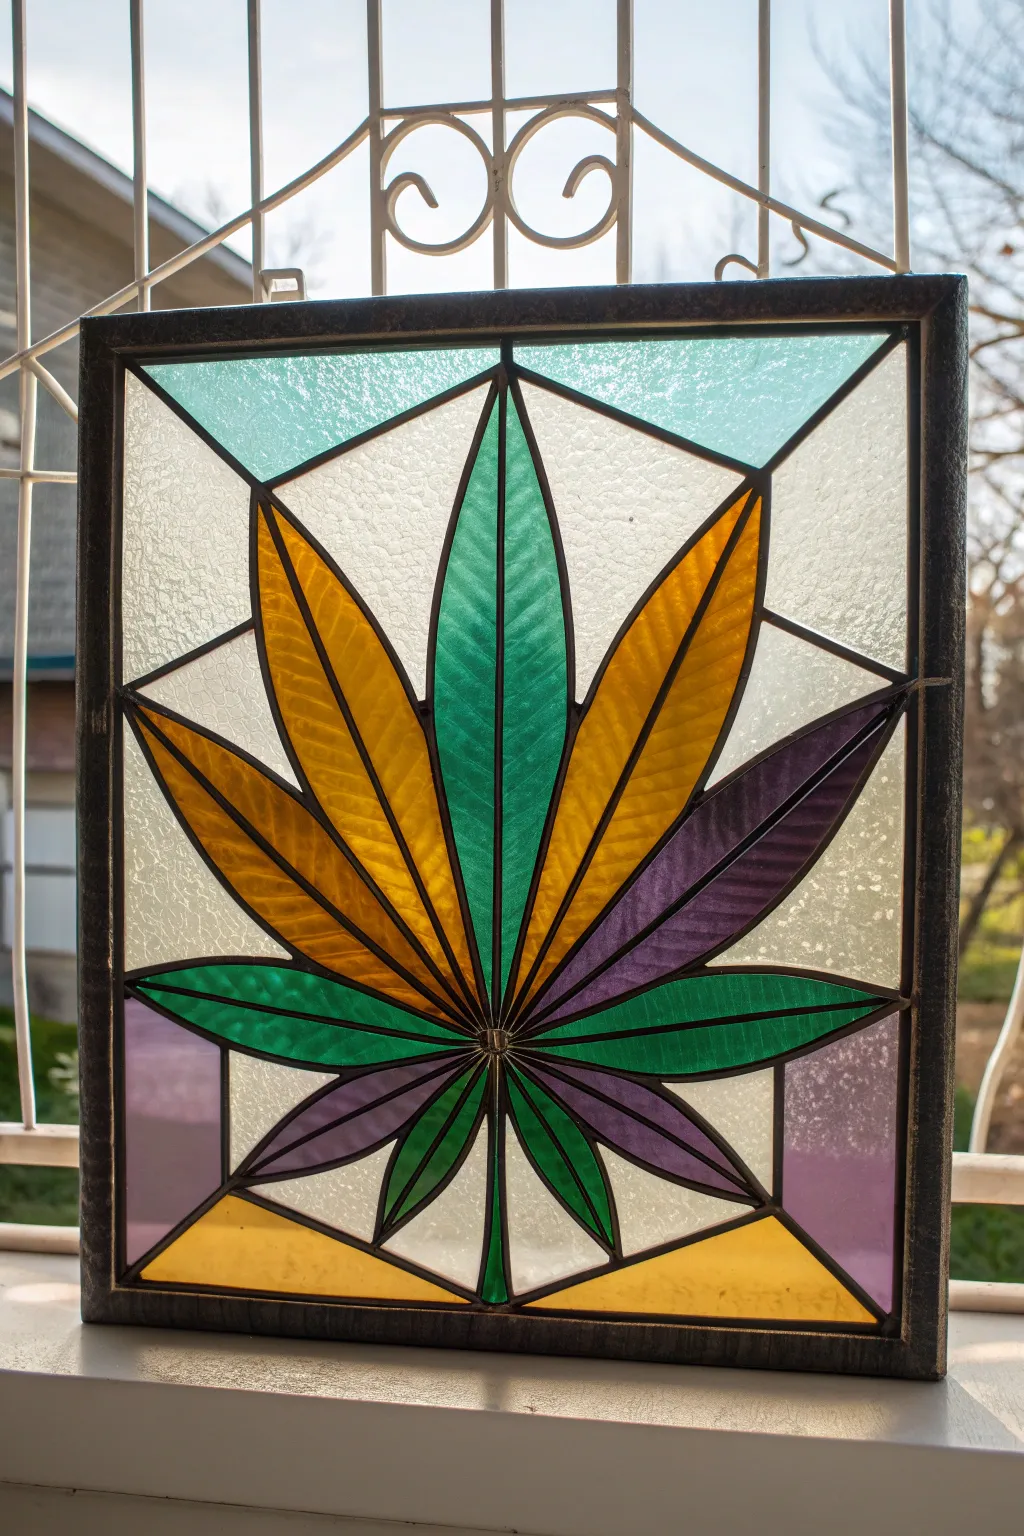
Capture the translucent beauty of traditional leaded glass without soldering a single thing. This painting project uses glass paints and relief outliner to create a vibrant, geometric cannabis leaf that glows beautifully in a sunny window.
How-To Guide
Materials
- Picture frame with glass insert (8×10 or similar)
- Black relief outliner paste (or faux lead)
- Glass paints (transparent solvent-based or acrylic)
- Colors: Teal, yellow-orange, dark purple, emerald green, lavender
- Soft synthetic round brushes (sizes 2 and 4)
- Paper and pencil for drafting
- Ruler
- Tape
- Cotton swabs and rubbing alcohol
- Toothpicks
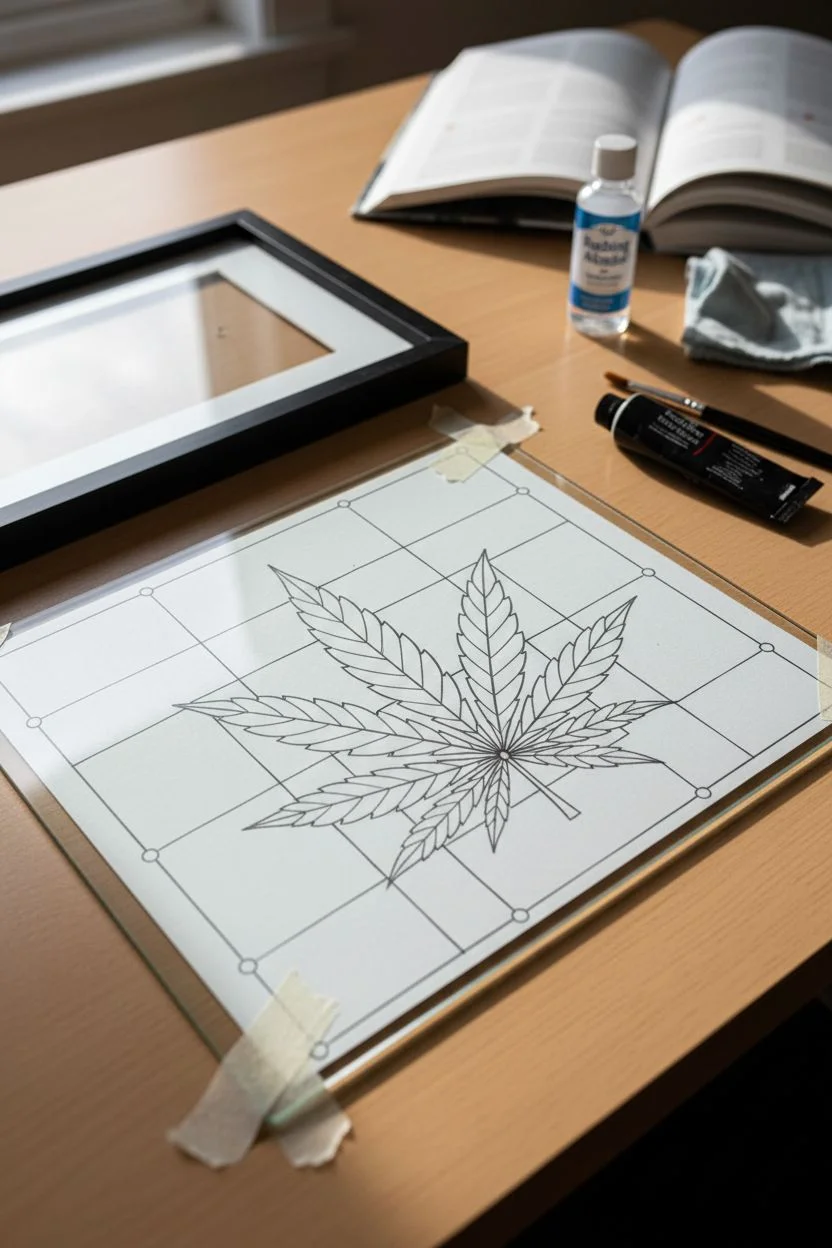
Step 1: Drafting and Prep
-
Clean the surface:
Remove the glass from your picture frame. Clean both sides thoroughly with rubbing alcohol and a lint-free cloth to remove any fingerprints or oils, which can prevent the paint from adhering properly. -
Draft the design:
On a sheet of paper cut to the size of your glass, draw a 13-point leaf. Start with a central vertical leaflet, then fan out six leaflets on each side, decreasing in size. Keep the shapes geometric and sharp. -
Add the background grid:
Use a ruler to draw background sections behind the leaf. Connect the tips of the leaflets to the frame’s edge or to each other with straight lines, creating a fractured, mosaic look. -
Secure the template:
Place your clean glass over the drawing. Tape the paper and glass together securely so the design doesn’t shift while you work.
Smooth Flow Tip
If your relief outliner tube feels stiff, run it under warm water for a minute. The heat softens the paste, making it much easier to pipe long, steady lines without hand fatigue.
Step 2: Creating the Lines
-
Practice your piping:
Before touching the glass, squeeze a bit of the black relief outliner onto a scrap piece of paper. You want a steady, even flow without air bubbles. -
Outline the main leaf:
Holding the tube like a pencil but slightly raised above the surface, trace the cannabis leaf first. Let the relief paste fall onto the glass rather than dragging the nozzle. -
Add the central veins:
Draw single vertical veins down the center of each leaflet. This mimics the structural soldering lines found in real stained glass. -
Outline the background:
Trace the straight geometric lines of the background grid. Ensure all your lines intersect cleanly with the leaf outline to create closed shapes; breaks in the lines will cause paint to bleed later. -
Dry the outlines:
Allow the outliner to dry completely. This usually takes 24 hours depending on the brand, but don’t rush it—if the lines are soft, they might smudge during painting.
Textured Glass Effect
For a hyper-realistic look, use ‘crystal clear’ structure gel in the background sections. Apply it with a sponge to mimic the ripples and imperfections of vintage cathedral glass.
Step 3: Painting the Glass
-
Prepare your colors:
Set up your palette with your glass paints. You’ll need teal, yellow-orange, deep purple, and green. I find that solvent-based paints offer the best clarity, but acrylic glass paints work well too. -
Flood the teal sections:
Using a size 4 brush, load up the teal paint. Apply it to the top central leaflet and the top background triangles. Use a ‘flooding’ technique where you drop paint in and nudge it to the edges rather than brushing back and forth. -
Paint the yellow leaves:
Fill the large leaflets on either side of the center with yellow-orange paint. Also fill the bottom corner background sections with this same warm tone to balance the composition. -
Add the purple tones:
Paint the middle-tier leaflets with dark purple. For the lower background rectangles, use a lighter lavender shade to create depth and contrast. -
Fill the remaining green:
Paint the remaining lower leaflets in emerald green. Carefully push the paint right up to the black relief lines to ensure no gaps of clear glass remain. -
Texture the clear areas:
For the white/clear background sections, use a clear medium or transparent white paint. While it’s wet, dab it gently with a stiff brush to create a frosted distortion effect. -
Pop air bubbles:
Inspect your wet paint for tiny bubbles. Use a toothpick to pop them immediately, or they will dry as permanent pockmarks in your faux glass.
Step 4: Finishing Up
-
Let it cure:
Allow the piece to dry flat in a dust-free area for at least 48 hours. Glass paint takes time to harden into a durable finish. -
Reassemble frame:
Once fully cured, place the glass back into the frame. Do not put the backing board on; leave it open so light can pass through. -
Final clean:
Gently wipe the front (unpainted) side of the glass to remove any smudges from handling before hanging it in your sunniest window.
Hang your finished piece where it can catch the morning light and fill your room with color

PENCIL GUIDE
Understanding Pencil Grades from H to B
From first sketch to finished drawing — learn pencil grades, line control, and shading techniques.
Explore the Full Guide
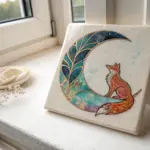
Galaxy Cannabis Leaf With Stars and Nebula Texture
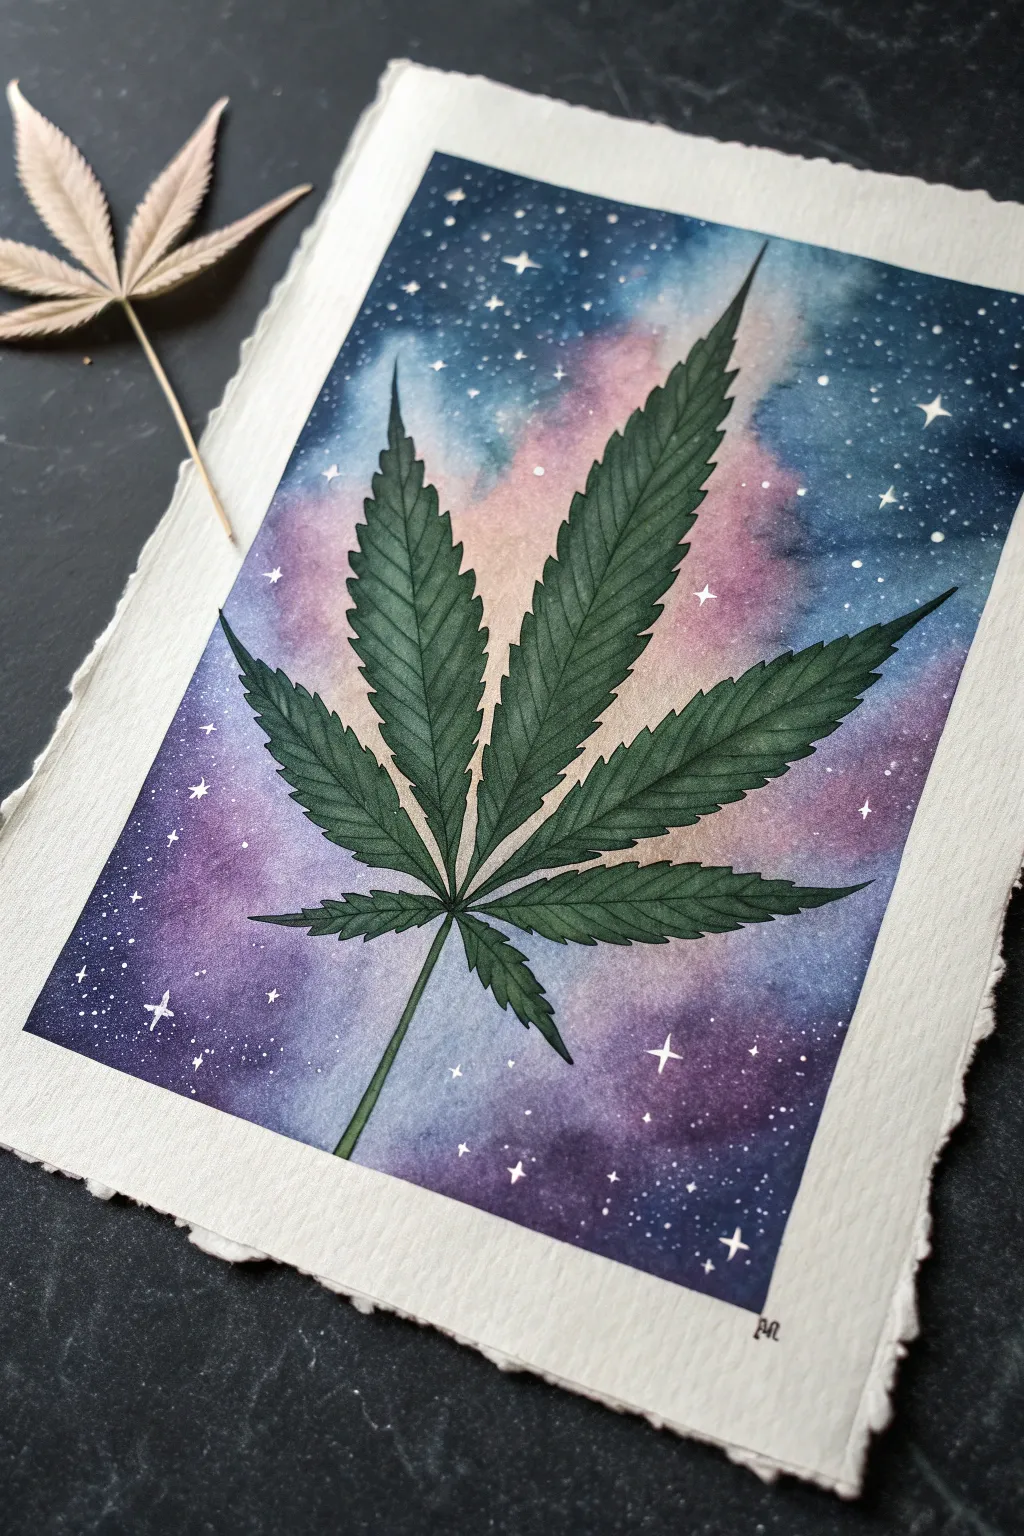
Merge the grounded beauty of botany with the infinite wonder of space in this watercolor project. You’ll create a vibrant, star-studded nebula background that serves as a dramatic canvas for a crisp, detailed cannabis leaf.
How-To Guide
Materials
- Cold press watercolor paper (deckled edge optional)
- Watercolor paints (Indigo, Purple, Magenta, Teal, Black)
- Green watercolor or gouache (Sap Green, Hooker’s Green)
- White gel pen or white gouache
- Masking fluid (drawing gum) and old brush
- Round brushes (sizes 2, 6, and 10)
- Fine liner brush (size 0 or 00)
- Pencil and eraser
- Jars of water and paper towels
Step 1: Preparation and Masking
-
Sketch the leaf:
Begin by lightly sketching the outline of a seven-pointed cannabis leaf in the center of your paper. Focus on getting the symmetry right, with the largest leaflet in the center and smaller ones fanning out. Don’t worry about the serrated edges yet; just get the main shapes. -
Refine the edges:
Go back over your guide lines and carefully draw the characteristic serrated (jagged) edges of the leaf. Keep the pencil lines light so they won’t show through the final paint. -
Apply masking fluid:
Using an old brush that you don’t care about (masking fluid ruins brushes), carefully fill in the entire leaf shape with masking fluid. This protects the white paper so we can paint the galaxy background freely without worrying about the edges. -
Let it dry completely:
Wait until the masking fluid is fully dry and rubbery to the touch. If you paint too soon, the fluid will lift and ruin your clean edges.
Protect Your Brush
Coat your brush bristles in bar soap before dipping into masking fluid. This creates a barrier that prevents the rubber from sticking to and ruining the hairs.
Step 2: Creating the Galaxy Background
-
Wet the background:
Brush clean water over the entire background area, surrounding the masked leaf. The paper should be glisten but not have standing puddles. -
Drop in bright colors:
While the paper is wet, drop in patches of your brighter colors like magenta, purple, and teal. Let them bleed into each other naturally to create the nebula clouds. -
Deepen the space:
While the first layer is still damp, introduce indigo and black around the corners and edges of the paper. Gently blend these darks inward, leaving the brighter colors visible near the center around the leaf to create a glowing effect. -
Add texture with salt (optional):
If you want a chemical reaction texture, sprinkle a tiny pinch of salt into the wet paint and let it sit. It pulls the pigment and creates star-like blooms. -
Dry the background:
Let this layer dry completely. I prefer to let it air dry to avoid pushing the pigment around with a hair dryer, but you can use one on a low setting if you’re impatient.
Step 3: Stars and Details
-
Splatter stars:
Load a brush with white gouache or slightly watered-down white acrylic. Tap the handle against another brush to splatter tiny white dots across the dark background. -
Draw focal stars:
Use a white gel pen or a fine brush with white paint to manually draw a few four-pointed ‘twinkle’ stars. Place them strategically in the darker areas for high contrast. -
Remove the mask:
Once the background is 100% dry, gently rub the masking fluid with your finger or a rubber cement pickup to peel it away, revealing the pristine white leaf shape underneath.
Bleeding Lines?
If paint bleeds under the mask, lift it gently with a damp stiff brush (scrubbing motion) and blot with a paper towel immediately after removing the mask.
Step 4: Painting the Leaf
-
Base green layer:
Mix a natural green tone (like Sap Green) and paint the entire leaf. Use a medium consistency—not too watery, not too thick—to get smooth, even coverage. -
Add shadows:
While the green is still damp, drop slightly darker green mixed with a touch of blue into the base of the leaflets where they meet the stem. This adds depth. -
Define the veins:
After the base green is dry, use your smallest liner brush and a dark green-black mix to paint the central vein of each leaflet. -
Paint side veins:
Continuing with the liner brush, paint thin, delicate veins branching out from the center line to the tips of the serrated edges. -
Final highlights:
For a finishing touch, mix a very pale green or use a gel pen to add tiny highlights along the top edge of the main veins to make them look three-dimensional.
Step back and admire how the organic shape of the leaf pops against the cosmic depth of your background

Have a question or want to share your own experience? I'd love to hear from you in the comments below!