Rock painting is one of those projects that feels like magic—one minute it’s just a plain stone, and the next it’s a tiny character or a little message that makes you smile. If you’re painting with kids, these easy rock painting ideas are all about big visual payoff with simple shapes, bold colors, and details that small hands can actually pull off.
Classic Ladybug Rocks
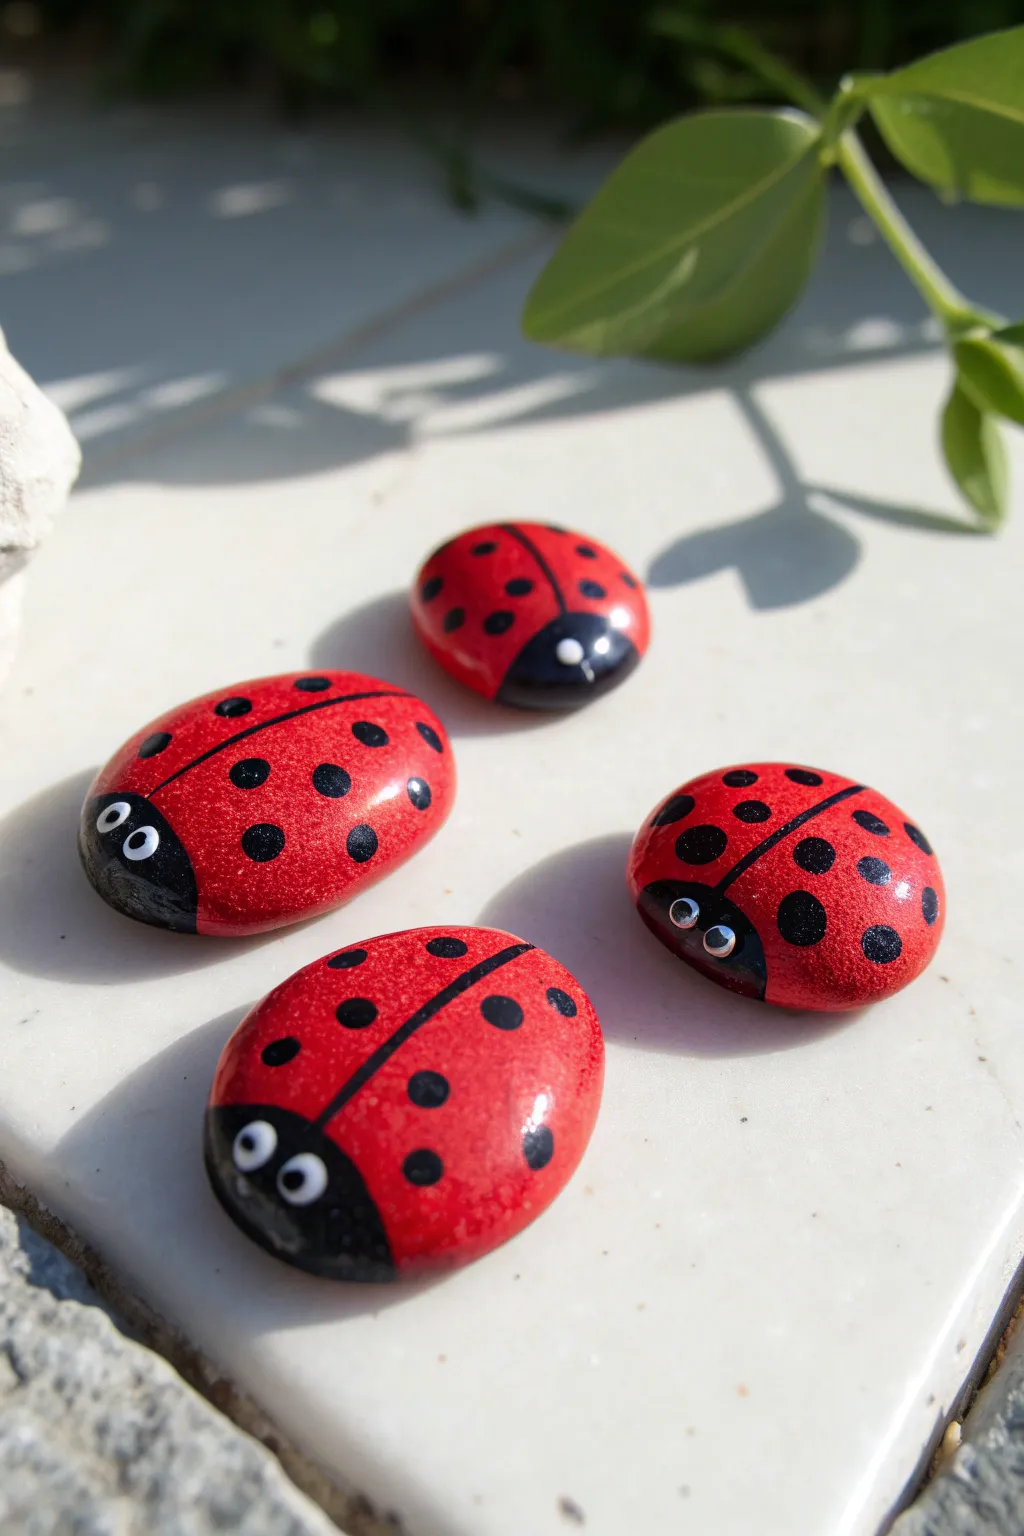
Transform smooth, rounded stones into charming little beetles that bring a pop of color to any garden or windowsill. These glossy red ladybugs are a perfect beginner project, using simple shapes and bold contrast for a delightful result.
How-To Guide
Materials
- Smooth, round river rocks (various sizes)
- Red acrylic paint (bright glossy finish preferred)
- Black acrylic paint
- White acrylic paint
- Flat paintbrush (medium)
- Small fine-tip detail brush
- Dotting tool or toothpick
- Clear spray sealer or varnish (glossy)
- Pencil (optional)
- Palette or paper plate
Step 1: Base Coat & Body
-
Clean your canvas:
Before pulling out the paints, wash your rocks thoroughly with warm soapy water to remove any dirt or dust. Let them dry completely, as moisture will keep the paint from sticking. -
Prime the surface:
If your rocks are very dark, you might want to paint a thin layer of white acrylic first to make the red pop later. Let this base layer dry fully. -
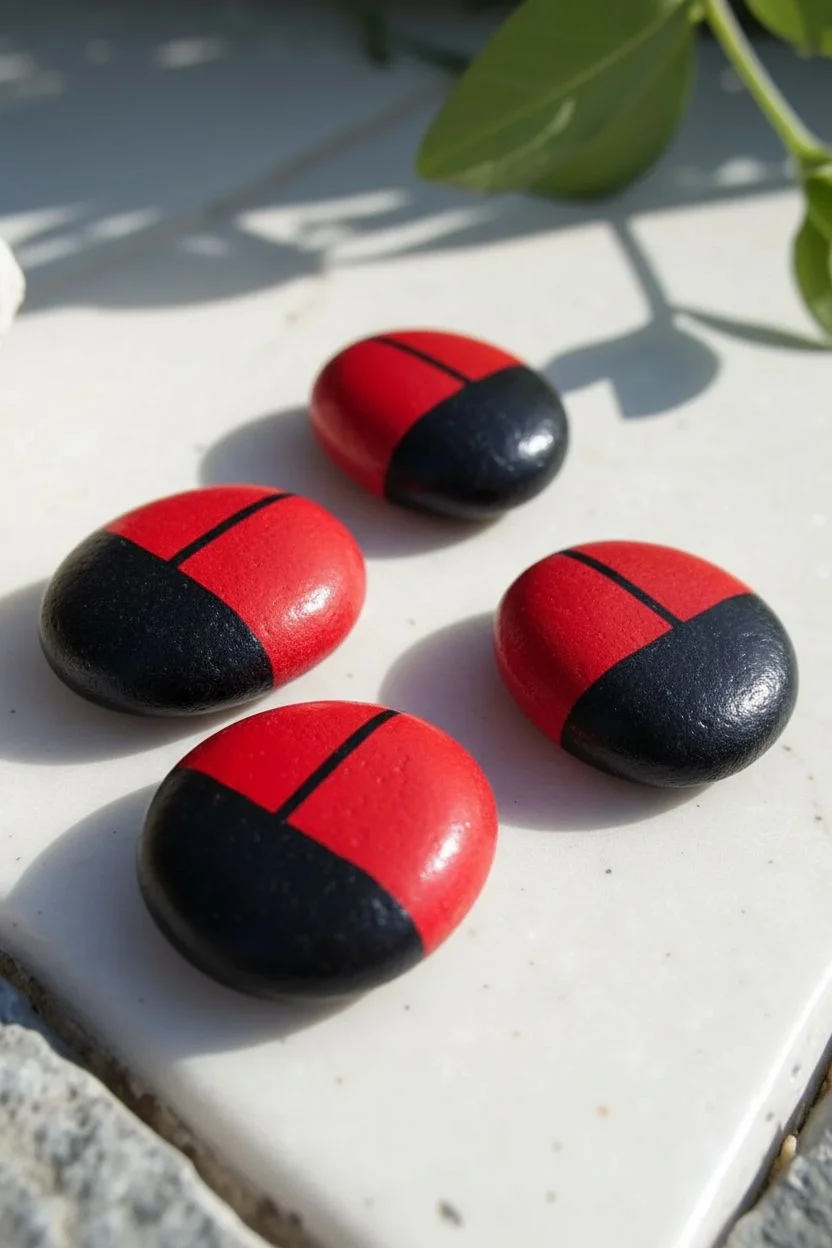
Paint the red shell:
Using your medium flat brush, cover about three-quarters of the rock in bright red paint. This will be the ladybug’s wings/body. -
Leave room for the head:
Leave a rounded section at the front of the rock unpainted (or just lightly covered), as you will be painting over this with black soon. -
Apply a second coat:
Red paint can sometimes be translucent. Once the first layer is dry to the touch, apply a second coat to ensure a rich, opaque color. -
Define the head:
Switch to black acrylic paint. At the front of the rock (the unpainted section), paint a semi-circle shape to create the ladybug’s head. -
Smooth the transition:
Carefully run your brush along the edge where the red and black meet to create a clean, curved line.
Paint looking streaky?
If the red paint looks uneven, let it dry 100% before adding another layer. Painting over wet acrylic lifts the previous coat and causes streaks.
Step 2: Details & Finish
-
Draw the center line:
Using a fine-tip brush and black paint, draw a straight line starting from the center of the black head down to the back of the rock. This separates the wings. -
Thicken the line slightly:
Go over the line gently if needed, but try to keep it relatively thin and straight. I usually rest my hand on the table to keep it steady. -
Add the spots:
Dip the handle end of a paintbrush or a dotting tool into black paint. Press gently onto the red wings to create round spots. -
Vary spot placement:
Place spots randomly on both sides of the center line. Try to make them symmetrical if you want a neat look, or random for a natural feel. -
Create the eyes:
Make sure the black head is completely dry. Dip a clean dotting tool or the end of a smaller paintbrush into white paint. -
Place the eyes:
Dot two white circles onto the black head area. Space them out slightly so your ladybug doesn’t look cross-eyed. -
Add pupils (optional):
For extra character, wait for the white dots to dry, then use a toothpick to place tiny black dots inside the white circles. -
Let it cure:
Allow the rocks to dry completely overnight. This is crucial before sealing to prevent smearing your hard work. -
Seal for shine:
Spray the finished rocks with a clear glossy sealer. This protects the paint from weather and gives the ladybugs that shiny, beetle-shell look.
Make them glow
Mix a tiny amount of fine glitter into your glossy sealer coat for magical ‘fairy garden’ ladybugs that sparkle in the sunlight.
Nestle your new little friends into a flower pot or arrange them on a pathway for a cheerful surprise


Smiley Face Rocks
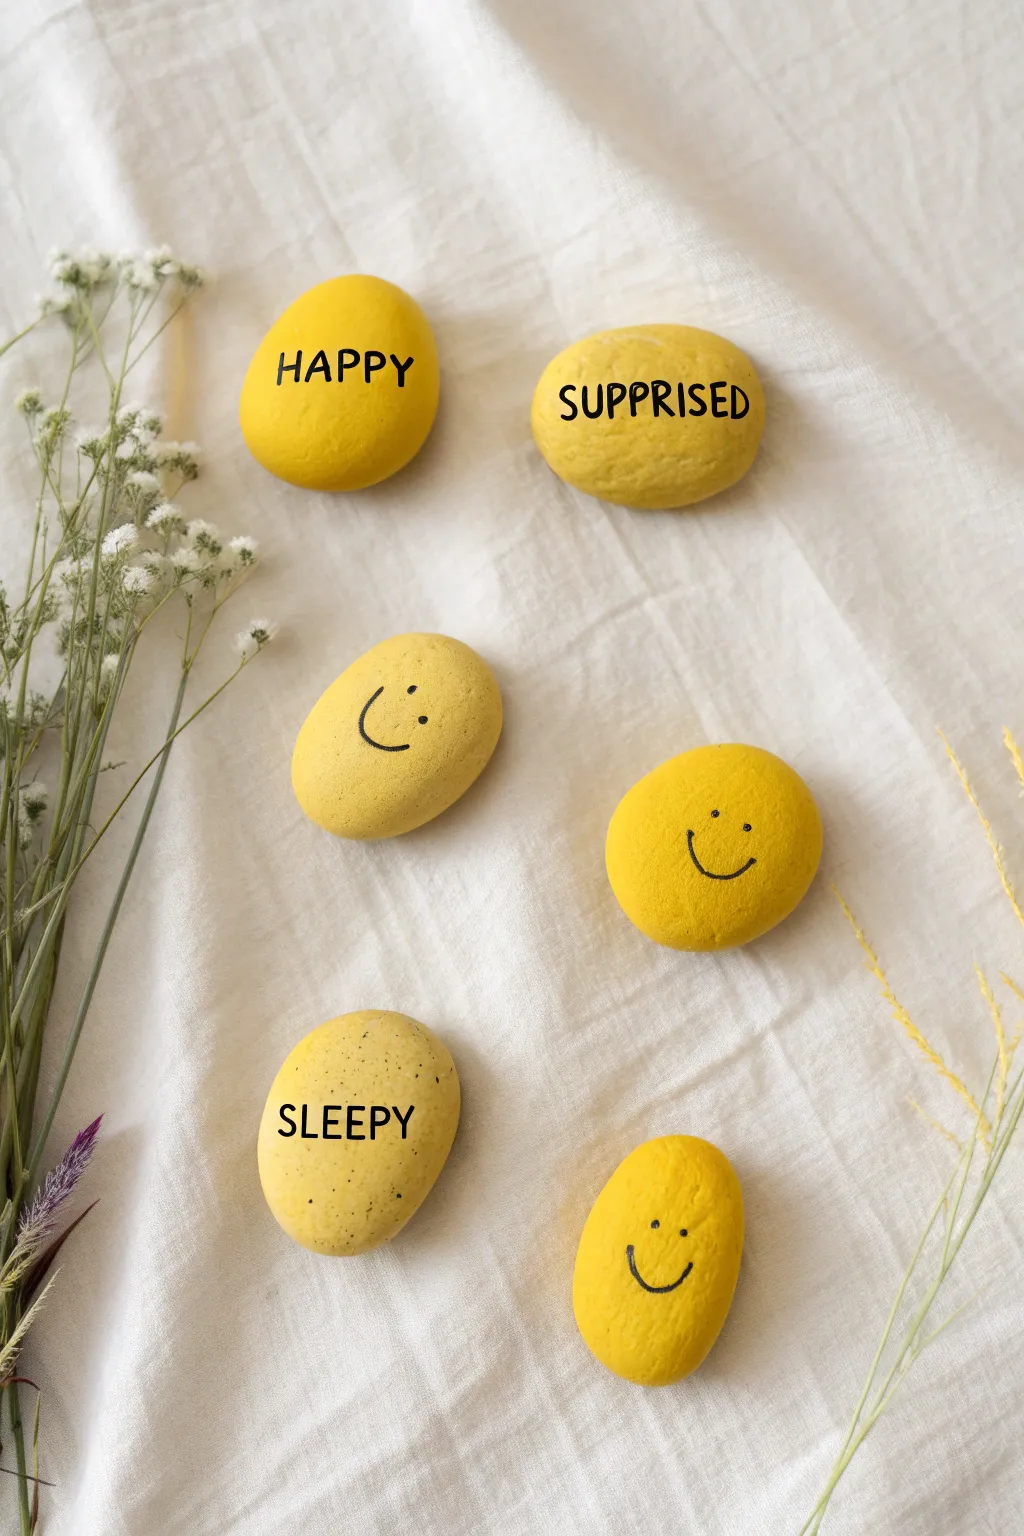
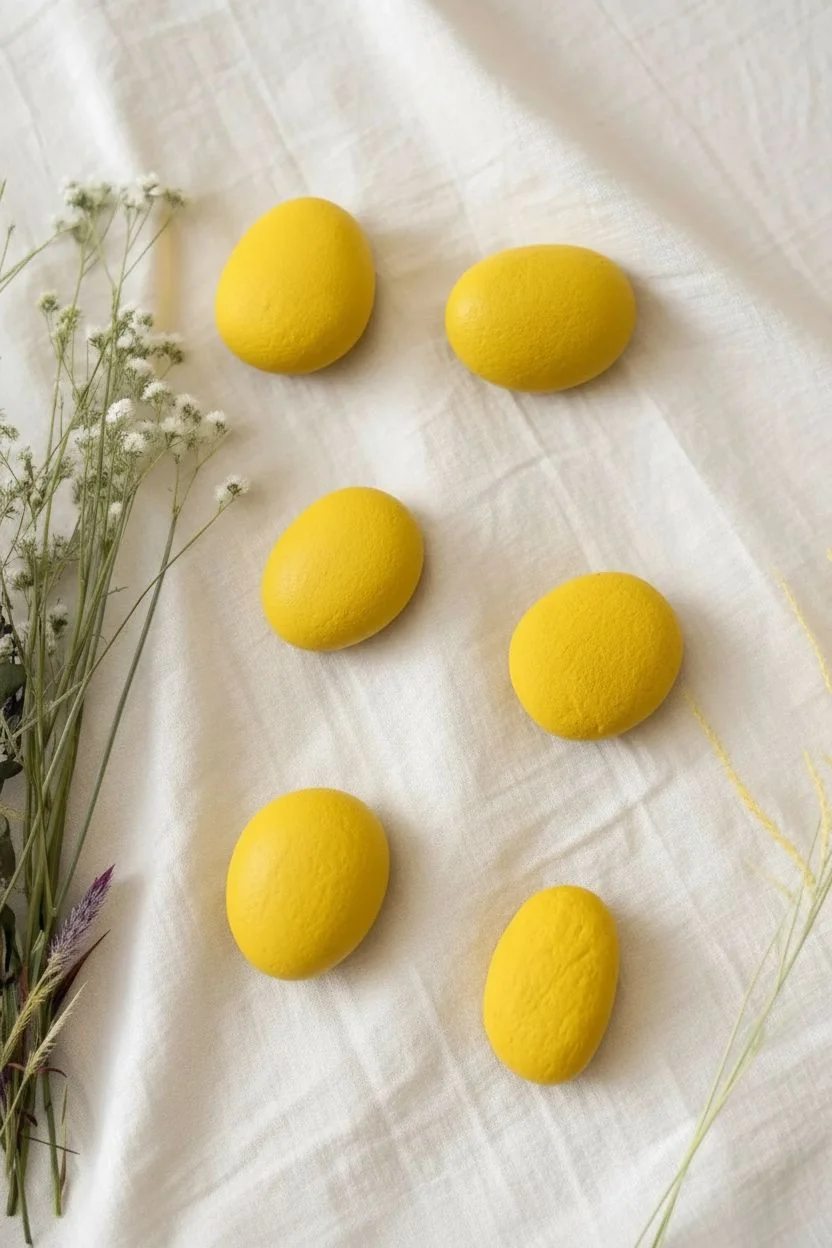
These cheerful yellow stones are a fantastic way to help kids learn about feelings while getting crafty. The project features pairs of bright yellow rocks—one with an emotion word and a matching mate with a simple, expressive face.
Detailed Instructions
Materials
- Smooth river rocks (oval or round shapes naturally work best)
- Bright yellow acrylic paint (matte or satin finish)
- Medium flat paintbrush
- Fine-point black permanent marker or black paint pen (extra fine tip)
- Newspaper or drop cloth
- Clear acrylic sealer spray (optional but recommended)
Step 1: Prepping the Canvas
-
Clean the stones:
Before you start painting, make sure your rocks are completely clean. Wash them with warm soapy water to remove any dirt or grit, then let them dry fully so the paint adheres properly. -
Set up your workspace:
Lay down some newspaper or a drop cloth to protect your table. Arrange your clean rocks in pairs based on size and shape. -
Apply the base coat:
Dip your flat paintbrush into the bright yellow acrylic paint. Brush a smooth, even layer over the top surface of the first rock. -
Paint the edges:
Make sure to extend the yellow paint down the sides of the rock so that no gray stone shows when looking from above. Let this first coat dry for about 15-20 minutes. -
Add a second coat:
For that vibrant, solid yellow look shown in the photo, apply a second coat of paint. This ensures the dark rock color doesn’t peek through. -
Wait for full drying:
This is crucial—allow the yellow paint to dry completely. If the paint is even slightly tacky, the marker might snag or bleed in the next steps.
Smooth Moves
If your rocks have a rough texture, mix a little white glue (PVA) into your yellow acrylic paint. It acts as a primer and fills in tiny pores for a smoother surface.
Step 2: Adding Expressions & Words
-
Plan your pairs:
Decide which rock will have the word and which will have the corresponding face. It’s helpful to keep them physically paired up on your workspace. -
Lettering ‘HAPPY’:
Take your black paint pen or marker. On the first rock, carefully print the word ‘HAPPY’ in uppercase letters across the center. Aim for a slightly loose, handwritten font style. -
Drawing the happy face:
On the partner rock, draw two small dots for eyes. Below them, draw a simple, wide ‘U’ shape to create a classic smile. -
Lettering ‘SUPPRISED’:
On the next word rock, write ‘SUPPRISED’ (or the correct spelling ‘SURPRISED’ if you prefer, though the photo shows a quirky misspelling) in the center. -
Creating the surprised face:
For the surprised expression, draw two dots for eyes again. Draw a smaller, slightly more curved smile or even a small circle for an ‘O’ mouth to match the feeling. -
Lettering ‘SLEEPY’:
On your final text rock, write the word ‘SLEEPY’ in clear block letters. -
Drawing the sleepy face:
This face is slightly different. Instead of dots, draw two small horizontal curves for closed eyes. Add a gentle smile underneath. -
Add texture (optional):
If you want the speckled look seen on the ‘SLEEPY’ rock in the photo, you can lightly flick a tiny bit of diluted black paint from a toothbrush, or just leave them solid yellow for a cleaner look. -
Seal the deal:
Once the black ink is totally dry, take the rocks outside and give them a light coat of clear acrylic sealer. This prevents the marker from fading and protects the paint from chipping.
Interactive Game
Turn the finished rocks into a memory match game! Flip them over so the stone side is up, mix them around, and challenge kids to find the matching emotion pairs.
Now you have a charming set of emotion stones ready for playtime or display


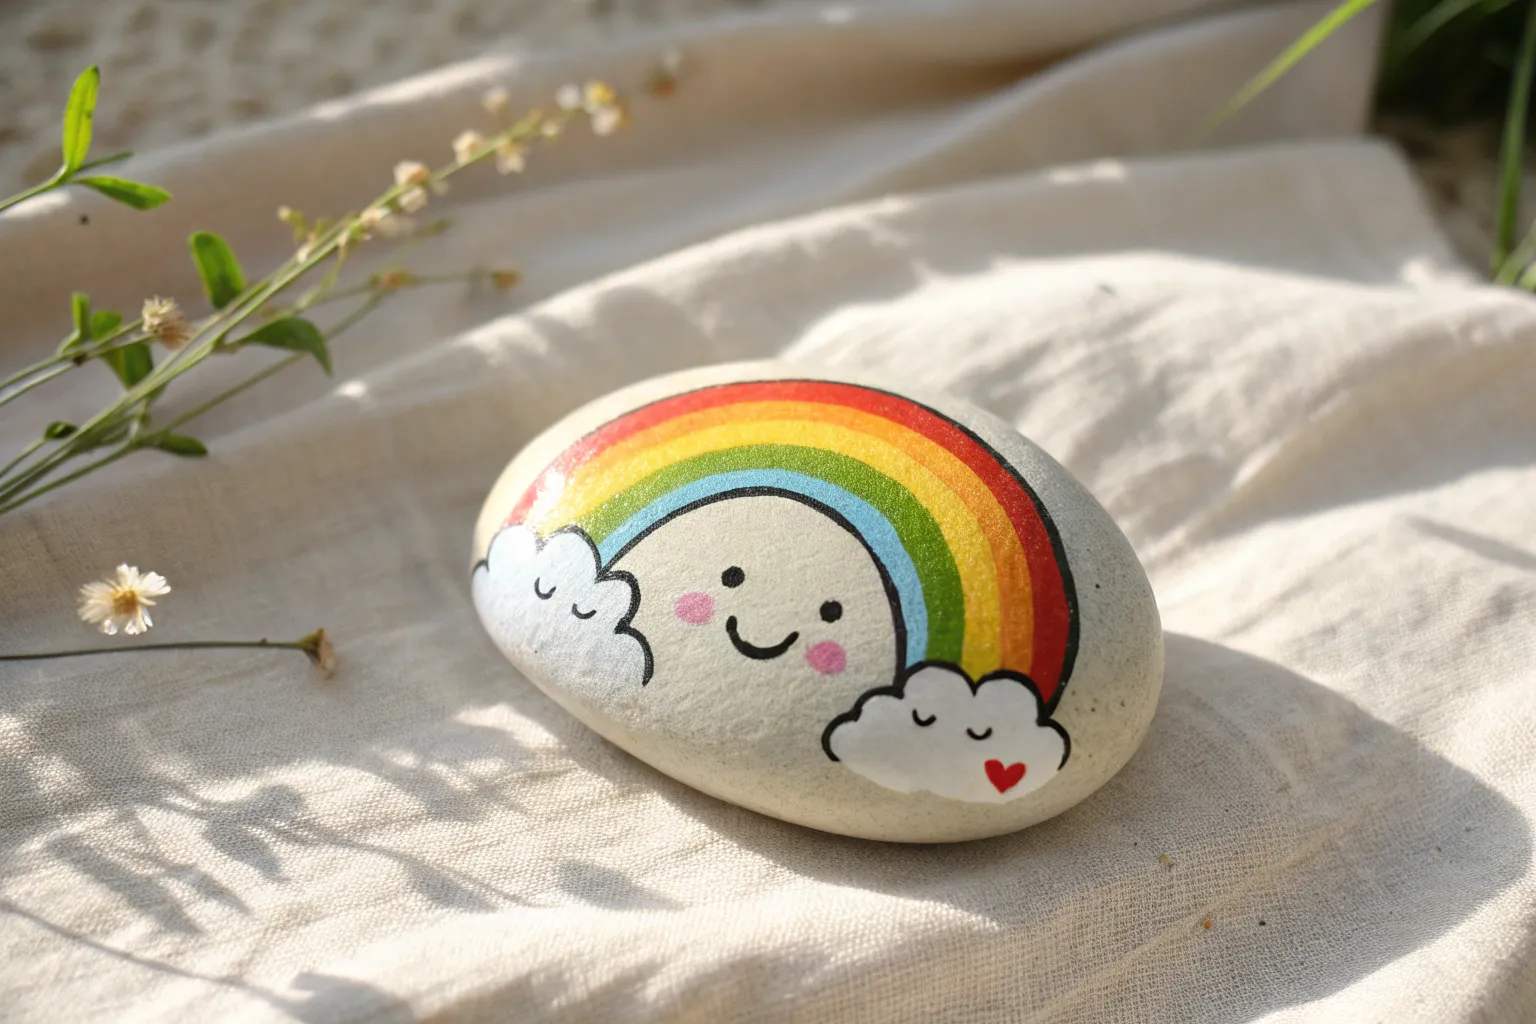
Rainbow Stripe Rocks
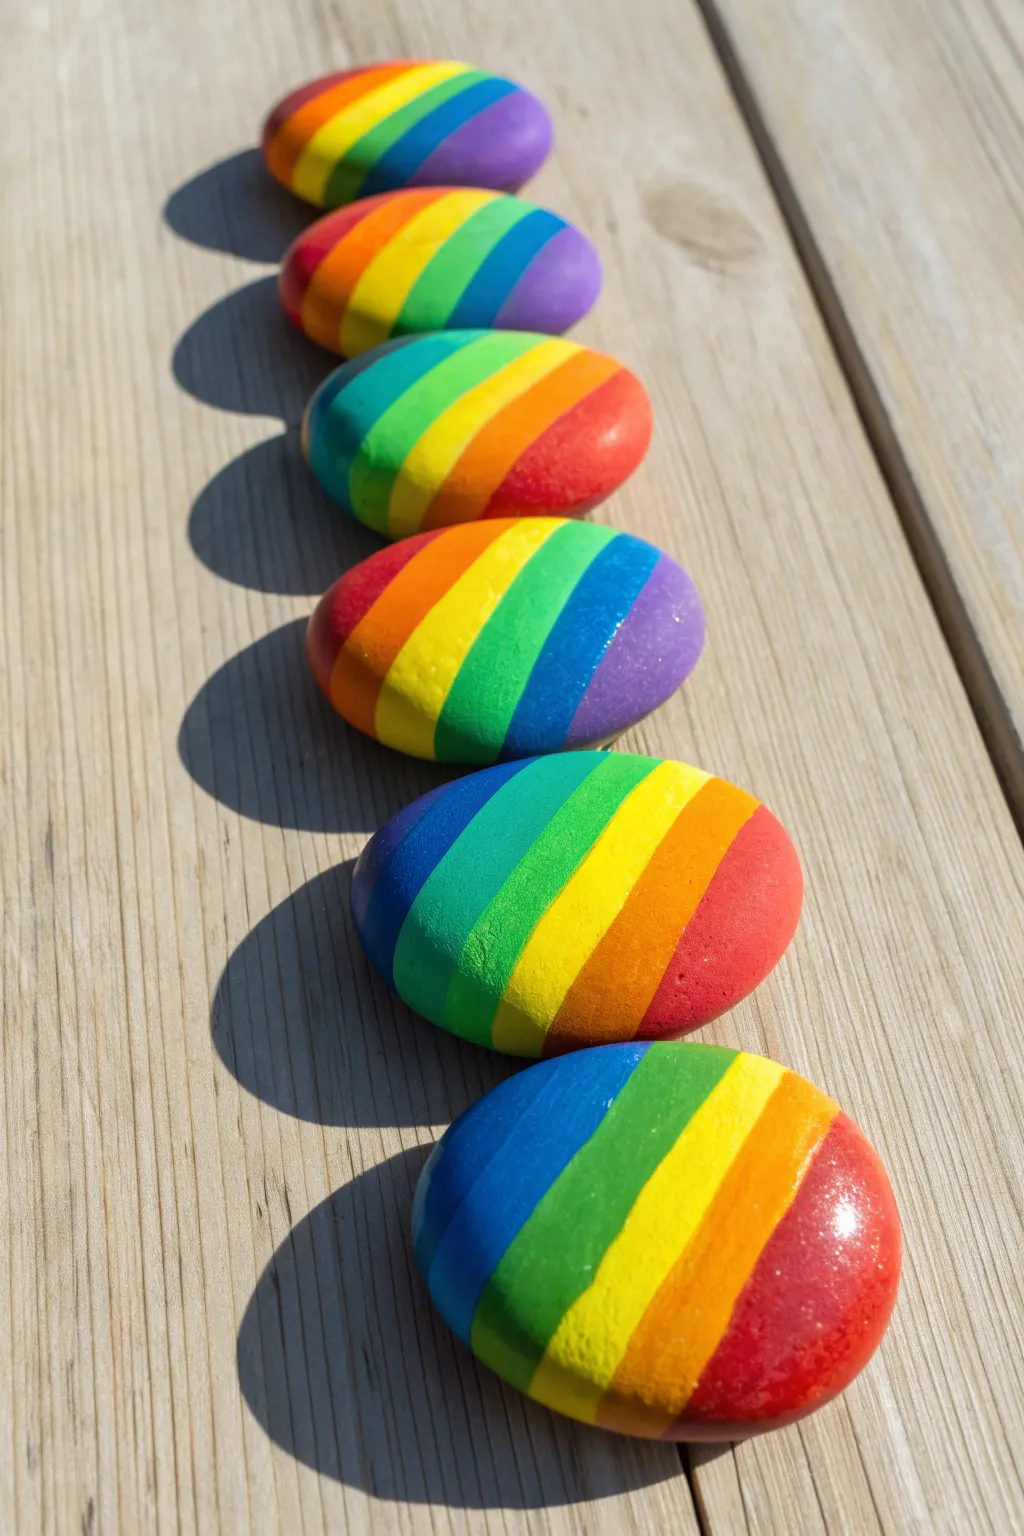
Brighten up the garden path or a windowsill with these strikingly simple yet bold rainbow stones. The diagonal stripes wrap perfectly around smooth pebbles, creating a continuous spectrum of color that looks cheerful from every angle.
How-To Guide
Materials
- Smooth, round or oval river rocks (approx. 2-3 inches in diameter)
- Acrylic craft paints (red, orange, yellow, green, blue, purple/violet)
- White acrylic paint (optional, for primer)
- Flat paintbrushes (approx. 1/4 inch width works best)
- Pencil
- Painter’s tape or masking tape (approx. 1/4 to 1/2 inch width)
- Water cup and paper towels
- Clear acrylic sealer spray (glossy finish)
Step 1: Preparation & Planning
-
Clean the surface:
Begin by thoroughly washing your rocks with warm soapy water to remove any dirt or oily residue. Let them dry completely, preferably in the sun. -
Prime with white (optional):
If your rocks are very dark grey or black, painting a base layer of white acrylic paint will help your rainbow colors pop. Let this base coat dry fully before moving on. -
Analyze the pattern:
Look at the diagonal flow of the stripes in the example. Notice how the bands are roughly equal in width and slant across the longer axis of the stone. -
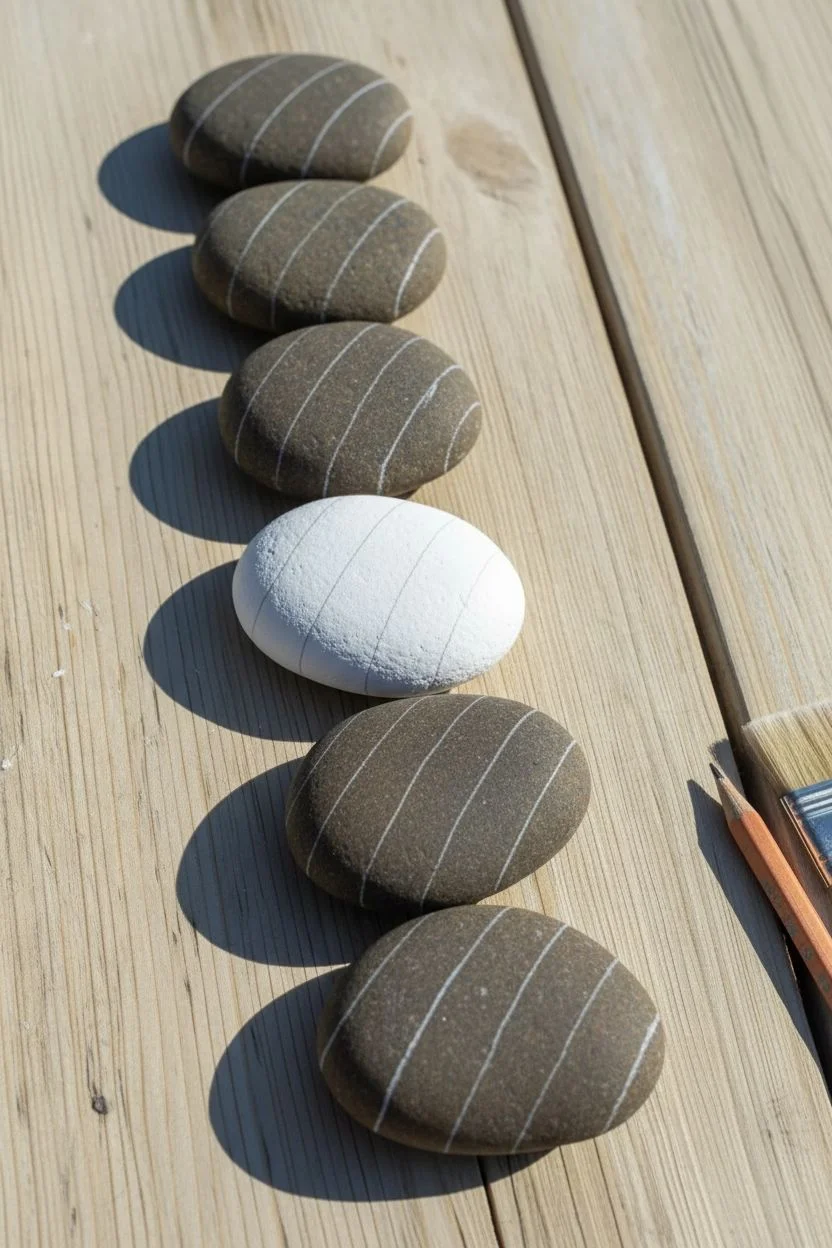
Sketch the guidelines:
Using a pencil, lightly draw diagonal lines across your rock to mark where each color band will go. Aim for about 5-6 sections depending on the size of your rock. -
Check the spacing:
Ensure your sections are wide enough to accommodate your paintbrush; narrow stripes are harder to fill neatly.
Uneven Lines?
If you struggle with shaky hands, apply thin masking tape or washi tape over the pencil lines. Paint every other color, let dry, remove tape, then tape over the painted parts to do the remaining stripes.
Step 2: Applying Color
-
Start with red:
Choose one end of the rock to begin. Load your flat brush with red paint and fill in the first diagonal segment. -
Create a sharp edge:
Turn the brush on its side to carefully paint along your pencil line, creating a crisp boundary for the red stripe. -
Move to orange:
Rinse your brush well. Next to the red stripe, paint the orange band. I find it helpful to slightly overlap the wet edges just a hair to avoid gaps, but be careful not to muddy the colors. -
Add the yellow:
Paint the yellow stripe next. Yellow is often translucent, so you might need a second coat here after the first one dries to make it opaque. -
Paint the green band:
Continue the pattern with a vibrant grass green. Try to keep the diagonal angle consistent with the previous stripes. -
Apply the blue:
Fill in the next section with a deep, true blue. Use the flat edge of the brush to maintain that straight line against the green. -
Finish with purple:
Complete the sequence with a purple or violet stripe at the remaining end of the rock. -
Inspect the sides:
Lift the rock carefully and ensure the stripes wrap all the way down the sides to the bottom edge for a finished look. -
Touch up gaps:
Check for any bald spots or uneven lines between colors. Use a small detail brush to neaten these transitions if necessary.
Pro Tip: Make Colors Pop
For the brightest result, paint the yellow and orange stripes first. It is much easier to paint dark colors (like blue and purple) neatly up against light colors than the other way around.
Step 3: Finishing Touches
-
Let it cure:
Allow the paint to dry completely. This usually takes about 20-30 minutes for acrylics, but wait longer if you applied thick layers. -
Prepare for sealing:
Take your dry rocks to a well-ventilated area, preferably outdoors. -
Apply the sealer:
Spray a light, even coat of clear glossy acrylic sealer over the rocks. This gives them that shiny ‘wet’ look seen in the photo and protects the paint from chipping. -
Dry and display:
Wait for the sealer to lose its tackiness before handling. Arrange them in a line to see your full spectrum come to life.
Line up your finished stones to create a beautiful, permanent rainbow that you can enjoy rain or shine


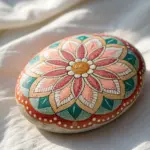
Heart Pattern Rocks
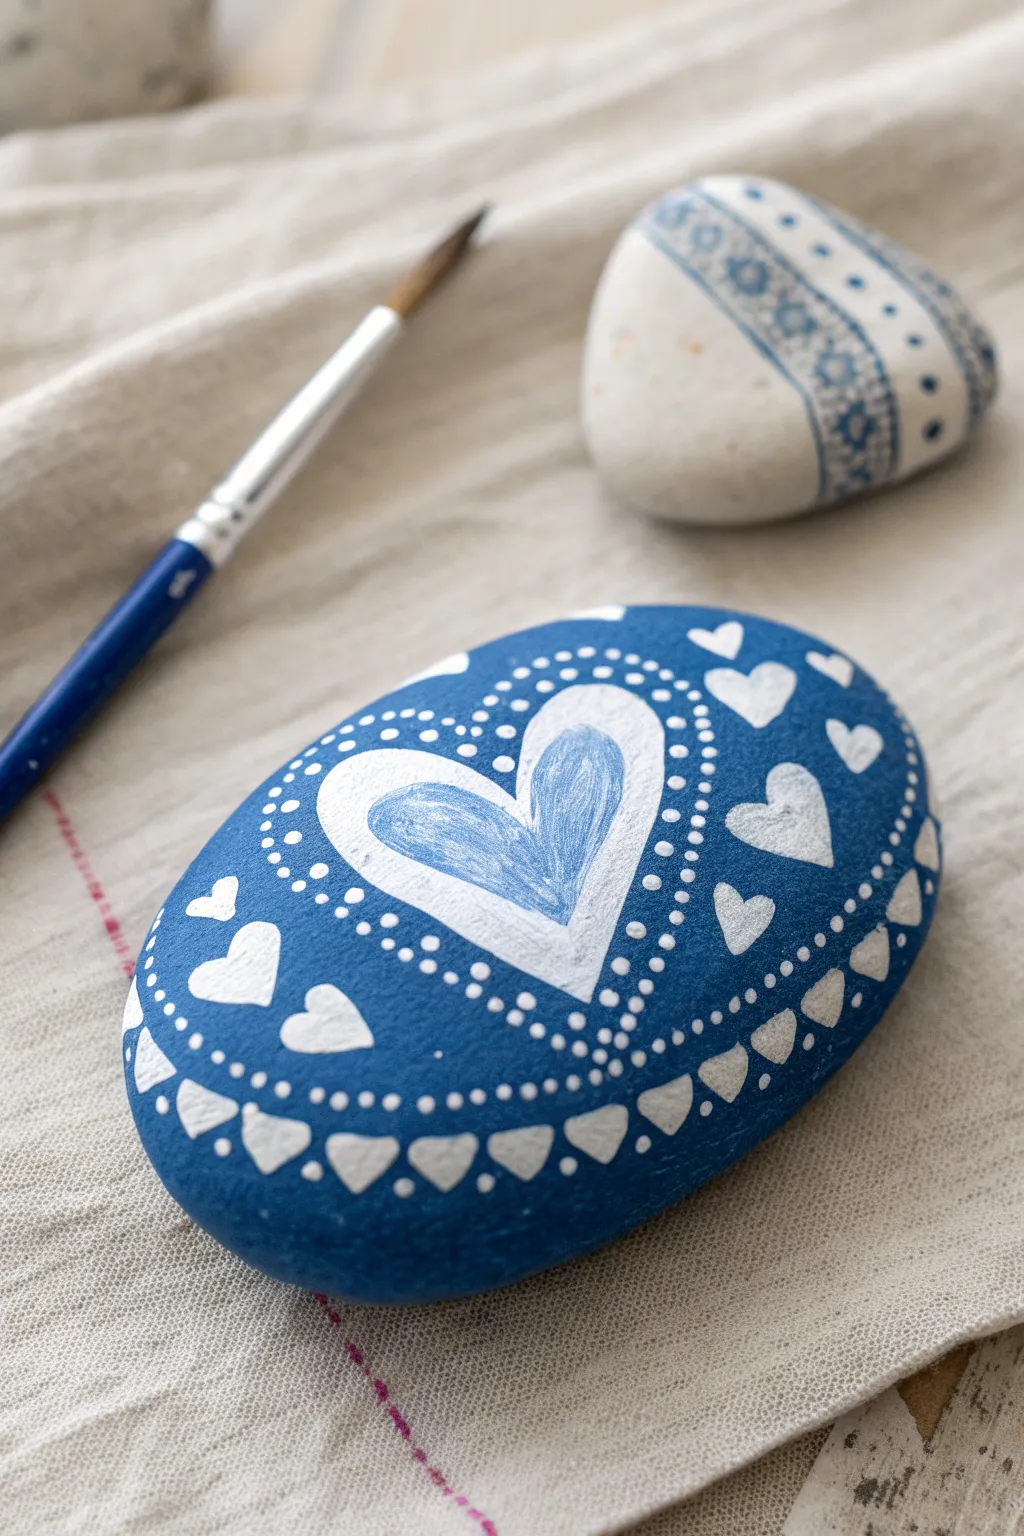
Transform a smooth river stone into a stunning token of affection with this intricate-looking yet simple design. Using a classic blue and white palette, you’ll build up layers of hearts and dots to create a beautiful mandala-style pattern.
Detailed Instructions
Materials
- Smooth, oval river rock (cleaned and dried)
- Deep blue acrylic paint (navy or cobalt)
- White acrylic paint
- Light blue acrylic paint (or mix blue and white)
- Medium flat paintbrush
- Fine detail paintbrush (size 0 or 00)
- Dotting tool (or the handle end of a paintbrush/toothpick)
- Gloss varnish or clear sealant spray
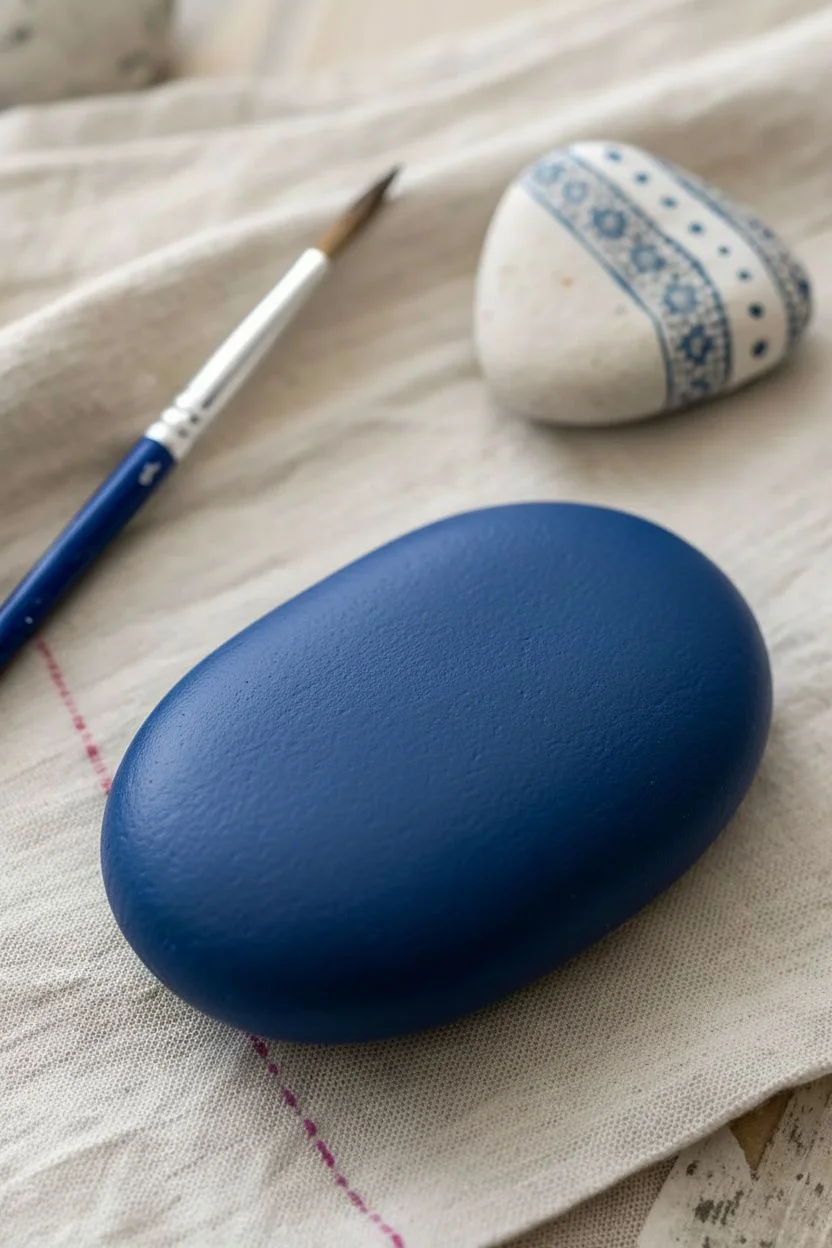
Step 1: Base Coating
-
Prepare the stone:
Begin by washing your stone with warm soapy water and letting it dry completely to ensure the paint adheres properly. -
Apply the background:
Paint the entire top surface of the rock with your deep blue acrylic paint. You may need two coats to get a solid, opaque finish; let the first coat dry before adding the second. -
Dry completely:
Wait until the blue base is perfectly dry to the touch before starting any detail work, or the white paint might smudge into the blue.
Paint Consistency Pro Tip
If your white paint isn’t flowing smoothly for the tiny hearts, add a singular drop of water to thin it slightly. It should feel like heavy cream.
Step 2: Central Heart Design
-
Paint the center heart:
Using your fine detail brush and light blue paint, draw a medium-sized heart right in the center of the painted surface. -
Outline the center:
Take the white paint and carefully outline the light blue heart. Make this outline slightly thick and bold so it stands out against the dark background. -
Add inner details:
Inside the light blue heart, use a very dry brush with a tiny bit of white paint to create feathery strokes, giving it a soft, textured look. -
Create the first dot border:
Dip your dotting tool or the back end of a small paintbrush into white paint. Place small, evenly spaced dots following the shape of the central heart, leaving a small gap between the heart and the dots. -
Add the second dot layer:
Create a second row of white dots around the first one. I like to make these slightly larger if possible, or just keep them consistent with the first row.
Step 3: Surrounding Patterns
-
Paint scattered hearts:
In the open blue space surrounding your central dotted heart, use your fine brush to paint small, solid white hearts randomly scattered. Angle them slightly outward for a radiating effect. -
Start the border:
Along the outer edge of the rock’s face, paint a ring of small, white triangles that point inward. These will look like the bottom tips of hearts. -
Connect the border:
Above each triangle base, paint two small rounded bumps to complete the heart shapes, forming a chain of white hearts around the perimeter. -
Add detail dots:
between the scattered hearts and the border, use your smallest dotting tool (or a toothpick) to add tiny white filler dots in empty spaces.
Upgrade Your Design
Try adding small rhinestone stickers in the center of the scattered hearts for a bit of sparkle that catches the light.
Step 4: Finishing Touches
-
Refine the lines:
Look over your design. If the blue background shows through any white areas too much, carefully add a second layer of white to brighten them up. -
Let it cure:
Set the rock aside in a dust-free area and allow the paint to dry completely. This usually takes at least an hour for thick dots. -
Seal the artwork:
Once fully dry, apply a coat of gloss varnish or clear sealant spray. This protects the stone from scratches and makes the deep blue color pop beautifully.
Place your finished heart rock on a desk or give it to a friend as a durable handmade valentine
BRUSH GUIDE
The Right Brush for Every Stroke
From clean lines to bold texture — master brush choice, stroke control, and essential techniques.
Explore the Full Guide
Polka Dot Surprise Rocks
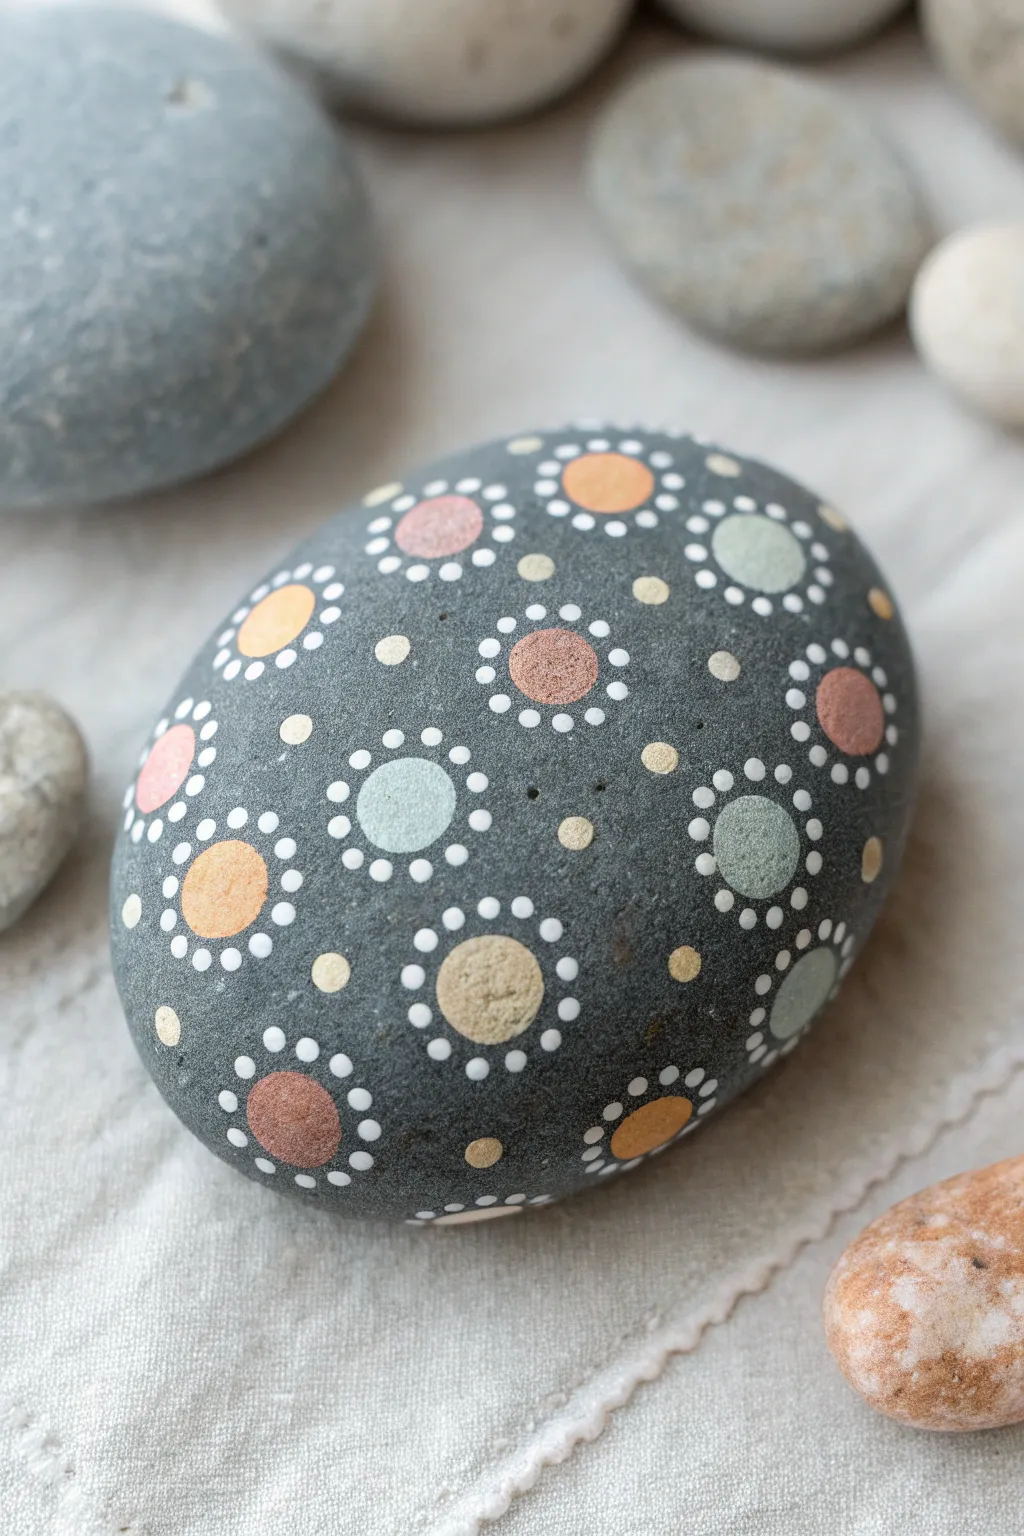
Transform a smooth river rock into a calming piece of art using a simple dotting technique. This design features pastel-colored circles rimmed with delicate white pearls, creating a scattered mandala effect that feels both modern and whimsical.
How-To Guide
Materials
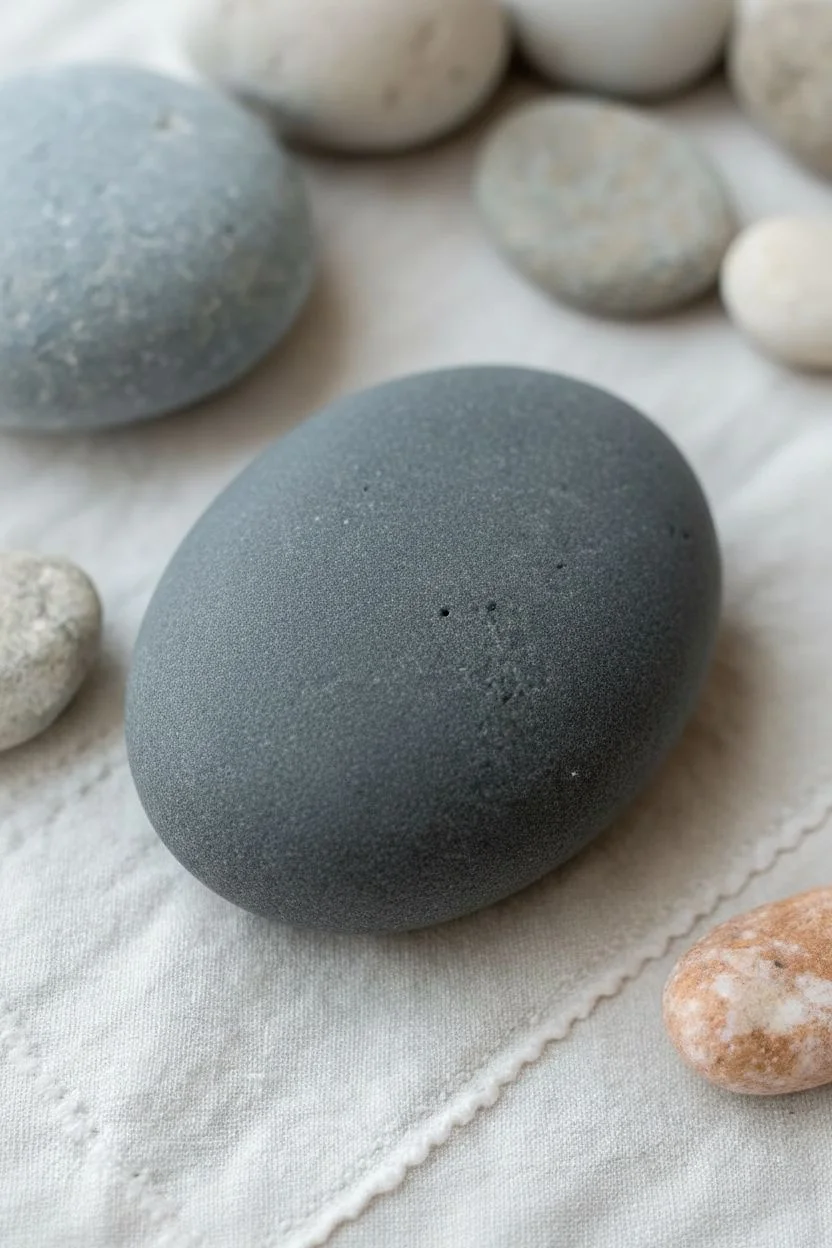
- Smooth, oval river rock (dark grey or black)
- Acrylic paints (white, pastel blue, peach, soft pink, light beige)
- Dotting tools or stylus set (various sizes)
- Fine point paintbrush (optional)
- Acrylic matte varnish or sealant
- Palette or small plate
- Damp cloth or paper towel
Step 1: Preparation
-
Clean the canvas:
Begin by washing your stone thoroughly with soap and water to remove any dirt or oils. Let it dry completely before starting to ensure the paint adheres properly. -
Assess the surface:
If your stone isn’t naturally dark or uniform in color, you can paint a base coat of dark grey or black acrylic paint. However, the natural stone texture often looks best for this organic style.
Paint peaking?
If your dots have little pointed peaks on top, your paint is too thick. Mix in a tiny drop of water or flow medium to help them settle into perfect, smooth domes.
Step 2: Painting the Primary Dots
-
Load your palette:
Squeeze out small amounts of your pastel colors: light blue, peach, pink, and beige. Keep them separate on your palette. -
Choose your large tool:
Select a medium-sized dotting tool or the flat end of a brush handle. You want a tool that creates a circle about 4-6mm in diameter. -
Place anchor dots:
Dip your tool into the pastel blue paint. Press gently onto the rock to create a few scattered circles. Space them widely apart to leave room for other colors and the detailed rings. -
Add color variety:
Wipe your tool clean and switch to the peach color. Place these dots in the empty spaces between the blue ones, maintaining that scattered look. -
Fill in the gaps:
Repeat the process with your soft pink and beige paints. Aim for a balanced composition where no two identical colors are right next to each other. -
Add stand-alone small dots:
Using a slightly smaller tool and the beige or gold paint, place a few tiny single dots in the larger empty spaces between your main circles. These act as little filler accents. -
Let it set:
Allow these primary colored dots to dry completely. If the paint is thick, the surface skin might dry while the center is wet, so be patient.
Make it Metallic
Swap the beige or peach paint for a metallic gold or copper. It adds a lovely shimmer that catches the light and makes the stone look like jewelry.
Step 3: Adding the Detail Rings
-
Prepare the white paint:
Ensure your white acrylic paint is a creamy consistency. If it’s too thick, add a drop of water or pouring medium so the tiny dots stay round and don’t peak. -
Select the smallest tool:
Switch to your smallest dotting stylus or a toothpick. You need precision here for the delicate outer rings. -
Start the first ring:
Choose one of your dry colored circles. Dip your tool in white and place a tiny dot at the ’12 o’clock’ position right next to the colored edge, but not touching it. -
Complete the circle:
Continue placing tiny white dots around the perimeter of the colored circle. Try to keep the spacing between them consistent. -
Rotate your work:
It helps to turn the rock in your hand as you work around each circle, ensuring you always have a comfortable angle for dotting. -
Technique check:
I find that re-dipping the tool every 2-3 dots keeps the size uniform. If you run out of paint, the dots will get progressively smaller. -
Ring all circles:
Repeat this ringing process for every colored circle on the rock. The rhythm of this step is quite meditative. -
Add accents to filler dots:
If you added those tiny standalone beige dots earlier, you can leave them plain or carefully place one tiny white dot right next to them for asymmetry.
Step 4: Finishing Touches
-
Final drying time:
Let the entire rock dry for at least an hour. The tiny white dots can be easily smudged if handled too soon. -
Seal the artwork:
Apply a coat of matte spray varnish or brush-on sealant. A matte finish preserves the natural look of the stone, while gloss makes the colors pop.
Place your finished mandala stone on a desk or shelf as a peaceful reminder of your creativity
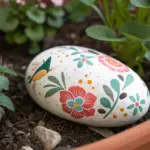
Simple Flower Rocks
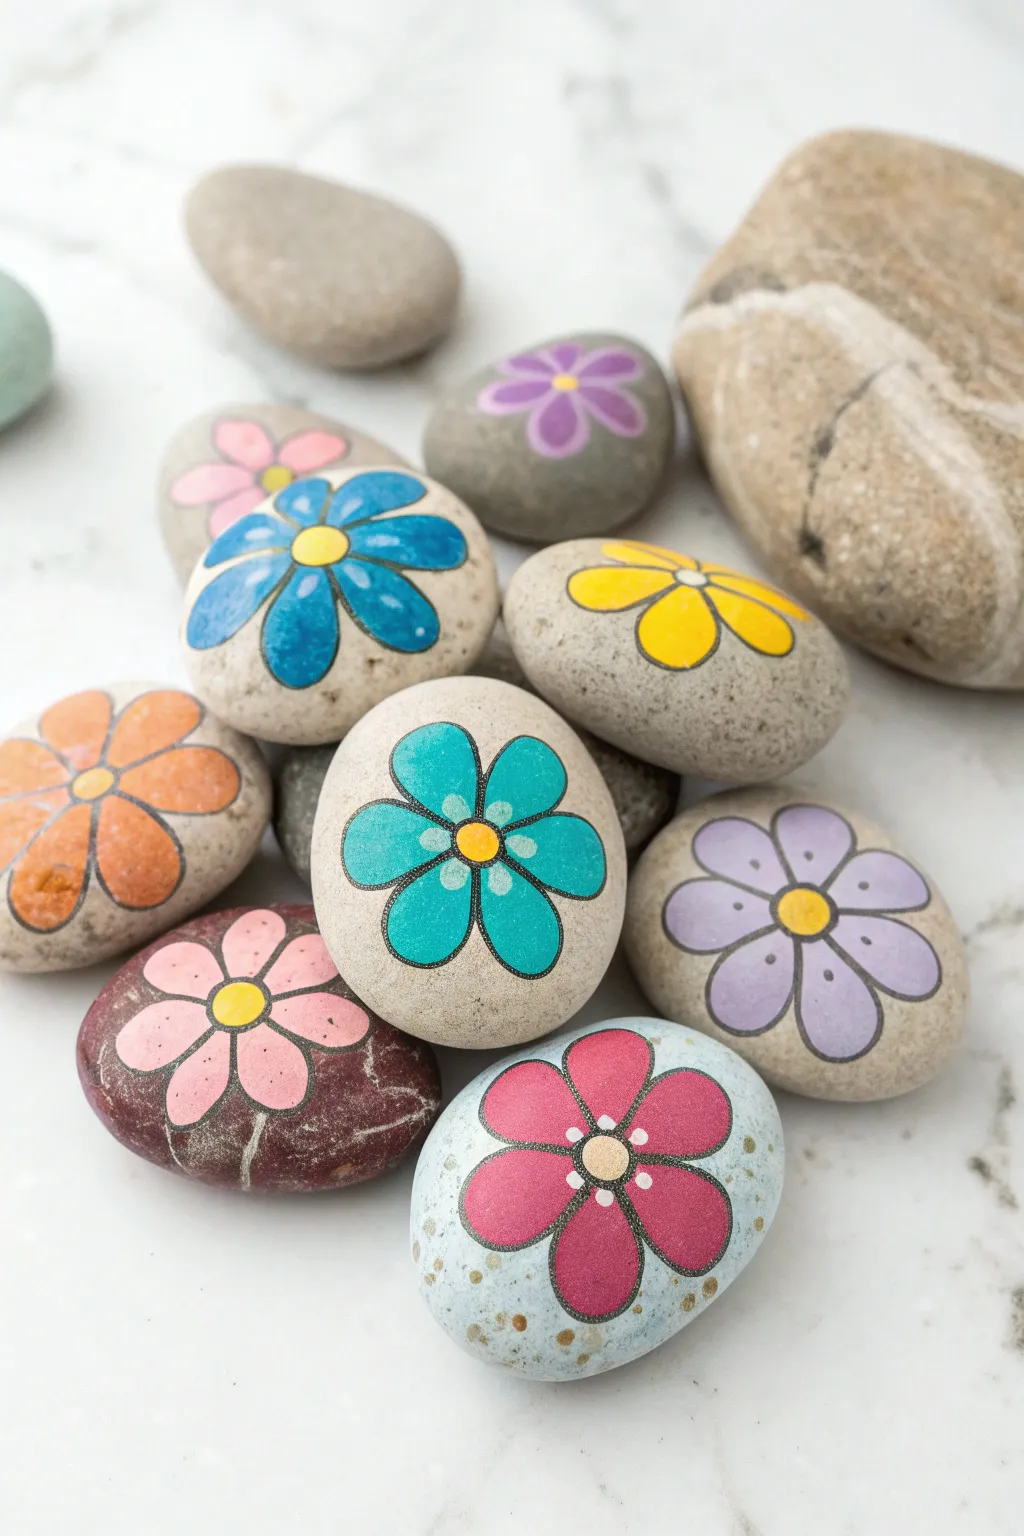
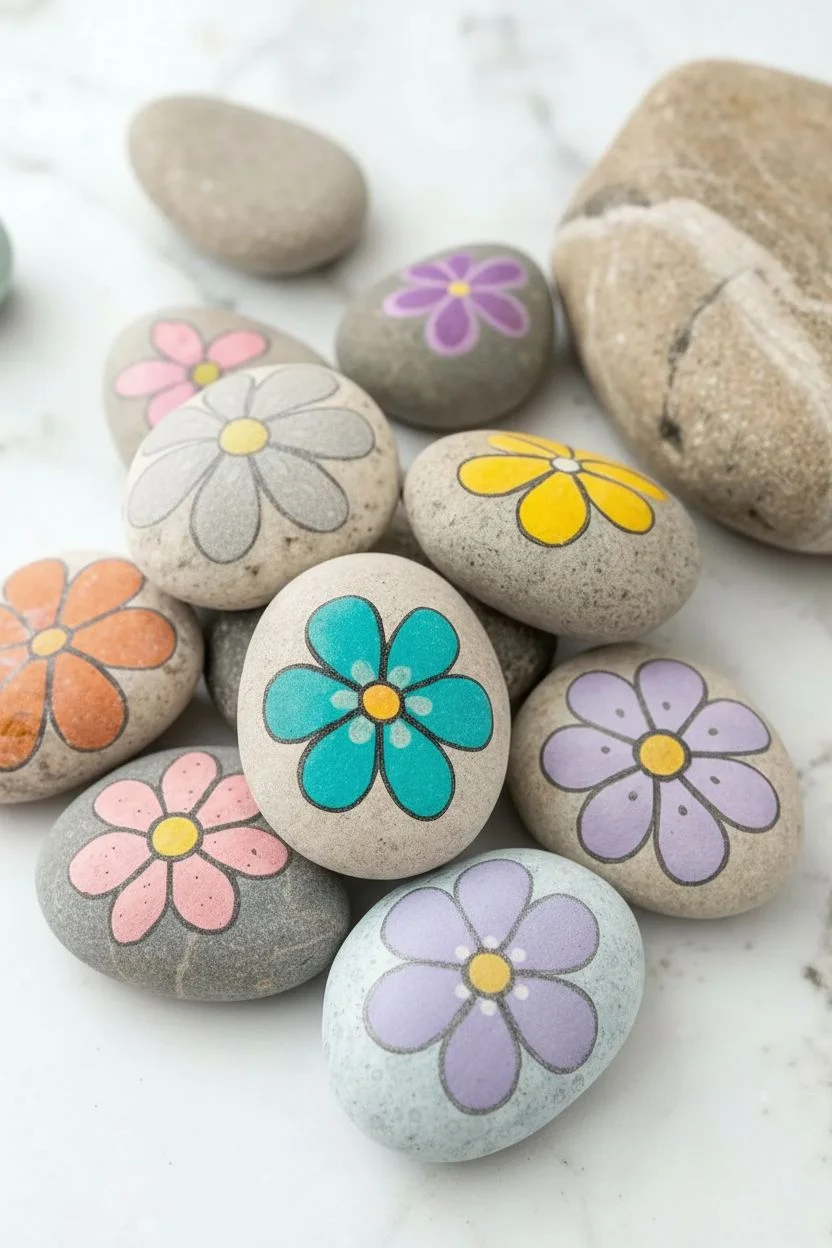
Transform smooth river stones into a colorful, everlasting garden with these cheerful flower designs. The clean black outlines and vibrant petals make for a striking contrast against the natural stone background.
Step-by-Step
Materials
- Smooth river rocks (2-3 inches wide)
- Acrylic paints (teal, yellow, orange, blue, pink, purple)
- Fine point black paint pen or permanent marker
- Small round paintbrushes
- Pencil for sketching
- Clear acrylic sealer or varnish (spray or brush-on)
- Water cup and paper towels
Step 1: Preparation and Sketching
-
Clean Your Canvases:
Begin by thoroughly washing your rocks with soap and warm water to remove any dirt or oils. Let them dry completely before starting; paint won’t stick well to a damp or dirty surface. -
Plan the Flowers:
Use a pencil to lightly sketch the outline of a simple daisy-like flower on the flattest side of each rock. Aim for five or six large, rounded petals surrounding a circular center. -
Size Matters:
Make sure your flower is large enough to be the main star of the rock. The petals should extend towards the edges of the stone, leaving just a small border of natural rock visible.
Step 2: Painting the Base Colors
-
Paint the Centers:
Start by painting the circular center of each flower with bright yellow acrylic paint. Use a small round brush for precision. -
Choose Your Petal Colors:
Select a variety of distinct colors for your flowers—teal, deep blue, orange, lavender, and magenta work beautifully together. -
Fill in Petals:
Carefully paint the petals of your first flower. I find it easiest to paint from the center outward to create smooth strokes. Keep the paint within your pencil lines. -
Layering Up:
If your paint looks a bit transparent or streaky after the first coat, let it dry for about 15 minutes and apply a second coat for full opacity. -
Repeat the Process:
Paint the petals on all your other rocks, switching colors for each stone to create a diverse garden. Let all paint dry completely—this is crucial before the next step.
Paint Pen Magic
Shake your paint pen well before use. Test the flow on a scrap piece of paper first to avoid a sudden puddle of ink ruining your rock art.
Step 3: Outlining and Detailing
-
Trace the Center:
Once the paint is bone dry, take your fine point black paint pen. Carefully draw a clean, thin line around the yellow center circle. -
Outline the Petals:
Continue with the black pen to outline each individual petal. Try to keep your hand steady and your lines consistent in thickness. -
Add Inner Details:
Draw small detail lines or dots inside the petals if you wish, or keep it simple with just the outline as seen in the main design. -
Dot Accents:
For extra flair, add tiny white or colored dots around the center circle or on the petals using the tip of a toothpick or a dotting tool. -
Let the Ink Set:
Allow the paint pen or marker ink to dry fully to prevent any smearing during the final sealing phase.
Glitter Glam
Mix a tiny bit of fine glitter into your final clear sealant coat. It adds a subtle sparkle that catches the sunlight when placed outdoors.
Step 4: Finishing Touches
-
Seal the Deal:
Protect your artwork by applying a coat of clear acrylic sealer. A spray sealer is often easier and prevents brush strokes from smudging your black lines. -
Dry and Display:
Place the rocks in a safe, dust-free area to cure according to the sealer’s instructions. Once dry, they are ready to brighten up a garden path or windowsill.
Enjoy scattering these durable blooms around your home or hiding them in the park for others to find

PENCIL GUIDE
Understanding Pencil Grades from H to B
From first sketch to finished drawing — learn pencil grades, line control, and shading techniques.
Explore the Full Guide
Bumblebee Stripe Rocks
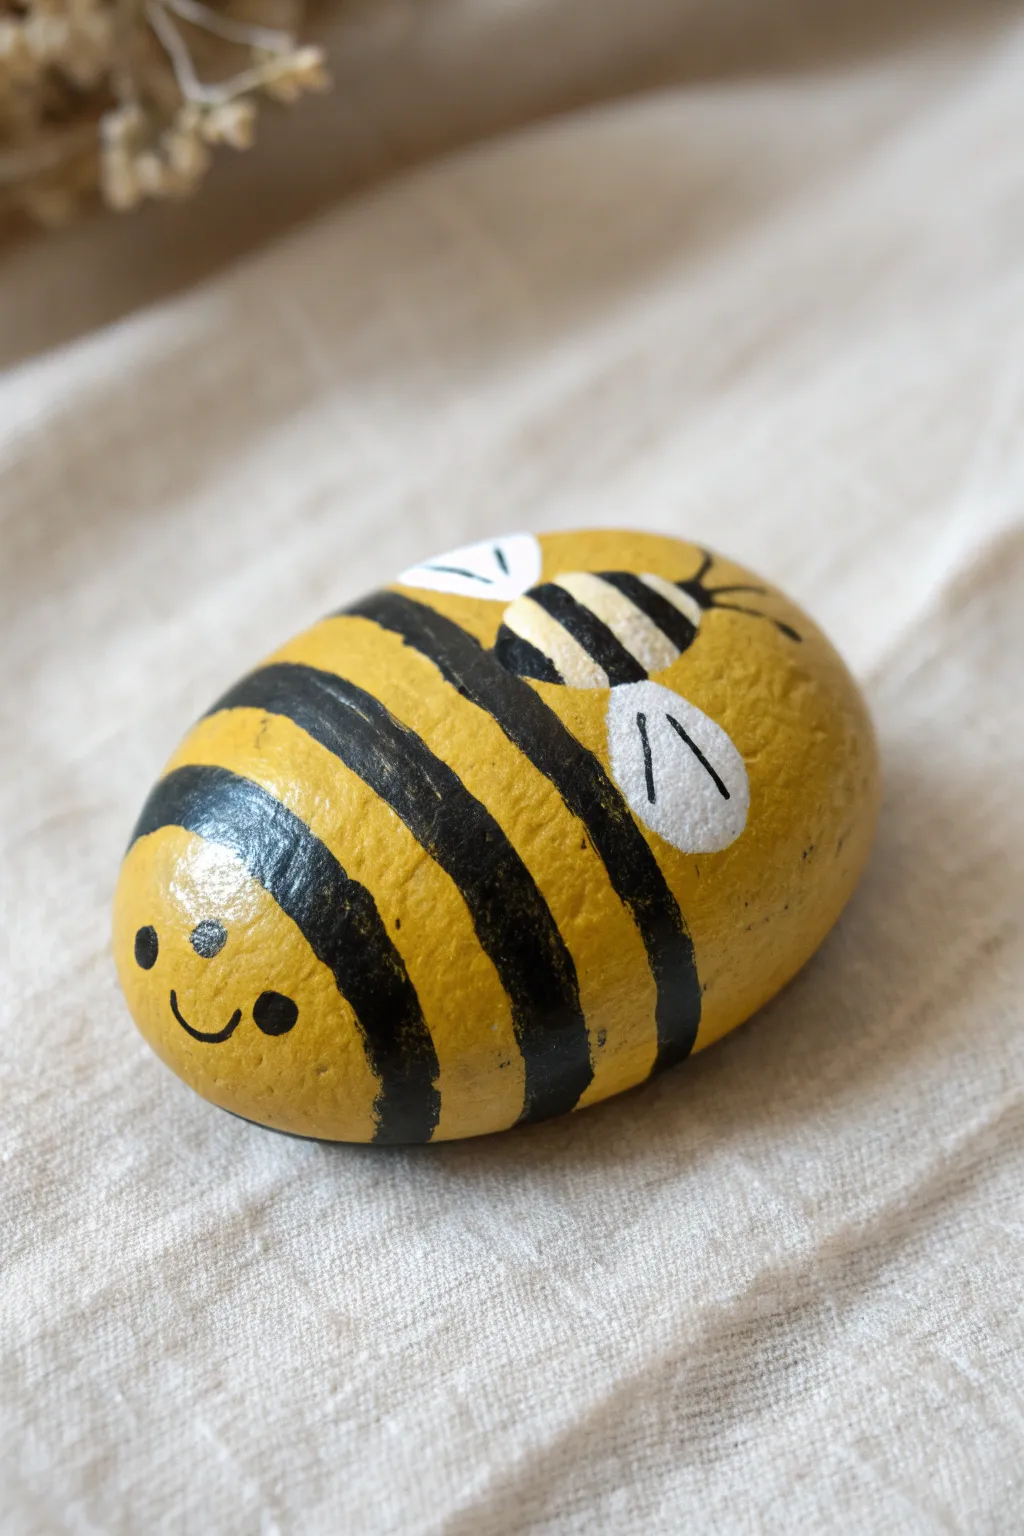
Transform a simple garden stone into a cheerful, buzzing friend with just a few coats of paint. This adorable bee features bright yellow stripes, a sweet smiling face, and even a tiny baby bee hitching a ride on its back.
How-To Guide
Materials
- Smooth, oval-shaped rock (roughly palm-sized)
- Yellow acrylic paint (bright, sunny shade)
- Black acrylic paint
- f White acrylic paint
- Medium flat paintbrush
- Small round detail brush
- Fine-point black permanent marker or paint pen (optional)
- Gloss sealant (spray or brush-on mod podge)
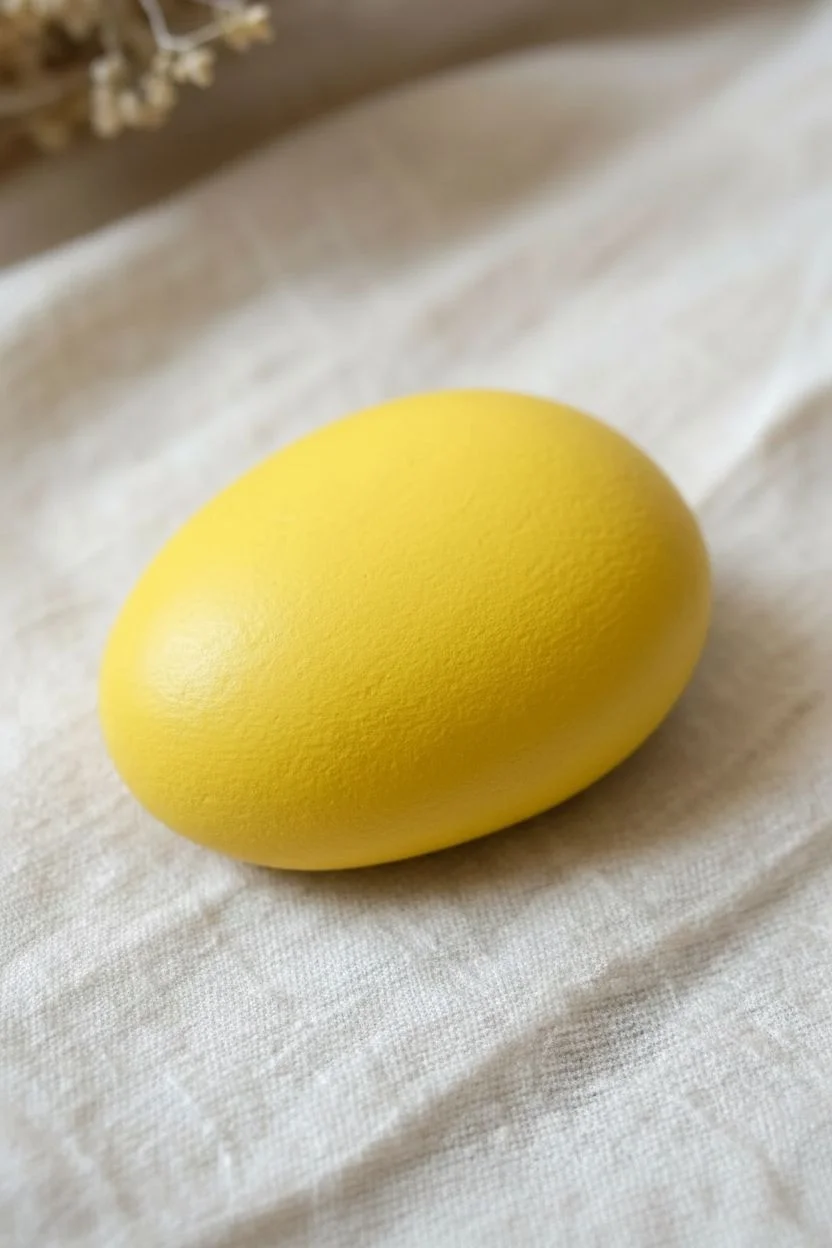
Step 1: Base Buzzy Coat
-
Clean Slate:
Begin by scrubbing your rock with warm soapy water and drying it completely. A clean surface ensures the paint sticks properly without peeling later. -
First Dip:
Using your medium flat brush, paint the entire top and sides of the rock with a bright yellow acrylic paint. -
Solid Coverage:
Let the first coat dry for about 10-15 minutes. If the rock’s natural color shows through, apply a second coat of yellow for a solid, opaque finish. -
Wait for Dryness:
Ensure the yellow base is completely dry to the touch before moving on to the stripes. Painting wet wet-on-wet here will make the colors muddy.
Smooth Operator
Look for river rocks specifically. Their tumbling in water makes them naturally polished and smooth, which makes painting clean, crisp stripes much easier than on rough stones.
Step 2: Earning Your Stripes
-
Curved Contour:
Load a medium brush with black acrylic paint. Start painting the stripes, curving them slightly to follow the roundness of the rock, which gives the bee volume. -
Stripe Spacing:
Leave a larger yellow space at the front for the face. Paint three to four thick black bands down the body, spacing them evenly. -
Crisp Edges:
If your edges look a little shaky, don’t worry. You can neaten them up later with a small brush and some yellow paint once the black is fully dry. -
Drying Time:
Allow the black stripes to dry completely. Black paint can smear easily into the lighter colors, so patience is key here.
Glitter Glam
Before sealing the rock, brush a tiny layer of glitter glue or sprinkle loose iridescent glitter onto the white wing sections to make them sparkle under the sun.
Step 3: The Tiny Rider
-
Baby Bee Spot:
On the upper back of the main bee, paint a small yellow oval. This will become the smaller bee resting on top. -
Tiny Stripes:
Using your smallest detail brush or a fine paint pen, add two very thin black stripes across the small yellow oval. -
Little Wings:
Paint two small white teardrop shapes on either side of the baby bee for its wings. I find two coats of white are usually needed to cover the yellow background. -
Wing Details:
Once the white wings are dry, use a fine liner brush or pen to add tiny black lines inside the wings for texture. -
Antennae:
Add two tiny curved lines coming off the front of the baby bee for its antennae.
Step 4: Friendly Faces & Finishing
-
Big Bee Wings:
Paint large white teardrop shapes on the sides of the main bee’s body, usually overlapping one of the black stripes slightly. -
Wing Definition:
Just like the baby bee, add thin black lines inside the larger white wings to distinguish the sections. -
The Face:
On the front yellow section, dip the handle end of a paintbrush into black paint and dot two eyes. -
A Happy Smile:
Use your finest brush or a black paint pen to draw a simple ‘U’ shape for the smiling mouth between the eyes. -
Cheeky Details:
You can add tiny white highlight dots to the black eyes to bring the character to life. -
Seal the Deal:
Once your masterpiece is 100% dry (give it a few hours), apply a coat of glossy sealant to protect against weather and scratching.
Now you have a wonderful little garden critter ready to hide among your flowers
Turtle Shell Rocks
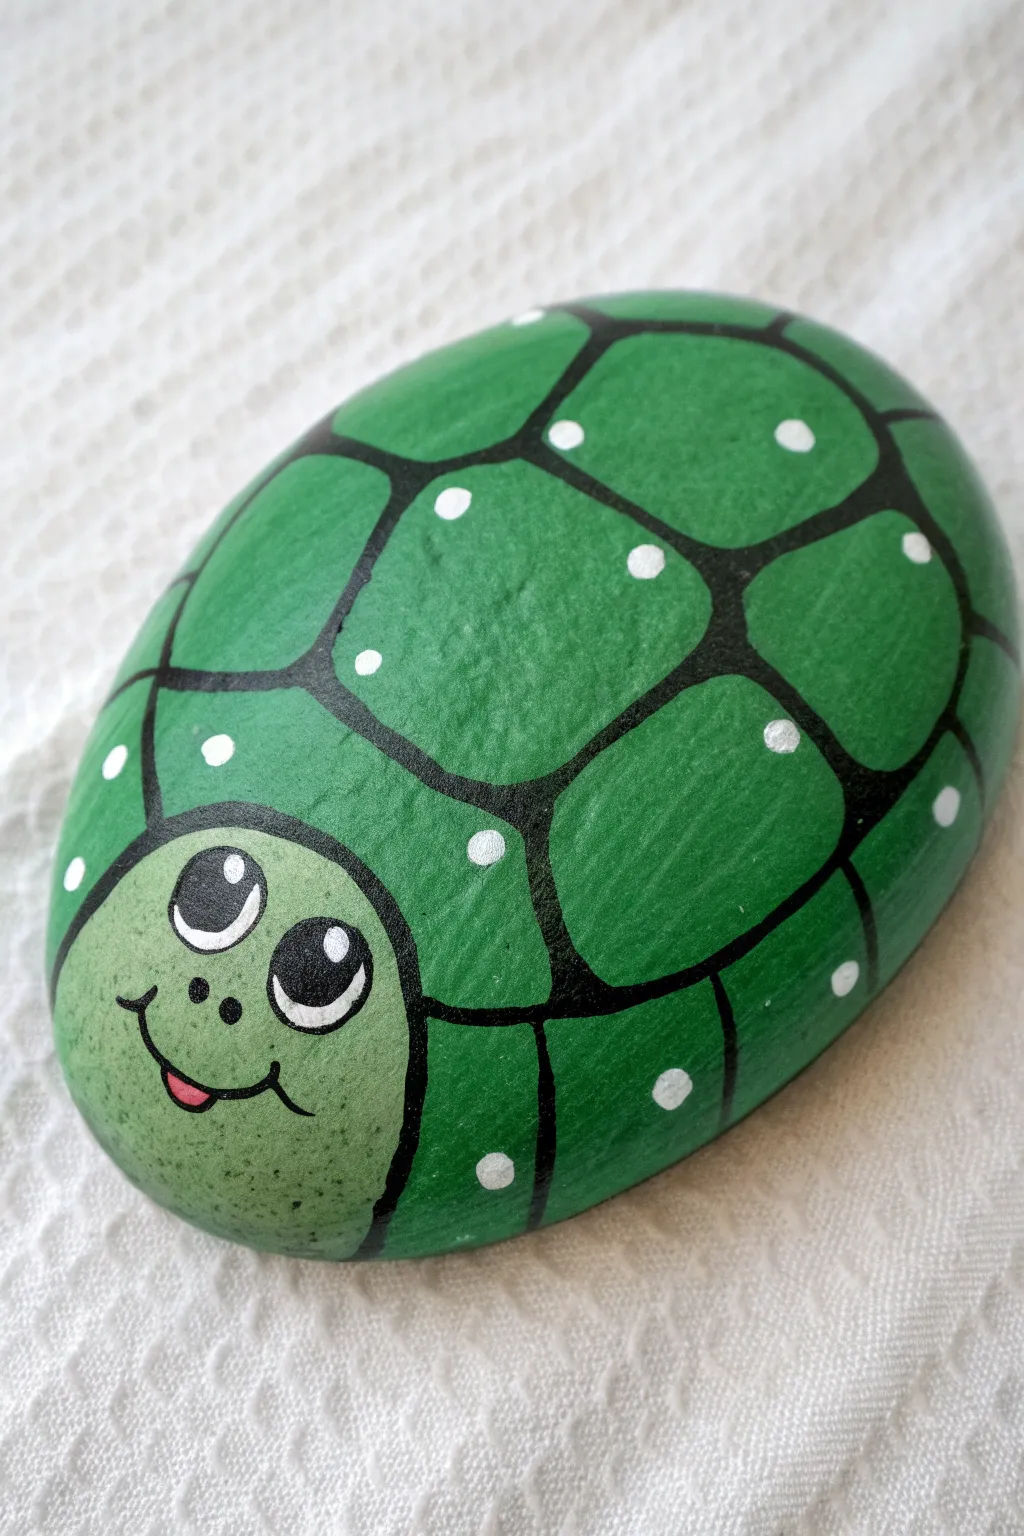
Transform an ordinary smooth stone into a friendly little turtle with a bright green shell and a sweet smile. This project uses simple lines and dots to create a cartoon-like character that feels perfect for hiding in the garden.
Detailed Instructions
Materials
- Smooth, oval-shaped rock (palm-sized)
- Acrylic paints (dark green, light lime green, black, white, pink)
- Pencil
- Medium flat paintbrush
- Fine detail paintbrush or liner brush
- Dotting tool or toothpick
- Clear acrylic sealer (spray or brush-on)
- Palette or paper plate
- Water cup and paper towels
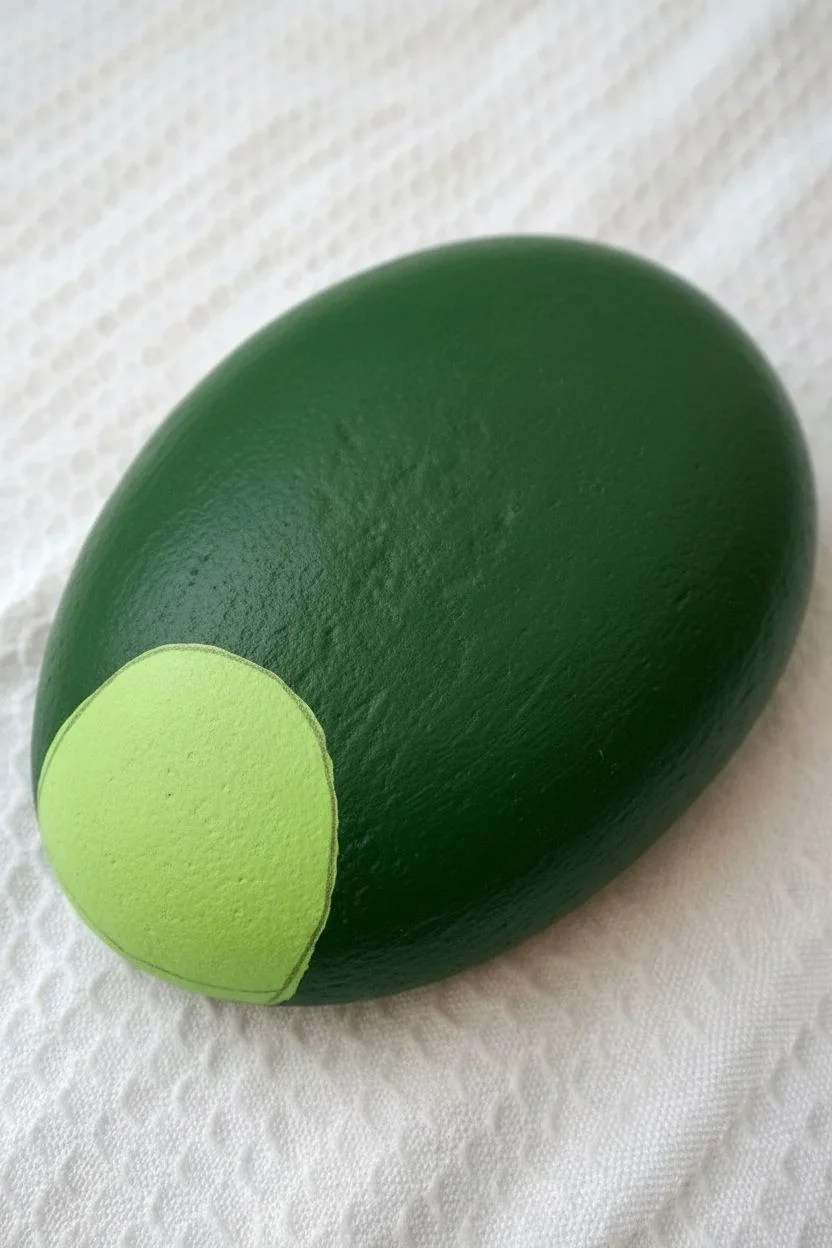
Step 1: Base Coating and Outline
-
Clean Your Canvas:
Start by washing your rock with soap and water to remove any dirt or grease. Dry it completely before you begin. -
Paint the Base Green:
Cover the top surface of the rock with your darker green acrylic paint. You might need two coats for opaque coverage, allowing the first layer to dry for about 10-15 minutes in between. -
Sketch the Head:
Once the green base is bone dry, lightly use a pencil to draw a large semi-circle at one end of the rock. This will become the turtle’s face. -
Fill in the Face:
Paint inside your pencil semi-circle with the light lime green paint. This creates a nice contrast against the darker shell color. Let it dry thoroughly.
Paint Too Thin?
If the black lines look transparent over the green, don’t overload your brush. Instead, let the first black line dry completely, then trace over it a second time for a bold, crisp look.
Step 2: Creating the Shell Pattern
-
Outline the Head:
Using a fine detail brush and black paint, carefully trace the curved line separating the light green head from the dark green body. Make this line fairly thick and bold. -
Draw the Spine Line:
Starting from the top center of the head outline, paint a black line straight down the middle of the shell to the back of the rock. -
Add Horizontal Lines:
Paint curved horizontal lines across the shell, intersecting the spine line. Think of drawing a grid that wraps around the curve of the stone. -
Create the Shell Border:
Paint a black line around the outer perimeter of the shell, creating a rim where the shell segments end. -
Soften the Corners:
If your grid lines look too sharp, slightly round off the corners inside each green segment with your black liner brush to give them a softer, more organic shell look.
Googly Eye Glitch
Want to make it even sillier? Skip painting the eyes and glue on a pair of plastic googly eyes once the sealer is dry. It adds a funny 3D wiggle effect.
Step 3: Adding the Cute Face
-
Paint the Eyes:
Use the handle end of a large paintbrush or your finger to stamp two large black circles onto the light green face area. While I usually place them close together, spacing them slightly can add a goofy charm. -
Add Eye Highlights:
Once the black eye circles are dry, add a medium white dot near the top of each eye, and a tiny white dot at the bottom for a sparkling reflection. -
Paint the Nose:
Using your finest brush or a toothpick, add two tiny black dots between the eyes for nostrils. -
Draw the Mouth:
Paint a simple, curved black smile under the nose. Add small vertical tick marks at the ends of the smile for dimples. -
Add the Tongue:
Paint a tiny pink semi-circle hanging from the side of the mouth to make the turtle look playful.
Step 4: Finishing Touches
-
Add Shell Details:
Dip a dotting tool or the back of a small paintbrush into white paint. Place one single white dot inside each dark green shell segment. -
Varnish the Turtle:
Allow the entire rock to dry overnight. Once cured, apply a coat of clear acrylic sealer to protect your artwork from weather if it’s living outside.
Now you have a charming little reptilian friend ready to decorate your porch or garden path


Frog Face Rocks
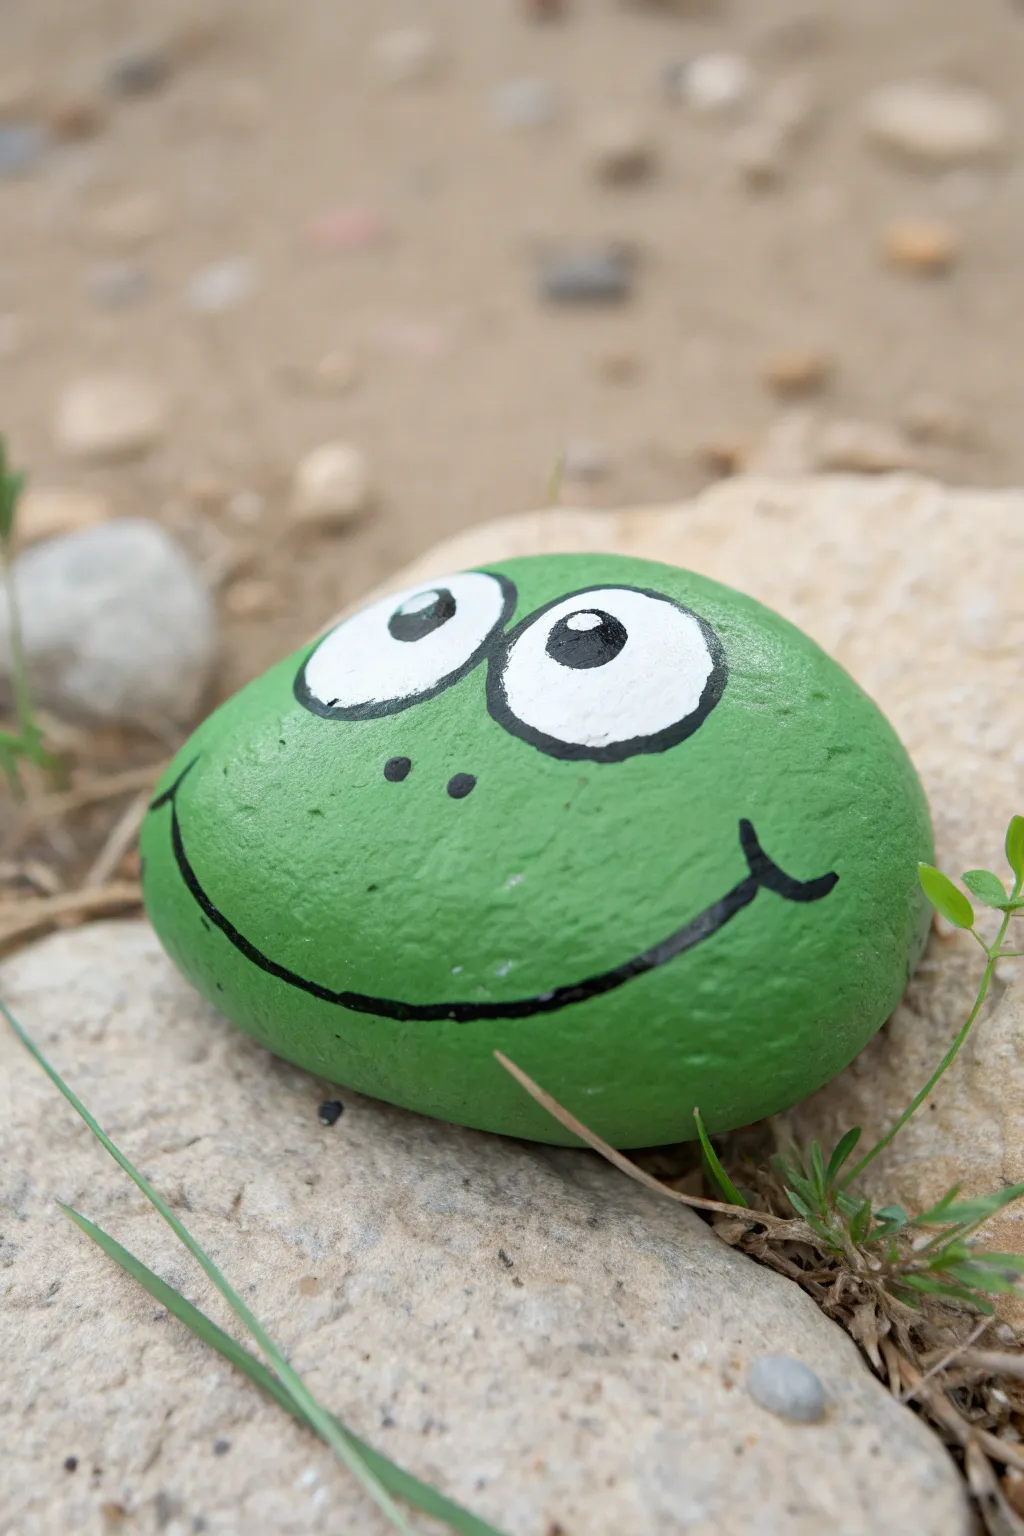
Transform a smooth, rounded stone into this undeniably cheerful frog character. With its bright green complexion and wide, expressive eyes, this simple painting project is perfect for bringing a little bit of pond life to a garden path or windowsill.
Step-by-Step Tutorial
Materials
- Smooth, round river rock (approx. palm-sized)
- Green acrylic paint (bright, grassy shade)
- White acrylic paint
- Black acrylic paint or fine-tip black paint pen
- Flat paintbrush (medium size)
- Small round detail brush
- Water cup and paper towels
- Clear spray sealant (optional)
Step 1: Base Coat
-
Clean Your Canvas:
Begin by washing your rock thoroughly with soap and water to remove any dirt or grit. Let it dry completely in the sun or use a hairdryer to speed things up. -
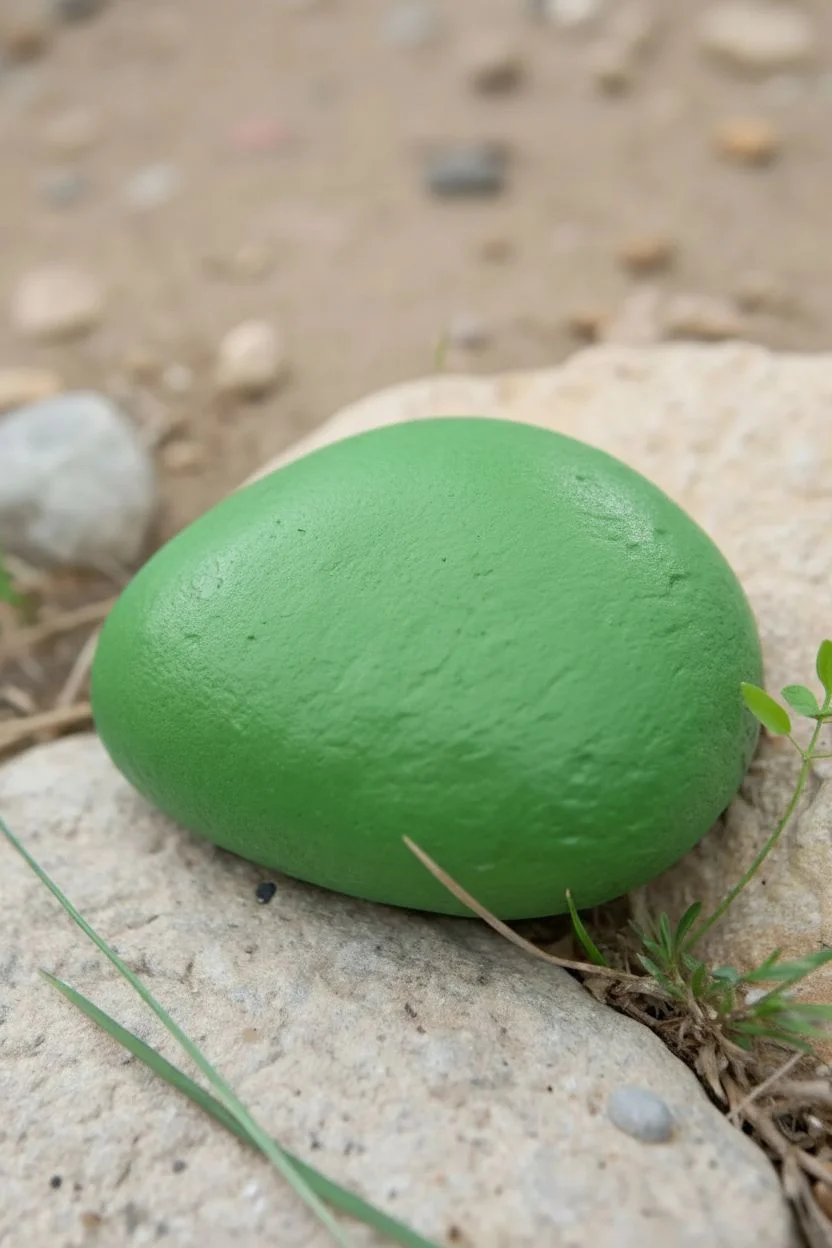
First Green Layer:
Using your flat paintbrush, apply a generous coat of bright green acrylic paint over the entire top surface of the rock. -
Build Opacity:
Because rocks are dark, one coat is rarely enough. Let the first layer dry for about 10-15 minutes, then apply a second coat to get that solid, vibrant green color. -
Final Touch-ups:
Inspect the rock for any bare spots or streaks. If needed, I like to add a quick third coat just to make sure the coverage is perfectly smooth.
Smooth Surface Trick
If your rock is pitted or uneven, mix a little white glue with white paint as a primer coat. This fills small holes for a smoother painting surface.
Step 2: The Big Eyes
-
Outline the Eyes:
Visualize two large ovals touching each other near the top edge of the rock. Use a very small amount of white paint on a detail brush to faintly sketch these shapes. -
Fill in White:
Load your round brush with white paint and fill in the two ovals. Try to keep the edges crisp and clean against the green background. -
Brighten the White:
White paint can be translucent. Once the first white layer is dry to the touch, paint a second layer to make the eyes pop brilliantly. -
Outline in Black:
Once the white is fully dry, take a fine-tip black paint pen (or a very steady hand with a liner brush) and draw a thin black outline around both white ovals. -
Add Pupils:
Paint two black circles (pupils) inside the white eyes. In the reference, they are positioned toward the upper-left, giving the frog a curious, sideways glance. -
Sparkle Spot:
To bring the frog to life, add a tiny dot of white paint inside the black pupil for a reflection highlights—this really adds personality.
Make It a Prince
Paint a small yellow crown on a separate tiny pebble and glue it to the top of the frog’s head with strong adhesive for a fairytale twist.
Step 3: Face Details
-
Position the Nostrils:
Locate the center of the face, just below the space between the eyes. Use the back end of a small paintbrush dipped in black paint to stamp two small dots for nostrils. -
Draft the Smile:
Imagine a wide, sweeping U-shape for the smile that stretches almost from one side of the rock to the other. -
Paint the Smile:
Using your black paint pen or liner brush, carefully draw the long, curved smile line. Keep the pressure consistent for an even line thickness. -
Cheek Dimples:
At each end of the smile, add a small upward-curved tick mark. This creates adorable little cheek dimples. -
Cleanup Edges:
If any lines went a little wobbly, you can use a bit of green paint on a small brush to tidy up the edges once the black paint is dry. -
Seal It Up:
If this frog will live outside, wait 24 hours for the paint to cure, then spray with a clear acrylic sealant to protect it from the rain.
Now your happy green friend is ready to sit among the leaves and watch over your garden
Fish Scale Rocks

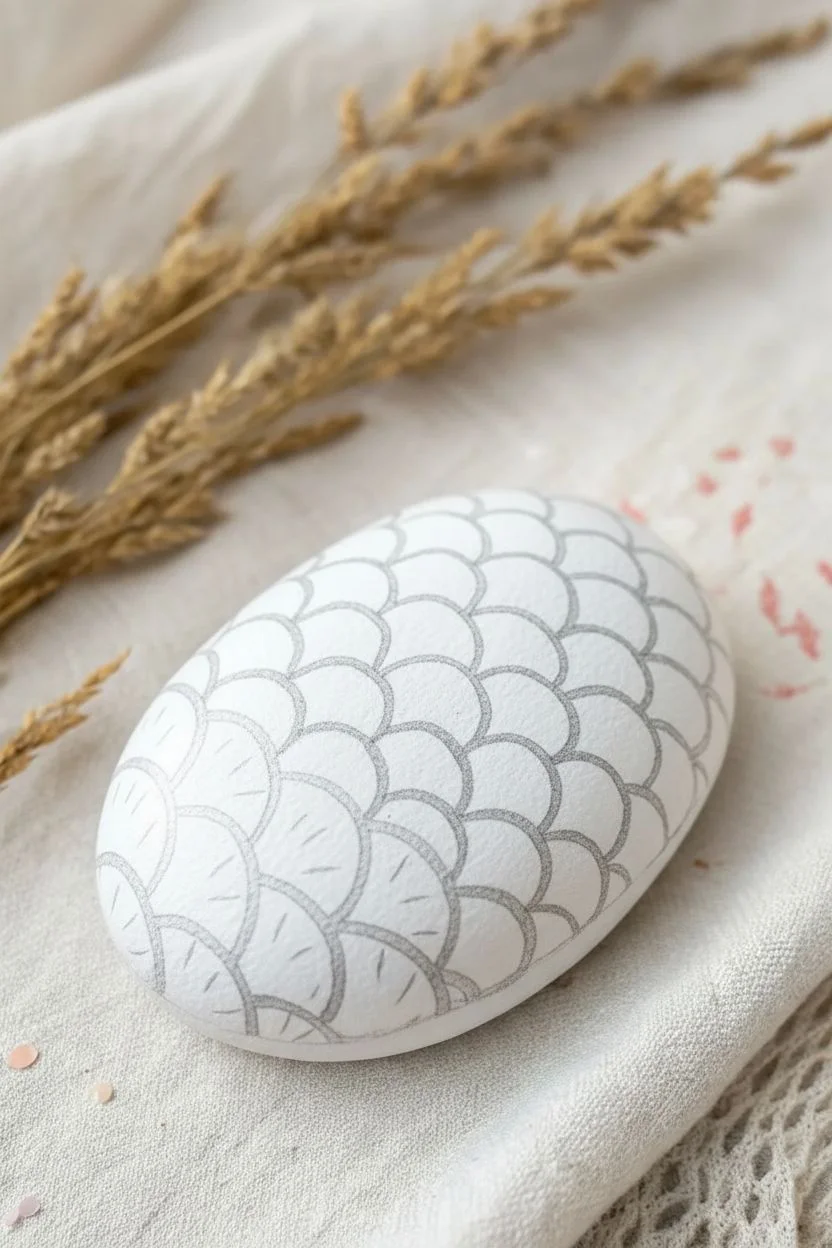
Transform a smooth river rock into a mesmerizing piece of aquatic art using simple repeating patterns. This design combines deep ocean blues with vibrant turquoise hues to create a textured, shimmering scale effect that looks beautiful on any desk or shelf.
Detailed Instructions
Materials
- Smooth, oval-shaped river rock
- Acrylic paints (dark blue, teal, turquoise, mint green, white)
- Fine detail paintbrush (size 0 or 00)
- Flat shader paintbrush (size 4 or 6)
- White paint pen (fine tip) or white flowing ink
- Blue paint pen (fine tip, optional)
- Pencil for sketching
- Gloss varnish or sealant
Step 1: Preparation & Base Coat
-
Clean the surface:
Begin by washing your stone with warm soapy water to remove any dirt or oils. Let it dry completely before starting, as moisture can prevent the paint from adhering properly. -
Prime the rock:
Apply a base coat of white acrylic paint to the entire top surface of the rock. This will make your blue and green colors pop much more vibrantly than painting directly on the grey stone. -
Sketch the scale grid:
Once the white base is dry, lightly use a pencil to draw curved, scalloped lines across the rock. Start from one end and work your way across, offsetting each row like bricks to create the classic fish scale pattern.
Step 2: Painting the Gradient
-
Start with the darkest blue:
Choose a specific section (like the bottom left corner shown in the example) to be your darkest point. Fill in these pencil scales with a deep, rich navy blue acrylic paint. -
Transition to teal:
Mix your navy blue with a little teal to create a transitioning shade. Paint the row of scales immediately adjacent to your dark blue patch. -
Apply the main turquoise hue:
For the middle section of the rock, switch to a bright turquoise or aqua color. Carefully fill in the scales, keeping your brush strokes clean near the pencil lines. -
Lighten the top scales:
As you reach the top or far edge of the rock, switch to your lightest mint green or pale cyan shade. This creates a beautiful ombré effect across the fish body. -
Add texture (optional):
If you want that slightly speckled look seen in the lighter scales, dab your brush gently or use a slightly dry brush technique rather than painting a solid, wet block of color.
Steady Hand Pro-Tip
Rest your pinky finger on a dry part of the rock while painting the fine outlines. This anchors your hand and prevents shaky lines.
Step 3: Detailing & Outlining
-
Outline the light scales:
Using a very fine brush and a darker teal paint (or a fine-tip teal paint pen), carefully trace over the curved top edges of your lighter turquoise and mint scales to define them. -
Outline the dark scales:
For the dark navy section, switch to a white paint pen or a fine brush with white paint. Draw crisp, steady arches over the top of each dark blue scale. -
Add interior details:
Inside the dark blue scales, paint thin white radiating lines or small ticks that point inward from the curved edge. This gives them a detailed, fin-like texture. -
Highlight the lighter scales:
On the lighter teal scales, add a very faint, thin highlight of white or pale mint along the very top edge of the curve to make them look three-dimensional. -
Refine the edges:
Check the perimeter of your painted area. If any paint went over the edge messy, you can clean it up with a damp cotton swab or paint a solid border.
Level Up: Metallic Pop
Use metallic gold or silver paint for the outlines instead of plain colors. It makes the fish scales shimmer magically in sunlight.
Step 4: Finishing Touches
-
Let it cure:
Allow the stone to sit undisturbed until all paint layers and fine lines are completely dry to the touch. -
Seal the artwork:
Apply a coat of gloss varnish or spray sealant. This is crucial for this project as it gives the ‘scales’ a wet, shiny look that mimics a real fish.
Now you have a glimmering piece of sea life that needs no aquarium
Cute Monster Rocks With Big Eyes
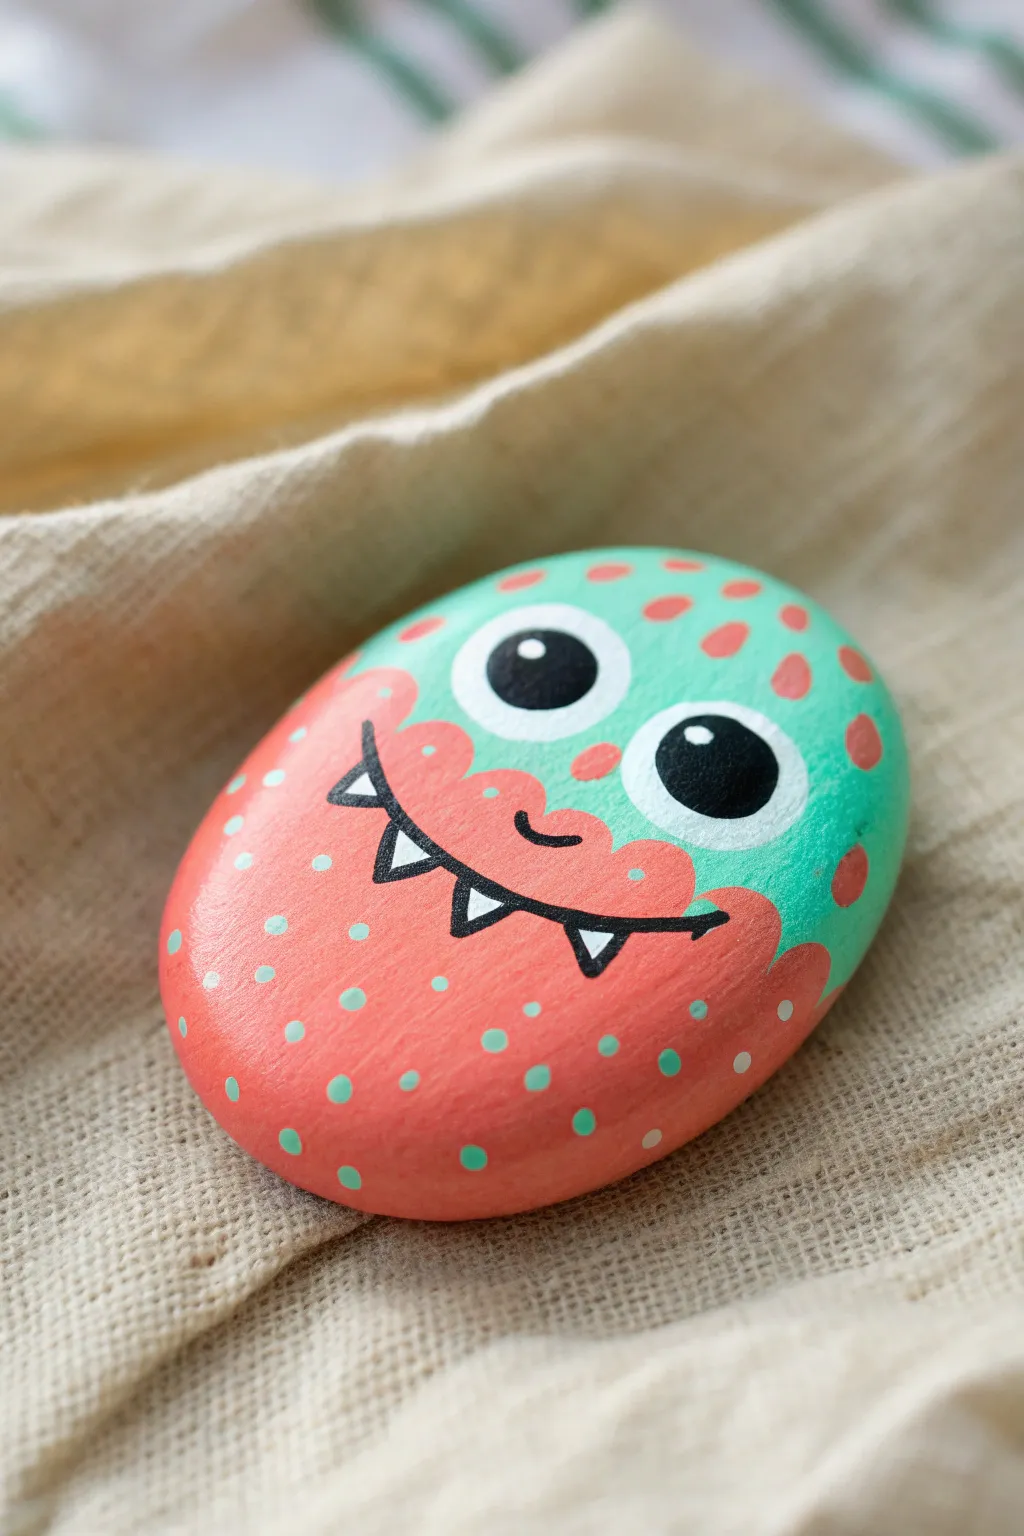
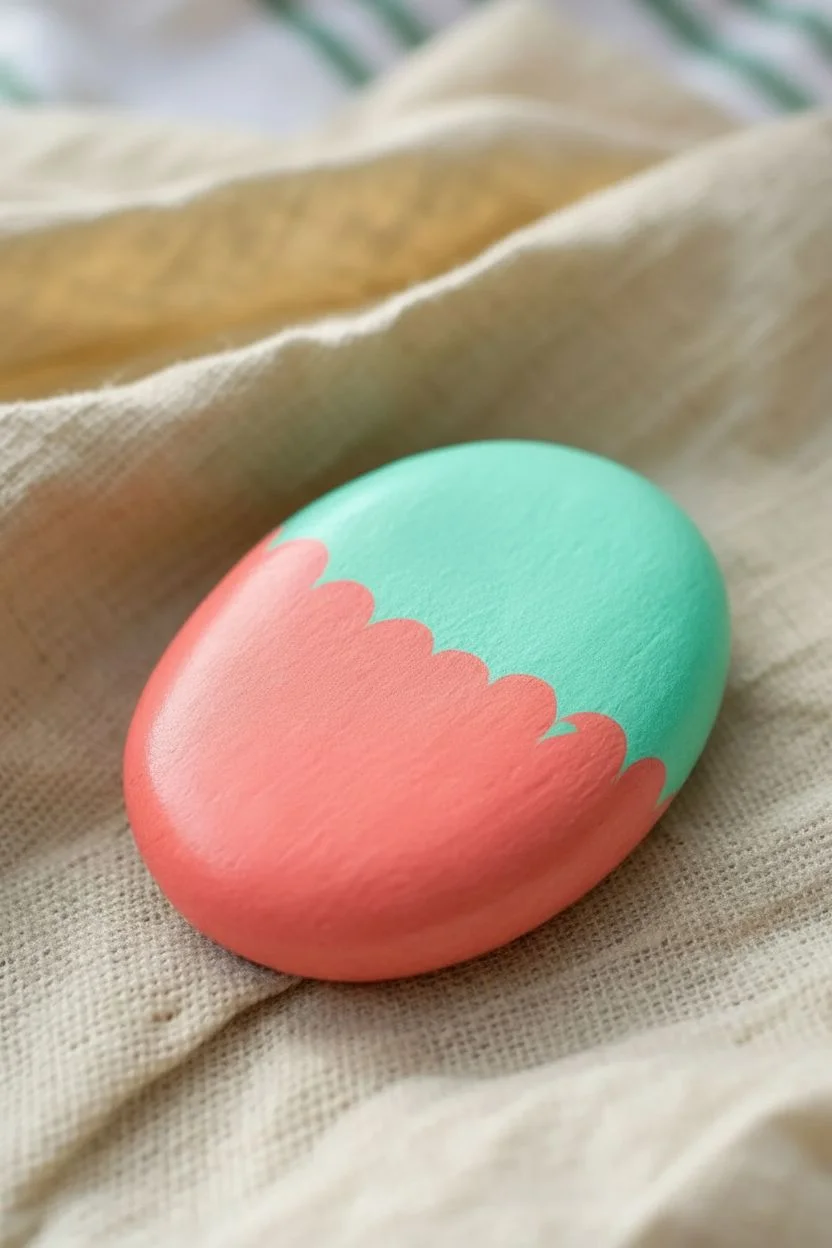
Transform a simple smooth stone into a friendly little creature with this vibrant color-blocking technique. By combining mint green and coral pink with goofy oversized eyes, you’ll create a lovable monster that pops with personality.
Step-by-Step Tutorial
Materials
- Smooth, oval river rock
- Acrylic paint (mint green, coral pink, black, white)
- Small flat paintbrush
- Fine detail paintbrush or liner brush
- Dotting tool or toothpick
- Pencil for sketching
- Spray sealer or varnish (optional)
Step 1: Base Colors
-
Clean the surface:
Begin by washing your rock with soap and water to remove any dirt or grit, then let it dry thoroughly. Paint glides much smoother on a clean surface. -
Sketch the division:
Use a pencil to lightly draw a curved, scalloped line across the lower middle of the rock. This will separate your monster’s face area from its body area. -
Paint the top section:
Fill in the upper section above your scalloped line with mint green acrylic paint. You may need two coats for opaque coverage, letting the first dry completely before adding the second. -
Paint the bottom section:
Paint the lower section with a bright coral or salmon pink. Carefully follow the scalloped edge where it meets the green, creating a neat boundary between the two colors. -
Dry completely:
Allow the base coats to dry fully. If the paint is still tacky, your next layers might smudge or lift the color underneath.
Step 2: Face Details
-
Outline the eyes:
Paint two large white circles in the center of the mint green section. These should touch each other slightly to give that cute, goofy look. -
Add pupils:
Once the white is dry, paint smaller black circles inside the white ones. Position them slightly toward the right rather than dead-center to give the monster some expression. -
Create the shine:
Using the very tip of a brush or a toothpick, place a tiny white dot in the upper corner of each black pupil. This ‘catchlight’ instantly brings the character to life. -
Draw the mouth line:
With a fine liner brush and black paint, draw a curved smile line that spans across the center, dipping into the pink section. -
Add the teeth:
Paint small white triangles hanging down from the black smile line. Let them dry, then outline them thinly with black paint to make them stand out against the background.
Smooth Operator
If you don’t have a naturally smooth rock, apply a base coat of white gesso first. It fills in tiny texture holes and makes your colors appear much brighter.
Step 3: Pattern & Finishing
-
Add pink spots:
Dip the handle end of a paintbrush into the coral pink paint. Stamp irregular dots onto the mint green section around the eyes. -
Add green spots:
Clean your brush handle, then dip it into the mint green paint. Apply small dots all over the bottom pink section to reverse the pattern. -
Refine the mouth:
Check your black outlines around the mouth and teeth. If they look faded, go over them one last time for a crisp, comic-book style finish. -
Seal the rock:
I always recommend finishing with a coat of clear spray sealer once the paint is bone dry to protect your monster from scratches and weather.
Googly Upgrade
Instead of painting the eyes, glue on large plastic googly eyes for a 3D effect that jiggles when you move the rock. Kids absolutely love the movement.
Place your new monster friend in the garden or on a desk to bring a smile to anyone who spots it
Emoji-Inspired Expression Rocks

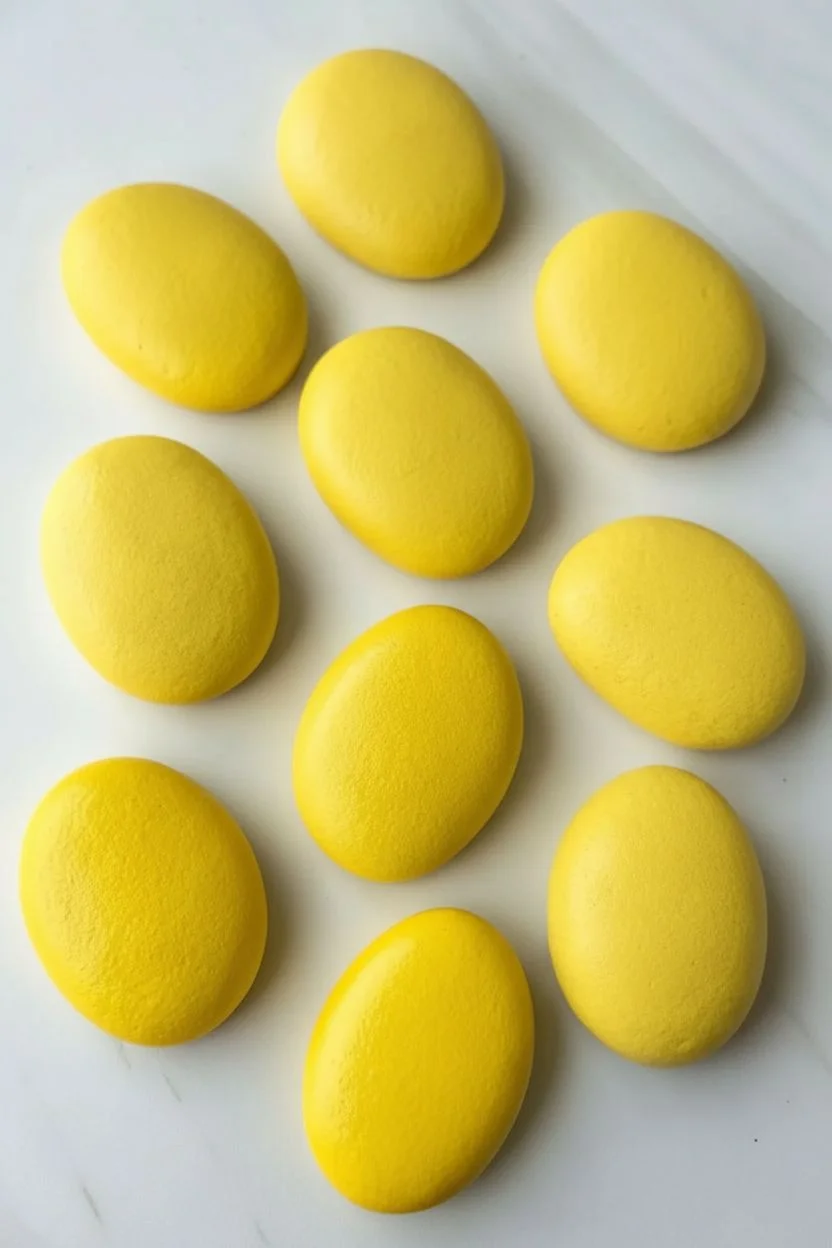
Transform smooth river rocks into a vibrant cast of characters with these cheerful emoji stones. This project combines bright yellow paint with simple black and red detailing to create a playful set of emotions perfect for story stones or garden decor.
How-To Guide
Materials
- Smooth river rocks (oval or round shape)
- Yellow acrylic paint (bright, sunny shade)
- Black acrylic paint or fine-point POSCA paint pen
- Red and pink acrylic paint or paint pens
- White acrylic paint
- Flat paintbrush (medium size)
- Fine detail paintbrush or liner brush
- Pencil for sketching
- Gloss varnish or clear sealant spray
Step 1: Base Preparation
-
Clean the canvas:
Start by washing your rocks thoroughly with warm soapy water to remove any dirt or grit. Let them dry completely, preferably in the sun, to ensure the paint adheres properly. -
Prime with yellow:
Squeeze out a generous amount of bright yellow acrylic paint. Using a medium flat brush, coat the entire top surface of the rock. Apply smooth, even strokes. -
Layer for opacity:
Yellow paint can be notoriously translucent, so let the first coat dry fully (about 15-20 minutes). Apply a second or even third coat until you have a solid, opaque background with no rock showing through. -
Dry completely:
Ensure the final yellow layer is bone dry before moving on to the faces. If the paint is tacky, your pencil sketch might dig into it.
Step 2: Adding Expressions
-
Choose your characters:
Decide which emoji expressions you want to create. Look at reference images or the photo above for ideas like heart eyes, winking faces, or big grins. -
Sketch the faces:
Lightly sketch the facial features onto the yellow background using a pencil. Keep the lines faint so they are easy to cover up later. -
Outline in black:
Using a fine detail brush dipped in black paint (or a black paint pen for easier control), carefully trace over your pencil lines for the eyes and mouths. Start with simple shapes like curved lines for smiling eyes. -
Fill in dark features:
For open mouths, sunglasses, or heart-shaped eyes, fill in the shapes. Use black for open mouths and sunglasses. Keep your hand steady and rest your pinky on the table for balance. -
Add colored details:
Once the black outlines are dry, use red or pink paint for details like tongues, heart eyes, or rosy cheeks. A small round brush works best for filling these specific shapes. -
Create the heart eyes:
For the love-struck emoji, paint two slanted hearts in red or pink where the eyes would be. I find that doing the outline first and then filling it in keeps the shape distinct. -
Paint the tongues:
For faces with tongues sticking out, fill the tongue shape with a vibrant red or pink. If the tongue overlaps a black mouth line, wait for the black to dry completely first to avoid smearing. -
Highlight the eyes:
For emojis with open eyes (like the big grin), use white paint to fill in the eye area, then add a black pupil once the white is dry. This makes the expression pop. -
Add teeth:
If painting a grinning face, use a very fine brush and white paint to draw a horizontal line or grid within the mouth to represent teeth.
Paint Transparency
If your yellow looks streaky, mix a tiny dot of white paint into the yellow for the first coat. This acts as a primer and helps the yellow cover the dark rock surface much faster.
Step 3: Finishing Touches
-
Touch up:
Look over your rocks for any uneven lines. You can carefully correct mistakes by painting over them with a dab of the base yellow paint once the mistake is dry. -
Seal the deal:
Once all paint is completely cured (give it at least an hour), apply a coat of gloss varnish or clear sealant spray. This protects the art from chipping and gives the emojis a professional, shiny finish.
Clean Lines Pro Tip
For the crispest lines on facial features, use acrylic paint pens instead of brushes. A fine-tip marker gives you drawing-like control, perfect for beginners or kids.
Group your finished rocks together to create a conversation piece that really shows some personality
Kindness Message Rocks
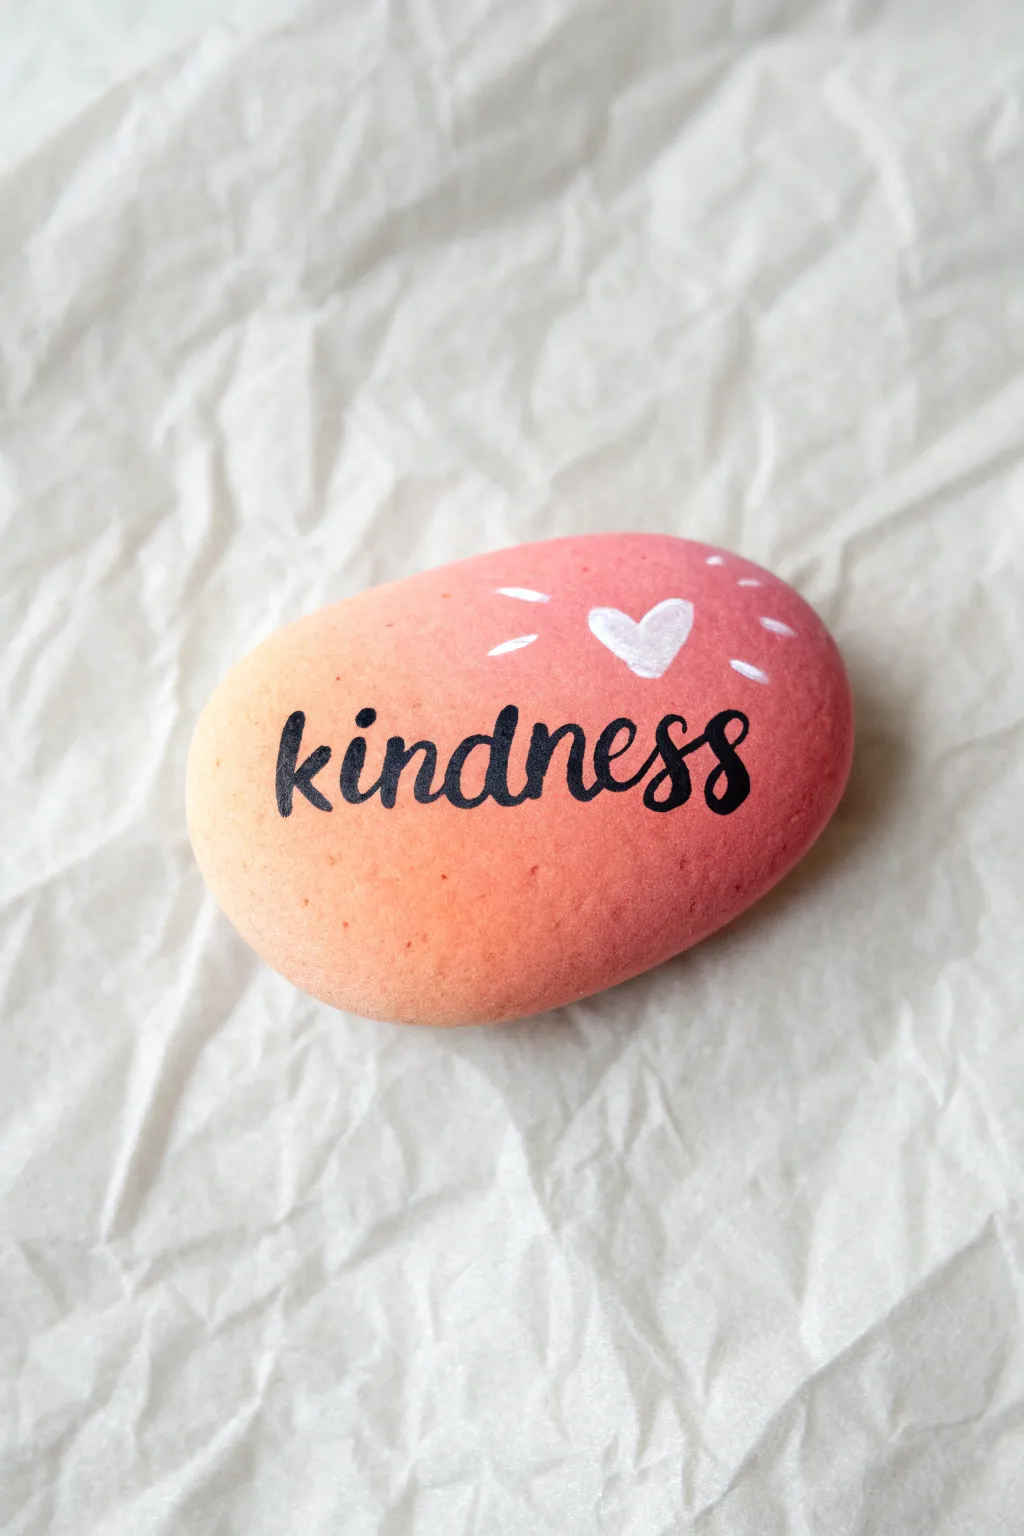
Spread a little love with this warm and fuzzy kindness rock featuring a sunny sunset gradient. The smooth blend of pink and peach creates the perfect backdrop for a bold, inspiring message written in classic script.
Step-by-Step Tutorial
Materials
- Smooth, oval river rock (cleaned and dried)
- Acrylic paint (Light peach/orange, rose pink)
- White acrylic paint or paint pen
- Black brush tip marker or fine liner paint pen
- Makeup wedge sponge or small kitchen sponge piece
- Palette or paper plate
- Spray sealant (matte or gloss)
- Pencil (optional for sketching)
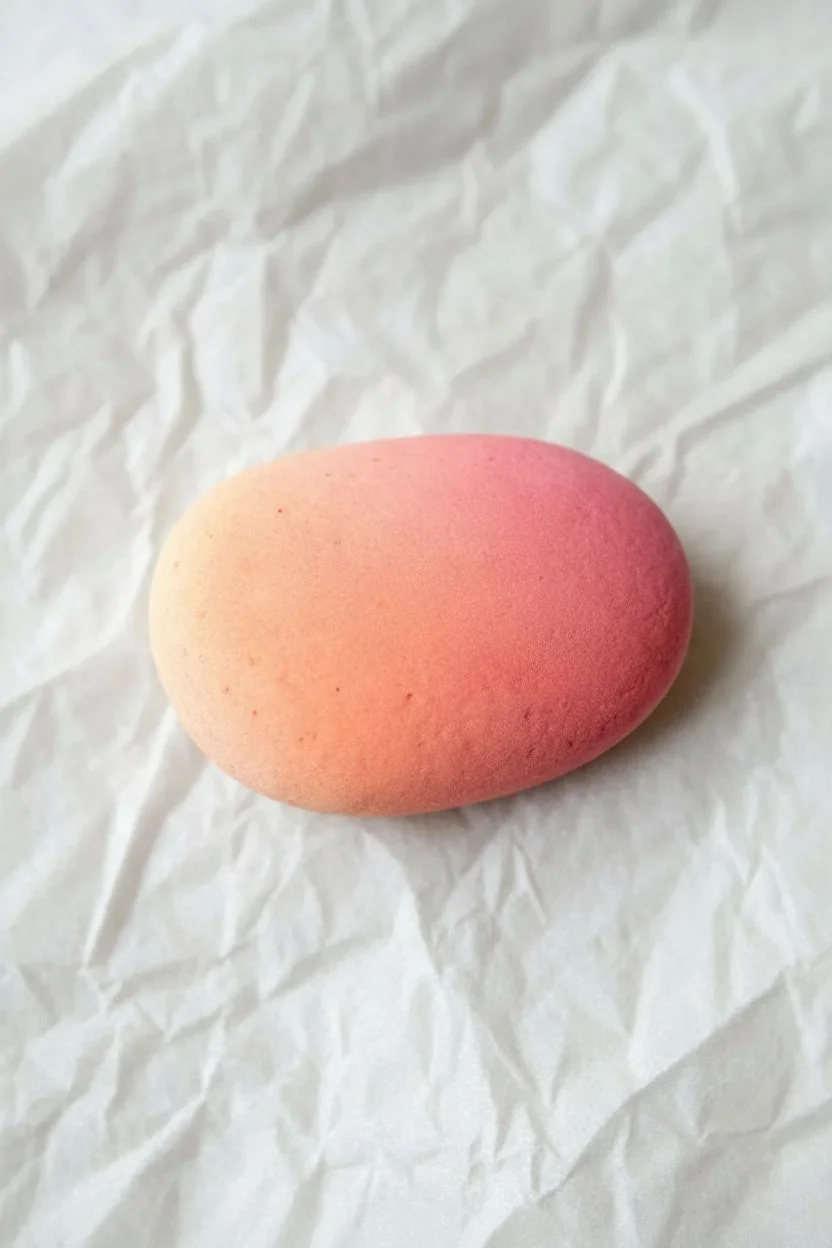
Step 1: Creating the Sunset Ombre
-
Prep the paints:
Squeeze a dime-sized amount of your peach paint and your rose pink paint onto your palette, placing them close to each other but not quite touching yet. -
Load the sponge:
Take your makeup wedge sponge and dab the flat bottom surface into both colors simultaneously. You want one half of the sponge loaded with peach and the other half with pink. -
Start sponging:
Press the sponge onto the center of the rock. Use an up-and-down dabbing motion rather than wiping or brushing, which helps build texture and coverage. -
Blend the middle:
As you dab, slightly shift the sponge up and down along the transition line where the colors meet. This helps the peach and pink merge naturally into a soft gradient without a harsh stripe. -
Extend the color:
Continue dabbing until the entire face of the rock is covered, keeping the pink tone concentrated on the right side and the peach on the left side. -
Second coat:
Let the first layer dry for about 5-10 minutes. If the stone’s natural color is showing through, repeat the sponging process for a more opaque, vibrant look. -
Dry completely:
Set the rock aside to dry fully before moving on to the lettering. I usually give this at least 20 minutes to ensure the surface is hard and not tacky.
Use a Makeup Wedge!
For the smoothest blend, use a cheap latex makeup wedge. The tiny pores create a much softer airbrushed effect than a standard paintbrush ever could.
Step 2: Lettering and Details
-
Plan the word:
Visualize where the word ‘kindness’ will sit. It should be centered horizontally. Lightly sketching with a pencil can help get the spacing right, but press very gently so you don’t scratch the paint. -
Write the base script:
Using a black brush pen or fine paint marker, write the word ‘kindness’ in cursive. Keep the letters connected and flowing. -
Thicken the downstrokes:
To get that faux-calligraphy look, go back over the letters and thicken only the lines where your pen moved downward. The upward strokes should remain thin and delicate. -
Fill the gaps:
Carefully color in the thickened downstrokes so they look solid black. Smooth out any shaky edges on your letters now. -
Add the white heart:
Using a white paint pen or a fine brush with white acrylic, draw a small heart just above the ‘n’ and ‘e’. Fill it in completely. -
Paint the rays:
Add three small, short dashes radiating from the left side of the heart, and three dashes on the right side. These represent a little shine or glow. -
Final check:
Look over your design for any smudges or thin spots in the black paint. Touch up as needed. -
Seal the deal:
Once everything is absolutely bone dry (give it an hour to be safe), take the rock outside and spray it with a clear acrylic sealer to protect your beautiful work from the elements.
Pen Tip Clogged?
If your paint pen stops flowing while writing over the acrylic background, scribbling quickly on a piece of scrap paper usually gets the ink moving again.
Now your little stone is ready to be hidden in a park to brighten a stranger’s day
Tic-Tac-Toe Game Rocks
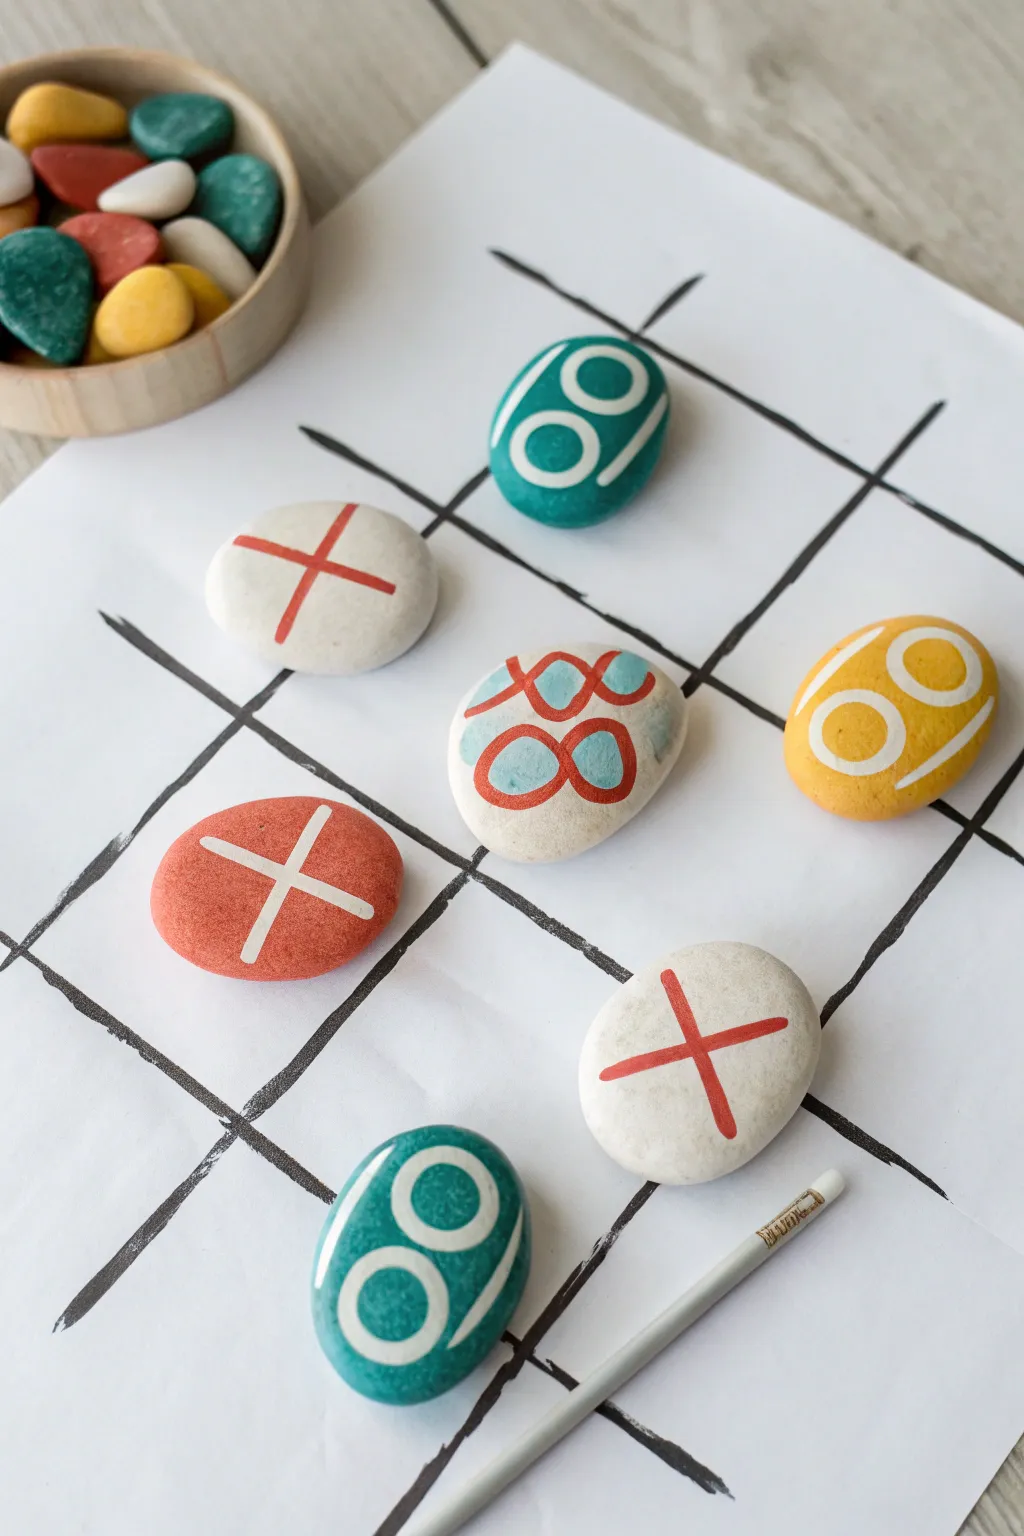
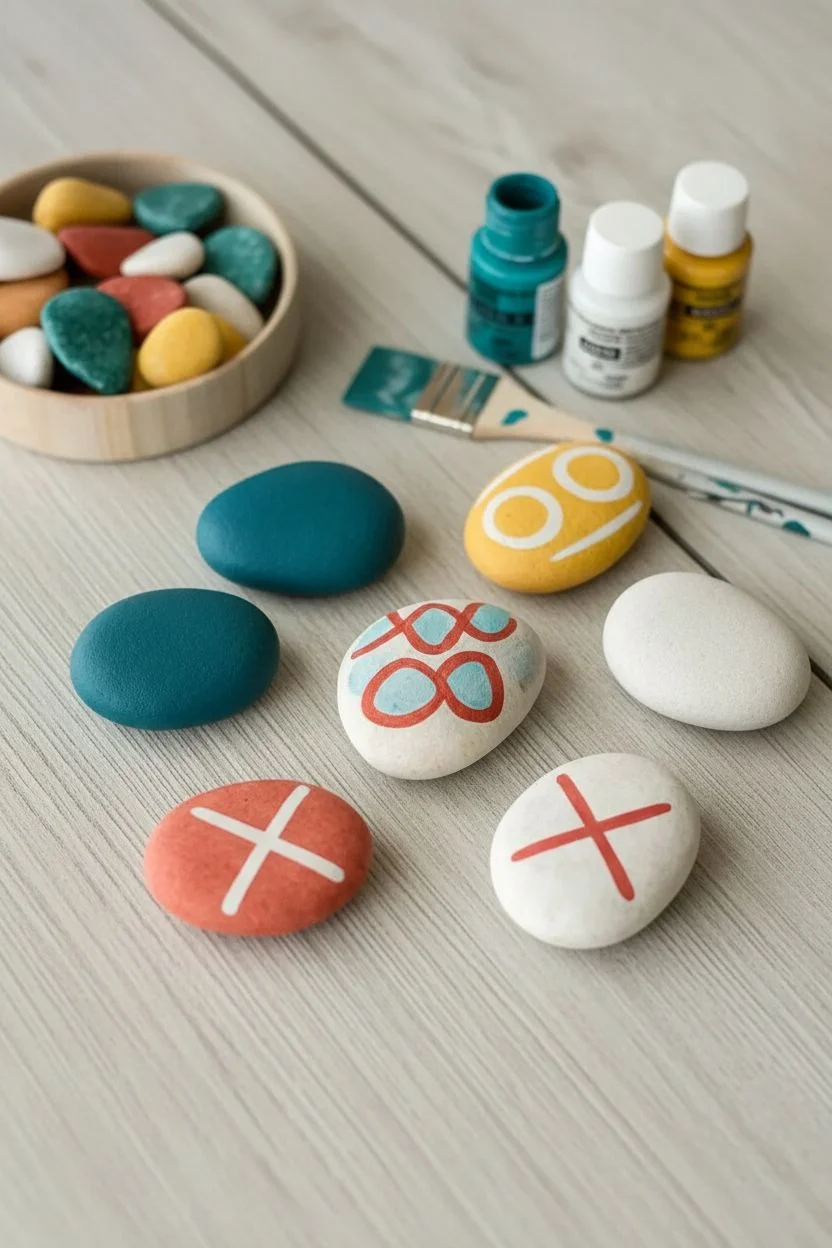
Transform ordinary garden stones into a portable game set with this colorful Tic-Tac-Toe project. The smooth, rounded rocks feel great in the hand, and the simple X and O designs make it perfect for kids to create and play with anywhere.
Step-by-Step
Materials
- 10 smooth river stones (roughly 2-3 inches wide)
- Acrylic paints (White, Red, Teal, Yellow)
- Small flat paintbrush
- Fine detail paintbrush
- Large sheet of white paper or cardstock
- Black marker or black paint
- Pencil (optional)
- Clear sealant spray or Mod Podge (optional)
- Ruler
Step 1: Preparing the Game Pieces
-
Clean the canvas:
Begin by washing your river stones thoroughly with soap and water to remove any dirt or dust. -
Dry completely:
Lay the stones out on a towel and let them dry completely before applying any paint, as moisture will prevent the acrylic from adhering properly. -
Divide the teams:
Separate your ten stones into two groups of five. This ensures you have enough pieces for Xs and Os, plus one or two extras just in case. -
Paint base coats:
For the ‘Team O’ stones, paint the entire surface of three stones with a solid teal color and one with a sunny yellow. -
Paint the remaining base:
Paint one of the ‘Team X’ stones with a solid reddish-orange hue. -
Leave natural stones:
I like to leave about half of the stones (3 for X, 1 for O, and the special center stone) essentially unpainted or with a light white wash to keep that natural rock texture visible.
Step 2: Painting the Symbols
-
outline the Os:
Using a fine detail brush and white paint, carefully draw a large circle on your teal and yellow painted rocks. If you need a guide, sketch the circle lightly with a pencil first. -
Fill the circles:
Go back over your white circles to thicken the lines, ensuring they stand out boldly against the colorful background. -
Create the Xs:
For the natural white stones, use red paint and a small flat brush to paint a large crossing ‘X’ in the center of each rock. -
The reversed X:
Take your solid red stone and paint a striking white ‘X’ on top of it. This visual flip matches the style of the teal stones you did earlier. -
Create teal Os:
On one of the natural white stones, paint a teal ‘O’ symbol to match the teal base color used previously. -
The special center stone:
For the unique middle piece shown in the image, paint two small red overlapping loops that look like an infinity symbol or a sideways ‘8’. -
Add detail to center stone:
Interlock that red symbol with two teal loops going vertically, creating a fancy knot design in the center of the white stone. -
Let paint cure:
Allow all the painted designs to dry completely. Acrylics usually dry to the touch within 20 minutes, but give them an hour to fully set.
Uneven Lines?
If painting the O or X feels shaky, use a white paint pen instead of a brush. It offers much better control for geometric shapes and fine outlines.
Step 3: Setting up the Board
-
Prepare the grid paper:
Lay out a large sheet of white paper or cardstock on a flat surface. -
Draw the grid lines:
Using a ruler and a black marker (or black paint with a rough brush for a textured look), draw two long vertical lines spaced about 4 inches apart. -
Cross the lines:
Draw two horizontal lines across the vertical ones to create a classic 3×3 Tic-Tac-Toe grid, making sure the squares are large enough to hold your rocks. -
Optional sealing:
If you plan to play outside often, spray the rocks with a clear sealant to protect the paint from chipping against the hard surfaces.
Travel Pouch
Draw the grid directly onto a small burlap drawstring bag with fabric markers. This way, the game board doubles as storage for your custom rocks.
Now gather a friend and enjoy a classic game with your beautiful handcrafted set
Glow-In-the-Dark Starry Night Rocks
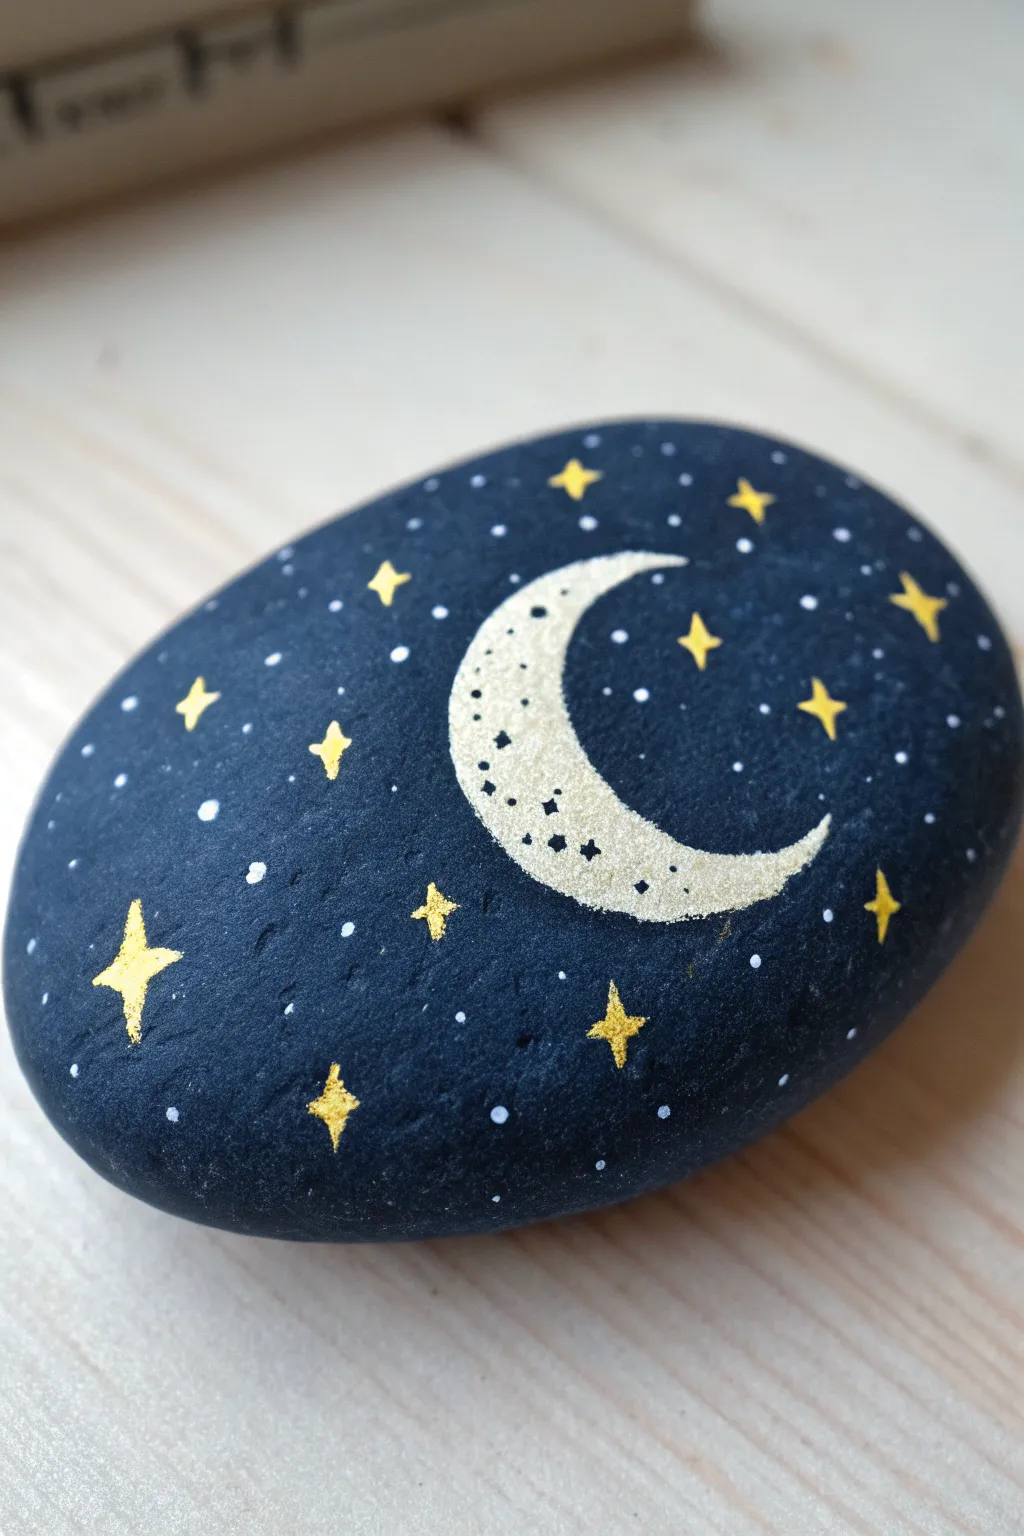
Transform an ordinary stone into a dreamy slice of the night sky with this simple yet striking project. Using a dark background makes the gold stars and pearly crescent moon truly pop, especially when the lights go out.
Detailed Instructions
Materials
- Smooth river rock (flat and oval-shaped works best)
- Black or very dark midnight blue acrylic paint
- Flat paintbrush
- Gold paint pen or fine bright gold acrylic paint
- Pale cream or glow-in-the-dark acrylic paint
- Fine detail paintbrush (size 0 or 1)
- Small dotting tool or toothpick
- Clear sealant spray (matte or satin finish)
Step 1: Setting the Night Sky
-
Clean your canvas:
Start by washing your rock with warm soapy water to remove any dirt or dust. Dry it completely with a towel so the paint adheres properly. -
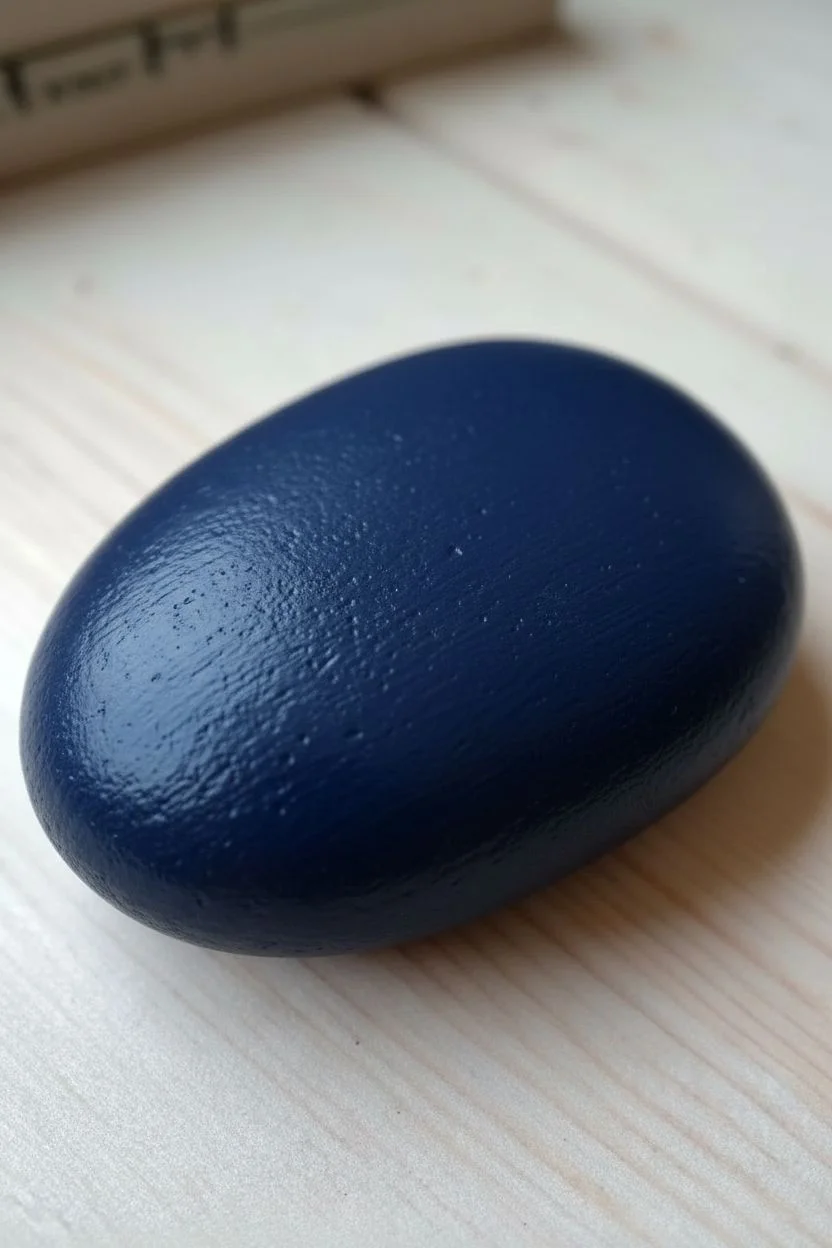
Create the base layer:
Squeeze out a nickel-sized amount of black or midnight blue acrylic paint. Using your flat paintbrush, cover the entire top surface of the rock in smooth, even strokes. -
Dry and repeat:
Let the first coat dry for about 10-15 minutes. If you can still see the stone’s texture through the paint, apply a second coat for a truly opaque, dark background.
Paint Pen Won’t Flow?
If your gold pen stops writing on the painted rock, the tip might be clogged with dried acrylic. Scribble quickly on a scrap piece of paper to unclog it before returning to the rock.
Step 2: Painting the Moon
-
Outline the crescent:
Once the background is bone dry, take your pale cream or glow-in-the-dark paint. Using the fine detail brush, lightly sketch a ‘C’ shape in the center of the rock. -
Thicken the shape:
Go over your outline, making the middle of the ‘C’ thicker while tapering the top and bottom points to sharp, delicate ends. -
Fill it in:
Fill the inside of the crescent shape with your paint. You might need two layers to make it bright enough against the dark background. Allow this to dry completely. -
Add texture:
For a cratered look, mix a tiny drop of grey into your cream paint. Use a toothpick to dab very faint, tiny dots sparingly on the inner curve of the moon.
Step 3: Adding the Stars
-
Draw primary stars:
Grab your gold paint pen or use gold paint on your finest brush. Draw a small cross or ‘plus sign’ shape near the bottom left of the rock. -
Sharpen the sparkle:
Extend the vertical line of your cross slightly longer than the horizontal one for a twinkling effect. Repeat this process to create 3-4 major stars scattered around the moon. -
Add medium stars:
Draw simple four-pointed diamond shapes (rhombuses) in sizes slightly smaller than your main stars. Scatter 5-6 of these randomly across the open dark spaces. -
Create distant stars:
Using the very tip of your brush or pen, tap tiny gold dots in clusters around the diamonds. Vary the pressure to make some dots tiny and others slightly larger.
Make It Magical
Instead of plain cream paint for the moon, use glow-in-the-dark acrylics. Charge it under a lamp for a minute, then turn off the lights to see your moon glow.
Step 4: Finishing Touches
-
Sprinkle white dust:
Dip a toothpick into white paint. Gently touch the rock surface in the empty black areas to create the look of distant galaxies or stardust. -
Check opacity:
Look closely at your gold stars. If the gold looks translucent against the black, carefully re-trace the shapes with the pen to make them shine brighter. -
Seal the artwork:
Once absolutely everything is dry (give it an hour to be safe), take the rock to a well-ventilated area. Hold your spray sealant 10 inches away and apply a light mist to protect your masterpiece.
Place your finished starry rock on a windowsill to charge up during the day and enjoy the view at night
Under-the-Sea Mermaid Tail Rocks
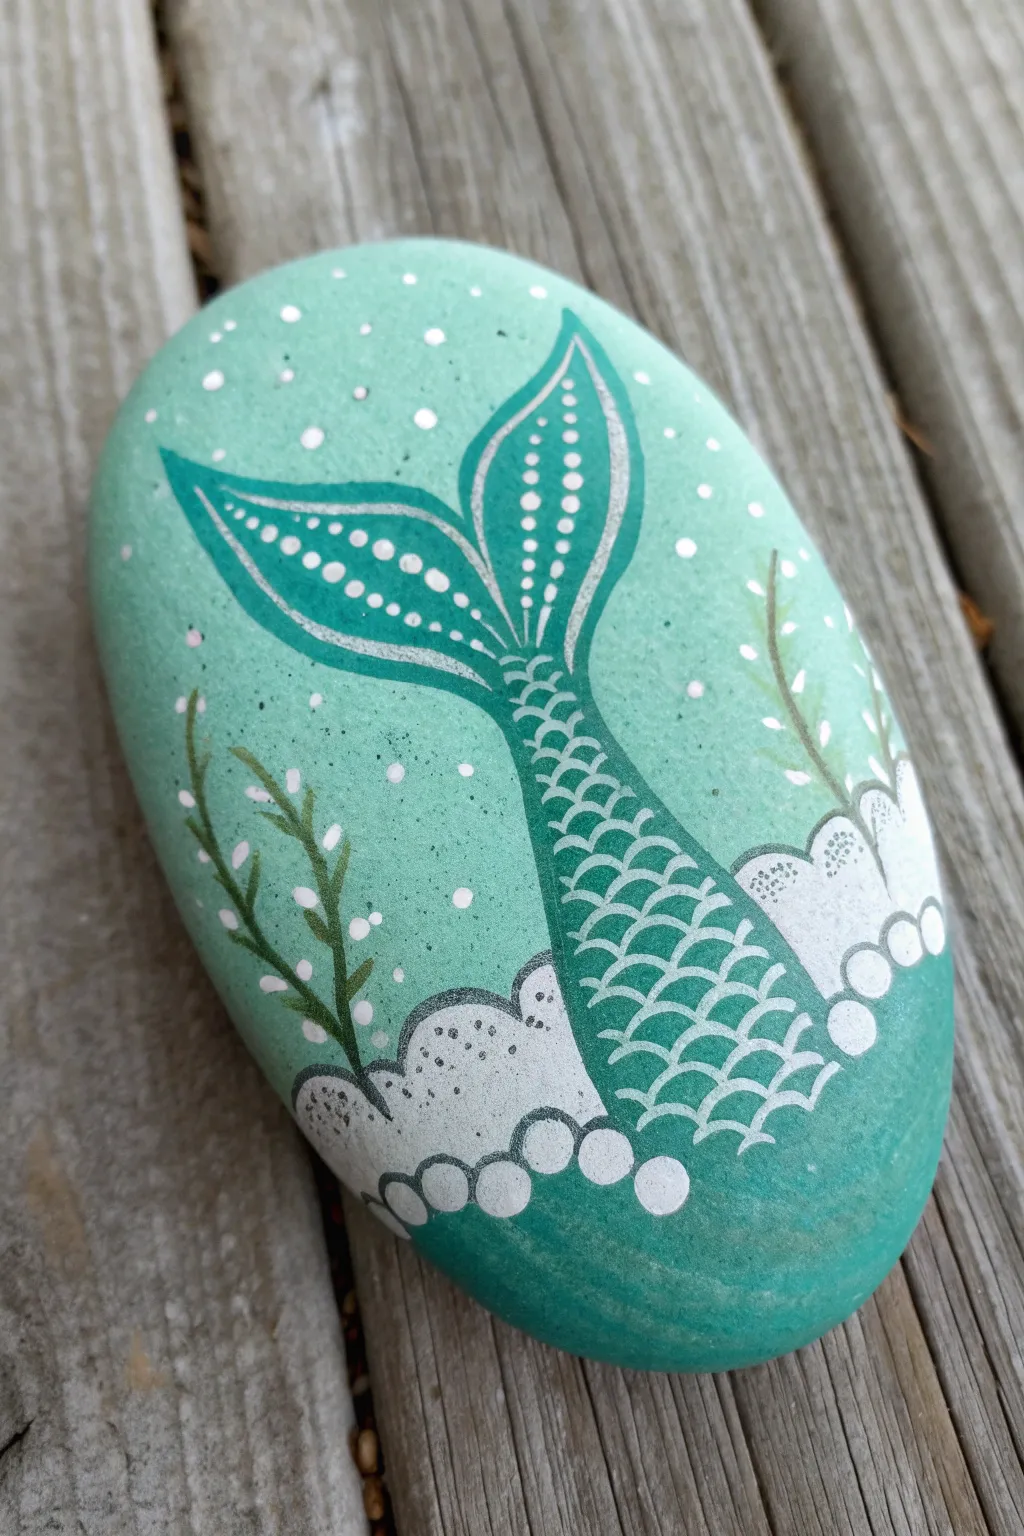
Dive into creativity with this enchanting rock painting that captures a mermaid tail splashing into sea foam. The soothing monochromatic teal palette combined with crisp white details makes for a truly magical underwater scene.
Step-by-Step Tutorial
Materials
- Smooth, oval river rock
- Acrylic paints: Light teal/mint green, medium teal, dark teal, white
- Flat paintbrush (medium)
- Fine detail paintbrush (liner brush)
- Dotting tools (various sizes) or toothpicks
- Pencil for sketching
- Clear acrylic sealer (spray or brush-on)
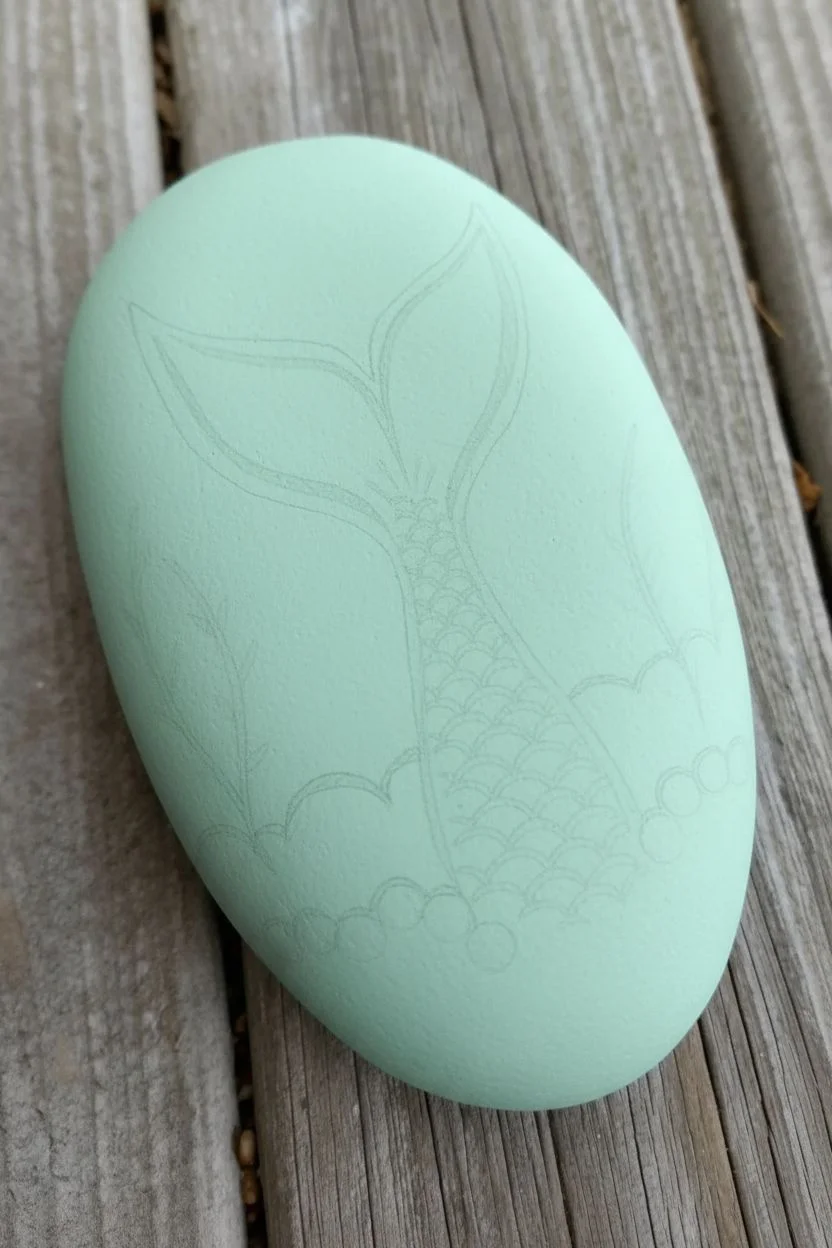
Step 1: Setting the Scene
-
Clean Your Canvas:
Begin by washing your rock with soap and water to remove any dirt or oils. Let it dry completely before starting. -
Base Coat Application:
Using your flat brush, paint the entire top surface of the rock with a light mint green or soft teal color. You may need two coats for opaque coverage; allow the paint to dry fully between layers. -
Sketch the Design:
Lightly sketch the outline of the mermaid tail in the center using a pencil. Draw the curved body coming up from the bottom and the flukes at the top. Also, lightly mark where the bubbly sea foam will be at the base.
Paint too thick?
If your fine lines are clumpy, mix a tiny drop of water into your acrylic paint. It should be the consistency of heavy cream or ink to flow smoothly from a liner brush.
Step 2: Painting the Tail
-
Outline the Shape:
With a liner brush and darker teal paint, carefully trace over your pencil sketch of the tail. Create a clean, defining line for the silhouette. -
Fill the Tail:
Fill in the tail shape with a medium teal color that is slightly darker than your background but lighter than the outline. Let this dry before adding details. -
Create Scales:
Using your finest brush and white paint (or a very light mint), paint small, overlapping ‘U’ shapes starting from the bottom of the tail to simulate scales. As the tail narrows, make your scales smaller. -
Detail the Fluke:
Inside the tail fins (flukes), paint curved white lines that follow the shape of the fin. I like to add a second, thinner line right next to the first for extra dimension. -
Add Dotted Accents:
Dip a small dotting tool or toothpick into white paint. Add a row of dots between the curved lines on the tail fins, graduating the size from small to large if possible.
Make it shimmer
Swap the plain white paint on the scales for a metallic silver or pearl white. It will make the mermaid tail glisten beautifully when the rock catches the sunlight.
Step 3: Creating the Sea Floor
-
Paint Sea Foam Mounds:
At the bottom of the rock, paint rounded, cloud-like mounds using white paint to represent sea foam or coral. Place one mound on each side of the tail base. -
Add Bubbles:
Along the bottom edge of your white mounds, paint a row of connected circles. Leave the centers unpainted (showing the background color) or fill them with a slightly darker shade for depth. -
Texture the Foam:
Using a very small dotting tool and dark teal paint, add tiny stippled dots inside the white foam mounds to give them a sandy or bubbly texture. -
Draw Seaweed Stems:
With thin, watered-down dark teal or brown paint, paint wavy, organic lines rising from the foam mounds on either side of the tail. -
Add Leaves:
Paint small, simple leaves along these stems. Keep them loose and flowing upward. -
Bubble Details:
Use your dotting tool to add scattered white dots of various sizes around the tail and seaweed, mimicking rising air bubbles.
Step 4: Finishing Touches
-
Highlight the Scales:
Go back over your scale pattern with a fresh coat of white if the first layer looks transparent. Crisp, bright white lines make the design pop. -
Review and Refine:
Check your outlines. If the background paint covered any edges, touch up the dark teal outline around the tail to make it sharp again. -
Seal the Artwork:
Once your painting is 100% dry (give it at least an hour), apply a clear acrylic sealer to protect your underwater masterpiece from scratches and weather.
Place your finished rock in a garden or near a fish tank to add a splash of ocean magic to your home
Mini Fairy House Door Rocks
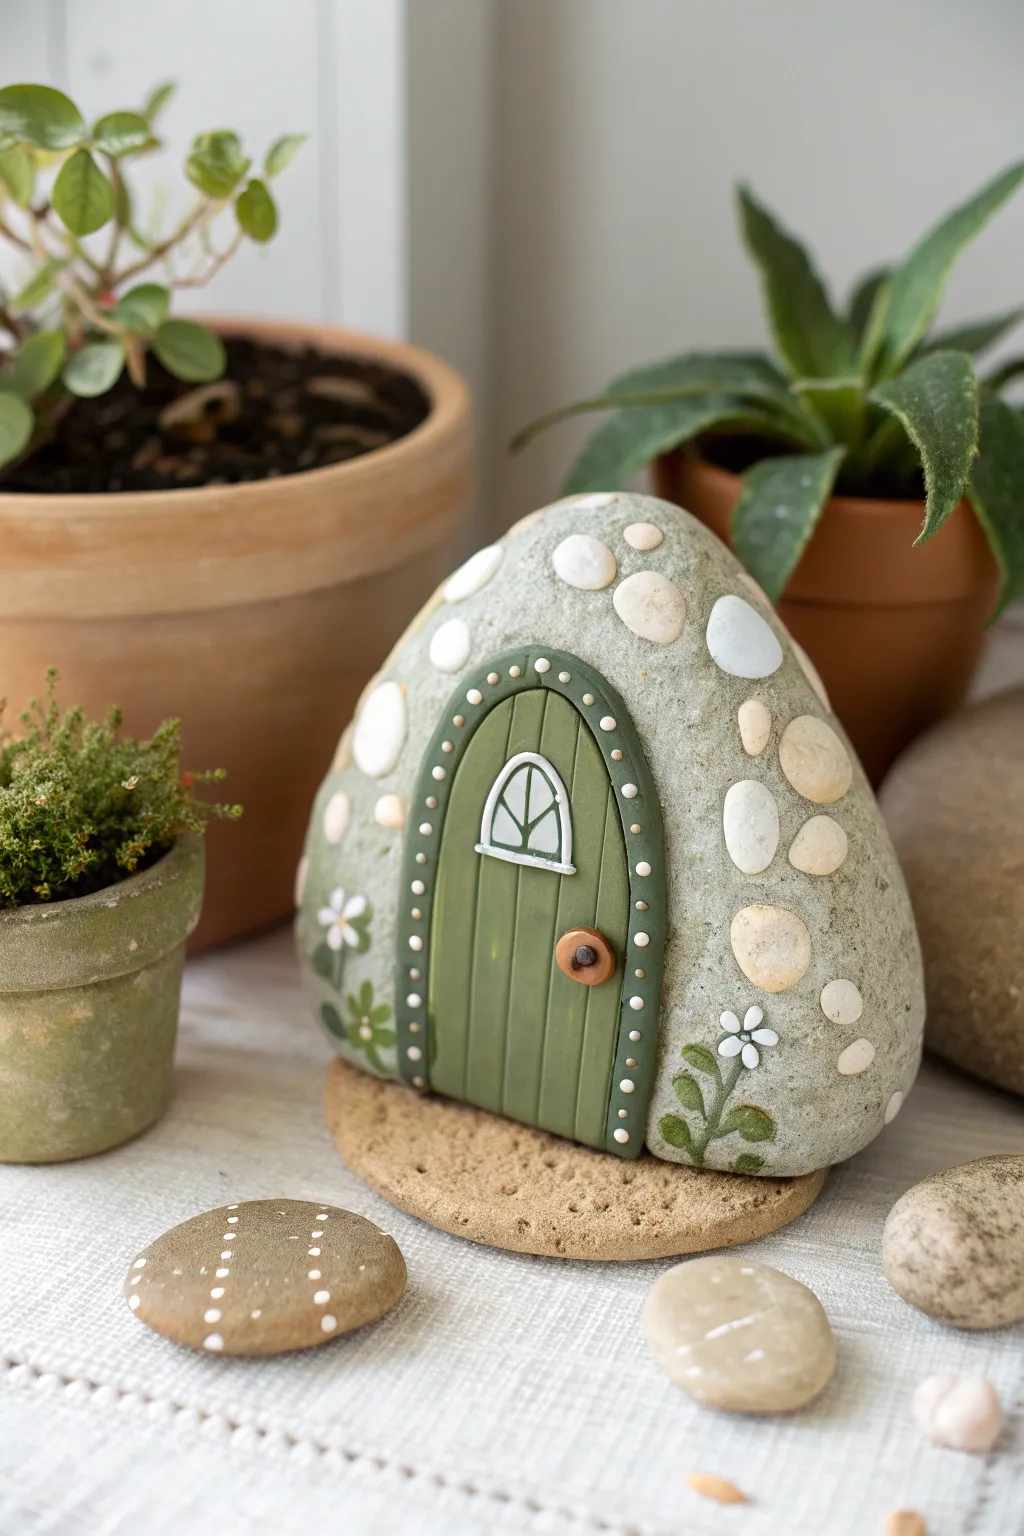
Transform an ordinary garden stone into an enchanting fairy dwelling complete with a sculpted door and tiny windows. This project combines rock painting with simple clay sculpting for a delightful 3D effect that feels straight out of a storybook.
Detailed Instructions
Materials
- Smooth, triangular or oval river rock (fist-sized)
- Air-dry clay or polymer clay
- Acrylic paints (dark green, light green, white, brown, grey)
- Fine detail paintbrushes
- Sculpting tool or toothpick
- Strong craft glue (E6000 or similar)
- Matte finish sealant or varnish
- Small flat embellishment stones or pebbles (optional)
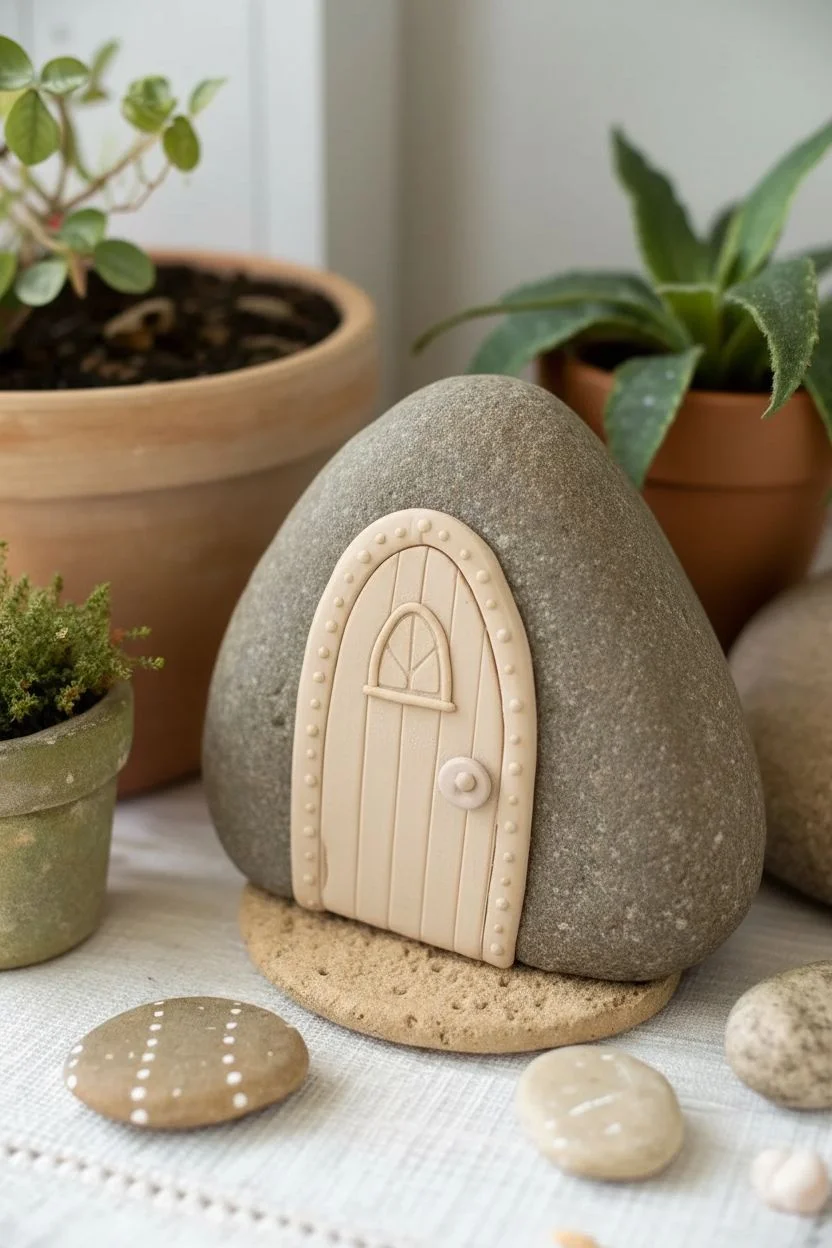
Step 1: Sculpting the Door
-
Shape the door frame:
Roll a small amount of clay into a long, thin snake. Flatten it slightly to create the arched door frame and shape it directly onto the flattest face of your rock to ensure it fits the curve perfectly. -
Create the door panel:
Roll a flat, oval piece of clay that fits inside your frame. Press it gently onto the rock surface so it sits flush within the arched border you just made. -
Add texture:
Use a sculpting tool or the edge of an old credit card to press vertical lines into the inner door panel. These grooves will mimic wooden planks. -
Form the window and knob:
Roll a tiny clay ball for the doorknob and press it onto the right side of the door. Shape a miniature semi-circle of clay for the window and place it near top center of the door. -
Dry the clay:
Carefully peel your clay pieces off the rock if possible, or leave them in place if using air-dry clay that shrinks minimally. Allow them to dry or bake according to your clay package instructions.
Step 2: Painting the Base
-
Clean the rock surface:
Wipe your rock down with a damp cloth to remove any dust or grit. Let it dry completely before starting to paint. -
Base coat the rock:
Mix a light grey acrylic paint and cover the entire surface of the rock. You might need two coats to get solid coverage over darker stones. -
Add stone texture:
Dip an old toothbrush or stiff brush into slightly watered-down white paint. Run your thumb over the bristles to flick tiny speckles onto the grey base for a realistic granite look. -
Paint decorative stones:
Paint oval and round shapes scattered across the rock’s surface in varied shades of off-white and cream to resemble embedded cobblestones.
Clay adhesion hack
To help air-dry clay stick better without glue later, brush a little bit of PVA glue onto the rock surface beneath the wet clay before you start sculpting.
Step 3: Assembly and Detail
-
Paint the door components:
Paint the door frame a deep, forest green. Paint the inner wooden planks a slightly lighter olive green to create contrast. -
Highlight the details:
Use a fine brush to paint the window frame white and add thin intersecting lines for panes. Paint the doorknob a metallic bronze or warm brown. -
Add decorative dots:
Using the handle end of a paintbrush, dot tiny white spots along the arched green door frame for architectural detail. -
Glue the pieces:
Once all paint is dry, apply strong craft glue to the back of your clay door assembly and press it firmly onto the center of the painted rock. -
Paint floral accents:
Paint simple white flowers near the base of the rock. Use five dots for petals and a yellow center, adding trailing green stems and leaves. -
Shading and depth:
Mix a watery dark grey or black wash. Carefully paint a thin line around the outer edge of the painted stones and the clay door to create a shadow effect. -
Seal the project:
Finish by applying a coat of matte sealant over the entire rock. This protects your paint from chipping and gives the clay a unified finish with the stone.
Make it a village
Create a whole fairy village by varying the door shapes (round vs. square) and paint colors for each rock. Add painted mushroom roofs for extra flair.
Place your finished cottage in a potted plant or garden corner for a magical surprise
Rock Pets With Accessories and Personalities
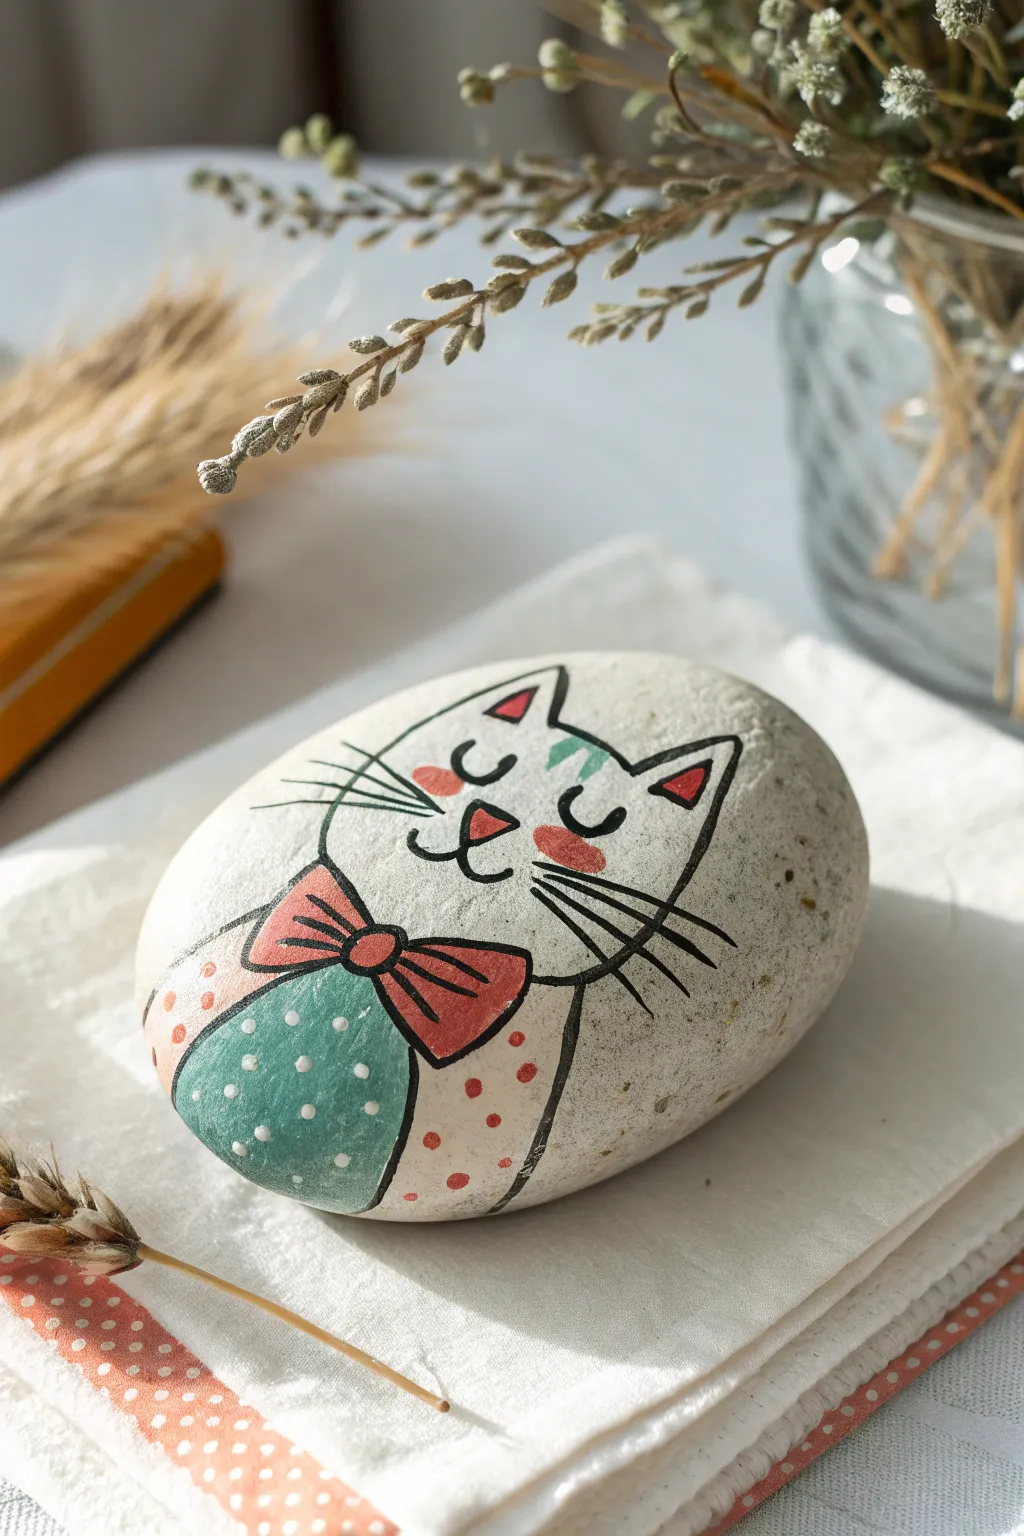
Turn a simple smooth stone into a dapper feline friend with just a few permanent markers and some creativity. This stylized cat features a cute polka-dot outfit and a warm smile, making it a perfect desk buddy or a thoughtful handmade gift.
Step-by-Step Guide
Materials
- Smooth, oval-shaped river rock (cleaned and dried)
- White acrylic paint or gesso (optional base coat)
- Black fine-tip permanent marker or paint pen (0.7mm to 1mm)
- Black ultra-fine permanent marker
- Teal or turquoise paint pen
- Coral or salmon pink paint pen
- White paint pen (fine tip)
- Spray sealer or varnish (matte or gloss)
Step 1: Preparation and Base
-
Clean your canvas:
Start by scrubbing your river rock with warm soapy water and a stiff brush to remove any dirt or oils. Let it dry completely in the sun or with a hairdryer before starting. -
Prime the surface:
If your rock is naturally gray or dark, paint a base layer of white acrylic paint or gesso over the top surface. If you have a naturally white stone like the one pictured, you can skip this step, though painting a base coat helps markers pop.
Bleeding Lines?
If the black outlines bleed when you add color, switch the order: color the main shapes first, let them dry completely, and then draw the black outlines on top last.
Step 2: Sketching the Outline
-
Draw the ears:
Using your fine-tip black marker, start near the top center of the rock. Draw two triangular ears, leaving a gap between them for the top of the head. -
Connect the head:
Draw a curved line connecting the inner points of the ears. Then, carefully draw the outer sides of the face, curving down towards where the neck would be. -
Create the body shape:
Extend the lines coming down from the head to form a rounded body shape that tapers near the bottom of the rock. The cat’s body should look like it’s wearing a coat or shirt. -
Draw the shirt collar:
Just under the chin area, draw two curved lines swooping inward to create the neckline of the cat’s outfit.
Step 3: Adding Character Details
-
Draw the facials features:
In the center of the face, draw a small inverted triangle for the nose. Below that, add a typical ‘w’ shape for the mouth. Draw two joyful ‘u’ shapes for closed, smiling eyes. -
Add the bowtie:
Right at the center of the neckline, draw a small circle for the knot. Extend two larger, rounded triangle shapes outward for the bowtie loops. Add simple crease lines inside the loops for dimension. -
Create the shirt pattern:
Draw a curved line splitting the cat’s chest. This creates a panel on the left (viewer’s left) which will be the teal shirt, and leaves the right side and sleeves open for a different pattern. -
Add whiskers:
Using the ultra-fine black marker now, flick three long lines outward from each cheek area. Quick, confident strokes make for the straightest whiskers.
Make it a Set
Paint different animal personalities on similar rocks—try a dog with a tie or a rabbit with a scarf—to create a whole collection of ‘pet rocks’ for your garden.
Step 4: Coloring and Polishing
-
Color the shirt panel:
Fill in the curved panel on the left side of the chest with your teal or turquoise paint pen. Apply the ink smoothly. -
Paint the red accents:
Use the coral pink marker to fill in the bowtie completely. Also, add small triangular accents inside the ears and two soft ovals on the cheeks for blush. -
Add polka dots:
Use the coral pink marker to dot the white sections of the ‘shirt’ area (the sleeves and main body). I like to stagger these dots slightly so they don’t look too grid-like. -
Create white details:
Once the teal paint is fully dry—give it a few minutes—use your white paint pen to add tiny polka dots over the teal section. -
Reinforce outlines:
Go back over your main black outlines with the thicker marker if any paint overlapped the edges. This crisp black line is what gives the art its cartoon style. -
Seal the artwork:
Allow the rock to dry for at least an hour. Finish by applying a light coat of spray sealer to protect your paint from chipping and to make the colors vibrant.
Place your charming new pet on a shelf where its cheerful expression can greet you every day


Have a question or want to share your own experience? I'd love to hear from you in the comments below!