When you want a handmade gift that feels personal fast, a birthday painting is honestly one of the sweetest ways to say “I thought of you.” I pulled together my favorite birthday painting ideas that work as cards, mini canvases, or quick sketchbook pieces—easy to customize, and super fun to make.
Watercolor Balloon Bouquet With Loose Washes
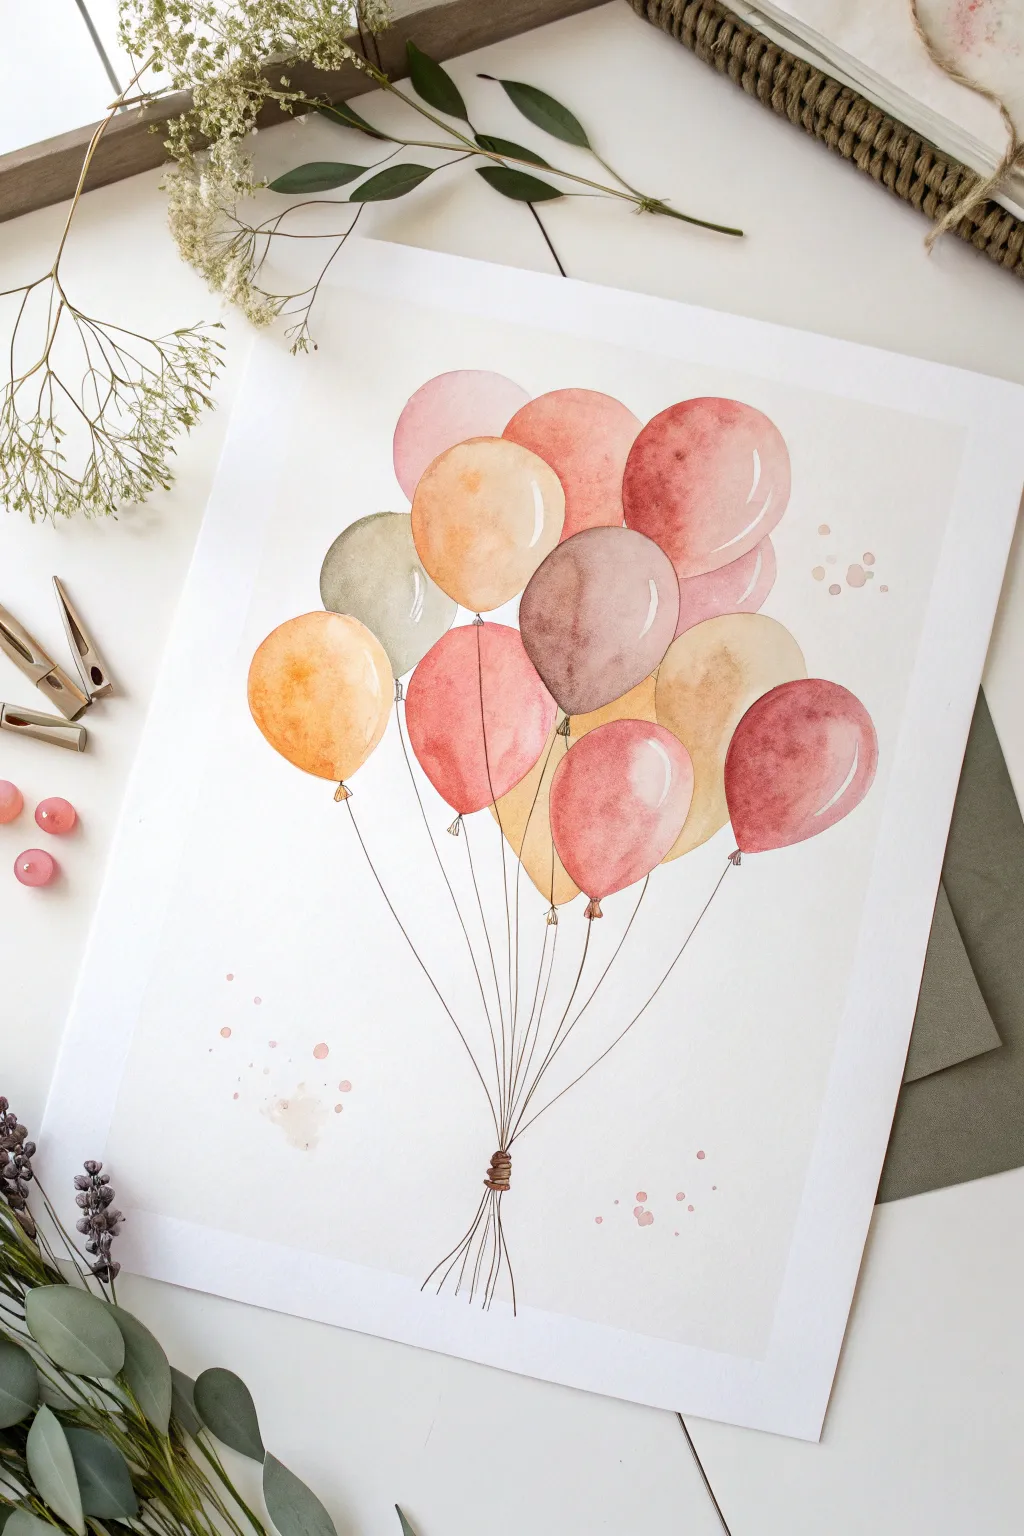
Capture the lightness of celebration with this soft, muted watercolor balloon bouquet. Using a sophisticated palette of terracotta, sage, and cream, you’ll learn to layer translucent washes to create depth and roundness without heaviness.
Step-by-Step Tutorial
Materials
- Cold press watercolor paper (140 lb/300 gsm)
- Round watercolor brushes (Size 4, 6, and a fine liner brush for strings)
- Watercolors: Burnt sienna, yellow ochre, sap green, alizarin crimson, and sepia
- Pencil (HB or H) and kneadable eraser
- Two jars of water
- Paper towels
- White gouache (optional highlights)
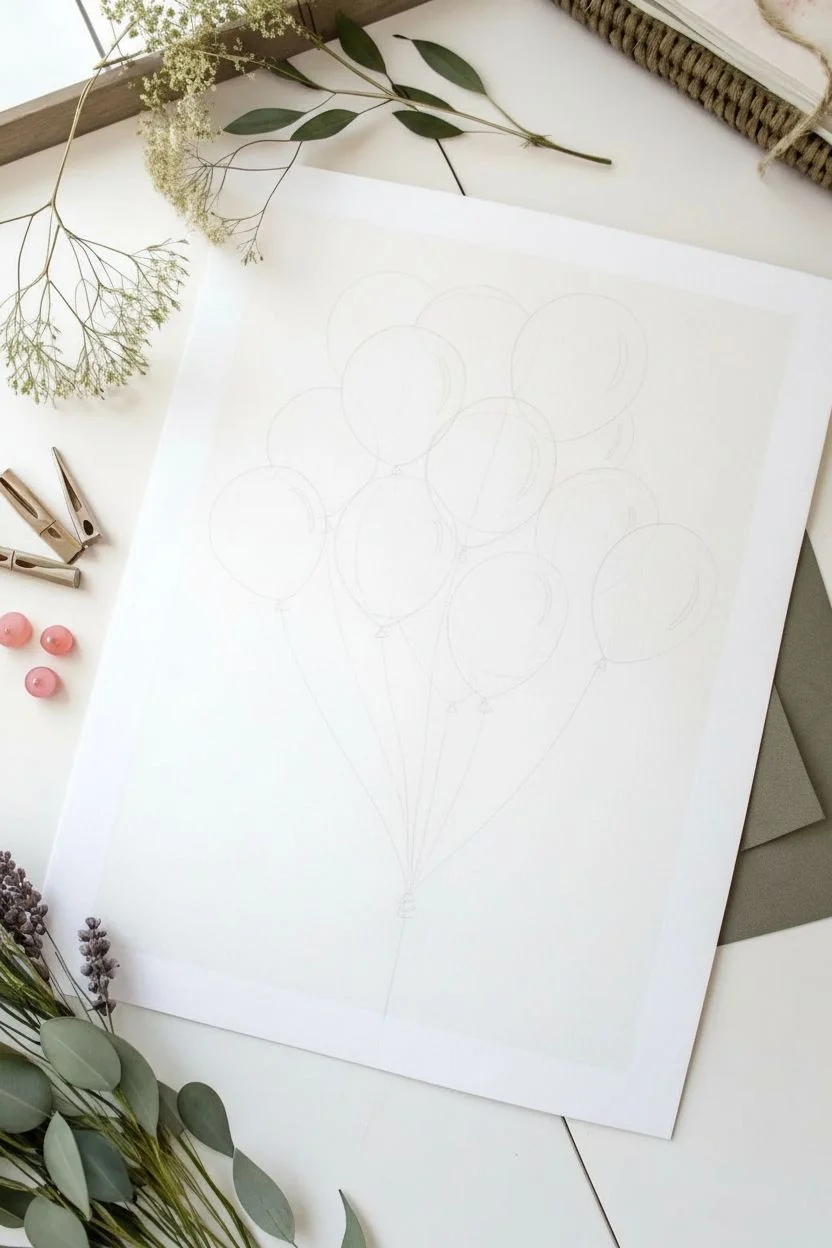
Step 1: Sketching the Composition
-
Light outlines:
Begin by lightly sketching roughly 10-12 oval shapes clustered together in the upper center of your paper. Keep the pressure very light so the pencil lines don’t show through the transparent paint later. -
Overlapping forms:
Make sure some balloons overlap others to create a sense of depth. Draw some ‘behind’ others by only sketching partial outlines where they tuck away. -
String planning:
Sketch a faint, single guide line from the center of the balloon cluster down to where the knot will be. This will help you aim your strings later.
Paint Bleeding?
If adjacent balloons bleed together, you’re working too fast! Wait for one shape to be bone-dry before painting its neighbor, or use a hair dryer to speed up the process.
Step 2: The First Wash
-
Mixing your palette:
Prepare watery puddles of your colors. Mix burnt sienna with a touch of crimson for the terracotta balloons, and yellow ochre with plenty of water for the cream ones. Create a muted sage by mixing sap green with a tiny dot of crimson or brown. -
Painting the first balloon:
Select a balloon that appears to be in the front. Load your size 6 brush with a pale wash of color (e.g., the peach tone) and fill the shape. -
Lifting highlights:
While the paint is still wet, rinse your brush, dry it slightly on a towel, and lift a small curved stripe of paint from the upper right side of the oval. This creates that shiny balloon reflection. -
Working in sections:
Move to a balloon that isn’t touching the wet one to prevent colors from bleeding into each other. Paint this one a different shade, perhaps the sage green or muted brown.
Add Metallic Touches
Use metallic gold watercolor for one or two of the balloons, or for the strings, to make the artwork pop and feel more like a special occasion gift.
Step 3: Building Depth and Layers
-
Adding shadows:
Once your first layer is damp (not soaking wet), drop a slightly more concentrated version of the same color into the bottom left curve of each balloon. Tilt the paper slightly to let it blend naturally. -
Painting behind:
When the front balloons are completely dry, paint the ones tucked behind them. The dryness of the front layer creates a crisp edge, making the ‘behind’ balloons obscure naturally. -
Color harmony:
Continue filling all shapes, alternating between terracotta, ochre, blush, and sage. I like to keep the colors quite diluted to maintain that airy feel. -
Deepening contacts:
Where two balloons touch, add a tiny bit of darker pigment to the balloon that is ‘behind’ the other. This cast shadow separates the forms visually.
Step 4: Fine Details
-
Drawing the strings:
Switch to your fine liner brush or a 00 round brush. Mix a dark sepia or black paint to an ink-like consistency. -
Connecting the bouquet:
Starting from the bottom center of each balloon, pull a very thin, shaky line down toward your central focal point. It helps to exhale as you pull the stroke to keep your hand steady. -
The central knot:
Gather all the lines at the bottom point. Paint a small, messy knot shape in dark brown, wrapping horizontally a few times to look like twine holding the bunch together. -
Loose ends:
Extend a few loose strings below the knot, letting them trail off and fade at the very bottom of the page. -
Optional splatter:
Load a brush with watery pink or brown paint and tap it against your finger to create subtle splatters around the balloons for a festive texture.
Once the final splatters are dry, you have a charming, timeless piece of art perfect for a birthday card or nursery decor
Tall Candles With Flickering Glow Highlights
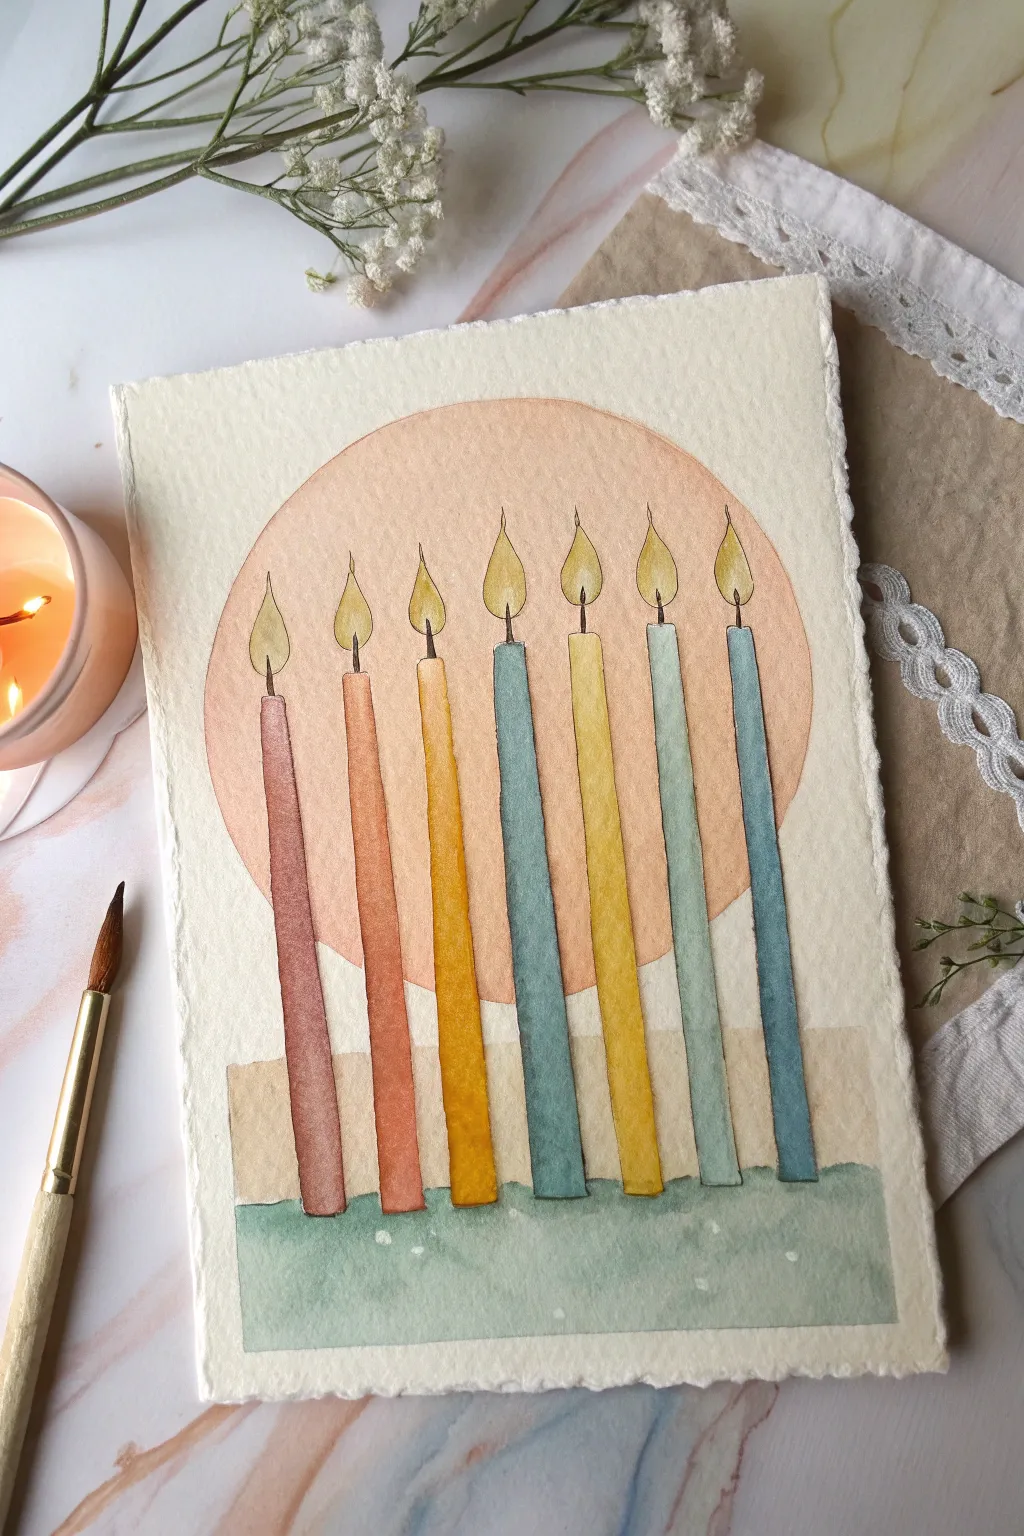
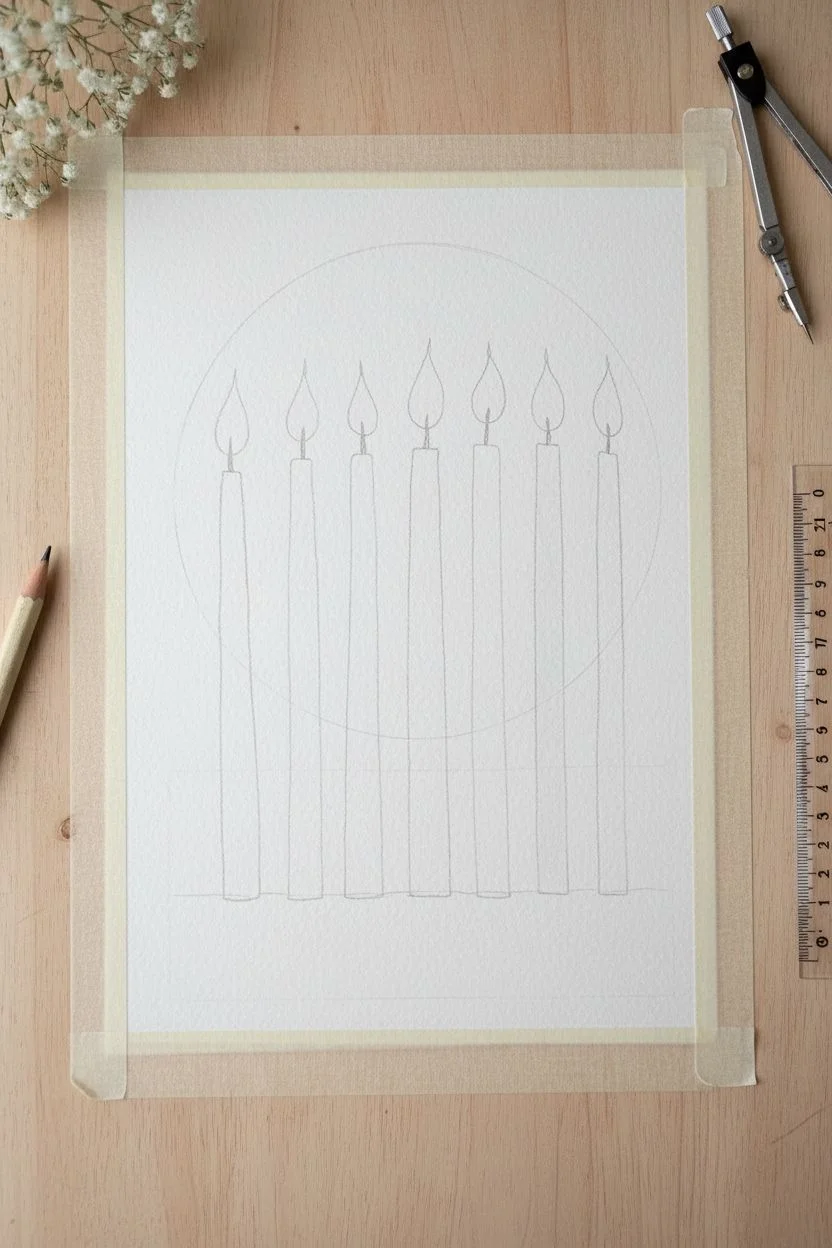
Celebrate a special day with this elegant watercolor illustration featuring seven tall, slender candles radiant against a soft, sun-like circle. Its soothing palette and simple composition make it a perfect handmade card or framed gift that captures the warmth of birthday wishes.
How-To Guide
Materials
- Cold press watercolor paper (approx. 300 gsm)
- Watercolor paint set (mustard yellow, burnt sienna, teal, indigo, peach/terracotta)
- Round watercolor brushes (size 4 and 0 or 00 for details)
- Pencil (HB or H for light lines)
- Ruler
- Compass or a circular object to trace (approx. 4-inch diameter)
- Micron pen or fine liner (0.1mm, black or dark brown) – optional but helpful
- Masking tape
- White gel pen or white gouache (for highlights)
Step 1: Planning and Sketching
-
Prepare the paper:
Begin by taping down your watercolor paper to a board or table to prevent buckling. If you want that beautiful deckled edge look shown in the photo, you can carefully tear the paper edges against a ruler before starting, rather than cutting with scissors. -
Draw the background circle:
Use a compass or a small bowl to lightly trace a circle in the upper-center portion of the paper. This will be the warm glow behind the candles. -
Sketch the candles:
Using a ruler, lightly draw seven vertical rectangles for the candles. They should be tall and slender, overlapping the bottom two-thirds of the circle and extending slightly below it. Vary the heights slightly if you want a more organic feel, or keep them uniform for symmetry. -
Add the flames:
Draw teardrop shapes at the top of each candle wick. Make sure the flames are positioned comfortably within the upper part of the circle or just piercing the top edge. -
Define the ground line:
Sketch a horizontal line near the bottom of the candles to indicate a tabletop or surface found below the circle.
Bleeding Edges?
If paint bleeds from the candles into the background, wait for it to dry completely, then gently lift the unwanted color with a damp, stiff brush and blot with a tissue.
Step 2: Painting the Background
-
Paint the sun circle:
Mix a watery wash of peach or soft terracotta. Carefully paint inside the circular line, but paint *around* the candle shapes and flames. You want this wash to be pale and even, creating a soft backdrop. -
Let it dry completely:
Wait until the circle is bone dry. If you paint next to it too soon, colors might bleed. -
Paint the background surface:
For the area directly below the candles (but not the very bottom strip), add a wash of light beige or sand color to ground the composition. -
Paint the foreground strip:
Paint the bottom-most strip (below the candle bases) with a soft teal or sage green wash. While this layer is still wet, you can drop in tiny dots of clean water to create subtle ‘blooms’ or texture like in the reference image.
Step 3: Bringing the Candles to Life
-
Mix your candle palette:
Prepare distinctive colors for the candles. The example uses a gradient from warm to cool tones: reddish-brown, burnt orange, mustard yellow, dull yellow, sage green, and teal blue. I like to keep my mixes fairly saturated so they stand out against the pale background. -
Paint the first candle:
Start with the leftmost candle using the reddish-brown mix. Carefully fill the tall rectangle, keeping your edges crisp. -
Paint alternating candles:
To prevent wet paint from merging between neighbors, skip a candle and paint the third one (mustard yellow), then the fifth (sage green), and the seventh (dark teal). Let these dry completely before filling in the gaps. -
Fill in the remaining candles:
Once the first set is dry, paint the second (burnt orange), fourth (dull yellow), and sixth (light teal) candles. -
Add shadow depth:
While the paint is drying on these candles, you can add a tiny amount of darker pigment to the right side of each candle to suggest cylindrical volume.
Pro Tip: Bloom Effect
To get the textured look in the green bottom section, sprinkle a tiny pinch of salt into the wet paint. Brush it off once fully dry for a magical, speckled effect.
Step 4: Details & Highlights
-
Paint the flames:
Using a bright yellow, paint the teardrop flame shapes. While wet, touch the very bottom of the flame with a tiny bit of orange to create a glowing core. -
Add the wicks:
Use a detail brush (size 0) with dark brown or black paint to draw a thin line connecting the candle top to the flame. -
Outline for definition:
For a stylized illustration look, use a very fine brush with dark paint (or a waterproof fine liner pen) to outline the candles and flames. Keep the line thin and delicate. -
Add highlights:
Finally, use white gouache or a white gel pen to add a small reflective highlight to the side of each candle and a tiny dot inside the flame for sparkle.
Step back and admire the warm, rhythmic pattern you’ve created with just simple shapes and color


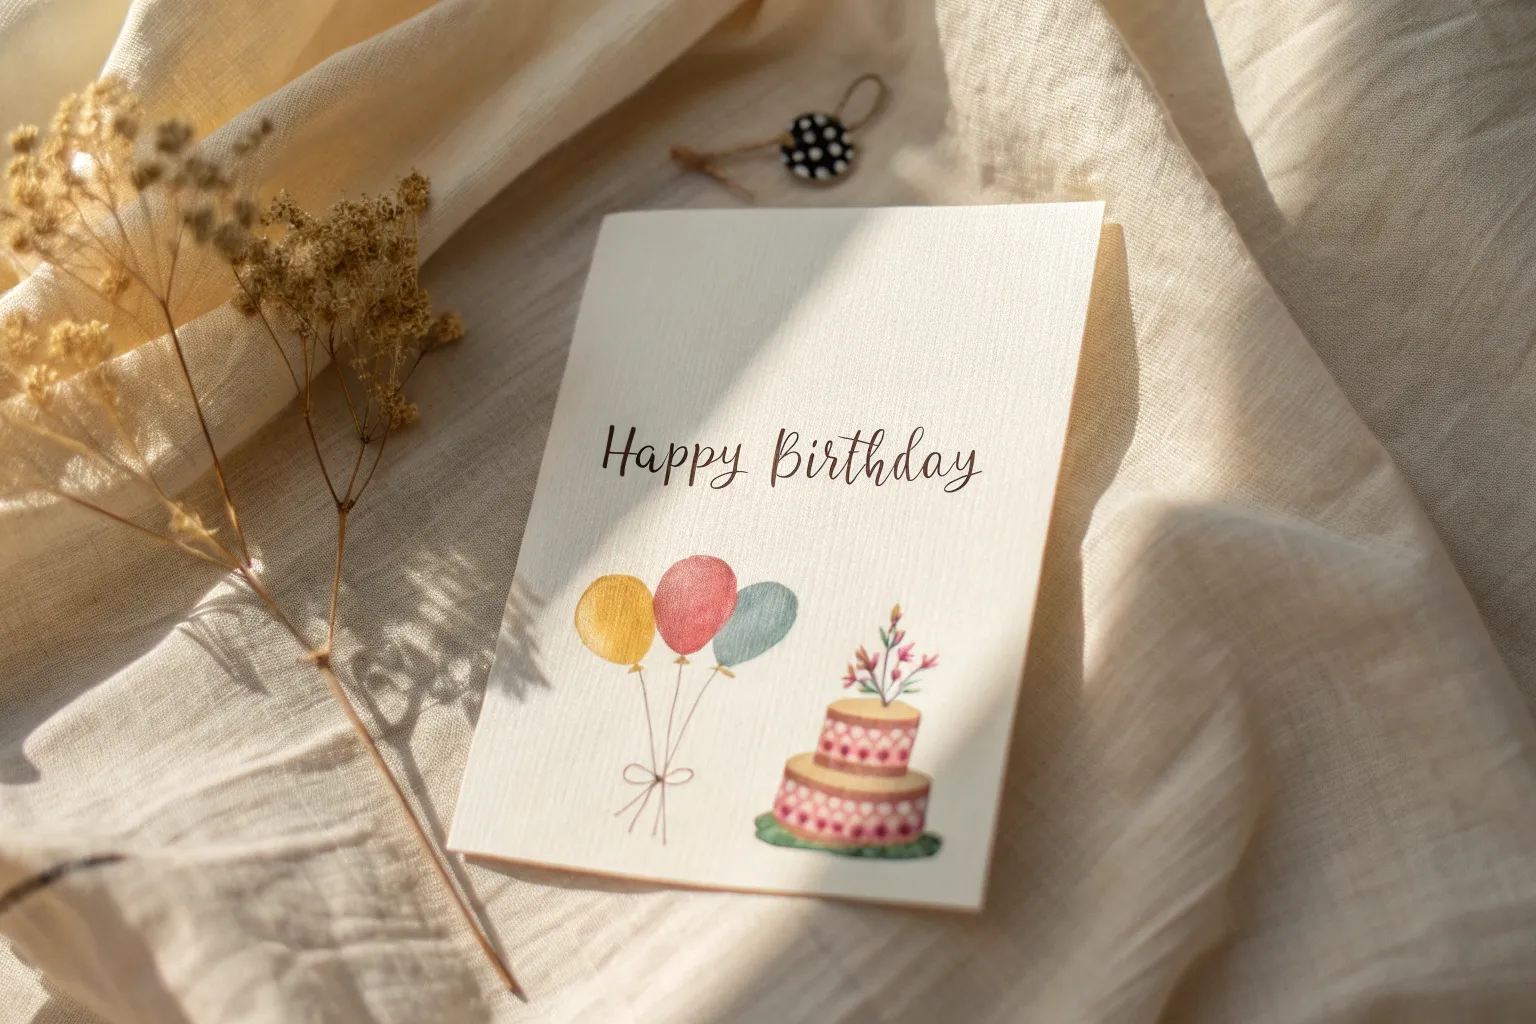
Hand-Lettered Happy Birthday With Colorful Drop Shadows
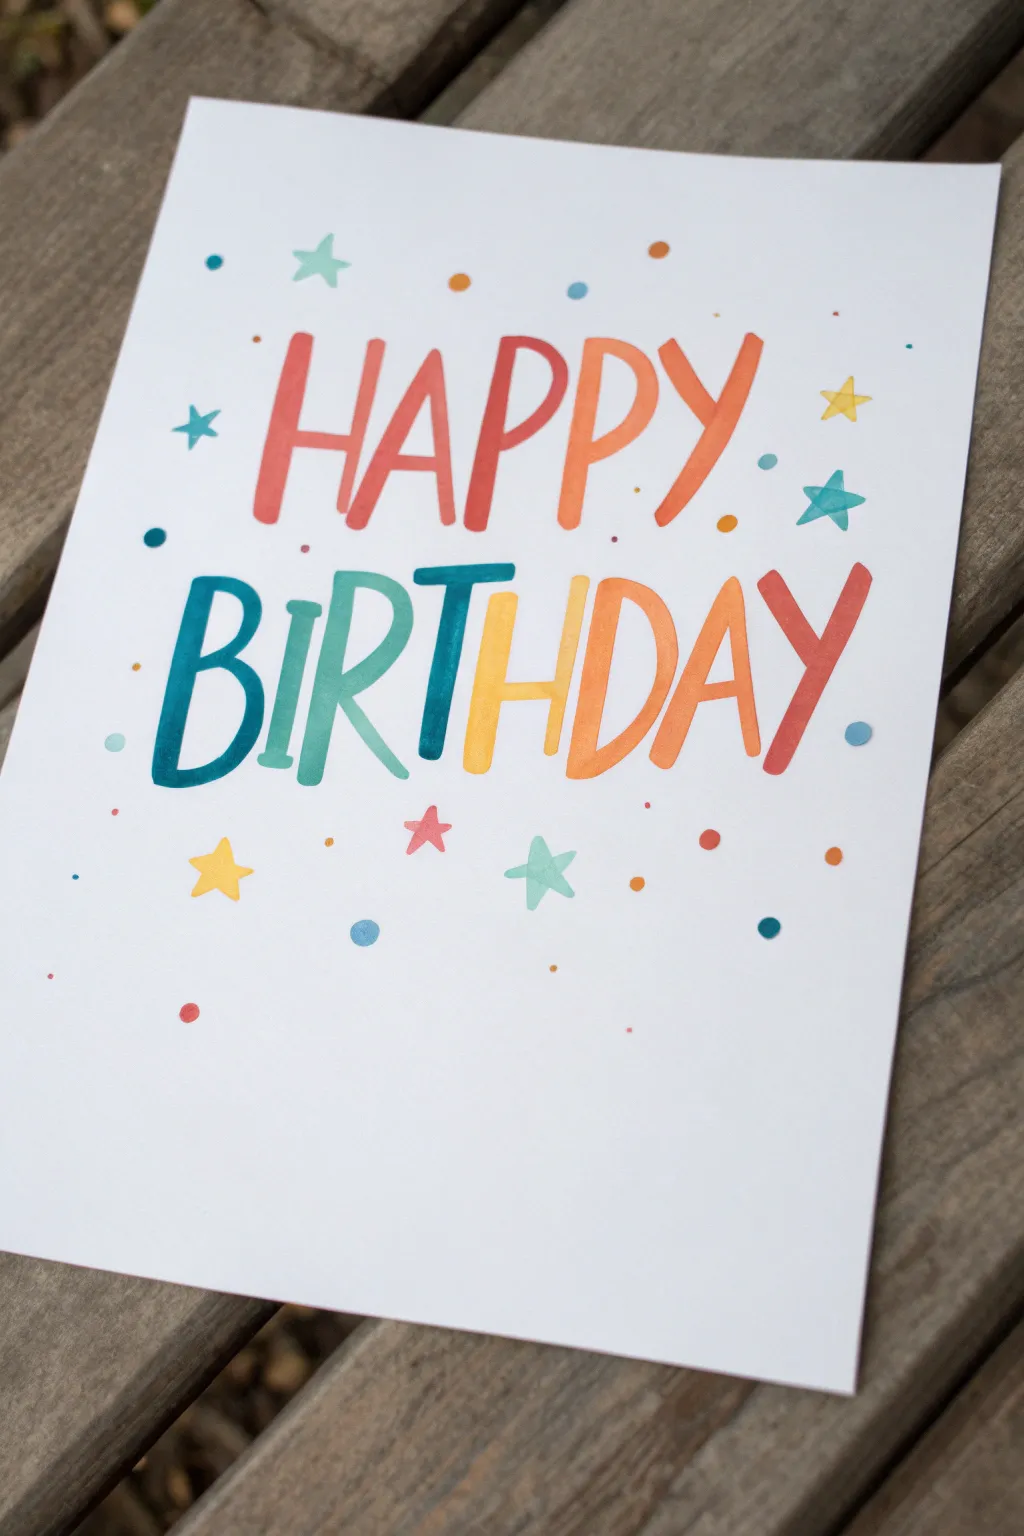
Bring instant cheer to any birthday celebration with this vibrant, hand-lettered card featuring a delightful color shift. The playful, bouncy letters and simple star accents create a festive look that feels both professional and personal.
Step-by-Step
Materials
- High-quality white cardstock or watercolor paper (A5 size)
- Pencil (HB or H)
- White eraser
- Brush pens or watercolor markers (Red, Orange, Yellow, Teal/Turquoise, Blue)
- Fine-tip colored markers (matching the brush pen colors)
- Ruler (optional)
- Scrap paper for testing colors
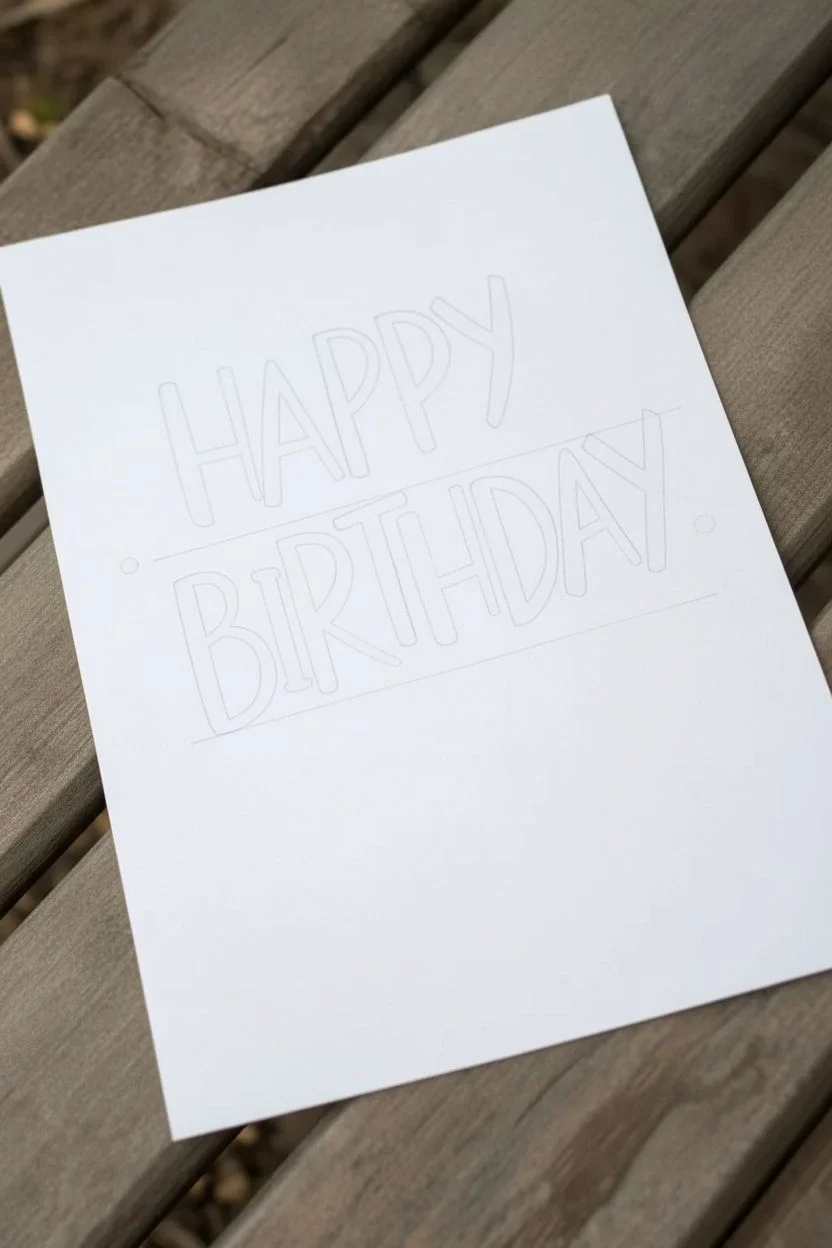
Step 1: Planning the Layout
-
Establish guidelines:
Begin by lightly drawing two horizontal baselines on your cardstock where you want the words ‘HAPPY’ and ‘BIRTHDAY’ to sit. Leave generous white space at the top and bottom. -
Sketch the letters:
Using your pencil, lightly sketch out the block letters. Aim for a tall, slightly narrow sans-serif style. To get that playful bounce, let some letters float slightly above or dip slightly below your baseline. -
Refine the spacing:
Check the kerning (spacing between letters). The word ‘BIRTHDAY’ is longer, so ensure the letters are slightly more condensed or the word starts further to the left to center it properly beneath ‘HAPPY’.
Blending Tip
To get a smoother gradient between letters, touch the tips of two markers together (e.g., orange to red) for a few seconds before writing to create a custom transition color.
Step 2: Lettering ‘HAPPY’
-
Start with red:
Select your red brush pen. Fill in the ‘H’ and the left half of the ‘A’. Use confident, downward strokes to keep the lines clean. -
Transition to orange:
While the red ink is still slightly wet, switch to your orange marker. Blend it into the right side of the ‘A’ and continue filling in the first ‘P’. -
Complete the gradient:
Move from orange to a lighter yellowish-orange for the second ‘P’ and the ‘Y’, creating a warm sunset gradient across the top word.
Step 3: Lettering ‘BIRTHDAY’
-
Begin with cool tones:
For the second line, start with a deep teal or turquoise marker. Fill in the ‘B’ and the ‘I’ completely. -
Create the teal-to-green shift:
Color the ‘R’ with a lighter seafoam green or mix your teal with a touch of yellow. Continue this lighter green tone into the ‘T’. -
Introduce yellow and orange:
Make the ‘H’ a bright yellow. This serves as a bridge between the cool start and warm finish of the word. -
Finish with warm tones:
Color the ‘D’ with orange, the ‘A’ with a reddish-orange, and finish the ‘Y’ with a deep red. This visual echo of the top line ties the design together beautifully.
Level Up: Glossy Finish
Once the ink is fully dry, accent the stars or specific parts of the letters with a clear glitter gel pen or a glossy accents medium for a raised, shiny texture.
Step 4: Adding Details
-
Let it dry:
Allow the main lettering to dry completely for at least 10 minutes to prevent smudging during the next steps. -
Erase pencil lines:
Review your card and gently erase any visible pencil sketches, being careful not to rub over the ink too vigorously. -
Draw large stars:
Using the same markers, draw five-pointed stars scattered around the text. Place a teal star near the ‘H’, a yellow one near the ‘Y’, and red/orange ones near the bottom right. -
Add confetti dots:
Take your fine-tip markers or the tips of your brush pens to dot small circles in various sizes around the empty spaces. Vary the colors to create a confetti effect. -
Include tiny specks:
For texture, add very tiny micro-dots with your finest maker tip to fill in any awkward empty voids without cluttering the design.
You now have a vibrant, handcrafted card ready to brighten someone’s special day


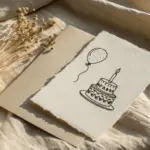
Birthday Banner Across the Top With Easy Triangle Pennants
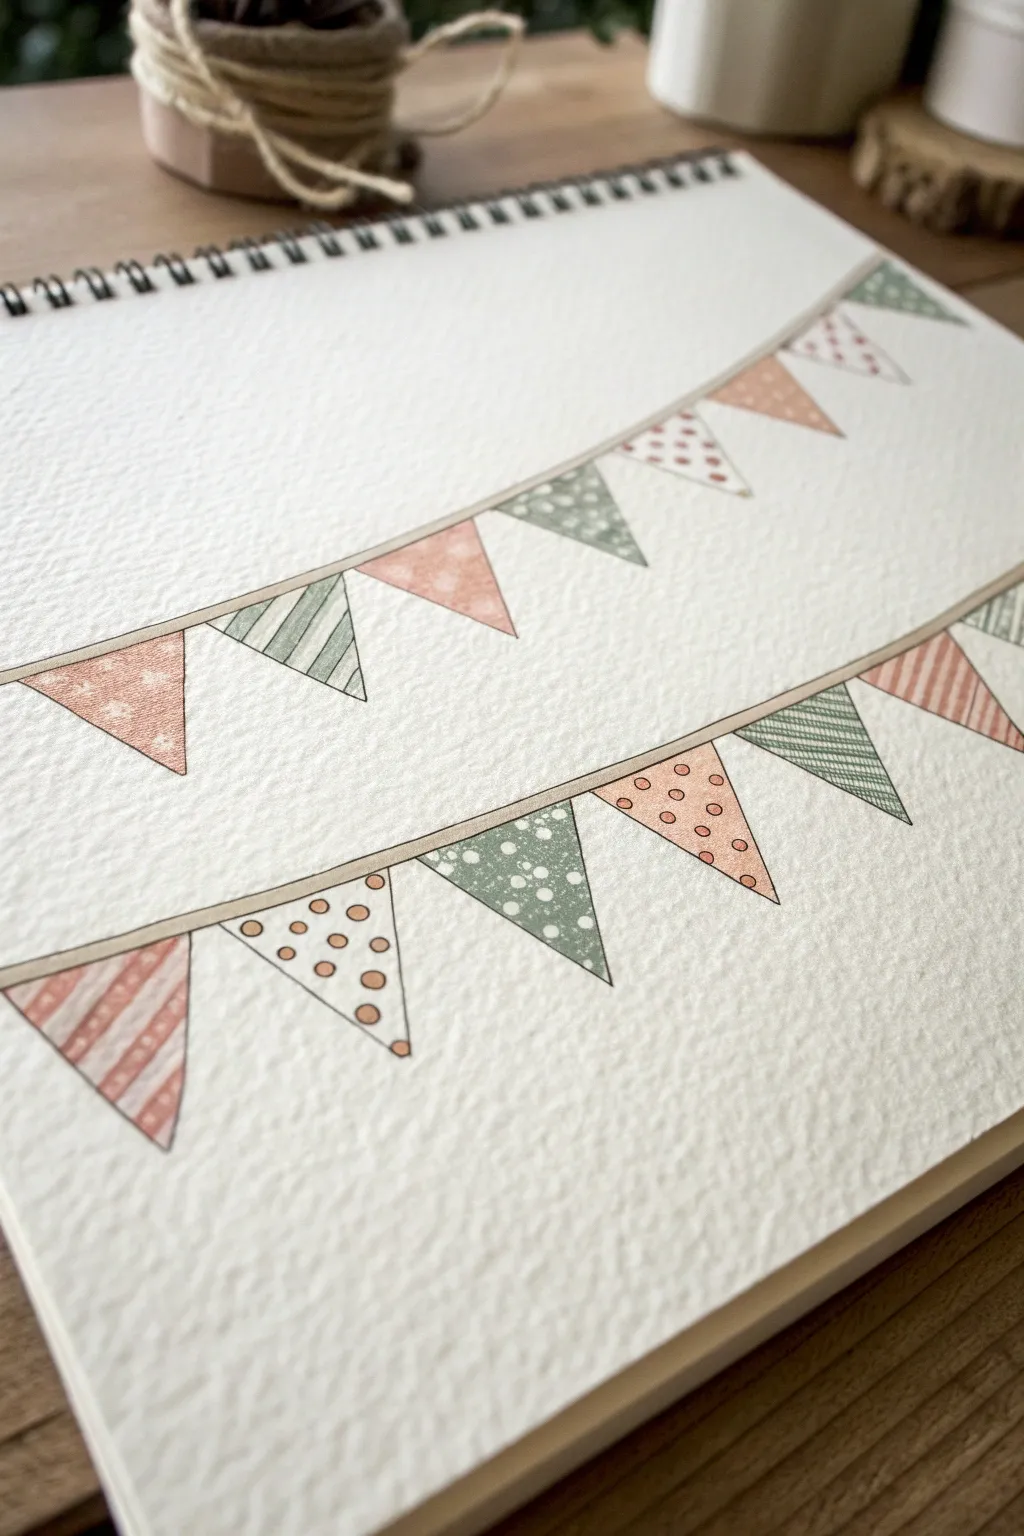
Celebrate any occasion with this charming and delicate double strand of bunting pennants, featuring soft pastel patterns and playful details. The gentle curve and varied geometric designs create a festive yet understated decoration perfect for handmade cards or bullet journals.
Detailed Instructions
Materials
- Cold press watercolor paper (with visible texture)
- Fine liner waterproof pen (0.3mm or 0.5mm, black)
- Watercolor paints (muted red/salmon, sage green, and white)
- Small round watercolor brush (size 2 or 4)
- Pencil and eraser
- Ruler
- White gel pen (optional, for details)
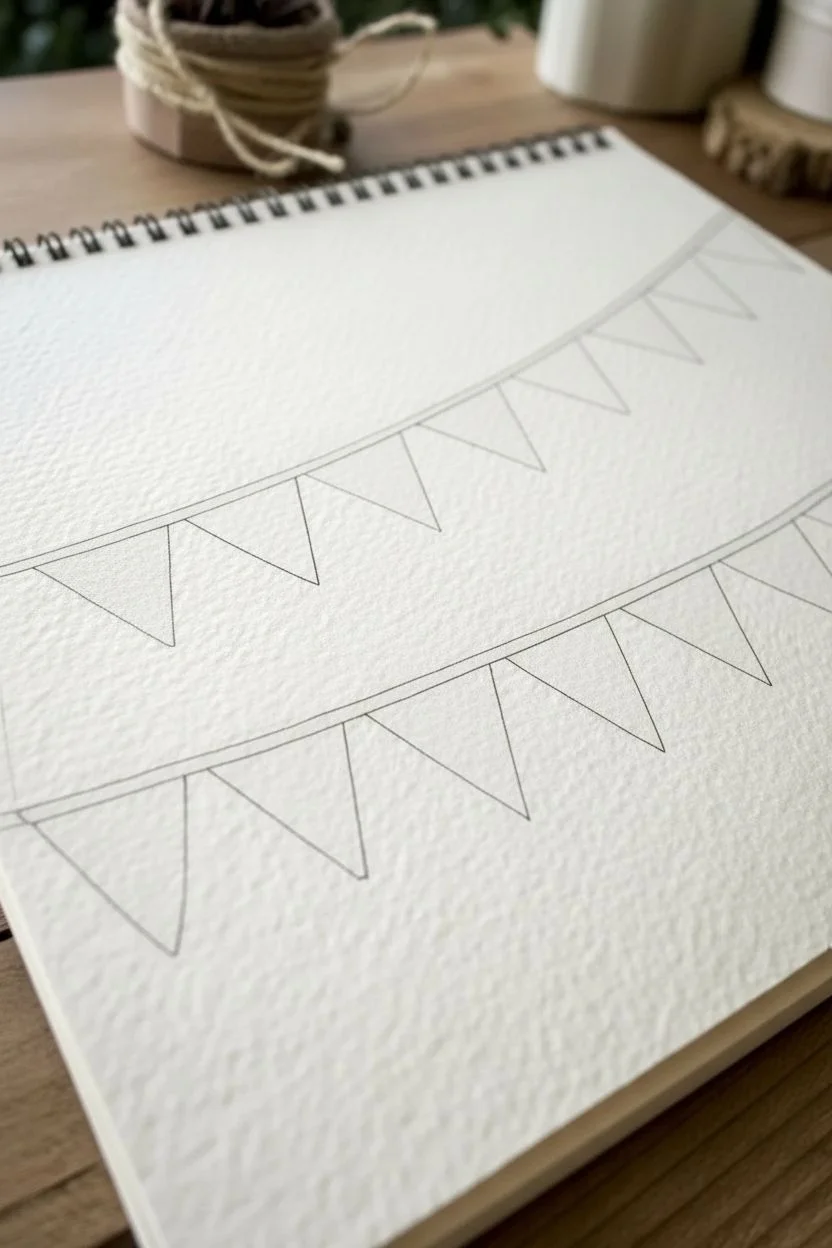
Step 1: Sketching the Layout
-
Draw the curves:
Start by lightly sketching two sweeping, curved lines across your page with a pencil. Let the top line dip gracefully from left to right, and draw a second, slightly deeper curve parallel to it below. -
Mark the pennants:
Along each curved line, lightly mark the top edge of your triangles with your pencil. Make sure to leave small spaces between each flag so they don’t look crowded. -
Form the triangles:
Draw the downward-pointing V-shape for each pennant. Try to keep them roughly the same size, but slight variations add a hand-drawn charm. -
Ink the outlines:
Using your waterproof fine liner, carefully trace over your pencil lines. Draw the curved string first, letting it run continuously past the tops of the flags. -
Define the flags:
Trace the triangular shapes of the flags. I prefer to stop the line just short of the corners occasionally to give it a sketched, organic feel rather than a rigid geometric look.
Clean Lines Secret
Use a waterproof archival ink pen for the outlines. If you ink first and use non-waterproof ink, the black lines will bleed muddy gray into your pretty pastels.
Step 2: Adding Patterns & Color
-
Plan your palette:
Mix a muted salmon pink and a soft sage green on your palette. You want these colors to be transparent and watery. -
Paint the solids:
Select a few random triangles on both strands and paint them with solid washes of your salmon color. Repeat with the sage green on different flags. -
Create striped patterns:
For the striped flags, paint fine diagonal or vertical lines with your smallest brush. Alternate between pink and green stripes on different flags to balance the composition. -
Add polka dots:
Paint small circles or dots on a few empty flags. You can do this by just dabbing the tip of your round brush onto the paper. -
Let it dry completely:
Wait until all paint is bone dry. This is crucial before adding any final ink details to prevent bleeding.
Shaky Hands?
Don’t worry if your lines aren’t perfectly straight! A little wobble adds character. You can ‘sculpt’ a crooked line by going over it a second time loosely.
Step 3: Final Details
-
Draw internal details:
Once the paint is dry, revisit with your black pen. Draw small circles over dry solid paint patches or add hatching lines to create texture on the patterned flags. -
Add white highlights:
If you have a white gel pen or opaque white gouache, add tiny dots or lines over the darker green flags to make the patterns pop. -
Erase pencil marks:
Gently erase any visible pencil sketches underneath your ink and paint, being careful not to rub too hard over the painted areas. -
Add the string detail:
Thicken the main string line slightly or add a second very thin line right next to it to give the rope some visual weight.
Now you have a festive yet elegant banner illustration ready to brighten up your bullet journal or greeting card
BRUSH GUIDE
The Right Brush for Every Stroke
From clean lines to bold texture — master brush choice, stroke control, and essential techniques.
Explore the Full Guide
Pet in a Party Hat for a Playful Birthday Card
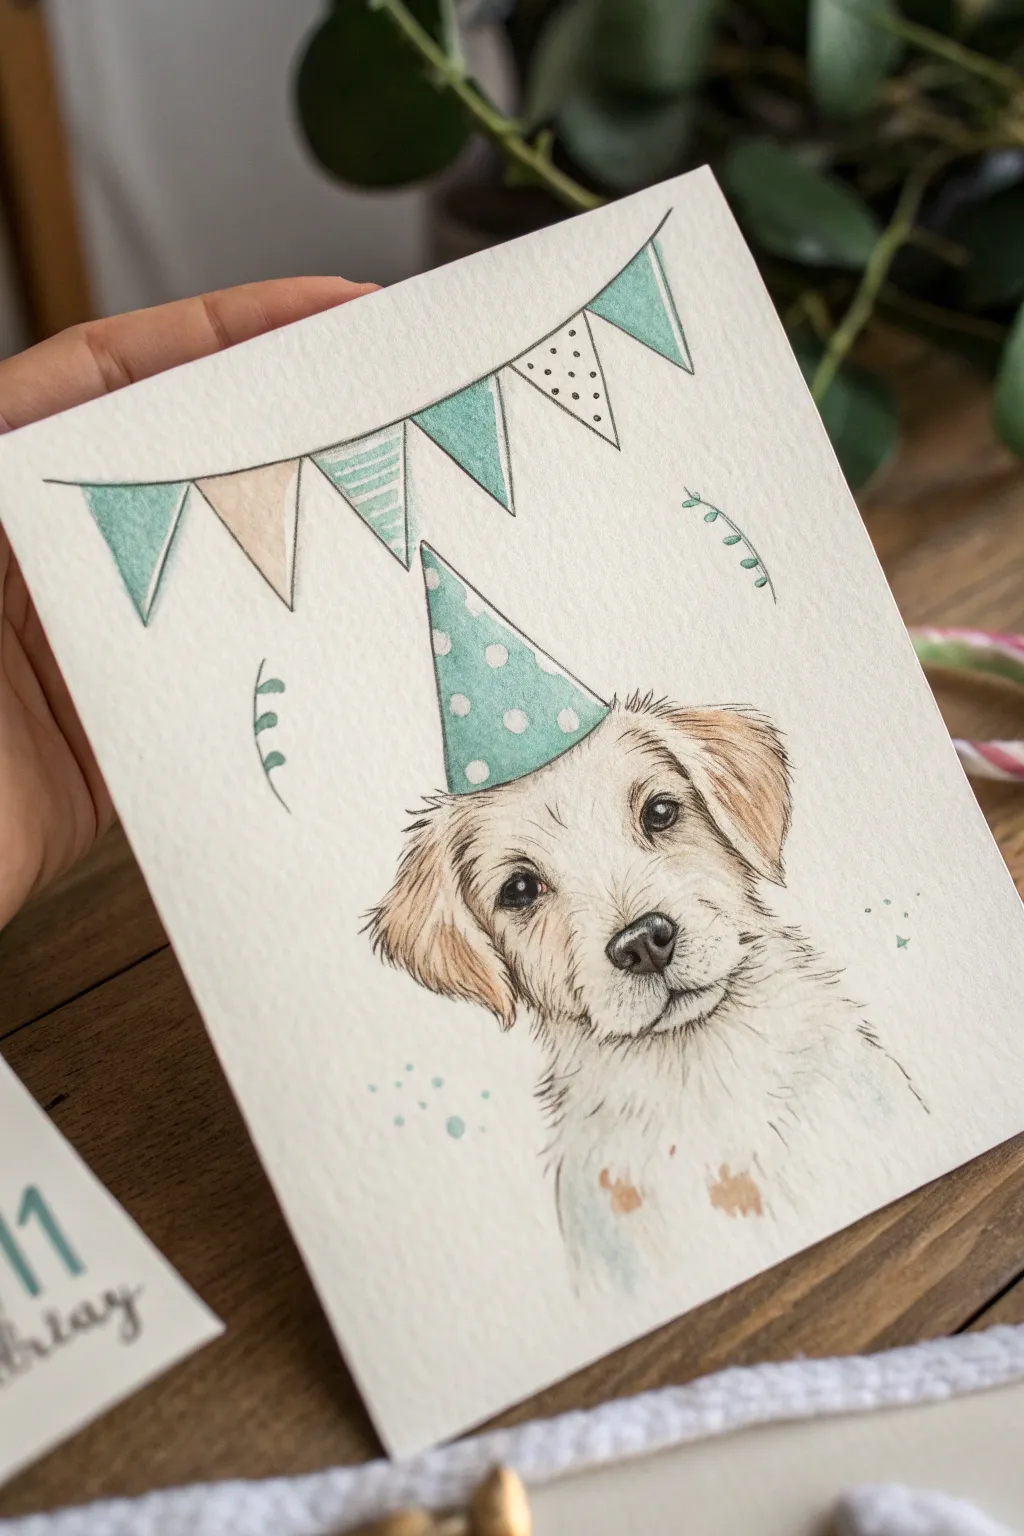
Capture the sweetness of a furry friend celebrating a special day with this charming watercolor and ink illustration. The combination of delicate pen lines and soft, translucent washes creates a heartwarming, personalized birthday greeting perfect for any dog lover.
Step-by-Step Guide
Materials
- Cold press watercolor paper (300 gsm)
- Waterproof fine liner pens (0.1mm and 0.3mm, black or sepia)
- Watercolor paints (Teal/Turquoise, Burnt Sienna, Yellow Ochre, Payne’s Grey)
- Round watercolor brushes (Size 2 and 4)
- Pencil (HB) and kneaded eraser
- Clean water and paper towels
- White gouache or white gel pen
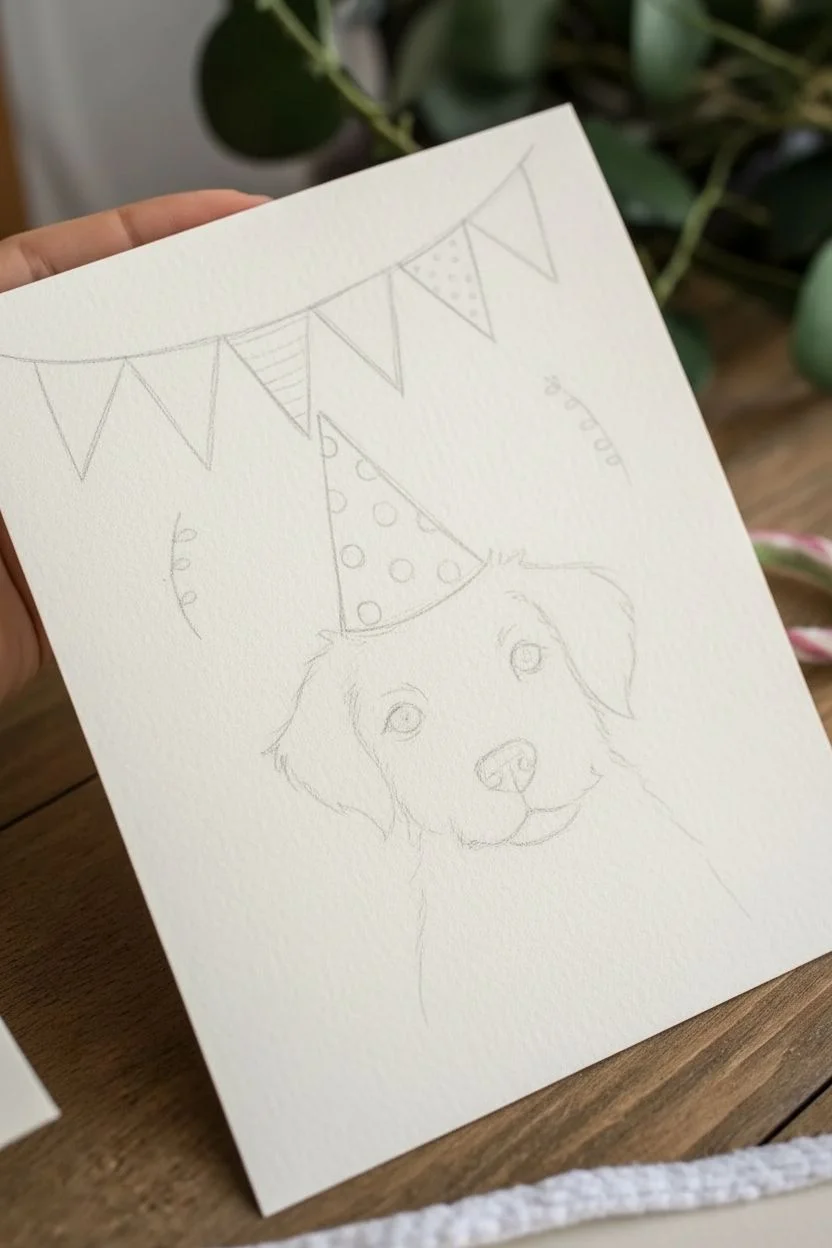
Step 1: Sketching the Layout
-
Outline the Composition:
Start with a light pencil sketch on your watercolor paper. roughly place the puppy’s head in the lower center, leaving ample space above for the hat and bunting. -
Define the Puppy:
Sketch the puppy’s features, focusing on large, expressive eyes and a soft snout. Don’t worry about drawing every hair; just outline the main tufts of fur around the ears and neck. -
Add Celebration Elements:
Draw a simple triangle party hat resting slightly tilted on the puppy’s head.Above that, sketch a curved line for the bunting string and add triangular flags hanging from it. -
Refine the Details:
Lightly mark where the polka dots go on the hat and add a few floating leaf shapes on either side for decoration. Use your kneaded eraser to lift any heavy graphite lines until they are barely visible.
Keeping Fur Soft
Avoid drawing a solid outline around the whole dog. Use broken lines and let the viewer’s eye connect the gaps for a fluffier look.
Step 2: Inking the Drawing
-
Trace the Features:
Using a 0.1mm waterproof fine liner, carefully ink the puppy’s eyes, nose, and mouth. Use broken, wispy lines for the fur to keep the texture looking soft rather than rigid. -
Ink the Accessories:
Switch to a slightly bolder 0.3mm pen for the party hat and bunting flags to make them stand out. Keep the lines clean and crisp. -
Erase Guide Lines:
Allow the ink to dry completely to avoid smudging. Once safe, gently erase all remaining pencil marks to leave a clean black-and-white illustration.
Step 3: Painting the Puppy
-
Base Fur Wash:
Mix a very dilute wash of Yellow Ochre and a touch of Burnt Sienna. With a size 4 brush, apply this pale cream color to the ears and patches of the face, leaving the muzzle and forehead largely white. -
Adding Depth to Ears:
While the first layer is still slightly damp, drop in a slightly more concentrated Burnt Sienna near the base of the ears to create a soft gradient. -
Painting the Eyes and Nose:
For the eyes and nose, mix Payne’s Grey with a little Burnt Sienna to get a warm charcoal tone. Paint the nose solid, leaving a tiny white highlight. Carefully fill in the pupils, keeping them dark and expressive. -
Texture and Shadow:
Using a size 2 brush and a very watery grey mix, add subtle shadows under the chin and around the neck ruff to suggest volume without darkening the fur too much.
Make it Sparkle
Add a tiny touch of metallic gold watercolor to the bunting or the top of the hat for a magical birthday shimmer.
Step 4: Painting the Decor
-
Hat Base Layer:
Paint the party hat with a calm Teal or Turquoise color. Carefully paint around the polka dots to keep them white, or paint the whole thing and add white later. -
Bunting Colors:
Paint the bunting flags using alternating colors. Use the same Teal from the hat for some flags, and a pale wash of Burnt Sienna or beige for others to create a cohesive palette. -
Adding Patterns:
Once the bunting flags are dry, use your fine liner to add tiny details like stripes or dots to a few of the flags for visual interest. -
Leaf Accents:
Paint the small floating leaves with a very dilute green or teal mix. Keep these minimal so they don’t distract from the main subject.
Step 5: Finishing Touches
-
Enhancing Fur Details:
Return to the fur with your fine liner. Add very short, quick strokes in darker areas (like the ears) to suggest individual hairs and add texture. -
Whiskers and Highlights:
With a steady hand, flick out a few delicate whiskers from the muzzle using the 0.1mm pen. If you painted over the hat dots, use white gouache or a gel pen to make them pop now. -
Final Splatters:
I like to finish by flicking a tiny amount of watered-down teal paint near the bottom for a playful, artistic vibe.
Now you have an adorable, custom hand-painted card ready to brighten someone’s special day
Memory Collage Painting With Mini Birthday Icons
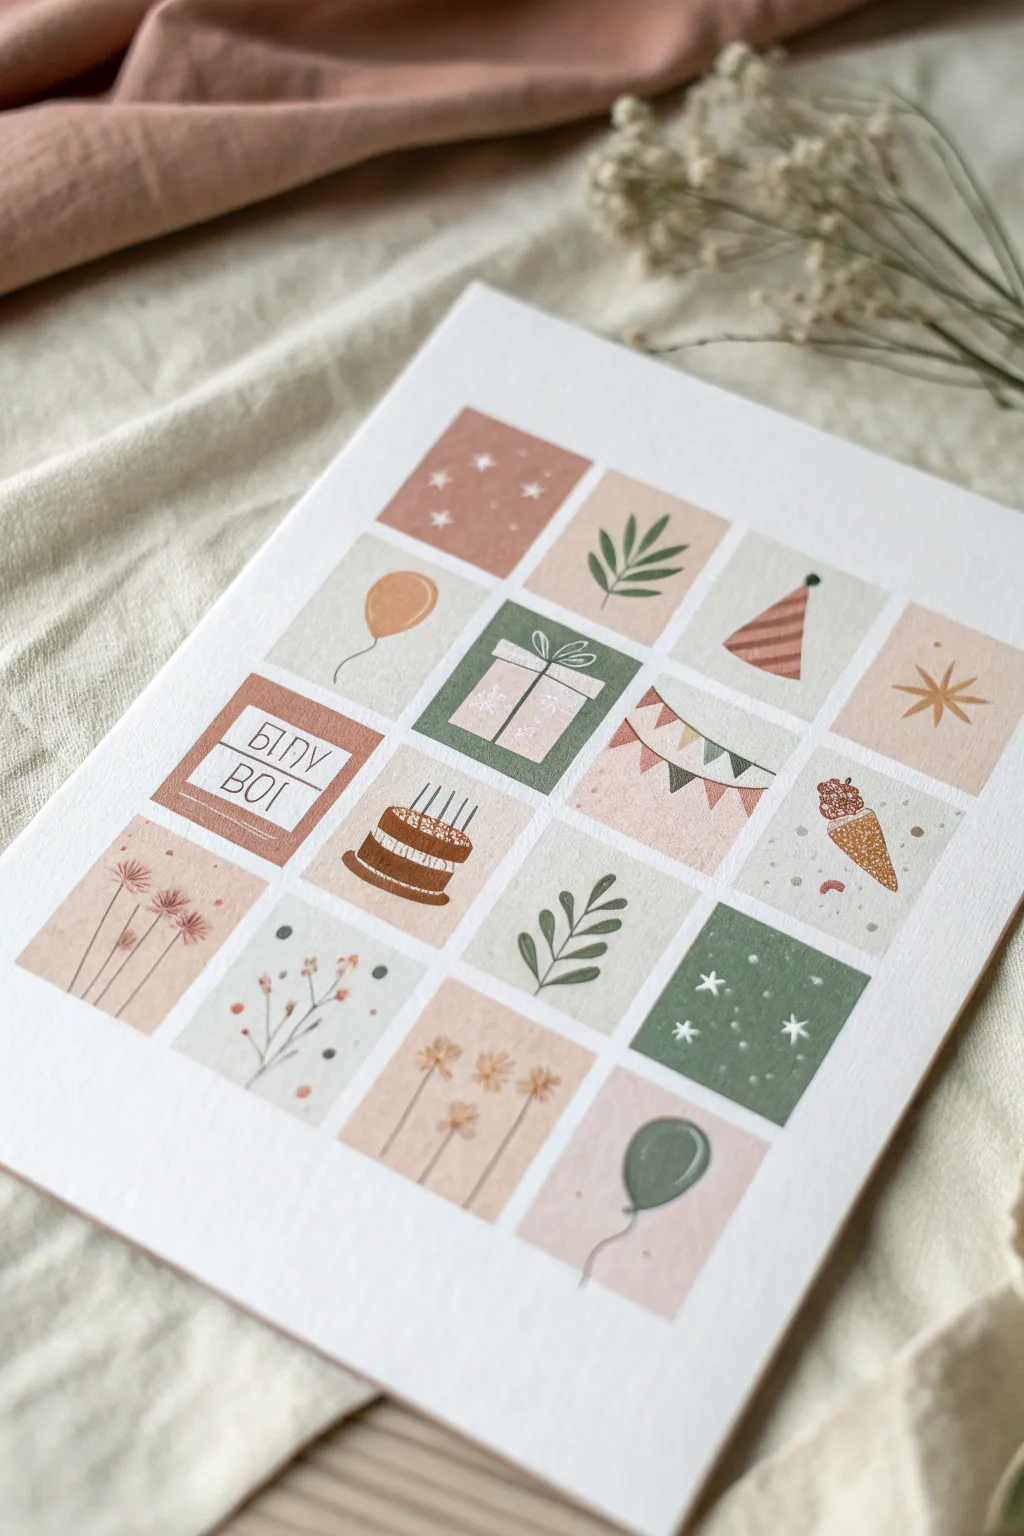
Celebrate a special day with this charming grid of miniature, soft-hued birthday illustrations. This grid-style painting combines playful party motifs with elegant botanical elements in a muted, earthy color palette perfect for a modern nursery or keepsake card.
Step-by-Step Tutorial
Materials
- Heavyweight watercolor paper or mixed media paper (A4 or 8×10 inch)
- Pencil (HB) and eraser
- Ruler
- Masking tape or painter’s tape
- Watercolor paints or gouache (Earth tones: terracotta, sage green, dusty pink, cream, ochre)
- Round brushes (sizes 2 and 4)
- Fine liner brush (size 0 or 00) for details
- White gel pen or white gouache
- Palette for mixing
Step 1: Preparation & Layout
-
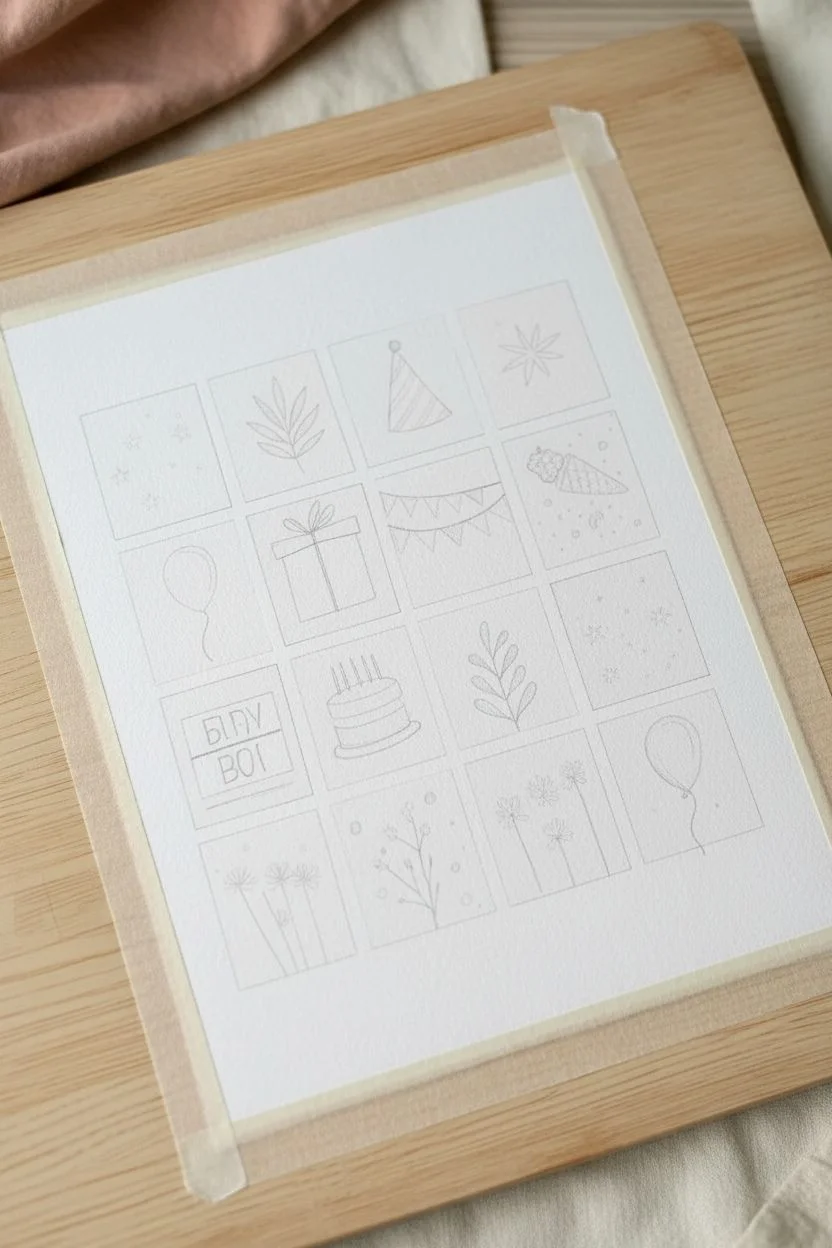
Secure the paper:
Begin by taping down your watercolor paper to a hard board or your work surface. This prevents the paper from buckling when wet and creates a clean border. -
Measure the grid:
Decide on a 4×4 grid layout. Measure the total area you want to paint and divide both the height and width by four to determine the size of your squares. -
Draft the lines:
Using a ruler and a very light pencil touch, draw the 16 squares. Leave a small, consistent gap of about 2-3mm between each square to create that clean white grid effect which separates the icons. -
Sketch the icons:
Lightly sketch a different simple symbol in each square. Refer to the photo for placement: place the ‘BDAY BOY’ sign, cake, balloons, presents, party hats, and botanical sprigs. Keep the sketches faint so graphite doesn’t smudge into your paint.
Uneven Grid Lines?
If your hand is unsteady, use thin defining tape (washi or masking) to block off the grid gutters. Paint over the tape, then peel it off to reveal perfect, straight white gaps between your painted squares.
Step 2: Blocking in Color
-
Mix your palette:
Prepare your color palette before painting. You’ll need dusty pink, terracotta, sage green, and a warm cream or beige. Gouache works beautifully here for that matte, opaque finish, but watercolors work too if kept less watery. -
Paint creamy backgrounds:
Identify the squares that have a light cream background (like the balloon, the ‘BDAY BOY’ sign square, and the botanical squares). Fill these backgrounds carefully, cutting in cleanly around the sketched central objects. -
Paint colored backgrounds:
Now paint the solid colored squares. Fill the top-left star square with terracotta, the top-middle leaf square with dusty pink, and the gift-box square with sage green. -
Fill in the icons:
While background squares dry, paint the icons on the lighter squares. Use terracotta for the cake layers and balloon, and sage green for leaves. I find it helpful to rotate the paper to keep my hand from resting in wet paint. -
Detail the party hat:
Paint the party hat with alternating stripes of dusty pink and terracotta. Let the layers dry completely between colors to prevent bleeding. -
Paint the ice cream:
Fill in the ice cream cone shape with a golden ochre tone and the scoop with a textured dusty pink.
Step 3: Fine Details
-
Add line work:
Switch to your finest liner brush or a size 0 round brush. Use a dark grey or black mixed with brown to outline the ‘BDAY BOY’ text box and write the letters. Keep the font simple and linear. -
Draw stems and strings:
Using the same fine dark mix, draw the thin strings for the balloons and the delicate stems for the floral elements in the bottom left and bottom center squares. -
Enhance the bunting:
Paint the tiny triangles of the bunting flags in alternating palette colors. Once dry, draw the thin string connecting them across the square. -
Add white accents:
Using a white gel pen or thick white gouache, add stars to the terracotta square, the ribbon on the gift, and the sprinkles on the cake. -
Final textures:
Add small dots or dashes to the background of the ice cream square and the green star square for extra texture. Paint the tiny candles on the cake.
Pro Tip: Color Harmony
Limit your palette to just 4-5 core colors. Mix these colors into each other (e.g., add a dot of green to your pink) to desaturate them and ensure every square feels cohesive with its neighbor.
Step 4: Finishing Touches
-
Review and erase:
Allow the entire painting to dry completely—give it at least 30 minutes. Once bone dry, gently erase any visible pencil lines from your initial grid. -
Remove tape:
Carefully peel away the masking tape at a 45-degree angle to reveal your crisp outer border.
Frame this delightful collection of mini-paintings to create a timeless memory of a happy celebration

PENCIL GUIDE
Understanding Pencil Grades from H to B
From first sketch to finished drawing — learn pencil grades, line control, and shading techniques.
Explore the Full Guide
Birthday Paint Party Group Canvas With Everyone Adding a Detail

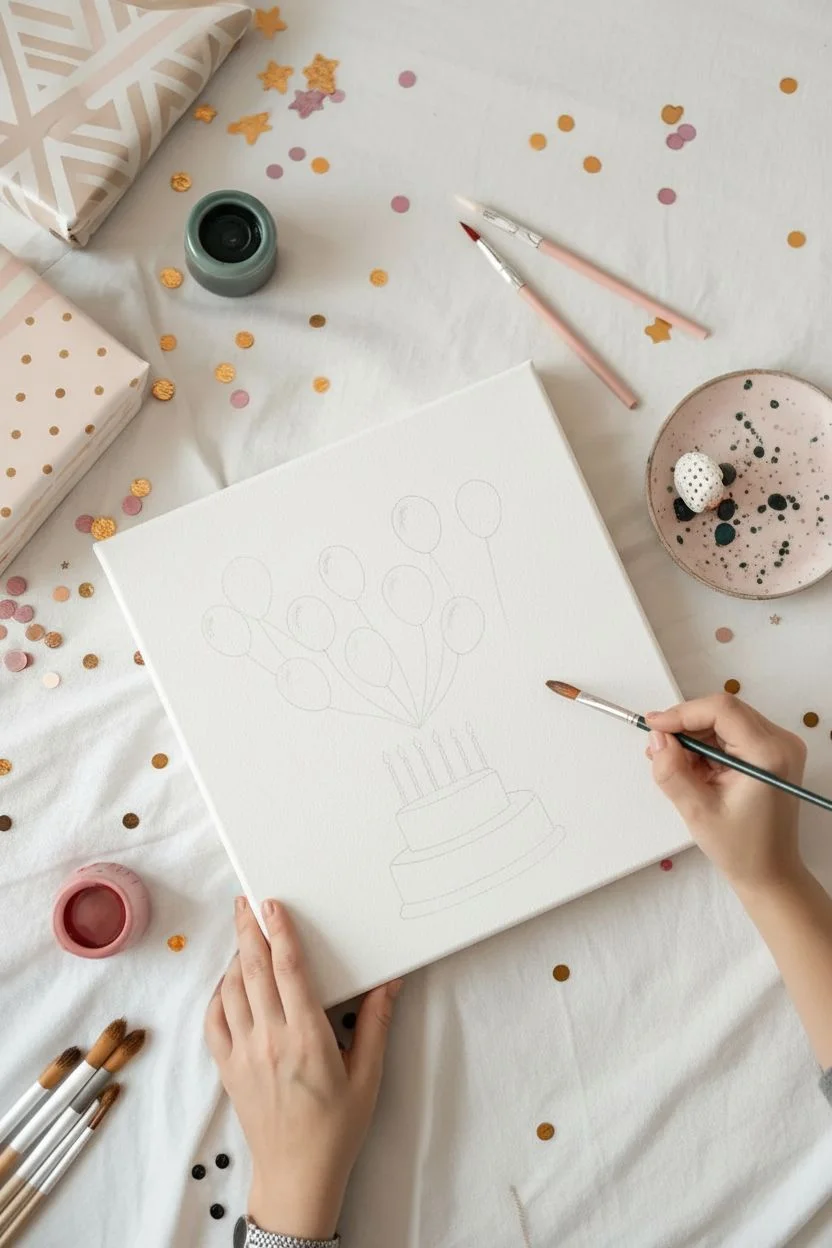
Capture the whimsy of a birthday celebration with this charming acrylic painting featuring a bouquet of balloons floating above a tiered cake. The soft pastel color palette mixed with metallic copper accents creates a sophisticated yet festive look that makes for perfect party decor or a heartfelt gift.
Step-by-Step Tutorial
Materials
- Square stretched canvas (approx. 12×12 inches)
- Acrylic paints (pastel pink, peach, sage green, grey, beige, white)
- Metallic copper or gold acrylic paint
- Flat shader brush (size 6 or 8)
- Round detail brush (size 2 or 3)
- Fine liner brush (size 0)
- Pencil for sketching
- Palette for mixing
- Cup of water and paper towels
Step 1: Planning and Sketching
-
Prepare the canvas:
Start with a clean, white stretched canvas. If your canvas isn’t pre-primed, apply a coat of white gesso and let it dry completely to ensure a smooth painting surface. -
Sketch the balloons:
Using a light pencil, draw an arrangement of about ten oval shapes in the upper center of the canvas. Vary the heights and angles slightly to make the bunch look natural, overlapping a few. -
Outline the cake:
Below the balloons, sketch a simple two-tier cake. Draw a wider, flattened oval for the base layer and a smaller one on top. Add vertical lines for the candles sticking out of the top tier. -
Connect the strings:
Draw faint, curved lines connecting the bottom of each balloon to the center point of the cake strings. It’s okay if these lines are loose; they are just guides for later.
Wobbly Lines?
If painting fine strings is difficult, wait for the paint to fully dry and use a fine-tip black permanent marker or a paint pen instead of a brush for steady lines.
Step 2: Painting the Balloons
-
Paint the first layer:
Select your pastel colors—peach, sage, pink, and beige. Fill in the individual balloons using your flat shader brush, distributing the colors evenly so no two same-colored balloons are right next to each other. -
Add metallic accents:
Choose two or three balloons to paint with the metallic copper paint. This adds a lovely shimmer and contrast to the matte pastels. -
Layering for opacity:
Acrylics can be translucent, especially pastels. Let the first coat dry for about 10 minutes, then apply a second coat to ensure solid, opaque coverage. -
Create highlights:
Once the base coats are tacky but almost dry, use a small amount of white paint on the round brush. Add a small curved highlight on the upper left side of each balloon to give them a 3D, inflated appearance. -
Add shadow depth:
For the balloons that appear ‘behind’ others, mix a tiny drop of grey into the base color and paint a thin shadow line along the edge where they overlap.
Step 3: Painting the Cake
-
Base coat the cake:
Paint the bottom tier of the cake with a soft pink or peach tone. Use smooth horizontal strokes to mimic the curve of the cake. -
Paint the top tier:
Paint the top tier in a contrasting light beige or cream color. Let this dry completely before moving to the texturing step. -
Add the speckled texture:
Dip a stiff brush or an old toothbrush into brown or copper paint. Run your thumb over the bristles to gently flick tiny speckles onto the top cake tier, creating a ‘cookies and cream’ or textured frosting effect. -
Paint the candles:
Using the fine liner brush, paint the candle sticks in a deep teal or green color. Add small yellow or orange dabs at the tips for the flames.
Add Dimension
Mix a textured medium or sand into the paint for the cake tiers to simulate real frosting texture, or glue on tiny real confetti pieces to the background.
Step 4: Fine Details
-
Draw the strings:
Load your fine liner brush with thinned black or dark grey paint. Carefully paint the strings connecting the balloons to the cake, following your initial pencil guides. -
Enhance with stars:
Using metallic gold or copper paint and the tip of your detail brush, scatter small four-point stars or tiny dots in the empty white space around the balloons. -
Final touches:
Check for any pencil lines that might still be visible and gently erase them if the paint is bone dry. Add a final highlight of white to the cake frosting if desired.
Now you have a sweet, celebratory artwork ready to hang or give to a friend on their special day


Have a question or want to share your own experience? I'd love to hear from you in the comments below!