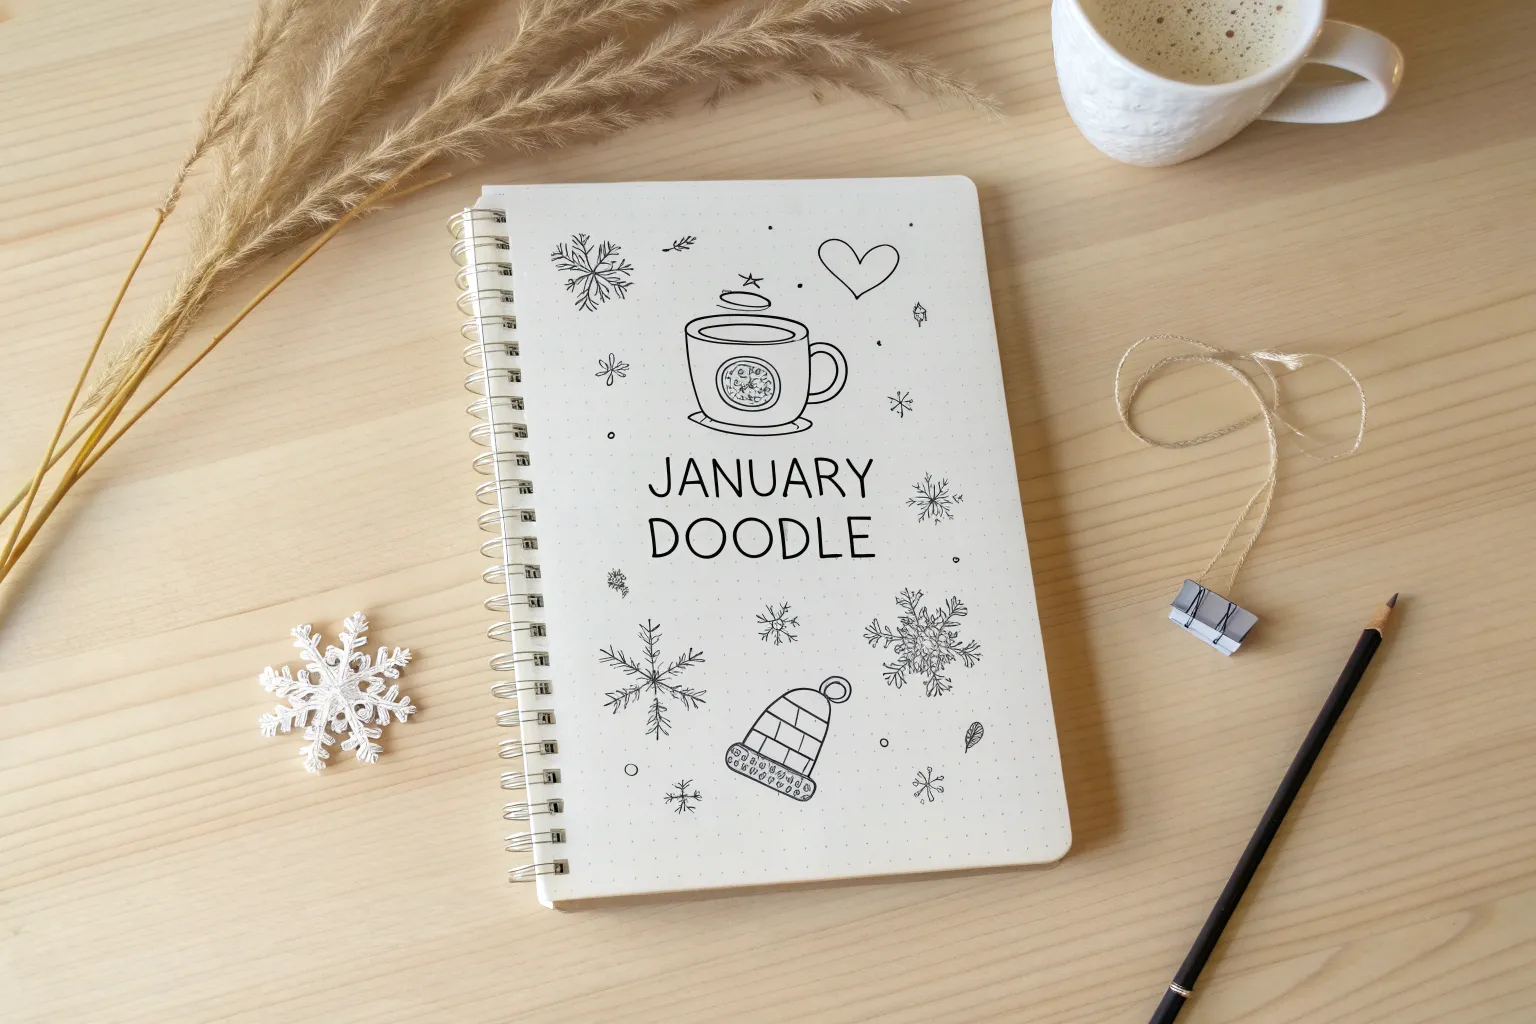
January always feels like a clean page—quiet, chilly, and full of that fresh-start energy. If you’re itching to fill your sketchbook or bullet journal this month, these January drawing ideas will keep your pencil moving without overthinking it.
Hello January Lettering With Snowflake Doodles
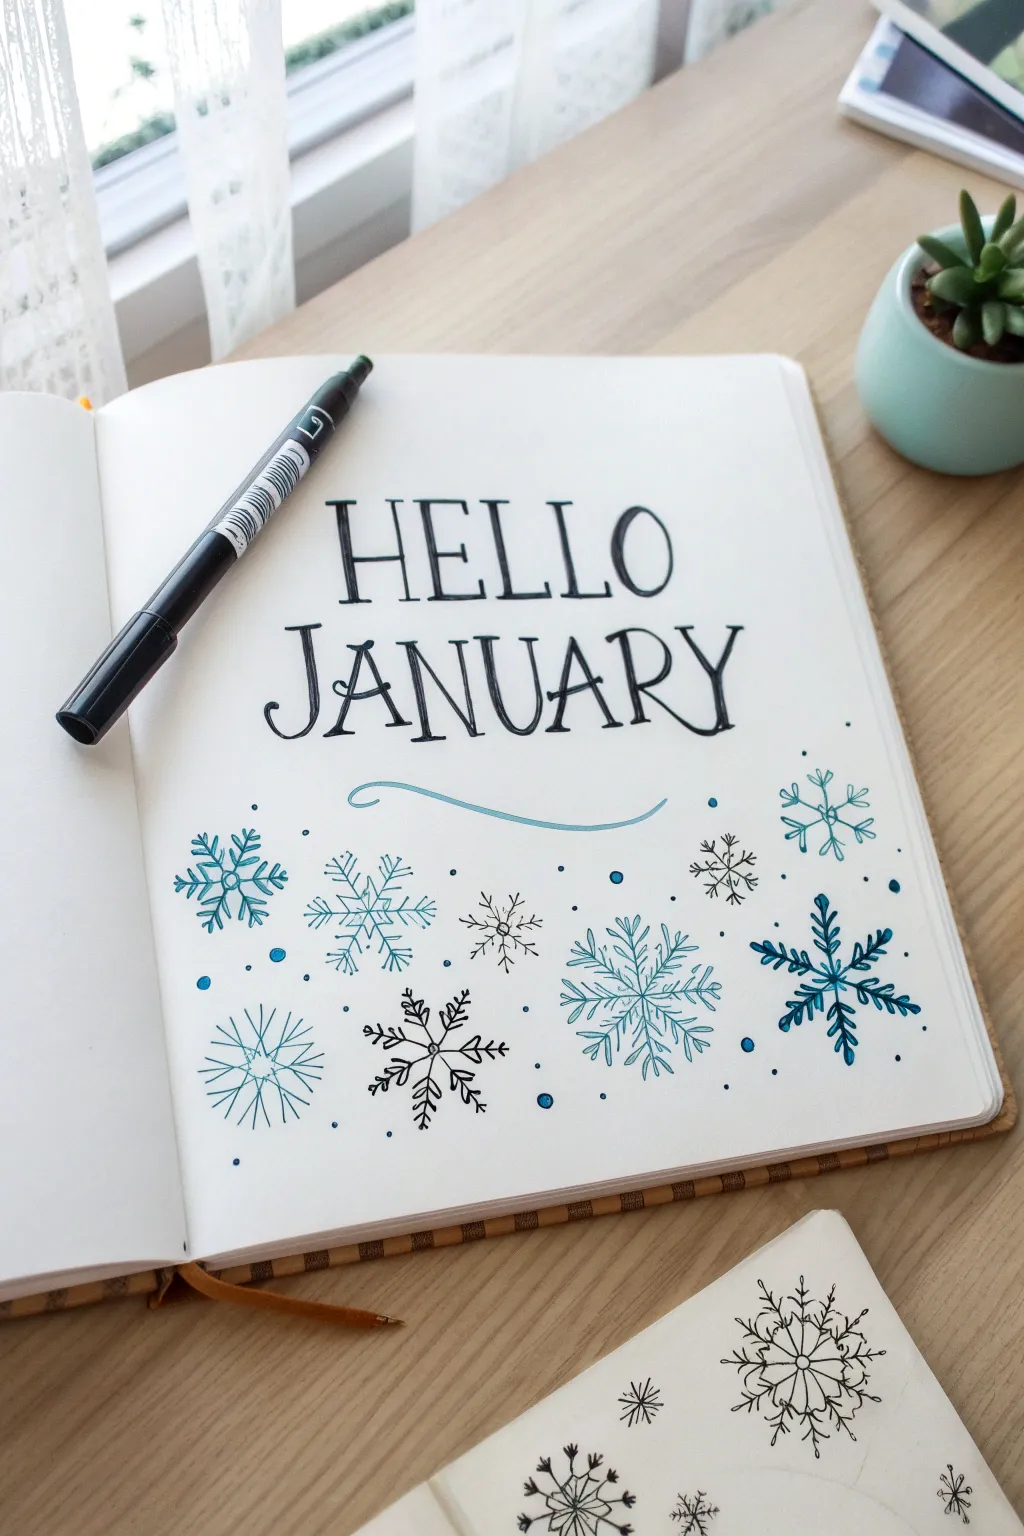

Welcome the first month of the year with this crisp and clean bullet journal cover page featuring elegant serif lettering. The design balances bold text with a flurry of delicate, hand-drawn snowflakes in a cool palette of blues and blacks.
How-To Guide
Materials
- A5 Dot grid journal or sketchbook
- Black brush pen or fineliners (0.5mm and 0.8mm)
- Blue gel pens or fineliners (light blue and teal)
- Pencil and eraser for sketching
- Ruler (optional)
Step 1: Drafting the Layout
-
Center layout:
Begin by finding the visual center of your page. Lightly pencil in two horizontal guidelines about two inches from the top to ensure your lettering stays straight. -
Sketch lettering:
Using a pencil, lightly sketch the words ‘HELLO’ and ‘JANUARY’. Plan for ‘HELLO’ to be slightly smaller and centered above ‘JANUARY’. Use a classic serif style, adding small perpendicular lines at the ends of your strokes. -
Rough placement:
Sketch rough circles or asterisks where you want your snowflakes to go. Aim for a scattered effect across the bottom half of the page, varying the sizes to create depth.
Uh-oh! Smudged ink?
Cover minor smudges by turning them into extra snowflakes or dots. If the smudge is on a letter, thicken the stroke slightly to hide it.
Step 2: Inking the Lettering
-
Outline text:
Take your black fineliner (0.5mm) and carefully trace over your penciled letters. Focus on keeping vertical lines straight and parallel. -
Add serif details:
Go back and emphasize the serifs on each letter. Notice how the ‘J’ in January has a distinct curve and the ‘O’ in Hello is tall and oval-shaped. -
Thicken strokes:
To give the letters a faux-calligraphy look, thicken the downstrokes slightly on letters like ‘H’, ‘L’, and ‘N’. This adds visual weight to the title. -
Decorative swash:
Draw a wavy, horizontal blue line underneath the word ‘JANUARY’ using a light blue pen. This visually separates the text from the illustrations below.
Step 3: Drawing the Snowflakes
-
Start with skeletons:
For the snowflakes, start by drawing simple crossing lines (an asterisk shape) as the base for each flake. I usually vary between 6-point and 8-point structures. -
The classic flake:
Create the large teal snowflake on the right by drawing small V-shapes along each arm of your asterisk base, pointing outward. -
The geometric flake:
For the light blue snowflake on the left, draw concentric hexagons connecting the arms of the asterisk to create a web-like pattern. -
The starburst flake:
Draw the large, thin light blue snowflake at the bottom left. Instead of V-shapes, simply double up the lines or add tiny dots at the tips for a delicate effect. -
Black accents:
Use your black fine liner to draw two or three smaller, high-contrast snowflakes. Keep these sharper with arrow-like tips to contrast with the softer blue ones. -
Fill the gaps:
Look for empty white spaces between your main flakes. Add tiny, simple asterisks in both blue and black to act as filler flakes.
Make it Sparkle
Use a silver gel pen or metallic marker to add highlights to the center of the snowflakes for a magical, shimmering frost effect.
Step 4: Final Touches
-
Add snow dots:
Using your blue and black pens, scatter small dots throughout the bottom half of the page. Vary the pressure to make some dots tiny and others distinct circles. -
Erase guidelines:
Wait until the ink is completely dry—usually about 5 to 10 minutes depending on your pen—before gently erasing all pencil marks. -
Review contrast:
Step back and check the balance. If an area looks too empty, add a few more blue dots. If a snowflake looks too faint, go over the lines one more time.
Now you have a serene and stylish cover page ready for your January planning


January Snowman Character Variations
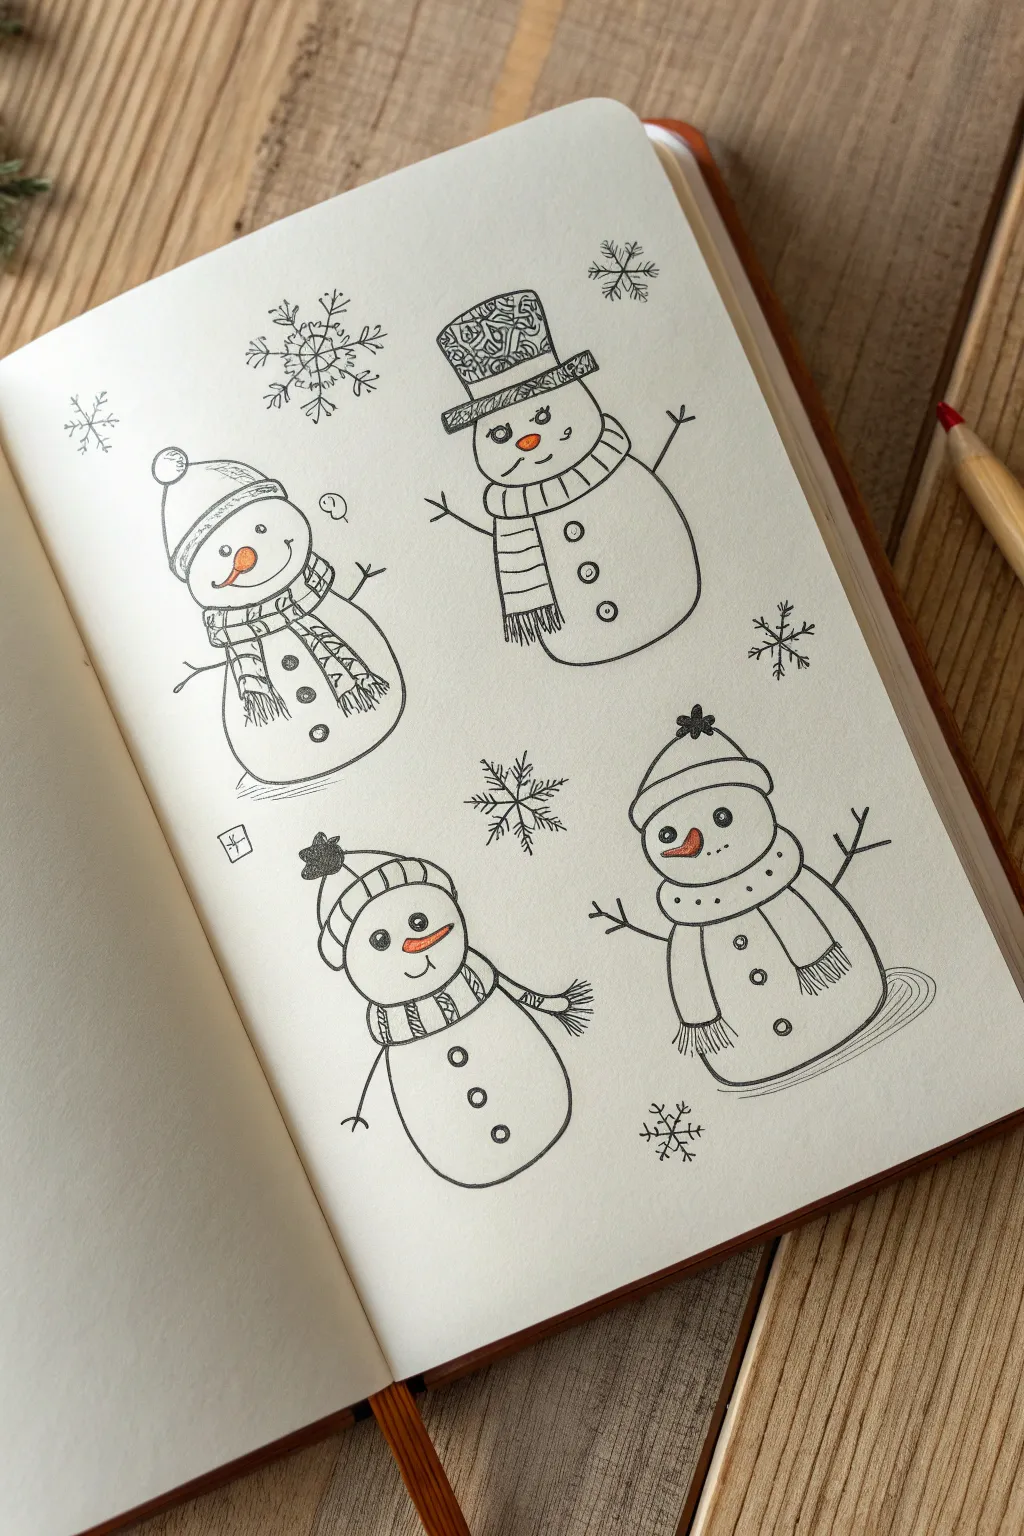
Embrace the winter season by filling a sketchbook page with four distinct, adorable snowman personalities. This pen-and-ink study explores different accessories and facial expressions, using simple line work and a pop of orange color to bring these snowy friends to life.
Step-by-Step Guide
Materials
- Sketchbook or drawing paper (smooth bristol or mixed media)
- Graphite pencil (HB or 2H)
- Kneaded eraser
- Fine liner pen (black, 0.3mm or 0.5mm)
- Colored pencil (orange)
- Ruler (optional)
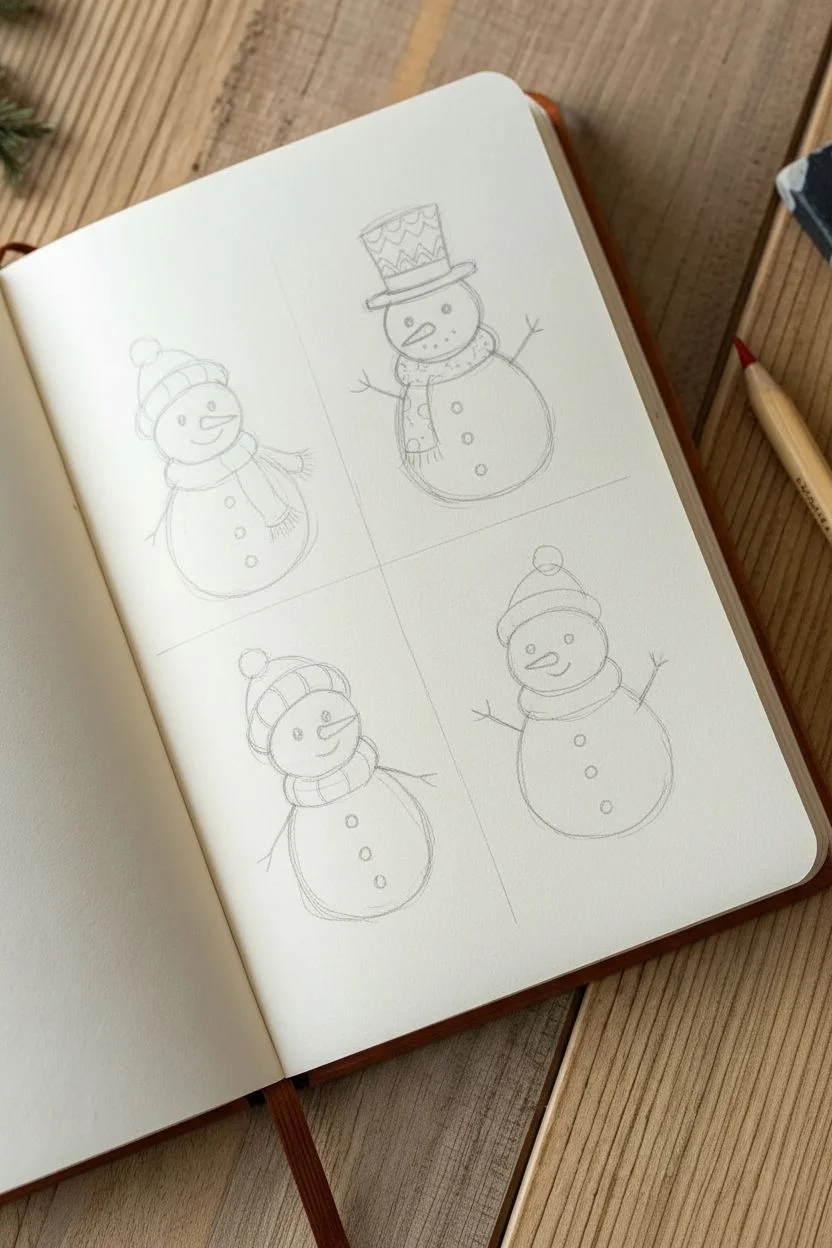
Step 1: Drafting the Basic Forms
-
Map out the positions:
Visualize your page divided into four equal quadrants. Using your pencil very lightly, draw a rough circle for the head and a larger oval for the body in the center of the top-left quadrant. -
Create the second figure:
Move to the top-right quadrant. Sketch a similar head-and-body structure, but make the body slightly more rounded and stout to vary the character shape. -
Sketch the bottom pair:
Repeat the process for the bottom-left and bottom-right sections. Try tilting the head of the bottom-left snowman slightly to the side to give him a curious look. -
Add hats and accessories:
Lightly pencil in the accessories. Give the top-left snowman a knit beanie and scarf. The top-right one gets a tall, patterned top hat. The bottom-left wears a simple striped beanie, and the bottom-right sports a sleek beanie with a pom-pom.
Step 2: Inking the Top Row
-
Outline the first snowman:
Using your fine liner, trace over your pencil lines for the top-left snowman. Use confident, single strokes for the rounded body parts. -
Detail the scarf pattern:
Draw the grid pattern on his scarf carefully. Add vertical fringe lines at the ends of the scarf to suggest texture. -
Ink the top hat character:
Move to the top-right figure. Outline his head and body, then focus on the top hat. Fill the hat band with small, intricate doodles or swirls to make it unique. -
Add stick arms:
Draw thin, branching lines for arms on both top characters. Keep the lines somewhat jagged to resemble actual twigs. -
Draw the facial features:
Place small dots for eyes and a curved line for the smile on both. Draw a carrot-shaped triangle for the noses, but don’t fill them in with ink yet.
Ink Confidence Tip
Don’t stress about perfect circles! A slightly wobbly line adds organic charm to a snowman. Keep your wrist loose and pull the pen toward you for smoother curves.
Step 3: Inking the Bottom Row
-
Define the tilted snowman:
Outline the bottom-left snowman. Make his hat stripes curve with the shape of his head to show volume. -
Create the last character:
Ink the final snowman on the bottom right. Give his scarf a soft, wrapped look around the neck and draw three buttons down his chest. -
Expressive faces:
Ink the faces for the bottom row. I like to give the bottom-left one slightly larger, innocent eyes and a small, upturned smile. -
Finalize limbs:
Add the twig arms to these two snowmen as well. Vary the angles—maybe one is waving hello or reaching out.
Smudge Prevention
If you are right-handed, work from the top-left to bottom-right to avoid smearing fresh ink. Lefties should work top-right to bottom-left.
Step 4: Finishing Touches
-
Incorporate snowflakes:
Draw large, stylized snowflakes in the empty spaces between the characters. Use a mix of six-pointed stars and intricate crystalline shapes. -
Erase guidelines:
Wait for the ink to dry completely. Gently run your kneaded eraser over the entire page to remove all graphite sketches. -
Add color pops:
Take your orange colored pencil and carefully fill in the carrot noses on all four snowmen. This splash of color ties the composition together. -
Ground the figures:
Add a few very light curved lines underneath the bottom snowmen to suggest they are sitting on the snow, not floating in space.
Now you have a charming page of winter characters ready to brighten up your journal


January Winter Accessories Flat Lay
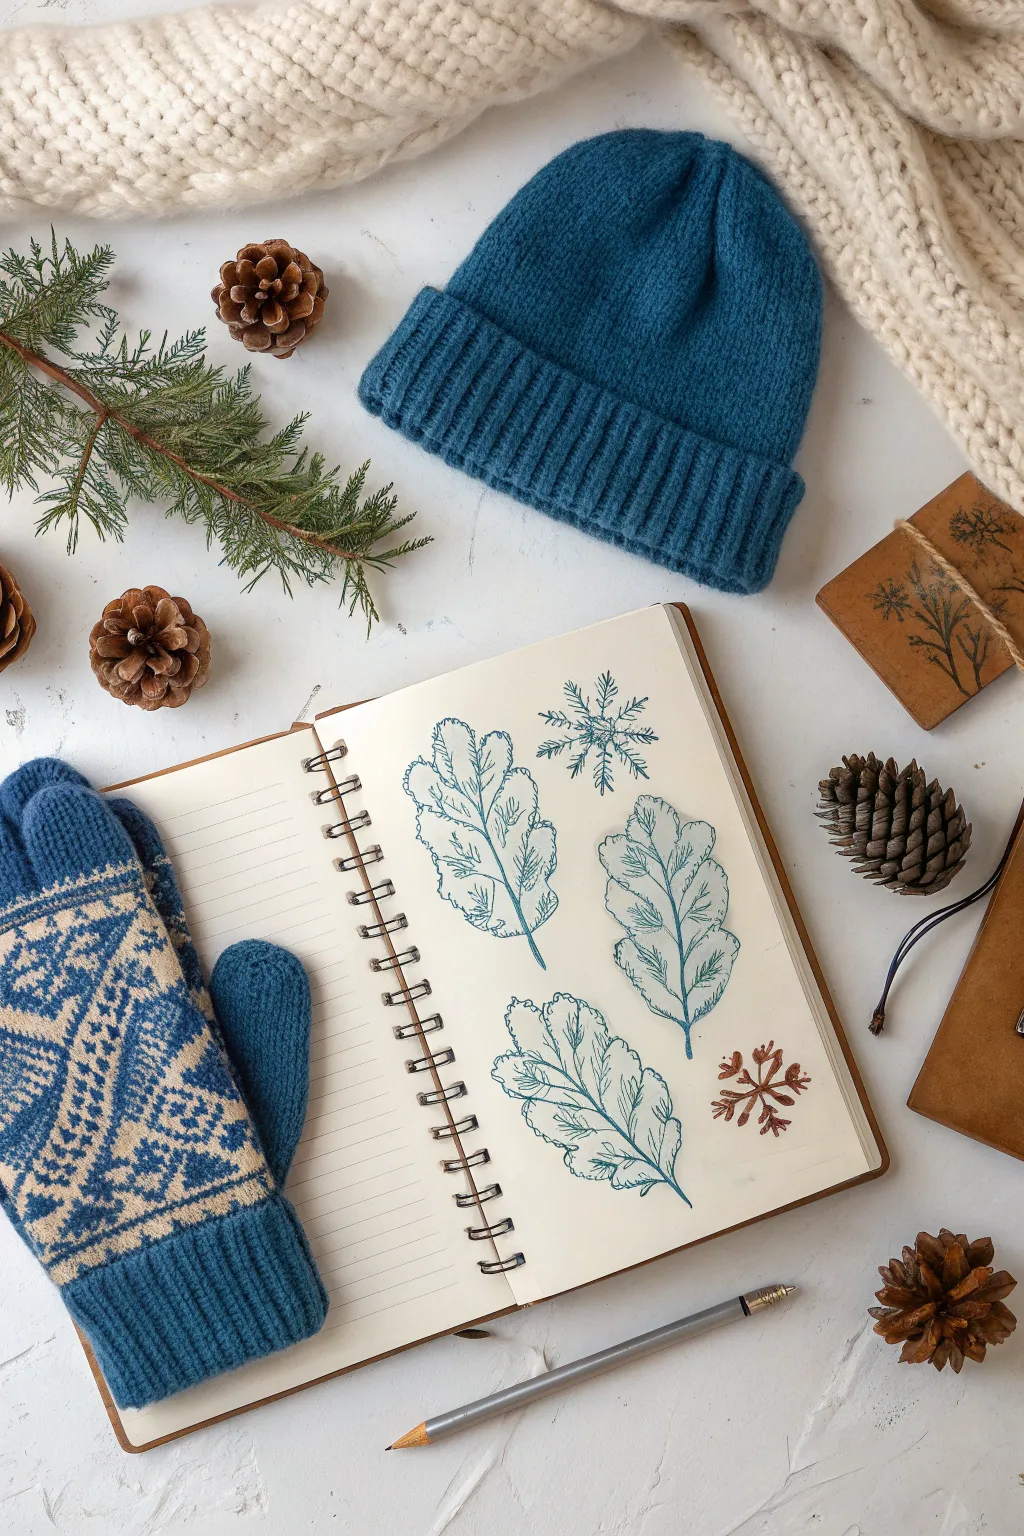
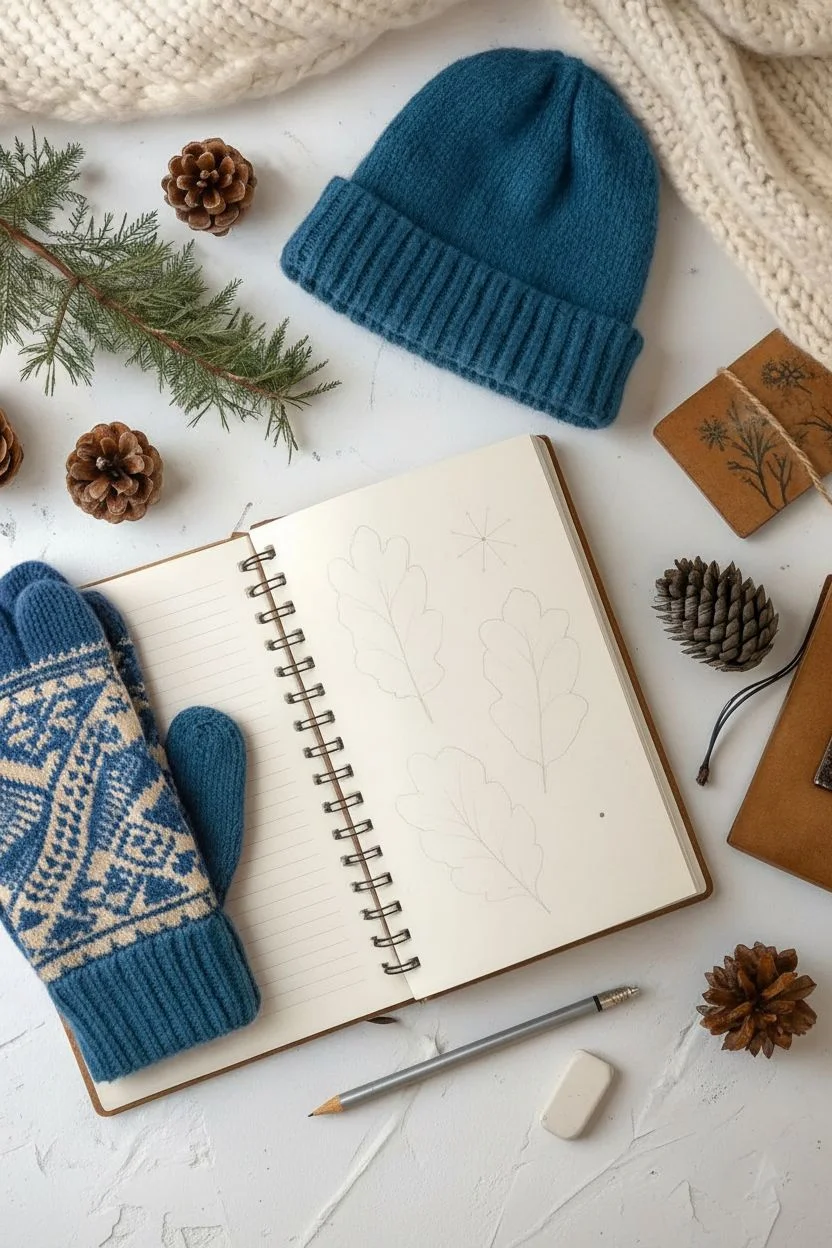
Capture the stillness of January with this delicate sketchbook study featuring frosted oak leaves and crystalline snowflakes. This project combines fine line work with subtle shading to create a crisp, wintry aesthetic right on the page.
Detailed Instructions
Materials
- Sketchbook with cream or off-white paper (spiral bound)
- Blue fineliner pen (0.3mm or 0.5mm)
- Brown fineliner pen (0.3mm)
- Graphite pencil (HB for initial sketching)
- Soft eraser
- Reference photo of oak leaves
Step 1: Planning the Composition
-
Rough layout:
Begin by lightly marking the position of your three main oak leaves using your pencil. Place one near the top left, one in the center right, and one at the bottom center to create a balanced, flowing arrangement. -
Mark snowflake spots:
Identify two empty spaces for your snowflakes—one between the top two leaves and a smaller one near the bottom right—and mark their centers with small pencil dots.
Uneven Lines?
Jittery lines actually help here! Oak leaves are naturally textured and dried winter leaves are crinkly. Don’t worry about smooth strokes; wobbly lines add realism.
Step 2: Drawing the Oak Leaves
-
Define the central veins:
Switch to your blue fineliner. For the first leaf, draw a gently curved central vein line that extends from the stem to the tip, keeping the line weight steady but distinct. -
Outline the lobes:
Starting from the bottom of the stem, draw the characteristic lobed outline of the oak leaf. Use wavy, organic lines to create the rounded projections, ensuring they don’t look too symmetrical or rigid. -
Add secondary veins:
From the central vein, draw smaller veins branching out into each lobe. Keep these lines slightly thinner or lighter than your main stem to establish hierarchy. -
Texture the leaf surface:
To give the leaves a dried, crinkly winter look, add very fine, short hatching lines inside the lobes. Follow the direction of the veins to suggest the slight curvature of the leaf surface. -
Repeat for the second leaf:
Move to the center-right leaf. Draw this one slightly angled away from the first, repeating the process of the central vein followed by the lobed outline. -
Detailing the second leaf:
Add your branching veins and texture lines. I find it helpful to vary the density of the texture lines here—some areas denser, some sparse—to show how light hits the uneven surface. -
Draw the bottom leaf:
Create the final leaf at the bottom. Position this one so it looks like it’s drifting or resting naturally below the others, maintaining that cohesive blue ink style.
Step 3: Adding Snowflakes
-
Draft the top snowflake:
Using your blue pen, draw a simple cross (+) followed by an X shape over it to create an eight-pointed star base for the large snowflake at the top. -
Detail the crystal arms:
Add small V-shapes or little branches coming off the main arms of the snowflake. Keep these geometric and precise to contrast with the organic shapes of the leaves. -
Draw the bottom snowflake:
Switch to a brown fineliner for the smaller snowflake at the bottom right. This color change adds a lovely warmth to the page. -
Simplify the shape:
Make this brown snowflake slightly simpler and bolder than the blue one, using thicker primary strokes to resemble a wooden ornament or a dried seed pod shape.
Add Winter Frost
Use a white gel pen to add tiny dots or lines over the blue ink on the leaf tips. This creates a magical effect that looks like morning frost or light snow.
Step 4: Refining and Finishing
-
Erase pencil marks:
Wait until the ink is completely dry to avoid smudging. Gently erase all your underlying pencil sketches to reveal the clean ink work. -
Review contrast:
Look over your leaves. If any areas look too flat, add a few more tiny hatching lines in the deepest curves of the lobes to increase contrast. -
Final touches:
Check the connection points where stems meet veins. You can thicken these junctions very slightly with your pen to make the drawing feel more grounded and solid.
Now you have a serene winter study that preserves the beauty of the season in your sketchbook


January Pine Trees and Bare Branch Silhouettes
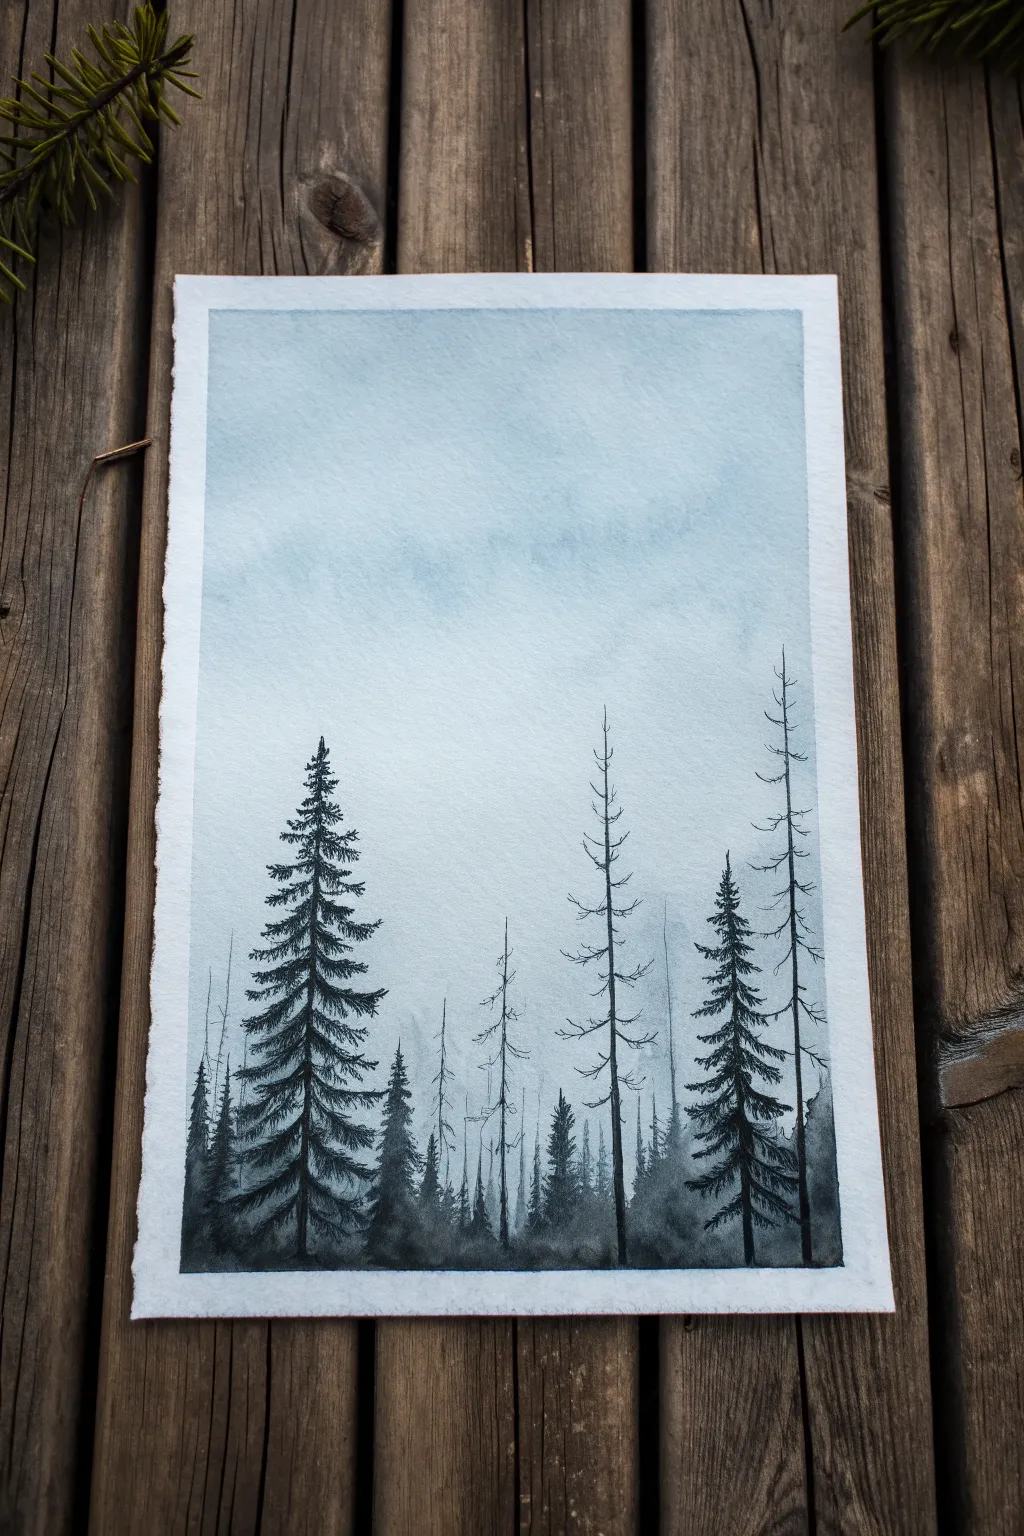
Capture the serene silence of a winter forest with this atmospheric watercolor piece. Using a monochrome palette, you’ll learn to layer washes for depth and detail sharp silhouettes against a soft, foggy backdrop.
Step-by-Step Tutorial
Materials
- Cold press watercolor paper (300 gsm)
- Masking tape
- Payne’s Grey or Indigo watercolor paint
- Black ink or concentrated black watercolor
- Large flat wash brush (1 inch)
- Round watercolor brush (size 6 or 8)
- Fine liner brush or rigger brush (size 0 or 1)
- Cup of water
- Paper towels
- Palette or white plate
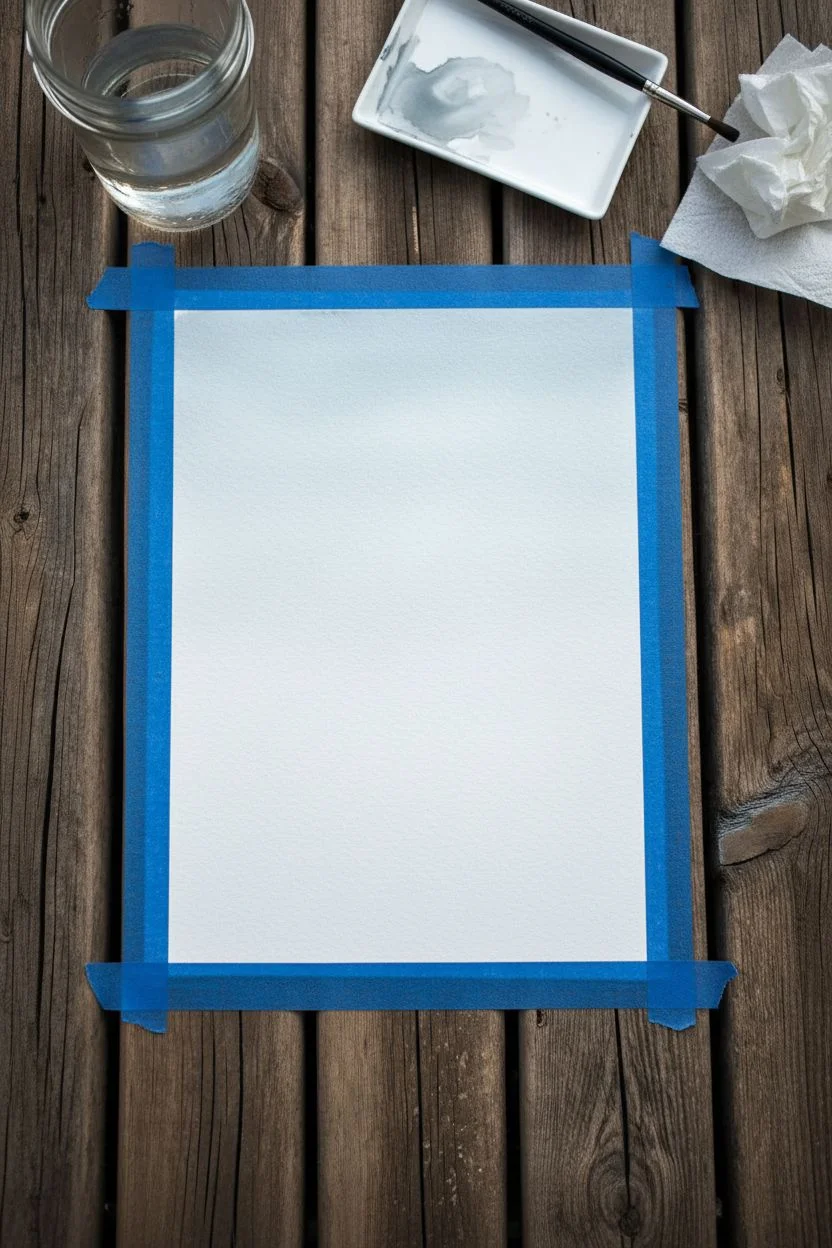
Step 1: Setting the Atmosphere
-
Prep the Surface:
Begin by taping down all four edges of your watercolor paper to a board or table. This creates that crisp white border and prevents buckling while creating wet washes. -
Mix the Sky Wash:
Dilute a small amount of Payne’s Grey or Indigo with plenty of water. You want a very pale, watery mix that looks almost clear on your palette. -
Wet the Paper:
Using your large flat brush, apply clean water evenly across the top two-thirds of the paper. It should be glistening but not forming puddles. -
Create the Gradient:
Load the flat brush with your pale wash and sweep it across the top of the paper. Tilt your board slightly so the paint naturally flows downward, creating a smooth transition from subtle blue-grey to white as it nears the bottom third. -
Dry Completely:
Let this sky layer dry completely. The paper must be bone dry before you add the next layers to keep the tree edges crisp.
Step 2: Planting the Misty Background
-
Mix a Mid-Tone:
Create a slightly darker version of your sky color. It should still be transparent but clearly visible against the white paper. -
Start the Distant Trees:
Using the round brush (size 6), paint loose, triangular shapes along the bottom third of the paper. These don’t need sharp details; let them be slightly blurry. -
Add Height Variation:
Vary the height of these background trees. Some should peek up high into the sky area, while others stay low to form a dense forest floor. -
Soften the Bottoms:
While the paint is still wet, rinse your brush and run clean water along the absolute bottom edge of these trees to blur them into the ‘ground’ mist. -
Layering Depth:
Once the first layer of trees is semi-dry, add a second layer of slightly darker trees in between the first set. This creates the illusion of a deep, dense forest.
Blooms & Cauliflowers?
If you see weird textures in your sky wash, you likely added water to semi-dry paint. Once a wash starts drying, don’t touch it again until completely dry.
Step 3: Detailing the Foreground
-
Prepare Black Ink:
Switch to your black ink or a very concentrated, creamy mix of black watercolor. You want maximum opacity for the foreground elements. -
Paint the Main Pine Trunk:
Using the fine liner brush, paint a straight vertical line for the trunk of the large pine on the left. Make it slightly thicker at the bottom and razor-thin at the top. -
Add Pine Branches:
Starting from the top of the trunk, use short, flicking strokes to create downward-sloping branches. Keep the top branches very short and widen the silhouette as you move down. -
Create Texture:
Tap your brush tip gently along the branches to suggest needle clusters. Don’t overwork it—imperfection makes the tree look organic. -
Paint Bare Trees:
On the right side, paint two or three tall, incredibly thin trunks. These are dead or dormant trees, so they won’t have thick foliage. -
Add Fine The Branches:
Use the very tip of your rigger brush to pull tiny, jagged branches out from these bare trunks. Make them brittle and sparse. -
Anchor the Forest:
Fill the bottom inch of the paper with dark, uneven strokes to represent the dark undergrowth where the trees are rooted, blending the distinct trunks into a shadowed base. -
Final Touches:
Step back and assess the composition. If needed, add a few tiny, faint vertical lines in the background to suggest more distant trunks before removing the tape.
Level Up: Snowfall
Load a toothbrush with white gouache or acrylic. Running your thumb over the bristles, splatter tiny white dots over the dried painting for a snowy effect.
Now you have a moody winter landscape perfect for serene January reflection
BRUSH GUIDE
The Right Brush for Every Stroke
From clean lines to bold texture — master brush choice, stroke control, and essential techniques.
Explore the Full Guide
New Year Fireworks Over a January Night Sky
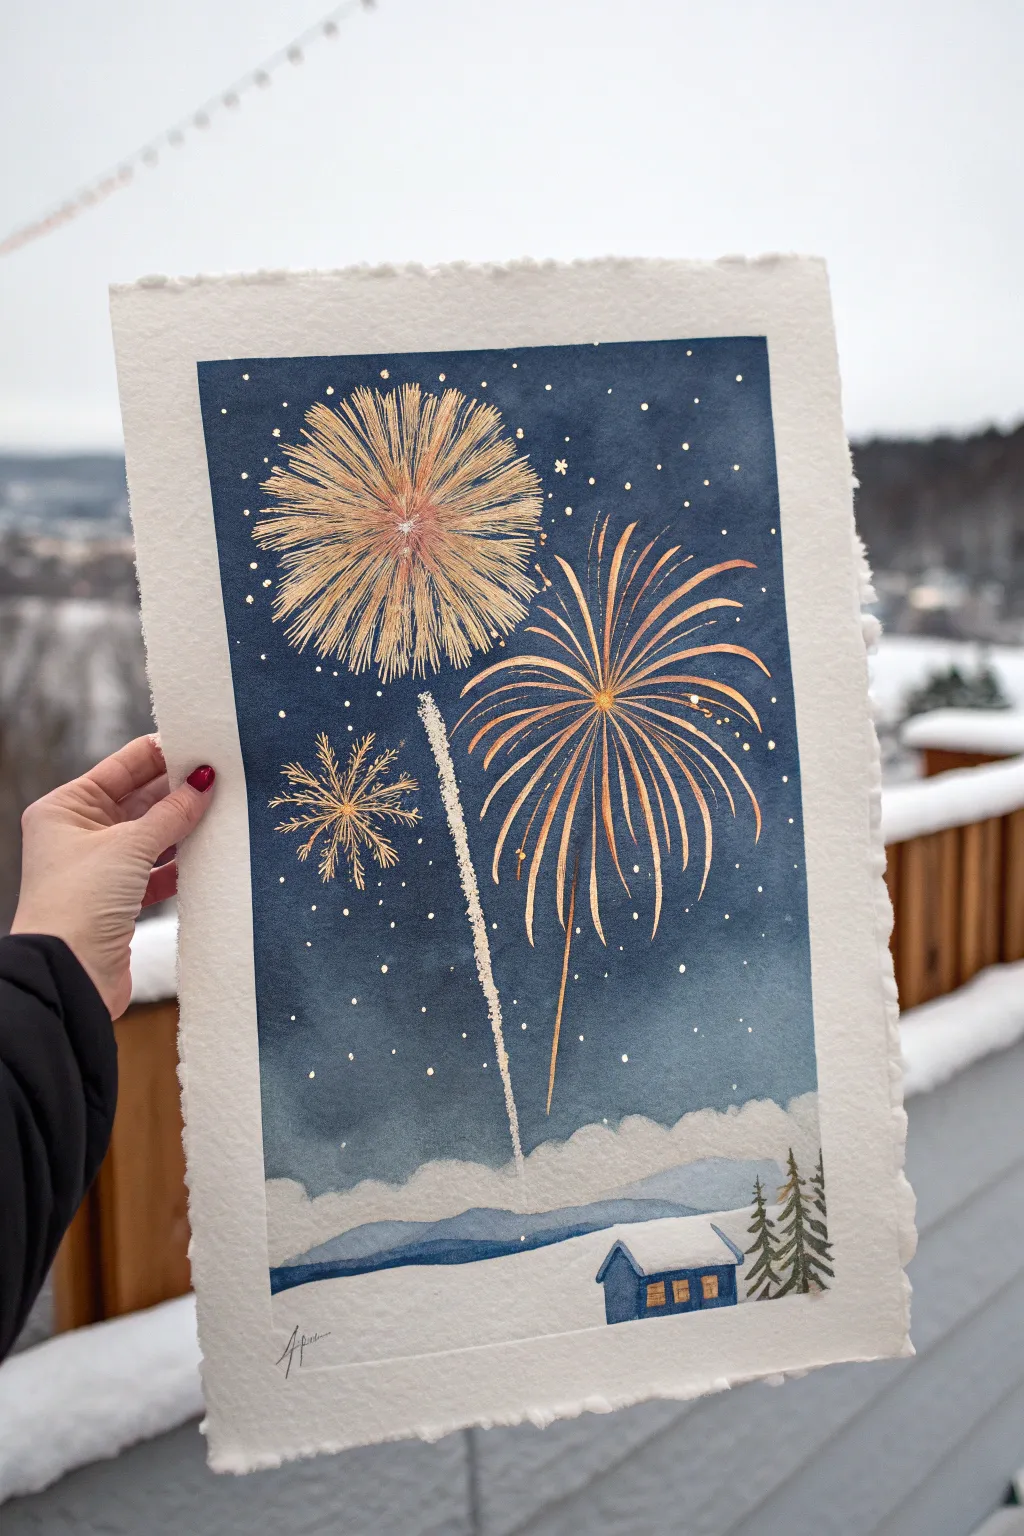
Capture the magic of a New Year’s celebration with this luminous watercolor and metallic ink painting. The contrast between the deep midnight blue sky and the glittering gold fireworks creates a festive atmosphere perfect for a January art night.
How-To Guide
Materials
- Cold press watercolor paper (deckled edge preferred for that rustic look)
- Masking fluid or white wax crayon
- Watercolor paints (Indigo, Payne’s Gray, Burnt Sienna, Yellow Ochre)
- Metallic gold ink or metallic watercolor pan
- White gouache or white gel pen
- Round watercolor brushes (sizes 2, 6, and 10)
- Small flat brush or rigger brush
- Painter’s tape or drawing board
- Jar of clean water
- Paper towels
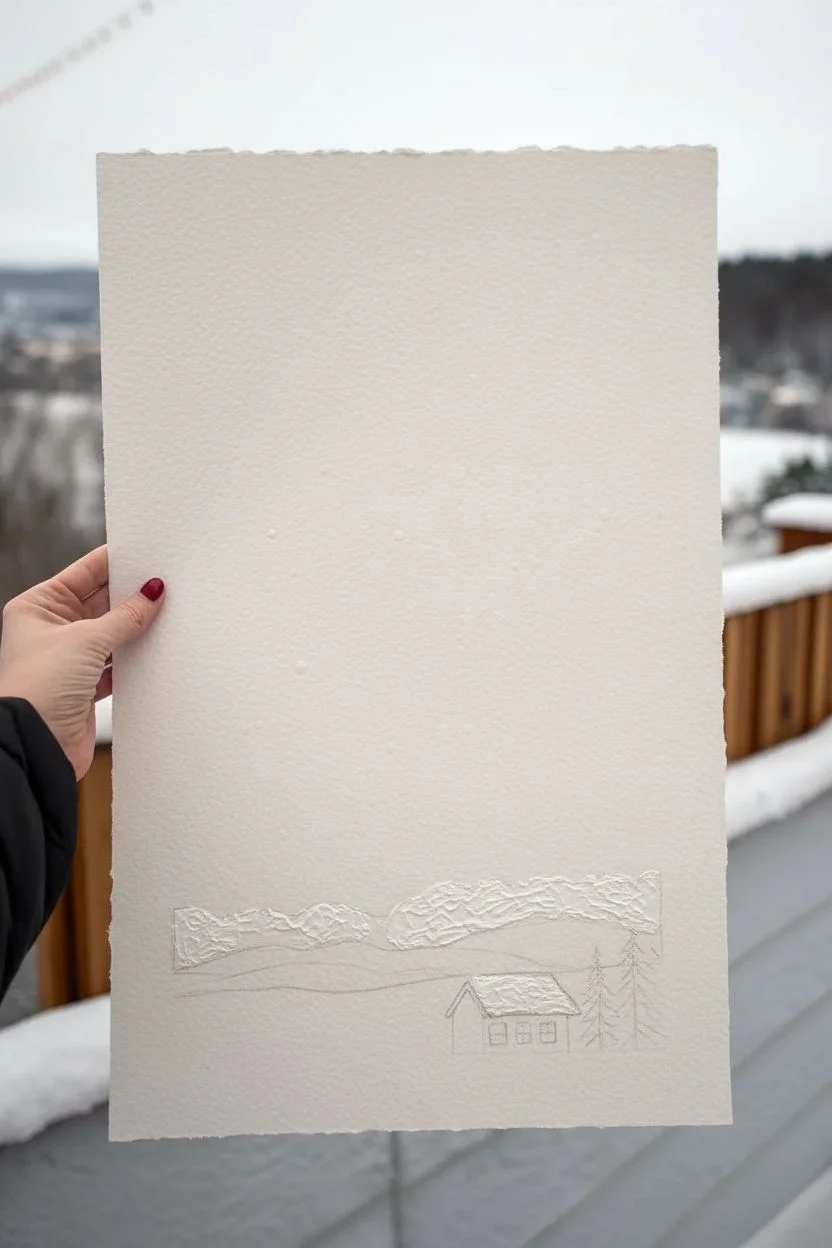
Step 1: Setting the Scene
-
Sketch the Horizon:
Begin by lightly sketching a low horizon line about one-quarter of the way up from the bottom of your paper. Draw the simple outline of a small cabin roof and two small side walls on the right side, along with a few jagged lines for pine trees next to it. -
Mask the Snow:
Apply masking fluid (or use a white wax crayon as a resist) to the snowy roof of the cabin and the rolling snowy hills in the foreground. This preserves the bright white paper against the dark sky we will paint next. -
Protect the Stars:
Using a very fine tool or the tip of a brush handle, dot tiny specks of masking fluid across the upper sky area. These will become your distant stars later.
Pro Tip: Glowing Effects
For extra glow, paint a tiny dab of water where the firework center will be, then drop in orange watercolor before adding the gold ink over it.
Step 2: Painting the Midnight Sky
-
Prepare the Wash:
Mix a generous amount of Indigo and Payne’s Gray to create a deep, rich midnight blue. You want this color to be quite saturated. -
Apply the Sky Gradient:
Start painting at the very top of the paper with your largest brush, applying the darkest blue. As you work your way down towards the horizon, add a tiny amount of water to your brush to slightly lighten the wash, creating a subtle gradient. -
Define Clouds:
Before the wash reaches the horizon line, stop painting to leave a jagged strip of white paper just above the snowy hills. Soften the bottom edge of the blue paint with a clean, damp brush to suggest low-hanging clouds or mist. -
Let it Dry Thoroughly:
Wait for the sky layer to become bone dry. If you paint the fireworks too soon, the gold ink will bleed into the damp blue and lose its crisp definition.
Level Up: Deckled Edges
If you don’t have deckled paper, fold your finished painting and carefully tear the edges against a ruler for that handmade, vintage look.
Step 3: Adding the Fireworks
-
Paint the Large Burst:
Load a size 2 brush or a rigger brush with metallic gold ink. On the right side, paint a central point and flick curved lines outward in a radial pattern to create the larger palm-tree style firework. -
Add the Starburst:
On the upper left, create a denser, more spherical firework. Use short, straight strokes radiating from a center, layering gold over a touch of diluted white gouache if you want it to look glowing. -
Create the Smaller Sparkler:
Below the spherical burst, paint a smaller, snowflake-shaped firework using simple cross-hatching strokes in gold. -
Draw the Trail:
Using a mixture of white gouache and a tiny bit of gold, paint a dashed or textured vertical line rising from the clouds up toward the fireworks to represent the smoke trail. -
Enhance with Dots:
Add tiny dots of gold ink around the tips of the firework tendrils to simulate fizzing sparks.
Step 4: Final Landscape Details
-
Remove Masking:
Gently rub away the masking fluid from the snow and stars once the sky is completely dry. -
Paint the Hills:
Mix a very watery, pale blue-grey wash. Swiftly paint over the background snow dunes to give them shadow and form, leaving the immediate foreground white. -
Paint the Cabin:
Fill in the walls of the cabin with a medium blue tone. Once dry, paint the windows with a bright Yellow Ochre to make them look warmly lit. -
Add Trees:
Using a dark mix of green and Payne’s gray, paint the pine trees next to the cabin using quick, downward dabbing strokes to mimic pine needles. -
Final Snowflakes:
Dip an old toothbrush or stiff brush into white gouache and flick a fine mist of snow over the entire painting, focusing on the dark sky area.
Now you have a dazzling winter scene that captures the excitement of a fresh start
January Penguin With a Scarf (Cute Style)
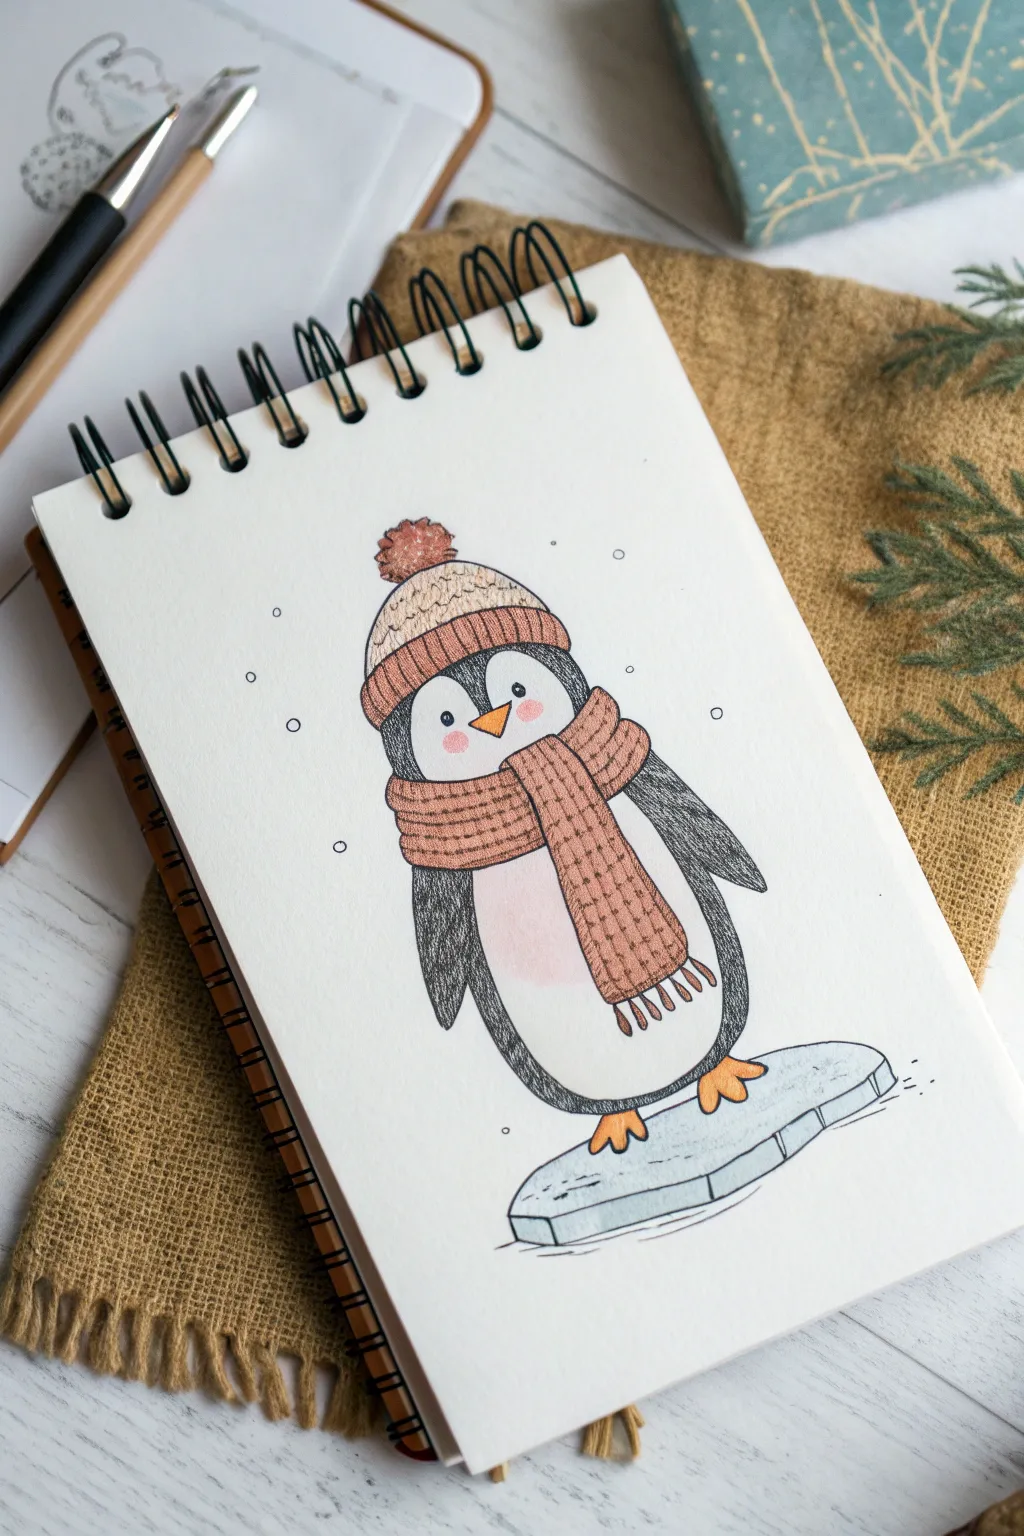
Capture the chill of winter with this adorable illustration of a penguin bundled up in warm knitwear. This tutorial guides you through creating a charming character with soft textures and a simple, clean illustrative style.
Detailed Instructions
Materials
- White sketchbook paper or mixed media paper
- HB pencil for sketching
- Fine-liner pen (black, approx. 0.3mm or 0.5mm)
- Colored pencils (black/dark grey, orange, light pink, blush pink, and a warm brown/terracotta)
- Eraser
- Optional: White gel pen for highlights
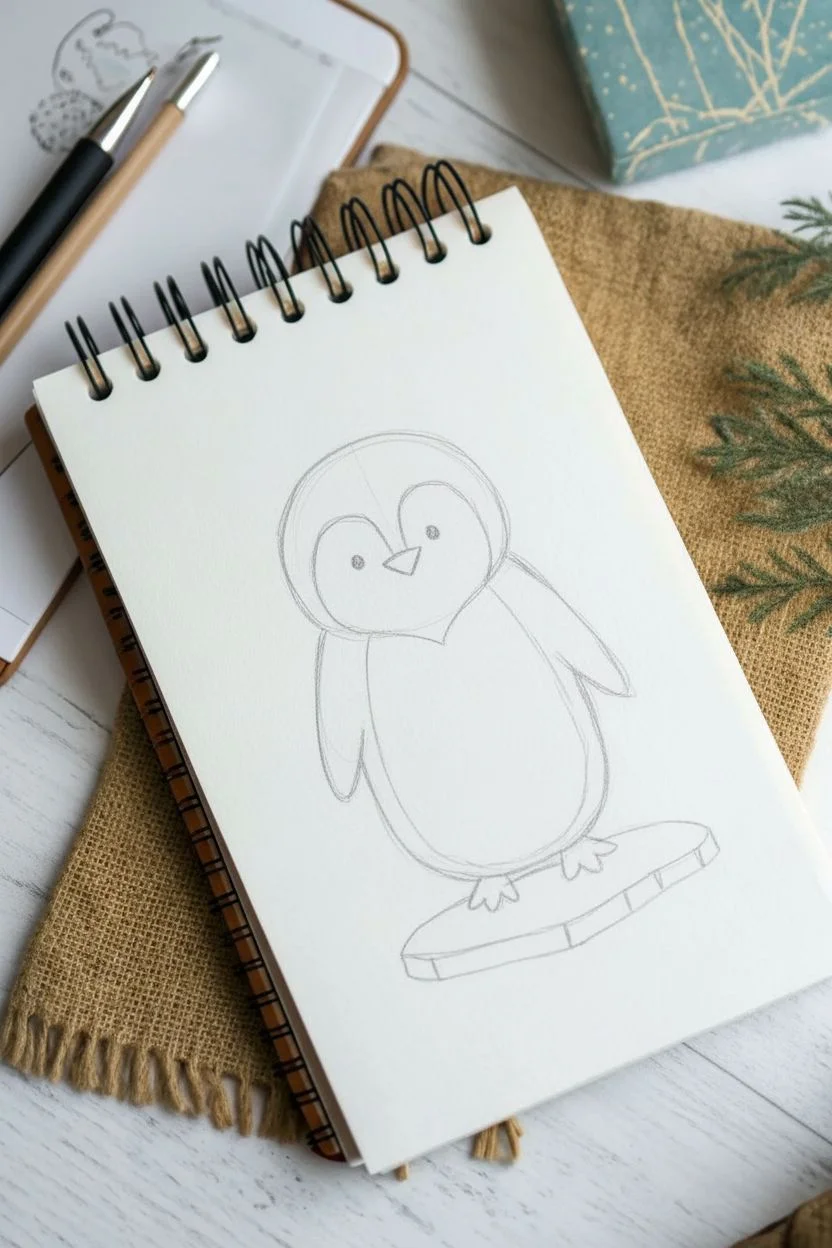
Step 1: Sketching the Base Shape
-
Draw the head outline:
Begin by lightly sketching a wide, rounded arch for the top of the penguin’s head. Keep your pencil pressure light so you can erase guidelines later. -
Define the body:
From the bottom of the head arch, draw a continuous oval shape that extends downward to form the penguin’s body. It should look a bit like a sturdy potato standing upright. -
Mark the face area:
Inside the head shape, draw a smaller, heart-shaped curve that dips in the center (the forehead) and curves out to define the white face markings. -
Sketch the flippers:
Add two simple curved shapes on either side of the body for the flippers. They should angle slightly backwards.
Step 2: Adding Accessories & Details
-
Draft the hat brim:
Draw a thick band curve right across the penguin’s forehead, slightly overlapping the top of the head arch. This will be the folded brim of the beanie. -
Finish the hat:
Add the rounded top of the hat above the brim, and sketch a fluffy pom-pom circle at the very peak. -
Draw the scarf wrapping:
create a chunky, curved section right under the penguin’s chin area. This is the part of the scarf wrapped around the neck. -
Add the scarf tail:
Draw the long tail of the scarf hanging down the front of the body, slightly off-center. Add little rectangles at the bottom to represent the fringe. -
Place the facial features:
Draw two small circles for eyes, widely spaced. In between and slightly lower, add a small triangular beak pointing sideways. -
Sketch the ice floe:
Underneath the penguin’s feet, draw an irregular, flat oval shape to represent a chunk of ice.
Fix Smudged Ink?
If your fine-liner smears when erasing, convert the smudge into a shadow or texture. Cross-hatch over it lightly with the pen to blend it in.
Step 3: Inking the Illustration
-
Outline the main lines:
Using your black fine-liner, carefully trace over your pencil lines. Use a confident, consistent stroke for the body and accessories. -
Add texture to the knitwear:
On the scarf and hat brim, draw vertical dashed lines to mimic a knitted rib pattern. I like to keep these slightly imperfect to look cozier. -
Ink the feet and eyes:
Fill in the pupils of the eyes, leaving a tiny white dot for a catchlight if you can. Draw the three-toed feet resting on the ice. -
Erase pencil marks:
Once the ink is completely dry, gently erase all the underlying pencil sketches to clean up your drawing.
Softer Texture Tip
When coloring the black body, don’t press hard. Layering light strokes creates a ‘furry’ texture rather than a solid, shiny block of color.
Step 4: Adding Color & Texture
-
Color the dark feathers:
Use a black or dark grey colored pencil to fill in the penguin’s head and back. Use small, circular strokes to create a dense, even texture that isn’t completely solid black. -
Warm up the accessories:
Color the hat and scarf with the terracotta or warm brown pencil. Press harder on the edges to create a sense of rounded dimension. -
Add blush and warmth:
Using a soft pink pencil, gently color circular cheeks under the eyes. Add a very faint geometric patch of pink on the penguin’s round belly. -
Fill the beak and feet:
Use an orange pencil for the beak and the feet. These add a nice pop of contrast against the cool ice. -
Color the ice:
Lightly shade the ice floe with a very pale blue or cool grey. Add a darker line on the side edge to show the thickness of the ice slab. -
Final touches:
Add a few tiny circles around the penguin to look like falling snow. If you have a white gel pen, add tiny dots to the knitwear for extra texture.
Now you have a sweet winter companion to decorate your journal pages or greeting cards

PENCIL GUIDE
Understanding Pencil Grades from H to B
From first sketch to finished drawing — learn pencil grades, line control, and shading techniques.
Explore the Full Guide
Polar Bear in a January Snowstorm
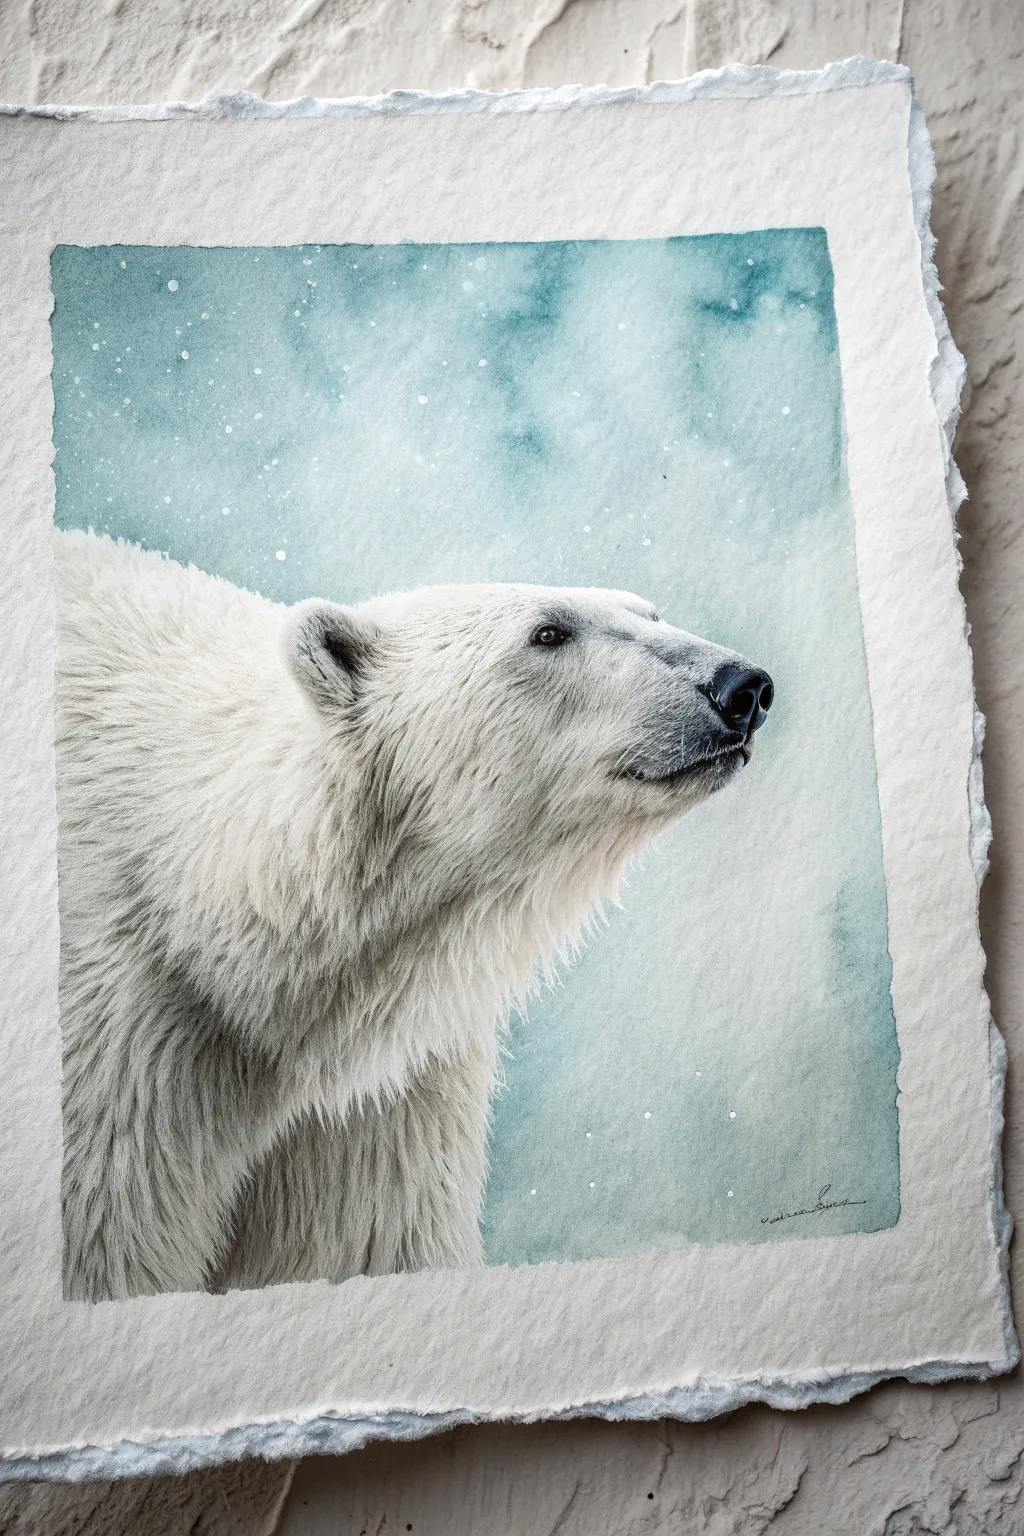
Capture the serene beauty of the Arctic with this detailed polar bear portrait, featuring realistic fur texture against a dreamy, snow-speckled sky. This project combines loose watercolor washes with precise detailing to create a striking contrast between the soft background and the crisp animal subject.
Step-by-Step Guide
Materials
- High-quality cold press watercolor paper (300gsm), preferably with deckled edges
- Watercolor paints (Phthalo Blue, Prussian Blue, Indigo, Burnt Umber, Payne’s Grey)
- White Gouache or bright white acrylic ink
- Range of brushes: Large wash brush, medium round (size 6), and fine liner (size 0 or 00)
- Masking fluid and an old brush or applicator
- Pencil (H or HB) and kneadable eraser
- Two jars of water
- Paper towels
- White gel pen (optional for finest details)
Step 1: Preparation and Sketching
-
Paper Selection:
Choose a heavyweight watercolor paper with a rough or cold-press texture. If your paper doesn’t have deckled edges, you can carefully tear the edges against a ruler to create that rustic, artistic look seen in the reference. -
Initial Sketch:
Lightly sketch the outline of the polar bear using an H pencil. Focus on the slope of the forehead, the position of the ear, and the muzzle shape. Keep your lines faint so they won’t show through the pale fur later. -
Masking the Bear:
Apply masking fluid carefully over the entire bear shape. This allows you to paint the background freely without worrying about ruining the pristine white fur. Let this dry completely before moving on. -
Masking Snowflakes:
Use a toothbrush or a stiff brush to flick a few tiny droplets of masking fluid into the sky area. These will become your distant falling snow later.
Step 2: Painting the Sky
-
Pre-wetting:
Wet the entire background area around the masked bear with clean water. The paper should be glisten, but not hold puddles. -
First Wash:
Mix a watery wash of Phthalo Blue and Prussian Blue. Drop this color into the wet paper, starting darker at the top and letting it naturally fade as it moves down the page. Tilt your board to help the paint flow. -
Creating Atmosphere:
While the paper is still damp, dab in stronger concentrations of Indigo or Payne’s Grey near the edges and corners to create a vignette effect. This draws the eye toward the center. -
Adding Texture:
Sprinkle a tiny pinch of salt onto the wet paint in the upper corners if you want extra ice-crystal texture, though smooth blends work beautifully too. Allow the background to dry completely—it must be bone dry. -
Removing Masking:
Once the sky is dry, gently rub off the masking fluid from the bear and the snowflakes using a clean finger or a rubber cement pickup tool. You should now have a stark white silhouette.
Keep it Clean
Work top to bottom or left to right (if right-handed) to avoid smudging the bright white paper. Place a clean sheet of scrap paper under your hand while detailing the fur.
Step 3: Rendering the Fur
-
Base Shadows:
Mix a very pale, watery grey using Payne’s Grey and a touch of blue. Identify the shadow areas—under the neck, behind the ear, and the lower chest. Apply this pale wash loosely to establish form, keeping the top of the head bright white. -
Fur Texture – Layer 1:
Switch to a smaller round brush. Using a slightly darker grey mix, start flicking small, directional strokes to mimic fur clumps. Follow the direction of hair growth: flowing back from the nose and sweeping down the neck. -
Deepening Shadows:
Add warmth to the shadows by mixing a tiny bit of Burnt Umber into your grey. Paint the deeper crevices in the neck fur and the inner ear. I find building these shadows slowly prevents the bear from looking dirty. -
Facial Details:
Use a fine liner brush and nearly black paint (Payne’s Grey + Indigo) to paint the eye, nose, and mouth line. Leave a tiny speck of white paper in the eye for a highlight, which brings the animal to life immediately. -
Nose Texture:
Dilute your black slightly to paint the top of the nose, then add a second layer of pure black to the nostrils and the shadow side of the snout to create volume.
Level Up: Metallic Touch
Mix a small amount of iridescent medium or silver watercolor into your snow spatters. When the light hits the finished piece, the snow will shimmer like real ice crystals.
Step 4: Final Details
-
Refining Fur:
With your smallest brush or a white gel pen, add crisp white hairs overlapping the darker shadow areas. This negative painting technique makes the fur look thick and layered. -
Whiskers:
Using a rigger brush or fine liner, swiftly paint the whisker roots near the muzzle with dark grey. You can scratch out fine white whiskers with an X-Acto knife or use white gouache for the tips. -
Final Snow:
Load a brush with white gouache. Tap the handle against another brush to splatter fresh, bright white snow over the sky and slightly overlapping the bear’s back to integrate the subject with the environment. -
Edging:
If the paint bled slightly under the mask, clean up the edges with white gouache to ensure the bear stands out sharply against the blue winter sky.
Step back and admire your frosty creation, perfectly capturing the silence of a winter morning
January Weather Icon Doodle Set
Get organized for the new year with this charming set of hand-drawn weather icons perfect for tracking January’s unpredictable forecast. This simple grid-based doodle sheet features everything from stormy rainclouds to delicate snowflakes, all rendered in soothing blue ink to match the winter mood.
Step-by-Step
Materials
- A5 grid or dot grid notebook
- Fine liner pen (0.3mm or 0.5mm, dark blue)
- Medium felt-tip marker (blue)
- Medium felt-tip marker (brown or bronze)
- Pencil (HB for sketching)
- Eraser
Step 1: Planning and Layout
-
Review the layout:
Observe how the icons are spaced. The left page is dedicated mostly to clouds, rain, and simple temperature symbols, while the right page focuses on snowflakes and suns. You don’t need distinct borders; just keep about two grid squares of space between each doodle. -
Lightly sketch positions:
Using your pencil, very faintly mark where each icon will go. Draw simple circles or ovals as placeholders to ensure your page doesn’t get overcrowded.
Step 2: Drawing the Cloud Variations
-
Basic cloud shapes:
Start on the left page. Draw several cloud outlines using your blue fine liner. Make the bottoms flat (following a grid line) and the tops fluffy with three or four humps. -
Stormy texture:
For the ‘storm’ clouds, fill the inside with a stippling technique. Use the fine liner to add dense dots or tiny scribbles, concentrating them at the bottom of the cloud to suggest heaviness. -
Adding precipitation:
Below one of your clouds, draw vertical dashed lines to represent heavy rain. Under a different cloud, draw small slanted dashes for light showers. -
Lightning strike:
Create a lightning icon by drawing a small cloud shape, then extending a jagged, Z-shaped bolt downwards. Double the line of the bolt to give it thickness.
Smudge Alert
Gel pens look great but smear instantly on smooth paper. Place a scrap piece of paper under your drawing hand to protect your finished icons while you work on the rest of the page.
Step 3: Temperature and Wind
-
Windy swirls:
Draw the wind icon by creating two swooping C-curves that look like clouds being blown. Add small spirals at the tail end of the curves to show motion. -
Simple thermometer:
Near the bottom of the left page, draw a long, narrow U-shape with a circle at the bottom. Add a smaller circle inside the bottom bulb and color it in with your blue marker. -
Temperature lines:
Draw a secondary, slightly angled vertical line next to the thermometer with small horizontal hash marks crossing it to represent degree measurements.
Creative Twist
Don’t limit yourself to blue! Use light gray markers to add shadows under the clouds, or use a metallic silver pen for the snowflakes to make them shimmer on the page.
Step 4: Winter Snowflakes
-
Standard geometric flake:
Move to the right page. Start a snowflake by drawing a simple cross (+) intersected by an X shape. -
Adding details:
On the tips of each arm of the snowflake, draw tiny V-shapes pointing outwards. You can vary this by putting small dots at the end of the arms instead. -
Complex flake center:
For the large, detailed snowflake at the bottom of the left page, start with a small central circle. Draw six arms extending out, and add ‘branches’ to each arm like a fern leaf.
Step 5: Sun and Finishing Touches
-
Happy sun:
On the right page, draw a small circle with triangle rays. Inside the circle, add two dots for eyes and a tiny curved smile. -
Golden sun:
Draw a larger partial sun in the bottom corner. Create a large arc or circle and fill it in with your brown or bronze marker. Use the fine liner to outline it and add sharp triangular rays around the edge. -
Erase pencil lines:
Wait at least five minutes to ensure the ink is completely dry. Gently run your eraser over the entire spread to remove the initial planning sketches. -
Final accents:
Scan the page for empty spots. Fill awkward gaps with tiny dots, miniature plus signs, or single raindrops to make the composition feel cohesive.
Now you have a library of custom weather symbols ready for your January daily logs


January Calendar Page With Tiny Daily Sketches
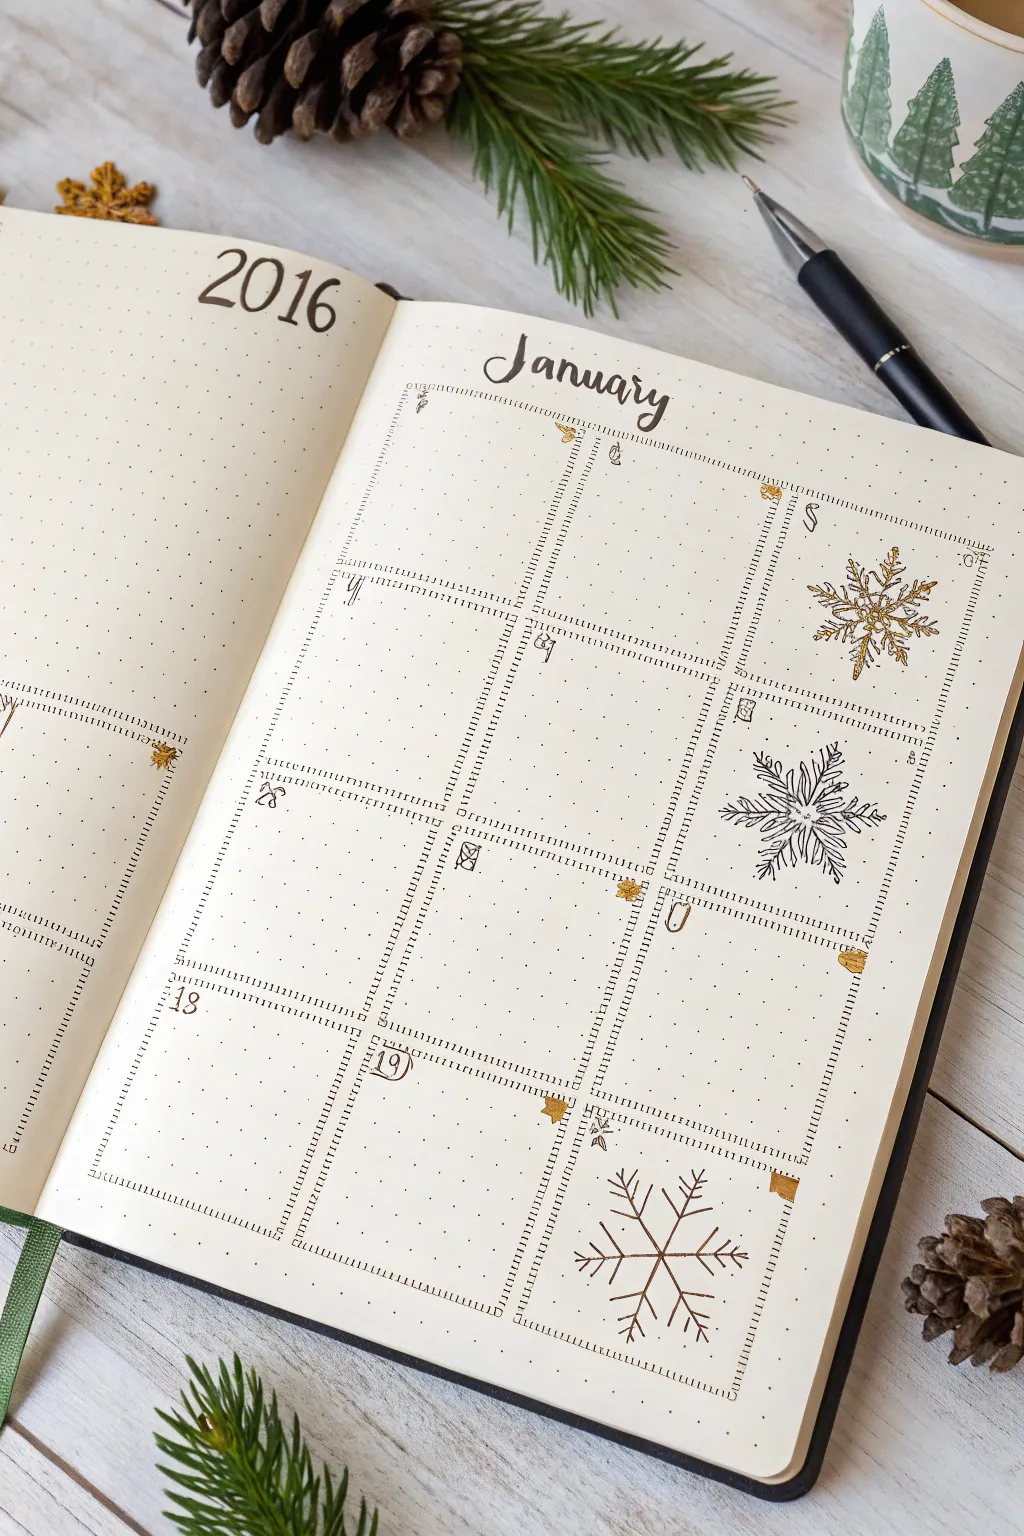
Kick off the new year with a crisp, organized monthly layout featuring delicate snowflake illustrations and golden accents. This bullet journal spread balances functional planning with cozy winter aesthetics through a clean grid structure and charming seasonal doodles.
How-To Guide
Materials
- A5 dotted notebook or bullet journal
- Fine liner pen (0.3mm or 0.5mm, black)
- Gold gel pen or metallic marker
- Ruler
- Pencil and eraser
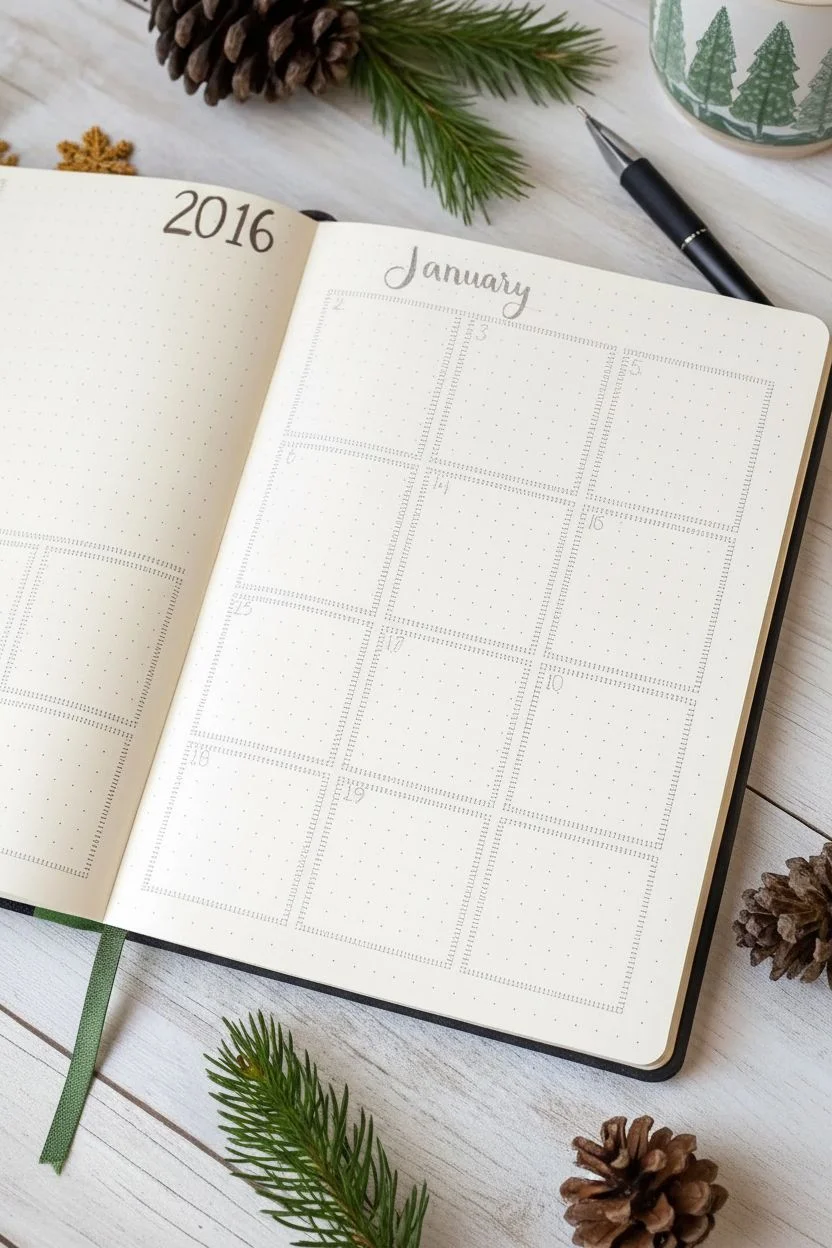
Step 1: Planning and Layout
-
Map out the grid:
Start by counting your dots to evenly space your calendar boxes. For this layout, you will need a 3-column by 5-row grid on the right page to accommodate the days and decoration. Use a pencil first to mark the corners of each day’s box. -
Draw the grid lines:
Using your black fine liner and a ruler, draw the vertical and horizontal lines over your pencil marks. Instead of a solid line, create a ‘stitched’ look by making small, evenly spaced hatch marks perpendicular to the imaginary line path. This adds a charming, rustic texture. -
Connect the spread:
Extend the grid onto the left page to capture the earlier days of the week, following the same stitched line pattern to maintain consistency across the spread.
Smudge Prevention
Wait at least 5 minutes before erasing pencil lines over gel pens. Metallic inks sit on top of the paper longer and smear very easily.
Step 2: Lettering and Headers
-
Pencil the headers:
Lightly sketch ‘2016’ (or your current year) in the top left corner of the left page and ‘January’ centered at the top of the right page. -
Ink the year:
Go over the year with your black pen using a classic serif font style. The numbers should look slightly formal, reminiscent of printed book type. -
Ink the month:
For ‘January’, switch to a bouncy, modern calligraphy style. Use faux calligraphy techniques by thickening the downstrokes of your cursive letters to give them weight and elegance. -
Erase guidelines:
Once the ink is completely dry—give it a minute or two to prevent smudging—erase all your initial pencil sketches.
Step 3: Detailed Illustrations
-
Sketch the snowflakes:
In the open column on the far right (or any empty boxes), lightly pencil three large snowflake designs. Vary their shapes: one can be star-like, one more floral, and one geometric. -
Ink the gold snowflake:
Take your gold gel pen and trace the top snowflake. Add small V-shapes to the ends of the arms to make it look crystallized. -
Ink the black snowflake:
For the middle snowflake, use your fine liner. Draw a central star and extend six arms, adding detailed branching lines that mimic frost patterns. -
Ink the simple snowflake:
For the bottom snowflake, keep the lines simple and straight with the fine liner, creating a minimalist crystal structure.
Keep it Straight
If you struggle with the ‘stitched’ line effect, draw a very faint continuous pencil line first, then ink your hatch marks over it.
Step 4: Finishing Touches
-
Number the days:
Write the date numbers in the top left corner of each daily box using the fine liner. Keep the numbers small and neat. -
Add visual interest to dates:
For specific dates, add a tiny decorative circle or bracket around the number to highlight them. -
Draw golden accents:
Using the gold pen, scatter tiny icons throughout the grid corners. Draw small maple leaves, simple squares, or dots to break up the white space. -
Add nature doodles:
In other corners, sketch tiny pine sprigs or leaves with the black pen. These should be microscopic sketches, just enough to add organic texture to the rigid grid. -
Final clean up:
Do one last pass with your eraser to remove any remaining stray pencil marks, ensuring the page looks crisp and clean.
Now you have a beautifully organized start to your year that captures the quiet beauty of winter
January Northern Lights Night Sky Study
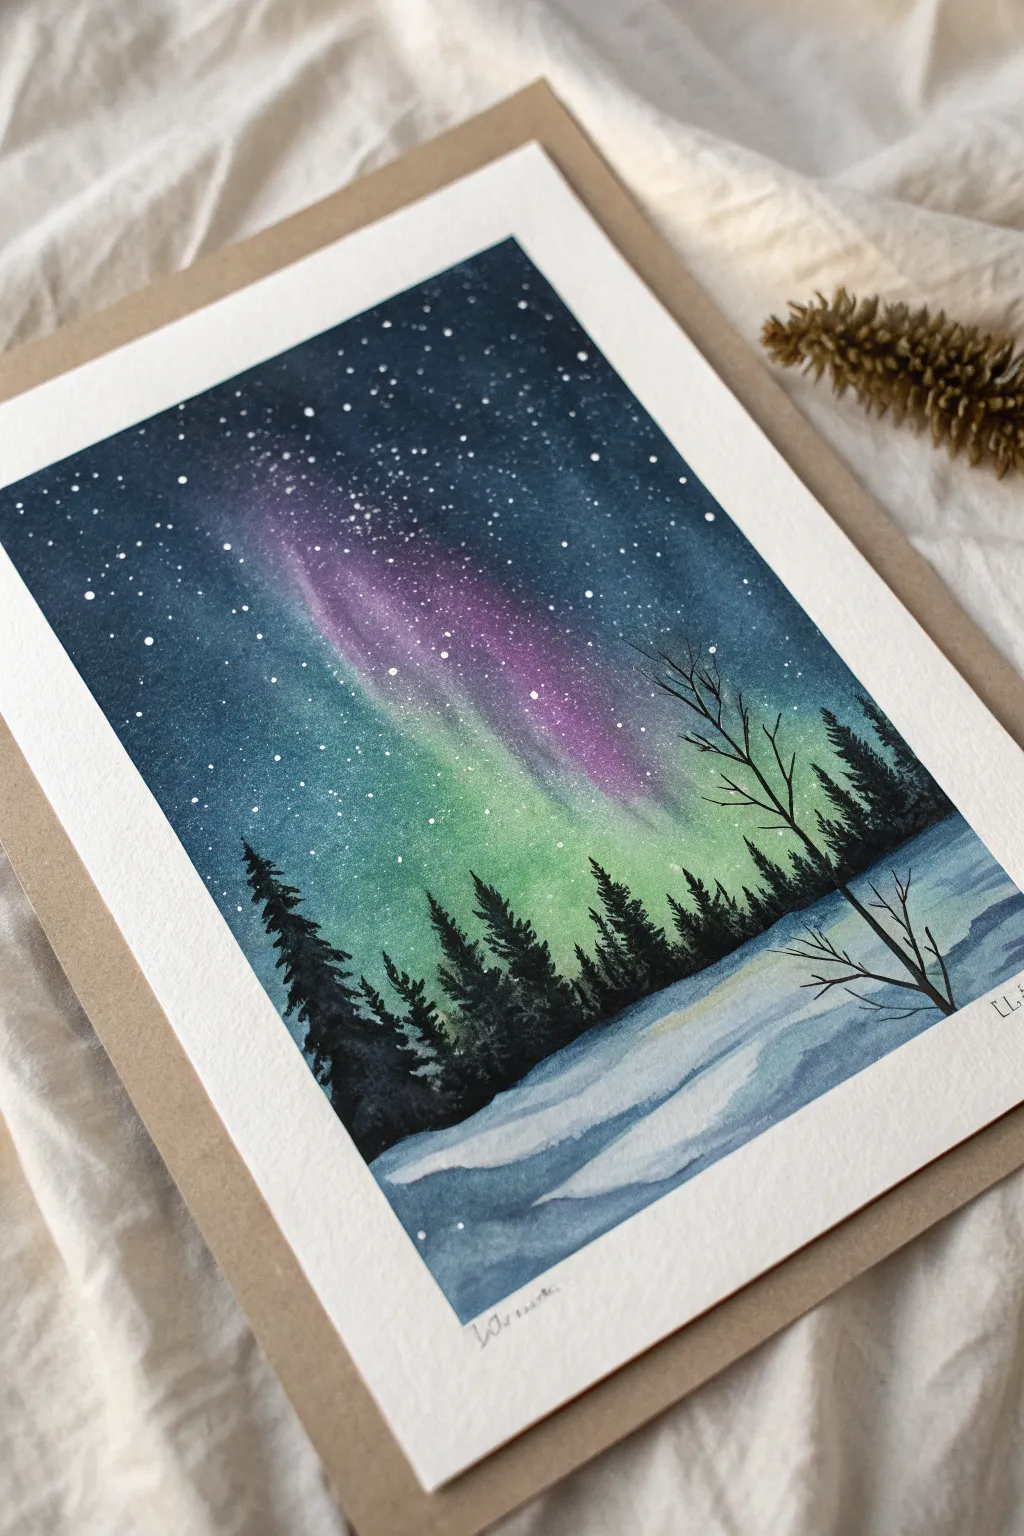
Capture the ethereal magic of the northern lights with this stunning watercolor tutorial. You’ll master wet-on-wet blending techniques to create a vibrant night sky glowing with teals and purples above a serene, snowy treeline.
Step-by-Step
Materials
- Cold Press Watercolor Paper (140lb/300gsm)
- Watercolor Paints (Indigo, Phthalo Green/Turquoise, Quinacridone Magenta/Purple, Black, Payne’s Grey)
- White Gouache or White Acrylic Ink
- Masking Tape
- Flat Wash Brush (3/4 inch)
- Round Brushes (Size 6 and Size 2)
- Paper Towels
- Two Cups of Water
- Toothbrush or Stiff Brush for Splatter
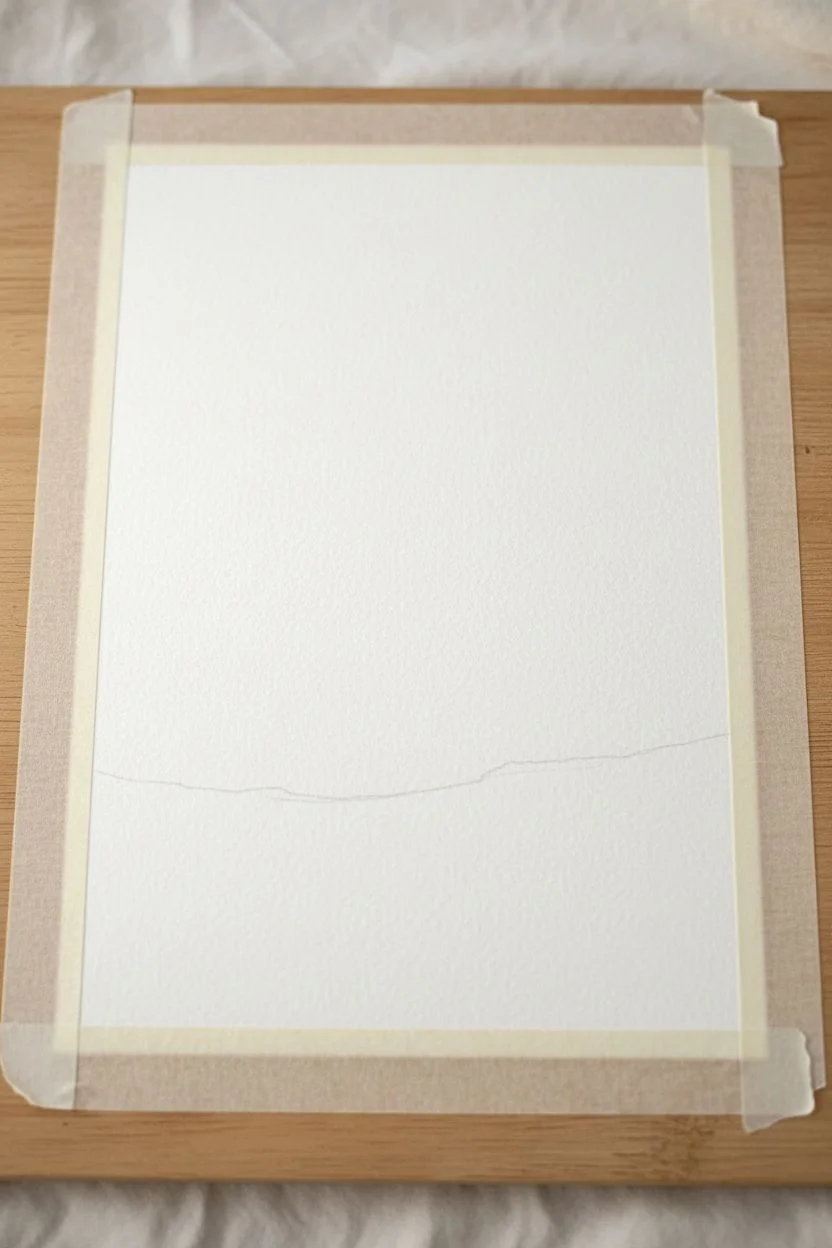
Step 1: Setting the Scene
-
Prepare your surface:
Begin by taping down all four edges of your watercolor paper to a board or table with masking tape. This creates that crisp white border seen in the final piece and keeps the paper flat while it’s wet. -
Sketch the horizon:
Lightly sketch a very faint horizon line about one-quarter of the way up from the bottom. Keep it slightly uneven to represent snow drifts, but don’t add heavy details yet.
Pro Tip: Wetness Control
If your aurora colors aren’t bleeding enough, add a touch more water. If they run uncontrollably, dab your brush on a paper towel to lift excess moisture.
Step 2: Painting the Aurora Sky
-
Pre-wet the sky:
Using your large flat brush, apply a generous layer of clean water to the entire sky area, stopping right at your horizon line. The paper should be glistering but not swimming in puddles. -
Apply the green glow:
While the paper is still wet, drop in a diagonal streak of bright Phthalo Green or Turquoise. Let it bloom and soften into the wet paper, keeping the edges indistinct. -
Add the purple streak:
Immediately alongside and slightly overlapping the green, paint a streak of Magenta or Violet. Allow the colors to mingle naturally on the page; this wet-on-wet technique creates the seamless aurora gradient. -
Darken the night sky:
Now, load your brush with deep Indigo or a mix of Blue and Black. Paint the corners and the top of the sky, carefully working around your bright aurora streaks. Blend the dark blue into the edges of the colors so the sky looks vast and deep. -
Smooth the transitions:
If the edges between the dark sky and bright aurora look too harsh, clean your brush, dampen it slightly, and gently feather the edges to soften them. Let this layer dry completely before moving on.
Level Up: Metallic Magic
Mix a tiny bit of iridescent medium into your star splatter or use metallic silver paint for the stars to give the finished piece a magical shimmer.
Step 3: Adding Stars
-
Prepare the stars:
Dilute a small amount of white gouache or acrylic ink with a tiny drop of water until it has a creamy consistency. -
Splatter technique:
Cover the bottom white section of your paper with a scrap piece of paper to protect the snow. Dip a toothbrush or stiff brush into the white paint and run your thumb across the bristles to flick tiny specks onto the dark sky. -
Add larger stars:
Use a size 2 round brush or a white gel pen to manually add a few larger, distinct stars in the darker blue areas for variety.
Step 4: Painting the Foreground
-
Create the snow shadows:
Mix a very watery wash of Payne’s Grey or diluted Indigo. Paint sweeping, curved strokes on the bottom white section to suggest drifts and shadows in the snow. Leave plenty of white paper showing for the highlights. -
Paint the tree silhouettes:
Using highly concentrated Black or very dark Green paint and your smallest round brush, begin painting the pine trees along the horizon line. Start with a vertical line for the trunk. -
Add pine branches:
Use a stippling or dabbing motion to create the texture of pine needles, making the trees wider at the bottom and pointy at the top. Vary heights to make the forest look natural. -
Include the bare tree:
On the right side, paint a delicate, bare tree with thin, reaching branches extending up past the horizon for contrast against the aurora. -
Anchor the trees:
Darken the very bottom of the tree line where it meets the snow to ground them firmly in the landscape.
Step 5: Finishing Touches
-
Final dry:
Allow the painting to dry thoroughly. The thick paint on the trees might take a little longer than the washes. -
Reveal the border:
Carefully peel away the masking tape at a 45-degree angle away from the painting to reveal your crisp, clean edges.
Step back and admire your beautiful winter night scene before sharing it with someone special


Have a question or want to share your own experience? I'd love to hear from you in the comments below!