
If you’ve been itching to sketch a family tree that feels both meaningful and beautiful, I’ve got you. Here are my favorite family tree drawing ideas—starting with the classic layouts everyone expects, then drifting into more playful, artsy twists.
Classic Oak Tree With Name Leaves
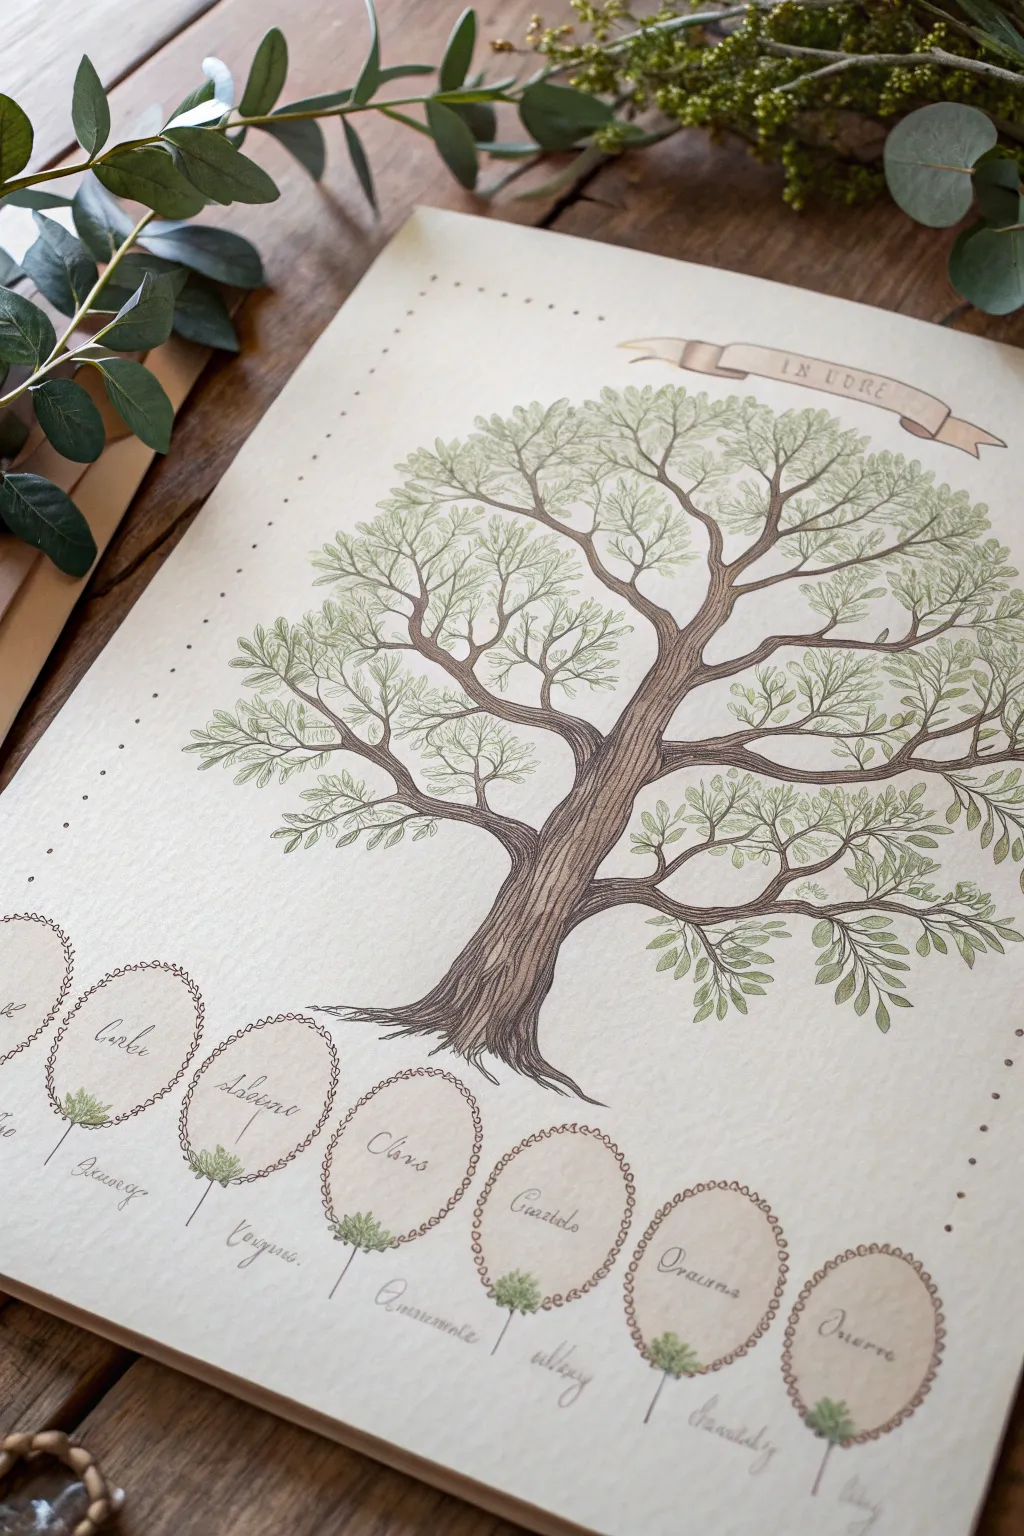
This elegant family tree design combines the sturdy grace of a classic oak with delicate, garland-style name frames for your ancestors. Using fine liners and soft washes of color on textured paper, you will create a timeless piece that feels like a discovered historical document.
Step-by-Step Tutorial
Materials
- Large sheet of heavyweight, cream-colored textured paper (cold press watercolor or mixed media paper)
- Fine liner pens (sizes 0.1, 0.3, and 0.5) in sepia or dark brown
- Watercolor paints (Olive Green, Sap Green, Burnt Umber, Yellow Ochre) or watercolor pencils
- Soft round paintbrush (size 4 or 6)
- Ruler
- Pencil and gathered eraser
- Compass or circular stencil
- Tracing paper (optional)
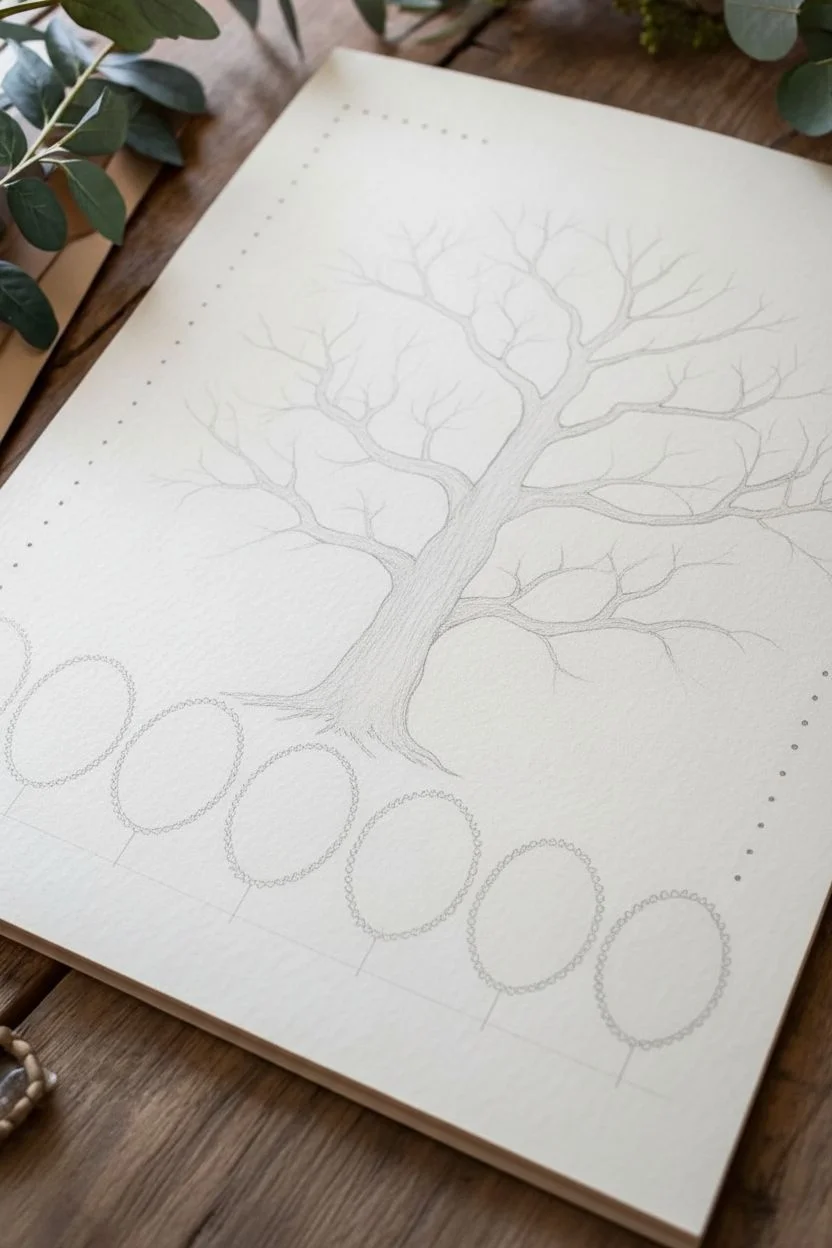
Step 1: Drafting the Structure
-
Establish the layout:
Begin by lightly measuring a border around your paper using a pencil and ruler. Leave about two inches of margin. Mark the center point of the paper to guide your trunk placement. -
Sketch the oval hierarchy:
At the bottom of the page, use your compass or stencil to draw a row of distinct ovals. These will be the root medallions for the oldest generation or primary names. Space them evenly across the width of the page. -
Outline the trunk:
Sketch a sturdy, wide trunk rising from just above the center of your oval row. Let the roots flair out slightly, hinting at a connection to the medallions without touching them directly. I like to keep the trunk lines slightly wavy to suggest organic bark texture. -
Develop the canopy:
Extend the main trunk into two or three large primary branches, then split those into smaller secondary branches. Fan them out to fill the upper two-thirds of the page in a balanced, rounded crown shape.
Step 2: Inking the Details
-
Ink the bark texture:
Switch to your 0.3 sepia fine liner. Outline the trunk and branches with broken, distinct lines. Fill the interior of the trunk with vertical, flowing lines that contour the shape of the wood, mimicking deep bark grooves. -
Draw the foliage:
For the leaves, don’t draw individual leaves one by one initially. Instead, draw clusters of leaf shapes at the ends of your smallest twigs using a 0.1 pen. Use small, looping strokes to create the impression of dense oak foliage. -
Detail the medallions:
Go over your pencil ovals with the 0.3 pen. Instead of a solid line, draw tiny, repetitive leaf or chain patterns to create a decorative garland border for each name frame. -
Add connecting stems:
Draw thin, straight vertical lines dropping down from the bottom of each medallion. Add a tiny cluster of leaves at the base of each oval where it meets stem line. -
Create the border:
Along your pencil margin lines, add a decorative element. Small dots or dashed lines work perfectly to frame the composition without distracting from the central tree. -
Add the banner:
In the upper right corner, sketch a flowing ribbon banner. Ink the outline and add the text ‘In Lovre’ or ‘Family Tree’ using a classic serif font.
Ancient Paper Effect
Before drawing, lightly sponge the edges of your heavy paper with strong brewed tea or diluted brown ink. This creates an aged, parchment-like vignette instantly.
Step 3: Adding Color and Names
-
Erase guidelines:
Once the ink is completely dry, gently erase all pencil marks. Be careful around the textured areas of the bark to avoid smudging the ink. -
Wash the trunk:
Mix a watery wash of Burnt Umber. Paint the trunk and branches, letting the color pool slightly in the shadowed areas to create dimension. -
Tint the leaves:
Use a mix of Olive Green and a touch of Yellow Ochre for the leaves. Dab the color on loosely; you don’t need to stay perfectly inside the lines. This loose style adds to the vintage charm. -
Color the medallions:
Apply a very faint wash of tea-stain color or diluted Yellow Ochre inside the oval frames to make them stand out against the cream paper background. -
Green accents:
Add a touch of the green mix to the small leaf clusters at the base of the medallions and the decorative garland borders. -
Lettering:
Using your finest 0.1 pen, carefully write the names of family members inside the ovals. Using a cursive or calligraphy style enhances the heirloom feel. -
Final connections:
If needed, write corresponding names or dates delicately along the branches of the tree itself, following the curve of the wood.
Variation: Seasonal Canopy
Instead of green, paint the leaves in shades of russet, orange, and gold for an autumnal theme, or add tiny pink blossoms among the green for a spring birth announcement.
Hang this beautiful record of your lineage in a simple wooden frame to celebrate your family’s history.


Simple School-Project Tree With Big Branch Labels
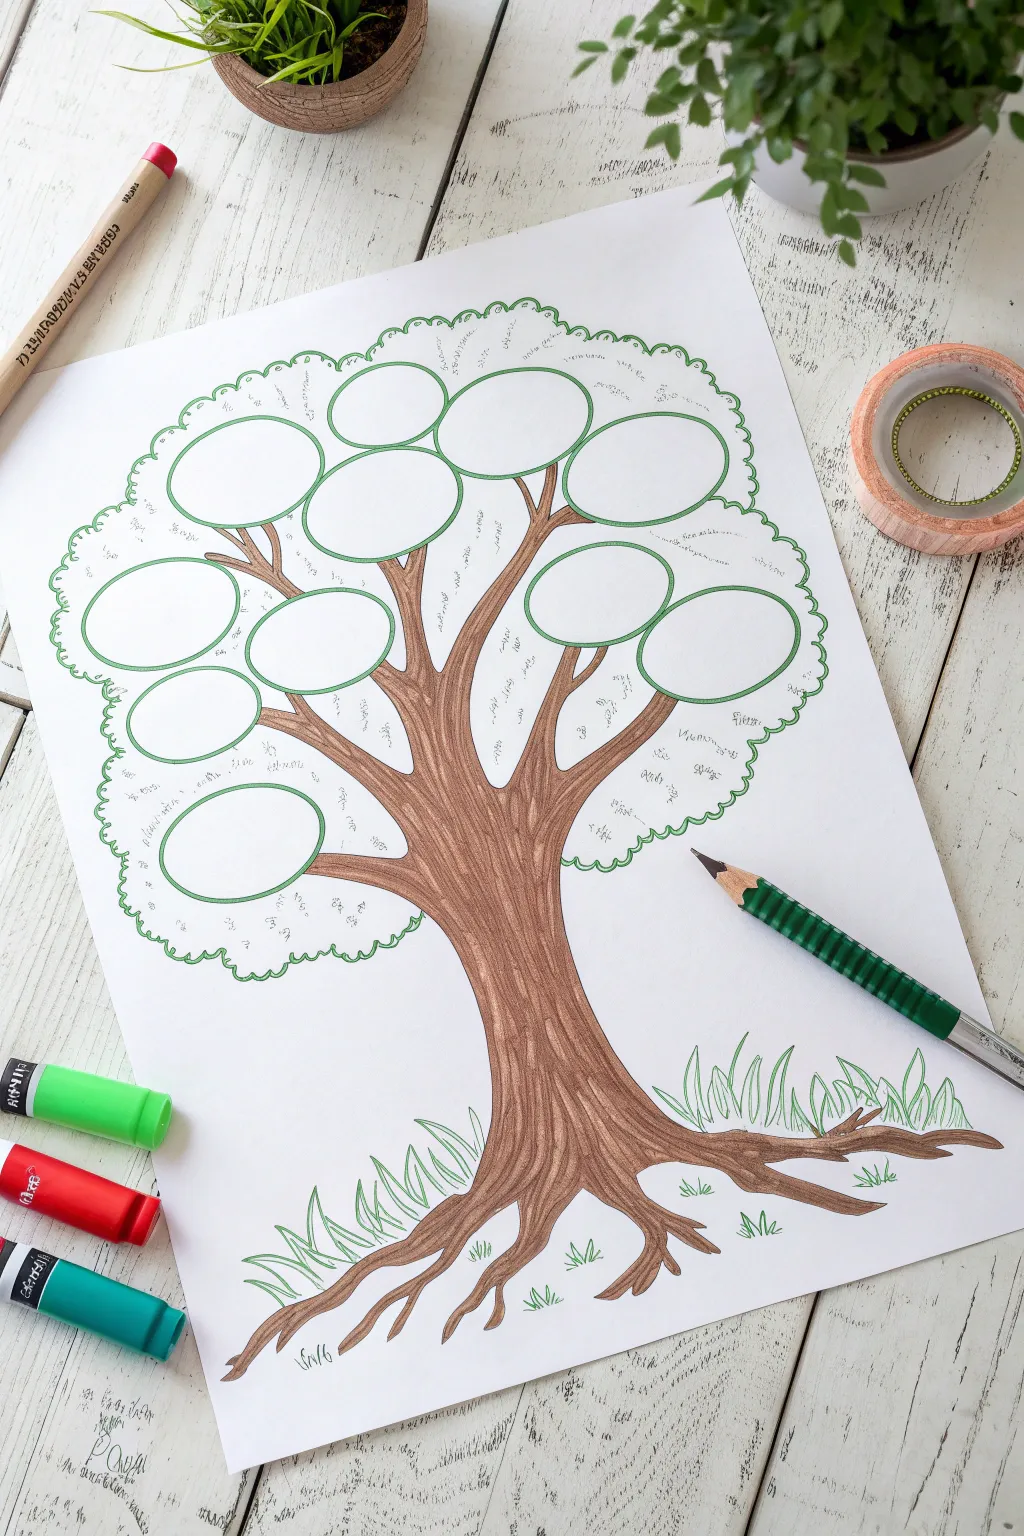
This charming family tree project features a sturdy, hand-drawn trunk and a canopy filled with neat oval spaces perfect for names or photos. It’s a classic school-project style that balances artistic flair with organized layout, making it easy to read and beautiful to display.
Detailed Instructions
Materials
- White drawing paper or cardstock (A4 or Letter size)
- Pencil for sketching
- Brown marker or colored pencil (medium shade)
- Green fine-tip marker or pen
- Eraser
- Oval stencil (optional, but helpful for consistency)
- Green markers (various shades for grass and details)
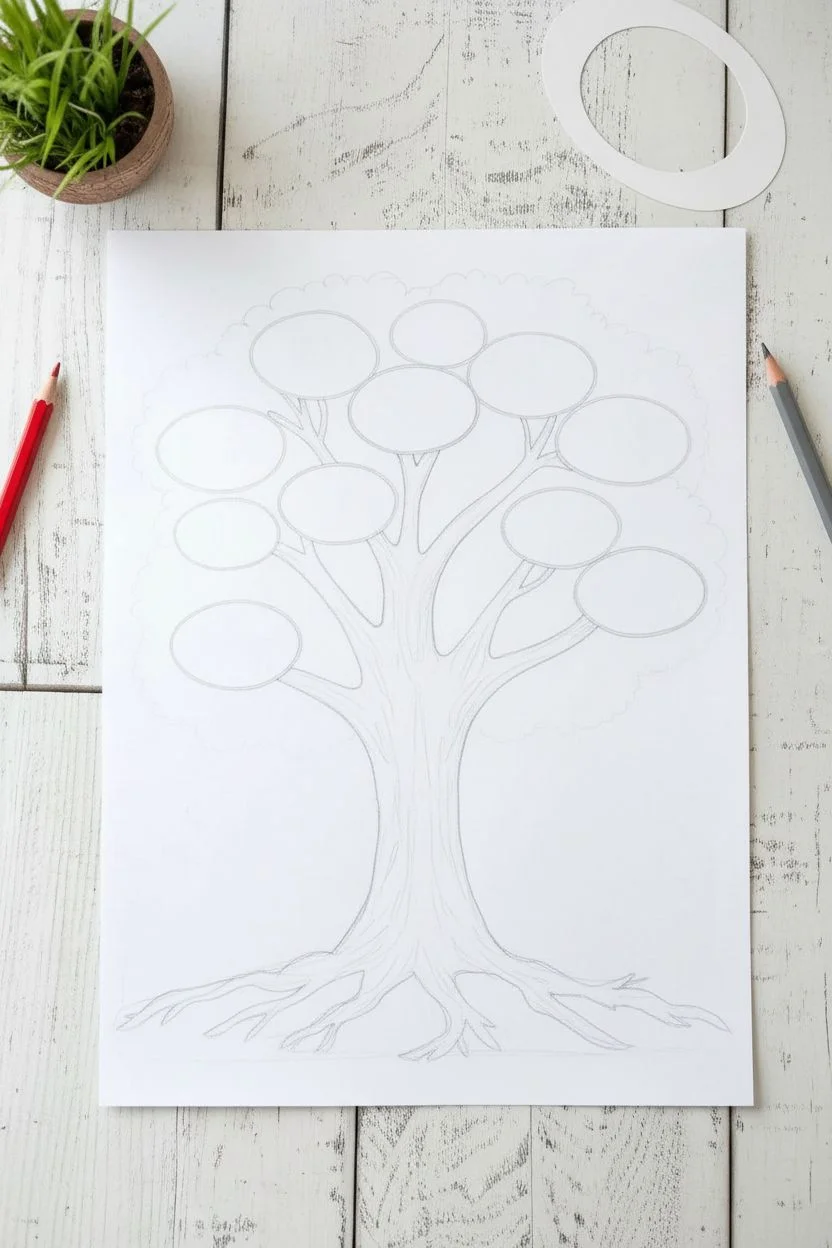
Step 1: Drafting the Structure
-
Position the paper:
Place your sheet of paper vertically on your workspace to give your tree plenty of height to grow. -
Sketch the trunk base:
Using a pencil, lightly sketch the base of the trunk near the bottom center of the page. Widen the lines as they reach the bottom to create a sturdy root system. -
Extend the branches:
Draw two main branches extending upwards from the trunk in a ‘Y’ shape, then add smaller sub-branches splitting off from these. These will support your name bubbles. -
Map out the roots:
At the very bottom, draw several wavy root lines spreading outward across the page to ground your tree visually. -
Draw the name ovals:
Lightly sketch oval shapes scattered throughout the upper area where the leaves would be. Aim for about 10-12 ovals, varying their rotation slightly to follow the direction of the branches they sit near.
Clean Lines Tip
Cut an oval shape out of thick cardstock to use as a tracing template. This ensures every family member’s ‘leaf’ is exactly the same size.
Step 2: Inking and Coloring the Trunk
-
Outline the wood:
Take your brown marker and carefully trace over your pencil lines for the trunk, branches, and roots. -
Add wood grain texture:
Fill the inside of the trunk with long, flowing vertical lines that follow the curve of the wood. I like to let these lines weave around knots and split where branches separate to create a natural bark texture. -
Deepen the color:
Go over areas where branches meet or under the roots a second time with the brown marker to add shadow and depth to the wood. -
Create the canopy border:
Switch to a green fine-tip marker. Draw a scalloped, cloudy line that encircles all your oval shapes, creating the outer shape of the tree’s leafy top.
Level Up: Seasonal Twist
Instead of green outlines for the ovals, use red, orange, and yellow for an autumn theme, or pink for a blossom-filled spring tree.
Step 3: Adding Greenery and Details
-
Outline the ovals:
Using the same green fine-tip marker, trace over your pencil ovals. Keep your hand steady to ensure smooth, clean curves. -
Add leafy texture:
Inside the canopy area but outside the ovals, draw tiny, scattered squiggles or ‘u’ shapes with a very fine green pen to suggest texture without cluttering the design. -
Draw grass tufts:
At the base of the tree, between the roots, sketch simple, spiky tufts of grass using a bright green marker. -
Refine the grass:
Add a few smaller, singular blades of grass slightly further away from the trunk to fade the scene into the white paper naturally. -
Erase guidelines:
Once all ink is completely dry, gently erase any remaining visible pencil marks from your initial sketch to leave a crisp, professional finish. -
Final check:
Look over your drawing for any gaps in the wood grain or breaks in the outline and touch them up as needed.
Your tree is now ready to be filled in with the names of your loved ones to complete your family history


Circle Family Tree Rings (Generations as Circles)
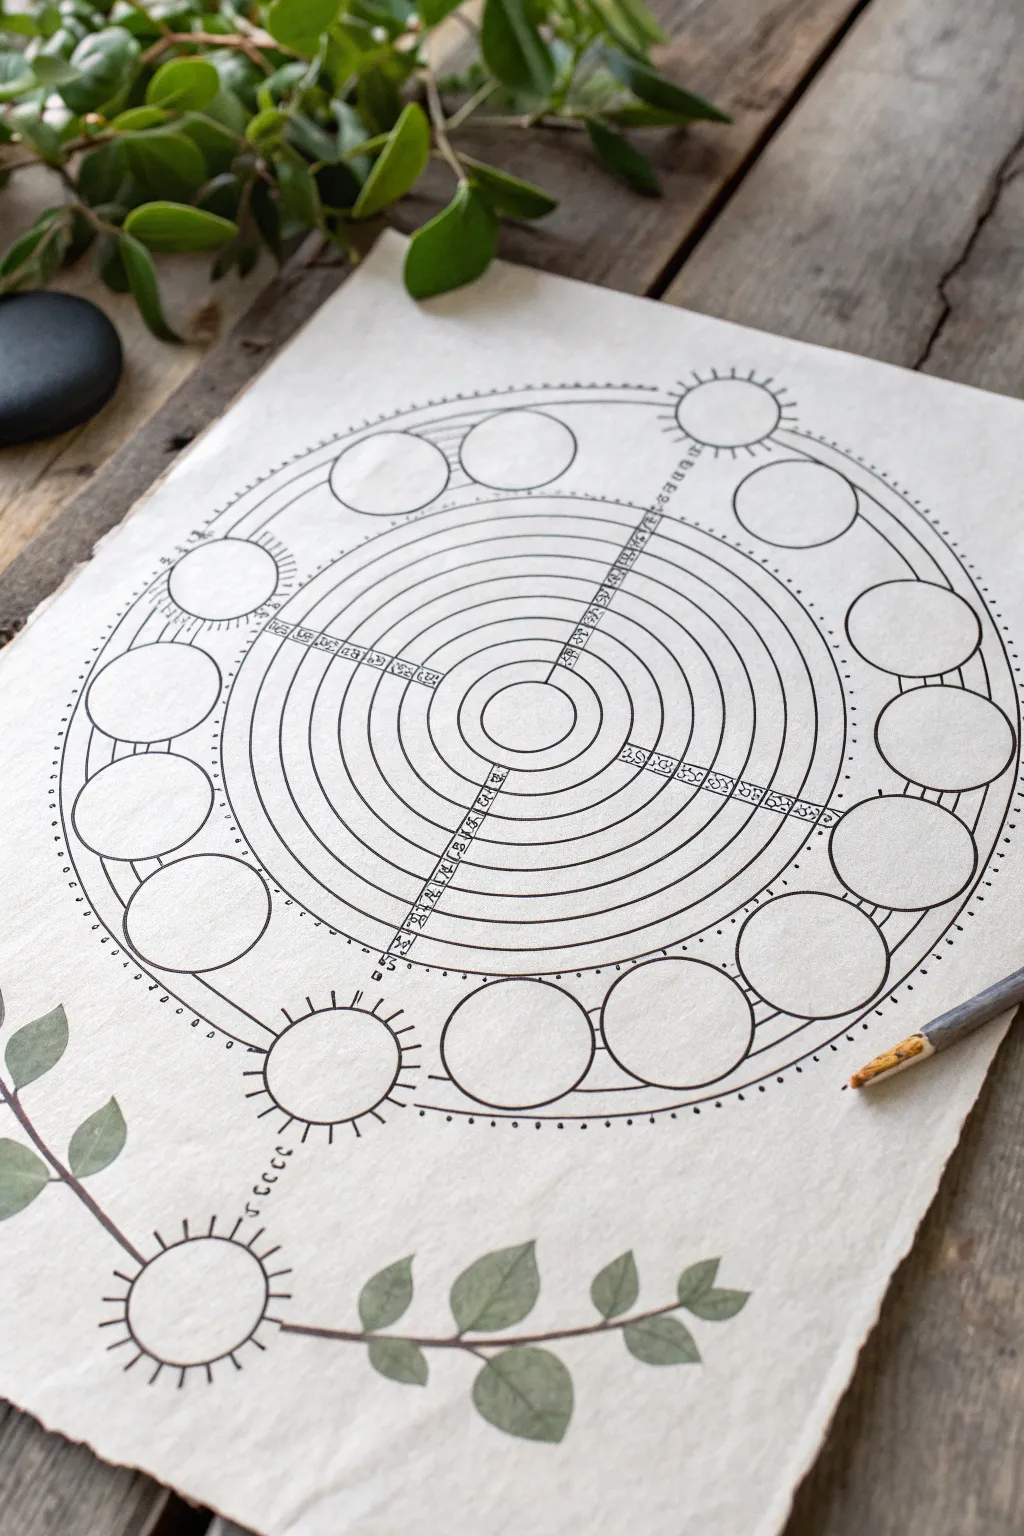
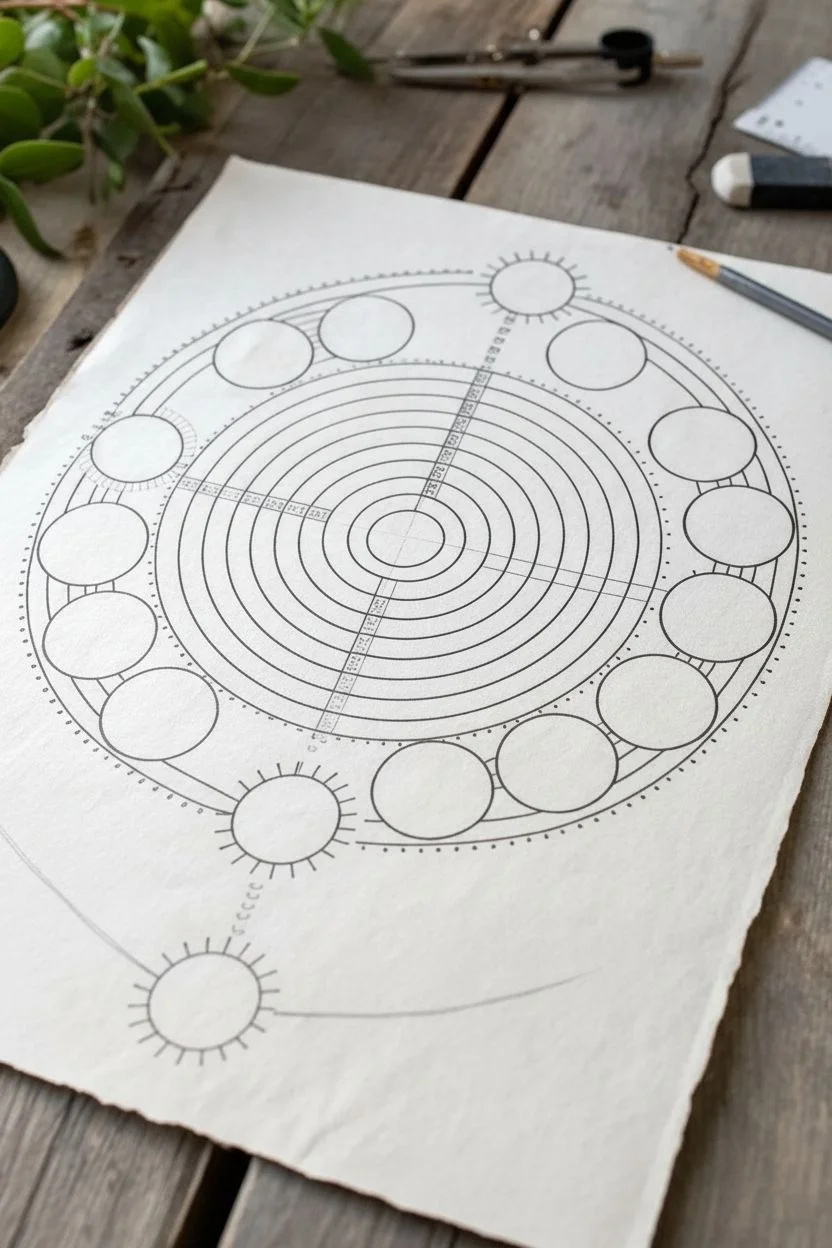
This elegant family tree moves away from traditional branches, organizing lineage in concentric circles that radiate outward like ripples in water. The design features precise geometric rings for generations and satellite circles for individual family members, all drawn on beautiful, textured paper with botanical accents.
Step-by-Step Tutorial
Materials
- High-quality textured paper (approx. 11×14 inches)
- Compass with an extension arm
- Fine-point archival ink pen (0.3mm and 0.5mm black)
- Pencil (HB or H)
- Eraser
- Ruler
- Protractor (optional but helpful)
- Watercolor paints (muted greens)
- Small round paintbrush (size 2-4)
Step 1: Drafting the Framework
-
Find the center:
Begin by lightly measuring and marking the exact center of your textured paper with a pencil. This anchor point is crucial for the symmetry of the entire piece. -
Draw the central generation:
Using your compass, draw a small central circle about 1 inch in diameter. This represents the starting individual or couple. -
Create the concentric rings:
Expand your compass radius by roughly 0.5 inches at a time to create a series of extensive concentric rings. Draw about 8-10 rings initially; the inner ones will hold text, while the outer ones define the structure. -
Divide the circle:
Lightly sketch a cross through the center point to divide the circles into four equal quadrants. For more complex families, you can further subdivide these sections using a protractor for even spacing. -
Draft the satellite circles:
Around the outermost large ring, use a template or your compass to sketch evenly spaced circles (roughly 1.5 inches each). These ‘orbiting’ circles will represent the most recent generation or children.
Step 2: Inking the Structure
-
Ink the main rings:
Switch to your 0.5mm archival pen. Carefully trace over your pencil lines for the main concentric circles. I find that rotating the paper rather than my hand helps keep the curves smooth. -
Add separation lines:
Ink the radial lines that divide the rings into sections. Notice in the example how these lines interrupt the concentric circles to create ‘blocks’ for names. -
Detail the satellite circles:
Ink the outer circles. Leave some of them disconnected from the main ring structure, while others can be connected by short straight lines as seen in the reference. -
Add decorative ‘sun’ motifs:
Select a few specific circles (like the cardinal points) to turn into sun-like motifs. Draw small, short tick marks radiating outward from the circle’s edge. -
Draw the connecting path:
Create a visual ‘stem’ leading away from the bottom of the main circle diagram. This line connects to a smaller independent circle at the bottom left, representing a separate branch or a specific focal ancestor.
Keep It Steady
To prevent smearing ink on the textured paper, place a scrap piece of clean paper under your drawing hand as you work across the design.
Step 3: Adding Text and Ornamentation
-
Create text guidelines:
Where the lines divide the rings into segments, draw a very intricate ladder-like pattern or small boxes along the dividing spokes. This decorative element adds a technical, cartographic feel. -
Add dot work:
Using your 0.3mm pen, add extremely fine stippling or dots along specific curved lines or within the decorative ladder sections to add texture and depth. -
Draft the botanical elements:
At the bottom of the page, sketch two simple leafy branches extending from the bottom-most circle. Keep the leaves simple and oval-shaped. -
Erase pencil marks:
Once the ink is completely dry—wait at least 15 minutes to be safe—gently erase all underlying pencil structure lines. -
Paint the leaves:
Mix a watery, muted green watercolor. Paint the leaves loosely; you want them to look soft and organic to contrast with the rigid geometric lines. -
Final touches:
If desired, add very subtle washes of color inside the satellite circles, or leave them stark white for high contrast.
antique Effect
Use a tea-staining technique on your paper before you start drawing to give the background an aged, parchment-like appearance.
Now you have a structured yet organic piece of art that maps your history in a beautiful radial pattern


Branch-and-Frame Portrait Tree
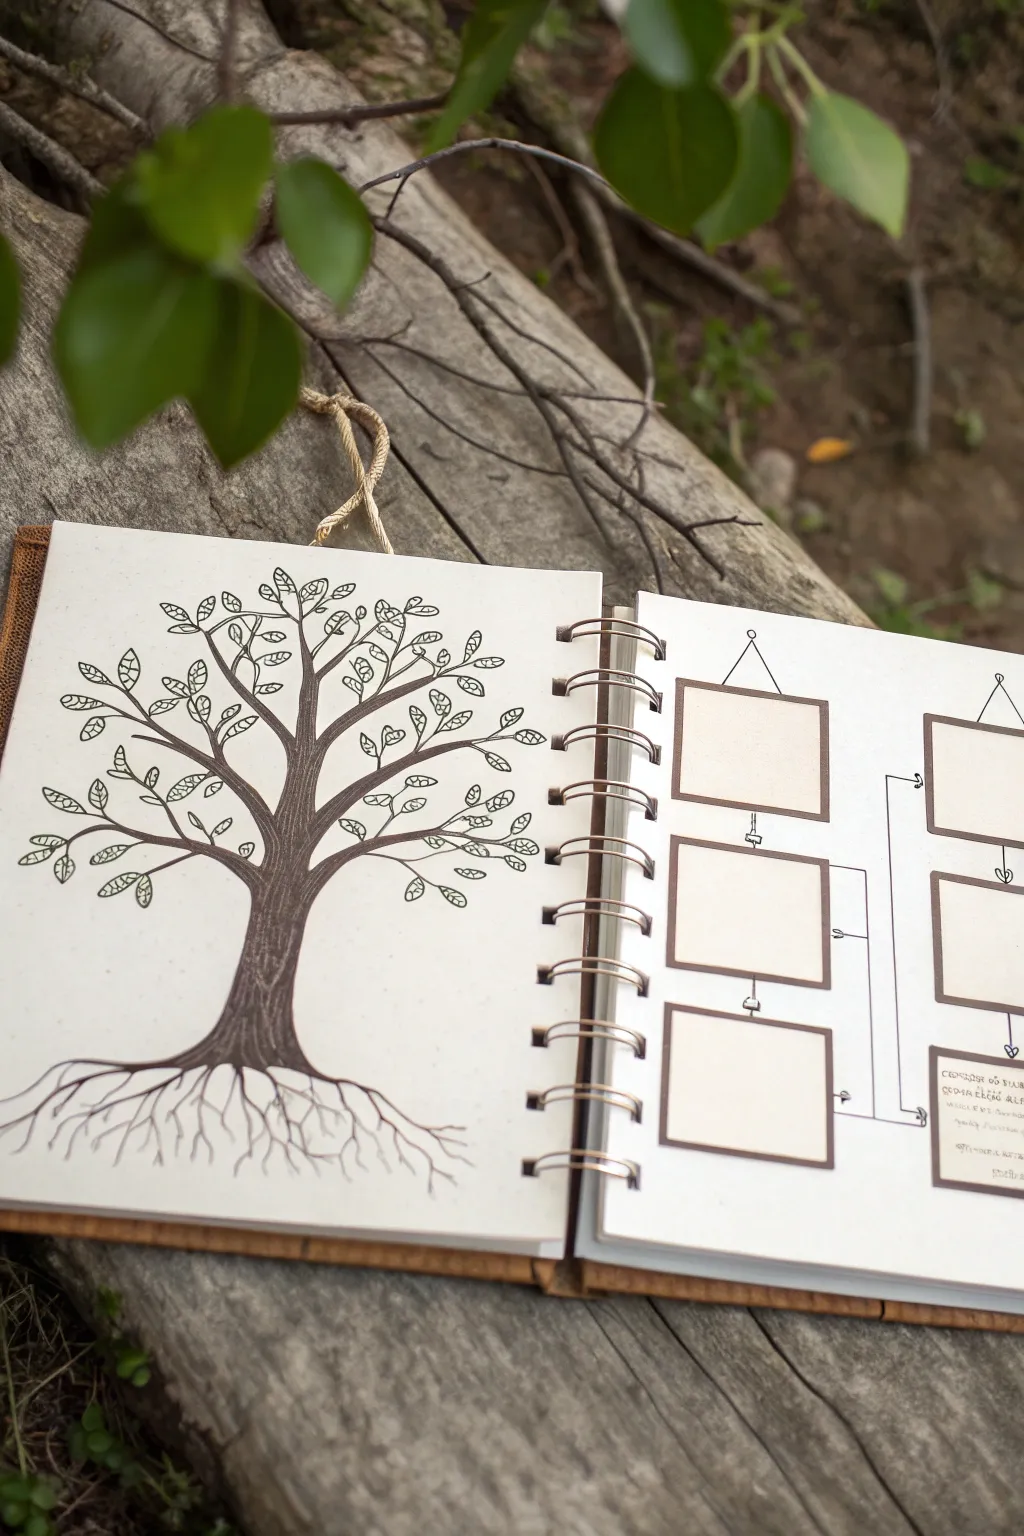
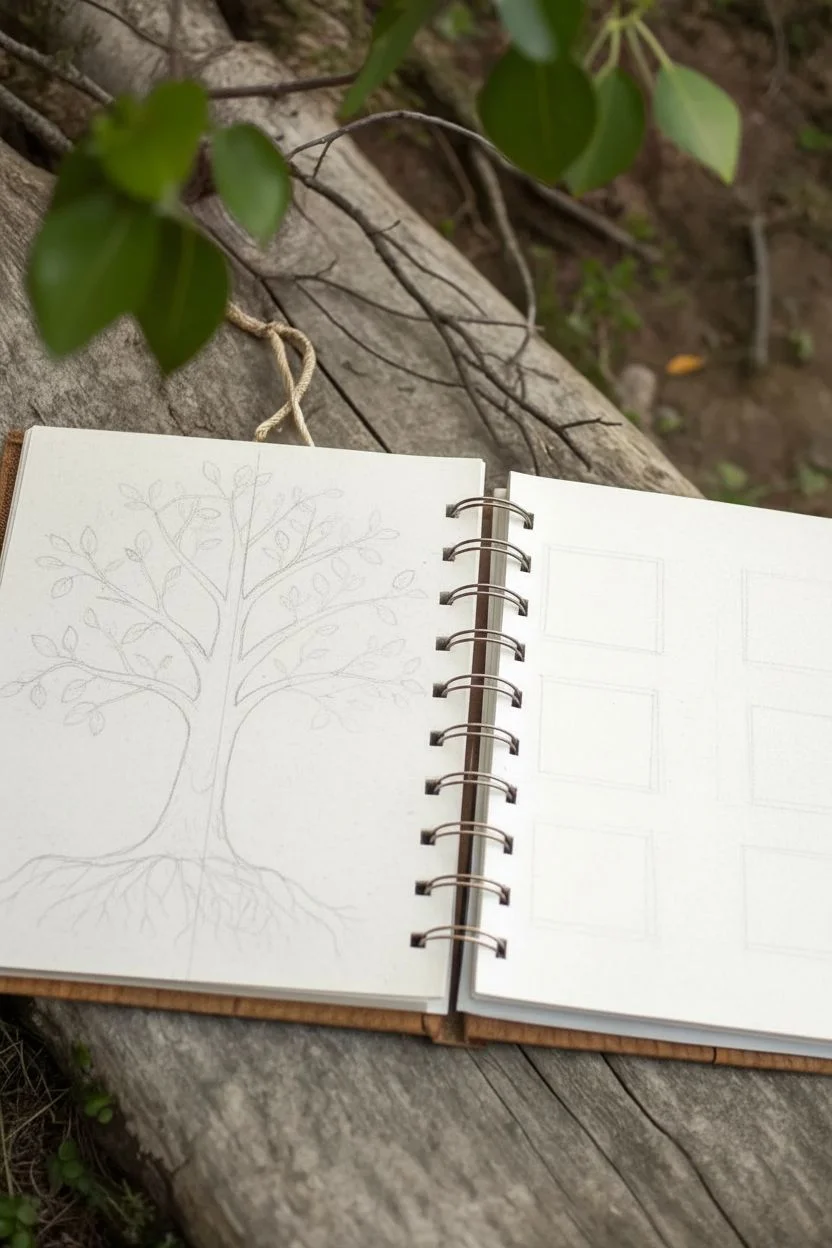
This classic family tree layout combines a detailed botanical illustration with geometric structure, creating a beautiful balance between organic lines and organized history. It spreads across two pages of a spiral sketchbook, dedicating the left side to the roots and canopy while reserving the right side for neatly connected portrait frames.
Detailed Instructions
Materials
- Spiral-bound sketchbook (heavyweight paper)
- Pencil (HB or 2B for sketching)
- Fine-liner pens (0.1, 0.3, and 0.5mm, black)
- Brown marker or colored pencil (for the trunk)
- Ruler
- Eraser
Step 1: Drafting the Tree Structure
-
Mark the center:
Begin on the left page of your sketchbook. Lightly sketch a vertical centerline to guide the tree’s placement, ensuring the trunk sits squarely in the middle. -
Sketch the trunk outline:
Using your pencil, draw the main trunk. It should be relatively thick and sturdy, flaring out significantly at the bottom for the roots and splitting into major branches about halfway up the page. -
Add the root system:
Extend the base of the trunk into a network of roots. Draw several thick roots that taper into wiggly, fine lines reaching toward the bottom edge of the paper. -
Create the main branches:
From the top of the trunk, split the tree into three or four primary branches that reach upward and outward. Keep the lines natural and slightly curved rather than perfectly straight. -
Fill in secondary branches:
Add smaller offshoots to your main branches to create a full canopy. These should fan out evenly to fill the upper two-thirds of the page.
Uneven Ink Lines?
If your straight lines wobble, don’t worry. Thicken the frame borders slightly to hide imperfections, giving the drawing a deliberate rustic, hand-drawn charm.
Step 2: Inking the Tree
-
Outline the trunk:
Switch to a 0.5mm pen to trace over your pencil lines for the trunk and main roots. Use long, confident strokes. -
Add bark texture:
With a finer point (0.1mm or 0.3mm), draw vertical, slightly wavy lines running up the trunk to simulate bark texture. These lines follow the contour of the tree. -
Color the trunk:
Take your brown marker or colored pencil and fill in the trunk and major branches. Apply slightly more pressure on the sides to create a shadowed, cylindrical effect. -
Draw the leaves:
Using the 0.3mm pen, add leaves to the ends of the smallest twigs. Draw simple oval shapes with a central vein line, clustering them in pairs or small groups for a stylized look. -
Detail the roots:
Go back to the root system with your finest pen. Extend the root tips with very delicate, squiggly lines that fade out as they go lower, giving the impression of grounding deep into the soil.
Step 3: Constructing the Frames
-
Plan the layout:
On the right page, lightly sketch the layout for your portrait boxes. You’ll want a column of three square frames on the left side of this page, and a column of two or three on the right. -
Draw the squares:
Use your ruler to draw precise squares. Vary the sizes slightly if desired, or keep them uniform for a clean look. Leave ample space between them for connecting lines. -
Ink the frames:
Go over your square sketches with a 0.5mm pen. To make them look like picture frames, add a second square just inside the first one and fill the gap with brown ink or marker. -
Add hanging details:
At the top center of each frame, draw a tiny loop or hook. Then, draw a triangle of ‘string’ extending upward to a nail point, making the frames appear to be hanging on a wall. -
Draw connector lines:
Using a ruler and a fine pen (0.1mm), draw the relationship lines. Use straight vertical and horizontal lines with arrowheads to show lineage connections between the frames. -
Erase guidelines:
Once the ink is completely dry, gently erase all pencil sketches from both pages to reveal the clean design. -
Add tiny details:
For a finishing touch, draw small decorative elements like tiny arrows or heart icons at the junction points of your connector lines.
Add Realism
Instead of leaving the frames blank, paste tiny photocopied sepia-toned photos of your ancestors inside each square for a mixed-media vintage look.
You now have a beautifully organized spread ready to be filled with family names and memories
BRUSH GUIDE
The Right Brush for Every Stroke
From clean lines to bold texture — master brush choice, stroke control, and essential techniques.
Explore the Full Guide
Root Banner Surname Tree (Roots as History)
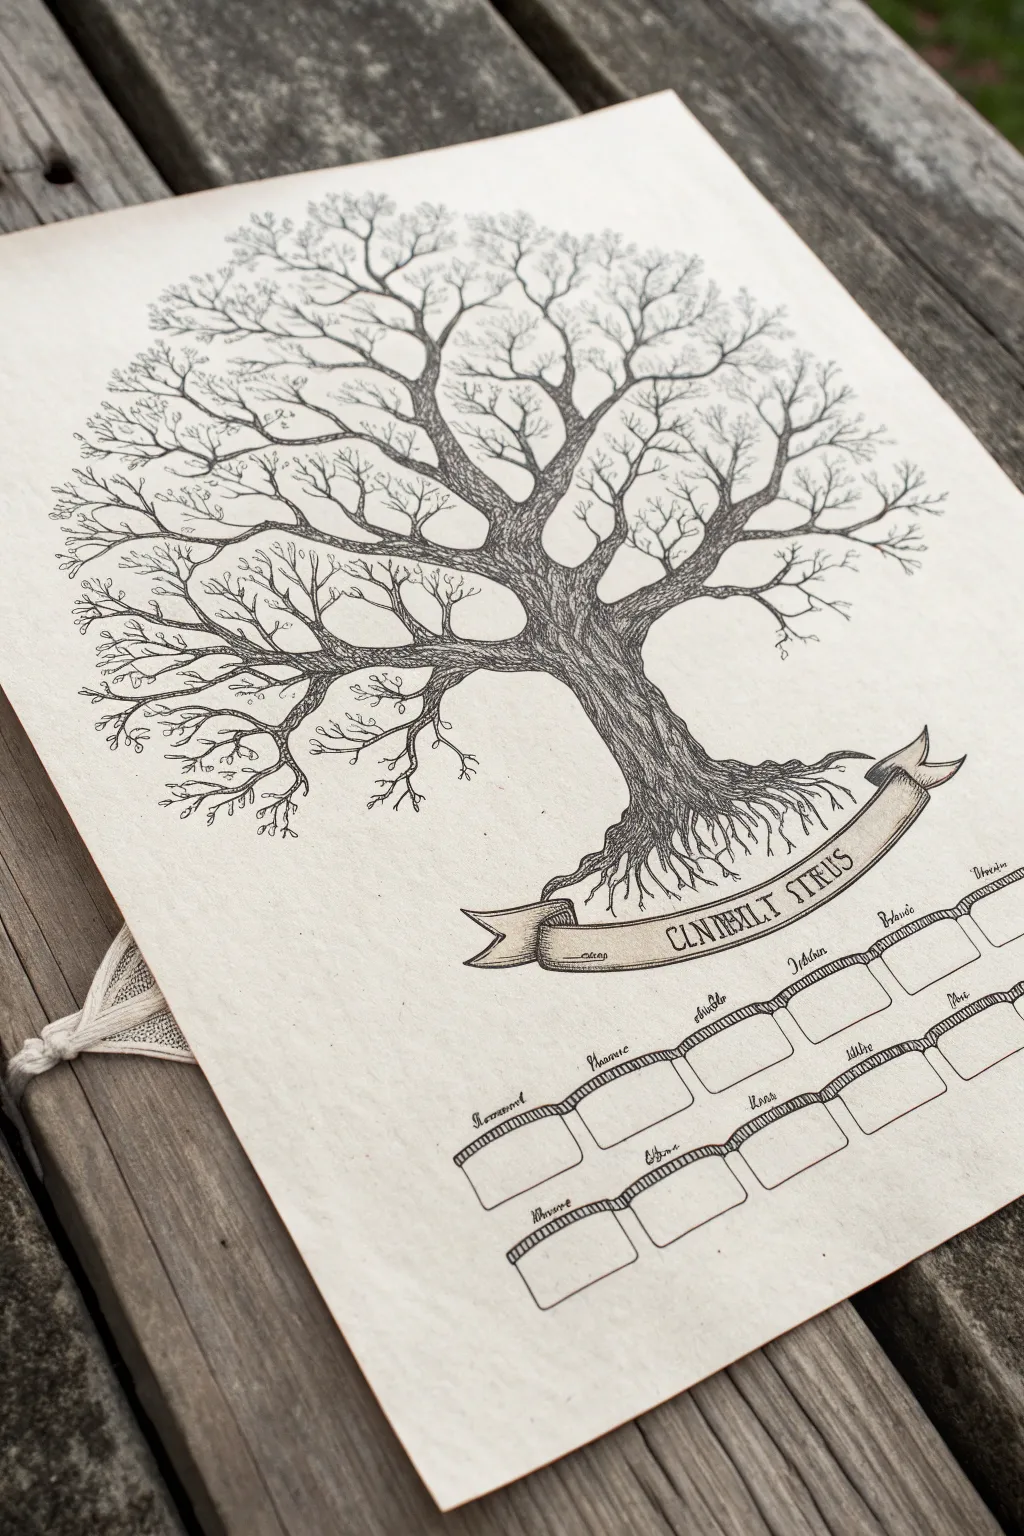
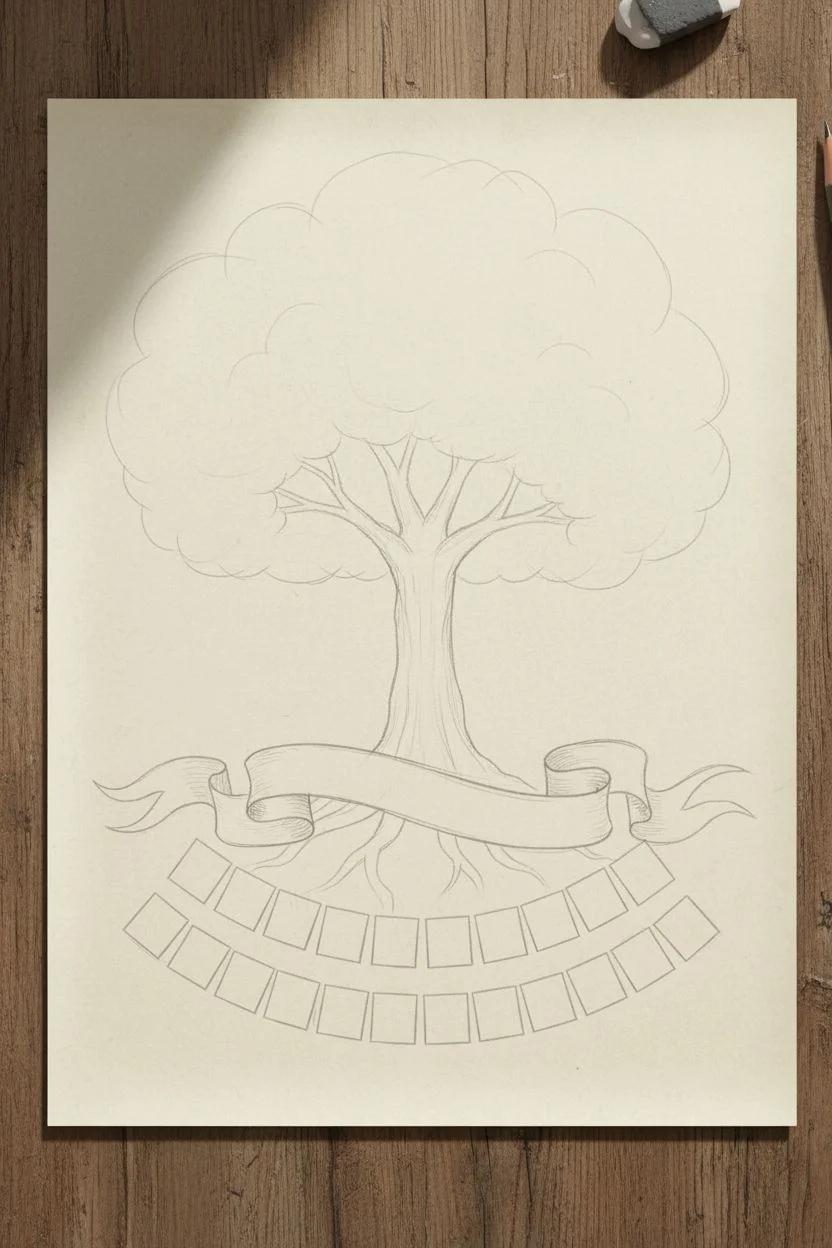
This elegant family tree design focuses on the metaphorical strength of roots, featuring a sturdy oak illustrated in fine black ink on textured paper. A scrolling banner entwined in the roots provides a perfect place for your surname, while structured boxes below await individual family names.
Step-by-Step
Materials
- High-quality parchment or cream-colored textured paper (A3 or 11×17 inch recommended)
- Pencil (HB or 2H for light drafting)
- Kneaded eraser
- Fine liner pens (sizes 0.05, 0.1, 0.3, and 0.5mm)
- Ruler
- French curve (optional, for the banner)
- Blending stump or tortillon (optional)
Step 1: Drafting the Skeleton
-
Establish the Trunk:
Begin by lightly sketching the central trunk in pencil. Position it slightly above the vertical center of your paper to leave room for the root system and the name boxes below. Keep the overall shape stout and strong. -
Map Out the Crown:
Draw faint, cloud-like outlines to define the overall canopy shape. This prevents your branches from running off the page later. Ensure the canopy is roughly circular but slightly wider than it is tall for a majestic feel. -
Sketch the Banner:
At the base of the trunk, sketch a flowing ribbon or banner. It should look as though the roots are growing over and around it. Draw the ends of the ribbon curling or folded for a three-dimensional effect. -
Draft the Name Grid:
Using your ruler, lightly pencil two or three rows of identical rectangular boxes below the banner. Curve the rows slightly to mirror the energy of the banner, or keep them straight for a formal look.
Step 2: Inking the Tree Structure
-
Outline the Trunk:
Switch to a 0.5mm pen to outline the main trunk. Use slightly shaky, organic lines rather than perfect straight ones to imitate rough bark texture. -
Draw the Main Branches:
Extend thick branches from the trunk, tapering them as they reach outward. Remember that branches split into ‘V’ shapes; avoid 90-degree angles for a natural appearance. -
Create the Root System:
Using a 0.3mm pen, draw the roots extending from the base. Let them weave over the top edge of your pencil-drafted banner, physically connecting the tree to the nameplate. -
Add Fine Twigs:
Switch to your finest 0.05mm or 0.1mm pen. Fill the canopy area with hundreds of tiny, delicate twigs. These should be very wavy and intricate, creating a dense network at the edges of the tree without drawing individual leaves.
Uneven Ink Flow?
If your fine liner skips on textured paper, don’t press harder. Instead, slow your hand speed down significantly. This allows the ink to soak into the paper’s ‘tooth’ for a solid black line.
Step 3: Texturing and Details
-
Bark Texture:
With a 0.1mm pen, add vertical contour lines running up the trunk. Group these lines in clusters, curving them around knots or twists in the wood to show form and roundness. -
Shading the Underside:
Add cross-hatching or dense vertical lines on the underside of the main branches and the right side of the trunk. This establishes a consistent light source coming from the upper left. -
Refining the Banner:
Outline the banner with a 0.3mm pen. Add small, parallel lines (hatching) at the folds of the ribbon where shadows would naturally fall to give it depth. -
Inking the Name Boxes:
Carefully ink the name boxes using a 0.3mm pen and a ruler. Embellish the top border of each box with a thicker line or a double line to make them look like architectural stone tablets. -
Adding Text:
If you are ready to commit, letter the family surname into the root banner using a serif font. Use pencil guidelines first to ensure the text is centered and follows the curve of the ribbon.
Antiqued Effect
Before drawing, tea-stain your paper! Brew strong black tea, brush it over the paper, and let it dry flat. This creates an authentic aged parchment look perfect for genealogy charts.
Step 4: Finishing Touches
-
Erase Guidelines:
Wait at least 15 minutes to ensure the ink is completely dry. I usually test a small corner first. Then, gently erase all pencil marks with your kneaded eraser to reveal the clean, high-contrast drawing. -
Final Contrast:
Step back and assess your drawing. Use the 0.5mm pen to darken the deepest crevices in the roots and the underside of the canopy to add a final pop of contrast.
Your finished chart is now a beautiful, archival-quality piece ready to be filled with names and framed for posterity
Apple Tree With Names Inside Fruit
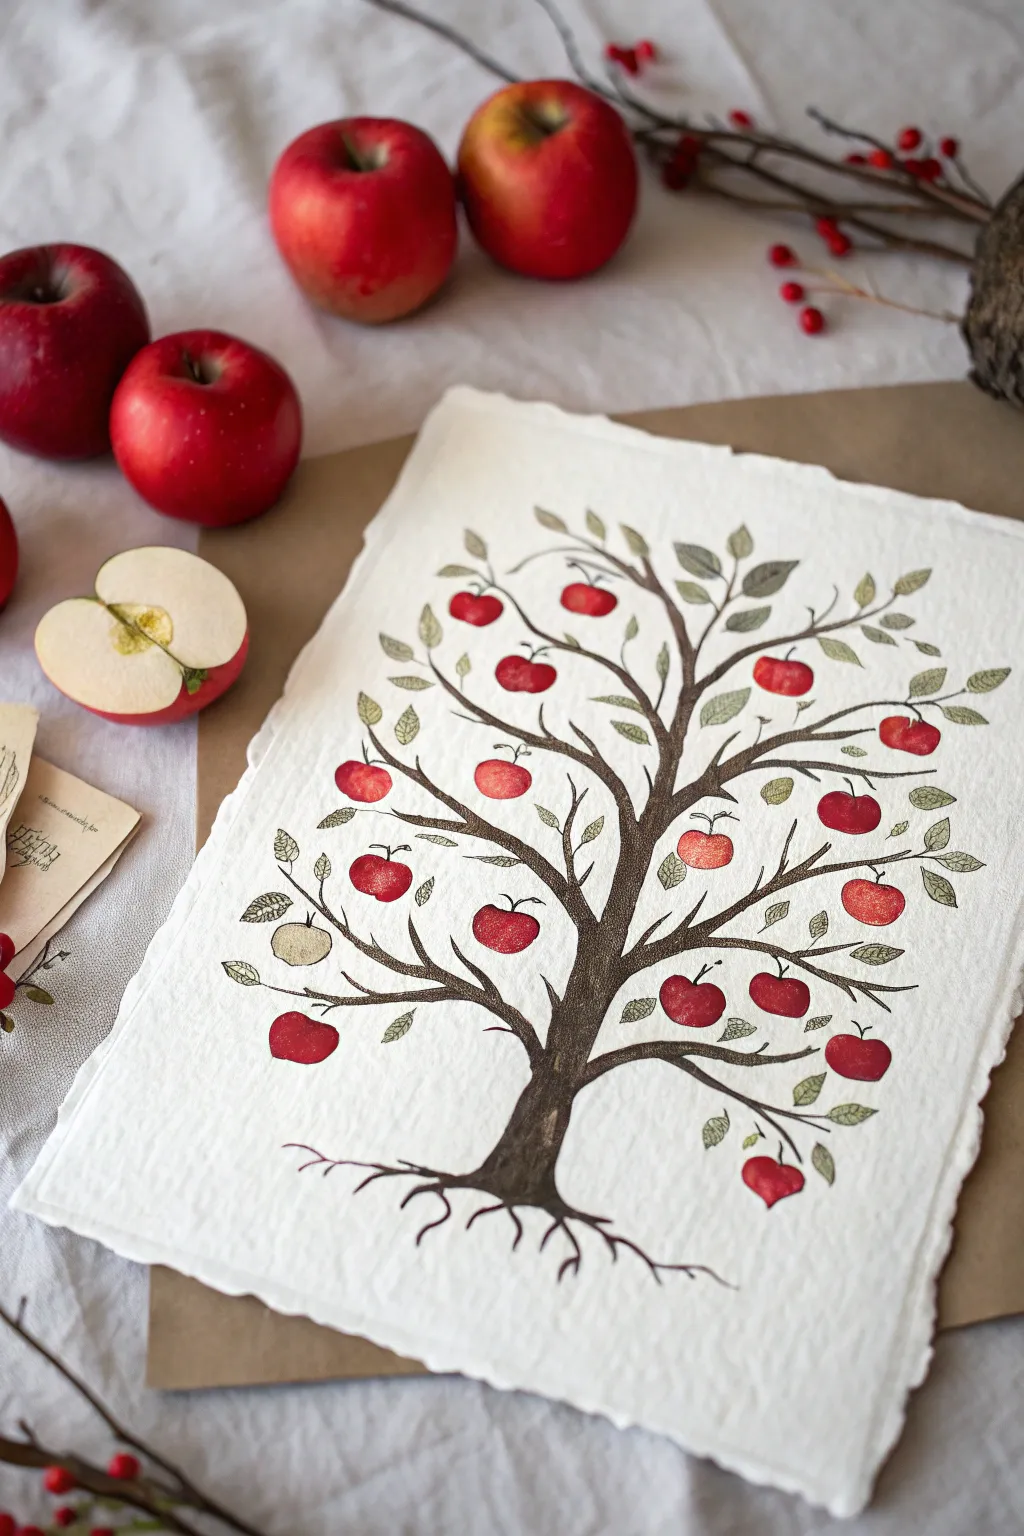
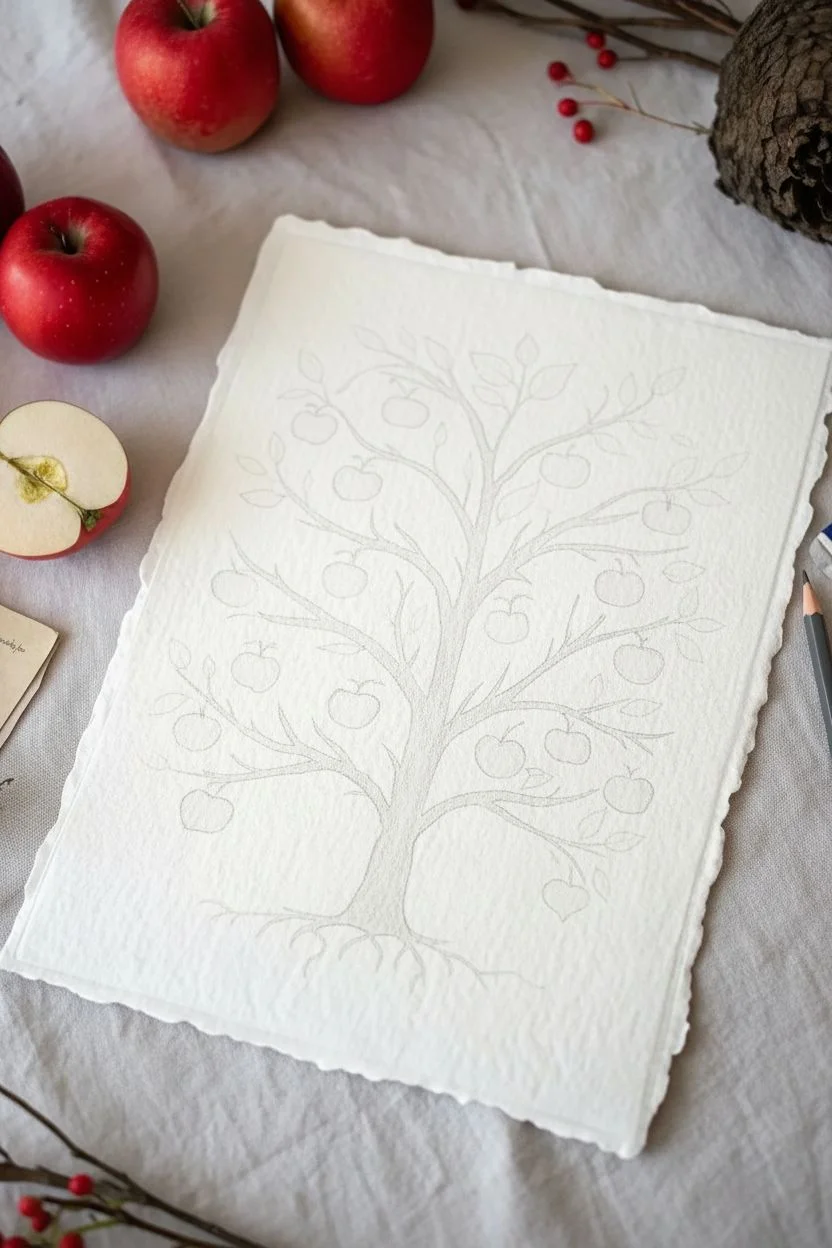
This charming family tree design features a sturdy, twisting trunk and vibrant red apples scattered among delicate leaves, all created on beautiful deckle-edge paper. The look is organic and folk-art inspired, perfect for adding family names directly onto the fruit for a personalized keepsake.
Detailed Instructions
Materials
- Heavyweight textured watercolor paper (deckle-edge preferred)
- Brown watercolor paint or ink (sepia or burnt umber)
- Red watercolor or gouache paint (crimson or cadmium red)
- Green watercolor or colored pencils (olive and sage tones)
- Fine liner pens (black or dark brown for details)
- Round watercolor brushes (size 2 and 4)
- Pencil for sketching
- Eraser
Step 1: Planning the Structure
-
Paper preparation:
Start with a high-quality sheet of textured paper. If your paper doesn’t have raw edges, you can gently tear the edges of a standard sheet against a ruler to create that rustic deckle look. -
Sketch the trunk:
Lightly sketch the central trunk using a pencil. Start wide at the bottom and let it taper upward, branching out into a Y-shape near the center of the page. -
Add roots:
Draw winding, exposed roots at the base. Let them spread out horizontally, mimicking the twisting nature of an old orchard tree. -
Map the branches:
Sketch secondary and tertiary branches reaching outward. Keep the lines slightly wavy rather than perfectly straight to capture an organic, wooden feel. -
Placement of apples:
Lightly draw circles or heart-shapes where you want your family members to be placed. Ensure they are evenly distributed across the canopy, leaving room for leaves in between.
Step 2: Painting the Tree
-
Base layer for the trunk:
Mix a watery wash of sepia or burnt umber watercolor. Paint the trunk and main branches, letting the natural texture of the paper show through the paint. -
Building dimension:
While the first layer is still slightly damp, drop darker brown pigment along the edges of the trunk and the underside of branches to create roundness and shadow. -
Detailing the bark:
Once the paint is dry, use a very fine brush or a thin brown pen to add vertical texture lines. These striations give the wood a realistic, aged appearance. -
Painting the roots:
Extend the dark brown color into the roots, tapering them off into fine points as they disappear into the imaginary soil.
Paint Bleeding?
If your red paint bleeds into the wet brown branches, wait for the tree structure to dry completely before starting the fruit. A hair dryer on low heat speeds this up.
Step 3: Fruit & Foliage
-
Painting the apples:
Fill in your sketched fruit shapes with a vibrant red watercolor or gouache. Gouache works well here for opacity if you plan to write names on top later. -
Creating highlights:
Lift a tiny bit of color from the top left of each apple with a clean, damp brush, or leave a small speck of white paper unpainted to simulate a shine. -
Adding the leaves:
Using olive or sage green, paint small, almond-shaped leaves attached to the thinner twigs. I like to vary the green intensity to make the canopy feel full and alive. -
Veining the leaves:
After the green paint dries completely, use a fine green pencil or pen to draw a central vein and delicate details on each leaf. -
Connecting the stems:
Use your finest brush or pen to draw tiny stems connecting every apple and leaf cluster back to the main branches, ensuring nothing is floating. -
Personalizing:
Once the red apples are bone dry, carefully write family names inside them using white ink or a metallic gel pen for high contrast.
Golden Apples
For a special touch, use gold watercolor paint for the grandparents’ or ancestors’ apples at the top or bottom of the tree to signify the family’s origins.
Now you have a beautiful, heirloom-quality piece that celebrates your family roots

PENCIL GUIDE
Understanding Pencil Grades from H to B
From first sketch to finished drawing — learn pencil grades, line control, and shading techniques.
Explore the Full Guide
Potted Plant Family Tree (Great for Small Families)
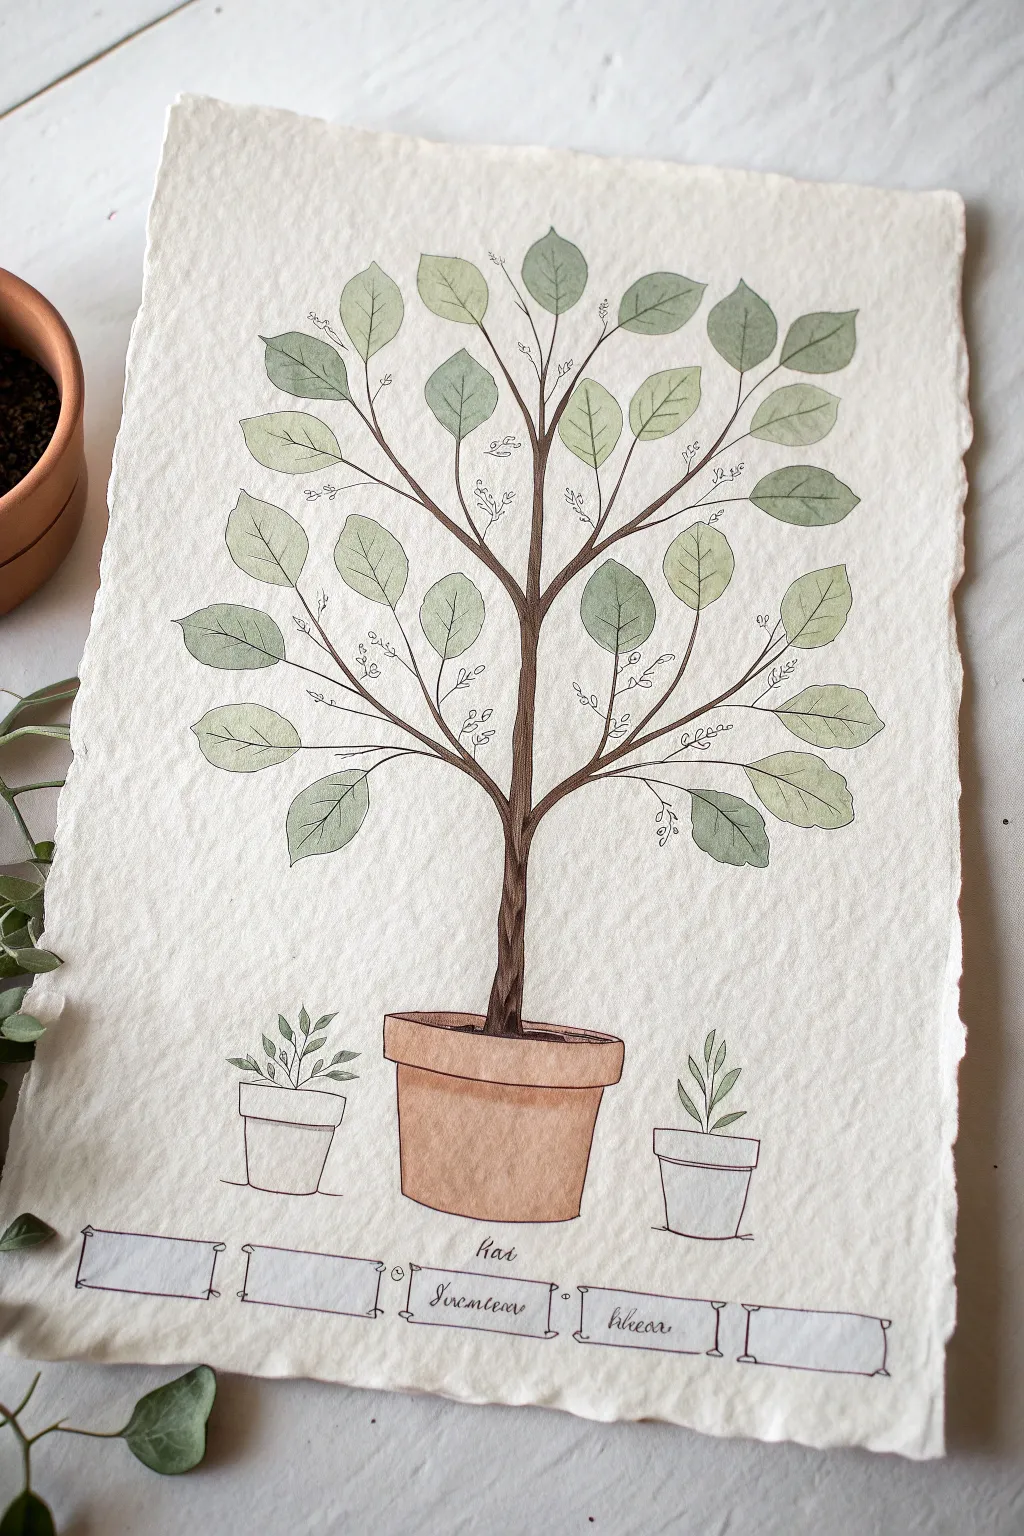
This elegant take on a family tree transforms the traditional diagram into a charming potted specimen, perfect for smaller families or couples. Using watercolor and ink on textured paper, you’ll create a piece that feels vintage, organic, and deeply personal.
Step-by-Step
Materials
- Heavyweight watercolor paper (300gsm, cold press, preferably with deckled edges)
- Watercolor paints (Sap Green, Olive Green, Burnt Sienna, Burnt Umber, Yellow Ochre)
- Round watercolor brushes (Size 2 and Size 6)
- Fine liner pens (Black, 0.1mm and 0.3mm)
- Pencil (HB) and eraser
- Ruler
- Jars for water and paper towels
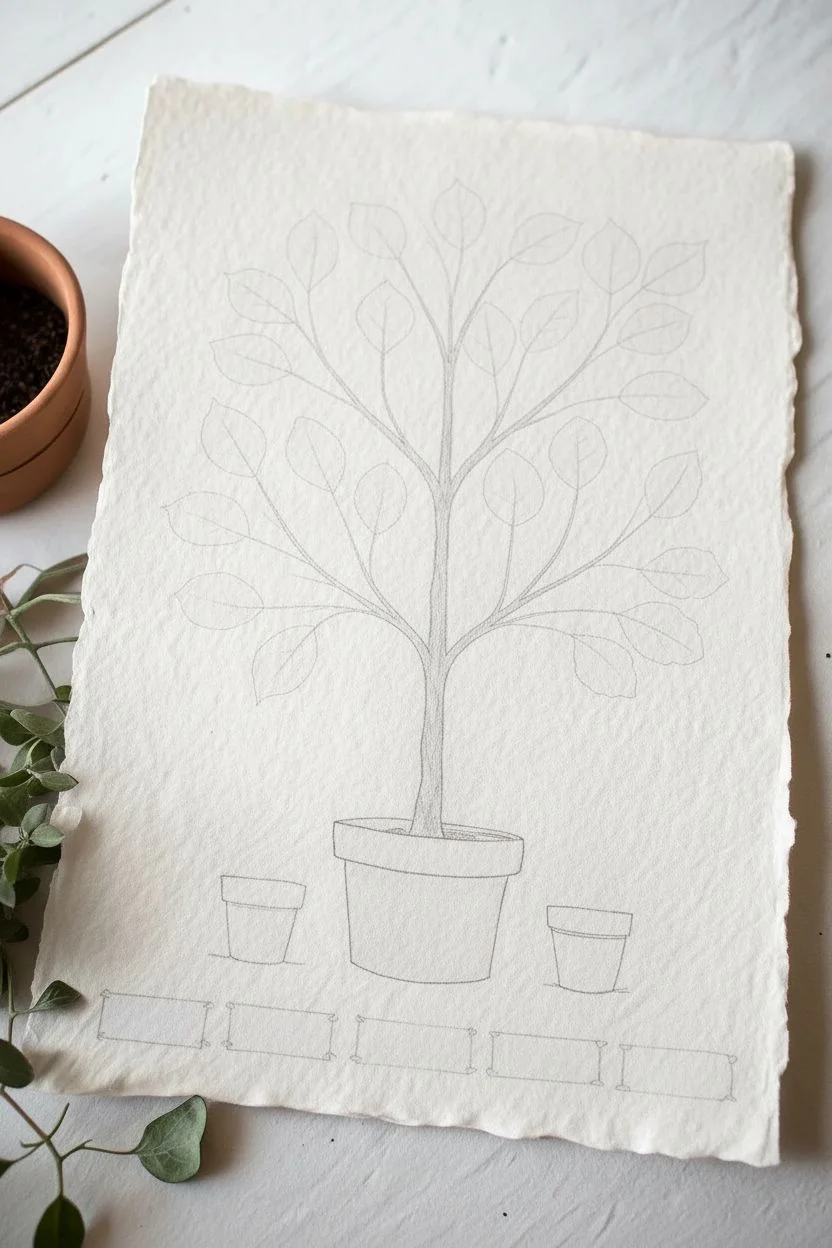
Step 1: Sketching the Structure
-
Prepare the paper:
If your paper doesn’t have a deckled edge, you can gently tear the edges against a ruler to create that rough, handmade look before you begin. -
Outline the main pot:
Lightly sketch the central terracotta pot near the bottom third of the page. Draw an oval for the rim, a slight lip under it, and a tapered base. -
Build the tree trunk:
From the center of the pot, sketch a trunk that rises straight up and then splits. Create a V-shape about a third of the way up the tree’s height for the first main branches. -
Branch outward:
Extend 3-4 main branches from that initial split, curving them gently outward. Keep the lines organic and slightly wavy rather than perfectly straight. -
Add leaf placement:
Sketch ovals for your leaves. Place them in opposing pairs or alternate them along the branches, ensuring you have enough distinct leaves to represent the family members you plan to include. -
Add side pots and banners:
Sketch two smaller pots on either side of the main one. Below the pots, draw a series of scroll-like banners or simple rectangular tags where names will eventually go.
Natural Variety Tip
Don’t clean your brush perfectly between every leaf. Carrying a tiny bit of the previous green into the next mix creates a harmonious, organic palette.
Step 2: Inking the Details
-
Outline the pots and trunk:
Trace your main pencil lines with the 0.3mm fine liner. Use a slightly broken or jittery line for the tree bark to give it texture. -
Detail the leaves:
Switch to the 0.1mm pen for the leaves. Outline each one and draw a central vein, but leave the smaller veins out for now to keep the look clean. -
Draw delicate fillers:
Add tiny, wispy sprigs or buds between the larger leaves using the 0.1mm pen. These little doodles add fullness without visual weight. -
Erase pencil marks:
Once the ink is completely dry—I usually wait at least 5 minutes—gently erase all underlying pencil sketches.
Step 3: Applying Watercolor
-
Paint the terracotta:
Mix Burnt Sienna with a touch of Yellow Ochre for the pots. Wash the color over the pots, adding a second layer to the left side while wet to create a shadow and dimension. -
Color the trunk:
Use a mix of Burnt Umber and a tiny bit of black. Paint the trunk with the size 2 brush, letting the color be darker at the base and lighter as the branches thin out. -
Paint the first leaf tone:
Mix a watery Sap Green. Paint about half the leaves with this light wash. Vary the saturation by adding more water for some leaves to create depth. -
Add contrasting greens:
Mix Olive Green with a touch of blue or grey for a cooler tone. Paint the remaining leaves. This variety makes the tree look more natural than using a single flat green. -
Wash the banners:
Dilute a tiny amount of purple or grey so it is barely visible. lightly wash the banner rectangles to separate them from the white background.
Rooted in History
Add significance by painting the main pot in a specific color or pattern that mimics an heirloom vase or piece of pottery from your actual family history.
Step 4: Final Touches
-
Add final textures:
Once the paint is bone dry, use your 0.1mm pen to add tiny stipling dots on the pots for texture and re-define any leaf edges that got lost. -
Inscribe names:
Using your neatest cursive or script lettering, write the family names in the banners at the bottom. You can also hide initials inside the leaves themselves for a subtle touch.
Now you have a beautifully rooted keepsake that celebrates your growing family
Vintage Botanical Family Tree on “Aged” Paper
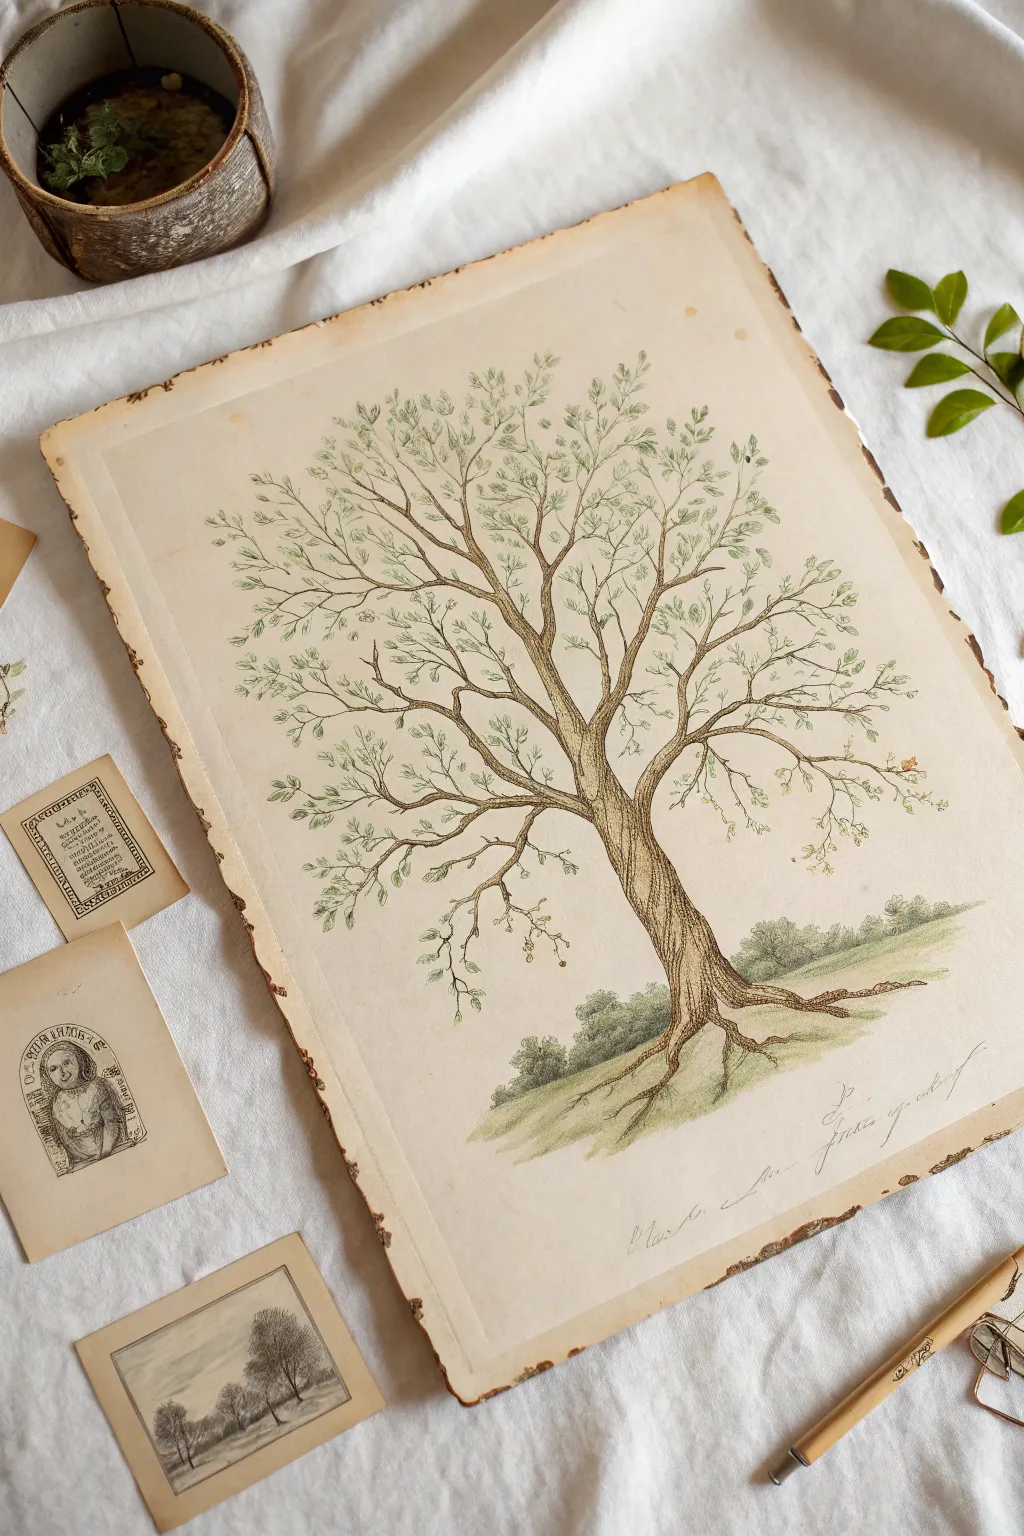
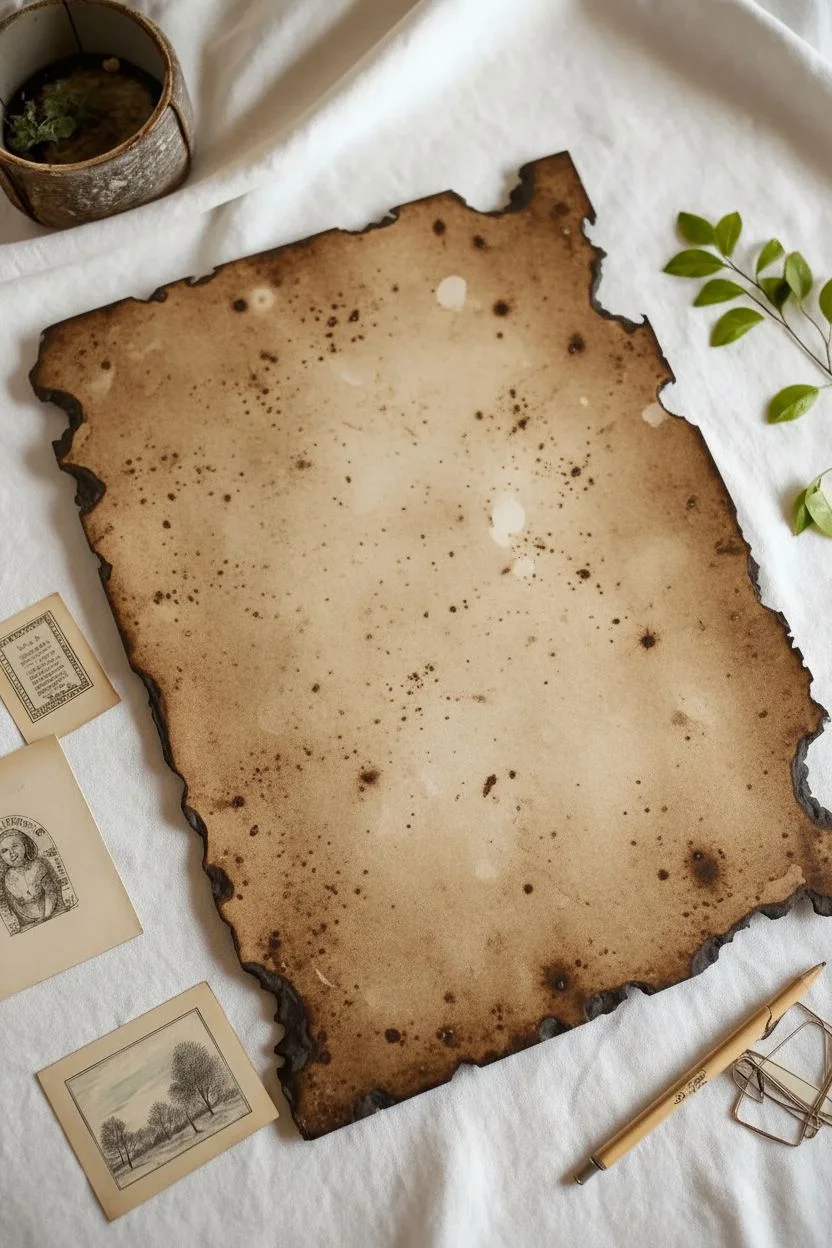
Transport your family history back in time with this elegant, botanical-style illustration on authentically aged paper. The delicate pen work and soft washes of color create the look of a treasured 19th-century scientific plate that has survived generations.
Step-by-Step
Materials
- Heavyweight watercolor paper (hot press for smoothness)
- Strong black tea or instant coffee crystals
- Baking sheet or large tray
- Fine-liner archival ink pens (0.1 and 0.3 sizes, brown or sepia)
- Watercolor paints (Sap Green, Burnt Umber, Yellow Ochre)
- Small round brushes (size 2 and 4)
- Lighter or candle (for edging)
- Pencil and kneaded eraser
- Spray bottle with water
Step 1: Aging the Paper
-
Prepare the brew:
Brew a very strong cup of black tea or dissolve about two tablespoons of instant coffee in a cup of hot water. Let it cool slightly so you don’t burn your fingers. -
Submerge and soak:
Place your watercolor paper into a baking sheet and pour the liquid over it. Ensure it is fully submerged and let it soak for 5–10 minutes depending on how dark you want the base tone. -
Create texture:
While wet, you can sprinkle a few instant coffee grains directly onto the paper for darker, speckled age spots. Let these burst and bleed for a moment. -
Dry flattened:
Carefully remove the paper and lay it on a flat, protected surface to dry completely. Placing a heavy book on it once it’s mostly dry will help flatten any buckling. -
Burn the edges:
Take your dry paper outside or over a sink. carefully light the very edge with a lighter. Let it burn inward just a fraction of an inch, then quickly blow it out to create that jagged, charred border.
Too Much Char?
If the burnt edges become too brittle or drop ash, brush the edges with a mixture of white glue and water to seal the carbon without changing the look.
Step 2: Drafting the Skeleton
-
Sketch the trunk:
Using a light pencil, sketch a central trunk that twists slightly as it rises. Aim for an organic feel, avoiding perfectly straight lines. -
Establish main branches:
Branch out from the top of the trunk into 4–5 main limbs. These will serve as the primary lineage lines for your family tree. -
Root the tree:
extend the base of the trunk into exposed roots that grip the ground. Sketch a small horizon line or grassy mound behind the roots to ground the composition. -
Add foliage clusters:
Lightly circle areas where leaves will go. In a botanical style, leaves are often airy and distinct rather than one big solid mass.
Make it a Record
Turn this into a functional chart by writing family names along the main twisting branches using a fine-point dip pen and black India ink.
Step 3: Inking and Coloring
-
Outline with sepia:
Switch to your 0.3 archival pen. Trace the trunk and branches using broken, scratchy lines to simulate rough bark texture. Don’t close every line perfectly. -
Detail the bark:
Use the finer 0.1 pen to add hatching and vertical striations along the trunk curves, emphasizing the twisted nature of the wood. -
Base wash for wood:
Mix a watery wash of Burnt Umber. Paint the trunk and branches, dropping in slightly more pigment on the shadowed side (usually the right or bottom) while the paper is damp. -
Leaf details:
Once the branches are dry, use the 0.1 pen to draw tiny, individual leaves attached to the finer twigs. Keep them loose and vary their direction. -
Green wash:
Dilute Sap Green with a touch of Yellow Ochre for an ‘old’ green look. Dapple this color over your pen-drawn leaves, intentionally painting outside the lines slightly for a painterly effect. -
Grounding the scene:
Paint a subtle wash of green and brown under the roots for the grassy knoll, letting it fade out into the background paper color so it doesn’t look like a hard border. -
Add script:
At the bottom right, use a pencil to lightly draft a signature or family name in flowing cursive. Go over it with a dilute grey watercolor mix or a grey pen for a faded ink look. -
Final touches:
Erase any remaining pencil marks gently. If the tree looks too new, touch a damp brush with tiny amounts of brown paint to the leaves to simulate autumn decay or age.
You now have a beautiful heirloom-quality piece that looks as if it was discovered in an ancestor’s attic


Watercolor Wash Canopy With Inked Name Tags

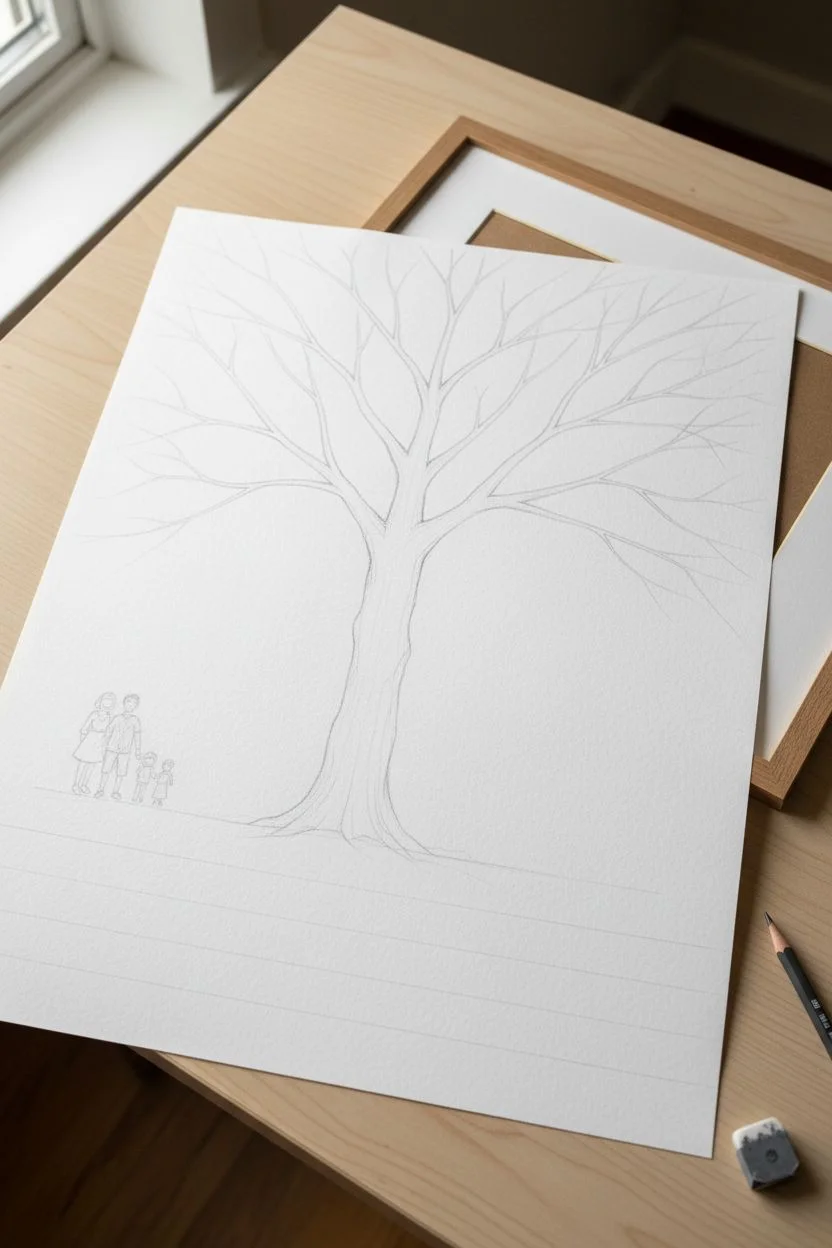
Create a stunning heirloom piece that combines the delicate flow of watercolor with precise ink detailing to chart your family history. This airy, light-filled tree features a textured trunk, fingerprint-style leaves, and a charming illustration of family members at the base.
Step-by-Step Tutorial
Materials
- Large sheet of hot press watercolor paper (at least 18×24 inches)
- Watercolors (pan or tube): raw sienna, burnt umber, sap green, olive green, cerulean blue
- Waterproof archival ink pens (sizes 005, 01, and 03)
- Round watercolor brushes (size 4 and 8)
- Pencil (HB) and kneaded eraser
- Clean water jar and paper towels
- Wooden frame with matte board (white)
Step 1: Drafting the Composition
-
Sketch the skeleton:
Begin by lightly sketching the main trunk in the center of your paper. Keep the trunk sturdy at the base and let it taper gradually as it moves upward. -
Map the branches:
Draw the primary branches splitting off from the trunk. Aim for a balanced, radial spread that fills the upper two-thirds of the sheet without looking cluttered. -
Add character detail:
Sketch a tiny couple or family figures standing to the left of the trunk base to give the tree a sense of majestic scale. -
Plan text placement:
Lightly rule horizontal guidelines near the bottom of the paper where you intend to write the family names or a dedication later.
Step 2: Painting the Tree Structure
-
Base trunk wash:
Mix a watery wash of raw sienna and burnt umber. Using the size 8 brush, paint the trunk, letting the colors bleed into each other for natural variation. -
Extending the branches:
Switch to the size 4 brush and continue the brown wash into the main branches, lightening the color mix with more water as you reach the tips. -
Adding wood texture:
Once the base wash is fully dry, use a fine 01 archival pen to draw vertical, flowing lines up the trunk to simulate bark texture. -
Defining the boughs:
Outline the main branches with the ink pen, but keep the lines broken and organic rather than solid and cartoonish. -
Fine branch detailing:
Use the 005 pen to draw the tiniest twigs extending from the painted branches. This fine networking is crucial for a realistic look.
Fixing “Blobs”
If a watercolor leaf looks too heavy or blob-like, quickly dab it with the corner of a paper towel while wet to lift the pigment, creating a soft, textured look.
Step 3: Creating the Canopy
-
Mixing leaf greens:
Prepare three different puddles of green: a light sap green, a deeper olive, and a blue-green mix. -
Stippling the foliage:
Dip your size 8 brush into the greens and gently press the belly of the brush onto the paper to create leaf shapes. Vary the angle to make them look distinct. -
Layering density:
Cluster more leaves near the branch ends, leaving open white space in the center of the canopy for an airy feel. -
Adding the sky:
With a very dilute cerulean blue, paint a loose wash behind the upper branches. I prefer to keep this irregular and cloudy rather than filling the whole background. -
Accent leaves:
Once the first layer of leaves is dry, add a few overlapping leaves in a darker shade or even a touch of gold paint for depth.
Interactive Art
Leave the branches bare and set out ink pads at a family reunion. Have relatives use their thumbprints as the leaves, signing their names over their print.
Step 4: Finishing Touches
-
Illustrating the figures:
Paint the tiny figures at the base with careful, small strokes. Use bright colors for their clothing to make them pop against the brown bark. -
Refining the figures:
Once the paint on the figures dries, outline them very delicately with the 005 pen. -
Inking the names:
Using your best calligraphy or handwriting, ink the family names or dedication along the bottom guidelines you drew earlier. -
Optional gold leaf:
If you want extra sparkle, apply tiny dabs of gold leaf or metallic watercolor to random leaves in the canopy. -
Erase and frame:
Gently erase any remaining pencil lines with the kneaded eraser. Place the artwork behind a white matte board and secure it in the frame.
Hang your finished masterpiece in a central location where generations can admire the roots and branches of your family story
Rainbow Color-Coded Family Lines
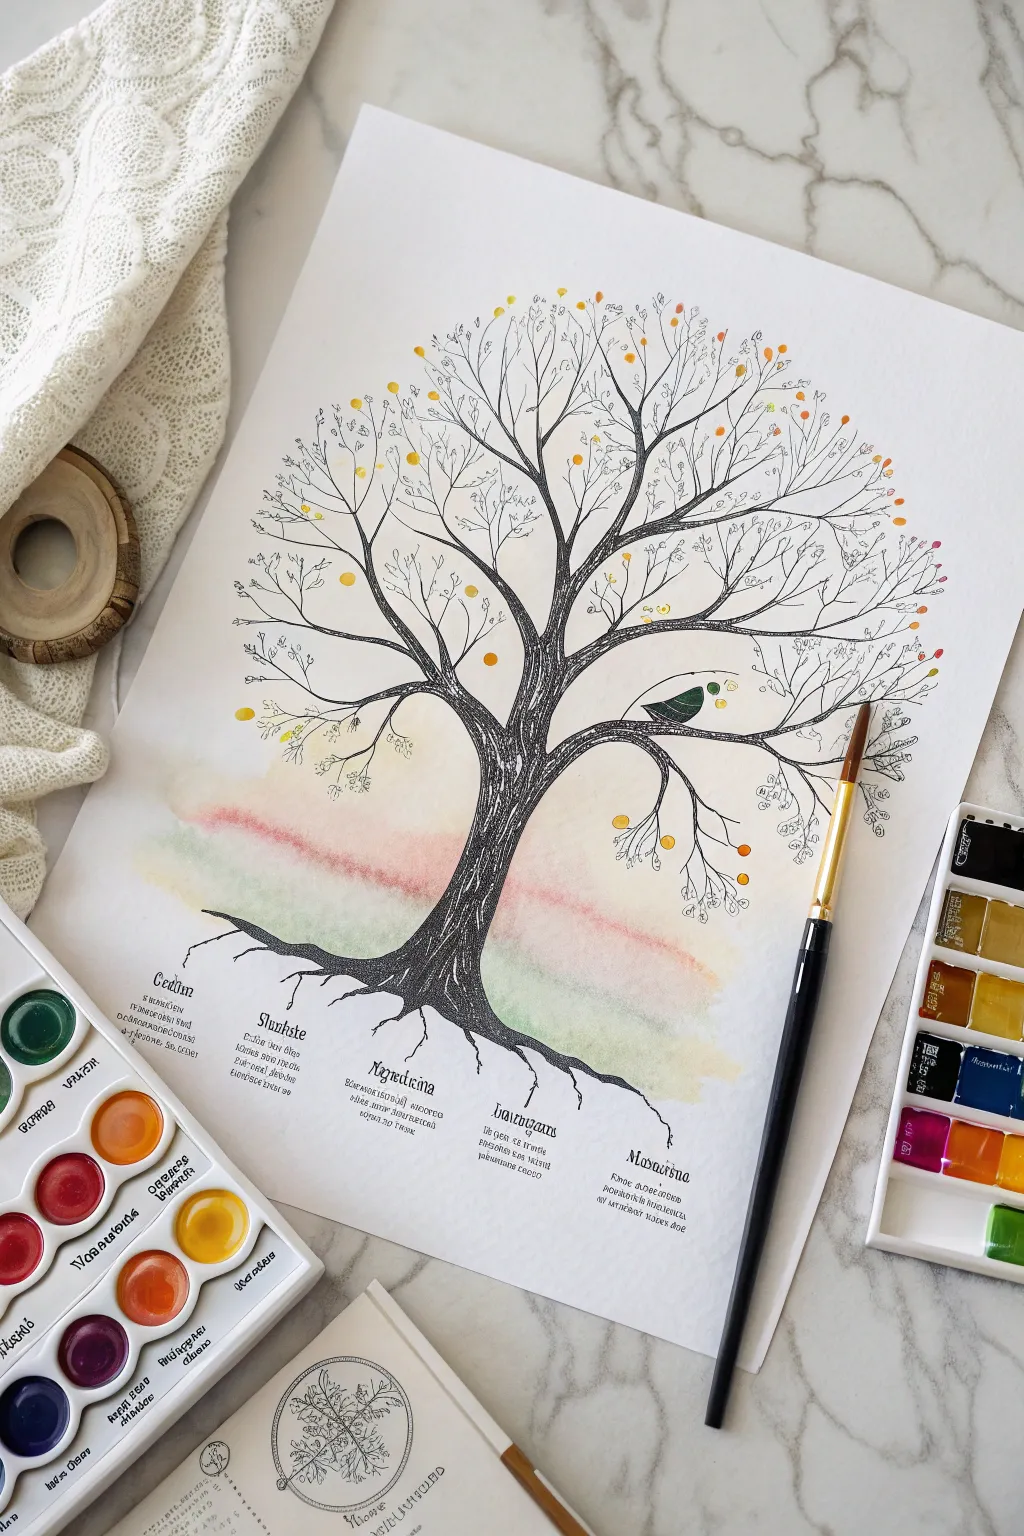
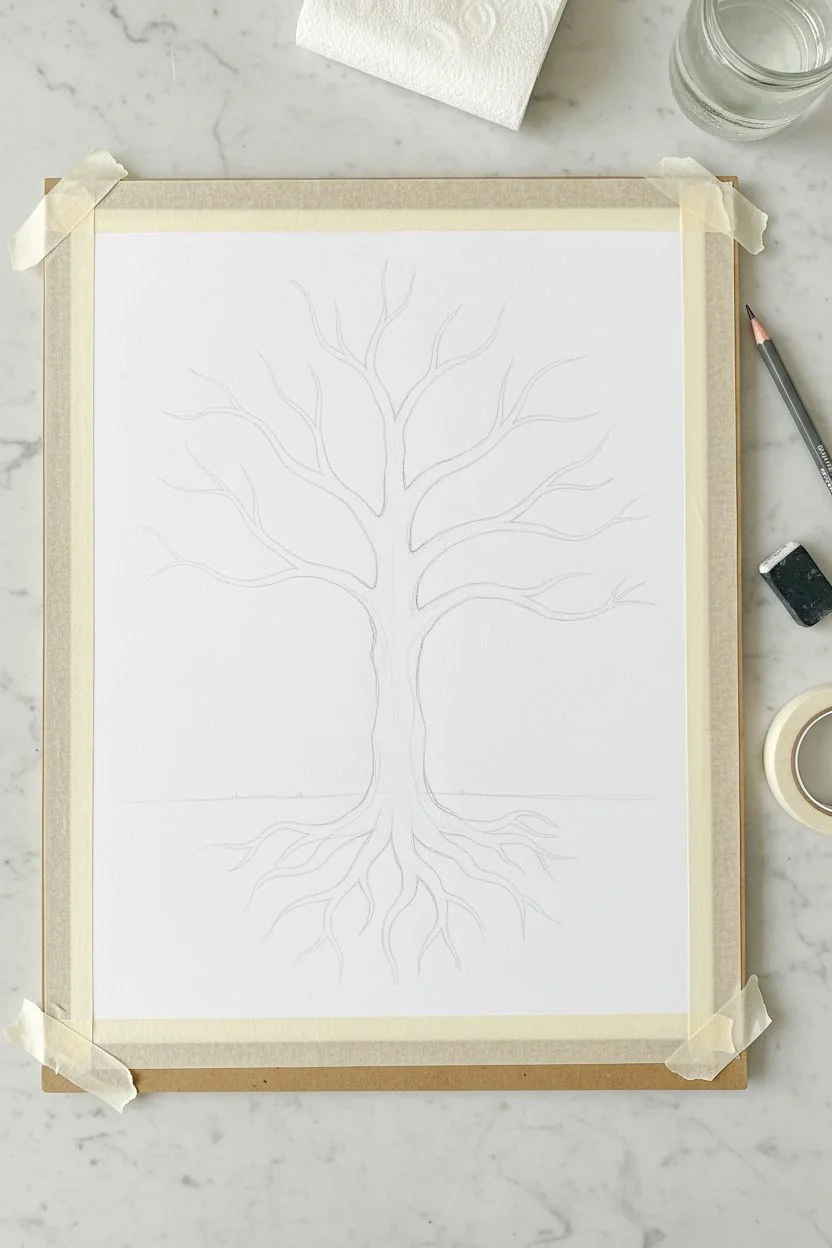
Blend the precision of ink illustration with the soft dreaminess of watercolor in this elegant family tree design. By using subtle color washes behind bold black lines, you create a timeless piece that feels both organic and structured.
Step-by-Step Guide
Materials
- High-quality watercolor paper (cold press, at least 140lb)
- Black archival fineliner pens (sizes 005, 01, and 05)
- Watercolor paint set
- Round watercolor brush (size 6 or 8)
- Small round detail brush (size 0 or 1)
- Graphite pencil (HB) and kneaded eraser
- Masking tape
- Paper towels and water cup
Step 1: Drafting the Structure
-
Prepare your paper:
Tape your watercolor paper down to a hard board or table surface using masking tape on all four edges. This prevents buckling when you add the watercolor wash later. -
Sketch the trunk horizon:
Using your HB pencil, lightly sketch a faint horizon line about a third of the way up the page. This is where your roots will ground the tree. -
Outline the trunk:
Draw the main trunk shape, ensuring it is thick at the base and tapers as it moves upward. Don’t worry about bark texture yet; focus on the silhouette. -
Branch outward:
Extend 4-5 main branches from the top of the trunk. Let them curve naturally, splitting into smaller and smaller forks until they fill the upper half of the page. -
Map the roots:
Mirror the branches by sketching root tendrils extending downward from the base. These can be slightly less detailed than the branches but should feel anchored.
Don’t Rush the Ink
Watercolor paper stays damp internally longer than it looks. If your pen bleeds or feathers, stop immediately! The paper needs more drying time before you continue inking.
Step 2: Applying the Color Wash
-
Wet the background:
Before painting, take your larger round brush and wet the paper area behind the tree with clean water. You want it damp, not soaking wet. -
Drop in color:
Load your brush with a very watered-down pigment—pink or peach works beautifully here. Gently touch the wet paper near the horizon line to let the color bloom softly. -
Create a gradient:
While the pink is still wet, introduce a pale yellow or light green near the bottom roots area. Allow these colors to bleed into each other naturally for that ethereal look. -
Dry completely:
This is crucial: let the background wash dry 100% before touching it with a pen. If the paper is cool to the touch, it’s still damp. I often use a hairdryer on low heat to speed this up.
Step 3: Inking the Details
-
Solidify the outline:
Using your 05 fineliner (the thickest one), trace over your pencil lines for the trunk and main branches. Use somewhat jagged, shaky strokes to mimic natural bark. -
Add bark texture:
Switch to the 01 fineliner. Draw vertical, flowing contour lines running up the trunk. These lines should weave around knots and follow the curve of the tree. -
Draw fine twigs:
Use the 005 pen (the thinnest one) to extend the tips of the branches into delicate, wispy twigs. This creates a fine, lacy effect at the canopy’s edge. -
Incorporate the ‘bird’:
Draw a simple stylized bird sitting on a lower branch using a dark green or black shape, adding a tiny beak and eye.
Metallic Magic
Use gold metallic watercolor or a gold gel pen for the leaves or to highlight specific names. It catches the sunlight beautifully and adds a premium feel.
Step 4: Adding Life and Legacy
-
Paint sparse leaves:
Using your small detail brush and yellow/orange paint, dap tiny circles or oval shapes onto the ends of the twig branches. Keep them sparse to maintain the drawing’s open feel. -
Ink the names:
Below the roots, use a calligraphy pen or your 05 fineliner to write family names or generational titles (like ‘Roots’, ‘Parents’, ‘Children’). Use a Gothic or Old English font style for a classic touch. -
Connect the names:
Draw faint lines extending from specific root tips down toward the corresponding text blocks, visually connecting the tree to the written history. -
Final erase:
Once the ink is completely dry (give it an hour to be safe), gently erase any visible pencil marks to clean up the illustration.
Now you have a stunning, heirloom-quality piece ready to frame or gift to a loved one
Heart-Leaf Family Tree (Sweet Keepsake Style)
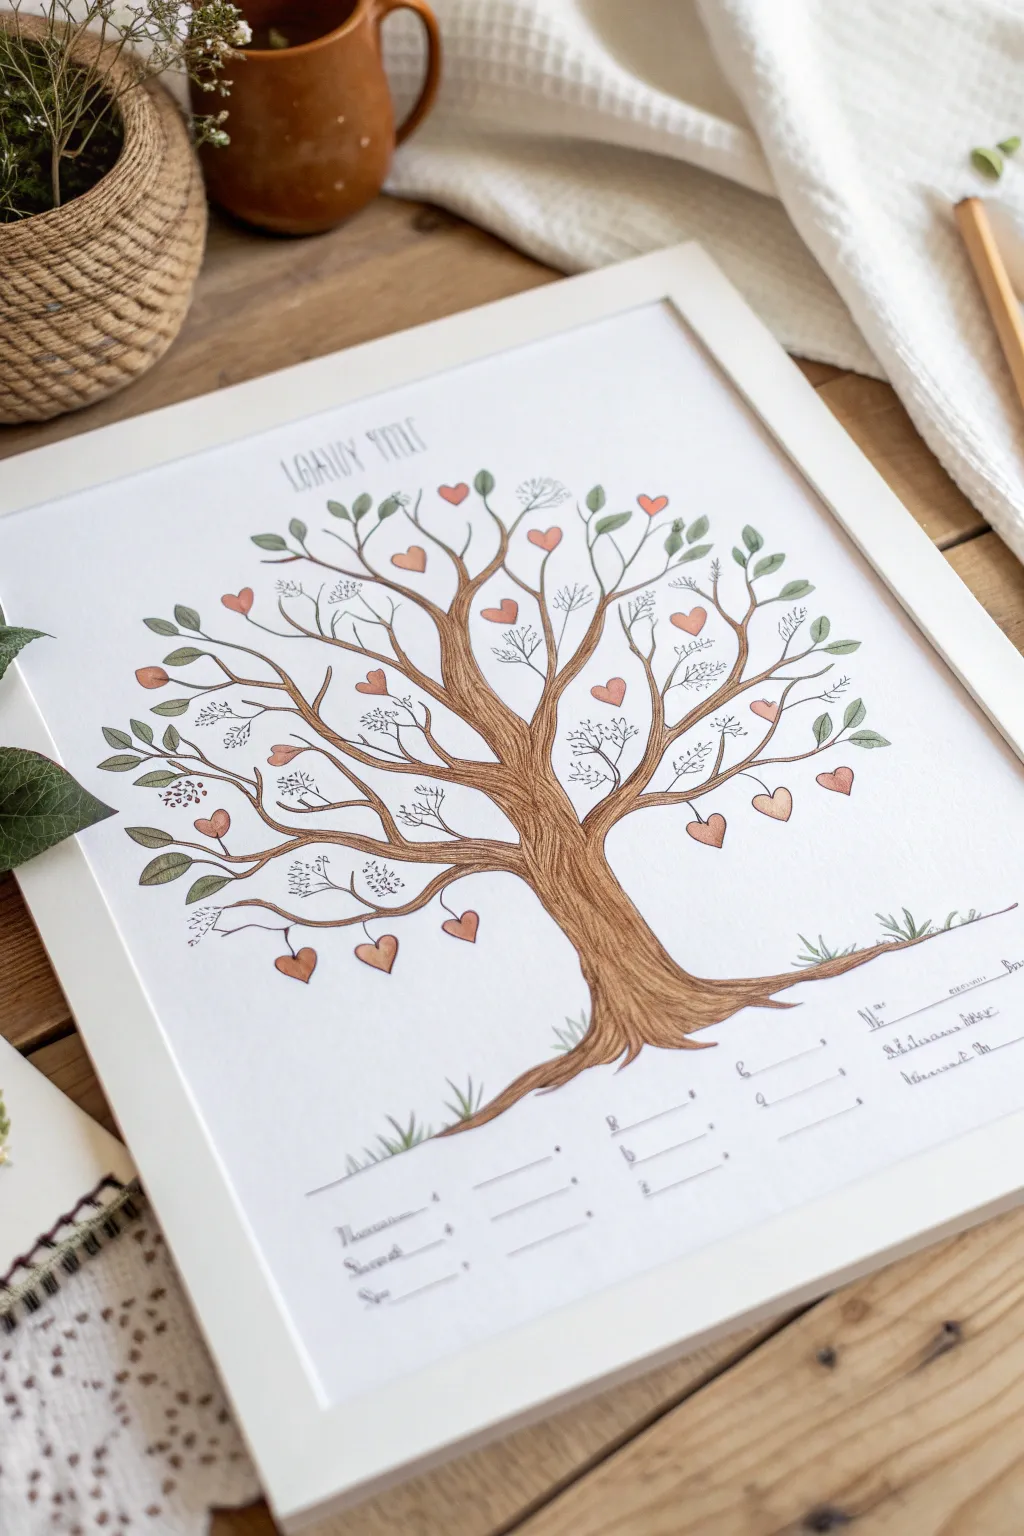
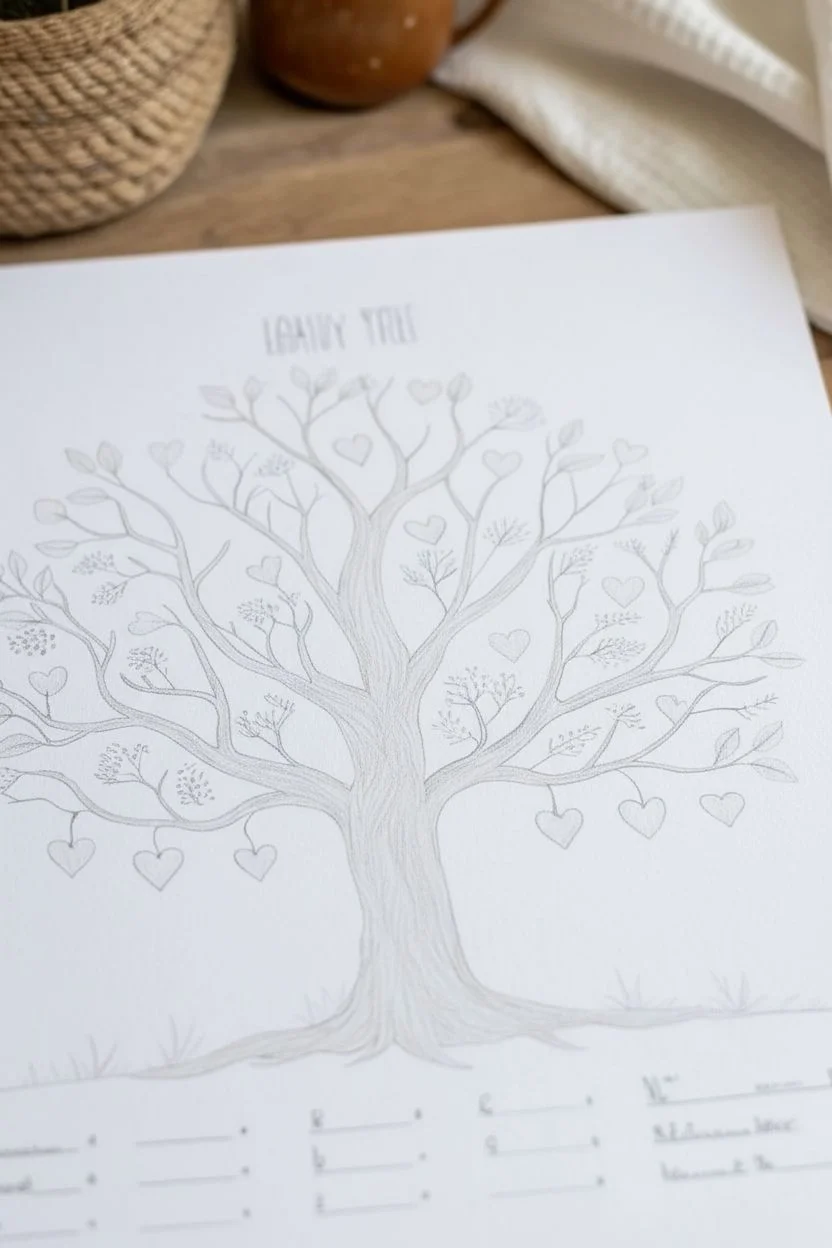
Capture your family’s legacy with this charming, illustrated-style family tree featuring distinctive heart ornaments hanging from its branches. The soft, textured shading of the bark and gentle watercolor-like hues give it a timeless, storybook quality perfect for framing.
How-To Guide
Materials
- High-quality white cardstock or watercolor paper (A3 size recommended)
- Pencil (HB for sketching)
- Fine liner pens (black or sepia, sizes 0.1 and 0.3)
- Colored pencils or watercolor pencils (browns, greens, muted reds/pinks)
- Ruler
- Eraser (kneaded eraser preferred)
Step 1: Sketching the Structure
-
Map the layout:
Begin by lightly marking the center of your paper. Leave about 3-4 inches of space at the bottom for the roots and the name listing area. Sketch a faint vertical line to guide the trunk’s placement. -
Draw the trunk base:
Sketch the trunk, starting wide at the bottom where the roots flare out into the ground. Taper it gently as you move upward before it splits into main branches. -
Create main branches:
Split the trunk into two or three primary thick branches. Let them curve naturally outward—think of a ‘Y’ shape that multiplies. Keep the lines wavy and organic rather than straight. -
Add secondary twigs:
From the main branches, sketch thinner twigs extending outward and upward to fill the canopy space. Ensure you leave enough gaps between them so the tree doesn’t look cluttered. -
Place the hearts:
Draw small heart shapes hanging from the tips of various branches. Distribute them evenly, placing some lower and some higher to create balance. These will represent family members. -
Add foliage hints:
Sketch small oval leaf shapes clustering around the thinner twigs. You can also add purely decorative twig sprays that have tiny buds but no leaves for texture. -
Design the text ares:
At the very top, lightly pencil guidelines for the family name title. At the bottom, under the roots, use a ruler to draw straight horizontal lines where detailed names or dates will be listed.
Uneven Ink Lines?
Don’t worry if your bark lines wobble—it actually helps! Real wood is imperfect. Embrace shaking hands as ‘natural texture’ for the tree trunk.
Step 2: Inking and Coloring
-
Outline the tree:
Using a 0.3 fine liner, carefully trace over your pencil lines for the trunk and branches. Use short, broken strokes for the bark to simulate texture rather than a single solid line. -
Adding wood grain:
Switch to a 0.1 fine liner to draw vertical, flowing lines inside the trunk. Let these lines curve around knots and branches to give the wood form and dimension. -
Ink the leaves and hearts:
Trace the leaves and hearts with the 0.1 pen. For the tiny decorative bud sprays, use delicate stippling or very faint lines to keep them airy. -
Color the bark:
Use a medium brown colored pencil to fill in the trunk. vary your pressure—press harder near the edges and under branches for shadow, and keep the center lighter for a highlight. -
Add depth to the wood:
Layer a darker brown or sepia pencil over the shadowed areas of the bark to enhance the 3D effect. I prefer to use quick, vertical strokes here to mimic the grain. -
Color the hearts:
Fill in the hanging hearts with a soft red or coral pencil. Shade the bottom curve of each heart slightly darker to make them look plump and dimensional. -
Greenery details:
Color the leaves with a sage or olive green. Leave a tiny sliver of white paper showing on one side of each leaf to act as a reflection. -
Ground the tree:
Add small tufts of grass near the roots using green pencil strokes. Add a faint brown underline beneath the roots to suggest the earth. -
Finalize text lines:
Trace the bottom ruling lines with a fine pen. Add small numbers or bullet points if you plan to index the names. -
Lettering:
carefully write or trace your family name at the top in a tall, serif font. If you are confident, ink the names at the bottom, or leave them blank to be filled in later. -
Clean up:
Wait for all ink to be completely dry, then gently erase all remaining pencil sketch lines to reveal the crisp illustration.
Add a Generation Key
Use different colored hearts (e.g., pink, red, burgundy) for each generation to make the lineage visually distinct at a glance.
Now you have a beautiful, hand-drawn heirloom ready to be filled with the names of those you love most
Handprint Canopy Tree (One Handprint Per Relative)
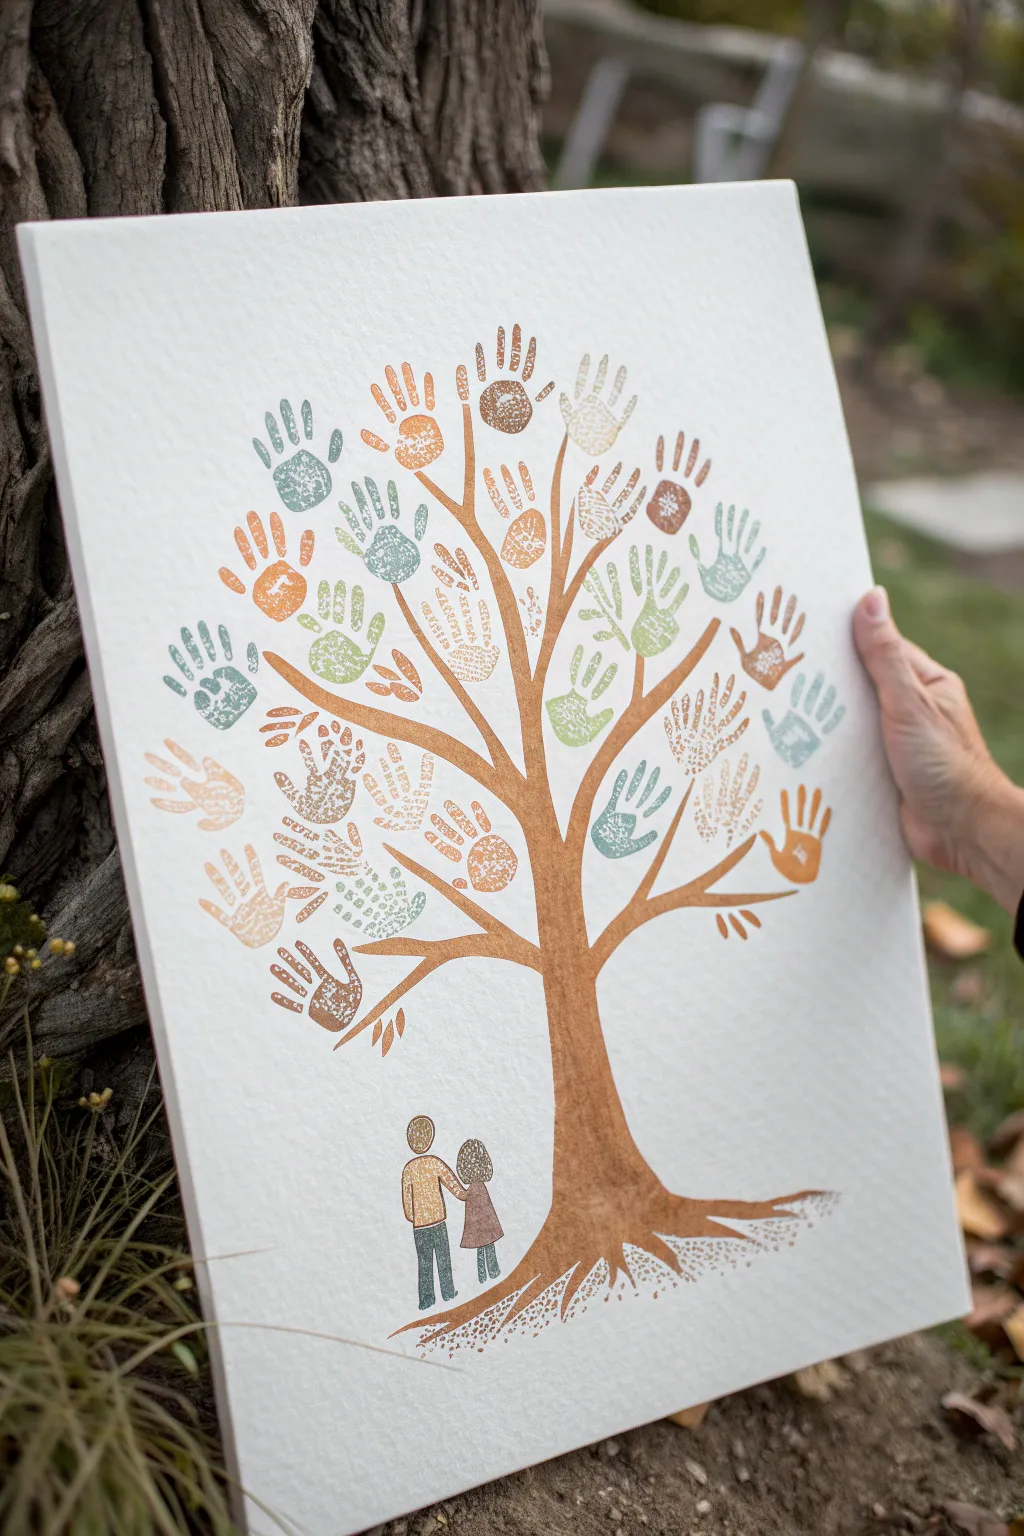
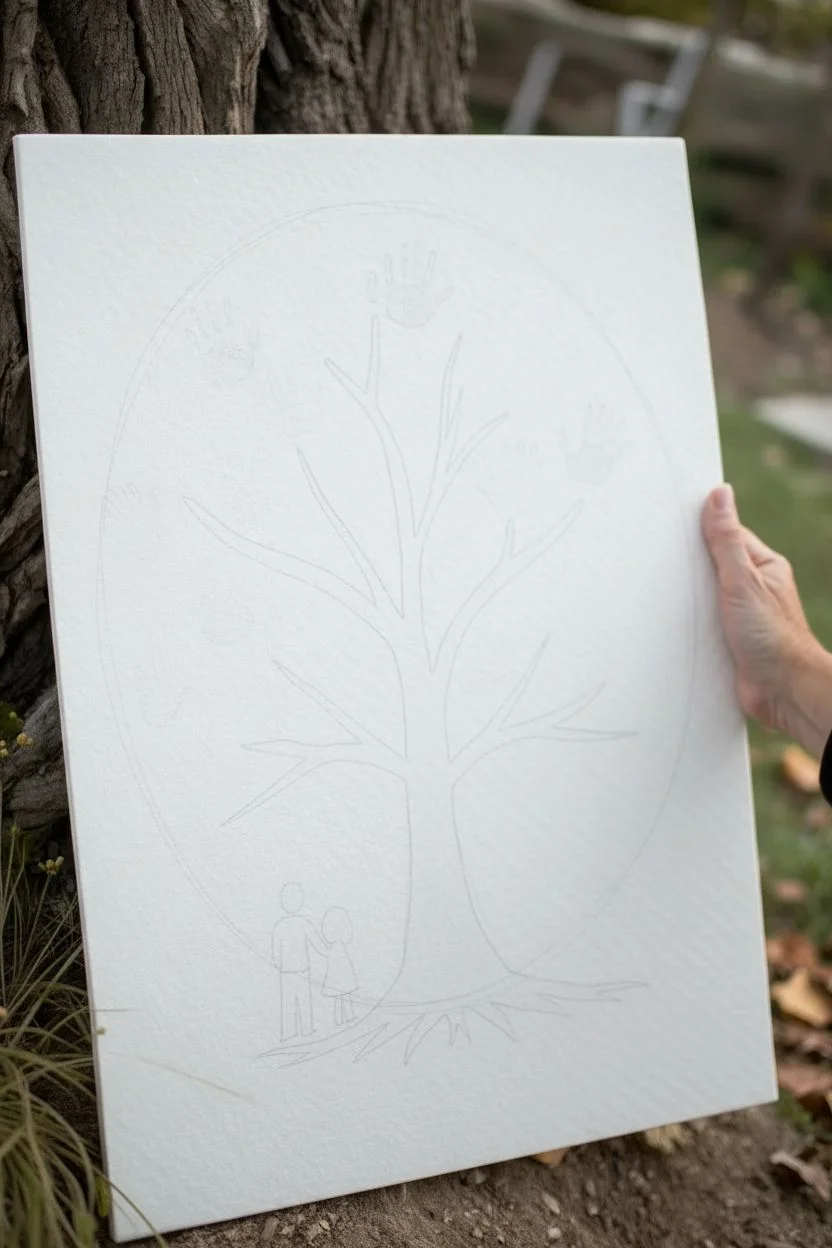
This heartwarming artwork transforms a traditional family tree into a literal tree of life, featuring a canopy made entirely of loved ones’ handprints. The result is a textural, collaborative piece where each colorful print represents a unique branch of your family’s history.
Step-by-Step Tutorial
Materials
- Large, high-quality watercolor paper or canvas board (16×20 inches or larger recommended)
- Brown watercolor paint or acrylic paint (for the trunk)
- Assorted non-toxic ink pads or acrylic craft paints (muted greens, blues, oranges, and earthy reds)
- Fine liner pens (black or dark brown) for details
- Paintbrushes (medium round for the tree, fine detail for the figures)
- Pencil and eraser
- Painter’s tape (optional, to secure paper)
- Paper towels or baby wipes (essential for clean hands!)
Step 1: Planning the Foundation
-
Map out the composition:
Begin by lightly sketching the tree trunk and branches with a pencil. Start the base at the bottom center, leaving about 2-3 inches of white space at the very bottom. Draw the main trunk tapering upward, splitting into several large primary branches that fan out towards the top corners. -
Draft the figure placement:
Near the base of the trunk, lightly sketch the silhouettes of the founding couple (or main subjects). Keep them simple—stick figure style works for positioning, which you’ll flesh out later. They should be looking up into the canopy. -
Plan the canopy volume:
Visualize an oval or circular shape where the leaves will go. I like to lightly mark the outer perimeter with a pencil so I know the boundaries for the handprints later on, ensuring the tree looks balanced.
Pro Tip: Consistent Prints
Test the handprint on scrap paper first! Ink pads often give more detailed fingerprints than paint. If using paint, apply it to the hand with a sponge brush for a thin, even coat that preserves texture.
Step 2: Painting the Structure
-
Paint the trunk base:
Using a medium round brush and diluted brown watercolor or acrylic, fill in the trunk. Start with a lighter wash to establish the shape, allowing the color to pool slightly at the edges for a natural bark effect. -
Extend the branches:
Pull the paint upwards into the branches. As you move towards the tips, use less pressure on your brush to make the lines thinner. Don’t worry about being too precise; natural branches are irregular. -
Add texture and roots:
Once the first layer is semi-dry, go back in with a slightly darker brown mix. Add vertical striations to the trunk to mimic bark texture. At the bottom, paint small, spindly roots gripping the imaginary ground. -
Illustrate the couple:
Using a fine brush or even a high-quality marker, fill in your couple. Use simple blocks of color for their clothing—like the teal pants and brown shirt in the example—and outline their hair. Keep the style illustrative and somewhat sketchy to match the organic feel of the tree.
Step 3: Creating the Canopy
-
Prepare your palette:
Set out your ink pads or pour small amounts of acrylic paint onto a palette. If using acrylics, apply a thin, even layer to a sponge or flat surface so you don’t get gobs of paint on the hands. -
Start with the outermost layer:
Begin placing handprints near the top outer edge of your imaginary canopy circle. Press the hand firmly onto the paper, ensuring the palm and all fingers make contact. Lift straight up to avoid smearing. -
Vary the colors:
Alternate between your chosen colors—sage green, dusty blue, terracotta, and mustard yellow work beautifully together. Clean hands thoroughly between color changes with baby wipes. -
Fill the middle section:
Work your way inward and downward. Overlap the prints slightly in some areas but try to give each one its own space. Orient the fingers pointing generally outward, mimicking the direction leaves would grow. -
Connect the floating prints:
Once the handprints are dry, take your brown paint and fine brush again. Paint thin, delicate twigs extending from your main branches to reach the ‘floating’ handprints, ensuring every print is connected to the tree system.
Level Up: Seasonal Shifts
Customize the color palette to match the season the artwork is created. Use bright greens or pinks for spring, deep greens for summer, or rusts and golds for an autumn-themed memory.
Step 4: Refining Details
-
Add names (optional):
If you wish to identify family members, wait until the paint is completely dry. Use a fine-tip archival pen to write names gently along the curve of a finger or inside the palm of the corresponding print. -
Detail the ground:
Add a few stippled dots or tiny dashes of earth-toned paint under the tree roots and the couple’s feet to ground them, rather than having them float in white space. -
Clean up sketch lines:
Examine the artwork for any visible pencil marks from your initial planning phase. Gently erase these, being careful not to rub over the painted areas. -
Seal the artwork:
If you used water-soluble paints, consider misting the final piece with a matte fixative spray to protect the prints from fading or moisture over time.
Hang this colorful collaborative masterpiece in a central spot where your family can admire their collective contribution to the family tree.
Family Milestones Tree (Dates Along the Branches)
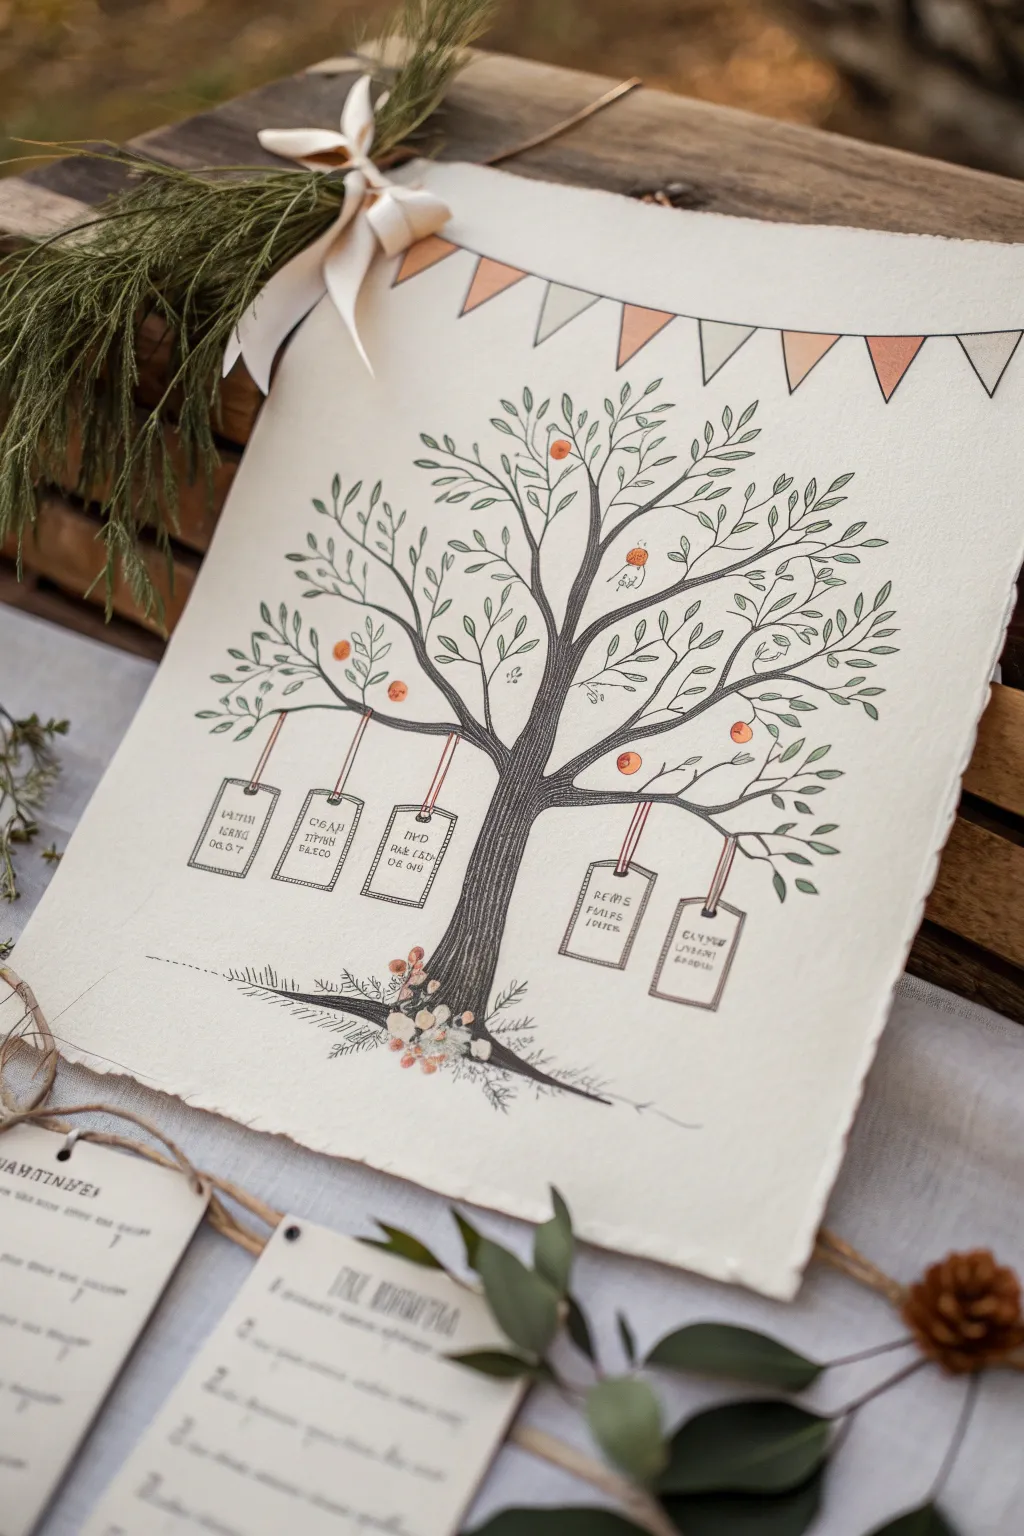
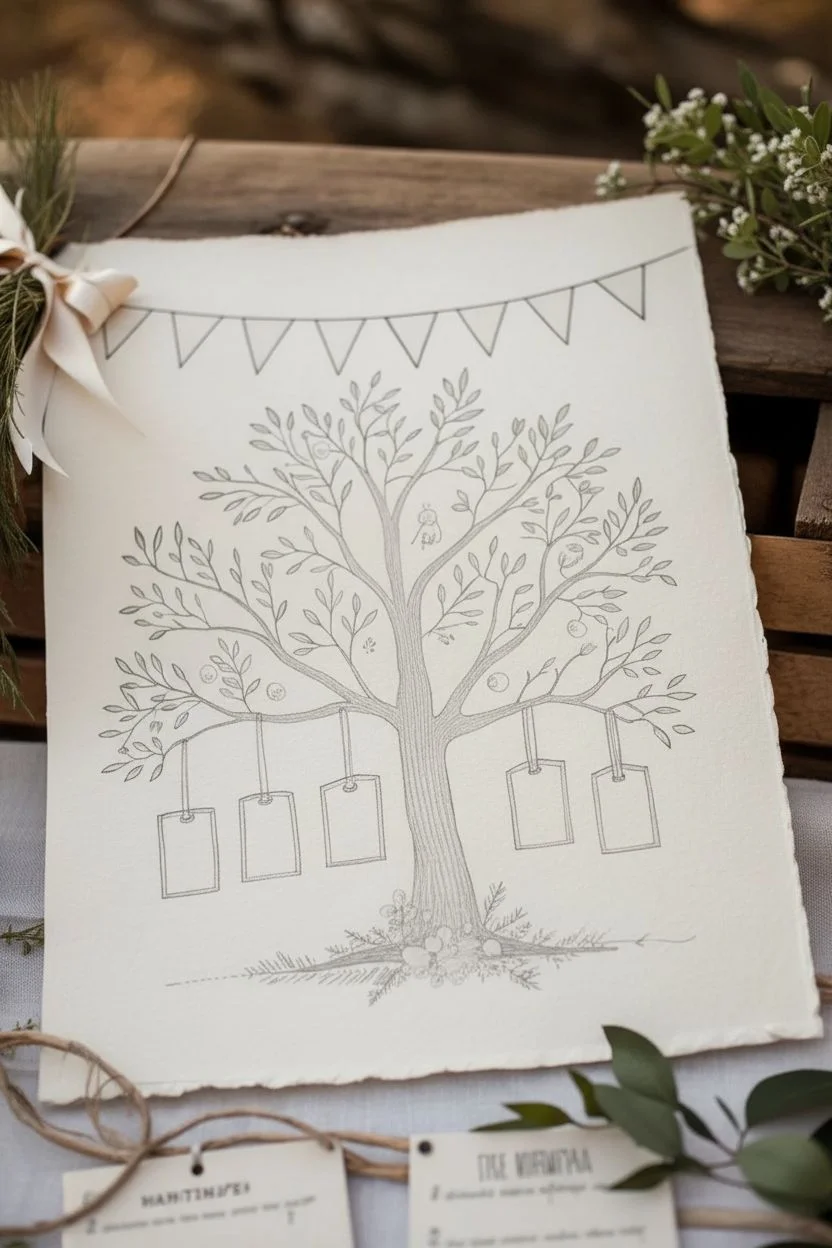
This charming illustration combines a delicately intertwined tree with hanging milestone tags, all set on beautiful deckled-edge paper. The addition of bunting and small fruit accents gives it a festive, folksy feel perfect for weddings or anniversaries.
Detailed Instructions
Materials
- Heavyweight cold-press watercolor paper (300 gsm) or handmade rag paper
- Fine liner pens (Black, 0.1mm, 0.3mm, 0.5mm)
- Pencil and eraser
- Ruler
- Watercolor paints or colored pencils (muted greens, terracotta/orange, warm browns)
- Small round brushes (size 0 and 2)
- White gel pen (optional)
- Fine-grit sandpaper (optional for edge distressing)
Step 1: Planning and Sketching
-
Prepare the paper:
If you aren’t using pre-torn paper, create a deckled edge effect by wetting a ruler against the paper’s edge and gently tearing the excess paper away to create a roughened, organic border. -
Outline the trunk:
Using a light pencil grip, sketch a central trunk that splits relatively low into main branches. Keep the trunk sturdy but not too thick, tapering gently as it rises. -
Draw the branch structure:
Extend the branches outward and upward. Create ‘Y’ shapes that separate and curve slightly. Ensure you leave enough vertical drop space below the lower branches for the hanging tags. -
Draft the bunting:
Sketch a curved line spanning the top width of the paper. Draw small triangular pennants hanging from this line, spacing them evenly. -
Position the tags:
Lightly draw rectangular tags hanging from the lower branches using vertical lines. Draw small circles at the top of each tag to simulate hole-punched attachments.
Drawing Realistic Strings
To make the tags look like they have weight, draw the string lines absolutely straight down. Include a tiny ‘knot’ detail where the string meets the branch.
Step 2: Inking the Foundation
-
Line the tree bark:
Using a 0.3mm pen, trace your trunk outline. Fill the interior of the trunk with vertical, slightly wavy lines to mimic bark texture, following the curve of the wood. -
Detail the branches:
Switch to a finer 0.1mm pen to ink the thinner upper branches. Keep your hand loose to create natural, slight wobbles rather than stick-straight lines. -
Add foliage:
Draw small, almond-shaped leaves clustering around the tips of the branches. Ensure the leaves point in various directions to look lush and organic. -
Incorporate fruit accents:
Scatter small circular fruits randomly throughout the canopy. I like to group them in pairs occasionally for visual interest. -
Base of the tree:
Sketch small tufts of grass, simple leafy plants, and perhaps a few fallen fruits around the roots to ground the image.
Step 3: Color and Final Details
-
Color the bunting:
Use diluted watercolor or soft colored pencils in alternating muted peach, terracotta, and sage green tones for the pennant flags. -
Tint the leaves and fruit:
Paint the leaves with a wash of sage green. Use a terracotta or soft orange for the fruits, keeping the color somewhat translucent rather than opaque. -
Detail the tags:
Outline the hanging tags with your black pen. Draw a double border around the edge of each tag for a finished look. -
Add tag strings:
Use a red or rust-colored fine liner to draw the strings attaching the tags to the branches. Make these lines taut and straight. -
Letter the milestones:
Carefully print your family names or important dates inside the tags. Using a block serif font adds a nice vintage touch. -
Shade the bark:
Add a very light wash of warm grey or diluted brown over the bark lines to give the tree volume without obscuring your ink work. -
Erase and refresh:
Once the ink and paint are completely dry, gently erase any visible pencil marks to clean up the illustration.
Ink Smudge Prevention
Work from the top left corner down to the bottom right (if you are right-handed) to avoid dragging your hand through wet ink or pencil graphite.
Frame your beautiful lineage chart in a rustic wooden frame to complete the organic aesthetic
Heritage Map Leaves (Origins Written Into the Canopy)
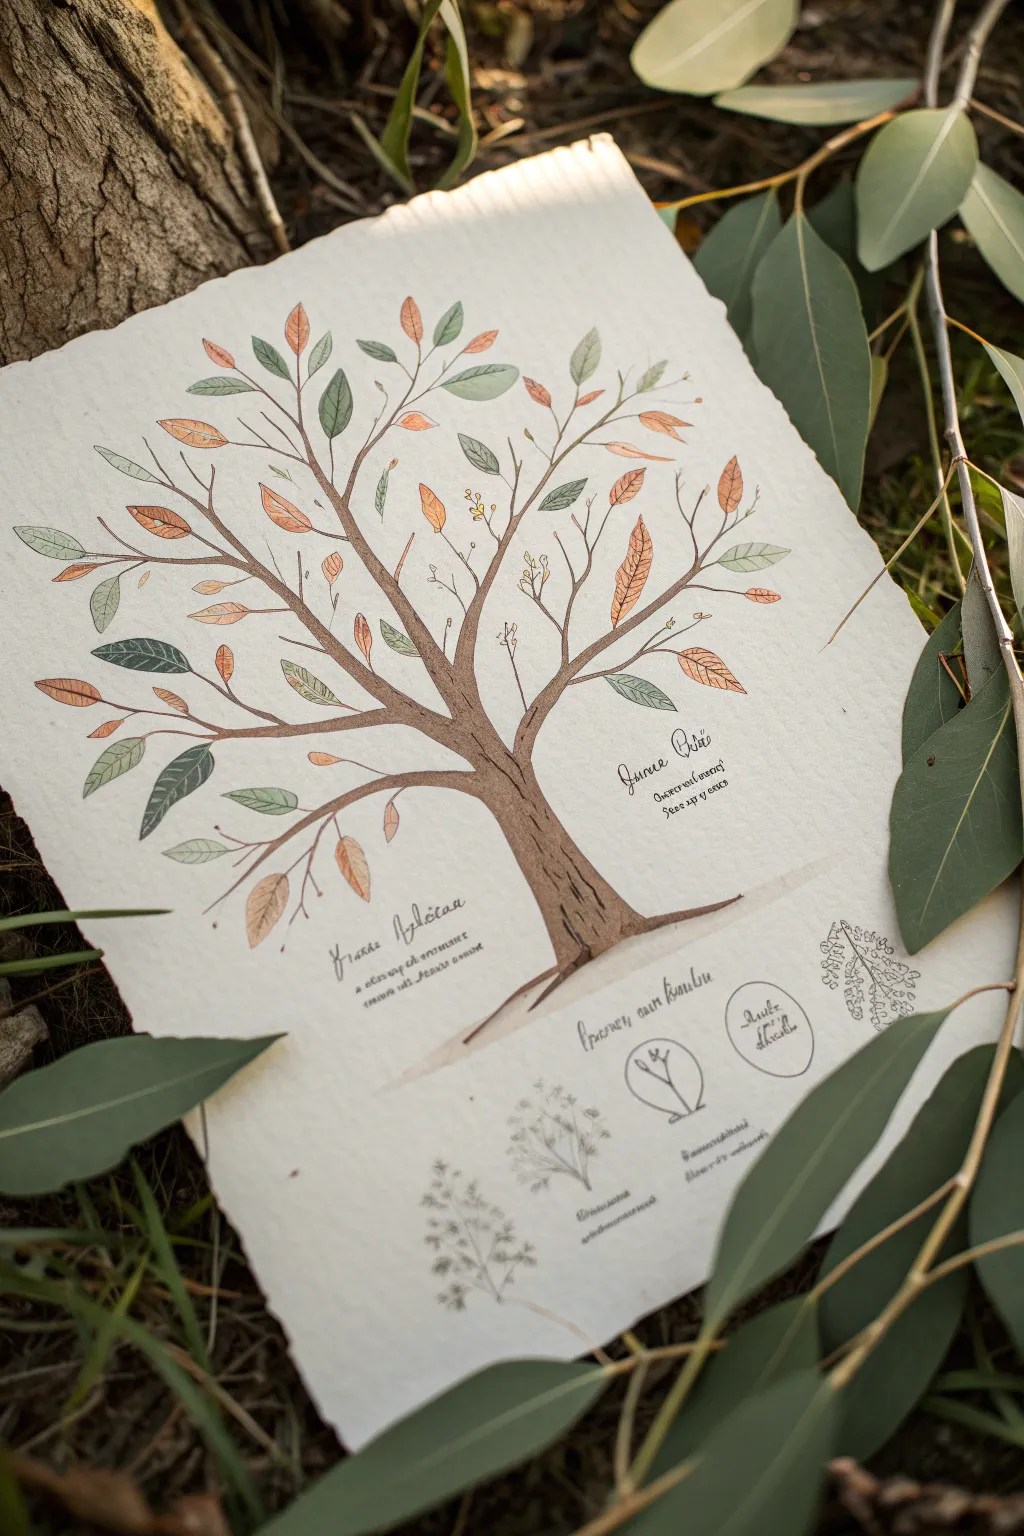

This project transforms a standard family tree into a delicate botanical illustration where each leaf represents a piece of your lineage. Using textured paper and a muted, earthy color palette gives the piece a timeless, archival quality perfect for framing.
Step-by-Step
Materials
- Heavyweight cold-press watercolor paper with deckle edge (or handmade paper)
- Fine liner pens (sepia and black, sizes 0.1 and 0.3)
- Watercolor paints (Burnt Sienna, Sap Green, Olive Green, Burnt Umber, Terra Cotta)
- Small round watercolor brush (size 2 or 4)
- Pencil (HB or 2H)
- Kneadable eraser
- Calligraphy pen or dip pen (optional)
- Reference photos of eucalyptus or willow leaves
Step 1: Drafting the Skeleton
-
Prepare the paper:
Begin with a sheet of high-quality, textured paper. If your paper doesn’t have a deckle edge, you can gently tear the edges against a ruler to create that rough, handmade look. -
Sketch the trunk:
Using your pencil lighty, draw the main trunk in the center. Start wide at the base, hinting at roots spreading out, and taper it gently as it rises. -
Extend the branches:
Draw primary branches splitting off from the trunk in a ‘V’ shape. Keep the lines somewhat wavy and organic rather than perfectly straight to mimic natural growth. -
Add secondary twigs:
From the main branches, sketch smaller twigs extending outward. Ensure there is enough space between them to accommodate the leaves without overcrowding. -
Outline leaf positions:
Lightly sketch oval and lance-shaped leaves attached to the twigs. Vary their sizes—some small near the tips, larger ones closer to the center—and vary their angles so they aren’t all uniform.
A Gentle Touch
When painting the leaves, don’t fill them in completely solid. Leave tiny specks of white paper showing to create a sparkle of light and keep the drawing from looking too heavy.
Step 2: Inking the Structure
-
Trace the wood:
Using a sepia or dark brown fine liner (0.3 size), carefully go over your pencil lines for the trunk and branches. Use broken, slightly jagged lines to suggest rough bark texture. -
Details on the trunk:
Add vertical striations inside the trunk outline to emphasize the wood grain. Keep these lines loose and not perfectly parallel. -
Ink the leaves:
Switch to a finer pen (0.1) for the leaves. Outline them with a steady hand, adding a central vein specifically where you plan to write names later. -
Erase pencil marks:
Once the ink is completely dry, gently roll a kneadable eraser over the entire drawing to lift the graphite without damaging the paper texture.
Make It Symbolic
Color-code the leaves by lineage side! Use olive green for the paternal line and terra cotta for the maternal line to instantly visualize the blending of two families.
Step 3: Adding Color
-
Base wash for the trunk:
Mix a watery wash of Burnt Umber and lightly paint the trunk. I like to keep this layer very transparent so the ink lines show through clearly. -
Shading the bark:
While the base layer is still slightly damp, drop in concentrated Burnt Sienna along the edges of the trunk to create dimension and roundness. -
Painting green leaves:
Mix a muted Olive Green. Paint about half of the leaves with this color, leaving some white space or lighter areas for highlights to keep them looking airy. -
Painting autumn leaves:
For the remaining leaves, mix a Terra Cotta or soft orange shade. Paint these interspersed among the green leaves to represent different branches of the family or generations. -
Add variance:
While the leaves dry, touch the tips of a few green leaves with a bit of the orange paint to create a natural, transitioning color effect.
Step 4: Script and Legends
-
Lettering the names:
Using a very fine pen or a dip pen, write family names along the curves of the branches or inside larger leaves. A simple cursive style works best here. -
Create the bottom legend:
At the bottom of the page, pencil in a small legend or key. You might draw icons representing birth, marriage, or origin locations. -
Illustrate the sub-elements:
Draw small botanical diagrams (like seeds or saplings) near the bottom to symbolize children or new generations, inking them with the same delicate style as the main tree. -
Final text details:
Add dates or descriptive text under the bottom illustrations using your smallest pen nib for a vintage textbook aesthetic.
Allow the entire piece to dry overnight before framing to ensure the paper settles back into its natural shape
Silhouette Cameo Family Tree (Profiles in Frames)
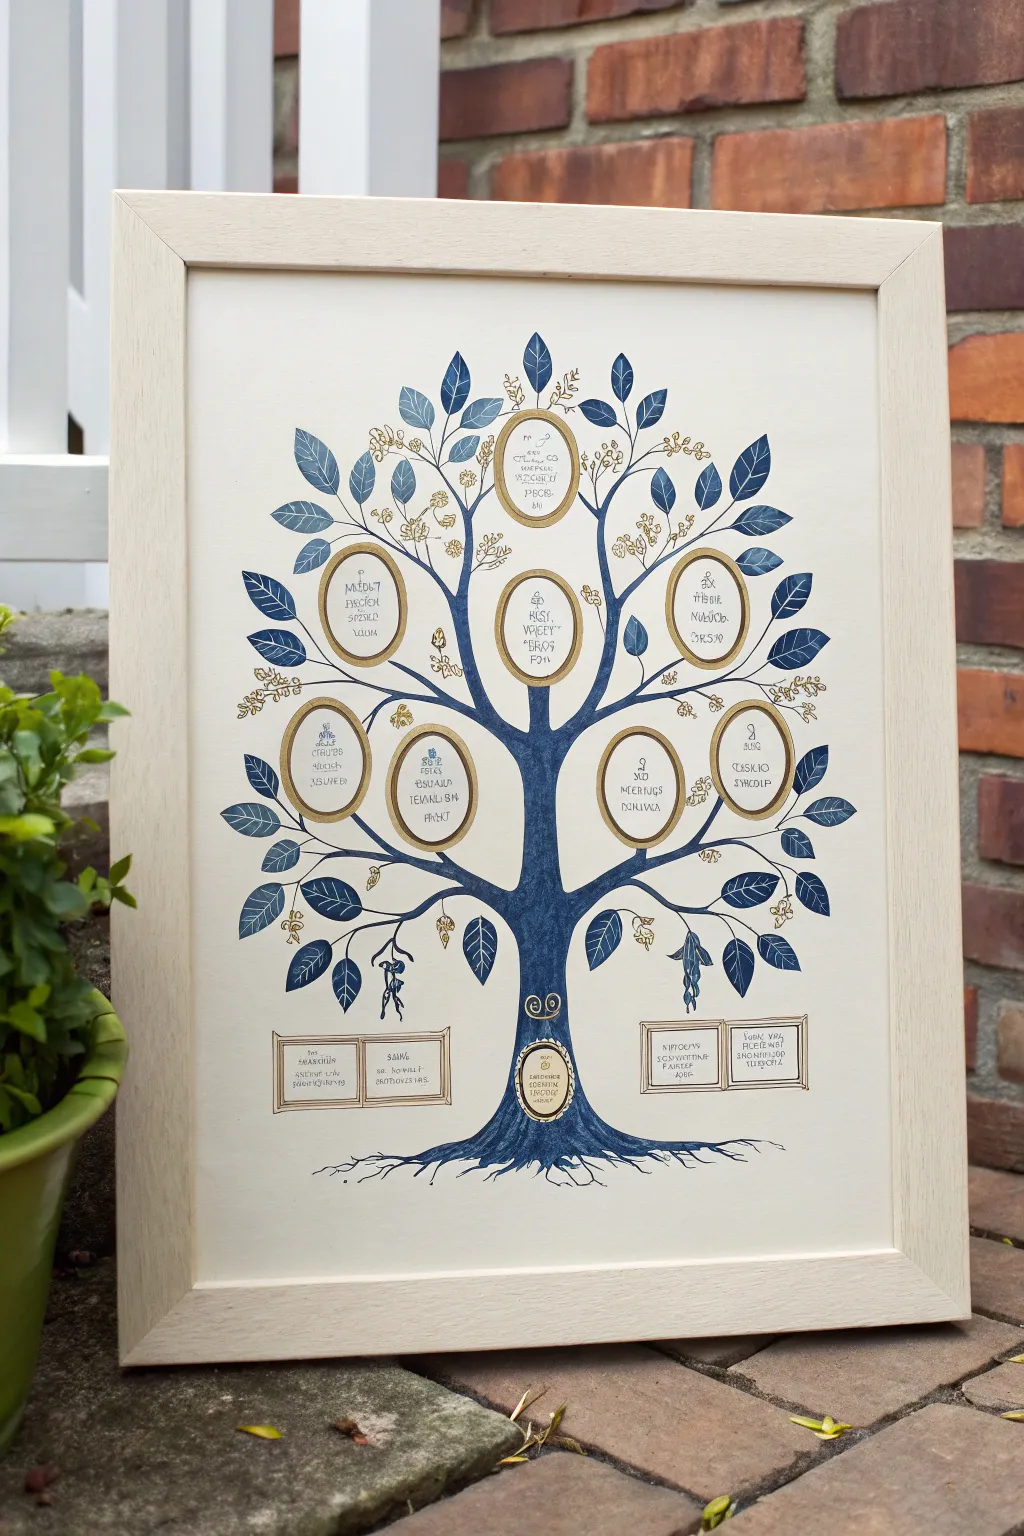
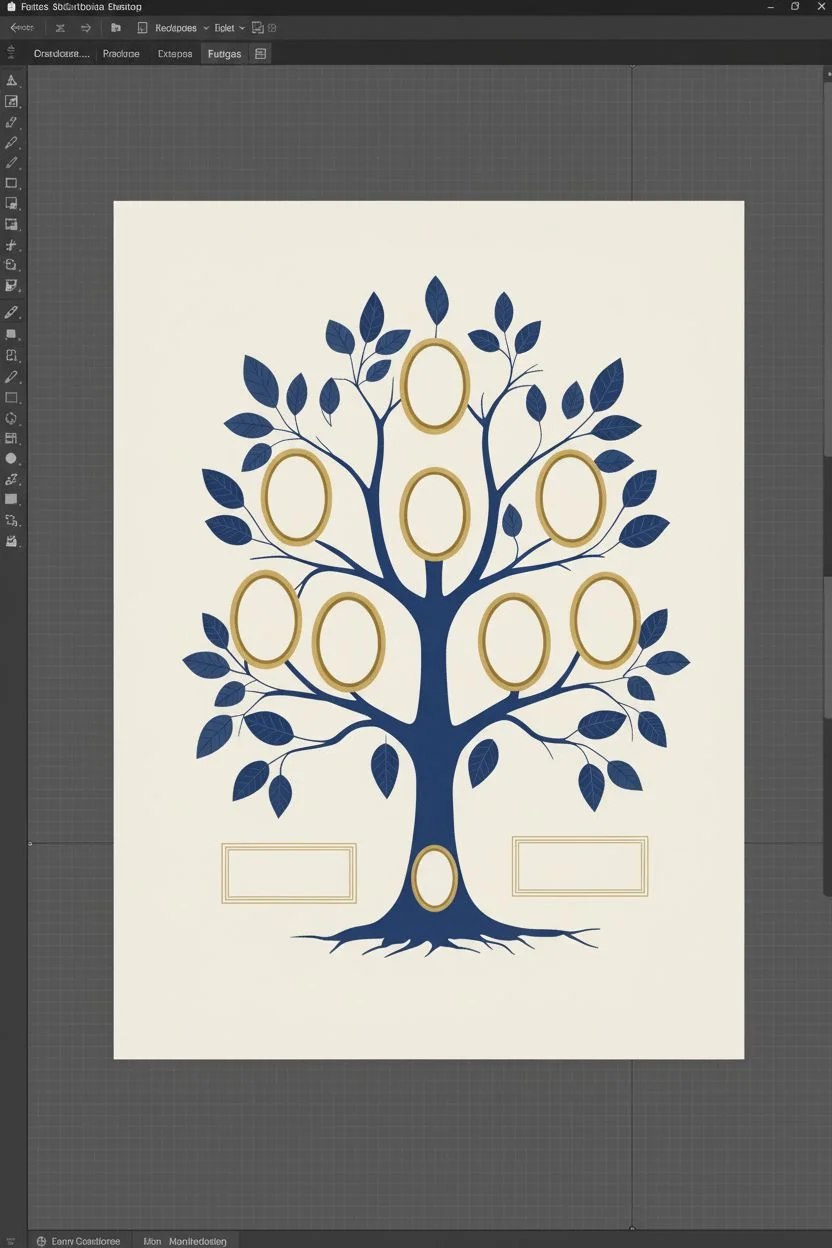
This elegant project combines the sharpness of die-cut vinyl or paper with the warmth of hand-drawn illustration to create a timeless family record. The deep indigo tree contrasts beautifully with delicate gold accents, resulting in a sophisticated piece of wall art perfect for any home.
Detailed Instructions
Materials
- Heavyweight cream or off-white cardstock (11×14 or similar size)
- Deep blue permanent vinyl (matte finish) OR dark blue cardstock and adhesive
- Gold metallic vinyl or gold cardstock
- Silhouette Cameo or Cricut cutting machine
- Transfer tape (if using vinyl)
- Fine-point black drawing pen (0.3mm or 0.5mm)
- Fine-point gold gel pen or metallic marker
- Weeding tool and scraper
- Light wood frame (light oak or birch)
Step 1: Designing the Layout
-
Create the tree vector:
Begin in your cutting machine software by designing or importing a tree silhouette. Look for a design with a sturdy central trunk and symmetrical blending branches that leave open ‘negative space’ for portraits. -
Add leaf details:
Ensure your tree design has defined, pointed leaves. If the vector is too simple, add individual leaf shapes to the branch tips to match the fullness seen in the example. -
Design the oval frames:
Create simple oval rings digitally. You will need one for each family member you wish to include. Size them to fit comfortably within the gaps of the tree branches. -
Create the base plaques:
Design two rectangular outlines for the bottom left and right of the trunk. These will serve as legends or dedication spaces. Add a small oval frame directly on the trunk’s base for the family surname or establishment date.
Pro Tip: Vector Magic
If you don’t have a vector file, scan a sketch of a tree and use the ‘Trace’ function in Silhouette Studio to create your own unique cut file.
Step 2: Cutting and Weeding
-
Cut the blue layer:
Load your deep blue vinyl (or cardstock) into the machine. Cut the main tree structure. If using vinyl, use a matte finish to give it a painted look rather than a sticker look. -
Cut the gold layer:
Load your gold metallic material. Cut the oval rings, the rectangular box frames, and the small base oval. Also, cut tiny scatter flowers or small leaf clusters to use as accents. -
Weed the designs:
Carefully remove the excess vinyl from your carrier sheets using a weeding tool. Be extremely gentle with the thin gold ovals so they don’t stretch or warp.
Step 3: Assembly and Hand-Detailing
-
Transfer the tree:
Apply transfer tape to your blue tree. Align it centrally on your large cream cardstock sheet. Burnish it well with a scraper tool before peeling back the tape to ensure strong adhesion. -
Place the gold frames:
Using transfer tape, position the gold ovals into the spaces between branches. This step requires patience to ensure they look balanced and level. -
Add gold accents:
Place the rectangular frames at the bottom and scatter the tiny gold flower clusters around the branches to connect the design elements. -
Write the names:
Using your fine-point black pen, carefully hand-letter family names inside the gold ovals. I find it helpful to lightly pencil guidelines first to ensure the text is centered. -
Add illegible text texture:
To mimic the ‘ancient manuscript’ look of the example, add tiny, stylized scribbles or faux-text lines underneath the main names using the black pen. -
Draw hanging charms:
With the black pen, draw thin lines dropping from the lower branches, adding small charms or silhouette figures hanging down, just like the whimsical details in the original art. -
Sketch root details:
At the very bottom of the trunk, use the black pen to extend thin, squiggly lines outward to simulate fine roots entering the ground. -
Highlight with gold ink:
Take your gold gel pen and add tiny manual embellishments—small dots on the leaves or extra tendrils near the gold vinyl flowers—to blend the printed and drawn elements.
Troubleshooting: Warped Vinyl
If thin vinyl lines stretch during transfer, chill the vinyl sheet in the fridge for 5 minutes before weeding to make it stiffer and easier to handle.
Step 4: Final Framing
-
Clean up:
Gently erase any pencil guidelines you made for the lettering. Make sure the ink is completely dry before doing this to avoid smudging. -
Mount and frame:
Place your finished artwork into a light wood frame. A mat isn’t necessary if you’ve left a good margin of white space, but a simple white mat can add depth.
Hang your personal history proudly and enjoy explaining the details to your guests


Have a question or want to share your own experience? I'd love to hear from you in the comments below!