The moon is basically the perfect painting subject: it’s instantly recognizable, super forgiving, and it lets you play with glow, texture, and dramatic contrast. Here are my favorite moon painting ideas—starting with the classic looks everyone loves, then easing into more creative twists once you’re warmed up.
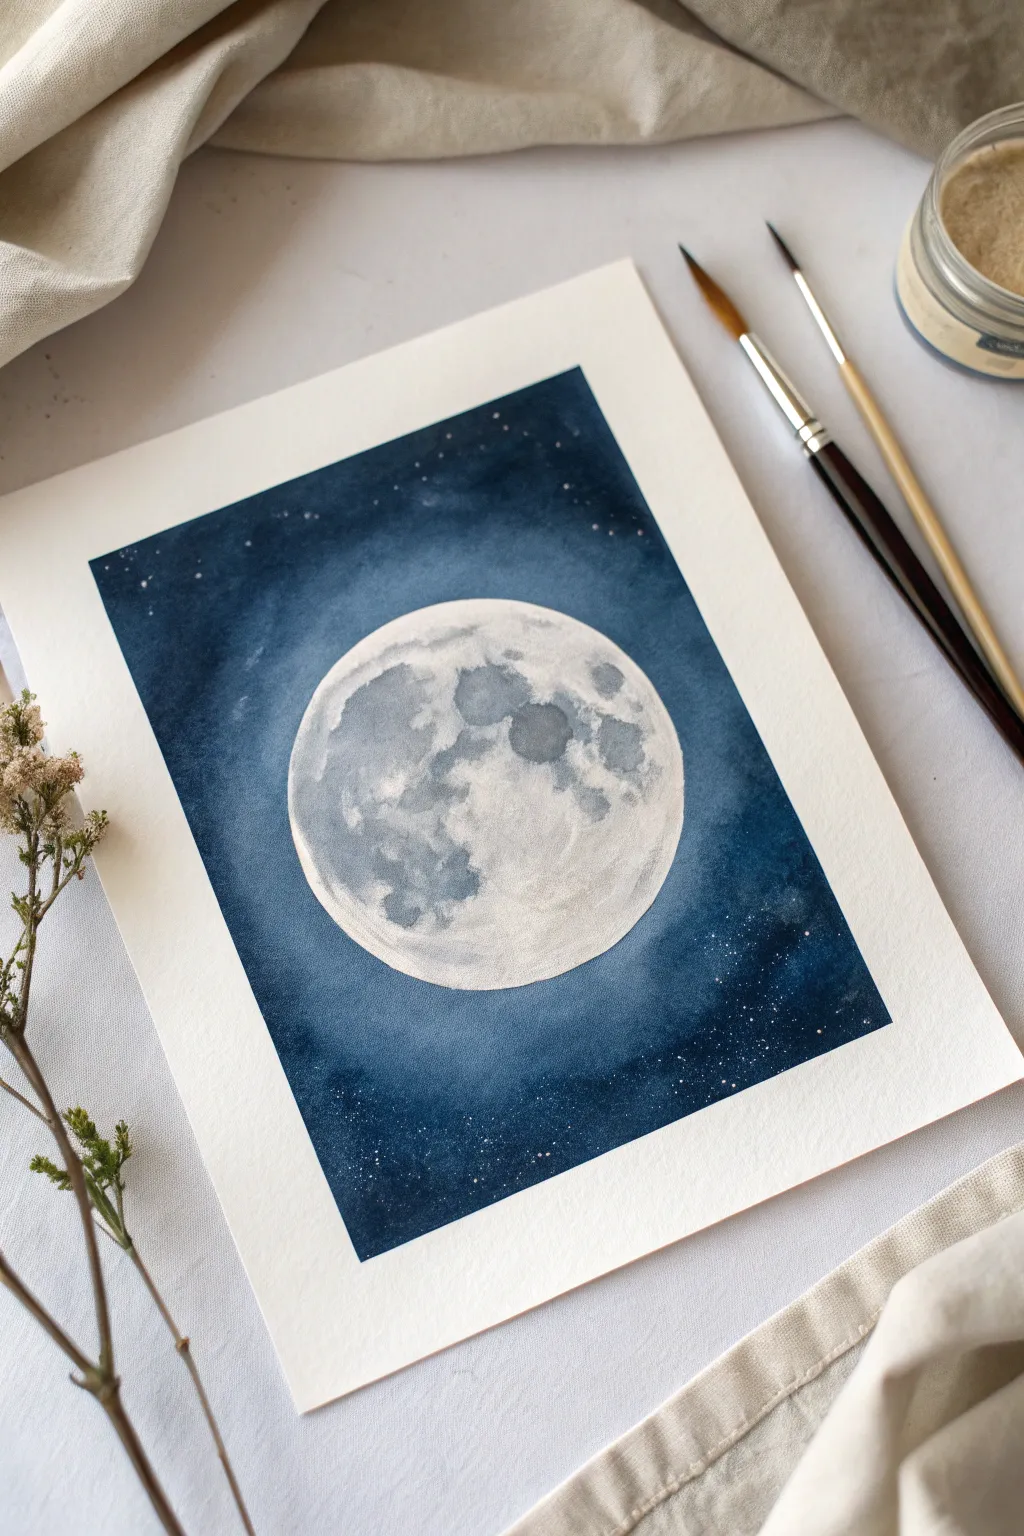
Classic Full Moon in a Starry Night Sky
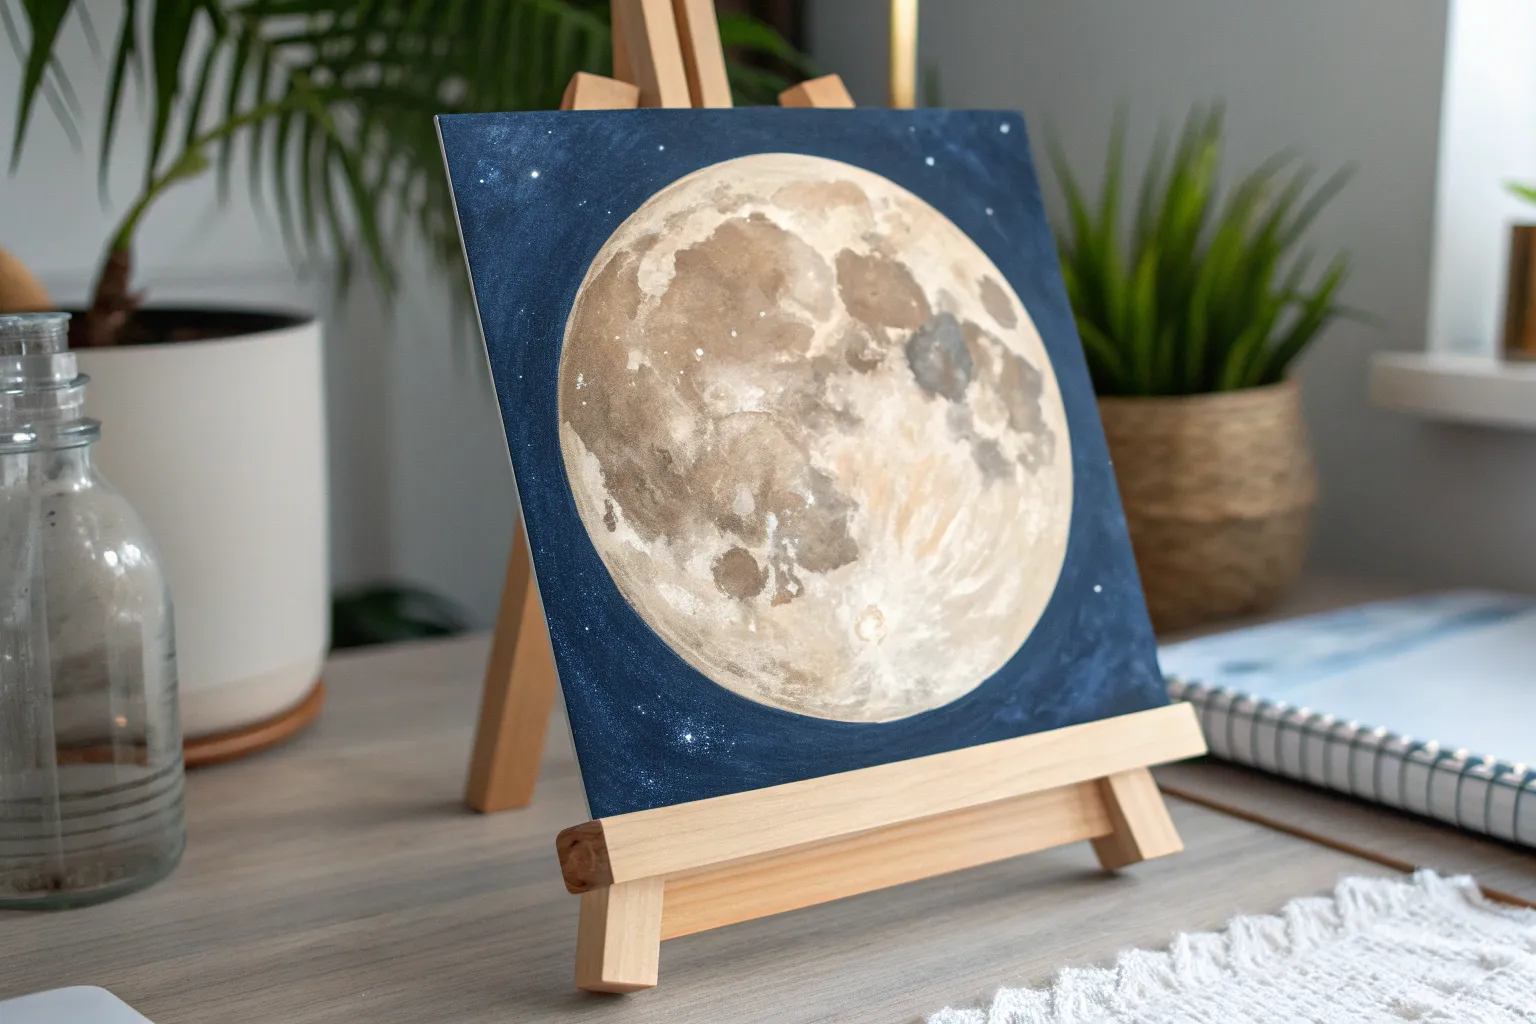
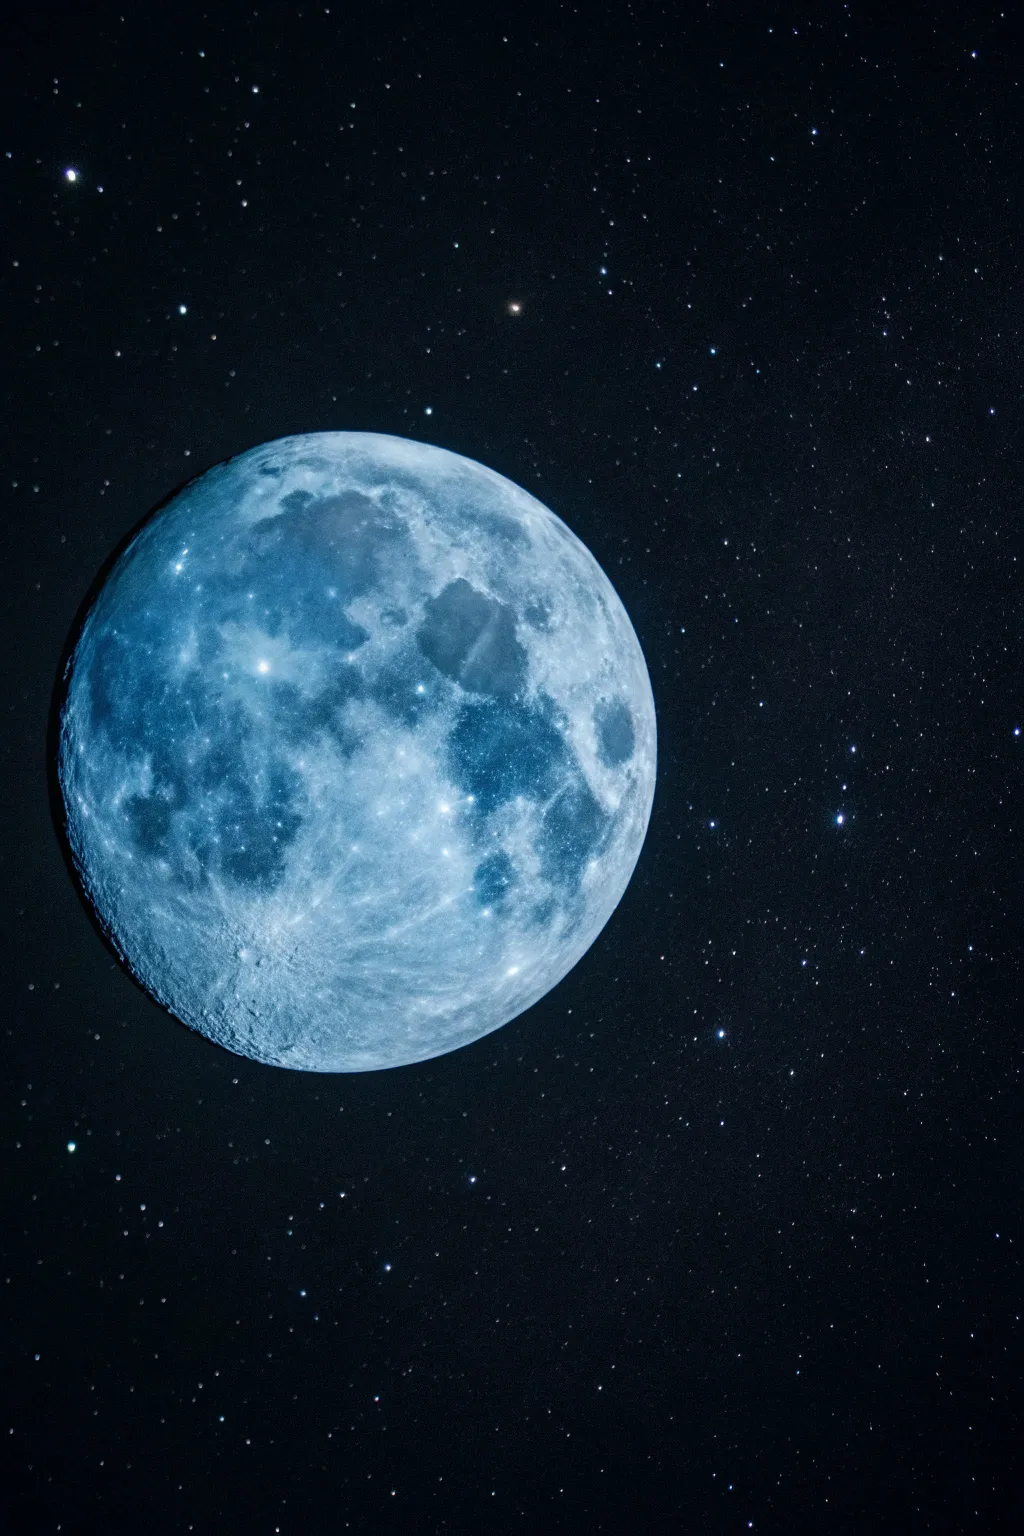
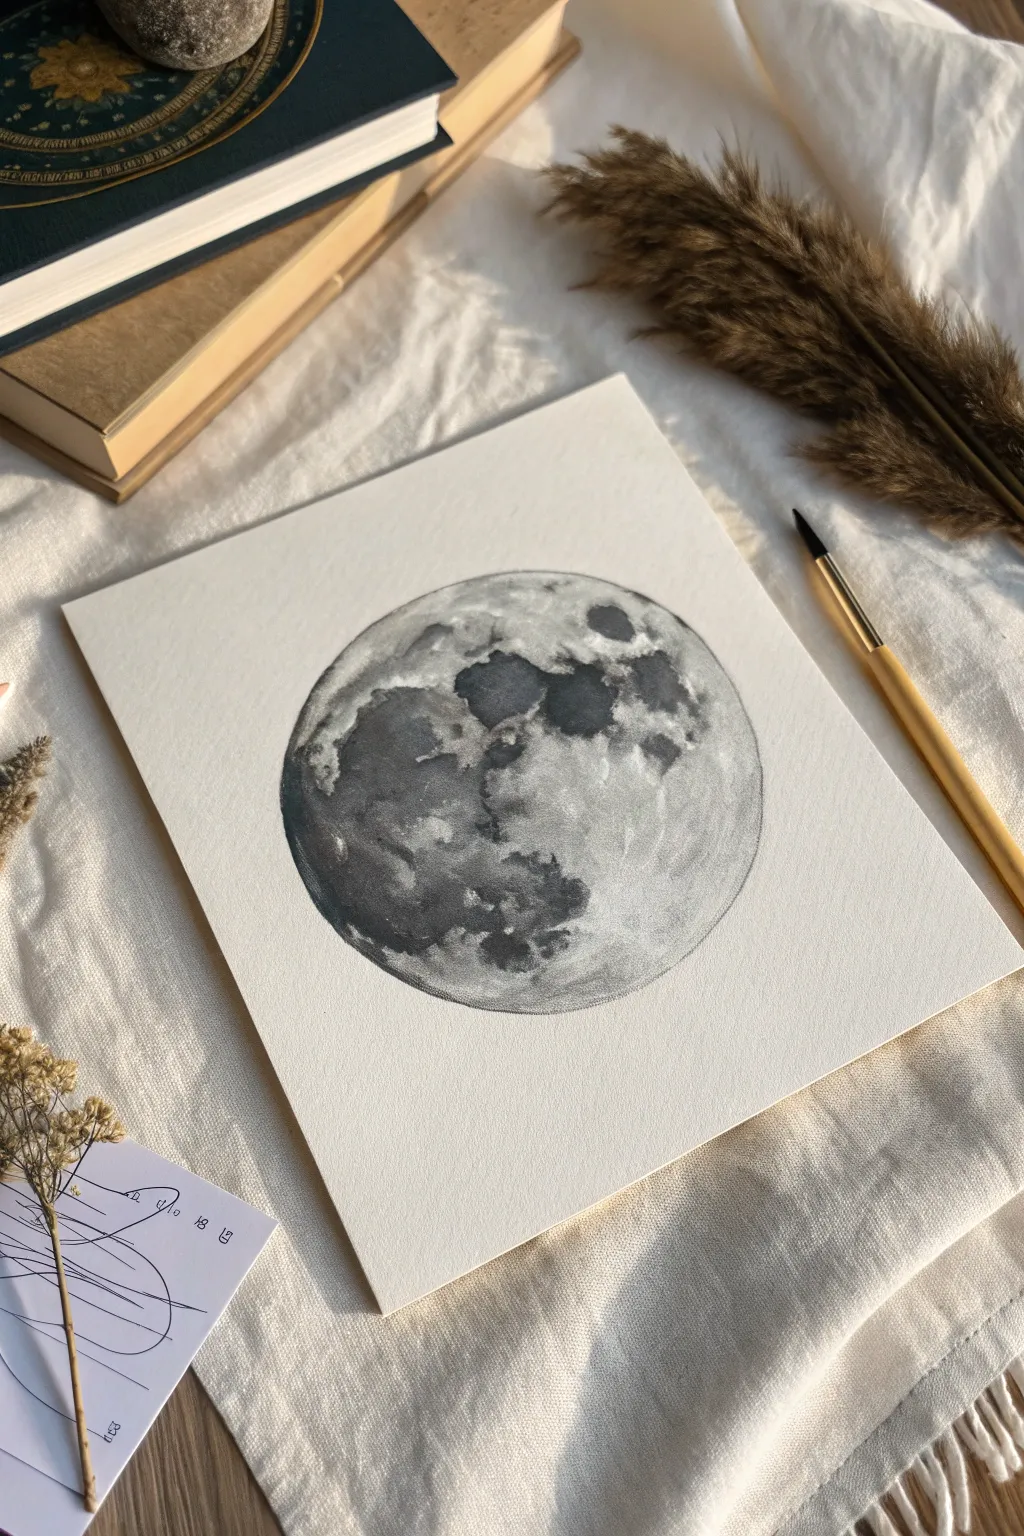
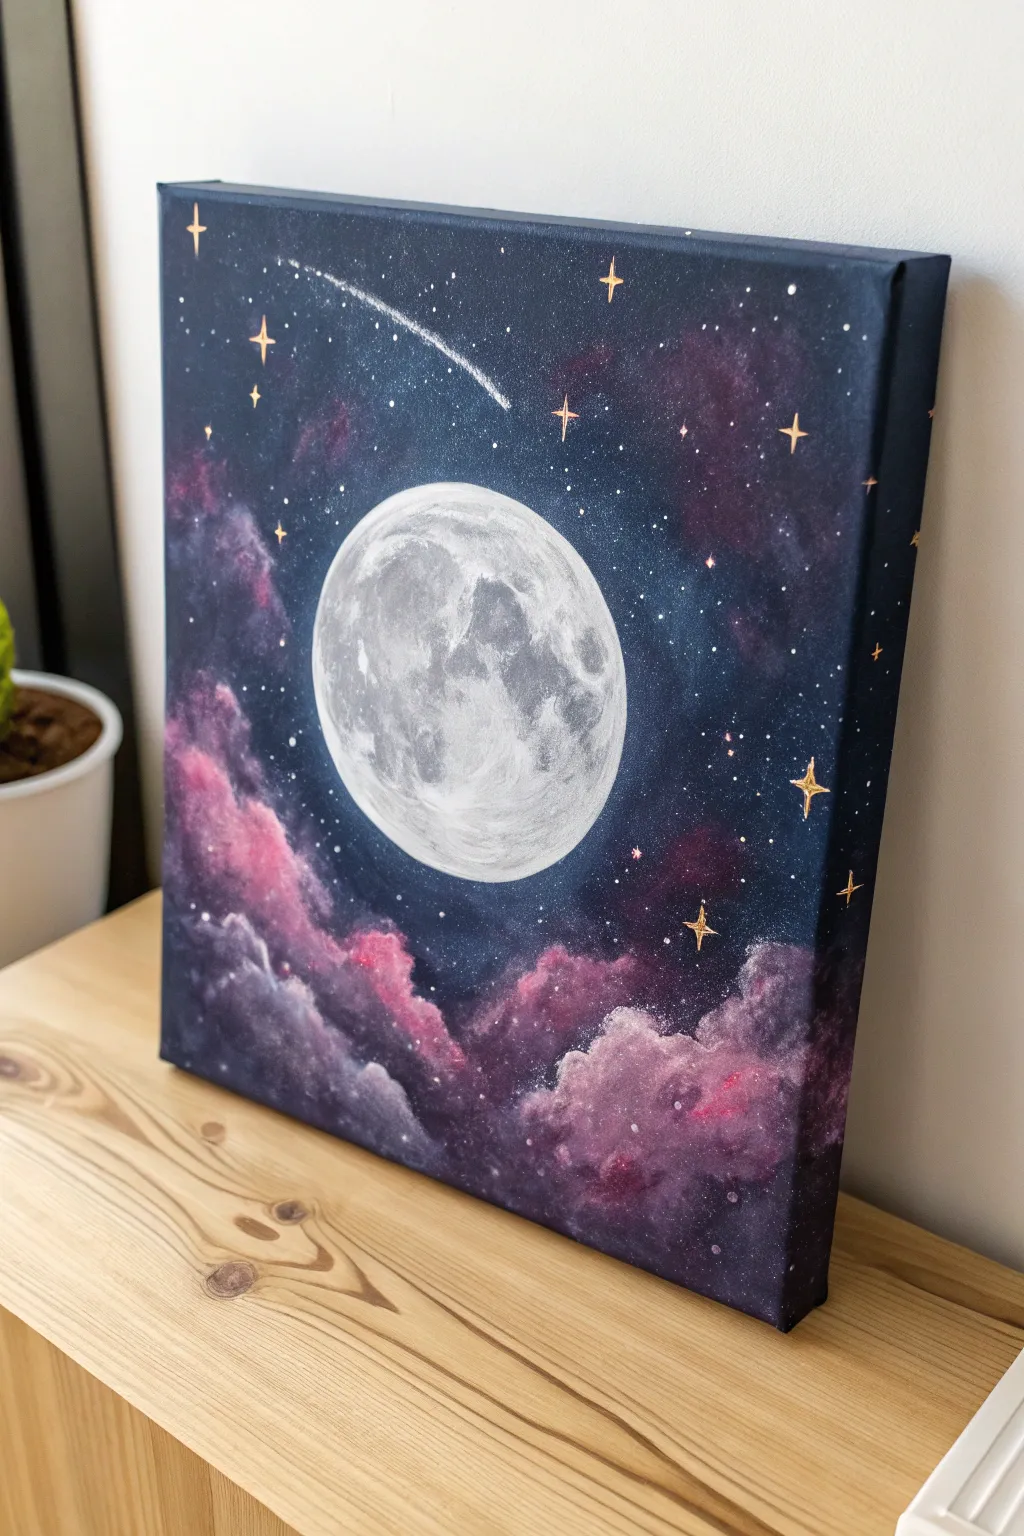
Capture the serene beauty of a classic full moon floating in a deep indigo sky with this watercolor project. The high contrast between the luminous moon and the rich background makes for a striking yet achievable piece.
Step-by-Step
Materials
- Cold press watercolor paper (300 gsm)
- Painter’s tape or washi tape
- Pencil and large circular object (for tracing)
- Masking fluid
- Watercolor paints: Indigo, Payne’s Gray, Lamp Black
- White gouache or white gel pen
- Round brush (size 8 or 10 for wasps)
- Fine detail brush (size 0 or 1)
- Old brush (for masking fluid)
- Paper towels and water jars
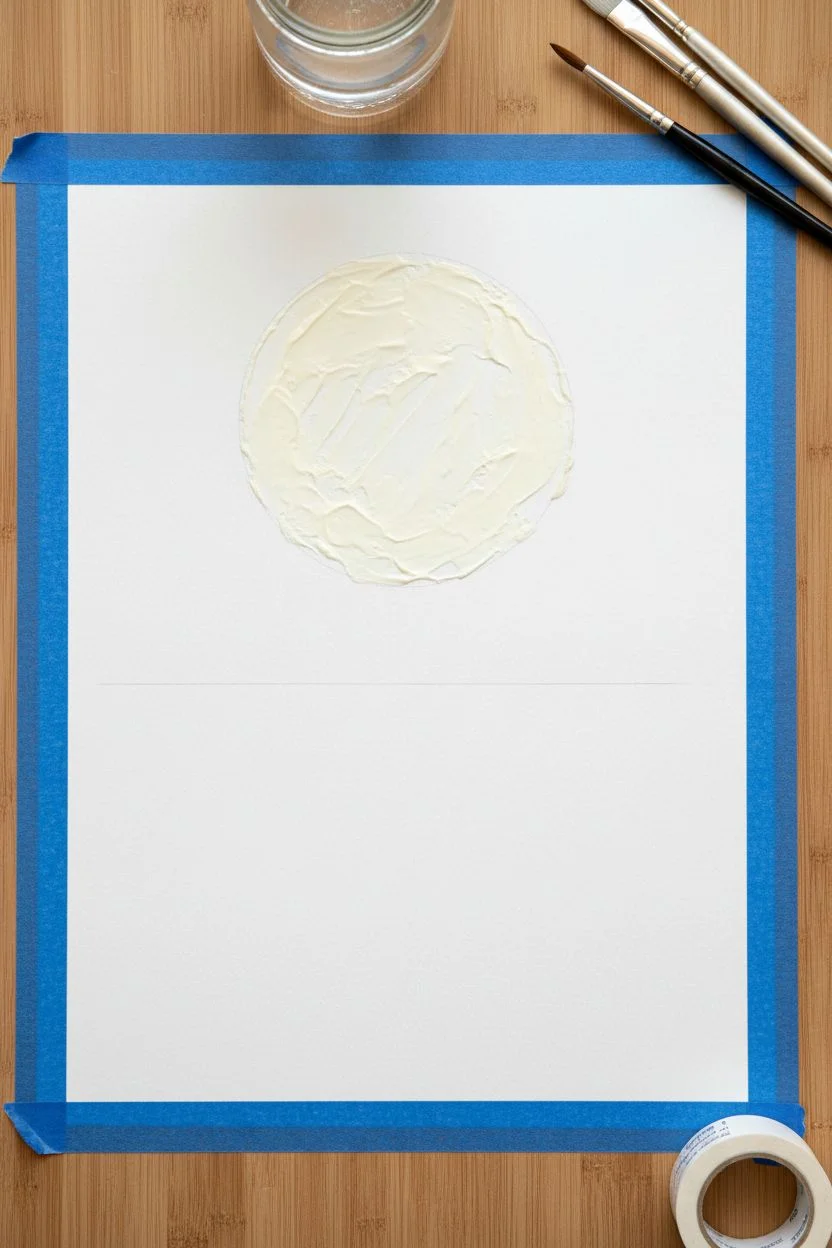
Step 1: Preparation & Masking
-
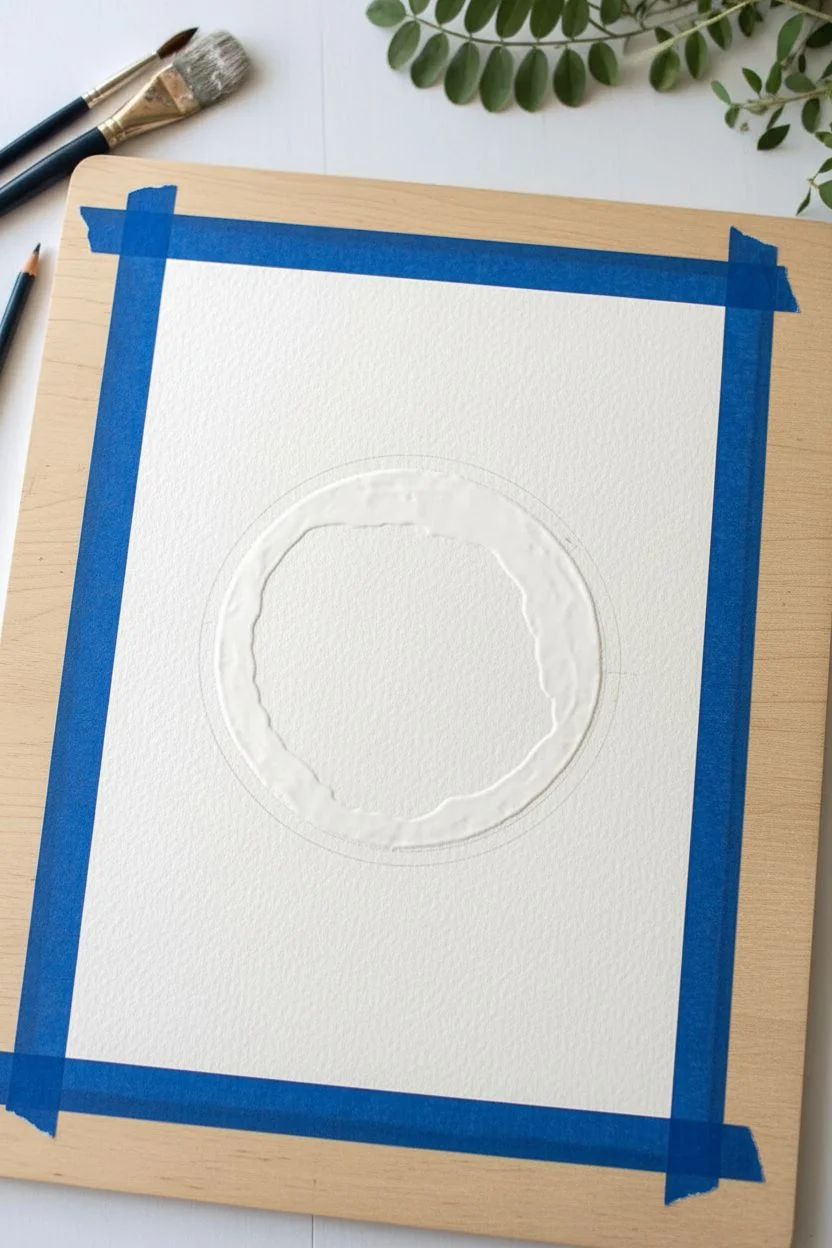
Tape the Edges:
Secure your watercolor paper to a board or table using painter’s tape on all four sides. This creates that crisp white border seen in the final piece and prevents the paper from buckling when wet. -
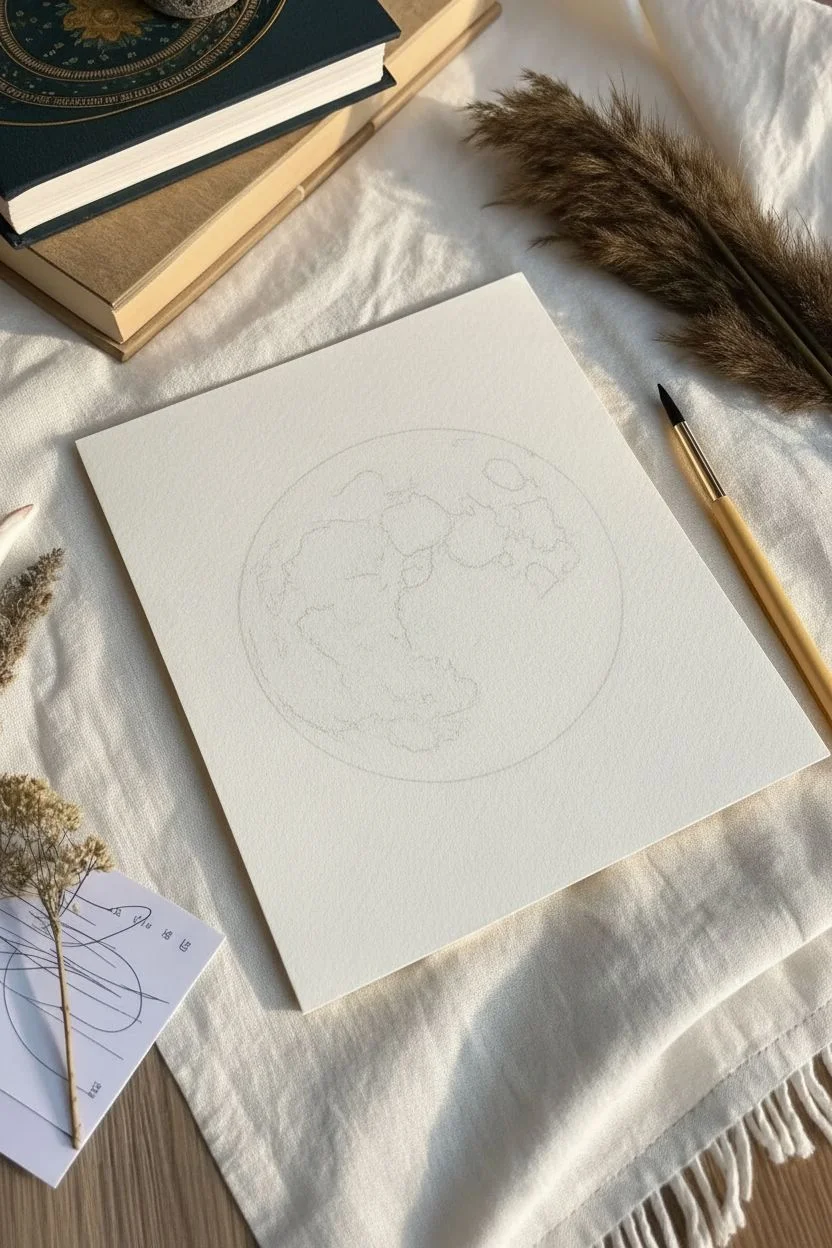
Sketch the Moon:
Place a large circular object (like a bowl or masking tape roll) in the center of your paper. Lightly trace around it with a pencil to define your moon’s shape. -
Apply Masking Fluid:
Using an old brush that you don’t mind ruining, carefully fill in the entire circle with masking fluid. This protects the white paper underneath so you can paint the dark sky freely without worrying about the edge. -
Let it Dry:
Allow the masking fluid to dry completely. It should feel rubbery and not tacky to the touch before you proceed.
Bleeding Edges?
If paint bleeds under the tape, use a slightly damp, stiff brush (like an acrylic brush) to gently scrub the unwanted pigment away, blotting with a tissue as you go
Step 2: Painting the Sky
-
Mix Your Darkest Blue:
Create a large puddle of deep night-sky color. I like to mix Indigo with a touch of Payne’s Gray and Lamp Black to get a rich, nearly-black blue. -
First Sky Layer:
Using your larger round brush, wet the paper surrounding the masked moon with clean water (wet-on-wet technique), then drop in your dark blue mixture. Let the color flow. -
Deepen the Tone:
While the paper is still damp, add more concentrated pigment, especially around the edges and corners, to create depth and a slight vignette effect. -
Dry and Repeat:
Let the first layer dry completely. If the sky isn’t dark enough, apply a second layer of paint to achieve that opaque, velvety night sky look. -
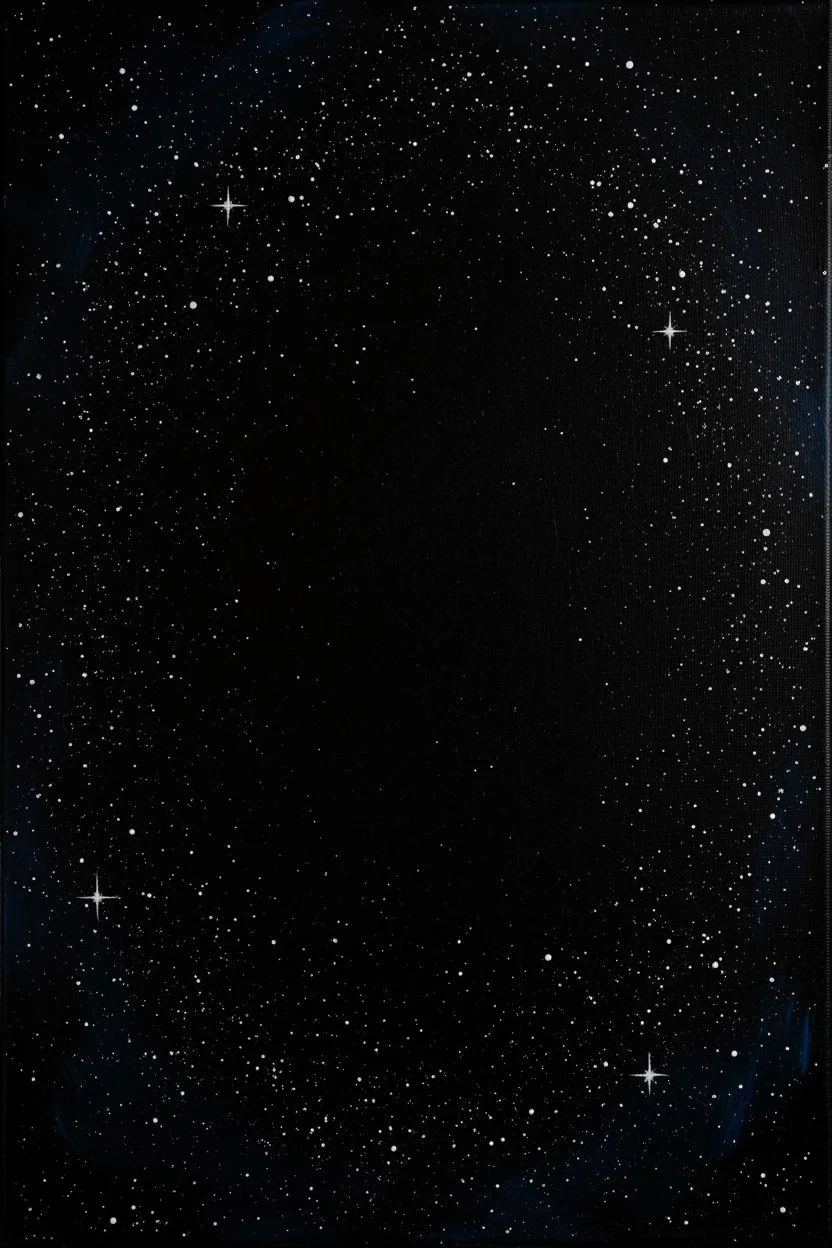
Add Stars:
Once the sky is bone dry, use white gouache or a white gel pen to dot small stars across the background. Vary the sizes for realism. -
Paint Larger Stars:
Select a few spots to add larger, twinkling stars. Draw small four-pointed star shapes using your fine detail brush and thick white gouache.
Level Up: Glow Effect
Before painting the dark sky, wet a ring around the masked moon and drop in clean water. This pushes pigment away, creating a subtle glowing halo around the moon
Step 3: Detailing the Moon
-
Remove Masking:
Gently rub away the dry masking fluid with your finger or a rubber cement pickup tool to reveal the stark white circle underneath. -
Mix Moon Shadows:
Dilute a very small amount of gray paint (Payne’s Gray worked well here) with plenty of water. You want a very pale, watery wash. -
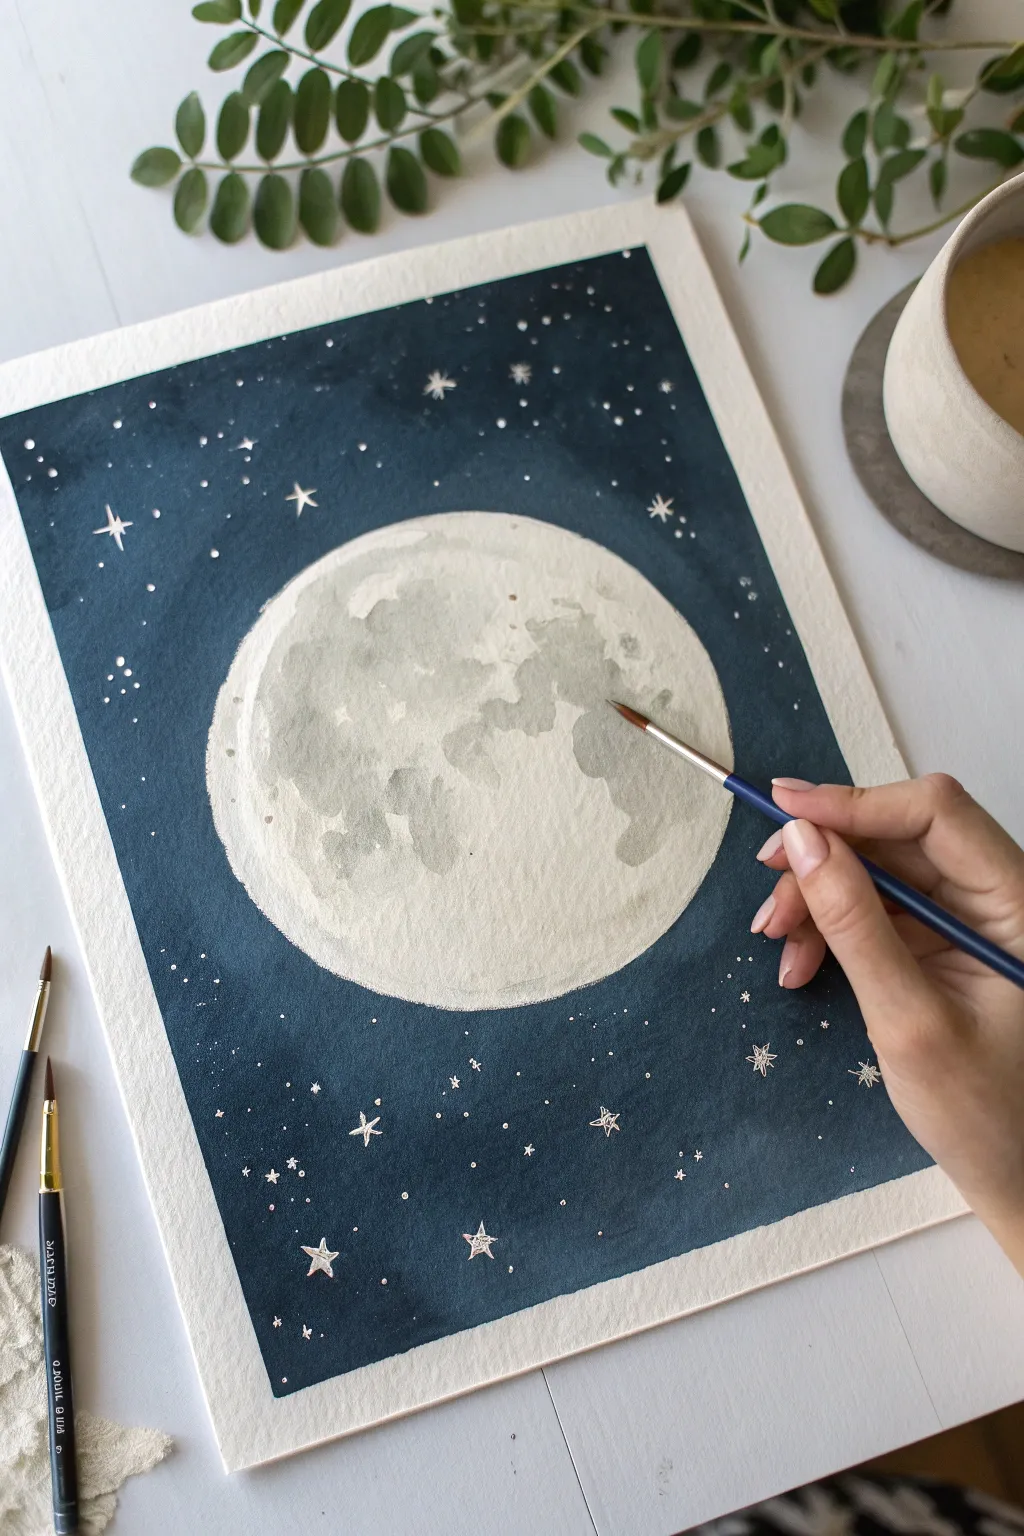
Map the Craters:
Look at a reference photo of the moon. Using the pale gray wash, paint organic, blotchy shapes to represent the ‘maria’ (dark plains) and craters. -
Soften the Edges:
While the gray paint is wet, rinse your brush and use slightly damp bristles to soften the edges of your gray blotches so they don’t look too harsh. -
Layer Shadows:
Once the first gray layer is dry, add a second, slightly darker gray layer to the deepest parts of the craters to add dimension and texture. -
Final Highlights:
If you accidentally darkened an area too much, use a tiny bit of white gouache to bring back the brightness on the crater rims. -
Reveal the Border:
Wait for everything to be 100% dry, then slowly peel away the painter’s tape at a 45-degree angle to reveal your clean white frame.
Now step back and admire the peaceful lunar landscape you have created


Moonlight Reflection Over a Calm Lake
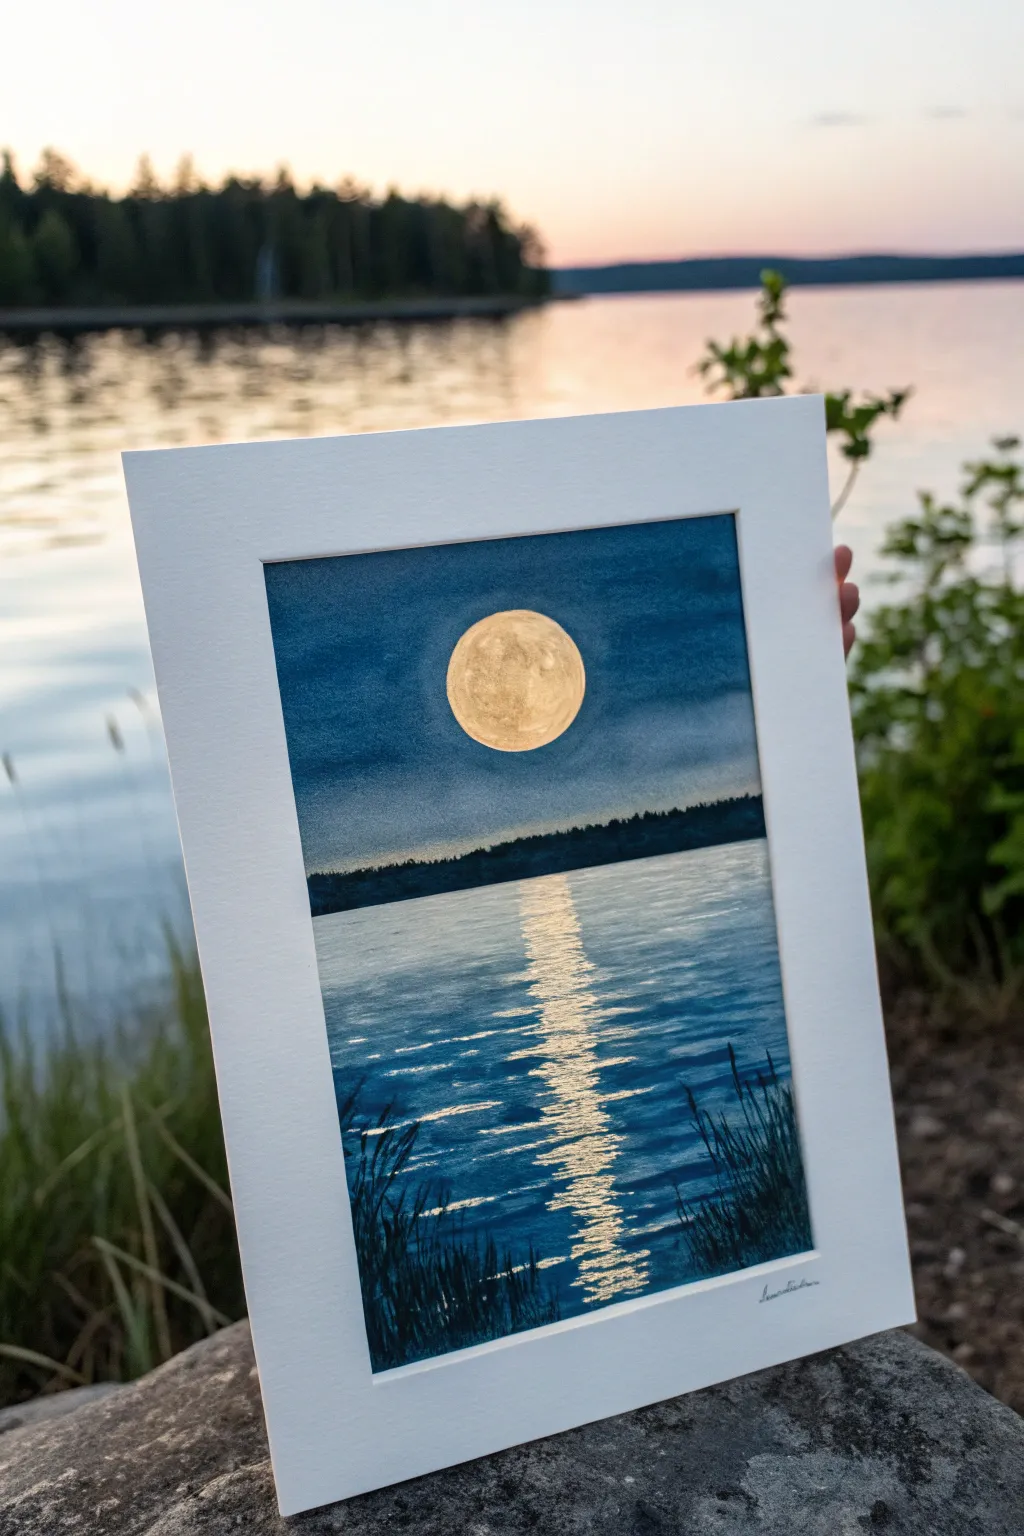
Capture the serenity of a quiet evening with this watercolor painting featuring a glowing full moon reflecting across a rippled lake. Using masking techniques and careful layering, you’ll create a striking contrast between the luminous moonlight and the deep, moody blues of the night sky.
Detailed Instructions
Materials
- Cold pressed watercolor paper (140lb/300gsm)
- Watercolor paints (Indigo, Payne’s Gray, Prussian Blue, Yellow Ochre, Burnt Umber)
- White gouache or white gel pen
- Masking fluid
- Synthetic round brushes (sizes 2, 6, and 10)
- Rigger or liner brush
- Pencil and circular object (for tracing)
- Jar of clean water
- Paper towels
- Artist tape
Step 1: Preparation and Masking
-
Prepare the paper:
Begin by taping down all four edges of your watercolor paper to a board using artist tape. This creates a clean border and prevents the paper from buckling when wet. -
Sketch the moon:
Using a jar lid or a compass, lightly trace a perfect circle in the upper center of the paper. Keep the pencil lines very faint so they don’t show through the final paint. -
Mark the horizon:
Draw a straight horizontal line about two-thirds of the way down the paper to separate the sky from the water. -
Apply masking fluid:
Carefully paint masking fluid over the entire moon circle. Let this dry completely before moving on to the next step, ensuring the moon stays pristine white.
Keep the Glow
To make the moon look brighter, keep the sky around it exceptionally dark. Contrast is key; the darker the surrounding blue, the more the moon will appear to shine.
Step 2: Painting the Sky and Moon
-
Wet-on-wet sky base:
Wet the entire sky area with clean water using your largest brush. While it’s glistening but not soaking, drop in a wash of Prussian Blue, starting darker at the top and fading slightly as you reach the horizon. -
Deepen the night colors:
While the paper is still damp, mix Indigo with a touch of Payne’s Gray. Charge this dark mixture into the top corners and edges of the sky to create a vignette effect, focusing the eye on the moon. -
Paint the distant trees:
Once the sky is dry, mix a very dark, thick color using Indigo and Burnt Umber. With a size 6 brush, paint the silhouette of a forest along the horizon line. Vary the heights of the trees for a natural look. -
Reveal the moon:
Ensure the sky is bone dry, then gently rub off the masking fluid with your finger or a rubber pick-up tool. -
Texture the moon:
Mix a watery pale wash of Yellow Ochre. Paint the moon, leaving tiny spots of white paper for brightness. I like to drop in tiny dots of diluted Burnt Umber while it’s wet to create craters and surface texture.
Metallic Magic
Swap the yellow ochre in the reflection for gold watercolor paint or metallic ink. This adds a genuine shimmer to the water when the light hits the painting.
Step 3: Creating the Reflection
-
Base water wash:
Wet the water area below the treeline. Apply a horizontal wash of Prussian Blue, keeping it lighter in the center where the moon’s reflection will sit. -
Building water depth:
While moist, drag horizontal strokes of Indigo from the left and right edges toward the center, leaving a lighter channel in the middle aligned with the moon. -
Initial reflection layer:
Mix a creamy consistency of Yellow Ochre and white gouache. Using a smaller brush, paint horizontal, broken lines in the center of the water, creating the ‘ladder’ of moonlight. -
Refining the ripples:
Switch to a darker blue mix. Paint thin, dark lines between the light reflection strokes to represent the shadows of the waves. -
Adding the sparkle:
Using pure white gouache or a gel pen, add sharp, bright highlights to the very center of the reflection path. Keep these strokes horizontal and jagged to mimic light catching the water’s surface.
Step 4: Foreground Foliage
-
Drafting the reeds:
Mix your darkest black-blue using Indigo and Payne’s Gray with very little water. -
Painting grass blades:
With a liner or rigger brush, flick upward strokes from the bottom corners of the paper. Use quick, confident motions to get tapered, grass-like tips. -
Adding texture and seed pods:
Add small, oval-shaped seed heads to some of the taller stalks. Cross some blades over others to create a dense, natural foreground that frames the scene. -
Final touches:
Review the painting. If the reflection needs more glow, add a few more touches of bright white. Sign your work in the bottom corner once dry.
Peel off the tape carefully to reveal your crisp white border and enjoy your calm moonlit night


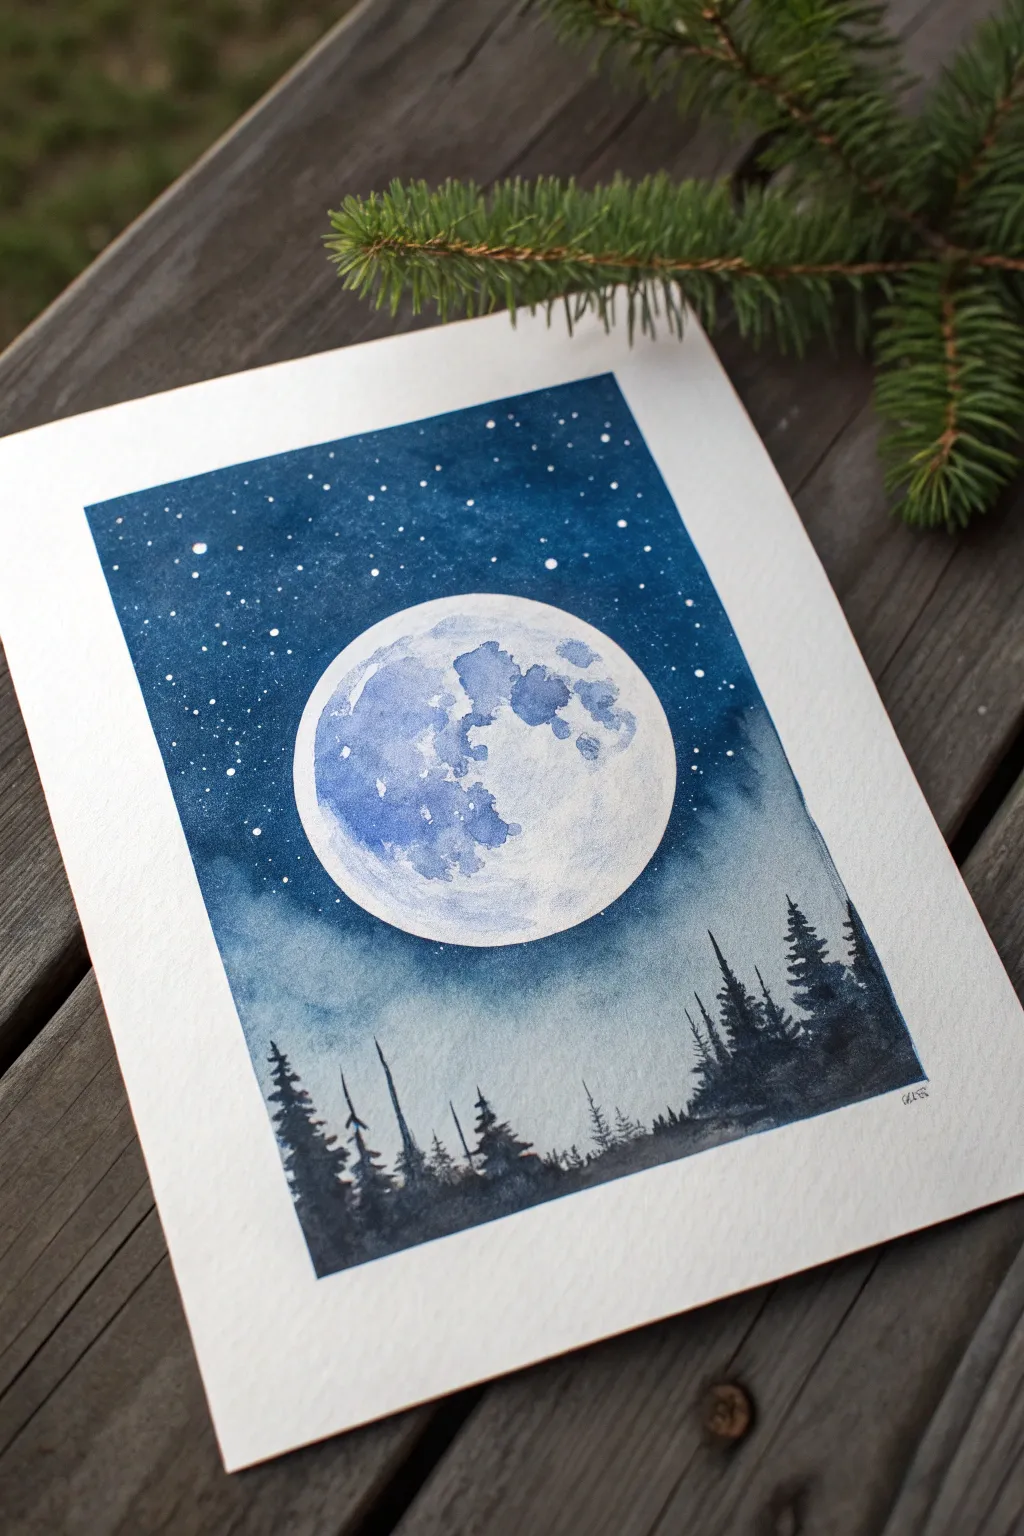
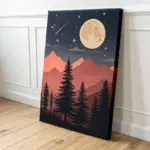
Moon With Pine Tree Silhouettes
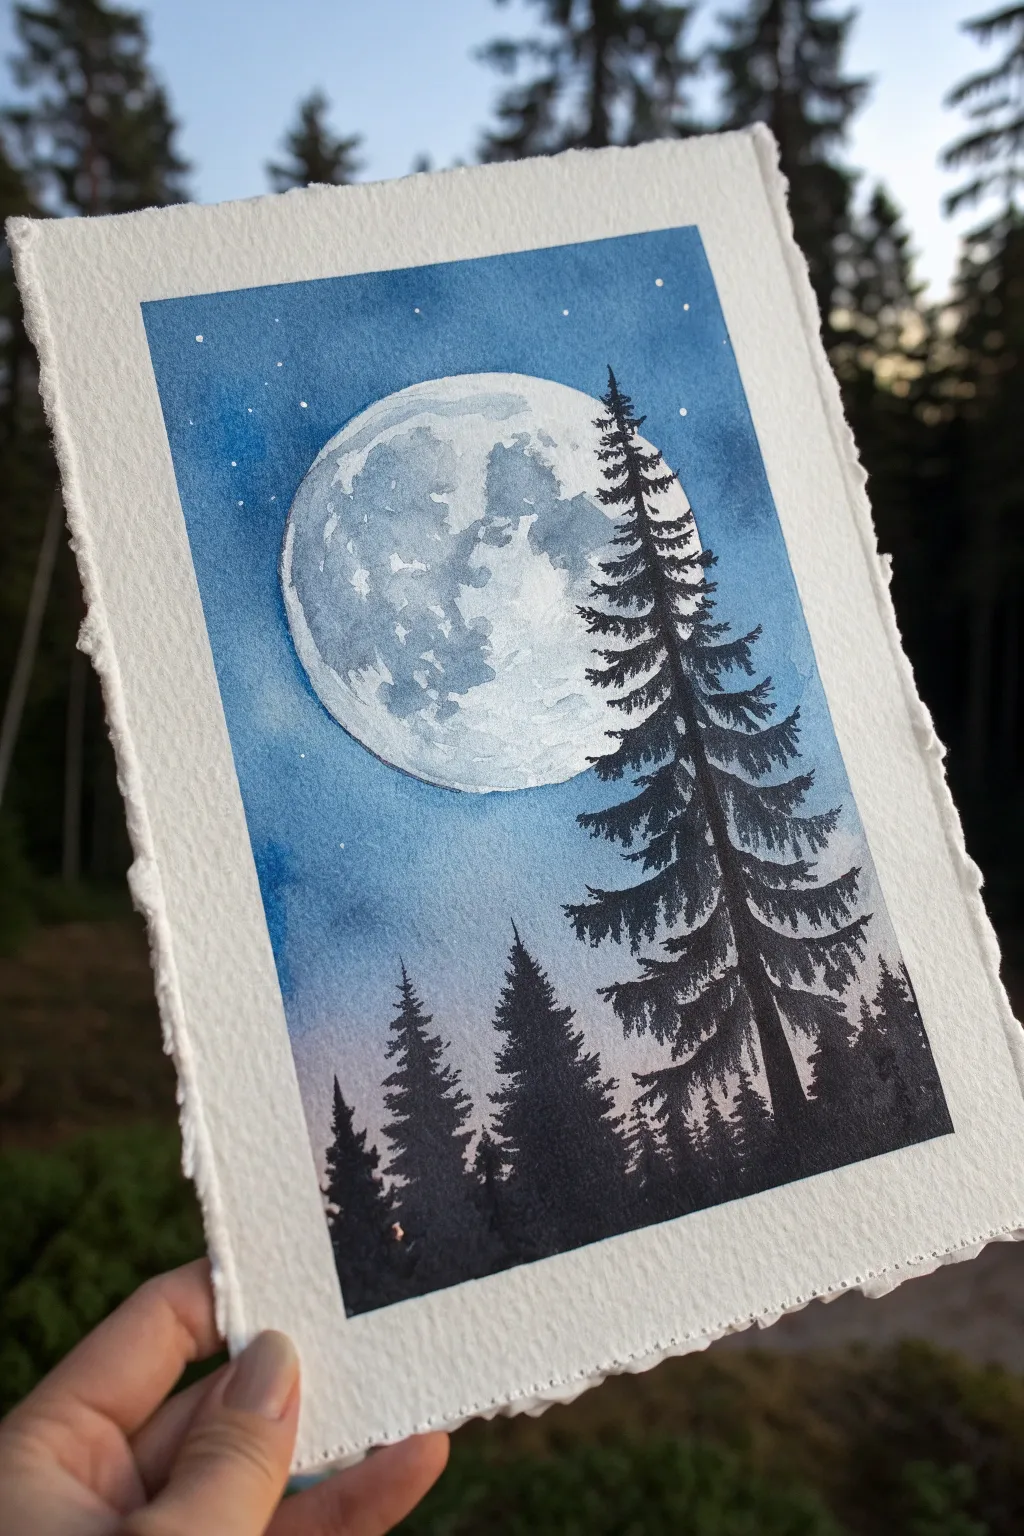
Capture the serene beauty of a crisp night with this watercolor project, featuring a luminous, detailed moon rising behind silhouetted evergreens. The contrast between the cratered lunar surface and the sharp, dark tree lines creates a stunning depth that looks professional yet is surprisingly achievable.
How-To Guide
Materials
- Cold press watercolor paper (300 gsm or heavier)
- Watercolor paints (Indigo, Prussian Blue, Paynes Gray, Alizarin Crimson)
- Masking fluid (drawing gum) and old brush
- Round brushes (sizes 2, 6, and 10)
- White gel pen or white gouache
- Pencil and round object for tracing (or compass)
- Painter’s tape or board for mounting
- Paper towels and water jars
Step 1: Preparation and Masking
-
Secure the paper:
Tape your watercolor paper down to a board on all four sides. This prevents buckling when we add water later. -
Outline the moon:
Using a roll of tape, a jar lid, or a compass, lightly trace a large circle in the upper center of your paper. Keep the pencil line faint so it disappears later. -
Protect the moon:
Fill in the entire circle with masking fluid. Use an old brush you don’t care about, or rub a bar of soap on your brush first to protect the bristles. This preserves the white paper for our moon texture later. -
Add stars (optional):
For a starry sky, you can flick a tiny amount of masking fluid onto the upper sky area using a stiff brush or toothbrush. Let all masking fluid dry completely before painting.
Saving Your Brush
Masking fluid ruins brushes instantly. Before dipping into the fluid, coat the bristles in dish soap. It acts as a barrier and makes cleanup much easier.
Step 2: Painting the Night Sky
-
Wet-on-wet technique:
With your largest clean brush, wet the entire paper area outside the moon circle. The paper should be glistering but not swimming in puddles. -
Start dark at the top:
Load your brush with a deep Indigo or Prussian Blue. Apply this concentrated color at the very top of the sky, letting the wet paper help diffuse the edges. -
Create the gradient:
As you move down the paper, dilute your blue slightly. Around the horizon line, mix in a tiny touch of Alizarin Crimson or a purplish tone to create a soft, glowing atmosphere near the treeline. -
Refine the wash:
Tilt your board slightly to help the colors blend downwards naturally. Ensure the paint goes right up to the edge of the dried masking fluid, but don’t worry if it looks messy on the gum itself. -
Let it dry completely:
Wait until the paper is bone dry. If it feels cool to the touch, it’s still damp. Using a hairdryer on a low setting can speed this up.
Add a Glow
Before painting the black tree over the moon, lightly scrub the sky right around the moon’s edge with a damp brush to lift a little blue, creating a soft glowing halo.
Step 3: Creating the Moon
-
Remove the mask:
Gently rub away the masking fluid with your finger or a rubber cement pickup tool to reveal the stark white circle. -
Moon base wash:
Dilute a grey-blue paint (like Paynes Gray mixed with a lot of water) until it is very pale. Wash this lightly over parts of the moon, leaving some areas pure white for highlights. -
Add craters and texture:
While the moon is still slightly damp, drop in stronger grey concentrations to mimic craters. I like to dab the pigment in random splotches, softening hard edges with a clean, damp brush to create that cloudy, lunar look.
Step 4: Silhouettes and Details
-
Mix the darkest dark:
Create a thick, opaque mixture for the trees. Use concentrated Paynes Gray or mix Indigo with Burnt Umber to get a near-black hue. It should be creamy, not watery. -
Paint the background trees:
Using a medium brush, paint the jagged, uneven tops of the distant forest along the bottom edge. Vary the heights to keep it looking natural. -
Anchor the main tree:
Choose a spot for your focal pine tree that overlaps the moon. Draw a thin vertical line for the trunk through the moon and down to the ground. -
Build the branches:
Switch to your smallest detail brush. Starting from the top of the trunk, paint branches extending outward. Use a zig-zag or stippling motion to mimic pine needles. -
Shape the tree:
Make the branches wider and denser as you move down the trunk. Ensure the silhouette is opaque where it crosses the moon—this contrast is the key to the painting’s drama. -
Final stars:
If you didn’t mask stars earlier, use a white gel pen or opaque white gouache to dot a few tiny stars in the darker blue sections of the sky. -
Deckle edge (optional):
To match the reference photo’s rustic look, you can carefully tear the edges of your paper against a ruler instead of cutting them straight.
Peel off the tape carefully to reveal your atmospheric night scene

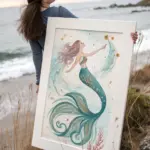

Crescent Moon With Wispy Clouds
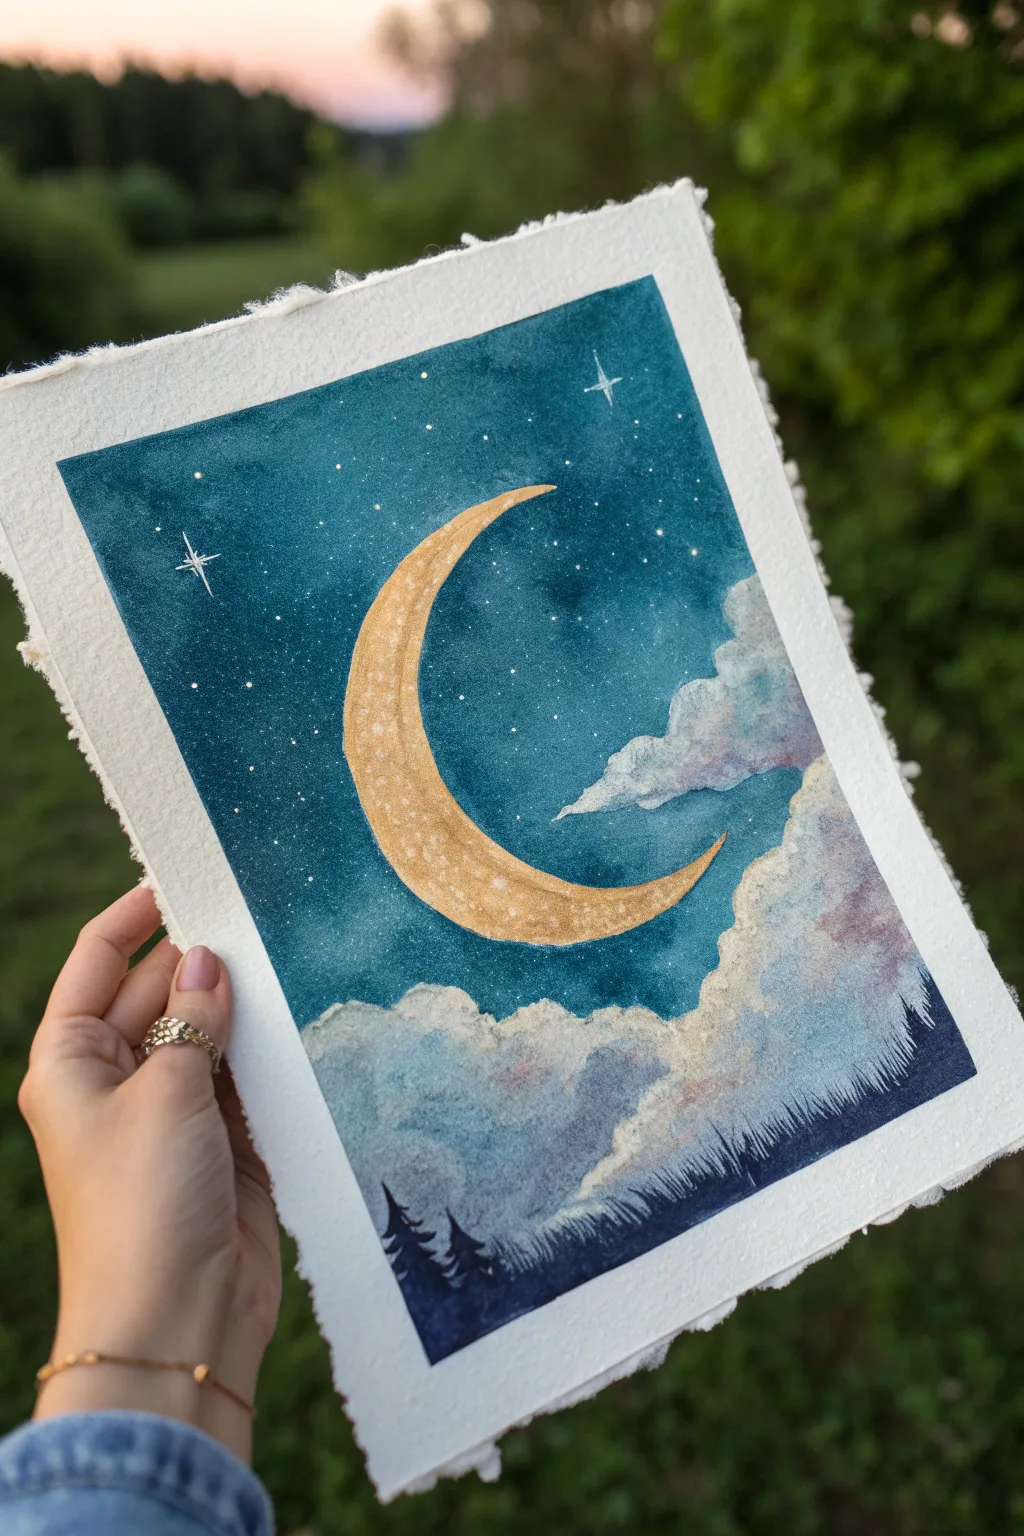
Capture the magic of a twilight sky with this dreamy watercolor painting featuring a shimmering golden crescent moon nestled among soft, violet-tinged clouds. The contrast between the deep teal sky and the warm metallic moon creates a striking piece that feels both peaceful and enchanting.
Step-by-Step
Materials
- Cold press watercolor paper (with deckled edges if possible)
- Watercolor paints (Indio/Navy Blue, Teal, Violet, Payne’s Gray)
- Gold metallic watercolor paint or gold gouache
- White gouache or white gel pen
- Masking fluid (optional but recommended)
- Round brushes (sizes 2, 6, and 10)
- Washi tape or masking tape
- Mixing palette
- Two jars of water
- Paper towels
Step 1: Planning & Masking
-
Sketch the Composition:
Begin by lightly sketching a large crescent moon in the center of your paper. Don’t worry about perfect symmetry; a slightly organic shape adds character. -
Outline the Clouds:
Lightly pencil in the fluffy cloud formations on the right side and near the bottom, letting them overlap the lower tip of the moon slightly. -
Protect the Moon:
Apply masking fluid carefully over the entire crescent moon shape. Let this dry completely before moving on to ensure your gold layer stays crisp later.
Step 2: Painting the Sky
-
Pre-wet the Sky Area:
Using clean water on your largest brush, wet the paper around the moon and above the cloud line. You want a sheen, but not puddles. -
Drop in Deep Blues:
While the paper is wet, load your brush with a mix of indigo and teal. Drop the color into the wet areas, starting from the top corners and working down toward the moon. -
Deepen the Night:
While the first layer is still damp, add concentrated indigo or Payne’s gray near the edges and corners to create a vignette effect, making the center feel like it’s glowing. -
Paint Around Clouds:
Carefully paint around your penciled cloud shapes. Use the tip of your brush to create soft, uneven edges where the sky meets the cloud tops. -
Let it Dry:
Allow this sky layer to dry completely. If the paper feels cool to the touch, it’s still wet.
Bleeding Colors?
If blue sky paint bleeds into your clouds, the cloud area might be too wet. Lift excess water with a thirsty brush or paper towel corner, let it dry, then repaint carefully.
Step 3: Creating the Clouds
-
Wet the Cloud Shapes:
Use clean water to wet the cloud areas you sketched earlier. -
Add Shadowy Tones:
Mix a very watery violet or diluted indigo. Gently dab this into the bottom/middle parts of the wet clouds to create volume and shadow. -
Define the Highlights:
Leave the very tops of the clouds white (the paper color). You can use a clean, damp brush to lift color out if it gets too dark. -
Soften Edges:
If the hard edge between the blue sky and the clouds looks too sharp, I often take a slightly damp brush and gently run it along that seam to blur it just a tiny bit.
Add Cosmic Wonder
Mix a tiny drop of iridescent silver into your blue sky wash. It won’t show much indoors, but in sunlight, the whole night sky will faintly shimmer like magic.
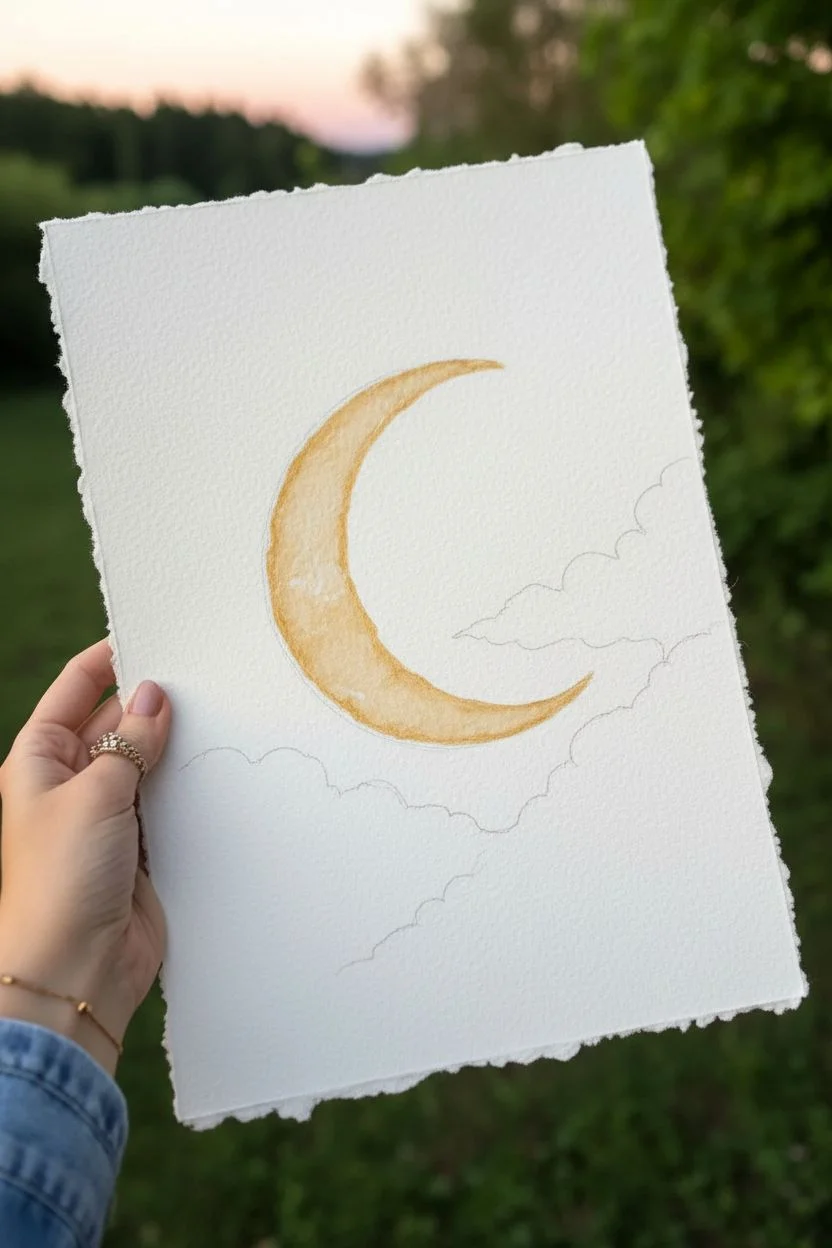
Step 4: The Golden Moon & Details
-
Remove Masking:
Once the sky is bone dry, gently rub away the masking fluid to reveal the stark white paper underneath. -
Paint the Gold:
Load a size 6 brush with metallic gold paint. Fill in the crescent shape, ensuring smooth coverage. -
Add Texture:
While the gold is drying, you can drop in slightly more concentrated gold or a tiny bit of brown in the ‘craters’ to give the moon textural depth. -
Paint the Treeline:
Using your smallest brush and concentrated indigo or black, paint a silhouette of trees along the very bottom edge. Use quick, upward flicking motions to create pine tree shapes and grass. -
Add Stars:
Dip a toothbrush or stiff brush into white gouache and flick it over the sky to create stars. Use a gel pen or fine brush to draw larger ‘twinkle’ stars with cross shapes.
Peel off your tape to reveal a stunning celestial scene ready to frame
BRUSH GUIDE
The Right Brush for Every Stroke
From clean lines to bold texture — master brush choice, stroke control, and essential techniques.
Explore the Full Guide
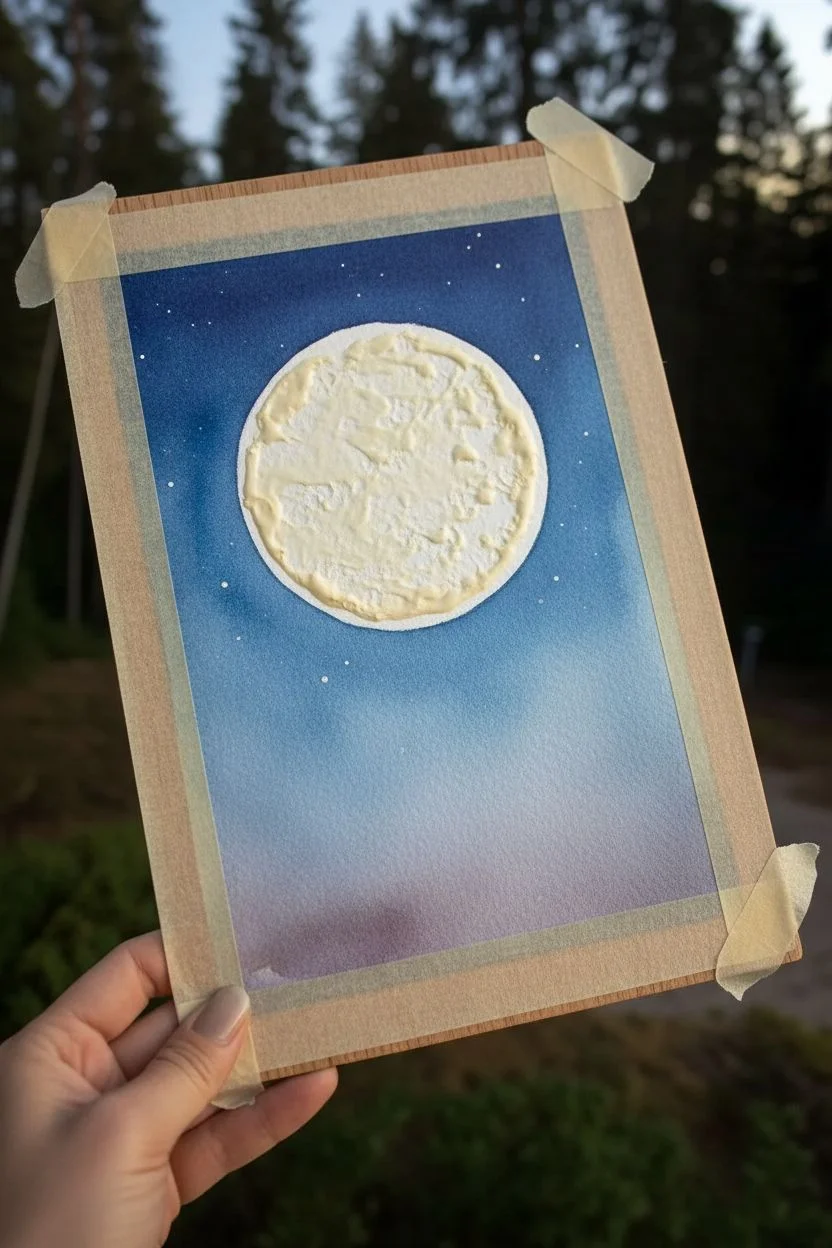
Easy Template Moon With a Smooth Glow Gradient
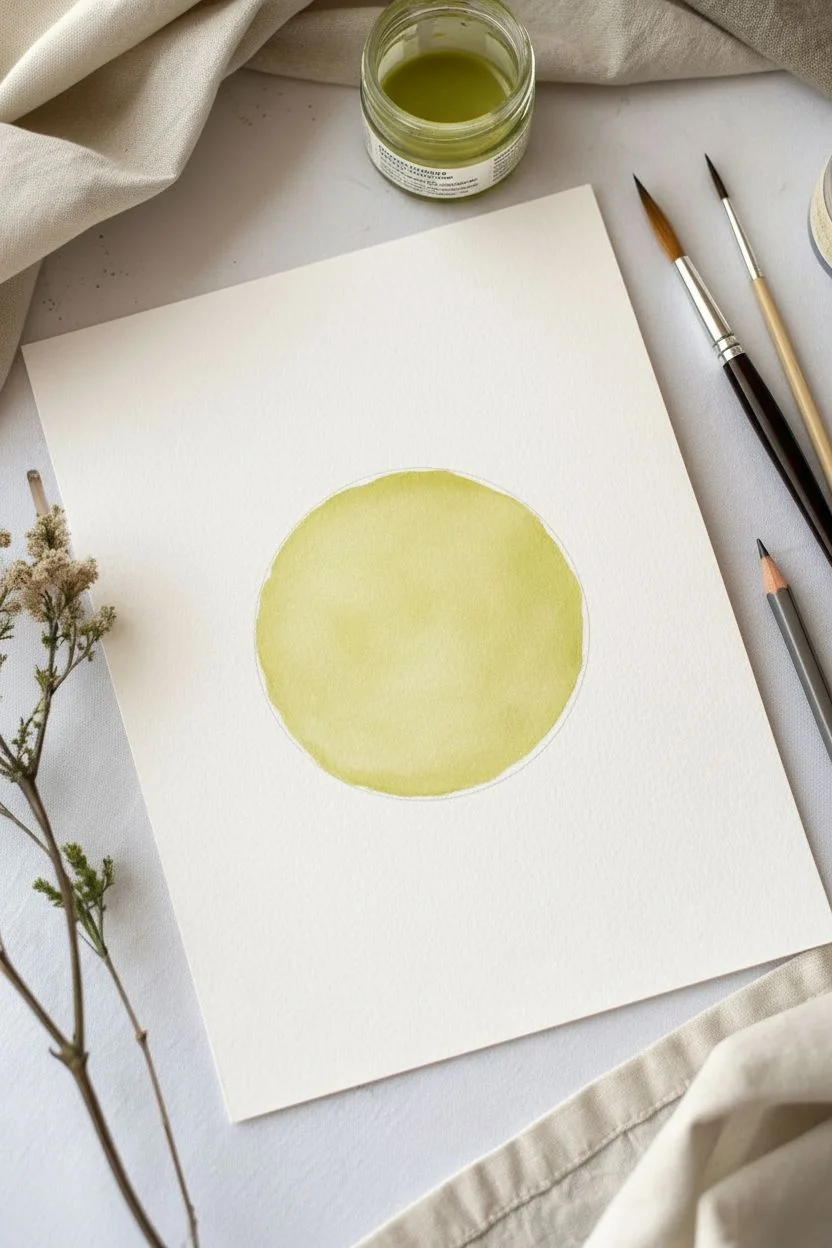
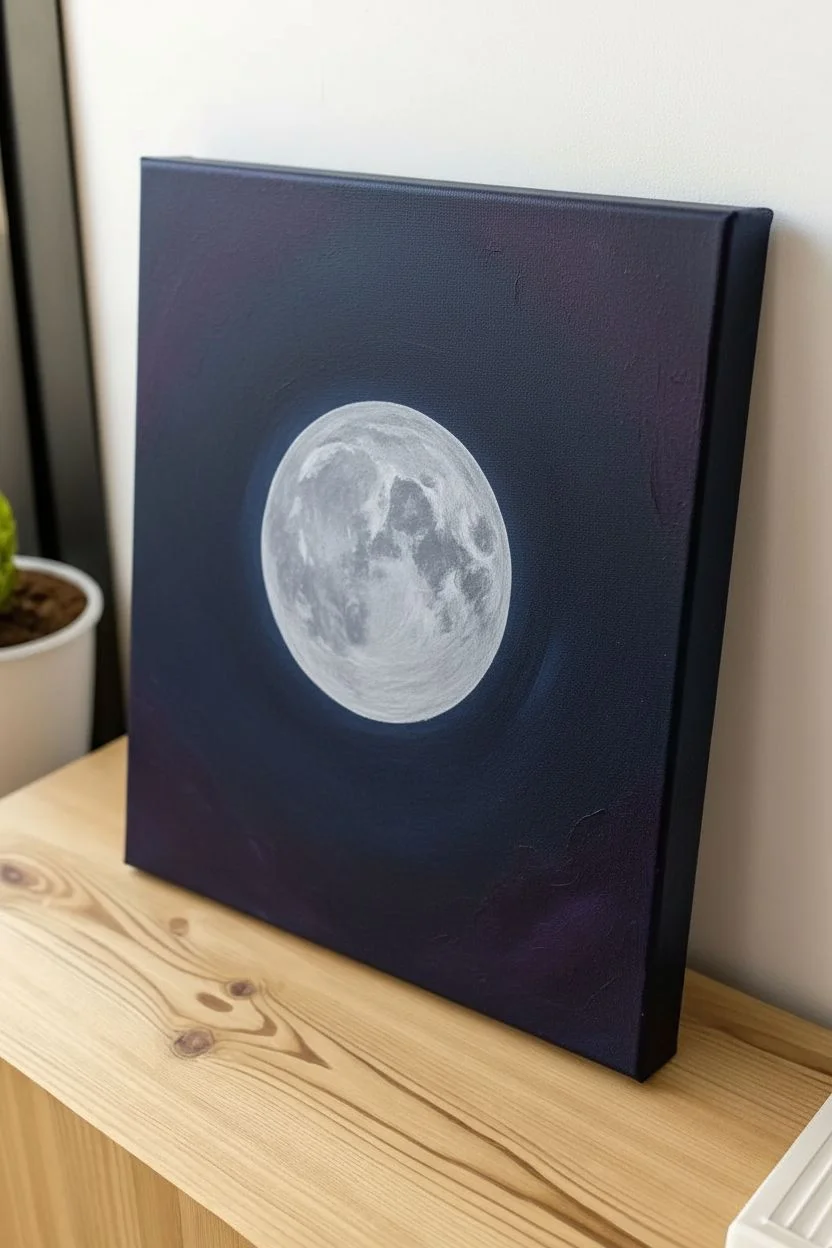
This project captures the serene beauty of a full moon against a deep, starry night sky using a simple masking technique. You will learn to build up layers of watercolor to create a soft, radiant glow that seems to emanate from the paper itself.
Detailed Instructions
Materials
- Cold press watercolor paper (140lb/300gsm recommended)
- Watercolor paints (Indigo, Payne’s Grey, Prussian Blue, Burnt Umber)
- Circular object for tracing (or a compass)
- Masking fluid (drawing gum) or masking tape
- Pencil and eraser
- Round watercolor brushes (size 4, 8, and a fine liner)
- Old brush or ruling pen for masking fluid
- Paper towels
- White gouache or white gel pen
- Clean water
Step 1: Preparation and Masking
-
Outline the moon:
Begin by lightly tracing a perfect circle in the center of your watercolor paper using a roll of tape, a jar lid, or a compass. keep the pencil line very faint so it doesn’t show through later. -
Protect the moon:
Apply masking fluid carefully to the entire inside of the circle. Use an old brush or a silicone applicator for this, as masking fluid will ruin good brushes. Ensure the edges are crisp and smooth. -
Dry completely:
Allow the masking fluid to dry 100%. It should feel tacky but solid to the touch. If you paint over wet masking fluid, you risk tearing the paper surface.
Step 2: Painting the Night Sky
-
Wet the background:
Using a large clean brush, wet the entire area of the paper surrounding the masked moon. You want the paper glistening but not swimming in a puddle. -
Apply the glow color:
Mix a diluted wash of Prussian Blue intermingled with a tiny touch of Indigo. Paint a ring around the masked moon, letting the color bleed softly outward into the wet paper. -
Deepen the outer edges:
While the paper is still wet, drop concentrated Indigo and Payne’s Grey into the corners and far edges of the paper. I find that tilting the paper slightly helps the dark paint flow naturally toward the center without overwhelming the glow. -
Blend the transitions:
Clean your brush, damp it slightly, and gently soften the transition between the dark outer edges and the lighter blue halo around the moon. The goal is a seamless gradient. -
Let it dry:
Allow this first sky layer to dry completely. The colors will likely fade slightly as they dry. -
Second sky layer (Glazing):
Rewet the dark outer corners carefully and add another layer of intense Indigo or Payne’s Grey to increase the contrast. Leave the lighter area near the moon untouched to maintain that glowing effect. -
Add stars:
Cover the moon (the masked area) with a scrap of paper. Load a stiff brush with white gouache or slightly watered-down white acrylic. Tap the brush handle against your finger to splatter tiny stars across the dark sections of the sky. -
Remove the mask:
Once the sky is bone dry, gently rub away the masking fluid with a clean finger or a rubber cement pickup tool to reveal the stark white circle.
Uneven Gradients?
If your sky gradient looks streak, you likely didn’t use enough water. Rewet the entire sky area gently with a spray bottle and tilt the paper to encourage pigment flow.
Step 3: Detailing the Moon
-
Mix shadow tones:
Prepare a very watery mix of Payne’s Grey and a tiny hint of Burnt Umber. You want a neutral, cool grey that isn’t too dark. -
Paint the maria (craters):
Look at a reference photo of the moon. Using a size 4 brush and your grey mix, paint the ‘seas’ or dark patches on the moon’s surface. Keep the edges of these shapes somewhat soft. -
Soften edges:
Immediately after painting a grey patch, use a clean, damp brush to feather out some of the edges, creating a rounded, spherical feel rather than flat blotches. -
Layering details:
Once the first grey layer is dry, go back in with a slightly darker grey mix to add depth to the darkest craters. Focus on the bottom right or left quadrant to suggest subtle shadow. -
Final texture:
If you want more texture, you can lift out tiny highlights using a thirst (damp but clean) brush or dab a bit of white gouache on the brightest ridges of the craters.
Add a Halo Effect
When painting the sky, leave a tiny sliver of unpainted white paper right next to the masking fluid. This creates an extra bright ‘rim light’ effect when the mask is removed.
Step back and admire your celestial artwork, perfect for framing or gifting to a stargazer
Warm Harvest Moon in Amber and Plum
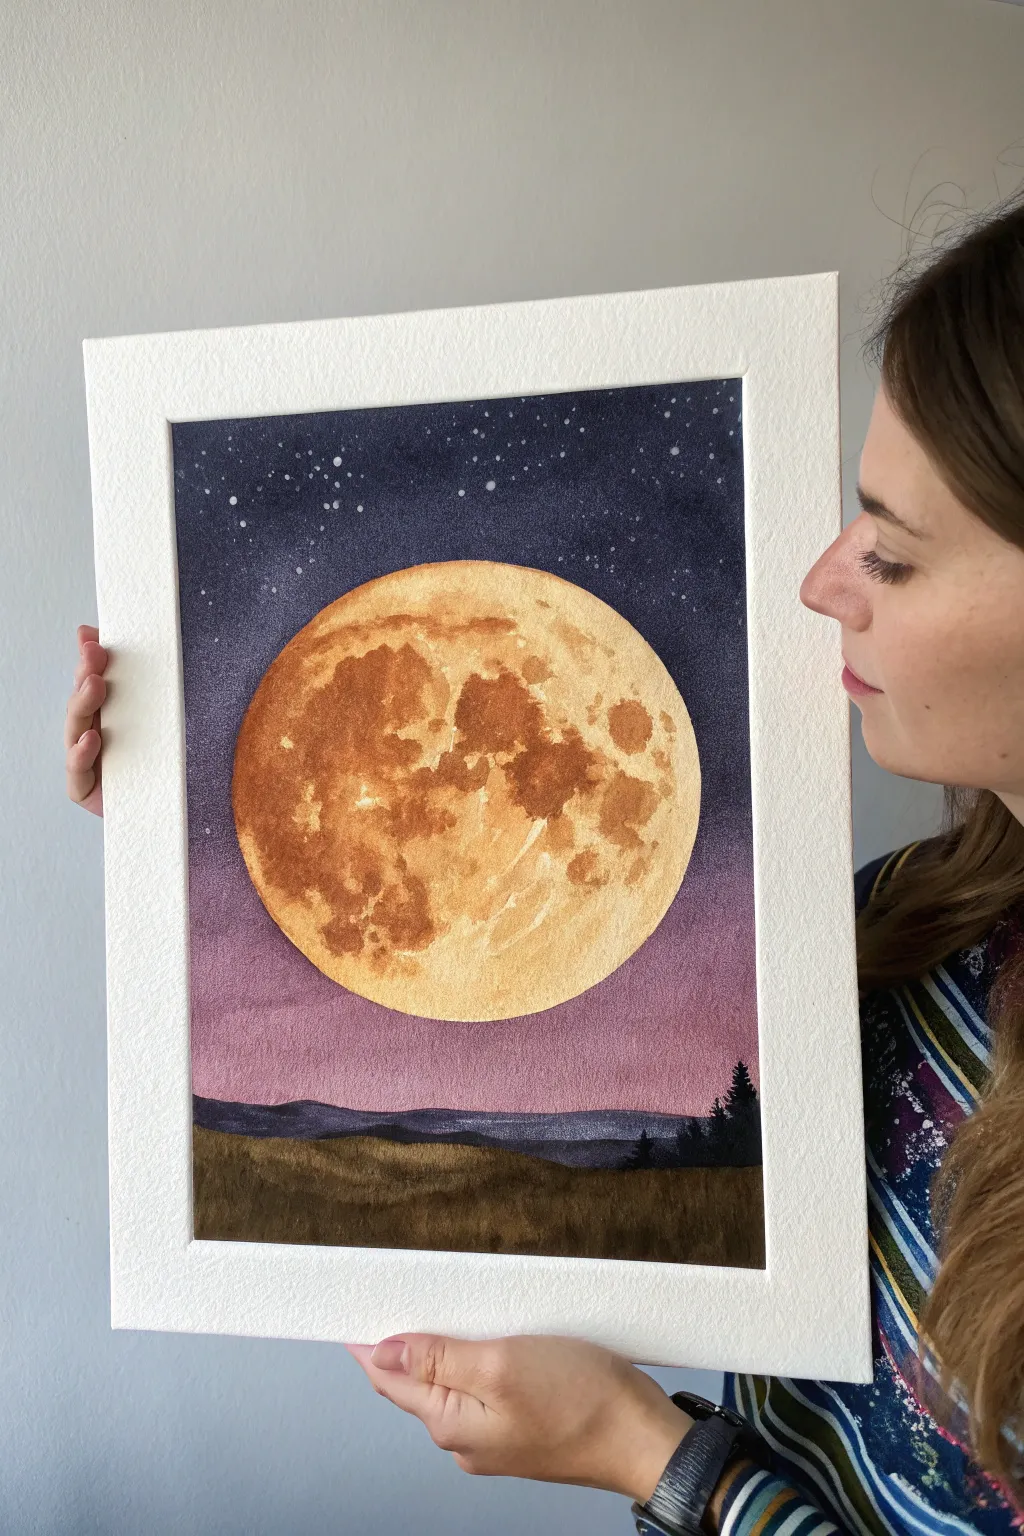
Capture the magic of an oversized autumn moon rising over a dusky landscape with this watercolor tutorial. The striking contrast between the textured amber moon and the smooth, plum-colored twilight sky creates a warm, inviting atmosphere perfect for seasonal decor.
Step-by-Step Guide
Materials
- Cold press watercolor paper (140lb/300gsm)
- Watercolor paints (Indigo, Lamp Black, Quinacridone Magenta, Burnt Sienna, Yellow Ochre, Burnt Umber)
- Round brushes (sizes 4, 8, and 12)
- Large flat wash brush
- Masking fluid or liquid frisket
- Circular stencil (plate or bowl)
- Pencil and eraser
- Painter’s tape or washi tape
- White gouache or white gel pen
- Clean water jars and paper towels
Step 1: Preparation and Sketching
-
Secure the paper:
Tape down all four edges of your watercolor paper to a board or table. This creates that crisp white border seen in the photo and prevents the paper from buckling during heavy washes. -
Trace the moon:
Place a large circular object like a dinner plate or bowl slightly above the center of the paper. Lightly trace around it with a pencil to create a perfect circle. -
Mask the moon:
Using an old brush or a silicone applicator, carefully apply masking fluid to the entire interior of the moon circle. This step is crucial because it keeps the moon area pristine white while you paint the dark sky. -
Wait for drying:
Let the masking fluid dry completely. It should feel rubbery and not tacky to the touch before you proceed.
Torn Paper?
If masking fluid tears your paper upon removal, you might be peeling too fast or the paper is too soft. Try warming the fluid slightly with a hair dryer for 10 seconds to soften it before rubbing.
Step 2: Painting the Sky Gradient
-
Prepare the colors:
Mix a large puddle of deep indigo mixed with a touch of black for the top sky. For the lower sky, mix a plum shade using muted purple or a blend of indigo and magenta. -
Wet-on-wet technique:
Wet the entire sky area (everything outside the masked moon and above the horizon line) with clean water using your large flat brush. -
Apply the darks:
Start at the very top with your darkest indigo mixture. Brush across horizontally, letting the paint flow downwards. The color should be richest at the top edge. -
Transition to plum:
As you move down past the top of the moon, rinse your brush slightly and pick up the plum/purple mix. Blend this into the wet edge of the indigo, working your way down to the horizon. -
Create the stars:
While the sky is still damp (not soaking wet), load a stiff brush with clean water or white gouache and flick tiny droplets over the dark indigo section to create stars. The dampness will soften their edges. -
Dry thoroughly:
Allow the sky wash to dry fully. You can use a hairdryer on a low setting if you are impatient, but air drying is safer for the masking fluid.
Step 3: Creating the Moon Texture
-
Remove the mask:
Gently rub away the masking fluid with your finger or a rubber cement pickup tool to reveal the clean white circle. -
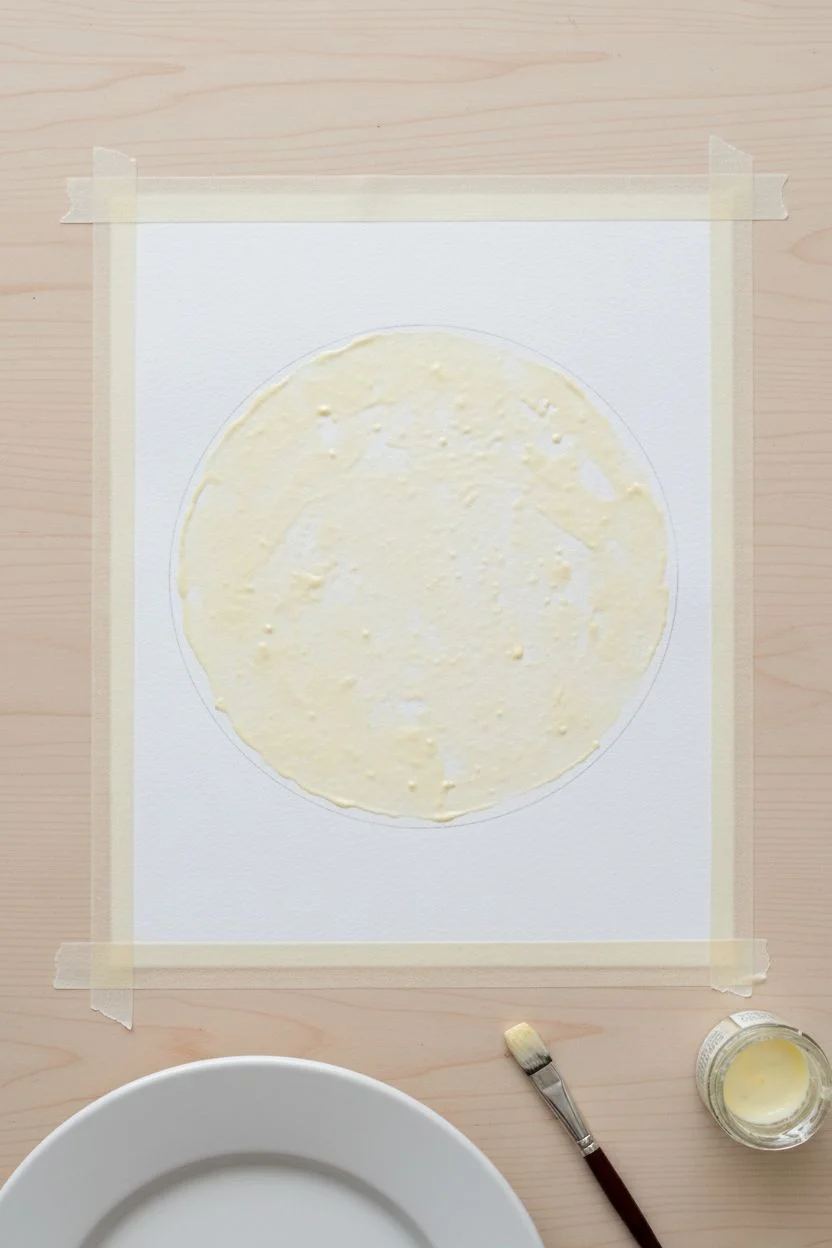
Base layer:
Wet the moon circle with clean water. Drop in a light wash of Yellow Ochre, covering most of the surface but leaving a few tiny spots lighter for highlights. -
Adding texture:
While the yellow base is wet, drop in Burnt Sienna and Burnt Umber. Focus these darker colors on the left side and in random ‘crater’ shapes to mimic the lunar surface. -
Refining craters:
Allow the paints to bloom and mix on the paper. Use a thirsty brush (a damp, clean brush) to lift out pigment in small circular motions to create crater rims and texture. I find dabbing with a crumpled tissue also creates great organic texture.
Salt Texture Trick
Sprinkle table salt on the wet moon paint while it’s drying. The salt absorbs pigment, creating intricate, crater-like textures perfect for the lunar surface.
Step 4: Landscape and Final Details
-
Painting the distant hills:
Once the sky is dry, paint a low mountain range along the horizon. Use a watered-down indigo or grey-purple to make them look far away. -
Foreground field:
Paint the bottom foreground with a mix of Burnt Umber and Indigo. Create gentle rolling hills by varying the value—darker in the dips, lighter on the crests. -
Adding trees:
Using a small size 4 brush and thick, pigmented black or dark green paint, dab in tiny pine tree silhouettes on the right side of the horizon line to give the scene scale. -
Enhance stars:
If your stars faded too much, use a white gel pen or white gouache to add a few bright, sharp points of light in the darkest part of the sky. -
Reveal:
Wait until the painting is bone dry, then carefully peel off the tape at a 45-degree angle to reveal your crisp edges.
Frame your celestial artwork in a simple white mat to really make those deep twilight colors pop

PENCIL GUIDE
Understanding Pencil Grades from H to B
From first sketch to finished drawing — learn pencil grades, line control, and shading techniques.
Explore the Full Guide
Blue Moon With Cool Silver Highlights
This striking tutorial guides you through creating a highly detailed, luminous blue moon set against the deep expanse of space. By layering cool blues and steely silvers, you’ll achieve a hyper-realistic, glowing lunar surface that seems to float off the canvas.
Step-by-Step
Materials
- Square or vertical rectangular canvas (e.g., 16×20)
- Acrylic paints: Phthalo Blue, Titanium White, Mars Black, Silver Metallic
- Large flat brush (1-2 inch)
- Medium filbert brush
- Small round detail brush
- Natural sea sponge (small piece)
- Old toothbrush
- Compass or round object for tracing
- Palette for mixing
- Water cup and paper towels
Step 1: Setting the Cosmic Stage
-
Prepare the background:
Begin by painting your entire canvas with Mars Black. Ensure full coverage so no white canvas shows through. Let this base layer dry completely. -
Add depth to space:
Mix a tiny drop of Phthalo Blue into a large amount of black to create a ‘midnight’ shade. Using your large flat brush, apply this scantly around the corners and edges, keeping the center pure black. -
Create the starfield:
Dilute a small mount of white paint with water until it’s fluid like ink. Dip an old toothbrush into this mixture. -
Splatter stars:
Hold the toothbrush over the canvas and run your thumb across the bristles to flick tiny specks of paint onto the black background. Vary the density, leaving the center area mostly clear for the moon. -
Paint larger stars:
Use a small round brush or the tip of a toothpick to add a few larger, brighter stars in specific spots to create variety among the splatter.
Sponge Too Saturated?
If your sponge mimics look like solid blobs, dab the sponge on a paper towel first. You want a ‘dry’ texture where individual pore marks are visible, not a wet stamp.
Step 2: Constructing the Moon
-
Outline the shape:
Once the background is fully dry, place a round object or use a compass to lightly trace a large circle slightly off-center on your canvas. -
Base coat the moon:
Mix Phthalo Blue with a touch of white to create a medium ‘moon blue.’ Fill in the entire circle with this color. I like to keep the edges slightly soft rather than perfectly crisp. -
Map the texture:
While the base is tacky, dip a dampened sea sponge into a darker mix of Phthalo Blue and trace amounts of black. Sponge this onto the moon to create the ‘maria’ (the dark basins), focusing on the classic lunar shapes. -
Start the highlights:
Rinse your sponge and squeeze it dry. Load it with a lighter blue (more white, less Phthalo) and dab it gently over the lighter areas of the moon to build texture. -
Refine the craters:
Switch to your medium filbert brush. Using a very light blue, almost white, dry-brush over the raised areas and crater ridges to imply topography.
Step 3: Detailing and Glow
-
Add silver luminosity:
Mix a small amount of Silver Metallic paint with Titanium White. Use your smallest round brush to paint the brightest impact craters and create ray systems (lines radiating from craters). -
Enhance the perimeter:
On the side of the moon facing your imaginary light source (usually top-left or bottom-left), paint a thin, bright silver-white line along the rim. -
Shadow side contrast:
On the opposite side of the moon, glaze a very thin, watery layer of pure Phthalo Blue to deepen the shadow while keeping the texture visible. -
Create the atmospheric glow:
Clean your large flat brush thoroughly. Pick up a tiny amount of dry Phthalo Blue and gently scrub it onto the black background immediately surrounding the bright side of the moon. -
Final bright stars:
Add one or two prominent white stars right next to the moon’s edge to emphasize the depth of the foreground object.
Pro Tip: Ray Systems
To make crater rays look realistic, flick your brush quickly outward from the center of the crater. The lines should be thin, uneven, and fade out as they travel.
Step back and admire your celestial creation, glowing with cool blue mystery against the void.
Moon Over Layered Mountain Silhouettes
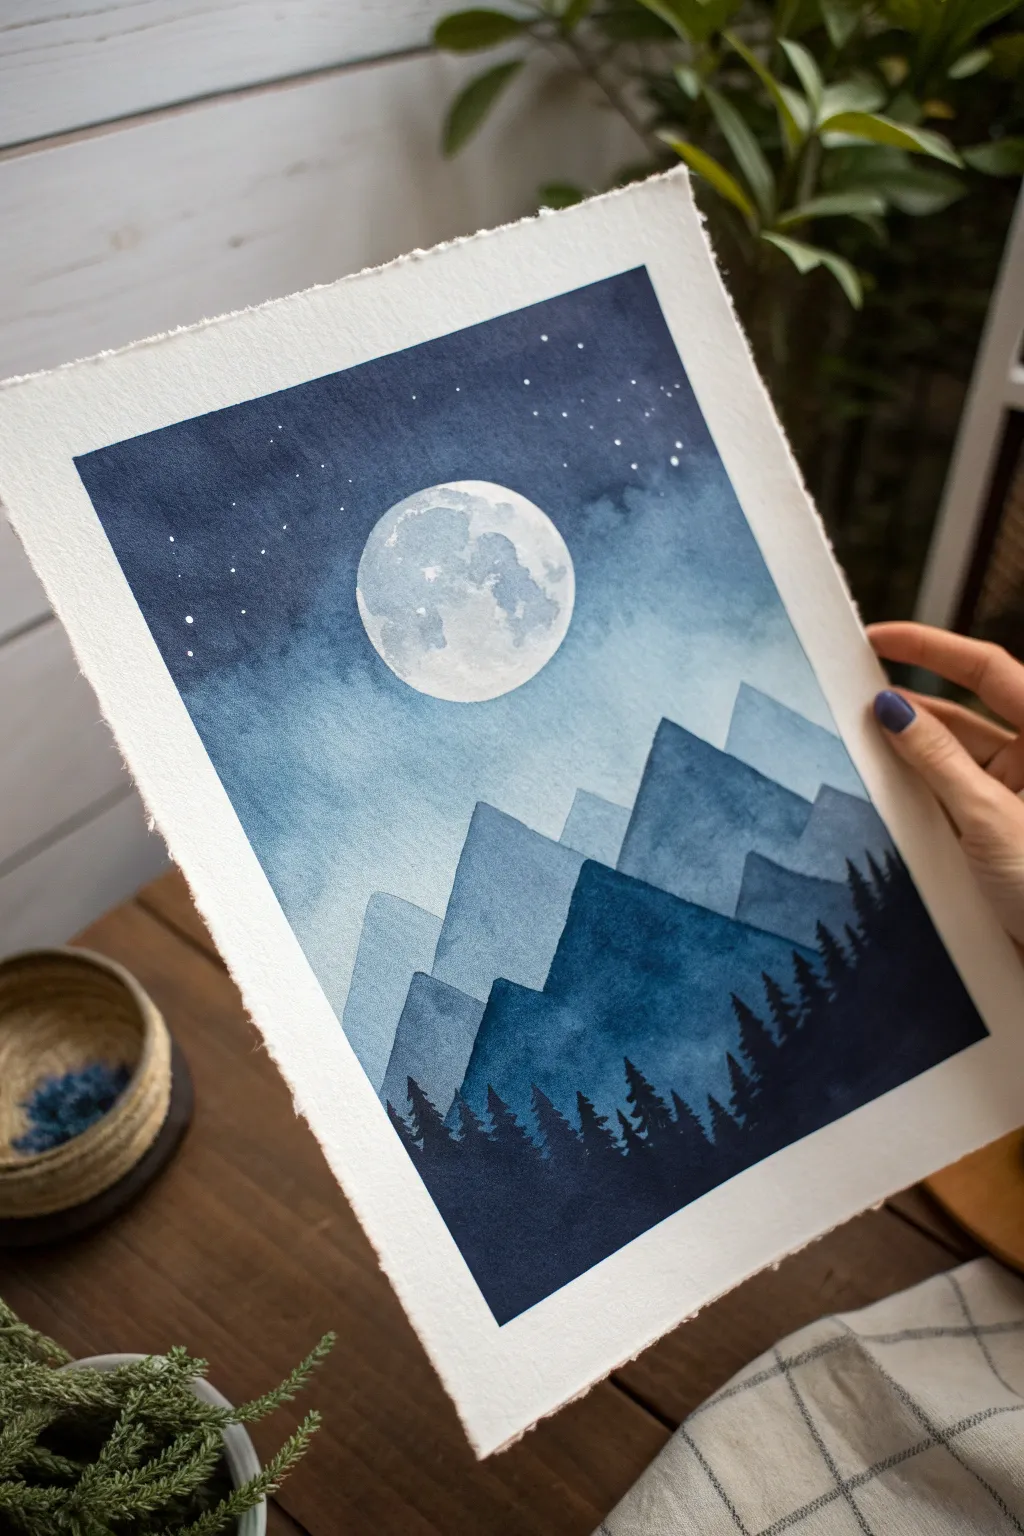
This serene watercolor project captures the tranquil beauty of a moonlit night using a monochromatic palette of blues and indigos. By layering simple geometric mountain shapes, you will build depth and perspective leading up to a radiant full moon.
Step-by-Step Tutorial
Materials
- Cold press watercolor paper (300 gsm/140 lb)
- Masking fluid or white gouache
- Painter’s tape or washi tape
- Round watercolor brushes (sizes 6, 12, and a small detail brush like size 0 or 2)
- Watercolor paints: Indigo, Prussian Blue, Payne’s Gray, and a touch of Ultramarine
- Two jars of water (one for clean, one for dirty)
- Paper towels
- Pencil and eraser
- Palette for mixing
- Old toothbrush (optional for stars)
Step 1: Preparation and Sketching
-
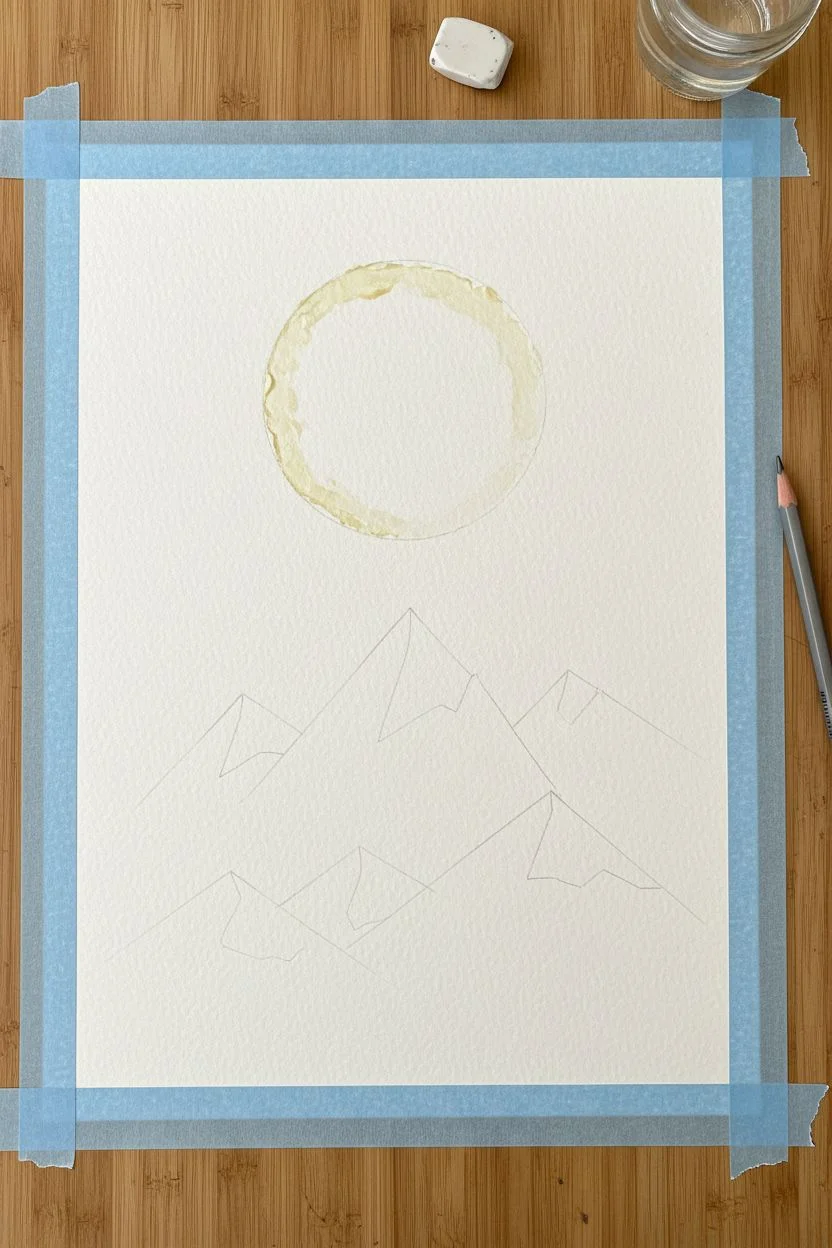
Secure the paper:
Tape your watercolor paper down to a hard board or your work surface. Since this painting uses a fair amount of water for the sky and mountains, securing all four sides helps prevent buckling. -
Sketch the composition:
Lightly sketch a circle for the moon in the upper center of the page. You can trace a roll of tape or a small cup to get a perfect circle. Below the moon, draw three to four distinct layers of jagged, triangular mountain peaks. -
Mask the moon:
Apply masking fluid carefully inside your moon circle to preserve the white of the paper. Let this dry completely before painting. If you don’t have masking fluid, you can carefully paint around the circle or add the moon later with opaque white gouache.
Step 2: The Night Sky
-
Create a gradient wash:
Mix a dark, rich Indigo with a little Prussian Blue. Wet the sky area (everything above the first mountain range) with clean water using your largest brush. -
Paint the upper sky:
While the paper is wet, drop the dark blue mixture at the very top edge. Pull the color down towards the mountains, adding more water to your brush as you go to dilute the pigment. -
Soften the horizon:
Ensure the sky is lightest just above the highest mountain peaks and around the moon area to simulate a glow. The wash should be fairly smooth, but minor cloud-like textures are lovely too. -
Add stars:
Once the sky is mostly dry but still slightly cool, you can flick diluted white gouache or masking fluid with a toothbrush for stars. Alternatively, wait until completely dry and use a white gel pen or detail brush.
Clean Edges Trick
To get those sharp, crisp lines on the mountain peaks without waiting forever, use a hairdryer on a low, cool setting between layers.
Step 3: Layering the Mountains
-
First mountain layer:
Mix a very watery, pale blue-grey wash (Payne’s Gray heavily or diluted with water). Paint the furthest mountain range—the shapes closest to the sky. These should be translucent and light to indicate distance. -
Let it dry:
Wait for this first layer to dry completely. If you paint too soon, the layers will bleed into each other and lose that crisp, geometric silhouette effect. -
Second mountain layer:
Mix a slightly darker shade, perhaps adding more Prussian Blue to your mix. Paint the second range of mountains that sits below and slightly in front of the first set. -
Build darker layers:
Continue this process for the third layer, making the paint progressively more pigmented and less watery. The mountains should get darker as they get closer to the bottom of the page. -
The foreground mountains:
For the largest, closest mountain shapes, use a strong mix of Indigo and Payne’s Gray. Paint these solid shapes boldly, ensuring the edges are sharp against the lighter mountains behind them.
Level Up: Cosmic Texture
Sprinkle a pinch of table salt onto the wet sky wash while it’s still damp. When it dries and you brush the salt off, it creates stunning starry textures.
Step 4: The Moon & Details
-
Reveal the moon:
Gently rub off the masking fluid from the moon area. The paper underneath should be stark white. -
Add lunar texture:
Using a very diluted grey wash, dab in shadows on the moon’s surface to create craters. Keep most of the moon white, focusing the texture on the left or bottom edges to suggest spherical volume. -
Paint the pine trees:
Use your smallest detail brush and a thick, creamy mixture of Indigo (almost black). Along the bottom edge of the closest mountain range, paint tiny vertical lines. -
Detail the branches:
On these vertical lines, add tiny horizontal dashes that get wider toward the bottom of each tree to form a triangular pine shape. Vary the heights to make the forest look natural. -
Fill the bottom:
Fill the very bottom of the page with solid dark pigment to ground the composition, blending it up into the tree line you just created.
Peeling off the tape reveals a clean border that frames your moody, atmospheric landscape perfectly


Moonrise Behind a Simple City Skyline Silhouette
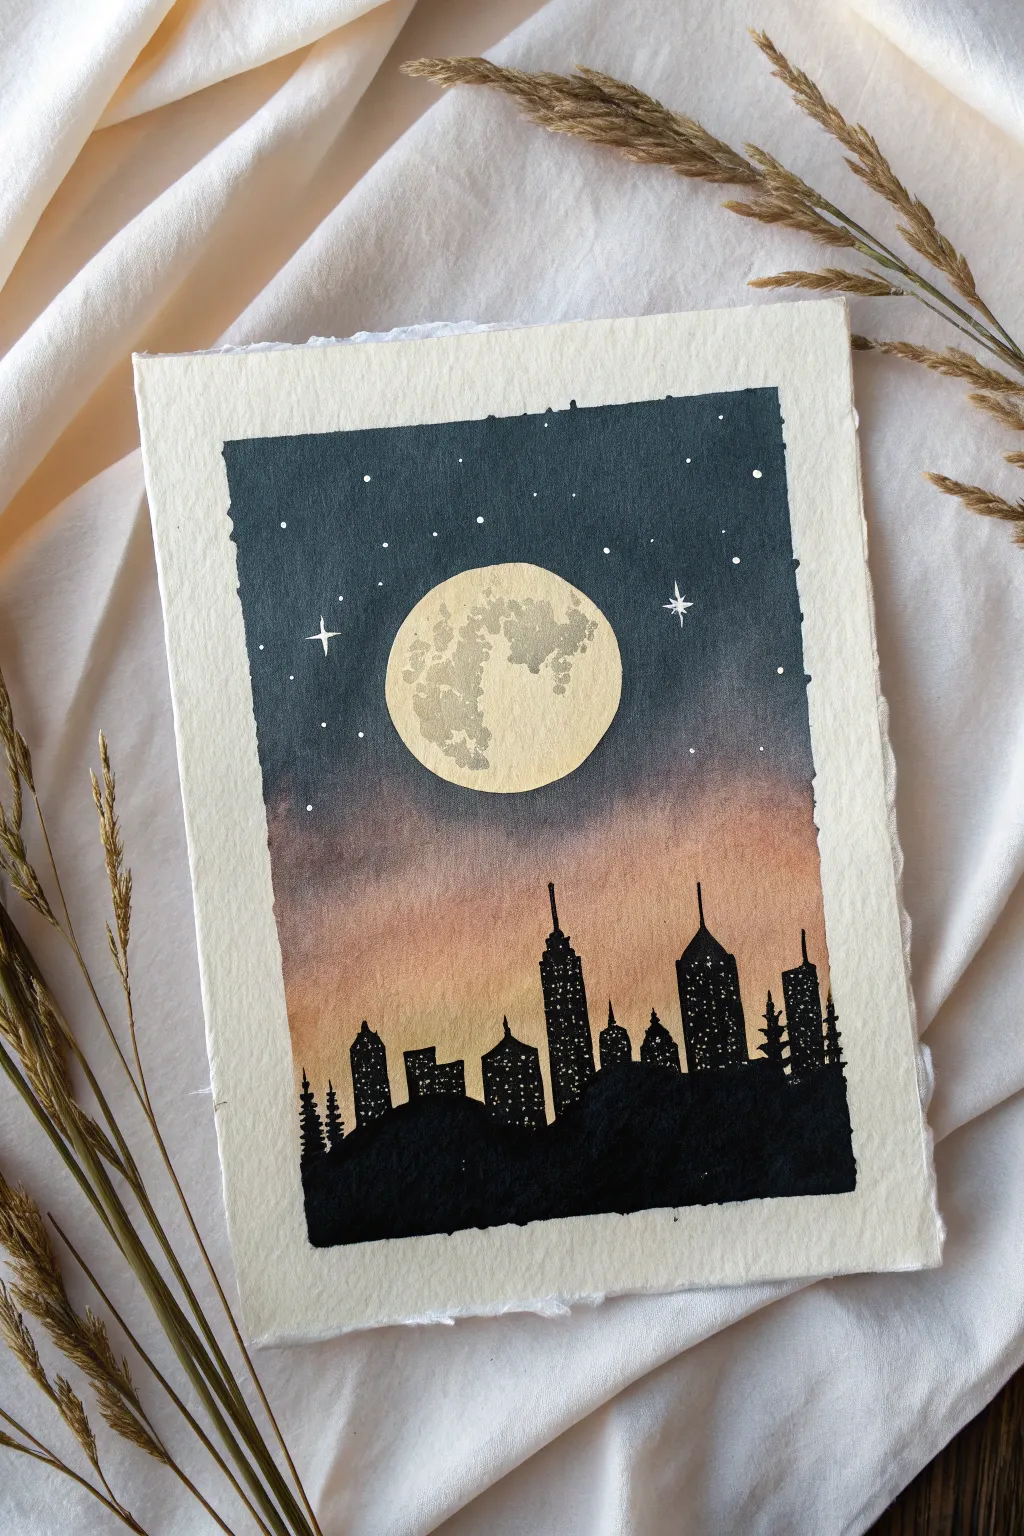
Capture the magic of an urban evening with this charming watercolor piece featuring a bold, cratered moon rising over a silhouetted city skyline. With its dramatic gradient sky and simple architectural shapes, this project is perfect for practicing smooth blends and sharp details.
Step-by-Step Guide
Materials
- Cold press watercolor paper (deckled edge optional)
- Masking fluid or liquid frisket
- Watercolor paints: Indigo, Paynes Gray, Alizarin Crimson, Cadmium Yellow, Burnt Sienna
- Flat wash brush (3/4 inch)
- Round brushes (size 4 and size 0 for details)
- White gouache or white gel pen
- T-square ruler or straight edge
- Pencil and eraser
- Masking tape (for clean edges)
- Paper plate or round object for tracing
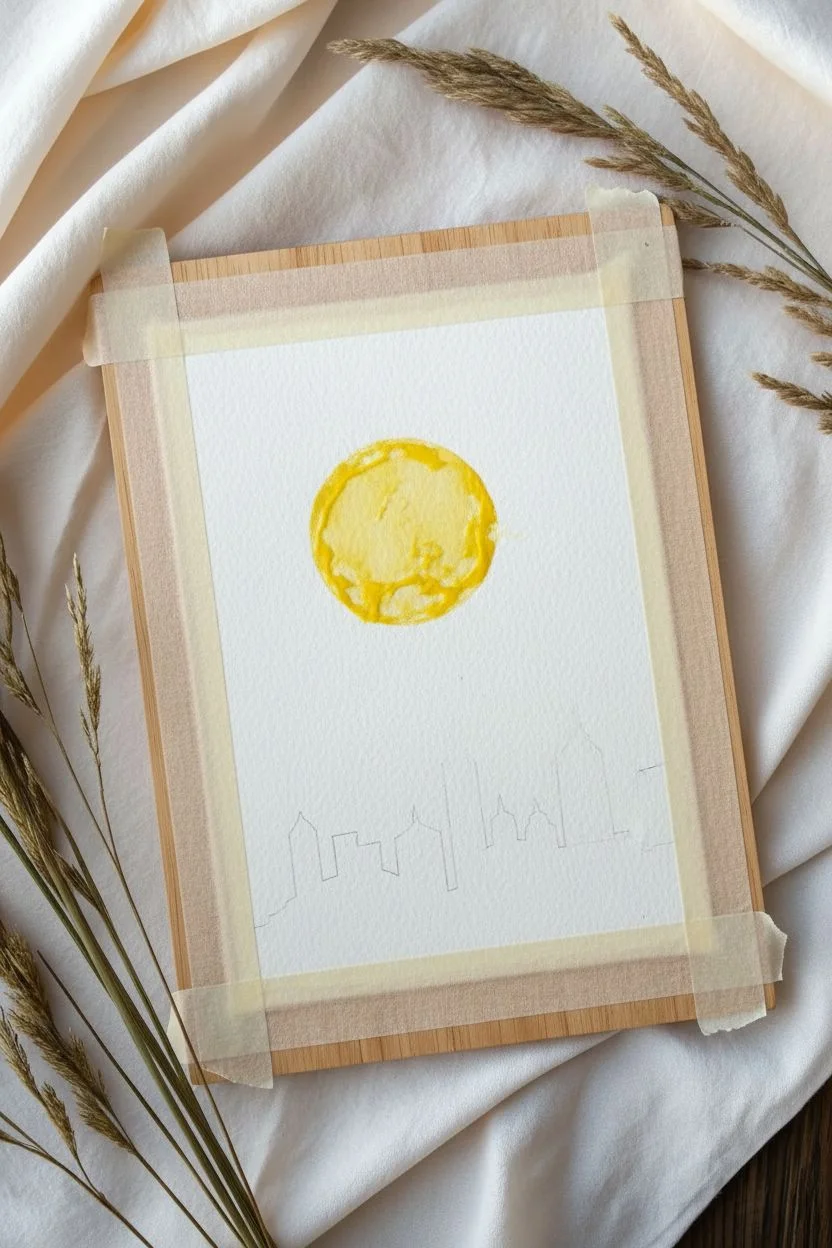
Step 1: Preparation and Masking
-
Define the Frame:
Begin by taping down the edges of your paper to a board. If you want the painted portion to float in the center like the example, tape off a rectangular border inside your paper, leaving a generous margin of white space around the outside. -
Sketch the Moon:
Use a small circular object or a compass to lightly draw a large circle in the upper center of your composition. It should take up a significant portion of the sky to achieve that dramatic look. -
Protect the Moon:
Paint a layer of masking fluid carefully inside the circle outline. This will preserve the white paper for the moon later. Let this dry completely—it must be dry to the touch before any paint touches the page.
Step 2: Painting the Sky Gradient
-
Prepare Your Palette:
Mix three puddles of paint: a deep indigo/black mixture for the top, a muted purplish-gray for the middle, and a warm peach color (mix yellow with a tiny touch of crimson) for the horizon. -
Wet the Sky Area:
Using your flat wash brush, apply clean water evenly across the entire sky area, stopping just above where you want the city bottom to be. -
Start the Horizon:
While the paper is wet, load your brush with the warm peach color. Paint the bottom third of the sky, letting the color float on the wet surface. -
Transition to Night:
Rinse your brush slightly and pick up the purplish-gray mix. Apply this to the middle section, gently blending it into the top of the peach layer while everything is still damp. -
Deepen the Night Sky:
Finally, load your brush with the heavy indigo mix. Start from the top tape line and paint downwards, blending into the purple section. The goal is a seamless ombré effect from dark night to sunset glow. -
Add Stars:
While the indigo section is still slightly damp but not soaking, flick a tiny amount of clean water or white gouache onto the dark area to create subtle distant stars. Let the entire background dry completely.
Bleeding Lines?
If paint bleeds under your tape, use a slightly damp stiff brush (like an acrylic brush) to gently scrub the leaked pigment away, then dab with a paper towel.
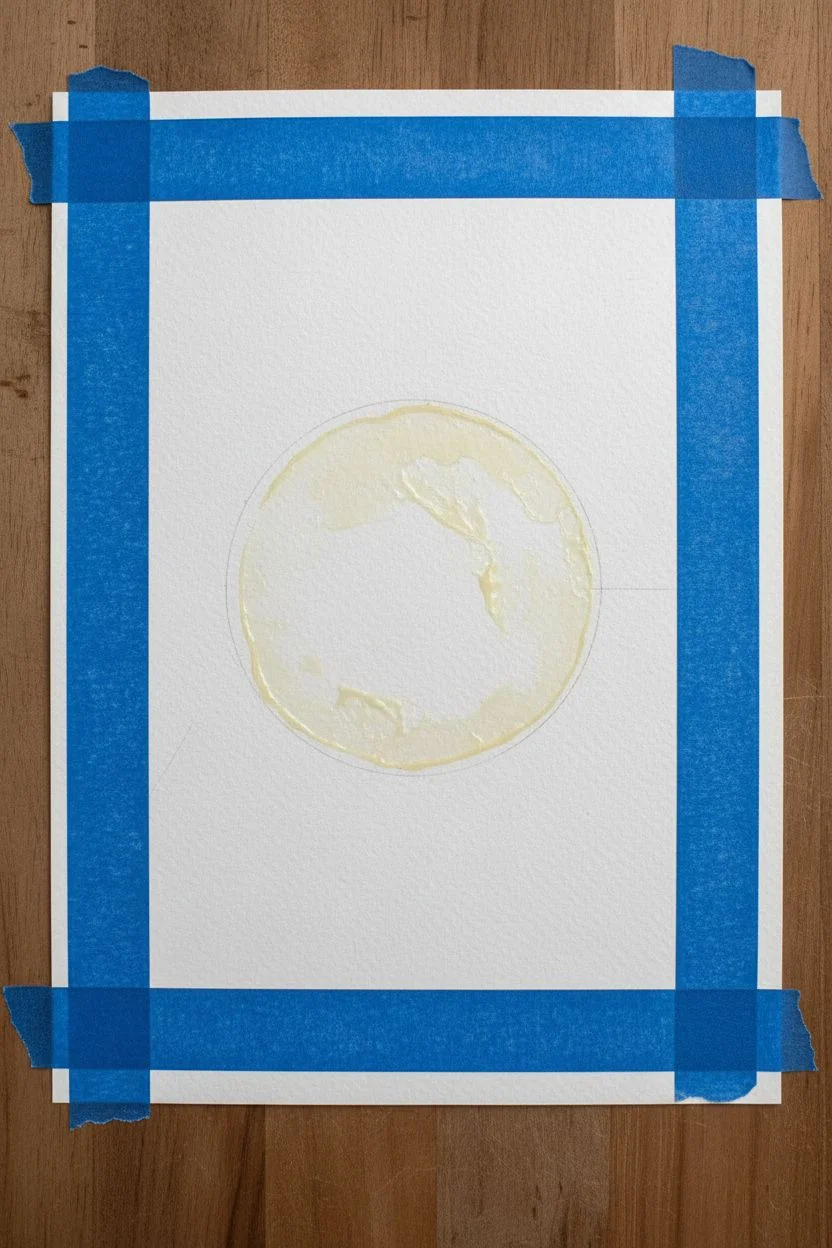
Step 3: Painting the Moon
-
Reveal the Moon:
Once the sky is bone dry, gently rub off the masking fluid with your finger or a rubber cement pickup to reveal the crisp white circle. -
Base Color:
Paint a very light, watery wash of pale yellow over the entire moon circle. -
Adding Craters:
While the yellow wash is still wet, drop in small dabs of diluted gray paint. I like to concentrate these textures on the left side to give the moon dimension and a spherical appearance.
Texture Trick
Sprinkle fine table salt onto the wet moon or dark sky section. Let it dry completely and brush it off for an amazing, organic pitted texture.
Step 4: The City Silhouette
-
Sketch the Skyline:
Lightly pencil in your city silhouette over the dry sunset background. Draw a mix of tall skyscrapers with antenna spires, shorter blocky buildings, and perhaps some rolling hills or treelines at the very bottom. -
Fill in the Buildings:
Using a smaller round brush and opaque black paint (or very concentrated indigo/Paynes gray), carefully fill in the silhouettes. Ensure the edges of the buildings are sharp and crisp. -
Create Lit Windows:
Before the black paint dries on specific buildings, you can use a clean, damp brush to lift out tiny squares of pigment. Alternatively, wait for the black to dry fully and use a white gel pen to draw grid patterns of lit windows. -
Ground the Scene:
Paint the rolling hills or foreground mass in solid black at the very bottom to anchor your buildings.
Step 5: Final Details
-
Brighter Stars:
Use a detail brush and white gouache (or a white gel pen) to add specific, bright stars in the dark blue sky. Add a few cross-shaped ‘twinkle’ stars for variety. -
Clean Up:
Wait for all paint to be perfectly dry. Carefully peel away your masking tape at a 45-degree angle to reveal the crisp borders.
Frame your miniature masterpiece and enjoy the peaceful nighttime view you’ve created
Double Exposure Moon Inside a Night Landscape
This captivating watercolor piece combines a textured, crater-filled moon with a deep indigo night sky and silhouetted forest. The strong contrast between the bright moon and the dark treeline creates a dramatic, atmospheric effect perfect for beginners and intermediate painters alike.
Step-by-Step
Materials
- Cold Press Watercolor Paper (140lb/300gsm)
- Masking fluid or white wax crayon
- Watercolor paints: Indigo (or Prussian Blue mixed with Black), Cerulean Blue, Payne’s Gray
- Round brushes: Size 8 (for washes) and Size 2 (for details)
- Painters tape or Washi tape
- Container of clean water
- Paper towels
- Compass or circular object for tracing
- Pencil (HB or lighter)
- White gouache or white gel pen
Step 1: Setting the Scene
-
Tape the edges:
Begin by taping down all four edges of your watercolor paper to a board or table. This creates that crisp white border seen in the final piece and prevents the paper from buckling under heavy washes. -
Trace the moon:
Using a compass or by tracing a small bowl, draw a perfect circle in the center of your paper. Keep your pencil lines extremely faint so they don’t show through the final painting. -
Mask the moon:
Apply masking fluid carefully over the entire interior of the moon circle. This protects the white paper while you paint the dark sky. Let the fluid dry completely before moving on.
Making Craters Look Real
Keep crater shapes random and concentrated slightly more on one side. Leave plenty of pure white paper showing; the contrast makes the moon glow.
Step 2: Painting the Night Sky
-
Prepare your dark mix:
Mix a large puddle of your darkest blue. Indigo is perfect here, but mixing Prussian Blue with a touch of Black works well too. You want a deep, saturated consistency. -
Wet the sky:
With your larger brush, apply clean water to the paper area outside the moon circle. Don’t go all the way to the bottom; stop about two inches from the bottom edge to leave room for the misty forest base. -
Apply the first wash:
Drop your dark blue mixture into the wet paper, starting at the top and working down around the masked moon. Let the paint bloom and spread. -
Darken the top:
While the paper is still wet, add more concentrated pigment to the top corners and edges to create a vignetted look. -
Fade the bottom:
As you reach the bottom area of the sky (just above where the trees will be), rinse your brush and use mostly water to drag the blue down, fading it into white. This creates a misty transition zone. -
Let it dry:
Allow the sky layer to dry completely. If the paper feels cool to the touch, it’s still damp.
Step 3: Adding the Moon Details
-
Reveal the moon:
Gently rub away the masking fluid to reveal the crisp white circle underneath. -
Paint the craters:
Dilute a small amount of Cerulean Blue or a light blue-grey mix. Using your Size 2 brush, paint irregular, organic blotches inside the moon to represent craters. -
Softening edges:
I like to immediately use a clean, damp brush to soften the hard edges of these blue crater shapes, creating a textured, spherical look rather than flat spots. -
Add deep shadows:
Drop tiny hints of slightly darker blue into the wettest parts of your craters for added dimension.
Level Up: Salt Texture
Sprinkle table salt onto the wet sky wash before it dries. The salt pushes pigment away, creating stunning, star-like crystal textures.
Step 4: The Forest & Stars
-
Base layer for trees:
Using a diluted Payne’s Gray or light Indigo, paint a jagged, uneven horizon line at the very bottom, blending it upward slightly into the mist you created earlier. -
Paint the tree silhouettes:
Switch to your small detail brush and load it with thick, creamy dark Indigo or Black. Paint vertical lines for tree trunks first. -
Add branches:
Use a erratic, zig-zag motion to dab branches onto the trunks. Make the trees vary in height, with some tall pines reaching up into the lighter sky area. -
Vary tonal values:
Make the trees in the foreground the darkest black-blue, while trees slightly ‘behind’ them can be a little more watery and grey to create depth. -
Splatter stars:
Cover the moon and trees with a scrap piece of paper. Dip a toothbrush or stiff brush into white gouache and flick it over the dark sky to create stars. -
Larger stars:
Use a white gel pen or the tip of a small brush with white gouache to manually place a few larger, brighter stars in key open spaces. -
Remove tape:
Once everything is bone dry, slowly peel off the tape at a 45-degree angle to reveal your clean edges.
Step back and admire the serene atmosphere you have captured in your moonscape painting
Moon Phases Mini Series (Four to Eight Panels)
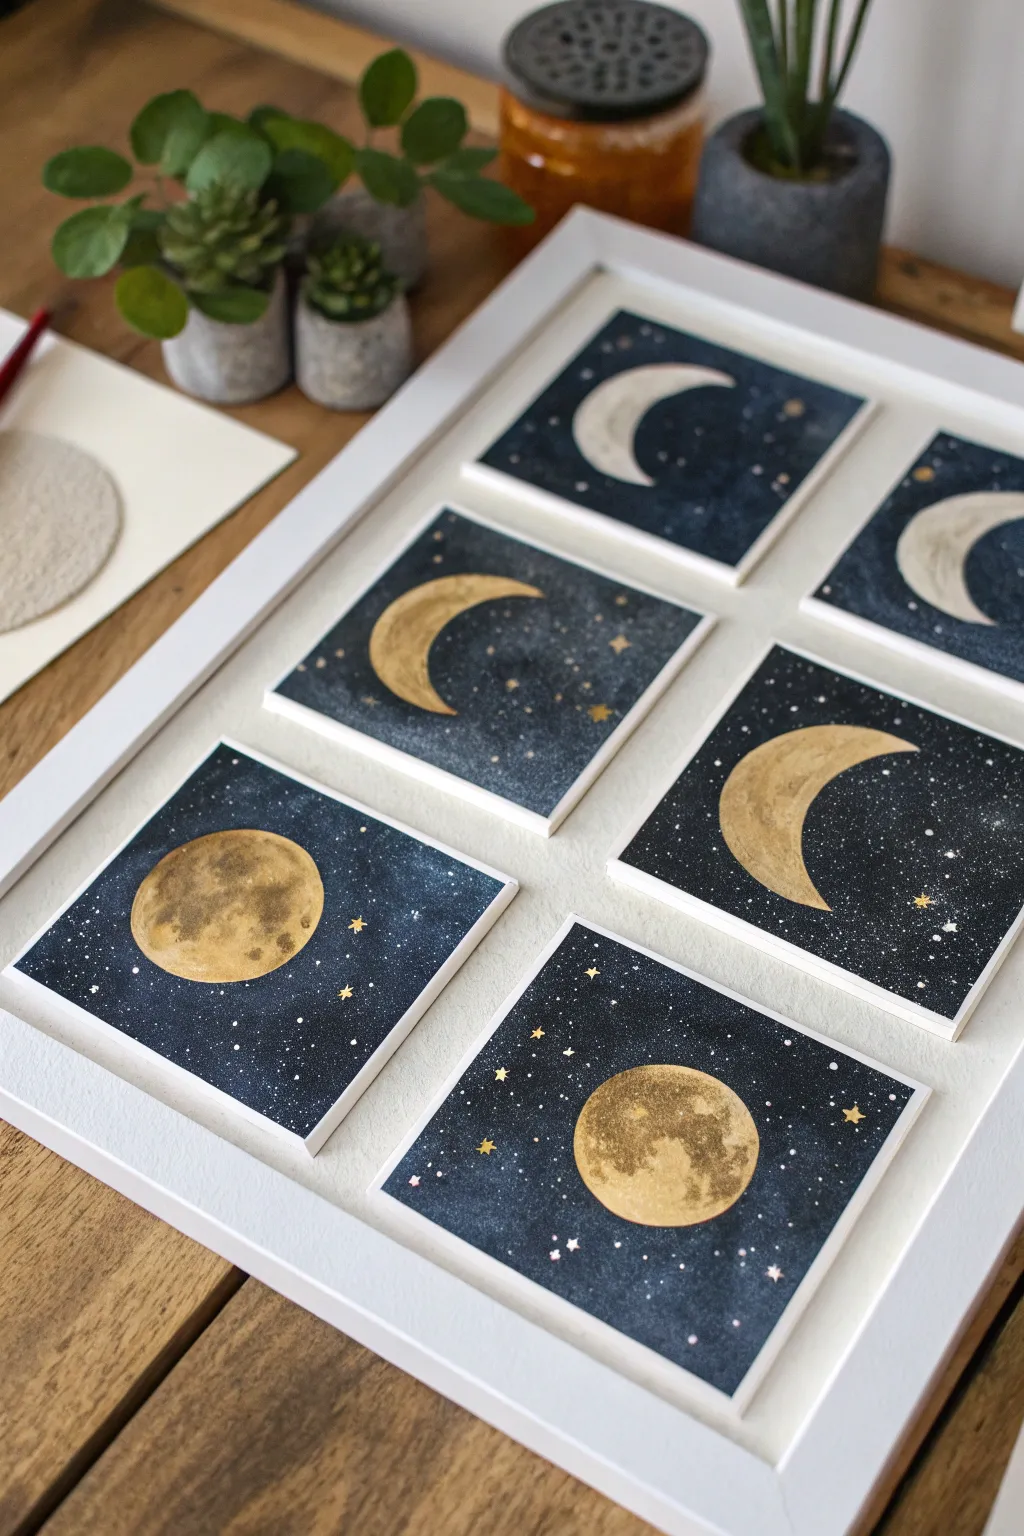
Capture the magic of the lunar cycle with this stunning mini-series of six individual panels. Using deep indigo watercolor backgrounds and striking metallic gold moons, these small square artworks create a cohesive and sophisticated gallery wall piece when framed together.
Detailed Instructions
Materials
- 6 small square watercolor paper blocks (approx. 4×4 inches, 300gsm cold press)
- Indigo and Payne’s Grey watercolor paints
- Metallic gold watercolor paint or gold gouache
- White gouache or opaque white ink
- Medium round brush (size 6 or 8)
- Small detail brush (size 0 or 1)
- Pencil and circular template (or compass)
- Old toothbrush (optional for splattering)
- White box frame with a large mat opening (or a multi-aperture mat)
- Double-sided foam tape
Step 1: Preparing the Night Sky
-
Cut your paper:
Cut your watercolor paper into six identical squares. Alternatively, you can use pre-cut watercolor ’tiles’ or coasters if available, but ensure the edges are clean. -
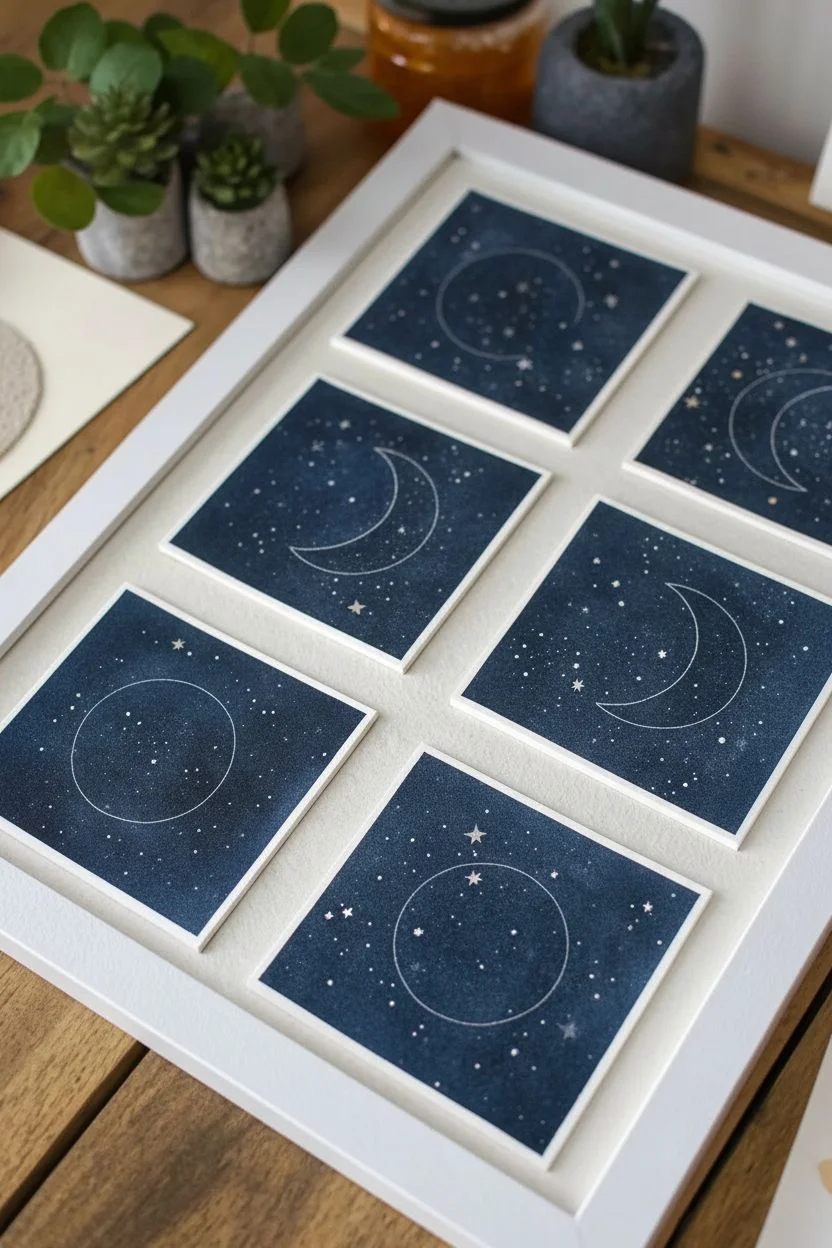
Sketch the phases:
Using a pencil and a circular template, lightly draw a circle in the exact center of each square. Since there are six panels, plan for two full moons (for symmetry at the bottom) and four crescents facing opposite directions as shown in the example. -
Mix the background color:
Create a rich, deep night sky color by mixing Indigo with a touch of Payne’s Grey or Black watercolor. You want this wash to be quite concentrated and pigment-heavy. -
Paint the background:
Carefully paint around your pencil moon outlines, filling the rest of the square with the dark blue mix. I find it easiest to outline the moon shape first with the tip of the brush, then flood the rest of the background quickly. -
Add texture while wet:
While the background paint is still damp, you can drop in tiny hints of pure black or a slightly lighter blue in random spots to create a subtle galaxy nebula effect. -
Splatter the stars:
Once the background is damp but not soaking wet, load a stiffer brush or toothbrush with white gouache. Flick the bristles to create a spray of tiny white stars across the dark sky. Let the background dry completely before moving on.
Fixing Bleeds
If dark paint bleeds into your moon shape, don’t wipe it! Let it dry fully, then paint over the mistake with opaque white gouache before applying your gold layer.
Step 2: Painting the Moons
-
Base layer for crescents:
For the crescent moons, mix your metallic gold paint to a creamy consistency. Paint the crescent shape carefully, staying within your penciled lines. -
Base layer for full moons:
Paint the two full moon circles with the same gold base. Ensure the coverage is opaque; you may need a second coat after the first dries if your gold is translucent. -
Adding texture and craters:
To make the moons look realistic, mix a tiny bit of brown or grey into your gold paint. While the base layer is slightly damp, dab this darker mix onto the surface to simulate craters and lunar maria. -
Highlighting the bright side:
For the crescent moons, add a touch of pure white gouache or a brighter silver-gold to the outer curved edge. This mimics the sun hitting the brightest part of the moon. -
Painting the shadowed side:
Don’t leave the dark side of the crescent empty. Mix a very watery, transparent wash of your background blue. Paint the ‘shadowed’ part of the moon circle so it is barely visible against the background, giving the illusion of the full sphere. -
Adding feature stars:
Use your smallest detail brush and pure gold paint to add a few larger, hand-painted four-point stars nearby the moons to tie the metallic theme together.
Step 3: Assembly and Framing
-
Flatten the artwork:
If your watercolor paper has buckled, place the dry paintings under a heavy book overnight to flatten them completely. -
Arrange the composition:
Lay out your six tiles on the backing board of your frame to determine spacing. The example uses a 2×3 grid layout with the full moons anchoring the bottom row. -
Mount the tiles:
Apply double-sided foam tape to the back of each watercolor square. The foam tape adds a slight 3D elevation, creating a nice shadow drop against the frame backing. -
Secure to backing:
Press each tile firmly onto the frame backing board or mat board, ensuring equal spacing between them. -
Final assembly:
Place the mat board over the tiles (if using a window mount) or simply insert the backing board into the frame, clean the glass, and close it up.
Add 3D Texture
Mix texture paste or thickening medium with your gold paint to physically build up the craters on the moon’s surface for a tactile, impasto finish.
Now you can hang your celestial gallery and enjoy the calming phases of the moon right in your home
Moon With Dramatic Negative Space and Minimal Stars
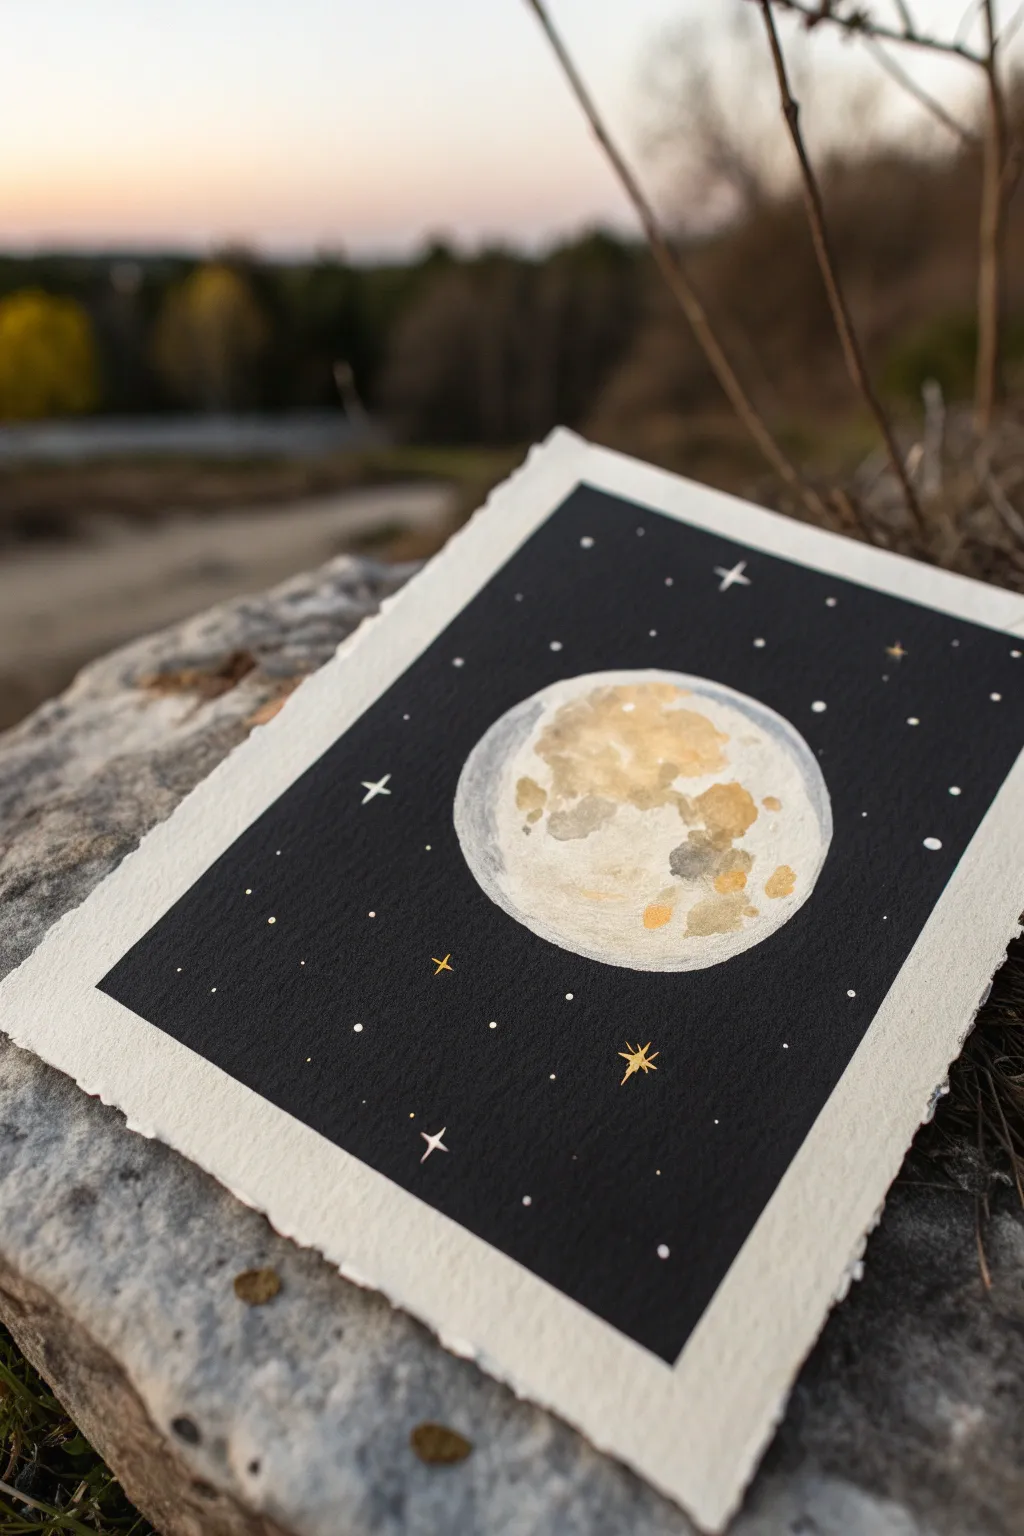
This striking project combines the stark beauty of a deep black night sky with the soft, textured glow of a watercolor moon. By using cold-pressed paper with deckled edges, you create a piece that feels like a vintage artifact found under the stars.
Step-by-Step
Materials
- Heavyweight watercolor paper (300gsm or higher) with deckled edges
- Pencil and round object (for tracing)
- Masking fluid
- Black gouache paint (matte finish)
- Watercolor paints (Yellow Ochre, Burnt Sienna, Payne’s Grey, Bleed Proof White)
- Gold metallic watercolor or gouache
- Flat shader brush (medium size)
- Round detail brush (size 0 or 1)
- Old brush (for masking fluid)
- Rubber cement pick-up (optional)
Step 1: Preparation & Masking
-
Outline the focal point:
Center a circular object, like a roll of masking tape or a large lid, on your deckled watercolor paper. Lightly trace the circle with a pencil to establish your moon’s perimeter. -
Apply masking fluid:
Using an old brush that you don’t mind ruining (or a dedicated applicator), fill in the entire circle with masking fluid. This protects the moon area while we work on the dark background. -
Wait for the mask to cure:
Let the masking fluid dry completely. If you touch it and it feels slightly tacky or cool, give it another ten minutes. Patience ensures you won’t rip the paper later. -
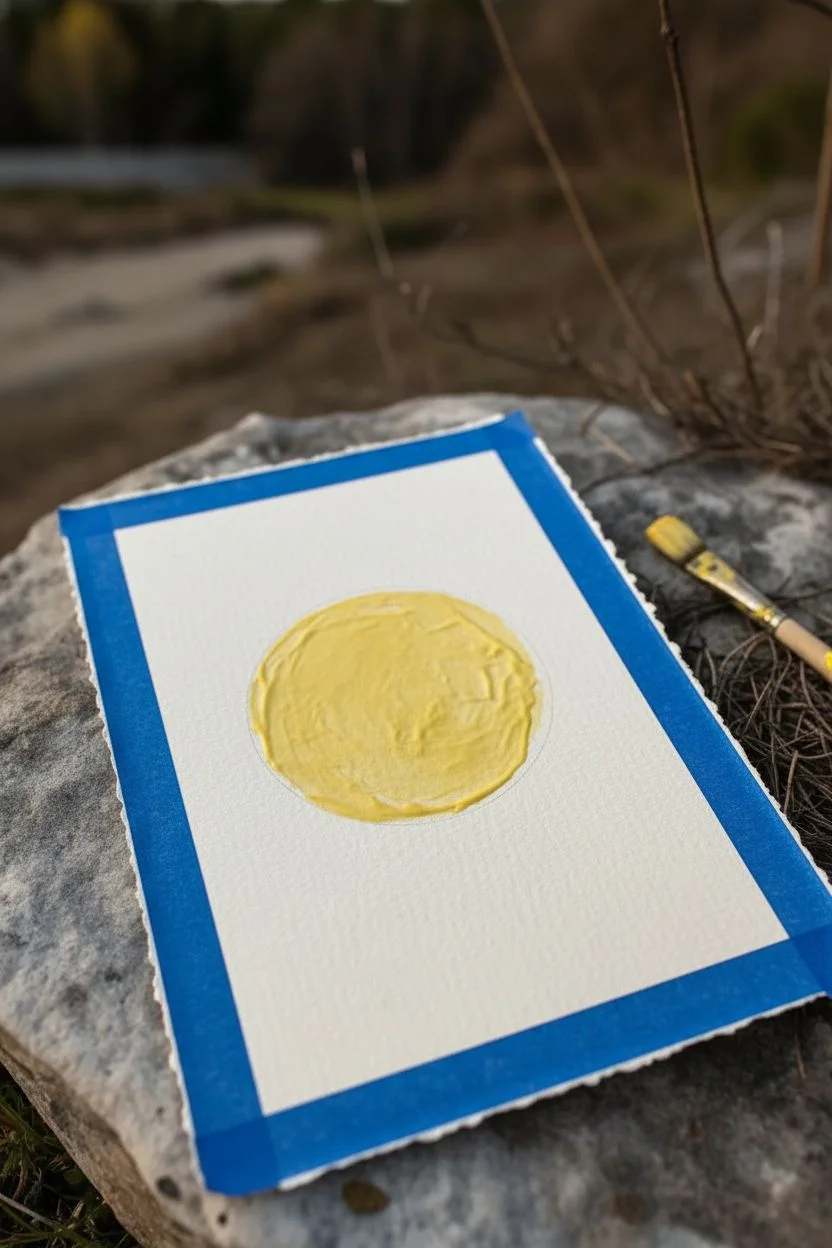
Create the border:
Use painter’s tape to tape off a rectangular border about half an inch inside the paper’s edge. This creates the clean, white ‘mat’ look shown in the reference photo, framing the dark sky.
Clean Edges Only
If black paint bled under the masking fluid, don’t panic. Use opaque white gouache or a white gel pen to reshape the edge, or blend it into the moon’s shadow.
Step 2: Painting the Void
-
Apply the black background:
Load a flat shader brush with opaque black gouache. I prefer gouache here because it dries to a lovely matte finish that absorbs light, unlike shiny acrylics. -
Ensure solid coverage:
Paint the entire area between the taped border and the masked moon. Apply a second coat if needed to ensure no white paper speckles show through the black abyss. -
Remove the masking:
Once the black paint is bone dry, carefully peel off the painter’s tape. Then, use a rubber pickup tool or your finger to gently rub away the masking fluid from the moon area, revealing a pristine white circle.
Step 3: Painting the Moon
-
Wet-on-wet base:
Clean your brush and wet the white moon circle with clean water until it glistens but isn’t pooling. -
Drop in warm tones:
While wet, drop in diluted touches of Yellow Ochre and a hint of Burnt Sienna. Let the pigment bloom naturally to create soft craters. -
Add shadows:
While the paper is still damp, dot in diluted Payne’s Grey or a watery black mix on the left side and random patches to simulate lunar geography. -
Create texture:
As the paint begins to settle, lift some pigment out with a thirsty, dry brush or a paper towel dab to create highlights and varied surface texture. -
Dry and detail:
Let the first layer dry. Using a small round brush, add sharper details with slightly thicker paint to define specific craters, keeping the edges soft.
Level Up: Texture
Sprinkle coarse salt onto the wet moon paint. Brush it off once totally dry for incredible, realistic crater textures without any extra painting.
Step 4: Celestial Details
-
Add metallic touches:
Mix a small amount of gold metallic paint. Selectively paint small gold patches over the dry moon surface to give it a magical, glowing quality. -
Paint larger stars:
Using your smallest detail brush and opaque white paint (or white gel pen), paint a few four-pointed stars scattered in the black sky. -
Include gold stars:
Switch back to your gold paint and add one or two golden stars to echo the warmth of the moon. -
Scatter the stardust:
Add tiny white dots to represent distant stars. Keep them random and sparse; negative space is powerful here. -
Final highlights:
Add a thin rim of white paint along the lit edge of the moon (usually the right side) to make it pop against the black background.
Now you have a serene lunar landscape perfect for framing in a floating glass frame
Textured Moon Using Dry Brush and Scumbling
Capture the stark beauty of the lunar surface with this monochromatic study that emphasizes texture over color. By utilizing dry brushing and scumbling techniques, you will create craggy craters and smooth maria that look startlingly realistic.
Detailed Instructions
Materials
- Cold Press Watercolor Paper (cut to a square)
- Black Watercolor Paint or India Ink
- Round Watercolor Brush (Size 6 or 8)
- Fine Detail Brush (Size 0 or 1)
- Jar of clean water
- Paper towels or cloth
- Compass or circular object for tracing
- HB Pencil
- Kneaded eraser
Step 1: Preparation and Outline
-
Define the shape:
Begin by lightly tracing a perfect circle in the center of your paper using a compass or a circular object like a bowl rim. -
Sketch the maria:
Inside the circle, very faintly shield in the large, dark shapes of the moon’s maria (the “seas”). Focus on the left side and top right, leaving the bottom right predominantly bright. -
Soften the lines:
Use a kneaded eraser to lift deeply pressed graphite, leaving only the faintest guide lines visible so the pencil won’t show through the finished paint.
Step 2: Establishing Values
-
Mix a mid-tone wash:
Prepare a very watery, pale grey wash on your palette. This shouldn’t be black yet, just a whisper of shadow. -
Apply the base layer:
Paint the entire circle with this pale wash, but carefully leave small, irregular specks of white paper completely dry. These will become your brightest highlight craters later. -
Map the shadows:
While the first layer is still slightly damp, drop a slightly darker grey into the areas you sketched as the maria. Let this bleed naturally for soft edges. -
Let it dry completely:
Wait until the paper is bone dry. This is crucial for the scumbling texture in the next phase.
Control the Texture
For maximum texture, hold your brush nearly parallel to the paper when scumbling. This ensures the bristles skim only the raised bumps of the paper.
Step 3: Dry Brushing Texture
-
Prepare for texture:
Load your medium round brush with thicker, less diluted black paint. Dab the brush repeatedly on a paper towel until almost no moisture remains. -
Scumble the edges:
Drag the semi-dry brush across the paper surface, focusing on the boundary lines between the dark maria and the lighter highlands. The tooth of the cold press paper will catch the pigment, creating a grainy texture. -
Build the darkness:
Repeat the dry brush process on the left side of the moon, layering strokes to deepen the blackest areas while keeping that rough, cratered look. -
Create transition zones:
I usually switch to a slightly more watered-down grey here, using the dry brush technique to create a mid-tone transition on the right side of the moon, fading out toward the bright edge.
Too Dark Too Fast?
If you accidentally make an area solid black, try lifting the pigment while wet with a twisted corner of a paper towel to regain some texture.
Step 4: Detailing Craters
-
Switch to fine brush:
Pick up your small detail brush and load it with concentrated dark grey or black paint. -
Define impact sites:
Add small, sharp curves and dots particularly near the terminator line (where light meets dark). These C-shapes suggest crater rims. -
Add rim shadows:
Paint tiny shadows inside the white specs you left blank in the first step to give them depth and dimension. -
Soften harsh marks:
If a crater looks too drawn-on, use a damp, clean brush to gently smudge one side of the line, blending it into the surrounding grey. -
Check the contrast:
Step back and look at your piece. If the dark patches look washed out, glaze one final layer of transparent black over the maria to deepen the contrast.
Once dry, you’ll have a moody, atmospheric moon painting perfect for framing or an art journal
Acrylic Pour Moon With Natural “Crater” Cells
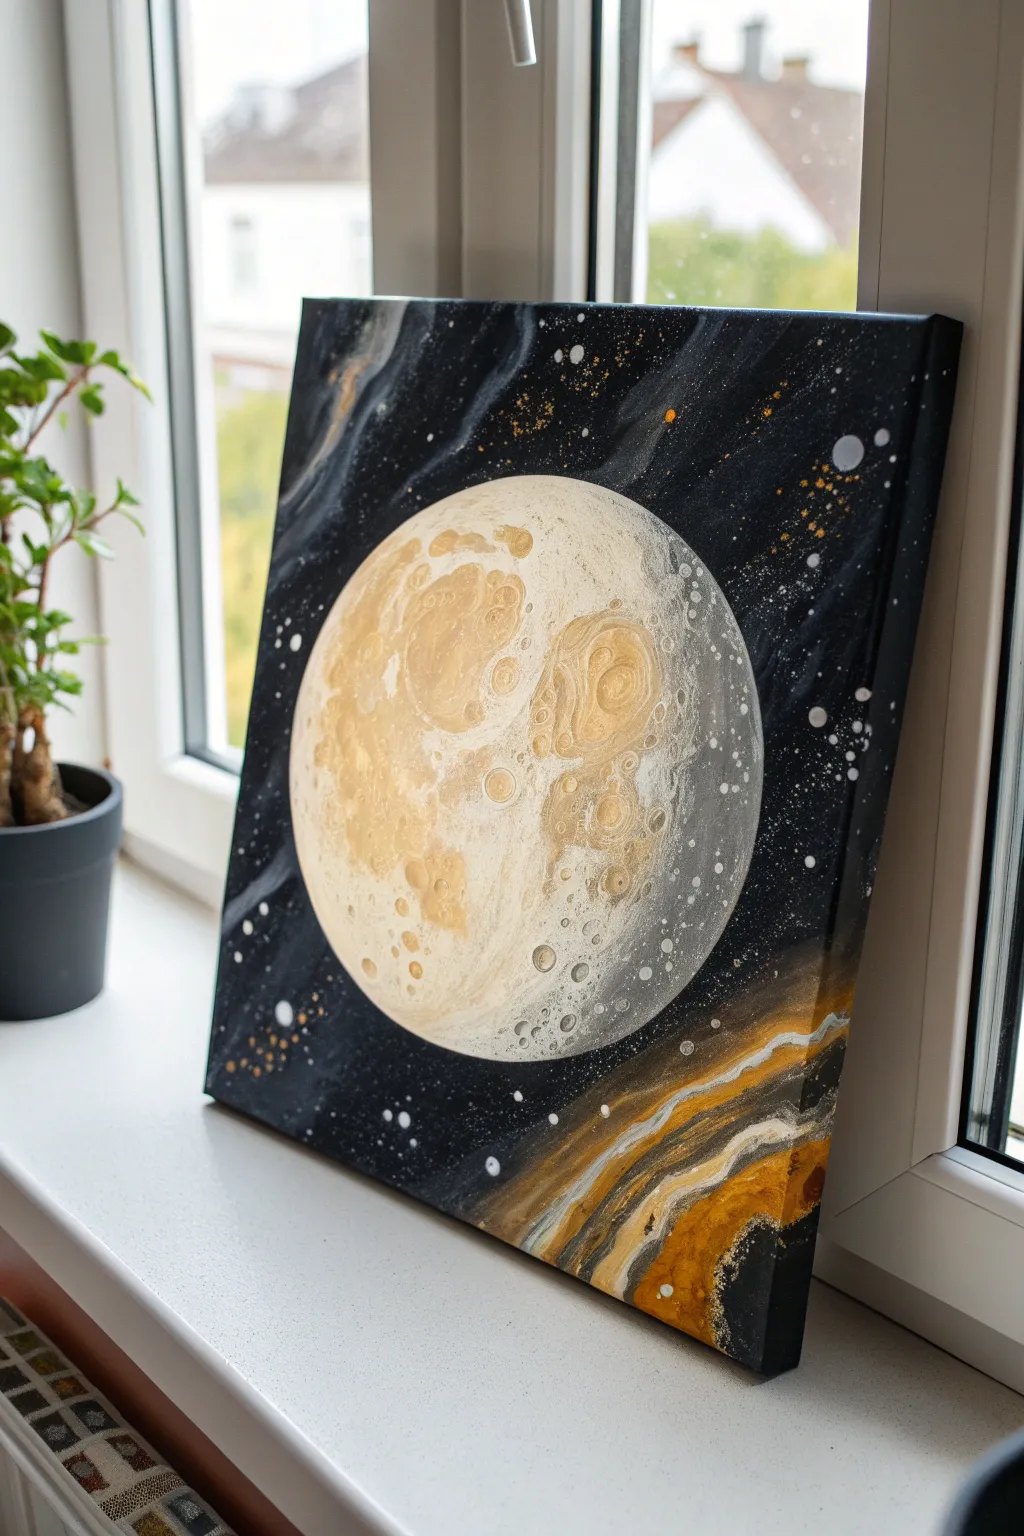
This stunning space-themed artwork combines the controlled chaos of acrylic pouring with traditional painting techniques to create a textured, crater-filled moon. The natural ‘cells’ formed by the paint mixture perfectly mimic the lunar surface, set against a deep, starry cosmos.
How-To Guide
Materials
- Square stretched canvas (e.g., 12×12 or 16×16 inches)
- Black acrylic paint (heavy body)
- Titanium white acrylic paint
- Metallic gold acrylic paint
- Cream or unbleached titanium acrylic paint
- Pouring medium (like Floetrol or Liquitex)
- Silicone oil (treadmill lubricant or hair serum)
- Round object for tracing (plate or lid)
- White or grey chalk pencil
- Painter’s tape or masking tape
- Plastic cups and stir sticks
- Hairdryer or heat gun
- Old toothbrush or stiffness bristle brush
- Wide flat paintbrush
Step 1: Preparation & Background
-
Define the moon:
Place your circular object slightly off-center on the canvas to create a dynamic composition. Trace around it lightly with a chalk pencil to mark wherein your moon will live. -
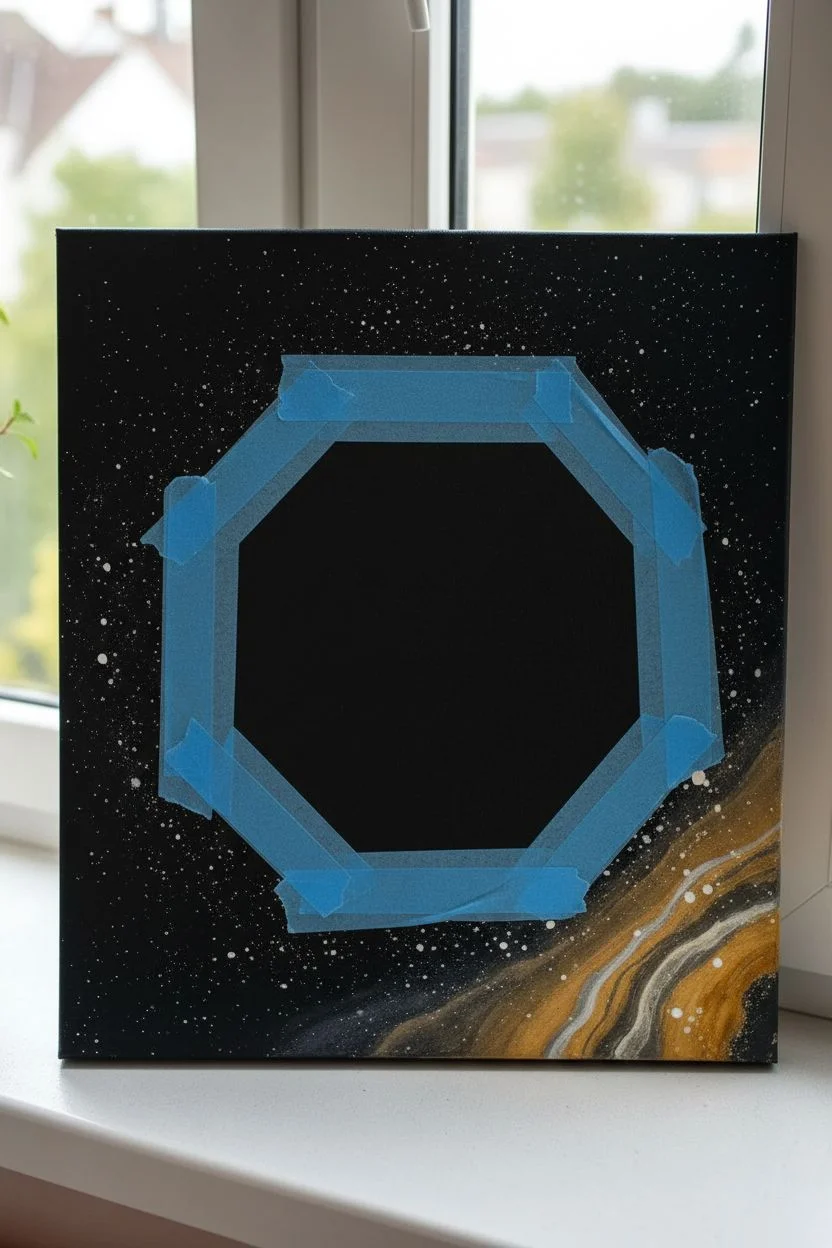
Mask the moon:
Carefully cover the inside of your traced circle with painter’s tape or masking film. Ensure the edges are sealed tight so your background paint doesn’t seep underneath. -
Paint the void:
Using a wide flat brush, paint the entire area outside the circle with black acrylic. Apply two coats if necessary for a solid, opaque coverage, and let it dry completely. -
Create the nebula swirl:
Mix small cups of gold, white, and a tiny bit of black with pouring medium (ratio roughly 1:1 paint to medium). In the bottom right corner, pour thin lines of these colors in a wavy pattern. -
Blow out the nebula:
Use a hairdryer on a low, cool setting or a straw to gently blow these poured lines outward, creating wispy, ethereal ribbons of color that look like space dust. -
Starry sky technique:
Dip an old toothbrush or stiff brush into slightly watered-down white paint. Flick the bristles with your thumb to spray fine mist clusters of stars across the black background, concentrating more near the nebula. -
Gold dust accents:
Repeat the previous step with metallic gold paint, adding a layer of warm sparkle to the cosmos. Allow the entire background to dry fully before proceeding.
Step 2: Pouring the Moon
-
Reveal the surface:
Gently peel away the masking tape or film to reveal the clean, white canvas circle. If any black paint bled through, touch it up with white gesso or paint now. -
Mix your moon colors:
Prepare cups of white, cream, and metallic gold mixed with pouring medium. The consistency should be like warm honey—fluid but not watery. -
Add the magic ingredient:
Add 2-3 drops of silicone oil to the gold and cream mixtures only. Stir just once or twice; over-stirring will break the oil up too much and reduce cell formation. -
The dirty pour:
Layer your white, cream, and gold paints into a single cup. Do not stir them. Pour this mixture into the center of your moon circle. -
Spread the lava:
Tilt the canvas slowly and carefully to guide the paint to the edges of the circle. You can use a craft stick to help push the paint precisely to the heavy black border without going over. -
Activate the craters:
Once the circle is filled, quickly pass a torch or heat gun briefly over the wet paint. The heat will pop air bubbles and bring the silicone to the surface, creating distinct, crater-like cells. -
Tilt for composition:
If I want the ‘craters’ to look stretched or clustered on one side, I tilt the canvas slightly again while the paint is still moving.
Torch Control
Don’t hold the torch in one spot; keep it moving. Too much heat will ‘cook’ the paint, creating a plastic skin that wrinkles later.
Step 3: Finishing Touches
-
Shadow work:
While the moon is still wet, carefully drip a tiny amount of grey or thinned black paint along one edge (the side ‘away’ from the light source) to create volume. -
Define the edge:
Use a very fine brush to clean up the perimeter of the moon if the pour went slightly over the lines, reapplying black where needed for a crisp edge. -
Drying time:
Let the painting dry on a perfectly level surface for at least 24-48 hours. Acrylic pours take much longer to dry than standard painting.
Muddy Moon?
If your colors are blending into grey instead of distinct cells, your paint is likely too thin. Add more paint to thicken your pouring mixture.
Hang your celestial masterpiece near a window to catch the light on those metallic gold craters
Moon in a Nebula Sky With Soft Color Clouds
Capture the mystic beauty of the night sky with this striking acrylic painting that places a highly detailed moon against a backdrop of deep space and swirling violet nebula clouds. The contrast between the cratered lunar surface and the soft, colorful atmosphere creates a truly magical piece for any wall.
Detailed Instructions
Materials
- Square stretched canvas (e.g., 10×10 or 12×12 inches)
- Acrylic paints: Titanium White, Mars Black, Prussian Blue or Phthalo Blue, Dioxazine Purple, Magenta or Quinacridone Red, Gold (metallic)
- Flat shader brushes (large and medium)
- Small round detail brush (size 0 or 1)
- Old toothbrush (for star splattering)
- Sponge or round sponge pouncer (optional for clouds)
- Compass or round object for tracing
- Pencil
- Palette and water cup
Step 1: Setting the Scene
-
Trace the moon:
Begin by positioning a circular object or using a compass in the exact center of your canvas. Trace a light circle with a pencil to mark where the moon will live—this protects the area from getting too dark during the background phase. -
Paint the base sky:
Mix Mars Black with a generous amount of Prussian Blue to create a very deep, midnight blue. Use a large flat brush to paint the entire background around your traced circle, ensuring you coat the sides of the canvas for a finished gallery look. -
Add deep space depth:
While the blue-black layer is still slightly wet, mix a little Dioxazine Purple into the dark blue and blend it into the upper right and left corners to add subtle color variation to the void of space.
Step 2: Creating Nebula Clouds
-
Start the nebula base:
Load a medium flat brush or a sponge with Dioxazine Purple. Dab these color clouds primarily in the bottom right corner and sweeping up the left side of the canvas. -
Soften the edges:
Use a dry, clean brush to gently feather out the edges of the purple clouds into the black background so they look misty rather than solid shapes. -
Layer in brights:
Mix Magenta with a tiny touch of White to create a vibrant pink. Dab this into the center of your purple cloud formations, leaving the darker purple visible around the edges for volume. -
Highlight the fluff:
I like to take a nearly dry brush with just Titanium White and barely graze the tops of the pink clouds. This ‘scumbling’ technique creates the illusion of light hitting of the gas clouds.
Dry Brushing Secret
For realistic clouds, wipe 90% of the paint off your brush onto a paper towel first. Building up faint, translucent layers works much better than thick globs of paint.
Step 3: Painting the Moon
-
Block in the lunar surface:
Fill your pencil circle completely with a flat gray color (mix Titanium White and a dot of Black). Let this dry fully before adding texture. -
Map the darker marias:
Mix a slightly darker, cool gray. Using a small round brush, paint the ‘seas’ or maria of the moon. These are the organic, blotchy shapes you see on the lunar surface—keep them irregular. -
Add crater highlights:
Switch to pure Titanium White on your smallest detail brush. Stipple (dot) texture onto the lighter gray areas to simulate rugged terrain. -
Detail the rim:
Paint a very thin, bright white line on the right edge of the moon to show the light source hitting it. Blend this slightly inward so it doesn’t look like an outline. -
Soften the shadow side:
On the left side of the moon, glaze a very watered-down black or dark blue over the edge to create a spherical shadow, making the moon look round rather than flat.
Glow Up Your Moon
Mix a tiny amount of glow-in-the-dark pigment into your final white highlight layer on the moon. It will look normal by day but magically luminescent at night.
Step 4: Stars and Details
-
Splatter stars:
Dilute Titanium White with a little water until it’s inky. Dip an old toothbrush into it and flick the bristles with your thumb to spray tiny stars across the dark sky and nebula areas. -
Paint hero stars:
Using your smallest liner brush and metallic Gold paint, add a few large four-point stars. Draw a cross shape with extended vertical and horizontal lines. -
Add a shooting star:
With a liner brush and slightly watered-down white, paint a small dot and quickly drag the brush away to form a fading tail. Place this near the top left aiming down toward the center. -
Final metallic touches:
Add tiny dots of Gold paint among the white splatter stars for a warm, twinkling effect that complements the purple clouds.
Allow the canvas to dry completely before sealing it with a gloss varnish to make those deep space colors pop
Fantasy Moon With Botanical Patterns and Gold Accents
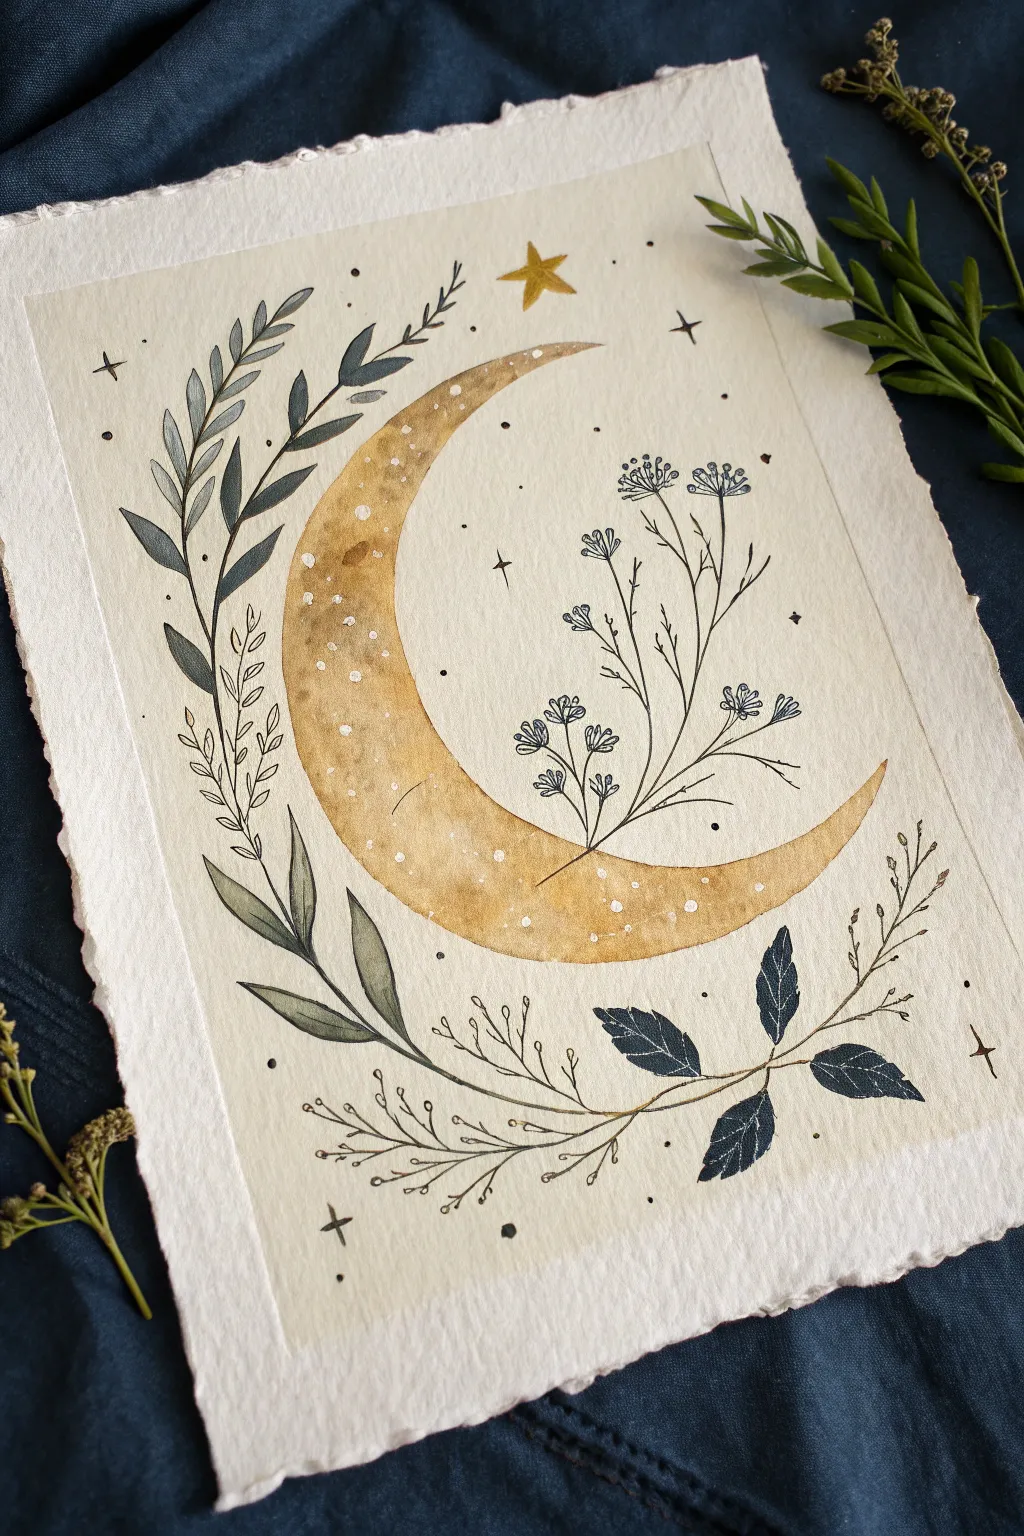
This ethereal watercolor project combines a glowing, textured crescent moon with delicate botanical line work for a magical, vintage aesthetic. Using deckle-edged paper adds an old-world charm that perfectly frames the celestial composition.
How-To Guide
Materials
- Deckle-edge watercolor paper (cold press, roughly A5 or 5×7 inches)
- Watercolor paints (Yellow Ochre, Burnt Sienna, Payne’s Gray, Sap Green, Indigo)
- Metallic gold watercolor paint or gold ink
- Fine liner pens (Black, 0.1mm and 0.3mm)
- White gel pen or white gouache
- Round watercolor brushes (Size 2 and 6)
- Pencil (HB) and kneaded eraser
- Circular object or compass for tracing
- Masking tape (optional, if you want flat paper)
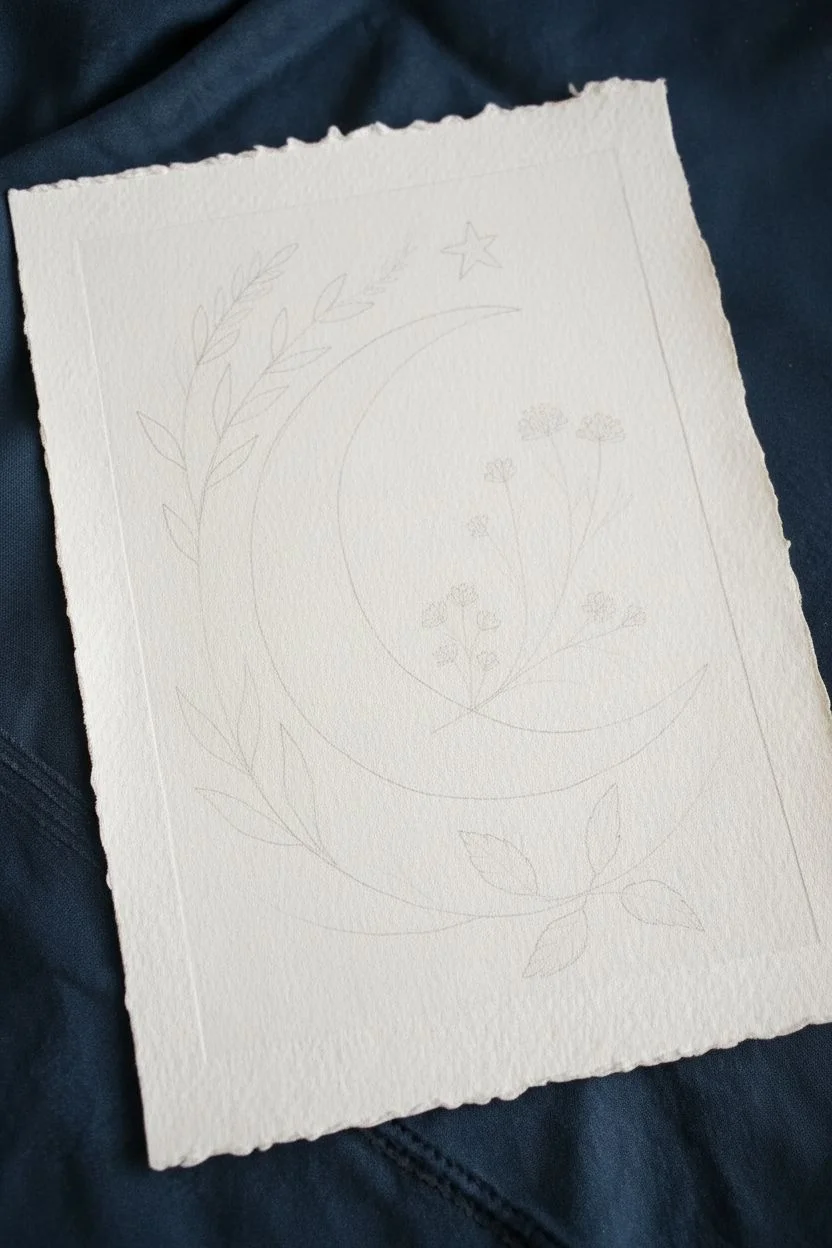
Step 1: Sketching the Composition
-
Trace the crescent shape:
Begin by lightly tracing a large circle in the center of your paper using a bowl or compass. Draw a second, slightly smaller inner curve to create a distinct crescent moon shape facing left. Keep your pencil lines extremely faint so they disappear under the paint. -
Map out the botanicals:
Sketch the main stems of the surrounding foliage. Place a large leafy branch curving up the left side and a delicate flowering sprig growing out from the moon’s inner curve. Position a darker leaf cluster at the bottom right to balance the composition. -
Add celestial details:
Mark small positions for scattered stars and sparkle shapes around the moon, particularly focusing on the upper right corner.
Pro Tip: Texturing
Sprinkle coarse salt on the wet moon paint and brush it off once dry. This creates unique, crater-like crystal patterns that look incredibly realistic.
Step 2: Painting the Moon
-
Apply the base wash:
Mix a watery wash of Yellow Ochre. Using your size 6 brush, fill in the entire crescent moon shape. Keep it relatively wet to allow for blending. -
Create texture and depth:
While the base is still damp, drop in touches of Burnt Sienna and a tiny bit of darker brown near the inner curve and the tips of the crescent. Let these colors bleed naturally to create that crater-like, organic texture. -
Splatter effect:
Before the moon dries completely, you can flick a tiny amount of clean water or darker paint onto the shape to create blooms and texture. -
Dry completely:
Let this layer dry fully. If the paper is cool to the touch, it’s still wet.
Level Up: Antique Look
Make the paper look aged by soaking the edges in strong tea or coffee before you start painting. This enhances the vintage botanical illustration vibe.
Step 3: Botanical Watercolor Layers
-
Paint the left foliage:
Mix a desaturated Grey-Green using Sap Green and a touch of Payne’s Gray. Paint the leaves on the left side, varying the intensity of the pigment so some leaves look translucent and others more solid. -
Paint the bottom leaves:
For the leaves at the bottom right, mix a deeper Indigo or Navy Blue. Paint these leaves solidly, as they act as a visual anchor for the piece. -
Add the gold star:
Using your gold metallic paint, fill in the prominent star at the top center of the page.
Step 4: Inking and Details
-
Outline the botanicals:
Once all paint is bonedry, take your 0.1mm fine liner. Carefully outline the painted leaves. Don’t worry about being perfectly on the edge; a little offset line work adds character. -
Draw the wildflowers:
Draw the delicate stems and tiny flower heads growing out of the moon using the pen directly—no paint needed here. These should be thin, wispy lines to contrast with the heavy moon. -
Add supportive line art:
Draw extra sprigs of leaves and berries in the background using just ink. I outline some empty leaf shapes on the left side to interact with the painted ones. -
Enhance the moon:
Use a white gel pen or white gouache to add tiny dots and specks across the painted moon surface, mimicking distant stars or magical dust. -
Final celestial touches:
Using the fine liner, draw small four-pointed stars, dots, and plus signs scattered in the background negative space to complete the magical atmosphere.
Now you have a mystical piece of art that captures the quiet beauty of the night sky


Have a question or want to share your own experience? I'd love to hear from you in the comments below!