I love rock painting because it turns an everyday stone into a tiny, satisfying piece of art you can finish in one creative sitting. Here are my favorite rock painting ideas for instant inspiration—starting with the classics and working up to a few extra “how did you do that?” techniques.
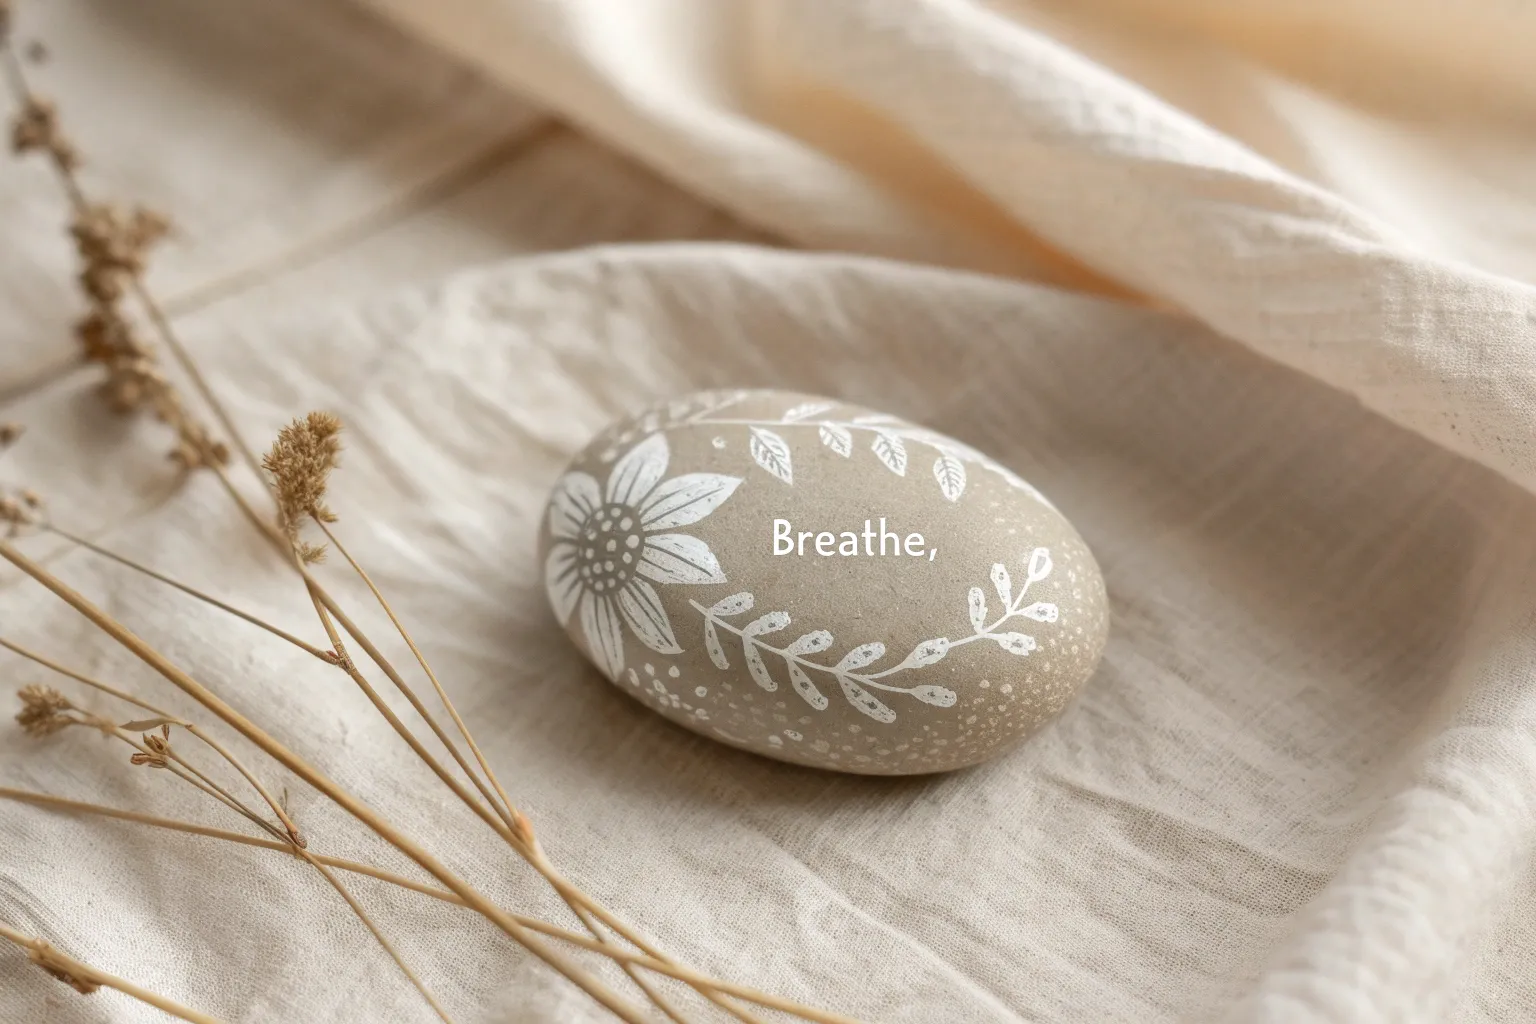
Hand-Lettered Kindness Message Rocks

Spread a little positivity with this simple yet impactful kindness rock. Featuring clean, classic typography and sweet heart accents on a soft beige background, this project is perfect for beginners looking to practice their lettering control.
How-To Guide
Materials
- Smooth river rock (round or oval)
- Acrylic paint (Light beige/sand color)
- Acrylic paint or paint pen (Reddish-brown/Terracotta)
- Acrylic paint or paint pen (Orange)
- Acrylic paint or paint pen (White)
- Fine-point black permanent marker or paint pen (for lettering)
- Flat paintbrush (medium size)
- Detail paintbrush (0 or 00 size)
- Clear sealant (spray or brush-on)
Step 1: Preparing the Canvas
-
Clean the stone:
Begin by washing your rock with warm, soapy water to remove any dirt or oils. Scrub gently with a brush if needed and let it dry completely before starting. -
Base coat application:
Using a flat paintbrush, apply a generous coat of light beige or sand-colored acrylic paint to the top surface of the rock. Smooth out your brushstrokes as you go. -
Second coat:
Once the first layer is dry to the touch, apply a second coat to ensure solid, opaque coverage. You shouldn’t see the original gray of the stone peeking through. -
Full dry:
Allow the base color to cure fully. This is crucial because writing on tacky paint will ruin your marker tip.
Fixing Smudged Ink
If your black marker bleeds when sealing, spray the first coat of sealer very lightly from a distance rather than brushing it on, which drags the ink.
Step 2: Lettering the Message
-
Pencil draft:
Lightly sketch the words ‘Be’ and ‘KIND’ in the center of the rock with a pencil. Place ‘Be’ slightly higher and centered, using a serif style, and ‘KIND’ below it in all caps. -
Outline the text:
Using your fine-point black marker or paint pen, carefully trace over your pencil lines. Go slowly to keep the lines steady. -
Add serif details:
Thicken the vertical downstrokes of your letters slightly to give them a classic serif look. Add the small horizontal ‘feet’ to the tops and bottoms of the letters I, N, and D.
Level Up: Texture
Mix a tiny pinch of baking soda into your beige base paint before applying it. This creates a realistic, gritty stone texture beneath your smooth lettering.
Step 3: Adding Decorative Elements
-
Left heart outline:
To the left of the text, draw a solid heart shape using reddish-brown or terracotta paint. Keep it tilted slightly outward. -
Right heart sketch:
On the right side, outline a similarly sized heart using the black fine liner or brown paint pen, leaving the inside unpainted for now. -
Dot details:
Dip the handle end of a small paintbrush or use a dotting tool with white paint. Add small, evenly spaced dots inside the solid reddish-brown heart on the left. -
Right heart shading:
Take a very small amount of reddish-brown paint on a dry detail brush. Gently scrub color inside the right-hand heart, focusing the pigment near the edges found inside the outline for a rough, textured look. -
Scattered hearts:
Using a tiny detail brush, paint miniature hearts scattered around the main text—some in orange, some in reddish-brown. I like to vary the angles so they look like they are floating. -
Confetti dots:
Fill in the remaining empty spaces with small dots of white and orange paint. Keep them random and delicate to frame the words.
Step 4: Finishing Touches
-
Erase guidelines:
Check closely for any visible pencil marks from your initial sketch. If the paint is bone dry, gently erase them. -
Seal the artwork:
Protect your design with a coat of clear sealant. A matte finish looks very natural on this stone style. -
Showcase:
Once the sealant is dry, place your rock in a small basket, on a windowsill, or leave it in a park for a stranger to find.
Now you have a charming, handcrafted reminder to be kind ready to brighten someone’s day


Bold Rainbow Stripe Painted Rocks

Capture the full spectrum of color with this wonderfully simple yet striking striped rock design. The bold, diagonal bands of acrylic paint create a cheerful gradient that wraps seamlessly around the stone’s natural curves.
Detailed Instructions
Materials
- Smooth, oval river rock (cleaned and dried)
- Acrylic paints: Red, Purple/Lavender, Medium Blue, Green, Yellow-Green, Yellow, Orange
- Flat paint brushes (small to medium width)
- Painter’s tape or masking tape (optional)
- Pencil (optional)
- High-gloss varnish or sealant spray
- Palette or paper plate
- Water cup and paper towels
Step 1: Preparation & Planning
-
Select the perfect stone:
Begin by finding a rock that is relatively smooth and flat. An oval shape works particularly well for this diagonal stripe pattern, as it gives the lines room to flow. -
Clean surface:
Scrub your rock thoroughly with soap and water to remove any dirt or oils. Let it dry completely before applying any paint, or the acrylics won’t adhere properly. -
Base coat consideration:
If your rock is very dark, you might want to paint a layer of white gesso first to make the colors pop. However, on a lighter grey stone like the one shown, you can paint directly onto the surface.
Crisp Line Hack
Struggling with straight lines? Use thin strips of washi tape or painter’s tape to block off sections. Paint one color, let dry, peel, and re-tape for the next.
Step 2: Painting the Stripes
-
Sketch the guides:
Using a pencil, lightly draw diagonal lines across the top face of the rock. Space them evenly to ensure each color band has roughly the same width. -
Start with purple:
I like to start from one side to avoid smudging wet paint. Begin with a lovely lavender or light purple stripe near the left edge. Use a flat brush to get a crisp edge. -
Add the red tip:
Fill the small remaining tip on the far left with a bold red or deep pink color just before the purple stripe. -
Paint the blue band:
Next to the purple, paint your medium blue stripe. Try to keep the line between colors as straight as possible, letting the brush bristles do the work. -
Apply the green:
Move on to a true green shade. Paint this band adjacent to the blue. If your paint looks translucent, let it dry for a few minutes and add a second coat for opacity. -
Blend the lighter green:
Next is a vibrant yellow-green or lime color. This acts as a transition shade between the darker green and the upcoming yellow. -
Sunshine yellow:
Paint a bright yellow stripe next. Yellow often requires two or three coats to look solid, so be patient here and let layers dry in between. -
Orange segment:
Add a rich orange band next to the yellow. Ensure the colors touch perfectly without leaving any bare rock gaps between the stripes. -
Final red tip:
Finish the far right tip of the rock with a deep red. Paint all the way down the sides of the rock so the pattern looks continuous from above. -
Refine the edges:
Inspect your lines. If any color has wobbled into its neighbor, you can carefully touch it up with the correct color once everything is dry.
Step 3: Finishing Touches
-
Dry completely:
Allow the rock to sit undisturbed until the paint feels hard to the touch. This usually takes about 20–30 minutes depending on paint thickness. -
Seal the artwork:
Take the rock to a well-ventilated area. Hold your spray sealant about 8–10 inches away and apply a light mist. -
Apply final gloss:
Once the initial mist is tacky-dry, apply a heavier coat of high-gloss varnish. This replicates the shiny, wet look seen in the inspiration image.
Glitter Upgrade
After the paint dries but before sealing, paint a thin layer of glitter mod podge over just one or two specific color bands to add sparkle and texture.
Now you have a brilliantly colorful paperweight or garden decoration to brighten up any space


Easy Polka Dot Pattern Rocks
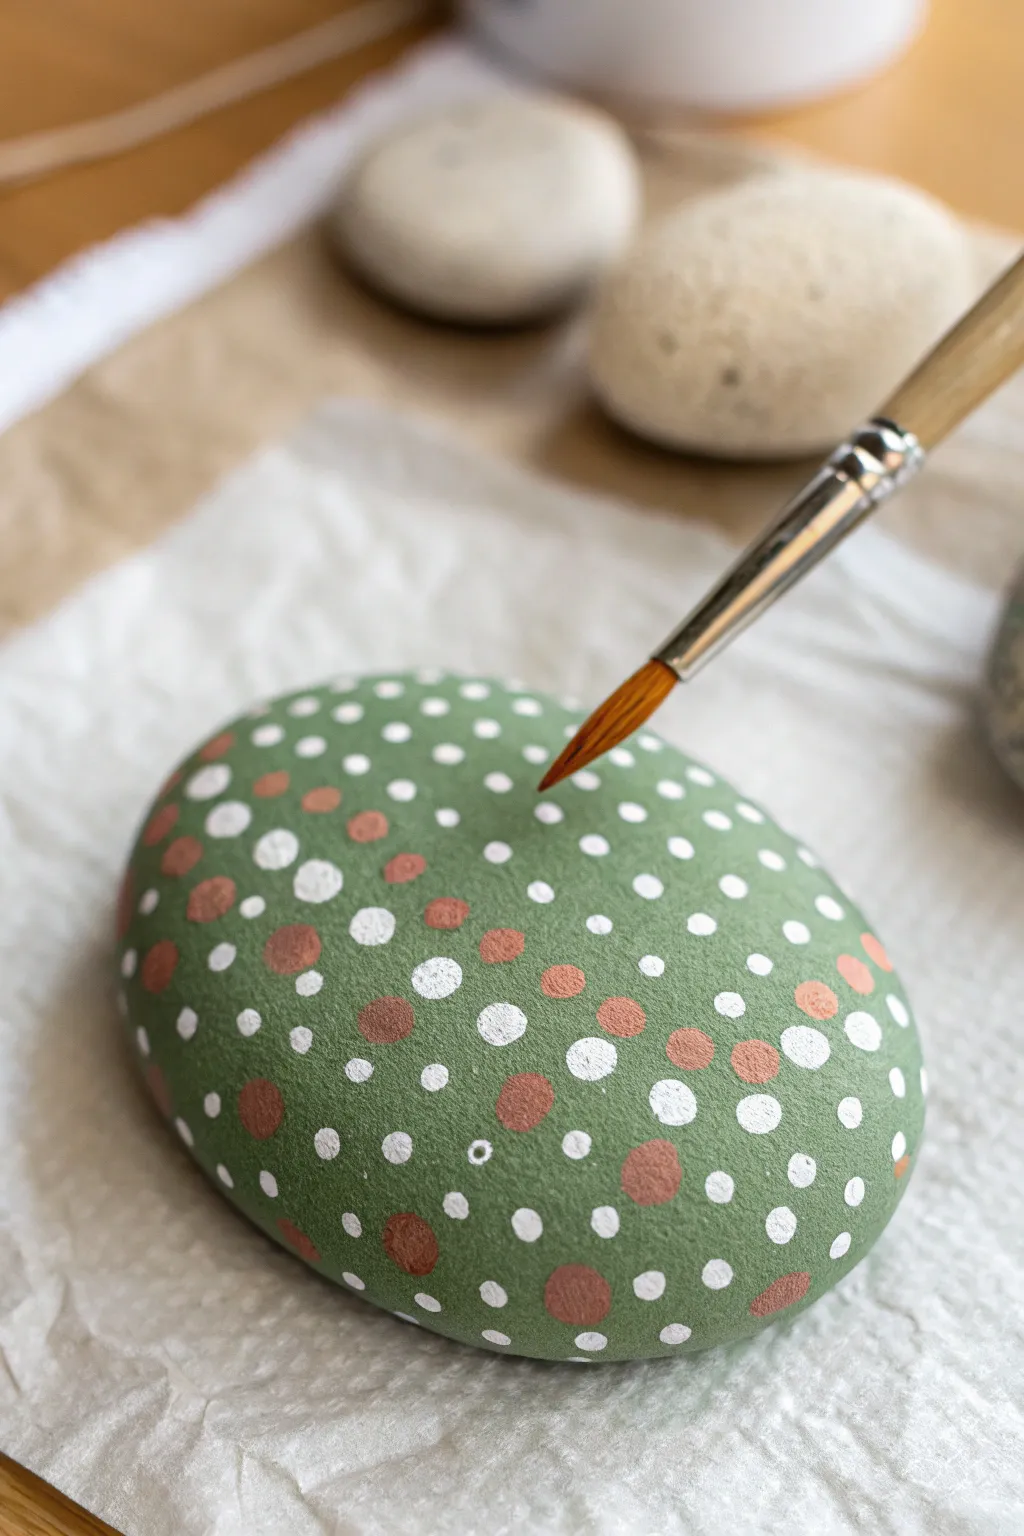
Transform a simple garden stone into a mesmerizing piece of art with this textured polka dot design. The soothing sage green base paired with metallic copper and crisp white dots creates an elegant, organic look perfect for home decor.
Step-by-Step Guide
Materials
- Smooth, rounded river rock (soap-size)
- Acrylic paint (Sage Green, White, Metallic Copper/Bronze)
- Large flat paintbrush (for base coat)
- Fine pointed round brush (size 2 or 4)
- Dotting tools or toothpicks (optional but helpful)
- Parchment paper or wax paper (for surface protection)
- Gloss or matte varnish (sealant)
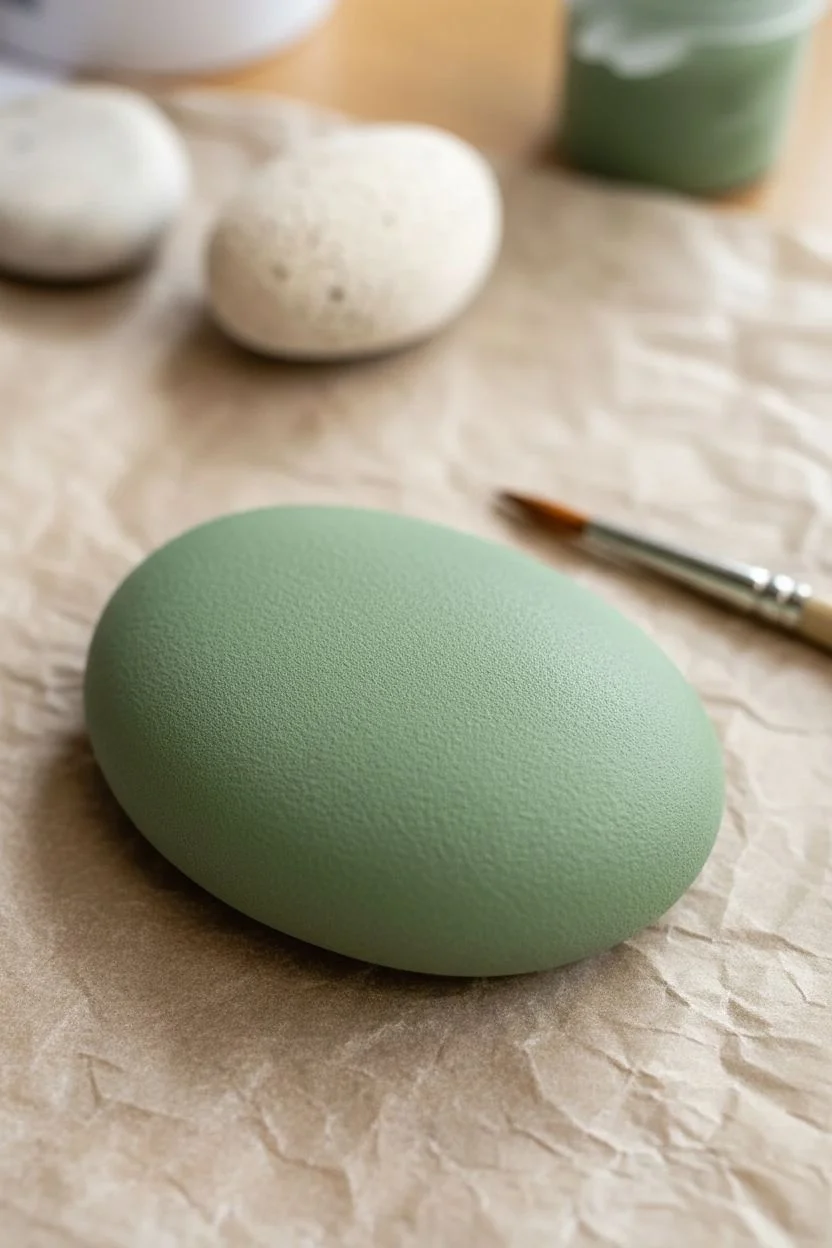
Step 1: Preparation & Base Coat
-
Clean the Stone:
Begin by thoroughly washing your rock with warm soapy water to remove any dirt or grease. Scrub it gently with a brush if needed and let it dry completely before starting. -
Prepare Your Workspace:
Lay down a sheet of parchment paper or wax paper to protect your table. This also gives you a nice surface to mix paints or test your brush strokes. -
Apply the Base Layer:
Using a larger flat brush, coat the top surface of the rock with your sage green acrylic paint. I find smoother rocks need less paint to get good coverage. -
Check for Opacity:
Let the first coat dry for about 15 minutes. If you can still see the dark stone underneath, apply a second coat of green to ensure a solid, matte background. Let this dry fully.
Step 2: Creating the White Pattern
-
Load the Brush:
Dip your fine pointed round brush into the white acrylic paint. You want just enough paint on the tip to form a bead, but not so much that it will drip. -
Start the Central Row:
Establish your pattern by gently touching the brush tip to the center of the rock to create a dot. Continue making a vertical line of white dots down the center. -
Vary the Spacing:
This design doesn’t require geometric perfection. Place white dots scattered randomly around the surface, leaving gaps where the copper dots will go later. -
Create Size Variation:
Press down slightly harder on the brush for larger dots, and use just the very tip for tiny speckles. This organic variation adds depth to the design. -
Fill the Edges:
Continue adding white dots all the way to the side curves of the stone, ensuring the pattern wraps naturally around the visible surface.
Uneven Dots?
If brush dots are difficult, use the handle end of your paintbrush. Dip the handle in paint and stamp it onto the rock for perfectly round circles every time.
Step 3: Adding Metallic Accents
-
Switch to Metallic:
Clean your brush thoroughly or switch to a fresh fine round brush. Dip it into the metallic copper or bronze paint. -
Fill the Gaps:
Look for the larger open green spaces between your white dots. Place copper dots in these areas to balance the color distribution. -
Layering Effect:
If you are feeling confident, you can carefully place a tiny copper dot overlapping the edge of a dried white dot for a layered effect, though separating them looks just as good. -
Adding Micro-Details:
Using the very finest point of your brush or a toothpick, add tiny micro-dots of white inside the empty green spaces to make the pattern look dense and intricate. -
Review the Balance:
Step back and look at the rock from a distance. If one area looks too green, add a small dot there. Aim for a mix of about 70% white dots and 30% copper.
Paint Consistency
For raised, tactile dots, do not add water to your acrylics. Use the paint straight from the tube so it holds its shape and texture on the curved surface.
Step 4: Finishing Touches
-
Let it Cure:
Allow the dotted pattern to dry completely. Since the dots are raised mounds of paint, this might take longer than the base coat—give it at least an hour. -
Check for Peaks:
Sometimes dot painting creates sharp peaks on the dots. If this happens, you can gently tap them down with a damp finger while the paint is still tacky. -
Seal the Artwork:
Once fully dry, apply a coat of varnish over the entire painted surface. This protects the paint from chipping and makes the metallic copper shine brighter.
Place your finished stone on a desk or in a planter to add a spot of handmade charm to your space


Ladybug Painted Rocks for Gardens
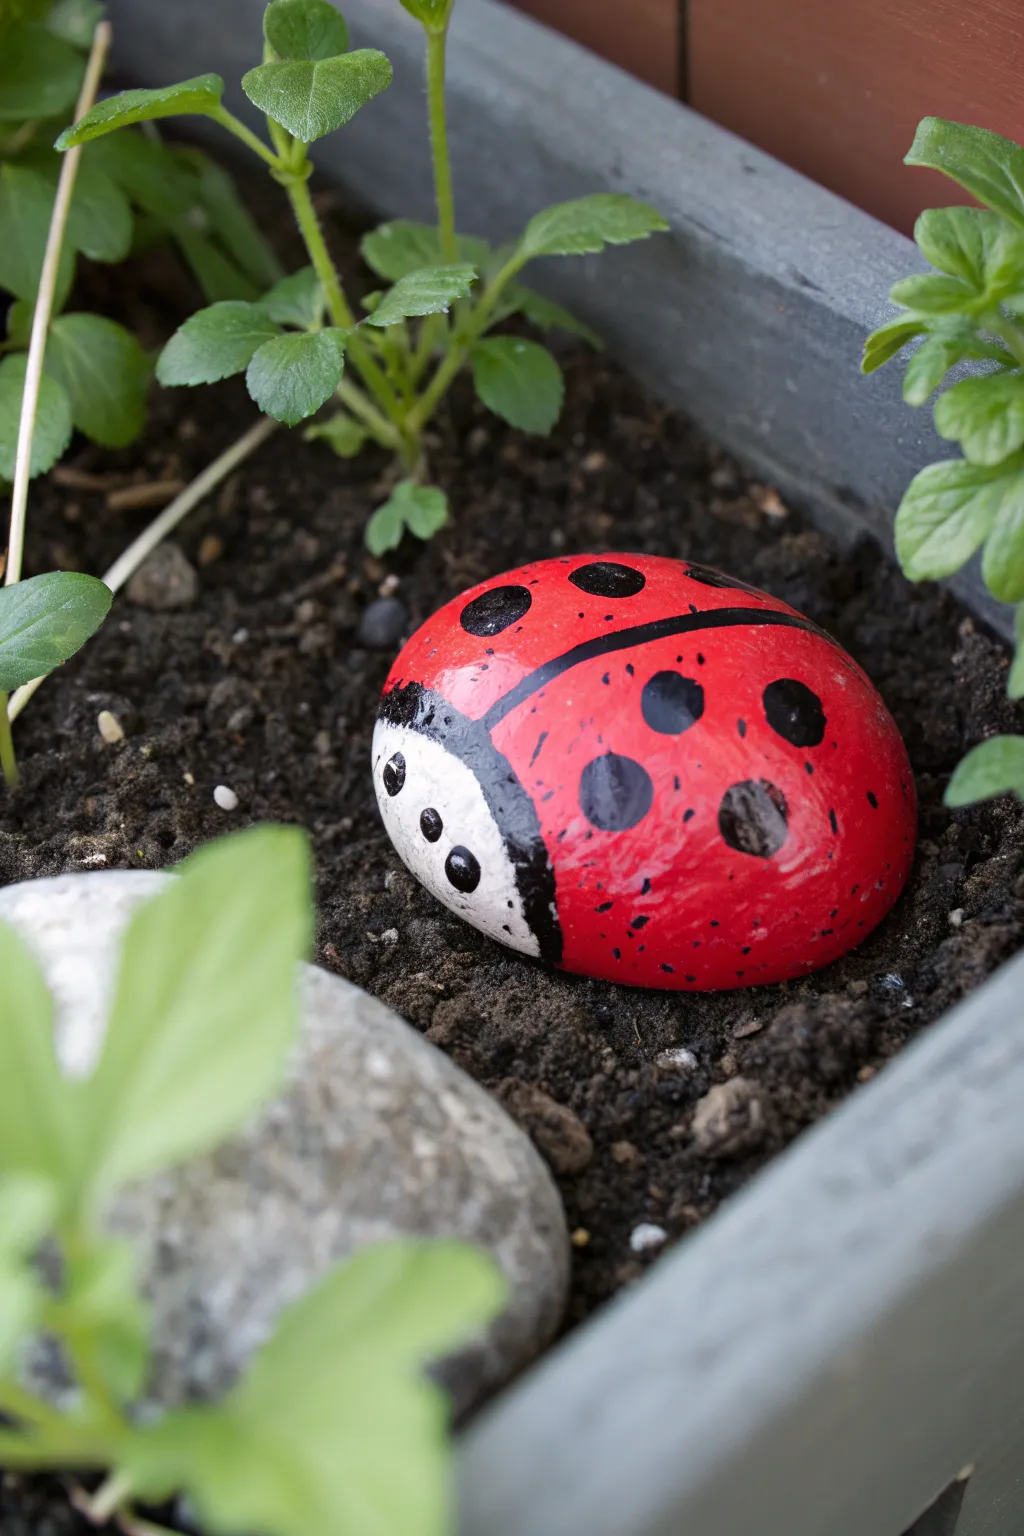
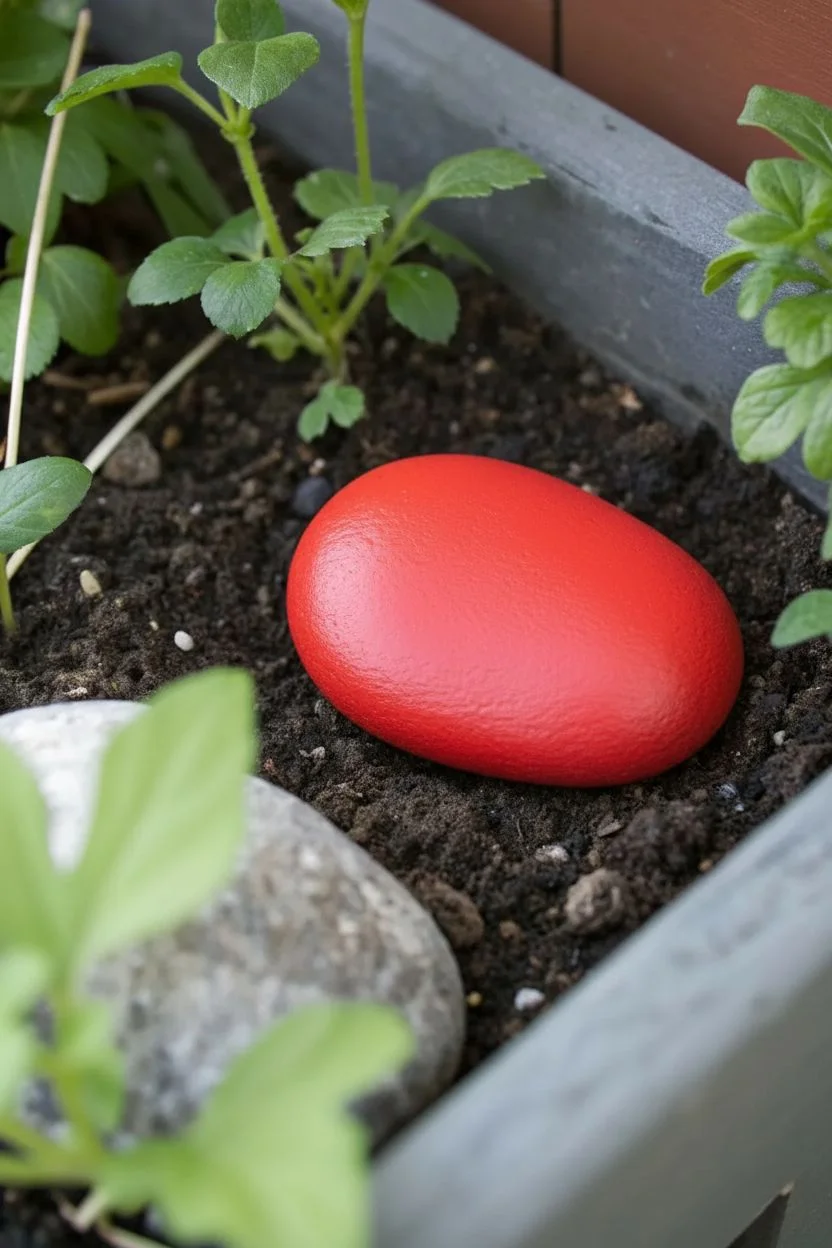
Add a pop of vibrant color to your flower beds with this charming ladybug rock painting project. The high-gloss finish makes the classic red and black design shine brilliantly against the earthy garden soil.
Detailed Instructions
Materials
- Smooth, rounded river rock (oval shape)
- Acrylic paint: Bright Red
- Acrylic paint: White
- Acrylic paint: Black
- Wide flat paintbrush
- Fine detail paintbrush or liner brush
- Dotting tool or end of a paintbrush handle
- High-gloss outdoor varnish or sealant spray
- Cup of water
- Paper towels
Step 1: Base Coating
-
Clean the stone:
Begin by scrubbing your rock thoroughly with soap and water to remove any dirt or oils that might prevent the paint from sticking. Let it dry completely in the sun. -
Prime the surface:
Apply a base coat of white acrylic paint over the top surface of the rock. This isn’t strictly necessary, but it helps the red pop much more than painting directly on dark stone. -
Apply the red base:
Using your wide flat brush, paint the entire top surface of the rock with bright red acrylic paint. You want a smooth, opaque finish. -
Add a second coat:
Allow the first red layer to dry to the touch, then apply a second coat to ensure no streaks remain and the color is solid.
Use a Sponge
For the initial red base coat, sponge the paint on instead of brushing. This eliminates brush strokes and creates a textured surface for the topcoat to grip.
Step 2: Defining the Shape
-
Outline the head:
Visualize the front quarter of your oval rock as the head. Use your fine brush and black paint to draw a curved line separating this section from the red body. -
Fill in the face:
Paint the area forward of your curved line completely black. Extend this black paint slightly down the sides of the rock to ground the design. -
Create the wings:
Starting from the center of the black head section, paint a straight black line running down the middle of the red body all the way to the back of the rock. -
Add the wing shape:
Near the head, curve the top of your straight line slightly outward like a ‘Y’ shape to distinguish the wings from the head area.
Step 3: Adding Details
-
Paint the face patches:
Once the black head is dry, use a clean detail brush to paint two large, white semicircles on either side of the face area for the eyes/face markings. -
Dot the eyes:
Dip the handle end of a paintbrush into black paint and press it gently onto the white face patches to create two perfectly round pupils. -
Add small black spots:
Switch back to your small brush or a large dotting tool. Paint several scattered black circles on the red wings. Vary their placement but keep them roughly symmetrical. -
Create variation:
I prefer to make some spots slightly larger than others to give the ladybug a more organic, natural look rather than perfect uniformity. -
Add tiny flecks:
For extra texture, dip a toothbrush or stiff brush in black paint and lightly flick a few tiny speckles onto the red area, or dab tiny dots manually.
Paint Peeling?
If your paint starts to peel off the rock after drying, the stone was likely too smooth or dirty. Sand the rock surface lightly with sandpaper before painting next time.
Step 4: Sealing and Finishing
-
Dry thoroughly:
Let the rock sit undisturbed for several hours or overnight. The thick layers of paint need to be completely cured before sealing. -
Apply varnish:
Coat the entire top of the rock with a high-gloss outdoor varnish. This creates that ‘wet’ look seen in the photo and protects it from rain. -
Let it cure:
Allow the varnish to dry according to the manufacturer’s instructions before placing your new friend in the garden soil.
Nestle your shiny new beetle among some green leaves for a delightful garden surprise
BRUSH GUIDE
The Right Brush for Every Stroke
From clean lines to bold texture — master brush choice, stroke control, and essential techniques.
Explore the Full Guide
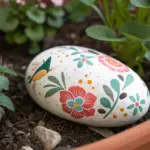
Simple Wildflower Bouquet Rocks
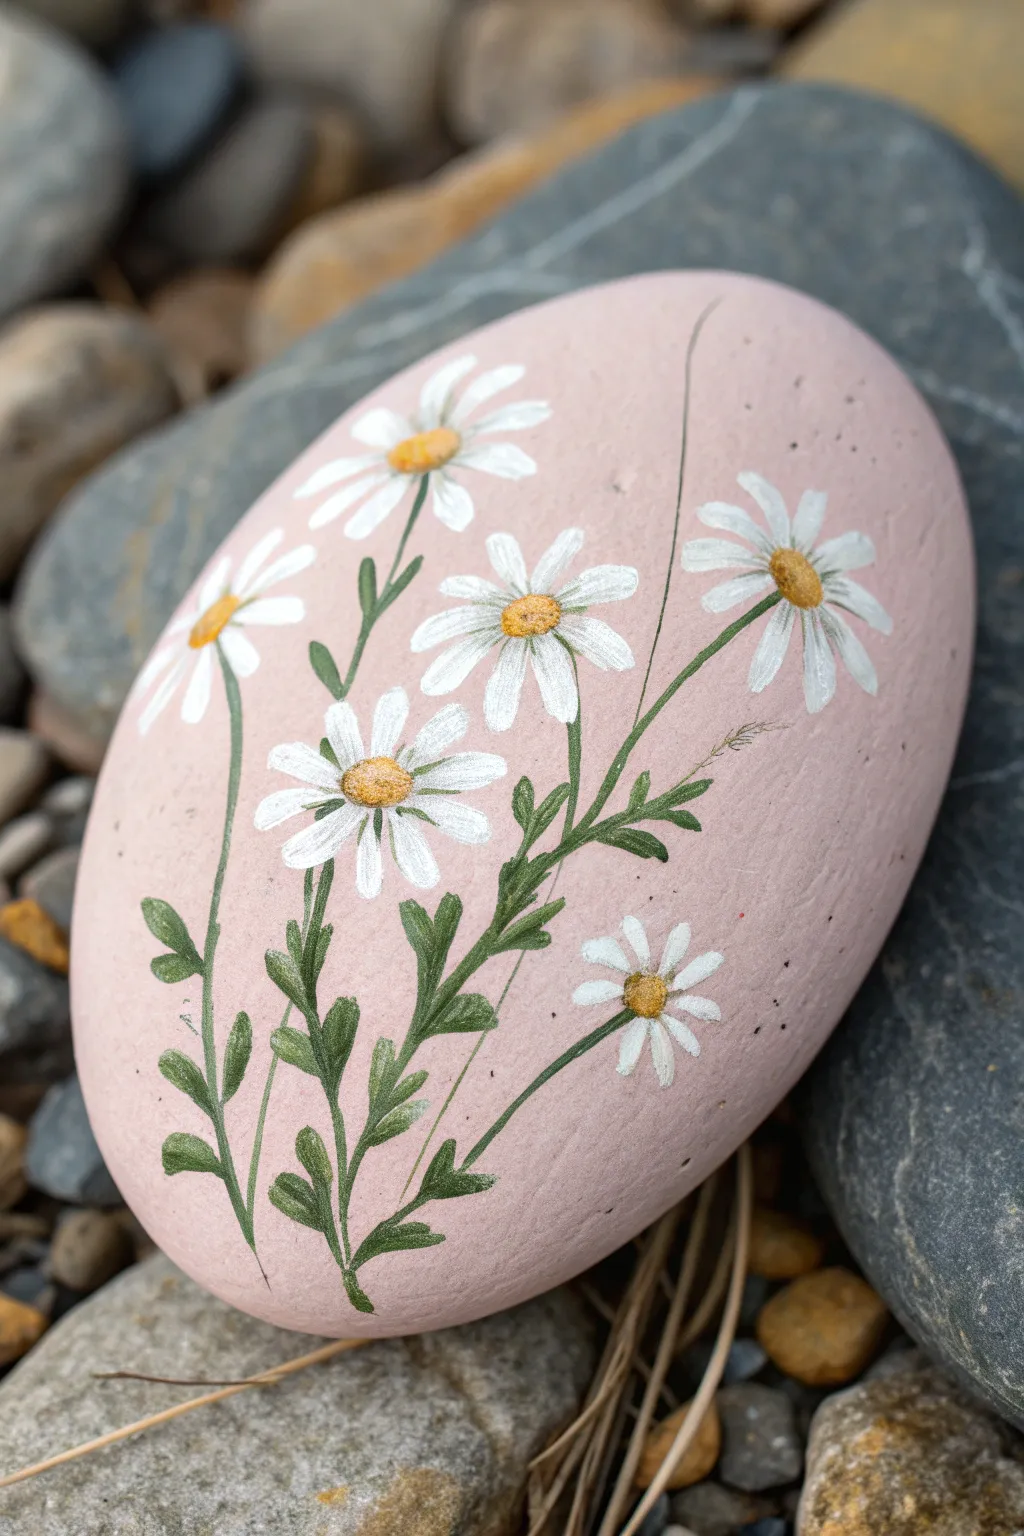
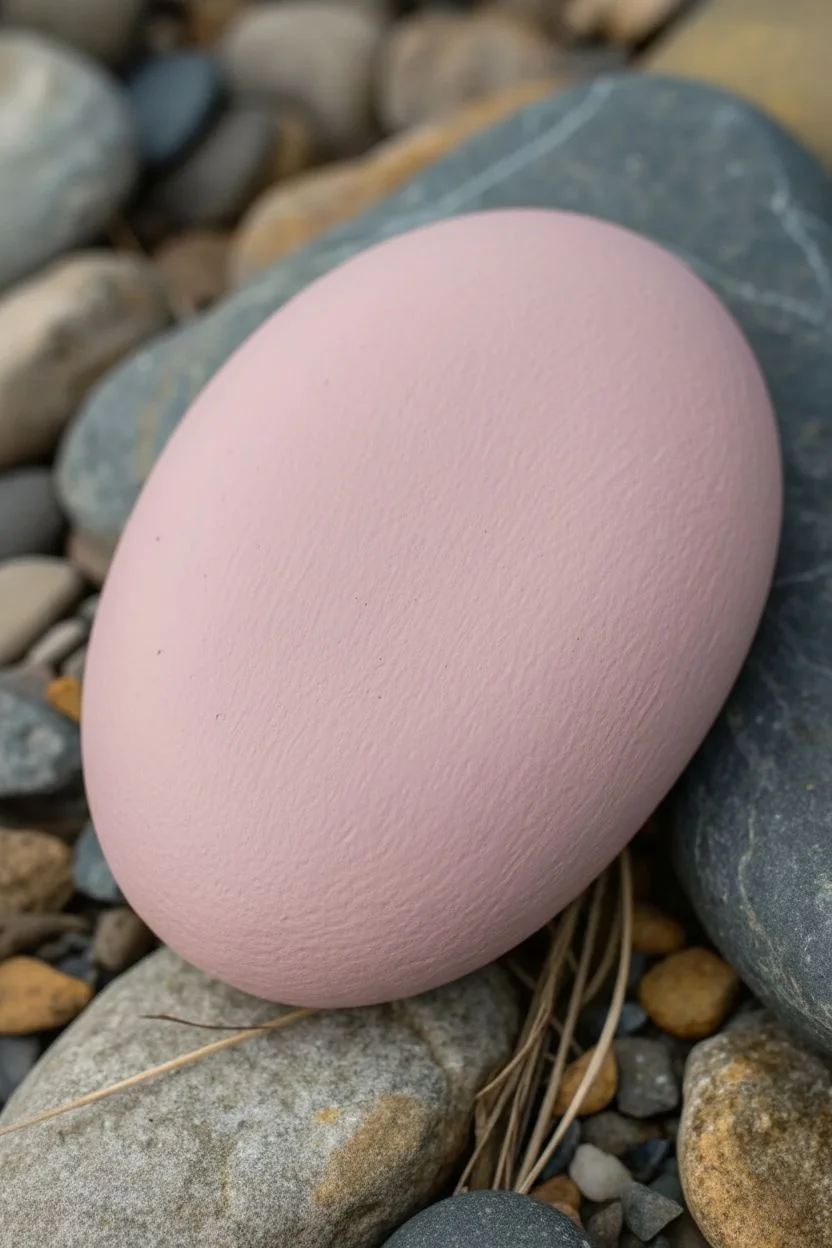
Transform a smooth river rock into a gentle piece of art with this dusty pink background and dainty white wildflowers. The soft hues and simple brushstrokes create a peaceful, spring-inspired bouquet that fits perfectly in the palm of your hand.
How-To Guide
Materials
- Smooth oval river rock (medium size)
- Acrylic paint: Dusty pink (or mix pink + white + touch of brown)
- Acrylic paint: Titanium White
- Acrylic paint: Olive Green or Sap Green
- Acrylic paint: Golden Yellow or Ochre
- Flat paintbrush (medium size)
- Round detail brush (size 0 or 1)
- Fine liner brush (size 00 or 000)
- Matte or satin sealer (spray or brush-on)
- Palette or paper plate
- Water cup and paper towels
Step 1: Preparing the Canvas
-
Clean the stone:
Before starting, scrub your rock with warm soapy water to remove any dirt or oils. Let it dry completely in the sun or use a hairdryer to speed things up. -
Base coat application:
Using your flat brush, cover the top surface of the rock with the dusty pink acrylic paint. You want a smooth, matte look. -
Desaturate if needed:
If your pink is too bright, mix in a tiny drop of brown or heavy cream to get that muted, natural tone seen in the photo. I usually test the color on a scrap paper first. -
Second layer:
Once the first coat is dry to the touch, apply a second coat of pink to ensure solid coverage. The stone’s natural color shouldn’t peek through.
Step 2: Planning the Bouquet
-
Visualize the layout:
Imagine a loose ‘V’ shape for your bouquet. You’ll want about five main flowers: one central, two slightly lower on the left, and two reaching up towards the right. -
Paint the centers first:
Using the round detail brush and your golden yellow paint, dab small, imperfect ovals where the flower heads will be. This helps position your composition before committing to petals. -
Initial stems:
Switch to your fine liner brush and thin your olive green paint slightly with water. Draw very thin, sweeping lines from the bottom center of the rock up to your yellow centers. -
Varying the stems:
Keep the stems wispy and organic—they don’t need to be perfectly straight. Let them curve naturally.
Uneven Petals?
Don’t stress over symmetry! Real wildflowers are messy. Variation in petal length and thickness actually makes the painting look more realistic and organic.
Step 3: Painting the Blooms
-
First petal layer:
Load your small round brush with titanium white. Press down and lift up quickly to create teardrop shapes radiating from the yellow centers. -
Petal direction:
Notice how the flowers on the sides are viewed from an angle. For these, paint petals shorter on the top side and longer on the bottom side to create perspective. -
Add a tiny bud:
Paint a small, lonely daisy lower down on the right side, slightly separated from the main bunch, to balance the composition. -
Refine the centers:
Once the yellow centers are dry, add a tiny dot of darker orange or brown to the bottom edge of each yellow oval to give them 3D volume.
Add Texture
Mix a pinch of baking soda into your yellow paint for the flower centers. When it dries, it’ll have a fuzzy, pollen-like texture.
Step 4: Foliage and Finish
-
Main leaves:
Using the liner brush and olive green, paint small, jagged leaves attachment to the stems. These should look like miniature oak leaves or arugula leaves. -
Leaf details:
The leaves near the base can be larger and denser, while the ones higher up near the blooms should be smaller and more sparse. -
Ghost stems:
Mix a tiny bit of water into your green to make a translucent wash. Paint a few very faint, thin lines in the background to suggest depth and distant grasses. -
Highlighting petals:
Go back over the white petals with a second layer of white just on the tips to make them pop against the pink background. -
Clean up:
If any green overlapped your white petals unintentionally, use a tiny bit of white to touch it up. -
Sealing the art:
Allow the entire rock to dry for at least 24 hours. Apply a matte spray sealer to protect the paint without making it look plasticky.
Place this charming stone on your desk or give it as a small token of affection to brighten someone’s day
Busy Bee and Butterfly Rock Designs
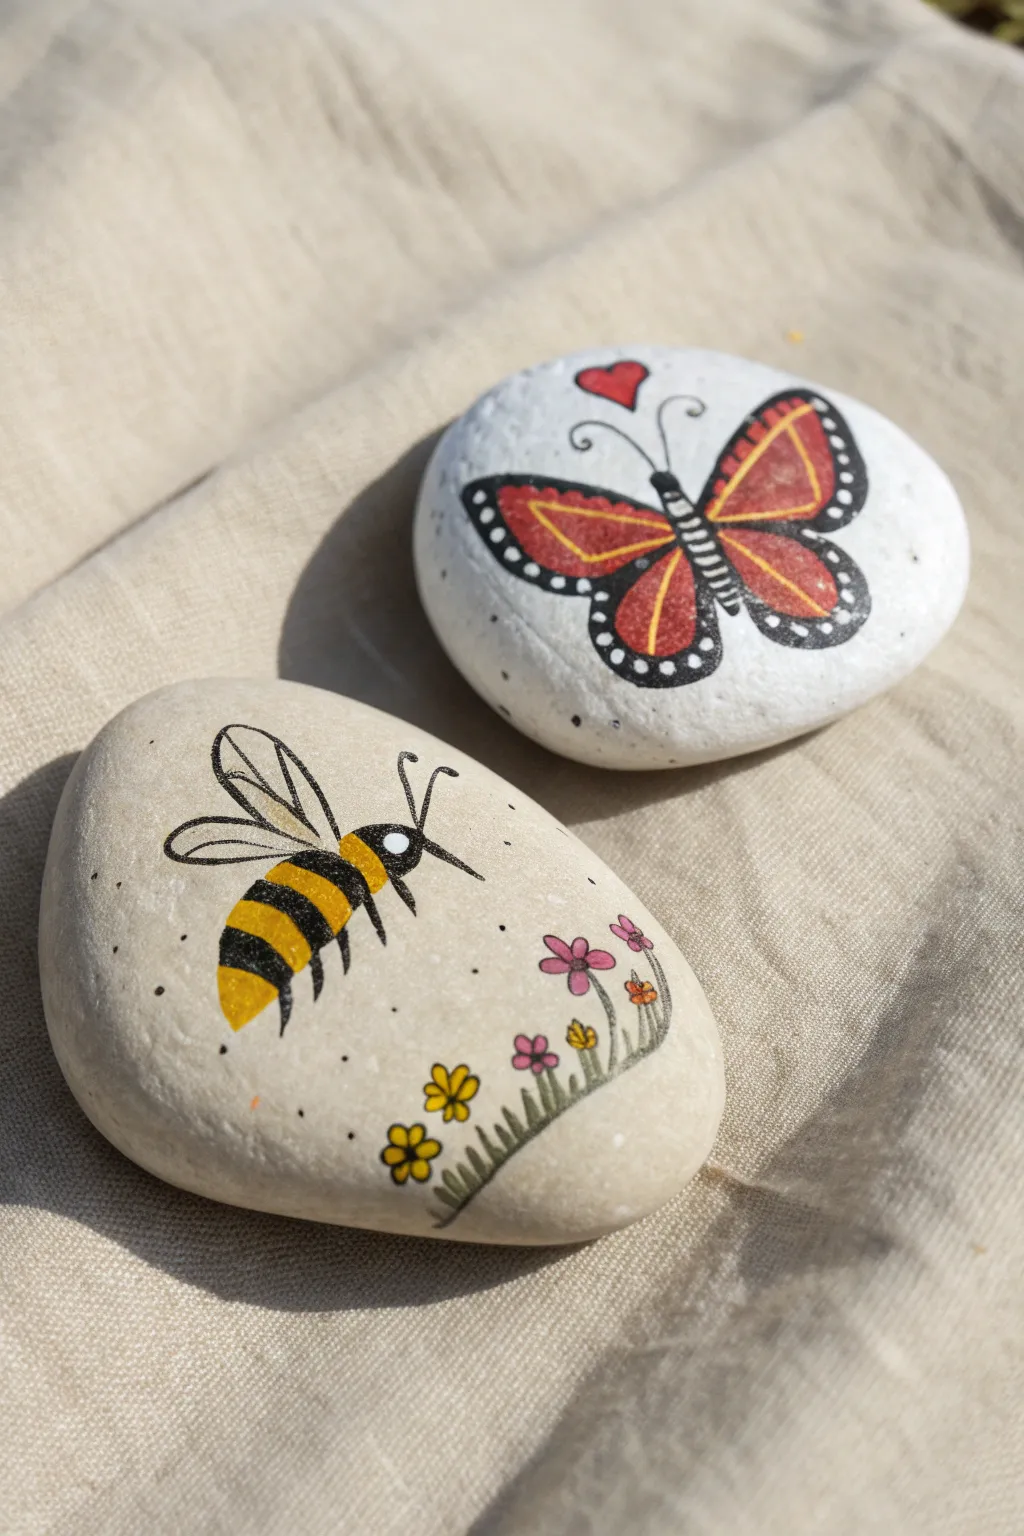
Bring your garden indoors with these charming painted stones featuring a buzzing bee among wildflowers and a vibrant red butterfly. This project uses smooth river rocks as a canvas for simple yet delightful illustrative designs that are perfect for beginners.
Detailed Instructions
Materials
- Two smooth, flat river stones (roughly palm-sized)
- Acrylic paint (black, yellow, red, orange, white, pink)
- Fine point paint pens or detail brushes (size 0 and 00)
- Matte white acrylic paint or gesso for the base coat
- Clear sealant spray or varnish
- Pencil for sketching
- Water cup and paper towels
Step 1: Preparing the Canvases
-
Clean the Stone:
Begin by scrubbing your stones with warm soapy water to remove any dirt or oils. Let them dry completely, ideally in the sun, to ensure the paint adheres properly. -
Base Color Application:
For the butterfly rock, paint the entire top surface with white acrylic paint. You may need two coats for full opacity. For the bee rock, leave the natural stone color exposed as the background, or add a very sheer wash of cream if your rock is too dark. -
Drying Time:
Allow the base layers to dry fully before sketching. If the white paint is tacky, your pencil or pen lines will dig in and smudge.
Step 2: Painting the Busy Bee
-
Sketch the Outline:
Lightly sketch the bee’s body shape on the left side of the natural stone. Draw an oval for the abdomen and a smaller circle for the head. Add outlines for two wings pointing upward. -
Color Blocking:
Using yellow paint and a small brush, fill in the thick stripes on the bee’s abdomen. Leave space between them for the black stripes later. -
Detailing the Body:
Once the yellow is dry, use a fine black paint pen or liner brush to fill in the black sections of the abdomen and the head. Add a small white dot on the head for the eye. -
Adding Wings:
Carefully draw the wing outlines with your black liner. Keep the lines thin and delicate. Draw a line down the center of each wing for detail. -
Legs and Antennae:
Draw two antennae curving from the head and add spindly legs extending from the bottom of the body. Keep your hand steady and light. -
Meadow Floor:
At the bottom right of the rock, paint short, upward green or grey strokes to resemble grass blades. -
Floral Accents:
Dot small yellow and pink flowers onto the grass tips. I like to keep these simple—just five small dots for petals around a center point. -
Final Bee Touches:
Add tiny black stippling dots around the bee and flowers to give the piece a whimsical, illustrative texture.
Fixing Smudges
Did your black line smudge? Don’t wipe it! Let it dry completely, then paint over the mistake with your base color (white or cream) before trying the line again
Step 3: Creating the Butterfly
-
Sketch Symmetry:
On the white-painted stone, lightly draw a vertical line for the body and sketch two large upper wings and two smaller lower wings to ensure symmetry. -
Wing Base Color:
Fill the inner sections of the wings with a warm red or reddish-orange paint. Leave a bare border around the edges for the black outline. -
Adding Veins:
Once the red base is dry, use a thin yellow or light orange paint to draw the veins inside the wings. A simple ‘V’ shape inside the top wings works well. -
Bold Outlines:
Using black paint, outline the entire butterfly. Make the outer edges of the wings thick and bold, while keeping the inner lines thinner. -
Decorative Dots:
In the thick black border of the wings, use a toothpick or dotting tool to add tiny white dots. This mimics a Monarch butterfly pattern. -
Body Details:
Paint the central body black with horizontal white stripes. Add curly antennae at the top. -
The Heart Accent:
Paint a small red heart floating just above the butterfly’s head for a sweet finishing touch.
Add Some sparkle
Mix a tiny amount of glitter medium into the clear sealant or paint the bee’s wings with a metallic pearl paint for a subtle shimmer in the sunlight
Step 4: Finishing
-
Clean Up:
Check for any pencil marks that are still visible and gently erase them if the paint is fully cured. -
Seal the Work:
To protect your art from chipping or fading, apply a coat of clear varnish or sealant spray. A matte finish looks very natural, while gloss makes the colors pop.
Now you have a pair of delightful garden friends to brighten up your desk or flower pot

PENCIL GUIDE
Understanding Pencil Grades from H to B
From first sketch to finished drawing — learn pencil grades, line control, and shading techniques.
Explore the Full Guide
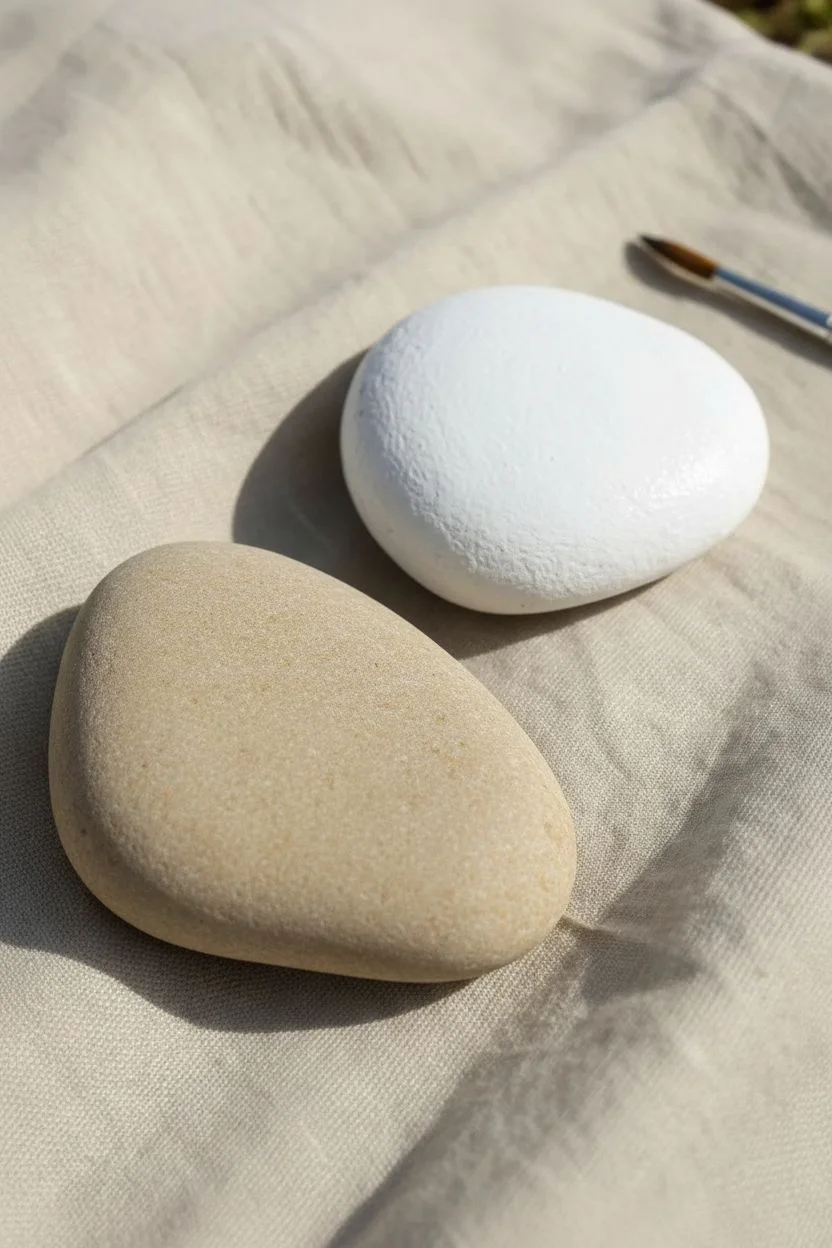
Sweet Owl Face Painted Rocks
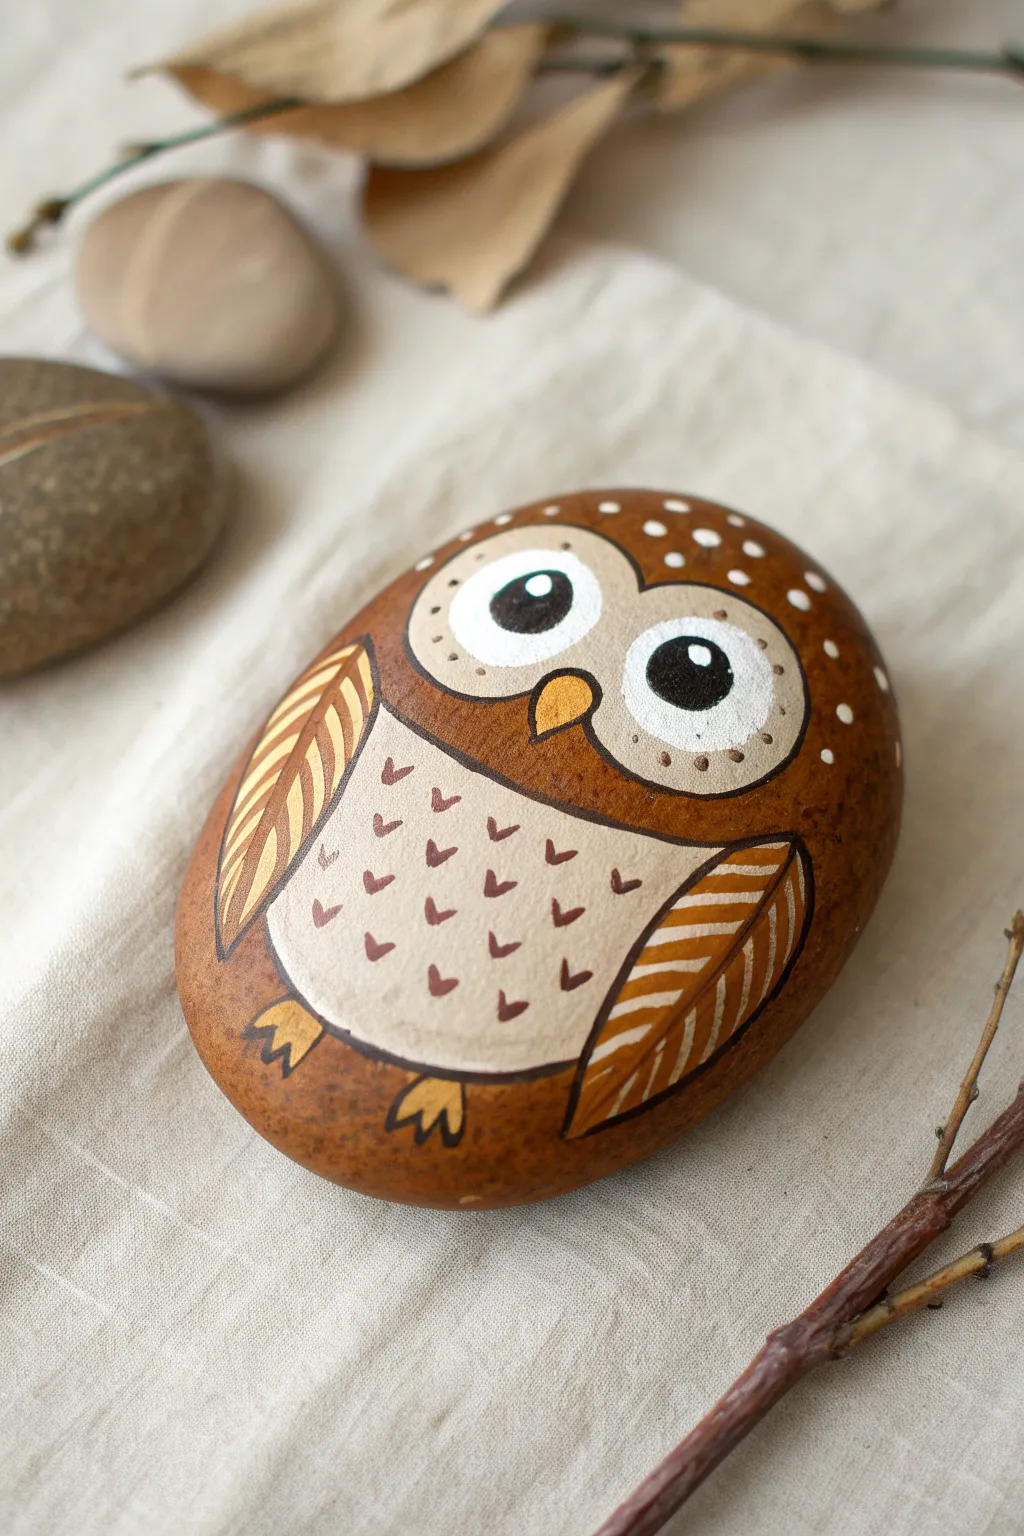
Transform a simple smooth stone into a charming woodland friend with warm earth tones and wide, curious eyes. This painted rock project features intricate feather details and a sweet expression that makes it a perfect desk companion or garden accent.
Step-by-Step
Materials
- Smooth oval river rock (medium size)
- Acrylic paints (dark brown, tan/beige, white, yellow/gold, black)
- Pencil for sketching
- Fine point detail brushes (sizes 0 and 00)
- Medium flat brush
- Dotting tool or toothpick
- Sealer (spray or brush-on varnish)
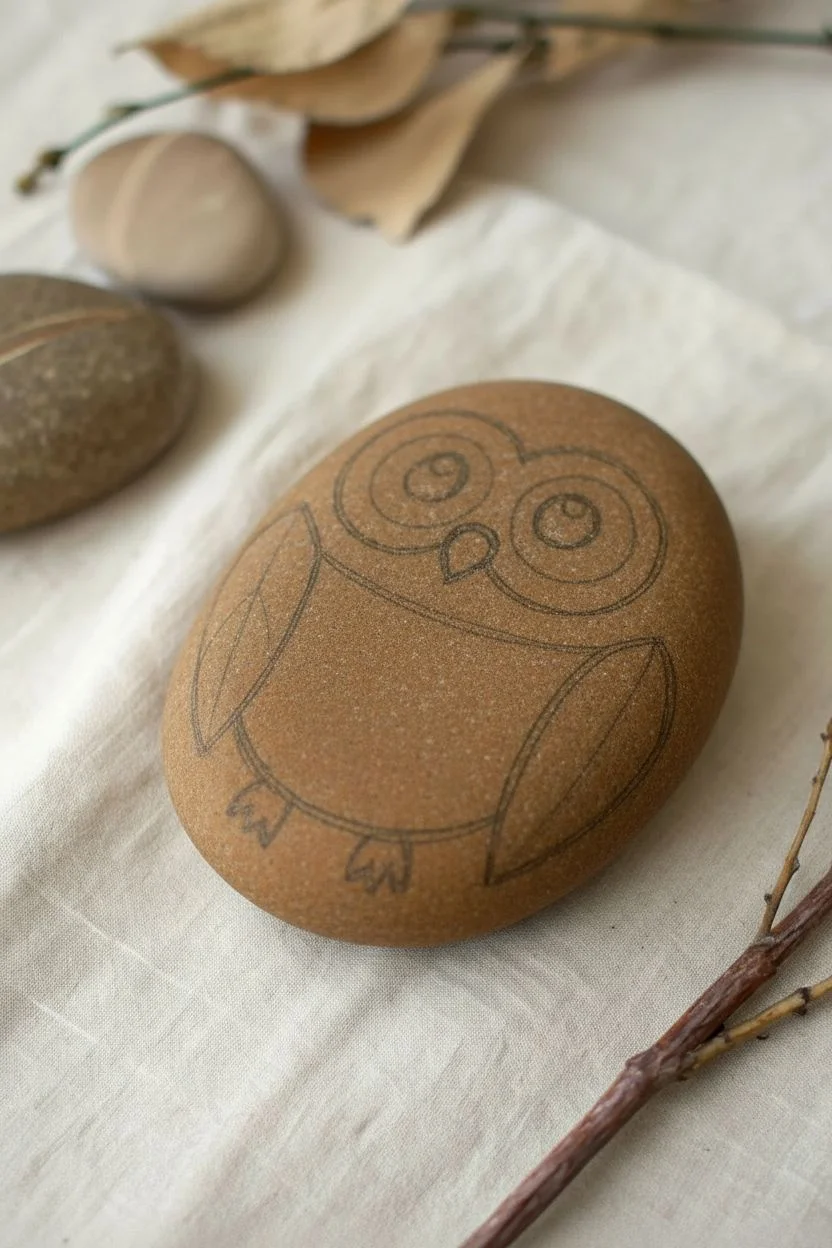
Step 1: Base and Sketching
-
Clean the canvas:
Before starting, ensure your rock is thoroughly washed with soap and water and completely dry. A dirty surface will prevent the paint from adhering properly. -
Test the natural color:
Since the owl’s body uses the natural brown of the stone in the background, you don’t need a full base coat if your rock is already a nice earthy brown. If your rock is grey, paint the entire surface with a warm chestnut brown acrylic paint and let it dry. -
Draft the features:
Using a light pencil, gently sketch the large oval for the belly area and the two large circles for the eyes. Draw the wing shapes on the sides; they should look like elongated leaves hugging the body.
Brush Control Trick
For the tiny ‘V’ feathers, try thinning your paint slightly with water. It helps the paint flow off a fine liner brush much smoother than thick paint.
Step 2: Blocking in Color
-
Paint the belly:
Fill in the large central oval (the owl’s chest/belly) with a creamy beige or light tan paint. You may need two thin coats to get solid coverage over a darker rock. -
Create the face mask:
Paint two large, connecting circles in the same beige color around the eye area. Think of this shape as looking a bit like a sideways figure-eight or a mask. -
Whites of the eyes:
Inside your beige face mask circles, paint two smaller white circles for the eyes. Make sure they are centered but leave a beige border around them. -
Add the beak:
Paint a small, inverted triangle right where the two eye circles meet. Use a golden yellow color for this beak. -
Wing base:
Fill in the wing shapes on the left and right sides with a medium brown or golden-brown tone, distinct from the rock’s natural color but harmonious with it.
Make it a Family
Paint different sizes of rocks to create a whole owl family. Use slightly different colors for the belly feathers to give each one a unique personality.
Step 3: Creating the Details
-
Outline work:
Using your finest detail brush and dark brown paint (mixed with a tiny drop of water for flow), carefully outline the eyes, the beige face mask, the beak, and the belly oval. -
Eye definition:
Paint large black circles inside the white eye areas. Once dry, add a tiny white dot in the upper corner of each black pupil to create a ‘sparkle’ of life. -
Feather V-shapes:
On the beige belly, paint small, scattered ‘V’ shapes or tiny hearts using dark brown paint. Keep them random but evenly spaced to mimic fluffy chest feathers. -
Wing texturing:
Switch to a lighter cream or gold color. Paint diagonal stripes or leaf-vein patterns inside the brown wing shapes to simulate folded feathers. -
The feet:
At the very bottom of the body, paint two small claw feet using the same golden yellow as the beak. Outline them in dark brown once dry.
Step 4: Finishing Touches
-
Dotted crown:
Dip a dotting tool or the back of a paintbrush into white paint. Add a series of dots across the forehead area and scattered on the sides of the head for extra texture. -
Face details:
Add tiny brown dots around the white parts of the eyes (inside the beige mask area) to give the face depth and texture. -
Final outline:
If needed, reinforce the outer lines of the wings to make them pop against the stone background. -
Seal the deal:
Wait at least 24 hours for the paint to cure completely. Apply a coat of clear varnish or sealer to protect your artwork from chipping and weather.
Now your wise little owl is ready to perch on a shelf or hide among your garden plants
Tropical Fish Painted Rock Collection
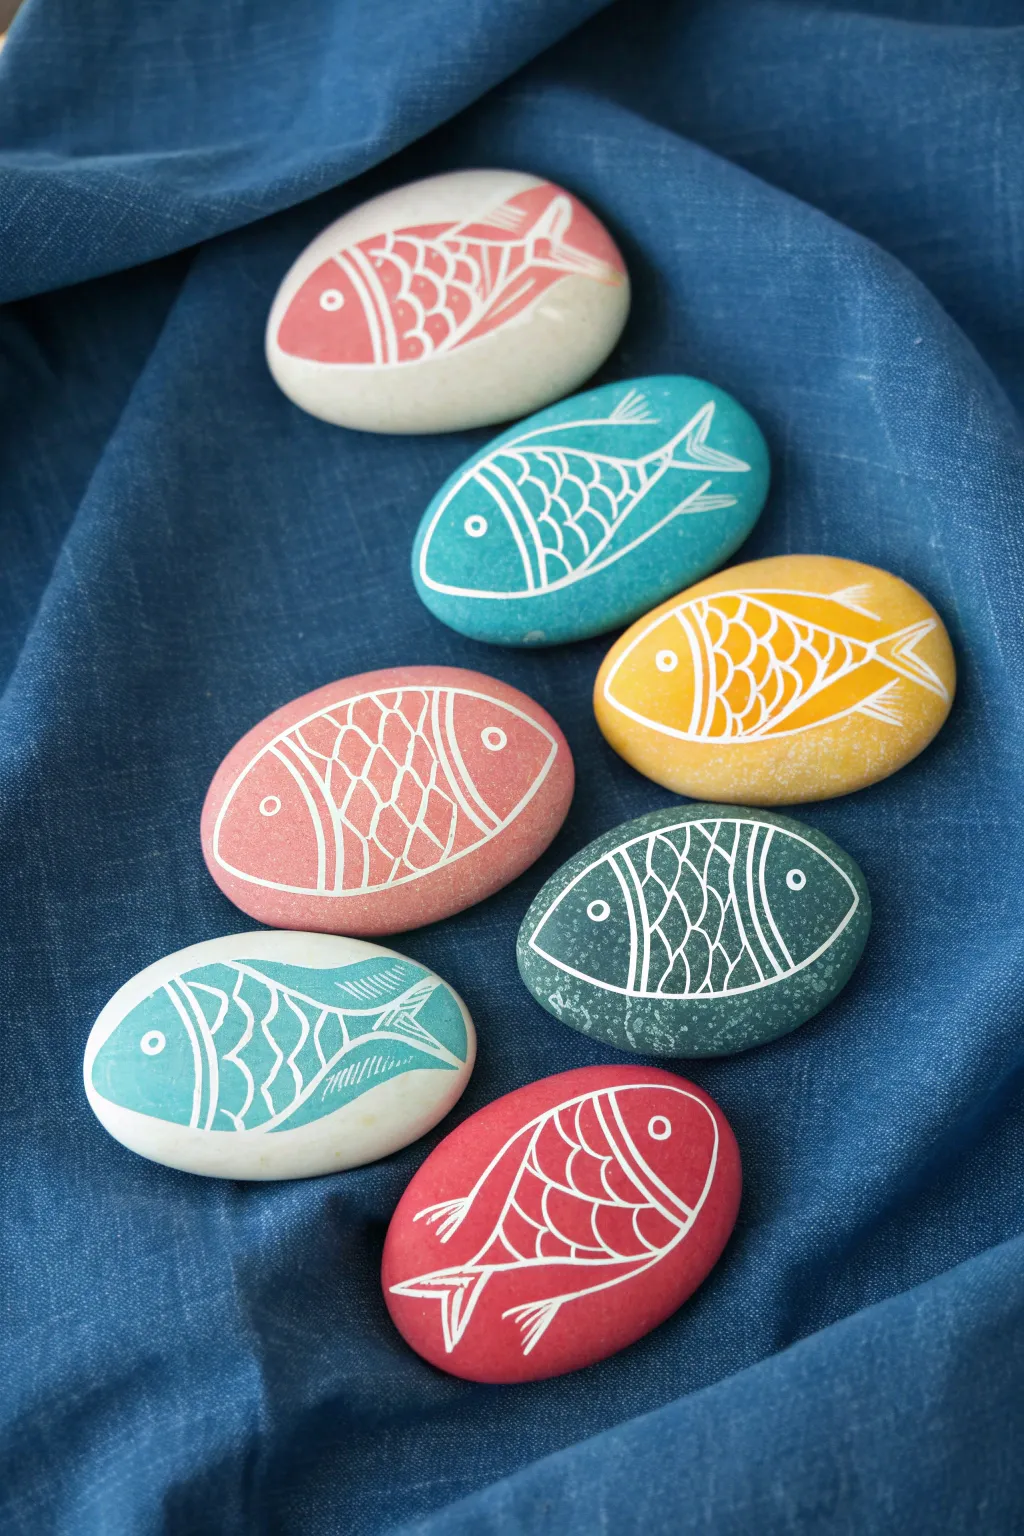
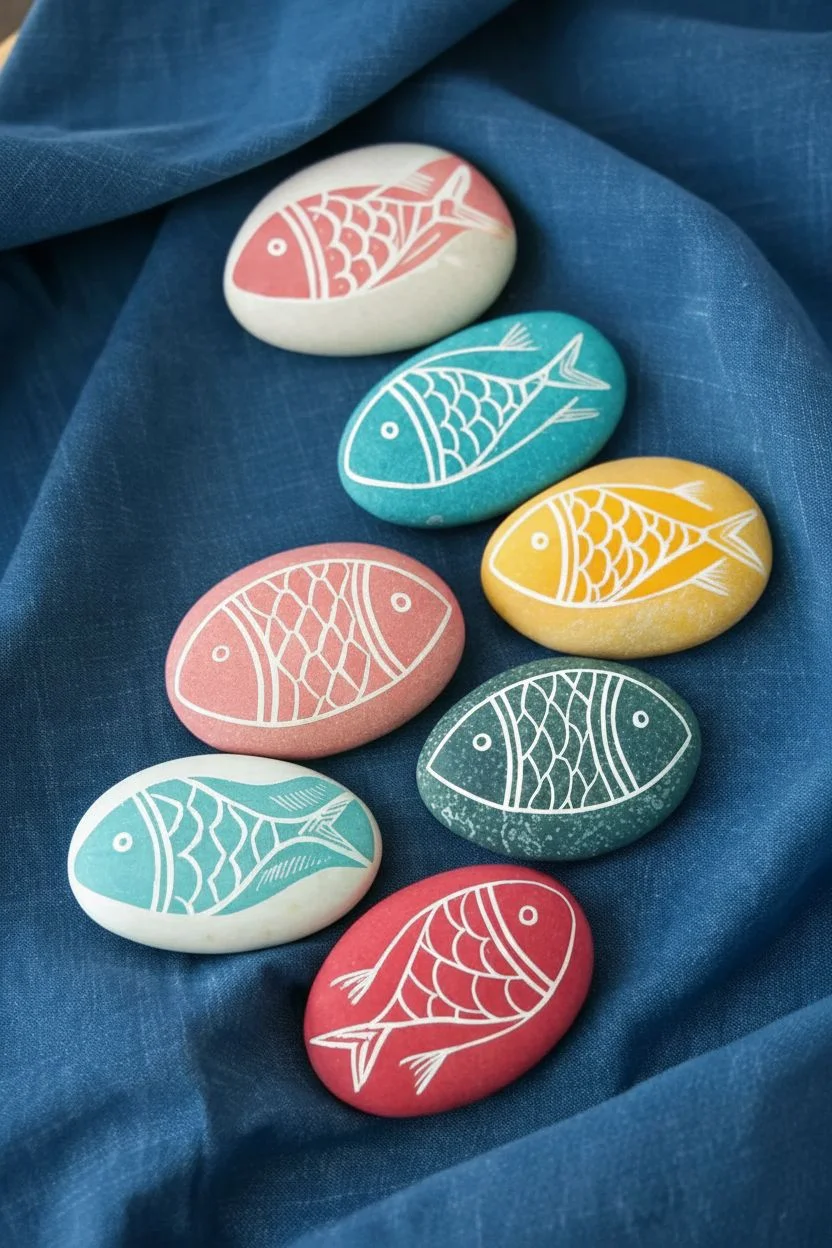
Transform smooth river stones into a colorful school of tropical fish with this vibrant rock painting project. The clean, crisp white lines create a stunning ‘sgraffito-like’ effect against the bright, solid background colors, making them perfect for summer decor or garden accents.
Step-by-Step Guide
Materials
- Smooth river rocks (flat, oval shapes work best)
- Acrylic paints (coral, teal, yellow, dark green, red, light blue, soft pink)
- White extra-fine acrylic paint pen (0.7mm tip)
- Wide flat paintbrush
- Pencil (optional)
- Spray sealer or varnish (matte or gloss)
- Soap and water
Step 1: Preparation and Base Coat
-
Clean Your Stones:
Begin by scrubbing your selected stones with warm soapy water to remove any dirt or oily residue. This ensures your paint adheres properly. Let them dry completely, preferably in the sun. -
Select Color Palette:
Choose a variety of bright, tropical colors for your base coats. Looking at our collection, we want a coral pink, a deep teal, a sunny yellow, a muted green, a bright red, a soft light blue, and a dusty rose pink. -
Paint First Base Coat:
Using your wide flat brush, paint the entire top surface of one rock with your first chosen color. Don’t worry about the underside yet. -
Apply Second Coat:
Acrylics often need opacity. Once the first layer is dry to the touch, apply a second coat to ensure the color is solid and vibrant without streaks. Let this dry fully for at least an hour. -
Prepare the Colors:
Repeat this process for all seven rocks, giving each one a unique, solid background color. I find it helpful to paint them all at once so they are ready for the detailing stage together.
Pen Acting Up?
If your paint pen drags or skips, the rock surface might be too rough. Try lightly sanding the rock before painting, or ensure your base coat is completely dry.
Step 2: Drawing the Fish Outline
-
Prime the Pen:
Shake your white extra-fine paint pen well and depress the nib on a scrap piece of paper until the ink flows smoothly. You want a consistent line before touching the rock. -
Outline the Body:
Starting near the center, draw a large oval or almond shape that follows the natural curve of the stone. This will be the main body of the fish. -
Add the Tail Fin:
At the narrower end of your oval, draw a triangle or forked shape for the tail fin. Connect it seamlessly to the back of the body. -
Define the Head:
Draw a curved vertical line roughly one-third of the way from the front of the fish to separate the head from the body. -
Create the Eye:
In the center of the head section, simple draw a small circle for the eye. Place a tiny dot in the center for the pupil.
Step 3: Adding Details and Patterns
-
Draw Scales:
Fill the body section with a scale pattern. You can do this by drawing rows of small ‘U’ shapes or intersecting diagonal lines to create a diamond lattice effect. -
Vary the Patterns:
Don’t make every fish identical. Try simple vertical stripes on one, cross-hatching on another, or traditional scalloped scales on a third to give the school variety. -
Detail the Tail:
Add texture to the tail fin by drawing 3 or 4 straight lines radiating from the body outward to the tip of the tail, mimicking fin spines. -
Add Fins:
Draw small triangular fins on the top and bottom of the fish body. Add little line details inside these shapes as well for consistency. -
Refine Lines:
Go back over any lines that look faint or etched. A second pass with the white pen can make the design really pop against the dark colors. -
Correct Mistakes:
If you slip up with the pen, quickly wipe it away with a damp Q-tip before it dries, or simply touch it up with a bit of the base paint color once dry.
Design Variation Tip
Try reversing the colors! Paint a white silhouette of a fish on a raw stone, let it dry, and then fill in the surrounding negative space with bright colors.
Step 4: Finishing Up
-
Allow to Cure:
Let the paint pen ink dry completely. This usually takes about 15-20 minutes, but give it longer if you laid down thick ink. -
Seal the Rocks:
To protect your art from chipping or fading, take the rocks to a well-ventilated area and apply a spray sealer. A matte finish looks natural, while gloss makes them look wet. -
Second Seal Coat:
Apply a second light coat of sealer for extra durability, especially if you plan to keep these rocks outside.
Arrange your beautiful school of fish on a blue tablecloth or nestle them among garden plants for a splash of aquatic charm.


Juicy Fruit Slice Rock Paintings
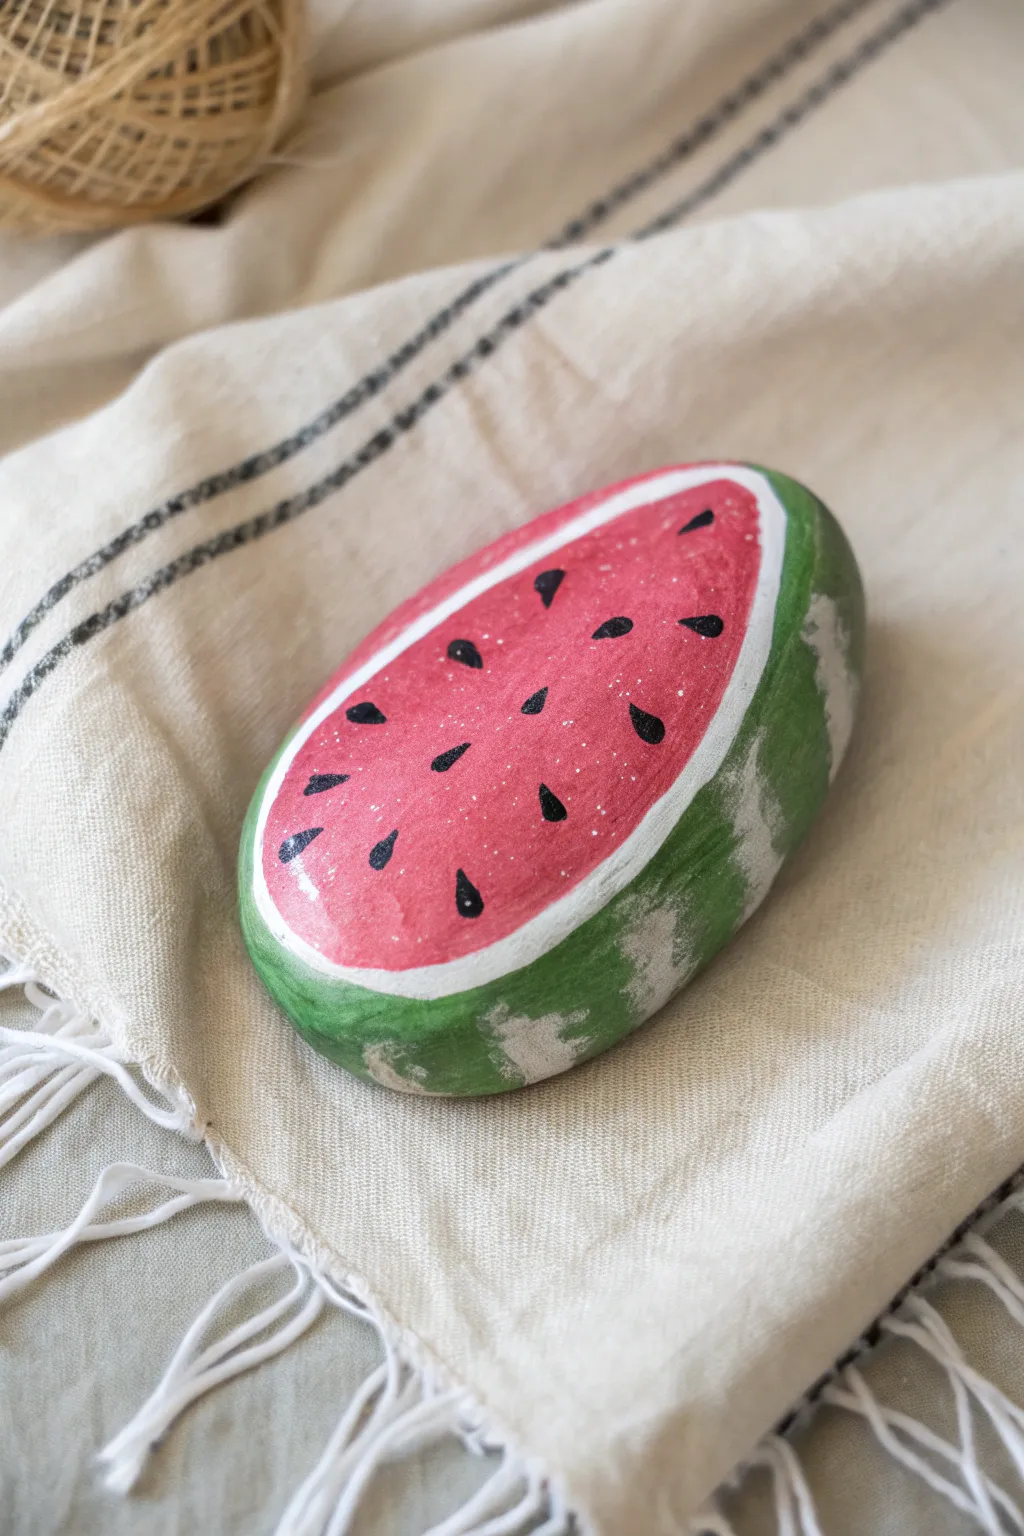
Transform a simple oval stone into a refreshing slice of summer with this delightful watermelon rock painting project. The vibrant pink flesh, crisp white rind, and textured green skin turn an ordinary rock into a juicy piece of art.
Step-by-Step Tutorial
Materials
- Smooth oval or oblong river rock
- Acrylic paints (bright pink/red, titanium white, sap green, dark green, black)
- Medium flat brush
- Small round detail brush (size 1 or 0)
- Fine liner brush
- Pencil for sketching
- Water cup and paper towels
- Matte or satin sealant (spray or brush-on)
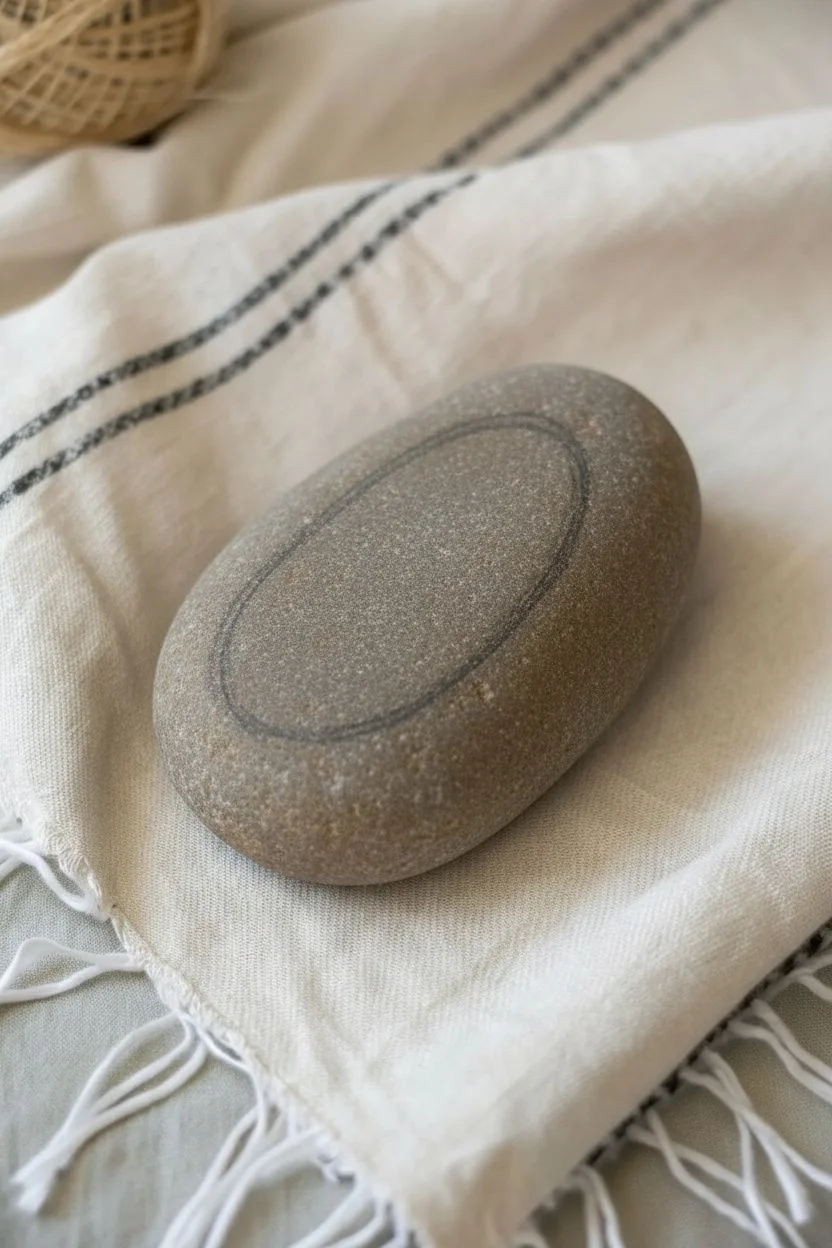
Step 1: Planning the Slice
-
Clean and prep:
Begin by washing your rock thoroughly with soap and water to remove any dirt or oils. Let it dry completely before starting. -
Base coat consideration:
If your rock is very dark, you might want to paint a base layer of white acrylic over the top surface where the fruit flesh will be. This helps the pink pop later. -
Sketch the outline:
Using a pencil, lightly draw a smaller oval shape on the top surface of the rock. This will be the pink edible part of the watermelon.
Seed Spacing Secret
Visualize a radiating pattern from the center when placing seeds. Instead of random dots, arrange them in loose concentric rings pointing outward.
Step 2: Painting the Flesh and Rind
-
Fill the center:
Load your medium flat brush with a bright red or deep pink acrylic paint. Fill in the center oval you sketched, ensuring solid, opaque coverage. -
Create the white pith:
Once the pink is dry, use a clean brush to paint a thick white border surrounding the entire pink center. I find it easiest to rotate the rock as I paint to keep the line even. -
Add the green skin:
Paint the remaining outer sides and bottom of the rock with a medium sap green. Carefully bring this green paint up to meet the white border, leaving a clean edge where they touch. -
Rind texture:
While the green paint is still slightly tacky, mix a tiny bit of white into your green or use a very light green shade. Using a dry brush technique, dab and streak this lighter color vertically along the green sides to mimic the mottled pattern of a watermelon rind.
Step 3: Adding Seeds and Details
-
Drying time:
Allow the main blocks of color to dry completely. This prevents the black seeds from bleeding into the wet pink paint. -
Paint the seeds:
Switch to your small round detail brush and black paint. Create teardrop shapes scattered across the pink area. Point the rounded bottom of the teardrop toward the center of the rock and the pointed tip toward the white rind. -
Vary the sizes:
Make some seeds slightly larger and others smaller for a natural look. Don’t worry about perfect symmetry. -
Highlight the flesh:
Dip a fine liner brush or a toothpick into white paint. Add tiny, subtle specks or very thin dashes on the pink flesh area to give it a glistening, juicy texture. -
Flesh gradient (optional):
If you want extra realism, you can dry brush a slightly deeper red near the center of the pink area before adding seeds. -
Final touches:
Check your white pith line. If the green or pink has made it messy, carefully touch it up with fresh white paint to keep it crisp.
Make a Bite Mark
For a fun twist, paint a jagged ‘bite’ mark out of the side. Paint the negative space black or dark grey to create depth before adding the rind details.
Step 4: Sealing and Protecting
-
Wait for cure:
Ensure the rock is absolutely dry, especially the thick black seeds which can take longer than the thin layers. -
Apply sealant:
Protect your artwork with a layer of spray sealer. A satin or gloss finish works particularly well here to enhance the ‘wet’ look of the fruit slice.
Now you have a refreshing piece of decor that looks good enough to eat on a hot summer day
Mini Cactus and Succulent Rock Paintings
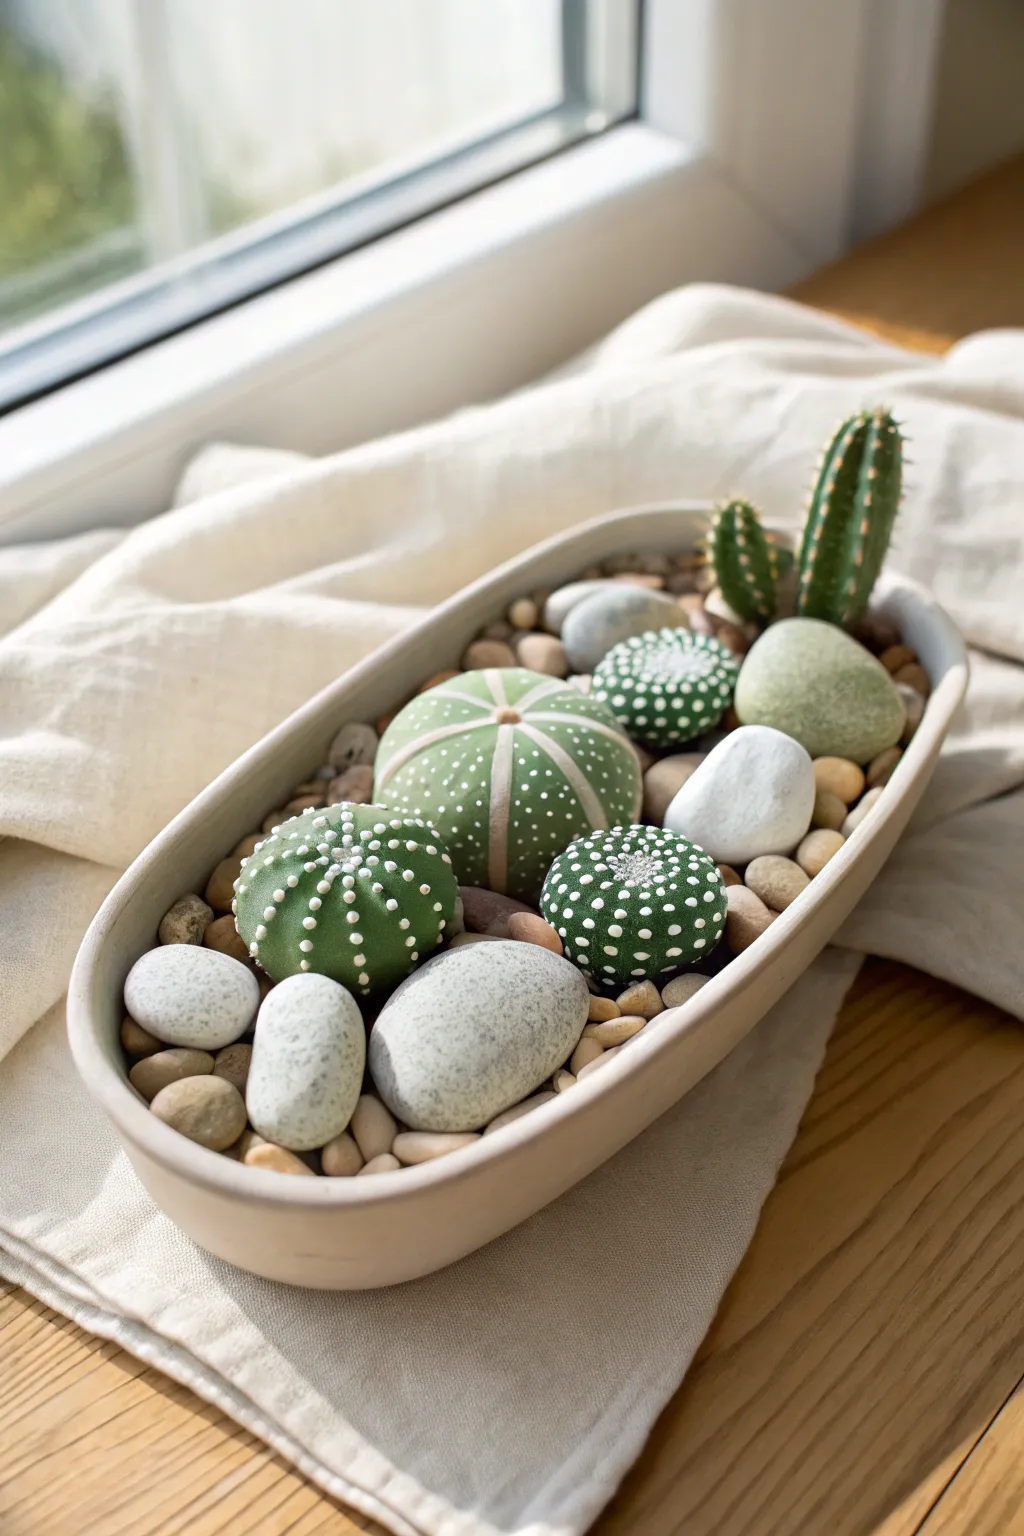
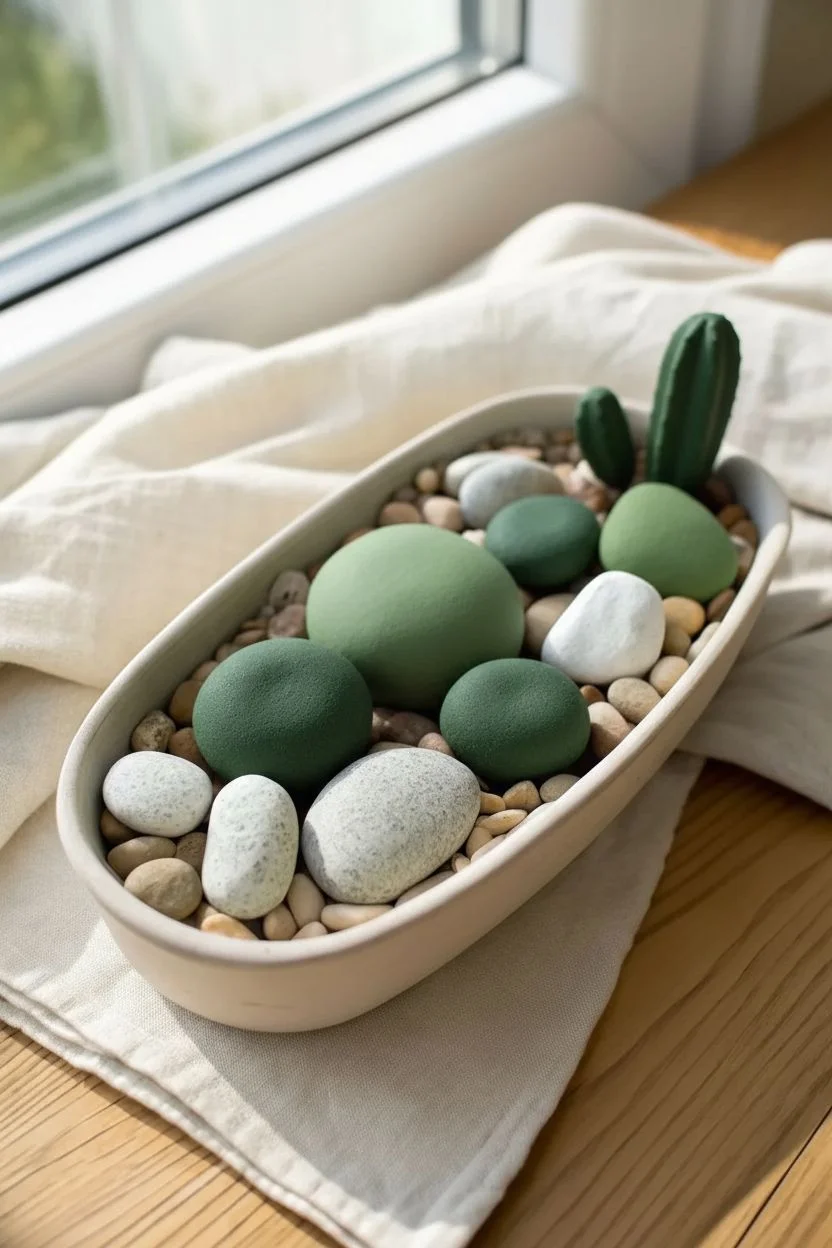
Transform smooth river stones into a maintenance-free desert oasis with this clever painting project. By layering shades of green and adding delicate white details, these rocks become convincing mini succulents that never need watering.
How-To Guide
Materials
- Smooth, rounded river rocks (various sizes)
- One oblong/tall rock (for the standing cactus)
- Acrylic paints: Dark forest green, lime green, sage green, white, yellow ochre
- Detail brushes (fine liner and small round)
- Flat shader brush
- Shallow ceramic dish or planter
- Small pebbles or gravel for filling
- Matte finish clear sealant spray
Step 1: Base Coating
-
Select your shapes:
Choose three round, smooth stones for the barrel cacti and one elongated stone for the columnar cactus. Wash and dry them thoroughly to remove any dust. -
Mix your greens:
Prepare three different shades of green on your palette. Use a deep forest green for the smallest round rock, a sage green or muted lime for the large central rock, and a mix of forest and lime for the medium round rock. -
Apply base colors:
Paint the entire surface of each rock with its designated green shade. You may need two coats to get full, opaque coverage, letting the paint dry completely between layers. -
Paint the tall cactus:
Coat the elongated rock with the darkest forest green heavily. This mimics the deep color of taller columnar cacti often found in nature. -
Dry time:
Allow all the base coats to dry fully for at least 30 minutes before moving on to the detailed line work.
Paint Slipping?
If acrylic paint slides off the slick rock surface, dab a thin layer of white glue or gesso on the rock first. This creates a ‘tooth’ for the colored paint to grab onto.
Step 2: Barrel Cactus Details
-
Large cactus striping:
On the largest sage-green rock, use a liner brush and a very pale, almost white-green mix. Paint thin vertical lines radiating from the center top down the sides to create the cactus segments. -
Adding the areoles:
For the segment lines you just painted, add tiny white dots along them. Space them evenly to look like the spines growing out of the ridges. -
Medium cactus texture:
On the medium-sized dark green rock, paint vertical rows of star-shaped clusters. Use white paint and a fine liner brush to make tiny ‘asterisk’ marks running from top to bottom. -
Small cactus stippling:
For the smallest round rock, I find a simple dot pattern works best. Dip the non-brush end of a paintbrush into white paint and stamp rows of dots vertically around the stone. -
Center details:
Add a small cluster of fuzzy white dots at the very top center of each round rock to represent the growing point where new spines emerge.
Make Them Bloom
Glue a small vibrant tissue paper flower or a tiny pom-pom to the top of one cactus to mimic a seasonal desert bloom.
Step 3: Columnar Cactus & Assembly
-
Vertical ridges:
Take the tall dark rock and paint thin, vertical stripes using a lighter yellow-green shade. This highlights the ridges of the cactus body. -
Adding spines:
Along the yellow-green ridges, paint tiny horizontal dashes or small ‘v’ shapes in white or light yellow to mimic sharp spines. -
Sealing the art:
Once all paint is completely dry, spray the rocks with a matte finish sealant. Avoid glossy sprays, as real cacti have a rather matte, waxy texture. -
Prepare the planter:
Fill your shallow dish with small, neutral-colored pebbles or gravel to create a bed for your ‘plants’. -
Arrangement:
Nestle your painted rocks into the gravel. Place the tall cactus in the back and the round barrel cacti in the front, burying the bottoms slightly so they look rooted. -
Final touches:
Add a few unpainted, decorative smooth stones around the painted ones to add variety and realism to the scene.
Enjoy your everlasting garden on a sunny windowsill or desk
Four-Season Tree Painted Rock Set
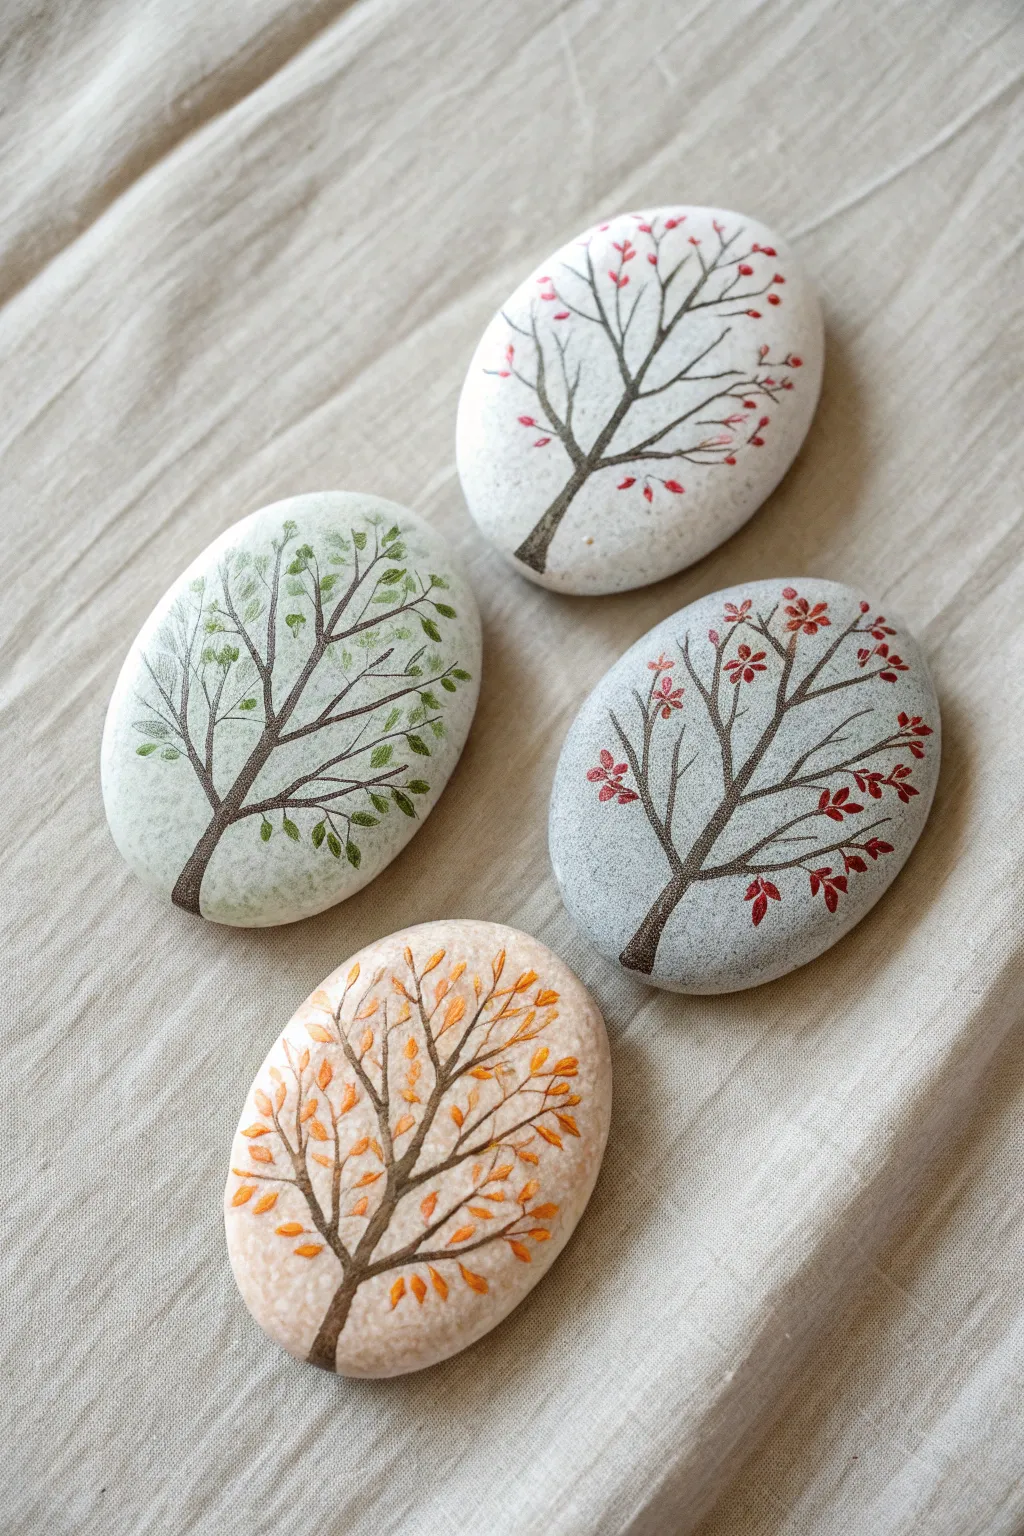
Capture the passing of time with this elegant set of four hand-painted stones, each representing a different season through delicate branch work and color. These smooth river rocks feature fine-line botanical art that looks sophisticated yet is wonderfully achievable for beginners.
Step-by-Step
Materials
- 4 smooth, oval river rocks (approx. 2-3 inches long)
- White or light beige acrylic paint (for base coat)
- Fine liner brush (size 0 or 00)
- Black or dark brown archival ink pen (0.1mm to 0.5mm) or acrylic paint
- Acrylic paints in seasonal palettes: light green, dark green, orange/rust, red, and pink
- Matte finish spray sealer
- Pencil for sketching
- Palette or small plate
- Water cup and paper towels
Step 1: Preparation & Base Coat
-
Clean the canvas:
Begin by washing your stones with warm soapy water to remove any dirt or oils. Scrub them gently with a brush if needed, then let them dry completely in the sun or with a hair dryer. -
Create a neutral background:
Though the stones in the image look natural, applying a very sheer wash of light beige or off-white paint can help your colors pop without losing the stone’s texture. Mix a drop of paint with water and brush it over the surface, or skip this if your stones are naturally very pale. -
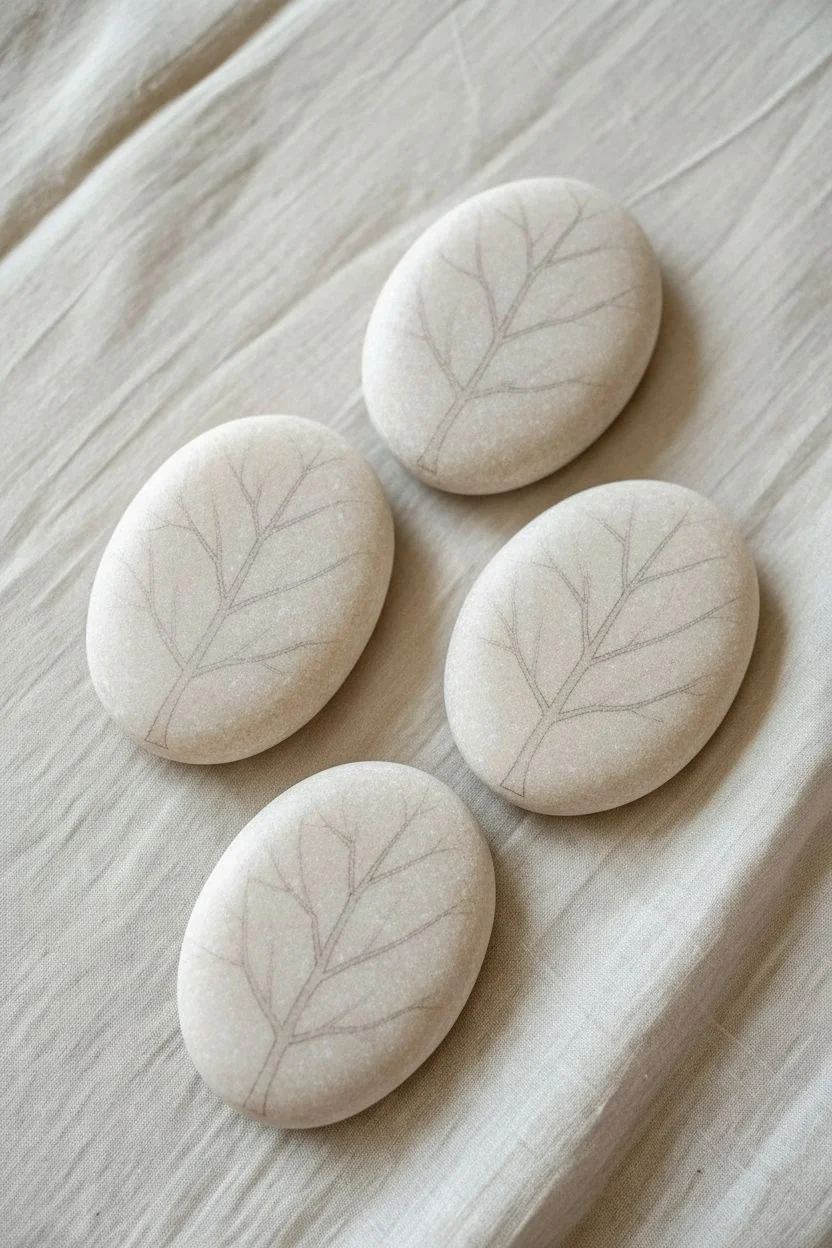
Sketch the skeletons:
Using a pencil, lightly sketch a central trunk line on each stone. Start from the bottom third and curve gently upward. Add two or three main branches extending outward, keeping the lines faint so they don’t show through later.
Step 2: Painting the Trunks
-
Mix your bark color:
Combine dark brown with a tiny touch of black to create a rich, earthy bark tone. Alternatively, you can use a fine-tip archival ink pen for ultimate control, which I often find easier for creating those really thin branch tips. -
Anchor the tree:
Start painting at the base of the trunk. Press down slightly harder with your brush to make the base wider, then lift pressure as you move upward to taper the trunk into a thin line. -
Branch out:
From the main trunk, paint the primary branches. Remember that branches always get thinner as they grow away from the trunk. Use the very tip of your liner brush for these strokes. -
Add fine twigs:
Extend smaller twigs from your main branches. Think of the letter ‘Y’ as you paint—branches typically split into two. Keeping these lines extremely delicate is key to the minimalist look. -
Repeat for all four:
Recreate this tree structure on all four stones. Don’t worry about making them identical; subtle variations in the curve of the trunk make them look more natural as a set.
Uneven Lines?
If your branches look shaky or too thick, switch from a brush to a 0.05 micron pen. It offers much more stability than a brush for beginners.
Step 3: Adding Seasonal Foliage
-
Spring (Top Right Stone):
For the spring tree, you want sparse, budding energy. Use a mix of soft pink and a tiny dot of red. Instead of full leaves, paint tiny dots or very small tear-drop shapes near the tips of the branches to represent flower buds. -
Summer (Left Stone):
For the summer tree, mix a fresh, leafy green. Paint small oval leaves clustered along the branches. I prefer to vary the green shade slightly—adding a bit of yellow to some leaves—to create depth and the look of sun-dappled foliage. -
Autumn (Bottom Stone):
The autumn tree needs warmth. Mix orange, rust, and golden yellow colors. Paint the leaves a bit looser and fuller than the spring buds, filling the canopy with rich, warm tones to signify the changing season. -
Winter (Right Stone):
This tree represents late autumn or early winter berries. Use a darker grey-blue for the background shading if desired, or keep it plain. Paint small clusters of deep red or crimson 4-petal flowers or berries clinging to the bare branches. -
Refine the details:
Go back and check if any branches look ‘floating.’ If a leaf or flower isn’t connected to a branch, use your brown paint or pen to draw a tiny stem connecting it back to the main structure.
Texture Twist
Mix fine sand into your base coat paint before applying it to the stone. This creates a gritty, tangible surface texture behind smooth trees.
Step 4: Finishing Touches
-
Let it cure:
Allow the paint to dry completely. Acrylics dry fast, but give it at least 20 minutes to ensure you don’t smudge your fine lines during the sealing process. -
Seal the artwork:
Finish with a spray-on matte sealer. A glossy finish might reflect too much light and obscure the delicate details, so matte is best for this natural aesthetic. Apply two thin coats.
Display your four-season set together on a tray or scatter them on a windowsill to enjoy a year of nature in miniature
Center-Out Dot Mandala Rocks
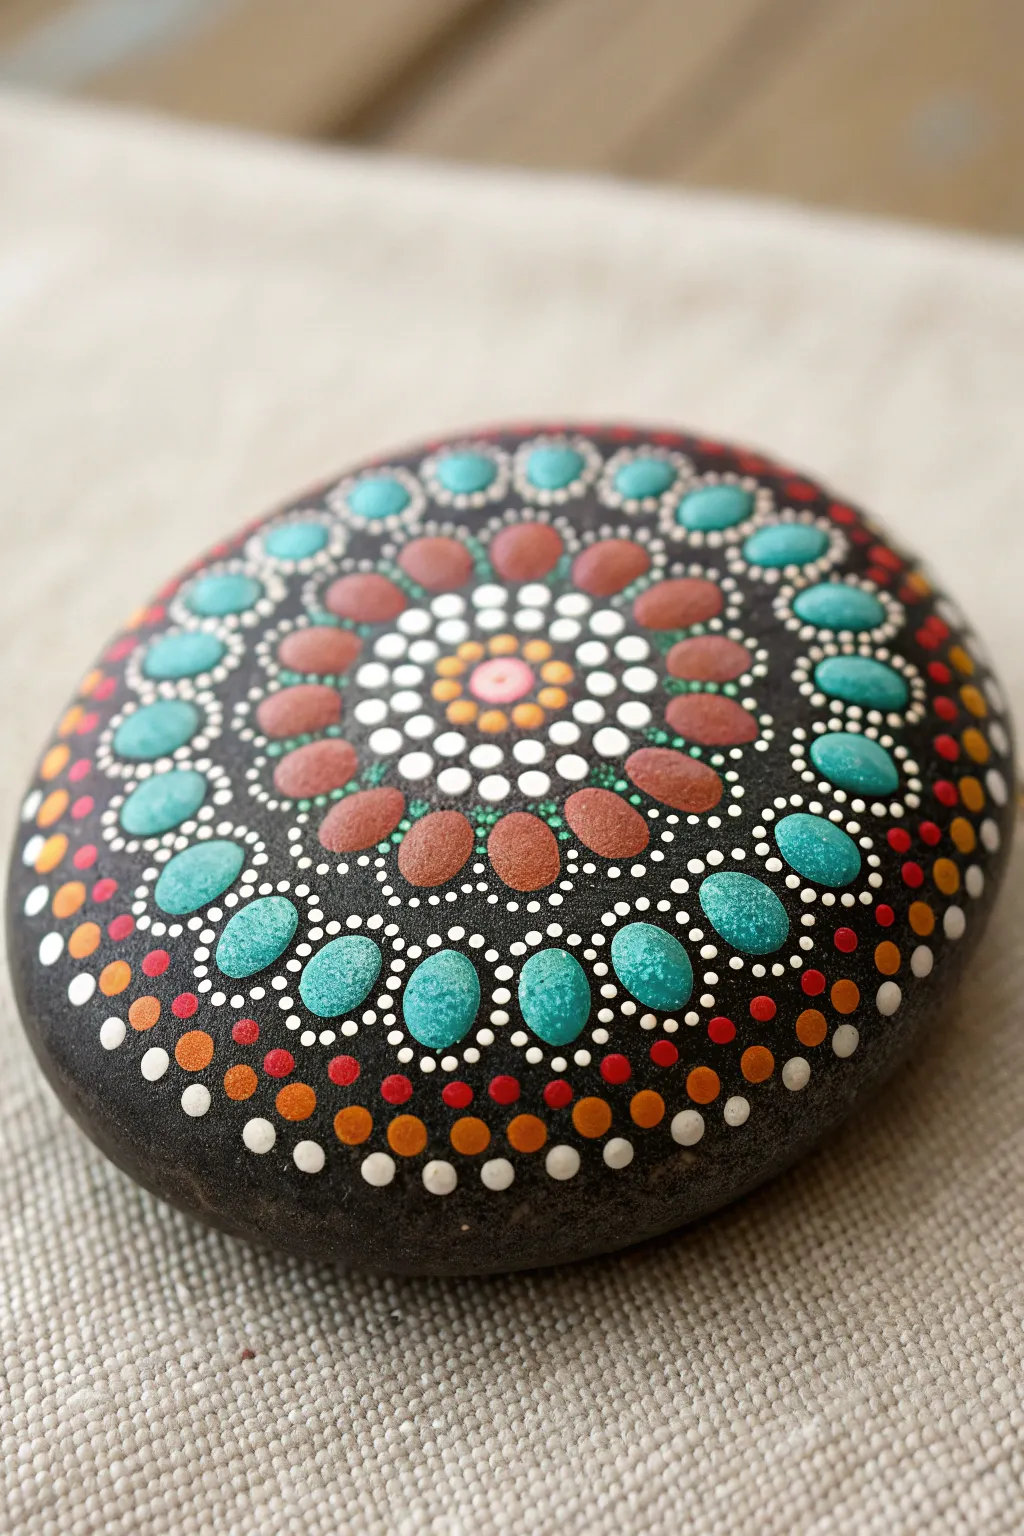
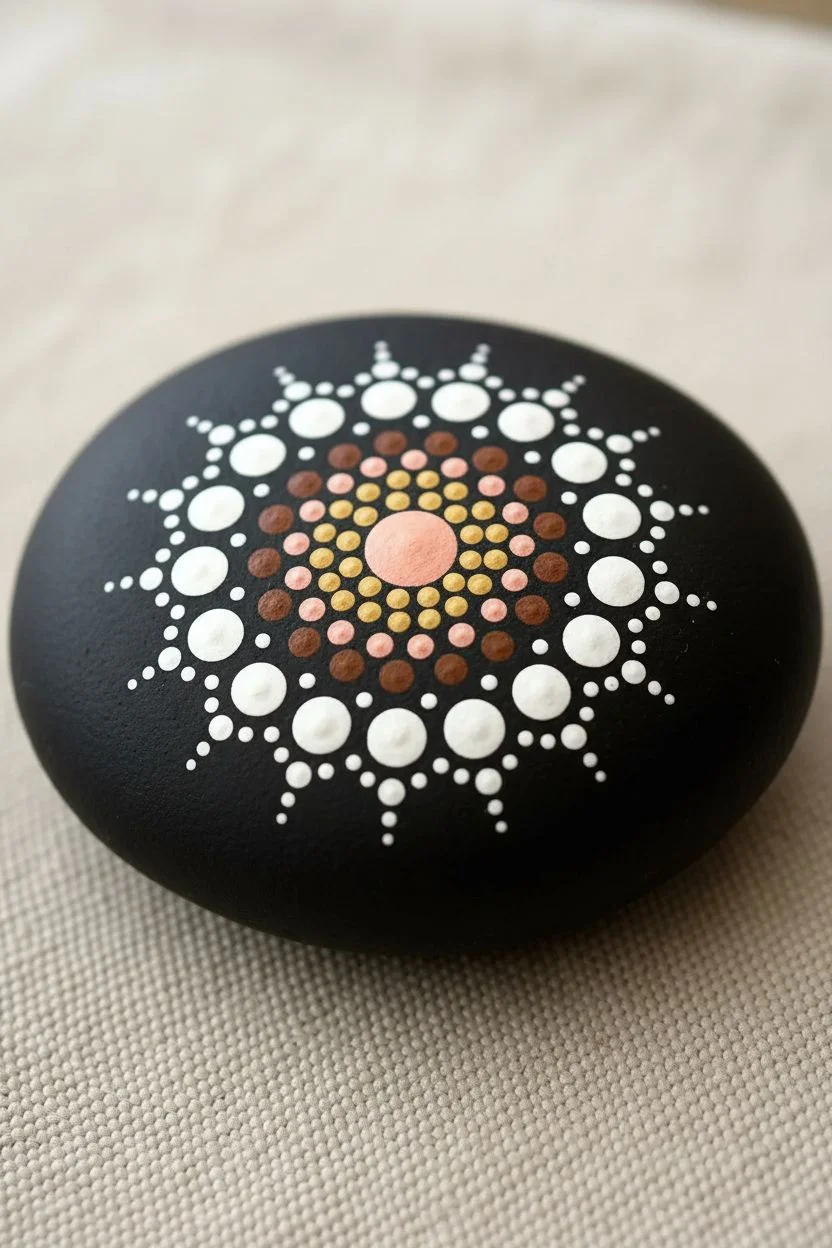
This soothing mandala design radiates outward with earthy browns, warm oranges, and striking turquoise accents against a dark backdrop. The symmetrical dot pattern builds naturally from the center, creating a mesmerizing effect that’s surprisingly achievable with patience.
Detailed Instructions
Materials
- Smooth, round river rock (approx. 4-5 inches wide)
- Black or dark charcoal acrylic paint (base coat)
- Acrylic paints: Peach/Pink, Yellow/Ochre, Burnt Sienna/Red-Brown, White, Turquoise/Teal, Orange, Deep Red
- Dotting tools (set of various sizes usually 1mm to 10mm)
- Matte or satin sealant spray
- Palette or small tray
- Damp cloth for clean up
Step 1: Preparation and Center
-
Prepare the canvas:
Begin by washing your stone with soapy water and letting it dry completely. Apply two base coats of black or dark charcoal acrylic paint, allowing full drying time between coats to ensure a smooth, opaque surface. -
Find the center:
Locate the visual center of your rock. Using a medium-sized dotting tool, place a single, perfect peach or soft pink dot right in the middle. -
First ring of gold:
Using a smaller tool, place a ring of small yellow-ochre dots tightly around the central pink dot. Try to keep them evenly spaced. -
White accent ring:
Surround the yellow ring with a circle of larger white dots. These should be slightly bigger than the yellow ones to start expanding the design outward. -
Walking the dots:
Around each white dot from the previous step, ‘walk the dots’. This means placing a tiny white dot between two larger ones, or creating a small arch over them if space permits. In this specific design, it looks like a simple ring of white dots expanding slightly.
Paint Consistency Pro Tip
For perfectly round, peaks-free dots, your paint should be the consistency of heavy cream. If it’s too thick, it leaves spikes; too thin, and the dots flatten out.
Step 2: Building the Petals
-
Create the brown petals:
Switch to a darker burnt sienna or reddish-brown color. Place large, oval-shaped drops or large dots in a ring around your white circle. If using a large round tool, you can slightly drag the paint to elongate the shape into an oval petal. -
Outline the petals:
Using your smallest dotting tool and white paint, carefully place a row of tiny dots outlining each brown petal. This high contrast makes the shapes pop against the dark background. -
Add a turquoise ring:
In the ‘V’ shape created between the tips of the brown petals, place a medium-sized turquoise dot. This introduces the cool color tone that defines this specific look. -
Expand the turquoise:
For the next major layer, create large, prominent turquoise ovals. Position these directly above the previous turquoise dots, effectively creating a larger ring of blue. These are the dominant visual element of the outer design. -
Frame the turquoise ovals:
Just as you did with the brown petals, use your tiny tool and white paint to create a delicate frame of dots around each large turquoise oval.
Swoosh It Up
Instead of just dots, try ‘swooshing’ the large turquoise ovals with a small brush or silicone tool to create a teardrop shape for a more floral look.
Step 3: The Outer Rim
-
Inner rim decoration:
In the gaps between the large turquoise framed ovals, place a small stack of dots. Start with a medium red or burnt orange dot, and perhaps a tiny white one above it to fill the negative space. -
Begin the outer border:
Moving towards the edge of the stone, create a ring of alternating colors using medium-sized tools. Alternate between bright orange, deep red, and white dots. -
Second border row:
Add another row further out, staggering the placement so these dots sit in the valleys of the previous row. Use contrasting colors—if the inner dot was red, place an orange or white one next to it. -
Fading out:
As the rock curves downward, continue your pattern with slightly larger dots in white, orange, and brownish-red. I find that letting the dots follow the natural curve of the rock helps the design feel organic. -
Final drying and sealing:
Allow the rock to dry for at least 24 hours. The thick dots take longer to cure than flat paint. Once fully dry, spray with a matte or satin varnish to protect your beautiful work from scratches.
Place your finished mandala stone on a desk or in a garden nook to enjoy a moment of colorful zen every day
Starry Galaxy Painted Rocks
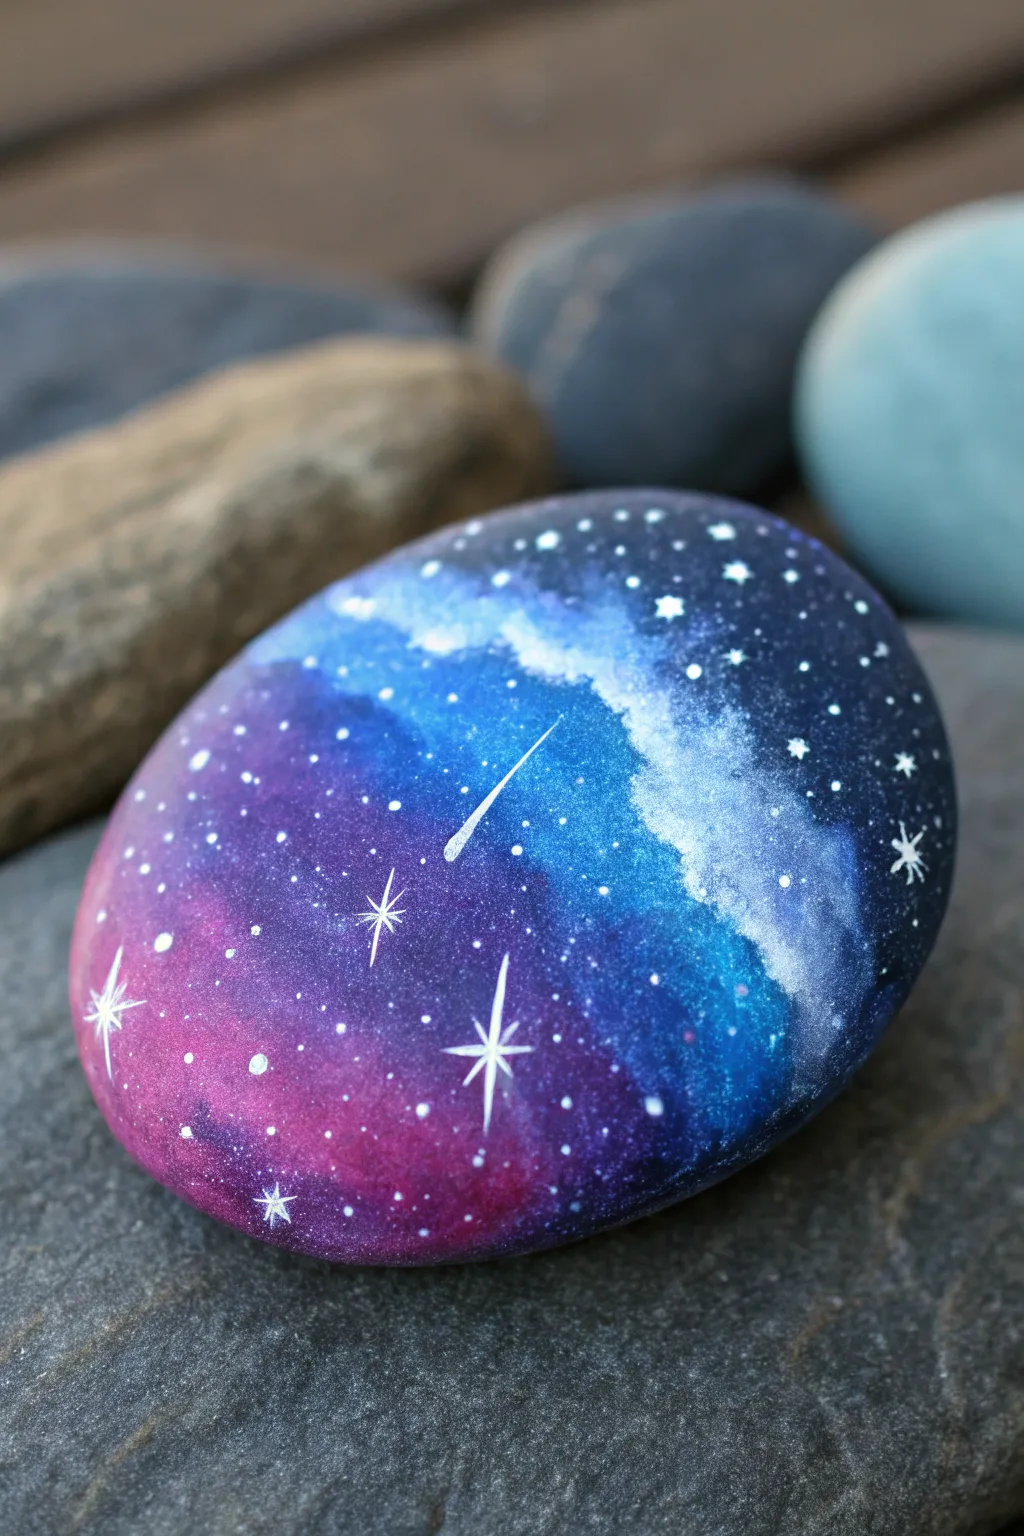
Capture the magic of a deep space nebula right in the palm of your hand with this mesmerizing galaxy rock. Using layers of blending sponge work and delicate brush strokes, you’ll transform a simple stone into a window to the stars featuring vibrant nebulas and shooting stars.
Step-by-Step Tutorial
Materials
- Smooth, oval river rock (cleaned and dried)
- Acrylic paints: Black, White, Deep Violet, Magenta, Phthalo Blue, Turquoise
- Makeup sponges or small crafting sponges
- Detail brushes (liner brush or size 0 round)
- Flat base coat brush
- Palette or paper plate
- Water cup and paper towels
- Spray gloss varnish or sealer
Step 1: Preparing the Void
-
Clean Your Canvas:
Begin by scrubbing your rock with warm soapy water to remove any dirt or grease. Dry it thoroughly before starting art, as moisture will prevent the paint from adhering properly. -
Base Coat:
Apply a solid coat of black acrylic paint over the entire top surface of the rock. You want this background to be opaque, so apply a second coat if the first one looks streaky. -
Dry Completely:
Allow the black base to dry completely. This creates the deep darkness of space needed for the colors to pop later.
Muddy Galaxy Fix
If colors are turning gray or muddy, stop blending! Let the current layer dry completely before adding new colors on top. Wet-on-dry layering keeps hues distinct.
Step 2: Creating the Nebula
-
Sponge Preparation:
Dampen a small piece of makeup sponge slightly, then pick up a small amount of Deep Violet paint. Dab off the excess on your palette until the texture looks soft and airy, not gloppy. -
First Nebula Layer:
Gently dab the violet sponge across the mid-left section of the rock, fading it out towards the edges. Keep the shape organic and cloud-like rather than circle-perfect. -
Adding Magenta Depth:
While the violet is still slightly tacky, load a clean corner of the sponge with Magenta. Dab this into the lower left curve, overlapping the violet slightly to create a rich purple gradient. -
Blue Transition:
Using a fresh sponge area, pick up Phthalo Blue. Dab this color diagonally across the center of the rock, merging slightly with the dark violet areas but extending toward the upper right. -
Brightening the Core:
Mix a tiny bit of White with Turquoise to create a glowing cyan. Sponge this gently into the center of your blue area to create the bright ‘heart’ of the nebula. -
Milky Way Streak:
Take a very small amount of pure White on a nearly dry sponge. Very lightly tap a diagonal streak through the blue section, diffusing it heavily so it looks like distant star dust rather than a white stripe. -
Softening Edges:
If any edges look too harsh, I like to take a sponge with a tiny bit of black paint and gently tap the borders to blend the colors back into the dark background.
Step 3: Starlight Details
-
Flicking Stars:
Water down a small amount of white acrylic paint until it has an inky consistency. Dip a stiff brush or old toothbrush into it and run your finger across bristles to spray tiny specks over the nebula. -
Painting Major Stars:
Switch to your finest liner brush. Dip it in undiluted white paint and place deliberate dots where you want brighter stars. Vary the sizes—some tiny pinpricks, some slightly larger dots. -
The Crossed Stars:
Select 3-4 of your largest white dots to turn into twinkling stars. Using the very tip of your liner brush, pull a vertical line up and down from the center dot, then a horizontal line left and right. -
Adding Diagonal Flares:
For the largest stars solely, add tiny diagonal strokes between the main cross lines to create an eight-point star effect. -
The Shooting Star:
Locate the blue section of your nebula. Paint a small white dot, then immediately drag your brush tail away from it quickly and lightly to create a fading tail effect. -
Final Star Highlights:
Add a few tiny white dots specifically in the darkest black areas to create contrast and depth in the empty space.
Starry Precision
For perfectly tiny stars, dip the end of a toothpick or a dotting tool into the white paint instead of using a brush. It prevents accidental blobs.
Step 4: Sealing the Universe
-
Check for Dryness:
Ensure every layer of paint, especially thick white star dots, is bone dry to the touch. -
Varnish Application:
Spray the rock with a clear gloss varnish. This not only protects the paint from chipping but also deepens the dark colors, making the galaxy effect more vibrant.
Now you have a stunning piece of the universe that fits right in your pocket
Sunset Mountain Silhouette Rocks
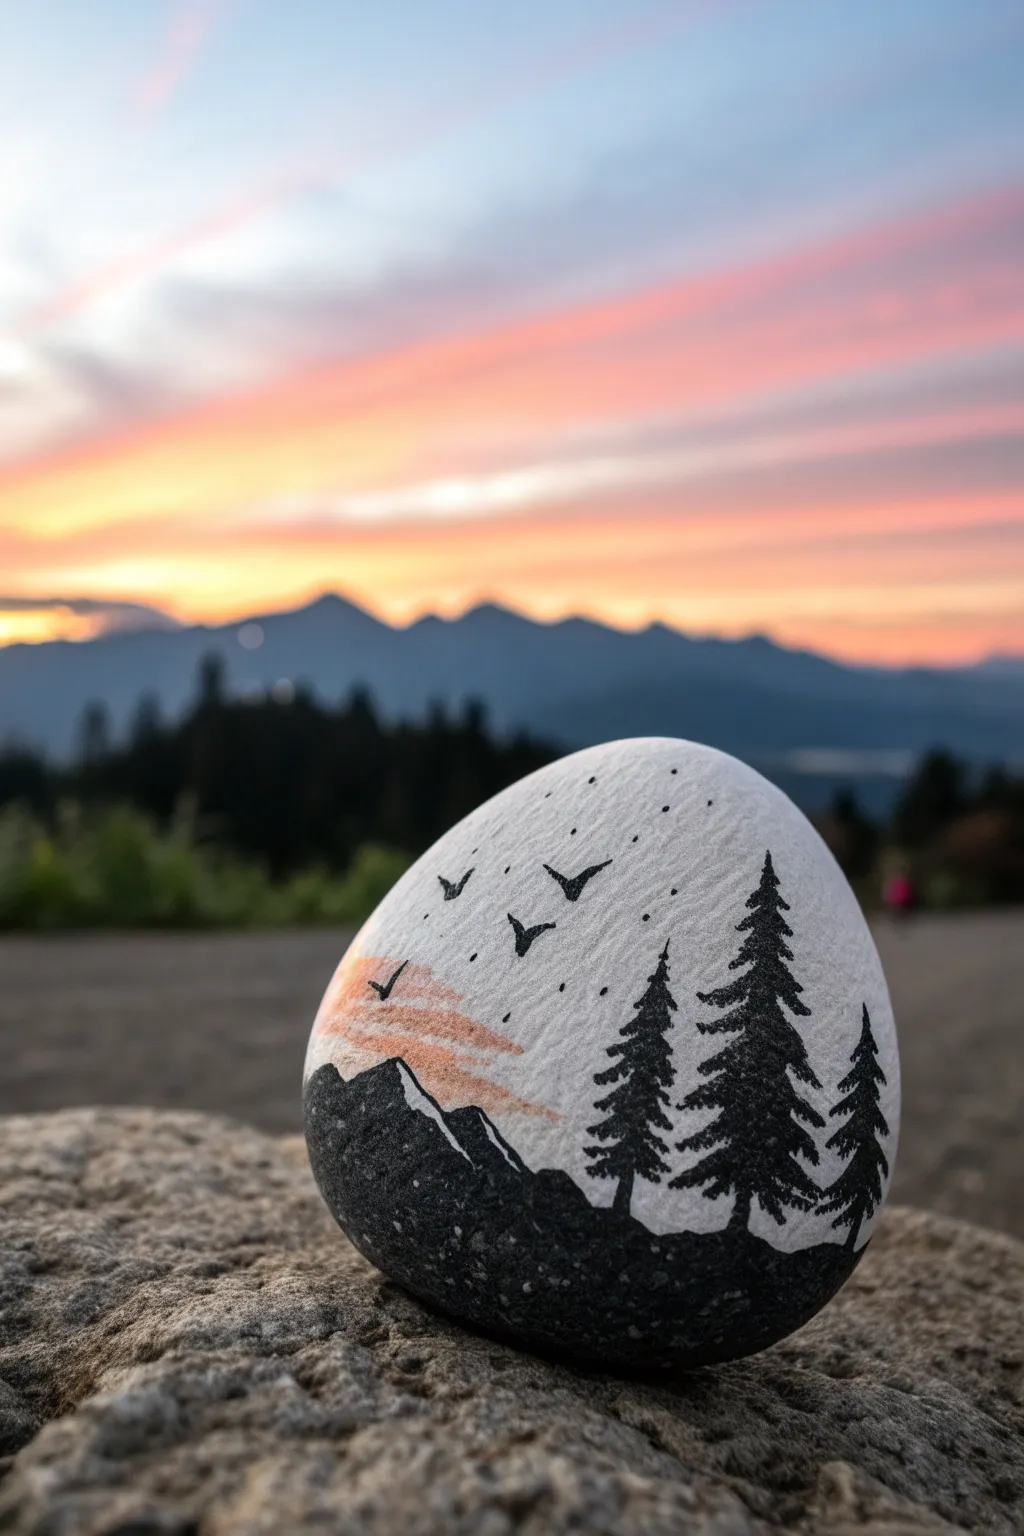
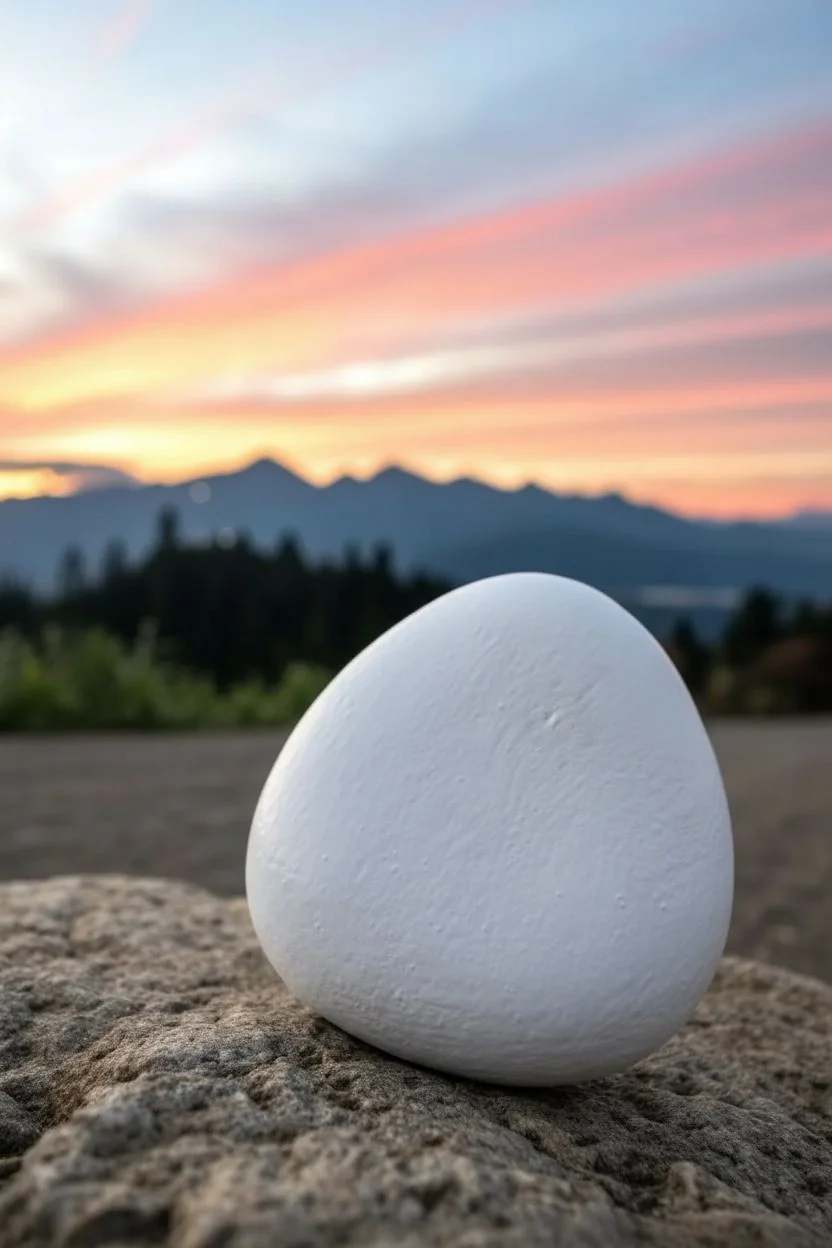
Capture the serene beauty of twilight with this picturesque painted rock project. Using simple silhouettes and a touch of sunset shading, you’ll transform an ordinary stone into a piece of portable mountain art.
Detailed Instructions
Materials
- Smooth, rounded river rock (palm-sized)
- White acrylic paint or gesso
- Carbon black acrylic paint
- Pale orange or peach acrylic paint
- Fine liner brush (size 0 or 00)
- Small flat brush
- Black ultra-fine point paint pen (optional but recommended)
- Matte finish spray sealant
- Water cup and paper towels
Step 1: Base Preparation
-
Clean the canvas:
Begin by scrubbing your rock with soap and warm water to remove any dirt or oils. Let it dry completely in the sun or use a hair dryer to speed up the process. -
Prime the surface:
Using a flat brush, apply a coat of white acrylic paint or gesso over the top surface of the rock. You don’t need to cover the bottom. -
Second coat:
Once the first layer is dry, apply a second coat of white. This ensures an opaque, bright background that will make your black silhouette pop. -
Smooth it out:
Inspect the white surface for any significant brush strokes. If needed, a third thin coat applied with a soft brush can create a smoother finish for the fine details later.
Uneven Texture?
If your rock surface is too pitted for fine details, apply extra layers of thick gesso and sand it lightly with fine-grit sandpaper after drying.
Step 2: Sky Details
-
Mix your sunset hue:
Take a tiny amount of pale orange or mix a drop of orange with plenty of white. You want a very soft, pastel shade that mimics the last light of the sun. -
Dry brush the clouds:
Wipe most of the paint off your flat brush onto a paper towel until it’s ‘dry.’ I find this technique crucial for creating that wispy, fading cloud effect. -
Apply the color:
Gently drag the dry brush horizontally across the left-middle section of the rock. Keep the strokes light and feathery to suggest scattered clouds. -
Add floating birds:
Using your finest brush or a black paint pen, draw small ‘V’ shapes in the sky area. vary their sizes and the angles of their wings to make the flock look natural. -
Stipple the stars:
Add tiny dots in the upper white area using the very tip of your brush or a toothpick. Keep them sparse and random.
Step 3: Mountain & Trees
-
Outline the mountains:
Switch to black paint and outline a jagged mountain range about one-third up from the bottom of the rock. Make the peaks uneven for realism. -
Fill the foreground:
Fill in the entire area below your mountain outline with solid black paint. This grounds the composition. -
Highlight the peaks:
With a very fine brush and white paint, add thin, jagged lines along the right side of the mountain peaks to suggest snow or light reflection. -
Start the pine trees:
Draw three vertical lines on the right side of the rock to serve as trunks for your pine trees. Make the center one the tallest. -
Add branches:
Starting from the top of each trunk, paint small, downward-sloping dashes. Widen the branches as you move down the trunk to create a conical shape. -
Refine the foliage:
Go back over the trees to fill in gaps, making the silhouette dense and textured. The tree bases should merge seamlessly into the black mountain ground.
Add Subtle Depth
Mix a tiny drop of dark blue into your black paint for the farthest mountain range to create atmospheric perspective against the pure black foreground.
Step 4: Finishing Touches
-
Check detailed edges:
Clean up any fuzzy edges on your birds or tree tips with a tiny bit of white paint if necessary. -
Let it cure:
Allow the rock to dry overnight to ensure all thick layers of paint are fully hardened. -
Seal only the necessary areas:
Apply a clear matte spray sealant. Light dustings are better than one heavy coat to prevent the ink or paint from bleeding.
Now you have a peaceful mountain moment captured in stone to decorate your garden or desk
Tiny House and Village Painted Rocks

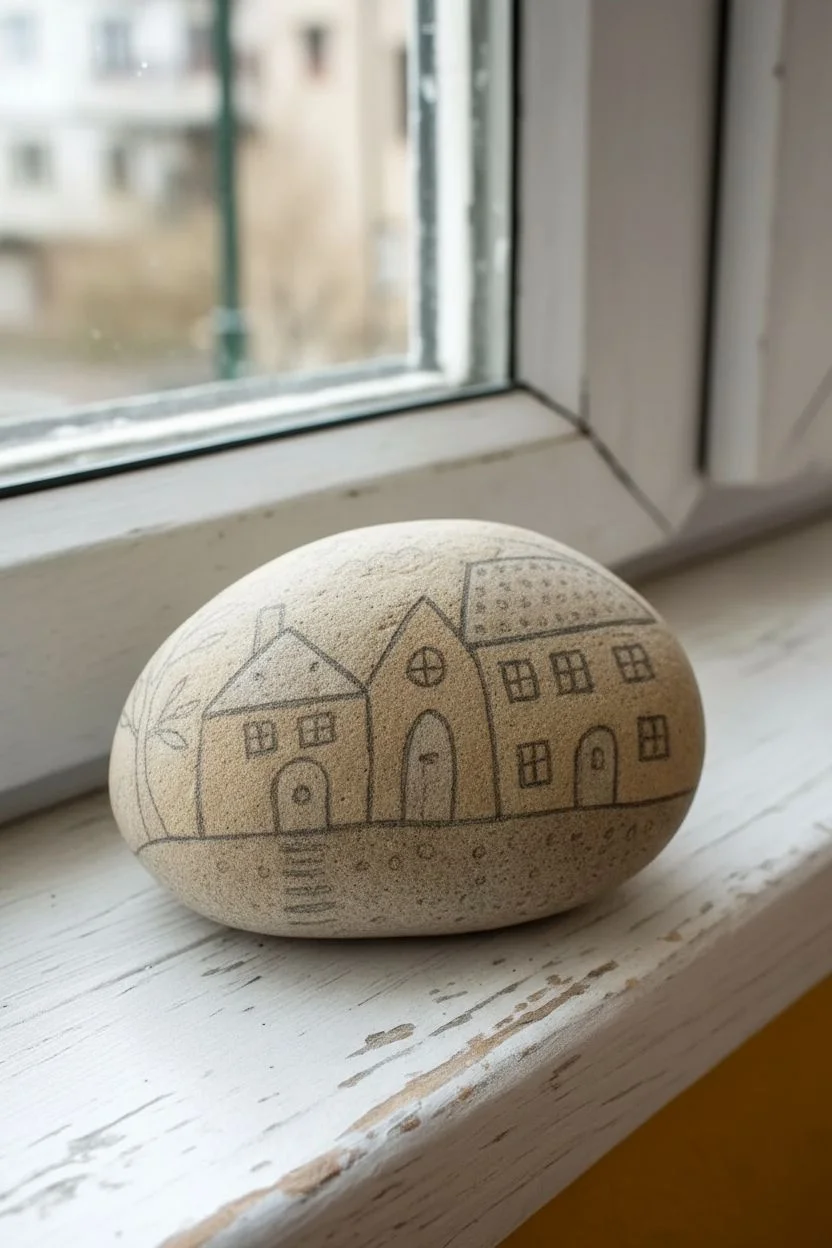
Transform a simple garden stone into a charming storybook scene with this tiny village painting tutorial. The finished piece features rustic cottages with warm, earthy tones and delicate line work that gives it a cozy, folk-art feel.
Step-by-Step Guide
Materials
- Smooth, oval-shaped river rock (cleaned and dried)
- Acrylic paints (White, Burnt Sienna, Yellow Ochre, Deep Red, Black)
- Fine point detail brushes (Sizes 0 and 00)
- superfine black paint pen or liner marker (0.5mm or smaller)
- Pencil and eraser
- Matte or satin varnish/sealer
- Water cup and paper towels
Step 1: Preparation and Sketching
-
Clean Your Canvas:
Begin by scrubbing your rock with warm, soapy water to remove any dirt or oils. Let it dry completely before starting; even a little moisture can ruin your paint adhesion. -
Draft the Skyline:
Using a pencil, lightly sketch the horizon line near the bottom third of the stone. This will be the ground your houses sit on. -
Outline the Houses:
Draw the basic shapes of three houses side-by-side. Make the central house slightly taller with a steep peaked roof. The house on the left should be smaller, and the one on the right should be wider, perhaps two stories. -
Add Architectural Details:
Sketch in the doors, windows, and roof lines. Add a small tree on the far left side with bare branches reaching upward.
Ink Smearing?
If your black pen smears when varnishing, switch to a spray sealant instead of a brush-on one. Spray light coats from a distance to lock the ink in safely.
Step 2: Blocking in Color
-
Paint the Facades:
Using your white acrylic paint, fill in the main walls of the left and center houses. You may need two thin coats to get a solid, opaque look against the natural stone color. -
Color the Right House:
For the larger house on the right, leave the stone unpainted if it’s a nice light beige color, or mix a very diluted wash of yellow ochre and white to give it a creamy tint. -
Roofing Work:
Paint the roof of the left house with a golden yellow-orange mix (Ochre + Burnt Sienna). For the large house on the right, use a deep reddish-brown. -
Door Details:
Carefully paint the arched door on the left house a deep red. Paint the central door a mustard yellow, and the right-hand door the same deep red. Let all paint dry completely.
Make It a Village
Paint several rocks with different building types—a church, a bakery, or a barn—to create an entire interchangeable stone village for play.
Step 3: Fine Lining and Details
-
Outline the Structures:
Once the paint is bone dry, use your superfine black paint pen to trace over all your pencil lines. Outline the roofs, walls, and ground line with steady, confident strokes. -
Window Details:
Draw square outlines for the windows. Fill the panes with a touch of yellow paint, then draw the cross-mullions with your black pen over the top once the yellow is dry. -
Roof Textures:
On the red roof of the right house, use a tiny dotting tool or the tip of a brush to add rows of small white dots to simulate tiles. -
The Lonely Tree:
Trace the tree trunk and branches on the left side with black ink. Add small dabs of red paint to the tips of the branches to represent autumn leaves or berries. -
Atmospheric touches:
Draw two simple, wavy birds flying in the sky above the houses. I find that keeping these lines thin maintains the delicate scale of the village. -
Ground Texture:
Underneath the houses, add texture to the ground by stippling small black dots and dashes. Draw a tiny ladder or steps leading up to the door on the left-most house.
Step 4: Finishing
-
Erase Guidelines:
Check very carefully that all ink and paint is cured, then gently erase any visible pencil marks remaining from your initial sketch. -
Seal the Deal:
Apply a coat of matte or satin varnish to protect your artwork from chipping and weather. This also helps the colors pop without adding too much artificial shine.
Place your tiny village on a windowsill or hide it in the garden for a neighbor to discover
Tic-Tac-Toe Painted Rock Game Set
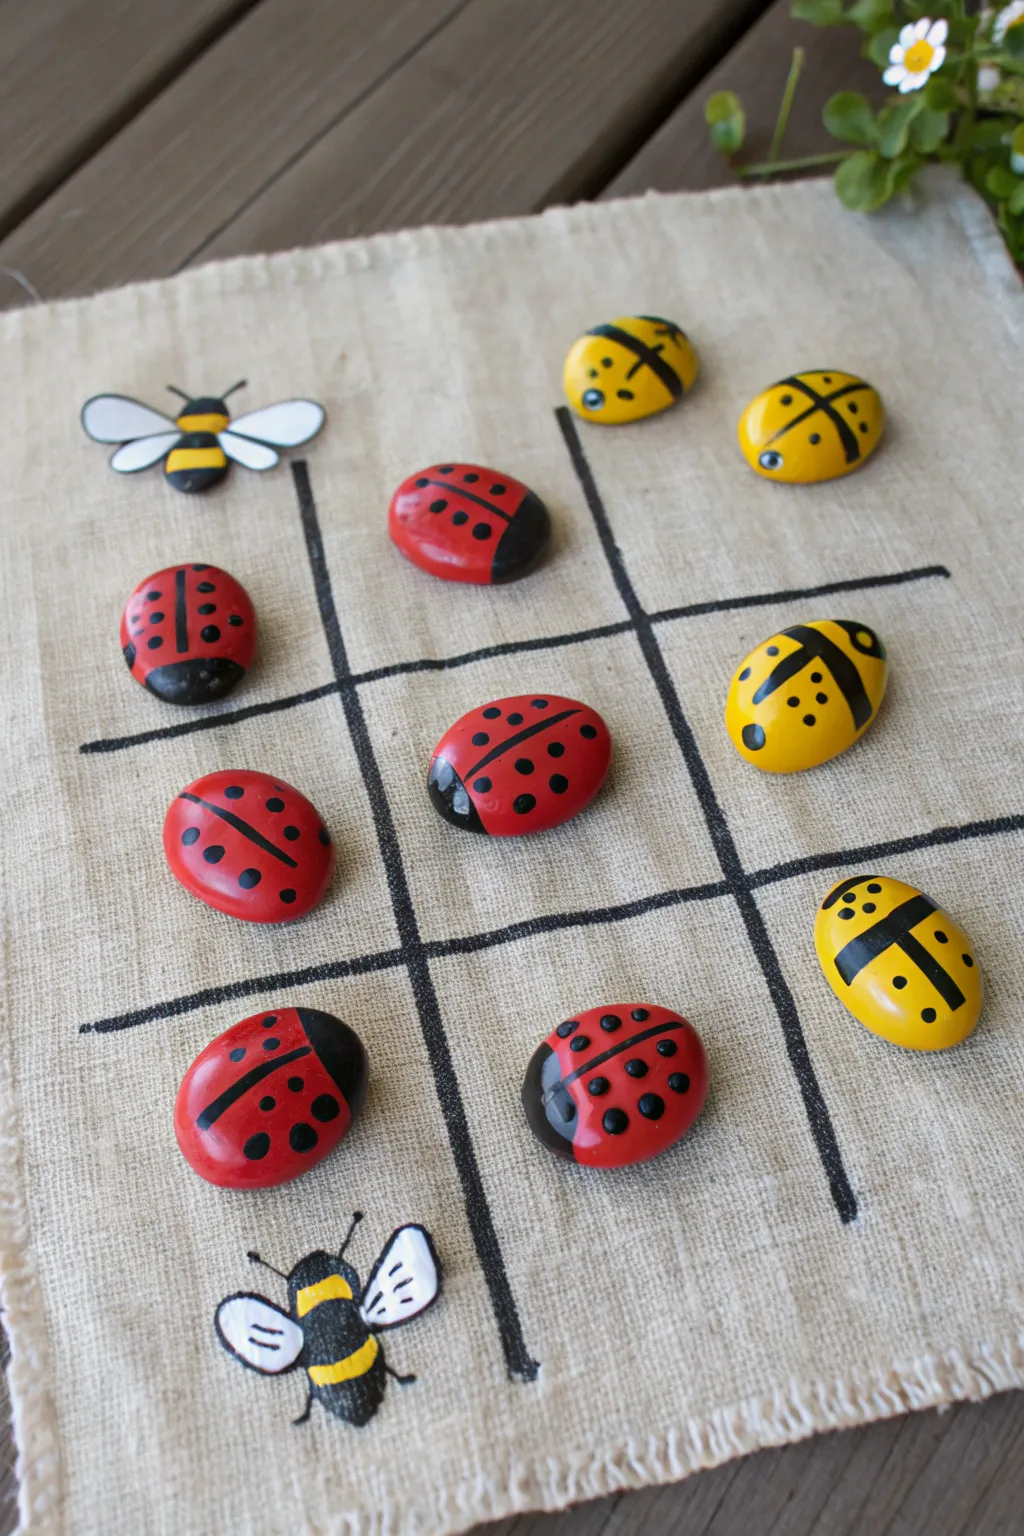
Transform ordinary garden stones into a charming backyard game with this ladybug vs. beetle tic-tac-toe set. Painted on smooth pebbles and played on a custom rustic fabric board, this portable game is perfect for summer picnics or cozy family game nights.
Detailed Instructions
Materials
- 10 smooth, oval-shaped rocks (approx. 1-2 inches)
- Acrylic paints (red, yellow, black, white)
- Fine detail paintbrushes (liner brush and small round brush)
- Dotting tool or toothpick
- Clear acrylic sealant (spray or brush-on)
- Square of linen or canvas fabric (approx. 12×12 inches)
- Black fabric paint or permanent marker
- Ruler
Step 1: Preparing and Base Coating Rocks
-
Clean the canvas:
Begin by thoroughly washing your rocks with warm, soapy water to remove any dirt or oils. Let them dry completely, as moisture will prevent the paint from adhering properly. -
Divide the teams:
Separate your ten rocks into two groups of five. The smoother and flatter the rocks, the easier they will be to paint and handle during the game. -
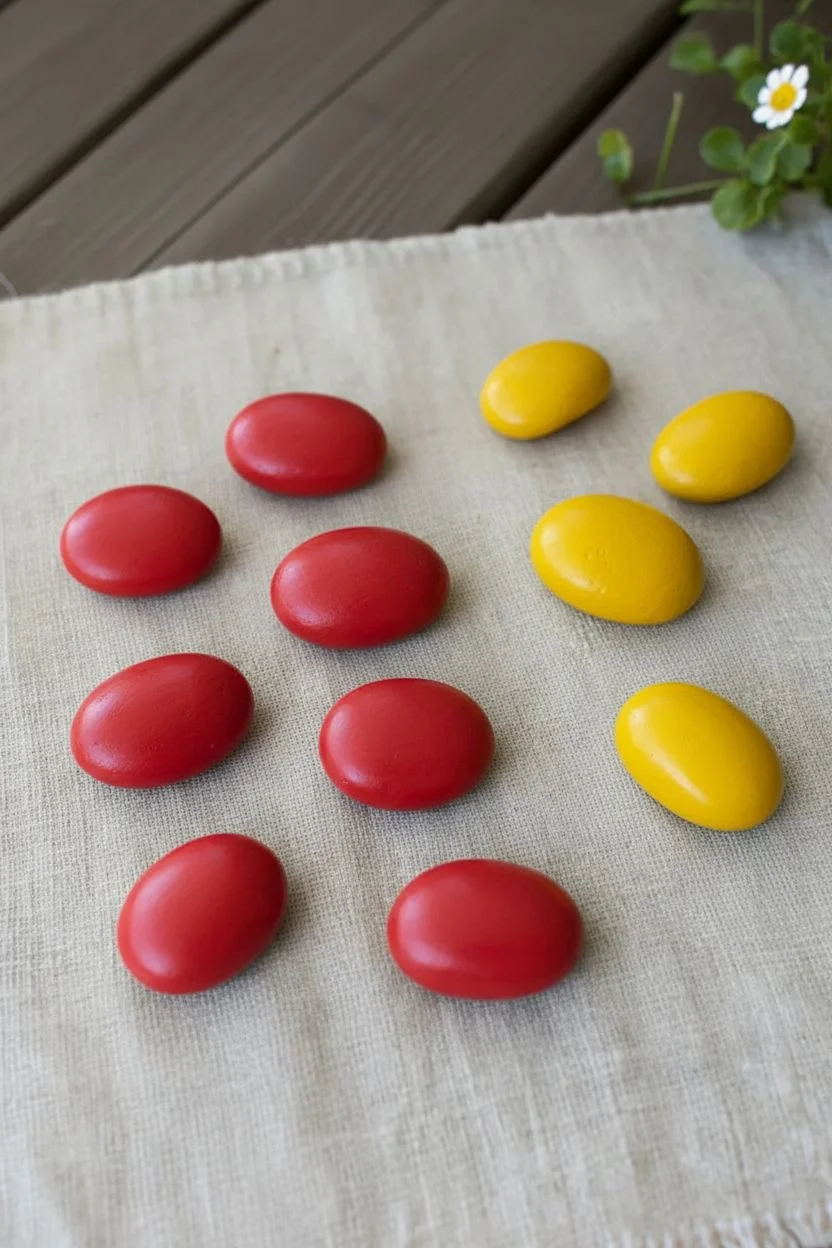
Base coat: Team Ladybug:
Paint the top surface of the first five rocks with a bright, opaque red acrylic paint. You may need two coats for full coverage, allowing the first layer to dry before adding the second. -
Base coat: Team Beetle:
Paint the remaining five rocks with a vibrant yellow acrylic paint. Like the red rocks, apply a second coat if the color looks streaky or translucent.
Uneven Dots?
If your dots vary too much in size, practice first on paper. Reload your dotting tool with fresh paint for every single dot to ensure consistent size and roundness.
Step 2: Painting the Bug Details
-
Painting ladybug heads:
On the red rocks, use black paint and a small brush to paint a semi-circle at one end of the rock. This creates the ladybug’s head. -
Adding the dividing line:
Draw a straight black line down the center of the red back, starting from the head and going to the tail, to separate the wings. -
Adding ladybug spots:
Dip a dotting tool or the back end of a paintbrush into black paint. Press gently onto the red wings to create random spots. Vary the placement so each bug looks unique. -
Painting beetle heads:
Repeat the head-painting process for the yellow rocks, painting a black semi-circle at the front. -
Creating beetle stripes and spots:
For the yellow beetles, paint a black cross on the back—one line down the center and one line horizontally across. Add small dots in the quadrants formed by the cross. -
Adding eyes:
Once the black heads are fully dry, dip a fine tip or toothpick into white paint and add two tiny dots to the black head area for eyes. I find this tiny detail instantly brings the characters to life. -
Sealing the rocks:
After all paint is cured, apply a coat of clear acrylic sealant or varnish. This protects the paint from chipping during intense tic-tac-toe matches.
Step 3: Creating the Game Board
-
Prepare the fabric:
Cut your linen or canvas fabric into a square. You can pull a few threads from the edges to create a rustic, frayed fringe look. -
Grid layout:
Using a ruler and a pencil, lightly mark out a basic tic-tac-toe grid (two vertical lines, two horizontal lines) in the center of the fabric. -
Painting the grid:
Trace over your pencil lines using black fabric paint or a thick permanent marker. The lines don’t need to be perfectly sharp; a slightly hand-drawn look adds character. -
Adding decorative bees:
In the empty corners or edges of the fabric, sketch outlining shapes of bees. Paint the bodies yellow and black, and outline the wings in white or light grey. -
Finishing touches:
Add antennae and small flight trails (dashed lines) to your fabric bees using a fine liner brush or marker. -
Final assembly:
Allow the fabric paint to dry completely according to the manufacturer’s instructions before placing your finished rocks onto the board.
Smooth Moves
Sand rough spots on your stones with fine-grit sandpaper before painting. A smoother surface makes painting straight lines significantly easier.
Now you have an adorable, handmade game set ready for play either indoors or out in the garden sunshine
Mix-and-Match Rock People Portraits
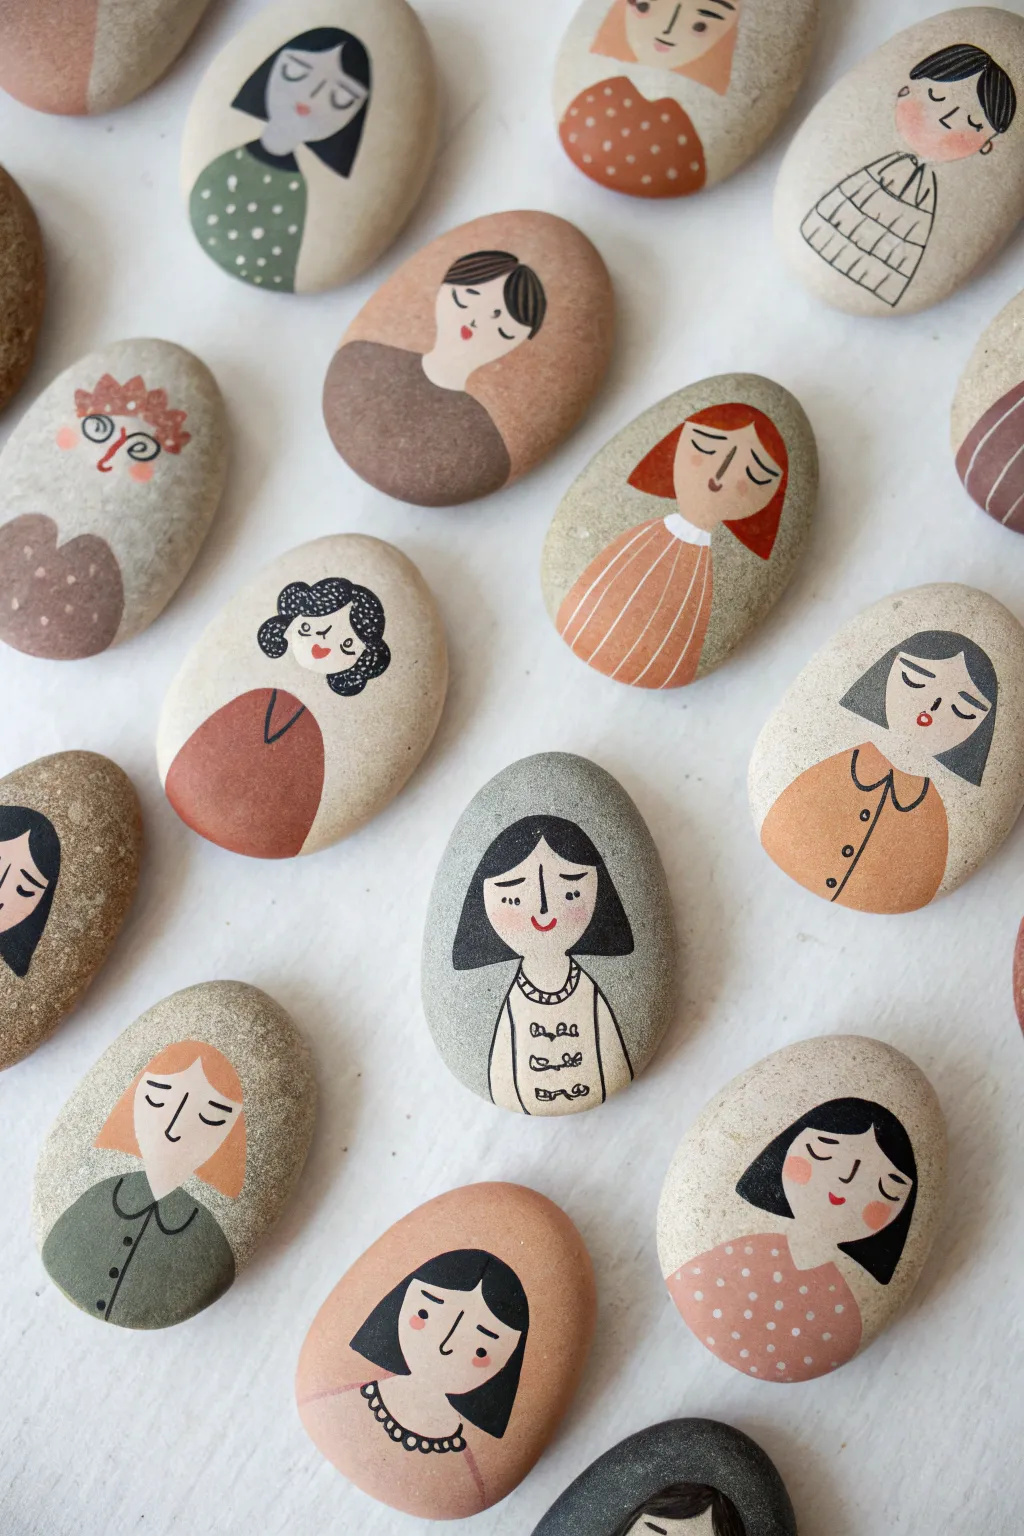
Transform smooth river stones into a charming cast of characters with this mix-and-match portrait tutorial. These stylized, folksy faces rely on simple shapes and a muted, earthy color palette to create a cohesive collection.
Step-by-Step
Materials
- Smooth river rocks (flat, oval shapes work best)
- Acrylic paints (muted tones: rust, olive green, cream, mustard, warm brown, black)
- Small flat brush (size 4 or 6)
- Detail/liner brush (size 0 or 00)
- Pencil for sketching
- Matte paint sealer or varnish
- Palette or paper plate
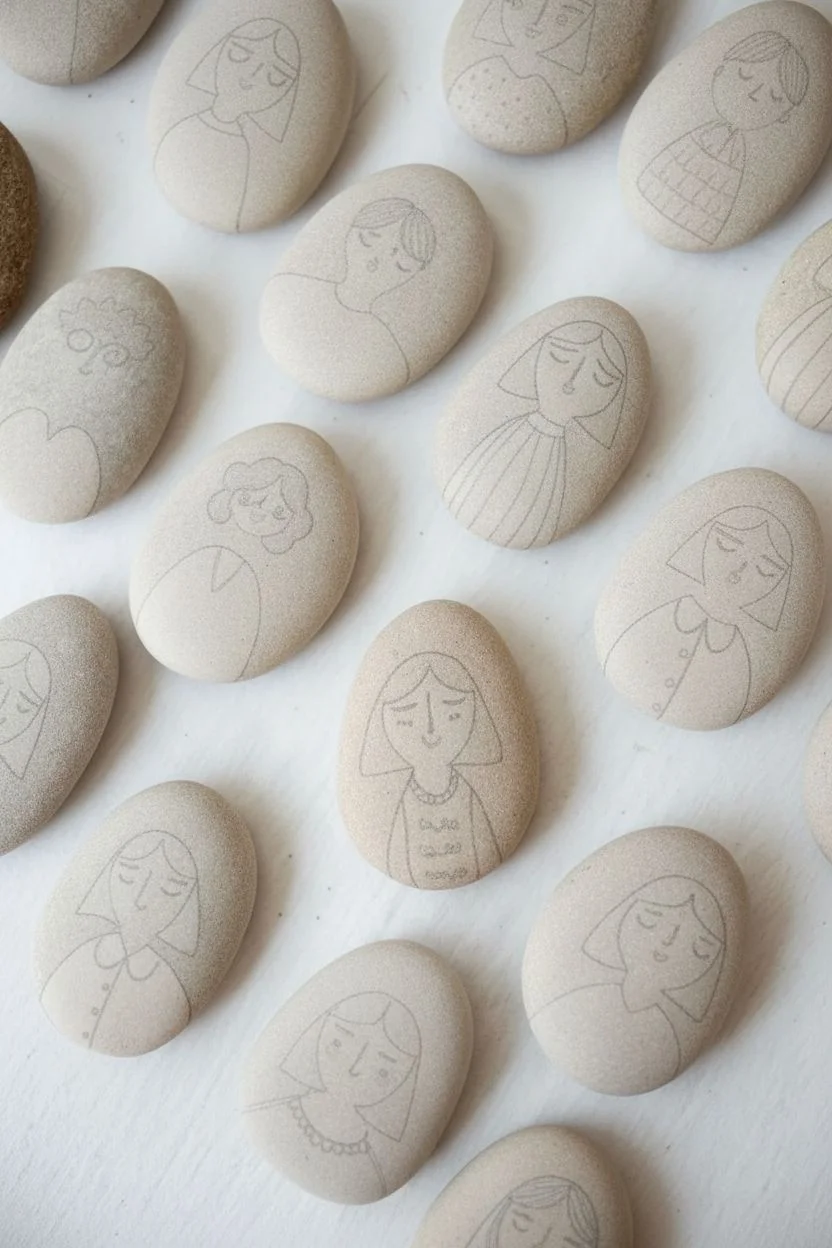
Step 1: Prepping the Canvas
-
Select your stones:
Choose stones that are relatively flat and smooth. Oval or egg-shaped rocks naturally suggest face shapes, making them ideal for this project. -
Clean and dry:
Wash the rocks thoroughly with soap and water to remove any dirt or oily residue. Let them dry completely, or speed up the process with a hairdryer. -
Sketch the layout:
Using a pencil, lightly outline the basic composition on each rock. Draw a simple U-shape or oval for the head near the top third, and a curved line below it to suggest shoulders or a neckline.
Pro Tip: Pen Power
Struggling with brush control for tiny eyes? Use a fine-tip permanent marker or archival ink pen for the smallest facial features instead of paint.
Step 2: Blocking in Color
-
Paint the skin tone:
Mix a pale cream or warm almond color. Using your flat brush, fill in the face and neck area. You may need two coats to ensure opaque coverage against the darker stone. -
Paint the clothing:
Choose a muted color for the shirt or dress—think rust red, olive green, or slate grey. Paint the shoulder area below the neck, varying the neckline shapes (V-necks, rounded collars, or boat necks) for variety. -
Add hair base:
Use black or dark brown paint to block in the hair shape. Experiment with different styles: a short bob, long flowing locks, or buns. Let the hair frame the face shape you painted earlier. -
Let it dry:
Allow these base layers to dry completely before moving on to delicate details. If the paint is wet, your fine lines will bleed.
Level Up: Mix & Match Game
Paint heads on small round stones and bodies on separate larger stones. This lets you physically swap heads and outfits for an interactive toy.
Step 3: Adding Personality
-
Draw facial features:
With your finest liner brush and slightly watered-down black paint (or an ink pen if you prefer), add the eyes. Simple closed curves or tiny dots create a serene, sleeping, or contemplative look. -
Add noses and mouths:
Paint a tiny ‘L’ or curved line for the nose. For the mouth, use a small dab of red or pink for a lipstick look, or a simple black line for a smile. -
Cheeky details:
Dilute a tiny bit of pink or rust paint with water to make a glaze. Dab this gently onto the cheeks for a rosy, flushed effect. -
Clothing patterns:
Using the liner brush, add patterns to the clothing area. Try painting small polkadots, vertical stripes, or a grid pattern over the dried base color of the shirt. -
Collars and accessories:
Outline collars with black ink or paint. You can add details like buttons down the front or a scalloped lace edge on a neckline.
Step 4: Finishing Touches
-
Clean up outlines:
If any edges look messy, I like to go back with the original background color or the stone’s natural color to tidy up the perimeter of the portrait. -
Dry thoroughly:
Ensure the thickest parts of the paint are completely dry to the touch to prevent smudging during sealing. -
Seal the work:
Apply a coat of matte varnish or sealer. A matte finish preserves the natural, stone-like aesthetic better than a high gloss.
Arrange your finished stone family in a bowl or on a shelf to enjoy their quiet company
Marbled Pour-Effect Painted Rocks
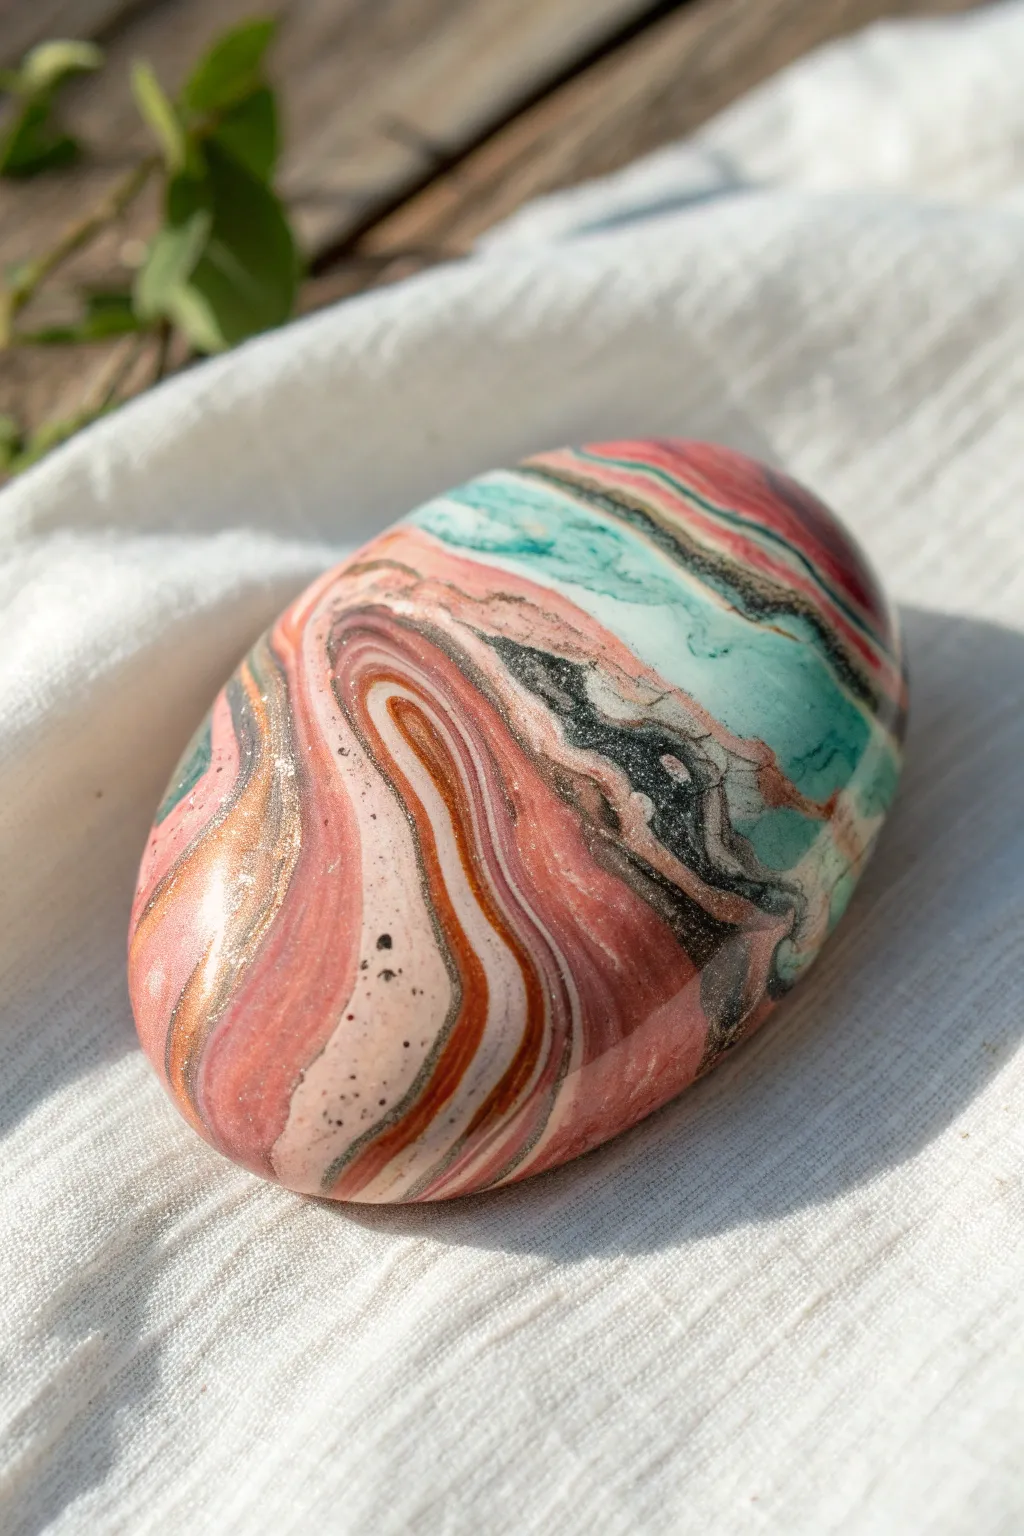
Capture the fluid beauty of agate and marble with this mesmerizing pour-painted rock project. Using a swirl of salmon pinks, teals, and metallic golds, you’ll transform an ordinary stone into a sophisticated, glossy paperweight or decorative art piece.
Step-by-Step Tutorial
Materials
- Smooth, oval river rock (clean and dry)
- Acrylic pouring paints (pre-mixed or mix your own)
- Colors: Salmon pink, teal/turquoise, black, white, metallic gold/copper
- Pouring medium (if mixing your own paint)
- Small plastic cups (one for each color)
- Wooden craft sticks for stirring
- One medium plastic cup for the ‘dirty pour’
- Disposable gloves
- Elevated drying rack (or inverted cups)
- Tray or box to catch drips
- High-gloss spray varnish or resin (for sealing)
- Cardboard or plastic drop cloth
Step 1: Preparation & Mixing
-
Clean your canvas:
Begin by scrubbing your rock with soap and water to remove any dirt or oils. Let it dry completely in the sun or with a cloth. A clean surface ensures the paint adheres perfectly without peeling later. -
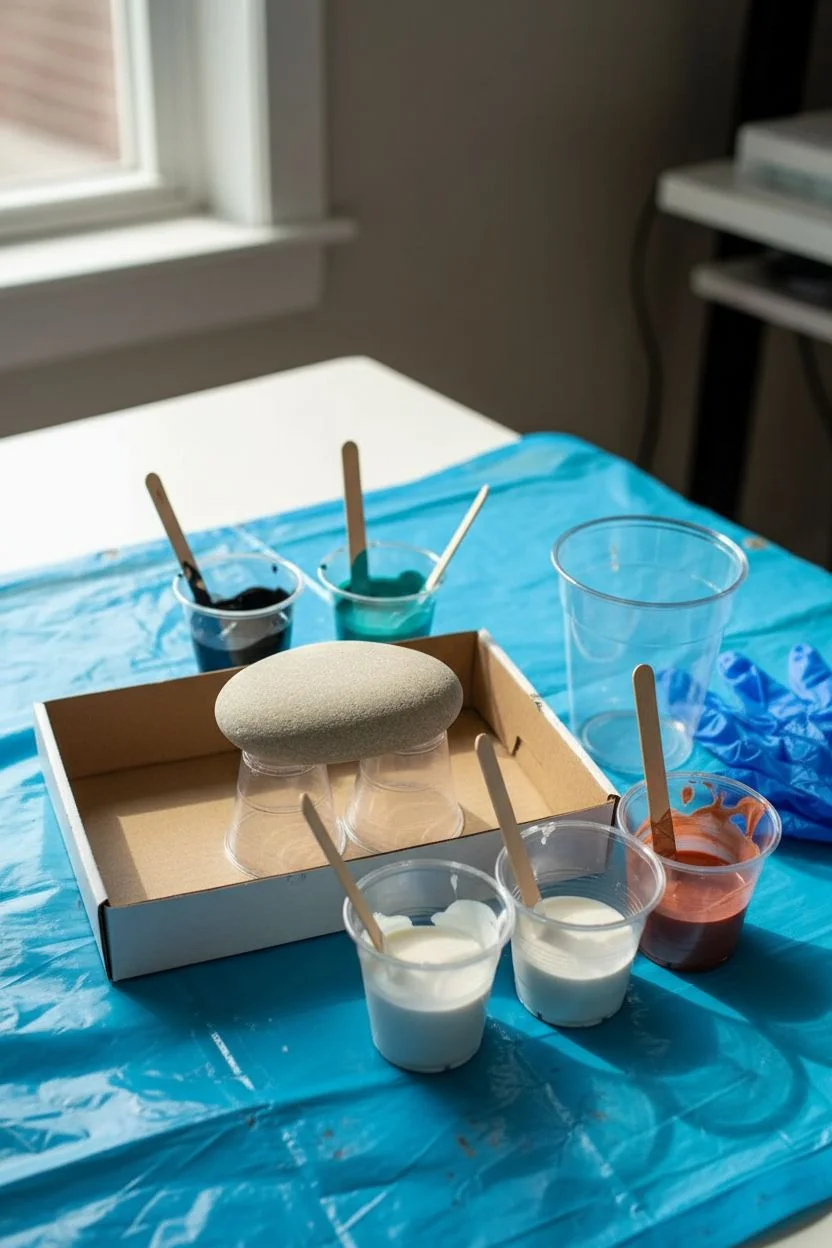
Setup your station:
Cover your work area with a plastic drop cloth or cardboard. Place a plastic tray or box in the center to catch excess paint. Position your rock on an elevated surface inside the tray—upside-down cups work great for this. -
Prepare your paints:
If you are not using pre-mixed pouring paints, mix regular acrylics with a pouring medium. A standard ratio is often 1 part paint to 1 part medium, plus a few drops of water until it flows like warm honey. -
Check consistency:
Test your colors; they should all have the same fluid consistency. If the paint is too thick, add water drop by drop. If it’s too thin, add a tiny bit more paint. I like to lift the stick and see if the paint makes a small mound before disappearing.
Fixing Muddy Colors
If colors are blending into grey instead of distinct swirls, your paint is likely too thin or you are tilting too aggressively. Thicken slightly and tilt slower.
Step 2: The Dirty Pour Technique
-
Layer the first color:
Take your empty ‘dirty pour’ cup. Pour a small amount of white paint into the bottom as your base. This helps the other colors slide and mix without getting muddy. -
Add contrasting layers:
Gently pour in a layer of salmon pink, followed by a layer of teal. Don’t stir them! You want them to sit on top of each other. Pour down the side of the cup to keep layers distinct. -
Introduce darks and metallics:
Add a thin stream of black paint for contrast, followed immediately by your metallic gold or copper. The metallic layer often creates beautiful cells and separation. -
Repeat the stack:
Continue layering your colors in this random order until the cup is about half full (or enough to cover your specific rock size). Remember, do not stir the cup.
Step 3: Pouring & Tilting
-
The pour:
Hold the cup directly over the center of your elevated rock. Begin pouring slowly in a circular motion, letting the paint cascade over the sides. The patterns will emerge as the paint flows. -
Fill the gaps:
As the paint flows, ensure it covers the entire top surface. If the dirty pour runs out before covering the edges, you can pour a little extra single-color paint near the bare spots to help the main puddle travel. -
Tilt for movement:
This is the fun part. Gently pick up the rock (wearing gloves creates less mess) and tilt it slowly in different directions. Watch how the stripes of pink and teal stretch and swirl. -
Direct the flow:
Encourage the paint to run off the edges to create a seamless look. Try to manipulate the rock so that the black veins streak through the pink and teal sections naturally. -
Check the edges:
Inspect the bottom edges of the rock. Use your gloved finger to gently smooth any drips hanging off the bottom so they don’t dry into distinct bumps.
Add Sparkle
While the paint is still wet, lightly sprinkle ultra-fine loose cosmetic glitter over the teal sections to mimic mineral deposits found in real geodes.
Step 4: Finishing Touches
-
Let it cure:
Place the rock back on its elevated stand. Allow the paint to dry undisturbed for at least 24 to 48 hours. Acrylic pours dry slowly, and rushing this can cause cracking. -
Clean the bottom:
Once fully dry, flip the rock over. If there are messy dried drips on the underside, you can sand them down gently with fine-grit sandpaper for a flat base. -
Seal for shine:
To achieve that glass-like finish seen in the photo, apply 2-3 coats of high-gloss spray varnish or a layer of art resin. This step makes the metallic gold pop and intensifies the pigments.
Display your polished-looking creation on a desk or shelf to admire the stone’s new flowing energy
3D Optical Illusion Geometric Rocks
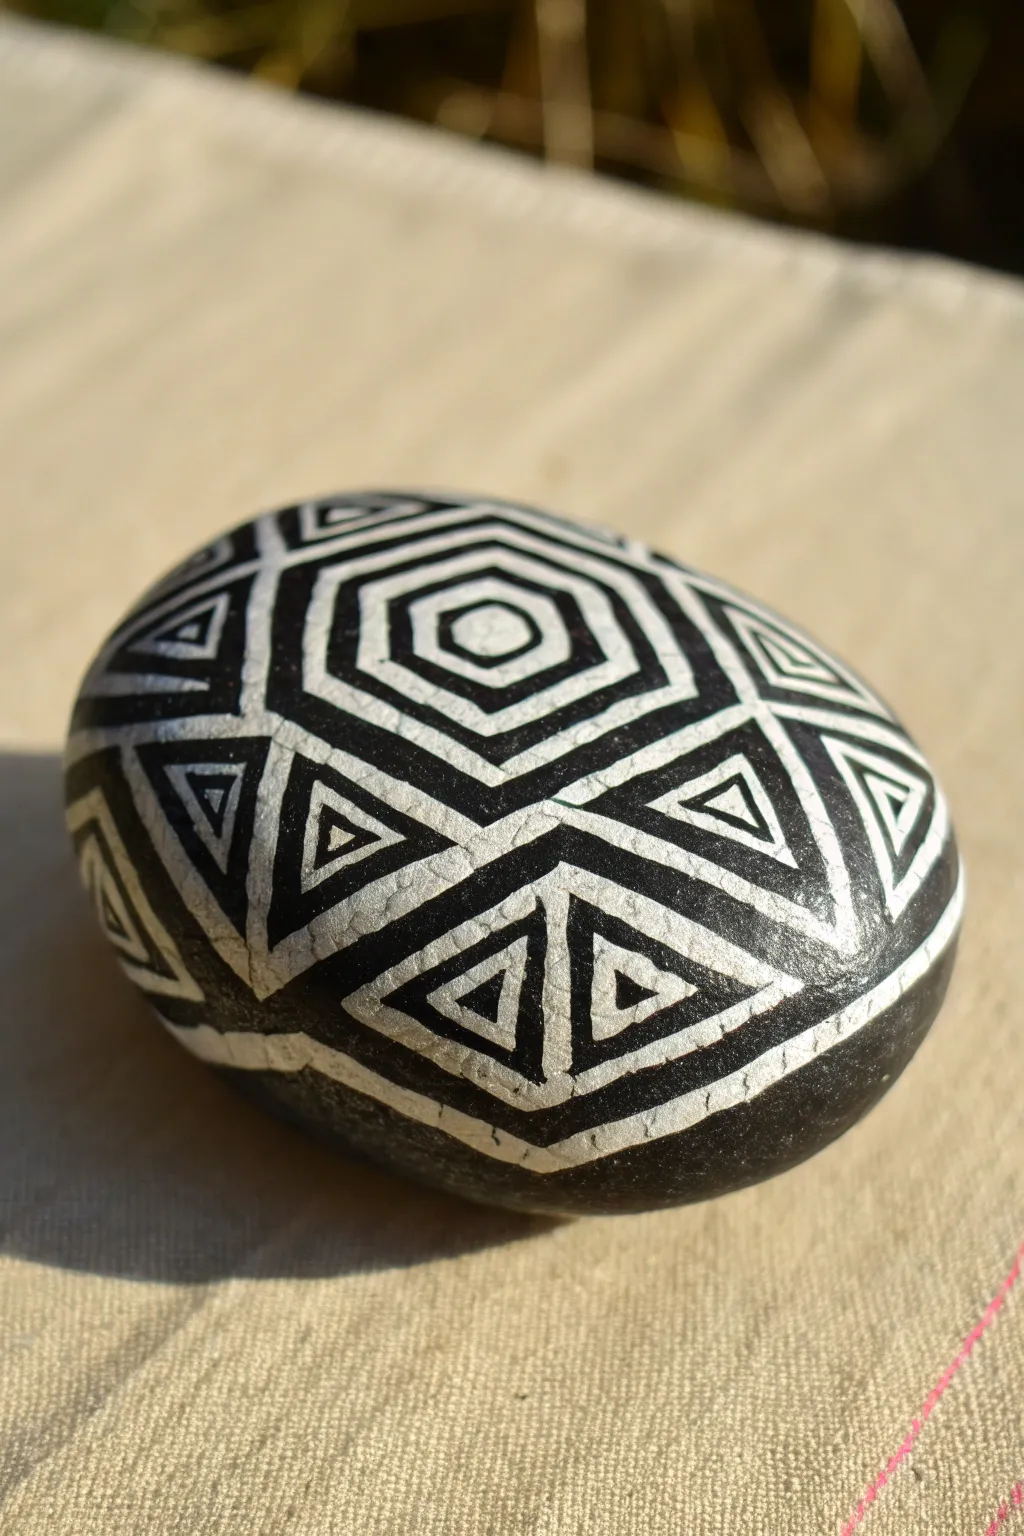
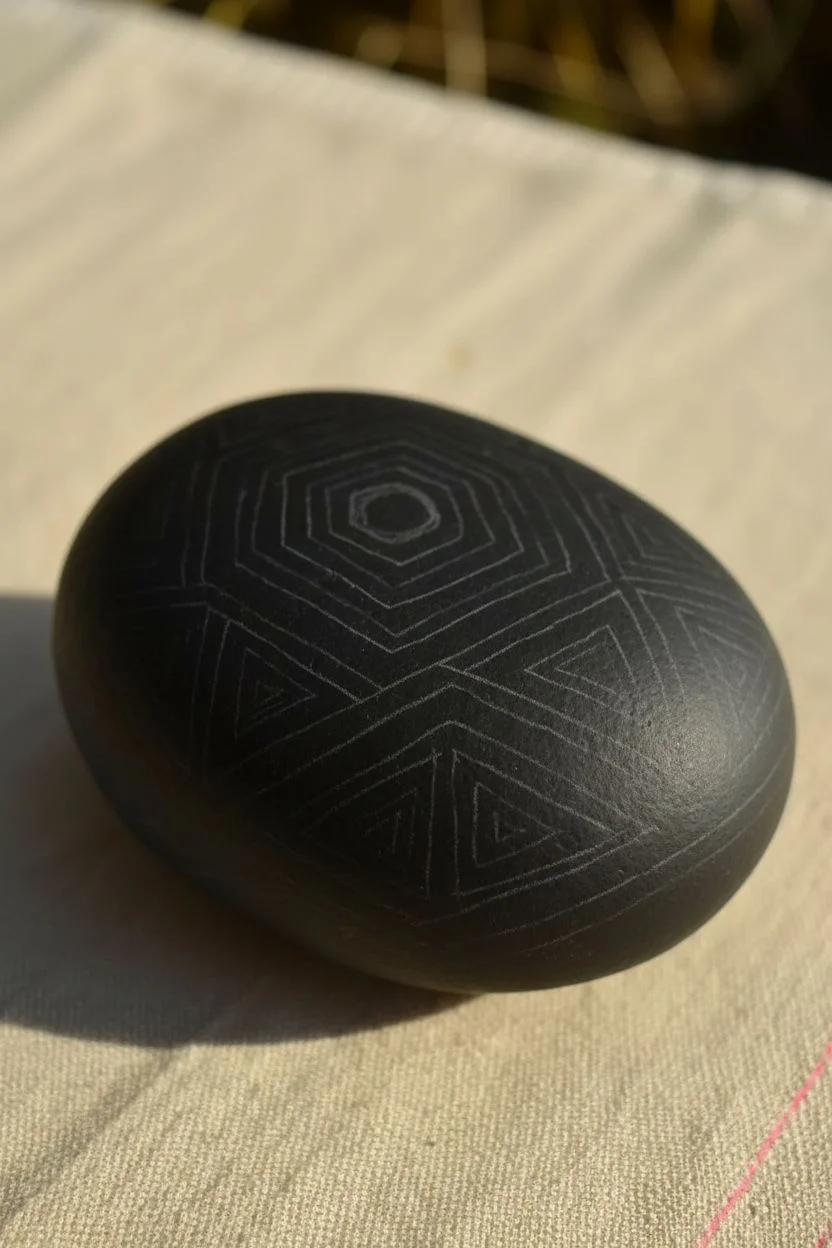
Transform a simple smooth stone into a mesmerizing piece of optical art using high-contrast black and white. This design relies on nested geometric shapes—specifically hexagons and triangles—to create a captivating 3D illusion that looks complicated but is built one line at a time.
Step-by-Step Guide
Materials
- Smooth, oval river rock (medium to large size)
- Black acrylic paint (matte finish recommended)
- White acrylic paint or specialized white paint pen (extra fine tip)
- Flat paintbrush (medium size)
- Detail liner brush (size 0 or 00, if not using a pen)
- Pencil (HB or lighter)
- Ruler or flexible measuring tape
- Spray varnish or sealant (matte or satin)
- Eraser
Step 1: Preparation and Base Coat
-
Clean the stone:
Begin by thoroughly washing your rock with warm soapy water to remove any dirt or oils. Scrub it gently and let it dry completely before starting; even a little moisture can prevent the paint from adhering properly. -
Apply the base color:
Using your flat brush, coat the entire top surface of the rock with matte black acrylic paint. You want a solid, opaque background, so don’t be afraid to apply a second coat once the first is dry to ensure no stone color shows through. -
Dry the base:
Allow the black base coat to dry fully. It needs to be hard to the touch so your pencil sketch won’t scratch the paint layer underneath.
Geometry Tip
Can’t draw a perfect hexagon? Cut a small hexagon template out of paper or cardstock. Trace around it for the center, then freehand the outer rings using the traced shape as a guide.
Step 2: Drafting the Geometry
-
Find the center:
With a pencil, lightly mark the approximate center of the rock. This will be the anchor point for your main hexagon pattern. -
Draw the central hexagon:
Sketch a small hexagon in the center. Try to keep the six sides equal in length. This is the ‘eye’ of the design. -
Expand the rings:
Draw two or three larger, concentric hexagons around that central one. Leave uniform spacing between the lines to create the ‘tracks’ where the white paint will eventually go. -
Extend lines outward:
From the corners of your outermost hexagon, draw straight lines extending outward toward the edges of the rock. These lines will form the boundaries for the triangular sections surrounding the central shape. -
Fill the triangular voids:
Within those new triangular sections, sketch smaller, nested triangles that descend in size. The points of these triangles should aim toward the central hexagon, enhancing the 3D effect.
Step 3: Painting the Design
-
Outline the main shapes:
Using your white paint pen or a very fine liner brush loaded with thinned white acrylic, carefully trace over your pencil lines. Start with the central hexagon rings. -
Define the radiating lines:
Paint the straight lines that radiate from the hexagon corners outward. These act as the ‘spokes’ of your design and separate the triangular zones. -
Paint the nested triangles:
Carefully paint the smaller triangles inside the radiating sections. I adhere to a ‘top-down’ approach here to avoid smudging wet paint with my hand. -
Thicken the lines:
Once your initial trace is done, go back and slightly thicken the white lines. The goal is to make the white bands roughly equal in width to the black gaps between them for high contrast. -
Clean up edges:
If any white lines are wobbly or too thick, use a small brush with a bit of black paint to ‘erase’ and tidy up the edges, sharpening the geometry. -
Add side details:
Continue the pattern over the curve of the rock. Depending on your rock’s shape, the triangles might distort slightly near the bottom, which actually helps the optical illusion.
Wobbly Lines?
If your hand is shaking, try resting your pinky finger on a dry part of the rock for stability. Using a paint pen instead of a brush often offers much better control for straight geometric lines.
Step 4: Finishing Touches
-
Check for consistency:
Step back and look at the rock from a distance. Ensure your black spacing is consistent. Use the black paint again to touch up any areas where the white feels too dominant. -
Let it cure:
Allow the white paint to dry completely. If you used a paint pen, this can happen quickly, but standard acrylics might need 20 minutes to fully set. -
Remove pencil marks:
Check for any visible pencil lines that weren’t covered by paint. If the paint is fully cured, you can very gently erase them. -
Seal the artwork:
Finish by applying a matte or satin spray varnish. Hold the can about 12 inches away and use light bursts to avoid making the ink run.
Place your finished rock in a garden or on a desk where the light can play off your intricate geometric handiwork


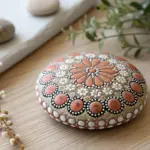
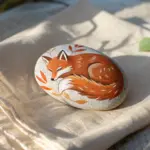
Have a question or want to share your own experience? I'd love to hear from you in the comments below!