I never get tired of drawing snow globes because they’re basically tiny worlds you can build inside one perfect circle. Here are my favorite snow globe drawing ideas, starting with the classic cozy ones and drifting into the more unexpected, artsy twists.
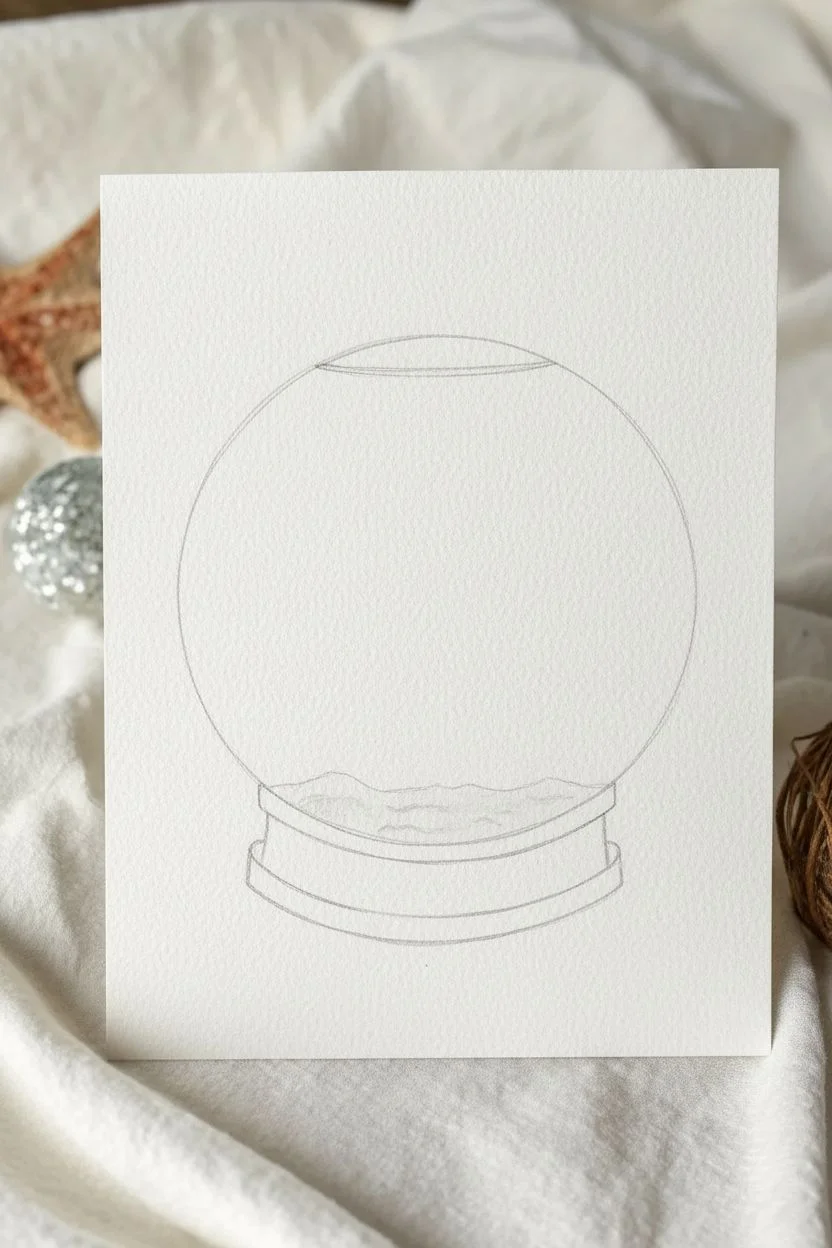
Classic Snowman Snow Globe Scene
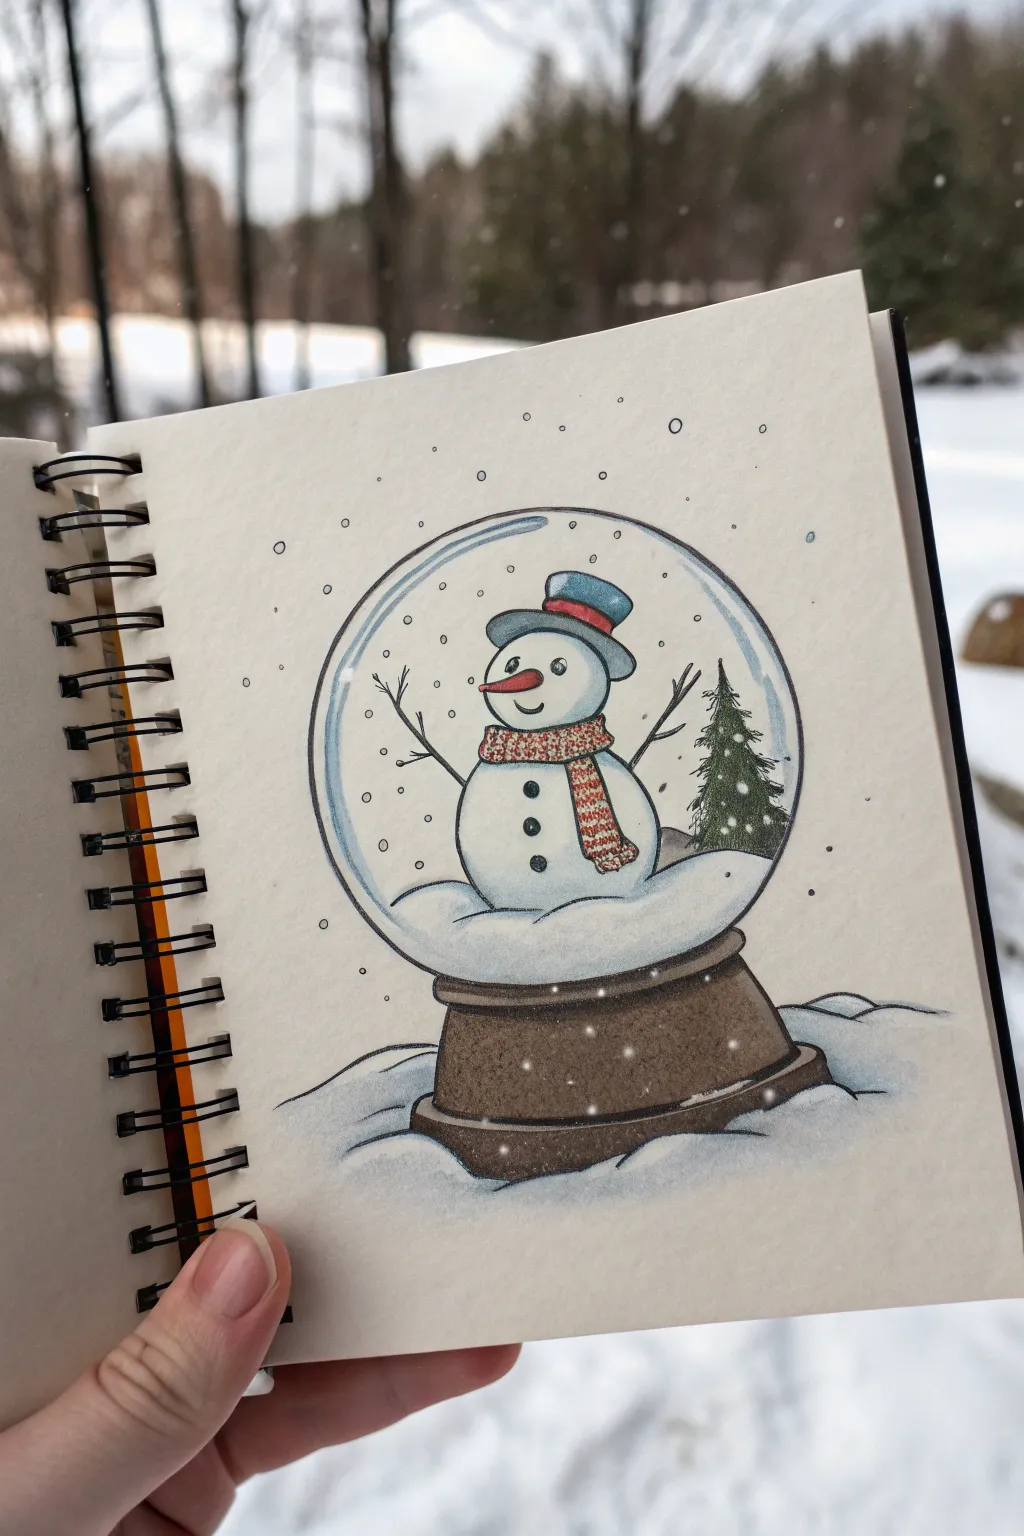
Capture the magic of a fresh snowfall with this charming sketchbook illustration featuring a classic snowman enclosed in glass. The combination of clean ink lines and soft colored shadings gives this piece a cozy, nostalgic feel perfect for a winter art journal.
Detailed Instructions
Materials
- Spiral-bound sketchbook (heavyweight paper preferred)
- Pencil (HB or 2B)
- Eraser
- Fine liner pens (black, sizes 0.1 and 0.3 or 0.5)
- Colored pencils (light blue, dark blue, brown, red, orange, dark green)
- White gel pen or white acrylic paint pen
- Compass or circular object to trace
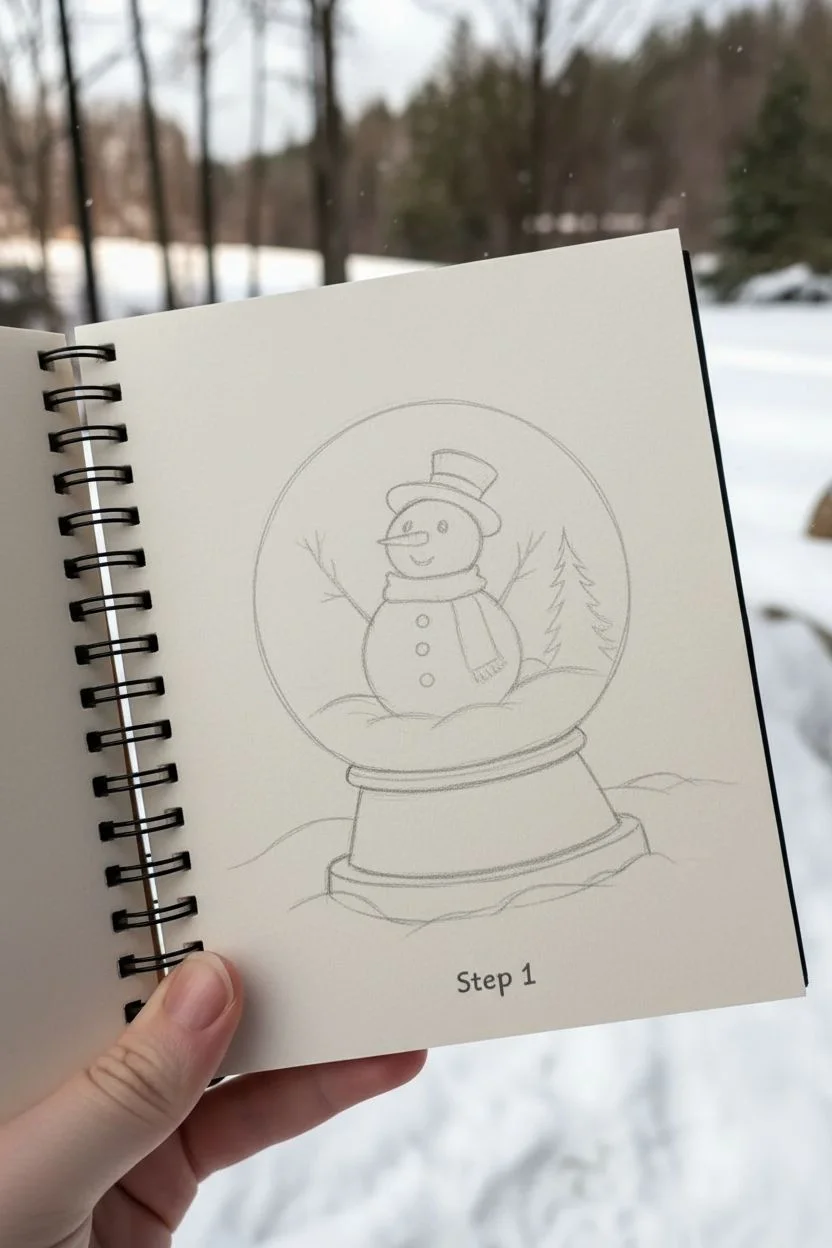
Step 1: Drafting the Structure
-
Set the circle:
Begin by drawing a perfect circle in the center of your page using a compass or by tracing a round object like a mug rim. This will be the glass part of your globe. -
Add the base:
Sketch a curved rectangle directly beneath the circle for the base. Widen the bottom slightly to give it stability and add a smaller curved rim at the very bottom. -
Sketch the snow mound:
Inside the bottom of the circle, draw a soft, hilly curve. This acts as the snowy ground your snowman will sit on. -
Build the snowman:
Draw the snowman’s body using two circles: a larger one resting on the snow mound and a slightly smaller one on top for the head. Add stick arms branching out from the sides. -
Draw the accessories:
Sketch a top hat on the snowman’s head with a band. Then, drape a scarf around the neck area, letting one end hang down the front of the body. -
Fill the background:
To the right of the snowman, sketch a simple evergreen tree shape. Keep it slightly smaller than the snowman to create a sense of scale inside the globe.
Step 2: Inking the Lines
-
Outline the globe:
Using your thicker fine liner (0.5 or 0.3), carefully trace the outer circle of the globe. For a realistic glass effect, don’t close the circle entirely; leave small breaks or make the line thinner near the top. -
Define the contents:
Switch to a finer pen (0.1) for the interior details. Outline the snowman, the scarf’s knit texture, the hat, and the stick arms. Use short, jagged strokes for the evergreen tree to mimic pine needles. -
Ink the base:
Outline the wooden base with steady lines. Add a double line at the top and bottom of the base to create ridges. -
Erase pencil marks:
Wait a moment for the ink to dry completely, then gently erase all visible pencil lines.
Uneven Globe Shape?
If tracing a circle feels tricky, rotate your sketchbook slowly while keeping your hand still. This pivots the paper under your pen for a smoother curve.
Step 3: Adding Color and Depth
-
Shade the snow:
Take a light blue colored pencil and gently shade the ‘shadow’ areas of the snow—specifically under the snowman and along the bottom curve on the ground. Leave the tops of the snow mounds white. -
Color the snowman:
Use the same light blue to add a subtle shadow to the left side of the snowman’s body and head, giving him a round, 3D form. -
Detail the accessories:
Color the scarf with alternating red and uncolored stripes. Use a dark blue for the hat, leaving a red band. Color the carrot nose bright orange. -
Fill the tree and base:
Color the pine tree with a deep forest green. For the base, use a medium brown, applying more pressure on the sides to create a rounded, cylindrical look. -
Create the glass effect:
With a very light hand, use the light blue pencil to trace just inside the ink line of the large circle, primarily on the left side, to suggest the thickness and reflection of glass. -
Ground the object:
Sketch a loose, snowy landscape outside the globe using your light blue pencil to ground the object, adding shadows underneath the base.
Level Up: Sparkle Effect
For a magical touch, use a metallic silver pen or glitter glue for the snowflakes inside the globe. It will catch the light just like real snow.
Step 4: Final Highlights
-
Add falling snow:
Using your fine liner, draw tiny circles scattered inside the globe for snowflakes. Add a few randomly in the air outside the globe as well. -
Apply white highlights:
This is my favorite part: take your white gel pen and add bright white dots over the dark green tree and the brown base to look like settled snow. -
Glass reflections:
Add a crisp white curved line on the upper left and lower right of the glass globe to simulate strong light hitting the surface.
Now you have a cozy winter scene captured forever in your sketchbook.


Easy Cartoon Snow Globe Doodle
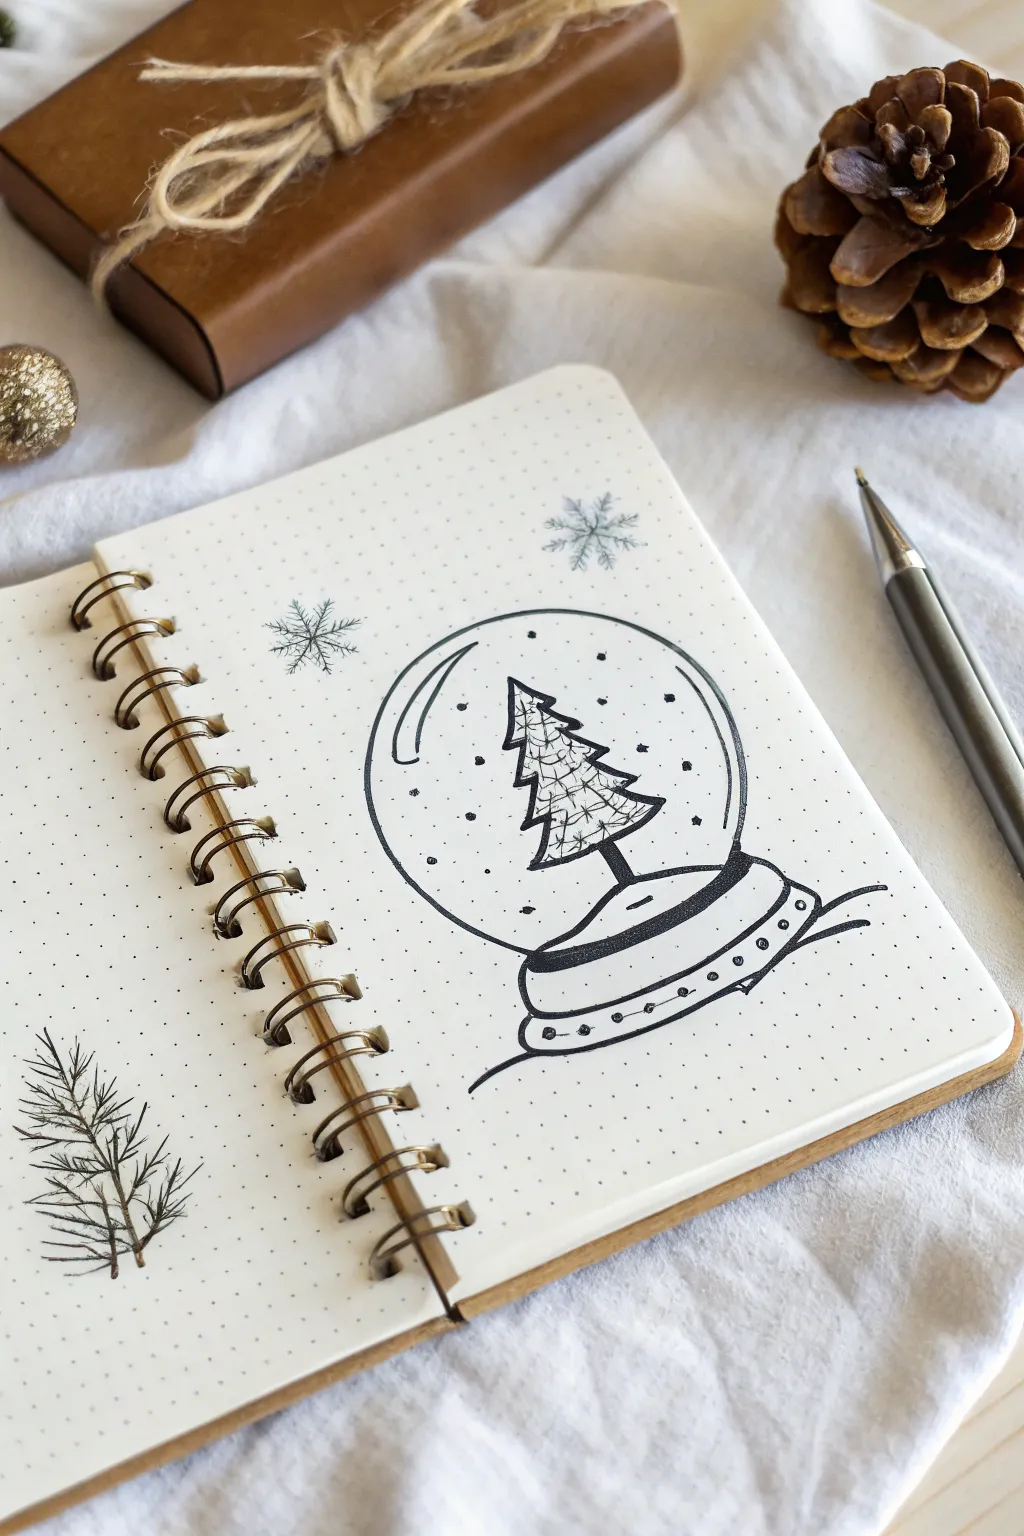
Capture the magic of winter in your bullet journal with this charmingly simple snow globe doodle. Using clean lines and dot grid paper as your guide, you’ll create a cozy holiday scene featuring a patterned Christmas tree.
Step-by-Step Tutorial
Materials
- Dot grid notebook or journal
- Fine liner pen (black, 0.3mm or 0.5mm)
- Pencil (HB or 2B)
- White eraser
- Circle stencil (optional)
Step 1: Planning and Base Structure
-
Find your center:
Locate an open spot in your dot grid journal. The dots are incredibly helpful for keeping things symmetrical without needing a ruler. -
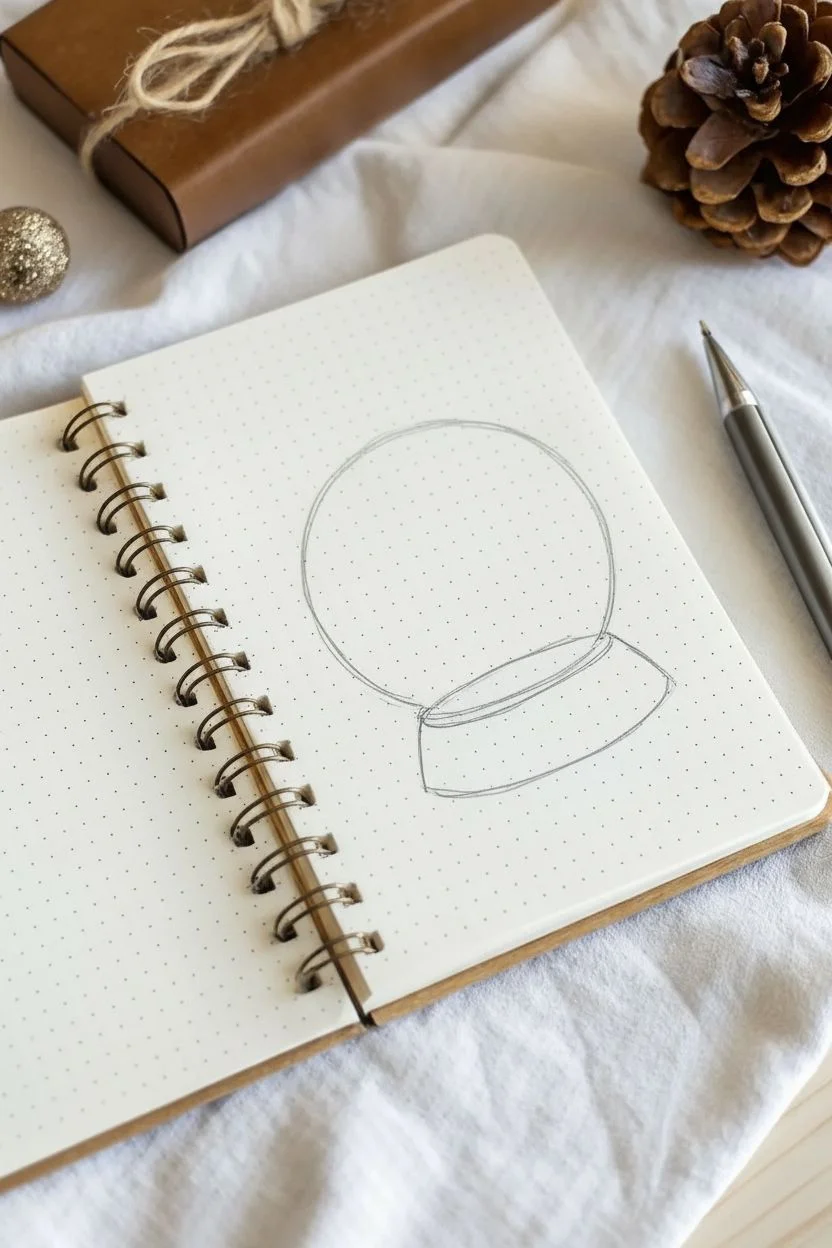
Pencil in the globe shape:
Start by lightly sketching a perfect circle for the glass part of the globe. If you struggle with freehand circles, trace a small lid or roll of tape that fits within your desired area. -
Draft the base:
Directly below the circle, sketch a flattened oval shape that overlaps slightly with the bottom of the globe. This will be the top of the stand. -
Complete the pedestal:
Draw a larger, wider curved rectangle shape beneath that first oval to create a sturdy-looking base for your snow globe.
Pro Tip: Dot Grid Magic
Use the grid dots as coordinate points. Count 4 dots left and 4 dots right from the center to ensure your globe is perfectly symmetrical.
Step 2: Drawing the Interior Scene
-
Center the tree trunk:
Sketch a small, simple vertical line rising from the center of the base’s top oval. This anchors your tree. -
Outline the tree tiers:
Draw a classic Christmas tree shape using three triangular tiers. Start with a small triangle on top, a wider one in the middle, and the widest one at the bottom. -
Shape the branches:
Curve the bottom line of each tree tier slightly upward to give the branches a little lift and volume, rather than leaving them perfectly straight. -
Trace the main lines:
Once you are happy with your pencil sketch, grab your fine liner pen. I prefer drawing the tree first so I don’t accidentally draw the globe line through it. -
Ink the globe:
Carefully ink the large circle, skipping the section where the base connects at the bottom. -
Ink the base:
Go over your pencil lines for the base. Add a second curved line near the bottom of the pedestal to creating a rim detail.
Step 3: Adding Details and Patterns
-
Pattern the tree:
Inside the tree outline, draw a grid of crossed diagonal lines to create a diamond pattern. -
Add texture:
Fill a few of the small diamond shapes with quick scribbles or hash marks to give the tree a textured, decorated look. -
Add snow dots:
Scatter small dots randomly inside the globe around the tree. Keep them sparse so it doesn’t look cluttered. -
Draw the reflection:
Add two curved lines on the upper left side of the glass globe, just inside the outline. One should be longer than the other to simulate a glass reflection. -
Detail the base:
Along the bottom rim of the base, add a row of tiny circles or dots for decoration. -
Ground the object:
Draw two gentle, wavy horizon lines extending outward from the bottom of the base to make it look like the globe is sitting on a surface.
Troubleshooting: Shaky Circles
If your circle looks wobbly, don’t restart. Thicken the outline slightly in the uneven areas to smooth out the curve visually.
Step 4: Finishing Touches
-
Draw hovering snowflakes:
In the empty space around the outside of the globe, draw two simple snowflakes using crossed lines with small V-shapes primarily at the tips. -
Let the ink set:
Give your drawing a few minutes to dry completely to avoid smudging the crisp black lines. -
Erase guidelines:
Gently erase all your original pencil sketches, leaving only the clean ink drawing behind.
This clean and simple illustration adds a festive touch to any winter journal spread


Nighttime Stars in a Snow Globe
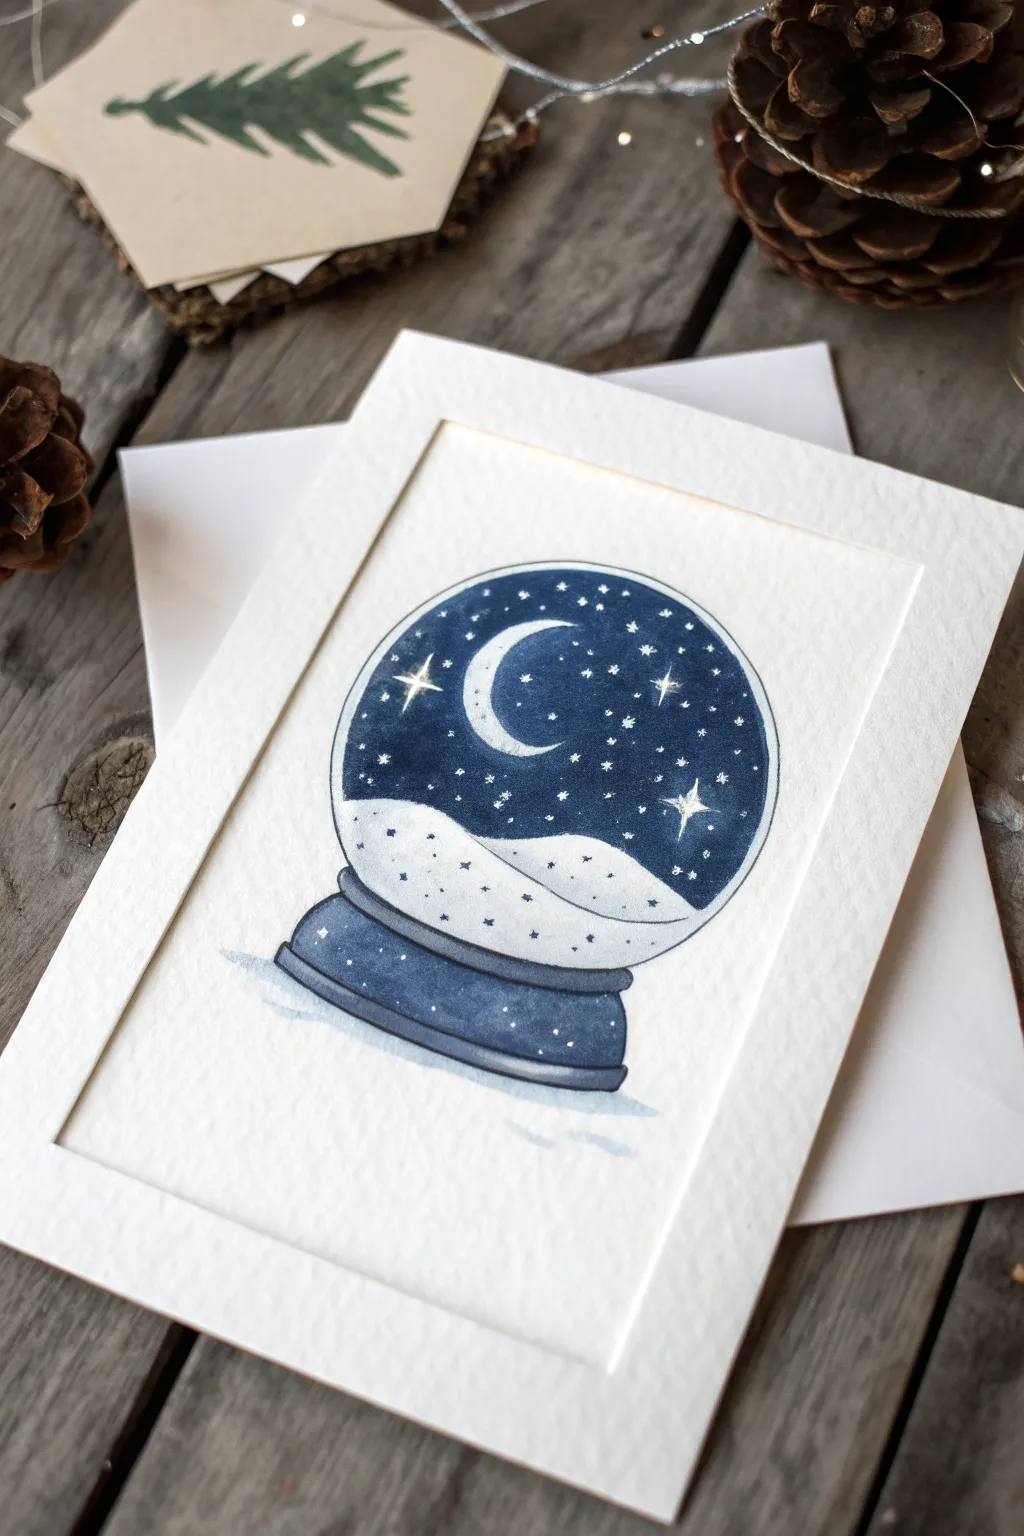
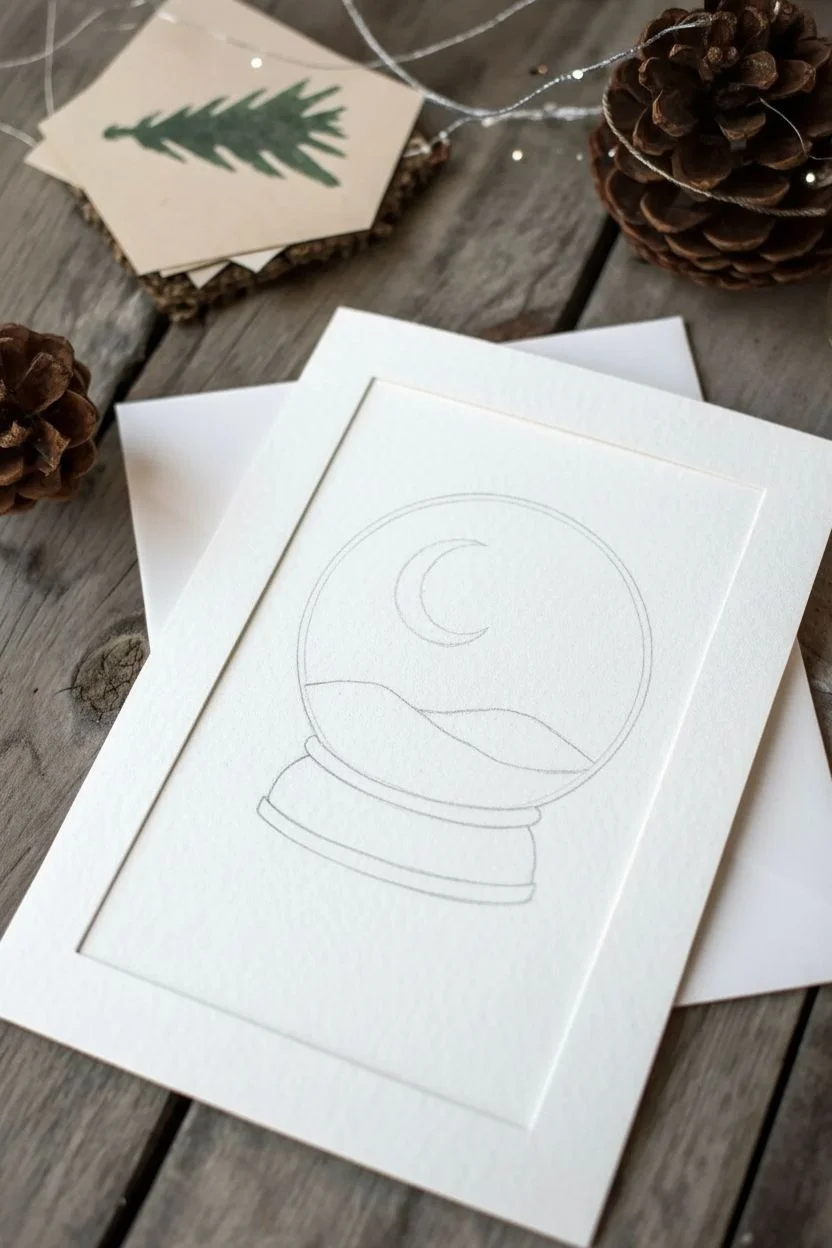
Capture the serenity of a winter night with this minimalist watercolor illustration. The deep indigo sky contrasts beautifully against the untouched white snow, creating a peaceful scene perfect for holiday cards.
How-To Guide
Materials
- Cold press watercolor paper (300 gsm)
- Watercolor paints (Indigo or dark Prussian Blue)
- Small round brush (size 2 or 4)
- Fine liner brush (size 00 or 0)
- White gel pen (opaque) or white gouache
- Pencil and eraser
- Ruler
- Circle template or compass
- Embossing tool or bone folder (optional for frame)
Step 1: Sketching the Outline
-
Frame the space:
Begin by deciding the size of your card. Lightly mark a rectangular border around the center of your paper. If you want the embossed look shown in the photo, use a ruler and an embossing tool (or the back of a butter knife) to press a rectangular groove into the paper, framing your future drawing area. -
Draw the globe:
Using a compass or a circular object, lightly draw a perfect circle in the upper two-thirds of your framed area. This will be the glass of the snow globe. -
Add the base:
Sketch the base of the globe below the circle. Start with a flattened oval shape connecting to the bottom of the circle, then add a slightly wider, rounded rectangle below it to create a sturdy stand. -
Define the interior:
Inside the circle, draw two distinct wavy lines near the bottom to represent snowdrifts. Sketch a crescent moon shape in the upper left quadrant. Keep these pencil lines very faint so they don’t show through the paint later.
Bleeding edges?
If the dark sky bleeds into the white snow, your brush was too wet. Let it dry, then use opaque white gouache to ‘paint out’ the mistake and reshape the snowdrift.
Step 2: Painting the Sky
-
Mix your color:
Prepare a rich, dark blue watercolor wash. Indigo is perfect here, or mix Prussian Blue with a touch of black or burnt umber to deepen it. You want the color to be quite saturated. -
First sky layer:
Carefully paint around the crescent moon shape—leave the moon the white of the paper. Fill the rest of the sky area down to the top edge of your snowdrift line. -
Smoothing the wash:
Work quickly while the paint is wet to ensure an even tone without hard edges inside the sky area. If the paint pools too much, lift it gently with a dry brush. -
Reserve stars:
While I usually add stars later, you can try leaving tiny specks of dry paper unpainted if you have excellent brush control. Otherwise, paint the whole sky (except the moon) solid blue and wait for the white pen step.
Add some sparkle
After the paint dries, brush a thin layer of glitter glue or iridescent medium over the snowdrifts. It adds a festive shimmer that catches the light beautifully.
Step 3: Painting the Snow & Base
-
Shadowing the drifts:
Dilute your dark blue paint significantly with water to create a very pale wash. Use this to add subtle shadows to the bottom of the snowdrifts, giving them volume. -
Texture on snow:
Add tiny stippled dots of this pale blue mix onto the white snow areas to suggest texture and fallen flakes. -
Base layer:
Paint the base of the globe using a medium-strength wash of the same blue. Make the left side and bottom edge slightly darker to suggest a light source coming from the upper right. -
Defined edges:
Once the first base layer is dry, use a fine liner brush and darker pigment to outline the rim where the glass meets the base, adding structural definition. -
Ground shadow:
Paint a very faint, watery shadow underneath the globe’s base on the ‘table’ surface to ground the object.
Step 4: Magical Details
-
Dry completely:
Ensure the dark blue sky area is 100% bone dry before proceeding. If it’s even slightly damp, your white ink will bleed. -
Background stars:
Using a white gel pen or fine brush with opaque white gouache, dot tiny stars throughout the dark blue sky. Vary the pressure to create different sized dots. -
Shining stars:
Select 3 or 4 spots to draw larger ‘twinkle’ stars. Draw a small cross shape with the white pen to make them shine brighter than the rest. -
Moon details:
If you accidentally painted over the moon’s edge, crisp it up now with the white pen. You can also add a tiny line of white along the right edge of the globe base for a highlight. -
Final outline:
Using a very fine liner brush and your darkest blue mix (almost black), carefully trace the outer edge of the glass globe and the main contour lines to make the illustration pop.
Now you have a charming winter scene ready to be gifted or displayed


Minimal Line Art Snow Globe With Negative Space
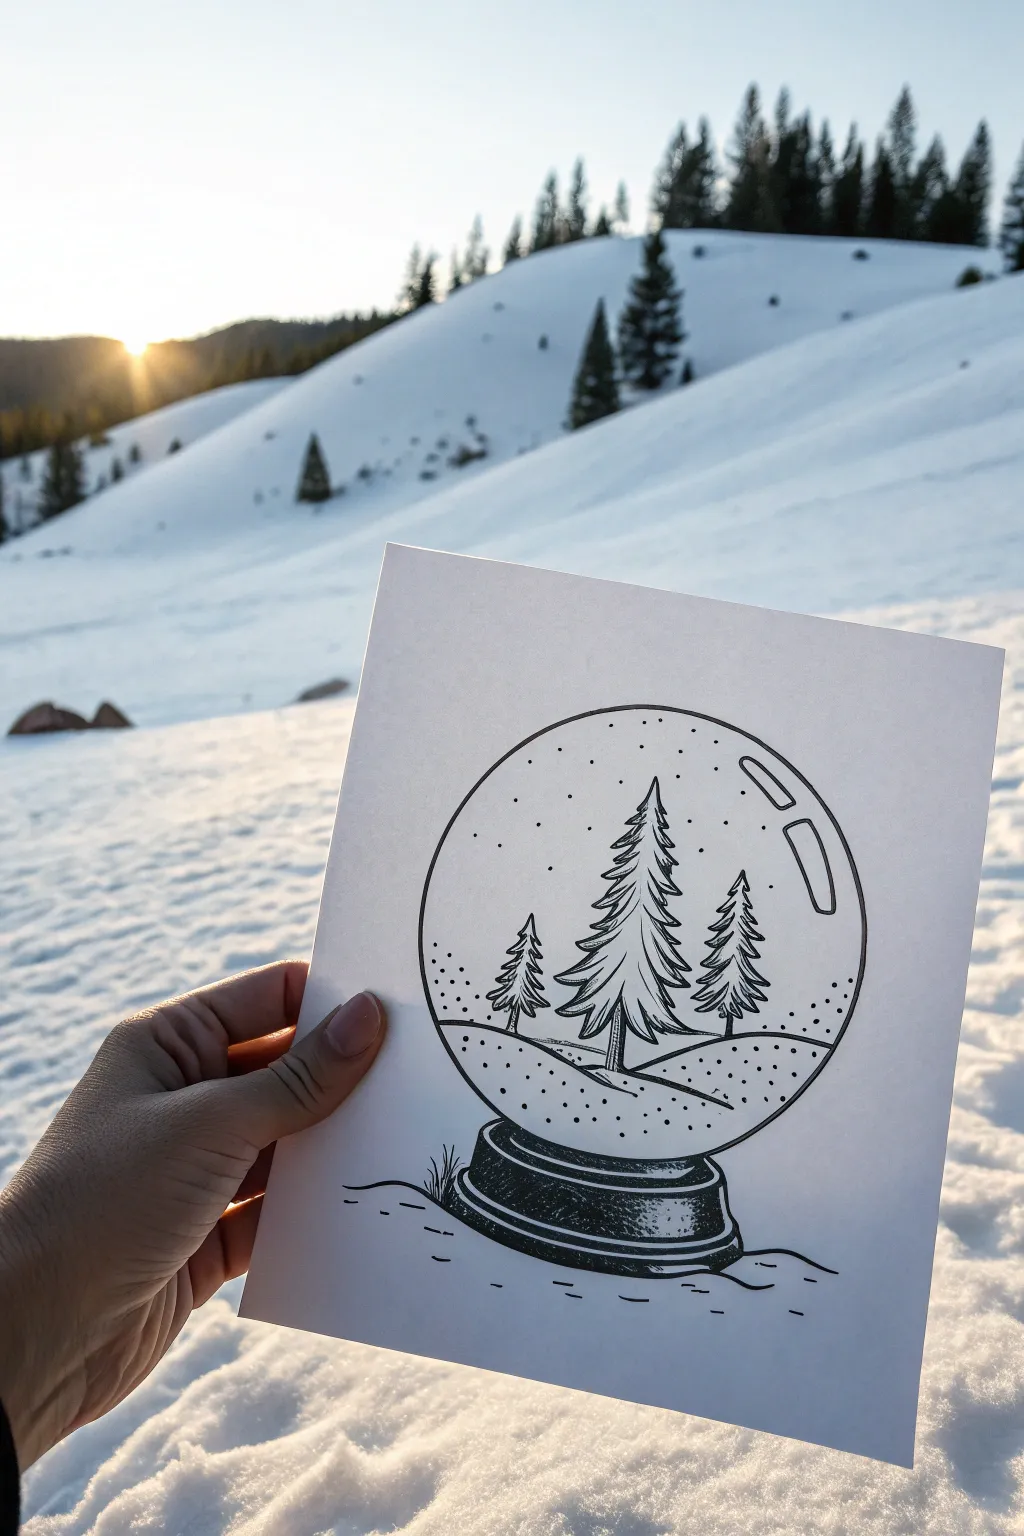
Capture the stillness of a winter forest with this clean, line-art illustration. By using strong outlines and negative space instead of shading, you’ll create a crisp, modern snow globe that feels both cozy and sophisticated.
Step-by-Step Tutorial
Materials
- High-quality white cardstock or mixed media paper
- Compass or circular object (approx. 4-5 inches)
- Pencil (HB or H)
- Eraser (kneaded preferred)
- Fine liner pen (01 or 03 size)
- Thicker graphic marker or pen (05 or 08 size)
- Ruler (optional)
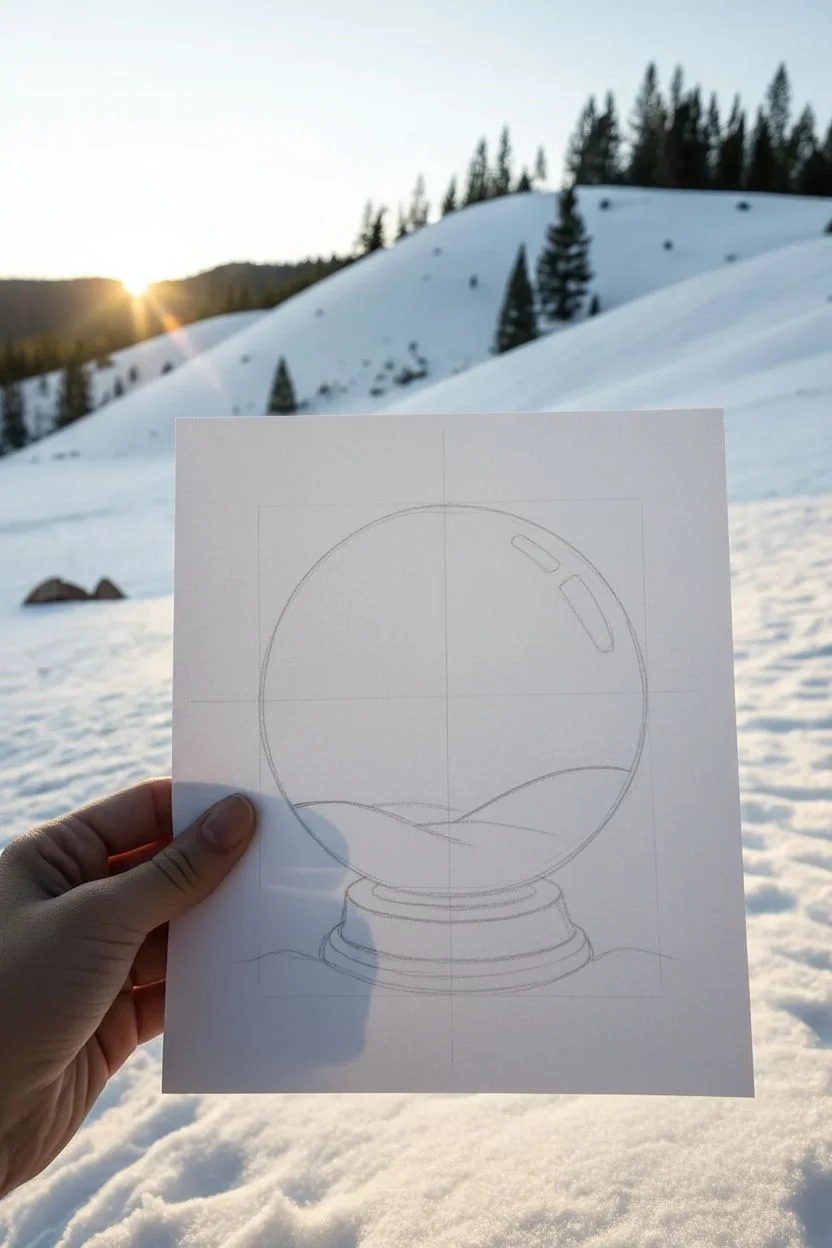
Step 1: Drafting the Globe
-
Establish the circle:
Begin by lightly tracing a perfect circle in the center of your paper using a compass or by tracing around a bowl. Keep your pencil pressure very light so it erases easily later. -
Sketch the base:
Draw a flattened oval shape slightly overlapping the bottom of the circle for the top of the snow globe stand. Below that, add two curved lines creating tiers to form the pedestal base. -
Create the ground line:
Inside the globe, sketch a few gentle, rolling curves across the bottom third of the circle. This creates the snowy hills where your trees will stand.
Ink Smearing?
If your ruler smudges fresh ink, tape a penny to the underside of the ruler. This raises the edge slightly off the paper, preventing drag marks.
Step 2: Sketching the Forest
-
Position the center tree:
Draw a vertical line in the middle of your snowy hill to mark the trunk of the main tree. This will be the largest tree, anchoring the composition. -
Add flanking trees:
Sketch two smaller vertical lines on either side of the main tree, setting them slightly further back on the hill to create depth. -
Flesh out the branches:
Using jagged, downward-sloping zigzag lines, sketch the triangular shape of the pine trees. I like to keep the branches slightly irregular to make them feel organic.
Crisp Circles
Rotate the paper, not your hand, when inking the main circle. This helps maintain a consistent hand position and smoother line curvature.
Step 3: Inking the Outline
-
Ink the globe perimeter:
Switch to your thicker pen (05 or 08). Carefully trace the main circle of the globe, stopping exactly where the base begins. -
Define the base:
Ink the tiered base with the same thick pen. Add a few small, darker hatch marks on the right side of the base rings to suggest a shadow without fully shading it. -
Add the glass reflection:
On the upper right curve of the globe, draw two small, curved rectangular shapes near the edge. These ‘glare’ lines are crucial for making the circle look like glass.
Step 4: Detailing the interior
-
Ink the trees:
Using the finer pen (01 or 03), trace your pine trees. Focus on sharp, pointy tips for the branches and ensure the trunks are solid black near the bottom for stability. -
Draw the snow banks:
Trace the rolling hill lines with the fine pen. Extend these lines slightly past the tree trunks to show the trees require a solid footing. -
Add falling snow:
Dot the sky area inside the globe with the fine pen. Vary the density; cluster a few near the edges and keep the center relatively clear. -
Texture the ground:
Add smaller stippling dots along the bottom curves of the snow hills. This differentiates the ground snow from the falling sky snow.
Step 5: Final Touches
-
Ground the object:
Using the thicker pen, draw a few broken, wavy lines extending horizontally from the base of the stand to show it is sitting on a surface. -
Add tufts of grass:
Draw two or three tiny, spiked grass tufts peeking out from behind the left side of the base to integrate the object with the ground. -
Dry and erase:
Wait at least 5-10 minutes for the ink to cure purely completely. Then, gently erase all pencil guidelines, being careful not to buckle the paper.
Now you have a serene winter scene perfectly preserved in ink
BRUSH GUIDE
The Right Brush for Every Stroke
From clean lines to bold texture — master brush choice, stroke control, and essential techniques.
Explore the Full Guide
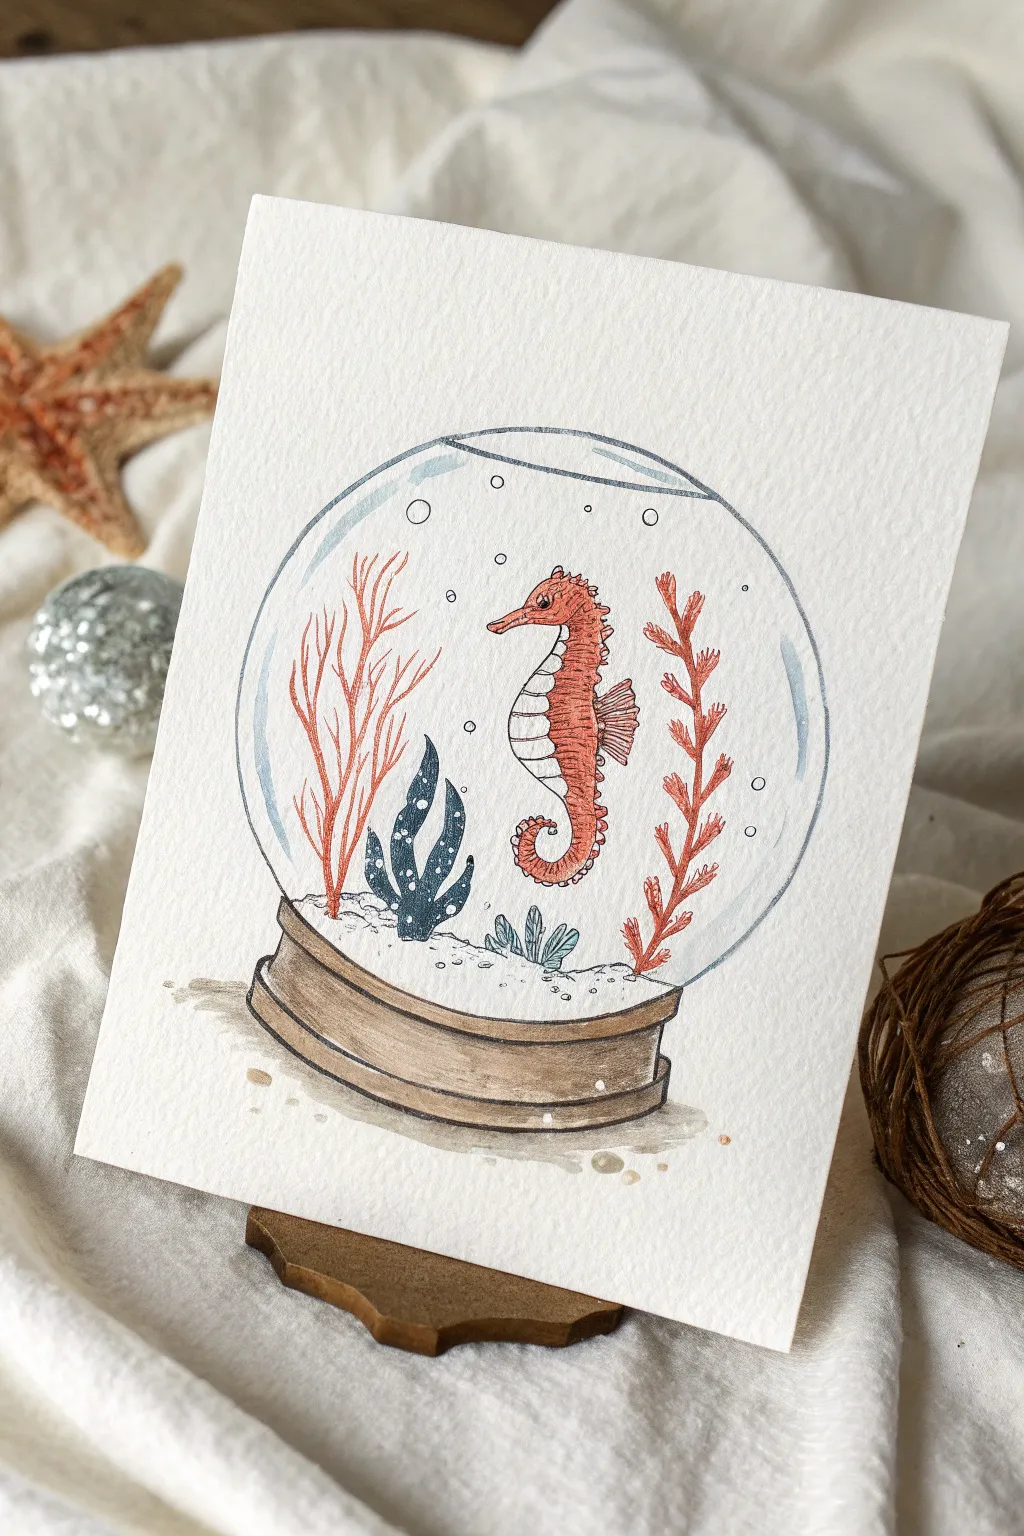
Underwater “Snow” Twist Snow Globe

This whimsical project takes the classic concept of a snow globe and submerges it, featuring a charming rusty-orange seahorse amidst stylized seaweed. The clean lines and gentle watercolor washes give it a lovely illustrative quality, making it perfect for handmade greeting cards or framed art.
Detailed Instructions
Materials
- Cold press watercolor paper (300 gsm)
- Waterproof fine liner pen (0.1 and 0.3 sizes, black or sepia)
- Watercolor paints (Rusty orange, indigo blue, coral red, sepia brown, teal)
- Round watercolor brushes (size 2 and 4)
- White gel pen or gouache
- Pencil and eraser
- Circle template or compas
Step 1: Drafting the Globe Structure
-
Outline the globe:
Begin by lightly sketching a perfect circle using a compass or a round household object as a template. This will form the main glass dome of your snow globe. -
Add the base:
At the bottom of the circle, sketch a slightly curved rectangle for the base. Add a second, thinner curved tier below it to give the stand dimension and weight. -
Create the waterline:
Draw an elliptical shape near the top of the circle to indicate the surface of the water, leaving a small gap between the water line and the top of the glass. -
Sketch the sandy bottom:
Inside the globe, just above the wooden base, draw a gentle, uneven hill to represent the sand bed where your plant life will sit.
Bleeding Lines?
If your black ink bleeds when you paint, stop! Ensure your pen is explicitly labeled ‘waterproof’ or ‘archival.’ If not, do the watercolor first, let it dry fully, then ink over it.
Step 2: Drawing the Inhabitants
-
Position the seahorse:
Lightly sketch the S-curve of the seahorse right in the center. Focus on capturing the curled tail, the protruding belly, and the snout. -
Add seahorse details:
Refine the sketch by adding the small dorsal fin on the back, the ridges along the spine, and a small eye. -
Sketch tall seaweed:
On the left side, draw tall, branching coral-like structures reaching upwards. Repeat this on the right side with a slightly leafier variation to frame the seahorse. -
Add foreground plants:
Draw shorter, thicker seaweed clumps near the center bottom. I like to make these curvy and substantial to contrast with the delicate coral. -
Ink the outlines:
Once satisfied with the pencil sketch, trace over everything with a waterproof fine liner. Use a slightly broken or lighter line for the glass globe to keep it looking transparent. -
Erase guide lines:
Wait until the ink is completely dry to avoid smearing, then gently erase all visible pencil marks.
Step 3: Bringing it to Life with Color
-
Paint the seahorse:
Mix a rusty orange watercolor. Carefully fill in the seahorse, leaving the belly area slightly lighter or white for contrast. -
Color the tall coral:
Use a diluted version of the same rusty orange or a coral red for the tall branching plants on the left and right sides. -
Paint the dark seaweed:
Mix a deep indigo or navy blue. Paint the thick, central seaweed plant, leaving tiny white specks dry if possible to suggest texture or bubbles. -
Paint the small plants:
Use a teal or light blue-green shade for the very small plant clusters at the seahorse’s tail. -
Wash the wooden base:
Mix a sepia or warm brown. Apply a wash to the base, adding a second layer of darker paint to the bottom and right edges to create a 3D shadow effect. -
Suggest glass reflections:
Dilute a tiny drop of blue paint with lots of water. Paint a thin, curved line along the inner left edge of the globe and the top waterline to suggest glass reflection.
Make it Sparkle
For a magical touch, use iridescent medium mixed into your blue glass wash, or apply tiny dots of silver glitter glue to the bubbles after the painting is completely dry.
Step 4: Final Flourishes
-
Add bubbles:
Using a fine liner, draw small floating circles of varying sizes around the seahorse. -
Create the sand texture:
Stipple tiny dots of brown ink along the sandy bottom and slightly underneath the base to ground the object. -
Add highlights:
Use a white gel pen to add small highlights to the seahorse’s eye, the seaweed leaves, and the ‘glass’ reflection lines to make them pop.
Now you have a serene underwater scene captured forever in glass


Have a question or want to share your own experience? I'd love to hear from you in the comments below!