Painting on wood has this cozy, earthy magic—like the surface is already telling part of the story with its grain and knots. If you’ve been craving fresh wood painting ideas that feel doable but still look like you really made something special, you’re in the right place.
Rustic Wildflowers on Wood Slices
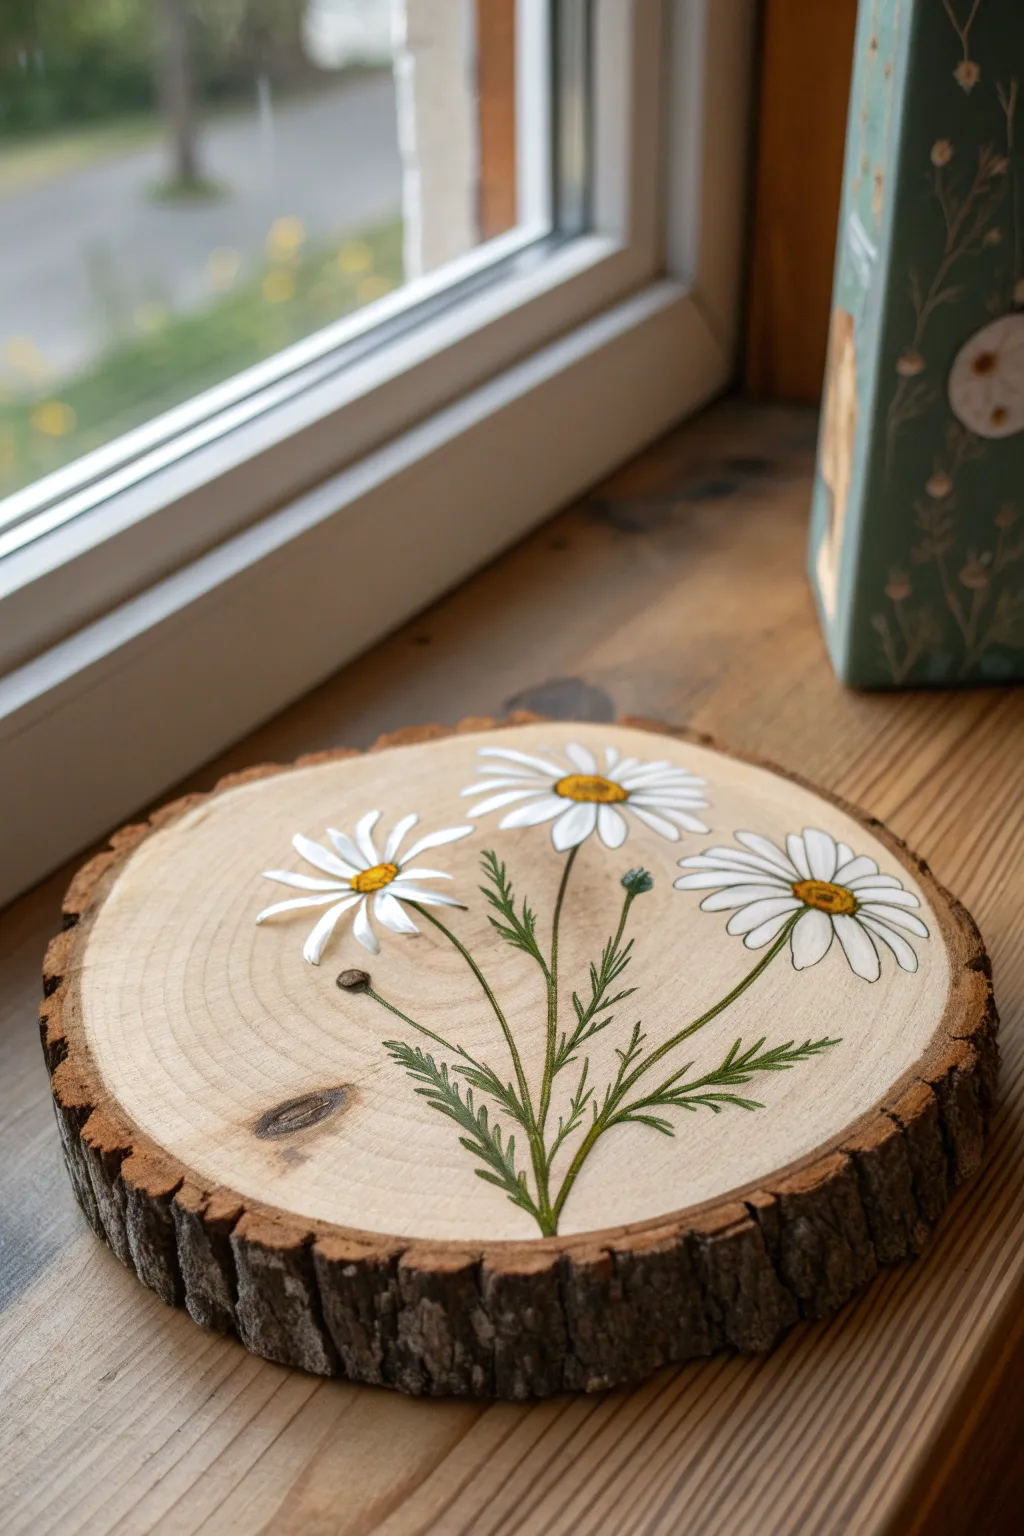
Bring the charm of a meadow indoors with this beautiful rustic art piece, featuring crisp white daisies painted directly onto a natural wood slice. The exposed wood grain serves as a perfect, warm backdrop for the delicate wildflowers, creating an organic decoration that fits any home.
Step-by-Step Guide
Materials
- Large wood slice (approx. 8-10 inches, sanded smooth)
- White acrylic paint (high opacity)
- Yellow ochre or golden yellow acrylic paint
- Sap green or olive green acrylic paint
- Dark brown acrylic paint (for centers)
- Round synthetic brush (size 2 or 4)
- Fine liner brush (size 00 or 0)
- Pencil for sketching
- Matte or satin varnish (spray or brush-on)
- Water cup and paper towels
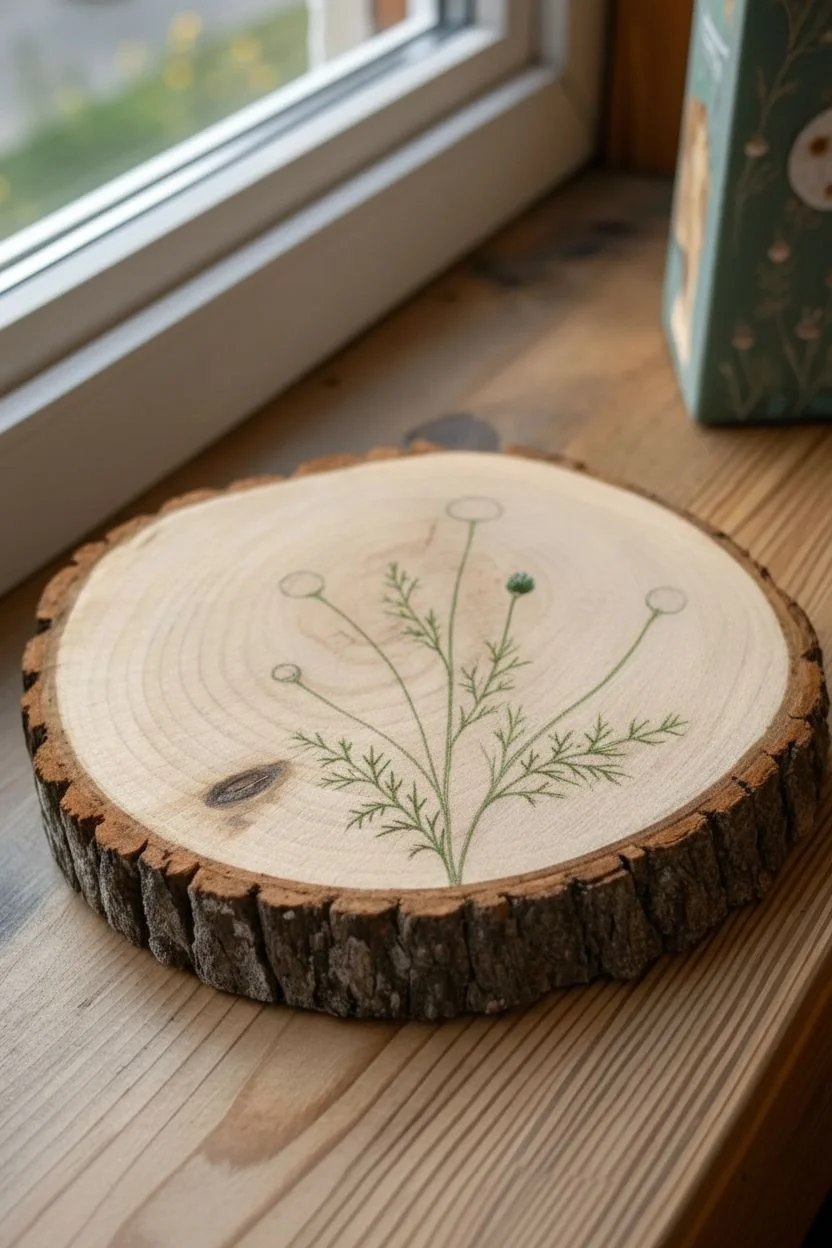
Step 1: Preparation & Sketching
-
Surface Prep:
Ensure your wood slice is clean and dust-free. If the surface feels rough to the touch, give it a quick pass with fine-grit sandpaper to ensure your brushes glide smoothly. -
Planning the Composition:
Visualize the placement of the stems. Imagine them originating from the bottom center, fanning out slightly as they rise. You want a balanced look with the tallest flower slightly off-center. -
Sketching the Stems:
Using a pencil with a light touch, draw three main curving lines for the stems. Add two smaller offshoot lines for unbloomed buds if you wish to match the reference closely. -
Drafting the Blooms:
At the top of each stem line, sketch rough ovals to mark where the flower heads will go. Don’t draw every petal yet; just establish the size and orientation of the flower centers.
Paint Bleeding?
If paint bleeds into the wood grain, apply a clear acrylic medium or matte sealer to the wood *before* painting your design to create a barrier.
Step 2: Painting the Greenery
-
Stem Structure:
Load your liner brush with olive green paint mixed with a tiny drop of water to help it flow. Trace over your pencil stem lines, keeping the stroke thin and delicate. -
Adding Leaves:
Using the same green, paint the leaves. These daisy leaves are jagged and fern-like. Start at the stem and flick outward in short, irregular strokes to mimic that feathery texture. -
Leaf details:
Continue adding these jagged leaves along the lower half of the stems. Vary the lengths of your strokes so the foliage looks natural and wild rather than uniform. -
Painting Buds:
For the unopened buds, paint small green tear-drop shapes at the ends of the shorter stems. You can add a tiny speck of white at the very tip to show petals just starting to peek through.
Add a Bee!
Make the scene livelier by adding a tiny bumblebee hovering near a flower. Use black and yellow dots with translucent white wings.
Step 3: Creating the Blooms
-
Base White Petals:
Switch to your round brush and white paint. Paint the petals radiating outward from the center oval. Press the brush down to create the belly of the petal and lift up as you pull away to create a tapered tip. -
Layering Petals:
Daisies have many petals. Once the first layer is down, add a few more petals in the gaps, perhaps slightly shorter or overlapping, to give the flower volume. -
Refining Shape:
If your white paint is translucent, let the first coat dry completely and apply a second coat. You want the white to pop brightly against the wood grain. -
Flower Centers:
Once the white petals are dry, dip your round brush into the yellow ochre paint. Dab it into the center of the flowers to create a textured, round disk. -
Adding Dimension:
While the yellow is still wet, pick up a tiny amount of dark brown paint on the very tip of your brush. Stipple (tap gently) this darker color onto the bottom edge of the yellow center to create shadow and depth. -
Highlighting Centers:
Clean your brush and pick up a speck of white or pale yellow. Tap a tiny highlight on the top edge of the yellow center to make it look domed and three-dimensional. -
Petal Definition:
To separate the petals visually, you can use a very watered-down grey or brown with your liner brush to add incredibly faint lines between some overlapping petals, though this is optional.
Step 4: Finishing Touches
-
Final Inspection:
Step back and look at your composition. If any stem looks too thin or a leaf section feels empty, add a few more touches of green now. -
Sealing the Artwork:
Allow the painting to dry for at least 24 hours. Apply a spray sealer or brush-on varnish to protect the paint and the wood from moisture and dust.
Place your finished wood slice on a shelf or attach a hanger to the back to display your floral masterpiece on the wall


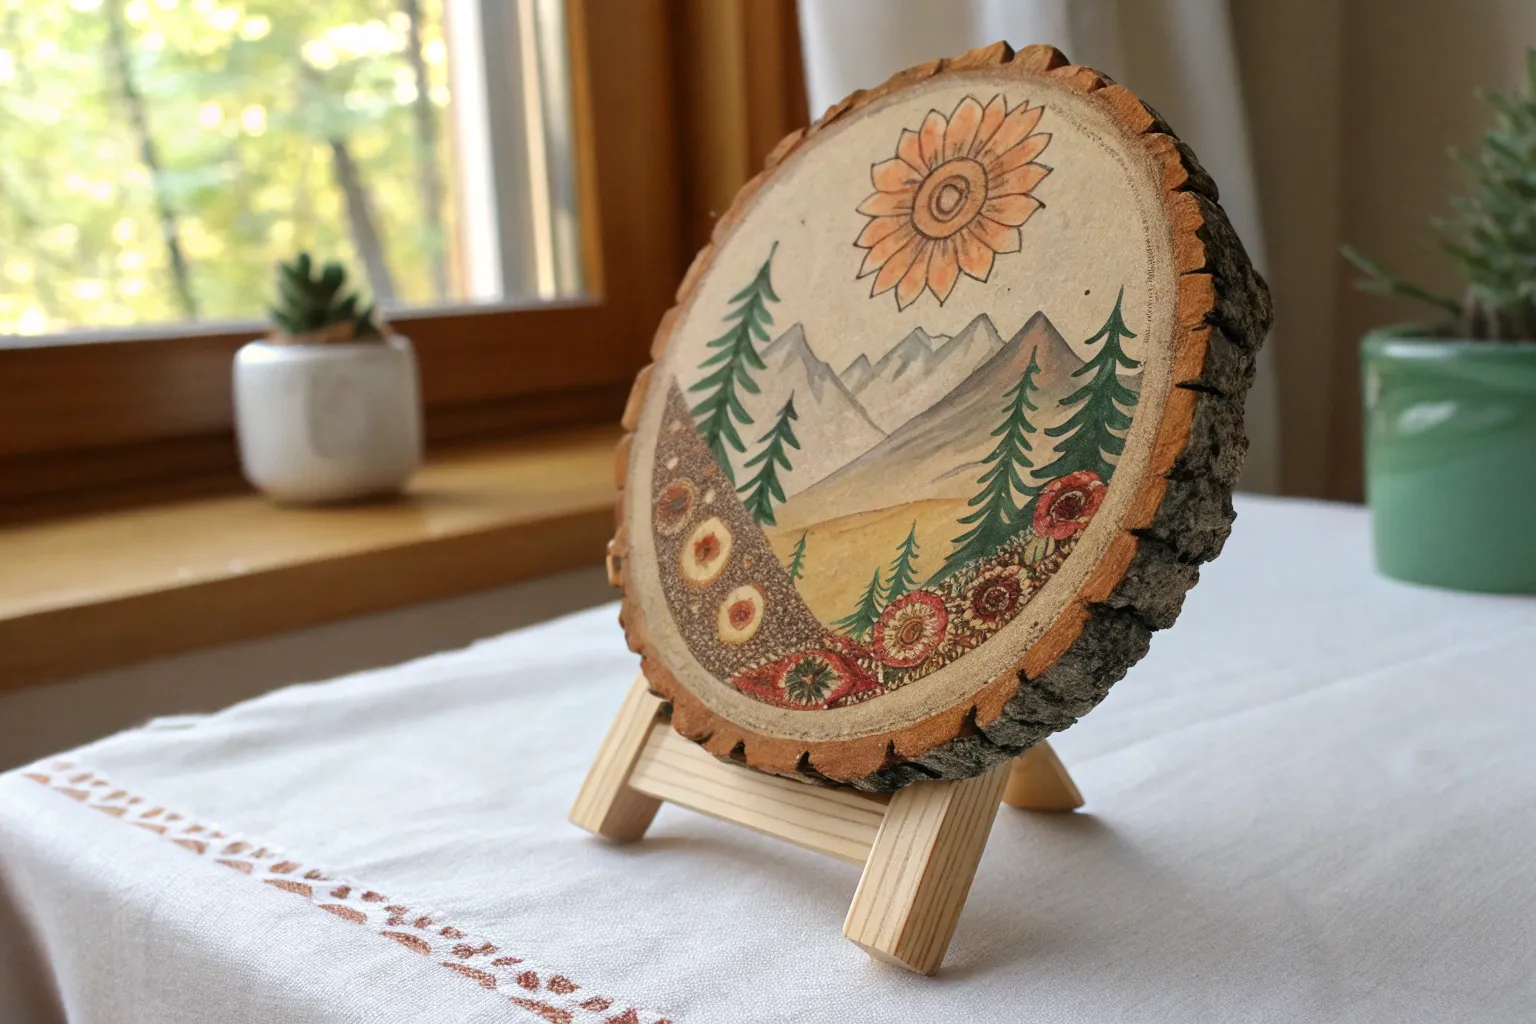
Sunset Gradient With Pine Tree Silhouettes
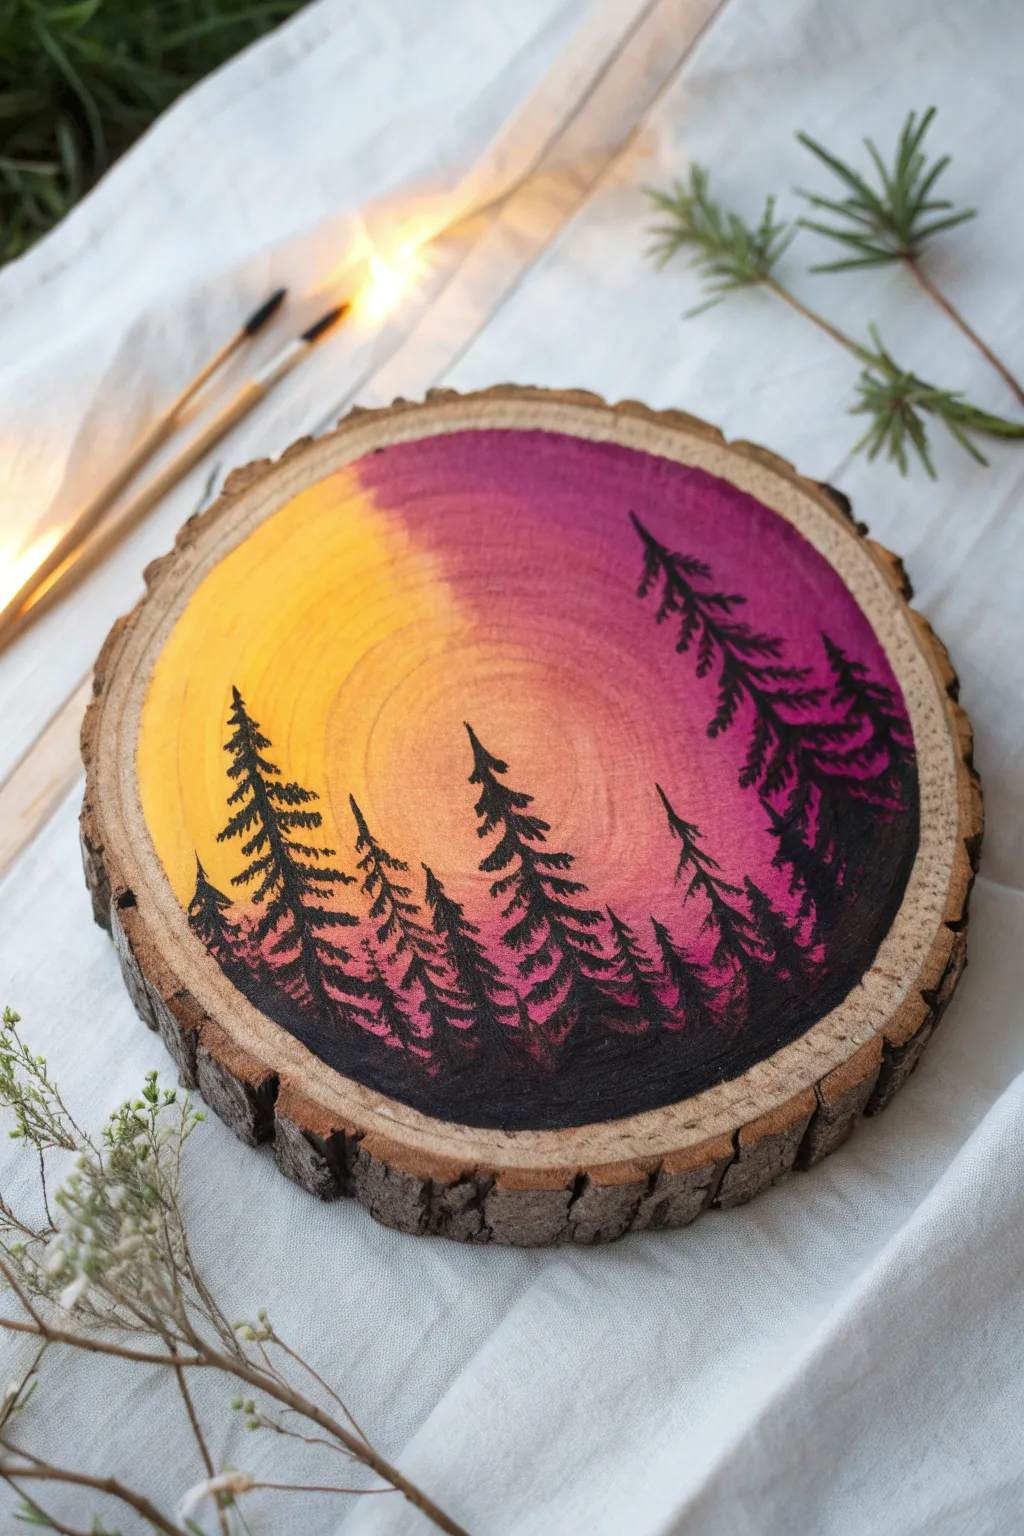
Capture the magic of twilight with this vibrant wood slice painting, featuring a seamless gradient skyline. The warmth of the raw wood grain peeking through the sunset colors creates a stunning, rustic piece perfect for cabin decor.
Step-by-Step
Materials
- Clean wood slice (approx. 6-8 inches diameter)
- Sandpaper (fine grit)
- Acrylic paints (primary yellow, bright orange, magenta, deep purple, black)
- Wide flat brush or sponge brush
- Small flat brush
- Fine liner brush (size 0 or 00)
- Pencil
- Palette used for blending
- Cup of water and paper towels
- Clear matte or satin varnish (optional spray or brush-on)
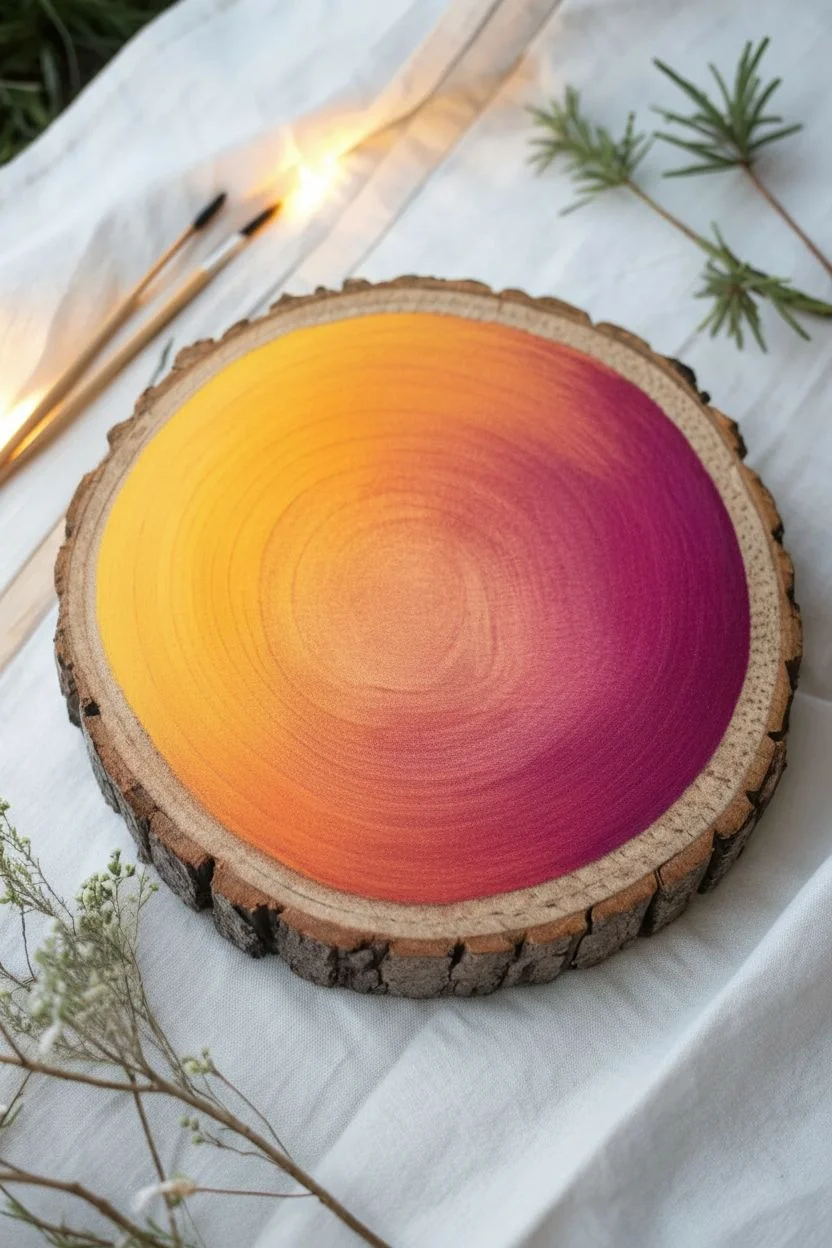
Step 1: Preparation & Base Gradient
-
Prep the surface:
Before painting, ensure your wood slice is smooth. Sand the surface lightly with fine-grit sandpaper to remove any rough fibers that might catch your brush, then wipe away the dust with a dry cloth. -
Plan the color zones:
Visualize the gradient diagonally across the wood. The top-left region will be bright yellow, transitioning through the center to orange, and ending in deep purple on the right side. -
Apply the yellow:
Load a wide flat brush with primary yellow. Paint a curved section on the upper left side, letting the paint be slightly translucent so the wood grain shows through. -
Blend in orange:
While the yellow is still wet, introduce bright orange to the center of the slice. Overlap the orange and yellow slightly, using back-and-forth strokes to create a soft, seamless transition. -
Add the purple tones:
On the far right and bottom curve, apply magenta. Where it meets the orange, blend them carefully to avoid making a muddy brown; clean your brush if needed between blending strokes. -
Deepen the edge:
Mix a small amount of deep purple into the magenta at the very outer right edge to create contrast. Smooth out any hard lines across the entire sky and let this layer dry completely.
Color Blending Trouble?
If acrylics dry too fast to blend, mist the wood slightly with water or use a ‘slow drying medium’ mixed into your paints to keep them workable longer.
Step 2: Painting the Silhouette
-
Sketch the horizon:
Very lightly sketch a low, uneven horizon line with a pencil. Mark the vertical positions for your tallest trees to ensure balanced placement. -
Paint the ground:
Using black acrylic paint and a small flat brush, fill in the ground area at the bottom. Make the top edge of this ground irregular to simulate uneven forest terrain. -
Start the main tree trunks:
With a fine liner brush and thinned black paint, draw thin vertical lines for the tree trunks. Vary their heights, placing the tallest ones on the right side to frame the composition. -
Form the tree tops:
Starting at the very tip of a trunk, create tiny dabbing motions with just the tip of your liner brush to make the pointed apex of the pine tree. -
Build the upper branches:
Work your way down the trunk using a zig-zag motion. Keep the branches narrow at the top and gradually widen your strokes as you descend. -
Create texture:
I find it helpful to wiggle the brush slightly as I pull outward to mimic rough pine needles rather than straight lines. -
Fill the lower canopy:
As you reach the bottom third of the tree, make the branches dense and heavy. Connect them solidly to the black ground layer you painted earlier. -
Add varying sizes:
Paint smaller, shorter trees in between the large ones to create depth. These should look like they are further in the distance. -
Refine the edges:
Check the silhouette against the sunset background. Use your liner brush to add tiny stray branches sticking out for a realistic, organic look. -
Seal the artwork:
Once the black paint is fully dry (give it at least an hour), apply a coat of clear matte varnish to protect the wood and make the colors pop.
Add a Starry Night
Once the sky is dry but before painting the trees, flick a toothbrush with thinned white paint over the darker purple sections to create a starry sky effect.
Display your rustic masterpiece on a shelf or attach a hanger to bring the outdoors inside


Mountain Landscape Framed by the Wood Rings
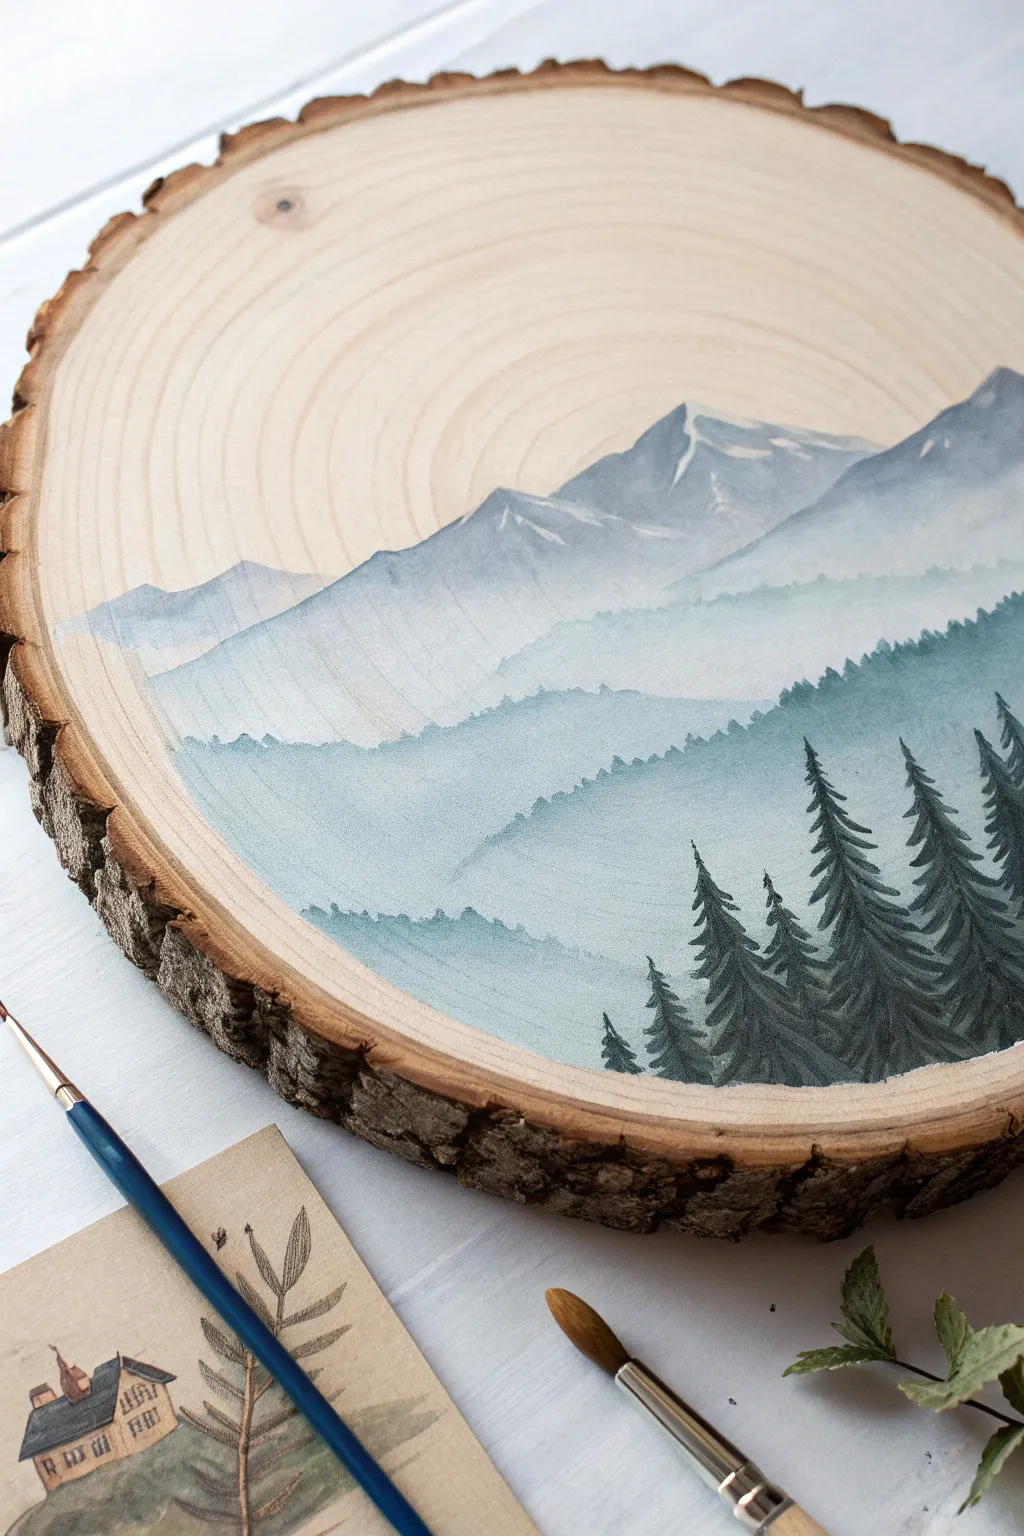
Capture the serene beauty of a foggy mountain range by using the natural grain of a wood slice as your canvas. This project uses translucent layers of paint to create atmospheric depth, letting the wood’s rings evoke a swirling, expansive sky above the peaks.
How-To Guide
Materials
- Large wood slice (approx. 8-10 inches, sanded smooth)
- Acrylic paints (primary blue, black, white, burnt umber)
- Gesso or clear matte medium (optional)
- Flat shader brush (size 6 or 8)
- Round detail brush (size 0 or 1)
- Water container
- Palette or mixing plate
- Paper towels
Step 1: Preparation and Planning
-
Smoothen the Surface:
Ensure your wood slice is perfectly smooth. If there are any rough patches, lightly sand them with fine-grit sandpaper and wipe away the dust with a barely damp cloth. -
Seal the Wood (Optional):
Wood is thirsty and will soak up paint quickly. If you want more control, apply a thin layer of clear matte medium or watered-down gesso to the area where you’ll be painting. Let this dry completely. -
Map the Horizon:
Visualize where your mountains will sit. Aim to paint only the bottom half or two-thirds of the slice, leaving the beautiful upper wood grain exposed to serve as the sky.
Water Control
Wood bleeds easily. Keep your paint creamy, not watery. If you want a wash effect, dampen the wood first with clean water, then drop inside that area.
Step 2: Painting the Distant Range
-
Mix the Background Grey:
Create a very pale, bluish-grey color. Mix a tiny dot of blue and black into a generous amount of white. The goal is a colour that is almost transparent when applied. -
Paint the Furthest Peaks:
Using your flat brush, paint the outline of the highest, furthest mountain range. Keep the edges interesting and jagged. Fill it in lightly, adding water to your brush to feather the bottom edge out into nothingness. -
Add Snowcaps:
While the grey is mostly dry but still tacky, use pure white paint on the sun-facing slopes of these peaks to suggest snow. Dry brush this on gently for a textured look. -
Create Atmospheric Haze:
Mix a slightly darker shade of blue-grey. Paint a second ridge of mountains below the first one, ensuring the top edge overlaps the bottom of the previous layer. This creates the illusion of distance.
Step 3: Building the Middle Ground
-
Deepen the Color:
For the next layer down, add a little more blue and a touch of green to your grey mix. You want this layer to stand out against the paler background mountains. -
Paint Rolling Hills:
Paint a rolling hill shape rather than a jagged peak. Along the top edge of this hill, use the tip of your brush to dab tiny, uneven vertical lines, suggesting a distant forest line. -
Fade the Bottom:
Just like the first layer, user water to fade the bottom of this hill section into the raw wood or the layer below it, creating a misty effect. -
Layering Downward:
Repeat this process one more time with an even darker, cooler blue-green mix. This layer should be lower on the wood slice and appear closer to the viewer.
Level Up: 3D Texture
Mix a little baking soda or modeling paste into your white paint for the snowcaps. This adds physical texture to the peaks that catches the light.
Step 4: The Foreground Forest
-
Mix the Darkest Tone:
Prepare your darkest color for the foreground trees. Mix blue, black, and a touch of brown to create a deep, rich forest green (almost black). -
Establish Tree Trunks:
Switch to your small round detail brush. On the bottom right (or left) side of the composition, paint several thin vertical lines to serve as the trunks for your foreground pines. -
Paint the Branches:
Starting from the top of a trunk, paint downward-sloping branches. Use short, quick strokes that get wider as you move down the tree. I like to keep these somewhat loose to mimic natural growth. -
Fill the Canopy:
Continue adding branches until the trees look full but distinct. Vary the heights of the trees to create a natural-looking cluster. -
Ground the Composition:
Use the dark green mix to fill in the very bottom edge of the wood slice beneath the trees, ensuring there is no floating foliage.
Now you can display your slice on a stand or add a hook to bring a piece of the high altitude wilderness into your home


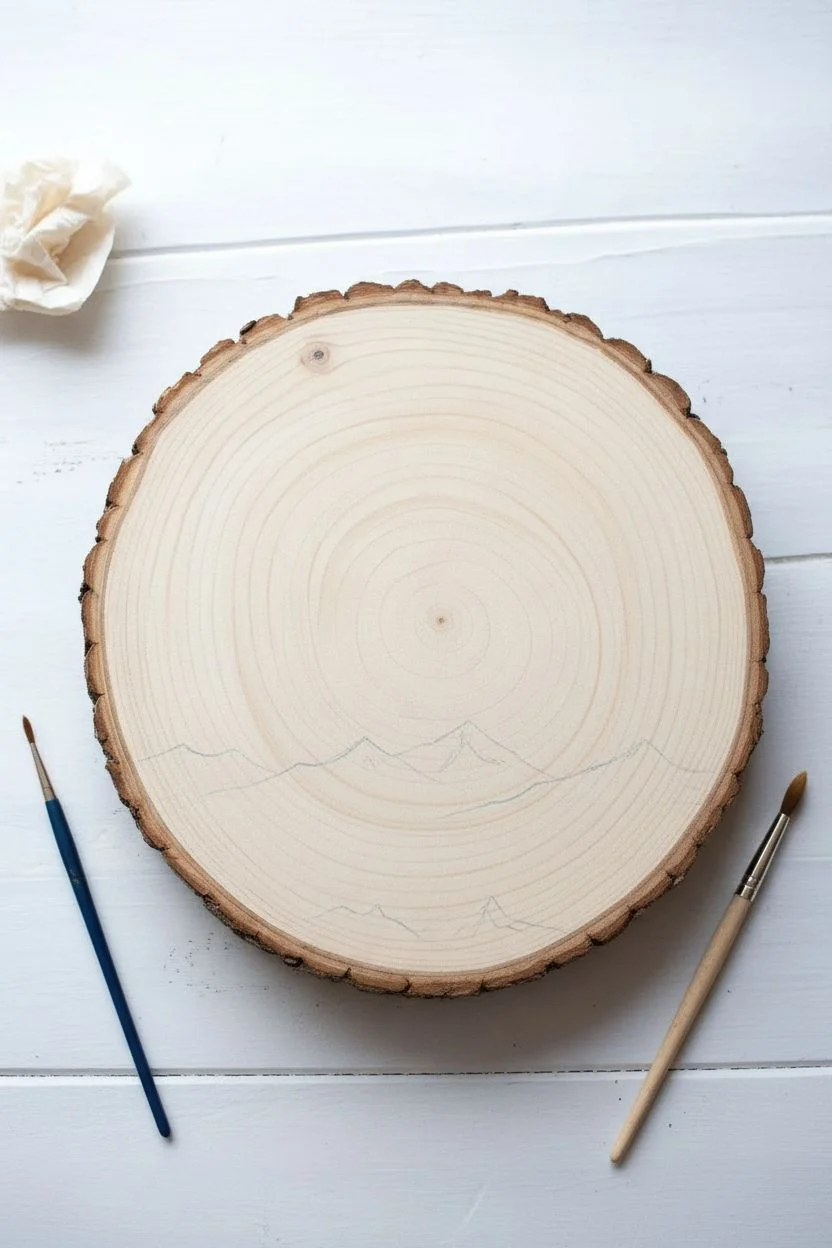
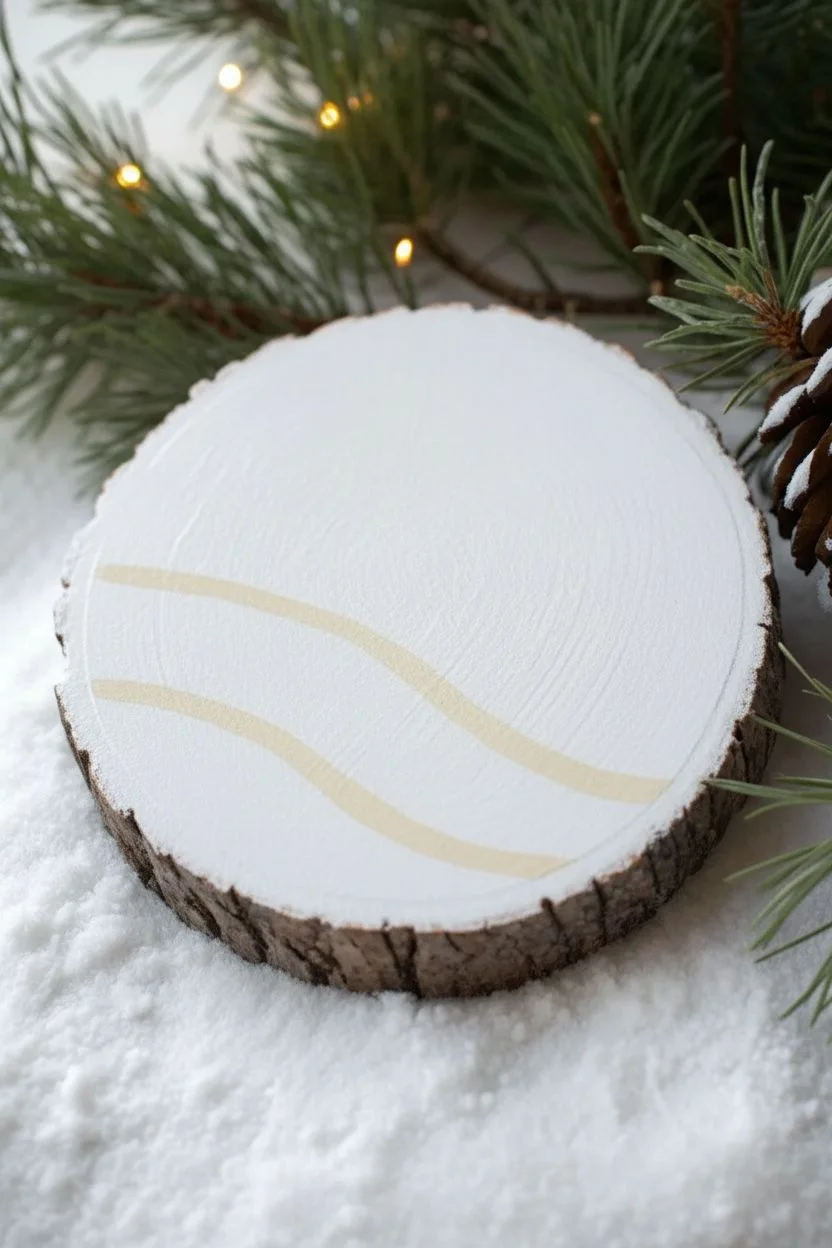
Simple Coastal Waves on a Wood Round
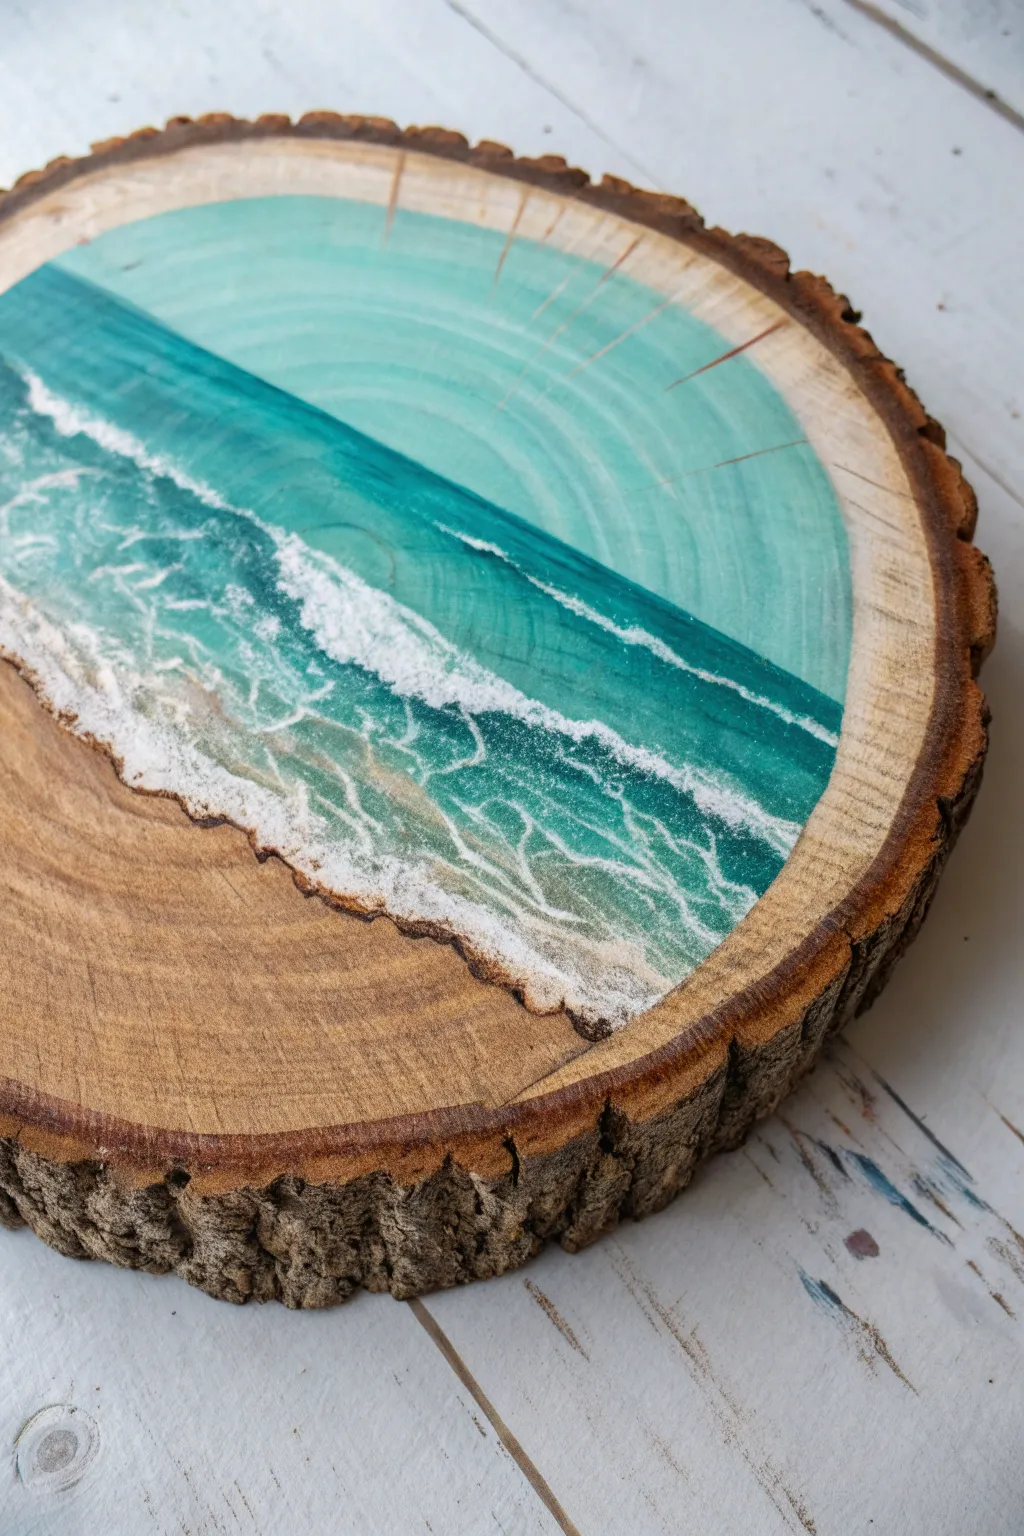
Capture the serenity of the shoreline on a natural canvas with this beautiful wood slice project. Using simple acrylic blending techniques, you’ll transform a raw piece of timber into a stunning piece of coastal decor that highlights the wood’s natural grain.
Detailed Instructions
Materials
- Large wood slice (with bark edge)
- Acrylic paints (Titanium White, Turquoise, Phthalo Blue, Teal, Beige/Sand)
- Flat shader brushes (medium and large)
- Small round detail brush or liner brush
- Palette or paper plate
- Cup of water and paper towels
- Clear matte or satin varnish (optional for sealing)
- Fine-grit sandpaper (optional)
- Masking tape or painter’s tape
Step 1: Preparation & Planning
-
Prepare the surface:
Inspect your wood slice for any rough patches on the face. If necessary, lightly sand the surface with fine-grit sandpaper to ensure your brush glides smoothly, then wipe away all dust with a damp cloth or tack cloth. -
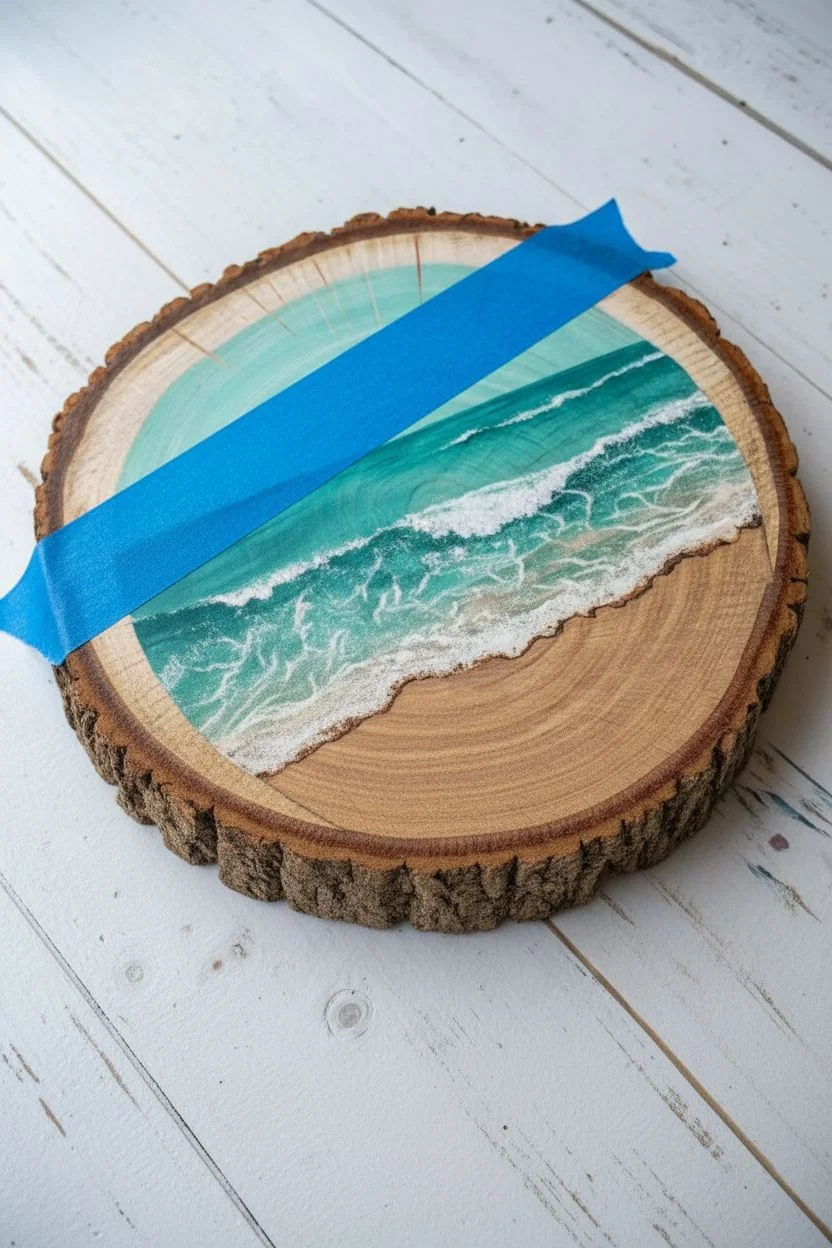
Mark the horizon:
Decide how much of the wood you want to leave exposed as ‘sand.’ Place a strip of masking tape across the wood slice to create a clean horizon line if you want a sharp sky separation, or simply visualize a diagonal line where the water meets the shore. -
Define the shoreline:
Using a pencil very lightly, sketch a wavy, organic line across the bottom third of the slice. This will be the water’s edge. Everything below this line will remain unpainted to represent the wet sand.
Foam Trouble?
If your sea foam looks too solid or heavy, wait for it to dry, then dry-brush a tiny amount of the underlying turquoise color over it to break it up and push it back.
Step 2: Painting the Ocean Gradient
-
Mix the deep ocean color:
On your palette, mix Phthalo Blue with a touch of Teal to create a deep, rich ocean color. This will be the darkest part of your water, furthest from the shore. -
Apply the dark water:
Using a large flat brush, paint a band across the middle of your water section. I like to keep my brush strokes horizontal to mimic the natural movement of water. -
Create the shallow water tone:
Without cleaning your brush thoroughly, dip into the Turquoise and a tiny bit of White. This creates the lighter, tropical color of shallow water. -
Blend the transition:
Apply this lighter turquoise below the dark blue band. While the paint is still wet, gently brush back and forth over the meeting point of the two colors to create a soft, seamless gradient. -
Fade to shore:
Mix a very watery wash of Beige or White. Apply this right at the pencil line where the water meets the wood. Feather it upwards into the turquoise to make the water look transparent as it gets shallower.
Step 3: Adding the Waves
-
Mix the foam color:
Prepare a pile of Titanium White paint. You want this to be slightly fluid but opaque, so add a drop of water if your paint is heavy body. -
Paint the main crash:
Use a medium flat brush to dab a thick, irregular line of white paint right where the dark blue meets the turquoise. This represents a breaking wave further out. -
Create the shoreline foam:
Load your brush with white and stipple (dab repeatedly) along the bottom edge where the paint meets the raw wood. Make this line irregular and bumpy to look like sea foam. -
Detail the sea lace:
Switch to your smallest liner brush. Drag irregular, wiggly lines back from the shoreline foam into the turquoise water. These shapes should look like a honeycomb or web pattern. -
Softening the foam:
If the white lines look too stark, use a clean, slightly damp brush to gently smudge the edges of the foam, making it look misty and wet. -
Highlight the crests:
Add a second layer of pure, thick white on top of the ‘crashing’ wave sections for added dimension and brightness. This makes the water look active and churning.
Add Sparkle
Mix a tiny pinch of fine iridescent glitter into your final varnish coat or sprinkle it on wet white paint to give the water a sun-kissed shimmer.
Step 4: Final Touches
-
Review contrast:
Step back and look at your painting. If the ocean looks flat, add a thin glaze of dark blue under the white wave crests to create a shadow, lifting the wave off the surface visually. -
Clean the edges:
If any paint accidentally got onto the bark rim, use a damp cloth or a craft knife to carefully remove it before it cures completely. -
Seal the artwork:
Once the paint is fully dry (wait at least 24 hours), apply a coat of clear varnish over the painted area. Painting only the water makes it look glossy and wet, contrasting beautifully with the matte raw wood.
Now you have a permanent slice of summer to display on your shelf or wall
BRUSH GUIDE
The Right Brush for Every Stroke
From clean lines to bold texture — master brush choice, stroke control, and essential techniques.
Explore the Full Guide
Cute Woodland Animal Portraits on Wood Slices
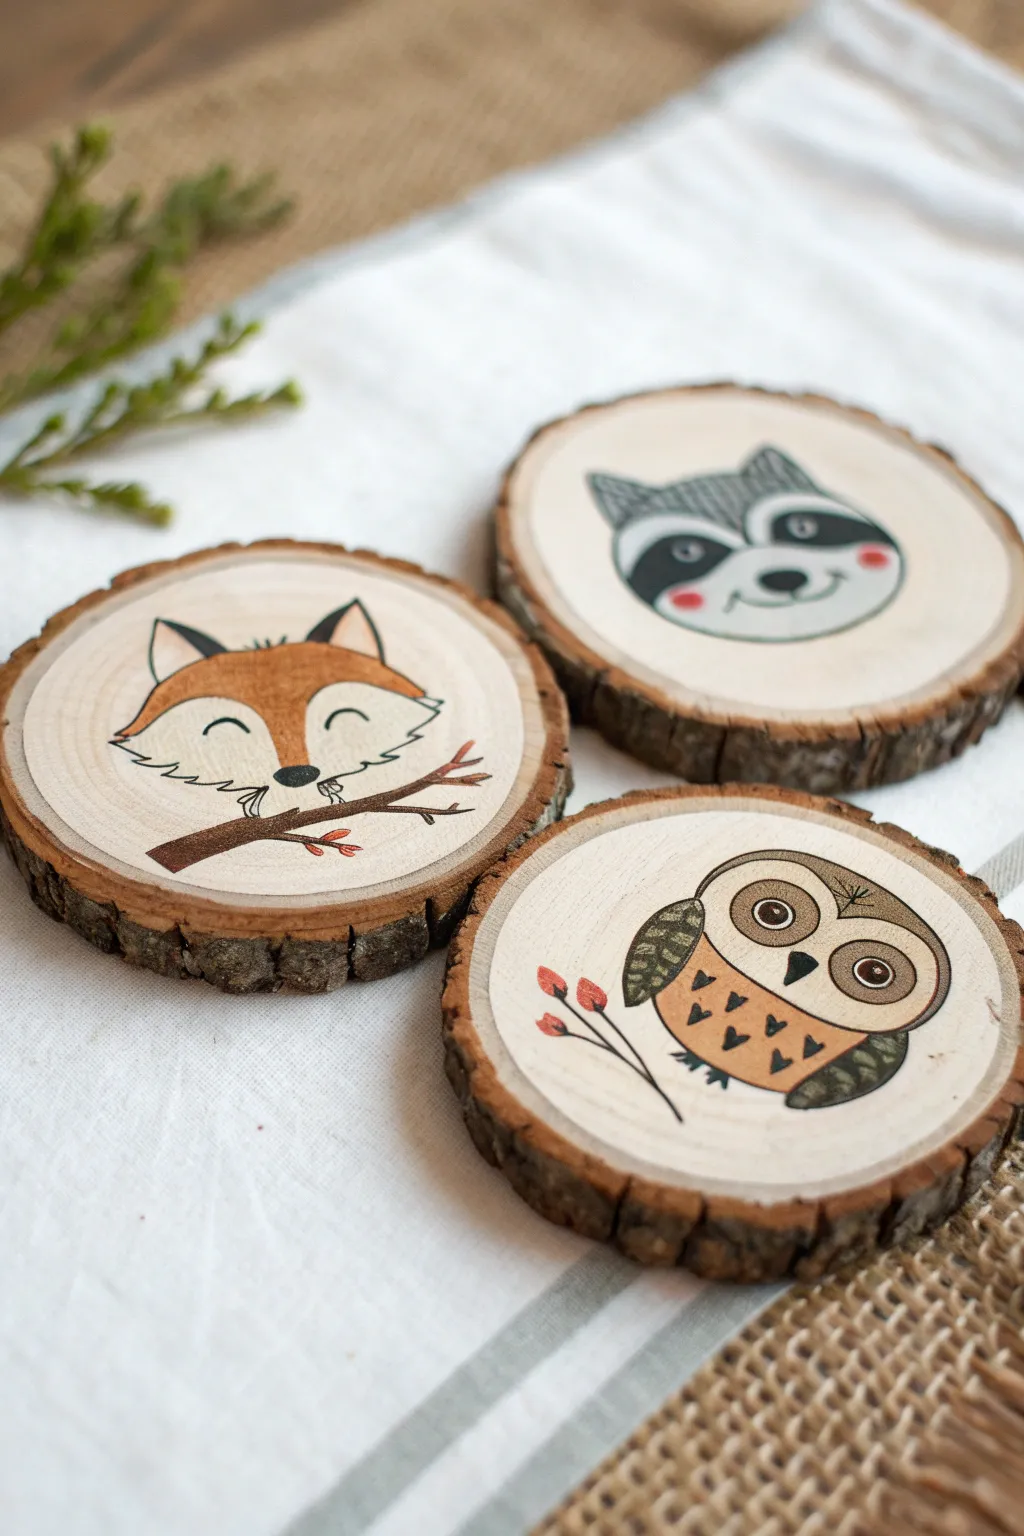
Bring the charm of the forest into your home with these adorable hand-painted wood slice portraits. Featuring a sleepy fox, a cheeky raccoon, and a wise little owl, this project combines rustic textures with clean, illustrative lines for a delightful finish.
How-To Guide
Materials
- 3 Birch or Pine wood slices (approx. 3-4 inches diameter), sanded smooth
- Acrylic craft paints: Burnt Orange, Forest Green, Warm Grey, Dark Brown, Cream/Off-White, Black
- Fine-point black paint pen or permanent marker (0.5mm or smaller)
- Small round detail brush (size 0 or 1)
- Medium flat brush (size 4 or 6)
- Graphite transfer paper (optional)
- Pencil
- Matte clear varnish or sealant spray
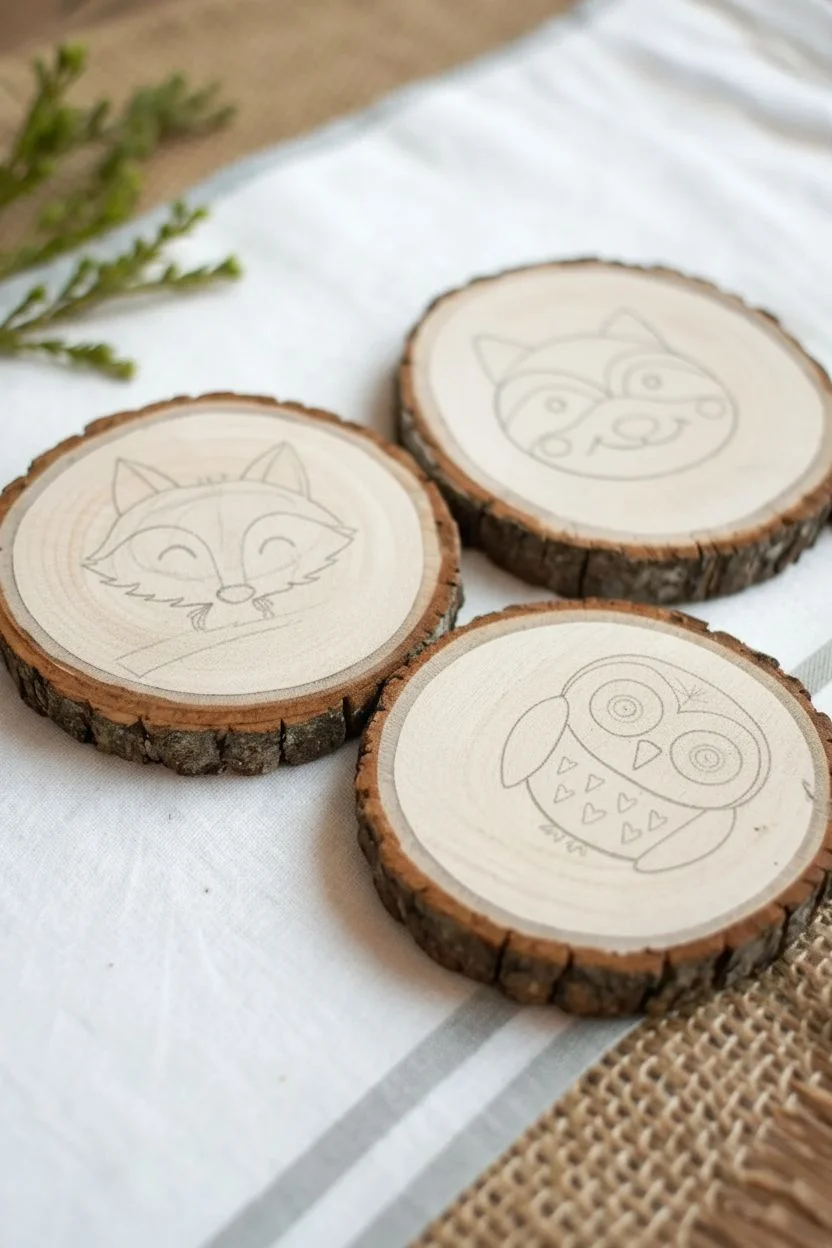
Step 1: Preparation & Sketching
-
Surface Check:
Inspect your wood slices to ensure the surface is flat and smooth. If there are any rough splinters in the center, give them a quick pass with fine-grit sandpaper and wipe away the dust. -
Sketch the Fox:
Using a light pencil hand, draw the fox’s head shape in the center of the first slice. Focus on the triangular ears and the pointy snout, adding a curved branch underneath where the chin rests. -
Sketch the Raccoon:
On the second slice, sketch a rounded head with two distinct triangular patches around the eyes. Add the small rounded ears and a simple curved smile. -
Sketch the Owl:
For the third slice, draw a large oval body. Inside, sketch two large circles for eyes and a curved line to separate the wings from the patterned chest. -
Refine Details:
Go back and lightly mark where the color changes will happen—like the white cheeks on the fox or the heart patterns on the owl’s chest—so you have a guide for painting.
Step 2: Blocking in Color
-
Fox Base Coat:
Load your brush with Burnt Orange. Carefully fill in the upper head and ears of the fox, leaving the snout and inner ears bare for the lighter color. -
Raccoon Grey Tones:
Mix a tiny dot of black into your white paint to create a soft grey. Paint the main head shape of the raccoon, avoiding the ‘mask’ area around the eyes. -
Bowl & Branch Details:
Using a dark brown, fill in the branch under the fox and the branch sprig next to the owl. I find a liner brush helps keep these thin lines crisp. -
Owl Body:
Paint the owl’s wings with a mix of Forest Green and a touch of brown for an olive tone. Use a warm beige or light brown for the chest area. -
White Highlights:
Using Cream or Off-White, fill in the fox’s snout, the raccoon’s muzzle, and the owl’s face surrounding the eyes. Apply two thin coats if the wood grain shows through too much. -
Raccoon Mask:
Paint the dark mask around the raccoon’s eyes using a dark grey or charcoal color (not pure black yet).
Prime the Surface
If your wood is very porous, paint a layer of clear matte medium or watered-down white glue on the slice first. This stops the paint from bleeding into the wood grain.
Step 3: Line Work & Finishing Touches
-
Let it Dry:
Allow the base colors to dry completely. If the paint is wet, your paint pen will snag and bleed. -
Define the Outlines:
Take your fine-point black paint pen and trace the outer edges of each animal. Keep your hand steady and use confident strokes rather than sketchy lines. -
Facial Features:
Draw the closed eyes on the fox for a sleeping look. For the raccoon and owl, draw open circles for eyes, adding small white dots later for a ‘sparkle’ effect. -
Adding Textures:
Using the pen or a very fine brush, add small decorative details: little ‘v’ shapes on the owl’s chest for feathers, and whiskers on the fox and raccoon. -
Rosy Cheeks:
Dilute a tiny drop of red or pink paint with water to make a glaze. Dab this lightly onto the cheeks of the raccoon for a cute blush effect. -
Botanical Accents:
Paint the small berries on the owl’s branch red and add tiny brown leaves to the fox’s branch. -
Seal the Wood:
Once the ink and paint are fully cured (wait at least an hour), spray the slices with a matte clear varnish to protect the artwork and keep the bark edge intact.
Fixing Wobbly Lines
If your paint pen line goes astray, don’t panic. Let it dry completely, paint over the mistake with the background color (or white), and redraw the line once dry.
Display these charming critters on your coffee table or add a magnet to the back for rustic fridge decor
Bee and Honeycomb Mini Painting on Wood
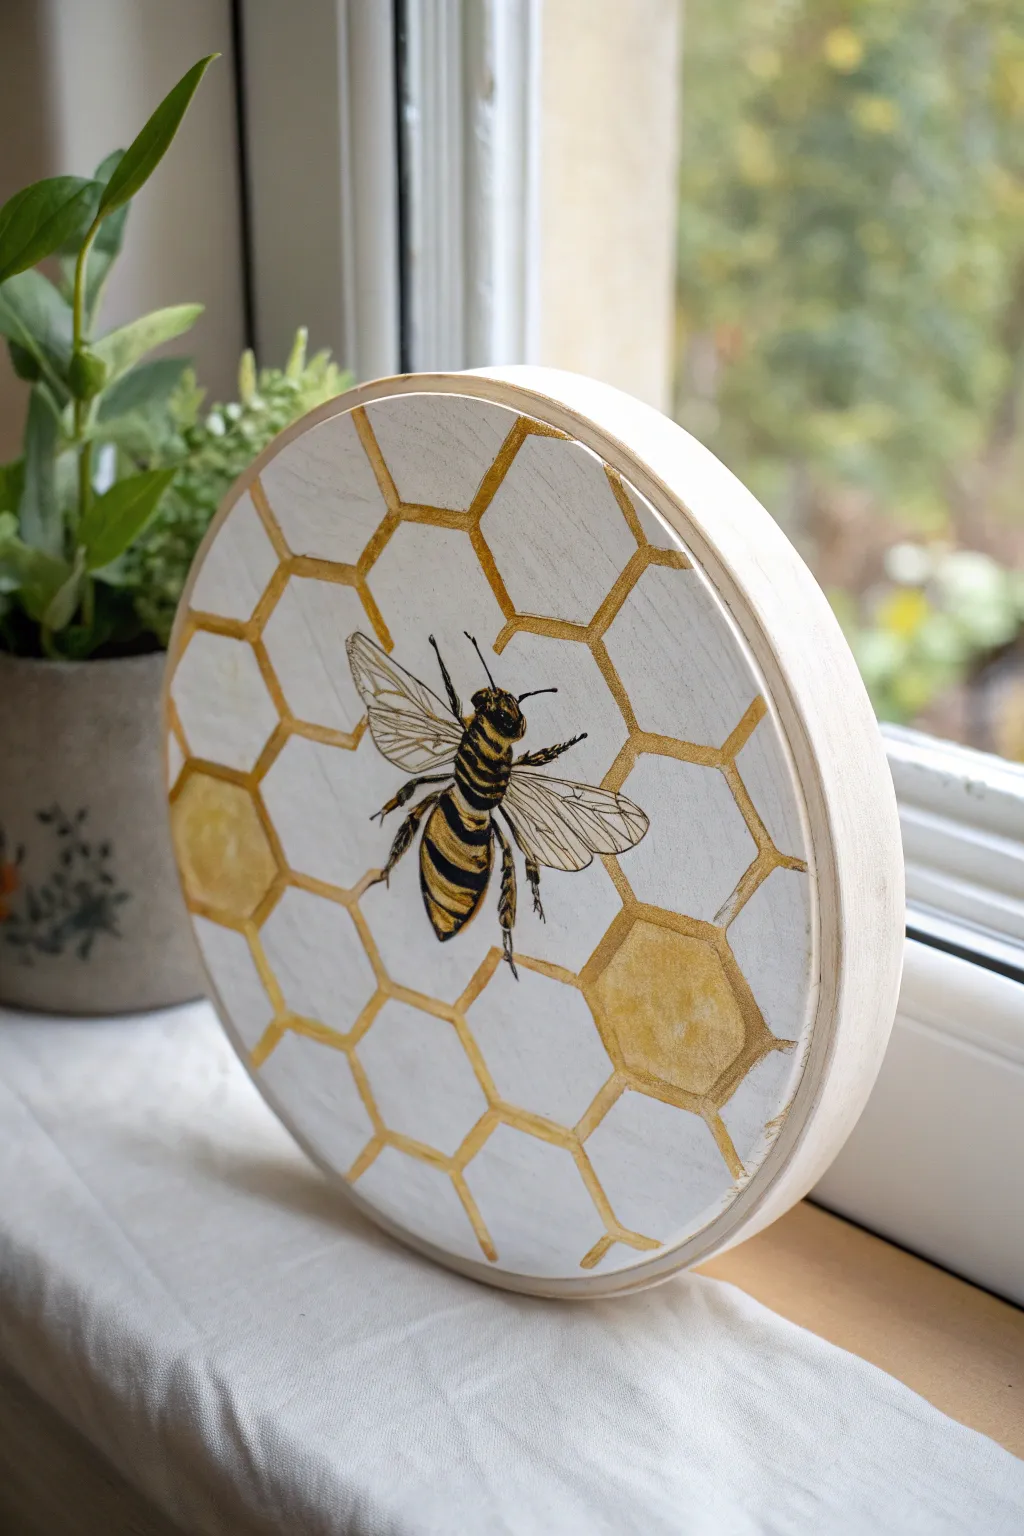

Bring nature indoors with this elegant wood painting project featuring a realistic bee resting on a geometric honeycomb. The contrast between the stark white background, metallic gold lines, and the detailed insect illustration creates a stunning, modern piece of decor.
Step-by-Step
Materials
- Round wooden panel or canvas (approx. 6-8 inches diameter)
- White acrylic paint (matte finish)
- Metallic gold acrylic paint
- Pencil
- Ruler or straight edge
- Fine liner brushes (size 0 and 00)
- Small flat brush
- Fine-tip permanent black marker or micron pen
- Yellow ochre acrylic paint
- Burnt umber acrylic paint
- Tracing paper (optional)
- Clear matte varnish
Step 1: Preparing the Base
-
Prime the wood:
Begin by applying a generous coat of white matte acrylic paint to the entire front surface and sides of your wooden round. Use a flat brush for even coverage. -
Sand and recoat:
Once the first layer is completely dry, lightly sand it if any wood grain has raised. Apply a second coat of white paint to ensure a solid, opaque background. -
Draft the honeycomb:
Using a pencil and ruler, lightly sketch a hexagon grid pattern across the surface. Start from the center and work your way out to ensure symmetry, or trace a printed hexagon pattern if you prefer precision.
Wobbly Lines?
If your gold lines feel unsteady, use a ruler as a guide for your brush, but keep the ruler slightly elevated off the surface to prevent smearing paint.
Step 2: Painting the Gold Structure
-
Line work:
Dip a fine liner brush into your metallic gold paint. Carefully trace over your pencil lines to create the honeycomb structure. -
Create variation:
Don’t worry about making the lines perfectly uniform; slight variations in thickness add an organic, hand-painted charm. Let the gold lines dry fully before proceeding. -
Add depth:
Select a few random hexagons to fill in partially. Mix a tiny drop of yellow ochre with your gold paint to create a slightly warmer tone, and wash this color into two or three random cells to simulate full honeycombs.
Step 3: Creating the Bee
-
Sketch the outline:
In the center of the panel, lightly sketch the outline of a honeybee with a pencil. Focus on the three main body segments: head, thorax, and abdomen. -
Block in color:
Using a small round brush, block in the yellow stripes on the bee’s abdomen using a mix of yellow ochre and a touch of gold for shimmer. -
Add dark tones:
Fill in the black stripes and the thorax using black paint or a very dark burnt umber mix. I find using a very dark brown looks softer and more natural than pure black. -
Detail the wings:
For the wings, use a very watery wash of white or light grey paint to suggest transparency. They should be barely visible against the white background. -
Refine with ink:
Once the paint is 100% dry, use a fine-tip black marker or micron pen to draw the intricate veins in the wings, the legs, and the fuzzy texture on the bee’s body. -
Add highlights:
Use your smallest brush (size 00) with pure white paint to add tiny highlights to the bee’s eyes and the top of the thorax to make it look three-dimensional.
Make It 3D
Add a small drop of crystal clear resin or 3D glossy accents over the bee’s main body to give it a realistic, raised shine that catches the light.
Step 4: Finishing Touches
-
Clean up:
Check the white background for any accidental smudges. Touch these up with your white acrylic paint. -
Seal the work:
Apply a coat of clear matte varnish over the entire piece to protect the paint and detailed ink work from fading or scratching.
Now you have a buzz-worthy piece of art ready to brighten up any windowsill or shelf

PENCIL GUIDE
Understanding Pencil Grades from H to B
From first sketch to finished drawing — learn pencil grades, line control, and shading techniques.
Explore the Full Guide
Mushroom Cluster With Mossy Details
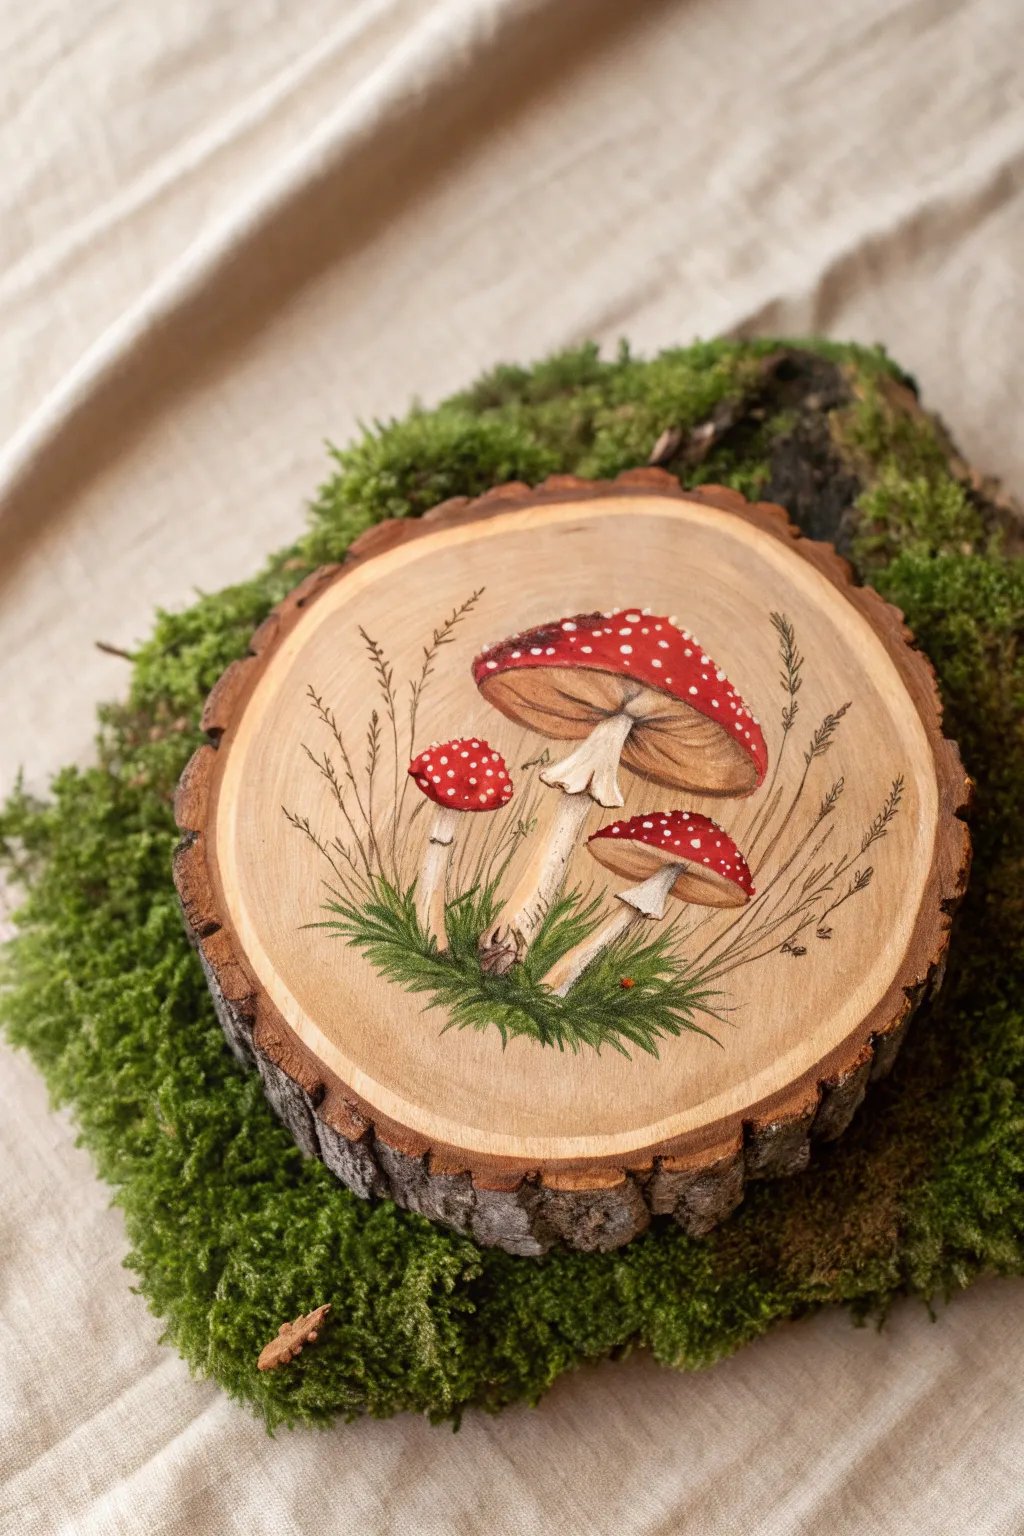
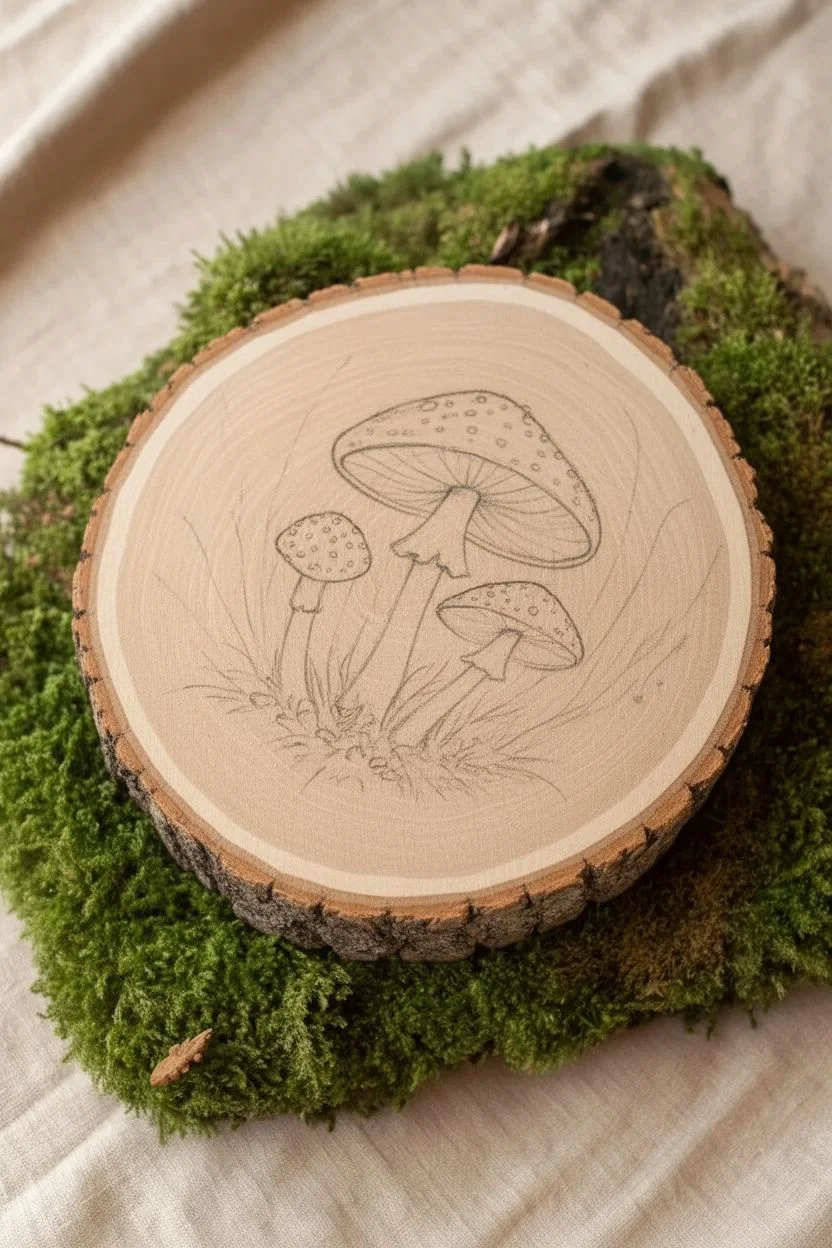
The warm, natural grain of a wood slice provides the perfect rustic backdrop for this charming cluster of red-capped mushrooms. This project combines acrylic painting with fine line work to create a delicate, illustrative piece that celebrates the beauty of fungi.
How-To Guide
Materials
- Wood slice with bark edge (approx. 5-7 inches diameter)
- Sandpaper (220 grit) and tack cloth
- Gesso or matte medium (clear)
- Acrylic paints: Cadmium Red, Titanium White, Burnt Umber, Yellow Ochre, Sap Green, Hookers Green, Raw Sienna
- Round brushes (sizes 2 and 4)
- Fine liner brush (size 0 or 00)
- Pencil (HB) and eraser
- Palette and water cup
- Matte spray varnish
Step 1: Preparation & Sketching
-
Prepare the surface:
Gently sand the face of your wood slice to create a smooth painting surface, being careful not to chip the bark edge. Wipe away all dust with a tack cloth. -
Prime the wood:
Apply a thin layer of clear gesso or matte medium. This seals the wood pores so your paint doesn’t soak in too quickly, but it keeps that beautiful natural grain visible. -
Sketch the composition:
Using a light hand, sketch your three mushrooms in the center. Place the largest one at the top right, a medium one below it, and the smallest one to the left. Just outline the caps and stems for now. -
Add foliage guides:
Lightly draw curved lines extending outward from the base of the stems to indicate where the tall grass and moss will eventually go.
Bleeding Wood Grain?
If the wood grain raises or paint bleeds, your sealant layer was too thin. Let it dry, sand lightly again, and apply a second coat of clear matte medium before continuing.
Step 2: Base Colors
-
Paint the caps:
Mix Cadmium Red with a tiny touch of Burnt Umber to deepen it slightly. Fill in the caps of all three mushrooms. You may need two thin coats for solid coverage. -
Paint the stems:
Mix Titanium White with a drop of Yellow Ochre and Raw Sienna to create a creamy off-white. Paint the stems and the gills (the underside of the caps). Don’t worry about detailing the gills yet; just get the base color down. -
Establish the mossy base:
Mix Sap Green and Hookers Green. Using a slightly scruffy round brush, stipple paint at the very bottom where the stems meet the wood to create a mossy texture.
Step 3: Detaling & Dimensions
-
Shade the caps:
Mix a darker red using more Burnt Umber. Paint this along the bottom edge of the red caps and slightly underneath the rim to create a 3D rounded effect. Blend it upwards while the paint is still slightly wet. -
Highlight the caps:
Add a tiny bit of Yellow Ochre to your red mix and carefully paint the very top center of the caps where the light would hit, blending edges softly. -
Define the gills:
Using your fine liner brush and a watered-down Raw Sienna or light brown, paint very fine, straight lines radiating from the stem to the edge of the cap underside on the large mushroom. -
Detail the stems:
Add shadows to the stems using a dilute brown mix. Focus on the area right under the cap skirt and along one side of the stem to suggest cylindrical volume. -
Create the spots:
Dip the tip of a small round brush or a dotting tool into pure Titanium White. Dot the red caps randomly. I like to vary the size of the dots—make some tiny and others slightly larger—to keep it looking organic.
Go 3D
Glue small bits of real dried moss (preserved reindeer moss works best) at the base of your painted mushrooms for a mixed-media texture that pops off the wood.
Step 4: Finishing Touches
-
Paint fine grass blades:
Switch to your finest liner brush. Mix a murky green-brown using Sap Green and Burnt Umber. With quick, confident flicks of your wrist, paint thin grass blades shooting up from the mossy base. -
Add grassy details:
Add tiny branching details to the tops of some grass blades to mimic seed heads. Keep these lines extremely delicate, almost like pen strokes. -
Highlight the moss:
Mix a light, yellow-green shade. Dab this lightly over the dark green base tufts you painted earlier to give the moss depth and volume. -
Final refinements:
Step back and assess your work. If the white spots look too stark, you can wash over them with a very watery yellow glaze to age them slightly. -
Seal the artwork:
Once fully dry (usually 24 hours to be safe), take the wood slice outdoors and apply a matte spray varnish to protect the paint without adding unwanted shine.
Display your new forest friend on a small easel or attach a hook to the back for a woodland wall accent
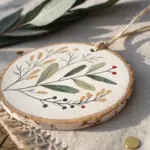
Botanical Wreath Ornament With Twine Hanger
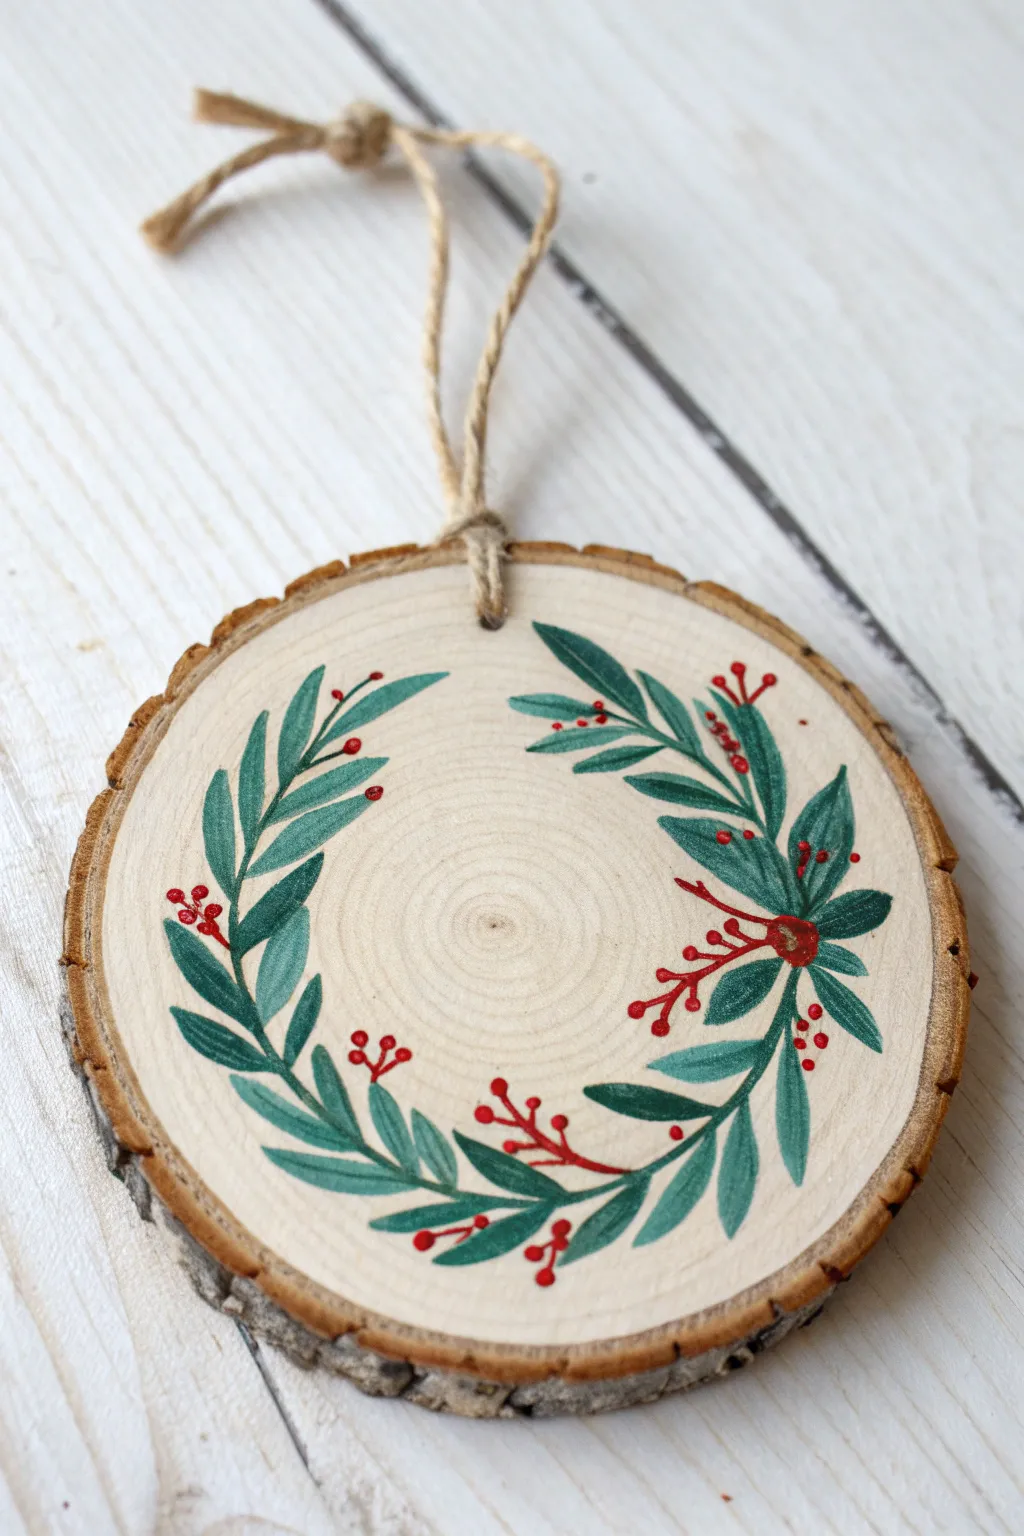
Capture the stillness of winter with this charming hand-painted wood slice ornament featuring a delicate botanical wreath. The combination of natural wood grain and vibrant acrylics creates a timeless holiday decoration perfect for gifting or hanging on your own tree.
Step-by-Step Tutorial
Materials
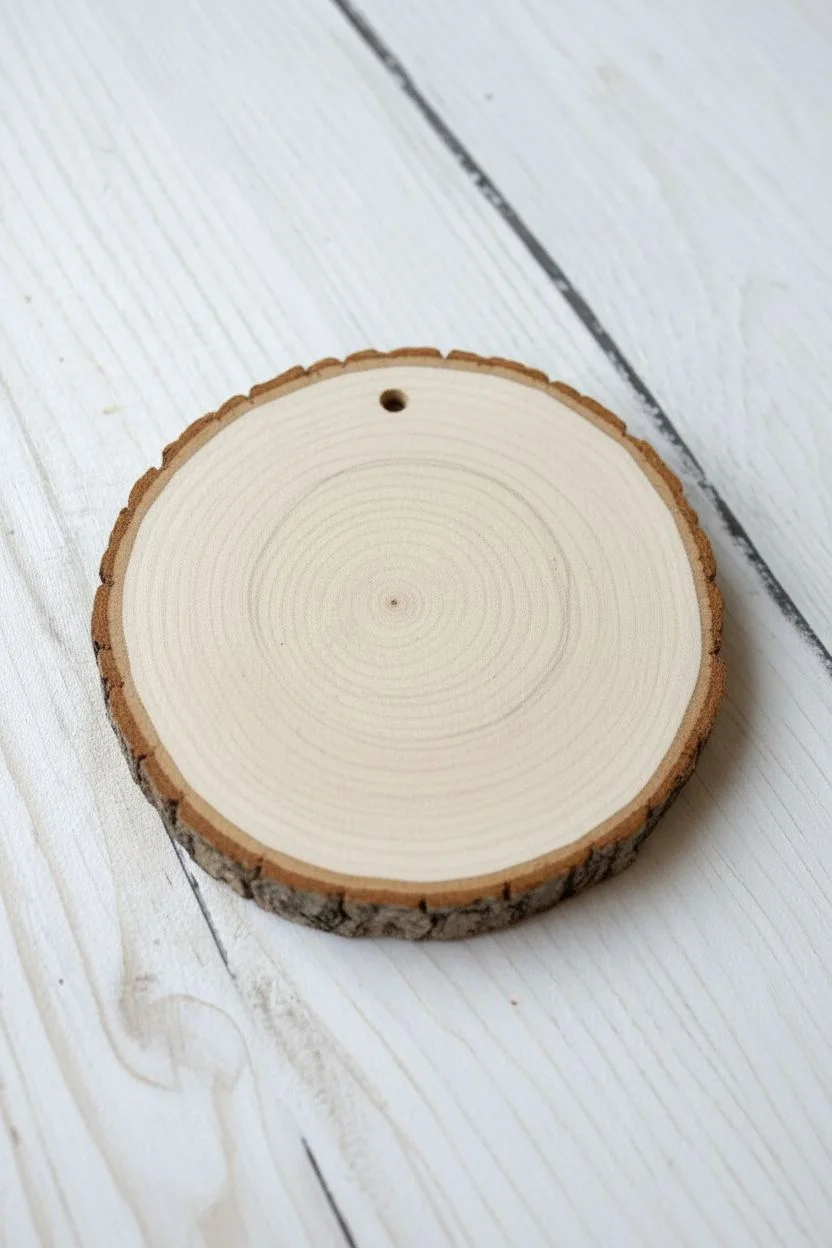
- Small wood slice approx. 3-4 inches diameter (pre-drilled or drill yourself)
- Acrylic paints: Hunters Green, Sage Green, Bright Red
- Fine detail paintbrushes (liner brush and small round brush)
- Jute twine
- Palette or paper plate
- Cup of water and paper towels
- Pencil (optional)
- Sandpaper (fine grit)
Step 1: Preparing the Canvas
-
Surface Smoothing:
Begin by lightly sanding the face of your wood slice. You want a very smooth surface so your fine brushstrokes don’t snag on the grain. Wipe away any sawdust with a dry cloth. -
Drilling the Hole:
If your wood slice isn’t pre-drilled, carefully drill a small hole near the top edge, leaving enough wood margin so it doesn’t split. Center it based on the shape of the bark. -
Planning the Design:
Visualize a circle in the center of the wood slice. You can lightly sketch a guide circle with a pencil if you need help keeping the wreath shape consistent, but keeping it freehand adds rustic charm.
Uneven Wood Texture?
If the wood slice is too rough and drinks up the paint, apply a coat of clear gesso or matte medium first to seal the pores before painting your design.
Step 2: Painting the Greenery
-
Starting the Left Branch:
Load your small round brush with the darker Hunter Green. Start at the bottom center and paint a curved line sweeping upwards to the left. This will be your main stem. -
Adding Dark Leaves:
Using the tip of the brush, press and lift to create almond-shaped leaves along the left stem. Keep them angled upwards and slightly alternating. -
Painting the Right Branch:
Reload with Hunter Green and paint a second sweeping curve starting from the bottom, mirroring the first but reaching up the right side. Add your dark green leaves to this side as well. -
Layering Lighter Green:
Mix a small amount of Sage Green or lighter green. Paint a few additional leaves overlapping or next to the dark ones. This adds depth and makes the wreath look lush. -
Adding the Secondary Branch:
Create a smaller, third branch section sweeping downwards or connecting the two main sides at the bottom center to close the loop slightly, ensuring the wreath looks continuous.
Step 3: Adding Berry Details
-
Mixing the Red:
Clean your brush thoroughly or switch to a very fine liner brush. Load it with Bright Red paint. The consistency should be fluid but not watery. -
Painting Fine Twigs:
Paint very thin, delicate lines branching out from the main green stems. These little red sprigs will hold the berries. -
Dotting the Berries:
Using the very tip of your brush or a dotting tool, place small red dots at the ends of your red twig lines. Vary the sizes slightly for a natural look. I usually group them in clusters of two or three. -
The Center Accent:
Identify a focal point on the right side of the wreath where the branches might overlap. Paint a small cluster of red berries there to anchor the design visually. -
Drying Time:
Allow the paint to dry completely. Acrylics on wood dry fast, but give it at least 20 minutes to ensure you don’t smudge the fine details.
Add Winter Snow
For a frosty look, dilute a tiny bit of white paint and lightly splatter it over the dry wreath using an old toothbrush to mimic falling snow.
Step 4: Finishing Touches
-
Sealing (Optional):
To protect your artwork for years to come, apply a thin coat of clear matte or satin varnish over the painted face. Let this cure fully. -
Preparing the Hanger:
Cut a piece of jute twine about 8-10 inches long. Fold it in half to create a loop at one end. -
Threading the Twine:
Push the folded loop end through the hole in the wood slice from front to back. -
Securing the Knot:
Thread the loose tails of the twine through the loop you just pushed through the hole (a cow hitch knot) and pull tight. -
Tying the Top:
Bring the two loose ends together at the top and tie a simple overhand knot to close the hanger loop.
Hang your new rustic masterpiece on a tree branch where the lights can illuminate the delicate details


Cozy Winter Scene on a Wood Slice
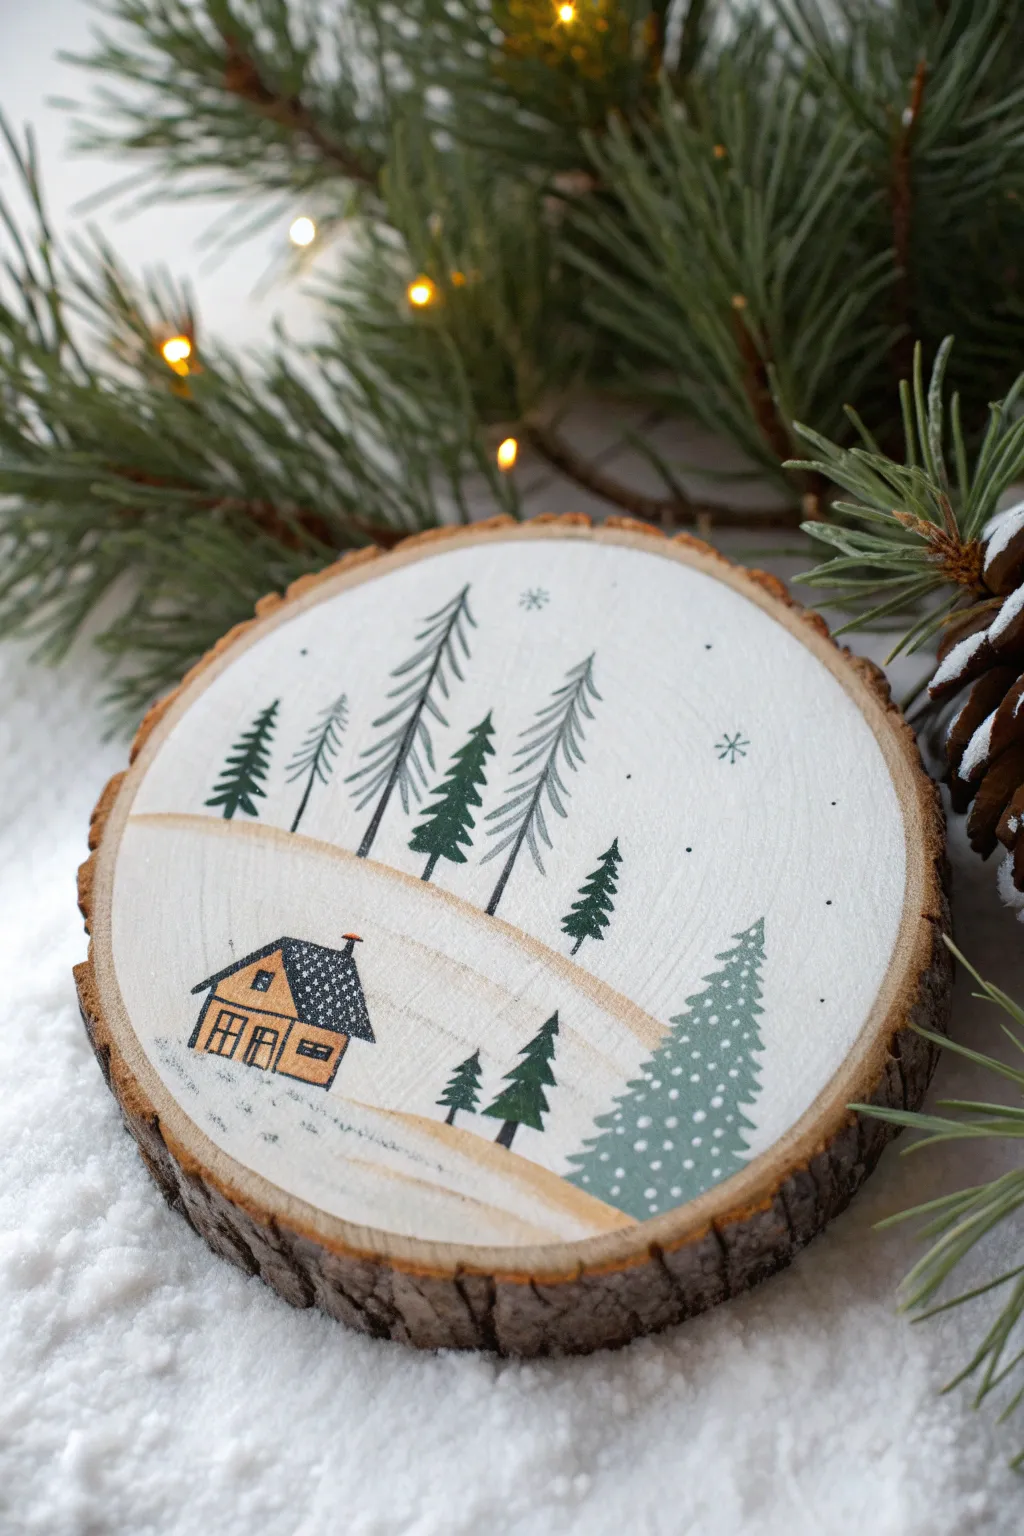
Capture the stillness of a snowy evening with this charming wood slice painting. Using simple line work and muted tones, you’ll create a peaceful winter landscape featuring a cozy cabin nestled among evergreen trees.
Step-by-Step Guide
Materials
- Medium-sized wood slice (approx. 4-5 inches diameter)
- White acrylic paint or gesso
- Fine grit sandpaper (220 grit)
- Pencil and eraser
- Fine liner brush (size 0 or 00)
- Small flat brush (size 4 or 6)
- Acrylic paints: Dark Green, Sage Green, Black, Golden Yellow (Ochre), Dark Grey
- Matte varnish or sealant
- Palette regarding mixing
Step 1: Preparation & Background
-
Sand the Surface:
Begin by sanding the face of your wood slice until it is completely smooth to the touch. -
Clean the Wood:
Wipe away all sanding dust with a slightly damp cloth or tack cloth to ensure a clean painting surface. -
Prime the Surface:
Using your flat brush, paint the entire face of the wood slice with white acrylic paint. You may need two coats to get an opaque, snowy base. -
Create the Hills:
Mix a tiny drop of ochre or light brown into your white paint to create a very pale cream color. -
Paint the Landscape Lines:
Paint two gentle, curved swoops across the slice to suggest rolling snow hills: one across the middle and one near the bottom third.
Step 2: Painting the Trees
-
Sketch the Composition:
Lightly sketch the placement of your trees and the small cabin with a pencil to guide your brushwork. -
Mix Tree Colors:
Prepare two shades regarding green: a deep forest green for the solid trees and a lighter grey-green for the stylized ones. -
Paint Background Trees:
Using the fine liner brush and the grey-green mix, paint the tall trees in the background used thin, downward strokes to mimic pine needles. -
Paint Foreground Pines:
Switch to the dark forest green and paint the smaller, solid pine trees scattered across the hills. -
Add the Large Pine:
On the bottom right, paint the largest pine tree using a sage green color, making it slightly fuller than the others. -
Detail the Large Pine:
Once the sage green is dry, use the tip regarding your brush to add tiny white dots onto the branches to look like falling snow.
Keep it Steady
For steady lines on the cabin, rest your pinky finger on a dry part of the wood slice to stabilize your hand while painting details.
Step 3: The Cabin & Details
-
Base Coat the Cabin:
Fill in the rectangular shape of the house with a golden yellow or ochre paint. -
Paint the Roof:
Paint the roof triangle and the side extension roof with a dark grey or charcoal color. -
Outline the Architecture:
I prefer to use a very fine liner brush with black paint here to carefully outline the house, windows, and door frames for a crisp look. -
Add Roof Texture:
Dab tiny white spots onto the dark grey roof to suggest snow accumulation. -
Paint the Chimney:
Add a tiny red or brown rectangle for the chimney stack on the roof peak. -
Add Falling Snow:
Dip the very tip of your liner brush or a toothpick into white paint and dot random snowflakes in the sky area. -
Draw Subtle Snowflakes:
Use a grey fine-tip pen or very thinned grey paint to draw a few six-pointed star asterisks in the sky for variety. -
Seal the Artwork:
Allow the paint to dry completely, overnight if possible, before applying a coat of matte varnish to protect your winter scene.
Add Sparkle
Mix a tiny pinch of iridescent fine glitter into your white varnish or sprinkle loose glitter over the wet snow dots for a magical finish.
This lovely piece of winter decor is now ready to be displayed on a mantel or hung as an ornament
Holiday Ornament Set Painted on Wood Rounds
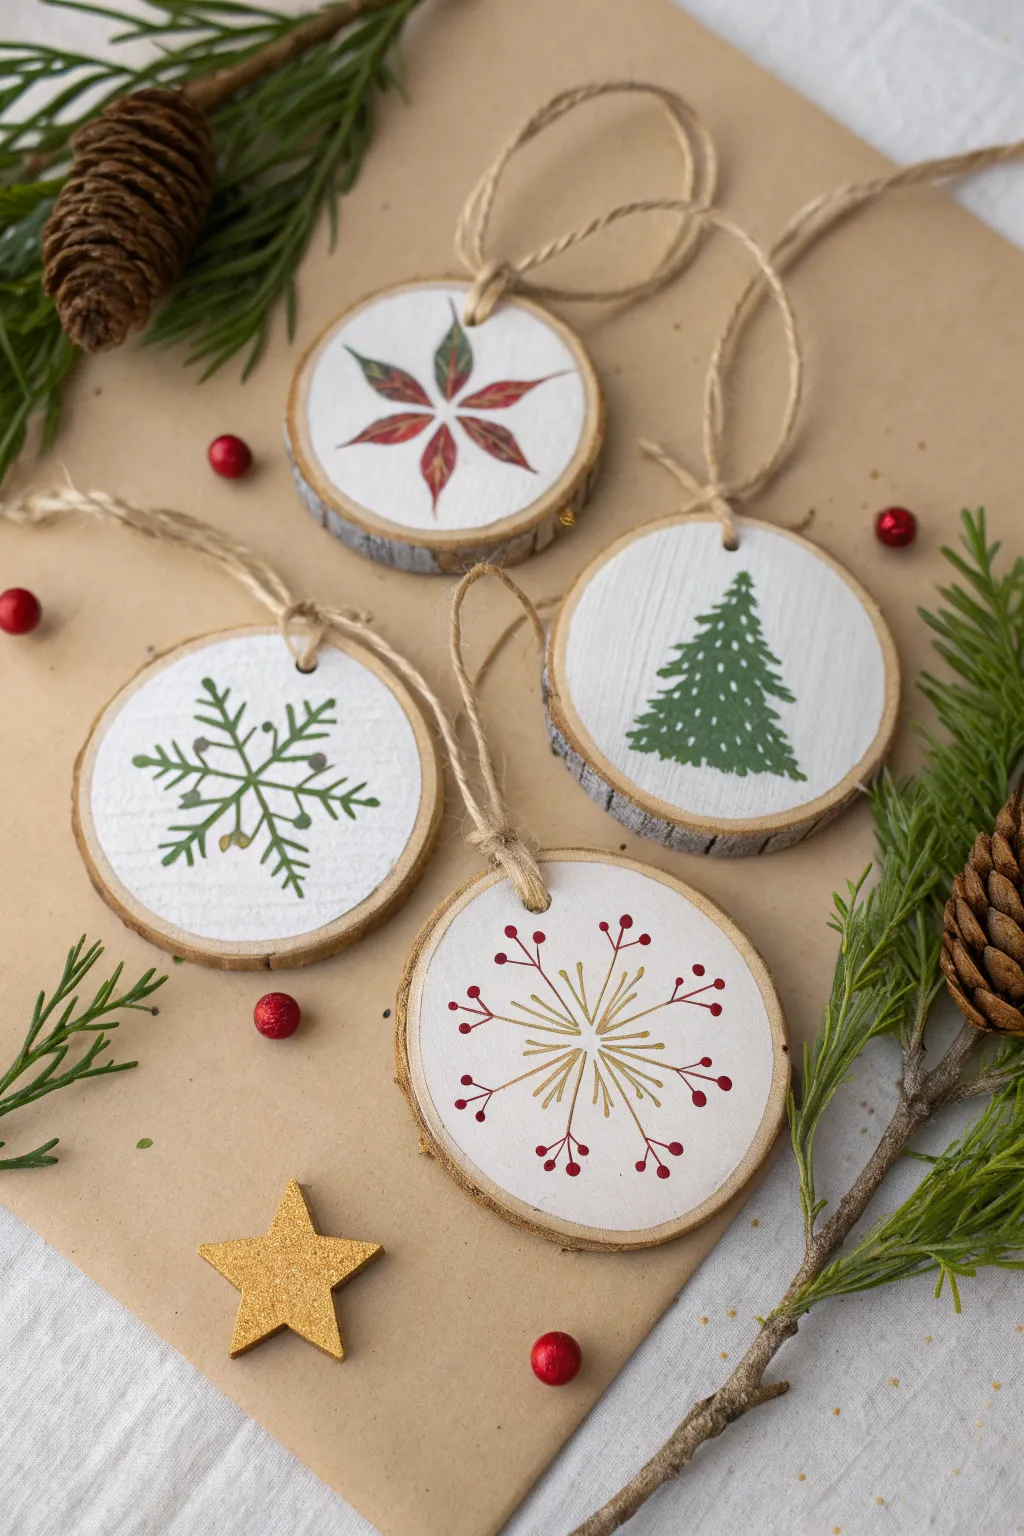
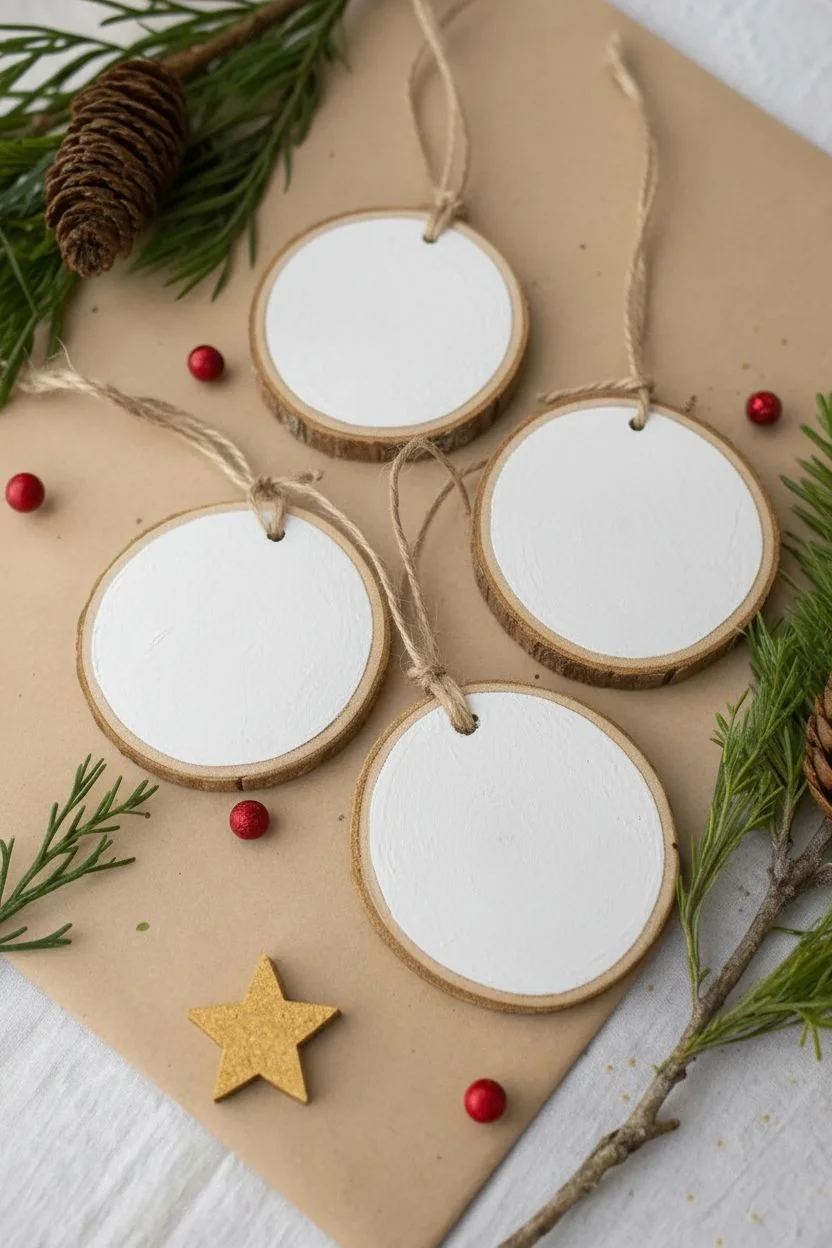
Transform simple wooden rounds into a charming set of holiday decor featuring classic winter motifs like snowflakes, evergreens, and poinsettias. This project combines the natural texture of wood bark with crisp white backgrounds and festive painted details for a cozy, rustic look.
Step-by-Step
Materials
- 4 unfinished wood slices (approx. 3-4 inches diameter) with bark edge and pre-drilled holes
- White acrylic paint (matte finish)
- Acrylic paints: Dark green, forest green, deep red, metallic gold
- Jute twine or hemp cord
- Flat paintbrush (medium size)
- Fine detail paintbrush (0 or 00 size)
- Pencil
- Matte clear sealer or varnish (optional)
- Palette or small plate
- Cup of water and paper towels
Step 1: Base Preparation
-
Surface Prep:
Begin by inspecting your wood slices. If the surfaces are rough, give them a quick sanding with fine-grit sandpaper to ensure a smooth painting area, then wipe away any dust with a dry cloth. -
Painting the Background:
Using your flat brush, paint the face of each wood slice with white acrylic paint. Leave a small ring of natural wood visible just inside the bark edge creating a framed effect. -
Second Coat:
Allow the first layer to dry completely. Apply a second coat of white paint to ensure solid, opaque coverage so the wood grain doesn’t show through too much. Let this dry fully before adding designs.
Smooth Circles
To get a perfect white circle background without tracing, outline the inner edge with a small flat brush first, rotating the wood slice as you paint, then fill in the center.
Step 2: Design 1: The Poinsettia Star
-
Sketching:
Lightly sketch a six-pointed star shape on one slice using a pencil. Draw elongated petal shapes radiating from the center. -
Painting Petals:
Mix a small amount of deep red with a tiny dot of green or brown to darken it slightly. Paint the petals, leaving the very center white. Add darker red strokes along the center of each petal for depth. -
Adding Greenery:
Between the red petals, paint very thin, wispy green leaves or sepals radiating outward to complete the starburst shape.
Step 3: Design 2: The Snowy Evergreen
-
Tree Shape:
On the second slice, use forest green paint to create a triangular tree shape. Start from the top and dab your brush downwards to create jagged, branch-like edges rather than straight lines. -
Adding Snow:
Once the green paint is dry to the touch, take your finest brush or a toothpick. Dip it in white paint and add tiny dots and dashes across the branches to mimic falling snow.
Personalized touch
Paint the year (e.g., ‘2024’) or a family name in small, neat letters on the back of the wood slice to turn these into cherished keepsake gifts.
Step 4: Design 3: The Green Snowflake
-
Base Lines:
On the third slice, paint a simple cross (+) in forest green. Then, paint an ‘X’ over it to create an eight-pointed asterisk shape. -
Branch Details:
Add small ‘V’ shapes along each line of the snowflake, pointing inward toward the center. Vary the size of the V’s to make it look organic. -
Gold Accents:
Using the tip of your detail brush, add tiny dots of metallic gold paint at the intersections or tips of the snowflake arms for a bit of sparkle.
Step 5: Design 4: The Berry Burst
-
Gold Radiance:
For the final ornament, start by painting thin metallic gold lines radiating from the center, creating a delicate starburst pattern. -
Stems:
Paint thin red lines extending outward between the gold rays. These will serve as the stems for your berries. -
Berries:
I find using the non-brush end of a paintbrush works best here. Dip the handle tip into deep red paint and dot it onto the ends of the red lines to create perfect round berries.
Step 6: Finishing Touches
-
Sealing:
Once all designs are completely dry (give them at least an hour), apply a thin layer of matte sealer over the painted area to protect your artwork from scratches. -
Strung Up:
Cut four lengths of jute twine, each about 8 inches long. Thread a piece through the pre-drilled hole of each wood slice. -
Knotting:
Tie the ends of the twine securely in a simple overhand knot to create a hanging loop. Trim any excess twine if necessary.
Hang these natural beauties on your tree or use them as handcrafted gift tags for presents
Mandala Dot Painting That Follows the Wood Grain
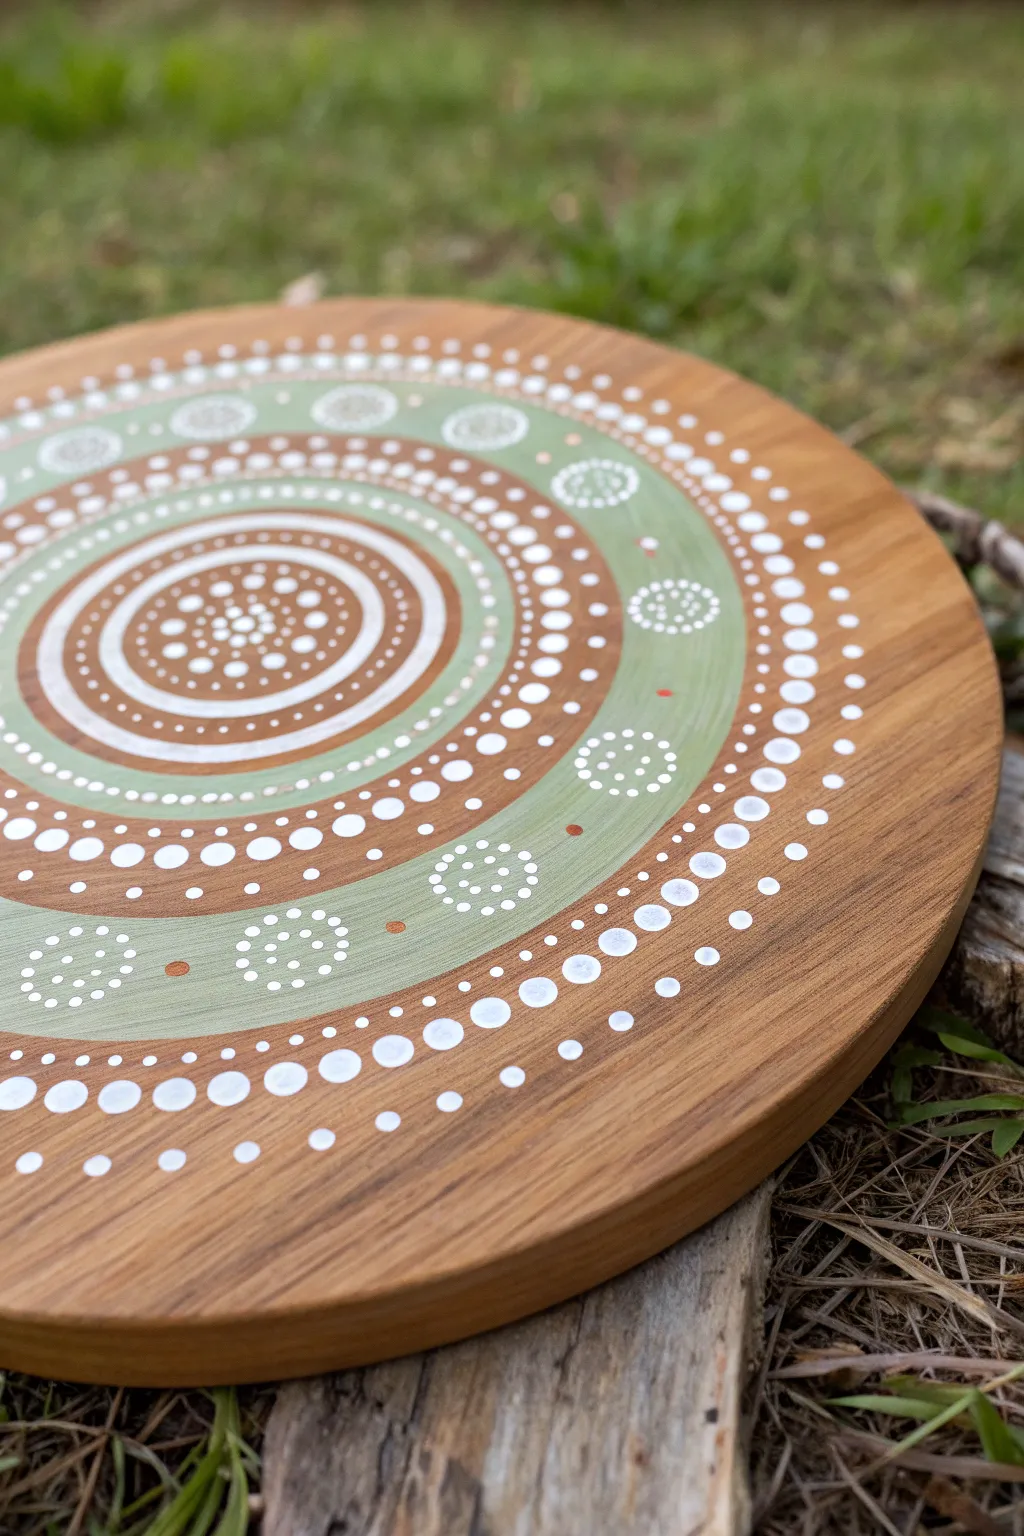
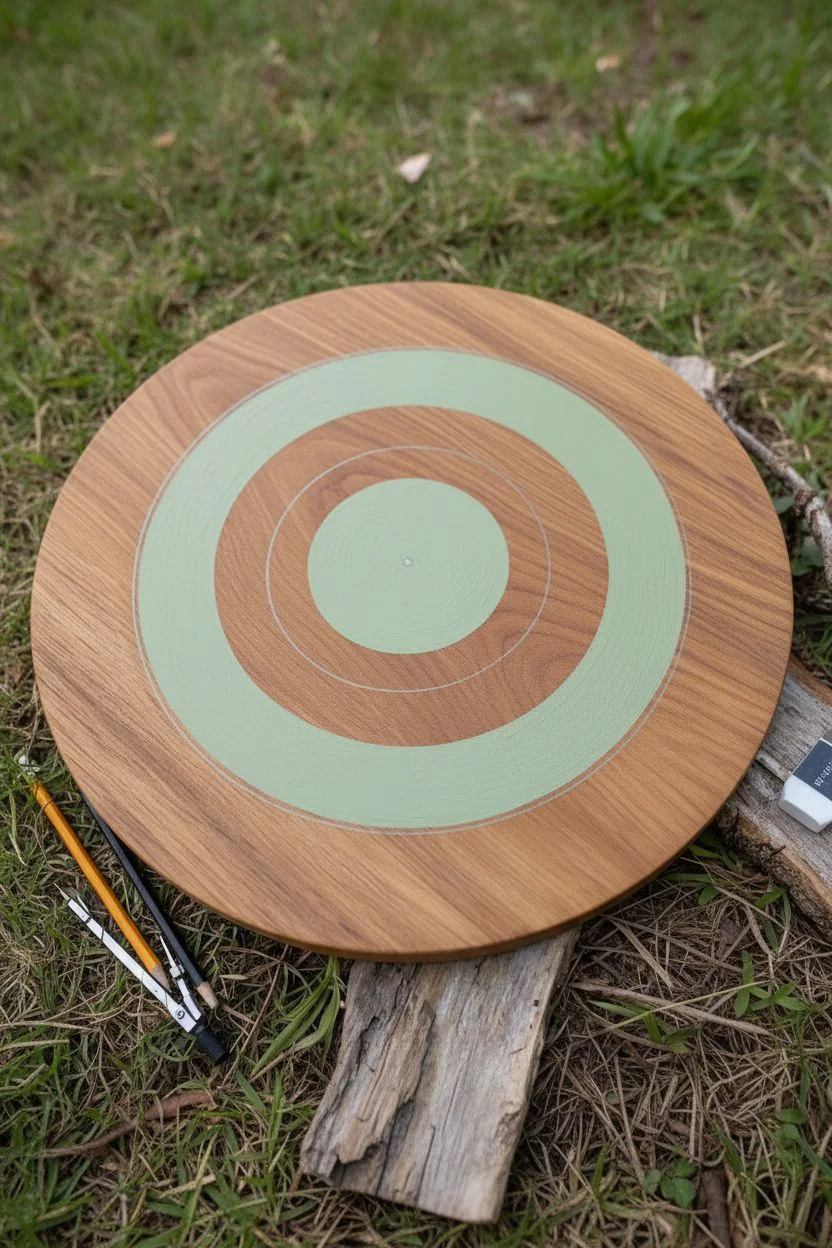
Embrace the natural beauty of wood by combining it with the meditative art of dot painting. This project features a calming sage green and crisp white palette on a round timber board, creating a stunning centerpiece or wall hanging that balances intricate detail with an organic feel.
Detailed Instructions
Materials
- Round wooden board (acacia or pine, approx. 12-14 inches)
- Acrylic paints: Sage Green, Titanium White, and Burnt Sienna (optional for touch-ups)
- Dotting tools (various sizes, from fine stylus to large rods)
- Compass and pencil
- Ruler
- Eraser
- Matte or satin clear varnish (spray or brush-on)
- Damp cloth or paper towel
- Palette or small containers for paint
Step 1: Preparation & Mapping
-
Surface Prep:
Ensure your wooden board is clean, dry, and smooth. If the wood grain is very rough, give it a light sanding with fine-grit sandpaper and wipe away the dust. -
Find the Center:
Use a ruler to locate the exact center of the board. Mark this spot lightly with a pencil, as this will be the anchor for your entire mandala. -
Draw Guidelines:
Using a compass, draw a series of concentric circles radiating from the center. Space them out variously—some close together for tight dot rows, and wider bands for the sage green sections. These don’t need to be permanent, just guides. -
Paint the Sage Bands:
Identify the wide ring about two-thirds of the way out and the central ring area. Paint these filled-in sections with sage green acrylic paint. You may need two thin coats for opaque coverage. Let this dry completely before dotting.
Fixing Whoopsies
Smudged a dot? Don’t wipe it! Let it dry completely, then scrape it off gently with a craft knife or paint over it with the background color.
Step 2: The Central Motif
-
Center Dot:
Dip a medium-sized dotting tool into white paint and place a single, perfect dot on your center mark. -
First Ring:
Using a smaller tool, place a ring of small white dots around the center dot. Keep them close but not touching. -
Expanding the Core:
Continue adding rings of white dots, gradually increasing the size of your dotting tool as you move outward. Leave a small gap of exposed wood between each ring to create defined brown bands. -
The White Band:
Paint a solid thin white ring or a very dense row of white dots that merge together to create a bright separation between the center wood section and the first sage green band.
Step 3: The Sage Green Ring
-
Large Circle Outlines:
On the dried sage green band, use a large dotting tool to stamp circles using white paint. Space them evenly around the ring. These act as the ‘containers’ for smaller dots. -
Filling the Clusters:
Switch to a very fine stylus. Inside each of the large white circles you just made (or outlining them if you painted ring shapes), place tiny white dots to create a ‘flower’ or atomic cluster effect. -
Inner Sage Details:
Add a ring of medium-sized sage green dots on the inner decorative band of wood, just outside the central white section. This ties the color palette together.
Mastering Consistency
For uniform dots, re-dip your tool into the paint for every single dot. The amount of paint on the tool dictates the size, so keep it fully loaded.
Step 4: Outer Details & Finishing
-
The Brown Border Pattern:
Move to the outer wooden band. Using a medium tool, create a consistent ring of white dots. Keep your spacing consistent to maintain the rhythm of the mandala. -
Layering Dots:
Once your base dots are dry, you can add ‘top dots.’ Place a smaller dot of a contrasting color (like sage on white, or white on sage) on top of larger dried dots to add dimension. -
Large Outer Dots:
Finish the perimeter with larger, bold white dots spaced slightly further apart. I often like to double-load the tool slightly or do a second coat on these to make them pop. -
Erase Guidelines:
Wait until the paint is absolutely bone dry—usually overnight is safest. Gently erase any visible pencil lines with a soft quality eraser. -
Seal the Wood:
Apply a clear satin or matte varnish over the entire board to protect the wood and the paint. Spray varnish works best here to avoid smearing the dots.
Now you have a serene piece of art that highlights the warmth of the timber
Galaxy Night Sky With Tiny Star Clusters
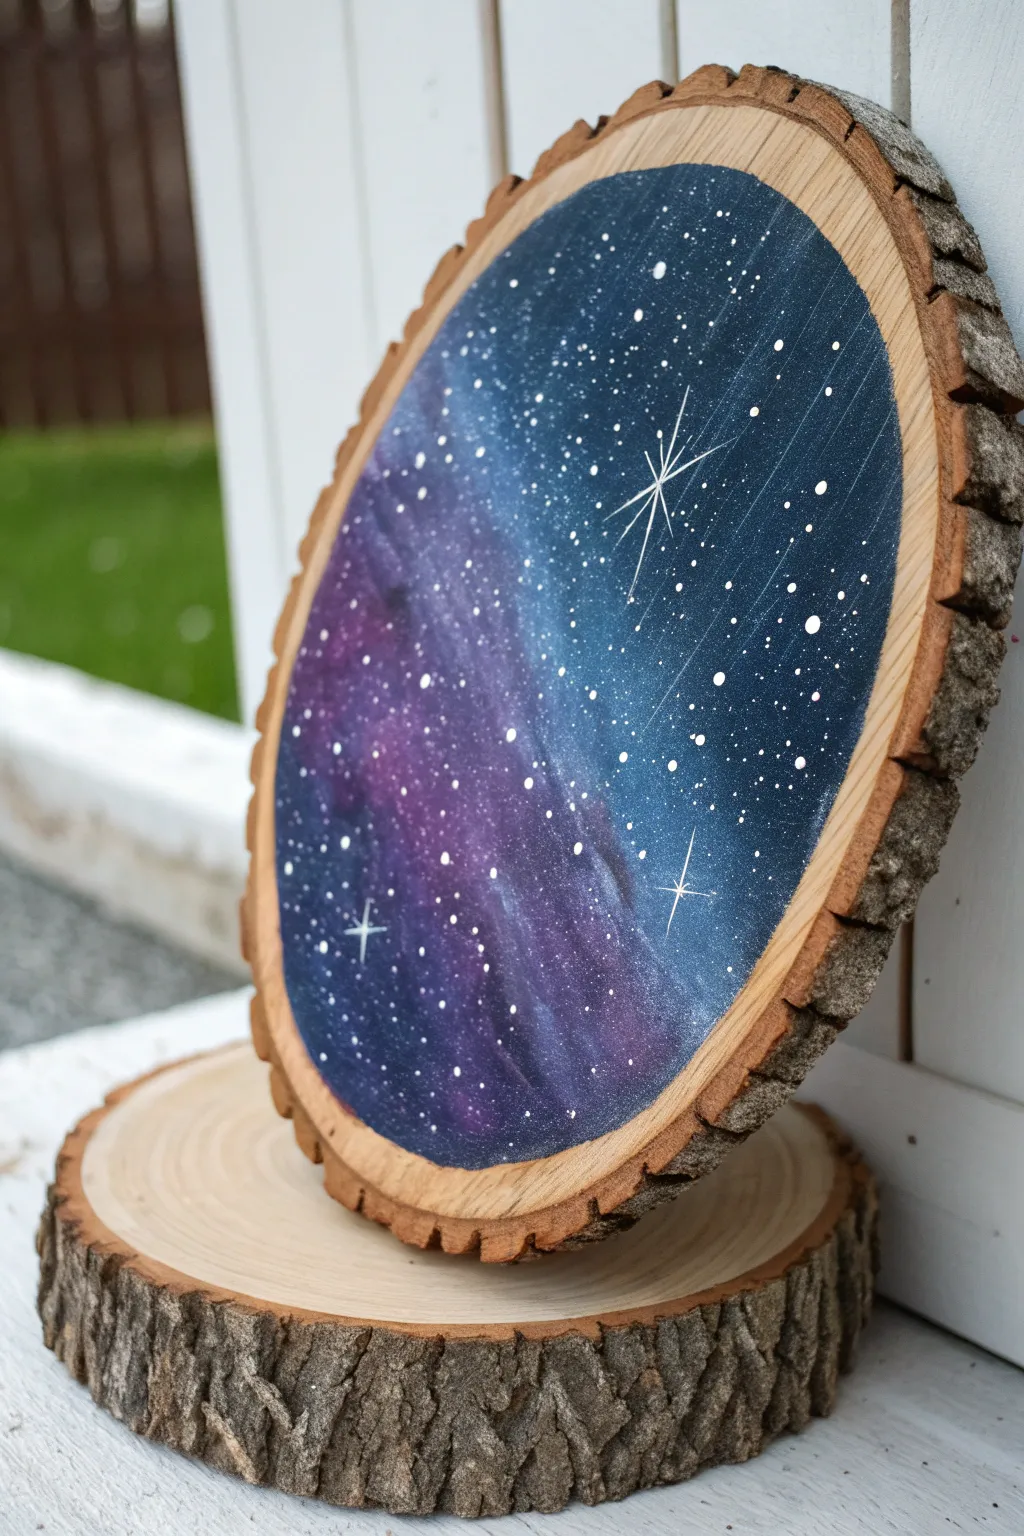
Transform a rustic slice of nature into a window to the cosmos with this stunning galaxy painting. By blending deep blues and purples with bright white stars, you can capture the magic of the Milky Way on a raw, textured canvas.
How-To Guide
Materials
- Large wood slice with bark edge (approx. 8-10 inches)
- Sandpaper (medium and fine grit)
- Acrylic paints: Black, Prussian Blue, Violet/Purple, White
- Flat brush (broad)
- Sponge brush or cosmetic sponge
- Detail liner brush (size 0 or smaller)
- Old toothbrush (for splattering)
- Paper towels
- Palette or paper plate
- Cup of water
- Clear matte or gloss spray sealer
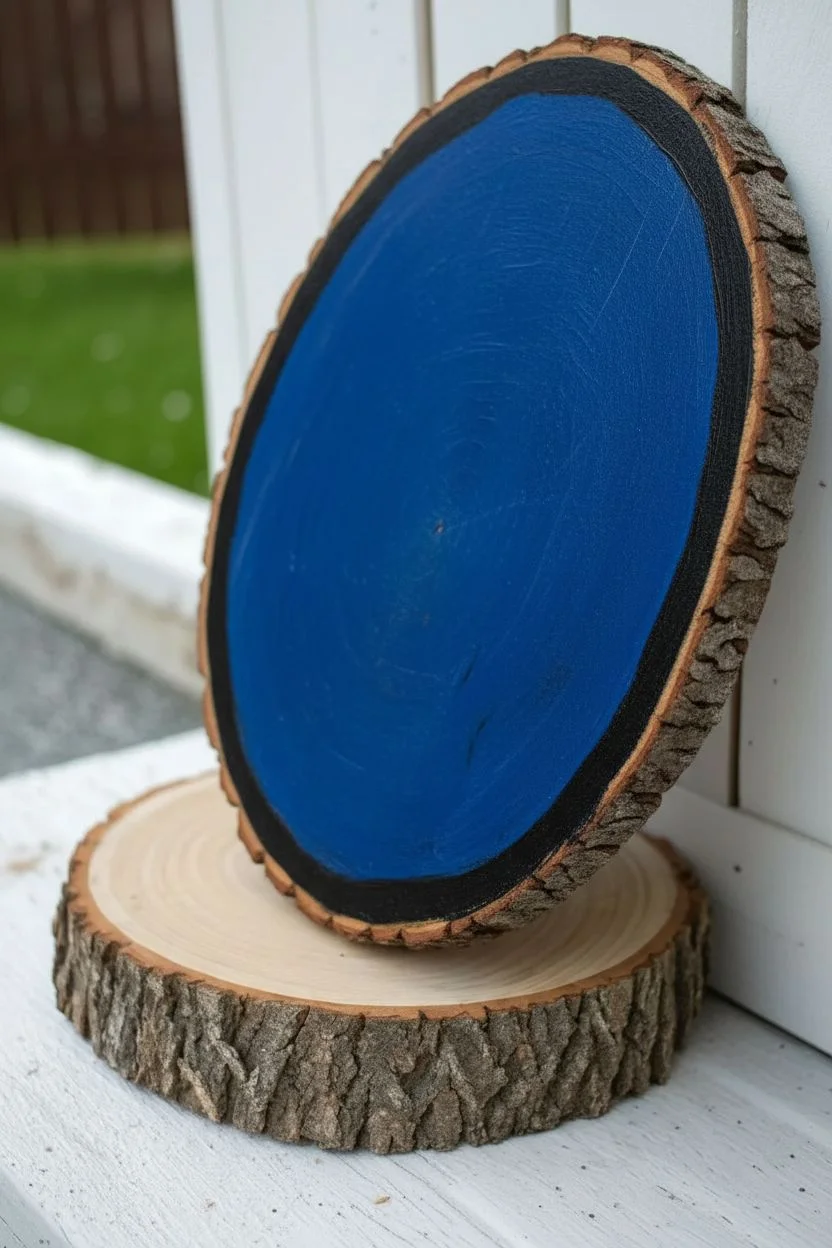
Step 1: Preparation & Base Layer
-
Sand the Surface:
Begin by smoothing the face of your wood slice. Start with medium grit sandpaper to remove any rough saw marks, then finish with fine grit for a silky painting surface. Wipe away all dust with a damp cloth. -
Define the Border:
Decide how much natural wood border you want to leave visible. You can lightly sketch a circle about 1 inch from the bark edge using a pencil, or simply eyeball it as you paint for a more organic feel. -
Apply the Base Coat:
Using your flat brush, paint the entire inner circle with a coat of Prussian Blue. Don’t worry about complete opacity yet; just establish the dark boundary of your night sky. -
Deepen the Edges:
While the blue is still slightly wet, pick up some black paint. Carefully blend this along the outer rim of your circle to create a vignette effect, making the edges of the galaxy disappear into the darkness.
Pro Tip: Controlled Splatter
Test your toothbrush splatter technique on a scrap piece of paper first. This helps you gauge how much pressure to use and prevents huge accidental blobs.
Step 2: Creating the Nebula
-
Sponge on the Nebula:
Switch to a sponge brush or cosmetic sponge. Dip it sparingly into the purple paint and blot off the excess on a paper towel until it’s almost dry. -
Build the Clouds:
Dab the purple sponge diagonally across the lower-left portion of the circle. Use a light pouncing motion to create a soft, cloud-like texture rather than hard strokes. -
Layer the Blues:
Clean your sponge or use a fresh side. Pick up a mix of Prussian Blue and a tiny dot of white to make a lighter blue. Sponge this into the upper right section, mirroring the purple cloud. -
Blend the Transition:
Where the purple and blue meet in the center, use a clean, slightly damp sponge to soften the edges, allowing the colors to merge without turning muddy. -
Add Highlights:
Add a tiny amount of white to your purple mix. Sponge this very lightly into the center of the purple cloud to give it depth and luminosity. -
Let it Dry:
Allow the background layers to dry completely. The paint needs to be set before we add the stars so the white remains crisp.
Level Up: Glow in the Dark
Mix phosphorescent paint powder with your white star paint. By day it looks standard, but at night your galaxy will emit a soft, magical glow.
Step 3: Stars & Details
-
Prepare Splatter Paint:
Mix a small amount of white paint with water until it reaches the consistency of heavy cream or ink. It needs to be fluid enough to fly off bristles. -
Create the Starfield:
Dip an old toothbrush into the thinned white paint. Hold it over the wood slice and run your thumb across the bristles to flick tiny specks of paint onto the galaxy. Focus more density on the diagonal path of the nebula. -
Add Medium Stars:
Using the tip of your smallest detail brush or a toothpick, dot individual stars around the sky. Vary the sizes slightly, making some larger than the splattered mist. -
Paint the North Star:
Choose a spot in the upper blue section for a feature star. Paint a small cross (+), then paint a diagonal cross (x) over it. Elongate the top and bottom tail of the vertical line slightly. -
Add Secondary Sparkles:
Paint a few smaller twinkling stars using simple cross shapes (+) in the purple area to balance out the composition. -
Final White Dots:
Place a few deliberate, brighter white dots near the center of your star bursts to make them glow.
Step 4: Finishing Touches
-
Clean the Border:
If any paint smudged onto the unpainted wood border, gently sand it away once the paint is fully dry to restore the crisp edge. -
Seal the Artwork:
In a well-ventilated area, spray the entire slice with a clear sealer. This protects the wood and makes the darkness of the galaxy pop.
This celestial piece brings the wonder of the night sky right into your home
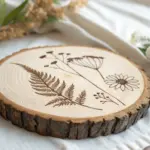
Negative Space Painting That Lets the Wood Shine Through
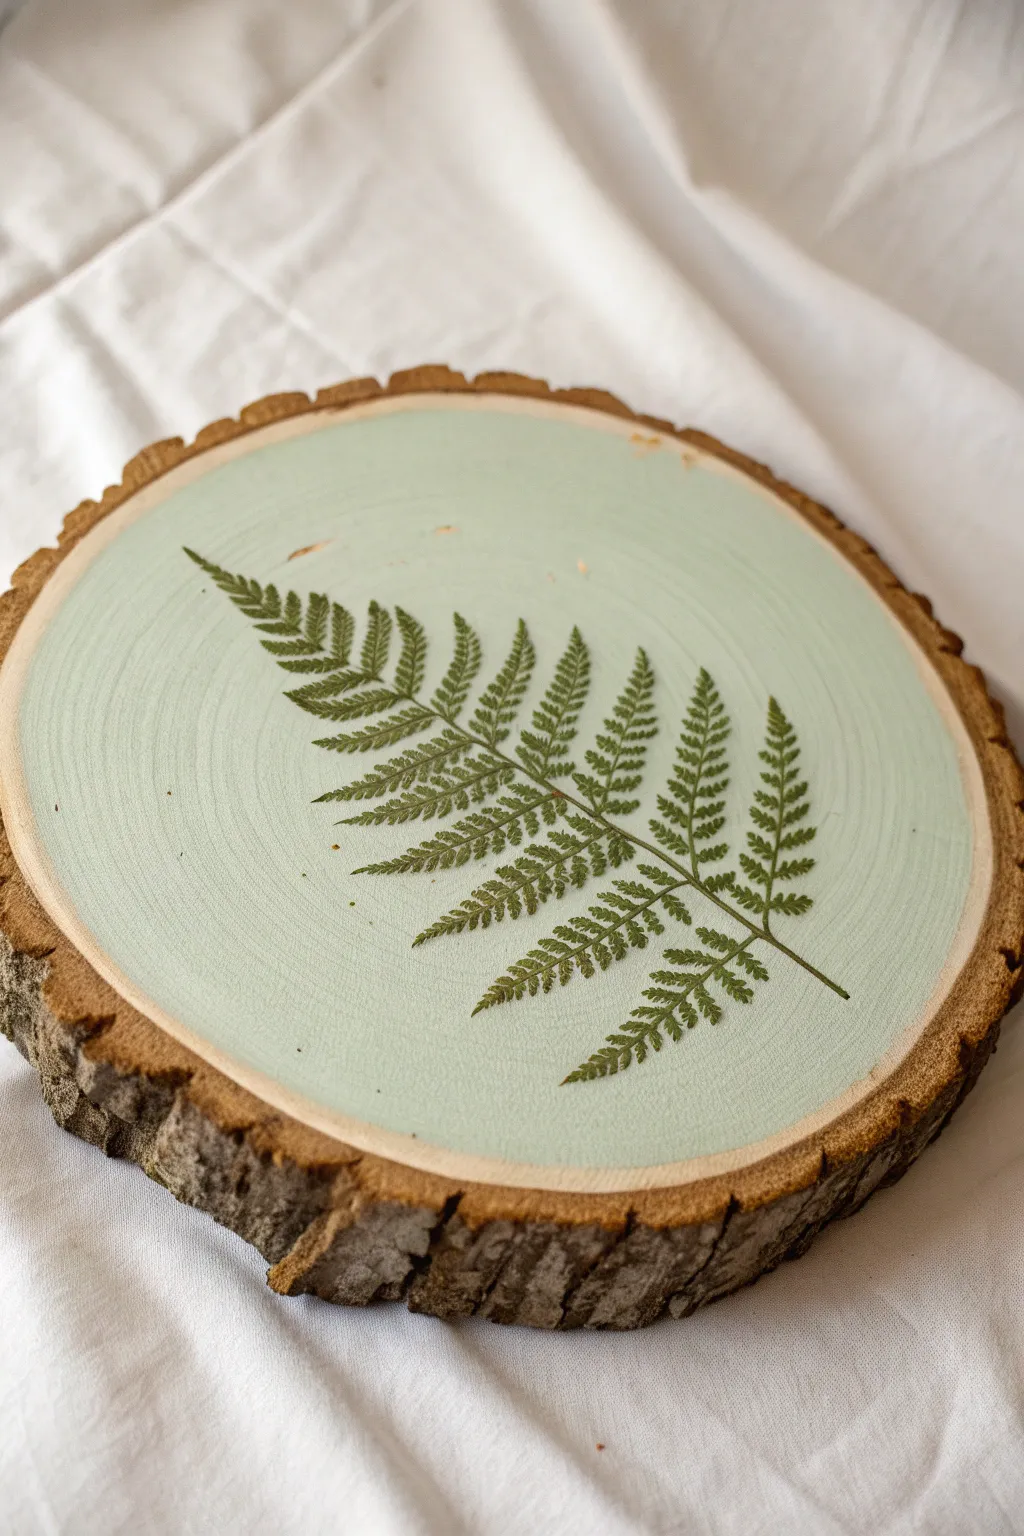
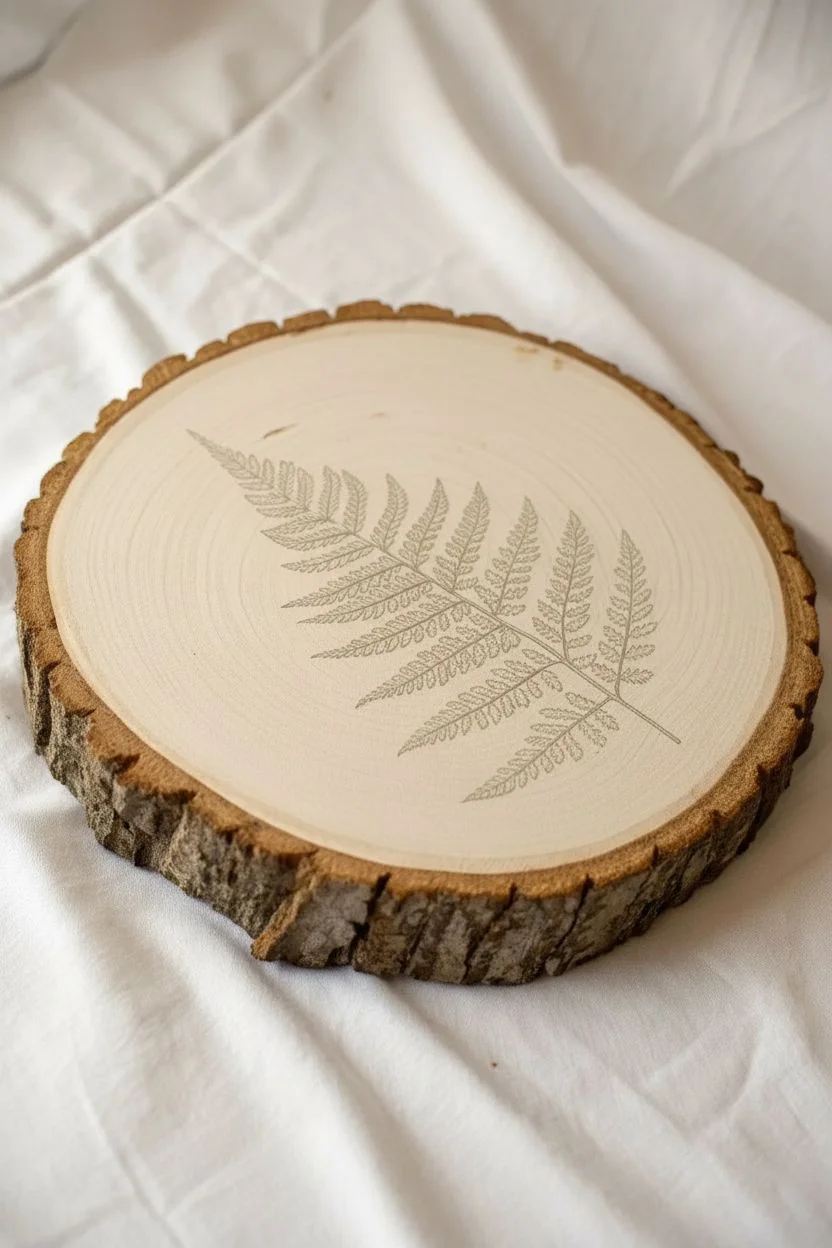
Capture the delicate beauty of the forest floor with this simple yet elegant wood slice project. By combining soft pastel tones with a crisp botanical silhouette, creating a piece of nature-inspired decor that feels both rustic and modern.
Detailed Instructions
Materials
- Wood slice with bark intact (approx. 6-8 inches)
- Light mint green acrylic paint
- Real fern frond (pressed/dried) OR a fern stencil
- Flat paintbrush (medium size)
- Small detail paintbrush
- Pencil
- Matte spray sealant or Mod Podge (optional)
- Fine-grit sandpaper
Step 1: Preparation
-
Prep the Surface:
Begin by inspecting your wood slice. If the surface feels rough to the touch, lightly sand the face with fine-grit sandpaper until it is smooth. -
Clean the Wood:
Wipe away any sawdust with a dry cloth or a tack cloth to ensure a clean painting surface. Do not use water, as it can raise the grain. -
Choose Your Composition:
Place your fern frond (or stencil) onto the wood slice to determine the best placement. Diagonal angles often look more dynamic than straight vertical alignment.
Step 2: Creating the Design
-
Outline the Fern:
If using a stencil, secure it with low-tack tape. If using a real pressed fern as a template, hold it gently in place and very lightly trace the outline with a pencil. -
Refine the Sketch:
Lift the fern away. If your pencil lines are faint, you can lightly go over them to make sure the complex frond shapes are visible, but keep the graphite light so it doesn’t smudge into the paint later. -
Protect the Edges:
Decide how close to the bark you want the paint to go. For this look, stick to an inner circle, leaving a small ring of natural wood exposed before the bark begins.
Crisp Lines Secret
For a sharper silhouette, try using liquid masking fluid on the fern shape before painting. Peel it off after the mint paint dries!
Step 3: Painting the Background
-
Load the Brush:
Dip your medium flat brush into the light mint green acrylic paint. You want smooth coverage without thick globs. -
Paint Around the Fern:
Begin painting the negative space—the area *outside* your fern sketch. Carefully cut in around the detailed jagged edges of the leaves. -
Switch Brushes:
For the tiny spaces between the leaflets and near the stem, switch to your small detail brush. This is where patience pays off to keep the fern shape distinct. -
Fill the Rest:
Once the tricky edges are defined, use the larger brush to fill in the rest of the wood slice surface out to your desired border. -
Check Coverage:
Let the first coat dry for about 10-15 minutes. If the wood grain is showing through too much for your liking, apply a second coat.
Try a Trio
Make a set of three using different botanical shapes like maple leaves or oak leaves, painted in complementary pastel hues.
Step 4: Refining and Detail
-
Clean Up Lines:
Inspect the silhouette of the fern. If paint bled into the ‘leaf’ area, you can gently scrape it away with a craft knife or touch it up with a tiny bit of brown paint to mimic the wood. -
Add Texture (Optional):
I sometimes like to add tiny, darker green or brown dots inside the negative space fern area to simulate stem texture or spores, though keeping it plain natural wood is classic. -
Dry Thoroughly:
Allow the paint to cure completely, usually for about an hour.
Step 5: Finishing
-
Seal the piece:
To protect your work, lightly spray the entire face of the wood slice with a matte sealant. -
Add Hanging Hardware:
Flip the slice over and attach a sawtooth hanger if you plan to mount it on a wall.
Now you have a serene piece of botanical art that brings a breath of fresh air into your home
Layered Mixed-Media Texture on Painted Wood
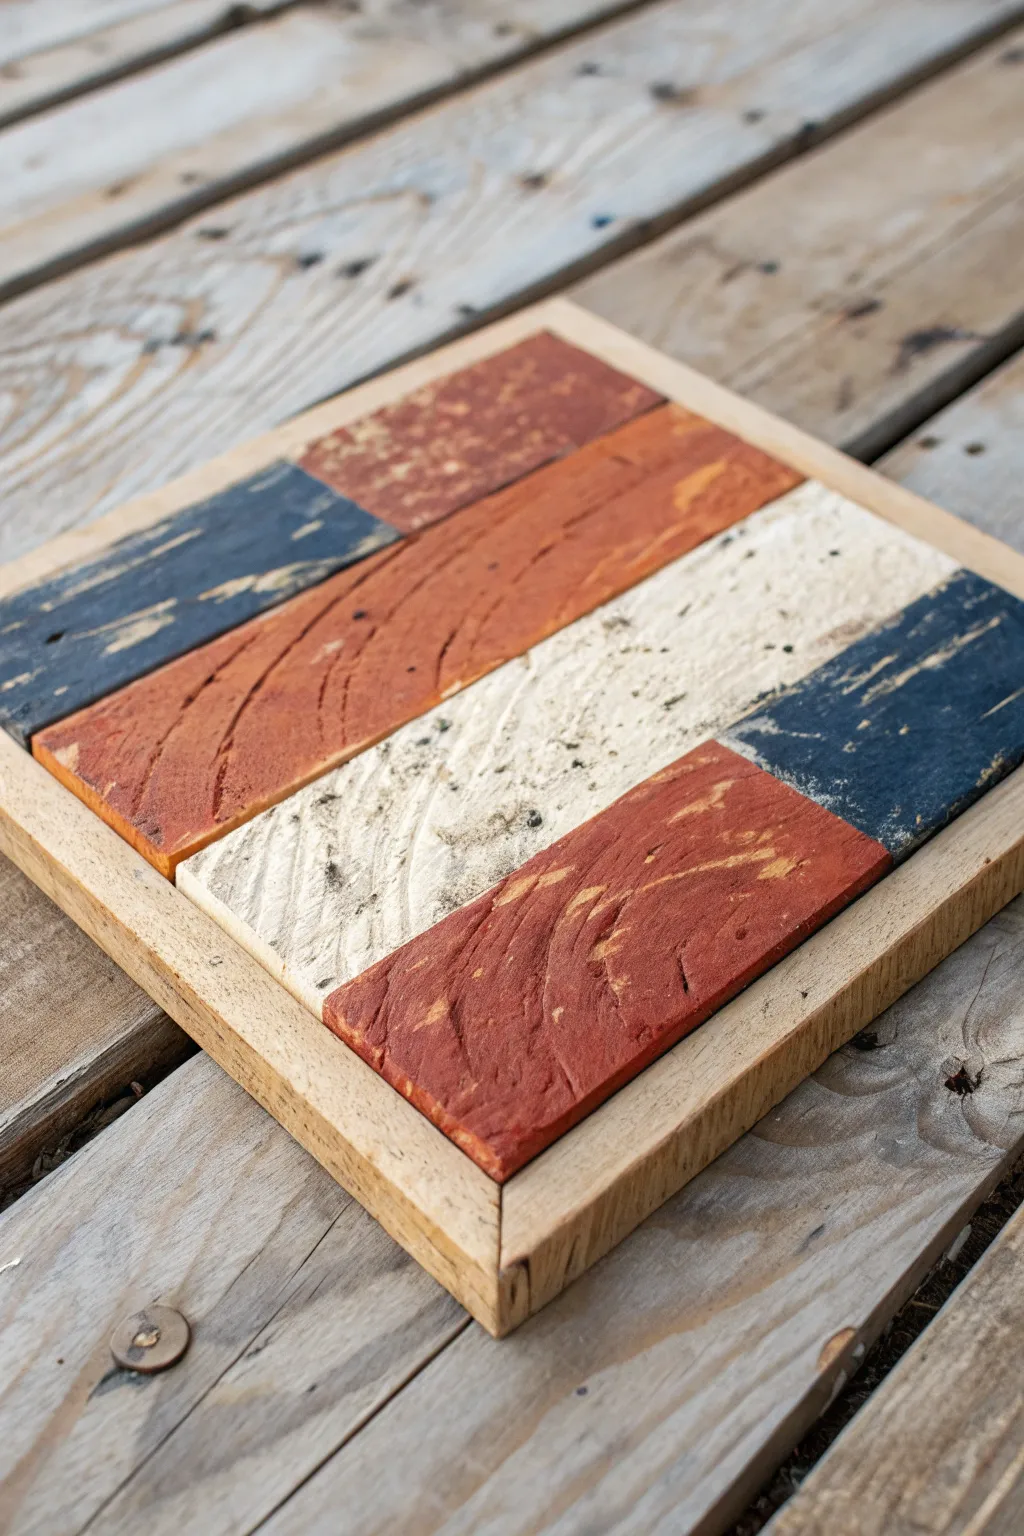
Achieve a beautifully weathered, Americana-inspired look with this simple yet striking wood slat project. Using layers of paint and strategic sanding, you’ll transform basic lumber into a piece that feels like a vintage treasure found in an old barn.
How-To Guide
Materials
- Three wood slats (approx. 2-3 inches wide)
- Square wood frame material (1×1 or similar)
- Wood glue
- Pin nails or finishing nails
- Barn red acrylic or chalk paint
- Navy blue acrylic or chalk paint
- Cream or antique white acrylic or chalk paint
- Coarse sandpaper (60 or 80 grit)
- Fine sandpaper (220 grit)
- Wax candle or petroleum jelly
- Clear matte sealer
- Paintbrushes
- Clean rag
Step 1: Preparation and Base
-
Select your wood:
Choose rough-sawn lumber or pallet wood for the slats if possible; the existing texture adds instant character. -
Cut to size:
Cut your three primary slats to equal lengths, ensuring they will fit snugly within your planned frame dimensions. -
Rough it up:
If you are using new, smooth wood, take the coarse sandpaper and aggressively sand the surface to create scratches and grooves for the paint to settle into. -
Stain the raw wood (optional):
Apply a light coat of dark wood stain to the slats and wipe it off immediately; this ensures that when you distress the paint later, dark wood shows through rather than fresh, light pine.
Step 2: Painting and Distressing
-
Apply a resist medium:
Rub a wax candle or a small amount of petroleum jelly along the edges and random high spots of the wood where you want the paint to chip off later. -
Paint the bottom slat:
Paint the bottom board entirely in barn red, using a relatively dry brush to avoid filling in all the wood grain texture. -
Paint the middle slat:
Paint the middle board with your cream or antique white paint, again keeping the application somewhat uneven for that aged effect. -
Paint the top slat section:
For the top board, paint typical navy blue on the left third and finish the remaining two-thirds with the barn red paint. -
Dry completely:
Allow all paint layers to dry thoroughly; this is crucial so the paint chips rather than smears during the next step.
Use A Scraper
For a truly chippy look, use a metal putty knife to scrape the paint off the waxed areas before sanding. It creates jagged, authentic peel marks.
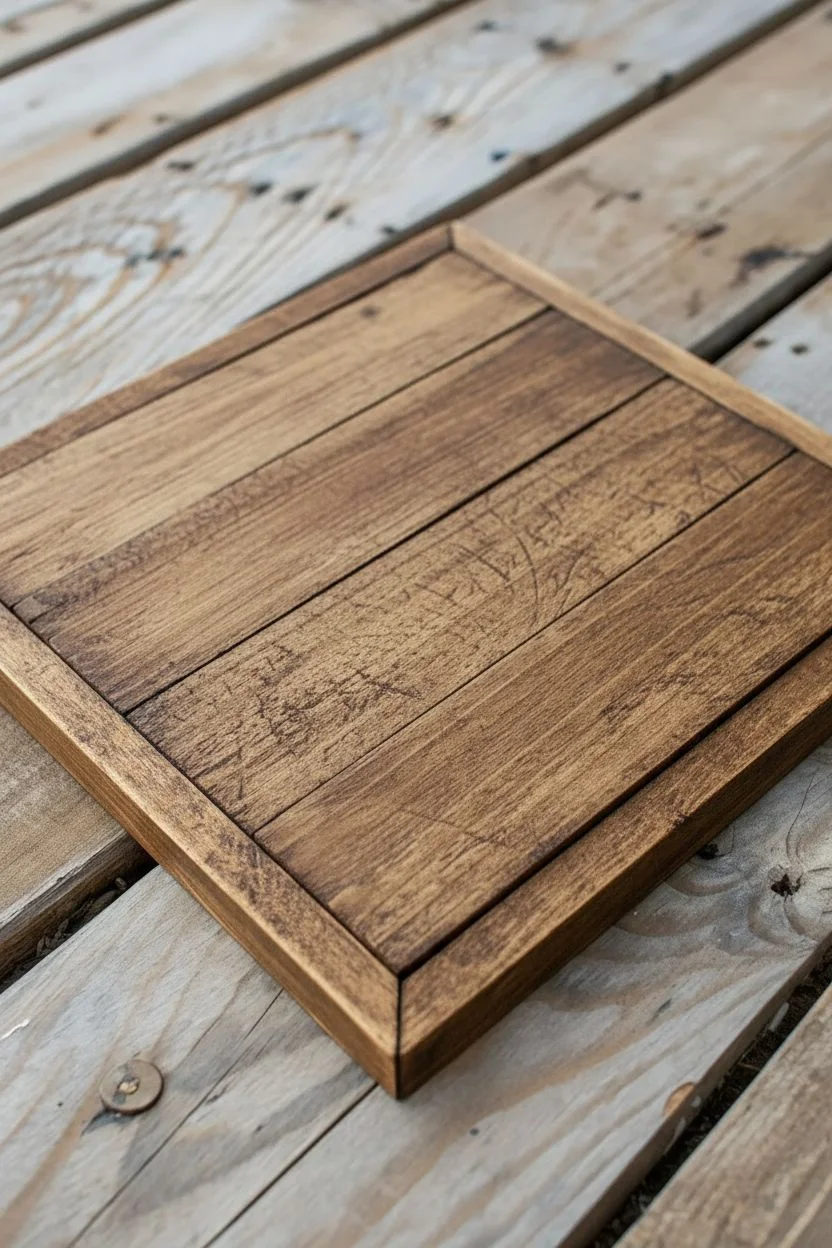
Step 3: Assembly and Finishing
-
Heavy distressing:
I usually grab a sanding block with 80-grit paper here and sand over the waxed areas, revealing the wood beneath the paint. -
Refine the texture:
Switch to fine sandpaper to smooth out any sharp paint ridges while blending the color transitions slightly. -
Build the frame:
Cut your frame pieces with 45-degree mitered corners to perfectly encase the three painted slats. -
Assemble the art:
Apply wood glue to the edges of the slats and the frame pieces, clamping them together on a flat surface. -
Secure the structure:
Use a few pin nails through the frame into the slats for extra durability once the glue has begun to set. -
Sand the frame:
Lightly sand surface of the new frame to soften the hard edges, making it look as worn as the painted interior. -
Seal the piece:
Apply a coat of clear matte sealer or paste wax to protect the paint and give the wood a rich, finished glow.
Add Stenciled Stars
Before sealing, dab white paint through a star stencil onto the blue section, then sand it back heavily so the stars look faded and vintage.
Now you have a charming piece of rustic decor that looks like it has a hundred years of history behind it


Have a question or want to share your own experience? I'd love to hear from you in the comments below!