If you’ve ever stared at a plain ornament and thought, “Okay… now what?” you’re in the right place. I’m sharing my favorite painting ornaments ideas—starting with the classics you see everywhere on Pinterest, then moving into the fun, slightly unexpected twists.
Classic Inside-Painted Swirl Baubles
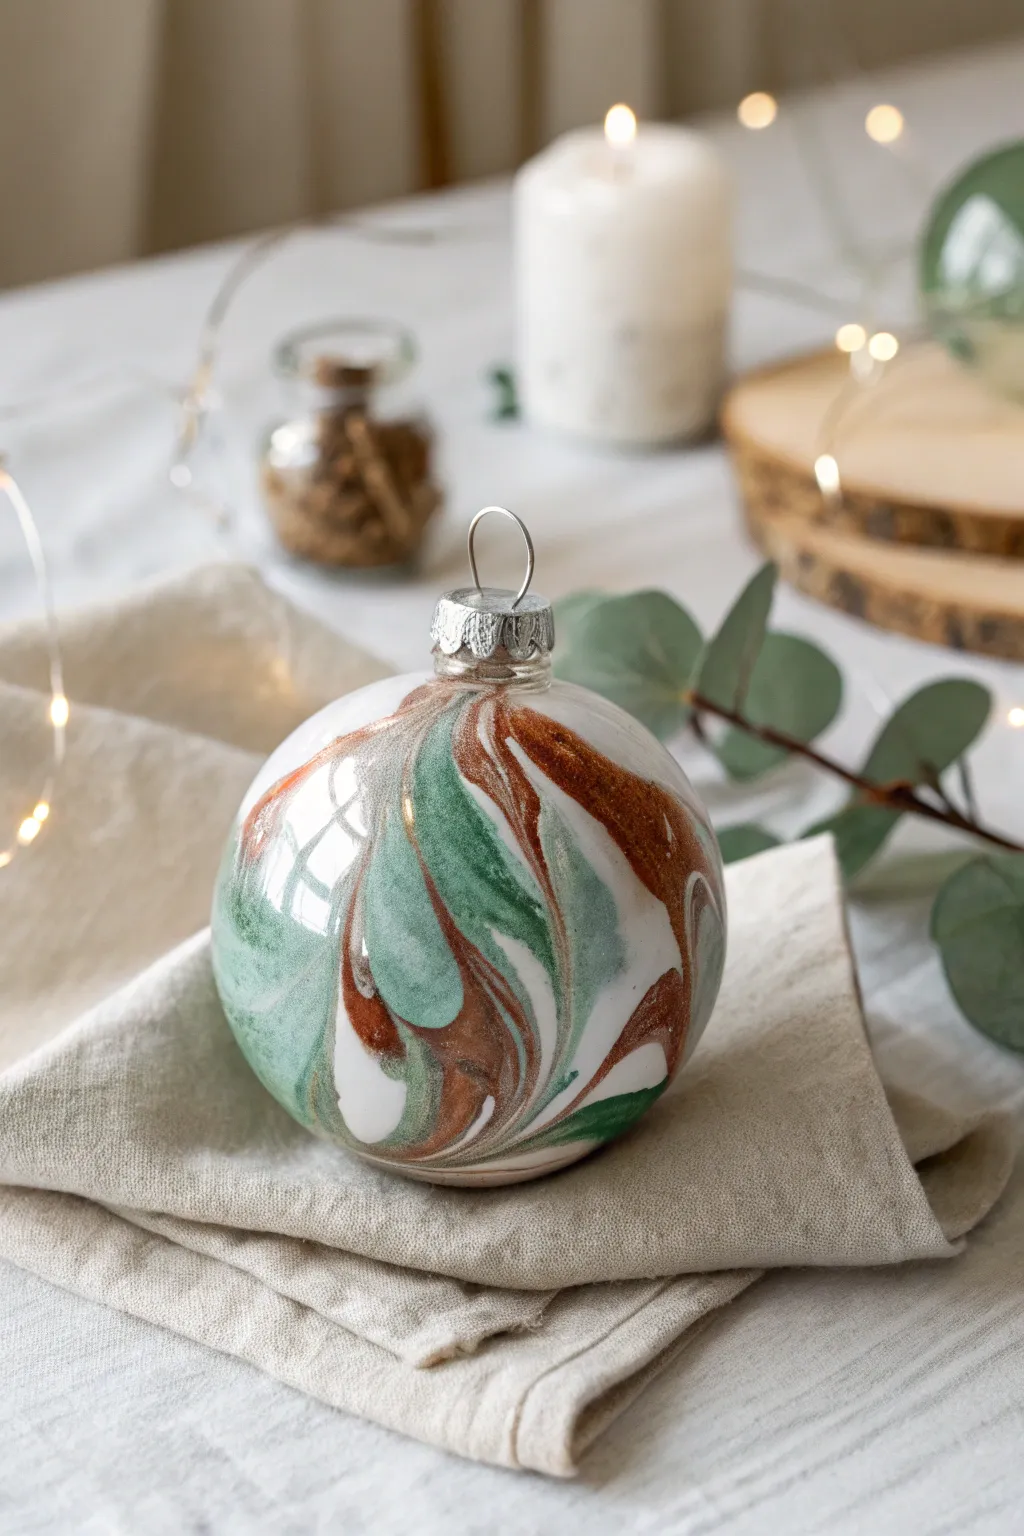
Capture the elegance of organic stone patterns with this sophisticated inside-painted technique. By swirling sage green, metallic bronze, and crisp white together, you’ll create a bauble that looks like a polished gemstone or high-end ceramic piece.
How-To Guide
Materials
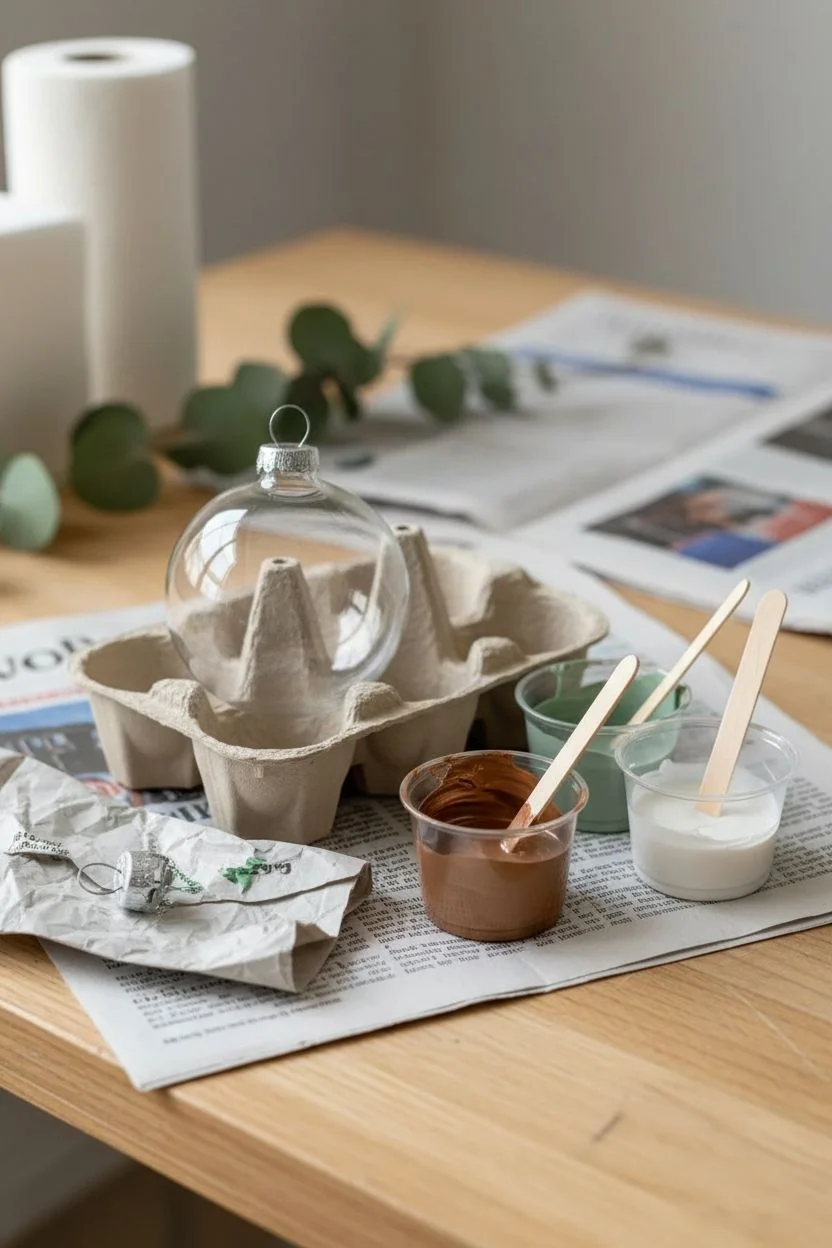
- Clear glass or plastic fillable ornament (removable cap)
- Acrylic craft paints: White, Sage Green, and Metallic Bronze/Copper
- Pouring medium or water (to thin paints)
- Small disposable cups (3)
- Small craft sticks or stirrers
- Empty egg carton or drying rack
- Paper towels
- Hairdryer (optional, with cool setting)
Step 1: Preparation & Mixing
-
Prep the workspace:
Lay down newspaper or a plastic drop cloth to catch any drips, as this process can get a little messy. Set up your egg carton or drying rack nearby so it’s ready for the wet ornaments. -
Remove the cap:
Gently squeeze the metal prongs of the ornament cap and pull it out of the glass sphere. Set the cap and wire aside in a safe place where they won’t get lost. -
Clean the glass:
If your ornaments are dusty inside, rinse them with a little rubbing alcohol or vinegar and let them dry completely. This removes manufacturing oils and helps the paint stick better. -
Mix the Bronze:
In your first small cup, squeeze out a generous amount of metallic bronze paint. Add a few drops of pouring medium or water—aim for a consistency like heavy cream that flows but isn’t watery. -
Mix the Sage:
Repeat the thinning process with your sage green paint in a second cup. You want this color to be just as opaque as the metallic shade. -
Mix the White:
Finally, prepare the white paint. I like to make the white just slightly thinner than the other two colors, as it helps move the other pigments around the curved surface.
Step 2: Pouring & Swirling
-
First pour: White:
Pour a small dollop of the thinned white paint directly into the ornament opening. Don’t coat the whole thing yet; just let it pool at the bottom. -
Add the colors:
Immediately add a squeeze of the sage green and then the bronze right on top of or next to the white puddle. Do not mix them with a brush. -
Begin the rotation:
Slowly tilt the ornament to the side. Watch as the puddle of paint begins to slide. As it moves, rotate the ball so the paint travels in a swirled path rather than a straight line. -
Layering movement:
Continue tilting and turning. The colors will naturally marble against each other as they coat the glass. Let the metallic bronze cut through the matte sage and white for that striking contrast. -
Add more paint if needed:
If you notice the paint isn’t covering the entire surface or looks too thin in spots, add another small squirt of white or bronze directly onto a bare patch. -
Tap to settle:
Gently tap the ornament against your palm to help the paint settle into any tiny air bubbles or stubborn clear spots. -
Invert to drain:
Once the entire interior is coated to your liking, turn the ornament upside down over a waste cup. Let the excess paint drip out for at least 30 minutes. This prevents a thick puddle from drying at the bottom.
Shake It Up
For a more speckled, less fluid look, put your thumb over the opening after adding paints and give it a hard shake. This creates a splatter energy rather than soft marble swirls.
Step 3: Drying & Assembly
-
Long dry time:
Turn the ornament right-side up and place it in the egg carton. Let it dry for at least 24-48 hours. Because the paint is enclosed, it takes much longer to cure than regular painting. -
Check for translucency:
As it dries, the paint might become slightly translucent. If you want a more solid look, you can repeat the pour with just a coat of white once the first layer is dry. -
Standard vs. Forced drying:
If you are impatient, you can use a hairdryer on the ‘cool’ setting to blow gentle air into the opening, but preserve the natural drying process for the smoothest finish. -
Reattach the cap:
Once the paint is fully dry and no longer smells like wet acrylic, carefully squeeze the prongs of the cap and reinsert it into the ornament neck. -
Final wipe:
Use a microfiber cloth to wipe away any fingerprints from the outside of the glass to make sure your beautiful interior work shines through clearly.
Gilded Touch
Before replacing the cap, use a small brush to paint the exterior metal cap with liquid gold leaf or rub n’ buff wax to match the warm bronze tones inside.
Hang your new marbled masterpiece near a twinkling light to watch the metallic bronze glow from within the glass

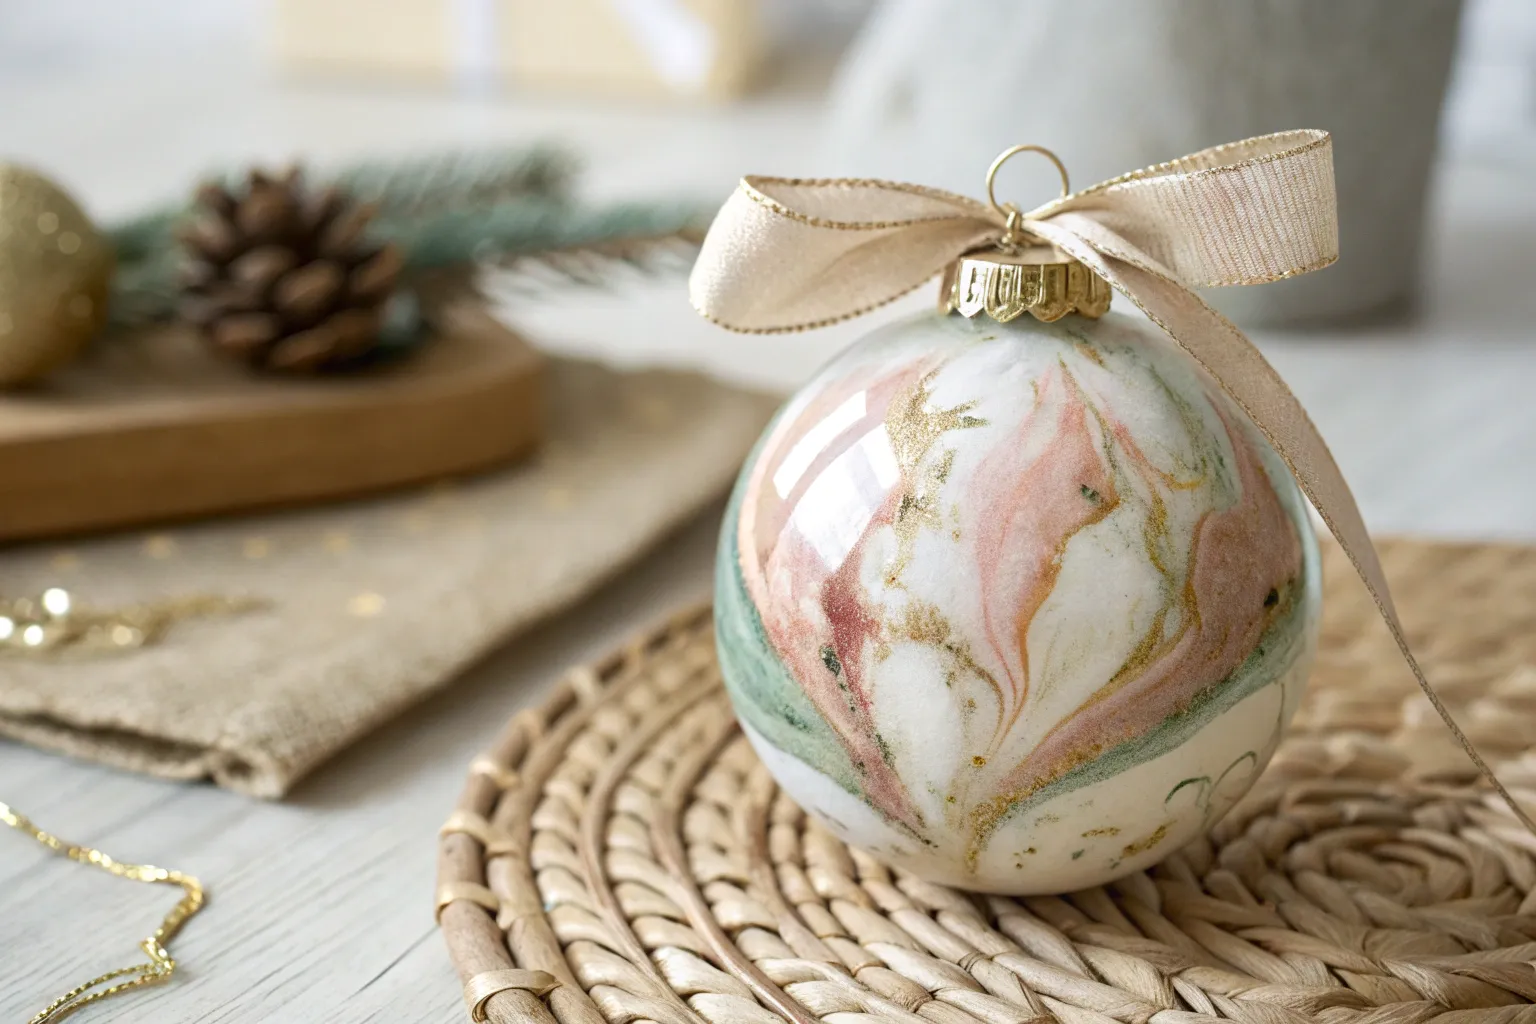
Marbled Ornaments With Gentle Color Veins
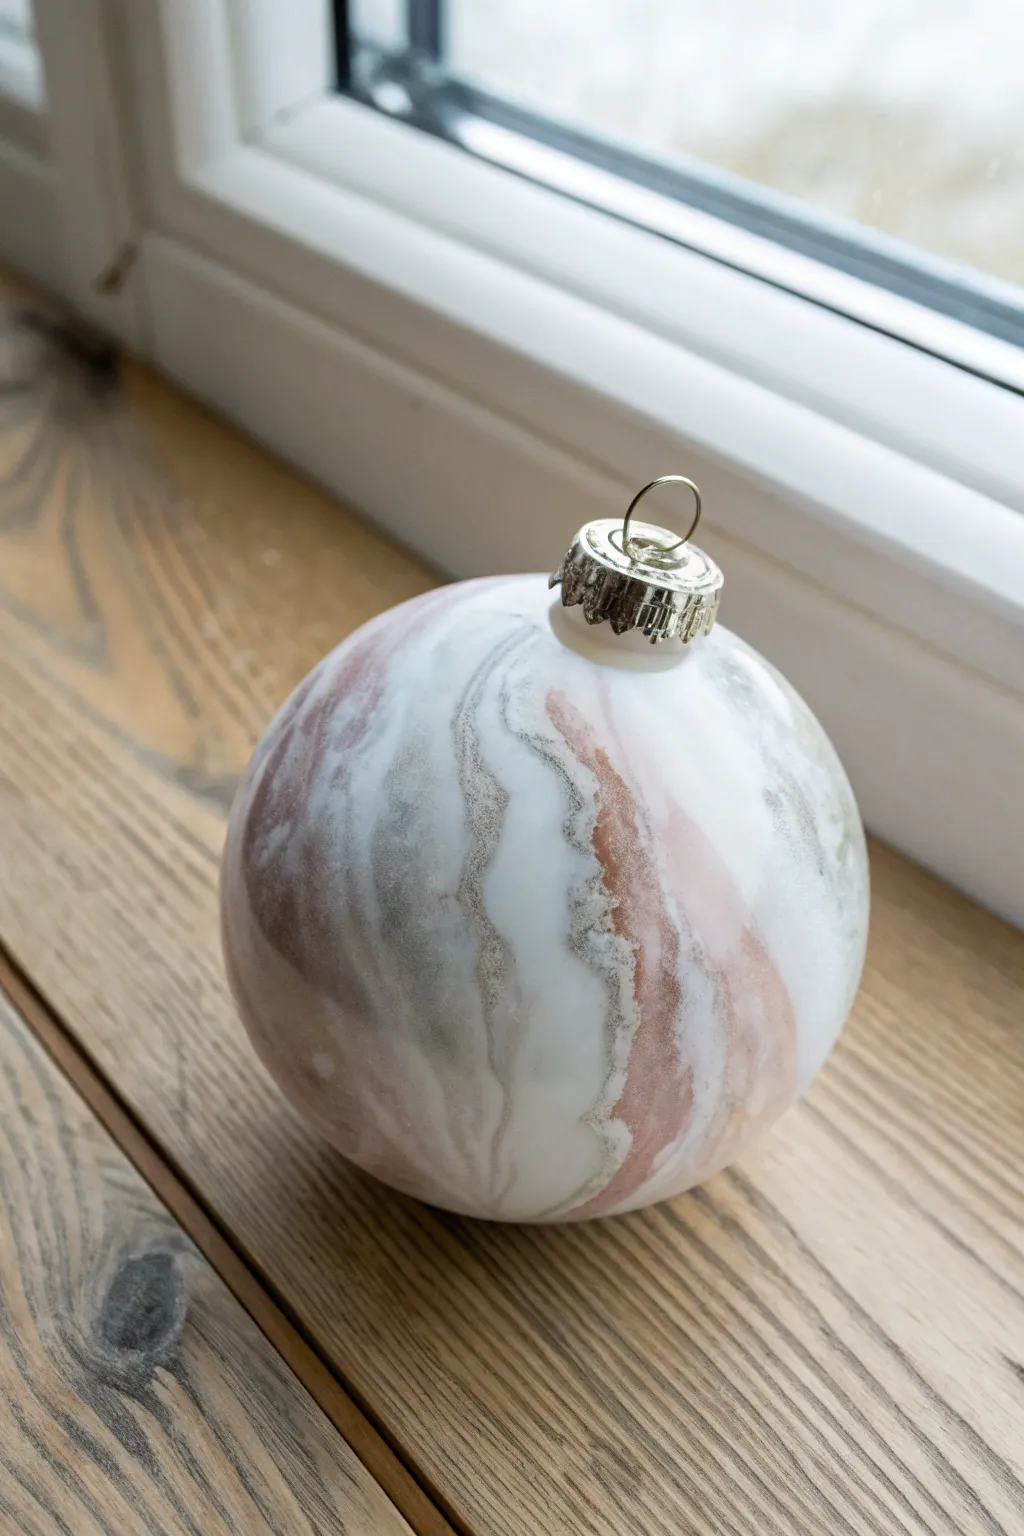

Capture the organic elegance of polished stone with this sophisticated marbling technique. By swirling soft pinks, greys, and metallic silvers inside a clear ornament, you create delicate veins that look effortlessly chic.
Detailed Instructions
Materials
- Clear glass or plastic ball ornaments (removable cap)
- Acrylic craft paints (white, soft dusty pink, grey, metallic silver)
- Pouring medium or water (to thin paints)
- Small disposable cups (one for each color)
- Wooden stir sticks or toothpicks
- Paper towels
- Empty egg carton or drying rack
Step 1: Preparation and Mixing
-
Remove the cap:
Gently pull the metal hanger and cap off the top of your clear ornament and set them aside in a safe place. -
Prepare the workspace:
Lay down some paper towels to catch any potential drips, as this process can get a little messy once you start shaking. -
Dilute the white paint:
In one small cup, mix a generous amount of white acrylic paint with a few drops of pouring medium or water. You want a consistency similar to heavy cream—fluid enough to move, but not watery. -
Mix accent colors:
Repeat the thinning process for your dusty pink, grey, and metallic silver paints in separate cups. -
Check consistency:
Test the flow by lifting your stir stick; the paint should run off in a smooth, continuous stream.
Vein Definition
Don’t over-shake the ornament! Gentle, slow tilting creates distinct ‘stone’ veins. Rapid shaking will muddy the colors into a singular grey-pink blob.
Step 2: Creating the Marble Effect
-
Add the base layer:
Pour a small amount of the thinned white paint directly into the opening of the ornament. -
Initial swirl:
Rotate the ornament slowly in your hand to coat the bottom third of the interior with white. I find this helps the subsequent colors slide more easily. -
Introduce the grey:
Drip a few drops of grey paint into the ornament, aiming for the edges of the white paint puddle. -
Add the pink:
Pour a small stream of the dusty pink paint slightly overlapping the grey and white sections. -
Add metallic highlights:
Finish the color addition with a tiny splash of metallic silver paint to create those shimmering, mineral-like veins. -
Begin the marbling motion:
Hold the ornament by the neck and slowly turn it upside down and sideways. -
Control the flow:
Watch as the paint runs down the sides. Adjust your angle to guide the veins into natural-looking curves rather than straight lines. -
Tap for movement:
If the paint gets stuck, gently tap the ornament against your palm to encourage the flow without mixing the colors into mud. -
Cover the surface:
Continue rotating until the entire interior surface is coated in the marbled pattern. -
Drain excess paint:
Turn the ornament completely upside down over a waste cup and let the excess paint drip out for at least 15 minutes. This prevents pooling at the bottom.
Matte Finish Magic
Once the paint is dry inside, spray the exterior glass with a matte clear coat. This mimics the texture of unpolished marble or ceramic stone.
Step 3: Finishing Up
-
Deep drying:
Place the ornament upside down in an egg carton or drying rack. Let it dry for at least 24 to 48 hours. Interior paint takes much longer to cure than exterior paint. -
Check for transparency:
Once dry, check if any areas are too sheer. If you want a more opaque look, you can swirl a thin layer of white paint inside again. -
Reattach hardware:
Carefully pinch the metal prongs of the cap and slide it back into the ornament neck. -
Clean the exterior:
Wipe the outside glass with a damp cloth to remove any fingerprints or stray paint smudges.
Hang your beautiful creation near a window or light source to let the metallic silver veins catch a glimmer


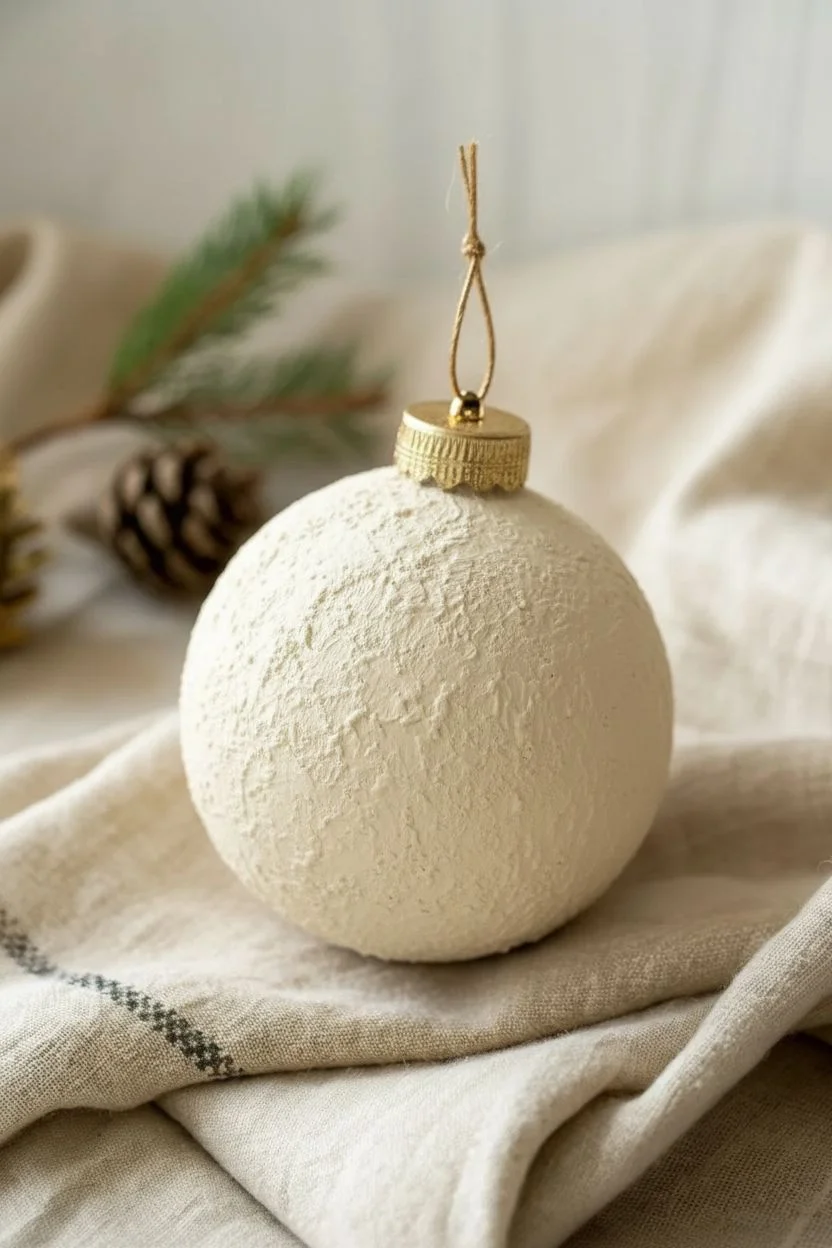
Half-Dipped Color Block Ornaments
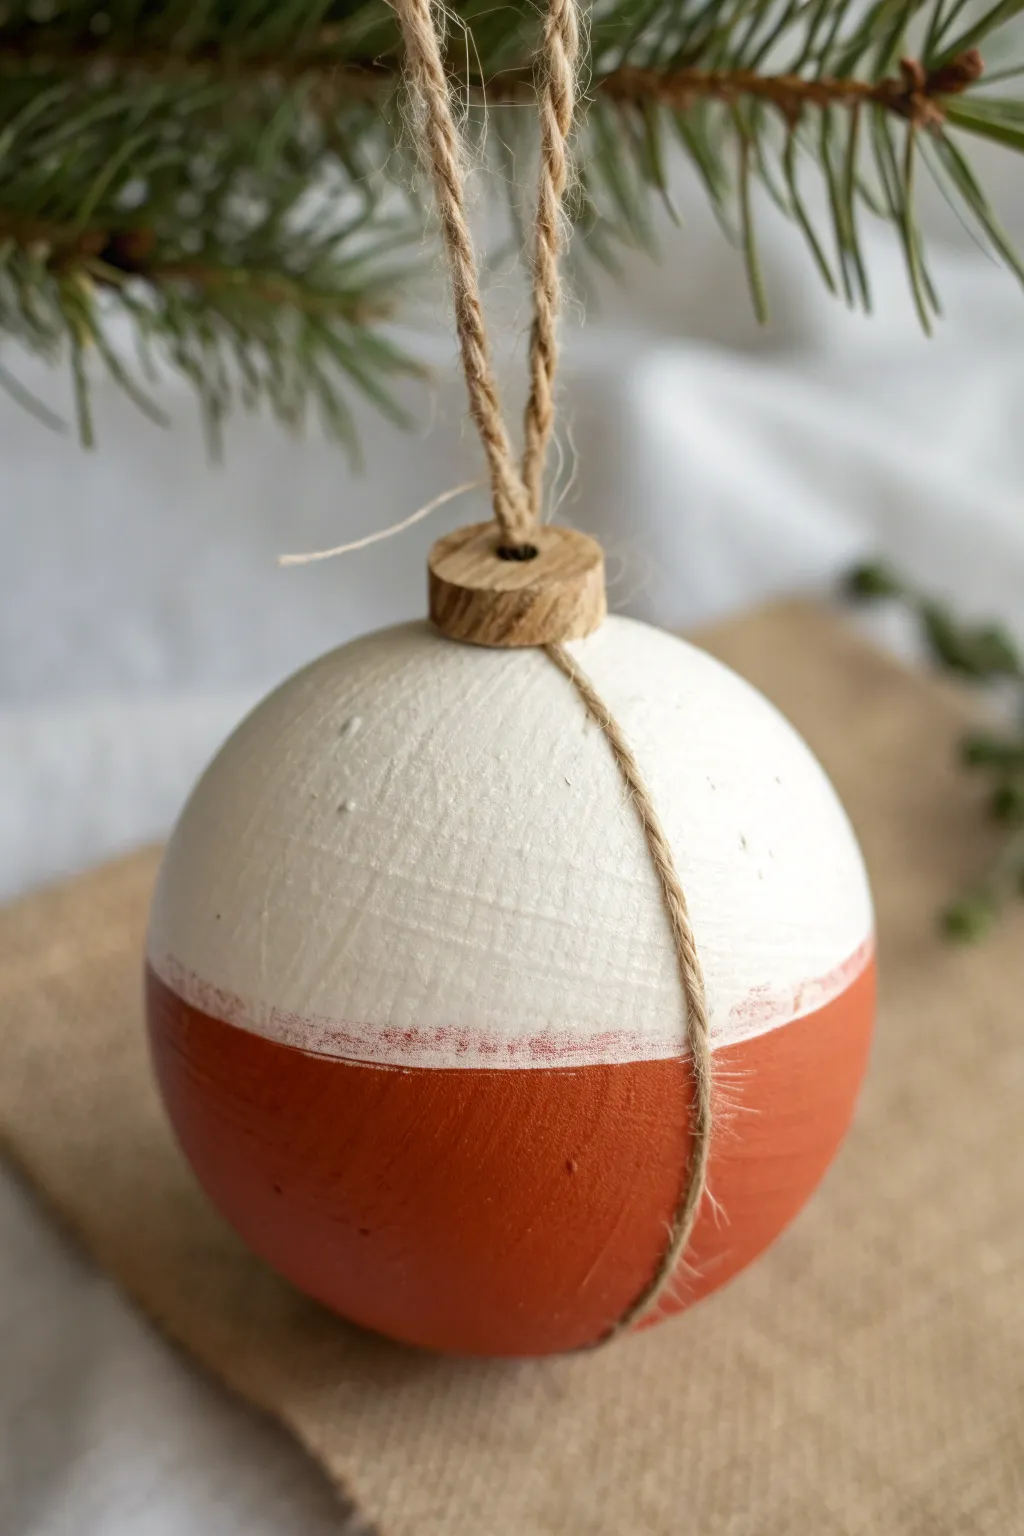
Embrace the beauty of simplicity with these half-dipped color block ornaments that perfectly blend modern design with rustic charm. The textured white finish against the warm terracotta red creates a stunning contrast, tied together with natural jute for an organic, earthy feel.
Step-by-Step Tutorial
Materials
- Unfinished wooden ball ornament or round paper mache ornament
- White or cream chalk paint
- Terracotta or warm rust-colored acrylic paint
- Masking tape or painter’s tape
- Medium flat paintbrush
- Small foam brush (optional)
- Small wooden washer or bead (for the cap)
- Jute twine
- Hot glue gun and glue sticks
- Scissors
Step 1: Preparation and Base Coat
-
Prepare surface:
Begin by ensuring your wooden or paper mache bauble is clean and free of dust. If using a raw wood ball, you might want to give it a very light sanding with fine-grit sandpaper to remove any splinters, though some texture adds to the rustic look. -
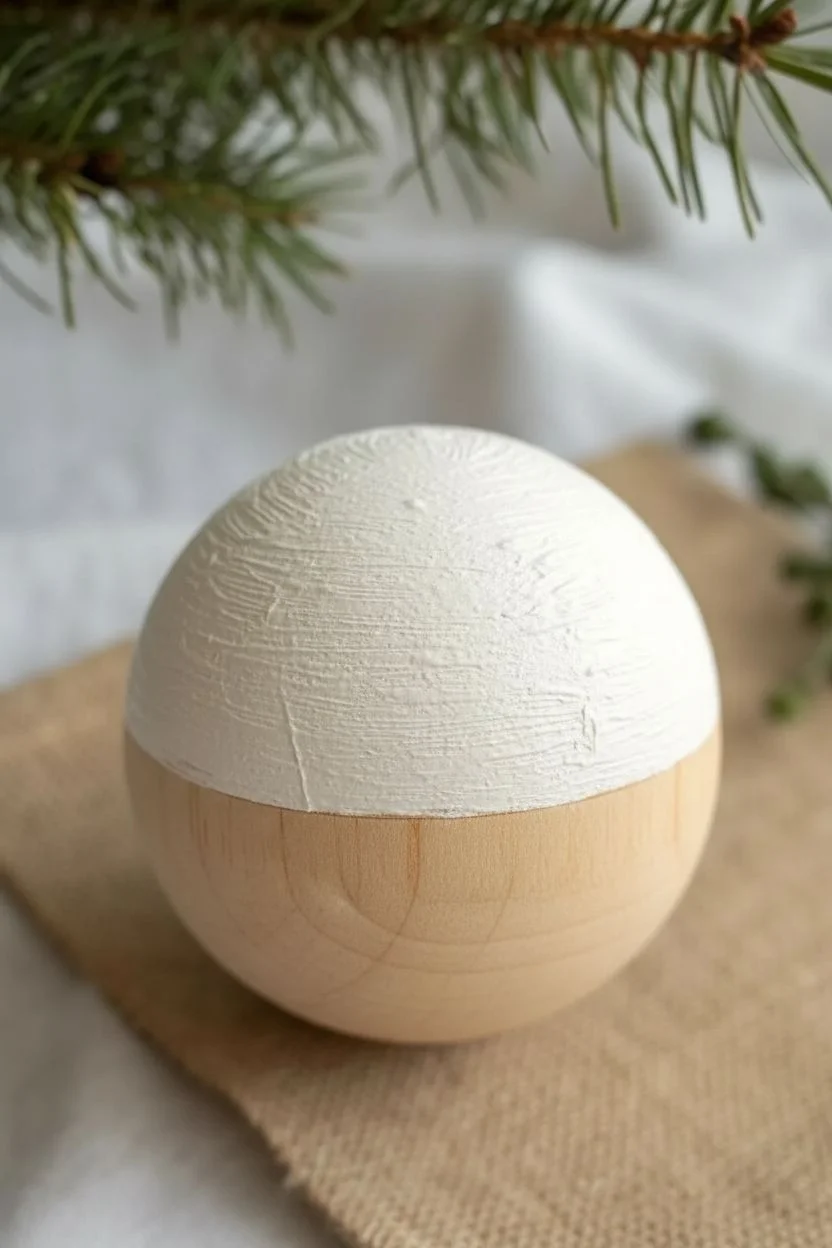
Apply first white layer:
Using your flat paintbrush, coat the entire upper half of the ornament with the white chalk paint. Don’t worry about being perfect at the equator line yet; simply ensure the top hemisphere is fully covered. -
Texture the paint:
Chalk paint is excellent for this project because passing the brush back and forth as it begins to set creates a lovely, plaster-like texture. Let this layer dry completely, usually about 20-30 minutes. -
Second white coat:
Apply a second coat of white paint to ensure opacity. Extending the paint slightly past the middle line is helpful so you don’t have gaps later. Allow this to cure fully before moving on.
Step 2: Creating the Color Block
-
Mask the line:
Place a strip of masking tape horizontally around the middle of the sphere. Press the edge of the tape down firmly to prevent paint bleed, creating a crisp separation between the two halves. -
Apply terracotta paint:
With the terracotta acrylic paint, cover the bottom half of the ornament. Stroke away from the tape edge initially to minimize the risk of paint effectively sneaking under the tape. -
Add richness:
Depending on the thickness of your acrylics, a second coat of terracotta might be necessary to achieve that deep, warm clay hue. I find that two thin coats adhere better than one thick, gloopy layer. -
Remove tape:
Carefully peel back the masking tape while the second coat is still slightly tacky, not completely dry. This helps keep the paint from cracking along the edge. -
Touch up edges:
If the line looks a bit too perfect or if there was minor bleeding, use a dry brush with a tiny amount of white paint to feather the edge slightly, creating that distressed look seen in the photo.
Clean Lines
For the sharpest possible paint line, paint a layer of white OVER the tape edge first. This seals the gap, so any paint that bleeds is white-on-white, blocking the red.
Step 3: Adding the Rustic Hardware
-
Prepare the cap:
Take your small wooden washer or a flat wooden bead. If it isn’t already the natural wood tone shown, you can stain it lightly or leave it raw to match the earthy vibe. -
Glue the cap:
Apply a small dab of hot glue to the very top pole of the white section of your ornament. Center the wooden washer and press it down firmly until the glue sets. -
Cut the twine:
Cut a length of jute twine, approximately 10-12 inches long, which will serve as your hanging loop. -
Thread the loop:
Fold the twine in half to create a loop. Push the folded end through the hole in your wooden washer cap. -
Secure the loop:
Tie a knot at the open ends of the twine to create a secure loop. If the hole in the washer is large enough, you can hide the knot inside the bauble or underneath the washer before gluing.
Level Up: Texture
Mix a teaspoon of baking soda into your terracotta paint. This creates a grainy, ceramic-like texture that mimics real clay pottery for an even more authentic look.
Step 4: Final Jute Detail
-
Anchor the decorative string:
To recreate the vertical string detail, take a new piece of jute twine. Glue one end to the bottom center of the terracotta section. -
Wrap vertically:
Pull the twine tautly up the side of the ornament, crossing over the paint line and up towards the wooden cap. -
Secure at the top:
Thread the twine through the center hole or wrap it once around the base of the wooden washer cap. Secure it with a tiny dot of glue. -
Complete the circle:
Continue the twine line down the opposite side of the ornament, returning to the bottom center point where you started. -
Final trim:
Glue the end of the twine at the bottom and trim any excess closely so the seam is almost invisible.
Hang your new rustic creation on a sturdy branch to admire the clean contrast and natural textures


Metallic Accents And Painted “Gilded” Details
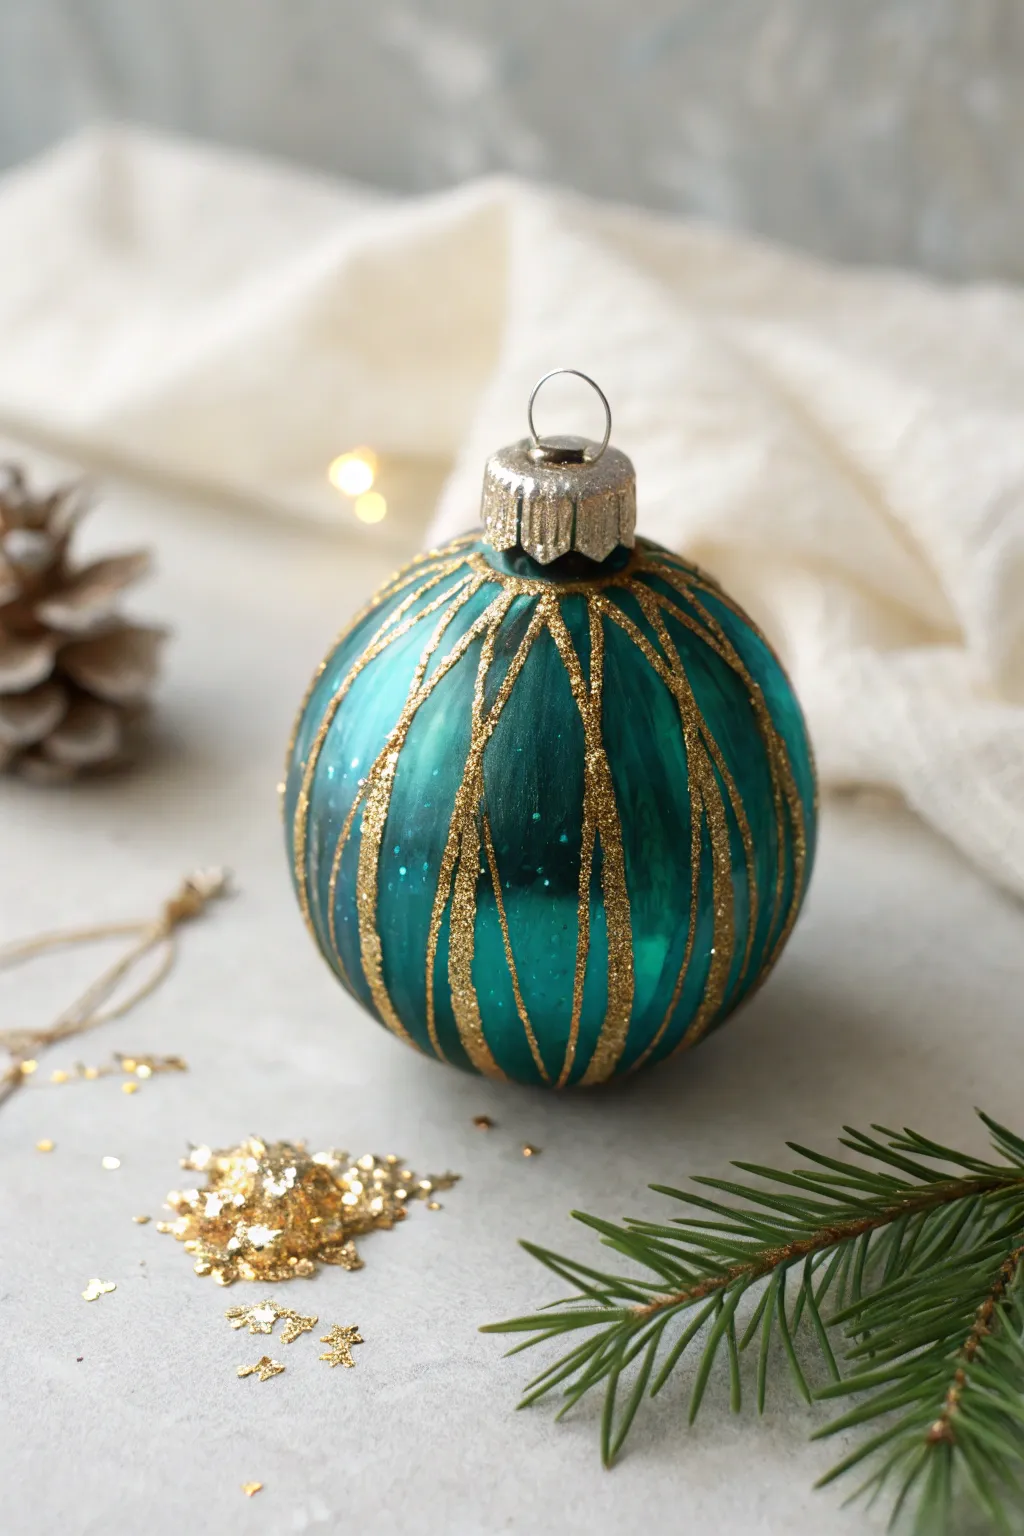
Transform a plain glass bauble into a luxurious holiday statement piece with this simple yet striking design. By combining rich teal hues with structured gold glitter lines, you’ll create a vintage-inspired ornament that looks like it came from an old-world boutique.
Detailed Instructions
Materials
- Clear glass or plastic ball ornament (removable cap preferred)
- Teal or deep turquoise acrylic craft paint
- Water
- Small mixing cup
- Gold glitter (fine to medium grain)
- Fine-tip glue pen or a small liner brush with white craft glue
- Loose turquoise glitter (very fine)
- Paper towels
- Empty egg carton or drying rack
Step 1: Creating the Base Color
-
Prep the ornament:
Begin by carefully removing the metal cap and wire hanger from your clear ornament. Set these aside in a safe spot so you don’t lose them. -
Mix the paint solution:
In your small mixing cup, combine a generous squirt of teal acrylic paint with a few drops of water. You want a consistency that is pourable but still opaque enough to coat the glass—think heavy cream. -
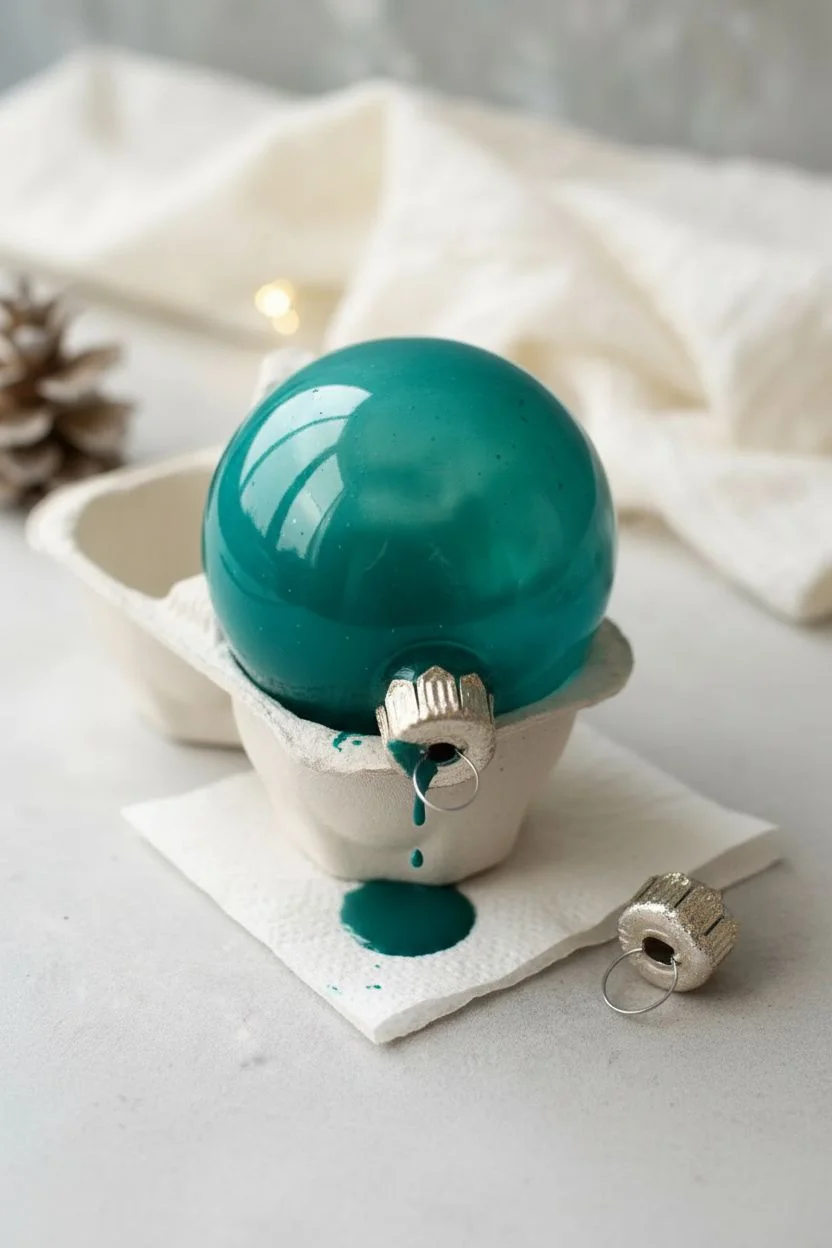
Pour and coat:
Pour the paint mixture directly inside the ornament through the top opening. Rotate the ball slowly in all directions, swirling the paint until the entire interior surface is completely covered in that rich teal color. -
Drain the excess:
Once coated, turn the ornament upside down over your mixing cup or a paper towel to let the excess paint drain out. I find that leaving it upside down in an egg carton for about 20 minutes ensures a smooth, streak-free internal finish. -
Dry completely:
Allow the interior paint to dry fully. This can take anywhere from a few hours to overnight depending on the paint thickness. While waiting, wipe down the exterior glass with rubbing alcohol to remove oils for better adhesion later.
Shake It Off
Work in vertical sections! Apply glue and glitter to one side, let it dry slightly, then rotate. This prevents you from accidentally smudging wet glue on the back while working on the front.
Step 2: Adding the Sparkle
-
Replace the cap:
Once the inside is dry, carefully place the metal cap and wire hanger back onto the ornament neck. -
Plan the lines:
Visualize the vertical lines before you start gluing. They should start right at the base of the metal cap and curve gently downwards, following the spherical shape of the ornament. -
Apply the first glue lines:
Using your fine-tip glue pen, draw two vertical lines dividing the ornament in half. Start at the cap and draw down about three-quarters of the way, tapering off near the bottom. -
Create the segments:
Continue drawing vertical curved lines between your initial marks. Aim for even spacing, but don’t worry about perfection; organic variation adds to the hand-painted charm. -
Add texture:
If you want the textured look seen in the photo, make your glue lines slightly irregular or ‘wobbly’ rather than perfectly straight. This helps the glitter catch the light better. -
The gilding process:
While the glue is wet, generously sprinkle the gold glitter over the lines. Do this over a folded piece of paper so you can easily funnel the excess back into the jar. -
Tap off excess:
Gently tap the neck of the ornament to shake off loose glitter. Let the glue lines set for about 10-15 minutes.
Step 3: Finishing Touches
-
Add subtle shimmer:
To mimic the subtle sparkle on the teal surface itself, mix a tiny drop of clear glue with water. Dab a few microscopic spots randomly between the gold lines. -
Apply micro-glitter:
Dust a pinch of very fine turquoise glitter over these spots. This creates depth and makes the glass look embedded with magic. -
Final dry:
Place the ornament back in its drying rack or hang it up. Let it cure completely for at least 24 hours to ensure the glitter is hardened and won’t flake off when touched. -
Clean up:
Use a dry, soft brush to sweep away any stray specks of glitter that stick to the plain glass areas where you don’t want them.
Vintage Patina
For an antique look, mix a tiny bit of bronze or copper glitter into your gold. The slight color variation mimics the tarnished elegance of genuine vintage glass ornaments.
Now hang your shimmering masterpiece near a tree light to catch that beautiful golden reflection
BRUSH GUIDE
The Right Brush for Every Stroke
From clean lines to bold texture — master brush choice, stroke control, and essential techniques.
Explore the Full Guide
Snowflake Motifs For Easy Ornament Painting
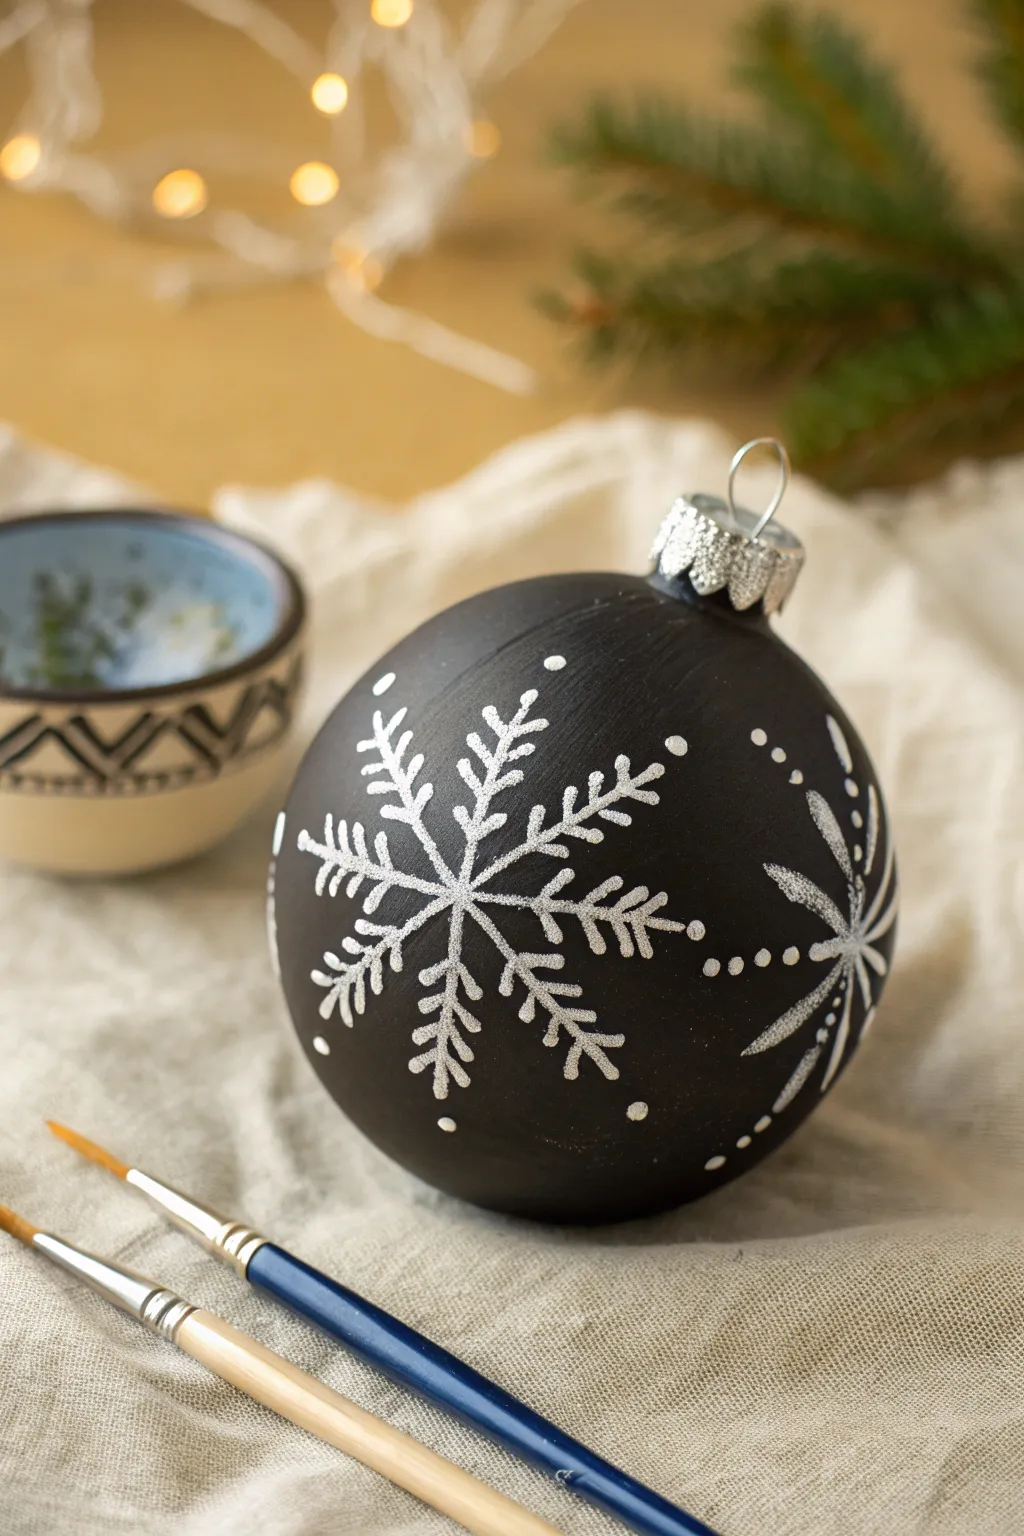
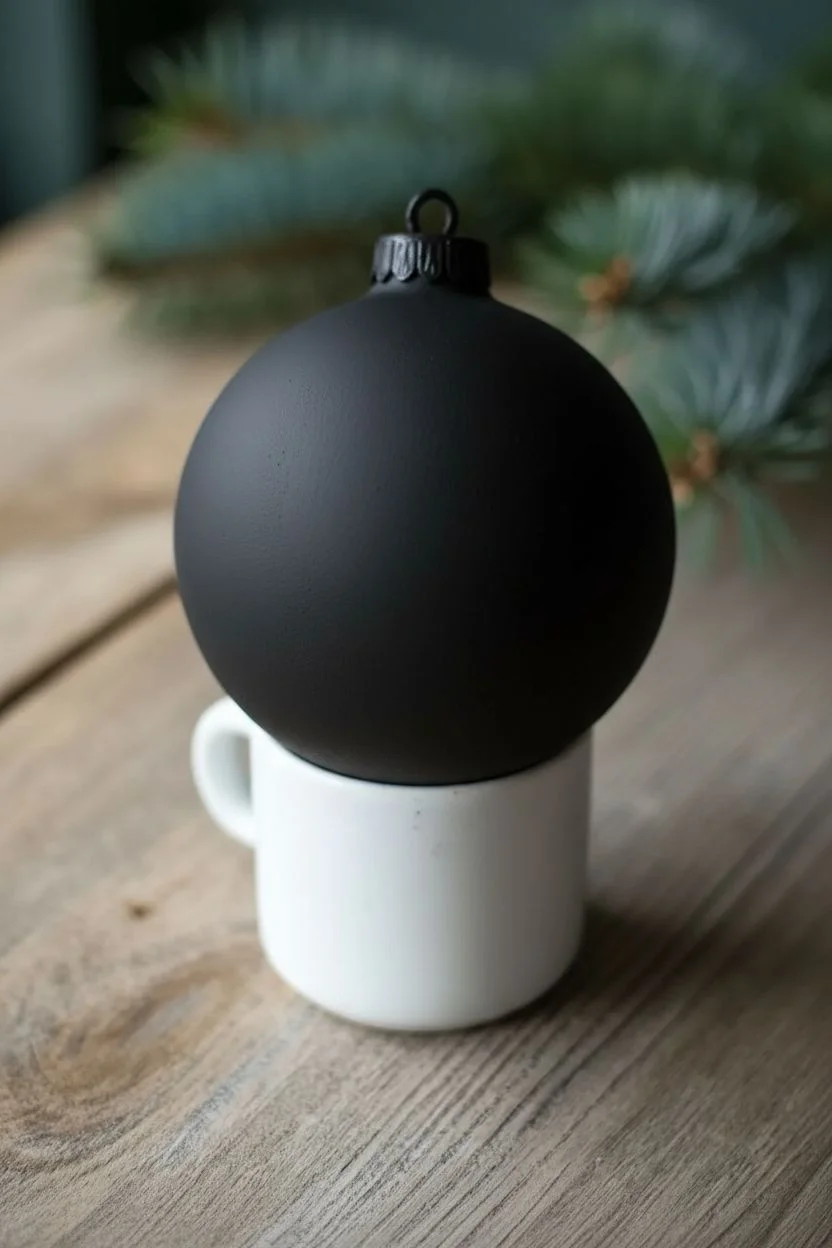
Transform a plain bauble into a winter wonder with this striking high-contrast design. The matte black background makes the intricate silver snowflakes pop, creating a sophisticated look that mimics a starry winter night.
Step-by-Step Tutorial
Materials
- Plain ceramic or glass ball ornament
- Matte black acrylic paint
- Metallic silver acrylic paint (high pigment)
- Fine detail brush (size 0 or 00)
- Small flat brush (size 4 or 6)
- Water cup and paper towel
- Egg carton or small cup for drying
- Optional: Matte spray varnish
Step 1: Setting the Backdrop
-
Clean surface:
Begin by wiping down your ornament with a slightly damp cloth to remove any dust or oils, ensuring the paint adheres perfectly. -
Remove cap:
Gently pull off the metal cap and hanger wire; set these aside so you can paint the entire neck of the ornament without obstruction. -
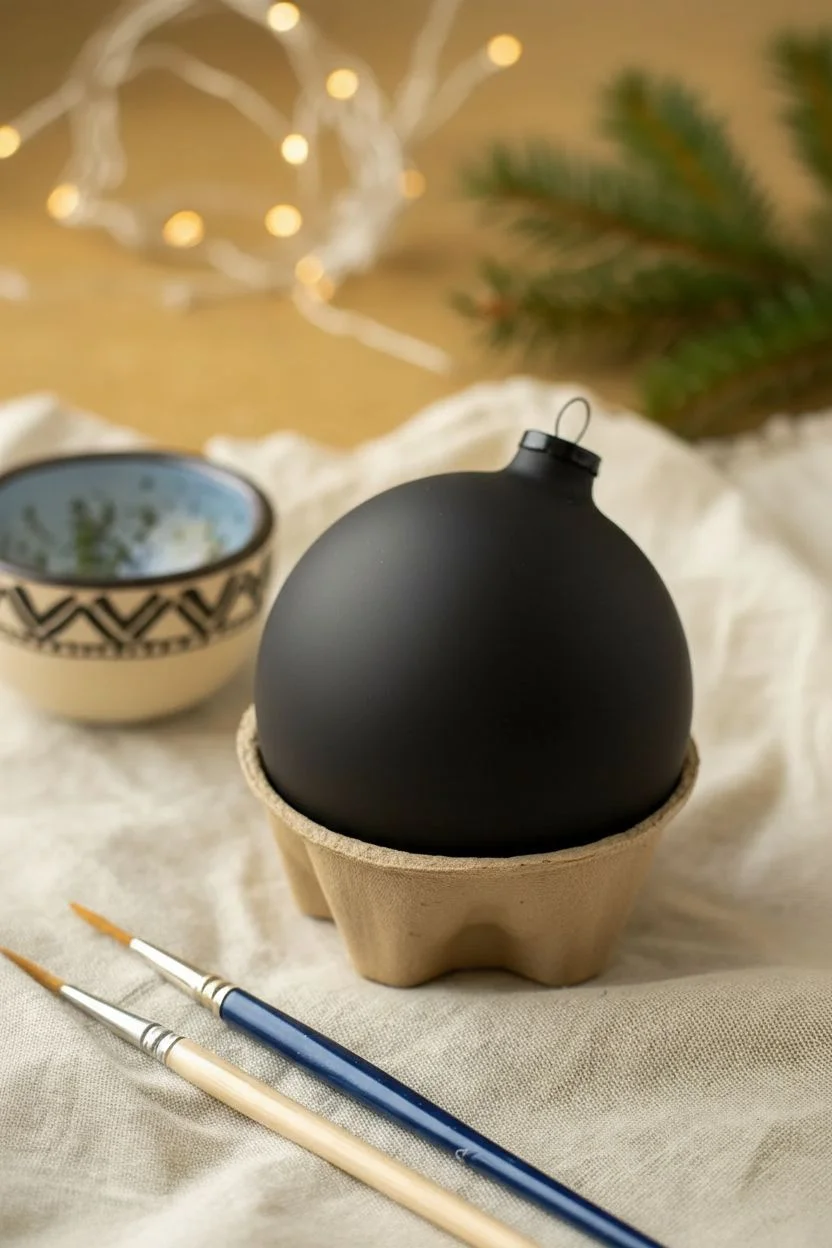
Base coat:
Using your flat brush, apply a smooth layer of matte black acrylic paint over the entire surface of the ball. -
First dry:
Place the ornament in an egg carton or a small drying cup and let it dry completely to the touch, which usually takes about 15–20 minutes. -
Check coverage:
Inspect the black coverage. If you can see streaks or the original color showing through, apply a second coat of black paint for a solid, opaque finish. -
Full cure:
Allow the base coat to dry thoroughly. I prefer to let this sit for at least an hour to ensure the black paint doesn’t lift when we add the silver.
Step 2: Designing the Snowflake
-
Center point:
Dip your fine detail brush into the metallic silver paint. Choose a prominent spot on the ‘equator’ of the ball and paint a tiny dot to serve as the center of your main snowflake. -
Main axis:
Paint a straight vertical line through your center dot, extending about an inch up and an inch down. -
Cross axis:
Paint a horizontal line of the same length through the center, creating a simple silver cross. -
Diagonals:
Add two diagonal lines through the center, bisecting the angles of your cross, so you end up with an eight-pointed star shape. -
Inner branches:
On each of the eight main arms, paint small ‘V’ shapes pointing outward, starting closer to the center of the snowflake. -
Outer branches:
Add a second set of small ‘V’ shapes further up each arm, near the tips, to flesh out the crystalline structure. -
Dot accents:
Using the very tip of your brush, place a single silver dot at the end of each snowflake arm for a finished, polished look.
Pro Tip: Better Flow
If your silver paint feels too thick or drags on the matte surface, mix in a tiny drop of water or flow medium. It helps create sharper, crisp lines.
Step 3: Adding Details
-
Partial flakes:
Move to the sides of the ornament and paint partial snowflakes coming into view from the edges, using the same line-and-V technique but only drawing half or quarter shapes. -
Starry sky:
Dip the handle end of your paintbrush into the silver paint to create various-sized dots in the empty black spaces, resembling falling snow or distant stars. -
Reattach hardware:
Once all silver paint is completely dry, gently snap the metal cap and hanger wire back onto the neck of the ornament. -
Seal (Optional):
For extra durability, you can lightly mist the finished piece with a matte spray varnish to protect your handiwork.
Level Up: 3D Sparkle
While the silver paint is still wet, sprinkle ultra-fine iridescent glitter over the snowflakes. It catches the tree lights beautifully.
Hang your new midnight creation near a light source to see the metallic silver truly shine
Simple Snowman Faces With Cozy Scarves
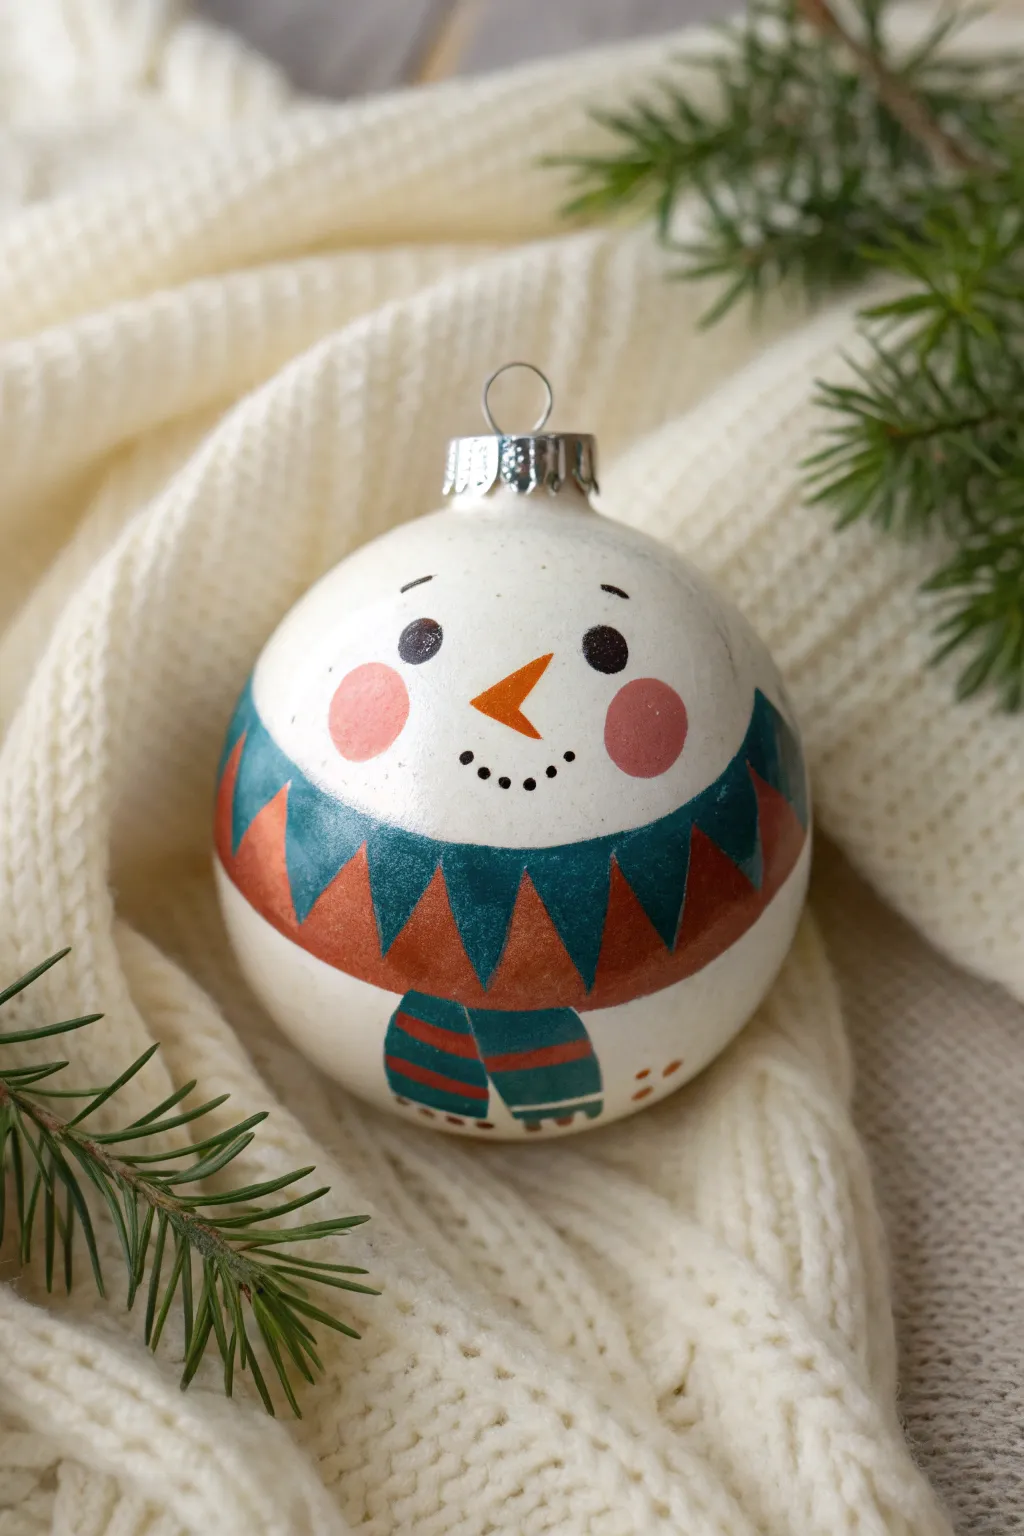
Transform a plain white bauble into a charming winter friend wrapped in a geometric scarf. This hand-painted design combines simple facial features with a festive pattern for an ornament that feels both modern and nostalgic.
Step-by-Step
Materials
- White ceramic or glass ball ornament (matte or satin finish preferred)
- Acrylic paints: Teal/dark turquoise, terracotta/rust orange, bright orange, black, pink
- Small flat shader brush (size 2 or 4)
- Fine liner brush (size 0 or 00)
- Small round sponge dobber or Q-tip
- Pencil for sketching
- Cup of water and paper towels
- Palette or paper plate
Step 1: Planning and Base Design
-
Clean surface:
Before starting, wipe down your ornament with rubbing alcohol or a damp cloth to remove any oils or dust. This ensures the paint adheres properly. -
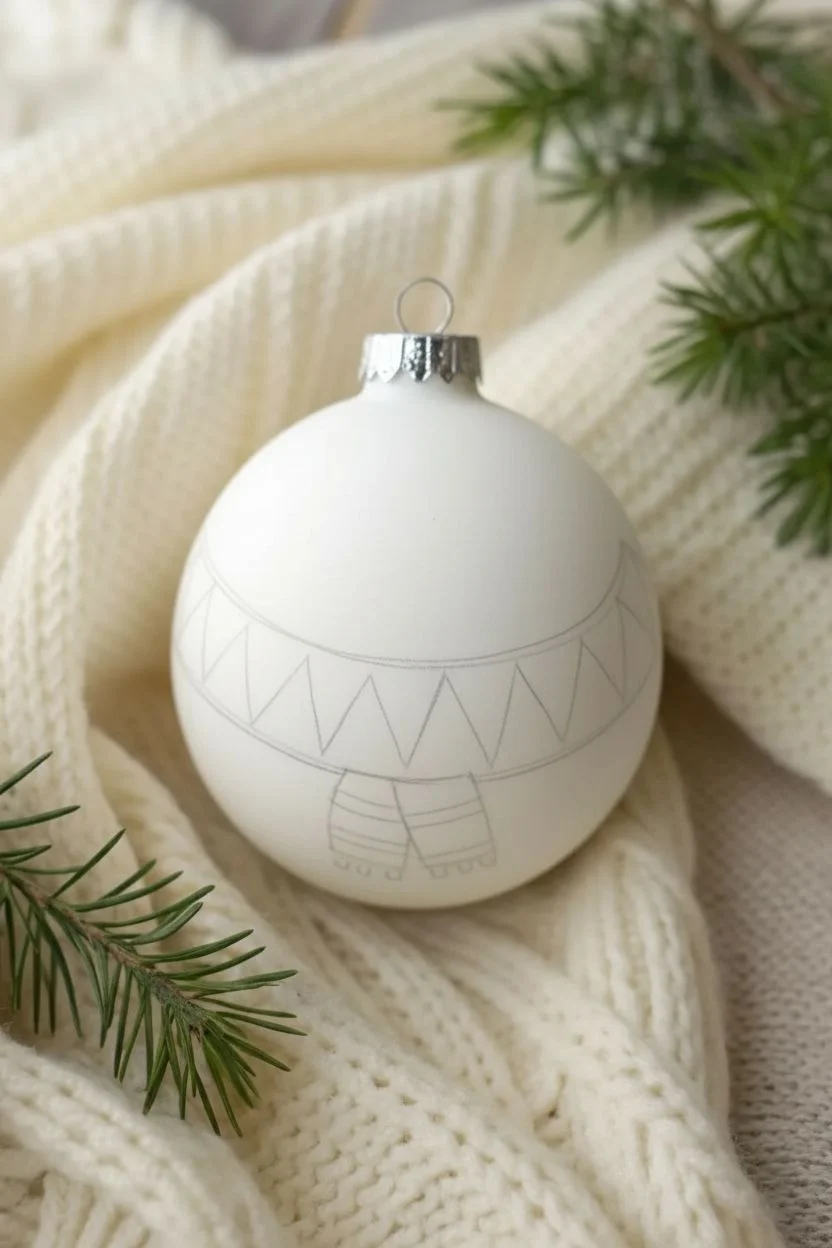
Establish the scarf line:
Imagine a line dividing the ornament roughly in half horizontally. Using a pencil lightly sketch a wavy or curved line around the entire circumference just below the midpoint. This will be the top edge of the scarf. -
Sketch the pattern:
Below your initial line, sketch a zigzag pattern that creates a row of triangles pointing down interlocked with triangles pointing up. Keep them fairly large and uniform. -
Add the scarf tails:
Select a spot on the bottom front of the ornament to be the center. Sketch two small vertical rectangles hanging down from the main scarf band to represent the scarf’s tied ends.
Step 2: Painting the Scarf
-
Fill the teal triangles:
Using your flat shader brush and teal paint, fill in the triangles that point downward. Careful edging is key here to keep the points sharp. -
Fill the rust triangles:
Rinse your brush thoroughly. Switch to the terracotta or rust orange paint and fill in the upward-pointing triangles. The alternating colors create that cozy knitwear look. -
Paint the scarf ends:
Move to the small rectangular ‘tails’ at the bottom. Paint the base of these shapes in the teal color. -
Add stripes to the tails:
Once the teal base on the tails is dry to the touch, use your fine liner brush with the rust paint to add horizontal stripes across them. -
Let it dry:
Allow all the scarf elements to dry completely before touching the ornament face again to avoid smudging.
Fixing Smudges
If you smudge paint on the white background, wait for it to dry completely. Then, gently scratch it off with a craft knife or paint over it with opaque white acrylic
Step 3: Creating the Face
-
Rosy cheeks:
Load a sponge dobber or the tip of your pinky finger with a small amount of pink paint. Dab off the excess on your palette, then gently press two soft circles onto the upper half of the ornament for cheeks. -
Paint the eyes:
Using the handle end of a paintbrush dipped in black paint, dot two eyes just above and slightly inward from the cheeks. I find this creates a perfect circle without brushstrokes. -
Add expression lines:
With your fine liner brush and the tiniest amount of black paint, draw small, arched eyebrows floating above the eyes. -
The carrot nose:
Mix a bright orange. Using the liner brush, paint a sideways triangle between the eyes, pointing towards the left cheek. Make the base slightly curved for dimension. -
The dotted smile:
Dip the very tip of your liner brush or a toothpick into black paint. Create a smile using 5-6 small dots, following the curve between the cheeks. -
Final details:
To ground the snowman, add two small brown or rust-colored dashes near the bottom curve of the ornament, suggesting visible feet or the bottom of the coat.
Glitter Finish
While the paint usually looks great matte, you can add clear glitter paint over the teal sections of the scarf to make it look like frosty wool
Hang your new cozy friend on the tree and enjoy the winter charm he brings to your decor

PENCIL GUIDE
Understanding Pencil Grades from H to B
From first sketch to finished drawing — learn pencil grades, line control, and shading techniques.
Explore the Full Guide
Polar Bear Ornaments With Soft Shading
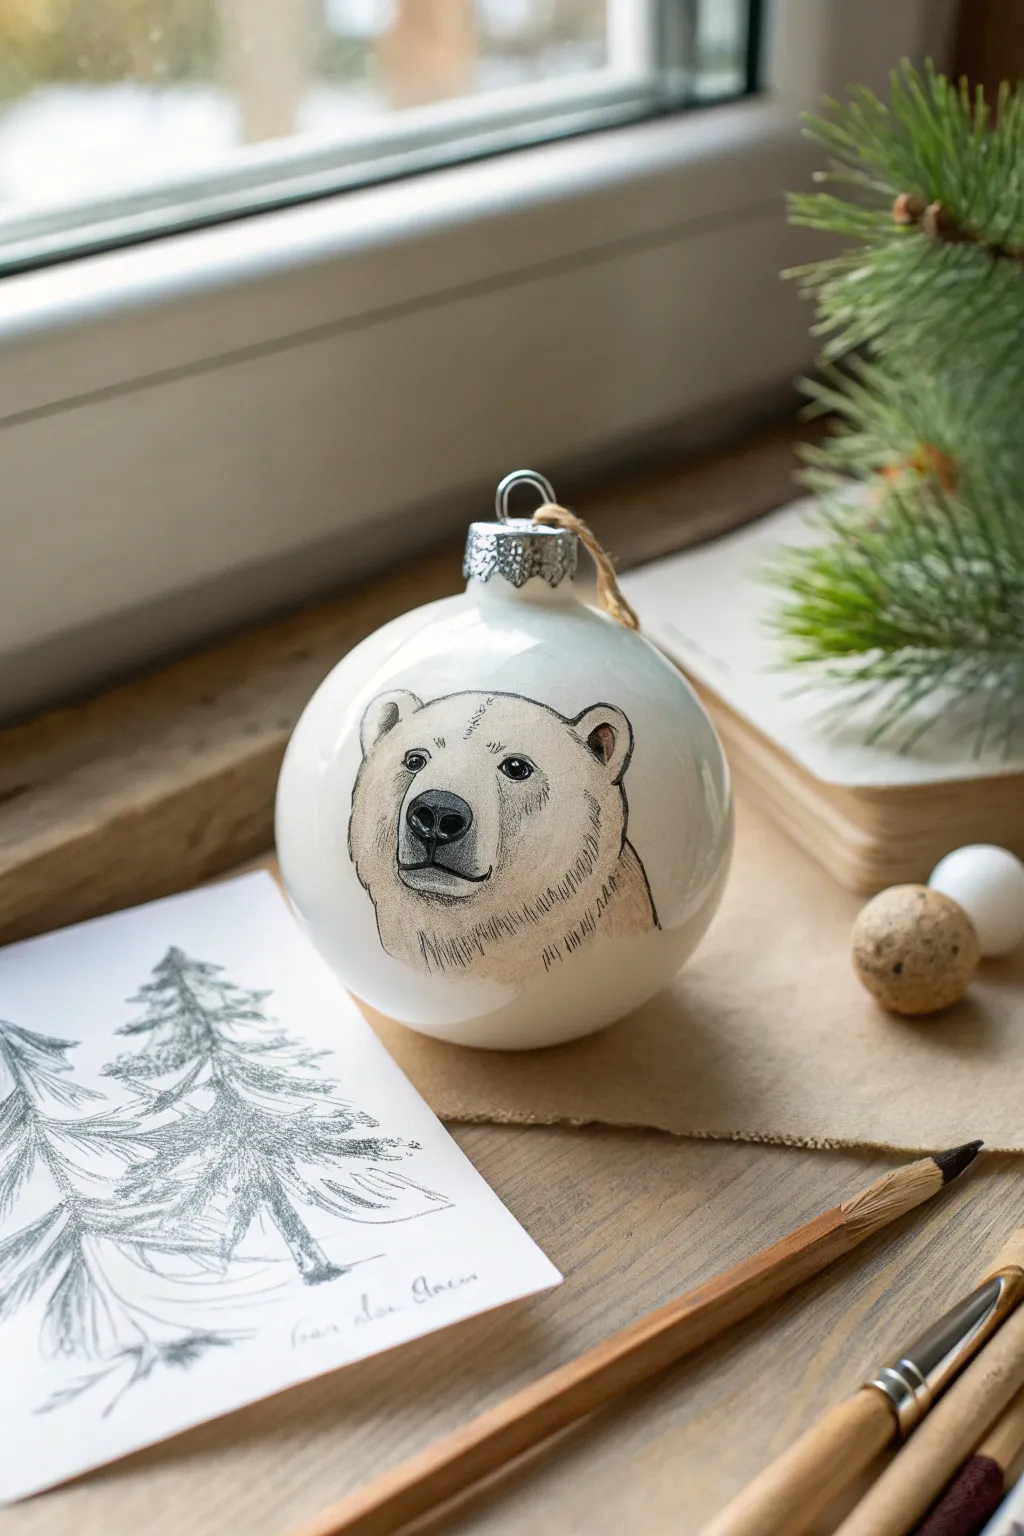
Capture the serene beauty of the arctic with this hand-painted polar bear ornament, featuring delicate fur textures and soft shading. This project transforms a simple white bauble into a sophisticated piece of art using precise brushwork and subtle color layering.
How-To Guide
Materials
- White matte glass or ceramic ornament (approx. 3-inch diameter)
- HB or 2B graphite pencil
- High-quality acrylic paints (Titanium White, Lamp Black, Burnt Umber, Raw Sienna, Unbleached Titanium)
- Detailed synthetic brushes (Round size 0, 2, and a fine liner brush)
- Small flat brush for blending
- Mixing palette
- Cup of water and paper towels
- Matte finish spray varnish (optional)
Step 1: Preparation and Sketching
-
Surface Prep:
Begin by gently wiping the ornament with a slightly damp cloth to remove any dust or oils. If your ornament is glossy glass, lightly sand the surface area where you’ll be painting with fine-grit sandpaper to help the paint adhere, then wipe clean again. -
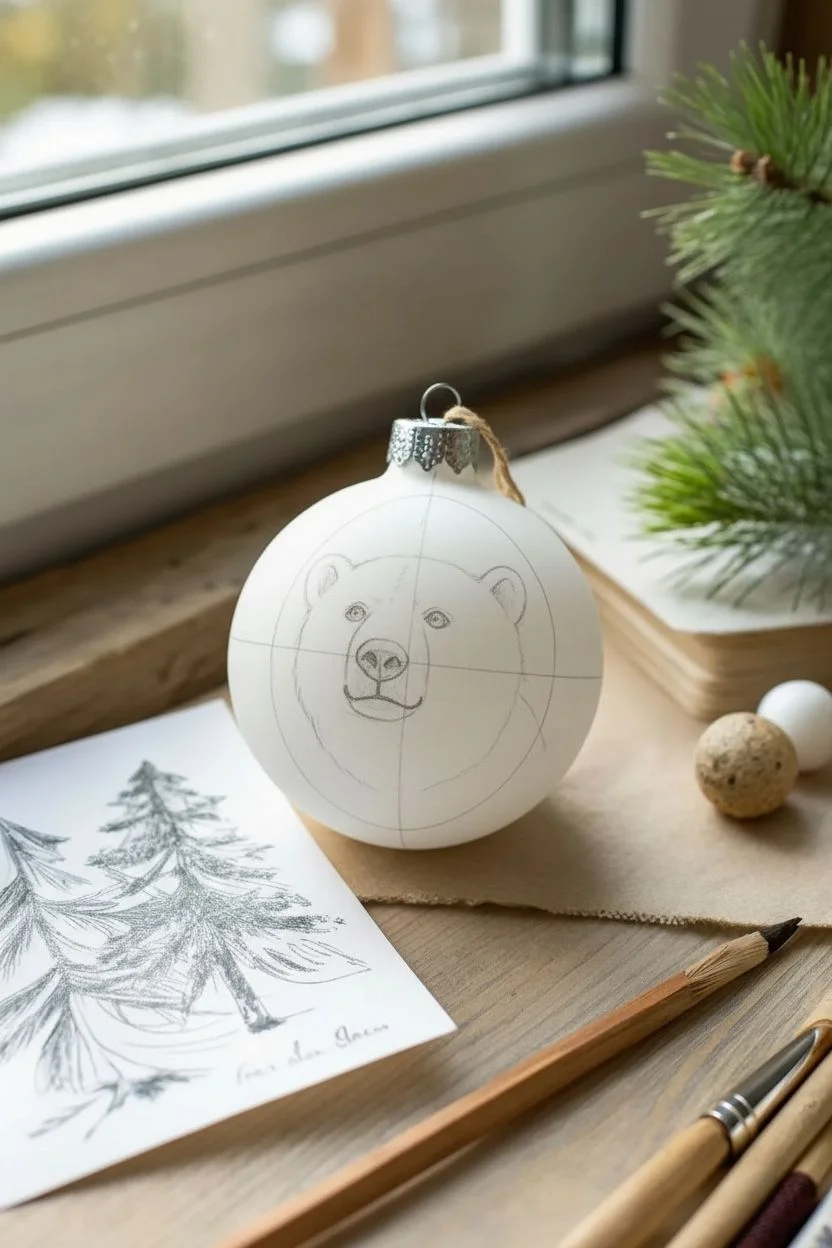
Reference Lines:
Using your graphite pencil, lightly sketch a vertical centerline and a horizontal eye line on the curve of the ornament. These guides are crucial for keeping the bear’s features symmetrical on a spherical surface. -
Basic Shapes:
Sketch a large, soft oval for the head. Add two smaller, rounded triangles at the top corners for ears. Draw a slightly flattened oval in the lower center for the muzzle area. -
Refining Features:
Lightly detail the triangular nose and the mouth line. Mark the positions for the eyes, ensuring they are spaced widely apart to capture that distinct polar bear look. Keep your pencil pressure extremely light so lines don’t show through the pale fur later.
Keep it Watery
Use fluid retarder or water to keep acrylics thin. Thick, globby paint kills the delicate fur effect. You want semi-transparent layers that build up slowly.
Step 2: Base Colors and Values
-
Mixing the Base Tone:
Mix Titanium White with a tiny touch of Unbleached Titanium or Raw Sienna. You want a color that is just slightly warmer and darker than the pure white of the ornament itself. This subtle difference is key to making the bear distinct. -
Applying the Base Layer:
Using a size 2 round brush, fill in the entire head shape with your mixed off-white color. Feather the edges outwards so there isn’t a hard line where the fur meets the white background. -
Shadow Mapping:
While the base is drying, mix a light wash of Burnt Umber into your off-white mix to create a soft beige shadow tone. Apply this lightly under the chin, inside the ears, and around the sides of the muzzle to build dimension. -
Deepening Shadows:
Mix a slightly darker brown using more Burnt Umber. Gently shade the inner depths of the ears and the shadow cast by the muzzle. I like to keep this paint diverse and watery for a watercolor-effect softness.
Add a Winter Scene
Extend the design by painting a faint, misty grey pine forest wrapped around the back of the ornament for a complete 360-degree arctic landscape.
Step 3: Detailing and Texture
-
Painting the Nose:
Load your size 0 brush with Lamp Black. carefully paint the nose shape. Add the nostrils as slightly darker, distinct shapes within the black area. -
Nose Highlight:
While the black is wet, lift a tiny spot on the top curve of the nose with a clean, dry brush, or wait until dry and add a micro-dot of grey to suggest wet skin texture. -
Creating the Eyes:
Paint the eyes solidly black and small. Polar bear eyes are dark and beady. Once dry, add the tiniest pinprick of pure Titanium White in the upper right quadrant of each pupil to bring them to life. -
Mouth Definition:
Use a liner brush and very thin black paint to draw the mouth line. Curve it slightly upwards at the corners to give the bear a gentle expression. -
Fur Texture – Dark:
Switch to your finest liner brush. Mix a diluted black or dark grey. Start adding ultra-fine, short strokes around the outline of the head, the ears, and the neck to simulate fur clumps. -
Fur Texture – Mid-tones:
Using your shadow beige mix, stroke in fur texture radiating from the nose bridge outward. Pay attention to the direction real fur grows—up the forehead and down the cheeks. -
Neck Fluff:
Add looser, longer strokes at the very bottom of the portrait to suggest the thick ruff of fur on the bear’s neck, letting it fade naturally into the white of the ornament. -
Final Highlights:
With pure Titanium White and a clean liner brush, add a few crisp fur strokes on top of the shadowed areas (like the top of the nose bridge and forehead) to create depth and contrast. -
Sealing the Work:
Allow the paint to cure fully for 24 hours. Lightly spray with a matte varnish to protect your delicate brushwork without adding unnatural shine.
Hang this regal bear on your tree and enjoy the quiet winter atmosphere it adds to your holiday decor.
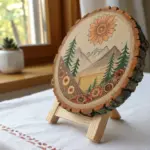
Woodland Fox Ornaments In Warm Autumn Tones
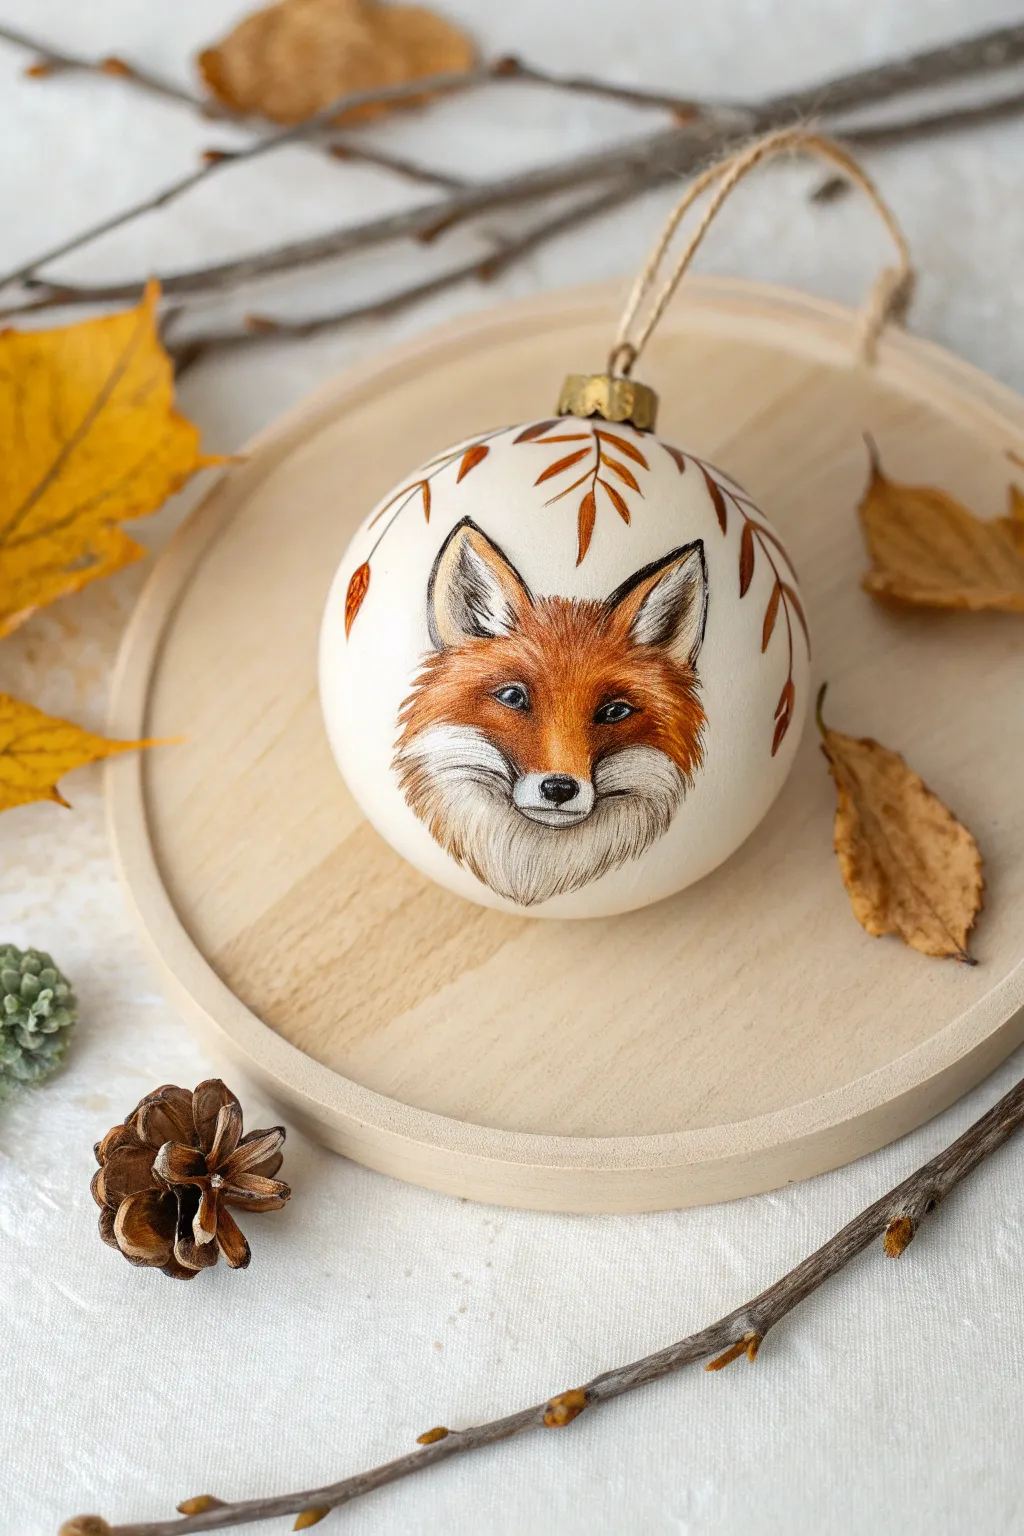
Capture the spirit of the forest with this delicately painted fox ornament featuring warm autumnal tones. The realistic fur texture and soulful eyes make this bauble a standout piece for any woodland-themed decor or tree.
Detailed Instructions
Materials
- Unfinished wooden or ceramic ball ornament (approx. 3-4 inches)
- White or cream matte acrylic craft paint (for base)
- Acrylic paints (Burnt Sienna, Orange, White, Black, Dark Brown, Cream)
- Very fine detail shader brushes (sizes 000, 00, and 0)
- Small round brush (size 2)
- Graphite transfer paper and pencil (optional)
- Matte spray varnish or sealant
- Jute twine for hanging
Step 1: Preparation & Base Coat
-
Prime the surface:
Begin by cleaning your ornament surface to ensure it’s free of dust. Use the size 2 round brush to apply an even coat of cream or off-white matte acrylic paint over the entire ball. Keep your brush strokes smooth to avoid ridges. -
Apply a second coat:
Once the first layer is completely dry to the touch, apply a second coat for full opacity. You want a solid, neutral background that will make the fox’s colors pop. Let this dry fully, perhaps overnight, to ensure a hard surface. -
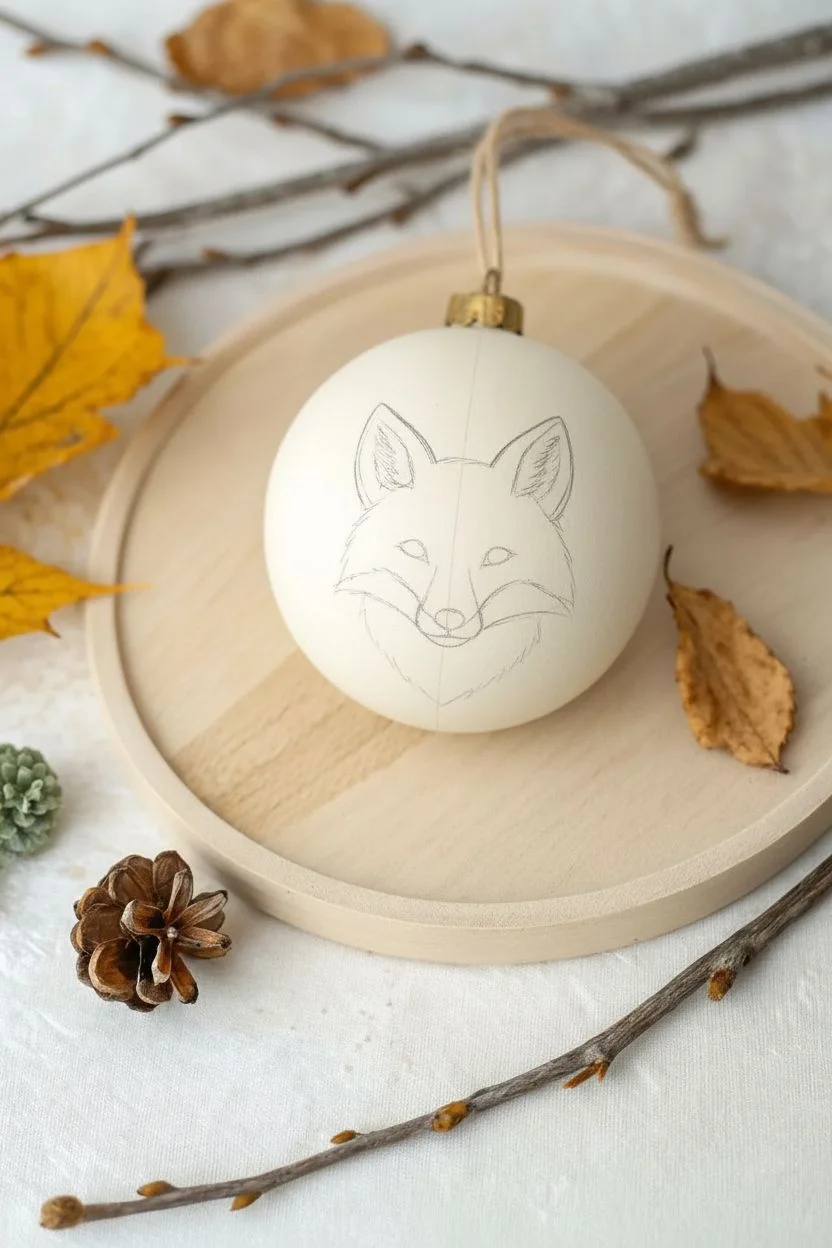
Sketch the outline:
Lightly sketch the fox’s head directly onto the ornament using a dull pencil. Start with a simplified diamond shape for the head, marking the large triangular ears and the tapered muzzle. Don’t worry about tiny details yet; just get the proportions right.
Steady Hand Trick
For tiny fur strokes, rest your pinky finger on the dry part of the ornament to stabilize your hand. Painting “away” from yourself usually creates sharper, better tapered lines.
Step 2: Painting the Fox
-
Block in basic colors:
Using a size 0 brush, block in the main color zones. Use a mix of Burnt Sienna and Orange for the forehead, cheeks, and outer ears. Use white for the muzzle, inner ears, and cheeks. -
Define the eyes:
Switch to your smallest 000 brush. Paint the almond-shaped eyes solid black. I find it helpful to steady my hand on a table for this step. Once dry, add a tiny dot of white in the upper corner of each eye for a lifelike reflection. -
Paint the nose:
Use solid black to paint the nose shape—an inverted triangle with rounded corners. Add a very thin line dropping down from the nose to define the mouth. -
Create fur texture (Orange):
This is the most crucial step. Using the 00 brush and slightly watered-down Burnt Sienna paint, create tiny, flicking brushstrokes starting from the center of the face and moving outward. Layer these strokes over your orange base coat to simulate fur. -
Refine the white fur:
Clean your brush thoroughly. Use thinned grey or very light brown paint to flick tiny lines into the white muzzle area, following the direction of hair growth. This adds volume so the white patches don’t look flat. -
Deepen the shadows:
Mix a small amount of black with dark brown. Carefully darken the tips of the ears, the corners of the eyes, and the area just under the chin to create depth and separation from the neck ruff. -
Outline details:
With your finest brush and diluted black paint (almost ink consistency), very delicately outline the ears and the main shapes of the face. Keep the line broken and uneven to mimic hair, rather than a solid cartoon outline. -
Add whiskers:
With a quick, confident motion, paint whisker spots on the muzzle using diluted black. Then, add a few very fine, long white or grey lines extending from the muzzle for whiskers.
Seasonal Variation
Swap the autumn leaves for holly berries and pine needles for a Christmas vibe, or use tiny painted wildflowers for a spring version.
Step 3: Finishing Touches
-
Add decorative leaves:
frame the fox’s head by painting simple, stylized leaves around the top curve of the ornament. Use a brown or deep rust color. Paint a central stem line and press down with the brush body to create leaf shapes branching off. -
Seal the artwork:
Allow the paint to cure for at least 24 hours. Once fully dry, spray the entire ornament with a matte varnish. This protects your detailed brushwork without adding a distracting glossy shine. -
Attach the hanger:
Remove the original metal cap if you took it off, or simply thread a piece of rustic jute twine through the loop. Tie a secure knot to finish the woodland look.
Hang your new woodland friend on a branch and enjoy the warm, rustic charm it adds to your space


Winter Bird Ornaments With Simple Color Layering
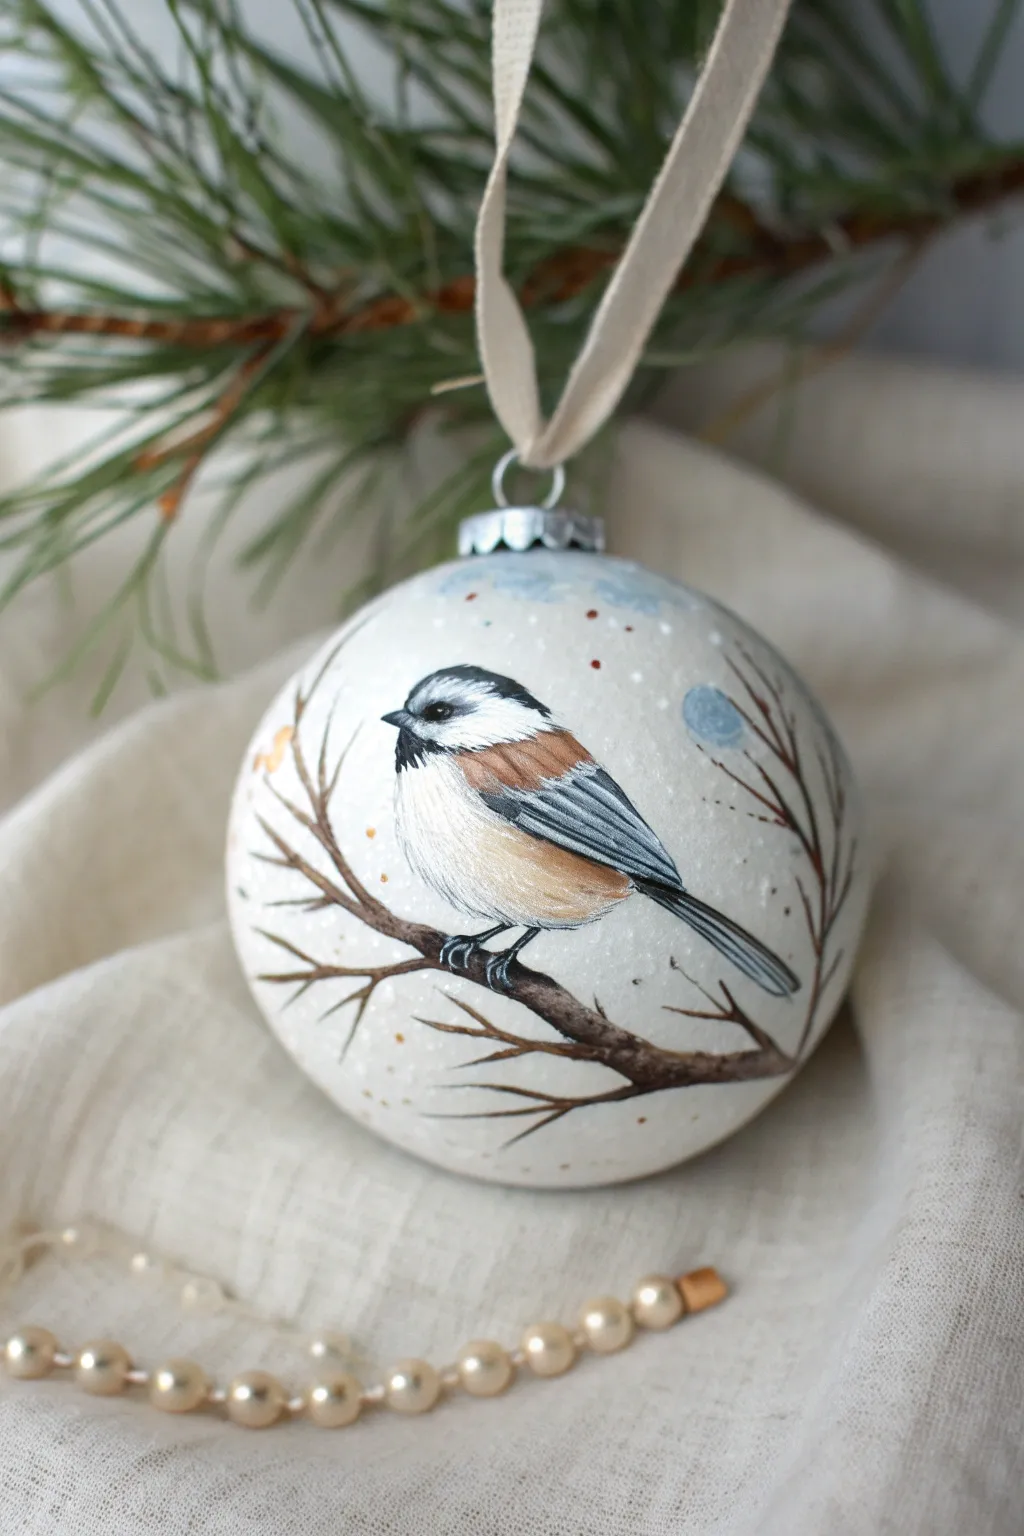
Capture the stillness of nature on a handmade ornament with this soft and detailed bird portrait. Using layers of acrylic paint, you’ll build up a realistic chickadee resting on a branch against a snowy, textured white background.
Step-by-Step
Materials
- White spherical ornament (ceramic bisque or primed glass)
- Acrylic paints: Titanium White, Carbon Black, Burnt Umber, Raw Sienna, Burnt Sienna, Payne’s Grey, light blue
- Synthetic paint brushes: small flat brush (size 4), fine liner brush (size 0 or 00), small round brush (size 2)
- Matte varnish or sealant
- Soft ribbon (beige or cream)
- Palette for mixing
- Water cup and paper towels
- Optional: Texture paste or sponge for the background
Step 1: Preparation and Background
-
Prepare the surface:
Ensure your ornament is clean and dust-free. If working with clear glass, apply a coat of white gesso primer first to create a solid, opaque base. -
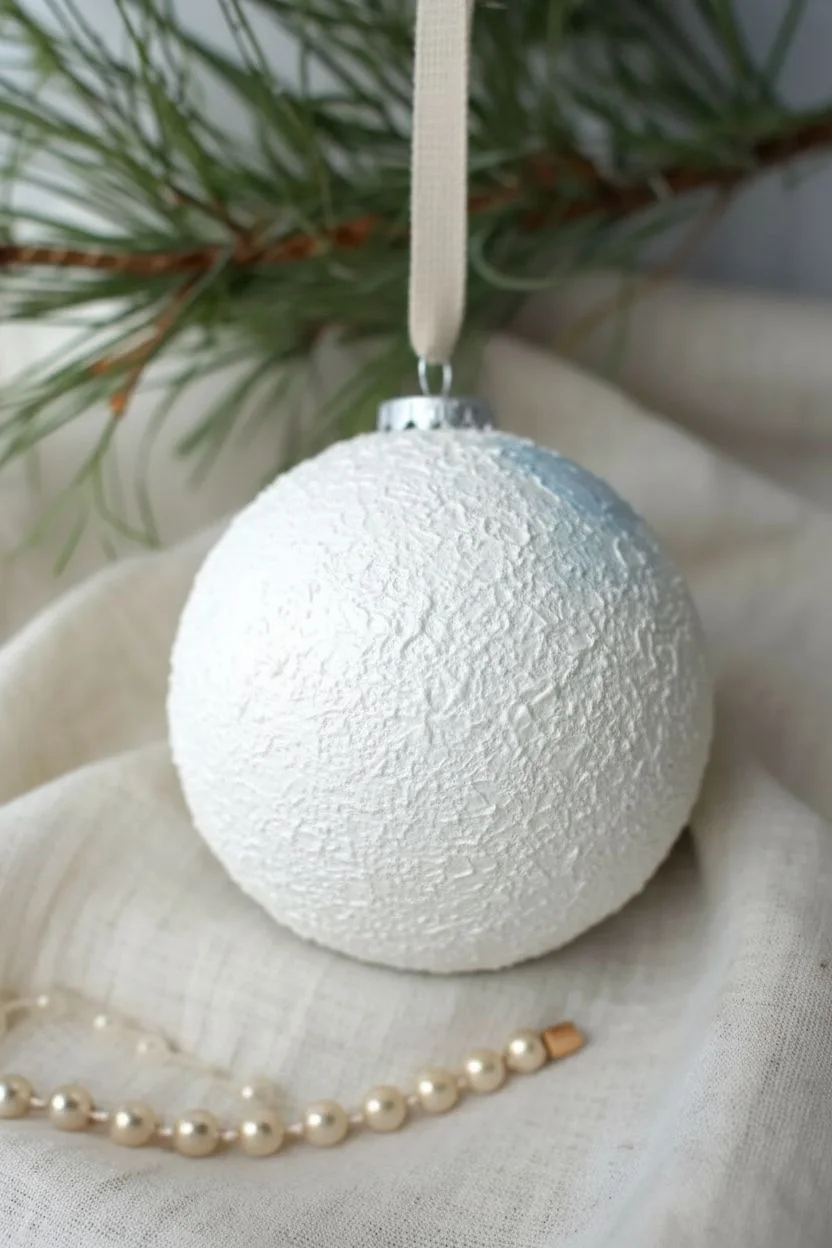
Create the snowy texture:
Using a sponge or a stiff brush, dab Titanium White paint all over the ornament. You want imperfect coverage that looks slightly stippled to mimic the feel of snow. Let this base layer dry completely. -
Add subtle atmosphere:
Mix a tiny drop of light blue with water to create a very faint glaze. Gently dab a few soft spots of this blue in the upper right quadrant to suggest a cold winter sky, blending the edges so they disappear into the white.
Unsteady Hands?
If you struggle with fine lines, brace your painting hand pinky finger against the dry part of the ornament for stability while doing detail work.
Step 2: Blocking in the Bird
-
Sketch the outline:
Lightly sketch the oval shape of the bird’s body and the angle of the branch using a very diluted Burnt Umber paint and a fine brush. Avoid using pencil, as graphite can sometimes smear into the white paint. -
Paint the underbelly base:
Start with the bird’s breast. Mix Titanium White with a tiny touch of Raw Sienna for a warm cream color. Apply this to the belly area, brushing in the direction of feathers. -
Add the wing base:
Block in the wing shape using a medium grey (mix Titanium White and Payne’s Grey). Don’t worry about individual feathers yet; just establish the triangular shape resting against the body. -
Define the head:
Using Carbon Black, carefully paint the classic chickadee cap and throat patch. Leave a clean white space between them for the cheek, filling that cheek area with pure Titanium White. -
Warm the flank:
While the belly paint is dry, glaze a wash of Burnt Sienna (rusty brown) just under the wing and fading into the belly. This distinctive wash adds that recognizable warmth to the bird’s side.
Step 3: Refining Details
-
Detail the wings:
Using your finest liner brush and a dark grey or black, paint the primary flight feathers. Draw thin, overlapping lines down the length of the wing to suggest individual feathers. -
Highlight the feathers:
Clean your brush and pick up pure white. Add tiny, confident strokes on top of the grey wing feathers to separate them and add volume. Add a few fluffier strokes to the white cheek patch as well. -
Paint the branch:
Mix Burnt Umber and a touch of black. Paint the main branch under the bird’s feet, varying the pressure to make the branch look organic and knotty, not like a straight line. -
Add fine twigs:
Extend thinner twigs branching out from the main limb. Make these lines very delicate at the tips, allowing them to frame the bird without crowding it. -
Construct the feet:
Using a dark grey, paint tiny curved lines wrapping over the branch to represent the bird’s claws. Add a tiny dot of white on the top curve of each toe for a highlight. -
The eye sparkle:
Paint a small black dot for the eye within the white cheek area (or adjacent to the black cap depending on the species variant). The most crucial step is adding a microscopic dot of white inside the black eye to bring it to life.
Textured Snow
Mix baking soda into your white acrylic paint for the background layer. It creates a gritty, realistic snow texture that looks great when dry.
Step 4: Finishing Touches
-
Background specs:
Create a ‘splatter’ effect for falling snow or berries. Use a toothbrush or flick a stiff brush to sprinkle tiny dots of Burnt Sienna or thinned white paint around the perimeter of the branch. -
Add soft berries:
I like to paint a few gentle, unfocused orange or red berries near the twig ends using a diluted wash of color, keeping them blurry so they don’t compete with the detailed bird. -
Seal the work:
Once sure the paint is bone dry (wait a few hours), apply a coat of matte varnish. This unifies the sheen and protects your delicate brushwork from scratching. -
Attach the hanger:
Thread a piece of soft beige ribbon through the ornament cap and tie it securely. The neutral tone complements the rustic nature of the painting perfectly.
Hang this serene little artwork on your tree to enjoy a quiet moment of nature throughout the season
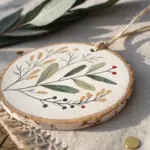
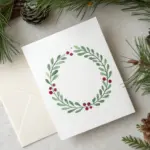
Holly, Cedar, And Pine Sprig Botanical Ornaments
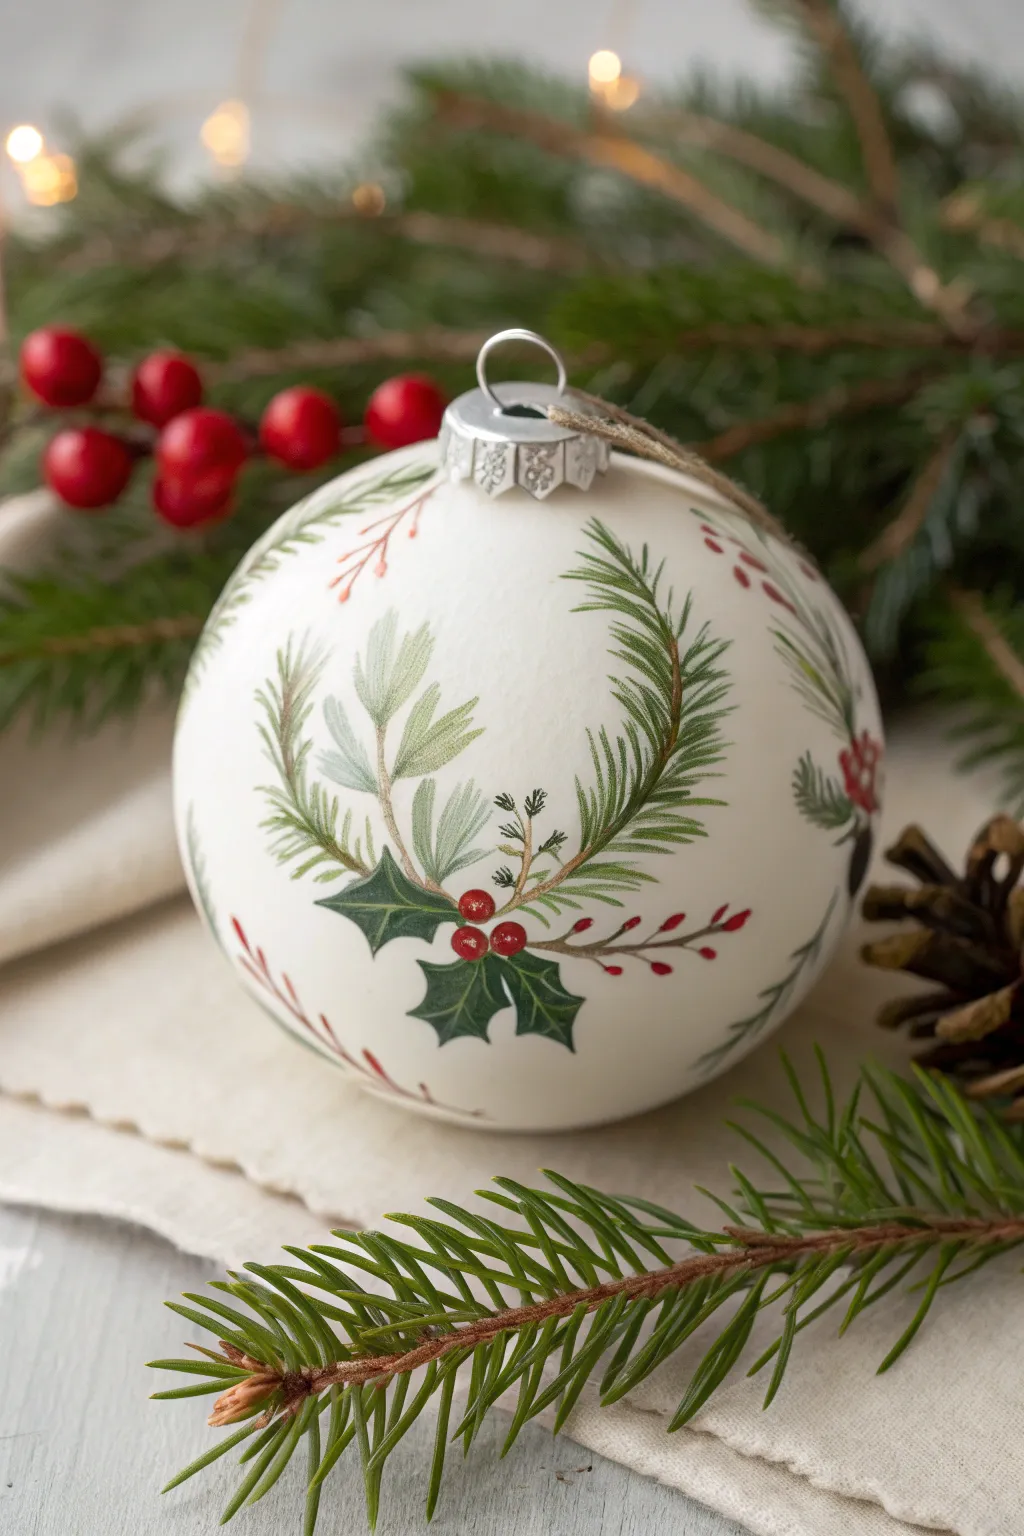
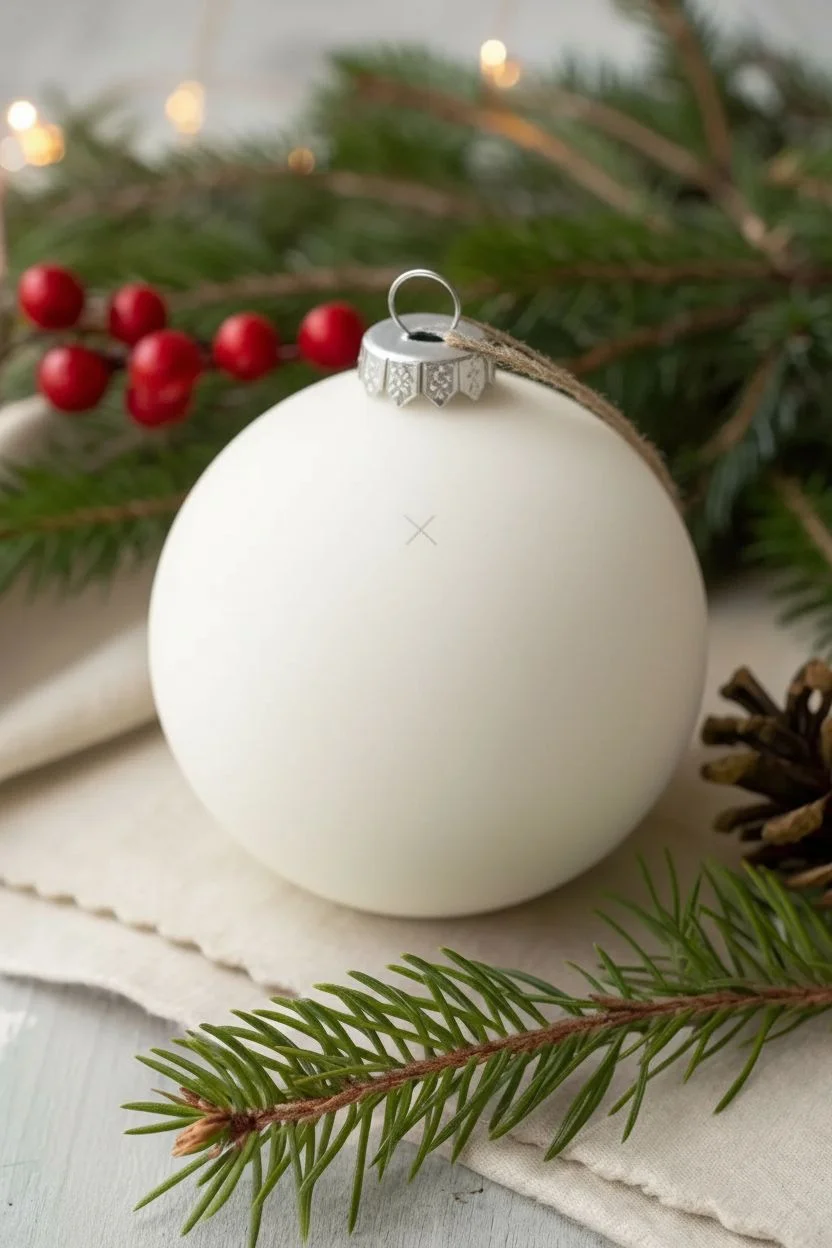
Capture the quiet elegance of a winter forest with this delicate botanical study on a creamy white ornament. The blend of structural pine needles, soft cedar fronds, and classic holly creates a sophisticated woodland design that looks lovely from every angle.
How-To Guide
Materials
- White or cream ceramic/matte glass ornament
- Acrylic craft paints (Deep Green, Sage Green, Olive Green, Bright Red, Burgundy, Brown)
- Fine liner brush (size 00 or 000)
- Small round brush (size 1 or 2)
- Palette or small dish
- Water cup and paper towels
- Pencil (optional, for light marking)
- Clear matte varnish (spray or brush-on)
- Jute twine for hanging
Step 1: Planning the Composition
-
Clean surface:
Begin by wiping down your ornament with a little rubbing alcohol or a damp cloth to remove any oils or dust. This ensures the paint adheres perfectly to the smooth surface. -
Visualize the layout:
Instead of drawing a complete sketch, I find it helpful to just lightly mark a small ‘X’ or dot with a pencil where the center of your main botanical cluster will be. This acts as your anchor point.
Paint Consistency
Add a drop of water to your acrylics for the pine needles. Ink-like consistency flows better from a liner brush for sharper points.
Step 2: Painting the Greenery
-
Base holly leaves:
Load a small round brush with Deep Green paint. Radiating from your center point, paint two or three classic holly leaf shapes. Keep the points sharp and crisp. -
Add dimension:
While the green is still slightly wet, mix a tiny drop of white or light yellow into your green and streak it down the center of each leaf to suggest a vein and highlight. -
Paint pine branches:
Switch to your fine liner brush and load it with thinned Brown paint. Draw two or three gentle, curving lines extending outward and upward from the holly cluster to serve as stems. -
Add pine needles:
Using the liner brush and Olive Green, flick short, thin strokes outward from the brown stems. Keep your wrist loose to make the needles look natural and somewhat irregular. -
Layering cedar textures:
Mix a soft Sage Green. Using the very tip of your round brush, paint softer, fern-like fronds on the opposite side of the pine branches. Use a pressing and lifting motion to create that feathery cedar texture. -
Create depth:
Go back in with a darker green shade and add a few needles or fronds behind the lighter ones. This layering creates a sense of volume so the painting doesn’t look flat.
Step 3: Berries and Details
-
Berry placement:
Using the back end of your brush handle or a dotting tool, dip into Bright Red paint. Place a cluster of three dots right at the junction where your stems and leaves meet. -
Berry highlights:
Once the red dots are dry to the touch, add a tiny speck of white paint to the upper right curve of each berry to make them look spherical and shiny. -
Add sprigs:
For extra detail, paint delicate, thin red or brown twigs extending away from the main cluster. Add tiny red dots along these twigs to mimic winter berries. -
Fill empty space:
Rotate the ornament and repeat this motif on the other side, or paint smaller individual sprigs floating in the empty white space to create a pattern.
Oops! Smudged Paint?
If you smear a line, quickly wipe it away with a damp Q-tip before it dries. The smooth surface makes corrections very forgiving.
Step 4: Finishing
-
Let it cure:
Allow the paint to dry completely. Acrylics on glass or ceramic can take a bit longer than on paper, so give it at least an hour. -
Seal the work:
Apply a coat of clear matte varnish. This protects your delicate brushwork from scratching and gives the ornament a unified, professional finish. -
Add the hanger:
Remove the standard silver hook if you wish and replace it with a loop of rustic jute twine to complement the natural woodland theme.
Hang your new woodland treasure on a branch near a light to see the subtle textures glow
Zentangle Pattern Ornaments For Meditative Painting
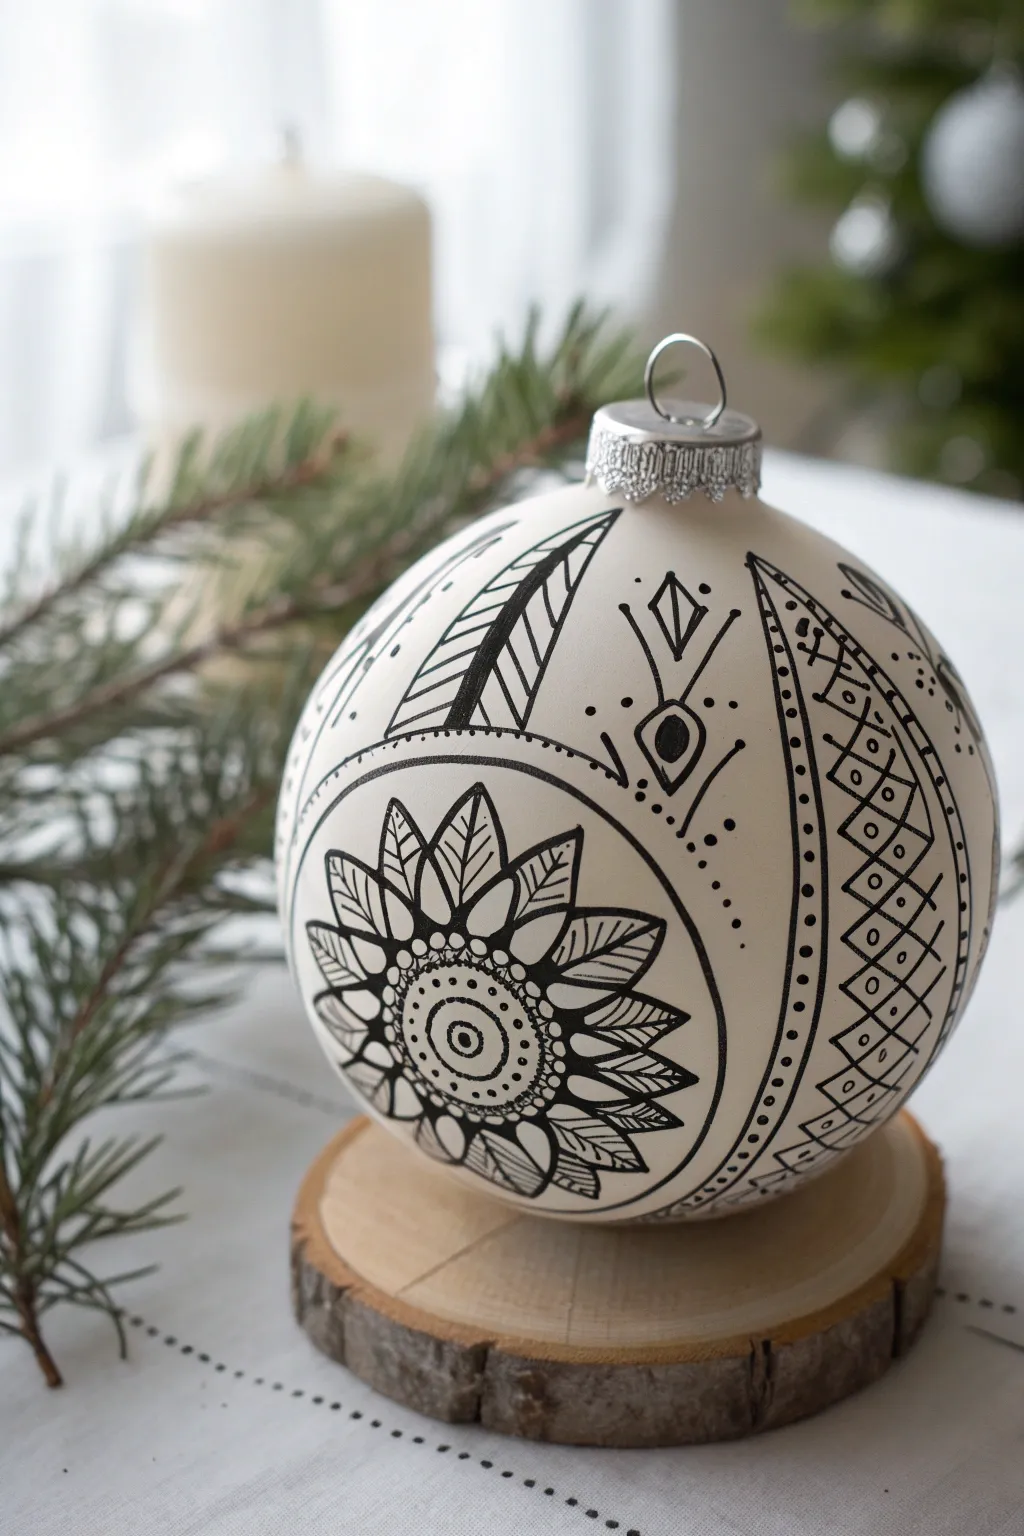
This project transforms a simple ceramic or matte ornament into a stunning piece of art using meditative ink patterns. With its striking black-on-while contrast and intricate mandala-inspired details, this hand-drawn bauble brings a modern bohemian touch to your holiday decor.
How-To Guide
Materials
- White or cream matte finish ceramic ornament
- Fine-point black permanent marker or paint pen (0.5mm or 0.7mm)
- Pencil (HB or lighter)
- Clean eraser
- Small cup or roll of tape (to hold the ornament steady)
- Work surface cover
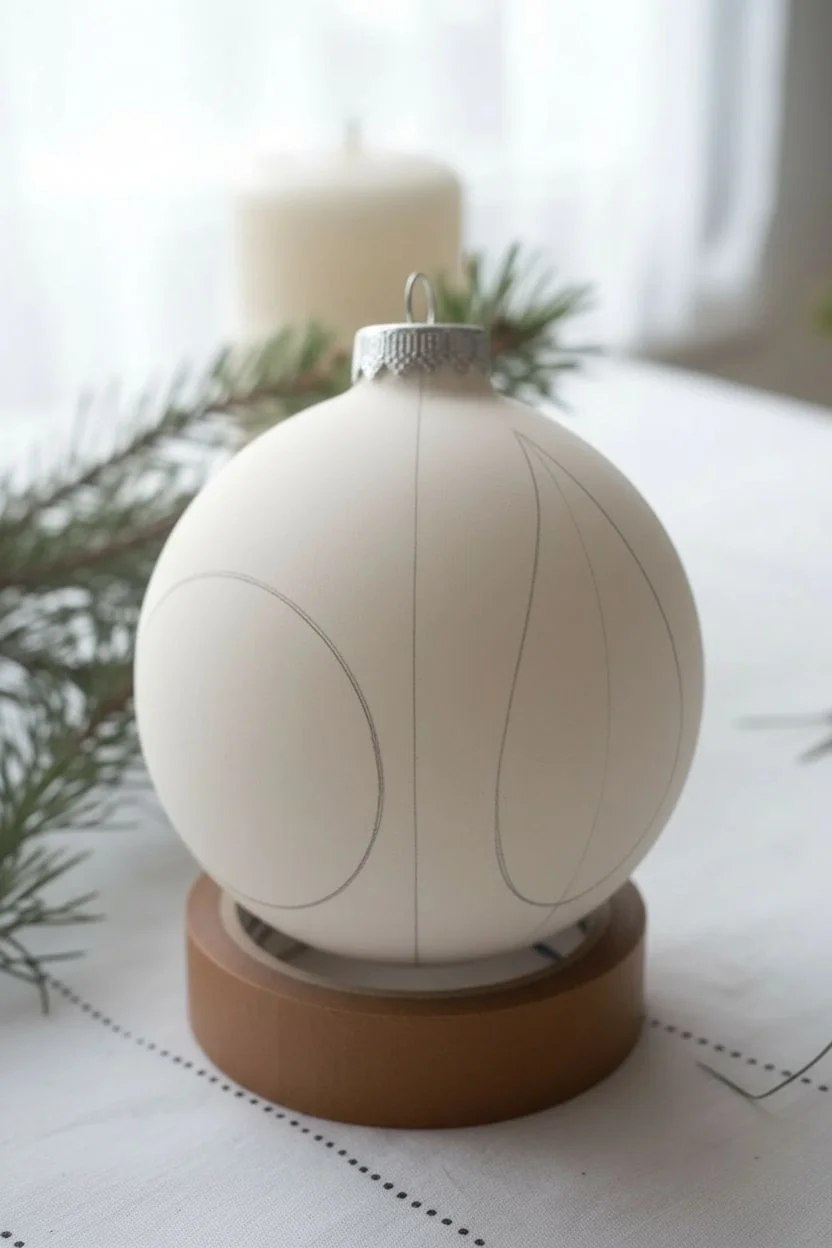
Step 1: Preparation & Mapping
-
Secure Your Canvas:
Place your round ornament onto a small cup or a roll of tape. This simple trick prevents it from rolling away while you work on the curved surface, giving you stability for those precise lines. -
Sketch the Main Divisions:
Using your pencil very lightly, draw a vertical line from the top cap down to the bottom to create a meridian guide. Then, sketching roughly halfway down the ornament, draw a large circle on the left side of your meridian line; this will house the main flower mandala. -
Define the Panel Shapes:
To the right of your main circle, sketch two tall, curved triangular panels reaching from the top toward the bottom. These swooping teardrop shapes will become the distinct patterned sections visible in the reference image.
Smudge Prevention
Work from the top down or left to right (if right-handed) to avoid your hand resting on wet ink. Rotating the bauble frequently helps keep your hand safe.
Step 2: Drawing the Flower Mandala
-
Center Circle:
Switch to your black ink pen. Inside the large pencil circle you drew earlier, outline a smaller dime-sized circle in the center. Inside that, draw a tiny dot, followed by a concentric ring around it. -
Inner Petal Layer:
Around the center core, draw a ring of small scallops or ‘U’ shapes to create a flower center texture. Add tiny stippling dots inside this area for depth. -
Main Petals:
Draw the large, pointed sunflower-style petals radiating outward from the center. Make them bold and roughly equal in size. -
Petal Details:
Inside each large petal, draw a central vein line. Add angled hatching lines on either side of the vein to create a leaf-like texture. -
Outer Frame:
Once the flower is complete, carefully trace over the original large pencil circle to enclose the design, creating a solid boundary line around your mandala.
Add Some Sparkle
Once the black ink is fully dry, trace over specific details like the center dot or diamond outlines with a metallic gold or silver gel pen for a festive shimmer.
Step 3: Filling the Patterned Panels
-
The Diamond Lattice Panel:
Move to the long, curved panel on the far right. Use your pen to draw a grid of diagonal lines, creating diamonds. -
Adding Inner Diamonds:
Inside every other diamond shape, draw a smaller diamond outline. -
Circle Accents:
In the remaining empty diamonds, place a small open circle in the center to vary the pattern density. -
Dotted Border:
Draw a double line along the left edge of this diamond panel. Fill the space between the double lines with a row of evenly spaced black dots. -
The Feathered Panel:
Locate the panel above the main mandala. Draw a central spine line, then fill one side with thick, heavy diagonal stripes and the other side with thin, close hatching to resemble a stylized feather.
Step 4: Final Touches & Clean Up
-
Geometric Filler Art:
In the open white space between your panels, draw a vertical geometric motif. Start with a small diamond near the top, a line connecting down to an oval shape with a heavy black center, and finish with fanned lines at the bottom. -
Drying Time:
Let the ink sit for at least 15 to 20 minutes to ensure it is completely dry. Drawing on a smooth surface often takes longer to set than paper. -
Erase Guidelines:
Gently erase your initial pencil sketches. Be careful not to rub too hard over the inked areas. -
Top Cap Inspection:
Check the silver cap of the ornament; ensure it’s firmly attached and clean any smudges if you touched it with inky fingers.
Hang your beautiful creation on the tree or place it on a wood slice for a chic centerpiece display
Galaxy Ornaments With Stars And Nebula Blends
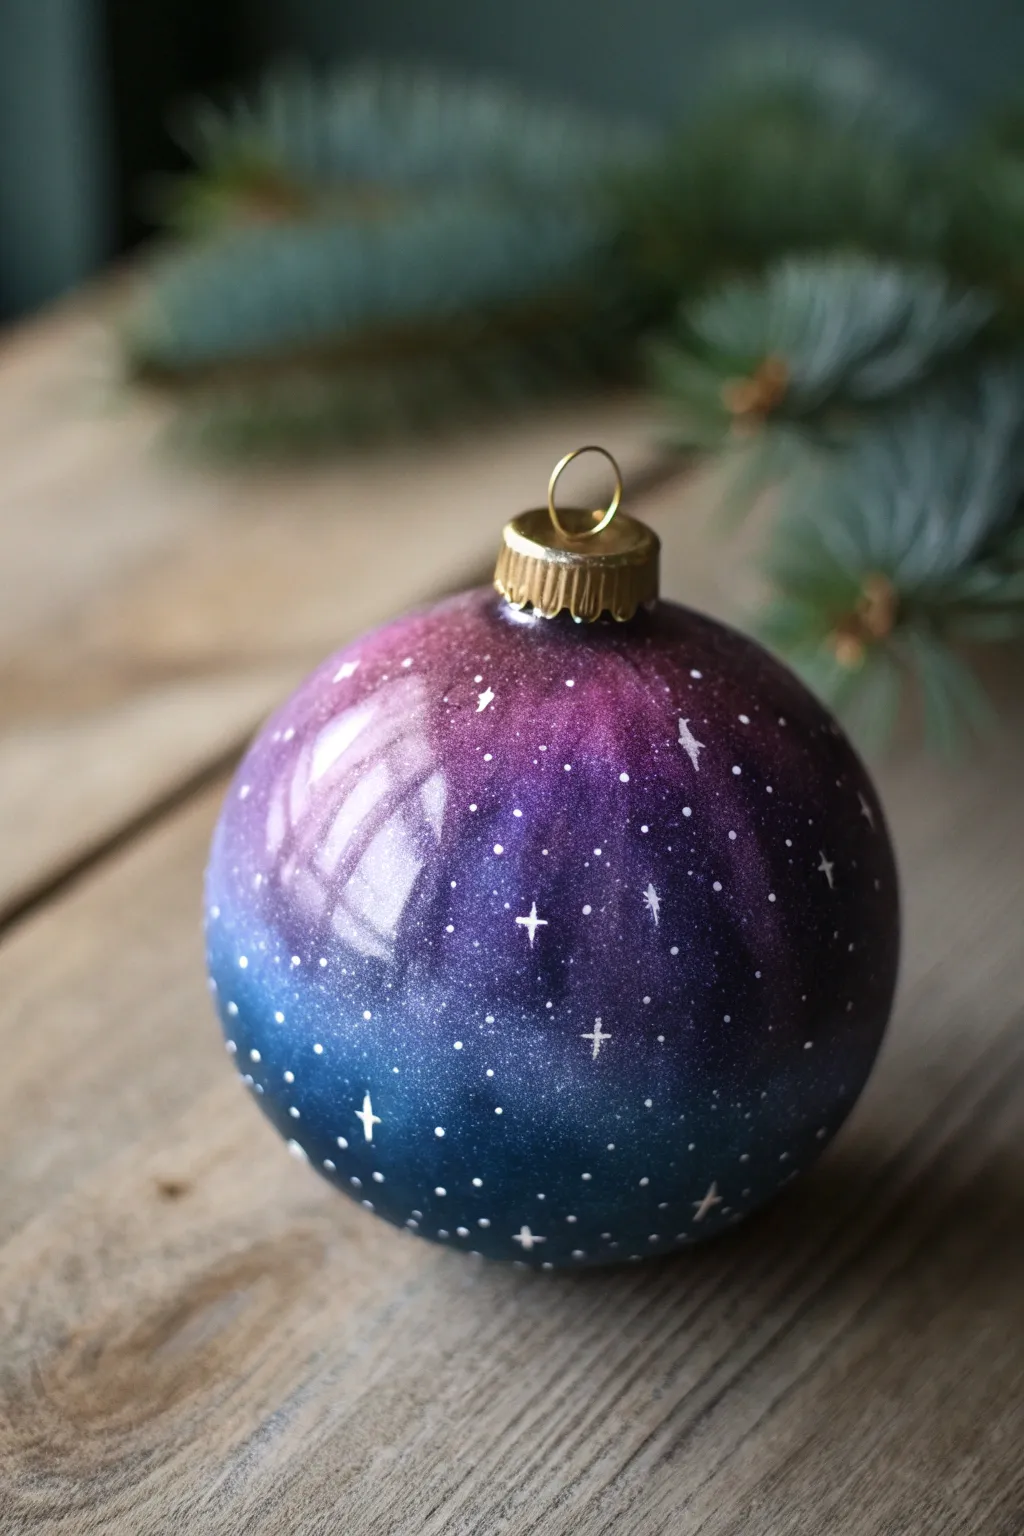
Transform a plain bauble into a piece of portable deep space with this stunning galaxy effect. By blending deep blues and vibrant purples with scattered stars, you’ll create a mesmerizing, glossy decoration that looks like a captured nebula.
Step-by-Step Guide
Materials
- Clear or solid-colored round ornament (glass or plastic)
- Black acrylic paint (matte or satin)
- Dark blue acrylic paint
- Purple/Violet acrylic paint
- Magenta or deep pink acrylic paint
- White acrylic paint
- makeup sponges
- Small round detail brush (size 0 or 00)
- Old toothbrush
- Gloss varnish or polyurethane sealer
- Palette or paper plate
- Cup for holding the ornament while painting
Step 1: Base Prep
-
Remove the cap:
Gently pull off the metal cap and wire hook from the top of your ornament and set them aside in a safe spot. -
Secure the ornament:
Place the ornament upside down on a stick or pencil, or rest it gently on the rim of a small cup so it doesn’t roll away while you work. -
Apply the base coat:
Using a sponge or soft brush, cover the entire ornament with black acrylic paint. This provides the necessary depth for space scenes. Let it dry completely.
Step 2: Creating the Nebula
-
Start with deep blue:
Dab a makeup sponge into your dark blue paint. Blot off the excess on your palette until the sponge is almost dry. -
Sponge the bottom:
Gently sponge the blue paint onto the bottom third of the ornament, fading it out as you move upwards. Keep the layers thin to let the black peek through slightly. -
Introduce purple:
Take a fresh side of your sponge and load it with purple paint. Apply this to the middle section of the ornament, blending it slightly into the top edge of the blue area. -
Add the highlights:
Using magenta or deep pink, sponge the top third of the ornament. Gently tap over the transition line where it meets the purple to create a seamless, soft gradient. -
Deepen the contrast:
If your colors look too flat, go back with a tiny bit of black on a sponge and lightly dab around the edges or between color zones to add dimension. -
Let it cure:
Allow the sponge layers to dry fully. Acrylics dry fast, but thick sponging might take 10-15 minutes.
Muddy colors?
If your blue and pink turn brown where they meet, let the first layer (blue) dry completely before sponging the pink layer over the transition zone.
Step 3: Reaching for the Stars
-
Prepare the star paint:
Mix a small amount of white acrylic paint with a drop of water. You want a consistency similar to heavy cream or melted ice cream. -
Create distant stars:
Dip an old toothbrush into the thinned white paint. Hold it a few inches from the ornament and run your thumb across the bristles to flick tiny specks of ‘stardust’ across the surface. -
Paint prominent stars:
Dip a fine detail brush (size 0) into un-thinned white paint. Dot random larger stars strategically around the ornament, placing some in the dark areas and some in the light. -
Add cross stars:
Select 3 or 4 of your larger white dots. Carefully paint a vertical line through the center, followed by a shorter horizontal line, creating a twinkling cross shape. -
Dry the details:
Wait for all the white paint to dry completely. The thicker dots will take longer than the fine mist.
Add sparkle
Mix a tiny amount of iridescent glitter medium or shimmer powder into your varnish topcoat for a subtle holographic sparkle that catches the tree lights.
Step 4: Finishing Up
-
Seal the artwork:
Apply a coat of high-gloss varnish or polyurethane. This protects the paint and gives the ornament that shiny, glass-like finish seen in the photo. -
Replace the hardware:
Once the varnish is dry to the touch and no longer tacky, carefully pop the metal cap and wire hook back onto the neck of the ornament.
Hang your new miniature universe on the tree and enjoy the cosmic view
Plaid Ornaments That Look Like Cozy Flannel
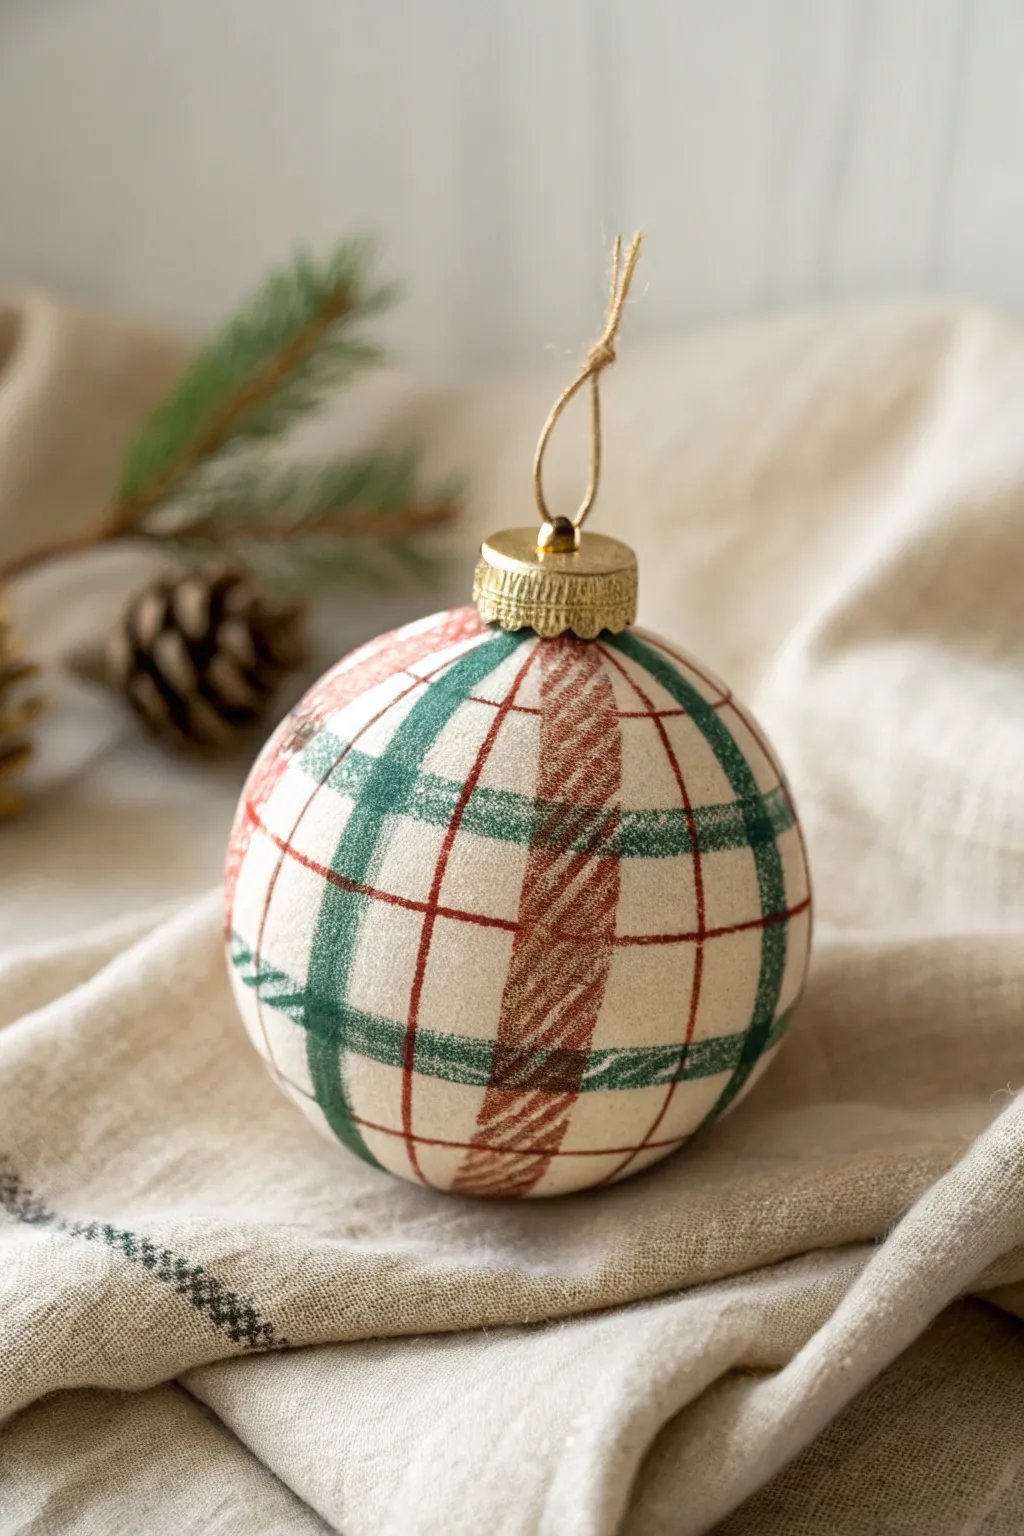
Transform a simple bauble into a rustic masterpiece that mimics the soft, woven texture of a favorite flannel shirt. Using a clever layering technique and textured paint effects, you will create a charmingly imperfect plaid pattern perfect for farmhouse decor.
How-To Guide
Materials
- Round ceramic or plastic ornaments (matte finish preferred)
- Chalk paint or matte acrylic paint (Cream/Off-white)
- Acrylic paint (Forest Green, Burgundy/Red)
- Flat shader brush (approx. 1/4 inch)
- Fine liner brush
- Stiff bristle brush or stencil brush (for texturing)
- Painters tape (optional, thin width)
- Gold ornament cap and string/twine
Step 1: Base Preparation
-
Clean surface:
Begin by removing the ornament cap and wiping down the bauble with rubbing alcohol to ensure it is free of dust and oils. -
Apply base coat:
Paint the entire ornament with a coat of cream or off-white chalk paint. Chalk paint is ideal here because it dries with a matte, velvety texture that simulates fabric. -
Add texture:
While the second coat of base paint is still slightly tacky, dab it gently with a dry, stiff-bristled brush or a sponge. This stippling action creates a rougher surface, mimicking the weave of cloth.
Fabric Texture Trick
Mix a teaspoon of baking soda into your base acrylic paint. It adds a grainy, fabric-like grit that looks incredibly realistic once dry.
Step 2: Creating the Plaid Structure
-
Plan vertical bands:
Load a flat shader brush with watered-down burgundy paint. You want a semi-transparent wash, not an opaque block of color, to let the ‘fabric’ texture show through. -
Paint first stripes:
Starting from the top opening, paint wide vertical stripes down the sides, following the curve of the ball. Space them evenly around the circumference. -
Create weave effect:
To make these stripes look woven, take a dry, clean brush and lightly drag it diagonally across the wet paint to create tiny hatch marks. -
Add horizontal bands:
Using the same burgundy wash, paint horizontal bands around the equator and upper/lower hemispheres, intersecting your vertical stripes. -
Intersecting squares:
Where the horizontal and vertical burgundy bands meet, apply a second layer of the wash to darken that specific square. This mimics the visual overlap found in real plaid fabric.
Level Up: Cozy Patches
Cut tiny squares of actual flannel fabric and decoupage them onto random sections before painting to create a ‘patched’ look.
Step 3: Adding the Grid
-
Switch colors:
Switch to your forest green paint. Keep this mixture slightly thicker than the wash but still fluid enough to flow smoothly. -
Paint green stripes:
With the flat brush turned on its edge or using a smaller brush, paint medium-width green stripes centered in the open cream spaces between your red bands. -
Paint horizontal green:
Repeat the process horizontally, painting green bands that run parallel to the red ones, filling the gaps in the grid. -
Dry brush texture:
Once the green is dry to the touch, use a very dry brush with a tiny amount of cream base paint to lightly whisk over the colorful areas. This ‘distressing’ softens the hard lines.
Step 4: Fine Details
-
Thin pinstripes:
Load a fine liner brush with opaque burgundy paint—do not water it down this time. -
Detail lines:
Paint very thin, crisp lines bordering the green stripes or running through the center of the cream squares. These pinstripes add complexity to the tartan pattern. -
Hatch marks:
To truly sell the flannel look, use your finest brush to add tiny, diagonal hatch marks in a lighter shade (white or light grey) over some of the intersections. -
Reattach hardware:
Once completely dry, pop the gold cap back onto the ornament neck. -
String it up:
Thread a piece of natural jute twine or rustic string through the loop for a final earthy touch.
Hang these on your tree alongside pinecones for a warm, cabin-in-the-woods atmosphere
Mini Character Portrait Ornaments With Simplified Faces
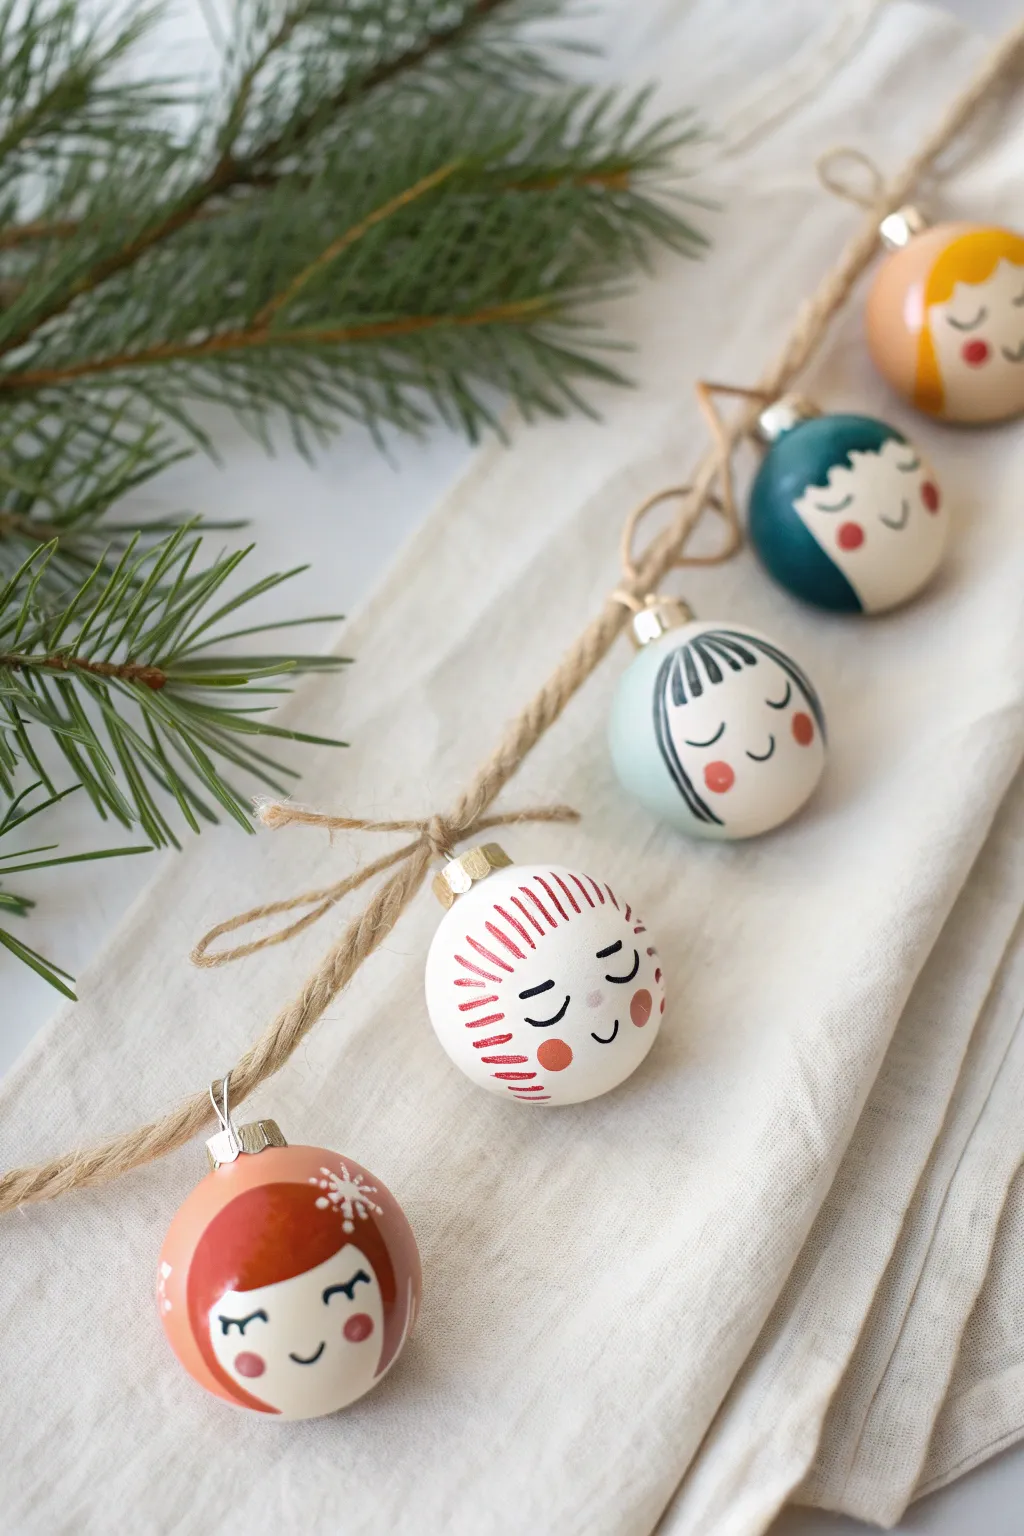
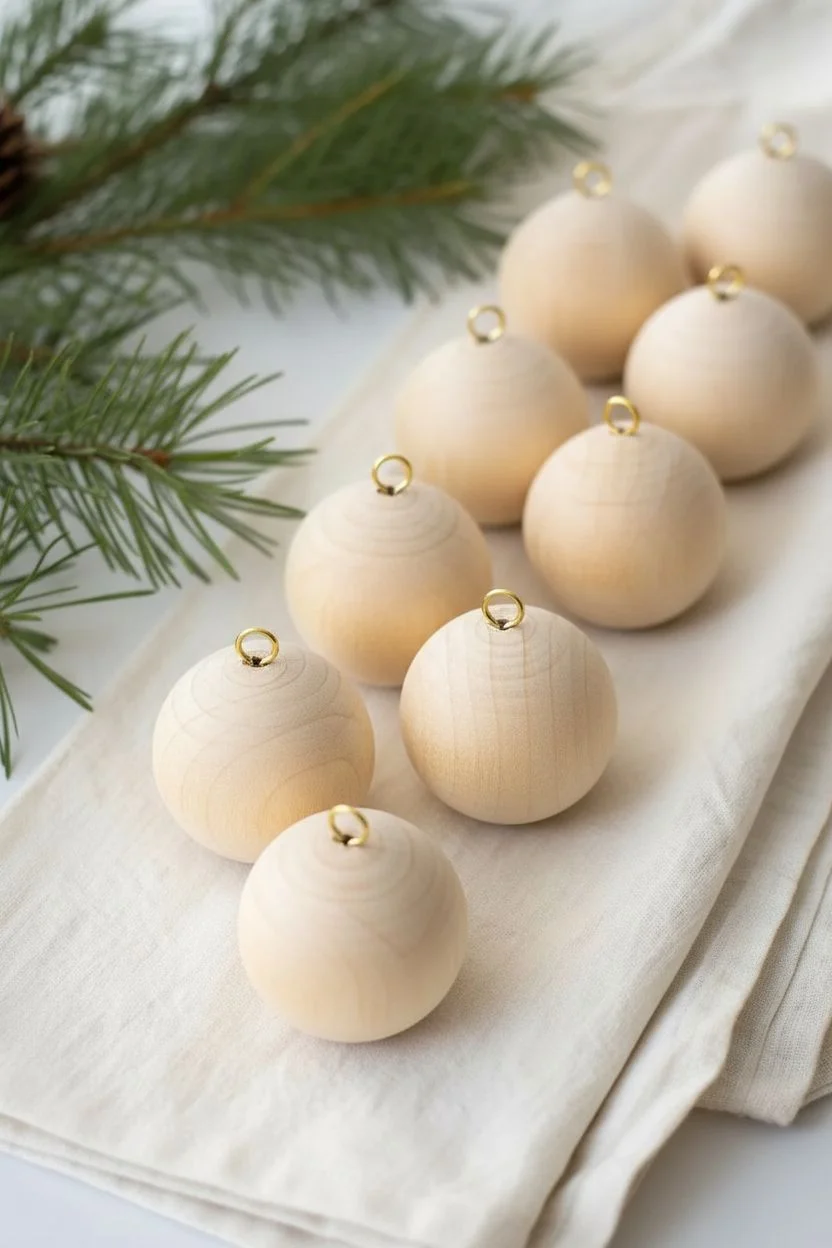
These charming ornaments bring personality to your holiday decor with their simplified, sweet facial expressions and stylized hair. Using plain wooden baubles as a canvas, you can create a diverse cast of mini characters that look wonderful strung together on a garland or hung individually on the tree.
How-To Guide
Materials
- Unfinished wooden ball ornaments (1.5 – 2 inch diameter)
- Gold screw eye hooks (if wood balls don’t have hangers)
- Acrylic craft paints (skin tones, hair colors: teal, red, yellow, black, white)
- Fine detail paintbrush (size 0 or 00)
- Small flat paintbrush
- Pencil with eraser
- Palette or small dish
- Jute twine or ribbon for hanging
- Matte or satin varnish (optional spray or brush-on)
Step 1: Preparing the Base
-
Attach Hangers:
If your wooden balls are plain spheres, carefully screw a gold eye hook into the center of the top of each ball. If they came with hangers pre-attached, ensure they are secure. -
Sand for Smoothness:
Lightly sand the wooden surface with fine-grit sandpaper if there are any rough patches. Wipe away the dust with a damp cloth to ensure your paint glides on smoothly. -
Base Coat (Optional):
For a lighter, creamy skin tone base, mix a tiny drop of brown or orange into a generous amount of white paint. Paint the entire ball and let it dry completely. leaving the raw wood is also a beautiful, natural option as seen in some variations.
Step 2: Painting the Hair
-
Sketch Hairlines:
Using a pencil very lightly, draw the outline of the hair for each character. Vary the styles—try straight bangs, side swoops, spiky tops, or full bobs. -
Block in Color:
Select your hair colors—deep teal, bright red, mustard yellow, or soft greyish-blue. Using the small flat brush, fill in the hair shapes you sketched. -
Refine Edges:
Switch to your detail brush to crisp up the hairline edges. The curves should be smooth and deliberate against the face area. -
Add Texture Details:
Once the base hair color is dry, add simple details. For the red hair, paint thin, radiating lines using a darker red or brown. For black hair, add thin grey highlights to suggest strands. -
Create Accessories:
For added charm, paint a small white snowflake detail on the hair, like a hair clip, as shown on the reddish-brown haired ornament.
Paint Pen Shortcut
Struggle with fine brush control? Use ultra-fine tip acrylic paint markers (0.7mm) for the eyes and mouth. They offer the precision of a pen but dry permanent like paint.
Step 3: Drawing the Faces
-
Placement Marking:
Visualize the face in the lower third of the exposed skin area. Lightly mark the position of the eyes and mouth with your pencil to ensure symmetry. -
Paint Closed Eyes:
Using thin black paint and your finest brush, paint two small ‘U’ shapes for sleeping eyes. Add very tiny lashes at the corners for a sweet, feminine look. -
Add the Smile:
Paint a simple, tiny curve for the mouth centered between and slightly below the eyes. Keep the line thin and delicate. -
Rosy Cheeks:
Dip the non-brush end (the handle) of a paintbrush into pink or coral paint. Dot this onto the cheeks to create perfect circles, or gently dab with a brush for a softer look. -
Dry and Set:
Let all paint dry completely for at least an hour. If you want to protect your work, apply a light coat of matte varnish over the entire ornament.
Fixing Smudges
If you smudge the black eye paint, don’t wipe it! Let it dry completely, then paint over the mistake with your skin tone color. Once that dries, try painting the eye again.
Step 4: Assembly
-
Measuring Twine:
Cut a long length of jute twine if you are creating a garland, or shorter loops for individual hangers. -
Attaching Ornaments:
Thread the twine through the eye hooks. For a garland, knot the twine around each hook to keep the faces spacing evenly apart. -
Finishing Touches:
Tie small bows with extra twine at the top of each hook if desired, or incorporate sprigs of greenery between the ornaments for a festive display.
Hang your garland of friendly faces on the mantel or nestle them into your tree branches to enjoy their peaceful expressions all season long


Have a question or want to share your own experience? I'd love to hear from you in the comments below!