When I’m stuck on what to paint, I reach for oil painting ideas that feel doable but still give that rich, glowy payoff oils are famous for. Here are my go-to subjects and mini-projects—starting with classic crowd-pleasers and ending with the fun, weird studio experiments.
Simple Landscape With Three Clear Planes
This project captures the quiet solitude of a winding country path, characterized by its muted earth tones and soft, atmospheric sky. By breaking the scene into three distinct planes—foreground road, mid-ground tree, and background hills—you create depth and perspective with ease.
Detailed Instructions
Materials
- Primed canvas or canvas board (approx. 16×20 inches)
- Oil paints: Titanium White, Burnt Umber, Yellow Ochre, Ultramarine Blue, Sap Green, Ivory Black
- Brushes: Large flat brush (size 10-12), medium filbert (size 6), small round liner (size 1-2)
- Palette knife for mixing
- Odorless mineral spirits or turpentine
- Linseed oil medium
- Paper towels or rags
- Wooden palette
Step 1: Planning and Sky
-
Sketch the composition:
Begin by lightly sketching the main elements with a thinned mixture of Burnt Umber and turpentine. Draw a horizon line about one-third up from the bottom, sketch the winding S-curve of the road starting wide at the bottom and narrowing as it recedes, and place a vertical line for the tree trunk on the left side. -
Mix sky colors:
Prepare a gradient of sky colors on your palette. Mix a large amount of Titanium White with a tiny touch of Ultramarine Blue for the upper sky. For the horizon area, mix White with a hint of Yellow Ochre and a speck of Burnt Umber creating a warm, creamy off-white. -
Paint the background sky:
Using the large flat brush, apply the blue-white mixture to the top third of the canvas. While it’s wet, blend the warm creamy mixture into the lower sky area near the horizon, using horizontal strokes to create a seamless transition. -
Establish distant hills:
Mix Ultramarine Blue with a little Burnt Umber and White to create a cool, desaturated grey-blue. Using the medium filbert brush, paint the distant hill shape on the right side of the horizon. The cool color will make it recede optically.
Muddied Colors?
If your sky and hill colors are turning grey or muddy where they meet, let the sky layer dry to the touch (24-48 hours) before painting the hills over it.
Step 2: The Middle Ground and Fields
-
Block in field colors:
Mix Yellow Ochre, a touch of Sap Green, and White to create the color of dried grass. Apply this broadly to the fields on either side of the road sketch. Vary the tone by adding more White for distant fields and a little Burnt Umber for areas closer to the viewer. -
Define the hill shadows:
On the sloping hill to the right, add a darker mixture of Sap Green and Burnt Umber to the side facing away from the light source. This simple shading establishes the three-dimensional form of the land. -
Paint the road base:
For the dirt road, mix a light, chalky beige using Titanium White and a very small amount of Burnt Umber. Fill in the road shape, following the curve of your sketch strokes. -
Add road texture:
While the road paint is wet, mix a slightly darker grey-brown. Use the edge of your brush to streak in faint tire tracks or ruts, following the perspective lines toward the horizon. -
Refine the road edges:
Soften the transition between the road and the grass. Use a dry brush to gently pull some of the grass color over the edge of the road, and vice-versa, so the path looks integrated into the landscape rather than floating on top.
Pro Tip: Atmospheric Perspective
To push the background further away, add more white and blue to your colors as objects get more distant. Warm, dark colors come forward; cool, pale colors recede.
Step 3: The Foreground Tree and Details
-
Paint the trunk:
Switch to your small round liner brush. Mix Ivory Black with Burnt Umber for a deep, almost-black brown. Paint the main trunk of the tree on the left, ensuring it is thicker at the base and tapers as it reaches upward. -
Branch structure:
Extend branches outward from the main trunk. Remember that nature is rarely perfectly straight; use a slightly shaky hand to create organic twists and turns in the wood. -
Add fine twigs:
Thin your dark paint mixture with a little mineral spirits or oil to make it flow like ink. Use the very tip of the liner brush to add delicate, wispy twigs at the ends of the larger branches. -
Suggest sparse foliage:
If you want a hint of lingering leaves, dab the tip of a dirty brush lightly around the branches using a muted olive tone. Keep this very sparse to maintain the stark, late-autumn look. -
Foreground grasses:
Mix a darker green-brown (Sap Green + Burnt Umber). At the bottom corners of the canvas, especially near the tree base, flick the brush upward to create individual tall grass blades overlapping the bottom of the trunk. -
Final highlights:
Add a few touches of pure Titanium White mixed with medium to the brightest part of the road and the cloud edges to make the light pop.
Step back and verify that your road guides the viewer’s eye smoothly from the foreground right into the heart of your serene landscape


Calm Seascape With a Clean Horizon Line
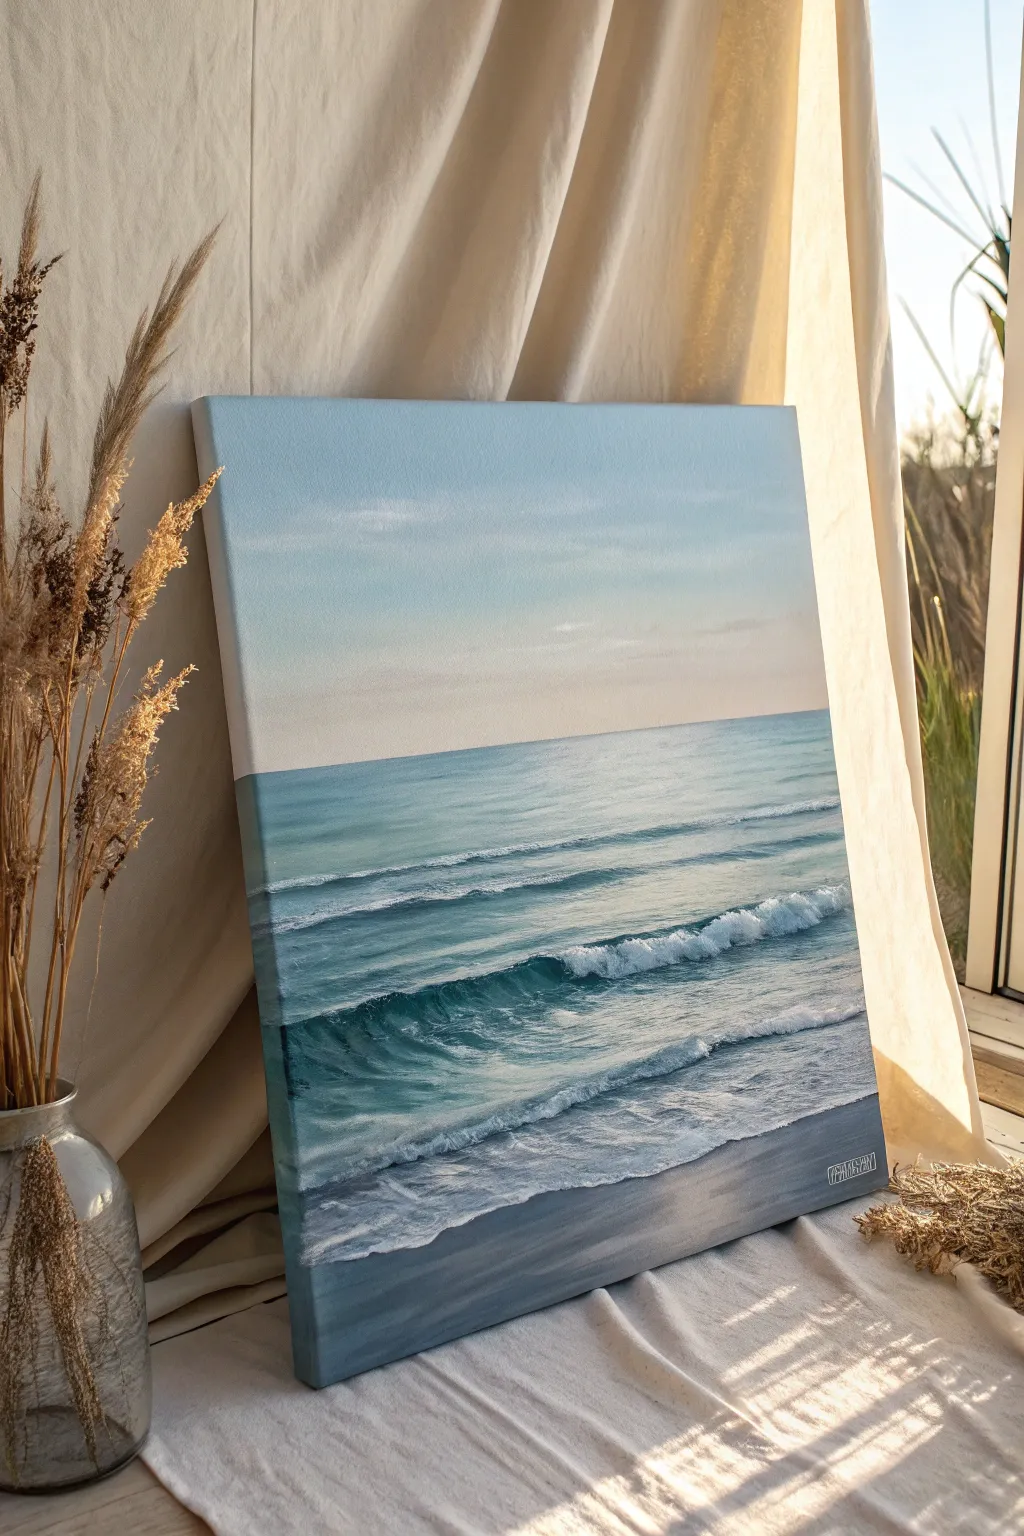
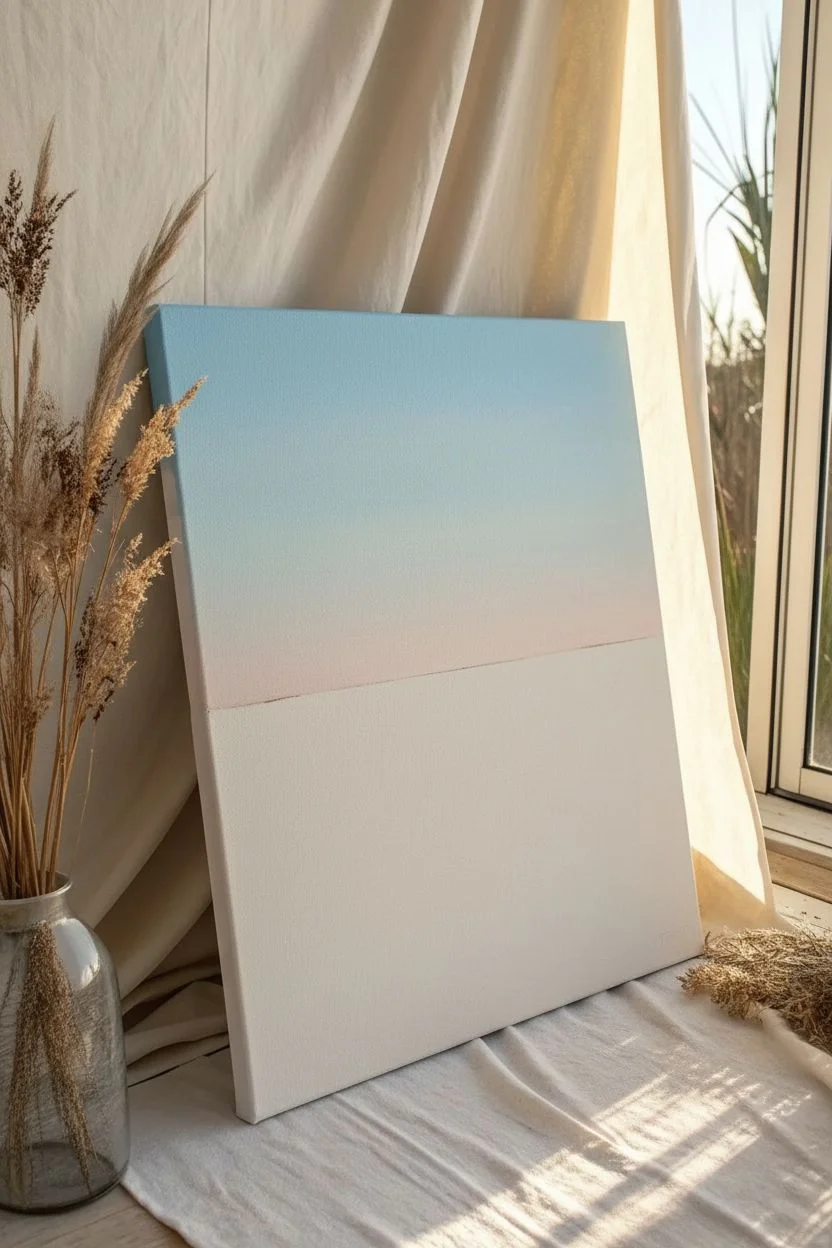
This serene oil painting captures the peaceful rhythm of rolling waves under a soft, gradient sky. By focusing on smooth transitions and translucent water effects, you’ll create a soothing coastal scene that feels fresh and airy.
Step-by-Step
Materials
- Stretched canvas (square or rectangular)
- Oil paints: Titanium White, Cerulean Blue, Phthalo Blue, Burnt Umber, Alizarin Crimson, Yellow Ochre
- Gesso (if canvas isn’t primed)
- Wide flat brush (2 inch)
- Medium flat brush (size 8)
- Small filbert brushes (sizes 4 and 6)
- Palette knife
- Odorless mineral spirits or turpentine
- Lint-free rag
- Easel
Step 1: Sky and Horizon
-
Prime and prep:
Ensure your canvas is clean and primed with gesso. Sketch a very faint, perfectly straight horizon line about one-third of the way down from the top using a ruler and a diluted wash of Burnt Umber. -
Mix the sky gradient:
Prepare two main mixtures for the sky: a pale, clean blue using Titanium White and Cerulean Blue, and a warm horizon glow using White with a tiny touch of Alizarin Crimson and Yellow Ochre. -
Apply the upper sky:
Using your wide flat brush, paint the top third of the sky with the blue mixture. Keep the paint relatively thin but opaque enough to cover the canvas grain. -
Paint the horizon glow:
While the blue is still wet, apply the warm pinkish mixture just above your horizon line. Don’t worry about a perfect blend just yet; simply get the color on the canvas. -
Blend the transition:
Clean your large brush and dry it thoroughly. Gently brush horizontally back and forth between the blue and pink areas to create a seamless, soft gradient. Clean the brush often to avoid muddying the colors. -
Add subtle clouds:
Mix a tiny amount of grey-blue into your white. Use the corner of a clean rag or a dry brush to scumble in very faint, horizontal cloud streaks near the top, keeping them soft and undefined.
Straight Edge Secret
Use masking tape for the horizon line. Paint the sky, let it dry slightly, remove tape, then paint the sea against that perfect edge.
Step 2: Deep Waters and Waves
-
Block in the sea color:
Mix a medium turquoise using Phthalo Blue, a touch of Yellow Ochre, and White. Paint the area immediately below the horizon line, keeping the edge against the sky sharp and straight. -
Darken the mid-ground:
As you move down the canvas, gradually add a little more Phthalo Blue to your mix to deepen the color where the waves will eventually swell. -
Suggest distant swells:
Use a small filbert brush with a slightly lighter teal mix to paint thin, horizontal lines in the distance. These shouldn’t be detailed waves, just suggestions of movement. -
Form the main wave:
Identify where your primary breaking wave will be. Paint a darker, translucent green-blue strip right below its crest to represent the shadow inside the curve of the water.
Step 3: White Water and Foam
-
Create the wave crest:
Load your palette knife or a coarse brush with thick Titanium White. Apply it to the top of your main wave, dragging slightly downward to mimic gravity pulling the foam. -
Add churning water:
Behind the main wave, dab irregular patches of white to show the turbulent ‘soup’ of previous waves breaking. Keep these shapes loose and not too uniform. -
Paint falling foam:
For the wave front, use a size 4 filbert brush to drag white paint vertically down into the dark water, creating the look of falling spray and aeration. -
Detail the foreground wash:
In the immediate foreground, paint the shallow water rushing up the sand. Use long, horizontal strokes of white mixed with a touch of blue, glazing it thinly so the underlying sand color peeks through.
Sunlight Glaze
Once fully dry, glaze a transparent mix of yellow and medium across the right side of the water to mimic warm sunrise directional lighting.
Step 4: Sand and Shadows
-
Paint the wet sand:
Mix Burnt Umber, blue, and white to make a cool grey-brown. Paint the bottom strip of the canvas, angling the brush strokes to follow the shoreline. -
Add reflections:
I like to take a clean, dry brush and vertically pull the wet sand color slightly upwards into the white foam wash to create the illusion of wet, reflective sand. -
Cast shadows:
Mix a deeper blue-grey and paint very thin shadows under the white foam edges. This lifts the foam off the surface and gives the water volume. -
Final highlights:
Use pure Titanium White on your smallest brush to add bright sparkles on the wave crest and the wettest parts of the sand where the light hits.
Step back and enjoy the calming atmosphere of your own private beach scene


Sunset Silhouette With a Smooth Gradient Sky
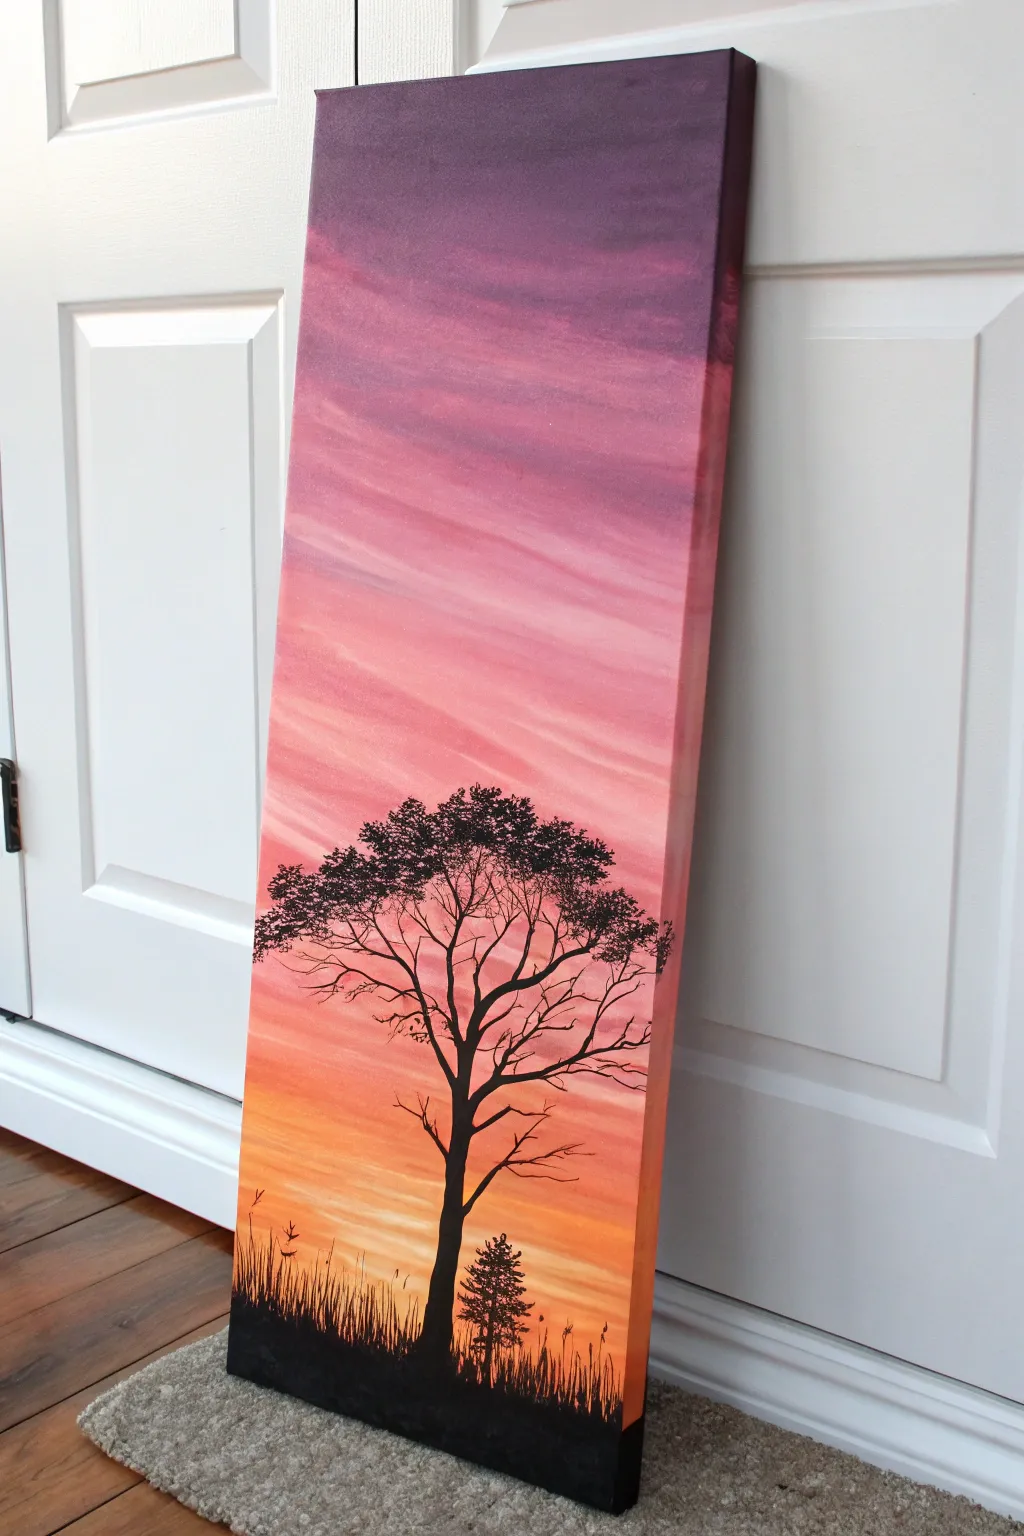
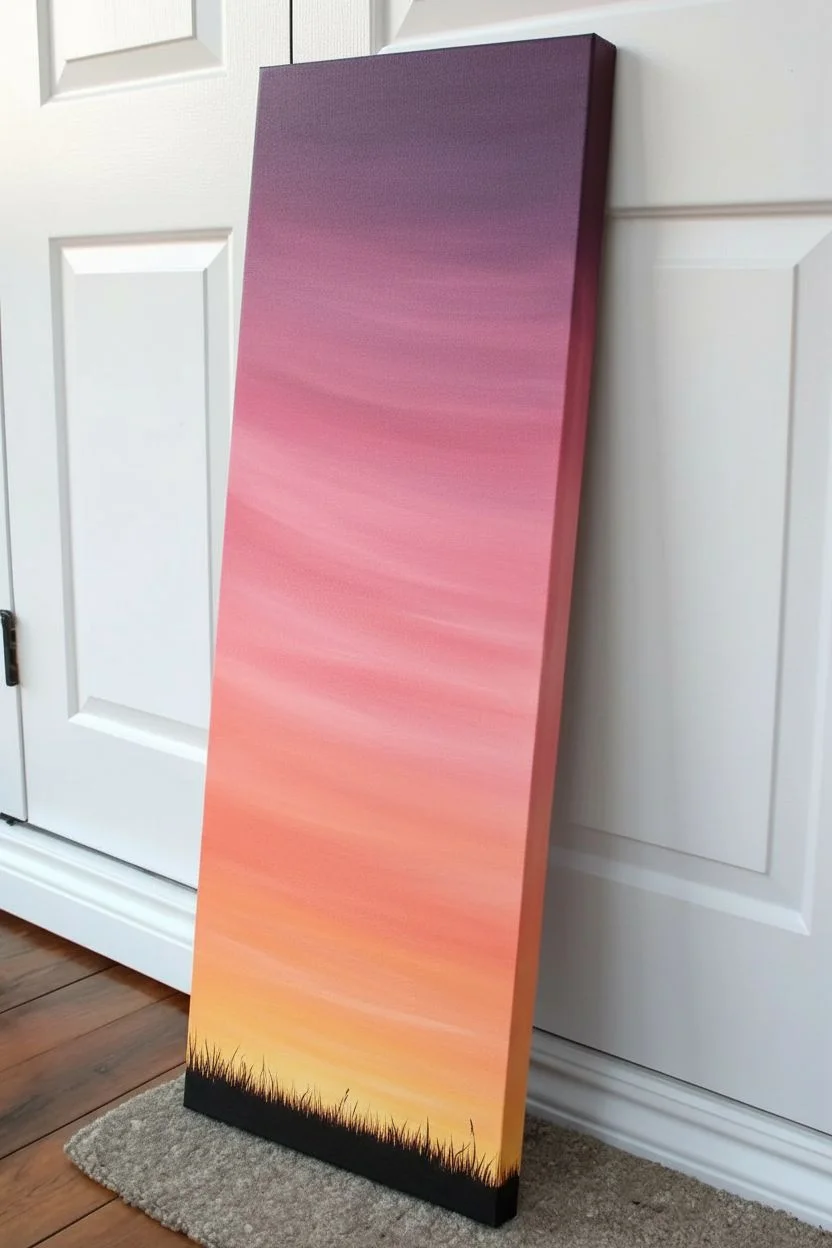
This striking vertical canvas captures the peaceful transition from day to night with a seamless oil gradient that moves from deep violet to warm orange. The sharp, black silhouette of a sprawling tree creates a stunning contrast against the soft, cloud-streaked sky.
Step-by-Step
Materials
- Tall vertical stretched canvas (approx. 10×30 or 12×36 inches)
- Oil paints (Titanium White, Cadmium Yellow, Cadmium Orange, Alizarin Crimson, Dioxazine Purple, Ultramarine Blue, Ivory Black)
- Large flat brush (2-inch) for the background
- Medium filbert brush for clouds
- Small #1 or #0 round script liner brush for fine branches
- Fan brush (optional, for grass texture)
- Palette knife
- Odorless mineral spirits and linseed oil medium
- Paper towels or shop rags
Step 1: Preparing the Sky Gradient
-
Prime the canvas:
Start by applying a very thin, even layer of liquid white or a mix of white with a touch of linseed oil over the entire canvas. This wet base helps the colors blend smoothly. -
Apply the top darks:
Using your large flat brush, load up a mix of Dioxazine Purple and a touch of Ultramarine Blue. Apply this to the top 15% of the canvas, using horizontal strokes. -
Transition to violet:
Clean your brush slightly, then pick up pure Dioxazine Purple. Paint the next section down, overlapping slightly with the darker top band to begin the blending process. -
Add the pink hues:
Mix Alizarin Crimson with a little Titanium White to create a vibrant pink. Apply this to the middle section of the canvas, blending upward into the purple as you go. Use long, horizontal strokes to keep the gradient linear. -
Introduce the warmth:
Clean the brush thoroughly. Mix Cadmium Orange with Titanium White and apply it below the pink section. The transition here creates a lovely coral tone. -
Finish with yellow light:
For the bottom 20% (the horizon area), use Cadmium Yellow mixed with plenty of white. Blend this upward into the orange, ensuring the brightest light is near the bottom where the horizon will be. -
Smooth the entire sky:
Take a clean, dry, large blending brush. Gently sweep back and forth across the entire canvas from top to bottom, wiping the brush on a rag between each pass to avoid muddying the colors. This creates that seamless ‘airbrushed’ look.
Muddy Colors?
If your gradient starts looking brown or grey, stop blending immediately. Clean your brush thoroughly. You likely dragged the purple layer down into the yellow/orange layer too aggressively.
Step 2: Adding Clouds
-
Mix the cloud color:
Create a soft lavender-pink using the residue of your purple and pink mixes added to more white. The cloud color should be just slightly different from the background to be visible but subtle. -
Paint soft streaks:
Using a filbert brush, gently scrub in diagonal cloud streaks across the upper middle section. Keep the pressure light so the wet background paint mixes slightly with your cloud color. -
Refine the cloud edges:
Use a clean, dry soft brush to lightly whisk the edges of your clouds. I like to barely touch the canvas here, feathering the edges so they look wispy and wind-blown rather than solid.
Step 3: Painting the Silhouette
-
Block in the ground:
Mix Ivory Black with a tiny bit of Alizarin Crimson (to warm it up). Using a flat brush, paint a solid black strip along the very bottom of the canvas for the ground. Let the sky tack up (dry slightly) for an hour or so if you find the black is sliding too much. -
Outline the main trunk:
With a smaller round brush and your black mix (thinned slightly with mineral spirits so it flows like ink), paint the main trunk of the tree. Make it thicker at the base and have it taper as it reaches upward. -
Construct the main branches:
Extend 3 to 4 major branches outward from the trunk. Let your hand tremble slightly as you pull the brush to create natural, organic kinks in the wood rather than straight lines. -
Add fine twigs:
Switch to your script liner brush. Load it with thinned black paint and pull out hundreds of tiny twigs from the main branches. Think of them like veins crackling outward. -
Stipple the leaves:
Use an old, splayed bristle brush or a sea sponge tapped into thick black paint. Gently tap (stipple) clusters of leaves onto the ends of the upper branches. Don’t cover all the twigs; leave plenty of ‘air holes’ for the sky to show through. -
Add the pine tree:
To the right of the main tree, paint a small vertical line. Using a fan brush or the corner of a flat brush, tap in downward-sloping branches to create a small, triangular evergreen shape. -
Detail the grass:
Finally, use your liner brush or the edge of a palette knife to pull sharp, vertical lines upward from the black ground. Vary their heights and angles to mimic wild, tall grass growing along the horizon.
Starry Night Level Up
Before painting the tree, flick a toothbrush loaded with thinned white paint over the dark purple section to add a field of faint stars emerging in the dusk.
Step back and admire how the stark black silhouette transforms that colorful background into a glowing evening scene


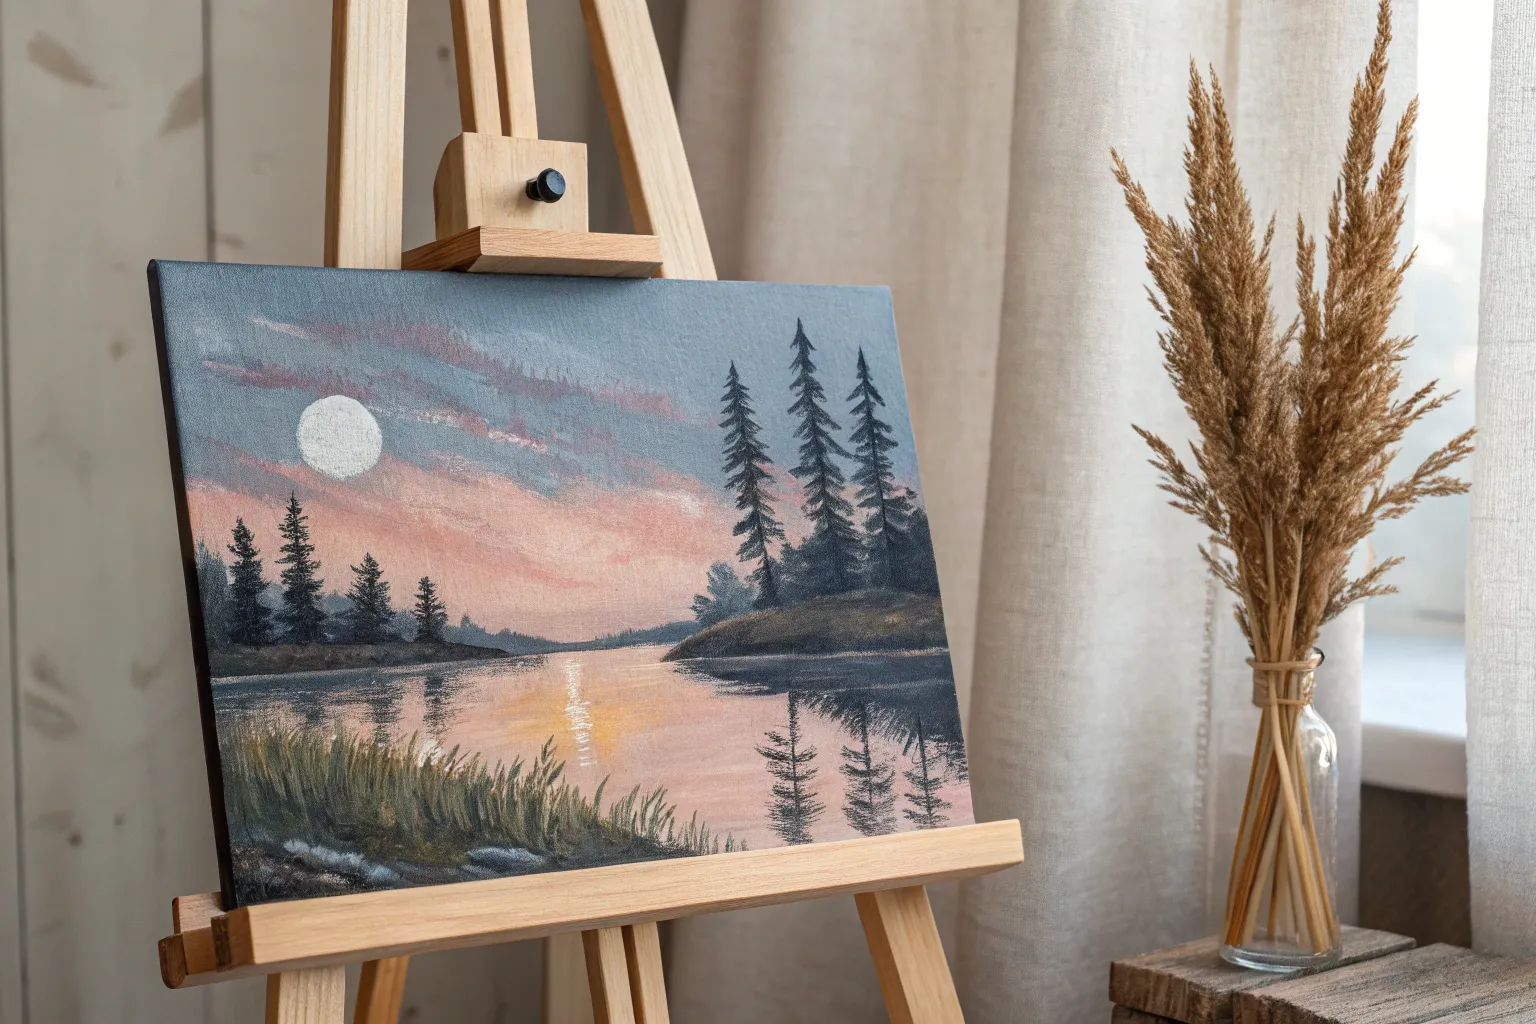
Moonlit Landscape With Cool Color Harmony
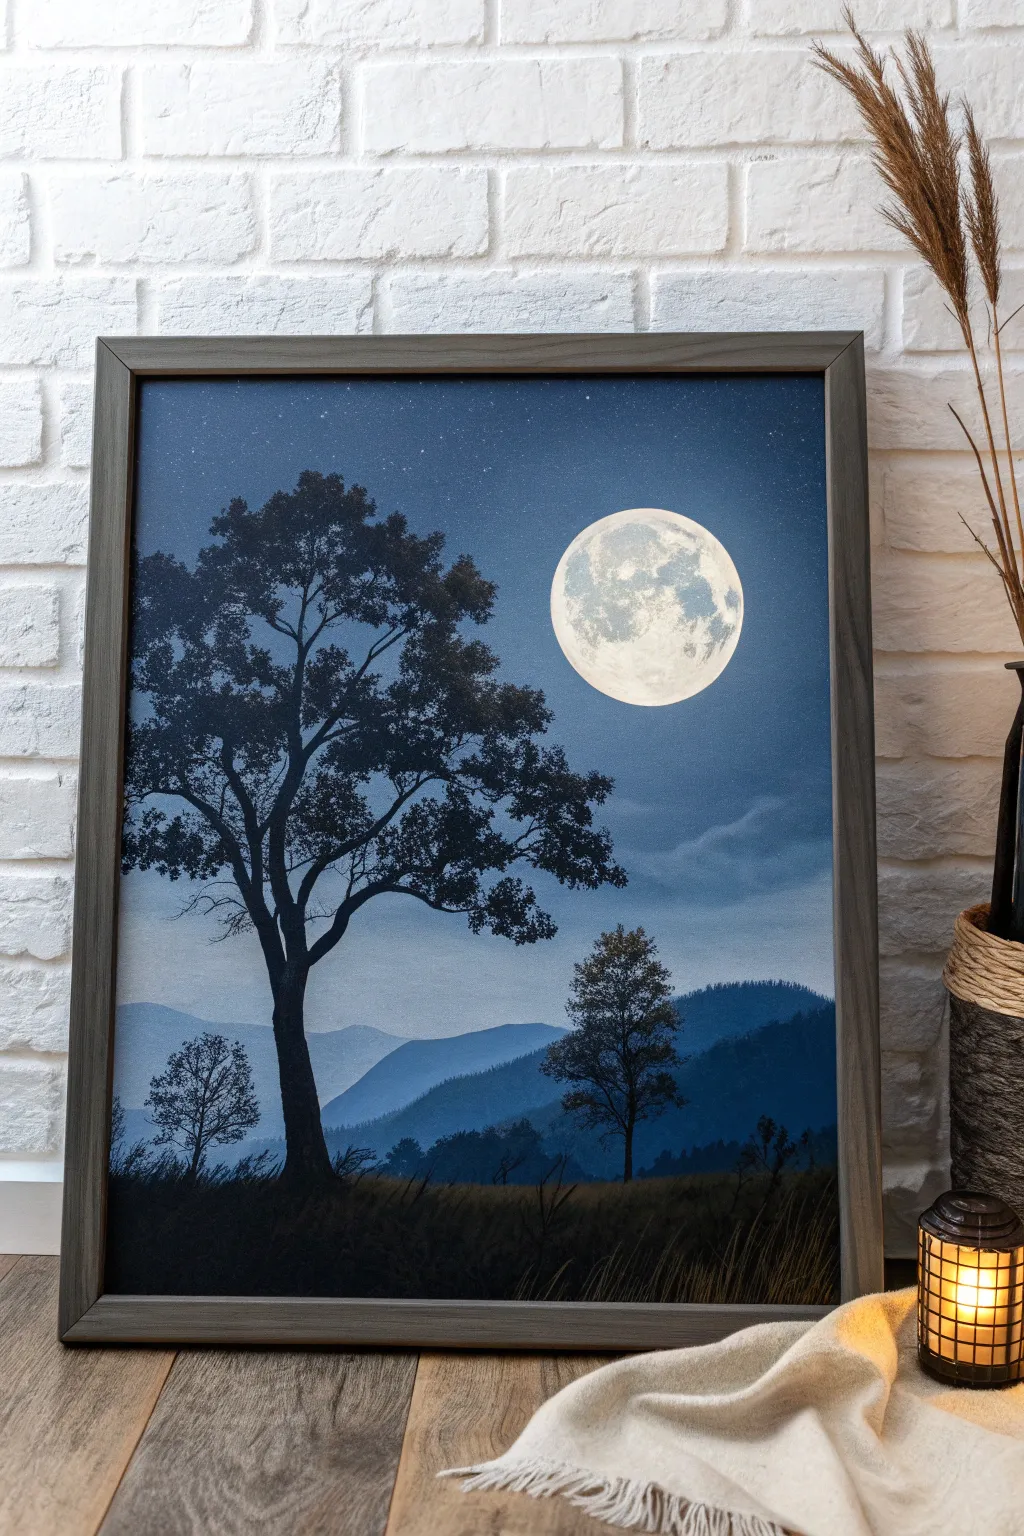
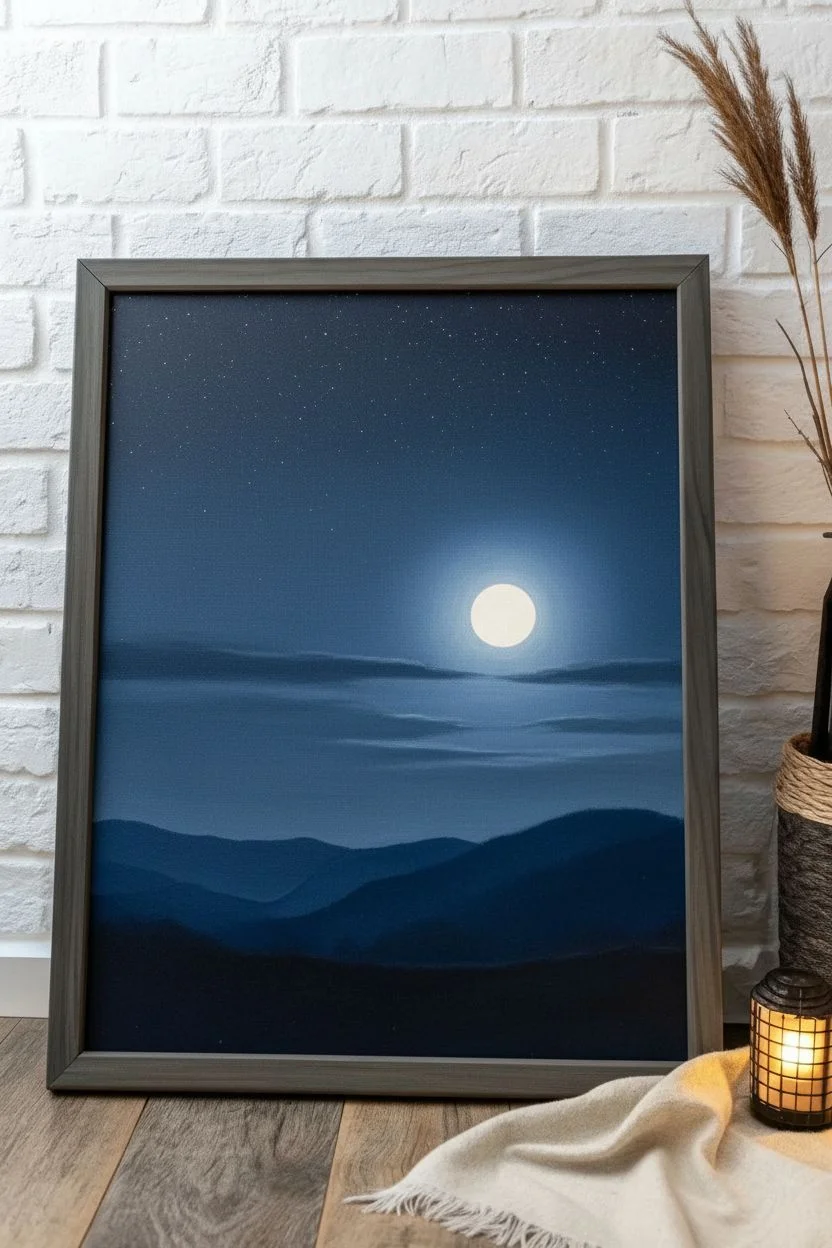
Capture the serene beauty of a quiet night with this atmospheric moonlit landscape painting. You’ll work with a soothing, cool color palette to create depth through misty mountains and dramatic silhouetted trees against a glowing sky.
Detailed Instructions
Materials
- Stretched canvas (16×20 or 18×24 inches)
- Oil paints: Titanium White, Ivory Black, Phthalo Blue, Ultramarine Blue, Prussian Blue, Burnt Umber
- Large flat brush (1-2 inch) for sky blending
- Medium filbert brush
- Small round detail brush (size 0 or 1)
- Fan brush (optional, for grass)
- Palette knife
- Odorless mineral spirits or turpentine
- Linseed oil medium
- Paper towels and palette
Step 1: Setting the Sky
-
Prime the gradients:
Begin by envisioning where your moon will sit. Mix Titanium White with a tiny touch of Phthalo Blue to create a very pale, nearly white center circle slightly to the right of the middle canvas. -
Radiate outwards:
Working wet-into-wet, surround your moon area with a slightly darker mix of Phthalo Blue and White. Blend the edges softly into the central moonlight so there are no harsh lines. -
Deepen the blue:
As you move toward the top and sides of the canvas, gradually introduce Ultramarine Blue and Prussian Blue into your mix. The corners should be the darkest, almost a midnight navy, to vignette the scene. -
Add subtle clouds:
While the sky paint is still wet, take a clean, dry brush and very lightly drag some horizontal streaks of slightly lighter blue-grey across the lower third of the sky to suggest distant, misty clouds. -
Starry details:
Dilute a small amount of Titanium White with mineral spirits until it’s inky. Load a stiff brush and flick the bristles to splatter tiny stars across the darker upper areas of the sky, avoiding the moon area.
Pro Tip: Glowing Edges
Mix a transparent glaze of white and medium. Lightly brush it over the edges of the dark mountains closest to the moon to create a ethereal backlight effect.
Step 2: The Moon & Mountains
-
Define the moon:
Once the sky is tacky or dry, use pure Titanium White to paint a crisp circle for the moon. I find using a stencil or tracing a lid helps get that perfect shape. -
Add lunar texture:
Mix a tiny bit of Ivory Black and Blue into White to make a light grey. Scumble this gently over parts of the white moon to create craters and the ‘sea’ texture. Keep it subtle; you want a glow, not a map. -
Distant mountains:
Mix a pale blue-grey shade. Paint the furthest mountain range as a simple, curvy silhouette about one-third up from the bottom. These should look hazy and faded. -
Closer hills:
Darken your blue-grey mix significantly with more Prussian Blue and a touch of Black. Paint a second range of hills below the first, overlapping them to create atmospheric perspective. -
Valley floor:
Fill the bottom area between the mountains and where the foreground will be with a deep, dark blue tone, suggesting a shadowed valley floor.
Level Up: Water Reflection
Turn the valley floor into a lake by mirroring the moon and tree shapes in the dark blue area, blurring them horizontally for a watery reflection.
Step 3: Silhouettes & Foreground
-
Block in the foreground:
Mix a ‘black’ using Burnt Umber and Ultramarine Blue (avoiding pure tube black for a richer look). Paint the solid ground at the very bottom of the canvas, curving it slightly. -
Main tree trunk:
Using your black mixture and a medium detail brush, paint the thick trunk of the large tree on the left. Ensure the base is wider and tapers as it reaches upward. -
Branch structure:
Switch to your smallest liner brush. Pull branches outward from the main trunk. Remember that nature is random—make some branches crooked and ensure they get thinner towards the tips. -
Adding foliage:
To create the leaves, tap a worn bristle brush or a sea sponge loaded with the dark mix onto the ends of the branches. Leave plenty of ‘sky holes’ so the background shows through; don’t create a solid blob. -
Secondary tree:
Repeat this process for the smaller tree on the right side. This tree sits further back in the mid-ground, so paint it slightly smaller to enhance the feeling of depth. -
Small shrubs:
Add a few tiny shrub silhouettes on the far left horizon line to balance the composition. -
Grassy texture:
Using a fan brush or a liner brush, flick upward strokes along the bottom black foreground. Use the dark mix first, then add a tiny touch of Umber or dull yellow to highlight just the tips of the grass catching the moonlight.
Step back and admire how the cool tones create a peaceful silence in your finished piece.
BRUSH GUIDE
The Right Brush for Every Stroke
From clean lines to bold texture — master brush choice, stroke control, and essential techniques.
Explore the Full Guide
Reflective Water Scene With Mirror-Like Shapes
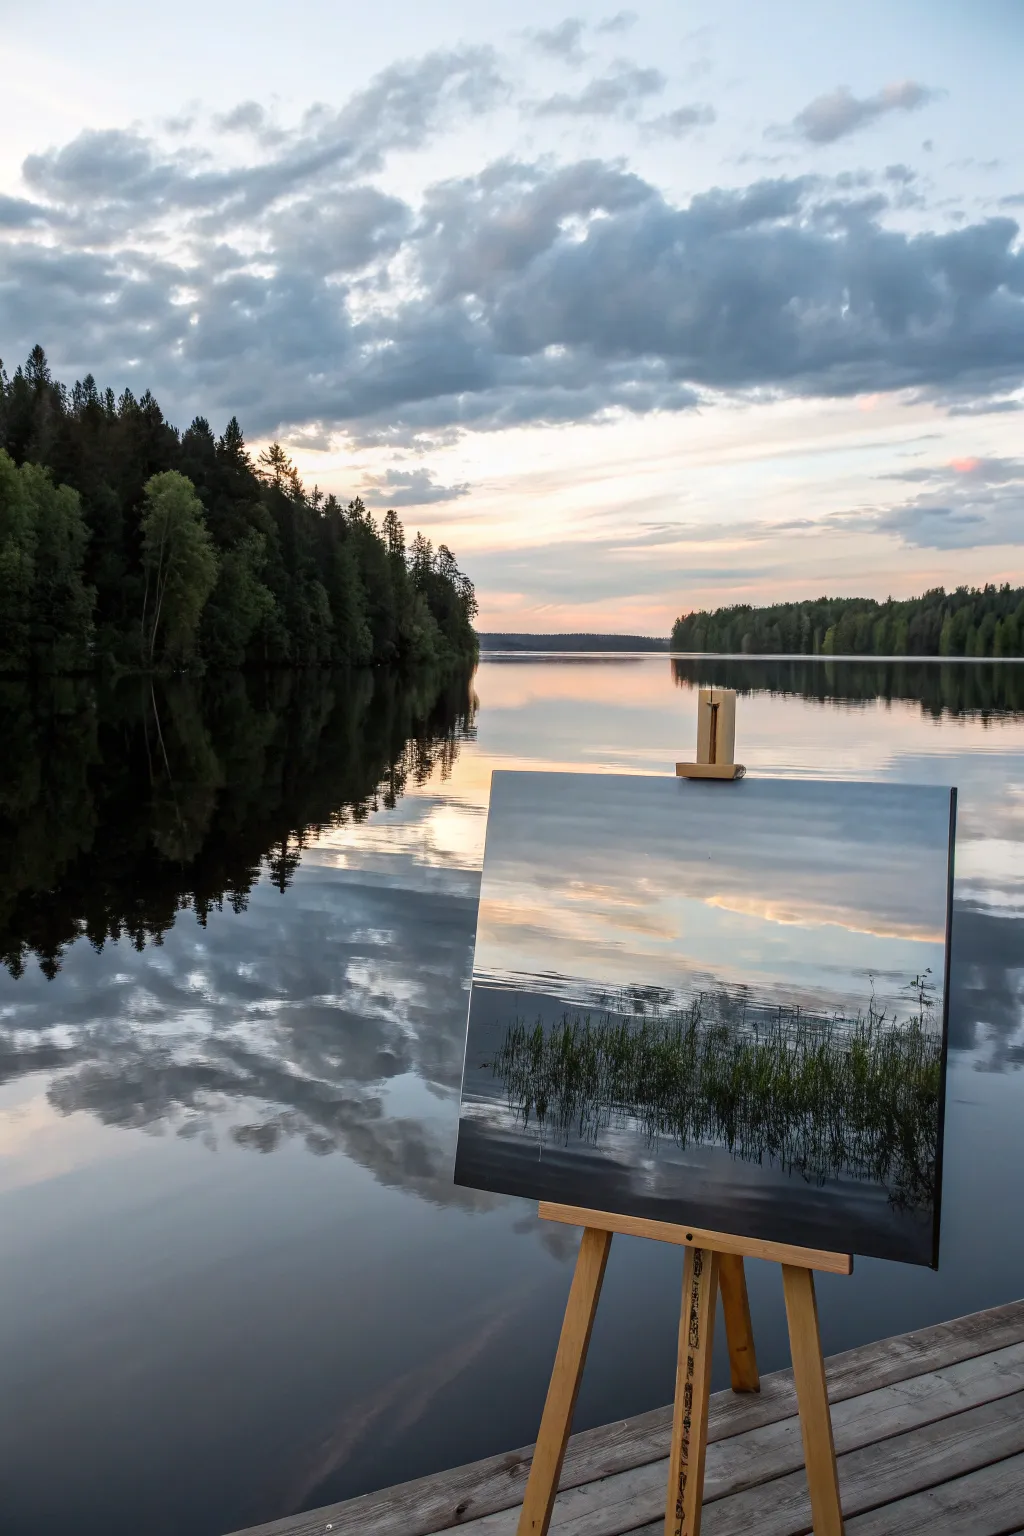
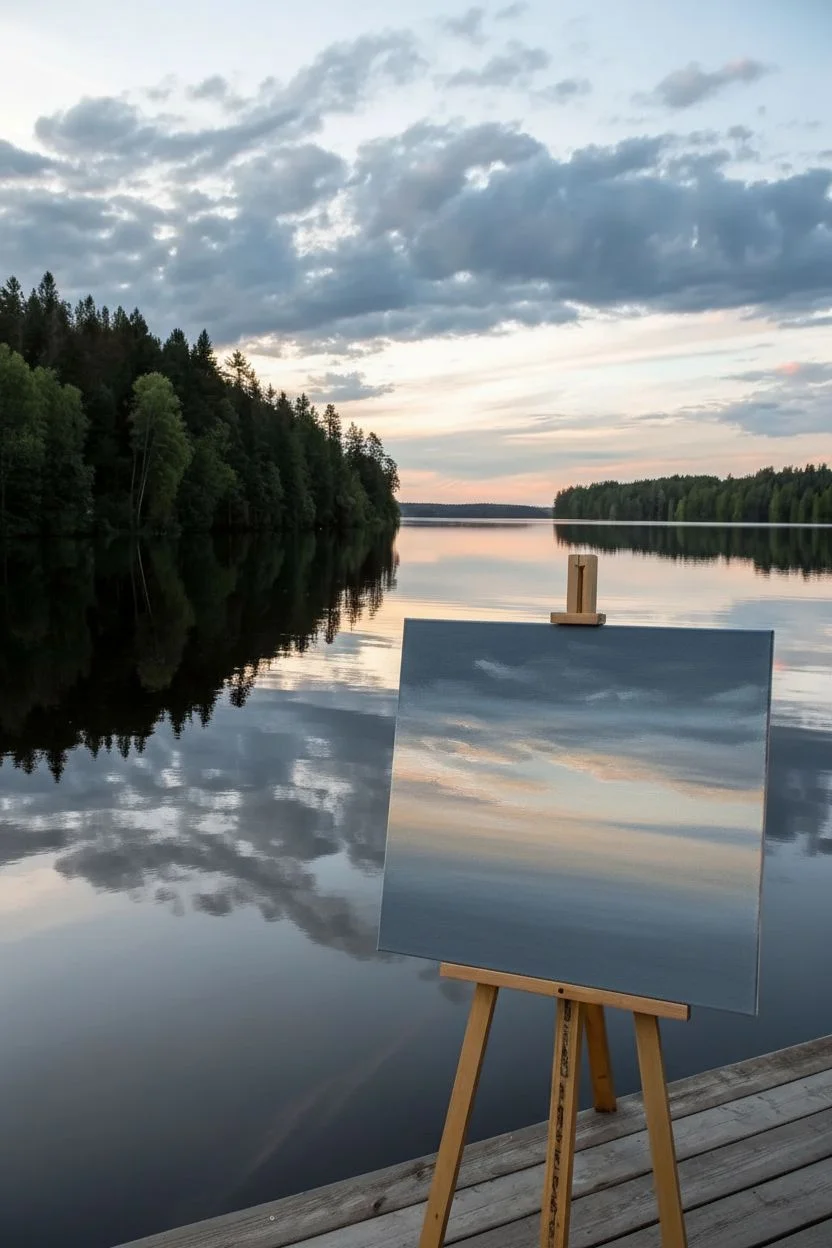
Capture the serene beauty of a twilight lake where the water becomes a perfect mirror for the sky. This project focuses on painting soft, reflective surfaces and subtle gradients to create a seamless connection between the elements.
How-To Guide
Materials
- Stretched canvas (rectangular format)
- Oil paints (Titanium White, Payne’s Grey, Phthalo Blue, Burnt Umber, Alizarin Crimson, Sap Green, Yellow Ochre)
- Odorless mineral spirits or turpentine
- Linseed oil medium
- Flat bristle brushes (large and medium)
- Filbert brushes (sizes 4 and 8)
- Rigger or liner brush for fine details
- Palette knife
- Palette
- Rag or paper towels
Step 1: Setting the Sky and Horizon
-
Prime the Surface:
Start by applying a very thin wash of Burnt Umber mixed with plenty of mineral spirits to tone your white canvas. This warmth will peek through later layers. Let this dry completely before proceeding. -
Establish the Horizon:
Using a ruler or a steady hand, draw a light horizontal line roughly one-third down from the top of the canvas. This will separate your sky from the vast expanse of water. -
Mix Sky Colors:
Prepare a gradient of blues and greys. Mix Titanium White with a touch of Phthalo Blue and Payne’s Grey for the upper sky, and prepare a warmer, paler mix with a tiny hint of Alizarin Crimson and Yellow Ochre for near the horizon. -
Paint the Sky Gradient:
Using a large flat brush, apply the darker blue mix at the very top. Gradually blend downwards into the warmer, paler tones as you reach the horizon line. Use horizontal strokes to ensure a smooth transition. -
Add Cloud Forms:
While the sky paint is still wet, use a Filbert brush to scumble in soft grey-white cloud shapes. Keep the edges soft to suggest distance and atmosphere.
Smooth Blending Trick
Use a large, soft makeup brush (clean and dry) to feather out your sky and water gradients. It eliminates brush marks better than standard art brushes.
Step 2: Reflecting the Water
-
Base the Water:
The water is a direct mirror of the sky but slightly darker. Mix the same sky colors but add a touch more medium to make the paint fluid. Apply vertical strokes first to pull the color down, then gently brush horizontally to flatten the water surface. -
Add Ripples and Movement:
Using a clean, dry brush, very lightly sweep horizontally across the water area to blur the reflection. This technique, called blending, removes brushstrokes and creates that glass-like effect. -
Reflecting Clouds:
Paint the reflections of the clouds into the water. remember, these should be vertically aligned with the clouds in the sky but looser and slightly distorted by the water’s surface. -
Darken the Foreground:
Mix a darker, murky tone using Payne’s Grey and Burnt Umber. Apply this to the bottom third of the canvas water area to represent the depth and shadow near the viewer.
Step 3: Vegetation and Details
-
Paint Distant Trees:
Mix a dark green-grey using Sap Green and Payne’s Grey. Along the horizon line, dab in the shapes of a distant tree line. Keep these shapes small and devoid of detail to maintain the illusion of depth. -
Reflect the Trees:
Immediately paint the reflection of these trees directly below the horizon line. Drag the paint downward slightly to mimic the vertical pull of a reflection. -
Foreground Reeds – Dark Layer:
Switch to your rigger or liner brush. Thin down a mixture of Burnt Umber and Sap Green with medium until it flows like ink. Paint vertical, grassy strokes rising from the bottom edge of the canvas. -
Foreground Reeds – Highlights:
Mix a lighter green using Sap Green and Yellow Ochre. Add highlights to the tips and edges of the reeds where the light catches them. I like to vary the height and thickness of these strokes for a natural look. -
Reflections of Reeds:
Paint vague, dark vertical shadows in the water directly beneath the reeds. Disturb these lines slightly with horizontal cuts of the water color to show they are submerged reflections. -
Final Surface Ripples:
Using a palette knife or fine brush with almost pure white paint, add a few very sharp, thin horizontal lines in the water to suggest surface tension or gentle ripples catching the last light.
Make It Golden Hour
Glaze the finished, dry painting with a very thin layer of transparent Indian Yellow near the horizon line to change the mood from dusk to a warm sunset.
Step back and enjoy the stillness of the moment you’ve created on canvas
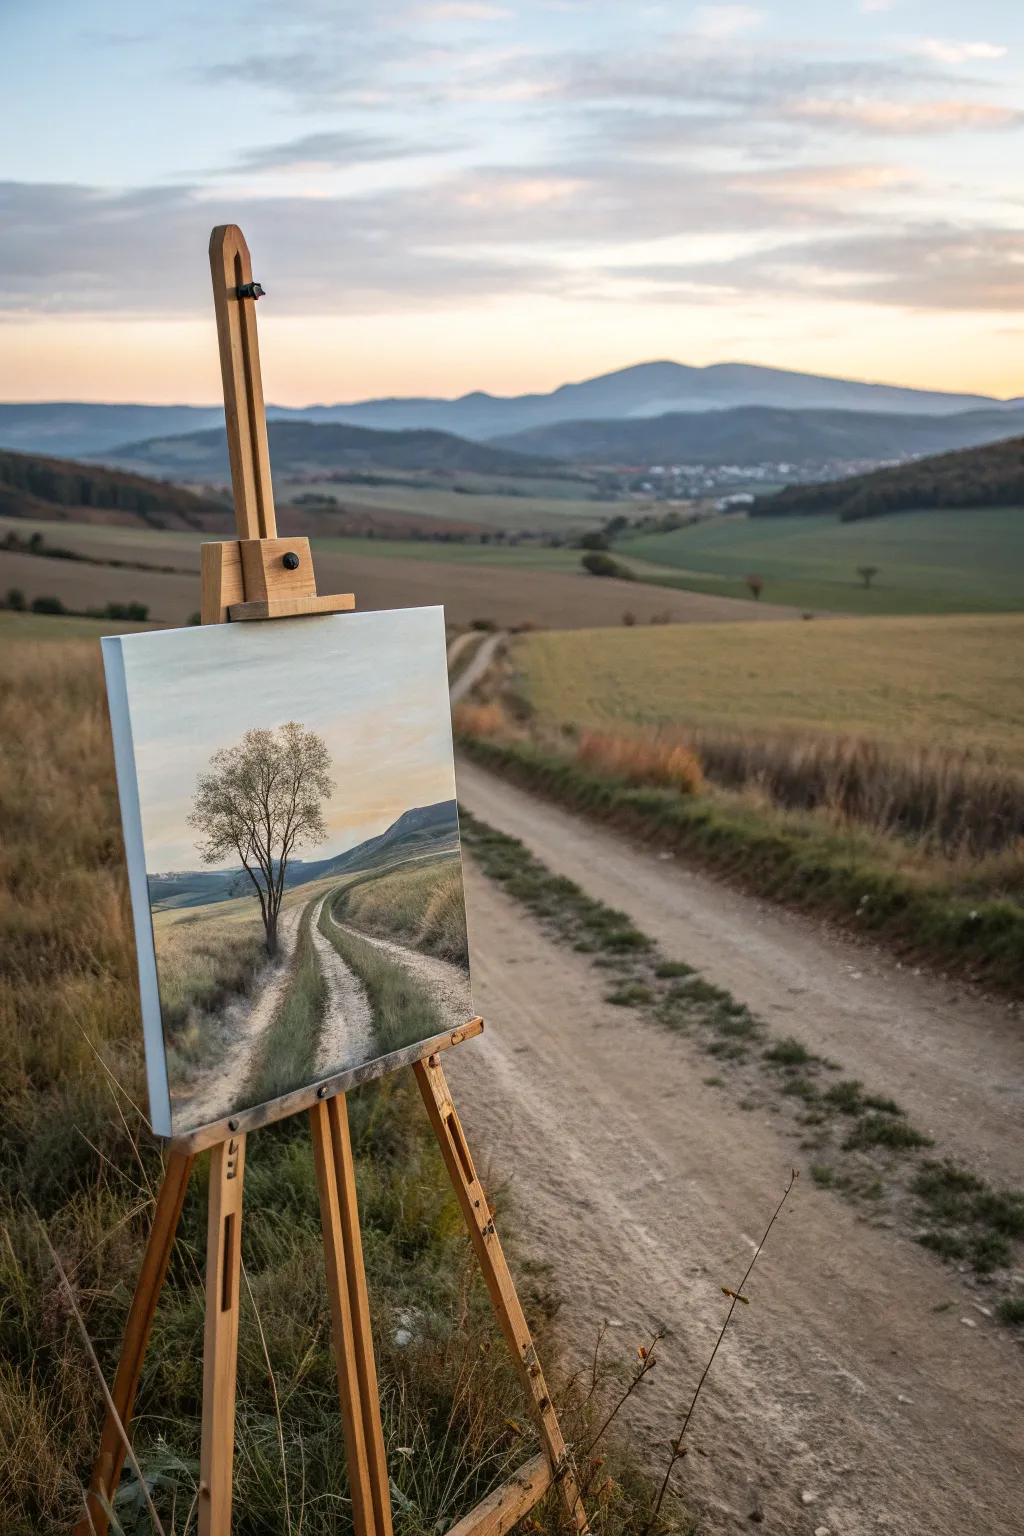
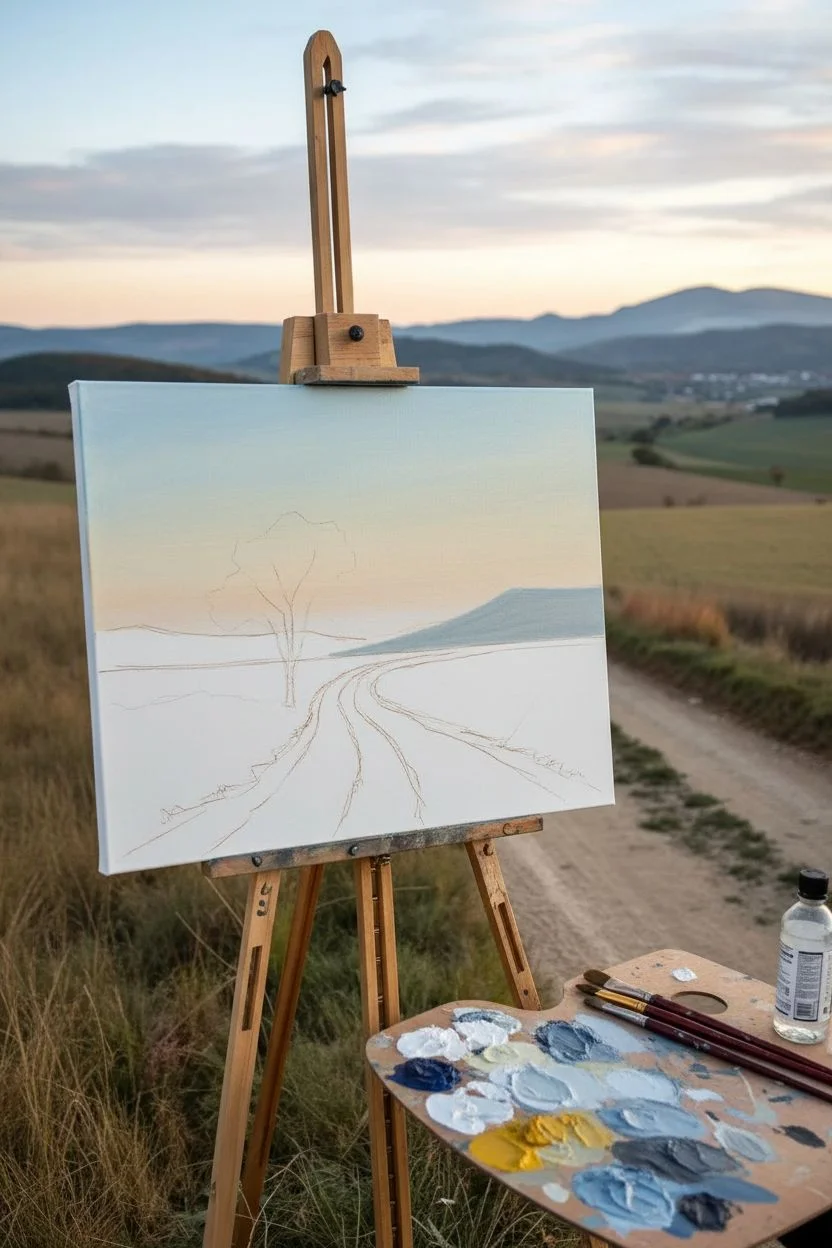
Lone Tree Study for Brushwork and Texture
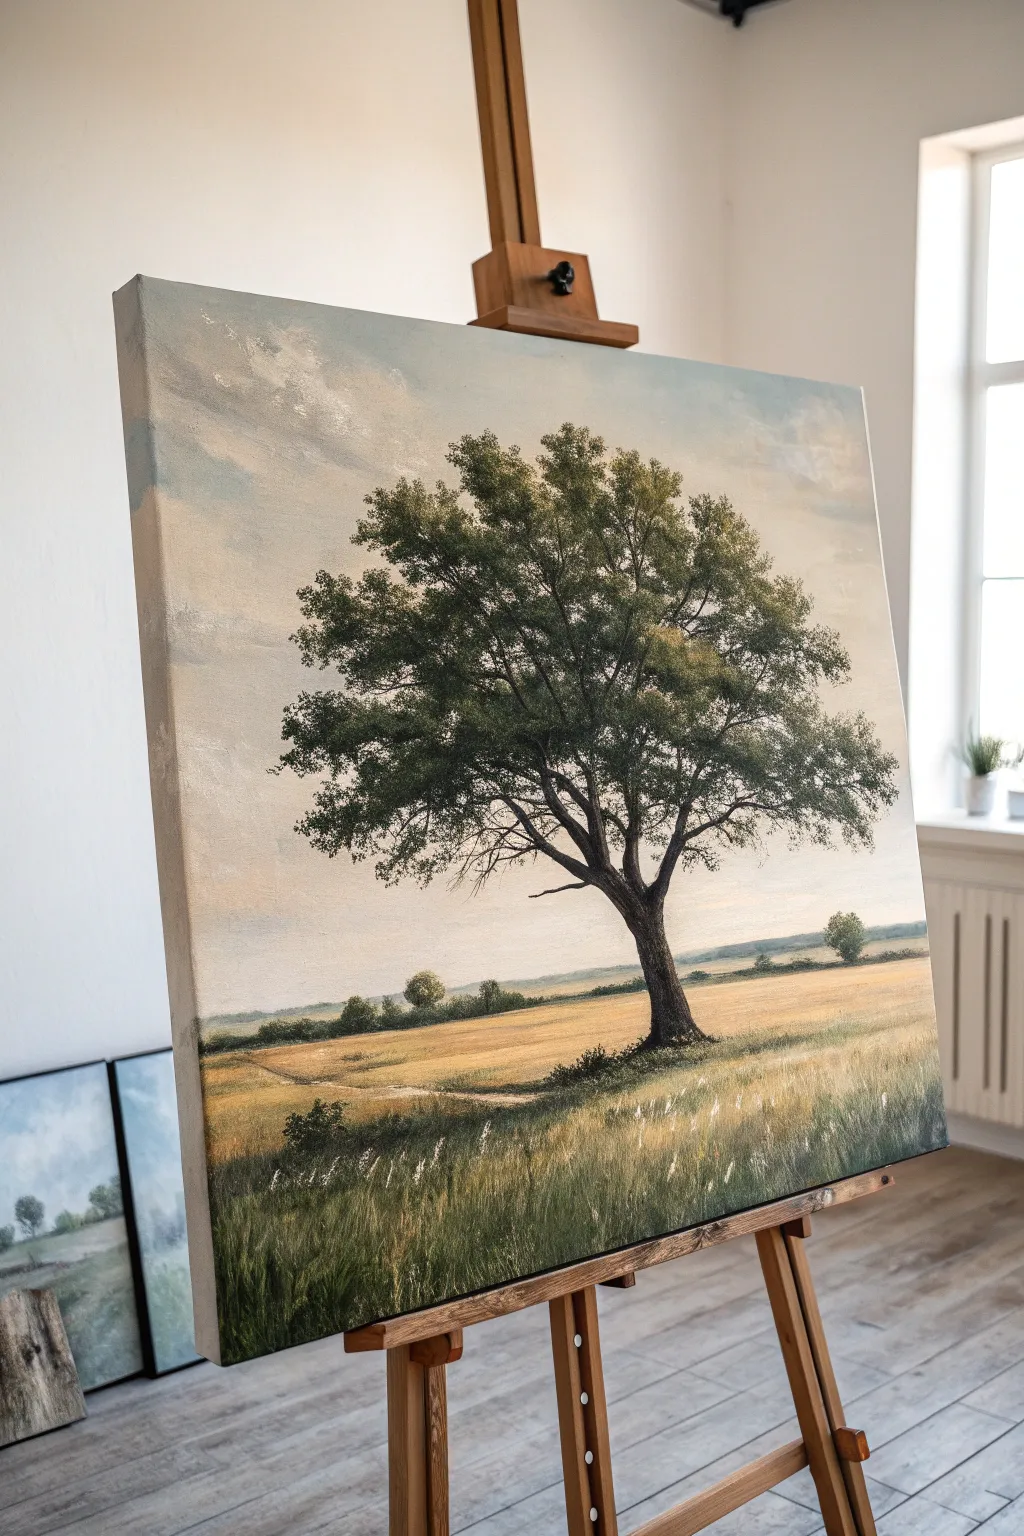
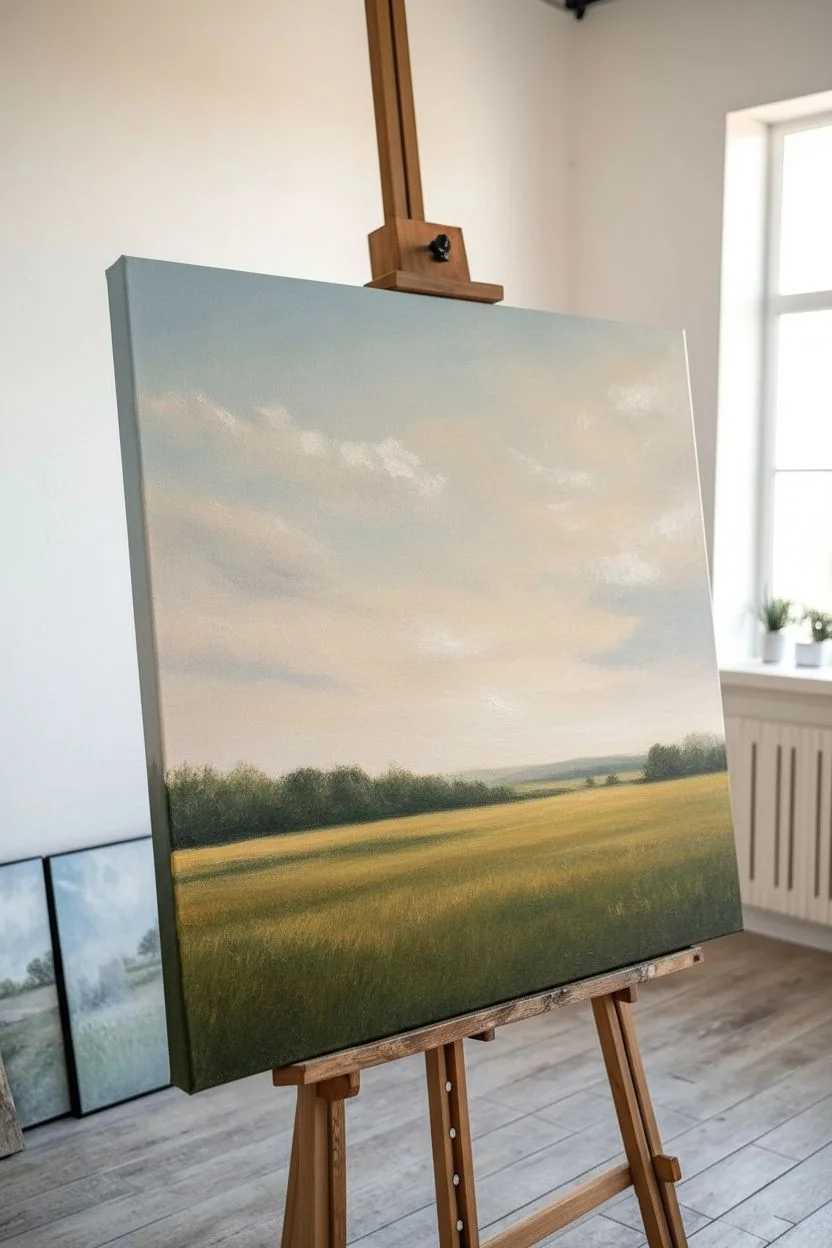
Master the art of texture and scale with this serene oil painting of a solitary tree standing guard over a golden field. This project focuses on building distinct foliage layers and capturing the gentle transition from grassy foreground to hazy sky.
Step-by-Step Tutorial
Materials
- Stretched canvas (approx. 24×30 inches)
- Oil paints: Titanium White, Ultramarine Blue, Burnt Umber, Yellow Ochre, Sap Green, Alizarin Crimson, Cadmium Yellow
- Brushes: Large flat brush (size 10-12), medium filbert (size 6), small round brush (size 0-2), fan brush
- Palette knife for mixing
- Odorless mineral spirits or turpentine
- Linseed oil medium
- Paper towels or rags
- Easel
Step 1: Atmospheric Foundation
-
Sky Gradient:
Begin with a large flat brush to establish the sky. Mix Titanium White with a touch of Ultramarine Blue for the upper corners. Gradually add more White and a tiny hint of Yellow Ochre as you work your way down towards the horizon line, creating a soft, warm fade. -
Cloud Formations:
While the sky layer is still wet (wet-on-wet), use a clean brush to scumble in soft, indistinct cloud shapes using pure Titanium White mixed with a whisper of Burnt Umber for shadows. Keep the edges blurry to push them into the distance. -
Horizon Line:
Establish the horizon roughly one-third of the way up the canvas. Paint a distant tree line using a cool, muted mix of Sap Green, Ultramarine Blue, and White. This should look hazy and out of focus. -
Underpainting the Field:
Block in the middle ground using Yellow Ochre and Titanium White. Use horizontal brushstrokes to suggest flat land. For the immediate foreground, mix in Sap Green and Burnt Umber to create a darker, richer base.
Don’t Over-Blend
If your tree leaves look like cotton balls, stop blending. Use a stiff brush and distinct tapping motions to keep the leafy texture crisp and separated.
Step 2: Constructing the Tree
-
Trunk Structure:
Using a medium filbert brush and a mix of Burnt Umber and Ultramarine Blue (making a near-black), sketch the main trunk. Observe how the trunk leans slightly; it shouldn’t be a perfectly straight vertical line. -
Major Branches:
Extend the thick trunk into main arterial branches. Use a mixture thinned with a little mineral spirits so the paint flows smoothly over the sky layer. Let these branches reach outward and upward in a ‘V’ and ‘Y’ pattern. -
Branch Detail:
Switch to a small round brush. Add twisting, smaller branches that taper off into nothingness. Remember to leave plenty of ‘sky holes’ where the foliage will eventually break apart. -
Bark Texture:
On the sun-facing side of the trunk (let’s assume light comes from the left), scumble a lighter brown mix (Burnt Umber + White) to create rough bark texture. Keep the shadow side dark and undefined.
Step 3: Foliage and Texture
-
Dark Foliage Masses:
Mix a dark green using Sap Green and Burnt Umber. Using an old filbert or a stiff bristle brush, tap in the deepest shadow areas of the tree’s canopy. Focus on the undersides of the branch masses. -
Mid-Tone Leaves:
Lighten your green mix with Cadmium Yellow and a touch of Ochre. Stipple this color over the dark masses, focusing on the tops and outer edges of the leaf clusters. Don’t cover the darks completely; they provide depth. -
Highlights and Airiness:
Mix a pale, warm green using mostly Yellow Ochre and White with a hint of Green. Use a light touch to dab the very tips of the canopy where the sun hits. Leave gaps to let the sky branches show through. -
Distant Companions:
Add smaller, simplified tree shapes in the background near the horizon. Keep these much lighter and bluer in tone than your main tree to simulate atmospheric perspective.
Add Life
Use a rigger brush to add a few tiny V-shapes in the distance for birds, or add small white dabs in the foreground for wildflowers.
Step 4: Foreground Details
-
pathway Creation:
Scrape away a bit of the wet paint in the field or paint over it with a light beige mix to suggest a worn dirt path winding from the left foreground toward the horizon. -
Tree Shadow:
Cast a shadow from the base of the tree stretching to the right. Use a transparent glaze of Burnt Umber and Blue over the yellow field to darken it without losing the golden undertone. -
Grassy Texture:
Use a fan brush or a small liner brush to flick upward strokes in the immediate foreground. Use varied greens and fibrous browns to create tall, wild grasses that obscure the bottom of the canvas. -
Final Highlights:
Add accents of nearly pure White or light yellow to the tips of the foreground grasses to catch the ‘light.’ I like to place a few stray grass blades overlapping the dark base of the tree trunk to ground it in the scene.
Take a step back to admire how your brushwork has built a quiet, enduring Sentinel in your landscape

PENCIL GUIDE
Understanding Pencil Grades from H to B
From first sketch to finished drawing — learn pencil grades, line control, and shading techniques.
Explore the Full Guide
Pet Portrait With Simplified Fur Masses
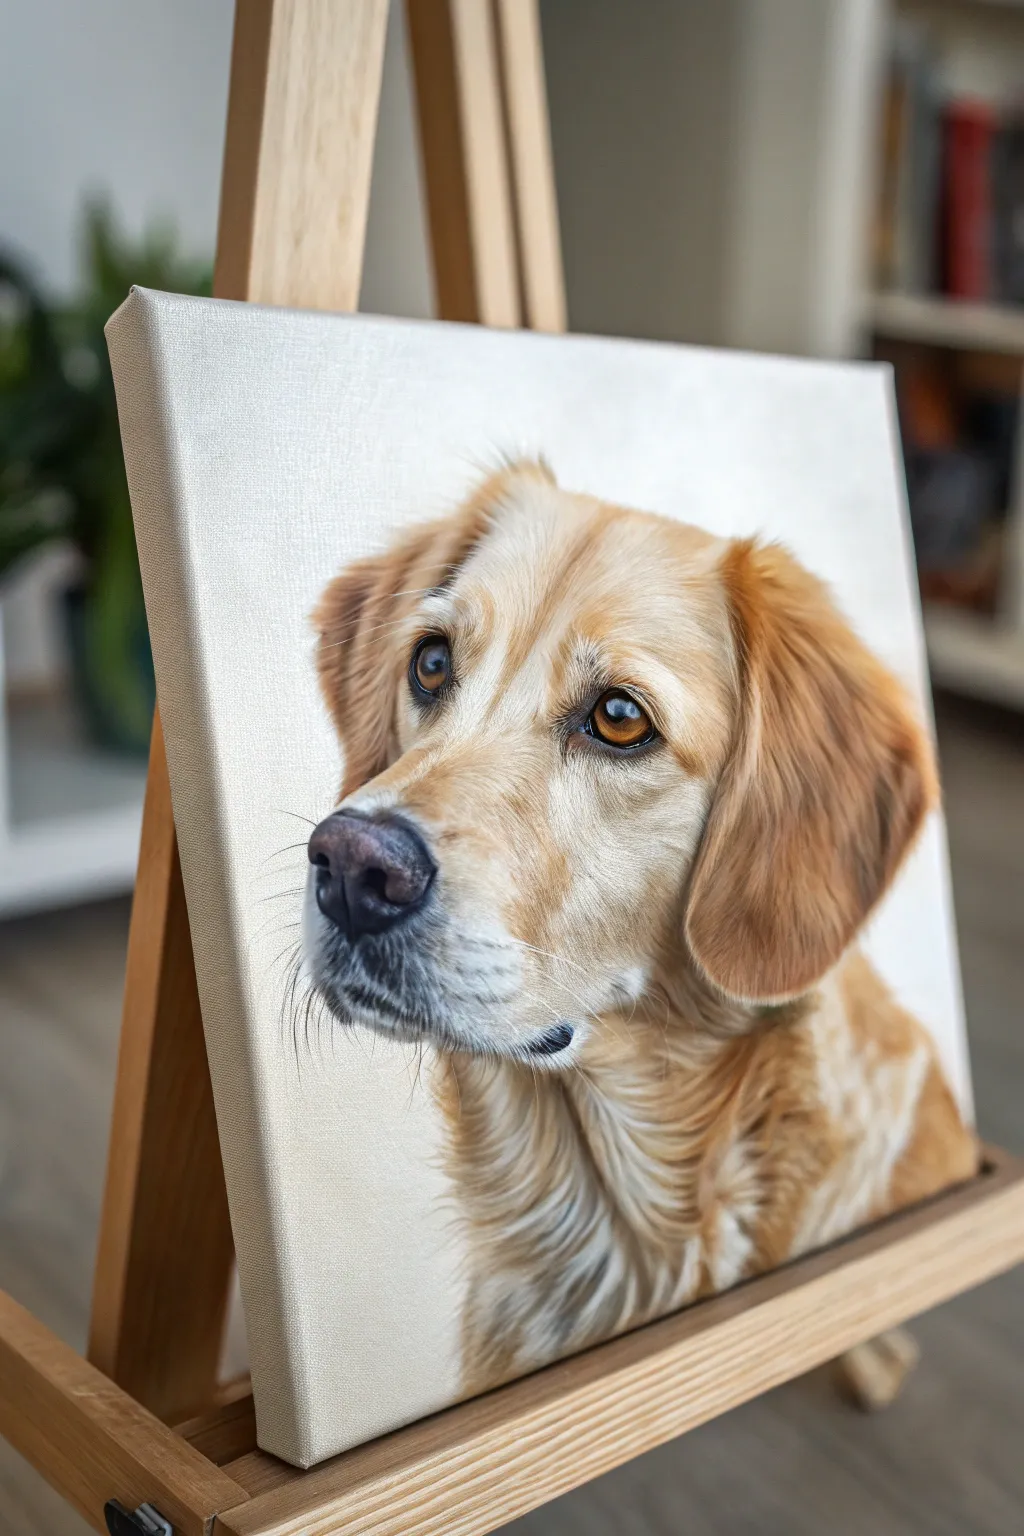
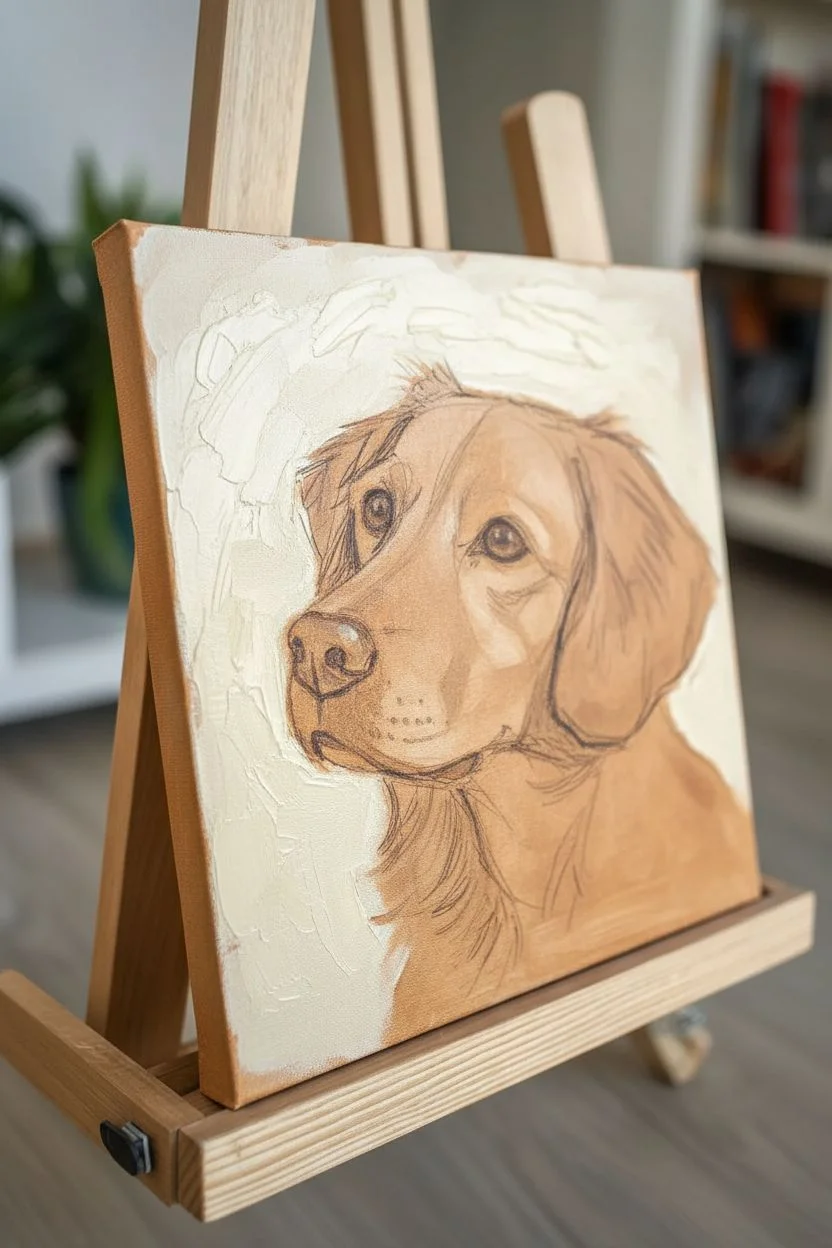
This project focuses on painting a lifelike Golden Retriever portrait by breaking down complex fur patterns into simplified, manageable masses. The result is a soft, expressive study that captures the gentle dignity of the breed against a clean, creamy background.
Step-by-Step Guide
Materials
- Stretched canvas (approx. 16×20 inches)
- Oil paints: Titanium White, Yellow Ochre, Burnt Sienna, Burnt Umber, Ultramarine Blue, Ivory Black
- Pointed round brushes (sizes 2, 4, and 6)
- Flat shader brush (size 10)
- Fine liner brush (size 0)
- Odorless mineral spirits or turpentine
- Liquin or linseed oil medium
- Palette and palette knife
- Easel
- Soft rag or paper towels
Step 1: Preparation and Underpainting
-
Prime the surface:
Begin by ensuring your canvas is primed. While most come pre-primed, adding a quick wash of diluted Burnt Sienna allows for a warm undertone that will glow through the fur later. -
Sketch the framework:
Using a small round brush dipped in thinned Burnt Umber, sketch the basic outline of the dog’s head. Focus on the triangular shape of the ears and the T-zone formed by the eyes and nose. -
Establish the background:
Mix a large amount of Titanium White with a tiny touch of Yellow Ochre and Ivory Black to create a warm, creamy off-white. Apply this to the negative space around the dog using your large flat brush, cutting in carefully around the fur outline.
Pro Tip: Fur Direction
Always paint fur strokes growing out from the skin. On the snout, strokes are short and flat; on the chest, they are long and flowing. Follow the skull’s anatomy.
Step 2: Blocking in Values
-
Map the darks:
Identify the darkest points: the pupils, the nostrils, and the shadow under the ear flaps. Mix Burnt Umber with Ultramarine Blue for a rich, near-black tone and place these anchors. -
Create the mid-tone gold:
Mix Yellow Ochre and Burnt Sienna with a little White. Paint the main masses of the ears and the top of the head. Don’t worry about individual strands yet; think in large, solid shapes. -
Define the muzzle:
The muzzle area is lighter. Add more Titanium White to your ochre mix and block in the snout area, blending softly where it meets the darker cheeks. -
Add deep shadows:
Use a mix of Burnt Sienna and Burnt Umber to paint the shadowed ‘valleys’ between the fur masses, specifically under the chin and the fold where the ear meets the neck.
Step 3: Developing the Fur Texture
-
Refine the eyes:
Using a smaller brush, paint the iris with a mix of Burnt Sienna and Yellow Ochre. Add a tiny dot of pure white for the catch-light to bring the dog to life instantly. -
Paint the nose texture:
The nose isn’t solid black; use a dark grey-brown for the top and lighter pinkish-grey for the front. Stipple gently with a worn brush to suggest the leather texture. -
Start the layering process:
Mix a lighter golden shade. Using a size 4 round brush, begin painting strokes in the direction of hair growth. I find it helpful to start at the bottom of the neck and work upward. -
Build fur masses on the ears:
The ears have longer, crimped hair. Use long, sweeping strokes with Burnt Sienna variations to suggest waves rather than individual hairs. -
Detail the muzzle whiskers:
Switch to a smaller brush. Paint short, directional strokes radiating from the nose bridge. Keep the paint slightly thinner here so it flows smoothly. -
Soften the transitions:
Use a clean, dry brush to very gently sweep over areas where the fur colors change. This blurs the distinct lines and makes the coat look soft and dense.
Level Up: Glazing Warmth
Once fully dry, apply a transparent glaze of Burnt Sienna over the shadowed side of the face. This instantly unifies the colors and deepens the golden richness.
Step 4: Final Details and Highlights
-
Add high-value highlights:
Load a liner brush with Titanium White and a touch of medium for fluidity. Add the brightest hairs on the brow ridge, the tip of the slightly wet nose, and the chest fur. -
Paint the whiskers:
Using a liner brush and fluid dark paint, execute quick, confident strokes for the muzzle whiskers. Vary the pressure so they taper at the ends. -
Introduce reflected light:
Mix a cool grey-blue and glaze it lightly onto the shadowed side of the white chest fur. This adds dimension and mimics natural lighting. -
Review edges:
Check the silhouette of the dog against the background. Using your background color, paint into the fur edge slightly to soften it so the dog doesn’t look like a cutout.
Step back comfortably and admire the loyal expression looking back at you from the easel
Rainy Night Street Scene With Glowing Lights
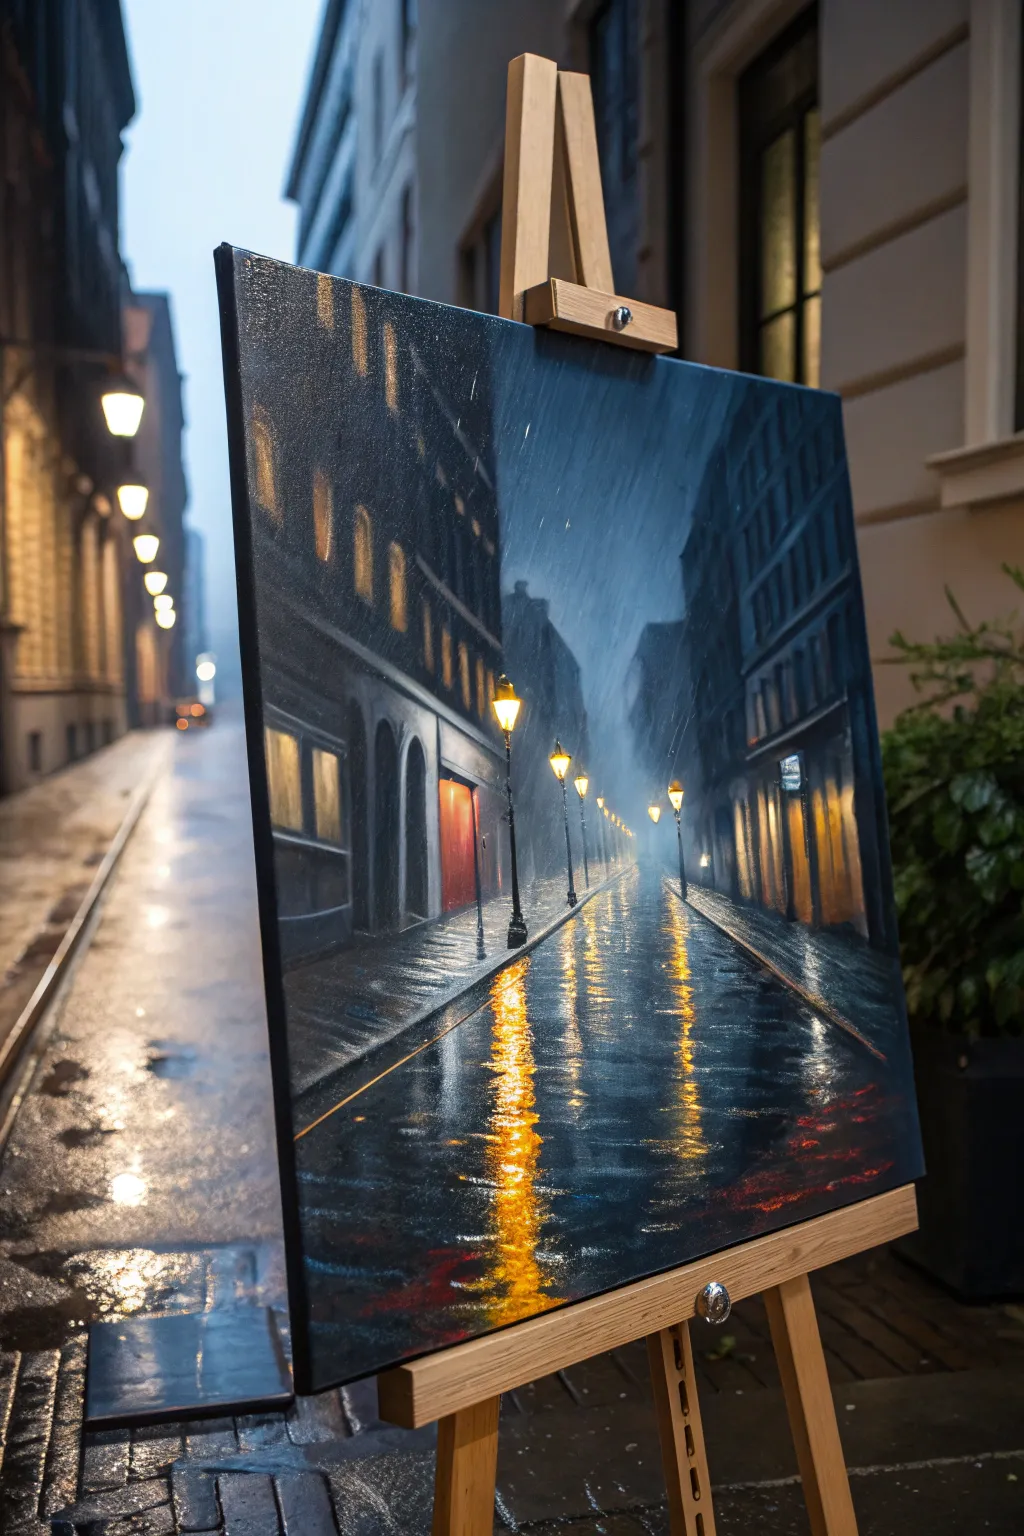
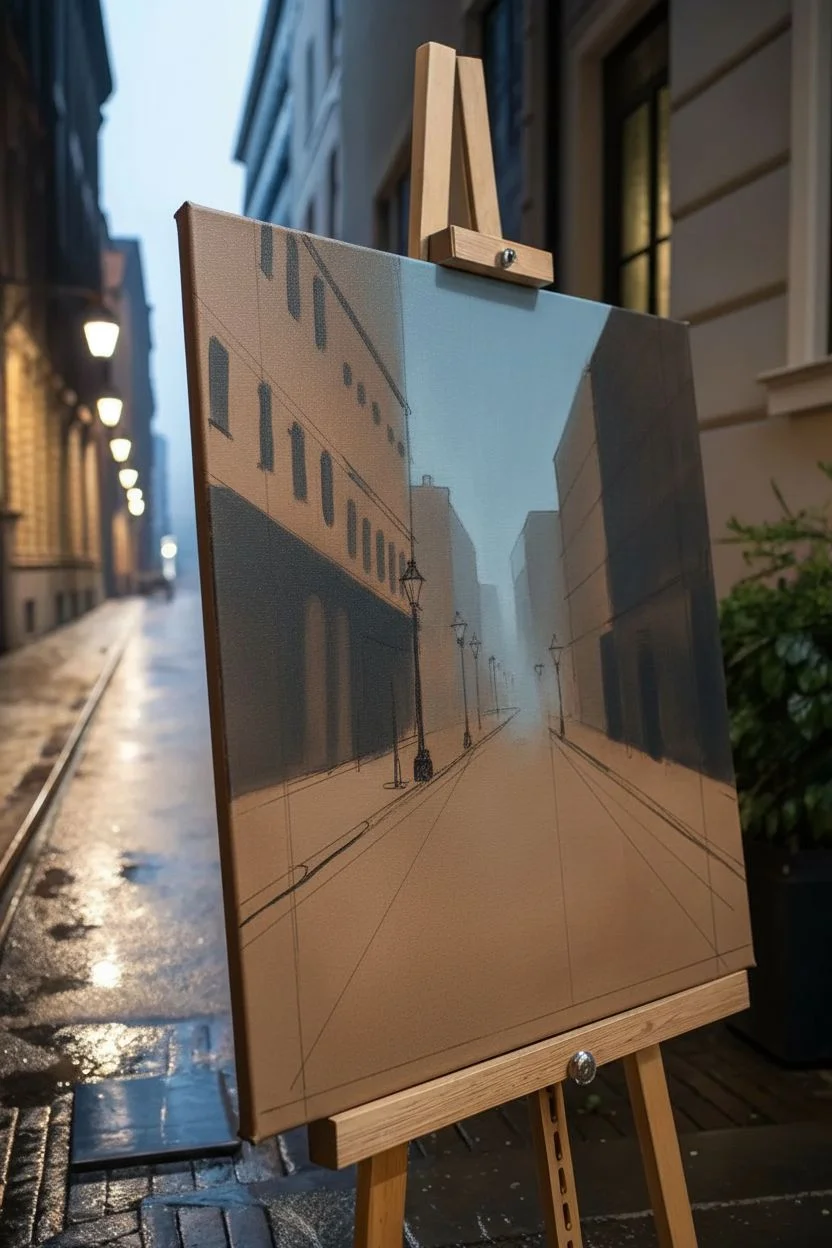
Capture the moody atmosphere of a rainy night in the city with this striking oil painting tutorial. You’ll learn how to render wet pavement reflections and glowing streetlights against a deep, cool-toned urban backdrop.
Step-by-Step
Materials
- Stretched canvas (approx. 16×20 inches)
- Oil paints: Titanium White, Ivory Black, Ultramarine Blue, Phthalo Blue, Alizarin Crimson, Cadmium Yellow, Burnt Umber
- Flat bristle brushes (large and medium)
- Round synthetic brushes (small for details)
- Palette knife
- Odorless mineral spirits or turpentine
- Linseed oil or painting medium
- Palette and rag
Step 1: Preparation and Underpainting
-
Prime the canvas:
Even if your canvas is pre-primed, apply a thin wash of burnt umber mixed with mineral spirits. This tones down the stark white and provides a warm undertone that will peek through the cooler colors later. -
Sketch the perspective lines:
Using a small round brush and thinned black paint, sketch the vanishing point slightly to the right of the center. Draw the diagonal lines for the curbs and building rooftops, ensuring they all converge at that single point to create depth. -
Block in the darks:
Mix a dark, cool grey using Ivory Black and Ultramarine Blue. Use a large flat brush to block in the silhouettes of the buildings on both sides, keeping the edges slightly soft to suggest distance and rain. -
Establish the sky:
For the narrow strip of sky between buildings, mix White, Phthalo Blue, and a tiny touch of black. Apply this with vertical strokes, blending it downward into the distance where the street disappears.
Muddy colors?
If your yellow lights turn green when mixing with the blue background, let the background dry completely first. Apply the yellow as a glaze later to keep it vibrant.
Step 2: Creating the Atmosphere
-
Paint the wet road base:
The road is a mirror for the sky and buildings. Mix a dark, slate blue-grey closer to the bottom of the canvas and gradually lighten it as you move toward the horizon line. Use horizontal strokes to emphasize the flat surface. -
Add structure to buildings:
Switch to a medium flat brush. Using a lighter grey-blue mix, paint the vertical planes of the buildings to suggest windows and architecture. Keep these shapes loose; we don’t need architectural precision, just the suggestion of forms. -
Mist and distance:
To create the foggy, rainy look at the end of the street, lightly scumble a transparent glaze of white and blue over the distant buildings. This pushes them back in space.
Add life
Paint a shadowy silhouette of a figure holding an umbrella walking away in the distance. It adds a narrative element and emphasizes the scale of the buildings.
Step 3: Lights and Reflections
-
Place the light sources:
Identify where the street lamps go. Paint small, solid circles of pure Titanium White first at the center of each lamp. This provides the brightest possible base for the glow. -
Add the yellow glow:
Once the white is tacky, glaze over it with Cadmium Yellow. Extend the yellow outward in a soft halo, blending it into the surrounding dark blue building shadows to create a fuzzy, radiant effect. -
Paint the first reflection layer:
Directly below each lamp, drag vertical strokes of yellow and orange down the wet pavement. These reflections should be wiggly and distorted, not perfect straight lines. -
Refine the reflections:
I like to take a clean, dry brush and gently drag it horizontally across the vertical reflections. This ‘cuts’ the light and makes it look like it’s sitting on ripples of water.
Step 4: Detailing and Rain Texture
-
Define the lamp posts:
Use your smallest round brush and inky black paint to draw the slender poles of the streetlights. Ensure the base of each pole meets the pavement convincingly. -
Add red accents:
Introduce warmth by painting the red doorway on the left and touches of red taillights in the distance. Reflect these red tones onto the wet street surface just like you did with the yellow lamps. -
Highlight the curbs:
Mix a light grey with a touch of blue. Paint the edges of the sidewalks and curbs. These lines act as crucial perspective guides, leading the viewer’s eye deep into the painting. -
Create the rain effect:
Mix a thin glaze of white and mineral spirits. Using a fan brush or a wide flat brush, lightly streak diagonal lines across the canvas, varying the pressure to suggest falling rain. -
Final brights:
Return to the center of your street lamps and the brightest parts of the reflections on the ground. Add tiny impasto touches of pure white mixed with a speck of yellow to make the lights truly sparkle.
Step back and admire how the contrast between warm lights and cool shadows brings your rainy night scene to life


Impressionistic Garden of Color Dabs
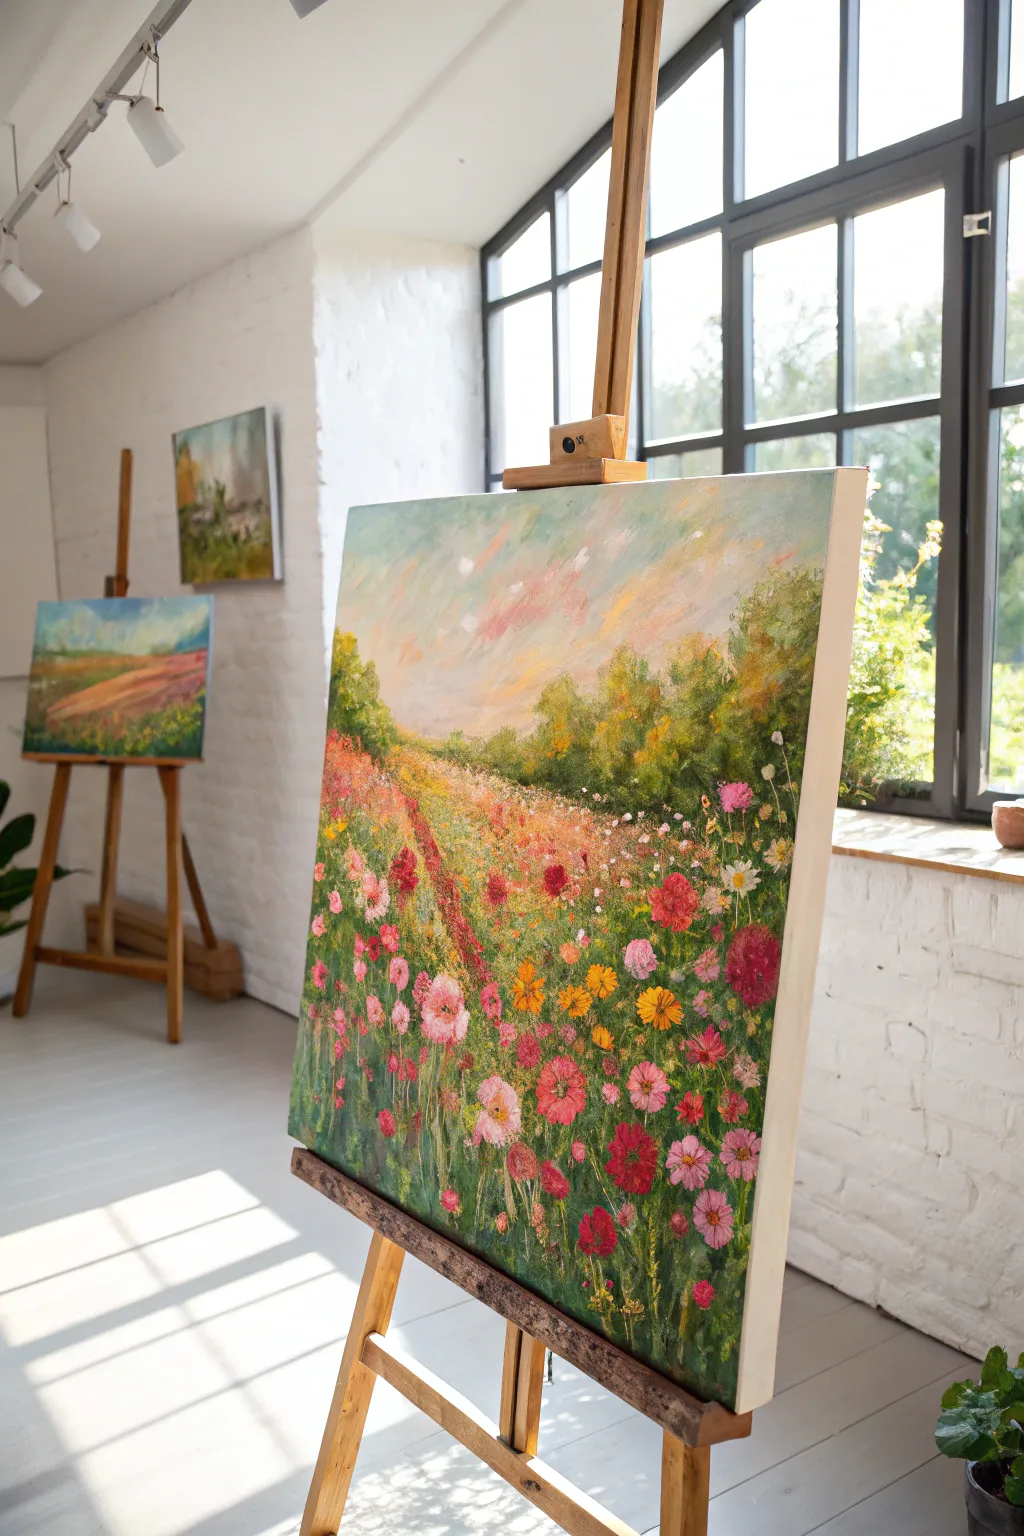
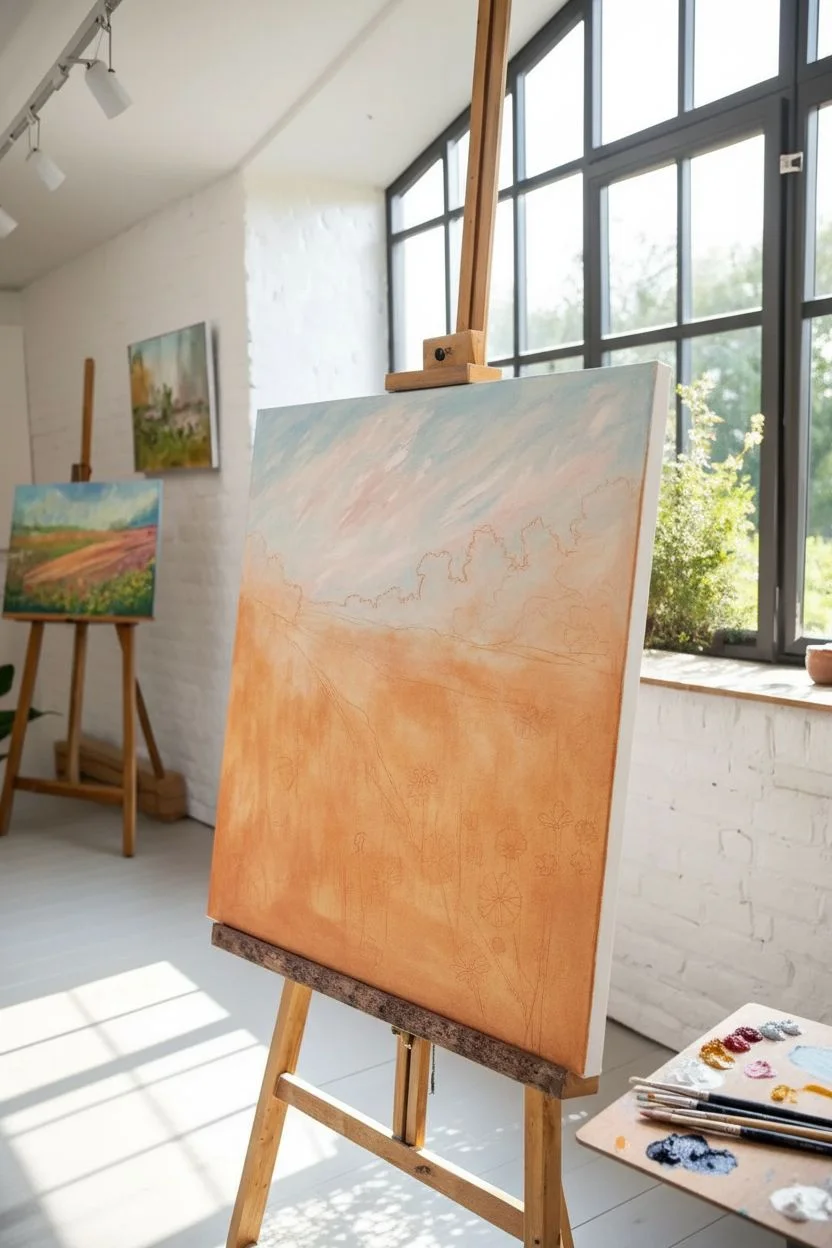
Capture the fleeting beauty of a summer meadow with this vibrant, impressionistic oil landscape. Using loose brushwork and layers of color dabs, you’ll build a lush garden scene that feels both energetic and serene.
Step-by-Step Tutorial
Materials
- Stretched canvas (approx 16×20 or 18×24 inches)
- Oil paints: Titanium White, Cadmium Yellow Medium, Cadmium Red (or Alizarin Crimson), Sap Green, Ultramarine Blue, Yellow Ochre, Burnt Sienna
- Brushes: Large flat brush (size 10-12), medium filbert brush (size 6-8), small round brush (size 2-4)
- Palette knife (for mixing and texture)
- Odorless mineral spirits or turpentine
- Linseed oil or painting medium
- Wooden palette
- Rags or paper towels
Step 1: Setting the Scene
-
Prime the Surface:
If your canvas isn’t pre-primed, apply two coats of acrylic gesso. Even on pre-primed canvas, a thin wash of burnt sienna diluted with mineral spirits helps kill the harsh white and adds warmth. -
Map the Horizon:
Using a small round brush and a thin mix of burnt sienna, sketch a light horizon line about one-third of the way down from the top. Sketch the general masses of the distant trees and the diagonal path of the flower field. -
Block in the Sky Base:
Mix Titanium White with a touch of Ultramarine Blue and a tiny bit of Yellow Ochre to create a warm, pale blue. Use your large flat brush to cover the sky area loosely. -
Add Cloud Movements:
While the blue is wet, mix white with a hint of Cadmium Red for a soft pink. Scumble this into the sky diagonally, suggesting movement in the clouds.
Muddy Colors?
If your flower colors look brown or muddy, let the green underlayer dry to the touch (1-2 days) before adding the bright floral dabs on top.
Step 2: Creating the Background
-
Paint Distant Greenery:
Mix Sap Green, Yellow Ochre, and a little white to create a muted, atmospheric green. Block in the distant tree line, keeping the edges soft so they recede. -
Darkize the Shadows:
Add a touch of Ultramarine Blue to your green mix to create a darker value. Dab this into the base of the trees to anchor them and create volume. -
Establish the Field Base:
For the meadow underpainting, switch to a medium filbert brush. Mix Yellow Ochre, Sap Green, and a warm yellow. Apply this broadly across the bottom two-thirds of the canvas using vertical strokes. -
Suggesting the Pathway:
Mix a darker, reddish-earth tone using Alizarin Crimson and Sap Green. I like to dry-brush this loosely in a messy diagonal line to suggest a trodden path or a change in vegetation density.
Palette Knife Punch
Use a palette knife to apply the final highlights on the foreground petals. The thick texture captures light and makes the flowers pop off the canvas.
Step 3: The Impressionistic Flowers
-
Start with Mid-Tones:
Load your medium filbert brush with pure colors—pinks, oranges, and deep yellows. Dab these randomly throughout the foreground, varying the pressure to create different sized splotches. -
Layering the Greens:
Mix a vibrant fresh green using Cadmium Yellow and Sap Green. Use the edge of your brush to paint vertical stems and grass blades in between your colorful flower patches. -
Creating Depth in Flowers:
Mix a deep red using Alizarin Crimson. Paint small, dark centers or shadow sides on your pink and red flowers to give them a three-dimensional cup shape. -
Adding Highlights:
Mix Titanium White with your pinks and yellows to create pastel highlights. Apply these to the top edges of the flowers where the sunlight would hit. -
The White Daisies:
Using a smaller round brush, dot in pure white spots across the field. These represent daisies or Queen Anne’s Lace and help break up the heavy saturated colors. -
Foreground Detail:
In the immediate foreground (bottom edge), make your strokes larger and more distinct. Define individual petals on the largest Cosmo-like flowers using thick impasto paint. -
Atmospheric Perspective:
As you move toward the horizon line, make your flower dabs smaller, less distinct, and slightly cooler in color. This mimics how the eye perceives distance. -
Final Texture Check:
Step back from the easel. If an area looks too flat, use your palette knife to scrape a little paint away or dab a thick glob of pure color on top for texture.
Allow the thickest areas of paint several days to dry completely before framing your vibrant garden scene
Self-Portrait From a Mirror With Honest Lighting
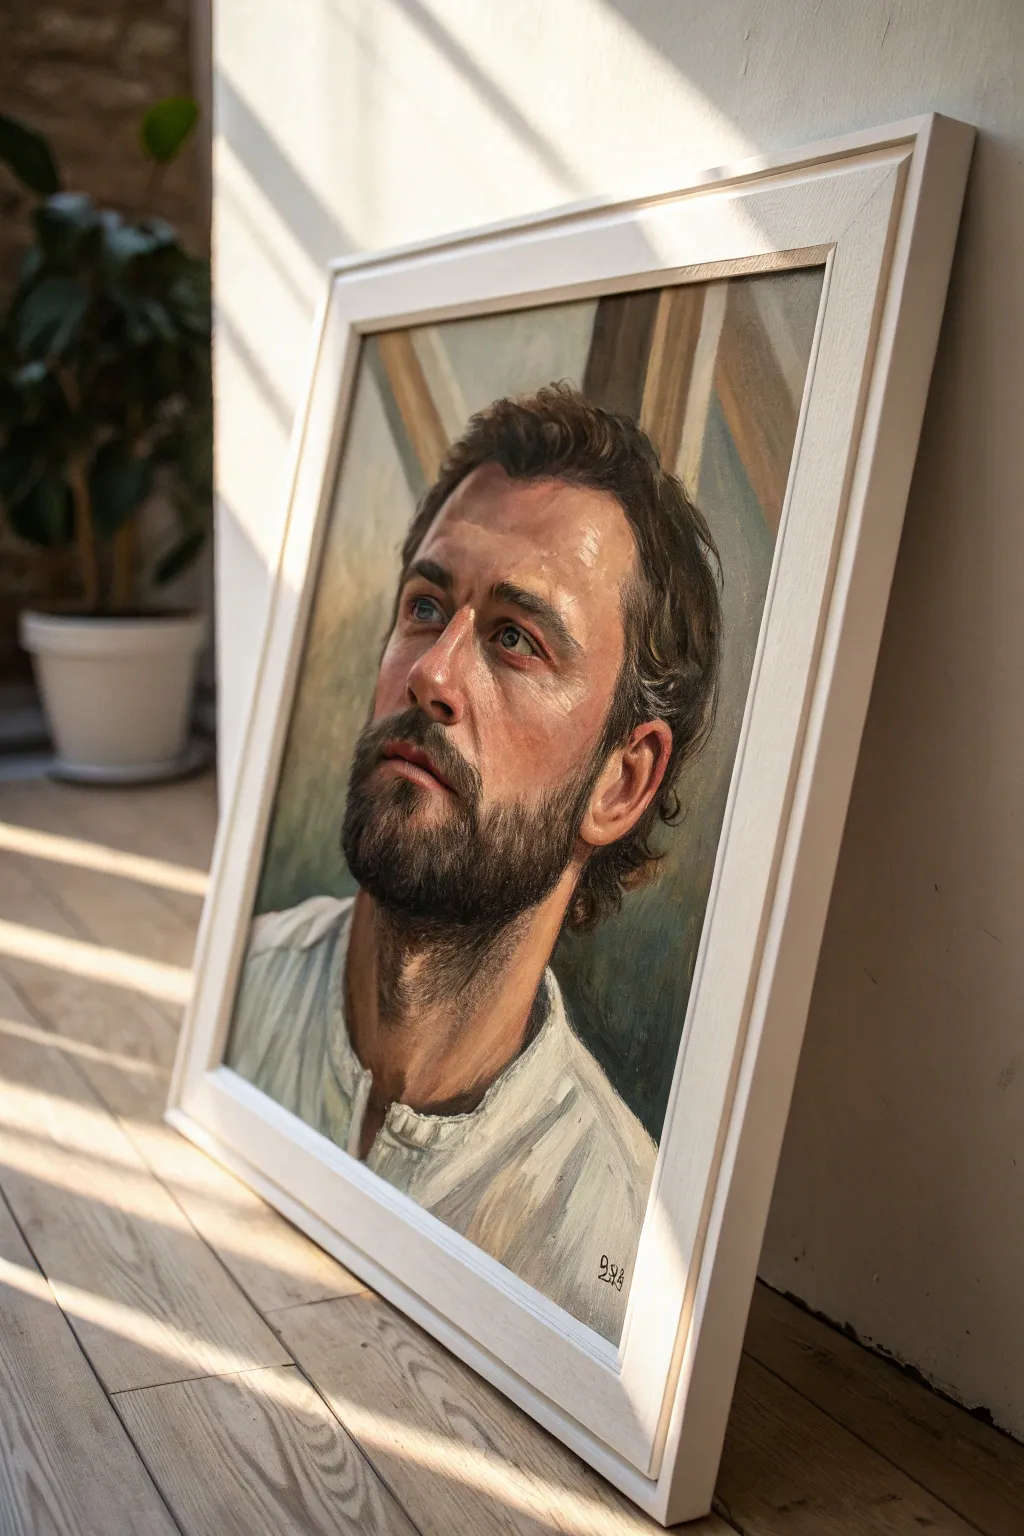
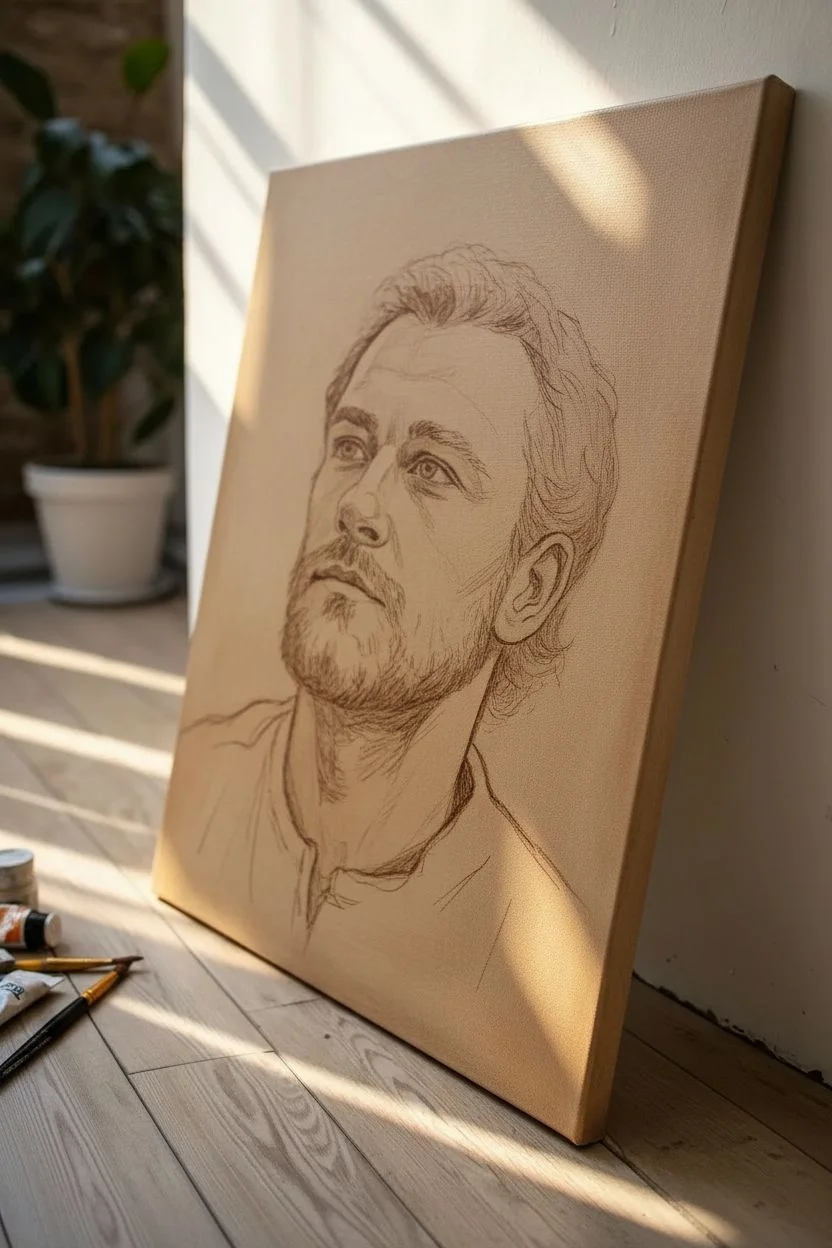
This project captures a contemplative moment using oil paints to render realistic skin tones and honest, directional lighting. By focusing on the interplay of cool shadows and warm highlights, you’ll create a striking self-portrait that feels both classic and immediate.
Step-by-Step
Materials
- Stretched canvas or canvas board (approx. 16×20 inches)
- Oil paints: Titanium White, Yellow Ochre, Cadmium Red Light, Alizarin Crimson, Burnt Umber, Ultramarine Blue, Ivory Black
- Floetrol or other drying retarder (optional)
- Odorless mineral spirits
- Assorted hog bristle brushes (filberts and flats, sizes 2-8)
- Soft synthetic round brushes for detailing
- Wooden palette
- Palette knife for mixing
- Mirror (for reference)
- White or light wood floating frame (optional finish)
Step 1: Setting the Composition
-
Prepare the source:
Sit in front of a mirror with a strong, single light source coming from one side (like a window). Observe how the light rakes across your forehead and nose while leaving the opposite side in shadow. Snap a reference photo if holding the pose is difficult. -
Tone the canvas:
Apply a thin wash of Burnt Umber mixed with mineral spirits across the entire canvas. Wipe it back with a rag to create a warm, neutral mid-tone background. Let this dry until it’s tacky but not wet. -
Sketch the underdrawing:
Using a small round brush and thinned Burnt Umber, sketch the basic contours of the head. Focus on the tilt of the neck and the upward gaze. Keep the lines loose; don’t worry about eyelashes or wrinkles yet, just the big shapes of the skull.
Pro Tip: The Squint Method
Periodically squint your eyes while looking at your subject. This blurs details and helps you see the major shapes of light and dark, ensuring your portrait has strong structure before detailing.
Step 2: Blocking In Values
-
Establish the darks:
Mix a dark value using Burnt Umber and Ultramarine Blue. Paint the darkest areas first: the hair mass, the deep shadow under the chin, the nostrils, and the pupils. This anchors your value range immediately. -
Mix your skin base:
Create a mid-tone flesh color using White, Yellow Ochre, and a touch of Cadmium Red. On your palette, create a ‘shadow’ version of this by adding a little Burnt Umber and Blue, and a ‘highlight’ version with more White and Yellow. -
Apply the shadow shapes:
Look at the side of the face away from the light. Block in these planes with your cool shadow mix. Don’t blend yet; just place the shape of the shadow on the cheek, temple, and neck. -
Paint the lit planes:
Load a size 6 filbert brush with your warm highlight mix. Apply the paint thickly on the forehead, the bridge of the nose, and the cheekbone catching the light. I find that being bold with these strokes prevents the face from looking overworked.
Step 3: Refining Features & Form
-
Transitional tones:
Mix a slightly redder tone (add Alizarin Crimson to your base flesh) for the areas where light meets shadow, known as the terminator line. Apply this specifically on the cheeks, nose tip, and ears to simulate blood flow under the skin. -
Scumbling beard texture:
For the beard, don’t paint individual hairs yet. Use a dry, rough brush with a dark grey-brown mix and ‘scumble’ (scrub lightly) over the jawline to create a stubble texture that reveals some skin tone underneath. -
Defining the eyes:
Switch to a smaller synthetic brush. Paint the whites of the eyes, remembering they aren’t pure white but a soft grey-blue. Add the iris color, keeping the top part slightly darker where the eyelid casts a shadow. -
Modeling the hair:
Return to the hair mass. Add lighter brown streaks where the light hits the waves of the hair. Keep the edges soft where the hair meets the background to suggest depth and movement. -
The shirt:
Block in the shirt using broad strokes of White mixed with a tiny bit of Ivory Black and Yellow Ochre for warmth. Don’t over-detail the folds; let the brushstrokes suggest the fabric’s direction.
Troubleshooting: Muddy Skin Tones
If skin looks gray or muddy, you likely over-blended warm and cool colors. Let the area dry completely, scraper it smooth if needed, and apply fresh, clean color strokes on top without blending.
Step 4: Highlights and Details
-
High-key highlights:
Mix Titanium White with a tiny speck of Yellow. Apply small, crisp dabs of paint to the specular highlights: the tip of the nose, the forehead slickness, and the catchlight in the eyes. -
Refine the beard:
Now use a rigger or fine liner brush to pull a few specific stray hairs out from the dark beard mass into the light. This tricks the eye into seeing detail without painting every follicle. -
Background atmosphere:
Paint the background around the head. A muted olive-grey or soft beige works well to push the face forward. Paint contrasting values—darker background against the light side of the face, and lighter background against the shadow side. -
Final adjustments:
Step back from the easel. Soften any edges that look too like a cutout, particularly around the ears and neck. Sign your work in the corner with a contrasting color. -
Framing:
Allow the painting to cure for several weeks. Once dry to the touch, frame it in a simple white floating frame to mimic the modern aesthetic of the reference image.
Hang your finished portrait in a spot with good natural light to echo the illumination within the painting.
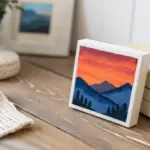
Limited Palette Landscape Series for Faster Learning
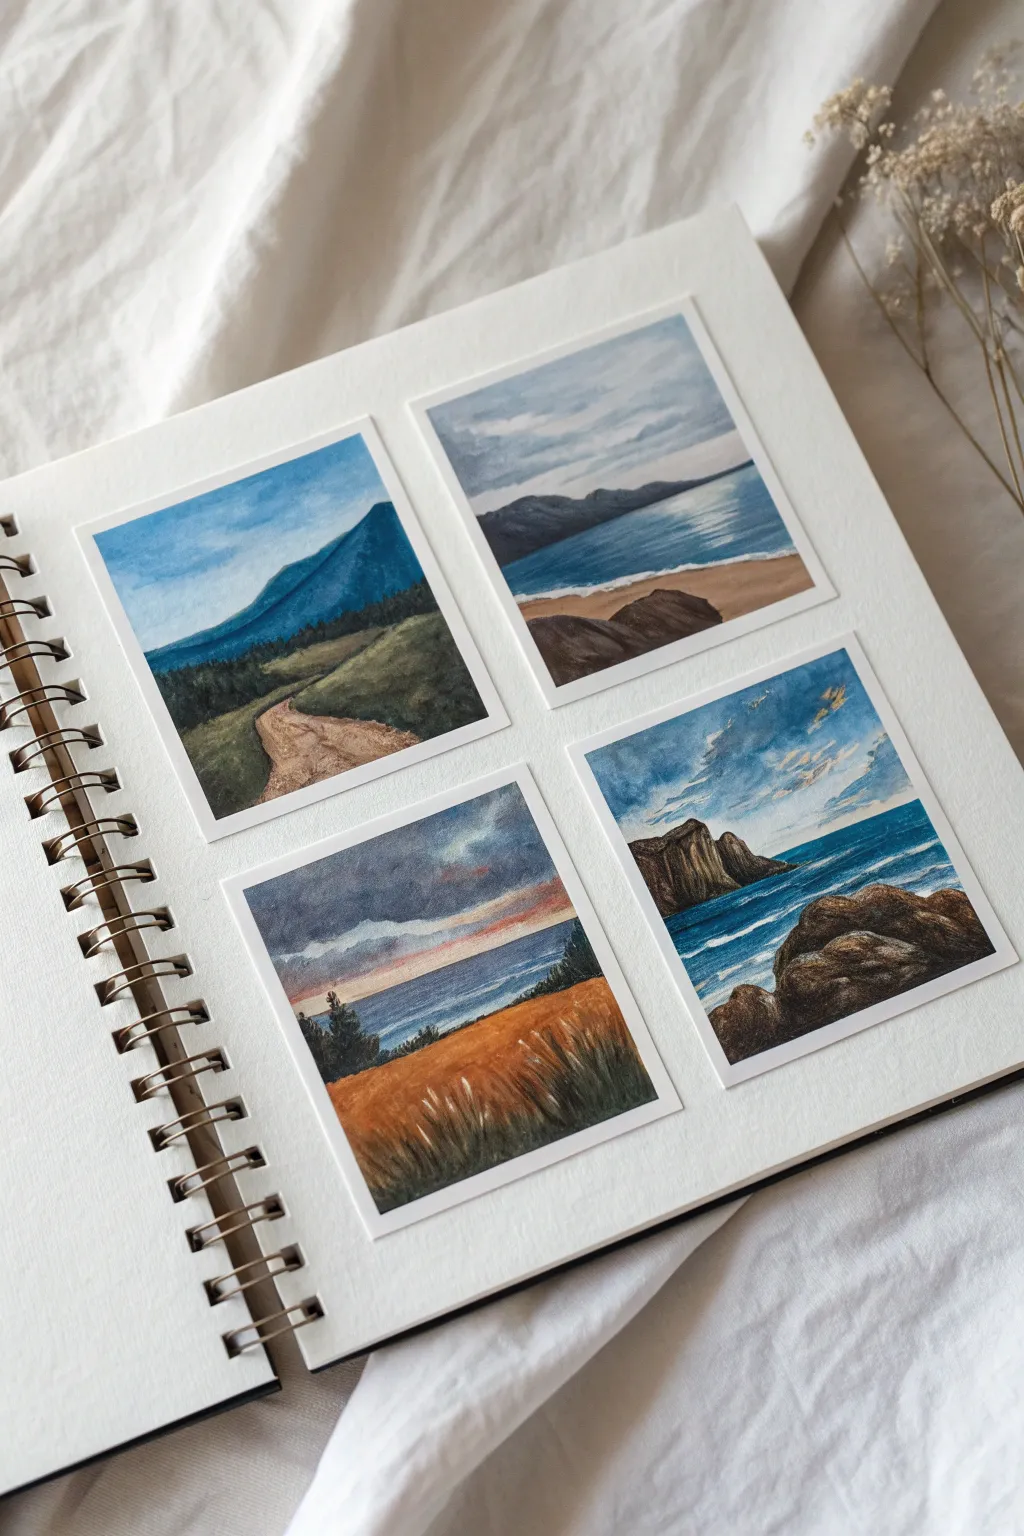
This tutorial guides you through creating a charming set of four miniature landscapes on a single sketchbook page, perfect for practicing limited palettes without the pressure of a large canvas. You’ll capture moody mountains, serene beaches, and golden fields, all framed neatly with crisp white borders.
Step-by-Step Tutorial
Materials
- Spiral-bound mixed media or oil painting sketchbook (heavyweight paper)
- Artist’s painter tape or washi tape (low tack)
- Oil paints: Titanium White, Ultramarine Blue, Burnt Sienna, Yellow Ochre, Alizarin Crimson
- Odorless mineral spirits or solvent-free gel
- Small flat brushes (sizes 2 and 4)
- Small round rigger or detail brush (size 0 or 1)
- Paper palette or glass palette
- Paper towels
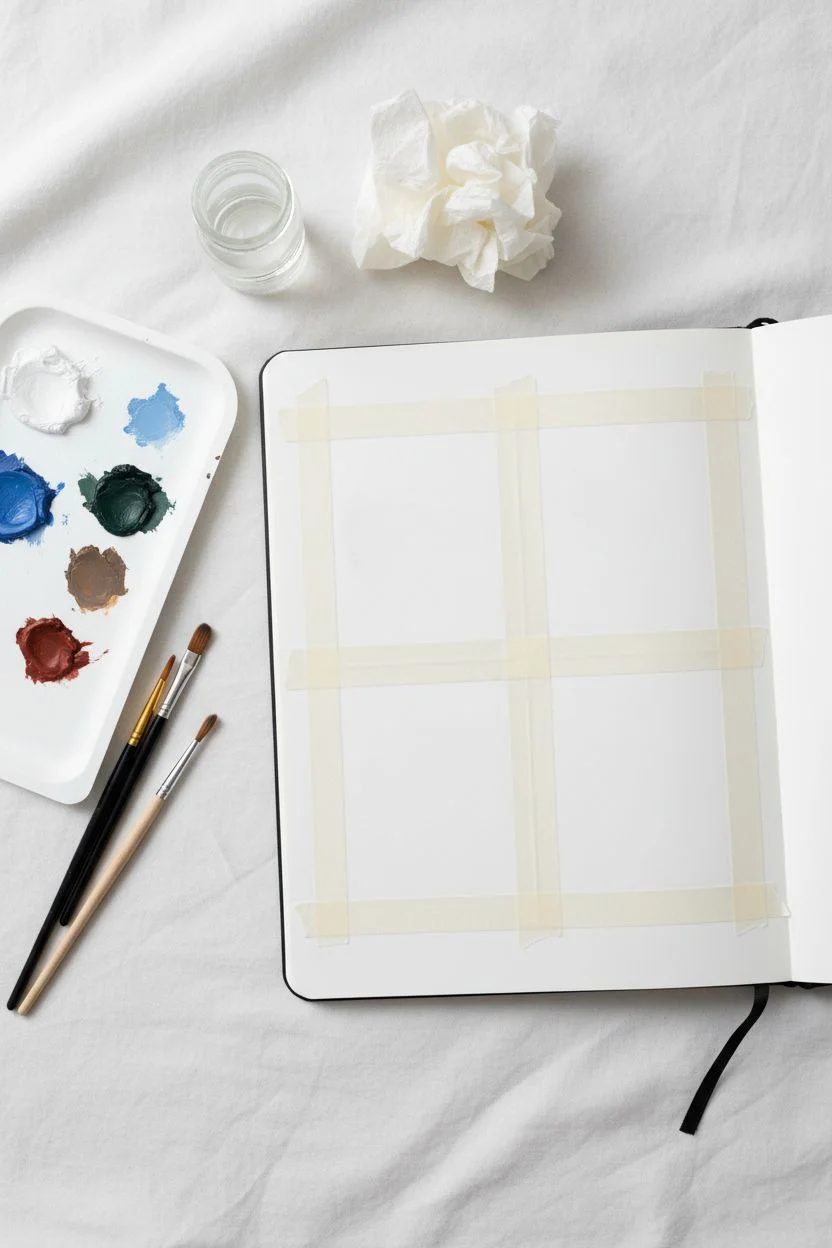
Step 1: Setting the Stage
-
Prep the page:
Open your sketchbook to a fresh page. Use low-tack artist tape to mask off four equal squares. Ensure you press the edges of the tape down firmly with a fingernail to prevent paint from bleeding underneath, creating that crisp instant frame later. -
Prime the surface (optional):
If your paper isn’t specifically for oil paint, apply a thin layer of clear gesso or matte medium to the squares and let it dry completely. This prevents the oil from degrading the paper fibers over time. -
Pre-mix a limited palette:
Squeeze out your four main colors plus white. Mix a ‘sky blue’ (White + Ultramarine), a ‘dark green’ (Ultramarine + Yellow Ochre), and a ‘neutral grey’ (Ultramarine + Burnt Sienna). Having these piles ready helps speed up the process.
Bleeding Edges?
If paint bled under the tape, wait for it to dry fully. Then, apply a small amount of white gouache or opaque white acrylic over the mistake to restore the crisp border.
Step 2: Top Left: The Winding Mountain Path
-
Block in the sky and mountain:
Start with the top left square. Paint a gradient sky using your light blue mix, fading to near white at the horizon. With a loaded flat brush, sweep in a large, blue-grey mountain shape on the right side. -
Add the foreground greens:
Mix a deep, earthy green using Yellow Ochre and a touch of blue. Fill in the grassy areas on the left and right, leaving a blank winding channel in the center for the path. -
Paint the dirt road:
Use Burnt Sienna mixed with plenty of White to create a light beige. Fill in the winding path, adding slight texture with the brush tip to suggest ruts in the dirt.
Step 3: Top Right: The Silent Lake
-
Create the horizon:
Moving to the next square, establish a high horizon line. Paint a moody, grey-clouded sky using touches of your neutral grey mix. -
Define the distant hills:
Paint a silhouette of dark, rolling hills across the middle ground. Keep the edges slightly soft to push them into the distance. -
Reflect and ground:
Reflect the blue of the water underneath the hills. Then, use a mix of Burnt Sienna and Ultramarine to paint the dark, rocky foreground shapes in the bottom left corner, grounding the composition.
Make it a Gift
Scan the finished page at high resolution. These square designs make perfect greeting cards or can be printed on sticker paper to seal envelopes.
Step 4: Bottom Left: Golden Hour Field
-
Paint the sunset sky:
For the bottom left square, start with a dramatic sky. Use darker greys for storm clouds at the top, transitioning into a streak of Alizarin Crimson and White near the horizon for a sunset glow. -
Layer the ocean:
Paint a thin strip of deep blue ocean just below the sunset line, keeping it perfectly horizontal. -
Wash in the field:
Mix a vibrant orange-brown using Yellow Ochre and Burnt Sienna. Fill the large foreground area with this warm tone to represent the dry field. -
Detail the grass:
Using your smallest rigger brush and some thinned paint, flick upward strokes in the foreground to create tall grasses. Add white highlights to the tips to catch the imaginary last light.
Step 5: Bottom Right: Cliffside Seascape
-
Establish the sky:
Paint a bright blue sky with diagonal white strokes to suggest wind-swept clouds. -
Form the cliffs:
On the left side, paint a vertical cliff face using dark browns and greys. Use vertical strokes to mimic the rock striations. -
Paint the active sea:
Fill the water area with a rich turquoise (Blue + touch of Green + White). Add horizontal white lines near the cliff base to show crashing waves. -
Add foreground rocks:
Place large, rounded boulders in the bottom right corner using dark earth tones. Highlights on the top surfaces will give them volume.
Step 6: Finishing Touches
-
The reveal:
Wait until the paint is tacky or touch-dry (depending on your medium and patience). Slowly peel the tape away at a 45-degree angle to reveal those satisfying, crisp white borders.
Enjoy your miniature gallery and the satisfaction of completing four paintings in a single sitting
Palette Knife Impasto Abstract Landscape
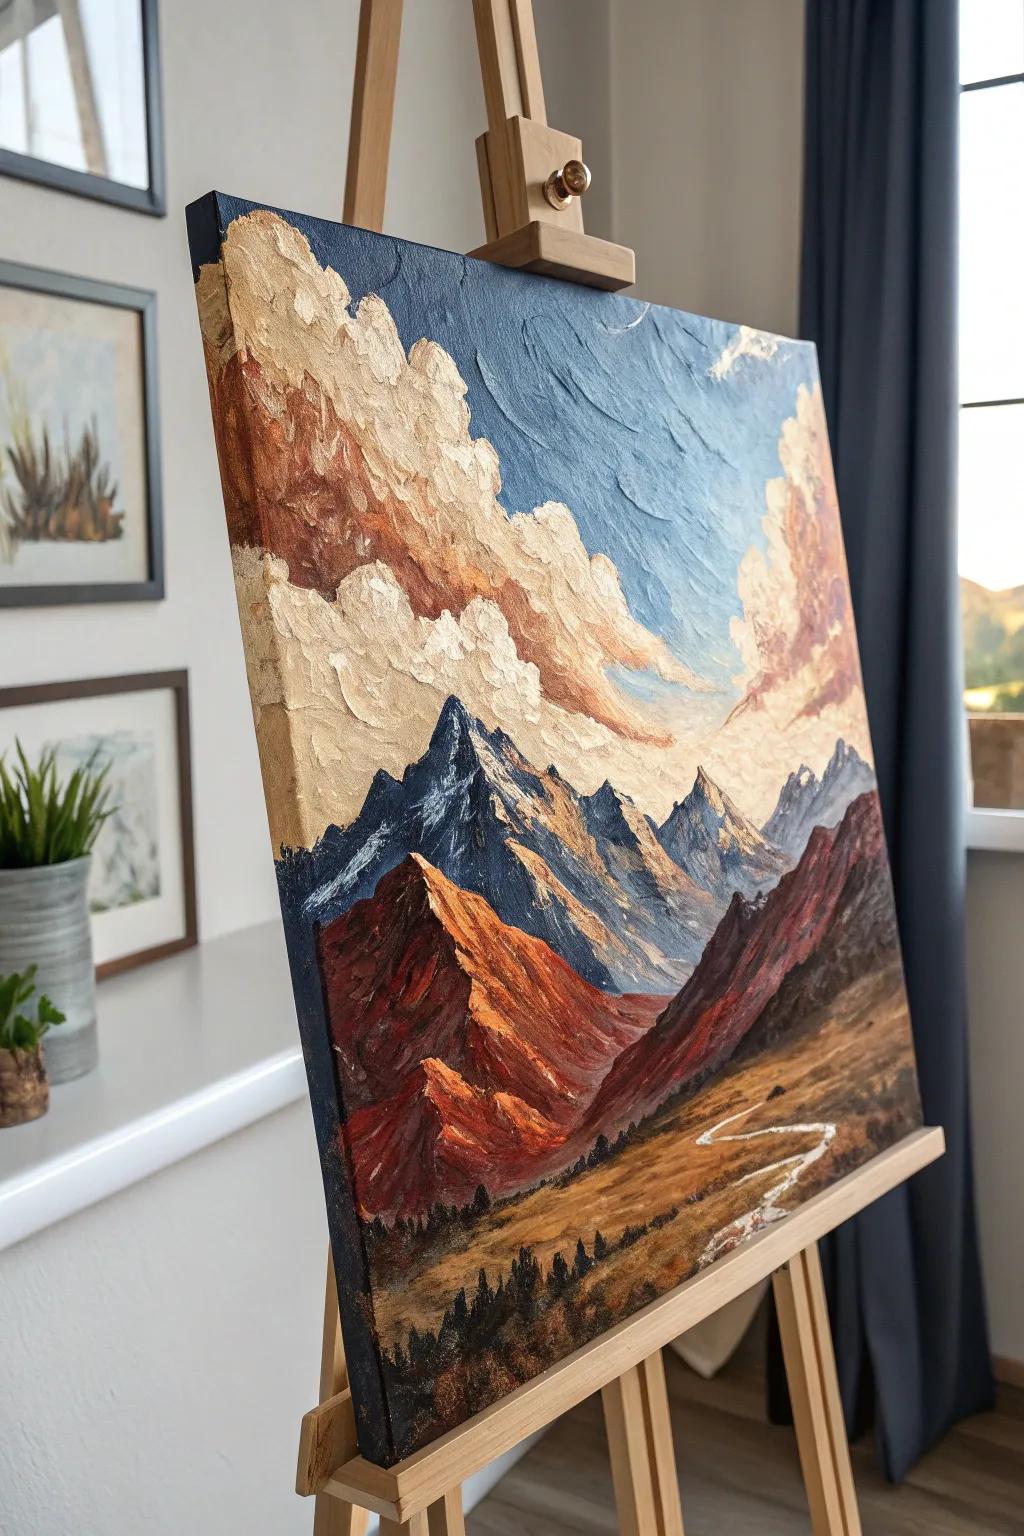
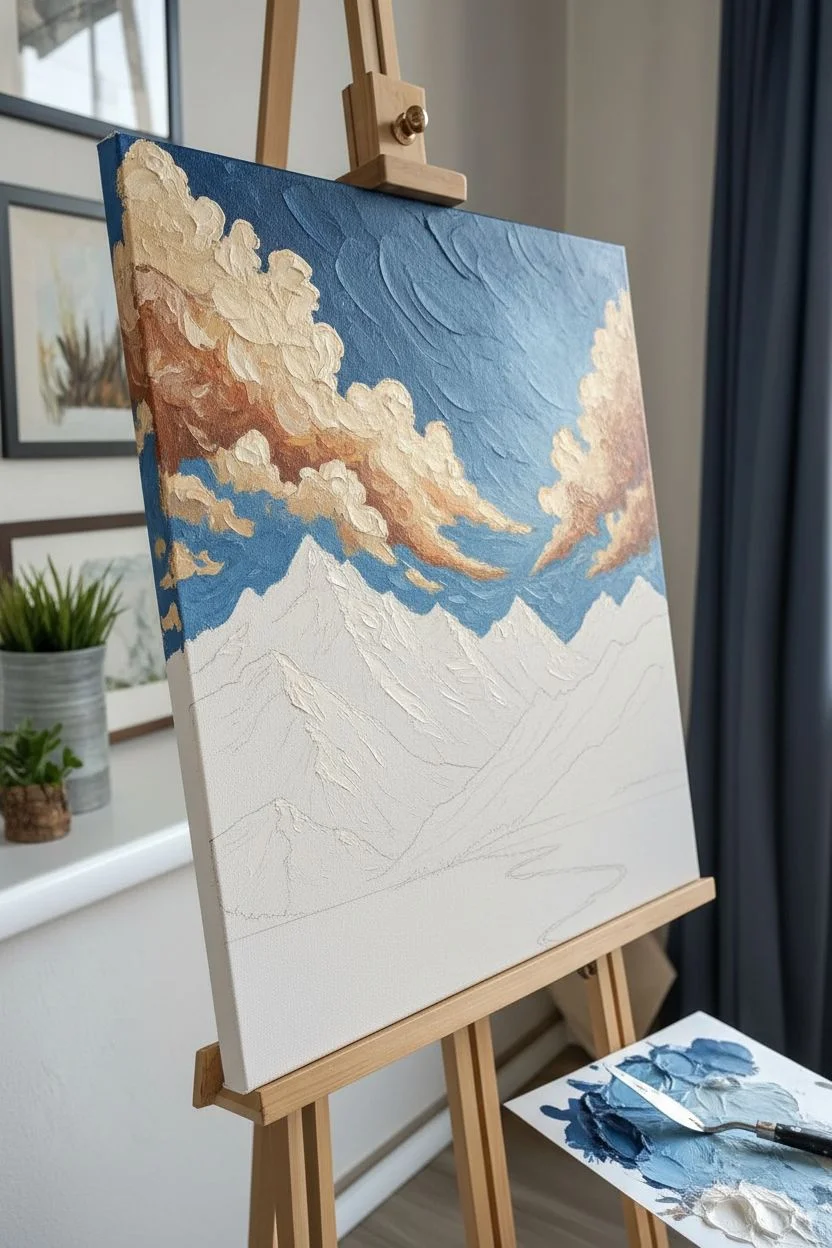
Capture the rugged beauty of a mountain range with this highly textured oil painting tutorial that emphasizes bold, sweeping strokes. Using thick impasto techniques, you will build up layers of rich earth tones and striking blues to create a dynamic, sculptural landscape.
Detailed Instructions
Materials
- Stretched canvas (approx. 16×20 inches)
- Oil paints (Titanium White, Ultramarine Blue, Burnt Umber, Burnt Sienna, Yellow Ochre, Alizarin Crimson, Ivory Black)
- Set of palette knives (including a large diamond shape and a long, thin trowel)
- Impasto medium or Cold Wax medium (to thicken paint)
- Tear-off palette or glass mixing surface
- Rags or paper towels
- Graphite pencil for sketching
- Easle
Step 1: Preparation & Sky
-
Sketch the composition:
Begin by lightly sketching the major shapes on your canvas. Mark a horizon line about one-third up from the bottom, outline the jagged peaks of the central mountains, and indicate the sweeping flow of the foreground valley and river. -
Mix the sky base:
On your palette, mix a generous amount of Ultramarine Blue with a touch of Titanium White and a tiny bit of Burnt Umber to dull the blue slightly. Add your impasto medium to give the paint body. -
Apply the blue sky:
Using a large palette knife, apply the blue mixture to the upper right corner of the canvas. Use confident, downward diagonal strokes to create a sense of movement in the atmosphere. -
Create the cloud clusters:
Wipe your knife clean. Mix Titanium White with Yellow Ochre and a hint of Burnt Sienna to create massive, creamy cloud forms. Apply this thickly to the left side of the sky, letting the paint physically rise off the canvas. -
Detail the clouds:
Use the edge of a smaller knife to add shadowed undersides to the clouds using a mix of the cloud color and a touch of the sky blue. This creates a fluffy, dimensional effect.
Step 2: The Mountain Range
-
Block in the distant peaks:
Mix a dark, cool grey-blue using Ultramarine Blue, Ivory Black, and White. Use the flat edge of your knife to scrape this color into the shapes of the furthest mountains, keeping the texture slightly flatter than the foreground to suggest depth. -
Form the central blue peaks:
For the mid-ground mountains, mix a vibrant dark blue. Apply this heavily with the knife, allowing the paint to break over the canvas texture. Add highlights of pure white mixed with a drop of blue on the sun-hit slopes. -
Create the red foreground ridges:
The most striking feature is the reddish mountain on the left. Mix Alizarin Crimson, Burnt Sienna, and a touch of Black for the shadow side. Apply this in jagged, upward strokes. -
Highlight the red ridges:
Clean your knife and mix Burnt Sienna with Yellow Ochre and White. Lightly grace the right-facing slopes of the red mountain. Hold the knife loosely so the paint ‘skips’ over the dark underlayer, creating rocky texture. -
Paint the right-side slopes:
Repeat the process for the dark brownish-red slopes on the right side of the canvas, ensuring these slopes angle down towards the center valley to lead the viewer’s eye.
Clean Breaks
Wipe your palette knife completely clean between every single color shift. Muddy colors happen when you don’t start with a pristine tool for each new stroke.
Step 3: Valley & Details
-
Establish the valley floor:
Mix Yellow Ochre, Burnt Umber, and White to create a golden grassland color. Spread this horizontally across the bottom third of the canvas, smoothing it out more than the mountains to differentiate the terrain. -
Carve the river:
Using a small, thin palette knife loaded with Titanium White and a speck of blue, carve a winding river through the valley floor. Make the line broken and irregular to mimic water reflecting light. -
Add deep shadows:
Mix a very dark, almost black brown. Use the tip of your smallest knife to dot in the tree line along the base of the mountains and the river banks. These should be vertical, jagged marks. -
Enhance texturing:
Step back and look at the whole piece. If the clouds or mountain peaks need more drama, mix a fresh batch of thick, light paint and apply ‘snow caps’ or cloud highlights directly on top of the existing layers without over-blending. -
Paint the edges:
Since this is gallery-wrapped style, take your leftover dark colors and paint the sides of the canvas dark grey or black to frame the image professionally.
Metallic Touch
Mix a small amount of metallic gold oil paint into your Yellow Ochre for the sunlit cloud edges. It adds a subtle shimmer that catches the light beautifully.
Allow your masterpiece several days to surface-dry in a well-ventilated area before moving it.
Dreamlike Symbolic Scene Painted From Imagination
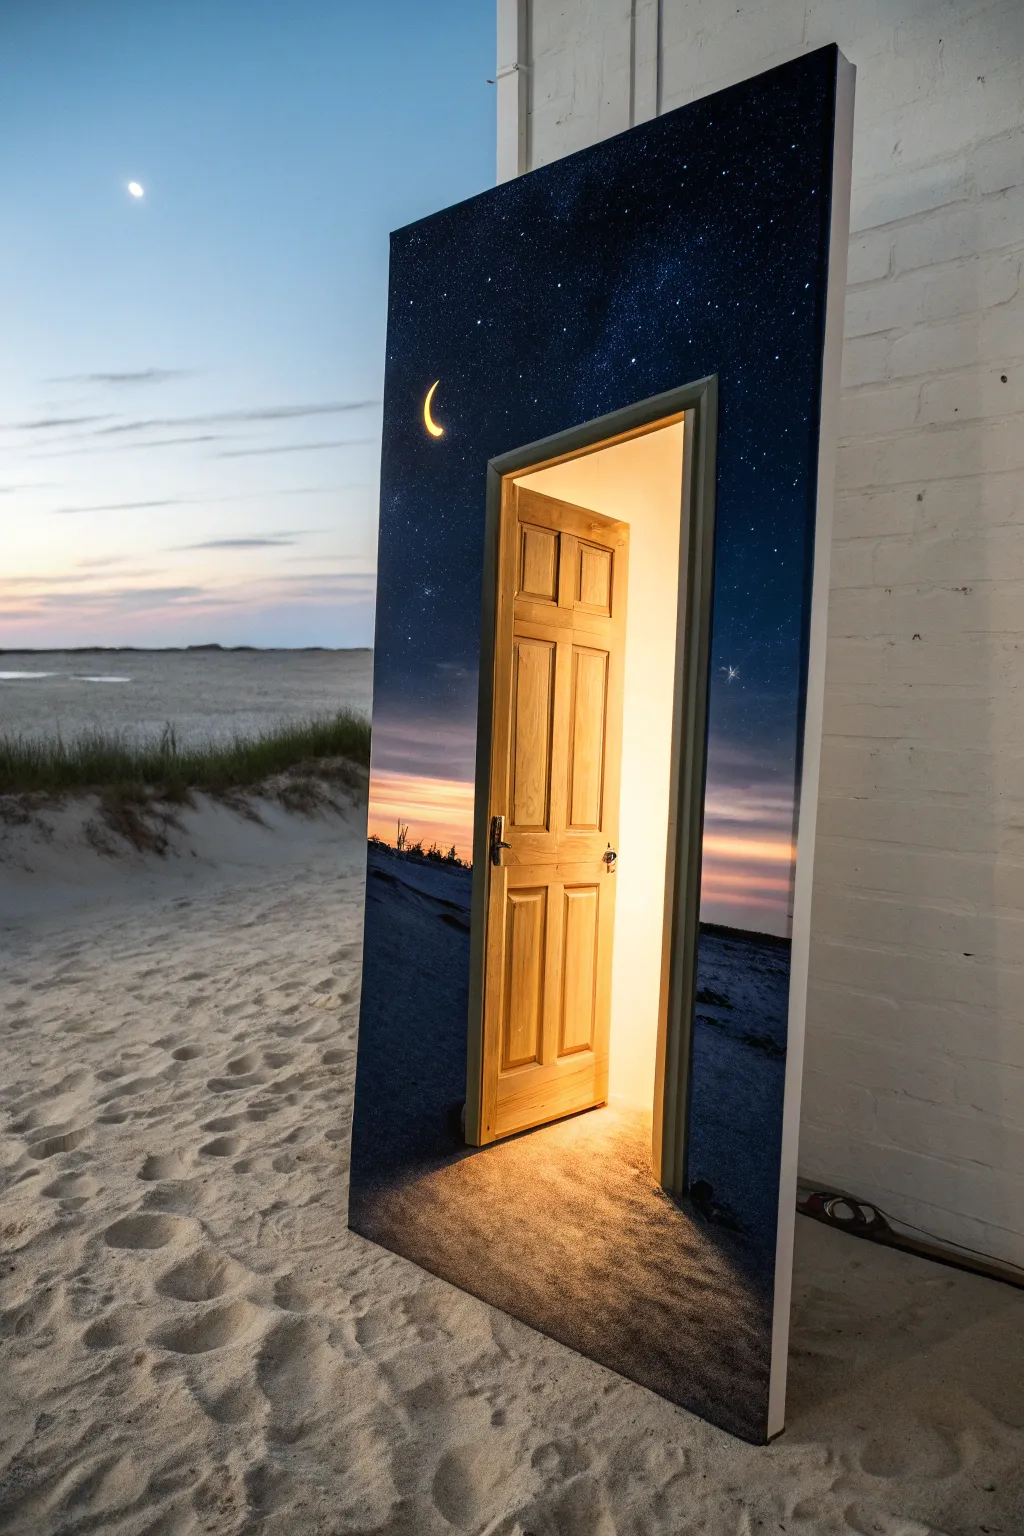
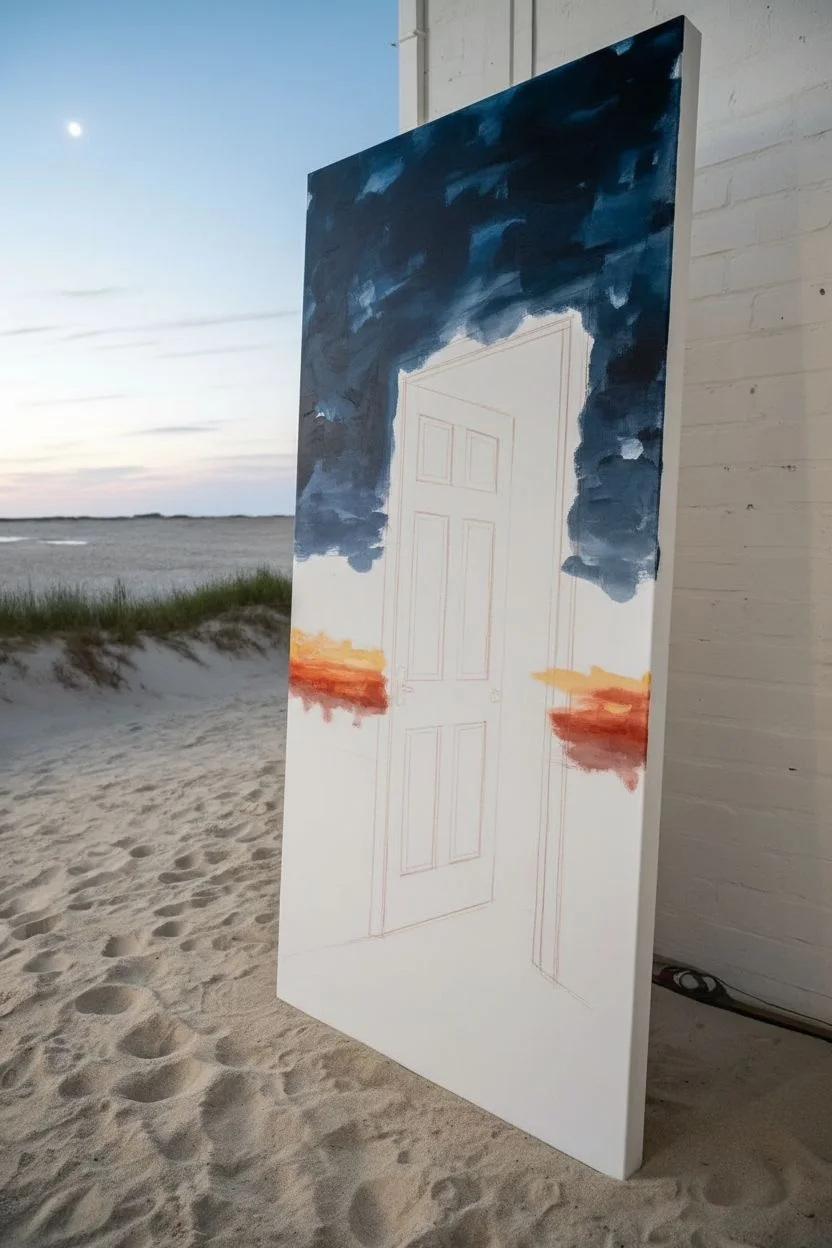
This ambitious project creates a freestanding surrealist portal, blending a starry night sky with a warm, inviting wooden door. By playing with light and shadow on a large panel, you’ll paint an imaginative scene that looks as if you could step right through it into another world.
Step-by-Step Guide
Materials
- Large wooden panel (MDF or plywood, approx. 4×8 feet)
- White gesso primer
- Oil paints: Titanium White, Ivory Black, Phthalo Blue, Alizarin Crimson, Cadmium Yellow, Burnt Sienna, Raw Umber
- Large flat brushes (2-3 inch) for background blending
- Medium filbert brushes for clouds and door details
- Small round brushes for stars and fine lines
- Odorless mineral spirits
- Palette knife
- Easel or wall support for the large panel
- Rags or paper towels
Step 1: Preparation and Underpainting
-
Prime the surface:
Begin by coating your large wooden board with two layers of white gesso. Sand lightly between coats to ensure a smooth painting surface, which is crucial for the seamless sky gradients we want to achieve later on. -
Sketch the layout:
Using thin charcoal or a diluted wash of Burnt Sienna on a small brush, establish the horizon line low on the canvas—about the bottom fifth. Sketch the rectangular frame of the door in the center, tilting it slightly to match the perspective you desire. -
Block in major values:
Roughly block in the dark areas of the night sky and the lighter areas near the horizon with thin washes of oil paint. This roadmap helps you visualize the high contrast between the cosmic sky and the glowing light.
Starry precision
Don’t over-flick the stars! Keep the star field random but sparse in some areas. Too many stars can flatten the depth. Use a ‘rigger’ brush for the tiny starburst reflections.
Step 2: Painting the Cosmic Sky
-
Mix the night sky base:
Create a deep, rich midnight blue by mixing Phthalo Blue with a touch of Alizarin Crimson and Ivory Black. You want this color to be very satisfyingly dark but not flat black. -
Apply the gradient:
Start applying this dark mix at the very top of the panel. As you work downward, gradually mix in more Phthalo Blue and eventually tiny amounts of Titanium White to lighten the sky as it approaches the horizon. -
Blend the sunset transition:
Near the horizon line, introduce Cadmium Yellow and Alizarin Crimson to create a soft sunset glow. Use a clean, dry large brush to blend the transition where the blue sky meets the warm horizon so there are no harsh lines. -
Add the stars:
Dilute Titanium White with a little medium until it’s fluid. Flick the bristles of a brush or use a toothbrush to spatter tiny stars across the dark upper section. Paint larger stars individually with a fine round brush for variety. -
Paint the crescent moon:
Place a small crescent moon in the upper left quadrant using Titanium White tinted with a tiny bit of Cadmium Yellow. Soften the outer edge slightly to make it glow.
Add a literal twist
Instead of painting the door, cut a rectangular hole in the panel and mount a real, lightweight door frame and door. Backlight it with LEDs for an interactive installation piece.
Step 3: Creating the Wooden Door
-
Base coat the door:
Mix a warm wood tone using Burnt Sienna, Yellow Ochre, and a touch of Titanium White. Apply this as a flat base coat to the door area we sketched earlier. -
Define the panels:
Once the base is tacky, use a darker mix (Burnt Sienna and Raw Umber) to paint the recessed lines and shadows of the door panels. This creates the 3D paneled effect. -
Add wood grain texture:
Use a fan brush or a dry flat brush with a slightly darker glaze to streak in wood grain patterns vertically along the stiles and rails of the door. -
Install the hardware:
With a small detail brush and a mix of black and silver (or grey), paint the door handle and hinges on the left side. Add high-contrast white highlights to make the metal look shiny. -
Create the door frame:
Paint the trim around the door in a neutral, shadowed grey-green or beige tone to separate the wooden door from the starry background.
Step 4: The Inner Glow & Final Touches
-
Paint the inner light:
The area ‘inside’ the open door needs to be blazing bright. Use pure Titanium White mixed with Cadmium Yellow in the center, blending out to a warmer orange at the edges of the opening. -
Cast the spill light:
Paint a pool of warm light spilling out from the bottom of the door onto the painted ground. Use rapid, horizontal strokes of yellow and white over the darker ground color to simulate light hitting a textured surface. -
Refine the door edge:
On the side of the door that is ‘open’ (the right edge), paint a rim of pure light to show backlighting. This separates the door sharply from the bright interior. -
Deepen the shadows:
Glaze the ground area outside the light spill with dark purples and blues to reinforce that it is night time, making the central light pop even more. -
Final blending check:
Stand back and look for any hard edges in the sky or ground that need softening. A soft, dry mop brush is perfect for one final pass over gradients.
Once the oils have fully cured, varnish your panel to deepen the dark blues and protect your surreal doorway to the stars


Have a question or want to share your own experience? I'd love to hear from you in the comments below!