
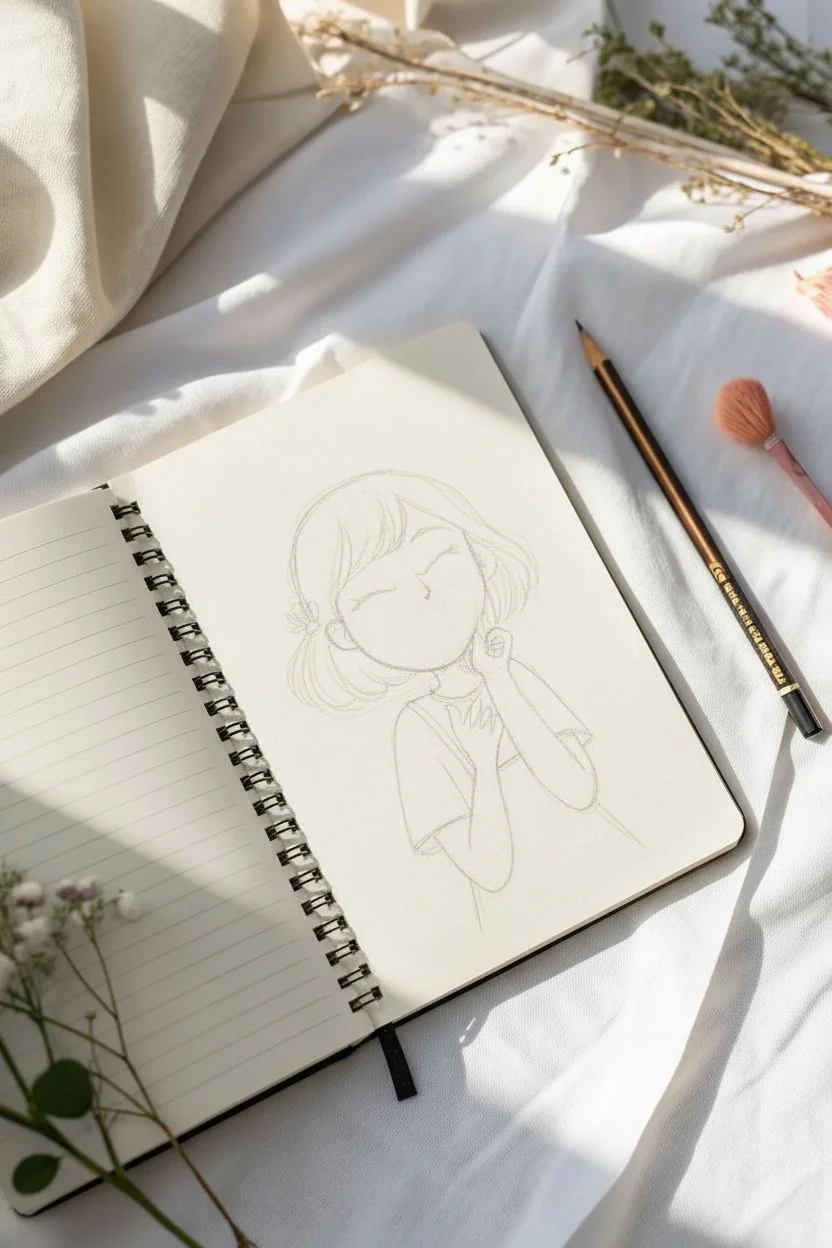
Whenever you’re stuck in a sketchbook slump, I love starting with a girl character—hair, outfit, and mood do half the storytelling for you. These drawing ideas for girls are cute, modern, and super doable, especially if you keep the backgrounds simple and let the character shine.
Cute Stylized Girl Portrait With Big Eyes
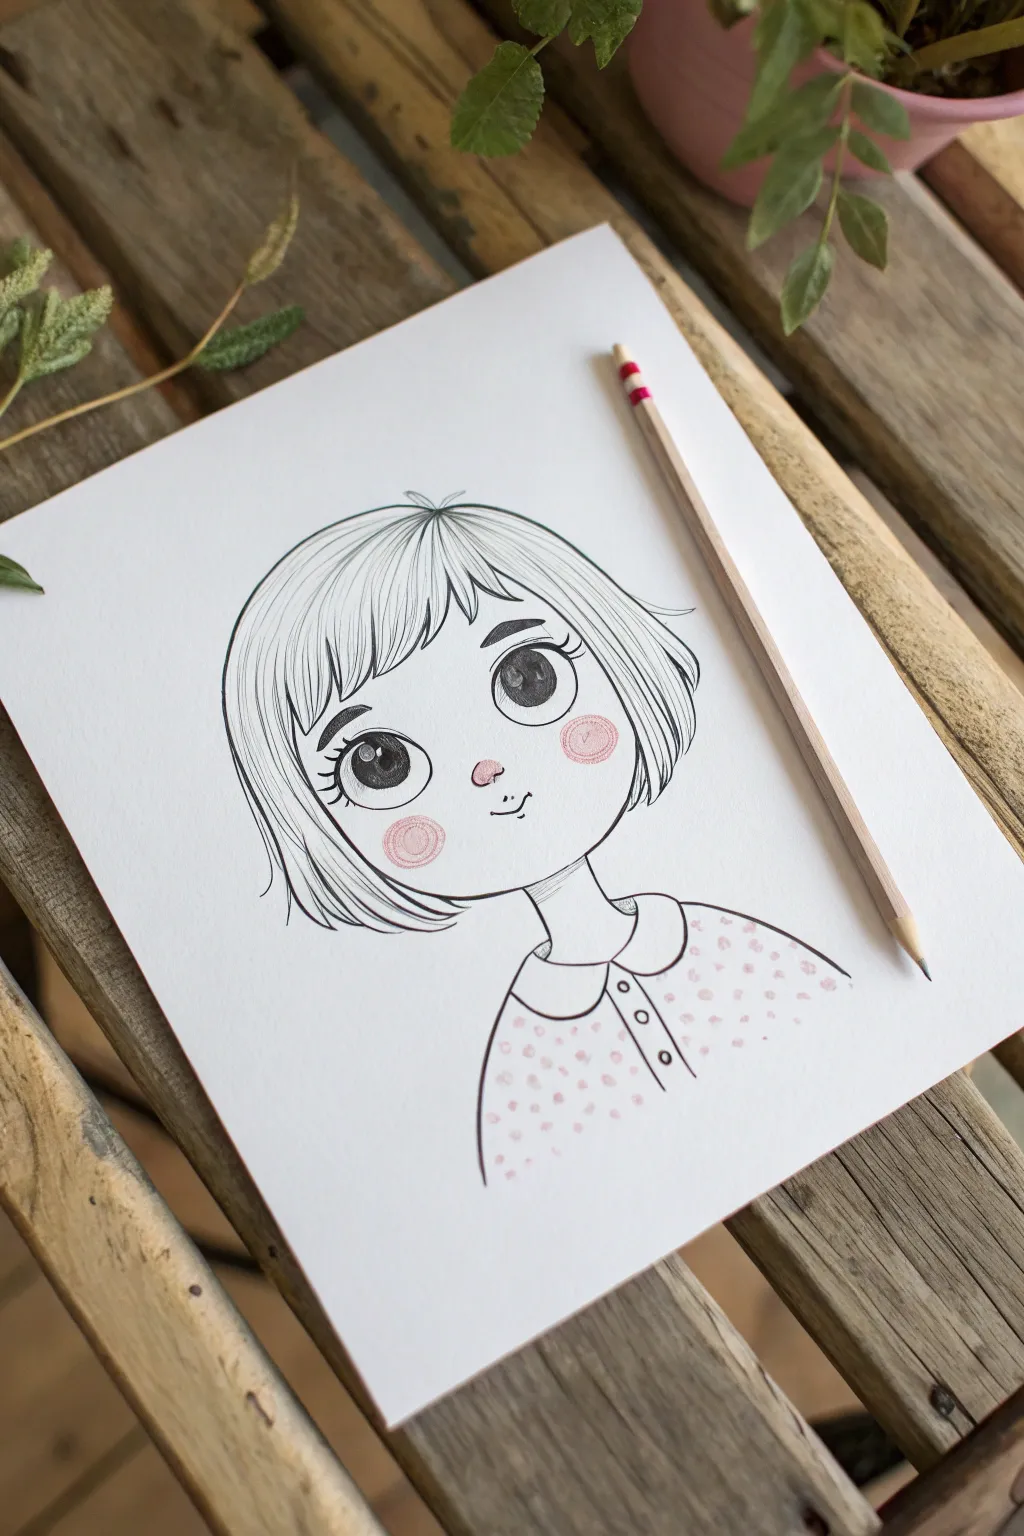
This charming project features a stylized portrait of a young girl with exaggerated, expressive eyes and a classic bob haircut. It captures a gentle innocence through clean lines and soft, minimal color accents on the cheeks and nose.
Step-by-Step Tutorial
Materials
- High-quality white drawing paper or cardstock
- HB or 2B graphite pencil (for sketching)
- Fine-liner pen (black, 0.3mm or 0.5mm)
- Pink colored pencil or pastel chalk
- Eraser
- Ruler (optional for symmetry)
Step 1: Setting the Foundation
-
Light Guide Lines:
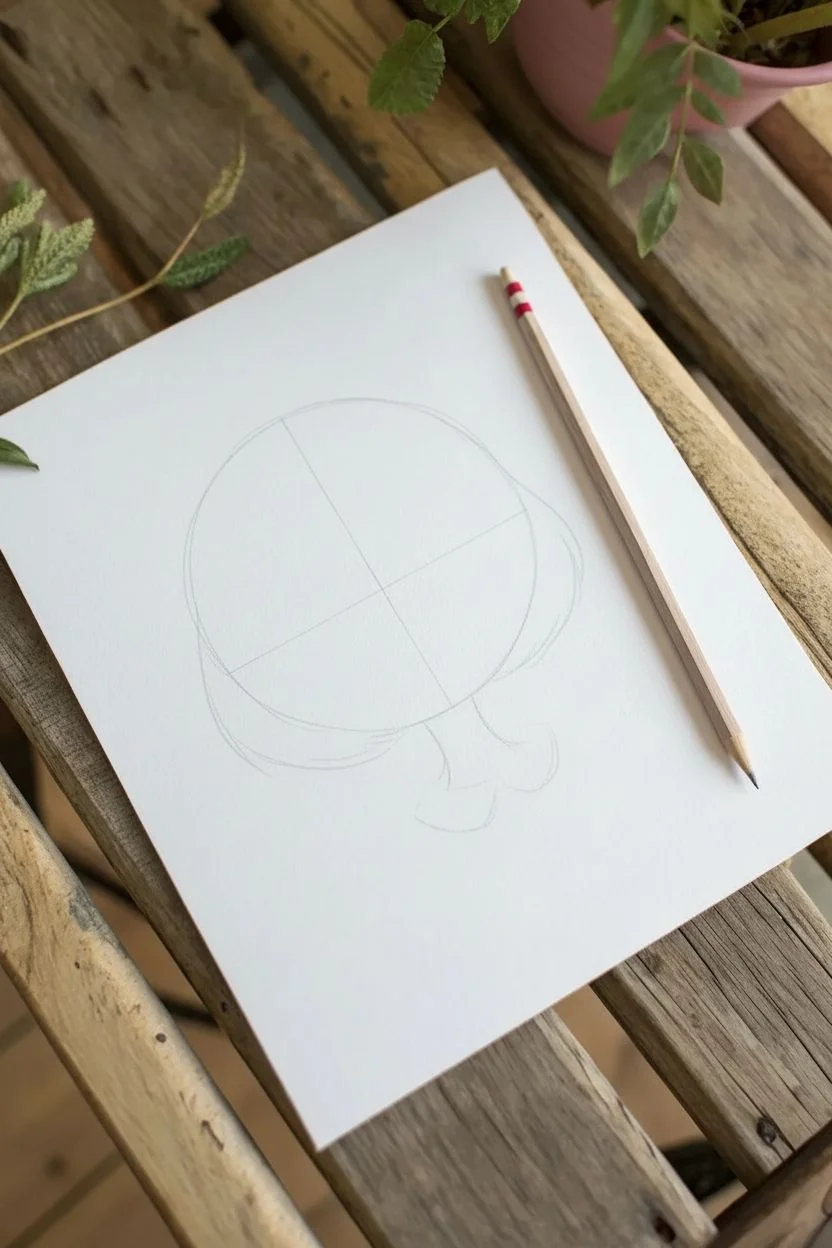
Begin with a very faint circle for the head in the center of your page. Draw a vertical line down the middle and a horizontal line about one-third of the way up from the bottom of the circle to mark where the eyes will sit. -
Jaw and Neck:
From the sides of the circle, sketch two gentle curves moving downward to form the jawline, meeting at a soft, rounded point for the chin. Add a slender neck extending from the center of the jawline. -
Hair Outline:
Sketch the general shape of the bob haircut. It should be slightly larger than the head circle, curving inward towards the chin on both sides. Don’t worry about individual strands yet; just focus on the helmet-like silhouette.
Step 2: Drawing the Features
-
Large Eyes:
Draw two large ovals on the horizontal guide line. These should be spaced comfortably apart. Inside each oval, draw a smaller circle near the top for the highlight and a larger dark circle for the pupil. -
Eyelashes and Brows:
Thicken the upper line of the eye ovals to represent the lash line. Add three distinct, curved lashes flaring out from the outer corner of each eye. Above the eyes, draw thick, short eyebrows that curve slightly downwards. -
Nose and Mouth:
Place a small, soft ‘U’ shape or a tiny oval right between the eyes, slightly lower than the bottom lash line, for the nose. Below that, draw a small, simple curved line for a smile, adding a tiny tick mark at one end for a dimple effect. -
Refining the Hair (Bangs):
Draw the bangs using jagged, sweeping lines. Start from a central point near the top of the head and fan them out. Some strands should be shorter in the middle and longer towards the sides, creating a textured fringe.
Troubleshooting
If the eyes look uneven, flip your paper over and hold it up to a light. Looking at the drawing in reverse instantly reveals asymmetry you might have missed.
Step 3: Inking and Details
-
Outer Hair Strands:
Using your fine pencil or pen, finalize the outer hair shape. Add internal lines that follow the curve of the hair to suggest volume and flow, especially near the tips of the bob. -
Filling the Eyes:
Color in the pupils darkly, leaving the small white circles completely empty for that sparkling look. Shade the rest of the iris lightly if you wish, or leave it stark black and white for high contrast. -
The Collar:
At the base of the neck, draw a Peter Pan collar consisting of two rounded flaps that meet in the middle. Add a small vertical placket down the center of the chest with three small circles for buttons. -
Complete the Outfit:
Draw the shoulders sloping down from the collar. Keep the lines simple and unclosed at the bottom to maintain the vignette style.
Level Up
Try using watercolor for the blush and dress pattern instead of pencil. A light wash gives a dreamy, soft effect that contrasts beautifully with ink lines.
Step 4: Color and Final Touches
-
Adding Blush:
Take your pink colored pencil. Gently shade small circles on the cheeks and a tiny touch on the nose tip. Use a circular motion and build the color up slowly rather than pressing hard. -
Dress Pattern:
Using the same pink pencil, lightly draw scattered dots all over the shirt area to create a polka-dot pattern. Make them random and soft. -
Pattern on the Blush:
For a stylized texture, I like to draw a tiny spiral or concentric circles inside the pink cheek spots using a darker pink or red fine-liner, or simply press harder with your pencil to create a swirl. -
Final Cleanup:
Wait for any ink to dry completely. Then, gently erase your initial guide lines (the face circle and cross) to leave the drawing looking clean and professional.
Now you have a sweet, expressive character portrait ready to frame or gift


Girl With Long Hair Flowing Over One Shoulder
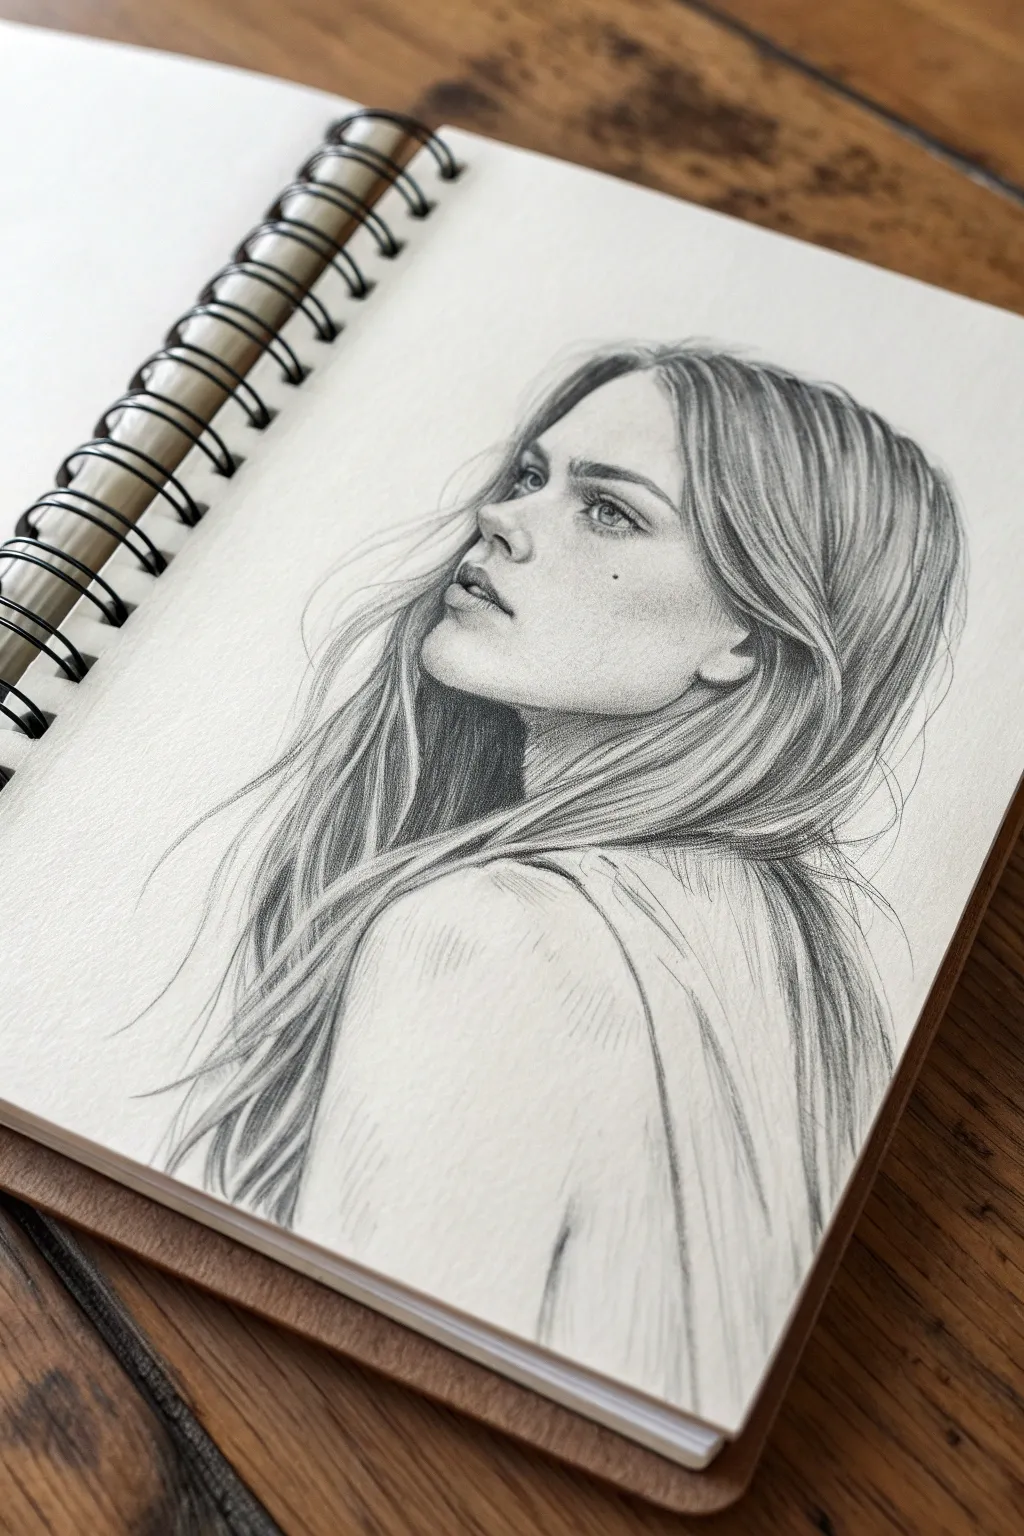
Capture a moment of quiet contemplation with this elegant pencil sketch of a woman looking over her shoulder. The drawing emphasizes texture and flow, contrasting the loose, windswept hair against the soft features of the face.
Step-by-Step
Materials
- Sketchbook with smooth or medium-tooth paper (e.g., Bristol or Multimedia)
- Graphite pencils (H or HB for sketching, 2B and 4B for shading, 6B for darkest depths)
- Kneaded eraser
- Precision mechanical pencil (0.5mm HB or 2B) for fine hair details
- Blending stump or tortillon
- Tissue or scrap paper (to protect the drawing)
Step 1: Laying the Framework
-
Establish the head tilt:
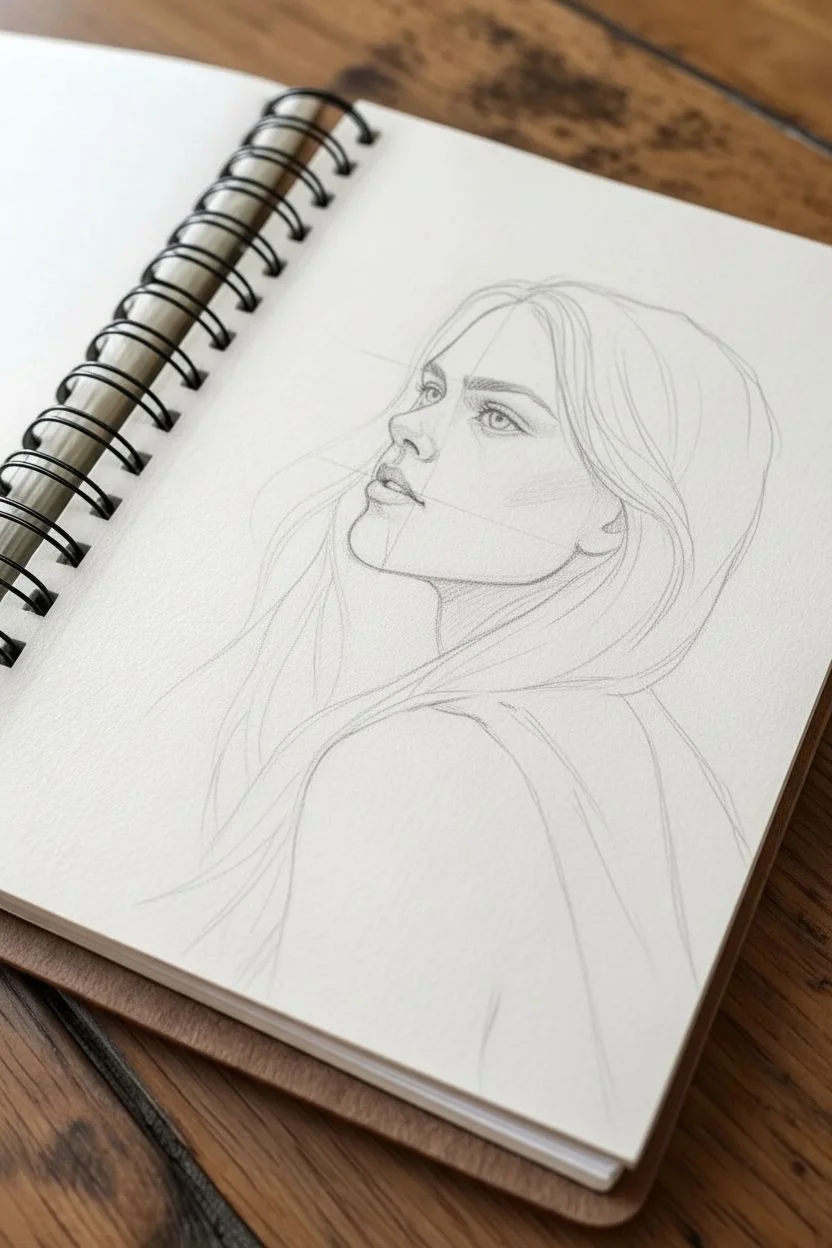
Begin with a light H or HB pencil to sketch a basic oval for the head. Draw a curved vertical centerline that wraps around the form to indicate the face is turned upward and away to the left. Mark horizontal guidelines for the eyes, nose, and lips. -
Outline the jaw and neck:
Define the jawline, keeping it soft but structured. Sketch the neck extending downwards, paying attention to the visible muscle (sternocleidomastoid) that turns the head. Sketch the curve of the shoulder rising up to meet the chin. -
Map facial features:
Lightly place the almond shape of the visible eye, the triangular base of the nose, and the small, parted shape of the lips. Verify the alignment—the corner of the mouth should align roughly with the pupil. -
Create hair volume:
Before drawing individual strands, outline the general mass of the hair. Sketch the hairline near the forehead and define the large sweeping shape flowing down the back and over the near shoulder.
Step 2: Shading the Face
-
Detail the eye:
Using a sharp 2B pencil or mechanical pencil, darken the upper lash line. Draw the iris and pupil, leaving a tiny spot of white paper for the catchlight to bring the eye to life. Add subtle shading under the brow bone. -
Sculpt the nose and lips:
Avoid hard outlines for the nose; instead, use soft shading on the underside and nostril area to define the form. For the lips, shade the upper lip slightly darker than the bottom one, emphasizing the parted center line. -
Contour the skin:
Switch to an HB pencil for skin tones. Shade lightly under the jawline to separate the head from the neck, and add a soft shadow on the cheek to suggest the cheekbone structure. A blending stump helps smooth these transitions perfectly. -
Refine the ear:
The ear is partially visible through the hair. Keep the details simple, darkening the inner folds slightly while keeping the outer rim light where it catches the light.
Smudge Alert
Graphite smears easily. Always keep a clean sheet of scrap paper under your drawing hand to protect finished areas while you work on other sections.
Step 3: Drawing the Hair
-
Establish dark roots:
Using a 4B or 6B pencil, darken the area under the neck and the deep crevices where the hair separates. This establishes the deepest values first. -
Draw the main flow:
With long, sweeping strokes of a 2B pencil, follow the direction of the hair growth. Start from the part or hairline and pull the pencil down in confident curves. I like to lift the pencil at the end of the stroke to taper the line naturally. -
Layering mid-tones:
Fill in the bulk of the hair with medium pressure. Leave gaps of white paper to act as highlights on the crown of the head and the curve of the shoulder. -
Adding fine strands:
Switch to your mechanical pencil. Draw loose, flyaway hairs escaping the main mass, especially near the face and crown. These messy strands create the realistic ‘windswept’ look. -
Create contrast:
Go back in with your 6B pencil to deepen the shadows behind the ear and under the hair mass where it rests on the shoulder. This high contrast makes the lighter strands pop.
Hair Flow Pro-Tip
Don’t draw every single strand evenly. Group hair into ‘ribbons’ or clumps first, shading the ends and roots of the ribbon, leaving the middle light for shine.
Step 4: Final Touches
-
Sketch the clothing:
Keep the clothing sketch very loose and gestural to ensure the detailed face remains the focal point. Use quick, diagonal hatching strokes to suggest fabric texture on the shoulder. -
Add beauty marks:
Place the small beauty mark on the cheek using a sharp point. It’s a tiny detail that adds immense character. -
Clean up highlights:
Use the kneaded eraser to lift out any graphite that smudged onto the highlights of the nose, forehead, or hair shine. Clean up the background to keep the silhouette crisp.
Now step back and admire the delicate emotion you have captured in this portrait


Side Profile Girl With A Sleek Ponytail
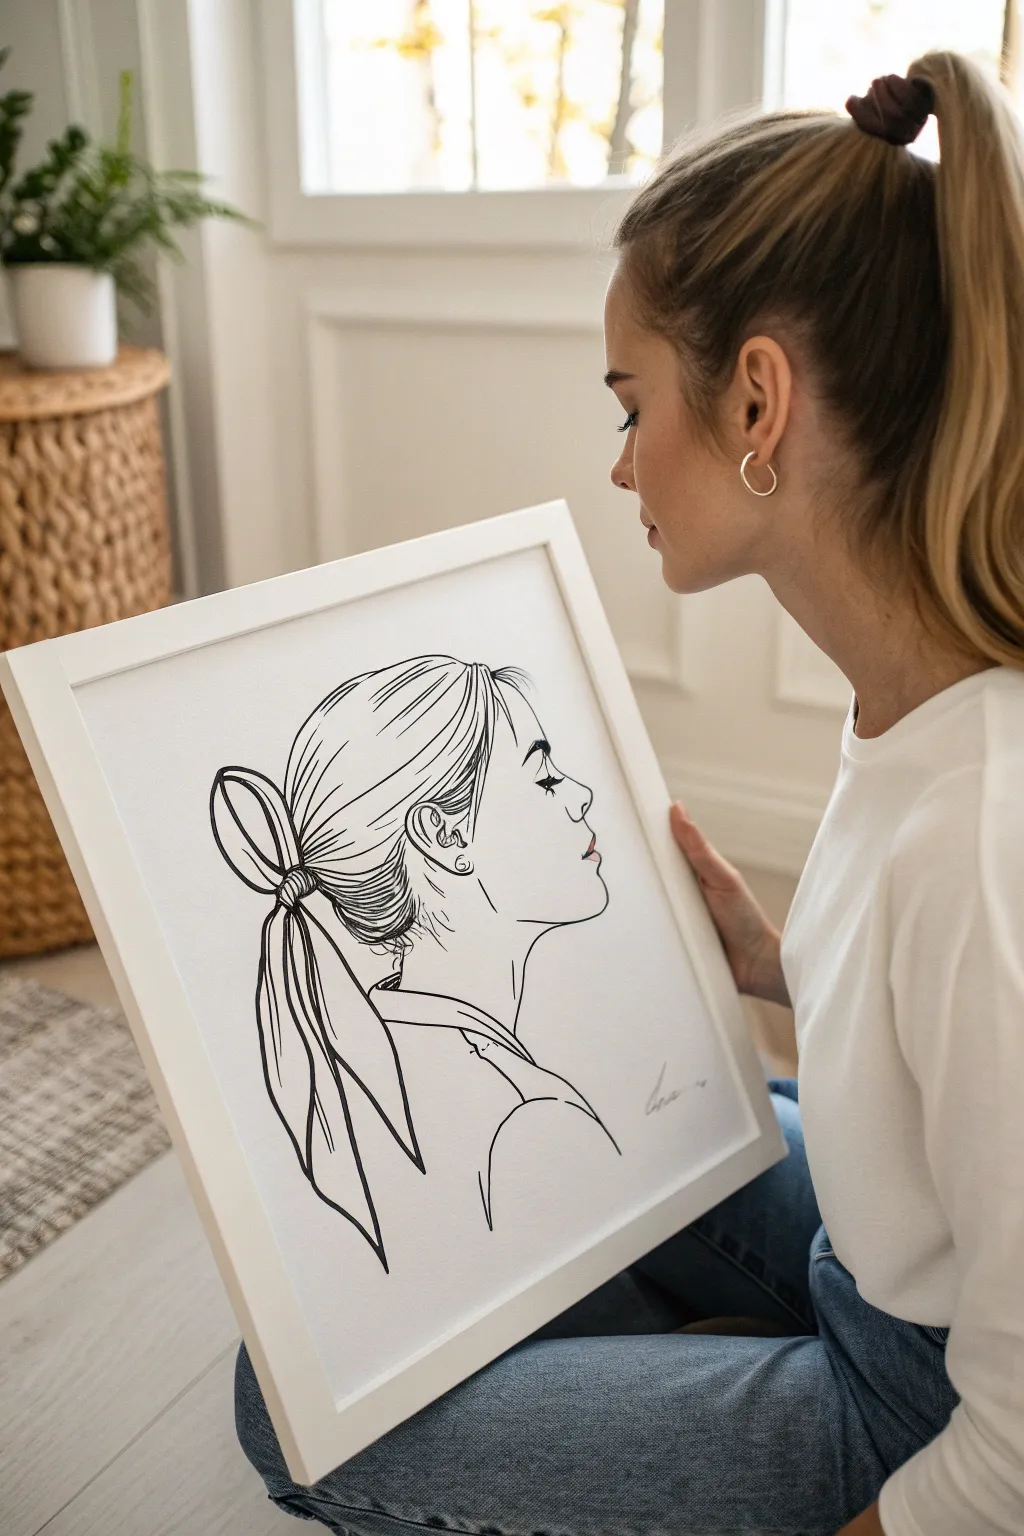
Capture the beauty of simplicity with this elegant line drawing featuring a side profile and a chic, ribbon-tied ponytail. The clean black ink on crisp white paper creates a modern, minimalist piece that looks stunning when framed.
Step-by-Step Guide
Materials
- High-quality white drawing paper (Bristol or smooth mixed media paper)
- HB pencil for sketching
- Kneaded eraser
- Fine liner pens (sizes 0.3mm, 0.5mm, and 0.8mm)
- White or light wood frame (square format recommended)
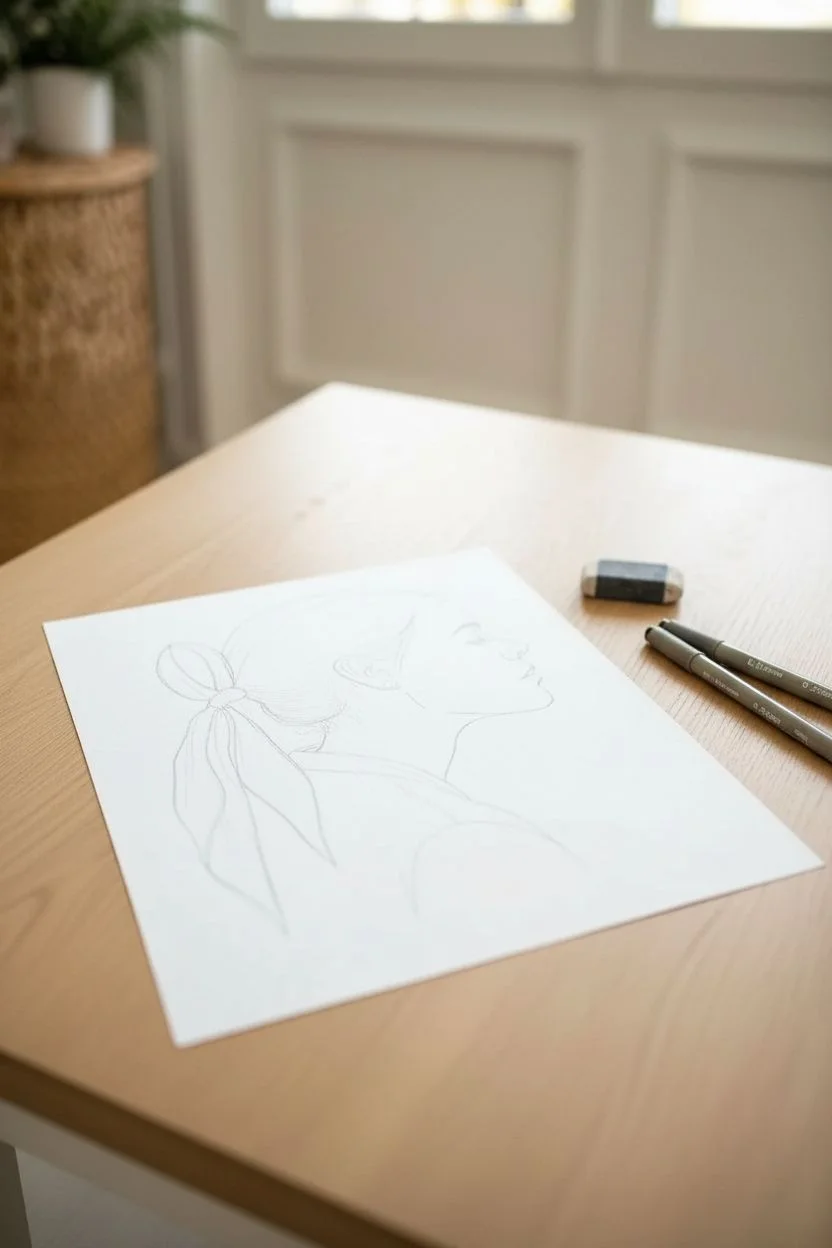
Step 1: Sketching the Framework
-
Establish the curve:
Begin by lightly sketching a gentle ‘C’ curve for the back of the head, extending down into the neck. -
Map the profile:
Softly outline the forehead, nose, lips, and chin. Keep your pencil pressure very light so these guide lines can be erased completely later. -
Position the ponytail:
Mark the gathering point of the hair at the back of the head, slightly below the crown line. -
Draft the ribbon:
Sketch a simple bow shape where the ponytail gathers. Draw two long, flowing ribbon tails draping down behind the neck.
Uneven Lines?
If your hand shakes, don’t restart. Thicken the line slightly in that area to mask the wobble, or add a second nearby line to make it look like intentional hatching texture.
Step 2: Inking the Features
-
Choose your pen:
Select your 0.5mm fine liner for the main facial profile. This weight provides a clear, defining line without being too heavy. -
Trace the face:
carefully ink the forehead, nose, lips, and chin. Pay attention to the delicate curve of the nostril and the upper lip. -
Add the eye:
Switch to a 0.3mm pen. Draw the closed eyelid with a heavy lash line to suggest downward-cast eyes. Use tiny flicking motions for the eyelashes. -
Refine the brow:
Use the same fine pen to draw the eyebrow. I prefer to use short, hair-like strokes rather than a solid block to keep it natural. -
Detail the ear:
If visible, sketch the simple curves of the ear inside the hairline using the 0.3mm pen.
Level Up: Gold Accent
Instead of black ink for the earrings or the hair ribbon, use a metallic gold gel pen or gold leaf. This adds a luxurious pop of color that catches the light beautifully.
Step 3: Creating Hair Texture
-
Outline the head shape:
Use the 0.8mm pen to draw the outer contour of the hair, starting from the forehead and sweeping back toward the ponytail tie. -
Draw directional strands:
With the 0.5mm pen, draw long, sweeping lines that follow the curve of the scalp toward the ponytail. Don’t fill every space; leave white gaps for highlights. -
Ink the ponytail tie:
Define the knot of the ribbon and the loops of the bow with the 0.8mm pen to make them stand out as a focal point. -
Flowing ponytail tails:
Draw the ribbon tails with long, confident strokes. Allow the lines to vary slightly in thickness to suggest the fabric folding. -
Ponytail volume:
Draw outlines for the hair hanging from the ponytail. Add a few internal lines to suggest movement and volume.
Step 4: Finishing Touches
-
Neck and Shoulders:
Use the 0.5mm pen to draw the neckline and a simple suggestion of the shoulder and clothing collar. -
Erase guidelines:
Wait at least 10 minutes to ensure the ink is totally dry. Gently erase all pencil marks with your kneaded eraser. -
Sign and Frame:
Add your signature in a corner using the finest pen. Place the finished drawing in a simple white frame to complete the look.
Hang your new minimalist masterpiece in a bright spot to enjoy the clean lines every day


Girl Looking Over Her Shoulder In 3/4 View
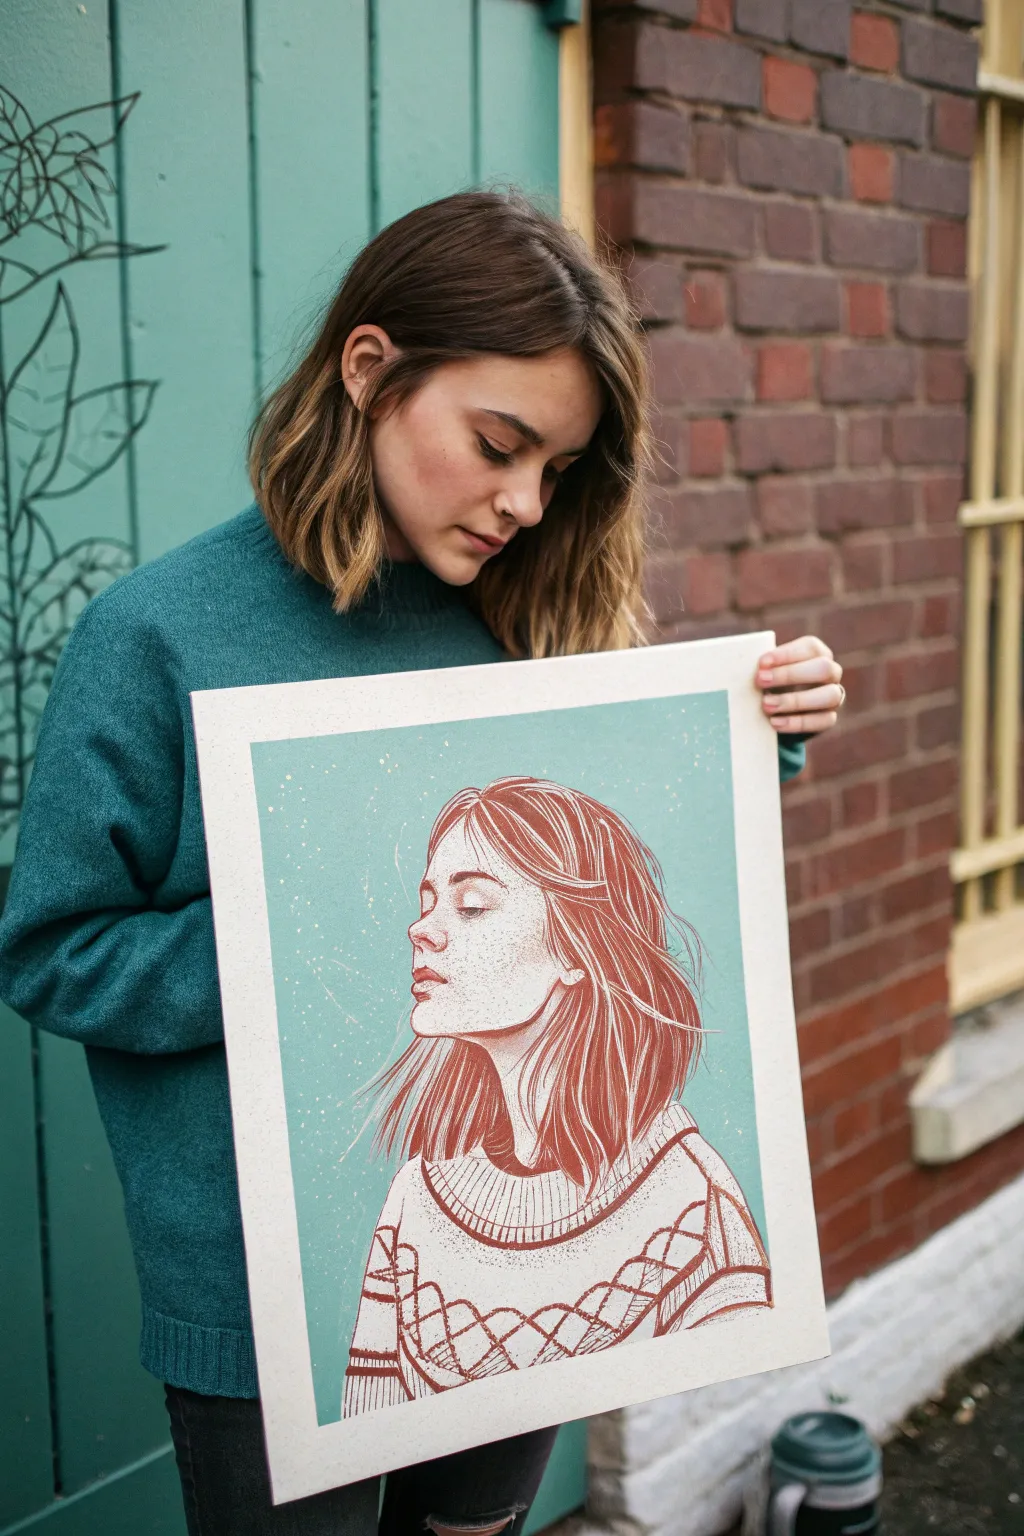
Capture the serene elegance of a side-glance with this stylized portrait tutorial, mimicking the clean lines and limited palette of screen printing. By combining a teal background with intricate reddish-brown linework, you’ll create a striking piece that feels both modern and classically handcrafted.
Detailed Instructions
Materials
- High-quality heavyweight mixed media paper (A3 or similar size)
- Teal gouache or acrylic paint
- Flat wash brush (1-inch width)
- Terra cotta or reddish-brown fine liner pens (0.3mm and 0.5mm)
- Terra cotta colored pencil or marker
- White gel pen (optional for highlights)
- Pencil (HB) and eraser
- Ruler and masking tape
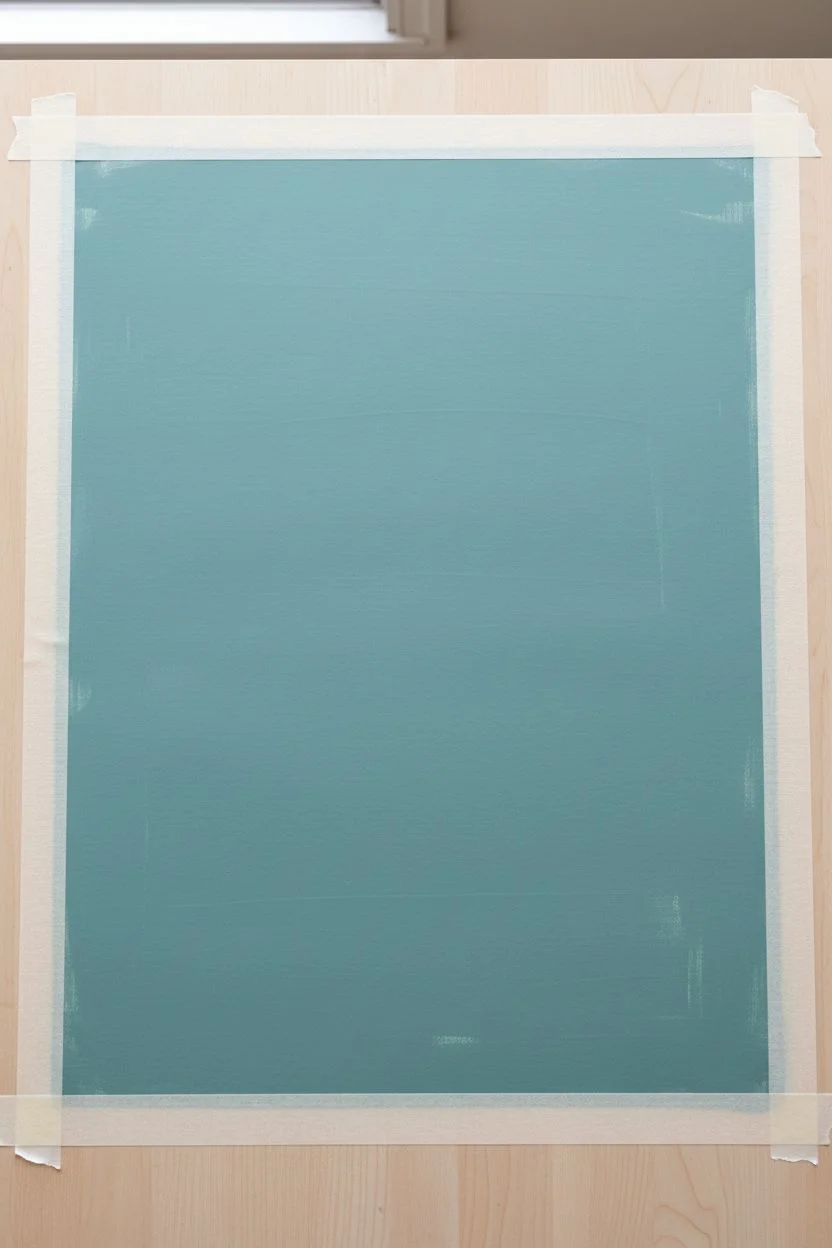
Step 1: Preparation & Background
-
Tape the borders:
Begin by securing your paper to a flat surface. Use masking tape to create a clean, even border around the edges, leaving about an inch of white space all around to frame the final image. -
Mix the background color:
Prepare your teal paint. If using acrylics, you might want to mix in a tiny bit of white to make it opaque and chalky. Aim for a muted, dusty teal rather than a bright electric blue. -
Paint the background field:
Using the flat wash brush, paint the entire area inside the taped borders with an even coat of teal. Apply long, horizontal strokes to minimize texture. Let this layer dry completely before moving on.
Clean Lines Pro-Tip
To keep your hand from smudging the teal background while inking, place a clean scrap sheet of paper under your drawing hand as you work across the page.
Step 2: Sketching the Subject
-
Outline the silhouette:
Once the teal is dry, lightly sketch the profile of the girl using your HB pencil. Focus on the 3/4 turn of the head—her nose should point left, but we should see the curve of her far cheek and eyebrow. -
Block in major shapes:
Sketch the large shapes for the hair, letting it flow down to shoulder length, and outline the bulk of the sweater. Don’t worry about the sweater pattern yet; just get the proportions of the shoulders right. -
Refine facial features:
Carefully detail the eye, looking slightly upward or straight ahead, and the lips. The expression should be relaxed and contemplative.
Step 3: Inking & Detailing
-
Define the face contour:
Using the 0.3mm terra cotta fine liner, trace over your pencil lines for the face. Keep the line weight consistent but purposeful, especially around the jawline and nose. -
Illustrate the hair:
Switch to the slightly thicker 0.5mm pen for the hair. Instead of drawing every strand, use long, sweeping lines to suggest volume and movement. Leave gaps between lines to let the teal background show through. -
Detail the eyes and lips:
Use the finer pen to add delicate hatching around the eye and under the brow bone to create depth without heavy shading. -
Stipple shading:
For a print-like texture, use stippling (small dots) on the cheek, nose bridge, and neck to add subtle shadow. This mimics the grain often seen in aquatint etchings. -
Outline the sweater:
Draw the collar and the main outline of the chunky knit sweater. The lines here should be slightly looser to imply the softness of wool. -
Create the knit pattern:
Draw the diamond pattern on the chest of the sweater. Use cross-hatching inside the diamonds to darken them, distinguishing them from the lighter parts of the knit. -
Fill solid areas:
Identify the darkest shadow areas in the hair and the folds of the sweater. Use a terra cotta marker or colored pencil to fill these sections in solidly for contrast.
Fixing Wobbly Lines
If a line goes astray or looks shaky, thicken it slightly to vary the line weight. This makes it look like an intentional stylistic choice rather than a mistake.
Step 4: Finishing Touches
-
Add atmospheric texture:
To enhance the printed look, add random speckles of white or light grey in the background space behind the head. You can flick a toothbrush with diluted white paint for this, or carefully dot with a gel pen. -
Highlighting:
Use a white gel pen to add tiny highlights on the tip of the nose, lower lip, and the brightest glints in the hair. -
Remove the tape:
Wait until every element is bone dry. Slowly peel back the masking tape at a 45-degree angle to reveal your crisp white border.
Frame your artwork in a minimalist wood frame to complement the warm tones of the drawing.
BRUSH GUIDE
The Right Brush for Every Stroke
From clean lines to bold texture — master brush choice, stroke control, and essential techniques.
Explore the Full Guide
Girl With Round Glasses And A Messy Bun
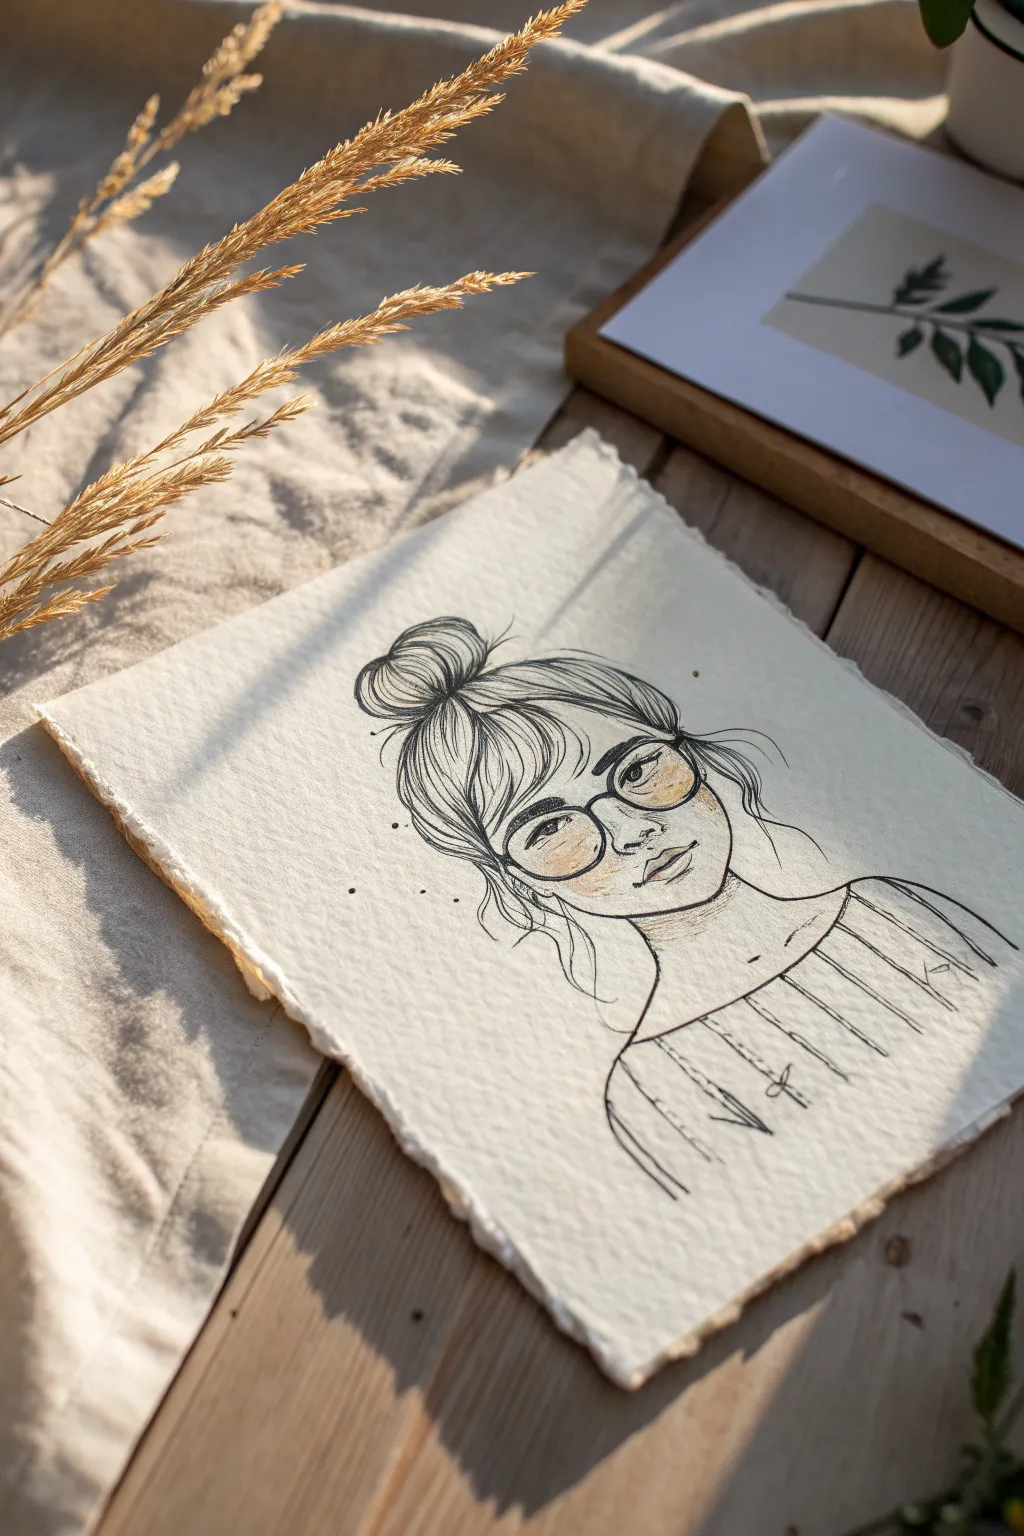
Capture a relaxed, bohemian vibe with this charming line art portrait featuring round spectacles and an effortless messy bun. The drawing uses simple ink lines and subtle shading on textured handmade paper to create a warm, artistic feel.
Step-by-Step Guide
Materials
- Textured heavy-grade deckle-edge paper (cream or off-white)
- H or HB pencil (for initial sketching)
- Fine liner pen (01 or 03 micron size, black)
- Slightly thicker liner pen (05 size, black)
- Soft drawing pencil (2B or 4B) for shading
- Kneaded eraser
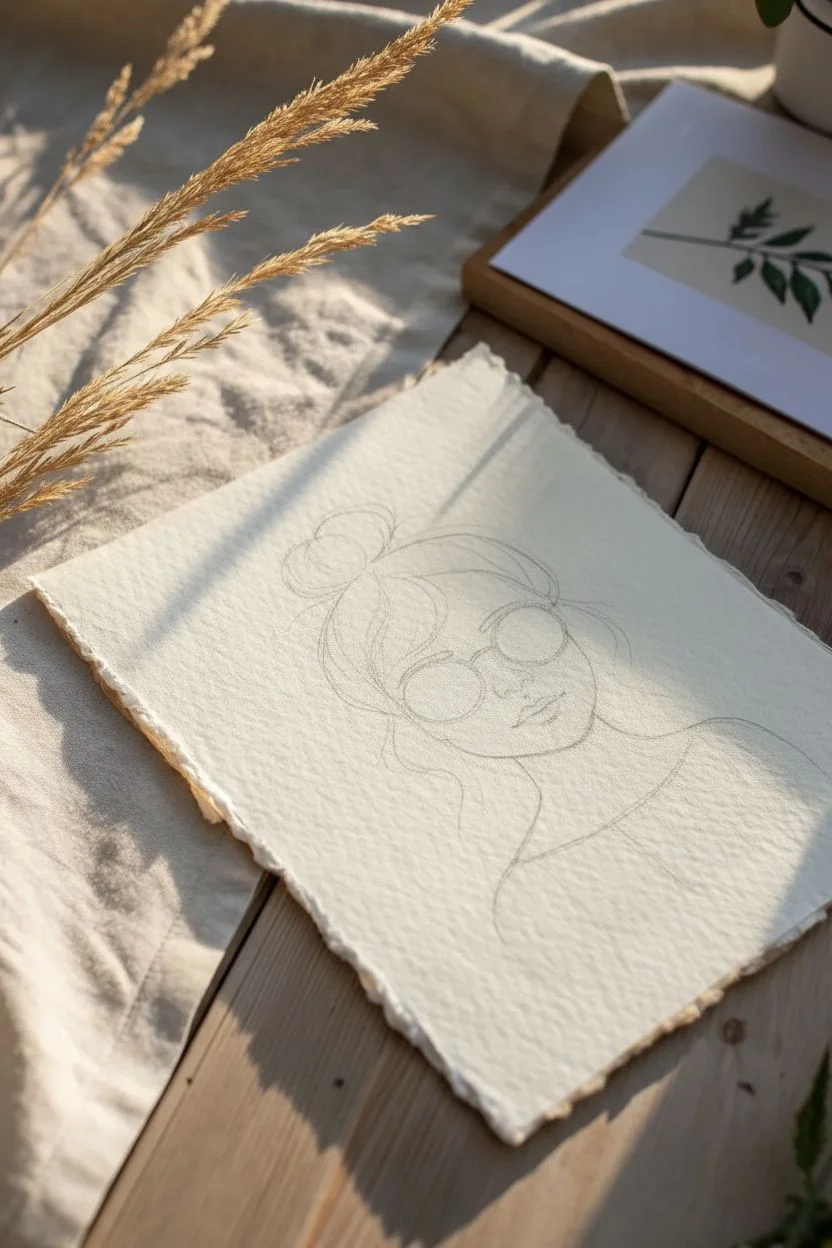
Step 1: Drafting the Structure
-
Outline the head shape:
Begin lightly with your H pencil. Draw a gentle oval for the face, slightly tapered towards the chin, and leave the top open where the hair will sit. -
Position the bun:
Sketch a large, rounded shape sitting high on top of the head for the bun. Keep it loose and not perfectly spherical to mimic the ‘messy’ look. -
Add hair volume:
Draw the hairline contours, allowing the hair to sweep loosely from the bun down to the ears. Include a few stray strands escaping the main shape to frame the face. -
Place the glasses:
Draw two large, perfect circles for the glasses frames. They should sit centrally on the face, with the bridge resting just slightly below the eye line. -
Mark the neck and shoulders:
Extend a graceful, slightly curved line down for the neck, connecting to a suggestion of shoulders. Keep the chest area broad to accommodate the patterned top later.
Uneven Circles?
If freehanding round glasses is tough, trace a coin or button lightly in pencil first. Ink over the trace, intentional imperfections add charm.
Step 2: Inking the Details
-
Ink the glasses:
Using your 05 pen, carefully trace the round frames. Make the rim slightly thicker than the other lines to make the glasses pop as a focal point. -
Draw the eyes:
Switch to the finer 01 pen. Inside the glasses, verify the eye position. Draw the upper lid with a slightly heavier line and add simple irises looking slightly to the side or straight ahead. -
Define facial features:
Add eyebrows just above the glasses frames—keep them soft and slightly arched. Ink a small, indicated nose and full lips with a gentle curve. -
Detail the messy bun:
Use fluid, sweeping strokes to define the hair. Instead of drawing every strand, focus on the direction of flow. Add loops and loose ends around the bun itself to emphasize the texture. -
Create the fringe:
Draw sweeping bangs across the forehead. Let some strands overlap the top of the glasses frames for a natural, layered depth. -
Add the freckles:
Lightly dot the area across the nose and cheeks with your fine pen. Keep the dots random and varied in size for a realistic freckled effect.
Step 3: Texture and Finishing
-
Sketch the clothing:
Draw the neckline of the shirt. Add vertical stripes down the garment using quick, sketchy lines rather than ruler-straight ones to maintain the organic style. -
Erase pencil marks:
Once the ink is completely dry, gently roll your kneaded eraser over the entire drawing to lift the graphite guidelines without damaging the paper surface. -
Add pencil shading:
Take your 2B pencil and lightly shade the cheeks (under the glasses) and the lips. I like to smudge this slightly with a finger for a soft, blushing look. -
Shade the neck:
Add a small shadow under the chin on the neck to create depth and separation between the head and body. -
Add decorative splatter:
For that artistic finish shown in the example, add three or four tiny ink dots floating to the left of the hair. It adds movement and balances the composition.
Add a Pop of Color
Use watercolor paint just on the cheeks (pink) or the shirt stripes (mustard yellow) to create a mixed-media focal point.
Frame your sketch on a wooden clipboard or in a floating frame to show off those beautiful deckled edges
Girl Wearing A Beanie With Loose Face-Framing Strands
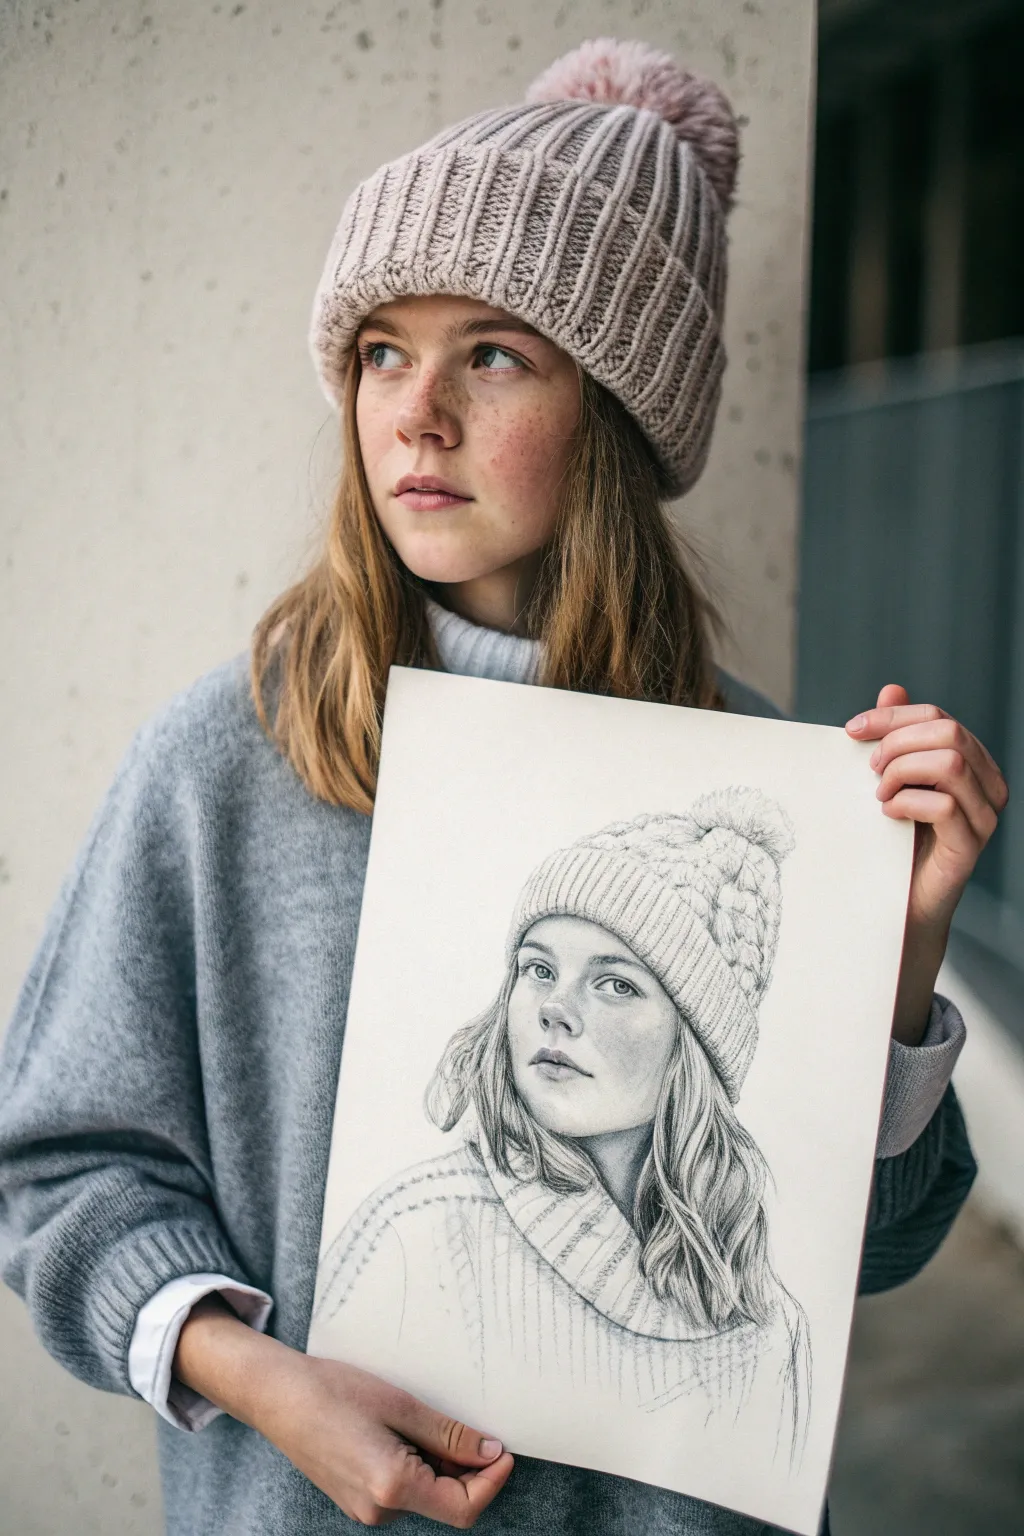
Capture the serene beauty of a winter day with this detailed graphite pencil drawing. This project focuses on realistic textures, from the chunky knit of a warm beanie to the soft, flowing strands of hair framing a gentle expression.
Step-by-Step
Materials
- Graphite pencils (HB, 2B, 4B, 6B)
- High-quality drawing paper (smooth or medium tooth)
- Kneaded eraser
- Blending stump or tortillon
- Mechanical pencil (0.5mm) for fine details
- Pencil sharpener
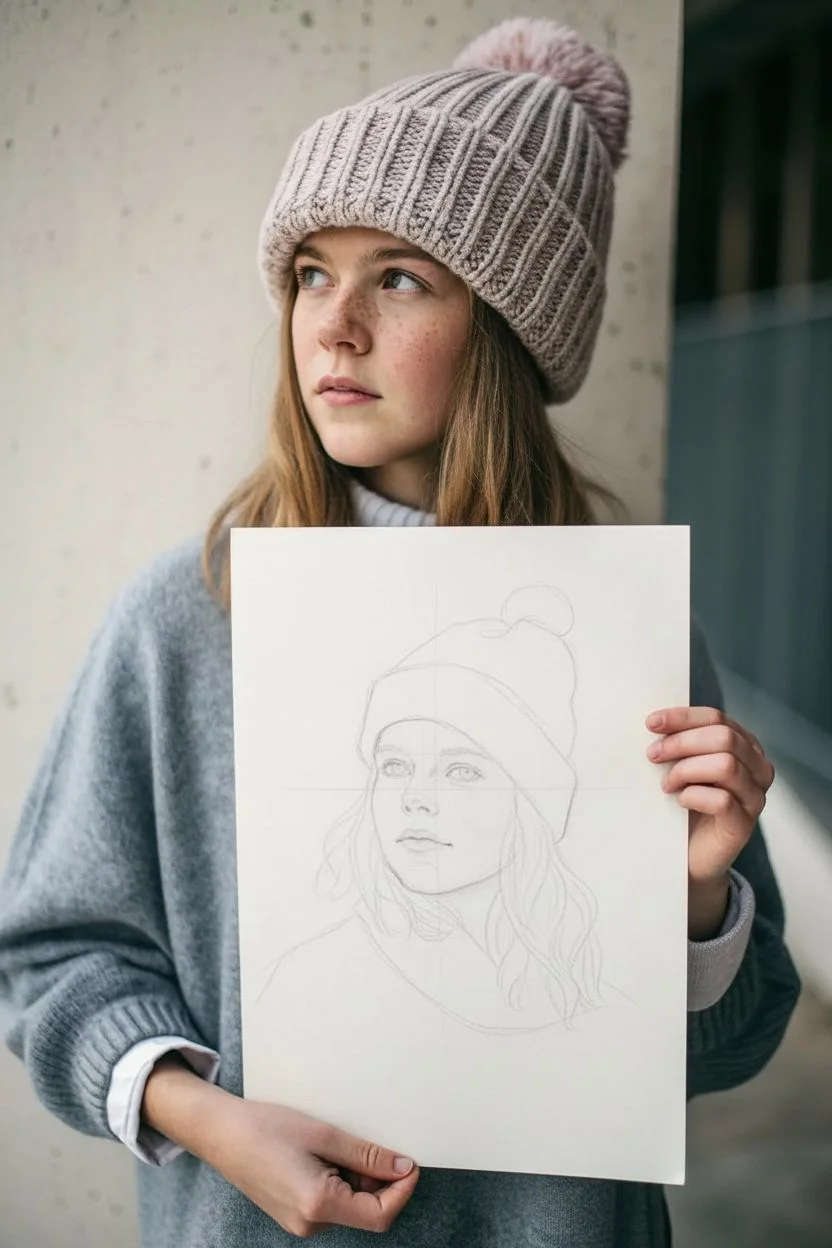
Step 1: Basic Structure & Proportions
-
Establish the head shape:
Begin lightly with an HB pencil, sketching an oval for the head. Since she is wearing a beanie, extend the top of the oval higher than the actual skull to account for the hat’s volume. -
Map out facial features:
Draw faint guidelines for the eyes, nose, and mouth. The eyes should be roughly halfway down the face, with the beanie sitting just above the eyebrows. Mark the jawline softly, keeping the chin slightly rounded. -
Outline the beanie:
Sketch the general shape of the beanie over the forehead. Indicate the folded brim clearly, wrapping around the head. Add a rough circle at the very top for the pom-pom. -
Define hair flow:
Draw the main masses of hair. Create loose, wavy shapes that emerge from under the beanie and frame the face, resting on the shoulders. Don’t worry about individual strands yet.
Knit Texture Tip
Don’t draw every single stitch. Draw the shadows *between* the ribs of the knit. Your brain will fill in the rest of the pattern automatically.
Step 2: Facial Features & Shading
-
Detail the eyes:
Switch to a mechanical pencil for precision. Outline the eyelids and irises. Shade the pupils dark, leaving small white circles for catchlights to bring them to life. -
Refine the nose and mouth:
Lightly shade the nostrils and the underside of the nose. For the lips, focus on the shadow between them and the shading on the upper lip, keeping the outline soft rather than a hard line. -
Add facial shading:
Using a 2B pencil, gently shade the face. Focus on the shadows under the beanie’s brim, along the side of the nose, and under the jawline. Use a blending stump to smooth these transitions for a realistic skin texture.
Skin Looking Smudgy?
If shading looks dirty, your blending stump might have old graphite on it. Sand it clean on a sandpaper block or use a fresh tortillon for skin tones.
Step 3: Texturing the Beanie
-
Draw the ribbing:
The brim of the beanie has vertical ribbing. Draw distinct vertical lines that curve with the head’s shape. Vary the line weight to show depth between the ribs. -
Create the knit pattern:
For the main part of the hat, sketch interlocking ‘V’ or ‘U’ shapes to mimic chunky knitting. I find it helpful to squint at my reference to see the main shadow shapes rather than every stitch. -
Shade the knit:
Use a 4B pencil to deepen the shadows between the knitted rows. This contrast creates the illusion of thick, soft wool. -
Fluff up the pom-pom:
Use short, flicking strokes radiating outward from the center of the pom-pom area. Keep the edges irregular to make it look fluffy and soft.
Step 4: Hair & Final Touches
-
Layer the hair:
Start defining sections of hair using long, flowing strokes with a 2B pencil. Follow the direction of the waves you mapped out earlier. -
Deepen hair shadows:
Switch to a 6B pencil for the darkest areas of the hair, particularly right under the beanie and behind the neck. This adds volume and depth. -
Add flyaways:
With a sharp H or HB pencil, draw very fine, stray hairs breaking the silhouette. This prevents the hair from looking like a solid block and adds realism. -
Suggest the sweater:
Lightly sketch the collar of the sweater. Use loose hatching to suggest a different knit texture than the hat, keeping it less detailed so focus remains on the face. -
Final contrast check:
Step back and assess your values. Darken the pupils and deepest shadows one last time to ensure the drawing has a full range of tones.
Take a moment to appreciate how the simple textures of wool and hair come together to frame the face

PENCIL GUIDE
Understanding Pencil Grades from H to B
From first sketch to finished drawing — learn pencil grades, line control, and shading techniques.
Explore the Full Guide
Girl Wearing A Face Mask With Expressive Eyes

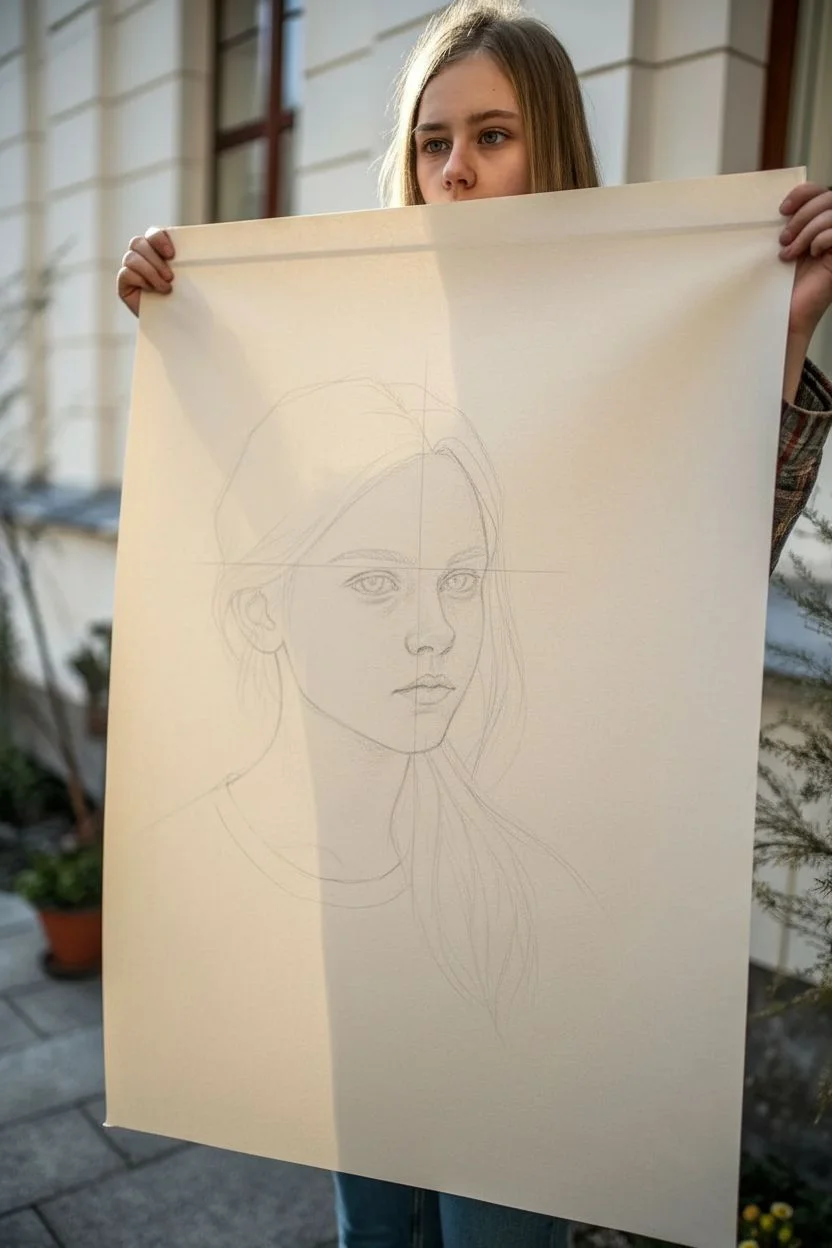
Capture the depth of emotion with this realistic graphite portrait of a young girl. This project focuses on soft values, delicate hair textures, and expressive eyes to create a drawing that feels almost alive.
Step-by-Step
Materials
- Large sheet of drawing paper (smooth or medium tooth, A2 or A3 size)
- Set of graphite pencils (HB, 2B, 4B, 6B)
- Mechanical pencil (0.5mm, HB or 2B)
- Kneaded eraser
- Precision eraser (stick eraser or mono zero)
- Blending stumps or tortillons
- Tissue paper or soft cloth
- Workable fixative spray
Step 1: Planning and Structure
-
Reference Analysis:
Begin by studying your reference photo closely, noting the direction of the light source. In this portrait, soft light comes from the front-left, casting subtle shadows on the right side of the face. -
Initial Sketch:
With an HB pencil, lightly sketch a vertical line for the center of the face and horizontal lines for the eyes, nose, and mouth. Keep these marks extremely faint so they can be erased later. -
Mapping Features:
Block in the basic shapes of the eyes, nose, and lips. Focus on correct proportions rather than detail right now; the space between the eyes should be roughly the width of one eye. -
Structuring the Hair:
Outline the general volume of the hair. Don’t draw individual strands yet; just map out the large masses where the hair parts and flows over the shoulders.
Muddy Shading?
If skin looks dirty or muddy, your graphite is too thick or smudged too much. Lift excess graphite with a kneaded eraser (dab, don’t rub) and re-shade lightly.
Step 2: Shading the Face
-
Layering Skin Tones:
Using a 2B pencil and a very light hand, apply a base layer of graphite to the shadowed areas of the face—beside the nose, under the eyebrows, and along the jawline. Use a circular motion to avoid harsh strokes. -
Soft Blending:
Take a clean tissue or blending stump and gently smudge the graphite you just laid down. This creates that smooth, skin-like texture seen in the portrait. -
Building Contrast:
Switch to a 4B pencil to deepen the shadows. Focus on the nostrils, the corners of the mouth, and the crease of the eyelids. I prefer to build these darks gradually rather than pressing hard all at once. -
Detailing the Eyes:
Sharpen your mechanical pencil for the irises. Draw the pupil dark and radiate lines outward for the iris texture. Leave a tiny white circle for the catchlight to bring the eyes to life. -
Refining the Nose and Lips:
Define the nose by shading the sides rather than drawing outlines. For the lips, shade the upper lip slightly darker than the bottom one, and add vertical texture lines with your mechanical pencil.
Pro Tip: Eye Sparkle
Make the eyes pop by ensuring your catchlight is pure white paper. If you accidentally shaded it, use a white gel pen or opaque white gouache for a crisp highlight.
Step 3: Creating Texture
-
Starting the Hair:
Using a 4B pencil, start drawing long, flowing strokes from the roots downward. Follow the direction of hair growth mapped out earlier. -
Developing Hair Volume:
Add darker values (6B) in the deepest areas of the hair, such as behind the neck and under the ear. Leave the high points of the hair curves lighter to represent shine. -
Individual Strands:
With a sharp mechanical pencil, add flyaway hairs and individual strands over the main masses. This adds realism and keeps the hair from looking like a solid block. -
Clothing Suggestion:
Sketch the neckline of the shirt loosely. Use a side-shading technique to create a rough, knitted texture without over-detailing, keeping the focus on the face.
Step 4: Final Touches
-
Lifting Highlights:
Take your kneaded eraser and pinch it into a sharp point. ‘Tap’ or lift graphite from the bridge of the nose, the tip of the nose, and the cheeks to create subtle highlights. -
Deepening Darks:
Do one final pass with your 6B pencil to ensure the darkest darks—pupils, nostrils, and deepest hair shadows—are rich and bold. -
Clean Up:
Use the precision eraser to clean up the whites of the eyes and erase any smudges on the background paper. -
Preserve:
Once fully satisfied, spray a light coat of workable fixative over the drawing. Hold the can about 12 inches away to prevent droplets.
Now step back and admire the subtle details you’ve captured in this emotive portrait
Chibi Girl With A Simple Outfit And Big Head Proportions
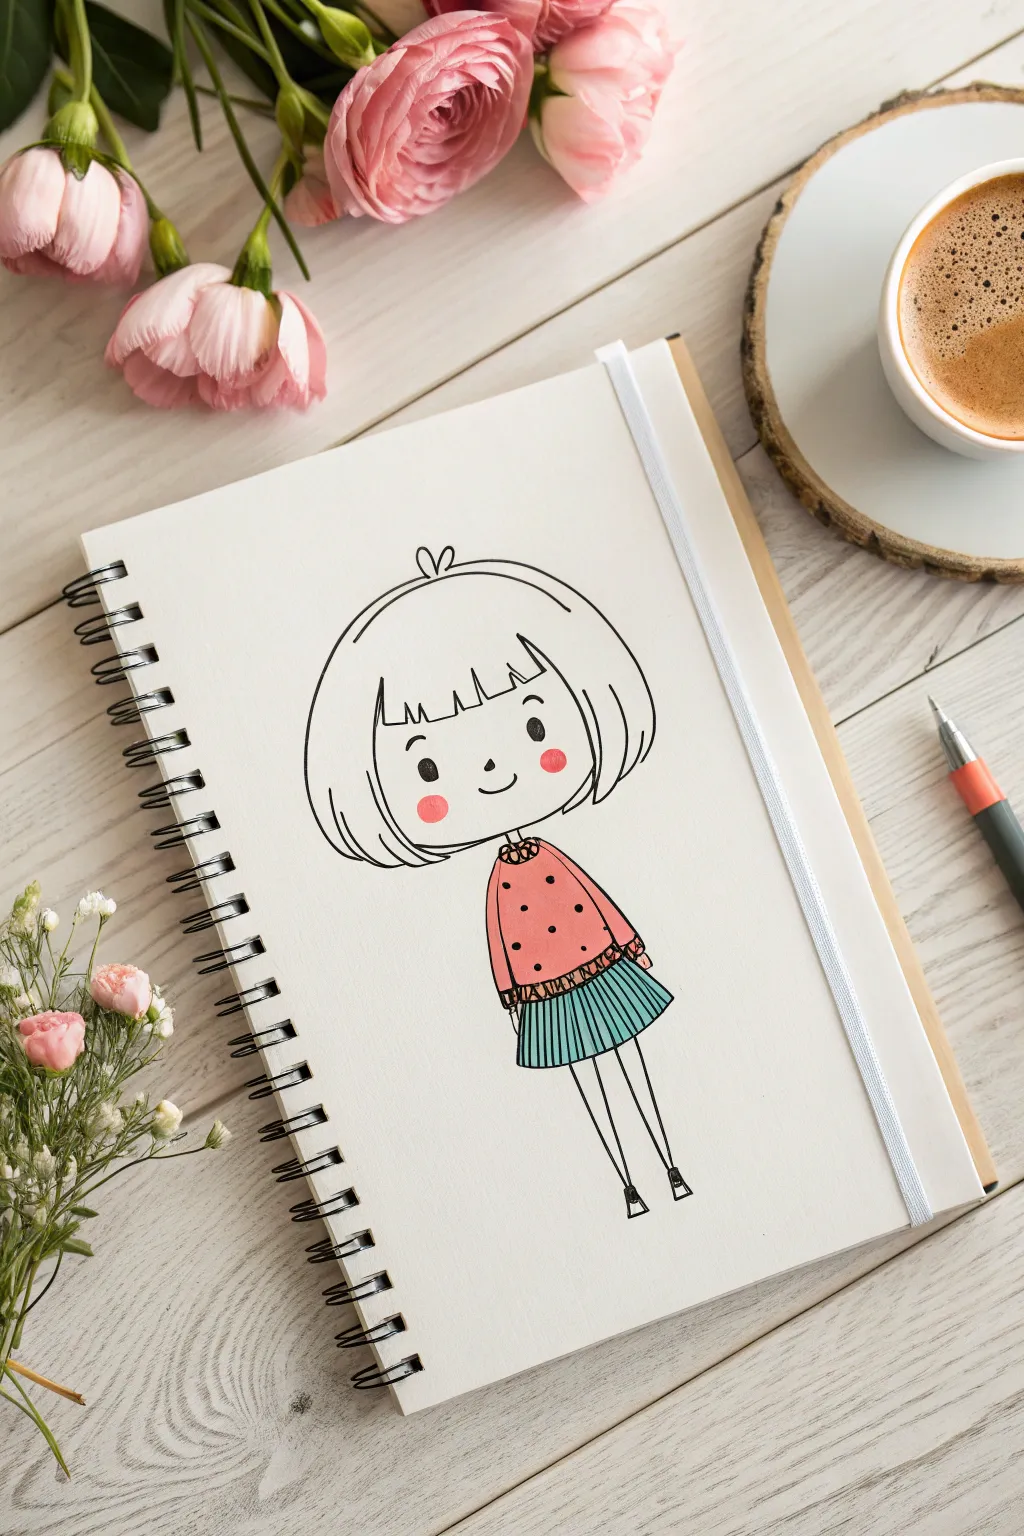
Create this utterly charming character featuring classic chibi proportions with an oversized head and tiny body. This drawing combines crisp black linework with soft pops of color on the cheeks, sweater, and skirt for a minimalist yet expressive look.
Step-by-Step
Materials
- Spiral-bound sketchbook or drawing paper
- Fine-liner pen (black, approx. 0.3mm or 0.5mm)
- Pencil (HB or 2B) and eraser
- Colored markers or brush pens (Soft Peach/Pink, Warm Red, Teal/Turquoise)
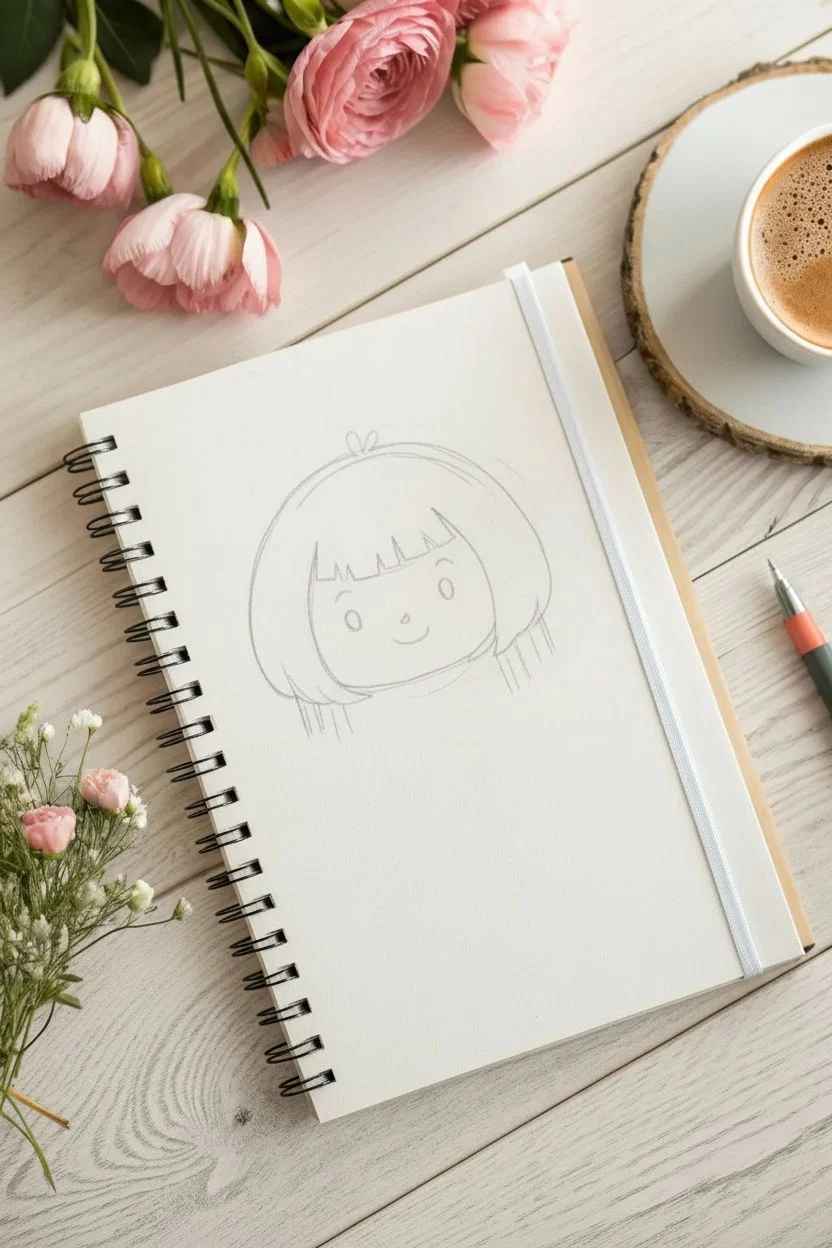
Step 1: Designing the Head and Hair
-
Outline the head shape:
Begin by lightly sketching a wide, rounded U-shape for the bottom of the face. Since this is a chibi style, keep the face shape broad and slightly flattened at the chin. -
Draw the bangs:
Across the forehead, draw the fringe line. Instead of a straight line, sketch a jagged, zig-zag pattern to suggest strands of hair cut into a bob. Keep the teeth of the zig-zag slightly irregular for a natural feel. -
Add the hair volume:
Draw the outer shape of the hair. Start from one side of the jaw, arc high above the forehead to create volume, and bring the line down to the other side, curving it slightly inward at the tips to frame the face. -
Detail the hair parting:
At the very top center of the head, draw two small loops resembling a little heart or bunny ears. This cute detail represents a stray cowlick or a hair clip. -
Sketch the inner hair strands:
Add a few short vertical lines inside the hair outline, near the ears, to suggest the tuck of the hair behind the face or just extra texture.
Step 2: Drawing the Facial Features
-
Place the eyes:
Draw two solid black ovals wide apart on the face. Place them quite low on the face—roughly halfway down or slightly lower—to maximize the cute factor. -
Add eyebrows:
Just above the bangs’ edge, draw two tiny, floating vertical dashes for eyebrows. Keeping them small and disconnected gives her a sweet, innocent expression. -
Draw the nose and mouth:
Right between the eyes, draw a tiny dot for the nose. Below that, draw a simple, small upward-curved line for a smile. -
Create the rosy cheeks:
Using your pink or soft red marker, dab two circular spots just underneath the eyes. I find that placing them slightly wider than the eyes makes the face look wider and cuter.
Ink Confidence
When inking long curves like the hair, lock your wrist and move your entire arm. This creates smoother lines than using just your fingers, which can be shaky.
Step 3: Drawing the Outfit
-
Draw the neck and collar:
Draw a very thin, short neck stem. Immediately below, sketch a scalloped or ruffled collar using small U-shapes connected in a circle. -
Outline the sweater:
Sketch a trapezoid shape for the sweater body, widening slightly as it goes down. Keep the shoulders rounded and soft. -
Add the sleeves:
Draw simple tubular sleeves extending down from the shoulders. They should be long enough to cover the hands, so just end them with a straight line at the bottom. -
Detail the sweater hem:
At the bottom of the sweater, draw a textured hemline. You can use a zig-zag line similar to the bangs or a series of small vertical dashes to mimic ribbing. -
Draw the pleated skirt:
Below the sweater, draw a flared skirt shape. Add vertical lines inside the shape to create the look of pleats.
Pattern Play
Customize her look by changing the sweater pattern! Try horizontal stripes, tiny hearts, or a plaid grid instead of polka dots for a totally different vibe.
Step 4: Legs and Finishing Touches
-
Sketch the legs:
Draw two very simple, thin lines extending downward for legs. They should taper slightly and be relatively long compared to the tiny torso. -
Add tiny shoes:
At the end of each leg, draw small, simple shoe shapes. You can add a little line across the ankle to suggest socks or a strap. -
Ink the lines:
Take your fine-liner pen and carefully trace over your pencil lines. Use confident strokes for the hair and crisp lines for the outfit. -
Color the sweater:
Fill the sweater with a warm red or pink marker. Once dry, use a black pen to add small polka dots all over the fabric for a pattern. -
Color the skirt:
Color the pleated skirt with a teal or turquoise marker. Try to stay neatly within the lines to maintain that clean, graphical look. -
Final clean up:
Once the ink is completely dry, gently erase any remaining pencil marks to leave your illustration looking polished and professional.
Now you have a delightful little character that is perfect for decorating journals or greeting cards


Winking Girl With A Peace Sign Hand Pose
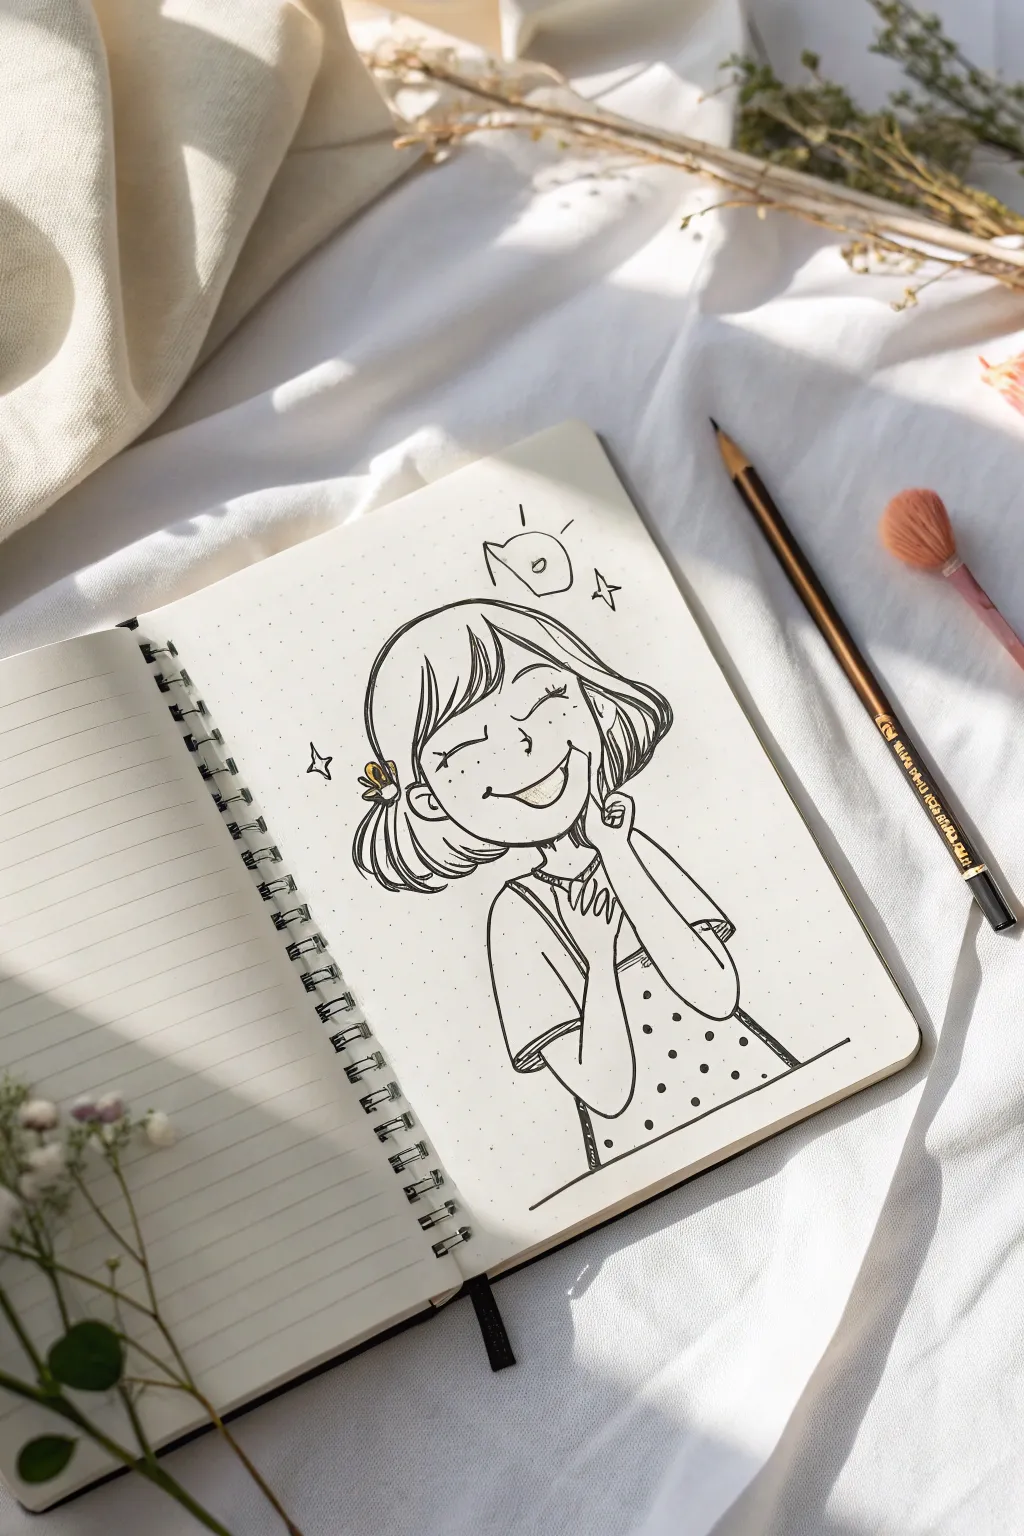
This cheerful drawing captures a playful moment of joy, featuring a winking girl with a cute peace sign pose. The style uses clean linework and subtle ink detailing to create a charming, doodle-like quality perfect for any sketchbook spread.
How-To Guide
Materials
- Dotted sketchbook or drawing paper
- Pencil (HB or 2B for sketching)
- Eraser (kneaded preferred)
- Fine liner pen (01 or 03 size, black)
- Thicker marker (05 or 08 size) for outer lines
- Yellow colored pencil or marker (for the bee)
Step 1: Sketching the Base
-
Outline the head shape:
Begin with a soft pencil sketch of a rounded rectangle for the face. Keep the chin slightly soft and rounded, avoiding harsh angles to maintain the cute aesthetic. -
Map out the hair:
Sketch the hair shape as a bob cut. Add bangs sweeping across the forehead and curling slightly inward at the ends near the jawline. -
Draft the hand pose:
Draw the hand positioned near the chin. The index and middle fingers should be extended upward in a V-shape, while the other fingers curl back, suggesting she is touching her cheek or chin. -
Add the torso:
Extend lines down from the neck for a simple shirt. Sketch the short sleeves and the overall shape of her upper body, including the slight straps of an apron or dungarees.
Step 2: Facial Features
-
Position the eyes:
Draw two curved lines for the closed, smiling eyes. For the winking effect, make the left eye (viewer’s left) a simple upward curve and the right eye an exaggerated squint. -
Add the smile:
Draw a wide, crescent-shaped mouth slightly open to show teeth. Add small creases at the corners to emphasize the happy expression. -
Draw the nose and freckles:
Place a tiny, subtle curve for the nose between the eyes. Lightly tap your pencil to create a scattering of freckles across the cheeks and bridge of the nose.
Keep it Loose
Don’t connect every single hair strand line. Leaving gaps in the internal hair lines makes the hair look shinier and less stiff.
Step 3: Refining and Inking
-
Ink the hair contour:
Switch to your thicker marker or pen. Trace the outer shape of the hair with confident, smooth strokes, adding flicking lines at the ends to suggest texture. -
Ink the face and features:
Use a finer liner pen (01 or similar) for the facial features. Carefully go over the eye curves, the smile, and the individual freckle dots. -
Ink the hand and clothes:
Trace the hand and clothing lines. Keep the lines relatively clean, but allow for slight variation in thickness to give the drawing character. -
Add hair details:
Add a few internal lines within the hair bangs and side sweeps to show flow and direction, ensuring you don’t overwork it—less is more here. -
Draw the clothing pattern:
Inside the dungaree shape, add evenly spaced polka dots with your pen. Don’t worry about perfect alignment; a random scatter looks more organic.
Wobbly Lines?
If your inking hand shakes, try pulling the pen toward you rather than pushing it away. Quicker strokes often result in smoother lines than slow ones.
Step 4: Decoration & Details
-
Add the hair accessory:
Draw a tiny bee clip or decoration on the left side of her hair. Use a yellow pencil to add a pop of color to the bee’s body. -
Sketch floating elements:
Above her head, add a few playful doodles like a cat head outline, a sun shape, or simple stars to fill the negative space. -
Thicken key lines:
Take a moment to thicken the outermost lines of the character slightly. This helps pop the figure off the page. -
Erase guidelines:
Once the ink is completely dry, gently erase all underlying pencil marks to reveal the crisp black and white illustration.
Now you have a charming character sketch ready to brighten up your bullet journal or diary pages
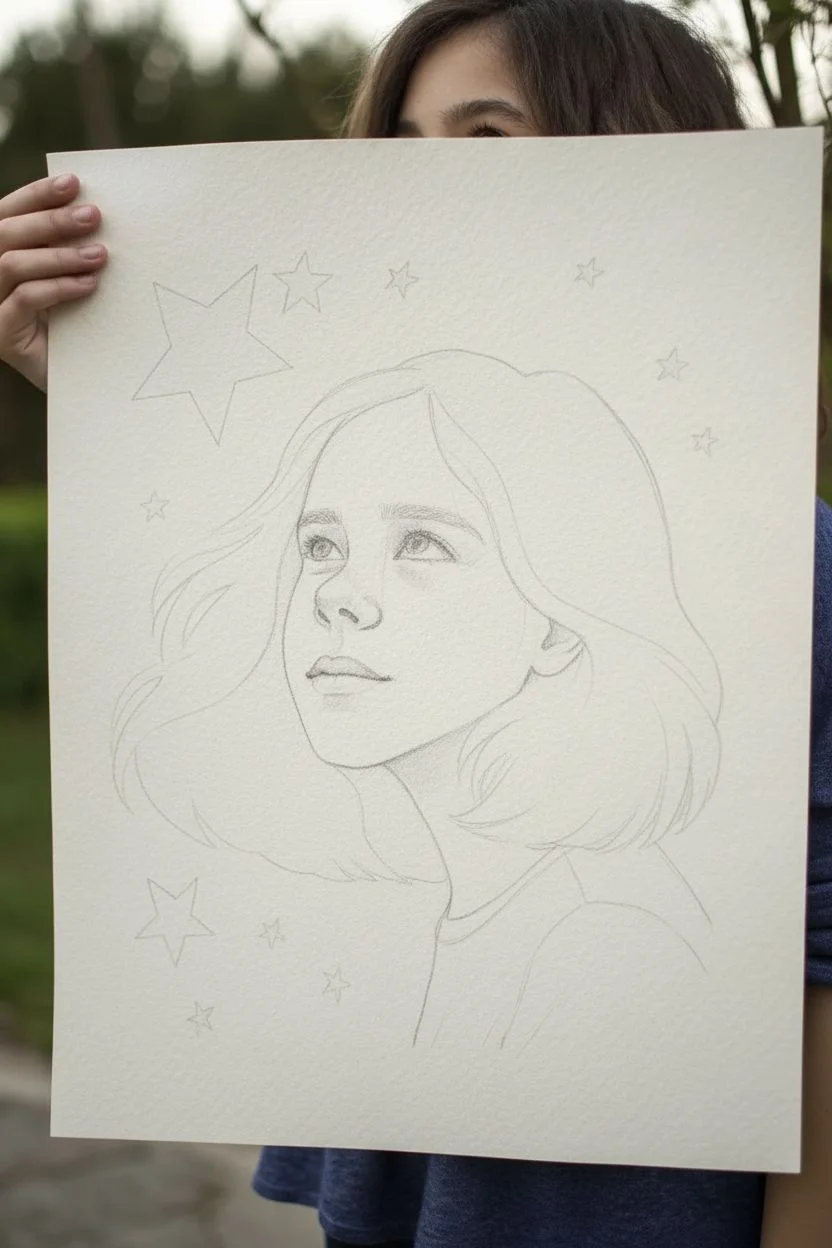
Girl With A Butterfly Near Her Face
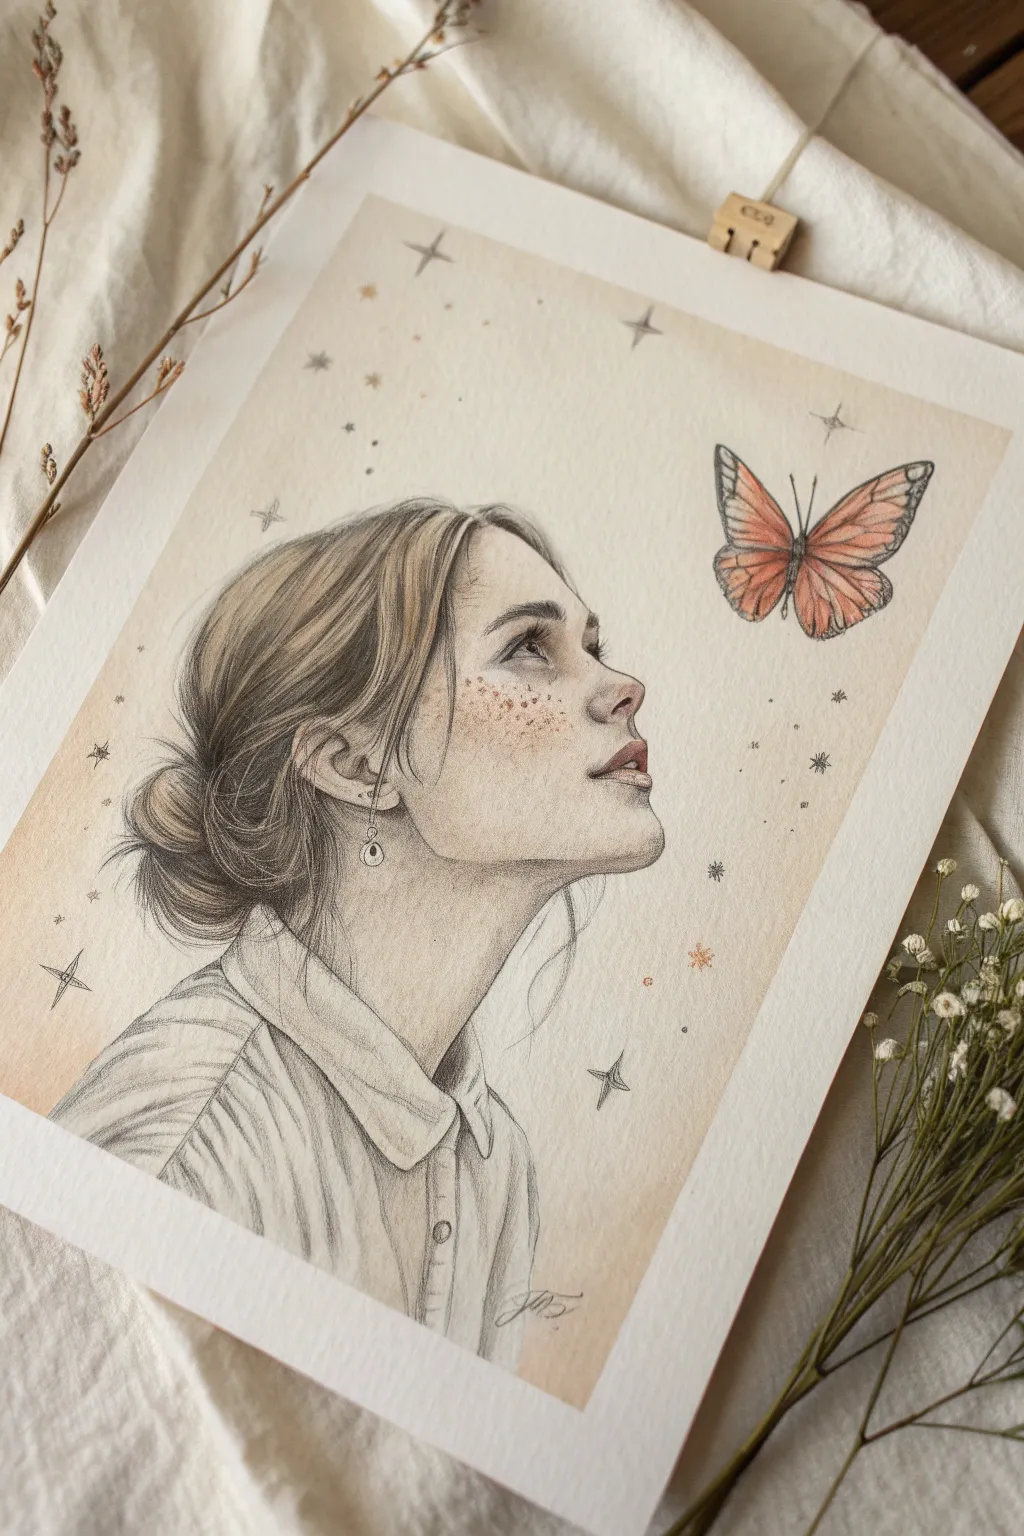
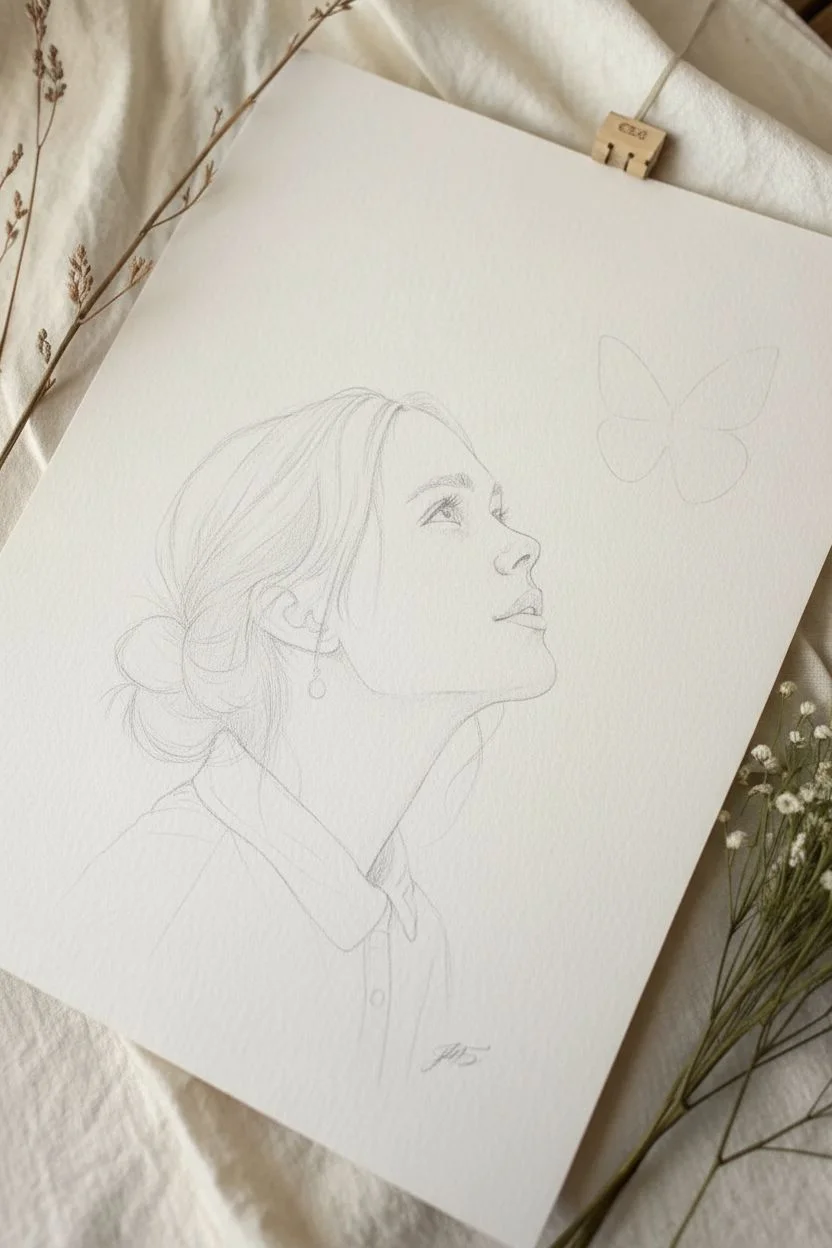
Capture a moment of quiet wonder with this mixed-media portrait, blending precise pencil shading with soft, ethereal color. This piece features a detailed profile gazing at a butterfly, set against a warm, starry background.
Step-by-Step Guide
Materials
- High-quality watercolor paper (cold press)
- Graphite pencils (HB, 2B, 4B)
- Fine-point mechanical pencil (0.5mm or 0.3mm)
- Watercolor paints (warm beige/ochre, coral/orange)
- Small round brushes (size 2 and 4)
- White gel pen or gouache
- Kneaded eraser
Step 1: Sketching the Composition
-
Lay out the proportions:
Begin lightly with an HB pencil to establish the profile of the girl’s face. Mark the eye line, nose tip, and chin to ensure the upward gaze feels natural. -
Position the butterfly:
Sketch a light oval shape where the butterfly will hover, slightly above her eye level to direct her gaze. I like to keep this very faint so it’s easy to adjust the distance later. -
Refine the facial features:
Carefully draw the eye, nose, and lips. The eye should be looking upward; pay attention to the curve of the nostril and the soft parting of the lips. -
Draft the hair and clothes:
Block in the hair mass, focusing on the bun at the nape and loose strands framing the face. Sketch the collar of the shirt simply, indicating folds without heavy detail.
Fixing Flat Hair
If hair looks flat, don’t just add more lines. Erase gently with a kneaded eraser to pull out highlights, then darken the deepest crevices for contrast.
Step 2: Pencil Shading & Detail
-
Shade the skin:
Using a 2B pencil, add soft shading to the face. Focus on the shadow under the jawline, around the eye socket, and the side of the nose to create dimension. -
Define the eyes:
Darken the pupil and iris with a 4B pencil, leaving a small highlight white. Add delicate eyelashes with a sharp mechanical pencil. -
Render the hair:
Build up the hair texture using long, flowing strokes. Start with the root and bun areas where shadows are deepest, then use lighter strokes for the highlights. -
Add freckles:
Lightly stipple small dots across the nose and cheeks. Vary the pressure and spacing so they don’t look like a uniform pattern. -
Detail the shirt:
Use hatched lines to shade the shirt collar and folds. Keep this sketchier than the face to draw focus to her expression. -
Add jewelry:
Draw the small hanging earring with a fine line, adding a tiny highlight to make it look metallic.
Add Gold Accents
Use metallic gold watercolor or a gold pen for the stars and the earring. This adds a magical shimmer when the drawing catches the light.
Step 3: Color & Background
-
Paint the background wash:
Mix a very watery warm beige or ochre watercolor. Apply a soft wash over the entire background area, carefully painting around the girl and the butterfly. -
Add warmth to the background:
While the wash is still damp, you can drop in slightly darker beige tones near the bottom corners to create a subtle vignette effect. -
Color the butterfly:
Use a coral or soft orange watercolor for the butterfly wings. Let the paint dry, then redraw the black veins and borders with a sharp dark pencil or fine liner. -
Warm up the face:
Add the tiniest touch of diluted pink or coral watercolor to her lips and perhaps a faint blush on the cheekbones. -
Draw the stars:
Once the background is completely dry, use your pencil to draw scattered four-point stars and small dots around the head and butterfly. -
Final highlights:
Use a white gel pen to add sparkles to the center of the drawn stars and re-emphasize the eye highlight if it got dull.
Step back and admire the dreamy atmosphere you’ve created with just pencil and a touch of paint
Sleeping Girl With A Dreamy Cloud Thought Bubble
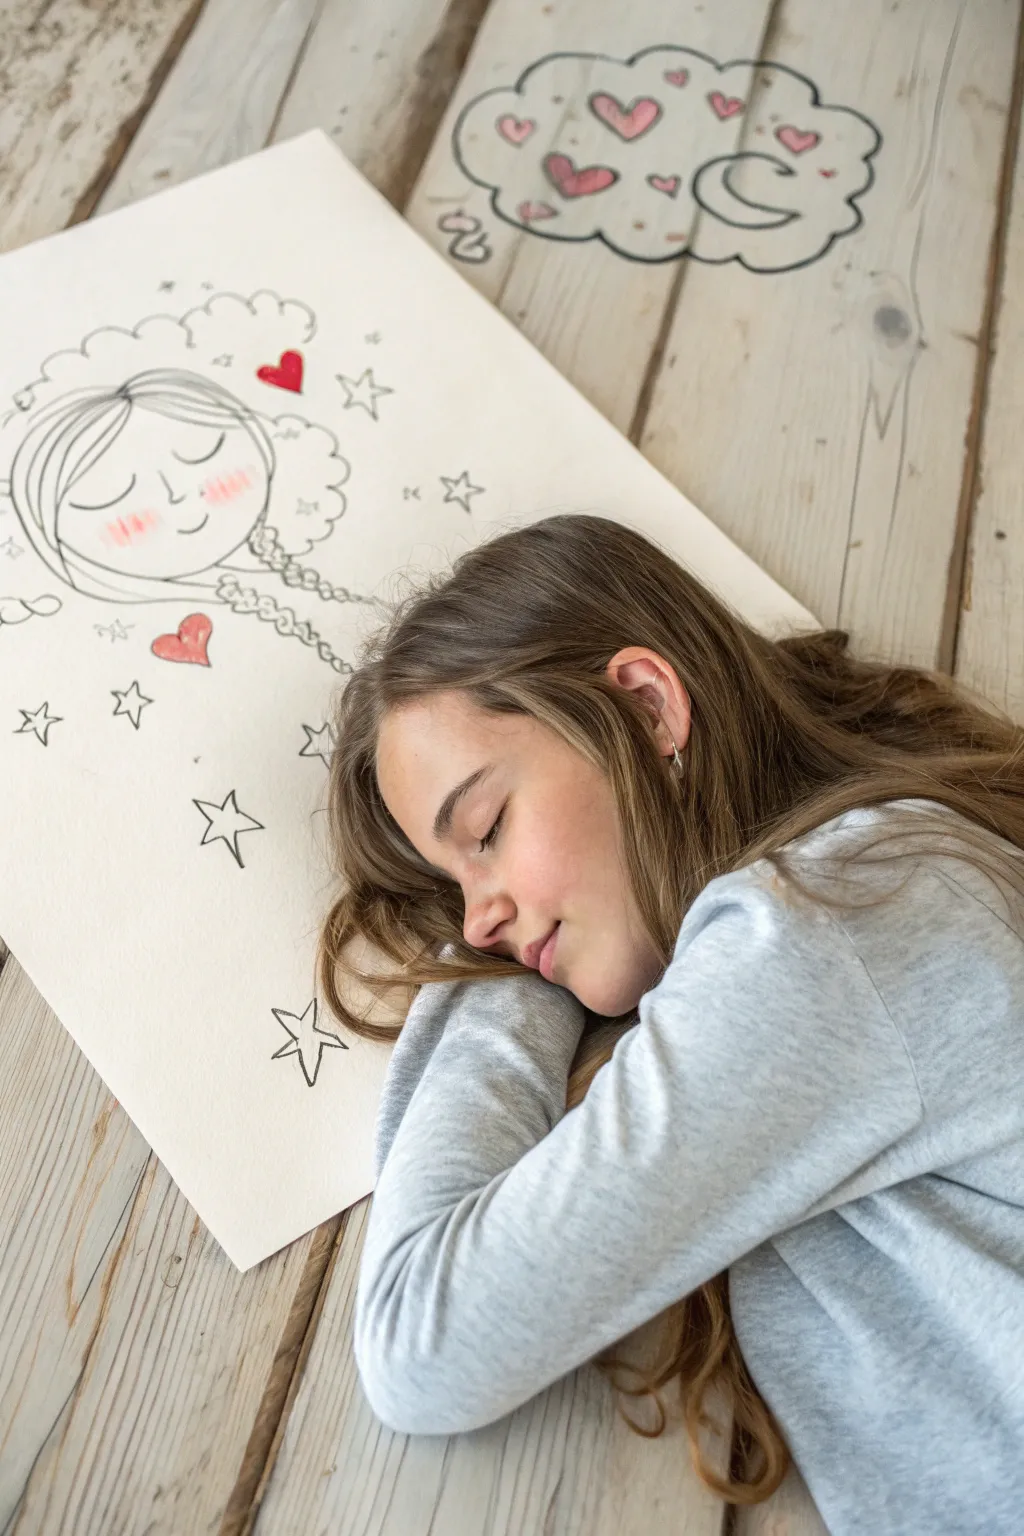
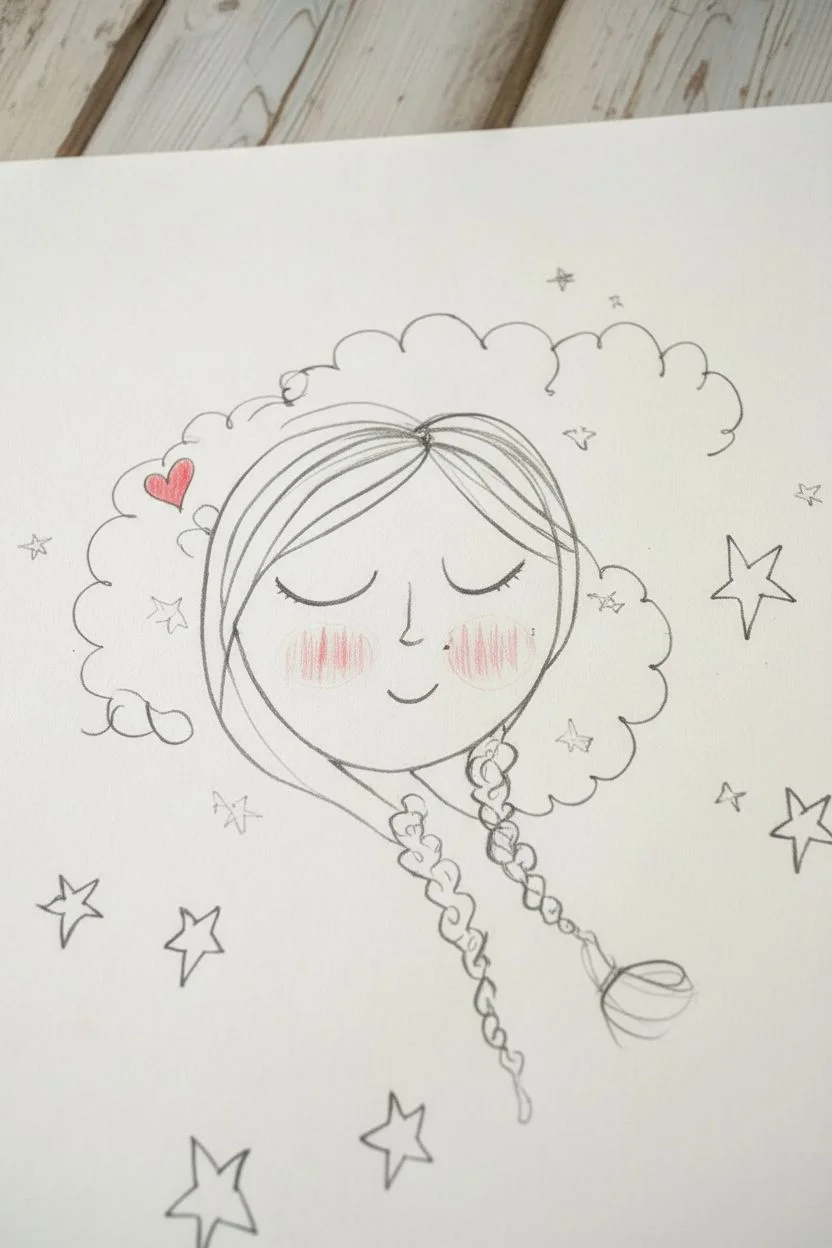
Capture the sweetness of dreams with this whimsical mixed-media drawing project. You’ll sketch a peaceful sleeping face surrounded by celestial doodles on a large sheet of paper, perfect for posing next to for a creative photo opportunity.
Detailed Instructions
Materials
- Large sheet of white drawing paper (A2 or similar size)
- Black fine-liner pen or marker
- Red colored pencil or crayon
- Graphite pencil for sketching
- Eraser
- Optional: Black paint for the background doodles on wood (if recreating the full scene)
Step 1: Sketching the Main Portrait
-
Position the head:
Start by lightly sketching a large oval shape on the bottom left side of your paper. Make sure it’s big enough to match the scale of a real face if you plan to pose with it. -
Draw the sleeping eyes:
In the center of the face, draw two gentle, downward-curving arcs for the closed eyelids. Add tiny upward flicks at the outer corners for eyelashes. -
Add facial features:
Sketch a simple ‘L’ shape or a small curve for the nose just below the eyes. Draw a small, upward-curved smile slightly to the right to suggest a happy dream. -
Outline the hair:
Draw sweeping lines from the top of the forehead down the sides to frame the face. Add a braid detail by drawing a series of interconnected heart-like shapes or loops extending down from one side. -
Add rosy cheeks:
Using your red colored pencil, lightly shade circular patches on the cheeks. I like to add vertical hatching lines over the red spots to give it a sketched, illustrative look.
Smudge Alert
Work from top to bottom if you’re right-handed (or vice versa) to avoid smearing fresh ink with your hand. If ink smudges, turn it into a shadow or a new doodle.
Step 2: Inking and Details
-
Ink the main lines:
Go over your pencil lines with a black fine-liner pen. Use a confident hand for the face outline and braid, allowing the lines to look hand-drawn and organic rather than perfectly smooth. -
Create the cloud hair:
Instead of drawing realistic hair at the top, draw a fluffy, cloud-like shape encompassing the top of the head. Use bumpy, scalloped lines. -
Add floating hearts:
Inside the cloud shape and floating near the braid, sketch a few simple hearts. Color them in solidly with your red pencil or marker. -
Erase guidelines:
Once the ink is completely dry, gently erase any visible graphite pencil marks to clean up the drawing.
Step 3: Adding the Dream World
-
Draw scattering stars:
Surround the portrait with hand-drawn stars. Draw these as five-pointed open shapes. Don’t worry about them being perfect; a little asymmetry adds charm. -
Create the thought bubble (Optional):
If you are drawing on a surface like the wooden floor shown, use washable paint or chalk. If sticking to paper, draw a separate large cloud shape above the main paper sheet. -
Fill the thought bubble:
Inside your thought bubble cloud, draw a large crescent moon and several floating hearts. Color the hearts red to tie them visually to the portrait. -
Final shading touches:
Add very light grey shading or cross-hatching to the crescent moon and the edges of the cloud to give them a bit of volume. -
Arrange the scene:
Place your finished drawing on the floor. If you created a separate thought bubble, position it above the drawing.
Collage It
Cut out paper hearts and stars from red and yellow construction paper and glue them onto the drawing for a 3D pop effect.
Now you have a sweet, dreamy artwork ready for a cozy photoshoot or wall display
Fashion Sketch Girl With A Statement Outfit
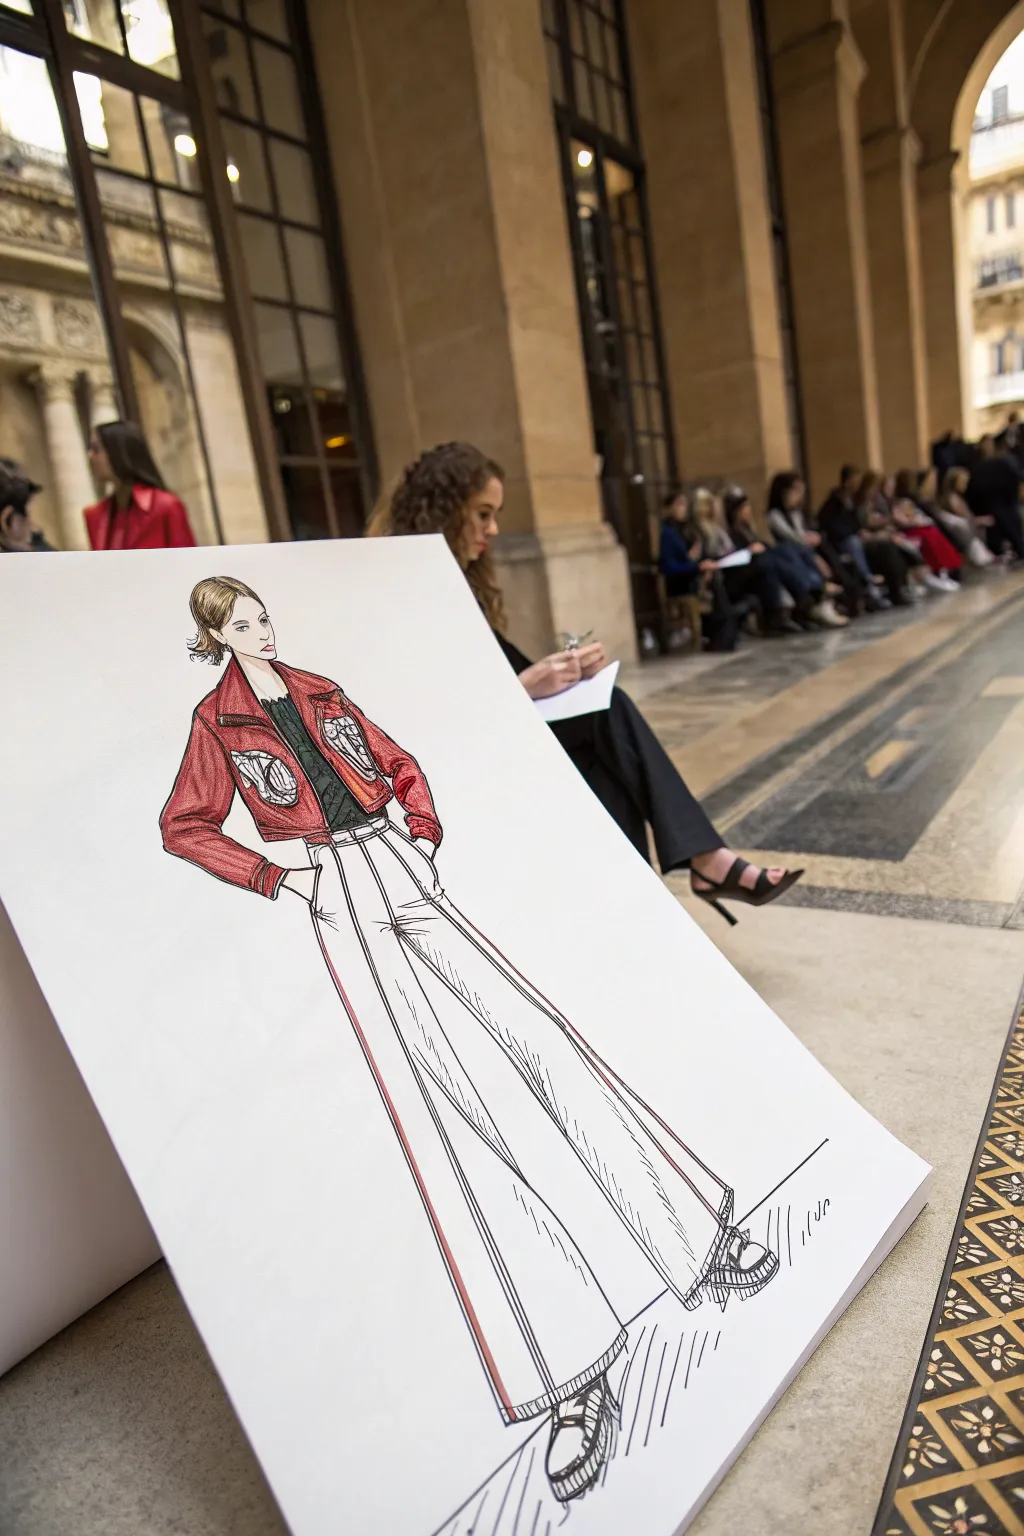
Capture the effortlessly cool vibe of street style with this dynamic fashion illustration featuring wide-leg trousers and a statement red jacket. This project combines classic croquis drawing techniques with bold marker work to create a professional-looking design sketch.
How-To Guide
Materials
- Heavyweight drawing paper or Bristol board (A3 or large format ideal)
- HB graphite pencil
- Kneaded eraser
- Fine liner pens (0.3mm and 0.5mm, black)
- Alcohol-based markers (Red, Dark Red, Dark Green/Black, Skin Tone)
- White gel pen (optional for highlights)
- Ruler
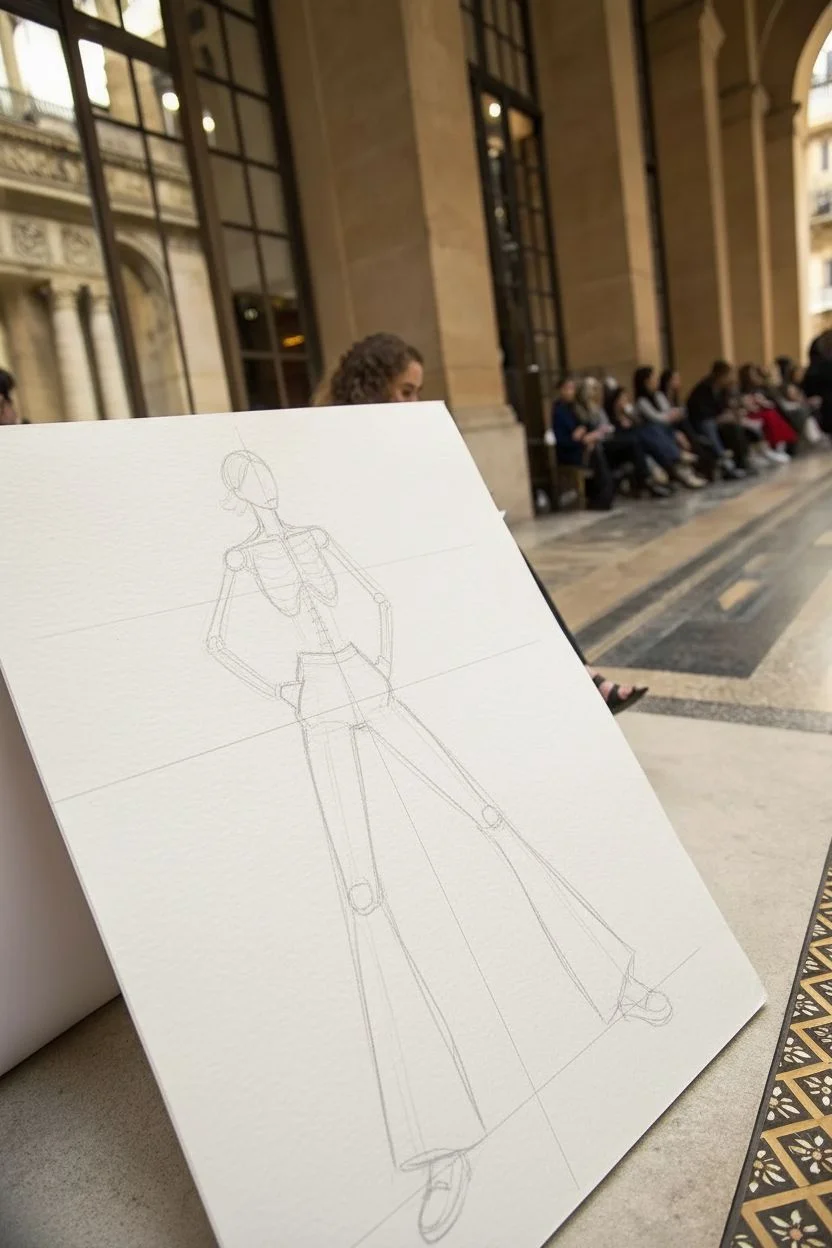
Step 1: Constructing the Pose
-
Establish the axis:
Begin by drawing a faint vertical line down the center of your page to act as the balance line. This ensures your figure stands straight and doesn’t look like she’s tipping over. -
Map body proportions:
Sketch a 9-head or 10-head proportion guide. Mark the head at the top, shoulders slightly below, waistline, hips, knees, and ankles. Since this is a fashion sketch, elongating the legs creates that stylistic, elegant look. -
Capture the stance:
Draw the ‘stick figure’ skeleton. Angle the shoulders and hips in opposite directions to create a dynamic ‘contrapposto’ pose. Position the legs wide apart in an A-line stance to support the wide trousers later. -
Flesh out the form:
Lightly sketch the shapes of the body over your skeleton. Focus on the tilt of the head and the placement of the hands, which will be tucked into pockets. Don’t worry about perfect anatomical details; focus on the flow.
Keep it loose
Don’t connect every single line perfectly. Leaving small gaps in outlines (especially on fabric folds) makes the sketch feel more modern and airy.
Step 2: Designing the Wardrobe
-
Outline the trousers:
Draw the high waistline of the trousers. Extend long, sweeping lines down from the hips to the floor, widening significantly as you go down to create that dramatic wide-leg silhouette. -
Add trouser details:
Sketch the center creases on each pant leg to give them volume. Add the pocket openings at the hips where the hands will disappear. -
Draft the jacket:
Sketch a cropped jacket shape sitting just above the hip line. Draw wide lapels and slightly oversized sleeves to contrast with the fitted waist. -
Refine clothing features:
Add details like the prominent pockets on the jacket front and the texture of the ribbed cuffs. Sketch the platform shoes peeking out from under the hem of the trousers.
Fabric Texture
Use a nearly dry marker to drag quick strokes across the trousers. This creates a ‘dry brush’ effect that mimics the texture of denim or linen.
Step 3: Inking and Coloring
-
Define lines with ink:
Switch to your 0.3mm fine liner. Go over your pencil lines, using quick, confident strokes. For the clothing folds, use broken lines to suggest movement rather than rigid outlines. -
Erase guidelines:
Once the ink is completely dry, gently remove all graphite sketch lines with your kneaded eraser to clean up the drawing. -
Color the jacket:
Use a bright red alcohol marker to fill in the jacket. Leave small slivers of white paper exposed on the shoulders and upper arms to act as natural highlights. -
Add depth to the red:
With a darker red marker, shade the areas under the lapels, inside the elbows, and beneath the pockets to create dimension. -
Detail the inner shirt:
Color the shirt underneath using a dark green or black marker. I find that leaving a slightly scratchy texture here adds visual interest similar to lace or textured fabric. -
Stripe the trousers:
Use your ruler and the red fine liner or marker to draw the bold vertical stripes down the sides of the trousers. -
Skin and hair:
Apply a light wash of skin tone to the face and neck. Sketch the hair with loose, wavy strokes using a light brown or dark blonde marker. -
Final touches:
Add grounding shadows near the feet with diagonal hatch marks to anchor the figure to the floor. Strengthen the darkest outlines with a 0.5mm pen for contrast.
Now you have a striking fashion illustration ready for your portfolio
Girl With Galaxy Hair And Floating Star Accessories
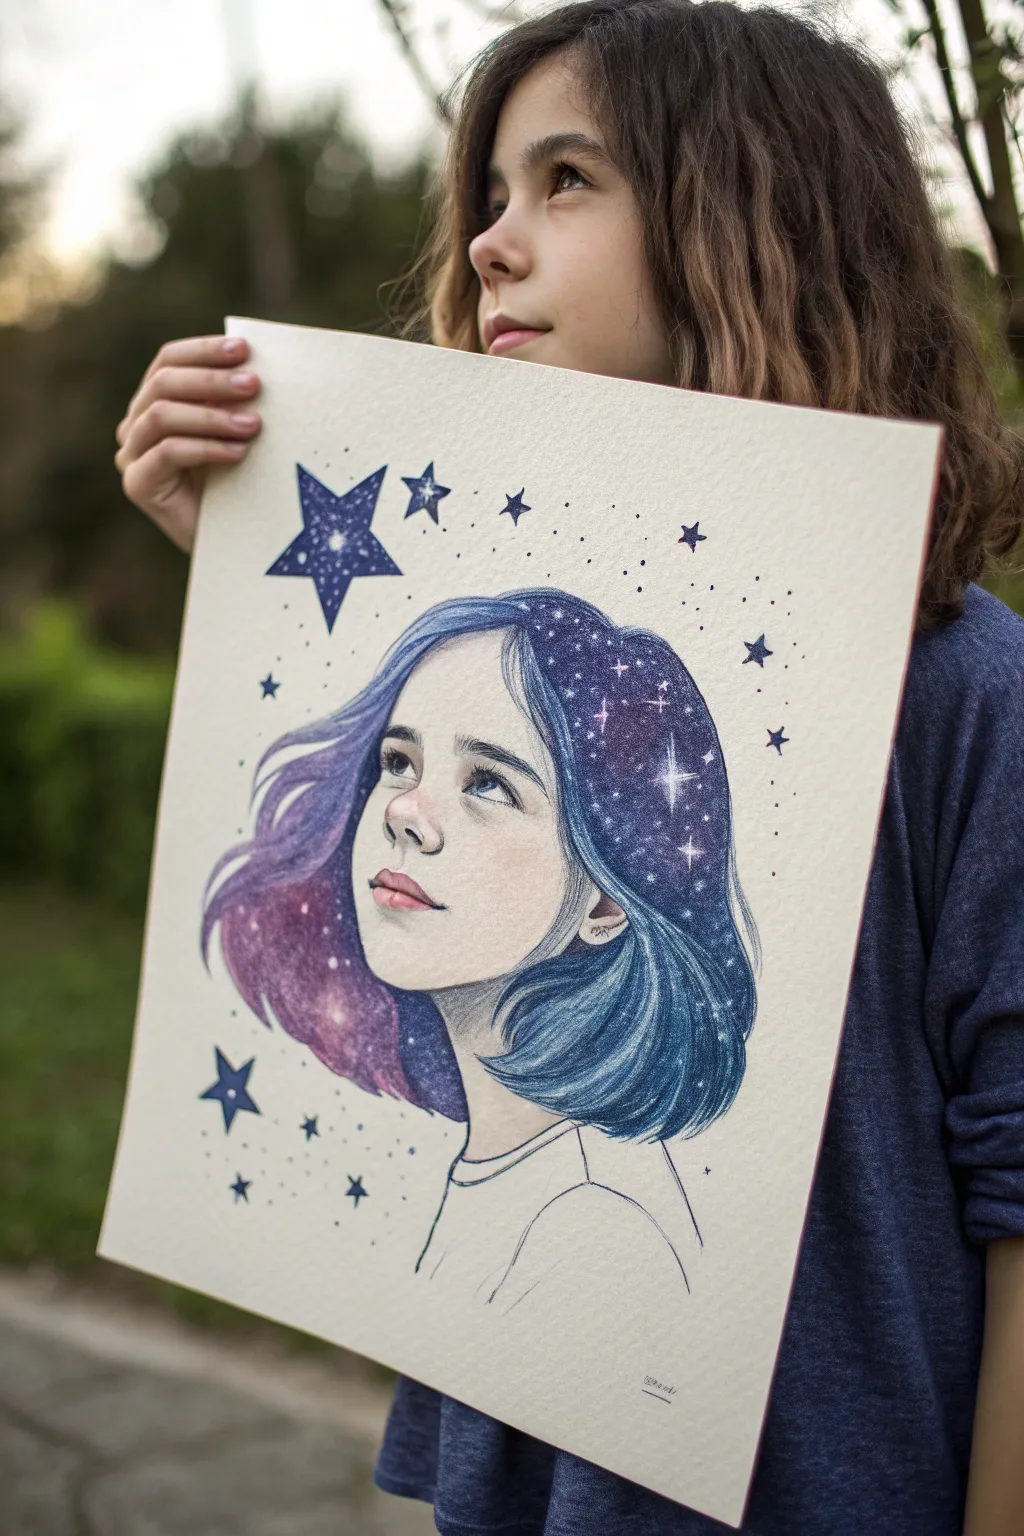
Capture the magic of the universe within a portrait by blending celestial colors into flowing hair. This drawing combines delicate facial features with bold, starry textures, creating a dreamy and ethereal piece perfect for aspiring artists.
Step-by-Step
Materials
- Heavyweight drawing paper or mixed media paper (lightly textured)
- H or HB graphite pencil for sketching
- Soft hi-polymer eraser
- Colored pencils (wax or oil-based): Indigo, Violet, Magenta, Light Blue, White, Peach/Skin tones
- Fine liner pen (0.1mm or smaller, black or dark grey)
- White gel pen or white gouache with a fine brush
Step 1: The Initial Sketch
-
Map the face:
Begin with a very light graphite sketch. Draw an oval for the head tilted slightly upward. Use guidelines to place the eyes higher than usual to emphasize the upward gaze, and mark the nose and mouth positions. -
Outline the hair:
Sketch the hair shape as a solid mass framing the face. Instead of individual strands, think of the hair as a container for your galaxy. Keep the lines smooth and flowing, tucking some behind the ear. -
Refine facial features:
Lightly draw the eyes looking up, adding irises and pupils. Refine the nose shape—keep it minimal, mostly focusing on the nostrils and tip—and draw the lips slightly parted. -
Place the stars:
Before coloring, lightly sketch the positions of the larger floating stars around the head so you don’t color over them later.
Uneven Hair Blend?
If your colored pencils look scratchy or won’t blend, apply a colorless blender pencil or a tiny specific amount of baby oil on a cotton swab to smooth the wax pigments together.
Step 2: Coloring the Face
-
Base skin tone:
Using a light peach or skin-tone pencil, gently shade the face. Use circular motions to keep the texture smooth. Keep the pressure very light. -
Add rosy cheeks:
Layer a soft pink or coral color onto the cheeks and the tip of the nose to give life to the character. This blush effect softens the look significantly. -
Define the eyes:
Using a dark blue or grey, fill in the irises, leaving a tiny white spot for the highlight. Outline the upper lash line firmly but keep the bottom lash line very faint. -
Detail the lips:
Color the lips with a rose pink, focusing the darkest pigment on the center line where the lips meet, fading out toward the edges.
Pro Tip: Paper Tooth
Use paper with a slight texture (vellum surface). Very smooth paper won’t hold enough layers of pencil to create that deep, rich galaxy color saturation.
Step 3: Creating the Galaxy Hair
-
Create the gradient base:
Start coloring the hair from the roots. Apply indigo blue at the top and underneath the ends where shadows would naturally fall. -
Blend in purples:
Transition from the dark blue into violets and magentas. I like to overlap the colors slightly to create a seamless gradient. Let some areas remain lighter blue. -
Deepen the contrast:
Go back in with your darkest indigo or even a touch of black pencil in the deepest shadows of the hair to make the colors pop. -
Simulate hair texture:
Use a sharpened colored pencil to draw fine, sweeping lines over your colored areas. This suggests individual strands without losing the galaxy effect.
Step 4: Stars and Final Touches
-
Fill the large stars:
Color the large floating stars with navy blue, leaving the edges crisp. You can add a slight gradient inside them for depth. -
Add the constellations:
Take your white gel pen or white gouache. Dot tiny stars directly onto the dark parts of the hair. Vary the size of the dots to mimic a real night sky. -
Draw distinctive shines:
Create a few ‘cross’ shaped stars (four points) in the hair to represent brighter glimmering stars. Place these over the darkest blue sections for maximum contrast. -
Ink the outlines:
Using a very fine liner (0.05 or 0.1), carefully trace the main contours of the face and neck. Keep the lines near the hair delicate. -
Connect the floating elements:
Add tiny stippling dots with your fine liner around the large floating stars, creating a sense of cosmic dust drift.
Step back and admire how you’ve turned a simple portrait into a window to the stars


Have a question or want to share your own experience? I'd love to hear from you in the comments below!