If you’re in the mood for cozy color and satisfying brushstrokes, pumpkin painting on canvas is the sweetest place to start. I pulled together my favorite ideas that feel beginner-friendly upfront, then get more playful and unexpected as you go.
Classic Orange Pumpkin With Soft Shadows
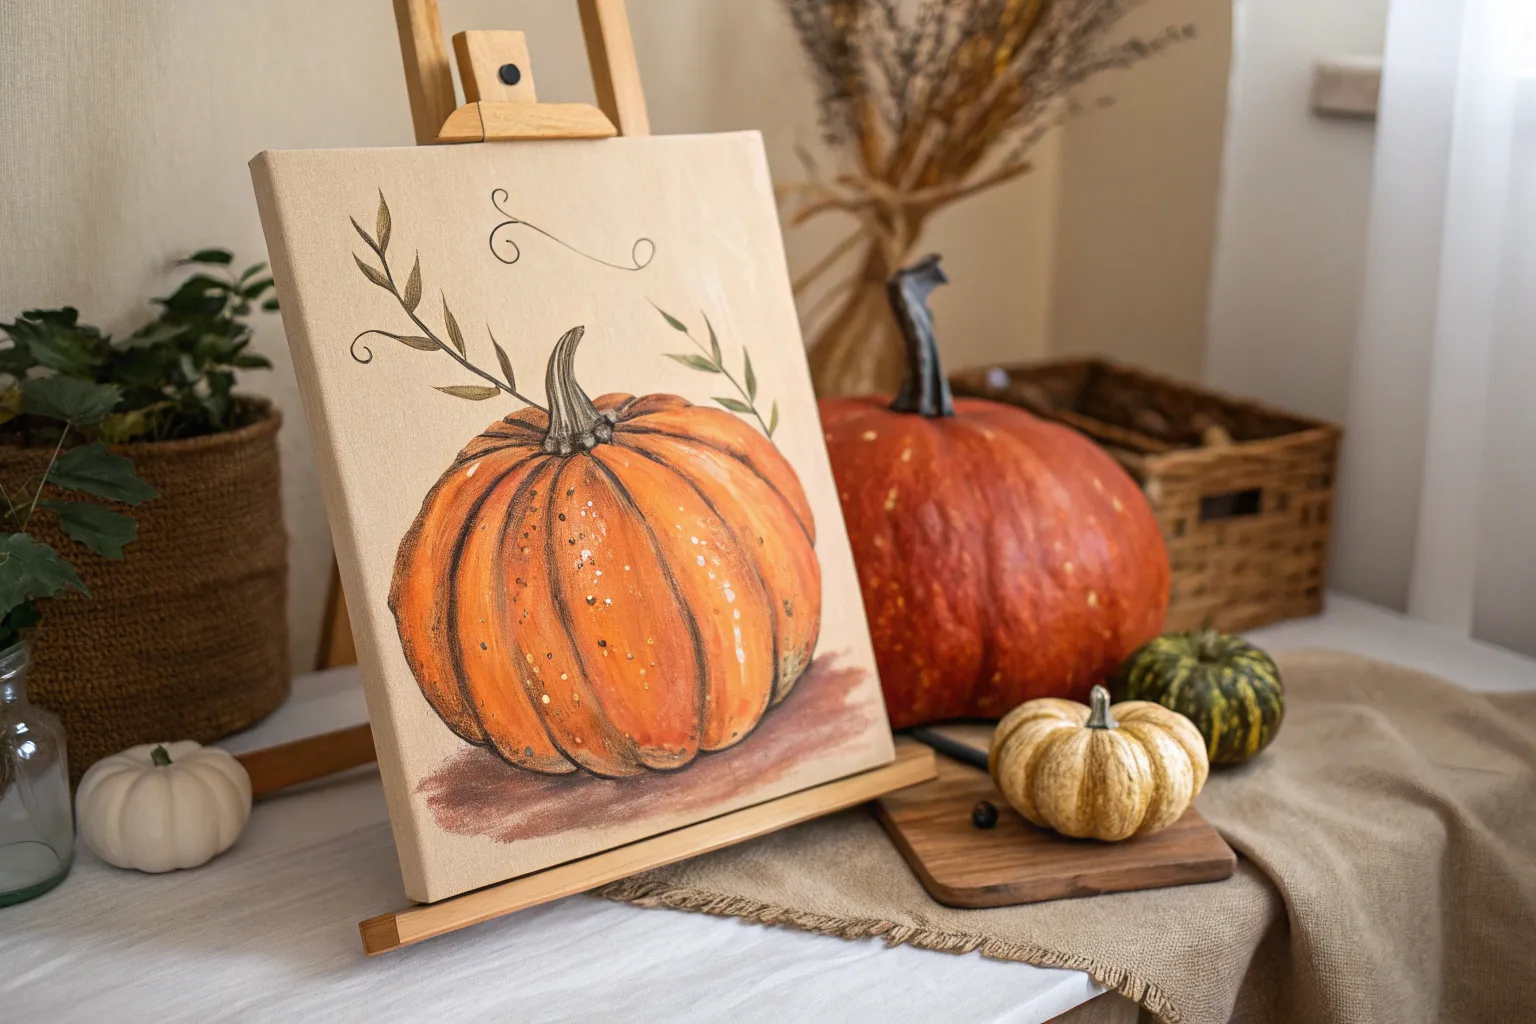
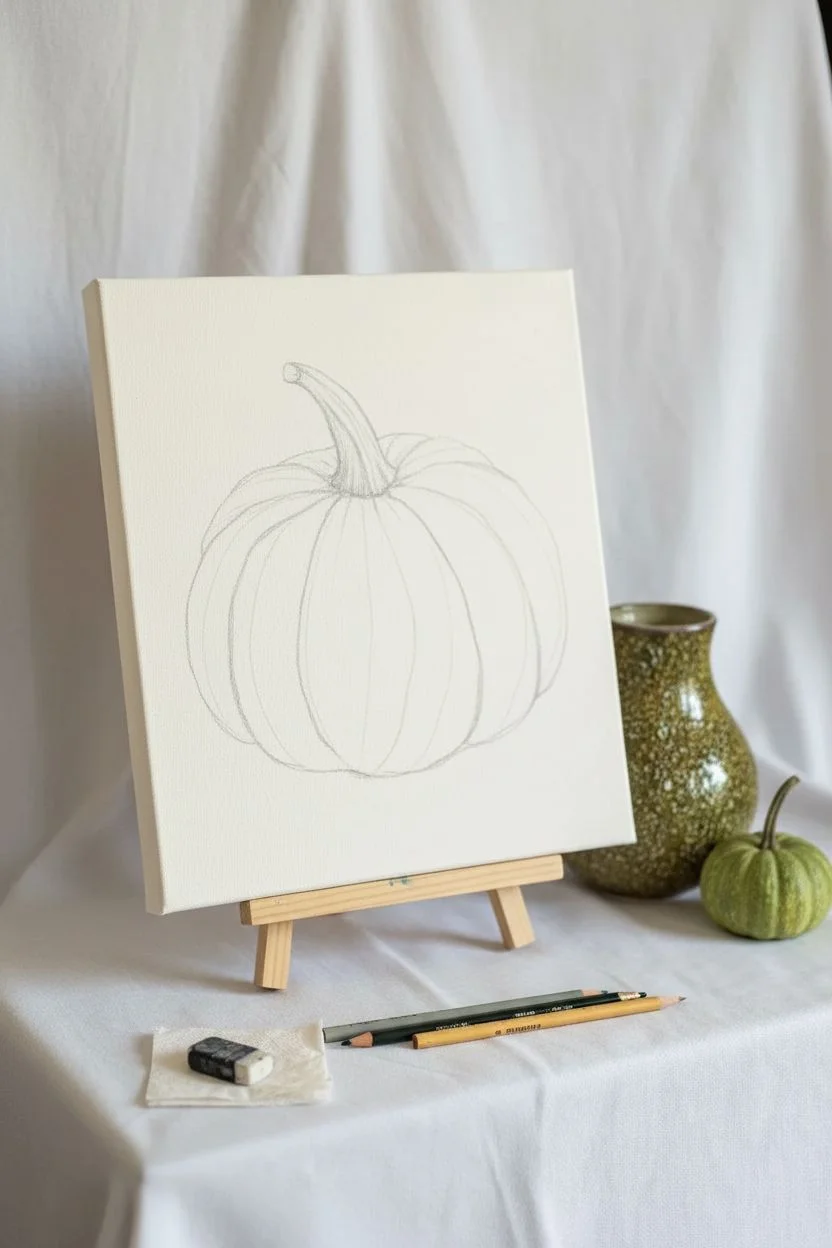
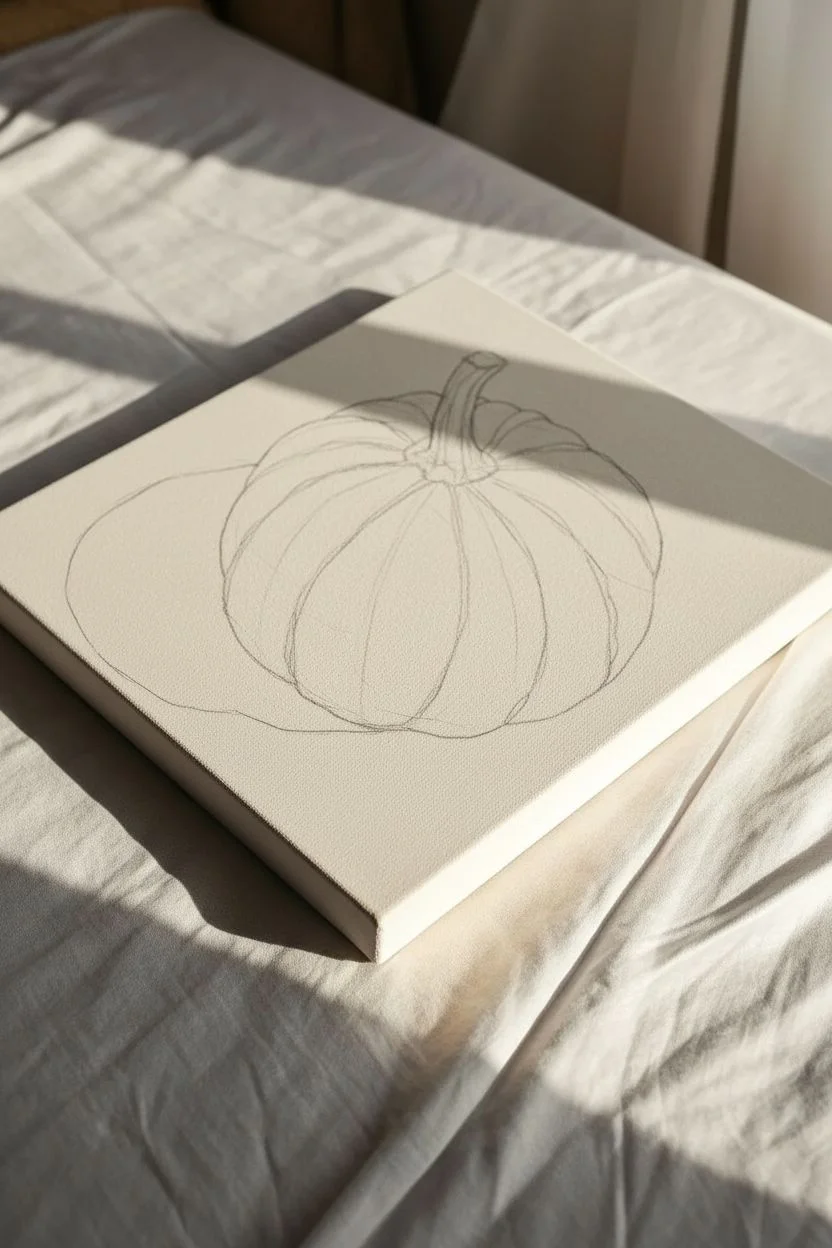
Capture the essence of autumn with this classic pumpkin study, featuring rich orange tones and a striking stem against raw linen. This project focuses on building form through layers and using the negative space of natural canvas to create a sophisticated, rustic look.
How-To Guide
Materials
- Deep profile canvas (beige or unbleached linen finish)
- Acrylic paints (Cadmium Orange, Burnt Sienna, Yellow Ochre, Titanium White, Hooker’s Green, Raw Umber)
- Small flat brush (size 6)
- Fine round liner brush (size 1)
- Graphite pencil (HB or lighter)
- Palette or paper plate
- Cup of water and paper towels
Step 1: Planning and Sketching
-
Analyze the Composition:
Note that the pumpkin sits centrally but slightly lower on the canvas, allowing the stem to reach upward into the blank space. The background is left completely unpainted to highlight the canvas texture. -
Sketch the Outline:
Using a light hand and your graphite pencil, draw a wide oval shape for the pumpkin’s body. Divide this oval into curved segments (ribs) that radiate from a central top point. -
Add the Stem:
Refine the top center point by drawing a curved stem. Give it a slightly twisted, organic feel, tapering it towards the end and widening where it meets the pumpkin. -
Define the Ribs:
Go back over your pumpkin segments. Make sure the lines curve outward to suggest roundness, creating deep grooves between the ‘slices’ of the pumpkin.
Step 2: Painting the Body
-
Base Color Mixing:
Mix Cadmium Orange with a touch of Yellow Ochre to create a warm, mid-tone orange. This will be your primary base color. -
First Layer Application:
Using the flat brush, fill in each rib segment with your base color. Keep the paint relatively thin so the canvas texture subtly shows through, maintaining that rustic aesthetic. -
Adding Highlights:
While the first layer is still slightly tacky, mix a bit of Titanium White into your base orange. Apply this lighter shade to the center of each rib segment where the light would naturally hit the roundest part. -
Creating Depth:
Mix Cadmium Orange with Burnt Sienna to create a shadow tone. Carefully paint along the sketch lines between the ribs to define the grooves. -
Blending the Curve:
Use a clean, slightly damp brush to gently blend the shadow tone from the grooves inward toward the highlighted centers. This creates the illusion of rounded, 3D volume.
Fixing “Muddy” Colors
If your orange and green mix into brown where they meet, let the orange layer dry completely before painting the stem. Acrylics layer best when dry.
Step 3: The Stem and Shadows
-
Base Green Tone:
Mix Hooker’s Green with a tiny dot of Raw Umber to desaturate it. Paint the entire stem with this earthy green mixture. -
Stem Texture:
After the green dries, use your fine liner brush with a lighter green (mix in some Yellow Ochre) to add tiny vertical strokes up the stem, mimicking its fibrous texture. -
Connecting Stem to Body:
Darken the base of the stem where it attaches to the pumpkin using Raw Umber. Blend this slightly downwards onto the top of the orange ribs to show connection. -
Cast Shadow Mix:
Create a transparent wash using heavily watered-down Raw Umber. Test the opacity on a scrap paper first; you want a faint, watery shadow, not a solid block of color. -
Painting the Ground Shadow:
Apply the wash in an oval shape underneath the pumpkin. I find it works best to keep the edges soft and slightly irregular rather than perfect. -
Deepening the Contact Point:
Add a second, more concentrated layer of the shadow wash directly underneath the bottom curve of the pumpkin where it touches the ‘ground’ to anchor the painting.
Go 3D with Texture
Mix a dab of modeling paste into your highlight color. Apply it to the center of the pumpkin ribs for physical texture that catches the light.
Step 4: Final Details
-
Checking Contrast:
Step back and assess your values. If the pumpkin looks flat, add a touch more white highlight to the very center of the front-most rib. -
Refining Dark Lines:
Use your fine liner brush with thin Burnt Sienna to crisp up the deepest crevices between the ribs if they got lost during blending. -
Signature Touch:
Sign your name near the shadow area using the fine liner brush and darkened paint for a professional finish.
Now you have a charming piece of fall decor that celebrates simplicity and warmth


Two Overlapping Pumpkins for Instant Depth
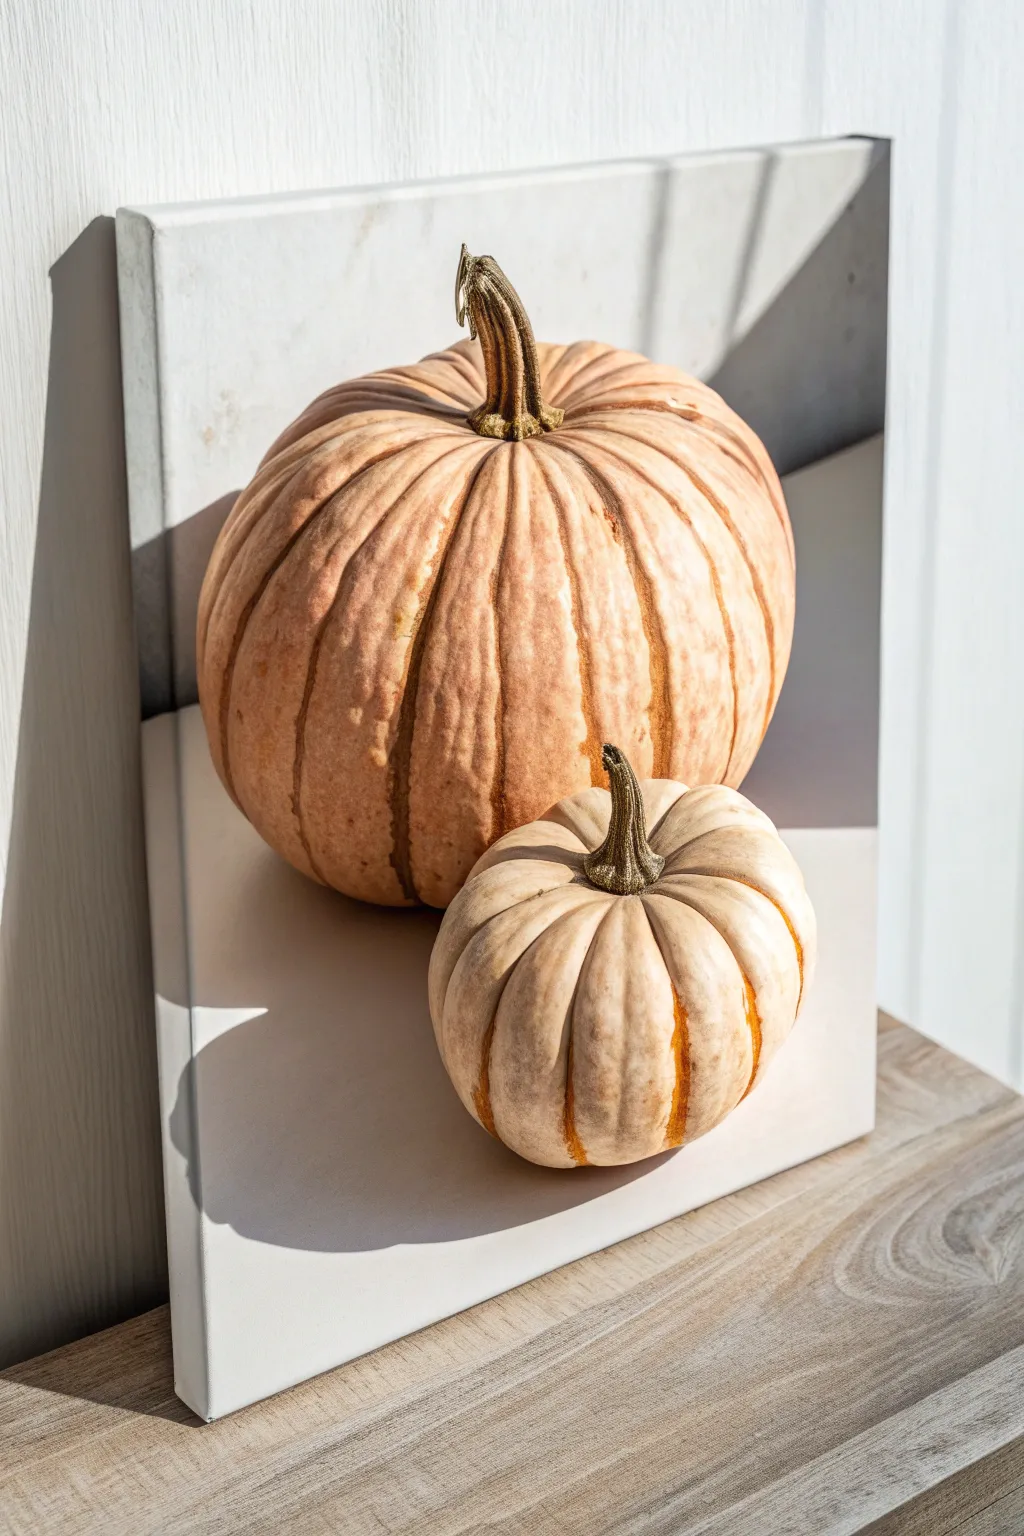
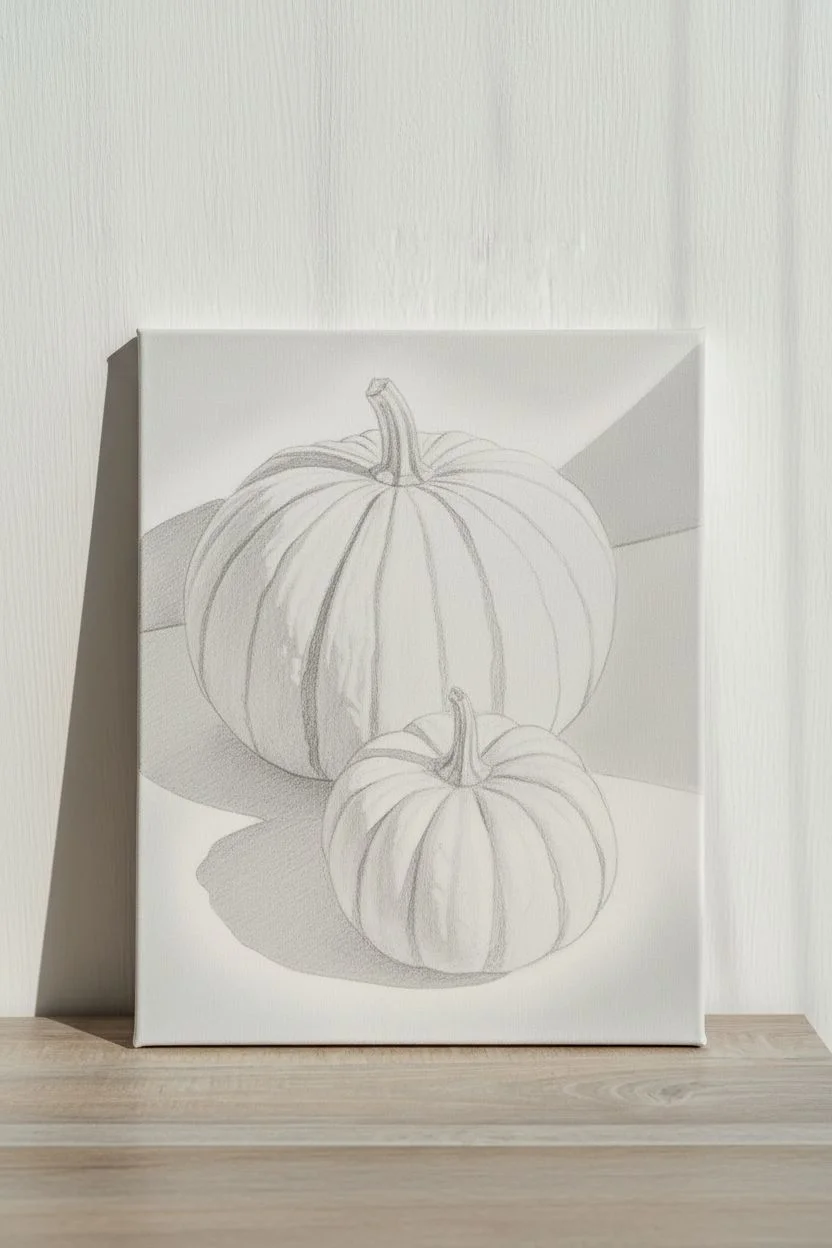
Capture the subtle elegance of autumn with this realistic painting of two overlapping heirloom pumpkins. The soft, muted orange tones and deep ribbing create a dimensional, farmhouse-style piece perfect for seasonal decor.
Step-by-Step
Materials
- Stretched canvas (rectangular)
- Acrylic paints (Titanium White, Burnt Umber, Yellow Ochre, Raw Sienna, unbleached Titanium)
- Assorted brushes (flat wash, angled shader, fine liner)
- Palette knife
- Water cup and paper towels
- Pencil for sketching
- Matte varnish (optional)
Step 1: Setting the Scene
-
Initial Sketch:
Begin by lightly sketching the outline of the larger pumpkin in the center-left of your canvas. It should fill a significant portion of the space. -
Adding the Foreground:
Draw the smaller pumpkin in front of the larger one, positioning it slightly to the right so it overlaps the bottom section of the big pumpkin. This overlap is crucial for creating instant depth. -
Defining Ribs:
Sketch the curved vertical lines that define the ribs of both pumpkins. Ensure the lines curve outward from the stem area and tuck back under at the bottom to show volume. -
Background Blocking:
Mix a very pale gray using white and a tiny dot of black or burnt umber. Paint the background walls and the ledge they are sitting on, keeping the strokes smooth and clean to mimic a minimalist setting. -
Shadow Mapping:
I find it helpful to identify where the light hits before painting. Mark the strong cast shadow to the left of the pumpkins on the background wall and the shadow cast by the small pumpkin onto the ledge.
Step 2: Layering the Pumpkins
-
Base Color Mixing:
Create a muted ‘heirloom’ orange by mixing Yellow Ochre, a touch of Raw Sienna, and plenty of Titanium White or Unbleached Titanium. You want a creamy, peachy tone, not a bright jack-o’-lantern orange. -
First Coat:
Apply this base color to both pumpkins, filling in the shapes completely. Don’t worry about the ribs yet; just get good, solid coverage. -
Deepening Values:
Mix Burnt Umber into your base orange to create a shadow tone. Paint this darker color into the crevices between the ribs you sketched earlier. -
Blending the Ribs:
While the paint is still slightly tacky, use a soft, damp brush to blend the shadow lines outward into the lighter sections. This softens the transition and makes the pumpkins look round rather than striped. -
Adding Highs:
Mix a highlight shade using mostly Titanium White with a whisper of Yellow Ochre. Apply this to the center of each rib where the light would naturally hit the highest point of the curve.
Natural Texture
For realistic skin texture, try dry-brushing tiny speckles or dots of brown and dark orange near the bottom of the pumpkins to mimic natural blemishes.
Step 3: Details & Shadows
-
Small Pumpkin Variation:
For the smaller foreground pumpkin, mix a slightly paler version of your base color to help visually separate it from the larger one behind it. -
Deep Shadows:
Use a mix of Burnt Umber and a tiny bit of dark blue or black to paint the deepest shadows—specifically right where the two pumpkins touch and at their bases. -
Painting the Stems:
Using a fine liner brush and dark brown paint, carefully stroke in the stems. Add texture by using quick, short vertical strokes, layering lighter browns on top for a woody look. -
Cast Shadows:
Paint the cast shadows on the wall and ledge using a transparent wash of gray-brown. The shadow should be darkest right next to the object and fade out slightly as it extends. -
Final Highlights:
Add tiny, pure white accents to the very tops of the pumpkin shoulders and the tips of the stems to make the form pop. -
Clean Up:
Check the edges where the pumpkins meet the white background. Use your background color to tidy up any messy outlines for a crisp finish.
Warm Glow
Glaze the finished painting with a very watered-down layer of Yellow Ochre over just the highlighted areas to give the lighting a warm, sunny afternoon feel.
Step back and admire how the simple overlap creates a convincing 3D effect on your canvas


A Trio of Pumpkins in a Balanced Composition
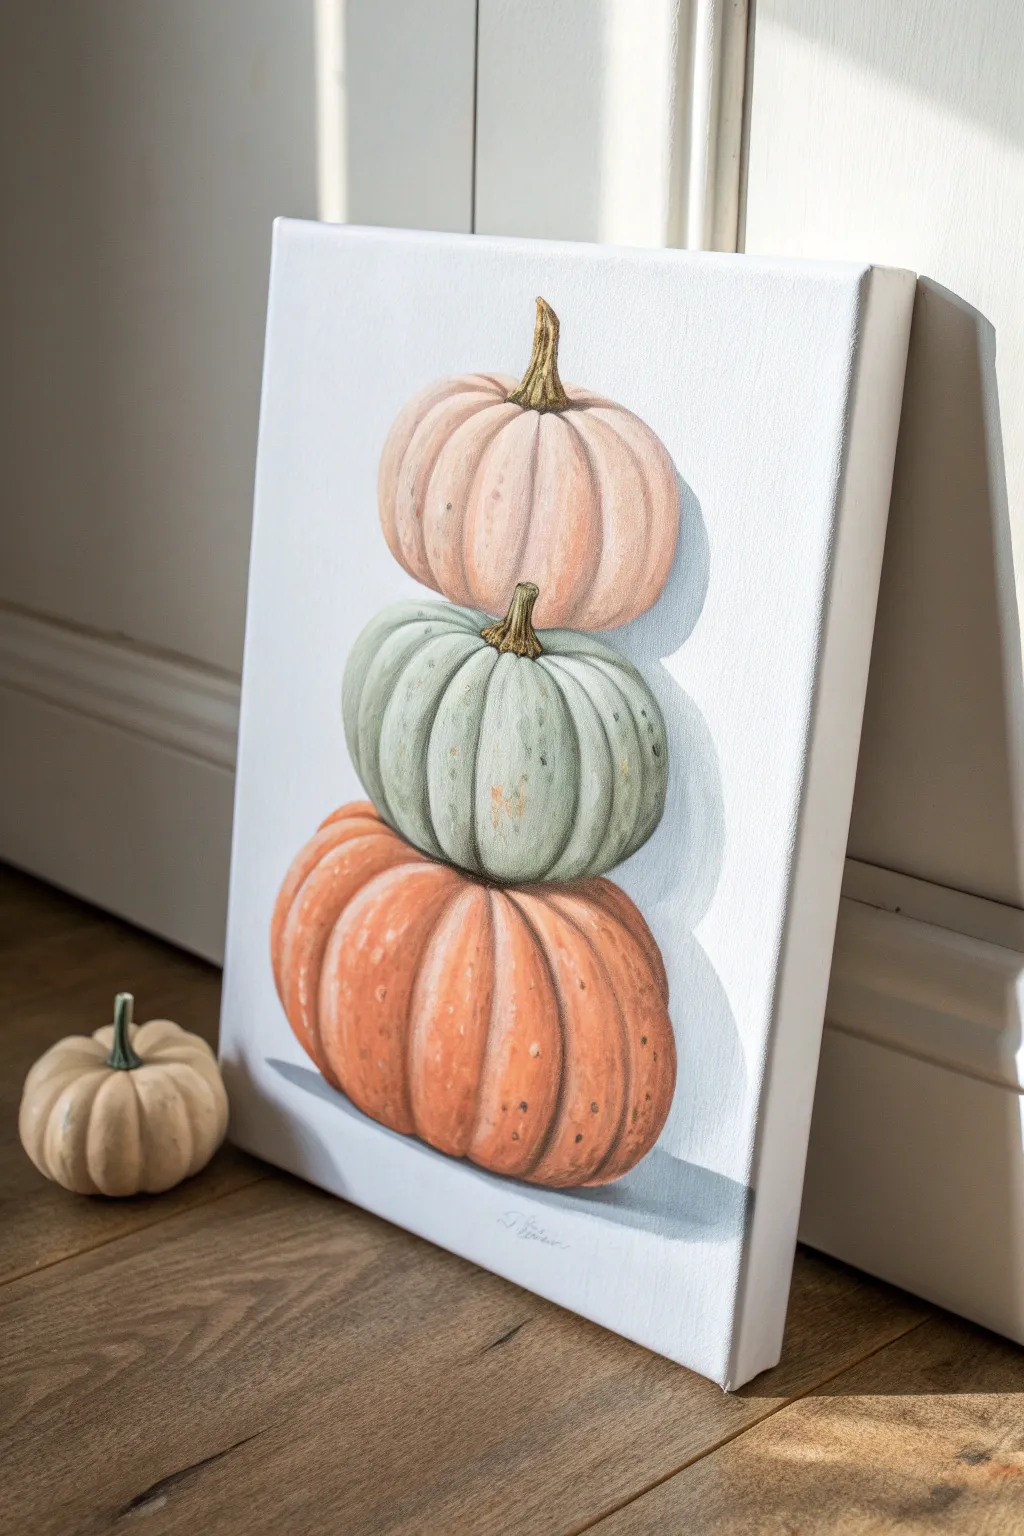
Capture the cozy essence of autumn with this graceful vertical composition featuring three heirloom pumpkins in soft, muted tones. The gentle stacking of peachy-pink, sage green, and classic orange creates a harmonious balance perfect for modern farmhouse decor.
Step-by-Step Guide
Materials
- Rectangular stretched canvas (e.g., 11×14 or 12×16 inches)
- Acrylic paints: Titanium White, Burnt Sienna, Yellow Ochre, Cadmium Orange, Sap Green, Payne’s Grey, Raw Umber
- Flat brush (medium)
- Round brush (small for details)
- Filbert brush (medium for curves)
- Palette for mixing
- Pencil and eraser
- Cup of water and paper towels
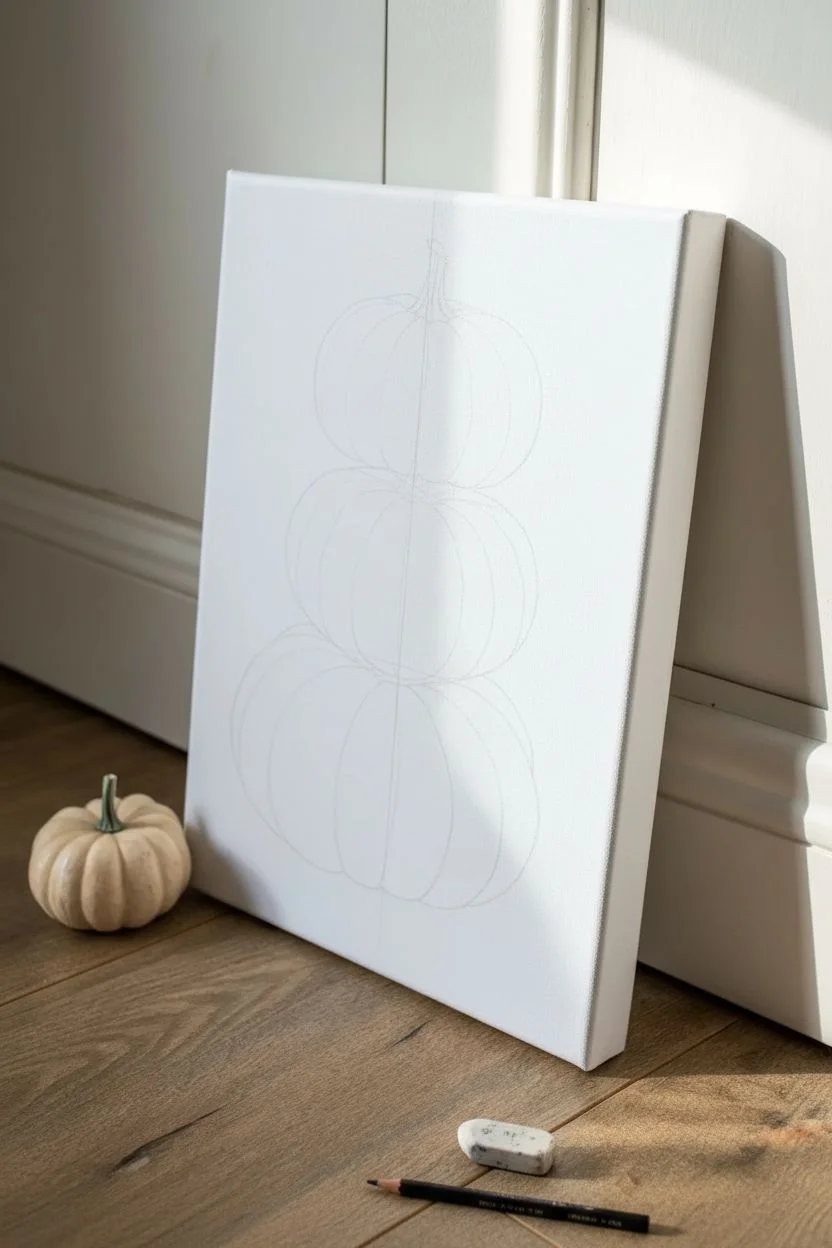
Step 1: Sketching the Composition
-
Establish the vertical axis:
Begin by lightly drawing a vertical line down the center of your canvas with a pencil. This guide will help ensure your pumpkin stack doesn’t lean to one side. -
Map out the shapes:
Sketch three ovals stacked on top of each other. Make the bottom oval the largest and widest, the middle one slightly smaller, and the top one the smallest to create a stable pyramid shape. -
Define the pumpkin ribs:
Draw curved lines radiating from the center top of each oval down to the bottom. These lines define the distinct sections or ‘ribs’ of the pumpkins. Don’t worry about perfect symmetry; organic irregularities look more realistic. -
Add the stems:
Sketch a short, twisted stem emerging from the top of the upper two pumpkins. For the bottom pumpkin, the stem is hidden by the one sitting on top of it, so just imply the depression where the middle pumpkin sits.
Step 2: Blocking in Base Colors
-
Mix the bottom orange:
Combine Cadmium Orange with a touch of Burnt Sienna and a tiny bit of White to create a warm, earthy orange. Apply this to the bottom pumpkin using your filbert brush, following the curve of the ribs. -
Create the sage green:
Mix Sap Green with plenty of White and a tiny dot of Payne’s Grey or Raw Umber to desaturate it. Paint the middle pumpkin with this soft, muted green, ensuring smooth coverage. -
Blend the blush pink:
For the top pumpkin, mix a large amount of Titanium White with a very small amount of Cadmium Orange and a whisper of Burnt Sienna. You want a pale, fleshy pink tone. -
Background wash:
While the pumpkins dry, paint the background with clean Titanium White. If you want a slight shadow effect like the reference, add a tiny drop of grey to the white for the area directly behind the pumpkins to make them pop.
Brushstroke Direction
Always paint your brushstrokes in the curve of the pumpkin (top to bottom like a quote mark). Horizontal strokes will flatten the shape, while curved strokes create roundness.
Step 3: Adding Dimension and Detail
-
Shading the orange pumpkin:
Mix a darker version of your orange using more Burnt Sienna. Paint this darker shade into the crevices between the ribs and at the very bottom of the pumpkin to create volume. -
Highlighting the orange pumpkin:
Add more White to your original orange mix. Apply this lighter tone to the center of each rib where the light would naturally hit, blending the edges softly into the base color. -
Contouring the green pumpkin:
Follow the same shading process for the middle pumpkin. darken your sage mix with a little more green and brown for the deep creases, and add white for the rounded tops of the ribs. -
Softening the pink pumpkin:
I like to keep the top pumpkin very soft. Use a slightly darker peach tone for the shadows between segments, and almost pure white for the highlights on the rounded parts. -
Painting the stems:
Using a small round brush, paint the stems with a mix of Raw Umber and Yellow Ochre. Add tiny streaks of darker brown to simulate the woody texture. -
Adding texture specs:
For a realistic heirloom look, dilute a bit of Burnt Sienna with water. Lightly flick or dab tiny specks onto the pumpkin skins, focusing heavily on the green and pink ones.
Try Metallic Accents
For a glamorous twist, use metallic gold paint for the stems or lightly dry-brush gold over the highest points of the ribs to catch the light beautifully.
Step 4: Final Touches
-
Cast shadows:
Mix a transparent glaze of Payne’s Grey and a lot of water (or glazing medium). Paint a soft shadow on the top of the orange pumpkin where the green one sits, and on the green one where the pink one sits. -
Grounding shadow:
Paint a horizontal cast shadow underneath the bottom pumpkin using a cool grey mix. This grounds the stack so it doesn’t look like it’s floating. -
Refining edges:
Use your smallest brush with white paint to clean up the background edges against the pumpkins if any paint went outside the lines.
Once dry, verify your highlights and shadows one last time to ensure your stack has plenty of depth and dimension


Dark Background That Makes the Pumpkin Pop
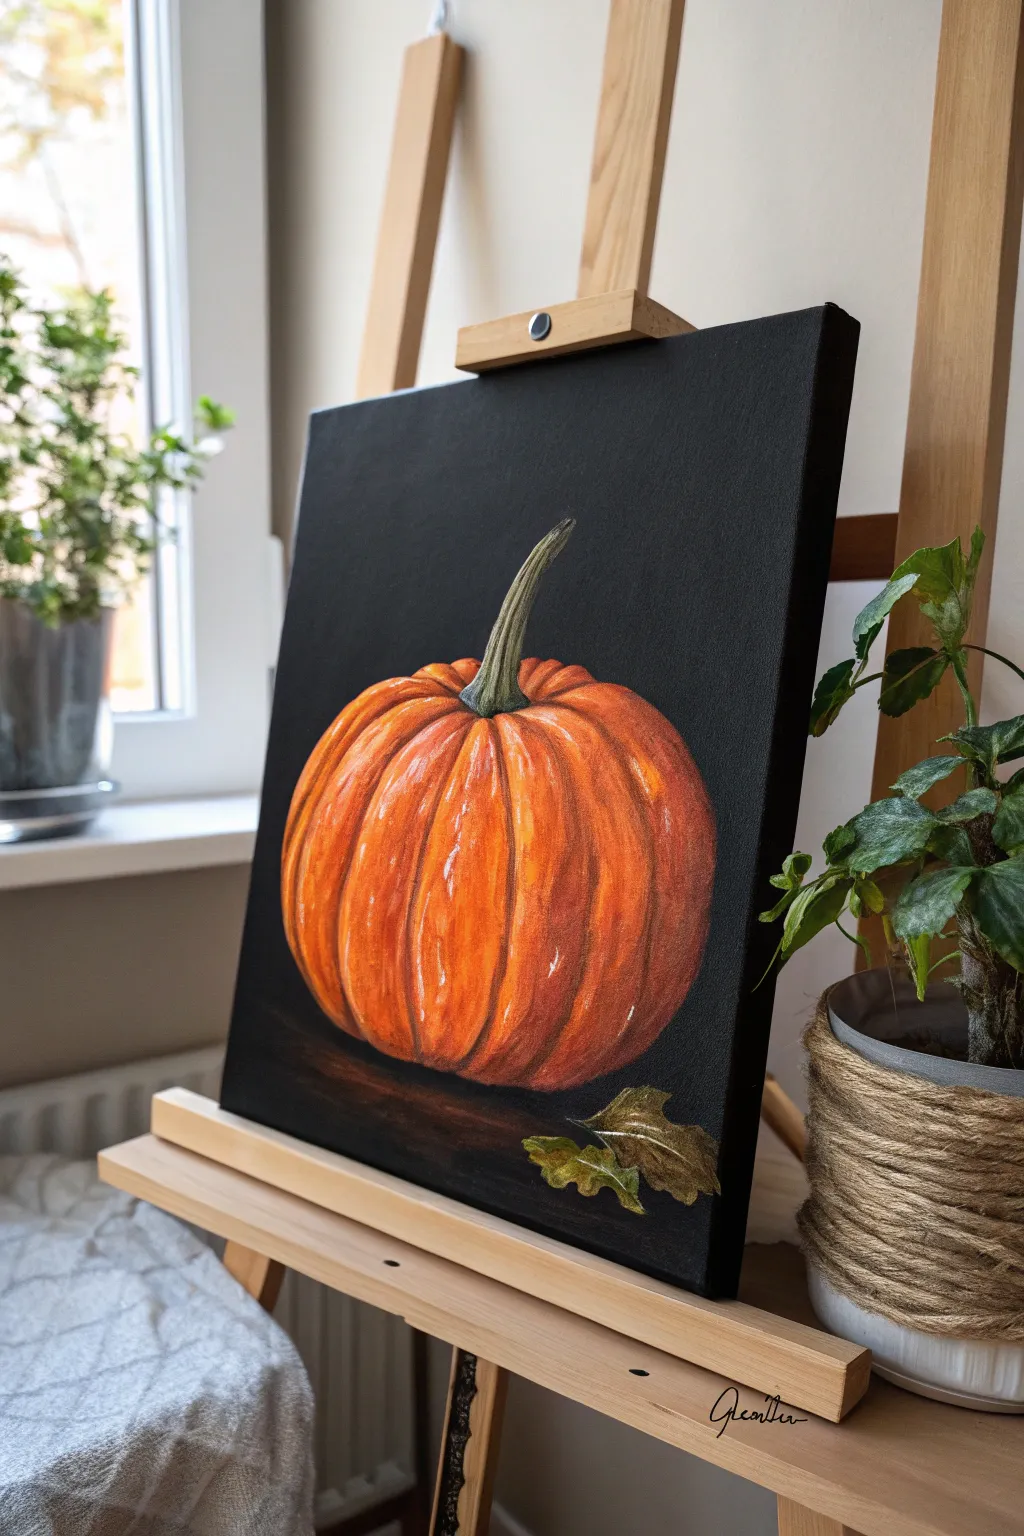
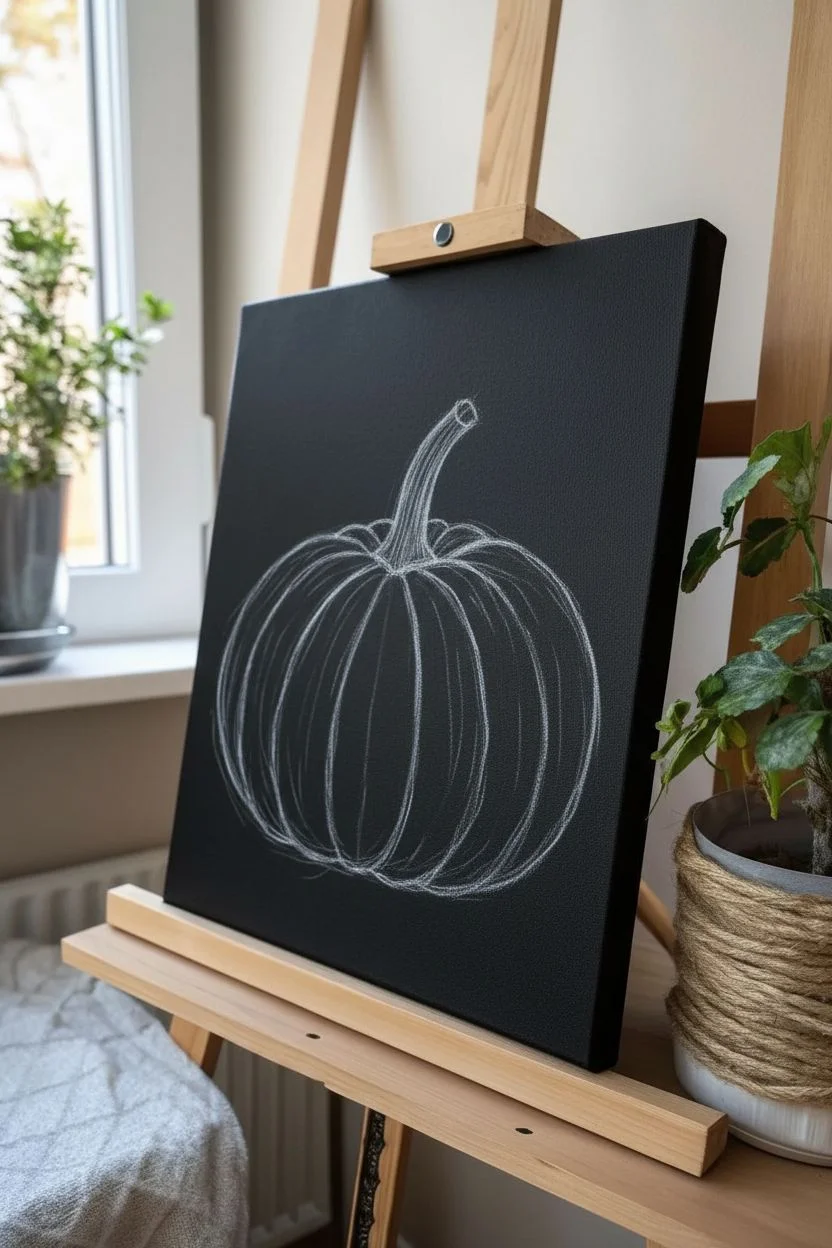
This striking acrylic painting uses high contrast to make a classic orange pumpkin leap off the canvas. By surrounding the bright subject with a solid black background, you create an instant mood of autumnal elegance and dramatic depth.
Step-by-Step Tutorial
Materials
- Stretched black canvas (approx. 12×14 inch) or primed canvas painted black
- Acrylic paints: Cadmium Orange, Burnt Sienna, Yellow Ochre, Titanium White, Mars Black, Sap Green
- B flat brushes (large for blocking, medium for blending)
- Round detail brushes (size 0 and 2)
- Palette knife (optional for mixing)
- White or yellow chalk pencil
- Water cup and paper towels
Step 1: Preparation and Sketching
-
Prepare the background:
If you aren’t starting with a pre-primed black canvas, apply two even coats of Mars Black acrylic paint to a standard white canvas. Allow it to dry completely between coats to ensure a solid, opaque finish. -
Outline the shape:
Using a white or yellow chalk pencil, lightly sketch a wide oval shape in the center of the canvas. It doesn’t need to be perfect circles; pumpkins have character because of their lumps and bumps. -
Divide into sections:
Draw curved vertical lines radiating from the top center divot down to the bottom to create the pumpkin’s ribs. These segments should get slightly wider in the middle and narrower at the top and bottom. -
Sketch the stem:
Add a curved, textured stem emerging from the central divot, leaning slightly to the right for a natural look. Keep the base of the stem thick where it joins the fruit.
Uneven Blending?
If your blends look choppy, keep a misting bottle handy. A light mist of water on the canvas keeps acrylics wet longer, allowing for smoother transitions between the dark grooves and bright highlights.
Step 2: Base and Structure
-
Block in the darkest orange:
Mix Cadmium Orange with a touch of Burnt Sienna. Fill in the entire pumpkin shape with this mid-tone, leaving the black background visible only outside your initial chalk lines. -
Define the shadows:
While the base is still slightly tacky, take pure Burnt Sienna (or mix a tiny dot of black into your orange) and paint along the vertical rib lines. This establishes the deep grooves between the segments. -
Highlight the center of ribs:
Mix Cadmium Orange with a little Yellow Ochre. Apply this lighter shade to the center of each rib section, blending outwards toward the darker grooves to create a rounded, 3D effect. -
Base coat the stem:
Paint the stem using a mix of Sap Green and a little Burnt Sienna to dull the green, creating an earthy, dried look.
Step 3: Building Depth and Texture
-
Deepen the bottom shadows:
Glaze the bottom third of the pumpkin with a thin layer of Burnt Sienna mixed with a drop of black. This grounds the object and gives it weight. -
Create texture strokes:
Using a smaller flat brush and pure Cadmium Orange, add vertical, slightly broken strokes following the curve of the ribs. This mimics the fibrous skin of the pumpkin. -
Detail the stem ridges:
Use a small round brush with a mix of Sap Green and White to paint thin, vertical ridges up the length of the stem, highlighting the twisted texture. -
Add high-contrast highlights:
Mix Titanium White with a small amount of Yellow Ochre. I like to apply this sparingly on the upper curve of the pumpkin ribs where the light would naturally hit, using a dry-brush technique for a speckled shine. -
Refining the stem connection:
Darken the area where the stem meets the orange flesh with a dark green-black mix to show it is recessed into the divot.
Pro Tip: The Pop Factor
Don’t be afraid of pure black. Re-applying a fresh coat of black around the finished pumpkin as a final step increases the contrast and makes the orange pigment appear significantly more vibrant.
Step 4: Finishing Touches
-
Clean up the edges:
Use Mars Black to paint over any orange that strayed outside your lines. This ‘cutting back’ technique makes the outer edge crisp and sharp against the dark void. -
Add reflected light:
Along the very bottom edge of the pumpkin, add a faint, thin line of lighter orange. This reflects light from the surface it sits on and separates the fruit from the shadow. -
Paint the ground shadow:
Mix a dark brown-black glaze and gently paint a horizontal shadow beneath the pumpkin, fading it out into the black background. -
Add the dried leaves:
At the base, paint two small, crinkled leaves using Yellow Ochre and Green. Highlight the edges with a light yellow to show their crisp, dry texture. -
Final bright spots:
Add tiny dots or lines of pure white on the shiniest parts of the pumpkin skin and the tip of the stem for a wet, realistic look.
Step back and admire how the intense contrast brings a sophisticated, moody atmosphere to your seasonal decor
BRUSH GUIDE
The Right Brush for Every Stroke
From clean lines to bold texture — master brush choice, stroke control, and essential techniques.
Explore the Full Guide
Teal or Sage Pumpkin for Modern Fall Vibes
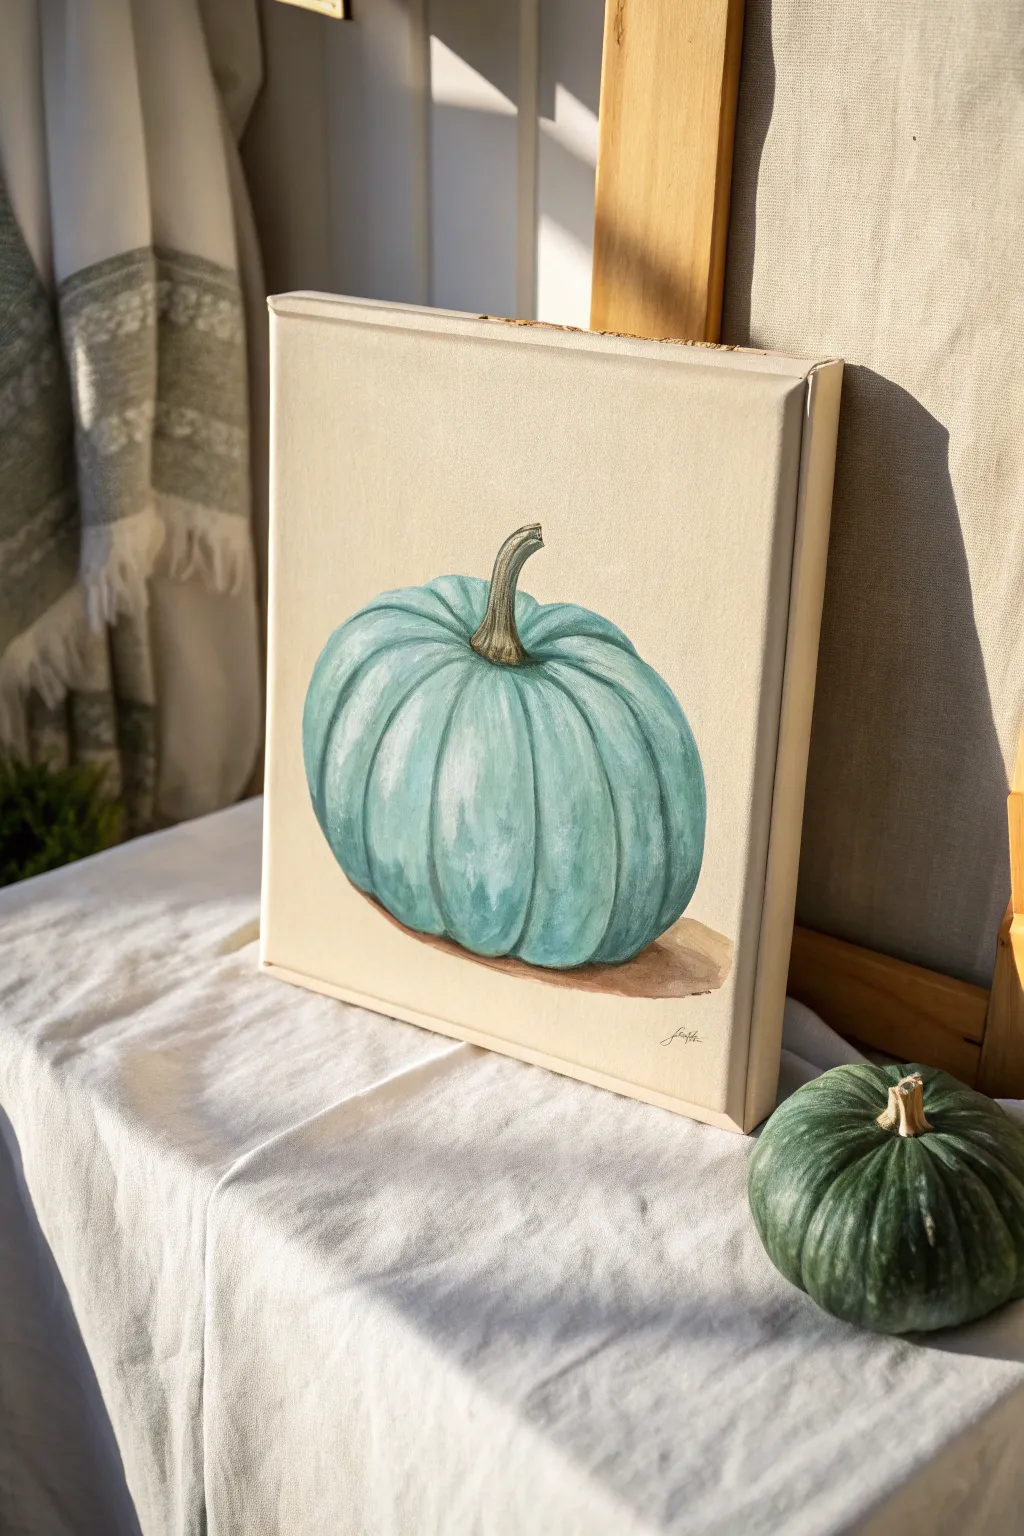
Move beyond traditional orange with this elegant, heirloom-style sage pumpkin study on a gallery-wrapped canvas. The soft teal tones and subtle highlighting create a modern farmhouse look that feels fresh yet classically autumnal.
How-To Guide
Materials
- Square gallery-wrapped canvas (10×10 or 12×12 inches)
- Acrylic paints: Titanium White, Burnt Umber, Yellow Ochre, Phthalo Blue (Green Shade), Hookers Green, and a touch of Black
- Round synthetic brushes (sizes 4 and 8)
- Fine liner brush (size 0 or 1)
- Flat wash brush (1-inch) for background
- Water cup and paper towels
- Pencil for sketching
- Palette for mixing
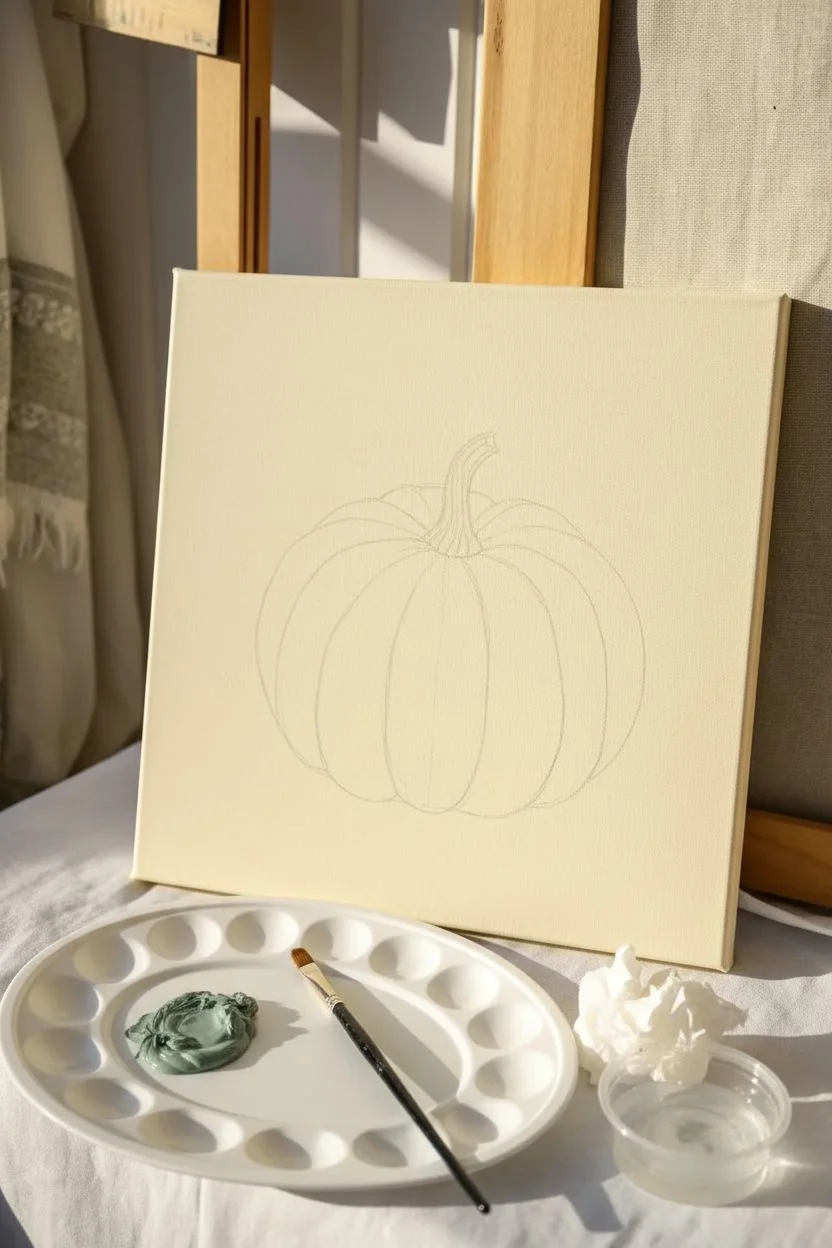
Step 1: Preparation & Base Layers
-
Prepare the Background:
Start by mixing a very pale, warm cream color using a large amount of Titanium White with a tiny speck of Yellow Ochre and Burnt Umber. Use your large flat wash brush to coat the entire canvas evenly. Depending on opacity, you may need two coats. Let this dry completely to create a smooth surface. -
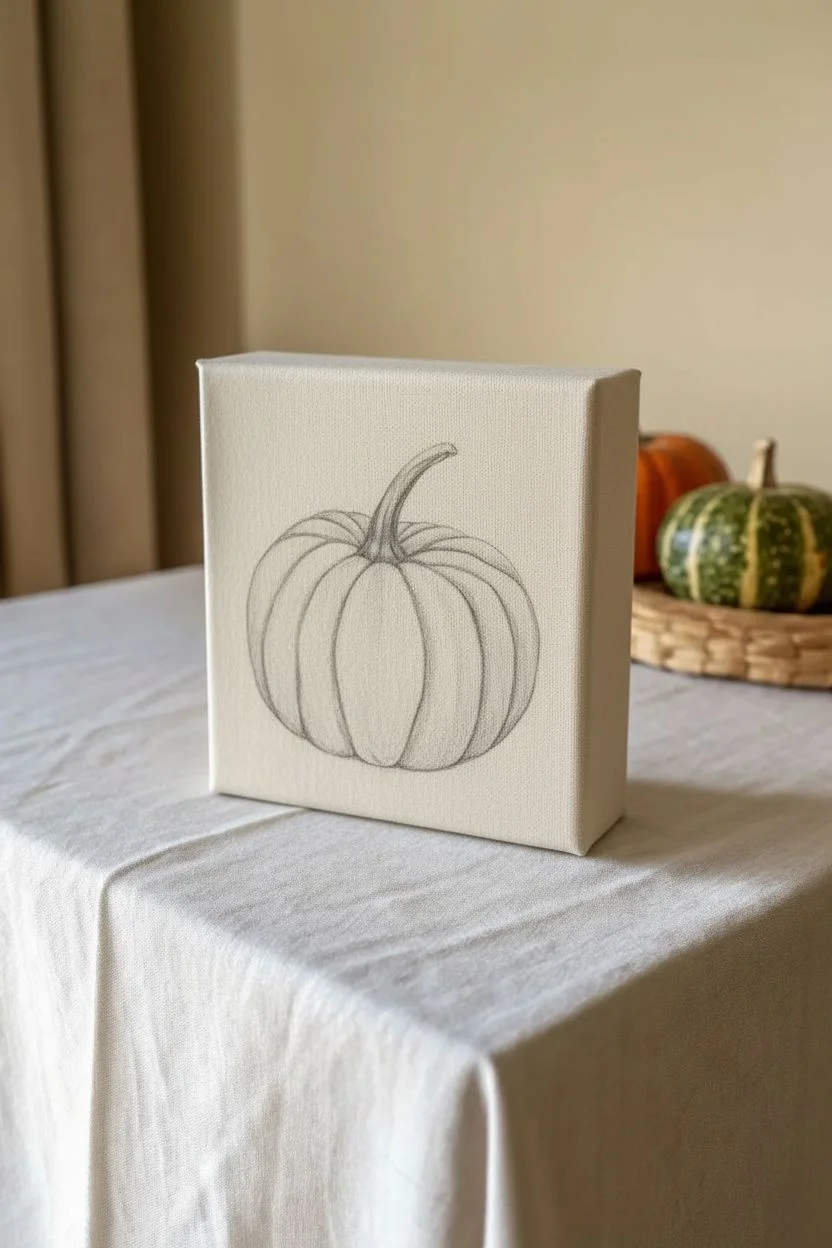
Sketch the Outline:
Lightly draw the pumpkin shape with a pencil. Start with a flattened oval or ‘squat’ circle. Don’t worry about perfect symmetry; natural pumpkins are delightfully irregular. Mark the center top where the stem will sit. -
Define the Ribs:
From the stem area, draw curved lines radiating downward to the bottom edge. These lines define the ‘ribs’ or sections of the pumpkin. The lines in the center should be straighter, while the outer lines should curve dramatically to hug the round form. -
Sketch the Stem:
Draw the stem emerging from the depressed center. Give it a twisted, slightly gnarled look, curving it off to one side. Add a small flat top where it was cut from the vine. -
Mix the Sage Green:
Create your main pumpkin color by mixing Titanium White, a small amount of Phthalo Blue, and a touch of Hookers Green. Dull this vibrancy slightly with a tiny bit of Burnt Umber until you achieve that dusty, vintage teal or sage hue.
Step 2: Building Form & Color
-
Block in the Base Color:
Using a size 8 round brush, fill in the pumpkin shape with your mixed sage color. Apply the paint somewhat thinly; it doesn’t need to dependably cover every pencil mark yet, as this is just the underlayer. -
Create Shadows:
Mix a darker version of your sage green by adding more Blue, Green, and a hint of Burnt Umber (avoid using straight black). Use a size 4 brush to paint along the pencil lines that define the ribs. Feather these dark lines outward slightly to start creating roundness. -
Establish the Stem Base:
Mix Burnt Umber with a little Yellow Ochre. Paint the entire stem with this earthy brown. While it’s wet, add a tiny bit of the dark green mix to the very base where the stem meets the pumpkin skin to ground it. -
Add Mid-tone Highlights:
Lighten your original sage mix with more White. Paint the center of each ‘rib’ section, blending the edges into the darker shadow lines you just painted. This contrast immediately makes the pumpkin look 3D. -
Dry Brushing Texture:
Once the previous layers are touch-dry, use a fairly dry brush with a lighter, whitish-teal mix. Drag it vertically down the high points of the pumpkin ribs. This mimics the slightly rough, matte texture of pumpkin skin.
Pro Tip: Curved Strokes
Always paint your brushstrokes following the curve of the pumpkin’s form. Straight vertical strokes will flatten the image, while curved C-strokes create volume.
Step 3: Details & Finishing Touches
-
Deepen the Crevices:
Go back in with your darkest green-brown mix and the fine liner brush. carefully reinforce the deepest parts of the grooves between the ribs, especially near the top and bottom where shadows collect. -
Highlight the Shoulders:
Mix a highlight color that is almost pure White with just a whisper of the green. Apply this to the ‘shoulders’ of the pumpkin (the top curve near the stem) where the light would naturally hit. Keep these strokes vertical and curved. -
Detail the Stem:
Using the liner brush, add thin streaks of light tan (White + Ochre) and dark brown along the length of the stem to show the fibrous, twisted texture. Add a crisp highlight on the top rim of the cut stem. -
Ground the Subject:
Mix a watery wash of Burnt Umber. Using the size 8 brush, paint a soft, elliptical shadow underneath the pumpkin. Keep the edges soft and hazy, not hard, to make it look like it’s sitting naturally on a surface. -
Final Assessment:
Step back five feet to view your work. If the pumpkin looks too flat, heighten the contrast by adding brighter white highlights to the center of the ribs and darker shadows to the crevices. -
Sign and Seal:
I like to sign my work small and unobtrusively near the shadow line using a diluted brown paint. Once fully dry (give it 24 hours), apply a matte or satin varnish to protect the surface.
Too Streaky?
If your blending looks rough, use a soft, clean, slightly damp brush to gently smooth over the transition area between the light highlight and the dark shadow while the paint is still wet.
Now you have a serene, sophisticated piece of fall decor that looks lovely on a mantle or shelf
Pumpkin With Sunflower Corner Accent
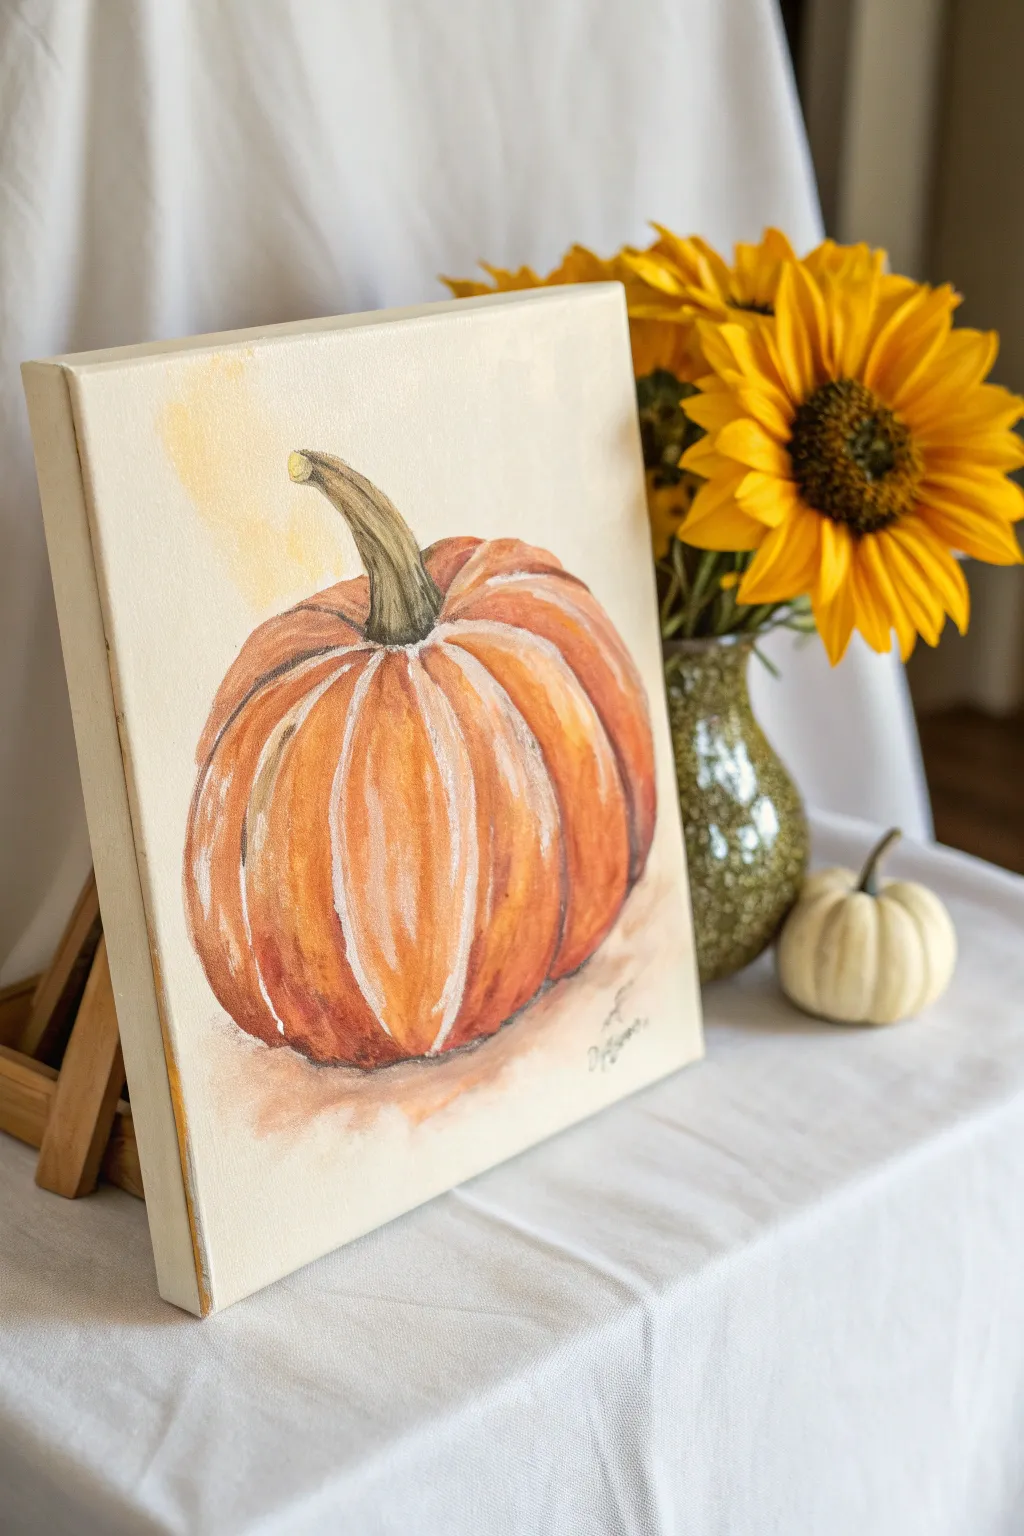
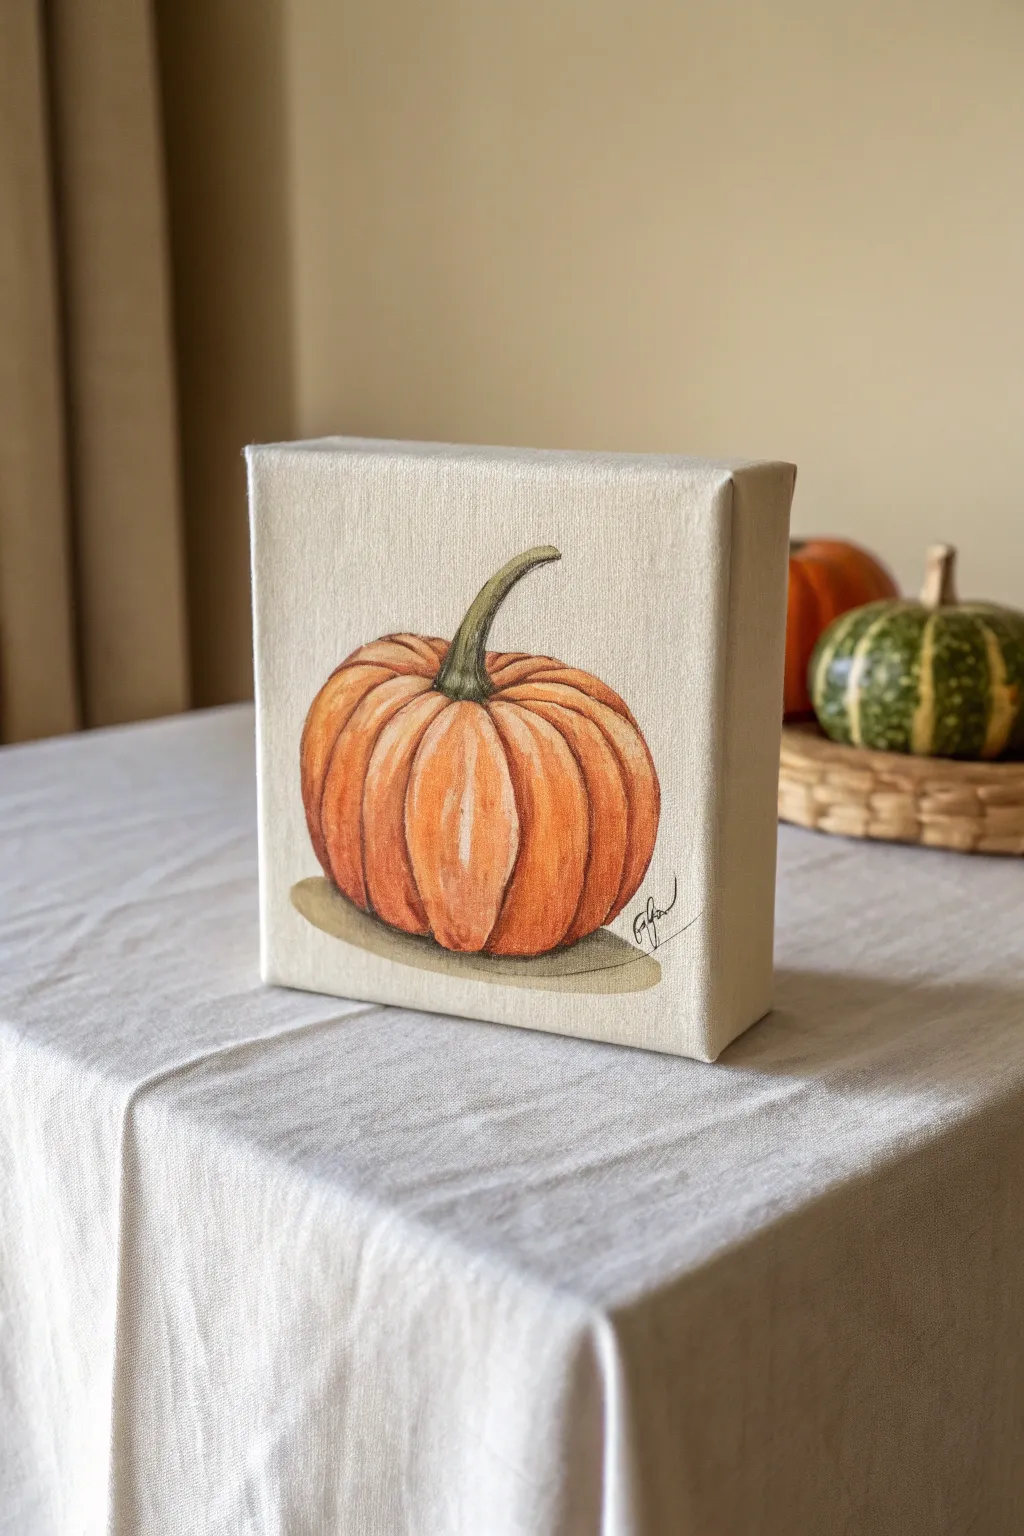
Capture the essence of autumn with this warm, inviting pumpkin study on canvas. This project focuses on building depth through layers of orange and employing subtle highlights to give your gourd a realistic, three-dimensional form.
How-To Guide
Materials
- Square stretched canvas (e.g., 8×8 or 10×10 inches)
- Acrylic paints (Titanium White, Burnt Umber, Yellow Ochre, Cadmium Orange, Burnt Sienna, Sap Green)
- Set of acrylic brushes (flat shader, round brush, small liner)
- Palette or paper plate
- Cup of water
- Paper towels
- Pencil for sketching
Step 1: Sketching the Outline
-
Define the shape:
Begin by lightly sketching a wide oval shape in the center of your canvas. Don’t worry about making it a perfect circle; pumpkins are naturally a bit squat and uneven. -
Add the stem:
Draw the stem emerging from the top center. Curve it slightly to the left, giving it a thick base where it meets the pumpkin and tapering it toward the top. -
Mark the ridges:
Sketch curved lines radiating from the base of the stem down to the bottom of the pumpkin. These lines will define the segments (ribs) of the pumpkin and help you place your shadows later.
Curve Your Strokes
Never paint straight up and down. Always curve your brushstrokes to follow the round shape of the pumpkin. This simple trick instantly adds visible volume.
Step 2: Underpainting and Base Layers
-
Apply a wash:
Dilute some Yellow Ochre with water to create a thin wash. Apply this loosely over the upper left quadrant of the background and faintly on the pumpkin itself to establish a warm undertone. -
Block in the orange:
Mix Cadmium Orange with a touch of Burnt Sienna. Using a flat brush, fill in the main body of the pumpkin, following the curve of your pencil lines with your brushstrokes. -
Base coat the stem:
Mix Sap Green with a little Burnt Umber to get a dusty, olive green. Paint the entire stem with this mixture.
Muddy colors?
If your orange shadows look dirty or gray, stop using black to darken the orange. Use colors like brown, deep red, or purple to create rich, natural shadows.
Step 3: Building Form and Shadow
-
Deepen the crevices:
Mix Burnt Sienna with a tiny amount of Burnt Umber. Use a round brush to paint along the ridge lines you sketched earlier. -
Create roundness:
Feather these darker lines outward into the orange sections, ensuring the transition isn’t too harsh. This shading makes the segments look puffy and round. -
Shadow the bottom:
Add more Burnt Umber to your orange mix and glaze the bottom curve of the pumpkin where it sits on the ground. -
Stem detailing:
Use a liner brush with pure Burnt Umber to add vertical striations to the stem, mimicking the woody texture of a dried vine.
Step 4: Highlights and Details
-
Mix the highlight color:
Combine Titanium White with a very small dot of Cadmium Orange. You want a pale, creamy peach color, not a stark white. -
Apply main highlights:
Identify the center of each pumpkin segment. Paint vertical strokes of your highlight mix along the highest point of each curve. -
Dry brush texture:
I like to wipe most of the paint off my brush and lightly drag this pale color horizontally across the orange skin in a few spots to simulate imperfect texture. -
Top of the stem:
Dab a little pure Yellow Ochre or light green on the the very cut tip of the stem to show where light catches the exposed fiber. -
Grounding shadow:
Mix a watery wash of Burnt Sienna and Burnt Umber. Paint a loose, indistinct shadow directly underneath the pumpkin so it doesn’t look like it’s floating.
Step 5: Finishing Touches
-
Refine the edges:
If the outer edge of your pumpkin looks too sharp, soften it slightly with a clean, damp brush to make it recede naturally. -
Add signature:
Using your smallest liner brush and thinned dark brown paint, sign your name in the bottom right corner. -
Final varnish:
Once fully dry (give it at least 24 hours), apply a coat of gloss or satin varnish to protect the painting and make the orange pop.
Step back and admire the warm, autumnal glow of your finished pumpkin masterpiece

PENCIL GUIDE
Understanding Pencil Grades from H to B
From first sketch to finished drawing — learn pencil grades, line control, and shading techniques.
Explore the Full Guide
Pumpkin Patch at Sunset With Easy Layered Shapes

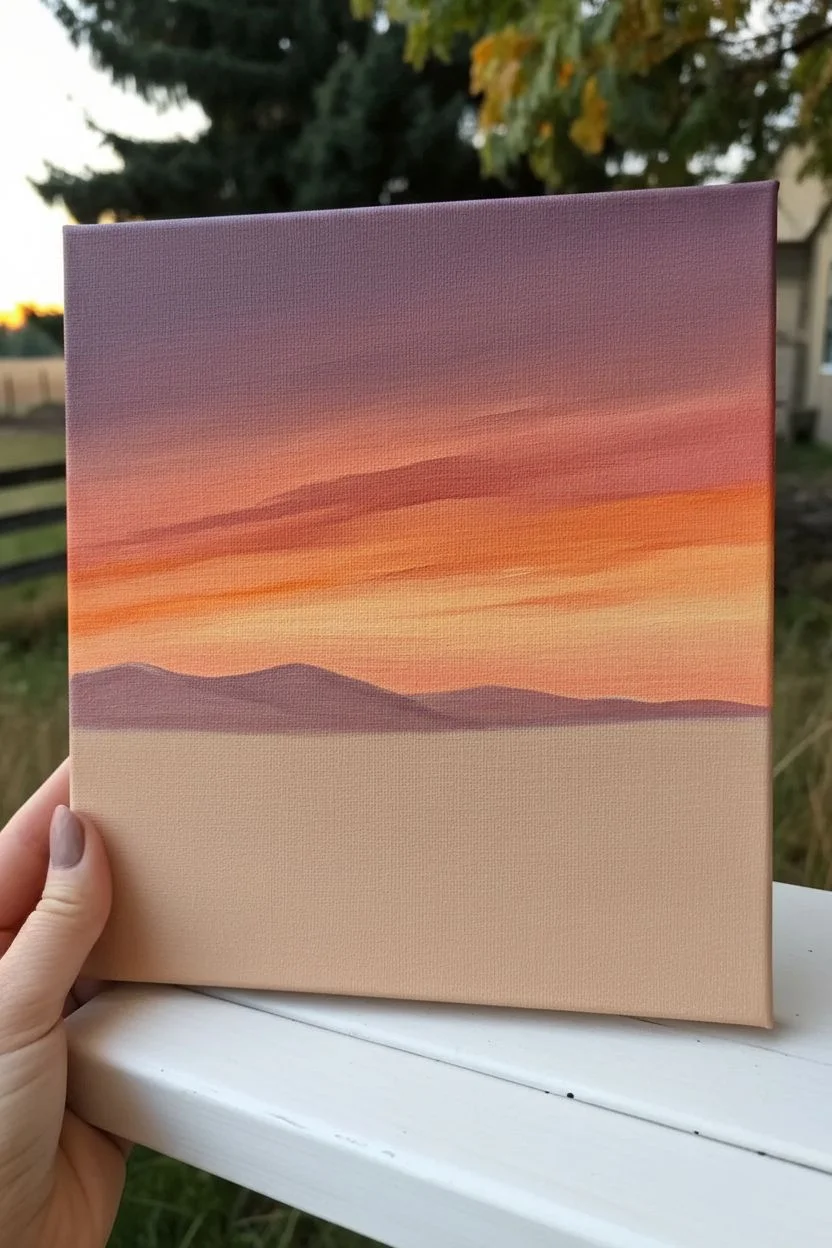
This warm and inviting scene captures the essence of a crisp autumn evening, with silhouetted trees set against a vibrant, layered sunset sky. It’s a perfect way to practice blending gradients and adding simple, charming details to a landscape.
Step-by-Step
Materials
- Small square deep-edge canvas (e.g., 6×6 or 8×8)
- Acrylic paints: Titanium White, Cadmium Yellow, Orange, Burnt Sienna, Raw Umber, Alizarin Crimson, Black
- Flat brushes (medium and small)
- Round detail brushes (size 0 and 2)
- Palette and water cup
- Paper towels
Step 1: Painting the Sunset Sky
-
Establish the horizon:
Begin by deciding where your horizon line will be. For this composition, place it just below the halfway point of the canvas. This gives plenty of room for that dramatic sky. -
Mix your gradients:
On your palette, prepare bands of color for the sky. You’ll need a deep dusty purple (mix Alizarin Crimson with a touch of Blue or Black and White) for the top, transitioning into a warm pink, then vibrant orange, and finally a pale yellow near the horizon. -
Paint the top layer:
Using a medium flat brush, apply the dusty purple mix to the very top section of the canvas. Use horizontal strokes that span the full width to keep the look smooth. -
Blend downwards:
While the purple is still slightly wet, pick up your pink-orange mix. Start brushstrokes just below the purple and work your way up slightly to blend the two colors together right on the canvas. Don’t overwork it; visible streaks add a cloud-like texture. -
Add the golden glow:
Clean your brush and switch to your pale yellow-orange mix. Paint the strip directly above the horizon line. Blend this upward into the orange section to create a radiant sunset effect. -
Create distant mountains:
Once the sky is dry to the touch, mix a muted mauve or light brownish-purple. With a smaller flat brush, paint a low, rolling mountain range sitting just on the horizon line.
Fixing Muddy Clouds
If your sky colors turn brown while blending, stop! Let the layer dry completely, then apply fresh paint over the top. Wet-on-wet blending only works before the paint gets tacky.
Step 2: Creating the Landscape
-
Block in the field:
For the grassy field, mix Yellow Ochre with a bit of Burnt Sienna. Fill in the entire bottom section of the canvas below the horizon line. I find adding a touch of white here keeps the color from looking too muddy. -
Add distant trees:
Using a small round brush or the edge of a flat brush and dark green-black paint, dab tiny vertical lines along the top of the ridge on the left side to suggest a distant pine forest. -
Paint the foreground tree:
Mix a dark brown-black color. On the right side of the canvas, paint a tall, slender tree trunk that reaches almost to the top edge. Add branches that angle upwards and outwards. -
Stipple the leaves:
Load an old, scruffy brush or a small round brush with dark paint. Use a tapping or stippling motion to create clusters of leaves on the tree branches. Keep the foliage somewhat sparse so the sunset peeks through. -
Texture the grass:
Switch to a thin liner brush with a mix of Raw Umber and Gold. Use quick, upward flicking strokes across the field, especially in the foreground, to create the texture of dry autumn grass.
Make It Pop
Mix a tiny amount of pure white with yellow and dab it on the sunlit side of the pumpkins for a glossy highlight. It adds instant dimension.
Step 3: Adding the Pumpkins
-
Outline pumpkin shapes:
Using a diluted orange paint, sketch five loose oval or round shapes in the foreground. Vary their sizes and angles—some tilting left, some right—to make them look natural. -
Fill the base color:
Fill in these shapes with a solid coat of bright Orange. Depending on your paint opacity, you might need two coats to cover the grass background completely. -
Add ribs and shadows:
Mix Burnt Sienna with a tiny dot of Black to get a shadow color. Paint curved lines from the top center of each pumpkin down to the bottom to define the ribs. Blend these lines slightly so they aren’t too harsh. -
Highlight the curves:
Mix Orange with White and paint the top curves of the pumpkin segments (between the shadow lines) to make them look round and plump. -
Attach the stems:
Using dark brown or grey paint, add stems to the tops of the pumpkins. Give the stems a little twist or jagged edge for character. -
Final grass details:
To ground the pumpkins, paint a few blades of grass overlapping the very bottom of the pumpkins using the same flicking motion as before. This makes them look like they are sitting *in* the field, not floating on top.
Step back and admire the warm, tranquil autumn evening you’ve just created.
Pumpkin Silhouette With Bold Negative Space
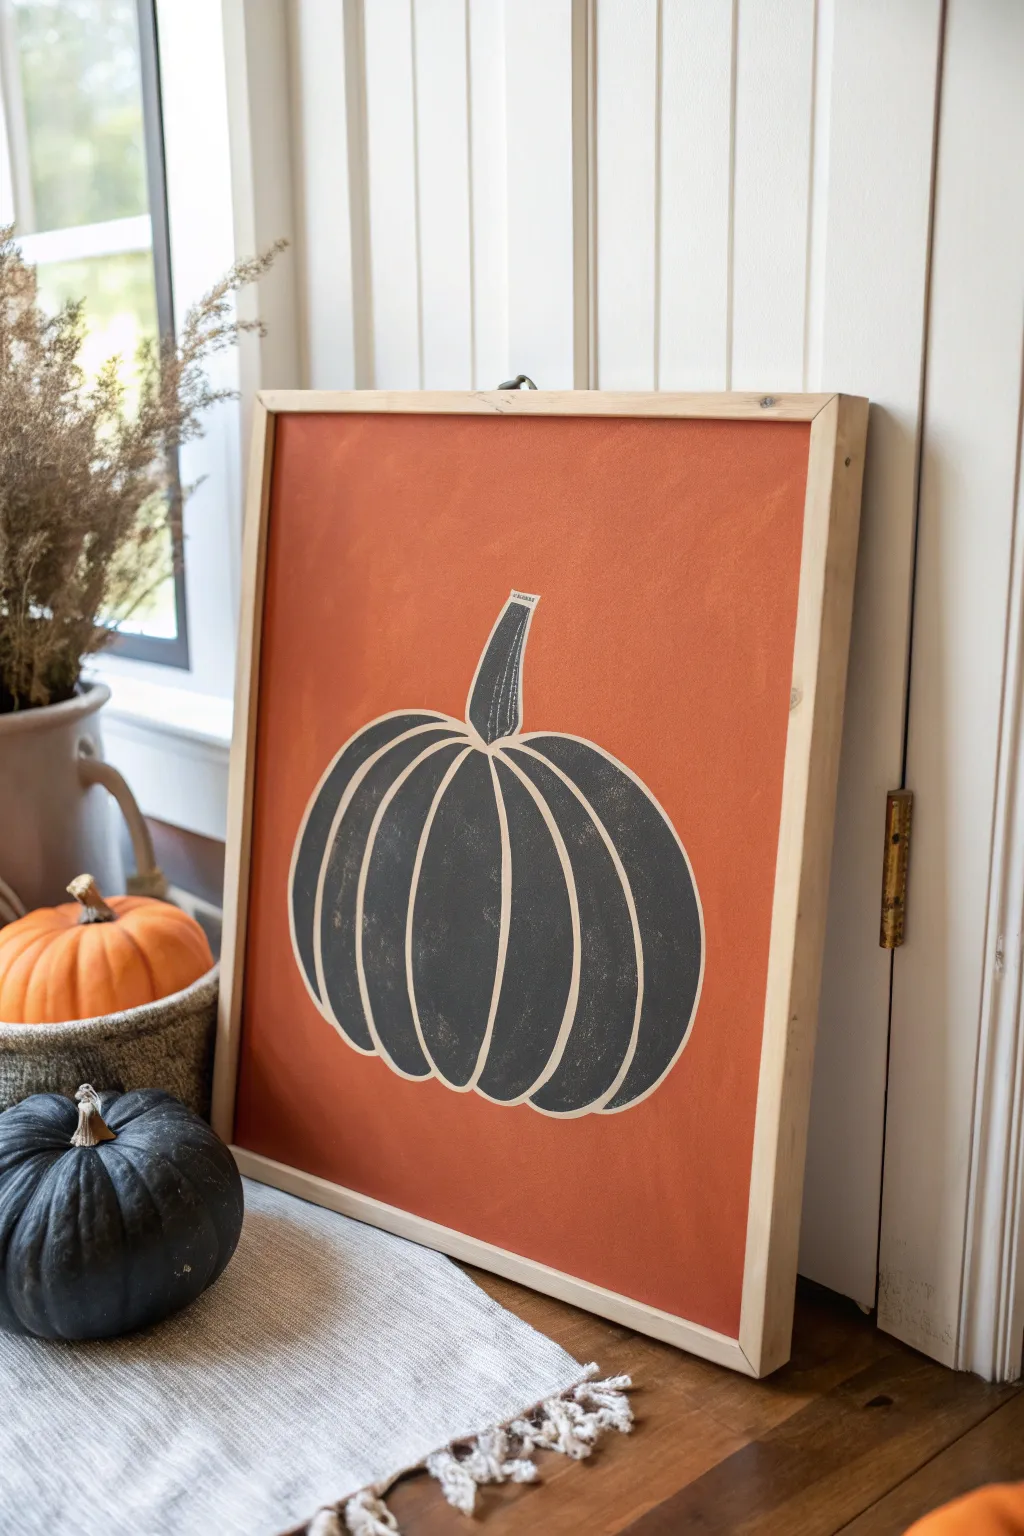
This project uses bold negative space to create a modern, minimalist pumpkin that pops against a warm, terracotta background. The graphic style relies on clean lines and contrast rather than shading, making it an excellent piece for adding sophisticated fall charm to your home decor.
Step-by-Step Tutorial
Materials
- Canvas or wood panel (approx. 16×20 inches for impact)
- Acrylic paint: Burnt Orange (or Terracotta), Carbon Black, and Titanium White
- Gesso (if your surface isn’t primed)
- Wide flat paintbrush (2-inch)
- Medium round brush (size 6 or 8)
- Fine liner brush (size 1 or 2)
- Chalk or a white charcoal pencil
- Ruler or straight edge (optional)
- Paper plate or palette
- Jar of water and paper towels
- Painter’s tape (optional for framing)
- Raw wood frame (optional)
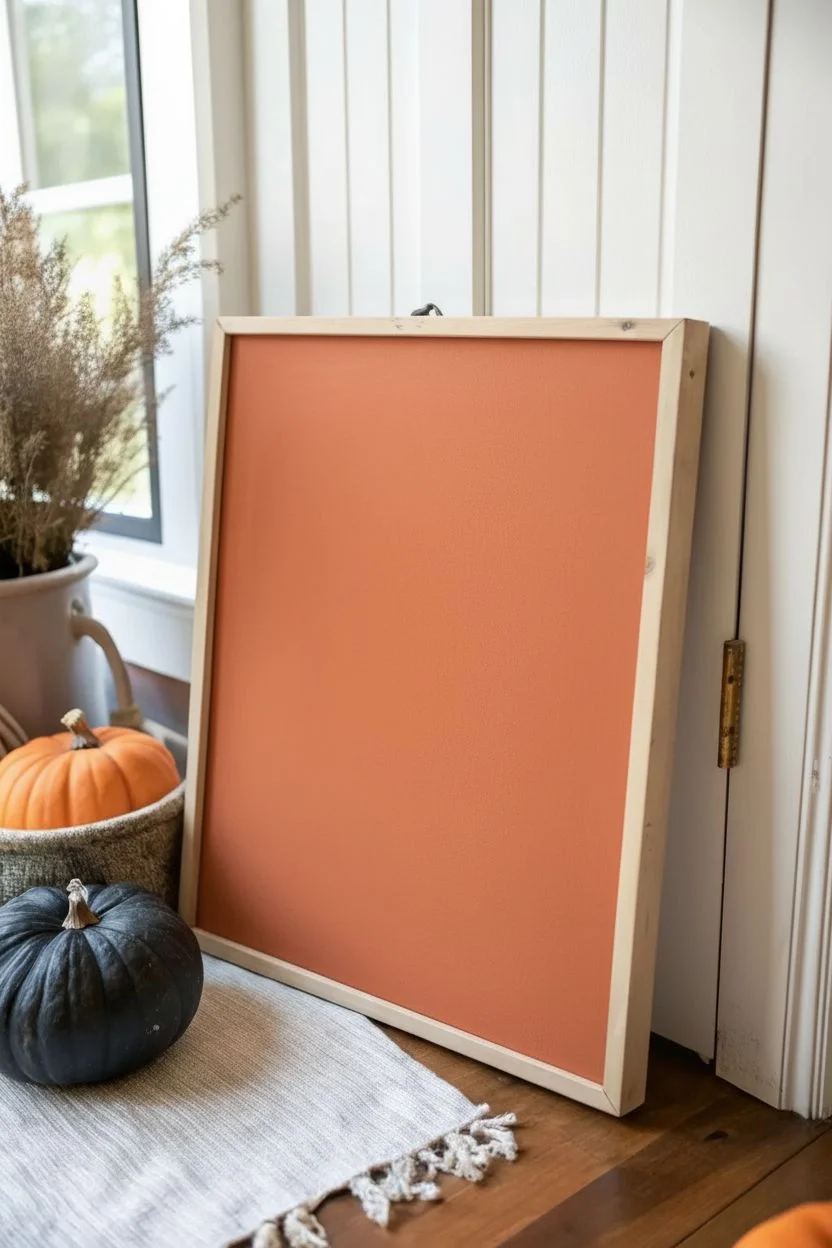
Step 1: Preparation and Background
-
Surface Prep:
Begin by ensuring your canvas or wood panel is clean and free of dust. If you are using raw wood, apply a coat of white gesso to prime the surface and let it dry completely. This prevents the wood from soaking up too much paint. -
Mixing the Background Color:
Squeeze out a generous amount of Burnt Orange paint. If the color feels too vivid, mix in a tiny drop of Carbon Black or brown to mute it down to a warm terracotta or rust shade. aim for a rich, earthy tone. -
Painting the Base Layer:
Using your wide flat brush, apply the orange paint across the entire surface. Use long, horizontal strokes to ensure even coverage. -
Applying the Second Coat:
Once the first layer is touch-dry, apply a second coat. This ensures the background is opaque and solid, which is crucial for this graphic look. Let this dry completely—usually about an hour—before moving on to the pumpkin.
Steady Hand Trick
Rest your pinky finger on a dry part of the canvas while painting fine lines. This anchors your hand, giving you much smoother control for the thin outlines.
Step 2: Drafting the Design
-
Sketching the Outline:
Using a piece of chalk or a white charcoal pencil, lightly sketch the outer silhouette of a pumpkin in the center of the canvas. Keep the shape somewhat flattened and wide for that classic heirloom pumpkin look. -
Defining the Ribs:
Draw curved vertical lines inside the silhouette to represent the pumpkin’s ribs. These don’t need to be perfectly symmetrical; a little irregularity adds character. -
Refining the Negative Space:
Go back over your rib lines and thicken them slightly with the chalk. These lines will remain unpainted (showing the orange background) or will be painted white later, creating the ‘gaps’ between the black segments. -
Adding the Stem:
Sketch a slightly curved, tapered stem at the top center. I find that angling the stem slightly to one side makes the pumpkin feel less stiff.
Step 3: Painting the Pumpkin
-
Filling the Segments:
Switch to your medium round brush and load it with Carbon Black paint. Carefully fill in the segments between your chalk lines, leaving a consistent gap between each black section. -
Managing Edges:
As you paint near the outer edges of the pumpkin, keep your hand steady to create a smooth curve. If the paint drags, add a tiny drop of water to your brush to improve the flow. -
Painting the Stem:
Fill in the stem shape with the black paint. You can leave a tiny sliver of orange between the stem and the main pumpkin body to visually separate them. -
Checking Consistency:
Look at your black areas. If the orange background is showing through the black strokes, apply a second coat of black once the first is dry to get that solid, matte finish seen in the inspiration image.
Texture Play
Mix a teaspoon of baking soda into your background paint before applying. It creates a subtle, grainy texture that looks like terracotta clay.
Step 4: Finishing Touches
-
Highlighting the Gaps:
This step is optional but impactful. Using your fine liner brush and Titanium White paint (or a very light cream), carefully trace the negative space lines between the black segments. This cleans up the edges and makes the design pop. -
Cleaning the Outline:
Outline the entire exterior of the pumpkin with the same thin white line. This separates the dark pumpkin form from the terracotta background clearly. -
Letting it Cure:
Allow the painting to dry effectively overnight. Avoid touching the black sections until you are certain they are fully cured, as black acrylic can remain tacky for a while. -
Erasing Sketch Lines:
Once fully dry, gently wipe away any visible chalk marks with a slightly damp cloth or a clean eraser. -
Framing the Piece:
To mimic the look in the photo, mount your canvas board into a simple, raw wood floating frame. Secure it from the back according to the frame’s instructions.
Hang your stunning graphic pumpkin in an entryway or lean it on a mantle for an instant autumnal update


Palette Knife Impasto Pumpkin With Thick Texture

Embrace the tactile joy of impasto painting with this vibrant pumpkin study that jumps right off the canvas. This project focuses on building distinct ridges and bold color contrasts to create a piece that feels as substantial as it looks.
Step-by-Step
Materials
- Small square stretched canvas (e.g., 8×8 or 10×10 inches)
- Heavy body acrylic paints
- Colors: Cadmium Orange, Burnt Sienna, Yellow Ochre, Titanium White, Phthalo Green, Burnt Umber, Mars Black
- Palette knife (medium trowel shape with a pointed tip)
- Flat synthetic brush (medium size)
- Pencil for sketching
- Palette for mixing
Step 1: Preparation and Base
-
Sketch the outline:
Begin by lightly sketching a flattened oval shape in the center of your canvas with a pencil. It doesn’t need to be a perfect circle; pumpkins have character, so a slightly squat, organic shape works best. -
Map the ribs:
Draw curved lines radiating from the center top (where the stem will be) down to the bottom edge. These lines define the segmented ribs of the pumpkin. Keep them curved to emphasize the roundness of the form. -
Sketch the stem:
Add the stem at the convergence point of your ribs. Draw it slightly twisted and angled to the right for a natural look, flaring out where it attaches to the pumpkin body. -
Mark the shadow:
Outline the cast shadow area on the left side of the pumpkin. This shape should mirror the curve of the pumpkin but stretch out onto the ‘table’ surface.
Pro Tip: Marble Effect
Don’t overmix your highlights on the palette. Leave streaks of white and yellow within the orange pile so when you swipe the knife, you get beautiful, natural striations on the canvas.
Step 2: Color Blocking
-
Mix your base orange:
Combine Cadmium Orange with a touch of Burnt Sienna to create a warm, deep mid-tone. Using a flat brush, block in the main body of the pumpkin, ignoring the rib lines for a moment. This ensures no canvas shows through later. -
Paint the shadow base:
Mix Phthalo Green with a little Mars Black to get a deep, cold teal. Paint the shadow shape on the left side of the pumpkin with your brush, scrubbing the color into the canvas weave. -
Block in the stem:
Use pure Phthalo Green mixed with a tiny bit of Burnt Umber to paint the basic shape of the stem.
Step 3: Applying Texture
-
Load the palette knife:
Switch to your palette knife now. Mix a vibrant highlight orange using Cadmium Orange and Yellow Ochre. Scoop a generous amount onto the bottom of the knife blade. -
Build the ribs:
Starting from the top near the stem, pull the knife downward along the center of each rib segment. Apply light pressure to leave a thick, raised ridge of paint. I like to let the paint break slightly to add interest. -
Add deep shadows:
Mix Burnt Sienna with a touch of purple or black. Use the edge of the knife to slice dark paint into the crevices between the ribs. This creates the deep grooves that give the pumpkin volume. -
Layer the highlights:
Without cleaning the knife perfectly (to allow some marbling), pick up some Titanium White mixed with Orange. Apply this to the highest points of the ribs on the right side where the light hits. -
Texture the shadow side:
On the left side of the pumpkin, use darker oranges and browns. Apply the paint in shorter, choppier strokes to suggest the curve turning away from the light.
Level Up: Background Context
Instead of leaving the background raw canvas, use a large brush to scumble a very faint, watery grey-blue around the pumpkin to suggest a cool tablecloth or airy room.
Step 4: Refining Details
-
Enhance the cast shadow:
Mix a thick pile of the dark teal shadow color (Phthalo Green + Black + White). Use the knife to spread a thick, smooth layer over your initial brushwork for the cast shadow on the table. -
Define the shadow edge:
Where the shadow meets the pumpkin, ensure the edge is crisp. You can use the tip of the knife to drag a little of the dark shadow color up onto the bottom left of the orange skin for reflected color. -
Sculpt the stem:
Using the dark green mix, build up the stem texture. Use the very tip of your knife to create vertical ridges that mimic the woody texture of a pumpkin stem. -
Add stem highlights:
Mix a lighter sage green (Green + White + Yellow Ochre). Touch this color to the right side of the stem’s ridges to make it look three-dimensional. -
Final texture check:
Look for areas where the paint looks too flat. Add touches of pure, unmixed orange or white directly to the canvas with the knife for pops of intense texture. -
Clean up edges:
If any paint has strayed outside your shape, use a clean, damp brush or a clean knife edge to tidy up the perimeter against the raw canvas background.
Let the thick paint dry completely, which may take a few days, before displaying your autumnal masterpiece
Abstract Geometric Pumpkin With Color-Block Ridges
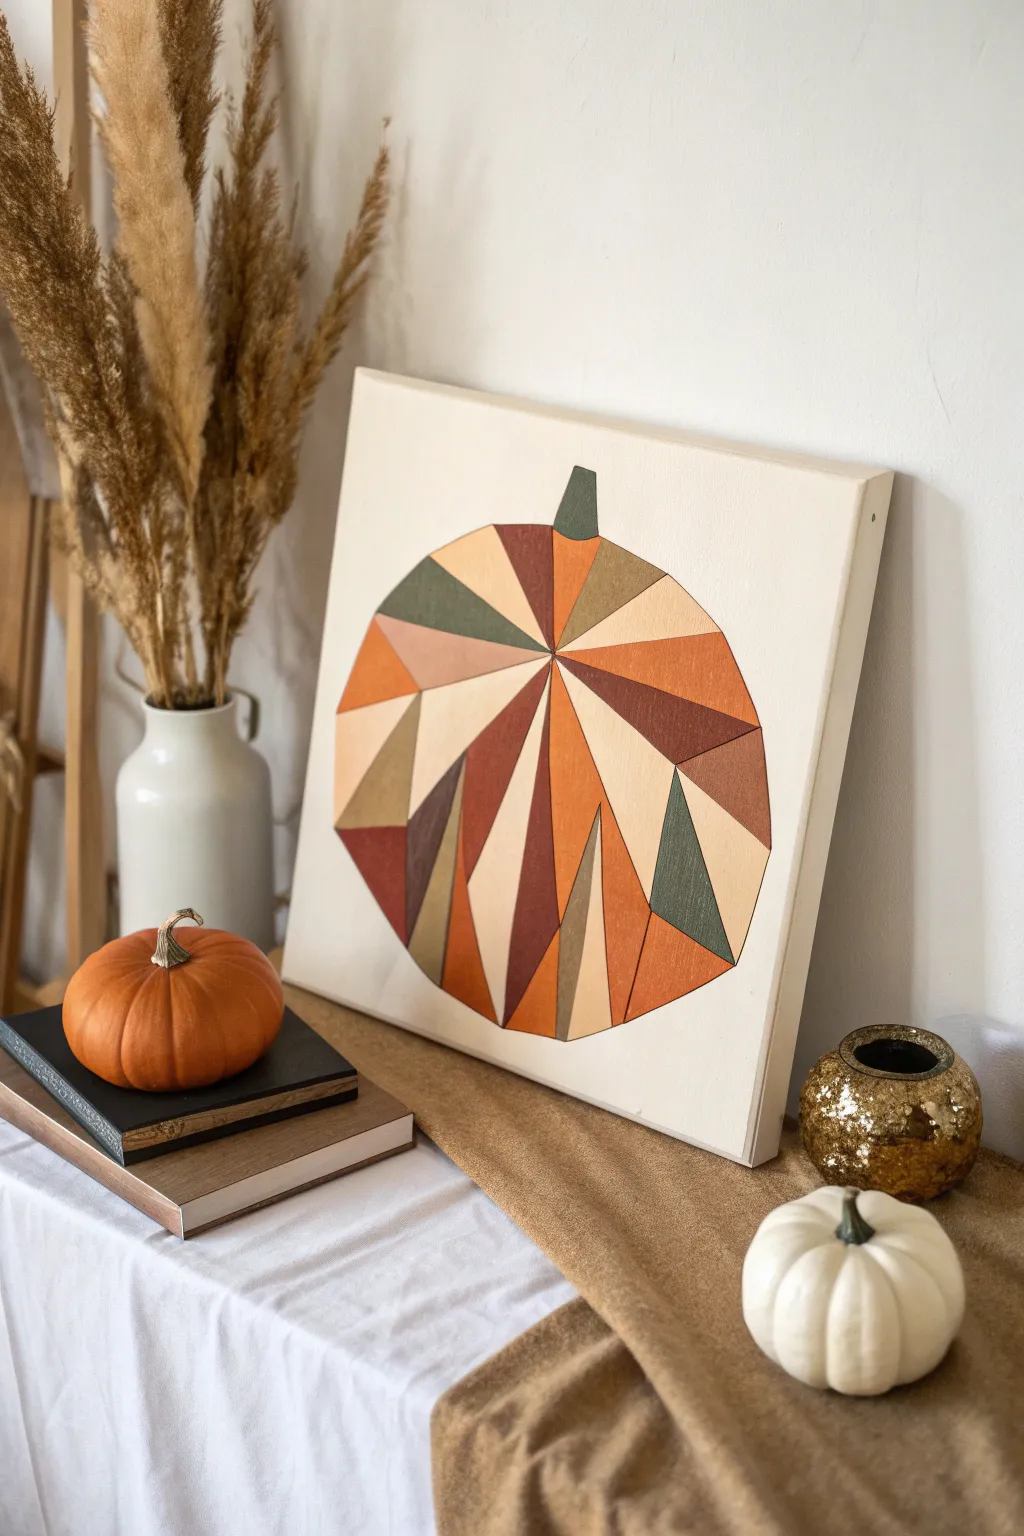
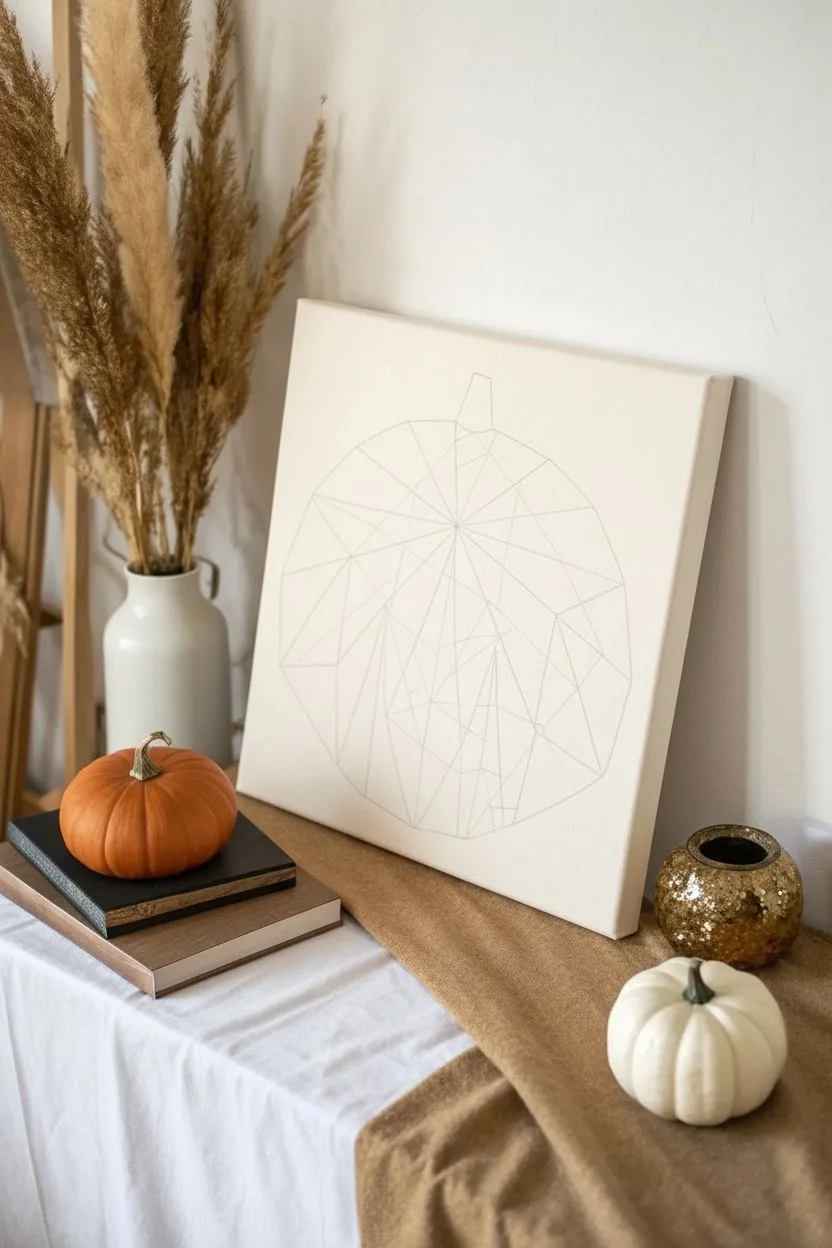
This modern take on fall decor features a stylized pumpkin formed from a kaleidoscope of geometric shards and earthy tones. The crisp lines and warm palette create a sophisticated, abstract focal point perfect for minimalist or boho interiors.
Detailed Instructions
Materials
- Square stretched canvas (approx. 12×12 or 16×16 inches)
- Acrylic paints (burnt orange, terracotta, cream, olive green, dark brown, tan)
- Painter’s tape or masking tape (various widths if available)
- Flat shader brushes (small and medium sizes)
- Pencil and eraser
- Ruler
- Palette or paper plate
- Compass or round object to trace (optional)
Step 1: Drafting the Design
-
Outline the pumpkin shape:
Begin by lightly sketching a large circle in the center of your canvas. It doesn’t need to be statistically perfect; a slightly organic round shape works well for a pumpkin base. -
Add a stem:
Draw a simple, blocky trapezoid shape at the very top center of your circle to represent the stem. -
Establish the center point:
Mark a small dot roughly in the upper-middle area of the pumpkin. This will act as the vanishing point where all your geometric segments will converge. -
Draw radiating lines:
Using your ruler, draw straight lines extending from that central dot out to the edge of the pumpkin outline. Space them irregularly to create sections of different widths. -
Create interior divisions:
Now, draw angled lines connecting the radiating lines within the pumpkin. Think of these as shattering the large slices into smaller triangles and quadrilaterals. -
Review the composition:
Step back and look at your pencil sketch. You want a mix of large and small shapes that mimic the vertical ridges of a pumpkin but with a sharp, fractal twist.
Tape for Sharpness
Struggling with straight lines? Use painter’s tape! Tape off a specific shape, paint it, and let it dry before moving to the neighbor. It takes longer but guarantees perfection.
Step 2: Planning and Painting
-
Plan your color map:
Before picking up a brush, lightly mark which sections will be which color. Aim for high contrast by placing dark browns next to creams, and olive greens next to oranges. -
Mix your palette:
Prepare your acrylic paints. I like to mix a little white into the orange to create a soft peach tone, giving you more variation than just straight-from-the-tube colors. -
Paint the first set of shapes:
Select a specific color, like the deep burnt orange, and paint all the non-touching shapes assigned to that color. Using a flat shader brush helps you get crisp edges. -
Let the first layer dry:
Allow these sections to dry completely. Acrylics dry fast, but you don’t want to accidentally smudge wet paint into a neighboring empty section. -
Apply the next color:
Move on to your terracotta or medium orange tones. Paint the assigned sections, being careful to butt the paint right up to the previous color without overlapping. -
Add the neutrals:
Fill in the cream and tan sections. These lighter shades are crucial because they act as the ‘highlights’ on the pumpkin, giving it dimension. -
Introduce the contrast:
Paint the dark brown and olive green sections. The green works beautifully for the stem and a few shadow shards within the body of the pumpkin. -
Apply second coats:
Lighter colors like the cream often need a second layer to look opaque. Check your coverage and re-apply where the canvas texture shows through too much.
Step 3: Finishing Touches
-
Refine the edges:
Once the main colors are dry, use your smallest flat brush to touch up any wobbly lines where two colors meet. Clean, sharp intersections are key to the geometric look. -
Clean up the background:
If you accidentally got pumpkin paint on the white background, paint over it with white acrylic or gesso to crisp up the outer silhouette. -
Erase visible pencil marks:
Wait for the painting to be 100% bone dry, then gently erase any pencil lines that might still be visible through lighter paint or on the background. -
Seal the artwork:
Finish with a coat of matte varnish to protect the paint and unify the sheen of the different colors without making it too glossy.
Make it Metallic
Swap one of the neutral tan colors for a metallic gold or copper paint. It adds a subtle glamour that catches the light beautifully.
Place your warm, geometric pumpkin on a mantle or shelf to bring a structured touch of autumn into your home
Mixed-Media Pumpkin Collage on Painted Canvas
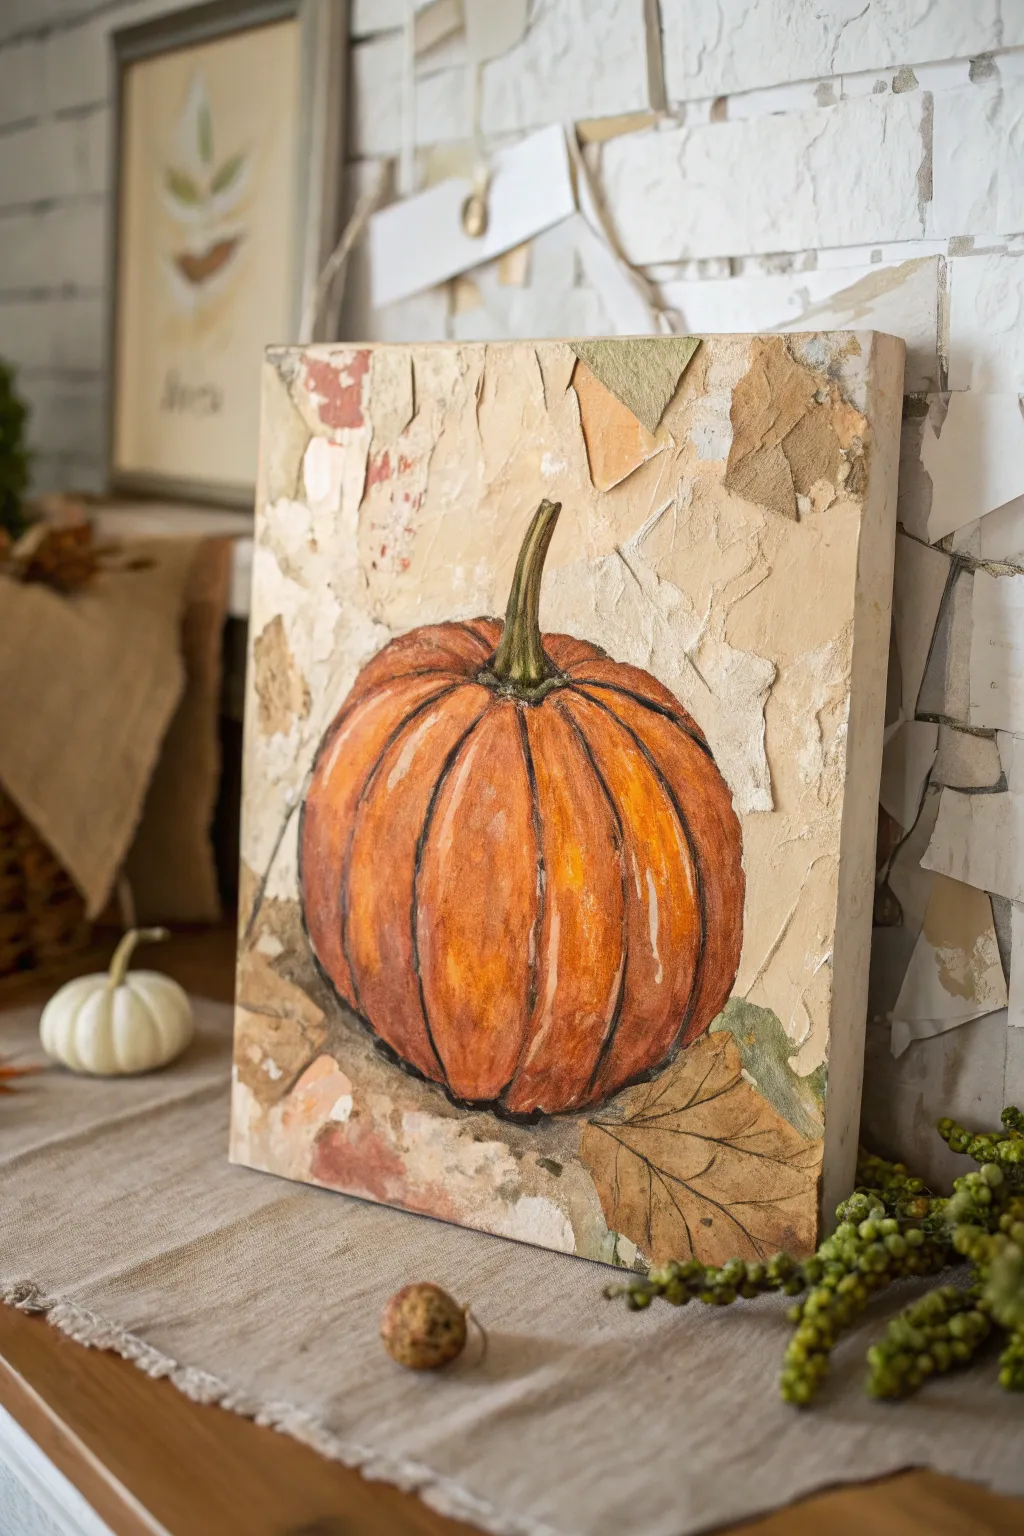
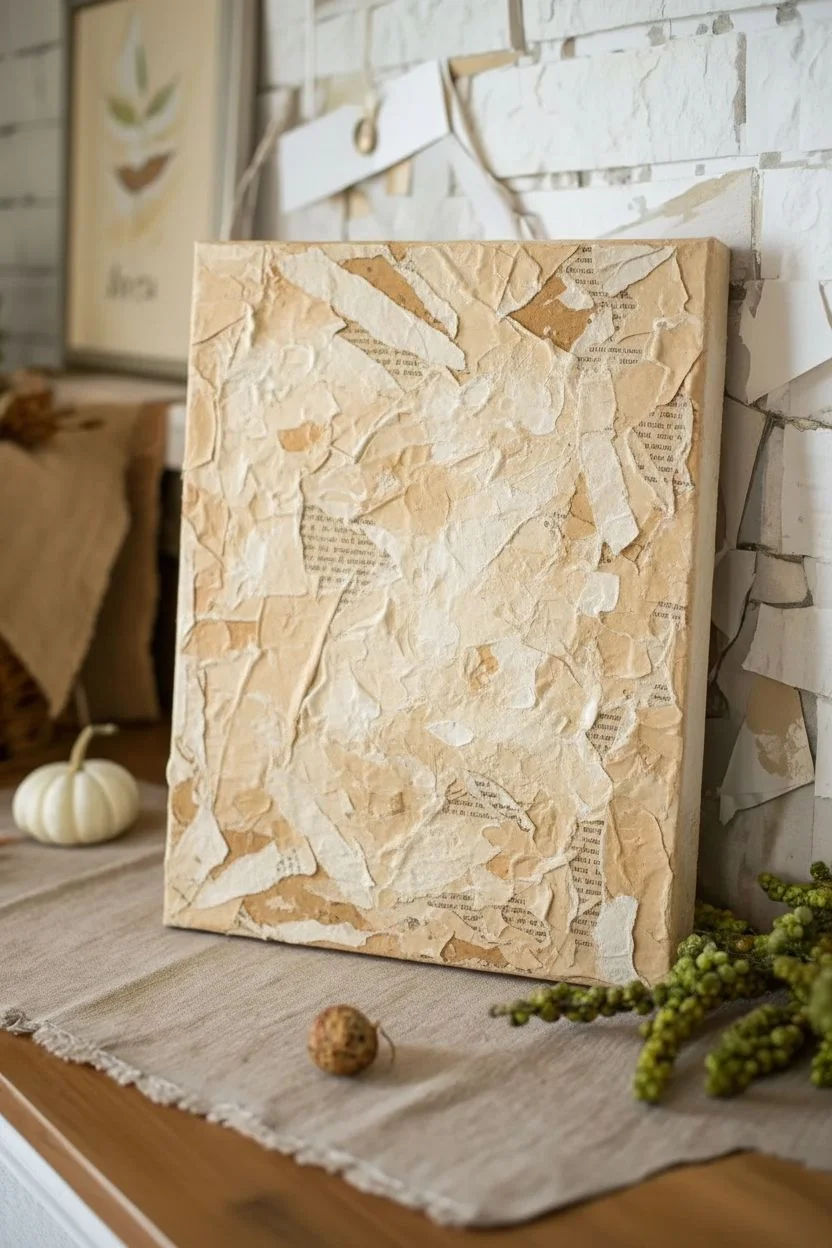
This project combines the tactile beauty of collage with traditional acrylic painting to create a wonderfully textured autumn centerpiece. By layering torn paper scraps beneath your paint, you achieve a rugged, vintage depth that a simple canvas can’t match.
Step-by-Step Guide
Materials
- Stretched canvas (11×14 or similar size)
- Scrap paper (old book pages, grocery bags, textured scrapbook paper in beige/tan)
- Matte finish Mod Podge or gel medium
- Acrylic paints (burnt orange, yellow ochre, burnt umber, raw sienna, sap green, titanium white)
- Wide flat brush for collage
- Medium round brush for painting
- Fine liner brush for details
- Palette knife (optional for texture)
- Pencil for sketching
- Paper towels and water cup
Step 1: Building the Textured Background
-
Prepare your paper scraps:
Begin by tearing your various papers into irregular shapes. Avoid straight scissor cuts; the rough, torn edges are essential for blending the layers seamlessly. Aim for pieces ranging from 1 to 3 inches in size. -
Apply the base layer:
Brush a layer of Mod Podge or gel medium directly onto the canvas. Place your paper scraps onto the wet medium, overlapping them randomly to cover the entire white surface. -
Seal the texture:
Once the canvas is covered, brush another coat of your adhesive medium over the top of the papers. Use your fingers to smooth out major air bubbles, but don’t worry about wrinkles—they add character to the background. -
Add a wash of color:
Mix a very watery wash of raw sienna and titanium white. Lightly brush this over the dried paper collage to unify the different scraps into a cohesive, warm beige background. Let this dry completely.
Wrinkle Rescue
If your paper bubbles too much, prick the air pocket with a pin while wet and press flat. If dry, sand it lightly to distress it intentionally.
Step 2: Sketching and Blocking
-
Outline the pumpkin shape:
Using a soft pencil, lightly sketch a large oval shape slightly off-center on the canvas. Add the vertical curved lines (ribs) of the pumpkin, making them wider in the middle and tapering at the top and bottom. -
Sketch the stem:
Draw a sturdy, slightly twisted stem emerging from the top center dip of the pumpkin. Keep the base of the stem thick where it connects to the fruit. -
Add grounding elements:
Sketch a few jagged shapes at the base to represent dried autumn leaves lying beneath the pumpkin. -
Block in the base orange:
Mix a mid-tone orange using burnt orange and a touch of yellow ochre. Paint the entire body of the pumpkin with this color, leaving the sketch lines visible if possible. Don’t worry about being perfectly opaque; letting the paper texture show through is part of the charm.
Step 3: Adding Depth and Detail
-
Define the ribs:
Mix a darker shadow color using burnt orange and a tiny bit of burnt umber. Paint along the vertical pencil lines to create the varying segments of the pumpkin. -
Highlight the curves:
Mix yellow ochre with titanium white. Apply this highlight color to the center of each pumpkin segment (rib) to make the form look round and three-dimensional. -
Blend the gradients:
While the paint is still slightly tacky, use a damp brush to gently feather the edges between your dark rib lines and the lighter centers, creating a smooth transition. -
Paint the stem:
Fill in the stem with sap green mixed with a little burnt umber. Add thin streaks of pure sap green and yellow ochre vertically up the stem to mimic fibrous texture. -
Create the base leaves:
Paint the leaf shapes at the bottom using a wash of raw sienna and burnt umber. I like to keep this paint very thin so the collage texture beneath really pops as ‘crinkled leaf veins’.
Metallic Touch
Rub a tiny amount of gold leaf or metallic bronze paint onto the raised edges of the collage paper for an elegant, shimmering finish.
Step 4: Refining and Outlining
-
Add final separation lines:
Using a fine liner brush and watered-down burnt umber (almost ink-like consistency), carefully re-trace the deepest crevices between the pumpkin ribs for sharp definition. -
Dry brush texture:
Load a dry brush with a tiny amount of off-white paint. Lightly whisk it over the top of the pumpkin and the background paper edges to catch the high points of the texture. -
Ground the object:
Add a simple cast shadow under the pumpkin using a transparent glaze of burnt umber to anchor it to the surface.
Display your textured masterpiece on a mantle or shelf to bring a cozy, artistic warmth to your seasonal decor


Have a question or want to share your own experience? I'd love to hear from you in the comments below!