Fall is basically nature showing off, and it’s the easiest season to paint because the colors do so much of the work for you. These easy fall painting ideas are all about cozy vibes, simple shapes, and beginner-friendly techniques you can actually finish in one sitting.
Pumpkin Patch With Simple Rows
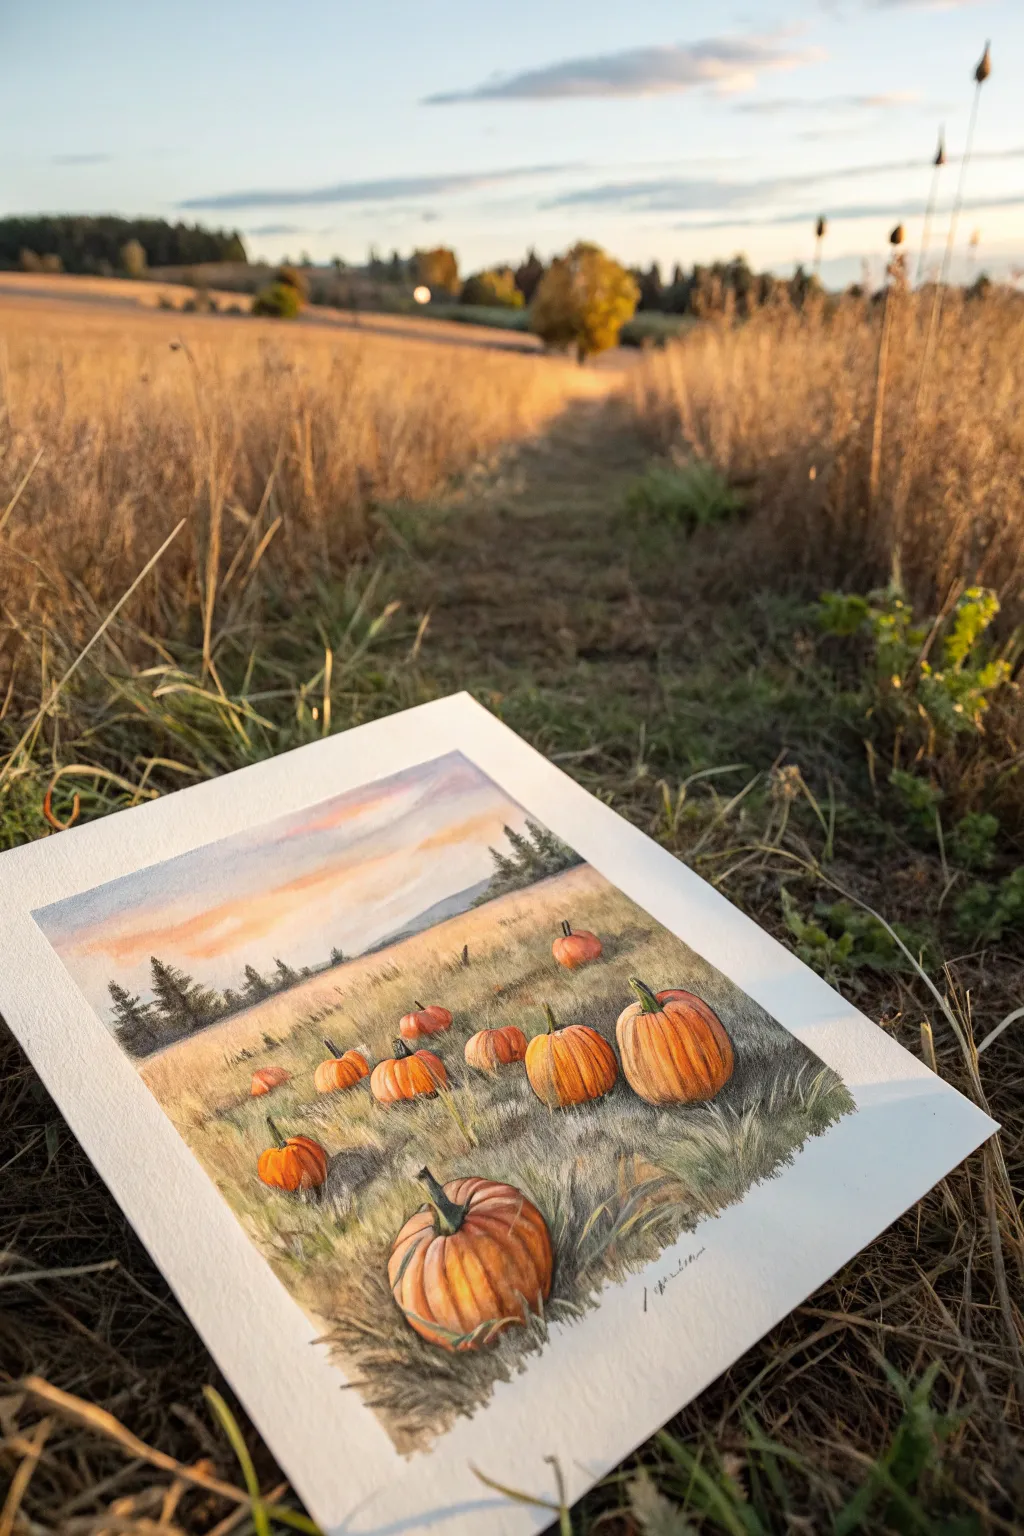
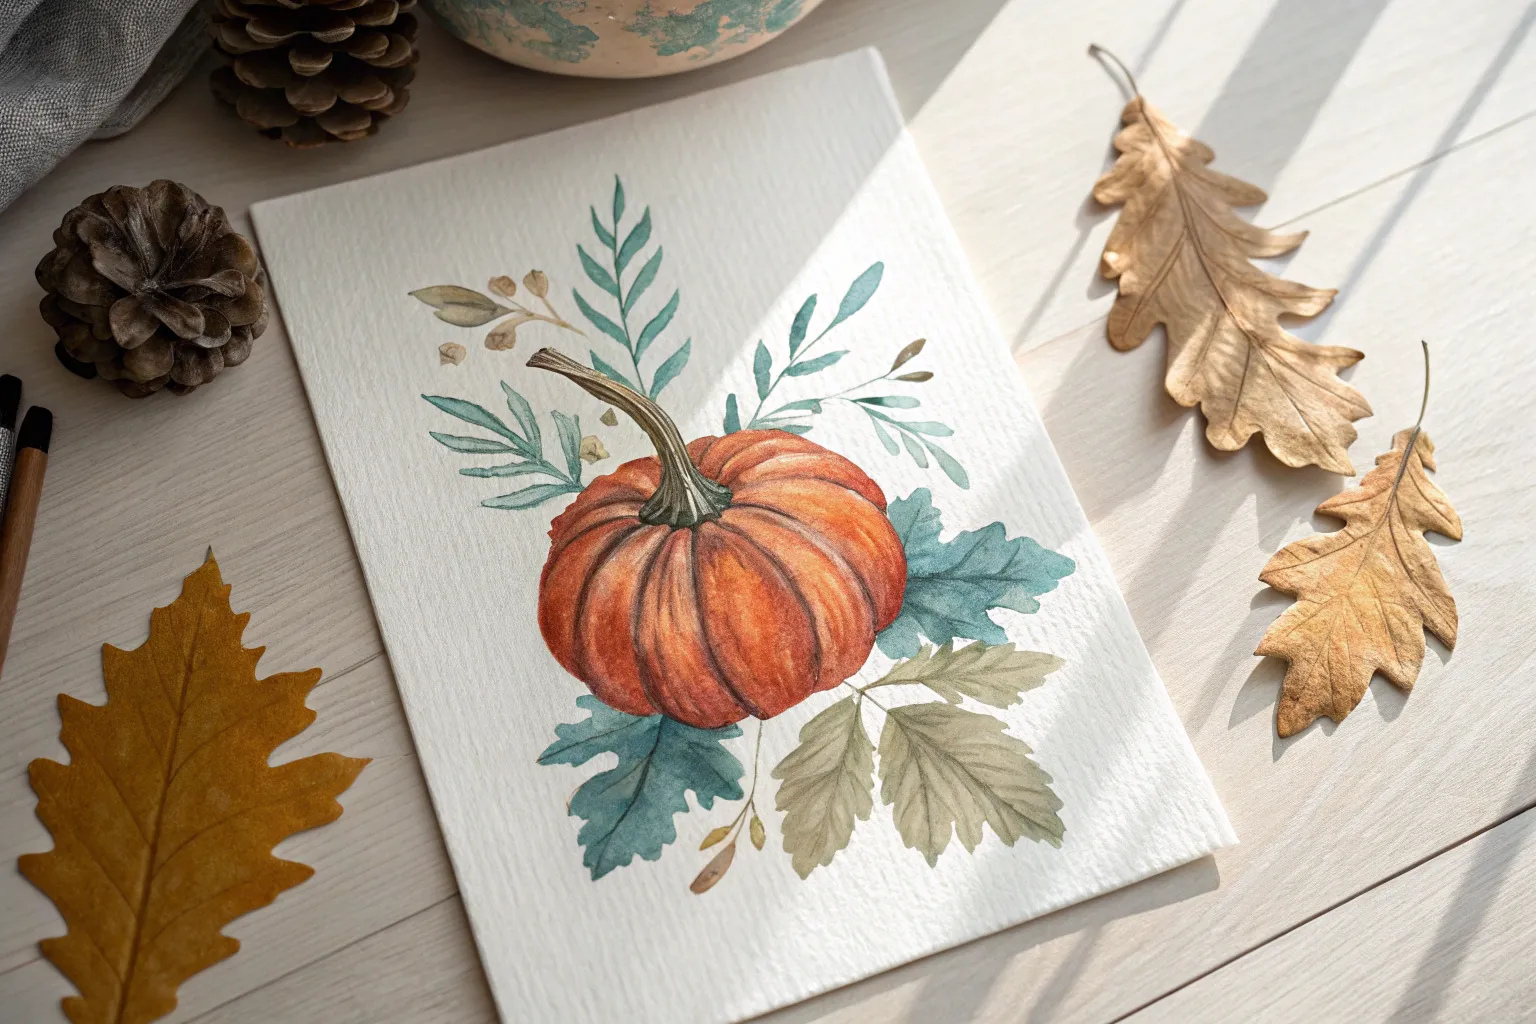
Capture the warmth of a late autumn afternoon with this watercolor landscape featuring a scattered pumpkin patch. The soft, glowing light and textured grasses create a nostalgic scene that perfectly mirrors the beauty of the harvest season.
How-To Guide
Materials
- Cold press watercolor paper (140lb/300gsm)
- Watercolor paints (Cadmium Orange, fluid Burnt Sienna, Sap Green, Ultramarine Blue, Yellow Ochre, Alizarin Crimson)
- Round brushes (sizes 4, 8, and 12)
- Masking fluid (optional, but helpful for pumpkins)
- Pencil (HB or 2B) and kneaded eraser
- Paper towels
- Two jars of water
- Painter’s tape or washi tape
Step 1: Planning and Sketching
-
Tape the Edges:
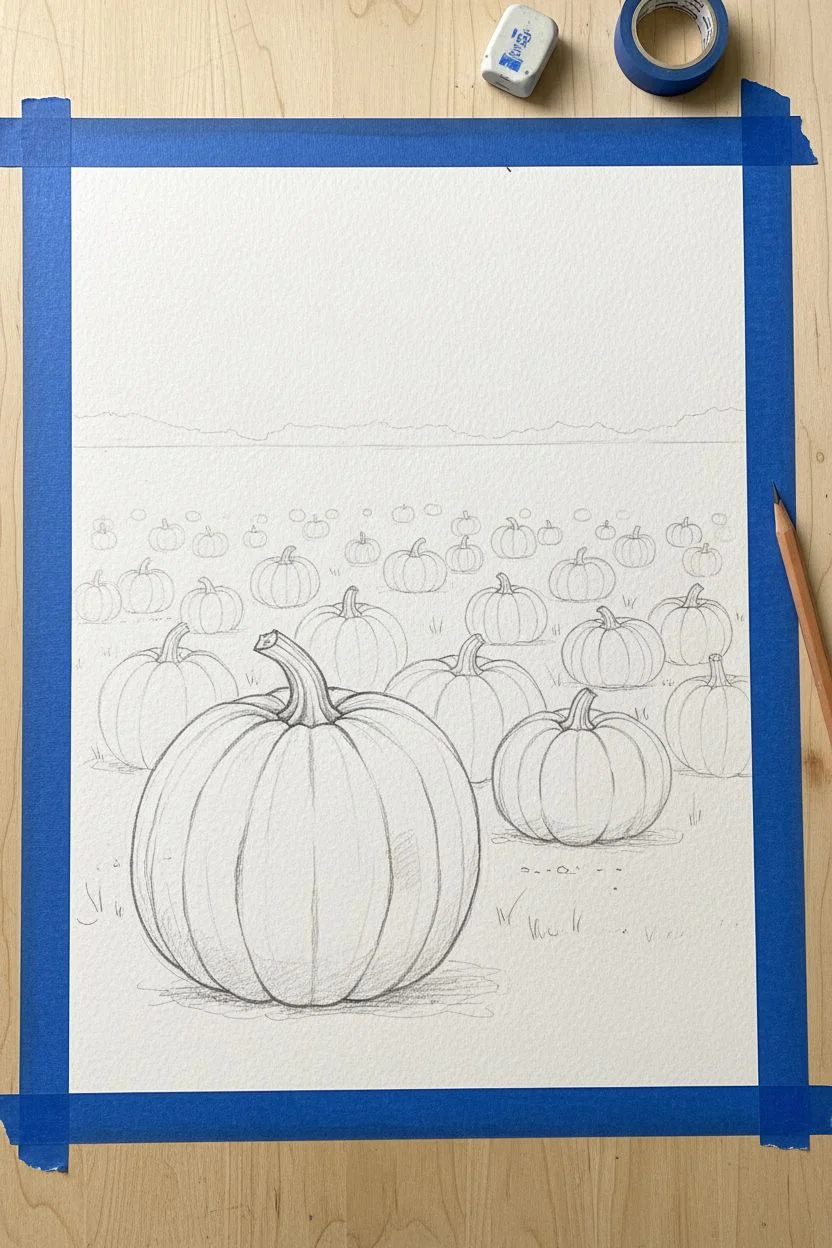
Begin by taping down your paper to a hard board using painter’s tape. This creates that crisp white border seen in the photo and prevents the paper from buckling during heavy washes. -
Establish the Horizon:
Lightly sketch a horizontal line about two-thirds of the way up the paper. This high horizon line emphasizes the foreground field and the pumpkins. -
Sketch the Pumpkins:
Draw the pumpkins scattered throughout the field. Place the largest, most detailed pumpkin in the immediate foreground, slightly off-center. Add mid-sized pumpkins in the middle ground and small circles for distant ones near the horizon. -
Refine Shapes:
Refine the pumpkin shapes by sketching the curved ridges (ribs) that give them volume. Add stems pointing in various directions to make the patch look organic and natural. -
Optional Masking:
If you want to keep your pumpkins bright orange without worrying about the grass color bleeding in, apply a thin layer of masking fluid over the pumpkin shapes and let it dry completely.
Step 2: Painting the Sky and Background
-
Wet-on-Wet Sky:
Wet the entire sky area with clean water using your size 12 brush. While wet, drop in pale Yellow Ochre near the horizon line to represent the setting sun. -
Add Cloud Colors:
While the paper is still damp, mix a soft violet gray using Ultramarine Blue and a tiny touch of Alizarin Crimson. Sweep this horizontally across the top of the sky, letting it blend softly into the yellow. -
Paint the Distant Trees:
Once the sky is dry to the touch, mix a dark, cool green using Sap Green and Ultramarine Blue. With the tip of a size 8 brush, dab in a line of distant overlapping pine trees along the horizon line. Keep the edges slightly uneven for a natural look. -
First Field Wash:
Mix a large puddle of watered-down Yellow Ochre and a touch of Burnt Sienna. Apply a wash over the entire grass area (paint around the pumpkins if you didn’t use masking fluid). This creates the base color for dried autumn grass.
Muddy colors?
If your grass looks muddy, let the first yellow layer dry fully before adding green strokes. Wet-on-wet green over yellow can turn brown if overworked.
Step 3: Bringing the Pumpkins to Life
-
Apply Base Color:
Remove the masking fluid if used. Paint each pumpkin with a base wash of Cadmium Orange. While wet, drop in pure yellow on the top highlights to show where the light hits them. -
Shadows and Volume:
While the orange is still damp, paint curved lines of Burnt Sienna or reddish-orange along the ribs of the pumpkins to create roundness. Darken the bottom of each pumpkin where it sits in the grass. -
Painting Stems:
Use a mix of Sap Green and Burnt Umber for the pumpkin stems. Make the base of the stem slightly wider where it attaches to the fruit. -
Adding Contrast:
Once the pumpkins are dry, mix a deeper orange-brown and glaze over the shadowed side of the pumpkins (opposite the light source) to give them weight and form.
Add some frost
For a chilly late-season look, lightly spatter opaque white gouache over the foreground grass to simulate morning frost.
Step 4: Textures and Details
-
Grass Texture:
Using a size 4 brush and a mix of Sap Green and Burnt Sienna, start flickering upward strokes around the base of the pumpkins. This grounds them so they don’t look like they are floating. -
Foreground Detail:
In the immediate foreground, paint distinct blades of grass. I prefer using a dry brush technique here—loading the brush with pigment but removing most water—to create rough, textured grass strokes. -
Cast Shadows:
Mix a shadow color (violet-gray or a dark cool green) and paint shadows extending from the base of the pumpkins onto the grass slightly to the right, consistent with your light source. -
Final Adjustments:
Step back and assess your values. If the foreground needs more punch, deepen the shadows under the largest pumpkin. Add a few very dark, thin strokes in the distant tree line to define distinct trees. -
The Reveal:
Wait for the painting to be 100% bone dry. Carefully peel the tape away at a 45-degree angle to reveal your crisp, clean edges.
Sign your name in the corner and frame your piece to bring a permanent touch of autumn into your home


Easy Fall Tree With Dabbed Leaves
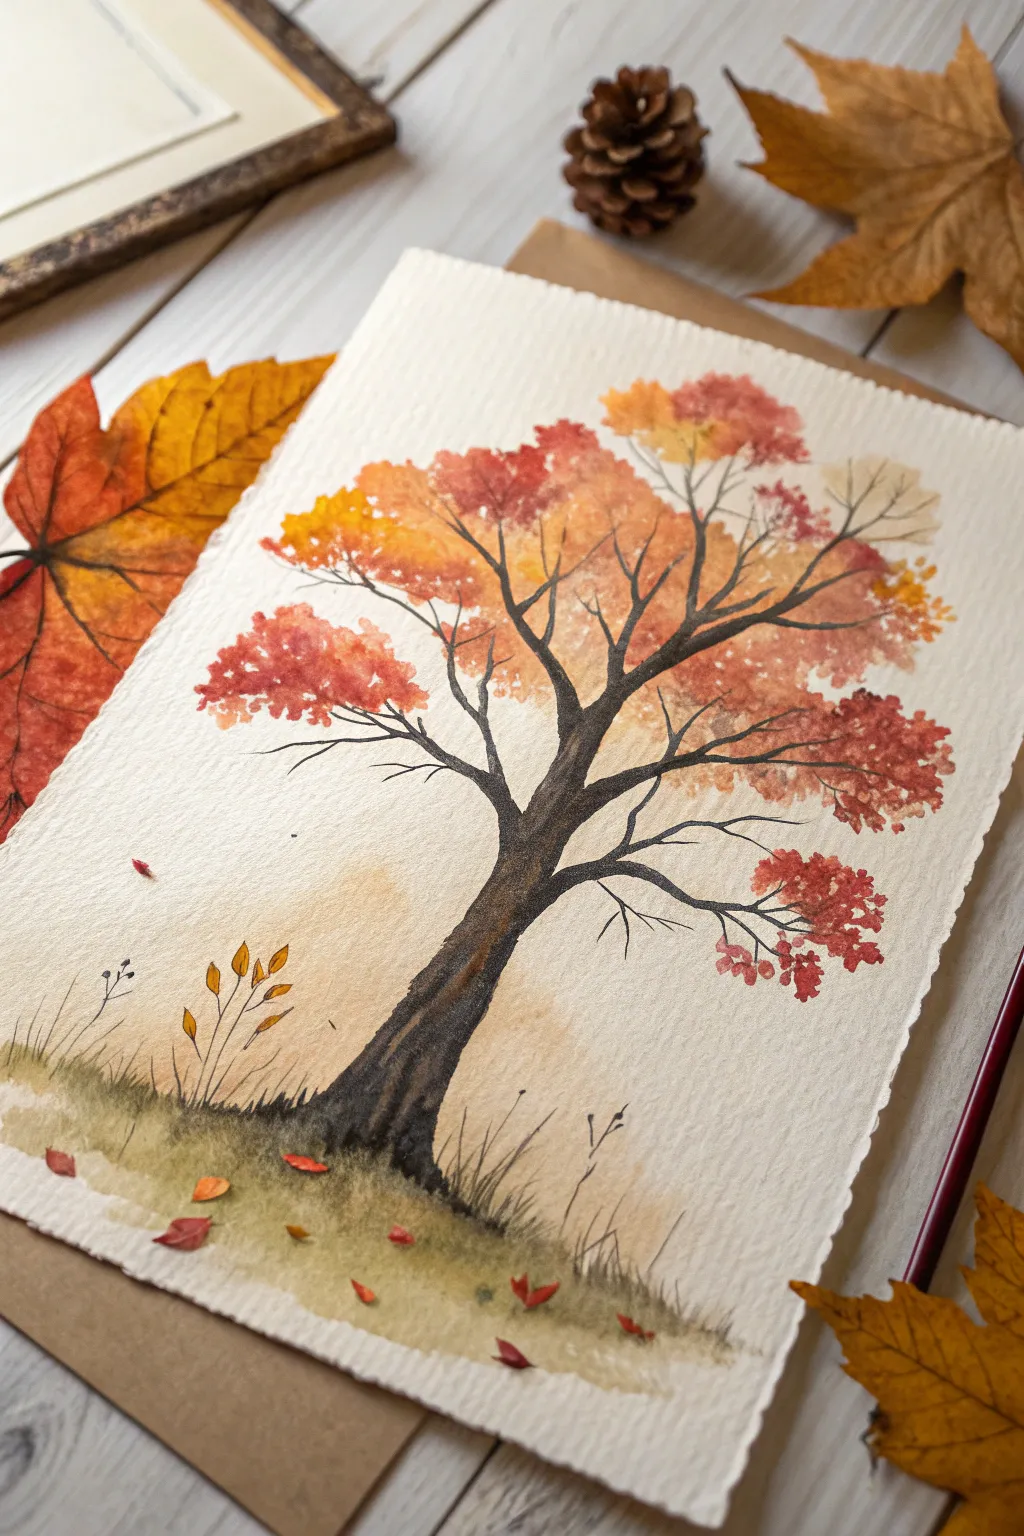
Capture the essence of fall foliage with this deceptively simple watercolor project that relies on loose dabbing techniques. The textured deckle-edge paper gives the final piece a vintage, organic feel perfect for seasonal decor.
Step-by-Step
Materials
- Cold press watercolor paper (deckle-edge preferred)
- Watercolor paints (burnt umber, lamp black, cadmium orange, alizarin crimson, yellow ochre, sap green)
- Round watercolor brush (size 6 or 8)
- Fine liner brush (size 0 or 1)
- Pencil (HB or H)
- Jar of water
- Paper towels
- Kraft paper or cardboard for mounting (optional)
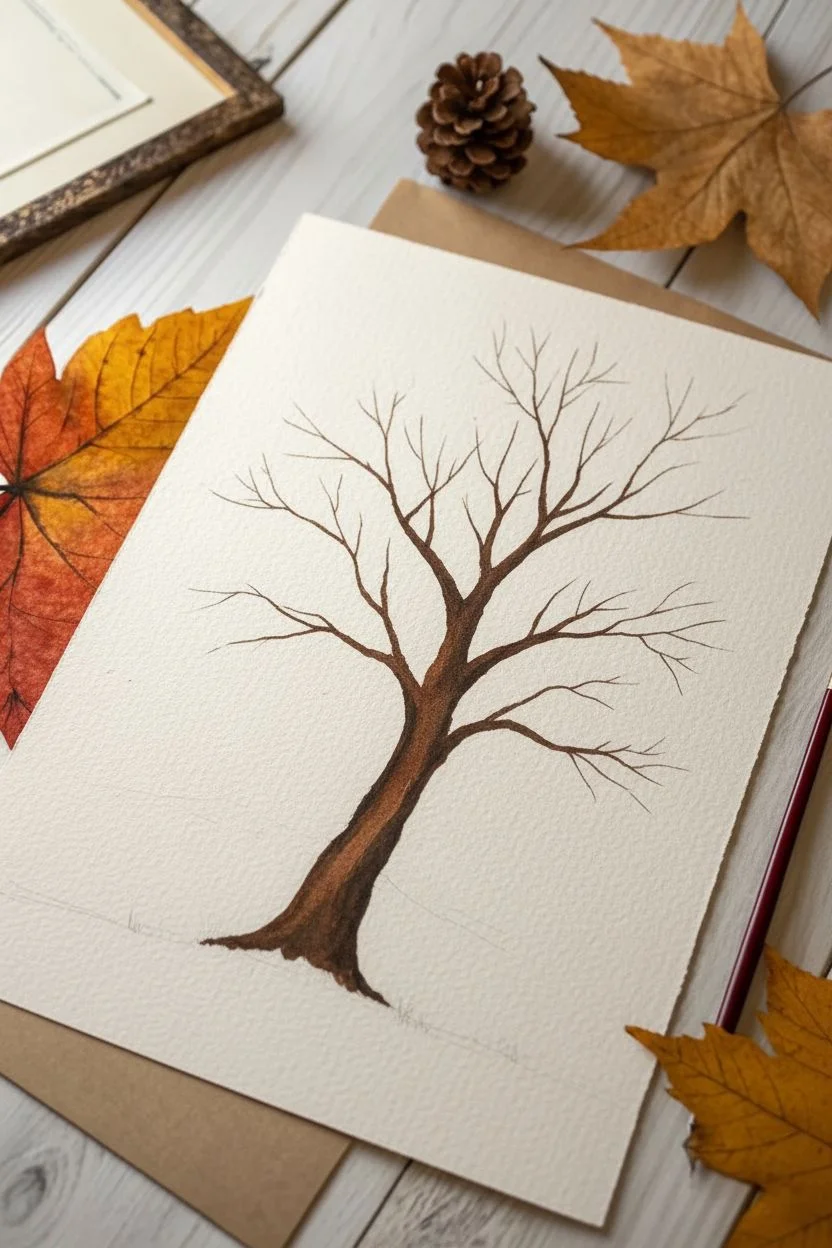
Step 1: Setting the Structure
-
Paper preparation:
If you are using a standard sheet of watercolor paper, you can tear the edges carefully against a ruler to create that rustic deckle-edge look shown in the photo, or simply tape your paper down to a flat board. -
Sketch the framework:
Lightly sketch the main trunk line, curving it slightly to the right to give the tree character. Add a few main scaffold branches spreading outward, but keep the lines very faint so they don’t show through the paint later. -
Painting the base trunk:
Mix burnt umber with a touch of lamp black to create a deep, rich brown. Using your round brush, fill in the trunk, starting wider at the base and tapering as you go up. -
Adding texture to the bark:
While the trunk is still slightly damp, lift out a tiny bit of color on the left side with a dry brush to create a highlighted area, giving the trunk roundness and volume. -
Extending the main branches:
Switch to your fine liner brush. Pull paint from the top of the main trunk outward to create thin, reaching branches. Remember that tree branches naturally split into ‘V’ shapes as they grow outward. -
Fine twig details:
Add smaller, distinct twigs coming off the main branches. Keep your hand loose and let the lines be slightly shaky; perfect straight lines look unnatural in nature.
Step 2: Creating the Foliage
-
Mixing fall colors:
Prepare puddles of your fall colors on your palette: bright orange, deep red, and golden yellow. You want these to be fairly diluted but still vibrant. -
Start with lightest tones:
Using the round brush, dab clumps of yellow ochre and light orange near the ends of the upper branches. Use a stippling motion—just touching the tip of the brush to the paper repeatedly. -
Adding mid-tones:
While the yellow areas are still wet, dab cadmium orange right next to and slightly into the yellow patches. Watch how the colors naturally bleed into each other to create soft transitions. -
Deepening with reds:
Introduce alizarin crimson to the lower clusters of leaves and the outer edges. Concentrate these darker reds on the shadow sides of leaf clumps for dimension. -
Creating airy gaps:
Don’t fill the entire canopy. Leave specific white spaces between leaf clusters so the sky can peek through. This negative space prevents the tree from looking like a solid lollipop. -
Connecting the leaves:
Once the leaf clusters are dry, use your liner brush with the dark brown mix to paint tiny stems connecting the floating leaf patches back to the main branches.
Muddy Leaves?
If your fall colors are turning brown where they touch, let the first color layer dry completely before dabbing the next color nearby. Wet-on-wet blends, wet-on-dry layers.
Step 3: Ground and Final Details
-
Washing the ground:
Dilute some sap green with a tiny bit of brown. Paint a horizontal wash at the bottom of the trunk for the ground, flicking the brush upward rapidly to suggest blades of grass. -
Soft background wash:
I like to add a very watery, pale wash of orange-yellow behind the lower trunk and ground area to simulate a hazy autumn atmosphere. Keep this extremely subtle. -
Painting fallen leaves:
Dab a few small spots of red and orange on the ground and ‘falling’ in mid-air. These should be looser and less defined than the leaves on the tree. -
Adding dry weeds:
Use the liner brush with diluted brown to add a few tall, thin dry weeds or stalks poking up from the grassy area on the left and right sides. -
Final contrast check:
Once completely dry, assess your values. If the trunk dried too pale, glaze over it with another layer of dark brown to ensure it anchors the painting visually.
Add Metallic Magic
Mix a tiny amount of gold watercolor or metallic pigment into your yellow leaf clusters. When the light hits the painting, it will shimmer like sunlit foliage.
Mount your finished piece on a piece of kraft paper to complete that warm, rustic presentation


Falling Leaves in a Breezy Swirl
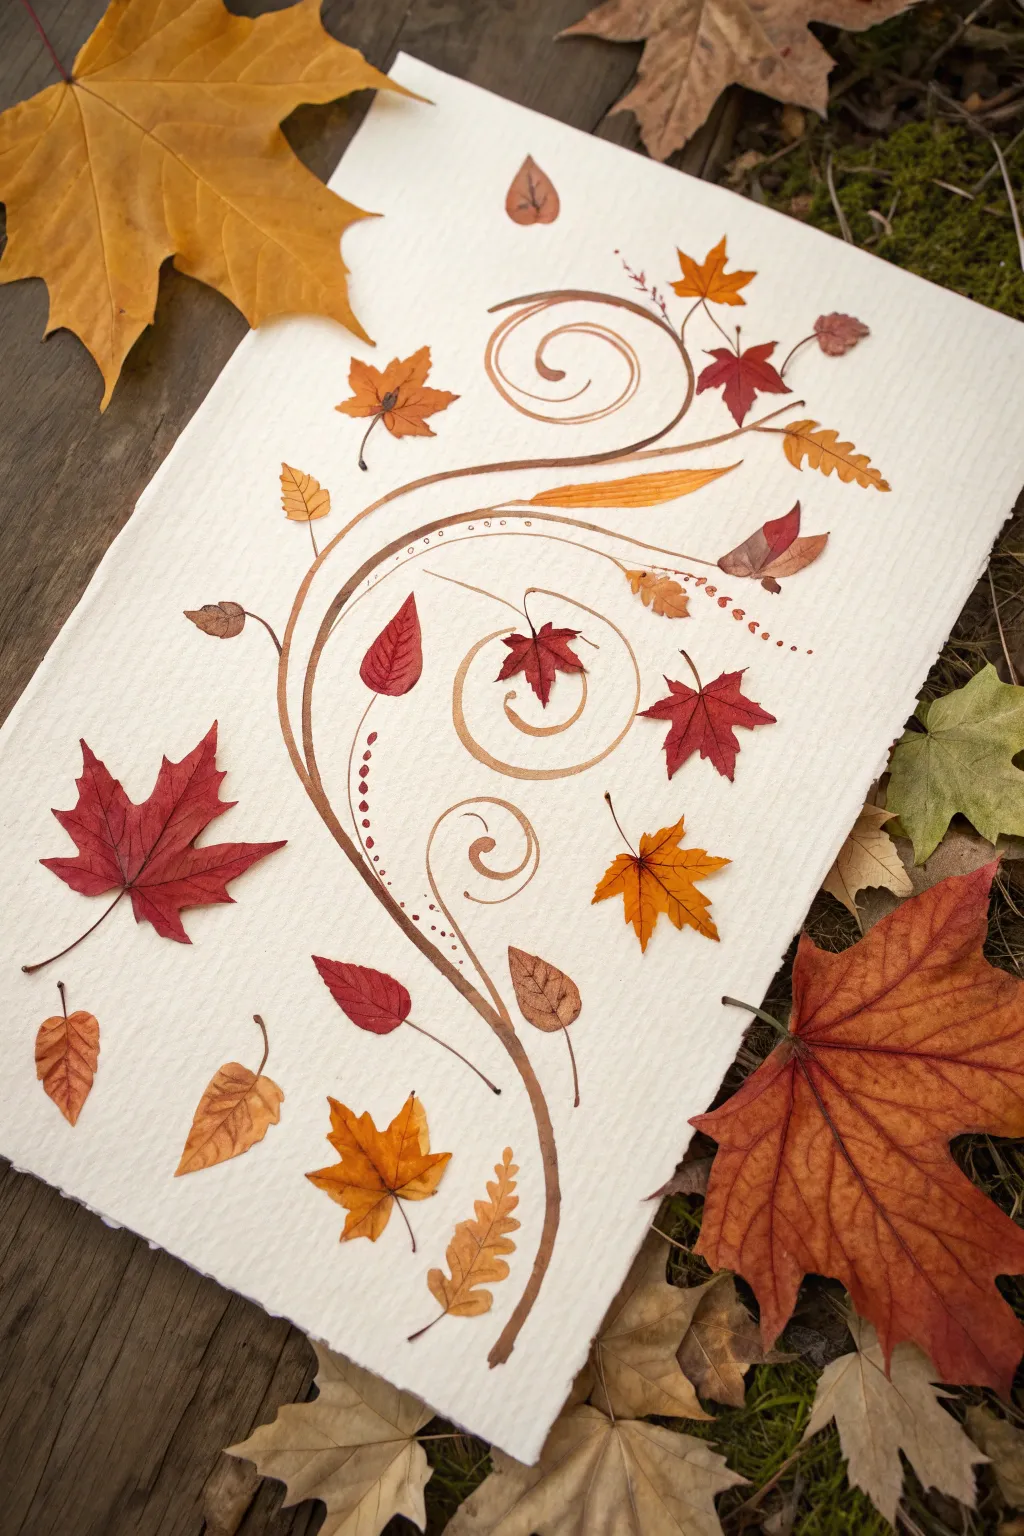

Capture the breezy movement of autumn with this delicate composition that combines the grace of painted vines with the texture of pressed foliage. This project creates a beautiful, organic flow that mimics leaves dancing in a gentle fall wind.
Step-by-Step Tutorial
Materials
- Heavyweight watercolor paper (cold press creates nice texture)
- Brown watercolor paint or ink
- Fine liner brush (size 0 or 00)
- Round brush (size 4 or 6)
- Assorted small pressed autumn leaves (real or high-quality paper cutouts)
- PVA glue or matte medium
- Pencil for light sketching
- Tweezers
- Paper towels
Step 1: Planning the Flow
-
Sketch the spine:
Begin by lightly sketching a large, S-shaped curve that starts from the bottom right and sweeps up towards the top left. This will be the main ‘spine’ of your wind gust. -
Add spiral accents:
Branching off your main S-curve, lightly pencil in three to four spiral flourishes. I like to place a large one near the top right and smaller ones tucked into the curves of the main line to create rhythm. -
Check composition:
Before painting, lay your pressed leaves onto the paper without glue. Arrange them along your sketched lines to ensure you have enough space and a balanced distribution of colors.
Sticky Situation
If your pressed leaves are brittle and cracking when glued, try brushing the glue onto the paper first, rather than the leaf itself, then gently dropping the leaf onto the glue patch.
Step 2: Painting the Vines
-
Mix your brown:
Create a watery, translucent brown using watercolor or ink. It should be dark enough to see but light enough to look delicate. -
Paint the main stem:
Using your round brush, paint the main S-curve. Press down slightly at the base (bottom right) for a thicker line and lift your brush as you sweep upward to taper it into a fine point. -
Detail the spirals:
Switch to your fine liner brush. Carefully trace your spiral sketches, keeping these lines much thinner than the main stem. The contrast in line weight adds elegance. -
Add decorative dots:
Along the inner curves of your spirals, dab tiny dots of brown paint. Space them out gradually, like a trailing tail of dust or magic, to emphasize the feeling of movement. -
Let it dry completely:
Wait for the paint to be bone dry before moving on. Touching wet watercolor can smudge your crisp lines.
Metallic Magic
Once the brown paint is dry, outline the main vine with a very fine gold gel pen or gold watercolor. It adds a stunning shimmer that catches the light like autumn sun.
Step 3: Arranging the Foliage
-
Select focal leaves:
Choose your 3-4 largest, most vibrant leaves (like the red maples). Position them at key points along the curve, such as the bottom left and the center of the largest spiral. -
Place smaller accents:
Take tiny leaves, ferns, or seed pods and scatter them near the tips of the spirals. These smaller elements make the ‘wind’ look like it’s carrying debris. -
Create direction:
Make sure every leaf is pointing somewhat in the direction of the swirl. If a leaf points against the flow, it will disrupt the sense of motion. -
Test the layout:
Step back and look at your arrangement one last time. Ensure there’s breathing room between the leaves so the painted vines remain visible.
Step 4: Securing the Artwork
-
Apply adhesive:
Using tweezers, lift one leaf at a time. Apply a thin layer of PVA glue or matte medium to the back. Too much glue will cause the paper to buckle, so use it sparingly. -
Press into place:
Gently press the leaf back onto the paper. Hold it for a few seconds to ensure it bonds with the textured watercolor paper. -
Flatten the leaves:
Once all leaves are glued, place a clean sheet of wax paper over the artwork and weigh it down with a heavy book for an hour. This keeps the leaves perfectly flat as the glue cures. -
Final painted touches:
After the glue is dry, use your fine liner brush to paint tiny stems connecting the real leaves to your painted vine. This integrates the collage elements seamlessy. -
Erase guidelines:
If any pencil marks are still visible around your painted lines, gently erase them now to clean up the finished piece.
Hang your finished swirl in a simple frame to enjoy a permanent gust of autumn breeze
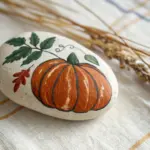


Acorn and Oak Leaf Mini Still Life
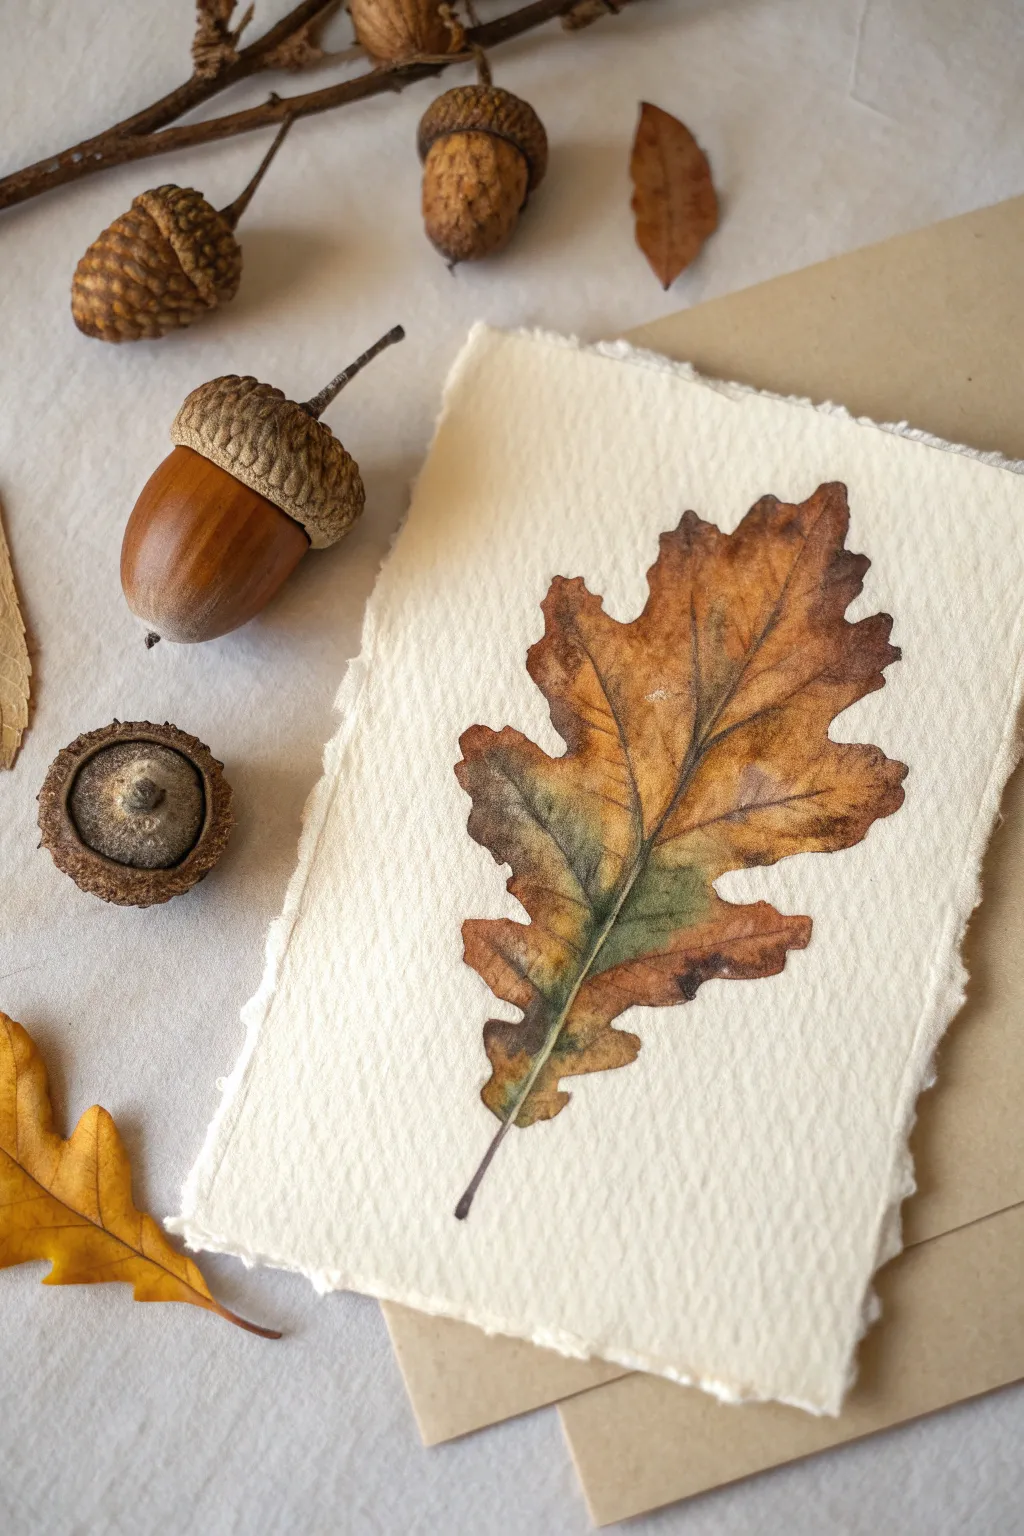
Capture the delicate beauty of autumn with this detailed botanical study on handmade paper. The textured surface and warm golden-brown tones create a vintage, rustic feel perfect for seasonal decor.
Detailed Instructions
Materials
- Heavyweight cold-press watercolor paper with deckled edges (approx. 4×6 inches)
- Watercolor paints (Burnt Sienna, Yellow Ochre, Sap Green, Burnt Umber, Payne’s Grey)
- Round watercolor brushes (size 0, 2, and 4)
- H pencil (for very light sketching)
- Kneaded eraser
- Jar of clean water
- Paper towels
- Palette for mixing
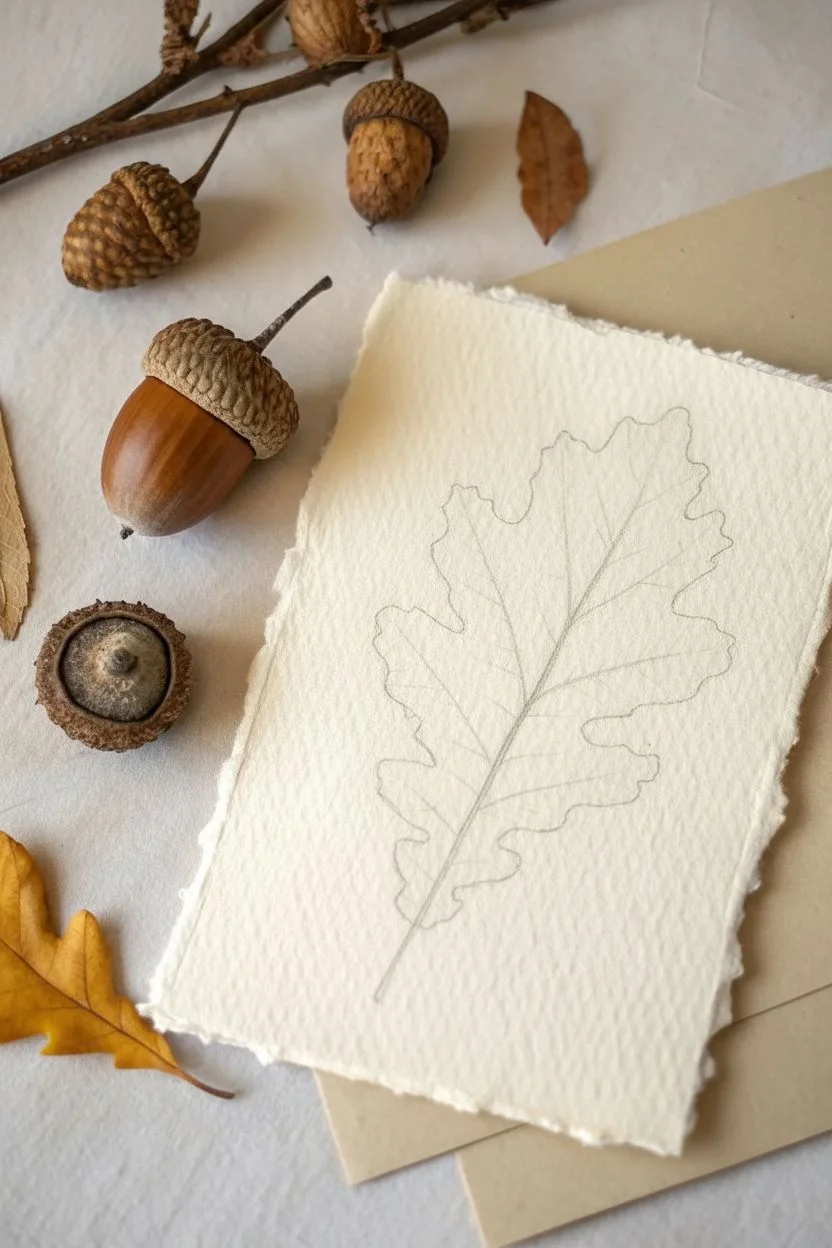
Step 1: Sketching the Outline
-
Position your subject:
If you have a real dried oak leaf, place it next to your paper for reference. Otherwise, study natural leaf shapes to understand the lobes. -
Lightly sketch the spine:
Using your H pencil, draw a very faint, curved line down the center of the paper to act as the main vein and stem. -
Draft the lobes:
Sketch the wavy outline of the oak leaf lobes. Keep the lines incredibly light—you don’t want graphite showing through the translucent watercolor later. -
Refine the edges:
Add small, jagged details to the edges of the lobes to mimic the natural crispness of a dried leaf. -
Lift excess graphite:
Roll your kneaded eraser gently over the entire sketch. You want the lines to be barely visible, just enough to guide your brush.
Deckle Edge Trick
If you don’t have handmade paper, you can fake the deckled edge! Crease regular watercolor paper, wet the fold with a brush, and gently tear it along a ruler.
Step 2: First Wash & Base Colors
-
Mix your base gold:
Create a watery mix of Yellow Ochre with a touch of Burnt Sienna. It should be transparent and warm. -
Apply the first wash:
Using the size 4 brush, paint the entire leaf shape with this golden mixture. Work quickly to keep a wet edge. -
Drop in green hints:
While the base wash is still wet (wet-on-wet technique), drop slight touches of watered-down Sap Green near the center vein, especially towards the bottom half. -
Add warmth to the tips:
Drop small amounts of concentrated Burnt Sienna into the tips of the lobes while the paper is still damp, letting the colors bleed naturally. -
Let it dry completely:
Wait until the paper is bone dry. If it feels cool to the touch, it is still wet inside the fibers.
Dealing with Blooms
If you get ‘cauliflower’ blooms where water pushes pigment away, don’t panic. For a dried leaf painting, these actually add perfect imperfections.
Step 3: Adding Texture & Veins
-
Mix a shadow color:
Combine Burnt Umber with a tiny dot of Payne’s Grey to create a deep, cool brown. -
Paint the main vein:
Switch to your size 0 or 2 brush. Carefully paint a thin line down the central spine, tapering it as you reach the top tip. -
Branch out:
Paint the secondary veins extending into each lobe. Keep these lines very delicate and slightly broken for a realistic look. -
Glaze focusing on shadows:
With a diluted Burnt Umber, paint gentle glazes along one side of the main vein to create depth and curvature. -
Create spotting:
Use a damp, stiff brush or an old toothbrush to flick tiny speckles of dark brown onto the leaf for that imperfect, organic texture. -
Darken the edges:
Using the size 2 brush and the dark brown mix, crisp up specific edges of the leaf, particularly in the crevices between lobes where shadows would gather. -
Paint the stem:
Use a concentrated dark brown to paint the stem at the bottom. Make the bottom of the stem distinct and sharp.
Step 4: Final Details
-
Soften harsh lines:
If any vein lines look too stark, run a slightly damp, clean brush along one edge of the line to soften it into the background. -
Review contrast:
Step back. I invariably find I need to darken the lowest point of the leaf near the stem to ground the image. -
Final dry:
Allow the painting to dry completely before framing or displaying.
Display your finished leaf alongside some real acorns for a charming seasonal vignette
BRUSH GUIDE
The Right Brush for Every Stroke
From clean lines to bold texture — master brush choice, stroke control, and essential techniques.
Explore the Full Guide
Sunset Silhouette With Bare Trees
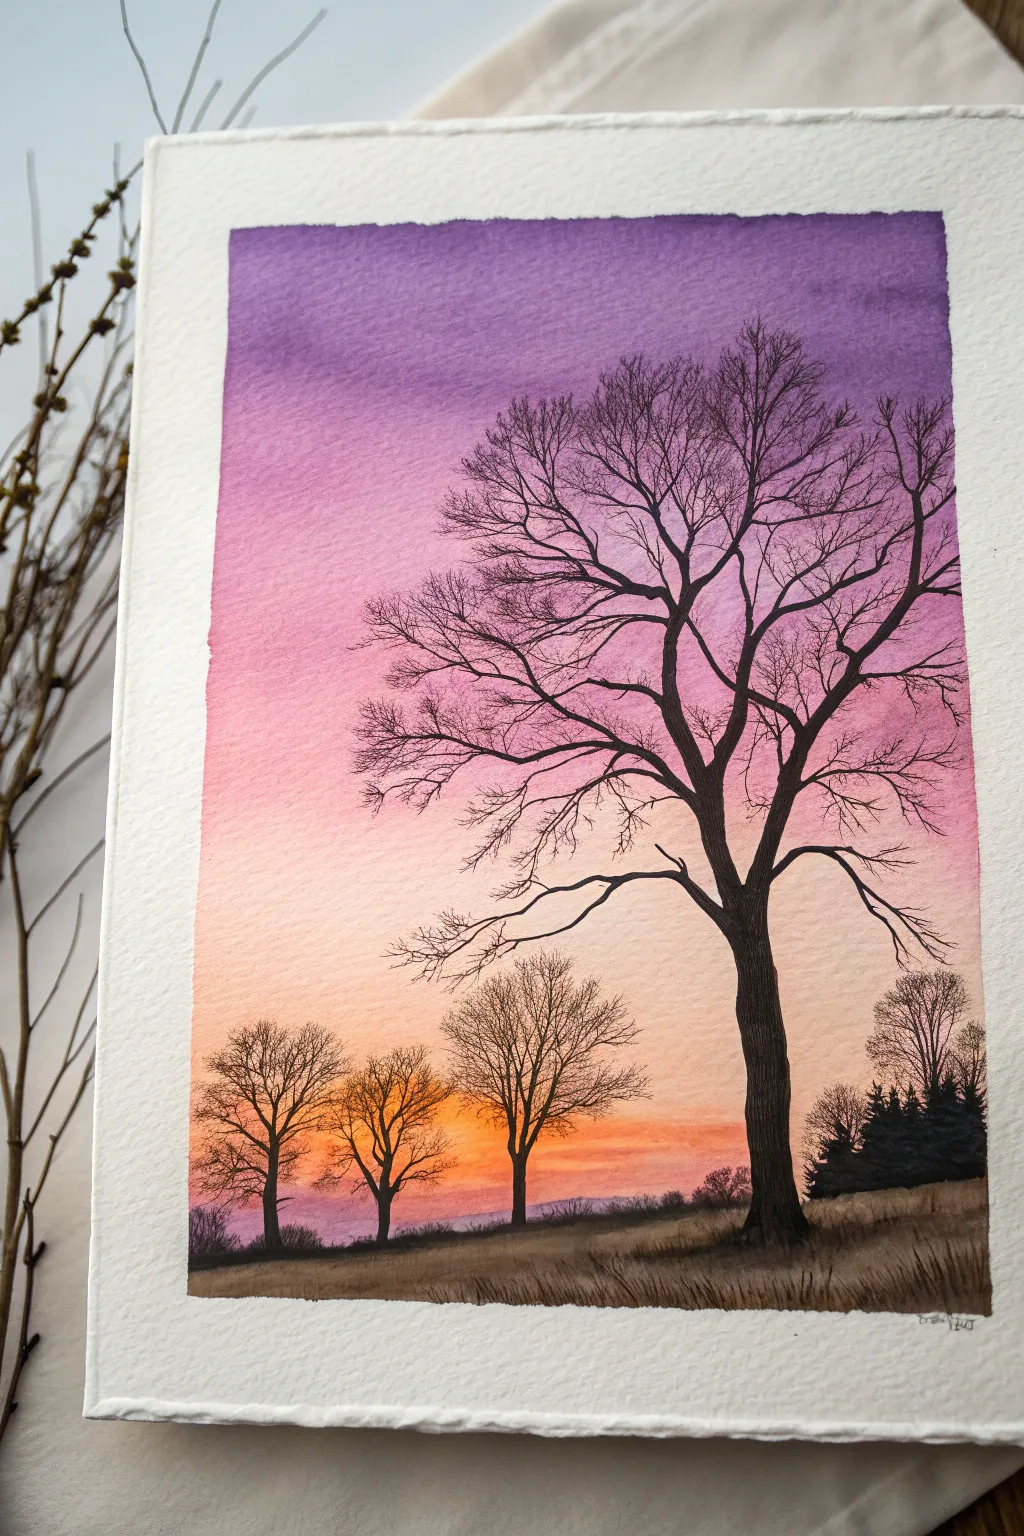
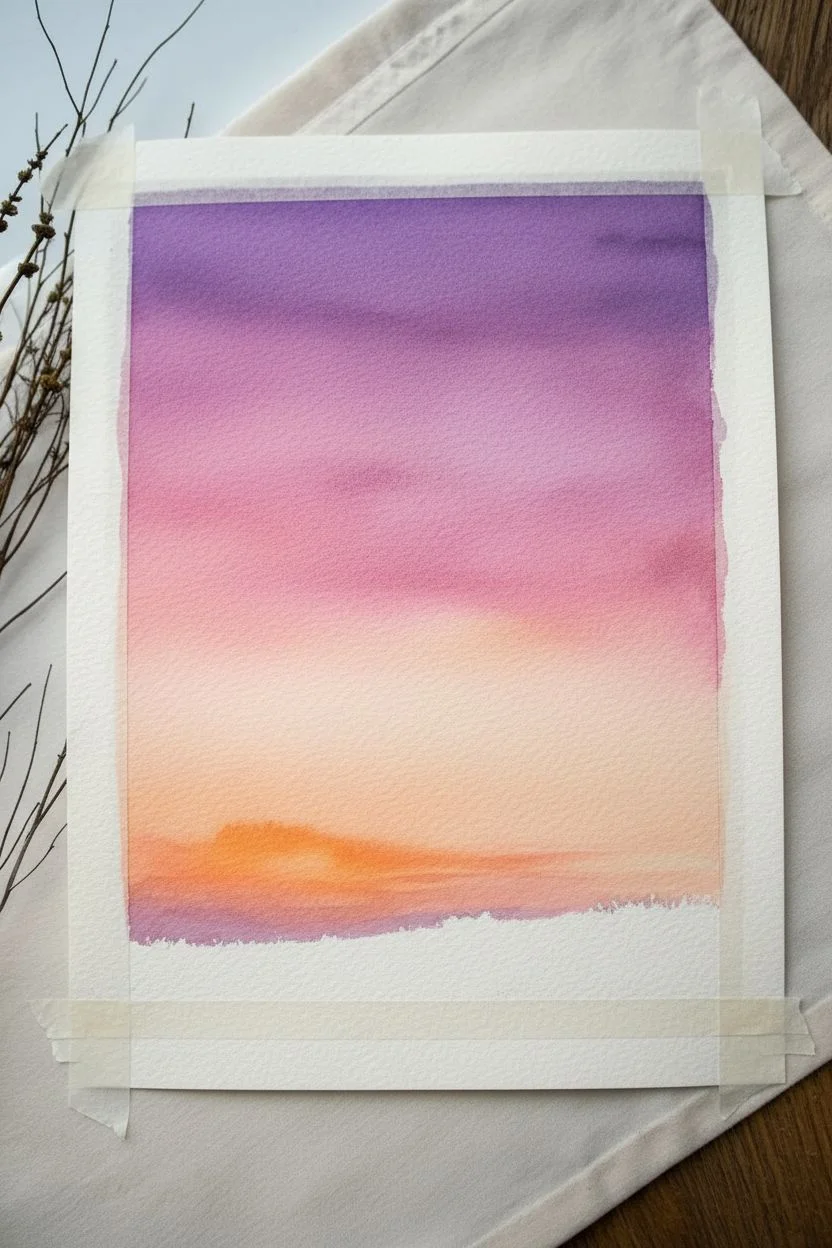
Capture the stark beauty of late autumn with this evocative watercolor landscape featuring a vibrant gradient sky. The contrast between the soft, glowing sunset and the sharp, dark silhouettes of leafless trees creates a striking visual that feels both peaceful and dramatic.
Step-by-Step Guide
Materials
- Cold press watercolor paper (140lb/300gsm), taped down
- Watercolors: Deep violet, magenta/rose, cadmium orange, yellow ochre, Payne’s gray or black, burnt umber
- Large flat wash brush (3/4 or 1 inch)
- Medium round brush (size 6 or 8)
- Fine liner or rigger brush (size 0 or 1)
- Masking tape
- Two jars of water (one for rinsing, one for clean water)
- Paper towels
- Pencil (HB or H)
Step 1: Painting the Gradient Sky
-
Prepare the paper:
Begin by taping the edges of your watercolor paper securely to a board. This creates the crisp white border seen in the example and prevents the paper from buckling during the wash. Use a pencil to very lightly sketch a low horizon line about one-fifth of the way up the page. -
Pre-wet the sky area:
With your large flat brush and clean water, apply an even coat of water to the entire sky area, stopping at the horizon line. You want the paper to be glistening but not forming puddles. -
Apply the violet top layer:
Load your brush with a watery deep violet. Paint a horizontal band at the very top of the paper, allowing the color to bleed downwards slightly into the damp paper. -
Blend in the middle tones:
Rinse your brush and pick up a vibrant magenta or rose color. Apply this just below the violet, slightly overlapping the two colors so they blend softly on the wet paper. -
Warm up the horizon:
Transition into cadmium orange as you move further down. As you approach the horizon line, mix in a little yellow ochre or warm yellow for that glowing sunset effect right above the ground. -
Adding texture clouds:
While the purple area is still damp, you can gently dab a slightly thirsty brush across the wash to lift a little color, creating faint, soft cloud streaks. -
Let the sky dry completely:
This is crucial. The sky must be bone dry before you paint the trees, or the black paint will bleed into a fuzzy mess. Use a hairdryer on a low setting if you need to speed this up.
Branch Genius
Use a rigger brush loaded with ink-consistency paint for the finest twigs. ‘Pull’ the paint outward from the branch rather than pushing it.
Step 2: Creating the Land and Silhouettes
-
Base layer for the ground:
Mix a diluted wash of burnt umber and yellow ochre. Paint the ground area below the horizon line, using horizontal strokes to suggest a grassy field. -
Adding ground texture:
While the ground wash is still wet, drop in slightly darker brown spots near the bottom edge. Using a dry brush, flick upwards gently from the bottom to create the suggestion of tall, dried field grass. -
Sketch the main tree:
Once the background is dry, use a pencil to lightly mark the position of the large tree on the right. Focus on the main trunk shape and the direction of the primary branches. -
Paint the main trunk:
Mix a very dark color using Payne’s gray and burnt umber (or just black). Using your medium round brush, paint the thick trunk of the foreground tree, making it wider at the base and tapering as it goes up. -
Detailing primary branches:
Switch to a smaller brush. extend the main branches outwards. Remember that trees are organic—let your hand wobble slightly to create natural bends and knots rather than straight lines. -
Using a rigger brush for twigs:
Change to your fine liner or rigger brush. Paint the delicate, spindly twigs at the ends of the branches. I find that holding the brush loosely at the end of the handle helps create more random, natural-looking twig patterns. -
Add background trees:
Using a slightly more diluted version of your dark mix (so they look further away), paint the smaller trees in the distance on the left side. Keep these shapes simpler and less detailed than the main tree. -
Paint the evergreens:
On the far right horizon, stipple (dab) your brush to create the jagged, triangular shapes of distant pine or evergreen trees. These should be quite dark to contrast against the bright sunset. -
Grounding the trees:
Add a few dark horizontal strokes at the base of your trees where they meet the ground to anchor them, suggesting shadows cast by the low sun. -
Final touches:
Review your branch structure. If some areas look too sparse, add a few more hair-thin twigs crossing over each other. Once fully dry, carefully peel off the masking tape at a 45-degree angle.
Level Up: Birds
Add 2-3 tiny ‘V’ shapes in the distance using your finest brush to represent birds returning to roost, adding life to the quiet scene.
Step back and admire the stark contrast of your silhouette against that glowing, colorful sky
Path Through Autumn Trees (Easy Perspective)
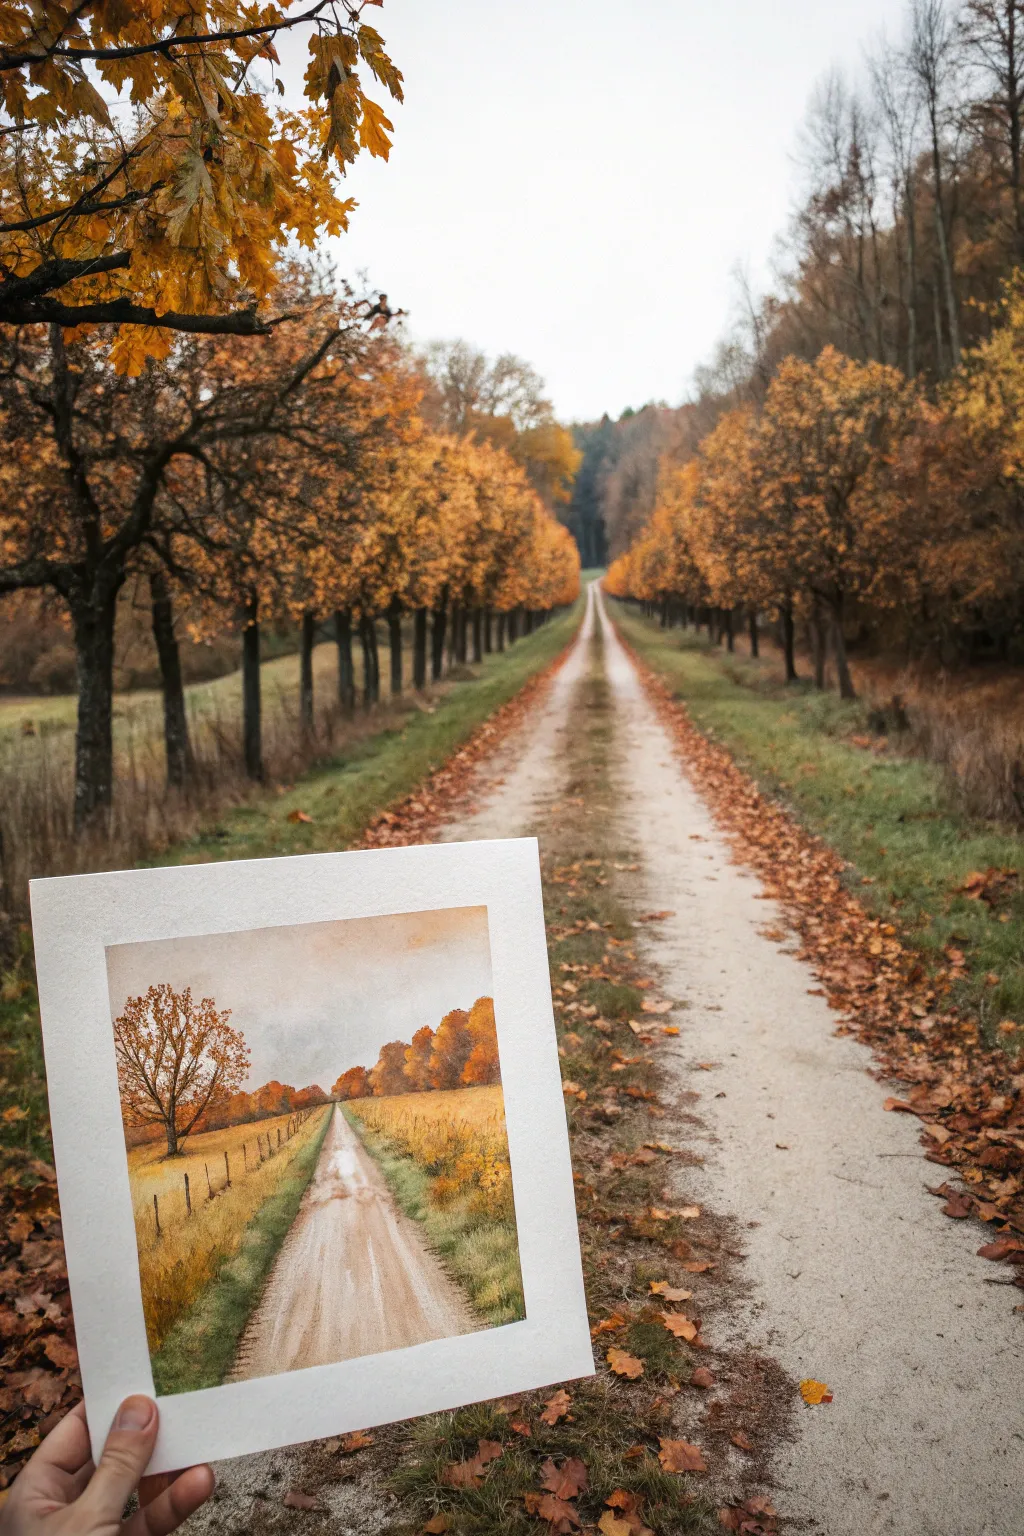
Capture the serene depth of an autumn dirt road cutting through golden fields with this atmospheric watercolor tutorial. The project uses one-point perspective to draw the viewer’s eye deep into the rustic landscape.
How-To Guide
Materials
- Cold press watercolor paper (140lb/300gsm)
- Watercolor paints (Burnt Sienna, Yellow Ochre, Ultramarine Blue, Sap Green, Burnt Umber)
- Masking tape (low tack)
- Flat wash brush (1/2 inch)
- Round brushes (sizes 4 and 8)
- Pencil (HB) and eraser
- Small cup of water
- Paper towels
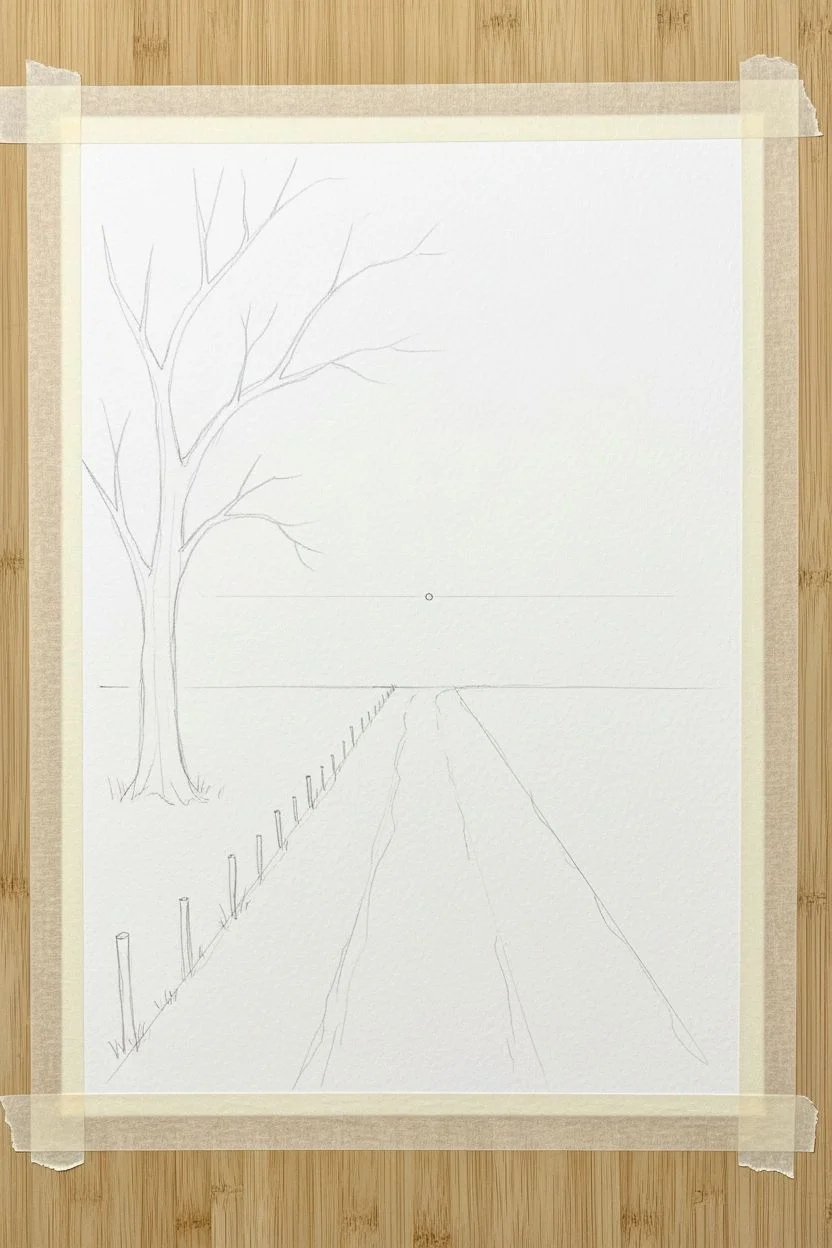
Step 1: Sketching the Perspective
-
Tape the borders:
Secure your paper to a hard board using masking tape on all four sides. This creates that crisp, clean white border shown in the example and keeps the paper from buckling when wet. -
Find the horizon:
Lightly draw a horizontal line roughly one-third of the way up from the bottom of the page. This will be your horizon line where the sky meets the ground. -
Establish the vanishing point:
Mark a small dot in the center of your horizon line. This is your vanishing point. -
Draw the path:
From the vanishing point, draw two diagonal lines extending downward to the bottom corners of the paper. Keep them narrow at the top and widening significantly as they reach the bottom to create the illusion of depth. -
Sketch the prominent tree:
On the left side, sketch the bare skeleton of a large tree. Focus on the trunk and main branches, remembering that organic shapes work best for nature scenes. -
Add fence posts:
Draw small vertical lines along the left side of the path for fence posts. Make the posts closer to the bottom of the page taller and spaced further apart, becoming shorter and closer together as they approach the horizon.
Step 2: Painting the Sky and Fields
-
Initial sky wash:
Wet the sky area with clean water using your flat brush. While damp, drop in a very pale wash of Ultramarine Blue mixed with a tiny touch of Burnt Umber to gray it down for an overcast autumn sky. -
Warm horizon glow:
While the sky is still damp, paint a faint line of Yellow Ochre right above the tree line area to suggest a warm, distant light. -
Base layer for fields:
Using a mix of Yellow Ochre and a touch of Sap Green, paint the grassy fields on either side of the road. Use horizontal brush strokes to suggest flat land. -
Texturing the foreground:
While the field wash is wet, drop in darker spots of Burnt Sienna and Sap Green near the bottom corners to create texture and visual weight in the foreground. -
Painting the road:
Mix a very diluted wash of Burnt Umber and a hint of blue. Paint the road surface, leaving streaks of white paper showing through to represent tire tracks or light reflecting on puddles.
Depth Trick
Make colors cooler (bluer) and paler as they get closer to the horizon line. Warm, dark colors advance, while cool, pale colors recede.
Step 3: Adding Trees and Details
-
Distant trees:
Mix Burnt Sienna with a little red or orange. Using the size 8 round brush, dab in the foliage for the distant tree line along the horizon. Keep shapes soft and undefined. -
Shadows on the tree line:
Add a darker mix of Burnt Umber and Ultramarine to the bottom of that distant tree line to ground it. -
The main tree trunk:
Switch to your size 4 round brush. With a dark mix of Burnt Umber, paint the trunk and branches of the large tree on the left. Use shaky, uneven strokes for a natural bark look. -
Main tree foliage:
Mix a vibrant orange using Yellow Ochre and Burnt Sienna. Stipple (dab repeatedly) leaves onto the branches of your main tree, leaving plenty of gaps so the sky shows through. -
Defining the fence:
Paint the fence posts with dark brown. Add very thin, faint horizontal lines connecting them to suggest wire. -
Roadside grass:
Use a thicker mix of Sap Green to paint short, upward flicks along the edges of the road where it meets the grass. This softens the transition between dirt and field. -
Road texture:
Once the road is dry, use a dry-brush technique (very little water on the brush) with light brown to drag texture across the dirt path, emphasizing the perspective lines. -
Final reveal:
Let the painting dry completely before carefully peeling off the masking tape at a 45-degree angle to reveal your clean edges.
Level Up: Puddles
Leave distinct, oval-shaped white spaces on the road. Carefully glaze the bottom edge of these shapes with the sky color to create reflective puddles.
Now you have a charming rural landscape that perfectly captures the golden light of the season

PENCIL GUIDE
Understanding Pencil Grades from H to B
From first sketch to finished drawing — learn pencil grades, line control, and shading techniques.
Explore the Full Guide
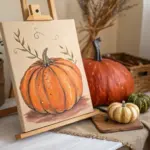
Candy Corn Color Blocking for Fall

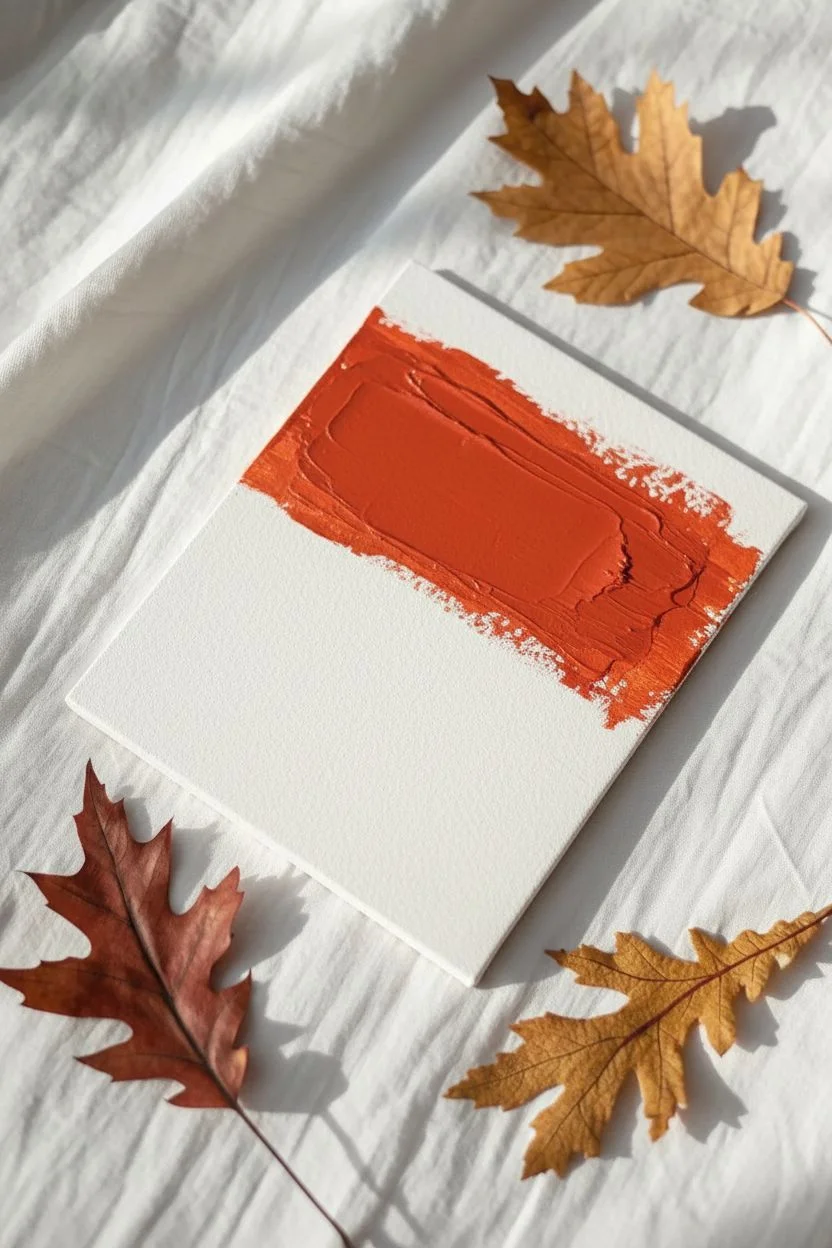
This minimalist painting captures the essence of autumn using just three bold, warm stripes reminiscent of classic candy corn. It’s a study in texture and color blocking that feels modern yet distinctly seasonal.
Step-by-Step
Materials
- Small rectangular canvas or heavy watercolor paper (approx. 5×7 inches)
- Acrylic paints: Rusty red-orange, bright pumpkin orange, and yellow
- Flat shader brush (size 10 or 12)
- Palette or paper plate
- Water cup
- Paper towels
Step 1: Preparation & First Stripe
-
Prepare your surface:
Lay down your canvas or thick paper on a flat surface. If you are using paper, you might want to tape the corners down lightly to prevent shifting, though keeping it loose allows for more freedom with the edges. -
Load the brush:
Squeeze a small amount of the rusty red-orange paint onto your palette. Dip your flat brush into the paint, ensuring the bristles are coated but not dripping. -
Test the dry brush:
Before hitting the canvas, dab the excess paint onto a paper towel. You want a ‘dry brush’ effect where the texture of the bristles shows through at the start and end of the stroke. -
Paint the top band:
Starting near the top third of your canvas, pull the brush horizontally from left to right. Don’t worry about perfectly straight edges; the rough, painterly look is part of the charm. -
Fill the color:
Go back over the center of this red-orange stripe to make the color opaque and solid, leaving the left and right edges slightly ragged and textured.
Step 2: Adding the Middle Layer
-
Clean your brush:
Rinse your brush thoroughly in water and dry it completely on a paper towel. Wet bristles will ruin the dry texture we are aiming for. -
Load the orange paint:
Pick up the bright pumpkin orange paint. Just like before, dab off a little excess so the paint isn’t gloopy. -
paint the middle band:
Position your brush directly below the red-orange stripe. Paint a horizontal band of orange. I like to let the wet edge of the orange just barely kiss the bottom of the red stripe. -
Blend the seam slightly:
If there is a gap, gently nudge the orange paint upward to meet the red. You don’t need to blend them into a gradient; just ensure they touch so there is no white space between colors. -
Refine the edges:
Add a little more paint to the center of the orange band to ensure bold coverage, keeping those outer edges rough and uneven consistent with the top stripe.
Textural trick
Don’t add water to your acrylics. Using the paint straight from the tube keeps it thick and helps create those lovely, ragged brush marks on the edges.
Step 3: Finishing with Yellow
-
Wash and dry again:
Clean the brush very well. Yellow is easily muddied by darker colors, so ensure your brush is perfectly clean and dry. -
Apply the bottom stripe:
Load up the yellow paint. Paint the final horizontal band below the orange one, completing the iconic candy corn trio. -
Connect the colors:
the yellow should meet the bottom of the orange stripe. If the orange is still wet, be careful not to drag it down into the yellow too much. -
Check the proportions:
Step back and look at your three bands. They should be roughly equal in height. If the yellow looks thin, add another pass to thicken the band downwards. -
Final texture check:
Look at the left and right ends of your stripes. If any look too neat or blocked off, use a nearly dry brush with a tiny bit of paint to feather the edges outward slightly for that rustic look. -
Let it dry:
Allow the painting to lay flat until completely dry. The thick acrylic might take about 20-30 minutes to set fully.
Oops, too messy?
If your edges get too messy or wild, simply wait for the paint to dry, then use a clean brush with a tiny bit of white paint to ‘erase’ or tidy up the perimeter.
Prop this little painting up on a shelf or mantle for an instant touch of cozy autumn charm
Spiderweb Corner Detail on a Fall Background
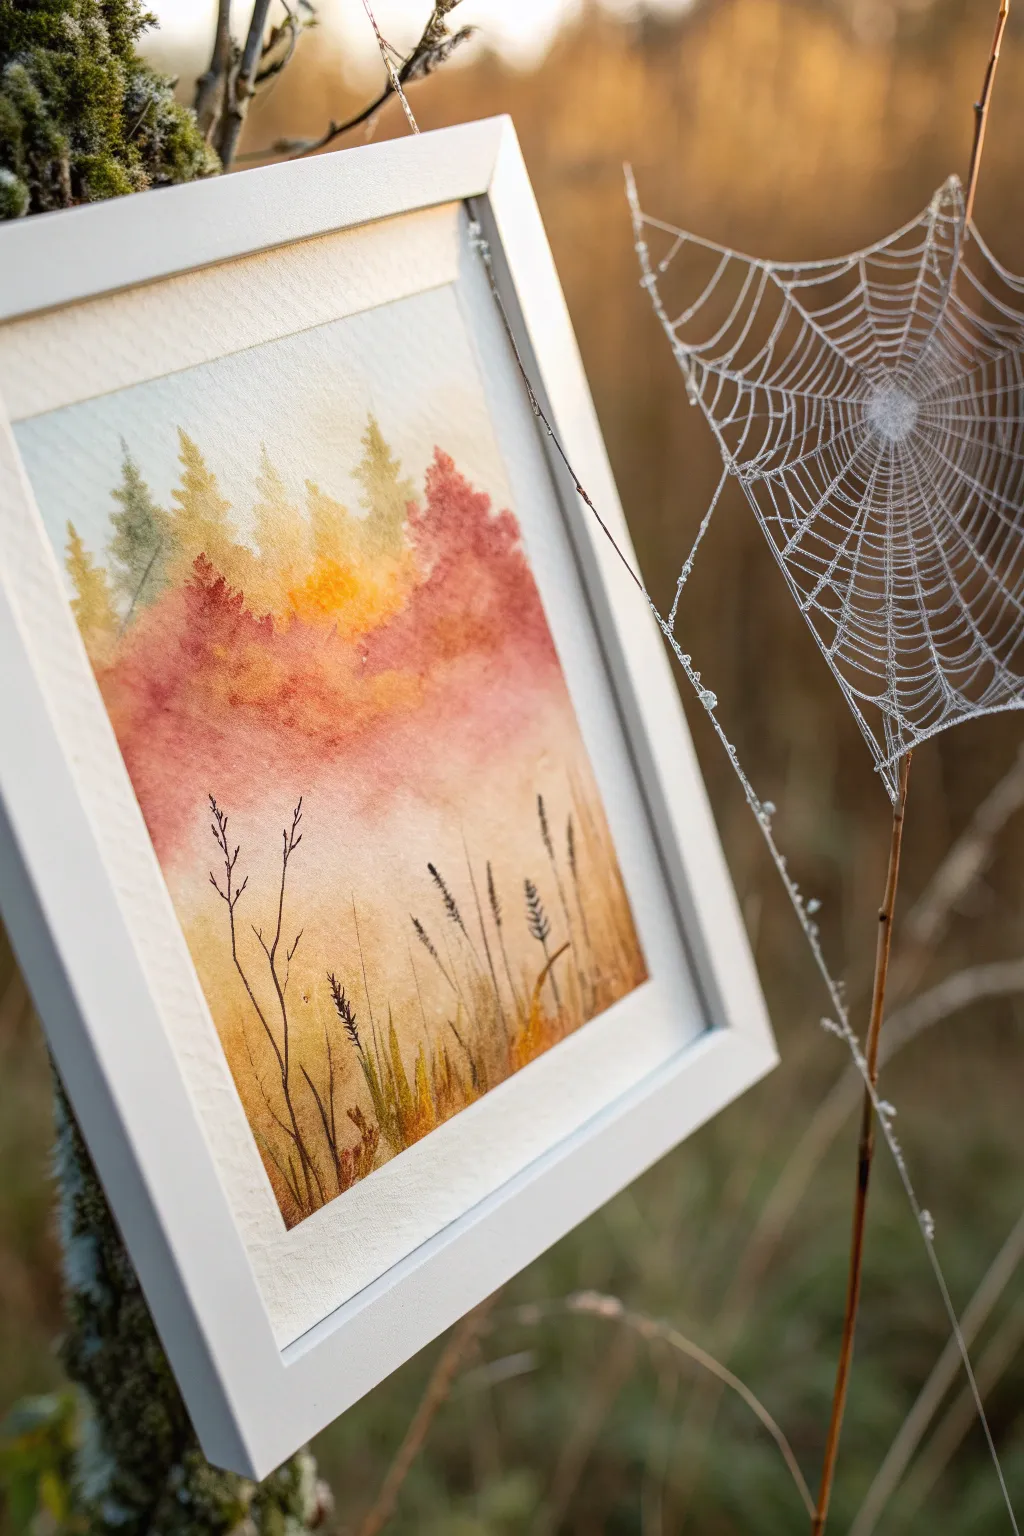
Capture the ethereal beauty of a foggy autumn morning with this soft watercolor landscape. Blending warm russet tones with cool greens creates a dreamy backdrop for crisp, detailed foreground grasses.
Detailed Instructions
Materials
- Cold press watercolor paper (140 lb/300 gsm)
- Watercolor paints (Sap Green, Burnt Sienna, Yellow Ochre, Alizarin Crimson, Sepia)
- White picture frame
- Painter’s tape or masking fluid
- Round brushes (flats for washes, fine liners for details)
- Two jars of water
- Paper towels
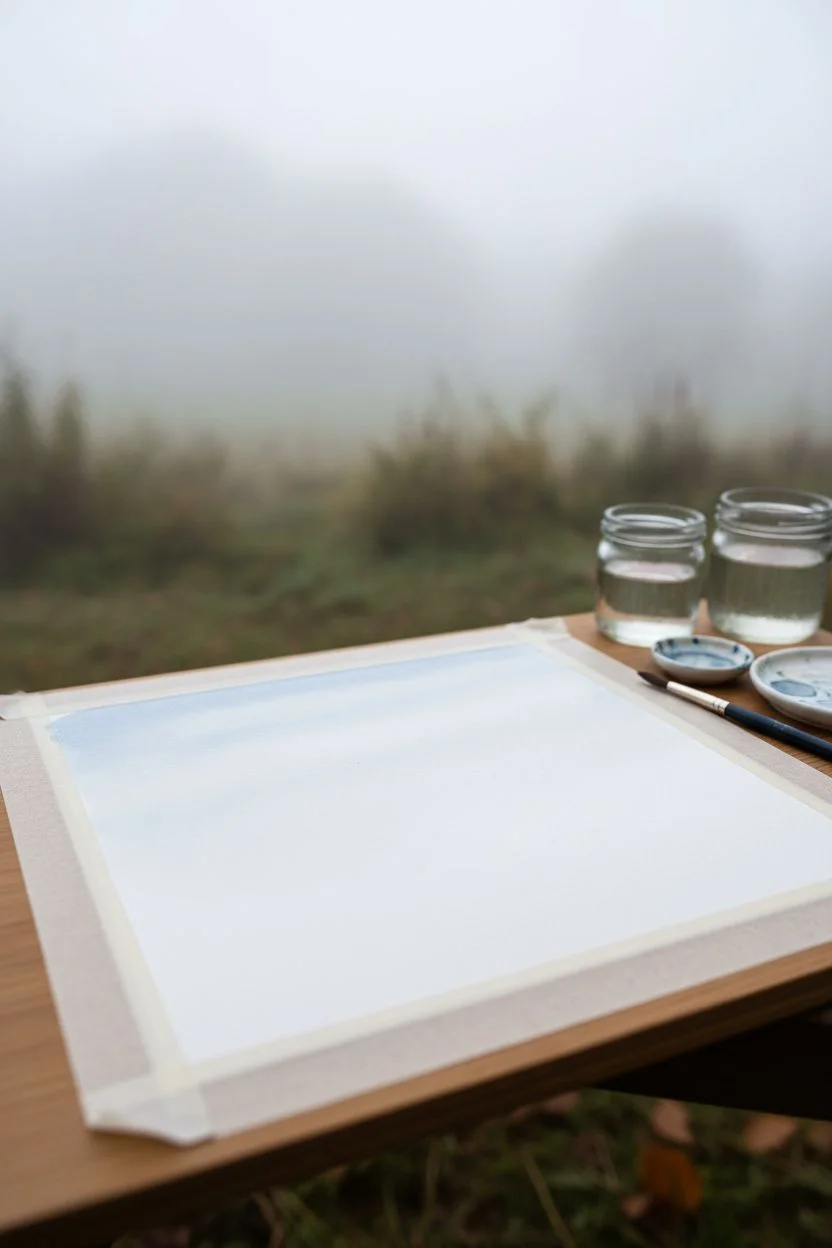
Step 1: Preparation & Sky Wash
-
Secure the paper:
Tape your watercolor paper down to a board on all four sides. This ensures a clean white border and prevents the paper from buckling when wet. -
Pre-wet the sky area:
Using a clean, large brush, wet the top two-thirds of the paper with clean water. You want it glistening but not forming puddles. -
Apply the soft sky:
While the paper is wet, drop in a very diluted wash of pale blue mixed with a touch of grey. Keep it extremely light, almost white, to represent the foggy morning atmosphere.
Mist Master Tip
To get that perfect foggy bottom on your trees, lift pigment off the paper with a thirsty brush or a clean paper towel while the paint is still wet.
Step 2: Painting the Distant Trees
-
Mix background greens:
Create a muted green by mixing Sap Green with a little Grey or blue. It should be watery to push the trees into the distance. -
Paint faint tree shapes:
While the sky is still slightly damp (but not soaking), paint vertical, soft pine tree shapes on the left side. Let the wet paper diffuse the edges for a blurry effect. -
Add autumn gold:
Moving towards the center, introduce Yellow Ochre mixed with plenty of water. Paint these tree shapes adjacent to the green ones, allowing the colors to bleed slightly where they touch. -
Introduce the red canopy:
For the vibrant red trees, mix Alizarin Crimson with Burnt Sienna. Apply this to the right side of the horizon line, dabbing your brush to simulate leafy textures. -
Soften the bottom edge:
Crucially, use a damp, clean brush to run along the bottom of this tree line. Drag the pigment downwards into the white paper to create a ‘mist’ effect where the trees vanish into the fog.
Step 3: The Misty Middle Ground
-
Create the foggy transition:
Allow the tree line to dry completely. Then, re-wet the area just below the trees with clean water. -
Wash in the ground hues:
Apply a very light wash of Burnt Sienna and Yellow Ochre to the bottom third of the paper. Keep this abstract and loose, representing the forest floor seen through mist. -
Building depth:
Once the first ground layer is dry, add slightly darker patches of brown near the bottom corners to anchor the composition.
Level Up: Spiderweb
Use a white gel pen or masking fluid before painting to draw a delicate spiderweb in the corner, appearing magically once you paint over it.
Step 4: Foreground Details
-
Mix a dark detail color:
Combine Sepia with a touch of purple or dark blue to make a near-black hue. You want this paint consistency to be thicker, like light cream. -
Paint main stalks:
Switch to your finest rigour or liner brush. Paint thin, confident lines starting from the very bottom edge and flicking upwards to create tall grass stalks. -
Add seed heads:
At the tops of some stalks, use tiny stippling motions to create textured seed heads. Vary the heights; some should reach high into the ‘mist’ area for contrast. -
Varying vegetation:
Mix a little olive green into your dark mix. Paint shorter, broader blades of grass at the very bottom to fill in the base and add variety. -
Final dry grass details:
I like to take a slightly dry brush with pure Yellow Ochre and add a few strokes among the dark grasses to suggest withered, light-catching stalks.
Step 5: Finishing Touches
-
Check the contrast:
Step back and look at your painting. If the foreground grasses don’t pop enough against the mist, darken them with another layer of Sepia. -
Remove tape:
Wait until the paper is bone dry. Peel the tape away slowly at a 45-degree angle to reveal your crisp white border. -
Frame your work:
Place the finished piece into a simple white frame to complement the foggy, high-key values of the painting.
Creating this misty atmosphere teaches wonderful control of water-to-paint ratios and results in a serene piece perfect for the season


Black Cat Silhouette With Autumn Moon
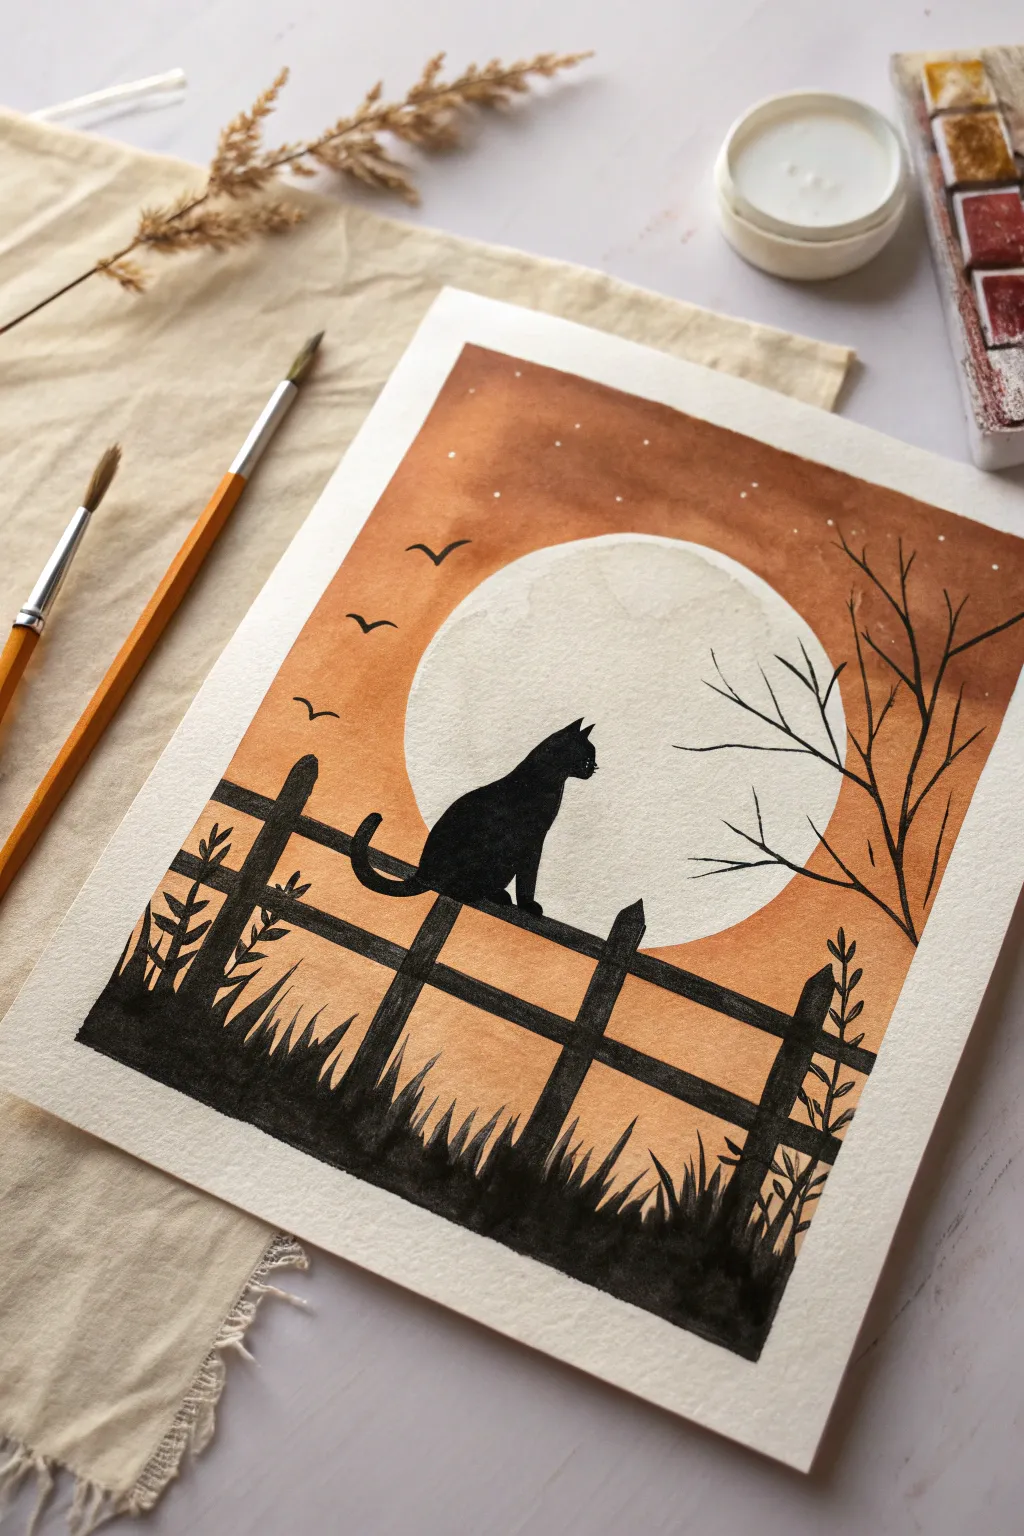
Capture the magic of an autumn evening with this atmospheric watercolor painting featuring a sleek cat silhouette against a glowing oversized moon. The warm, rusty orange gradients create a perfect backdrop for the stark black details, making this an ideal project for cozy fall crafting sessions.
How-To Guide
Materials
- Cold-press watercolor paper (300 gsm recommended)
- Masking tape or painter’s tape
- Pencil and round object (for tracing the moon)
- Watercolor paints (burnt sienna, orange, brown)
- Black paint (gouache or acrylic works best for opaque silhouettes)
- Round watercolor brushes (sizes 6 and 2)
- Flat brush for washes
- Clean water and palette
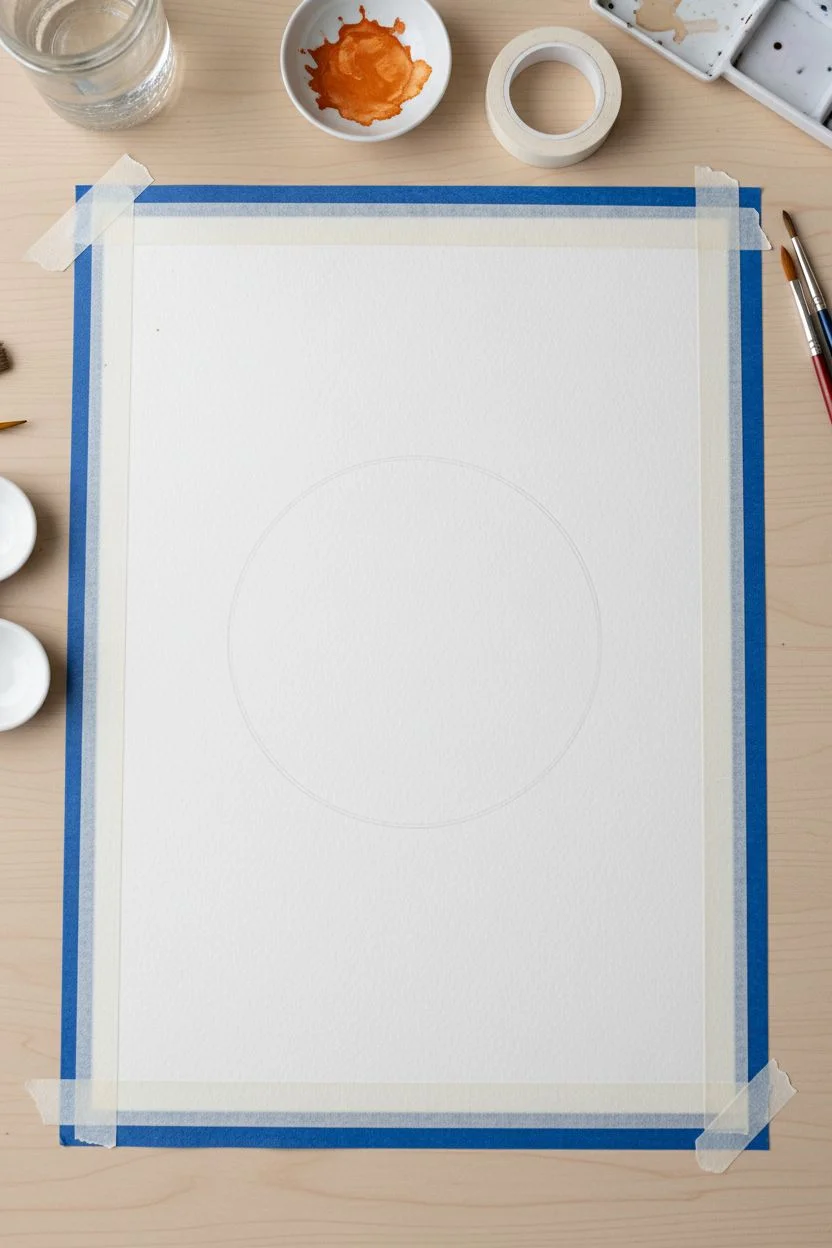
Step 1: Preparing the Background
-
Secure the paper:
Tape down all four edges of your watercolor paper to a board or table. This prevents buckling and creates that crisp white border you see in the final piece. -
Sketch the moon:
Place a round object (like a roll of tape or large jar lid) in the center of the paper, slightly offset towards the top. Lightly trace a circle with a pencil. Press very gently so the graphite doesn’t show through later. -
Mask the moon:
The moon needs to stay stark white. You can either carefully paint around your circle line in the next steps or use liquid masking fluid to cover the circle entirely. If painting around it, create a small puddle of clear water inside the circle line to help you visualize the boundary. -
Mix the sky color:
Prepare a warm, rusty orange mix. Combine orange with a touch of burnt sienna or brown to desaturate it slightly, giving it that earthy autumn feel rather than a bright summer orange.
Bleeding Lines?
If your black paint is feathering into the orange sky, the background wasn’t fully dry. Let it dry longer, or use a hairdryer on low heat before adding the black layer.
Step 2: Painting the Sky Glow
-
Wet-on-wet technique:
With a clean flat brush, dampen the area outside the moon circle with clean water. The paper should be glisten but not soaking wet. -
Apply the wash:
Load your brush with the rust-orange mix. Start painting from the outer edges inward towards the moon. Let the color naturally fade as it gets closer to the moon’s rim, creating a glowing effect. -
Deepen the edges:
While the paper is still wet, drop more concentrated brown or burnt umber pigment into the top corners and the very bottom. This vignette effect draws the eye to the center. -
Add texture:
If you want a speckled, starry look, you can standardly wait for this layer to dry just slightly and then sprinkle tiny drops of clean water or salt on the damp paint. For this specific piece, keep the wash fairly smooth with just subtle variations. -
Dry completely:
Let this background layer dry 100%. If the paper is cool to the touch, it’s still wet. Patience is key here to prevent the black silhouette from bleeding.
Step 3: Adding the Silhouette
-
Sketch the foreground:
Lightly sketch the fence rails, posts, and the cat profile with a pencil. The cat sits centrally on the top rail, overlapping the bottom of the moon. -
Paint the fence:
Using your black paint (gouache is my favorite here for opacity) and a size 6 round brush, fill in the horizontal rails and vertical posts. Ensure the edges are sharp. -
Define the cat:
Switch to a smaller size 2 brush for precision. Carefully fill in the cat’s silhouette. Pay close attention to the curve of the tail and the pointed ears. The black must be solid against the pale moon. -
Add grass details:
At the very bottom, use flicking upward strokes to create grass blades growing up around the fence posts. Vary the height and direction to make it look organic. -
Draw the bare tree:
On the right side, paint a bare, spindly tree branch reaching in from the edge. Use thin, shaky lines for the twigs to mimic natural growth patterns.
Make it Sparkle
Use metallic gold watercolor for the stars or mix a tiny bit of shimmer into the orange sky wash for a magical, glittering effect when the light hits it.
Step 4: Final Details
-
Add birds:
With the very tip of your smallest brush, paint three or four simple ‘V’ shapes in the upper left sky to represent distant birds. -
Paint stars:
Dip a small brush into white gouache or white acrylic. Gently dot tiny stars into the darker orange areas of the sky. Keep them small and delicate. -
Texturize the moon:
If your moon looks too stark white, mix a very, very watery grey wash. Blot most of it off your brush and lightly dab a few texture clouds inside the circle for a cratered look. -
Reveal the border:
Once everything is bonedry, slowly peel off the masking tape at a 45-degree angle away from the painting to reveal clean, crisp edges.
Now you have a striking high-contrast artwork that captures the mysterious beauty of the season
Cute Scarecrow With Simple Shapes
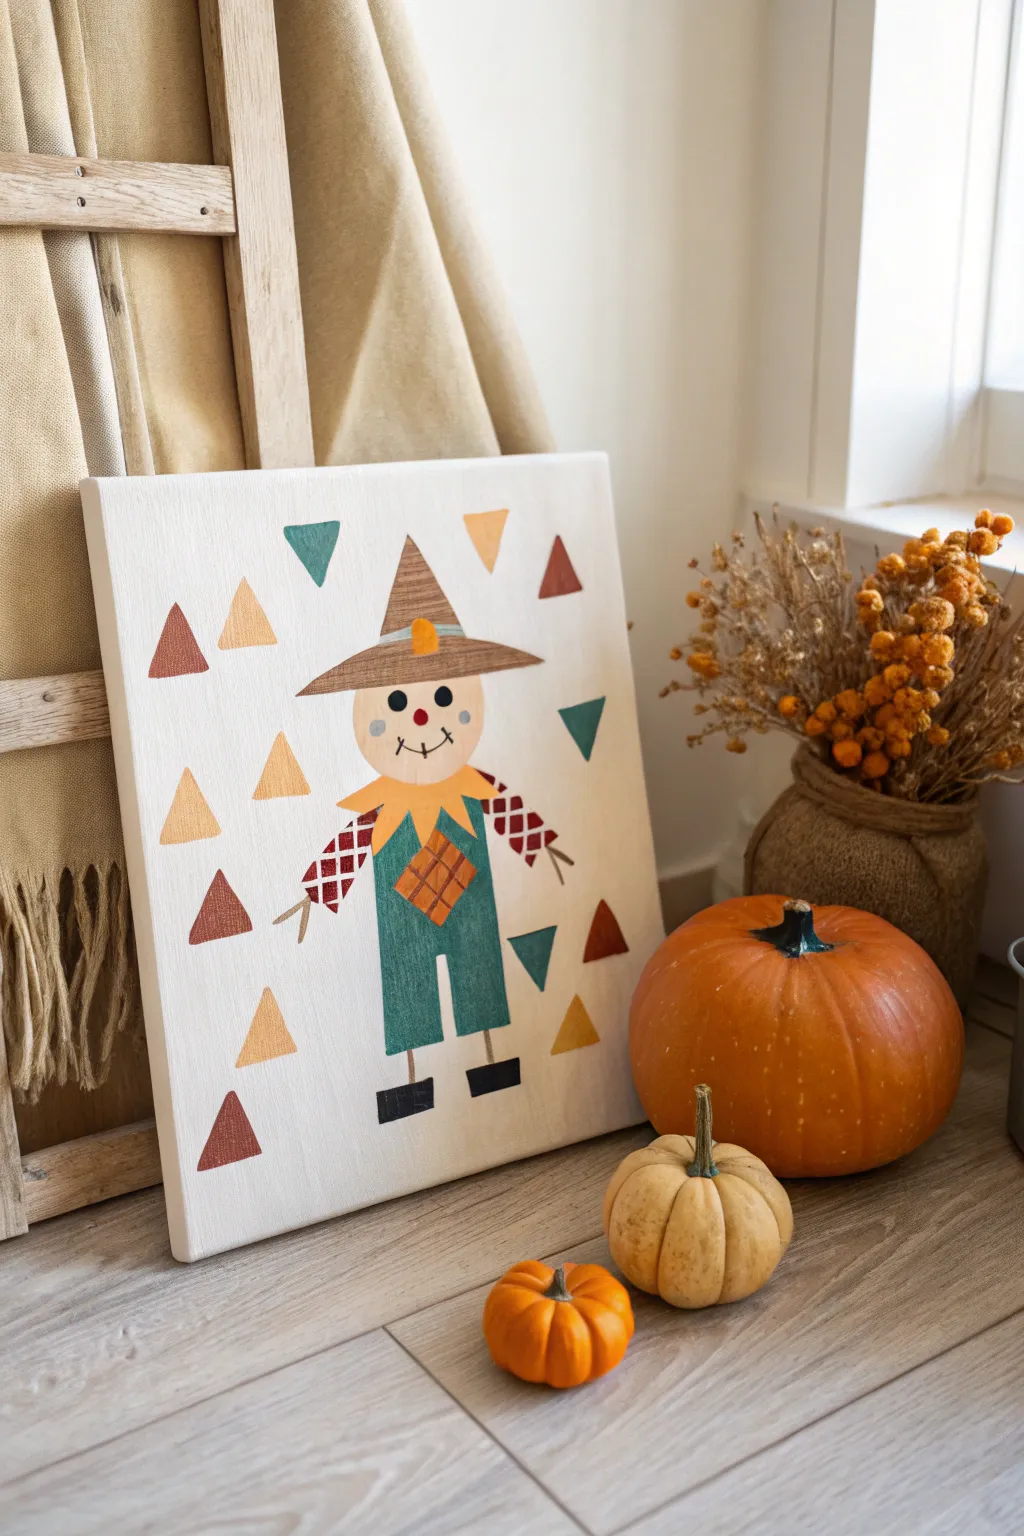

This charming canvas project combines geometric simplicity with classic autumn motifs for a modern take on fall decor. Using basic shapes like triangles and rectangles, you’ll build a friendly scarecrow character surrounded by festive confetti-like patterns.
Step-by-Step
Materials
- Square canvas (10×10 or 12×12 inches)
- Acrylic paints (teal, rust orange, mustard yellow, dark brown, tan/beige, red, black)
- Flat paintbrushes (large and small)
- Fine detail liner brush
- Pencil for sketching
- Ruler
- Painter’s tape (optional)
Step 1: Setting the Stage
-
Prime the Surface:
Begin with a clean white canvas. If your canvas isn’t pre-primed or looks a bit dull, give it a quick coat of white acrylic paint to create a smooth, bright base for your colors to pop against. -
Sketch the Scarecrow Base:
Find the center of your canvas. Using a pencil and very light pressure, sketch a large circle for the head and a rectangular body shape underneath it. Don’t worry about details yet, just get the main proportions right. -
Add the Hat and Legs:
Draw a large triangle on top of the circle for the hat, extending the bottom line wider than the head to create the brim. Add two simple rectangular legs sticking out from the bottom of the body tunic.
Step 2: Building the Character
-
Paint the Face:
Mix a warm beige or tan color and fill in the circular face. Use a flat brush to get smooth coverage, being careful to maintain the round edge. Let this dry completely before adding facial features. -
Color the Clothing:
Paint the body rectangle with a deep teal or forest green acrylic. For the legs, stick to the same color to create a jumpsuit look, or switch to a dark denim blue if you prefer contrast. -
Create the Hat:
Fill in the triangular hat shape with a medium brown. I find that using horizontal brush strokes here helps mimic the texture of straw or felt material. -
Design the Shirt Sleeves:
Sketch two arms angles slightly downward. Instead of painting them solid, use a thin brush to paint a red grid or checker pattern directly onto the white canvas to represent a plaid shirt underneath the overalls. -
Paint the Boots:
Add two small black rectangles at the bottom of the legs for boots. Keep them blocky and simple to match the geometric style of the artwork.
Uneven Triangles?
If you struggle painting straight lines freehand, cut a triangle shape out of a clean kitchen sponge. Dip it lightly in paint and stamp your background shapes for perfect uniformity.
Step 3: Details & Decoration
-
Add the Straw Collar:
Paint jagged, triangular shapes in mustard yellow around the neck area where the head meets the body. This mimics the classic scarecrow straw collar. -
Features and Hands:
Once the face is fully dry, use the handle end of a paintbrush dipped in black paint to dot the eyes. Paint a small orange triangle for the nose and use a fine liner brush for the stitched smile. Add stick-like lines for hands and feet sticking out of the sleeves and boots. -
Visual Texture:
Paint a small square patch on the scarecrow’s belly in orange, adding cross-hatch lines for detail. Add a horizontal band of lighter brown across the hat brim for extra dimension. -
Rosy Cheeks:
Mix a small amount of pink or watered-down red. Dab two soft circles on the cheeks to give him a friendly, flushed appearance. -
The Confetti Background:
Around the scarecrow, lightly pencil in scattered triangles of various sizes. Try to keep them randomly spacing but generally pointing upwards. -
Filling the Background:
Paint the background triangles using your palette of rust, mustard, deep red, and teal. Alternate colors so no two identical colors are right next to each other. -
Final Touches:
Inspect your edges. If the white background got smudged, touch it up with white paint for a crisp finish.
Add 3D Texture
Glue actual bits of raffia or thick twine onto the collar and cuffs instead of painting the straw lines. This mixed-media approach adds awesome tactile character.
Hang this cheerful piece in your entryway to greet guests with a festive autumn smile
Autumn Collage Grid of Tiny Paintings
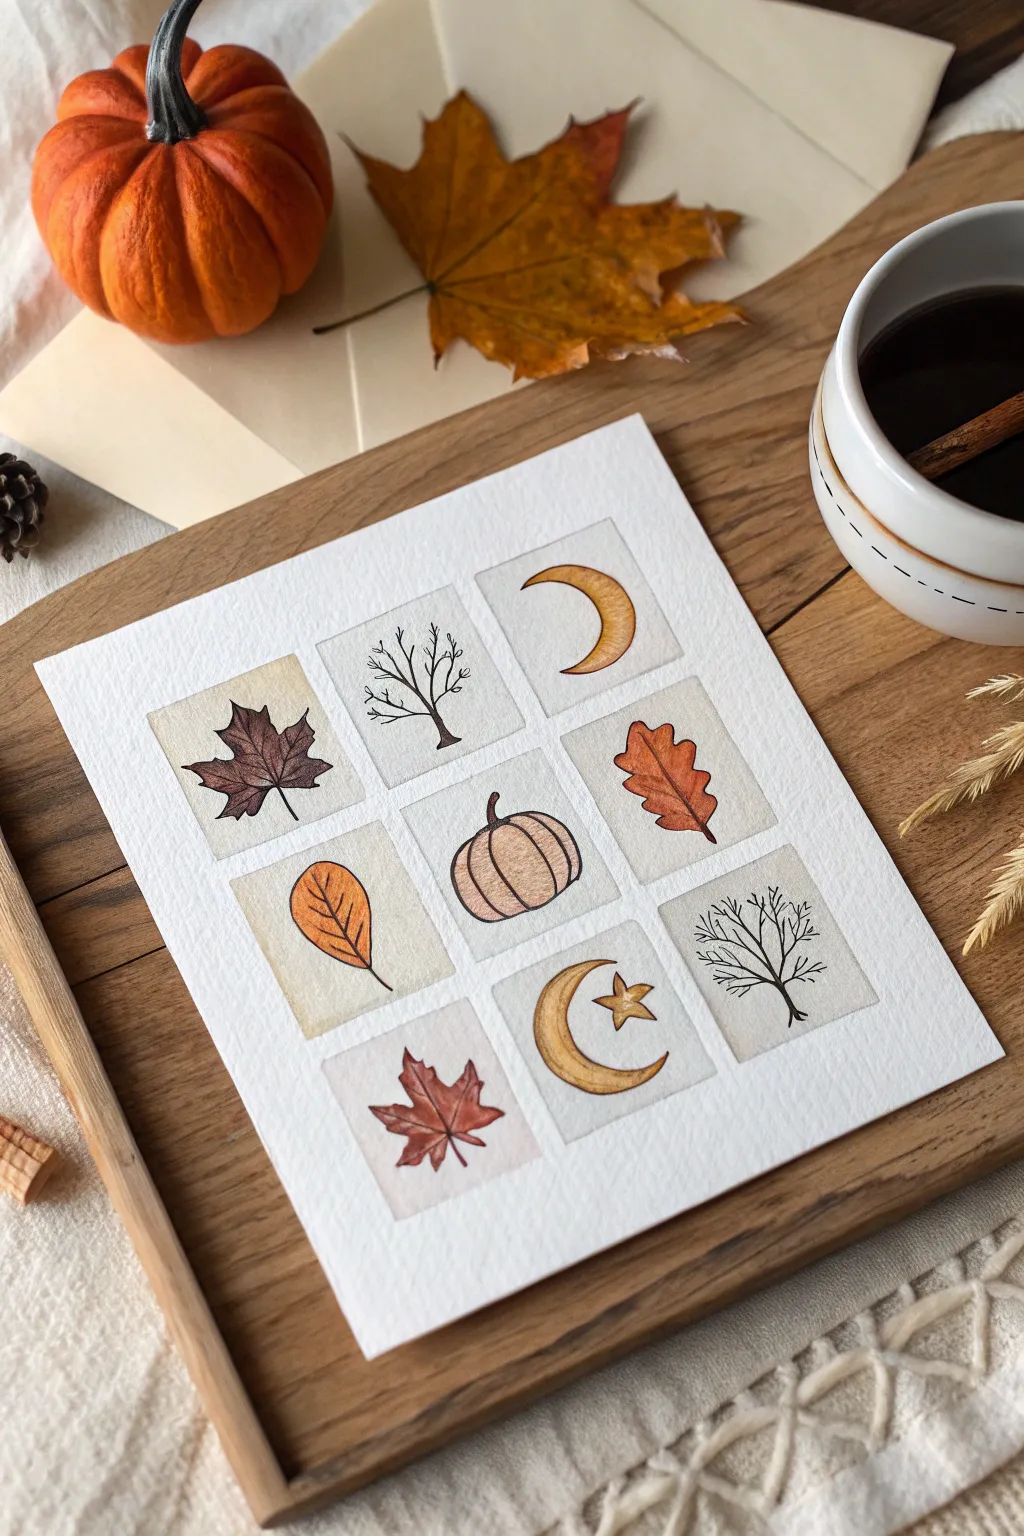

Capture the cozy essence of fall with this charming grid of miniature watercolor illustrations. This project combines simple line work with warm, muted tones to create a clean and modern piece of seasonal art.
Step-by-Step Guide
Materials
- Cold press watercolor paper (cut to approx. 6×8 inches)
- Pencil (HB or H)
- Ruler
- Eraser (kneaded preferred)
- Fine tip waterproof ink pen (0.1mm or 0.3mm, black or sepia)
- Watercolor paints (burnt sienna, yellow ochre, cadmium orange, sepia, paints gray)
- Small round watercolor brush (size 2 or 4)
- Painters tape or masking tape
- Cup of water and paper towels
Step 1: Setting the Grid
-
Tape the edges:
Begin by taping your watercolor paper to a flat board or work surface. This prevents buckling when we add water later and creates a crisp white border. -
Measure the grid:
Using your ruler and pencil, lightly mark out a 3×3 grid in the center of your paper. Aim for squares that are about 1.5 inches wide, leaving a small gap (about 0.25 inches) between each square for breathing room. -
Lightly sketch outlines:
Draw the squares very faintly. You want a guide for your paint, but graphite lines can be hard to erase once painted over, so keep a light touch. -
Sketch the motifs:
Inside each square, lightly sketch a different autumn element. Follow the pattern in the image: a maple leaf, a bare tree, a crescent moon, an oak leaf, a pumpkin, a vertical leaf, a crescent moon with a star, and two more tree/leaf variations.
Uneven Squares?
If your hand-painted squares look wobbly, use a stencil or the inside of a square roll of tape to trace perfect boxes, or lean into the organic look for a sketchbook vibe.
Step 2: Layering the Background
-
Mix a wash:
Create a very dilute wash for the background within the squares. I like to use a tiny touch of Yellow Ochre or diluted sepia to fully wet the inside of a square, giving it that vintage, creamy tone. -
Paint the squares:
Carefully fill in each pencil square with this pale wash. Be precise with your edges so they look neat. Let this layer dry completely before moving on.
Step 3: Inking the Details
-
Outline the subjects:
Once the paper is bone dry, take your fine waterproof pen and trace your sketched motifs. Use a steady hand for the bare trees and leaf veins. -
Add texture lines:
For the pumpkin, draw the curved vertical ribs. For the leaves, add central veins and smaller branching veins. Keep the lines delicate to maintain the minimalist style. -
Erase guidelines:
Gently erase any visible pencil marks from your initial sketching, being careful not to rub too hard over the painted background areas.
Add Some Sparkle
Once the paint is dry, use a gold gel pen or metallic watercolor paint to trace the crescent moons and stars for a magical, shimmering finish.
Step 4: Adding Color
-
Paint the leaves:
Start with the leaves using warm, earthy tones. For the top-left maple leaf, mix a deep brownish-purple. For the oak leaf, use a mix of Burnt Sienna and orange. Paint inside the ink lines. -
Color the moon and star:
Use a golden yellow or yellow ochre for the crescent moons and the star. You can drop in a slightly darker brown on the lower curve of the moon while it’s still wet to create a shadow. -
Paint the pumpkin:
Fill the pumpkin with a soft, pale orange. To give it dimension, paint the sides slightly darker than the center, mimicking roundness. -
Tree details:
The bare trees rely mostly on the ink work, but you can add a very faint wash of brown over their branches if you want them to stand out more against the background. -
Create shadows:
To make the grid pop, mix a transparent grey wash. Paint a thin line along the bottom and right edges of each square background to create a subtle drop-shadow effect. -
Final touches:
Review your grid. If any areas look too flat, add a second layer of paint to deepen the color, like on the dried orange leaf or the pumpkin stem. -
Remove tape:
Once everything is completely dry, slowly peel off the masking tape at a 45-degree angle to reveal your clean edges.
Display your finished grid in a simple wooden frame to celebrate the season
Abstract Autumn Landscape With Palette Knife Shapes
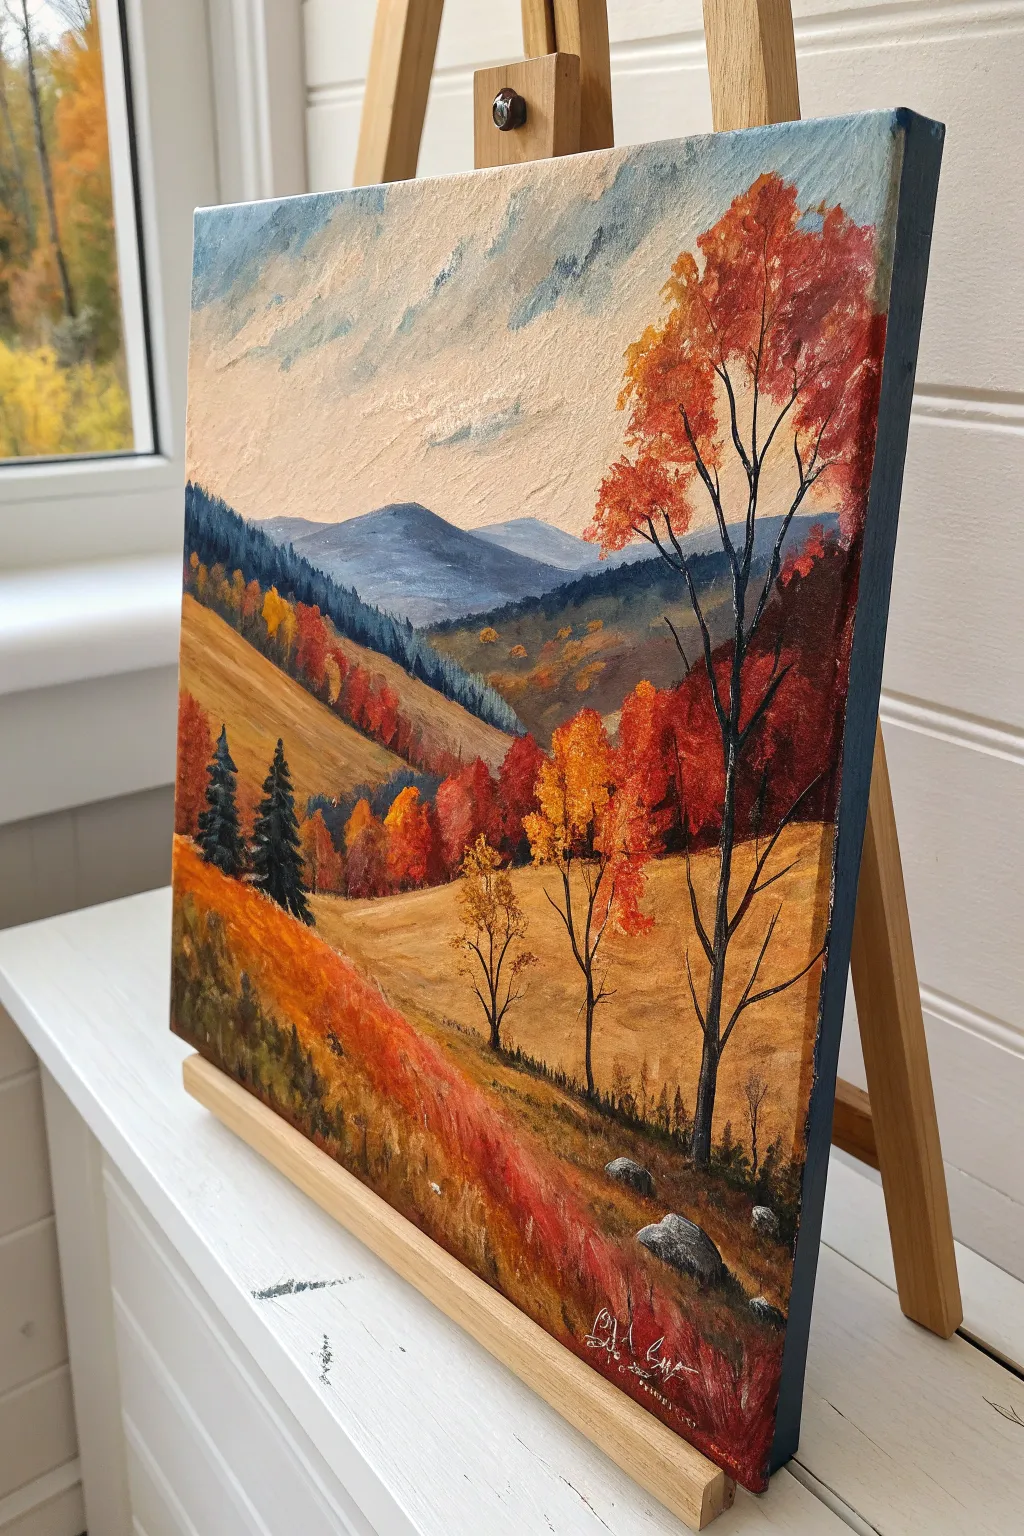
Capture the majestic sweep of an autumn mountain range with this vibrant landscape painting. By layering rich warm tones against cool blue peaks, you will create a piece that feels both expansive and intimately detailed.
Step-by-Step Guide
Materials
- Stretched canvas (square or rectangular portrait orientation)
- Acrylic paints (Titanium White, Ultramarine Blue, Burnt Sienna, Yellow Ochre, Cadmium Red, Alizarin Crimson, Sap Green, Phthalo Blue)
- Set of bristle brushes (large flat, medium filbert, lush small round)
- Palette knife (diamond shape)
- Modeling paste or texture gel (optional)
- Palette for mixing
- Cup of water and paper towels
- Easel
Step 1: Setting the Scene
-
Prepare the canvas:
If you want the subtle texture seen in the sky area, mix a small amount of modeling paste with white paint and scumble it across the upper third of the canvas. Let this dry completely before proceeding. -
Block in the sky:
Mix Titanium White with a tiny touch of Ultramarine Blue and Burnt Sienna to create a creamy, muted off-white. Paint the sky area using broad, sweeping strokes, leaving hints of the canvas texture visible. -
Add cloud shadows:
While the sky is still slightly tacky, mix a soft grey-blue using White and Ultramarine. Loosely brush in diagonal cloud formations near the top left corner to create movement. -
Paint the distant mountains:
Combine Ultramarine Blue with White and a speck of Phthalo Blue. Paint the furthest mountain ridges with this pale, cool blue effectively pushing them into the distance.
Muddy colors?
If your bright autumn leaves turn brown, let the dark background branches dry completely before applying the red and yellow leaf layers on top.
Step 2: Building the Middle Ground
-
Layer the mid-ground hills:
Darken your blue mixture with a touch of Sap Green and Burnt Sienna to create a deep teal-grey. Paint the rolling hill immediately in front of the distant mountains, allowing the top edge to be jagged to simulate distant trees. -
Create the golden slopes:
Mix Yellow Ochre, Titanium White, and a touch of Burnt Sienna. Paint the large diagonal slope on the left side, brushing downward to follow the lay of the land. -
Add distant foliage:
Using a smaller brush, stipple touches of Cadmium Red and Burnt Sienna onto the ridge of the golden slope. These small dabs represent a dense forest line in full autumn color. -
Establish the evergreens:
Mix Phthalo Blue, Sap Green, and a bit of Black or heavy Burnt Sienna to get a deep evergreen color. Paint two or three conical pine trees on the left slope, ensuring their silhouettes are dark against the lighter grass. -
Paint the valley floor:
Fill the lower central area with a wash of Yellow Ochre and White. This open field area should look brighter than the surrounding hills to create a sense of light hitting the valley.
Level Up: Texture
Use a palette knife for the foreground rocks and the brightest leaves. This impasto technique makes them physically stand out from the canvas.
Step 3: Foreground and Details
-
Paint the foreground hill:
Load a medium brush with Burnt Sienna, Alizarin Crimson, and Cadmium Red. Paint the bottom left corner, sweeping upward diagonally towards the center to create a steep, grassy foreground mound. -
Construct the main trees:
Using a thin rigger brush or the edge of a flat brush with dark brown paint (watered down slightly), paint the trunks and branches of the large trees on the right side. Let the branches reach high into the sky area. -
Add vibrant canopy leaves:
Switch to a filbert brush or a palette knife. Load it with thick Cadmium Red, Orange (red + yellow), and Yellow Ochre. Dab these colors heavily onto the right-side tree branches, clustering them to look like heavy foliage. -
Detail the mid-ground trees:
Add smaller bright orange and yellow trees in the middle distance, just behind the main foreground trees. I find that varying the heights here adds realistic depth to the forest line. -
Highlight the foreground grass:
Using a dry brush technique with Yellow Ochre and a bit of Red, lightly whisk over the dark foreground hill. This catches the texture of the canvas and looks like dry autumn tallgrass. -
Place the rocks:
Mix a light grey (White + Black + tiny dot of Blue). Paint round varying shapes in the bottom right corner for boulders. Add a dark shadow underneath each rock to ground them. -
Final highlights:
Add pure touches of Yellow or very light Orange to the tips of the trees where the sun would hit. Add a few vertical dark strokes in the foreground grass to suggest individual weeds.
Step back and admire the crisp autumn air you have captured on your canvas


Have a question or want to share your own experience? I'd love to hear from you in the comments below!