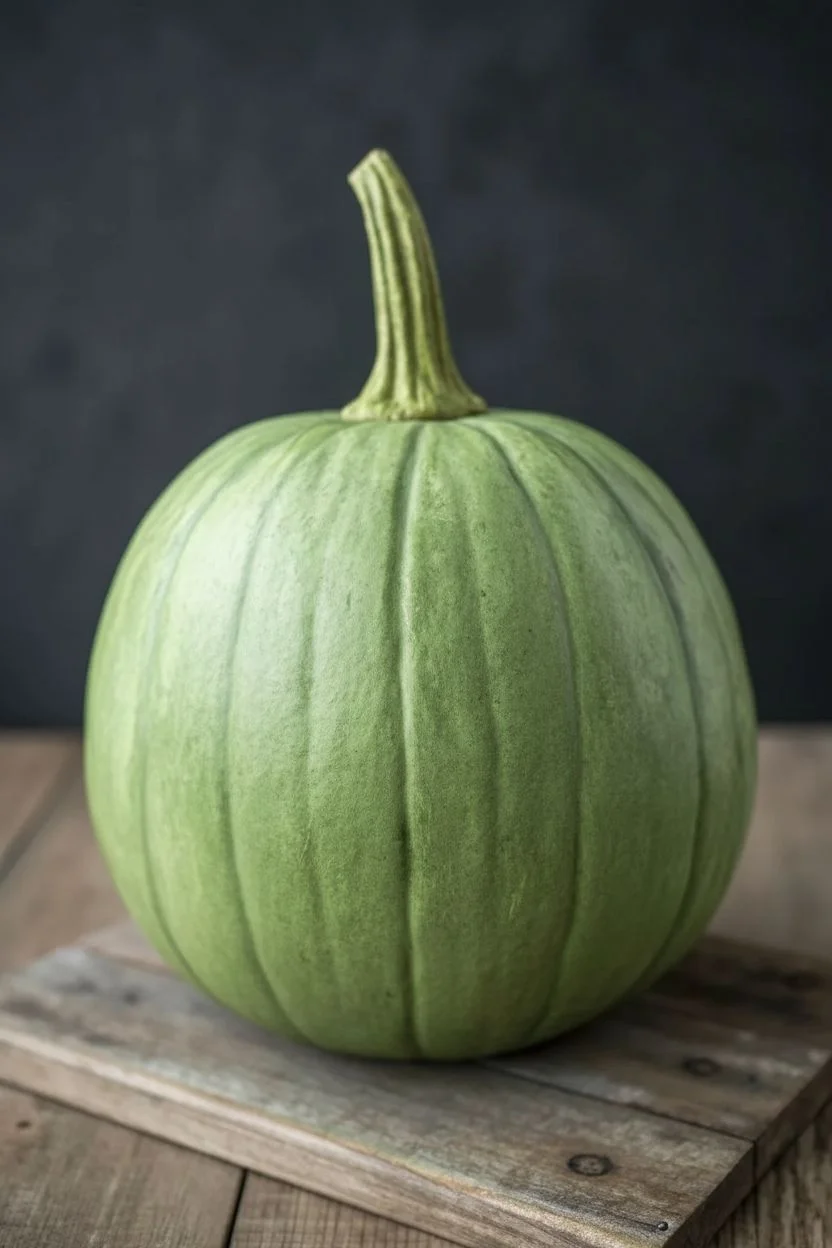
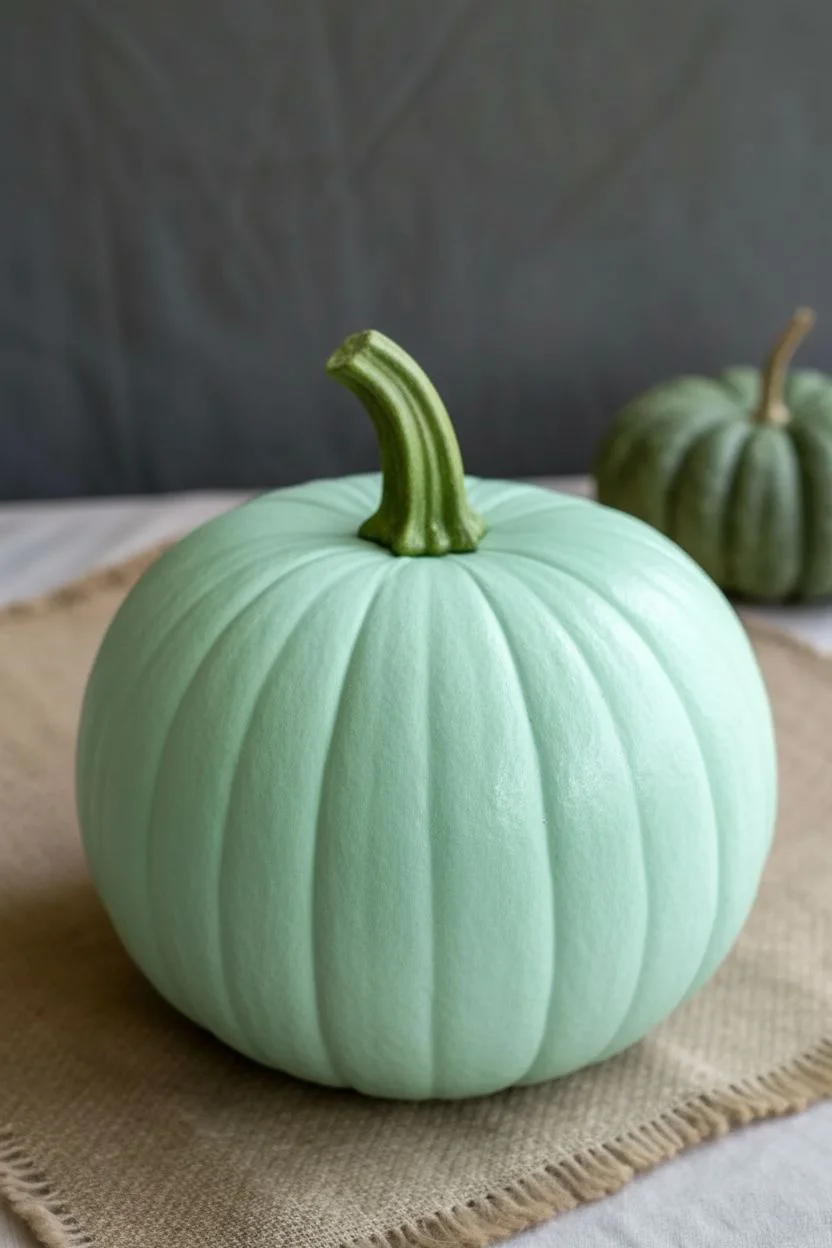
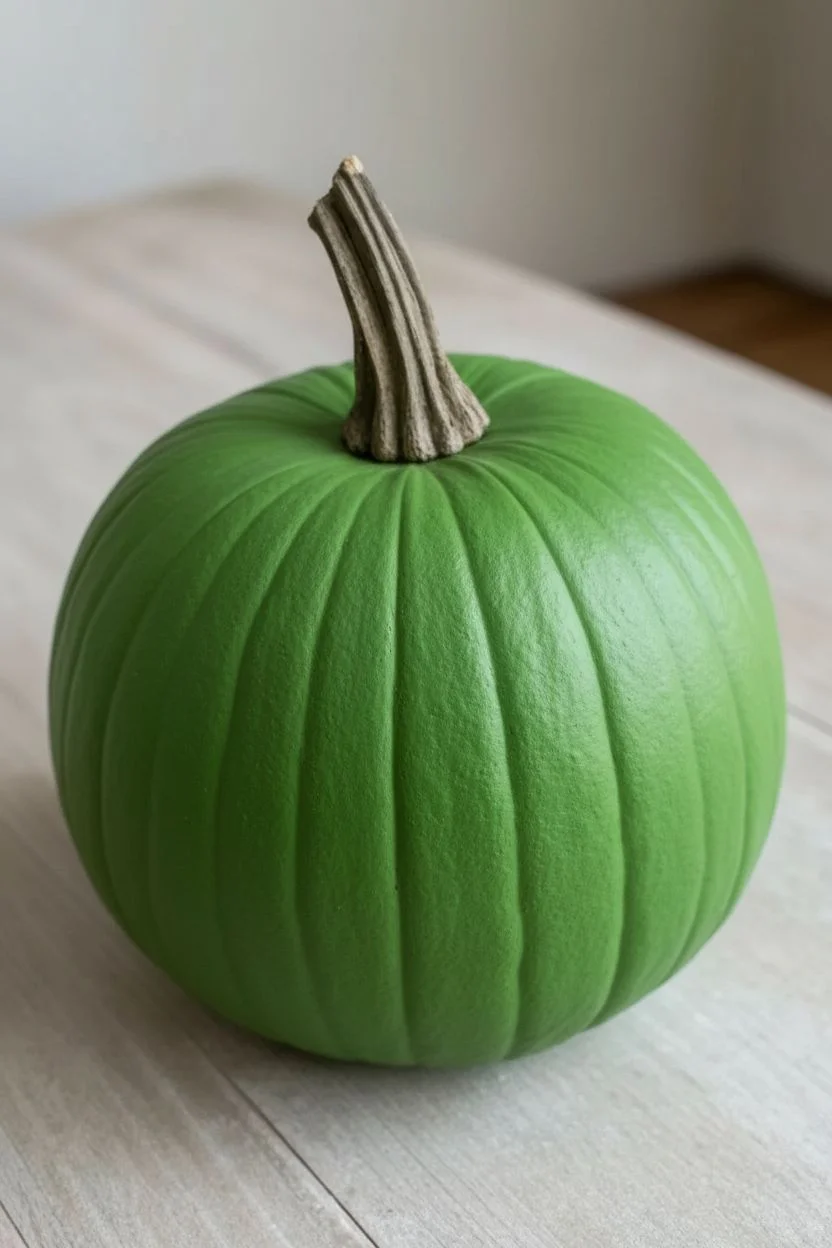
Painting a green pumpkin instantly flips the usual fall color story and makes your design pop from across the room. I love using a green base to turn pumpkins into characters and creatures—because the shape does half the storytelling for you.
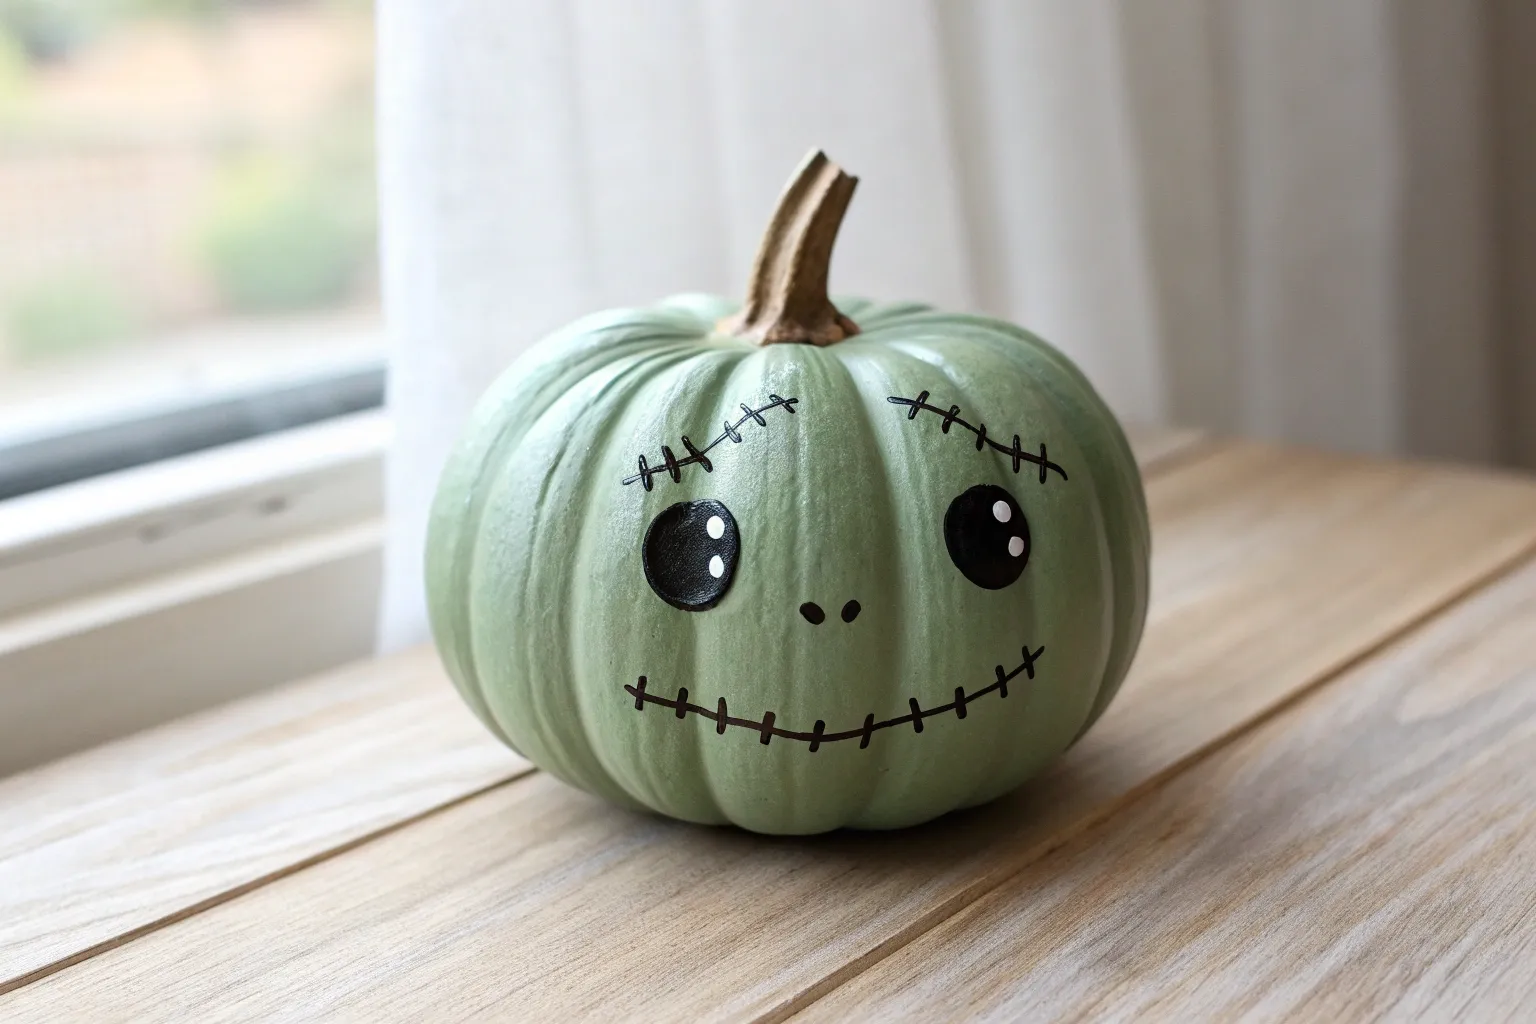
Classic Frankenstein-Inspired Green Pumpkin Face

Bring a touch of monster mash magic to your porch with this simple yet striking green pumpkin. With its matte lime finish and classic stitched smile, this no-carve project is perfect for adding character without the mess of pumpkin guts.
Step-by-Step Tutorial
Materials
- Medium-sized pumpkin (real or faux)
- Lime green acrylic craft paint (matte finish)
- Dark green acrylic paint
- Black acrylic paint
- Large foam brush or flat paintbrush
- Small round detail brush
- Pencil
- Newspaper or drop cloth
- Clear matte sealer spray (optional)
Step 1: Base Coat Preparation
-
Clean surface:
Begin by thoroughly wiping down your pumpkin with a damp cloth to remove any dirt or oils that might prevent the paint from sticking. -
Setup:
Lay down your newspaper or use a drop cloth to protect your workspace from drips. -
Apply first green layer:
Using the large foam brush, apply a generous coat of lime green acrylic paint over the entire surface of the pumpkin, avoiding the stem. -
Let dry:
Allow the first coat to dry completely for about 30-45 minutes. Acrylics dry fast, but you don’t want to drag wet paint. -
Second coat:
Apply a second coat of lime green to ensure solid, opaque coverage where no orange skin shows through. -
Stem painting:
While the body dries, carefully paint the stem solid black using a smaller brush to keep the edges neat.
Paint Slipping?
If the paint streaks or won’t stick to a glossy pumpkin skin, try lightly sanding the surface with fine-grit sandpaper first to give it some grip.
Step 2: Adding the Hair
-
Mix hair color:
If your dark green is too bright, mix in a tiny drop of black to create a shadowy forest green tone. -
Start the hairline:
Using a medium brush, paint a jagged, zig-zag line around the top of the pumpkin, about 2-3 inches down from the stem base. -
Fill the top:
Fill in the area between your zig-zag line and the black stem with the dark green paint. -
Refine the spikes:
Go back over the tips of the ‘hair’ spikes with a smaller brush to make them sharp and defined.
Make It 3D
Glue two actual bolts or painted wine corks to the sides of the pumpkin using strong craft glue to mimic Frankenstein’s monster’s classic neck bolts.
Step 3: The Monster Face
-
Sketch features:
Once the green base is totally dry, use a pencil to lightly sketch the eyes and nose placement. I find sketching lightly helps ensure the face is centered. -
Outline eyes:
Draw two half-circles for the eyes using your small detail brush and black paint; give them a flat top for a drowsy look. -
Fill eyes:
Fill in the eye shapes with solid black paint. -
Highlight eyes:
Once the black eyes are dry, dip the handle end of a paintbrush into white paint and dot it onto the black area for the pupils. -
Paint nose:
Paint two small, triangular nostrils right in the center of the face. -
Draw the mouth line:
Paint a long, slightly curved horizontal line across the lower half of the pumpkin for the mouth. -
Add stitches:
Using your thinnest brush, paint short vertical hash marks across the mouth line to create the stitched effect. -
Final touches:
Check for any uneven edges on your black lines and touch them up carefully. -
Seal (Optional):
If this pumpkin is living outside, spray it with a matte clear sealer to protect your paint job from the elements.
Place your spooky new creation on the steps to greet trick-or-treaters


Masked Turtle Team Green Pumpkins (Four Colors)
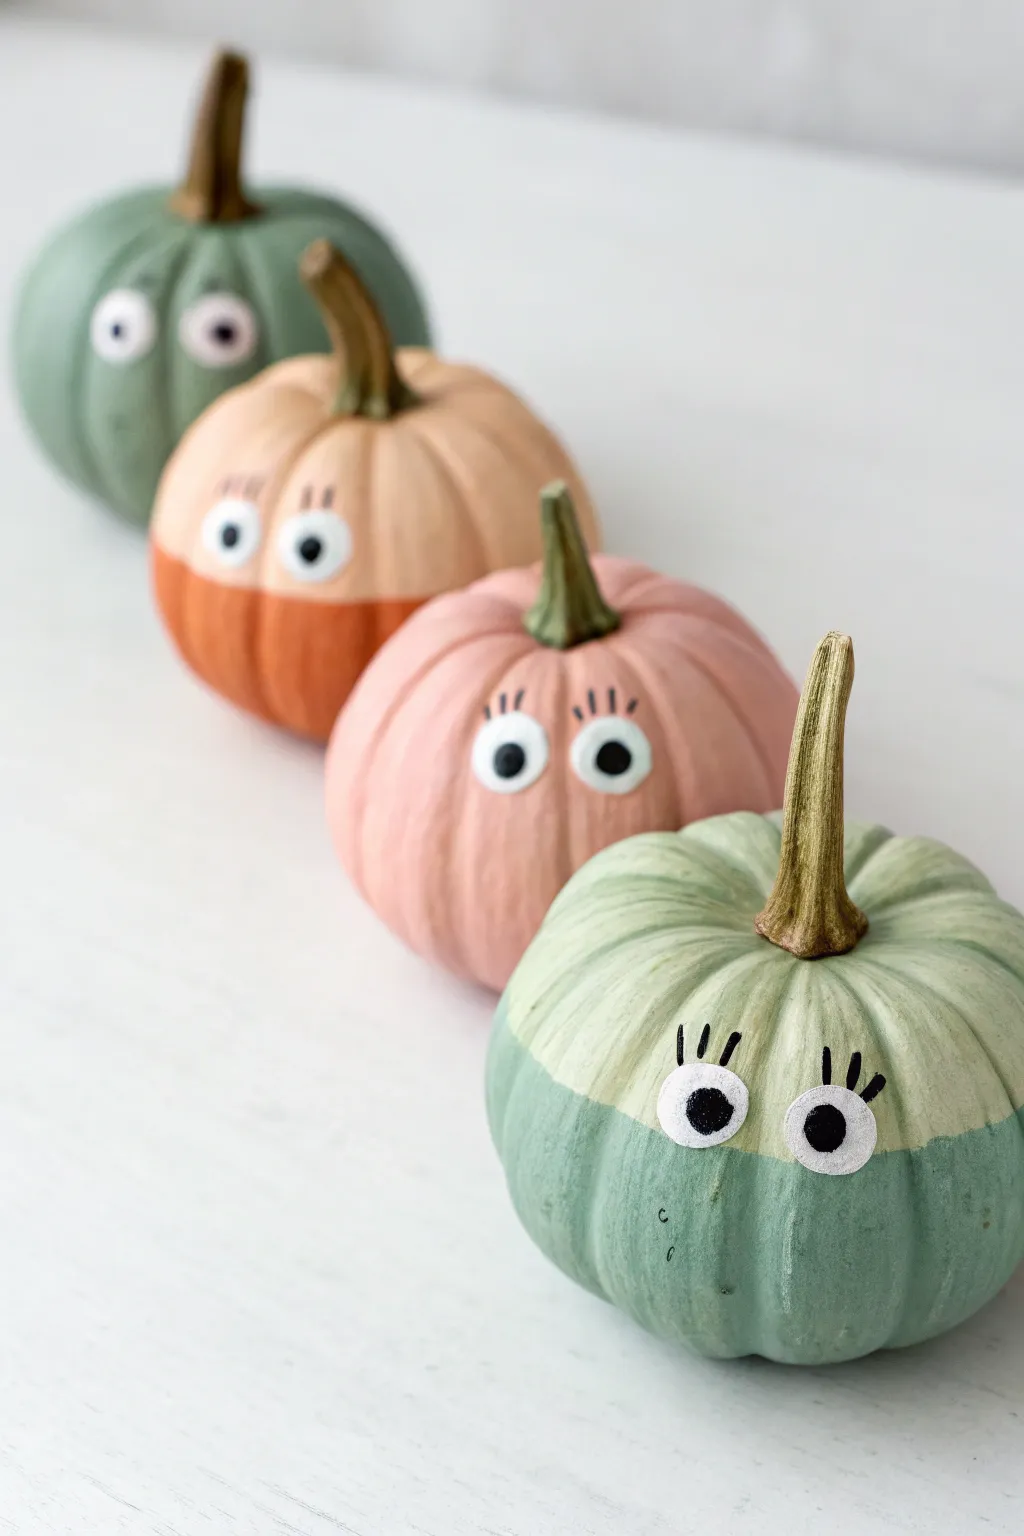
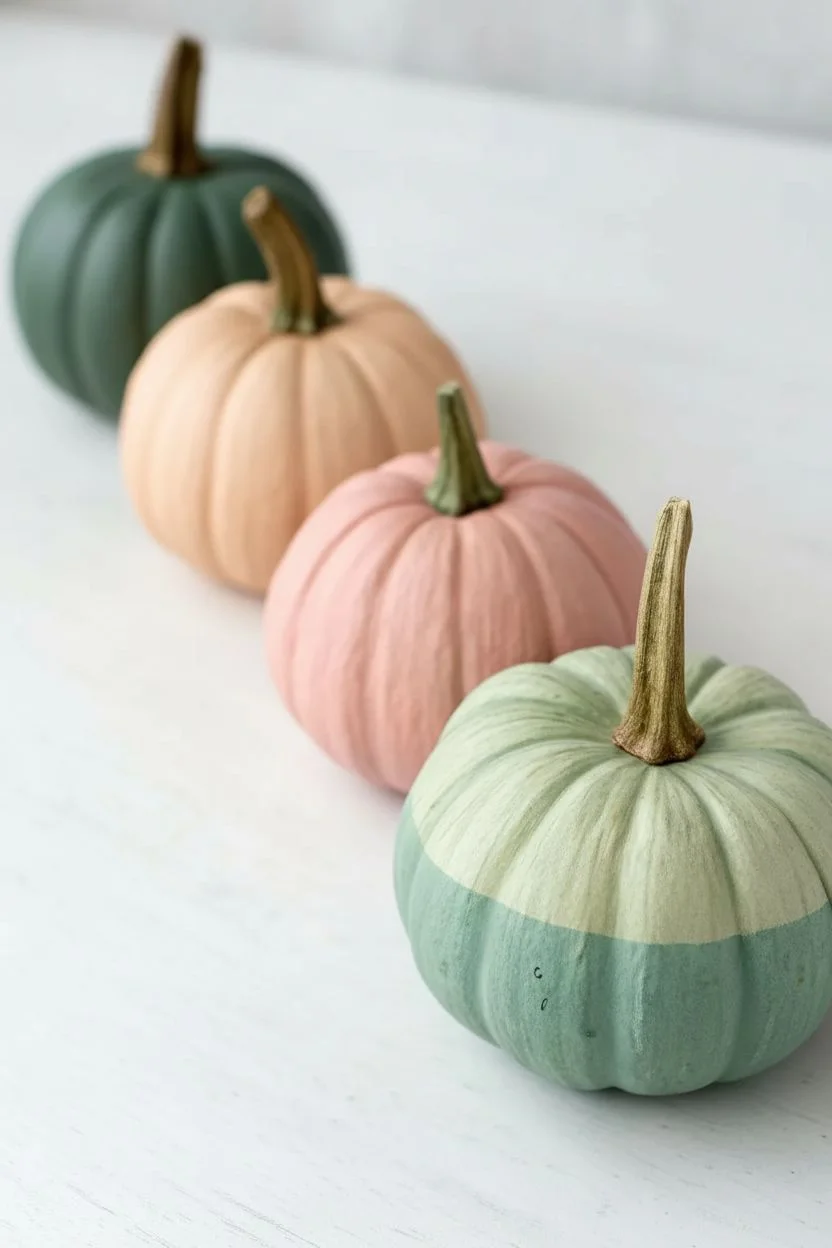
These adorable, pastel-toned pumpkins feature a charming two-tone paint effect that mimics little turtle shells or masks. With their wide-set eyes and dainty lashes, they create a playful lineup perfect for a mantle or kids’ craft table.
Detailed Instructions
Materials
- 4 small craft pumpkins (foam or ceramic)
- Acrylic craft paint (sage green, light peach, terracotta orange, blush pink, mint green, white)
- Black acrylic paint or a black paint pen
- Painter’s tape or masking tape
- Medium flat paintbrush
- Small round detail brush
- Pencil (optional)
- Matte finish clear sealant spray (optional)
Step 1: Base Coating
-
Clean surface:
Begin by wiping down your craft pumpkins with a damp cloth to remove any dust or manufacturing residue, ensuring a smooth painting surface. -
Select colors:
Choose your palette. For this specific look, you need a dark sage green, a light peach/terracotta combo, a solid blush pink, and a two-tone mint green set. -
Paint solid pumpkins:
Start with the solid-colored pumpkins. For the far left one, paint the entire surface with the dark sage green. For the third one in the row, paint the entire pumpkin blush pink. -
Apply second coats:
Let the first layer dry completely—acrylics usually take about 20 minutes. Apply a second coat to ensure opaque coverage.
Step 2: Two-Tone Effect
-
Tape the line:
For the split-color pumpkins, decide where your horizon line will be. Apply painter’s tape horizontally around the middle of the pumpkin, pressing down firmly into the vertical grooves. -
Paint bottom half:
Paint the bottom section of the peach pumpkin with terracotta orange and the bottom of the mint pumpkin with a darker mint or teal shade. -
Paint top half:
For the top halves, use a lighter peach tone and a very pale mint or off-white green respectively. -
Remove tape:
Peel off the tape carefully while the paint is still slightly tacky to get a cleaner line. -
Touch up:
Use a small brush to fix any bleed-through where the tape crossed the deep pumpkin grooves.
Bleeding Lines?
If paint bleeds under the tape in the pumpkin creases, wait for it to dry, then hand-paint a straight line over the mistake with your top color.
Step 3: Adding Personality
-
Paint eye whites:
Using white acrylic paint and a small round brush, paint two medium-sized circles on the front of each pumpkin. Keep them relatively close together for a cute look. -
Dry and repeat:
Let the white circles dry fully. You will likely need 2-3 coats of white to make them stand out brightly against the background color. -
Add pupils:
Once the white is bone dry, add a black pupil in the center of each white circle using the handle end of a paintbrush dipped in black paint—this acts like a stamp for perfect dots. -
Paint lashes:
Using a very fine liner brush or a black paint pen, draw three small, vertical distinct lashes above each eye. -
Paint stems:
Paint the stems in contrasting natural tones like brown or gold to finish the look. -
Optional sealing:
If these will be handled often or placed outside, give them a light mist of matte clear sealant spray.
Pro Tip: Eye Placement
Place the eyes slightly lower on the pumpkin curve—roughly centered vertically—to make the characters look cuter and more stable.
Arranging your finished pumpkins in a gradient row creates a lovely handmade autumn display


Rotting Green Zombie Pumpkin With Stitches

Transform an ordinary gourd into a menacing monster with this zombie-inspired design. Featuring a sickly green pallor, deep shadowed eyes, and gnarly painted stitches, this pumpkin brings the undead to your front porch.
Detailed Instructions
Materials
- Large pumpkin (real or foam craft pumpkin)
- Acrylic paints: Sage green, lime green, dark forest green, black, dark brown, white, and burnt sienna
- Matte finish spray sealant
- Assorted paint brushes: Large flat brush, medium round brush, fine liner brush
- Carving tools (if using a real pumpkin) or a hot knife (for foam)
- Pencil or dry erase marker
- Sea sponge or clean kitchen sponge
- Paper towels
- Water cup
Step 1: Preparation and Base Coat
-
Clean surface:
Begin by wiping down your pumpkin with a damp cloth to remove any dirt or waxy residue, ensuring the paint adheres properly. -
Priming the base:
Mix sage green with a touch of white to create a pale, sickly base tone. Apply this over the entire pumpkin, including the stem. -
Second coat:
Allow the first layer to dry completely for about 15-20 minutes. Apply a second coat to ensure solid, opaque coverage. -
Dry brushing:
Dip a dry brush into lime green paint and wipe most of it off on a paper towel. Lightly sweep the brush vertically along the pumpkin’s natural ridges to add highlighted dimension.
Paint Peeling?
If acrylic paint slides off the pumpkin skin, lightly sand the surface with fine-grit sandpaper first to give the paint some ‘tooth’ to grip onto.
Step 2: Face Sculpting and Carving
-
Drafting the face:
Using a pencil, lightly sketch large, angled eye sockets, triangular nose holes, and a wide, jagged mouth. -
Adding texture lines:
Sketch scar lines running across the forehead and cheeks where you plan to add the stitch details later. -
Carving the features:
Carefully carve out the mouth and nose holes completely. For the eyes, carve only the outline to create a recessed surface, leaving the inner pumpkin intact for painting. -
Carving the scars:
Use a linoleum cutter or a small loop tool to shallowly gouge out the scar lines you sketched, giving them physical depth.
3D Effect
Use actual twine or thick yarn for the stitches! Simply drill small pilot holes on either side of the scars and thread the material through.
Step 3: Painting Details and Shadows
-
Shadowing the recesses:
Mix a dark wash using black paint and water. Paint inside the carved nose and mouth areas to create deep, infinite darkness. -
Contouring features:
Take dark forest green paint and carefully shade around the eye sockets, under the brow ridges, and along the vertical ribs of the pumpkin to simulate rotting flesh. -
Painting the eyes:
Fill the recessed eye sockets with dark brown paint. While wet, blend in some black around the edges to deepen the look. -
Adding the iris:
Once the brown is dry, paint two small circles in a lighter reddish-brown for the irises, positioning them slightly off-center for a crazed look. -
Highlight reflection:
Using the handle end of a paintbrush dipped in pure white, dot a small reflection point in each eye to make them look wet and alive.
Step 4: Stitching and Final Touches
-
Coloring the scars:
Paint the inside of your gouged scar lines with burnt sienna to mimic raw, irritated skin. -
Painting the stitches:
Using your fine liner brush and dark brown paint, create the ‘thread’ marks crossing over the scars. Make them uneven—some thick, some thin—as if sewn hastily. -
Defining the mouth:
Use the fine brush with watery black paint to add vertical ‘teeth’ lines along the mouth opening, extending them slightly onto the green skin. -
Dirty wash:
I like to create a very diluted wash of brown and black paint. Dab this randomly over the pumpkin with a sponge and immediately wipe it back to leave grime in the textures. -
Stem work:
Paint the stem dark brown, then dry brush with sage green to tie it visually to the pumpkin body. -
Sealing:
Once all paint is fully dry, take the pumpkin outside and spray it with a clear matte sealant to protect your work from moisture.
Place your menacing creation in a dimly lit spot to really let those staring eyes unsettle your guests


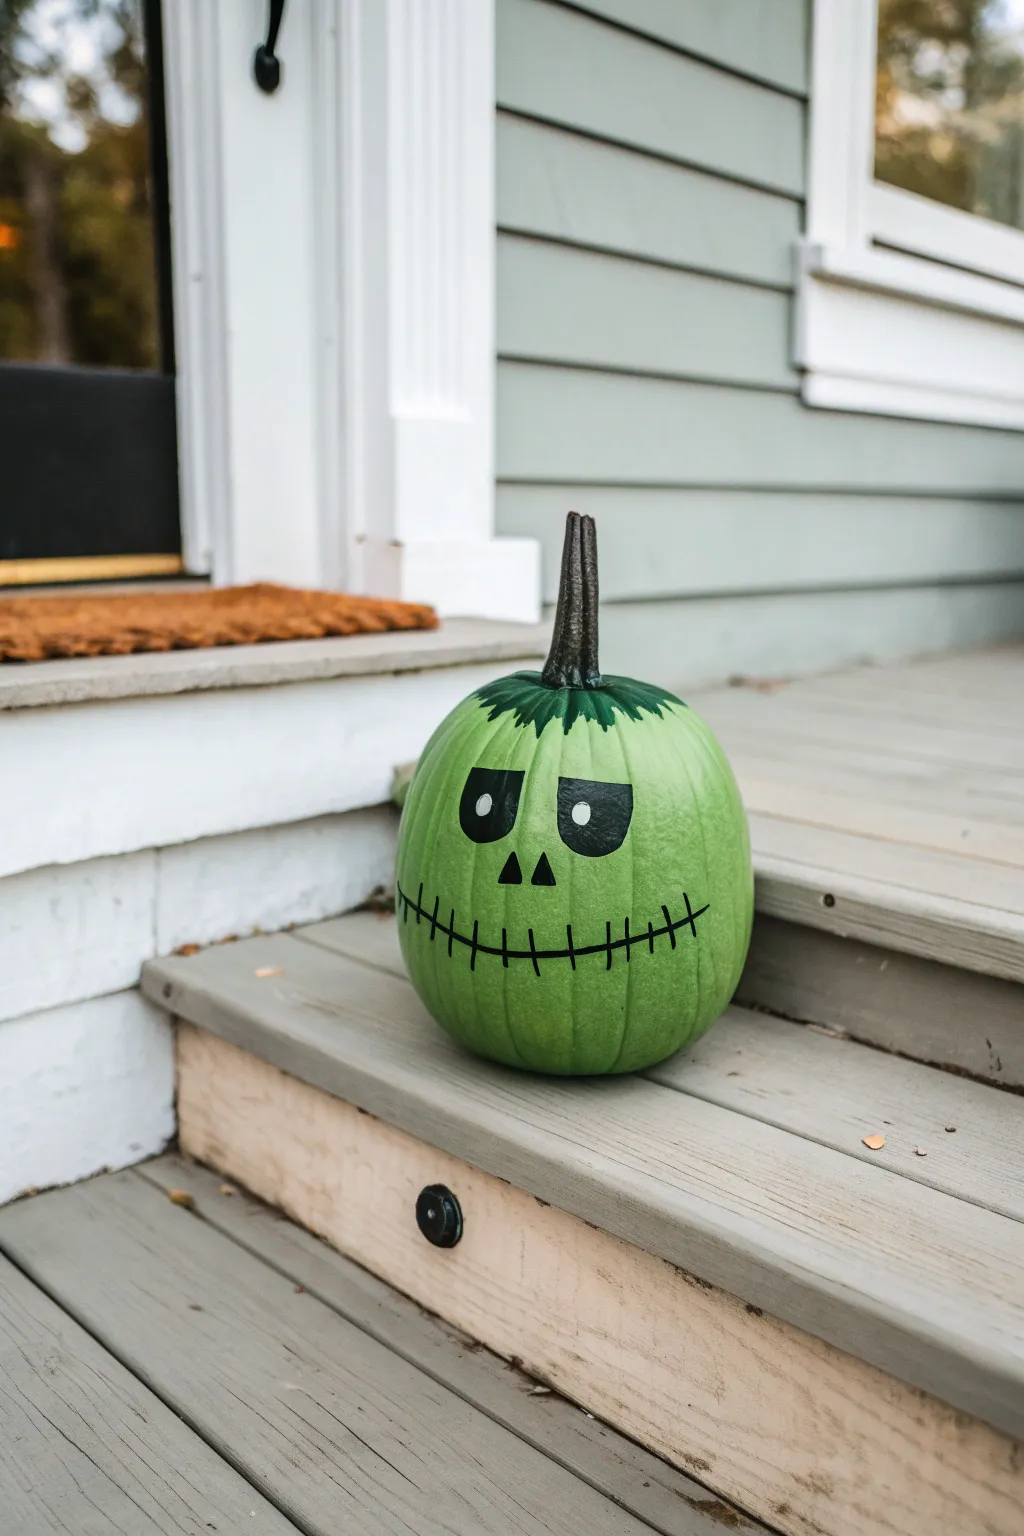
Googly-Eyed Silly Monster Green Pumpkin
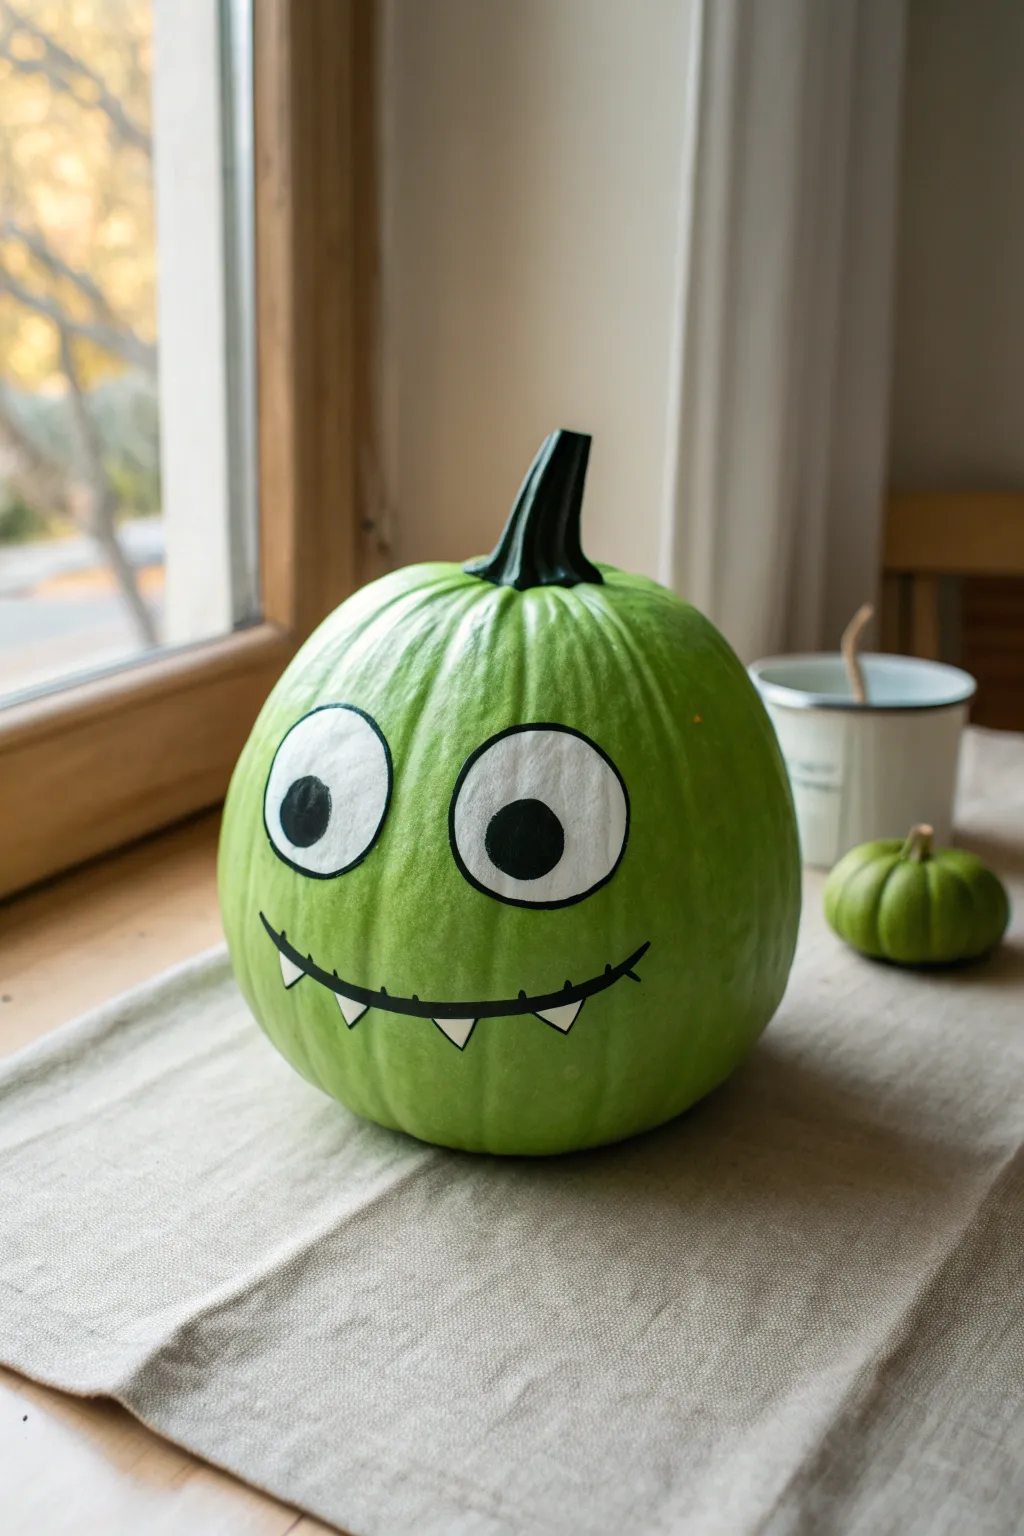
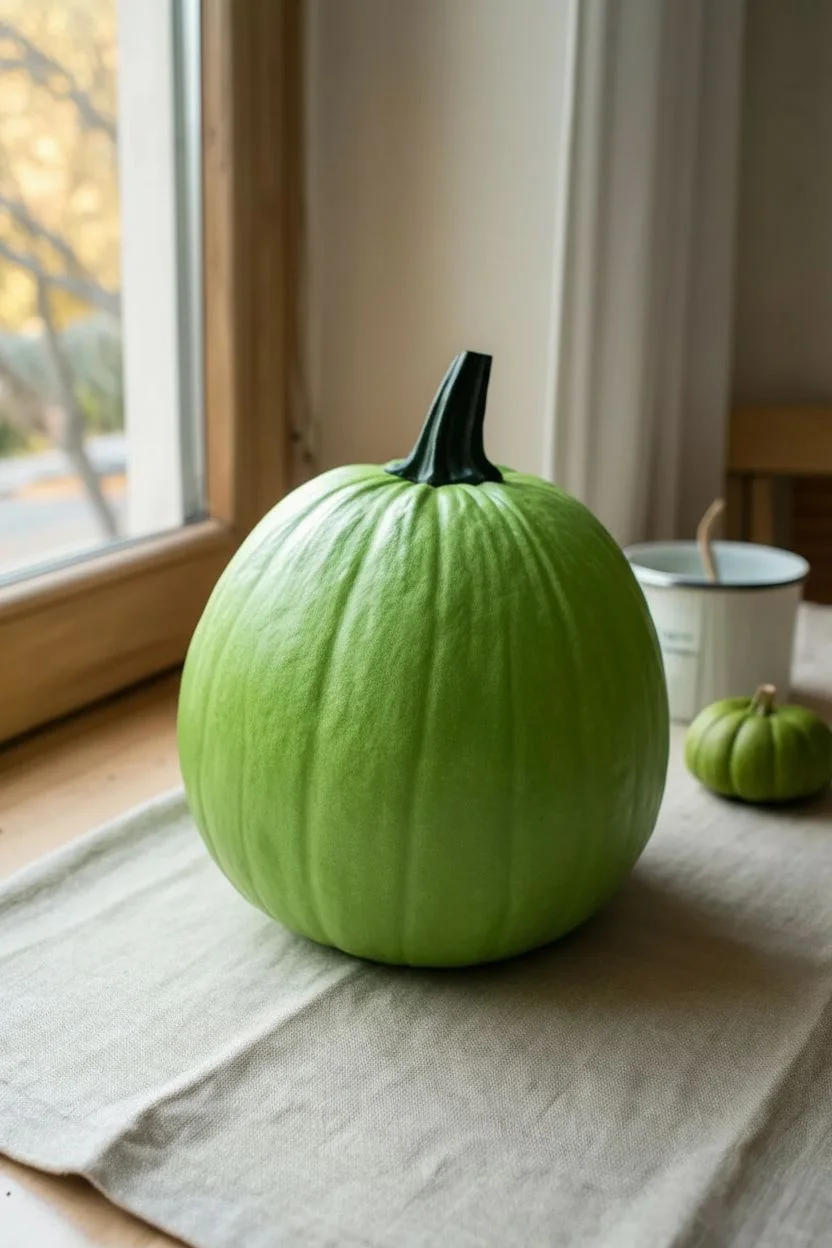
Transform a traditional orange gourd into a friendly, vibrant monster with this simple painting project. The result creates a cheerful, cartoonish character perfect for a windowsill display that isn’t too spooky.
Step-by-Step Tutorial
Materials
- Medium-sized pumpkin (real or faux)
- Bright lime green acrylic paint (matte finish)
- White acrylic paint
- Black acrylic paint
- Wide flat paintbrush (approx 1 inch)
- Medium filbert brush
- Small round detail brush
- Painter’s tape (optional)
- Pencil
- Water cup and paper towels
Step 1: Base Coat Application
-
Clean the surface:
Wipe down your pumpkin with a damp paper towel to remove any dirt or dust. A clean surface ensures the paint adheres properly and won’t peel later. -
Protect the stem:
If you want to keep the stem in its natural dark green color or if you plan to paint it separately later, wrap a small piece of painter’s tape around the base of the stem. -
Apply the first green coat:
Using your wide flat brush, apply a layer of lime green acrylic paint over the entire pumpkin. Brush in vertical strokes following the natural ridges of the pumpkin for a smoother look. -
Let it dry completely:
Acrylics on pumpkin skin can take a bit longer to dry than on canvas. Wait about 30-45 minutes until it is dry to the touch so you don’t lift the first layer. -
Add a second coat:
For that vibrant, opaque green shown in the photo, apply a second coat of green paint. This covers any orange that might be peeking through. -
Touch up the stem:
Remove the painter’s tape. If the stem needs darkening to match the photo, paint it carefully with black or dark hunter green paint using the medium brush.
Uneven Coverage?
If the green paint looks streaky, sponge paint the final layer instead of brushing. This creates a textured, darker finish that hides brushstrokes well.
Step 2: Painting the Features
-
Sketch the face:
Lightly sketch two large circles for eyes and a wide U-shape for the mouth using a pencil. Placing the eyes slightly askew adds to the silly character. -
Fill in the eye whites:
With the medium filbert brush and white acrylic paint, fill in the large eye circles. I find starting from the center and spiraling outward helps keep the edges neat. -
Layer the white:
Just like the green base, the white eyes will likely need a second coat to be bright and opaque against the green background. Let the first layer dry before adding the second. -
Outline the mouth:
Using your small round detail brush and black paint, trace over your pencil line for the mouth. Create a slightly curved, wide smile line spanning the width of the face. -
Sketch the teeth:
Lightly pencil in three small, downward-pointing triangles hanging from the main smile line—one on the left, two on the right. -
Fill the teeth:
Using the small detail brush (cleaned thoroughly), fill these small triangles with white paint. -
Paint the pupils:
Once the white eye circles are fully dry, paint two medium-sized black circles inside them. Place one slightly higher than the other to create that wonderfully goofy expression.
Step 3: Final Details
-
Outline the eyes:
Load your detail brush with black paint again. Carefully paint a thin outline around the white circles to make the eyes pop against the green skin. -
Outline the teeth:
Similarly, outline the three white teeth triangles with a very thin black line to define them clearly. -
Add stitch marks:
Along the main black smile line, paint tiny vertical hash marks every half-inch or so. This gives the mouth a stitched, Frankenstein-like appearance. -
Clean up edges:
Check for any smudges or uneven lines. You can use a tiny bit of the original green paint to ‘erase’ mistakes by painting over them once dry. -
Seal the paint (Optional):
If you plan to keep this pumpkin outside or for a long time, apply a thin coat of matte spray sealer to protect your artwork from moisture.
Make It 3D
Glue large plastic googly eyes onto the white painted circles for movement, or use white craft foam for the teeth to give the face real dimension.
Place your silly green monster near a window or on a porch to greet visitors with a goofy smile
BRUSH GUIDE
The Right Brush for Every Stroke
From clean lines to bold texture — master brush choice, stroke control, and essential techniques.
Explore the Full Guide
Grumpy Green Goblin Pumpkin With Pointy Teeth
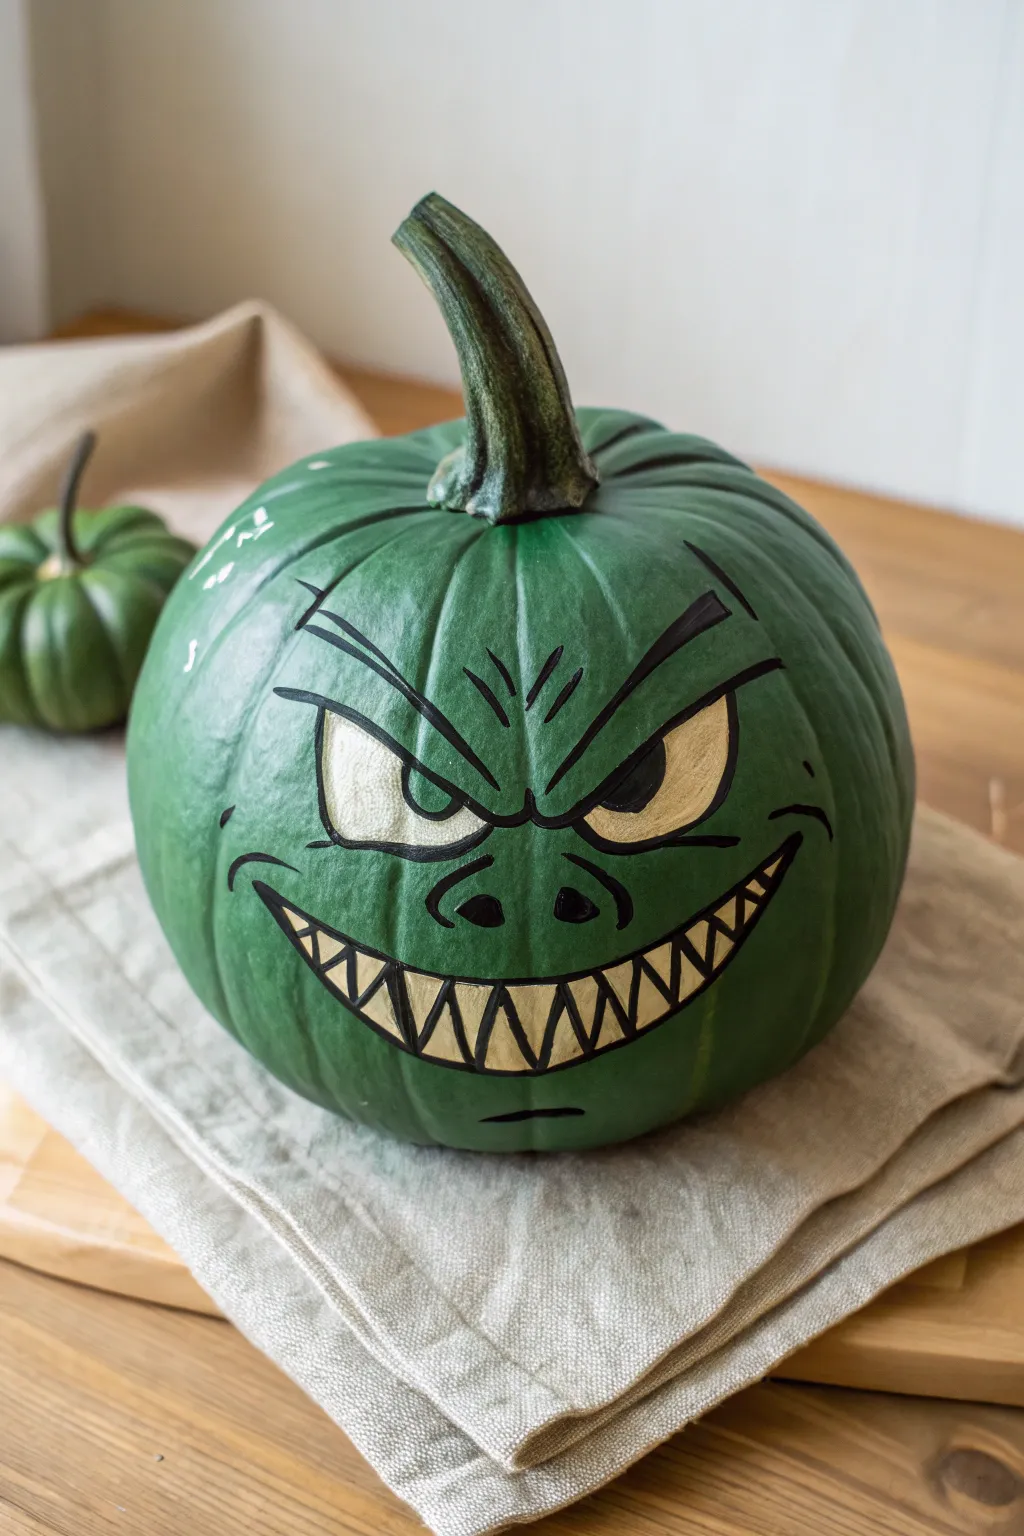

Transform a standard pumpkin into a mischievous, brooding goblin with this striking green-on-green design. By using a deep forest green base and contrasting cream accents, you’ll create a face that looks almost three-dimensional without carving a single hole.
How-To Guide
Materials
- Medium-sized round pumpkin
- Forest green acrylic paint (matte finish)
- Cream or light beige acrylic paint
- Wide foam brush or large flat brush
- Fine-point black paint pen or permanent marker
- Small round detail brush
- Pencil/chalk for sketching
- Spray sealer (clear matte)
Step 1: Setting the Scene
-
Clean the canvas:
Before putting brush to rind, make sure your pumpkin is completely clean. Wipe it down with a damp cloth to remove any dirt or field dust, then dry it thoroughly with a paper towel. -
Base coat application:
Using your large foam brush, apply the forest green acrylic paint over the entire surface of the pumpkin. Don’t worry about the stem just yet. Use long, vertical strokes that follow the pumpkin’s ribs for a natural look. -
Stem detailing:
While the body dries, paint the stem. You can leave it natural if it’s dark, or paint it a slightly darker brownish-green to seamlessly blend with the goblin theme. -
Second coat:
Once the first layer is dry to the touch (usually about 15-20 minutes), apply a second coat of green. This ensures solid, opaque coverage so none of the original orange peeks through.
Paint Pen Precision
If your paint pen tip gets clogged with dry acrylic, scribble vigorously on a scrap piece of cardboard or rough paper to clear the nib and get the ink flowing again.
Step 2: Sketching the Expression
-
Map out the face:
Use a pencil or a piece of white chalk to lightly sketch the face directly onto the dried green paint. Start with two large, angled semi-circles for the eyes. -
Draw the brow:
Connect the eyes with a deep V-shape in the center to create that furrowed, angry brow. Extend lines upward from the inner corners to emphasize the glare. -
Add the nose:
Sketch two small, distinct nostrils just below the eyes. I find that keeping them relatively small makes the artwork look more like a creature and less like a standard jack-o’-lantern. -
Outline the grin:
Draw a wide, crescent-shaped mouth that stretches almost to the sides of the pumpkin. Make the bottom lip curve upward sharply for a menacing effect. -
Detail the teeth:
Inside the mouth shape, draw sharp, triangular teeth along both the top and bottom. Keep them irregular—some slightly larger than others—to add to the gnarly goblin character.
Uneven Coverage?
If the cream paint looks streaky over the dark green, don’t keep brushing wet paint. Let it dry fully, then dab—rather than stroke—a second layer on top.
Step 3: Bringing it to Life
-
Fill the eyes:
Using your small round brush and cream paint, carefully fill in the eye shapes. You might need two coats here to get a solid, bright color against the dark green background. -
Paint the teeth:
Fill in the triangular teeth with the same cream color. Be careful to stay inside your sketched lines, but remember that the black outline later will hide minor wobbles. -
Inking the outlines:
Once the cream paint is fully bone-dry, take your black paint pen. Trace heavily around the outer edges of the eyes, nose, and mouth. -
Creating the irises:
Draw large black semi-circles inside the cream eyes, pushing them toward the upper inner corners to create a focused, angry stare. Leave a tiny speck of cream showing if you want a highlight. -
Define the teeth:
Use the paint pen to draw the zigzag line separating the top and bottom teeth, and outline each individual tooth heavily. -
Adding facial features:
Draw the furrow lines above the eyes and the curved accent lines around the corners of the mouth (smile lines). These lines give the face its ‘fleshy’ goblin texture. -
Final chin detail:
Add a small, curved horizontal line beneath the mouth to suggest a chin. -
Seal the deal:
Allow all paint and ink to dry completely for at least an hour. Finish by lightly misting the entire pumpkin with a clear matte spray sealer to protect your goblin from moisture.
Place your grumpy creation on the porch to greet visitors with a perfectly moody stare
Friendly Green Alien Pumpkin With Antennae

Transform a standard pumpkin into a visitor from another world with this adorable alien design. Featuring oversized anime-style eyes and custom-sculpted antennae, this project uses soft minty greens to create a friendly, not scary, extraterrestrial decoration.
Detailed Instructions
Materials
- Medium-sized pumpkin (real or faux)
- Mint green or seafoam green acrylic paint
- Light moss green acrylic paint (for stem)
- Black acrylic paint
- White acrylic paint
- Polymer clay or air-dry clay (green or paintable)
- Strong craft glue or hot glue gun
- Wide foam brush or flat paintbrush
- Medium round paintbrush
- Small liner brush
- Pencil for sketching
- Matte or satin sealant spray (optional)
Step 1: Base Coating
-
Clean the surface:
Begin by wiping down your pumpkin with a damp cloth to remove any dirt or oils. If using a real pumpkin, ensure it is completely dry before you start painting so the layers adhere properly. -
Apply the base color:
Using a wide foam brush, cover the entire pumpkin with the mint green or seafoam acrylic paint. You want a consistent, pastel alien skin tone. -
Let it dry and repeat:
Allow the first coat to dry completely, usually about 20 minutes. Apply a second or even third coat until the orange of the pumpkin is completely hidden and the color is opaque. -
Paint the stem:
Using a smaller brush, carefully paint the pumpkin’s natural stem with a light moss green shade. This helps blend the transition between the pumpkin and the antennae we will add later.
Sculpting Hack
Insert a small piece of toothpick or wire into the bottom of your clay antenna before baking. This creates a pin you can stick into the pumpkin stem for a stronger hold.
Step 2: Sculpting the Antennae
-
Shape the clay:
Take two equal portions of polymer or air-dry clay. Roll them into long, tapered snakes, slightly thicker at the bottom and thinning out toward the top. -
Curl the tips:
Gently curl the thin top end of each clay piece into a spiral. I find it helpful to wrap the clay around a pencil handle to get a uniform curve. -
Curve the stalks:
Bend the main stalk of the antennae slightly outward so they arc gracefully when placed together. -
Cure or dry the clay:
Follow the instructions for your specific clay. Bake polymer clay as directed or let air-dry clay sit overnight until rock hard. -
Paint the antennae:
Paint the hardened clay pieces with the same light moss green used on the pumpkin stem. This unifies the look. -
Attach to the stem:
Once the paint is dry, use strong craft glue or a hot glue gun to attach the base of the antennae to the sides of the pumpkin’s natural stem. Hold them in place for a minute until the glue sets firm.
Uneven Coverage?
If the mint green paint looks streaky, sponge the final coat on instead of brushing. The texture hides brush marks and mimics bumpy skin.
Step 3: Painting the Face
-
Sketch the features:
Lightly draw the outline of two large, slanted oval eyes with a pencil. Position them lower on the pumpkin to give it a cute, baby-face proportion. -
Fill the eyes:
Use a medium round brush and black acrylic paint to fill in the eye outlines. Work carefully around the edges to keep the oval shapes smooth and distinct. -
Add the highlights:
Dip the handle end of a paintbrush into white paint to create perfect circles. Place one large white dot in the upper corner of each eye and a smaller dot in the lower or inner section to create a shiny, reflective look. -
Draw the nose:
Using your finest liner brush or even a black paint pen, add two tiny dots between the eyes for nostrils. -
Paint the smile:
With the same liner brush, paint a delicate, thin smile line just below the nose dots. Keep the line simple and slightly curved upward. -
Seal the work:
If you plan to keep the pumpkin outside, give the finished piece a light coat of matte or satin spray sealant to protect the paint from moisture.
Enjoy displaying your adorable extraterrestrial friend on your porch or mantel this season

PENCIL GUIDE
Understanding Pencil Grades from H to B
From first sketch to finished drawing — learn pencil grades, line control, and shading techniques.
Explore the Full Guide
Green Witch Cauldron Pumpkin Illusion
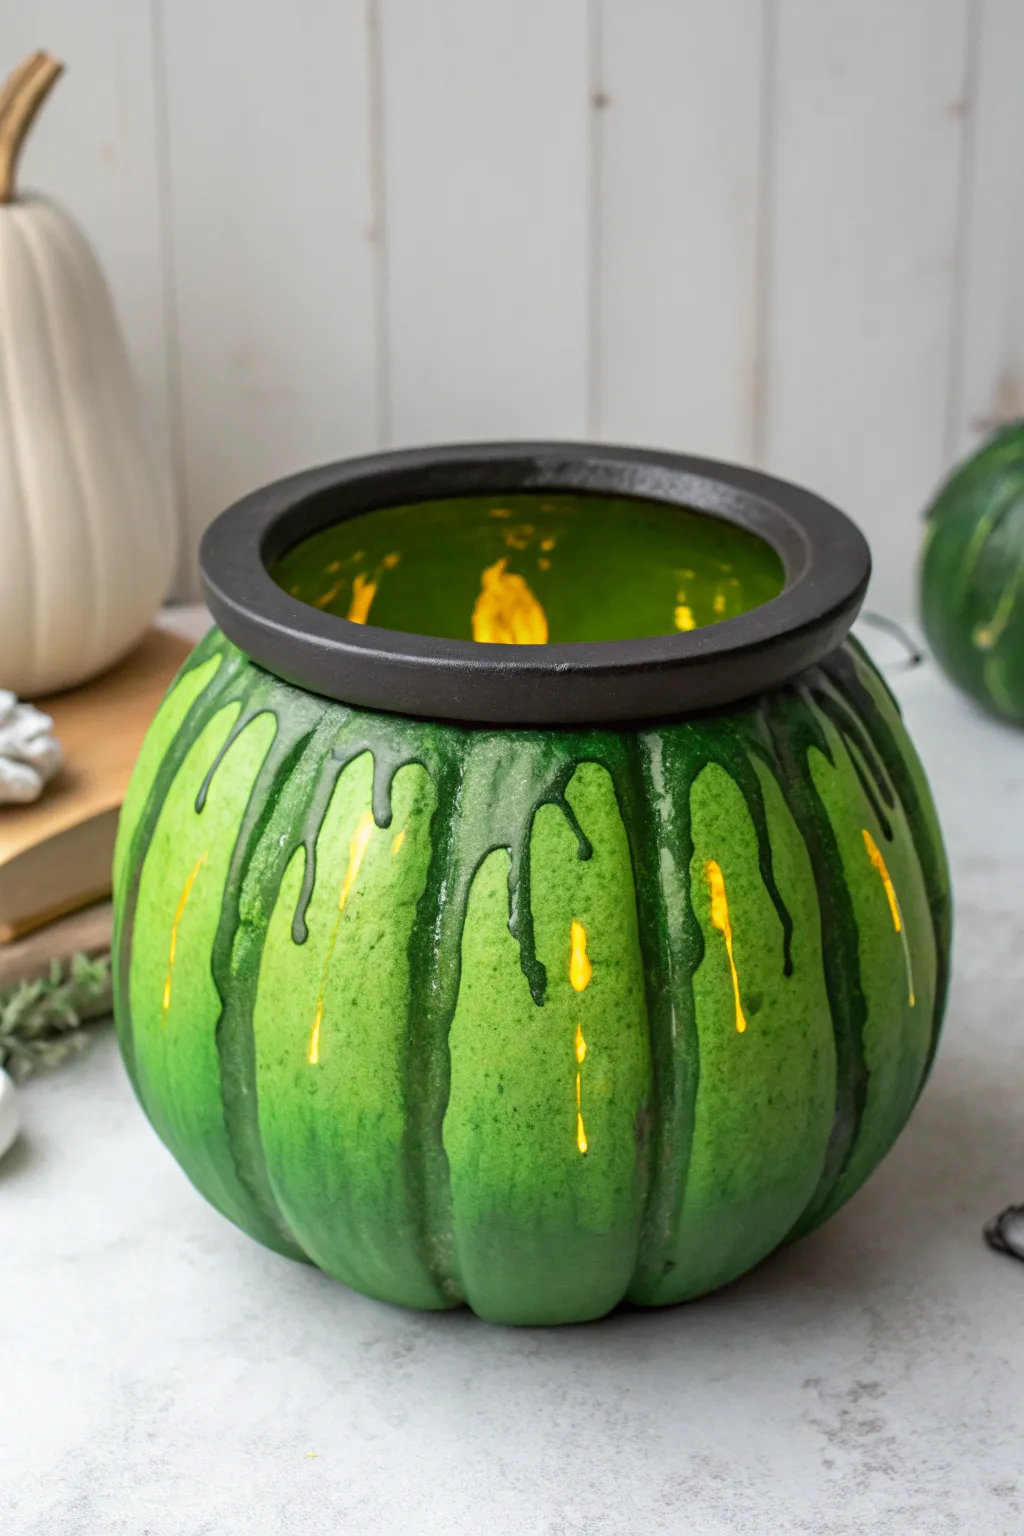
Transform an ordinary pumpkin into a bubbling witch’s cauldron with this clever painting technique. By layering bright greens and creating dimensional drips, you’ll craft a glowing, spooky centerpiece perfect for Halloween night.
Step-by-Step
Materials
- Medium-sized pumpkin (real or faux)
- Acrylic paints: neon green, forest green, black
- Thick foam ring or black polymer clay (for the rim)
- Hot glue gun and glue sticks
- Medium flat paintbrush
- Small detail paintbrush
- Sponge dabber
- Clear gloss varnish or Mod Podge
- Battery-operated LED light or tea light
- Carving knife (if using real pumpkin)
- Water cup and paper towels
Step 1: Preparation and Base Coat
-
Clean surface:
Begin by thoroughly wiping down your pumpkin with a damp cloth to remove any dirt or oils. Let it dry completely to ensure the paint adheres well. -
Carve the top:
Use a carving knife to cut a wide, circular opening at the very top of the pumpkin. Remove the stem and surrounding rind, creating a wide mouth for your cauldron. -
Gut the interior:
If you are using a real pumpkin, scoop out all the seeds and fibrous strands until the inside is clean. For faux pumpkins, simply ensure the opening is smooth. -
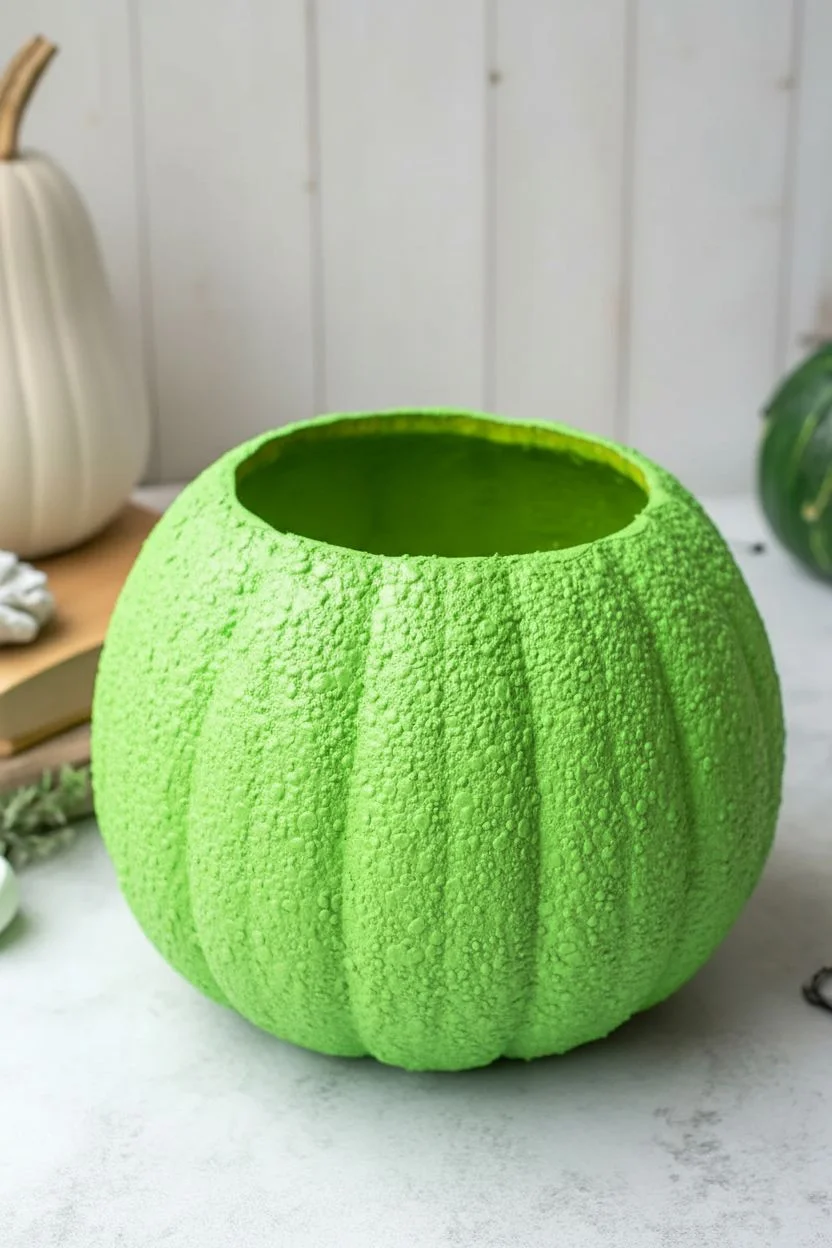
Apply base green:
Using a sponge dabber, apply a coat of neon green paint over the entire exterior. I like to use a stippling motion here to create a slightly textured, bubbly surface rather than smooth brushstrokes. -
Second coat:
Once dry, apply a second layer of neon green to ensure solid, opaque coverage. Let this layer dry completely before moving on.
Step 2: Creating the Cauldron Rim
-
Size the rim:
Take your foam ring or roll out a thick snake of black polymer clay. Measure it against the top opening of your pumpkin; it should sit slightly wider than the hole to look like a heavy iron rim. -
Shape and texture:
Flatten the top of your ring slightly to give it an industrial, cast-iron look. If using clay, bake according to package instructions now. -
Paint the rim:
Paint the foam ring or clay piece entirely black. Use matte black paint for a realistic iron finish, applying two coats if necessary. -
Attach the rim:
Run a bead of hot glue around the carved opening of the pumpkin. Swiftly press your black rim into place, holding it firm until the glue sets.
Paint Peeling?
If paint peels off a faux pumpkin, lightly sand the surface with fine-grit sandpaper before painting to give the pumpkin ‘tooth’ for grip.
Step 3: Drips and Details
-
Drafting the ooze:
Mix a small amount of forest green with a drop of black to create a dark, murky green. With your small detail brush, lightly sketch wavy outlines of drips originating from under the black rim. -
Painting the sludge:
Fill in these drip shapes with your dark green mixture. Make the drips vary in length—some stopping high up, others running almost to the bottom—to make the spill look natural. -
Adding dimension:
To make the drips look thick and viscous, add a second coat of the dark green paint just to the center of each drip line, leaving the edges slightly translucent. -
Highlighting:
Dip a fine brush into white or very pale green paint. Add tiny vertical highlights on the curves of the drips and the side of the cauldron to suggest a wet, shiny surface. -
Shadowing the grooves:
Dilute a little black paint with water to make a wash. Gently paint this into the natural vertical grooves of the pumpkin to emphasize its shape and add depth. -
Interior glow paint:
Paint the visible inside rim of the pumpkin yellow or bright orange. This helps reflect the light later and enhances the illusion that something is brewing inside.
Flickering Ember Effect
Use an orange or red flickering LED light instead of white. This simulates a fire under the cauldron, making your green potion glow eerily.
Step 4: Finishing Touches
-
Sealing the work:
Brush a coat of clear gloss varnish over the green parts of the pumpkin, especially the drips. This gives it a wet, slimy appearance perfect for a potion. -
Matte rim touch-up:
If any gloss got onto the black rim, touch it up with matte black paint. The contrast between the shiny green potion and the matte black iron is key to the illusion. -
Lighting it up:
Place a battery-operated LED light or tea light inside the pumpkin. The light will cast a glow against the internal yellow paint and shine through the opening.
Now step back and admire your bubbling cauldron as it casts a magical green glow over your Halloween display
Creepy Green Spider Pumpkin With Web Details
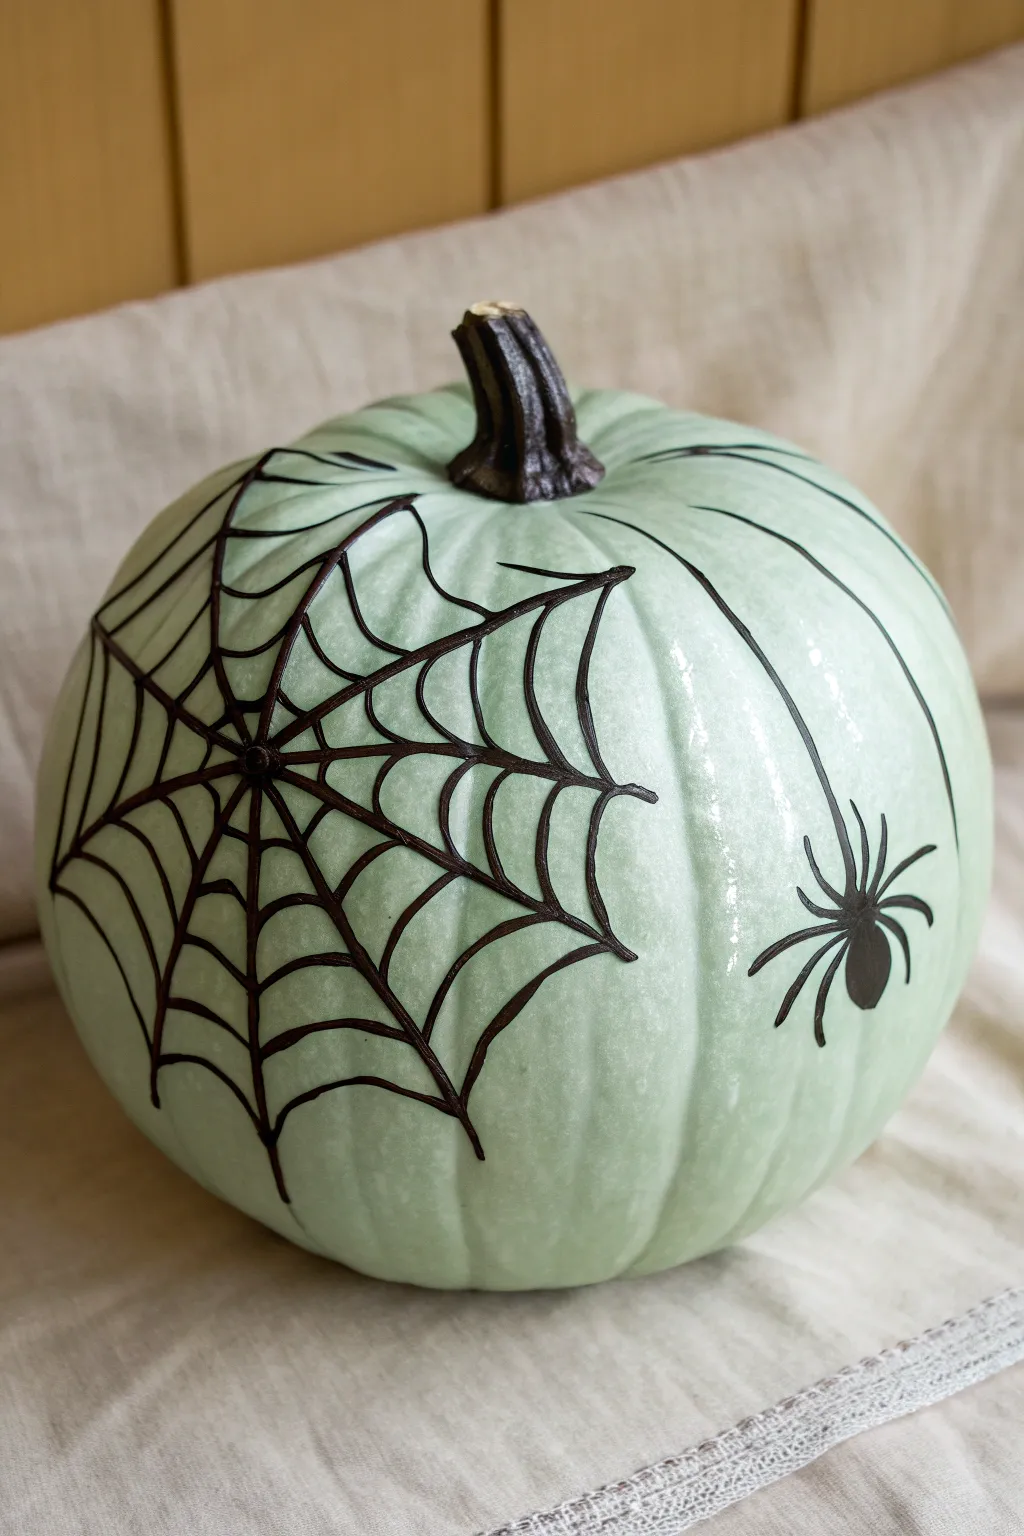
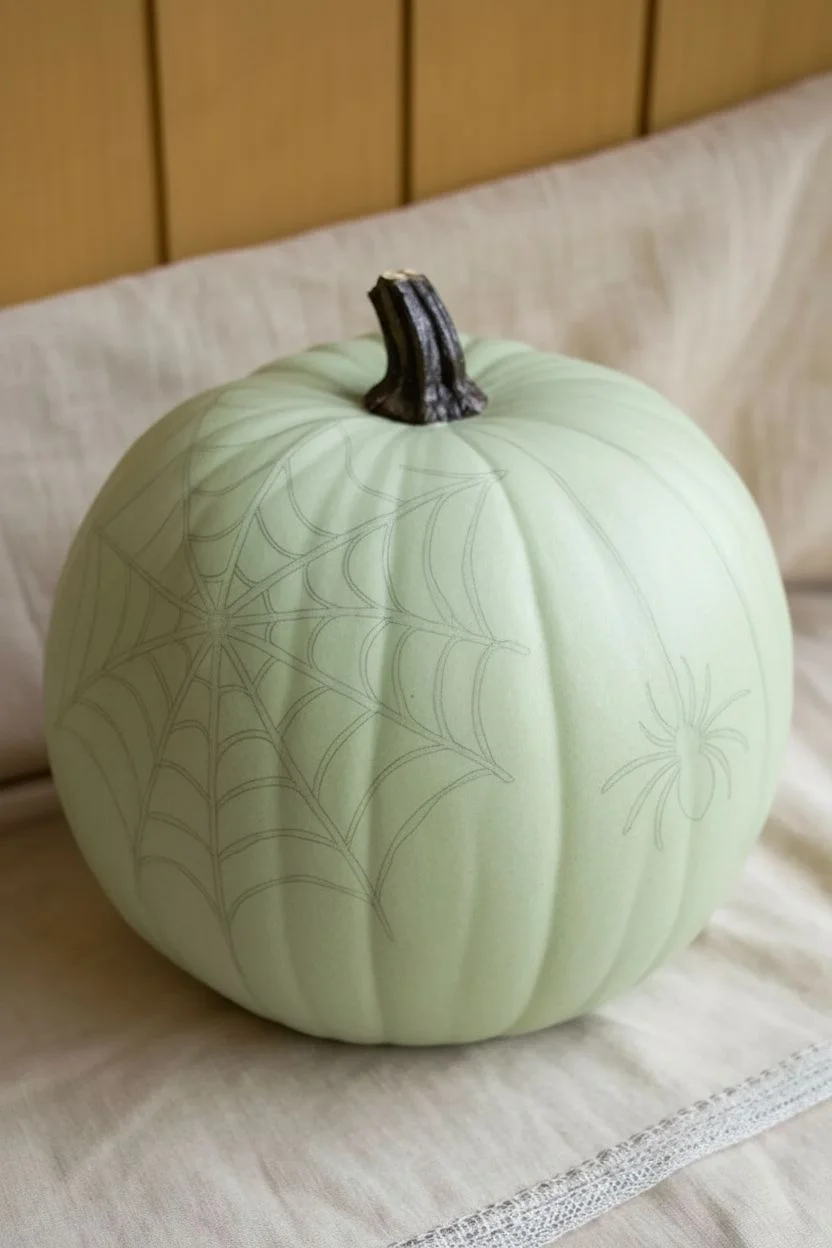
Transform a pale green pumpkin into a spooky centerpiece with this clean yet creepy spiderweb design. The raised black lines create a tactile 3D effect against the soft sage background, making the spider look like it’s crawling right off the surface.
How-To Guide
Materials
- Faux pumpkin (pale green or sage) or real pumpkin painted green
- Matte sage green spray paint (if using a real pumpkin)
- Black dimensional fabric paint (puffy paint) or black acrylic paint with a fine liner brush
- Pencil
- Eraser
- Paper towels
- Damp cloth
- Clear matte sealer (optional)
Step 1: Preparation
-
Clean surface:
Wipe down your pumpkin with a damp cloth to remove any dust or oils that might prevent the paint from sticking. -
Base coat (optional):
If your pumpkin isn’t already the perfect shade of pale minty green, apply two light coats of matte sage spray paint and let it dry completely overnight. -
Map the center:
Choose a spot slightly off-center on the front of the pumpkin to be the focal point of your web. Mark this lightly with a pencil.
Steady Hand Trick
Rest your pinky finger on a dry part of the pumpkin to stabilize your hand while tracing long lines.
Step 2: Drafting the Design
-
Sketch radial lines:
Using your pencil, lightly draw 7 to 9 long lines radiating outward from your center point, expanding across the pumpkin’s curve like wheel spokes. -
Curve the connectors:
Connect these spokes with swooping, U-shaped curved lines to create the webbing structure. Start small near the center and make the gaps wider as you move outward. -
Add the spider’s thread:
On the right side of the pumpkin, away from the main web, sketch a single long vertical line dropping down from the top stem area. -
Sketch the spider:
At the end of that thread, lightly outline a teardrop shape for the body, a smaller circle for the head, and eight creepy bent legs.
Make it Sparkle
While the black lines are still wet, sprinkle ultra-fine black or silver glitter over the web for a morning dew effect.
Step 3: Painting the Web
-
Test paint flow:
If using dimensional paint, practice squeezing a line onto a paper towel first to ensure no air bubbles cause splatters. -
Trace center spokes:
Carefully trace over your pencil lines for the radial spokes first. I prefer starting from the center and pulling the paint bottle outward for smoother lines. -
Trace webbing arcs:
Go back and connect the spokes with the curved webbing lines. Work from the center outward to avoid smudging your fresh work with your hand. -
Create a center knot:
Add a small, solid dot of black paint at the absolute center where all spokes meet to anchor the design visually. -
Correct mistakes:
If a line goes jagged, quickly wipe it away with a damp Q-tip while wet, or wait for it to dry and scrape it off with a fingernail.
Step 4: Adding the Spider
-
Draw the hanging thread:
Trace the long vertical line on the right side. Try to do this in one continuous motion for the cleanest look. -
Fill the body:
Outline and then fill in the spider’s abdomen and head so they are solid black. If using puffy paint, allow the paint to mound up slightly for volume. -
Detail the legs:
carefully pipe the legs extending from the body. Make the joints sharp and angular for a creepier appearance. -
Clean outline:
Use the tip of a toothpick to sharpen the very ends of the spider’s legs into fine points before the paint sets.
Step 5: Finishing Touches
-
Stem detail:
If your stem looks plain, dry brush a little dark brown or black paint onto the ridges to coordinate with the spooky theme. -
Cleanup:
Look closely for any visible pencil lines. Once the black paint is 100% dry (this can take several hours for puffy paint), gently erase them. -
Final drying:
Set the pumpkin in a safe, dust-free place for at least 24 hours to ensure the thick paint cures fully hard.
Now you have a sophisticated yet spooky decoration ready to display on your porch or mantle


Green Snake-Wrapped Pumpkin Optical Illusion
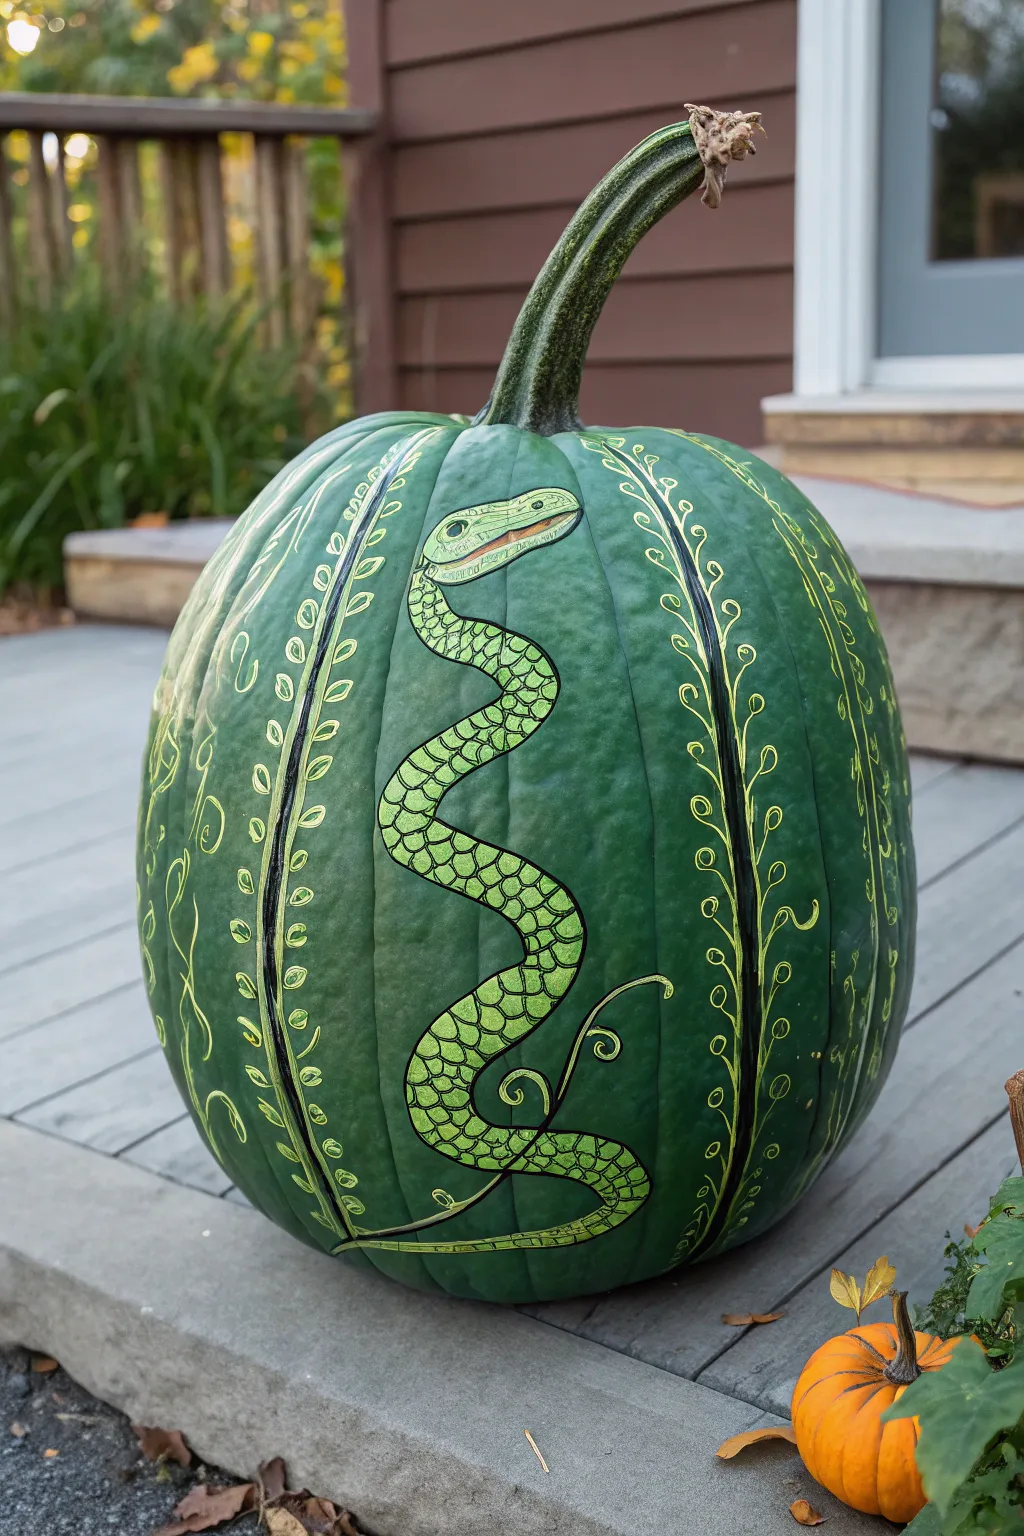
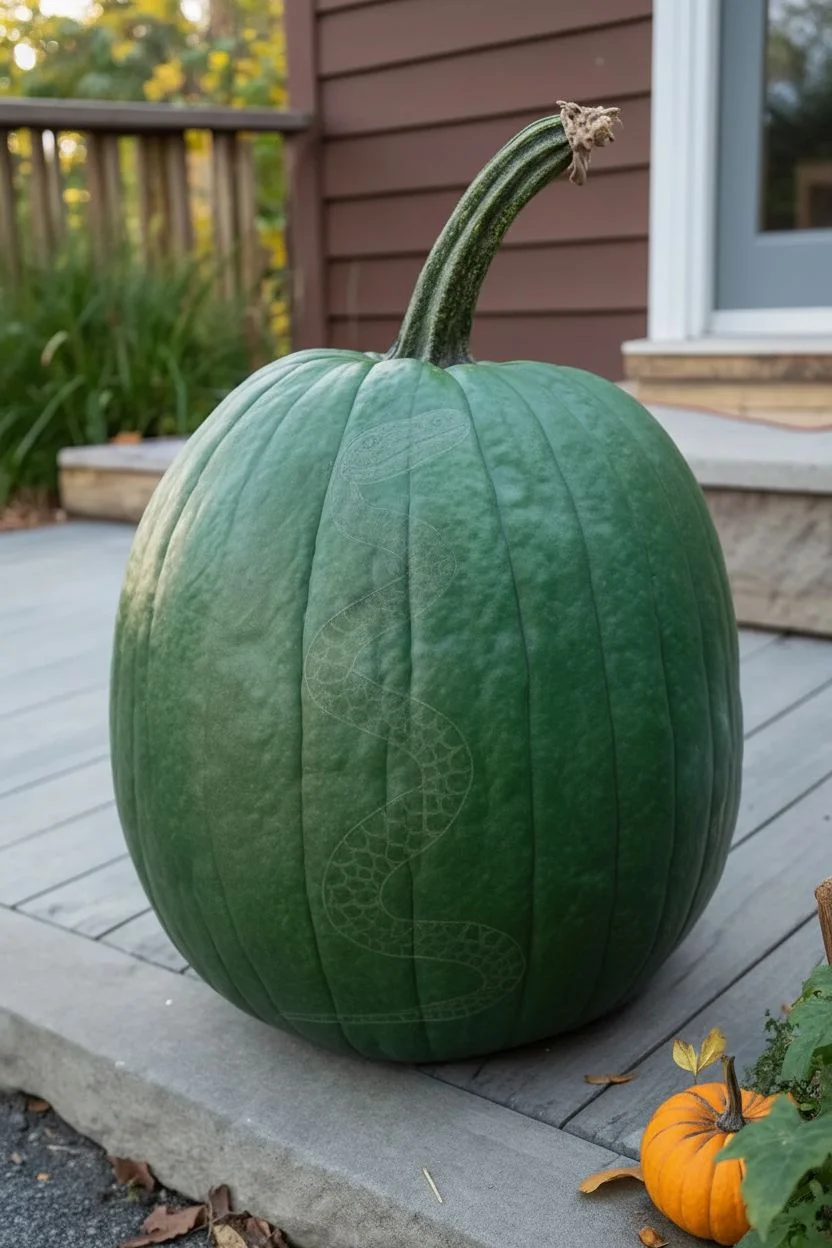
This striking project turns a unique green pumpkin into a canvas for a slithering masterpiece. Using fine line work and monochrome shading, you’ll create the illusion of a textured snake weaving seamlessly through decorative vines, perfectly matching the pumpkin’s natural hue.
Step-by-Step Tutorial
Materials
- Large green ‘Jarrahdale’ or ‘Blue Doll’ pumpkin
- Paint pens (Extra Fine and Medium tip) in Black
- Paint pens (Fine tip) in Light Green/Lime
- Paint pens (Fine tip) in White or Cream
- Alcohol wipes
- Graphite transfer paper (optional)
- Pencil and eraser
- Soft cloth
Step 1: Preparation and Planning
-
Surface Cleaning:
Begin by thoroughly wiping down your green pumpkin with alcohol wipes to remove any dirt or oily residue. This step is crucial because paint pens can skip or bleed on uncleaned waxy skins. -
Dry and Inspect:
Allow the pumpkin to air dry completely for about 10 minutes. While you wait, inspect the natural ribs of the pumpkin; these vertical indentations are perfect for hiding the ‘vines’ later. -
Sketching the Serpent:
Using a soft pencil, lightly sketch the outline of the snake. Start with the head near the top third, and let the body curve in an S-shape down the front, using the pumpkin’s curve to enhance the 3D effect. -
Placement Check:
Step back to view the sketch from a distance to ensure the snake looks like it is winding naturally. Adjust the tail so it tucks neatly towards the bottom.
Scale Symmetry
When drawing scales, make them smaller near the ‘neck’ and ‘tail’ and larger in the middle of the body. This size variation tricks the eye into seeing volume and roundness.
Step 2: Outlining the Form
-
Primary Black Outline:
Take your medium-tip black paint pen and trace over your pencil lines for the snake’s body. Use a confident, steady hand to create a solid boundary between the snake and the pumpkin background. -
Defining the Head:
Switch to an extra-fine black pen to detail the snake’s head. Draw the eye, the definition of the jaw, and the nostrils with precision. -
Adding the Scales Grid:
Still using the extra-fine black pen, draw the grid pattern for the scales inside the body outline. These don’t need to be perfect squares; slightly curved, diamond-like shapes look more organic and wrap around the form better. -
Filling the Scales:
This is the patience part. Carefully fill in the scales with a light green paint pen. Leave a tiny gap between the color and the black grid lines to keep the definition sharp. -
Highlights and Depth:
Once the green is dry, add tiny tick marks of white or cream on the upper left corner of individual scales. This simple addition creates a ‘shine’ that makes the snake look wet and glossy.
Paint Pen Clogs?
If your pen stops flowing, don’t press harder on the pumpkin or you’ll dent it. Instead, press the tip repeatedly on a scrap of cardboard or paper towel until the ink flows again.
Step 3: Decorative Vine Work
-
Tracing the Ribs:
Locate the natural vertical ribs of the pumpkin to the left and right of your snake. Use the medium black pen to draw thick vertical lines following these indentations. -
Creating the Leaves:
Along these black vertical lines, draw small, loop-like leaves using a fine-tip cream or light yellow pen. Space them evenly, angling them upwards to mimic growth. -
Adding Vine Tendrils:
Using the same cream pen, freehand some loose, curly tendrils branching off the main vines. Let these curls interact with the empty space around the snake without overlapping it. -
Highlighting the Vines:
Go back over the leaf loops with a second coat if the green pumpkin skin is showing through too much. I find opaque paint pens usually need two passes for vibrant color. -
Defining Leaf Detail:
Once the cream paint is fully dry, use your extra-fine black pen to add a tiny dot or line at the base of each leaf loop to anchor it to the main black vine. -
Final Cleanup:
Check for any smudges or pencil marks. Use a damp Q-tip to gently clean up any paint mistakes, or an eraser to remove visible sketch lines.
Now you have a sophisticated, slightly spooky centerpiece that celebrates the natural beauty of the pumpkin itself
Green Dragon Scale Pumpkin With Spines
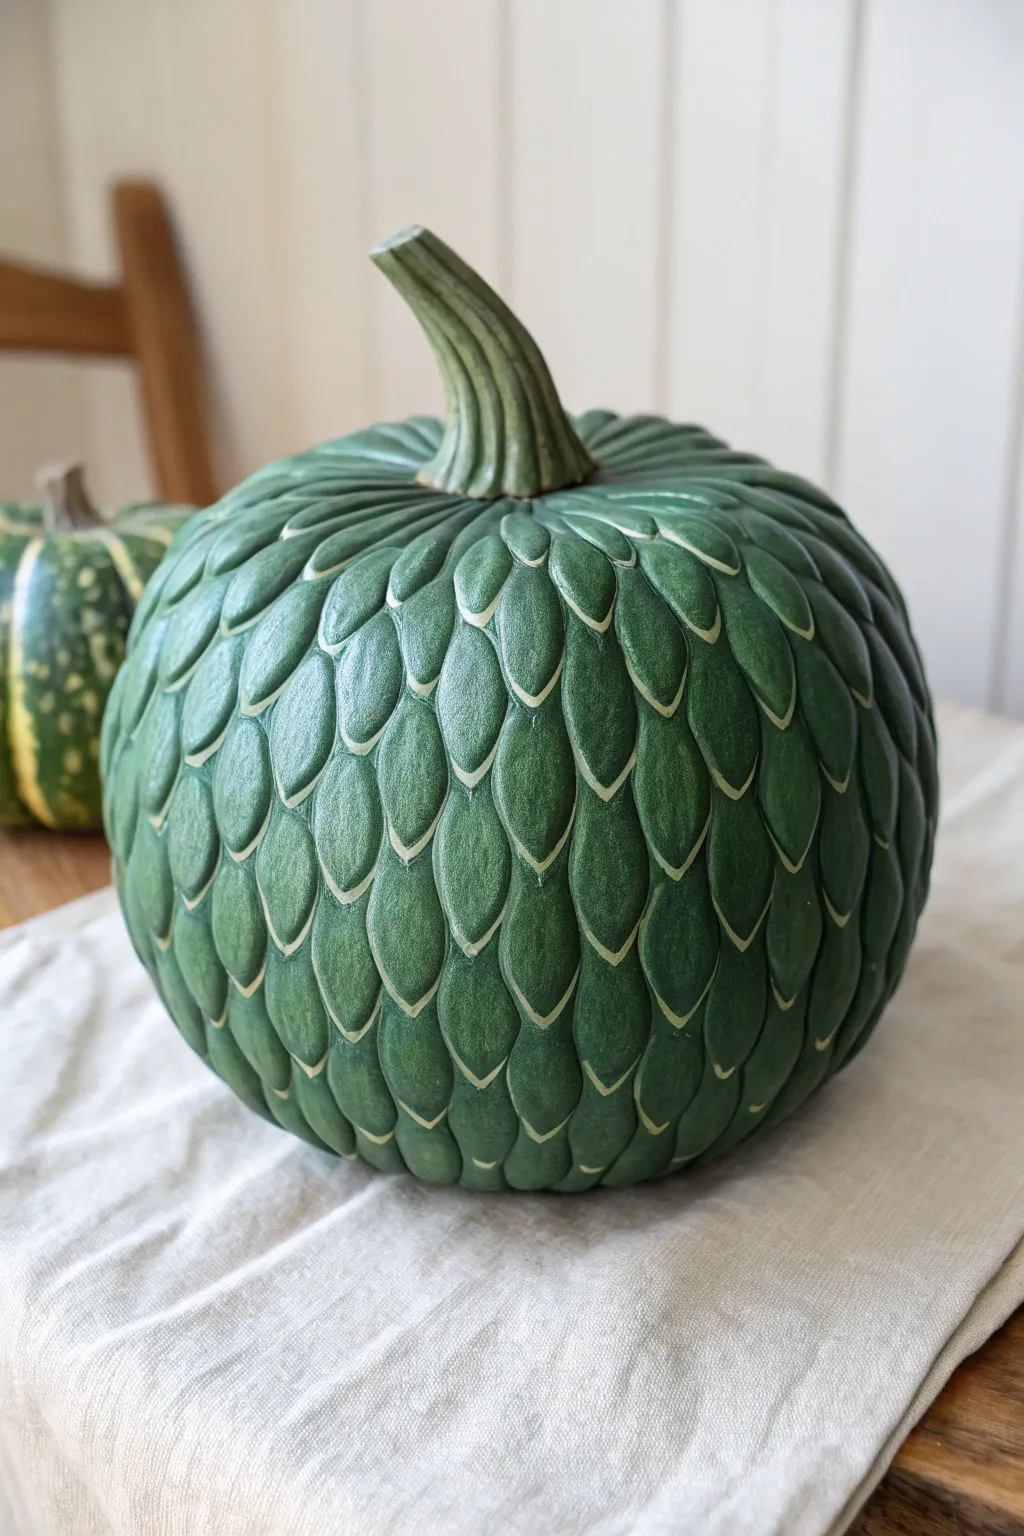
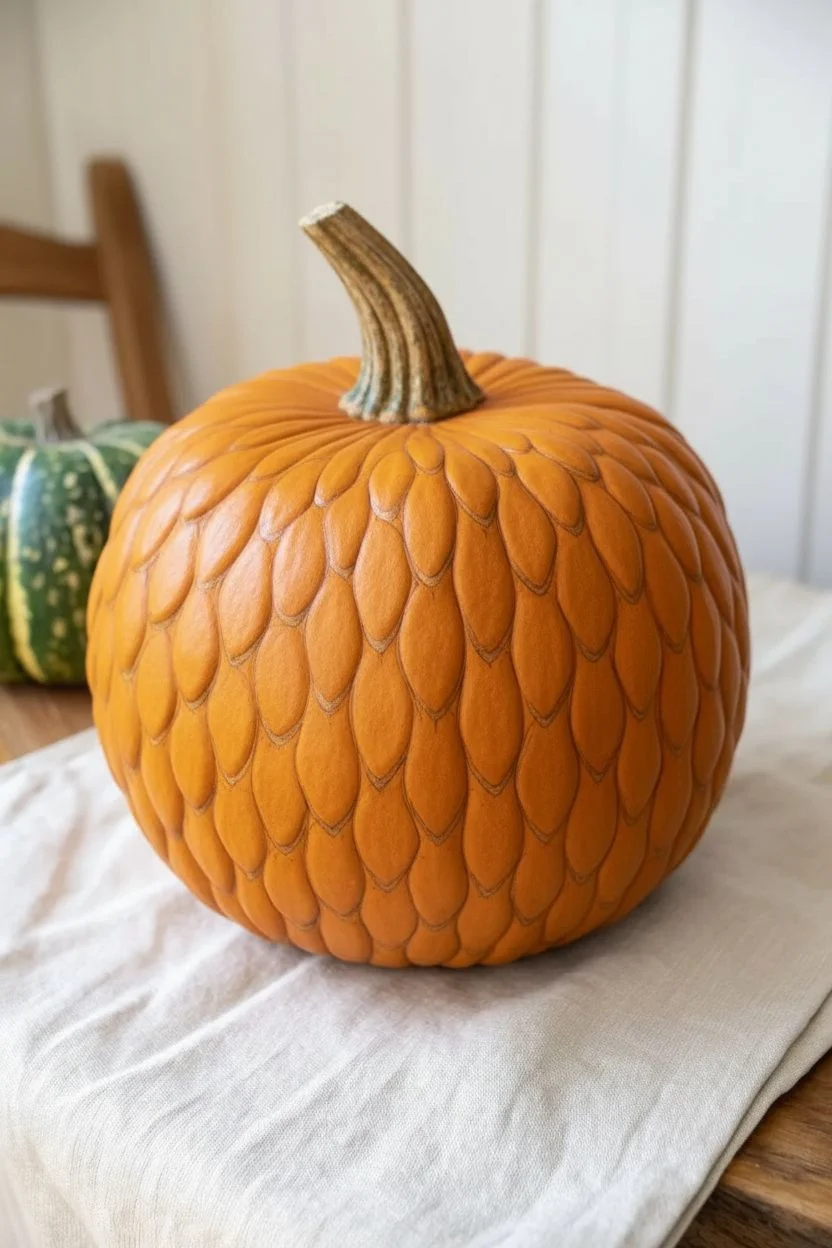
Transform a simple pumpkin into a mythical dragon egg with this deeply textured, scale-like design. The rich forest green and distinct ridges give it an organic, armored appearance that feels straight out of a fantasy novel.
How-To Guide
Materials
- Faux pumpkin (smooth surface works best)
- Air-dry clay or sculpting epoxy
- Carving tools (V-gouge or linoleum cutter) – optional if carving a real pumpkin
- Forest green acrylic paint (matte)
- Light sage or ivory acrylic paint (for highlights)
- Dark moss green paint (for shadows)
- Flat shader brush
- Fine detail brush
- Matte spray sealer
Step 1: Preparation & Base Layout
-
Clean surface:
Begin by wiping down your pumpkin to ensure it is free of dust and oils which might prevent clay or paint from adhering properly. -
Sketch the pattern:
Use a light pencil to draw a grid of overlapping arched shapes, starting from the top near the stem and working your way down. These will become your scales. -
Scale direction:
Ensure the pointed end of each ‘teardrop’ or scale shape points downward, mimicking the natural layering found on reptiles or pinecones.
Clay Cracking?
If air-dry clay cracks while drying, mix a tiny bit of fresh clay with water to make a paste (slip) and fill in the cracks, then smooth over.
Step 2: Sculpting the Texture
-
Apply base layer:
If using a smooth faux pumpkin, apply a thin, even layer of air-dry clay over the surface, roughly 1/4 inch thick. -
Define the scales:
Using a modeling tool or a spoon back, press into the clay to define the U-shaped bottom of each scale, creating a raised relief effect. -
Sharpen edges:
Use a finer sculpting tool to sharpen the ridges between scales. You want deep grooves so the individual scales pop out visually. -
Stem integration:
Blend the clay up the stem, adding vertical ridges with a tool to make the stem look muscular and twisted like the photo. -
Smoothing:
Dip your finger in a little water and gently smooth the surface of each individual scale to remove fingerprints. Let the clay dry completely, ideally overnight.
Metallic sheen
Mix an iridescent medium into your topcoat or dust the scale tips with green mica powder for a magical, shimmering dragon scale effect.
Step 3: Painting & Detailing
-
Base coat:
Paint the entire pumpkin, including the stem, with a solid coat of forest green acrylic paint. You may need two coats for full opacity. -
Deepen the shadows:
Mix a small amount of black into your forest green or use dark moss paint. Apply this into the deep crevices between the scales. -
Create the pale outline:
This is the crucial step for the ‘etched’ look. Using a very fine detail brush and light sage or ivory paint, carefully paint the thin recessed line that separates the scales. -
Dry brush technique:
I find that lightly dry-brushing the center of each scale with a slightly lighter green adds a nice rounded dimension. -
Stem highlights:
Add subtle lighter green streaks along the ridges of the stem to emphasize its twisted texture. -
Final seal:
Once fully dry, spray the entire project with a matte clear coat to protect the paint and uniform the finish.
Now you have a mythical centerpiece that looks ancient and organic
Frog Prince Green Pumpkin With a Gold Crown
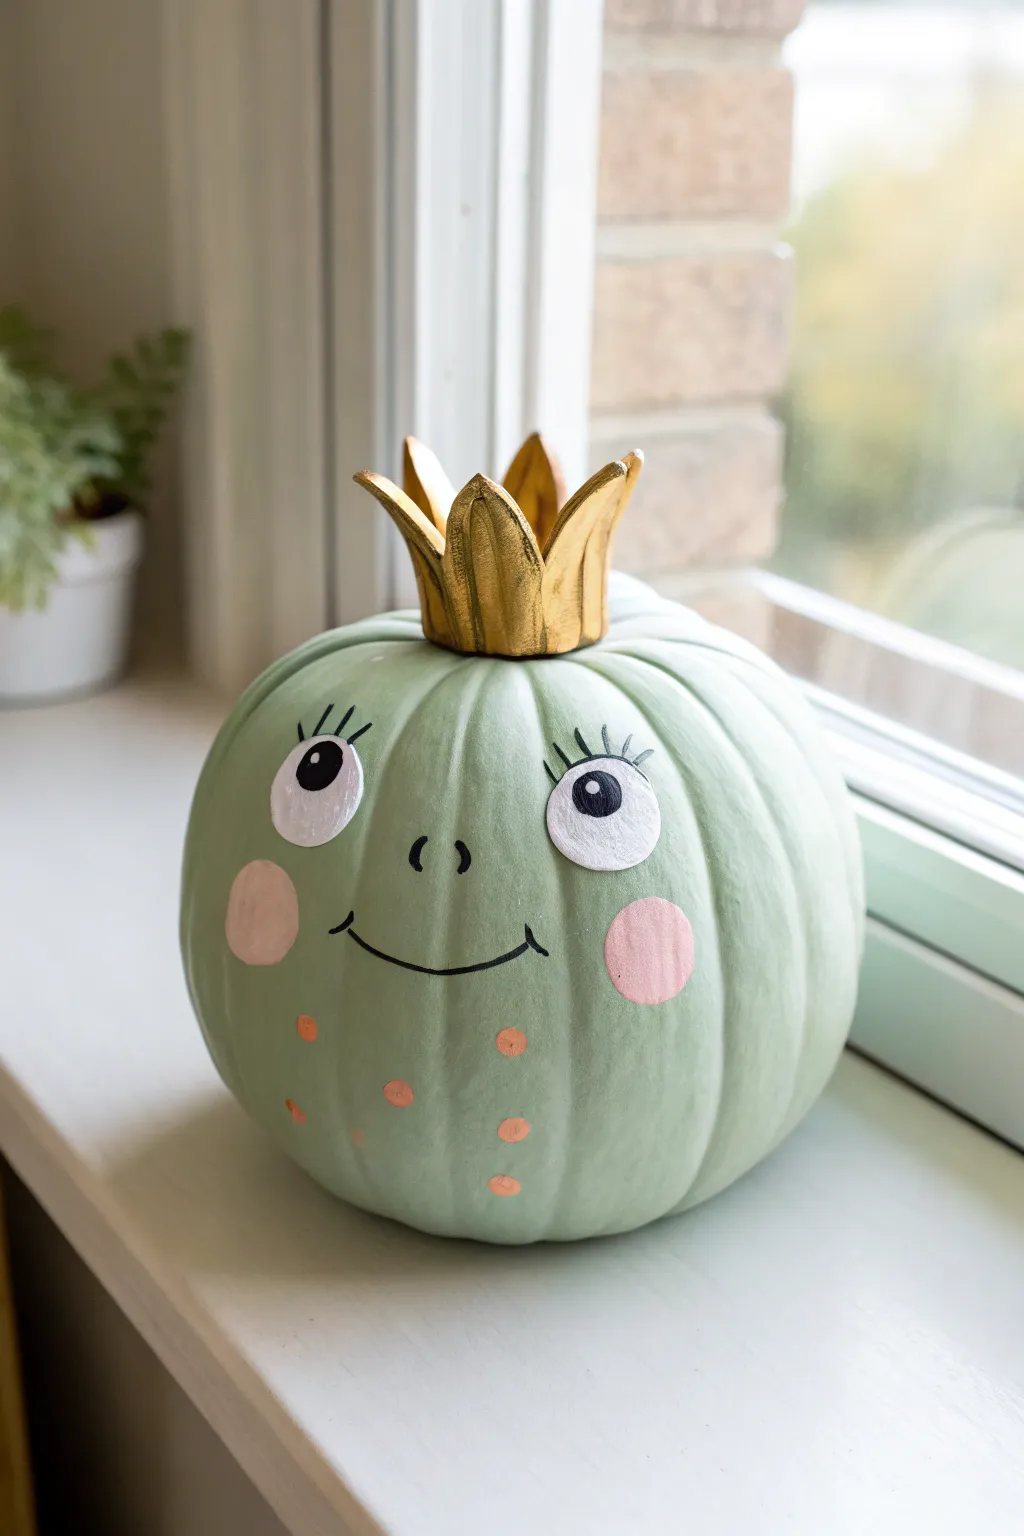
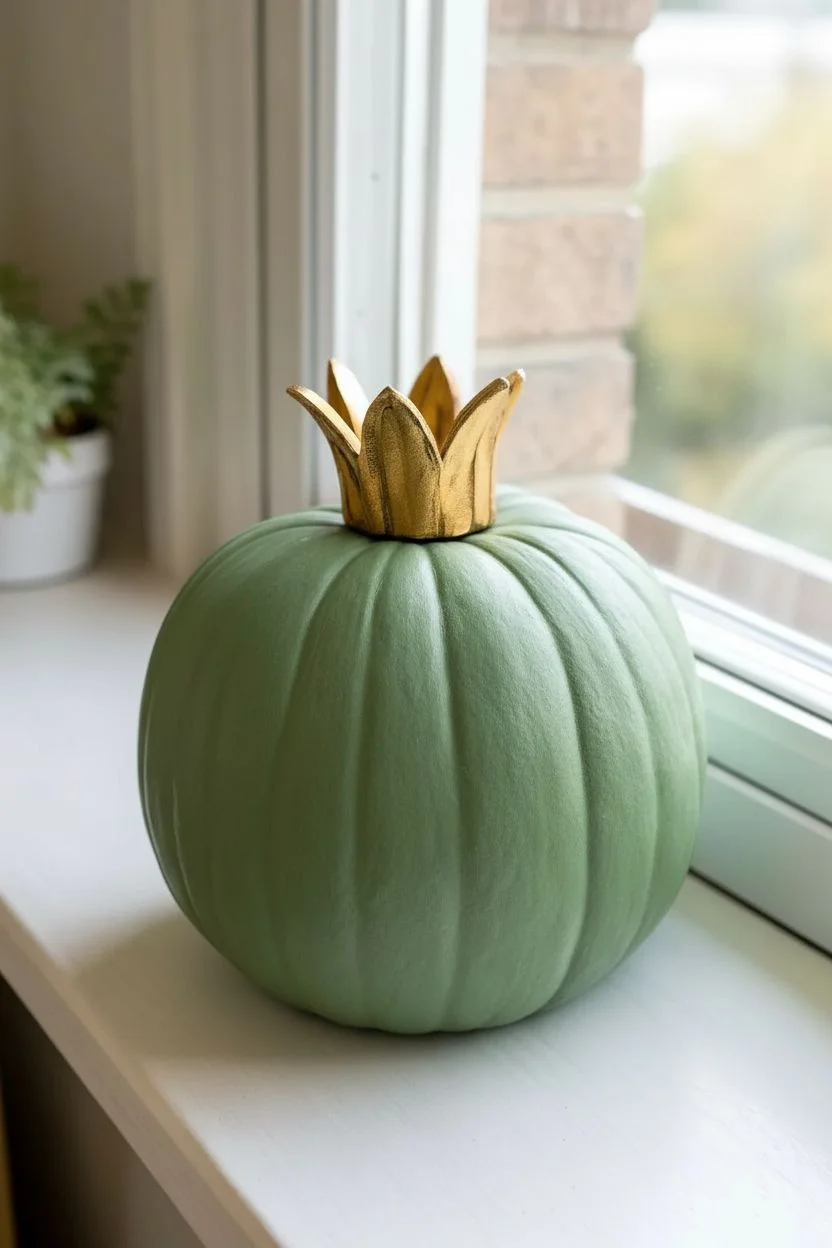
Transform a simple gourd into royalty with this charming frog prince design. With its soft sage green hue, whimsical expression, and regal gold crown, this pumpkin character brings a fairytale touch to your autumn decor.
Step-by-Step Tutorial
Materials
- Faux pumpkin (medium size)
- Sage or mint green acrylic craft paint
- Gold metallic paint (liquid or pen)
- White cardstock or foam sheet
- Pink acrylic paint
- Black paint pen (fine tip)
- Black permanent marker
- Small foam crown or air-dry clay
- Hot glue gun and glue sticks
- Paintbrushes (flat and round)
- Scissors
Step 1: The Royal Base
-
Prep the pumpkin:
Begin by wiping down your pumpkin with a damp cloth to remove any dust or oils, ensuring the paint adheres properly. -
Apply the base coat:
Using a wide flat brush, paint the entire pumpkin with a sage or mint green acrylic paint. Work the paint into the vertical grooves. -
Add a second coat:
Allow the first layer to dry completely for about 30 minutes, then apply a second coat for opaque, solid coverage. -
Prepare the crown:
While the pumpkin dries, tackle the crown. If using a foam crown cut-out or a modeled clay piece, paint it thoroughly with metallic gold paint.
Crown Alternative
No clay? Cut a strip from the inner tube of a toilet paper roll, cut zigzag spikes into the top edge, and paint it gold. It’s the perfect size!
Step 2: Painting the Face
-
Outline the cheeks:
Once the green base is dry, visualize where the face will go. Use a round brush dipped in soft pink paint to create two large, circular rosy cheeks on the lower half of the pumpkin. -
Draw the nose:
Using a fine-tip black paint pen, draw two small, curved vertical lines in the center of the face to serve as the frog’s nostrils. -
Draft the smile:
Sketch a wid, shallow ‘U’ shape for the smile with a pencil first to get the symmetry right. -
Trace the smile:
Go over your pencil line with the black paint pen, adding tiny perpendicular tick marks at the corners of the mouth for a stitched or dimpled look. -
Add decorative spots:
Dip the handle end of a paintbrush into your gold paint or use a gold paint pen to dot small circles on the belly area below the mouth.
Add Some Sparkle
While the pink cheek paint is still wet, sprinkle a tiny bit of iridescent glitter onto the circles for a magical, shimmering effect.
Step 3: The Big Eyes
-
Cut the eyes:
Cut two large ovals out of white cardstock or white craft foam. These oversized eyes are key to the character’s cute expression. -
Draw the pupils:
Use a black permanent marker to color in large black circles within the white ovals. I like to place them slightly cross-eyed or looking upward for extra personality. -
Add the highlight:
Add a tiny dot of white paint inside the black pupil area to give the eyes a sparkle of life. -
Attach the eyes:
Use a hot glue gun to secure the paper eyes onto the pumpkin, positioning them fairly wide apart above the cheeks. -
Paint the lashes:
Using the fine-tip black paint marker, draw three long, curved eyelashes extending from the top of each eye directly onto the pumpkin skin.
Step 4: Crowning Glory
-
Secure the stem:
Check your gold painted crown is dry. Apply a ring of hot glue to the bottom edge of the crown. -
Place the crown:
Press the crown firmly over the pumpkin’s stem. Hold it in place for 30 seconds until the glue sets completely.
Now your pumpkin looks ready to be kissed and transformed into a prince
Garden Bug Green Pumpkin (Ladybug, Beetle, or Caterpillar)
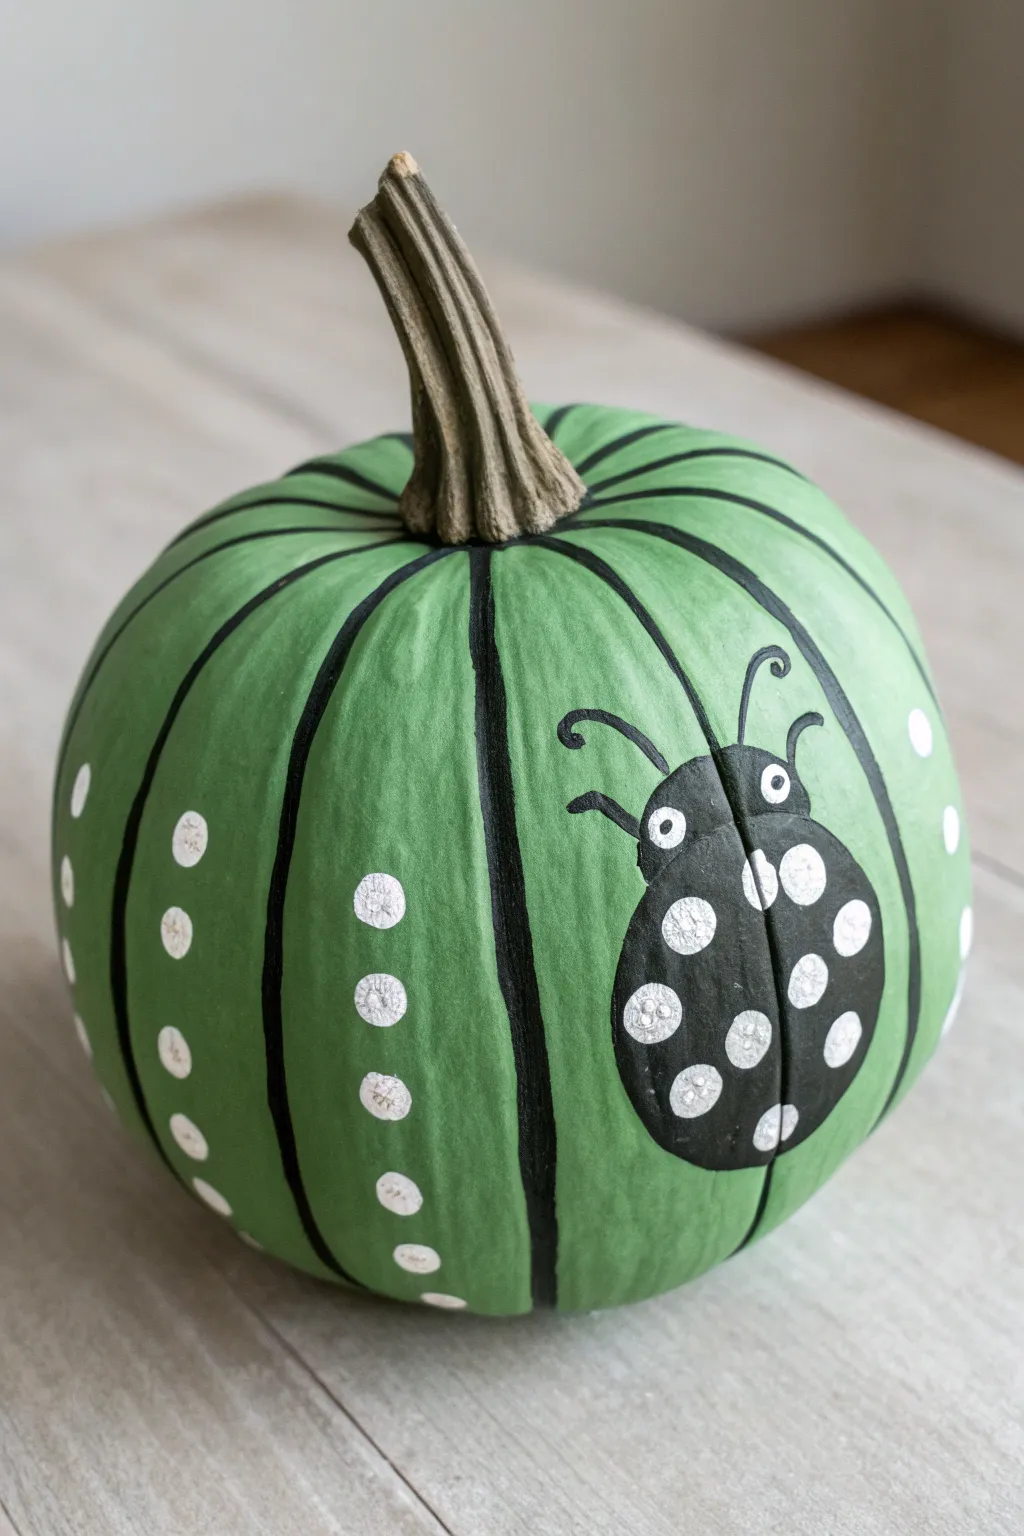
Transform a standard orange pumpkin into a garden-inspired masterpiece with this striking green beetle design. The crisp black lines and playful polka dots create a bold contrast that makes the creepy-crawly look charming rather than scary.
How-To Guide
Materials
- Medium-sized pumpkin (real or faux)
- Acrylic craft paint: Leaf Green
- Acrylic craft paint: Black
- Acrylic craft paint: White
- Wide flat paintbrush (1-inch)
- Medium round paintbrush
- Fine liner paintbrush
- Pencil
- Paper plate or palette
- Cup of water and paper towels
- Clear acrylic sealer (spray or brush-on, optional)
Step 1: Base and Background
-
Clean the surface:
Before starting, wipe down your pumpkin with a damp cloth to remove any dirt or oils. If you are using a real pumpkin, ensure it is completely dry before applying paint. -
Paint a base coat:
Using your wide flat brush, apply a coat of white paint to the entire pumpkin. This acts as a primer and ensures your green color will pop and look true to tone, rather than muddy against the orange skin. -
Apply the green:
Once the white primer is dry, switch to your Leaf Green acrylic paint. Cover the entire pumpkin, including the bottom, with an even coat. Use long, vertical strokes following the natural curve of the pumpkin. -
Add a second coat:
Let the first green layer dry completely. Apply a second coat of green to ensure full opacity so no streaks remain. Allow this to dry fully before moving on to the details.
Use the brush handle
For perfectly round dots without a stencil, dip the back end of your paintbrush handle into paint and stamp it onto the pumpkin like a tool.
Step 2: Defining the Segments
-
Outline the ribs:
Identify the natural grooves or ribs of your pumpkin. Using a medium round brush and black paint, carefully paint a stripe down the center of each groove from the stem to the base. -
Thicken the lines:
Go back over your black stripes to ensure they are solid and opaque. Depending on the size of your pumpkin, you may want these lines to be about 1/4 inch thick to create a defined ‘cage’ effect. -
Double-check coverage:
Inspect your vertical stripes. If the brush skipped over any bumpy textures, dab a little extra black paint into the recesses to create a continuous, smooth line.
Step 3: Creating the Beetle
-
Sketch the bug:
Choose a prominent section between two black stripes for your main beetle. Lightly sketch a large oval shape with your pencil, positioning it so the black vertical stripe runs right through the center of the bug’s body. -
Paint the body:
Using the medium round brush and black paint, fill in the oval shape you just sketched. The vertical stripe will now act as the sensory dividing line for the beetle’s wings. -
Add the head:
Paint a smaller semi-circle at the top of the oval for the head. Make sure it connects seamlessly to the body. -
Detail the antennae:
Switch to your fine liner brush. Paint two curved lines extending from the head, curling outward at the ends to create whimsical antennae. -
Add the legs:
With the same fine liner brush, paint two small, curved legs extending from the upper side of the body on the left. Repeat on the right side if visible, or keep it strictly profile-view depending on placement.
Wobbly lines?
If your black stripes look shaky, brace your painting hand against the pumpkin with your pinky finger to stabilize your stroke as you pull down.
Step 4: Polka Dot Details
-
Paint beetle spots:
Dip the handle end of a paintbrush into your white paint. Press it onto the dried black beetle body to create perfect, uniform dots. I prefer to randomly scatter these for a natural look. -
Add eyes:
Using a slightly smaller brush handle or tool, dot two white circles onto the head of the beetle for eyes. Once dry, add a tiny black dot in the center of each for pupils. -
Decorate neighboring segments:
Select the green segments adjacent to your beetle. Using the larger brush handle technique or a round brush, paint a vertical column of white polka dots running down the center of these green panels. -
Refining the dots:
If your white paint is slightly transparent, you may need to dab a second layer of white over each dot once the first layer is dry to make them bright and crisp. -
Seal the work:
Once all paint is completely dry (give it at least an hour), you can spray or brush on a clear acrylic sealer to protect your design from chipping or moisture.
Place your beetle pumpkin on the porch or a sunroom table to add a touch of garden whimsy to your fall decor
Haunted Graveyard Green Pumpkin Scene
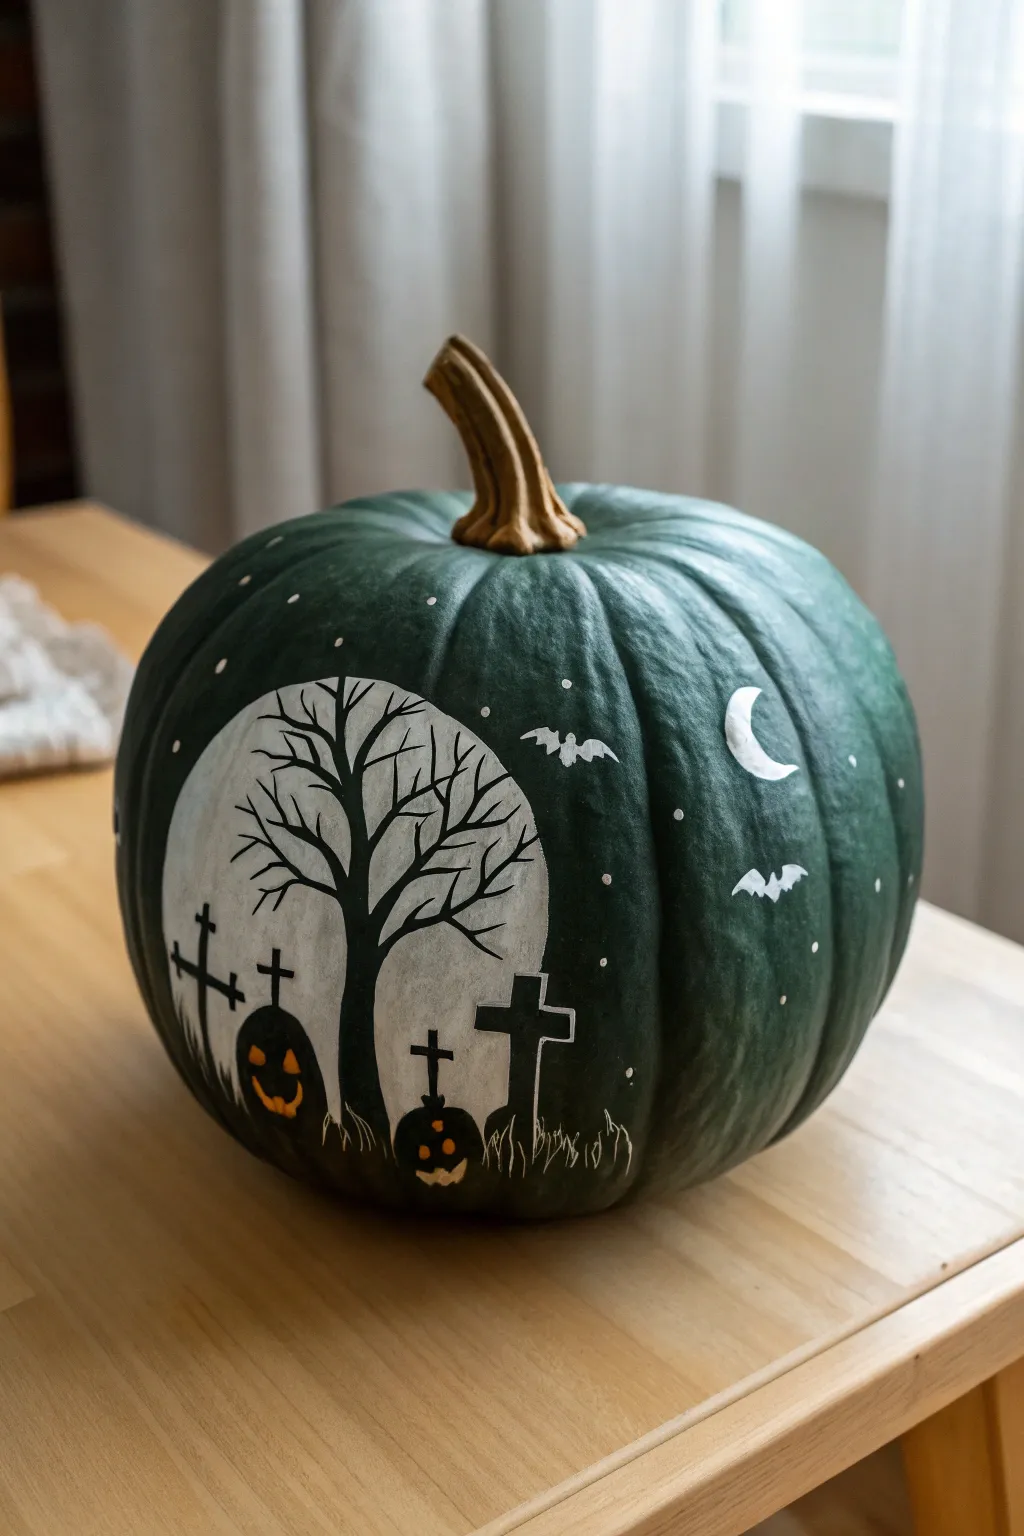
Transform a deep green pumpkin into a spooky evening scene with this striking high-contrast painting. The dark skin of the pumpkin acts as the perfect twilight backdrop for a bright full moon and silhouetted graveyard details.
Detailed Instructions
Materials
- Large deep green or jarrahdale pumpkin (real or faux)
- White acrylic craft paint
- Black acrylic craft paint
- Orange acrylic craft paint
- Large round sponge brush or pouncer
- Fine liner brush (size 0 or 00)
- Small round brush (size 2)
- Pencil or chalk for sketching
- Paper palette or plate
- Cup of water and paper towels
- Clear matte acrylic sealer spray (optional)
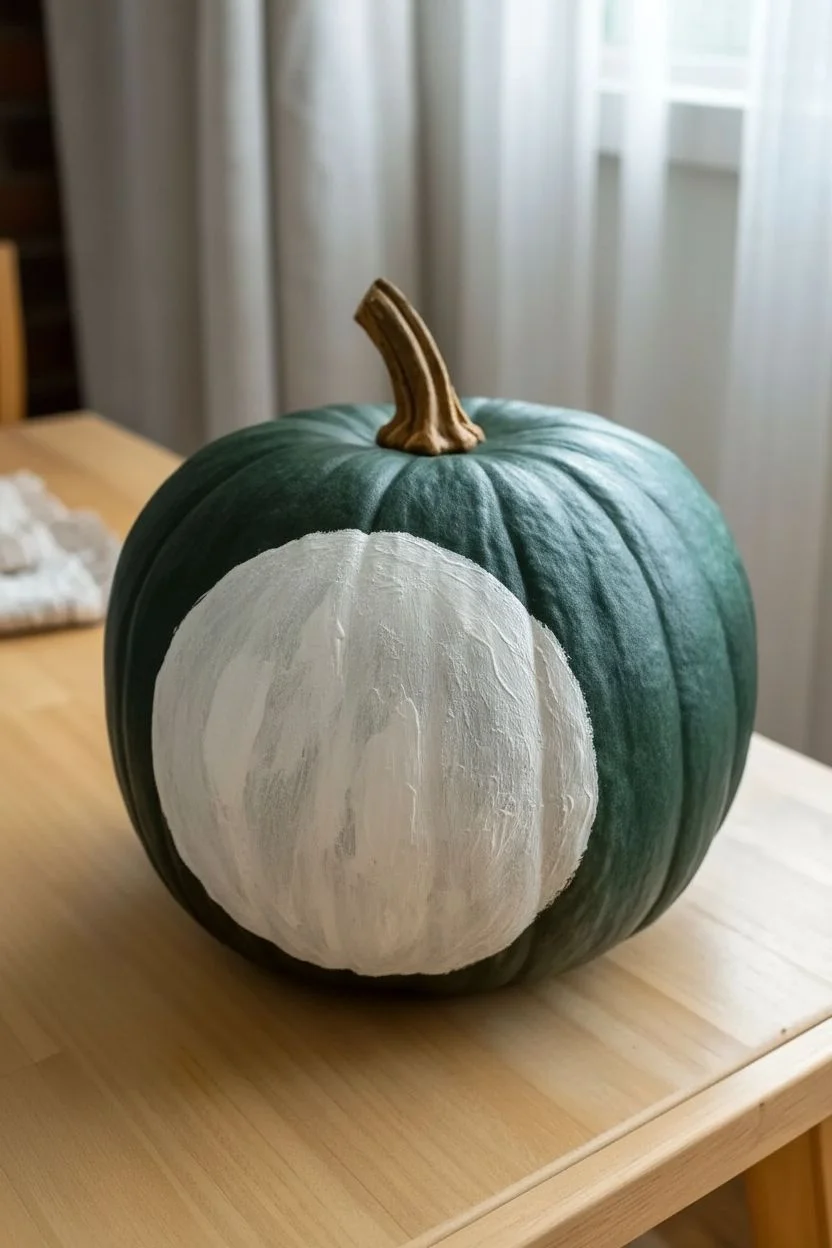
Step 1: Setting the Moonlit Stage
-
Clean surface:
Begin by thoroughly wiping down your pumpkin with a damp cloth to remove any field dust or waxy residue, ensuring the paint adheres properly. -
Outline the moon:
Choose the flattest face of your pumpkin. Using a large circle stencil, a bowl rim, or just freehanding it, lightly trace a large circle with chalk or a pencil to define your moon. -
Paint the moon base:
Dip your round sponge brush into white acrylic paint. Dab the paint onto the circle area to fill it in, creating a slightly textured surface that mimics the moon’s craters. -
Refine the edges:
Switch to a small round brush to neaten the edges of your white circle, making sure the moon looks nice and spherical against the dark green rind. -
Let it dry completely:
Allow the white moon layer to dry fully. This is crucial because painting black wet-on-wet will turn your spooky scene into a gray smudge.
Bat Silhouette Trick
For easy bats, paint a wide ‘V’ shape first, then scalloped edges underneath. Keep the wings pointed for a sharper look.
Step 2: Painting the Silhouette
-
Draft the tree:
Lightly sketch the main trunk of your eerie tree starting from the bottom center of the moon, branching upward and outward toward the top edges. -
Block in the trunk:
Using black paint and your size 2 round brush, paint the thick trunk of the tree. I like to make the base slightly wider to anchor it visually. -
Add main branches:
Extend the black paint upwards to create the primary branches. Let your hand shake slightly as you paint to give the branches a gnarled, spooky organic look. -
Paint fine twigs:
Switch to your fine liner brush. Add delicate, wispy twigs extending from the main branches, ensuring they reach all the way to the edge of the white circle and slightly beyond. -
Add the tombstones:
Paint simple cross shapes and rounded tombstone silhouettes along the bottom edge of the moon in black. Vary their heights and tilts to make the graveyard look old and neglected. -
Ground the scene:
Use the liner brush to flick small, quick upward strokes along the very bottom of the moon and around the tombstones to represent tall, unkempt grass.
Paint Slipping Off?
Real pumpkin skin can be oily. If paint beads up, wipe the spot with rubbing alcohol first to break down the natural wax.
Step 3: Atmospheric Details
-
Jack-o’-lantern faces:
Once the black tombstone shapes are dry, use the very tip of your fine brush and orange paint to add tiny triangular eyes and a grin to one or two of the rounder shapes, turning them into pumpkins. -
Paint the crescent moon:
Move to the side of the main scene. Paint a small, sharp white crescent moon floating in the dark green space to add depth to the ‘sky’. -
Add bats:
Using white paint for high contrast against the green skin, paint small ‘M’ shapes with extended wings to create bats flying near the crescent moon. -
Starry night:
Dip the tip of a toothpick or the handle end of a paintbrush into white paint. Dot small stars randomly around the main moon and side elements. -
Highlight the grass:
Add a few very faint white strokes near the bottom grass area (outside the moon) to suggest moonlight hitting the ground. -
Wait for curing:
Let the entire design dry for at least an hour. If you used thick globs of paint for texture, give it a bit longer. -
Seal the artwork:
If you plan to keep this pumpkin outside, give it a light coat of clear matte acrylic sealer to protect your painting from moisture.
Now you have a hauntingly beautiful centerpiece that requires absolutely no carving
Forest Spirit Green Pumpkin With Mossy Texture
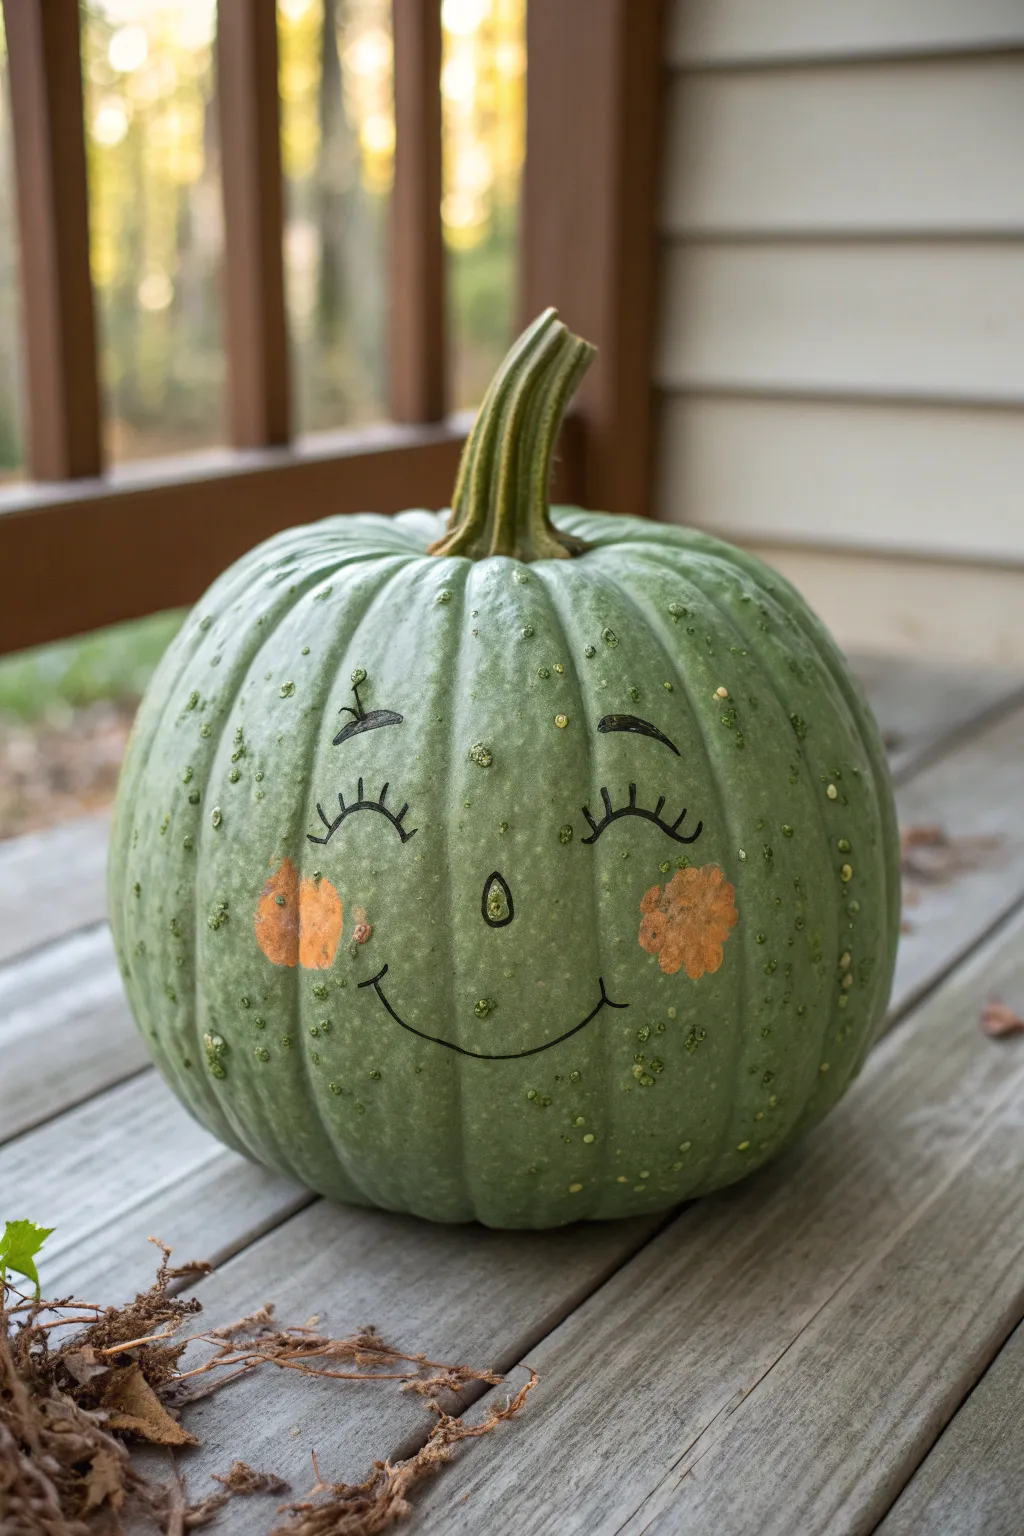
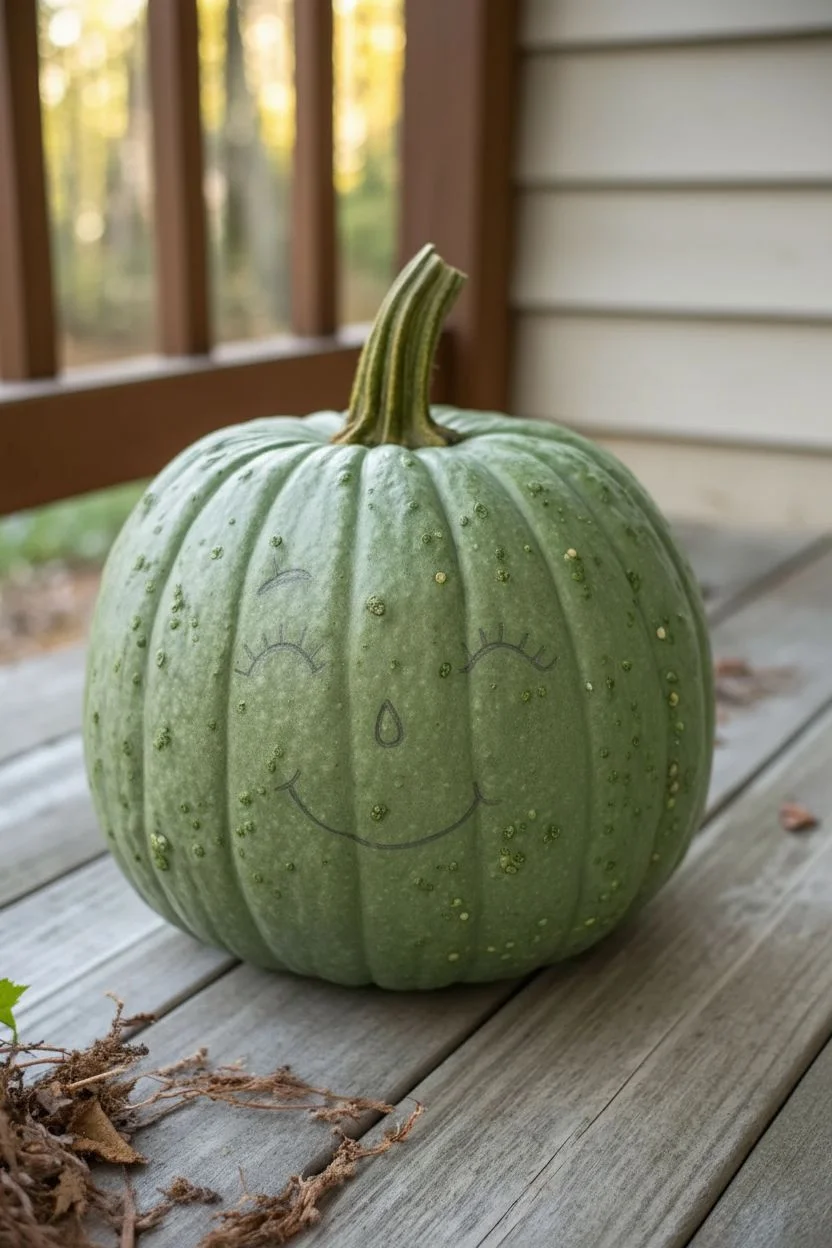
Transform a textured green pumpkin into a whimsical character with just a few simple touches. This project celebrates the natural warty surface of heirloom varieties by adding a gentle, sleeping face and soft rosy cheeks to create an adorable forest guardian.
Step-by-Step Guide
Materials
- Green warty pumpkin (Jarrahdale or similar heirloom variety)
- Black acrylic paint pen (fine to medium tip)
- Pencil for sketching
- Orange acrylic craft paint
- Bronze or metallic copper acrylic paint
- Small round paint brush
- Paper towel or cloth
- Clear matte sealant spray (optional)
Step 1: Preparation and Planning
-
Clean the Surface:
Begin by gently wiping down your pumpkin with a damp cloth to remove any dirt or garden debris. Be careful around the ‘warts’ or textured spots so you don’t knock them off. Let it dry completely. -
Choose the Face Side:
Rotate the pumpkin to find the best ‘front.’ I usually look for a relatively smooth patch between the vertical ribs for the face, while letting the warty texture frame the sides like hair. -
Sketch the Features:
Lightly sketch the face design directly onto the pumpkin skin using a pencil. Draw two wide, downward-curving arcs for closed eyes, a tiny teardrop shape for the nose, and a simple upward curve for the smile.
Step 2: Painting the Features
-
Outline the Eyes:
Using your black paint pen, carefully trace over your pencil lines for the eyes. Apply steady, even pressure to get a solid black line. -
Add the Eyelashes:
Draw four distinct lashes on each eye. Start from the eyelid line and flick the pen upward and outward. I like to make the outer lashes slightly longer for a sweeter expression. -
Create the Eyebrows:
A few inches above the eyes, draw small, floating curved lines for eyebrows. Keep them short and arched to maintain that peaceful look. -
Draw the Nose:
Trace the small teardrop or oval shape for the nose. You can leave the center empty for now or color it in solid black depending on your preference; for this look, outline it boldly. -
Ink the Smile:
Trace the main smile line. At each end of the smile, add a tiny perpendicular tick mark or ‘dimple’ line to cap off the expression. -
Let the Ink Dry:
Pause for about 10-15 minutes to let the paint pen dry completely. Smudging black ink at this stage is heartbreaking, so patience is key.
Use the Texture
Incorporate the pumpkin’s natural ‘warts’ into the design. If a bump lands on the cheek area, paint right over it—it adds 3D character to the face.
Step 3: Adding the Blush
-
Mix the Cheek Color:
On a palette or paper plate, mix a small amount of orange acrylic paint with just a tiny drop of bronze or copper. This gives the blush a slightly shimmering, organic feel. -
Position the Cheeks:
Locate the spot right below the outer corners of the eyes. This is where the rosy cheeks will sit. -
Paint the Blush Circles:
Using a small round brush, dab the paint onto the pumpkin in a rough circle shape. Don’t worry about being perfectly round; a slightly irregular edge looks more natural on a textured pumpkin. -
Feather the Edges:
Before the paint dries, tap around the edges of your cheek circles with a clean finger or a dry brush to soften the transition so it doesn’t look like a stiff sticker. -
Highlight the Nose (Optional):
If you left the inside of the nose hollow, you can add a tiny dot of the cheek color inside it to tie the color palette together.
Paint Pen Struggles
If the pen stops flowing on the waxy skin, scribble on a scrap piece of paper to get the ink moving again, then return to the pumpkin surface.
Step 4: Finishing Touches
-
Clean Up Lines:
Check your black lines. If the paint pen skipped over any bumps in the pumpkin skin, go back and carefully fill in those gaps for a solid look. -
Erase Pencil Marks:
Once you are 100% certain the paint is bone dry, gently use a soft eraser to remove any visible pencil guidelines. -
Seal (Optional):
If this pumpkin is going outside, give the painted face a light coat of matte sealant spray to protect the artwork from morning dew.
Place your sleepy forest spirit on your porch step and enjoy the peaceful autumn vibe it brings to your decor
Deep Green Pumpkin With White Botanical Line Art

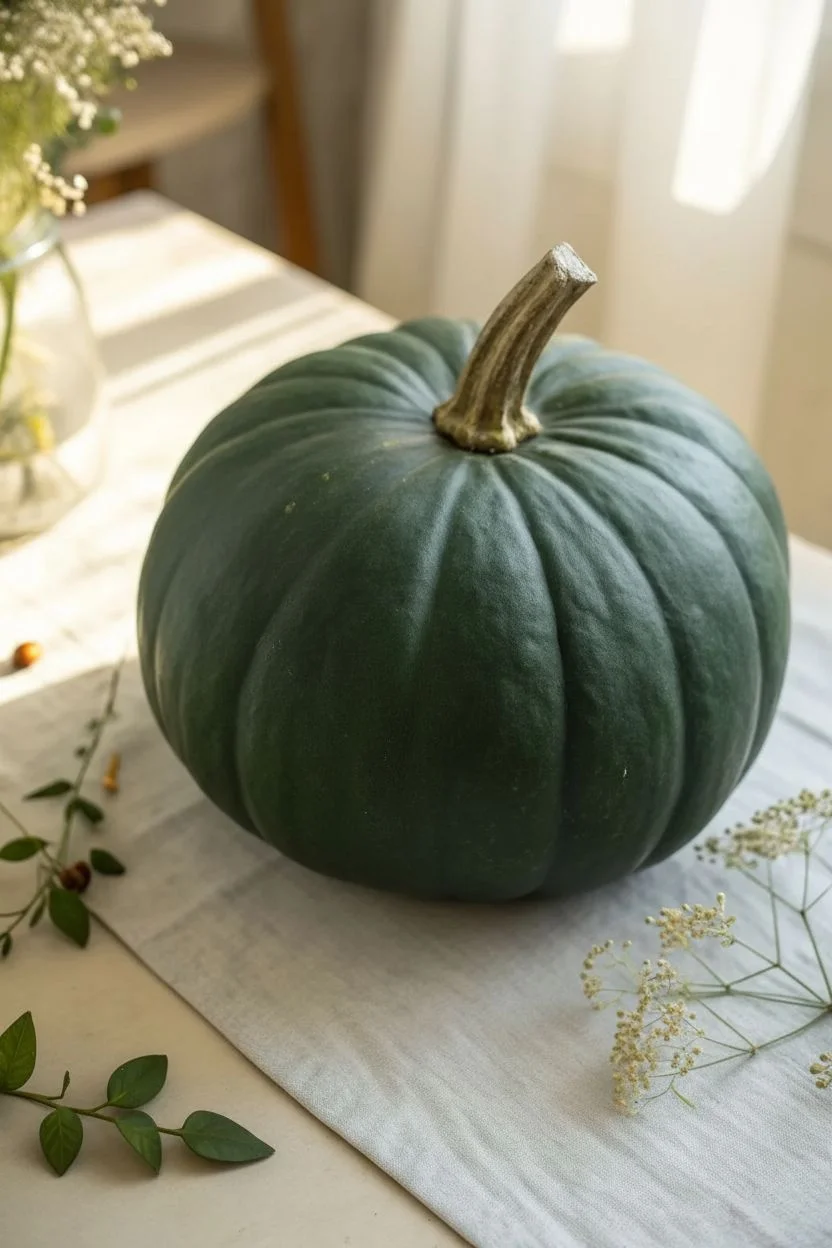
Transform a simple dark green pumpkin into a sophisticated piece of autumnal decor using delicate white line work. The contrast between the moody, deep rind and the crisp botanical illustrations creates a modern and refined look that feels both rustic and chic.
Step-by-Step Tutorial
Materials
- Dark green pumpkin (real or faux)
- White paint marker (fine point)
- White paint marker (extra fine point)
- Pencil (optional for sketching)
- Damp cloth or paper towel
- Rubbing alcohol
- Matte clear sealant spray (optional)
- Cotton swabs
Step 1: Preparation
-
Clean the surface:
Begin by thoroughly washing your pumpkin with mild soap and water to remove any dirt or field debris. Dry it completely with a clean towel. -
Degrease for adhesion:
Wipe the entire surface of the pumpkin with rubbing alcohol on a paper towel. This removes natural oils from the rind that can prevent the paint markers from adhering properly or flowing smoothly. -
Assess the shape:
Rotate your pumpkin to find the ‘face’ or the best side for your main design. Look for an area with relatively smooth ribs, as deep crevices can be tricky to draw across.
Choosing the Right Marker
Oil-based paint markers usually adhere better to waxy pumpkin rinds than water-based ones. They offer richer opacity and are more resistant to moisture once dry.
Step 2: Planning the Design
-
Visualize the flow:
Observe how the ribs of the pumpkin naturally curve. Your botanical stems should follow these vertical lines loosely, growing upward from the bottom center toward the stem to look organic. -
Light sketching (optional):
If you are nervous about freehanding, use a dull pencil to very lightly mark the main curved lines for your stems. Don’t press hard, or you will dent the rind. Keep the sketch minimal. -
Test your markers:
Shake your white paint markers well and depress the nibs on a scrap piece of paper or cardboard to get the ink flowing nicely before touching the pumpkin.
Step 3: Drawing the Botanicals
-
Draft the main stems:
Start with the fine point marker. Draw long, sweeping curves starting near the base of the pumpkin and reaching about halfway up. These will serve as the anchors for your leaves. -
Add secondary branches:
Branch off from your main stem with smaller, curved lines. Vary the direction slightly—some curving left, some right—to mimic the randomized growth of wild vines. -
Outline the leaves:
Using the same fine point marker, draw simple elongated oval or teardrop shapes attached to your branches. Keep the outlines clean and distinct. -
Detail with extra-fine point:
Switch to your extra-fine point marker for delicate work. In the center of each leaf, draw a simple vein line. I like to let the main outline dry for a minute before adding this interior detail to prevent smudging. -
Create distinct leaf styles:
Mix up your foliage types. On one stem, draw leaves with smooth edges. On another, try drawing leaves that look more like fern fronds with tiny, repetitive angled ticks, as seen on the right side of the example image. -
Layer the design:
Don’t be afraid to let stems cross over each other. It adds depth. Just make sure the ink from the bottom layer is dry before drawing a fresh line across it. -
Add whimsical elements:
In the empty spaces between stems, add tiny circles, dots, or small swirls near the base of the stems. This fills visual gaps and adds a touch of magic to the composition.
Add Subtle Dimension
For a 3D effect, use a light grey marker to add a tiny shadow line next to your thickest white stems. This makes the botanicals appear to float slightly off the surface.
Step 4: Finishing Touches
-
Correcting mistakes:
If you make a slip, quickly dip a cotton swab in rubbing alcohol and gently erase the wet ink. If the ink has dried, you can carefully scratch it off with a fingernail or toothpick. -
Check line opacity:
Step back and look at the design. If any white lines look too faint or streaky against the dark green background, trace over them a second time to brighten the white. -
Clean up sketch marks:
If you used pencil earlier, check to see if any graphite lines are visible. Once the paint is 100% dry, gently erase or wipe them away. -
Seal the artwork (optional):
If you plan to keep the pumpkin on a porch where it might get misty, spray a light coat of matte clear sealant over the painted area to protect your line work.
Place your finished masterpiece on a linen runner or a wooden crate to enjoy the serene, nature-inspired vibe.
Mint Green Pumpkin With Gold Polka Dots
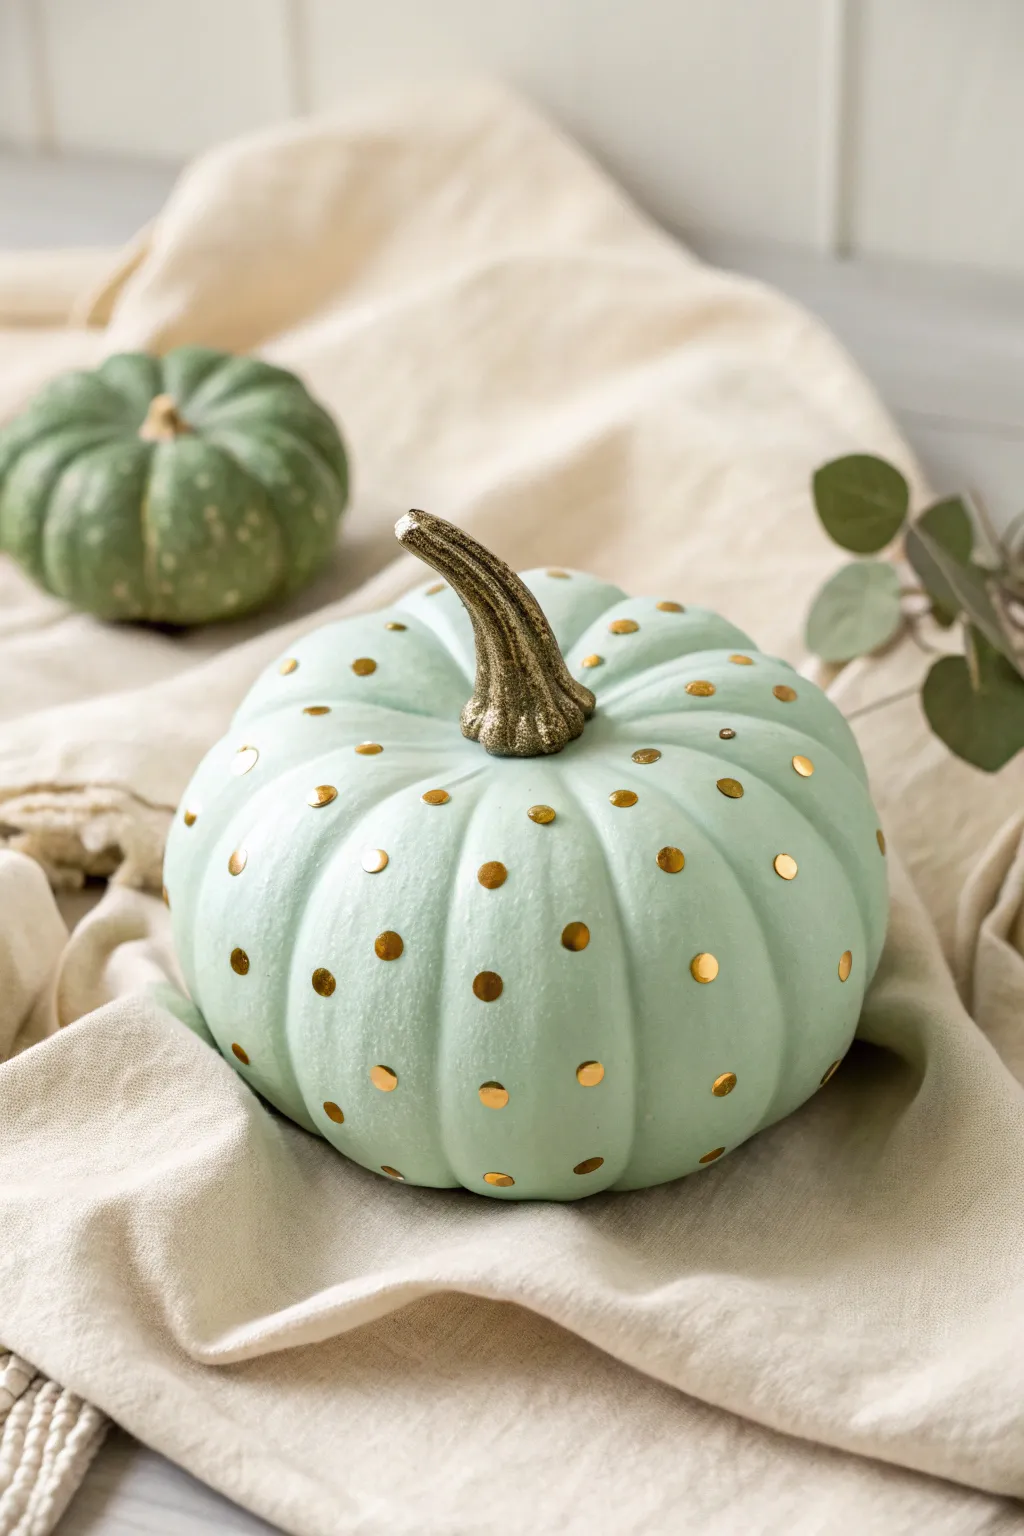
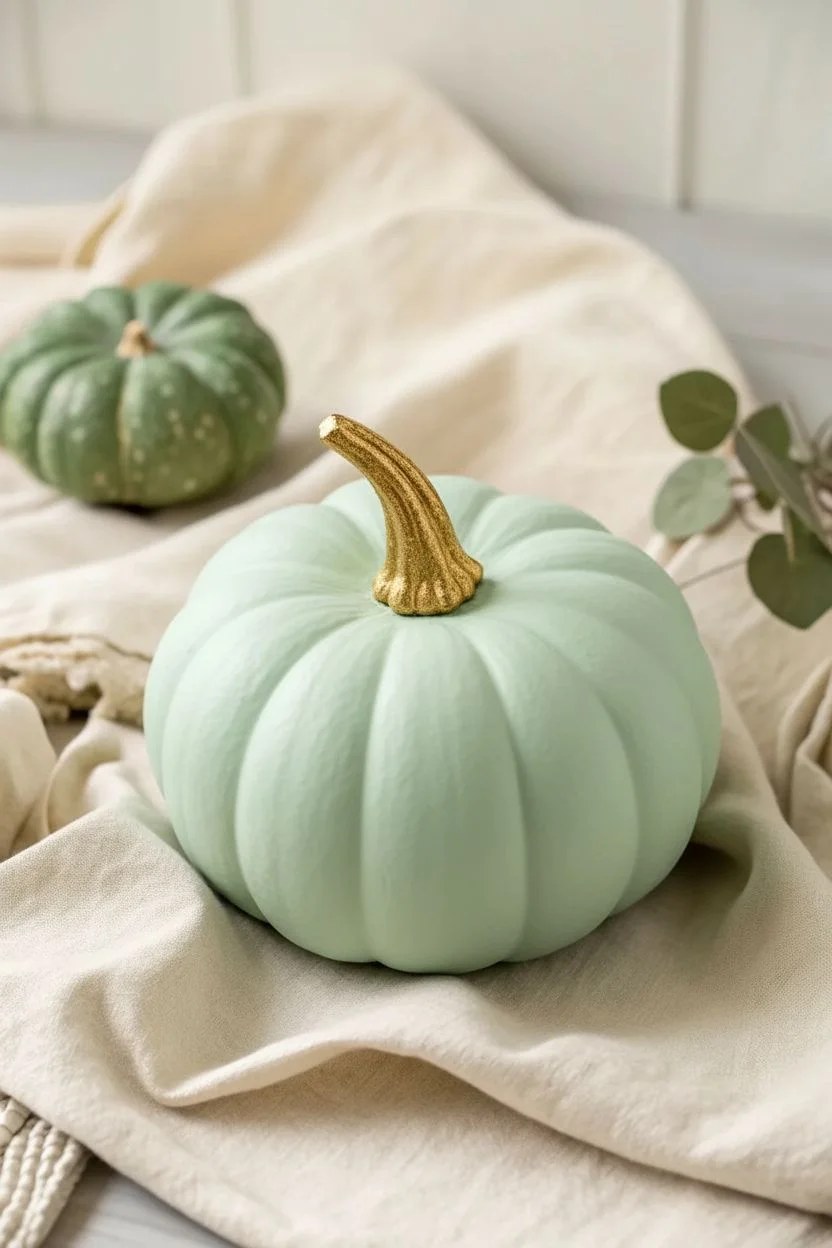
Transform a standard craft pumpkin into a chic centerpiece with this refreshing mint green and gold design. The combination of soft pastel paint and glimmering metallic confetti dots creates a sophisticated look perfect for modern fall decor.
How-To Guide
Materials
- Faux medium-sized craft pumpkin (white or orange)
- Mint green acrylic craft paint (matte finish)
- Metallic gold acrylic paint
- Gold foil confetti dots or large sequins (approx. 1/4 inch)
- Mod Podge or craft glue
- Medium flat paintbrush
- Small fine-tip paintbrush
- Tweezers
- Damp paper towels
Step 1: Base Coat & Stem
-
Prep the surface:
Wipe down your faux pumpkin with a damp paper towel to remove any dust or oils that might prevent the paint from sticking. -
First coat of mint:
Using your medium flat brush, apply a layer of mint green acrylic paint to the entire body of the pumpkin, carefully avoiding the stem area. -
Let it dry:
Allow the first coat to dry completely for about 20-30 minutes. If you are painting over a bright orange pumpkin, you will likely see streaks at this stage. -
Second coat:
Apply a second coat of mint green paint to ensure opaque, even coverage. I find that brushing vertically from top to bottom follows the pumpkin’s natural curve best. -
Touch up:
Inspect the pumpkin for any thin spots and add a third coat if necessary. Let the body dry completely before moving on. -
Paint the stem:
Using the small fine-tip brush, carefully paint the stem with metallic gold acrylic paint. Get into all the little grooves and ridges of the stem texture. -
Stem second layer:
Once the gold stem is dry to the touch, add a second layer to make the metallic finish really pop and shine.
Sticky Situation
A wax pencil (often used for nail art gems) picks up sequins much easier than standard tweezers, preventing scratches on the gold finish.
Step 2: Adding the Polka Dots
-
Plan your pattern:
Before gluing, visualize the spacing of your dots. An offset grid pattern (where dots on the next row sit between the dots of the previous row) tends to look most natural on a round shape. -
Apply glue:
Starting near the top of the pumpkin, place a tiny dot of craft glue or Mod Podge where you want your first gold confetti piece to go. -
Place the dot:
Use tweezers to pick up a single gold confetti dot and place it gently onto the glue. Press down lightly to secure it. -
Work in columns:
Work your way down one rib or section of the pumpkin, spacing the dots about 1.5 to 2 inches apart. -
Offset the next row:
Move to the next section of the pumpkin. Place these dots so they align with the gaps in your first column, creating a staggered effect. -
Continue around:
Repeat this process around the entire circumference of the pumpkin. Keep turning the pumpkin as you go to maintain consistent spacing. -
Check the bottom:
Don’t forget to add a few dots near the base so the pattern mimics a continuous fabric print. -
Clean up:
If any glue squeezed out from behind the dots, wipe it away gently with a damp cotton swab or wait for it to dry clear. -
Final cure:
Let the pumpkin sit undisturbed for at least an hour to allow the glue to fully set before displaying.
Glaze It Up
For a porcelain look, brush a coat of high-gloss varnish over the entire pumpkin after the mint paint dries, but before adding the gold dots.
Place your shimmering mint creation on a table runner or mantle for an elegant touch of autumn style
Mint-to-Forest Green Ombre Pumpkin With Ridge Highlights
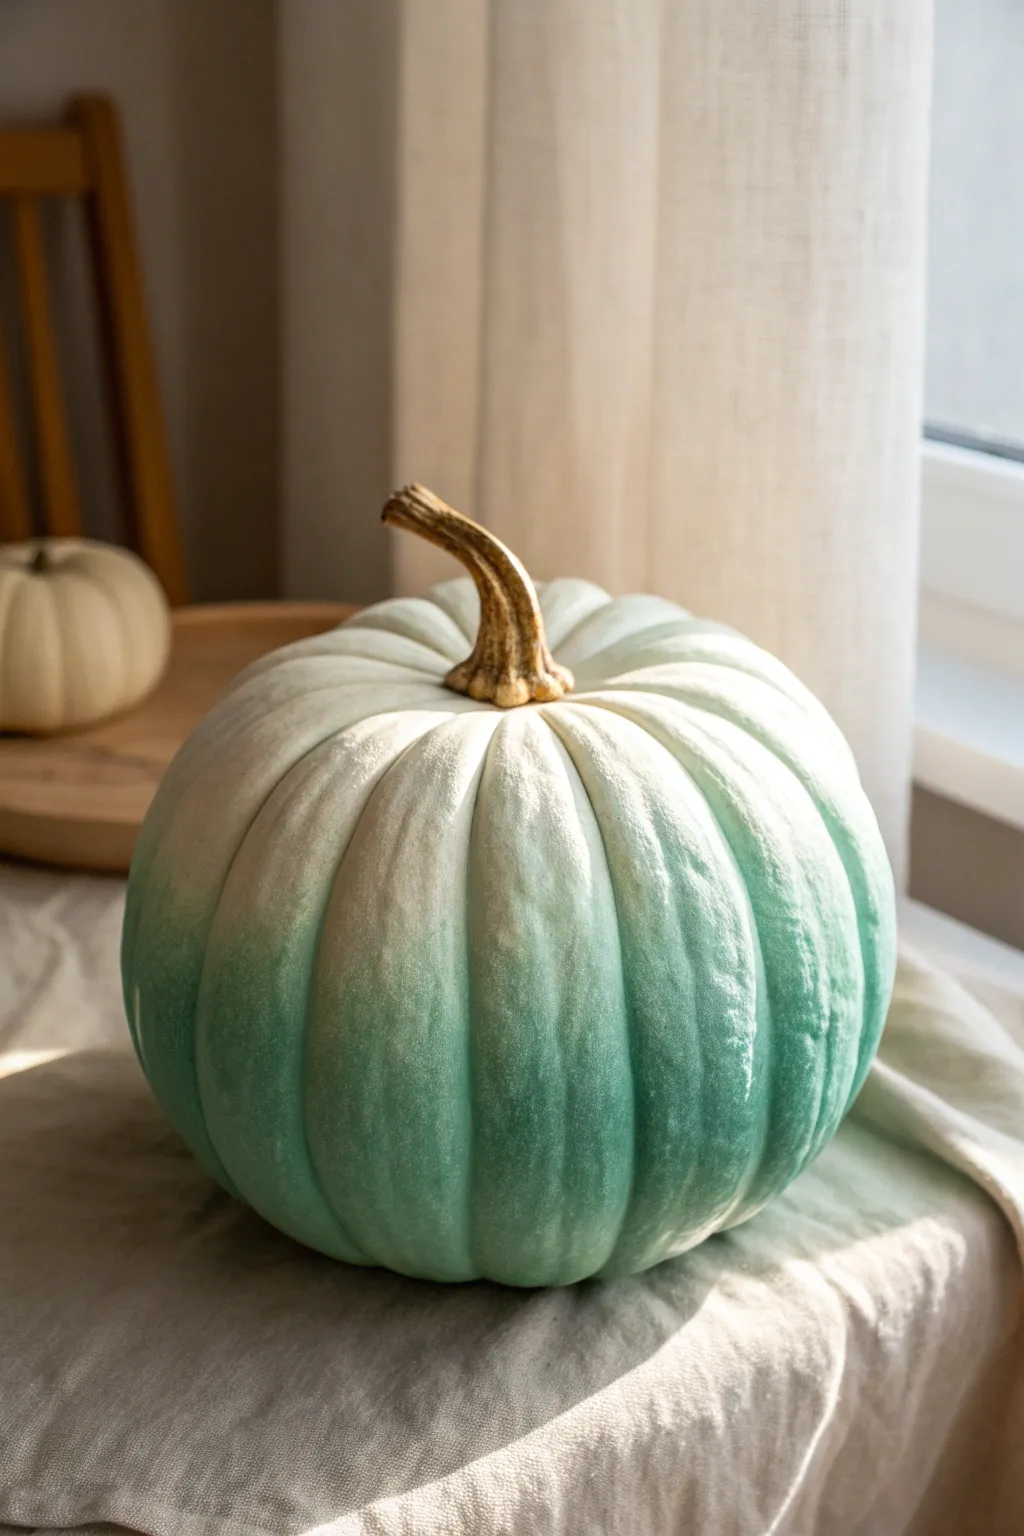
Achieve a sophisticated autumnal look with this ombre pumpkin that transitions from soft creamy mint to deep forest green. This technique highlights the pumpkin’s natural ridges and creates a beautifully serene gradient perfect for modern farmhouse decor.
Step-by-Step
Materials
- Faux or real pumpkin (white or cream base is best)
- Forest green acrylic paint
- Mint green acrylic paint
- White acrylic paint
- Medium flat paintbrush
- Soft blending sponge or makeup sponge
- Small detail brush
- Palette for mixing paint
- Paper towels
- Matte sealant spray (optional)
Step 1: Preparation and Base Coat
-
Clean surface:
If using a real pumpkin, wash it thoroughly with mild soap and water to remove any dirt or oils. For faux pumpkins, give them a quick wipe with a damp cloth to ensure the paint adheres properly. -
Protect stem:
Wrap the stem carefully with painter’s tape to keep it natural and brown. I find this much easier than trying to paint around it later. -
Prime with white:
Apply a solid base coat of white acrylic paint over the entire pumpkin. -
Dry completely:
Allow the white base layer to dry fully before moving on. This ensures your green colors will pop and look true to tone rather than muddy.
Sponge Tactics
Keep your blending sponge slightly damp, not soaking wet. A little moisture helps acrylics blend smoothly without lifting the layer underneath.
Step 2: Creating the Color Gradient
-
Mix your palette:
Prepare three piles of paint on your palette: pure forest green, pure mint green, and a 50/50 mix of the two. -
Paint the bottom third:
Using your flat brush, apply the forest green paint to the bottom third of the pumpkin. Be generous with the paint here to get full coverage. -
Paint the middle section:
Apply the 50/50 mix to the middle section of the pumpkin, slightly overlapping the dark green bottom section. -
Start the blend:
While the paints are still wet, use your sponge to dab along the line where the forest green and medium green meet to soften the transition. -
Paint the upper section:
Apply the mint green paint to the top third, stopping just short of the very top near the stem. -
Top transition:
Use a clean side of your sponge to blend the mint green into the middle section. Work gently to avoid dragging dark paint upwards. -
Creamy top:
Leave the very top area near the stem white (or whatever your base color was) and lightly feather the mint green into it for a fading effect. -
Second pass:
If the coverage looks streaky, wait for the first layer to dry slightly and apply a second coat following the same gradient steps.
Step 3: Highlighting and Finishing
-
Mix highlight shade:
Mix a very light shade by combining white with just a tiny drop of mint green. -
Dry brush technique:
Dip your clean flat brush into the highlight mixture, then wipe almost all of it off onto a paper towel until the brush feels dry. -
Highlight the ridges:
Gently sweep the dry brush vertically down the raised ribs of the pumpkin. This accentuates the pumpkin’s shape and adds that frosted texture. -
Check the blend:
Step back and assess your ombre. If any lines look too harsh, use a slightly damp sponge to pat them out. -
Remove tape:
Carefully peel away the painter’s tape from the stem once the paint is dry to the touch. -
Clean up edges:
If any green paint got onto the stem, use a small detail brush with brown or tan paint to touch it up. -
Optional seal:
For longevity, especially if displaying outdoors, spray the pumpkin with a clear matte sealant.
Rough Transitions?
If your gradient looks blocky, paint a thin line of the intermediate color between the two harsh zones and sponge it out immediately while wet.
Place your new ombre creation near a window to let the natural light catch those highlighted ridges
Swampy Green-and-Black Marble Pumpkin Finish
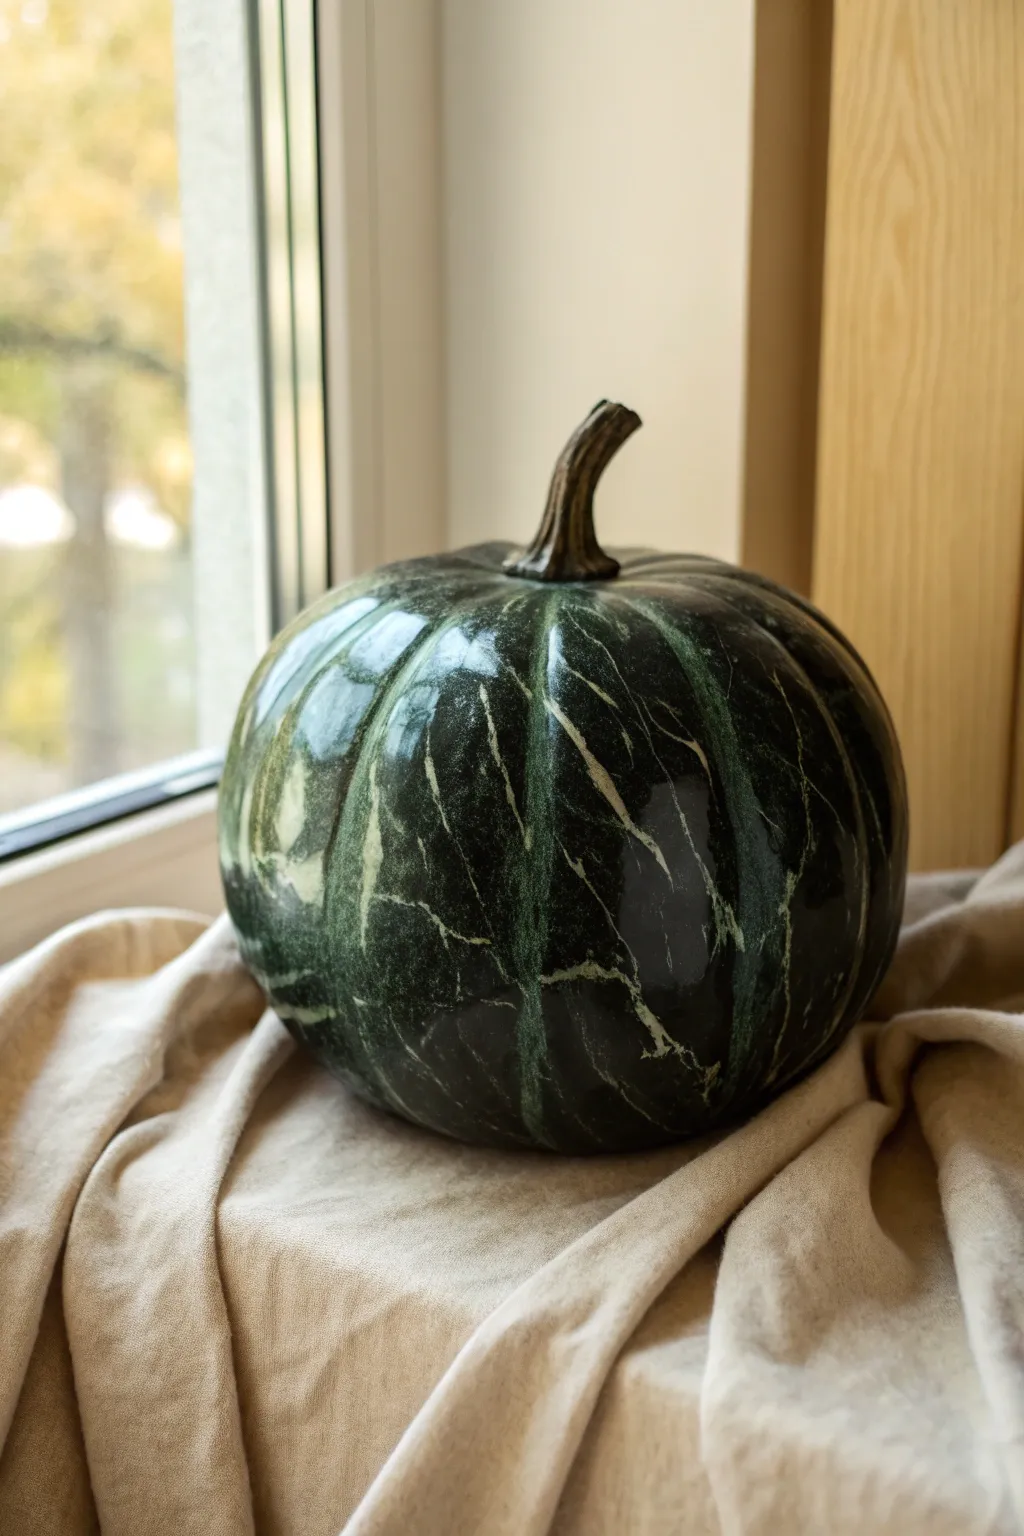
Transform a standard craft pumpkin into a strikingly realistic piece of moody decor that mimics deep, swamp-green serpentine stone. This technique uses simple acrylics and a glazing medium to achieve that high-end, polished rock look perfect for an elegant autumn display.
Step-by-Step Guide
Materials
- Faux craft pumpkin (smooth surface works best)
- Black acrylic paint
- Dark forest green acrylic paint
- Metallic silver or pearl white acrylic paint (for veins)
- Glossy glazing medium or floating medium
- High-gloss spray varnish
- Sea sponge or crumpled plastic bag
- Fine liner brush
- Feather (optional, for veining)
- Soft synthetic flat brush
Step 1: Base Preparation
-
Clean surface:
Wipe down your faux pumpkin with a damp cloth to remove any dust or oils that might prevent paint adhesion. -
Apply base coat:
Paint the entire pumpkin with a solid coat of black acrylic paint. You want a deep, opaque background, so applying two thin coats is better than one thick one. -
Dry completely:
Let the black base coat dry fully. If you rush this step, the subsequent marble layers might lift the base paint.
Step 2: Marbling Technique
-
Mix the glaze:
In a small container, mix your dark forest green paint with the glazing medium. Aim for a ratio of about 1 part paint to 2 parts glaze to create a translucent, jewel-toned mixture. -
Sponge application:
Dip a sea sponge (or a crumpled plastic bag) into the green glaze mixture. Dab off the excess on a paper towel so it isn’t dripping. -
Create texture:
Lightly pounce the sponge over the black pumpkin. You don’t want partial coverage—leave plenty of the black base showing through to create depth. -
Soften edges:
While the glaze is still wet, take a clean, dry soft brush and very gently feather the edges of the green patches to blur them slightly into the black. -
Layering depth:
I like to repeat the sponging process once the first layer is tacky, focusing on just a few areas to make the green appear deeper and richer.
Natural Stone Tip
Work in diagonal currents rather than straight vertical lines for the marble pattern. Real stone veins rarely travel straight up and down.
Step 3: Veining and Detailing
-
Prepare vein paint:
Create a watery mix of your metallic silver or pearl white paint. It should be the consistency of ink so it flows easily. -
Map the veins:
Using a fine liner brush or the edge of a feather, drag shaky, irregular lines down the pumpkin’s ribs. Imagine how lightning forks—keep the lines random. -
Roll the brush:
To make the veins look organic, twist the brush between your fingers as you drag it. This creates natural variations in line thickness. -
Soften the brights:
If a vein looks too stark or bright, immediately tap it gently with a dry brush or your finger to push it back into the ‘stone’ surface. -
Add intricate cracks:
Add very tiny, faint hairline fractures branching off the main veins using the very tip of your liner brush with barely any pressure.
Level Up: Gold Leaf
For a luxe touch, replace the silver paint with genuine gold leaf adhesive and foil on the larger veins, brushing away excess for a gilded finish.
Step 4: Polishing the Stem
-
Paint the stem:
Paint the stem with a mix of brown and a touch of the dark green you used earlier. This ties the stem visually to the body of the pumpkin. -
Dry brushing:
Lightly dry brush a lighter tan or beige color over the raised ridges of the stem to highlight the texture and differentiate it from the smooth marble skin.
Step 5: Final Finish
-
Cure time:
Allow the painted veins and layers to dry completely, preferably overnight, to ensure no moisture is trapped. -
First gloss coat:
Spray the pumpkin with a high-gloss varnish. The gloss is essential—it turns the painted texture into something resembling polished stone. -
Final gloss coat:
Apply a second coat of high-gloss spray for extra shine and durability, making sure to get into the crevices near the stem.
Place your finished pumpkin near a window where natural light can catch that glossy, stony sheen
Neon Green Slime-Drip Pumpkin With Glossy Highlights
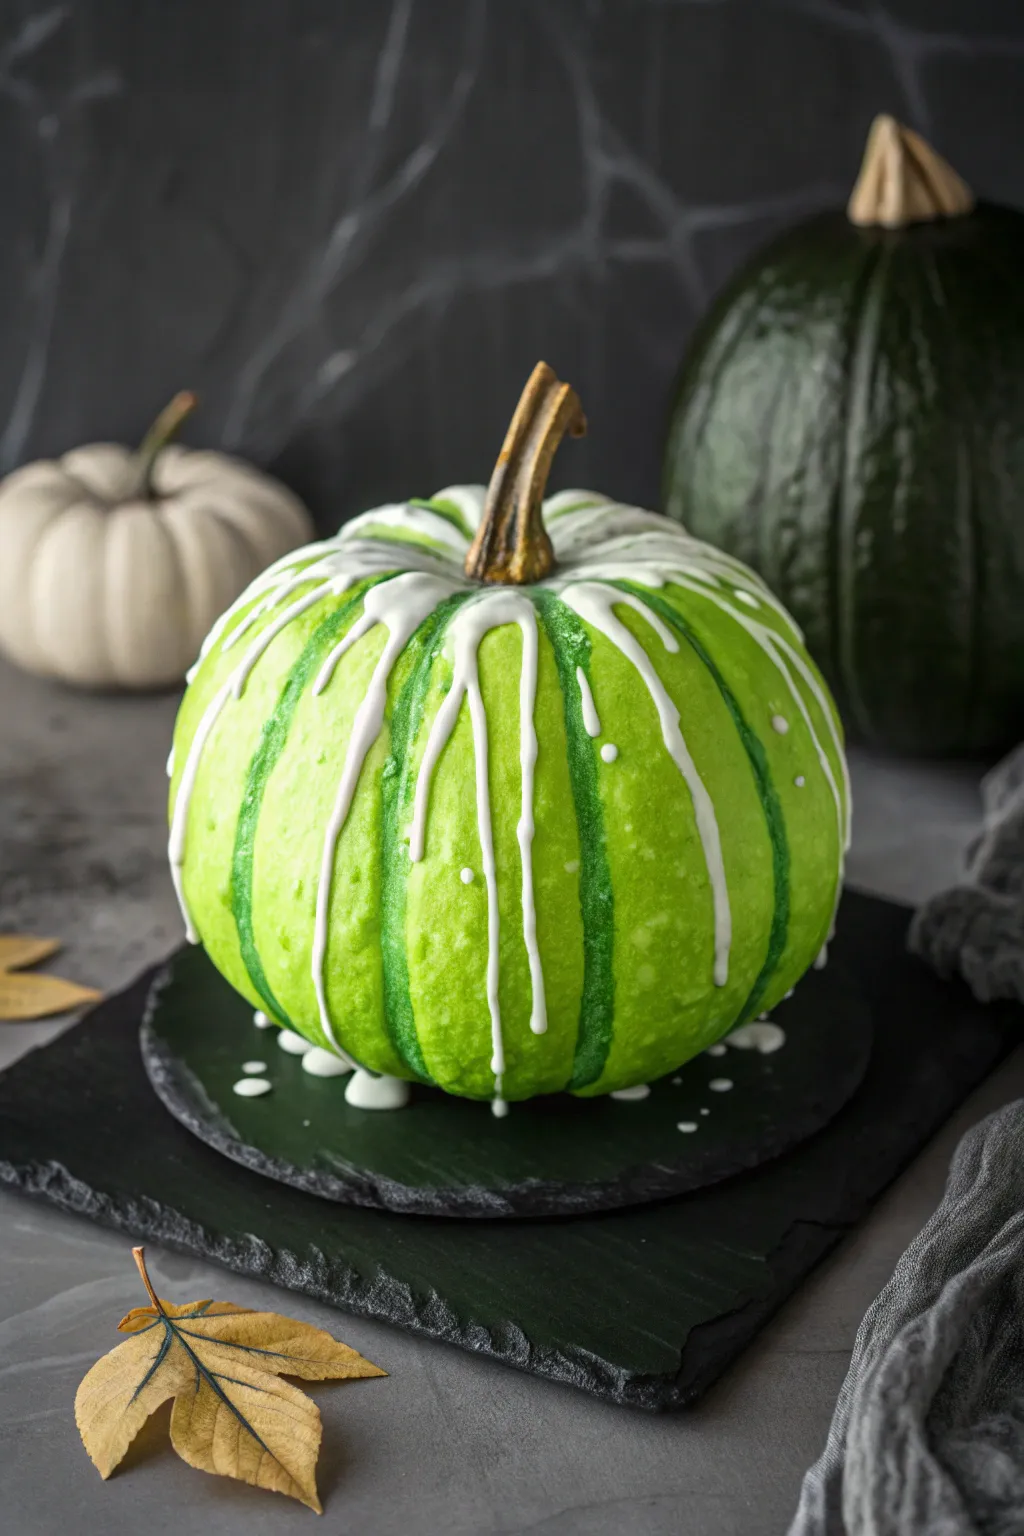

Transform an ordinary pumpkin into an electrifying centerpiece with this high-contrast neon design. The vibrant lime base combined with glossy white drips creates a spooky, cartoon-like slime effect that instantly grabs attention.
How-To Guide
Materials
- Medium-sized round pumpkin (real or faux)
- White primer spray paint
- Neon lime green acrylic paint (matte or satin)
- Dark forest green acrylic paint
- High-gloss white puffy paint or dimensional fabric paint
- Wide flat paintbrush (1-2 inch)
- Small angled shader brush
- Clear matte sealant spray
- Damp cloth
- Painter’s tape (optional)
Step 1: Base Preparation
-
Clean surface:
Begin by wiping down your pumpkin thoroughly with a damp cloth to remove any dirt or oils. If using a real pumpkin, ensure the skin is completely dry before proceeding. -
Prime the pumpkin:
Take the pumpkin outdoors or to a well-ventilated area. Apply a thin, even coat of white primer spray paint over the entire surface, including the bottom. This white undercoat is crucial for making the neon green pop later. -
Protect the stem:
While the primer dries, wrap the stem carefully with painter’s tape if you wish to keep its natural wood look. Alternatively, you can paint around it carefully later.
Pro Tip: Gravity Helper
If you want thicker, more realistic drips, hold the pumpkin upside down for a few seconds immediately after applying a heavy line of puffy paint to let it bulk up before gravity pulls it down.
Step 2: Creating the Neon Base
-
First lime coat:
Using your wide flat brush, apply a generous coat of neon lime green acrylic paint. Paint in vertical strokes from top to bottom, following the natural curve of the pumpkin. -
Layer for opacity:
Neon pigments can be naturally translucent. Allow the first coat to dry to the touch, roughly 20 minutes, then apply a second or third coat until you achieve a solid, vibrant lime color with no streaks showing through. -
Identify ridges:
Look closely at your pumpkin’s natural vertical indentations (ribs). You will be accentuating these valleys to create depth. -
Paint dark stripes:
Dip your small angled shader brush into the dark forest green paint. Carefully paint a thin line down the deepest part of every vertical groove on the pumpkin. -
Blend the stripes:
Before the dark green dries completely, use a slightly damp, clean brush to gently feather the edges of the dark stripe outward into the lime green. This creates a soft gradient rather than a harsh line. -
Dry completely:
Allow the entire painted pumpkin to dry for at least an hour. The base needs to be completely set before we add the finishing texture.
Troubleshooting: Runny Paint
If your white drips are running too fast and looking watery, your puffy paint might be too warm. Pop the bottle in the fridge for 15 minutes to thicken the formula before applying.
Step 3: The Slime Effect
-
Start the drips:
Grab your bottle of high-gloss white puffy paint. Starting at the very top near the stem, squeeze a generous amount of paint so it pools slightly. -
Guide the flow:
Slowly guide the nozzle down the side of the pumpkin to create long, unpredictable drip trails. Vary the pressure on the bottle: squeeze harder for thick globs and lighter for thin connecting lines. -
Create variation:
Make some drips travel halfway down the pumpkin, while letting others stop short near the top. I like to alternate the lengths to keep the look organic and fluid. -
Add splatter details:
Squeeze tiny individual dots of the white puffy paint onto random spots on the pumpkin’s surface to look like splatters that flew off the main slime. -
Pool the bottom:
If you plan to display this on a specific stand, you can carefully add a few ‘puddles’ of white paint at the very base where the pumpkin sits, creating the illusion that the slime is pooling on the table. -
Final drying time:
Puffy paint takes much longer to dry than acrylics. Let the pumpkin sit undisturbed for at least 4-6 hours, or overnight, to ensure the white drips harden completely and maintain their glossy shine. -
Seal the base:
Once the puffy paint is fully cured, you can lightly mist the green areas with a clear matte sealant, being careful not to dull the glossy white drips too much.
Now step back and admire your brilliantly bold pumpkin that brings a modern, toxic-waste twist to traditional fall decor


Have a question or want to share your own experience? I'd love to hear from you in the comments below!