A plain wooden crate is basically a blank canvas with built-in function, and that’s my favorite kind of art project. Here are my go-to wooden crate painting ideas—from classic finishes you’ll actually use in your home to bolder, more creative looks that feel like mini masterpieces.
Classic Solid Color Makeover for Clean Storage
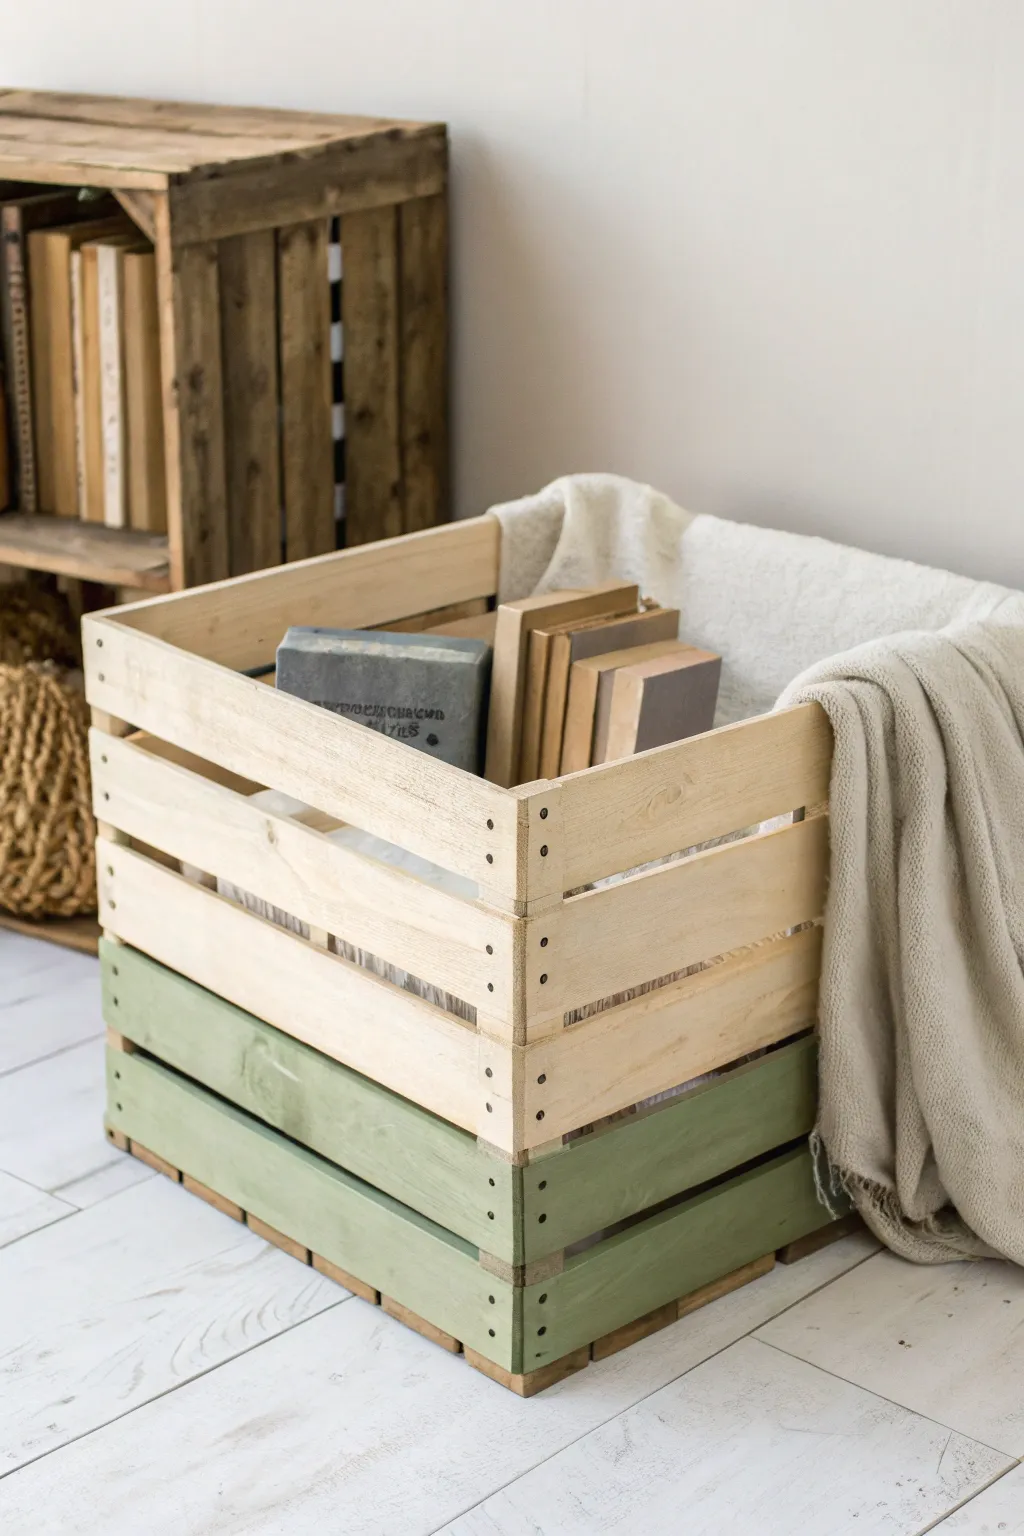
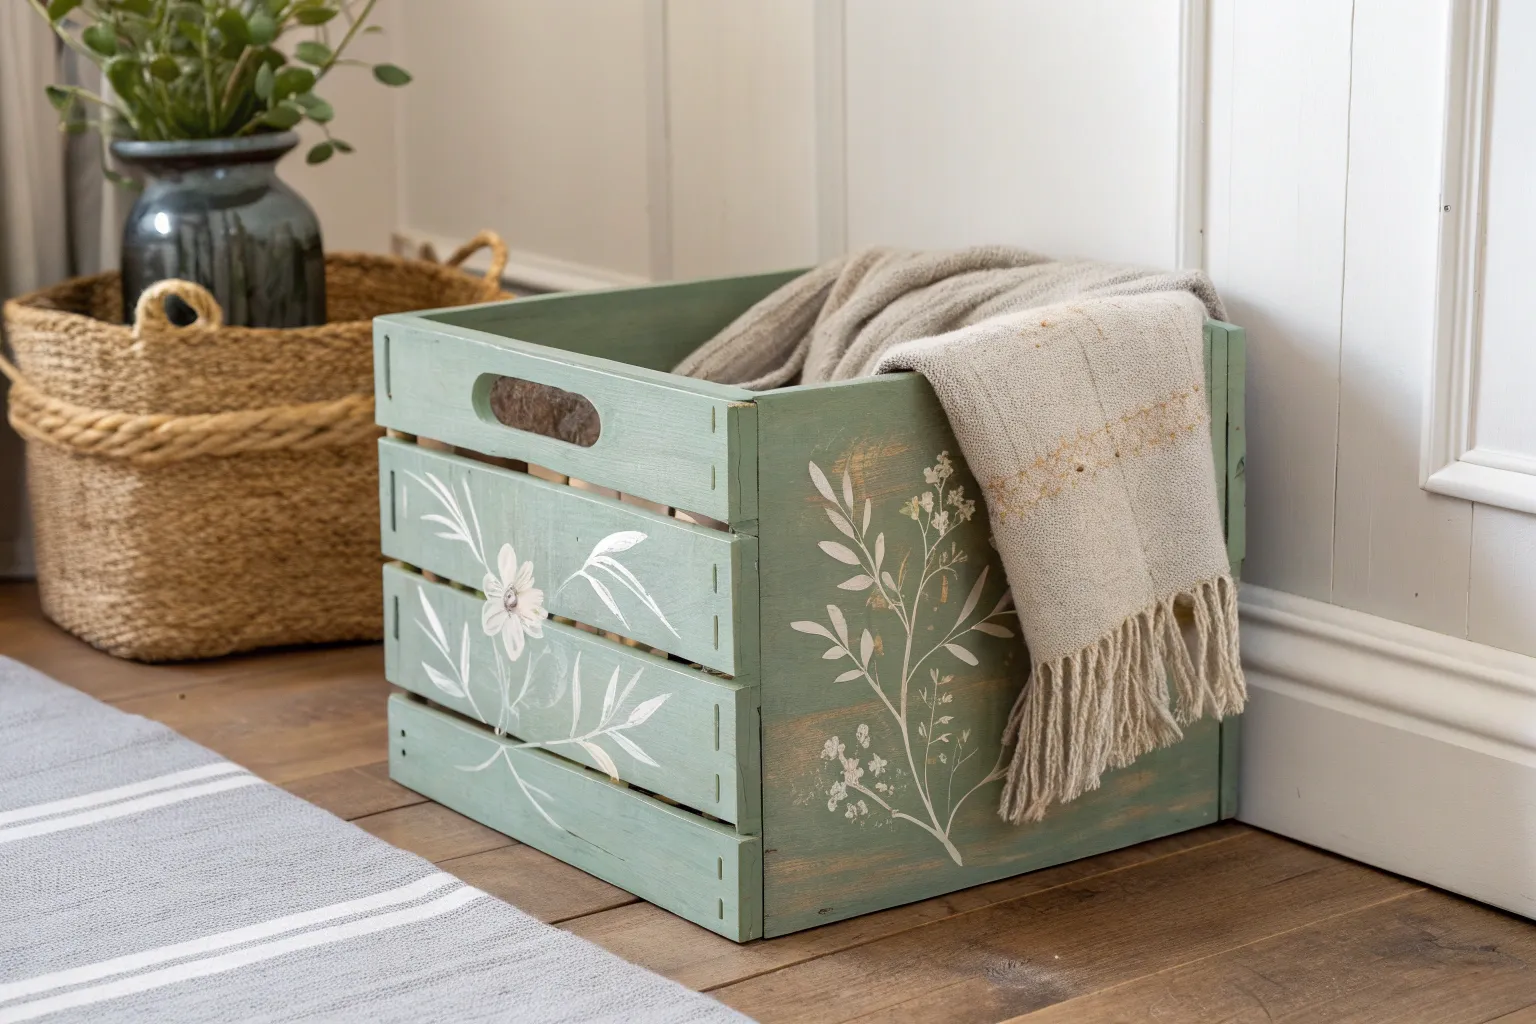
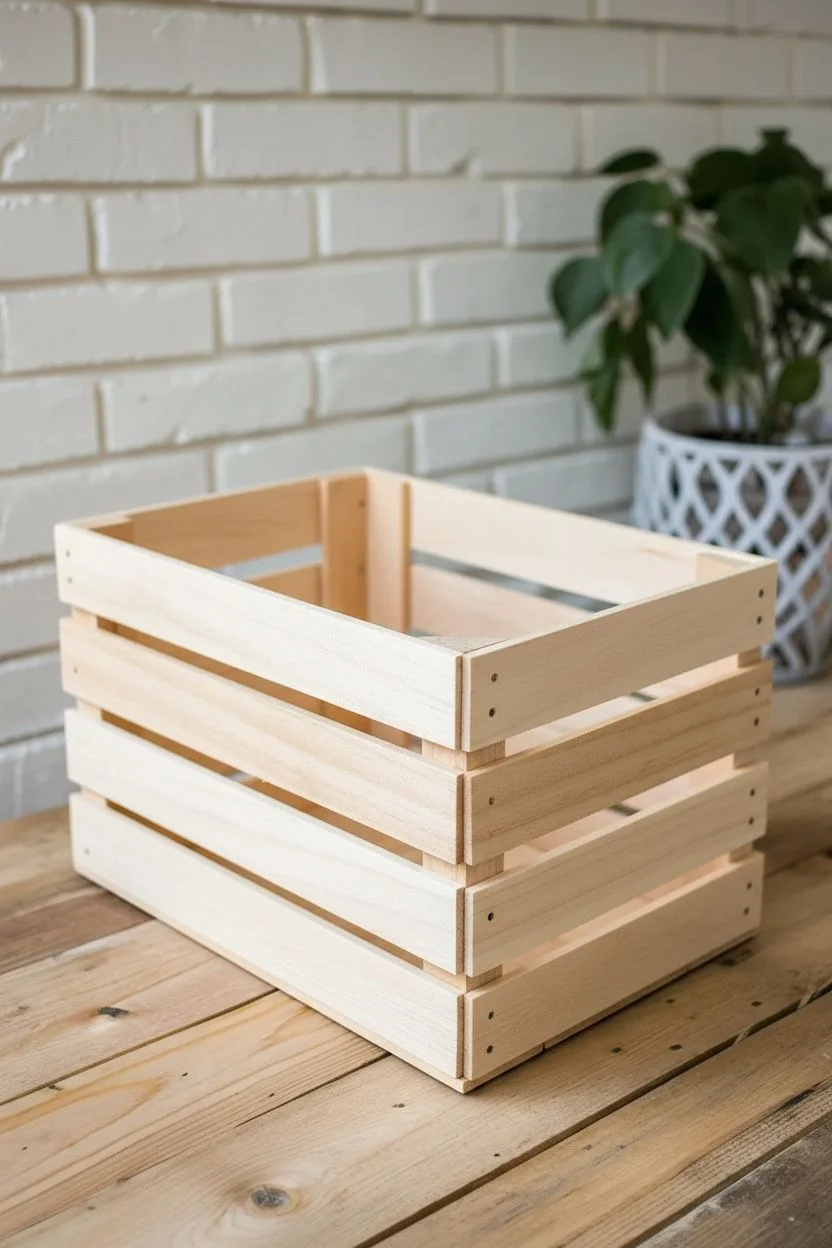
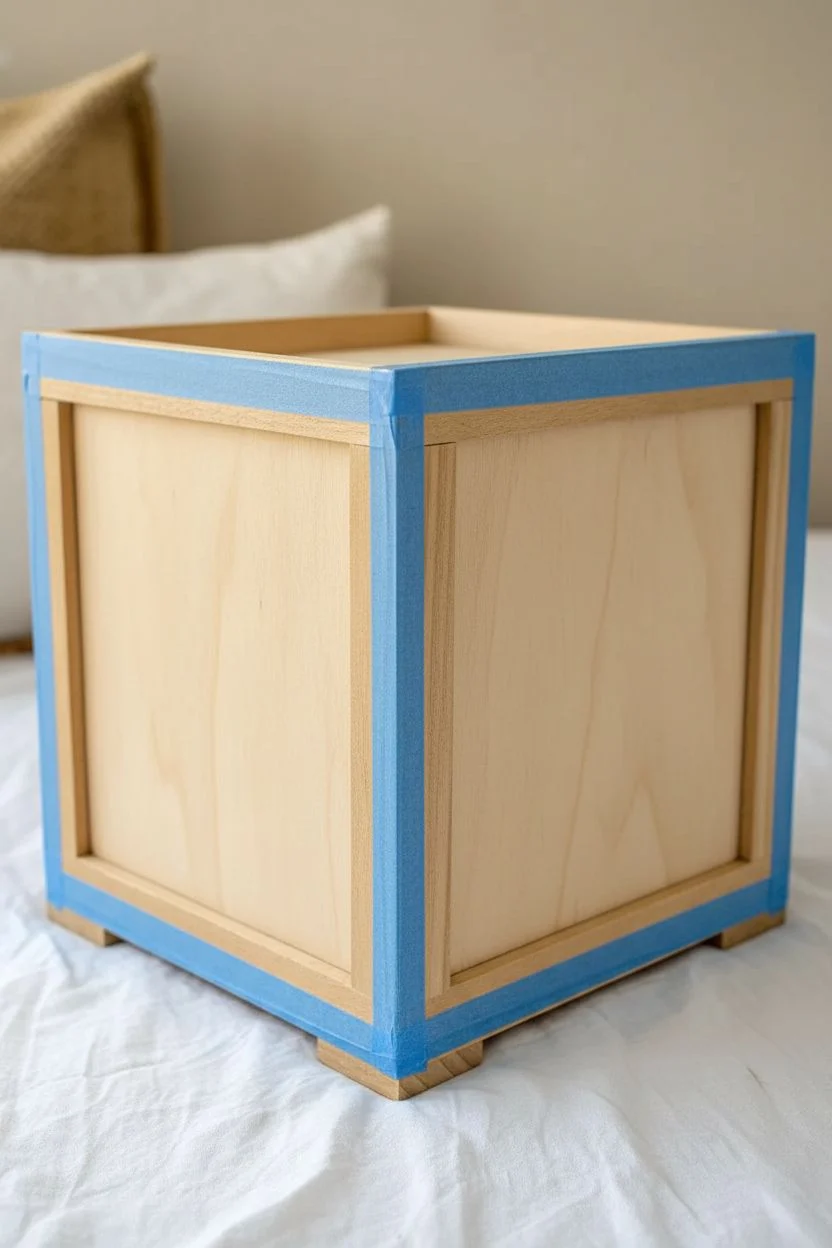
This project transforms a basic wooden crate into a stylish storage solution using a partial-paint technique that mimics a “dipped” look. By combining the warmth of natural wood with a calming sage green hue, you create a modern, minimal piece perfect for holding throws or books.
Detailed Instructions
Materials
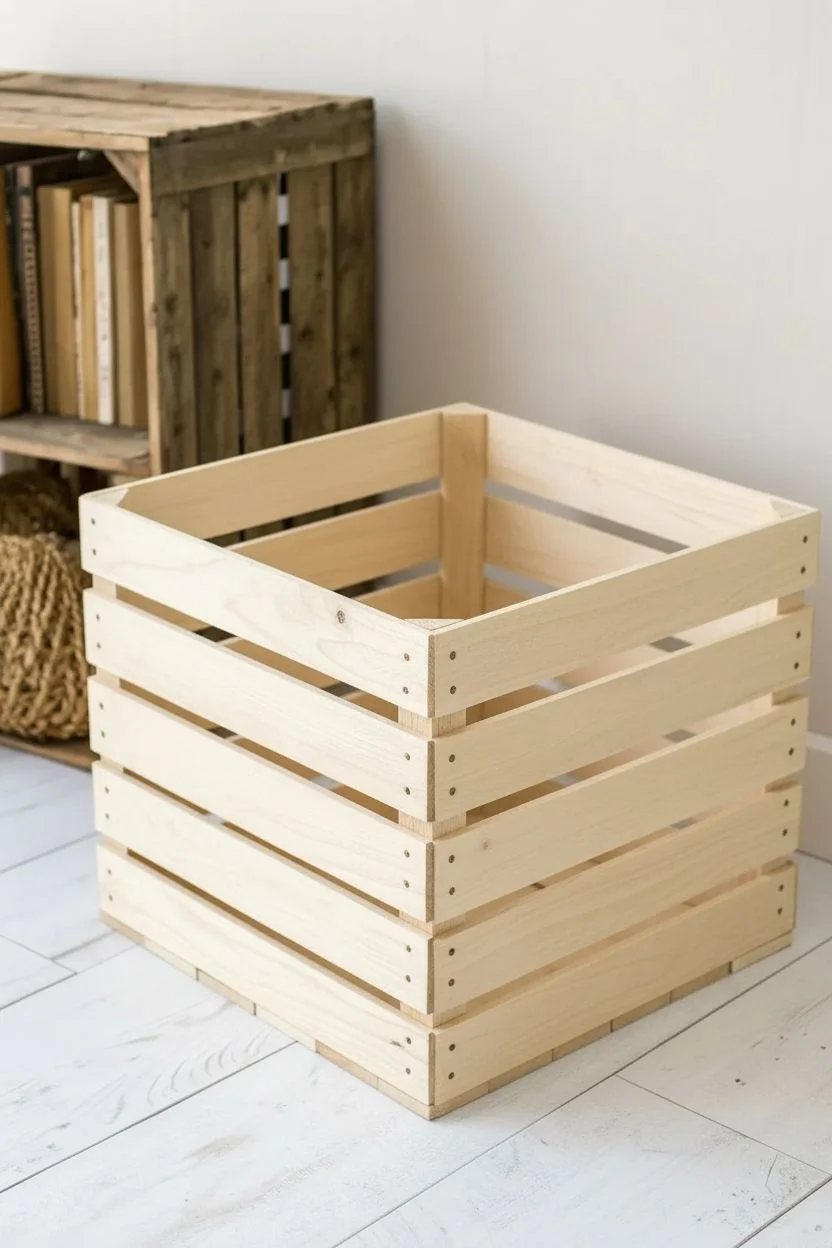
- Unfinished wooden crate (slatted)
- Sandpaper (120 and 220 grit)
- Painter’s tape (wide width recommended)
- Sage green acrylic or chalk paint
- Paintbrush (2-inch flat synthetic)
- Matte clear sealant or wax
- Clean cloth or rag
- Ruler or tape measure
- Pencil
Step 1: Prep Work
-
Inspect the crate:
Begin by looking over your wooden crate for any rough splinters, loose staples, or jagged edges that might snag your blankets later. -
Initial sanding:
Use the 120-grit sandpaper to smooth down any significant rough spots on the exterior and interior slats. -
Fine tune the surface:
Follow up with a pass of 220-grit sandpaper over the entire surface to ensure it feels smooth to the touch. -
Clean the dust:
Wipe the entire crate down thoroughly with a clean, dry cloth or a tack cloth to remove all sawdust, as hidden dust will ruin your paint line.
Bleed-Proof Lines
Before painting the green, paint a thin layer of clear matte medium or white paint over the tape edge. This seals the gap, ensuring the green line stays razor-sharp.
Step 2: Creating the Dipped Effect
-
Measure the paint line:
Decide how high you want the “dipped” color to go; for this look, measure up from the bottom to cover the bottom two horizontal slats. -
Mark the guide:
Using your pencil and ruler, make small, light marks on the vertical support posts to indicate exactly where the color should stop. -
Apply tape:
Run a strip of painter’s tape horizontally across the vertical posts, aligning the bottom edge of the tape with your pencil marks. Ensure this line is perfectly straight. -
Seal the tape edge:
I like to press the edge of the tape down firmly with a fingernail or a credit card to prevent paint from bleeding underneath onto the natural wood section.
Step 3: Painting
-
First coat application:
Dip your wide brush into the sage green paint and apply it to the bottom section of the crate, brushing in the direction of the wood grain. -
Mind the gaps:
Don’t forget to paint the inside edges of the slats and the interior bottom section so the color looks consistent from all angles. -
Let it dry:
Allow the first coat to dry completely according to the manufacturer’s instructions, usually about 30 to 60 minutes. -
Second coat:
Apply a second coat of green paint to ensure solid, opaque coverage without any wood grain showing through. -
Remove tape:
While the second coat is still slightly tacky (not fully dried), carefully peel off the painter’s tape at a 45-degree angle to get the crispest line.
Add Mobility
Screw four small caster wheels to the bottom corners of the crate. This turns your stationary storage into a rolling bin perfect for moving heavy books.
Step 4: Finishing Touches
-
Check for imperfections:
Once fully dry, inspect your paint line; if there was any minor bleeding, you can gently scrape it away with a craft knife or touch it up with sandpaper. -
Seal the wood:
Apply a coat of matte clear sealant or furniture wax over the entire outer surface—both the painted and unpainted sections—to protect the wood and unify the finish. -
Buff the finish:
If using wax, let it sit for a few minutes and then buff it gently with a lint-free cloth for a soft, professional sheen. -
Final cure:
Let the crate cure for 24 hours before filling it with heavy items to ensure the finish hardens completely.
Now you have a chic, custom storage piece that adds a pop of color without overwhelming your space


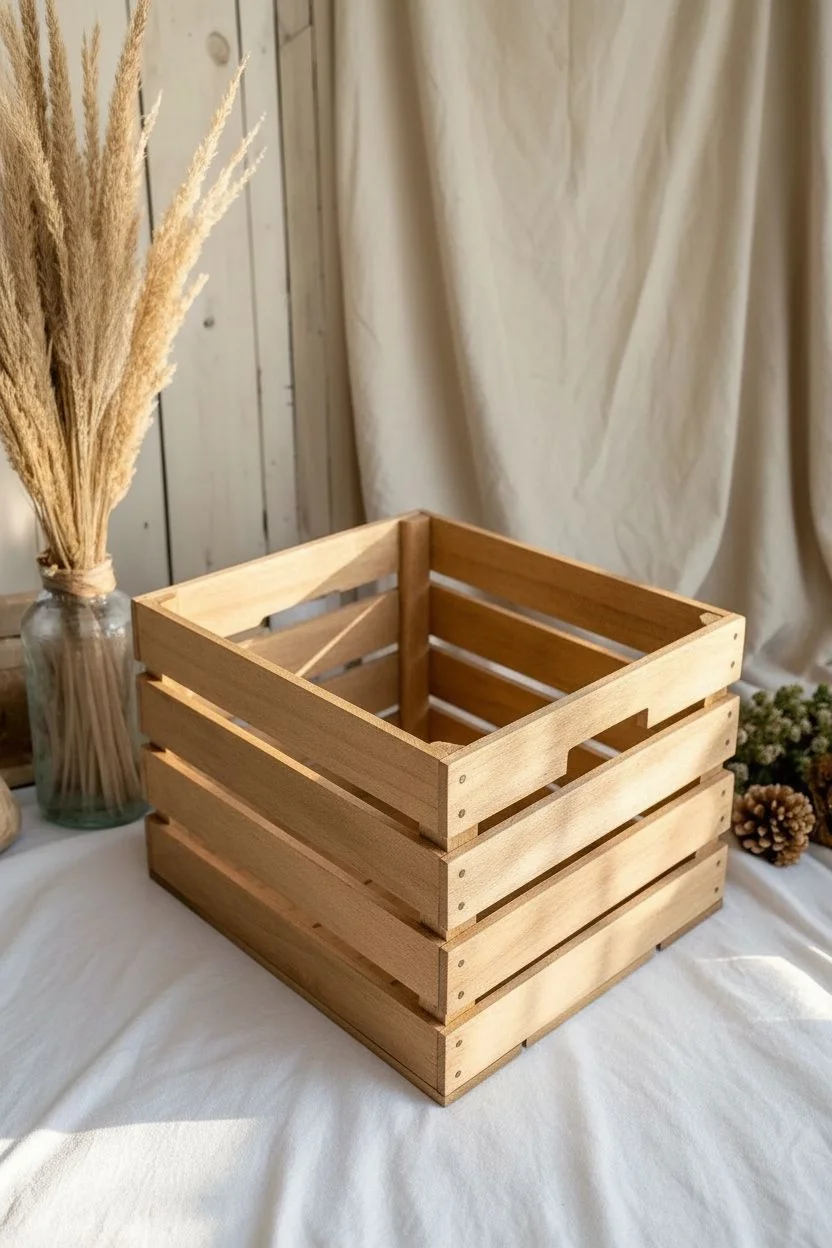
Chalky Matte Finish With Soft Distressing
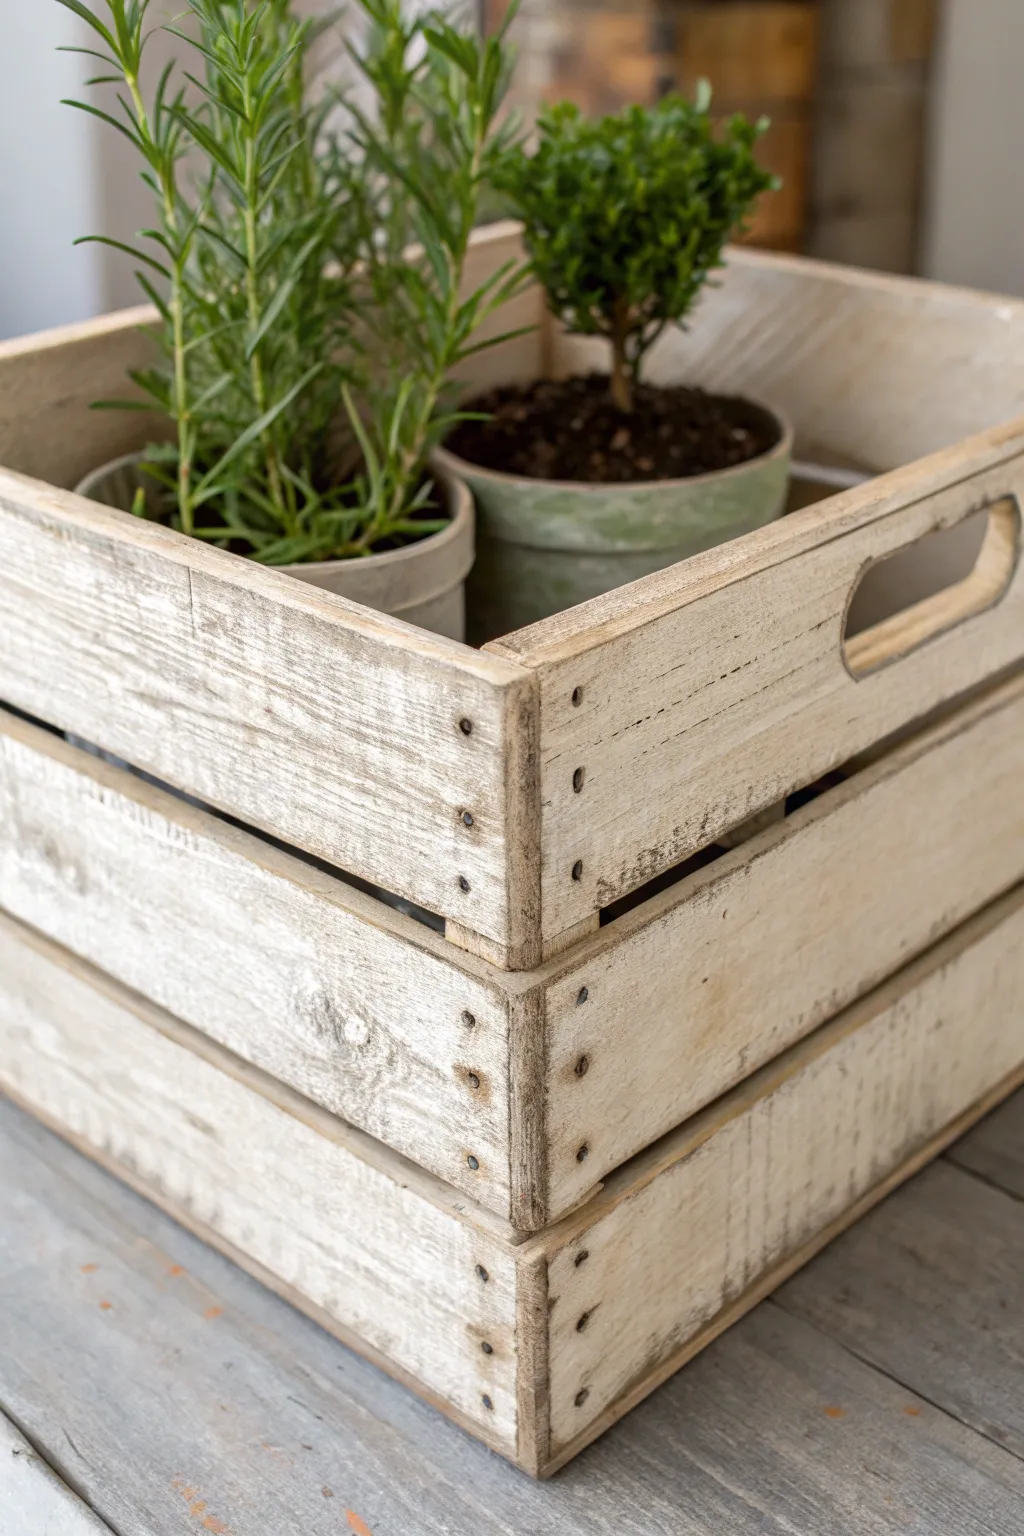
Transform a plain, unfinished wooden crate into a vintage-inspired storage piece with this simple technique. The combination of chalky matte paint and strategic sanding creates a wonderfully worn look that feels like it’s been in the family for generations.
Step-by-Step
Materials
- Unfinished wooden crate (slatted style)
- Chalk-style paint (warm white or creamy off-white)
- Wide synthetic bristle brush (2-inch)
- Sandpaper (150-grit or 220-grit)
- Sanding block
- Clear matte wax or polycrylic sealer (optional)
- Clean, lint-free cloth
- Drop cloth or old newspaper
Step 1: Preparation & Base Coat
-
Assess the surface:
Begin by inspecting your unfinished crate for any rough splinters or labels. If the wood is extremely rough, give it a quick pass with 150-grit sandpaper to smooth out dangerous spots without removing all the natural texture. -
Dust it off:
Wipe the entire crate down with a tack cloth or a slightly damp rag to remove sawdust. Paint won’t adhere properly if the surface is dusty. -
Load the brush:
Dip your wide synthetic brush into the chalk paint. You don’t need to overload it; chalk paint is thick and covers well. -
Paint the interior slats:
Start painting the inside of the crate first. Reach into the corners and cover the bottom slats. It doesn’t have to be perfect since the contents will hide most of it, but thorough coverage looks professional. -
Paint the exterior slats:
Move to the outside. Apply the paint in long, smooth strokes following the grain of the wood. Don’t worry if the wood grain shows through slightly in some areas; this adds to the rustic charm. -
Tackle the edges:
Pay special attention to the top edges and the cut-out handle areas. Dab the brush into the end grain of the wood to ensure fully saturated color in those porous spots. -
Dry completely:
Let the crate dry fully. Chalk paint dries quickly, usually within 30 to 60 minutes, but I like to give it a full hour to ensure it’s ready for sanding.
Uneven Distressing?
If you sanded off too much paint in one spot, just dab a little paint back over the area with a dry brush, let it dry, and try sanding again more gently.
Step 2: Distressing & Finishing
-
Identify wear points:
Visualize where a crate would naturally wear down over time—corners, edges of slats, and the area around the handles are prime targets. -
Sand the corners:
Using a sanding block with 150-grit paper, firmly sand the sharp corners of the crate until the raw wood shows through. -
Distress the slat edges:
Run your sandpaper along the horizontal edges of the wooden slats. Apply varying pressure to create an irregular, authentic worn look rather than a uniform line. -
Highlight the texture:
If your crate has rough saw marks or knots, lightly sand over these flat surfaces. This removes the paint from the high points of the texture, revealing the wood beneath. -
Focus on the handles:
Sand the edges of the handle cutouts heavily. These areas would see the most use in real life, so significant distressing here looks very natural. -
Clean up the dust:
Once you are happy with the level of distressing, use a clean, dry cloth or a vacuum brush attachment to remove all the fine sanding dust. -
Seal the finish (Optional):
To protect the finish and make dusting easier later, apply a thin coat of clear matte wax with a lint-free cloth or a coat of matte polycrylic. -
Buff the wax:
If using wax, let it sit for about 10-15 minutes, then buff it gently with a clean cloth to achieve a soft, subtle sheen.
Waxing Wisdom
Use clear wax sparingly! A grape-sized amount covers a large area. Too much wax can leave a sticky residue that attracts dust and yellows over time.
Now you have a beautifully weathered crate perfect for organizing linens or yarn


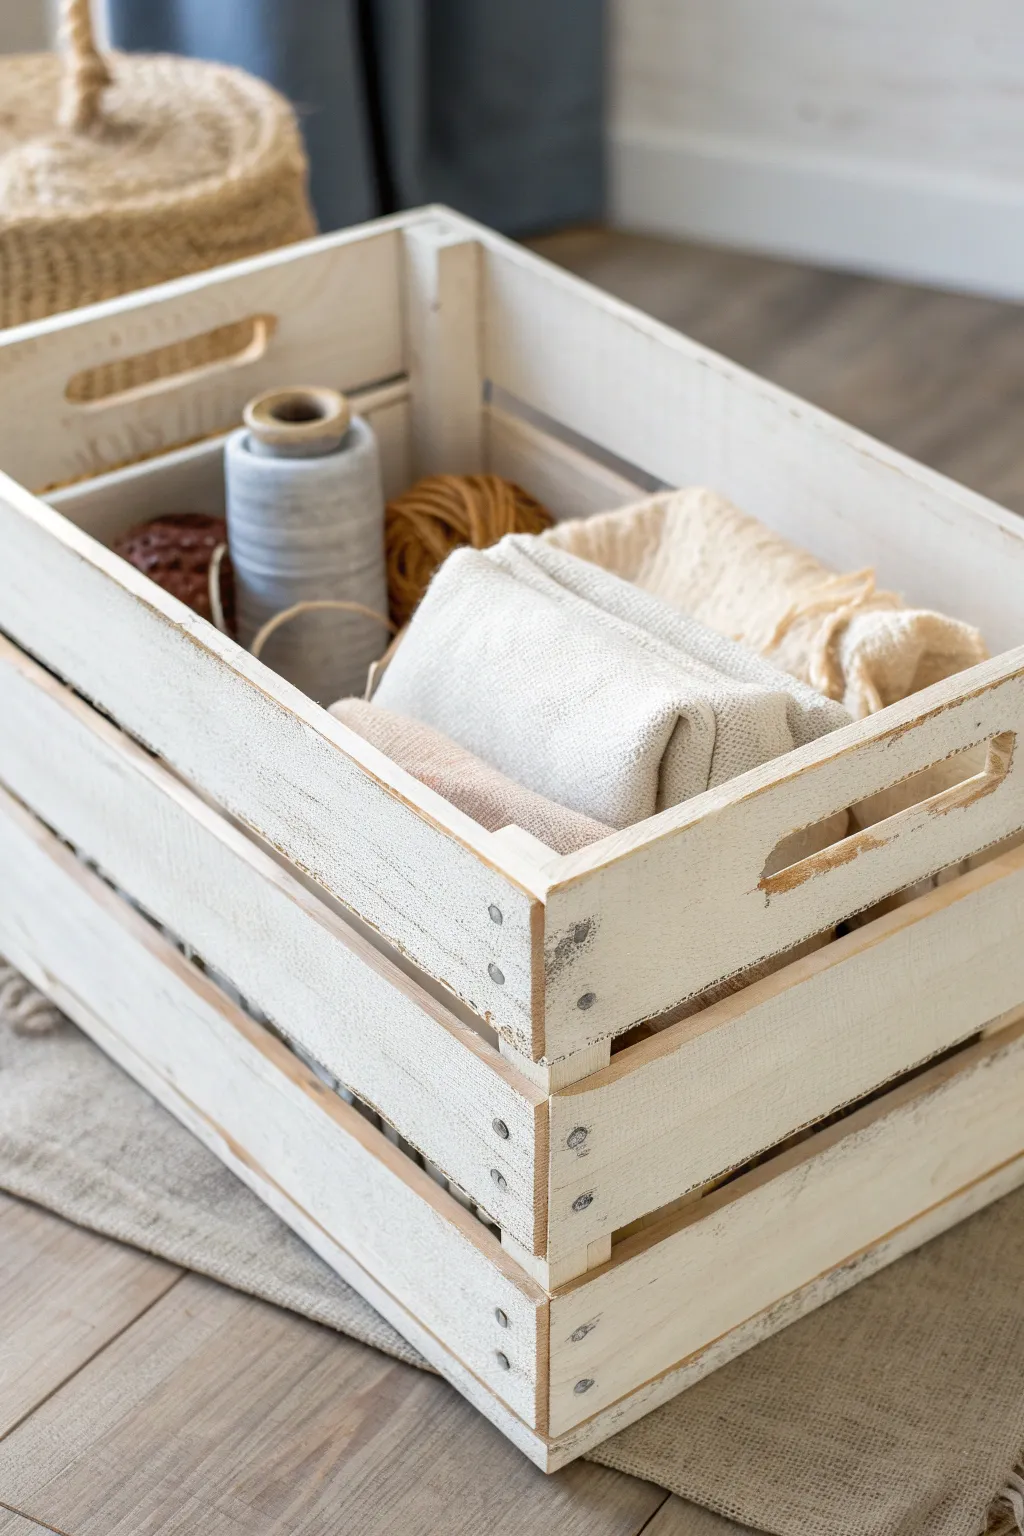
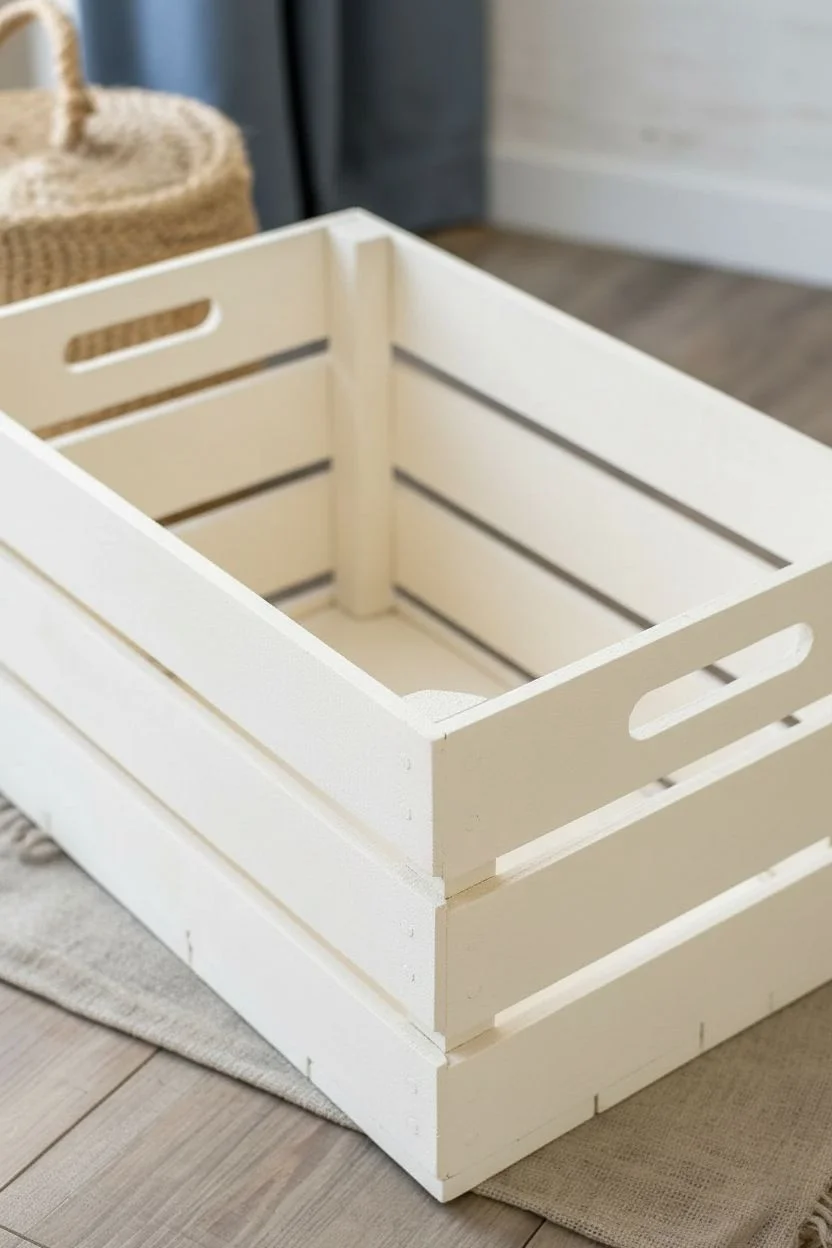
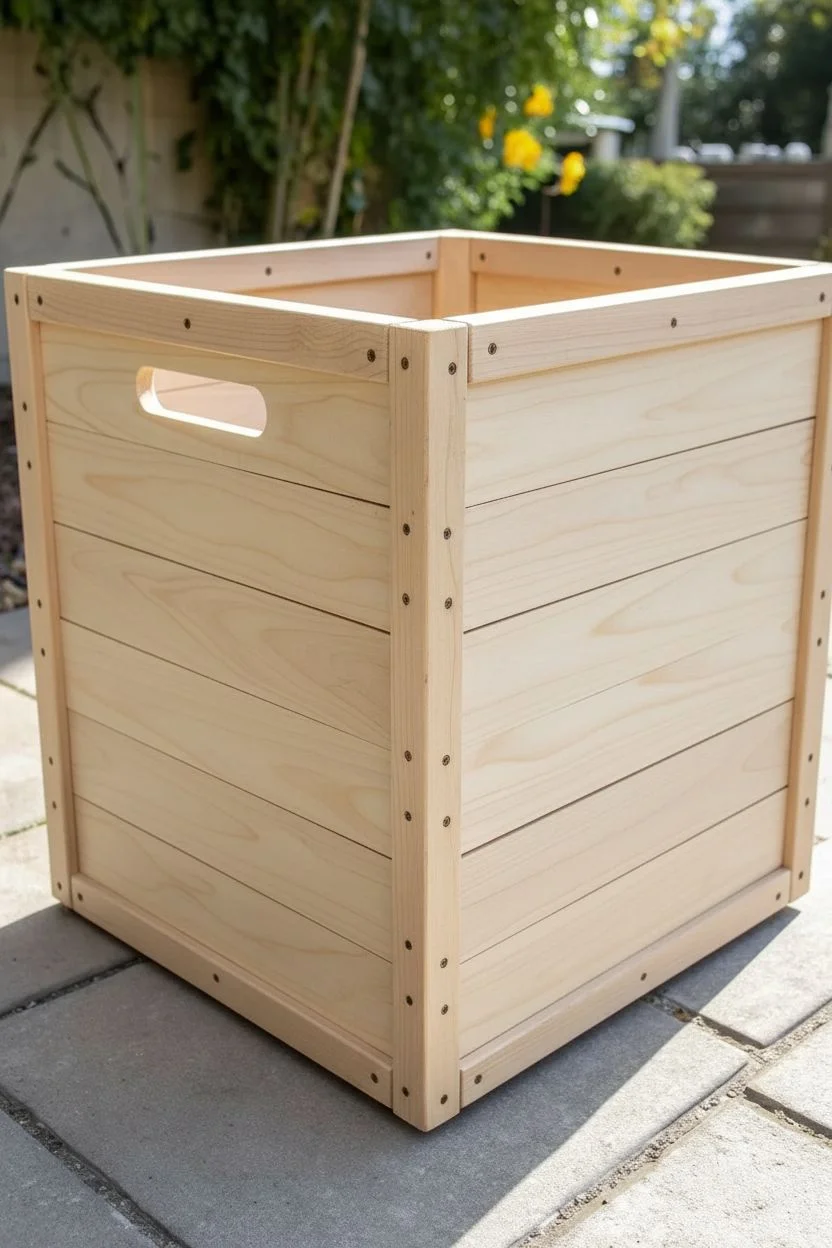
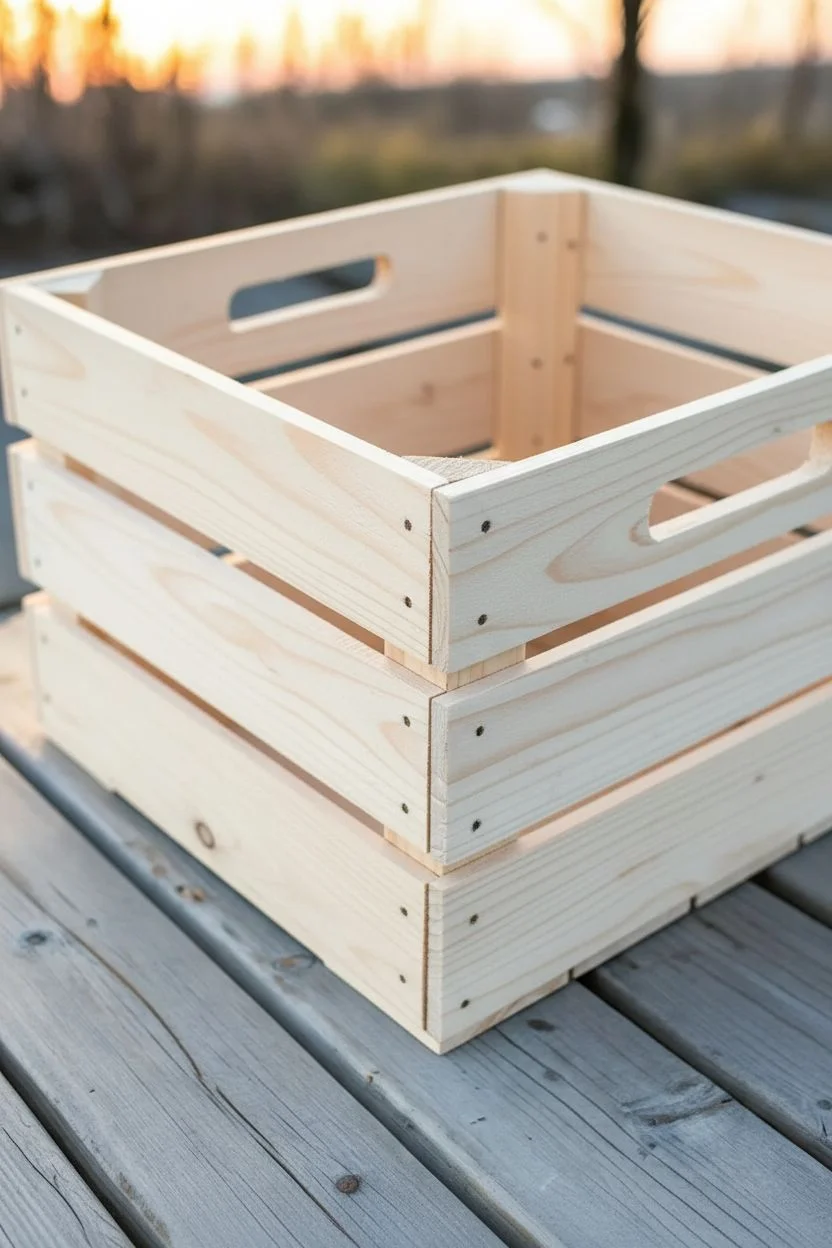
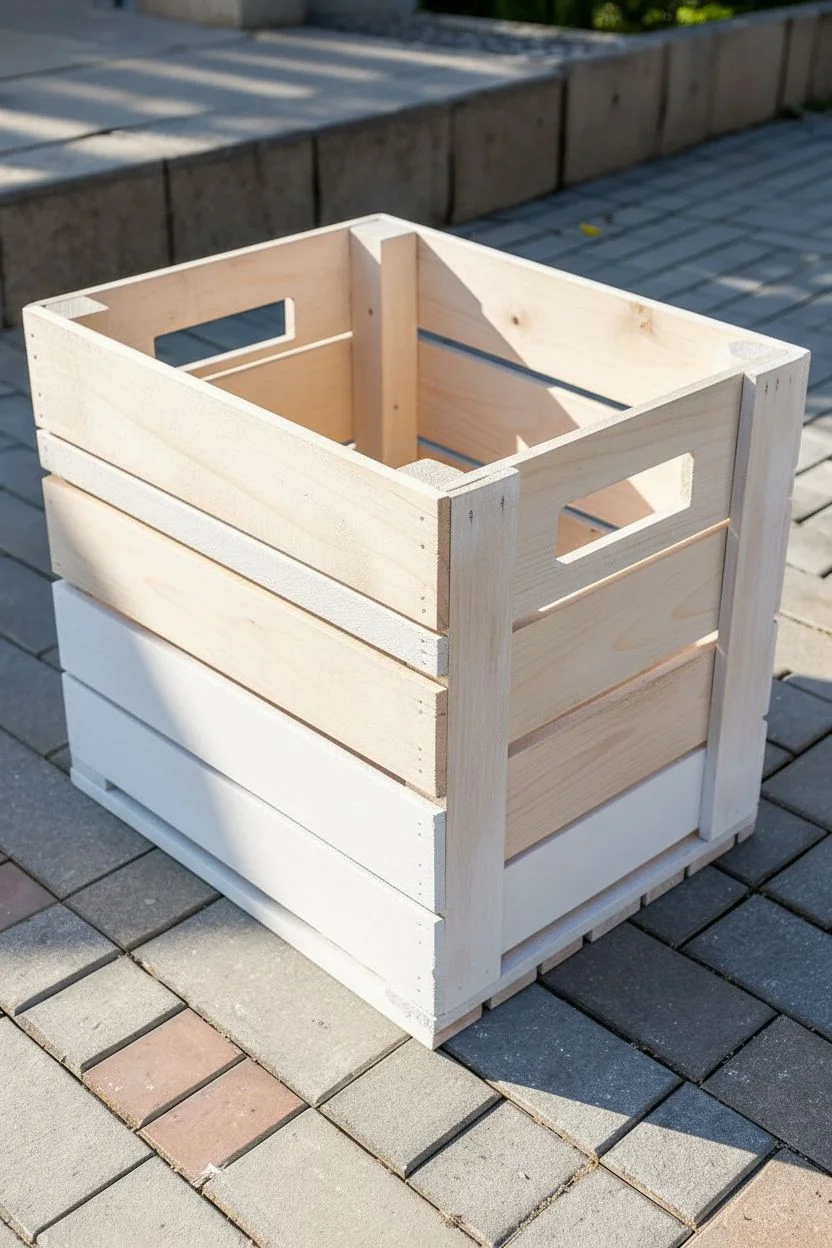
Whitewashed Crate That Still Shows the Wood Grain
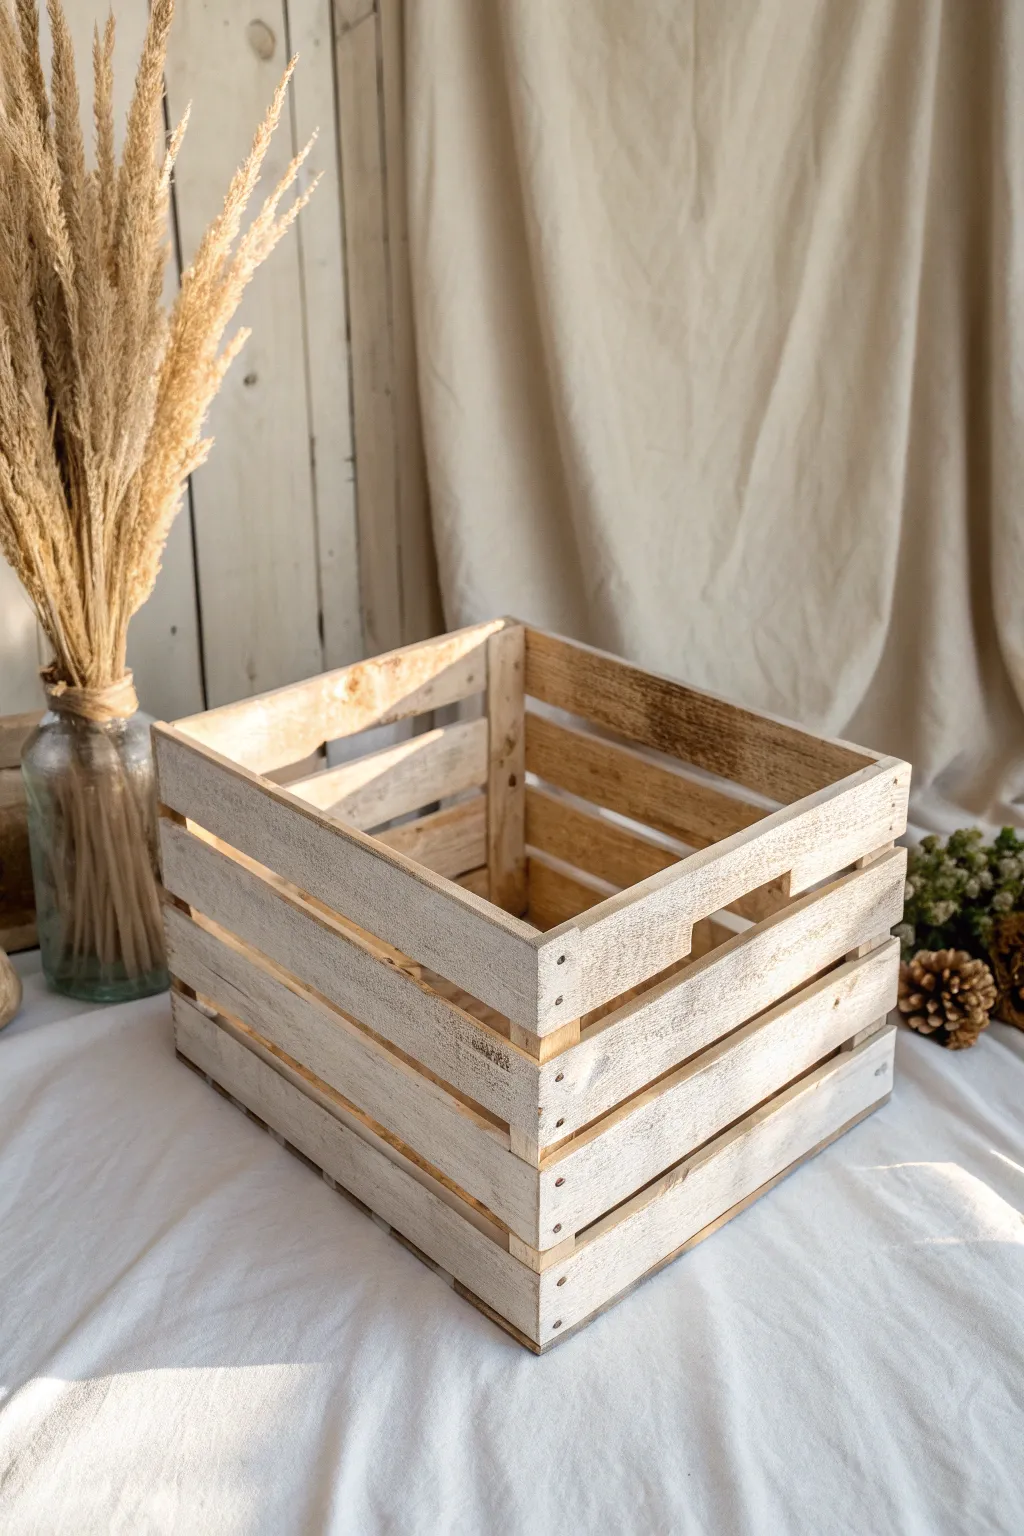
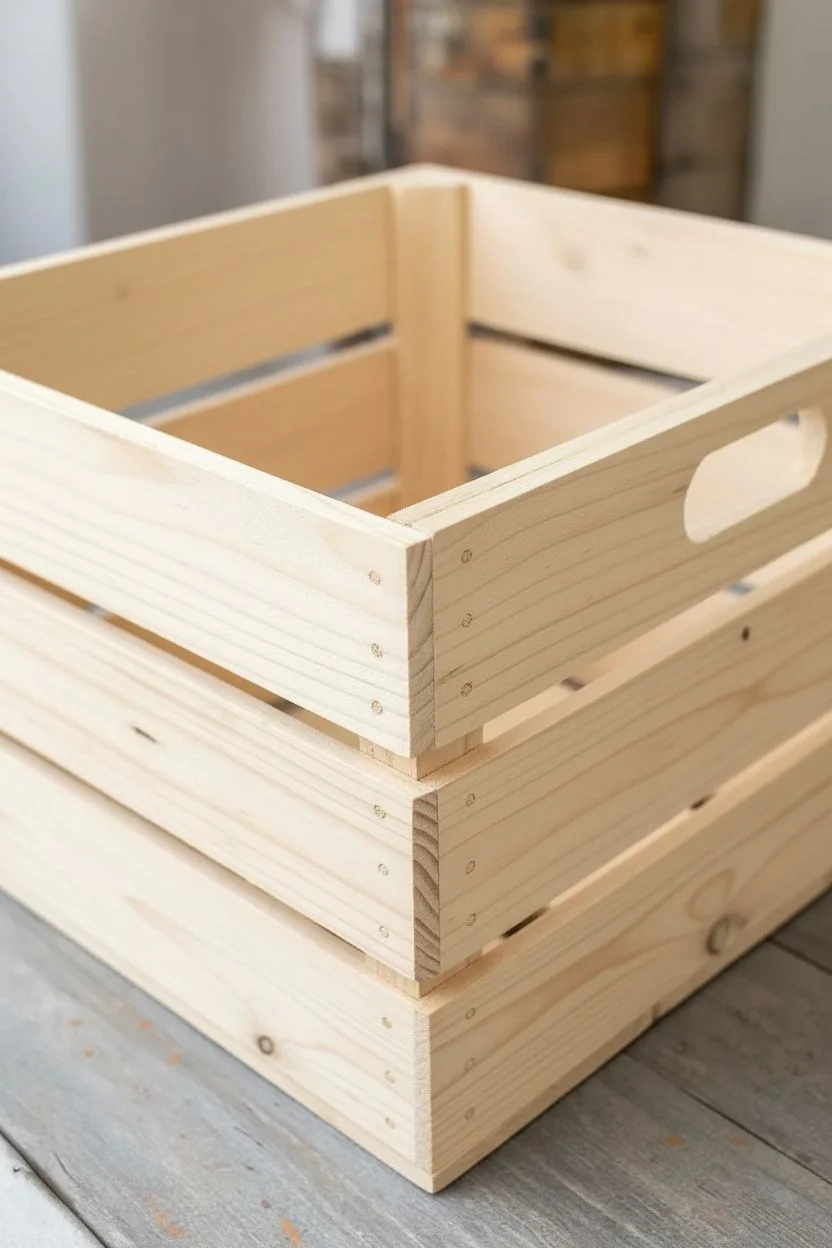
Achieve that airy, farmhouse chic aesthetic by giving a simple wooden crate a gentle whitewashed finish. This technique brightens up the timber while allowing the natural knots and grain patterns to peek through beautifully.
Step-by-Step Tutorial
Materials
- Unfinished wooden crate (slatted)
- White latex or acrylic paint (matte or satin finish)
- Water (for diluting)
- Sandpaper (120 and 220 grit)
- Clean lint-free rags or old t-shirt
- Paintbrush (synthetic bristle, 2-inch width)
- Plastic cup or container for mixing
- Stir stick
- Drop cloth or newspaper
- Tack cloth or dry brush
Step 1: Preparation and Sanding
-
Assess the surface:
Inspect your unfinished crate for any rough splinters or loose staples. Remove any staples that might be sticking out dangerously. -
Initial rough sanding:
Use 120-grit sandpaper to go over the entire crate. Focus on the sharp edges of the slats and the corners. -
Smoothing the grain:
Switch to fine 220-grit sandpaper for a finishing pass. This ensures the wood fibers are smooth, which helps the whitewash glide on evenly rather than absorbing blotchily. -
Dust removal:
Wipe down the entire crate with a tack cloth or a clean, dry brush to remove all sawdust. Any leftover dust will create clumps in your paint mixture. -
Set up your workspace:
Lay down your drop cloth or newspaper to protect your work surface from watery paint drips.
Knotty problems
Wood knots absorb liquid differently. If a knot looks too dark after one coat, dab a little undiluted paint on it with your finger, wait a moment, then wipe it back to blend.
Step 2: Mixing the Whitewash
-
Pour the paint base:
Pour a small amount of white paint into your mixing container. Start with about half a cup. -
Add water:
add an equal amount of water to the container to create a 1:1 ratio. This is a standard starting point for whitewashing. -
Stir thoroughly:
Use your stir stick to blend the water and paint until the consistency resembles heavy cream or whole milk. -
Test the opacity:
Test a small stroke on the bottom of the crate. If it’s too solid, add more water. If it’s too transparent, add a splash more paint.
Add a handle accent
Drill holes in the shorter sides and thread thick jute rope or leather strips through to create rustic handles that contrast perfectly with the white wood.
Step 3: Application Technique
-
Dip and offload:
Dip your brush into the mixture, but don’t overload it. Tap the excess off against the side of the container. -
Brush with the grain:
Apply the wash to one slat at a time, brushing in the direction of the wood grain. Long, confident strokes work best here. -
Immediate wipe-back:
Here I prefer to work quickly; while the paint is still wet, take your lint-free rag and wipe over the painted area. This pushes the pigment into the grain and removes excess surface paint. -
Control the look:
Apply lighter pressure with the rag if you want a whiter look, or press harder to reveal more wood tone. -
Work in sections:
Continue painting and wiping one side at a time. Don’t paint the whole crate at once, or the wash will dry before you can wipe it back properly. -
Detail the uneven spots:
Use the tip of your brush to get the whitewash into the corners and gaps between slats, then use the rag to blot out any pooling liquid.
Step 4: Finishing Touches
-
Let it dry:
Allow the crate to air dry completely. Because the paint is diluted, this should only take about 30 to 60 minutes. -
Optional distress sanding:
If you want a more weathered look, take your 220-grit sandpaper and lightly distress the edges and corners where wear would naturally occur. -
Final inspection:
Check for any dried drip marks you might have missed and sand them away gently.
Now you have a beautifully refreshed storage piece ready to organize your home with style


Two-Tone Crate With a Painted Interior Pop
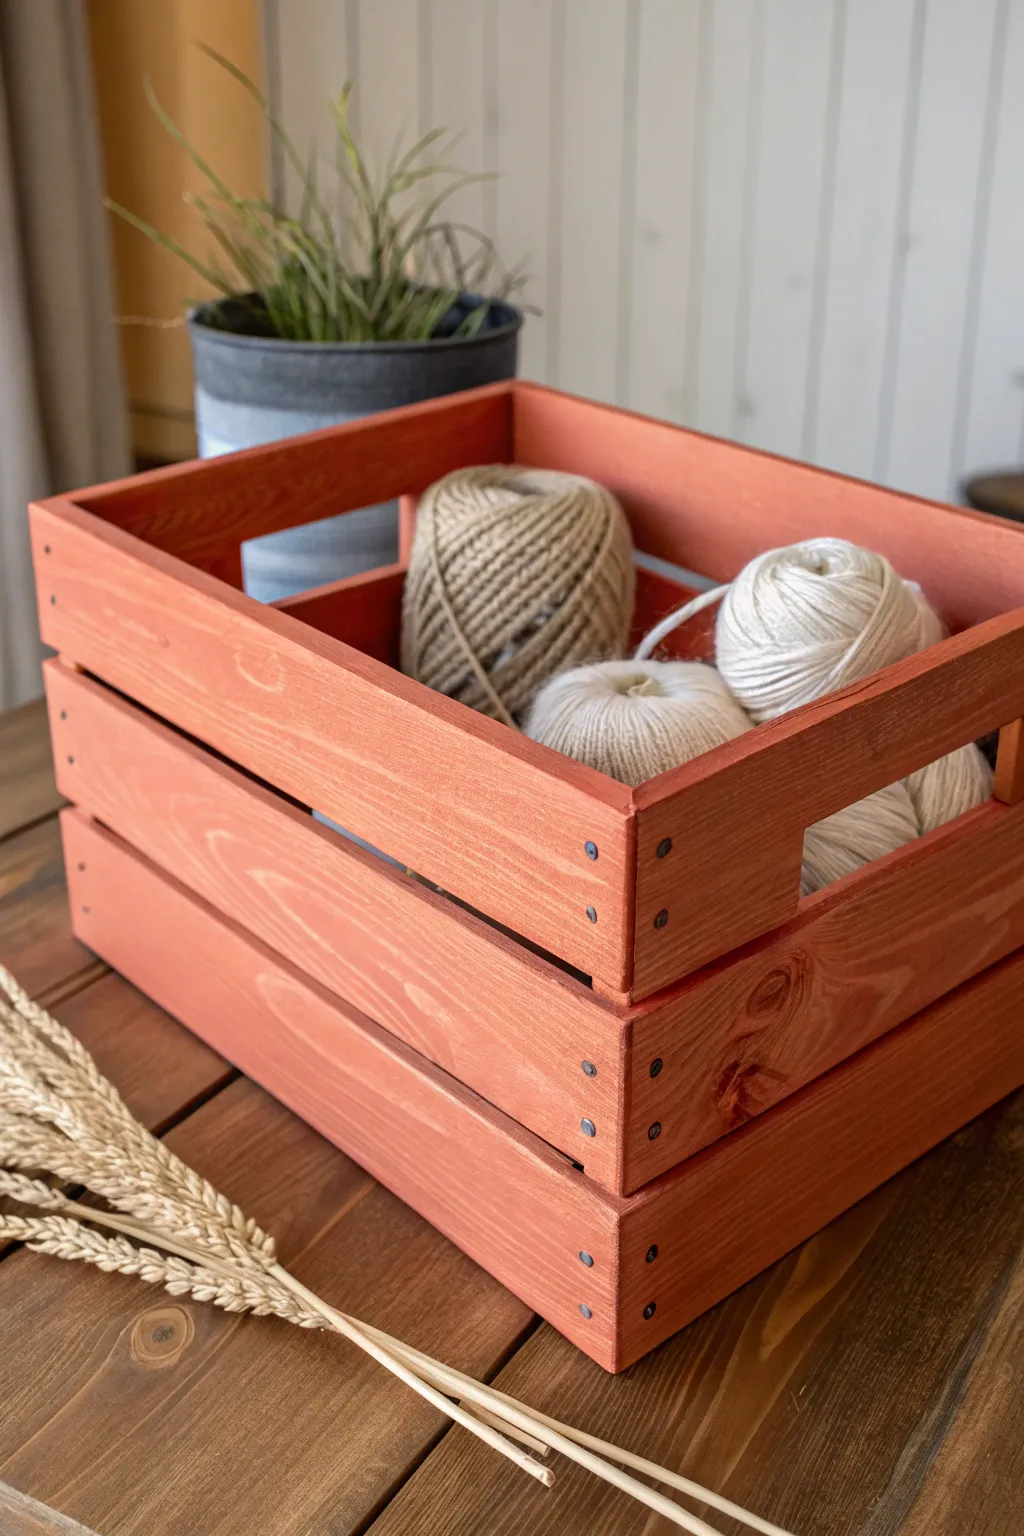

Transform a plain craft store crate into a warm, rustic storage piece with a simple yet striking monochromatic stain application. The rich terracotta hue allows the natural wood grain to shine through while adding a cozy pop of color perfect for organizing your yarn or craft supplies.
Step-by-Step
Materials
- Unfinished wooden crate (slatted sides with handles)
- Water-based wood stain or semi-transparent paint (Terracotta, Rust, or Burnt Sienna shade)
- Medium-grit sandpaper (120-150 grit)
- Fine-grit sandpaper (220 grit)
- Foam brushes or synthetic bristle brushes
- Lint-free tack cloth or rag
- Drop cloth or masking paper
- Matte spray sealer or clear polycrylic
- Disposable gloves
Step 1: Preparation & Sanding
-
Inspect the crate:
Begin by looking over your unfinished wooden crate for any rough splinters, staples, or sticker residue. If there are staples sticking out, use pliers to remove them or hammer them flat. -
Initial sanding:
Take your medium-grit sandpaper (120-150) and sand the entire crate. Pay special attention to the raw edges of the slats and the cutouts for the handles, as these are often the roughest areas. -
Smooth the surfaces:
Switch to fine-grit sandpaper (220) to smooth down the flat exterior and interior surfaces. You want the wood to feel soft to the touch so it won’t snag any delicate yarn you plan to store later. -
Clean off dust:
Wipe the entire crate down thoroughly with a tack cloth or a slightly damp rag. It’s crucial to remove all sanding dust, especially from the corners and between the slats, to ensure a smooth finish.
Uneven Color Absorption?
If the pine is absorbing stain blotchily, apply a pre-stain wood conditioner first. This helps soft woods take stain evenly for a professional look.
Step 2: Staining Application
-
Set up your workspace:
Lay down your drop cloth to protect your table. Put on disposable gloves, as wood stain can be messy and hard to wash off skin. -
Stir the color:
Open your terracotta stain or thinned paint. Stir it gently but thoroughly to mix any pigments that have settled at the bottom without creating air bubbles. -
Start with the interior:
Dip your foam brush into the stain and begin applying it to the inside corners and bottom of the crate first. I find it easier to tackle the hard-to-reach inside spots before the outside gets wet and sticky. -
Work in the direction of the grain:
Brush the stain along the wooden slats, following the natural grain of the wood. Apply long, even strokes to avoid lap marks where the brush stops and starts. -
Coat the exterior:
Move to the outside of the crate. Apply the stain to the exterior slats, ensuring you get the brush into the gaps between the boards for full coverage. -
Check for drips:
Keep a rag handy to immediately wipe away any drips that pool in the corners or run down the sides. Capturing these early prevents dark, uneven splotches. -
Wipe back excess:
If you are using a traditional penetrating stain, let it sit for about 2-3 minutes, then gently wipe off the excess with a clean lint-free rag. This reveals the beautiful wood grain texture. -
Assess the color depth:
Let the first coat dry according to the can’s instructions (usually 1-2 hours). If you want a deeper, richer terracotta red, apply a second coat using the same method.
Step 3: Finishing Touches
-
Light sanding between coats:
Once the stain is completely dry, very lightly run your fine-grit sandpaper over the surface to knock down any raised grain. Wipe away the dust again. -
Seal the project:
To protect your yarn from snagging on dry wood or picking up color transfer, apply a coat of matte spray sealer or clear polycrylic. -
Apply sealer evenly:
Hold the spray can about 8-10 inches away and use sweeping motions to apply a thin, even coat. Don’t forget the inside bottom and corners. -
Allow specifically for drying:
Let the sealer cure fully, usually for 24 hours, before placing any items inside so the finish hardens completely. -
Check handle smoothness:
Do a final touch test on the handle cutouts. If they feel rough, a tiny bit of wax or an extra dab of sealer can make them comfortable to grip.
Add a Vintage Label
Use a stencil to paint a vintage number or word like “WOOL” in cream or white on the short end of the crate for an industrial farmhouse vibe.
Fill your newly finished crate with chunky knits or craft supplies to enjoy that perfect blend of organization and rustic style
BRUSH GUIDE
The Right Brush for Every Stroke
From clean lines to bold texture — master brush choice, stroke control, and essential techniques.
Explore the Full Guide
Geometric Triangle Pattern Across the Slats
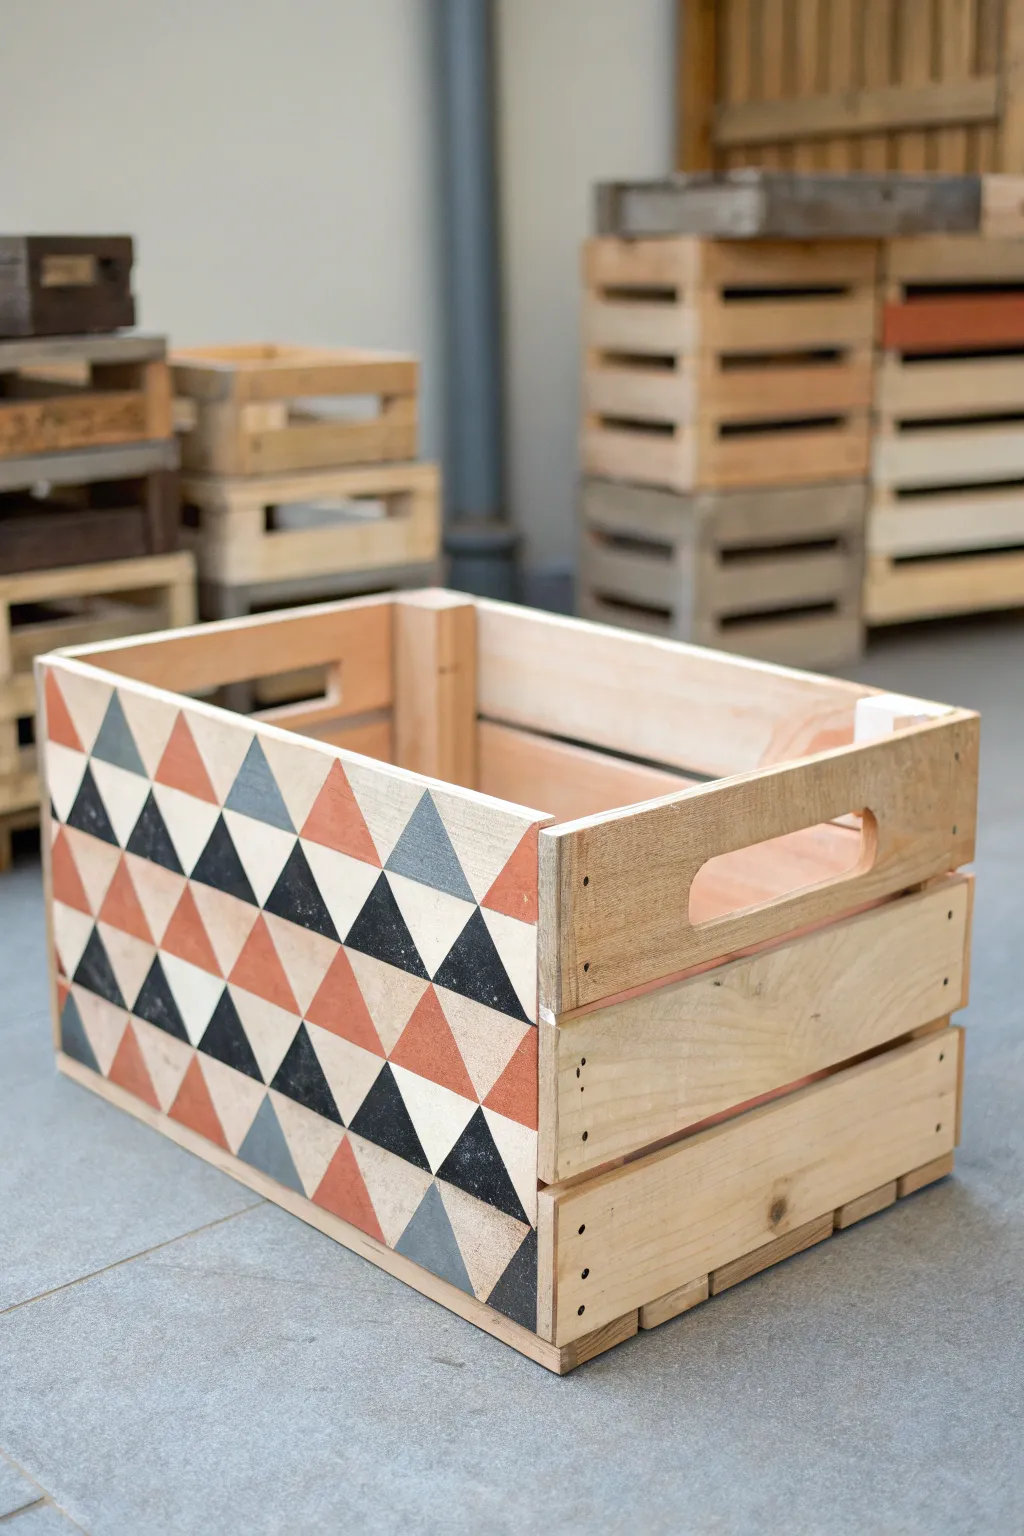
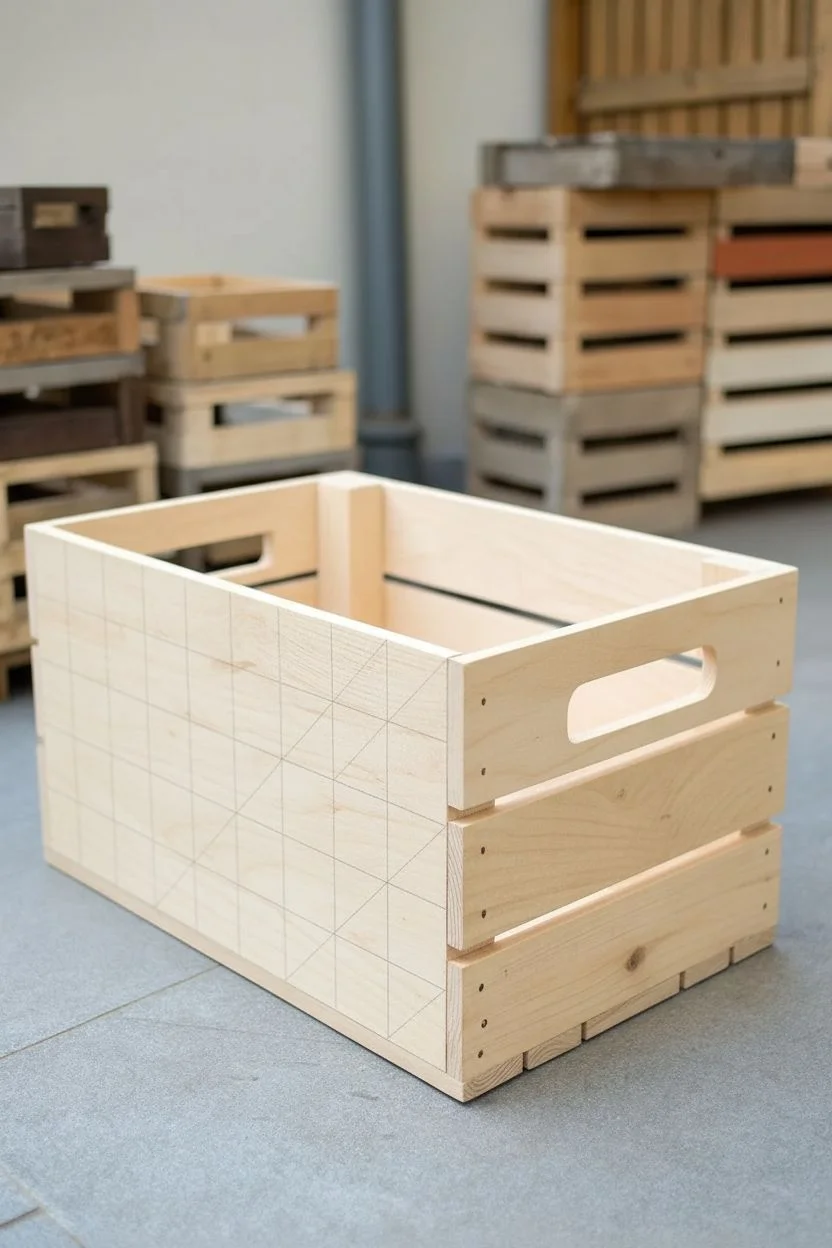
Transform a basic wooden storage crate into a modern statement piece with this bold geometric upgrade. By painting triangular patterns directly across the slats rather than treating each board individually, you create a cohesive, eye-catching design that blends rustic texture with contemporary shapes.
Step-by-Step Tutorial
Materials
- Unfinished wooden crate (slatted sides)
- Sandpaper (120 and 220 grit)
- Painter’s tape (1-inch width works best)
- Acrylic craft paints (Black, Terracotta/Burnt Orange, Dark Grey)
- Flat artist brushes (medium and small)
- Ruler or straight edge
- Pencil
- Clear matte acrylic sealer (spray or brush-on)
- Drop cloth or newspaper
Step 1: Preparation and Planning
-
Sand the surface:
Begin by giving the entire crate a good sanding, focusing on the exterior slats where you will be painting. Start with 120-grit paper to remove rough splinters, then finish with 220-grit for a smooth painting surface. -
Clean the wood:
Wipe down the entire crate with a tack cloth or a slightly damp rag to remove all sawdust. Any lingering dust will prevent your tape from sticking properly. -
Plan your grid:
Visualize the side of the crate as a single canvas, ignoring the gaps between slats for a moment. Using a pencil and ruler, lightly mark a grid of squares across the face of the crate. A 3-inch or 4-inch square size usually works well for standard crates. -
Draw the diagonals:
Once your squares are marked, draw a diagonal line through each square to create two triangles. Alternate the direction of the diagonal lines in adjacent squares to create a varied, quilt-like pattern.
Crisp Lines Only
For ultra-sharp lines on textured wood, paint a thin layer of clear matte medium or white paint over the tape edge first to seal it before applying your color.
Step 2: Painting the Pattern
-
Mask the first color group:
Select the triangles you want to paint Black first. Use painter’s tape to mask off the edges of these specific triangles. tape right over the gaps between slats to keep the line straight. -
Seal the tape edges:
I like to press the edge of the tape down firmly with a fingernail or credit card to ensure paint doesn’t bleed underneath, especially on the rougher wood grain. -
Paint the black triangles:
Fill in the masked areas with black acrylic paint. Use a flat brush and stroke away from the tape edge to further prevent bleeding. -
Handle the gaps:
When painting over the gap between slats, gently dab the brush on the edges of the wood to coat the thickness of the slat, maintaining the geometric shape visually even across the empty space. -
Remove tape and dry:
Carefully peel off the tape while the paint is still slightly tacky to get crisp lines. Allow the black paint to dry completely before moving to the next color. -
Mask for the second color:
Once dry, apply fresh tape to outline the triangles designated for the Terracotta color. Make sure you aren’t putting tape over wet paint. -
Paint the terracotta sections:
Apply the rusty orange or terracotta paint to these new sections. You may need two coats depending on the opacity of your paint and how absorbent the wood is. -
Repeat for grey:
Repeat the masking and painting process for your third color, the Dark Grey. Leave some triangles unpainted to let the natural light wood tone act as a fourth color in your palette.
Step 3: Finishing Touches
-
Touch up lines:
Inspect your triangles for any messy edges or paint bleeds. Use a small detail brush to tidy up lines or carefully sand away minor errors on the unpainted wood sections. -
Erase pencil marks:
Gently erase any visible pencil guidelines that remain in the unpainted wood triangles. -
Seal the project:
To protect the paint from chipping and make the crate easier to dust, apply a coat of clear matte acrylic sealer over the entire exterior. -
Clean the slat edges:
If paint dripped heavily into the interior through the slat gaps, sand the back of the slats lightly for a clean, professional finish.
Bleeding Paint?
If paint bleeds under the tape into the wood grain, don’t wipe it. Let it dry fully, then gently scrape the bleed away with a craft knife or sand it off.
Now you have a stylish, custom storage solution that looks great stacked in any corner of the room
Color-Blocked Crate for Bold, Simple Impact
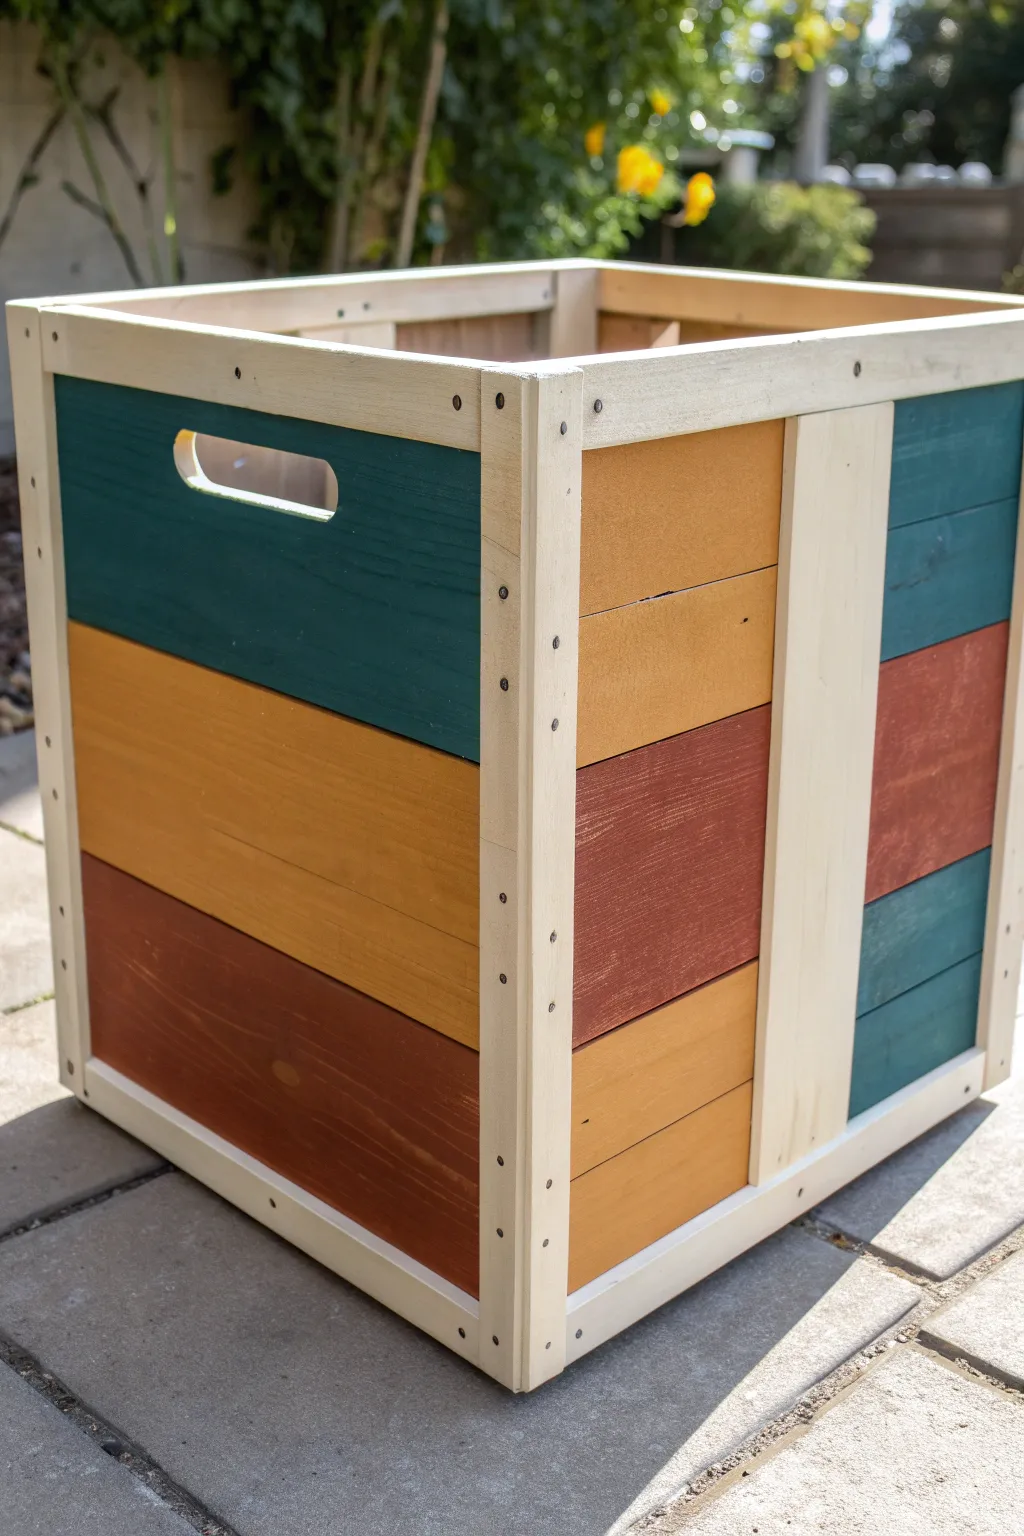
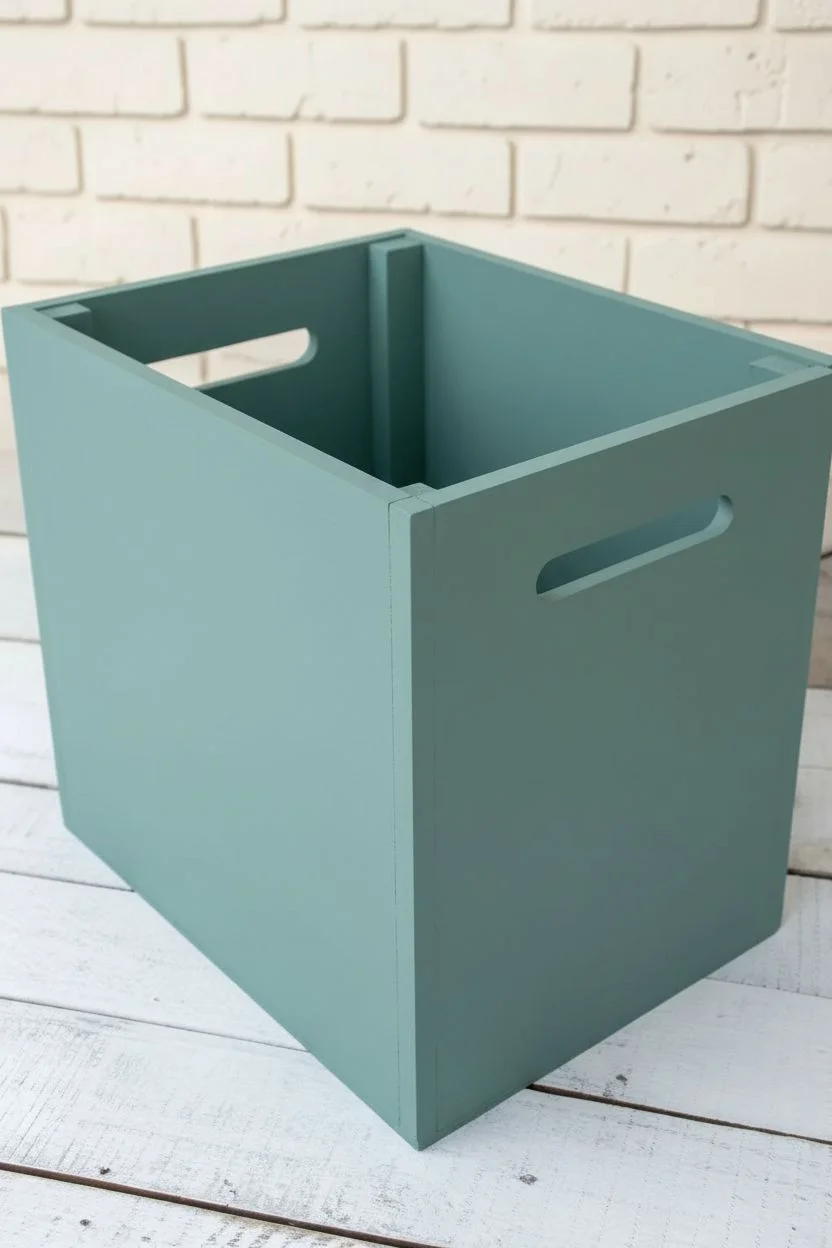
Transform a plain wooden crate into a stylish storage solution with this bold, color-blocked design. Using a palette of deep teal, mustard yellow, and terracotta rust, this project adds a modern, geometric pop of color to any room while keeping the frame crisp and clean.
Step-by-Step
Materials
- Unfinished wooden crate (slatted sides)
- Sandpaper (120 and 220 grit)
- Painter’s tape (high quality)
- Acrylic or chalk paint: Deep Teal
- Acrylic or chalk paint: Mustard Yellow
- Acrylic or chalk paint: Terracotta/Rust
- Acrylic or chalk paint: Creamy White (for the frame)
- Small flat paintbrush (1-inch width)
- Detail paintbrush
- Clear matte polyurethane sealer
- Tack cloth or clean rag
Step 1: Preparation & Sanding
-
Check the surface:
Inspect your crate for any rough splinters or uneven edges. If the wood is very rough, start by sanding the entire crate with 120-grit sandpaper to knock down the major imperfections. -
Refine the finish:
Switch to 220-grit sandpaper for a final pass. You want surface to be smooth to the touch so the paint goes on cleanly without soaking into rough grain. -
Clean the dust:
Wipe down the entire crate inside and out with a tack cloth or a damp rag to remove all sawdust. Any lingering dust will ruin your paint finish.
Bleed-Proof Lines
To prevent paint bleeding under tape, brush a tiny amount of the *base* color (white) over the tape edge first to seal it before applying the colored paint.
Step 2: Painting the Frame
-
Isolate the frame:
Before painting the colorful slats, focus on the structural frame—the vertical posts and the top and bottom bands. I like to tape off the edges where the slats meet the frame to ensure crisp lines. -
Apply the base coat:
Paint the entire structural frame with your Creamy White paint. Use a flat brush and long strokes to minimize texture. -
Second coat:
Allow the first coat to dry completely, then apply a second coat to the frame for solid, opaque coverage. Don’t forget the top rim and the inside edge of the handle cutouts. -
Remove frame tape:
carefully peel off the tape you used to protect the slats while the paint is still slightly tacky to prevent peeling.
Step 3: Color Blocking the Slats
-
Plan your pattern:
Look at the slat arrangement. In this design, the colors alternate (Teal, Yellow, Red) but are staggered differently on adjacent sides. Decide which slat gets which color before you dip your brush. -
Tape for precision:
Apply fresh painter’s tape along the newly painted white frame edges where they meet the horizontal slats. This protects your crisp white lines. -
Paint the Teal slats:
Using a clean brush, paint the designated Deep Teal slats. Be careful to get paint into cracks, but avoid dripping onto the slats below. -
Paint the Yellow slats:
Switch to a clean brush and apply the Mustard Yellow to its assigned sections. The yellow pigment is often more transparent, so apply a thin coat first. -
Paint the Terracotta slats:
Fill in the remaining slats with the Rust/Terracotta color. Take your time near the edges. -
Apply second coats:
Once the first layer is dry to the touch, apply a second coat to all colored slats. The yellow may even need a third light coat for full vibrancy. -
Touch up details:
Use a small detail brush to fix any spots where the color might have missed the grain or where lines aren’t perfectly straight.
Distressed Effect
For a rustic look, lightly sand the edges of the colored slats after painting to reveal a bit of the natural wood underneath before you seal it.
Step 4: Finishing
-
Final smooth sanding:
Once all paint is 100% dry, lightly run a piece of ultra-fine sandpaper or a brown paper bag over the varied surfaces to smooth out any raised wood grain. -
Seal the crate:
Apply a clear matte polyurethane sealer over the entire crate. This protects the colors from chipping and makes the crate easier to dust later. -
Let it cure:
Allow the sealer to cure for at least 24 hours before filling the crate with any heavy items.
Now you have a vibrant, custom storage piece ready to organize your space with style

PENCIL GUIDE
Understanding Pencil Grades from H to B
From first sketch to finished drawing — learn pencil grades, line control, and shading techniques.
Explore the Full Guide
Paint-Dipped Look With a Clean “Drip Line” Edge
Transform a plain wooden crate into a stylish storage solution with this modern, minimalist paint-dipped effect. The warmth of the terracotta paint contrasts beautifully against clean, natural wood for a look that fits perfectly in any boho or contemporary space.
Step-by-Step Guide
Materials
- Unfinished wooden crate (slatted)
- Sandpaper (120 and 220 grit)
- Painter’s tape (high quality)
- Matte acrylic or chalk paint (Terracotta/Peach shade)
- Flat paintbrush (1-2 inch)
- Clean rag or tack cloth
- Measuring tape or ruler
- Sealer (clear matte polycrylic or wax, optional)
Step 1: Prep Work
-
Assess the wood:
Begin by inspecting your unfinished crate for any rough patches, splinters, or stickers. Remove any retail stickers or staples that might be stuck to the bottom or inside. -
Initial sanding:
Use 120-grit sandpaper to smooth out the rougher areas of the wood, focusing on the edges where the slats meet the corner posts. -
Fine sanding:
Switch to 220-grit sandpaper for a final pass over the entire crate. You want the surface to feel smooth to the touch, which helps the paint glides on evenly. -
Clean the surface:
Wipe the entire crate down thoroughly with a tack cloth or a slightly damp rag to remove all sawdust. Dust is the enemy of a crisp paint line.
Bleeding Lines?
If paint bled under your tape, don’t panic. Since the top is natural wood, you can usually gently sand the error away with 220-grit paper without ruining a base coat.
Step 2: Planning the Dip
-
Choose your line:
Decide where you want the color division to happen. In the example, the bottom two slats are painted, while the upper slats remain natural. This corresponds to roughly the bottom half or third of the crate height. -
Tape the horizontal lines:
Apply painter’s tape horizontally along the bottom edge of the slat *above* the ones you intend to paint. This protects the upper natural wood. -
Tape the vertical posts:
This is crucial: don’t forget the vertical corner supports inside the crate. You need to wrap tape around these posts at the exact same height as your horizontal line so the ‘dip’ looks continuous. -
Seal the tape edge:
Press down firmly along the edge of the tape with your fingernail or a credit card. For extra insurance against bleeding, I sometimes brush a tiny amount of clear matte medium or white paint along the tape edge first to seal it.
Add a Pattern
For extra flair, use a white paint pen or a stencil to add small geometric shapes or dots over the dry terracotta section for a custom boho pattern.
Step 3: Painting
-
First coat application:
Dip your flat brush into the terracotta paint. Apply the paint to the bottom section of the crate, brushing in long strokes with the grain of the wood. -
Watch the corners:
Dab the brush carefully into the corners and where the slats attach to the posts to ensure full coverage in the nooks. -
Paint the inside:
Don’t forget the interior! Paint the inside bottom slats and floor of the crate to match the exterior ‘dipped’ level. -
Let it dry:
Allow the first coat to dry completely according to the paint manufacturer’s instructions (usually 30-60 minutes). -
Second coat:
Apply a second coat of paint for a rich, opaque finish. If your wood is very thirsty, a third light coat might be necessary for full color depth.
Step 4: Finishing Touches
-
Remove tape:
While the final coat is still slightly tacky (not fully cured), carefully peel off the painter’s tape at a 45-degree angle. This helps prevent the paint from chipping at the line. -
Touch ups:
Inspect your crisp line. if any paint bled under the tape, use a small piece of sandpaper to gently buff it away, or scrape it carefully with a craft knife. -
Optional sealing:
If you plan to use the crate for heavy items or in a humid room, apply a clear matte sealer over the painted section (or the whole crate) to protect the finish. -
Final cure:
Let the crate sit undisturbed for 24 hours to let the paint finish curing before filling it with items.
Now you have a chic, custom storage piece ready to organize your home
Sponge Stipple Texture for a Stoneware-Inspired Finish
Transform a plain pine crate into a piece that mimics the textural, dusty feel of aged stoneware. This technique uses layers of paint and strategic wiping to achieve a weathered, artisanal look that fits perfectly in farmhouse or coastal decor.
Step-by-Step
Materials
- Unfinished wooden crate (slatted)
- Medium-grit sandpaper (120-150 grit)
- Chalk paint or matte acrylic paint (Warm White or Cream)
- Chalk paint or matte acrylic paint (Light Grey)
- Small natural sea sponge
- Cotton rags (lint-free)
- Wide flat paintbrush (2-inch)
- Water container for rinsing
- Matte clear sealant spray (optional)
Step 1: Preparation and Base
-
Inspect the crate:
Begin by checking your raw wooden crate for any manufacturing stickers, rough splinters, or large staple holes. If there are visible staples that are loose, hammer them flush. -
Light sanding:
Run your 150-grit sandpaper over the entire surface, focusing on softening the sharp edges of the slats. This helps the paint adhere and achieves a more lived-in appearance. -
Wipe down:
Use a slightly damp cloth or tack cloth to remove all sanding dust. It is crucial to have a clean, dust-free surface before applying any paint.
Step 2: The Whitewash Technique
-
Prepare the whitewash:
Mix a small amount of your Warm White chalk paint with water in a separate container. Aim for a ratio of about 2 parts paint to 1 part water; you want it thinner than standard paint but heavier than a stain. -
Apply the wash:
Using the wide flat brush, apply the diluted white paint to one side of the crate. Don’t worry about perfect coverage—just get the paint into the grain. -
Wipe back immediately:
While the paint is still wet, take a dry cotton rag and wipe the surface in the direction of the wood grain. This removes excess pigment and lets the natural wood tone peek through. -
Repeat for all sides:
Continue this process for the remaining three outer sides and the top edges. I prefer to leave the inside raw or very lightly washed, as plants will likely cover it. -
Dry time:
Let this initial whitewash layer dry completely, which should take about 30 minutes since the paint was diluted.
Paint Too Opaque?
If your whitewash hides too much wood grain, immediately mist the wet paint with water from a spray bottle and wipe firmly with a rag to lift the pigment.
Step 3: Creating the Stoneware Texture
-
Mix the grey stipple:
Pour a small amount of Light Grey chalk paint onto a palette or paper plate. Do not dilute this paint; you need the full thickness for texture. -
Load the sponge:
Dampen your sea sponge slightly, wring it out fully, and then dab it into the grey paint. Blot the excess onto a paper towel until the sponge is almost dry. -
Stipple the corners:
Lightly dab the sponge along the vertical corners and edges where the slats meet the solid supports. This mimics where dirt and age would naturally accumulate on stone. -
Feather the texture:
Use a clean, dry brush to lightly sweep over the wet sponge marks, blurring them into the white background so there are no harsh sponge shapes visible. -
Adding high-contrast dry brushing:
Take your wide brush, ensure it is completely dry, and dip just the very tips of the bristles into undiluted White paint. -
Highlight the grain:
Drag the brush horizontally across the slats efficiently and quickly. This ‘dry brush’ technique catches the raised wood grain, creating a dusty, chalky highlight on top of the grey and wood tones. -
Detailing the hardware spots:
If your crate has visible nail heads or staples, dab a tiny bit of the grey paint on them to dull their metallic shine and blend them into the rustic finish.
Add Mossy Age
Mix a tiny drop of sage green into your grey paint details. Dab this sparingly into the deepest cracks or corners to simulate subtle moss growth found on old stone.
Step 4: Final Touches
-
Final distressing:
Once everything is dry, take your sandpaper and gently scuff the edges of the handle cutouts and the corners of the box to reveal bare wood. -
Blend the scuffs:
Wipe the sanded areas with a dry cloth to soften the transition between paint and raw wood. -
Seal:
If this crate will be used outdoors or near water, apply a light coat of matte spray sealant to protect the finish without adding shine.
Fill your newly textured crate with fresh herbs or succulents to complete the organic, farmhouse look


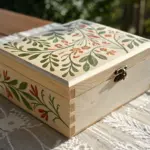
Floral Decoupage Panels on the Crate Sides
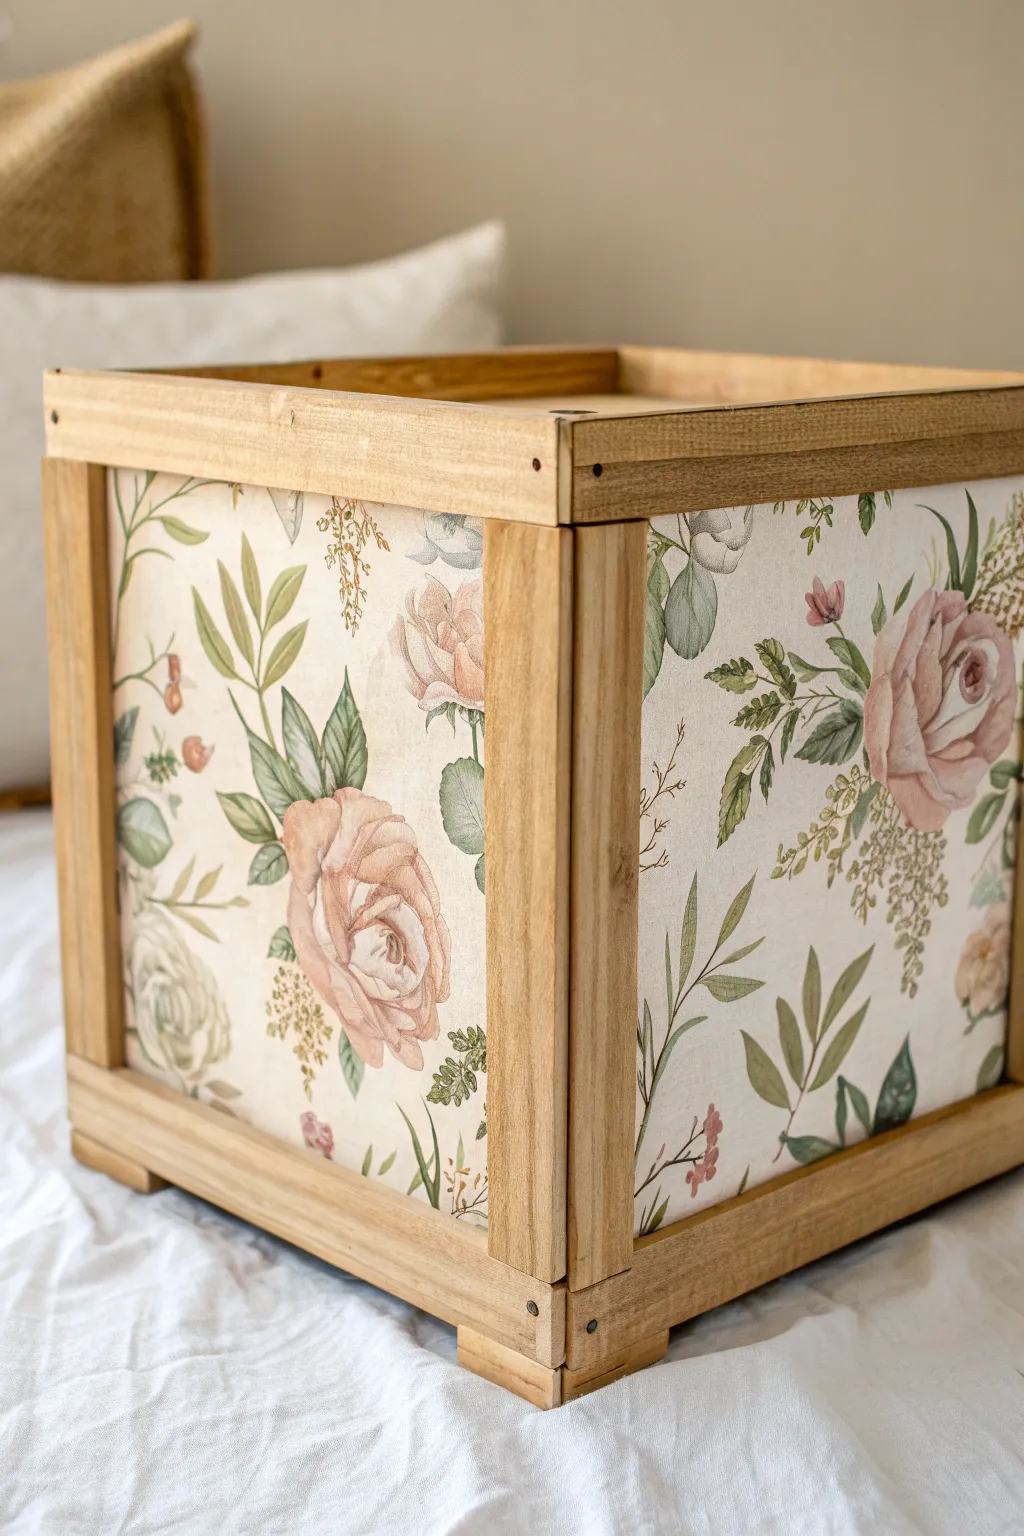
Transform a plain wooden crate into a charming, cottage-core inspired storage piece using a simple yet stunning paper application technique. The combination of natural, unfinished wood framing with delicate floral panels creates a soft, romantic look perfect for organizing linens or keepsakes.
Step-by-Step Tutorial
Materials
- Square wooden crate with recessed side panels
- Floral pattern decoupage paper, wallpaper scraps, or decorative napkins
- Matte finish decoupage medium (like Mod Podge)
- Small foam brush or flat synthetic brush
- Pencil
- Ruler or measuring tape
- Scissors or craft knife
- Fine-grit sandpaper (220-grit)
- Painter’s tape
- Smoothing tool or old credit card
Step 1: Preparation & Planning
-
Assess your crate:
Examine your wooden crate to determine if the side panels are removable. If they slide out, removing them will make this process much easier. If they are fixed in place, proceed with the assumption that you will be applying paper directly within the frame. -
Sand the surfaces:
Lightly sand the wooden frame and especially the side panels with 220-grit sandpaper. This smooths out rough grain and creates a better surface for adhesion. -
Clean the dust:
Wipe the entire crate down thoroughly with a tack cloth or a slightly damp microfiber rag to remove all sawdust, ensuring a clean slate for your adhesive. -
Protect the frame:
If you are working with fixed panels, apply painter’s tape carefully along the inner edges of the wooden frame posts and rails to protect the natural wood from stray glue.
Wrinkle-Free Tip
Work in small sections if your paper is thin. Mist the back of thick wallpaper lightly with water before gluing to relax the fibers and prevent bubbling.
Step 2: Cutting the Floral Panels
-
Measure the panels:
Measure the height and width of the recessed side spaces precisely. I like to measure each side individually, as wooden crates are often slightly irregular. -
Trace the pattern:
Lay your floral paper face down on a clean surface. Using your measurements, mark the cut lines on the back of the paper with a pencil and ruler. -
Account for patterns:
Before marking, check the front of the paper to ensure you are centering large floral motifs, like the pink roses, nicely within your cut lines. -
Cut the paper:
Use sharp scissors or a craft knife and a straight edge to cut out your four paper rectangles. Start slightly larger than your measurement; you can always trim it down, but you can’t add paper back. -
Dry fit:
Place each cut piece into its respective frame panel to check the fit. Trim tiny slivers off the edges if the paper buckles or doesn’t lie completely flat.
Level Up: Textile Texture
Instead of paper, use patterned fabric! Adhere it using the same decoupage medium for a tactile, upholstery-style finish that adds warmth.
Step 3: Application & Finishing
-
Apply adhesive to wood:
Using a foam brush, apply a thin, even layer of matte decoupage medium directly onto one wooden side panel. Avoid thick globs which can cause wrinkles. -
Position the paper:
Carefully align the top edge of your paper with the top of the recessed panel and slowly lower the rest of the paper down onto the adhesive. -
Smooth it out:
Start from the center of the paper and gently press outward towards the edges using a smoothing tool or credit card to push out trapped air bubbles. -
Seal the paper:
Once the paper is adhered and slightly set (wait about 15 minutes), apply a top coat of the matte decoupage medium over the paper to seal and protect it. -
Repeat for all sides:
Continue this process for the remaining three sides of the crate, allowing each side to dry slightly before rotating the crate to work on the next. -
Remove tape:
If you used painter’s tape, carefully peel it away while the top coat is still slightly wet to prevent pulling up dried finish. -
Clean up edges:
If any glue seeped onto the natural wood frame, wipe it away immediately with a damp cloth or scrape it gently once dry. -
Final dry time:
Allow the entire crate to cure for at least 24 hours in a dry area before filling it with heavy items.
Now you have a beautifully customized storage crate that blends rustic wood with elegant floral charm.
Vintage-Inspired Typography With Faux Aged Edges
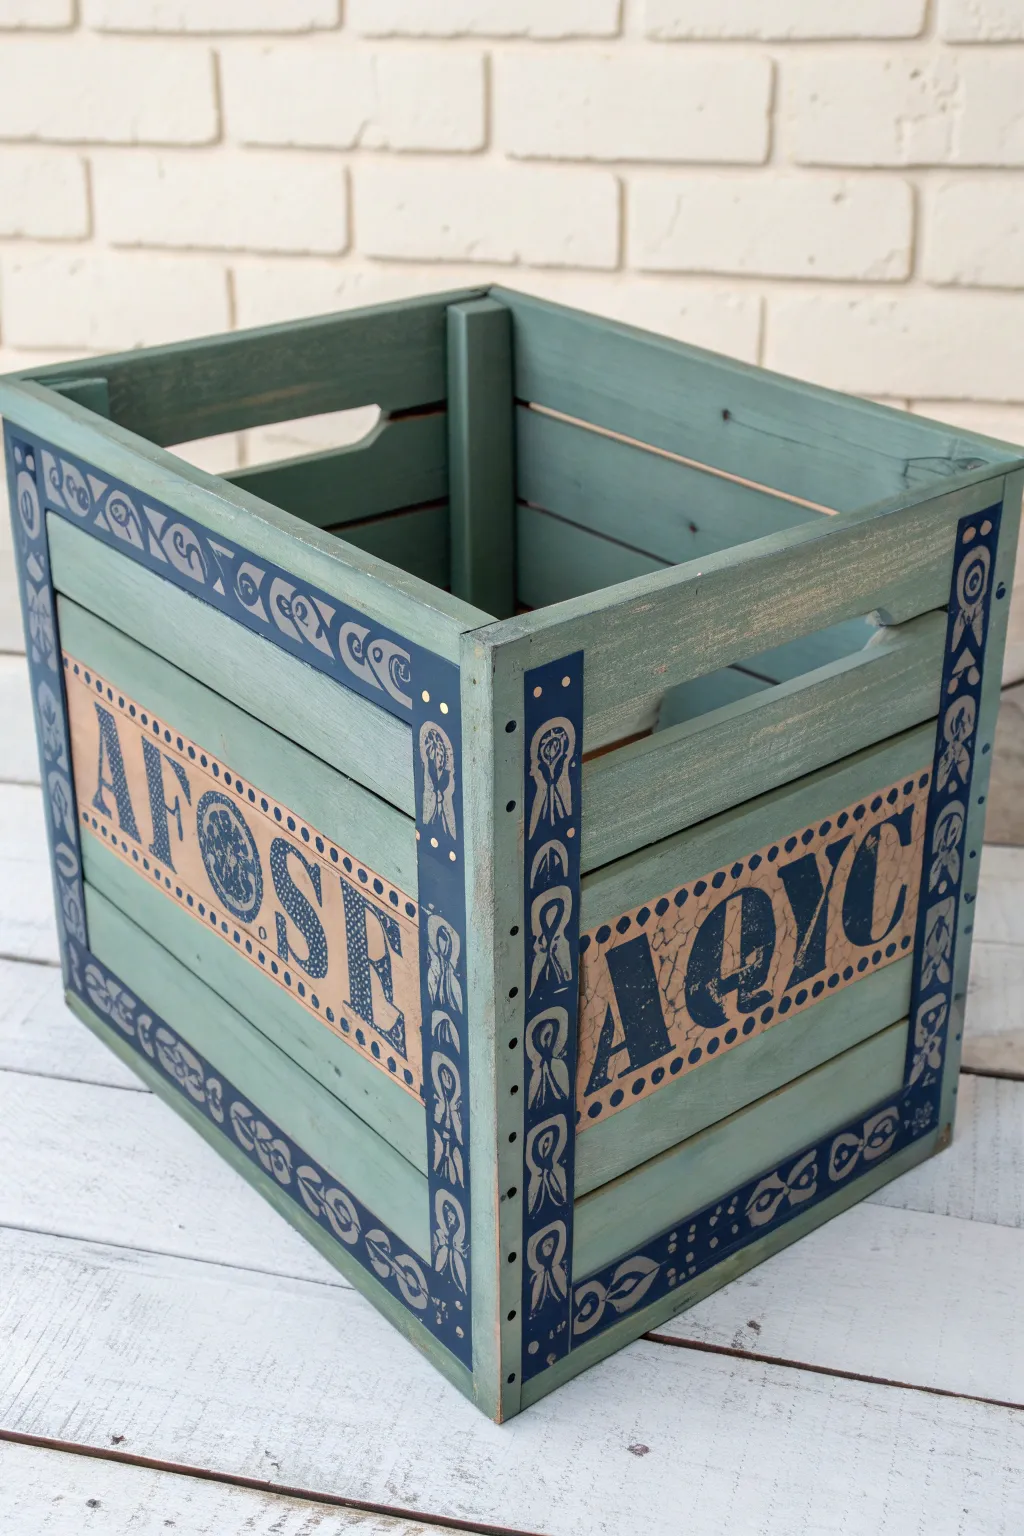
Transform a plain wooden crate into a charming storage piece with a faux-aged finish and custom hand-painted lettering. This project combines soft, muted teal tones with bold navy accents to create a timeless, vintage-inspired look perfect for organizing any room.
How-To Guide
Materials
- Unfinished wooden crate
- Sandpaper (120 and 220 grit)
- Chalk paint (muted teal/sage green)
- Acrylic paint (navy blue, cream/tan)
- Painter’s tape
- Stencil vinyl or printed template
- Carbon transfer paper
- Small flat paintbrushes
- Detail liner brush
- Clear matte sealer (spray or brush-on)
- Pencil and ruler
Step 1: Preparation & Base Coat
-
Smooth the surface:
Start by giving the entire crate a good sanding. Use 120-grit sandpaper first to remove any rough splinters, especially around the handle holes and slat edges, then follow up with 220-grit for a smooth finish suitable for painting. -
Clean dust:
Wipe the crate down thoroughly with a tack cloth or a damp rag to remove all sawdust. Any lingering dust will prevent the paint from adhering smoothly. -
Apply the base color:
Using a wide flat brush, paint the entire exterior and interior of the crate with your muted teal chalk paint. Work with the grain of the wood to minimize brush strokes. -
Paint a second coat:
Allow the first layer to dry completely (usually 30-60 minutes for chalk paint). Apply a second coat to ensure opaque, even coverage, watching for drips between the slats.
Step 2: Designing the Typography
-
Create the text zone:
Measure a rectangular area in the center of the side slats where your text will go. Use painter’s tape to mask off a rectangle, leaving a border of the teal base color visible around the edges of the slat. -
Paint the background panel:
Fill in this masked rectangle with a cream or tan acrylic paint. This creates a contrasting background that mimics an old label or painted sign. -
Peel and dry:
Carefully peel off the painter’s tape while the paint is still slightly tacky to get a clean edge. Let this cream panel dry fully before moving on. -
Transfer the lettering:
Print out your chosen vintage-style uppercase letters (like ‘A F O S E’ and ‘A Q Y C’) sized to fit the panel. Place carbon transfer paper over the cream rectangle, tape your printout on top, and trace the outline of the letters with a pencil.
Clean Lines Hack
When painting the cream rectangle, paint a thin layer of the base teal color over the tape edge first. This seals the tape so the cream paint won’t bleed underneath.
Step 3: Detailing & Borders
-
Fill the letters:
Using a small flat brush and navy blue acrylic paint, carefully fill in the traced letters. Work slowly near the edges to keep the serif font crisp. -
Add decorative dots:
Dip the non-brush end of a paintbrush into the navy paint to stamp a row of small, consistent dots along the top and bottom borders of the cream panel. -
Draft the corner borders:
Using a pencil, lightly sketch the vertical border designs on the corner posts and horizontal slat edges of the crate. The design in the image uses stylized floral or ribbon motifs. -
Paint the border design:
With a thin liner brush and the navy paint, hand-paint the border designs over the teal base. I like to stabilize my hand by resting my pinky finger on a dry part of the crate while doing this detail work. -
Create the frame lines:
Paint thick navy lines along the vertical edges of the crate corners to ‘frame’ the artwork, connecting your decorative motifs.
Level Up: Antique Wax
After the matte sealer dries, apply a dark antique wax with a lint-free cloth, focusing on corners and crevices, to deepen the color and add instant age.
Step 4: Finishing Touches
-
Distress the edges:
Once all paint is bone dry, take 220-grit sandpaper and lightly sand the edges of the crate and corners. Gently scuff the painted lettering to give it a worn, historic appearance. -
Clean again:
Wipe away the sanding dust one last time to prepare for sealing. -
Seal the project:
Apply a clear matte sealer over the entire crate. This protects your hand-painted typography and the chalk paint finish from scratches and moisture.
Now step back and admire how a simple storage box has become a conversation piece full of character
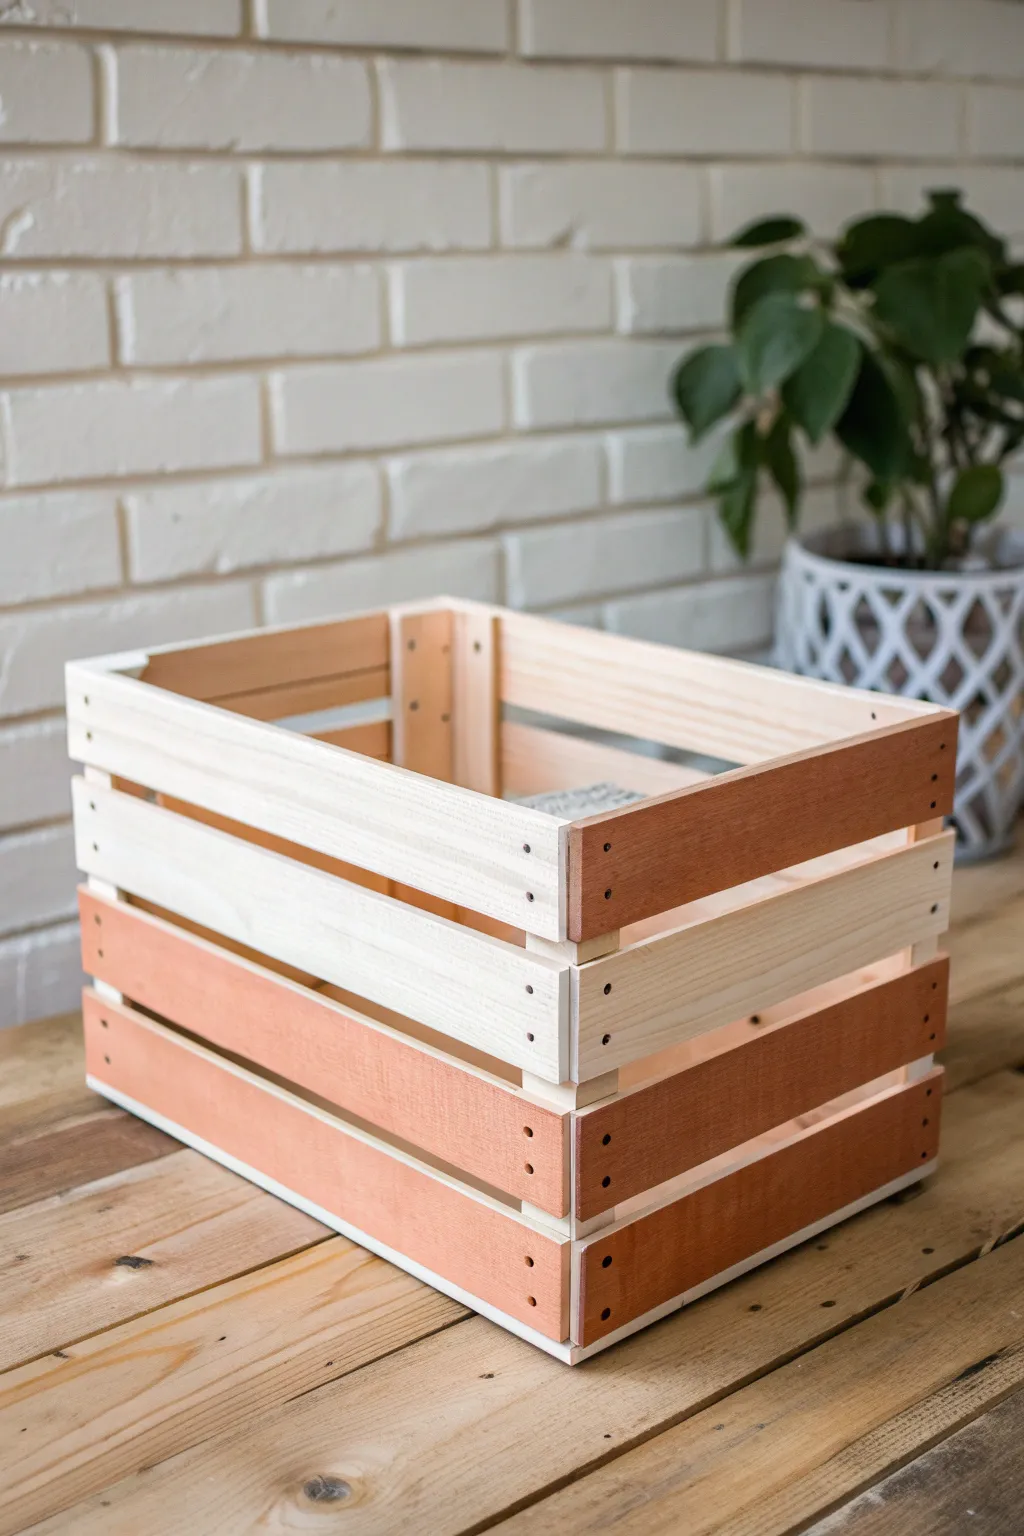
Handle Cutout Accents Painted in a Contrasting Color
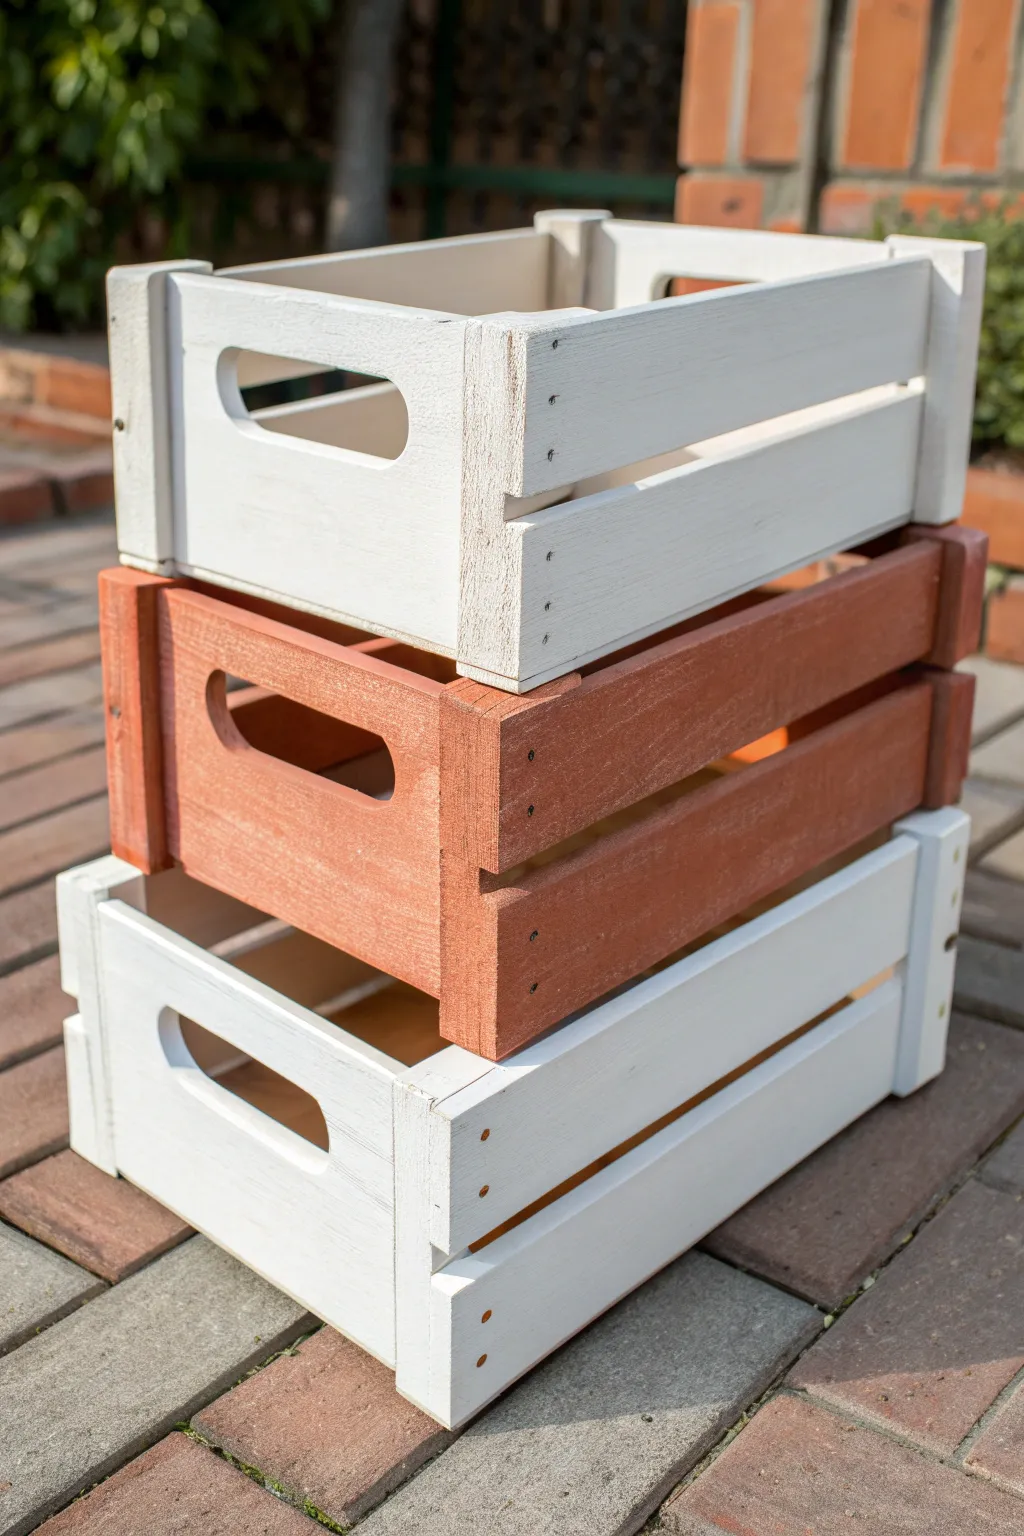
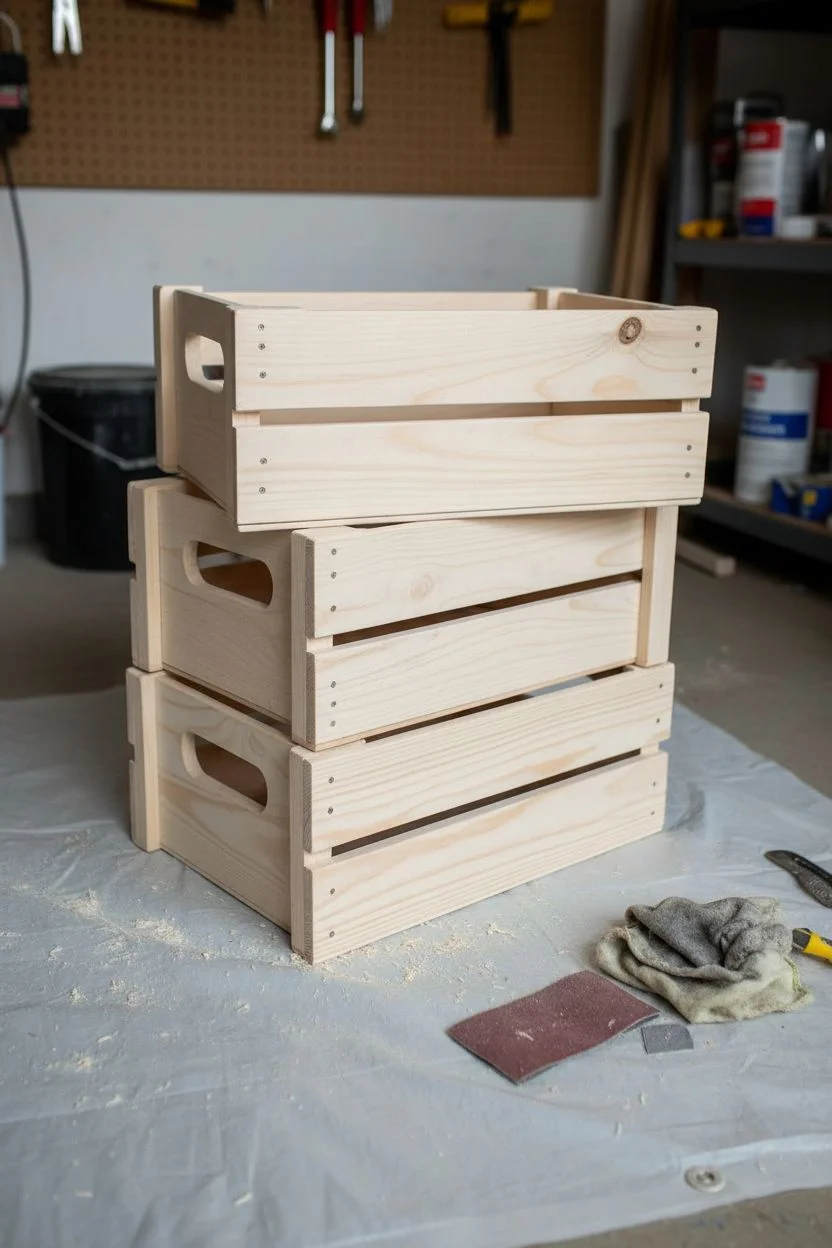
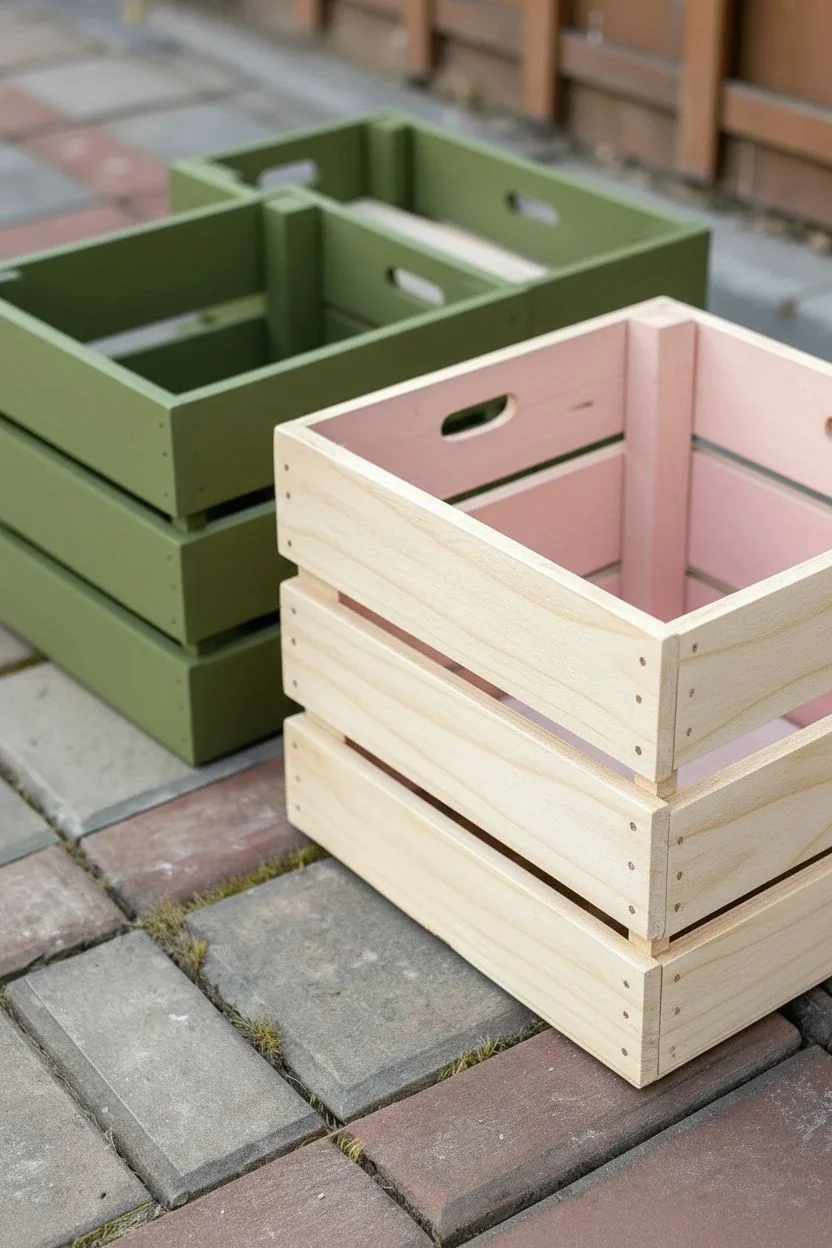
Transform plain wooden organizers into a stylish storage solution with this alternating color scheme. By pairing a crisp white wash with a warm chestnut stain, you create a cohesive yet visually interesting stack that highlights the natural wood grain.
Step-by-Step
Materials
- 3 Unfinished wooden crates (slatted style)
- White chalk paint or matte acrylic paint
- Chestnut or reddish-brown wood stain (water-based recommended)
- Sandpaper (120 and 220 grit)
- Wide flat paintbrushes (2 inch)
- Foam brushes or staining sponges
- Clean lint-free rags
- Drop cloth or newspapers
- Clear matte sealer (polyurethane or wax)
Step 1: Preparation
-
Inspect the Crates:
Check your raw wooden crates for any loose staples, splinters, or rough patches. -
Initial Sanding:
Use 120-grit sandpaper to smooth out the roughest areas, paying special attention to the handle cutouts where hands will go. -
Refine the Surface:
Follow up with 220-grit sandpaper over the entire exterior and interior surfaces to create a smooth base for the paint and stain to adhere to. -
Clean Up Dust:
Wipe down every crate thoroughly with a tack cloth or a slightly damp rag to remove all sawdust.
Bleed-Through Blues?
If knots in the wood turn yellow through the white paint, spot-prime those knots with a shellac-based primer before repainting that area.
Step 2: Painting the White Crates
-
Select Your Crates:
Choose two of the crates to be your white anchors for the top and bottom of the stack. -
Dilute the Paint:
Mix a small amount of water into your white chalk paint—about a 4:1 ratio. This helps the wood grain peek through slightly for a rustic look. -
Paint the Interiors:
Start by painting the inside slats and corners first. It’s much easier to reach these spots before the outside is wet. -
Paint the Exteriors:
Apply the white paint to the outside slats using long, horizontal strokes with your wide flat brush. -
Handle Detailing:
Carefully paint inside the handle cutouts. Don’t let paint pool in the corners here. -
Dry and Assess:
Let the white crates dry for about 30 minutes. If you want a more solid look, apply a second coat now; otherwise, one coat provides a nice whitewashed effect.
Smooth Operator
Sand lightly between coats of paint or sealer with a brown paper bag. It smooths the surface without removing any finish.
Step 3: Staining the Accent Crate
-
Apply Stain:
Dip a foam brush or rag into your chestnut stain and apply it to the third crate, starting with the interior slats. -
Wipe Excess:
After applying stain to a section, wait about 1-2 minutes and then wipe off the excess with a clean rag. I find this gives maximum control over the color depth. -
Stain the Exterior:
Repeat the process on the outside, ensuring you get stain into the gaps between the slats. -
Check for Drips:
Inspect the corners and bottom edges for any running stain and wipe it away immediately. -
Full Cure:
Allow the stained crate to dry completely, which usually takes longer than the paint—roughly 2 to 4 hours depending on humidity.
Step 4: Finishing Touches
-
Distress (Optional):
Use fine 220-grit sandpaper to lightly scuff the edges and corners of the white crates if you want a more vintage vibe. -
Seal the Wood:
Apply a clear matte sealer to all three crates to protect the finish and make dusting easier later. -
Final Assembly:
Once fully dry, stack them up with the stained crate sandwiched between the two white ones.
Now you have a custom storage tower that perfectly balances modern brightness with rustic warmth
Inside-Lined Look Using Painted Patterns to Mimic Fabric
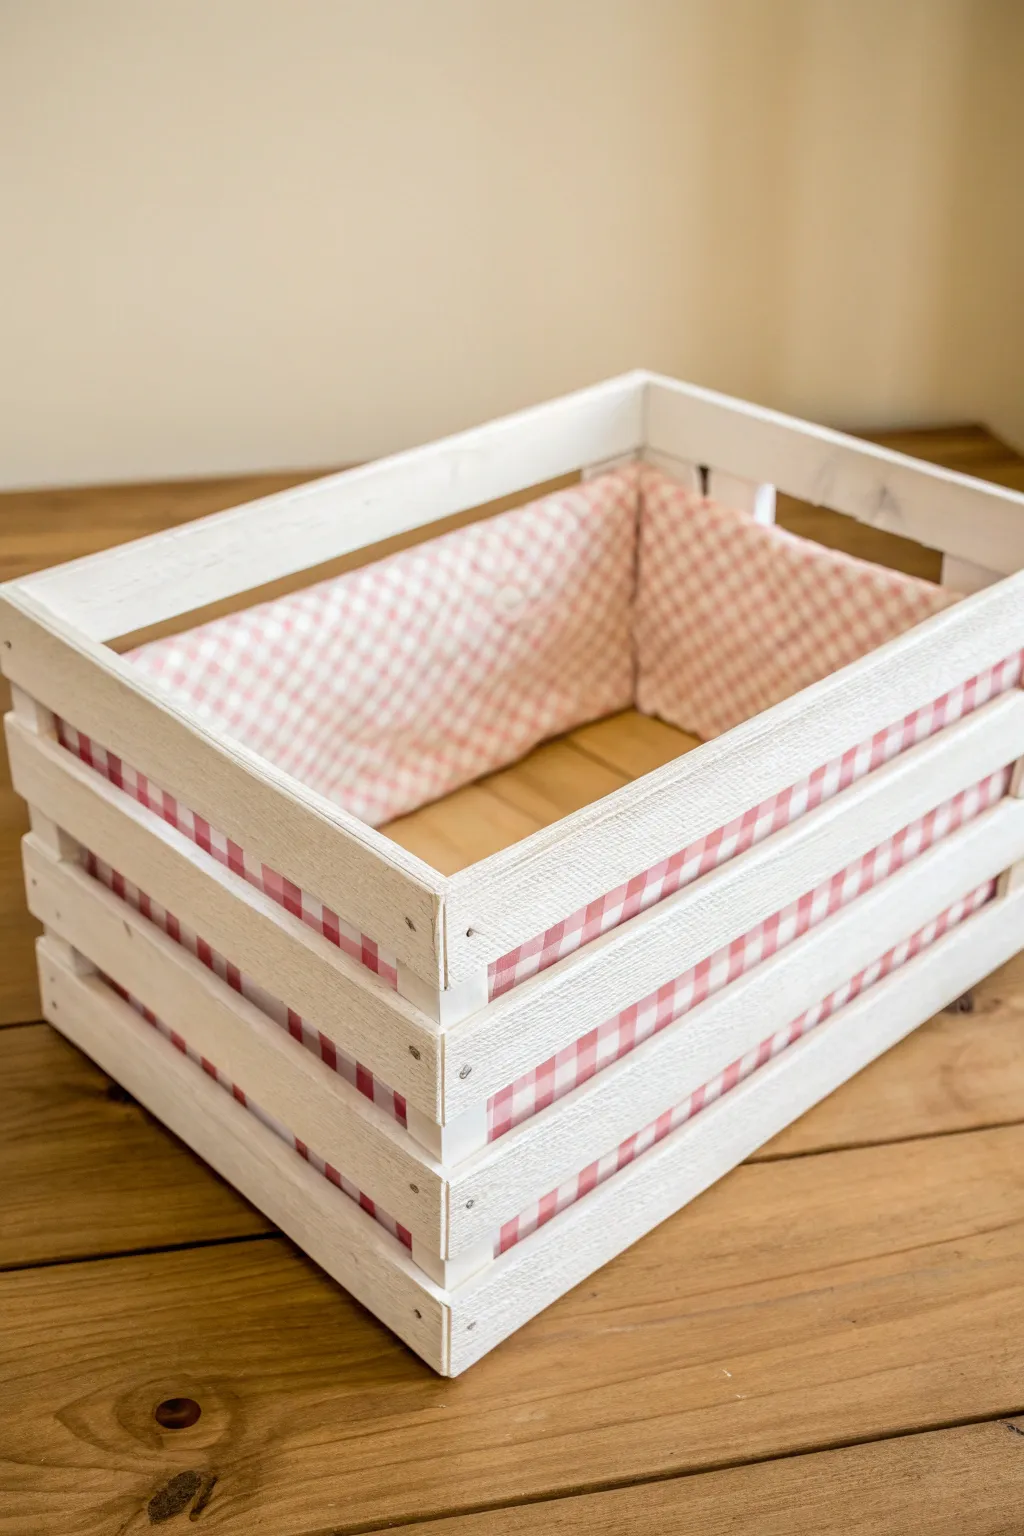
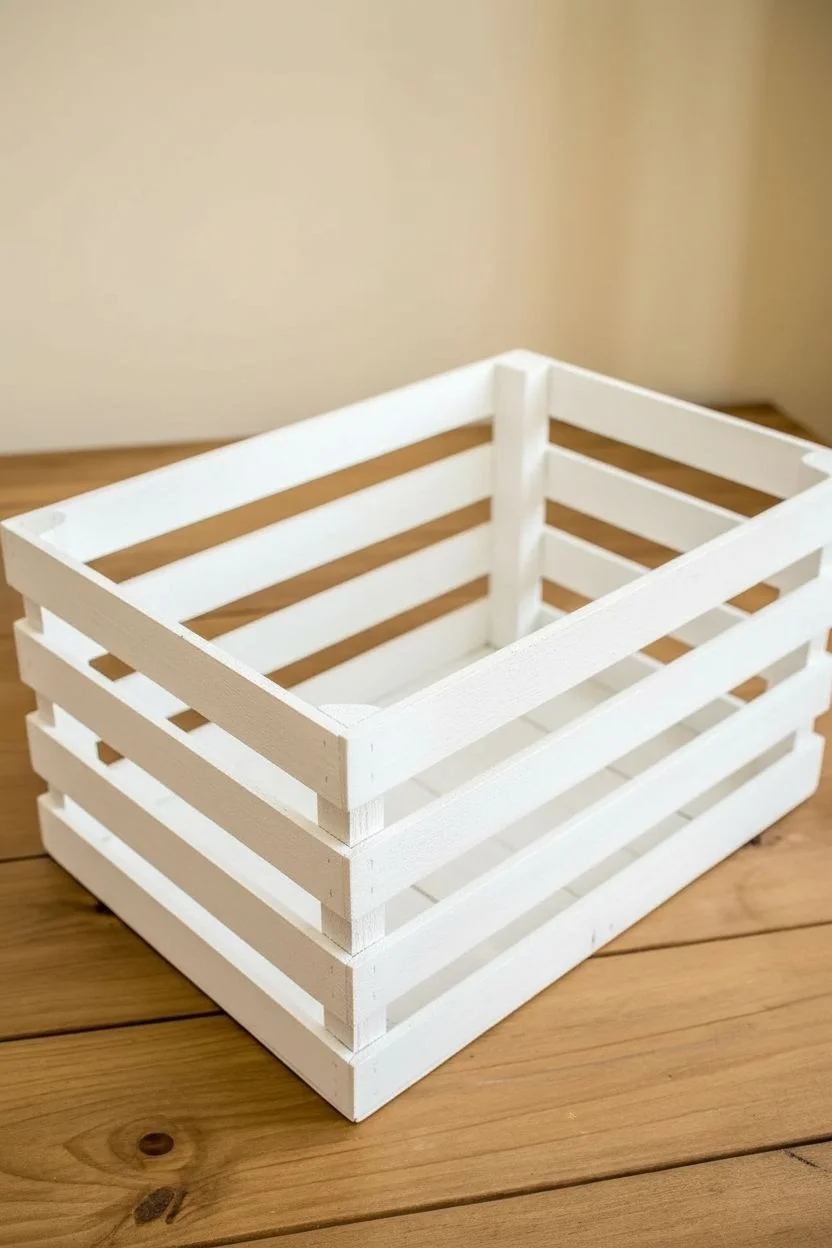
Transform a simple wooden crate into a charming storage piece by creating the illusion of a fabric liner with paint. This project features a soft whitewashed exterior and a clever internal gingham pattern that peeks through the slats for a cozy, cottage-core aesthetic.
Detailed Instructions
Materials
- Unfinished wooden crate
- White acrylic paint (matte or satin)
- Pink acrylic paint (or color of choice)
- Wide flat brush or chip brush
- Small flat artist brush (approx. 1/4 inch)
- Painter’s tape or masking tape (approx. 1/4 to 1/2 inch width)
- Sandpaper (medium grit)
- Mixing palette or paper plate
- Water cup and paper towels
- Ruler
Step 1: Preparation & Whitewashing
-
Prep the crate:
Begin by inspecting your wooden crate for any rough splinters or sharp edges. Give the entire surface, especially the edges of the slats, a quick rub with medium-grit sandpaper to smooth it out. Wipe away all the dust with a slightly damp cloth or tack cloth. -
Mix the whitewash:
Squeeze a generous amount of white acrylic paint onto your palette. To create a whitewash rather than a solid opaque coat, mix in a small amount of water—I aim for a consistency similar to heavy cream. -
Apply the base coat:
Using a wide flat brush or a chip brush, apply the white paint mixture to the entire exterior of the crate. Paint with the grain of the wood. -
Paint the slat edges:
Don’t forget the top edges and the sides of the slats. These areas will be visible and frame your internal design, so ensure they get a good coat of white. -
Base coat interior:
Paint the *inside* of the slats and the corner posts solid white. This will serve as the background color for your gingham pattern. Apply a second coat here if frame coverage is blotchy, as you want a clean white canvas. -
Let it dry:
Allow the crate to dry completely. Since we used a thinner whitewash, it should dry fairly quickly, usually within 20-30 minutes.
Wobbly Lines?
Don’t stress about perfect lines inside the creative slats. Small imperfections actually make the pattern look more like organic, wrinkled fabric rather than a rigid print.
Step 2: Creating the Gingham Pattern
-
Plan the grid:
The gingham look relies on a grid. You can tape this off, but because we are working *inside* the crate slats, painting freehand grids often works better for tight spaces. If you prefer precision, use a ruler and faintly mark vertical lines spaced 1/2 inch apart on the white interior slats. -
Mix the mid-tone pink:
For gingham, you need three shades: white (base), mid-tone pink (intersection single layers), and dark pink (intersection overlaps). Start by mixing your pink paint with a good amount of white to create a soft, mid-tone pastel pink. -
Paint vertical stripes:
Using your small flat brush, paint vertical stripes along your pencil marks inside the crate slats. Try to keep the width of the stripe equal to the width of the white space in between. -
Paint horizontal stripes:
Once the verticals are dry to the touch, paint horizontal stripes across the slats using the same mid-tone pink. This creates a basic grid. -
Mix the darker tone:
Now, add a little more original pink to your mix (or use straight pink) to get a shade slightly darker than your stripes. This represents where the ‘fabric’ threads would overlap. -
Fill the intersections:
Dip your small square brush into the darker pink. Carefully paint small squares only where the vertical and horizontal pink stripes cross each other. This step is what makes the pattern pop and look like woven fabric. -
Repeat on all sides:
Continue this process for all four interior sides of the crate. It can be a bit tricky reaching into the corners, so take your time and angle your brush as needed.
Step 3: Finishing Touches
-
Clean up edges:
If any pink paint accidentally got onto the top or front face of the exterior slats, touch it up with a bit of your original white paint. -
Distress the exterior:
For a rustic, farmhouse vibe, take your sandpaper and gently scuff the edges of the outer slats. This reveals a bit of the raw wood beneath the white paint. -
Check the corner posts:
Ensure the vertical corner posts inside the crate are clean white or painted to match the aesthetic. Leaving them white usually frames the ‘fabric’ panels nicely. -
Seal the project:
To protect your handiwork, especially if the crate will hold items that might scratch the paint, apply a coat of clear matte sealer over the entire project. -
Final dry:
Let the sealer cure according to the bottle instructions before placing items inside.
Pro Tip
Work on one interior side at a time and let it dry before rotating the crate. This prevents your hand from smudging wet paint as you reach in to work on the opposite side.
Now you have a charming storage crate that looks professionally lined without sewing a single stitch
Seasonal Crate Painting That Swaps Out With the Calendar
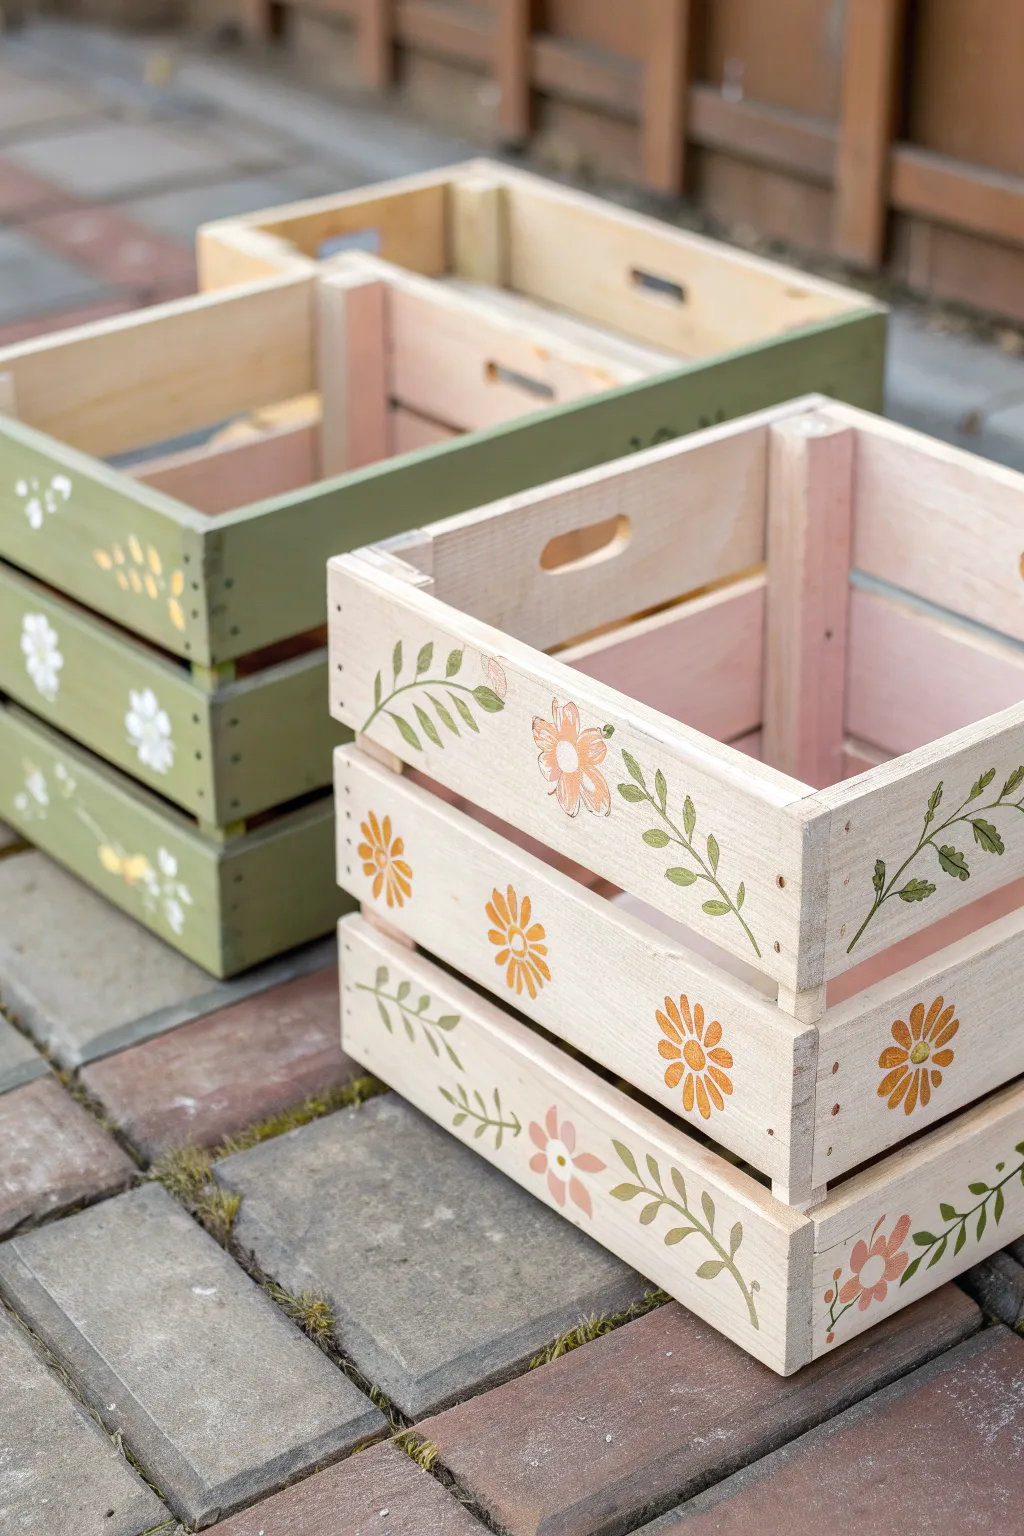
Transform plain wooden storage bins into charming decor pieces with a soft wash of color and delicate woodland motifs. These crates feature alternating floral and leafy designs that bring a fresh, hand-painted aesthetic to any room or garden space.
Step-by-Step Guide
Materials
- Unfinished wooden crates (slatted)
- Sandpaper (medium and fine grit)
- Tack cloth or slightly damp rag
- Chalk paint or acrylic paint (Cream, Olive Green, Pale Pink, White, Mustard Yellow)
- Flat paintbrush (2-inch)
- Small round detail brushes (sizes 2 and 4)
- Floral stencil (optional)
- Pencil
- Matte clear sealer (spray or brush-on)
- Paper plate or palette
- Water cup
Step 1: Preparation & Base Coat
-
Sand the surfaces:
Begin by giving the wooden crates a thorough sanding. Start with medium grit to remove any rough splinters, especially around the handle cutouts, and finish with fine grit for a smooth painting surface. -
Clean the dust:
Wipe down the entire crate with a tack cloth or a damp rag to remove all sawdust. If you skip this, your paint will feel gritty and won’t adhere properly. -
Mix a color wash:
For the cream crate, dilute a small amount of cream chalk paint with water (about a 1:1 ratio). We want a semi-transparent wash that lets some wood grain show through, rather than a solid, heavy coat. -
Apply the wash:
Using the 2-inch flat brush, apply the wash to the exterior slats. Work quickly and wipe off any excess with a rag if it looks too opaque. Paint the interior slats a pale pink for a hidden pop of color. -
Paint the green crate:
For the second crate, use your olive green paint. Depending on the brand, you might need two coats for solid coverage. Let the first coat dry completely before adding the second. -
Dry time is key:
Allow both crates to dry fully—wait at least one hour. If the wood feels rough after the paint dries, give it a very light pass with fine sandpaper.
Pro Tip: Stencil Hack
Not confident painting freehand? Use a adhesive stencil for the flowers, then hand-paint the connecting stems to make the design look custom and less rigid.
Step 2: Designing the White Crate
-
Plan the layout:
On the cream-washed crate, visualize an alternating pattern. One slat will have a vine, the next a flower, and so on. Lightly mark the center of each slat with a pencil if you need a guide. -
Paint the stems:
Using a small round brush and olive green paint, create sweeping, curved lines for stems. Vary the direction—some curving up, some down—to keep the look organic. -
Add the leaves:
Press down your brush and lift as you pull away to create teardrop-shaped leaves along the stems. Keep them loose and painterly. -
Create the flowers:
Dip a clean brush into mustard yellow or pale orange. Paint simple daisy shapes with elongated petals. Leave a tiny bit of space in the center of the petals. -
Detail the blooms:
Once the flower petals are dry, add a contrasting center dot in white or dark brown. Lightly outline some petals with a fine-tip pen or very thin brush strokes if you want a more illustrated look. -
Fill the gaps:
Look for empty spots on the slats. Add smaller buds or single floating leaves to balance the composition without overcrowding it.
Step 3: Designing the Green Crate
-
Switch the palette:
For the green crate in the background, use white for the flowers and a muted yellow for the leaves to create contrast against the dark base. -
Apply the pattern:
Repeat the same technique: curved stems, simple petal shapes, and alternating leaf patterns. The white paint may need two coats to stand out brightly against the olive background. -
Seal the work:
After all detail work has dried for at least 24 hours, apply a matte clear sealer. This protects the wood from moisture, especially if you plan to use these outdoors or for plant storage.
Level Up: Vintage Vibes
After the final paint job is dry, lightly sand the edges and corners of the crate to distress it, giving your project a weathered, farmhouse-antique appearance.
Now you have a set of personalized crates ready to organize your space with colorful charm
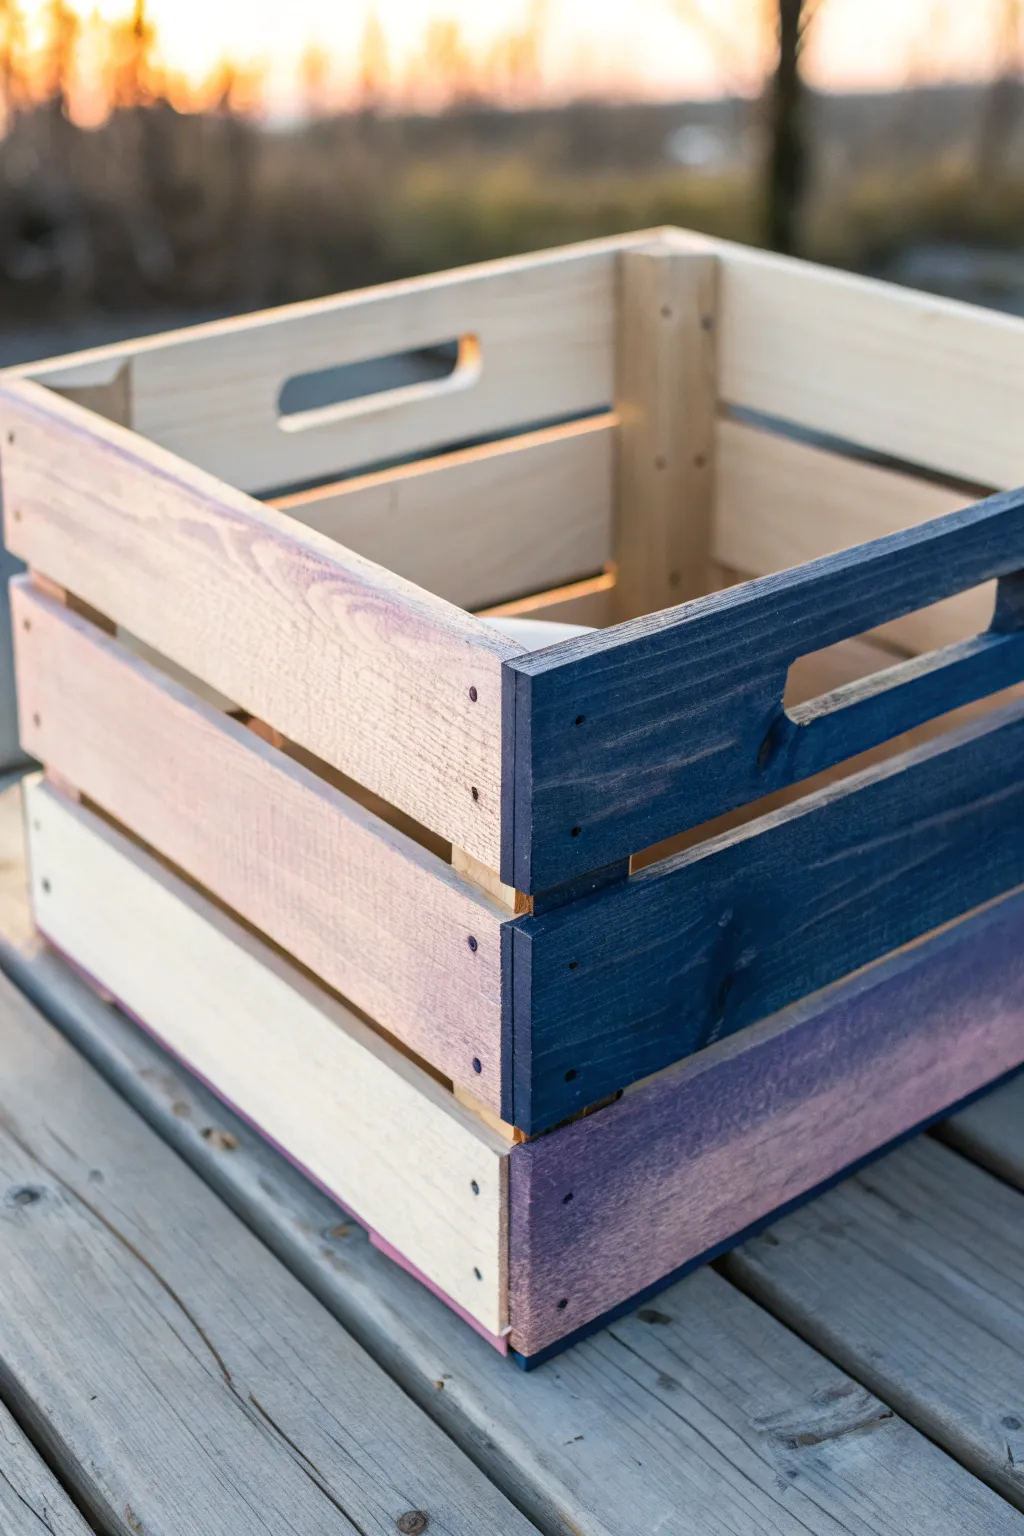
Ombre Fade Across the Wooden Crate Slats
Transform a plain wooden crate into a stylish storage piece with this unique take on an ombre fade. By treating each slat individually with different saturation levels of dye or stain, you create a striking geometric look where corners meet in beautiful contrast.
Step-by-Step
Materials
- Unfinished wooden crate (pine or similar)
- Sandpaper (120 and 220 grit)
- Water-based wood stain or diluted acrylic paint (Navy Blue)
- Water-based wood stain or diluted acrylic paint (Purple/Violet)
- Small plastic cups or containers for mixing
- Foam brushes or synthetic bristle brushes
- Clean rag or tack cloth
- Water for diluting
- Matte spray sealer (optional)
Step 1: Preparation
-
Inspect the crate:
Examine your wooden crate for any rough splinters or staples that stick out. -
Sand the surfaces:
Using 120-grit sandpaper, smooth down the exterior faces of the slats. Follow up with 220-grit for a polished finish that accepts stain evenly. -
Clean the dust:
Wipe the entire crate down thoroughly with a tack cloth or a slightly damp rag to remove all sanding dust. The wood needs to be perfectly clean for the dye to soak in properly. -
Plan your color map:
Decide which face will be the ‘dark’ side and which will be the ‘light’ or ‘fading’ side. In the example, the side facing right is primarily deep navy blue, while the left-facing side fades from bare wood to light blush.
Tape for Crisp Lines
For perfectly sharp corners where different colors meet, run a strip of painter’s tape vertically along the corner edge of the adjacent side.
Step 2: Mixing the Stains
-
Prepare the navy wash:
Pour a small amount of navy paint or stain into a cup. If using acrylic paint, dilute it with water until it has a milky consistency. This allows the wood grain to show through. -
create the purple blend:
In a second cup, mix a small amount of purple stain. I like to keep this one slightly more translucent than the navy to create that bottom-slat accent. -
Mix a blush wash:
In a third cup, create a very watery mixture using just a drop of the purple/red pigment. This will be for the faintest transitional slats.
Step 3: Painting the Dark Side
-
Paint the top slat:
On the side designated as the ‘dark’ side, apply the full-strength navy wash to the top slat. Brush specifically up to the corner joint, ensuring a crisp line where the slats meet. -
Paint the middle slat:
Apply the same navy wash to the middle slat on this side. Ensure you get inside the handle cutout if your crate has one. -
Wipe excess:
After about 30 seconds, lightly wipe the slats with a rag to remove excess liquid and reveal the grain structure. -
Apply the purple accent:
On the bottom slat of this same side, switch to your purple wash. This creates a subtle color shift at the base.
Use Fabric Dye
Swap paint for liquid fabric dye. It penetrates cheap pine wonderfully and offers vibrant, transparent colors that highlight grain patterns.
Step 4: Painting the Light Side
-
Leave the top natural:
On the adjacent ‘light’ side, leave the top slat completely unpainted. The contrast between this raw wood and the dark navy on the adjoining face is what makes this design pop. -
Apply the blush fade:
Paint the middle slat of the light side with your very watery blush mixture. It should look like a faint whisper of color compared to the dark side. -
Finish with light wood tone:
For the bottom slat on the light side, leave it mostly natural or apply an incredibly dilute wash to match the top slat. This anchors the ombre effect. -
Refine the corners:
Check the corner joints where the dark and light sides meet. If any navy bled onto the raw wood side, gently sand it away once dry.
Step 5: Finishing Touches
-
Dry completely:
Allow the crate to dry for at least 2-4 hours. The colors may lighten slightly as the water evaporates. -
Seal the wood:
To protect the raw wood sections from yellowing or staining over time, apply a light coat of clear matte spray sealer over the entire exterior.
Fill your new crate with blankets or books to show off that beautiful geometric contrast
Abstract Brushstroke Crate That Looks Like a Mini Canvas
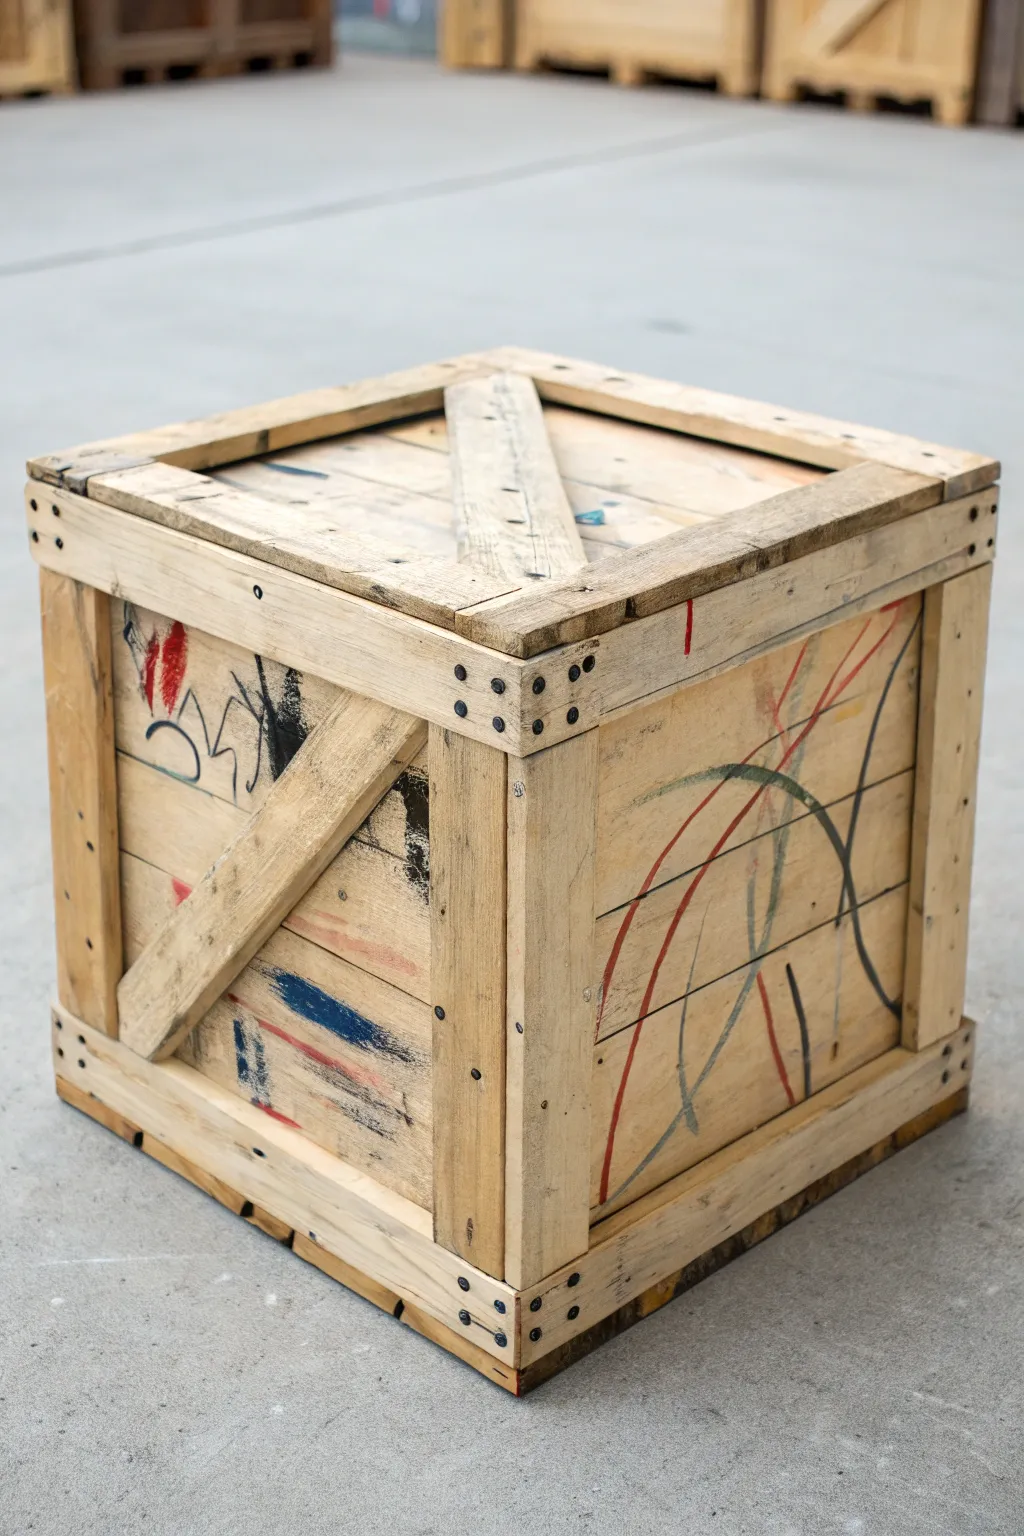
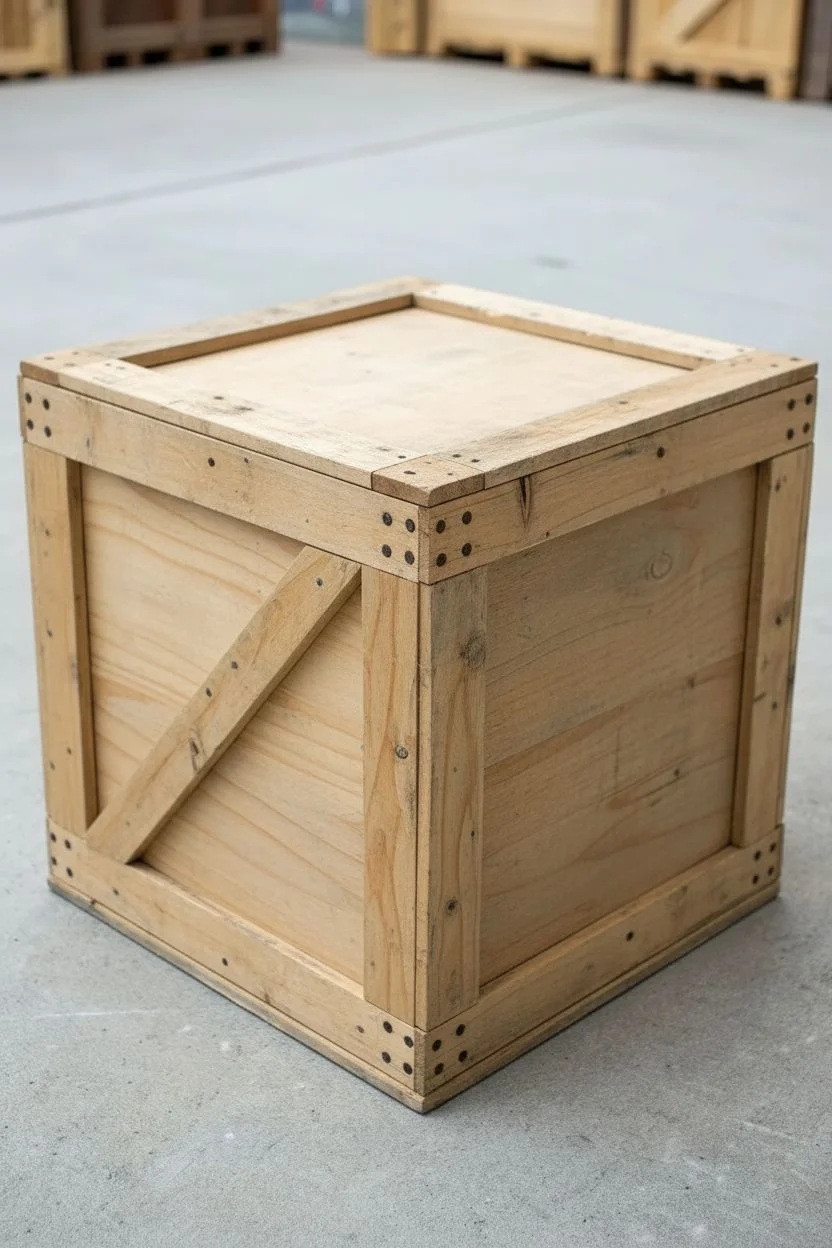
Transform a rough wooden shipping crate into a piece of gritty, modern decor by treating the wood surfaces like a blank canvas. This project embraces imperfection, using freeform scrawls and chaotic brushstrokes to create an edgy, industrial-chic storage solution.
Step-by-Step Guide
Materials
- Large wooden shipping crate (rough, unfinished)
- Sandpaper (medium grit, 100-120)
- Acrylic paints (black, deep red, navy blue, forest green)
- Assorted brushes (flat 1-inch, round detail brush, stiff bristle brush)
- Graphite pencil or charcoal stick
- Drop cloth or newspapers
- Matte clear sealant spray (optional)
Step 1: Preparation
-
Clean the surface:
Before painting, ensure your crate is free of loose dirt and sawdust. A quick wipedown with a dry cloth or a stiff brush is usually sufficient. -
Light sanding:
Since we want to maintain the raw, industrial look, don’t sand it perfectly smooth. Just knock down any dangerous splinters on the edges and corners with 100-grit sandpaper so it’s safe to handle. -
Setup:
Place your crate on a drop cloth. Orient it so you can easily access all sides, as this design wraps around the corners.
Loose Wrist Technique
Hold your paintbrush at the very end of the handle, far from the bristles. This reduces control and forces looser, more energetic strokes that look authentic.
Step 2: Creating the Graffiti Base
-
Initial sketching:
Take a graphite pencil or charcoal stick and loosely scribble on the side panels. Don’t overthink this; simple loops, squiggles, and meaningless gestures work best to build a chaotic foundation. -
Black gestural lines:
Load a round detailing brush with black acrylic paint. Enhance some of your pencil marks with quick, confident strokes. Vary the pressure to create lines that go from thin to thick unpredictably. -
Adding texture:
While the black is wet, you can smudge a few lines with your finger or a dry rag to make them look weathered and worn into the wood grain. -
The diagonal brace:
Focus some heavy black scribbles near the intersection where the diagonal wooden brace meets the uprights. This creates visual weight and shadows in the corners.
Step 3: Adding Color Accents
-
Red bursts:
Dip a stiff bristle brush into deep red paint. Wipe most of it off so the brush is nearly dry. Apply jagged, vertical strokes on the upper left panel, allowing the brush texture to show through. -
Blue dry brushing:
Switch to navy blue paint. On the lower left panel, drag a flat brush horizontally across the wood grain. The paint should catch only on the high points of the wood texture. -
Green curves:
I like to introduce a contrasting shape here. Use a watered-down forest green to paint large, sweeping arches on the right-hand panel. Let these lines overlap your previous black marks. -
Layering lines:
Go back in with red paint and a thin brush. Paint long, sweeping lines that mimic the curve of the green arches but intersect them, creating a chaotic web of movement. -
Top lid accents:
Don’t forget the top. Add small dabs of blue and faint black smudges near the center diagonal plank to tie the design together.
Stencil Stamping
Use actual shipping stencils (like ‘fragile’ or arrows) and spray paint them in faded black over your artwork to enhance the industrial cargo vibe.
Step 4: Distressing and Finishing
-
Sanding back:
Once the paint is fully dry to the touch, take your sandpaper and lightly scuff over the painted areas. This makes the ‘graffiti’ look like it has been there for years. -
Refining the chaos:
Step back and look at the composition. If an area feels too empty, add a few more rapid black squiggles or dots to balance the visual weight. -
Sealing the art:
If you plan to use this merely for display, you can skip this, but for functional storage, apply a light coat of matte clear sealant spray to protect the paint without adding shine. -
Hardware check:
As a final touch, ensure any nails or staples inherent to the crate’s structure are secure, tapping them in with a hammer if they are protruding.
Now you have a unique conversation piece that blends raw industrial structure with expressive abstract art.
Stamped Pattern Repeats for a Handmade Printmaking Feel

Transform a plain wooden crate into stylish storage with this block-print inspired design. By combining geometric patterns with organic floral motifs on raw wood, you achieve a warm, rustic look that feels custom-made rather than mass-produced.
How-To Guide
Materials
- Unfinished wooden crate (slatted sides)
- Sandpaper (120 and 220 grit)
- White or cream chalk paint
- Medium brown acrylic paint (warm tone like Sienna or Umber)
- Geometric diamond pattern stencil
- Floral or mandala circular stamp (or stencil)
- Small floral/vine pattern stencil (for vertical posts)
- Stencil brushes (flat-topped)
- Painter’s tape
- Matte clear sealer spray
Step 1: Preparation and Base Layer
-
Sand the Crate:
Begin by giving the entire crate a thorough sanding. Use 120-grit sandpaper first to remove rough splinters, especially around the handle holes, then follow up with 220-grit for a smooth finish suitable for painting. -
Dust Clean:
Wipe away all sanding dust with a slightly damp cloth or tack cloth. Dust trapped under the paint will ruin the crispness of your stencils. -
Whitewash the Middle Slat:
For the middle horizontal slat, apply a watered-down coat of white chalk paint. Mix the paint with about 20% water to create a wash that allows some wood grain to peek through. -
Paint the Bottom Slat:
Apply a solid coat of white chalk paint to the lowest horizontal slat on the long side. This creates a bright background for the contrasting stamped pattern later. -
Whitewash Vertical Posts:
Apply the same whitewash mixture to the vertical corner posts of the crate. Feather the edges so it looks naturally weathered. -
Dry Completely:
Allow all base coats to dry fully. Chalk paint dries quickly, but give it at least 30-45 minutes to be safe.
Stamp Precision Trick
If you don’t have stamps, use a stencil and a makeup sponge. The dense foam applies paint much more smoothly than a brush for those intricate circular mandala designs.
Step 2: Applying the Main Patterns
-
Tape the Top Slat:
Position your geometric diamond stencil on the top raw wood slat. Use painter’s tape to secure it firmly and mask off the slat below so you don’t accidentally get paint on it. -
Stencil the Diamond Pattern:
Using a dry flat-topped brush and the white chalk paint, stipple the paint over the diamond stencil. Keep your brush very dry to prevent bleeding under the stencil edges. -
Fill the Diamonds:
Once the white outline is dry, carefully reposition the stencil or use a fine detail brush to fill the centers of the diamonds with the warm brown acrylic paint. This creates that lovely two-tone ‘inlay’ look. -
Stamp the Side Panel:
Move to the short side of the crate. On the slat below the handle, use a circular floral or wagon-wheel stamp. Dip it lightly in the brown paint, blot the excess on a paper towel, and press firmly in a repeating row. -
Stencil Vertical Posts:
On the whitewashed vertical corner posts, use the small floral or vine stencil. With brown paint and a very light touch, add the pattern vertically to frame the crate’s faces.
Add Functional Flair
Screw small casters onto the bottom corners of the crate. It turns static storage into a rolling bin perfect for firewood, toys, or blankets.
Step 3: Detailed Embellishments
-
Decorate the Bottom White Slat:
Return to the long side with the solid white bottom slat. Using the brown paint, stencil or stamp delicate floral motifs across it. Since the background is white, these brown details will pop beautifully. -
Add Partial Patterns:
On the middle whitewashed slat, add just a partial geometric detail or a half-height stencil border. I like to keep this area subtler to balance the heavier patterns above and below. -
Distress the Paint:
Once all patterns are bone dry, take a piece of 220-grit sandpaper and lightly scuff over the painted designs. This is crucial for that ‘worn-in’ farmhouse aesthetic. -
Focus on Edges:
Sand a bit more aggressively on the edges of the slats and corners to simulate natural wear and tear. -
Seal the Wood:
Take the crate to a well-ventilated area and apply a light coat of matte clear sealer. This protects the raw wood from yellowing and keeps the paint from chipping further.
Fill your new crate with blankets or books and enjoy the custom charm it adds to your room
Painted Faux Wood Inlay Illusion for a High-End Look
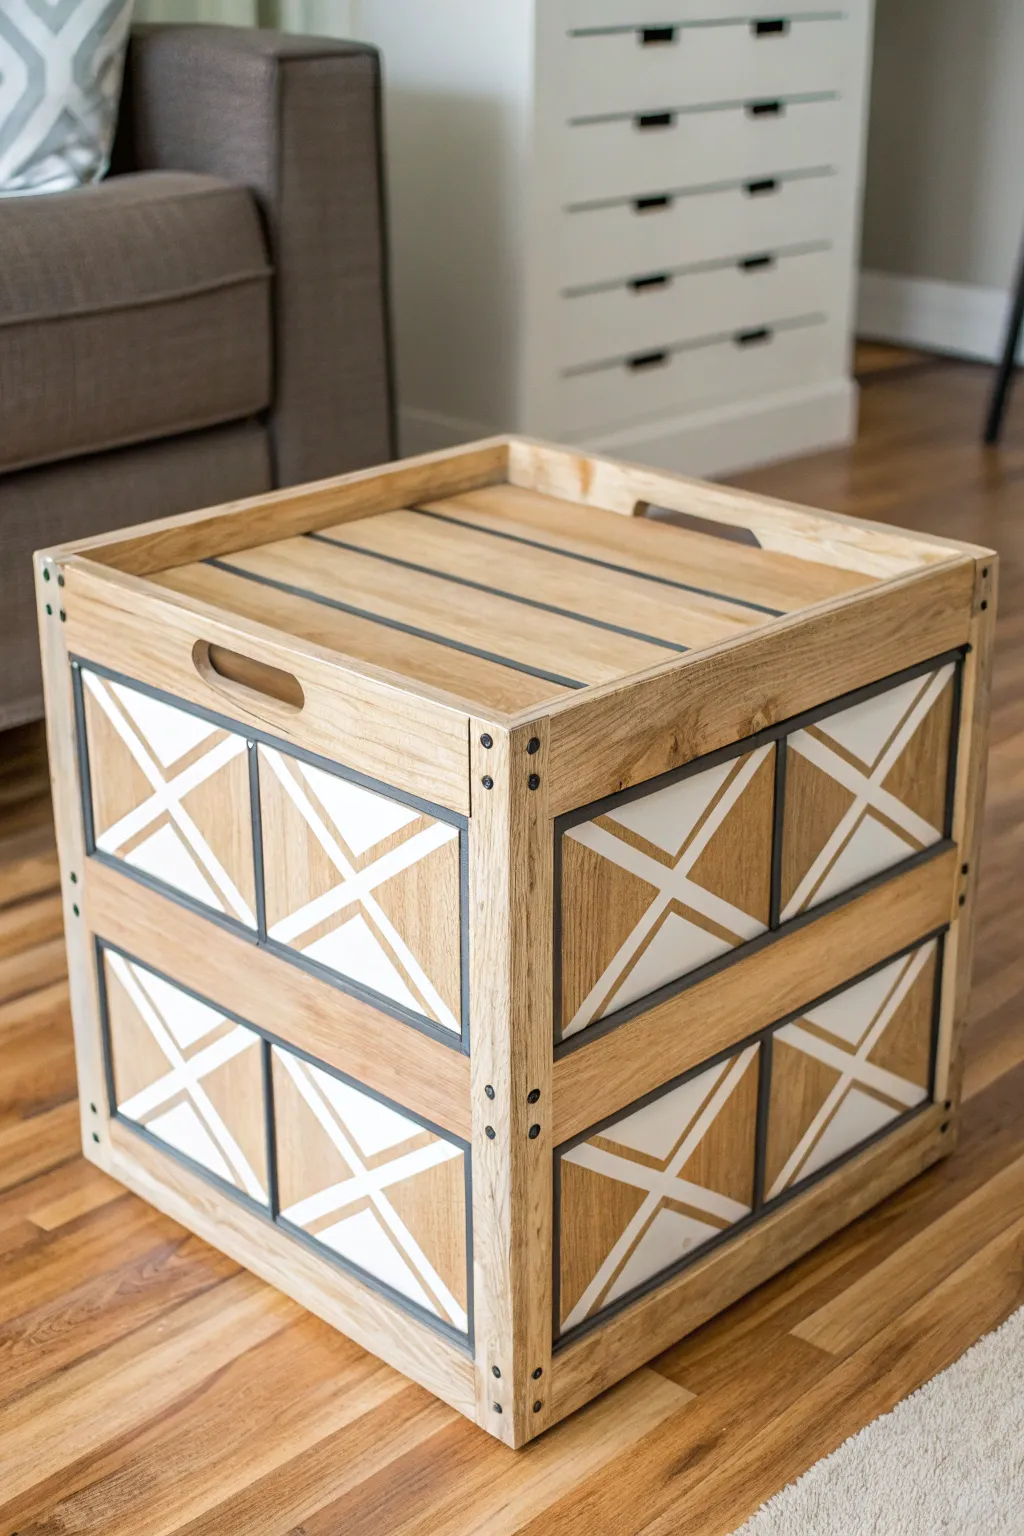
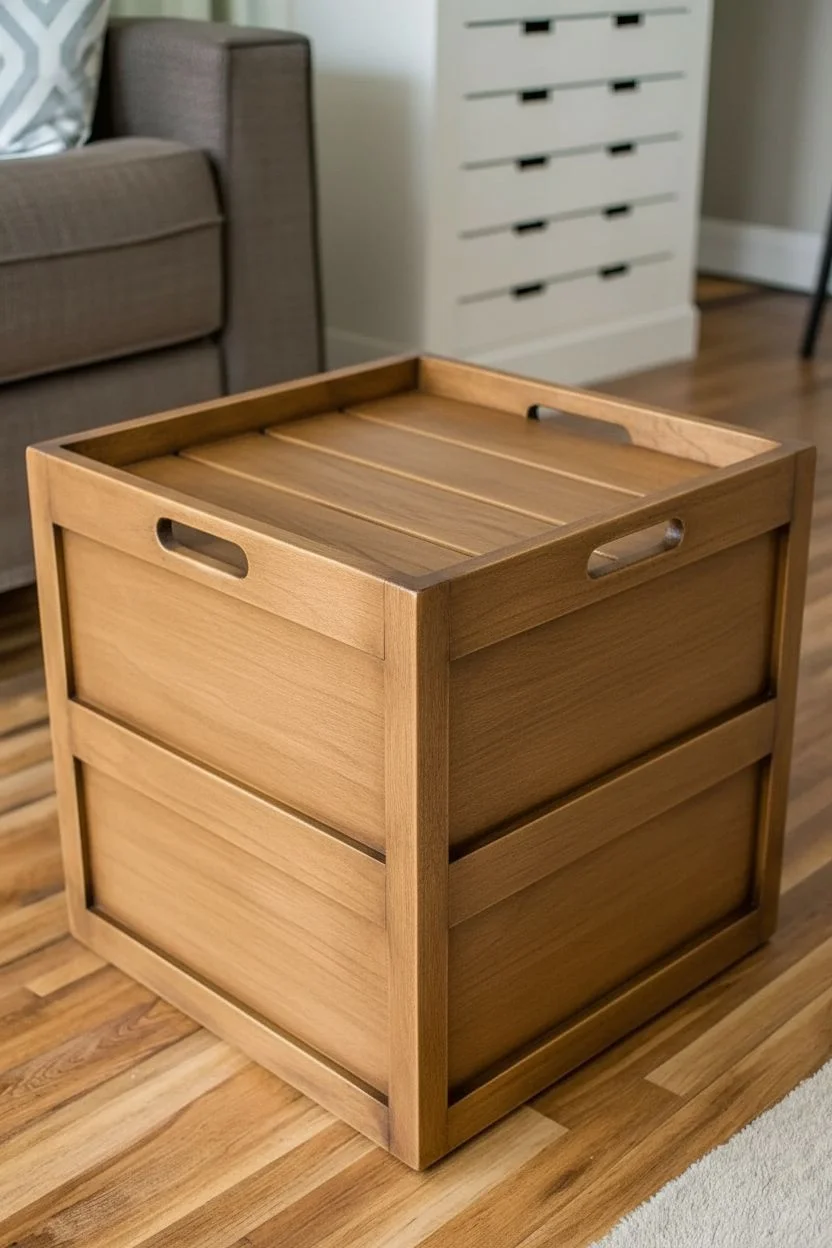
Transform a plain wooden crate into a sophisticated storage piece that mimics the look of high-end marquetry. By combining strategic staining with crisp white paint lines, youll achieve a geometric “inlay” effect that elevates basic pine into furniture-quality decor.
Step-by-Step Tutorial
Materials
- Unfinished wooden crate with lid (or crate + tray)
- Wood stain (medium oak or walnut tone)
- White acrylic paint or chalk paint
- Dark grey acrylic paint (or very dark stain)
- Painter’s tape (various widths, including fine line tape)
- Foam brushes
- Small flat artist brush
- Ruler and pencil
- Sandpaper (220 grit)
- Matte clear coat sealer
- Hardware (optional: black upholstery tacks)
Step 1: Preparation and Base Stain
-
Sand the surface:
Begin by giving the entire crate a light sanding with 220-grit sandpaper along the grain. This removes splintery edges and ensures the stain absorbs evenly across the panels. -
Clean the wood:
Wipe away all sanding dust thoroughly using a tack cloth or a slightly damp rag. Any leftover dust will create gritty lumps in your finish later. -
Apply the stain:
Using a foam brush or rag, apply your chosen wood stain to the entire crate, including the inside and the lid. Work in sections, wiping off excess stain after a minute or two to prevent blotchiness. -
Let it dry completely:
Allow the stain to dry for the full time recommended on the can, usually overnight. If the wood feels rough after staining, do a very gentle scuff sand with high-grit paper.
Bleeding Lines?
If paint bleeds under the tape, wait for it to dry fully. Then, gently scrape the excess away with an X-Acto knife or touch it up with a tiny brush and the original stain color.
Step 2: Creating the Grid Framework
-
Measure the panels:
On the side panels of the crate, identify the recessed areas. Measure these spaces to create an even grid pattern, essentially dividing the large rectangular side into smaller square sections. -
Paint the divider lines:
Using the dark grey paint and a small flat brush, paint straight lines to define your grid (the ‘frames’ around the faux inlay squares). I find that using a dark grey rather than black looks softer and more like metal or aged wood. -
Outline the inner panels:
Paint a thin border of this dark grey around the inner edge of each recessed panel section to create depth and separation for the design.
Step 3: Painting the Faux Inlay Design
-
Mark the centers:
In each of the square sections you’ve created, use a ruler to lightly mark the exact center point with a pencil. -
Tape the ‘X’ pattern:
Apply painter’s tape to mask off the wood areas, leaving an exposed ‘X’ shape in each square. The goal is to paint the white lines, so you are covering everything that should remain stained wood. -
Seal the tape edges:
Press the tape edges down firmly with a credit card or your fingernail. To get super crisp lines, brush a tiny amount of the base stain or clear matte medium along the tape edge first to seal it. -
Apply white paint:
Paint the exposed ‘X’ areas with white acrylic paint. You may need two thin coats for opaque coverage, letting the first dry before applying the second. -
Remove tape carefully:
Peel off the tape while the final coat of paint is still slightly tacky. Pull at a 45-degree angle away from the painted line to ensure a sharp edge. -
Detail the lid:
Repeat a simplified version of this process on the lid. Tape off linear stripes instead of X’s, painting them dark grey to mimic metal banding or gaps between planks.
Level Up
Add caster wheels to the bottom of the crate to turn it into a movable toy box or rolling storage ottoman for a living room.
Step 4: Finishing Touches
-
Add decorative hardware:
If desired, pre-drill tiny holes and gently tap black upholstery tacks or small decorative screws into the corners of the main vertical supports. This adds an industrial storage look. -
Touch up any bleeds:
Inspect your white lines. If any paint bled under the tape, use a small detail brush dipped in your original stain color to carefully correct the edges. -
Seal the project:
Protect your hard work by applying a clear matte sealer over the entire crate. This protects the painted inlay design from scratching and makes the crate easy to dust.
Now you have a custom storage piece that looks professionally crafted and hides clutter beautifully.


Have a question or want to share your own experience? I'd love to hear from you in the comments below!