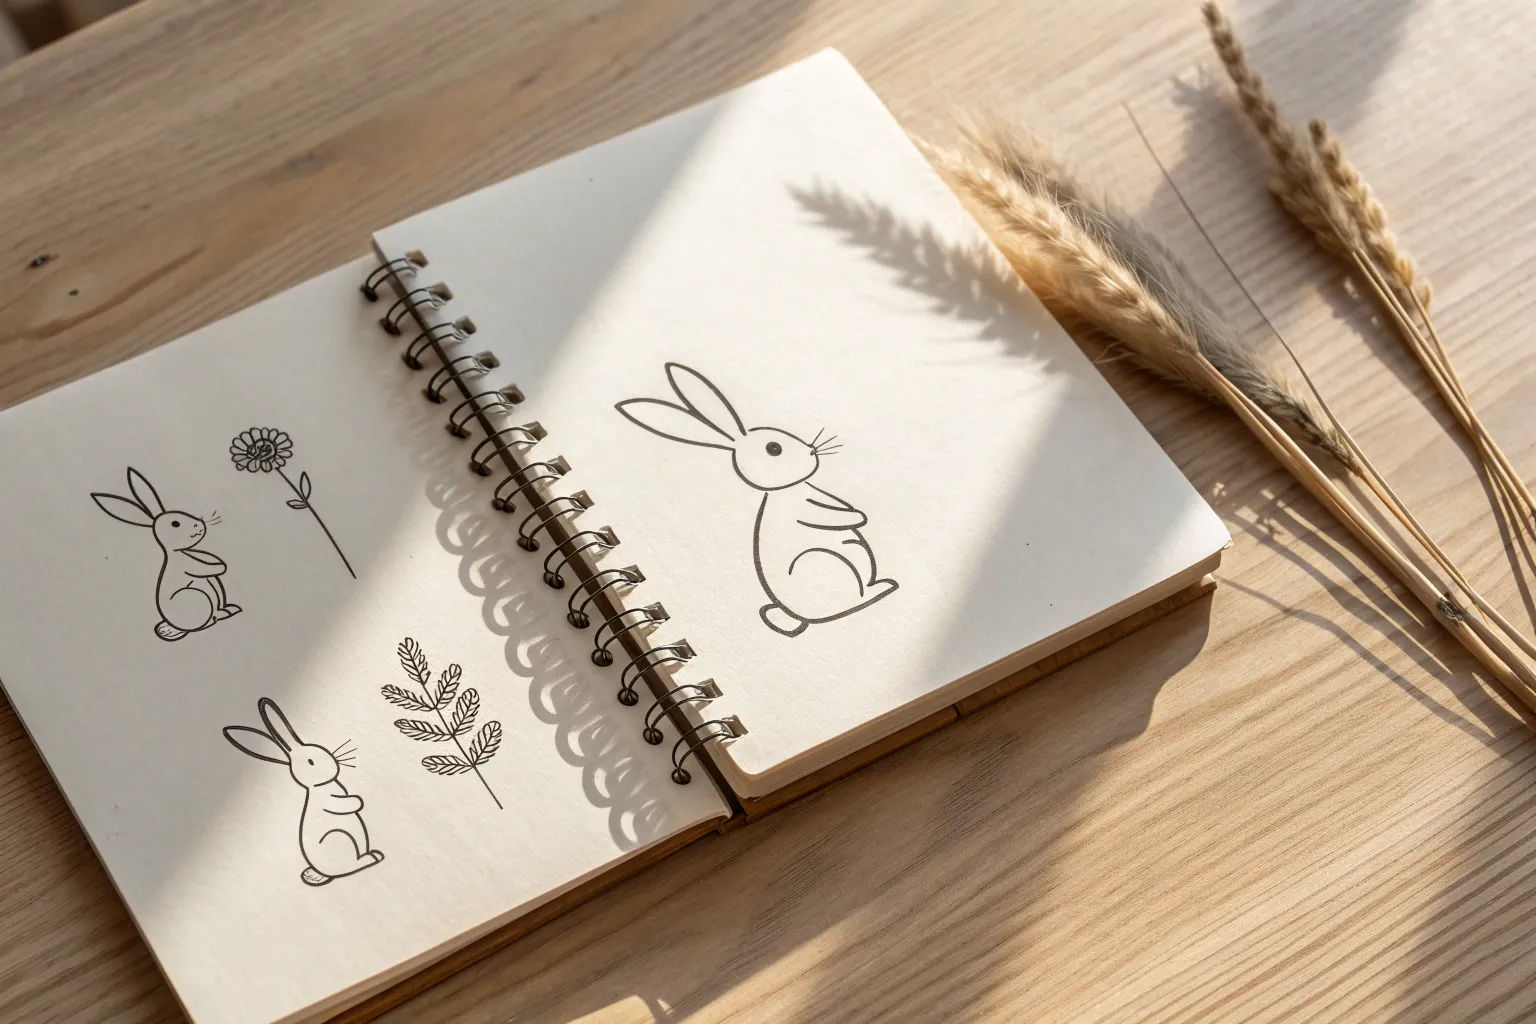
When I want a quick, feel-good sketch session, I reach for simple Easter drawings because they’re basically built from circles, ovals, and a few happy lines. Here are my favorite beginner-friendly Easter drawing ideas—starting with the classics everyone expects, then sliding into some extra-playful twists.
Classic Easter Egg With Easy Stripe Patterns
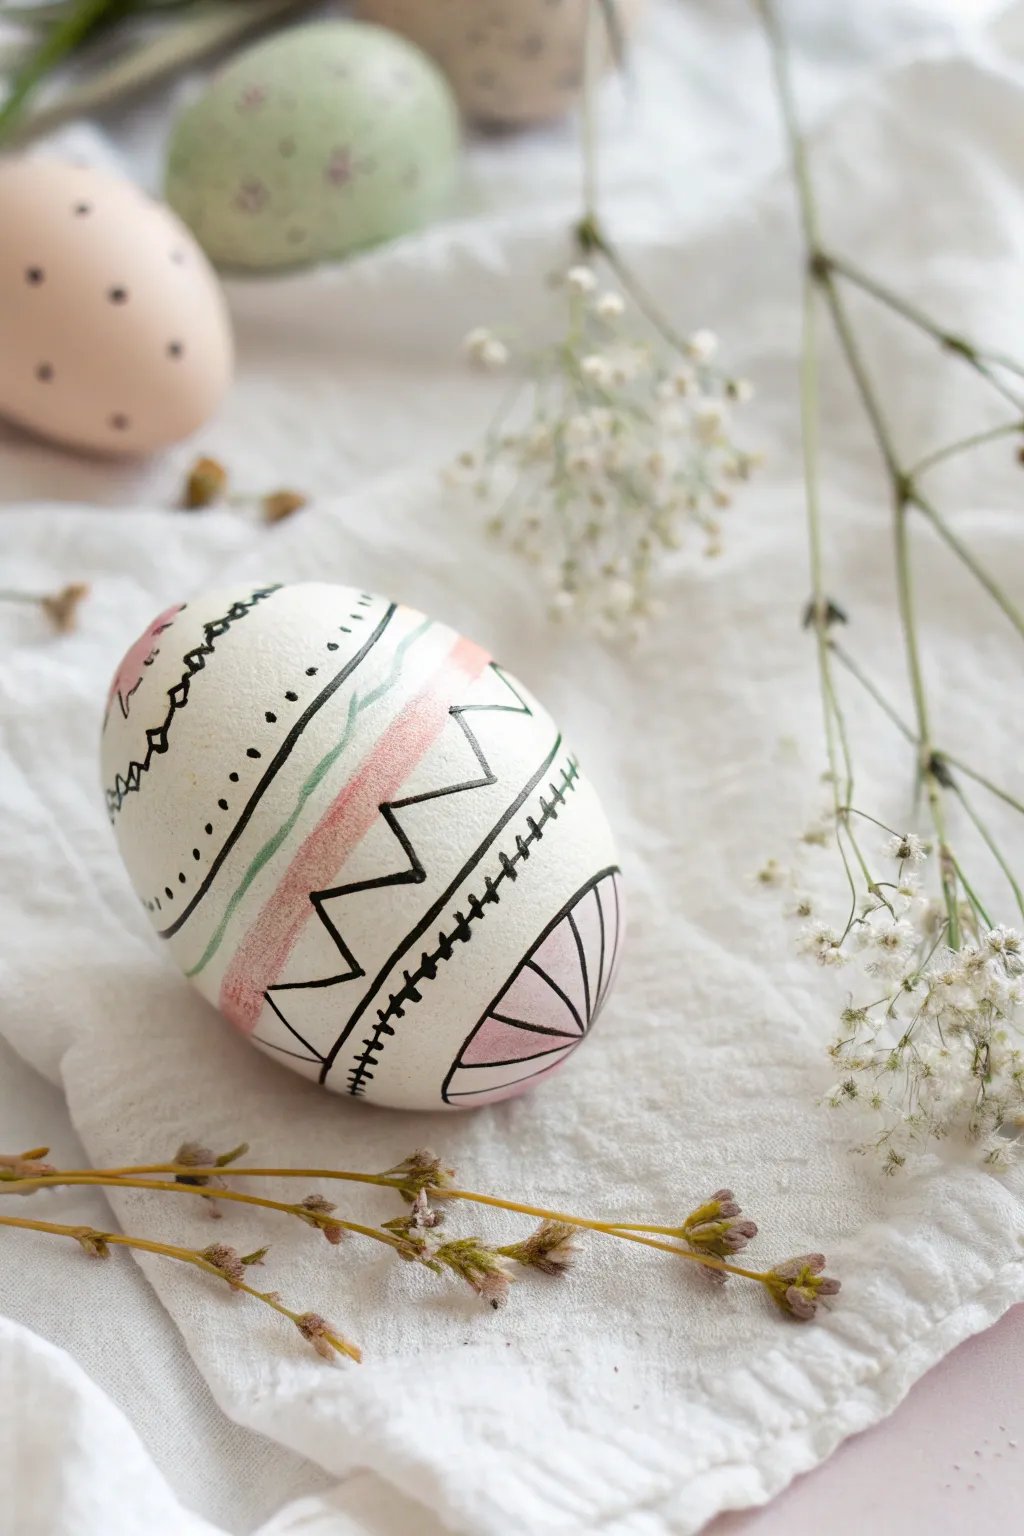
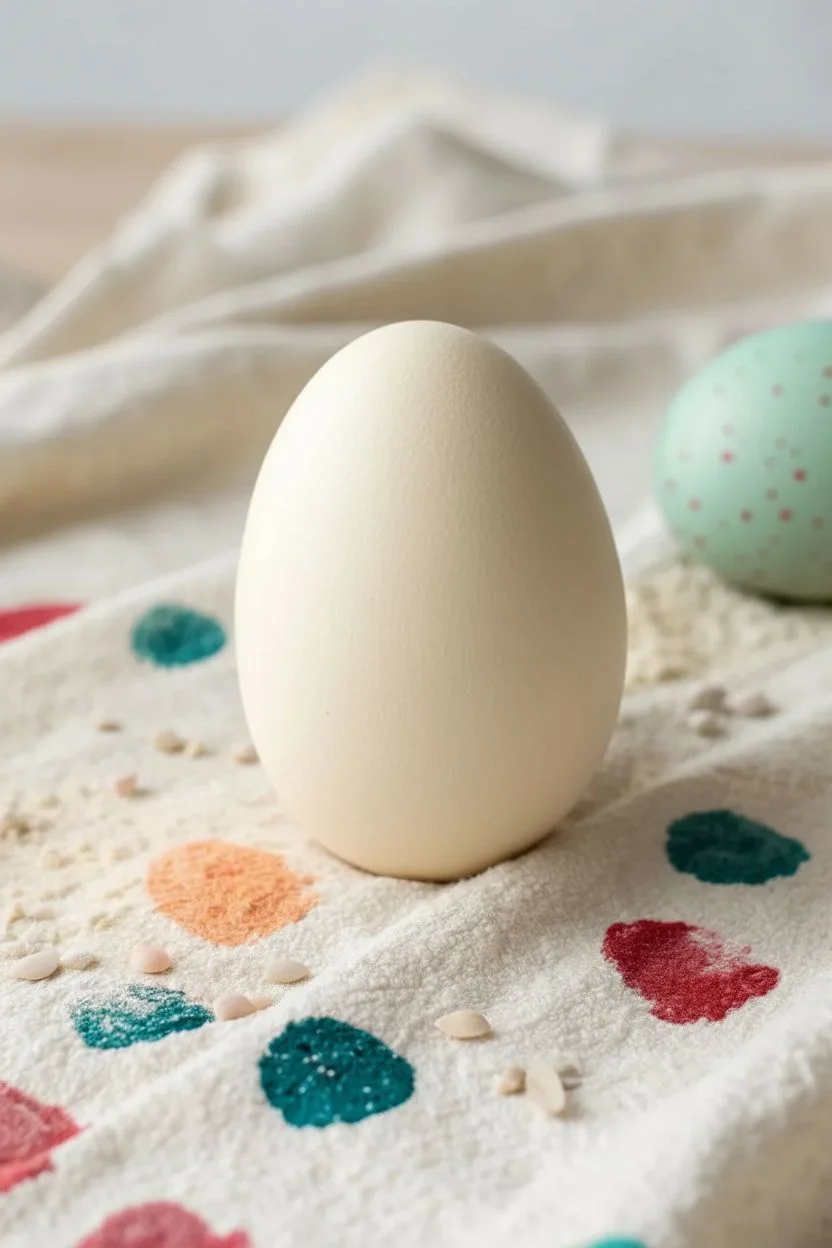
This minimalist yet striking design combines geometric precision with soft pastel accents for a modern Easter look. The mix of hand-drawn black ink details and gentle washes of color creates a beautiful textured effect that feels both artistic and approachable.
Step-by-Step
Materials
- White egg (hard-boiled, blown out, or ceramic)
- Fine-point black permanent marker or drawing pen (0.3mm or 0.5mm)
- Watercolors or diluted acrylic craft paint (soft pink, sage green)
- Fine round paintbrush
- Pencil (optional for sketching)
- Egg stand or drying rack
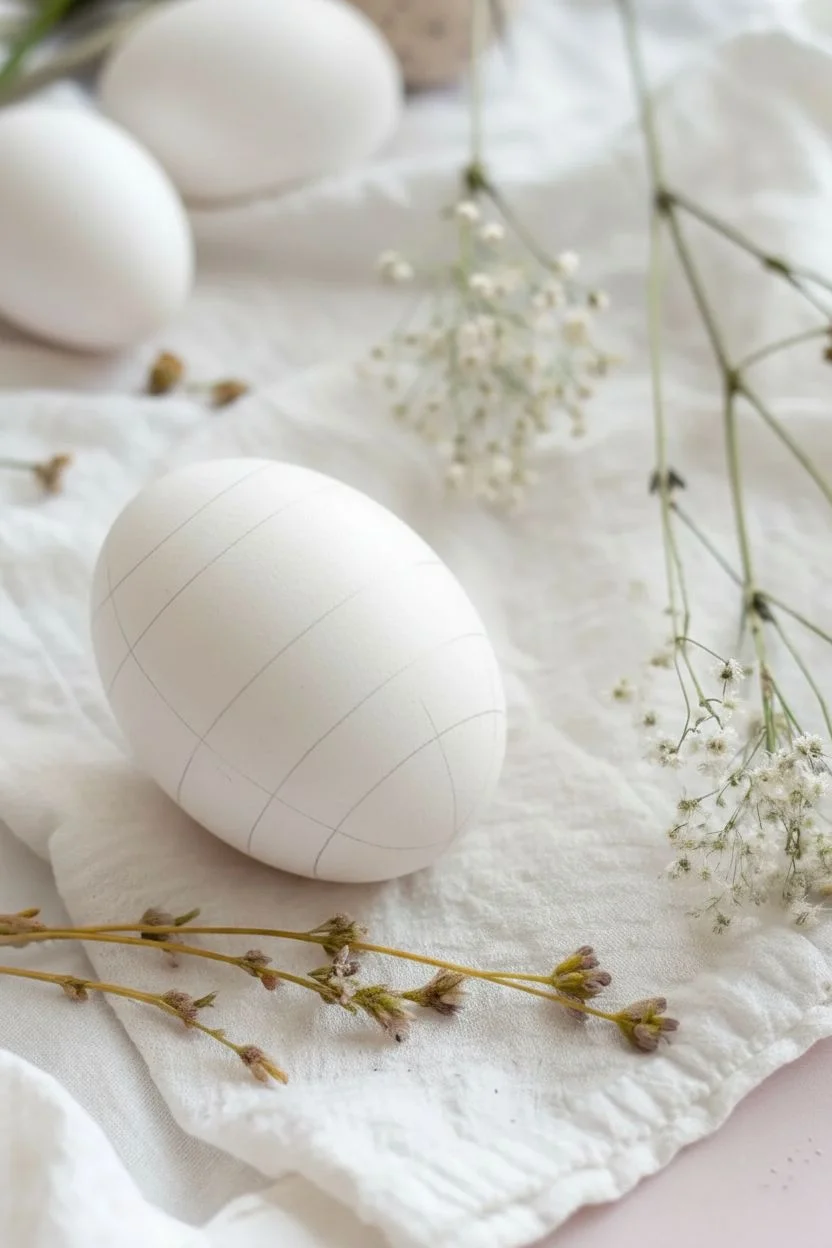
Step 1: Planning the Bands
-
Clean surface:
Start with a clean, dry white egg. If you are using a real egg, wipe it down gently with vinegar first to remove any oils that might resist the ink. -
Visualizing stripes:
Imagine dividing the egg into horizontal bands. You don’t need to draw lines all the way around yet, but mentally map out a wide central band for the main zig-zags and narrower bands above and below for accents. -
Pencil draft:
If you are feeling unsure about freehanding, very lightly sketch your horizontal dividing lines with a pencil. Keep the pressure minimal so you don’t groove the shell.
Step 2: Adding Pastel Accents
-
First color wash:
Dip your fine brush into the soft pink watercolor. Paint a wide, slanted band across what will be the center section of your design. -
Feather the edges:
The paint doesn’t need to be solid; a slightly translucent, washed-out look adds to the charm. Let the edges be a little uneven. -
Green accent line:
Using the sage green paint, create a thinner, wavy line just above your pink band. Allow these painted sections to dry completely before touching them with ink to prevent bleeding. -
Bottom pink shape:
Paint a semi-circle shape at the bottom curve of the egg using the same pink tone. This will later become a sunburst-style motif.
Ink Smearing?
If your black pen smudges on the paint, the paint wasn’t fully dry. Use a hairdryer on a warm, low setting for 60 seconds to ensure the surface is moisture-free.
Step 3: Detailed Ink Work
-
Main zig-zag:
Once the paint is bone dry, take your black fine-point pen. Draw a bold, sharp zig-zag line directly over the pink band. The contrast between the rigid geometric line and the soft paint is key. -
Dotted border:
Above the zig-zag area, draw a sequence of small, evenly spaced dots. Follow the curvature of the egg to keep the line looking natural. -
Hashed line:
Below the main zig-zag, draw a solid black line. Turn this into a ‘stitch’ pattern by adding tiny perpendicular dashes all along it, spacing them closely together. -
Top decorative loop:
Near the top of the design, create a looped, cursive-style line. Think of it like a loose, messy scribble or a series of connected loops. -
Sunburst detailing:
Move back to the pink semi-circle at the bottom. Outline the curved edge with your black pen. -
Radiating lines:
Draw straight lines fanning out from the bottom center point of the pink semi-circle to the outer rim, creating sections like slices of a pie. -
Upper accents:
If the top feels empty, add a very thin double line or a few more scattered dots near the apex of the egg to balance the design.
Go Metallic
Swap the black ink for a gold or copper paint pen. The metallic sheen against the matte pastel watercolor creates a luxurious, high-end finish.
Step 4: Finishing Touches
-
Check for smudges:
Inspect your work carefully. If you used a glossy marker, give it extra time to set before handling the decorated area. -
Erase guidelines:
If you see any visible pencil marks from your initial sketch, gently erase them now, being careful not to rub off any delicate watercolor patches. -
Seal (optional):
For a long-lasting finish, especially on ceramic eggs, you can apply a thin layer of matte varnish, though the raw matte texture of the shell is quite beautiful on its own.
Place your finished egg in a simple ceramic bowl or on a linen napkin to let the delicate pattern really shine


Cute Bunny Face in Simple Shapes
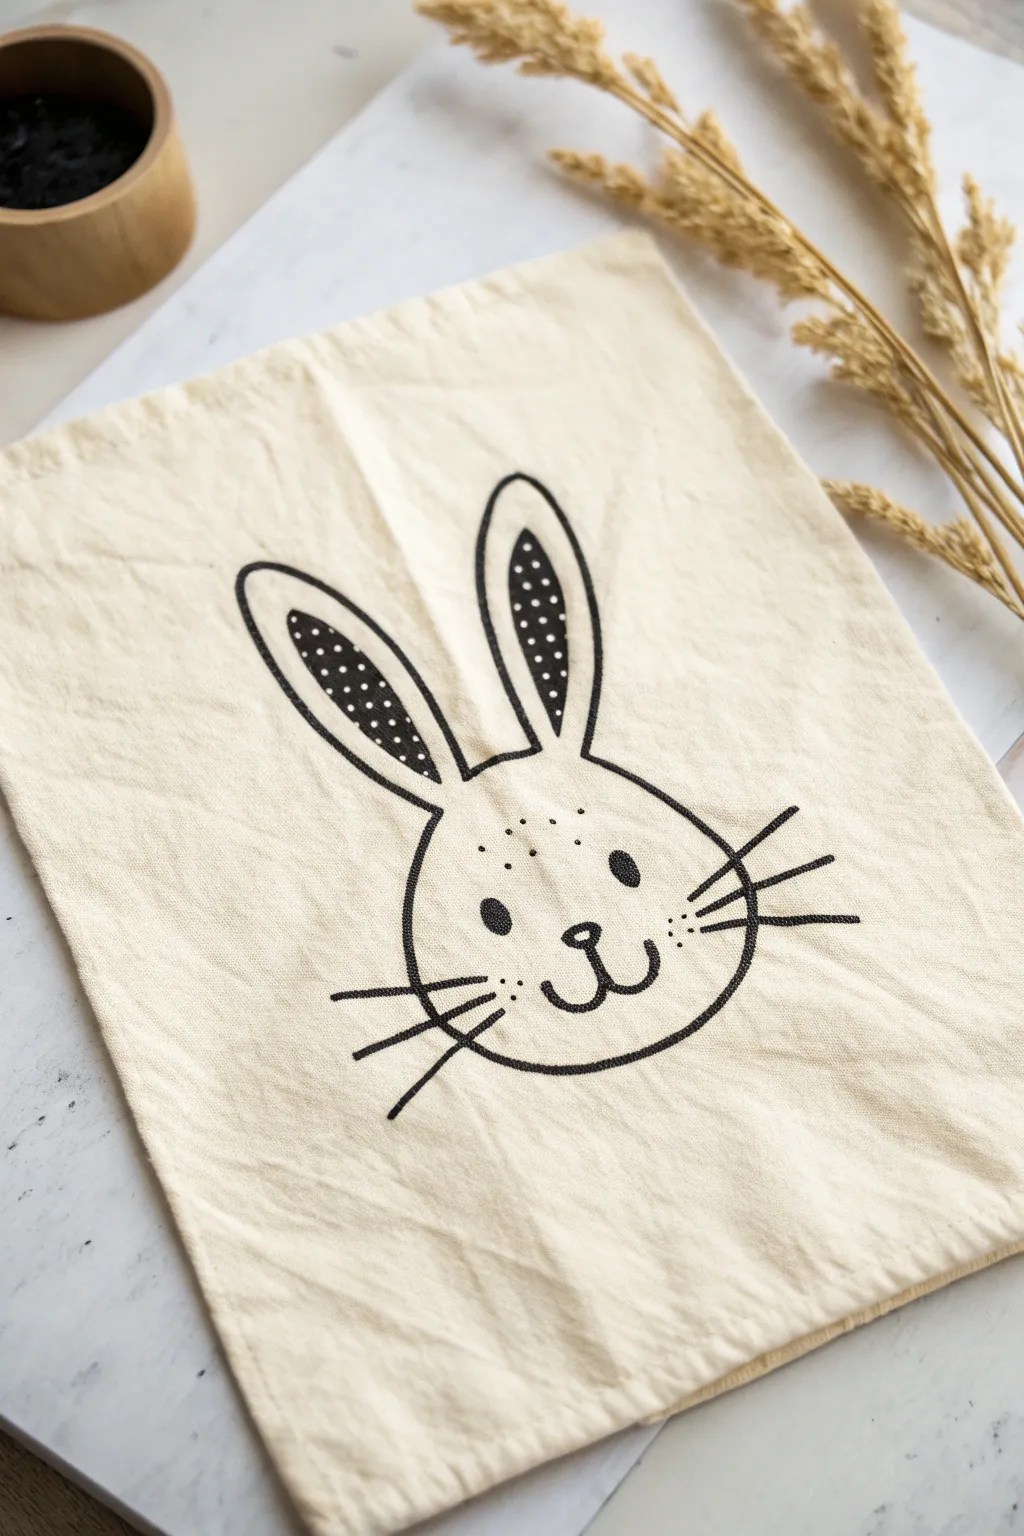
Transform a plain canvas bag into a charming Easter accessory with just a few simple lines. This minimalist bunny design relies on basic shapes and bold contrast to create a friendly, modern look perfect for egg hunting.
How-To Guide
Materials
- Small canvas or muslin drawstring bag (beige/cream)
- Black fabric marker or fabric paint pen (fine tip)
- Black fabric marker or fabric paint pen (medium/bold tip)
- Cardboard insert or stiff paper
- Pencil
- Eraser
- Iron (optional, for setting ink)
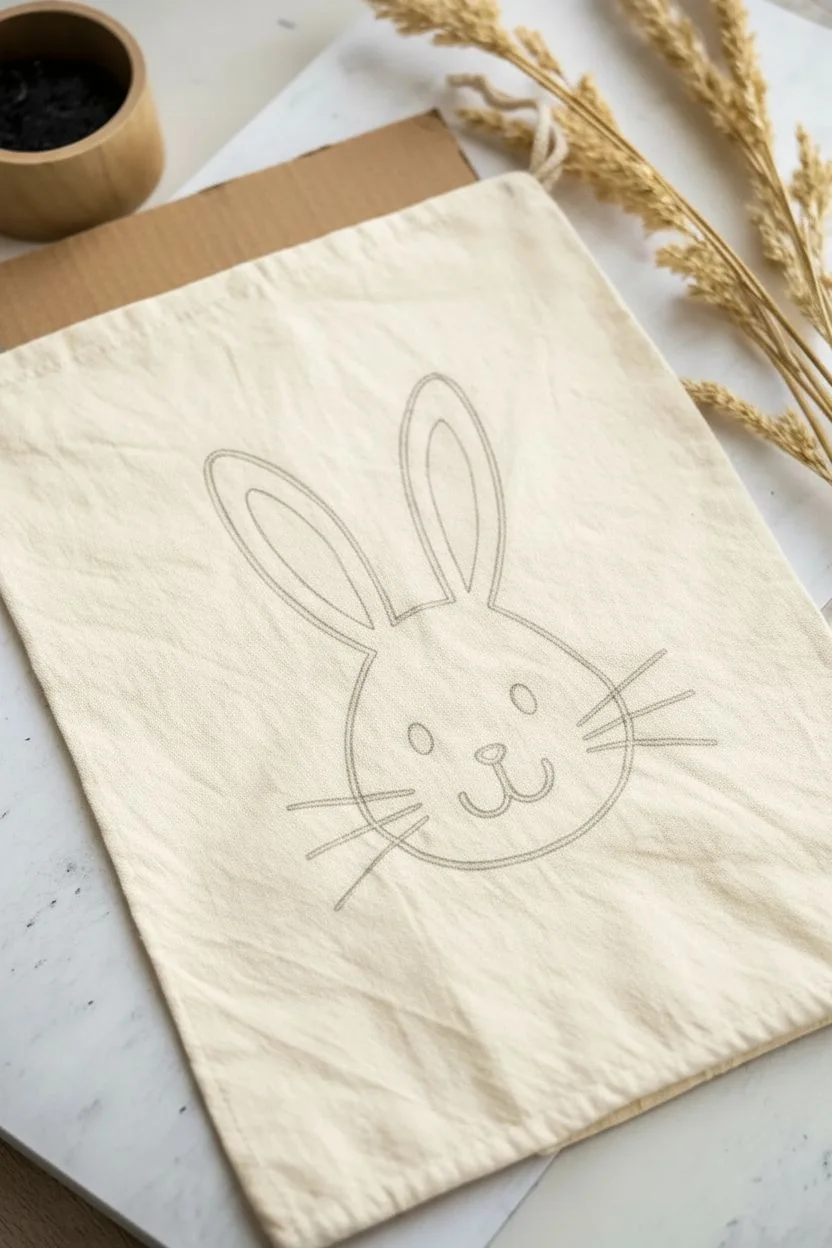
Step 1: Preparation & Sketching
-
Prepare the surface:
Before starting, iron your canvas bag to remove any deep creases that might interrupt your drawing lines. Slip a piece of cardboard inside the bag to prevent the ink from bleeding through to the back side. -
Draft the head shape:
Using a pencil and very light pressure, sketch an oval shape near the bottom center of the bag. The top of the oval should be slightly narrower than the bottom to create chubby cheeks. -
Position the ears:
From the top of the head oval, sketch two tall, elongated loops for the ears. Make them slightly wider at the middle and taper them at the tips, angling them slightly outward. -
Add inner ear details:
Draw a smaller loop inside each ear shape, leaving a consistent border between this inner loop and the outer ear line. -
Sketch the face features:
Place two small oval eyes wide apart in the middle of the face. Below them, draw a small rounded triangle for the nose and a simple ‘w’ shape for the mouth.
Bleeding Lines?
If ink spreads into the fabric grain, your marker is too wet. Work faster so ink doesn’t pool, or switch to a finer tip pen for crisp edges.
Step 2: Inking the Outline
-
Trace the main outline:
Switch to your medium/bold fabric marker. Carefully trace over your pencil lines for the main head shape and the outer ear lines, keeping a steady hand for a clean, consistent stroke. -
Refine the ears:
Trace the inner ear loops. Try to keep the spacing even between the inner and outer lines. -
Fill the inner ears:
Using the fine tip marker, add small polka dots inside the inner ear loops. I like to scatter them randomly rather than in perfect rows to keep the playful, hand-drawn aesthetic. -
Fill the background (Optional):
Alternatively, you can fill the the space *around* the polka dots with black ink, leaving the dots as negative space (white circles), which creates a bolder look like the example image.
Step 3: Facial Details
-
Draw the eyes:
Fill in the two oval eyes completely with solid black ink. Make them distinct and solid to catch the viewer’s attention. -
Ink the nose and mouth:
Trace the nose and mouth lines. Ensure the connection point between the nose and the mouth curve is clean. -
Add freckles:
With the fine tip marker, add three or four tiny dots on each cheek area and a few on the forehead for texture. -
Draw the whiskers:
Draw three straight lines extending outward from each cheek. Use a quick, confident flicking motion so the lines taper naturally at the ends.
Stencil Hack
Struggle with symmetry? Cut an ear shape out of cardstock and trace around it for perfectly matched bunny ears.
Step 4: Finishing Touches
-
Erase guidelines:
Allow the ink to dry completely (wait at least 15-20 minutes). Gently erase any visible pencil marks remaining around your design. -
Heat set the design:
To make your bag washable, follow the instructions on your fabric marker. This usually involves ironing the design (with a cloth over it) for a few minutes on a high setting.
Now your custom bunny bag is ready to be filled with treats and treasures


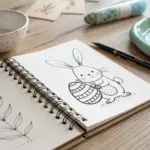
Floppy-Eared Bunny Sitting Beside an Egg
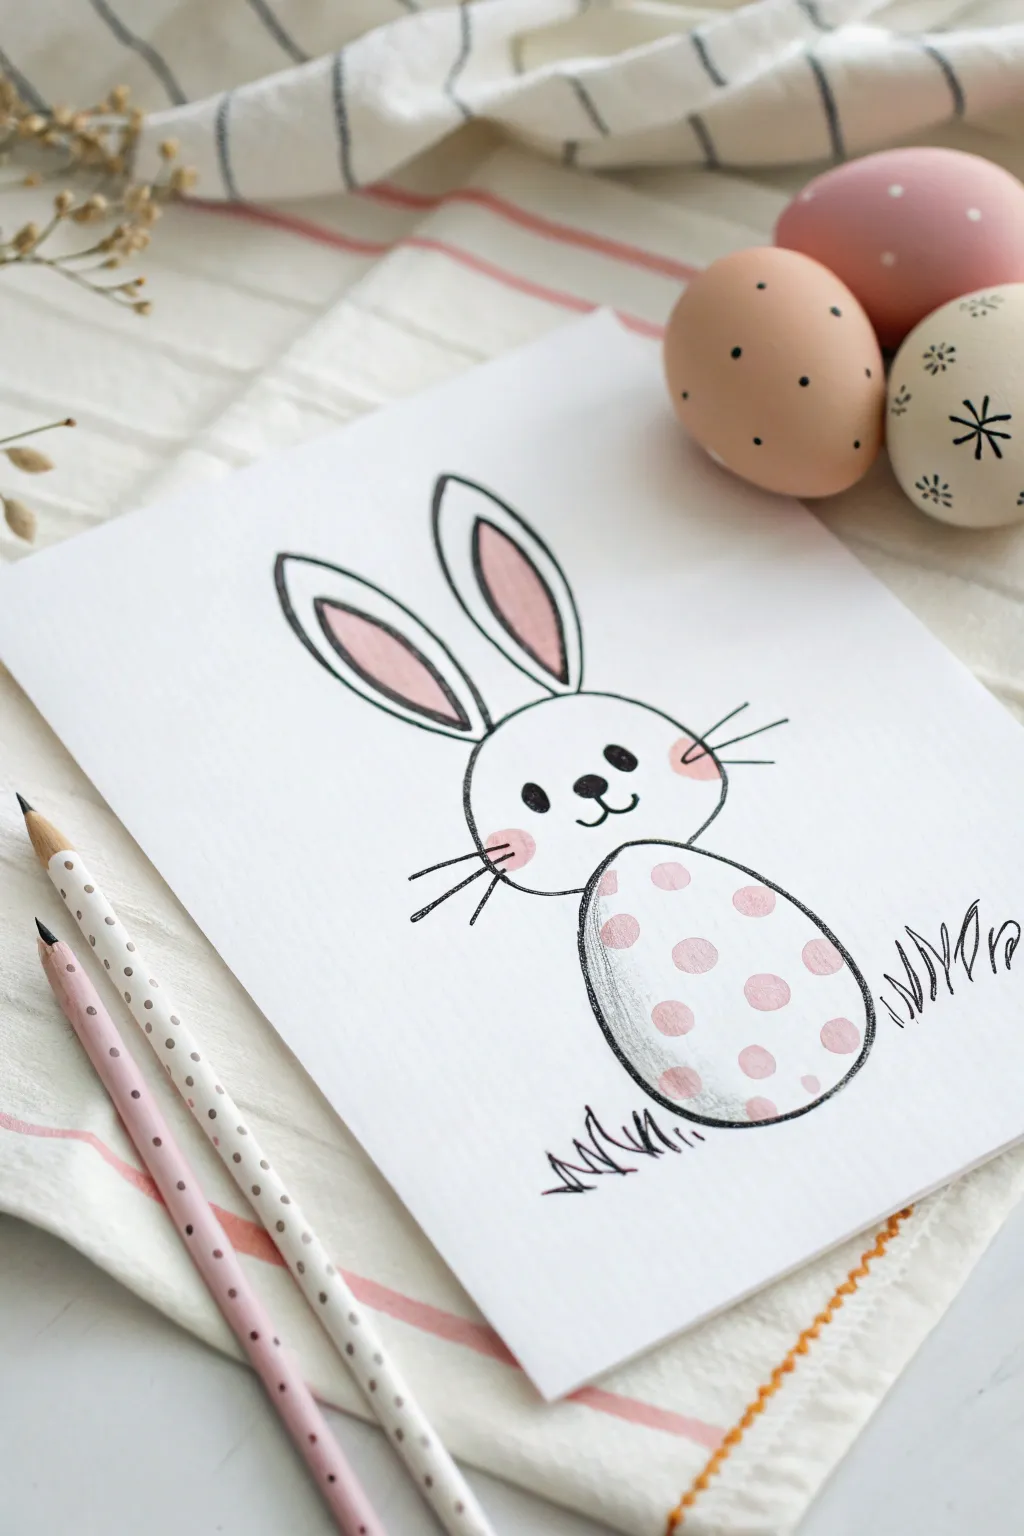
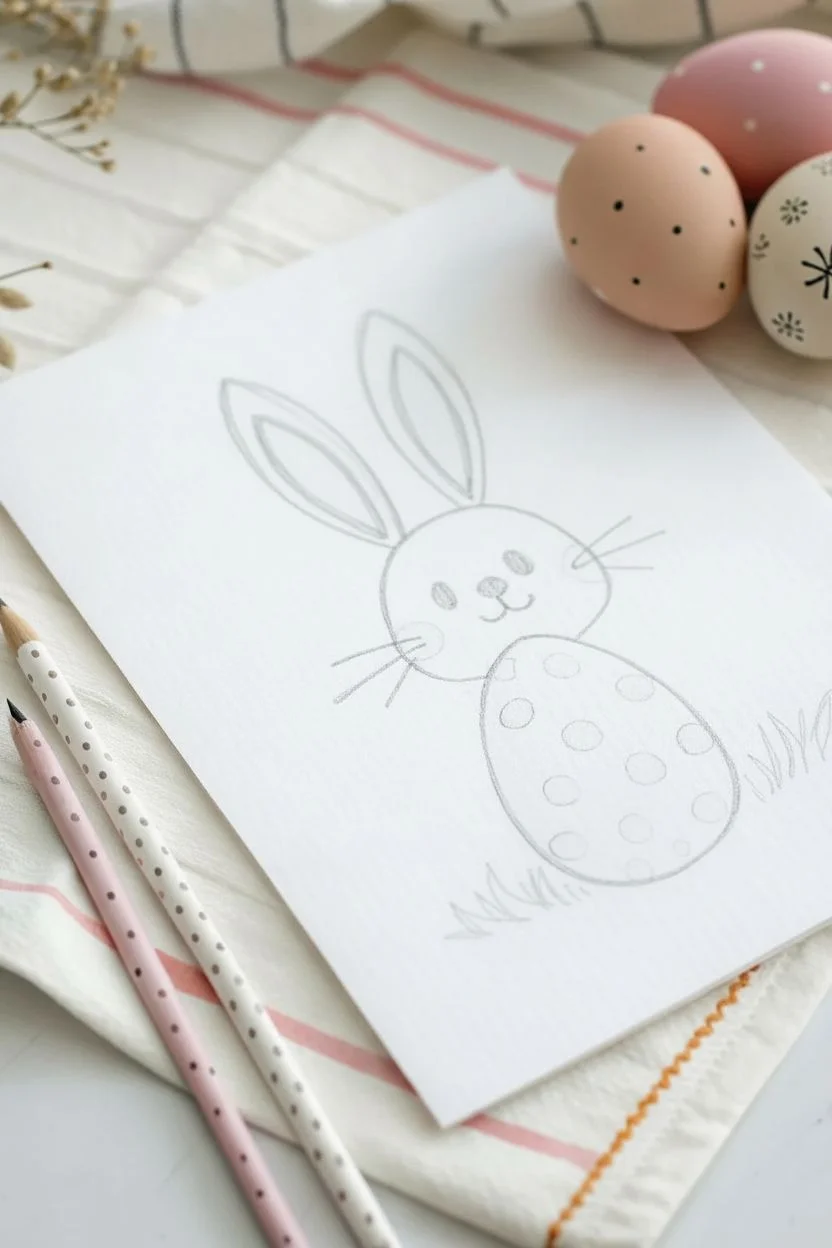
This charming Easter illustration features a minimal bunny with a playful twist—its body is actually a decorated Easter egg! With soft pink accents and clean black lines, it makes for a delightful holiday card or decoration.
Step-by-Step Guide
Materials
- White drawing paper or cardstock
- Black fine-liner pen or marker
- Pink colored pencil (pastel shade)
- Pencil for sketching
- Eraser
Step 1: Sketching the Outline
-
Start with the Head:
Begin by lightly sketching a slightly flattened circle in the upper middle area of your paper. This will be the bunny’s head. -
Add the Egg Body:
Directly beneath the head, draw a larger oval shape. Make it slightly wider at the bottom than the top, creating the classic egg shape for the bunny’s body. -
Outline the Ears:
Draw two long, tall loops extending from the top of the head. Angle them slightly outward to give the bunny a perky, alert expression. -
Inner Ear Details:
Inside each ear loop, sketch a smaller, parallel loop that follows the outer shape but stops just short of the head line.
Step 2: Drawing the Details
-
Sketch the Face:
In the center of the head circle, place two small dots for eyes. Below them, add a small rounded triangle for the nose and a simple ‘w’ shape for the mouth. -
Add Whiskers:
Draw three straight lines fanning out from each cheek area. Keep them light for now. -
Decorate the Body:
Fill the egg-shaped body with scattered circles of varying sizes to create a polka dot pattern. Don’t worry about making them perfect circles; a hand-drawn look adds character. -
Sketch the Grass:
At the base of the egg body, add a few jagged, spiky lines on either side to represent patches of grass.
Clean Lines Hack
Draw your lines ‘toward’ your body rather than pushing the pen away. This typically gives you more control and stability for smoother curves.
Step 3: Inking and Coloring
-
Ink the Outlines:
Take your black fine-liner and carefully trace over your pencil lines. I like to use confident, smooth strokes here to keep the lines clean. -
Thicken Key Lines:
Go over the outer lines of the bunny and the egg shape a second time to make them slightly bolder than the interior details. -
Fill in Facial Features:
Color in the small nose and eyes completely with black ink. Ensure the whiskers are crisp and clearly defined. -
Erase Pencil Marks:
Wait a moment for the ink to dry completely, then gently erase all visible pencil sketches underneath your ink lines. -
Color the Ears:
Using the pink colored pencil, gently shade the inner loops of the ears. Apply light pressure for a soft, pastel look. -
Add Cheek Blush:
Draw small pink circles on the cheeks, right where the whiskers start. Color them in softly to give the bunny a rosy glow. -
Color the Polka Dots:
Fill in the circles on the egg body with the same pink pencil. You can vary the pressure slightly to create subtle differences in tone. -
Final Touches:
Review your drawing. If you want more contrast, you can darken the grass blades slightly with the black pen.
Level Up: Pattern Play
Instead of polka dots, try filling the egg body with zigzag stripes, tiny stars, or flowers to customize your bunny for different themes.
Your playful bunny drawing is now ready to hop onto the fridge or into a frame


Hatching Chick Popping Out of an Eggshell
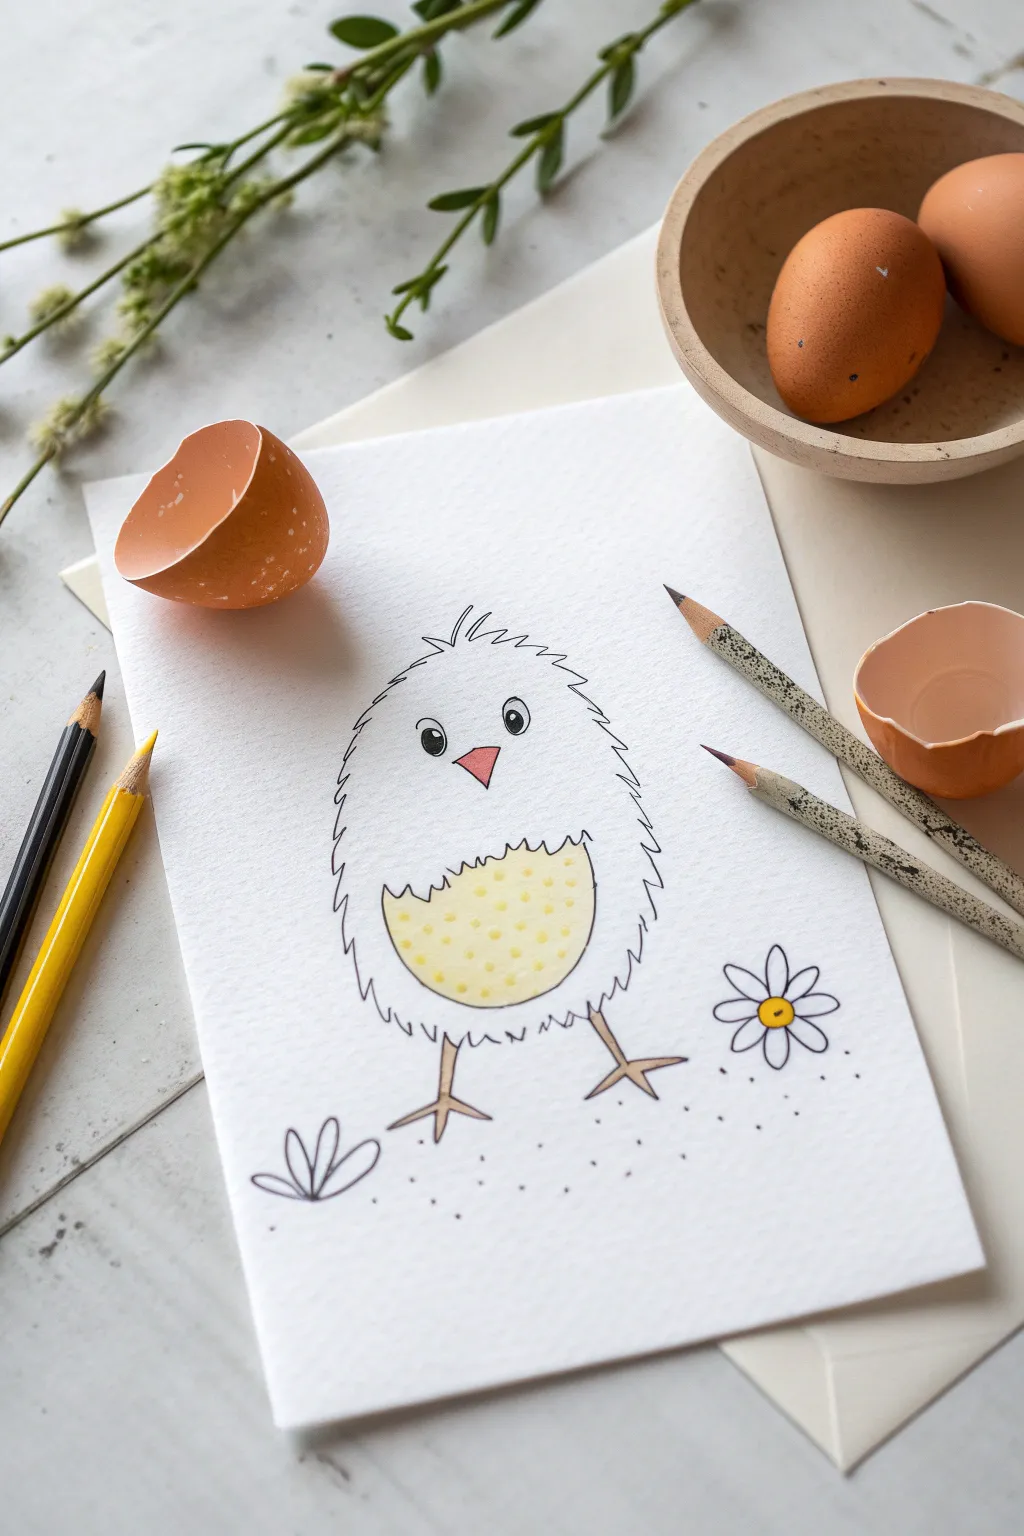
This adorable, fluffy chick drawing captures the simplicity of spring with its minimal lines and sweet expression. It’s a perfect beginner project that uses basic shapes and gentle textures to create a charming Easter illustration.
Step-by-Step Tutorial
Materials
- Heavyweight white drawing paper or cardstock
- Fine-liner pen (black, archival ink)
- Yellow colored pencil
- Orange colored pencil or marker
- Graphite pencil (HB for sketching)
- Eraser
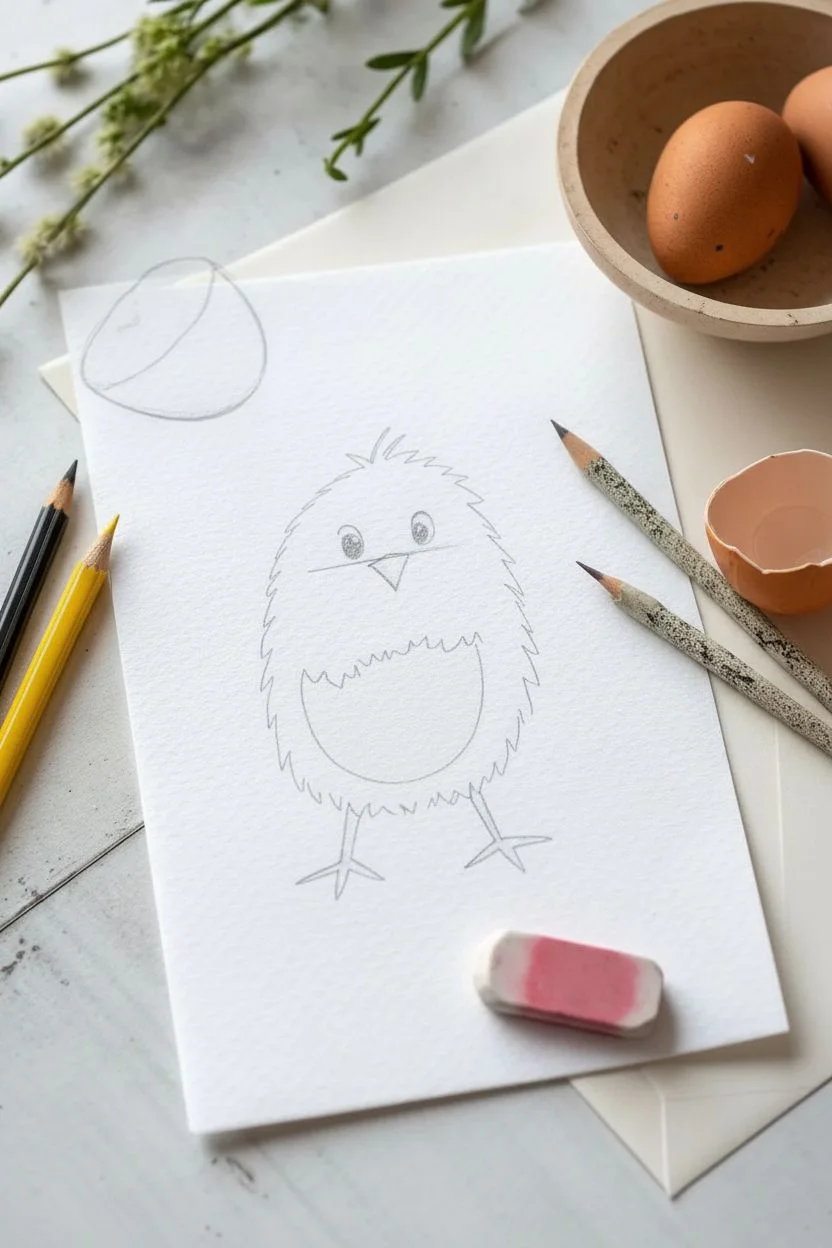
Step 1: Sketching the Base
-
Outline the body shape:
Start by lightly sketching a large, vertical oval in the center of your paper using your graphite pencil. This guides the overall shape of your chick. -
Mark the belly:
Inside the lower half of the oval, draw a wide ‘U’ shape to define where the belly coloring will go later. Keep these lines faint so they can be easily erased or inked over. -
Position the face:
Lightly mark a horizontal line across the upper third of the oval to help you place the eyes evenly. Add a small triangle right in the center for the beak.
Uneven Eyes?
If the eyes look lopsided, thicken the outline of the smaller one slightly. A thicker limbal ring can balance out the size difference without ruining the cute look.
Step 2: Inking the Details
-
Create the fluffy texture:
Switch to your fine-liner pen. Instead of tracing the oval with a solid line, use short, jagged, zig-zag lines to trace the outer edge. This creates the illusion of soft downy feathers. -
Add the head tuft:
At the very top of the head, draw a few longer, curved spikes of hair pointing upward to give the chick a messy, just-hatched look. -
Define the belly feathers:
go over your ‘U’ shape sketch for the belly. Use a scalloped or wavy line for the top edge of this section to look like layered feathers, and continue the zig-zag texture for the bottom curve. -
Draw the eyes:
Draw two solid black circles for eyes, leaving a tiny white dot in the upper corner of each for a highlight. This spark of life is crucial for a cute expression. -
Ink the beak:
Trace your triangle sketch for the beak with the pen. I find turning the triangle slightly downward makes the face look sweeter. -
Add the legs:
Draw two simple stick legs extending from the bottom. End each leg with three straight lines splayed out for the toes. -
Erase the pencil guide:
Wait a moment for the ink to dry completely, then gently erase all your graphite pencil lines.
Texture Twist
For a softer look, use a grey fine-liner instead of black. It makes the chick look much fluffier and less graphic.
Step 3: Adding Charm & Color
-
Color the belly:
Take your yellow colored pencil and fill in the belly area. apply the color lightly and evenly so the texture of the paper still shows through slightly. -
Add polka dots:
Using the same yellow pencil (or a slightly darker shade if you have one), press harder to create small, scattered dots across the yellow belly patch. -
Color the beak:
Fill in the small triangle beak with an orange or pinkish-red pencil. -
Draw a companion flower:
To the right of the chick, draw a simple daisy. Start with a small circle, then add petal loops around it. Color the center yellow. -
Add the ground context:
On the left side, draw a small three-leaf plant shape. Then, tap your fine-liner pen gently around the feet and bottom of the page to create ‘sand’ or dirt specks.
Now you have a sweet little character ready to brighten up any Easter card
BRUSH GUIDE
The Right Brush for Every Stroke
From clean lines to bold texture — master brush choice, stroke control, and essential techniques.
Explore the Full Guide
Easy Carrot Doodle With Easter Flair
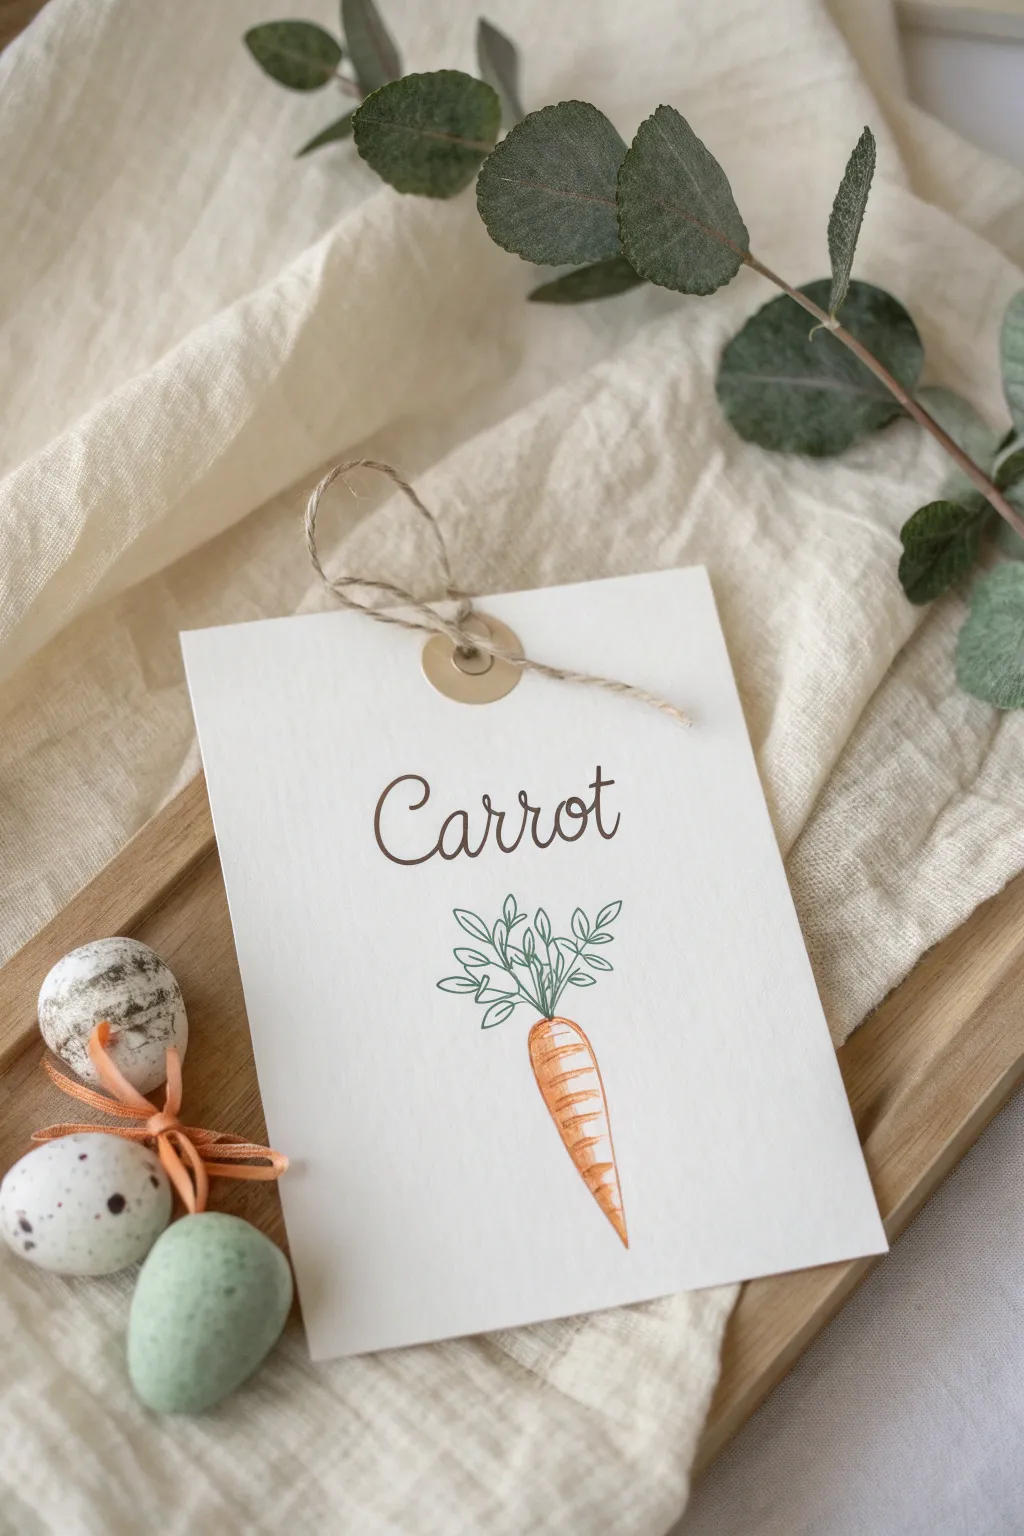
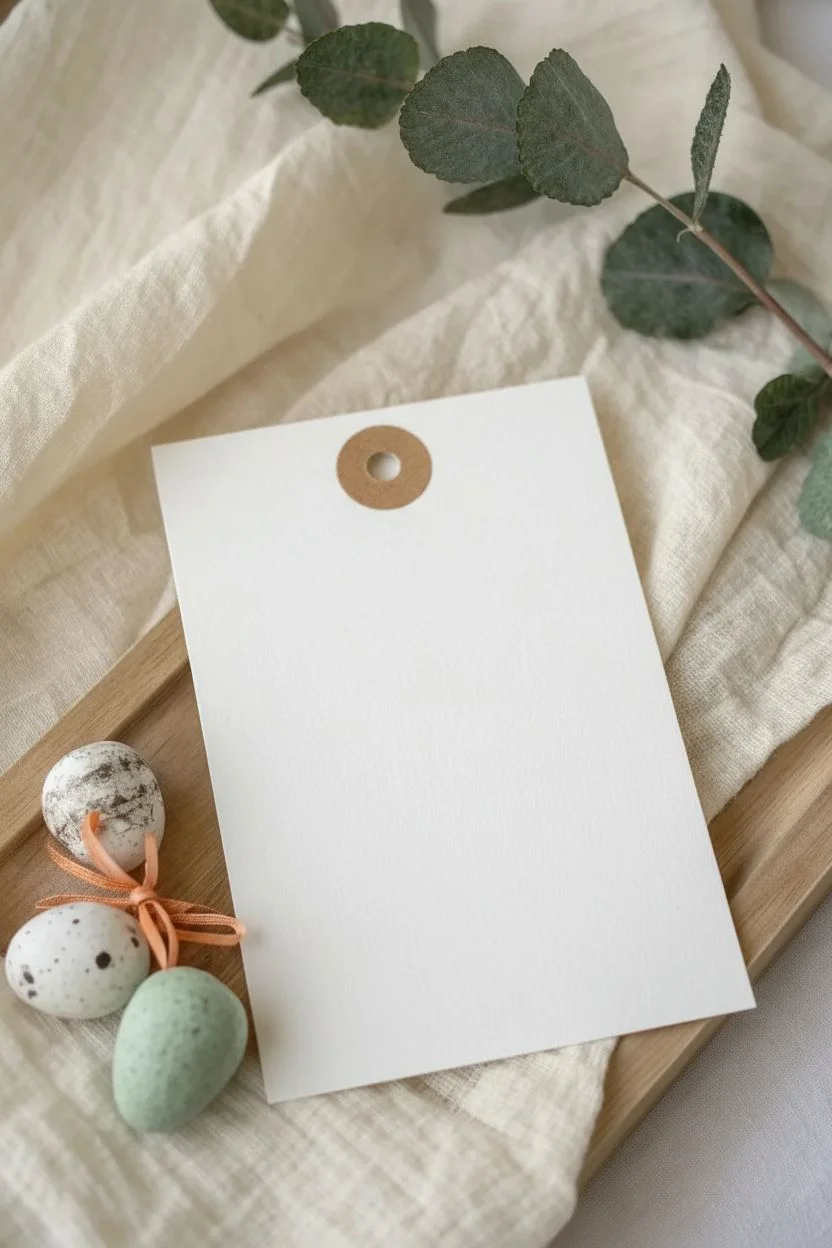
This charming handmade tag combines simple line art with soft coloring for a rustic Easter look. It’s perfect for labeling garden-themed gifts or adding a personalized touch to treat bags.
Step-by-Step
Materials
- Heavyweight textured white cardstock or watercolor paper
- Fine-liner pen (black or dark green)
- Watercolor pencils or markers (orange and green)
- Brown brush pen or calligraphy marker
- Kraft paper reinforcement stickers
- Hole punch
- Jute twine
- Scissors
- Ruler
- Pencil and eraser
Step 1: Preparing the Tag
-
Cut the base:
Measure and cut a rectangle from your textured cardstock, approximately 3 inches wide by 5 inches tall. -
Punch the hole:
Using a standard hole punch, create a hole centered near the top edge of the rectangle, about half an inch down. -
Reinforce:
Apply a kraft paper reinforcement sticker over the hole on the front side of the tag to give it that classic tag aesthetic.
Fixing Smudges
If you smear ink while erasing pencil marks, wait for it to fully dry. Then, use a white gel pen to carefully draw over the smudge or correct wobbly lines.
Step 2: Lettering
-
Sketch guidelines:
Lightly sketch a horizontal line with a pencil about one-third of the way down from the top to ensure your text stays straight. -
Draft the text:
Using your pencil, lightly write the word “Carrot” in a loose, bouncy script font. Focus on round loops for the ‘a’ and ‘o’ to keep it friendly. -
Ink the letters:
Trace over your pencil lines with a brown brush pen or marker. Vary your pressure slightly on the downstrokes to mimic hand-lettering if your pen allows. -
Erase guidelines:
Wait for the ink to dry completely to avoid smudging, then gently erase your pencil guideline.
Step 3: Drawing the Carrot
-
Outline the body:
Below the text, use your fine-liner to draw a long, tapered ‘V’ shape for the carrot body. The lines don’t need to be perfectly straight; a little wobble adds character. -
Add texture lines:
Draw short, horizontal curved dashed lines across the carrot body to represent the ridges and texture of the root. -
Start the greens:
From the top center of the carrot, draw three to five stem lines radiating upward and outward using a green fine-liner. -
Add leaves:
Draw small oval or teardrop shapes along the stems to create the leafy greens. Keep the outlines simple and open.
Add Watercolor Splash
For a looser artistic vibe, add a few tiny splatters of watered-down orange paint around the carrot drawing before the paper fully dries.
Step 4: Coloring & Finishing
-
Color the root:
Use an orange watercolor pencil or marker to fill in the carrot body. I like to leave the center slightly lighter to create a highlighted, rounded effect. -
Blend the color:
If using watercolor pencils, use a barely damp brush to soften the orange pigment, blending the strokes together without soaking the paper. -
Color the leaves:
Lightly fill in the leaves with a soft green shade. You don’t need to fill them completely; leaving some white space keeps the look airy. -
Attach the twine:
Cut a 10-inch piece of jute twine. -
Loop it:
Fold the twine in half, push the loop end through the reinforced hole from front to back, and pull the tails through the loop to secure it with a lark’s head knot. -
Tie the ends:
Tie the two loose ends of the twine together in a simple overhand knot to create a closed loop for hanging.
Now you have a sweet, custom tag ready to adorn your spring gifts
Peace Dove Carrying a Little Easter Egg
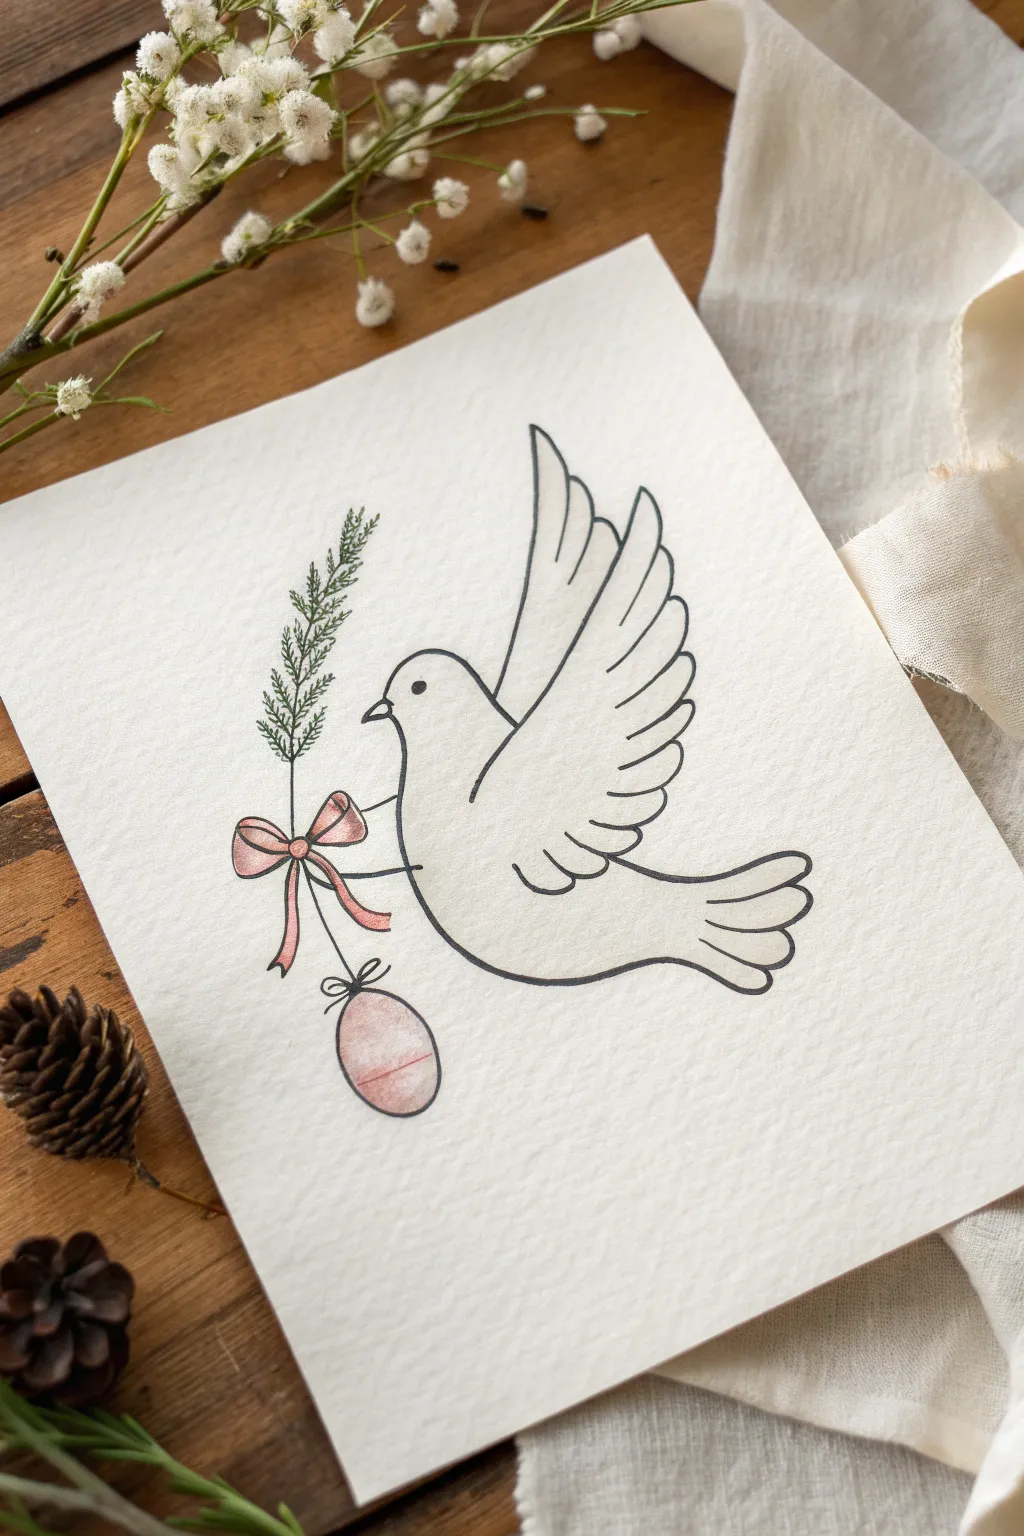
For a serene and charming Easter greeting, this minimalist line drawing captures a dove in flight carrying a delicate egg. The combination of clean black ink lines and soft watercolor accents creates an elegant, handcrafted look that’s perfect for cards or framed art.
How-To Guide
Materials
- Cold press watercolor paper (A5 or 5×7 inch)
- Pencil (HB or H)
- Kneaded eraser
- Fine liner pen (0.3mm or 0.5mm, waterproof black ink)
- Watercolor paints (Olive Green, Soft Pink/Rose)
- Small round paintbrush (size 2 or 4)
- Cup of water
- Paper towel
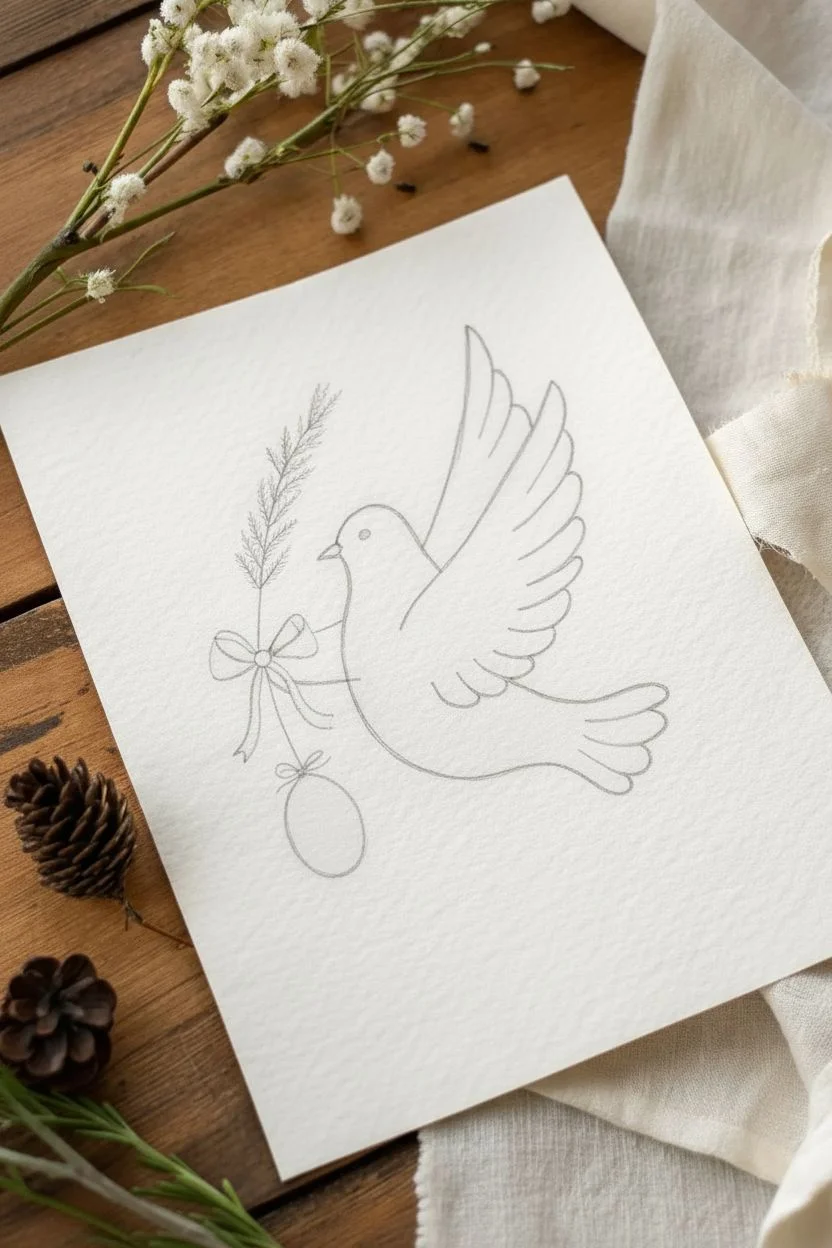
Step 1: Sketching the Dove
-
Head and Beak:
Start near the center-left of your paper. Lightly sketch a smooth curve for the top of the dove’s head, bringing it down into a small, triangular beak pointing towards the left. -
Neck and Chest:
Continue the line from under the beak, curving downwards and to the right to form a full, rounded chest. This line should sweep underneath to define the bird’s belly. -
Wing Outline:
From the upper back (just behind the head), draw a long, sweeping curve upwards to verify the front edge of the wing. Bring the line down in a series of scalloped shapes to create feathers, ending near the tail. -
Tail Feathers:
Sketch the tail extending from the lower body. Use three or four rounded, finger-like shapes fanning out slightly backwards to suggest the bird is in flight. -
Eye Detail:
Place a small dot or circle for the eye slightly back from the beak to give the bird a gentle expression.
Smudged Ink?
If your fine liner smudges when you paint, it isn’t waterproof. Stop and let the outline dry for 24 hours, or switch to a pigment-based art pen like a Micron.
Step 2: Adding the Details
-
The Olive Branch:
Draw a thin vertical stem rising from the area near the dove’s chest or beak area. Add small, scattered dashes along the stem to represent pine needles or tiny leaves. -
The Ribbon:
Sketch a simple bow tied around the lower part of the stem. Draw two loops and two trailing ribbons flowing downwards. -
Hanging the Egg:
Draw a thin string descending from the bow. At the end of the string, sketch a classic oval egg shape. Add a tiny bow or knot where the string meets the egg.
Textured Paper Look
Use cold-press watercolor paper. The rough ‘tooth’ of the paper adds that lovely vintage texture visible in the example photo.
Step 3: Inking and Coloring
-
Trace with Ink:
Using your waterproof fine liner, carefully trace over your pencil lines. Keep your hand steady but don’t worry about perfection; slightly organic lines add character. -
Erase Guidelines:
Wait at least 5-10 minutes for the ink to fully dry to prevent smudging. Gently rub your kneaded eraser over the entire drawing to lift the pencil marks. -
Paint the Branch:
Dip your damp brush into a diluted olive green. Lightly dab color onto the leafy sprig. Keep it loose and don’t try to fill every line perfectly. -
Color the Bow:
Switch to a soft pink. Carefully fill in the ribbon loops and tails. I personally like to leave tiny white gaps near the knot to simulate highlights. -
Paint the Egg:
Wash the pink color over the egg shape. You can add a deeper pink line across the middle while the paint is still wet for a subtle decorative stripe. -
Dove Shading (Optional):
If you want a bit of dimension, dilute a tiny drop of grey or brown paint with lots of water. Add a very faint shadow under the wing and along the belly.
Once the paint is dry, your graceful dove illustration is ready to bring a touch of peace to your Easter celebration

PENCIL GUIDE
Understanding Pencil Grades from H to B
From first sketch to finished drawing — learn pencil grades, line control, and shading techniques.
Explore the Full Guide
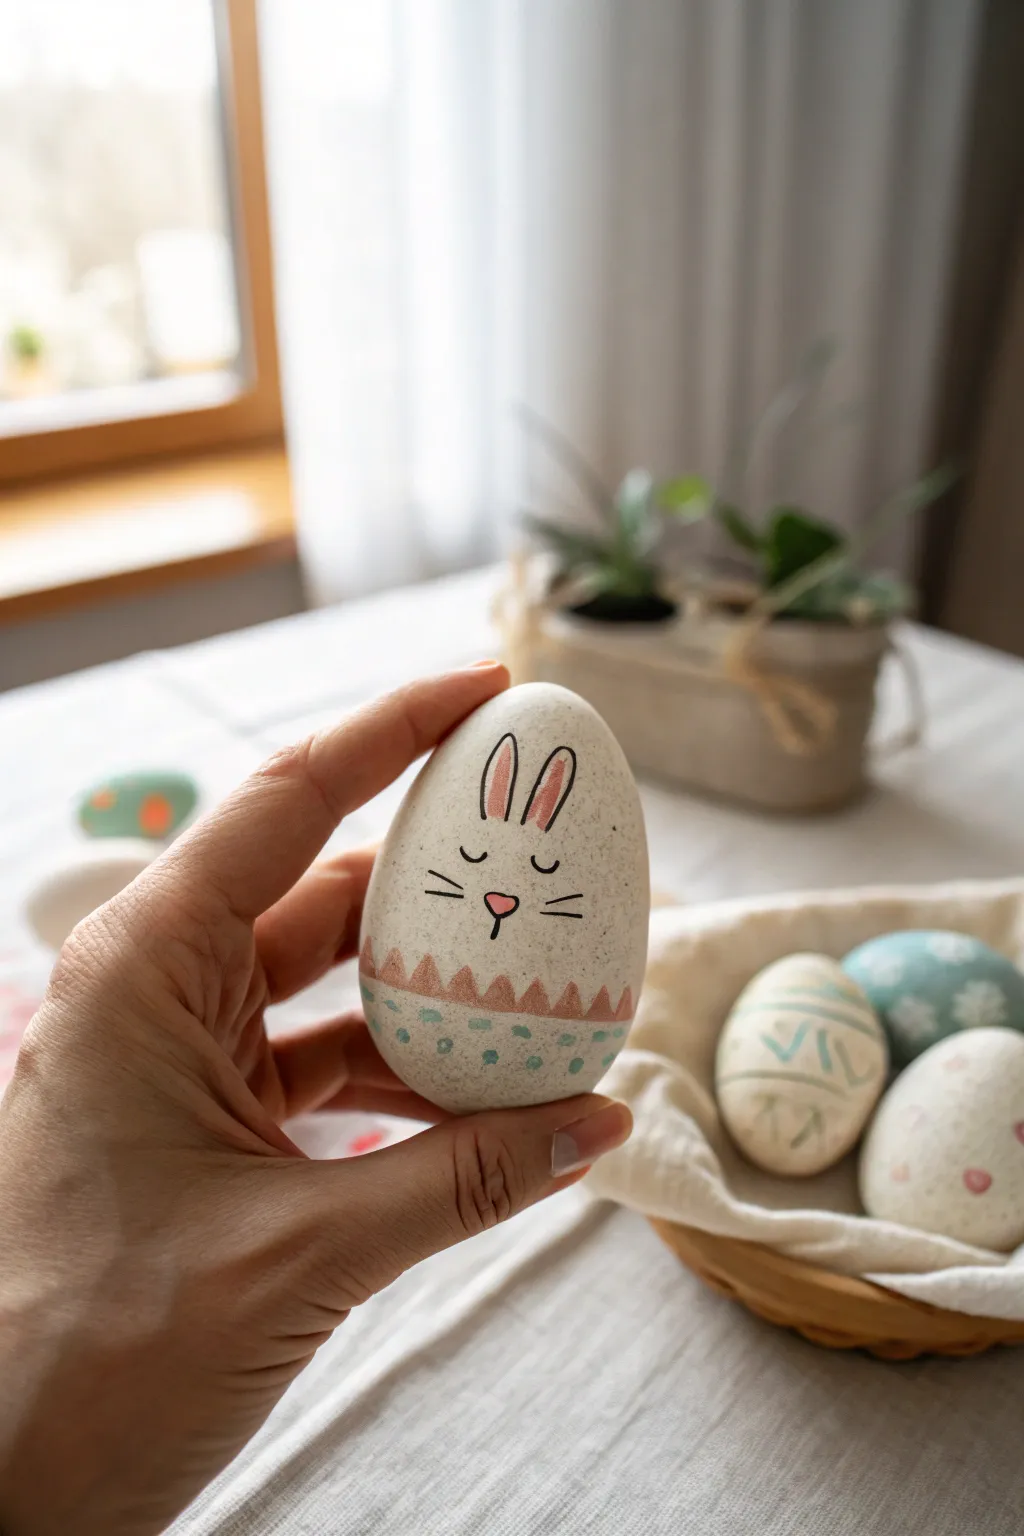
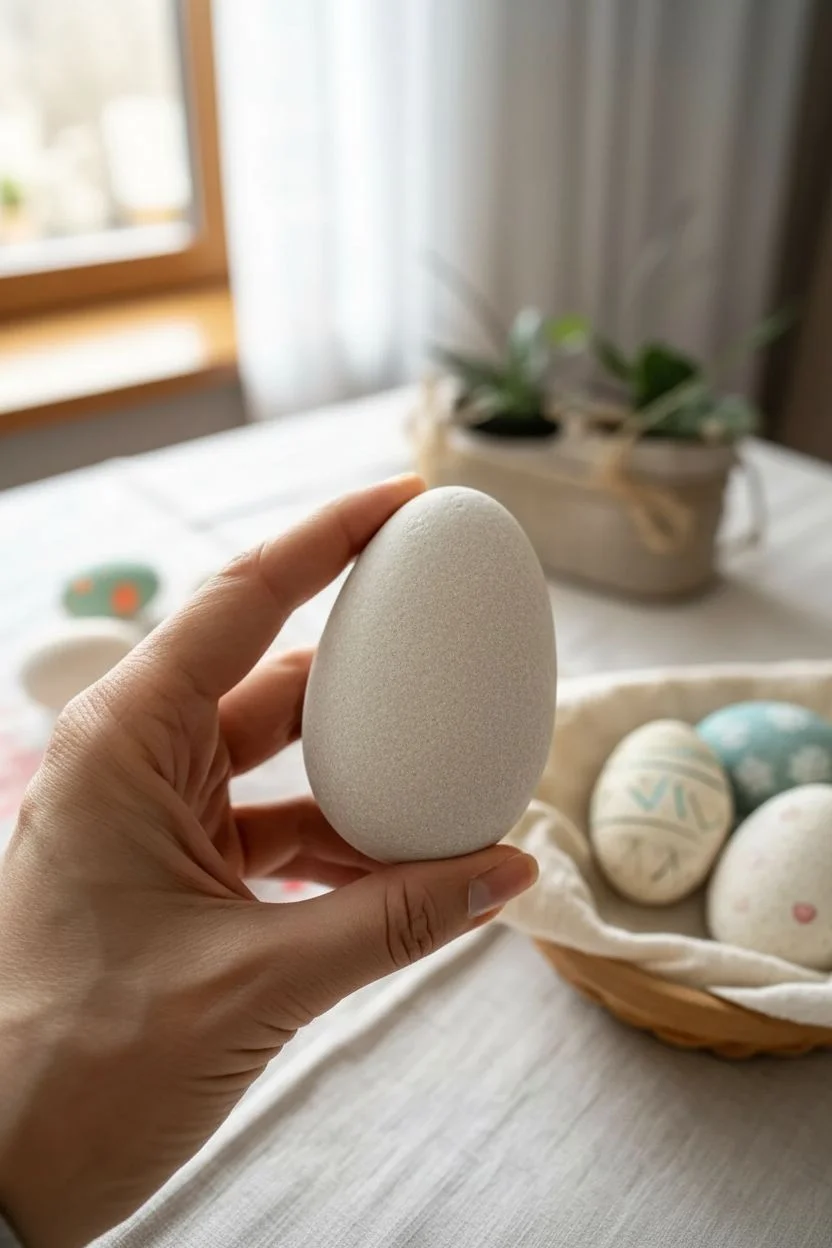
Personified Egg With a Cute Face
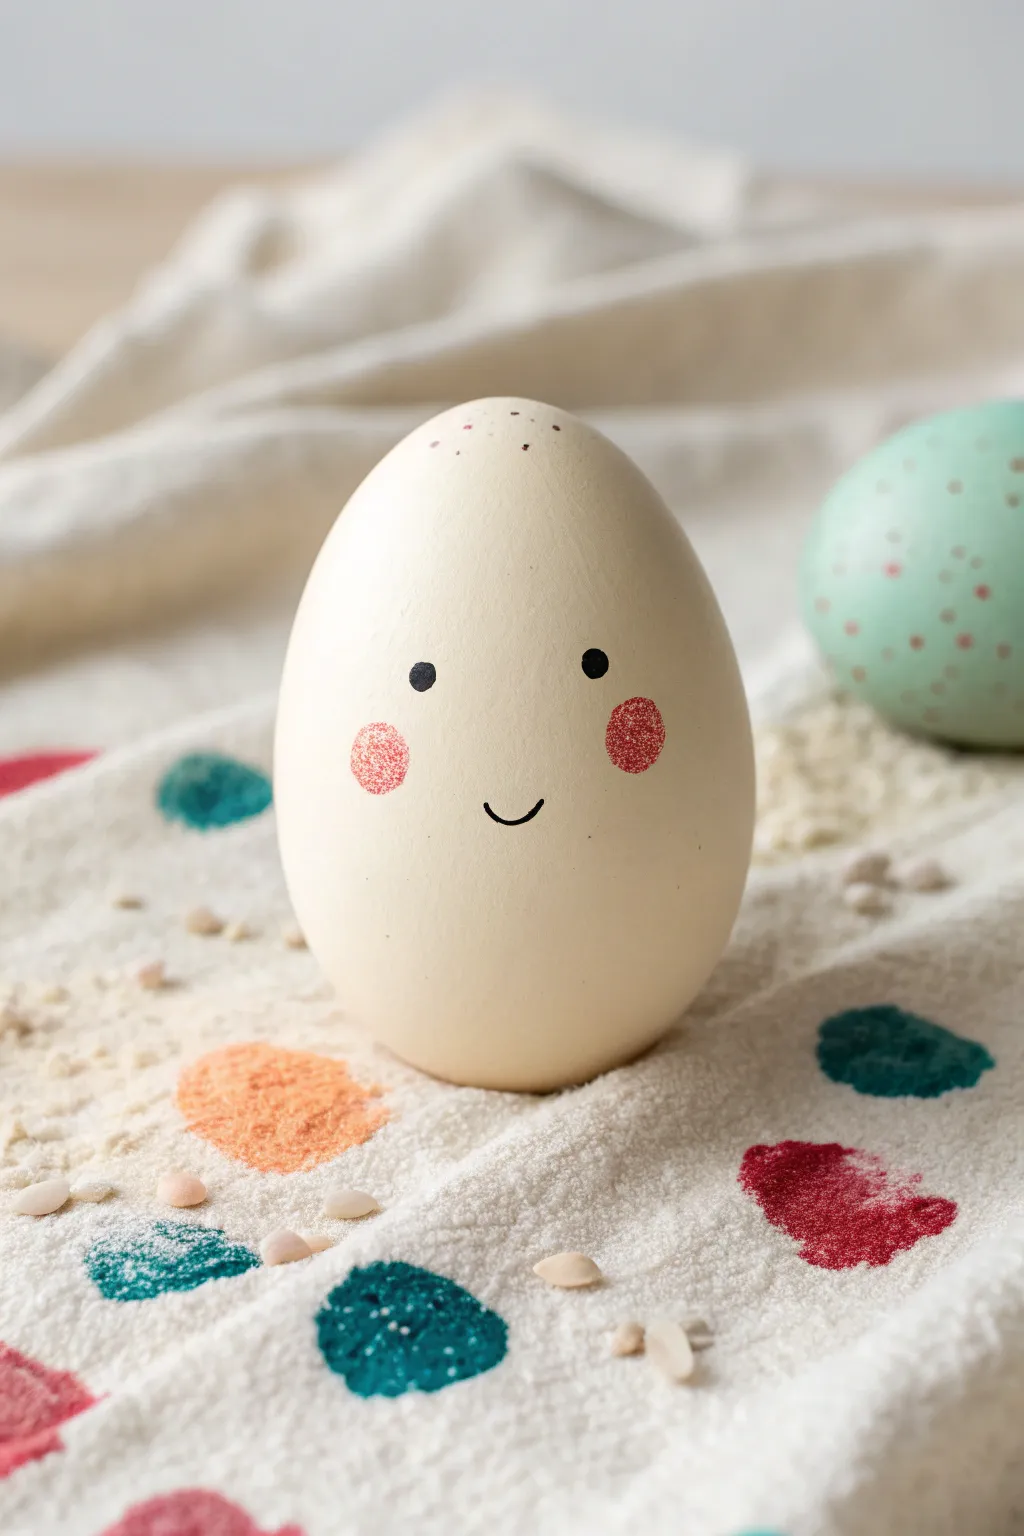
Sometimes the most minimal designs capture the most charm, and this little egg character proves exactly that. With its soft cream finish, rosy cheeks, and gentle smile, this project is perfect for crafting a peaceful, farmhouse-style Easter vignette.
How-To Guide
Materials
- Wooden or craft egg (smooth surface)
- Cream or off-white acrylic paint
- Flat paintbrush
- Black fine-tip paint pen or permanent marker
- Red or coral acrylic paint
- Small round sponge dobber or Q-tip
- Brown acrylic paint (optional for speckles)
- Matte sealant spray
- Toothbrush (optional)
Step 1: Base Preparation
-
Clean surface:
Begin by wiping down your wooden or craft egg with a slightly damp cloth to remove any dust or manufacturing residue. Let it dry completely. -
Apply base coat:
Load your flat paintbrush with cream or off-white acrylic paint. Apply light, even strokes from top to bottom, turning the egg as you go. -
Smooth coverage:
If the wood grain shows through significantly, allow the first coat to dry for about 15-20 minutes, then apply a second thin coat for an opaque, porcelain-like finish. -
Full drying:
Set the egg aside to cure fully. I like to rest mine on a bottle cap or an egg carton so it doesn’t roll away while drying.
Stamp Perfection
For the most natural cheek texture, offload almost all the paint from your sponge before stamping the egg. A ‘dry brush’ effect looks softer than solid color.
Step 2: Adding the Face
-
Position the eyes:
Visualize the face placement first—you want the features slightly lower than the center line to create that cute, baby-faced proportion. -
Draw the eyes:
Using your fine-tip black paint pen, gently press down to create two small, solid black circles for the eyes. Space them widely apart. -
Create the smile:
Directly between the eyes but slightly lower, draw a tiny, shallow ‘U’ shape for the mouth. Keep the line very thin and delicate. -
Prepare cheek color:
Squeeze a tiny drop of red or coral paint onto your palette. If the red is too bright, mix in a speck of the cream base coat to soften it. -
Blotting tool:
For the rosy cheeks, use a small round sponge dobber. If you don’t have one, a tightly wound Q-tip works perfectly. -
Test the stamp:
Dip your tool into the paint and dab it on a scrap piece of paper first. You want a textured, ‘stamped’ look, not a solid glob of paint. -
Apply cheeks:
Gently press the tool onto the egg, placing the rosy circles just outside and slightly below the level of the eyes.
Step 3: Finishing Details
-
Add subtle speckles:
To mimic a natural eggshell look, dip an old toothbrush into slightly watered-down brown paint. -
Flick the paint:
Hold the toothbrush a few inches away from the very top of the egg and run your thumb across the bristles to flick tiny specks onto the ‘forehead’ area. -
Control the spray:
Keep the speckling very light and concentrated mostly at the top crown of the egg so it doesn’t obscure the face. -
Protect the art:
Once all paint is perfectly dry, take the egg outside or to a well-ventilated area. -
Seal it:
Spray a light coat of matte sealant over the entire egg. This protects the painted face from scratching and gives the egg a unified sheen. -
Final cure:
Let the sealant dry according to the can’s instructions before handling or displaying your new friend.
Make a Family
Vary the eye spacing and mouth shape on different eggs. Try a surprised ‘O’ mouth or winking eyes to give each egg in the dozen its own personality.
Nestle your finished character into a bowl with a soft cloth for a heartwarming seasonal display
Egg With Bunny Ears (Super Simple Mashup)
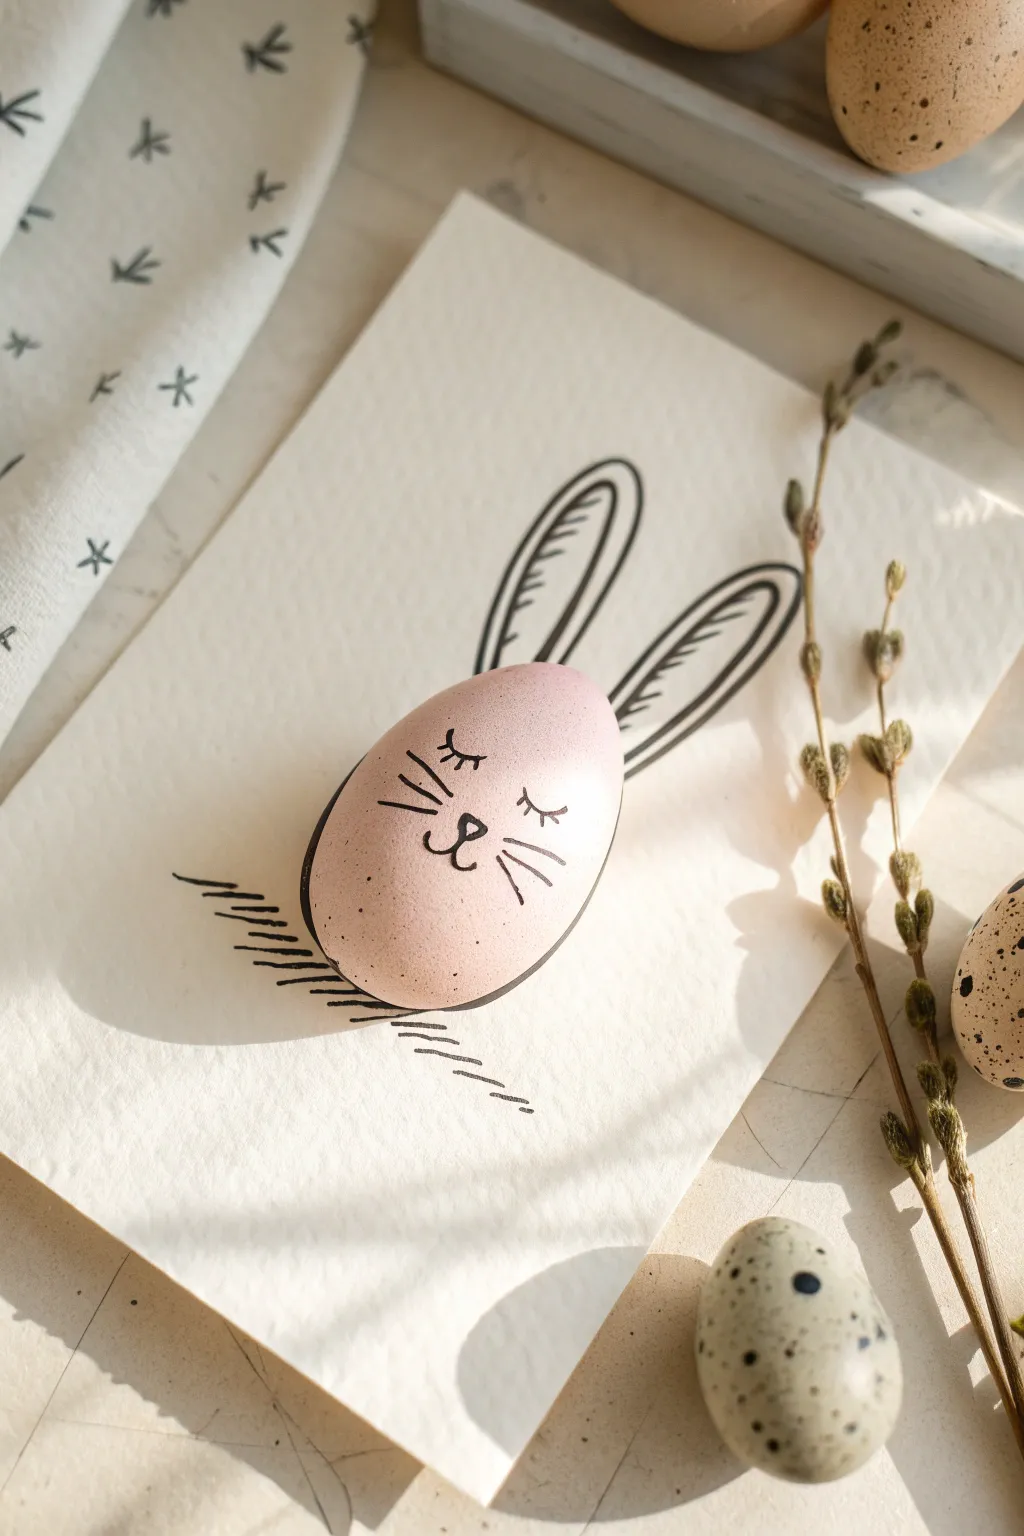
This charming project combines a simple line drawing with a real 3D element to create a whimsical Easter bunny portrait. It creates a delightful interplay between the flat illustration on paper and the dimensional egg that serves as the bunny’s face.
Detailed Instructions
Materials
- Cream colored cardstock or watercolor paper
- One egg (hard-boiled or blown out)
- Black fine-liner pen (waterproof preferable)
- Black brush pen or thicker marker
- Pink or light brown egg dye (or acrylic paint)
- Pencil for sketching
- Eraser
- Ruler (optional)
Step 1: Preparing the Egg Face
-
Dye the egg:
Start by dyeing your egg a soft, earthy pink or light brown shade. The goal is a natural, speckled look, so a light dip in dye works perfectly. Let it dry completely. -
Sketch the face:
Hold the egg upright. Using a pencil, lightly sketch the bunny’s facial features on the center of the egg. You’ll want two closed, sleepy eyes with lashes, a small heart-shaped or triangular nose, and a mouth. -
Ink the eyes:
With your fine-liner pen, trace over your pencil lines for the eyes. Draw a simple curved arch for each eye and add three small lashes flicking outward. -
Draw the nose and mouth:
Fill in the small nose with black ink. From the bottom of the nose, draw a small vertical line connecting to a split ‘w’ shape for the mouth. -
Add whiskers:
Draw three long, straight whiskers extending from each cheek area. Keep your hand loose so the lines taper naturally at the ends.
Natural Texture
Use a brown egg instead of a white one for an instant earthy tone, or gently flick watered-down brown paint onto a white egg for speckles.
Step 2: Creating the Backdrop
-
Position the egg:
Place your piece of cardstock on a flat surface. Set your decorated egg in the center where you want the head to be. This is crucial for sizing the ears correctly. -
Mark ear placement:
Lightly mark two small dots on the paper right above the top curve of the egg to indicate where the ears should start. -
Mark the shadow:
While the egg is still in place, make a light mark on the paper near the bottom left curve of the egg where we will add grounding shadows. -
Remove the egg:
Set the egg aside safely so you can draw freely on the paper. -
Sketch the ears:
Using the reference dots, sketch two long, oval-shaped bunny ears extending upwards. Make the left ear slightly straighter and the right ear slightly angled to the side for character. -
Outline the ears:
Go over your ear outlines with a thicker black marker or brush pen to give them bold definition. -
Add inner ear detail:
Switch back to your finer pen. Inside each ear outline, draw a smaller, thinner oval shape. Add short, diagonal hatching lines inside this inner shape to suggest texture. -
Create the ground shadow:
To the left of where the egg will sit, draw a series of horizontal hatching lines. Start with longer lines near the ‘body’ area and let them get shorter as they move outward. -
Extend the shadow:
Add a few diagonal hatch lines below the horizontal ones to create a loose, artistic shadow effect that grounds the composition. -
Erase guidelines:
Once the ink is fully dry, gently erase any visible pencil marks from your initial sketching phase.
Add Dimension
Glue a tiny pom-pom on the back of the egg for a tail, or cut out paper bow ties to lean against the bottom of the egg for extra flair.
Step 3: Assembly
-
Final placement:
Place the egg back onto the paper. Align it so the top of the egg sits just below the base of your drawn ears. -
Adjust position:
Ensure the bottom the egg aligns with your drawn shadow lines, making it look like the bunny is resting directly on the paper. -
Secure the egg (optional):
If you want to display this upright or keep it permanent, use a small loop of tape or a dab of poster putty on the back of the egg to stick it to the paper.
Now you have a clever mixed-media piece that brings your Easter decor to life


Chick Face in an Egg (Just Two Curves)
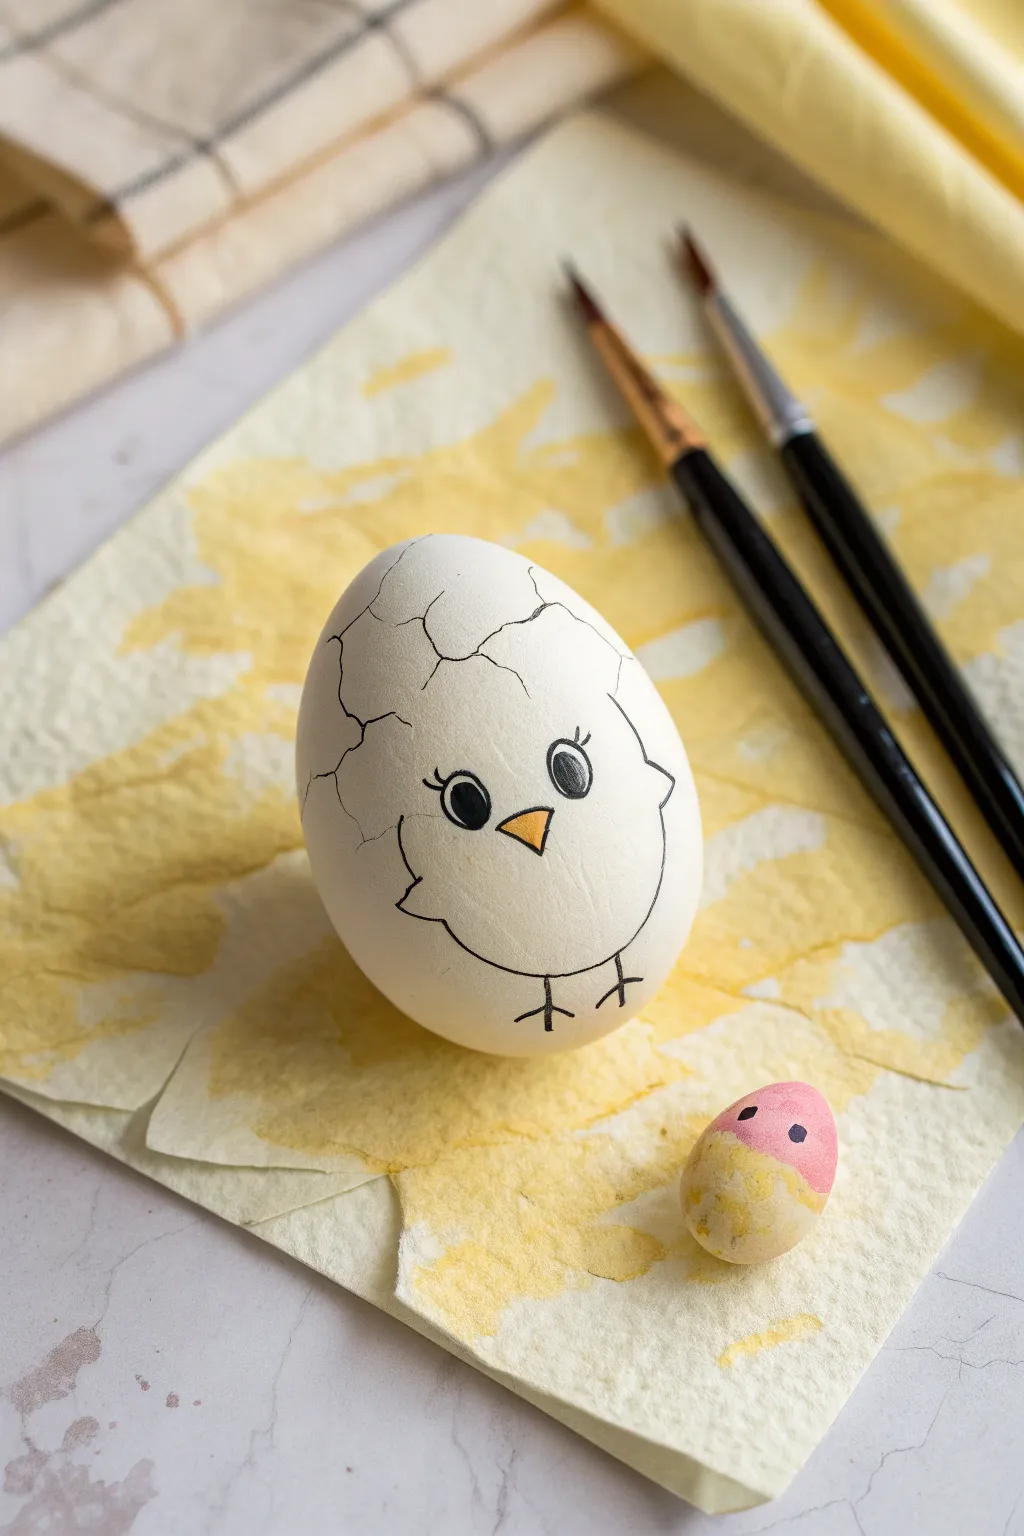
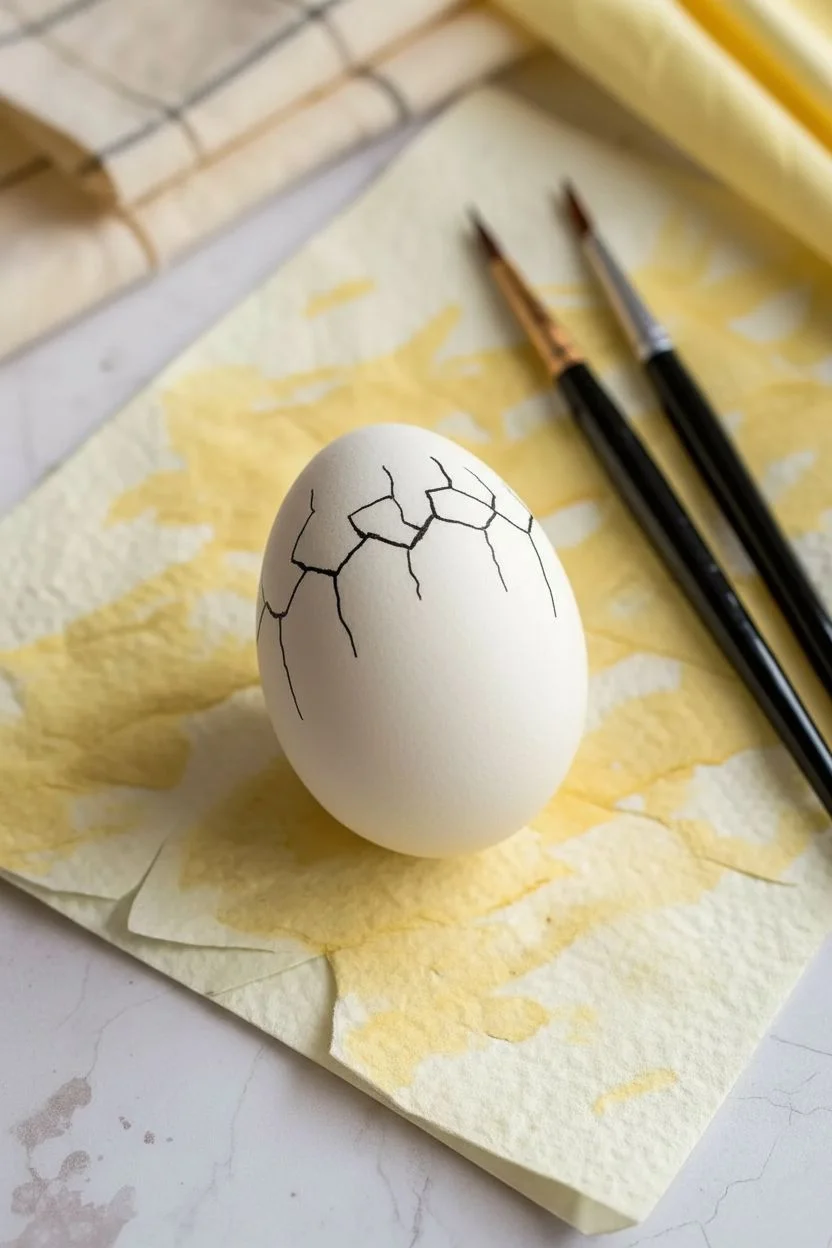
This minimalist yet adorable project turns a plain white egg into a hatching chick using simple line art. It’s a perfect last-minute Easter craft that relies on negative space and clean lines rather than complex dyeing techniques.
How-To Guide
Materials
- White hard-boiled egg (or blown hollow egg)
- Small pink or multicolored speckled candy egg (optional prop)
- Black fine-tip permanent marker or drawing pen
- Yellow permanent marker or paint pen
- Pencil (for sketching)
- Soft eraser
- Egg turning stand or egg carton
Step 1: Preparing the Canvas
-
Clean the shell:
Ensure your egg is clean, dry, and at room temperature. If there is any condensation, the ink won’t adhere properly. -
Position the egg:
Hold the egg upright. Decide which side is smoothest for the face. I find it helpful to rest the egg in a carton or cup if my hands get shaky.
Ink Smudge Prevention
Work from top to bottom if you are right-handed (or vice versa) to avoid dragging your palm through wet ink. Let the black dry fully before adding yellow.
Step 2: Drawing the Cracked Shell
-
Sketch the top crack:
Using a pencil very lightly, draw a jagged, zig-zag line horizontally across the upper third of the egg. This represents the top of the shell breaking off. -
Add vertical fractures:
From that main zig-zag line, draw a few stray fracture lines reaching upward toward the top point of the egg to make the crack look realistic. -
Ink the cracks:
Trace over your pencil lines with the black fine-tip marker. Keep your hand loose; shaky lines actually make cracks look more authentic.
Add 3D Texture
Glue tiny pieces of real crushed eggshell over the drawn ‘cracked’ area on the top for a mixed-media effect that feels real to the touch.
Step 3: Creating the Chick Face
-
Outline the head shape:
Starting from the jagged crack line you just drew, sketch a large ‘U’ shape or a circle that connects back up to the crack. This defines the chick’s head popping out. -
Add the cheek fluff:
On the left and right sides of that ‘U’ curve, add small pointed zig-zags sticking outward to simulate fluffy feathers or wings. -
Draw the eyes:
Inside the head shape, draw two large circles. Leave a small white highlight spot inside each, then fill the rest of the circle in with black ink. -
Add eyelashes:
Give the chick some personality by drawing two or three short, curved lashes extending from the top outer corner of each eye. -
Draw the beak:
Between an slightly below the eyes, draw a small inverted triangle. -
Color the beak:
Carefully fill in the triangle beak with your yellow marker or paint pen. -
Body details:
At the very bottom of the ‘U’ shape (the chick’s body), draw a curved line connecting the left and right sides. -
Draw the feet:
Below the body curve, draw two simple stick legs. Add three little toes to each foot. -
Trace the main body:
If you are happy with the pencil sketch of the body, head, and feet, trace over everything with the black marker. -
Erase guidelines:
Once the ink is completely dry—give it a full minute—gently erase any remaining pencil marks.
Step 4: Miniature Companion (Optional)
-
Prepare the mini egg:
Take a small candy egg or a speckled chocolate egg. -
Paint a shell:
Use a pink paint pen to color just the top third of the mini egg to look like a hat or shell fragment. -
Add mini eyes:
Dot two tiny black eyes onto the yellow portion of the mini egg to create a little friend for your main chick. -
Final arrangement:
Place the large egg and the mini egg together on a piece of textured paper or a napkin for a sweet display.
Now you have a charming, minimalist character egg that tells a story without needing any dye
Bunny Hugging a Giant Easter Egg
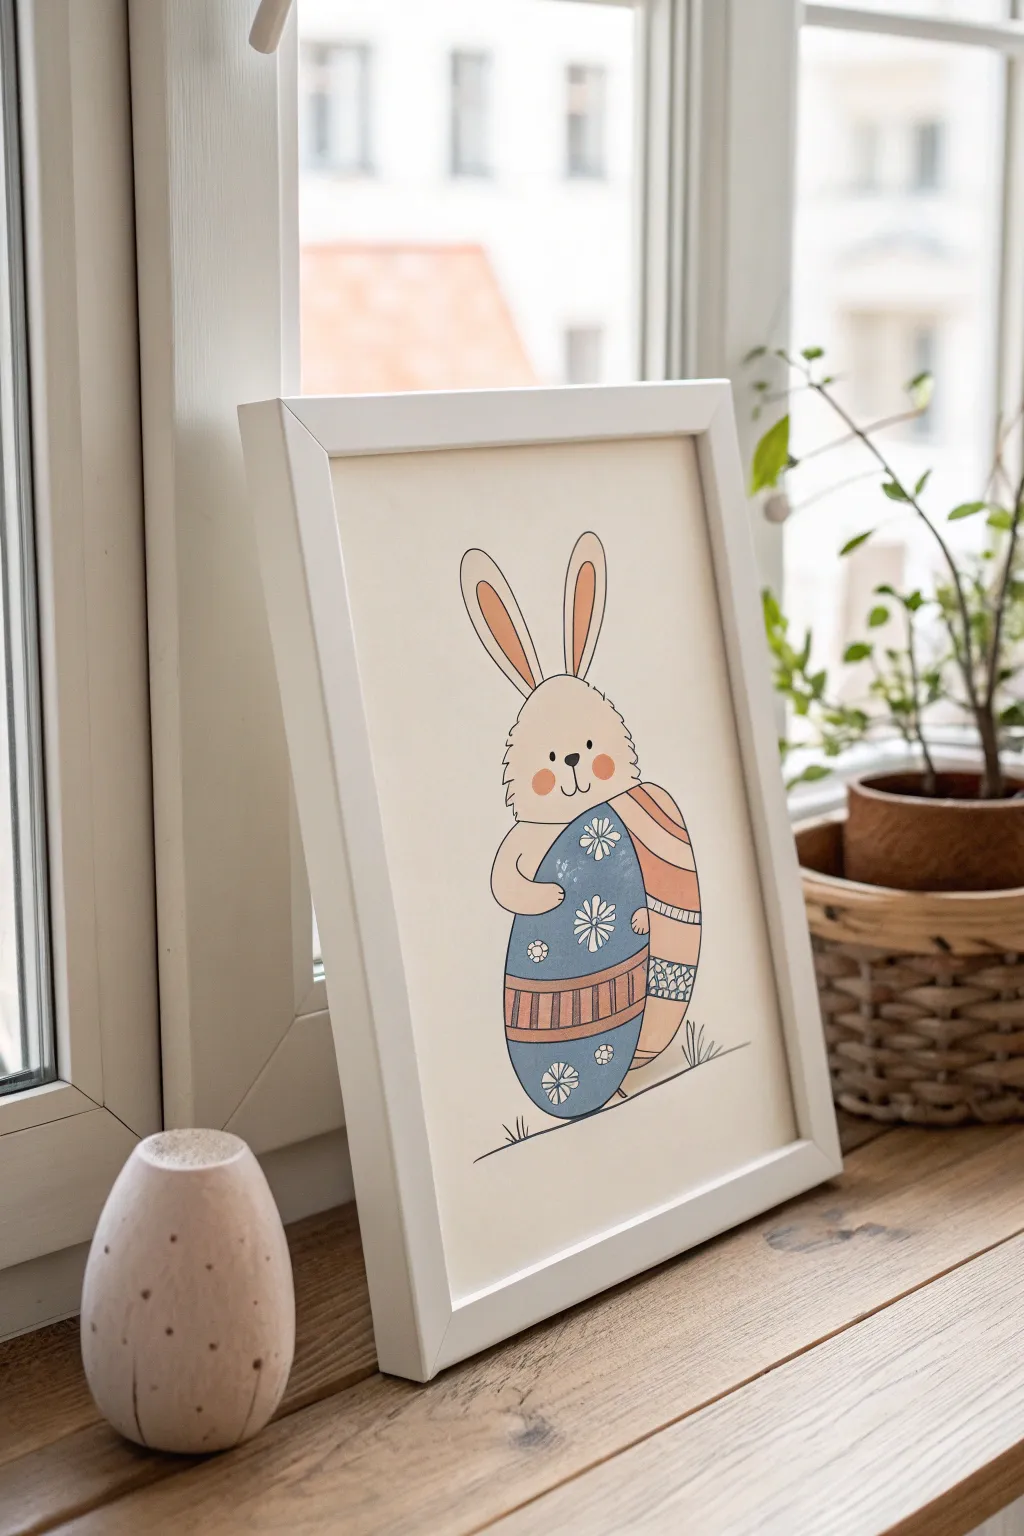
This charming, minimalist illustration features a sweet rabbit embracing an oversized, decorated egg, perfect for seasonal framing. The style combines clean ink outlines with soft, flat color blocks for a modern, Scandinavian-inspired look.
Detailed Instructions
Materials
- Heavyweight drawing paper or mixed media paper (A4 size)
- Fine liner pen (black, waterproof, 0.5mm or 0.8mm)
- Alcohol markers or watercolors (beige/tan, peach, dusty blue, soft terracotta/orange)
- White gel pen
- Pencil (HB or 2H)
- Eraser
- Ruler
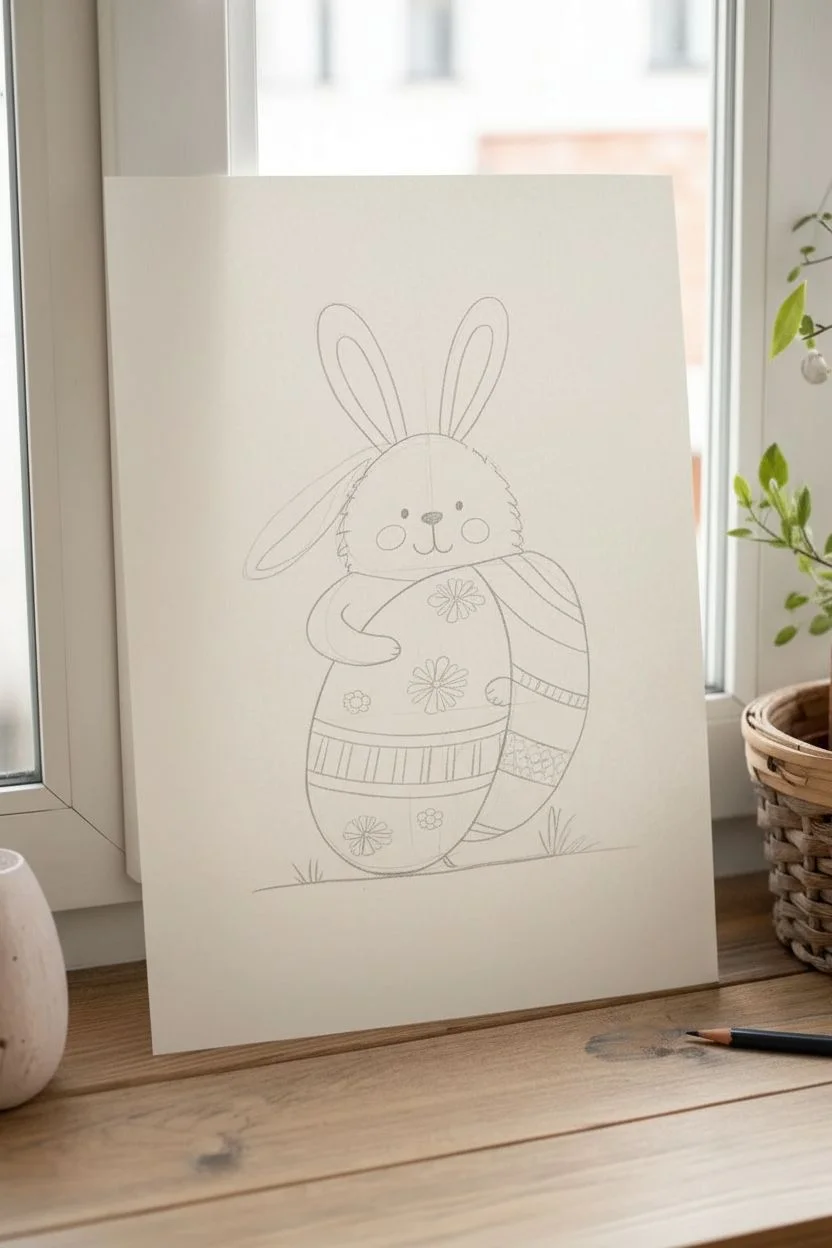
Step 1: Sketching the Shapes
-
Outline the egg:
Start by drawing a large, tall oval shape in the lower center of your paper. This will be the main body of the egg. Don’t worry if it’s not mathematically perfect; a slightly organic shape adds charm. -
Position the bunny head:
Resting right on top of the egg oval, lightly sketch a rounded shape for the head. It should be slightly narrower than the egg but proportional. Imagine a soft Gumdrop shape. -
Add the ears:
Draw two long, upright ears extending from the top of the head. Make them rounded at the tips. The left ear can tilt slightly outward for personality, while the right stands straight up. -
Sketch the arms:
Draw two small, curve-shaped arms coming from the side of the bunny’s body (which is hidden behind the egg), wrapping around the egg’s sides. These are simple ‘U’ shapes that suggest a hug. -
Draw the facial features:
Place two small dots for eyes wide apart on the face. Add a small triangular nose centered below them, and a simple ‘w’ shape for the mouth. Sketch two circles for rosy cheeks. -
Detail the egg design:
Divide the egg with curved horizontal lines. Create a large band in the middle and curved segments at the top and bottom. Sketch rough placements for the flower patterns and stripes inside these bands.
Clean Edges Tip
If using watercolor, wait for the black ink to be 100% dry before painting to avoid bleeding. If using markers, ink the black outlines *last* over the color to prevent smearing.
Step 2: Inking the Lines
-
Refine the contour:
Take your black fine liner. Go over your pencil sketch, but use a jagged, zig-zag motion for the bunny’s fur on the cheeks and top of the head to give it a fluffy texture. Keep the egg lines smooth and continuous. -
Inking details:
Ink the eyes, nose, and mouth. Draw the intricate patterns on the egg. For the central blue band, draw the flower outlines carefully. Ink the striped section below it with vertical lines. -
Add the ground:
Draw a simple horizontal line near the bottom of the egg to ground the figure. Add a few small tufts of grass sticking up. -
Clean up:
Wait at least 5-10 minutes for the ink to fully set, then gently erase all visible pencil marks so your coloring surface is clean.
Fixing Shaky Lines
Did an outline go crooked? Don’t restart! Thicken the line slightly in that area to hide the wobble, or add a small decorative doodle (like a dot or heart) over the mistake.
Step 3: Adding Color
-
Base bunny color:
Using a beige or very light tan marker (or watercolor wash), fill in the bunny’s head, ears, and arms. Leave the inner ear sections uncolored for now. -
Ear and cheek accents:
Use a peach or soft pink shade to color the insides of the tall ears and the round circles on the cheeks. -
Primary egg color:
Color the large central band of the egg with a dusty blue. Carefully work around the flower shapes if you want them to remain white, or color over them if you plan to use an opaque white pen later. -
Secondary egg accents:
Use the dusty blue again for the bottom-most section of the egg. I find repeating colors helps balance the composition. -
Warm egg stripes:
Take a soft terracotta or muted orange marker. Fill in the top section of the egg and the striped band below the flowers. Alternate coloring the vertical stripes to create a pattern. -
Final decorative touches:
Once the blue ink is dry, use a white gel pen to draw the flower petals if you colored over them, or to add crisp white dots to the centers of the flowers. You can also add tiny white dots to the blue sections for extra texture.
Place your finished drawing in a simple white frame to complete the minimalist Easter aesthetic
Simple Egg Hunt Scene With Just a Few Props
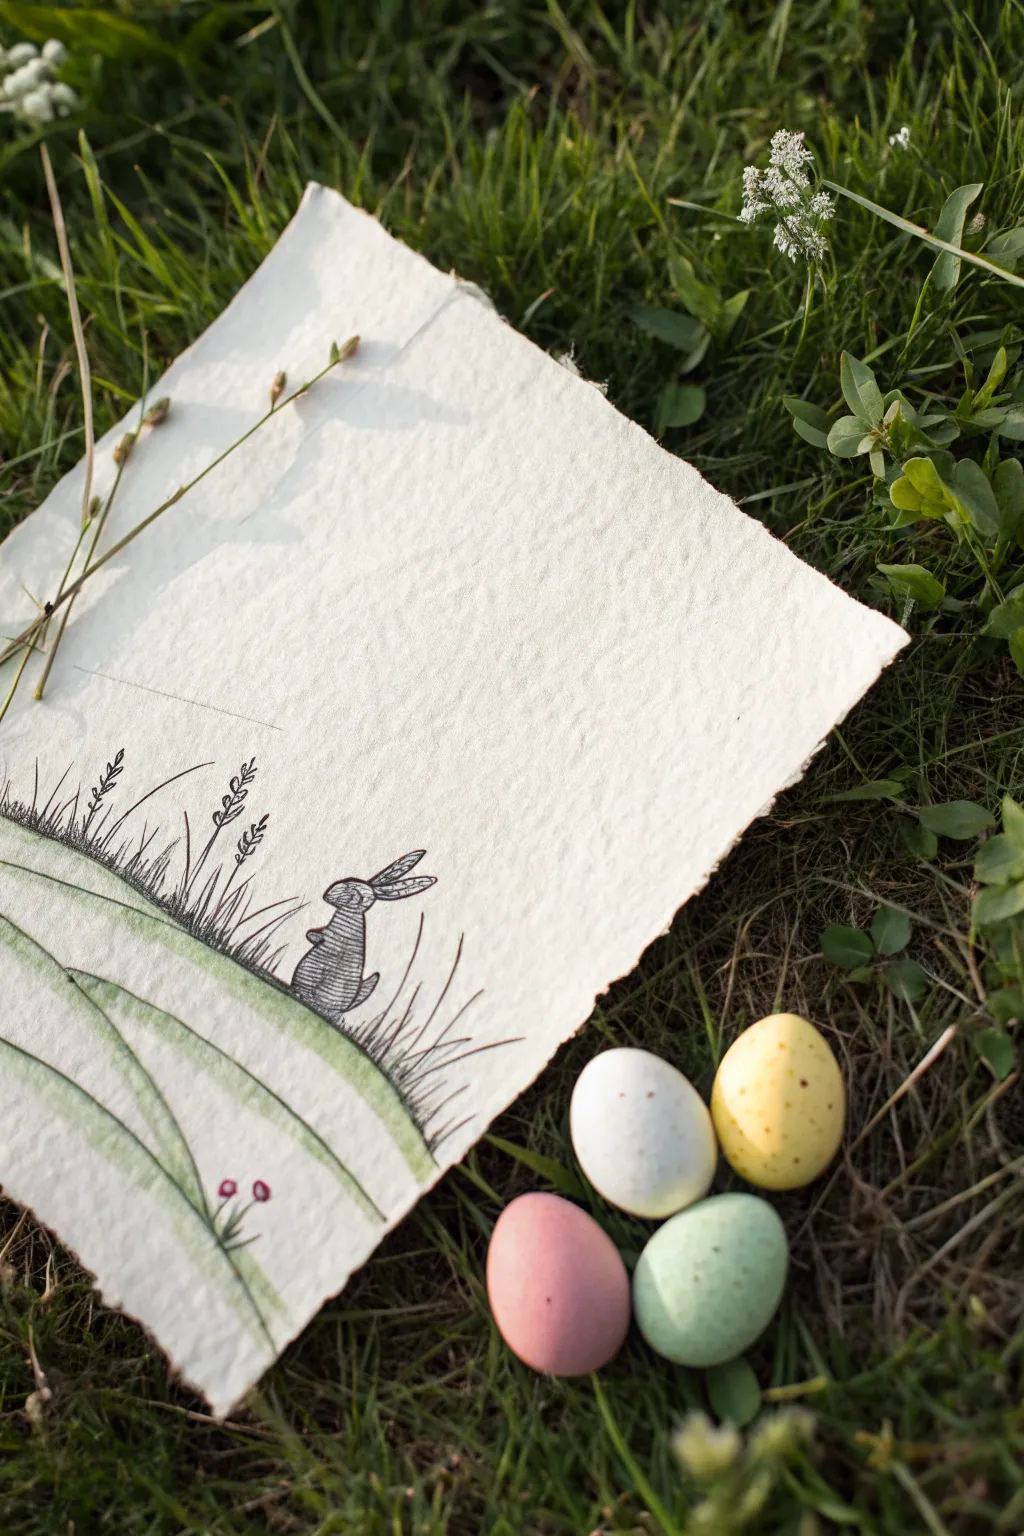
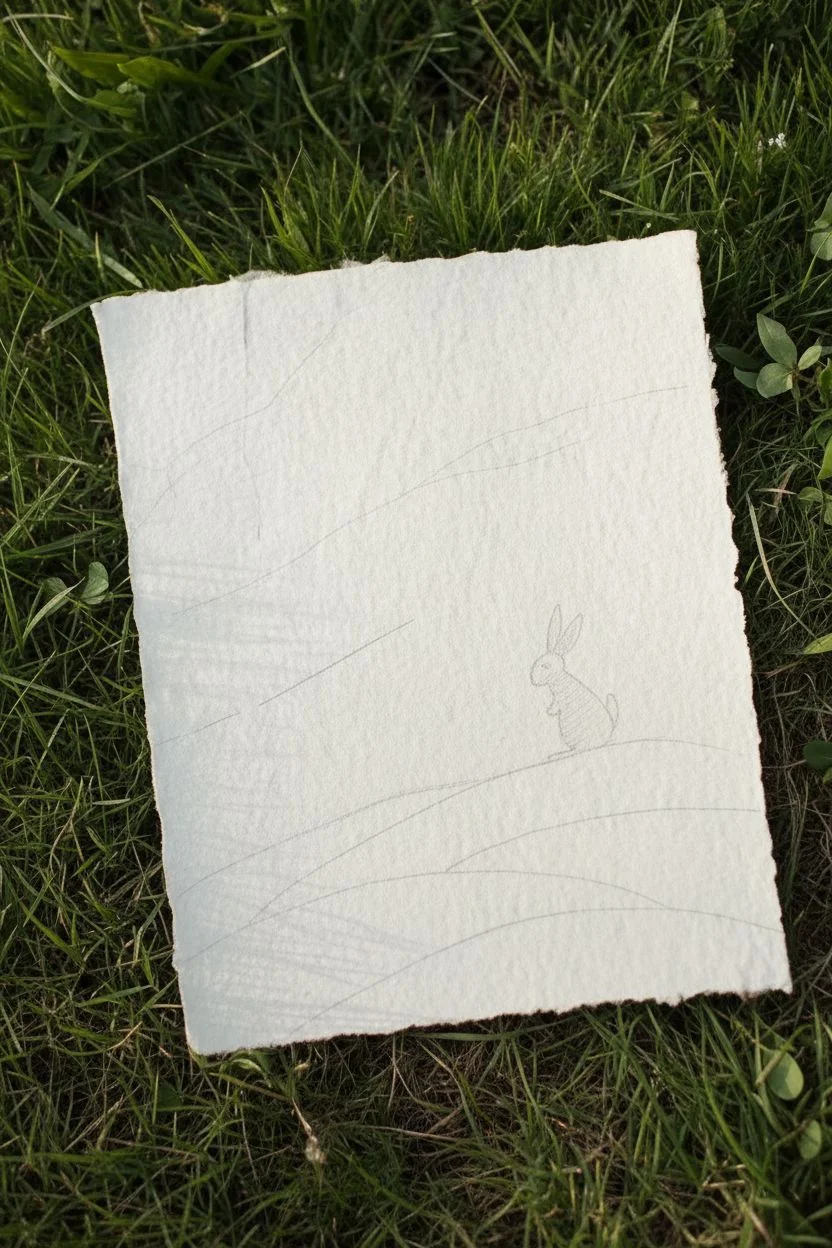
Capture the fresh feeling of spring with this delicate mixed-media drawing featuring a charming bunny silhouette. The combination of black ink linework and soft green washes on deckled-edge paper creates an elegant, organic look perfect for an Easter card.
How-To Guide
Materials
- Heavyweight cold-press watercolor paper (300 gsm)
- Black fineliner pen (0.3mm or 0.5mm, waterproof)
- Fountain pen or dip pen (optional, for variation)
- Watercolor paints (sap green, olive green)
- Soft round watercolor brush (size 4 or 6)
- Pencil and eraser
- Ruler
- Water cup and paper/cloth towel
Step 1: Preparing the Paper
-
Tear the edges:
Instead of cutting your paper with scissors, place a ruler firmly along the edge where you want your border to be. Pull the paper upward and toward you against the straight edge to create a soft, torn “deckled” look on all four sides. -
Draft the composition:
Lightly sketch the layout with a pencil. Draw a few sweeping, curved lines starting from the bottom left corner to represent rolling hills. These hills should overlap slightly to create depth. -
Place the bunny:
On the second or third hill layer, roughly in the middle-right area, sketch a small, simple silhouette of a sitting rabbit. Focus on the oval body, a round head, and two tall ears pointing backward.
Step 2: Inking the Scene
-
Outline the rabbit:
Using your black fineliner, carefully trace over your pencil sketch of the rabbit. Use short, hatched lines for the body to simulate fur texture, rather than a single solid outline. -
Fill the silhouette:
Add horizontal hatching lines across the rabbit’s body. Keep the lines close together but let some paper show through to keep the drawing feeling airy and light. -
Draw the grass blades:
Along the curve of the hill directly under the rabbit, draw clusters of vertical grass blades. Use quick, upward flicking motions with your pen so the tips taper naturally. -
Add floral details:
Intersperse a few taller stems within the grass. Draw tiny seed heads or leaves at the top of these stems to resemble wild meadow wheat or weeds. -
Ink the hill lines:
Go over your main hill curves with the pen. Don’t make this a solid line; break it up occasionally or let the grass blades form the boundary of the hill for a more organic feel. -
Erase pencil marks:
Wait at least 5-10 minutes for the ink to dry completely to avoid smudging. Gently erase all your initial pencil guidelines.
Ink Smudging?
If your black lines bleed when you add watercolor, your pen isn’t waterproof. Let the ink dry for an hour or ink the drawing *after* painting the background instead.
Step 3: Adding Color
-
Mix your greens:
Prepare a watery wash of sap green watercolor. You want this to be very transparent, so use plenty of water. -
Paint the first sweep:
Using your round brush, paint a broad stroke following the curve of the lowest hill. Start from the left edge and lift your brush as you gently fade out toward the right. -
Layer the hills:
Repeat this process for the upper hills. Leave a small gap of white paper between the green strokes to distinguish the different layers of the landscape. -
Add variety:
Drop a tiny amount of concentrated olive green into the wet paint near the bottom of the hills while they are still damp. This wet-on-wet technique adds subtle shadow. -
Paint tiny flowers:
If you drew any small flowers in the foreground, use the very tip of your brush to dab a tiny spot of pink or red. It’s a small detail that brings the scene to life. -
Let it dry completely:
Allow the paper to dry flat. The deckled edges might curl slightly as they dry, which adds to the handmade charm of the final piece.
Add Texture
Sprinkle a pinch of salt onto the wet green watercolor paint before it dries. Brush it off later for a speckled, mottled texture that looks just like mossy grass.
Place your finished artwork next to a bowl of treats or mount it on cardstock for a beautiful handmade gift
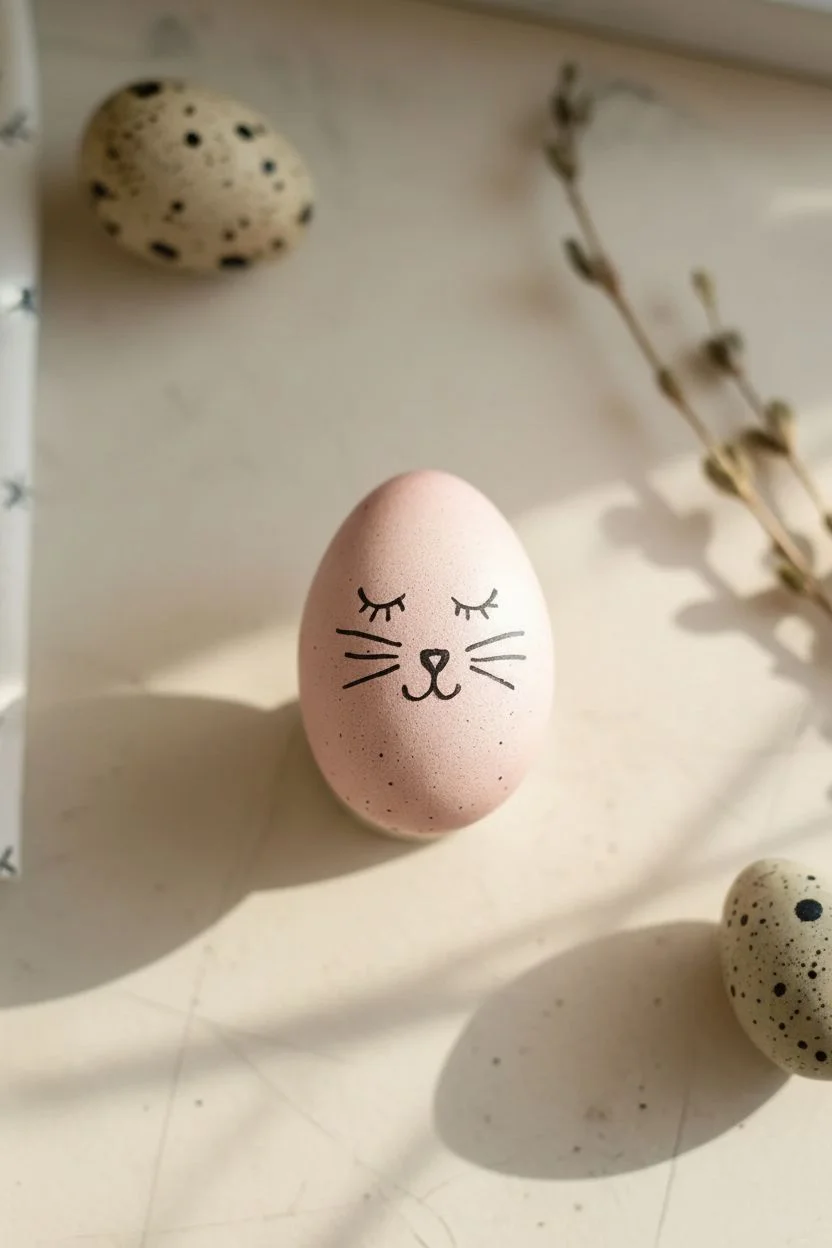
Easy Easter Drawing on a Smooth Rock (Egg or Bunny Face)
Transform a simple smooth stone into an adorable Easter decoration with just a few strokes of paint. This minimalist bunny face design uses the natural texture of the rock as a backdrop for a sweet, rustic look.
Step-by-Step Tutorial
Materials
- Smooth, oval-shaped river rock (egg-sized)
- Fine grit sandpaper (optional)
- Acrylic paint pens (black, pink, white, light blue)
- Small detail paintbrush
- Matte acrylic varnish or sealant spray
Step 1: Preparation
-
Clean the Canvas:
Begin by thoroughly washing your stone with warm soapy water to remove any dirt or oils. Scrub it gently with a brush if needed. -
Dry Completely:
Let the sun or air dry the rock completely. Porous stones can hold moisture, which will prevent paint from adhering properly. -
Optional Smoothing:
If your stone has rough patches that stick out, lightly sand them down with fine grit sandpaper to create a smoother surface for drawing.
Stone Selection Tip
Look for light-colored stones like granite or quartz. A lighter background makes the delicate black lines pop without needing a white base coat.
Step 2: Drawing the Base Design
-
Sketch the Ears:
Using a thin black acrylic paint pen or a very fine brush with black paint, draw two long, narrow loops near the top of the stone for the bunny ears. -
Outline the Face:
Draw two small, curved semicircles for closed eyes slightly below the ears. Leave some space between them. -
Add the Nose:
In the center below the eyes, draw a small inverted triangle for the nose. I like to round the corners a bit to make it look softer. -
Draw Whiskers:
Extend two or three straight horizontal lines out from either side of the nose area to create simple whiskers. -
Create the Mouth:
Draw a tiny vertical line down from the bottom point of the nose triangle to complete the mouth.
Level Up: Texture
Use a speckling technique! Flick a stiff brush with diluted brown paint over the finished white areas to give it a realistic ‘robin’s egg’ speckled effect.
Step 3: Adding Color
-
Color the Ears:
Use a soft pink paint pen to fill in the inside of the ear loops. Leave a small border of empty space between the pink and the black outline. -
Fill the Nose:
Carefully fill in the triangular nose with the same pink shade. -
Create the Decorative Band:
About two-thirds of the way down the rock, draw a zigzag line horizontally across the stone using a muted pink color to create a decorative band. -
Fill the Band:
Fill in the triangles created by the zigzag line, painting downwards slightly to create a solid row of pink triangles. -
Add Lower Dots:
Switch to a light blue paint pen. Below the pink band, add scattered polka dots in the remaining space at the bottom of the ‘egg’. -
Add Cheek Highlights:
For a subtle touch, you can add two extremely faint pink circles near the whiskers for cheeks, though the original design skips this for a cleaner look. -
Let Color Dry:
Allow all the colored elements to dry completely before touching the rock again to avoid smudging your fine lines.
Step 4: Finishing Touches
-
Seal the Design:
Once you are certain the paint is bone dry, spray the rock with a clear matte sealant. A glossy spray works too, but matte keeps the natural stone look. -
Display:
Your rock is now ready to be nested in a basket with other decorated stones.
You now have a charming, permanent Easter decoration that brings a touch of nature to your holiday display
Surprise Fold-Over Egg That Reveals a Bunny Inside
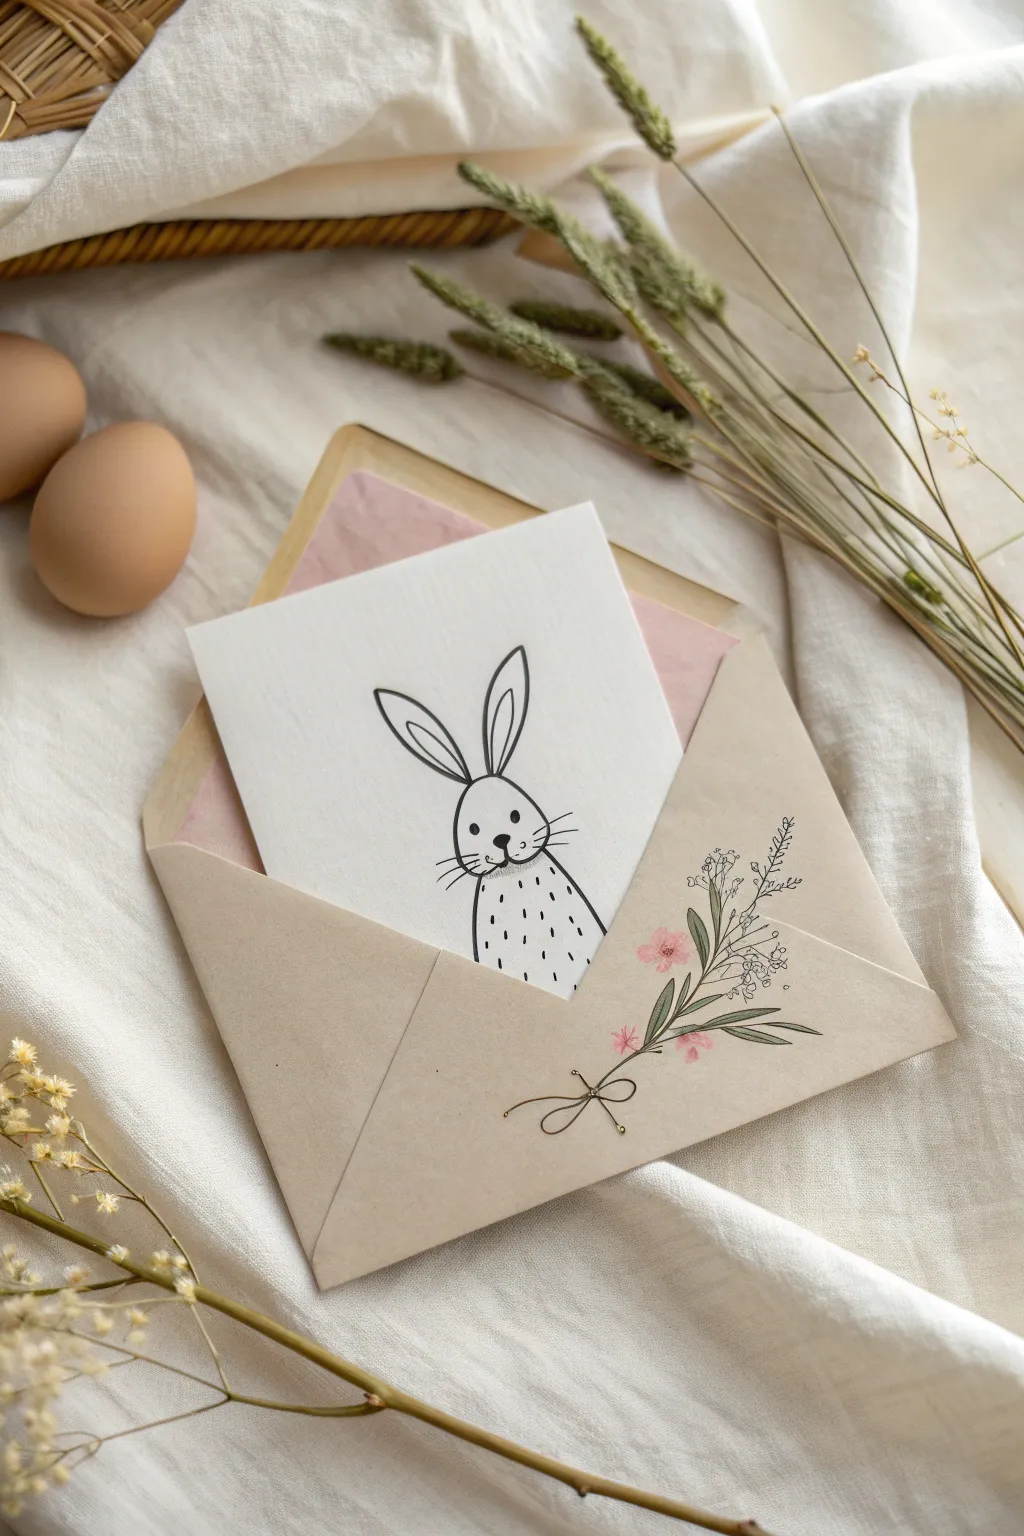
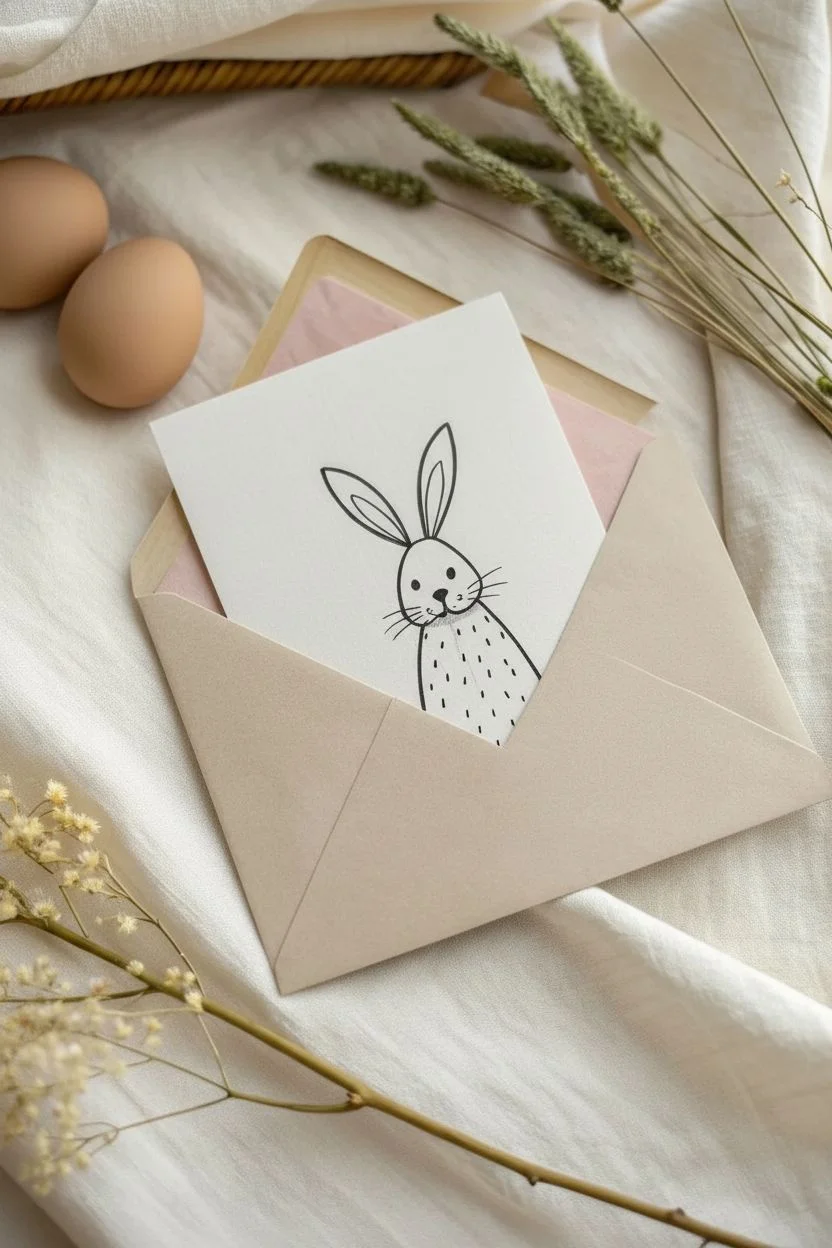
This charming project features a sweet, hand-drawn bunny on crisp white cardstock, nestled inside a kraft envelope adorned with delicate floral details. The minimalist aesthetic combines simple line work with subtle watercolor touches for a professional-looking finish.
How-To Guide
Materials
- Heavyweight white cardstock or watercolor paper (approx. 5×7 inches)
- Light kraft paper envelope (A7 size)
- Fine liner pen (black, archival ink, size 03 or 05)
- Pencil (HB or H)
- Eraser
- Watercolor paints (pink and green shades)
- Small round paintbrush (size 2 or 4)
- Ruler
Step 1: Drawing the Bunny
-
Lightly sketch the outline:
Start by lightly sketching the bunny’s shape with your pencil. Draw a small oval for the head and two long, tapered shapes for the ears extending upwards. Keep the lines faint so they are easy to erase later. -
Define the face:
Within the head oval, sketch two small dots for eyes. Below them, add a small, rounded triangle for the nose and a ‘W’ shape for the mouth. Add simple straight lines for whiskers extending from the muzzle area. -
Add the body shape:
From the bottom of the head, draw a simple bell shape or rounded hill for the body. This doesn’t need to be detailed; a clean outline works best for this minimalist style. -
Ink the main lines:
Once you are happy with your pencil sketch, trace over the main outlines with your fine liner pen. Use a confident, steady hand. I like to start with the ears and work my way down to ensure I don’t smudge the wet ink. -
Add inner ear details:
Draw smaller, inner contours inside the ears to give them depth. These lines should mimic the outer shape but stop before reaching the head. -
Give the bunny personality:
Ink the facial features. Fill in the eyes completely black, leaving a tiny speck of white if you want a highlight. Darken the nose and carefully trace the whiskers. -
Create the fur texture:
Instead of drawing a solid outline for the body, use short, broken lines or small dashes scattered across the body area to suggest fur texture without heavy shading. -
Erase pencil marks:
Wait for the ink to dry completely—this is crucial to avoid smearing. Gently erase all visible pencil sketches to leave a clean, crisp black-and-white drawing.
Step 2: Decorating the Envelope
-
Sketch the floral spray:
Position your kraft envelope so the bottom flap is facing you. Lightly pencil a small bouquet design on the lower right corner of the flap. -
Draw the stems:
Using your fine liner, draw four to five stems intersecting near the bottom. Add a small bow detail where the stems cross to make it look like a tied bouquet. -
Add leaves and buds:
Draw small, elongated leaves along the stems. Add tiny circles or teardrop shapes at the ends of some stems to represent flower buds. -
Paint the flowers:
Dip your brush into a diluted pink watercolor. Gently dab color onto the flower -
Paint the leaves:
Clean your brush and pick up a soft sage green watercolor. Carefully fill in the leaf shapes. The kraft paper will absorb water differently than white paper, so use less water than usual. -
Final drying time:
Allow the painted envelope to dry flat completely before inserting your card to prevent wrinkling or color transfer.
Ink Smearing?
If your fine liner smears when erasing pencil marks, switch to a waterproof archival ink pen (like Micron) or let the ink sit for at least 15 minutes before erasing.
Add a Pop of Color
Use a light pink marker or diluted watercolor to add tiny rosy cheeks to the bunny’s face for an extra touch of sweetness.
Now your lovely handmade card is ready to bring a smile to someone special this holiday


Have a question or want to share your own experience? I'd love to hear from you in the comments below!