A plain jewelry box is basically a tiny canvas with hinges, drawers, and so much personality waiting to happen. Here are my favorite jewelry box painting ideas to help you turn that little storage piece into something you’ll genuinely love seeing on your dresser.
Classic Floral Lid Bouquet
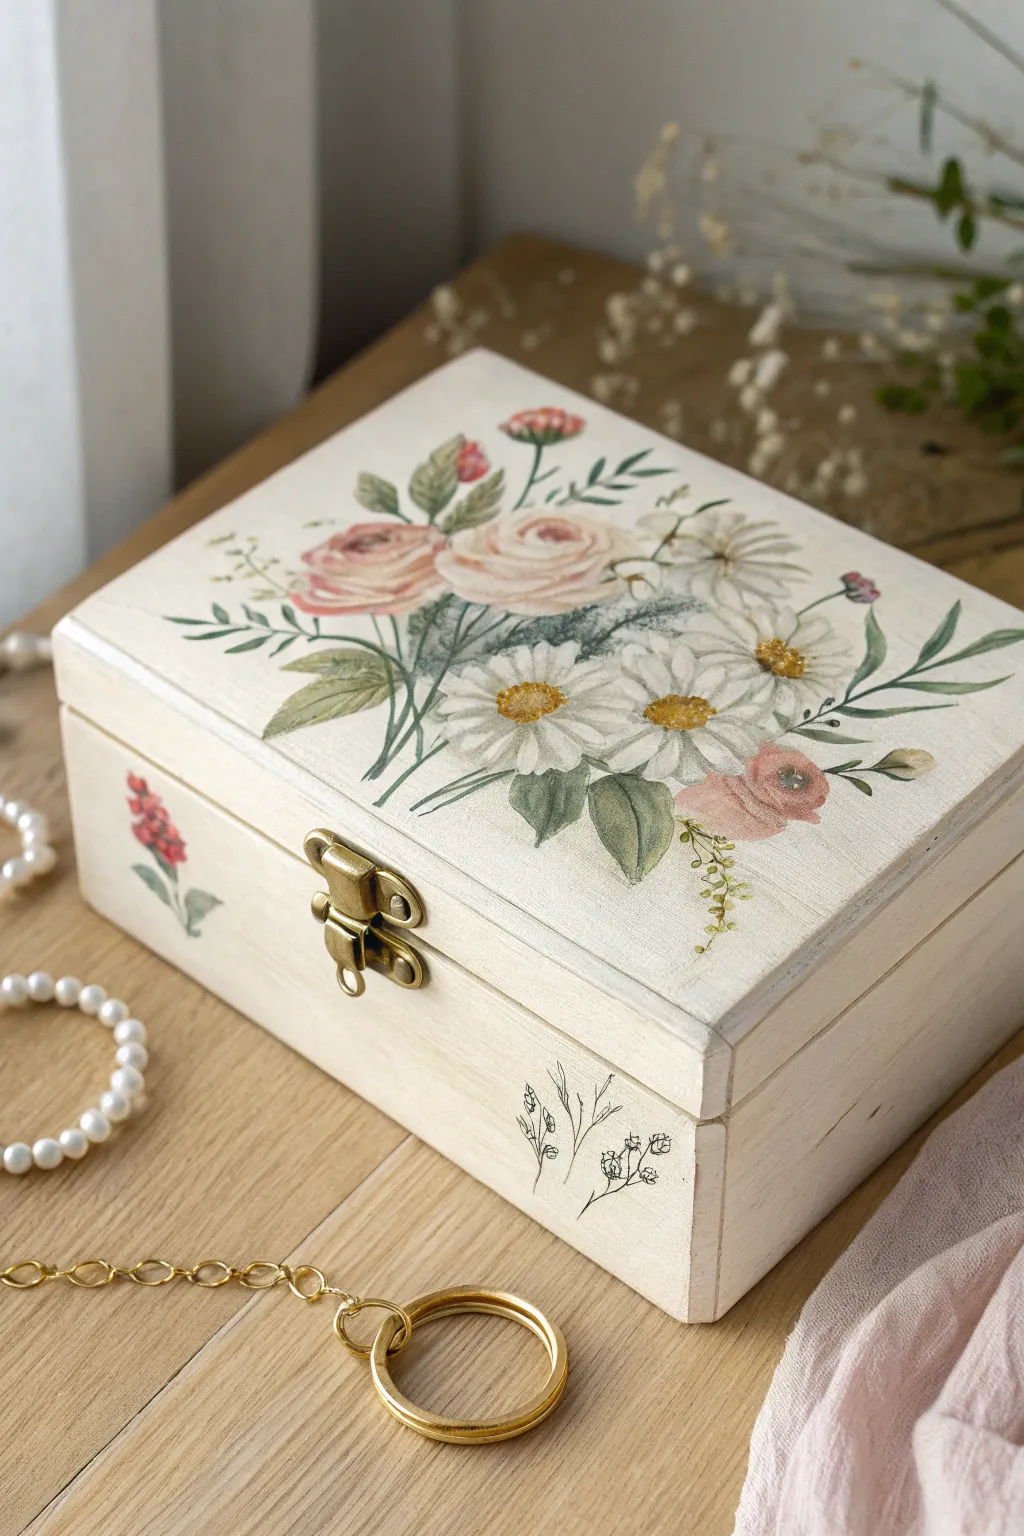
Transform a plain wooden box into a romantic keepsake with this soft, vintage-inspired design. Featuring a central bouquet of creamy roses and daisies on the lid, this project uses delicate shading and muted tones to achieve a classic heirloom look.
Step-by-Step Guide
Materials
- Unfinished wooden jewelry box with latch
- Sanding block (fine grit)
- White or cream acrylic paint (matte finish)
- Acrylic paints: sage green, olive green, dusty rose, burgundy, ochre, warm white
- Flat shader brush (medium)
- Round detail brushes (sizes 0 and 2)
- Pencil for sketching
- Palette or paper plate
- Water cup and paper towels
- Matte varnish or sealant
Step 1: Preparation & Base Coat
-
Surface Prep:
Begin by removing the hardware if possible, or taping it off carefully with painter’s tape. Sand the entire wooden box lightly with a fine-grit sanding block to remove any rough splinters and create a smooth painting surface. -
Base Painting:
Apply a coat of warm white or cream acrylic paint to the outside of the box. Use long, even strokes with your flat brush to minimize texture. Let this coat dry completely. -
Second Coat:
Apply a second coat of the cream paint to ensure solid coverage. For that slightly rustic, hand-painted feel shown in the photo, don’t worry if the wood grain peeks through just a tiny bit in the corners.
Brush Control Trick
For the ultra-thin stems, roll your liner brush into a needle-sharp point on your palette before touching the wood. Keep only the very tip wet to avoid blobs.
Step 2: Painting the Lid Bouquet
-
Sketch the Layout:
Lightly sketch your bouquet design onto the lid with a pencil. Place two large roses slightly off-center and surround them with three daisy shapes. Add flowing lines for the stems and leaves extending outward. -
Block in Roses:
Mix a soft blush pink using white and a tiny dot of dusty rose. Fill in the circular rose shapes. While the paint is still wet, swirl in a slightly darker rose color to define the petals’ centers. -
Rose Details:
Once the base is tacky, use a small round brush with a darker burgundy-pink mix to paint C-shaped curves for the petal edges, creating depth and separating the layers of the bloom. -
Daisy Petals:
Paint the daisy petals using pure warm white. Start from the outside of the petal and stroke inward toward the center of the flower. This helps the petals look tapered and natural. -
Daisy Centers:
Dab the centers of the daisies with ochre paint. Texture is key here—stipple the paint with the tip of your brush to mimic the fuzzy pollen center. -
Layering Greenery:
Mix sage green with a bit of white for the leaves. Paint the larger leaves first, using a sweeping motion to create elongated shapes. Vary the green shades slightly for interest. -
Fine Stems:
Switch to your size 0 liner brush. Mix an olive green paint with a drop of water to make it flow smoothly. Paint thin, delicate stems connecting the flowers and adding wispy sprigs extending to the corners. -
Gold Accents:
Add tiny dots of ochre or gold paint to the centers of the daisies and casually along a few of the outer sprigs to catch the light. -
Highlights and Shadows:
Add tiny slivers of white on the rose petal edges for highlights. Then, wash a very diluted gray-green under some leaves to ground the bouquet on the box.
Level Up: Liner Pen
Struggling with tiny details? Use a brown or grey waterproof fine-tip pigment liner pen to outline the leaves and petals for an illustrative ‘botanical print’ style.
Step 3: Adding Side Details
-
Front Face Sprigs:
On the front vertical face of the box, sketch a tiny vertical sprig near the left corner. Paint this with a single red accent flower and a few green leaves to balance the design. -
Simple Line Work:
On the bottom right corner of the front face, use your finest brush or a black fine-liner pen to draw very minimal, sketch-style botanical outlines. This simpler style contrasts beautifully with the full painting on top.
Step 4: Finishing Touches
-
Distressing (Optional):
If you want an aged look, lightly sand the edges of the box again to reveal a hint of raw wood, softening the starkness of the white paint. -
Sealing:
Once all paint is completely dry (wait at least an hour), apply a layer of matte varnish over the entire box to protect your artwork from handling. -
Reassembly:
Remove any tape or reinstall your hardware carefully.
Now you have a charming, hand-painted box ready to store your favorite treasures or give as a thoughtful gift


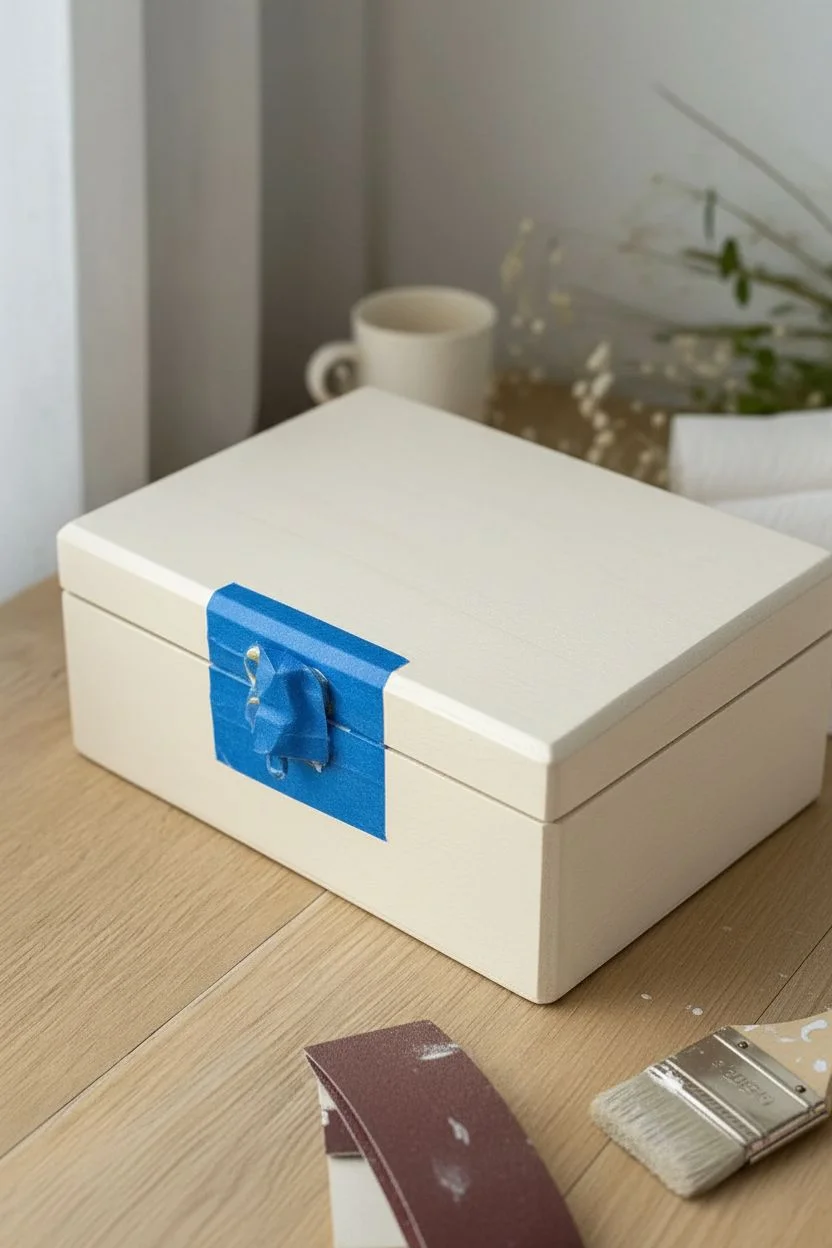
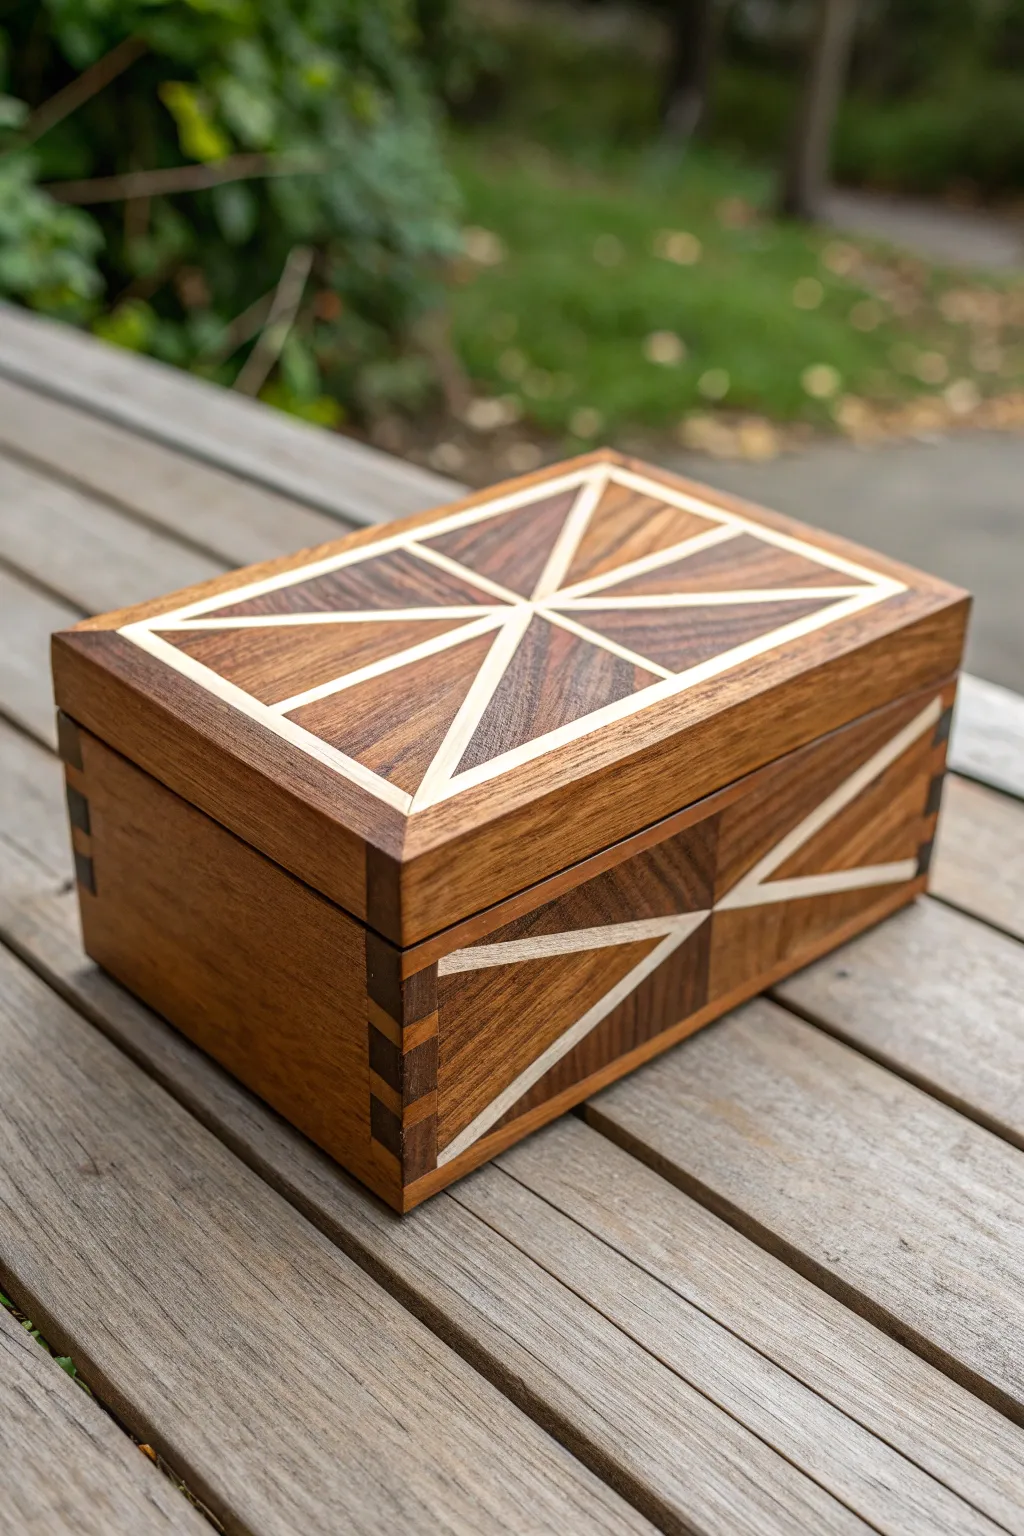
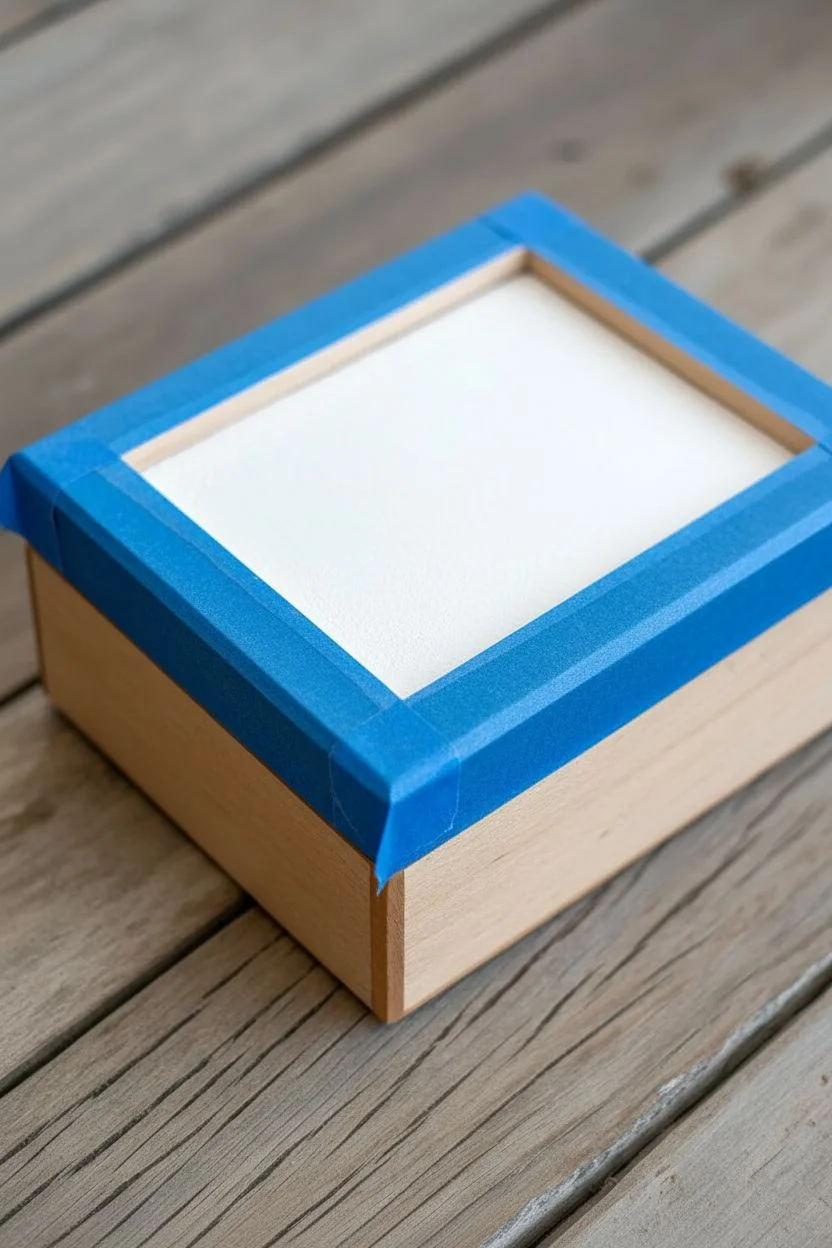
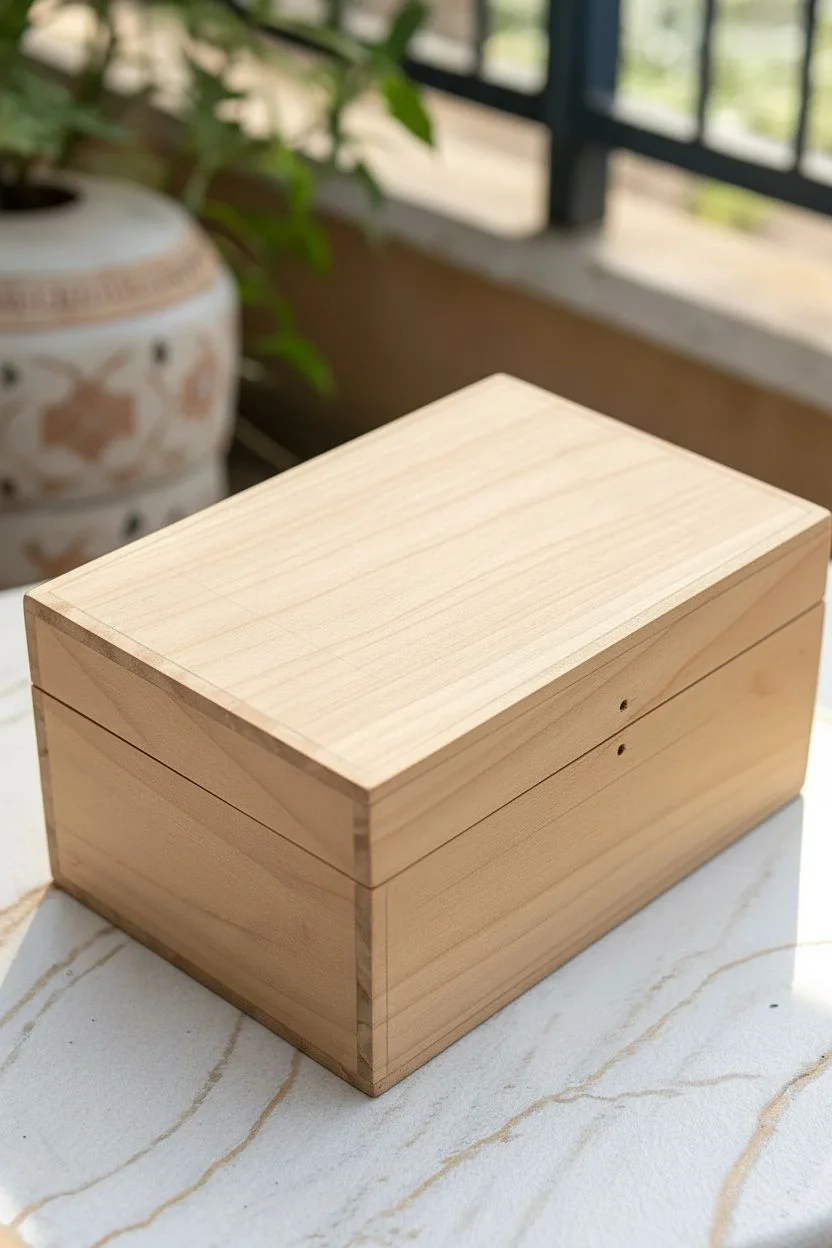
Crisp Stripes With Painter’s Tape
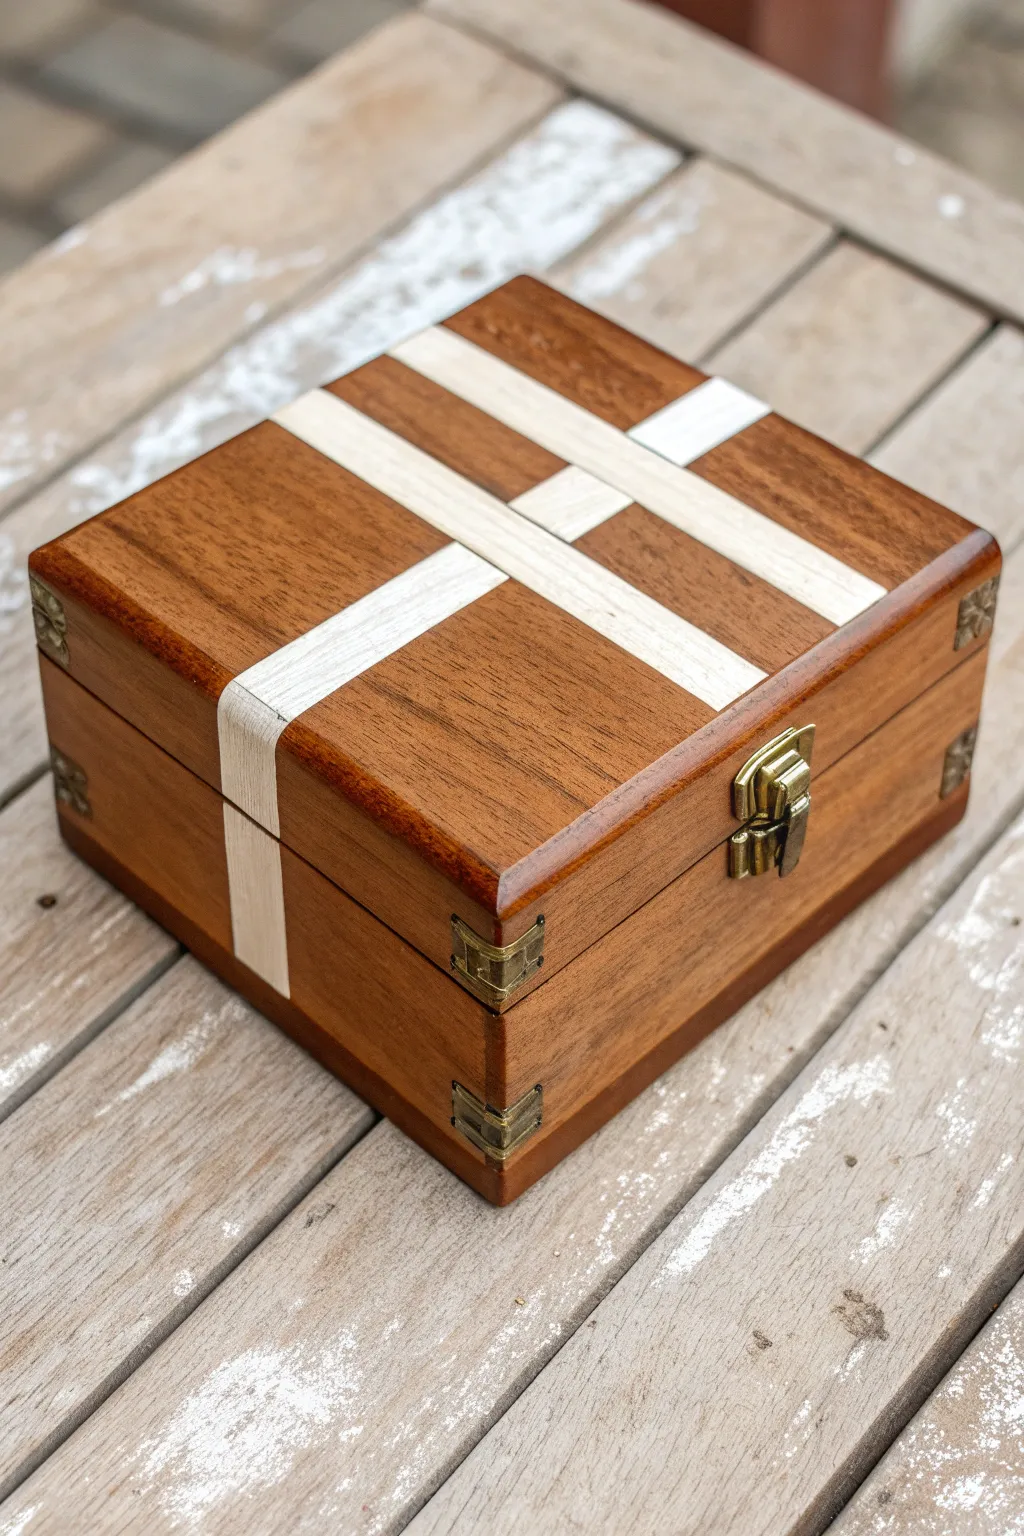
Transform a plain wooden box into a sophisticated keepsake holder using the power of negative space. By masking off stripes before staining, you preserve the light natural wood to create a bold, modern geometric pattern that looks like high-end inlay work.
How-To Guide
Materials
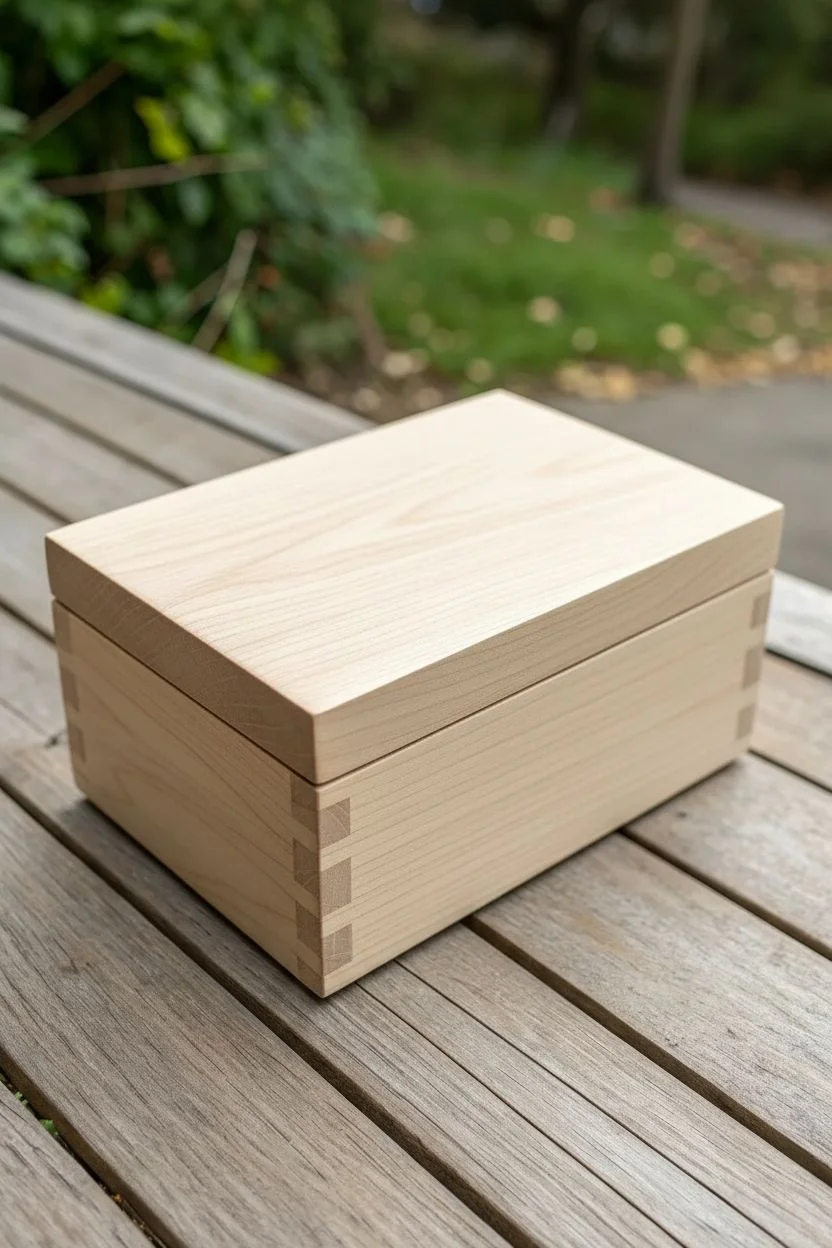
- Unfinished wooden jewelry box
- Medium-grit sandpaper (120-150 grit)
- Fine-grit sandpaper (220 grit)
- Painter’s tape (various widths, 0.5 to 1 inch)
- Dark wood stain (e.g., walnut or mahogany)
- Foam brush or lint-free staining rag
- Clean wiping cloths
- Polyurethane sealer (satin or matte)
- Small bristle brush
- Brass corner protectors (x8) and latch
- Small screwdriver
- Hobby knife (optional)
Step 1: Preparation & Masking
-
Remove hardware:
Before doing anything else, remove any existing latch or hinges if possible. If the hardware is glued on or difficult to remove, carefully cover it completely with small pieces of painter’s tape to protect it from the stain. -
Rough sanding:
Sand the entire exterior of the box with medium-grit sandpaper. This smooths out any factory roughness and prepares the wood fibers to accept the stain evenly. -
Fine sanding:
Follow up with the fine-grit sandpaper for a silky finish. Wipe away every speck of dust with a clean, dry cloth or a tack cloth; any leftover dust will create bumpy texture later. -
Plan your stripes:
Decide on the layout of your stripes. The example uses two parallel lines intersecting with two other parallel lines. You can measure for perfect symmetry or eyeball it for an artistic look. -
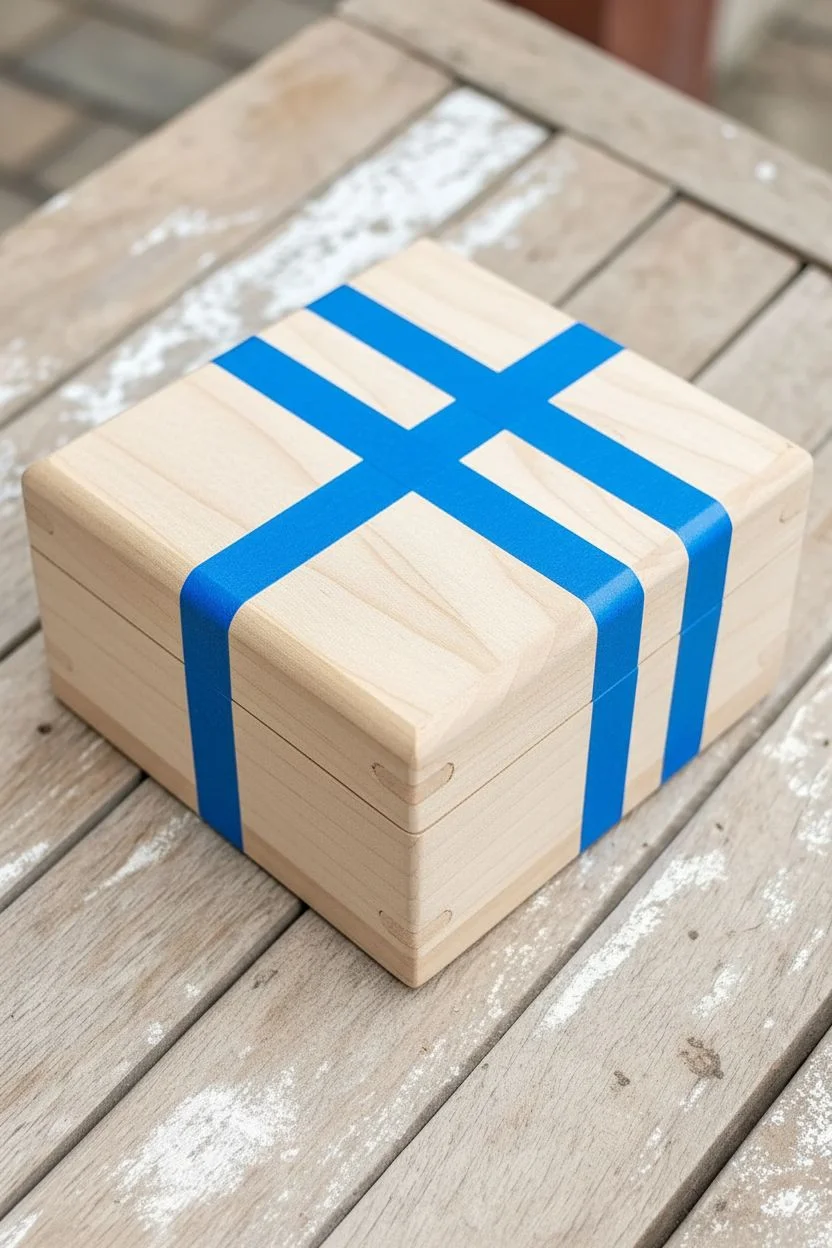
Apply the tape:
Apply strips of painter’s tape across the lid and down the sides of the box. Ensure the tape wraps continuously over the edges so the lines flow seamlessly from the top to the bottom. -
Seal the edges:
Press down firmly along the edges of every piece of tape. I like to run the back of my fingernail or a credit card along the tape edge to ensure a tight seal, which prevents the stain from bleeding underneath.
Bleeding Lines?
If stain seeped under the tape, carefully scrape the excess off the light wood with a sharp hobby knife, or lightly sand that specific spot with folded sandpaper.
Step 2: Staining & Finishing
-
Apply stain:
Dip your foam brush or rag into the dark wood stain. Apply it generously over the exposed wood areas, brushing in the direction of the wood grain. -
Wait and wipe:
Allow the stain to penetrate the wood for 5-15 minutes, depending on how dark you want the finish. Afterward, wipe off the excess stain with a clean cloth using long, smooth strokes. -
Let it dry:
Let the stain dry completely according to the manufacturer’s instructions. This is crucial because pulling tape off wet wood can sometimes cause smudging. -
The reveal:
Carefully peel back the painter’s tape. Pull slowly at a 45-degree angle away from the stain line to reveal the crisp, light wood stripes underneath. -
Seal the deal:
Stir your polyurethane sealer gently (don’t shake, or you’ll get bubbles). Apply a thin, even coat over the entire box, including the lighter stripes. -
Sand between coats:
Once the first clear coat is dry, lightly sand with fine-grit sandpaper to knock down any raised grain. Wipe away the dust and apply a second coat for durability.
Add Metallic Flair
Instead of leaving the stripes as bare wood, paint them with metallic gold or copper acrylic paint for a glamorous contrast against the dark wood stain.
Step 3: Hardware Installation
-
Attach the latch:
Reattach your latch or install a new brass one in the center of the front panel. Use a small screwdriver to secure the screws tightly. -
Position corner protectors:
Take the decorative brass corner pieces and test-fit them on the top and bottom corners of the box. They add a great industrial, vintage feel to the project. -
Secure corners:
Nail or screw the corner protectors into place. If they use tiny nails, holding them with needle-nose pliers can save your fingers from getting hammered.
Now you have a striking, personalized box ready to hold your treasures or be gifted to someone special


Playful Polka Dots on Lid and Sides
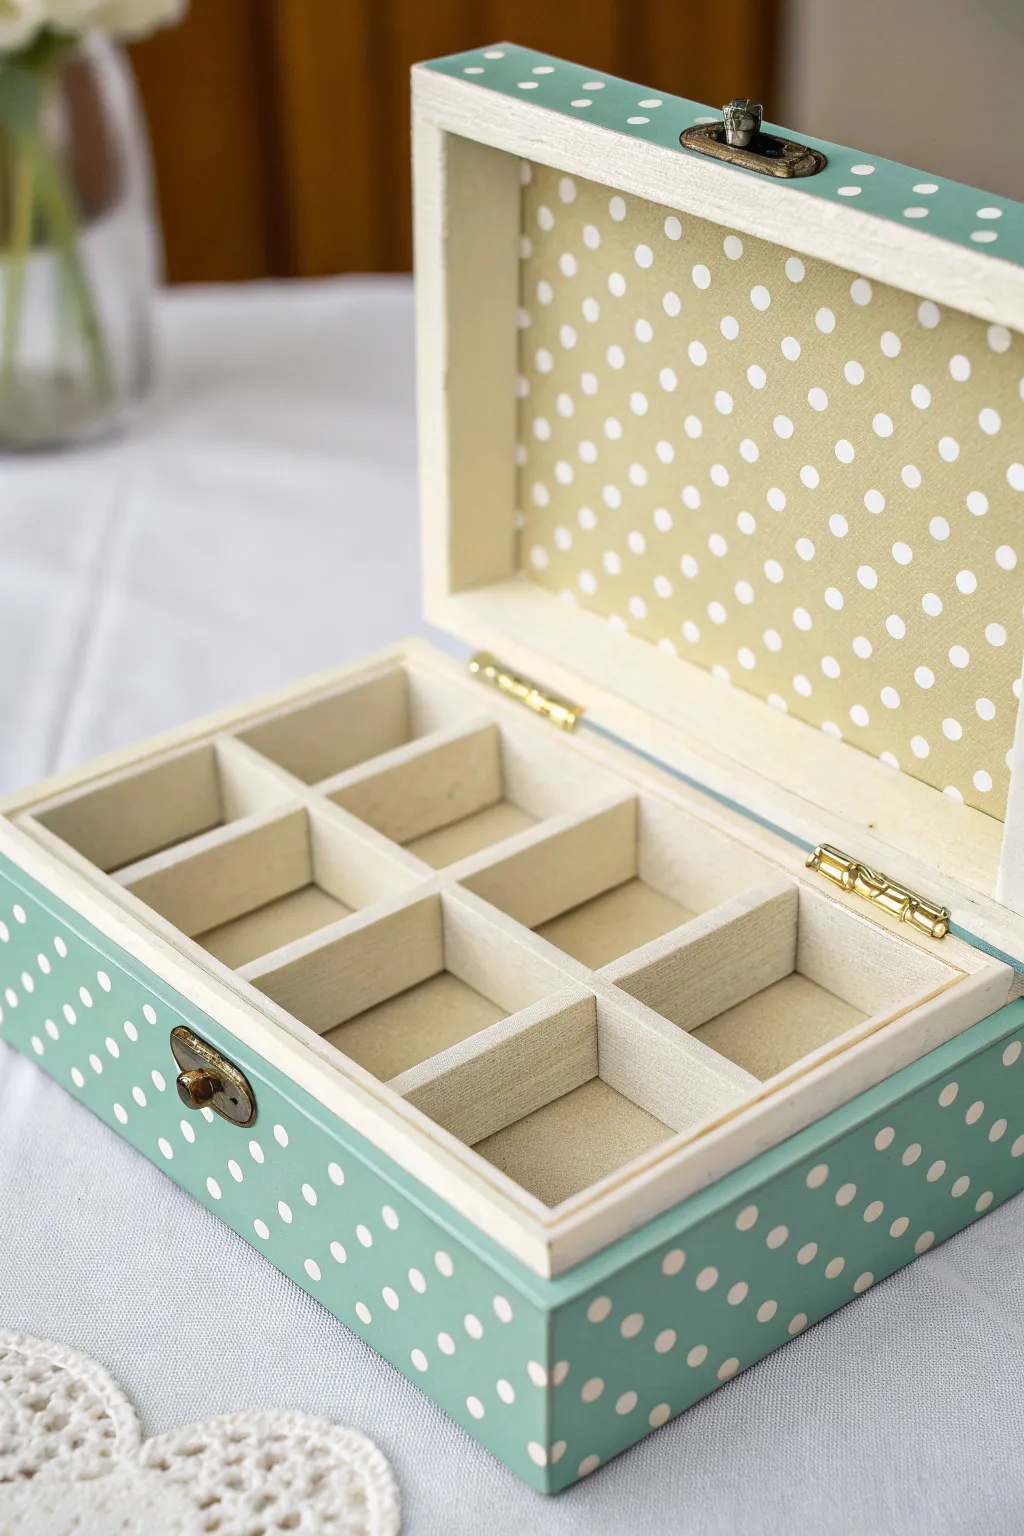
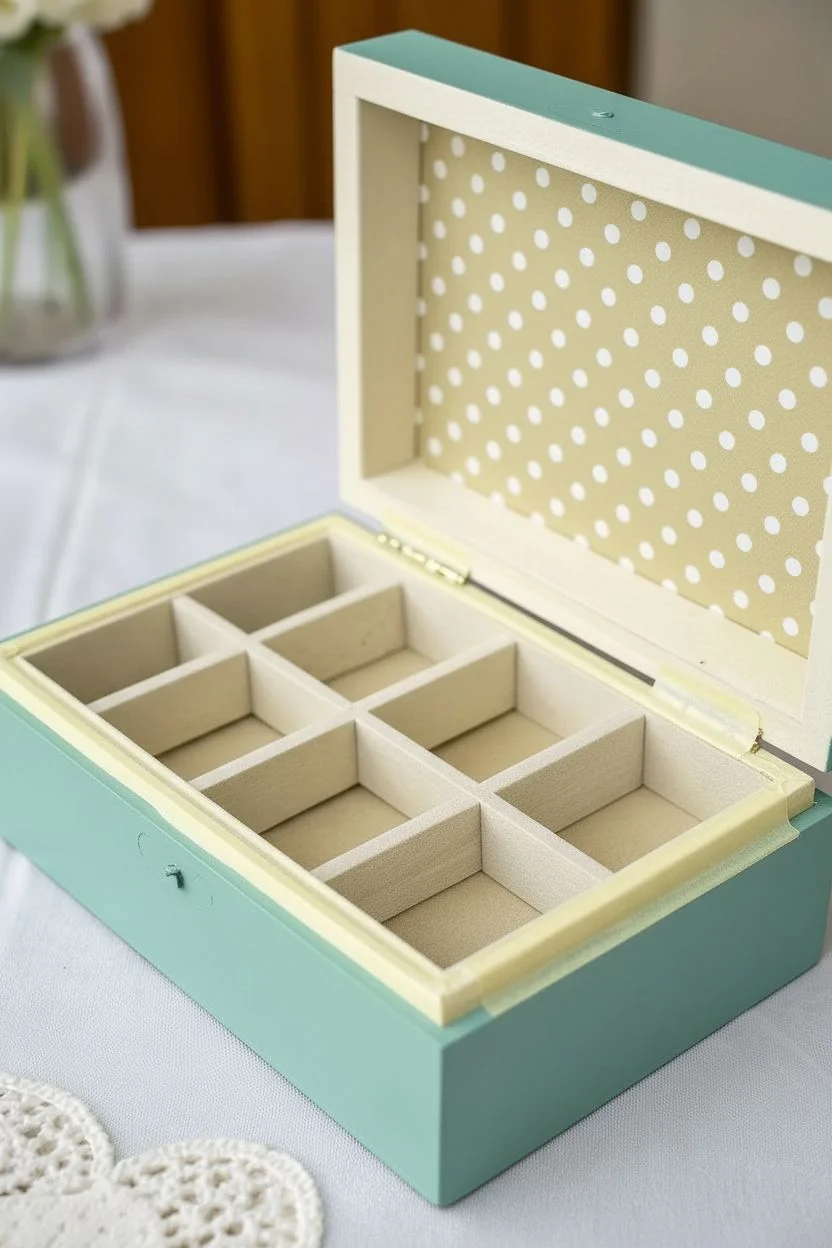
Transform a plain wooden box into a charming keepsake with this fresh, playful design. The combination of a soothing teal base with crisp white polka dots creates a timeless look that brightens up any dresser.
Detailed Instructions
Materials
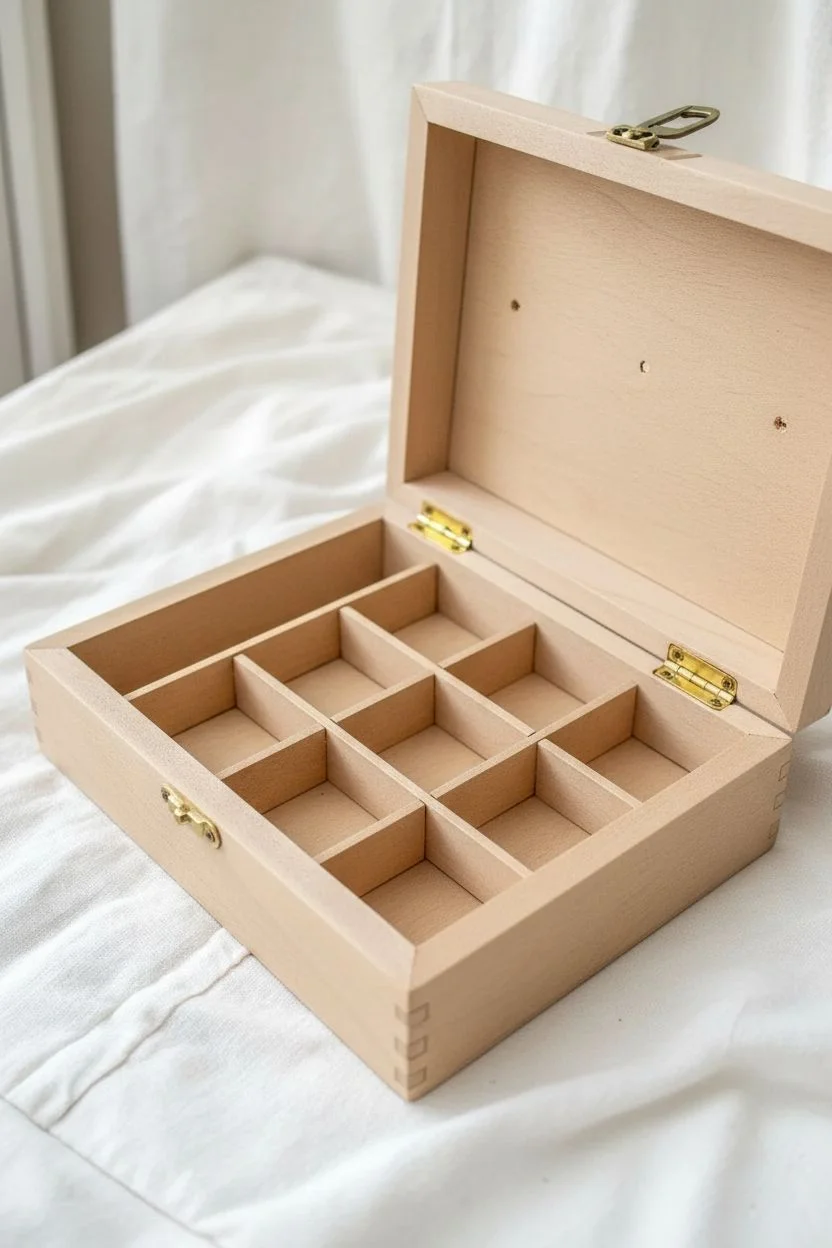
- Unfinished wooden jewelry box with compartments
- Sandpaper (220-grit)
- Tack cloth or damp rag
- Teal or aqua acrylic craft paint
- White acrylic craft paint
- Medium flat paintbrush (3/4 inch)
- Small round paintbrush (size 2 or 3)
- Painter’s tape
- Small foam pouncer or the handle end of a paintbrush
- Patterned scrapbooking paper (yellow/beige polka dot)
- Mod Podge or decoupage glue
- Scissors and ruler
- Small screwdriver (optional, for hardware removal)
- Matte or satin clear sealant spray
Step 1: Preparation & Base Coating
-
Remove Hardware:
Before you begin, use a small screwdriver to carefully remove the latch and hinges. Keep these screws and pieces in a small bowl so they don’t get lost. Removing hardware ensures a much cleaner paint job than trying to paint around them. -
Sand the Wood:
Lightly sand the entire exterior and interior rims of the box using 220-grit sandpaper. You just want to smooth out any rough grain or splinters. Wipe away the dust with a tack cloth. -
Tape the Interior:
If you want to keep the interior compartments natural or unfinished as shown in the photo, apply painter’s tape along the inner upper edge of the box base and the lid’s inner frame. -
Paint the Base Coat:
Using your flat brush, apply the teal acrylic paint to the entire exterior of the box. Use long, smooth strokes going with the grain of the wood. -
Check Coverage:
Let the first coat dry for about 20 minutes. It will likely look a bit streaky, which is normal. Apply a second coat for solid, opaque coverage and let this dry completely for at least an hour. -
Detail the Liip:
Use a smaller brush to carefully paint the rim of the lid where it meets the box. On this specific project, I kept the very thick edge of the lid white/cream to frame the teal, so paint that strip white now if your box has a similar construction.
Fixing Smudged Dots
If you smudge a wet dot, wait for it to dry completely. Sand it flat gently, paint over it with the teal base color, let that dry, and re-stamp the white dot.
Step 2: Applying the Polka Dots
-
Plan the Pattern:
Decide on your spacing. A diagonal grid pattern usually looks best. You can lightly mark dots with a pencil and ruler first if you are nervous about freehanding. -
Create the Dots:
Dip the handle end of a paintbrush or a small foam pouncer into white acrylic paint. This is the easiest way to get perfectly round circles without a stencil. -
Stamp the Surface:
Touch the tool straight down onto the teal surface, then lift straight up. Practice on a piece of scrap paper first to gauge how much paint you need. -
Work in Sections:
Paint the dots on the lid first, then move to the sides. Be careful not to smudge wet dots on one side while working on another; you might need to let each side dry before rotating the box. -
Clean Up Edges:
Once the dots are dry, inspect your work. If any dots look lopsided, you can carefully touch them up with a tiny round brush.
Step 3: Interior Lining & Finish
-
Measure the Inner Lid:
Measure the inside recessed area of the lid. Cut a piece of your patterned scrapbooking paper (beige with white dots complements the exterior nicely) to fit this rectangle exactly. -
Line the Lid:
Apply a thin layer of Mod Podge to the back of the paper and press it firmly into the inside of the lid. Smooth it out from the center toward the edges to remove air bubbles. -
Seal the Exterior:
Once all paint is fully cured (usually 24 hours is safest), spray a light coat of matte or satin sealant over the exterior to protect the finish from scratches. -
Reattach Hardware:
Screw the hinges and latch back into place. Since you painted over the holes, you might need to poke them with a tack first to help the screws catch. -
Final Touch:
Fill the compartments with your jewelry and enjoy your organized, custom creation.
Add Velvet Lining
Instead of leaving the compartments bare wood, cut pieces of adhesive felt or velvet to line the bottom of each section for a more luxurious finish.
This delightful painted box makes a perfect gift for a friend or a lovely addition to your own vanity


Soft Ombre Fade Across Drawer Fronts
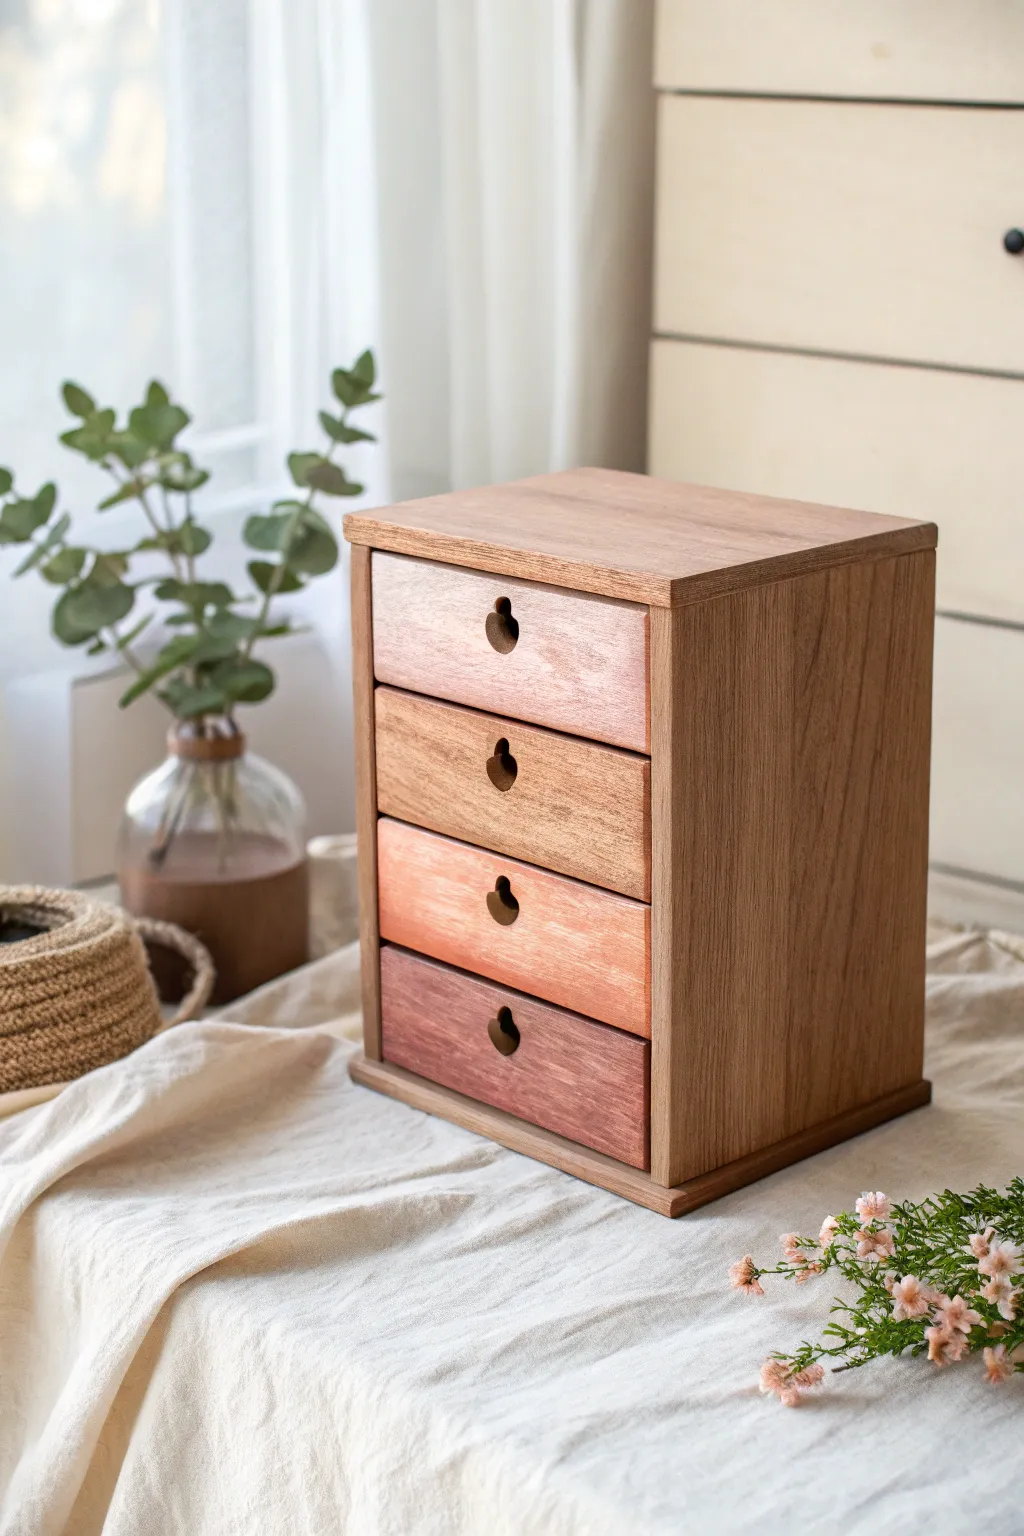
Transform a plain wooden organizer into a serene storage piece using a soft, stepped ombre technique. This project relies on custom-mixing a warm palette to create a gentle transition of color down the drawer fronts while keeping the natural wood beauty intact.
Step-by-Step Guide
Materials
- Unfinished wooden mini-chest (4 drawers)
- Sandpaper (220 grit)
- Clean tack cloth or barely damp rag
- Matte acrylic craft paints (Terracotta, Antique White, Burnt Sienna, Deep Mauve)
- Soft synthetic flat brush (1/2 inch to 1 inch)
- Palette or disposable plate for mixing
- Painter’s tape
- Clear matte sealer spray or wax
- Screwdriver (if hardware needs removal, though this unit uses cutouts)
Step 1: Preparation
-
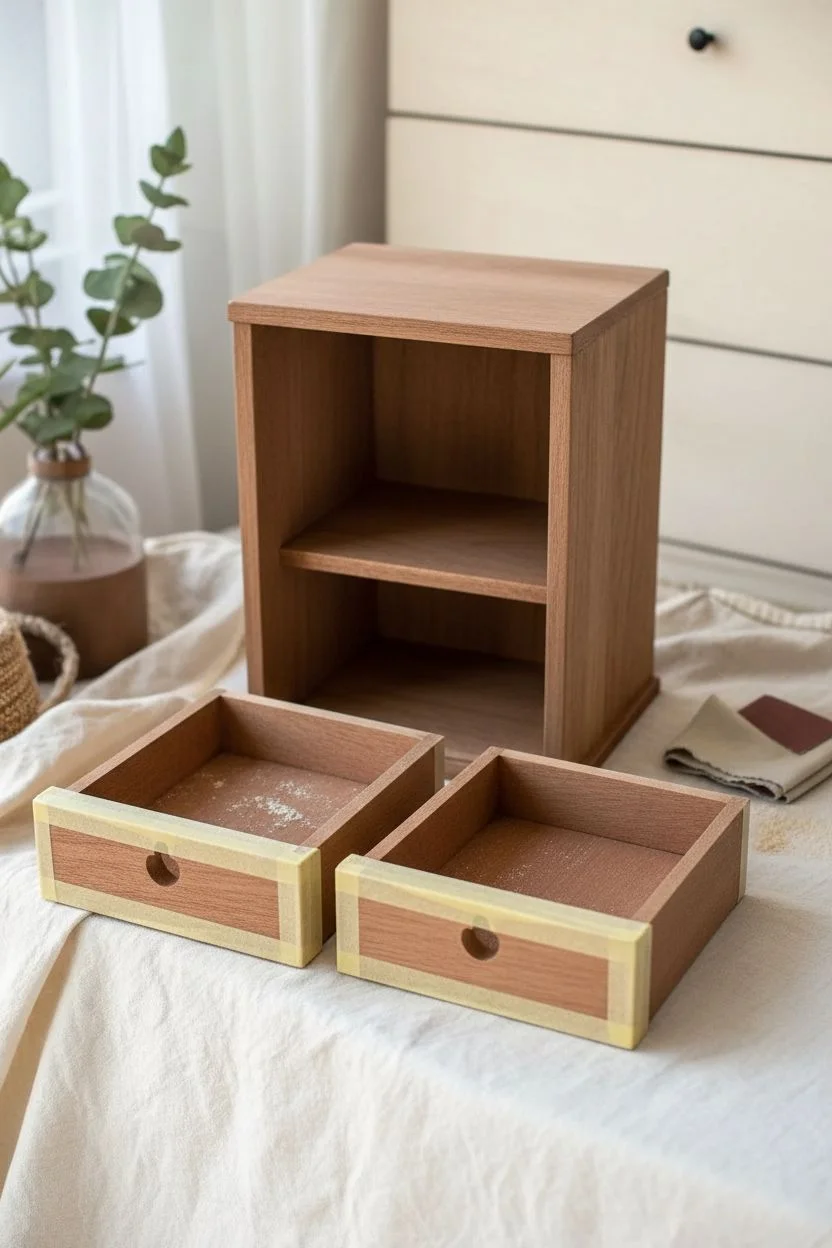
Assess the Surface:
Begin by removing the drawers from the main housing unit to ensure you can reach every edge easily. -
Sand for Smoothness:
Lightly sand the front face of each drawer with 220-grit sandpaper. You aren’t trying to remove material, just knocking down any rough fibers to ensure the paint glides on perfectly. -
Remove Dust:
Wipe away every speck of sawdust using a tack cloth or a damp rag. Dust is the enemy of a smooth finish. -
Protect the Edges:
If you want crisp lines where the drawer front meets the side joint, apply painter’s tape along the side edges of the drawers. This keeps the paint strictly on the front face.
Paint looking chalky?
If your acrylics look too dry or chalky, mix a drop of water or glazing medium into the paint. This improves flow without losing the matte look.
Step 2: Mixing the Gradient
-
Establish the Darkest Tone:
On your palette, pour out your base dark color—a mix of Deep Mauve with a touch of Burnt Sienna creates that grounded, earthy bottom tone. -
Create the Lightest Tone:
In a separate spot, pour a generous amount of Antique White. This will be the base for your top drawer. -
Mix the Middle Shades:
This is the crucial step. Create two intermediate puddles. For the second-to-bottom drawer, mix your dark base with a little white and a drop of Terracotta. For the second-from-top drawer, use mostly Antique White with just a smudge of the Terracotta and Mauve. -
Test the Swatches:
I always recommend painting a tiny swatch of each mixed color on a piece of scrap paper first. Let them dry, as acrylics often darken slightly, and arrange them to ensure the transition looks smooth.
Add a wash effect
Dilute your paints with 50% water to create a semi-transparent stain rather than opaque paint. This lets the wood grain show through the color.
Step 3: Painting Application
-
Paint the Bottom Drawer:
Starting with the bottom drawer (the darkest shade), apply the paint in long, horizontal strokes. Using horizontal strokes mimics the wood grain direction. -
Work Upwards:
Move to the next drawer up with your second-darkest shade. Apply a thin, even coat. If the wood grain is very thirsty, you might need a second coat later. -
Apply the Mid-Tone:
Paint the third drawer (second from the top) with your lighter terracotta-beige mix. Be careful around the finger-pull cutout to avoid drips pooling inside. -
Finish with the Top Drawer:
Apply your lightest shade—the Antique White with just a hint of warmth—to the top drawer. -
Check Coverage:
Allow the first coats to dry for about 20 minutes. If the wood grain is showing through more than you’d like, apply a second thin coat to all drawers.
Step 4: Finishing and Reassembly
-
Sand Between Coats (Optional):
For an ultra-smooth finish, you can do a very gentle pass with high-grit sandpaper between dried coats, but wipe it clean again before sealing. -
Seal the Wood:
Once the paint is fully cured (give it a few hours), apply a clear matte sealer or a clear furniture wax. This protects the paint from finger oils without adding an artificial gloss. -
Address the Frame:
While the drawers dry, decide if the outer frame needs attention. A simple clear wax on the unpainted wood usually brings out a nice richness that complements the painted fronts. -
Reassemble:
Remove any painter’s tape carefully. Slide the drawers back into their slots, ensuring the gradient flows correctly from light to dark.
Enjoy the calming effect your new organized chest brings to your space
BRUSH GUIDE
The Right Brush for Every Stroke
From clean lines to bold texture — master brush choice, stroke control, and essential techniques.
Explore the Full Guide
Shabby Chic Distressed Pastels
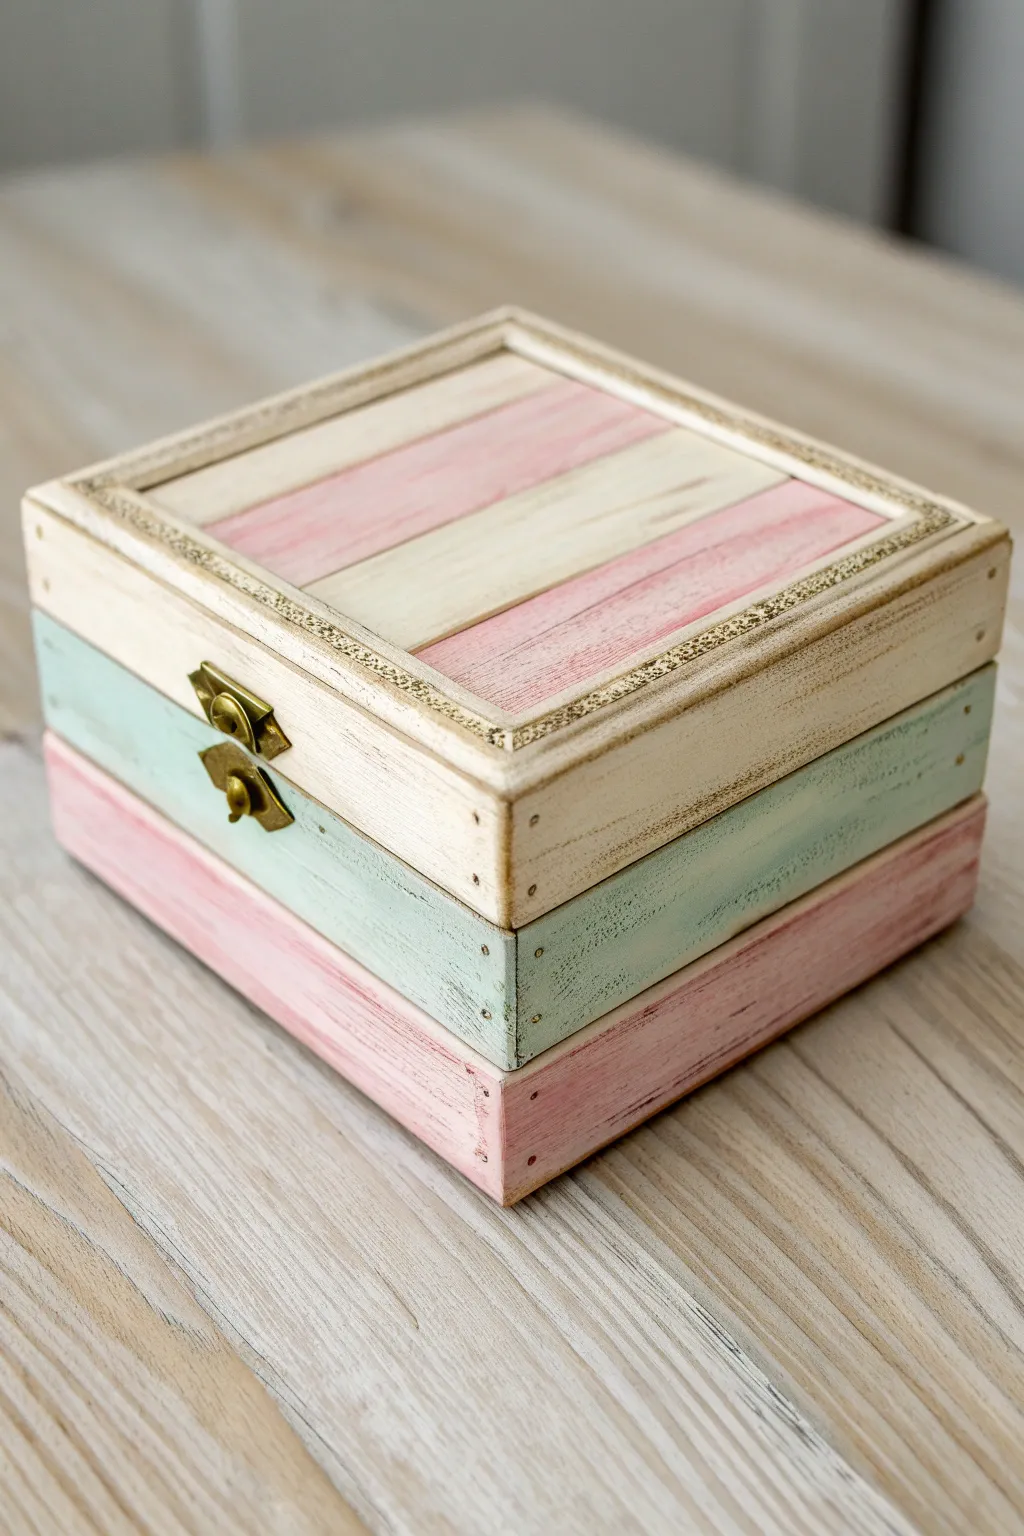
Transform a plain wooden jewelry box into a vintage treasure with this soft, distressed pastel design. The layered cream, mint, and blush tones create a dreamy, time-worn aesthetic perfect for storing your favorite trinkets.
Detailed Instructions
Materials
- Unfinished wooden jewelry box with a latch
- Chalk-style paints (Cream, Pastel Mint, Pastel Pink)
- Small flat synthetic paintbrushes
- Small angled detail brush
- Painter’s tape or masking tape (low tack)
- Sandpaper (medium grit, 120-150)
- Sandpaper (fine grit, 220)
- Clear furniture wax or matte varnish
- Clean lint-free rag or wax brush
- Screwdriver (match head size to hardware)
Step 1: Preparation & Mapping
-
Remove Hardware:
Before you begin painting, carefully remove the latch and hinges using a small screwdriver. Place these tiny screws and pieces in a small bowl so they don’t get lost. -
Sand the Raw Surface:
Give the entire unfinished box a quick sanding with fine-grit (220) sandpaper to remove any rough splinters or factory imperfections. Wipe away the dust with a damp cloth. -
Analyze the Sections:
Observe the structure of your box. This particular design relies on the natural horizontal breaks in the wood construction. Identify where you want your three color bands: the lid assembly, the middle box section, and the base.
Uneven Stripes?
If paint bleeds under the tape, don’t panic. Since this style is distressed, simply sand that blurry edge heavily later. It will look like intentional wear rather than a mistake.
Step 2: Painting the Base Colors
-
Paint the Bottom Tier:
Start with the bottom section of the box. Load your brush with pastel pink chalk paint and apply a smooth coat. Don’t worry about perfect opacity yet; chalk paint builds up beautifully. -
Paint the Middle Tier:
Moving upwards, paint the middle structural section with your pastel mint green. careful near the seam where it meets the pink, but don’t stress too much—we will distress these edges later. -
Paint the Lid Frame:
Paint the outer frame of the lid with the cream or off-white paint. Ensure you get into any routed grooves or decorative edges. -
Dry and Second Coat:
Allow the first layer to dry completely (usually 30-45 minutes). Apply a second coat to all three sections to ensure solid, rich color coverage.
Age It Further
For a deeper antique look, use dark wax instead of clear wax on the corners. It settles into the sanding grooves and mimics decades of handling.
Step 3: Creating the Striped Lid
-
Base Coat the Inset:
For the flat inset panel on top of the lid, paint the entire surface with your cream color first. Let this dry fully. -
Tape the Stripes:
Apply strips of painter’s tape diagonally or horizontally across the inset panel to create stripes. Press the edges of the tape down firmly to prevent bleed-through. -
Paint the Contrast Stripes:
Using the pastel pink paint, fill in the exposed wood between the tape strips. Use a fairly dry brush to avoid pushing paint under the tape adhesion. -
Reveal the Pattern:
I prefer to peel off the tape while the paint is still slightly tacky, not bone dry. Carefully lift the tape to reveal your cream and pink stripes.
Step 4: Distressing & Finishing
-
Edge Distressing:
Once all paint is thoroughly dry (give it a few hours), take your medium-grit (150) sandpaper. Sand the corners, edges, and raised ridges firmly to reveal the raw wood underneath. -
Surface Scuffing:
Lightly drag the sandpaper across the flat painted surfaces and the striped lid to give it a worn, lived-in texture. -
Clean Up Dust:
Use a tack cloth or a slightly damp rag to remove all the sanding dust from the distressed areas. -
Apply Wax:
Dip a lint-free rag or wax brush into clear furniture wax. Massage it into the wood in circular motions, covering all painted areas. -
Buff the Finish:
Let the wax sit for about 10-15 minutes, then buff it briskly with a clean cloth to create a soft, protective sheen. -
Reattach Hardware:
Locate your hardware bowl and screw the latch and hinges back into their original holes. The contrast of the metal against the distressed paint completes the look.
Now your lovely jewelry box adds a touch of vintage charm to any dresser or vanity
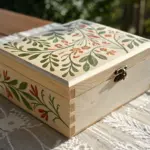
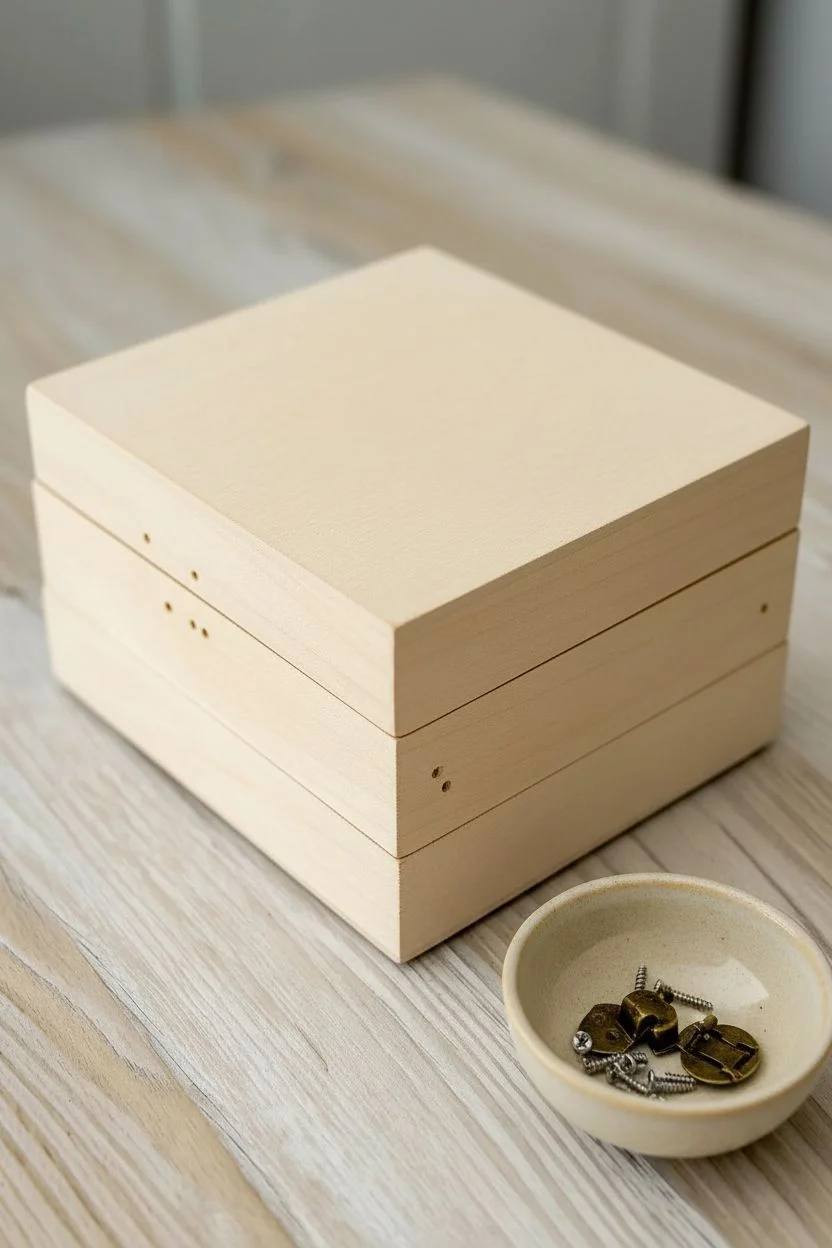
Hand-Painted Vine and Leaf Wraparound
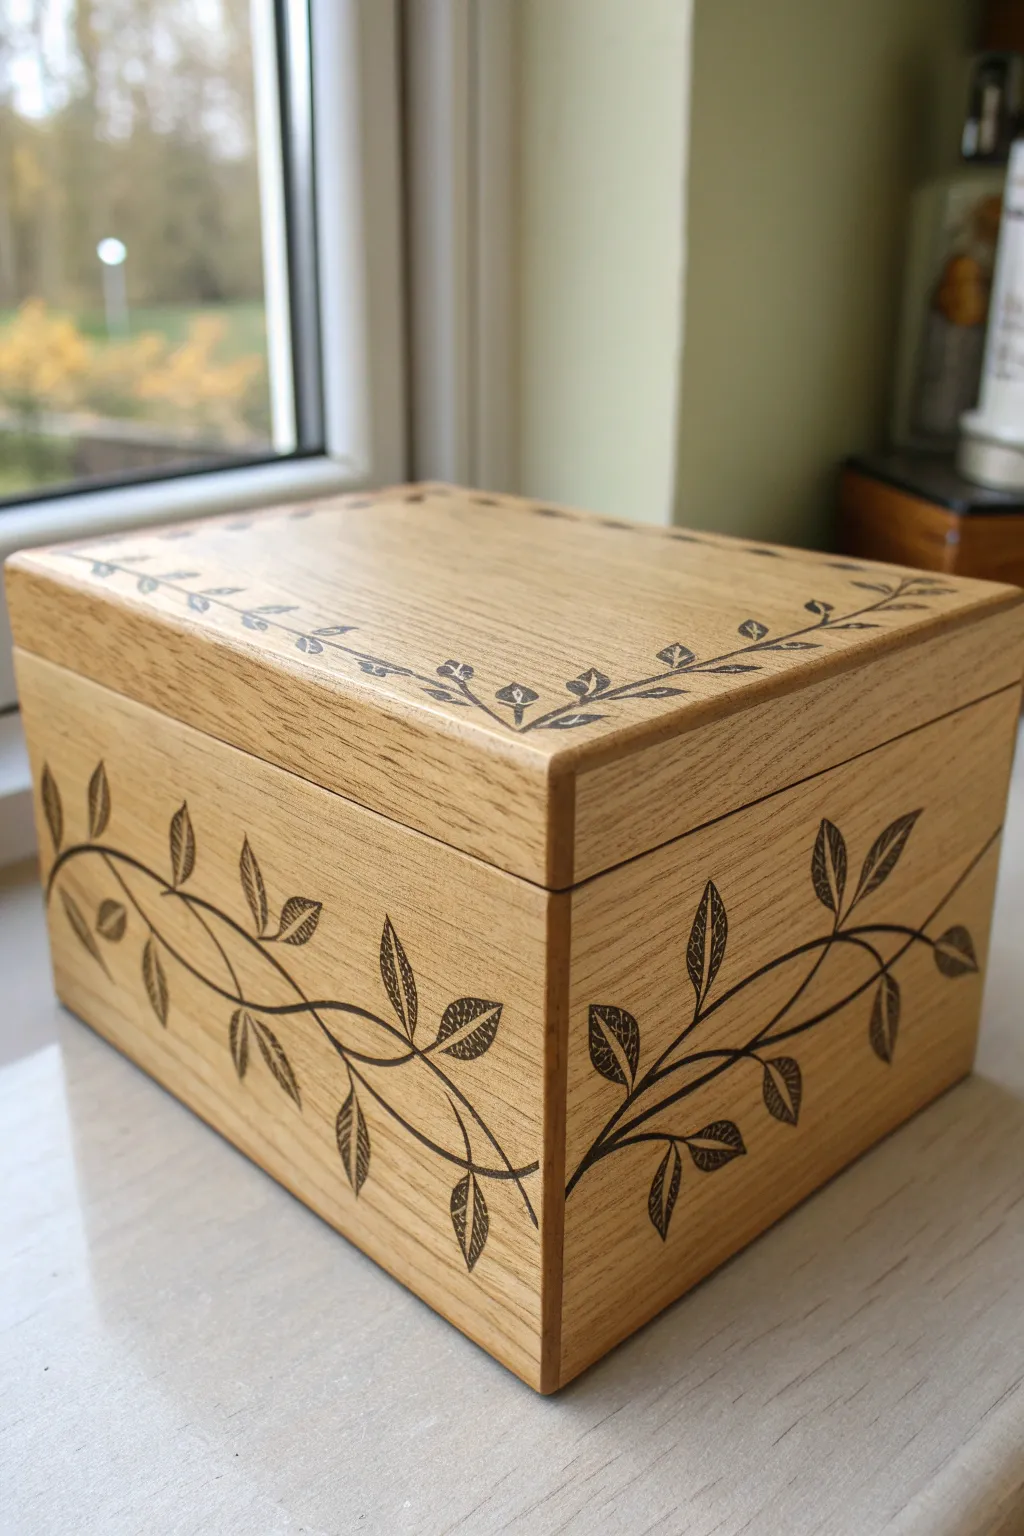
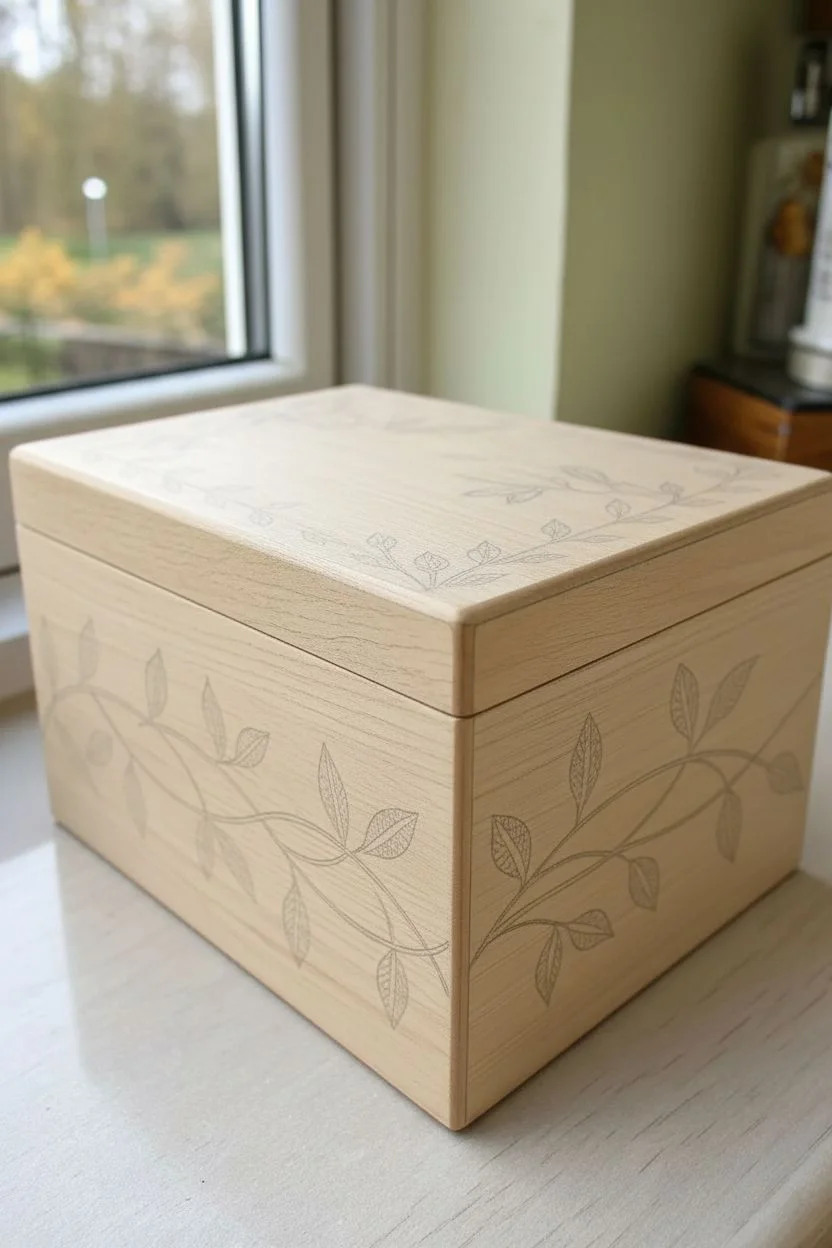
Bring natural elegance to a simple wooden storage box with this flowing, continuous vine design that wraps seamlessly around the corners. The contrast of the dark, organic leaves against the light oak grain creates a timeless look that works beautiful for jewelry or keepsakes.
Step-by-Step Guide
Materials
- Unfinished wooden box (oak or light wood)
- Sandpaper (220 and 400 grit)
- Tacky cloth
- Pencil (HB or lighter)
- Fine-tip black paint marker (0.7mm or 1mm)
- Ultra-fine tip black paint marker (0.5mm) for details
- Clear matte or satin spray varnish
- Ruler or flexible measuring tape
- Graphite transfer paper (optional)
Step 1: Preparation and Planning
-
Prepare the Surface:
Begin by sanding the entire exterior of the box with 220-grit sandpaper to remove any rough patches or factory coatings. Follow up with 400-grit for a satiny smooth finish. -
Clean the Dust:
Wipe the entire box down thoroughly with a tacky cloth to remove all sanding dust. -
Plan the Lid Boarder:
Using a ruler, lightly mark a specific distance from the edge of the lid (about 1 inch) to act as a guideline for your top vines. -
Sketch the Main Stem:
Lightly sketch a waving, undulating line that travels around the perimeter of the box sides with your pencil. Make sure the wave connects naturally where the sides meet the corners.
Step 2: Drawing the Base Design
-
Add Leaf Shapes:
Along your waved vine line, sketch paired almond-shaped leaves. Keep them somewhat symmetrical but allow for natural variation in size and angle. -
Detail the Lid:
Repeat the sketching process on the lid top, creating a simpler vine border that follows the rectangular shape of the top surface. -
Ink the Stems:
Take your standard fine-tip paint marker and carefully trace over the main vine stems first. Use long, confident strokes to avoid shaky lines. -
Outline the Leaves:
Using the same marker, outline the almond shapes of the leaves. Ensure the tips of the leaves are sharp and crisp. -
Cross the Corners:
Pay special attention when drawing over the corner joints. I find it helpful to look at the box from a 45-degree angle to ensure the line looks continuous as it wraps around.
Smooth Operator
Work with the grain, not against it. If your marker tip keeps catching on the wood texture, try switching to a brush pen for a smoother flow over the rough spots.
Step 3: Adding Detail and Texture
-
Fill the Leaves:
This style isn’t solid black; use your ultra-fine tip marker to draw the central vein in each leaf. -
Create Texture:
Instead of coloring the leaves in, draw tiny diagonal hash marks or stippling inside one half of each leaf to create shading and depth. -
Refine Edges:
Go back over any lines that look too thin or faint, particularly at the base where the leaf meets the stem, to add visual weight. -
Erase Sketches:
Allow the ink to cure for at least 30 minutes. Once completely dry, gently erase any visible pencil guidelines.
Burn It Up
Want a more rustic, permanent look? Skip the paint markers entirely and use a wood burning tool (pyrography pen) to sear the design directly into the timber.
Step 4: Finishing Touches
-
Check for Gaps:
Inspect the design for any spots where the ink skipped over the wood grain and touch them up delicately. -
First Coat of Varnish:
In a well-ventilated area, spray a light, even coat of matte or satin varnish over the box to seal the wood and protect the design. -
Light Sanding:
Once the first coat is dry (check the can’s instructions), lightly sand with 400-grit paper to knock down any raised grain. -
Final Seal:
Apply a second and final coat of varnish for durable protection.
Now you have a beautifully personalized heirloom box ready to hold your treasures

PENCIL GUIDE
Understanding Pencil Grades from H to B
From first sketch to finished drawing — learn pencil grades, line control, and shading techniques.
Explore the Full Guide
Checkered Pattern for a Retro Jewelry Box
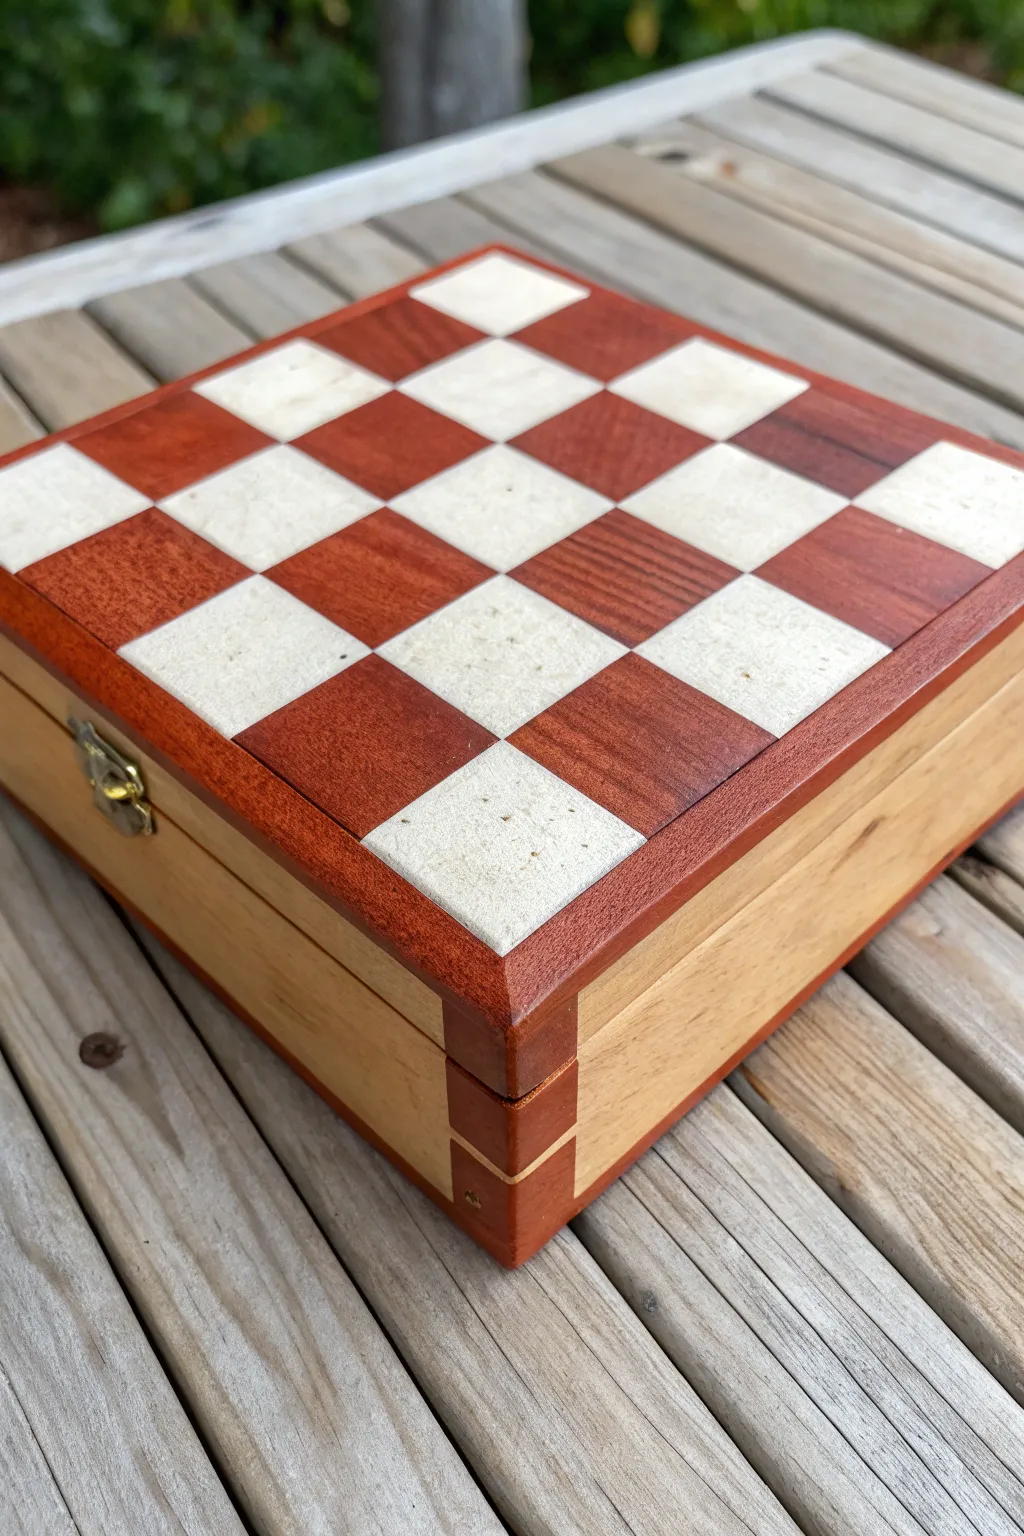

Transform a plain wooden box into a stunning piece of retro decor with this clever faux inlay technique. Using painter’s tape and specific staining methods, you’ll create a rich, warm checkerboard pattern that looks like expensive marquetry work.
How-To Guide
Materials
- Unfinished wooden box (w/ smooth, flat lid)
- Painter’s tape (high quality)
- Pencil
- Ruler or framing square
- X-Acto knife or craft knife
- Gel stain (Red Mahogany or Cherry)
- Gel stain (Natural or Golden Oak)
- Clean cotton rags
- Fine grit sandpaper (220-320)
- Clear polyurethane topcoat (satin finish)
- Small foam brushes
Step 1: Preparation & Grid
-
Sand the Surface:
Begin by sanding the top of your wooden box with 220-grit sandpaper. It is crucial that the surface is perfectly smooth and free of existing varnish so the stain can penetrate evenly. -
Clean the Dust:
Wipe away all sanding dust with a slightly damp cloth or tack cloth. Any remaining dust will get trapped under your tape and ruin the crisp lines. -
Find the Center:
Using your ruler, measure the width and length of the lid to find the exact center point. Mark it lightly with a pencil. -
Draw the Grid:
Decide on the size of your squares (e.g., 1.5 inches). Draw a complete grid across the top of the box based on that center point. Light pencil pressure is key here so the lines don’t show later. -
Create a Border:
If your grid doesn’t perfectly reach the edges, draw a frame or border around the exterior of the grid to contain the pattern, just like in the photo.
Bleed Prevention
Before applying the dark stain, paint a thin layer of clear matte medium or clear sealer over the tape edges. This seals the gap so any bleeding is clear, keeping the stain lines crisp.
Step 2: Creating the Pattern
-
Tape Phase One:
Mask off every *other* square in a checkerboard pattern. You want to cover the squares that will remain light-colored first. Use the X-Acto knife against a metal ruler to cut the tape precisely along your pencil lines. -
Seal the Edges:
Press down firmly on all tape edges with your fingernail or a burnishing tool. This prevents the dark stain from bleeding underneath. -
Apply Dark Stain:
Dip a corner of your rag into the Red Mahogany gel stain. Apply it sparingly to the exposed wood squares. Gel stain is best here because it sits on top and doesn’t run as much as liquid stain. -
Wipe Excess:
Immediately wipe off excess stain to achieve a consistent, semi-transparent tone that lets the wood grain show through. -
Stain the Border:
While you have the dark stain out, carefully stain the outer border and the sides of the lid if you want them to match the dark squares. -
Remove Tape:
Carefully peel back the tape while the stain is still slightly tacky but not wet. Pull at a 45-degree angle away from the stained area to keep clean lines. -
Dry Time:
Let the dark squares dry completely according to the manufacturer’s instructions. This usually takes overnight.
Mix Up Materials
Instead of wood stain, try using metallic gold and matte black acrylic paint for the squares to create a glamorous, modern art-deco version of this jewelry box.
Step 3: Finishing Touches
-
Tape Phase Two (Optional):
If you want a very high-contrast look, you can leave the light squares raw. However, for the warm look in the photo, I recommend masking the *dark* squares now to stain the light ones. -
Apply Light Stain:
Apply the Natural or Golden Oak stain to the remaining squares. This adds that creamy, aged look without making them too dark. -
Remove and Dry:
Remove the second round of tape and let the entire piece cure fully for 24 hours. -
Light Sanding:
Once bone dry, very gently run 320-grit sandpaper over the surface to knock down any raised grain, but be careful not to sand through your color. -
Topcoat Application:
Apply a thin layer of satin polyurethane with a foam brush. Long, smooth strokes work best to avoid bubbles. -
Final Coat:
Let the first coat dry, lightly sand again, and apply a second coat for a durable, professional finish. -
Detail Work:
If your box has corner joints like the one shown, use a tiny artist brush to accentuate the joinery with a slightly darker stain for visual interest.
Now you have a timeless, handcrafted box that looks like a vintage treasure.
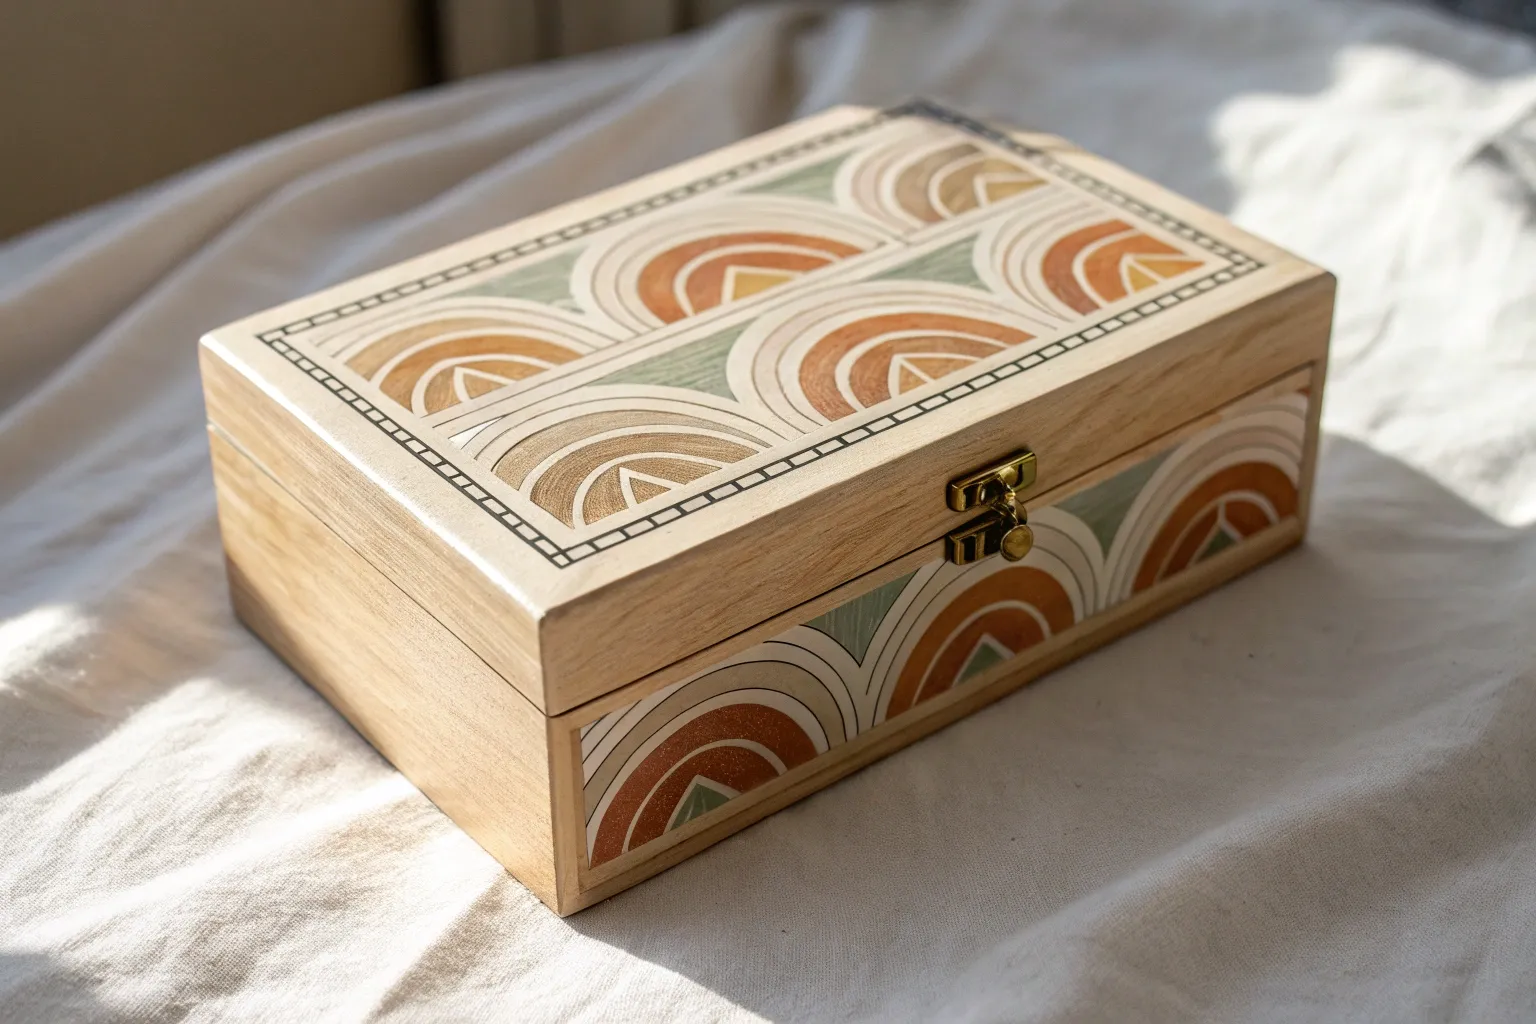
Geometric Color Blocking With Clean Edges
Achieve the sophisticated look of complex wood marquetry using only paint and tape on a simple wooden jewelry box. This technique mimics the grain direction and contrasting species of a high-end inlaid piece without requiring a single saw cut.
Step-by-Step
Materials
- Unfinished wooden jewelry box
- Painter’s tape (high quality, low tack)
- Acrylic paints (Dark Walnut Brown, Warm Chestnut, Cream/Off-White)
- Glazing medium
- Fine grit sandpaper (220 grit)
- X-Acto knife or craft blade
- Ruler or straight edge
- Pencil
- Small flat synthetic brushes
- Detail liner brush
- Matte or Satin varnish
Step 1: Preparation & Base Work
-
Sand the Box:
Begin by sanding your unfinished wooden box with 220-grit sandpaper. You want the surface to be exceptionally smooth so the paint glides on and mimics a polished wood veneer. -
Wipe Clean:
Remove all sanding dust with a tack cloth or a slightly damp rag. Any debris left behind will ruin the smooth illusion of the inlay.
Step 2: Mapping the Design
-
Mark the Center:
On the lid, use your ruler to find the exact center point. Draw a very light pencil line dividing the lid into four equal quadrants (a cross). -
Draw Diagonals:
From the center point, draw diagonal lines out to each corner, creating an ‘X’ shape. You should now have eight triangular sections radiating from the center. -
Tape the ‘Inlay’ Lines:
Using thin strips of painter’s tape (or cutting regular tape into thin 1/8 inch strips), tape over your pencil lines. These taped areas will eventually become the light ‘inlay’ strips, so ensure they intersect perfectly at the center.
Bleeding Lines?
If paint bleeds under the tape, carefully scrape excess dry paint away with an X-Acto knife before painting the cream lines. This keeps edges crisp.
Step 3: Painting the Wood Grain
-
Mix the Dark Glaze:
Mix your Dark Walnut Brown acrylic paint with glazing medium (about a 1:1 ratio). This transparency allows the brushstrokes to look like wood grain rather than flat paint. -
Paint First Set of Triangles:
Select four non-adjacent triangles (e.g., the top and bottom pairs). Paint them with the dark glaze mixture. I like to drag the brush strictly in one direction—parallel to the outer edge of the box—to simulate vertical grain. -
Mix the Medium Glaze:
Create a second mixture using the Warm Chestnut paint and glazing medium. This will act as the contrasting wood species. -
Paint Second Set of Triangles:
Paint the remaining four triangles with this lighter brown glaze. For these, change the direction of your brushstrokes to be horizontal (parallel to the lid’s long edge). This alternating grain direction is key to the marquetry effect. -
Repeat on Sides:
Extend your diagonal lines down the front and sides of the box using a ruler. Tape off these lines similarly to the lid. -
Paint Side Panels:
Apply the dark and medium glazes to the side triangles, maintaining the alternating grain direction logic you established on the lid. -
Let Dry completely:
Allow the paint to fully cure. If the color feels too thin, apply a second coat of glaze, being careful to follow the same brushstroke direction.
Level Up: Grain Tool
Use a specialized rubber wood-graining rocker tool on the wet glaze for the larger triangles to create realistic knots and swirls in the finish.
Step 4: Revealing & Refining
-
Remove Tape:
Carefully peel away the masking tape strips. You should now see the raw wood underneath acting as the dividing lines. -
Paint the Inlay Lines:
Using a steady hand and your detail liner brush, paint the revealed raw wood lines with Cream or Off-White paint. This mimics a maple or holly wood inlay stringing. -
Add Finger Joint Details (Optional):
If your box doesn’t have visible joinery, use a small square brush to paint faux finger joints on the corners. Simply paint alternating small dark and light squares down the corner edge. -
Clean Up Edges:
If any glaze bled under the tape, use a tiny brush with the Cream paint to tidy up the lines.
Step 5: Finishing
-
Apply Varnish:
Finish the entire piece with a coat of Satin or Matte varnish. This unifies the sheen of the different paints and protects the ‘wood’ finish. -
Sand Between Coats:
For an ultra-realistic feel, very lightly sand the first coat of varnish with a brown paper bag, then apply a second coat.
Place your jewelry inside your masterpiece and admire the illusion of fine woodworking you created with just a brush


Dotted Mandala Centerpiece on the Lid
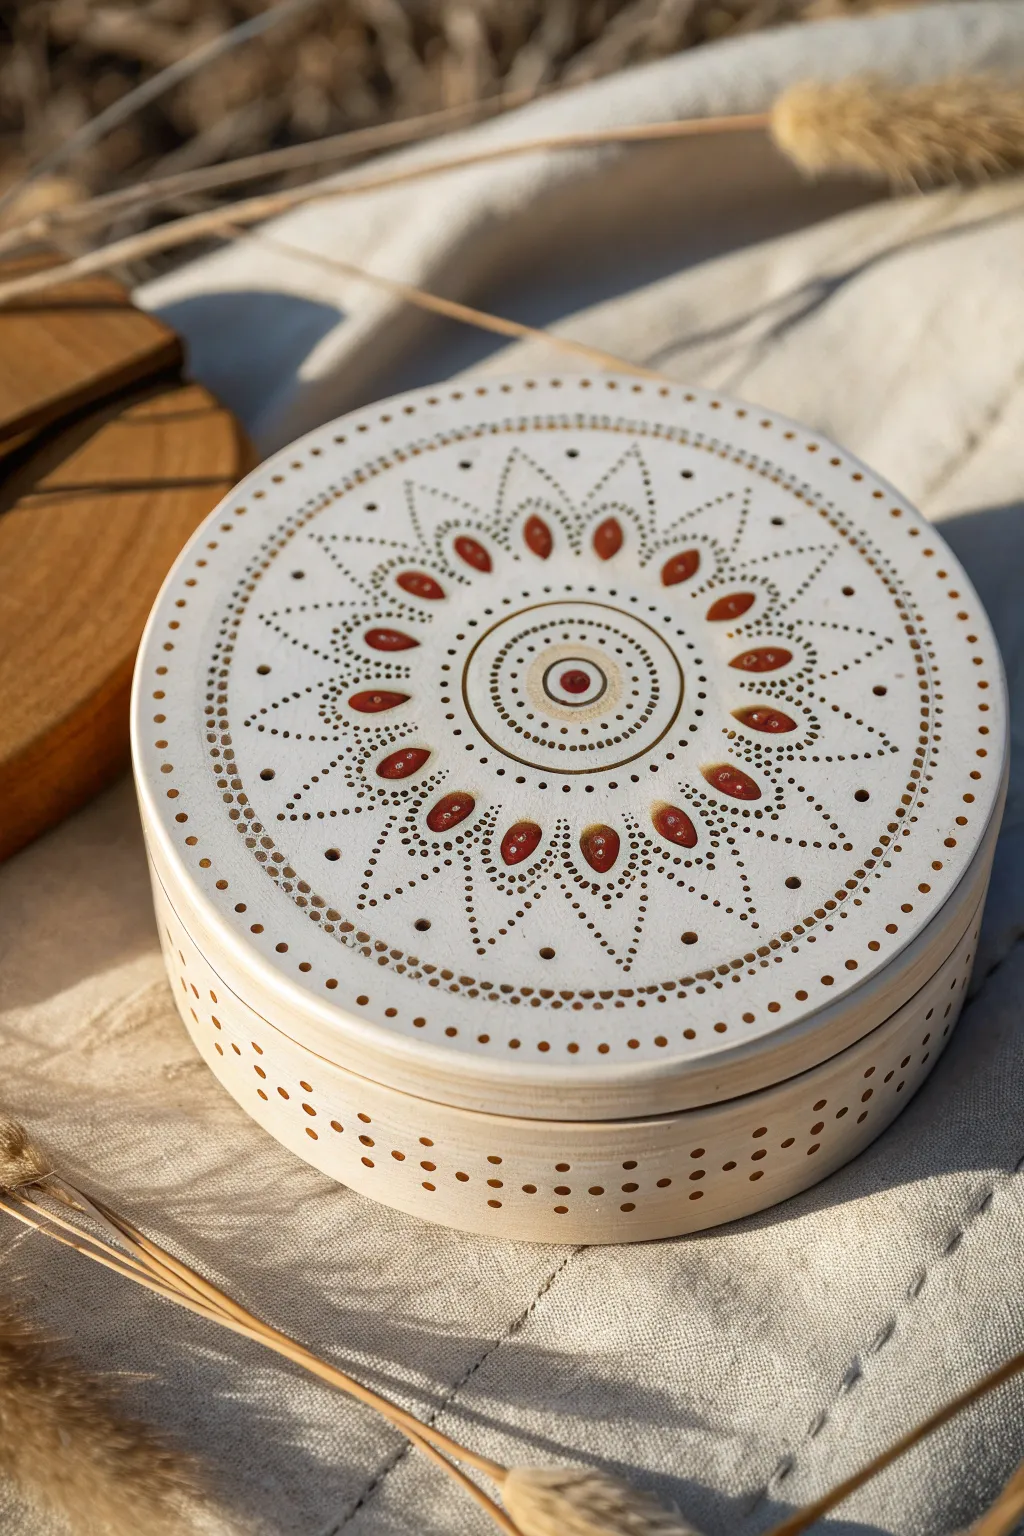
Transform a plain wooden box into a radiant keepsake with this precision dotting technique. The design features a glowing central mandala in warm amber and gold tones, radiating outward like a sunburst against a creamy white background.
How-To Guide
Materials
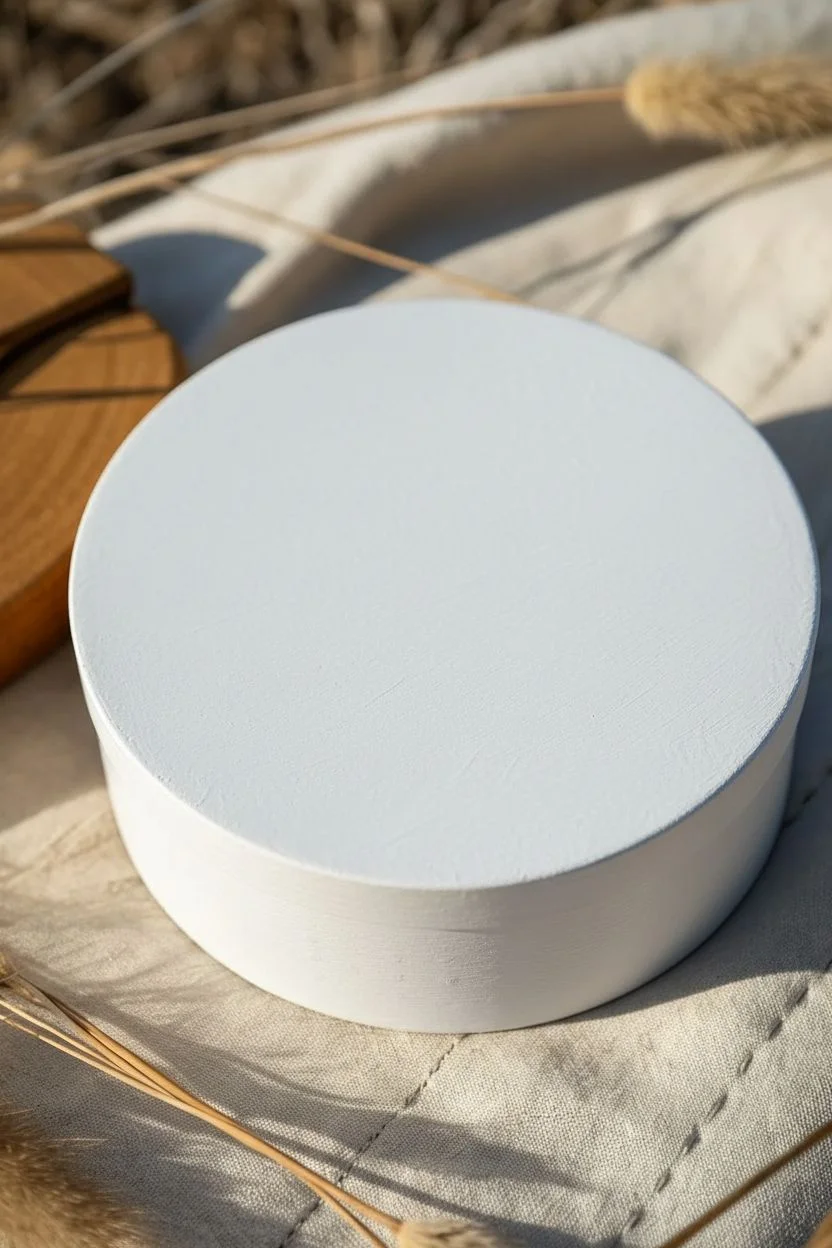
- Round wooden box (birch or pine)
- Fine-grit sandpaper (220-grit)
- White acrylic paint (matte finish)
- Gold acrylic paint (metallic)
- Amber or burnt sienna acrylic paint (glossy or high-flow)
- Dotting tools (set of varying sizes)
- Fine liner brush (size 0 or 00)
- Compass or round stencils
- Pencil
- Ruler
- Spray varnish (satin or matte)
Step 1: Preparation and Base Coat
-
Sand the Surface:
Begin by lightly sanding the lid and sides of your wooden box. You want a perfectly smooth canvas for the delicate dots, so focus on removing any burrs or rough grain. -
Clean the Wood:
Wipe away all sanding dust with a slightly damp cloth or a tack cloth. Dust particles are the enemy of smooth dot work. -
Apply Base Color:
Paint the entire lid and the sides of the box with the matte white acrylic paint. This might need two or three thin coats to get solid, opaque coverage without brushstrokes showing. -
Dry Completely:
Allow the base coat to dry fully—wait at least an hour. If the paint feels cool to the touch, it’s not ready yet.
Paint Consistency
If your dots leave peaks (like a Hershey’s Kiss), your paint is too thick. Mix in a drop of pouring medium to help it self-level into a smooth dome.
Step 2: Drafting the Grid
-
Find the Center:
Use a ruler to lightly mark the exact center of the lid with a pencil. This is crucial for symmetry. -
Draw Concentric Circles:
Using a compass, draw a series of light concentric circles expanding from the center. Create guidelines for the central medallion, the main petal ring, and the outer border. -
Mark Radial Lines:
Divide your circle into equal segments like a pie chart using a protractor. Eight or sixteen slices work best for this specific 16-point star pattern.
Step 3: Creating the Mandala
-
The Center Origin:
Start with a medium dotting tool and place a single red-amber dot right in the center. Once dry, surround it with a ring of tiny white dots using your smallest tool. -
First Gold Ring:
Dip a fine liner brush or a very small dotting tool in gold paint. Carefully draw circling rings around the center cluster, alternating between solid thin lines and rings of micro-dots. -
Painting the Petals:
Switch to the amber/burnt sienna paint. In the middle ring section, paint teardrop shapes (petals) radiating outward. Space them evenly based on your pencil guidelines. -
Adding Petal Details:
While the amber paint is wet, you can add a tiny drop of gold to the center of each teardrop for a marbled look, or wait for it to dry and add a highlight dot on top. -
Dotted Outlines:
Using a small dotting tool and gold paint, create ‘chains’ of tiny dots that outline the shape of pointed petals or star rays around your central amber teardrops. -
Outer Rays:
Extend the design outward by stippling longer, pointed triangle shapes using gradation dots—starting with larger dots near the center and getting tinier as they extend to the points. -
Border Work on Lid:
Along the very edge of the lid’s top surface, create a border using a repetitive pattern of medium gold dots to frame the artwork. -
Filling Negative Space:
Look for empty areas between the main star points. Add single, larger accent dots (drilled or painted) to balance the visual weight.
Correcting Smudges
Did a dot smudge? Don’t wipe it! Let it dry completely, then paint over it with the white base color. You can then re-dot the area cleanly.
Step 4: Side Details and Finish
-
Box Side Pattern:
Moving to the vertical side of the box, use a grid stencil or freehand a simple geometric pattern. Create rows of uniform dots near the bottom edge. -
Erase Guidelines:
Once you are absolutely certain all paint is bone dry (I usually wait overnight for this step), gently erase any visible pencil marks. -
Seal the Project:
Finish with a spray varnish. Hold the can 12 inches away and apply light, misty coats to avoid smearing the raised texture of the dots.
Place this beautiful box on your vanity to hold your favorite rings or earrings
Starry Night Jewelry Box With Splatter Stars
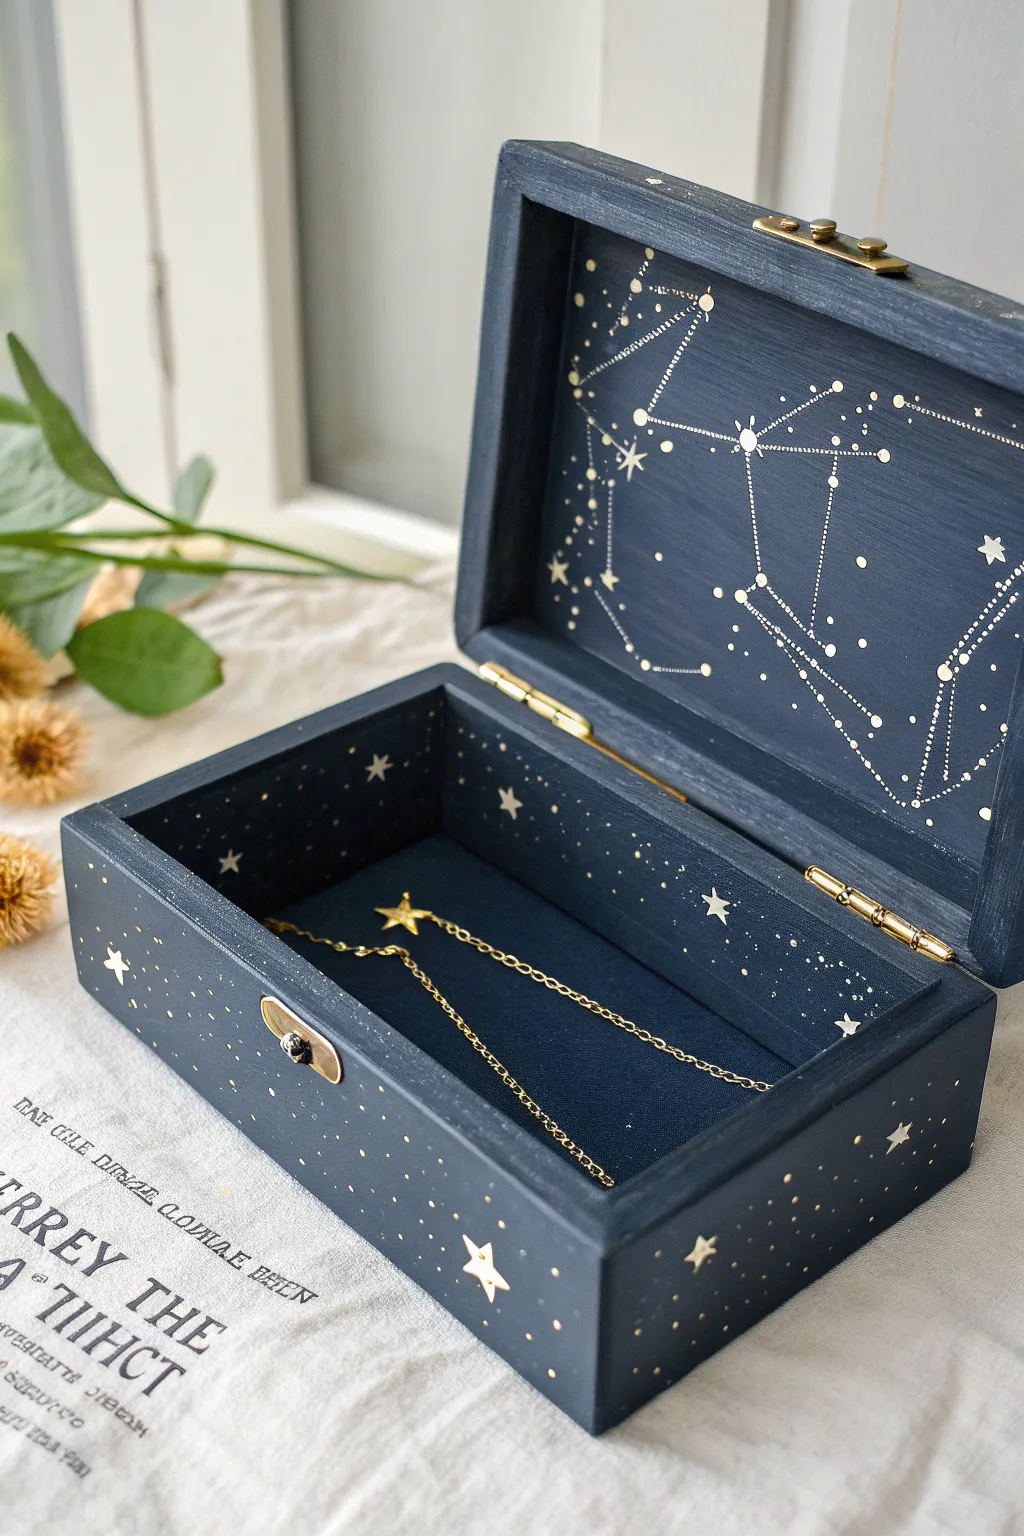
Transform a simple wooden box into a piece of the night sky with this enchanting celestial project. Using deep midnight blue paint and delicate gold accents, you’ll create a galaxy of stars and constellations that makes for a truly magical home for your favorite jewelry.
Step-by-Step Guide
Materials
- Unfinished wooden box with hinged lid
- Deep midnight blue or navy acrylic paint
- Gold metallic acrylic paint or paint pen (fine tip)
- White or light silver acrylic paint (optional for extra shimmer)
- Medium flat paint brush
- Small round detail brush (size 0 or 00)
- Old toothbrush or stiff bristle brush
- Painter’s tape or masking tape
- Graphite transfer paper (optional)
- Pencil
- Constellation printed template (optional)
- Deep blue felt or velvet fabric for lining
- Gold star charm or sticker (for the interior base)
- Spray sealer (matte or satin finish)
- Small screwdriver (to remove hardware)
Step 1: Preparation & Base Coat
-
Remove Hardware:
Begin by carefully unscrewing the hinges and latch from your wooden box using a small screwdriver. Store these tiny screws in a safe place, like a small bowl or ziplock bag, so they don’t get lost. -
Sand the Surface:
Lightly sand the entire box with fine-grit sandpaper to smooth out any rough edges or splinters. Wipe away the dust with a damp cloth or tack cloth to ensure a clean painting surface. -
Apply the Midnight Blue:
Using your flat brush, paint the entire exterior of the box with the deep midnight blue acrylic paint. Ensure you get into the corners and edges. Depending on the opacity of your paint, you may need a second coat for a rich, solid finish. -
Paint the Interior:
Paint the inside walls and the inside of the lid with the same blue shade. Leave the very bottom floor of the box unpainted if you plan to line it with fabric later, or paint it blue if you prefer a painted interior. -
Let it Dry:
Allow the paint to dry completely. This is crucial before moving on to the delicate gold details, as wet paint can smudge your fine lines.
Clean Lines Pro-Tip
If you struggle with shaky hands for the constellation lines, use a white or gold gel pen instead of a brush. It offers much better control for fine details.
Step 2: Creating the Galaxy
-
Splatter the Stars:
Dip an old toothbrush or stiff brush into the gold metallic paint. Test on a piece of scrap paper first by flicking the bristles with your thumb to create a spray of tiny dots. Once confident, gently splatter gold ‘stars’ across the exterior and interior walls of the box. -
Control the Density:
Vary the density of your splatter. Create clusters of stars in some areas to mimic the Milky Way, while leaving other areas more sparse. -
Hand-Paint Larger Stars:
Using your smallest detail brush or a fine-tip gold paint pen, hand-paint individual larger stars. simple crosses or five-pointed star shapes work perfectly. Place these randomly amongst the splatter for variety.
Level Up: Zodiac Sign
Personalize the lid by painting the specific zodiac constellation of the person you are gifting the box to, making it a truly custom present.
Step 3: Mapping the Constellations
-
Plan Your Layout:
For the inside of the lid, decide which constellations you want to feature. You can sketch them lightly with a pencil first or use graphite paper to trace a printed design directly onto the dry blue paint. -
Connect the Dots:
Dip the detail brush into the gold paint (or use the pen) to create the main ‘stars’ of the constellation first. Make these dots slightly larger than your background stars. -
Draw the Lines:
Connect your constellation stars with thin, delicate lines. I find that using a ruler isn’t necessary; slightly organic lines look more like an old star map. Use dotted or dashed lines for a whimsical touch. -
Add Starbursts:
Enhance key stars in the constellation by drawing small starbursts or crosses over the dots to make them shine brighter than the rest.
Step 4: Interior & Assembly
-
Line the Bottom:
Measure the inside bottom of the box. Cut a piece of deep blue felt or velvet to match these dimensions perfectly. Apply a thin layer of craft glue to the bottom of the box and press the fabric firmly into place. -
Add a Focal Point:
To mimic the inspiration image, glue a small gold star charm or sticker onto the fabric lining, slightly off-center. This adds a delightful surprise when the box is emptied. -
Seal the Work:
Once all paint is absolutely dry (give it a few hours), spray the entire painted wood surface with a clear matte or satin sealer. This protects your artwork from scratches and handling. -
Reattach Hardware:
Retrieve your hardware and carefully screw the hinges and latch back into their original holes. Open and close the lid a few times to ensure everything is aligned correctly.
Place your favorite necklace inside and enjoy your own personal slice of the midnight sky
Galaxy Sponge Blend Across the Lid

Transform a plain wooden box into a stunning piece of the cosmos with this galaxy-inspired painting project. Using blending techniques and simple star details, you’ll create a dreamy nebula effect that wraps seamlessly around the edges.
Step-by-Step
Materials
- Unfinished wooden jewelry box with latch
- Acrylic paints (Dark Navy Blue, Royal Blue, Magenta/Berry, Purple, White)
- Small cosmetic sponges or crafting sponge dobbers
- Fine detail brush (size 0 or 00)
- Painter’s tape
- Sandpaper (fine grit)
- Matte finish sealer or varnish
- Palette or paper plate
- Old toothbrush (optional for splatter)
Step 1: Preparation and Base Coat
-
Prepare the hardware:
Before you begin painting, carefully mask off the metal latch and hinges with small pieces of painter’s tape. This ensures your hardware stays gleaming gold and clean. -
Sand the surface:
Lightly sand the entire exterior of the wooden box with fine-grit sandpaper to remove any rough patches. Wipe away the dust with a slightly damp cloth to ensure a smooth painting surface. -
Apply the base color:
Using a brush or sponge, coat the entire outside of the box with your darkest Navy Blue or Black acrylic paint. This deep background is crucial for making the galaxy colors pop later. -
Check coverage:
Let the first coat dry completely. If the wood grain is still visible, apply a second coat of the dark base color to achieve solid, opaque coverage.
Starry Depth Trick
Paint a few tiny stars, let dry, then sponge a very thin layer of transparent blue over them. Add bright white stars on top to create 3D depth.
Step 2: Creating the Galaxy Blend
-
Start the nebula swirl:
Load a slightly damp sponge with a mix of Royal Blue and a touch of Purple. Dab this diagonally across the lid, starting from the bottom right corner and moving towards the center, keeping the edges soft and feathered. -
Add the vibrant core:
While the previous layer is still tacky, take a clean sponge and dip it into Magenta or Berry paint. Dab this into the center of your blue swirl, blending outwards so the colors transition naturally from pink to purple to blue. -
Extend to the sides:
Continue dabbing your sponge colors down the sides of the box. The galaxy pattern should look like it wraps uninterrupted over the edge, rather than stopping abruptly at the lid line. -
Deepen the shadows:
Go back in with your Dark Navy sponge around the outer corners of the lid. Lightly dab over the edges of your bright colors to create depth and receding space, making the center glow more intensely. -
Soften the transitions:
If any lines look too harsh, take a mostly dry, clean sponge and gently tap over the boundaries where colors meet to blur them together. -
Let the galaxy cure:
Allow the blended paint layers to dry completely. This is important before adding crisp white details so the colors don’t mud together.
Muddy Colors?
If your blues and pinks are turning brown where they meet, let the bottom layer dry completely before sponging on the next color.
Step 3: Stars and Details
-
Paint the major stars:
Using your finest detail brush and white acrylic paint, hand-paint several larger, eight-pointed stars. Place them randomly, focusing on the darker areas to create contrast. -
Add medium stars:
For variety, paint simple dots of varying sizes. Press a little harder for medium stars and use the very tip of the brush for smaller ones. -
Create the star clusters:
Dilute a small amount of white paint with water. Dip an old toothbrush into this mixture and run your thumb across the bristles to flick a fine mist of tiny stars across the ‘milky way’ stripe in the center. -
Highlight the edges:
For a refined look, lightly brush a very faint amount of the lighter blue or purple along the sharp wooden edges of the lid to highlight the box’s structure. -
Remove tape:
carefully peel away the painter’s tape from the latch and hinges. If any paint seeped through, gently scrape it off with a toothpick while the paint is fresh. -
Seal the artwork:
Once all paint is fully dry (I usually wait overnight to be safe), apply a coat of matte finish sealer. This protects the design from scratches and gives the box a smooth, professional feel.
Now you have a unique celestial treasure chest ready to hold your favorite keepsakes
Faux Lace Pattern for a Vintage Jewelry Box
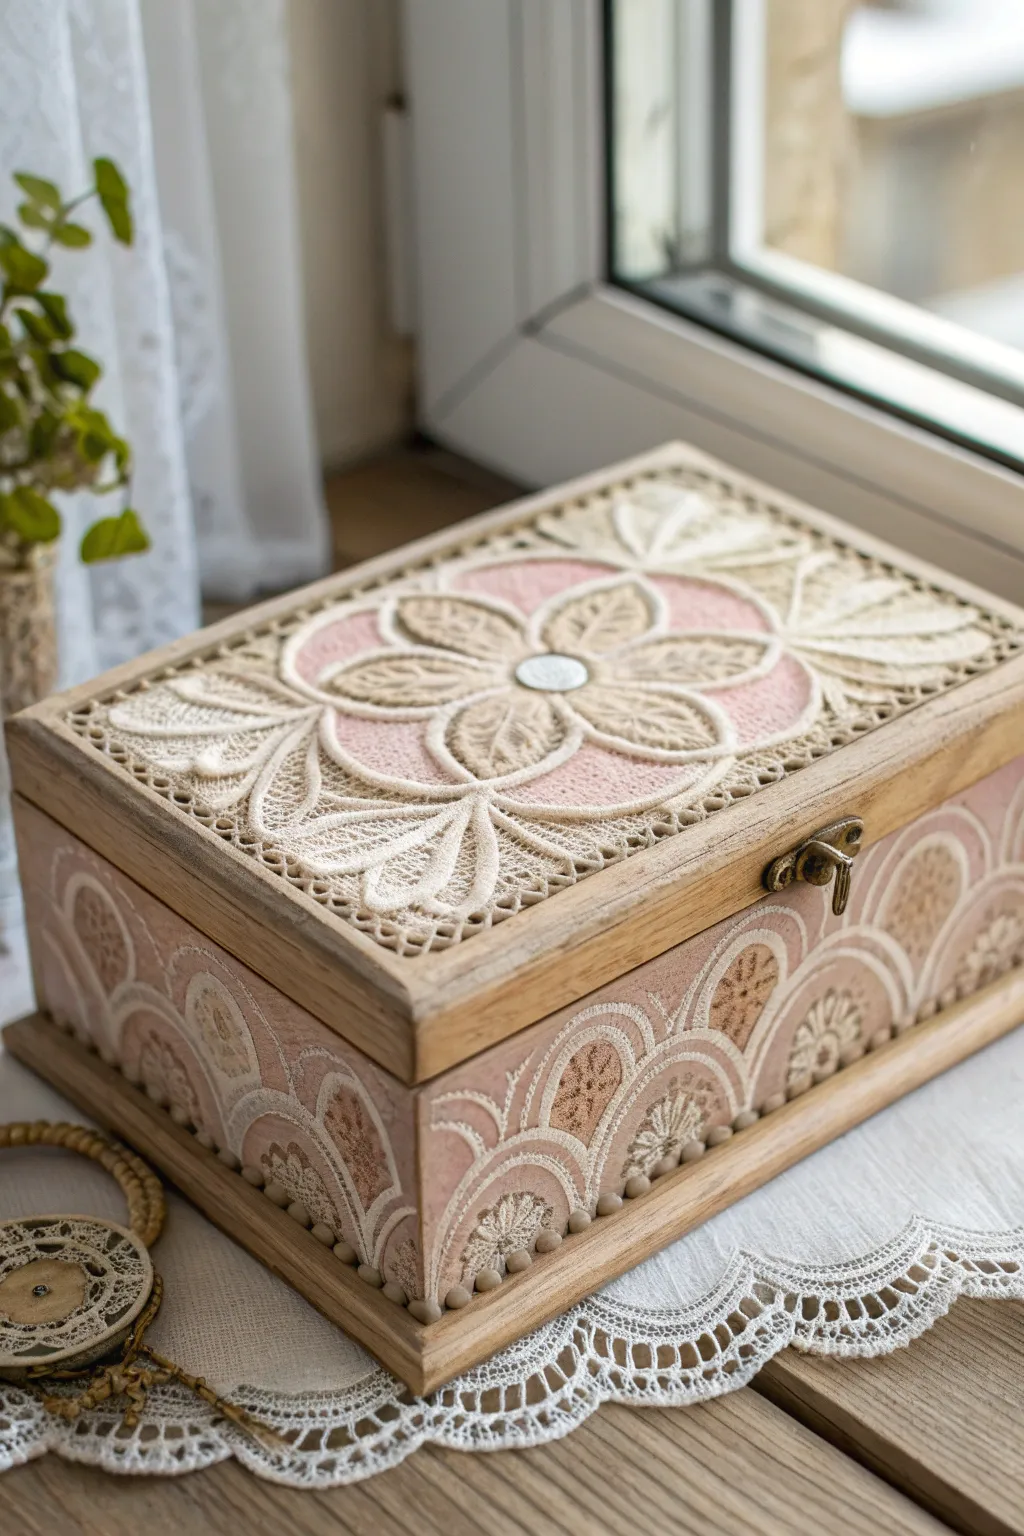
Transform a plain wooden box into a romantic keepsake with this faux lace technique. Using raised stenciling and careful painting, you’ll create the illusion of delicate, timeworn crochet lace resting on dusty pink fabric.
Step-by-Step Guide
Materials
- Unfinished wooden jewelry box with latch
- Chalk paint (Dusty Pink, Cream/Antique White)
- Texture paste or modeling paste
- Lace stencil (floral/doily pattern for top, scalloped pattern for sides)
- Palette knife or spatula
- Fine grit sandpaper (320-400 grit)
- Small round detail brush
- Flat synthetic brush (1 inch)
- Dark antique wax
- Lint-free cloth
- Matte spray sealer
- Small round embellishment (for center)
Step 1: Base Preparation
-
Sand the surface:
Begin by lightly sanding the entire wooden box to remove any rough splinters or existing varnish. Wipe it clean with a tack cloth or slightly damp rag to ensure no dust remains. -
Paint the background:
Apply a base coat of dusty pink chalk paint to the top inset panel and the side panels where you plan to add the design. Leave the wooden frame edges (the rim of the lid and the base) unpainted if you want to keep that natural wood look shown in the photo. -
Refine the edges:
Use a small brush to neatly paint up to the edges of the frame. If you accidentally get paint on the wood trim, wipe it off immediately with a damp cloth. -
Let it cure:
Allow the pink base coat to dry completely. Chalk paint dries fast, but give it at least an hour to be safe for the stencil phase.
Smudged Stencil?
If the paste bleeds under the stencil, wait for it to dry completely. Then, use a craft knife to gently scrape away the excess paste and touch up with pink paint.
Step 2: Creating the Lace Top
-
Position the stencil:
Place your large floral or doily stencil precisely in the center of the lid’s painted panel. Use painter’s tape to secure it firmly so it doesn’t shift. -
Apply texture paste:
Using a palette knife, spread a generous layer of texture paste over the stencil. Think of it like frosting a cake—you want an even layer, not too thick but enough to create a raised effect. -
Reveal the design:
Carefully lift the stencil straight up. Do not drag it. This reveals the raised floral pattern. Immediately wash your stencil before the paste hardens. -
Dry the paste:
Let the texture paste dry completely. This can take several hours depending on humidity. It should be hard to the touch.
Tinted Paste Trick
Mix a drop of your cream paint directly into the white texture paste before stenciling. This saves you from having to paint the intricate lace details later.
Step 3: Detailing the Sides
-
Stencil the scallops:
For the sides, use a scalloped or arch-pattern stencil. Align the bottom of the stencil with the bottom edge of the side panel. -
Add raised texture:
Apply the texture paste over this side stencil just as you did for the top. Repeat this around all four sides of the box, letting each side dry a bit if handling becomes tricky. -
Add bead details:
While the paste is still slightly wet (or using a separate heavy body gel later), pipe small dots along the bottom edge of the scallop design to mimic the beaded trim seen in the image.
Step 4: Painting and Antiquing
-
Paint the lace:
Once all texture paste is rock hard, paint over the raised designs with Cream or Antique White chalk paint. Use a detail brush to carefully coat the raised areas without getting too much cream paint on the pink background. -
Soften the look:
I prefer to dry brush a tiny bit of the cream paint over the pink areas near the lace edges. This makes the transition look like real fabric thread blending into the background. -
Apply antique wax:
Dip a lint-free cloth or a waxing brush into dark antique wax. Lightly buff it over the exposed wooden frame edges to deepen the color and give it an aged look. -
Shadow the lace:
Using a very small amount of wax on a fine brush, gently darken the crevices of the raised lace pattern. This adds depth and makes the ‘threads’ look three-dimensional. -
Wax the sides:
Repeat the waxing process on the side panels, focusing on the lower areas of the scallops to create a shadowed, recessed effect. -
Attaching the center:
Glue a small, round embellishment or flat-back pearl into the very center of the top floral design to act as the focal point. -
Final seal:
Mist the entire box with a matte spray sealer to protect the chalk paint and texture paste from chipping.
Place your jewelry inside and enjoy the vintage charm of your handmade heirloom
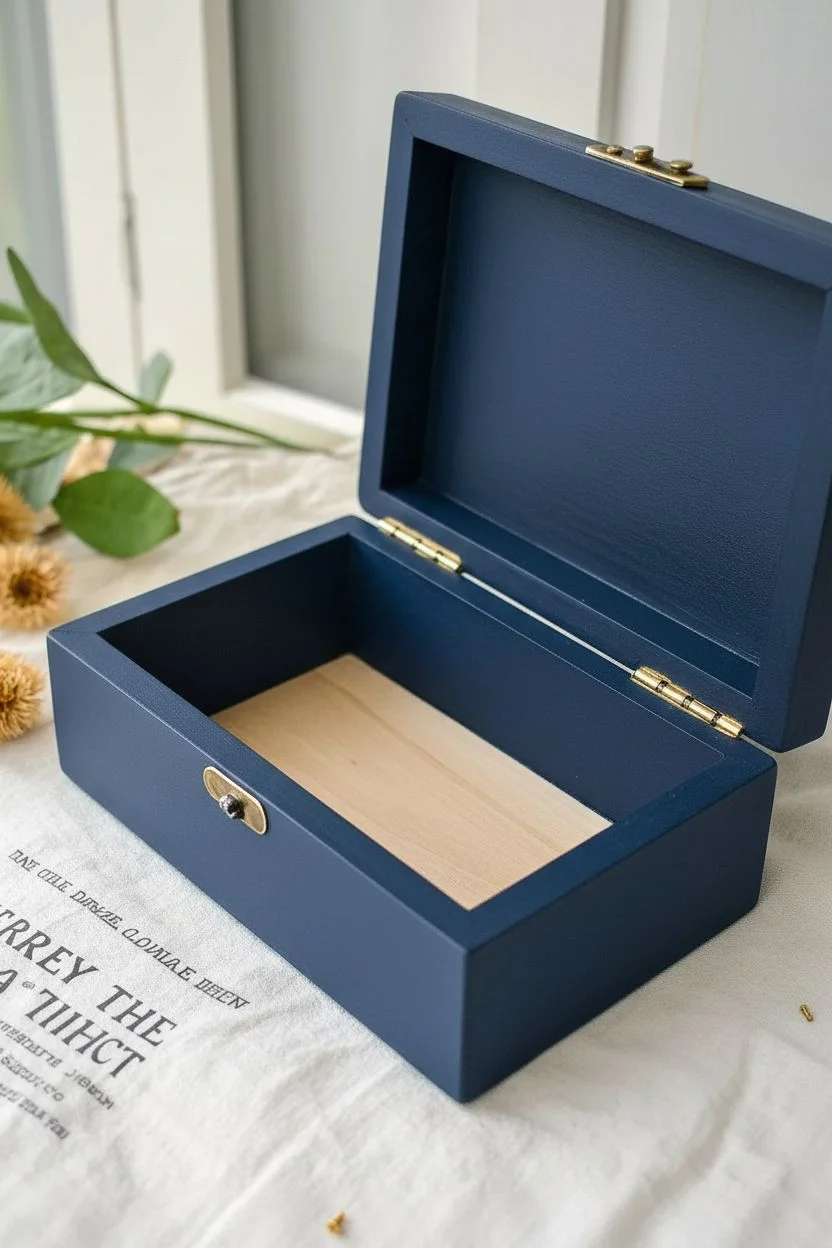
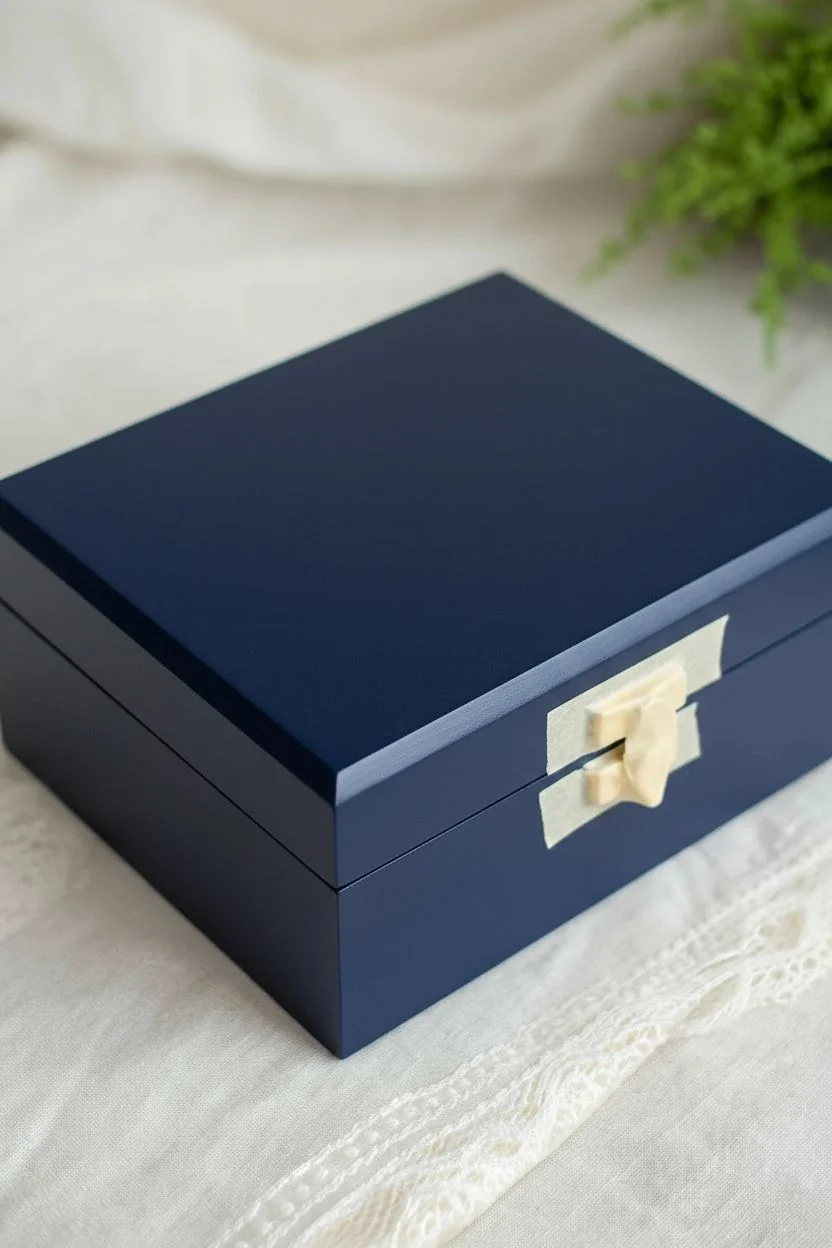
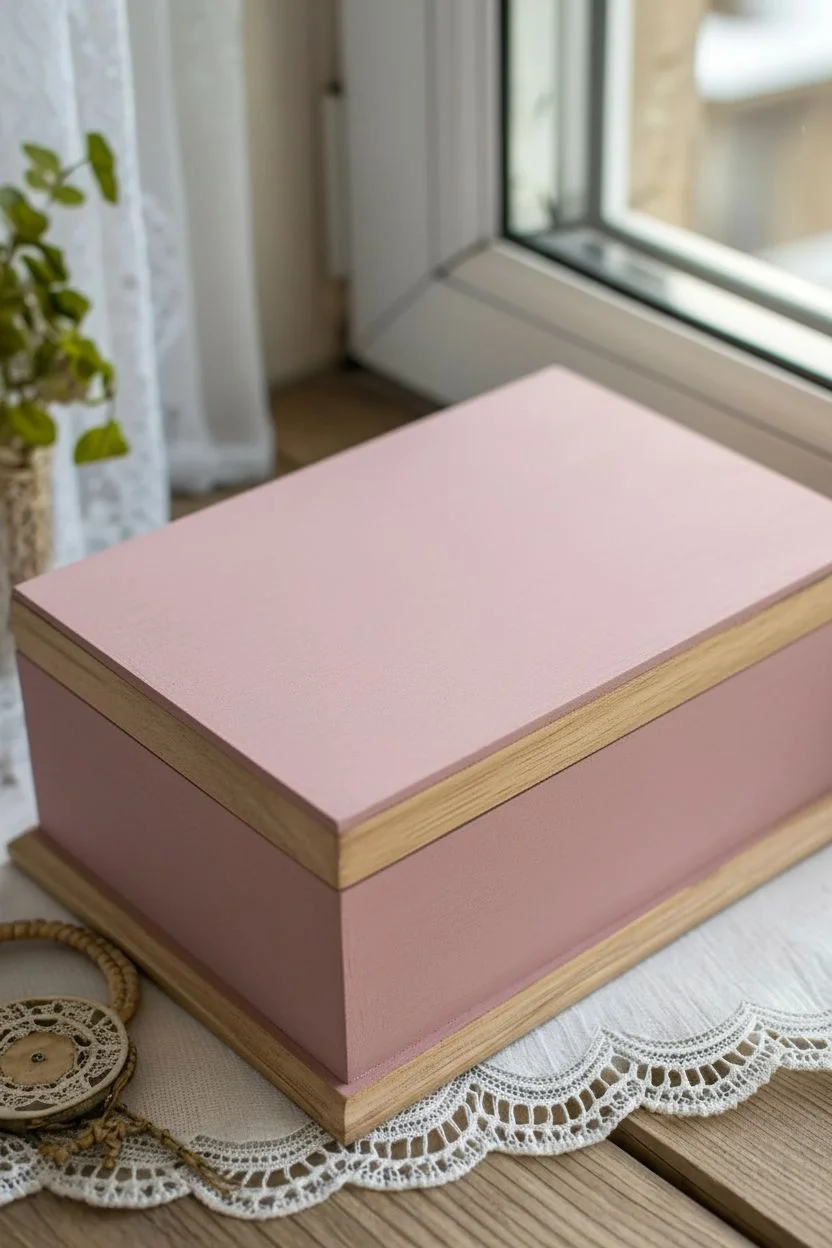
Hardware Highlight: Painted Box With Polished Latch Contrast
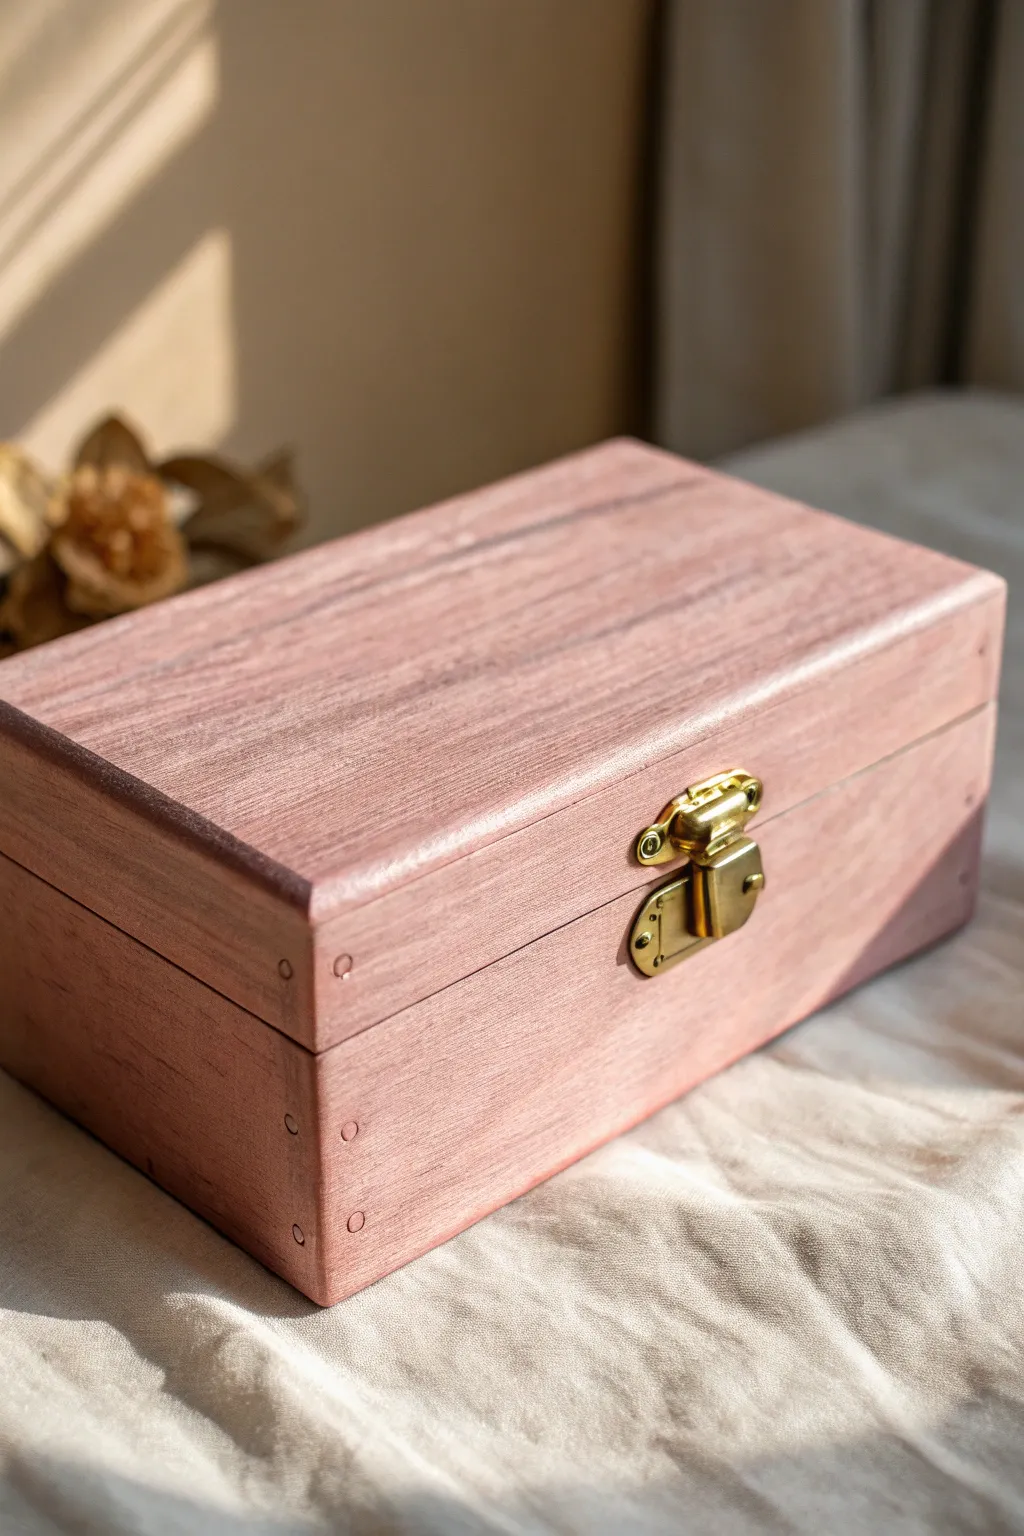
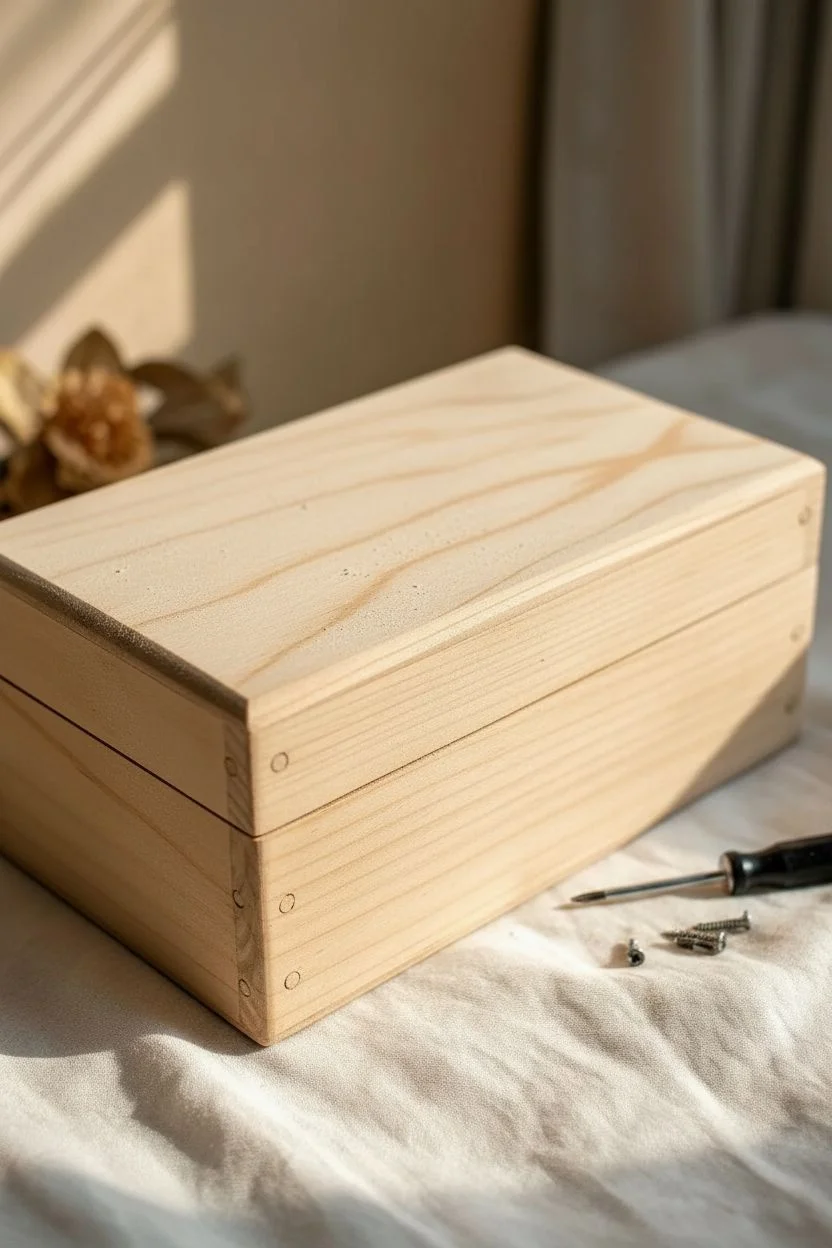
Transform a plain wooden box into a sophisticated keepsake with this technique that celebrates natural texture. By using a semi-transparent wash rather than opaque paint, you achieve a soft, dusty rose hue that allows the beautiful wood grain to shine through, perfectly accented by polished hardware.
Step-by-Step Tutorial
Materials
- Unfinished wooden box with latch hardware
- Sandpaper (220-grit and 400-grit)
- Small screwdriver (sized for hardware screws)
- Pink acrylic paint (Matte finish, color: dusty rose or mauve)
- Water relative to paint ratio
- Mixing cup or small jar
- Wide, flat synthetic brush (1-inch width)
- Lint-free cotton rags or shop towels
- Matte spray sealant or clear wax
- Metal polish (for the latch)
- Microfiber cloth
Step 1: Preparation & Disassembly
-
Remove hardware:
Begin by carefully removing the latch and any hinges using your small screwdriver. Keep these screws in a small dish so they don’t get lost; working without hardware attached ensures a much cleaner finish. -
Initial light sanding:
Even if the box looks smooth, give it a quick pass with 220-grit sandpaper. Go with the direction of the wood grain to remove any factory coating or oils that might repel your paint wash. -
Dust cleanup:
Wipe the entire box down thoroughly with a tack cloth or slightly damp rag to remove all sawdust. Any dust left behind will create gritty bumps in your finish.
Patchy Color?
If the wash looks blotchy, the wood may have had uneven sap levels. Lightly sand the dark spots and apply a tiny amount of plain water before re-washing to even absorption.
Step 2: Creating the Wash
-
Mix the paint solution:
In your mixing cup, combine roughly 1 part dusty rose acrylic paint with 2 parts water. You want a consistency similar to skim milk—runny enough to soak in, but pigmented enough to tint. -
Test the opacity:
Test your mixture on the bottom of the box first. If it covers the grain too much, add more water; if it’s barely visible, add a drop more paint.
Step 3: Applying the Finish
-
Brush on the wash:
Dip your flat brush into the diluted paint and apply it to one side of the box, brushing in long strokes with the wood grain. -
Wipe away excess:
Immediately after brushing, take a lint-free rag and gently wipe the surface in the direction of the grain. I find this steps creates that professional ‘stained’ look rather than a ‘painted’ one. -
Repeat for all exterior sides:
Work one side at a time—brush on, wipe off—until the entire exterior is coated. Don’t forget the back panel where the hinges were. -
Check the edges:
Pay special attention to the lid seam and corners. Use the rag to blot up any drips that might have pooled in the screw holes or joinery cracks. -
Dry and assess:
Let the box dry for about 20 minutes. If the color is too faint for your taste, repeat the brush-and-wipe process for a second layer to deepen the pink tone without losing the grain visibility. -
Smooth the grain raise:
Water-based washes often ‘raise the grain,’ making the wood feel fuzzy. Once fully dry, very lightly run a piece of 400-grit sandpaper over the surface to knock down that fuzz and make it silky smooth.
Luxe Interior
Line the bottom of the interior with adhesive velvet or felt in a cream or sage green color. This adds a hidden layer of luxury and protects delicate jewelry.
Step 4: Sealing & Reassembly
-
Apply clear protection:
Spray a thin coat of matte clear sealant over the box, or buff in a clear furniture wax. This protects the color and keeps the wood feeling natural, not plastic-like. -
Polish the hardware:
While the sealer cures, take your metal latch and hinges. Use a dab of metal polish and a microfiber cloth to shine them up to a high-gloss gold finish. -
Reattach hardware:
Carefully screw the hinges and front latch back into their original holes. Hand-tighten these gently so you don’t strip the soft wood. -
Corner details (optional):
If your box has decorative corner pins or nails like the one shown, use a tiny brush to clean any pink wash off their heads, or lightly sand them to bring back the metal glint.
Now you have a soft, beautifully stained box ready for gifting or holding your favorite trinkets
Tiny Landscape Scene on the Jewelry Box Lid
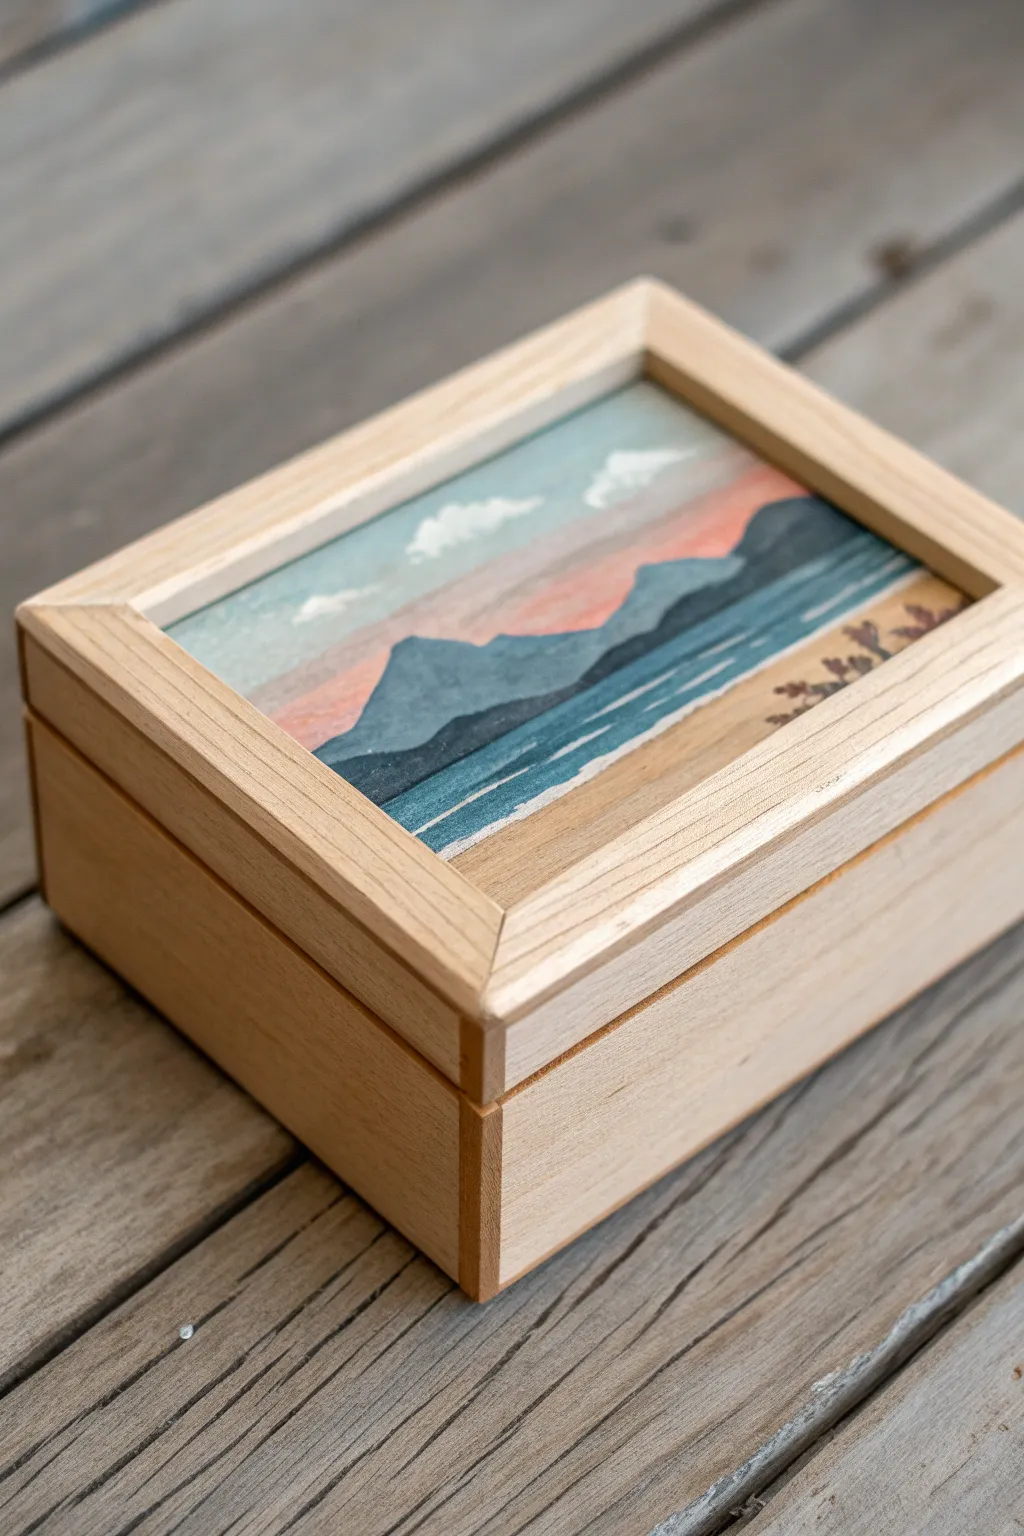
Transform a plain wooden jewelry box into a keepsake treasure with this calming landscape painting. The recessed lid acts as a natural frame for a scene featuring gentle blue mountains, a peachy sunset, and tranquil waters.
How-To Guide
Materials
- Unfinished wooden jewelry box with a recessed lid
- Fine grit sandpaper (220-grit)
- Painter’s tape
- Gesso or white acrylic primer
- Acrylic paints: Titanium White, Cerulean Blue, Burnt Sienna, Peach/Salmon, Navy Blue, Yellow Ochre
- Flat brushes (small/medium)
- Round detail brush (size 0 or 1)
- Small cup of water
- Paper towels
- Matte or satin varnish
Step 1: Preparation
-
Prepare the surface:
Lightly sand the recessed panel where the painting will go to ensure a smooth texture. Wipe away any dust with a clean, dry cloth. -
Protect the frame:
Apply painter’s tape carefully along the inner wooded edges of the ‘frame’ surrounding the recessed panel. Press the edges of the tape down firmly with your fingernail to prevent paint from bleeding onto the natural wood. -
Prime the background:
Paint the entire recessed area with a thin, even coat of gesso or white acrylic paint. This creates a bright base that will make your sunset colors pop.
Step 2: Sky and Background
-
Mix the sky colors:
On your palette, create a soft sky blue by mixing white with a tiny dot of Cerulean Blue. Next, mix a warm sunset coral using the Peach paint with a touch of white. -
Paint a gradient sky:
Start at the top of the panel with your pale blue. While the paint is still wet, add the coral color just below it, blending the two slightly where they meet to create a soft transition. -
Add cloud details:
Using a small, dry brush and pure white paint, dab in two or three fluffy clouds near the top center. Keep the edges soft and organic rather than distinct circles.
Clean Lines Secret
Before painting your color, paint a thin layer of clear matte medium over the edge of your painter’s tape. This seals the tape edge so no color can bleed under.
Step 3: Mountains and Water
-
Outline the mountains:
Once the sky is dry, mix a medium blue-grey using Cerulean Blue, a touch of Navy, and a tiny bit of Burnt Sienna to dull it. Paint two overlapping mountain shapes across the horizon line. -
Create the shoreline:
For the lower section, mix Yellow Ochre with plenty of White to make a sandy beige. Paint the bottom right corner in a diagonal sloping shape to represent the beach. -
Paint the water base:
Use a mix of Cerulean Blue and White to fill the area between the mountains and the beach. Make your horizontal strokes smooth to mimic calm water. -
Add water depth:
Take your Navy Blue and paint a distinct, darker band at the base of the mountains to represent their reflection and shadow on the water. -
Paint water highlights:
Using a clean, fine brush and diluted white paint, add thin, broken horizontal lines across the blue water area to suggest gentle ripples catching the light.
Make It Personal
Instead of a generic landscape, match the mountain range silhouette to a favorite vacation spot or local landmark to make the gift extra meaningful.
Step 4: Foreground and Finishing
-
Paint the foliage:
Mix Burnt Sienna with a dot of Navy to create a dark brown. Using your smallest detail brush, paint tiny, branching shapes on the sandy beach area in the bottom right corner. -
Add foliage leaves:
Stipple tiny dots of reddish-brown onto those branches to suggest small bushes or dry flowers in the foreground. -
Remove the tape:
Carefully peel away the painter’s tape while the paint is dry to the touch but not fully cured, pulling at a 45-degree angle away from the wet edge. -
Seal the artwork:
Wait 24 hours for the acrylics to fully cure. Here I prefer to apply two thin coats of matte varnish to protect the artwork without making it too glossy.
This peaceful little landscape box is now ready to hold your most precious items
Abstract Brushstroke Texture Like a Mini Canvas
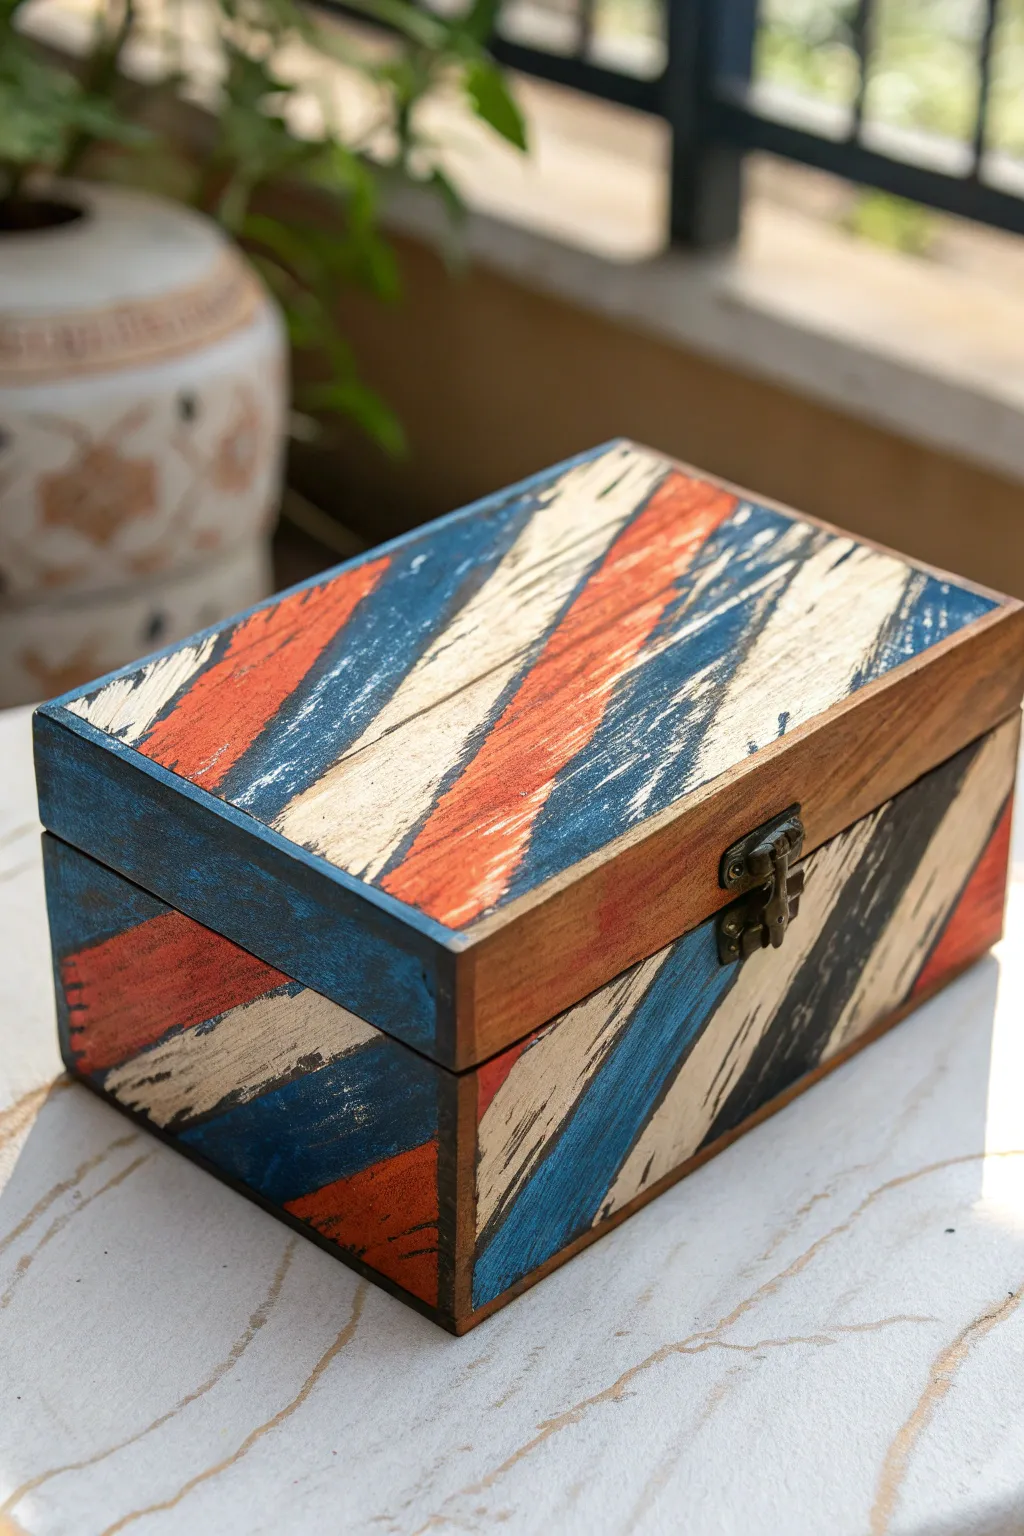
Transform a plain wooden box into a miniature piece of modern art with this bold and textural design. Using a palette of deep navy, terracotta orange, and creamy white, you’ll create dynamic diagonal stripes that celebrate the raw energy of brushwork.
Detailed Instructions
Materials
- Unfinished wooden jewelry box with hinged lid
- Acrylic paints: Navy Blue, Terracotta/Burnt Orange, Cream/Off-White
- Flat bristle brushes (medium and small)
- Sandpaper (medium grit and fine grit)
- Painter’s tape or masking tape
- Paper towels
- Matte finish varnish or sealant
- Screwdriver (to remove hardware)
Step 1: Preparation and Base
-
Remove Hardware:
Before you begin, use a small screwdriver to carefully remove the metal latch and hinges. Keep these screws in a safe place so you don’t lose them. -
Initial Sanding:
Give the entire box a light sanding with medium-grit sandpaper to remove any rough splinters or factory coatings. Wipe away the dust with a clean, dry cloth. -
Plan the Diagonals:
Visualize diagonal stripes running across the top and down the sides. You can lightly sketch these lines with a pencil if you want precise guides, but freehanding adds to the rustic charm.
Pro Tip: Better Brushwork
Use a stiff-bristled brush rather than a soft synthetic one. The stiffer bristles create distinct scratch marks in the paint, which is essential for achieving that rugged texture.
Step 2: Creating the Texture
-
Dry Brush Technique:
For this look, you want a ‘dry brush’ effect. Dip your flat brush into the navy blue paint, then dab most of it off onto a paper towel until the brush is almost dry. -
First Stripe Set:
Apply the blue paint in quick, confident diagonal strokes. Let the wood grain show through in spots; don’t aim for solid, opaque coverage. -
Edges and Continuation:
Make sure your strokes carry over the edge of the lid and down the sides of the box, ensuring the pattern flows continuously even when the box is closed. -
Terracotta Layer:
Switch to a clean brush. Using the same dry-brush technique, apply the terracotta orange stripes parallel to the blue ones. -
Adding Cream Highlights:
Once the darker colors are touch-dry, add the cream or off-white stripes in the remaining gaps. I like to let these overlap the blue and orange slightly to create interesting transitional textures. -
Side Panel Detailing:
Rotate the box and continue the diagonal pattern down the front, sides, and back. Ensure the lines angle in a consistent direction all the way around. -
Layering for Depth:
Go back over the stripes with a second, very light layer of paint if certain areas look too bare, but maintain that scratchy, textural appearance.
Troubleshooting: Too Much Paint?
If you accidentally apply a blob of solid color, don’t wipe it wet. Let it dry completely, then use heavy-grit sandpaper to aggressively scuff it back until the texture matches the rest.
Step 3: Distressing and Finishing
-
Sanding Back:
Allow the paint to dry completely (at least 1 hour). Then, take fine-grit sandpaper and gently sand over the painted surfaces. This reveals more wood grain and enhances the rustic, weathered aesthetic. -
Focus on Edges:
Sand the corners and sharp edges a bit more aggressively to mimic natural wear and tear. -
Clean Up:
Thoroughly wipe the box down with a slightly damp cloth to remove all sanding dust before sealing. -
Sealing the Art:
Apply a coat of matte varnish or sealant. A matte finish is crucial here to keep the organic, earthy feel of the wood and paint texture. -
Reattach Hardware:
Once the sealant is fully cured, screw the hinges and the latch back into their original holes.
Now you have a stylish, custom storage piece that looks like it came straight from an artisan market
Marbled Dip Look for a One-of-a-Kind Jewelry Box
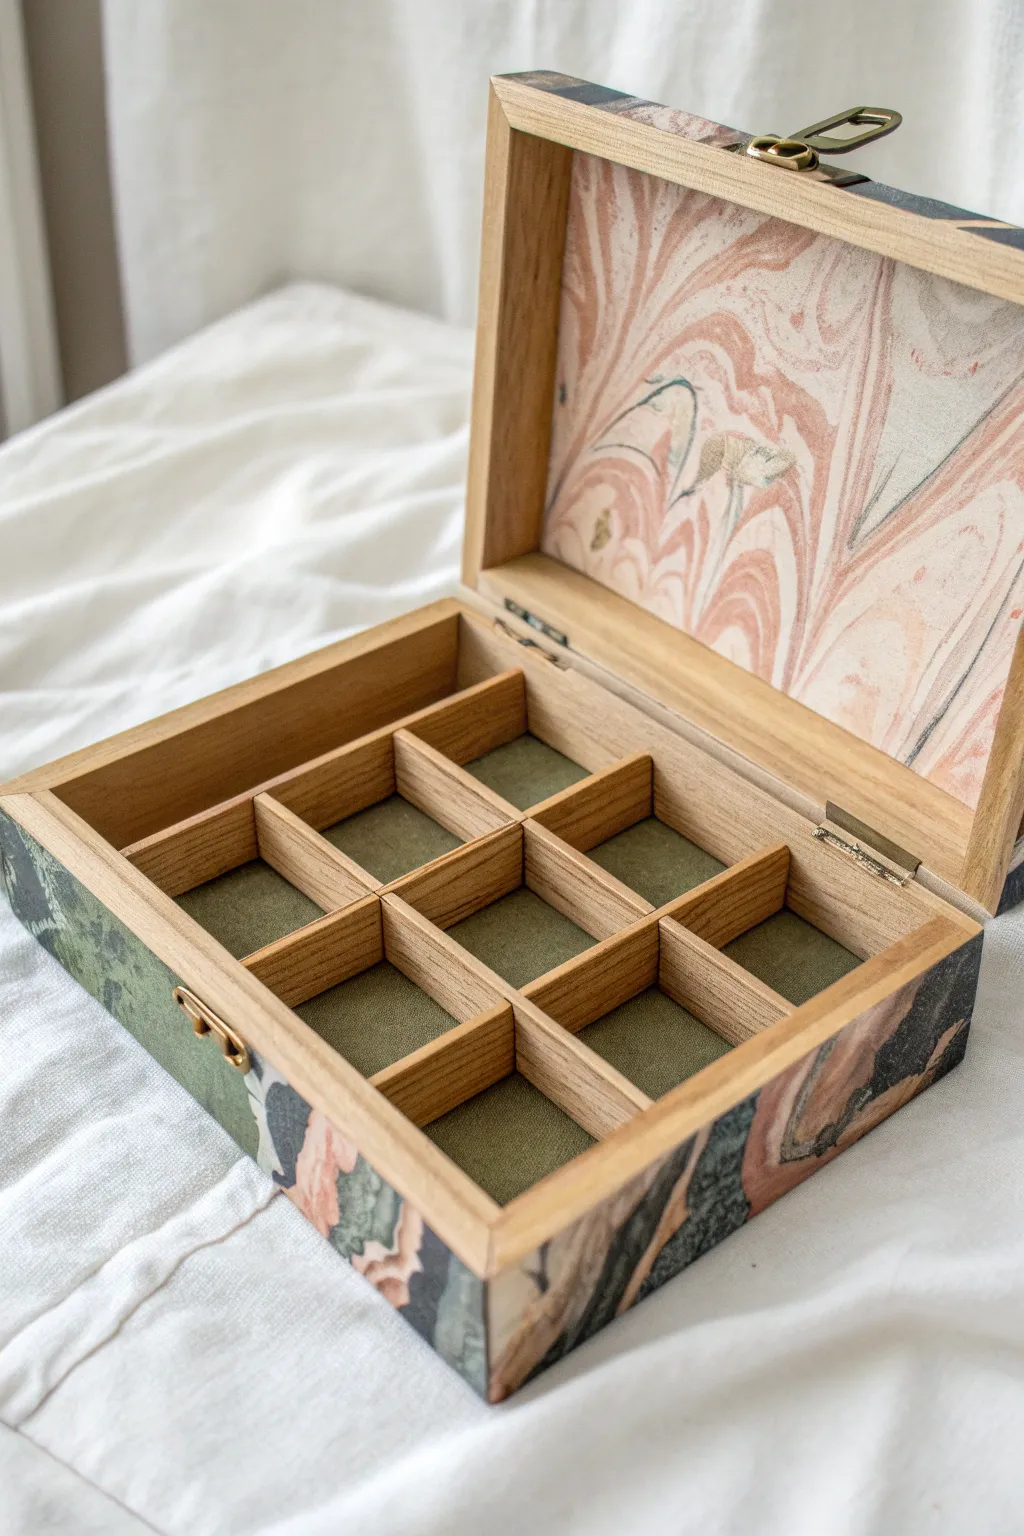
Transform a plain wooden organizer into a chic statement piece using the timeless art of paper marbling. This project combines natural wood textures with swirling, organic patterns in soft pinks and greens for a look that feels both vintage and modern.
Step-by-Step
Materials
- Unfinished wooden jewelry box with dividers
- Marbling kit (inks/paints and carrageenan/size)
- White or cream cardstock paper (uncoated)
- Wide, shallow tray (larger than your paper)
- Mod Podge (Matte finish)
- Foam brushes
- X-Acto knife or sharp craft blade
- Self-healing cutting mat
- Ruler
- Fine-grit sandpaper (220 grit)
- Pencil
- Green felt or velvet sheets (adhesive backed is easiest)
- Screwdriver (small, for removing hardware)
Step 1: Preparation & Paper Marbling
-
Hardware Removal:
Begin by carefully unscrewing the hinges and latch from your wooden box. Keep these tiny screws safe in a small bowl so you don’t lose them. -
Surface Prep:
Lightly sand the exterior and interior wooden surfaces with 220-grit sandpaper to remove any rough splinters, then wipe away the dust with a tack cloth. -
Prepare the Size:
Mix your marbling size (thickened water) according to your kit’s instructions. This usually needs to sit for a few hours to clear up bubbles. -
Drop the Ink:
Gently drop your chosen colors—pink, sage green, and charcoal grey work beautifully here—onto the surface of the size. Create a palette that complements the natural wood tone. -
Create the Swirls:
Use a skewer or marbling comb to gently manipulate the floating ink. Drag through the dots to create the organic, wave-like ‘stone’ pattern seen in the example. -
Print the Paper:
Carefully lay your cardstock onto the liquid surface, let it sit for a few seconds, and peel it back to reveal the design. Rinse gently if your kit requires it, then let the sheets dry completely flat.
Troubleshooting: Wrinkled Paper
If bubbles appear while gluing, prick them with a pin and smooth down immediately. Don’t over-saturate paper with glue, or it will warp.
Step 2: Application & Liner
-
Measure the Lid Interior:
Measure the inside rectangle of the box lid. Transfer these measurements to your best marbled sheet. -
Cut the Lid Insert:
Using a metal ruler and sharp craft knife, cut the paper slightly smaller than your measurement to ensure it fits without buckling. -
Apply Lid Paper:
Brush a thin, even layer of Mod Podge onto the back of the paper. Press it firmly into the inside of the lid, smoothing out air bubbles from the center outward. -
Exterior Wrapping:
Measure the height and perimeter of the box’s exterior walls. Cut strips of marbled paper to match the height perfectly. -
Adhere Exterior Paper:
Apply Mod Podge to one side of the box at a time. Carefully align the paper strip, wrapping it around corners for a seamless look. I find smoothing it down with a bone folder helps edges stay crisp. -
Cut Liner Pads:
Measure the bottom of each small compartment in the base grid. Cut squares of green felt or velvet to fit these spaces. -
Install Liners:
Peel the backing off your adhesive felt (or use a dab of glue) and press the squares into the bottom of the compartments. -
Seal the Exterior:
Once the paper is fully dry, apply a final top coat of Matte Mod Podge over the exterior paper to protect it from wear and tear. -
Reassemble:
Once everything is dry and cured, screw the hinges and latch back into their original holes.
Pro Tip: Pattern Continuity
When cutting strips for the outside, cut one long continuous strip from your paper so the marble pattern flows seamlessly around the box corners.
Fill your newly customized compartments with your favorite treasures and enjoy the unique flair it adds to your dresser


Have a question or want to share your own experience? I'd love to hear from you in the comments below!