When you want sketchbook ideas easy enough to start right now, the trick is keeping things small, simple, and a little bit playful. Here are my go-to prompts for quick wins that still look super satisfying on the page.
Easy Doodle Icons in a Grid
Transform a blank dot-grid page into a charming sampler of miniature illustrations. Tucked neatly into imaginary rows, these cosmic different botanical and shape-based icons create a satisfyingly organized yet whimsical spread.
How-To Guide
Materials
- Dot grid notebook or sketchbook
- Fine liner pen (0.3mm or 0.5mm suggested)
- Pencil (optional for layout)
- Eraser
Step 1: Setting the Structure
-
Visualize the grid:
Open your dot grid notebook to a fresh spread. While you don’t need to draw physical lines, mentally divide the page into invisible squares, using the dots as guides. Aim for each doodle to occupy a space of roughly 2×2 or 3×3 dots. -
Start at the top left:
Begin in the upper left corner. Draw a simple sun icon with short rays radiating outward. Keep it small, leaving about two or three empty dots of ‘breathing room’ before where your next icon will go. -
Move across the row:
Moving to the right, draw a simple branch with leaves. I prefer to draw the central stem first, then add small oval leaves on alternating sides using the grid dots to keep the size consistent. -
Complete the first row:
Finish the top line with a few more celestial or nature themes. Add a small flower with a scribbled center and a crescent moon. Space them evenly so the row looks balanced.
Wobbly Lines?
Don’t stress about perfect symmetry. If a line goes astray, thicken the outline slightly to hide the wobble. The hand-drawn impurity is part of the charm.
Step 2: Building the Collection
-
Mix your themes:
For the second ‘row,’ introduce variety. Draw a simple outline heart, then a five-pointed star. Mixing geometric shapes with organic nature themes keeps the page interesting. -
Draw a crossed heart:
Further along, draw a heart with a vertical line through the center to create a ‘broken’ or folded effect. This adds a nice stylistic variation to the standard heart shape. -
Add a feather or fern:
Draw a vertical line slightly curved. Add many small, close-together diagonal lines coming off the stem to create a feather or fern leaf texture. -
Create a striped leaf:
Draw a teardrop shape for a leaf. Inside, draw a central vein and then fill one side with diagonal hatching lines for contrast.
Step 3: Adding Detail and Contrast
-
Incorporate solid fills:
About halfway down the page, draw a small heart and fill it in completely with your ink. These solid black accents anchor the page visually and prevent it from looking like just a collection of outlines. -
Draw a planet:
Create a small circle, then add a flat ring around the center to make a simple Saturn-style planet. Using a stencil or a coin might help if you struggle with small circles, but a hand-drawn look adds character. -
Add ‘sparkle’ clusters:
In gaps between larger icons, draw tiny clusters of dots or miniature four-pointed stars (just a cross with tapered ends). These act as filler elements that tie the grid together. -
Sketch a UFO:
Near the bottom left, draw a flattened oval (saucer) with a small dome on top to create a playful UFO. -
Draw a daisy:
Create a flower with a larger center circle and short, rounded petals all around. This looks great near the bottom corners as a grounding element.
Make it Pop
Use a light gray marker or a pastel highlighter to add a simple ‘shadow’ to the right side of each icon. This lifts them off the page instantly.
Step 4: Finishing Touches
-
The final leaf:
At the very bottom, draw one last detailed leaf with a central vein and distinct side veins. Angle it slightly to match the flow of the other items. -
Review spacing:
Scan the whole page. If any area looks too empty, adding a single tiny dot or a micro-heart is a perfect way to balance the negative space without overcomplicating the design. -
Erase guidelines:
If you used pencil to plan out your icon spacing or shapes, gently erase those marks now, being careful not to smudge your ink if it isn’t fully dry.
You now have a delightful library of icons ready to decorate any future journal entry


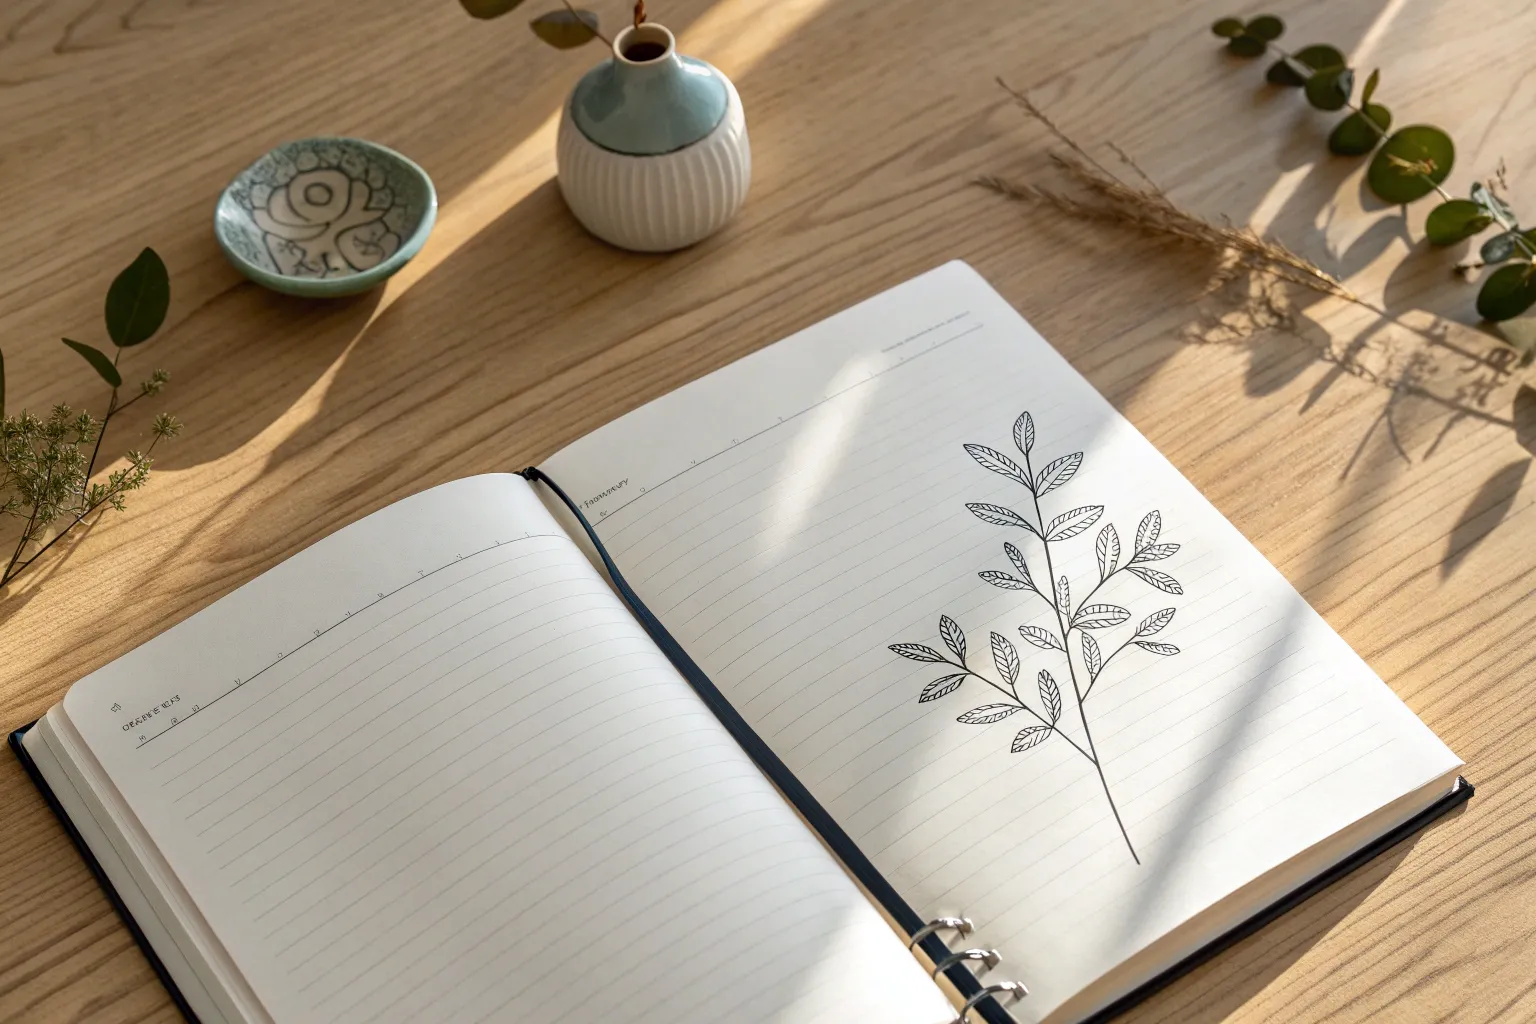
Simple Leaves and Stems With Minimal Lines
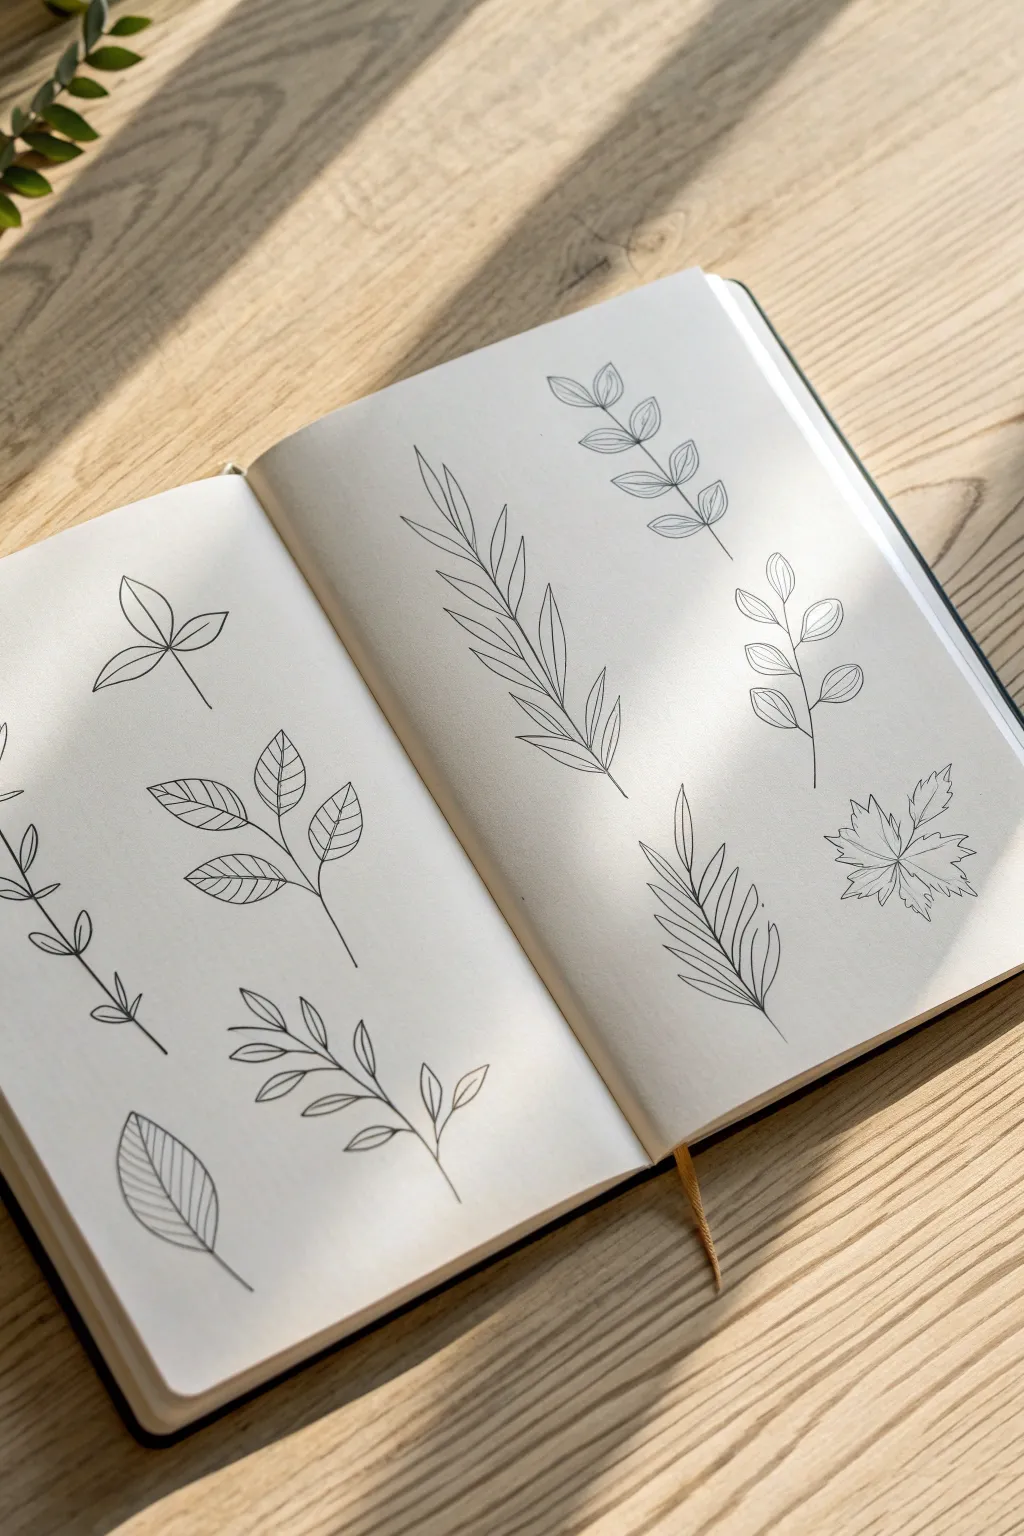
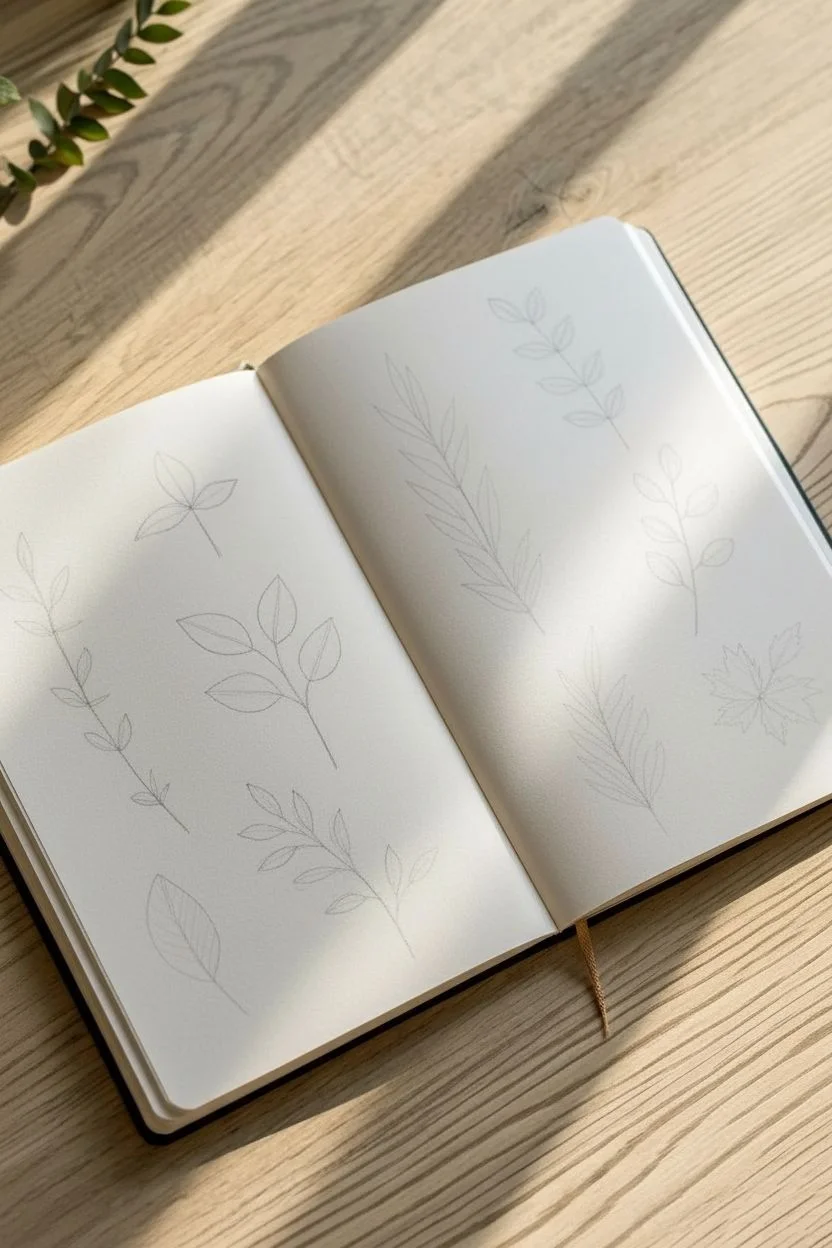
Embrace the elegance of simplicity with this collection of nine distinct botanical line drawings. This spread focuses on capturing the essence of various leaf shapes and stem structures using clean, uninterrupted strokes for a modern and airy aesthetic.
Step-by-Step
Materials
- Sketchbook (smooth or mixed media paper recommended)
- HB Pencil
- Soft Eraser
- Fine liner pen (0.3mm or 0.5mm, black)
- Ruler (optional, if you want perfect grid spacing)
Step 1: Planning the Layout
-
Visualize the grid:
Imagine a 2×3 imaginary grid across your double-page spread, or lightly mark positions with a pencil to ensure your nine drawings have enough breathing room. You’ll want roughly four designs on the left page and five on the right. -
Lightly sketch spines:
Using your HB pencil with very light pressure, draw the central spine or stem for each of the nine plants. Vary the curves—some should be straight and upright, others gently curving to the left or right to create dynamic movement.
Step 2: Left Page Designs
-
Draw the geometric tri-leaf:
For the top left design, start with a simple vertical stem. At the top, sketch three distinct leaf shapes radiating outward: one pointing straight up and two branching horizontally. Give them pointed tips and a clear center vein line. -
Create the rounded opposite leaves:
Below the first drawing, sketch a stem with pairs of leaves growing opposite each other. These leaves should be oval-shaped with pointed tips. Inside each leaf, draw a central vein and angled side veins (chevrons) for detail. -
Form the climbing vine:
On the bottom left, draw a long, slightly curved stem. Along this stem, add pairs of small, narrow oval leaves. Keep the spacing consistent as you move up the stem to mimic a climbing plant. -
Sketch the single detailed leaf:
In the bottom corner, draw a single, large tear-drop shaped leaf. Draw a straight line down the center, then fill the left and right sides with close, diagonal parallel lines to represent texture. -
Add the alternate branching stem:
For the final design on this page, draw a stem where branches alternate sides (left, then right). Attach small, almond-shaped leaves to the end of each short branch, adding a simple center line to each.
Wobbly Lines?
Don’t stress if your lines aren’t laser-straight. Organic variations make botanical drawings look more natural. Draw from your shoulder, not your wrist, for smoother long strokes.
Step 3: Right Page Designs
-
Draw the tall grass-like fern:
On the top left of the right page (near the binding), draw a long central stem. Add long, slender leaves that angle sharply upward, creating a ‘V’ shape with the stem. These should look like wheat or tall grass. -
Create the stacked geometric plant:
To the right of the grass, sketch a vertical stem. Add pairs of leaves that look like two triangles joined at the stem, getting slightly smaller as they reach the top. Add a center vein and horizontal veins to each leaf. -
Sketch the rounded eucalyptus style:
Below the geometric plant, draw a fragile, thin stem. Add circular or coin-shaped leaves attached by very short stems. Draw a simple curved line inside each circle to suggest volume and veins. -
Form the tropical palm frond:
In the lower middle area, draw a long, curved spine. From this spine, draw long, narrow leaves closely packed together, radiating outward and upward like a feather or palm leaf. -
Draw the jagged maple leaf:
For the final bottom right design, outline a single complex leaf with five distinct pointed lobes, similar to a maple or sycamore. Fill the interior with branching veins connecting to a central point at the base.
Pro Tip: Vein Direction
Make sure your leaf veins curve slightly toward the tip of the leaf rather than being perfectly straight. This subtle curve mimics real biology and adds dimension to flat drawings.
Step 4: Inking and Refining
-
Trace with fine liner:
Take your black fine liner (0.3mm works best for this delicate look) and carefully trace over your pencil sketches. Keep your hand steady and try to make each line fluid and continuous rather than sketchy. -
Vary line weight (optional):
If you want to add depth, go over the main stems a second time to make them slightly thicker than the delicate veins inside the leaves. -
Let the ink settle:
I always wait at least five minutes after inking before touching the paper again to ensure the ink is completely dry and won’t smudge. -
Erase pencil guides:
Gently erase all underlying pencil marks with a soft eraser. Be careful near the paper edges to avoid crinkling the page.
You now have a clean, reference-filled spread ready to inspire future botanical artworks.


Cute Fruit Minis Scattered on the Page
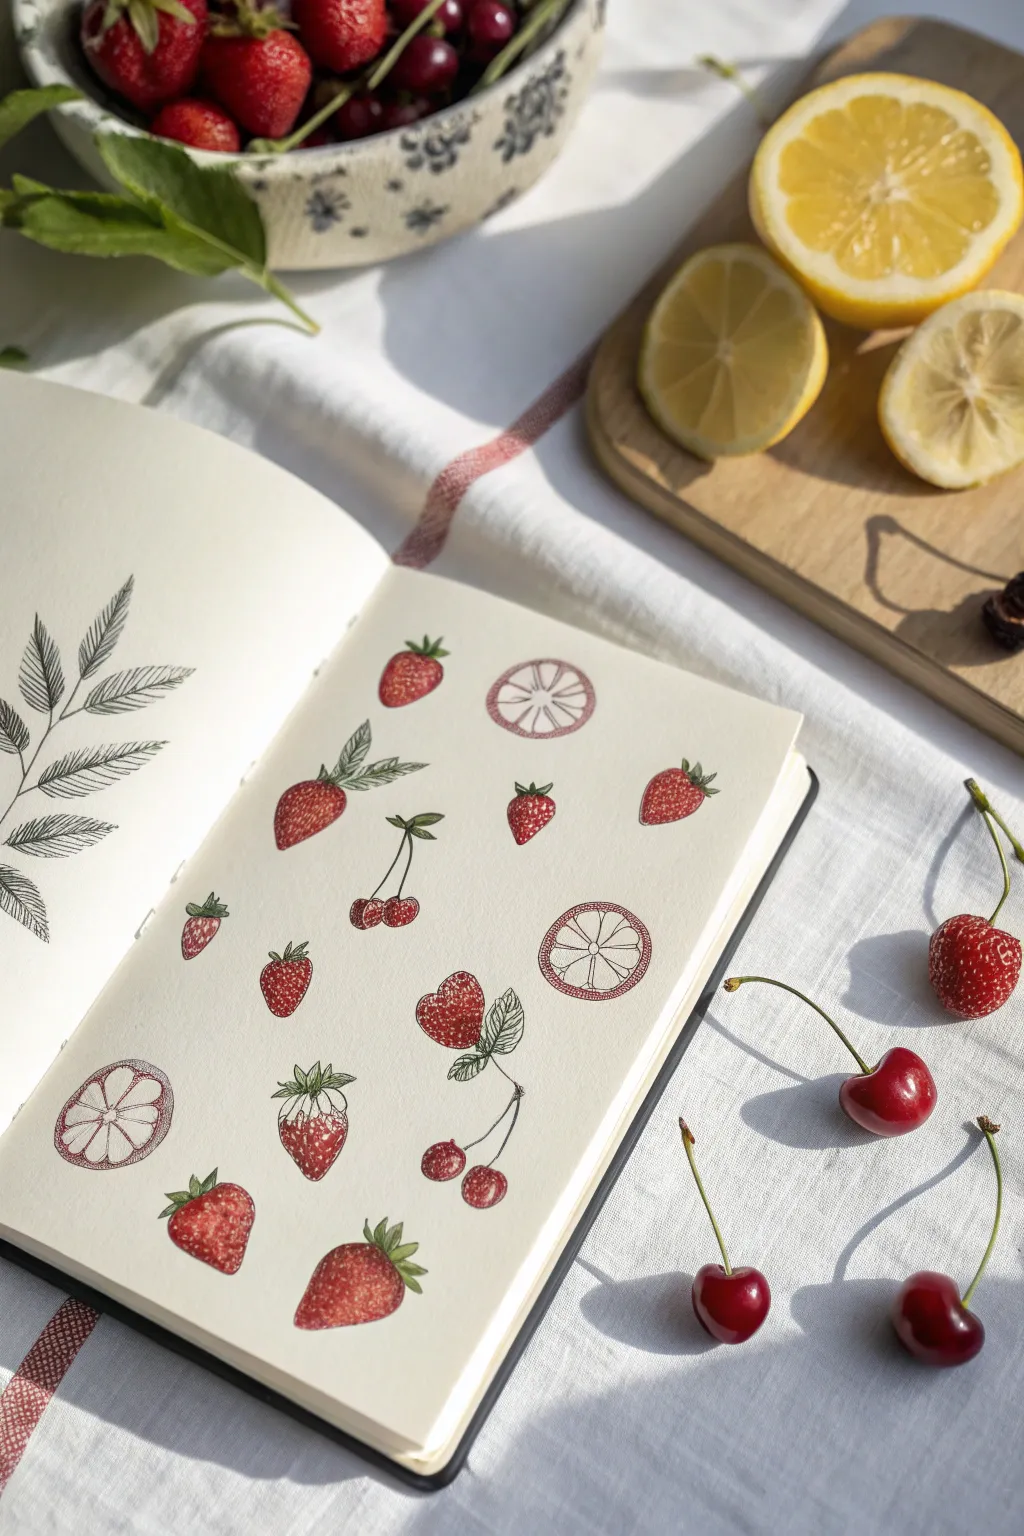
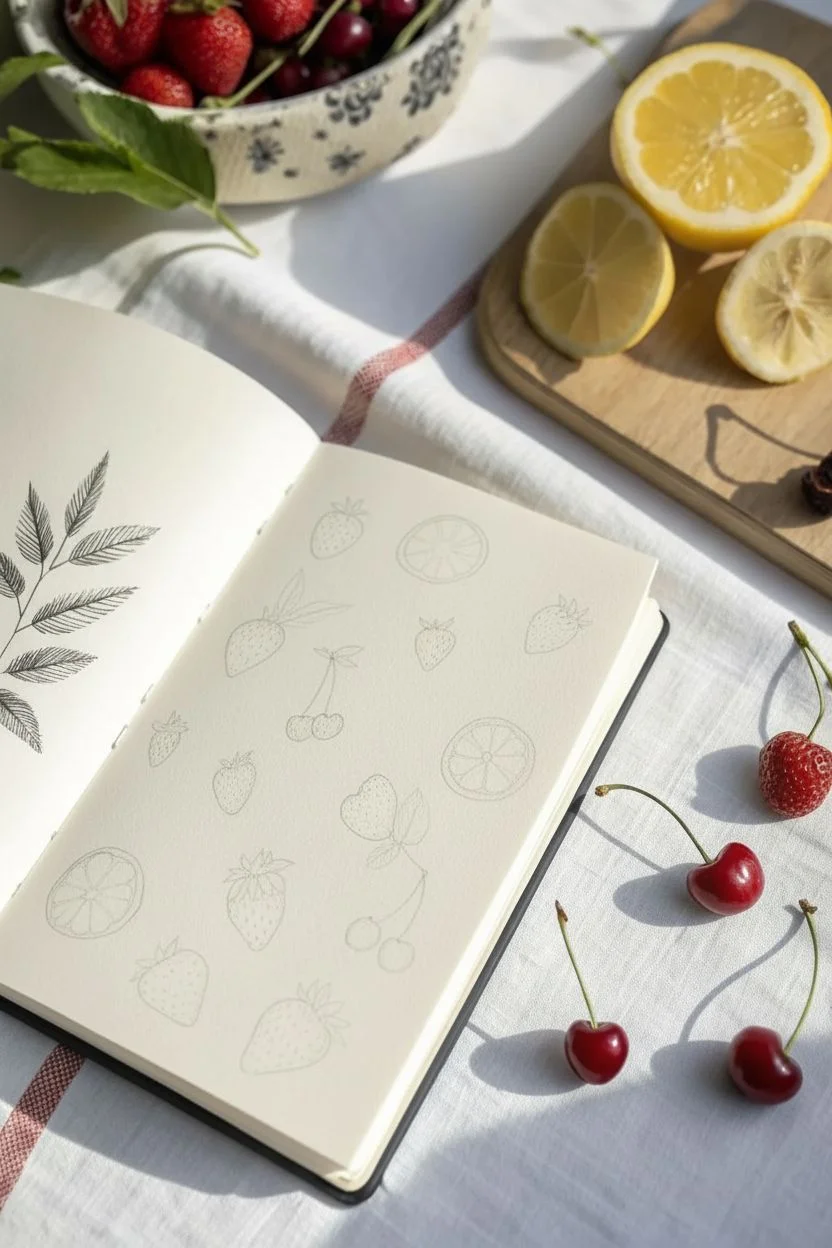
Capture the sweetness of summer with this delightful page of scattered mini-illustrations featuring strawberries, cherries, and citrus slices. Using a mix of fine liners and vibrant markers, you’ll create a sketchbook spread that feels fresh, organic, and full of juicy detail.
Step-by-Step Tutorial
Materials
- Sketchbook with smooth or mixed-media paper
- HB pencil and eraser
- Fine liner pens (Black, 0.1mm and 0.3mm)
- Fine liner or gel pens (Red and Green)
- Red alcohol markers or watercolor markers (light and deep red)
- Green markers (leaf green)
- White gel pen (for highlights)
Step 1: Planning the Layout
-
Rough placement:
Start by lightly mapping out where your fruit will go on the page using an HB pencil. Aim for a random, scattered look rather than perfect rows. I like to visualize a handful of fruit tossed onto a table to get that natural spacing. -
Sketch the strawberries:
Draw small, heart-shaped outlines for the strawberries. Vary their sizes and angles—some pointing up, some down, and some slightly tilted. -
Add cherries:
Sketch pairs of circles connected by long, thin stems for the cherries. Include a few single cherries as well to break up the pattern. -
Insert citrus slices:
Draw circles for the citrus slices. Add an inner circle slightly smaller than the outer rim, and lightly mark lines radiating from the center to divide the segments. -
Refine the leaves:
Go back to your strawberry sketches and add the leafy caps (calyx) on top. Make them jagged and expressive. For the cherries, you can add a simple leaf attached to the stem junction.
Ink Smudging?
If your black fineliner smears when you color over it with alcohol markers, switch to a water-based fineliner or let the black ink cure for at least 15 minutes before coloring.
Step 2: Inking the Outlines
-
Outline fruits:
Switch to your 0.1mm black fine liner. Carefully trace the pencil lines for the fruit bodies. Keep your hand relaxed; slightly wobbly lines can actually add to the organic charm here. -
Detail the citrus:
For the lemon slices, ink the outer rind and the inner segments. Instead of straight lines for the segments, use slightly curved, bubbly lines to mimic the texture of the pulp. -
Ink the stems and leaves:
Trace the stems and leaves. If you want a more delicate look, use the 0.1mm tip for the fruit bodies and a slightly thicker 0.3mm for the main stems, or vice versa, to create visual interest. -
Erase pencil marks:
Wait a few minutes to ensure the ink is completely dry, then gently erase all your pencil guides so the page looks clean.
Step 3: Adding Color and Texture
-
Base layer for strawberries:
Use a light red marker to color the body of the strawberries. Don’t worry about perfect coverage; a little texture is good. -
Deepen the red:
Take a deeper red marker and layer it over the shaded sides of the strawberries (usually the bottom or one side) to create volume. -
Strawberry seeds:
With a fine-tipped pen (or the very tip of your marker if it’s fine enough), add tiny dots or teardrop shapes for the seeds. I prefer leaving small white gaps around the seeds if using a coloring pencil, but with markers, you can just dot them over the red. -
Color the cherries:
Fill the cherries with a deep, vibrant red. Leave a tiny sliver of white paper uncolored on the upper curve of each cherry to act as a natural highlight, or color it solid and add white later. -
Green accents:
Color the leaves and stems with your green markers. Use a lighter green for the strawberry caps and a slightly darker green for the cherry stems if available. -
Citrus details:
Instead of coloring the lemon slices solid yellow, use a red or pink fine liner to scribble gentle cross-hatching inside the segments. This minimalist style mimics the pink grapefruit or blood orange look shown in the reference.
Add Variety
Try slicing the strawberries! Draw a few strawberries cut in half length-wise. Show the white/pink interior pattern to break up the solid red shapes.
Step 4: Final Touches
-
White highlights:
Using a white gel pen, add tiny dots or curved lines on the shadiest parts of the strawberries and the roundest part of the cherries to make them look glossy. -
Texture check:
If any area feels too flat, go back in with your black fine liner and add tiny stippling dots for shadow. -
Stray leaves:
Consider adding one or two standalone green leaves in empty gaps to balance the composition.
Now you have a refreshing, colorful spread that perfectly preserves the feeling of summer fruit on paper


Everyday Object Sketch: Mug, Spoon, and Keys


Capture the quiet beauty of nature with this minimalist line drawing featuring a delicate leafy twig paired with a circular floral stamp motif. This project focuses on clean lines and gentle shading to create an elegant, sketchbook-ready composition.
Step-by-Step
Materials
- Sketchbook or drawing paper
- HB or 2B pencil
- Fine liner pen (black, size 0.3 or 0.5)
- Eraser
- Ruler (optional)
Step 1: Drafting the Layout
-
Position the elements:
Begin by lightly marking the placement of your two main elements on the page. Place a small circle on the left side for the stamp motif and a gentle, curving diagonal line extending from the center towards the bottom right for the twig’s stem. -
Outline the twig structure:
Along the diagonal stem line, sketch short, thin lines branching out on alternating sides. These will be the center veins for your leaves. -
Draw leaf shapes:
Lightly sketch the general shape of the leaves around each branch line. Aim for a simple, almond-like shape that tapers to a point. Vary the sizes slightly, making the leaves at the tip of the twig a bit smaller. -
Draft the stamp circle:
Refine your circle sketch on the left. It doesn’t need to be perfectly round; a hand-drawn look adds character. Inside, lightly suggest a few squiggly lines to represent text or abstract floral shapes.
Stamp Authenticity
To make the circle look more like a real stamp, intentionally break the outer line in one or two spots to simulate uneven ink application.
Step 2: Inking the Botanical
-
Ink the main stem:
Using your fine liner pen, carefully trace over the main stem line. Keep your hand relaxed to achieve a natural, organic curve rather than a rigid stick. -
Define the leaves:
Ink the outline of each leaf. Instead of a continuous line, try breaking it slightly near the stem connection for a lighter feel. I like to add a tiny imperfection or wobble here and there to make them look more organic. -
Add center veins:
Draw the central vein for each leaf, starting from the stem and stopping just short of the leaf tip. This creates a breathing room that keeps the drawing airy. -
Detail the leaf mesh:
Add very fine, diagonal hatching lines inside the leaves to represent smaller veins. Keep these strokes light and swift, angling them away from the center vein towards the leaf edge.
Step 3: Finishing the Stamp Motif
-
Ink the circle:
Go over the circular boundary with your pen. You can double up the line in some areas or make it slightly sketchy to mimic the uneven pressure of a rubber stamp. -
Add abstract text:
Inside the circle, create loose, scribbly lines that mimic cursive handwriting. Don’t worry about writing actual words; the goal is to create the texture of text. -
Incorporate floral hints:
Add a few tiny, simple flower shapes or dots within the circle to suggest a botanical theme for the stamp design.
Try Watercolor
Once the ink is dry, add a loose wash of sage green watercolor over the leaves, intentionally painting outside the lines for an artsy look.
Step 4: Final Touches
-
Erase pencil marks:
Wait a moment for the ink to dry completely to avoid smudging. Then, gently erase all underlying pencil sketches. -
Assess contrast:
Look at your drawing from a distance. If the leaves feel too empty, add a few more hatching lines near the base of the leaves to deepen the shading.
Close your sketchbook knowing you have created a serene and timeless piece of botanical art.
BRUSH GUIDE
The Right Brush for Every Stroke
From clean lines to bold texture — master brush choice, stroke control, and essential techniques.
Explore the Full Guide
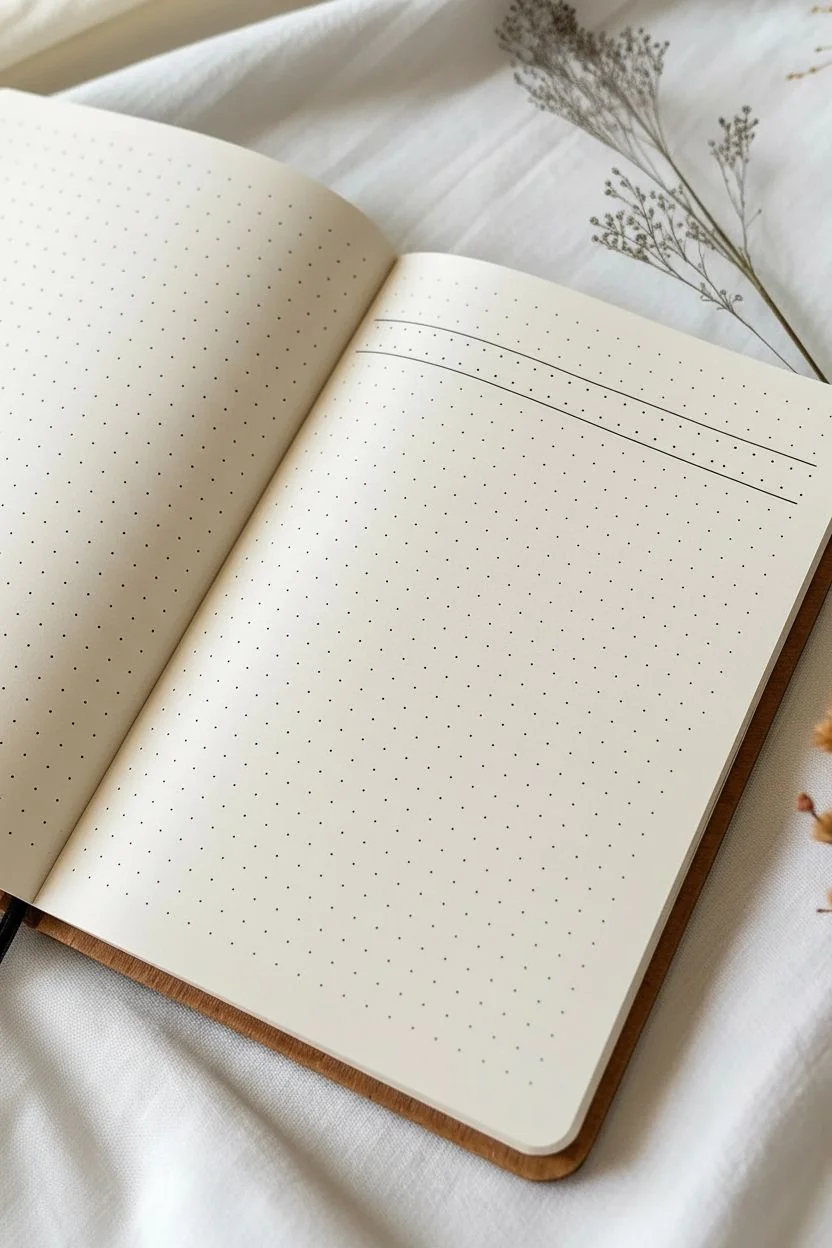
Moon and Stars Line Art Page


Transform a blank bullet journal page into a dreamy night sky with this simple yet striking line art pattern. Stick to clean, black ink on dotted grid paper to achieve that modern, minimalist aesthetic perfect for relaxation.
How-To Guide
Materials
- Dotted grid sketchbook or bullet journal
- Fine-liner pen (0.3mm or 0.5mm, black)
- Pencil (HB or H)
- Eraser (kneaded or standard white)
- Ruler (optional, for spacing)
Step 1: Planning the Layout
-
Analyze the grid:
Start by observing your dot grid. The beauty of this pattern lies in the seemingly random scattering of elements, but spacing is key. -
Sketch the moon anchors:
Lightly sketch three main crescent moons with your pencil to anchor the composition. Place one in the upper left, one on the mid-right, and one near the bottom center. -
Add cloud structures:
Pencil in the basic shapes for three puffy clouds. Scatter them in the empty spaces between your moons: a small one at the top center, a medium one near the middle, and a large, detailed one on the right side. -
Fill the gaps:
Sketch the placement of your larger stars. Don’t worry about the tiny details yet; just mark where the main five-pointed stars and sparkles will go to balance the page.
Step 2: Inking the Main Elements
-
Outline the moons:
Switch to your fine-liner pen. Carefully trace your crescent moon shapes. I like to keep the lines crisp and connected, avoiding sketchy, broken strokes. -
Ink the clouds:
Draw the clouds using a series of connected bumps or scallops. Vary the size of each bump to make them look fluffy and organic. -
Detail the large cloud:
For the largest cloud on the right, add smaller internal scallops near the bottom edge to give it volume and dimension. -
Add cloud texture:
Draw tiny ‘plus’ signs (+) and small dots inside the clouds to add texture without shading.
Grid Guide
Use the dots on the paper as geometric guides. For example, make your star points land exactly on dots to keep them symmetrical and sized consistently.
Step 3: Drawing the Stars
-
Draw five-pointed stars:
Ink your classic five-pointed stars. You can draw them in one continuous motion or outline the perimeter for a hollow look. -
Create four-pointed sparkles:
Draw the diamond-shaped stars (sparkles). Draw a stretched diamond shape with slightly curved sides that swoop inward. -
Add open stars:
In the remaining larger gaps, draw simple five-pointed star outlines that vary slightly in size and rotation.
Wobbly Lines?
If your curves are shaky, try moving your entire arm from the elbow rather than just your wrist. Draw curves faster for smoother lines.
Step 4: Finishing Touches
-
Sprinkle the confetti:
Look for any large negative spaces. Fill these with tiny open circles (like bubbles) and simple dots. -
Create micro-stars:
Add the smallest details: single dots and tiny clusters of specks to mimic distant stars. -
Wait for ink to dry:
Let your page sit for at least five minutes to ensure the ink is completely set. Smudging is the enemy here. -
Erase pencil lines:
Gently erase your initial sketch marks. Hold the paper taut with one hand while erasing to prevent wrinkling the page. -
Final assessment:
Scan the page for any uneven gaps. If a spot looks too empty, simply add a small dot or circle to balance the weight.
Now you have a serene, celestial page ready to be admired or used as a backdrop for journaling
Simple Mushroom Cluster With Light Hatching

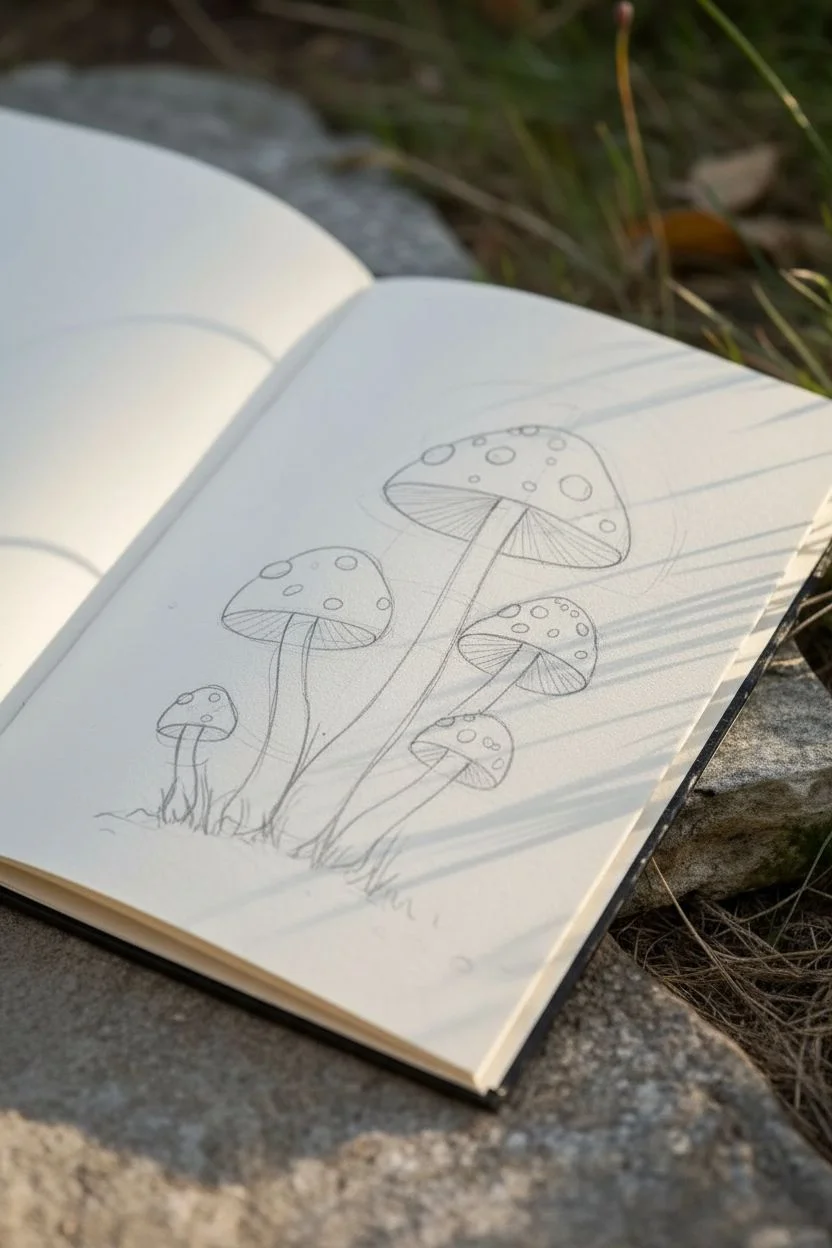
Capture the whimsical charm of nature with this black ink drawing of a mushroom family. Using simple line work and hatching techniques creates varying textures that give these fungi a classic, botanical illustration feel.
Step-by-Step
Materials
- Sketchbook with quality drawing paper
- Pencil (HB or H)
- Eraser
- Fine liner pen (01 or 03 size)
- Thicker fine liner pen (05 or 08 size)
- Ruler (optional)
Step 1: Penciling the Framework
-
Establish the Stems:
Begin by lightly sketching four long, slightly curved lines for the stems. Make the central stem the tallest and thickest, angling slightly to the right, while the others should be shorter and lean outward from a central base point. -
Cap Outlines:
Draw the mushroom caps on top of the stems. Start with flattened oval shapes or semi-circles. The tallest mushroom gets a wide, umbrella-like cap, while the smaller ones on the left and right can be slightly more bell-shaped. -
Adding Details:
Sketch small circles and irregular ovals scattered across the top of each cap to represent the characteristic warts or spots found on Amanita mushrooms. -
Refining Shapes:
Connect the caps to the stems with a ring-like skirt (annulus) midway down the stems, though the reference keeps this subtle. Ensure the bottom of the caps curves underneath to show where the gills will be.
Uneven Lines?
Don’t panic if your pen slips! Nature is rarely perfect. Simply thicken the line slightly in that area or turn the mistake into a textured bump on the stem.
Step 2: Inking Guidelines
-
Outline the Caps:
Using your 03 fine liner, carefully trace the outer edges of the mushroom caps. Keep your hand steady but allow for slight natural wobbles to make them look organic. -
Outline the Stems:
Ink the long stems, ensuring you stop where the grass will eventually cover the base. I find it helpful to pull the pen toward myself for smoother long lines. -
Draw the Spots:
Ink the small circular spots on the caps. Leave these shapes empty for now, as they will remain white to contrast with the shading later. -
Erase Pencil Marks:
Once the foundational ink is completely dry—give it a minute or two—gently erase all your underlying pencil sketches for a clean slate.
Pro Tip: Lighting
Decide on a light source before you start shading (e.g., top right). Keep that side of the stems and caps mostly white, and concentrate your ink on the opposite side.
Step 3: Shading and Texture
-
Gill Details:
Underneath each cap, draw fine, closely spaced lines radiating from the stem outward to the edge of the cap. These lines represent the gills and should follow the curve of the mushroom. -
Stem Texture:
Use a technique called stippling (lots of small dots) mixed with short, vertical dashes along the shadowed side of the stems—usually the left side in this composition—to create a rounded, textured look. -
Darkening the Underside:
Add a second layer of hatching lines (cross-hatching) just under the rim of the cap where it meets the gills. This deepens the shadow and makes the cap look three-dimensional. -
Cap Shading:
Add very light, sparse stippling on the tops of the caps, focusing on the edges away from the light source. This keeps the tops looking smooth but not flat.
Step 4: Grounding the Composition
-
Grass Blades:
At the base of the cluster, use quick, upward flicking motions to draw blades of grass. Vary the lengths and angles so they look wild rather than manicured. -
Ground Texture:
Add a few horizontal scribbles and small rocks or pebbles around the base to suggest soil. Don’t overdo it; just a hint of ground is enough. -
Deepen Shadows:
Switch to a slightly thicker pen (05) to darken the deepest crevices where the stems meet the ground and directly under the caps. This increases the contrast of the drawing. -
Final Touches:
Review the drawing for balance. If any area looks too light, add a few more dots or hatching lines, but preserve the white space on the highlighted sides of the stems.
Now you have a charming woodland study right in your sketchbook

PENCIL GUIDE
Understanding Pencil Grades from H to B
From first sketch to finished drawing — learn pencil grades, line control, and shading techniques.
Explore the Full Guide
One-Object Still Life From Your Desk
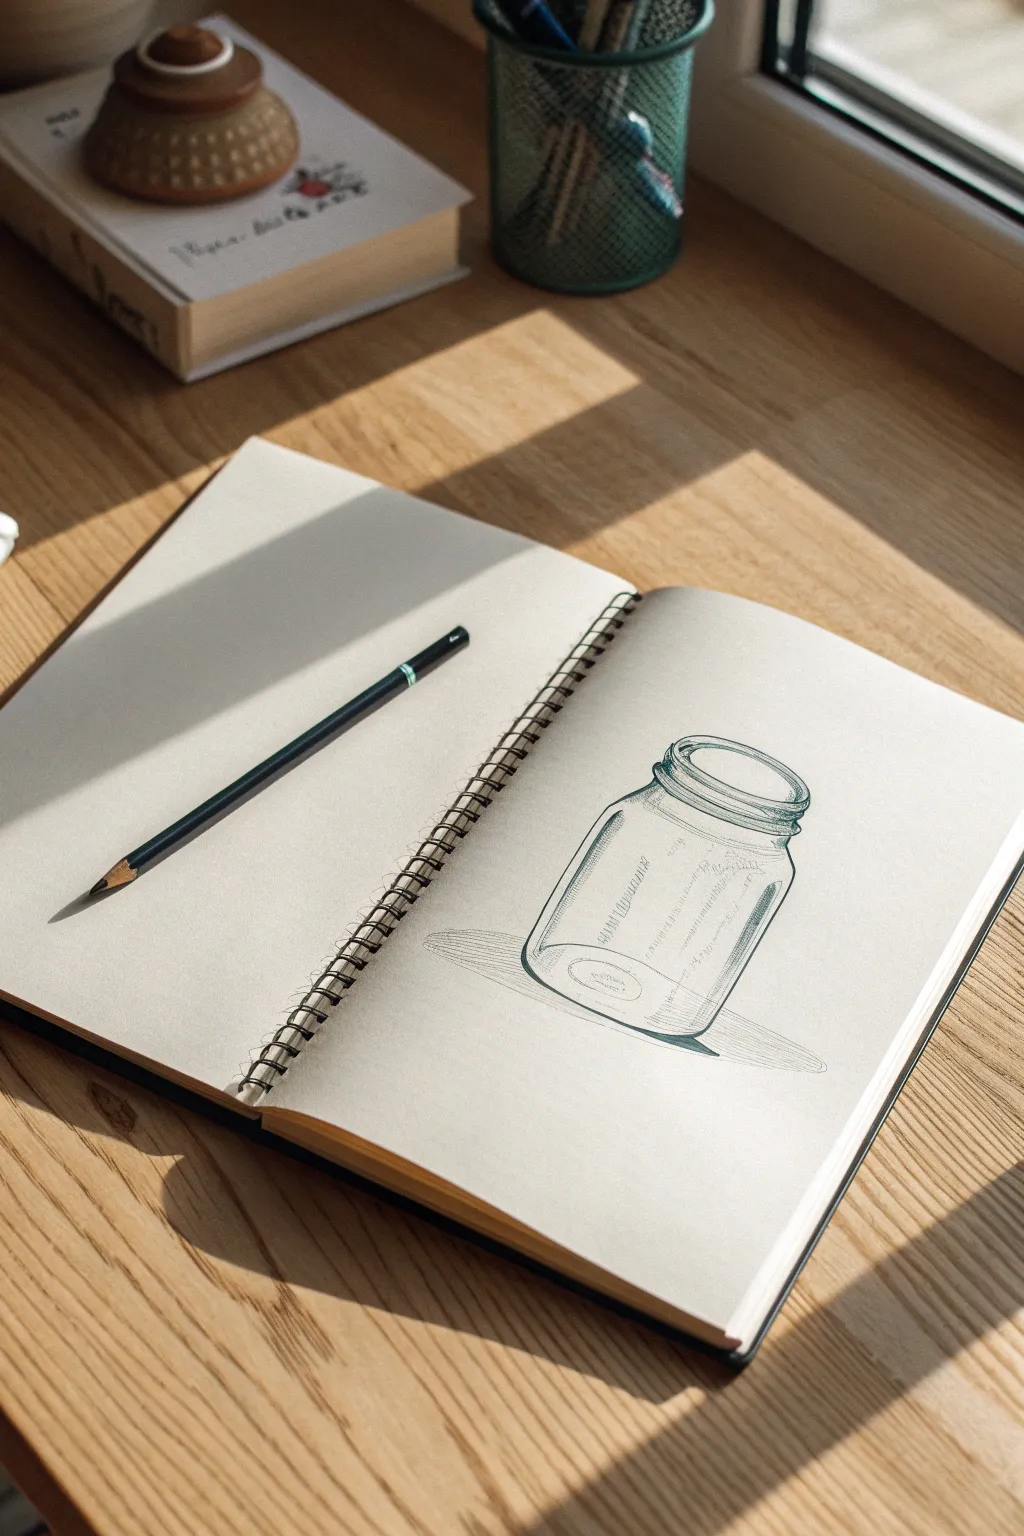
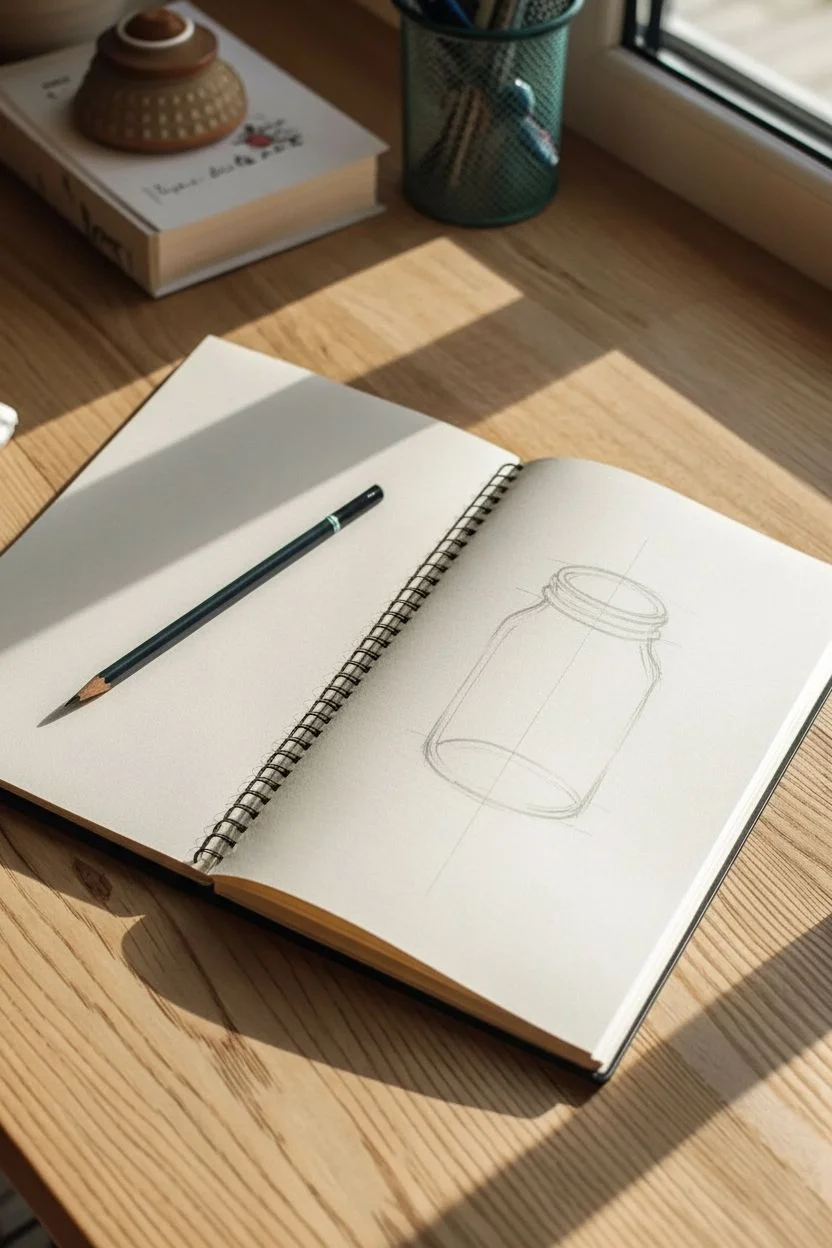
Capture the delicate transparency of glass with this simple yet effective sketchbook study. Using just a pencil, you’ll learn to render reflections and form by observing a common household jar.
How-To Guide
Materials
- Sketchbook with cream or off-white paper
- HB or 2B graphite pencil
- Eraser
- Sharpener
Step 1: Drafting the Basic Shape
-
Establish the central axis:
Start by drawing a very faint vertical line in the center of your page. This axis line will help you keep the jar symmetrical and upright. -
Mark the height:
Decide how tall your jar will be. Make a small mark at the top and bottom of your axis line to set the total height. -
Define the proportions:
Divide the height into sections: mark where the threaded neck ends and the main body begins. The neck is usually about one-fifth of the total height. -
Draw the top ellipse:
Sketch a narrow oval (ellipse) at the top mark for the jar’s opening. Keep your lines light and loose so you can correct the curve easily. -
Add the bottom ellipse:
Draw a mirroring ellipse at the bottom mark. Because of perspective, this bottom ellipse should be slightly rounder (more open) than the top one. -
Connect the sides:
Draw vertical lines connecting the widest points of your ellipses to form the sides of the jar. Curve the shoulders gently inward to meet the neck.
Wobbly Ellipses?
If your ovals look pointy like almonds, focus on roundness at the extreme ends. Draw through the shape using your whole arm, not just your wrist.
Step 2: Refining the Details
-
Detail the rim:
Give the jar’s rim thickness by drawing a second, slightly larger ellipse around the first one at the top. This creates the glass lip. -
Add the threads:
Sketch the screw threads on the neck. Instead of straight lines, draw slightly diagonal, curved strokes that wrap around the cylindrical form of the neck. -
Clean up guidelines:
Use your eraser to gently lift away the central axis line and any messy construction marks, leaving just the clean outline of the jar. -
Indicate the base:
Draw an inner curve at the bottom of the jar to show the thickness of the glass base. This inner line usually curves slightly more than the outer edge.
Step 3: Shading and Transparency
-
Identify light source:
Determine where your light is coming from (e.g., the right side). This decision will guide where you place highlights and shadows. -
Shade the sides:
Apply light vertical hatching along the left side of the jar to indicate shadow. Keep the strokes distinct but close together. -
Create reflections:
Leave crisp white spaces on the glass surface, particularly on the shoulder or side facing the light. These untouched areas represent strong reflections. -
Deepen the contrast:
Go back over the darkest areas—like the rim, the threads, and the very bottom edge—with firmer pressure to anchor the drawing. -
Suggest text or texture:
Sketch some faint, scribbled lines on the front face of the jar to suggest embossed lettering or a label, but keep it abstract rather than readable. -
Ground the object:
Add a cast shadow on the table surface extending to the left. Use horizontal hatching strokes here to differentiate the table plane from the vertical glass. -
Final touches:
Review your drawing for balance. I sometimes like to add a few stray vertical lines inside the jar to suggest the distortion of the glass back.
Pro Tip
To make glass look truly transparent, ensure you can see the back edge of the bottom ellipse through the front of the jar.
Now you have a classic glass study that improves your grasp of perspective and light
5-Minute Timer Sketches of Random Objects
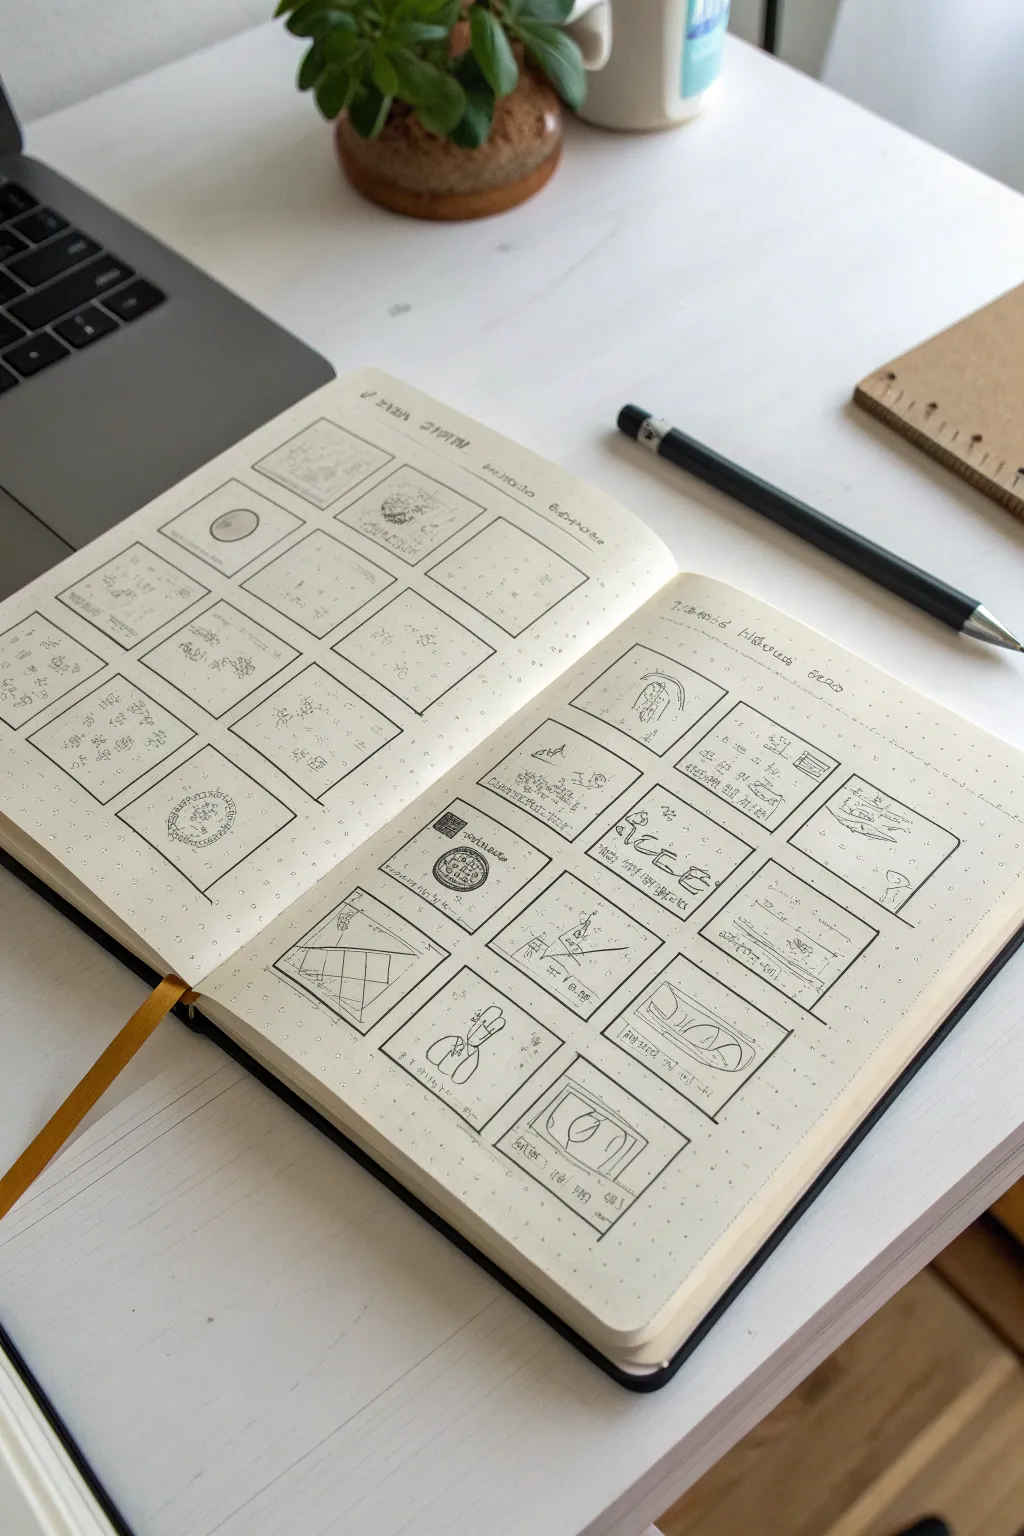

This sketching exercise uses a small-scale grid layout to break the perfectionist mindset and encourage rapid idea generation. The result is a visually satisfying spread of bite-sized drawings that captures random objects and fleeing thoughts in a storyboard style.
Detailed Instructions
Materials
- A5 dotted notebook or sketchbook (cream paper adds a nice warmth)
- Black mechanical pencil or fineliner (0.5mm)
- Ruler
- Eraser (optional, but keep it minimal)
- Timer (phone or stopwatch)
Step 1: Setting up the Grid
-
Open your spread:
Start with a fresh, two-page spread in your dotted notebook. Flatten the spine gently so the pages lie as flat as possible, which makes drawing near the center easier. -
Define the margins:
Using your ruler, lightly mark a margin around the edge of the pages. Leave about 2-3 centimeters of white space at the top for a header and slightly less on the sides. -
Measure the boxes:
Calculate the size of your squares based on your page width. Aim for squares roughly 3×3 cm to 4×4 cm. You want them small enough to finish quickly but large enough to hold detail. -
Draw the grid lines:
Draw your horizontal and vertical lines with a steady hand. Don’t worry if lines overlap slightly at the corners; this gives the page a drafted, architectural feel. -
Create spacing:
Leave a small gap (approx. 5mm) between each square. This negative space is crucial because it frames each tiny sketch and prevents the page from looking cluttered. -
Add text placeholders:
At the top of the page, pencil in a small area for a date or a theme title. You can also add tiny lines under specific boxes if you plan to label your sketches.
Uneven Grid lines?
Don’t erase them! Wobbly grid lines add to the ‘field notes’ aesthetic. If a line is truly crooked, simply go over it again firmly to make it look intentionally bold.
Step 2: The 5-Minute Sketching Session
-
Select your subject:
Look around your room for a random object—a coffee mug, a plant, a lamp, or even a corner of the ceiling. Don’t overthink this choice; proximity determines the subject. -
Set the timer:
Set your timer for exactly 5 minutes. This constraint forces you to focus on essential shapes rather than perfect shading. -
Start with basic shapes:
In the first box, lightly sketch the primary geometric forms of your object. Is it a cylinder? A cube? Ignore details for the first 30 seconds. -
Refine the outline:
Darken your lines to define the object’s true contour. Let your hand be loose; shaky or multiple lines add character to this style of sketching. -
Add minimal shading:
Identify where the light is coming from and add quick hatching or scribbles to the shadowed side. I find that keeping hatching strokes in one consistent direction unifies the look of the whole page. -
Incorporate context:
If time permits, add a horizon line or a hint of the table surface so the object isn’t floating in whitespace. -
Move to the next box:
Once the timer dings, stop immediately. Move to the next empty square, pick a new object, and restart the timer. Repeat this until the spread is filled.
Try a Storyboard
Instead of random objects, use the grid to draw a short sequence of an event from your day, like making coffee step-by-step, to create a mini graphic novel.
Step 3: Finishing Touches
-
Add loose scribbles:
Go back over your sketches. If a box feels too empty, add some abstract scribbles or unintelligible ‘mock writing’ to simulate texture or notes, as seen in the reference image. -
Annotate briefly:
Write the date or the name of the object in tiny, neat print near the sketch. This turns the spread into a visual diary entry. -
Clean up:
Erase any stray construction lines around the grid that distract from the artwork, but leave the loose pencil marks inside the boxes.
Now you have a dynamic collection of daily observations recorded in a structured yet artistic format


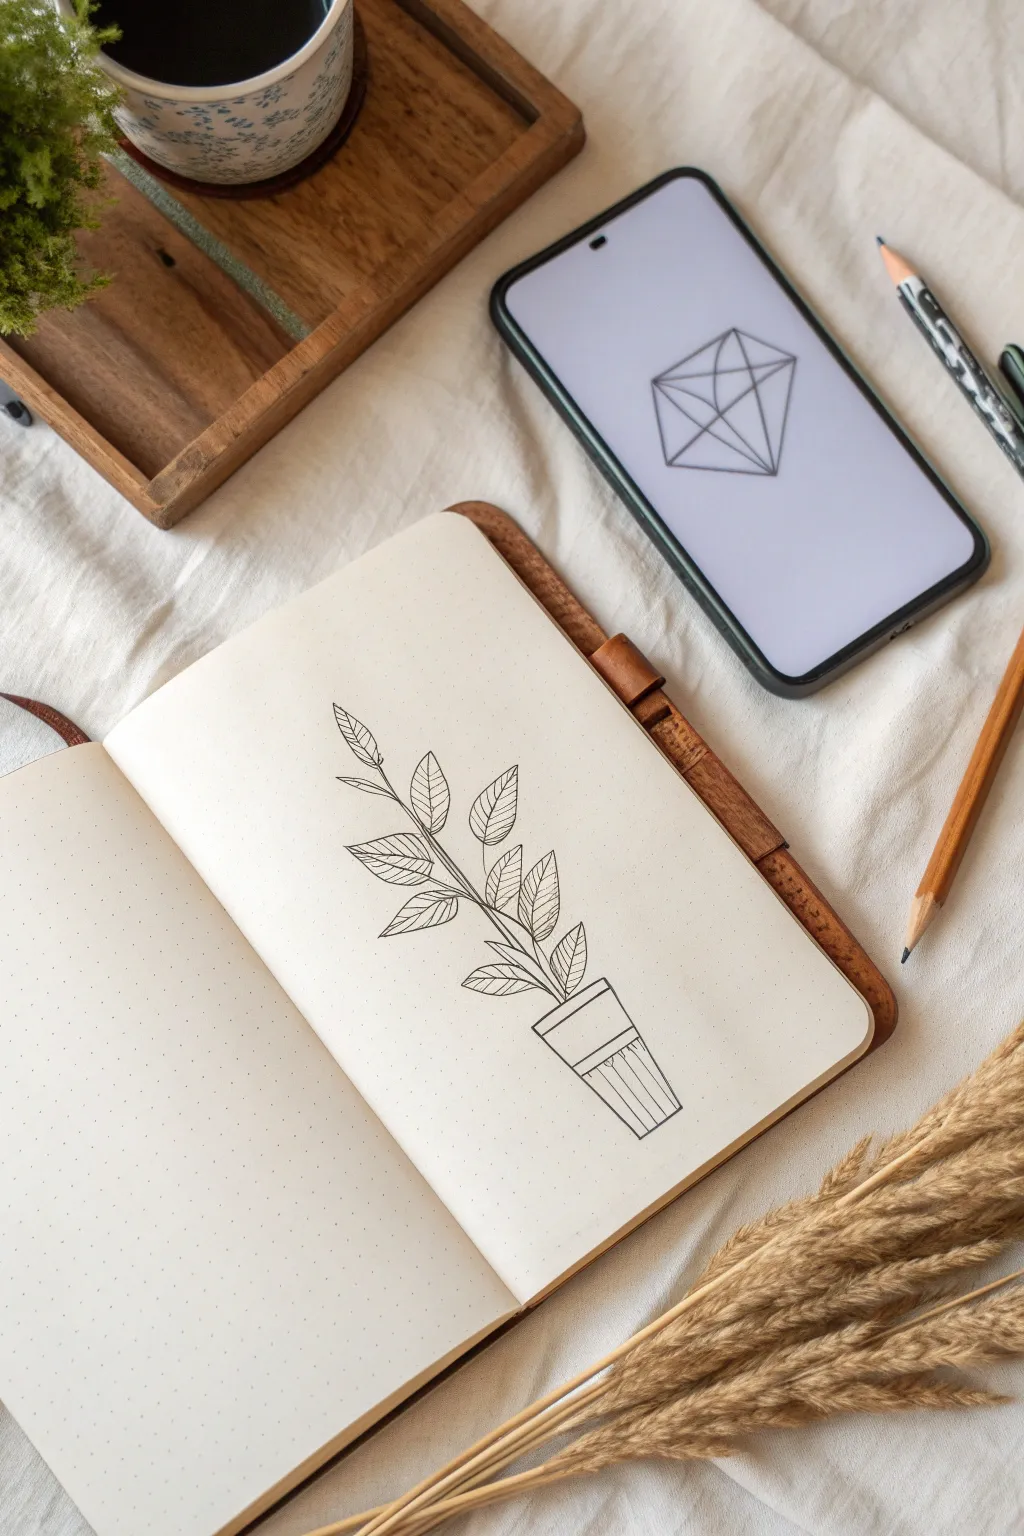
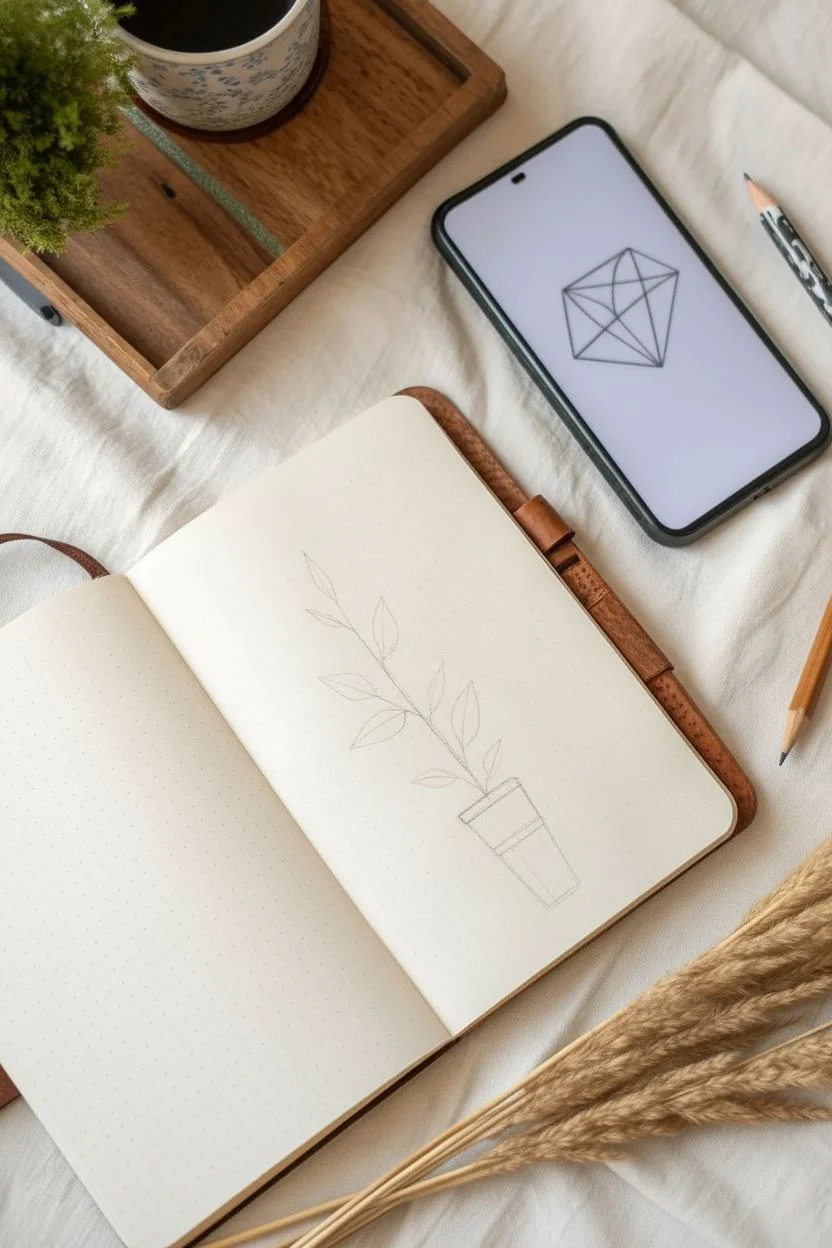
Contour Drawing Without Shading
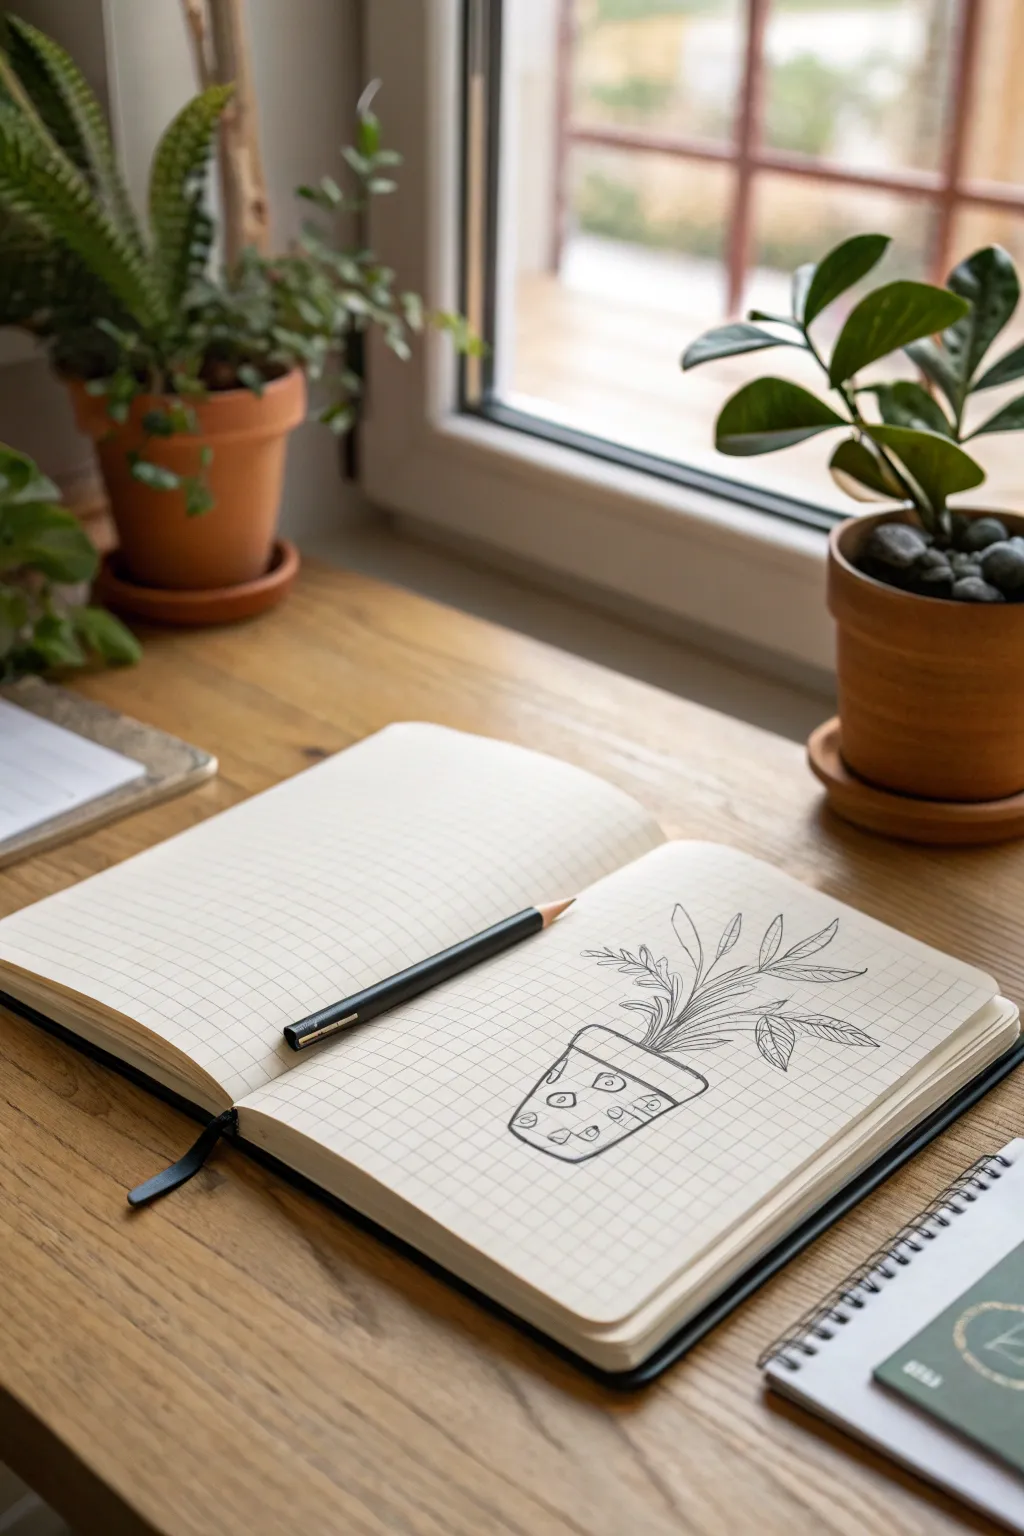

This simple yet charming project focuses on capturing the essence of a houseplant using clean, confident lines on grid paper. By limiting shading and textures, you’ll create a striking minimalist illustration that pops off the page.
Step-by-Step Tutorial
Materials
- Grid paper notebook or sketchbook
- Fine-liner pen (black, 0.5mm or 0.8mm) or sharp graphite pencil
- Eraser (if drafting first)
- Real plant or photo reference
Step 1: Drafting the Shapes
-
Set the Stage:
Open your grid notebook to a fresh spread. Position your reference plant nearby. Start by visualizing where the pot will sit on the lower half of the page to leave room for the leaves. -
Lightly Sketch the Pot Rim:
Using very light pressure, sketch a flattened oval or ellipse to represent the top opening of the pot. Use the grid lines to ensure it’s level. -
Draw the Pot Body:
Extend two lines downward from the widest points of your ellipse. taper them slightly inward as they go down to create the classic flowerpot shape. -
Close the Pot:
Connect the two bottom lines with a curved line that mirrors the curve of the front bottom rim. This gives the object volume.
Wobbly Lines?
Don’t stress over perfect straightness. In contour drawing, slight wobbles add organic character. If you make a mistake, just keep going; don’t scribble it out.
Step 2: Adding the Foliage
-
Main Stem Base:
Draw a small cluster of stems emerging from the center of the pot’s opening. Keep these lines short and bunched together. -
First Leaf Outline:
Choose a prominent leaf to start. Draw a long, central vein line extending outward, then draw the leaf perimeter shape around it. I like to start with the center leaf to anchor the composition. -
Add Side Leaves:
Branch out to the left and right. Draw the stems first, then add the leaf shapes. Keep the contours smooth and continuous. -
Check Symmetry:
Step back and look at the balance. Add a few smaller leaves near the base or facing different directions to make the plant look natural but not perfectly symmetrical. -
Vein Details:
Inside each leaf shape, draw a single central line if you haven’t already. Add simple diagonal lines branching from the center vein to the edges for detail.
Step 3: Inking and Definition
-
Commit to the Lines:
Switch to your fine-liner pen or press harder with your pencil. Trace over your draft lines with a deliberate, steady hand. -
Define the Pot Rim:
Draw a second curved line just under the top rim of the pot to create the ‘lip’ thickness. This small detail adds realism. -
Pot Patterning:
Decorate the pot surface. Draw irregular shapes—specifically circles with dots inside or organic blob shapes—scattered across the pot’s face. -
Texture the Soil:
Add a few tiny scribbles or short dashes right at the base of the stems inside the pot rim to suggest soil texture. -
Enhance Leaf Overlaps:
Where a leaf passes in front of a stem, ensure the front line is solid and stop the back line cleanly to show depth. -
Final Clean Up:
Once the ink is completely dry (give it a full minute), gently erase any pencil guidelines that are still visible.
Level Up: Color Pop
Use a single watercolor wash or a marker to fill in just the leaves or just the pot pattern. Leaving the rest black and white creates a stylish focal point.
Enjoy the clean, graphic look of your new botanical illustration
Blind Contour of Your Hand
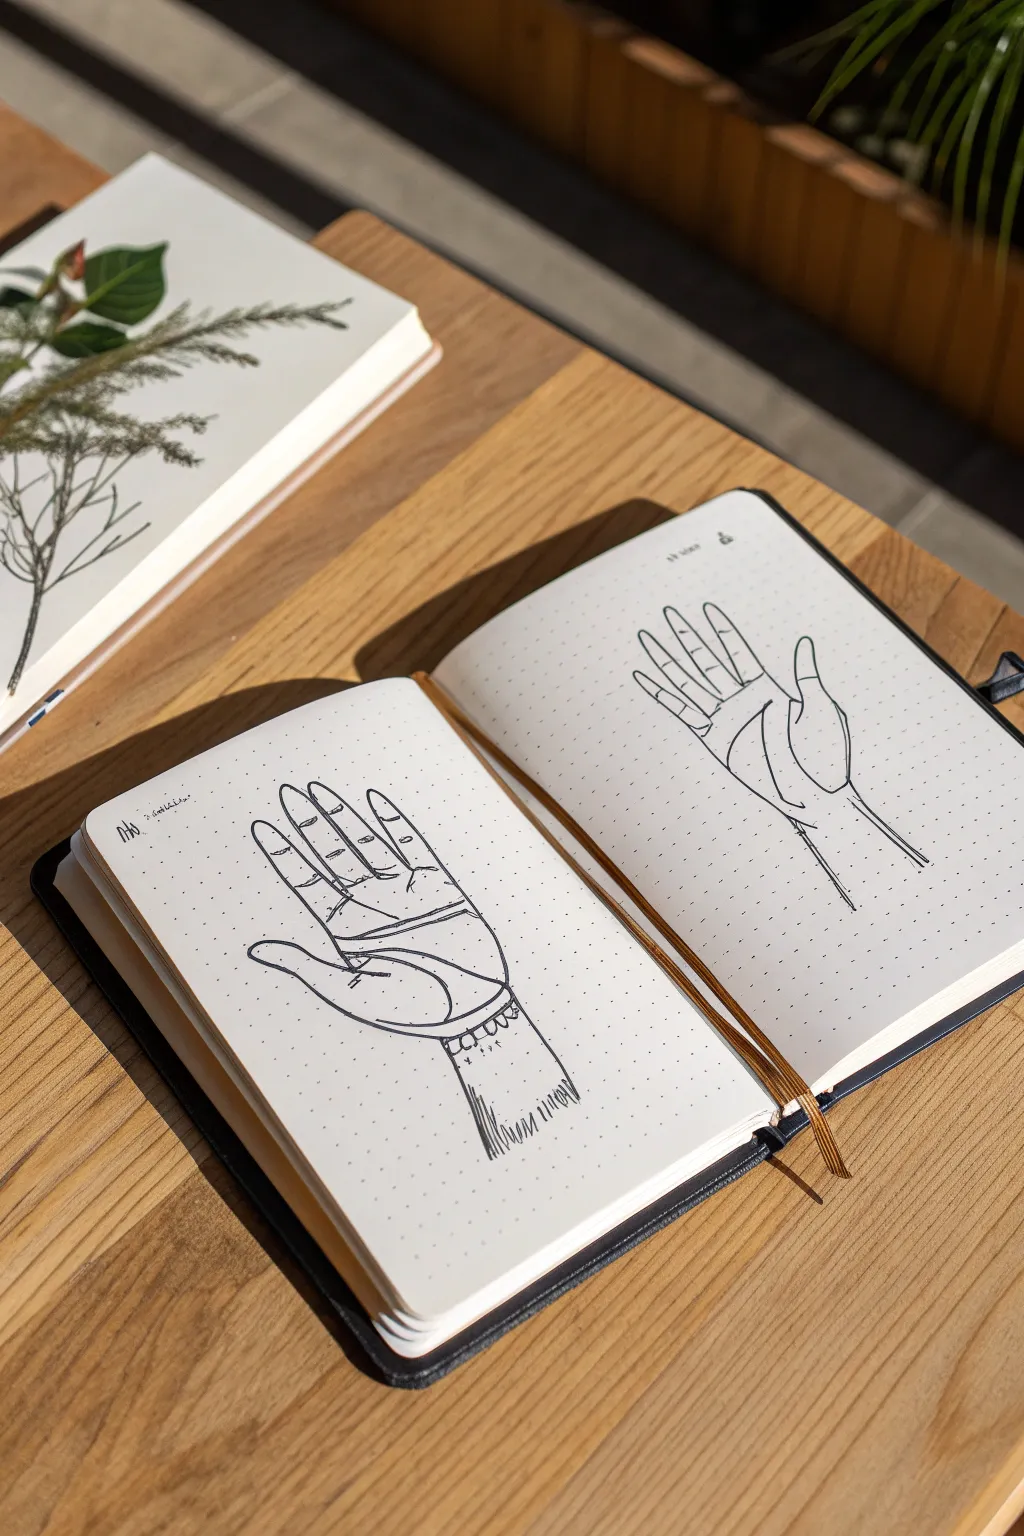
This exercise captures the essence of your own hands using simple, expressive ink lines on dot grid paper. It is a fantastic way to loosen up your drawing muscles and practice observation without the pressure of perfection.
Detailed Instructions
Materials
- Dot grid notebook or sketchbook
- Fine liner pen (0.3mm or 0.5mm black)
- Your own hands (as models)
- Pencil (HB) and eraser (optional for sketching guidelines)
Step 1: Setting the Stage
-
Book placement:
Lay your sketchbook flat on a comfortable surface. If you are right-handed, you will draw your left hand first, so position your left hand comfortably on the table next to the book. -
Observe your subject:
Take a moment to simply look at your hand. Notice the major lines in your palm, the length of your fingers, and the curve of your thumb.
Wobbly Lines?
Don’t erase! In contour drawing, ‘mistakes’ are actually recording your eye’s movement. If a line is wrong, just draw the correct one right next to it.
Step 2: Left Page: Detailed Palm Study
-
Start the outline:
On the left page, begin drawing near the wrist. Use the dots on the paper to help guide your proportions if needed, but keep your focus primarily on your actual hand. -
Trace the thumb:
Draw the curve of the thumb, moving slowly up to the tip and back down towards the webbing. -
Finger contours:
Continue drawing the outline of the index, middle, ring, and pinky fingers. Don’t worry if lines overlap or wobble; it adds character. -
Close the shape:
Bring the line down the side of the palm and close the shape at the wrist. -
Add palm lines:
Look closely at your palm. Draw the three major creases (life line, head line, heart line) using confident, singular strokes. -
Finger details:
Add small curved lines at the joints of each finger to show where they bend. These small details give the hand volume. -
Wrist details:
Draw a faint horizontal line or simple bracelet detail across the wrist area to simulate a cuff or jewelry. -
Shading strokes:
Add vertical hatching lines at the base of the wrist to suggest shadow and form, just like the example interaction.
Add Dimension
Use a light grey marker or a water brush with very diluted ink to add simple shadows along one side of the fingers for a quick pop of 3D depth.
Step 3: Right Page: Stylized Contour
-
Switch perspective:
Now, look at your right hand (or whichever hand is free). You will draw this on the right-hand page. -
Simplified approach:
For this second drawing, aim for fewer lines. Start again at the wrist, keeping your pen moving fluidly. -
Continuous line feel:
Try to lift your pen less often. Draw the thumb and then sweep up into the index finger. -
Connect the fingers:
Draw the remaining fingers, noticing how the gaps between them look. Focus on the negative space between the fingers as much as the fingers themselves. -
Minimal details:
Unlike the left page, keep the interior details sparse. Draw just one or main two lines to suggest the palm and the base of the thumb. -
Finalize the wrist:
Extend two simple parallel lines downward to represent the arm, leaving them open at the bottom for a clean, graphical look. -
Review and refine:
I like to scan both drawings to see if any line weights need thickening to balance the two pages, but generally, the raw look is best.
Now you have a mirrored set of hand studies that document your personal observation skills
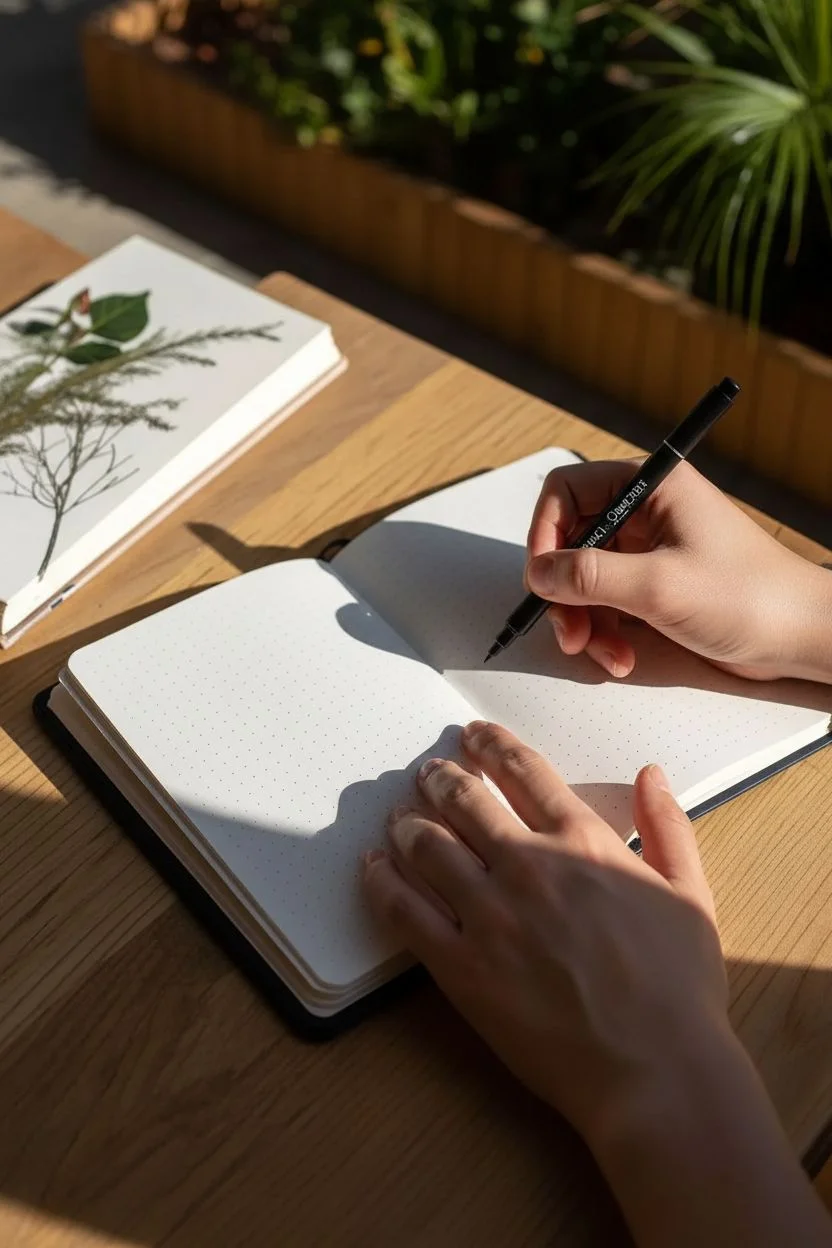
Continuous Line Drawing of a Houseplant
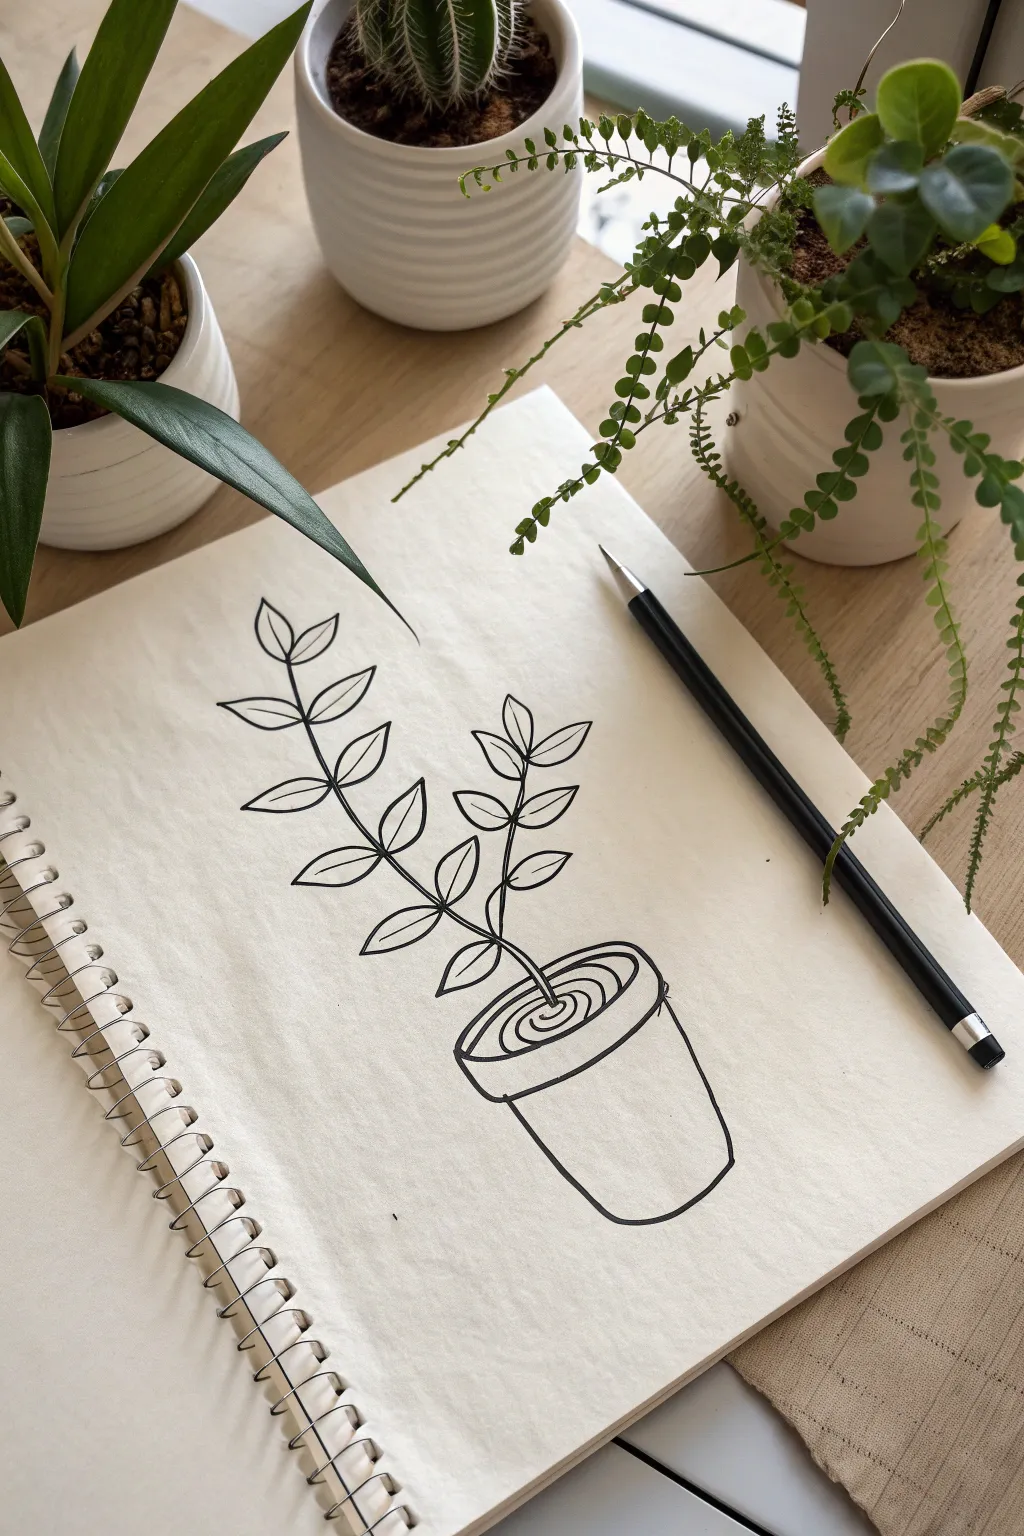
Embrace the flow of continuous line drawing with this elegant and minimalist plant study. This exercise challenges you to create a complete image of a potted plant without lifting your pen from the paper, resulting in a fluid and organic aesthetic.
How-To Guide
Materials
- Spiral-bound sketchbook (smooth paper works best)
- Black drawing pen, fine liner, or gel pen (0.5mm or 0.7mm)
- Pencil (optional, for sketching)
- Eraser (optional)
Step 1: Planning the Flow
-
Visualize the path:
Before putting pen to paper, look at your subject and trace the path in your mind. The line will need to travel up from the pot, branch out into leaves, retrace its steps, and eventually form the pot itself. -
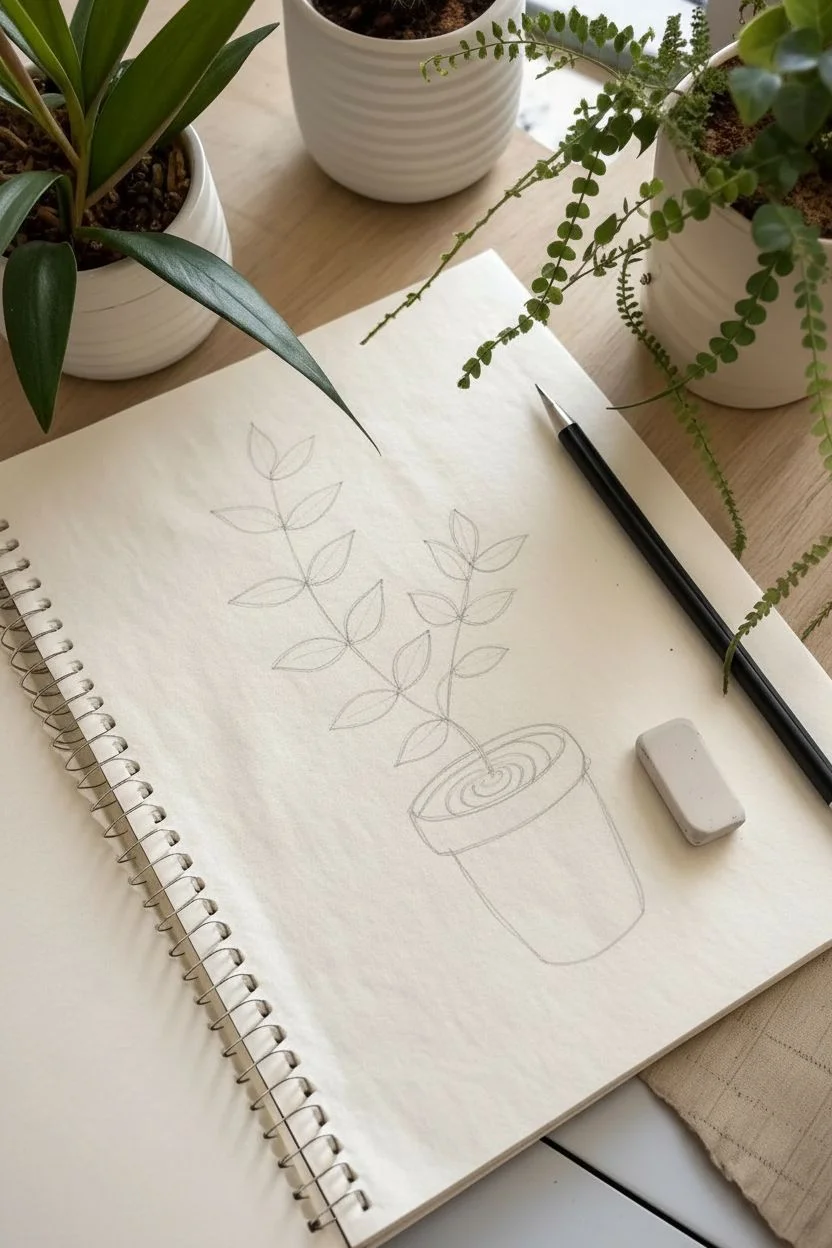
Light pencil sketch (optional):
If you are feeling nervous about committing to ink immediately, lightly sketch the basic shapes of the stems and pot with a pencil. This acts as a roadmap for your continuous line later.
Broken line?
If you accidentally lift your pen, don’t panic. Place the tip back down precisely where the line ended and continue. The tiny break adds character.
Step 2: Drawing the Foliage
-
Start at the soil line:
Begin your drawing at the center of where the pot’s opening will be. This point represents where the stem emerges from the soil. -
Draw the main stem:
Draw a line extending upwards, curving slightly to the left. This will become the taller of the two branches. -
Create the first leaf:
Near the top of your line, branch out to the side to form a pointed, oval leaf shape. Loop the line back to the main stem. -
Add opposite leaves:
Continue down the stem, drawing leaves in pairs or alternating sides. Remember, you must travel back along the center vein of the leaf or retrace the stem line to get to the next position. -
Connect to the second stem:
Once you reach the bottom of the first stem, don’t lift your pen. Instead, branch off to the right to start the second, shorter stem. -
Detail the second branch:
Repeat the leaf-drawing process for this smaller branch. Keep the leaves slightly smaller here to create visual variety and balance. -
Return to the base:
Trace your line back down the second stem until you meet the original starting point at the soil line.
Step 3: Forming the Pot
-
Draw spiraling soil:
From the base of the stems, draw a tight spiral outward. This circular motion mimics the look of soil or decorative stones inside the pot. -
Define the pot rim:
Expand the spiral into a wider oval to create the rim of the pot. Circle around the existing soil lines to enclose them. -
Create the rim depth:
Draw a second, slightly larger oval around the first one to give the pot’s rim some thickness and dimension. -
Draw the pot’s left side:
From the left edge of the rim, draw a line straight down, angling it slightly inward. -
Form the base:
Curve the line across the bottom to create the base of the pot. Make this curve parallel to the curve of the rim. -
Close the shape:
Draw the line up the right side to meet the rim, completing the pot’s outline without breaking the flow.
Use color accents
After the ink dries, add a wash of watercolor just inside the leaves or pot. The loose color contrasts beautifully with the strict line work.
Now you have a stylish, fluid illustration that captures the essence of a houseplant with simple elegance
Repeating Shape Pattern (One Shape, Many Ways)
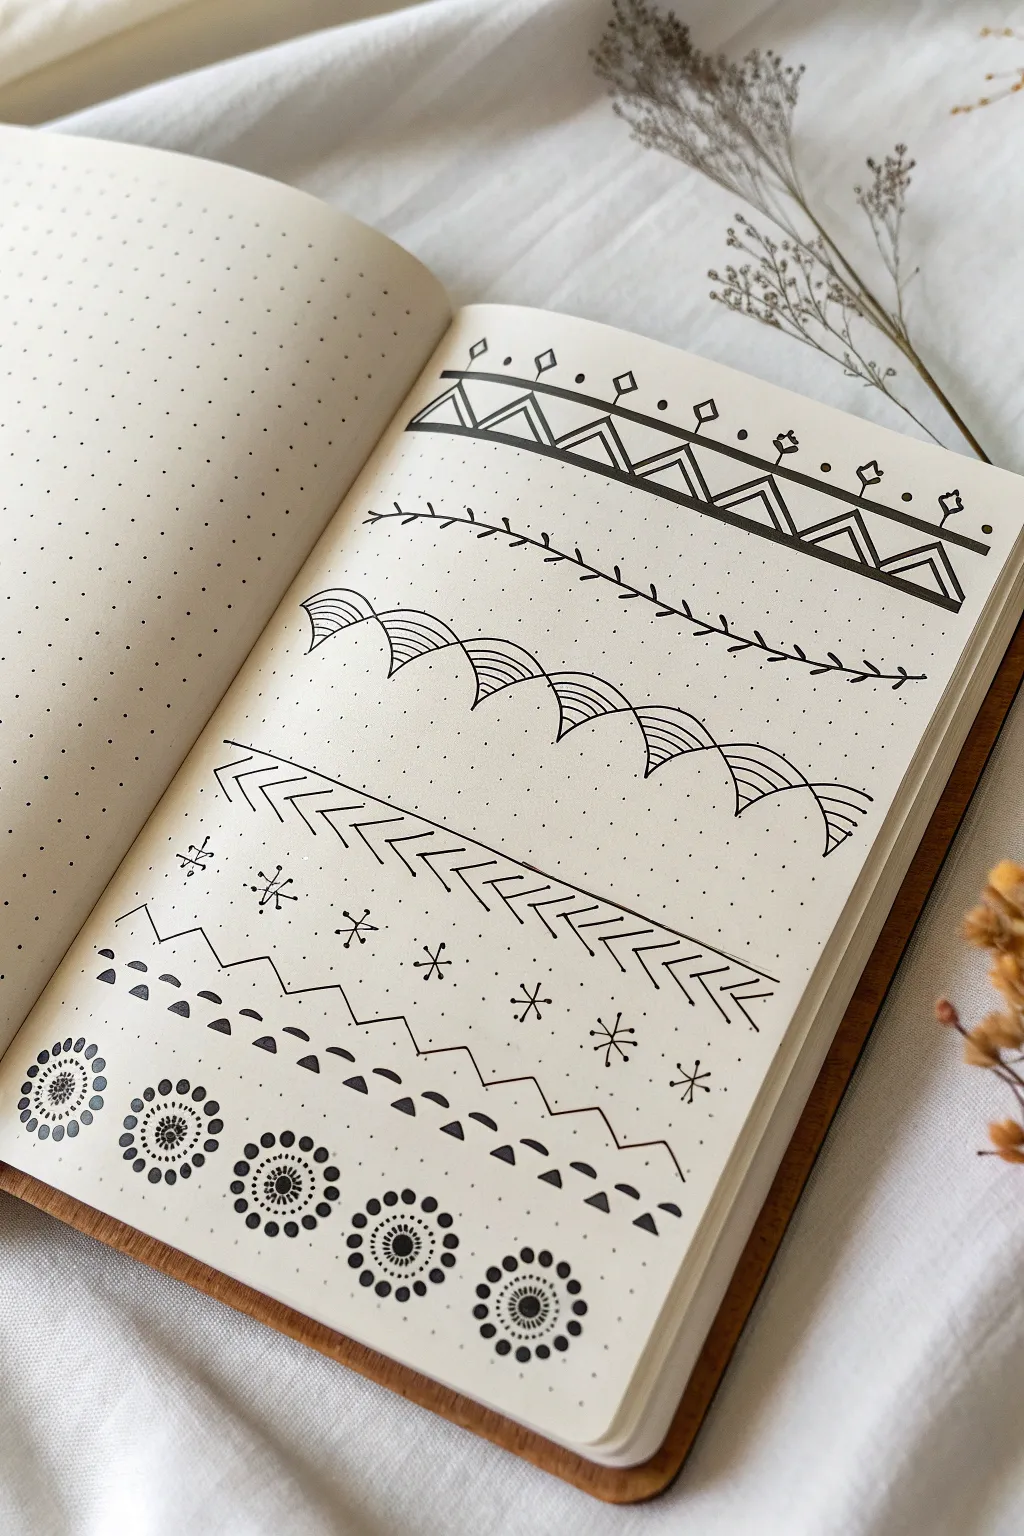
Transform a simple dot grid page into a reference sheet of stunning decorative borders. These five distinct patterns range from geometric zig-zags to organic vines and intricate mandalas, giving you a versatile toolkit for bullet journaling.
Step-by-Step
Materials
- Dot grid notebook or journal
- Fine liner pen (01 or 03 size, black)
- Thicker artistic pen or brush pen (optional for filling)
- Ruler (optional but helpful)
Step 1: Planning and Setup
-
Prepare your page:
Open your dot grid notebook to a fresh page. Ensure you are working on a flat surface so your lines remain steady. No pencil sketch is strictly needed, as the dot grid acts as your guide.
Grid Guide
Use the dots! Count squares (e.g., ‘every 3 dots’) to ensure your repeating patterns, like the zig-zags or circles, stay perfectly even without measuring.
Step 2: Drawing the Geometric Border
-
Draw the base parallel lines:
For the first pattern at the top, draw two horizontal parallel lines across the page, spacing them about two dot-grid squares apart. -
Create the triangles:
Inside the parallel lines, draw a continuous zig-zag line to create a row of triangles pointing up and down. -
Add inner details:
Inside each triangle, draw a smaller triangle that follows the same angles. This creates a nested effect. -
Decorate the top edge:
Above the top parallel line, add small diamond shapes floating above the peak of every other triangle. Connect them with tiny dots or small floating circles for extra flair.
Wobbly Lines?
If your long horizontal lines aren’t straight, break them up. Draw short segments from dot to dot rather than trying to pull one long stroke across the page.
Step 3: Drawing the Organic Vine
-
Draw the central stem:
Skip a few rows down. Draw a single horizontal line that gently curves or waves slightly, rather than being perfectly straight, to mimic a natural branch. -
Add the leaves:
Along this stem, draw small, simple curves branching out on alternating sides. Keep them relatively evenly spaced. -
Refine the shape:
Close these curves back to the stem to form leaf shapes. I find keeping the leaves small and delicate makes the vine look more elegant.
Step 4: Drawing the Scalloped Waves
-
Create the wave outline:
Drop down another few rows. Draw a series of connected semi-circles (arches) across the page, like a row of rainbows. -
Fill the arches with curves:
Starting from the left corner of each arch, draw curved lines that radiate toward the opposite side. Fill the entire semi-circle with these swooping lines to create a textured, fan-like appearance.
Step 5: Drawing the Arrows and Mountains
-
Draw the arrows:
For the fourth pattern, draw a series of horizontal ‘V’ shapes or chevrons pointing to the right. Stack two or three chevrons together, leaving a gap, and then repeat the stack. -
Create the mountain range:
Below the arrows, draw a simple zig-zag line across the page. Unlike the first border, leave the top open. -
Fill the negative space:
In the ‘valleys’ of your zig-zag line (the downward pointing triangles), color them in solid black or add small semi-circles to create visual weight. -
Add floating elements:
In the empty spaces above the zig-zags and around the arrows, add small asterisks or simple snowflake shapes to balance the composition.
Step 6: Drawing the Mandala Dots
-
Outline the main circles:
For the final pattern at the bottom, draw a row of evenly spaced circles, about the size of a dime. -
Add the center detail:
Place a solid black dot in the exact center of each circle. Then, draw a dashed or dotted ring around that center point. -
Create the petals:
Around the outer edge of your main circle, draw small solid dots. Space them closely so they look like tiny beads or petals surrounding the flower.
Once filled, this page serves as a beautiful style menu for decorating future journal entries
Doodle Fillers to Use Anywhere
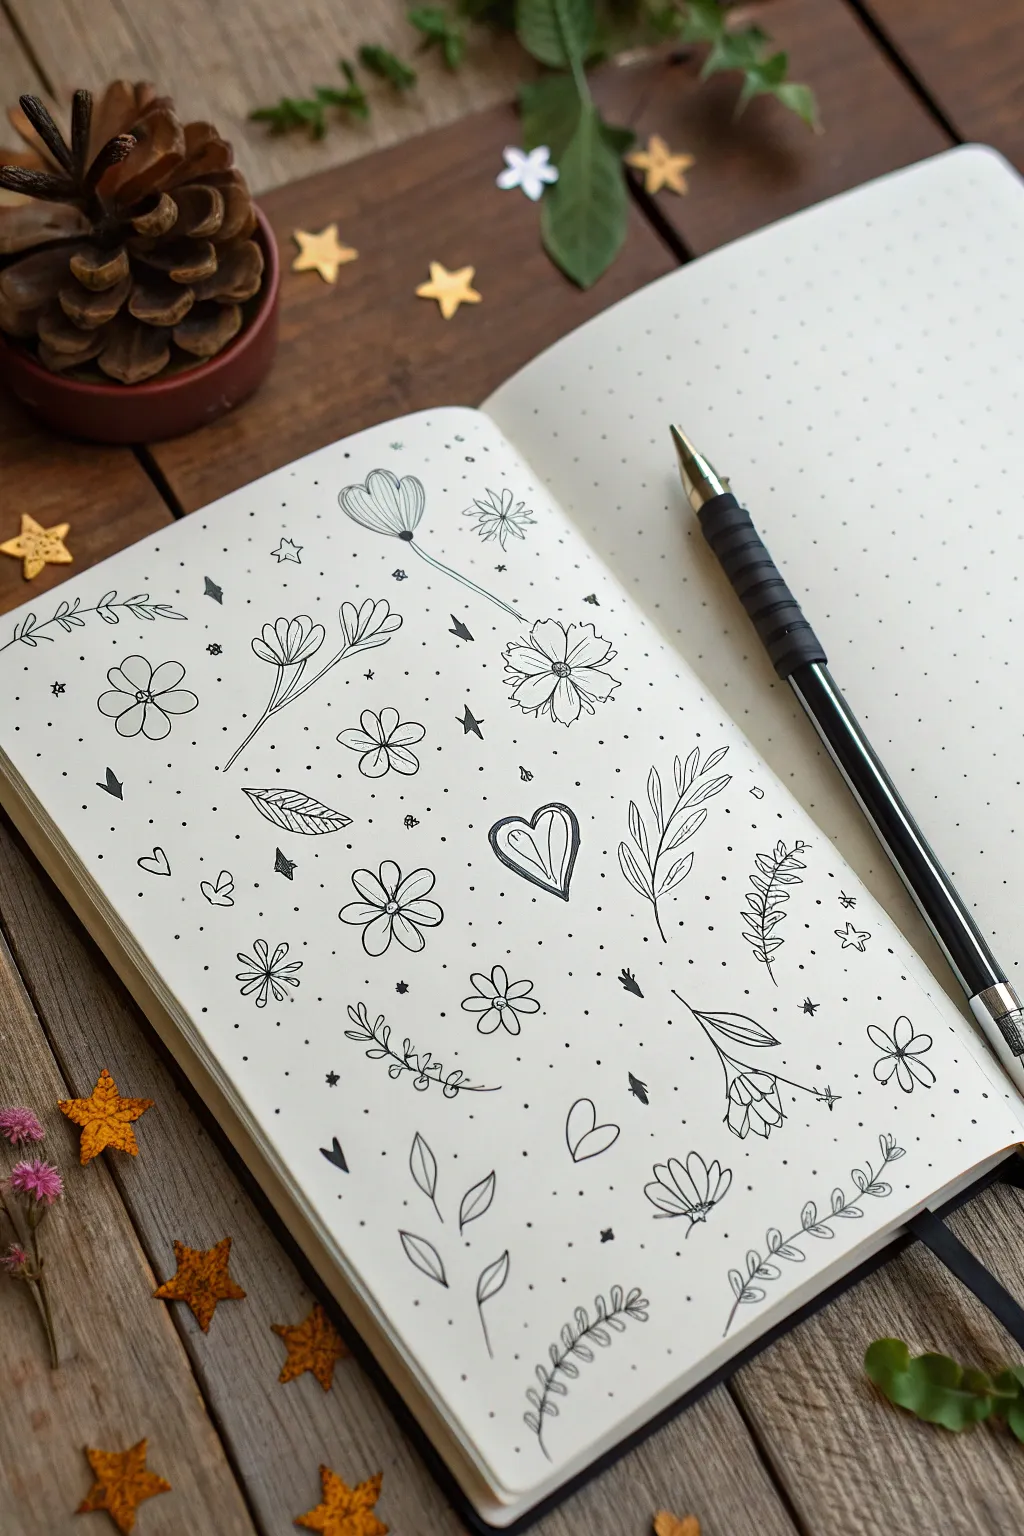
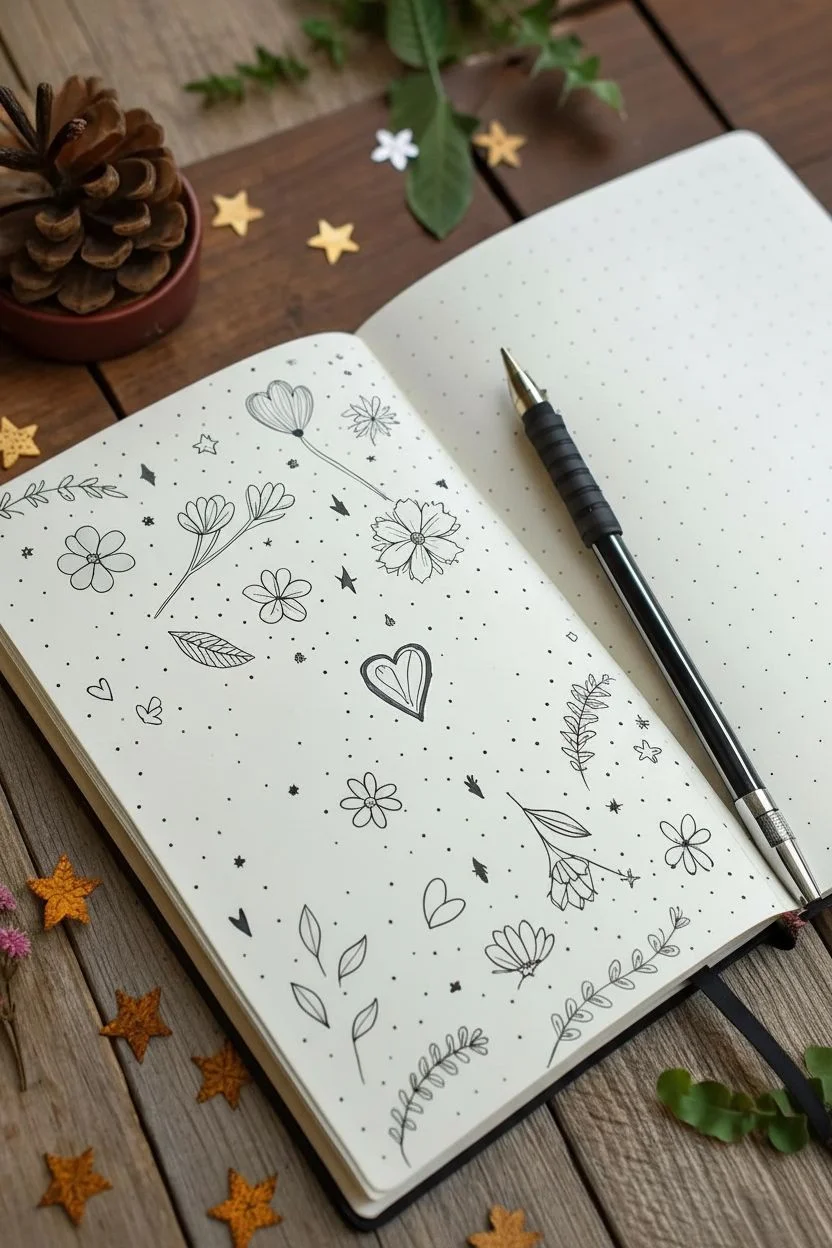
Transform a blank page into a charming garden of ink with this simple patterns and floral motifs tutorial. This easy sketchbook filler uses minimalist line art on dot-grid paper to create a relaxing, scattered composition perfect for practice or decoration.
Detailed Instructions
Materials
- Dot grid journal or sketchbook
- Fine liner pen (black, size 0.3 or 0.5)
- Pencil (optional for sketching)
- Eraser
Step 1: Setting the Composition
-
Start with large blooms:
Begin by placing your largest flower motifs randomly across the page to anchor the composition. Draw a simple five-petal flower near the center-right, keeping the lines loose and organic. -
Add vertical interest:
Sketch a tulip-style flower near the top center. Draw a U-shape for the cup, add a serrated line across the top, and pull a long, slightly curved stem downward. -
Draw the heart feature:
Place a whimsical heart in the middle of the page. Instead of a solid outline, use multiple sketchy lines to give it a hand-drawn, textured feel, adding vertical shading lines inside for depth.
Uneven Lines?
Don’t worry if lines aren’t perfectly straight or circles aren’t round. Use ‘broken’ or sketchy lines intentionally; it adds to the organic doodle aesthetic.
Step 2: Fleshing Out Foliage
-
Create leafy stems:
To the right of the heart, draw a vertical stem. Add pairs of simple, pointed oval leaves climbing up the stem, keeping them symmetrical. -
Draw a fern sprig:
Lower down on the right side, add a fern-like branch. Draw a central spine and add small, closely packed leaves angling upwards on both sides. -
Add a vine border:
along the bottom right edge, draw a long, curving line. Along this vine, add small teardrop-shaped leaves alternating sides to frame the corner. -
Sketch floating leaves:
Fill empty spaces on the left side with isolated leaf doodles. Try a simple sprig with three leaves fanning out from a single point. -
Add a striped leaf:
Draw a single, large leave shape near the left-center. Fill it with diagonal hatching lines to create visual texture and contrast against the open flowers.
Vary Line Weight
Make your doodles pop by going over the outer edges of major flowers a second time to thicken the line, while keeping interior details thin and delicate.
Step 3: Smaller Floral Details
-
Draw tiny cosmos:
Scatter smaller, simple daisy-like flowers around the larger elements. These can be just a central circle with 5-6 loop petals around it. -
Add a drooping bud:
near the bottom right, draw a stem that curves over at the top, ending in a bell-shaped flower head facing downward. Add simpler lines inside to suggest petals. -
Create a twin flower:
On the left side, draw a stem that splits into a Y-shape. At the end of each branch, draw a small cup-shaped bloom with vertical line details. -
Draw a multi-petal bloom:
Near the top left, create a flower with rounded petals. I like to add a tiny circle in the center and distinct lines radiating outward on each petal for detail.
Step 4: Micro-Fillers and Texture
-
Sprinkle in stars:
Fill the gaps between your botanical drawings with tiny four-pointed stars. Draw these by making a small cross and curving the lines inward to meet at points. -
Add miniature hearts:
Draw tiny, simple outline hearts in the smallest gaps to add sweetness to the spread. -
Draw solid accents:
Add tiny solid black triangles or diamond shapes sporadically. This adds ‘weight’ and contrast to the page so it isn’t just thin lines. -
The dot technique:
Finally, gently tap your pen to create stippling dots in the empty white spaces. This ‘confetti’ effect ties the whole spread together and makes it look complete.
Now you have a lively page of botanical doodles that proves even simple shapes can create a beautiful composition
Shape-to-Object Doodles (Circle Prompts)
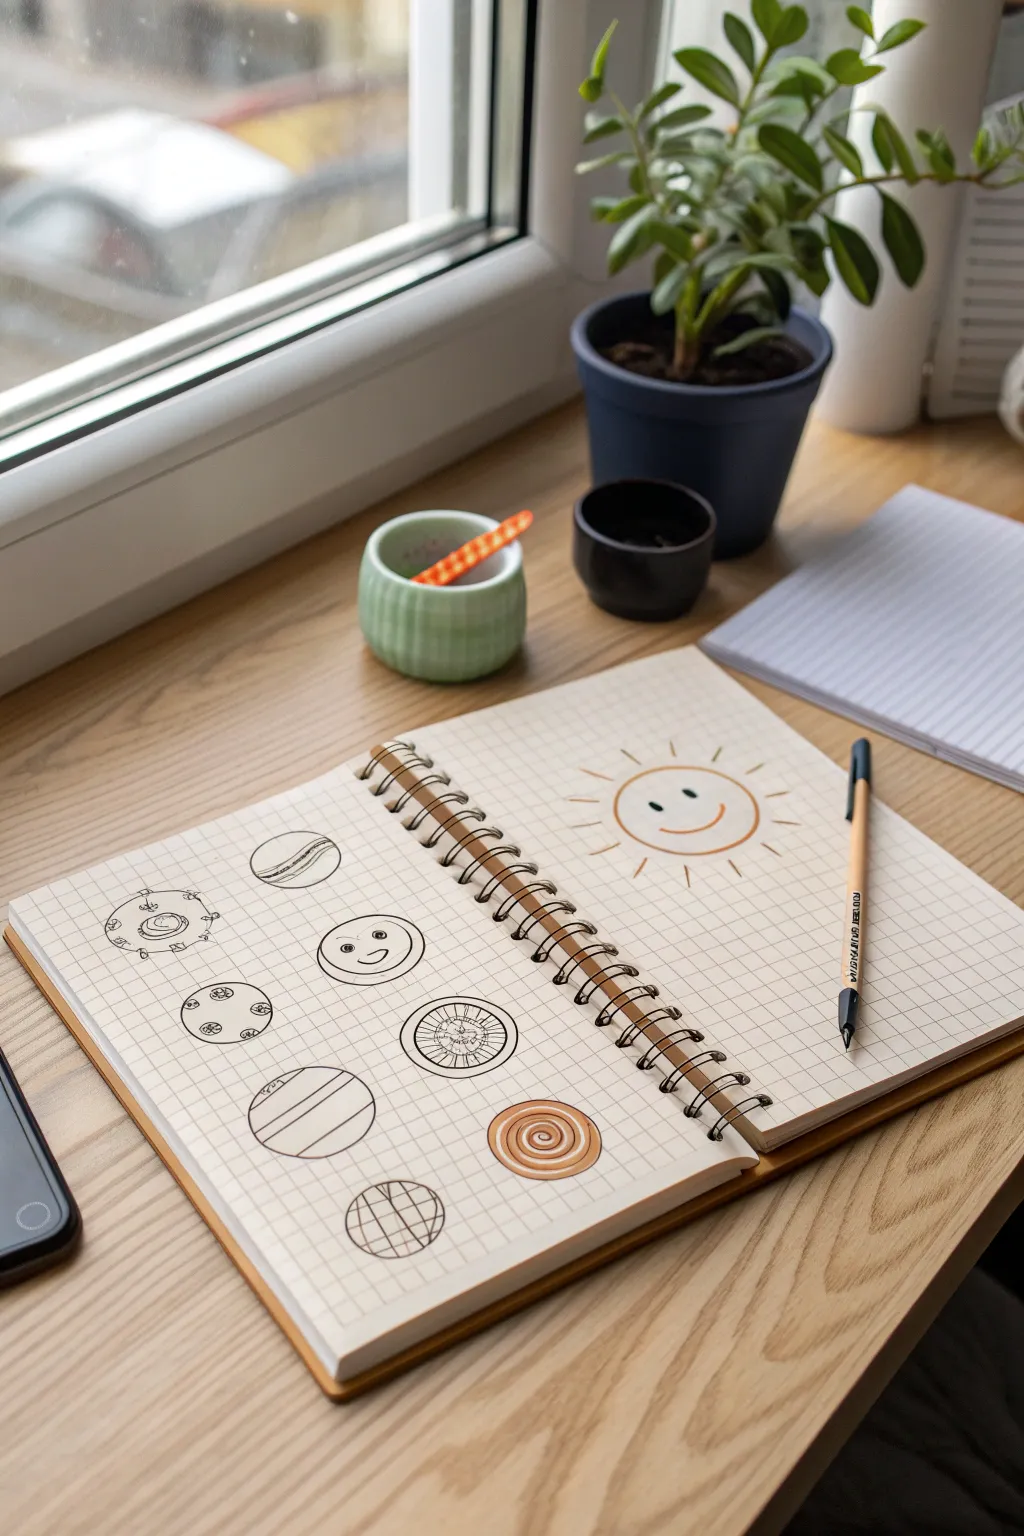
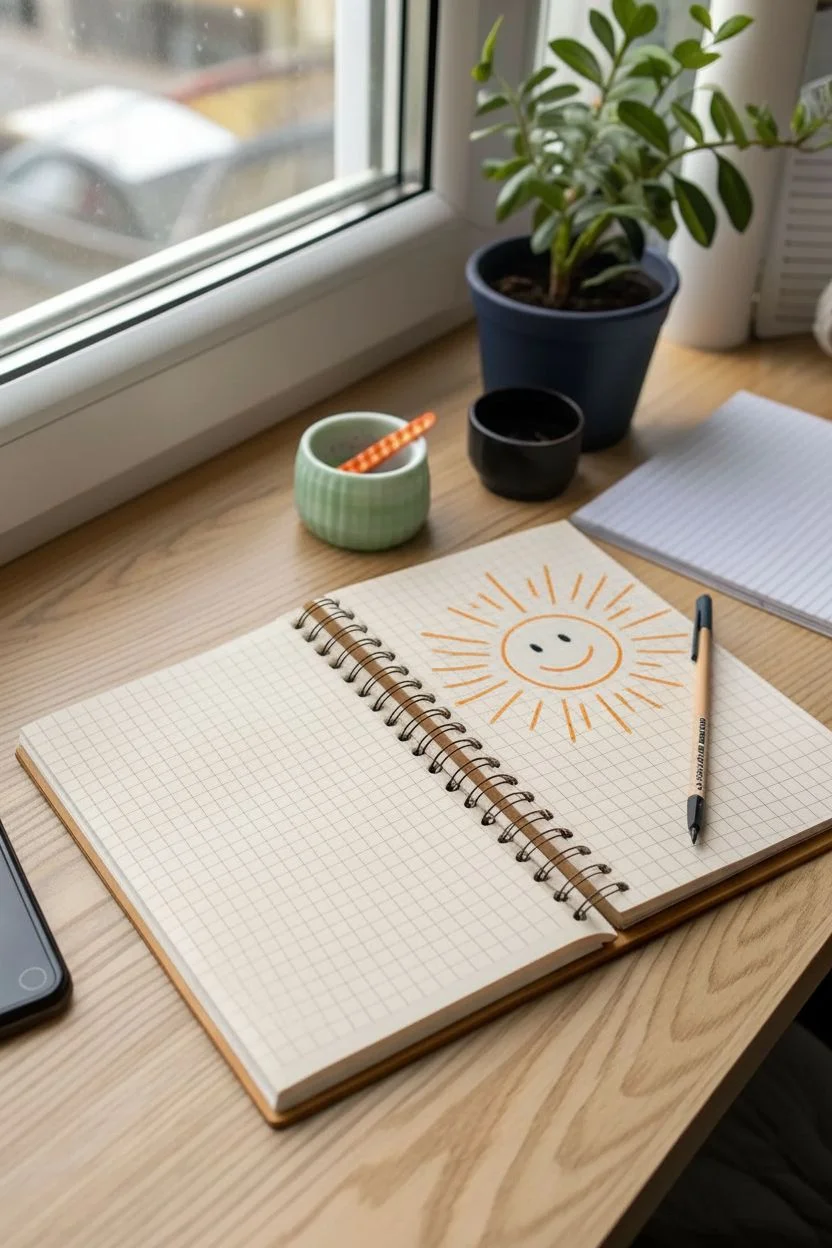
This classic creativity exercise transforms a page of simple circles into a variety of charming objects, from planets to cookies. It’s a low-pressure way to engage your imagination using nothing but a grid notebook and a trusty pen.
How-To Guide
Materials
- Spiral-bound A5 sketchbook with grid/graph paper
- Fine-tip black drawing pen (approx. 0.5mm)
- Orange or terracotta fineliner or marker
- Pencil (optional, for planning circles)
- Circle stencil or a small round object (like a coin) for tracing
Step 1: The Sunshine Page
-
Draw the main circle:
On the right-hand page, start by drawing a fairly large circle in the upper center area using your orange marker. The grid lines are perfect for helping you keep things symmetrical without needing a ruler. -
Add the smile:
Switch to your black pen to add two small, solid black dots for eyes near the top half of the circle. Create a wide, gentle curve underneath for the smile using the orange marker. -
Radiate the rays:
Using the orange marker again, draw short, straight lines radiating outward from the entire circumference of the circle. Try to space them relatively evenly, using the grid boxes as spacing guides.
Use the Grid
Don’t ignore the grid lines! Use them to align the tops and bottoms of your circles so your columns stay perfectly straight.
Step 2: Left Page: The Circle Grid
-
Establish the layout:
On the left page, you will be drawing eight circles in a grid formation—two columns of four. You can freehand these with your black pen or lightly trace a small round object if you want perfect uniformity. -
Circle 1: The Ringed Planet:
Starting at the top left, draw your first black circle. Add a slightly wobbly horizontal ring around the middle that extends past the circle edges, doubling back behind it to look like Saturn. -
Circle 2: The Striped Marble:
To the right of the planet, draw the second circle. Fill the interior with three diagonal, slightly curved parallel lines to simulate a stripe pattern on a round ball. -
Circle 3: The Cookie:
Move to the second row, left side. Draw a circle and add five small, irregular blobs inside it. Fill these blobs in solid black to represent chocolate chips. -
Circle 4: The Happy Face:
Beside the cookie, draw another circle. This time, add two widely spaced dot eyes and a simple U-shaped smile. I like to add tiny cheek marks at the ends of the smile for extra cuteness. -
Circle 5: The Gas Giant:
Third row, left side. Draw a circle and fill it with horizontal bands. Make the top band thin, the middle band wide, and the bottom band medium to suggest atmospheric layers on a planet. -
Circle 6: The Wheel:
To the right, draw a circle with a smaller circle inside it (a hub). Connect the inner hub to the outer rim with many thin lines radiating outward like bicycle spokes. -
Circle 7: The Globe:
Bottom row, left side. Draw your circle and create a grid pattern inside it. Draw two vertical curved lines and two horizontal straight lines that intersect, mimicking latitude and longitude lines. -
Circle 8: The Cinnamon Roll:
For the final spot on the bottom right, switch to your orange marker. Instead of a simple outline, start from the center and spiral outwards until you reach the size of the other circles, creating a tasty swirl.
Theme Ideas
Try a themed page next time: turn all circles into different fruits (orange, kiwi, melon) or different sports balls (basketball, baseball, tennis).
Now you have a playful spread of doodles designed to spark even more spherical ideas
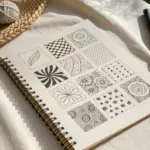
Tiny Thumbnails for Quick Composition Practice
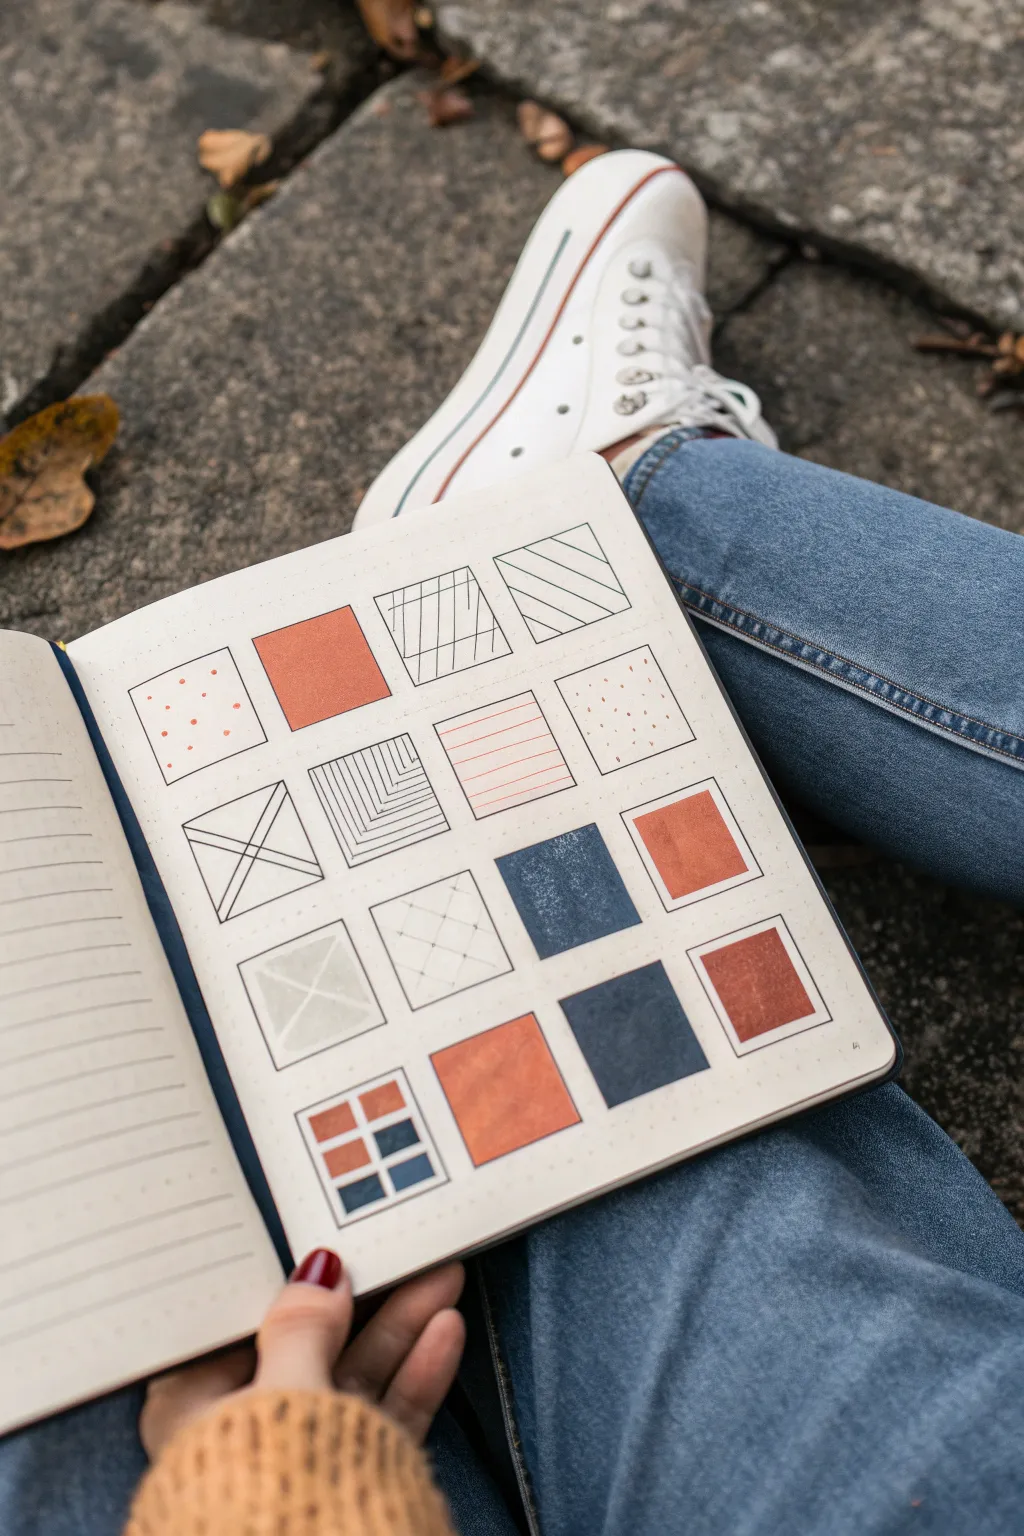
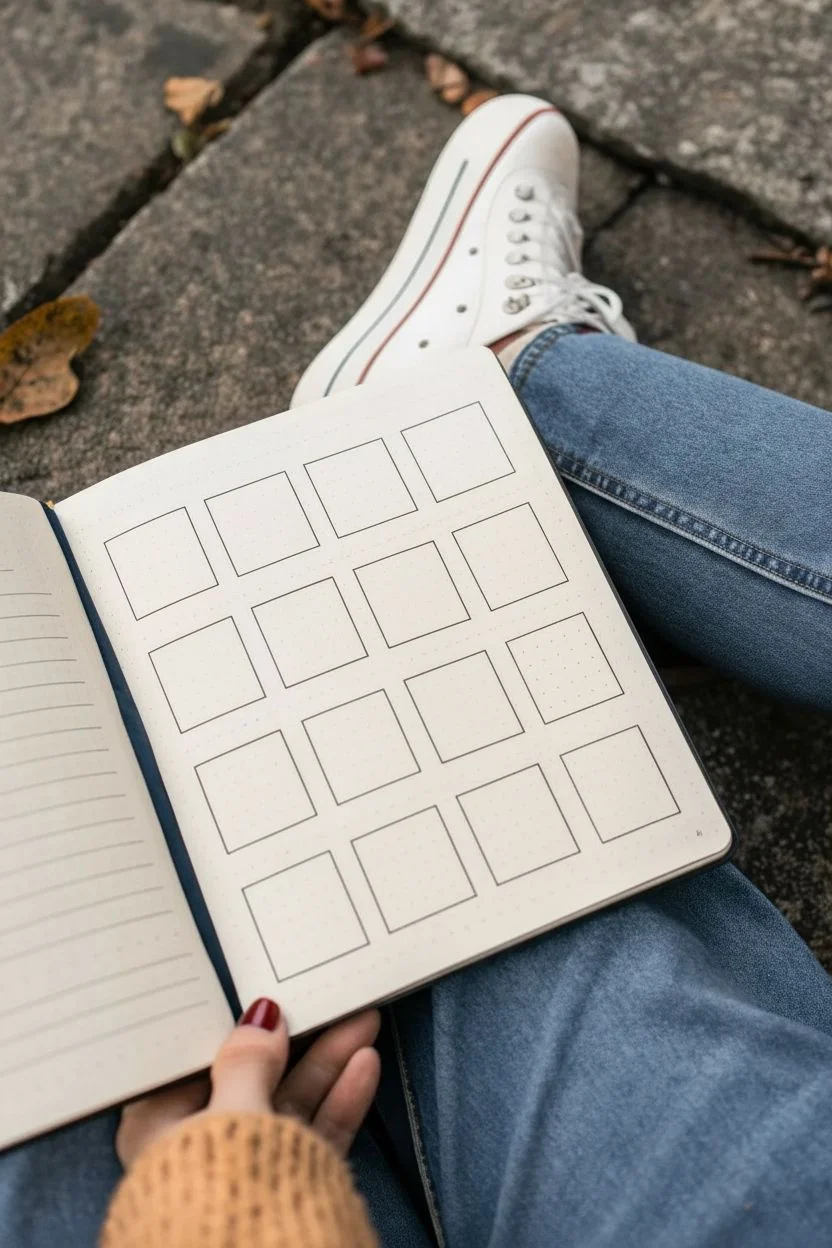
This satisfying sketchbook exercise transforms a simple grid into a playground for pattern and color exploration. It features sixteen neat squares filled with a mix of geometric line work, solid color blocking, and delicate textures to create a cohesive yet varied visual study.
Step-by-Step
Materials
- Dot grid or blank sketchbook
- Pencil (HB)
- Ruler
- Fine liner pen (black, 0.3mm or 0.5mm)
- Colored markers or paints (Terracotta Orange, Navy Blue)
- Eraser
Step 1: Setting the Framework
-
Measure the page:
Start by finding the center of your page. Since you’ll be drawing a 4×4 grid of squares, you need to ensure there is enough margin on all sides to keep the layout centered. -
Draw the main grid:
Using your ruler and pencil, lightly map out a large square that will contain your sixteen smaller squares. If you are using a dot grid journal, simply count the dots to ensure equal spacing. -
Divide into cells:
Divide your large square into four equal columns and four equal rows. You should now have sixteen identical small squares. Leave a small gap (buffer zone) between each square if you want that separated ‘floating’ look shown in the example. -
Ink the outlines:
Go over your pencil squares with a fine liner pen. Keep a steady hand or use a ruler edge to get crisp, sharp borders. I often purposely lift the pen slightly at corners to avoid ink blobs. -
Erase guidelines:
Once the ink is completely dry—give it a minute or two—gently erase all your pencil marks to leave a clean black framework.
Uneven Ink Lines?
If your hand shakes while inking the borders, embrace the wobble! Go over the line again loosely to create a deliberate ‘sketched’ aesthetic rather than a rigid architectural one.
Step 2: Adding Line & Pattern
-
Establish the dot pattern:
In the top-left square, use your orange marker to add small, evenly spaced dots. Keep them aligned in a grid pattern. -
Create diagonal textures:
Move to the third square in the top row. Draw diagonal hatching lines. Vary the density or cross-hatch sections to create visual interest. -
Simple diagonal lines:
In the fourth square of the top row, draw simple, widely spaced diagonal lines from the bottom left to the top right corner. -
Geometric focus:
For the first square in the second row, draw an ‘X’ from corner to corner. Then, add a horizontal line through the middle to create a Union Jack-style geometry. -
Concentric corners:
In the second square of the second row, start at the bottom-left corner and draw L-shaped right angles that grow progressively larger, creating an illusion of depth. -
Horizontal stripes:
On the third square of the second row, use your terracotta marker to draw thin, horizontal red lines. Keep them delicate. -
Stippling details:
For the last square in the second row, use a fine-tip pen to add tiny black dots (stippling). Keep them loose and airy rather than dense. -
Subtle cross-hatch:
In the second square of the third row, draw a very faint diamond cross-hatch pattern using a pencil or very light grey pen for a ghostly texture.
Step 3: Blocking in Color
-
Terracotta solids:
Use your terracotta/orange marker to fill in the second square of the top row completely. Repeat this solid fill for the fourth square in the third row. -
Deep navy solids:
Fill the third square of the third row with a solid block of navy blue. The contrast between the dark blue and the light paper drives the composition’s balance. -
Offset navy block:
Fill the third square on the bottom row completely with the navy blue. It creates a nice diagonal visual link with the navy block above it. -
Bordered square:
In the last square of the third row, first draw a smaller inner square. Fill the space between the inner and outer square with terracotta, leaving the center empty. -
Color grid mini-composition:
For the first square on the bottom row, divide it into a mini 2×2 grid. Fill the top-left and bottom-right quadrants with terracotta, and the bottom-left quadrant with navy. Leave the remaining quadrant white or fill with navy. -
Large terracotta anchor:
Fill the second square of the bottom row entirely with terracotta orange. This heavy block of color anchors the bottom of the page.
Make It Interactive
Turn this into a mood tracker by assigning different patterns or colors to specific emotions. Fill one square each day to build a visual diary of your month.
Step back and appreciate how these simple geometric choices come together to form a striking gallery on a single page
Draw the Same Object Five Times (Fast Study Row)

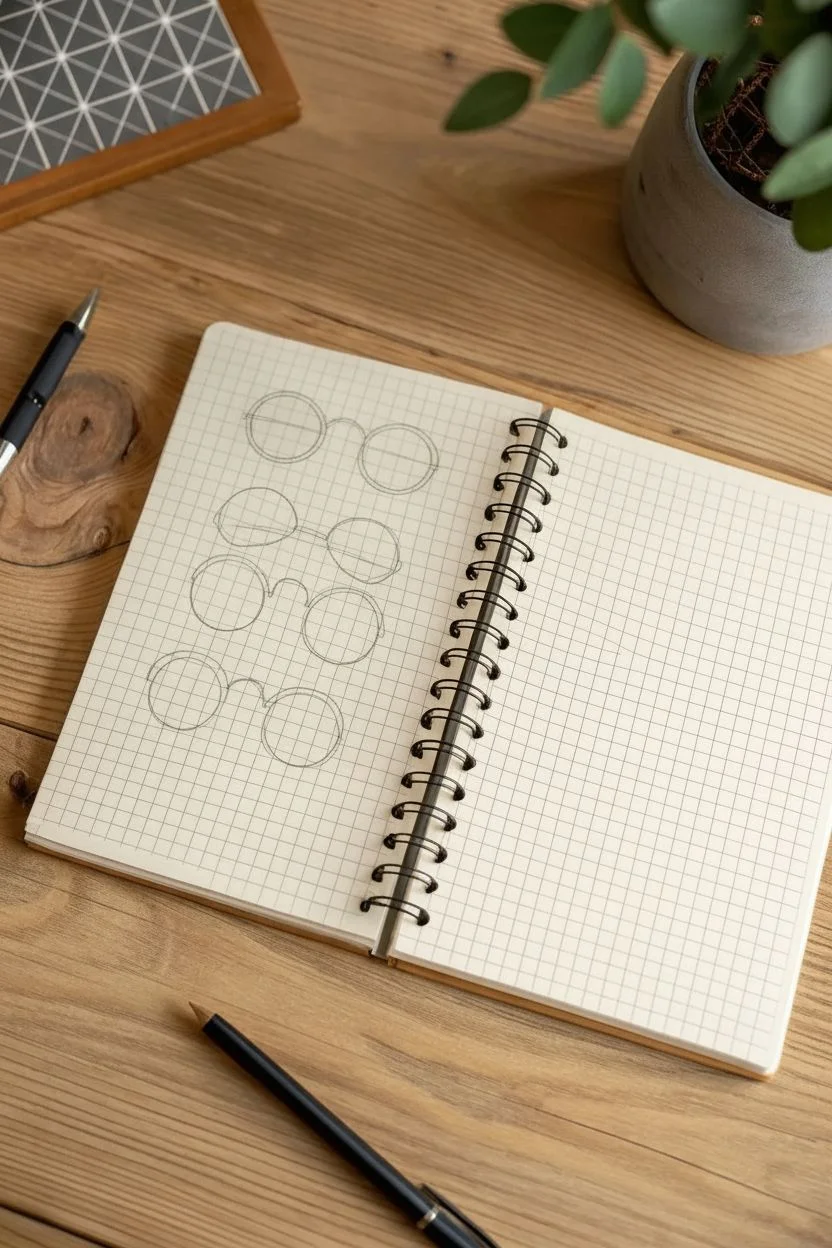
This quick and satisfying study focuses on capturing the subtle variations of a single object: reading glasses. Using a simple grid notebook, you’ll sketch four distinct frame styles in a clean vertical column to practice shape consistency and line weight.
Step-by-Step Guide
Materials
- Grid or graph paper spiral notebook
- Fine liner pen (0.3mm or 0.5mm black)
- Mechanical pencil (HB lead)
- Eraser
- Ruler (optional)
Step 1: Setting up the Grid
-
Establish a centerline:
Begin by lightly marking a vertical centerline down the middle of your left-hand page with your pencil. This invisible guide will ensure all four pairs of glasses are perfectly aligned. -
Mark vertical spacing:
Count the grid squares to space your drawings evenly. Leave about 4-5 grid squares between where the bridge of each pair of glasses will sit. -
Sketch the circle guides:
For the first pair at the top, sketch two light circles using the grid to keep them symmetrical. They should be roughly 3-4 grid squares wide.
Wobbly circles?
Don’t correct a wobbly line by drawing over it again; it makes the mistake obvious. Embrace the wobble or use a circular object like a coin as a stencil.
Step 2: Drafting the Shapes
-
Draft the classic round frames:
On your top set of circles, draw a simple arched bridge connecting them. Add small horizontal lines on the outer edges to represent the hinges. -
Draft the aviator style:
Move down to your next position. Sketch a slightly more teardrop shape for the lenses. Add a double bridge—one curved line on top and a straighter one just below it. -
Draft the semi-rimless frames:
For the third pair, focus on the top half of the circle. Draw a heavier brow line that curves gently, leaving the bottom half of the lens implied or very faint. -
Draft the rounded square frames:
For the final pair at the bottom, sketch shapes that are slightly more squared off at the corners but still generally round. Give them a keyhole-style bridge for variety.
Try colored lenses
Use a light blue or gray watercolor wash or marker inside the lenses to give the appearance of glass reflection.
Step 3: Inking the Outlines
-
Trace the first pair:
Switch to your fine liner pen. I prefer starting with the top pair to avoid smudging ink as I work down. Carefully trace your pencil lines for the round frames. -
Refine the bridge:
When inking the bridge, use a confident, single stroke. If lines connect, like at the hinges, make sure they touch cleanly without overshooting. -
Ink the aviators:
For the second pair, use a very light touch for the bottom of the lens to suggest a thin metal wire, and press slightly harder for the top bar. -
Ink the brow-line glasses:
On the third pair, thicken the top rim significantly. Go over the line twice if needed to create that bold acetate look, but keep the nose bridge thin. -
Complete the final pair:
Ink the bottom pair with a consistent line weight all around, emphasizing the geometric nature of the shape.
Step 4: Finishing Touches
-
Add temple details:
Go back to each pair and add just a hint of the temple arms extending backward. You don’t need to draw the whole arm; just a short diagonal line on the left and right adds 3D depth. -
Let the ink cure:
Wait at least two full minutes to ensure the ink is completely dry. Grid paper can sometimes absorb ink slowly. -
Erase guidelines:
Gently erase your vertical centerline and the initial pencil sketches. Hold the paper taut so the eraser doesn’t crinkle the page.
Now you have a clean, graphical study of eyewear shapes ready to be expanded with more styles
Sketch From Your Camera Roll (One Snapshot, One Page)
Capture the beauty of everyday house plants with this minimalist line art sketch. Using the crisp structure of dot grid paper, this project focuses on clean lines and leaf detailing to create a stylized, elegant potted plant illustration.
Step-by-Step
Materials
- Dot grid notebook or sketchbook
- Fine liner pen (black, 0.3mm or 0.5mm)
- Pencil (HB or 2B for sketching)
- Eraser
- Ruler (optional but helpful)
Step 1: Planning Structure
-
Establish the pot baseline:
Begin by drawing a short horizontal line near the bottom center of your page. This will be the base of your flower pot. Use the dot grid to keep it perfectly straight. -
Outline the pot shape:
Draw two diagonal lines angling outward and upward from the ends of your base line. Connect the tops of these diagonal lines with a horizontal line to form a trapezoid shape. -
Add the pot rim:
To create the rim of the pot, draw a narrow rectangle sitting directly on top of your trapezoid. It should be slightly wider than the top of the pot body. -
Draw the main stem:
Sketch a central vertical line rising from the center of the pot’s rim. Curve it very slightly to the left or right to give the plant a more organic, natural posture rather than a rigid stick. -
Mark leaf placements:
Lightly mark short, angled lines branching off the main stem in an alternating pattern. These will serve as the center veins (midribs) for your leaves.
Step 2: Drawing the Leaves
-
Create the first leaf shape:
Starting at the tip of one of your branch lines, draw a curved line back toward the stem, bowing it out to create a leaf belly. Mirror this on the other side to close the leaf shape. -
Vary leaf orientation:
Continue drawing the outlines for all the leaves. Try to make some point slightly upward and others droop slightly downward to mimic gravity’s effect. -
Add the top leaf:
Cap off the main stem with a single, smaller leaf pointing vertically. This gives the plant a distinct growing point. -
Draw secondary veins:
Inside each leaf outline, draw the center vein clearly. Then, add diagonal lines branching from the center vein to the outer edges to represent the leaf’s texture. -
Detail the veins:
Keep your vein lines light and parallel. I find that spacing them closer together makes the plant look denser, while wider spacing feels airier. -
Refine the stem:
Go back to the main stem and thicken it slightly by adding a second line parallel to the first, tapering it as it reaches the top leaf.
Wobbly Lines?
If your long lines aren’t straight, lock your wrist and move your entire arm from the elbow. Looking at the destination point rather than the pen tip also helps aim your line.
Step 3: Inking and Finishing
-
Outline the pot with ink:
Using your fine liner, carefully trace over the pencil lines for the pot. Use a ruler here if you want a very crisp, modern architectural look. -
Add pot texture:
Draw vertical lines inside the pot body to simulate a fluted or textured ceramic design. Keep the spacing consistent using the dots as a guide. -
Ink the plant:
Trace the plant stem and leaves. When flexible, rotate your notebook so your hand is always pulling the pen in a comfortable direction, leading to smoother curves. -
Enhance line weight:
Consider going over the outer edges of the major leaves one more time to make the silhouette pop against the background. -
Wait and erase:
Allow the ink to dry completely to avoid smears. Finally, gently erase all underlying pencil marks to reveal your clean illustration.
Level Up: Shadow Play
Add depth by drawing stippling dots or hatching lines on just one side of the pot and under the leaves. This simulates a light source and makes the flat drawing feel 3D.
Enjoy the calming simplicity of your new botanical page
Floating Mini Surreal Doodles (No Background Needed)
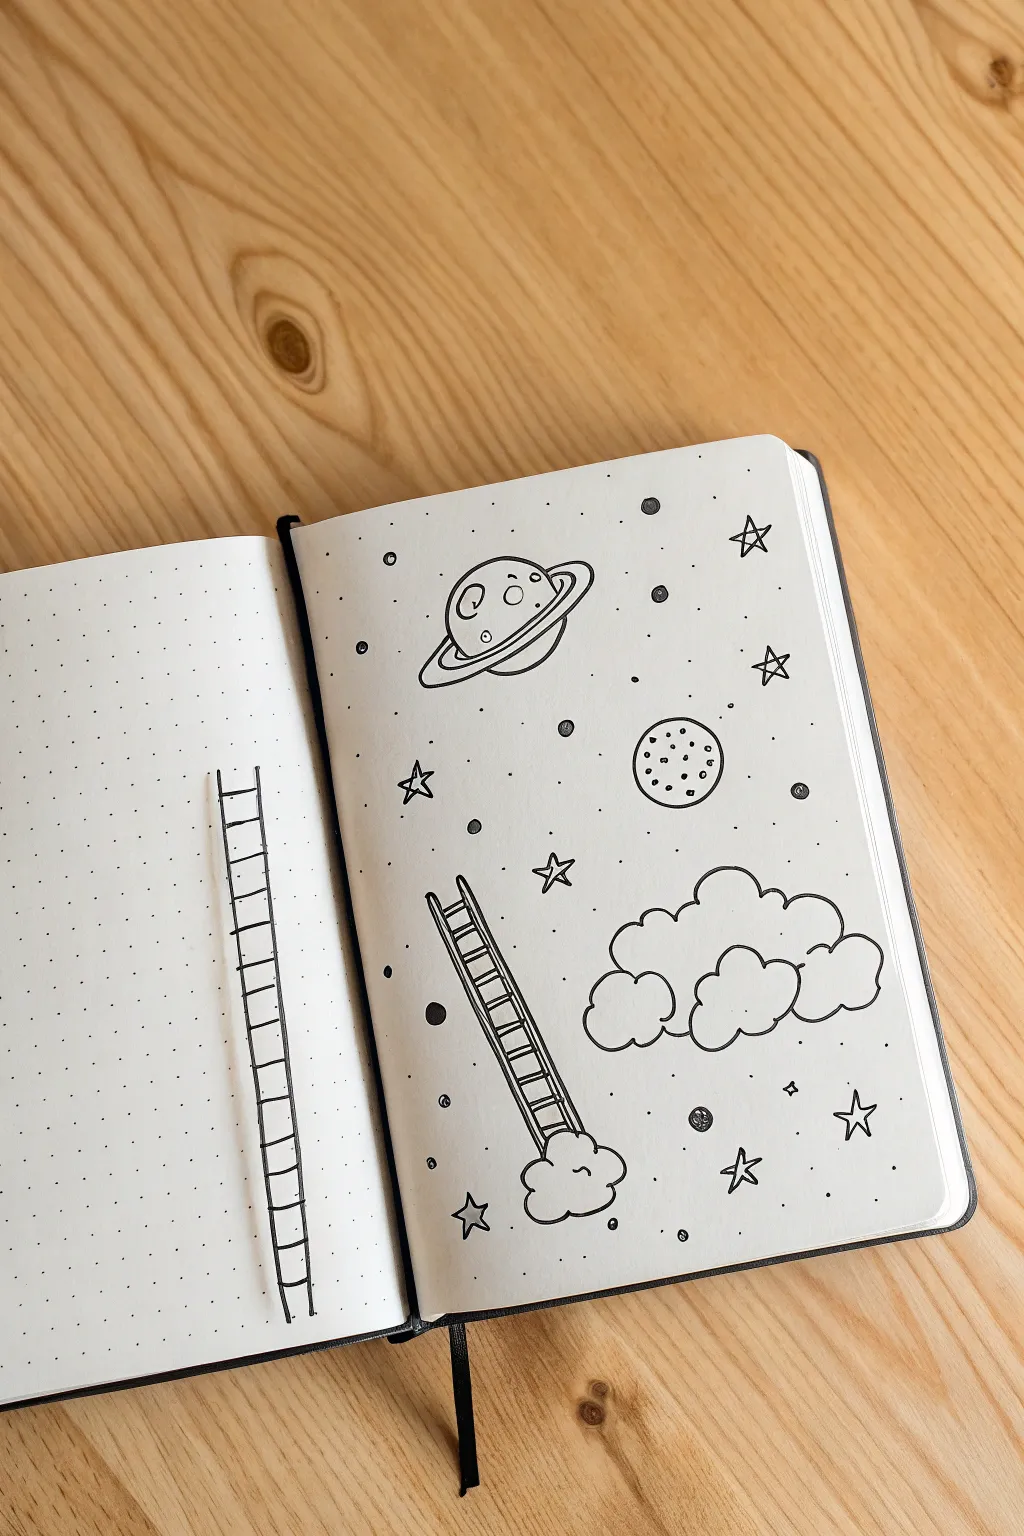
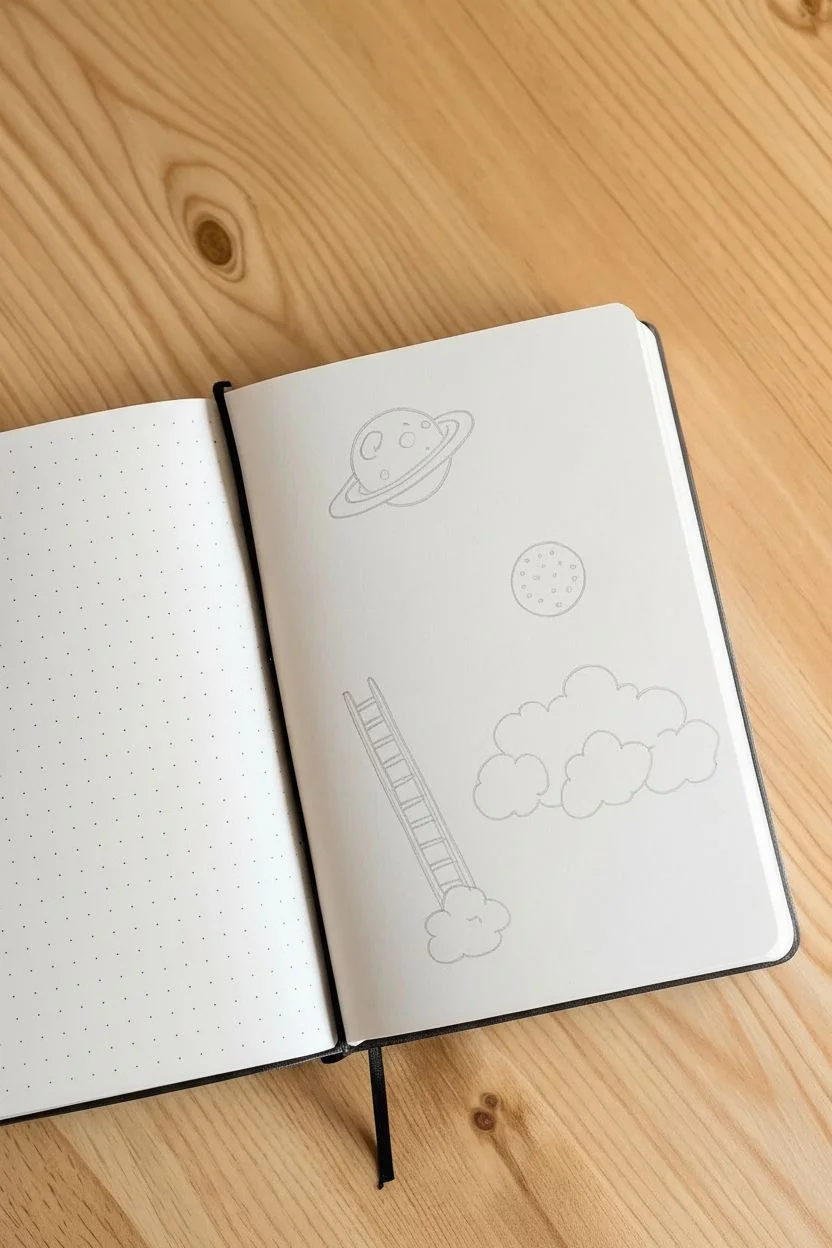
Create a whimsical, minimalistic spread where reality blends with fantasy using just a single pen. This floating ladder doodle invites the viewer to climb straight off the page into a field of stars and planets.
Step-by-Step Guide
Materials
- Dotted Grid Notebook or Sketchbook
- Fine Liner Pen (Black, 0.3mm or 0.5mm)
- Pencil (HB or H for light sketching)
- Eraser
Step 1: Setting the Scene
-
Pencil Outline:
Start by lightly sketching the main elements with your pencil. Position a diagonal ladder rising from the bottom center toward the middle of the page. -
Adding Clouds:
At the base of the ladder, sketch a small, fluffy cloud that the ladder seems to rest inside. To the right of the ladder, draw a larger, multi-lobed cloud formation. -
Celestial Placement:
Above the ladder, sketch a large ringed planet (like Saturn) near the top center. Add a circular moon with craters to the right of the ladder’s top.
Wobbly Lines?
Don’t stress about perfectly straight ladder rails. A slightly shaky hand actually adds character and a ‘hand-drawn’ charm that suits this surreal style perfectly.
Step 2: Inking the Ladder
-
Vertical Rails:
Switch to your fine liner. Carefully trace the two long vertical side rails of the ladder. If you want a 3D effect, add a second line right next to each rail to give them thickness. -
Adding Rungs:
Draw horizontal lines for the rungs. Space them evenly as you move up the ladder. If you doubled your side rails, make sure the rungs connect to the inner lines. -
Depth Details:
Add tiny second lines underneath each rung to give them a bit of dimension, essentially turning stick lines into small rectangular bars.
Add Pop of Color
Use a grey mildliner or watercolor brush pen to add drop shadows underneath the clouds and on one side of the planets to make them float off the page.
Step 3: Drawing the Sky Elements
-
The Big Cloud:
Ink the large cloud on the right using bumpy, scalloped lines. Variate the size of the bumps to keep it looking organic rather than mechanical. -
The Base Cloud:
Ink the small cloud at the ladder’s base. You can add a tiny swirl or a hidden face if you’re feeling playful. -
Saturn Ring:
For the planet, draw the ring first as a skinny oval that cuts through where the planet body will be. Then, draw two half-circles above and below the ring to form the sphere. -
Planet Details:
Add a few small craters (little circles) inside the planet body. Draw an inner line on the ring to show the gap between the ring and the planet. -
The Moon:
Ink the circle for the moon. Fill it with several small circles of varying sizes to represent craters. Stipple (add dots) inside a few craters for shadow.
Step 4: Finishing Touches
-
Starry Night:
Scatter 5-point stars around the empty focal areas. Draw them by making a pentagon shape with inward-curving sides. -
Distant Planets:
Draw tiny circles randomly in the background. Color some in completely black, and leave others as open circles or tiny ringed planets. -
Magic Dust:
Using the very tip of your pen, tap dots gently throughout the background to create ‘space dust’ or distant stars. Keep these sparse near the main drawings and denser in empty voids. -
Cleanup:
Wait at least five minutes to ensure the ink is completely dry. Gently erase all your pencil sketches to reveal the crisp black lines. -
The Second Ladder:
On the opposite page, you can start a simple straight ladder rising up the grid, mirroring the theme without crowding the spread.
Now you have a serene little portal to space right in your notebook


Have a question or want to share your own experience? I'd love to hear from you in the comments below!