Sometimes you just want a page of drawing ideas that instantly spark a cute, confident girl character—no overthinking required. Here are my go-to sketch prompts that help you practice faces, hair, outfits, and personality while still keeping it fun and doable.
Simple Girl Portrait in 3/4 View
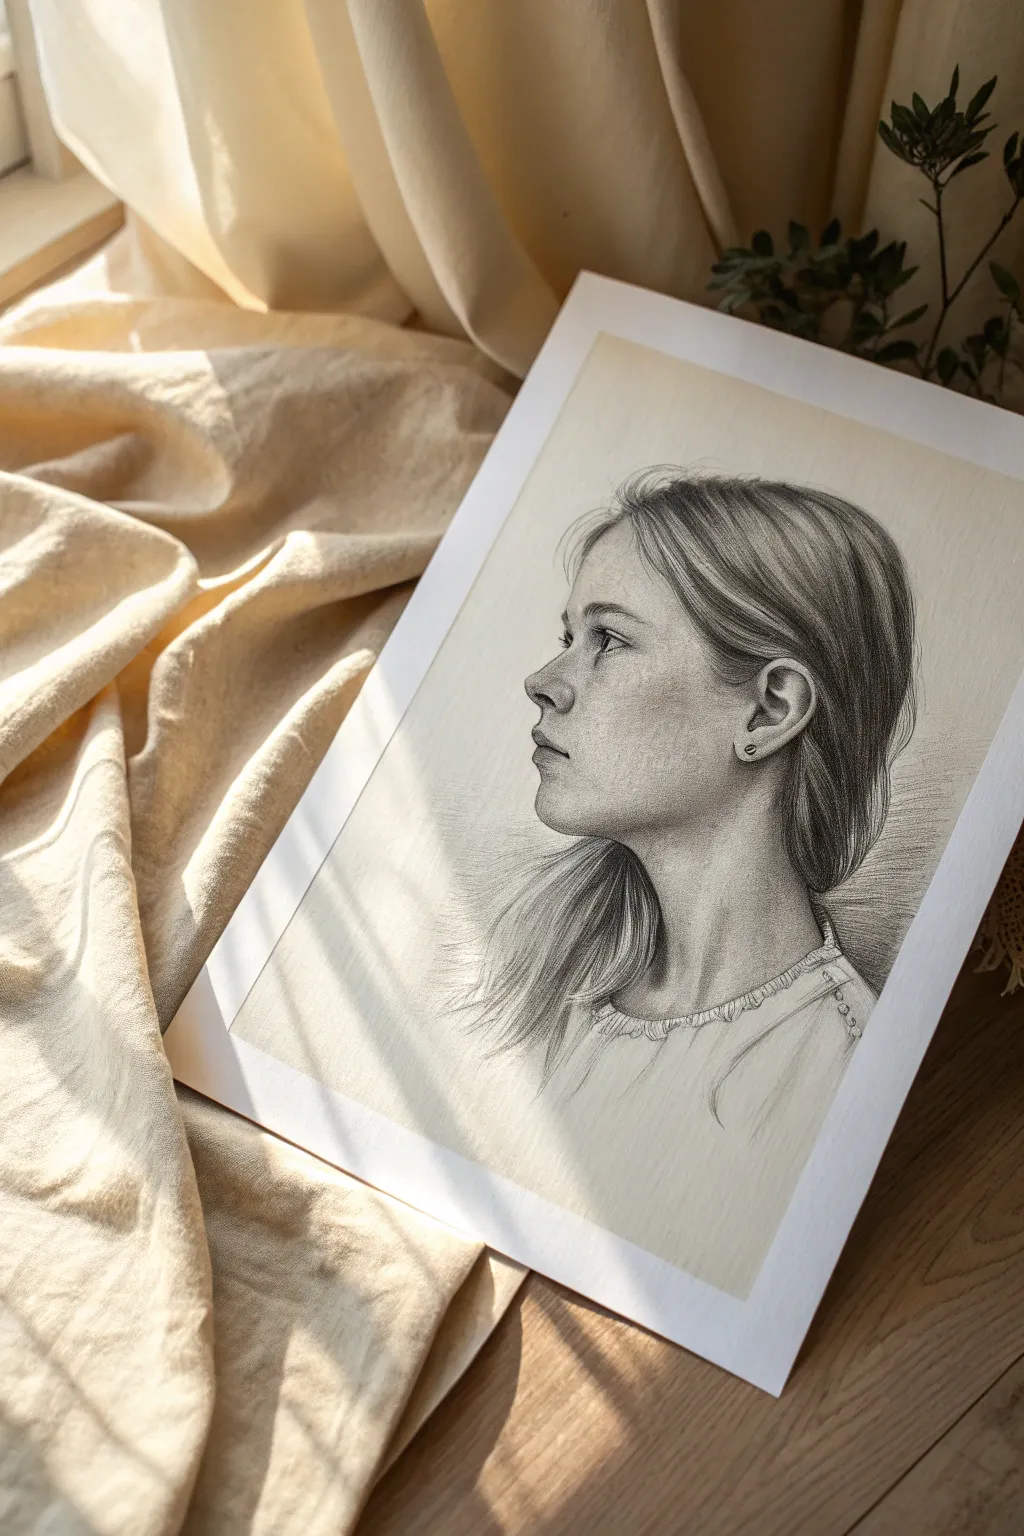
Capture the delicate grace of a young girl’s profile in this realistic graphite drawing. This project focuses on soft shading techniques and rendering fine hair textures to create a serene, lifelike portrait.
Step-by-Step Tutorial
Materials
- Smooth bristol or mixed media paper (light cream or off-white tone)
- Graphite pencils (HB, 2B, 4B, 6B)
- Mechanical pencil (0.5mm, HB) for fine details
- Kneaded eraser
- Blending stump (tortillon)
- Soft tissue or chamois cloth
- Fixative spray
Step 1: Establishing the Structure
-
Map the head shape:
Begin with a very light HB pencil sketch. Draw a large oval for the cranium and a smaller, slightly angled shape attached to the front for the jaw and face area. Keep these lines faint so they can be erased later. -
Define the profile line:
Carefully sketch the contour of the profile. Pay attention to the inward curve of the nose bridge, the rounded tip of the nose, and the gentle slope of the lips. The chin should be soft but defined. -
Place the features:
Locate the ear; it should sit roughly between the height of the eyebrow and the bottom of the nose throughout the side of the head. Sketch the eye shape from the side view—it will look like a sideways ‘V’ or triangle shape. -
Refine the proportions:
Check your spacing. ensure the neck connects naturally to the back of the head and under the jaw. Sketch the basic flow of the hair, sweeping it back behind the ear and down over the shoulder.
Soft Skin Technique
Don’t press hard. Build layers of graphite slowly and use circular motions with your blending stump. This prevents scratchy lines and keeps the skin looking youthful.
Step 2: Building Values and Features
-
Shade the skin base:
Using a 2B pencil held at a low angle, lightly shade the face. Avoiding the highlights on the nose tip and cheekbone, apply a gentle layer of graphite. -
Blend for smoothness:
Take a tissue or blending stump and gently rub the graphite into the paper to create the smooth skin texture characteristic of a young girl’s face. -
Detail the eye:
Switch to a sharp 4B pencil or a mechanical pencil. Darken the pupil and the upper lash line. Leave a tiny white speck for the catchlight to bring the eye to life. -
Sculpt the nose and mouth:
Instead of drawing outlines, use shading to define the nose. Darken the nostril and the corner of the mouth. Shade the upper lip slightly darker than the lower lip. -
Add structure to the ear:
The ear is complex; focus on the shadows inside the curves rather than outlining the whole shape. Use the 2B pencil to deepen the inner recesses.
Add Lighting Effects
Draw distinct diagonal shadows across the lower drawing to mimic the slat-lighting seen in the reference photo. It adds immediate atmosphere
Step 3: Rendering Hair and Clothing
-
Establish hair direction:
With an HB pencil, draw long, flowing strokes that follow the curve of the skull. Start from the hairline and sweep backwards towards the ponytail area. -
Create depth in the hair:
I usually switch to a 4B or 6B pencil here to punch up the contrast. Darken the areas behind the ear and at the nape of the neck where shadows naturally gather. -
Add individual strands:
Use a mechanical pencil to flick in loose, wispy strands escaping the main mass of hair. Focus on the hairline and the ends of the ponytail for realism. -
Lift highlights:
Take your kneaded eraser and mold it into a wedge. Press and lift graphite along the crown of the head to simulate light hitting the shiny hair strands. -
Sketch the collar:
Lightly outline the gathered neckline of the blouse. Add small, curved dashes to mimic the stitching or ruffled texture along the collar edge. -
Shade the clothing:
Keep the clothing sketch quite loose compared to the face. Add soft vertical shadows to suggest folds in the fabric below the neck.
Step 4: Final Touches
-
Deepen the darkest shadows:
Revisit the pupil, the nostalgic, and the deepest hair shadows with your 6B pencil to ensure you have a full range of values. -
Clean up edges:
Erase any stray construction lines around the profile. If the background looks messy, carefully clean it up to keep the focus on the portrait.
Once sealed with fixative, frame your drawing with a wide mat to give this quiet moment the space it deserves


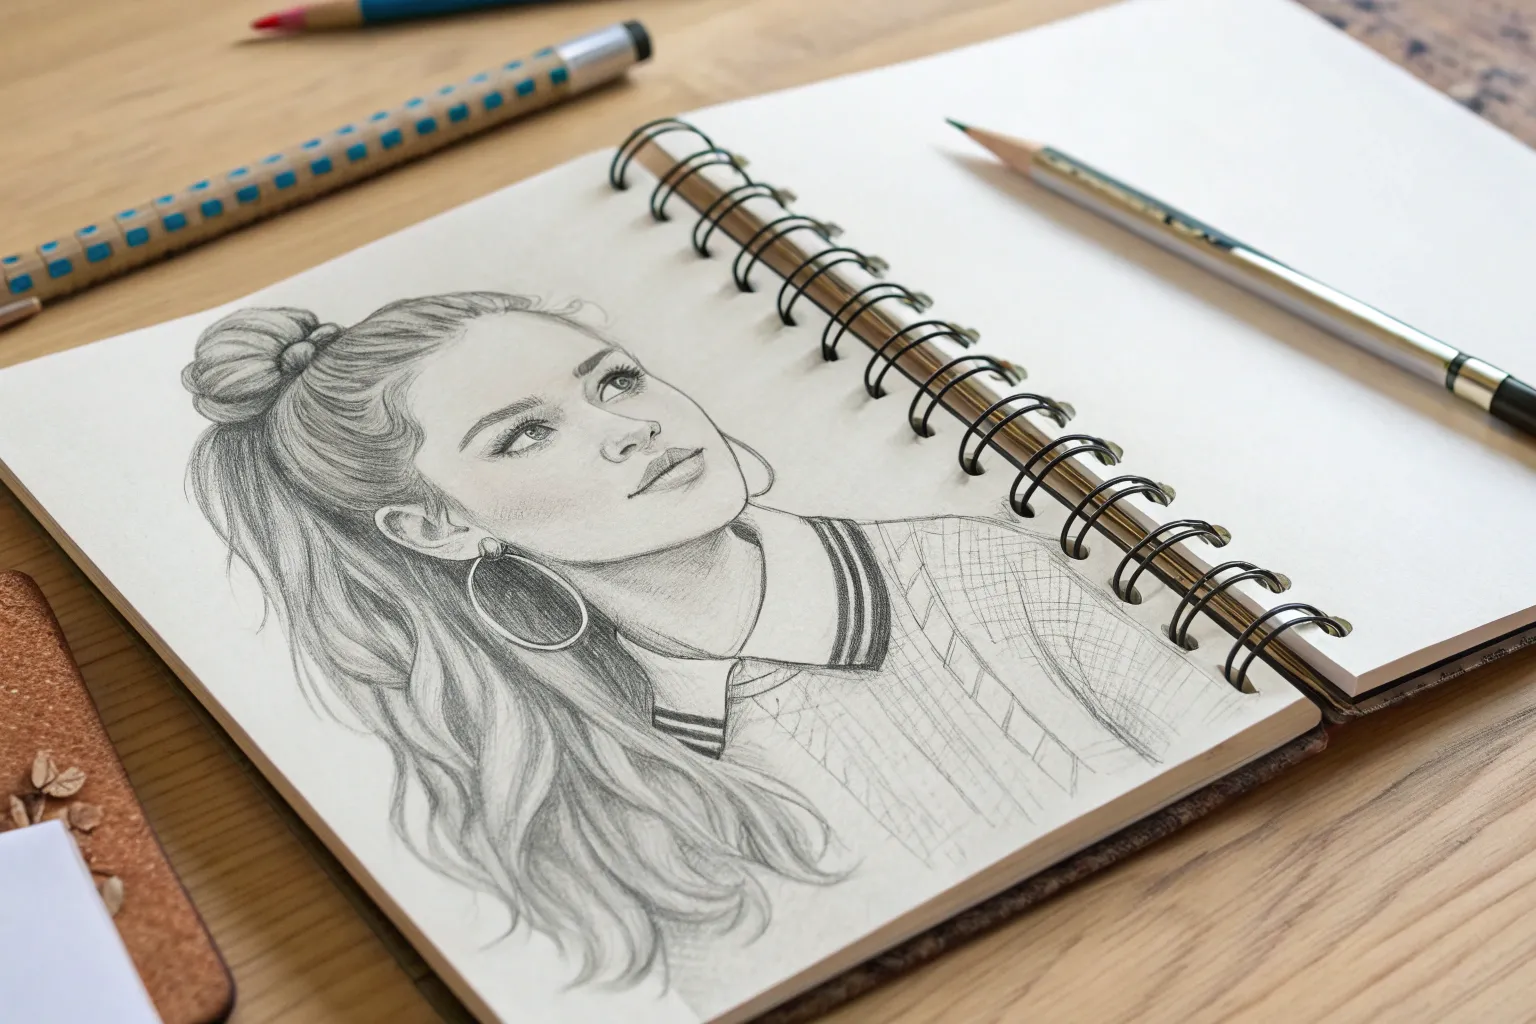
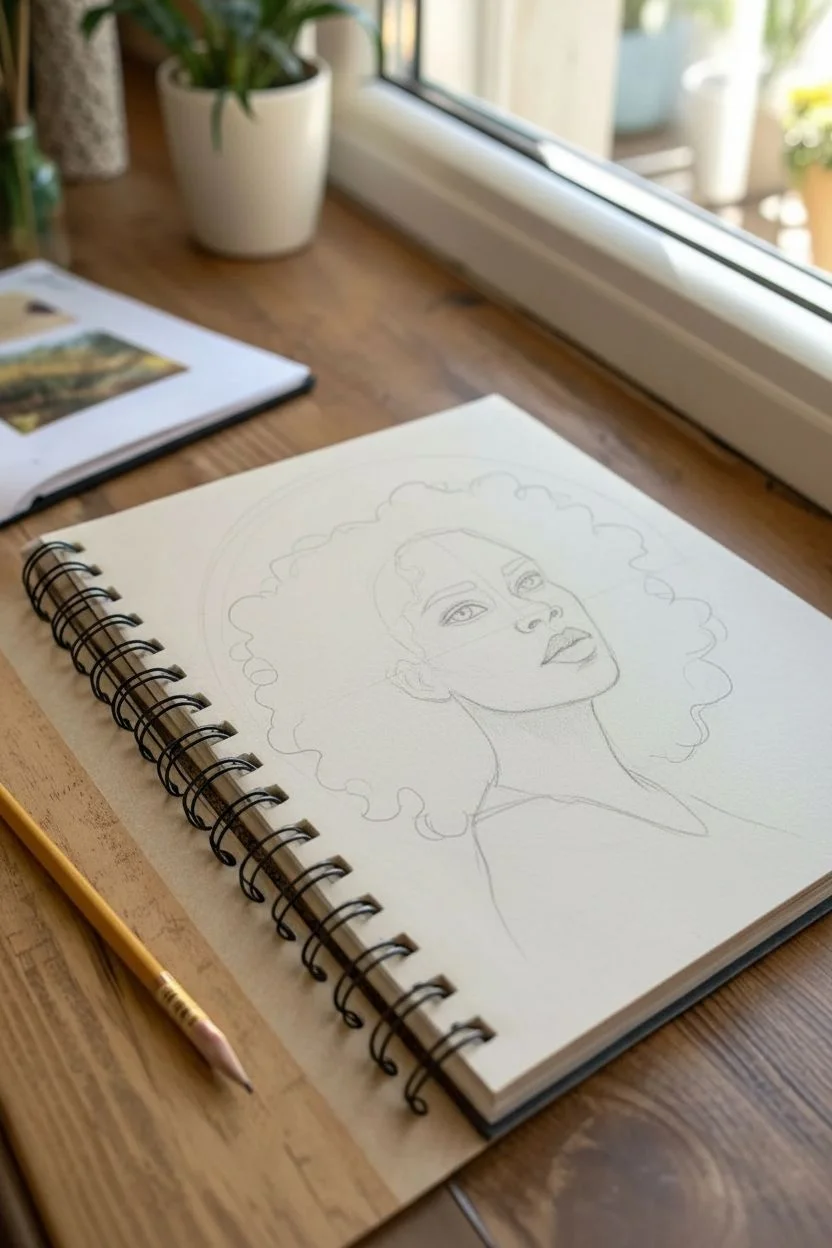
Girl With Big Expressive Eyes Practice Sheet

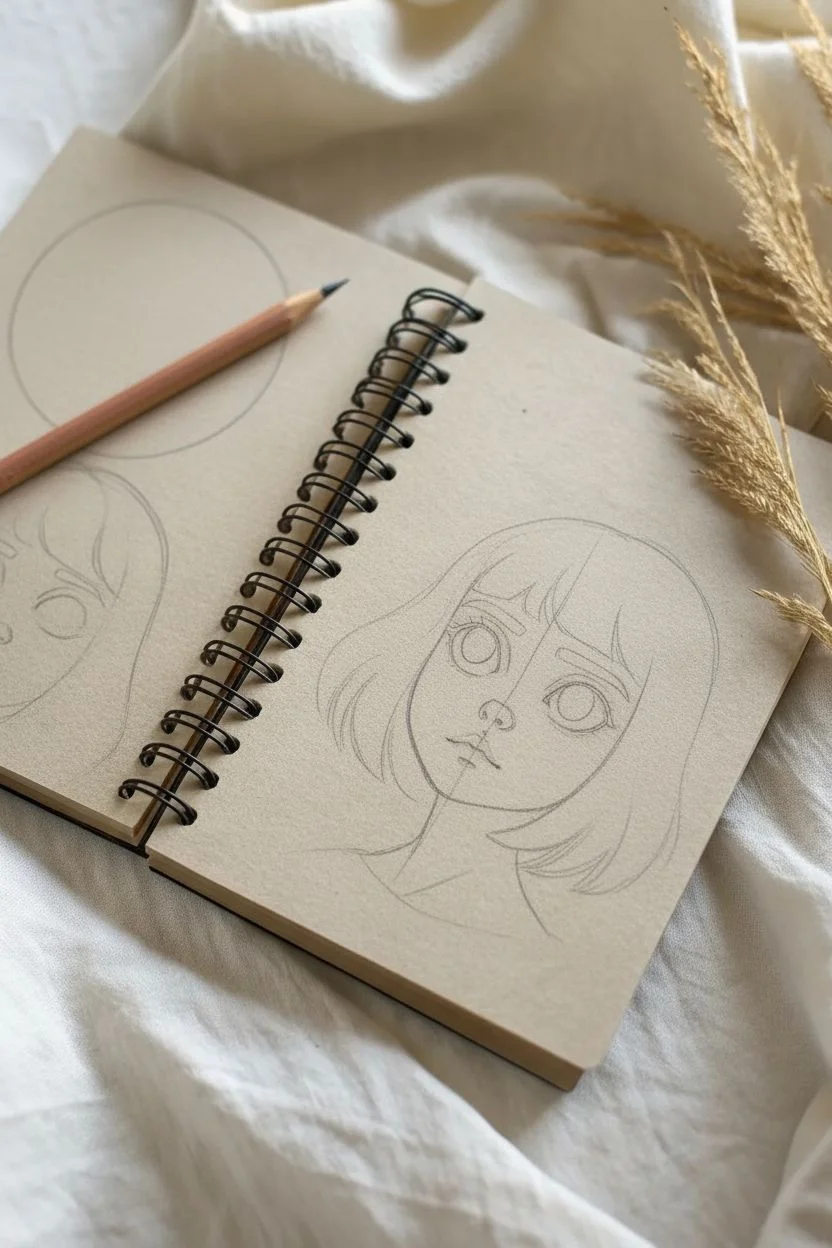
Capture the charm of stylized portraiture with this practice sheet focusing on oversized, expressive eyes and a chic bob haircut. Using toned tan paper allows your graphite shading to pop with warmth and depth, creating a character that feels both lively and sweet.
Step-by-Step Guide
Materials
- Toned tan sketchbook (spiral bound)
- Graphite pencils (HB for sketching, 2B and 4B for shading)
- White charcoal or pastel pencil (optional for highlights)
- Kneaded eraser
- Blending stump or tortillon
- Pencil sharpener
Step 1: Laying the Foundation
-
Map the head shape:
Start with a light HB pencil. Draw a circle for the cranial mass and attach a jawline that tapers down to a small, rounded chin. Keep your lines very faint so they can be easily erased later. -
Place guidelines:
Draw a vertical line down the center of the face to help with symmetry. Then, draw a horizontal line slightly below the halfway point of the face; this is where those big eyes will sit. -
Outline the features:
Sketch two large almond shapes on the horizontal line. The space between them should be roughly the width of one eye. Mark a small button nose just below the eye line and a short, curved line for the mouth halfway between the nose and chin. -
Draft the hair volume:
Sketch the outline of the bob haircut. Start the hairline slightly above the eyebrows and let the hair curve around the face, ending just below the chin. Don’t draw individual strands yet; focus on the helmet-shape of the hair.
Uneven Eyes?
To fix asymmetry, check your drawing in a mirror or snap a photo and flip it horizontally. This reveals crooked features instantly so you can adjust guidelines before shading.
Step 2: Designing the Eyes
-
Draw the irises and pupils:
Inside the eye shapes, draw large circles for irises. In the center of those, add smaller black pupils. Leave a small white circle within the pupil or iris for that crucial spark of life. -
Thicken the lash line:
Use a 2B pencil to darken the upper eyelid line significantly. Taper it out at the corners to create a winged eyeliner effect. -
Add individual lashes:
Draw distinct, curving lashes springing from the upper lid. Group them slightly so they look like clumps rather than a perfect picket fence. Add smaller lashes on the lower lid. -
Define the eyebrows:
Draw thick, expressive eyebrows floating slightly above the eyes. Use short, upward strokes to mimic hair texture rather than drawing a solid block.
Step 3: Shading and Texture
-
Shade the eyes:
Using your 2B or 4B pencil, gradient shade the iris. Make it darkest at the top (under the lid shadow) and lighter towards the bottom. -
Contour the face:
Lightly shade under the chin, the sides of the nose, and just under the hair bangs to create depth. A blending stump works wonders here to soften the graphite into the tooth of the tan paper. -
Detail the nose and lips:
Define the nostrils with small C-shapes. Shade the upper lip to be darker than the lower lip. I like to leave a tiny sliver of unshaded paper on the lower lip to make it look plump. -
Add freckles:
Dot a few playful freckles across the bridge of the nose and cheeks. Vary the pressure so some are dark and distinct while others are faint.
Level Up: Color Pop
Use a single colored pencil (like teal or violet) lightly in the irises before shading with graphite. The subtle hue creates a magical effect against the neutral tan paper.
Step 4: Hair and Finishing Touches
-
Strand the hair:
Go back to the hair outline. Use long, confident strokes to follow the curve of the bob. Focus on the tips of the hair curling inward toward the neck. -
Add bangs texture:
Draw vertical strokes for the bangs, ensuring they look uneven and natural rather than perfectly straight across. -
Draw the collar:
Sketch a simple ribbed collar at the base of the neck. Use simple vertical ticking lines to suggest the knit texture of a sweater. -
Deepen the darks:
Do a final pass with your 4B pencil. Darken the pupils, the lash line, and the deepest shadows in the hair to increase contrast. -
Optional highlight pop:
If you have a white charcoal pencil, add a tiny tough of white to the catchlight in the eyes and the tip of the nose to make the drawing really shine against the tan paper.
Now you have a charming character sketch filled with personality and life


Cute Girl With Freckles and Blush
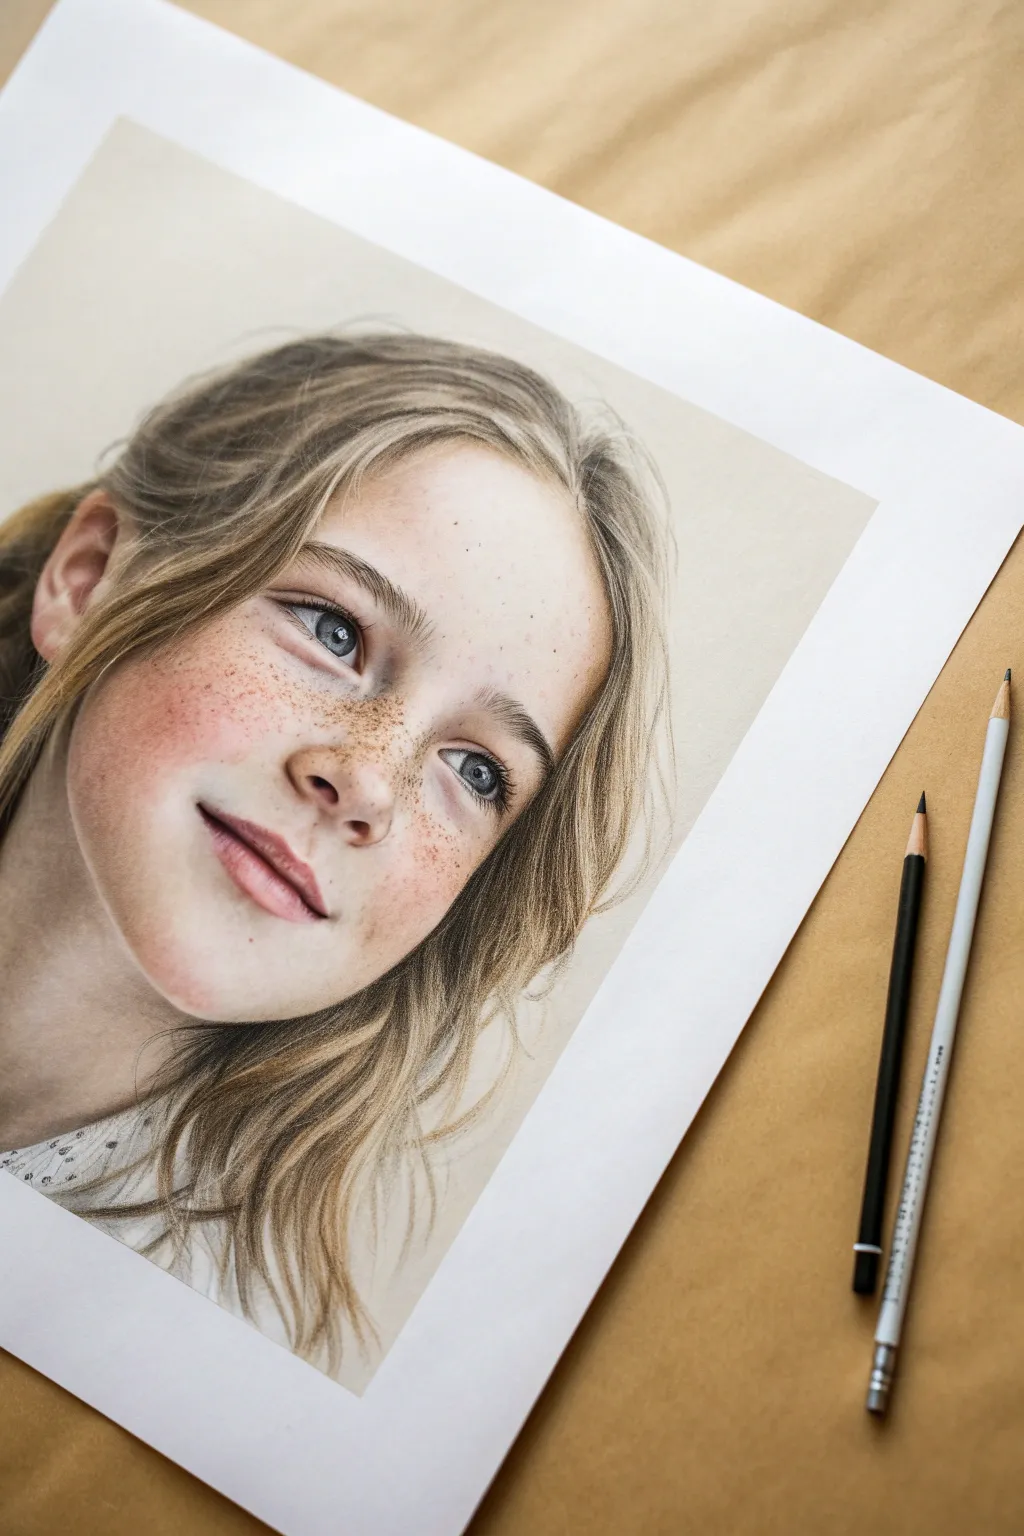
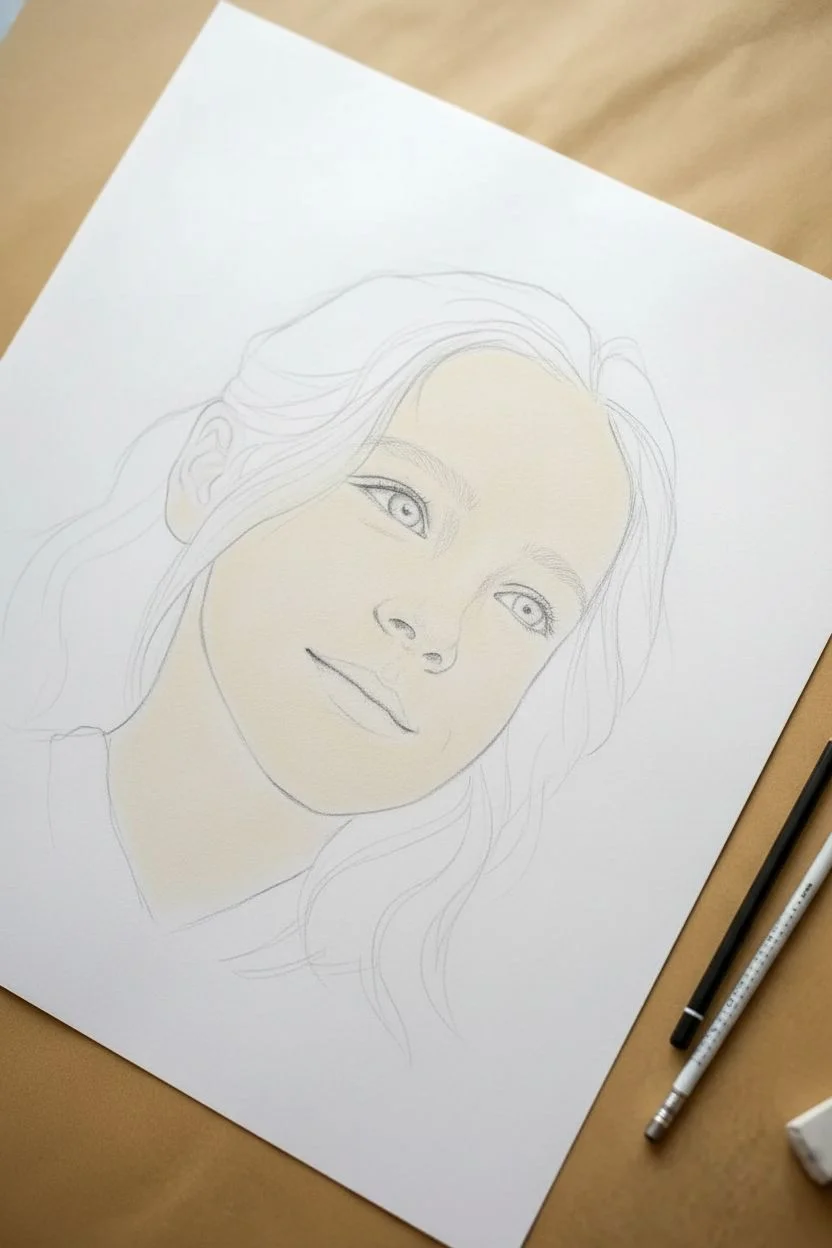
Capture the delicate beauty of childhood with this advanced color pencil study, focusing on realistic skin textures and bright eyes. This project teaches you how to layer translucent colors to build up rosy cheeks and natural freckles for a stunning lifelike finish.
Detailed Instructions
Materials
- Heavyweight smooth Bristol board or hot-pressed watercolor paper
- High-quality wax or oil-based colored pencils (flesh tones, warm browns, ochres, blues, pinks)
- Graphite pencil (HB) for initial sketch
- Kneadable eraser
- Electric eraser (optional for highlights)
- Colorless blender pencil or blending stump
- White gel pen (optional for extreme highlights)
- Pencil sharpener (very sharp point needed)
Step 1: The Foundation
-
Initial Outline:
Begin with a very light HB graphite sketch. Focus on accurate proportions, paying special attention to the spacing between the eyes and the angle of the jawline. -
Lightening the Sketch:
Roll your kneadable eraser gently over the entire drawing. You want the graphite lines to be barely visible ‘ghost lines’ so they don’t muddy your colored pencil layers later. -
Base Skin Tone:
Select a very pale cream or ivory pencil. Apply an even, light pressure layer over the entire face, avoiding the whites of the eyes and the teeth. Use circular motions to avoid directional streaks.
Keep It Sharp
For hyper-realism, your pencil point is everything. Rotate the pencil slightly every few strokes to maintain a sharp point, or sand it constantly.
Step 2: Facial Features
-
Eye Base:
Fill in the iris with a light grey-blue. Keep the pupil area clear for now. Shade the whites of the eyes (sclera) with a very faint cool grey, keeping the corners slightly darker to create a spherical form. -
Eye Detail:
Deepen the blue of the iris using radial strokes from the pupil outward. Add a dark charcoal or indigo ring around the outer edge of the iris and fill in the pupil with black, leaving a sharp white shape for the catchlight. -
Nose and Mouth Construction:
Lightly shade the nostrils with a burnt ochre—avoid harsh blacks here. For the lips, lay down a base of pale rose, darker at the center line where the lips meet. -
Lip Texture:
Build up the lip color with berry and coral tones. Use vertical, curved strokes to mimic the natural texture of lip skin.
Temperature Check
Skin isn’t just pink and brown. Add tiny, faint touches of light blue or green in the shadow areas (like under the chin) to make the skin look translucent.
Step 3: Building Skin Complexity
-
Blush Application:
Gradually introduce pink and salmon tones to the cheeks and the tip of the nose. I find it best to work in extremely sheer layers here; you can always add more, but erasing pencil is difficult. -
Deepening Shadows:
Use a light brown or taupe to contour the face. Shade under the chin, the side of the nose, and beneath the hairline to create three-dimensional volume. -
The Freckles:
This is the defining feature. Take a sharp medium-brown pencil and dot irregular marks across the nose and cheeks. Vary the pressure: some should be distinct dots, while others should be faint smudges. -
Freckle Variation:
Layer a second color of freckles using a darker burnt sienna. Randomize the placement so it doesn’t look like a pattern, clustering them slightly closer on the bridge of the nose.
Step 4: Hair and Finishing Touches
-
Hair Base:
Lay down broad strokes of a wheat or pale yellow color following the direction of hair growth. Don’t worry about individual strands yet; focus on the major clumps of hair. -
Defining Strands:
Using a sharpened ochre and light brown pencil, draw long, flowing lines to define individual hairs. Press harder in the shadowed areas where hair tucks behind the ear or falls around the neck. -
Darker Values in Hair:
Add depth with a dark umber pencil in the deepest crevices of the hair. Keep your pencil extremely sharp to maintain the illusion of fine texture. -
Flyaways:
Use a very sharp lighter pencil or even a white pencil to add stray hairs crossing over the darker areas. This messiness adds realism. -
Blending:
Use a colorless blender or a white pencil to burnish the skin areas, pushing the pigment into the paper tooth for a smooth, creamy complexion. -
Final Highlights:
Re-establish the brightest highlights. If your paper white has gotten lost, use a fine electric eraser or a touch of white gel pen on the tear duct, lip glossiness, and nose tip.
Take a moment to admire the lifelike gaze and soft textures you have patiently built up on the page


Girl Side Profile With Clean Nose and Lip Shapes
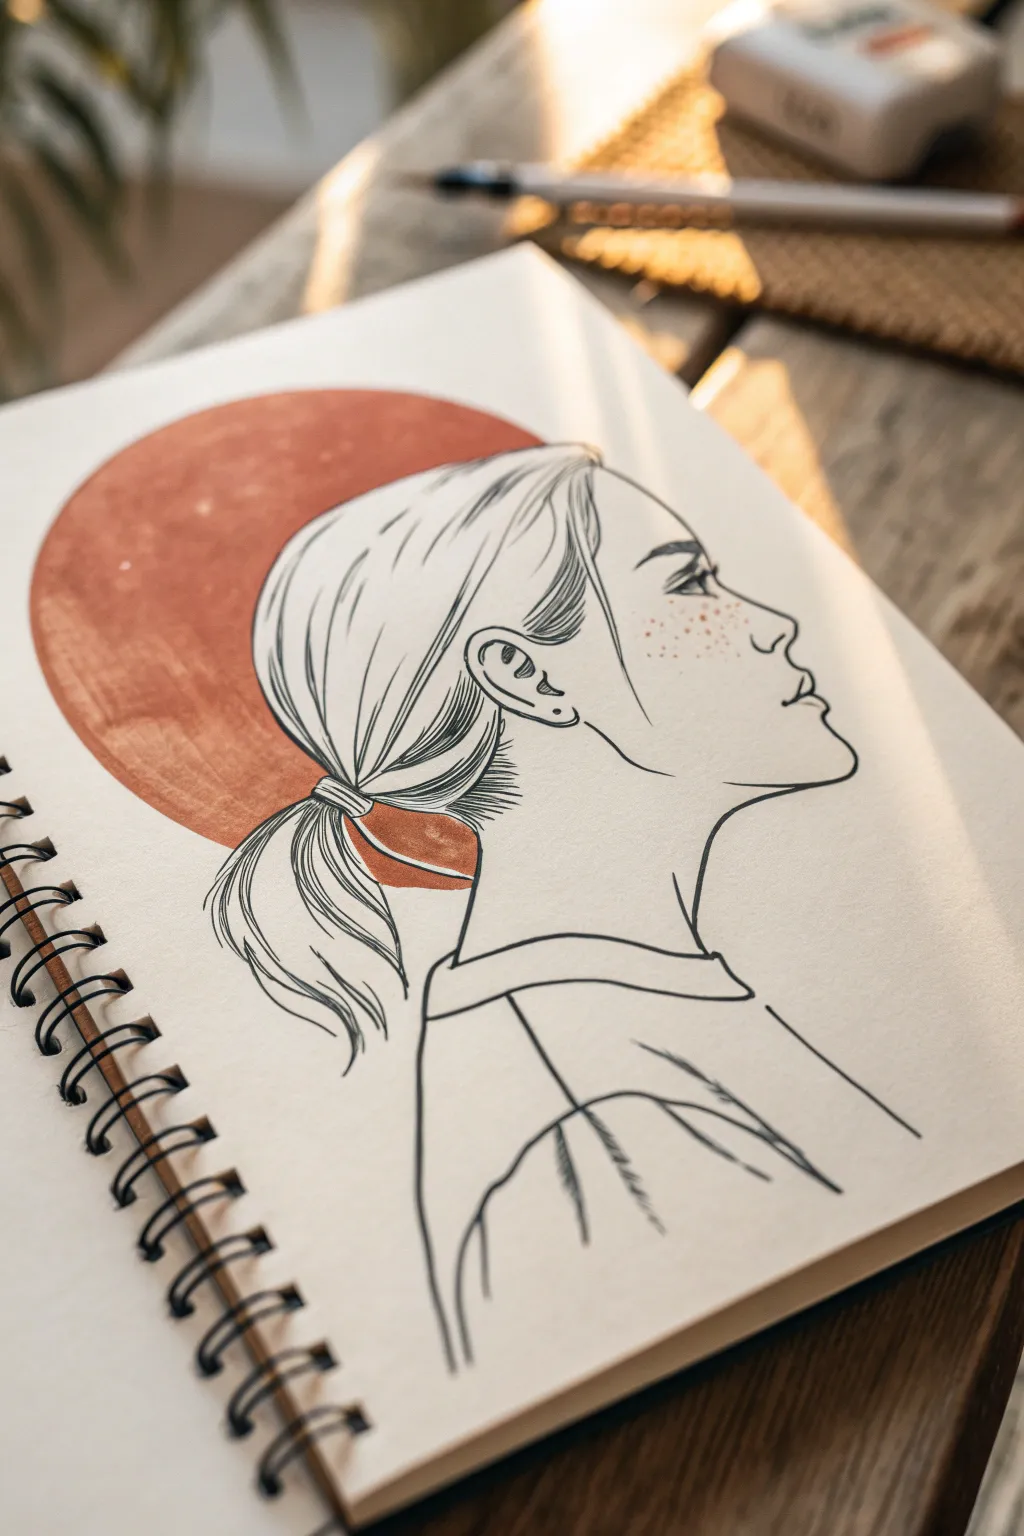
This striking side profile drawing combines clean, minimal line art with a bold geometric shape to create a modern and aesthetic portrait. The contrast between the delicate ink work and the warm, rust-colored circle creates a beautiful focal point that looks great in any sketchbook.
Step-by-Step Guide
Materials
- Sketchbook or heavy drawing paper
- HB graphite pencil
- Fine liner pens (0.1mm, 0.3mm, and 0.5mm)
- Rust or terracotta colored marker (alcohol or water-based)
- White gel pen (optional)
- Eraser
- Ruler or circular object for tracing
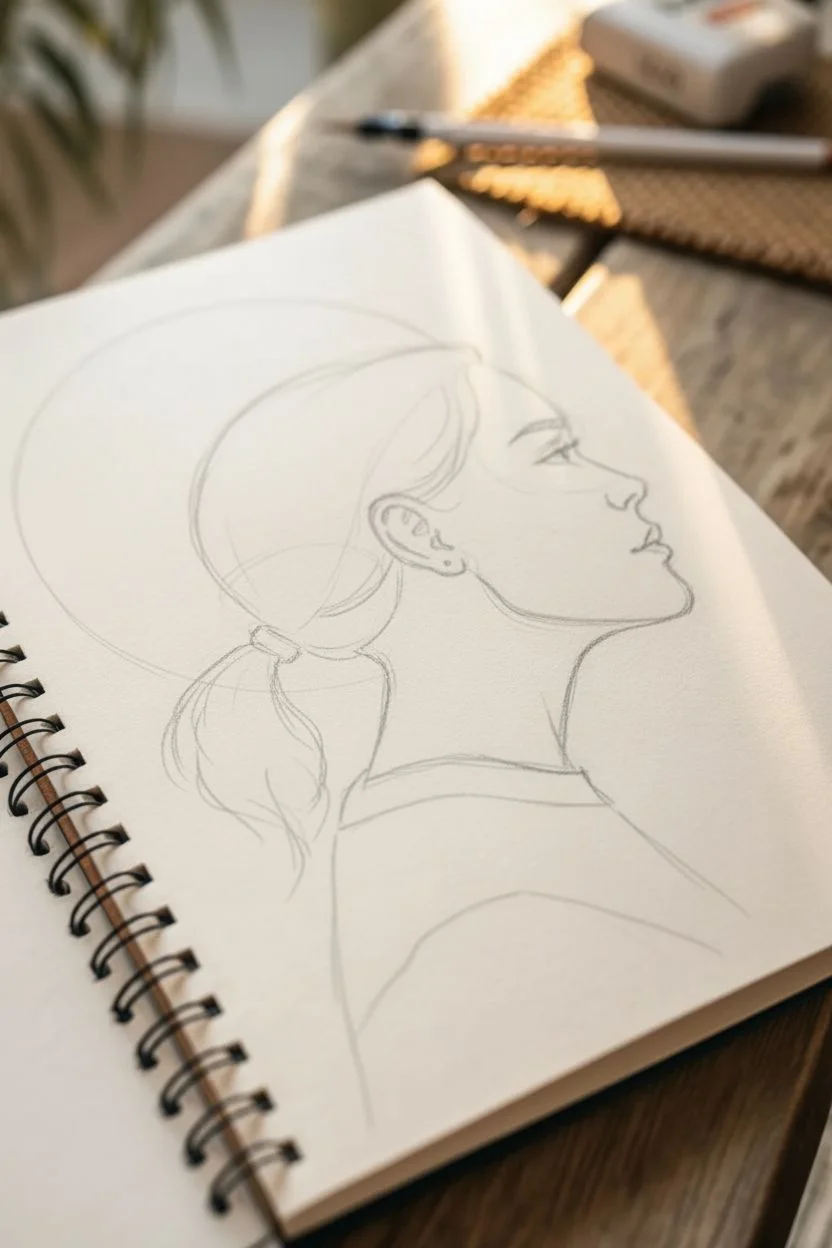
Step 1: Sketching the Foundations
-
Establish the head shape:
Start with your HB pencil by drawing a circle for the cranium. Lightly sketch a sweeping jawline coming down from the circle to define the chin and neck. -
Draft the profile features:
Lightly unnecessary lines. Mark the placement of the nose, lips, and eye. The nose should have a gentle slope, slightly upturned at the tip. Keep the lips full but simple. -
Map out the hair:
Sketch the hair pulled back tightly. Draw curved lines sweeping from the forehead back towards the nape of the neck where the ponytail will sit. -
Add the ponytail basics:
Draw the ponytail shape extending from the gathered point. Keep the outline loose and slightly wavy to suggest movement. -
Position the geometric background:
Lightly trace a large circle behind the head. It should frame the back of the head and the ponytail area, but stop before it hits the face profile.
Smooth Circles
Don’t freehand the large circle. Trace a bowl or masking tape roll for a perfect geometric shape that contrasts beautifully with organic hair lines.
Step 2: Inking the Line Art
-
Define the face profile:
Using a 0.3mm fine liner, carefully trace your pencil lines for the forehead, nose, lips, and chin. Use a steady, continuous stroke for the smoothest look. -
Ink the eye and brow:
Switch to a finer 0.1mm pen for the eye details. draw the eyelashes and the iris looking upward. Fill in the eyebrow with short, hair-like strokes. -
Add freckles:
With the 0.1mm pen, gently tap a constellation of dots across the nose bridge and cheek area. Vary the pressure slightly so some are darker than others. -
Outline the ear:
Draw the ear shape using the 0.3mm pen. Add the inner ear details carefully, ensuring they look anatomically correct but simplified. -
Ink the main hair volume:
Use the 0.5mm pen for the main outline of the head and ponytail to give it weight. Draw long, sweeping curves following the direction of the hair growth. -
Detail the hair strands:
Switch back to the 0.1mm pen to add internal hair texture. Focus these lines near the roots and the ponytail tie to show tension, leaving the middle areas cleaner for highlights. -
Draw the neck and shoulders:
Extend the neck lines down into a simple shirt collar. Keep the clothing lines loose and sketchy compared to the face.
Add Metallic Flare
Use gold ink or a gold paint pen to fill in the circle instead of marker. It catches the light and makes the drawing look incredibly chic.
Step 3: Color and Final Touches
-
Erase pencil guides:
Wait for the ink to dry completely to avoid smudging. Gently erase all visible graphite sketch lines. -
Fill the sun circle:
Take your rust-colored marker and carefully color inside the large circle shape you drafted earlier. Be very careful around the hair outlines; the color should go *behind* the hair. -
Refine the edges:
Go over the outer edge of the circle one more time with the marker to ensure a crisp, clean curve. -
Check transparency illusion:
Since we are drawing the circle ‘behind’ the figure, ensure you don’t color over the ponytail itself unless you want a transparent effect. In this style, the hair remains white. -
Add deep shading (optional):
I sometimes add a few thicker black strokes or cross-hatching right under the ear and at the ponytail tie to add depth.
Now you have a serene, minimalist portrait ready to be framed or kept as a sketchbook highlight

PENCIL GUIDE
Understanding Pencil Grades from H to B
From first sketch to finished drawing — learn pencil grades, line control, and shading techniques.
Explore the Full Guide
Girl Facing Away With Long Hair Flow
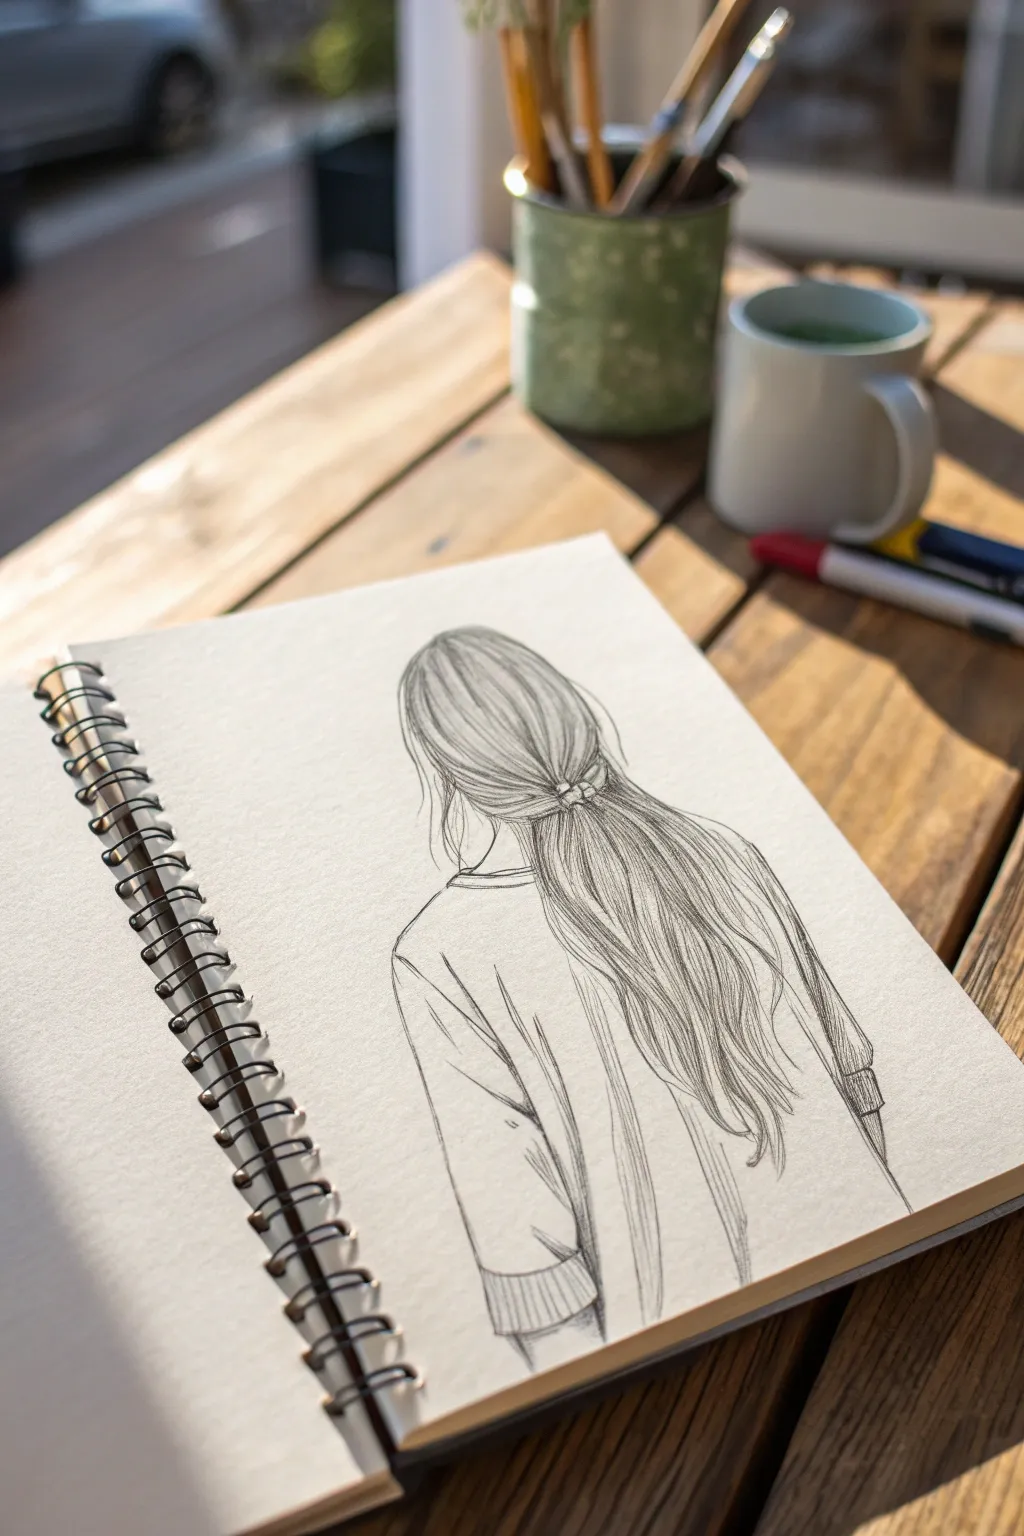
This pencil sketch captures a serene moment of a girl facing away, her long hair cascading gently down her back. The beauty of this piece lies in the fluid, loose strokes that create movement without needing hyper-realistic detail.
How-To Guide
Materials
- Spiral-bound sketchbook (smooth or medium tooth paper)
- HB or 2B graphite pencil (for initial outlines)
- 4B or 6B graphite pencil (for darker shading and texture)
- Kneaded eraser
- Pencil sharpener
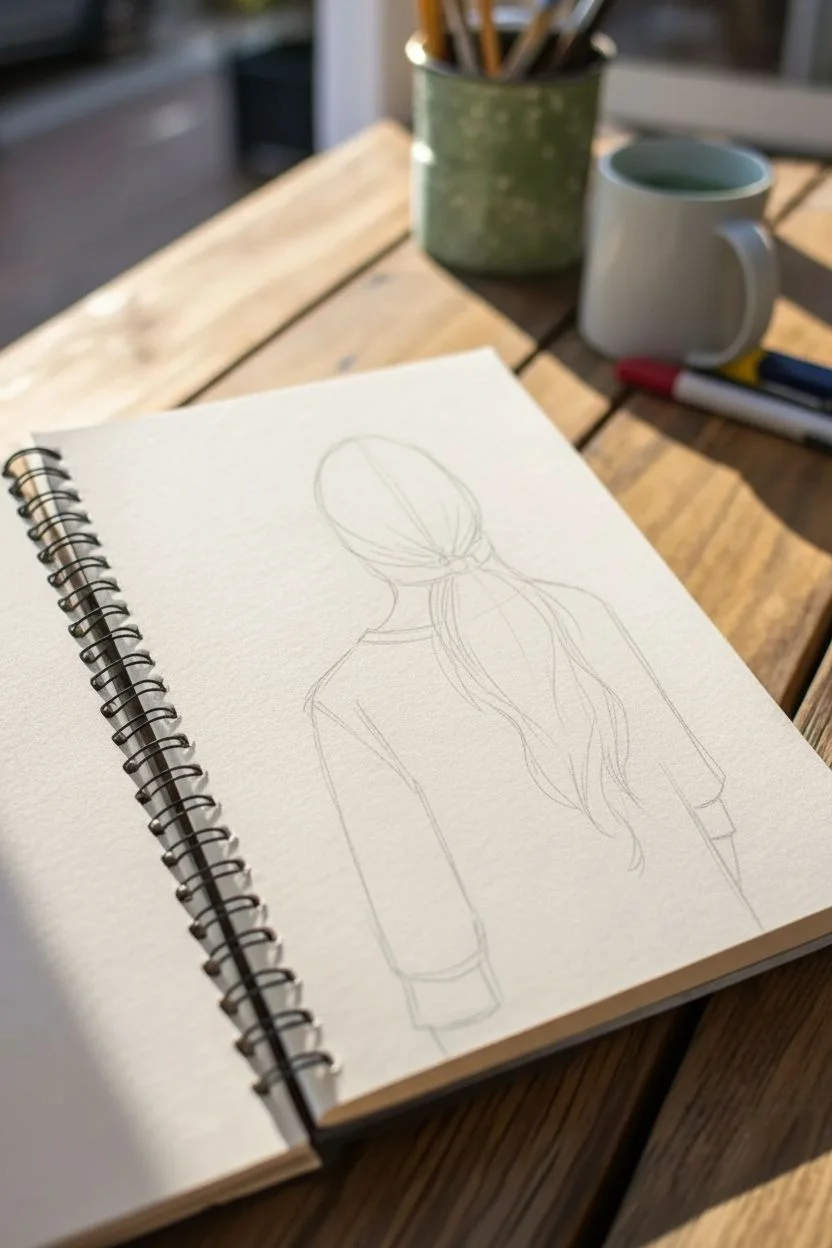
Step 1: Laying the Foundations
-
Outline the head shape:
Begin with your lighter HB pencil. Sketch a soft, slightly elongated oval in the center of your page to represent the back of the head. Don’t press too hard; these lines are just guides. -
Add the shoulders:
Draw the slope of the shoulders extending downwards from beneath the oval. The left shoulder should drop slightly lower than the right if you want a relaxed posture, creating a natural, asymmetrical look. -
Mark the hair tie position:
Decide where the hair is gathered. Place a small horizontal mark or a tiny oval shape at the base of the skull area to indicate where the hair tie will eventually go. -
Rough in the hair length:
Lightly sketch the general perimeter of the hair. Let it flow down past the shoulders, tapering slightly towards the middle or bottom of the back. Think of this as a single mass shape for now. -
Define the torso:
Sketch the straight lines of the torso and the arms at the sides. Keep the lines loose, indicating a loose-fitting sweater rather than tight clothing.
Step 2: Detailing the Hair
-
Start the hair flow:
Switch to your sharper, darker pencil if you wish, or press slightly firmer. Draw long, sweeping strokes starting from the crown of the head down towards the hair tie. These lines should curve slightly to show the contour of the skull. -
Create the gathered effect:
Around your hair tie mark, draw lines that converge. The hair needs to look like it’s being pulled gently inward before spilling out again. -
Draw the lower mane:
From the hair tie downwards, release the strokes. Make them long, wavy, and somewhat uneven. I like to let my hand relax here to get that natural ‘messy’ flow. -
Add strands and flyaways:
Don’t make the hair a solid block. Add individual stray hairs on the outer edges and a few loose strands escaping near the neck to add realism. -
Darken the shadows:
Use a 4B pencil to add depth. Shade the area right underneath the hair tie and the deep crevices where the hair creates shadows against the back. This contrast makes the highlights pop.
Hair Looking Stiff?
Stiff hair often comes from drawing lines that are too parallel. Intentionally crisscross a few strands and vary the pressure on your pencil—heavy at the start of the stroke, lighter at the end.
Step 3: Clothing and Final Touches
-
Define the neckline:
Draw the curved neckline of the shirt just below the hair. It should look like a soft fabric resting on the shoulders. -
Add fabric folds:
Sketch long, vertical creases on the back of the shirt to show the drape of the fabric. Add some bunching lines near the armpits where sleeves naturally wrinkle. -
Texture the cuffs:
At the bottom of the visible sleeve (on the left side especially), draw faint vertical hatching lines to suggest a ribbed texture on the cuff. -
Refine the outlines:
Go over your main contours with a confident, darker line. If any original guide lines are distracting, lightly lift them with your kneaded eraser. -
Clean up highlights:
Use the sharp edge of your eraser to ‘draw’ white lines back into the hair, creating shine stripes across the crown and the thickest part of the tail.
Pro Tip: Smudge It
For softer hair texture, lightly smudge your pencil shading with a blending stump or cotton swab, then draw crisp dark hairs back over the top for depth.
Now you have a serene, custom sketch that perfectly captures a quiet moment
Girl With Messy Bun and Loose Flyaways
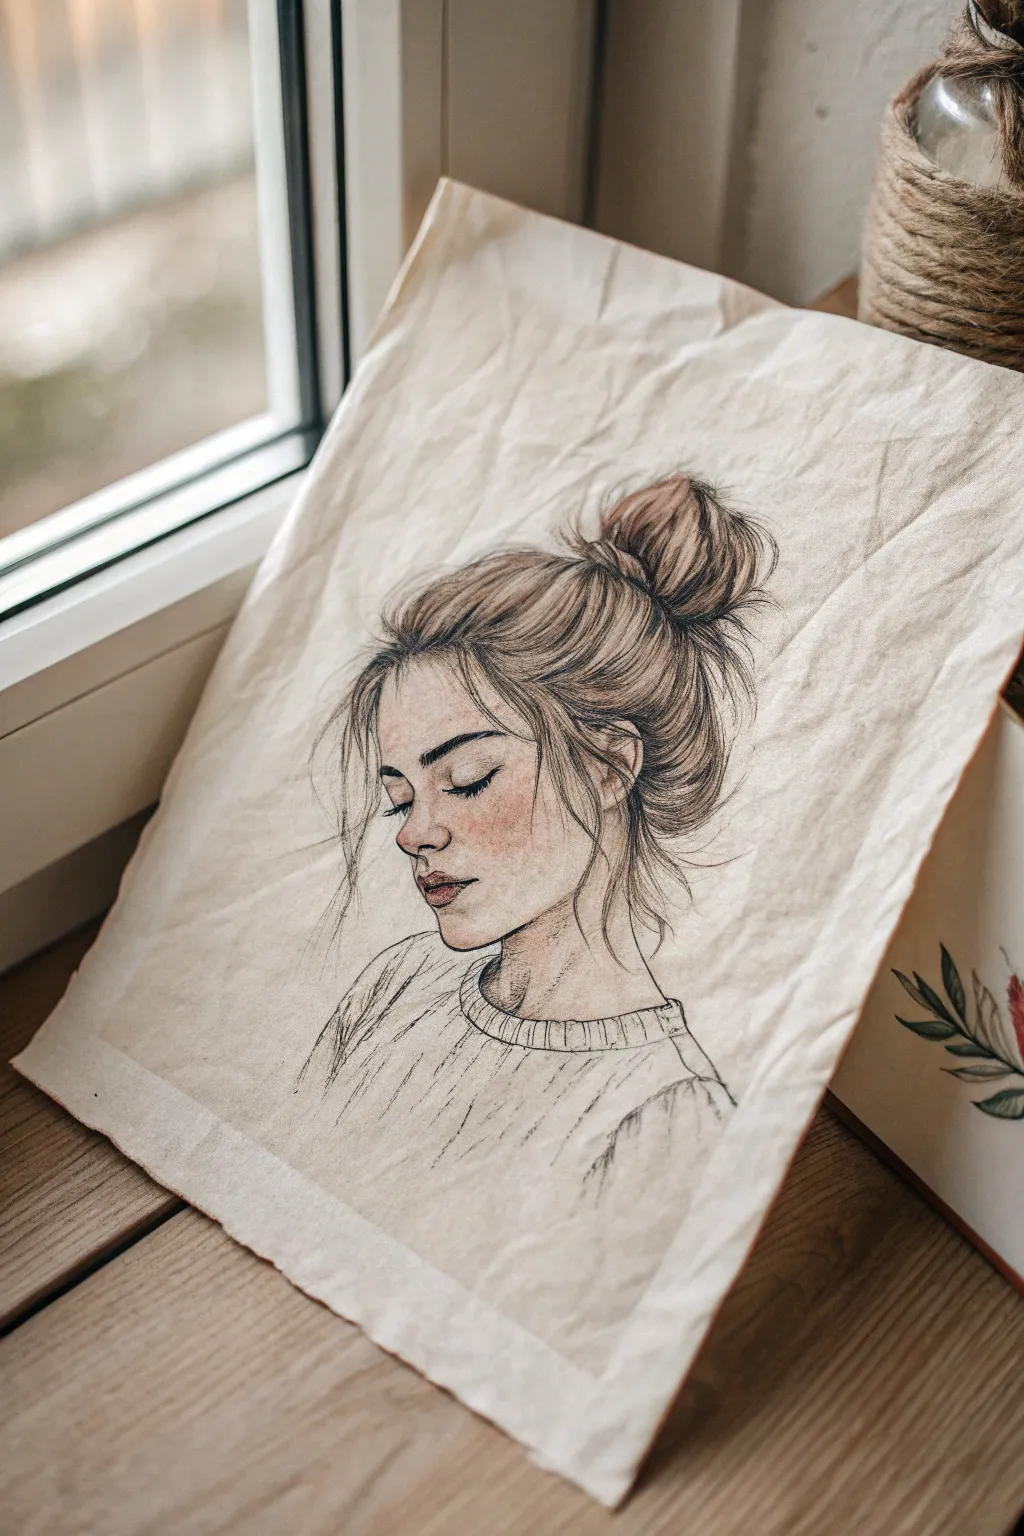
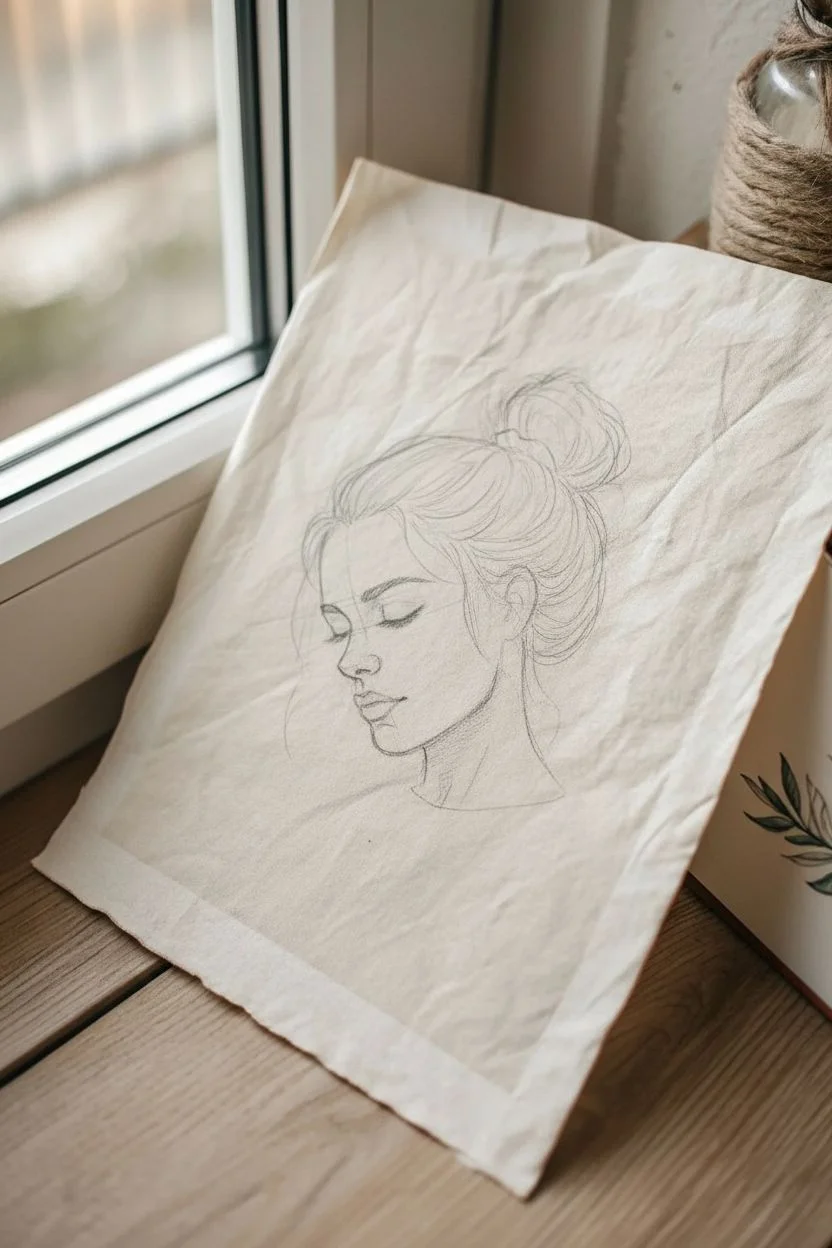
Capture the quiet beauty of a moment of reflection with this delicate mixed-media sketch. Using soft pencil lines and subtle hints of color on textured paper, you will recreate the effortless elegance of a girl with a tousled messy bun.
Step-by-Step
Materials
- Textured off-white paper (parchment style or heavy drawing paper)
- HB graphite pencil (for initial outlines)
- 2B and 4B graphite pencils (for shading and details)
- Fine liner pen (dark brown or sepia, 0.1mm)
- Colored pencils (blush pink, mahogany, soft brown)
- Blending stump or cotton swab
- Kneaded eraser
Step 1: Laying the Foundation
-
Paper Preparation:
To achieve the rustic aesthetic shown in the photo, crumple your piece of paper gently into a ball and then smooth it back out flat. This creates organic creases and a vintage texture before you even start drawing. -
Head Shape Outline:
Using your HB pencil with a very light hand, sketch an oval for the head. Add a slight tilt to the left to suggest a relaxed posture. Mark horizontal guidelines for the eyes, nose, and mouth. -
Profile Definition:
Refine the left side of the face. Sketch the curve of the forehead, dipping in for the eye socket, then out for a soft, rounded nose tip. Continue down to define the lips and a gentle chin line. -
Facial Features:
Draw the closed eye using a thick, curved lash line that sweeps downward. Add a simple curved line for the eyebrow, keeping it soft. Sketch the nose nostril and the parting line of the lips.
Step 2: Creating the Hairstyle
-
Hairline and Volume:
Sketch the hairline, keeping it somewhat irregular. Draw large, sweeping curves pulling back from the forehead and nape of the neck towards the crown to establish the main volume of the hair. -
The Messy Bun:
At the crown of the head, draw a rounded, irregular shape for the bun. Use looping, circular strokes to mimic hair wrapped around itself. Don’t make it a perfect circle; let it look loose and organic. -
Adding Texture with Graphite:
Switch to your 2B pencil. Fill in the hair with long strokes that follow the direction of the strands—from the roots towards the bun. Leave some areas lighter to suggest shine. -
Flyaways:
This is crucial for the ‘messy’ look. Use quick, light flicks of the pencil to draw loose strands escaping the bun and falling near the face. Let some cross over the cheek and forehead.
Keep it Loose
Hold your pencil further back, away from the tip, when drawing the flyaways. This reduces control slightly and helps create more natural, random curves.
Step 3: Adding Depth and Color
-
Deepening Shadows:
With the 4B pencil, darken the area right behind the ear, the center of the bun where the hair is tightest, and the lash line. This contrast makes the drawing pop. -
Blushing the Cheeks:
Take a blush pink colored pencil and very lightly shade the cheek area and the tip of the nose. Use a circular motion to avoid harsh lines. -
Lip Tint:
Apply a touch of mahogany or deep pink to the lips, concentrating the color in the center and fading out toward the edges. -
Hair Nuances:
Layer a soft brown colored pencil over the graphite in the hair. This adds warmth without overpowering the sketch style. I find blending this slightly with a stump gives a lovely softness. -
Clothing Sketch:
Draw the neckline of a knit sweater using loose, broken lines. Add vertical hatching strokes to suggest the ribbed texture of the fabric. -
Final Ink Touches:
Using a sepia or dark brown fine liner, selectively re-trace the darkest parts: the eyelashes, the nostril, and the deepest crevices of the hair bun. -
Softening Edges:
Use a kneaded eraser to lift some graphite from the high points of the face (cheekbone, nose bridge) to create highlights.
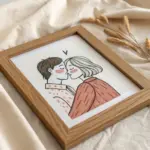
Framing Idea
Instead of a traditional frame, use wooden poster hangers or mount the finished crumpled paper onto a canvas board for a modern, rustic display.
Step back and admire the gentle emotion you’ve captured in your portrait
BRUSH GUIDE
The Right Brush for Every Stroke
From clean lines to bold texture — master brush choice, stroke control, and essential techniques.
Explore the Full Guide
Girl With Braids for Pattern Practice
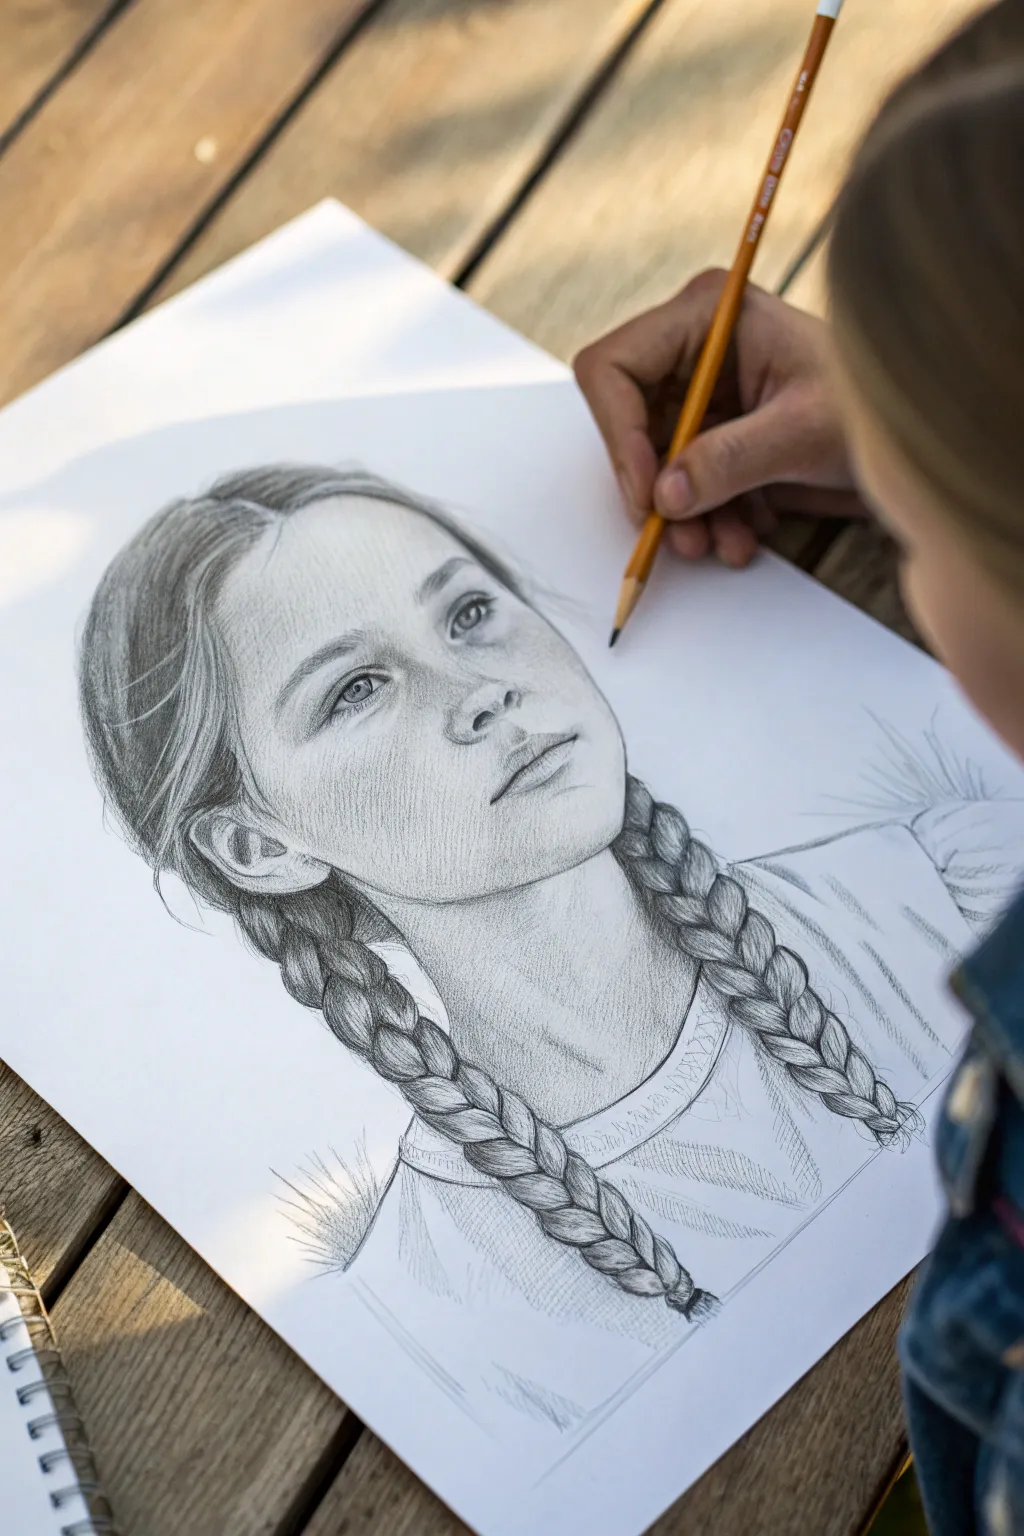
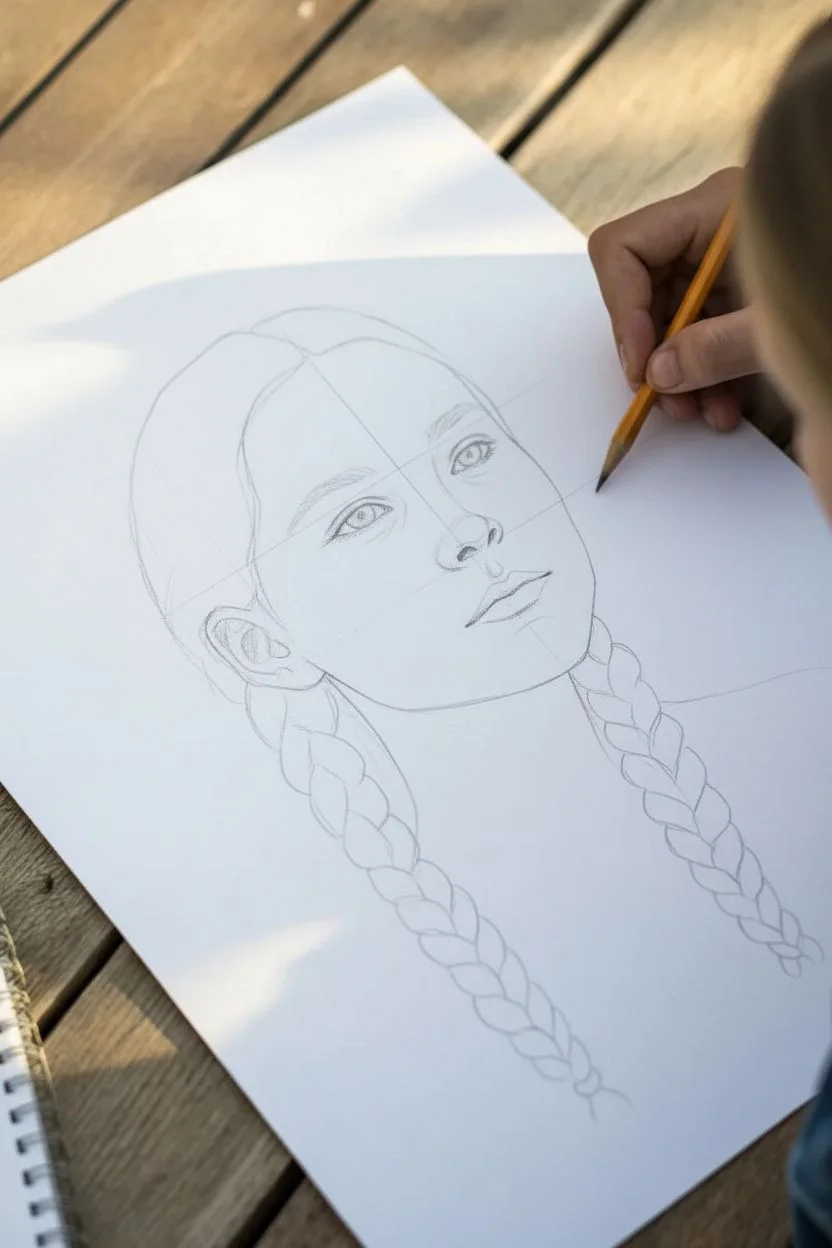
This detailed graphite portrait focuses on capturing the delicate textures of braided hair and soft facial features. It is a fantastic exercise for practicing intricate patterns and subtle shading to create a lifelike appearance.
Detailed Instructions
Materials
- Quality drawing paper or sketchbook (smooth bristol or vellum)
- Graphite pencils (HB for initial lines, 2B and 4B for shading)
- Mechanical pencil (0.5mm) for fine hair details
- Kneaded eraser
- Blending stump or tortillon
- Pencil sharpener
Step 1: Constructing the Framework
-
Establish the head shape:
Begin with a light HB pencil to draw an oval for the head. Add a vertical centerline slightly angled to the right, indicating a three-quarter view, and horizontal guidelines for the eyes, nose, and mouth. -
Map facial features:
Sketch the almond shapes of the eyes specifically on the eye line. Mark the bridge of the nose and the nostril placement. Draw the lips, ensuring the upper lip is slightly thinner than the lower lip. -
Outline the braids:
Draw two long, curved lines extending from behind the ears down to the chest area to guide the braids. Sketch the interlocking ‘Y’ or heart shapes that make up the braid segments loosely along these guide lines.
Mastering Braid Volume
Think of braids as interlocking teardrops. Shade the ends of each ‘teardrop’ heavily where they tuck under the next section, leaving the middle bright.
Step 2: Defining the Eyes and Face
-
Detail the eyes:
Switch to a 2B pencil to darken the pupils and the upper lash line. Leave tiny white circles for the catchlights to make the eyes look alive. -
Form the nose:
Instead of drawing hard lines for the nose bridge, use soft shading on one side to suggest form. Darken the nostrils gently, keeping the edges soft. -
Shade the skin:
Using the side of your HB pencil, apply a light layer of graphite over the shadowy side of the face (left side). Use a blending stump to smooth this out, creating a seamless skin texture. -
Add freckles:
Tap your pencil tip lightly across the nose and cheeks to create subtle freckles. Vary the pressure so some are darker than others for realism.
Fixing Flat Hair
If hair looks like a solid block, you’ve shaded too evenly. Use an eraser to carve out highlights and re-establish individual strands with a sharp pencil.
Step 3: Rendering the Hair
-
Establish hair flow:
Draw the main hair mass on the scalp, pulling strokes from the part line down toward the ears. Keep your wrist loose to mimic natural hair growth. -
Detail the braid structure:
Go back to your braid outlines. Darken the crevices where the hair sections overlap. This creates the necessary depth to make the braid look three-dimensional. -
Add texture to braids:
Within each braid segment, draw fine, curved lines following the woven pattern. I find a mechanical pencil works best here to keep the lines crisp and distinct. -
Create highlights:
Use your kneaded eraser to lift graphite from the highest centered point of each braid segment. This simulates light hitting the shiny curves of the hair. -
Refine the hairline:
Add wispy baby hairs around the temples and forehead. These shouldn’t be perfect distinct lines but rather soft suggestion of flyaways.
Step 4: Clothing and Final Touches
-
Sketch the neckline:
Draw the curved collar of the t-shirt. Add a secondary line for the stitching detail around the neck. -
Suggest fabric folds:
Use loose, angular hatching to indicate wrinkles in the shirt fabric. Keep this shading much looser and rougher than the face to keep the focus on the portrait. -
Deepen contrasts:
Take a 4B pencil and darken the deepest shadows—under the chin, inside the braids, and the pupils. This high contrast will make the drawing pop off the page. -
Clean up:
Erase any remaining construction lines or smudges on the background paper to leave a clean, professional finish.
Take a moment to admire how the simple repeating pattern of the braids brings so much character to your portrait
Girl With Pigtails and a Playful Pose
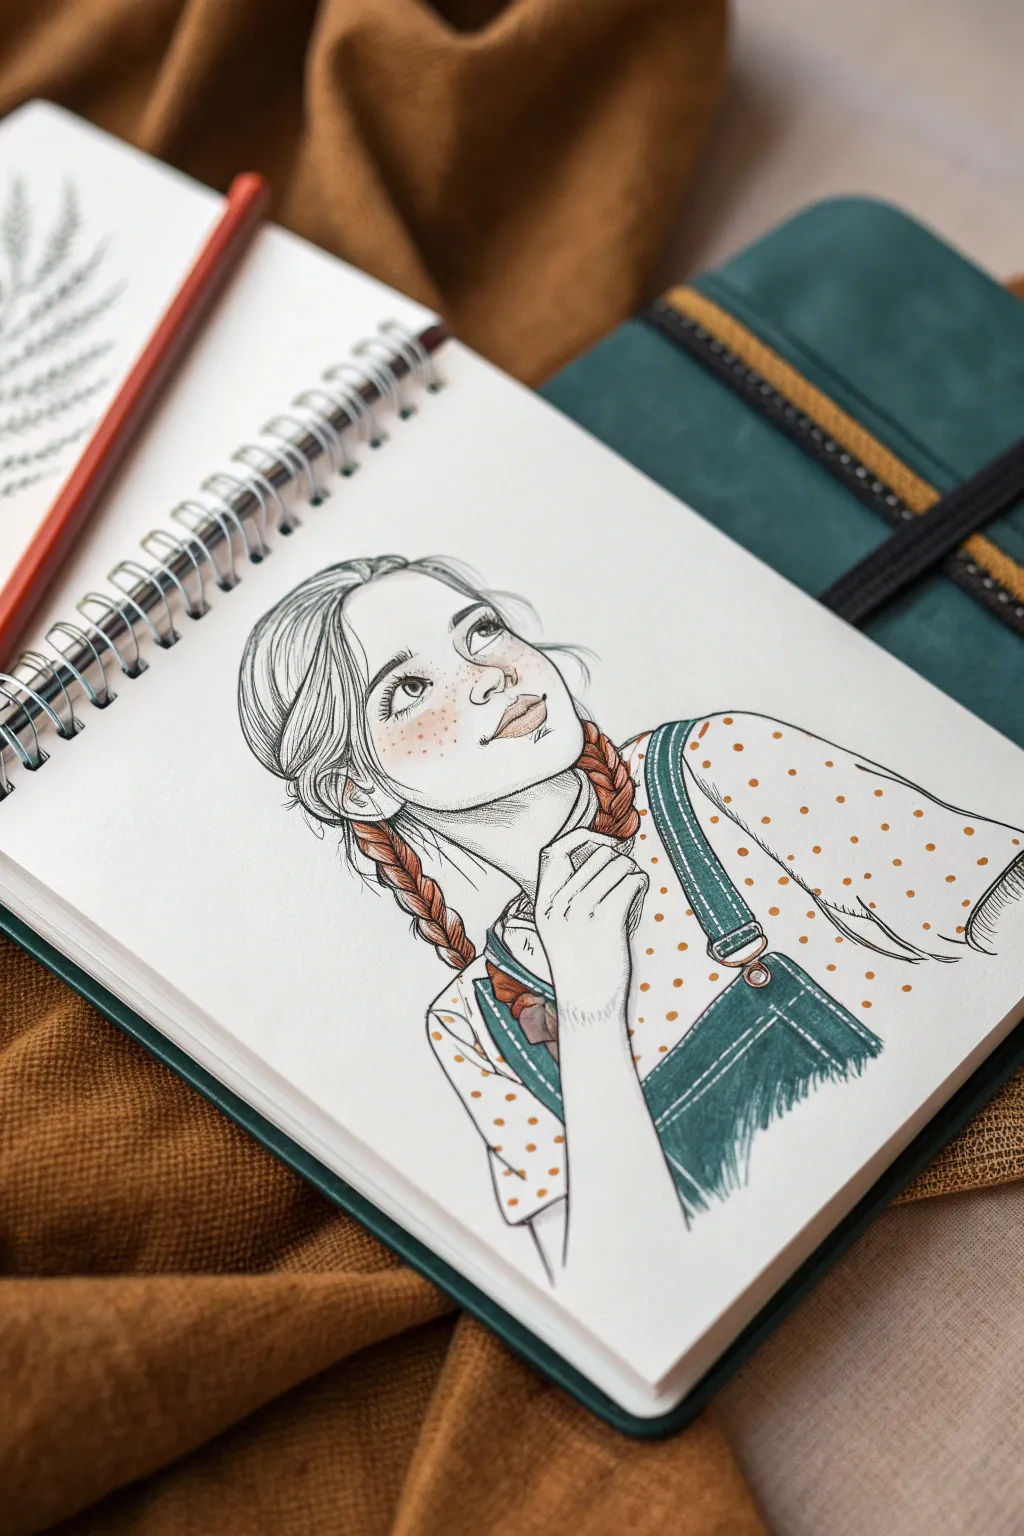
Capture the charm of youthful curiosity with this delicate ink and marker sketch of a girl looking skyward. Combining clean linework with soft touches of color makes for a sweet, stylized portrait perfect for your sketchbook.
Step-by-Step
Materials
- Spiral-bound sketchbook (heavyweight mixed media paper suggested)
- Pencil (HB or H for initial sketch)
- Kneaded eraser
- Fine liner pens (Black, sizes 0.1mm and 0.3mm)
- Alcohol-based markers or colored pencils (Skin tone, burnt orange/red, teal green, light yellow)
- White gel pen (optional for highlights)
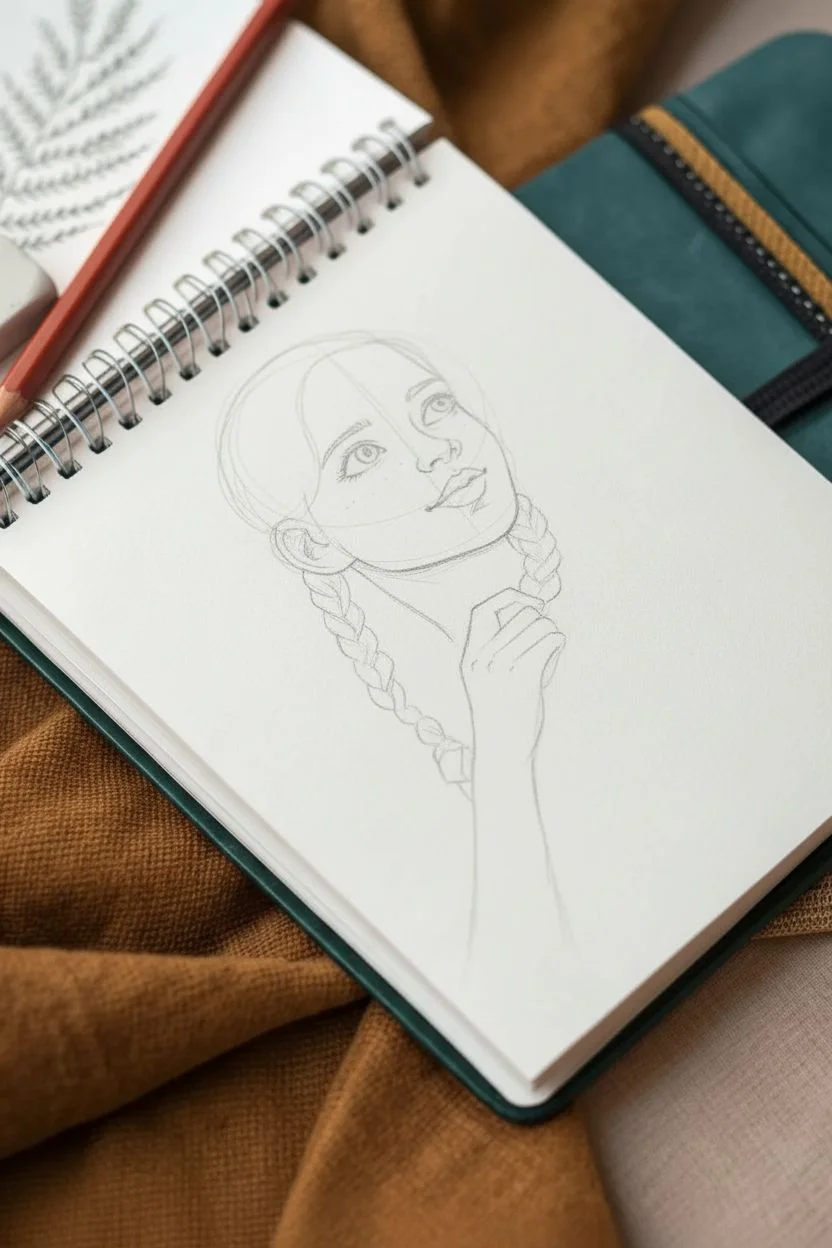
Step 1: Drafting the Structure
-
Map the head shape:
Start with a light circle for the cranium and jawline. Keep the chin slightly rounded but tapered. Position the head at a slight upward tilt, so the jawline is prominent. -
Establish guidelines:
Draw faint facial guidelines. The eye line should curve upward to match the head tilt. Mark the center line of the face slightly off-center to suggest a 3/4 view. -
Draft the features:
Sketch large, expressive almond-shaped eyes looking up and to the right. Place a small, button nose just below the eye line and full lips slightly parted. -
Outline the braids:
Draw the hair swept back loosely from the forehead. Sketch two thick braids coming down over the shoulders. Don’t worry about individual strands yet; focus on the interlocking ‘heart’ shapes of the braid structure. -
Sketch the pose and outfit:
Add the neck and shoulders. Draw one hand brought up near the chin in a thoughtful gesture. Sketch the straps of overalls over a t-shirt.
Step 2: Refining with Ink
-
Ink the eyes:
Switch to your 0.1mm fine liner. carefully outline the upper lash line, making it thicker at the outer corners. Draw the iris and pupil, leaving a small white circle for the highlight. -
Detail the face:
Inking the nose and mouth requires a delicate touch; use broken lines for the nose bridge to keep it soft. Outline the face shape, adding the ear on the left side. -
Flowing hair lines:
Use long, confident strokes for the hair pulled back. For the braids, outline the main segments first, then add shorter internal lines to suggest texture and tension in the weave. -
Clothing contours:
Outline the overalls and t-shirt sleeves. Add the distinctive metal clasps on the overall straps. Sketch the hand, keeping the fingers long and elegant. -
Add texture and shadow:
Use fine hatching lines (parallel strokes) under the chin for a shadow. Add tiny dots across the cheeks and nose for freckles. -
Erase pencil marks:
Once the ink is completely dry, gently run your kneaded eraser over the entire drawing to lift the graphite guides.
Fixing Smudged Ink
If you smudge pen ink while erasing, turn it into a shadow or creative shading. You can also carefully paint over it with opaque white gouache or a white gel pen to mask the error.
Step 3: Adding Color
-
Skin tones:
Apply a very pale, warm skin tone marker. Leave the highlights on the forehead and nose uncolored or very light. Add a touch of pink to the cheeks and lips. -
Color the braids:
Use a burnt orange or rust-colored marker for the hair. Focus the color on the braided sections, leaving the top of the head mostly illustrated by line work for a lighter feel. -
Overall straps:
Fill in the overalls with a teal or forest green marker. Use vertical strokes to mimic the texture of denim or corduroy. I like to leave small gaps in the coloring to suggest a worn fabric look. -
Polka dot pattern:
Take a yellow-orange marker and carefully add small polka dots to the t-shirt area. Keep them spaced randomly but evenly. -
Deepen the shadows:
Go back over the braids with a second layer of the rust marker in the crevices where the hair overlaps to create depth. -
Stitching details:
Using a white gel pen or a very fine light gray liner, add tiny dashed lines on the green overalls to look like stitching.
Natural Looking Freckles
For realistic freckles, vary your pressure. Tap the pen tip lightly in a random cluster across the nose bridge and cheeks, avoiding perfect symmetry or identical dot sizes.
Looking at your finished piece, notice how the upward gaze brings a sense of wonder to the entire composition


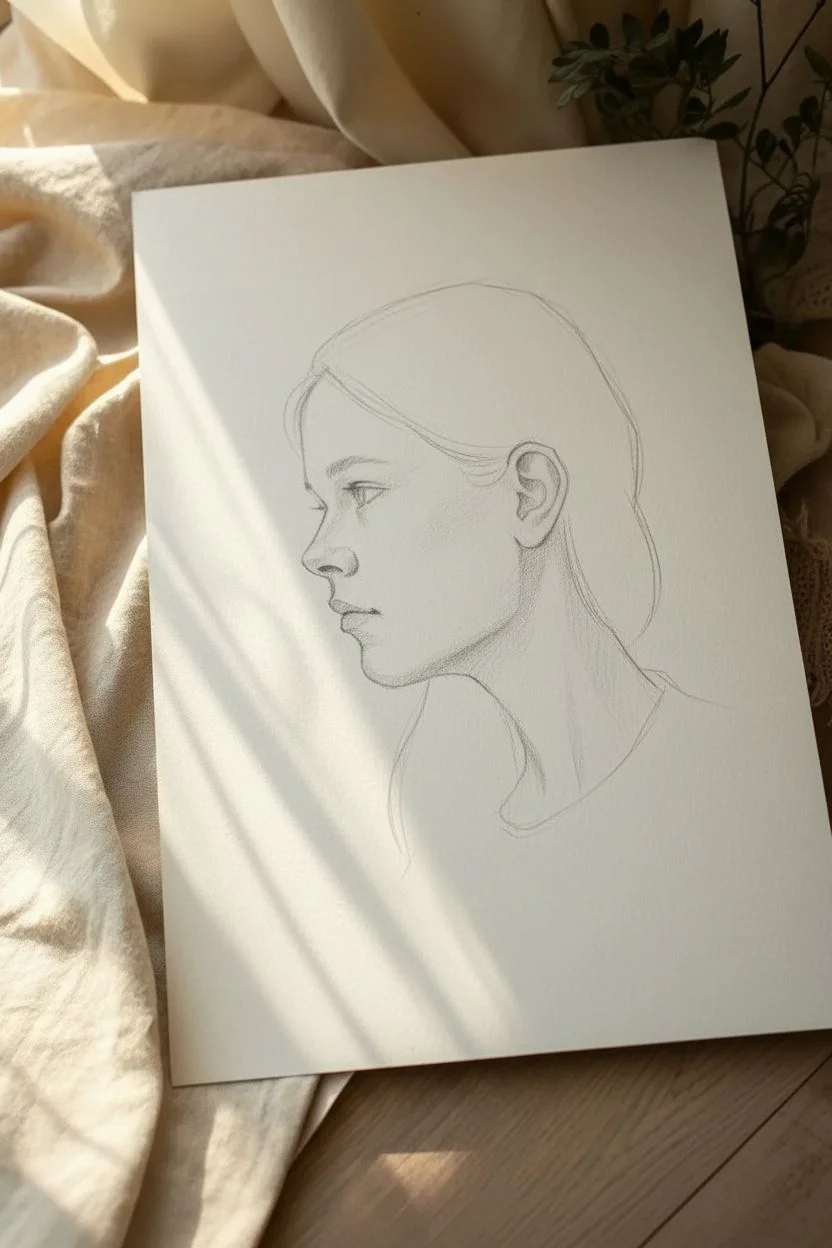
Girl With Wavy Hair and Soft Highlights

Capture a moment of quiet contemplation with this delicate pencil portrait featuring flowing, wavy hair and soft facial details. The contrast between the detailed, sweeping lines of the hair and the minimal shading of the face creates a striking, airy aesthetic.
Step-by-Step Tutorial
Materials
- Sketchbook (medium-tooth paper)
- H or HB pencil (for initial outlines)
- 2B and 4B pencils (for shading and darkening)
- Fine liner or mechanical pencil (optional for precision)
- Kneaded eraser
- Blending stump (optional)
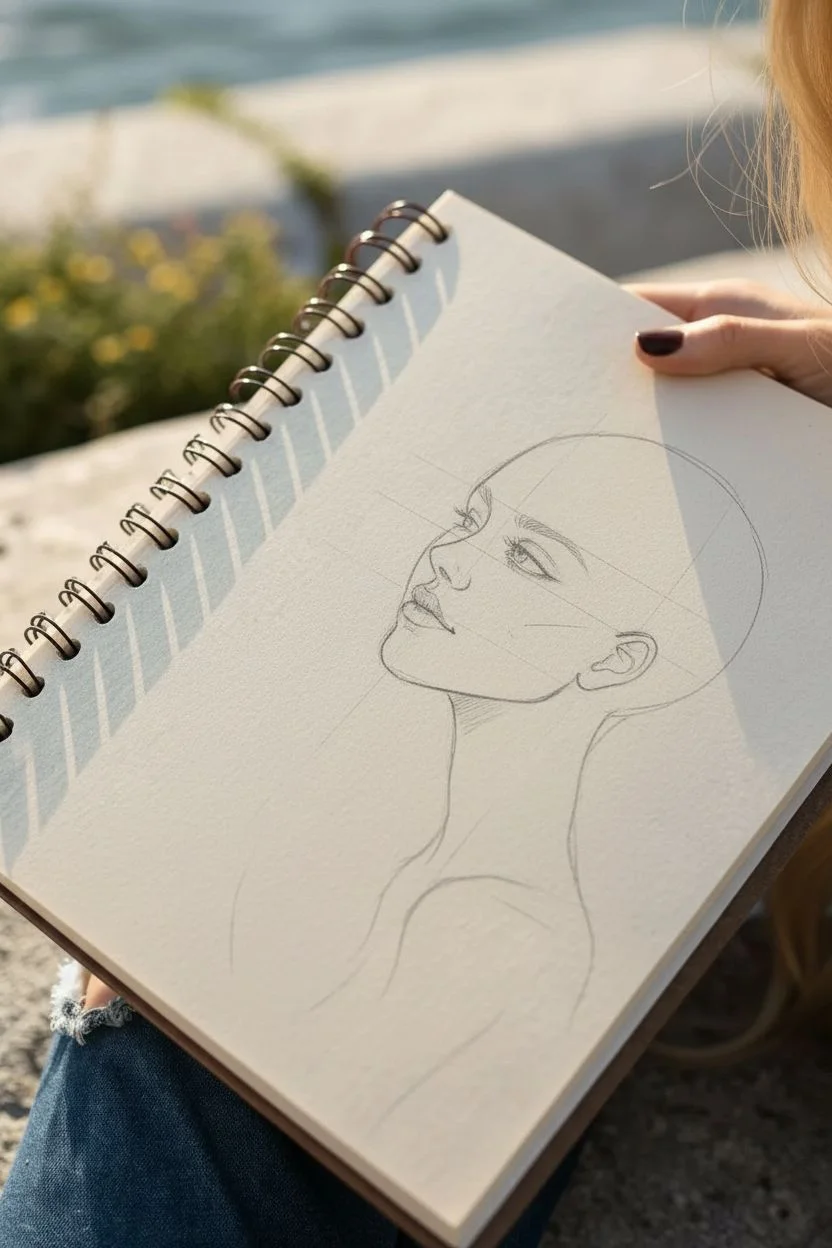
Step 1: Planning the Profile
-
Lay the Foundation:
Start with your H pencil and lightly sketch a circle for the cranium and a curved line extending down for the jawline. This will anchor your profile. -
Map the Facial Features:
Draw faint horizontal guidelines across the face to mark the positions of the eyes, the base of the nose, and the mouth. Keep these lines very light as you’ll erase them later. -
Define the Profile Edge:
Using your guide, slowly carve out the silhouette of the face. Sketch a slightly upturned nose, full lips, and a defined chin. The nose bridge should have a gentle slope. -
Position the Ear and Neck:
Place the ear slightly below the eye line, roughly halfway back on the head. Extend a graceful, long neck line down from under the jaw and the back of the head.
Hair Flow Secret
Draw hair strokes from the shoulder upward into the wave sometimes. This reverse stroke creates a tapered end that looks more natural.
Step 2: Drawing the Features
-
The Eye Detail:
Sketch the eye in profile, resembling a sideways ‘V’ shape. Add a defined iris and pupil looking upward or straight ahead. Thicken the upper lash line significantly for a bold look. -
Adding Lashes and Brows:
Draw long, individual eyelashes curving outward. Above the eye, sketch a structured eyebrow with individual hair strokes, arching it gently for a relaxed expression. -
Refine the Lips and Nose:
Darken the nostril and the corner of the mouth. Add a tiny vertical hatching line on the lips to suggest texture without outlining them fully. -
Sprinkle Freckles:
Take a sharper pencil (HB or mechanical) and gently dot speckles across the nose bridge and cheeks. Vary the pressure so some are darker and some are faint.
Step 3: Flowing Hair Texture
-
Outline the Hair Mass:
Draw the general shape of the hair blowing backward. Start from the forehead hairline and sweep large, S-shaped curves down past the shoulders. -
Establish the Strands:
Switch to a 2B pencil. Begin drawing long, continuous lines that follow the wavy flow of your outline. Don’t lift your pencil too often; long strokes create fluidity. -
Create Depth with Shadows:
Identify the areas where hair tucks behind the ear or overlaps. Darken these shadow pockets with a 4B pencil to push them into the background. -
Detailing the Waves:
Fill the hair sections with repetitive curved hatching lines. Keep the ‘hills’ of the waves lighter and the ‘valleys’ darker to create a shiny, three-dimensional effect. -
Add Flyaways:
For a realistic, windblown look, draw several loose, unruly strands escaping the main mass of hair at the forehead and nape of the neck.
Add a Pop of Color
Use a single watercolor wash or a colored pencil in a soft pastel shade (like blush pink) on just the cheek or lips for a stylish accent.
Step 4: Final Touches
-
Neck Shading:
Add very light diagonal shading on the neck, right under the jawline, to cast a shadow and separate the head from the neck. -
Darken Key Lines:
Go over your main profile line, the eye, and the deepest hair shadows one last time with your darkest pencil to make the drawing pop off the page. -
Clean Up:
Use your kneaded eraser to lift away any stray construction lines or smudges around the face, keeping the skin tone bright and untouched.
Now you have a serene, airy portrait that beautifully captures motion in a still image
Girl With Curly Hair Volume Study
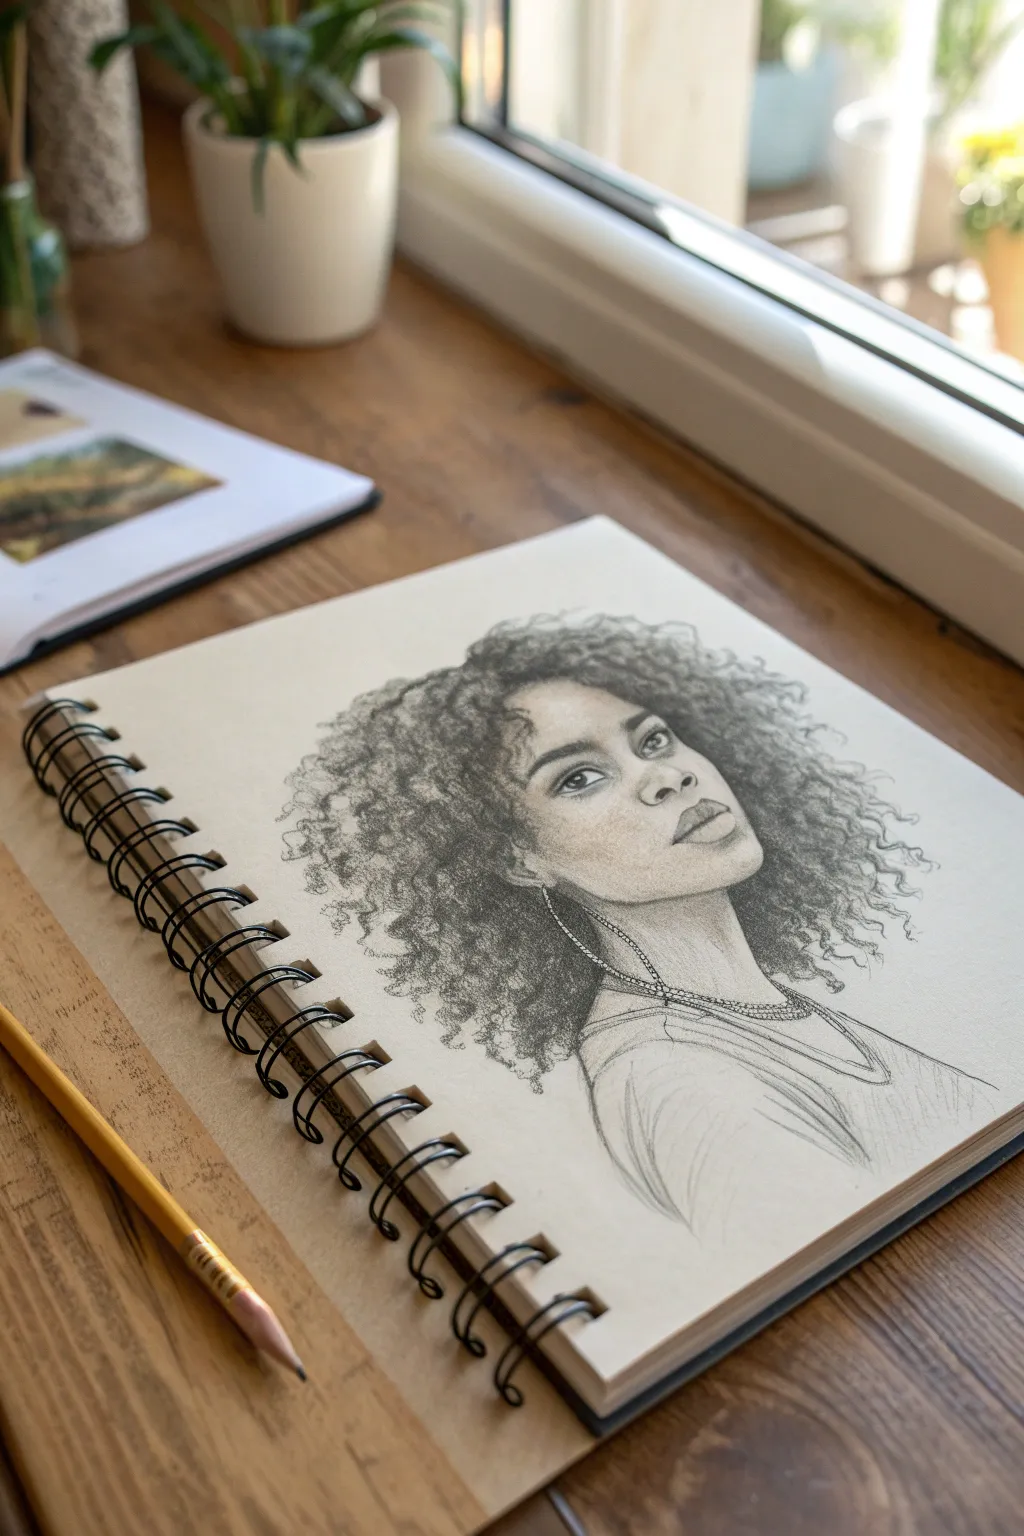
Capture the beauty of natural texture with this pencil portrait focused on volume and soft light. You’ll learn to build up dense curls without drawing every single strand, creating a striking and soulful expression.
Detailed Instructions
Materials
- Spiral-bound sketchbook (medium tooth paper)
- Graphite pencils (HB, 2B, 4B, and 6B)
- Kneaded eraser
- Blending stump or tortillon
- Mechanical pencil (0.5mm HB) for fine details
Step 1: Structuring the Face and Volume
-
Establish the head shape:
Begin with a light oval for the face, keeping in mind the slightly upward angle of the chin. Sketch a faint guideline down the center of the face to help align features later. -
Map out the hair mass:
Instead of drawing individual hairs, drawn a large, cloud-like outline around the head to distinct the boundaries of the curls. Go big—the volume is the key feature here. -
Place facial features:
Use your HB pencil to lightly mark the eye line, nose bottom, and mouth. The eyes should be looking slightly upward and to the side, matching the head tilt through the centerline. -
Refine the jawline:
Define the jaw and neck. Since the head is tilted back slightly, the neck will appear longer and the chin more prominent. Add a light curve for the collarbone area.
Muddy Shading?
If hair looks like a solid blob, you’ve over-blended. Re-introduce texture with sharp 4B pencil scribbles and lift crisp highlights with your eraser.
Step 2: Shading the Features
-
Detail the eyes:
Using a mechanical pencil or sharpened 2B, draw the iris and pupil. Leave a tiny white spot for the catchlight to bring them to life. Shade the upper eyelid crease darker to create depth. -
Sculpt the nose:
Avoid hard outlines for the nose. Instead, use soft shading on the sides and under the tip to suggest form. The nostrils should be the darkest points here. -
Render the lips:
Outline the lips lightly. Shade the upper lip slightly darker than the lower lip. Add a small shadow beneath the bottom lip to make it look full and protruding. -
Add facial shadows:
With an HB pencil, lightly shade the side of the face away from the light source. I like to blend this gently with a stump to keep the skin looking smooth compared to the textured hair.
Step 3: Building the Curls
-
Establish dark zones:
Take your 4B or 6B pencil and identify the darkest areas of the hair—usually right behind the ears and close to the neck. Lay down heavy graphite here to create a base of depth. -
Create texture with scribbling:
Use a loose, circular scribbling motion (scumbling) to fill the main volume of the hair. Vary your pressure to create varied tones, keeping the edges soft and fluffy. -
Define individual ringlets:
Switch to a 2B pencil. Look for key curls generally on the outer perimeter and near the forehead. Draw specific ‘S’ curves and loops here to suggest defined ringlets emerging from the mass. -
Lift out highlights:
Take your kneaded eraser and mold it into a point. Dab and drag it through the hair mass to lift graphite, creating soft, light-catching highlights on the curves of the curls. -
Add flyaways:
Using a sharp mechanical pencil, draw very fine, stray hairs breaking the outer silhouette. This is crucial for realism; perfect hair looks unnatural.
Golden Ratio
Try drawing the hair even bigger! Exaggerating the volume ratio between hair and face can make the portrait feel more fashionable and stylistic.
Step 4: Final Touches and Accessories
-
Draw the earring:
Add the long, dangling earring using firm, dark lines. Ensure it hangs vertically, responding to gravity, regardless of the head’s tilt. -
Sketch the clothing:
Keep the clothing sketch loose and minimal. Use quick, sweeping strokes to suggest the neckline and shoulders without drawing attention away from the face. -
Deepen contrast:
Do a final pass with your 6B pencil. Darken the pupils, the corners of the mouth, the deepest hair shadows, and the necklace line to make the drawing pop.
Enjoy the interplay of soft skin tones against the energetic texture of the curls
Girl With Short Hair and Bold Silhouette
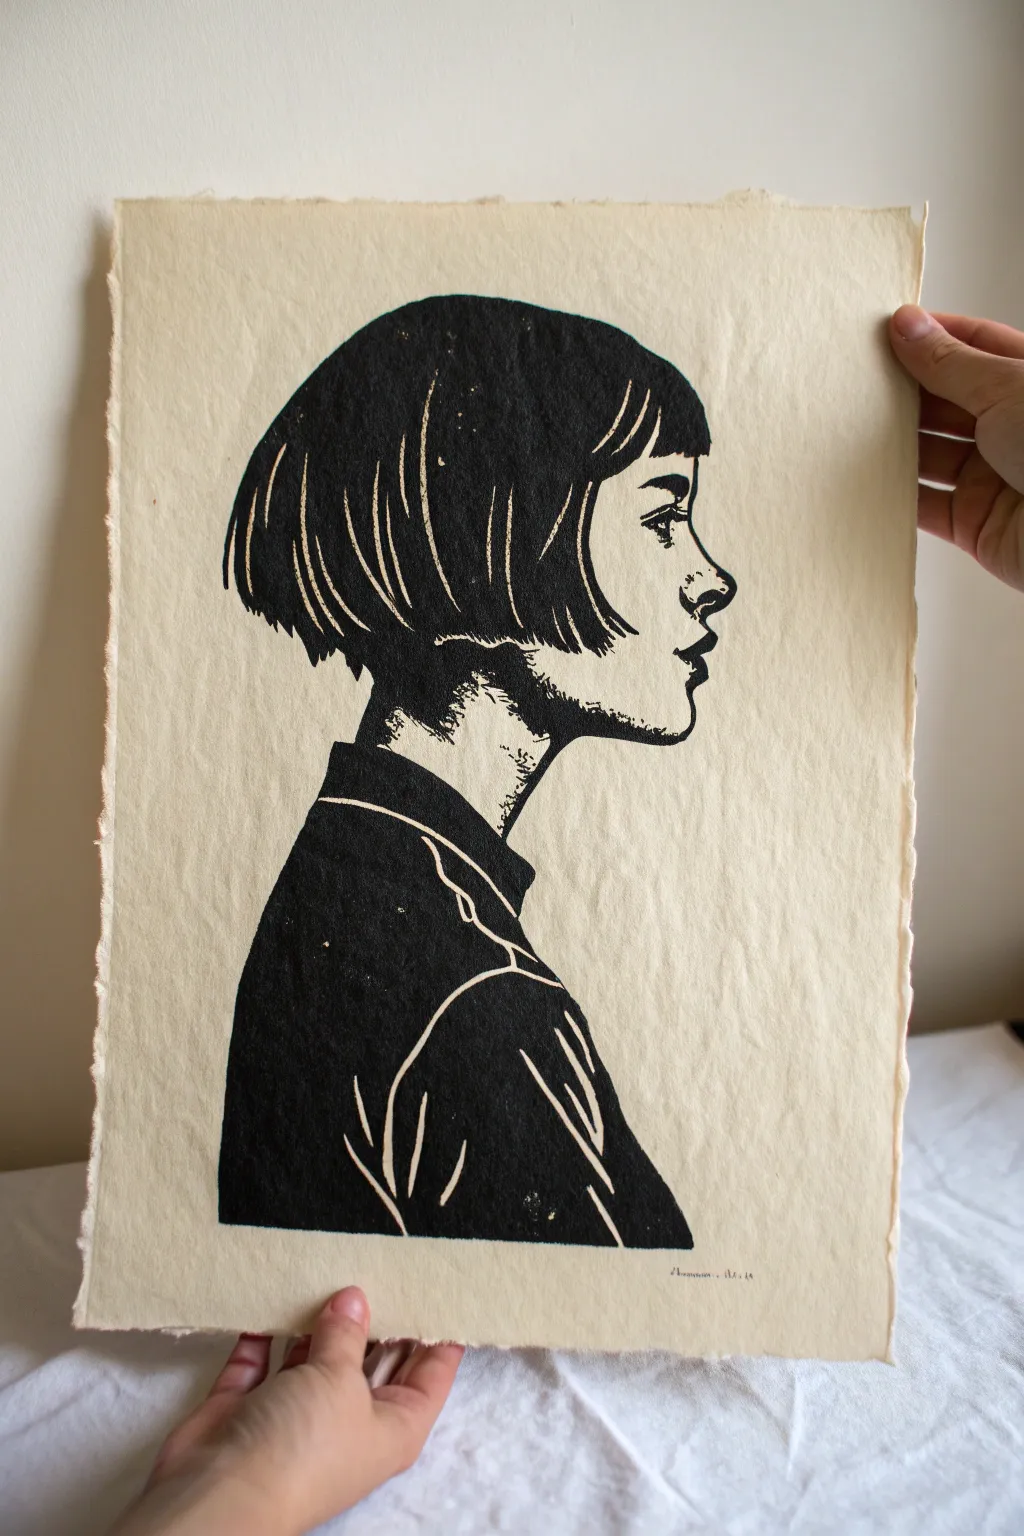
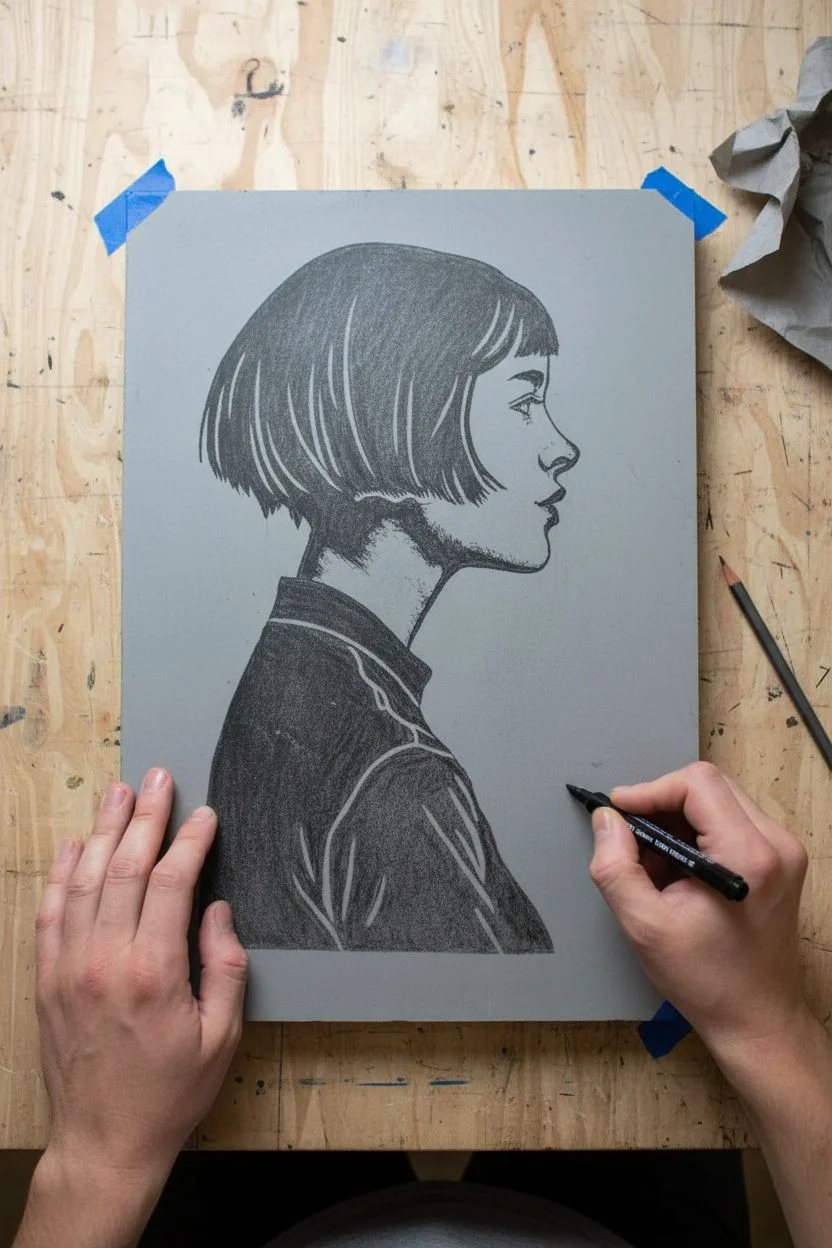
Capture the stark beauty of a high-contrast silhouette with this linocut-inspired project. Using block printing techniques allows you to create sharp lines and deep blacks that give this profile portrait its distinctive, graphic impact.
Step-by-Step
Materials
- Soft-cut linoleum block (at least 5×7 inches)
- Linoleum cutter set (needs V-gouge and U-gouge blades)
- Block printing ink (black, oil-based or water-soluble)
- Brayer (rubber roller)
- Smooth printmaking paper (cream or off-white, like Rives BFK or mulberry)
- Baren or wooden spoon (for burnishing)
- Pencil and tracing paper
- Carbon transfer paper
- Glass or acrylic sheet (for rolling ink)
- Blue painter’s tape
Step 1: Drafting and Transfer
-
Sketch the profile:
Begin by sketching the side profile of a girl on a piece of paper. Focus on the simple shapes: the curve of the nose, the line of the lips, and the distinctive bob haircut. Keep the details minimal, as we are aiming for a graphic look. -
Define light and dark:
Shade your sketch heavily with a pencil to plan your cuts. Decide exactly which areas will remain black (the hair mass, the shirt, the eye detail) and which will be white (the skin, the hair highlights). This ‘map’ is crucial. -
Transfer to the block:
Place a sheet of carbon paper face-down on your linoleum block, then tape your sketch on top. Trace over your lines firmly with a pencil. Remember, the final print will be a mirror image of your carving, so if direction matters, flip your image before tracing. -
Reinforce the lines:
Once the carbon transfer is done, I like to go over the faint lines on the grey block with a permanent marker. This prevents the design from smudging while you work and makes it very clear where to cut.
Step 2: Carving the Block
-
Start with the outline:
Using a fine V-gouge tool, carve carefully along the very outer edge of your marker lines. Outline the entire silhouette first to separate the positive space (the girl) from the negative space (the background). -
Detail the hair:
Switch to your finest V-tool to create the texture of the hair. Carve thin, confident sweeping lines downward from the crown and bangs. These carved lines will remain white, creating the highlighted strands against the black mass. -
Carve the facial features:
For the eye, nose, and lips, use a very steady hand and shallow cuts. You want to remove the ‘skin’ area, leaving thin ridges for the eyelashes and the outline of the profile. Be conservative here; you can always carve more away later. -
Clear the background:
Change to a wider U-gouge tool to remove the large areas of the background. Always cut away from your body and your other hand. -
Address the clothing:
Draft the folds of the shirt. Carve bold, fluid lines to suggest wrinkles in the fabric. Keep the majority of the shirt solid to anchor the bottom of the composition with heavy black tones. -
Clean up the edges:
Inspect the non-printing areas (the background) for any high ridges that might accidentally catch ink. Shave these down flat.
Clean chatter marks
If you see unwanted rogue lines in the background (chatter), carefully trim those ridges down before your next print, or wipe ink off them with a rag before pressing.
Step 3: Inking and Printing
-
Prepare the ink:
Squeeze a small line of block printing ink onto your glass or acrylic slab. Use the brayer to roll it out, lifting and rolling in different directions until you hear a consistent ‘velcro’ sizzling sound. -
Ink the block:
Roll the inked brayer over your carved block. Apply thin, even layers rather than one thick glob. Build up the opacity until the raised surfaces appear shiny and fully coated. -
Position the paper:
Carefully align your printmaking paper over the inked block. Once the paper touches the ink, do not shift or slide it, or the image will blur. -
Burnish the print:
Using a baren or the back of a wooden spoon, rub the back of the paper firmly in small circular motions. Apply pressure evenly across the entire image, paying special attention to the edges and the fine hair details. -
The reveal:
Pick up one corner of the paper and slowly peel it back to reveal your print. This is the most satisfying moment. -
Drying:
Place your wet print on a flat surface or hang it on a drying line. Oil-based inks may take a few days to fully cure, while water-soluble inks dry much faster.
Patchy black areas?
If the solid black areas look salty or speckled, you likely didn’t use enough ink or pressure. Apply a second thin layer of ink and burnish heavily in circles.
Now you have a striking, hand-pulled print ready to be framed
Girl Wearing a Beanie for Simple Head Shapes
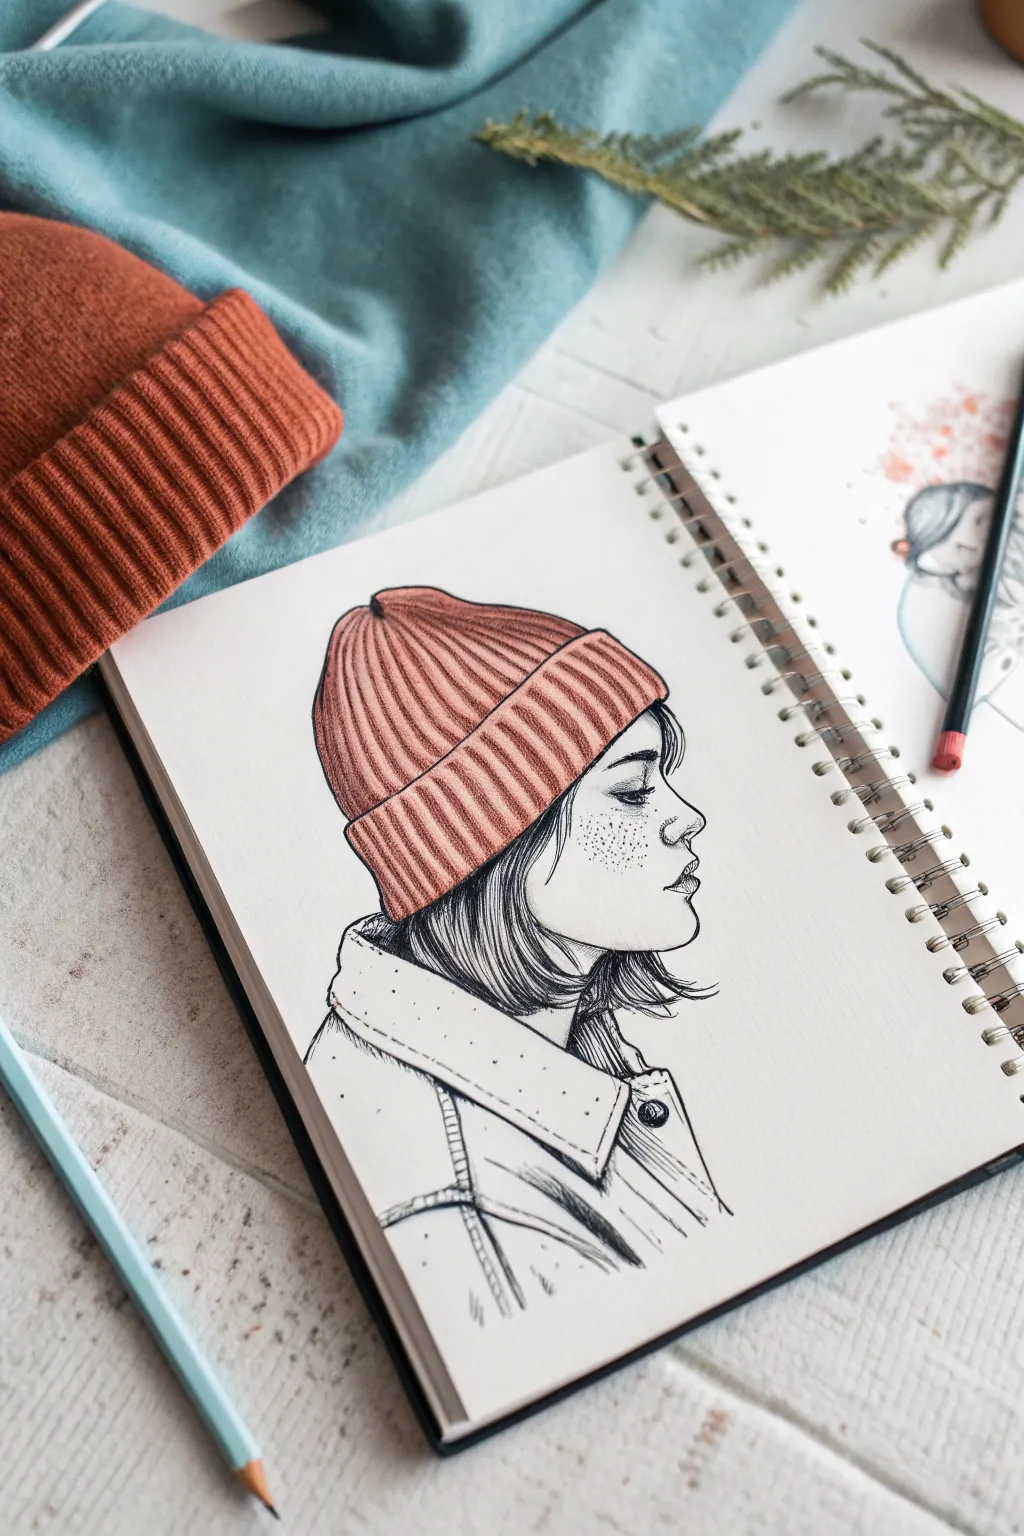
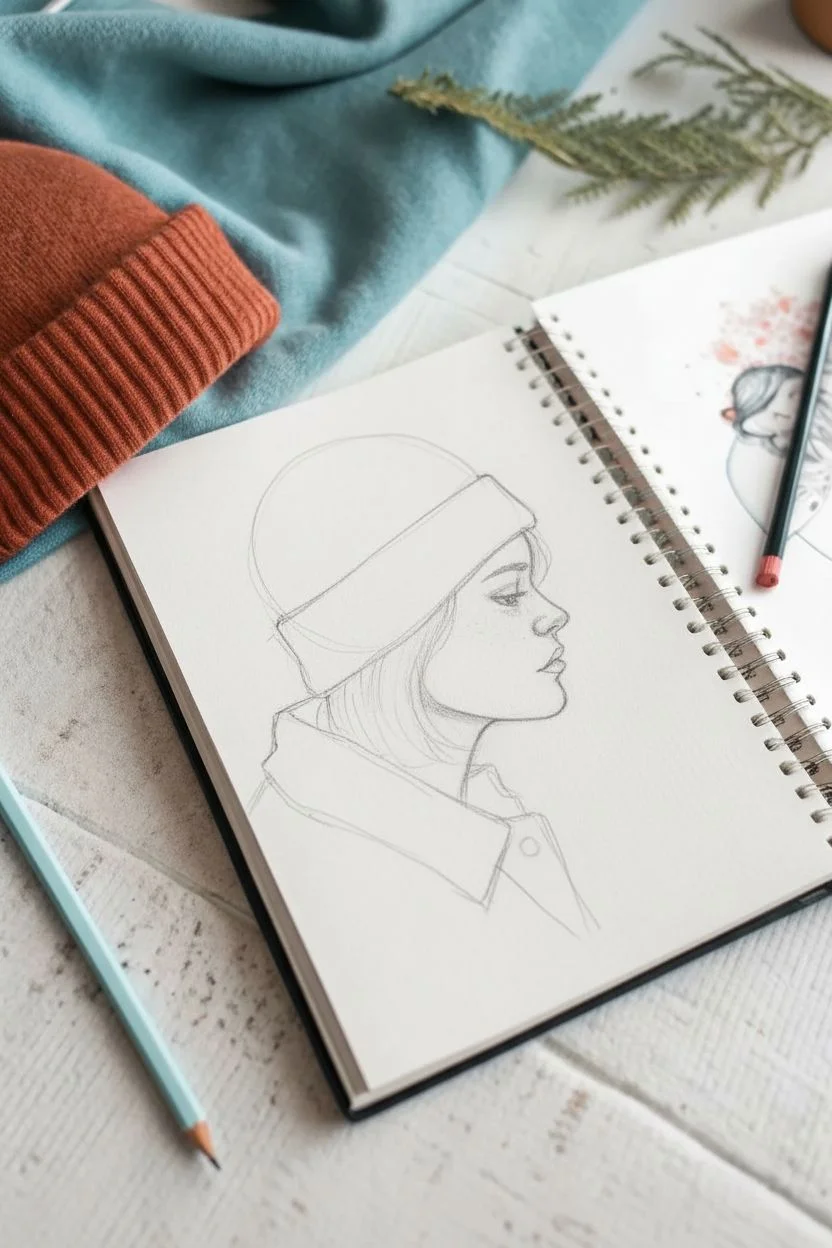
This charming mixed-media sketch captures a side profile with delicate line work and a pop of warm color. By focusing on simple head shapes and textured shading, you will create a stylish character illustration perfect for filling a sketchbook page.
How-To Guide
Materials
- Sketchbook with smooth, heavy paper (mixed media or bristol)
- H or HB graphite pencil for initial sketching
- Kneaded eraser
- Fine liner pens (0.1mm, 0.3mm, and 0.5mm)
- Rust or terracotta colored pencil
- White gel pen (optional for highlights)
Step 1: Laying the Foundation
-
Map the head shape:
Start lightly with your H pencil. Draw a loose circle for the cranial mass and extend a jawline downwards and slightly forward to establish a side profile view. Keep these lines faint as they are just guides. -
Position the beanie:
Visualize the beanie sitting on top of the circle. Sketch a rounded dome shape that sits slightly higher than the actual skull to suggest fluffiness. Draw a wide rectangular band across the forehead area for the folded brim. -
Draft facial features:
Mark the eye line roughly halfway down the face. Sketch a simple side-view nose profile, lips, and chin. The goal is a soft, youthful profile, so keep the nose slightly upturned and the chin rounded. -
Outline the hair and collar:
Sketch the hair falling from beneath the beanie, cutting across the ear area (which is hidden) and ending in a bob cut just above the shoulders. Add the large, structured collar of the coat wrapping around the neck area.
Natural Knit Texture
When drawing the vertical ribbing lines on the hat, don’t make them perfectly parallel. Slight wobbles make the fabric look soft and woolly rather than rigid.
Step 2: Inking the Outlines
-
Define the facial profile:
Switch to a 0.3mm fine liner. Carefully trace the final line of the forehead, nose, lips, and chin. Use a delicate touch for the eyelashes and eyebrows to keep the expression soft. -
Ink the beanie brim:
Outline the folded brim of the hat. Instead of straight lines, use slightly wavy vertical strokes to suggest the ribbed knit texture. Don’t close the top of the brim perfectly straight; let it curve with the head. -
Complete the hat shape:
Ink the top dome of the beanie. Just like the brim, use broken or slightly textured lines rather than a rigid continuous stroke to maintain that soft fabric feel. -
Detail the hair:
Use a 0.1mm pen for the hair. Draw swift, confident strokes following the direction of growth—downwards from the hat and curving slightly outward at the ends. Leave some gaps for highlights. -
Structure the coat:
Outline the coat collar and shoulders with the 0.5mm pen for a heavier visual weight. Add the stitching details along the collar edge using small, dashed lines. -
Erase pencil guides:
Wait a moment for the ink to set completely, then gently gently roll your kneaded eraser over the entire drawing to lift the graphite without damaging the paper surface.
Step 3: Adding Texture and Color
-
Texture the hair:
Take the 0.1mm pen again and darken the areas where the hair tucks behind the jaw or under the hat using tight hatching lines. This adds depth and volume to the bob. -
Stipple the face:
Add freckles across the nose and cheek area using light dots. I find that varying the pressure of the dots makes the freckles look more natural and less uniform. -
Shade the clothing:
Use hatching lines on the coat collar and shoulders to indicate shadow areas, particularly where the collar folds over the main body of the jacket. -
Color the beanie brim:
Grab your rust-colored pencil. Fill in the brim using vertical strokes that mimic the ribbing. Press harder in the crevices of the ribbing to create natural dimension. -
Color the beanie dome:
Color the top part of the hat with the same pencil. Use curved strokes that follow the roundness of the head. Keep the color slightly lighter near the top left to suggest a light source. -
Enhance texturing:
Go back over the colored pencil with your 0.3mm black pen. Add distinct vertical lines over the color to emphasize the heavy knit ribbing of the fabric. -
Final touches:
Add a button detail to the coat if you haven’t already, and deepen any final shadows under the chin or hat brim to make the profile pop off the page.
Pen Smearing?
If your colored pencil drags or smears the ink lines underneath, insure the ink is 100% dry, or apply the pencil layer first and ink the texture lines on top.
Enjoy the contrast between the crisp ink lines and the warm, textured pencil shading on your finished character sketch
Girl in a Cap Adjusting the Brim
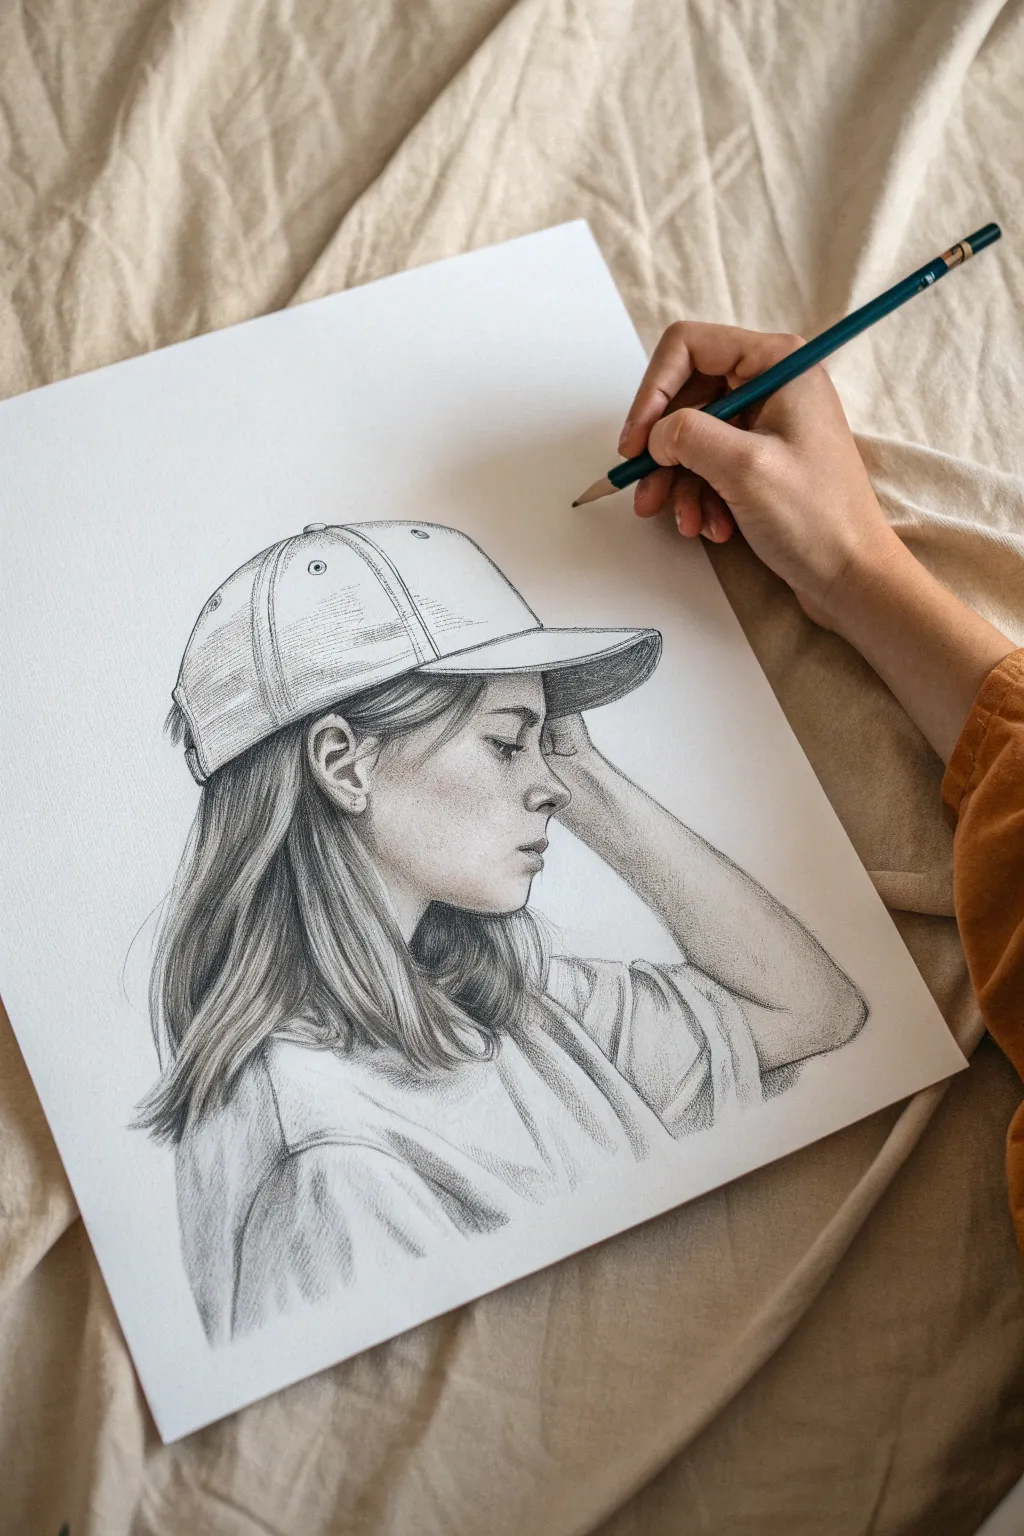
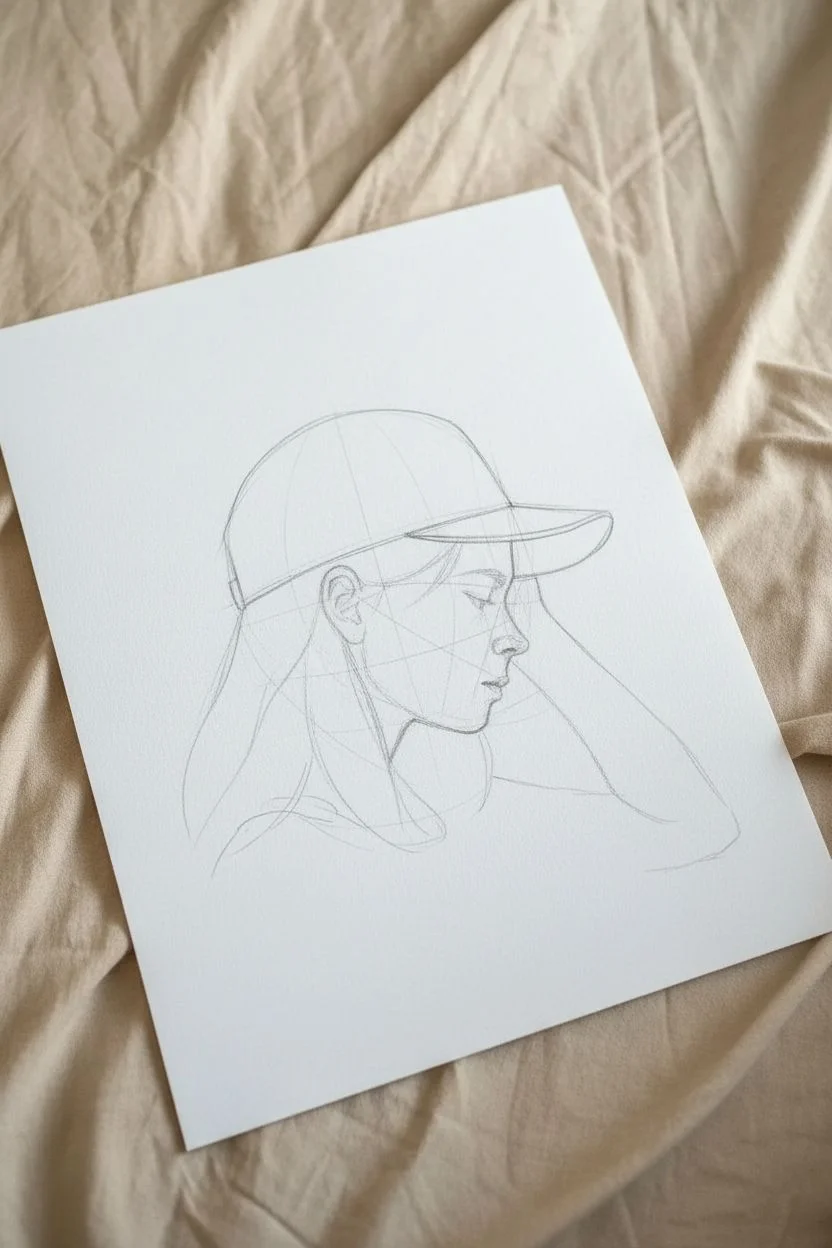
Capture the calm, contemplative mood of this profile portrait featuring a girl wearing a baseball cap. This graphite pencil drawing focuses on delicate shading techniques to render realistic hair texture and soft facial features.
Step-by-Step
Materials
- High-quality drawing paper (smooth or medium tooth)
- Graphite pencils (range: HB, 2B, 4B, 6B)
- Mechanical pencil (0.5mm HB for fine details)
- Kneaded eraser
- Paper blending stump or tortillon
- Pencil sharpener
Step 1: Planning the Profile
-
Establish the head shape:
Start with a light circle for the cranium and structure the jawline descending from it. Since this is a profile view, ensure the jawline curves gently toward the chin. -
Map facial features:
Draw faint guidelines for the eye level, nose, and mouth. Place the ear relatively low and far back to account for the angle of the head. -
Sketch the cap outline:
Place the baseball cap’s dome over the cranium circle. Extend the bill straight out above the eye line, adding a slight curve to show perspective.
Step 2: Refining the Sketch
-
Draft the arm and hand:
Sketch the arm raised, with the hand resting gently near the temple or forehead. Keep the fingers loose and suggestive rather than rigid. -
Outline the hair:
Draw the general shape of the hair flowing down from under the cap. Don’t draw individual strands yet; just map out the main masses of hair over the shoulder. -
Define the facial profile:
Sharpen the lines of the nose, lips, and chin. The nose should have a soft slope, and the lips should be slightly parted or relaxed. -
Detail the cap structure:
Add the seams of the cap, the button on top, and the ventilation eyelets. Sketch the distinct stitching lines on the bill and front panels.
Hair Texture Tip
Don’t draw every single hair. Draw ‘ribbons’ or clumps of hair first, then add stray strands on top for realism.
Step 3: Detailed Graphite Shading
-
Shade the skin tones:
Using an HB or 2B pencil, lightly shade the face. Focus on the shadow under the cap’s brim, the hollow of the cheek, and under the jawline. -
Render the eye:
Switch to a sharp mechanical pencil or 4B for the eye. Darken the lash line and the pupil, leaving a tiny white highlight for life. -
Texture the cap:
Use cross-hatching or stippling to give the cap a fabric texture. Darken the underside of the bill significantly to create depth and contrast against the forehead. -
Establish hair flow:
With a 4B pencil, draw long, flowing strokes following the direction of the hair. Start from the roots under the cap and sweep downward. -
Deepen hair shadows:
I like to use a 6B pencil here to darken the areas behind the ear and closest to the neck. This negative space makes the lighter strands pop forward. -
Clothing folds:
Sketch the t-shirt, adding distinct folds where the fabric bunches at the armpit and shoulder due to the raised arm. -
Shading the arm:
Add soft gradients to the raised arm to show cylindrical volume. Keep the shading lighter on the top edge where the light hits. -
Refining clothing texture:
Use broad, soft strokes to shade the t-shirt. Enhance the shadows within the folds to make the fabric look loose and comfortable.
Add a Logo
Customize the cap by drawing a small, embroidered logo or decal on the front panel to personalize the character.
Step 4: Final Touches
-
Clean up highlights:
Use a kneaded eraser to lift graphite from high points like the cheekbone, the bridge of the nose, and the illuminated strands of hair. -
Enhance contrast:
Go back over the darkest darks—the pupil, the deepest hair shadows, and the fabric creases—to ensure the drawing has a full dynamic range. -
Final assessment:
Check the proportions and smudge any harsh lines with a blending stump for a smoother skin texture, leaving the pencil strokes visible in the hair for contrast.
Take a moment to admire the quiet emotion you’ve captured in your finished drawing
Girl With Glasses and Reflections
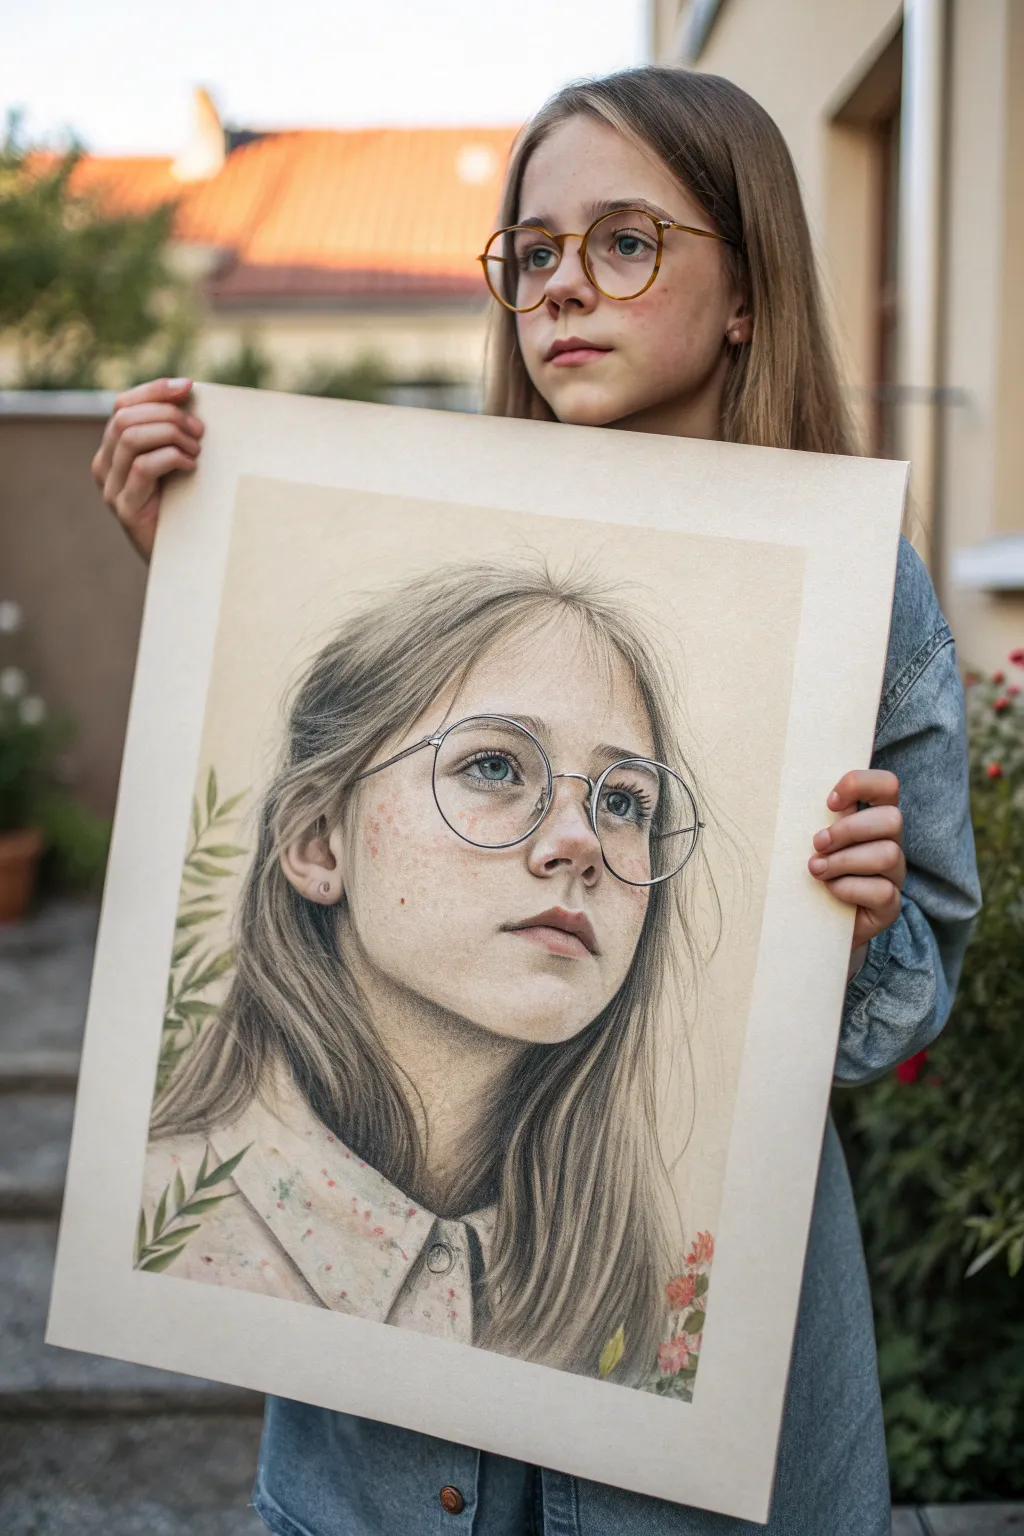
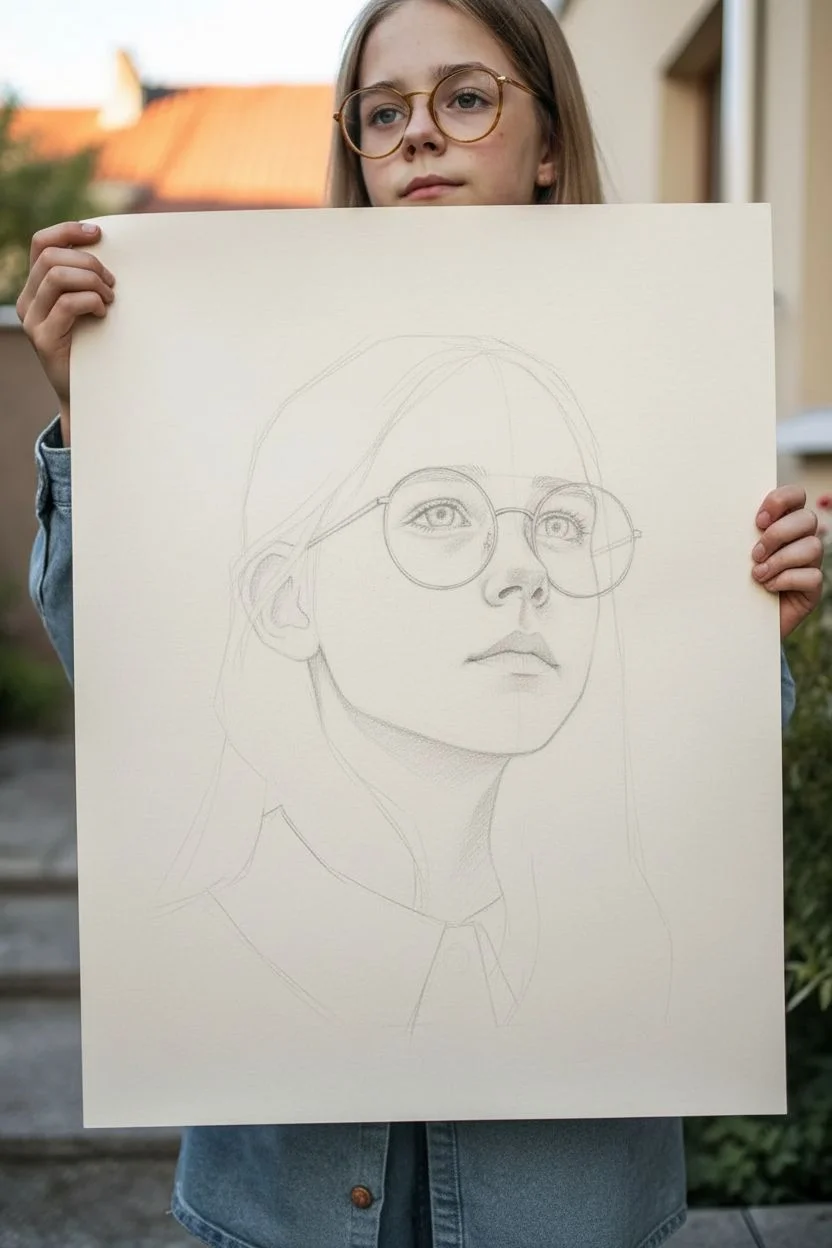
This tutorial guides you through creating a sensitive, realistic portrait of a girl with glasses, focusing on delicate shading and the tricky nature of transparent lenses. The finished piece combines the softness of graphite with subtle touches of colored pencil for a warm, organic feel.
Detailed Instructions
Materials
- Large sheet of heavyweight cream or toned drawing paper (A3 or larger recommended)
- Graphite pencils (4H, 2H, HB, 2B, 4B)
- Colored pencils (muted greens, earthy browns, soft pinks, white)
- Kneaded eraser
- Precision mechanical eraser
- Blending stumps (tortillons)
- Fixative spray
- Reference photo
Step 1: Laying the Foundations
-
Light Sketching:
Begin by lightly sketching the overall composition using a 4H pencil. Focus on simple geometric shapes for the head, placing the eyeline just below the vertical center. Keep your lines incredibly faint so they can be erased later. -
Placement of Features:
Map out the facial features, paying special attention to the large round glasses. Draw the frame outlines lightly, ensuring they sit correctly on the bridge of the nose and wrap gently around the face shape. -
Refining the Proportions:
Check your proportions carefully. The nose should be slightly upturned, and the lips should have a soft, natural expression. Ensure the iris placement within the glasses frames is symmetrical.
Step 2: Shading the Face and Features
-
Building Eye Definition:
Switch to an HB pencil to define the eyes. Draw the lash line and pupils clearly. Remember that the glass lenses might distort the edge of the face slightly—this adds realism. -
Soft Skin Shading:
Using a 2H pencil, start shading the skin tones. Use gentle, circular motions to build up layers of graphite. I find that leaving white space for highlights on the nose and cheekbones early on keeps the drawing fresh. -
Deepening Shadows:
Gradually introduce a 2B pencil to deepen the shadows under the chin, beneath the nose, and in the corners of the eyes. Blend these areas softly with a tortillon for a smooth, skin-like texture. -
Freckle Details:
Using a sharp colored pencil in a terracotta or warm brown shade, dot in faint freckles across the nose and cheeks. Vary the pressure so some are darker than others. -
Lip Texture:
Shade the lips using graphite, focusing on the vertical cracks and texture. Add a very faint wash of muted pink colored pencil over the graphite to give them a natural flush.
Pro Tip: Lens Distortion
To make glasses look realistic, slightly displace the face line where it passes through the lens. The side of the face visible through the glass should sit slightly ‘in’ compared to outside the frame.
Step 3: The Glasses and Hair
-
Rendering the Frames:
Use a 4B pencil to darken the wireframes of the glasses. Keep the lines crisp and metallic. Add small highlights along the rims using a mechanical eraser to simulate light hitting silver or gold metal. -
Creating Reflections:
Inside the lenses, lightly shade across the eye area with a harder pencil to suggest the glass surface. Add sharp, distinct white highlights using a white colored pencil or gouache to represent reflections. -
Basic Hair Strands:
Start the hair with long, sweeping strokes using an HB pencil. Follow the direction of growth, flowing from the roots down past the shoulders. Keep the strokes fluid. -
Adding Depth to Hair:
Layer darker 4B pencil strokes in the shadowed areas of the hair, such as behind the neck and under the ear. Leave the top of the head lighter to suggest overhead lighting.
Level Up: Mixed Media Pop
Use a white gel pen for the absolute brightest highlights on the glasses frames and in the eyes. This crisp, opaque white creates a convincing shine that pencil cannot achieve.
Step 4: Atmospheric Details & Finishing
-
Botanical Elements:
On the left and bottom right corners, sketch in delicate leaf sprigs and small flowers. Use muted olive greens and soft reds. These shouldn’t be hyper-detailed; keep them slightly softer than the face. -
Clothing Texture:
Sketch the collar of the shirt. Instead of solid shading, use small, random marks and stippling with colored pencils to suggest a floral or patterned fabric texture. -
Final Contrast Check:
Step back and evaluate the values. Darken the pupils and the darkest shadows in the hair one last time to make the portrait pop. -
Protecting the Work:
Once fully satisfied, spray the drawing with a workable fixative to prevent the graphite from smudging.
Now you have a soulful portrait that captures a quiet moment of reflection
Girl With a Scarf in Windy Motion
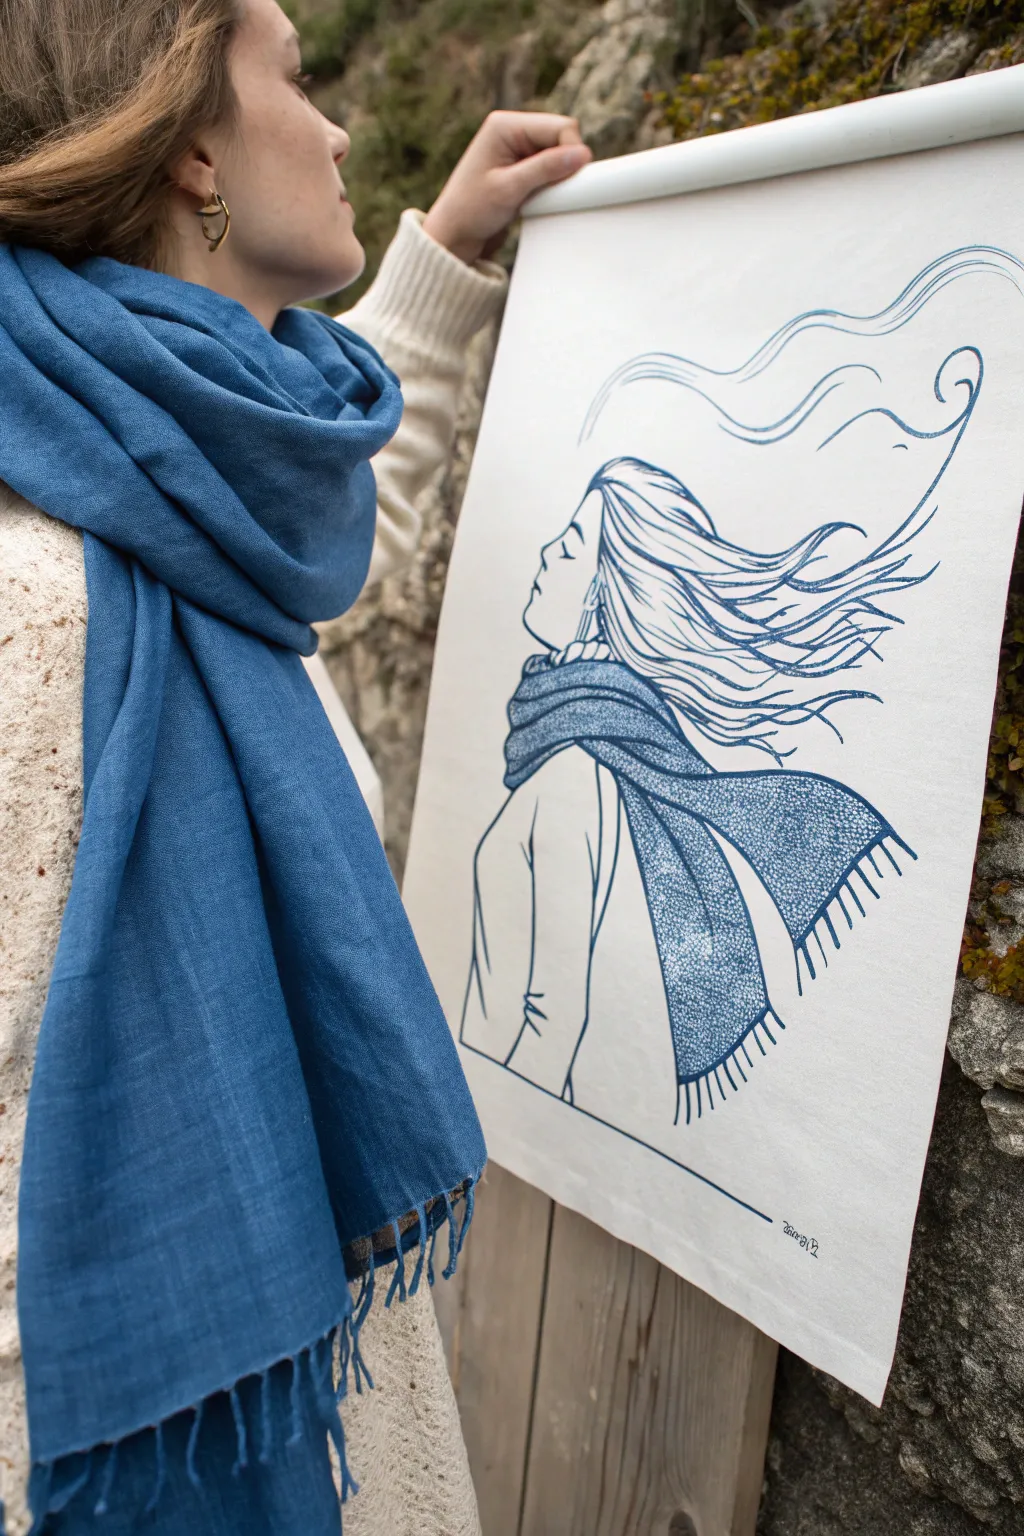
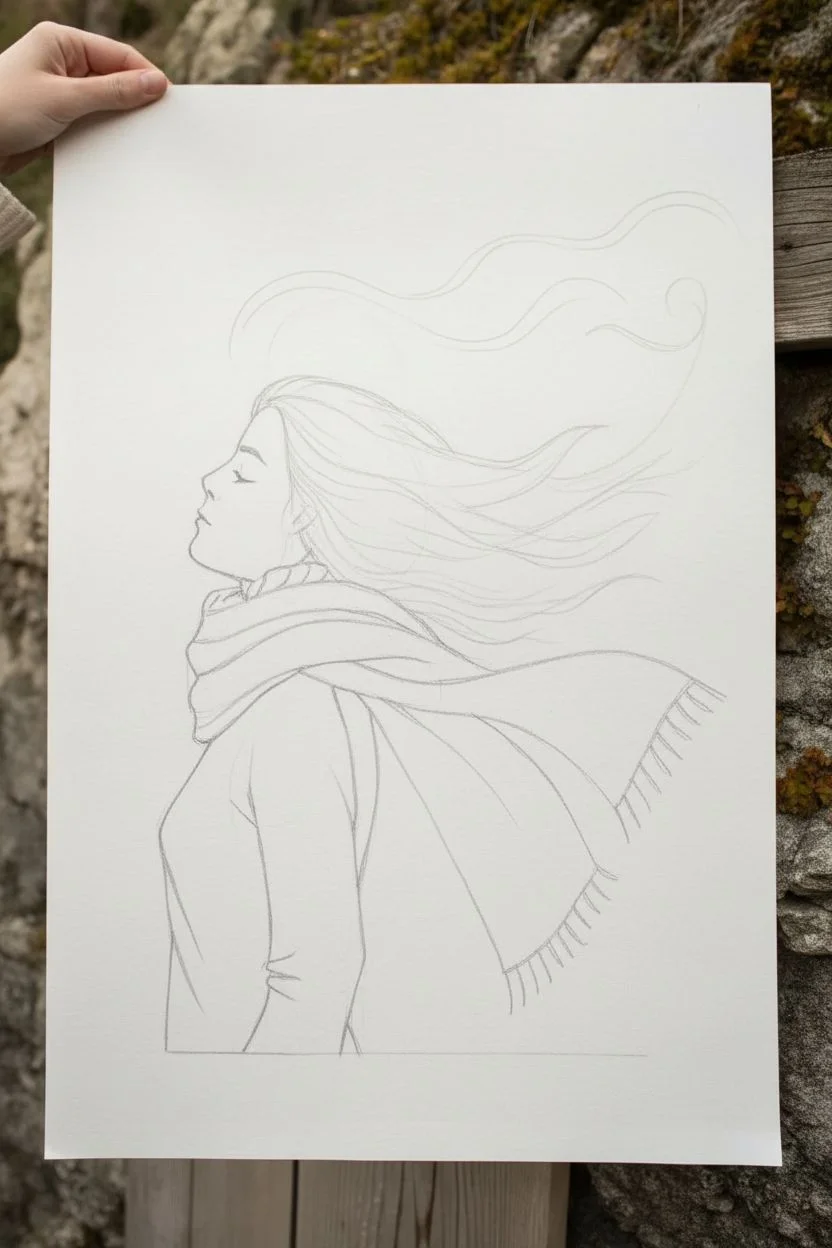
Capture the feeling of a blustery day with this elegant monochromatic line drawing. Using simple linework and textural stippling, you’ll create a serene profile of a girl wrapped in a flowing scarf that seems to dance in the wind.
Step-by-Step
Materials
- Large sheet of heavyweight white drawing paper (A2 or similar size)
- Pencil (HB or 2H for sketching)
- Eraser
- Fine liner pen (0.3mm or 0.5mm, dark blue or indigo)
- Thicker marker or brush pen (matching blue/indigo)
- Ruler
- Wooden dowels or poster hanger (optional for display)
Step 1: Drafting the Composition
-
Establish the profile:
Begin by lightly sketching the outline of the girl’s face in profile on the left side of your paper. Focus on a simple, upward-tilted chin and a closed eye to suggest a moment of calm. -
Add the torso:
Sketch the basic shape of the upper body. Keep the clothing lines simple—just a sleeve and the side of a sweater—so the focus remains on the scarf and hair. -
Map out the hair:
Draw flowing guidelines for the hair, sweeping them back and to the right. Imagine the wind is coming from the left, pulling the strands horizontally across the page. -
Sketch the scarf shape:
Draw the scarf wrapping loosely around the neck. Let one end trail off behind her, following the same wind direction as the hair. Add a second tail hanging down for balace. -
Refine the motion:
Add a few abstract, swirling lines above the head to represent the wind itself. These should be loose and curvy, contrasting with the straighter structural lines.
Stippling Patience
Stippling takes time! Don’t rush or the dots will turn into dashes. Put on a podcast and treat the dotting process as a meditative exercise.
Step 2: Inking the Outlines
-
Trace face and body:
Using your fine liner pen, carefully trace over your pencil lines for the face, neck, and sweater. Use a steady hand to keep the lines clean and continuous. -
Ink the hair strands:
Switch to confident, sweeping strokes for the hair. Don’t outline it as one big shape; instead, draw individual thick locks that taper at the ends to show movement. -
Define the scarf contour:
Outline the main shape of the scarf with a slightly thicker line if possible. Add fringed tassels at the ends of the scarf tails. -
Add floating curls:
Ink the abstract wind swirls above the head. I like to vary the pressure here, making the lines slightly thinner at the very tips for elegance.
Match Your Style
Instead of blue ink, try using a tepid coffee wash for the scarf’s fill to add warmth, or stitch the scarf lines with embroidery thread for 3D texture.
Step 3: Adding Texture and Detail
-
Start the stippling:
To mimic the knitted texture of the scarf shown in the original art, use stippling (tiny dots). Start at the edges of the scarf where shadows would naturally fall. -
Fill the scarf:
Continue filling the scarf shape with thousands of tiny dots. Densely pack them in shadowed areas (like the folds around the neck) and spread them out in lighter areas. -
Create folds:
Use the density of your dots to suggest folds in the fabric. A dense cluster of blue dots creates a dark fold, while sparse dots create a highlight. -
Add hair details:
Go back into the hair with your finest pen. Add very thin, quick lines within the larger locks to simulate individual strands blowing in the breeze. -
Clean up:
Once the ink is completely dry, thoroughly erase all underlying pencil sketch marks so only the crisp blue lines remain. -
Sign and border:
Add a simple straight line near the bottom for a grounding element, and sign your name in the corner for a professional finish.
Hang your finished print in a well-lit spot to enjoy the sense of movement and calm it brings to the room
Girl Expression Grid: Happy, Angry, Shy, and Sad
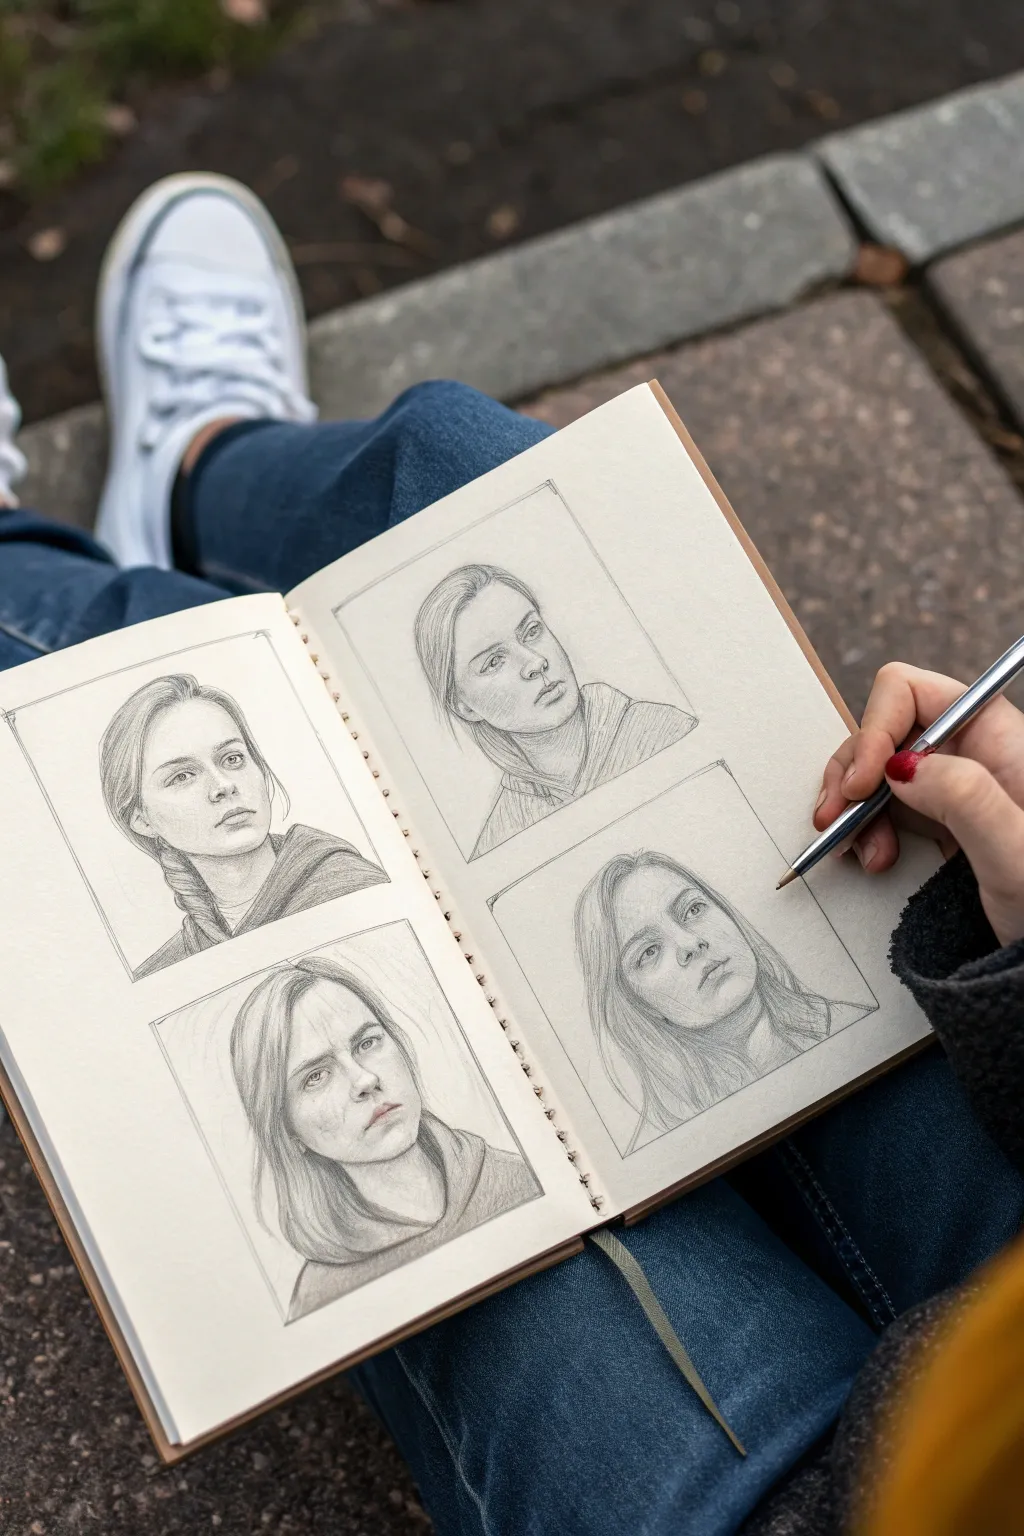
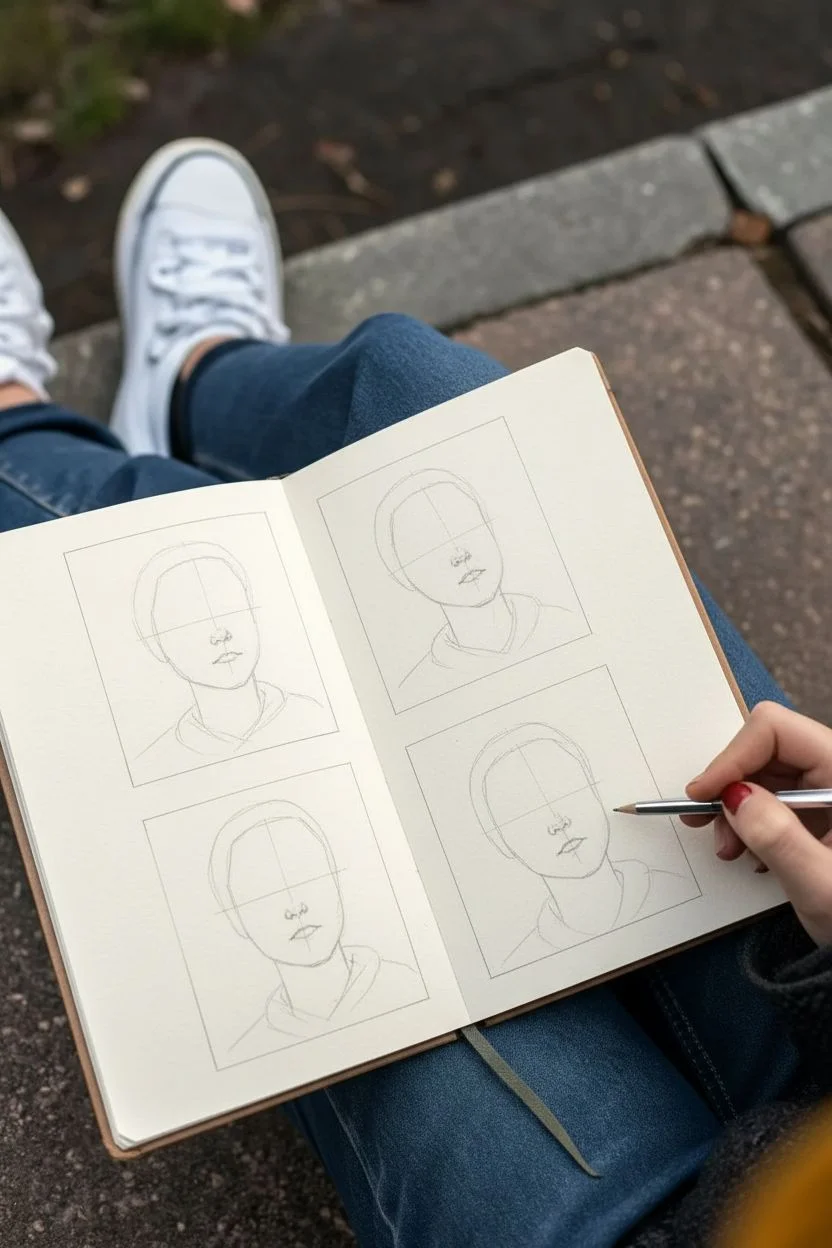
Capture the subtle nuances of human emotion with this expressive grid study. Using just a sketchbook and pencil, you’ll draw the same subject in four distinct states—Happy, Angry, Shy, and Sad—creating a captivating narrative across a single page spread.
Step-by-Step Guide
Materials
- Sketchbook (smooth or vellum bristol paper recommended)
- Mechanical pencil (0.5mm or 0.7mm, HB lead)
- Standard graphite pencils (optional, 2B and 4B for darker values)
- Kneaded eraser
- Precision eraser (for highlights)
- Ruler
Step 1: Setting the Stage
-
Grid Preparation:
Begin by lightly ruling four equal rectangular borders on your sketchbook spread. Aim for a 2×2 layout, leaving comfortable margins between the frames and the edge of the paper so each portrait feels contained but connected. -
Initial Blocking:
Within each frame, lightly sketch an oval for the head shape. Vary the tilt of the head for each box to create dynamic movement; for instance, tilt two heads slightly upward and two slightly downward or sideways. -
Axis Lines:
Draw faint vertical center lines and horizontal eye lines on each oval. These guides are crucial because they dictate the direction the subject is facing, ensuring your study doesn’t look flat.
Troubleshooting: Flat Faces?
If faces look flat, check your values. Don’t be afraid of dark darks! Deepen shadows under the chin and hair to make the features pop forward.
Step 2: Top Left: Calm/Observant
-
Structural Outline:
Start with the top-left frame. Sketch the features lightly, positioning the eyes looking slightly off to the side. Keep the mouth neutral and closed to convey a sense of calm observation. -
Hair and Shadow:
Outline the hair, sweeping it back loosely. Begin shading the left side of the face (the viewer’s left) to establish a light source coming from the right. This initial shading defines the cheekbone and jawline. -
Detailing Features:
Darken the pupils and the lash line. Add soft shading under the lower lip and around the nose bridge. Keep drawing pressure moderate; this expression relies on softness. -
Clothing Texture:
Sketch a simple collar or hoodie neckline. Use diagonal hatching strokes to suggest fabric texture without stealing focus from the face.
Step 3: Top Right: Defiant/Alert
-
Head Tilt:
For the top-right portrait, position the head tilting away slightly. This angle often communicates alertness or skepticism. -
Focused Gaze:
Draw the eyes slightly narrowed or focused on a distant point. Ensure the eyebrows have a subtle arch, perhaps slightly knit, but not fully furrowed. -
Contouring:
Apply stronger contrast here. I prefer to press a bit harder on the jawline shadow to give the face more weight and seriousness. Refine the hair strands to look a bit more tousled.
Pro Tip: Consistency is Key
To keep the person looking like the same girl in every box, measure the distance between the eyes. If that width changes, the identity changes.
Step 4: Bottom Left: Melancholy/Sad
-
Downward Energy:
In the bottom-left frame, tilt the head slightly downward. Sketch the eyebrows so the inner corners pull upward—this is the universal signal for sadness or distress. -
Softening the Gaze:
Draw the eyelids slightly lowered. When shading the eyes, keep highlights minimal to make them look glassy or watery. Add subtle shading beneath the eyes to suggest tiredness. -
Mouth Tension:
Unlike the neutral mouth in step 3, draw the corners of the lips turning very slightly downward. Keep the lips parted just a tiny bit to show vulnerability. -
Adding Depth:
Deepen the shadows in the hollows of the cheeks and under the chin. This higher contrast adds drama to the melancholy expression.
Step 5: Bottom Right: Distant/Longing
-
Upward Gaze:
For the final portrait, have the subject look upward. This pose often suggests daydreaming or longing. The neck should be stretched slightly as the chin lifts. -
Flowing Hair:
Let the hair flow more freely around the shoulders in this frame. Use long, sweeping pencil strokes to distinguish the hair texture from the skin. -
Refining the Jaw:
Pay attention to the underside of the jaw, which will be very visible here. Use cross-hatching to create a soft gradation of shadow under the chin. -
Final Polish:
Go back over all four drawings. Strengthen the framed borders with a ruler. Use your kneaded eraser to pick out highlights on the nose tips, foreheads, and lower lips to bring the faces to life.
Now you have a dynamic character study that tells a story without a single word
Girl With Butterflies for Whimsical Storytelling
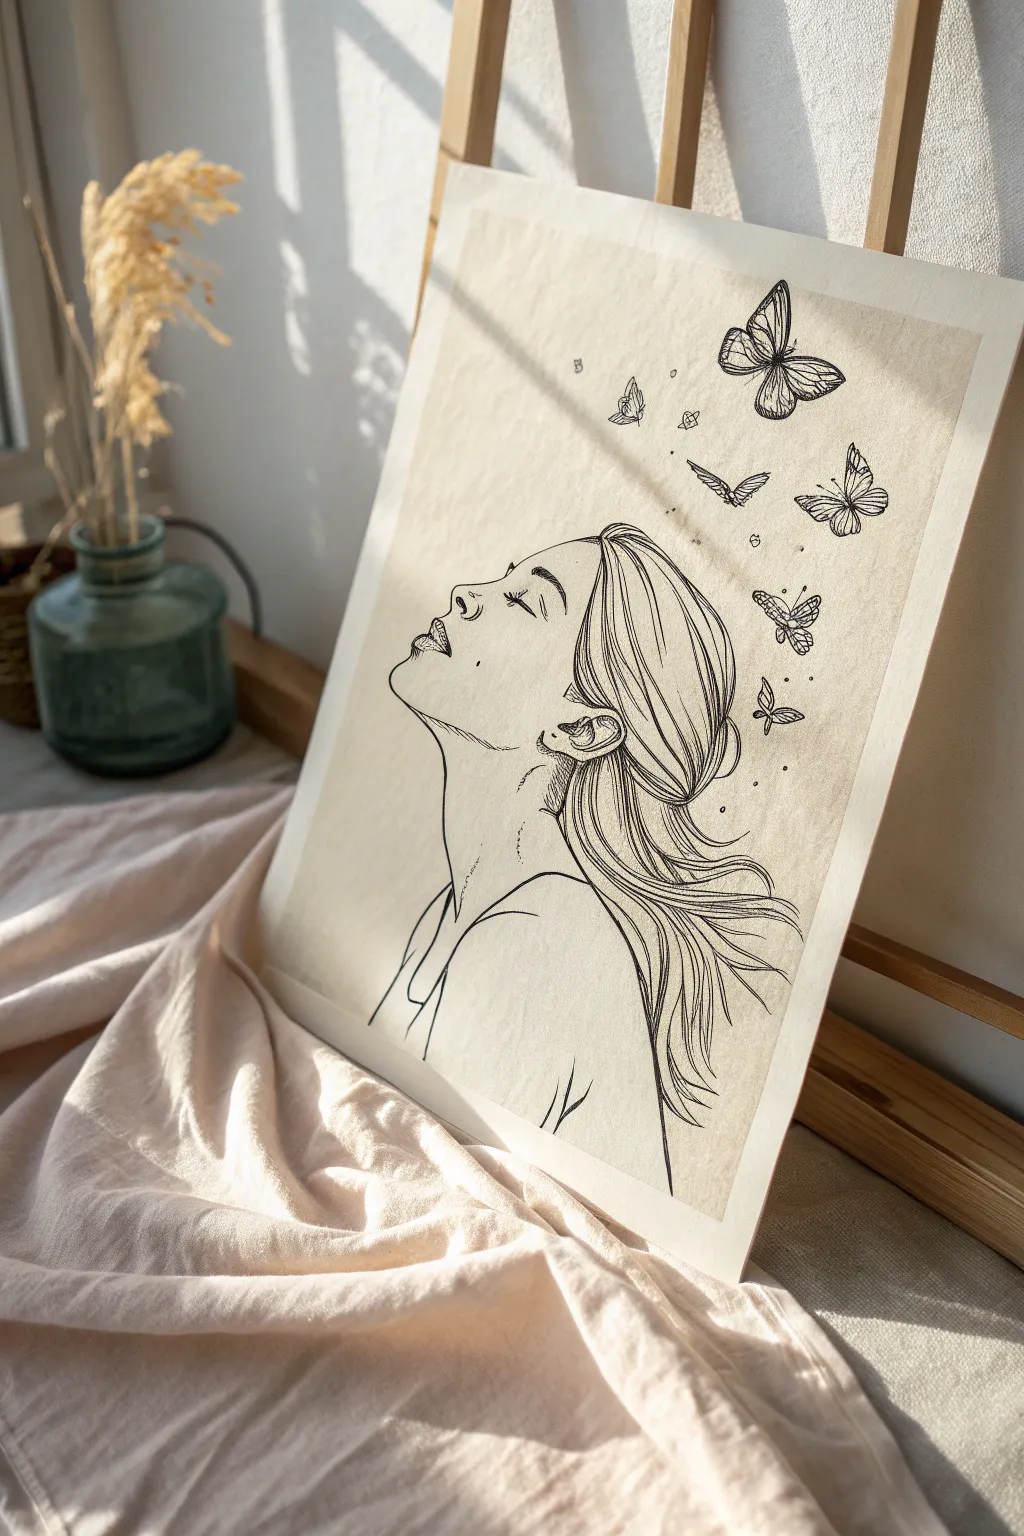
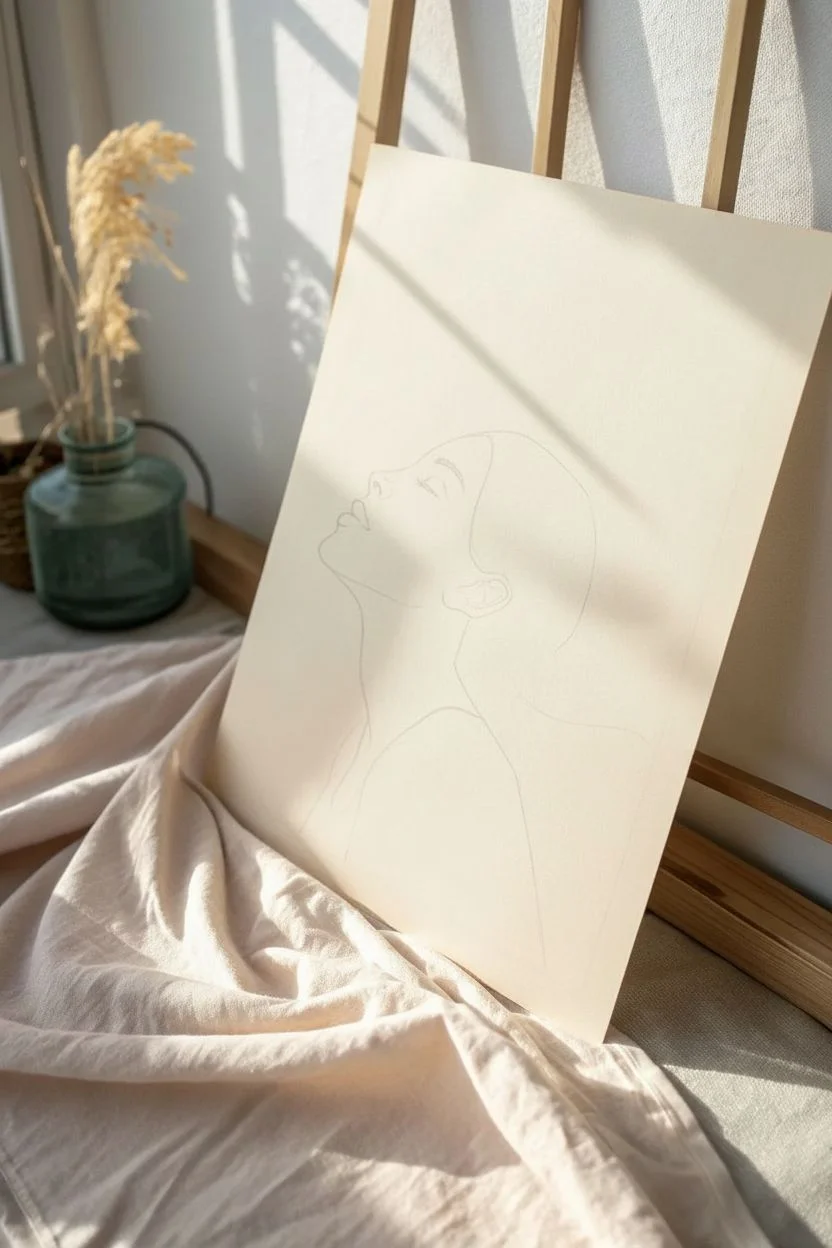
Capture the delicate beauty of a tranquil moment with this minimalist line drawing. This project uses fine ink work on warm-toned paper to create an ethereal portrait of a girl releasing thoughts as a flutter of butterflies.
Step-by-Step Guide
Materials
- Smooth cream or beige drawing paper (A4 or similar)
- HB pencil for sketching
- Kneaded eraser
- Fine liner pens (sizes 0.1, 0.3, and 0.5)
- Ruler (optional, for finding alignment)
Step 1: Face Structure
-
Establish the angle:
Begin lightly with your HB pencil. Draw a diagonal line roughly 45 degrees pointing upward towards the left; this will guide the tilt of the head. -
Map the profile:
Sketch a soft oval shape along that diagonal line for the cranium, and attach a jawline that sweeps back towards where the ear will be. Keep your pressure extremely light so you can erase later. -
Refine the features:
Carve out the profile shape. Start with the forehead, curving in slightly for the bridge of the nose, and out for a petite, upturned nose tip. -
Lips and chin:
Sketch full lips that are slightly parted, following the upward tilt. Connect the lower lip to a rounded chin and a long, elegant neck curve.
Uneven Lines?
If your hand shakes while inking long hair strands, don’t panic. Turn the shaky line into a thicker, stylized strand or add a second line next to it to create a shadow shape.
Step 2: Hair and Details
-
Ear placement:
Place the ear fairly low on the head, aligning roughly with the nose and eye level. Sketch a C-shape with a small lobe. -
Hair volume:
Outline the main hair mass. The hair is pulled back loosely; draw sweeping lines from the forehead back over the ear, creating a bun or gathered shape at the nape of the neck. -
Loose strands:
Add flow by sketching long, loose strands falling from the gathered area down onto her back and shoulder. These lines should feel fluid and wind-swept. -
The eye:
Draw the closed eye as a single, curved heavy eyelash line. Add a small eyebrow arch above it that follows the calm expression.
Enhance the Magic
Add a splash of watercolor to just the butterflies. Pale blues or violets look stunning against the beige paper and emphasize the ‘thoughts taking flight’ concept.
Step 3: Inking the Portrait
-
Commit to the outline:
Switch to your 0.3 fine liner. Carefully trace over your pencil profile, keeping the line weight consistent but lifting pressure slightly at the end of hair strands for a tapered look. -
Detail the hair:
Use the 0.1 pen for the internal hair texture. Draw long, sweeping strokes that follow the curvature of the head. Don’t fill every space; leave gaps to suggest shine and volume. -
Defining the ear:
Add the inner ear details with the 0.1 pen, using small, broken lines to suggest the cartilage without making it look too rigid. -
Neck shading:
Add very minimal hatching under the jawline and on the neck using your finest pen (0.05 or 0.1) to create subtle depth.
Step 4: The Butterflies
-
Plotting the flight path:
Lightly sketch a curved path of circles and triangles starting from the top of her head/forehead area and floating upward to the right corner of the page. -
Drafting butterfly shapes:
Turn those simple shapes into butterfly outlines. Vary the sizes—smaller ones near the head, larger ones further away. Make sure their wings are angled in different directions to simulate chaotic flight. -
Inking the wings:
Using the 0.1 pen, ink the butterfly outlines. I like to make the wing edges slightly jagged or bumpy rather than perfectly smooth circles to look more realistic. -
Adding wing patterns:
Fill the wings with delicate veins and patterns. Use quick, light flicks of the pen for lines inside the wings. -
Movement dots:
Add tiny stippled dots (pointillism) trailing behind the butterflies and around the head to represent magical dust or movement. -
Final cleanup:
Wait at least 10 minutes for the ink to be completely dry, then gently use the kneaded eraser to remove all pencil marks.
Frame this serene piece in simple wood to let the delicate line work truly shine
Girl Sketch Page of Mini Ideas: Hair, Hands, and Outfits
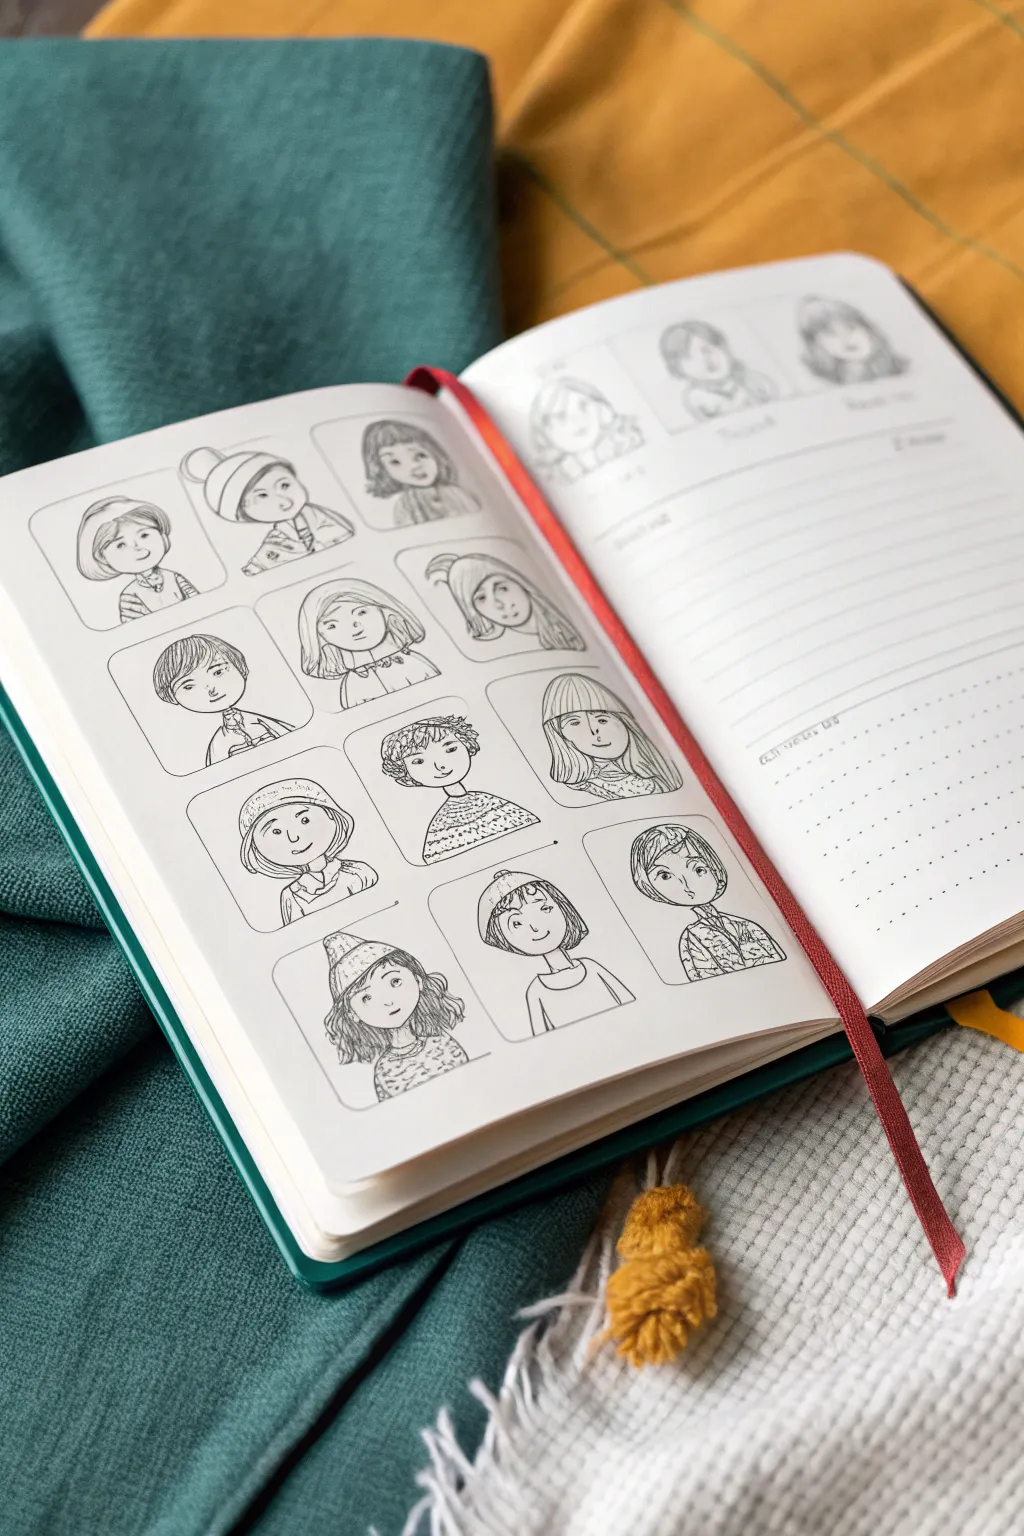
This project is a delightful practice in character design, filling a notebook page with a grid of unique, stylized girl portraits. It’s a fantastic way to explore different hairstyles, expressions, and accessories without the pressure of a full-page illustration.
Detailed Instructions
Materials
- A5 or similar sized sketchbook (blank or dot grid)
- Fine liner pen (0.1mm or 0.3mm black)
- Pencil (HB or 2B for sketching)
- Eraser
- Ruler
- Corner rounding tool (optional, or draw freehand)
Step 1: Setting the Grid
-
Plan your layout:
Start by measuring your page width and deciding on a grid size. For this A5-sized look, aim for three columns and four or five rows. Calculate the size of your squares so they have even spacing between them. -
Pencil the frames:
Using your pencil and ruler, lightly draw out the grid of squares. Leave a generous margin around the edges of the page so the artwork feels centered and not cramped. -
Round the corners:
To mimic the soft, sticker-like aesthetic in the reference, sketch rounded corners on each of your penciled squares. You can freehand this or use a coin or stencil for perfect uniformity. -
Ink the frames:
Go over your rounded squares with your fine liner pen. Keep your hand steady and confident. Once the ink is completely dry, erase the sharp pencil corners and guidelines.
Pro Tip: Consistency
Keep the head sizes consistent across all boxes. Even with different hair, the skulls should feel like they belong to the same ‘series’ or scale.
Step 2: Sketching the Portraits
-
Draft the head shapes:
Lightly sketch a basic circle or oval in the center of each box with your pencil. Vary the shapes slightly—some rounder, some more angular—to create distinct character personalities. -
Add neck and shoulders:
Draw simple lines for necks and shoulders. Don’t worry about anatomical perfection; these are stylized doodles. Change the clothing necklines (scoop neck, collared shirt, sweater) to add variety. -
Brainstorm hairstyles:
This is the fun part! Sketch a different hairstyle for each box. Try a bob, long waves, a beanie, a messy bun, or bangs. Let the hair break slightly outside the ‘frame’ of the head shape but stay contained within the box. -
Place facial features:
Map out the eyes, nose, and mouth. Keep the features relatively low on the face for a cute, ‘chibi’ or youthful look. Use simple dots or small circles for eyes.
Step 3: Inking and Details
-
Ink the outlines:
Switch to your fine liner. Start by tracing the jawlines and hair outlines. I find it helpful to rotate the sketchbook as I draw curves to keep the line smooth. -
Inking the hair texture:
Add texture to the hair with careful strokes. For straight hair, use long, swift lines. For curly hair, use squiggles or loops. Don’t outline every single strand; suggest volume with key lines. -
Define the faces:
Ink the facial features. Keep the lines thin and delicate here. A tiny curved line makes a nose; simple dots create friendly eyes. Add eyebrows to give expression—raised for surprise, slanted for determination. -
Add clothing details:
Ink the collars and shoulders. Add small patterns to the clothes like stripes, polka dots, or simple knit textures to make each character feel complete. -
Final erase:
Wait at least five minutes to ensure the ink is totally set. Then, gently erase all underlying pencil sketches to reveal your clean, crisp character grid.
Level Up: Color Pop
Use a single watercolor wash or a colored pencil to fill in just the background of each box, leaving the character white for a negative-space effect.
You now have a charming reference sheet of characters that you can expand into full stories later


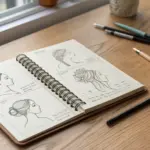

Have a question or want to share your own experience? I'd love to hear from you in the comments below!