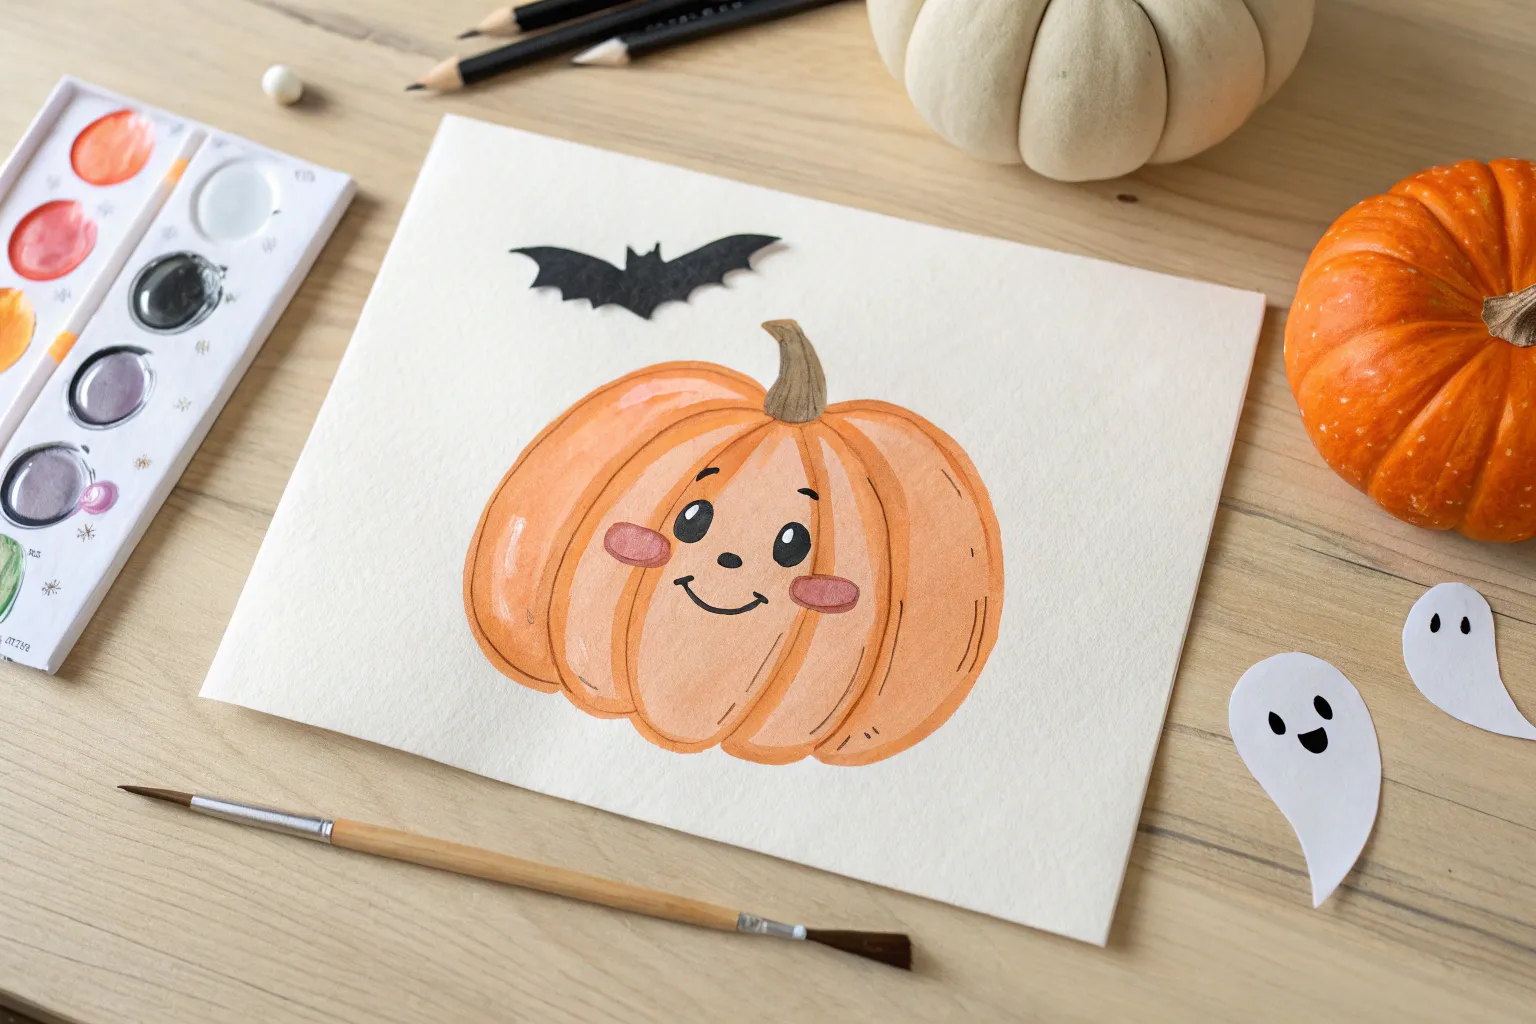
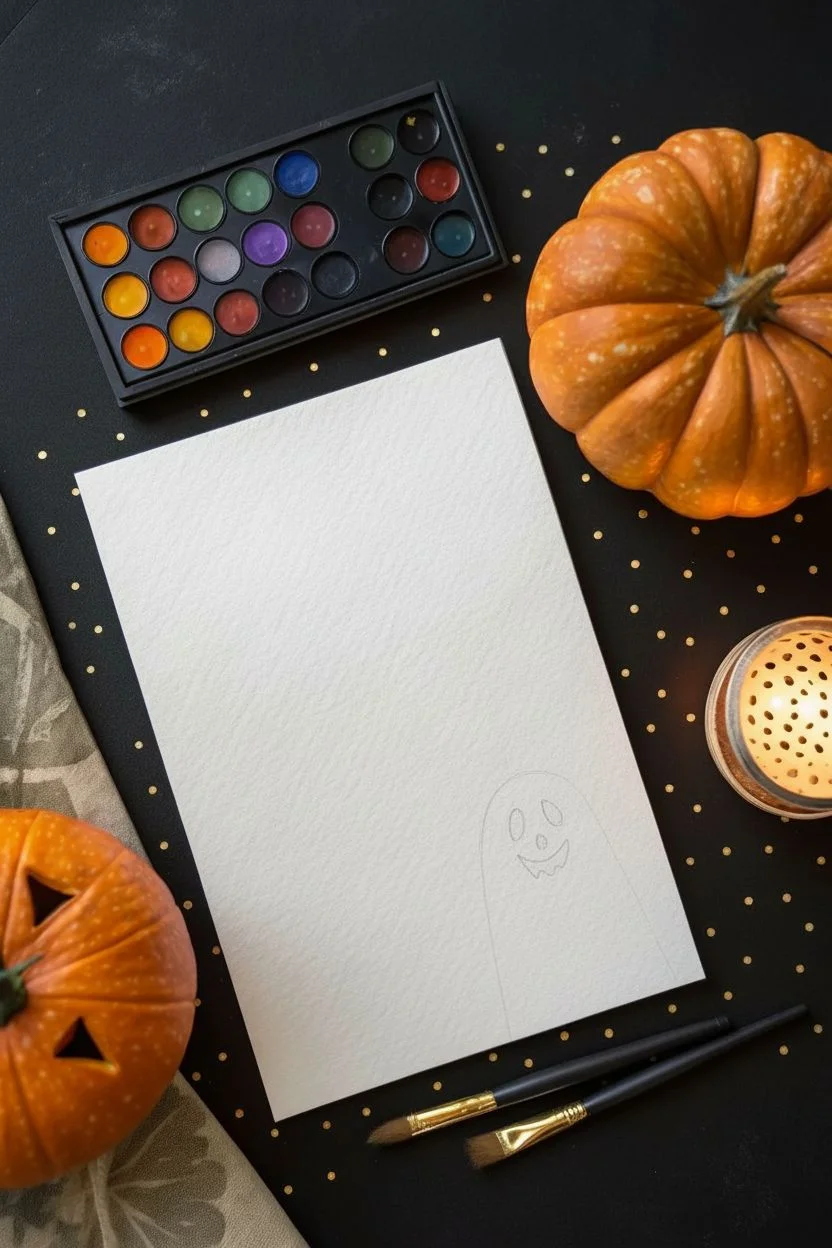
Halloween painting is my favorite kind of crafty chaos—bold colors, simple shapes, and instant spooky vibes. These ideas are made for kids to jump right in, feel proud fast, and still end up with something super cute to hang up.
Friendly Ghosts on a Deep Night Sky
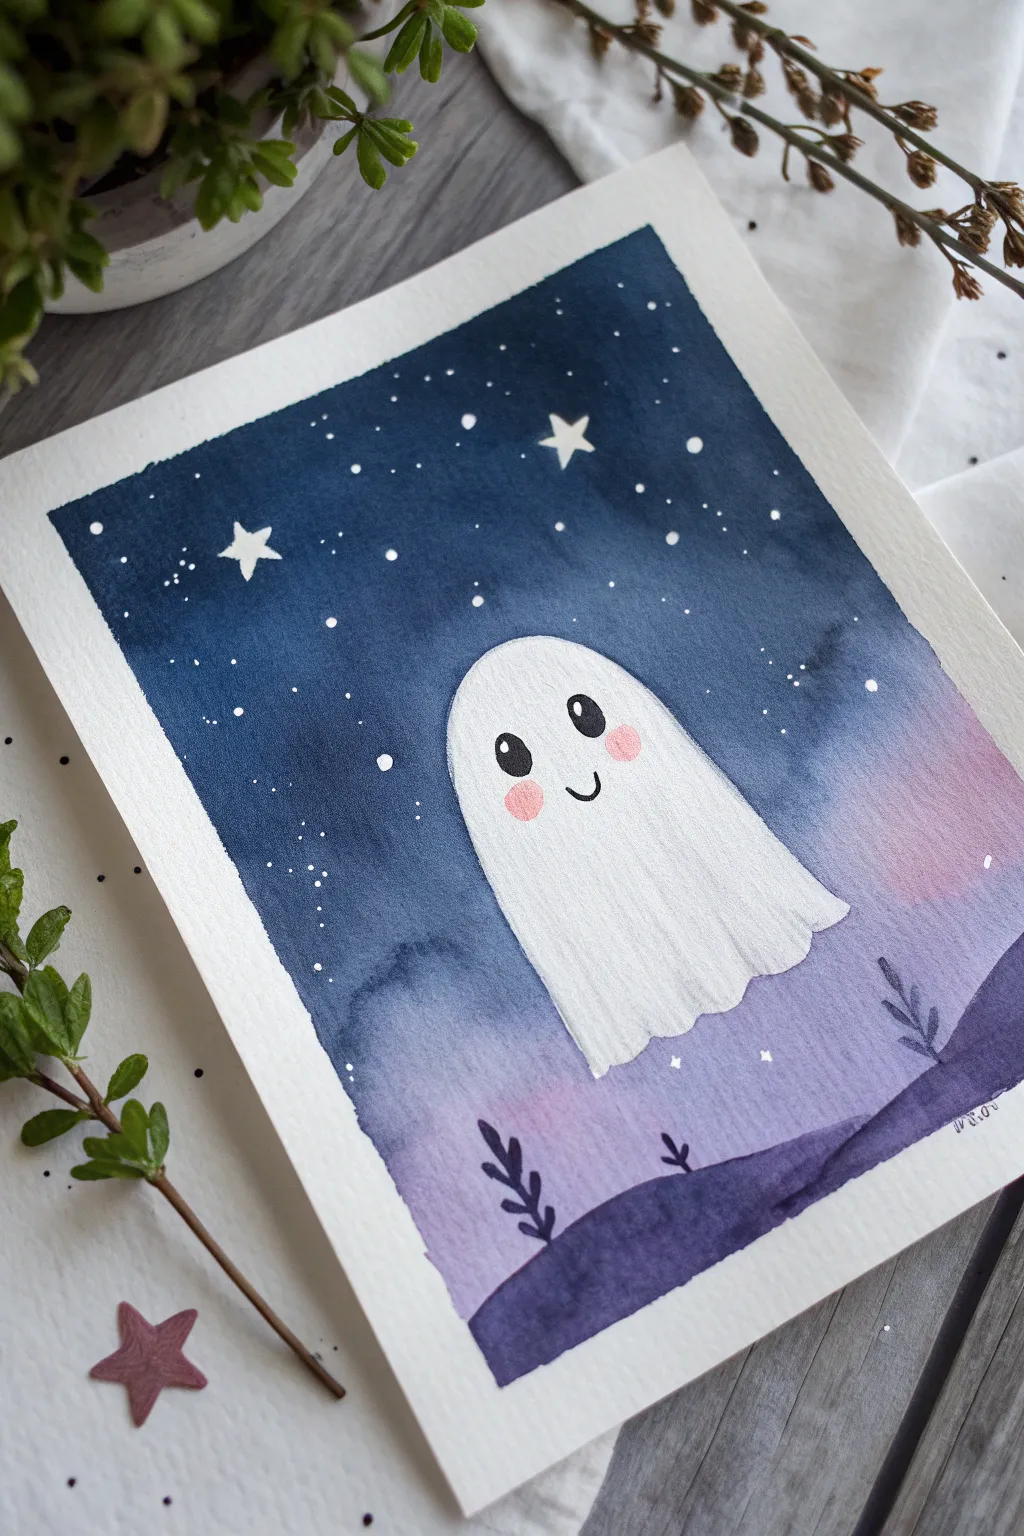
Create a magical little scene featuring the friendliest ghost floating through a starry October night. This watercolor project uses simple gradient techniques to make a glowing twilight sky that really makes your ghost character pop.
Step-by-Step
Materials
- Cold press watercolor paper (A5 size works well)
- Watercolor paints (Indigo/Payne’s Gray, Purple, Pink/Magenta)
- Masking fluid or white wax crayon (optional)
- Round watercolor brushes (Size 6 and Size 2)
- White gouache or white gel pen
- Pencil and eraser
- Paper towel
- Painter’s tape
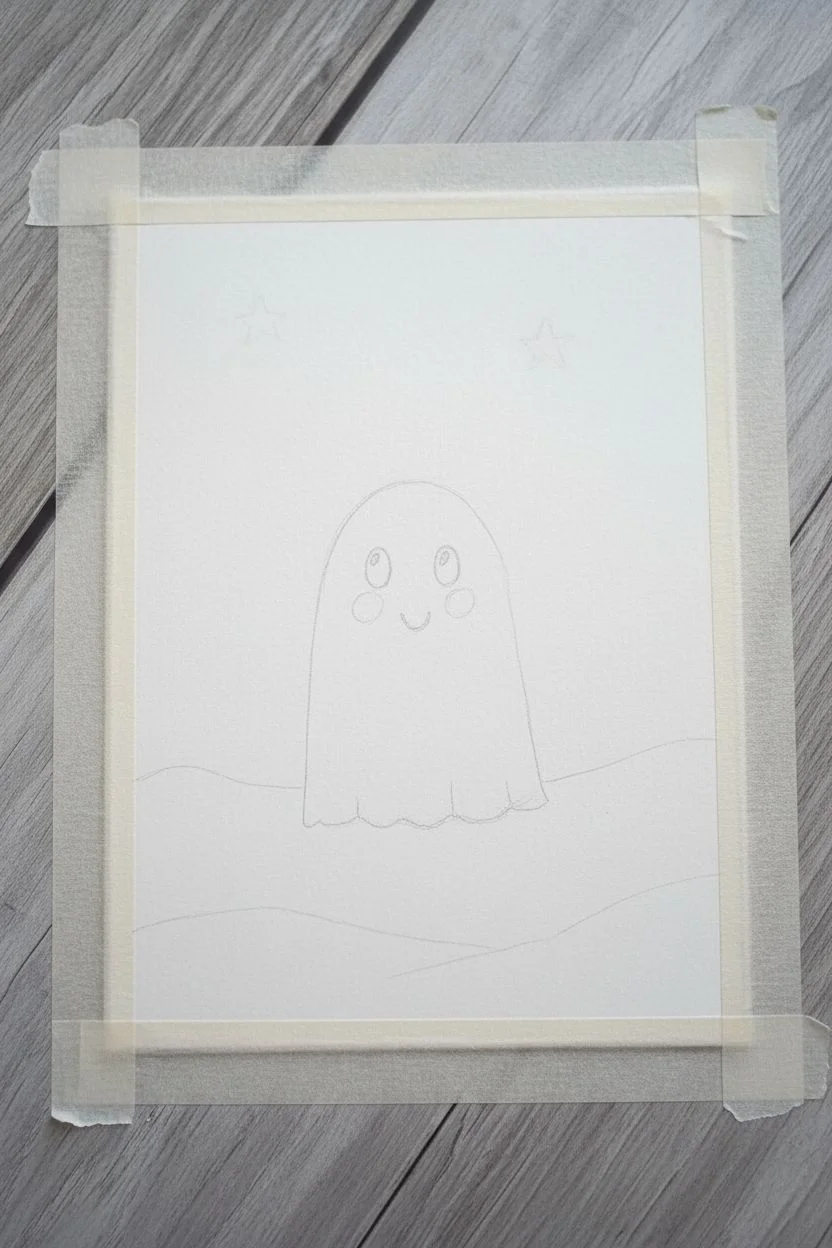
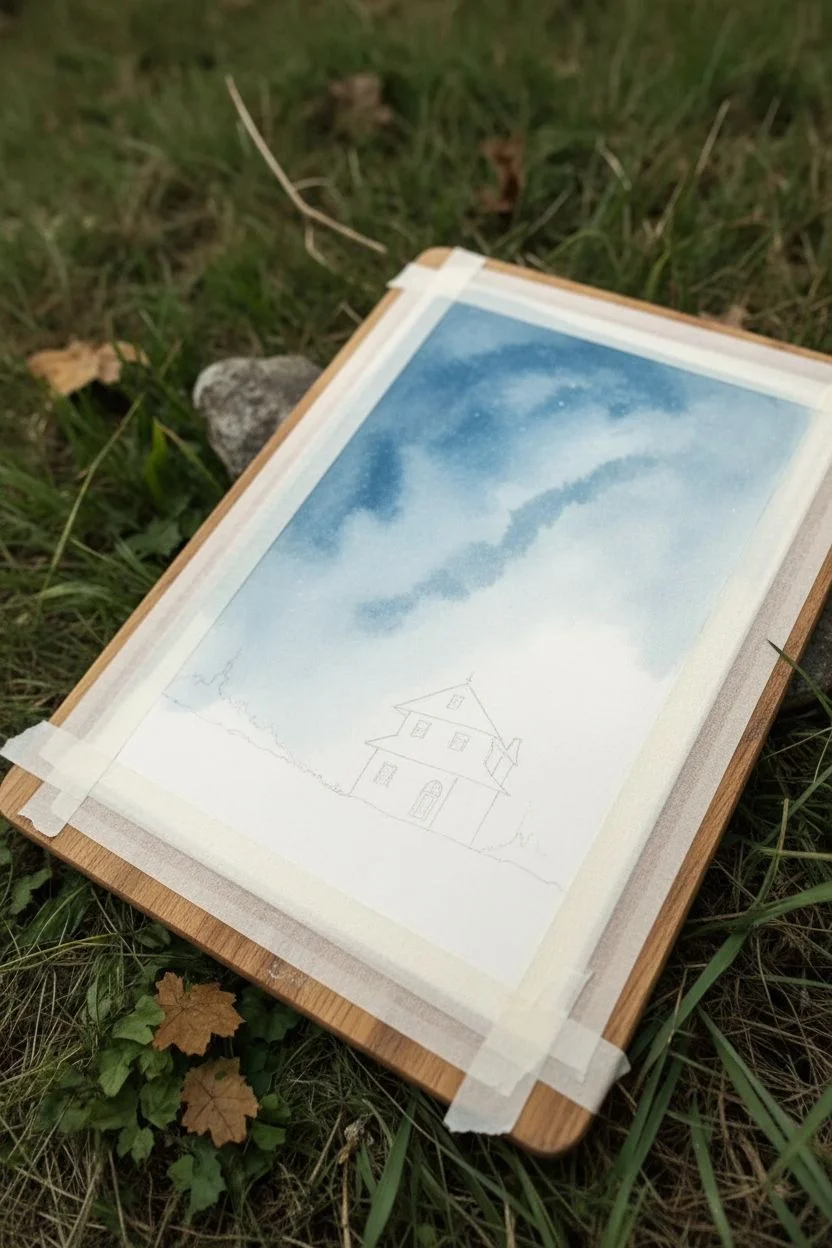
Step 1: Sketching and Preparation
-
Tape the edges:
Start by taping your watercolor paper to a board or table with painter’s tape. This creates that crisp white border you see in the final piece and keeps the paper flat while wet. -
Draft the ghost shape:
Lightly sketch a simple dome shape in the center of the paper for the ghost’s head. Extend the lines down and create a wavy, uneven hem at the bottom where the ‘sheet’ ends. -
Add landscape details:
Draw faint, rolling hill lines behind the bottom of the ghost to ground the scene, but keep them simple. -
Draw the face:
Sketch two oval eyes and a small ‘u’ shaped smile. Don’t press too hard with the pencil, as you want these lines to be barely visible later.
Keep it Clean
To keep the ghost bright white, you can apply masking fluid over the sketch before painting the sky. Rub it off later for perfect edges.
Step 2: Painting the Sky Gradient
-
Prepare the background wash:
Clean your brush thoroughly. Paint clear water over the entire sky area *around* the ghost. Be very careful to leave the ghost shape completely dry inside. -
Start with the darkest color:
Load your brush with a deep indigo or dark blue. Dab this color onto the wet paper at the very top, letting it bleed downwards slightly. -
Transition to purple:
While the blue is still wet, introduce a purple hue around the middle section of the sky. Blend it gently upward into the blue so there is no hard line. -
Add the twilight glow:
Near the horizon line (the hills), drop in a soft pink or magenta. Let this touch the wet purple paint above it to create a smooth sunset fade. -
Let it dry completely:
This is crucial—wait until the paper is bone dry. If you touch it and it feels cool, it needs more time.
Cauliflower Blooms?
If you see weird textures in your sky, you likely added water to paint that was already drying. Next time, work faster while the paper is evenly wet.
Step 3: The Ghost and Foreground
-
Paint the hills:
Mix a dark purple or violet shade. Paint the hills at the bottom, overlapping the bottom edge of the ghost slightly to make it look like it’s floating behind or just above them. -
Create ghost shadows:
Make a very watery, pale grey wash. Gently paint vertical stripes along the folds of the sheet to give the ghost dimension, keeping the main part of the body brilliant white. -
Paint the face features:
Using a small detail brush or a black liner, fill in the oval eyes and trace the smile. Add two soft pink circles for rosy cheeks using watered-down pink paint. -
Add foliage silhouettes:
With the same dark purple used for the hills, paint tiny sprigs of plants or leaves poking up from the ground using the tip of your smallest brush.
Step 4: Magical Final Touches
-
Review the gradient:
If your sky dried too light, you can glaze a second layer over the top once the first is dry, but avoid painting over the pink area to keep it glowing. -
Create the stars:
Use white gouache or a white gel pen to dot tiny stars all over the dark blue sky. Vary the sizes, making some just pinpricks and others distinct dots. -
Draw larger stars:
Add two or three larger, five-pointed stars near the top for visual interest. -
Add eye highlights:
Place a minuscule white dot inside the black of each eye. This ‘catchlight’ brings the character to life. -
Remove the tape:
Peel the tape away slowly at a 45-degree angle to reveal your clean edges and frame your spooky masterpiece.
Now you have a charming little phantom ready to haunt your fridge


Black Cat Silhouette Sitting by a Pumpkin
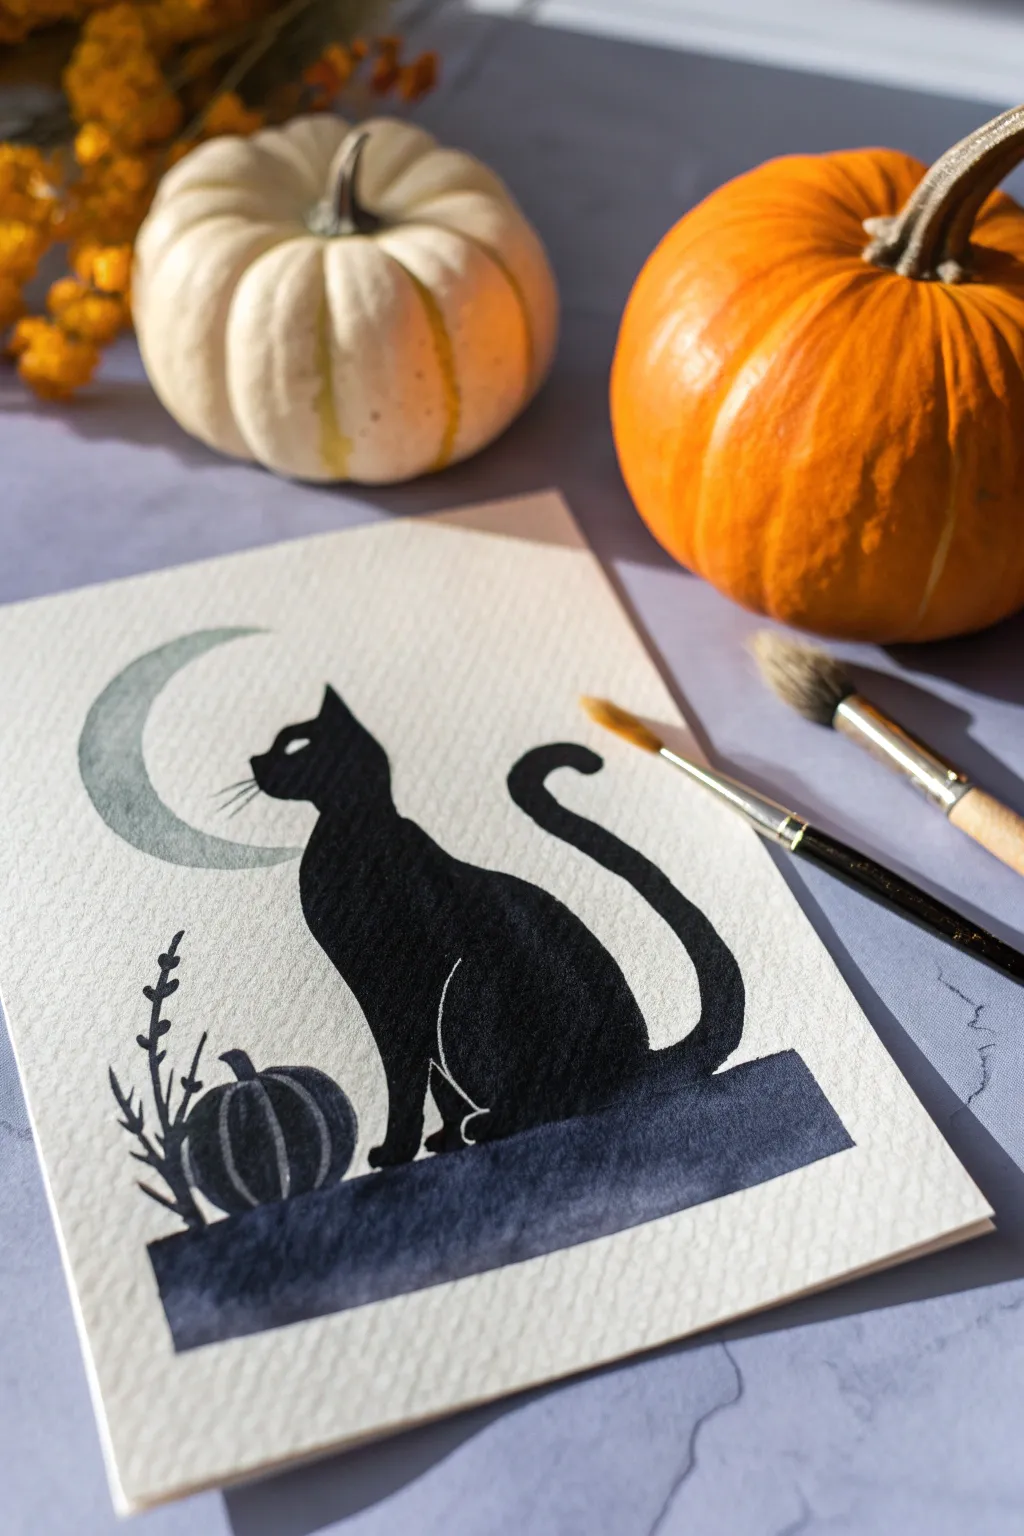

Capture the magic of a Halloween night with this elegant watercolor silhouette featuring a watchful black cat and a crescent moon. This project uses simple shapes and bold contrasts to create a scene that looks professional yet is surprisingly easy to master.
Step-by-Step Tutorial
Materials
- Cold press watercolor paper (A5 size works well)
- Black watercolor paint or black India ink
- Diluted grey-blue watercolor paint
- Round brush (size 6 or 8)
- Fine liner brush (size 0 or 1)
- Pencil for sketching
- Eraser
- Water cups
- Paper towels
Step 1: Sketching the Composition
-
Outline the moon:
Start near the top left corner of your paper. Lightly sketch a crescent moon shape, making sure the curve faces inward toward the center of the page. -
Position the ground:
Draw a faint horizontal line about a quarter or fifth of the way up from the bottom edge to serve as your ground level. -
Sketch the pumpkin:
On the left side of the ground line, draw a small, rounded pumpkin shape. It should look slightly squat, with ridges sketched lightly to give it form. -
Outline the cat:
Next to the pumpkin, sketch the outline of a sitting cat. Draw a smooth curve for the back, a rounded head with pointed ears, and a long tail that curls up behind the body into an ‘S’ shape.
Step 2: Painting the Light Elements
-
Paint the moon:
Mix a very watery, pale grey-blue color. Carefully fill in your moon sketch. You want this to look translucent and misty, so keep the pigment load light. -
Let it settle:
Allow the moon to dry completely before moving on. If you work too fast, the black paint from the cat might bleed into the moon later.
Clean Lines Pro Tip
For the sharpest silhouette edges, don’t overload your brush with water. A creamy, ink-like consistency gives you more control and prevents bleeding.
Step 3: Creating the Silhouettes
-
Mixing the black:
Load your medium round brush with concentrated black watercolor or India ink. You want a deep, opaque black for the best silhouette effect. -
Fill the cat’s body:
Start filling in the cat’s body, working carefully along the edges first to keep them crisp. Leave the very bottom edge where it meets the ground wet for now. -
Define the tail:
Use the tip of your brush to paint the curling tail. Try to do this in one or two smooth, confident strokes to keep the line fluid rather than shaky. -
Add the pumpkin silhouette:
Using a slightly diluted black wash (so it’s just a shade lighter than the cat), paint the pumpkin. Leave tiny slivers of white paper between the pumpkin ridges to define its shape. -
Connect the shadows:
While the bottom of the cat and pumpkin are still slightly damp, paint a thick, dark horizontal band for the ground. This helps merge the figures into the shadow naturally.
Level Up: Starry Night
Once the painting is totally dry, flick a toothbrush loaded with diluted white gouache over the scene to create a dusting of distant stars or magical dust.
Step 4: Adding Fine Details
-
Paint the foliage:
Switch to your fine liner brush. To the left of the pumpkin, paint thin, spindly stems rising up. -
Add leaves:
Dab small, simple leaf shapes along these stems to simulate dried autumn weeds or branches. -
Outline the pumpkin stem:
Add a small, curved stem to the top of your pumpkin silhouette. -
Refine the cat’s face:
Carefully define the pointed ears. Leaves a tiny triangular negative space (white paper) for the eye if you want, or paint it solid first and add white gouache later. -
Paint the whiskers:
Using a very dry fine brush or a black pen, flick three thin whiskers extending from the cat’s muzzle. -
Add subtle definition:
If your black paint is dry, you can use a white gel pen or white gouache to add a very fine line separating the cat’s front leg from its body for extra dimension. -
Final drying time:
Let the entire piece dry flat. Watercolor paper can buckle, so taping it down beforehand or weighting it after drying helps keep it pristine.
Framing this stark black-and-white piece creates a striking decoration for the season


Bat Silhouettes Flying Across a Full Moon
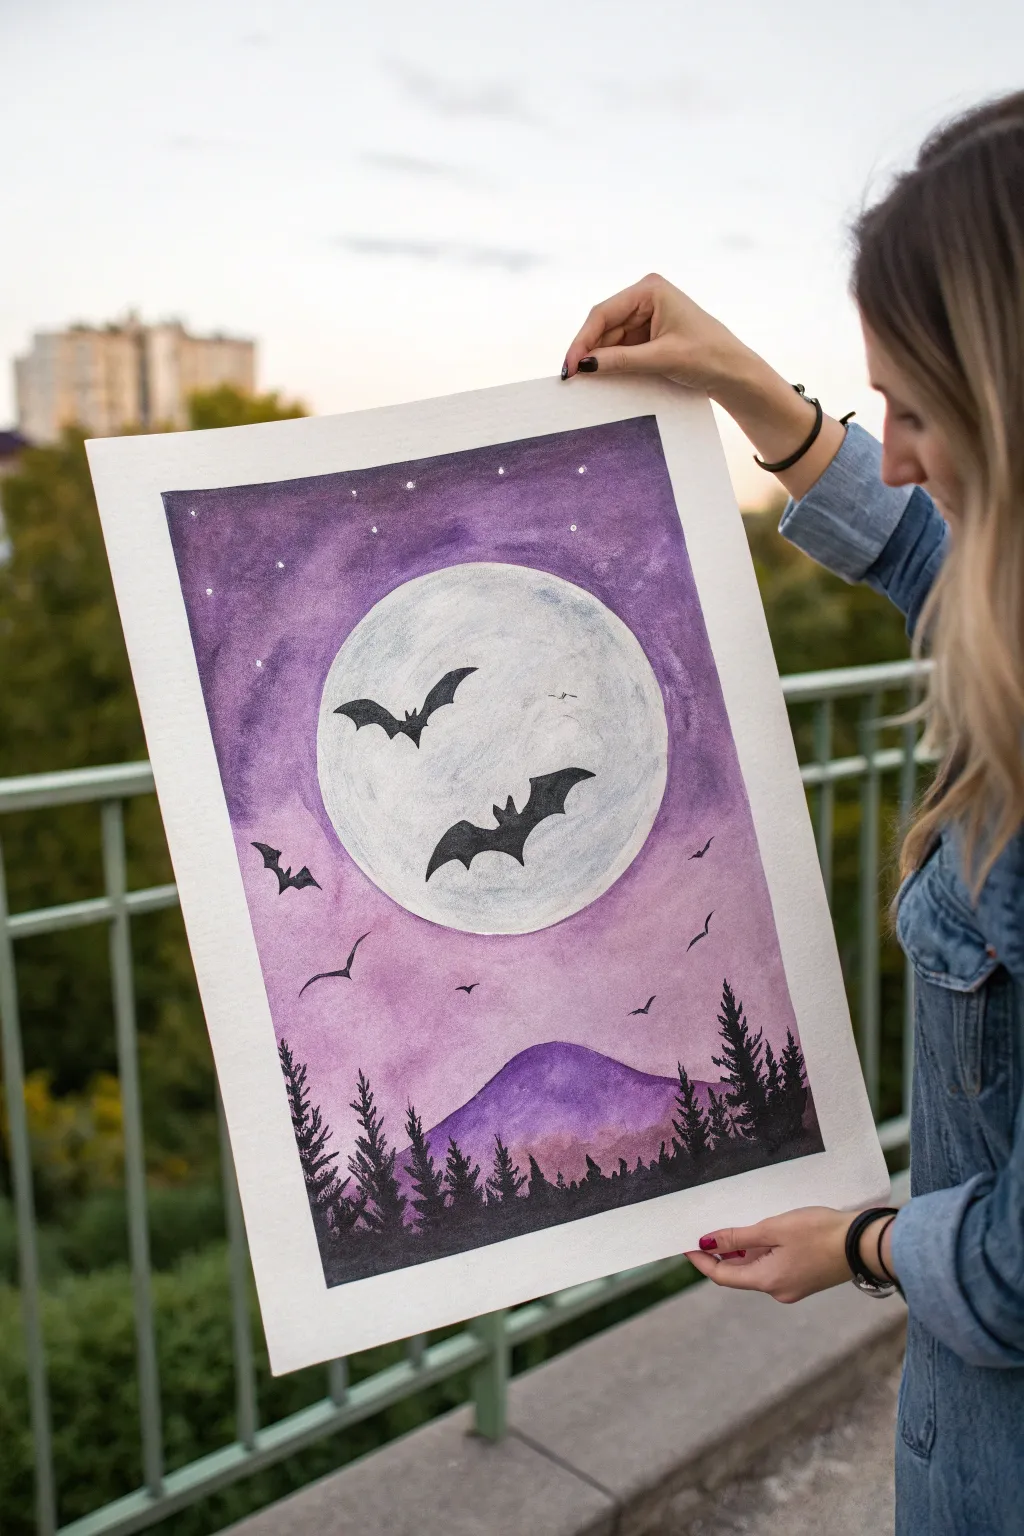
Create a spooky yet serene Halloween scene featuring striking bat silhouettes against a glowing full moon. This watercolor project uses wet-on-wet techniques to achieve a dreamy purple sky that contrasts beautifully with sharp black details.
Step-by-Step Guide
Materials
- Cold-press watercolor paper (A3 or A4)
- Watercolor paints (Purple, Indigo, White)
- Black gouache or acrylic paint
- Large flat brush or wash brush
- Round brush (size 6 or 8)
- Fine detail brush (size 0 or 1)
- Masking tape
- Pencil and round object for tracing (like a bowl)
- Paper towels
- Water cups
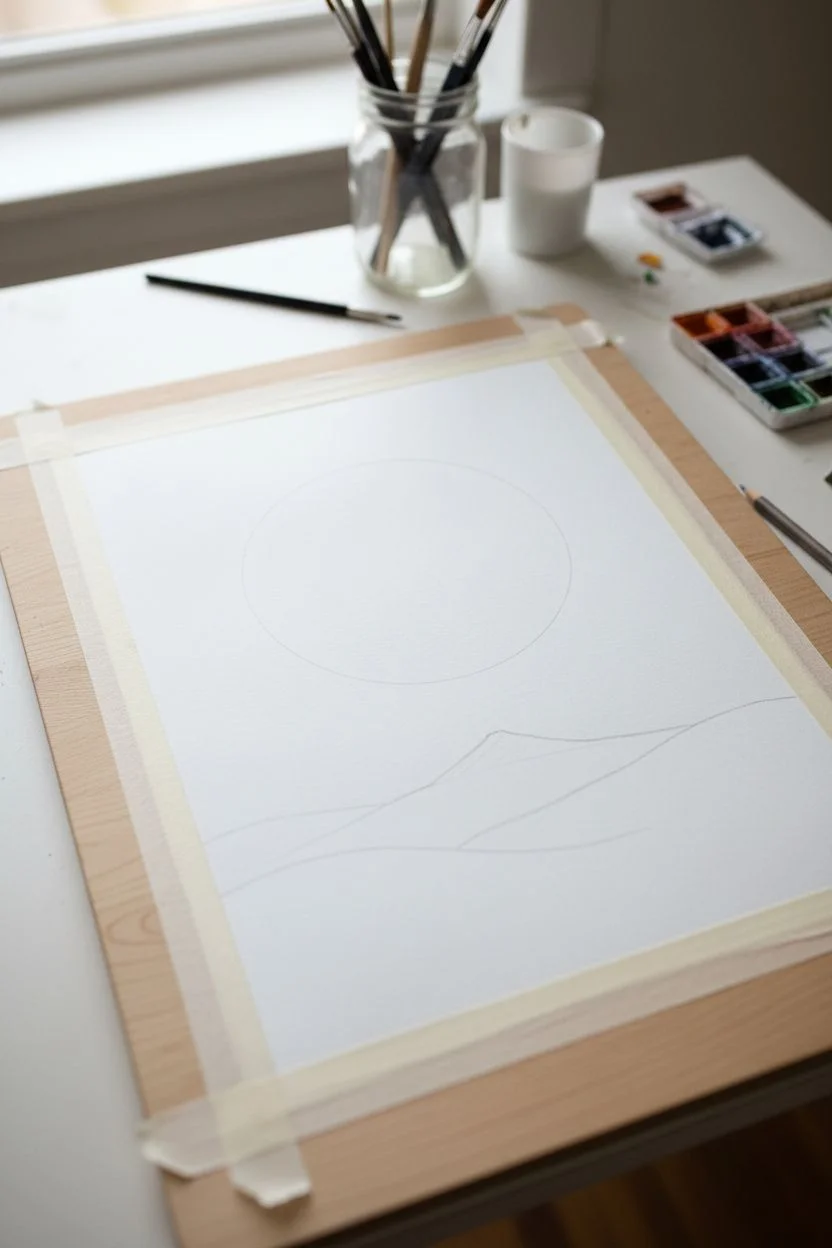
Step 1: Setting the Scene
-
Secure Your Paper:
Begin by taping down all four edges of your watercolor paper to a board or table. This creates a clean white border and prevents the paper from buckling when wet. -
Trace the Moon:
Place a bowl or round object slightly above the center of the paper. trace a light circle with a pencil to define your moon. -
Outline the Hills:
Lightly sketch a rolling hill line near the bottom third of the paper. Add a larger, gentle peak in the center to suggest a distant mountain.
Clean Moon Edges
If you struggle to paint around the circle perfectly, use liquid frisket (masking fluid) to cover the moon before painting the sky. Rub it off once dry.
Step 2: Painting the Sky & Moon
-
Wet the Sky Area:
Using your large brush and clean water, wet the entire sky area around the moon circle. Be careful not to get water inside the moon circle itself. -
Apply the Purple Wash:
Load your brush with a vibrant purple watercolor. Start applying it near the edges of the paper, letting the color bleed inward. -
Deepen the Edges:
While the paper is still wet, drop in darker purple or a touch of indigo at the very top corners to create a vignette effect. -
Fade Toward the Moon:
Use a damp, clean brush to soften the purple paint as you get close to the pencil line of the moon, creating a subtle glowing halo. -
Paint the Moon:
Once the purple sky is dry, wet the inside of the moon circle. Use a very diluted mix of grey or pale blue to add texture, dabbing it lightly to look like craters. -
Add Stars:
Take opaque white watercolor or gouache on a small brush and tap or flick it to create stars in the purple sky. You can dot a few larger stars manually for emphasis.
Step 3: Adding Silhouettes
-
Paint the Mountain:
Mix a semi-transparent purple wash—slightly darker than the sky—and paint the large central hill. Let this dry completely before moving on. -
Define the Treeline:
Switch to black gouache or acrylic for maximum opacity. Using a medium round brush, paint a jagged black line across the very bottom edge for the ground. -
Create Pine Trees:
Use the tip of your brush to pull vertical lines up from the black ground. Then, use a dabbing motion to add branches that get wider toward the bottom of each tree. -
Vary Tree Heights:
Make some trees taller than others, overlapping the purple mountain in the background to create depth. -
Sketch the Bats:
If you aren’t confident freehanding, lightly sketch the bat shapes with a pencil inside the moon and in the sky area. -
Paint the Large Bats:
Fill in the large bat silhouettes inside the moon using solid black paint and your fine detail brush. Sharp wing tips are key here. -
Add Distant Bats:
Paint smaller, simpler ‘m’ shapes or checkmark shapes in the purple sky area to represent bats flying further away. -
Finishing Touches:
Let everything dry completely. I like to slowly peel off the masking tape at a 45-degree angle to reveal that crisp, professional border.
Spooky Texture
Sprinkle a pinch of table salt onto the wet purple sky paint. As it dries, the salt absorbs pigment, creating unique starburst textures.
Hang your masterpiece in a window or on the fridge to add a touch of handcrafted magic to your holiday decor


Simple Spiderweb Corners With a Cute Spider
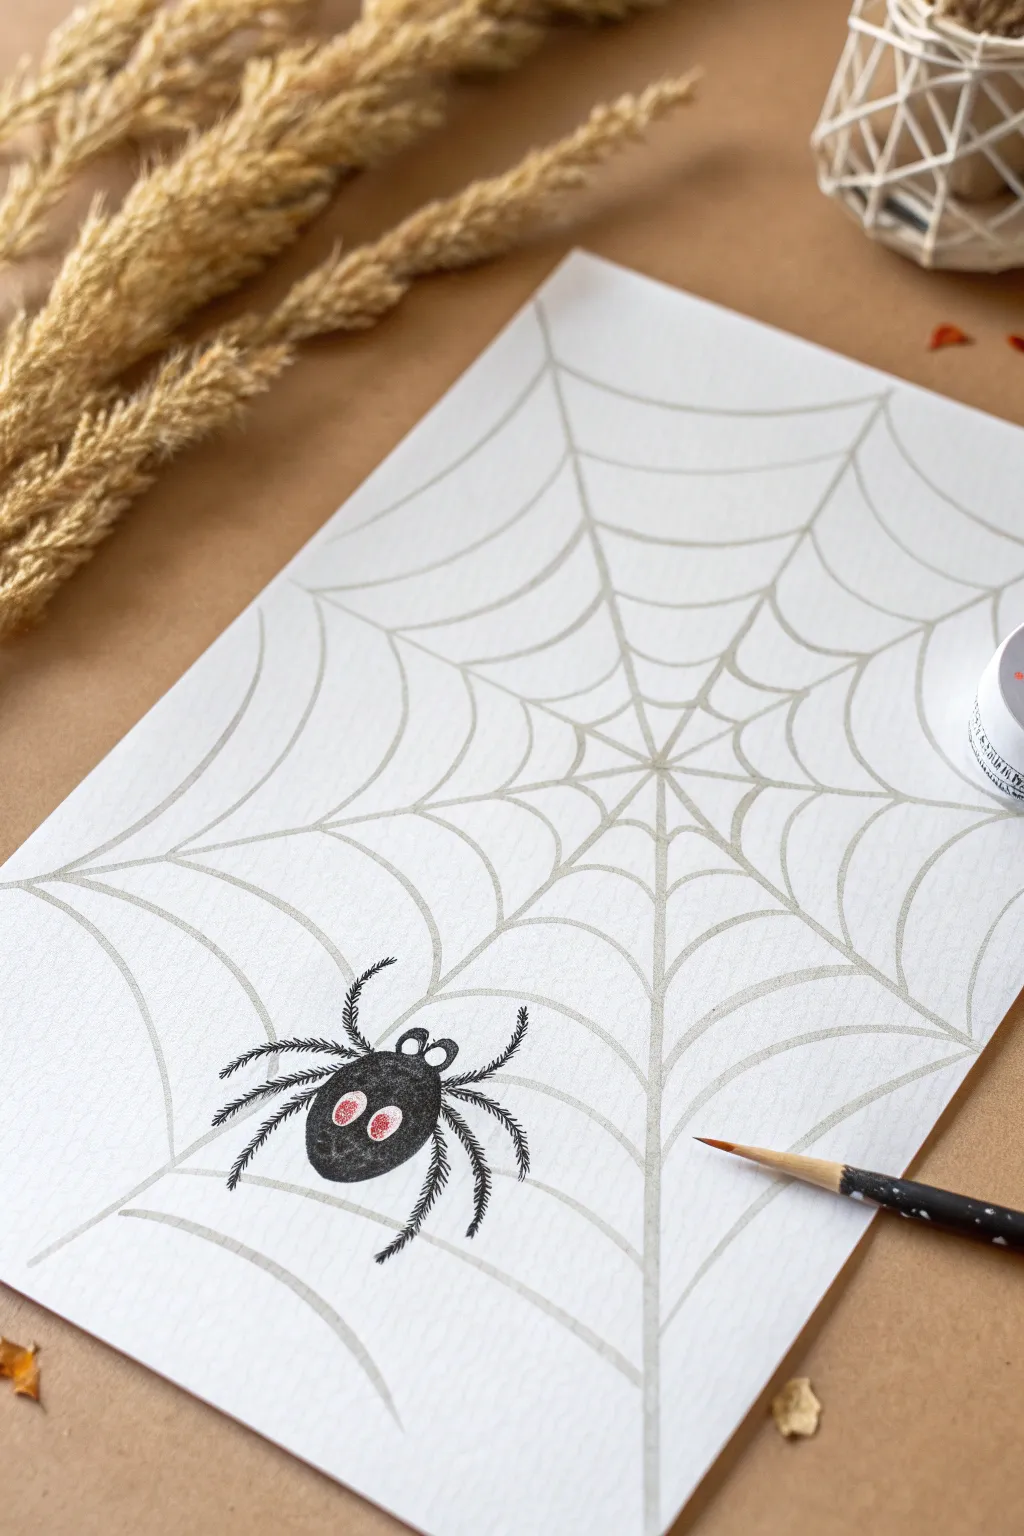
This charming project features a friendly, googly-eyed spider resting on a delicate web, perfect for adding a touch of spooky fun to your home. Using simple lines and basic shapes, you’ll create a clean, graphic design that looks surprisingly professional.
Step-by-Step Tutorial
Materials
- High-quality white drawing paper or cardstock
- Light pencil and eraser
- Light grey fine-tip marker or colored pencil
- Ruler (optional but helpful)
- Black acrylic paint or black marker
- Fine-point paintbrush (size 1 or 2)
- Red paint or small red stickers (for eyes)
- White or grey gel pen (for eye details)
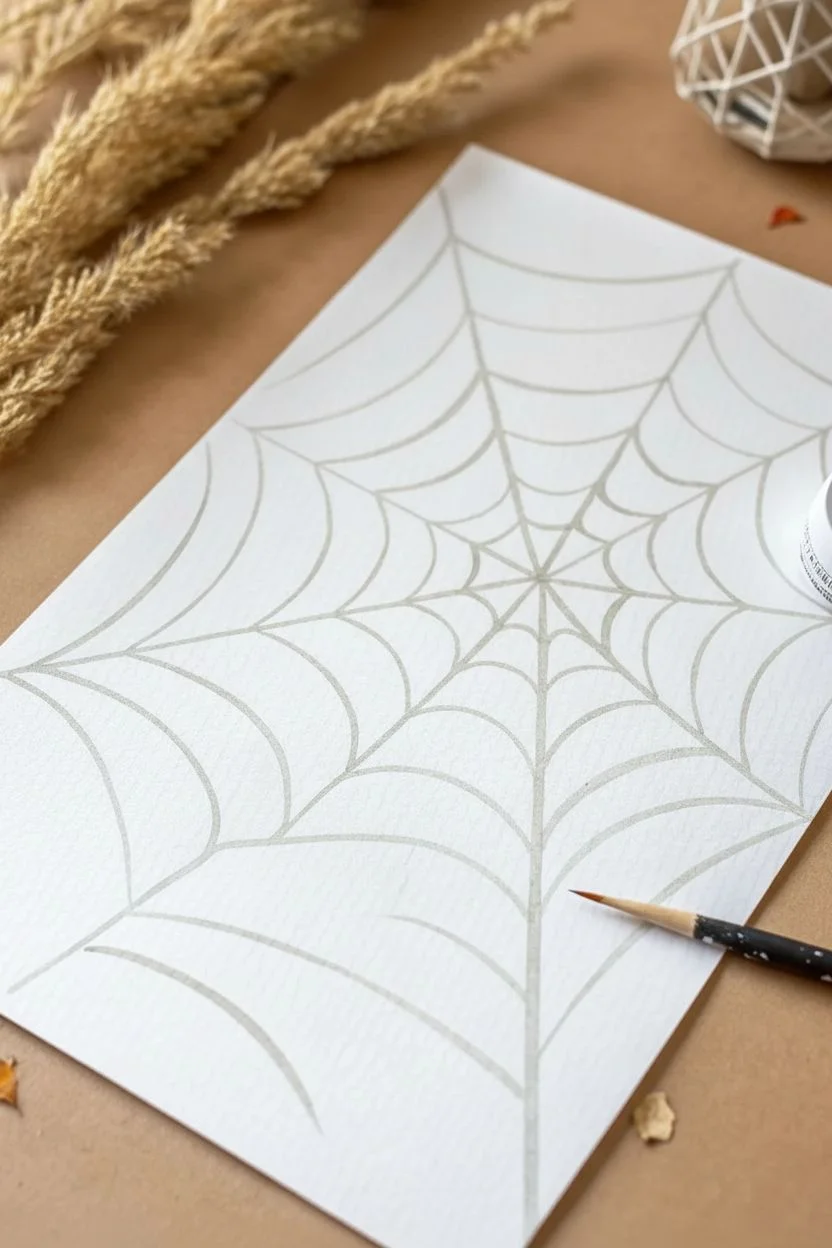
Step 1: Weaving the Web
-
Find your center:
Visualize a point roughly a third of the way down the page and slightly to the right. This doesn’t need to be exact, but it will serve as the center point where all your main web lines will meet. -
Draft the main lines:
Using a light pencil, draw straight lines radiating outward from that center point to the edges of the paper. Think of these as the spokes of a bicycle wheel. You should aim for about 7 to 9 main lines. -
Add the curves:
Starting near the center, draw curved lines that connect each spoke to its neighbor. These should look like little hammocks dipping slightly between the straight lines. -
Expand the web:
Continue drawing these connecting curves in expanding rings as you move outward toward the edge of the paper. Keep the spacing somewhat consistent, growing slightly larger towards the outside. -
Trace with grey:
Once happy with your pencil sketch, carefully trace over all the web lines using a light grey fine-tip marker or colored pencil. This creates that subtle, silken thread look without being too harsh. -
Clean it up:
Gently erase any visible pencil marks underneath your grey lines to keep the drawing looking crisp and tidy.
Wobbly Web Lines?
Don’t stress about perfectly straight lines! Real spiderwebs are often asymmetrical and slightly wonky. Those little imperfections actually make the drawing feel more organic and natural.
Step 2: Painting the Spider
-
Place the body:
Choose a spot in the bottom-left quadrant of the web for your spider. Using black acrylic paint and a fine brush, paint a slightly flattened oval shape for the main body. -
Add the head:
Just above the body oval, paint a much smaller circle that slightly overlaps the top. This will be the head area where the eyes sit. -
Create texture:
While holding your brush, use a dabbing motion rather than smooth strokes to give the spider’s body a slightly fuzzy or hairy texture. -
Paint the legs:
Using the very tip of your brush or a thin black marker, draw four legs extending from each side of the body. Make them jointed—draw a line going up and out, then bent sharply downwards. -
Fuzz up the legs:
Go back over the leg lines with tiny, short strokes perpendicular to the main leg line. This adds that classic creepy-crawly hairy detail. -
Dry time:
Let the black paint dry completely before moving on to the final details. Only a few minutes usually suffices for thin acrylic layers.
Make it Sparkle
Before the grey web lines dry completely, sprinkle a tiny pinch of silver glitter over the center. It will mimic morning dew catching the light on the silk threads.
Step 3: Bringing it to Life
-
Paint the eyes:
Dip a clean brush into red paint (or use a red paint pen) and add two bold ovals on the head area for eyes. -
Add pupils:
Once the red layer is dry, add a small vertical slash of white or light grey in the center of each red eye to create a reflective pupil. -
Final highlights:
For a finishing touch, add tiny white dots inside the pupils to make the eyes look glossy and alive. I find a white gel pen gives the most control here.
Now you have a delightfully spooky corner decoration ready to display
BRUSH GUIDE
The Right Brush for Every Stroke
From clean lines to bold texture — master brush choice, stroke control, and essential techniques.
Explore the Full Guide
Bubble Letter “Boo” in Bold Halloween Colors
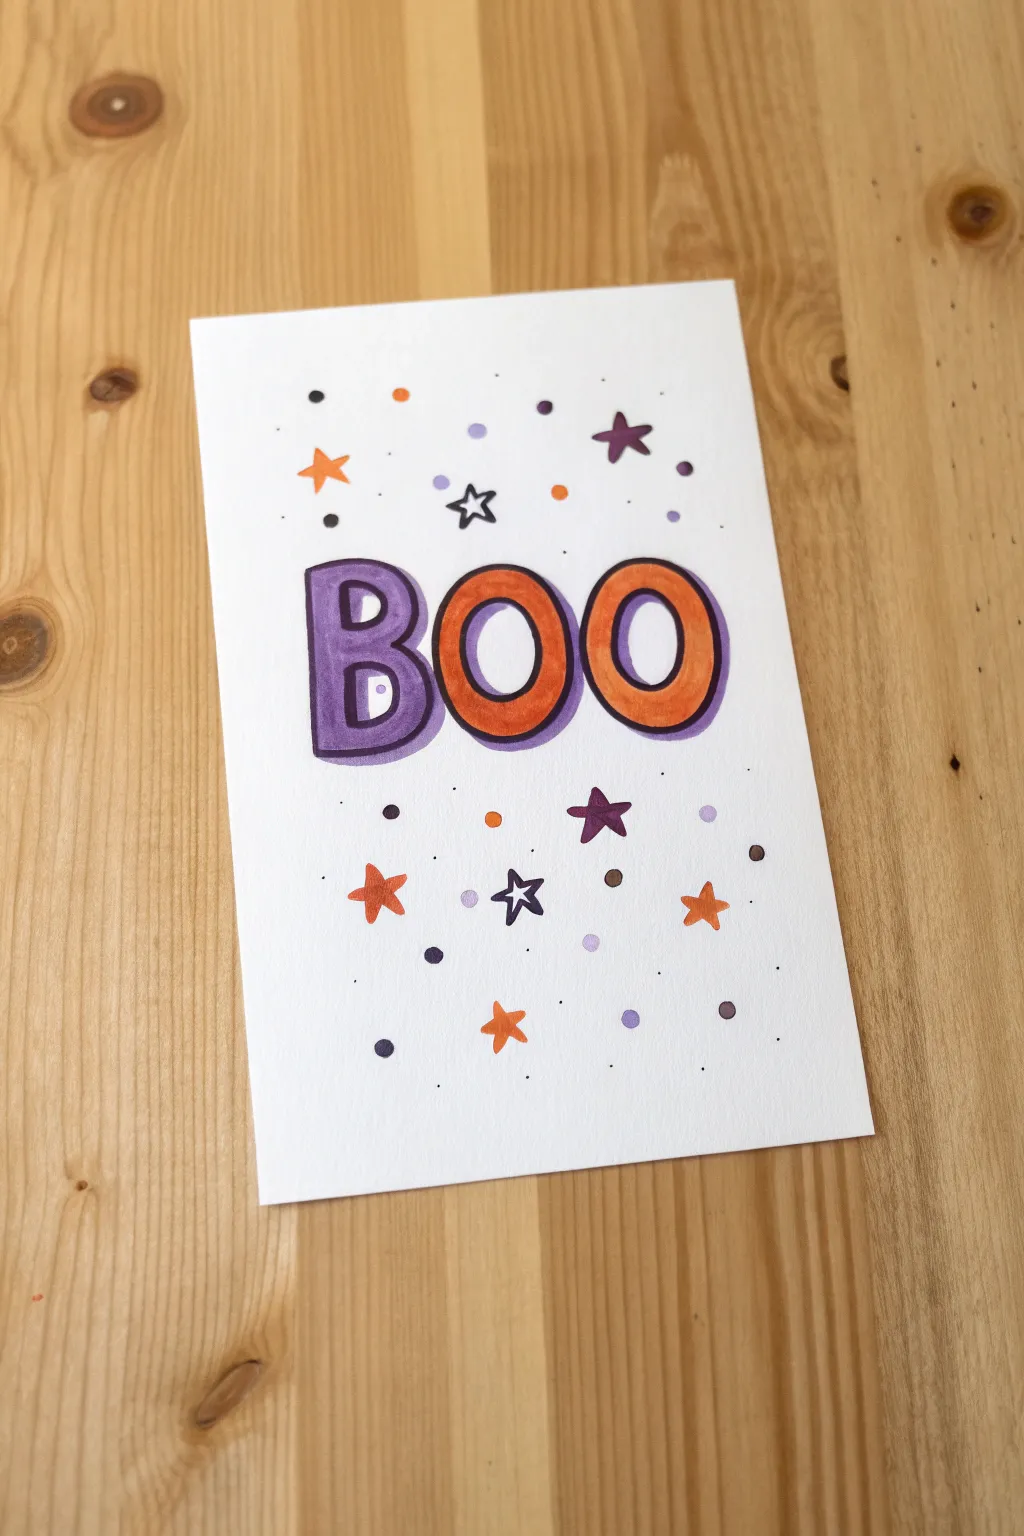
This fun lettering project combines classic Halloween colors with a playful bubble font to create a festive card or decoration. With vibrant orange and purple markers, you’ll learn how to add dimension to simple letters for a design that pops right off the page.
Step-by-Step
Materials
- White cardstock or heavy drawing paper (A5 size works well)
- Pencil (HB or 2B)
- Eraser
- Purple alcohol marker or felt-tip pen
- Orange alcohol marker or felt-tip pen
- Fine-liner pen (black, roughly 0.5mm)
- Thinner purple marker (or a light lilac shade for variation)
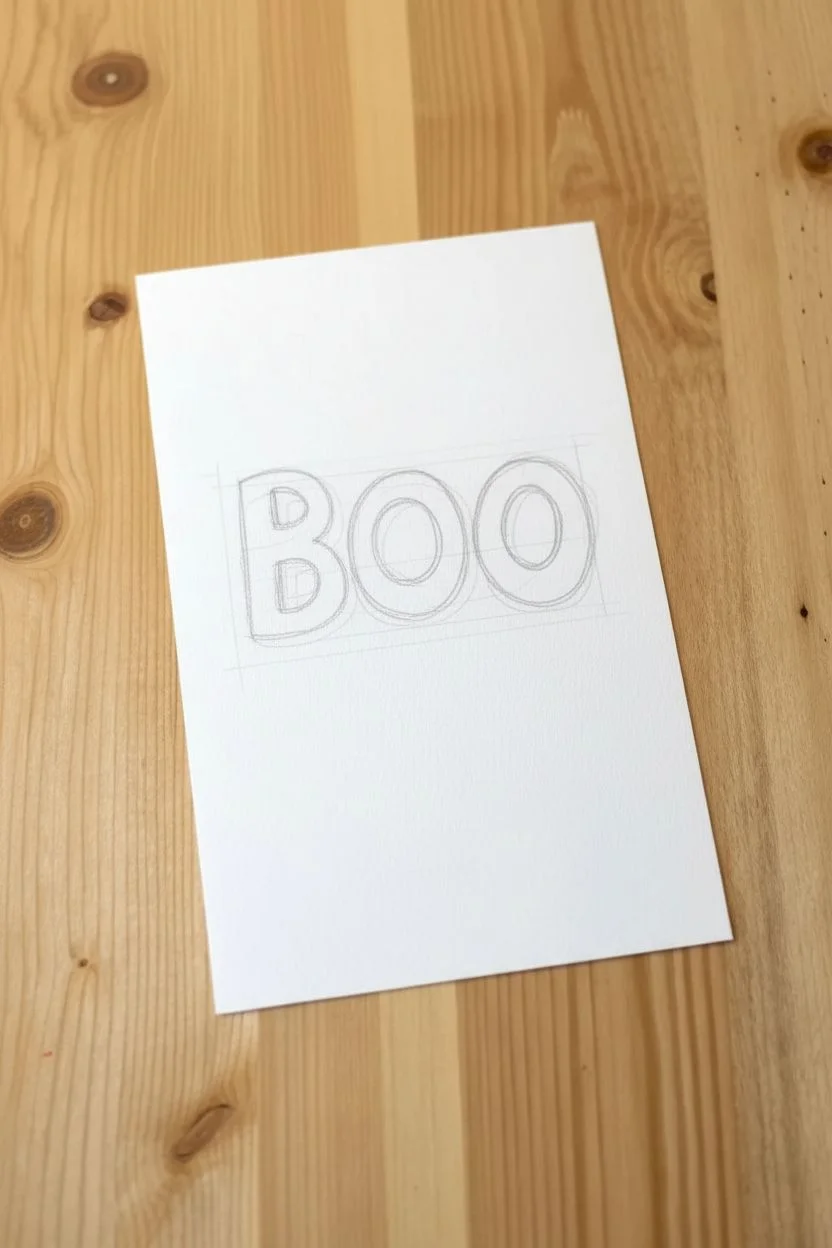
Step 1: Drafting the Design
-
Center layout:
Start by finding the visual center of your paper. Lightly sketch a horizontal line where you want the word ‘BOO’ to sit. -
Sketch the letters:
Using a pencil, draw the letters ‘B’, ‘O’, and ‘O’ in a distinct bubble style. Make them nice and wide with rounded edges. -
Spacing check:
Ensure the letters are close or slightly touching for a cohesive look. Adjust your pencil lines until the word feels balanced in the middle of the page.
Fixing Wobbly Lines
If your black outline isn’t perfectly smooth, simply thicken the line slightly in that area to hide the wobble. A varied line weight can actually add character
Step 2: Adding Color
-
Color the ‘B’:
Take your main purple marker and fill in the entire shape of the letter ‘B’. Work in consistent strokes to avoid streakiness. -
Fill the ‘O’s:
Switch to your bright orange marker. Carefully color in both ‘O’ shapes, keeping the color inside your pencil sketch lines. -
Dry time:
Give the ink a minute to set completely before outlining so the black ink doesn’t bleed into the color. -
Outline in black:
Using your black fine-liner, trace the outer perimeter of each letter. Go slowly around the curves for a clean, professional finish. -
Don’t forget the holes:
Trace the inner holes of the ‘B’ and both ‘O’s with the black pen as well.
Step 3: Creating Dimension
-
Shadow placement:
To make the letters pop, decide on a light source—let’s assume it’s coming from the top left. This means shadows will fall on the right and bottom sides. -
Draw the shadow shapes:
Using a purple marker (or a slightly lighter shade if you have one), draw a thick line hugging the right side and bottom edge of each letter. -
Refining the 3D look:
Make sure the shadow follows the curves. For the ‘O’s, this crescent shape on the bottom right really sells the rounded bubble effect. -
Create the outline shadow:
Outline your new purple shadow shapes with a thin black line to define them clearly against the background.
Make It Sparkle
Add highlights! Once dry, use a white gel pen to add a small curved line or dot on the upper left of each letter and star to make them look shiny and plastic
Step 4: Background Details
-
Large stars:
Draw a few five-pointed stars scattered randomly around the letters. Color some orange and some dark purple. -
Outline stars:
Draw 2-3 stars simply as black outlines with white centers to add variety to the pattern. -
Dot clusters:
Using your different marker colors, add small solid circles in open spaces. Mix sizes—some tiny dots and some slightly larger ones. -
Micro details:
Take the black fine-liner one last time and add tiny specks or pin-prick dots in groups of three to fill any awkward empty voids. -
Final erase:
Wait until everything is totally dry, then gently erase visible pencil marks from your initial sketch.
Display your vibrant typographic art on the fridge or mantle for a quick burst of spookiness
Witch Hat Silhouette Against a Glowing Moon
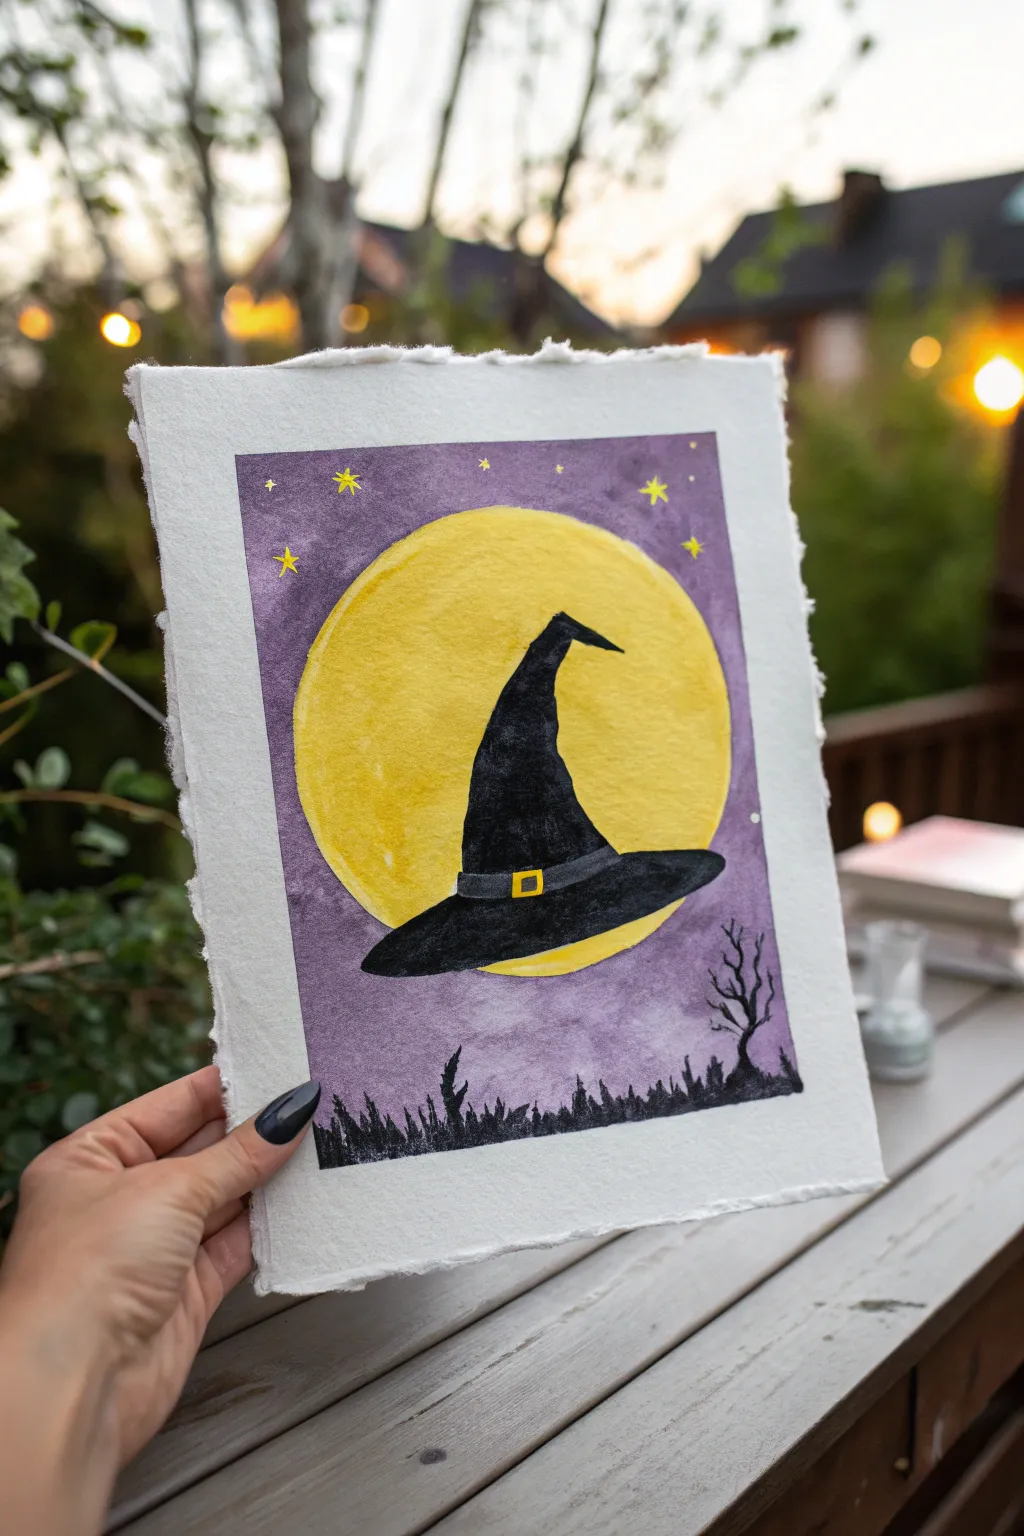
Create a spooky yet charming atmosphere with this high-contrast watercolor project featuring a witch’s hat floating against a giant glowing moon. The vibrant yellow against the deep purple sky makes the silhouette pop beautifully.
Detailed Instructions
Materials
- Cold press watercolor paper (deckled edge optional)
- Watercolor paints (yellow, purple, black)
- Masking tape or painter’s tape
- Round watercolor brushes (large size 10-12, medium size 4-6, fine liner size 0-1)
- Pencil for sketching
- Circular object to trace (bowl or lid)
- Jar of clean water
- Paper towels
- Gold paint or metallic marker (optional)
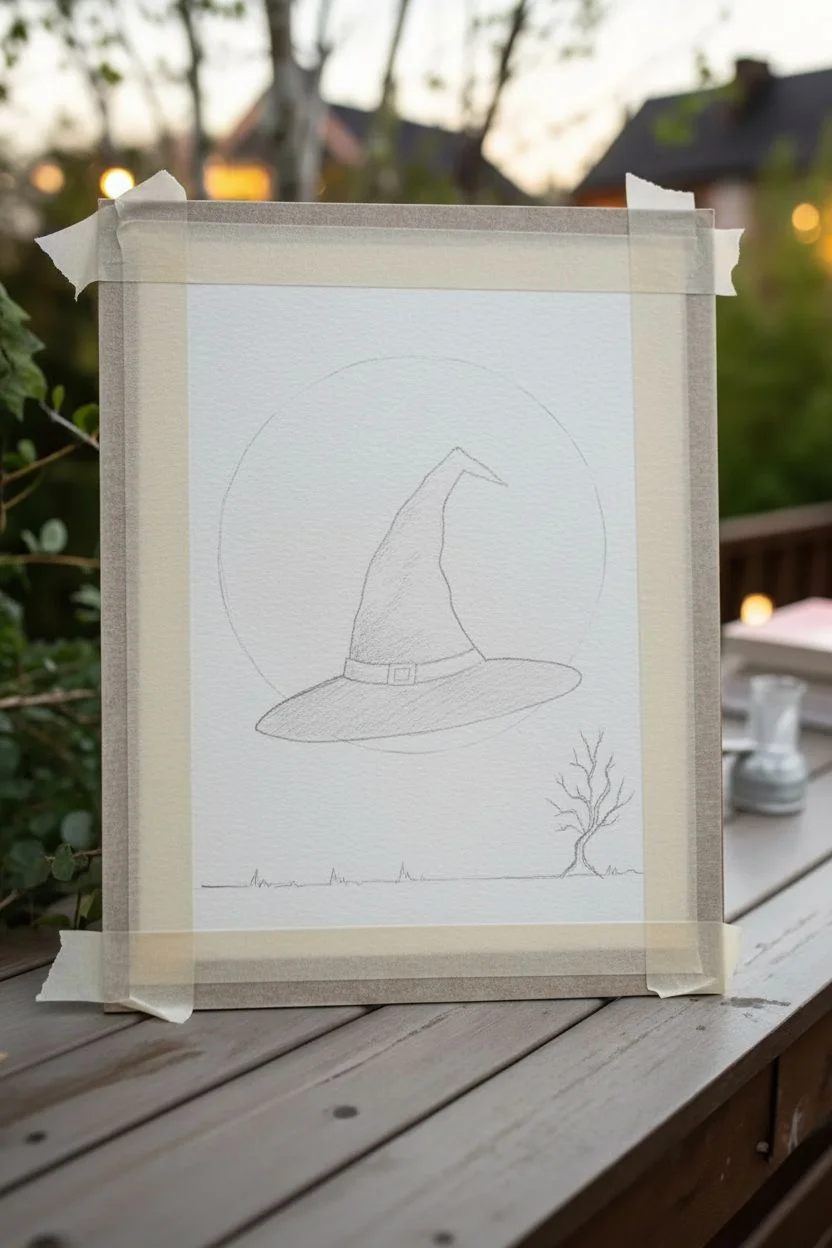
Step 1: Preparation & Sketching
-
Tape edges:
Begin by taping down the four edges of your watercolor paper to a board or table. This creates a crisp white border and keeps the paper flat when wet. -
Trace the moon:
Place your circular object (like a bowl or large lid) in the center of the paper and lightly trace around it with a pencil to create your full moon. -
Sketch the silhouette:
Inside the moon circle, lightly sketch the outline of a crumpled witch’s hat. Make sure the brim extends slightly beyond the moon’s circle on the sides for a dynamic look. -
Add the landscape:
Draw a faint horizontal line near the bottom for the ground, sketching in jagged grass shapes and a spooky, twisted tree on the right side.
Clean Lines Trick
If you struggle with painting smooth circles freehand, use liquid masking fluid over the moon area before painting the purple sky. Rub it off later for a perfect edge.
Step 2: Painting the Sky & Moon
-
Paint the moon base:
Load your large round brush with clean water and wet the inside of the moon circle. Drop in bright yellow watercolor paint, letting it spread naturally. -
Add moon texture:
While the yellow is still wet, dab in a slightly darker golden yellow or orange in random spots to create craters and depth. Let this dry completely before moving on. -
Start the sky:
Once the moon is dry, carefully paint the sky area around it using a purple wash. Be very careful outlining the edge of the moon so the yellow stays clean. -
Deepen the night:
While the purple layer is still wet, drop in some darker purple or indigo near the top corners to create a vignette effect, making the night sky look vast. -
Dry time:
Allow the entire background layer (sky and moon) to dry completely. If the paper feels cool to the touch, it’s still damp.
Spooky Splatter
For a magical texture, load an old toothbrush with gold or white paint and flick the bristles to spray a fine mist of ‘magic dust’ over the background.
Step 3: Adding the Silhouette
-
Fill the hat:
Using a medium round brush and concentrated black paint (with very little water), carefully fill in the shape of the witch’s hat. -
Define the edges:
Switch to a finer brush to crisp up the pointed tip of the hat and the sharp edges of the brim. -
Paint the hat band:
Leave a tiny gap or use lighter grey paint for the hat band area, or just paint it solid black if you plan to paint yellow over it later. -
Ground the scene:
Use the black paint to fill in the bottom landscape strip. Use upward flicking motions with your brush to create the texture of tall, spooky grass. -
Paint the twisted tree:
With your finest liner brush, paint the skeletal tree on the right. Start with a thicker trunk and pull the brush out to create whisper-thin, jagged branches.
Step 4: Final Details
-
Add the buckle:
Once the black hat is totally dry, use opaque yellow paint, a gold metallic marker, or a gel pen to draw a small square buckle on the hat band. -
Paint the stars:
Using the same yellow or gold, paint tiny stars in the purple sky. I like to vary them between simple dots and four-pointed sparkles. -
Remove tape:
Slowly and carefully peel off the masking tape at a 45-degree angle, away from the painting, to reveal your crisp white border.
Now you have a bewitching piece of art perfect for the Halloween season

PENCIL GUIDE
Understanding Pencil Grades from H to B
From first sketch to finished drawing — learn pencil grades, line control, and shading techniques.
Explore the Full Guide
Monster Mash Portraits in Bright Neon Colors
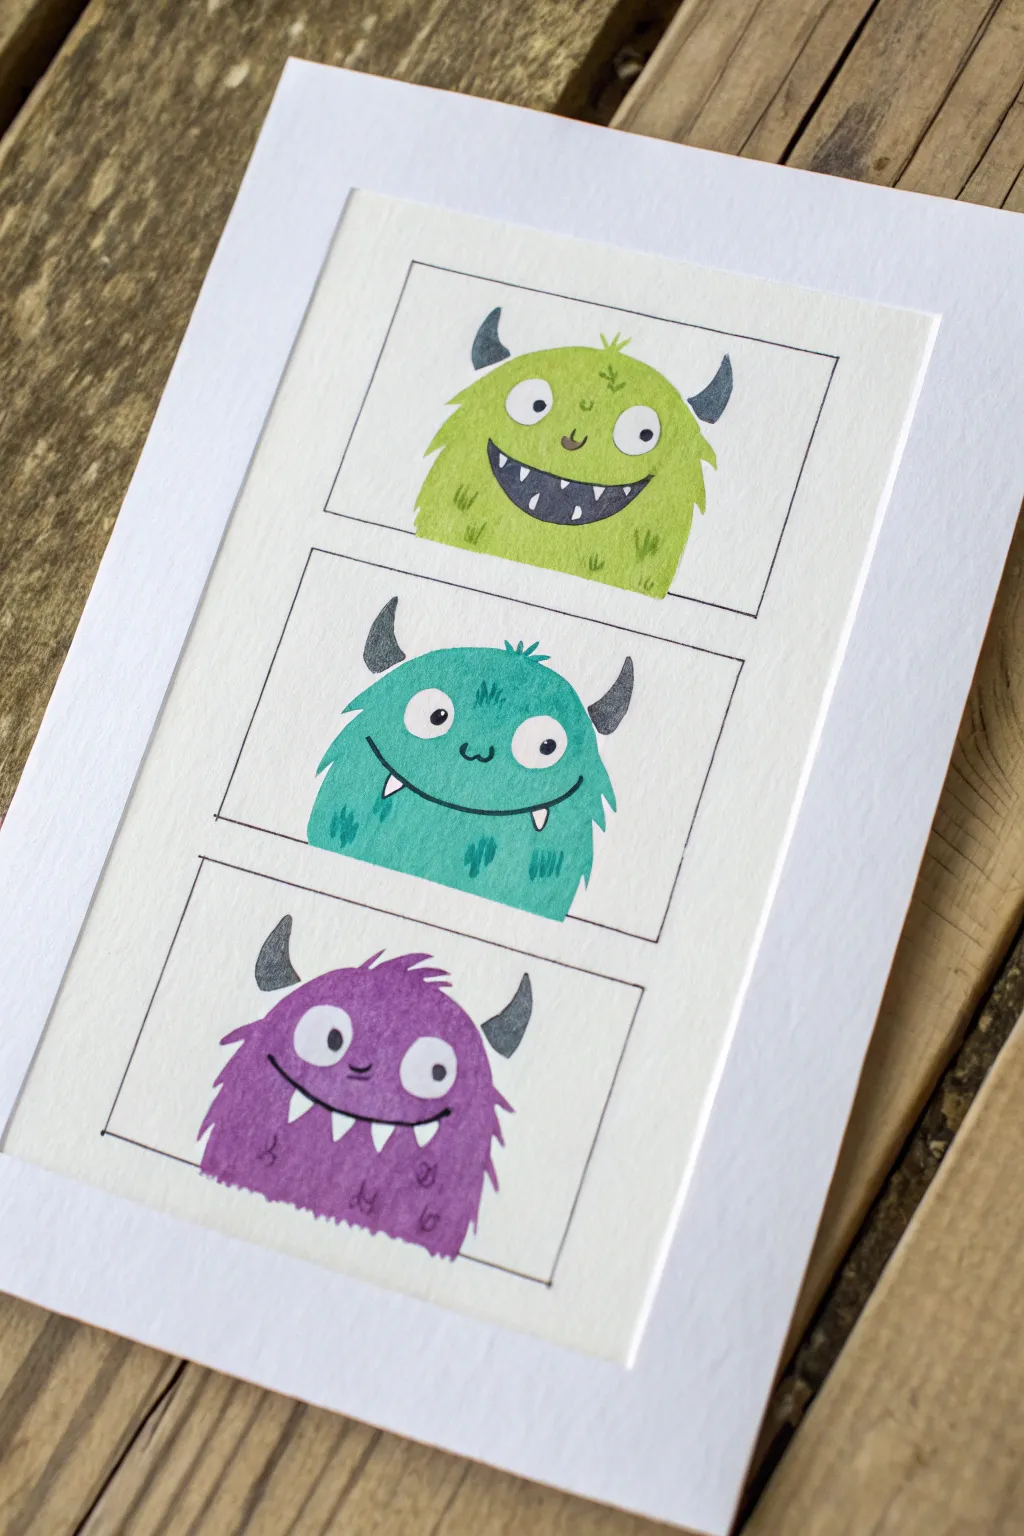
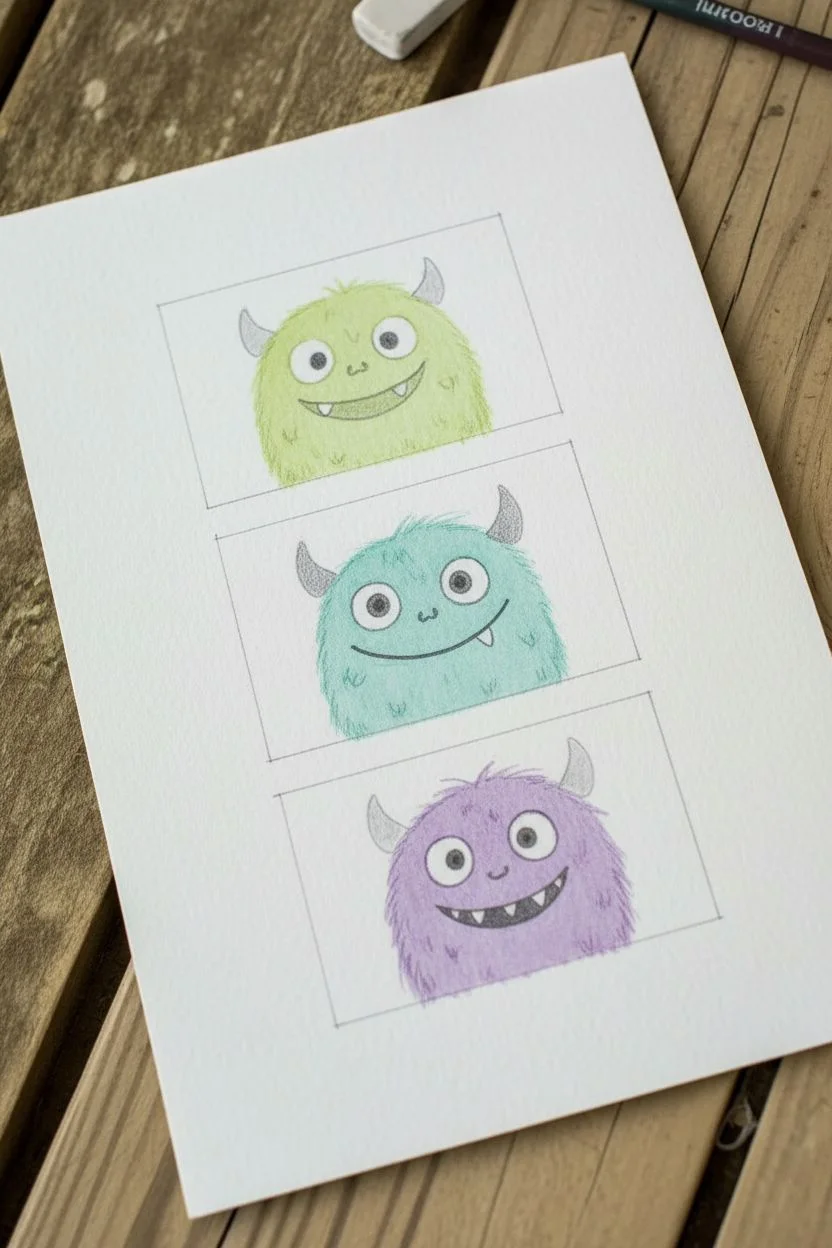
Create a charming trio of not-so-scary monsters with this stacked portrait. Using bright watercolors and fine liner pens, you will bring three distinct characters to life, each with their own unique personality and fuzzy texture.
Detailed Instructions
Materials
- Heavyweight watercolor paper or cardstock (white)
- Black fine liner pen (01 or 03 tip)
- Pencil and eraser
- Ruler
- Watercolor paints or gouache markers (lime green, teal, purple)
- Small round paintbrush (size 2 or 4)
- Dark grey or slate watercolor paint
- White gel pen (optional)
- Paper towels and water cup
Step 1: Planning the Layout
-
Define the frames:
Begin by using your ruler and pencil to draw a tall rectangle centered on your paper. Divide this rectangle into three equal, smaller squares stacked vertically. -
Sketch the guides:
Inside each square, lightly sketch a rounded mound shape sitting at the bottom of the frame. These will be the bodies of your monsters. -
Add basic features:
Sketch large circles for eyes. Give the top monster two eyes, the middle one two wider-set eyes, and the bottom one slightly wonky eyes. Add distinct mouth shapes: a wide grin for the top, a simple curved smile for the middle, and a toothy grin for the bottom. -
Detail the horns:
Draw different horn styles for each monster. Small curved horns for the top, wider horns for the middle, and sharp ones for the bottom monster work well to differentiate them.
Uneven Color?
If your watercolor dries with ‘blooms’ or uneven edges, don’t restart. Simply add more fur texture strokes over the uneven spots to hide them naturally.
Step 2: Inking the Outlines
-
Trace the frames:
Use your black fine liner to ink the rectangular boxes you drew first. Keep your hand steady or use the ruler again for crisp lines. -
Outline the monsters:
Ink the main body shapes, but here is the trick: instead of a smooth line, use short, jagged scribbles along the edges to simulate fur. This fuzzy texture makes them look much friendlier. -
Finalize facial features:
Ink the eyes, pupils, and mouths. For the teeth, draw the triangular shapes clearly. Don’t worry about filling in dark areas yet; just get the outlines down. -
Clean up:
Once the ink is completely dry—give it a minute or two to prevent smudging—gently erase all your pencil sketches.
Step 3: Painting the Characters
-
Paint the top monster:
Load your brush with a bright lime green watercolor. Paint the body of the top monster, carefully working around the eyes and teeth. Keep the wash relatively flat and even. -
Paint the middle monster:
Wash your brush thoroughly and switch to a teal or turquoise shade. Fill in the middle monster’s body, again avoiding the white of the eyes and teeth. -
Paint the bottom monster:
Use a vibrant purple for the bottom character. As you paint near the jagged fur lines, let the brush tip push color slightly into those points. -
Fill the dark details:
Mix a dark grey or slate blue color. Use this to fill in the horns on all three monsters. I find this softer than pure black and adds nice dimension. -
Add contrast:
Use the same dark grey to fill inside the mouths, painting around the white teeth triangles. This high contrast will make the expressions pop.
Pro Tip
Leave a tiny sliver of white space between the paint and the black ink outline. This ‘uncolored’ gap creates a professional, illustrative style.
Step 4: Final Textures
-
Add fur details:
Once the base paint is dry, take a slightly darker shade of each body color (or just less water) and paint small ‘v’ shapes or dashes on the bodies to suggest texture and tufts of fur. -
Refine the faces:
If the eyes look a bit flat, use your fine liner to thicken the pupils or add tiny eyebrows for expression. -
Optional highlights:
If you have a white gel pen, add tiny dots to the eyes or the tips of the horns for a little extra shine.
Frame your finished monster stack or turn it into a fun greeting card for a friend
Haunted House Shapes With Glowing Yellow Windows

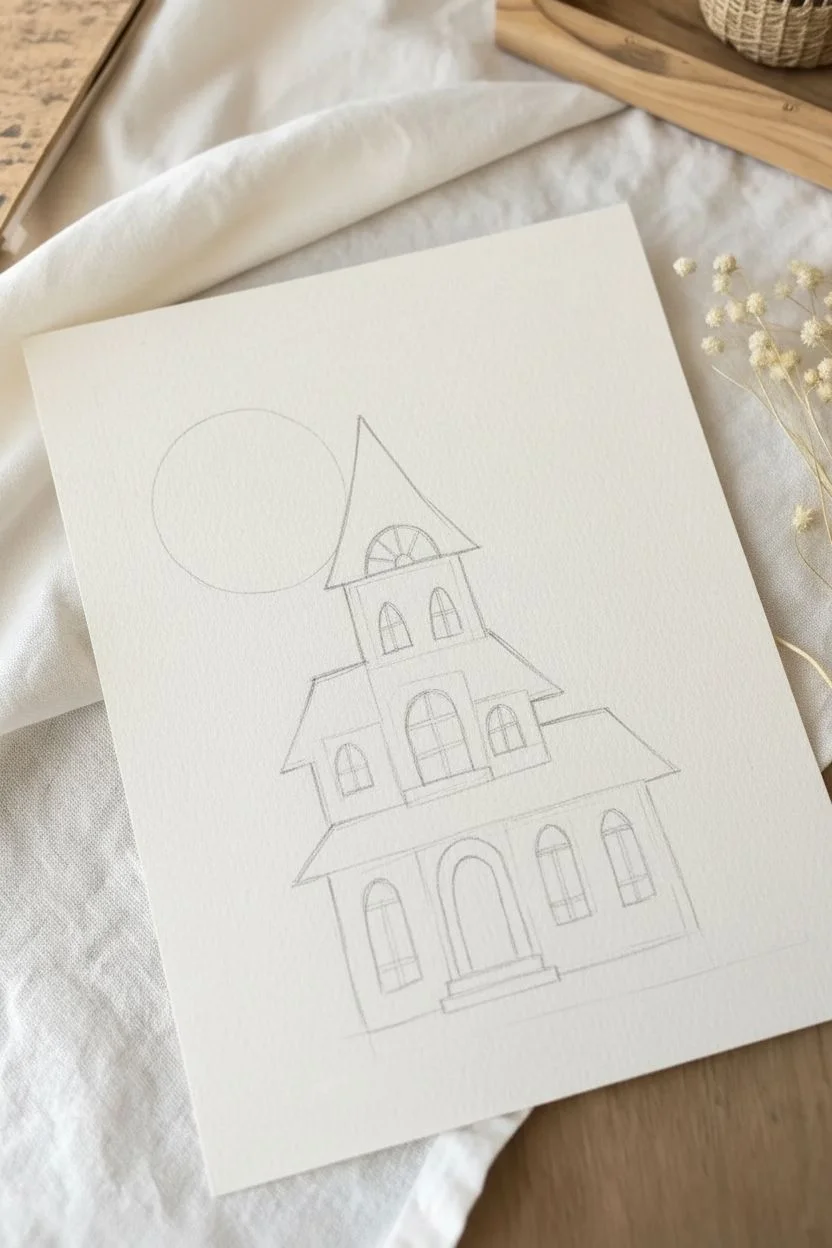
This eerie watercolor project creates a classic spooky scene featuring a looming silhouette house lit from within. The glowing yellow windows really pop against the dark ink-like structure, while a textured full moon sets the perfect Halloween mood.
How-To Guide
Materials
- Watercolor paper (cold press creates nice texture)
- Watercolor paints (yellow, grey, black)
- Black ink or gouache for the dark house silhouette
- Round paintbrushes (size 6 for washes, size 2 for details)
- Pencil and eraser
- Masking fluid or white wax crayon (optional)
- Salt (for moon texture)
- Cup of water and paper towels
Step 1: Sketching the Scene
-
Light outlines:
Begin by lightly sketching the outline of your haunted house with a pencil. Start with a central vertical rectangle for the main tower, and add a smaller rectangular section on the left and a wider one on the right. -
Adding the roof:
Top the main tower with a tall, pointed triangle roof. Add slanted trapezoid roofs to the side sections to create varied heights. -
Window placement:
Draw arched window shapes scattered across the house. Place a large round arched window near the top of the tower and various smaller ones below. Don’t forget an arched doorway at the bottom center. -
Moon and extras:
Sketch a large circle to the upper left of the house for the full moon. Lightly mark where your bare tree branch will extend from the top right corner.
Make Windows Pop
For the brightest possible windows, use a yellow paint marker or Posca pen after the watercolor is dry. The opaque ink sits on top and glows intensely.
Step 2: Painting the Atmospheric Background
-
The glowing moon:
Load a clean brush with water and wet the inside of your moon circle. Drop in bright yellow watercolor paint, letting it bloom. While it’s still wet, I like to dab in a tiny bit of grey on one side to create crater shadows. -
Salty texture:
While the moon paint is still damp, sprinkle a tiny pinch of salt onto it. This will absorb pigment as it dries, creating a crater-like texture. -
Sky wash:
Paint the sky area around the house with a very diluted, watery grey wash. Keep this layer light and uneven to suggest mist or clouds, being careful not to paint inside your house outline. -
Grounding the house:
Paint a strip of muted green or grey at the very bottom for the grassy ground. Add small, jagged grass blades sticking up around the base of the house using the tip of your brush. -
Drying time:
Let the entire background dry completely. Pause here until the paper is no longer cool to the touch. Once dry, brush off the salt form the moon.
Shimmery Magic
Mix a tiny bit of metallic gold watercolor into your yellow moon paint or flick some silver stars into the sky for a magical, glittering night effect.
Step 3: Building the Silhouette
-
Window underpainting:
Using bright yellow paint (you can use gouache for better opacity), fill in all the window shapes and the doorway arch. Make sure this yellow is bold and saturated. -
Protecting the glow:
Allow the yellow windows to dry fully. This is crucial so the black paint doesn’t bleed into your light source. -
Painting the walls:
Using black gouache or very concentrated black watercolor, begin painting the walls of the house. Carefully outline around your yellow windows first, then fill in the remaining wall space. -
Adding dimension:
To give the house texture, you don’t need to make the black perfectly flat. Slight variations in opacity can look like weathered wood. -
Roof details:
Paint the roofs black, extending the eaves slightly past the walls. Use the very tip of your small brush to add tiny points or finials to the peaks of the roofs. -
Window panes:
Once the yellow windows are dry and surrounded by black, use your finest detail brush (or a black fineliner pen) to draw cross-shaped frames inside the windows.
Step 4: Final Spooky Details
-
The creeping branch:
Mix a dark brown or black. Starting from the right edge of the paper, paint a jagged branch reaching toward the house. Press harder at the base and lift pressure as you move outward to taper the twiggy ends. -
Flying bats:
Paint simple ‘M’ shapes or small silhouettes in the sky to represent bats flying near the moon and tree. -
Doorway definition:
Paint the door inside the arched frame using a lighter diluted brown or grey, so it looks recessed compared to the black walls. Add steps leading up to it with horizontal strokes.
Your haunted house is now ready to spook up your walls for the season


Pumpkin Patch at Night With Easy Oval Pumpkins
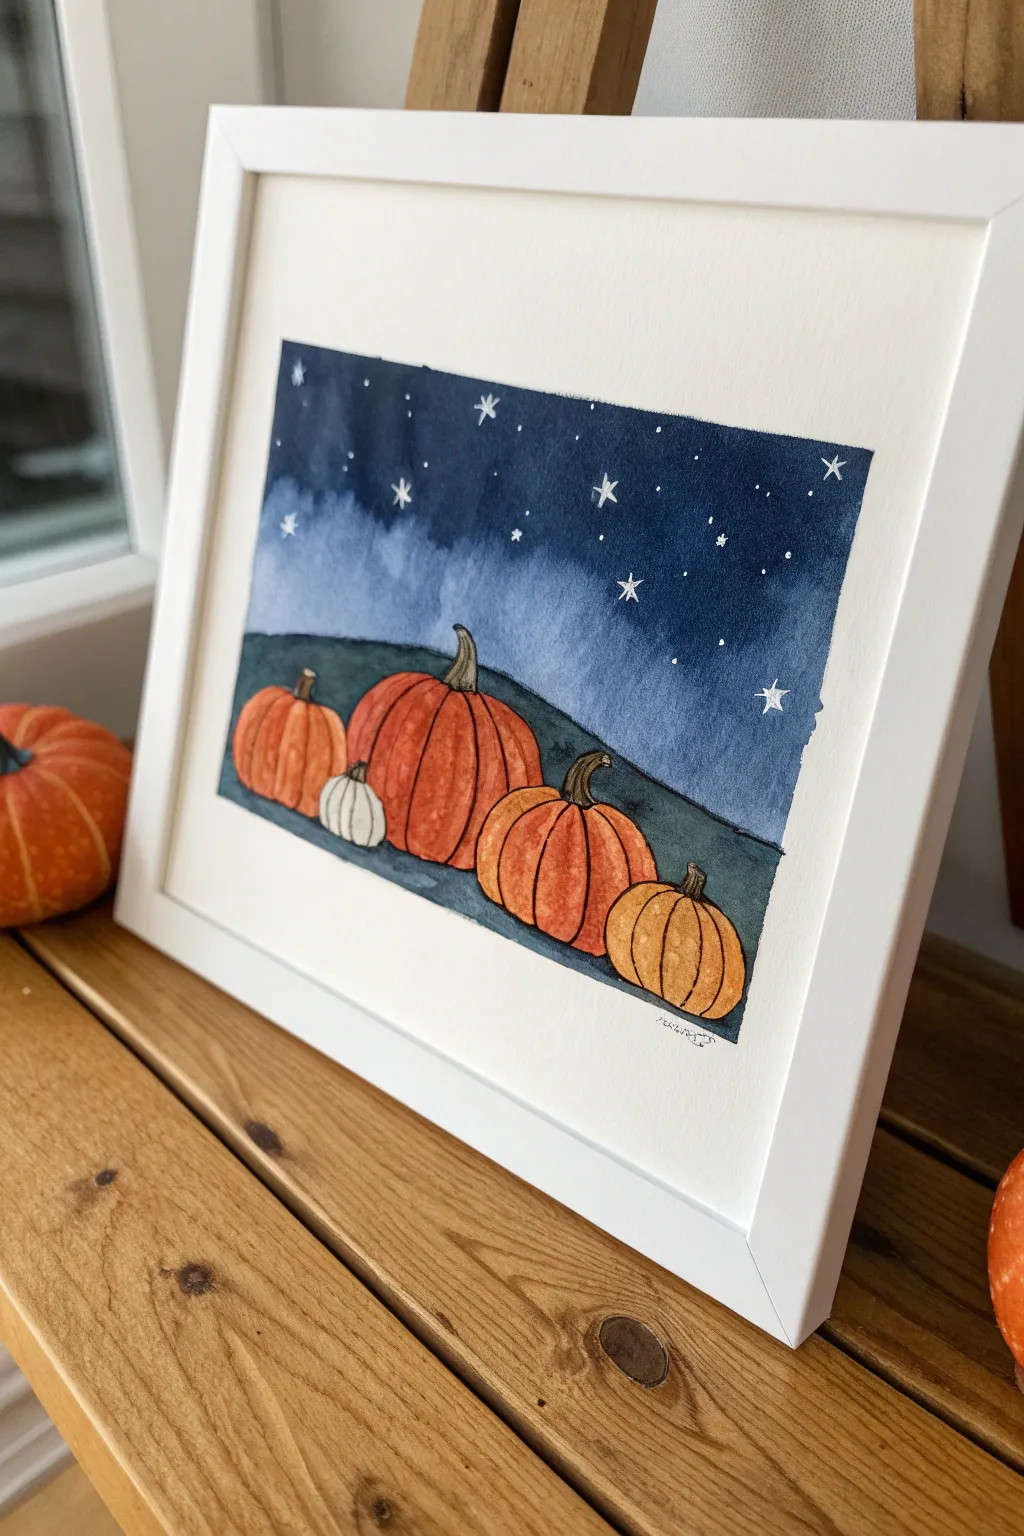
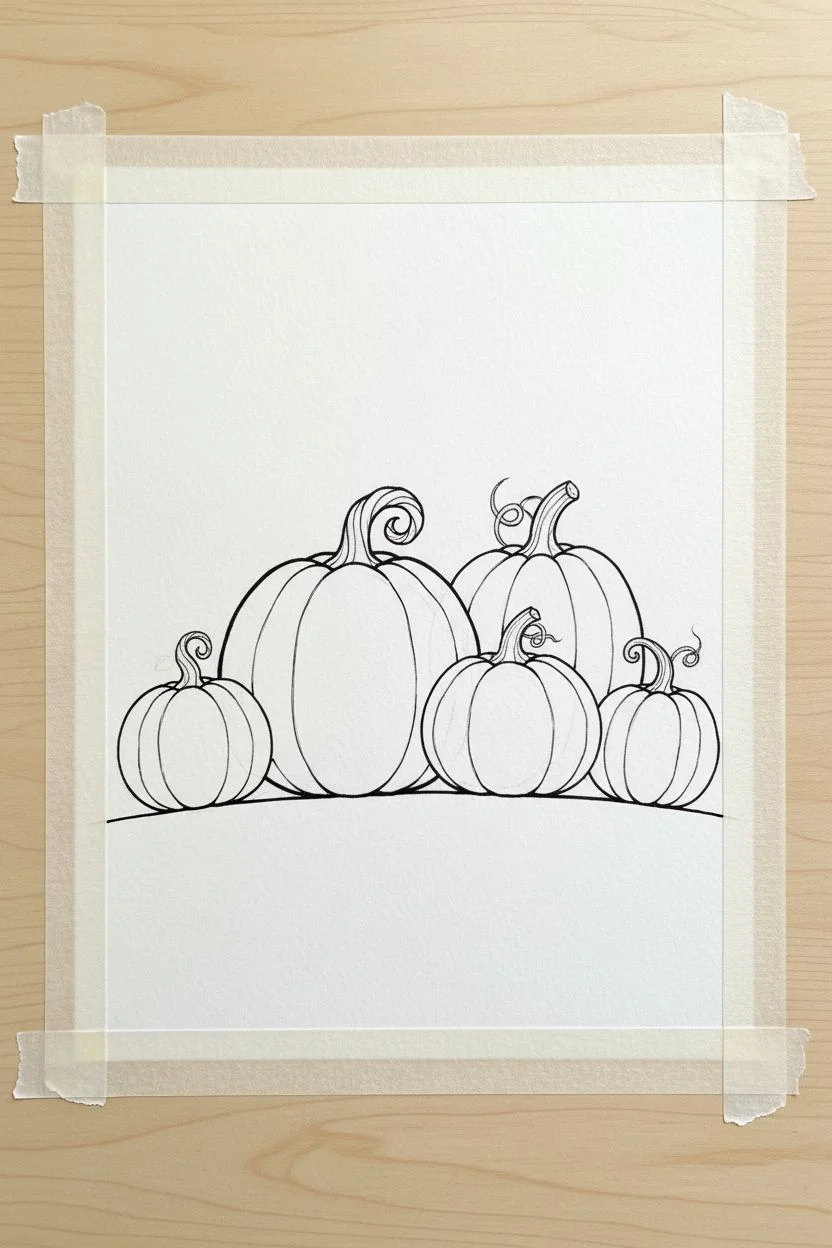
Capture the magic of an autumn evening with this watercolor and ink project featuring a row of pumpkins under a twinkling sky. The contrast between the deep indigo background and the warm orange pumpkins makes the scene pop right off the page.
How-To Guide
Materials
- Watercolor paper (cold press creates nice texture)
- Watercolor paints (Indigo/Dark Blue, Orange, Red, Brown, Yellow Ochre, Forest Green)
- Fine-tipped black ink pen or waterproof micron pen
- White gel pen or white acrylic paint
- Round watercolor brushes (size 4 and 8)
- Pencil and eraser
- Painter’s tape or masking tape
- Jar of water and paper towels
Step 1: Sketching the Patch
-
Tape the edges:
Before you start drawing, tape down the edges of your watercolor paper to a hard surface. This creates that clean, crisp white border you see in the final piece and keeps the paper from buckling when it gets wet. -
Draw the horizon line:
Using a pencil, lightly draw a slightly curved horizontal line across the lower third of the paper. This separates the grassy hill from the night sky. -
Outline the pumpkin shapes:
Sketch five pumpkins resting on this line. Start with the largest one in the center-left. Draw varied shapes—some tall and skinny, some short and squat. Don’t worry about details yet, just focus on the basic oval outlines. -
Add the stems:
Draw thick, curved stems on top of each pumpkin. Give them a little twist or hook shape to make them look organic and natural. -
Refine with ink:
Once happy with your sketch, go over the pencil lines with a waterproof black pen. Add vertical curved lines inside each pumpkin to show the ridges or segments, following the curve of the pumpkin’s outer shape.
Step 2: Painting the Foreground
-
Paint the pumpkins orange:
Load your brush with bright orange watercolor. Paint the segments of the pumpkins, leaving tiny slivers of white paper occasionally near the top for highlights. Vary the orange tone by adding a touch of red for the darker pumpkins and yellow for the lighter ones. -
The little white pumpkin:
For the small white pumpkin, use very watered-down grey or pale blue just along the shadow edges, leaving the rest the white of the paper. -
Color the stems:
Paint the stems using a mix of brown and green. Let the color be uneven to look like textured wood. -
Paint the grassy hill:
Mix a dark forest green with a tiny bit of blue. Paint the ground area below and around the pumpkins. Since it’s a night scene, keep this green quite dark and muted. -
Let it dry completely:
It is crucial to let the pumpkins and grass dry fully before starting the sky, or the dark blue might bleed into your bright oranges.
Pro Tip: Sky Texture
While the blue sky paint is still wet, sprinkle a tiny pinch of salt on it. As it dries, the salt pushes pigment away, creating a cool, starry texture.
Step 3: The Night Sky
-
Prepare the sky color:
Mix a large amount of deep indigo or navy blue paint. You want a strong, saturated color for the night sky. -
Wet-on-wet technique:
I like to brush clean water over the sky area first (being careful not to touch the pumpkins). This helps the dark paint spread smoothly. -
Apply the dark wash:
While the paper is damp, apply your indigo paint starting from the top. As you move down toward the pumpkins, add a little more water to your brush to create a slight gradient, making the horizon just a bit lighter than the top of the sky. -
Careful edges:
Use the tip of a smaller brush to paint carefully around the pumpkin stems and leaves to keep their edges sharp. -
Final drying time:
Let the entire painting dry completely. The paper should feel room temperature to the touch, not cool.
Troubleshooting: Bleeding
If blue sky bleeds into a pumpkin, dab it immediately with a clean, dry paper tissue to lift the color, then let it dry fully before fixing.
Step 4: Finishing Touches
-
Review ink lines:
If the paint has obscured any of your black outlines, gently re-trace them with your pen to bring back the definition. -
Add the stars:
Using a white gel pen or a fine brush with white acrylic paint, draw small stars in the sky. Make some simple dots and others with little cross shapes for twinkling stars. -
Reveal the border:
Slowly peel away the painter’s tape at a 45-degree angle to reveal your clean white frame.
Frame your spooky masterpiece or hang it on the fridge to welcome the Halloween season
Handprint Ghosts for a Halloween Keepsake Painting
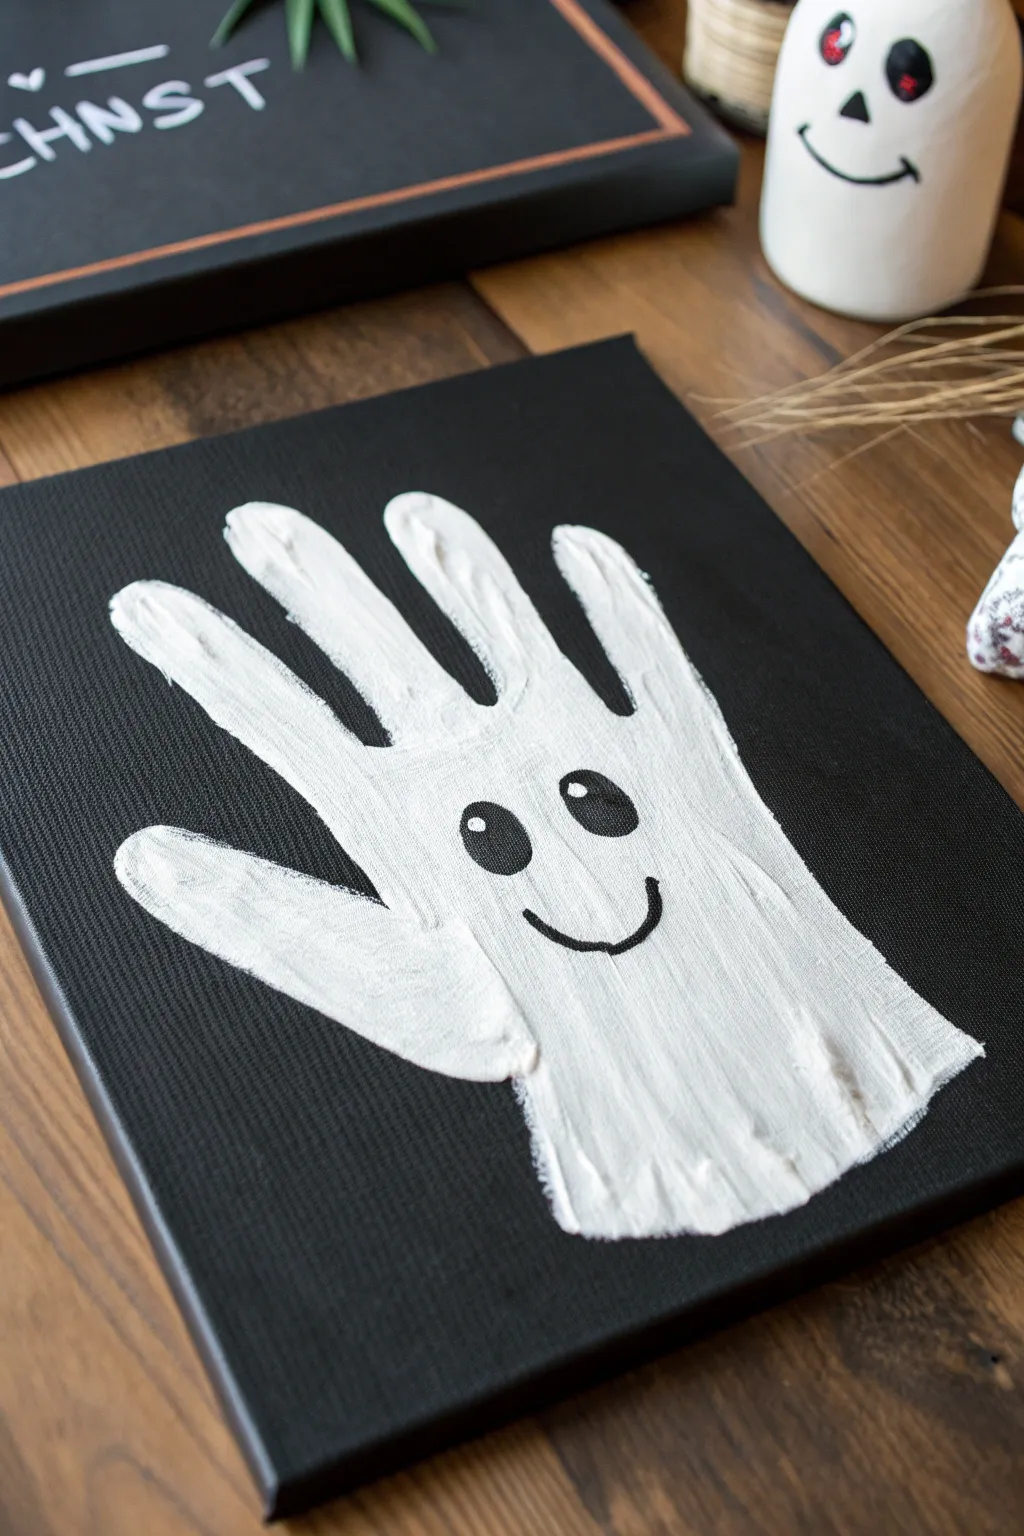
These adorable handprint ghosts are a perfect way to capture tiny hands forever while creating festive Halloween decor. The stark white paint against a black canvas makes the little spirit pop out with delightful, spooky charm.
Step-by-Step
Materials
- Small stretched black canvas (or white canvas painted black)
- White acrylic paint
- Black acrylic paint
- Medium-sized foam brush or flat paintbrush
- Small fine-tip paintbrush
- Paper plate or palette
- Baby wipes or paper towels (for cleanup)
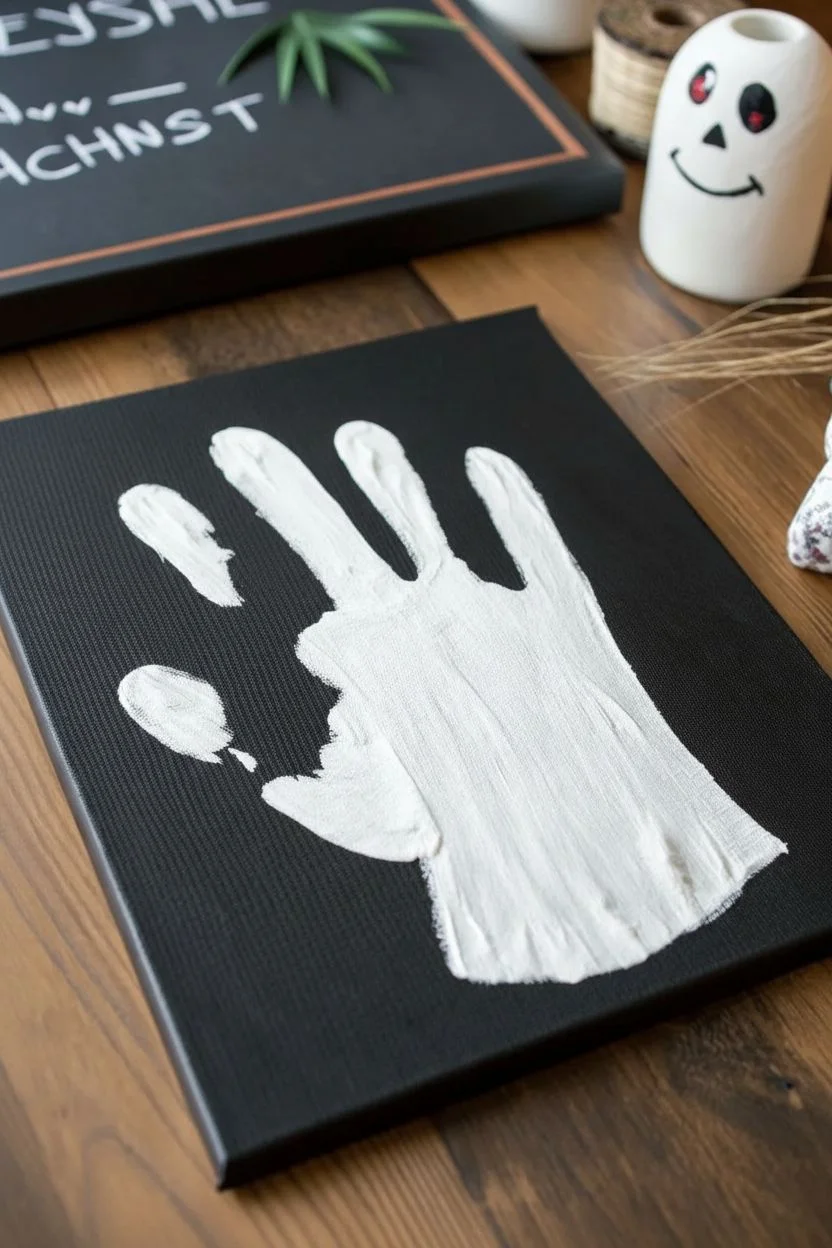
Step 1: Preparing the Handprint
-
Set up your workspace:
Cover your table with newspaper or a drop cloth. Have your canvas ready and within easy reach, as this process can move quickly once the paint is applied. -
Prepare the paint:
Squeeze a generous puddle of white acrylic paint onto a paper plate. You need enough to fully coat a hand without having to stop and squeeze more. -
Coat the hand:
Using a foam brush or flat paintbrush, apply a thick, even layer of white paint to the palm and fingers of your child’s hand. I like to make sure the paint is wet and glossy, but not dripping. -
Check for coverage:
Inspect the hand quickly to ensure no dry spots remain, especially in the creases of the palm and fingertips, as these details make the ghost look best.
Step 2: Creating the Impression
-
Position the hand:
Guide the painted hand over the center of the black canvas. Orient the hand so the fingers point toward the top edge and the wrist is toward the bottom. -
Press down firmly:
Press the hand down onto the canvas. Gently push down on each finger and the center of the palm to ensure the paint transfers completely to the fabric texture effectively. -
Lift carefully:
Hold the canvas steady with one hand and lift your child’s hand straight up and off the canvas in one smooth motion to avoid smudging the ghostly shape. -
Immediate cleanup:
Immediately wipe the painted hand with baby wipes or send the artist to the sink for a wash while the paint is still wet. -
Touch up if needed:
If the print is very patchy, you can use a small brush to fill in large gaps with a little white paint, but keeping some texture adds to the ghostly effect. -
Allow to dry:
Set the canvas aside in a safe spot and let the white paint dry completely. This usually takes about 20 to 30 minutes depending on how thick the paint is.
Stamp Satisfaction
Make sure the canvas is on a hard, flat surface rather than carpet when stamping. The fabric needs resistance to take the paint from the hand cleanly.
Step 3: Adding the Ghostly Face
-
Prepare black paint:
Squeeze a small dime-sized amount of black acrylic paint onto your palette. -
Paint the eyes:
Dip a fine-tip paintbrush into the black paint. Paint two vertical ovals in the upper middle part of the palm area to create the ghost’s eyes. -
Start the smile:
Below the eyes, paint a simple curved line for the mouth. You can make it a happy smile or a spooky ‘O’ shape depending on the ghost’s personality. -
Add eye highlights:
Once the black eye paint is dry, dip the very tip of a clean brush handle or a fine brush into white paint and add a tiny dot to the top corner of each black eye for a sparkle of life. -
Final drying:
Let the facial features dry completely before displaying your spooky masterpiece.
Boo-tiful Additions
Add a little orange bow tie painted near the wrist or stick on googly eyes instead of painting them for a fun, 3D textured effect.
Hang your spooky creation on the wall to enjoy a memory of how small those hands once were
Fingerprint Pumpkins in a Garland Line
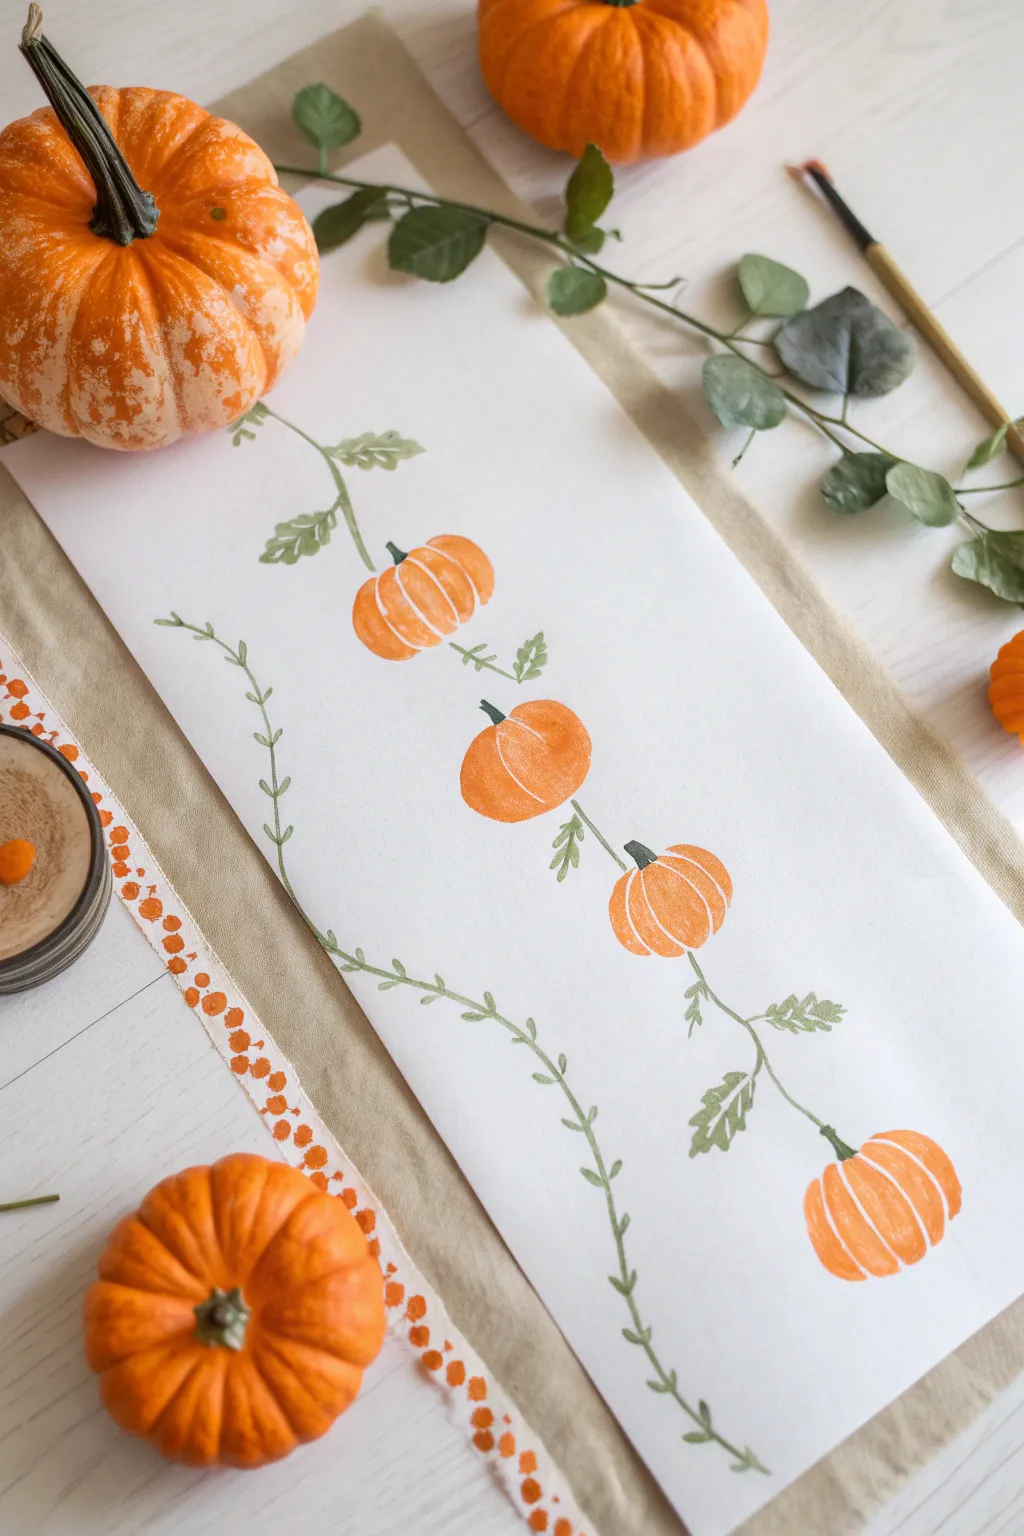
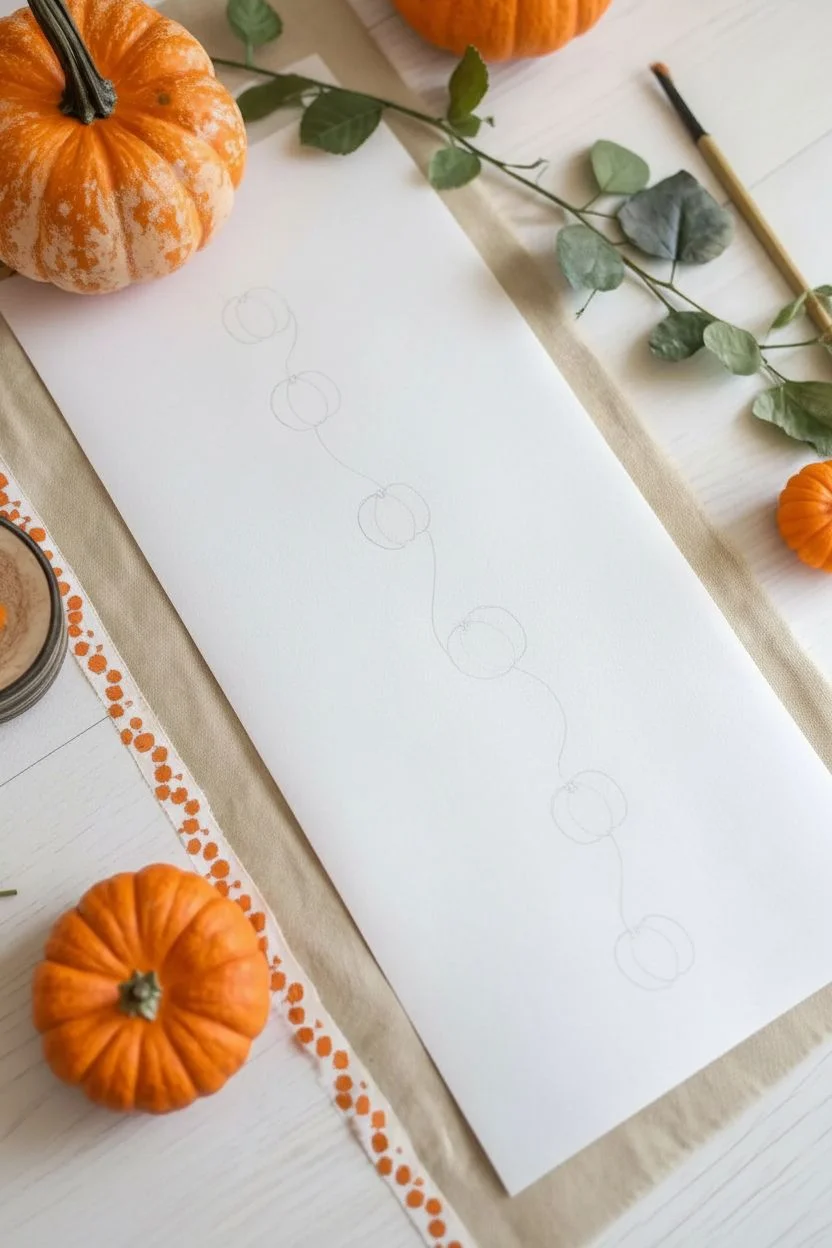
Create a charming table runner or wall hanging featuring a delicate vine of painted pumpkins. This project combines simple brushwork with easy shapes to make a festive autumn decoration that feels both rustic and refined.
Step-by-Step Tutorial
Materials
- Long strip of white cardstock or watercolor paper (approx. 6-8 inches wide)
- Orange acrylic or poster paint
- Green acrylic or poster paint (sage or olive tone)
- Thin round paintbrush (size 2 or 4)
- Flat paintbrush (size 6 or 8)
- White gel pen or fine white paint marker
- Palette or paper plate for mixing
- Pencil (optional)
- Paper towels
Step 1: Planning the Vine
-
Prepare your surface:
Lay out your long strip of paper on a flat surface. If the paper has been rolled, flatten it out under some books for an hour before starting so it lies smoothly. -
Mark pumpkin placement:
Using a pencil very lightly, mark four or five spots down the center of the paper where you want your pumpkins to sit. Space them somewhat evenly but keep the organic feel by not measuring perfectly. -
Draft the main vine:
Lightly sketch a wavy, meandering line connecting your pumpkin marks. Let the line curve gently back and forth down the length of the paper.
Uneven Paint Coverage?
If your orange paint looks streaky, don’t worry! This adds texture that mimics a real pumpkin rind. Just let the first layer dry and dab a second thin layer on top.
Step 2: Painting the Pumpkins
-
Load your brush:
Squeeze a generous amount of orange paint onto your palette. Dip your flat brush (size 6 or 8) into the paint, ensuring it’s fully loaded but not dripping. -
Create the center oval:
At your first pumpkin mark, paint a slightly flattened oval shape for the center of the pumpkin. This acts as the anchor for the rest of the shape. -
Add side lobes:
Paint a curved ‘C’ shape attached to the left side of the oval, and a backward ‘C’ shape on the right side. This builds out the pumpkin’s segments. -
Repeat down the line:
Move to the next mark and repeat the process. Vary the sizes slightly—some can be tall and thin, others short and squat—to give your vine natural variety. -
Let the orange curve:
For a dynamic look, tilt some pumpkins slightly left or right so they look like they are dangling naturally from a vine rather than standing straight up. -
Initial drying time:
Allow the orange pumpkin shapes to dry completely to the touch. This usually takes about 10-15 minutes depending on how thick your paint application is.
Stamp Instead of Paint
For a kid-friendly twist, slice an apple in half, dry it, dip it in orange paint, and stamp it to make the pumpkin shapes instantly consistent and quick.
Step 3: Painting the Greenery
-
Mix your green:
Prepare a sage or olive green hue. If you only have bright green, mix in a tiny dot of red or brown to earthy it up. -
Paint the main stem:
Using your thin round brush, paint over your pencil line to create the main vine stem. Keep your hand loose to allow for natural variations in line thickness. -
Connect the pumpkins:
Paint a short, sturdy stem coming out of the top of each orange pumpkin, connecting it directly to the main wavy vine line. -
Add secondary vines:
Paint a secondary, thinner wavy line running parallel or intertwining with the main vine. I like to make this one more delicate to fill empty white space. -
Paint leaves:
Along the vines, paint small, jagged leaves. Think of an oak leaf shape—lobes that are irregular rather than smooth ovals. -
Add tendrils:
Using the very tip of your thin brush, add tiny corkscrew curls or ‘v’ shapes coming off the main vine for those classic pumpkin tendrils.
Step 4: Adding Details
-
Highlight the segments:
Once the orange paint is bone dry, take your white gel pen or fine paint marker. Draw thin curved lines on the pumpkins to define the ridges between segments. -
Add shine:
Add a few small white tick marks or dots near the top of the pumpkin curves to mimic light reflecting off the surface. -
Final touches:
If any leaves look too transparent, go back with a second coat of green paint to make them pop against the white paper. -
Erase guidelines:
Once absolutely everything is dry, gently erase any visible pencil marks from your initial sketch.
Display your beautiful handmade vine on a table or hang it vertically for a festive touch
Resist Painting: Crayon Halloween Shapes Under Watercolor
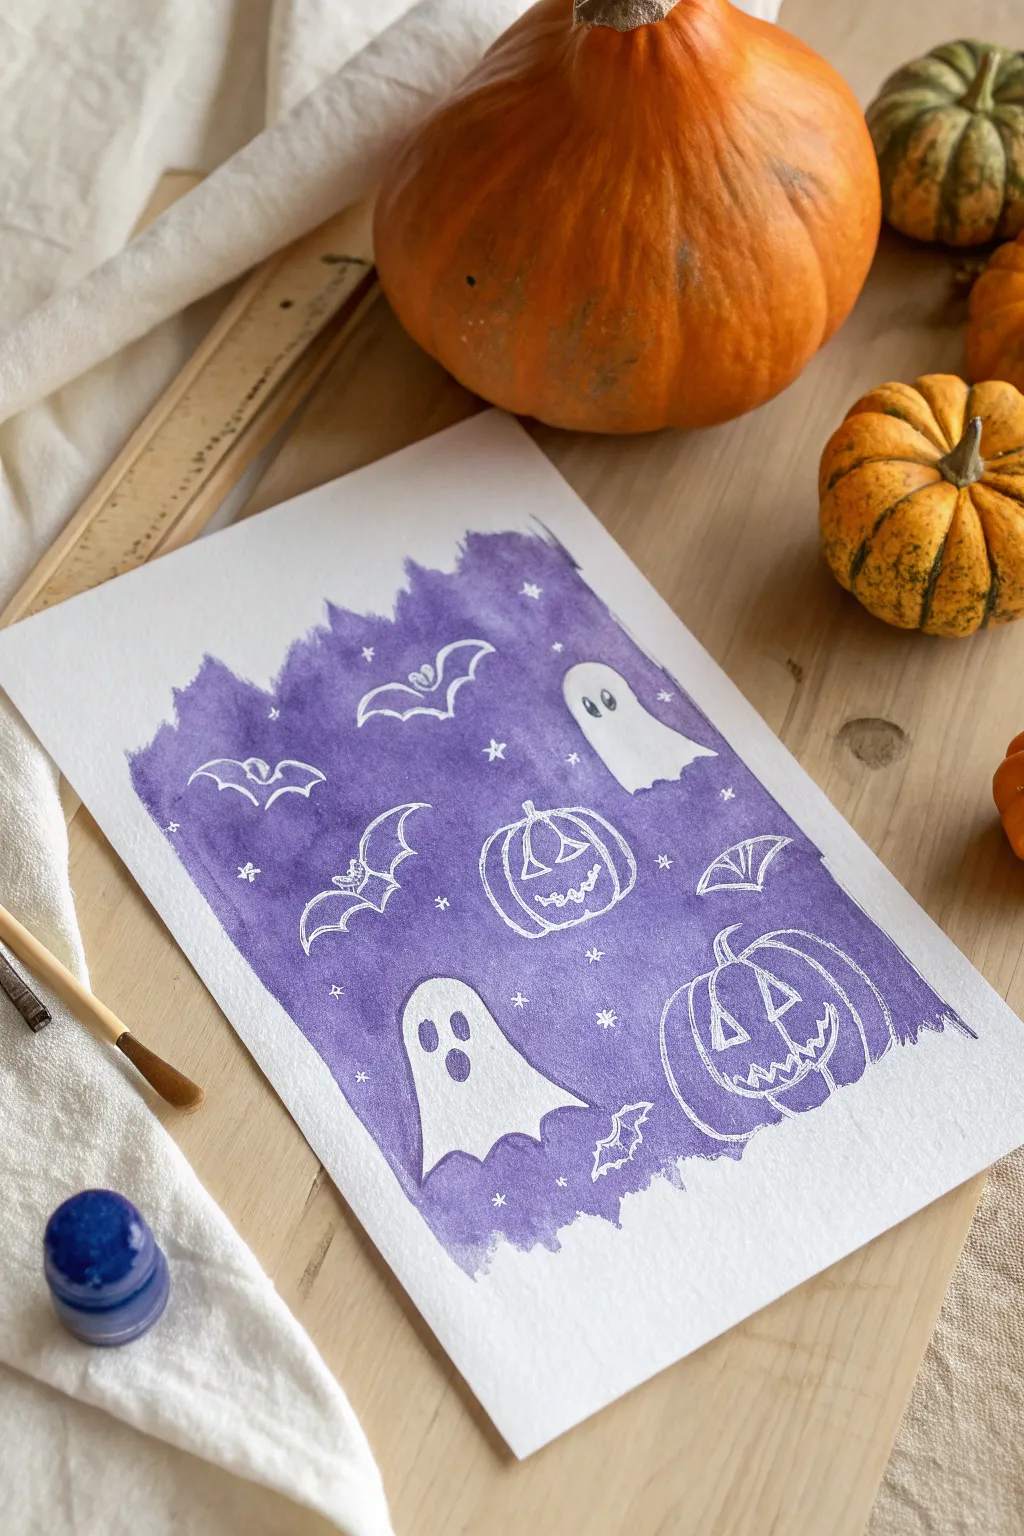
Create a magical Halloween scene where ghostly figures and pumpkins appear out of nowhere. This simple yet stunning technique uses white crayon to push away purple watercolor paint, revealing hidden drawings like secret messages.
How-To Guide
Materials
- High-quality white paper (watercolor paper is best)
- White wax crayon or white oil pastel
- Purple watercolor paint (liquid or pan set)
- Medium-sized round paintbrush
- Water cup
- Paper towels
- Pencil (optional, for light sketching)
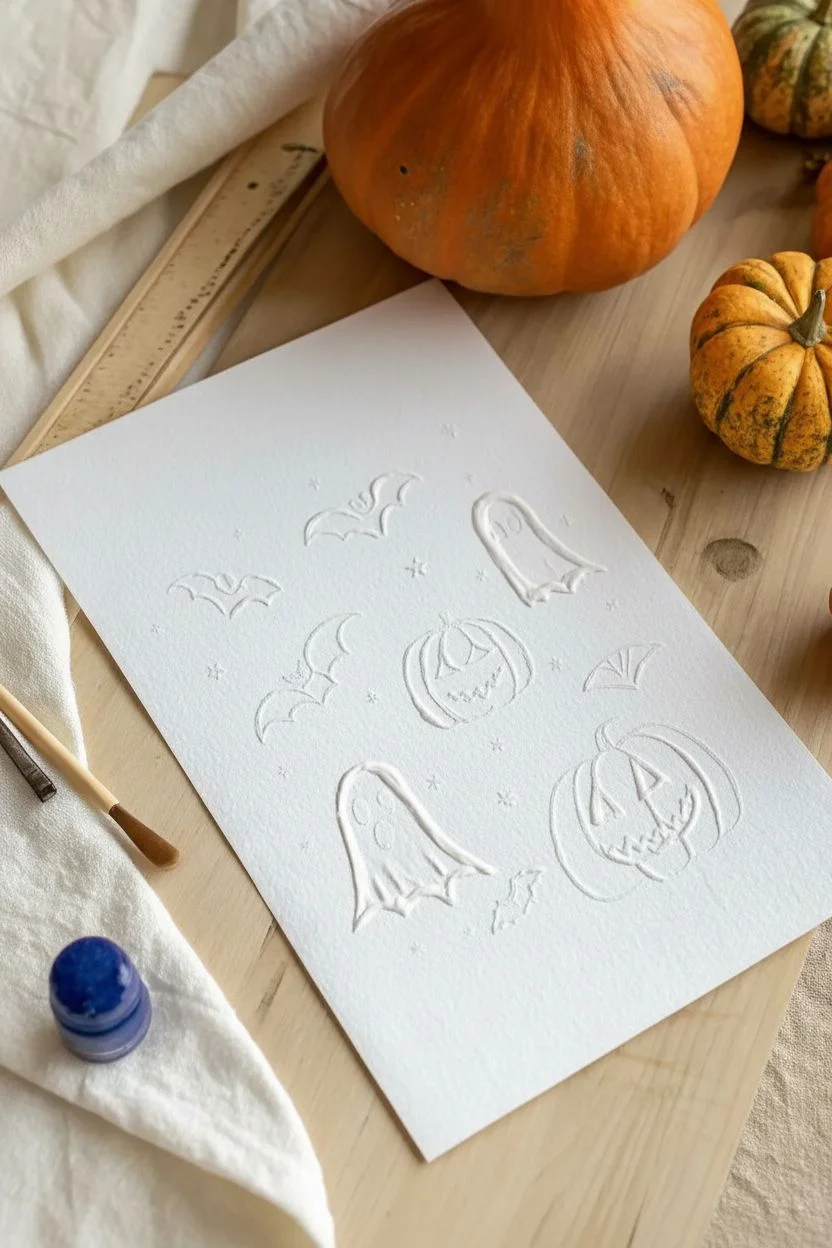
Step 1: Drawing the Hidden Designs
-
Plan your composition:
Visualize where you want your Halloween characters to go. You can lightly sketch the shapes with a pencil first if you need a guide, but keep the lines extremely faint so they don’t show through later. -
Draw the first ghost:
Take your white crayon and press firmly as you draw a classic ghost shape near the center or bottom. Make sure to draw outlines for the eyes and mouth, coloring them in solidly if you want them to remain white, or leaving them open. -
Add a jack-o’-lantern:
Draw a pumpkin shape nearby. Add the curved lines for the ridges and draw a triangle face. Remember, everywhere you draw with the white crayon will stay white, so outline the face features clearly. -
Fill the space with bats:
Sketch simple bat silhouettes with the white crayon. Outline the wings with jagged edges to make them look spooky. -
Sprinkle in details:
In the empty spaces between your main characters, draw small stars, crosses, or sparkles. These little details really make the purple background pop. -
Review your wax lines:
Go over your main lines one more time to ensure a thick, heavy layer of wax. The heavier the wax application, the better the ‘resist’ effect will work against the water.
Paint sticking to wax?
If the paint covers your drawing, the wax layer is too thin. Blot the paint away, let it dry, draw over the lines again firmly, and re-paint.
Step 2: The Magical Reveal
-
Prepare your purple paint:
Mix your purple watercolor with enough water to make it flow easily, but keep it saturated. You want a deep, spooky violet color, not a faint lavender. -
Test the wash:
Dip your brush and do a quick test stroke on a scrap piece of paper to check the color intensity. I always like to ensure the purple is dark enough to contrast with the white paper. -
Start the wash:
Begin painting over your drawing. Instead of painting strictly inside the lines, create a jagged, rough rectangular shape that encompasses all your drawings. -
Watch the resist happen:
Brush directly over your crayon marks. The water-based paint will bead up and slide off the oil-based crayon, instantly revealing your white drawings. -
Refine the edges:
Continue filling in the background, keeping the outer edges of the paint rough and uneven for an artistic, textured look. -
Blot excess paint:
If big puddles of purple paint are sitting on top of your wax drawings, gently dab them with a paper towel or a dry brush to lift the color off the crayon. -
Add depth:
While the paint is still wet, you can drop slightly darker purple into the empty spaces between the ghosts and pumpkins to add dimension. -
Let it dry completely:
Set the painting aside on a flat surface. As it dries, the contrast between the white wax and purple paint will become even sharper.
Add a glow effect
Before adding the purple wash, outline your white crayon drawings with a bright yellow crayon. They will look like they are glowing in the dark.
Now you have a hauntingly beautiful piece of art perfect for displaying this season
Salt Texture Night Sky Behind a Silhouette Scene
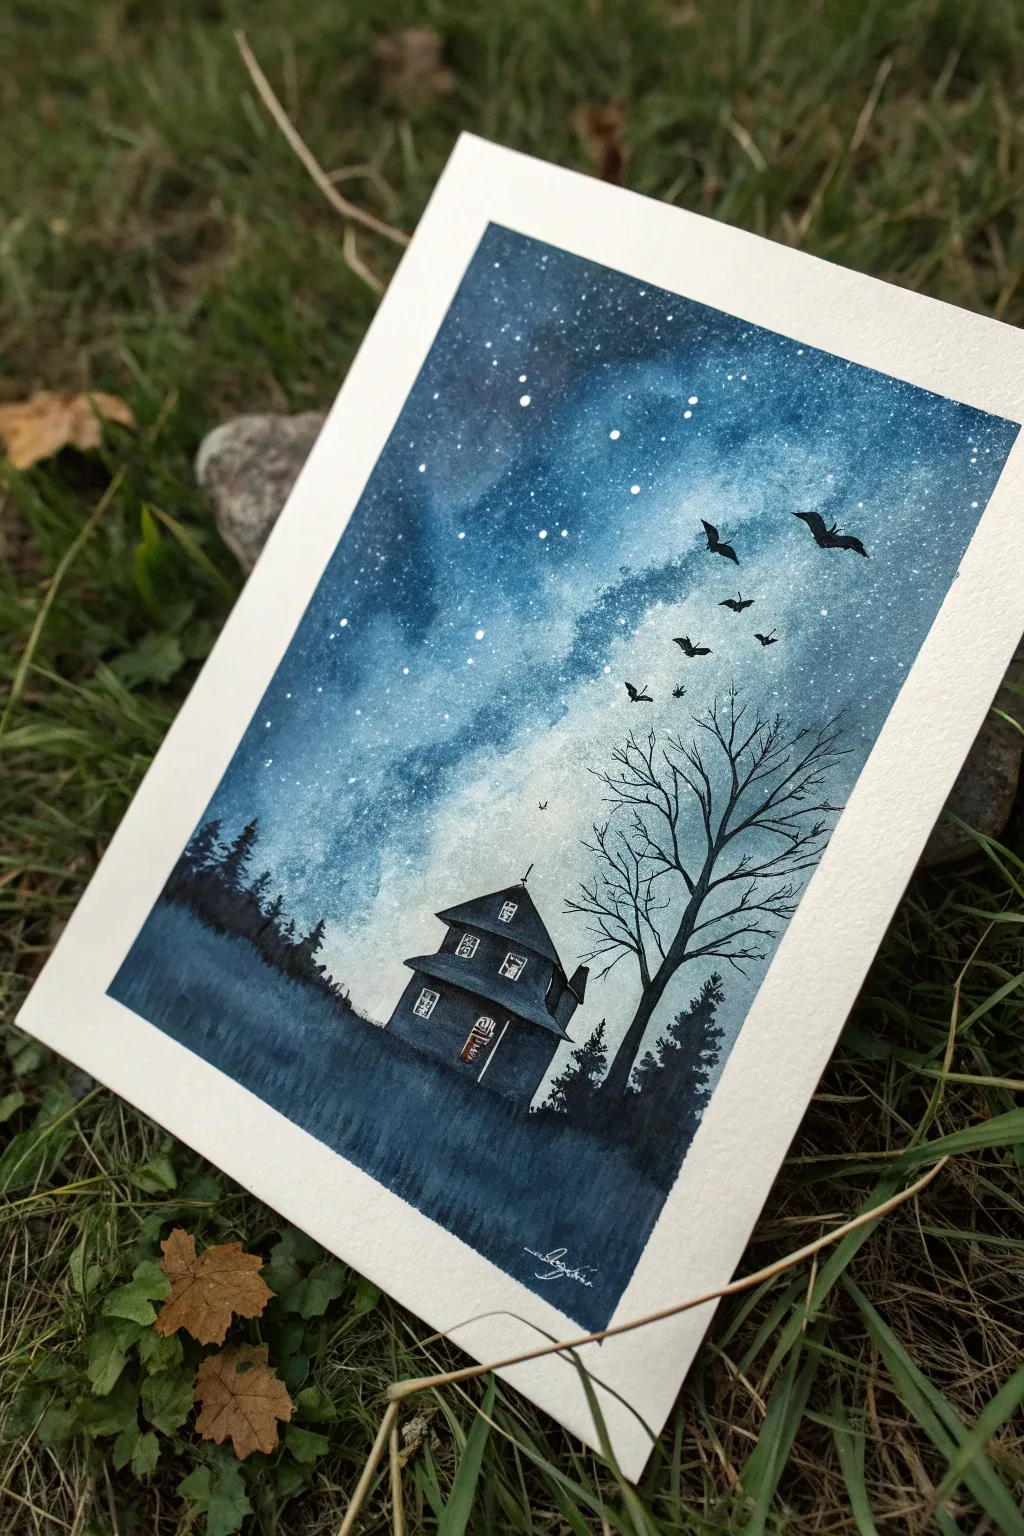
Capture the magic of a Halloween night with this watercolor project that uses everyday table salt to create a breathtaking galaxy effect. The deep indigo sky contrasts beautifully against stark black silhouettes, making for an atmospheric and slightly eerie scene.
Step-by-Step Tutorial
Materials
- Watercolor paper (cold press, heavy weight)
- Watercolor paints (Indigo, Payne’s Gray, Black, Prussian Blue)
- Table salt or sea salt
- Paintbrushes (large wash brush, medium round, fine liner)
- Masking tape or painter’s tape
- White gel pen or white gouache
- Pencil and eraser
- Clean water
Step 1: Setting the Scene
-
Prepare your paper:
Tape down all four edges of your watercolor paper to a board or table. This prevents buckling when the paper gets wet and creates that crisp white border seen in the final piece. -
Sketch the silhouette:
Lightly sketch the outline of the house and the horizon line using a pencil. You don’t need details yet, just the basic shape of the roof and walls to know where to stop your sky wash. -
Wet the sky area:
Using your large brush and clean water, wet the entire sky area down to the horizon line. Avoid painting over the house sketch; keep that area dry for now.
Season Your Sky
Use different grain sizes! Coarse sea salt creates large, dramatic blooms, while fine table salt makes subtle, dense stars. Mix them for cosmic depth.
Step 2: Creating the Galaxy Sky
-
Apply the light mid-tones:
While the paper is wet, drop in swirls of Prussian Blue or a lighter bright blue. Leave some uneven patches of white or very pale blue to suggest the milky way or glowing light. -
Deepen the cosmos:
While the first layer is still damp, load your brush with deeper Indigo and Payne’s Gray. Dab these dark colors around the edges and corners, blossoming inward but leaving the center lighter. -
Add the salt magic:
This is the crucial step: while the paint is still shiny and wet (but not puddling), sprinkle salt over the upper sky area. The salt absorbs the pigment as it dries, creating starry textures. -
Patience is key:
Let the painting dry completely undisturbed. If you move it or use a hairdryer too aggressively, the salt crystals might slide and ruin the starburst effect. -
Remove the salt:
Once the paper is bone dry, gently rub off the salt crystals with your fingers or a soft brush to reveal the speckled texture underneath.
Step 3: Painting the Silhouettes
-
Paint the house base:
Mix a very dark grey or black watercolor. Fill in the sketch of your house carefully. Using watercolor allows for subtle variations in tone, so it doesn’t look like a flat sticker. -
Add the grassy ground:
Extend the dark color from the base of the house horizontally to create the ground. Use upward flicking motions with a semi-dry brush to create the texture of tall, unkempt grass. -
Layer the forest background:
On the left side, paint distant tree shapes using a slightly watered-down black. This creates atmospheric perspective, making them look further away than the house. -
Detail the main tree:
Using your finest liner brush and black paint, create the bare tree on the right. Start with the trunk and branch out into progressively thinner twigs that reach into the sky. -
Add darker foreground trees:
Paint a few small pine tree shapes near the house base in pure black to anchor the scene.
Salt Stuck?
If salt sticks to the paper, your paint was likely too dry when applied, or you used too much sizing. Gently scrape stubborn grains with a credit card edge.
Step 4: Final Atmosphere
-
Illuminate the windows:
If you painted the windows solid black, use a white gel pen to draw the window frames. If you left them unpainted, you can gently glaze them with a tiny bit of yellow for a glow. -
Paint the bats:
With the fine liner brush, paint small ‘v’ and ‘m’ shapes in the lighter part of the sky to represent a colony of bats taking flight. -
Enhance the stars:
The salt creates a great texture, but for extra sparkle, use a white gel pen or white gouache to add a few sharp, bright stars or constellations over the darkest blue sections. -
Clean up:
Wait for everything to dry fully, then slowly peel away the masking tape at a 45-degree angle to reveal your crisp border.
Now you have a hauntingly beautiful piece of art to display for the spooky season
Splatter Paint Potion Bottles With Bubbly Details
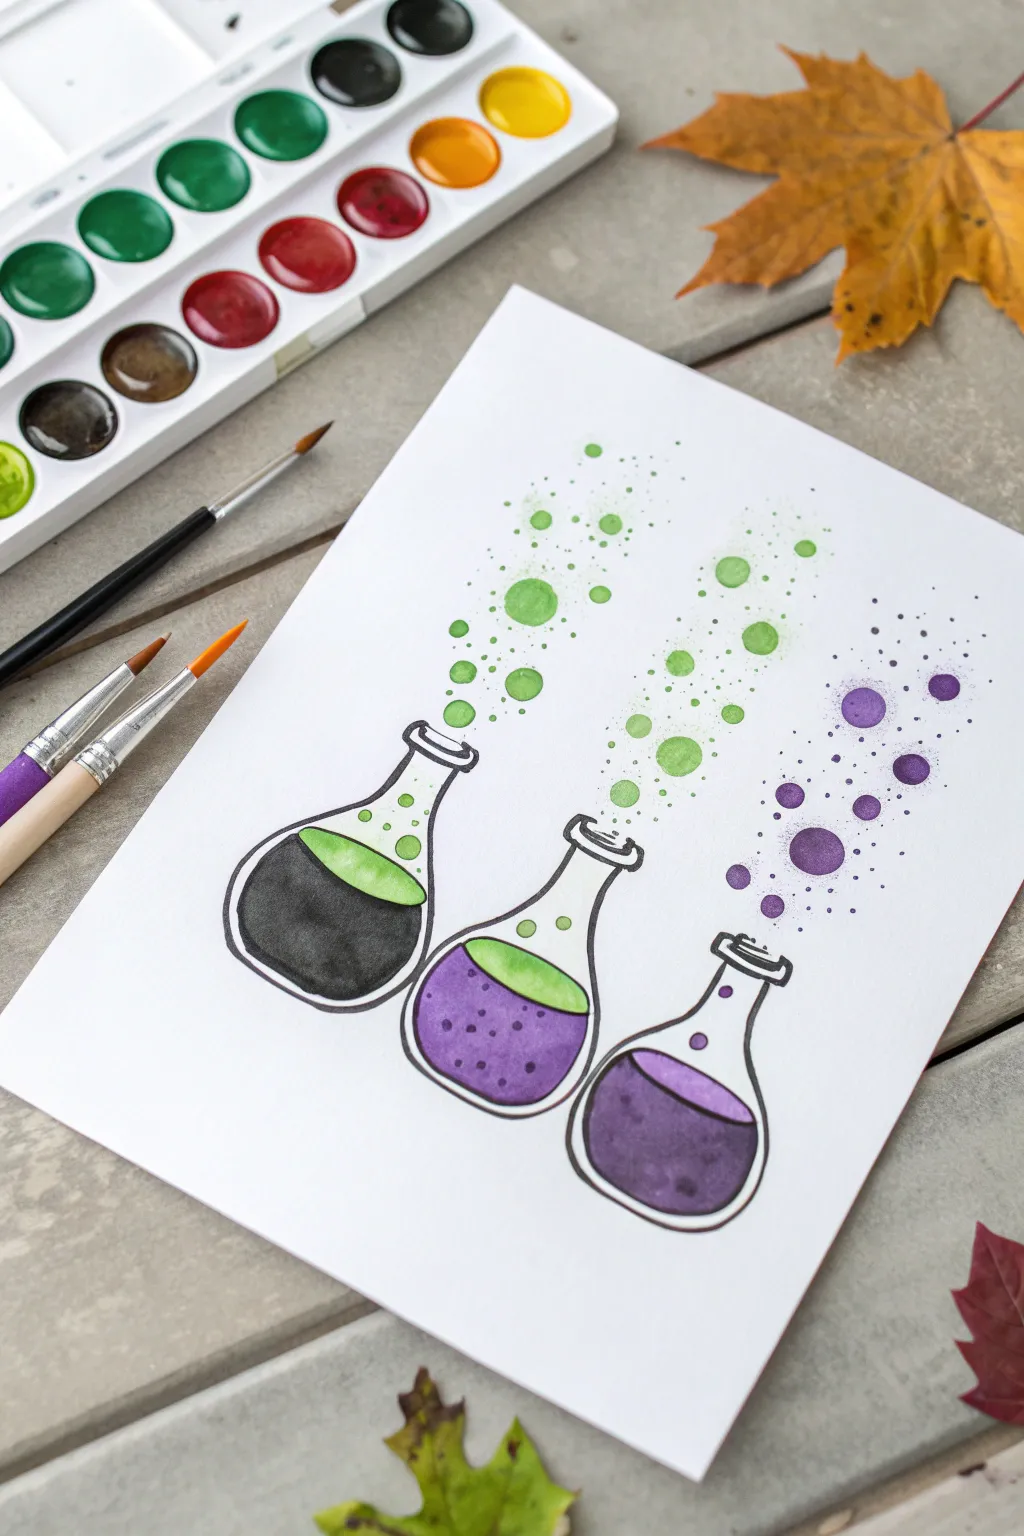
Summon a touch of magic with these delightfully bubbly potion bottles that use a clever splatter technique to create fizzing effects. This watercolor project combines bold outlining with transparent washes to make three unique concoctions that look like they are popping right off the page.
How-To Guide
Materials
- Watercolor paper (heavyweight, cold press)
- Watercolor paint set (specifically black, purple, lime green)
- Black waterproof fine-liner pen (like a Micron or Sharpie)
- Small round paintbrush (size 2 or 4)
- Medium round paintbrush (size 6 or 8)
- Cup of water
- Paper towels
- Pencil and eraser
Step 1: Drawing the Vessels
-
Sketch the shapes:
Begin by lightly sketching three flask shapes in a row using your pencil. Vary the shapes slightly; try a rounded bottom for the center and flatter bottoms for the outer ones to create visual interest. -
Add the necks:
Draw long, slender necks rising from each base, ending with a small oval opening at the top. Don’t worry about being perfectly symmetrical; a little wobble adds character to old potion bottles. -
Define the liquid levels:
Inside each bottle, sketch a curved line to show where the liquid sits. For the first two bottles, draw a second curved line floating near the top of the liquid to indicate a layer of foam. -
Outline with ink:
Once you are happy with your pencil sketch, trace over the bottle outlines with your black waterproof fine-liner. Draw the glass rim slightly thicker to give it dimension. -
Erase guidelines:
Wait a moment for the ink to dry completely, then gently erase all the pencil marks so the watercolor paper is clean and ready for paint.
Step 2: Filling the Potions
-
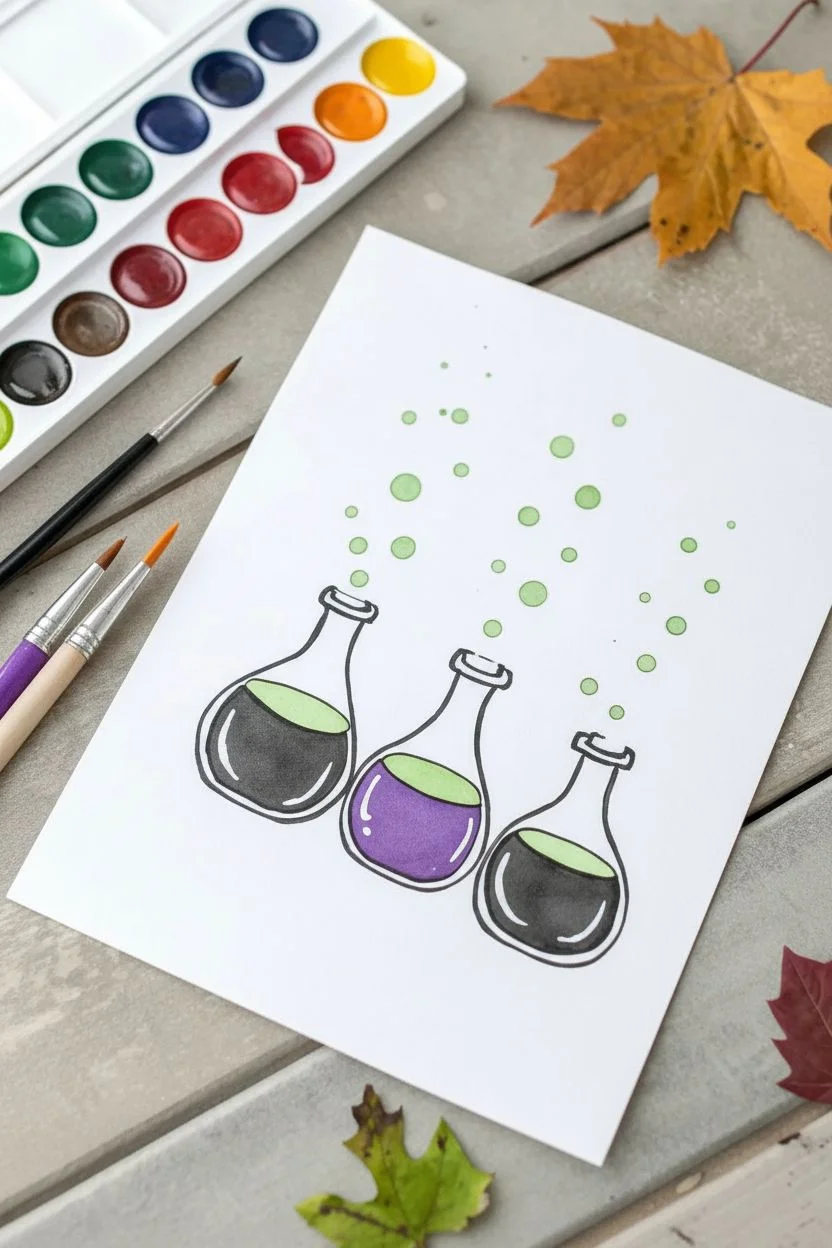
Paint the first potion:
For the leftmost bottle, load your medium brush with black watercolor. Fill the bottom section of the flask, leaving the ‘foam’ area empty. The black contrasts beautifully against the white paper. -
Add the toxic foam:
Rinse your brush well and pick up a bright lime green. Paint the floating oval shape sitting on top of the black liquid. Let the colors touch slightly if you want a tiny bit of bleed, or keep them separate for a crisp look. -
Paint the middle brew:
Moving to the center bottle, paint the liquid purple. While the paint is still wet, you can tap in a tiny drop of darker purple to add depth. Paint the foam layer on top with the same lime green used before. -
Fill the final flask:
For the bottle on the right, fill the liquid area with a deep purple. This bottle doesn’t have a green foam layer, but you can leave a thin white line near the top of the liquid to suggest a reflection on the surface. -
Paint internal bubbles:
Use your smallest brush to paint a few small circles floating inside the liquid of the center and right bottles to show carbonation.
Splatter Control
To prevent paint from spraying onto the neighboring bottles, cover the finished sections with a scrap piece of paper while tapping your brush.
Step 3: Creating the Fizz
-
Start the green bubbles:
Load your brush with watery lime green paint. Above the first two bottles, paint several distinct circles of varying sizes rising upward in a column. -
Splatter the fine mist:
I like to load a brush with plenty of green pigment and water, hold it over the paper, and tap the handle against another brush. This creates a spray of tiny speckles around the larger painted bubbles. -
Repeat for the purple bubbles:
Clean your brush and switch to purple paint. Above the third bottle, paint large and medium circles rising up, just like before. -
Add purple splatter:
Use the tapping technique again to spray fine purple mist around the third bottle’s bubbles. Aim carefully to keep the mist moving upward in a vertical stream. -
Add final details:
Once the paint is fully dry, use your fine-liner to trace the bottom halves of the largest painted bubbles, giving them a shadow and making them look three-dimensional.
Glow in the Dark
Once the artwork is completely dry, paint over the lime green bubbles with glow-in-the-dark acrylic paint for a spooky surprise at night.
Enjoy displaying your spooky laboratory creation this Halloween season
Glow-In-The-Dark Style Highlights on Ghosts and Pumpkins
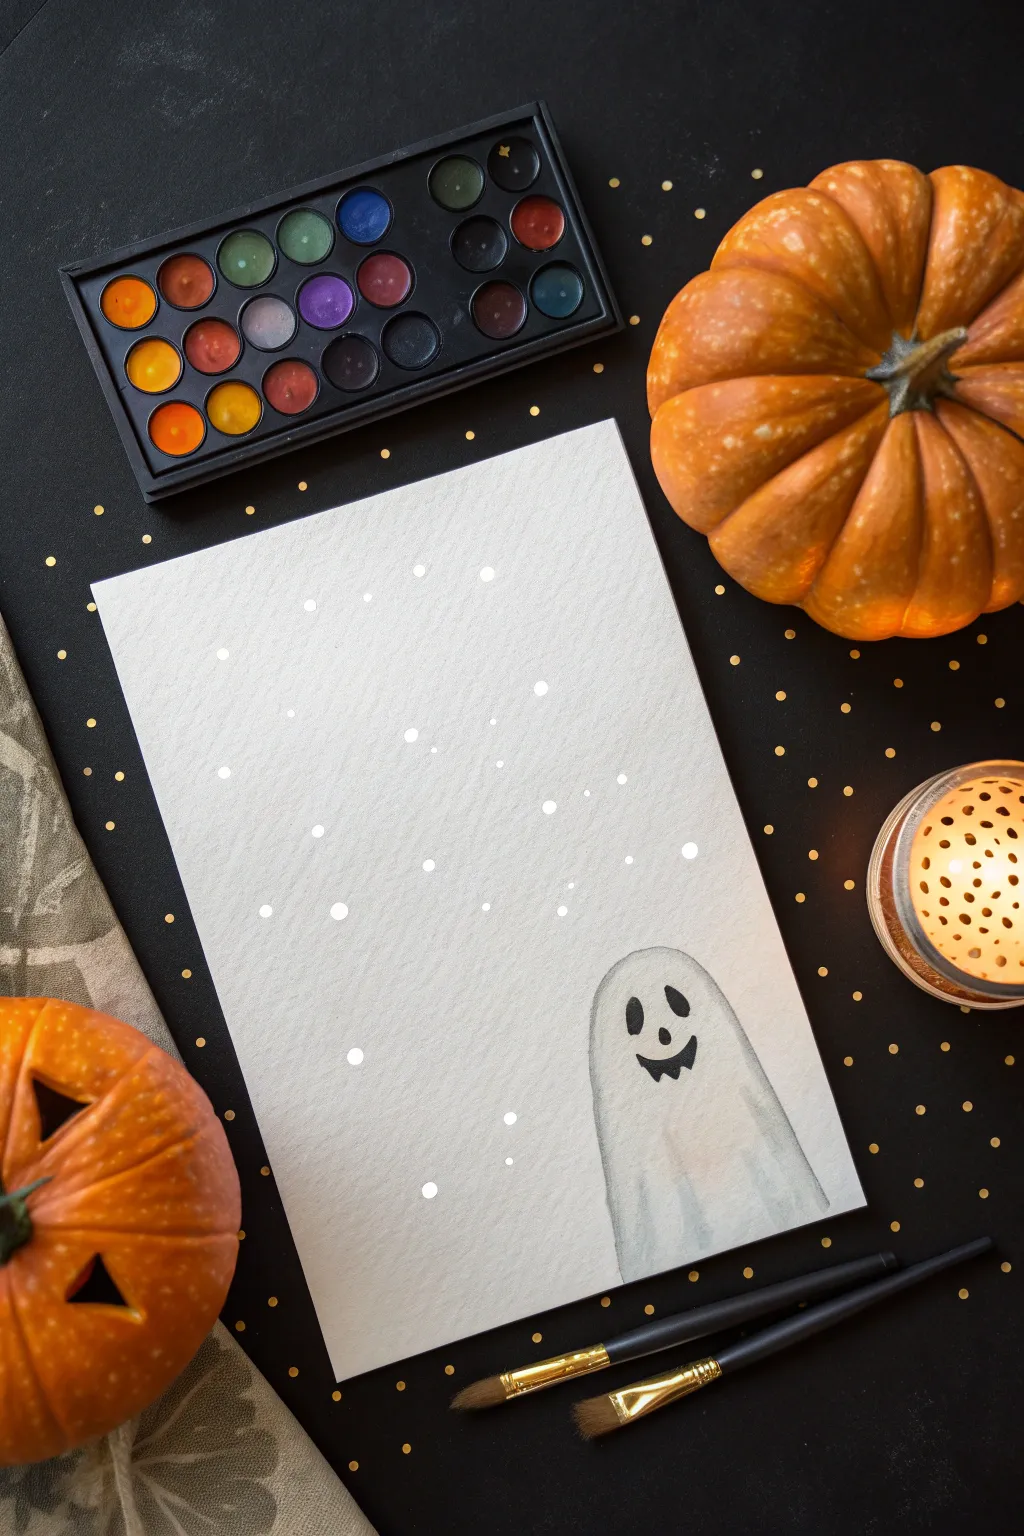
Create a delightfully minimal Halloween scene featuring a friendly little phantom amidst a gentle flurry of glowing specks. This project uses soft watercolor washes and precise white highlights to create a magical, almost phosphorescent effect on simple paper.
Step-by-Step
Materials
- Cold press watercolor paper (A4 or A5)
- Watercolor paints (black, grey, and a touch of blue)
- Fine round paintbrush (size 2 or 4)
- White gel pen, white posca marker, or opaque white gouache
- Clean water and paper towels
- Pencil and eraser
Step 1: Sketching the Visitor
-
Plan placement:
Visualize your composition before putting pencil to paper. The ghost sits comfortably in the bottom right corner, leaving plenty of negative space above for our magical atmosphere. -
Draw the outline:
Using a pencil very lightly, sketch a simple arch shape for the ghost’s head. Extend the lines down, letting them wave slightly at the bottom to suggest a floating hem. -
Add the face:
Sketch two small oval eyes and a curved, smiling mouth. Keep the expression friendly rather than scary—this is a happy haunting.
Uneven Grey Wash?
If your ghost looks streaky, re-wet the entire shape with clean water and drop in pigment. This helps redistribute the color evenly before it dries.
Step 2: Painting the Phantom
-
Prepare a grey wash:
Mix a very dilute grey on your palette using plenty of water and a tiny dot of black paint. I sometimes like to add a microscopic touch of blue to make the ghostly white feel colder. -
Apply the first layer:
Wet your brush with the grey wash and paint the entire body of the ghost, staying carefully within your pencil lines. -
Create dimension:
While the paper is still damp, drop a slightly darker grey concentration along the bottom right edge or the folds of the sheet. This wet-on-wet technique creates soft, shadowy volume. -
Let it dry completely:
Wait for the paint to be bone dry. If the paper feels cool to the touch, it still needs more time. -
Paint the features:
Using undiluted black paint and your finest brush tip, carefully fill in the eyes and mouth. A steady hand is key here to get clean edges.
Step 3: Creating the Atmosphere
-
Map out the magic:
The background relies on negative space, but we will fill it with ‘glowing’ orbs. You can lightly dot pencil marks where you want your white specks, or freestyle it. -
Add large white dots:
Take your white paint pen, Posca marker, or a brush loaded with opaque white gouache. Create several larger, distinct white circles scattered randomly across the upper half of the paper. -
Add medium specks:
In between the larger dots, add medium-sized points of white. Try not to make them too uniform; randomness feels more like magic dust or snow. -
Fill with tiny stars:
Finally, use the very tip of your tool to add tiny pinpricks of white throughout the sky area and even overflowing slightly near the ghost. -
Enhance the ghost:
If you want your ghost to really pop, outline the very top arch of his head with a faint dusting of white specks or a very thin white line to catch the light. -
Add contrast dots:
For depth, you can mix a very pale grey and add just a few grey dots among the white ones. This makes the bright white dots appear to glow brighter by comparison.
Make It Glow Real
Swap standard white paint for actual glow-in-the-dark acrylic paint for the dots. Charge it under a lamp, and the magic becomes real when lights go out.
Step 4: Finishing Touches
-
Review contrast:
Check if the ghost’s face needs a second coat of black to be truly opaque and dark. -
Clean up:
Once absolutely everything is dry, gently erase any visible pencil lines around the ghost’s border for a seamless look.
Now you have a charmingly minimal piece of seasonal art ready to be framed or gifted.


Have a question or want to share your own experience? I'd love to hear from you in the comments below!