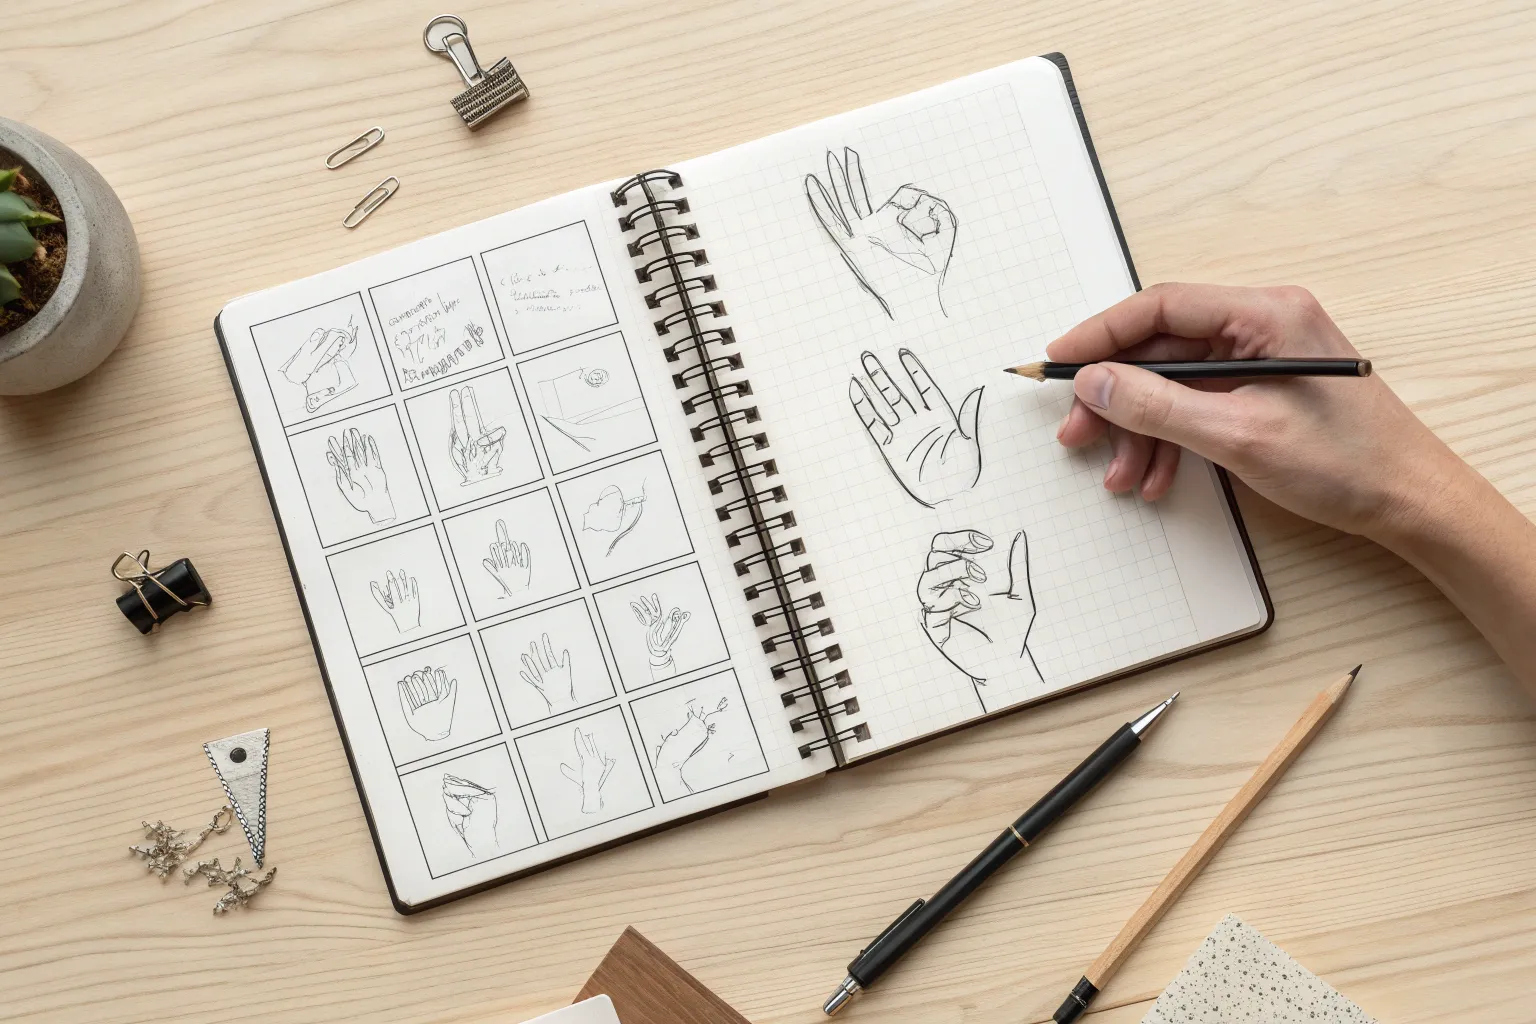
If you’ve ever stared at your sketchbook thinking, “Hands are hard,” you’re in very good company. These hand drawings ideas are my favorite studio-friendly prompts for practicing gestures, structure, and style without making it feel like homework.
Open Palm Study With Clear Finger Spacing
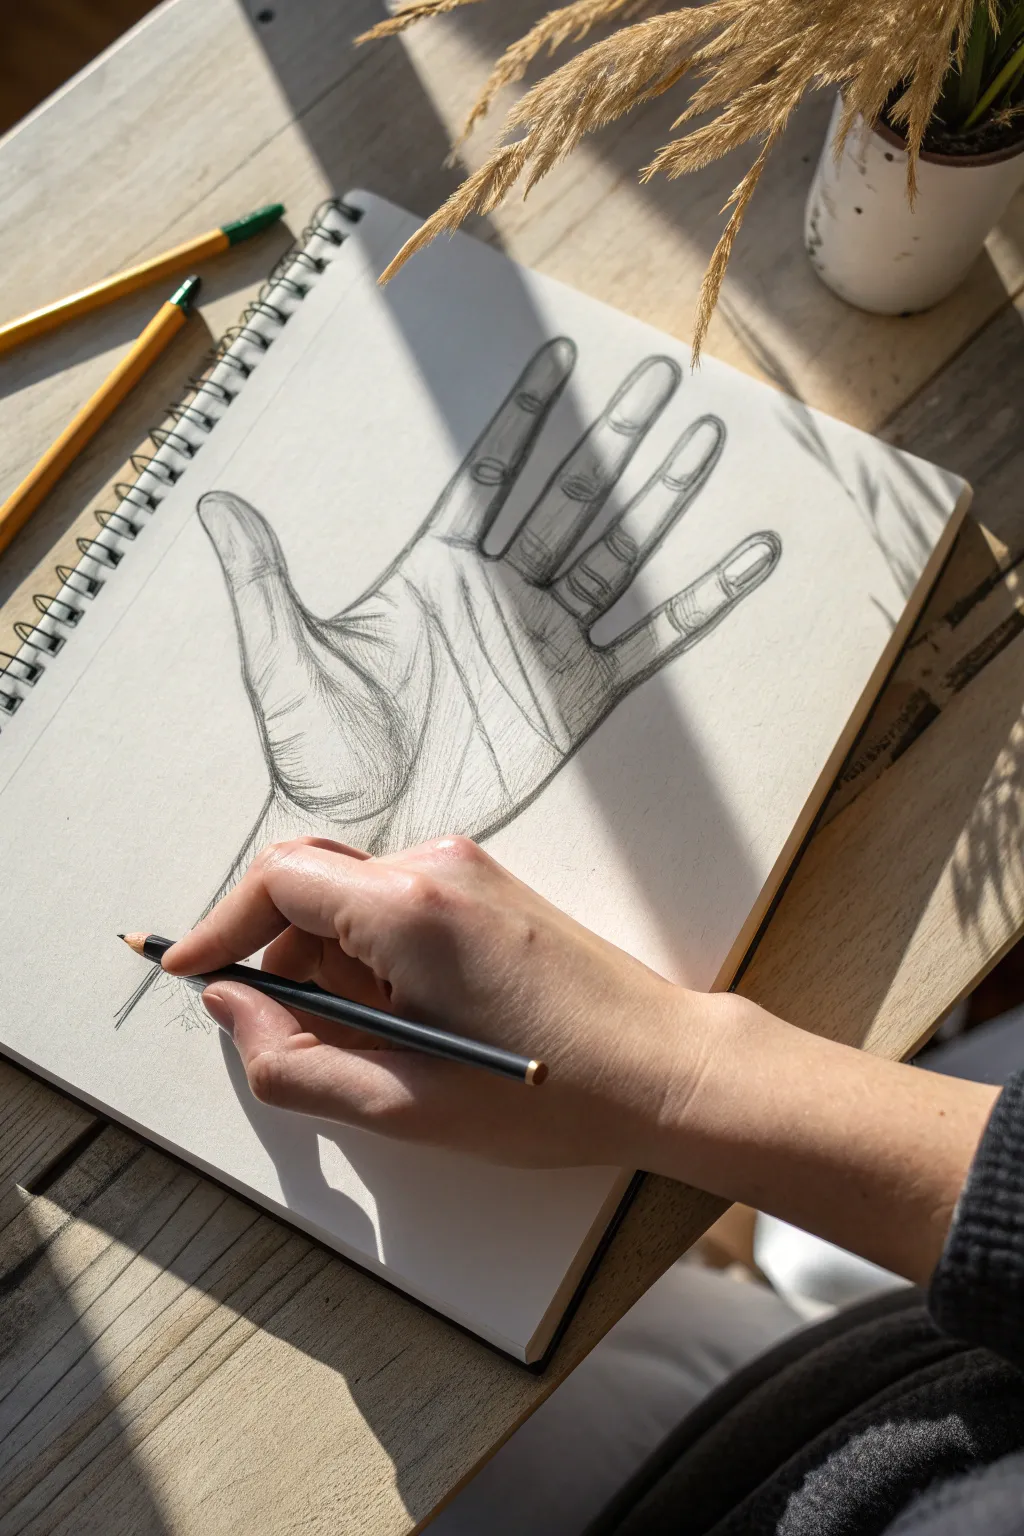
Capture the intricate anatomy and expressive potential of the human hand with this focused study. This project guides you through rendering an open palm with realistic shading and clear finger spacing, perfect for practicing proportions and volume.
Step-by-Step
Materials
- Spiral-bound sketchbook (medium drawing paper)
- Graphite pencils (HB for sketching, 2B and 4B for shading)
- Kneaded eraser
- Pencil sharpener
- Blending stump (optional)
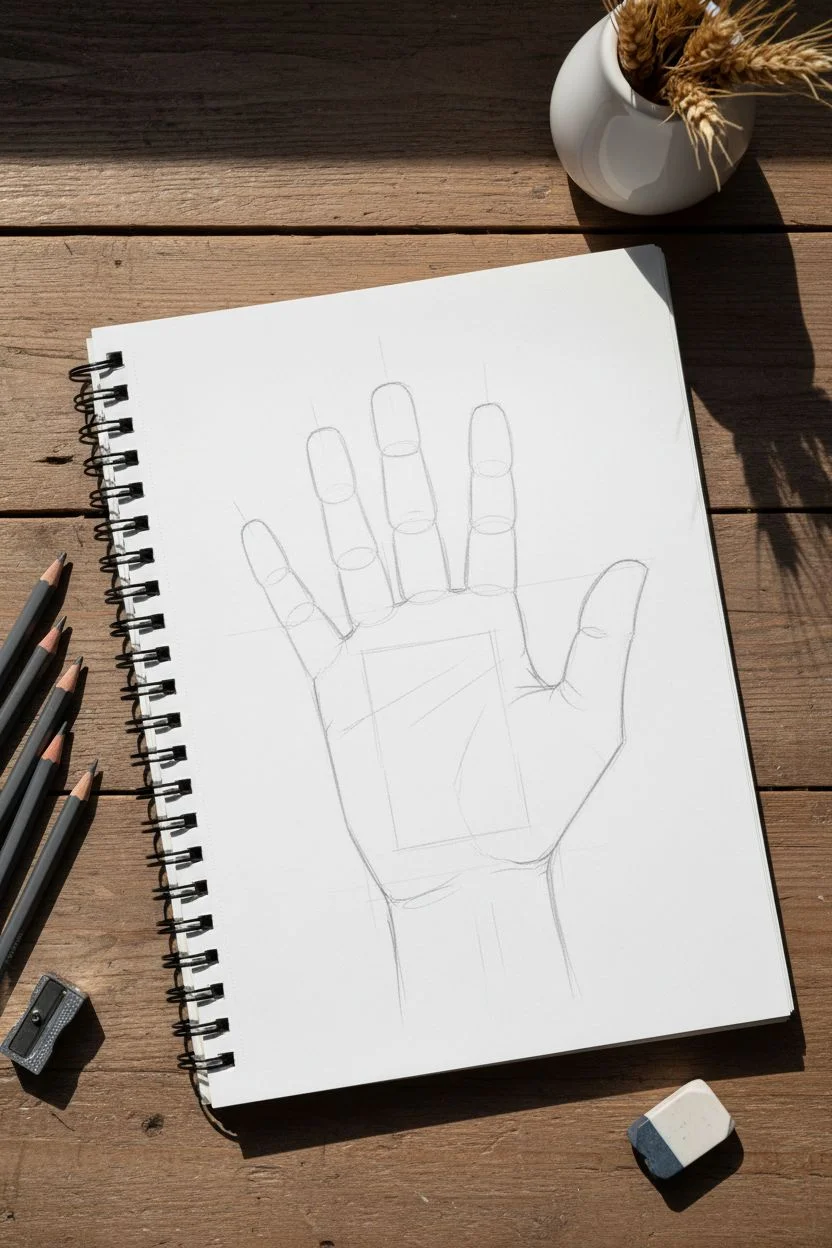
Step 1: Drafting the Basic Structure
-
Establish the palm block:
Begin by lightly sketching a slightly tapered square or rectangle shape to represent the main mass of the palm. Keep your lines very faint using an HB pencil so they can be easily adjusted or erased later. -
Mark the wrist connection:
Draw the wrist lines extending downwards from the base of your palm block. Let them taper slightly inward to suggest the natural narrowing of the forearm. -
Indicate finger positions:
From the top edge of the palm block, draw five straight lines radiating outward to map the direction and length of each finger. Ensure the spaces between these lines are wide enough to accommodate the open pose. -
Sketch finger segments:
Using your guide lines, build the cylindrical shapes of the fingers. Break each finger down into three segments (distal, middle, and proximal phalanges), except for the thumb which has two visible segments. -
Define the thumb joint:
Draw the large, fleshy base of the thumb (the thenar eminence) as a rounded oval shape at the lower side of the palm block, connecting it smoothly to the wrist.
Use Negative Space
To check finger proportions, look at the ‘V’ shapes of empty space between the fingers. If these negative shapes look correct, the fingers are likely placed well.
Step 2: Refining Contours and Details
-
Smoothen the outline:
Go over your structural sketch with a firmer line to define the actual skin contours. Pay attention to the webbing between the fingers, creating soft curves rather than sharp angles. -
Add knuckle indicators:
Lightly mark the locations of the knuckles with small ellipses or curved lines. This helps visualize where the skin will fold and wrinkle. -
Draw primary palm lines:
Sketch the major creases of the palm: the life line curving around the thumb, the head line across the middle, and the heart line near the fingers. Keep these strokes loose and organic. -
Detail the finger pads:
Refine the tips of the fingers. Instead of perfect circles, give them a slightly fleshy, tapered look to show the soft pads on the underside. -
Add fingernails:
Even from a palm view, the tips of fingernails might peek over the top. If visible, draw them lightly; otherwise, focus on the curves of the fingertips themselves.
Step 3: Shading and Texture
-
Determine the light source:
Visualize a light source coming from the top left (or match the lighting in your reference). This decision dictates where your shadows will fall. -
Shade the thumb base:
Using a 2B pencil, apply hatching strokes to the fleshy mound of the thumb. Shade the side furthest from the light to make it look round and three-dimensional. -
Darken the palm recesses:
Add depth to the center of the palm where the skin naturally dips. I find that soft, curved hatching follows the form best here. -
Render finger volume:
Shade the sides of each finger cylinder. Leave a highlight strip down the center of each segment to suggest roundedness and volume. -
Emphasize the creases:
Deepen the main palm lines with a 4B pencil. Don’t just draw a single dark line; add tiny branching cracks to make the skin look realistic and weathered. -
Cast shadows:
If the hand is resting on a surface or interacting with light, add cast shadows beneath the fingers or on one side of the hand to ground the drawing. -
Final contrast check:
Step back and look at your drawing. Darken the deepest shadows (like the spaces between tight fingers or deep wrinkles) and use an eraser to lift out bright highlights on the fleshy pads.
Fingers Look Flat?
Ensure your shading strokes wrap around the form like curved bands (contour hatching) rather than going straight across. This curvature creates the illusion of 3D volume.
With practice, these structural techniques will become second nature, allowing you to draw hands confidently from any angle

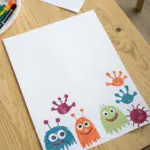

Relaxed Fist With Knuckle Planes
This study captures the raw power and subtle tension of a clenched fist, focusing heavily on anatomy and the distinct planes of the knuckles. Using simple graphite, you will build up layers of shading to create volume, realistic skin textures, and a strong sense of three-dimensional form.
How-To Guide
Materials
- Sketchbook with smooth or medium-tooth paper (white or off-white)
- Graphite pencils (HB for sketching, 2B and 4B for shading, 6B for deep darks)
- Kneadable eraser
- Pencil sharpener (or craft knife for a long point)
- Blending stump or tissue (optional)
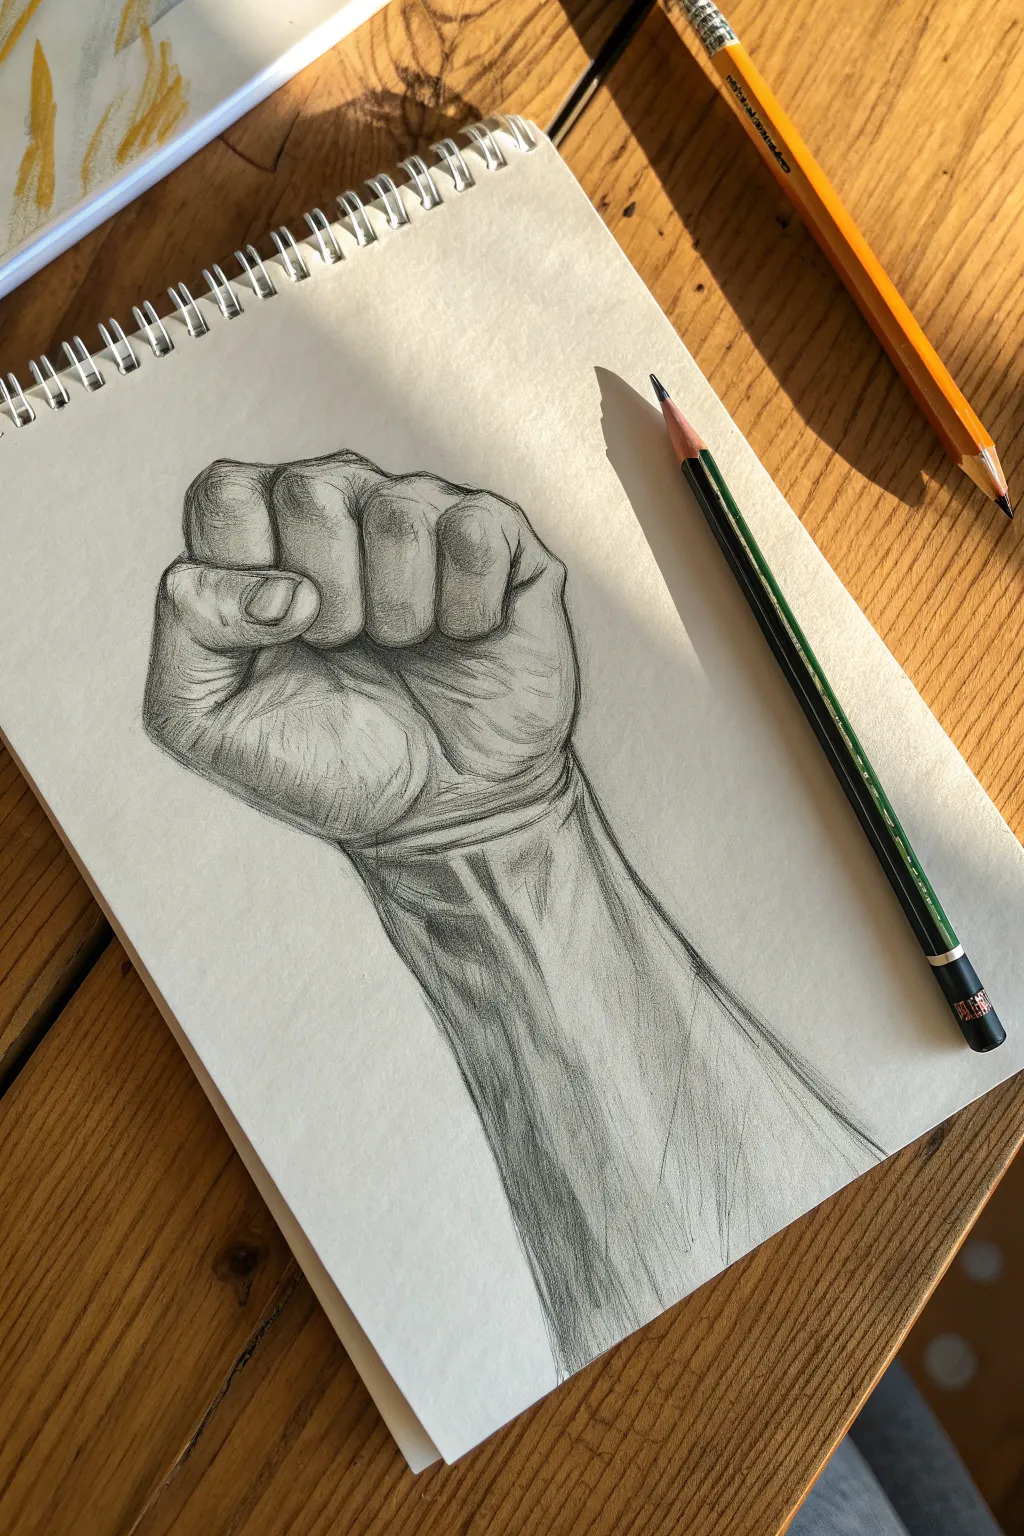
Step 1: Structural blocking
-
Establish the fist shape:
Begin with a light HB pencil. Draw a boxy, squared-off shape to represent the main mass of the hand where the fingers fold in. Keep lines very faint so they can be erased later. -
Add the thumb placement:
Sketch a smaller, curved form overlapping the front of the ‘box’ to indicate where the thumb tucks over the index and middle fingers. The tip of the thumb should rest near the second knuckle of the middle finger. -
Outline the wrist:
Draw two converging lines extending downwards from the fist to form the wrist and forearm. Note that the wrist isn’t straight; it should taper slightly inward before widening out for the forearm muscles. -
Define the finger segments:
Divide the top of your boxy shape into four vertical sections for the fingers. Sketch the rounded tops of the knuckles, paying attention to their cascading height—the middle finger knuckle is usually the highest point.
Step 2: Defining the Knuckle Planes
-
Carve out the knuckles:
Using slightly firmer pressure, refine the outline of each knuckle. Instead of drawing perfect circles, try to see them as geometric planes—giving them a slightly squared-off look at the top adds realism. -
Detail the thumb and forefinger:
Sketch the fingernail on the thumb and the specific fold where the thumb presses against the index finger. Capture the wrinkle of skin right at that pressure point. -
Map the tendons:
Lightly trace lines extending from the knuckles down the back of the hand towards the wrist. These guides will help you place shadows later to show the extensor tendons beneath the skin. -
Refine the contour:
Go over your outer outline. Add small bumps and indentations to represent the natural unevenness of skin and bone, especially along the pinky side of the hand and the wrist bone.
Fixing “Sausage Fingers”
If fingers look rubbery, check your knuckles. Adding sharp angles or ‘planes’ to the joints mimics bone structure better than smooth curves.
Step 3: Shading and Texture
-
Establish the light source:
Decide on your light direction—in the example, it comes from the top left. This means shadows will fall heavily on the right side of the wrist and the undersides of the fingers. -
Apply base shading:
Switch to a 2B pencil. Use hatching strokes to lay down a mid-tone gray on the shadow side of the arm and the crevices between fingers. -
Deepen the crevices:
With a 4B pencil, darken the deep gaps between the folded fingers and the heavy shadow beneath the thumb. This high contrast separates the digits visually. -
Sculpt the wrist muscles:
Use long, directional hatching strokes running down the length of the forearm. Shade strictly along the anatomy to suggest the brachioradialis and flexor muscles underneath. -
Highlight the knuckles:
Use your kneadable eraser to lift graphite off the tops of the knuckles and the bulky part of the thumb base. This creates highlights that make these areas pop forward. -
Add skin wrinkles:
Draw fine, curved lines horizontally across the wrist and vertically on the finger joints to show skin folding. Keep the pencil very sharp here for crisp detail. -
Cross-hatching for density:
On the darkest side of the arm (the right side), layer cross-hatching strokes over your initial shading. This builds a rich, dense texture that suggests weight.
Dynamic Tension
To make the fist look tighter, draw stress lines pulling from the knuckles toward the wrist. Taut skin equals strength.
Step 4: Final Polish
-
Intensify core shadows:
Take a 6B pencil or press firmly with your 4B to add the absolute darkest accents—specifically right under the palm heel and in the deepest finger creases. -
Refine edges:
Clean up the outer silhouette. If your shading went outside the lines, erase it to keep the form crisp. -
Textural touches:
Add tiny, faint speckles or broken lines on the back of the hand to simulate skin pores and imperfections, avoiding a ‘plastic’ smooth look. -
Final assessment:
Step back and squint at your drawing. I usually find this helps reveal if the contrast is strong enough; if it looks flat, darken your shadows one last time.
Keep practicing different hand angles to master the complex anatomy of the human fist


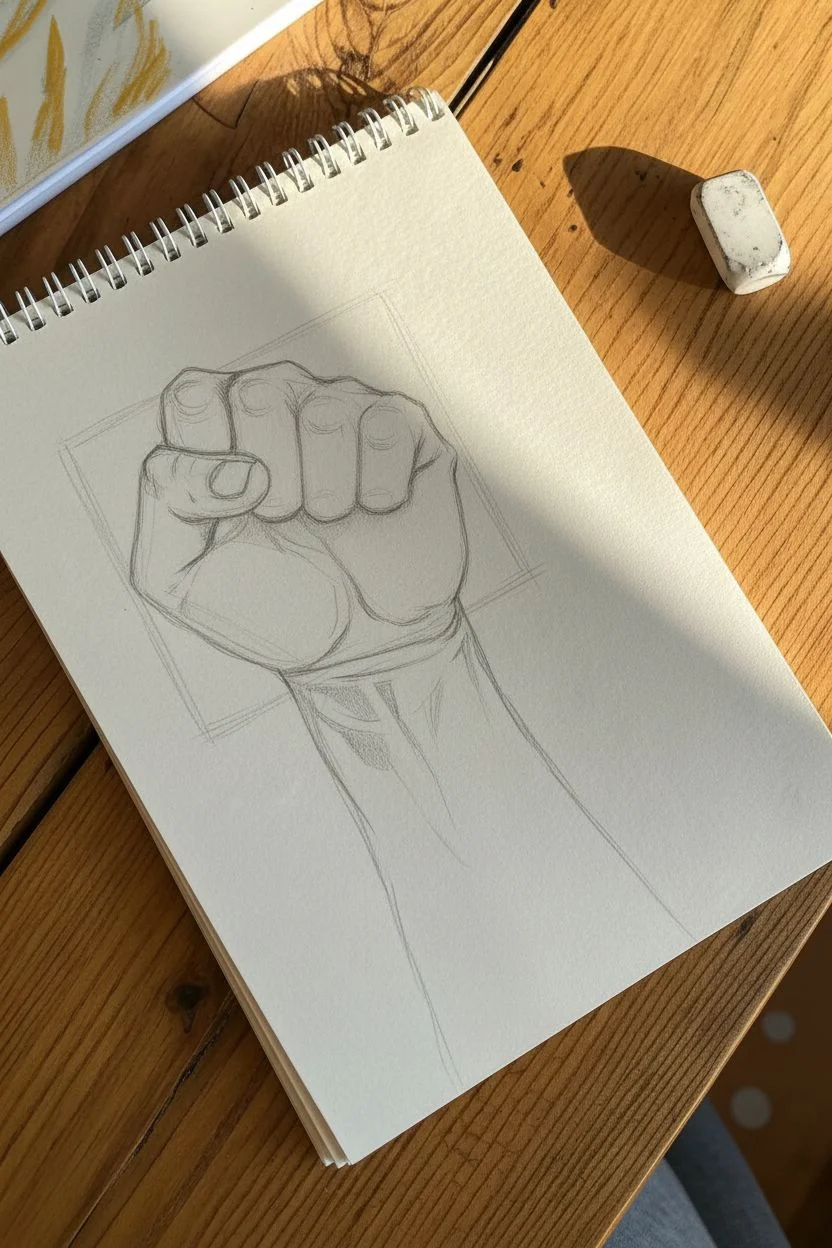
Peace Sign With Overlapping Fingers
This project captures a timeless gesture in a clean, minimalist line art style on textured paper. The frayed edges of the paper give it a raw, handmade feel that perfectly complements the simple black ink drawing.
Detailed Instructions
Materials
- Heavyweight cream or off-white drawing paper (around 140lb/300gsm)
- Fine liner pen (Black, size 05 or 08)
- Pencil (HB or 2B)
- Good quality eraser
- Ruler (straight edge)
- Optional: Light box or transfer paper
Step 1: Preparing the Canvas
-
Select your paper:
Start with a sturdy piece of cream-colored paper. Using a thicker cardstock or watercolor paper adds a nice tactile quality that standard printer paper lacks. -
Create the frayed edges:
Instead of cutting the paper with scissors, place a ruler firmly along the line where you want the edge to be. Firmly tear the paper upward against the ruler’s edge to create that soft, deckled look seen in the photo. -
Plan the composition:
Identify the center of your torn paper. The hand should sit centrally but slightly lower to allow the fingers to extend upwards without feeling cramped.
Uneven Lines?
Don’t stress about shaky lines. In this minimalist style, slight wobbles add organic character. If a line is too thin, thicken the adjacent line to balance it out.
Step 2: Sketching the Outline
-
Base structure of the palm:
Using your pencil very lightly, draw a simplified square shape for the palm. This acts as the anchor for the fingers. -
Positioning the extended fingers:
Sketch two long cylinders extending from the top of the palm for the index and middle fingers. Angle them slightly apart to form the classic ‘V’ shape. -
Sketching the folded fingers:
Draw the ring and pinky fingers folded down into the palm. These will look like two rounded shapes tucked against the fleshy part of the hand. -
Placing the thumb:
Draw the thumb crossing over the folded ring finger. The tip of the thumb should rest right on top of the first knuckle of the ring finger. -
Refining the anatomy:
Go back over your blocky shapes and add natural curves. Pay attention to the web of skin between the index and middle finger, and narrow the wrist slightly as it exits the bottom.
Add Dimension
Use a light gray marker to add a simple drop shadow on one side of the hand. This subtle touch makes the drawing lift off the paper instantly.
Step 3: Adding Details
-
Adding knuckles and nails:
Lightly sketch the fingernails on the extended fingers. They should look like soft U-shapes. Mark the location of the knuckles with faint lines. -
Creases and skin folds:
Draw the major creases in the palm where the thumb folds over. These diagonal lines show tension in the hand. -
The wrist lines:
Add two short lines at the wrist to suggest the separation between the hand and the forearm.
Step 4: Inking the Final Art
-
Outline the main shape:
Switch to your black fine liner. Start by tracing the outer silhouette of the hand. Keep your hand steady and maintain a consistent line weight. -
Finger details:
Ink the lines separating the fingers. When drawing the fingernails, keep the lines slightly thinner or broken if you want a more organic look. -
The thumb overlap:
Carefully ink the thumb where it crosses the ring finger. Ensure the line of the thumb clearly sits ‘on top’ visually by stopping the ring finger lines when they hit the thumb outline. -
Reference the knuckles:
Add the horizontal dashed lines on the fingers to denote knuckles. Don’t close these shapes completely; let them ‘breathe’ a little. -
Inner palm texture:
Add the detailed hatching and creases inside the palm. Use quick, confident strokes for these lines to mimic the natural texture of skin. -
The wrist shading:
I usually add a few small, broken lines near the wrist and outer palm to suggest shadow and form without heavy shading.
Step 5: Polishing
-
Let the ink set:
Information on drying times is crucial here: wait at least 5 to 10 minutes to ensure the ink is completely dry before touching it. -
Erase pencil marks:
Gently erase all underlying pencil sketches. Hold the paper taut with one hand so the erasing friction doesn’t crinkle your frayed edges. -
Final assessment:
Check your lines. If any main outlines look too thin, go over them once more to thicken them, making the hand pop against the cream paper.
Place your finished drawing against a contrasting background fabric to highlight those lovely torn edges


Finger Heart Gesture for Clean Line Art
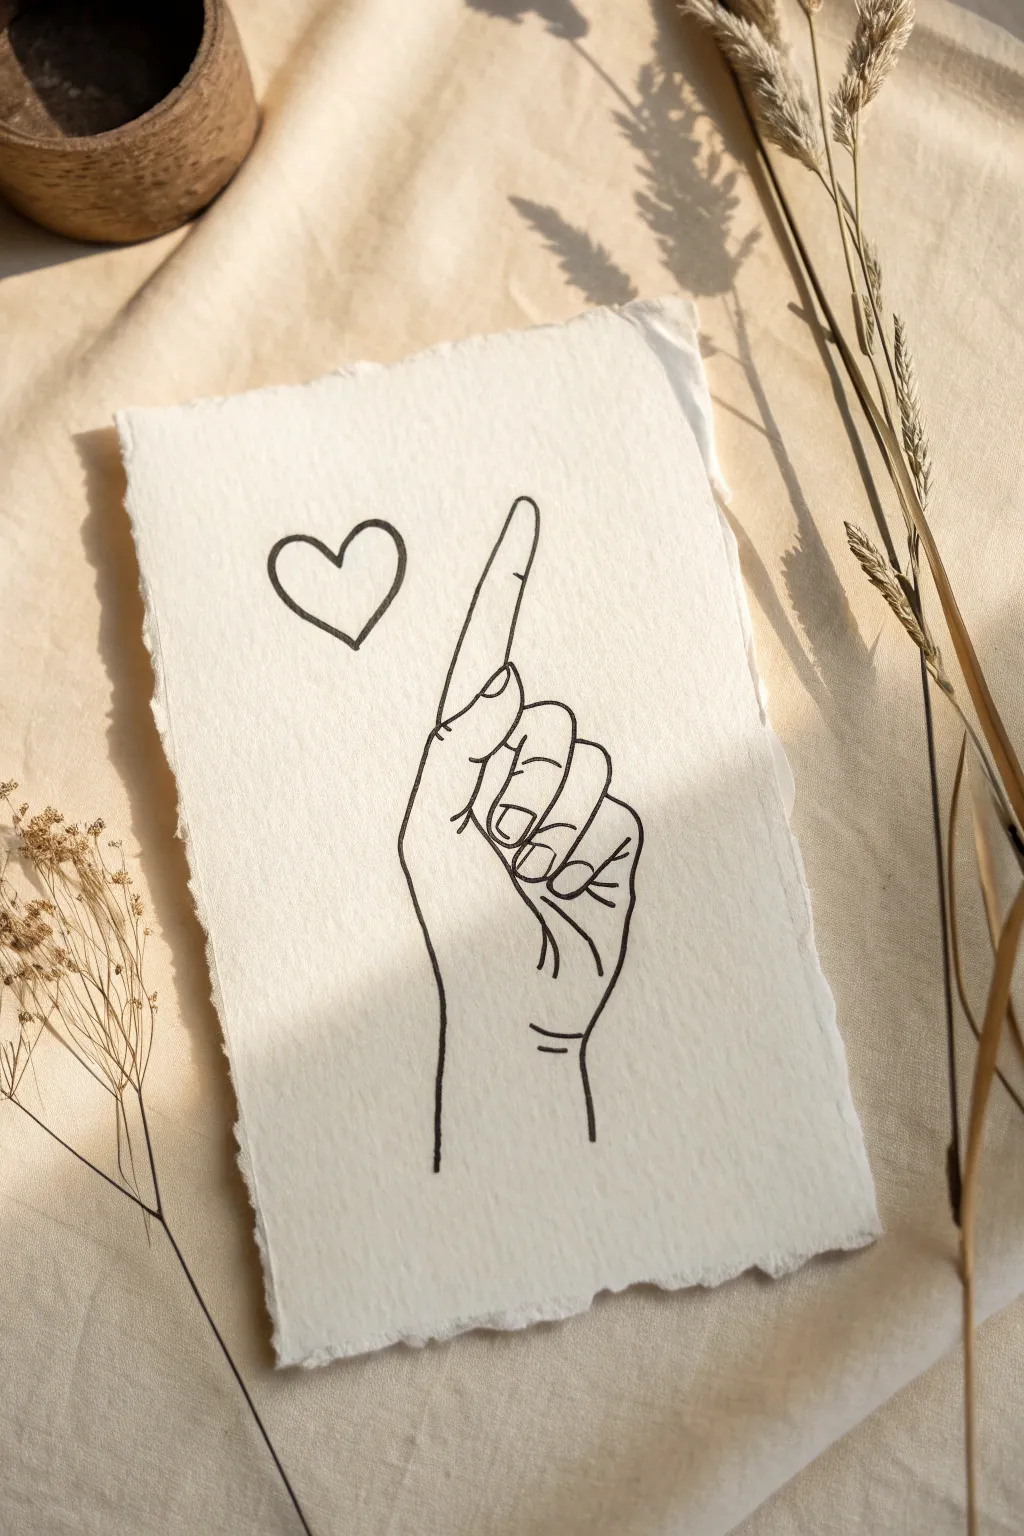
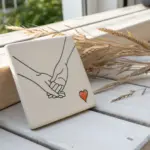
Capture a simple yet meaningful gesture with this minimalist line art tutorial featuring a pointing hand and floating heart. Using deckled-edge paper adds a high-end, textured feel to this clean aesthetic, making it perfect for framing or gifting.
Detailed Instructions
Materials
- Deckled-edge cotton paper (A5 size)
- Fine liner pen (0.3mm or 0.5mm, black)
- Pencil (HB or 2H)
- Kneaded eraser
- Ruler (optional for alignment)
- Smooth work surface
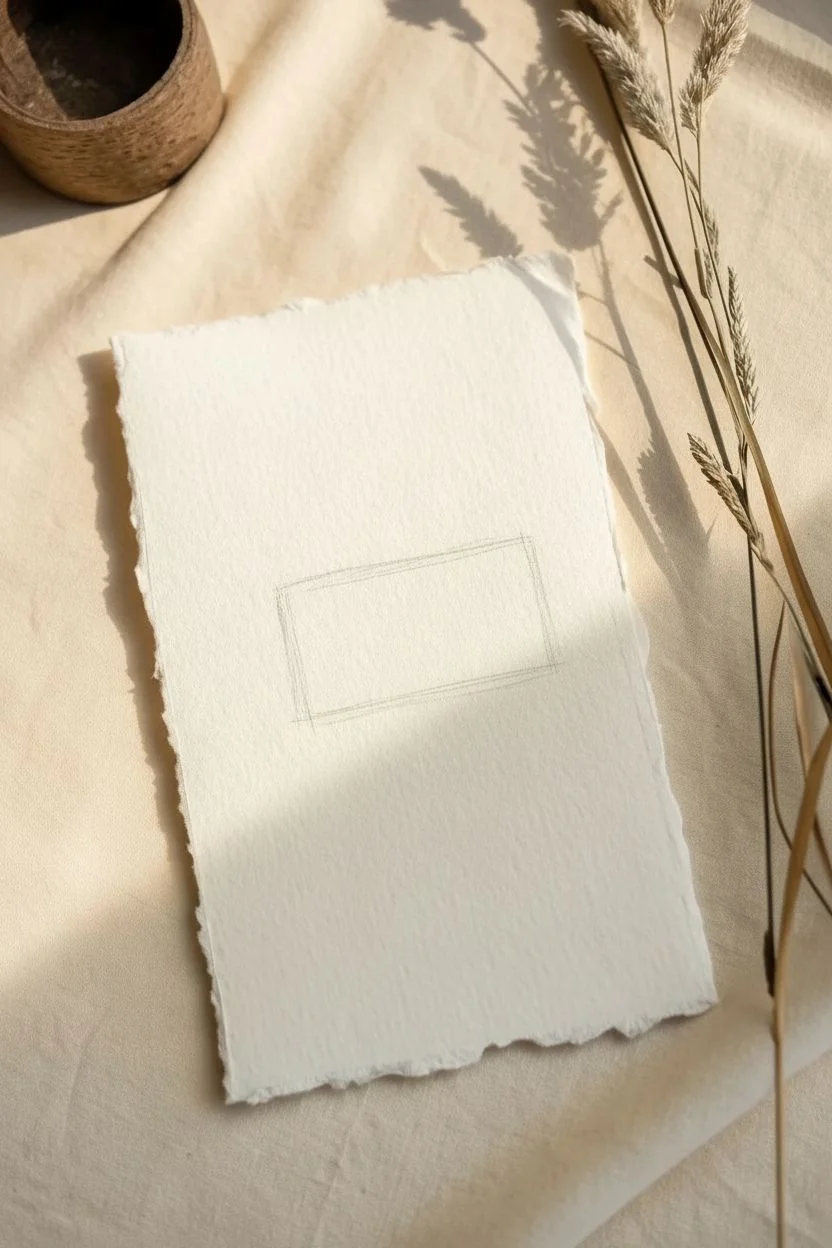
Step 1: Planning the Composition
-
Center the design:
Begin by finding the visual center of your deckled paper. Unlike standard paper, the ragged edges mean you should eyeball the center rather than measure strictly from the edge. -
Sketch the palm block:
Lightly sketch a rectangular block shape slightly below the center. This will represent the main mass of the palm and serve as the anchor for the fingers.
Ink Bleed Tips
Cotton paper is absorbent. Test your pen on a scrap piece first. If it bleeds, switch to a pigment-based liner rather than a liquid ink rollerball.
Step 2: Drafting the Hand
-
Outline the index finger:
Draw an elongated oval shape extending upward from the left side of your palm block. Tilt it slightly to the right to create a natural pointing angle. -
Add the folded fingers:
Sketch three cascading oval shapes to the right of the index finger. These should look like they are curling inward towards the palm, getting progressively smaller. -
Position the thumb:
Sketch the thumb crossing over the base of the index finger. The tip of the thumb should rest near the first knuckle of the pointing finger. -
Refine the wrist:
Extend two vertical lines downward from the palm block to indicate the wrist. Keep them relatively straight but slightly tapered inward.
Add a wash
Enhance the sketch by adding a very pale watercolor wash of blush pink inside the heart or a soft gray shadow behind the hand for dimension.
Step 3: Inking the Lines
-
Start with the index finger:
Using your fine liner, trace the left side of the index finger first. I find it helpful to pull the pen toward me for smoother lines. Continue up and over the fingertip. -
Detail the fingernail:
Draw a small, curved U-shape near the tip of the index finger to suggest the nail. Keep it simple; too much detail ruins the minimalist vibe. -
Ink the thumb fold:
Draw the contour of the thumb, paying attention to where the skin folds near the knuckle. Use slight breaks in the line or thinner strokes to indicate wrinkles. -
Define the curled fingers:
Trace the three folded fingers. Focus on the nails—drawing small squares with rounded corners—and the creases where the fingers bend. -
Connect the outer palm:
Draw the outer edge of the hand, curving gently from the pinky knuckle down to the wrist bone. -
Add wrist details:
Ink the two wrist lines. Add a small, horizontal floating line just above the wrist to suggest the crease where the hand bends.
Step 4: Finishing Touches
-
Draw the heart:
Position your pen to the left of the index finger. Draw a simple, open line heart. Make sure the bottom point is sharp and the curves are symmetrical. -
Let the ink set:
Wait at least five minutes for the ink to dry completely. Textured cotton paper can hold ink longer than smooth paper, and smudging now would be heartbreaking. -
Erase guidelines:
Gently roll your kneaded eraser over the pencil sketches. Avoid rubbing back and forth vigorously, as this can damage the delicate deckled surface. -
Check line weight:
Look over your drawing. If the main outline feels too thin compared to the paper texture, go over the outer silhouette once more to thicken it slightly.
Place your finished drawing in a floating glass frame to show off those beautiful rough edges

PENCIL GUIDE
Understanding Pencil Grades from H to B
From first sketch to finished drawing — learn pencil grades, line control, and shading techniques.
Explore the Full Guide
Two Hands Holding Hands From a Side View
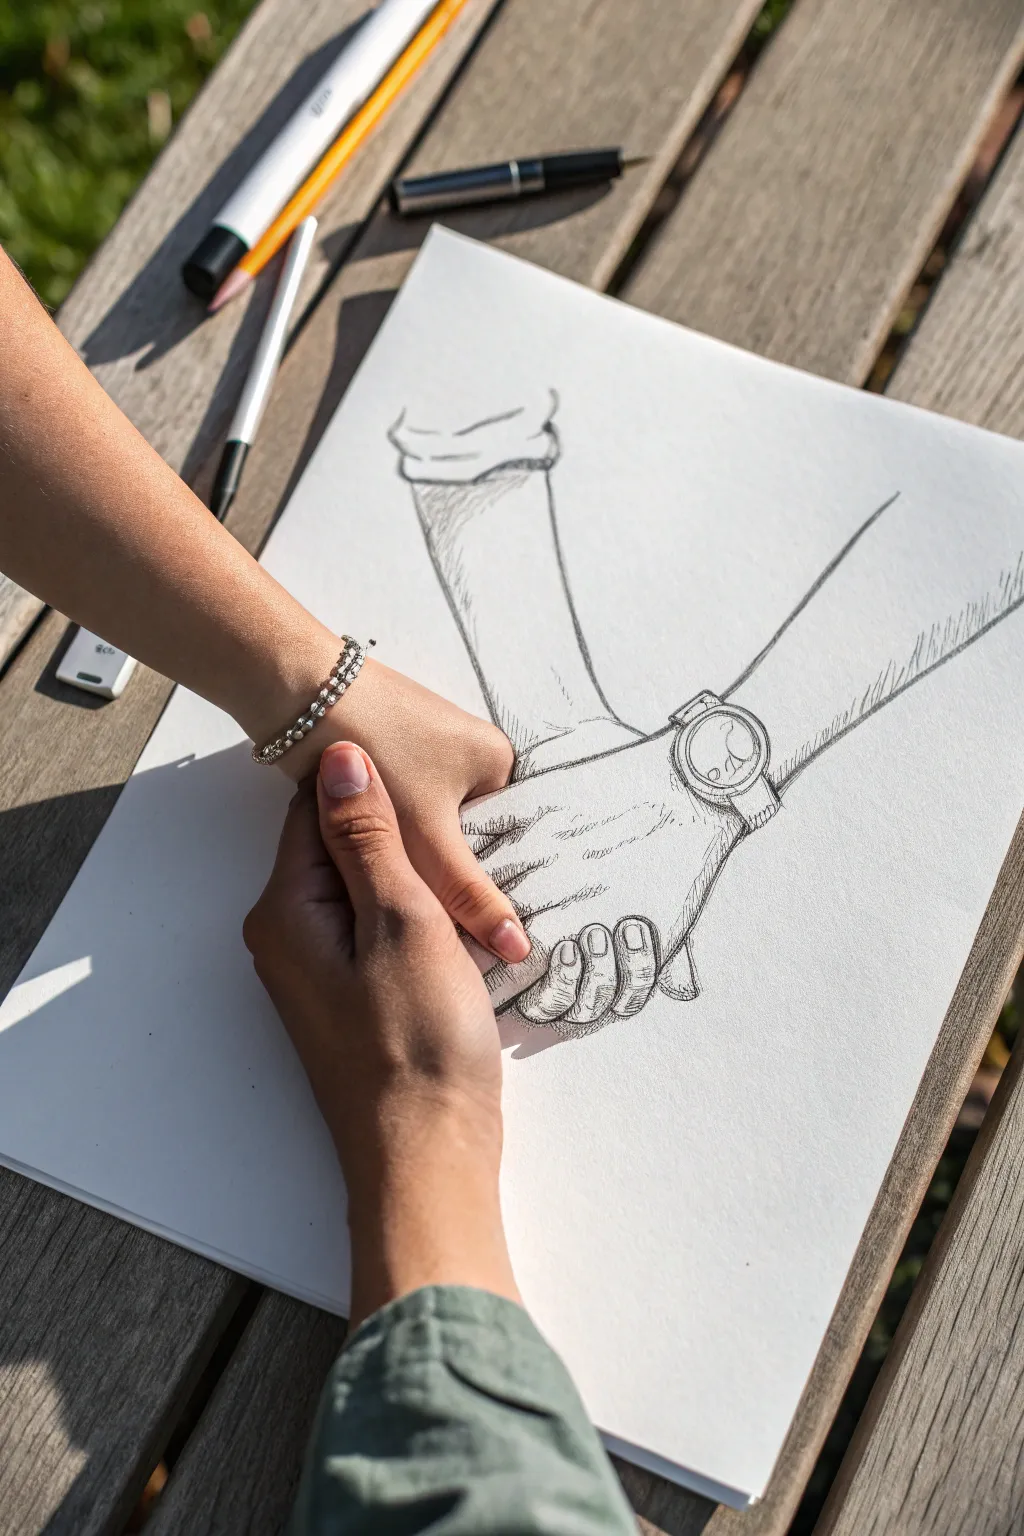
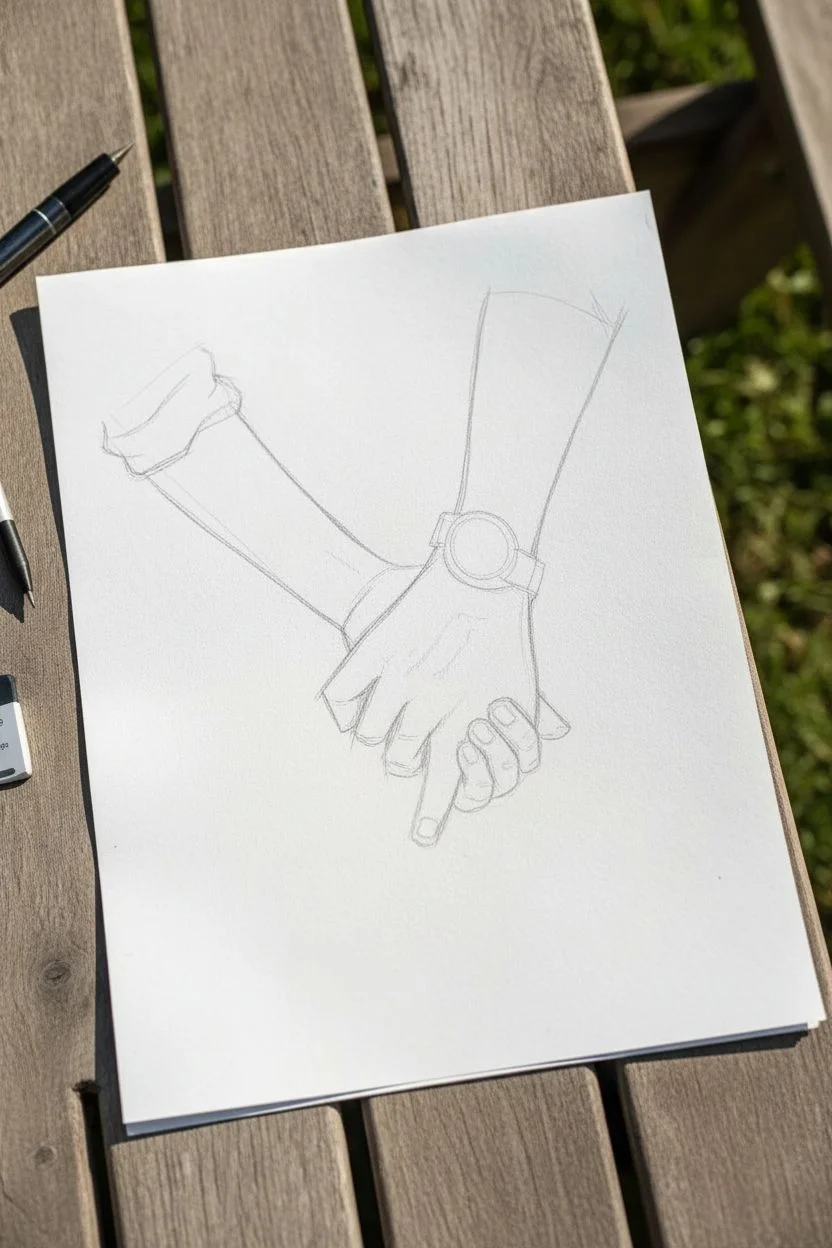
Capture the connection between two people with this touching pencil sketch of interlaced hands. This tutorial guides you through illustrating the delicate interaction of fingers and wrists, using simple shading techniques to bring depth and emotion to the paper.
Step-by-Step Guide
Materials
- High-quality white cartridge paper (A4 or similar)
- HB graphite pencil (for initial sketching)
- 2B or 4B graphite pencil (for shading and darkening)
- Fine liner pen (optional, for crisp outlines)
- Eraser (kneaded eraser preferred)
- Pencil sharpener
Step 1: Drafting the Basic Structure
-
Position the wrists:
Start by drawing two diagonal lines coming from the top center and the right side of the paper. These represent the forearms converging. The left arm should angle down slightly, while the right arm angles up to meet it. -
Outline the left hand shape:
At the end of the left forearm, sketch a blocky mitten shape to represent the main mass of the hand. Angle it downwards as if it is resting on top of something. -
Outline the right hand shape:
Below the left hand shape, sketch the opposing hand. This one should look like it is supporting the top hand, with the palm area facing slightly upward. -
Add wrist details:
On the top arm, sketch a slightly curved line near the elbow area to suggest a rolled-up sleeve. On the lower arm, sketch a circle where the wrist meets the hand to adhere a watch face later.
Use Your Own Reference
Take a photo of your own hand (or ask a friend) in this pose using your phone. Drawing from a real photo helps understand difficult 3D finger angles.
Step 2: Refining the Anatomy
-
Define the top hand’s thumb:
Refine the top hand by drawing the thumb. It should wrap around the lower hand’s palm area. Keep the lines soft and curved to show gentle pressure. -
Sketch the top fingers:
Draw the visible fingers of the top hand. They should be relaxed, curing slightly over the edge of the lower hand. You don’t need to detail every knuckle yet, just get the flow right. -
Detail the lower hand’s grip:
For the bottom hand, draw the fingers curling upward and wrapping around the top hand’s palm. The fingertips should be visible, gripping gently. -
Draw the watch:
Flesh out the circle on the lower wrist into a watch. Draw the strap connecting to the watch face, and add a simple circular rim. -
Add arm details:
Lightly sketch short, hatched lines along the lower arm to suggest arm hair, adhering to the direction of growth. For the top arm, refine the crumpled fabric of the sleeve.
Step 3: Shading and Texturing
-
Erase guidelines:
Gently erase your initial structural lines and stick-figure guides, leaving only the refined contours of the hands and arms. -
Darken the outlines:
Switch to a softer pencil (like a 2B) or apply more pressure to solidify the main outlines. Pay attention to valid overlaps, like where the thumb crosses the lower hand. -
Shade the contact points:
Add shading where the hands touch. Darken the area under the top thumb and between the interlaced fingers to create a sense of depth and contact. -
Add skin folds:
Draw small, subtle lines at the knuckles and where the skin folds on the palms. These shouldn’t be solid lines, but rather broken, faint strokes. -
Shade the arms:
Use light diagonal hatching on the forearms to suggest roundness. I find it helpful to keep the center of the arm lighter to simulate a highlight. -
Detail the watch face:
Add the hands of the clock and subtle reflections on the glass face. Shade the strap slightly darker to differentiate the material from the skin. -
Refine the sleeve:
Darken the creases in the rolled-up sleeve on the top arm to give the fabric volume and weight. -
Final contrast check:
Step back and look at your drawing. Deepen the darkest shadows—usually between the fingers and under the wrist—to make the hands pop off the white page.
Fixing Stiffness
If fingers look like sausages or sticks, check the joints. Adding slight bends and wrinkles at the knuckles immediately makes them look natural.
With your final pencil strokes complete, you have a timeless piece of art representing support and connection
Handshake Study With Interlocking Forms
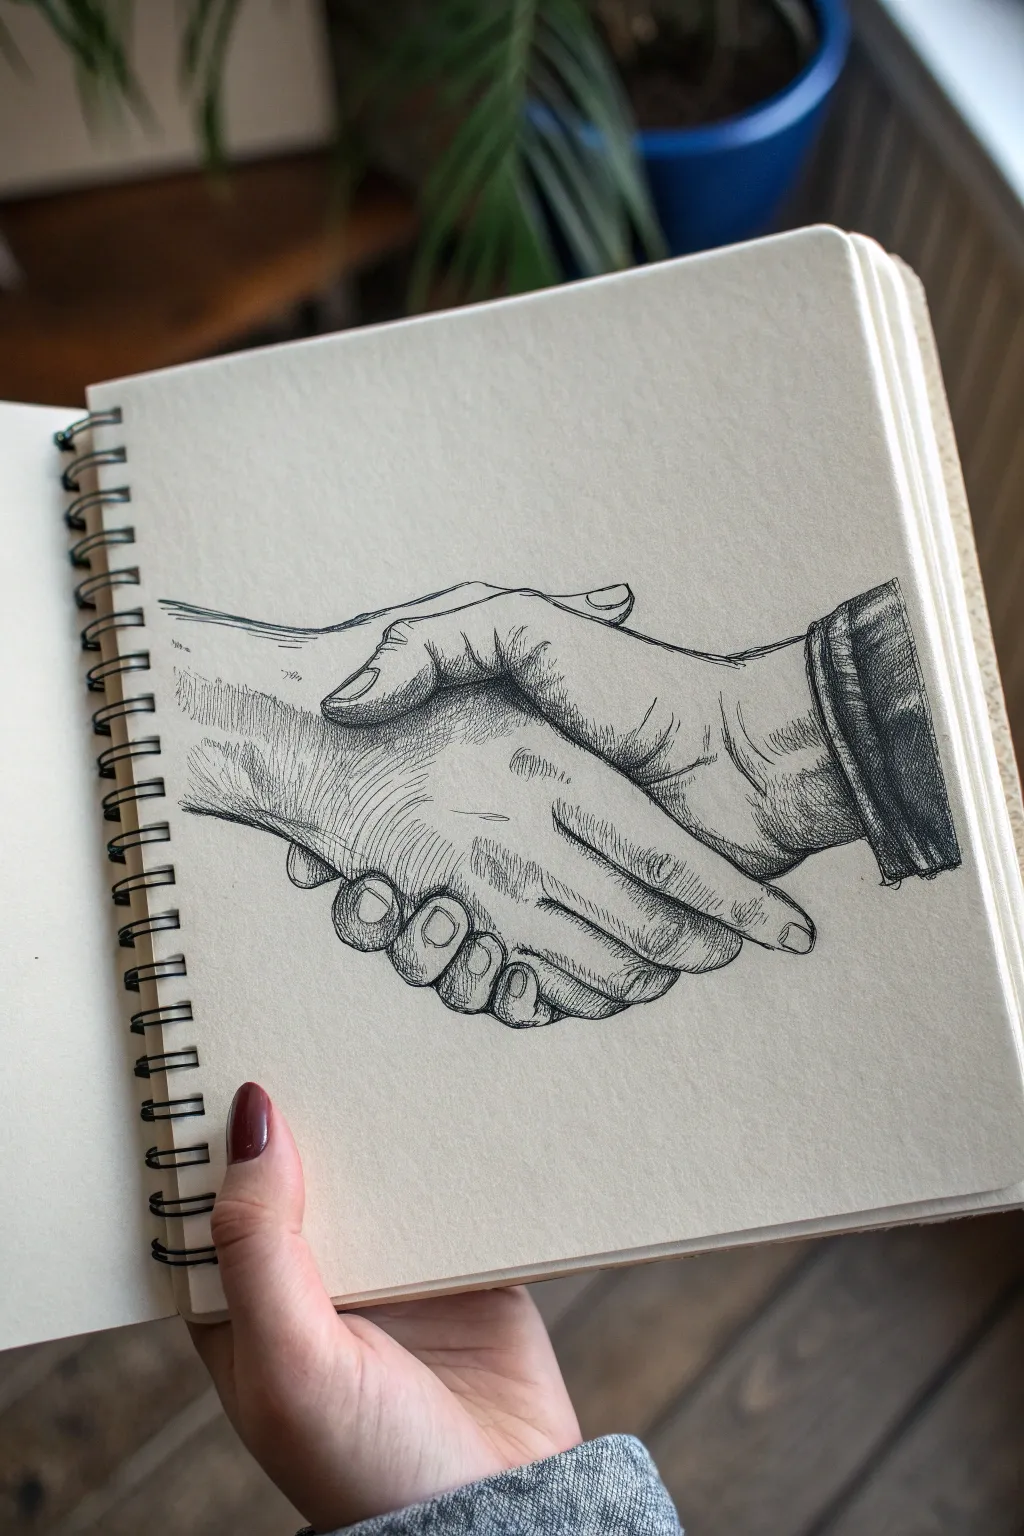
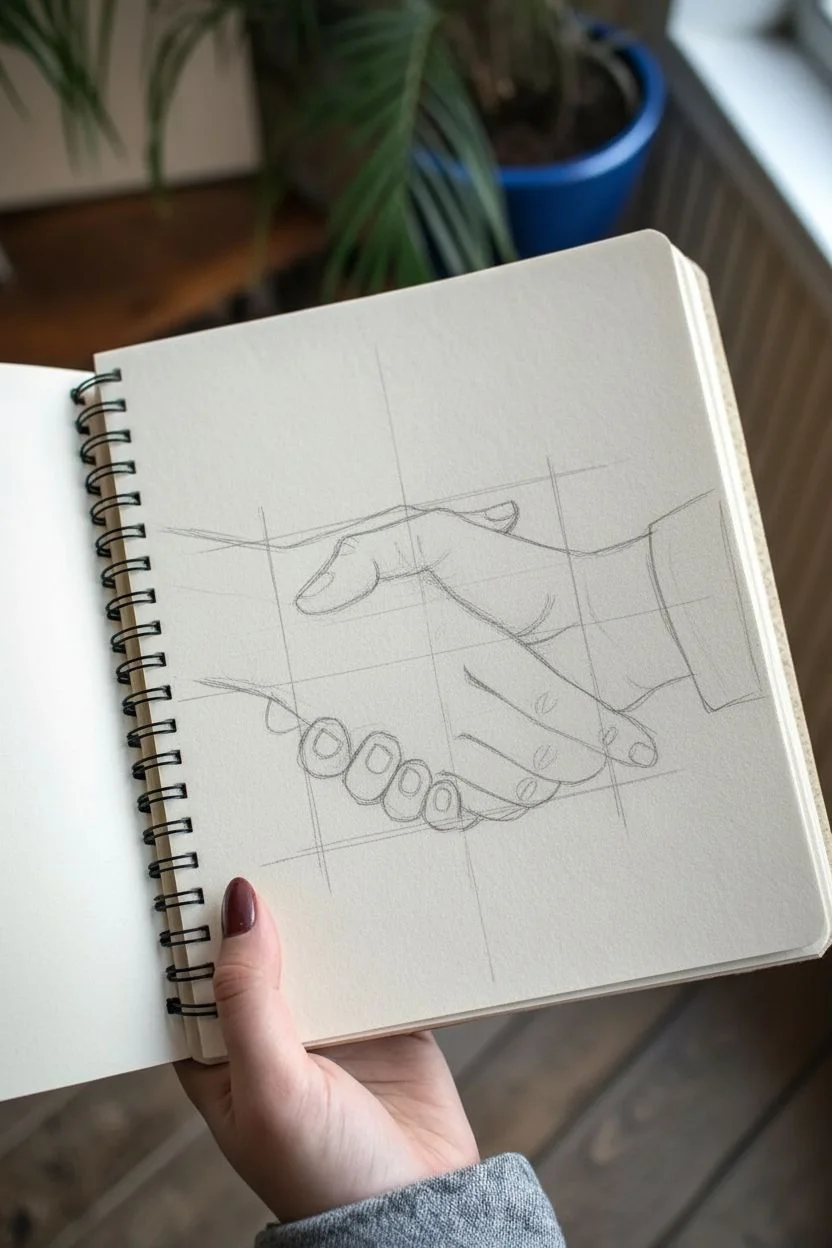
This study captures the specific tension and connection of a handshake through precise line work and hatching. The drawing focuses on the interlocking shapes of the fingers and the contrast between the bare arm and the cuffed sleeve, rendered in a classic ink illustration style.
How-To Guide
Materials
- Spiral-bound sketchbook with smooth, heavyweight paper (approx. A5 size)
- H or HB pencil for initial sketching
- Kneaded eraser
- Fine liner pens (sizes 0.1, 0.3, and 0.5)
- Ruler (optional, if you need help with proportions)
Step 1: Structural Foundation
-
Establish the Angles:
Begin by lightly sketching the central axis of the handshake. Draw two intersecting lines that represent the wrists and forearms coming together—the left arm coming in slightly from above, and the right arm (the one with the sleeve) coming in straight from the side. -
Block in the Palms:
Sketch a simplified boxy shape where the palms meet. This doesn’t need to be detailed yet; just establish the volume where the hands press together. -
Map the Thumb Connection:
Draw the thumb of the left hand wrapping over the top of the right hand. This is a crucial anchor point. Ensure the thumb joint has a distinct curve before it tucks downward. -
Outline the Fingers:
Sketch the four fingers of the right hand wrapping around the bottom of the left hand. Pay attention to the knuckles; they should form a stairstep pattern, receding slightly as they go from the index to the pinky finger. -
Refine the Grip:
Sketch the fingers of the left hand extending straight out, gripping the side of the right hand. Notice how the tips of these fingers disappear behind the bulk of the right hand’s palm. -
Add the Sleeve Detail:
On the right wrist, sketch the cuff of the shirt or jacket. Draw the curved line where the fabric meets the skin, making it slightly loose to suggest volume.
Tip: Following the Form
When hatching, never draw flat straight lines. Always curve your strokes slightly to mimic the cylindrical shape of the fingers and arm muscles.
Step 2: Inking the Outlines
-
Initial Contour Line:
Using your 0.3 pen, carefully trace over your pencil sketch. Start with the ‘inner’ lines where the hands touch—the crook of the thumb and the clasp of the fingers—to ensure the connection looks tight. -
Define the Wrinkles:
Switch to a 0.1 pen to add the skin folds. Focus on the knuckles of the bottom fingers and the distinct wrinkles on the top of the thumb where the skin scrunches up. -
Outline the Arms:
Use the 0.3 pen again for the outer contours of the arms. Keep your line weight consistent but allow it to break slightly in areas where the light might hit, like the top of the forearm. -
Erase Guidelines:
Once the ink is completely dry, gently erase the visible pencil marks with your kneaded eraser to reveal a clean line drawing.
Step 3: Shading and Texture
-
Start the Hatching:
With the 0.1 pen, begin adding single-direction hatching lines on the side of the left hand (the one on the left). Follow the curvature of the muscle; the lines should wrap slightly around the form. -
Deepen the Shadows:
Look for the deepest crevices: between the fingers and under the thumb. Use dense cross-hatching (layering lines perpendicularly) here to create darker values that suggest depth. -
Texture the Knuckles:
On the fingers wrapping underneath, use short curved strokes to emphasize the roundness of each digit. Leave the tops of the knuckles white to act as highlights. -
Detail the Forearm:
Add longer, sweeping hatching lines along the bare forearm. Keep these lines lighter and more spaced out than the hand details to show the smoother texture of the arm skin. -
Darken the Sleeve:
I prefer to switch to the 0.5 pen for the clothing to differentiate the texture. Fill the cuff area with dense, dark hatching, leaving only a thin rim of white at the edge to separate the fabric from the dark shadow. -
Final Contrast Check:
Review the drawing for contrast balance. If the hands look too flat, add a second layer of hatching to the underside of the palm and between the gripping fingers to make the forms pop.
Troubleshooting: Flat Hands
If the handshake looks flat, your values are too similar. Deepen the darkest shadows significantly where the hands touch to create necessary separation.
Your sketchbook now holds a permanent gesture of connection and agreement
BRUSH GUIDE
The Right Brush for Every Stroke
From clean lines to bold texture — master brush choice, stroke control, and essential techniques.
Explore the Full Guide
Typing Hands on a Keyboard From Above
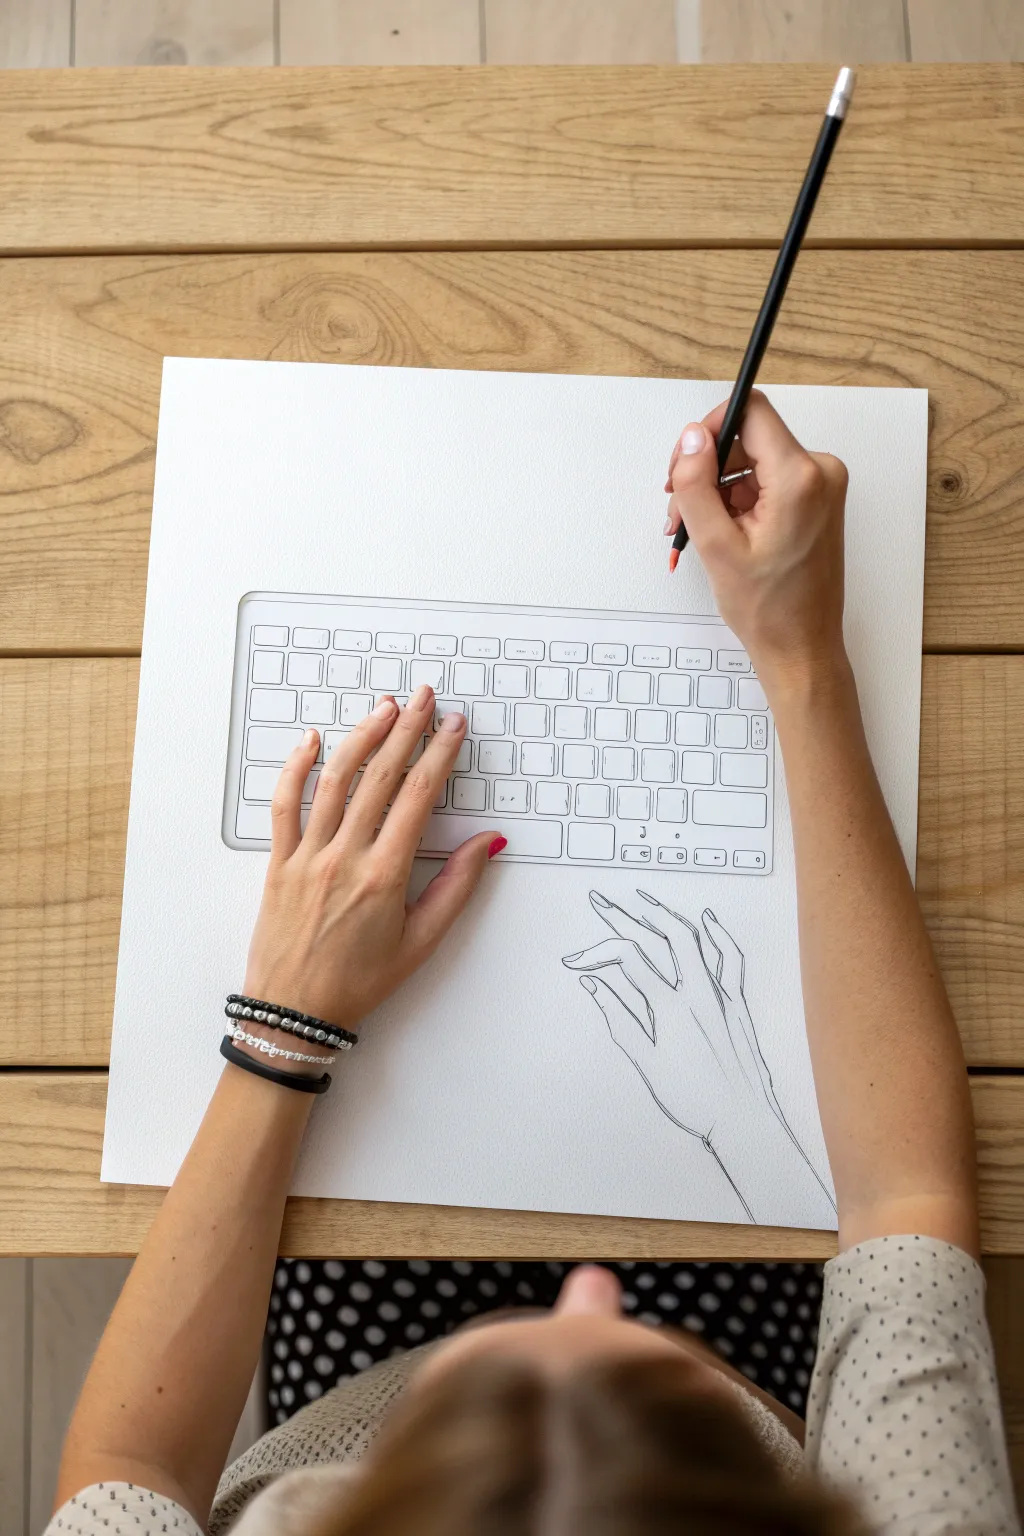
Create a mind-bending piece of art where reality blends with graphite in this clever perspective study. You’ll sketch a detailed computer keyboard and a hand from a top-down view, leaving space for your own real hand to complete the illusion.
Step-by-Step
Materials
- Large sheet of high-quality drawing paper (smooth bristol or hot press watercolor paper)
- Graphite pencils (H for sketching, HB/B for outlines)
- Fine-point black pen or multiliner (0.3mm or 0.5mm)
- Ruler or T-square
- Eraser (kneaded)
- Reference photo of a keyboard (or a real keyboard)
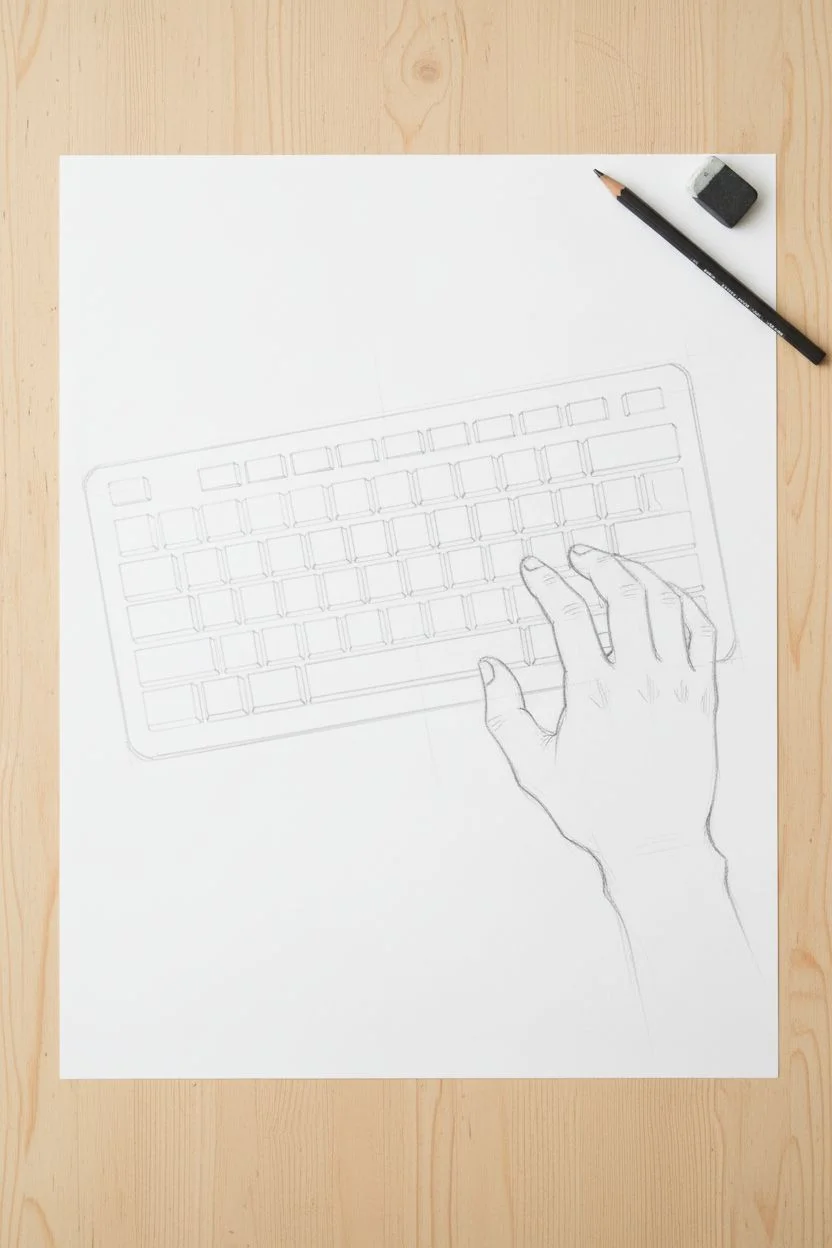
Step 1: Drafting the Keyboard Interface
-
Establishing the boundaries:
Begin by lightly sketching a large rectangle in the center-left of your paper using an H pencil and a ruler. This will be the outer frame of your keyboard. Leave plenty of white space around it. -
Rounding the corners:
Keyboard corners are rarely sharp. Carefully sketch small curves at each of the four corners of your rectangle to mimic the sleek design of modern tech accessories. -
Creating the key grid:
Lightly draw a grid inside the rectangle to guide your key placement. Standard keyboards usually have 5 or 6 rows. Measure these out evenly so your keys don’t look squashed. -
Sketching the key shapes:
Within your grid, start drawing the individual square shapes for the keys. Remember that keys have a small gap between them, not touching directly. Keep your lines faint at this stage. -
Adding dimension:
To give the keys depth, draw a slightly smaller square inside each key shape, or add a thin sidewall to the bottom and right edges to simulate a 3D button.
Clean Lines Pro Tip
When inking long straight lines on the keyboard, lock your wrist and move your entire arm from the shoulder to keep the lines straight without a ruler.
Step 2: Drawing the ‘Ghost’ Hand
-
Positioning the right hand:
To the right of the keyboard, lightly sketch the outline of a hand in a resting or typing position. This hand will remain drawn, creating a visual balance with your real left hand later. -
Refining the fingers:
Pay attention to the knuckles and joints. Use simple oval shapes first to get the finger segments right, then smooth them into a continuous contour line. -
Adding fingernails:
Sketch in the fingernails. This small detail is crucial for orientation, showing the viewer that the hand is facing palm-down. -
Wrist connection:
Extend the lines of the wrist down towards the bottom edge of the paper. Keep these lines clean and fairly simple.
Step 3: Inking and Finalizing
-
Inking the keyboard:
Switch to your fine-point black pen. Carefully trace over your graphite lines for the keyboard. I prefer to rotate the paper to get the most comfortable angle for straight lines. -
Defining the key details:
Add the specific legends (letters and symbols) to the keys if you wish, or leave them blank for a minimalist aesthetic similar to the reference photo. -
Inking the drawn hand:
Trace the outline of the right hand. Use a confident, fluid line rather than sketchy, broken strokes to give it an elegant illustration style. -
Adding wrist creases:
Place two small, curved lines at the wrist joint of the drawn hand to suggest movement and skin folds. -
Erasing guidelines:
Once the ink is completely dry (give it a few minutes to be safe), gently erase all the underlying pencil marks with your kneaded eraser to clean up the artwork. -
Creating the interactive moment:
Place your real left hand over the left side of the drawn keyboard. Mimic a typing pose with your fingers resting on the keys. -
Capturing the illusion:
Grab your camera or phone to photograph the scene from directly above. The interaction between your real hand and the drawn world completes the piece.
Level Up: Shadow Play
Add light grey shading with a marker under your real hand’s position on the paper to match the shadow your real hand casts, deepening the illusion.
Now you have a clever interactive art piece that blurs the line between the artist and the canvas
Foreshortened Hand Reaching Toward the Viewer
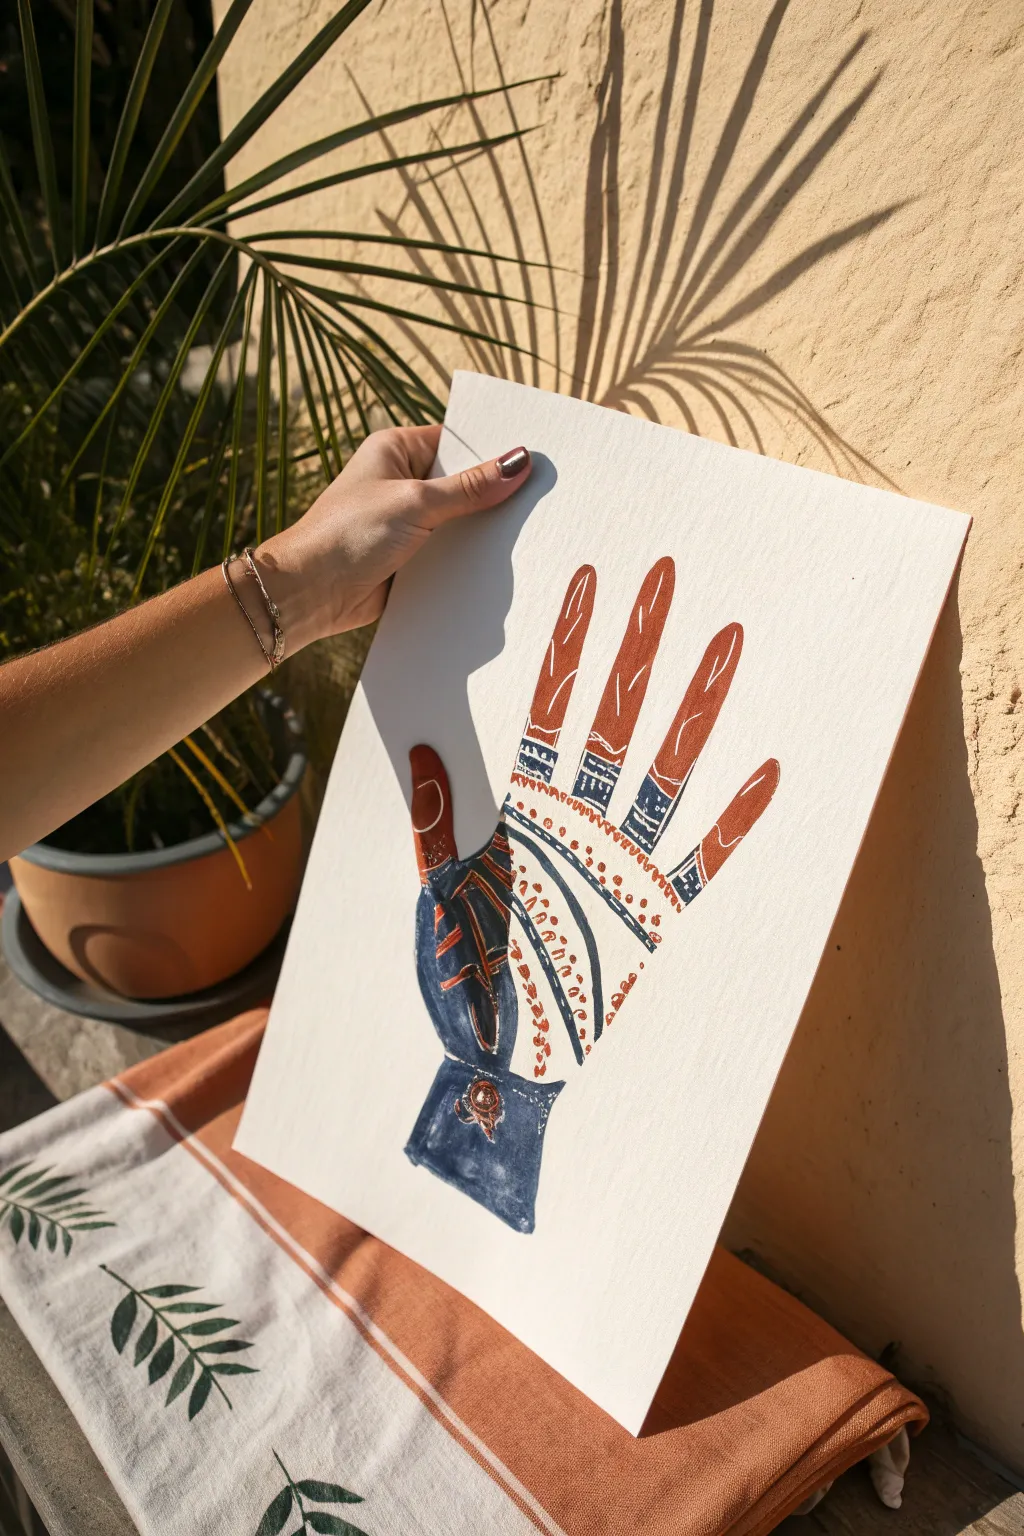

Capture the beauty of traditional patterns with this striking two-tone block print illustration. By carving a stylized hand design into a soft block and printing with deep indigo and terracotta inks, you’ll create a piece complete with intricate negative space detailing.
Step-by-Step Tutorial
Materials
- Soft-cut carving block (linoleum or rubber)
- Linocut carving tools (V-gouge and U-gouge)
- Pencil and tracing paper
- Block printing ink (Indigo Blue and Terracotta/Burnt Sienna)
- Brayer (rubber roller)
- Heavyweight printmaking paper or mixed media paper
- Inking plate or piece of glass
- Baren or clean wooden spoon
Step 1: Designing and Carving
-
Sketch the outline:
Begin by sketching the outline of an open hand on your tracing paper. Include the wrist and cuff area. Keep the fingers slightly separated to make carving easier later. -
Transfer to the block:
Flip your tracing paper graphite-side down onto your carving block. Rub the back firmly to transfer the image. Remember, the final print will be a mirror image of your carving. -
Draw internal details:
Using a pencil directly on the block, map out your patterned zones. Mark the cuff, the palm center, and the bands across the fingers where colors will shift. -
Carve the negative space:
Using a small V-gouge tool, carve away the main outline of the hand so the background remains white (unprinted). -
Detail the fingers:
Switch to a fine tool to carve the leaf-like shapes inside each finger. Remove the material carefully, leaving a border of raised block around the edges of the fingers. -
Create pattern bands:
Carve horizontal rows of small squares or lines across the knuckles and base of the fingers. These geometric bands act as a visual break between the palm and fingers. -
Detail the palm:
For the palm area, carve radiating lines and rows of small dots. I find that rotating the block rather than my hand helps get smoother curves here. -
Finalize the cuff:
Carve a decorative cuff at the wrist, perhaps adding a central button feature or geometric borders to anchor the design.
Uneven Ink Coverage?
If your print looks salty or speckled, you likely didn’t use enough ink. Add a bit more ink to your slab and listen for that distinct ‘velcro’ sound when rolling.
Step 2: Inking and Printing
-
Prepare the colors:
Squeeze a small amount of indigo ink and terracotta ink onto your inking plate, keeping them well separated. -
Charge the brayer:
Roll your brayer into the terracotta ink until you hear a sticky, sizzling sound, ensuring an even coat on the roller. -
Ink the fingers:
Carefully roll the terracotta ink only onto the finger section of your carved block. If you get ink on the palm area, wipe it away with a damp cloth immediately. -
Apply the second color:
Clean your brayer or use a second one to pick up the indigo ink. Carefully ink the bottom half of the block—the palm and wrist cuff—blending slightly where it meets the fingers or keeping a hard line. -
Align the paper:
Place your block ink-side up. Carefully lower your paper onto the block, ensuring it is centered. Once the paper touches the ink, do not shift it. -
Burnish the print:
Using a baren or the back of a wooden spoon, rub the back of the paper in circular motions. Apply firm, even pressure over the entire design to transfer the ink. -
Reveal the artwork:
Slowly peel back one corner of the paper to check coverage. If it looks patchy, lay it back down and rub that area again. When satisfied, peel the paper completely off the block. -
Dry the print:
Place the finished print in a safe, flat place to dry. Oil-based inks can take a few days, while water-soluble inks will dry much faster.
Clean Lines Pro Tip
To keep the two ink colors from muddying each other, use a piece of paper as a mask. Cover the palm while inking the fingers, then remove it to ink the palm.
Once dry, frame your unique hand print to add a touch of artisan charm to your wall


Continuous Line Hand Pose for Flow and Rhythm
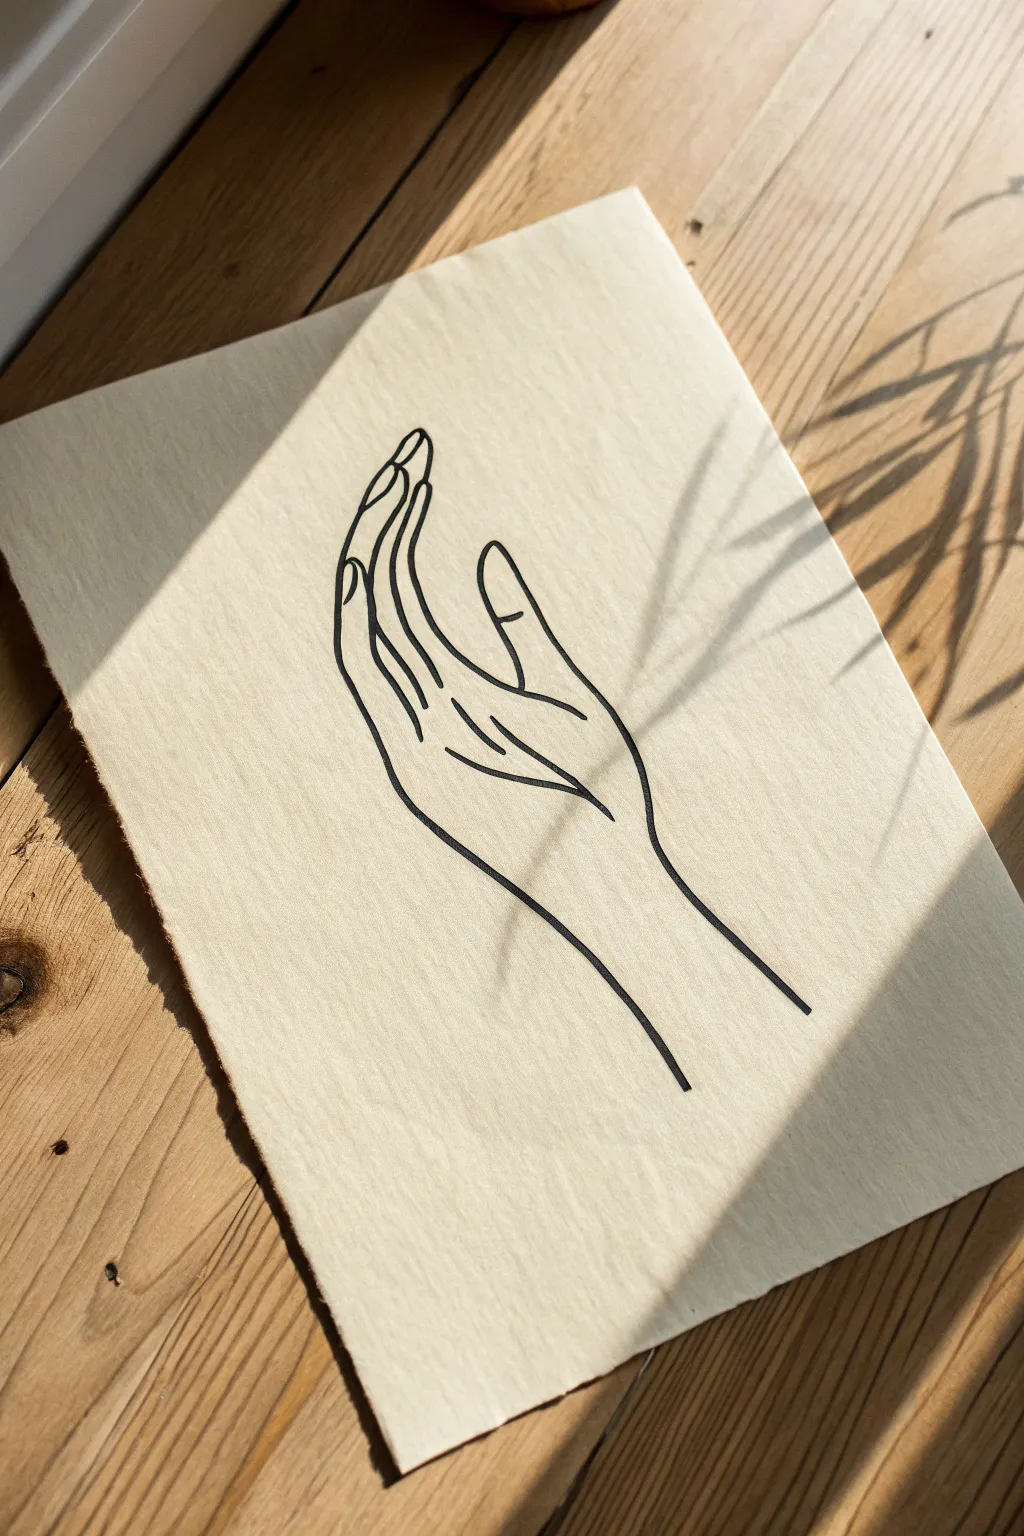
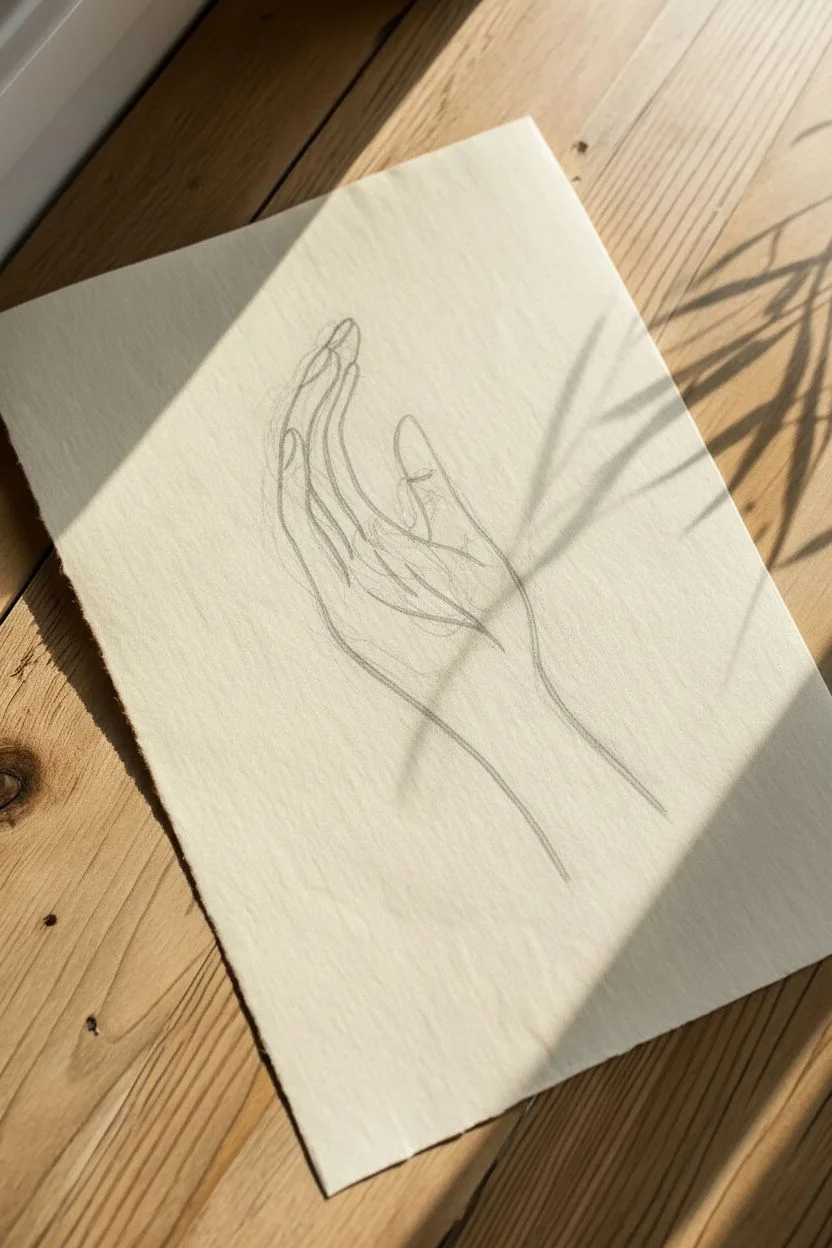
Capture the elegance and fluid movement of a hand gesture with this minimalist drawing project. Using just a few deliberate strokes, you will create a modern, impactful piece of art that looks striking on textured paper.
Step-by-Step Tutorial
Materials
- Cream or off-white textured paper (medium weight)
- Pencil (HB or 2H for sketching)
- Kneadable eraser
- Fine liner pen (black, 0.5mm or 0.8mm)
- Ruler or straight edge (optional for tearing paper)
Step 1: Preparation & Sketching
-
Prepare your paper:
Start by selecting a high-quality cream-colored paper. If your paper has standard straight edges, you can create a rustic look by tearing the edges against a ruler to mimic the deckled edge seen in the example. -
Establish the wrist:
Lightly sketch two parallel, slightly angled lines near the bottom right of the page to represent the wrist and forearm. Keep these strokes faint as they are just guides. -
Outline the palm shape:
From the top of your wrist lines, draw a soft, curved shape moving upwards and slightly left. This forms the base of the palm and the thumb muscle. -
Position the thumb:
Sketch the thumb extending outward to the right. It should curve gently away from the palm, creating an open, relaxed ‘L’ shape relative to the fingers. -
Sketch the finger flow:
Lightly map out the four fingers extending upward. Instead of drawing them straight, curve them slightly to the left to capture that graceful reaching motion. -
Refine the finger shapes:
Add detail to your finger sketches. focus on the segments; the index finger acts as the leader, while the other three fingers naturally group together behind it. -
Check proportions:
Step back and look at your sketch. Ensure the thumb isn’t too long and the wrist feels wide enough to support the hand.
Wobbly Lines?
Don’t stress over perfect straightness. In continuous line art, slight wobbles add organic character. If a mistake happens, thicken the line slightly to mask it.
Step 2: Inking & Finishing
-
Start the final line:
Take your black fine liner. Begin at the bottom right wrist line. Draw confidently upward, tracing the outer edge of the wrist. -
Trace the thumb:
Continue the line smoothly up the side of the thumb, around the tip, and down into the crevice between the thumb and index finger. -
Draw the palm crease:
I find it helpful to lift the pen briefly here to reposition, then draw the distinct lifeline crease that curves from the thumb joint toward the center of the palm. -
Outline the index finger:
Draw the index finger, paying attention to the nail shape. The line should flow seamlessly from the thumb area. -
detail the middle finger:
Draw the middle finger slightly behind the index finger. You only need to draw the visible top portion and the right side, suggesting overlapping forms. -
Complete the ring and pinky:
Repeat this for the ring and pinky fingers. Remember, less is more; let the viewer’s eye fill in the gaps where fingers overlap. -
Finish the outer edge:
Bring your line down from the pinky finger, curving gently along the outer edge of the palm. -
Close the wrist:
Extend that final line down to form the left side of the wrist, ensuring it parallels your starting line. -
Add inner details:
Add the small, essential details like fingernail outlines on the visible fingers and minor creases in the palm to give the drawing depth. -
Let it dry:
Wait a few minutes to ensure the ink is completely set and dry to the touch. -
Erase pencil marks:
Gently gently roll your kneadable eraser over the drawing to lift away all initial pencil graphite without damaging the textured paper surface.
Try Colored Paper
Swap the cream paper for a textured kraft brown or a deep sage green. Switch your black pen for a white gel pen to create a stunning, inverted high-contrast look.
Now you have a sophisticated piece of minimalist art ready to frame or display on a mood board
Cylinders and Boxes Construction for Every Finger
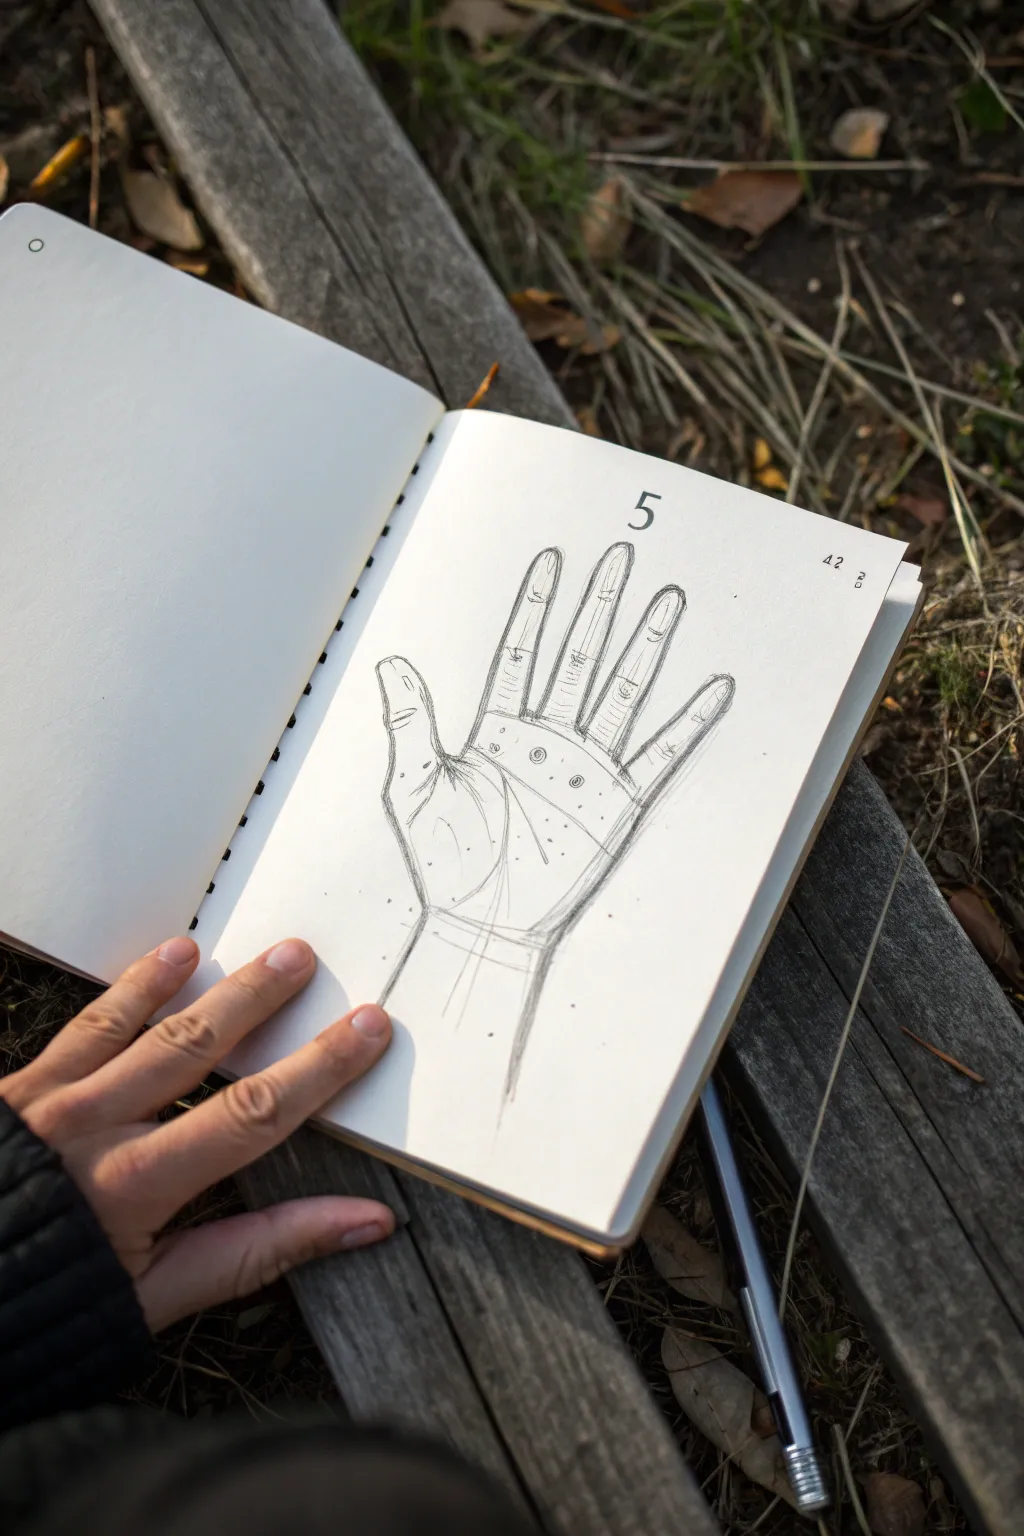
This tutorial guides you through drawing a detailed hand study that emphasizes underlying anatomy using basic geometric forms. The resulting sketch has a lovely, instructional aesthetic, perfect for filling a practice sketchbook with structural analyses.
Detailed Instructions
Materials
- Sketchbook (heavyweight paper preferred)
- H or 2H graphite pencil (for initial construction)
- HB or 2B graphite pencil (for detailing)
- Fine-tip eraser (like a stick eraser)
- Ruler (optional, for layout marks)
Step 1: Planning and Construction
-
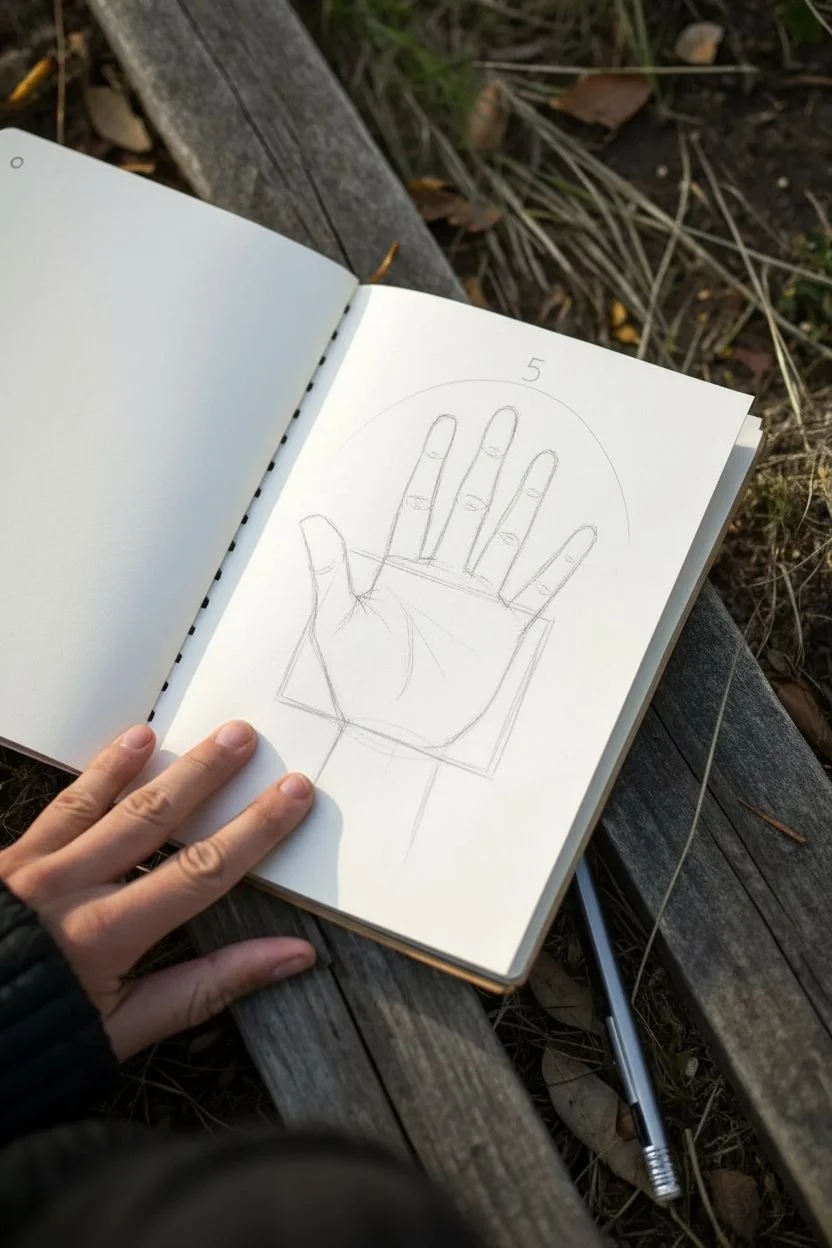
Page Setup:
Start by positioning your sketchbook on a flat surface. In the upper center of the page, lightly pencil in the number ‘5’ to replicate the sequential study look of the original reference. -
Establishing the Palm Box:
Using your harder pencil (H or 2H), draw a rough square or slight rectangle in the center of the page. This ‘box’ represents the palm mass and serves as the anchor for the fingers. -
Mapping the Finger Arcs:
Draw a faint, curved line hovering above the palm box. This arc will help you determine where the fingertips should end, ensuring the middle finger is the longest and the pinky is the shortest. -
Basic Finger Cylinders:
Sketch light vertical lines extending from the palm box up to your arc. Treat each finger not as a flat stick, but as a series of three stacked cylinders. Keep these lines very loose and faint for now. -
The Thumb Wedge:
Attach a triangular wedge shape to the side of the palm box. From this wedge, extend the two segments of the thumb, angling them slightly away from the palm. -
Adding the Wrist:
Drop two vertical lines down from the base of the palm box to indicate the wrist. Add a slight curve at the bottom to suggest the cylindrical volume of the arm.
Wonky Fingers?
If fingers look flat, double-check your joint ellipses. curving these lines creates depth. All curves should follow the same perspective arc.
Step 2: Defining Anatomy
-
Articulating the Joints:
Switch to your HB pencil. At the points where the finger cylinders meet (the knuckles), sketch small ovals or ellipses. This helps visualize the 3D form of the joints. -
Refining the Thumb:
Darken the outline of the thumb. Emphasize the fleshy webbing between the thumb and the index finger with a curved, confident line. -
Contouring the Fingers:
Go over your initial cylinder sketches with firmer lines. Instead of perfectly straight lines, taper them slightly at the joints to mimic skin wrapping around bone. -
Drawing the Fingernails:
At the tip of each finger, sketch a U-shape for the nail bed. Adding the nail gives the fingers immediate orientation and perspective. -
Palm Lines:
Inside the palm, sketch the three major flexor lines: the heart line, head line, and life line. Keep these strokes brisk and slightly broken rather than solid and heavy.
Level Up: Color Accents
Use a colored pencil (red or blue) for the internal construction lines like the bones or joints. It separates structure from the surface contour.
Step 3: Detailing and Texturing
-
Knuckle Details:
Add tiny horizontal hatch marks across the finger cylinders where the skin folds at the knuckles. This reinforces the idea of flexibility. -
Adding Structural Markers:
To mimic the technical look of the reference, draw small circles at the base of the fingers on the palm. These represent the padding at the top of the palm. -
Shading the Edges:
Add very light hatching along the right side of the palm and fingers. I find this subtle shading instantly gives the hand volume and pops it off the white paper. -
Wrist Construction Lines:
Draw a few horizontal curved lines across the wrist area. These ‘cross-contour’ lines show the roundness of the arm without needing full shading. -
Final Cleanup:
Use your eraser to lift away any distracting construction lines, but leave some of the faint underlying geometry visible—it adds to the ‘study’ aesthetic. -
Annotation:
Finish by adding the small ’42 g’ text in the upper right corner to complete the scientific journal appearance.
Keep practicing this structural method and soon you will be drawing hands from imagination with ease
Doodle-Filled Hand Silhouette With Pattern Textures
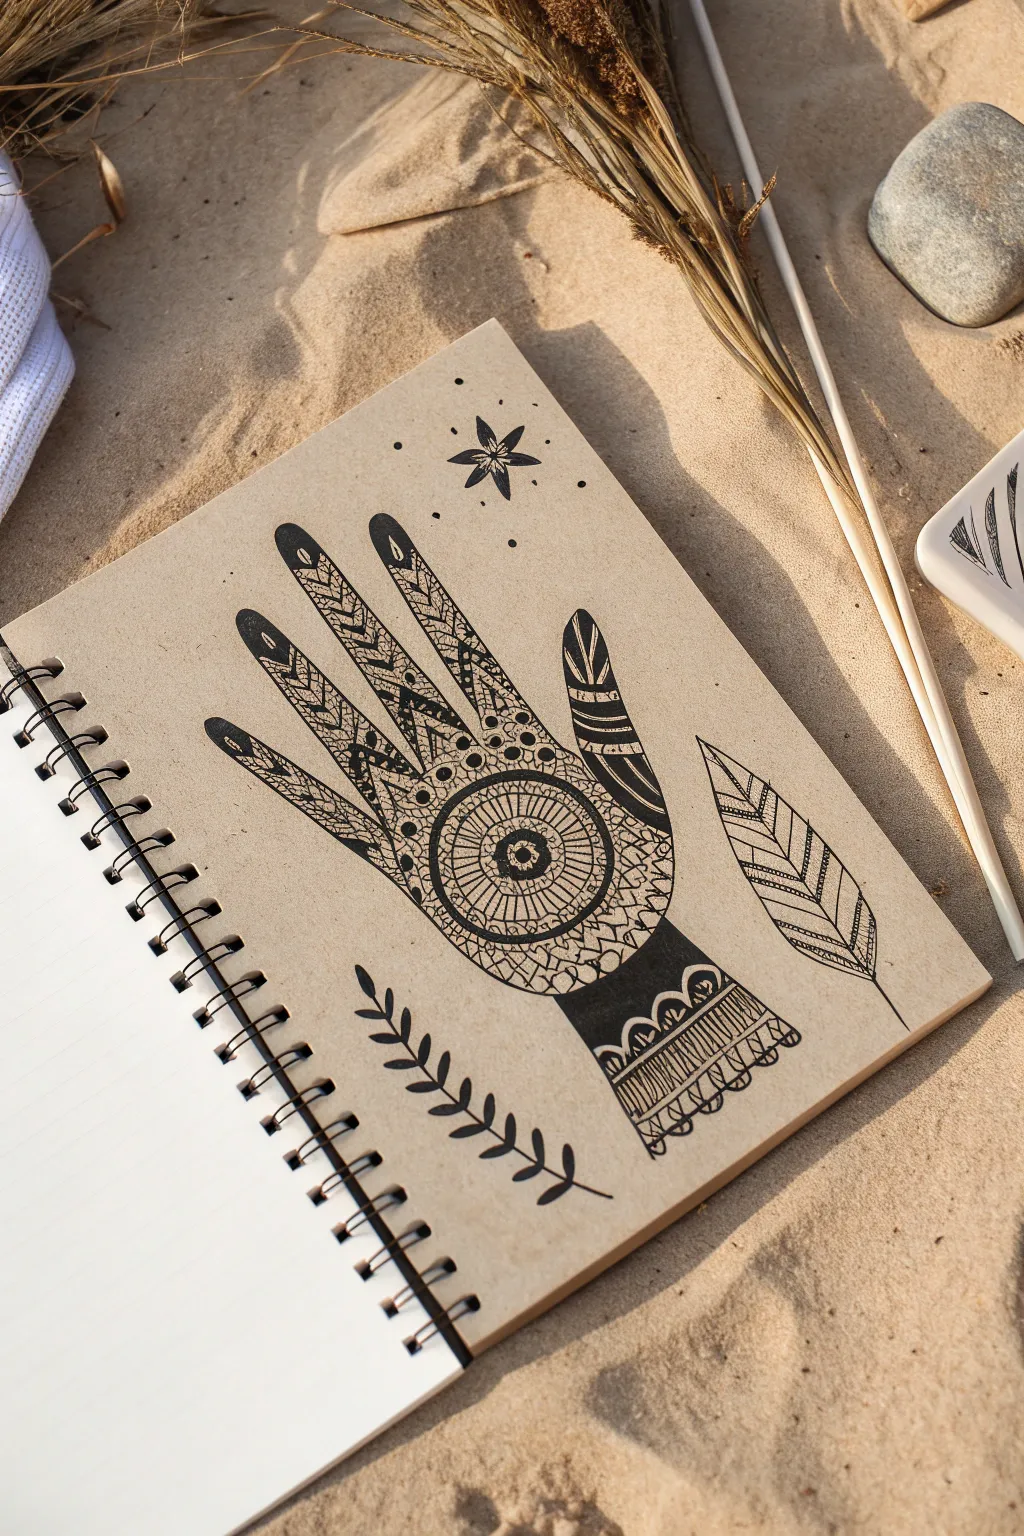
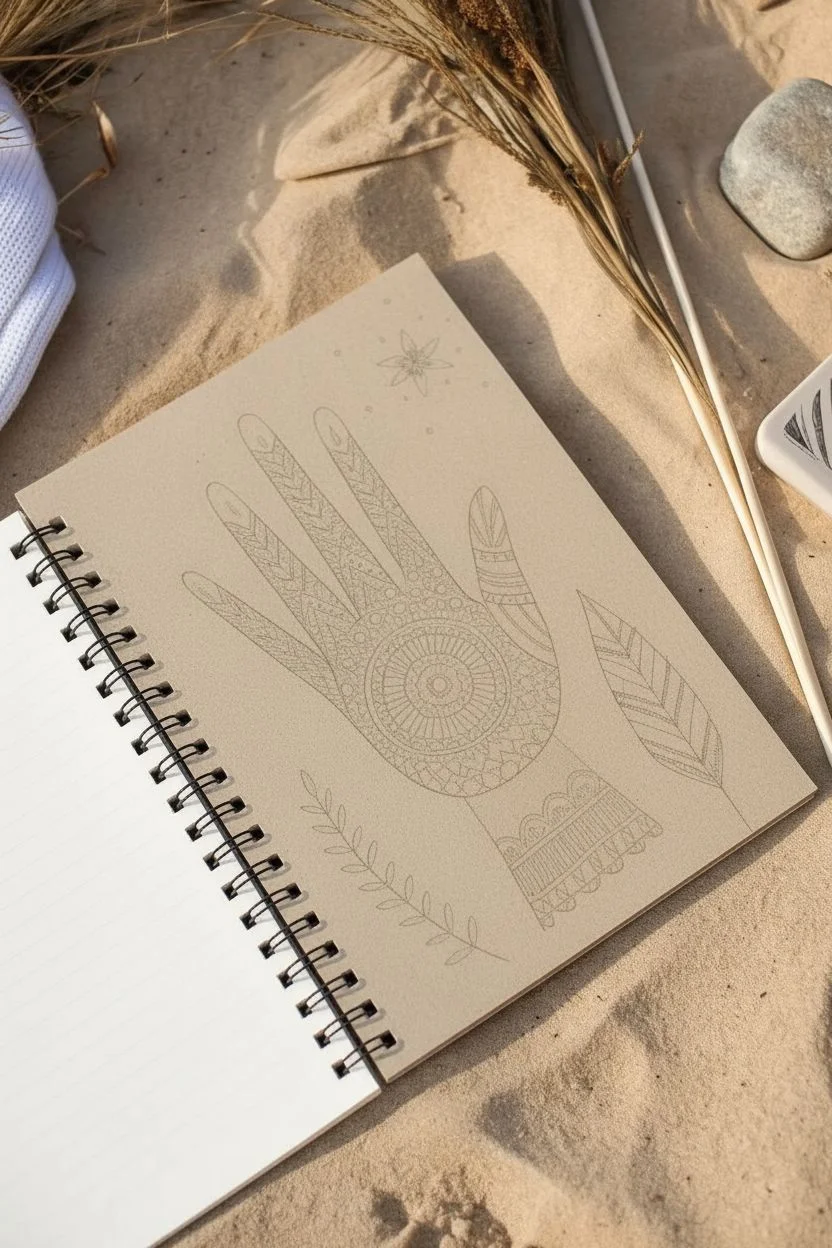
Transform a simple hand silhouette into a mesmerizing piece of art using intricate patterns and bold linework. This project combines the rustic charm of kraft paper with the precision of mandala-style doodles for a relaxing and aesthetic result.
Step-by-Step
Materials
- Kraft paper sketchbook or tan-toned paper
- Fine liner pens (Black, sizes 0.1, 0.3, and 0.5)
- Black brush pen or thick marker
- Pencil (HB or 2H)
- Eraser
- Ruler (optional)
- Compass or circle stencil (optional)
Step 1: Planning the Layout
-
Trace lightly:
Begin by placing your own hand on the kraft paper page. Using a light pencil touch, trace the outline of your hand, keeping your fingers slightly spread apart. -
Refine the shape:
Lift your hand and smooth out the traced lines with your pencil. You want the fingers to look elegant and slightly elongated, rather than anatomically perfect. -
Sketch the accessories:
To the right of the hand, lightly sketch a simple leaf shape. Below the wrist, draw a curved branch with small leaves. Above the hand, mark a spot for the star symbol. -
Establish the focal point:
Lightly draw a circle in the center of the palm. Use a compass or stencil if you want it perfect, or freehand it for a more organic feel. This will be the center of your mandala pattern.
Step 2: Inking the Palm patterns
-
Start the center mandala:
Switch to your 0.3 fine liner. Ink the central palm circle. Draw a small flower or gear shape in the very middle, then surround it with concentric rings. -
Add radial details:
Fill the rings with repeating patterns: tiny triangles, radiating lines, or dots. Keep the spacing consistent to create that mesmerizing mandala effect. -
Create the outer scallop:
Draw a scalloped (semi-circle) border around the main circle. Inside each scallop, add detail like a small dot or hatch lines. -
Connect to fingers:
Draw curved lines extending from the central mandala up towards the base of each finger. These sections will serve as dividers for different patterns.
Smudge Control
Kraft paper is less absorbent than watercolor paper. Place a scrap piece of paper under your drawing hand to prevent oils or sweat from smearing fresh ink.
Step 3: Detailing the Fingers
-
Section the thumb:
The thumb features bolder, darker sections. Use a heavier pen (like a 0.5 or small brush pen) to fill in thick curved bands, leaving thin white stripes for contrast. -
Pattern the fingers:
Move to the index, middle, ring, and pinky fingers. Divide them into horizontal segments using your 0.1 pen. I prefer to alternate between geometric zig-zags and organic leafy shapes. -
Add key details:
In the index and ring fingers particularly, draw vertical lines running up the center, then fill the sides with diagonal hatching or chevron patterns. -
Darken the tips:
At the very top of each finger (the fingernail area), draw a small arc and fill the space above it with solid black ink. Add a tiny white dot or line inside the black for a highlight.
Add Some Gold
Use a metallic gold gel pen or marker to highlight specific rings within the mandala or the fingertips for a magical, celestial touch.
Step 4: The Wrist Cuff & Background
-
Draw the cuff outline:
At the wrist base, draw two parallel horizontal lines about a half-inch apart to form a ‘cuff’. -
Fill the cuff:
Fill this band with vertical hatching lines, creating a dense texture. Below this band, draw a row of loop-de-loops or scallops. -
Add the solid black element:
Just above the patterned cuff, use your thickest marker to fill in a solid black block that transitions into the palm patterns. This anchors the drawing visually. -
Ink the leaf doodle:
Go over your pencil sketch for the large leaf on the right. Draw a central vein, then fill the leaf halves with diagonal stripes and zig-zags similar to the finger patterns. -
Ink the branch:
Trace the branch below the hand with a solid black line. Fill in the small leaves completely so they are solid black silhouettes. -
Add the star:
Ink the star above the hand. Draw an eight-pointed star and black out alternating sections to make it pop. -
Final erase:
Wait at least 5-10 minutes for the ink to dry completely to avoid smearing. Gently erase all remaining pencil marks to reveal the crisp design.
Step back and admire the intricate balance of heavy blacks and fine lines you’ve created.


Have a question or want to share your own experience? I'd love to hear from you in the comments below!