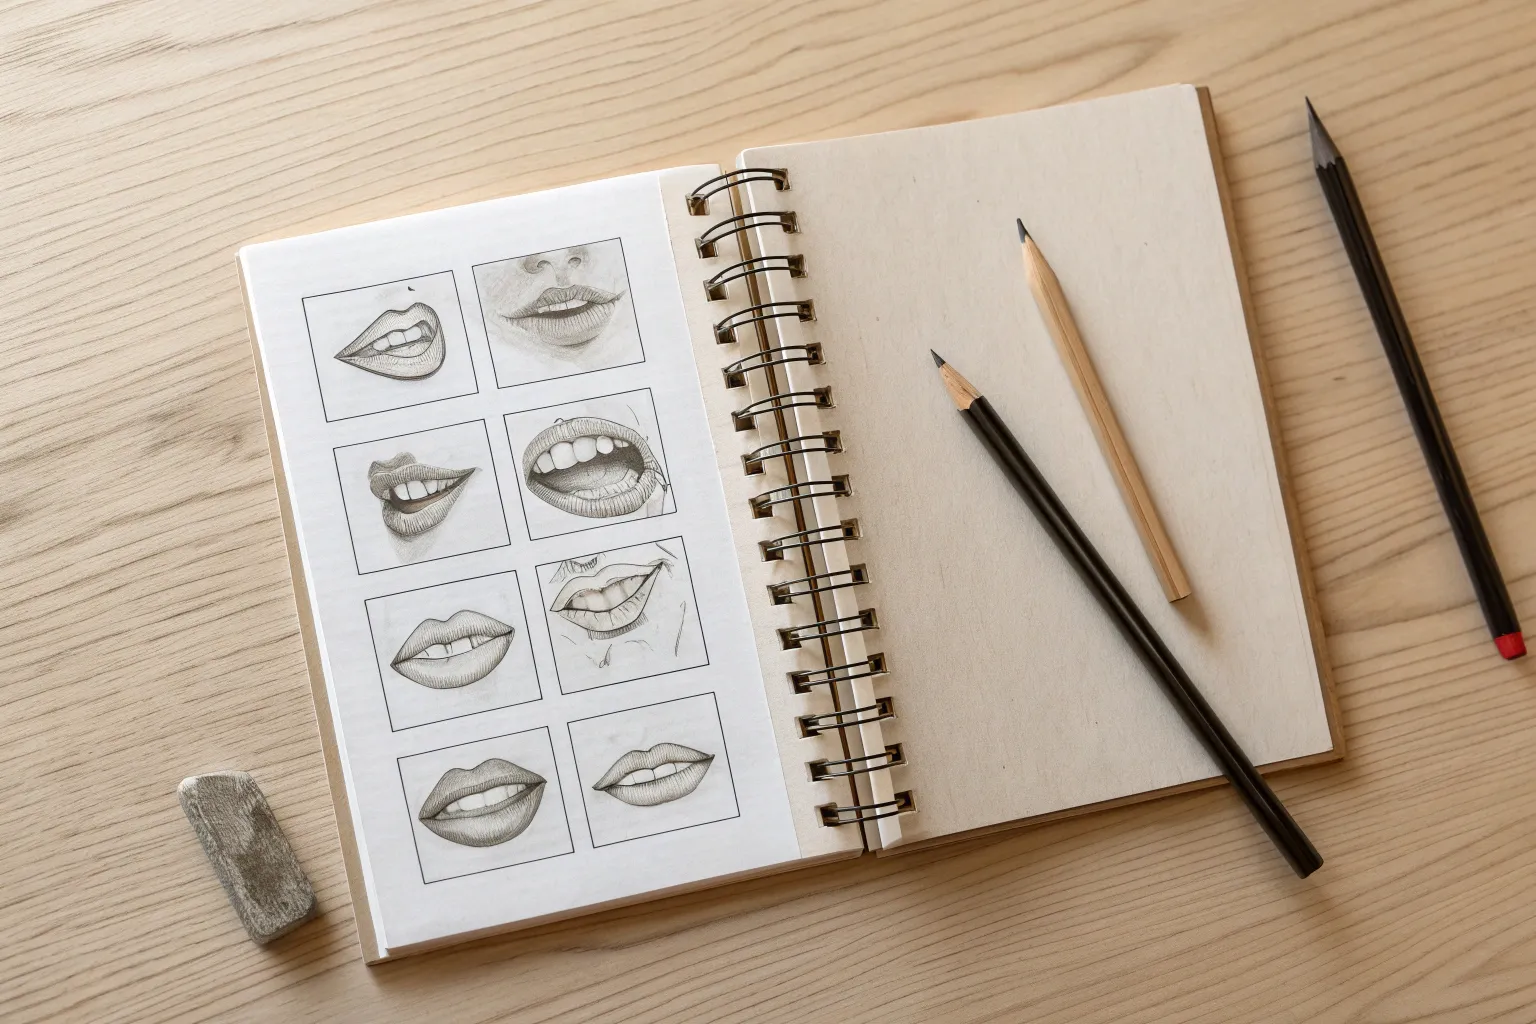
If you’ve ever drawn a face that felt “almost there,” the mouth is usually the tiny detail that makes or breaks the vibe. Here are my favorite mouth drawing ideas to help you practice shapes, angles, expressions, and styles—without getting overwhelmed.
Map the Cupid’s Bow and Lower Lip Tubercles
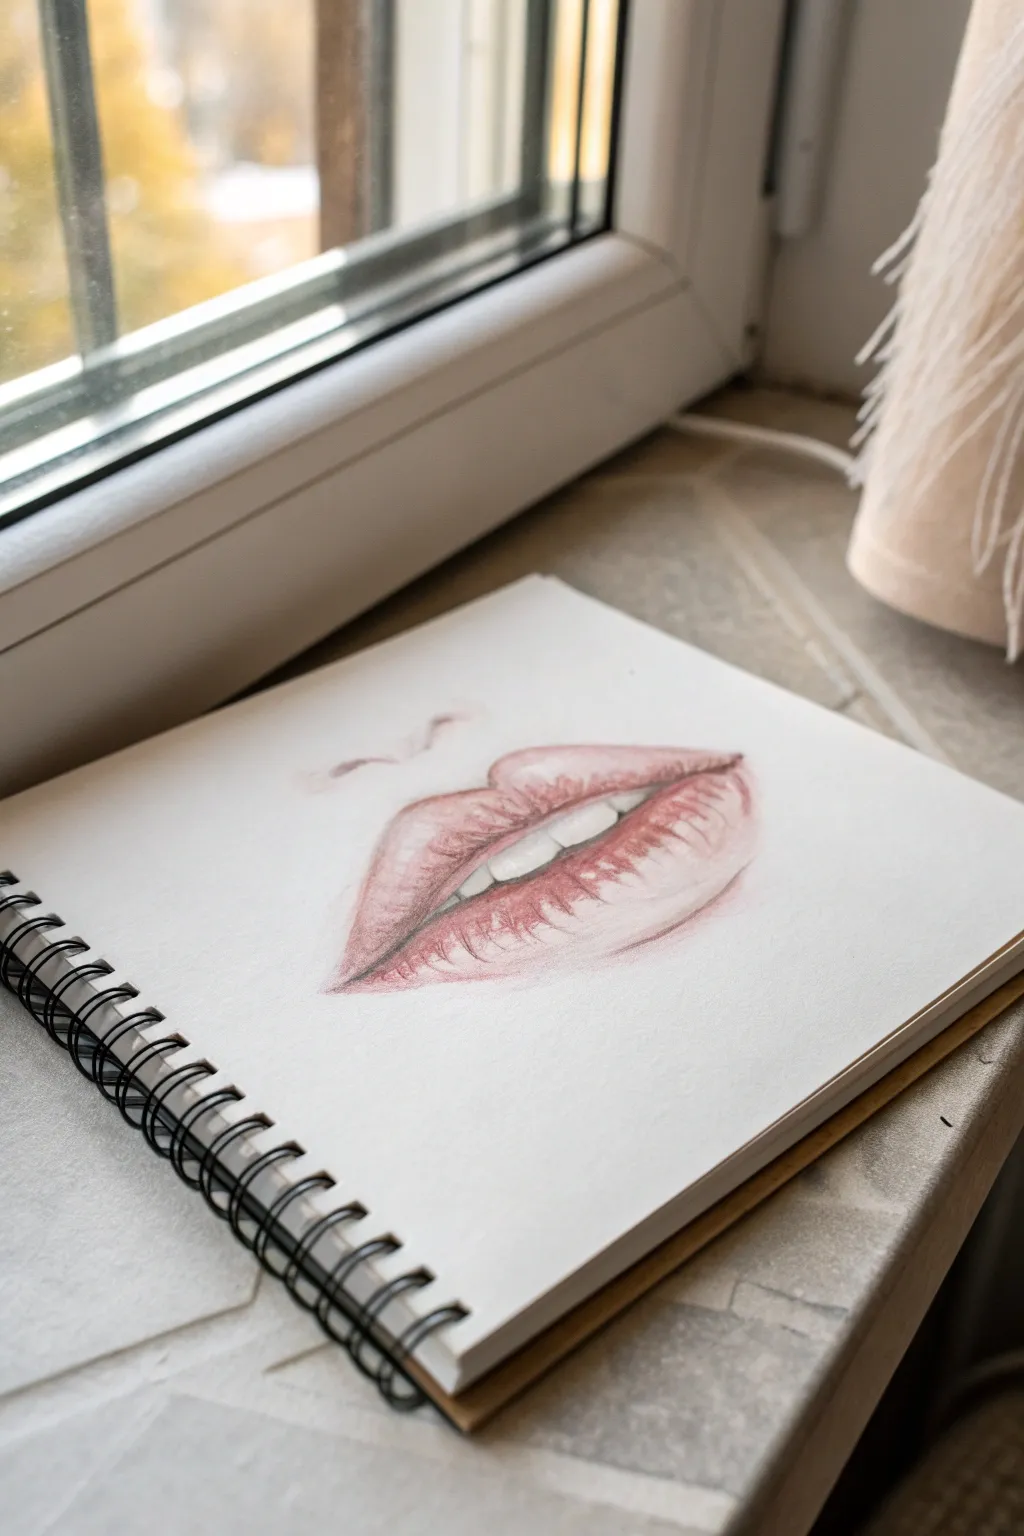
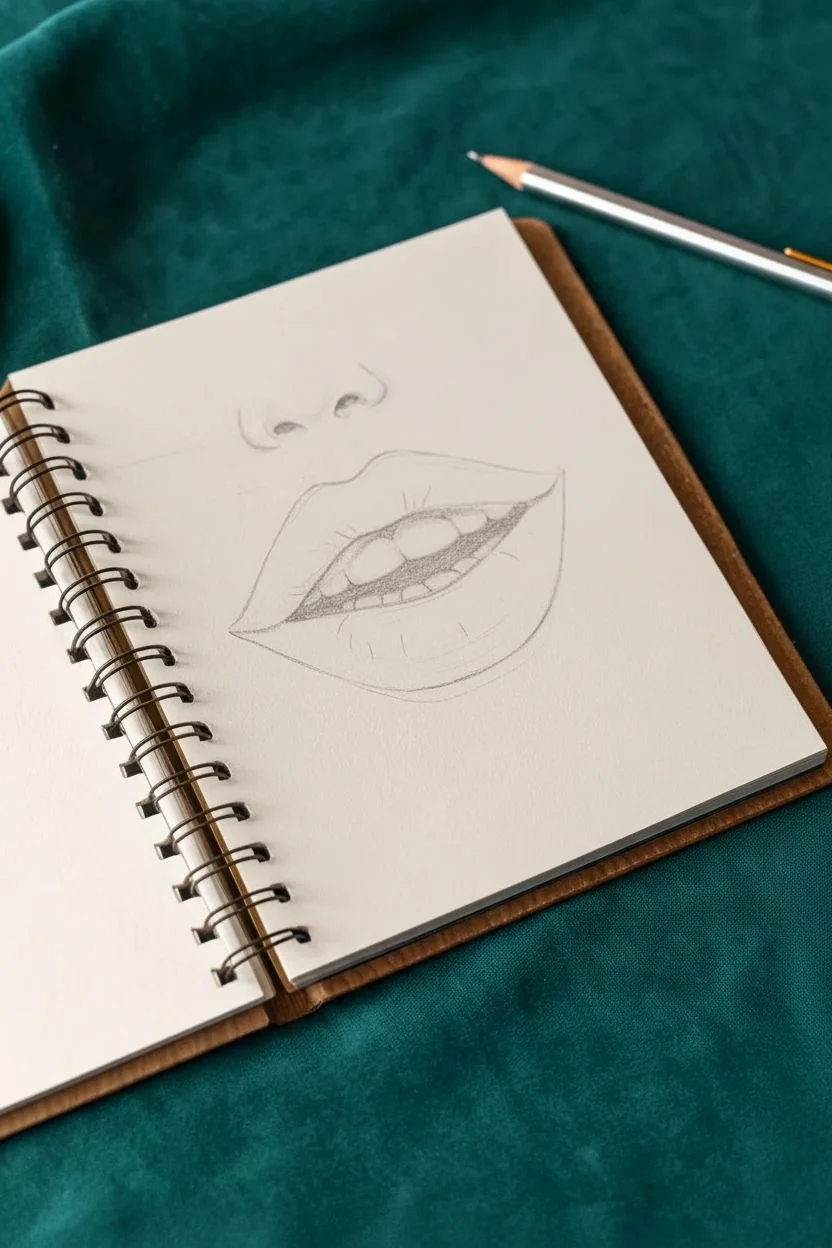
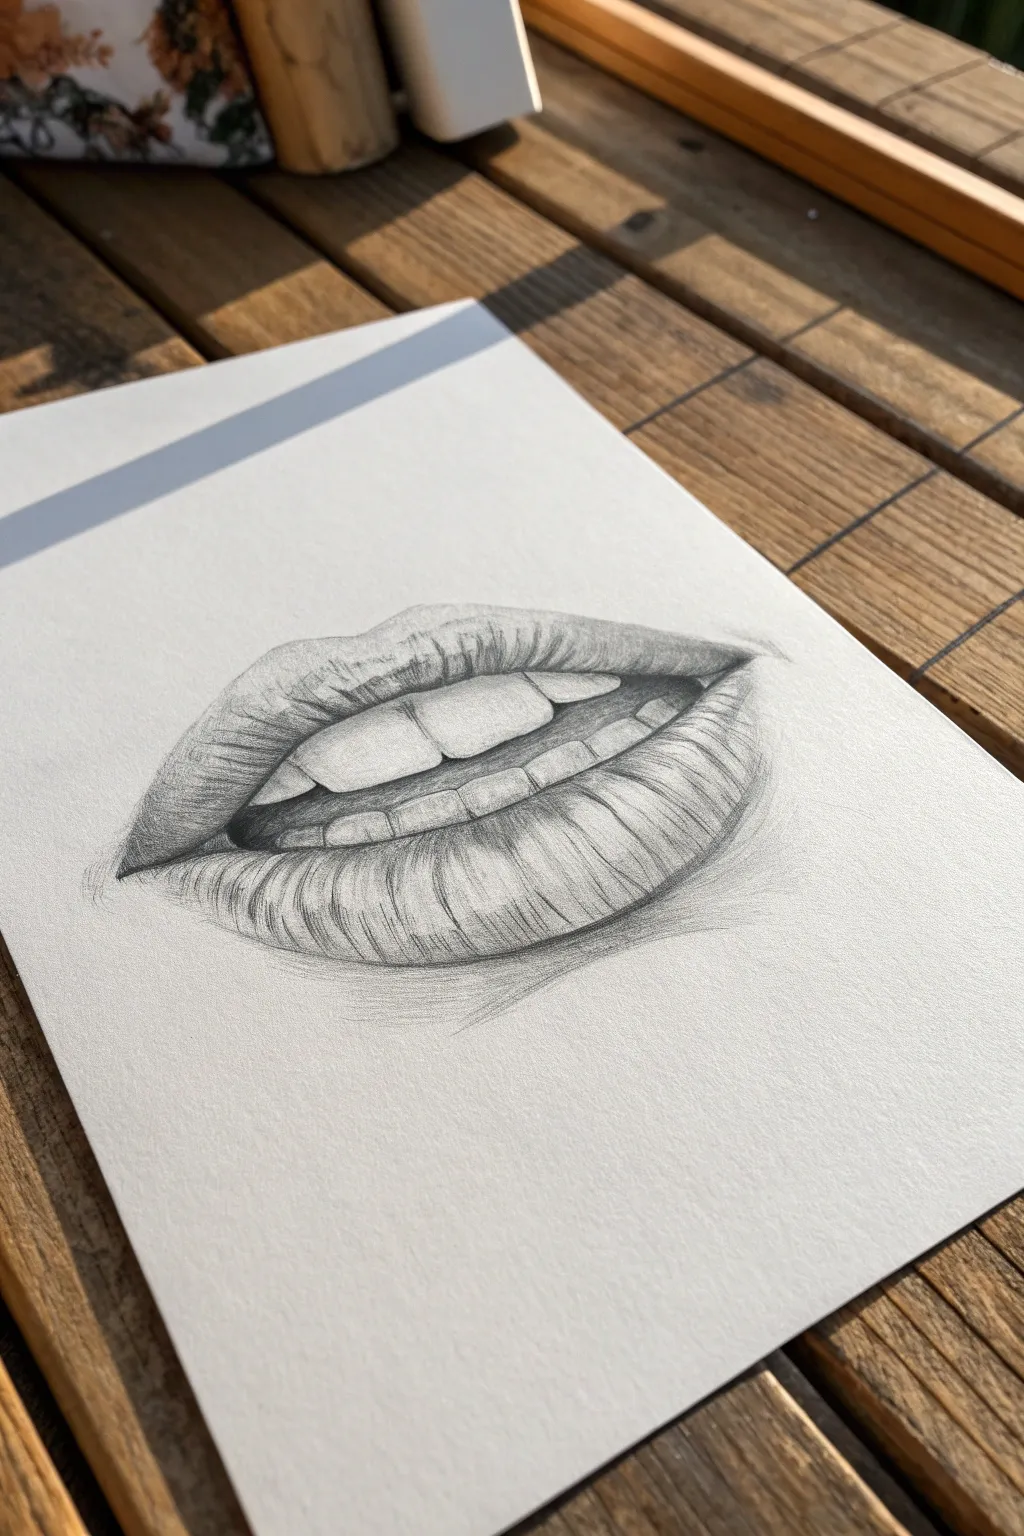
Capture the delicate volume of slightly parted lips with this soft, realistic study. Using gentle layering in muted rose and peach tones, you will create a convincing sense of depth and natural texture.
How-To Guide
Materials
- Spiral-bound sketchbook (medium weight paper)
- H or HB graphite pencil (for initial sketch)
- Colored pencils (Rose, Peach, Dark Red/Burgundy, White)
- Kneaded eraser
- Paper blending stump or cotton swatch
Step 1: Structural Sketching
-
Establish the centerline:
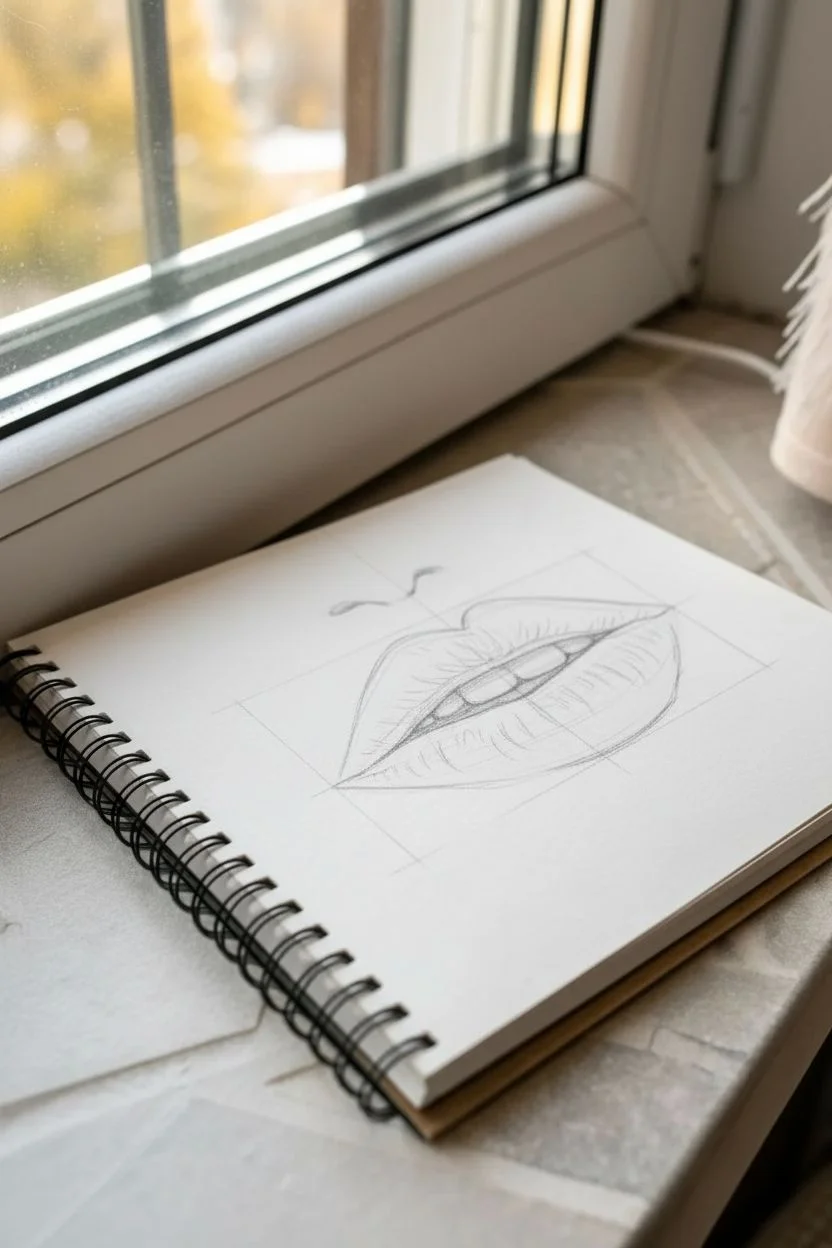
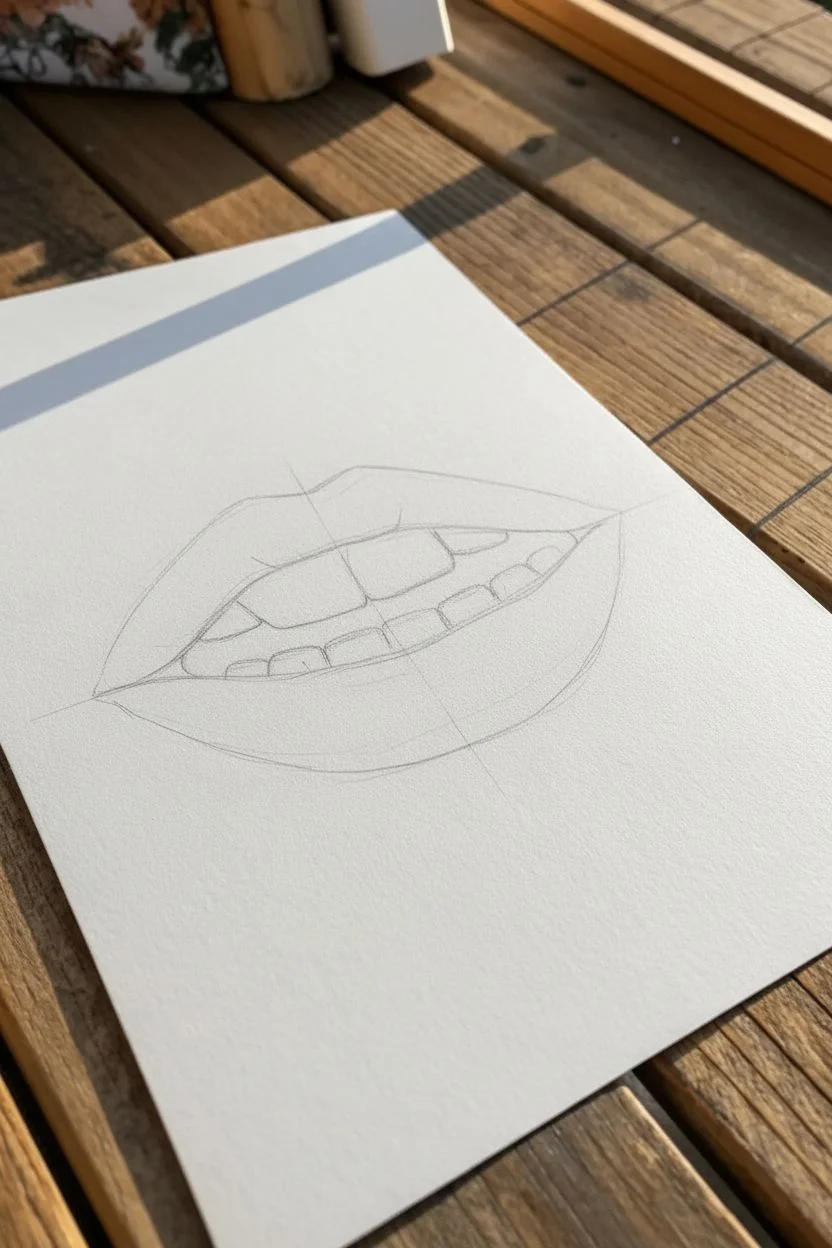
Begin by lightly drawing a vertical centerline and a horizontal line where the mouth will open. This crosshair helps you keep the lips symmetrical. -
Map the Cupid’s bow:
Sketch the ‘V’ shape of the Cupid’s bow on the top lip. Ensure the dips are soft and mimic the gentle curve shown in the reference image. -
Outline the lip shape:
Connect the Cupid’s bow to the corners of the mouth with sloping lines. Then, draw the bottom curve of the lower lip, making it fuller and rounder than the top lip. -
Indicate the teeth:
Since the mouth is slightly parted, lightly draw the bottom edge of the top teeth. Keep this very faint; you don’t want heavy outlines on teeth. -
Refine thephiltrum:
Add the faint, curved suggestion of the philtrum (the groove above the lip) and the nostrils just above that area to ground the drawing in space. -
Lighten the guidelines:
Use your kneaded eraser to dab away the graphite lines until they are barely visible. This prevents grey smudging when you add color.
Directional Stroking
Always curve your pencil strokes to follow the contour of the lip. Vertical straight lines will flatten the image, while curved C-strokes enhance the roundness.
Step 2: Layering Base Colors
-
Apply the base tone:
Using a soft peach or light pink pencil, fill in the entire lip shape. Use small circular motions to get into the tooth of the paper without pressing hard. -
Define the mouth opening:
Take a darker rose or burgundy shade and carefully darken the corners of the mouth and the line where the lips meet the teeth. This creates the primary depth. -
Shade the upper lip:
The upper lip is usually in shadow. Lightly layer a medium rose tone over it, leaving a very small highlight near the Cupid’s bow if desired. -
Establish volume on the lower lip:
Shade the bottom edge of the lower lip and just under the teeth using the medium rose color. Leave the center of the bottom lip lighter to suggest fullness.
Step 3: Detailing and Texture
-
Create lip fissures:
Sharpen your dark red or burgundy pencil to a fine point. Draw delicate, curved vertical lines on the lower lip to represent natural creases. -
Soften the lines:
Don’t leave the creases as harsh stripes. Go back over them lightly with your peach pencil to blend them into the surrounding skin tone. -
Darken the shadows:
Deepen the shadow underneath the bottom lip to make it pop forward. I find this cast shadow is crucial for making the drawing look 3D. -
Define the teeth:
Use a light grey or very pale blue to shade only the corners of the teeth, keeping the center white. This makes them look curved rather than flat. -
Add high-contrast accents:
Revisit the darkest corner points of the mouth with your darkest red or even a touch of brown to maximize contrast. -
Highlighting:
Using a white pencil, burnish the center of the bottom lip and the peak of the Cupid’s bow. Press firmly to create a waxy, reflected light effect. -
Final blend:
If the texture looks too grainy, use a paper stump or cotton swatch to very gently blur the transitions between the shadow and light areas.
Teeth Looking Grey?
If your teeth look dirty or too dark, use a clean eraser to lift the pigment. Remember that teeth are rarely pure white, but shadows should be subtle.
With these steps complete, your drawing should now exhibit a soft, lifelike volume and natural coloration


Practice a Closed-Lip Smile With Corner Pockets
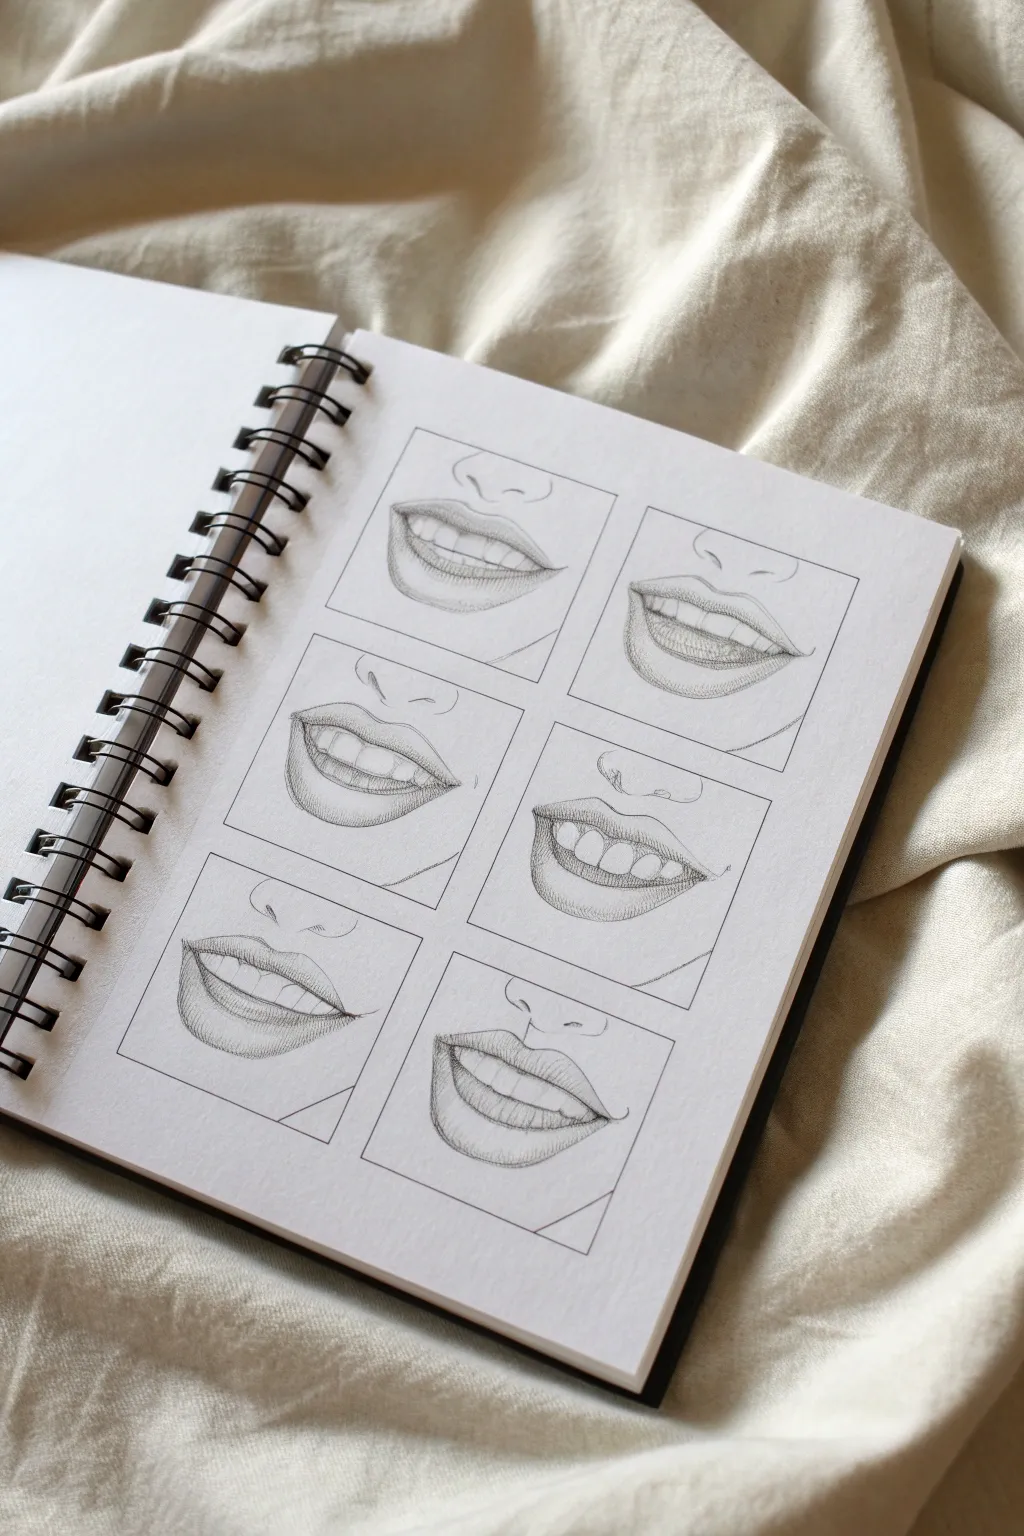
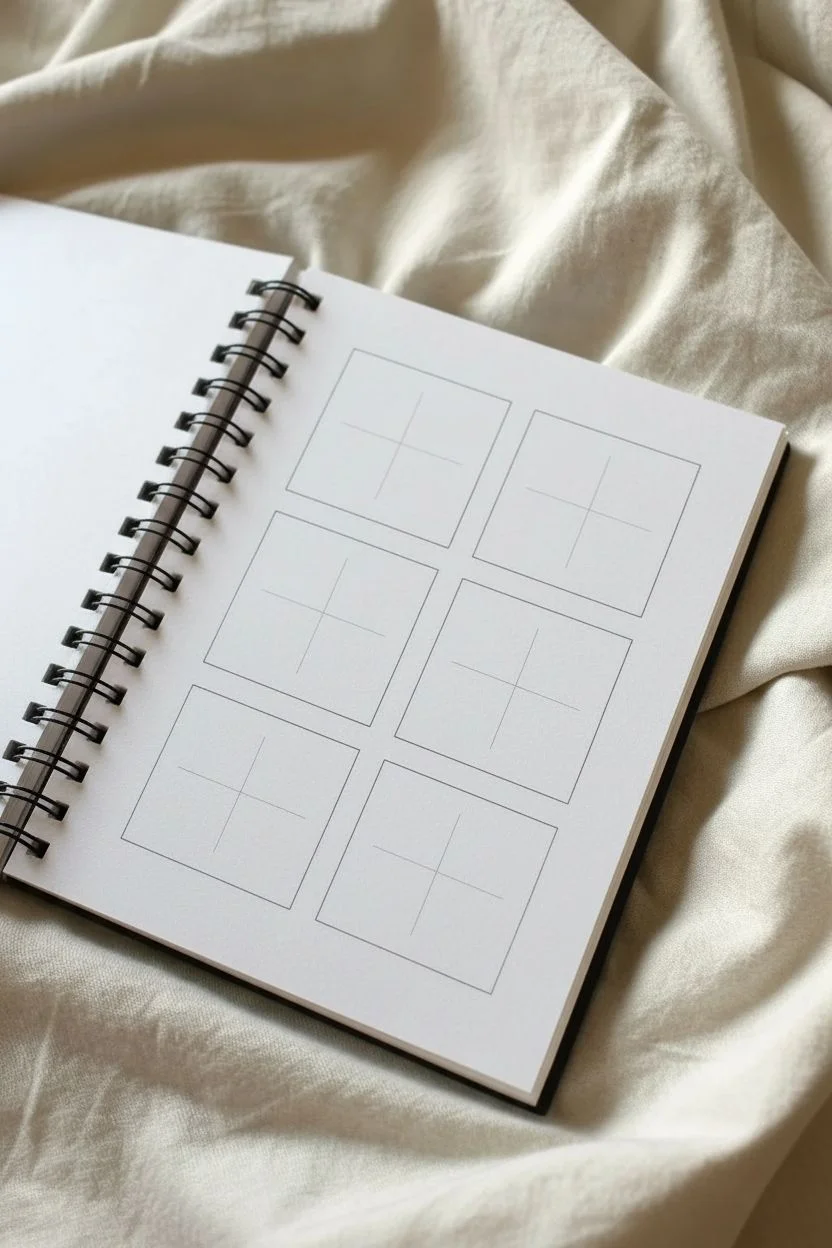
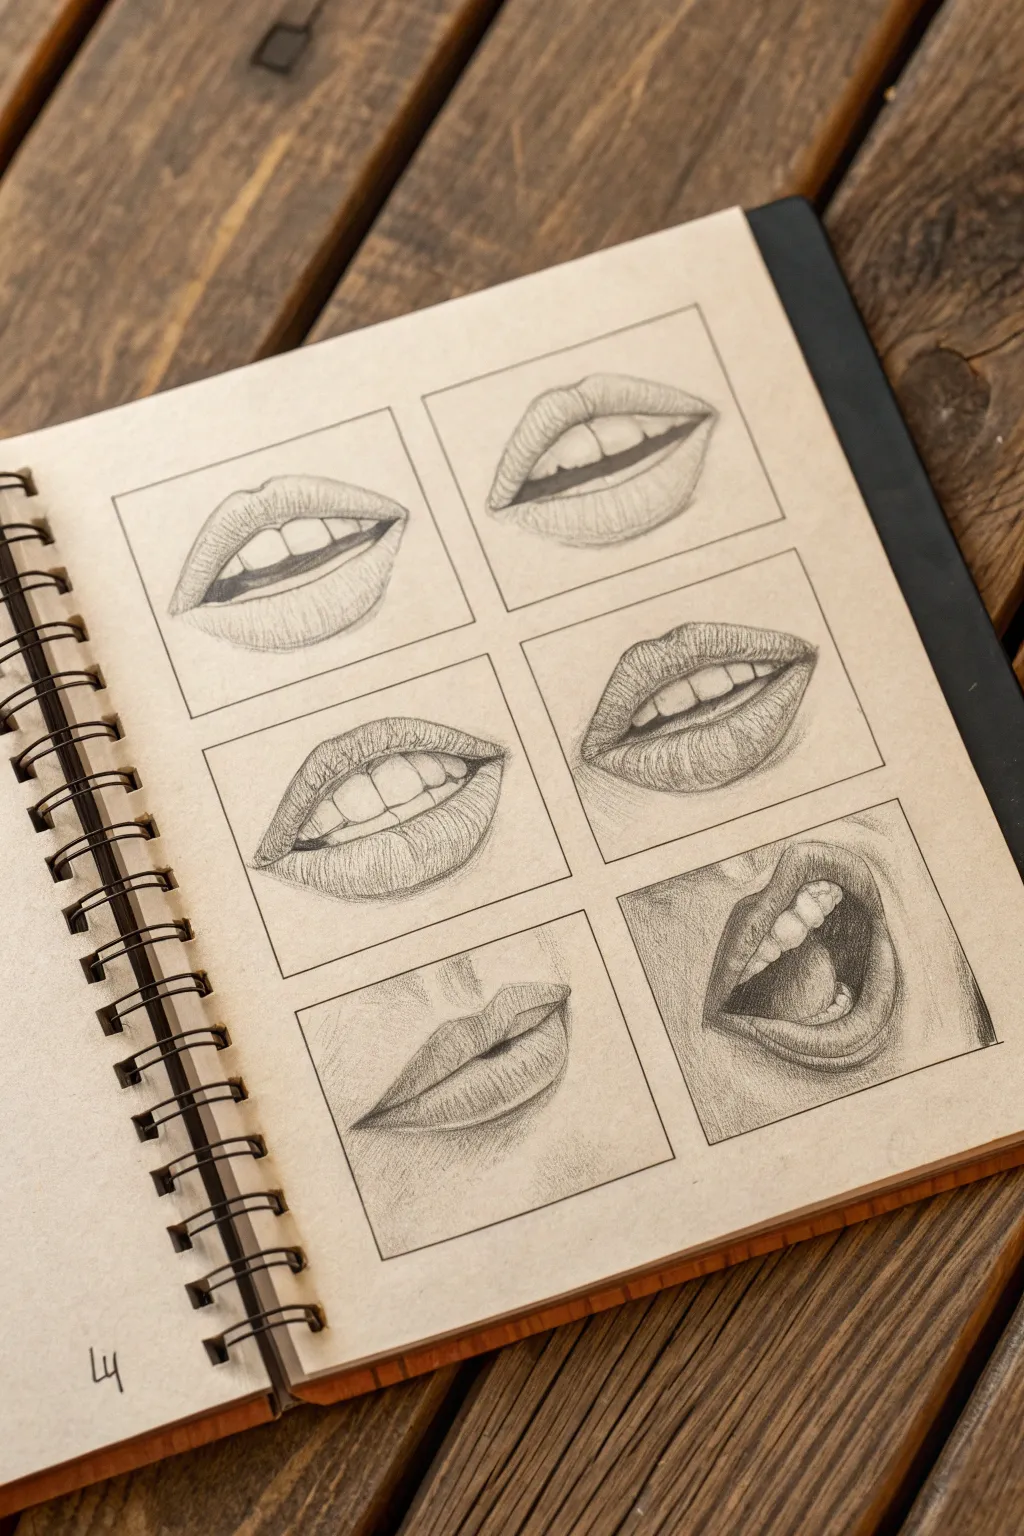
Master the subtleties of a smile with this structured sketchbook study, featuring six distinct mouth expressions drawn in a clean 2×3 grid. The focus is on capturing the gentle curvature of lips and the glint of teeth using precise graphite shading.
Step-by-Step Tutorial
Materials
- Spiral-bound sketchbook (heavyweight paper recommended)
- Graphite pencils (gradations: HB, 2B, 4B)
- Ruler
- Kneaded eraser
- Fine-point mechanical pencil (optional, for details)
- Blending stump or tortillon
Step 1: Setting the Grid
-
Measure the layout:
Begin by measuring your sketchbook page to create a balanced grid. You will need six equal squares arranged in two columns of three rows. Leave a comfortable margin around the edges and between the squares for a clean, gallery-like presentation. -
Draw the frames:
Using your ruler and an HB pencil with very light pressure, draw the six square frames. Keep these lines crisp but faint enough that they don’t distract from the drawings inside; you want them to act as windows.
Pro Tip
Avoid outlining individual teeth with hard lines, which makes them look like piano keys. Instead, use soft shading at the top and bottom of the tooth to suggest the separation.
Step 2: Sketching the Structures
-
Center point mapping:
In each square, lightly mark a central vertical axis and a horizontal line roughly where the lips will meet. This crosshair helps ensure your mouths are symmetrical and centered within their frames. -
Outline the top row:
Start with the top-left square. Sketch a generic mouth shape, slightly open to show teeth. For the top-right square, draw a wider, fuller smile with slightly more teeth visible. Focus only on the outer contours of the lips and the gum line. -
Outline the middle row:
Move to the middle-left square. Draw lips that are slightly parted, emphasizing the ‘cupid’s bow’ on the top lip. In the middle-right square, sketch a smile that angles slightly upward to the right, showing a bit of perspective. -
Outline the bottom row:
For the bottom-left, draw a gentle, relaxed smile where the bottom lip is fuller. Finally, in the bottom-right square, create a similar smile but vary the angle of the teeth slightly. All outlines should be very faint at this stage. -
Add nose references:
Just above the top lip in each square, lightly sketch the base of the nose (nostrils and septum). This context is crucial for understanding the philtrum (the vertical groove) connection.
Level Up
Try drawing the same mouth expression in all six squares, but rotate the angle slightly for each one (front, 3/4 view, side profile) to create a rotating motion study.
Step 3: Defining the Teeth
-
Indicating the dental arch:
Inside the open mouths, draw the curve of the teeth. Don’t draw individual heavy vertical lines between every tooth yet; instead, draw the continuous bottom edge of the top teeth first. -
Separating the teeth:
Lightly indicate the gaps between teeth. Remember, these shouldn’t be dark black lines, but rather subtle shadows. The two front teeth are usually the largest focal point.
Step 4: Shading and Texture
-
Base shading on lips:
Switch to a 2B pencil. Begin shading the lips using vertical, curved strokes that follow the rounded form of the lip. This directional shading mimics the natural texture of skin. -
Darkening the corners:
The corners of the mouth (commissures) are the darkest points. Use a 4B pencil to deepen these small triangle-shaped shadows, which gives the smile depth and dimension. -
Shading the upper lip:
The upper lip usually angles downward and catches less light. Shade it slightly darker than the bottom lip, leaving a small highlight along the top edge if the light source is from above. -
Shading the lower lip:
I prefer to leave the center of the bottom lip almost white to represent a strong highlight. Shade heavily underneath the bottom lip to show the cast shadow on the chin. -
Refining the teeth:
Shade the teeth very gently near the gum line and corners of the mouth, keeping the center teeth brightest. Defined gums are only necessary if the smile is very wide; usually, just a hint of shadow works best. -
Adding skin texture:
Using an HB pencil, add very light cross-hatching to the skin around the mouth (cheeks and chin areas) to differentiate it from the white background, but fade it out before it touches the frame borders. -
Final contour check:
Go over your main outlines one last time with a sharp pencil or mechanical pencil to crisp up the edges. Ensure the philtrum lines lead naturally from the nose to the cupid’s bow.
Now you have a comprehensive reference sheet for drawing various smiles to look back on


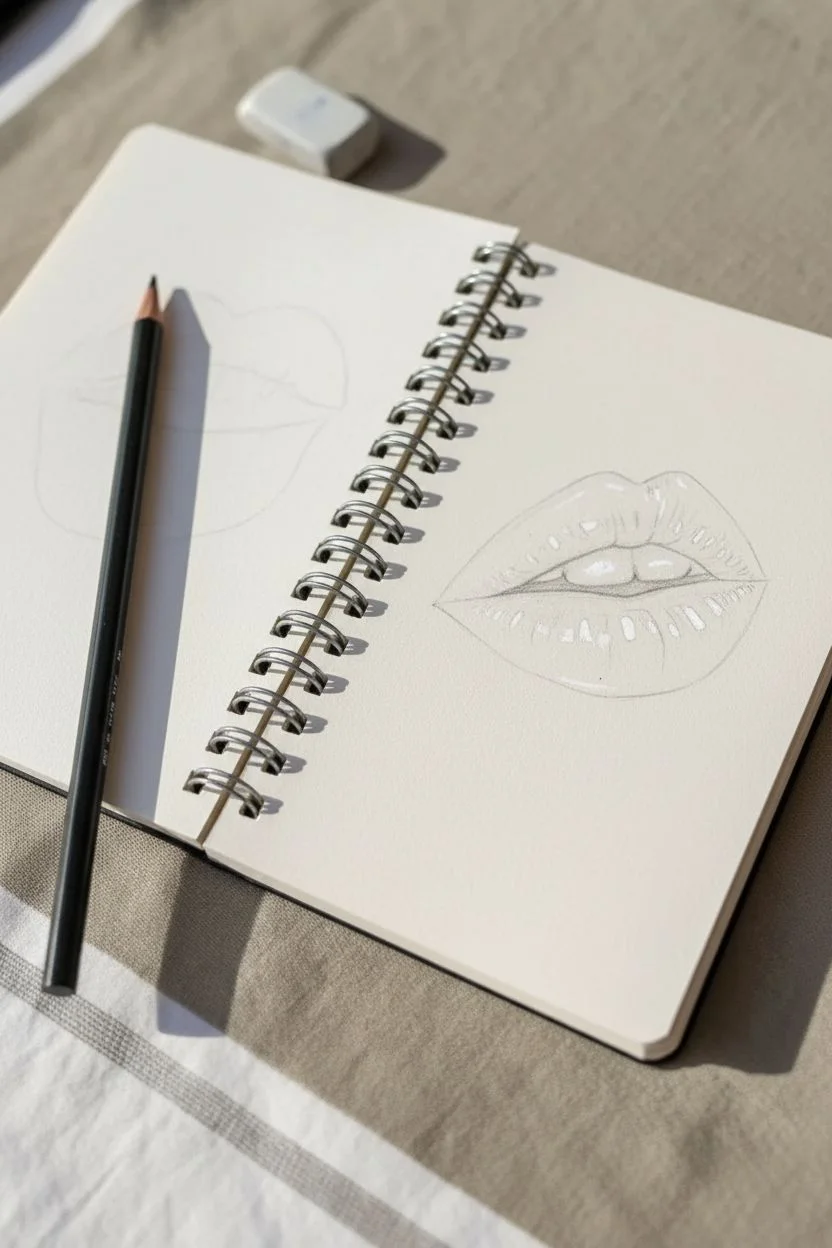
Draw a Relaxed Neutral Mouth (No Expression)
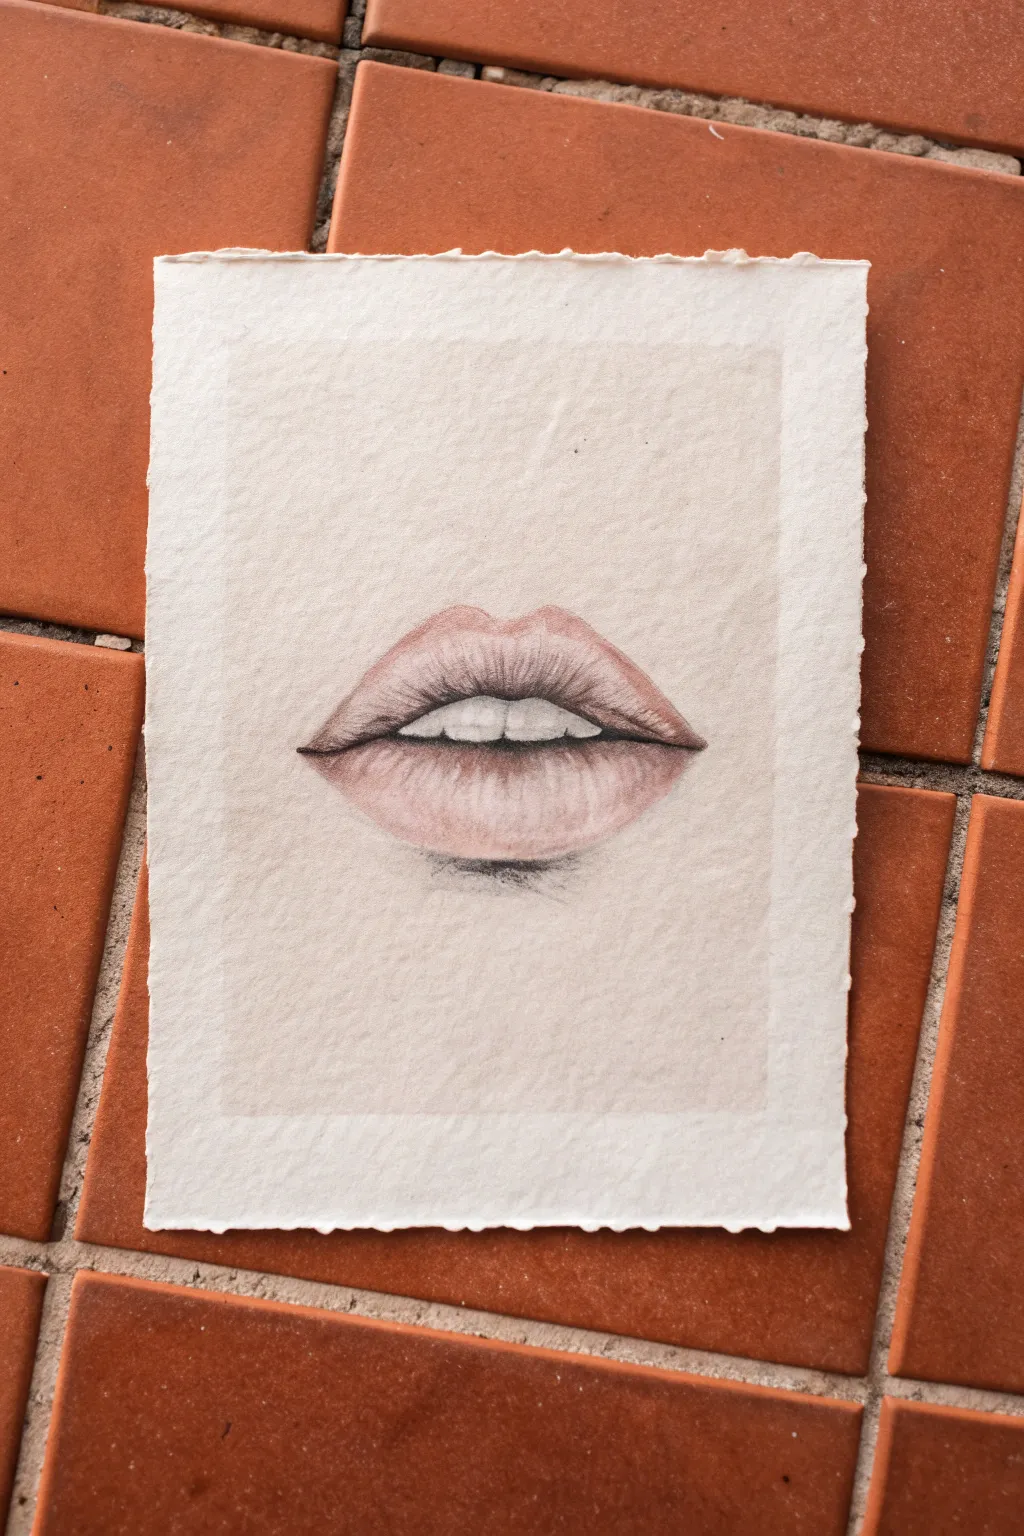
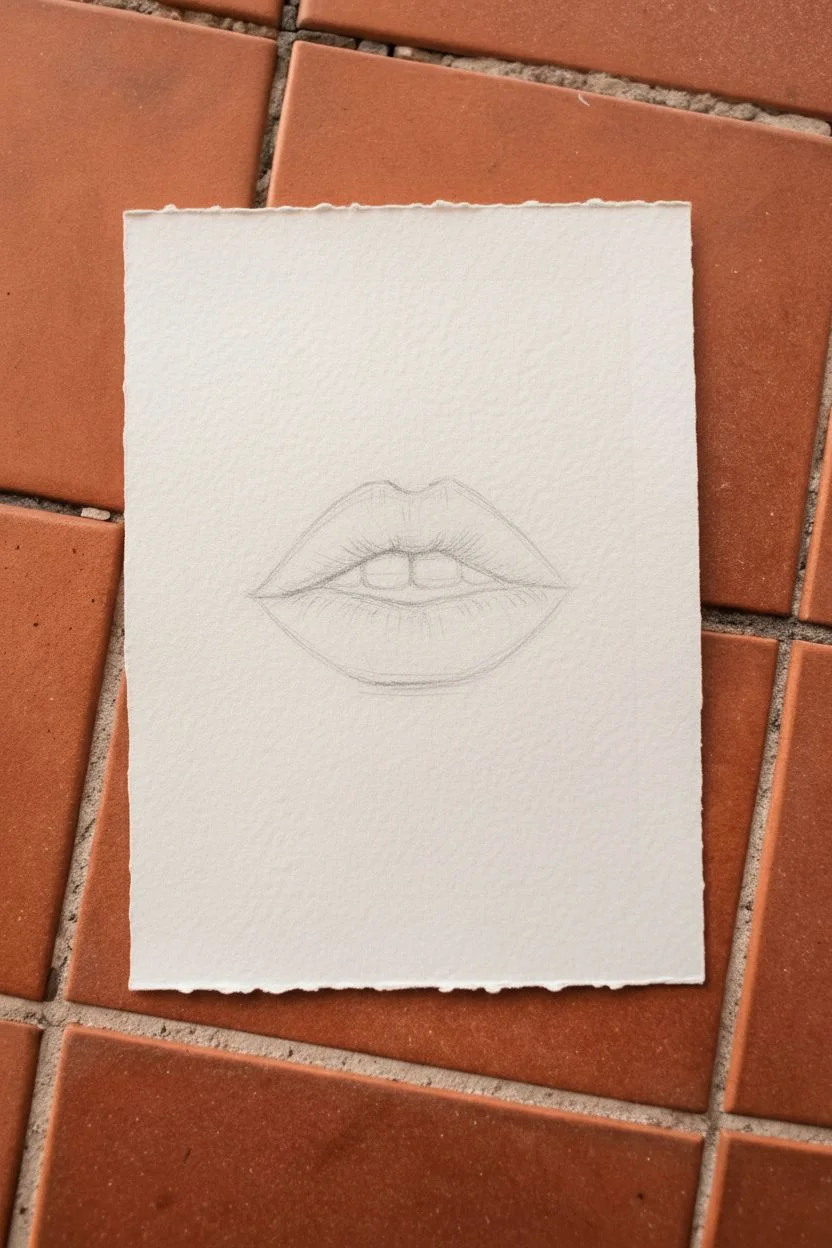
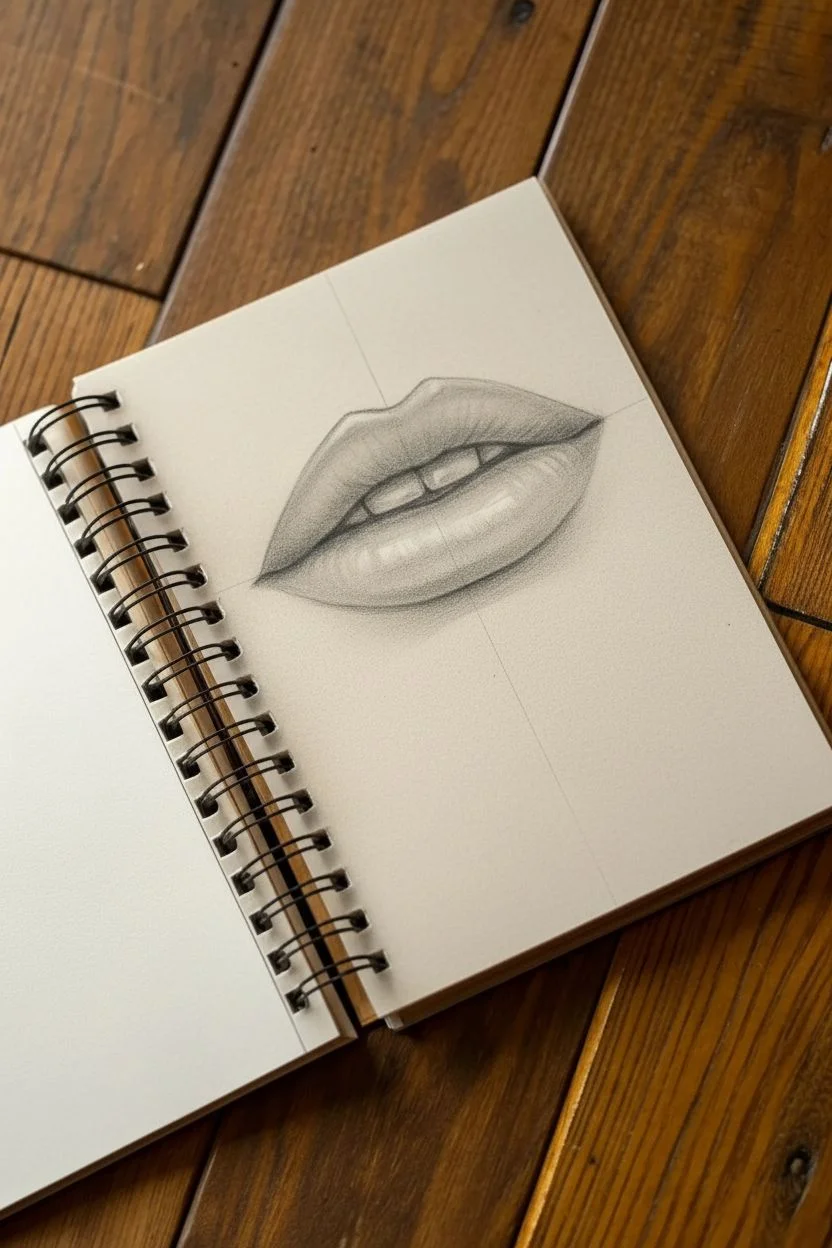
Capture the subtle elegance of a mouth at rest with this detailed pencil drawing tutorial. This project focuses on gentle shading and texture to create a realistic, neutral expression on beautifully textured paper.
Step-by-Step Guide
Materials
- High-quality textured paper (e.g., cold press watercolor paper or handmade paper with deckled edges)
- Graphite pencil (HB or H for outlining)
- Colored pencils (flesh tones, warm pinks, dusty rose, dark brown, cream/white)
- Kneaded eraser
- Pencil sharpener
- Blending stump or tissue
Step 1: Sketching the Foundation
-
Define the Center Line:
Begin by lightly drawing a horizontal line where the lips will meet. This shouldn’t be perfectly straight; give it a gentle, natural wave—slightly dipping in the middle and curving up towards the corners. -
Map the Lip Borders:
Lightly sketch the top border of the upper lip featuring the cupid’s bow. Then, mark the bottom curve of the lower lip. Keep these initial lines faint so they don’t show through later. -
Indicate the Opening:
Since the mouth is slightly parted to show teeth, draw a second line just below your first center line. The space between perfectly frames the upper teeth. -
Suggest the Teeth:
Draw faint vertical indications for the two front teeth. Do not outline individual teeth heavily; just hint at their edges to keep them looking natural and recessive.
Teeth look like chiclets?
Avoid outlining each tooth completely. Only shadow the gum line and the very tips. Let the vertical gaps be implied by vague shadows rather than hard lines.
Step 2: Building Color and Form
-
Base Tone Application:
Using a pale flesh-tone pencil, lightly fill in both lips. Use the side of your pencil lead to catch the texture of the paper, creating a grainy, soft look right from the start. -
Deepening the Upper Lip:
Layer a dusty rose color onto the upper lip. Since the upper lip usually angles inward and catches less light, apply slightly more pressure here than on the bottom lip. -
Shading the Corners:
Take a darker brown or mauve pencil and deepen the corners of the mouth. Fade this color inward toward the center to create volume and curvature. -
Defining the Lip Line:
Refine the line where the lips part using a sharpened dark brown pencil. The corners should be the darkest points, gradually lightening as you move toward the center. -
Adding Vertical Texture:
Lips have natural vertical creases. With a sharp pink or light berry pencil, draw curved strokes on the bottom lip that follow its rounded contour. These shouldn’t be straight lines; curve them like parentheses.
Add a Glossy Finish
Use a white gel pen to add tiny, sharp dots of reflected light on the fullest part of the bottom lip and the moisture line for a ‘wet’ look.
Step 3: Details and Refining
-
Shadowing the Teeth:
Teeth are rarely pure white. Lightly shade the top of the teeth (where they go under the lip) with a cool grey or muted cream to set them back in the mouth. -
Highlighting the Lower Lip:
Identify the plumpest part of the bottom lip. Leave this area lighter or gently lift pigment with your kneaded eraser. You can add a touch of white pencil here to simulate a soft sheen. -
Shadow Beneath the Lip:
I find that grounding the drawing is crucial, so add a soft, crescent-shaped shadow directly under the center of the bottom lip using graphite or a cool grey pencil. This suggests the chin’s structure. -
Refining the Cupid’s Bow:
Sharpen the definition of the cupid’s bow on the top lip. Ensure the peaks are soft and rolling rather than sharp points. -
Blending for Softness:
Use a clean blending stump to gently soften the transition between the lip color and the skin. We don’t want a hard outline like lipliner; we want the color to diffuse naturally into the surrounding skin tone. -
Final Contrast Check:
Step back and check your values. If the mouth looks flat, darken the crease line between the lips and the shadow underneath the lower lip one last time for extra pop.
Now you have a beautifully rendered, realistic mouth drawing ready to be framed or added to a larger portrait study


Explore Full Lips vs. Thin Lips in a Mini Grid
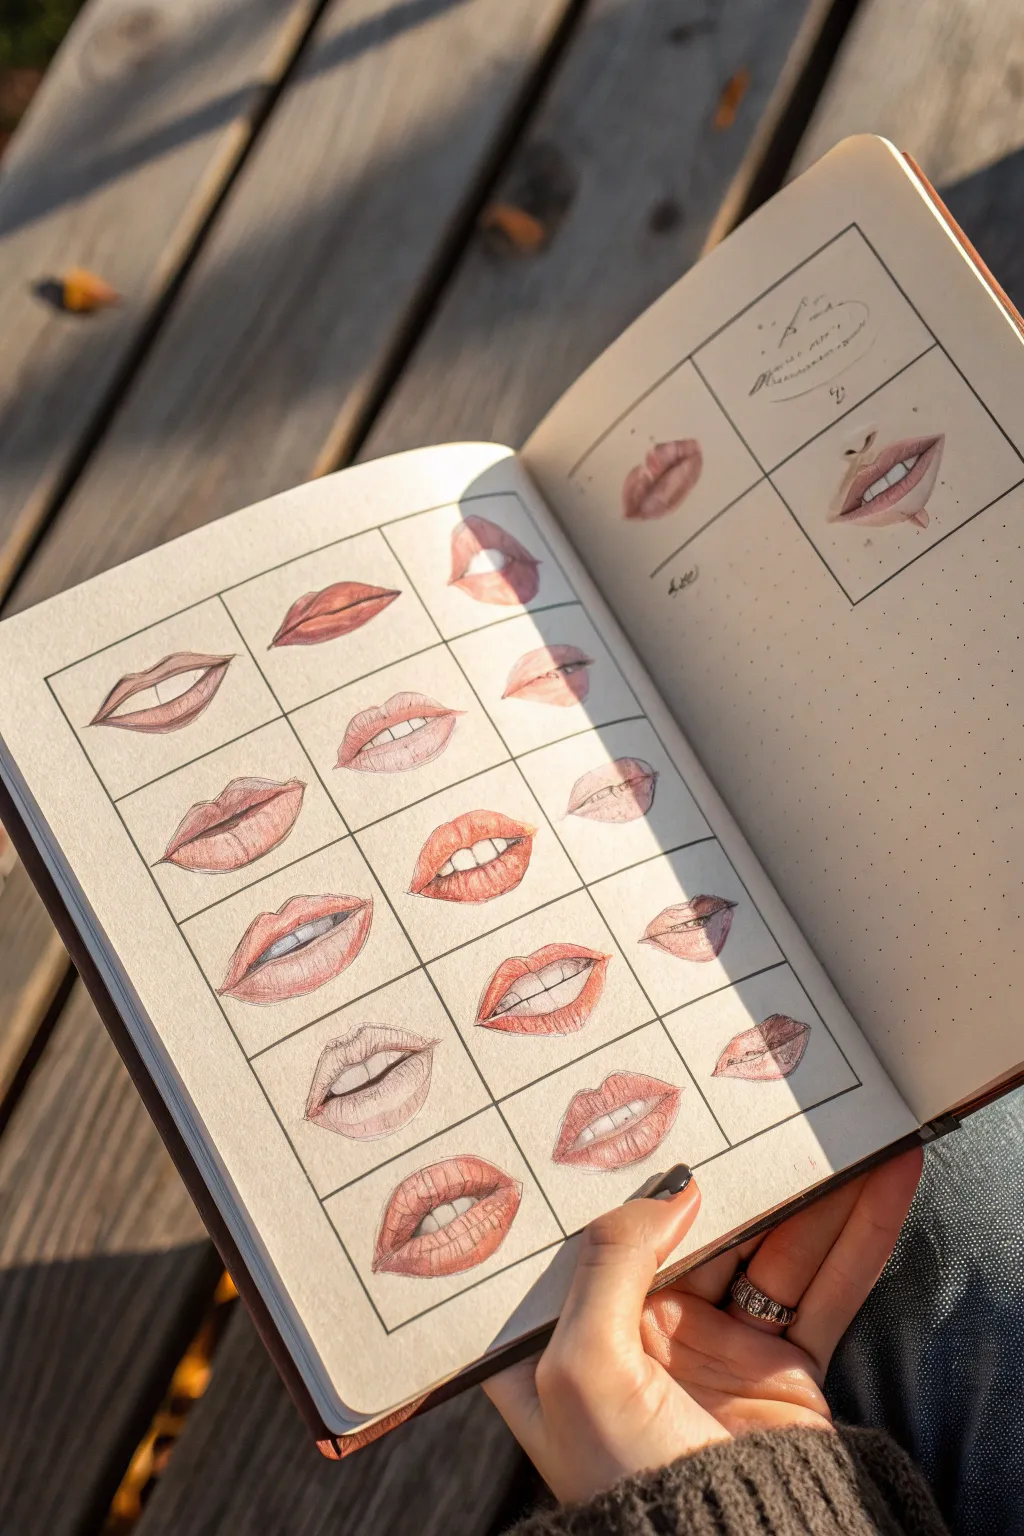
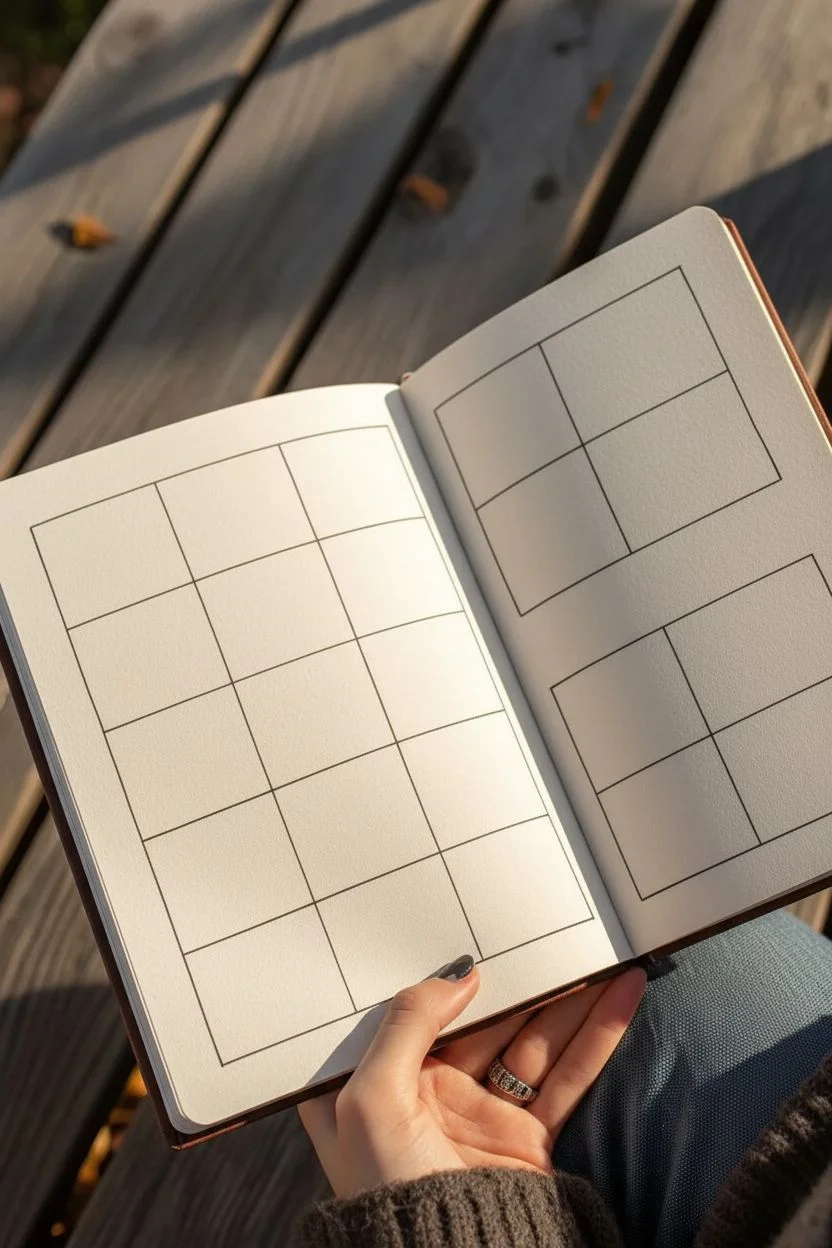
Master the nuances of mouth anatomy with this organized grid study, perfect for practicing variations in fullness and expression. This structured approach allows you to compare subtle differences side-by-side, creating a satisfying and educational sketchbook spread.
How-To Guide
Materials
- Sketchbook (cream or off-white paper preferred)
- Mechanical pencil (0.5mm HB)
- Fine-liner pen (black, 0.1mm or 0.3mm)
- Colored pencils (flesh tones, pinks, reds, browns)
- Ruler
- White gel pen (for highlights)
- Kneaded eraser
Step 1: Setting the Stage
-
Grid Layout:
Begin by drawing a large rectangle on the left page of your sketchbook. Use your ruler to divide this into a 3×5 grid, creating 15 equal square boxes. On the right page, draw a few larger, free-floating boxes or a simple quadrant for more detailed studies later. -
Inking the Structure:
Once you are happy with the grid spacing, trace over your pencil lines with a fine-liner pen. Keep the lines crisp and straight, but don’t worry if they aren’t mechanically perfect; a little hand-drawn character adds charm.
Fixing “Flat” Lips
If lips look flat, curve your texture lines more aggressively around the form. The center lines should be straight, but side lines act like contour rings
Step 2: Sketching Forms
-
Basic Shapes:
In each box, lightly sketch the basic geometry of a mouth. Start with a horizontal center line for the aperture, then map out the cupid’s bow and the bottom curve of the lower lip. -
Varying Fullness:
Intentionally vary the shapes as you move through the grid. For top rows, focus on thinner upper lips or wider smiles. For the middle and bottom rows, exaggerate the fullness of the lower lip or create a pouty shape to explore volume. -
Adding Teeth:
For mouths that are slightly open, gently indicate the bottom edge of the top teeth. Avoid drawing individual lines between teeth; instead, just suggest the overall shape of the dental arch. -
Refining Contours:
Go back over your rough sketches with cleaner pencil strokes, defining the corners of the mouth (commissures) and the sharp edge of the vermilion border.
Step 3: Color & Detail
-
Base Layer:
Select a pale dusty pink or nude colored pencil. Lightly shade the lips, keeping the pressure even. Leave the center of the lower lip slightly lighter to suggest a highlight. -
Deepening Shadows:
Using a slightly darker mauve or terra-cotta pencil, shade the corners of the mouth and the line where the lips meet. This line is usually the darkest part of the drawing and gives the mouth its depth. -
Vertical Texture:
Lips aren’t perfectly smooth skin. Use a sharpened pencil to draw faint, curved vertical lines following the contour of the lips. These striations should curve outward towards the edges of the mouth to show roundness. -
Volume Shading:
Darken the area just under the lower lip to create a cast shadow on the chin. This immediately makes the lip look like it is protruding forward. -
Building Contrast:
Layer a warmer red or brown in the darkest creases, particularly the cupid’s bow and the corners. I find that building these colors slowly prevents the drawing from looking waxy. -
Teeth Logic:
If teeth are visible, do not leave them pure white. Lightly shade the corners of the dental arch with a cool grey to show they recede into the mouth.
Pro Tip: Shadow Colors
Never use black for shading lips. It kills the vibrancy. Instead, use dark browns, deep purples, or maroons for the deepest crevices and corners
Step 4: Final Touches
-
Highlighting:
Use a white gel pen or a very sharp white charcoal pencil to add small, crisp highlights. Place them on the fullest part of the lower lip and the ridges of the cupid’s bow to make them look moist and realistic. -
Border Clean-up:
Check the grid lines one last time. If your coloring went outside the boxes, you can carefully re-ink the black border lines to crisp everything back up.
Flip through your finished grid to see how differenct shapes change the personality of the face

PENCIL GUIDE
Understanding Pencil Grades from H to B
From first sketch to finished drawing — learn pencil grades, line control, and shading techniques.
Explore the Full Guide
Add Lip Texture With Subtle Lines and Soft Edges
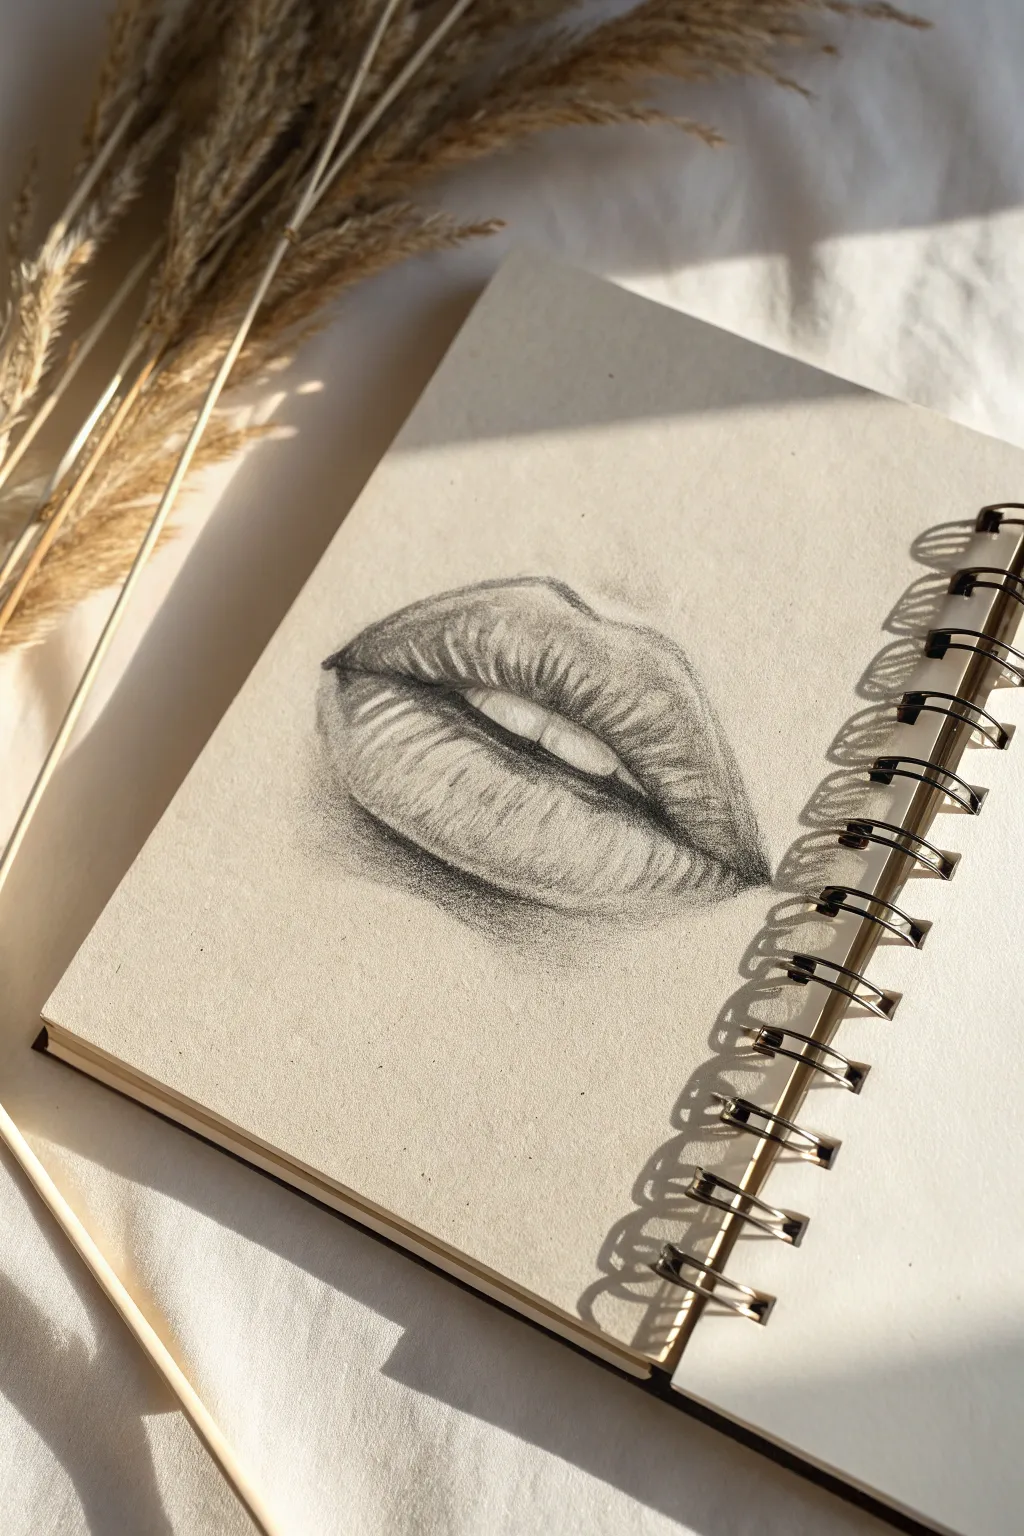
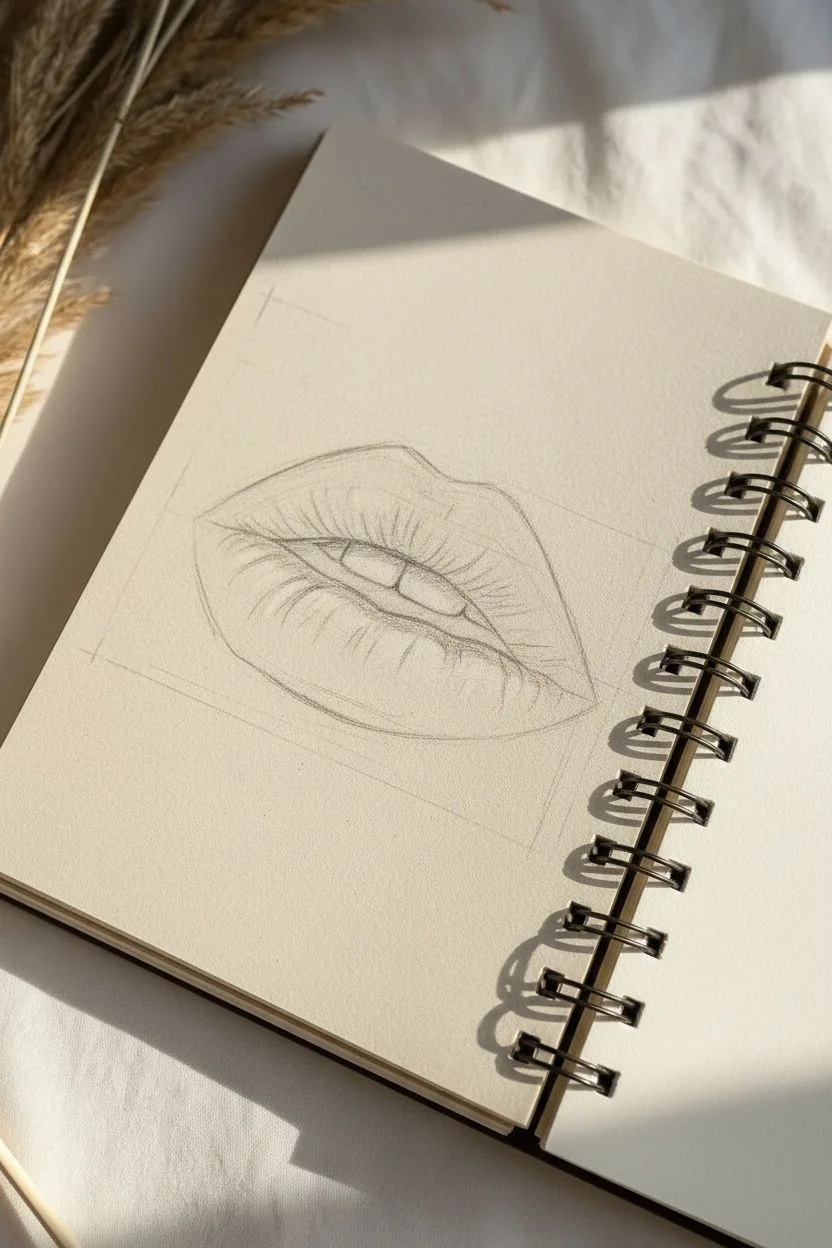
Learn how to capture the delicate fullness of lips with this pencil study, focusing on realistic texture and lighting. The drawing features slightly parted lips with visible teeth, rendered with soft shading and fine vertical striations to suggest natural skin creases.
Step-by-Step Tutorial
Materials
- Sketchbook with textured off-white or cream paper
- HB graphite pencil (for initial outlines)
- 2B or 4B graphite pencil (for shading)
- Mechanical pencil (0.5mm, optional for fine details)
- Kneaded eraser
- Blurring stump or cotton swab (optional)
Step 1: Basic Sketch and Placement
-
Establish the width and center:
Start by lightly marking the total width of the mouth with two small ticks. Draw a faint vertical centerline to ensure symmetry between the left and right sides of the lips. -
Outline the upper lip:
Sketch the ‘Cupid’s bow’ at the top center. From the peaks, curve gently downwards towards the corners of the mouth. Keep your pressure extremely light so lines can be adjusted or erased easily. -
Define the mouth opening:
Draw the line where the lips part. This line will not be straight; it should dip in the center and curve up slightly towards the corners. Leave a small gap to indicate where the teeth will be visible. -
Outline the lower lip:
Sketch the bottom curve of the lower lip. This is typically fuller and rounder than the top lip. Ensure the curve tapers naturally into the corners you established earlier. -
Indicate the teeth:
Very faintly suggest the bottom edge of the two front teeth within the parted gap. Avoid drawing hard vertical lines between teeth; just hint at their shape with the bottom edge.
Fixing “Flat” Looking Lips
If lips look flat, your center highlight isn’t bright enough. Lift more graphite from the middle of the bottom lip with a kneaded eraser to exaggerate the roundness.
Step 2: Shading and Form
-
Begin the darkest values:
Using your 2B or 4B pencil, darken the corners of the mouth. This is usually the area with the deepest shadow. Taper this darkness inwards along the parting line, but keep it sharpest at the corners. -
Shade the upper lip:
The upper lip usually angles downward, catching less light. lay down a consistent base tone across the upper lip, but leave a thin sliver of highlighted skin just above the Cupid’s bow untouched. -
Establish core shadows on the lower lip:
The lower lip catches the most light. Apply shadow mainly just under the mouth opening and at the very bottom edge where the lip curves back towards the chin. Leave the center of the lower lip mostly bare paper for a strong highlight. -
Cast shadow under the lip:
Beneath the center of the lower lip, add a soft, diffused shadow on the skin. This helps ‘push’ the lip forward, making it look plump and three-dimensional. -
Refine the teeth:
Keep the teeth very light—mostly the color of the paper. Add a tiny amount of shading at the top of the teeth where the upper lip casts a shadow on them. This sets them back into the mouth.
Step 3: Texturing and Details
-
Add vertical lip wrinkles:
Lips have natural vertical cracks. Using a sharp pencil or mechanical pencil, draw curved vertical lines following the contour of the lips. On the bottom lip, these should curve outward like the lines on a pumpkin. -
Softening texture lines:
Specific distinct lines can look unnatural. Gently go over your vertical texture lines with a blending stump or a light layer of shading to integrate them into the lips, so they look like surface texture rather than stripes. -
Deepen the creases:
Return to the darker areas of the cracks. Press harder in the center of the cracks and lift your pencil as you move outward, creating a variation in line weight that mimics deeper folds. -
Enhance the highlights:
Use your kneaded eraser to tap or lift graphite from the highest points of the lower lip texture. This creates the ‘shiny’ look of moisture on the lips. -
Final contrast check:
Ensure the corners of the mouth and the line separating the lips are the darkest points on the page. Darken these if necessary to make the highlights pop. -
Cleaning up:
Erase any stray construction lines around the outside. If you want a sharper edge, carefully outline the very outer perimeter, but often a softer edge looks more realistic.
Level Up: Gloss Effect
For a ‘lip gloss’ look, create hard-edged, pure white highlights. Instead of soft gradients, leave stark, irregular shapes of white paper untouched.
Keep practicing different mouth expressions to see how the folds change with movement
Place Highlights for Glossy or Matte Lips
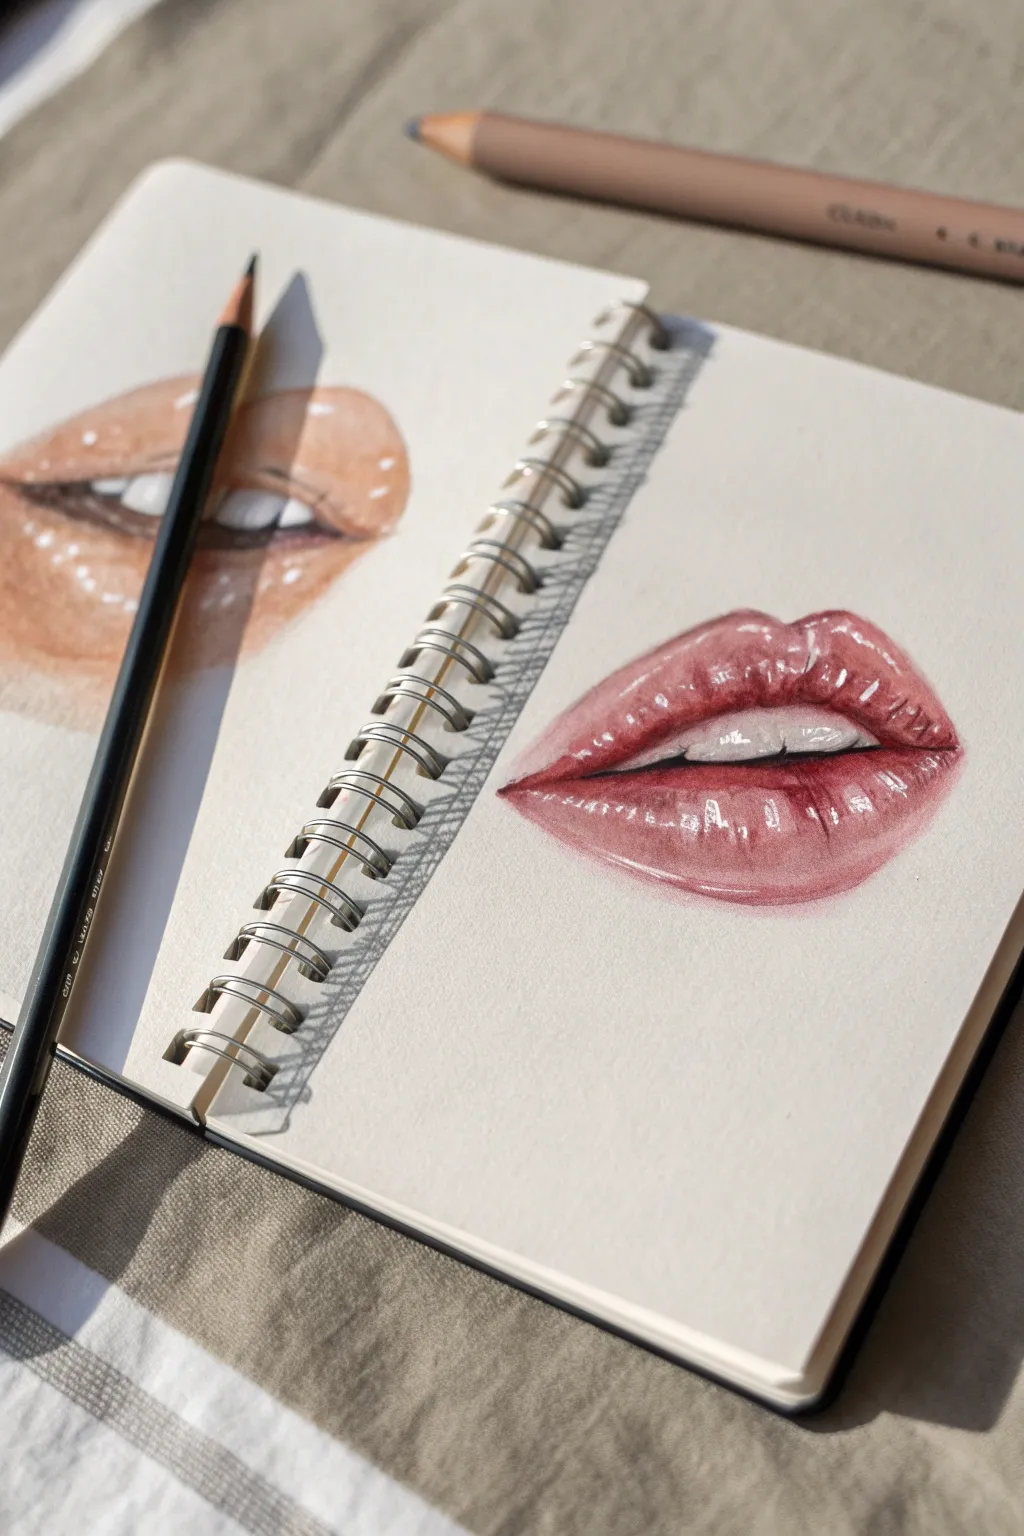
Master the art of realistic, high-shine lips with this detailed colored pencil tutorial. You will learn how to layer soft pinks and deep reds to build form, while preserving crisp white highlights that give the lips their signature wet, glossy look.
Detailed Instructions
Materials
- Spiral-bound sketchbook (smooth or vellum bristol paper recommended)
- Set of colored pencils (specifically shades of pink, dusty rose, deep maroon, and warm beige)
- White gel pen or white gouache (for finest highlights)
- Graphite pencil (HB for sketching)
- Kneaded eraser
- Pencil sharpener
Step 1: Sketching the Framework
-
Outline the shape:
Begin by lightly sketching the outline of the lips with your HB pencil. Focus on the ‘Cupid’s bow’ at the top center and the subtle curve of the bottom lip. Keep your lines very faint so they don’t show through the final color. -
Define the opening:
Sketch the inner opening of the mouth. Draw the bottom edge of the top lip and the top edge of the bottom lip, leaving a gap for the teeth. Slightly curve these lines to suggest the volume of the lips. -
Indicate the teeth:
Lightly mark the visible teeth in the open space. Don’t outline individual teeth too harshly; just suggest their bottom edge where they meet the lower lip and the shadows between them. -
Map the highlights:
Before adding any color, lightly outline where your brightest white highlights will be. On wet lips, these are usually vertical streaks on the bottom lip and crisp shapes on the Cupid’s bow. I find mapping these out early prevents me from accidentally coloring over them.
Tip: Keep It Sharp
For realistic lip texture, keep your pencil extremely sharp. Dull points blend too much; sharp points create the distinct cracks and wrinkles needed for detail.
Step 2: Base Layers & Shadows
-
Apply the base tone:
Start with a soft dusty rose or light pink pencil. Gently shade the entire lip area, avoiding the highlighted shapes you mapped out earlier and the teeth. use a light circular motion to get even coverage. -
Darken the corners:
Take a slightly darker berry or medium pink shade. Begin building depth in the corners of the mouth and along the bottom edge of the top lip. This gradient creates the illusion of roundness. -
Shade the teeth:
Teeth aren’t stark white. Use a very light grey or cool beige to gently shade the top of the teeth where they go under the lip, leaving the bottom edges brighter. -
Deepen the mouth line:
Use a deep maroon or brownish-red pencil to darken the crease where the lips meet. This line should be the darkest part of your drawing to create contrast.
Step 3: Building Gloss and Details
-
Add vertical texture:
Lips have natural vertical wrinkles. Using your medium pink shade, draw curved vertical strokes on the bottom lip. These strokes should wrap around the form like contour lines, accentuating the fullness. -
Refine the top lip:
Add similar vertical texture to the top lip, radiating downward from the Cupid’s bow. Deepen the color near the bottom edge of the top lip to make it look like it curves inward. -
Enhance the shadows:
Switch back to your deep maroon. Darken the shadows underneath the bottom lip to lift it off the page. Strengthen the shadows in the vertical cracks of the lips, but don’t make them solid lines—feather them out. -
Blend the mid-tones:
Use a warm beige or peachy pencil to blend the edges of your pinks into the white highlight areas. You don’t want a harsh line between pink and white; a smooth transition makes the gloss look realistic. -
Cast shadow on teeth:
Add a crisp, dark shadow on the teeth right underneath the top lip. This small detail adds immense depth and shows that the top lip overhangs the teeth.
Level Up: Color Play
Try this same technique with purple or deep red tones. Darker lipstick colors create higher contrast highlights, making the ‘gloss’ effect even more dramatic.
Step 4: Final Highlights
-
Intensify contrast:
Check your darkest values. If the corners of the mouth look washed out, add a touch of dark brown or purple to really push the contrast against the shiny areas. -
Clean up highlight edges:
If your pencil strayed into the white highlight zones, gently lift it with a kneaded eraser. The edges of a wet highlight should be sharp and distinct. -
Add ultimate shine:
For that hyper-glossy look, take a white gel pen or a fine brush with white gouache. Add tiny, crisp dots or lines inside the brightest highlights on the bottom lip. This ‘specular highlight’ simulates wet reflection. -
Final touches:
Review the outer edge of the lips. The transition to skin should be soft, not a hard outline. Use a skin-tone pencil to gently feather the outer edge of the pink into the surrounding paper.
Now step back and admire how simple lines and careful shading transform into a realistic, glossy finish
BRUSH GUIDE
The Right Brush for Every Stroke
From clean lines to bold texture — master brush choice, stroke control, and essential techniques.
Explore the Full Guide
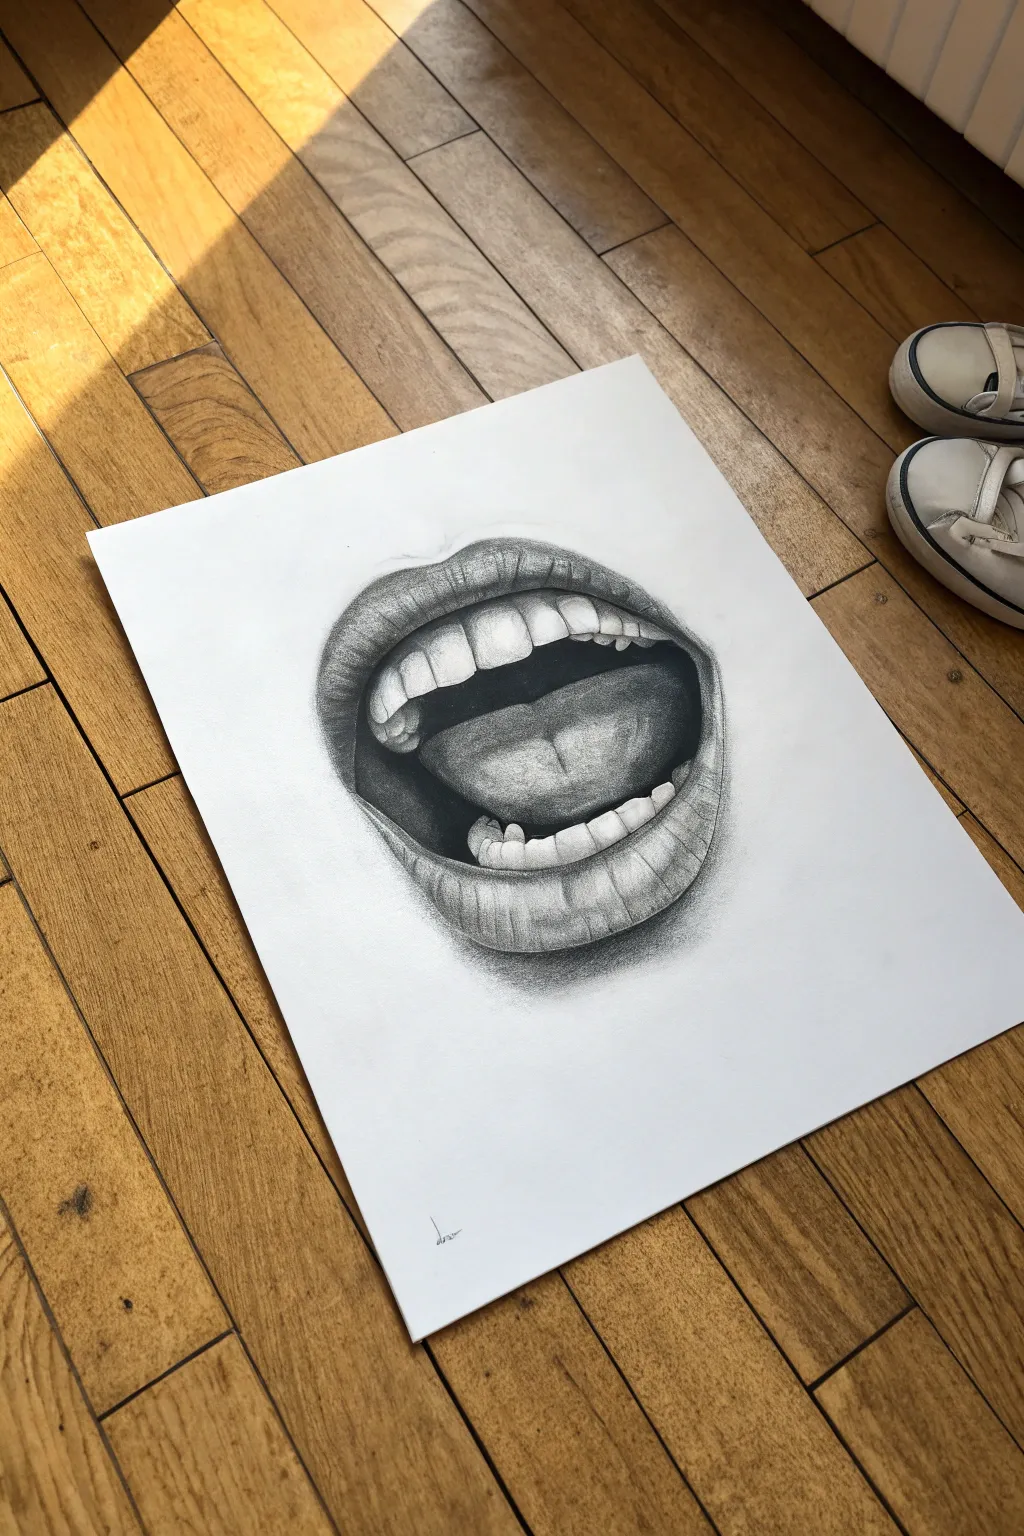
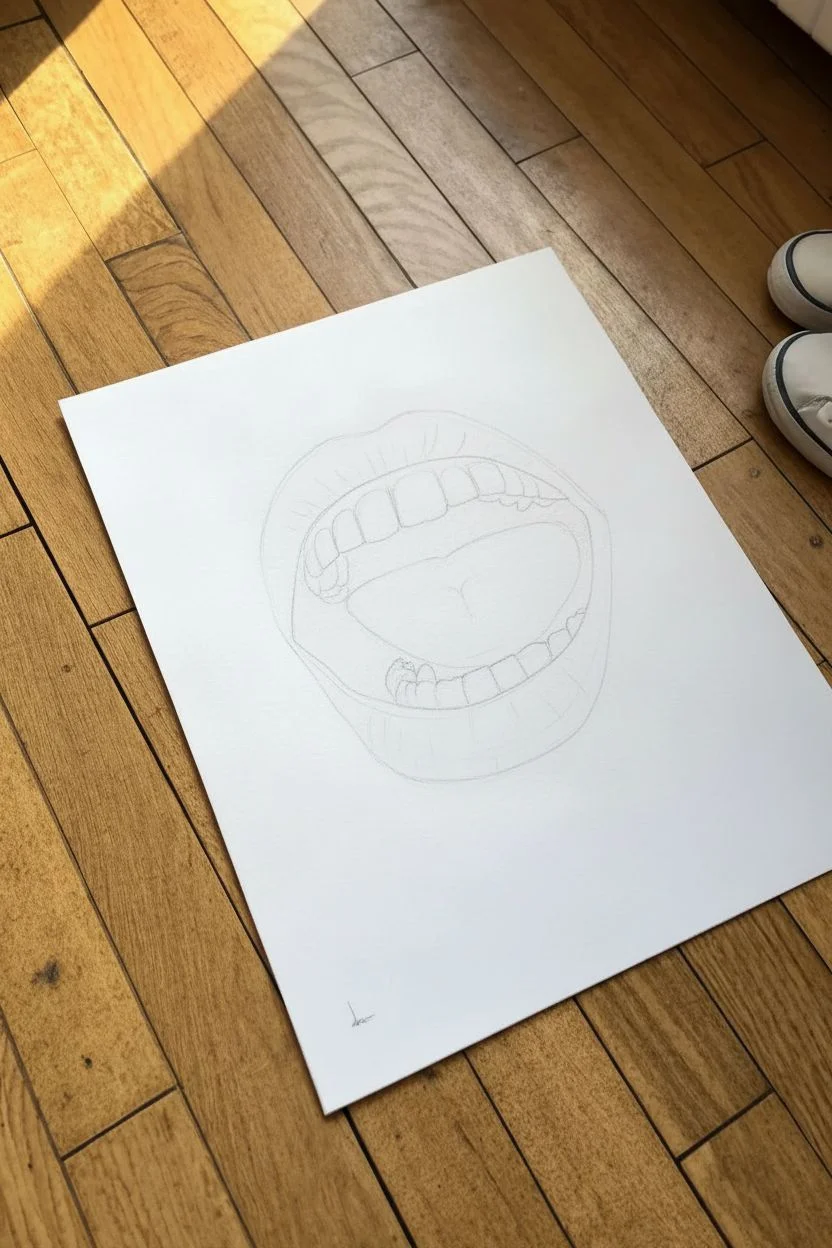
Sketch an Open Mouth With Visible Teeth
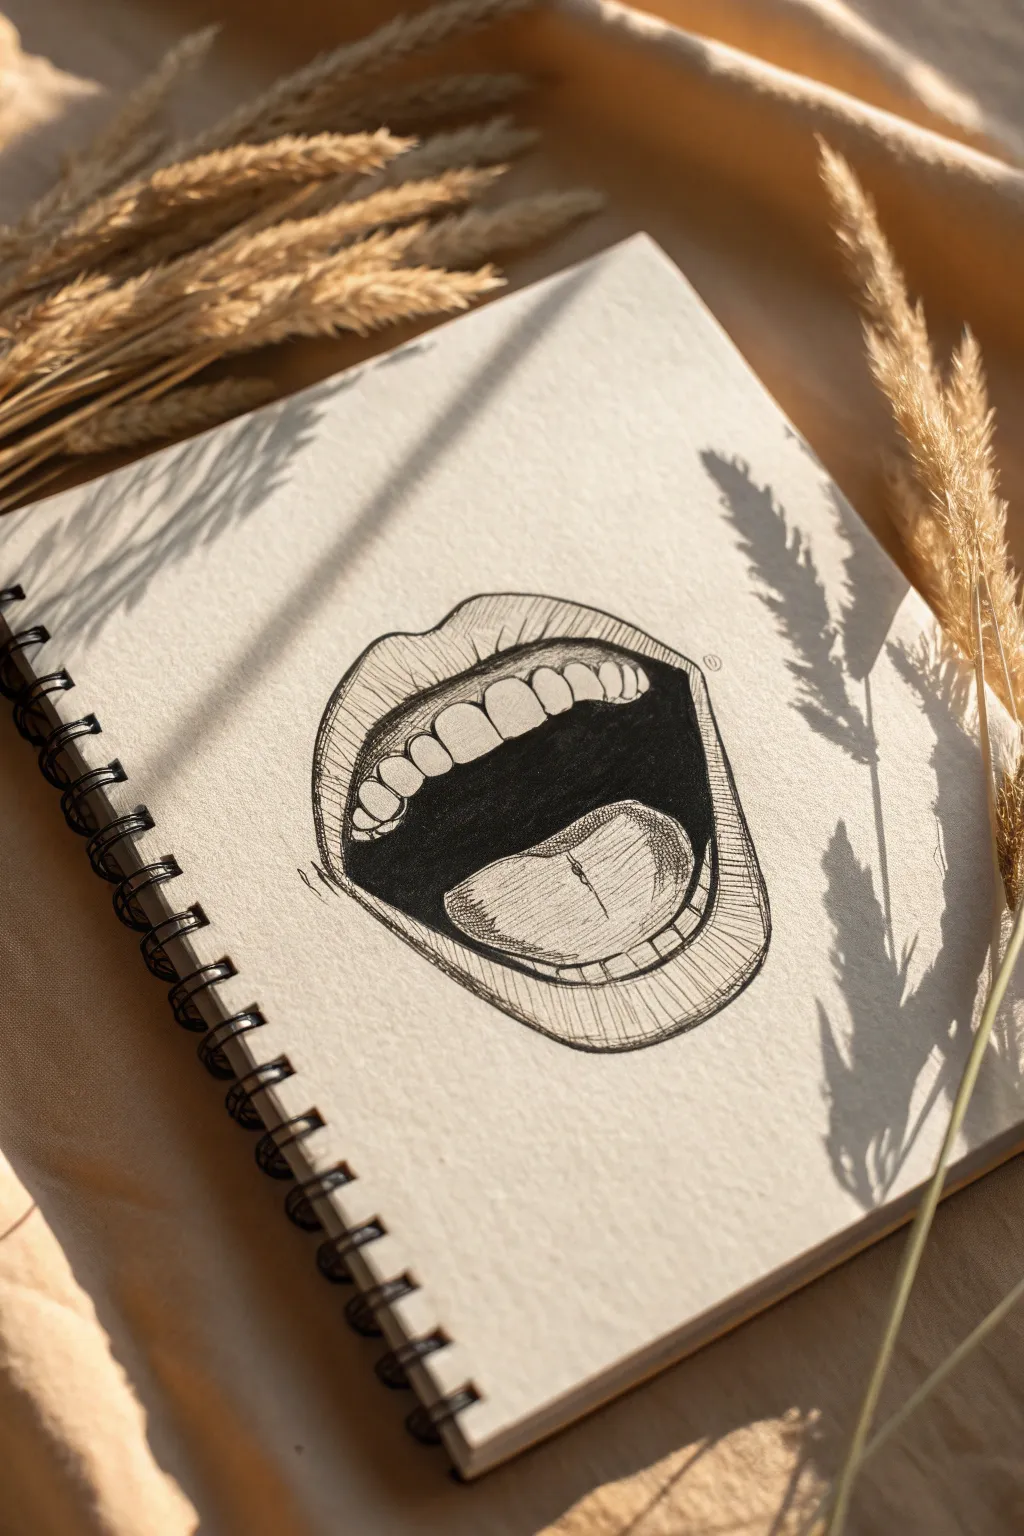
This striking black ink drawing captures the raw emotion of an open mouth, focusing on strong contrasts and linear shading. The bold, dark interior of the mouth makes the teeth and tongue pop, creating a dramatic focal point on the page.
Step-by-Step
Materials
- Spiral-bound sketchbook (heavyweight paper recommended)
- Black fine liner pen (0.3mm or 0.5mm)
- Black brush pen or thick marker for filling
- Pencil (HB or 2B for sketching)
- Eraser
Step 1: Penciling the Outline
-
Establish the outer shape:
Start lightly with your pencil. Sketch a wide, rounded heart-like shape for the upper lip’s outer edge. Then, draw a deep U-shape for the bottom lip, connecting it to the top corners to form a wide open mouth. -
Define the inner opening:
Inside your lip outline, draw a smaller, parallel shape to define the thickness of the lips. The space in the very center will be the mouth cavity. -
Sketch the upper teeth:
Draw the row of upper teeth hanging down from the top lip line. The two front teeth should be the largest, with the teeth getting smaller and curving upward as they move toward the corners of the mouth. -
Add the tongue:
Visualize a large, smooth mound rising from the bottom of the mouth. Sketch the top surface of the tongue, leaving a distinct gap between it and the upper teeth. -
Place lower teeth:
Depending on the angle, only the tops of the lower teeth might be visible. Sketch a faint row just peering out from behind the bottom lip, curving around the tongue.
Lip Volume Hack
When hatching the lips, curve your lines like parentheses ( ) around the center fullness. This simple directional trick makes the lips look much plumper.
Step 2: Inking the Lines
-
Inking the main contours:
Switch to your fine liner pen. Trace over your pencil lines for the lips, teeth, and tongue with a confident, steady hand. -
Detailing the lips:
To give the lips texture, add vertical contour lines. These lines should curve with the volume of the lip—curving outward in the center and flattening toward the sides. -
Adding creases:
Draw small, subtle creases at the corners of the mouth to suggest the skin stretching. -
Refining the tongue:
Add a central line or groove down the middle of the tongue sketch. Use stippling (small dots) or very light hatching on the tongue’s surface to suggest a rougher texture compared to the smooth teeth.
Step 3: Creating Contrast
-
Fill the dark void:
Using a brush pen or thick marker, fill in the empty space inside the mouth completely black. Be very careful around the edges of the teeth and tongue to keep their shapes crisp. -
Shading the upper lip:
Return to your fine liner. Add vertical hatching lines to the upper lip. Keep the lines closer together at the edges and bottom for shadow, and further apart near the top edge for a highlight effect. -
Shading the lower lip:
Apply similar hatching to the bottom lip. I find that curving these lines slightly helps emphasize the roundness and fullness of the lip. -
Adding depth to the tongue:
Use light cross-hatching on the sides of the tongue to make it look three-dimensional, leaving the top center mostly white to show where the light hits. -
Defining the teeth:
Ideally, leave the teeth mostly white. You can add very tiny, faint lines near the gum line to show separation, but avoid outlining each tooth heavily or they may look gap-toothed.
Add Pop Art Flair
Instead of black ink for the mouth cavity, try using a deep red marker or paint. It creates a vibrant, retro pop-art look against the monochrome sketch.
Step 4: Final Touches
-
Clean up sketch lines:
Wait until the ink is completely dry to avoid smudging. Then, gently erase any visible pencil marks from your initial sketch. -
Enhance shadows:
Look at your drawing as a whole. If the lips feel too flat, add a second layer of hatching in the darkest areas, usually the corners and the inner edges touching the teeth. -
Final border check:
Ensure the outer contour of the lips is solid. You might want to thicken this outer line slightly to separate the mouth clearly from the paper background.
Once the ink sets, you have bold, expressive artwork that jumps right off the page
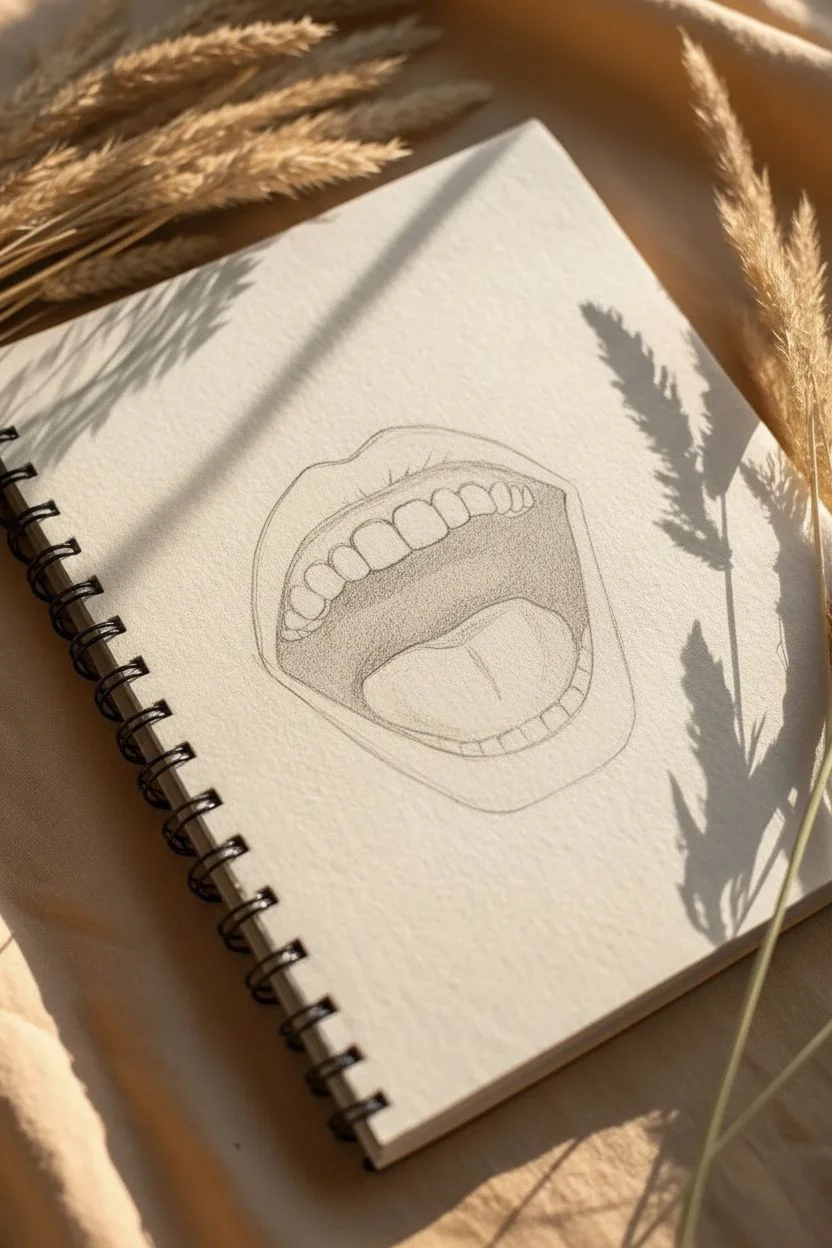
Add a Tongue and Throat Shadow for Depth
This tutorial guides you through creating a hyper-realistic graphite drawing of an open mouth, focusing on the interplay of light and deep shadow. You will capture the texture of the lips, the sheen of the teeth, and the crucial depth within the mouth cavity.
Step-by-Step Tutorial
Materials
- High-quality drawing paper (smooth bristol or hot-pressed watercolor paper)
- Graphite pencils (ranging from 2H or HB for outlining to 4B, 6B, and 8B for deep shadows)
- Kneaded eraser
- Precision eraser (pencil eraser or Mono Zero)
- Blending stumps (tortillons)
- Soft tissue or cotton swab for smoothing
Step 1: Initial Sketch and Outline
-
Establish the outer shape:
Begin with a light HB or 2H pencil to outline the overall oval shape of the open mouth. Mark the corners of the lips and the center line to ensure symmetry. -
Define the lip contours:
Refine the outer shape into the distinct bow of the upper lip and the curve of the lower lip. Keep these lines faint so they don’t show through later. -
Map out the teeth:
Sketch the row of upper teeth following the curve of the upper lip. Pay attention to the size differences; the two front teeth are central and largest, tapering off to the sides. Sketch the visible bottom teeth just peering over the lower lip. -
Place the tongue:
Draw the contour of the tongue resting in the bottom of the mouth. Indicate the central groove down the middle of the tongue to give it volume.
Step 2: Developing the Darkest Values
-
Fill the oral cavity:
Switch to a softer graphite pencil, like a 6B or 8B. Begin filling in the empty space between the teeth and the tongue. This needs to be pitch black to create the illusion of depth. -
Refine the edges:
Carefully work the dark graphite right up to the edges of the teeth and the tongue. A sharp pencil point is crucial here to keep the tooth edges crisp and distinct against the black background. -
Deepen the corners:
Darken the inner corners of the mouth where the upper and lower lips meet. This helps the lips look like they are wrapping around the form of the face.
Clean Edges
Place a piece of scrap paper under your drawing hand. This prevents your palm from smudging the drawing or transferring oils to the paper as you work.
Step 3: Rendering the Tongue and Teeth
-
Shade the tongue base:
Using a 2B or 4B pencil, shade the tongue. The back part of the tongue receding into the throat should be darker, fading into the black background. -
Texture the tongue:
Add texture to the front of the tongue using small, irregular circular motions or stippling. Leave a subtle highlight area on the front curve to make it look wet. -
Shade the gums and teeth:
Lightly shade the visible gums above the teeth. For the teeth themselves, use a harder pencil (H or HB). Shade very lightly near the gum line and between the teeth, leaving the main surface of the teeth paper-white for brightness. -
Create a cast shadow:
Add a soft shadow cast by the upper teeth onto the surface of the tongue. This anchors the elements together spatially.
Wet Look
To make the lips look glossy, use a white gel pen or opaque white gouache to add tiny, sharp dots of pure white highlighting on the fullest parts of the lip.
Step 4: Realistic Lip Texture
-
Base tone for lips:
Apply a mid-tone layer of graphite (HB or B) over both lips. Use a blending stump or tissue to smooth this base layer out completely. -
Draw vertical fissures:
Using a sharp 2B or 4B pencil, draw the vertical wrinkles and cracks common on lips. Follow the curve of the lip—curving outward from the center—to show volume. -
Deepen lip shadows:
Darken the bottom edge of the upper lip and the area just under the lower lip. This makes the lips appear to protrude from the paper. -
Lift highlights:
Take your fine precision eraser or form a point with your kneaded eraser. I find that lifting graphite out in thin strips between the dark wrinkles creates the most convincing fleshy texture. -
Enhance contrast:
Go back in with your darkest pencil (6B) and reinforce the deepest cracks in the lips and the shadow underneath the lower lip to make the highlights pop. -
Final blending and cleanup:
Use a clean blending stump (tortillon) to soften any harsh pencil strokes on the skin surrounding the mouth, fading the drawing gently into the white of the paper. Clean up stray smudges with your kneaded eraser.
Step back and admire the dramatic depth created by your high-contrast shadows


Try a Side Profile Mouth With Overlapping Planes

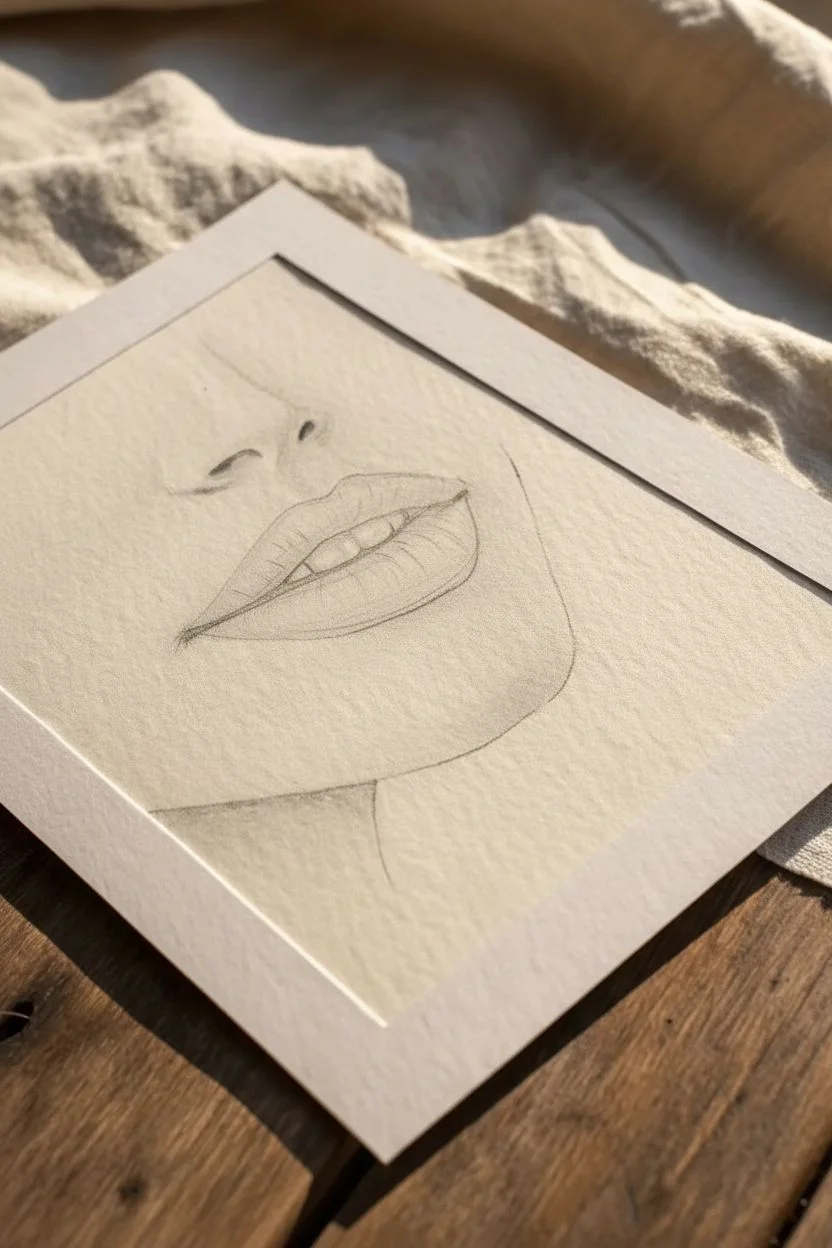
Master the subtle geometry of the human face with this delicate graphite study focusing on lips in a three-quarter view. By focusing on overlapping planes and texture, you’ll capture a sense of realism that feels both soft and structured.
How-To Guide
Materials
- High-quality textured drawing paper (beige or cream tone)
- Graphite pencils (HB, 2B, 4B)
- Precision eraser or kneaded eraser
- Blending stump (tortillon)
- White matte board/frame for presentation
- Pencil sharpener
Step 1: Establishing the Contours
-
Lightly Map the Face Angle:
Begin with an HB pencil, using very light pressure. Draw a faint diagonal axis line to determine the tilt of the head. This isn’t a straight-on view, so imagine the centerline of the face curving slightly to the left. -
Sketch the Nose Base:
Position the nose relative to your axis line. Outline the curve of the nostril wing and the columella (the fleshy bit between nostrils), keeping shapes loose and angular rather than perfectly round. -
Define the Philtrum:
Draw the philtrum—the groove between nose and lip. Because of the angle, the side closest to the viewer should appear slightly wider, while the far side is foreshortened. -
Outline the Upper Lip:
Sketch the ‘Cupid’s bow’ of the upper lip. Notice how the peak on the left is higher and more prominent, while the right peak recedes slightly into perspective. -
Draw the Aperture Line:
Mark the parting between the lips. This line shouldn’t be straight; give it a gentle wave that follows the volume of the upper lip resting on the lower one. -
Outline the Lower Lip:
Create the curve of the bottom lip, making it fuller than the top. Ensure the bottom edge tapers naturally toward the corners of the mouth. -
Suggest the Jawline:
Lightly trace the curve of the jaw and chin area to provide context for the mouth. Keep this line extremely faint as it serves only as a boundary.
Fixing Flat Lips
If lips look flat, curve your shading strokes. Visualize the lips as rounded cylinders; straight vertical lines flatten the form, while curved lines create volume.
Step 2: Adding Volume and Texture
-
Shade the Nostrils:
Switch to a 2B pencil. Darken the interior of the nostril to create depth, but avoid making it a solid black hole—leave a tiny hint of reflected light near the bottom if possible. -
Contour the Upper Lip:
Using the 2B pencil, begin shading the upper lip. Use vertical strokes that curve with the form of the lip. The upper lip is usually in shadow because it angles inward. -
Detail the Lip Texture:
Enhance the vertical cracks and fissures on both lips. I like to sharpen my pencil to a fine point here to draw varied lines—some short, some long—that follow the curvature of the lip skin. -
Darken the Aperture:
Use a 4B pencil to deepen the line where the lips meet. This should be the darkest part of the drawing, anchoring the forms together. -
Render the Lower Lip:
Shade the lower lip more lightly than the upper one to suggest it catching light. Focus the shadow underneath the center of the lip and towards the corners to make it look plump. -
Refine the Teeth Hint:
If your sketch shows a slight opening, lightly shade the teeth. Do not outline individual teeth; instead, use a soft grey tone to suggest they are receding into the shadow of the mouth.
Emphasize Texture
Use a harder pencil (H or HB) to etch tiny, sharp creases into the dark shading of the lips. This contrast between soft shading and sharp lines mimics real skin texture.
Step 3: Final Polish
-
Shadow the Chin:
Add a soft shadow beneath the lower lip (the mental crease) to push the chin forward visually. Use the side of your pencil or an HB for a smoother transition. -
Blend for Softness:
Take your tortillon or blending stump and very gently smudge the shading on the skin around the mouth. Keep the actual lip texture crisp, but soften the shadows on the philtrum and chin. -
Lift Highlights:
Use a kneaded eraser to tap or stroke the fullest part of the lower lip and the tip of the nose. This removes pigment to create bright highlights that simulate moist skin. -
Review and Frame:
Clean up any stray graphite dust from the background. Place your finished textured paper behind a clean white matte board to frame the composition professionally.
Now you have a sensitive and realistic study of form ready to be displayed on your desk or wall
Rotate to a 3/4 View Mouth Wrapped Around the Dental Arc
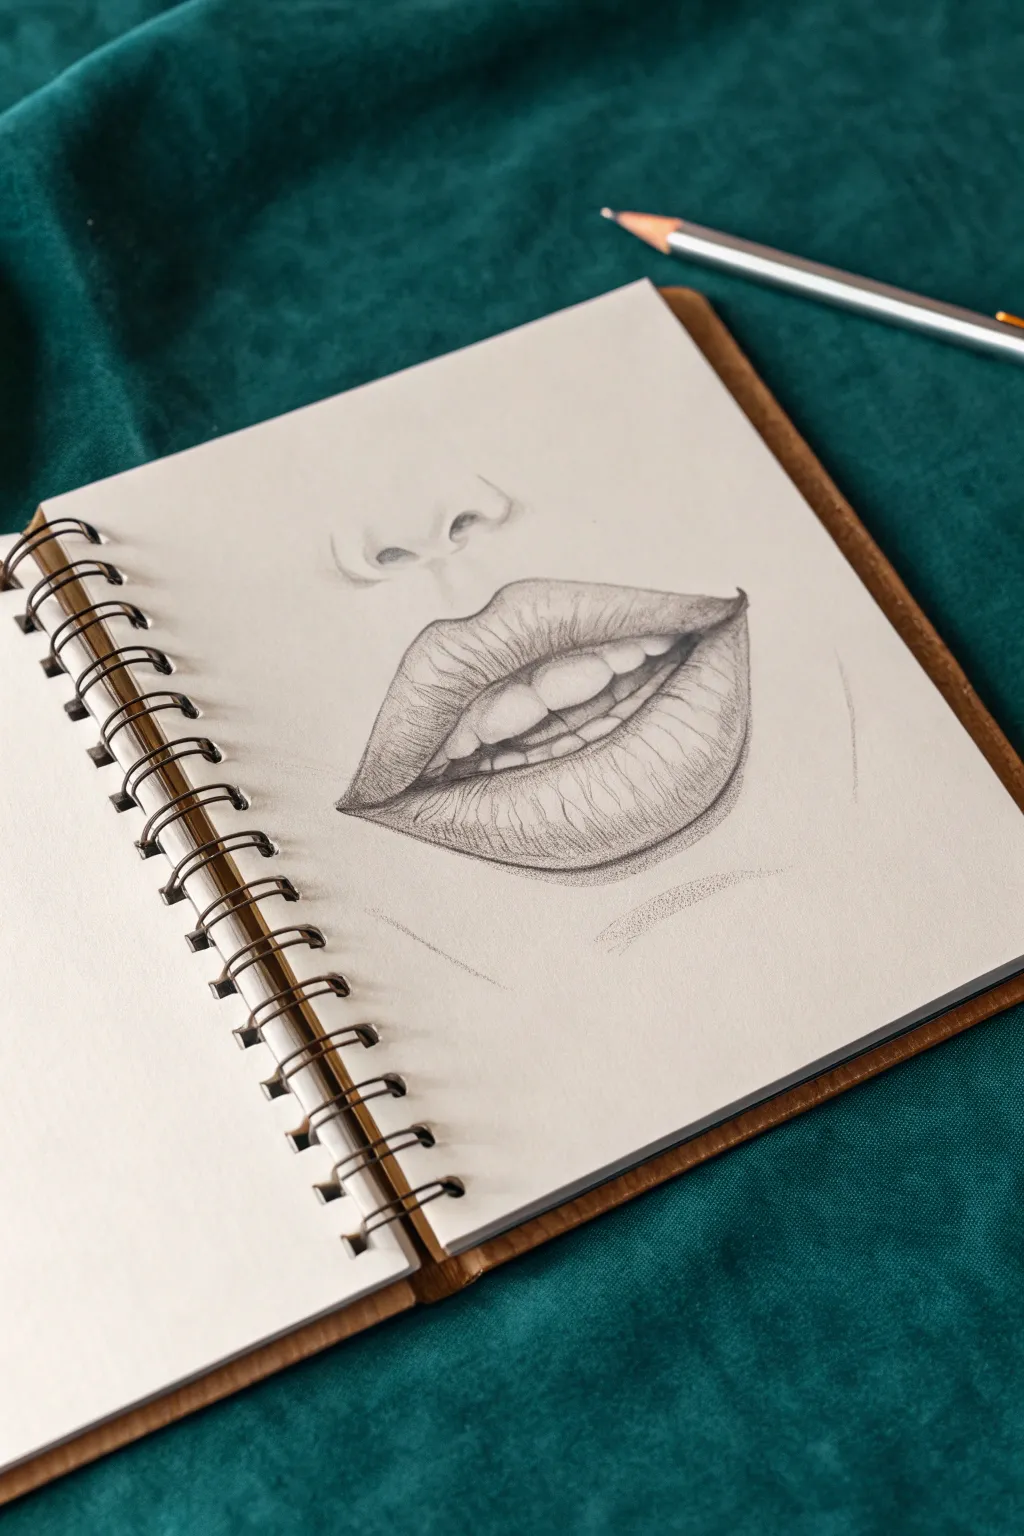
This study captures the subtle curve of lips in a three-quarter perspective, emphasizing how the mouth wraps around the dental arc. It’s a fantastic exercise in shading and texture, focusing on the vertical creases of the lips and the depth of the inner mouth.
Detailed Instructions
Materials
- Sketchbook with smooth or medium-tooth paper
- HB pencil (for initial outlines)
- 2B or 4B pencil (for deeper shading)
- Fine-point mechanical pencil (optional, for details)
- Kneaded eraser
- Blending stump or cotton swap
Step 1: Structural Foundation
-
Establish the curve:
Begin by lightly drawing a curved horizontal line to represent the center separation of the lips. Since this is a 3/4 view, make the line shorter on the left side and longer on the right side of the center point to imply perspective. -
Mark width and height:
Sketch light tick marks to indicate the top peak of the cupid’s bow and the bottom edge of the lower lip. Remember that in this angle, the far side of the mouth will appear slightly compressed. -
Draft the nose placement:
Draw the nostrils continuously above the lips. Use soft, looping “C” shapes for the nostrils themselves, ensuring the nose aligns centrally above the cupid’s bow, though shifted slightly left due to the rotation. -
Outline the lip shapes:
Connect your guide marks to form the outer contour of the lips. The upper lip should have a defined dip at the center, while the lower lip is full and rounded. Keep these lines very faint so they can be refined or erased later. -
Open the mouth:
Draw the bottom edge of the top lip and the top edge of the bottom lip, leaving a gap where we explicitly see the teeth. The corners of the mouth should taper into sharp, dark crevices.
Uneven Teeth?
Avoid outlining each tooth individually, which looks unnatural. Instead, shade the negative space *around* the teeth and the gum line to let the teeth emerge.
Step 2: Defining the Features
-
Sketch the teeth:
Lightly indicate the front teeth within the gap. Don’t draw individual heavy lines between every tooth; instead, suggest their shapes by drawing the bottom curve of the top teeth and just a hint of the gum line. -
Refine the cupid’s bow:
Go back over the top lip line, making the cupid’s bow sharp and distinctive. Ensure the slope on the right side (the side facing us) is longer and more gradual than the steeper, shorter left side. -
Darken the corners:
Using a softer pencil (like a 2B), darken the very corners of the mouth where the lips meet. This anchors the drawing and creates immediate depth. -
Establish the philtrum:
Sketch two very faint vertical lines connecting the nostrils to the peaks of the cupid’s bow to indicate the philtrum groove.
Step 3: Shading and Texture
-
Base shading on the upper lip:
Apply a light, even layer of graphite to the upper lip. The upper lip generally angles inward, casting it slightly in shadow compared to the lower lip. -
Shadow the dental arc:
Darken the empty space inside the mouth, specifically around the corners and behind the teeth. This negative space needs to be quite dark to make the white of the teeth pop forward. -
Contour the lower lip:
Shade the bottom edge of the lower lip to show its roundness. Leave the center-top part of the lower lip lighter to represent a highlight where the light hits the curved surface. -
Add lip creases:
Draw curved vertical lines texture across both lips. Use a flicking motion with a sharp pencil. These lines should wrap around the form—curving outward on the sides—to emphasize volume. -
Deepen the contact shadows:
Press harder with your pencil directly under the upper lip where it casts a shadow onto the teeth. This separation is crucial for realism. -
Refine the nose shading:
Add soft shading inside the nostrils and underneath the nose tip. Leave the edges soft/blurred rather than outlining the nose with a hard line. -
Highlight and Blend:
Use a kneaded eraser to lift pigment from the center of the bottom lip and the peaks of the cupid’s bow for bright highlights. -
Final touches:
Reinforce the darkest darks inside the mouth corners and verify the curvature of the lip texture lines. Add a very faint shadow under the bottom lip to seat it on the face.
Add Wetness
Use a white gel pen or very sharp eraser to add tiny, hard white dots on the lower lip texture. This mimics moisture reflecting light.
You now have a realistic mouth study that captures both volume and perspective
Tackle Extreme Angles: Looking Up and Looking Down
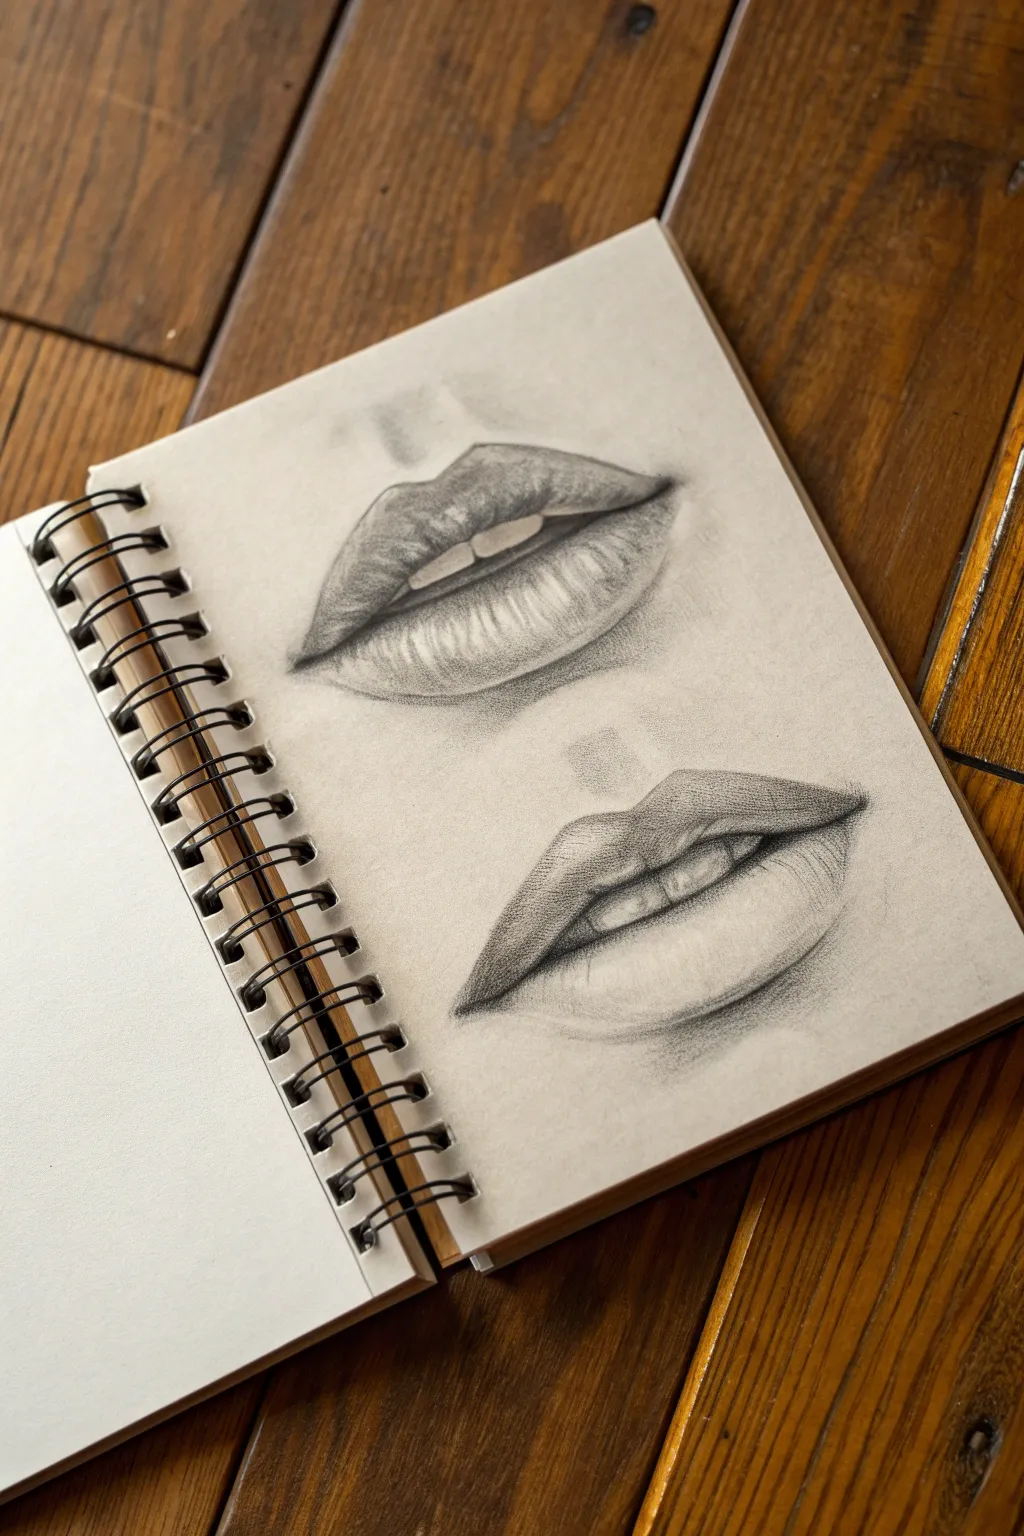
Master the subtlety of perspective with these two distinct lip studies rendered on warm-toned paper. This exercise focuses on capturing volume and texture while navigating the tricky foreshortening of upward and side-glancing angles.
Step-by-Step
Materials
- Sketchbook with cream or tan toned paper
- Set of graphite pencils (HB, 2B, 4B, 6B)
- White charcoal pencil or white pastel pencil
- Kneaded eraser
- Blending stump (tortillon) or soft tissue
- Fine-point mechanical pencil (optional for details)
Step 1: Drafting the Upper Mouth (Slight Upward Tilt)
-
Establish the centerline:
Begin by lightly sketching a vertical centerline for the top set of lips. Since this angle is looking slightly up, curve the line of the mouth opening upward like a very gentle bow. -
Outline the lip shapes:
Sketch the outline of the upper lip, noting the prominent ‘cupid’s bow’ peak. For the bottom lip, draw a fuller curve that tapers narrowly at the corners. The corners should align vertically with the widest part of the cupid’s bow. -
Define the teeth:
Because the mouth is slightly open, sketch two small rectangular shapes for the front teeth peeking through. Keep the lines very faint; hard lines here will make the teeth look unnatural. -
Base shading:
Using an HB pencil, lay down a soft, even layer of graphite over both lips, avoiding the teeth. Use your blending stump to smooth this into the paper’s grain.
Fixing Flatness
If lips look flat, your shading lines might be too straight. Curve your pencil strokes to follow the roundness of the lip ‘cylinders’ to recreate volume.
Step 2: Texturing the First Mouth
-
Darken the core line:
Switch to a 4B pencil and deepen the shadow inside the mouth (the darkest area), specifically the corners and the gap above the lower lip. This establishes your deepest value. -
Contour hatching:
With a 2B pencil, draw curved hatching lines on the lower lip. These lines should wrap around the form like longitude lines on a globe to show the roundness. -
Sculpt the upper lip:
Shade the upper lip, keeping it generally darker than the top edge of the lower lip. The light source is coming from above, casting a shadow on the upper lip itself. -
Add highlights:
Take your white charcoal pencil and apply bright highlights to the center swell of the lower lip and the rim of the cupid’s bow. This contrast pops against the toned paper.
Step 3: Drafting the Lower Mouth (Side/Down Tilt)
-
Map the angle:
Move lower on the page. Draw a centerline that tilts diagonally. This set of lips is seen from a three-quarter angle, so the far side will be shorter and more compressed than the near side. -
Sketch the opening:
Draw the parting line between the lips. Notice how the corner nearest to you dips down, while the center rises, creating a soft ‘S’ curve. -
Form the volume:
Outline the outer edges. The lower lip should look heavy and full on the near side, tapering quickly as it recedes into the distance.
Beyond The Lines
Try adding a subtle philtrum (the groove above the lip) shading or a beauty mark to give the sketch more character and anatomical context.
Step 4: Refining and Shading the Second Mouth
-
Establish deep shadows:
Using a 6B pencil, darken the very corner of the mouth and the line separating the lips. This drawing has higher contrast, so don’t be afraid to go dark. -
Create directional texture:
On the lower lip, use sharp, rhythmic pencil strokes that curve downward. These lines simulate the natural cracks and texture of the skin. -
Shade the upper lip plane:
Shade the entire upper lip with a 2B, getting darker closer to the opening. Leave the very top edge slightly lighter to suggest a rim. -
Blend selectively:
Use the blending stump to check the harshness of your pencil strokes, but don’t smooth everything out completely—leave some texture visible. -
Highlight the form:
Apply white charcoal firmly to the fullest part of the lower lip. I find adding a tiny touch of white to the top edge of the upper lip really helps define the form against the paper. -
Final shadow cast:
Add a soft, diffused shadow underneath the center of the lower lip using the 2B pencil. This grounds the mouth and emphasizes the protrusion of the lip.
Step back and admire how the white highlights bring the three-dimensional form to life on the toned surface
Capture Emotion: Smirk, Pout, Grimace, and Shout
Master the subtleties of human emotion with this structured study of six distinct mouth expressions. This sketchbook exercise focuses on realistic shading, dental structures, and the natural curves of the lips to create a dynamic reference page.
Detailed Instructions
Materials
- Sketchbook with smooth or lightly textured paper
- Graphite pencil set (HB, 2B, 4B, 6B)
- Mechanical pencil (0.5mm HB for fine details)
- Kneaded eraser
- Fine-point eraser or eraser stick
- Paper blending stump or tortillon
- Ruler
Step 1: Preparation and Layout
-
Grid the page:
Begin by lightly drawing six equal squares on your sketchbook page using a ruler and an HB pencil. Arrange them in two columns of three rows. Keep your lines faint so they frame the drawings without distracting from them. -
Establish center lines:
Inside each square, sketch a very faint vertical center line and a horizontal line where the mouth opening will sit. These guidelines will help you keep the lips symmetrical and properly positioned within each frame.
Don’t Outline Every Tooth
Avoid drawing heavy dark lines between every single tooth. Instead, suggest the separation by shading the gum triangles above and adding tiny shadows at the biting edge.
Step 2: Drafting the Basic Shapes
-
Outline the top row:
For the top left square, sketch a slightly parted mouth with a soft Cupid’s bow. In the top right square, draw a similar shape but slightly wider to show a bit more teeth, indicating a gentle smile. -
Outline the middle row:
In the middle left square, draft a mouth that is slightly wider and flatter, showing a full row of upper teeth. For the middle right square, sketch a grimace or strained expression where the lips pull back tighter against the teeth. -
Outline the bottom row:
In the bottom left, draw closed lips that curve slightly downwards or puckered. Finally, for the bottom right square, sketch a wide-open mouth from a side angle to capture a shout or yawn, outlining the tongue and depth of the throat. -
Define the teeth:
Go back through your sketches and lightly mark the individual teeth separations. Don’t draw hard lines between teeth; just indicate the gums and the biting edges.
Step 3: Shading and Rendering Texture
-
Base layer shading:
Using a 2B pencil, apply a light, even layer of graphite to the lips. Avoid the highlight areas—usually the center of the bottom lip—to keep them bright white. -
Contour lines:
Start adding vertical texture lines to the lips using a sharp HB pencil. These lines should curve with the volume of the lip (curving outward like parentheses) rather than straight up and down. -
Deepen the shadows:
Switch to a 4B pencil to darken the corners of the mouth and the line where the lips meet. For the open mouth sketches, darken the inside of the mouth cavity significantly to create depth. -
Rendering teeth:
Shade the teeth very subtly. I find it effective to shade the gums and the very top of the teeth near the gumline, leaving the main body of the tooth white. Add a tiny drop shadow from the top lip onto the teeth. -
Refining lip texture:
Enhance the realism by deepening the cracks and vertical wrinkles on the lips with a mechanical pencil. Focus on the bottom right and middle right drawings where the skin is stretched. -
Blending:
Use a paper stump to gently soften your shading, especially on the skin around the mouth. Be careful not to smudge the crisp edges of the teeth. -
Adding highlights:
Take your fine-point eraser or the edge of a kneaded eraser and lift out bright highlights on the fullest part of the lower lip and moist areas of the gums. -
Skin shading:
Add light shading around the outside of the lips to show the structure of the philtrum (the groove above the lip) and the chin. This grounds the mouth so it doesn’t look like a sticker floating on paper. -
Final contrast:
Use a 6B pencil to punch up the darkest blacks in the corners of the mouth and the depths of the open shout. This high contrast makes the teeth look brighter by comparison. -
Clean up:
Erase any smudges outside the square frames and re-trace the square borders with a ruler and pen or dark pencil for a polished presentation.
Add Wetness for Realism
Use a white gel pen or very sharp eraser to add tiny, sharp dots of reflection on the corners of the mouth and gums. This ‘wet look’ instantly makes the drawing feel alive.
Now you have a comprehensive reference page capturing the nuanced movement of the mouth
Draw a Lip Bite for Tension and Story
Capture the subtle tension of a lip bite with this detailed pencil study, focusing on realistic textures and shading. The drawing features parted lips revealing teeth, rendered with careful attention to the vertical cracks and highlights that give lips their characteristic volume.
Step-by-Step
Materials
- High-quality drawing paper (smooth or medium tooth)
- Graphite pencils (HB, 2B, 4B)
- Mechanical pencil (0.5mm, HB or 2B) for fine details
- Kneaded eraser
- Blending stump or tortillon
- Sharpener
Step 1: Planning the Structure
-
Establish the width and center:
Begin by lightly marking the total width of the mouth with a horizontal line. Draw a vertical centerline to help you keep the lips symmetrical, though remember that a natural expression won’t be perfectly mirrored. -
Map the upper lip arch:
Sketch the ‘Cupid’s bow’ of the upper lip. For this open-mouth pose, the arch should be slightly flattened as the skin stretches. Keep your lines incredibly faint using an HB pencil so they can be erased or covered later. -
Define the mouth opening:
Draw the bottom edge of the top lip and the top edge of the bottom lip. Instead of a single straight line, create a gentle, wavy gap that is wider in the center and tapers to sharp corners at the sides. -
Outline the teeth:
Lightly indicate the front two teeth (central incisors) and the start of the neighboring teeth. The teeth shouldn’t be fully outlined squares; just hint at their bottom edges and the small triangular gum gaps between them. -
Complete the lower lip shape:
Sketch the bottom curve of the lower lip. This line should be fuller and more rounded than the top lip, creating a sense of weight and volume.
Teeth Looking Flat?
Avoid outlining individual teeth with heavy lines. Instead, use the shadows of the gums and the darkness of the mouth interior to define their shape naturally.
Step 2: Shading and Texture
-
Establish the darkest values:
Switch to a 4B pencil to deepen the corners of the mouth and the area directly behind the teeth. This high contrast is crucial for making the white teeth pop forward visually. -
Base tone for the upper lip:
Using a 2B pencil or the side of your HB lead, apply a gentle, even layer of graphite over the upper lip. Keep the pressure light to avoid damaging the paper tooth. -
Add vertical lip crevices:
Lips have natural vertical cracks and wrinkles. Draw these lines following the contour of the lip—curving outward from the center. They shouldn’t be straight vertical lines; they wrap around the cylindrical form of the lip. -
Refine the upper lip shading:
Darken the upper lip, especially near the bottom edge where it overlaps the teeth. This cast shadow creates depth. I find it helpful to vary the line weight of the wrinkles here—thick in the shadows, thin in the light. -
Shade the teeth:
Teeth are rarely pure white. Use an HB pencil to add very subtle shading near the top (under the lip) and along the sides to curve them back. Leave the center of the teeth the white of the paper. -
Texture the lower lip:
The lower lip usually catches more light. Draw vertical texture lines similar to the top lip but leave a horizontal band of ‘negative space’ (empty paper) across the fullest part of the middle lip to act as a strong highlight. -
Deepen lower lip shadows:
Shade firmly under the lower lip to create a shadow on the imaginary chin area. This pushes the lip forward. Also, darken the outer corners where the top and bottom lips meet. -
Blend for smoothness:
Use a blending stump to gently soften your shading, especially on the skin around the mouth and the transition from shadow to highlight on the lips. Be careful not to smudge the crisp edges of the teeth.
Level Up: Wet Look
To make the lips look glossy, use a white gel pen or white charcoal pencil to add tiny, sharp dots of reflection over your brightest graphite highlights.
Step 3: Highlights and Details
-
Lift out highlights:
Take your kneaded eraser and mold it into a fine point. Dab or stroke through the graphite on the fullest part of the lower lip to regain bright white highlights. This creates that ‘glossy’ or moist look. -
Sharpen the teeth edges:
Use a mechanical pencil to clean up the edges of the teeth. If your shading smudged onto them, erase it cleanly. The contrast between the dark interior of the mouth and the crisp tooth edge is vital. -
Enhance the lip cracks:
Go back in with a sharp 2B or mechanical pencil and reinforce the deepest parts of the vertical lip wrinkles. Make sure these lines taper off as they reach the highlight area. -
Add faint skin texture:
Lightly shade the skin immediately surrounding the lips (the filtrum and chin shadow) to ground the drawing, so the mouth doesn’t look like a sticker floating on blank paper. -
Final contrast check:
Step back and look at the drawing. Strengthen the darkest darks one last time—usually in the mouth corners and directly under the top lip—to ensure the drawing has a full range of value.
Now you have a dynamic, expressive mouth study that captures both volume and emotion.
Simplify Into Stylized Cartoon Mouth Shapes
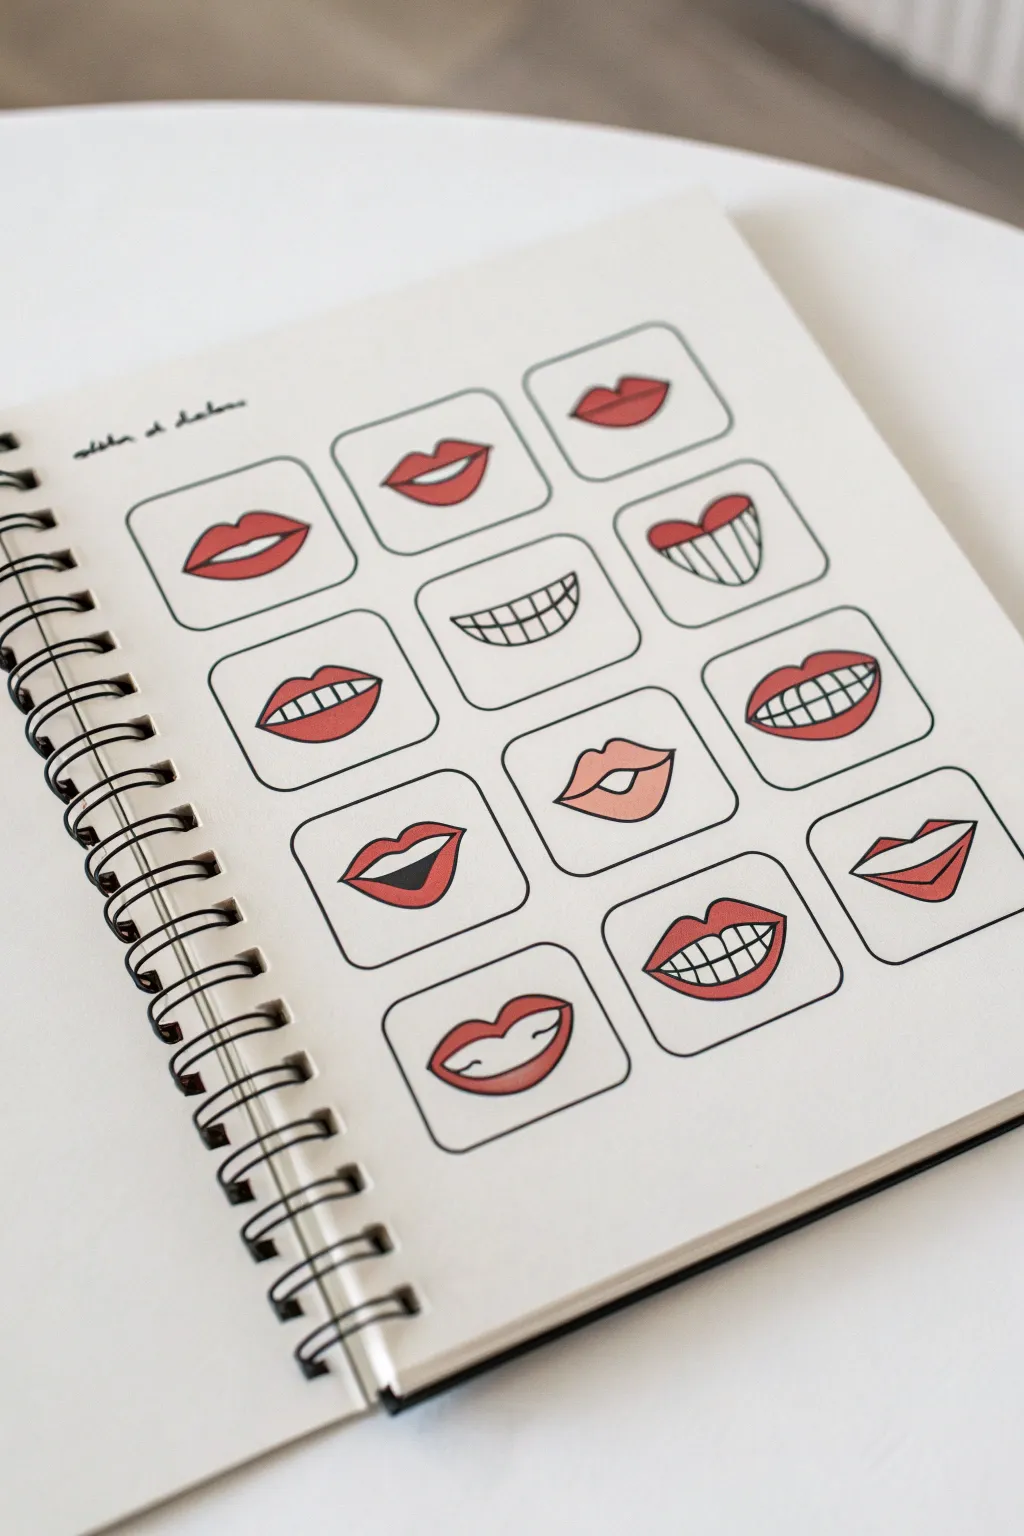
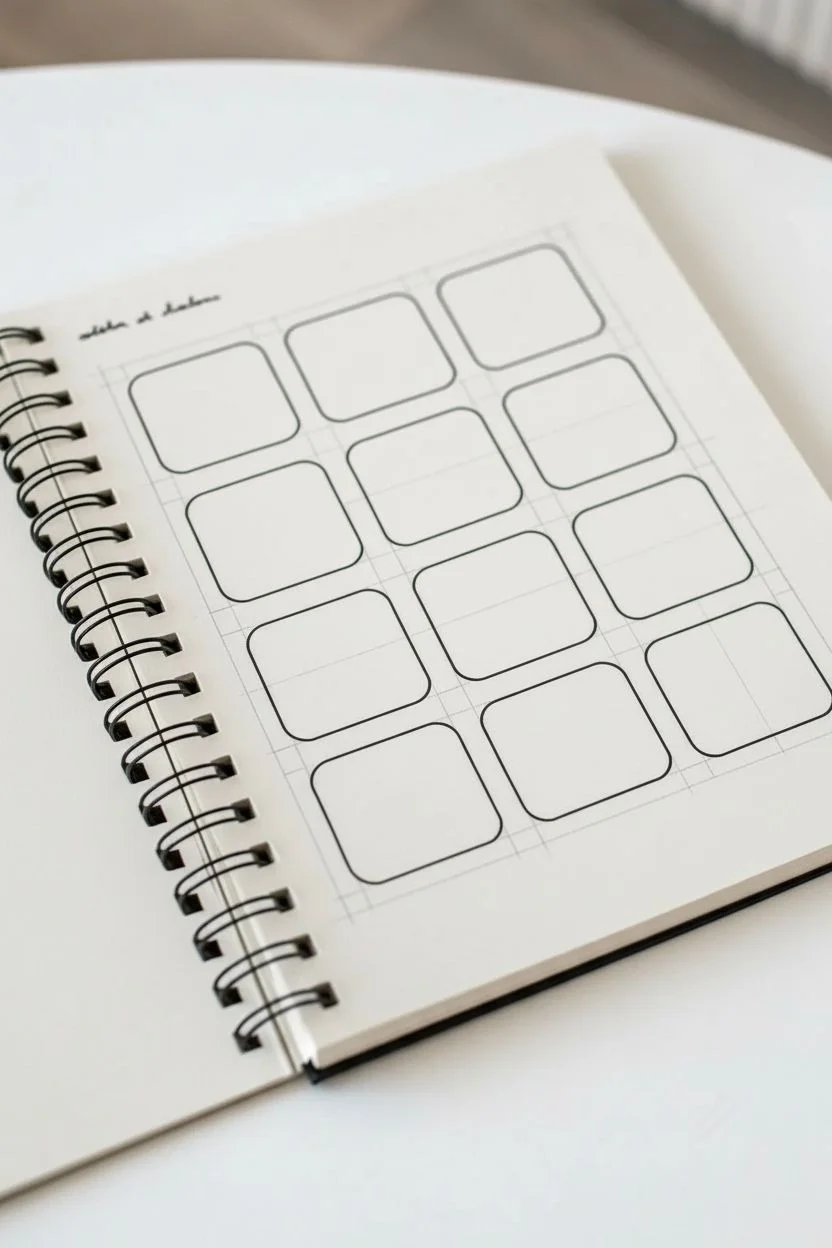
This project is a delightful exercise in character design, featuring a grid of twelve highly stylized cartoon mouths on a spiral notebook page. With simple black outlines and pops of coral red, you’ll create a reference sheet of playful expressions ranging from toothy grins to subtle smirks.
How-To Guide
Materials
- Spiral-bound sketchbook (heavyweight paper preferred)
- Pencil (HB or 2B)
- Eraser
- Fine liner pen (black, 0.4mm or 0.5mm)
- Coral red or salmon pink marker (alcohol or water-based)
- Ruler
- Rounded square stencil (optional)
Step 1: Setting the Grid
-
Measure the layout:
Start by lightly marking out a grid on your page with a pencil and ruler. You need space for three columns and four rows of squares. -
Draft the frames:
Draw twelve squares, spaced evenly apart. I typically leave about a half-inch of breathing room between each box so the page doesn’t feel cluttered. -
Rounding the corners:
Soften the look by manually rounding the corners of each square with your pencil, or use a stencil if you want them perfectly uniform. -
Ink the frames first:
Go over your final rounded square frames with the black fine liner. Drawing these first helps establish the boundaries for your artwork.
Step 2: Sketching the Mouth Shapes
-
Basic lip outlines:
Using your pencil, sketch the general outer shape of the lips inside each box. Vary the shapes: try distinct ‘cupid’s bows’ for some and simple curves for others. -
Adding the openings:
Define the mouth openings. For open mouths, draw the inner void shape; for closed smiles, draw the partition line between the upper and lower lip. -
Teeth and tongues:
Sketch in details like rows of teeth or a tongue curve. Notice how the example uses simple vertical lines to suggest teeth without drawing every single gap. -
Expression check:
Step back and look at the grid as a whole. Ensure you have a good mix of expressions—some showing gum, some biting a lip, and some wide open.
Consistent Curves
Turn the notebook as you draw the curved corners of the boxes. Pulling the pen toward your hand usually results in a smoother arc than pushing it away.
Step 3: Inking and Coloring
-
Inking the outlines:
Carefully trace your pencil sketches with the black fine liner. Keep your hand steady to maintain a clean, graphic look similar to a sticker sheet. -
Defining the details:
Ink the smaller details, like the lines between teeth. Keep these lines slightly thinner or lighter than the main lip outline if possible. -
Erase pencil marks:
Wait until the ink is completely dry to prevent smudging, then gently erase all remaining pencil guidelines from the grid and drawings. -
Coloring the lips:
Take your coral or salmon marker and fill in the lips. Be careful to stay within the lines, as the contrast between the color and the white paper is key. -
Coloring tongues:
If you have a slightly darker shade, use it for the tongues. If not, the same coral color works perfectly fine to keep the palette cohesive. -
Leaving white space:
Ensure you leave the teeth and the background of the boxes pure white. This negative space makes the red pop. -
Filling the voids:
For open mouths where the back of the throat is visible, color that space solid black with your pen to create depth. -
Final clean up:
Check for any stray marks or uneven edges. You can slightly thicken the outer contour of the lips to hide any coloring mistakes.
Sticker Sheet Aesthetic
Add a small white border around the lips inside the colored zone, or add a subtle grey drop shadow under each box to make them look like 3D stickers.
Now you have a charming reference page of expressions to use in your future character drawings
Go Surreal: a Mouth as a Portal With Tiny Scenes Inside
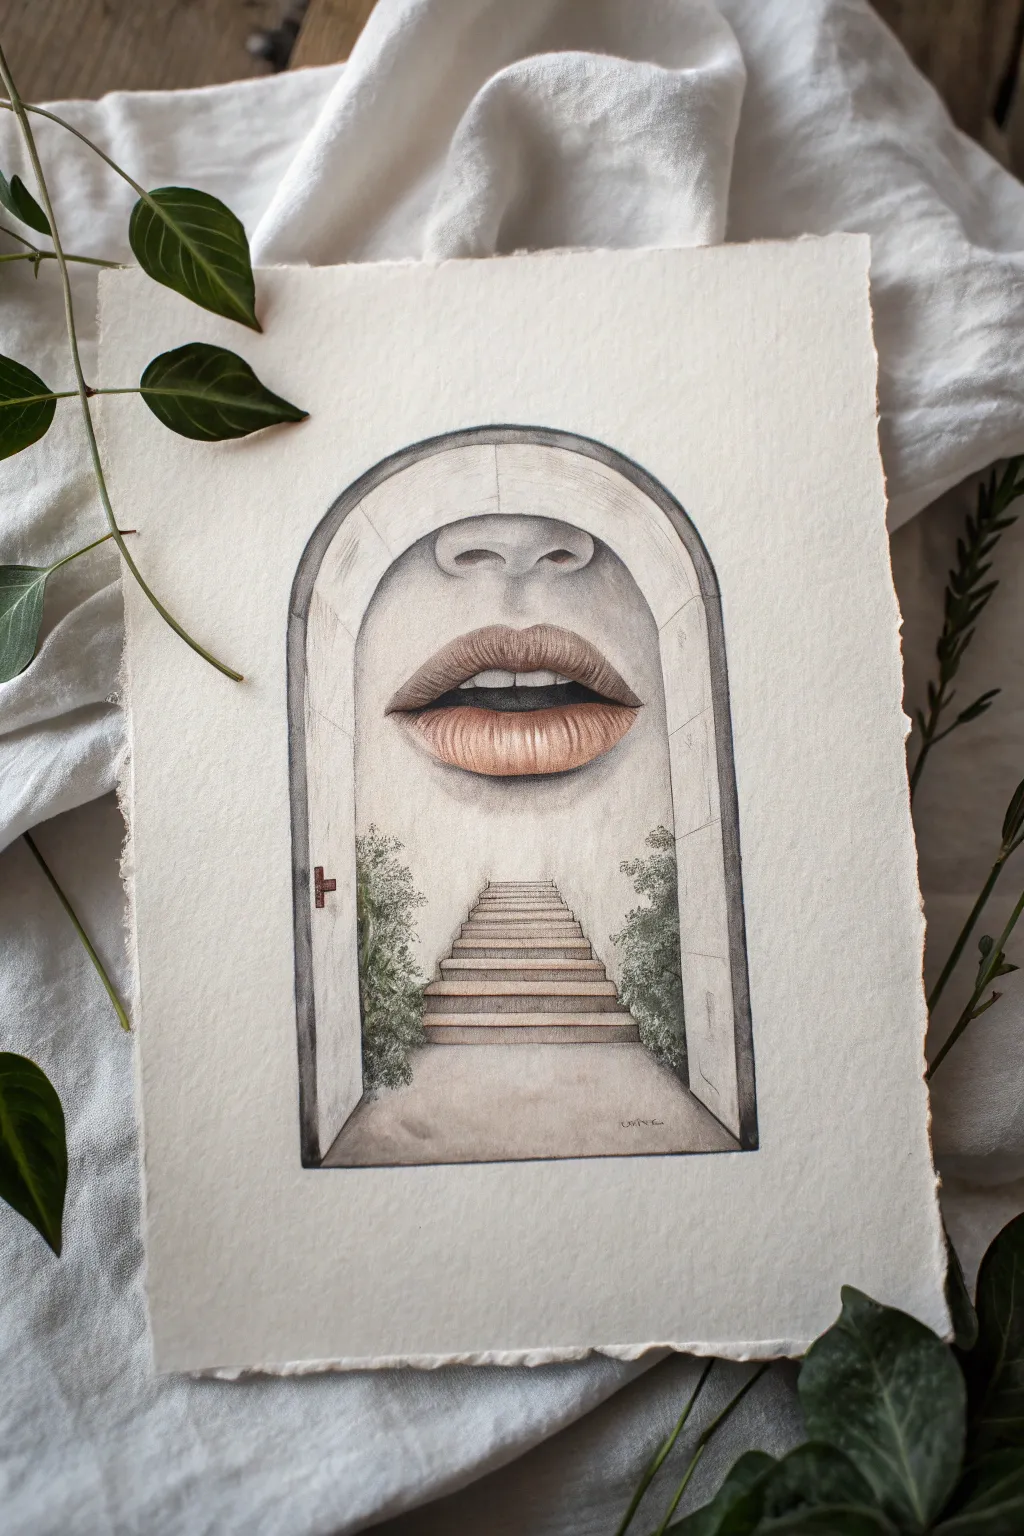
This evocative artwork merges architectural precision with organic portraiture, depicting a mouth and nose hovering within a stone archway that reveals a hidden staircase instead of a throat. The piece plays with scale and surrealism, rendered softly on textured paper to create a dreamlike quality.
Step-by-Step Tutorial
Materials
- High-quality watercolor paper or mixed media paper (deckle edge preferred)
- Graphite pencils (HB, 2B, 4B)
- Fine liner pens (0.05mm and 0.1mm, grey or sepia)
- Colored pencils (flesh tones, warm browns, greens, greys)
- Kneaded eraser
- Ruler
- Blending stump (tortillon)
Step 1: Drafting the Architecture
-
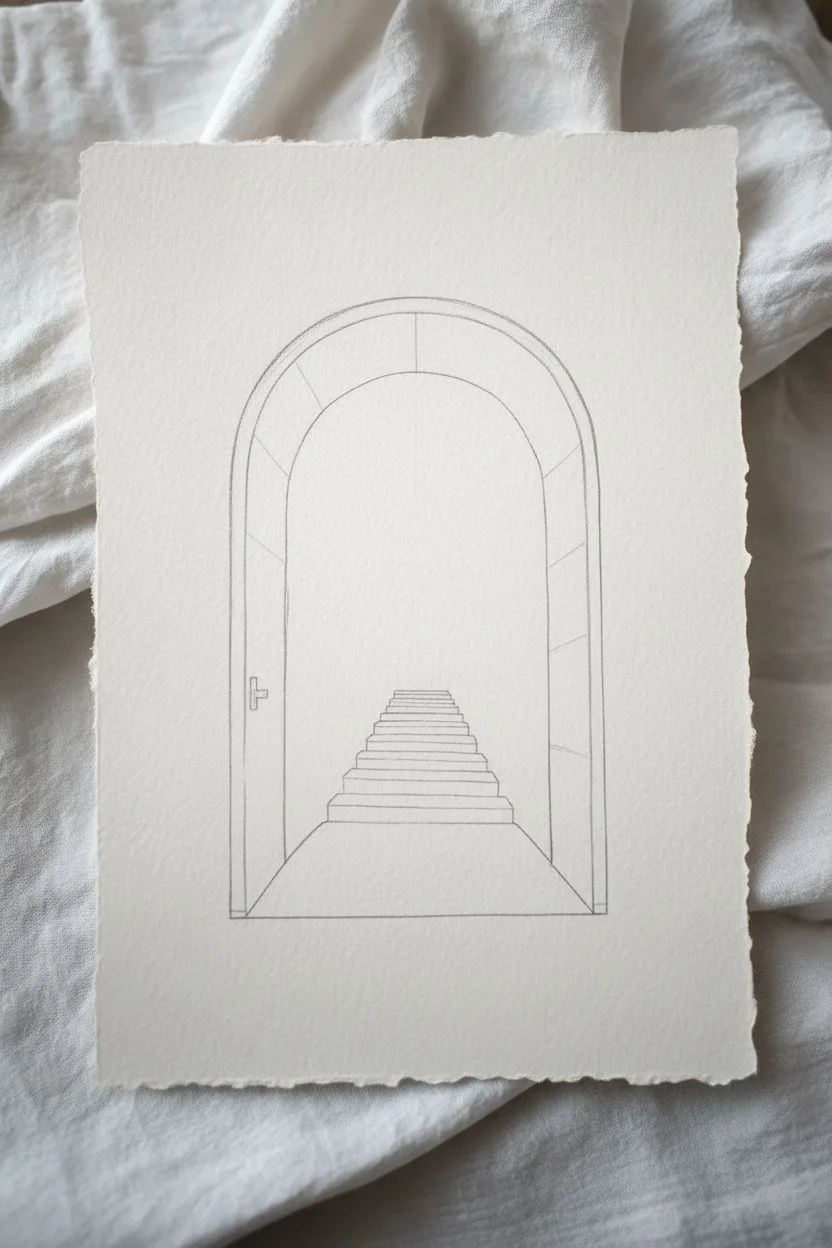
Layout the arch:
Begin by lightly sketching a tall, vertical rectangle with a rounded top arch using an HB pencil. Ensure the arch has thickness by drawing a second, smaller concentric line inside the first. This creates the stone doorframe illusion. -
Add dimension:
To give the doorway depth, draw diagonal lines connecting the inner and outer arch corners at the bottom, creating a recessed feel. Add a vertical line on the left side to suggest the thickness of the jamb. -
Sketch the hinge:
On the left vertical jamb, roughly halfway up (or slightly lower), sketch a simple, small metal hinge. This small detail grounds the surreal aspect in reality. -
Draw the stairs:
Starting at the bottom third of the open space, draw a series of horizontal lines narrowing slightly as they go up to create perspective. Connect these with vertical risers to form a staircase ascending into the ‘mouth’ area.
Uneven Lip Texture?
If your lips look too waxy or flat, use a very sharp colored pencil to draw tiny vertical creases, then lightly blend. Highlights with a white gel pen can tempt the eye.
Step 2: Drawing the Facial Features
-
Place the mouth:
Position the mouth directly above the top of the stairs, floating in the upper center of the arch. Sketch the upper and lower lips, keeping them slightly parted to reveal the darkness inside. -
Add the nose:
Just above the Cupid’s bow of the lip, sketch the nostrils and the tip of a nose. You don’t need the bridge or eyes; the nose should fade out before it hits the top of the stone arch. -
Integrate the elements:
Refine the connection between the stairs and the face. The top of the stairs should seem to lead directly into the oral cavity but fade out into a soft white void just behind the lower lip.
Step 3: Adding Color & Texture
-
Shade the lips:
Using colored pencils in warm flesh tones, shade the lips. Use vertical strokes to mimic natural lip texture. Darken the corners and the line where the lips meet with a warm brown. -
Define the skin:
Lightly shade the skin around the mouth and nose using a very pale flesh tone or graphite. Use a blending stump to keep this texture incredibly smooth, fading gently into the white paper background. -
Render the stone arch:
Use a grey pencil or diluted black ink to outline the arch. Add faint cracks and texture to the ‘stone’ surface. Shade the inner jambs darker to emphasize that the face is recessed inside the doorway. -
Paint the foliage:
On either side of the staircase, sketch small, bushy shapes. Use different shades of green colored pencil—darker at the bottom, lighter at the tips—to create small shrubs growing indoors. -
Detail the stairs:
Shade the vertical risers of the stairs with a cool grey to separate them from the horizontal treads. Use a ruler to keep these lines crisp against the organic shapes of the bushes.
Pro Tip: Atmospheric Depth
Fade the top of the stairs and the nose edges. Don’t outline them harshly; let them dissolve into the paper grain to make the ‘portal’ feel dreamlike and endless.
Step 4: Refining and Finishing
-
Deepen the contrast:
The area inside the mouth needs to be the focal point. Use a dark brown or black pencil to shade the very back of the mouth opening, behind the teeth, creating a deep shadow. -
Highlight the teeth:
Ensure the teeth remain the white of the paper, but add very subtle grey shading at the gum line and between teeth for dimension. -
Enhance the shadows:
Add cast shadows under the bottom lip and around the nostrils. I find that deepening the shadow where the stairs meet the floor adds necessary weight to the scene. -
Final touches:
Go over the outer edge of the arch with a slightly firmer line to contain the composition. Sign your work subtly near the bottom of the doorway floor.
Now you have a mysterious portal that invites the viewer to step into a new world


Have a question or want to share your own experience? I'd love to hear from you in the comments below!