When I’m craving a creative reset, I grab my acrylics because they let you layer fast, go bold, and fix things as you go. I pulled together 100 approachable acrylic painting ideas—starting with the classic favorites and sliding into the fun, unexpected stuff once you’re warmed up.
7 Sunset and Sunrise Acrylic Painting Ideas
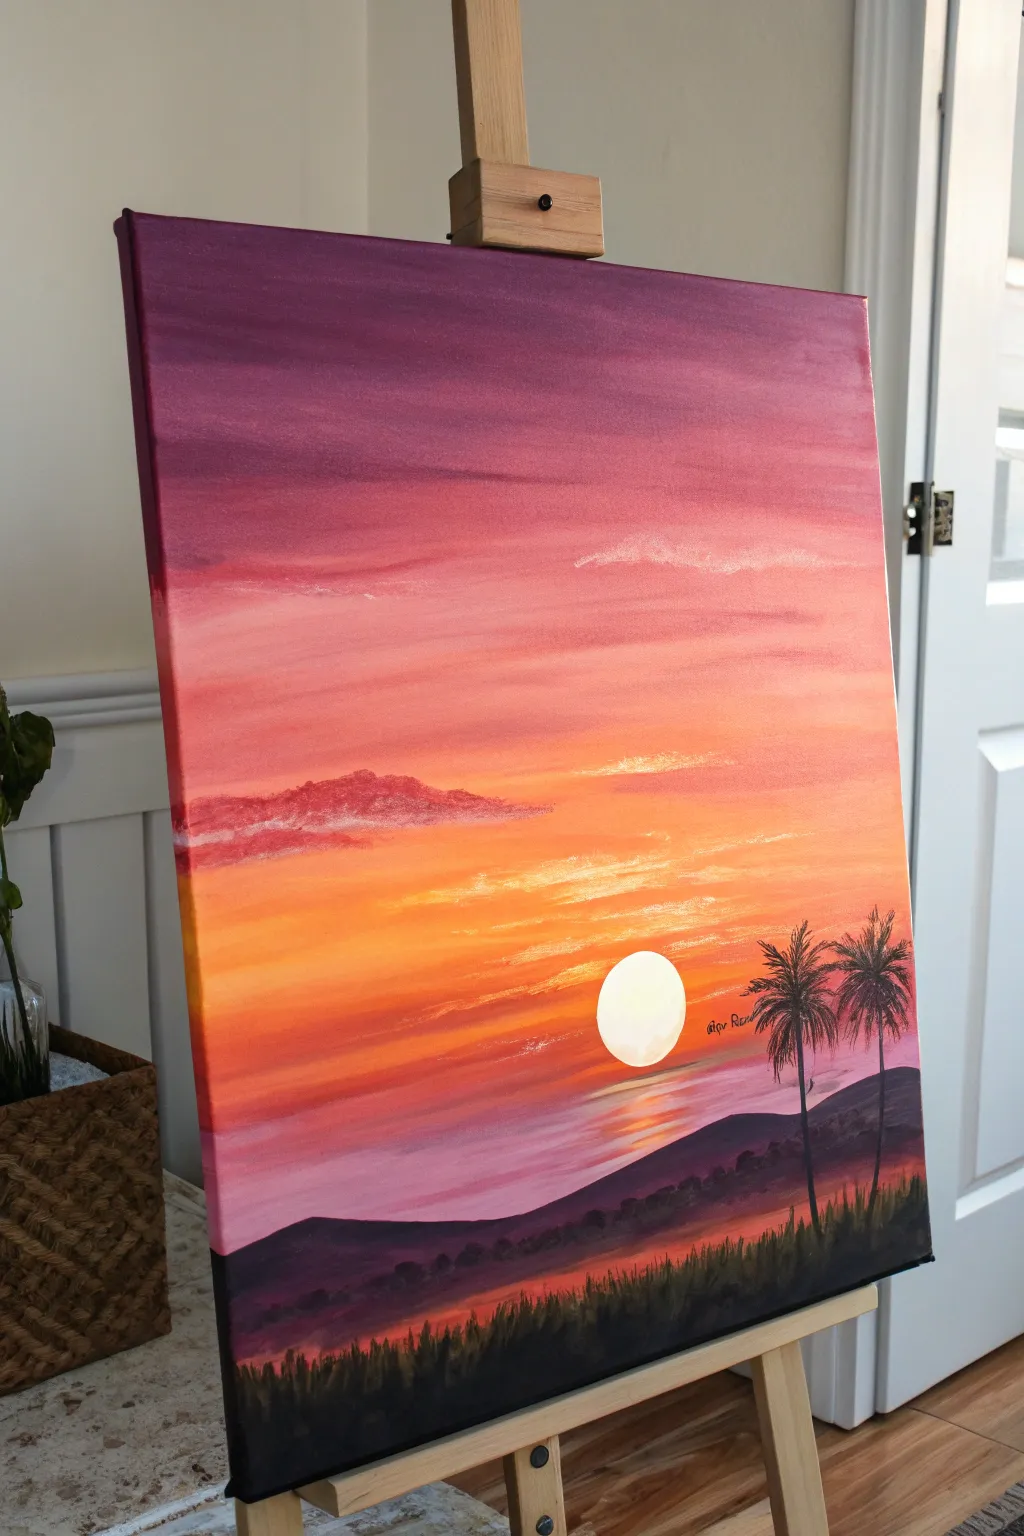
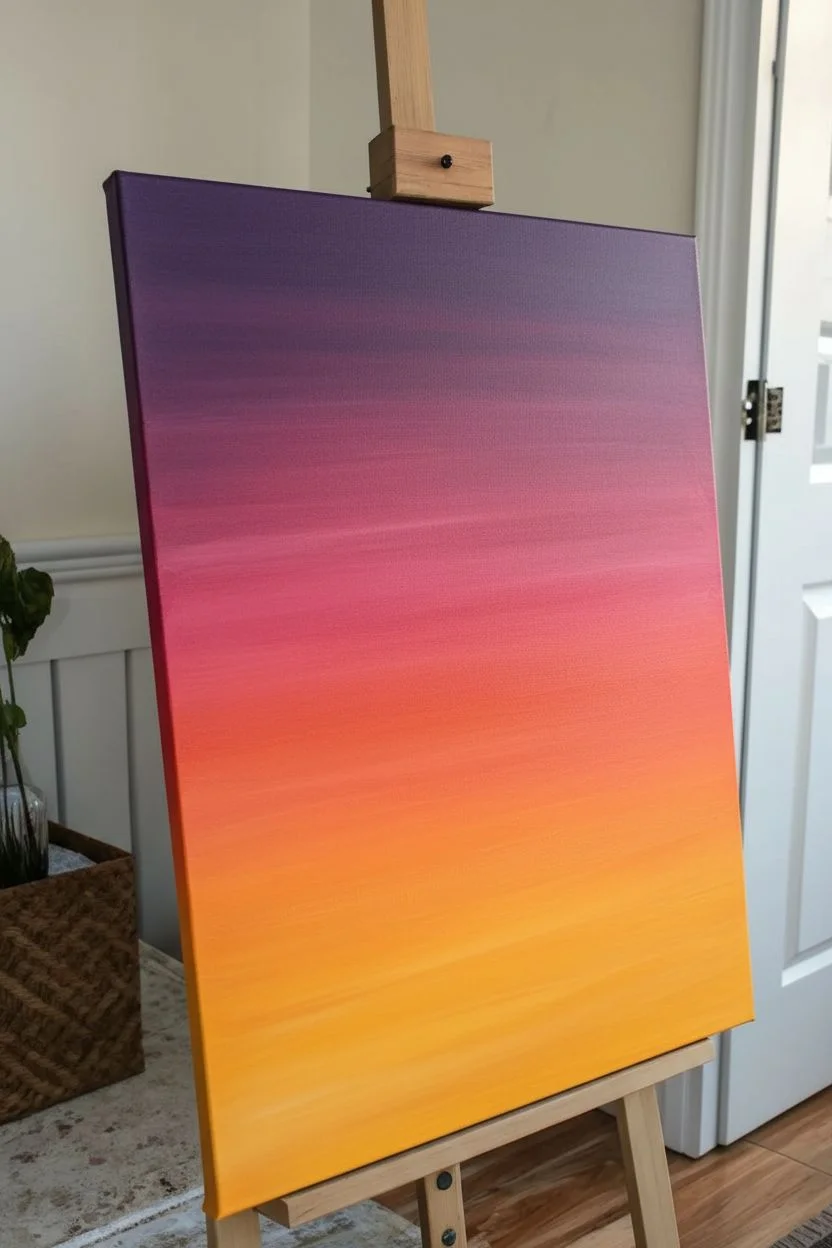
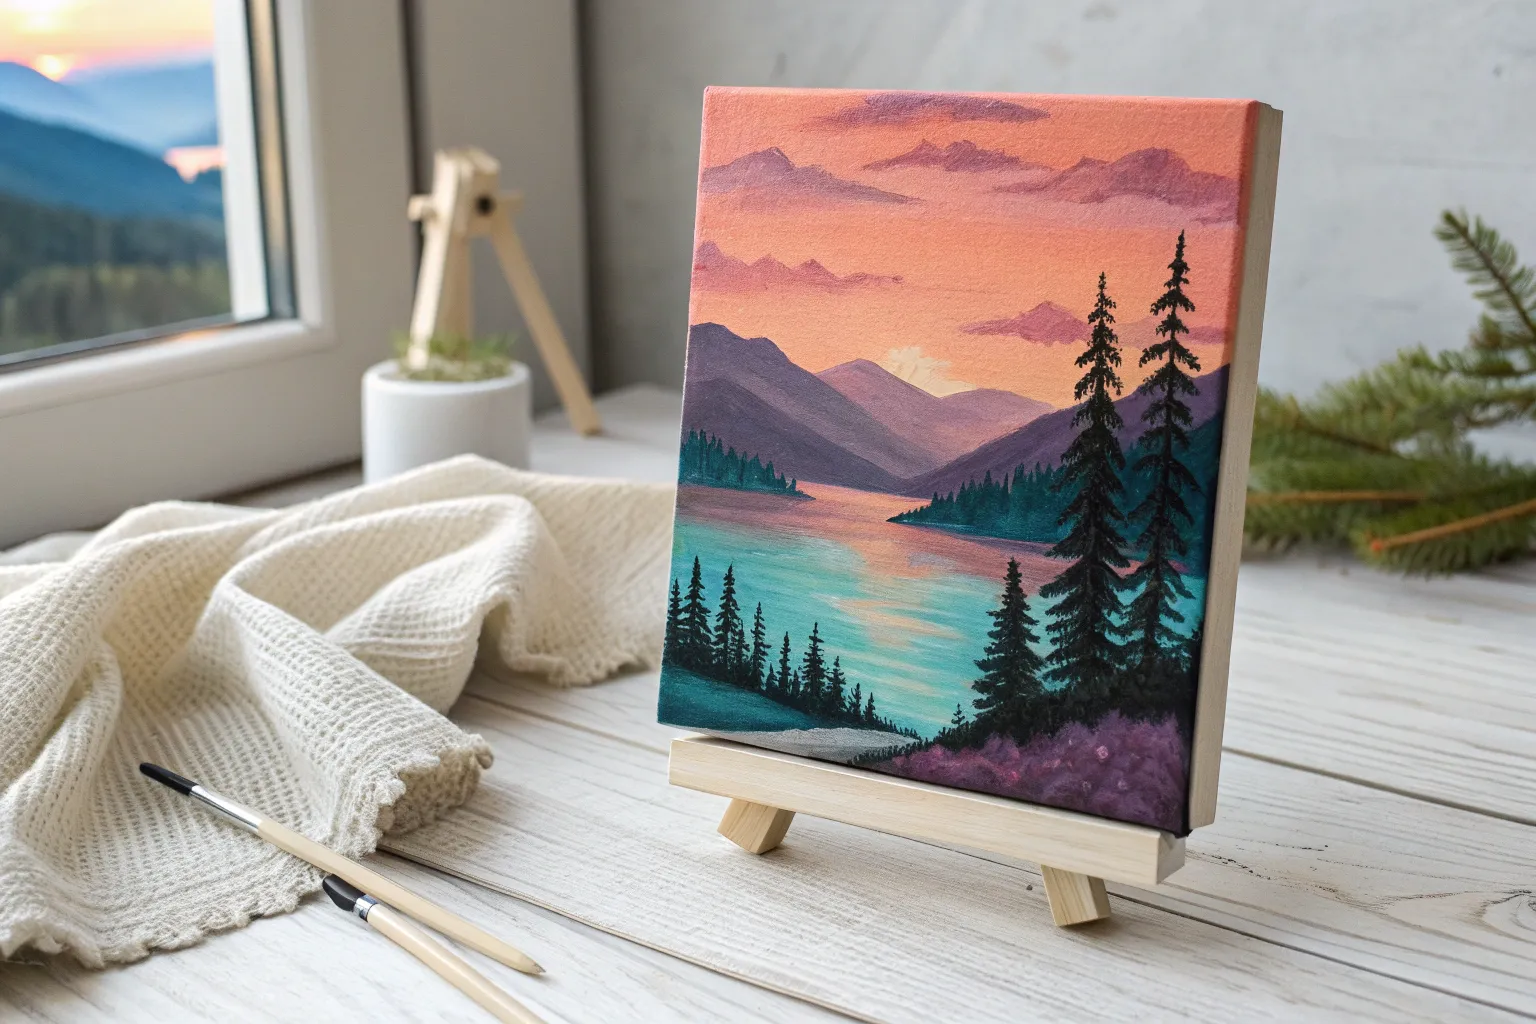
Capture the serene transition from day to night with this vibrant acrylic landscape featuring a stunning purple-to-orange gradient sky. This project uses bold silhouettes against soft, blended clouds to create a striking tropical evening scene.
Step-by-Step
Materials
- Stretched canvas (e.g., 16×20 inch)
- Acrylic paints: Titanium White, Cadmium Yellow, Cadmium Orange, Magenta or Alizarin Crimson, Dioxazine Purple, Mars Black
- Large flat wash brush (1-2 inch)
- Medium flat brush
- Small round brush
- Fine liner brush
- Palette for mixing
- Water cup and paper towels
- Easel
Step 1: Sky Gradient Base
-
Prepare the canvas:
Place your canvas on the easel. If needed, apply a thin coat of white gesso to prime the surface, though most pre-stretched canvases come ready to paint. -
Mix the top color:
On your palette, mix Dioxazine Purple with a touch of Magenta to warm it up. Using your large flat wash brush, paint the top fifth of the canvas with horizontal strokes. -
Transition to pink:
Without cleaning the brush perfectly, pick up some Magenta and a tiny bit of White. Blend this into the bottom edge of the purple section, working your way down the canvas. -
Add the orange tones:
Clean your brush. Load it with Cadmium Orange and blend it into the pink layer. Use long, sweeping horizontal strokes to ensure a smooth transition without harsh lines. -
Paint the horizon:
Mix Cadmium Yellow with a little White and Orange. Apply this to the lowest part of the sky area, just above where your hills will go. This creates the glowing light source effect.
Blending Buddy
If your acrylics are drying too fast to blend smooth transitions, keep a spray bottle of water handy. A light mist keeps the paint workable longer.
Step 2: Clouds and Atmosphere
-
Add wispy clouds:
Using a smaller flat brush and a mix of Magenta and White, gently dab in some horizontal cloud streaks across the pink and orange zones. Keep the paint thin so the background glows through. -
Strengthen the purple clouds:
Mix a darker purple shade. Add subtle, elongated cloud shapes near the top left and middle sections to create depth throughout the sky. -
Create the sun:
Once the yellow horizon area is tacky or dry, use a round brush loaded with pure Titanium White to paint a crisp circle low in the sky, slightly off-center to the right. -
Enhance the sun’s glow:
Take a very small amount of yellow-white mix and dry-brush a faint halo around the white sun to make it look radiant.
Level Up: Texture
Use a fan brush for the grass to create density quickly, or mix a tiny bit of dark green into the black foreground for subtle color depth.
Step 3: Landscape Elements
-
Draft the background hills:
Mix Mars Black with a little Purple and White to create a hazy, dark grayish-purple. Paint the distant rolling hills about one-third up from the bottom. -
Add the middle ground:
Darken your mixture by adding more Black. Paint a second layer of hills or land closer to the viewer, overlapping the distant hills slightly. -
Paint water reflections:
Below the sun, in the area representing water or mist, lightly drag a brush with pink and orange paint horizontally to create zig-zag reflections of the sunset colors. -
Intensify the sun reflection:
Add a few sharp streaks of pure White directly beneath the sun on the water surface to mimic the strong reflection of light.
Step 4: The Silhouette Foreground
-
Block in the foreground:
Load a medium brush with pure Mars Black. Paint a solid dark strip at the very bottom of the canvas, rising slightly on the right side. -
Paint grass blades:
Switch to a liner brush or the edge of a small flat brush. Flick upward from the black foreground to create uneven blades of grass along the entire bottom edge. -
Position the palm trees:
Using the liner brush and black paint, draw two thin, slightly curved vertical lines on the right side for the palm trunks. Make the one on the far right slightly smaller for perspective. -
Add palm fronds:
From the top of each trunk, paint outward curved strokes that droop down at the ends. Add quick, short strokes along these curves to represent the individual leaves. -
Final touches:
If desired, sign your name in small letters near the palm trees using black or a dark color that blends unobtrusively.
Step back and enjoy the warmth of your tropical evening scene


7 Mountain and Desert Acrylic Painting Ideas
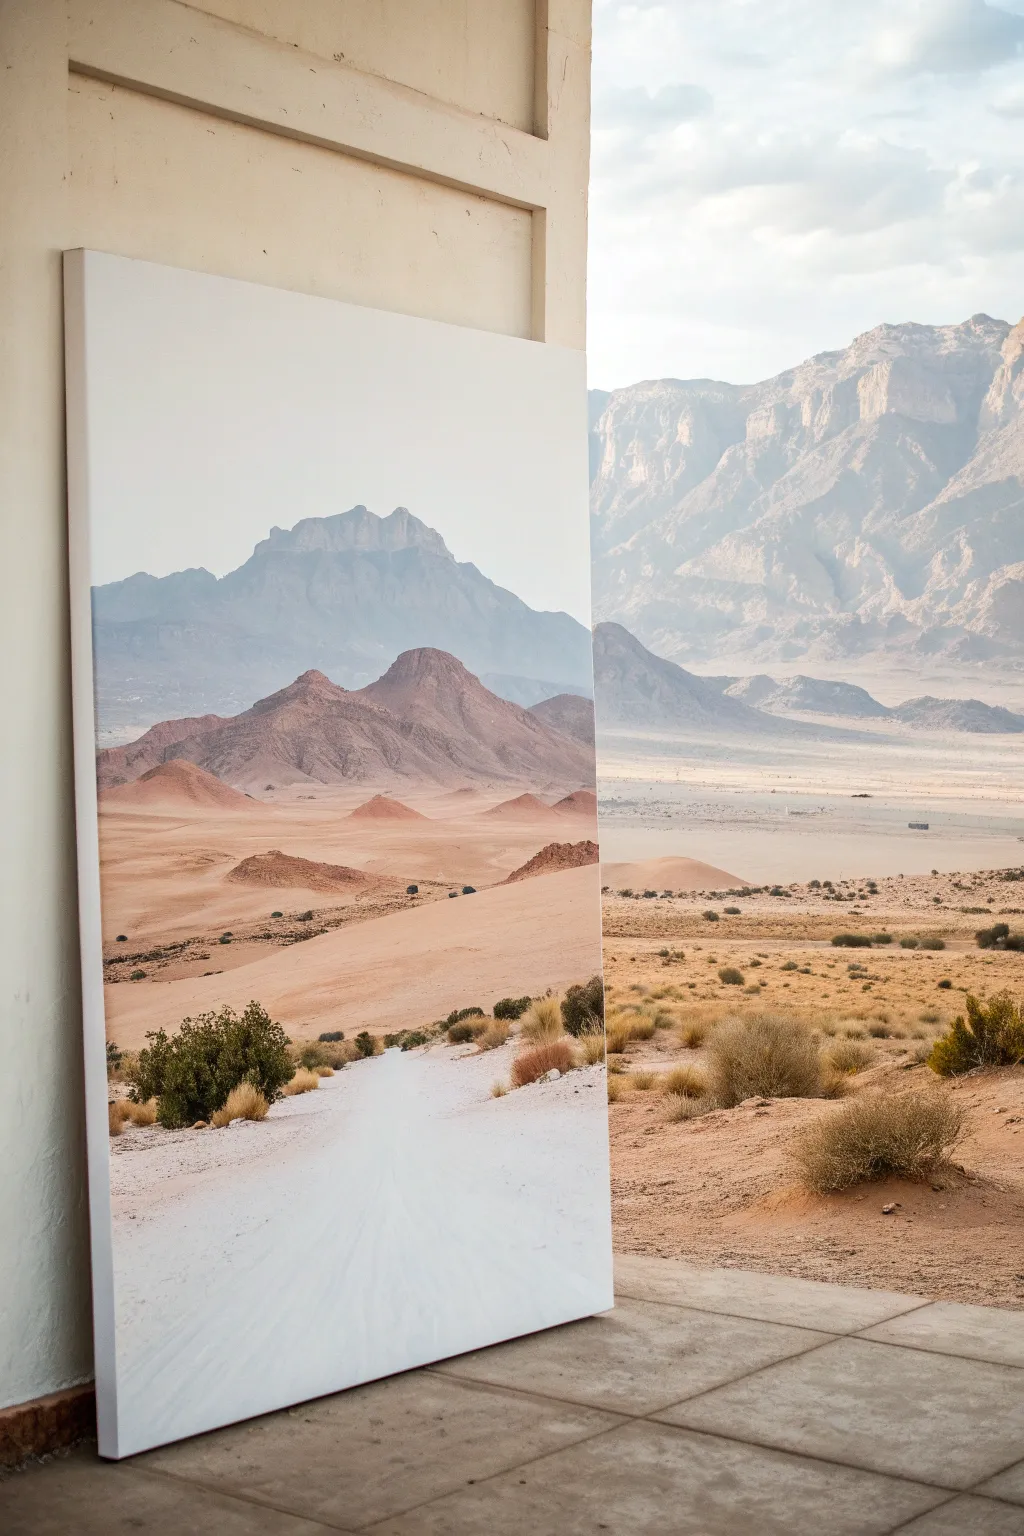
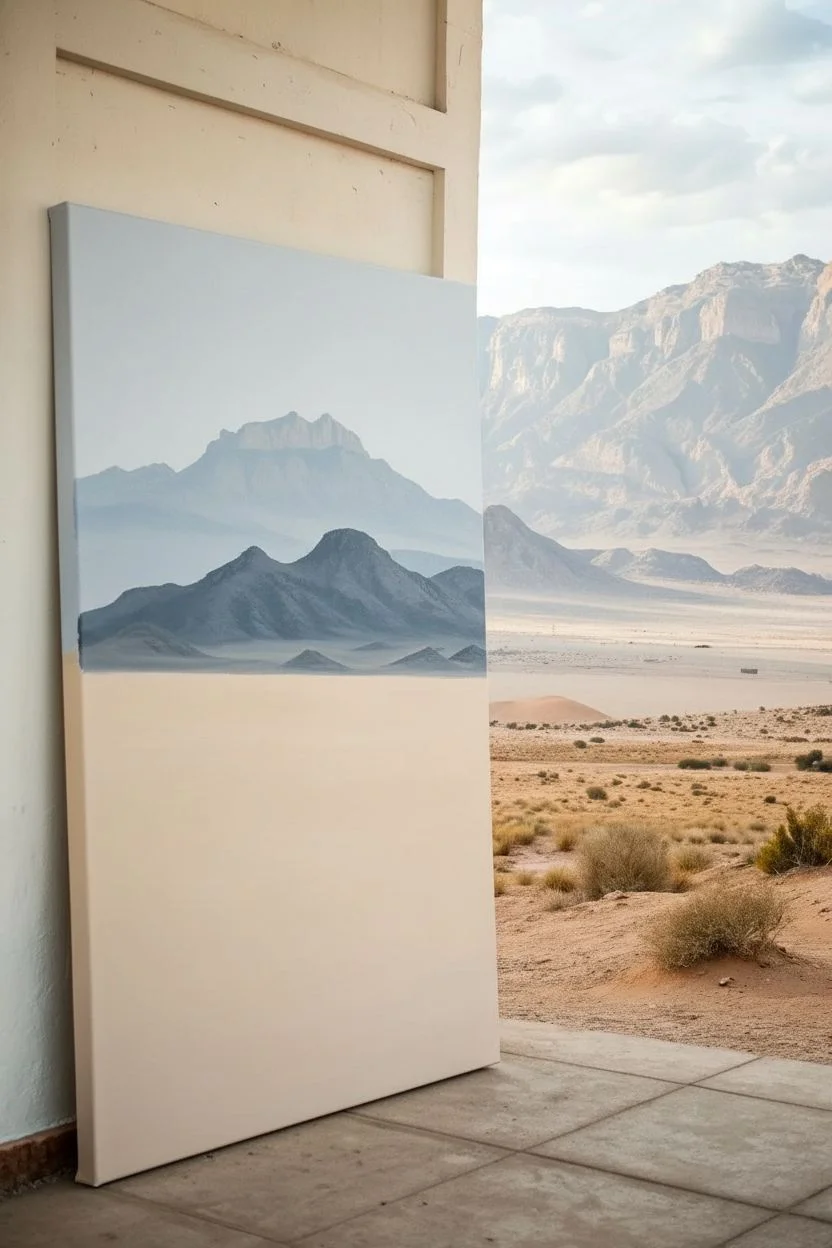
Capture the stark beauty of an arid landscape with this large-scale acrylic project that blends atmospheric perspective with grounded textures. You will create a sense of vast depth, leading the viewer’s eye from a sandy foreground path all the way to hazy, distant blue mountains.
Step-by-Step Tutorial
Materials
- Large stretched canvas (e.g., 24×36 inches or larger)
- Acrylic paints: Titanium White, Mars Black, Burnt Sienna, Yellow Ochre, Ultramarine Blue, Alizarin Crimson, Raw Umber
- Large flat brushes (2-3 inch) for blending
- Medium filbert brushes for mountains and dunes
- Small round brushes for shrubs and details
- Palette knife (optional for texture)
- Water container and paper towels
- Acrylic retarder or slow-drying medium
Step 1: Setting the Atmosphere
-
Prime and prep:
Start with a clean, large canvas. If you want a smoother finish for the sky, apply a coat of gesso and sand it lightly once dry. -
Paint the sky gradient:
Mix a very pale grey-blue using Titanium White, a tiny touch of Ultramarine Blue, and the smallest dot of Mars Black. Paint the top third of the canvas, keeping the color solid and flat to represent a hazy, overcast desert sky. -
Block in the distant range:
Create a blue-grey shade for the furthest mountains. Use Ultramarine Blue, White, and a touch of Burnt Sienna to desaturate the blue. Paint a sheer, jagged silhouette about halfway down the canvas. Keep the edges soft to mimic atmospheric perspective. -
Add the mid-ground peaks:
Mix a darker, more defined blue-grey for the closer mountain range. This shape should sit slightly lower than the first, overlapping it. I like to add a little extra definition to the ridges here, suggesting rocky textures without being too detailed.
Step 2: Sculpting the Dunes
-
Base coat the desert floor:
Transition to earthy tones. Mix White, Yellow Ochre, and a small amount of Burnt Sienna to create a light sandy beige. Apply this to the entire bottom half of the canvas, establishing the ground plane. -
Paint the red hills:
Mix Burnt Sienna with a touch of Alizarin Crimson and White to create a dusty reddish-pink tone. Paint the rolling hills that sit directly in front of the blue mountains. Use softer, rounded brushstrokes to differ from the jagged peaks. -
Layering the hills:
While the red hill paint is still slightly wet, blend a slightly darker version of the same color into the lower sections to create shadows and volume. This gives the hills a three-dimensional look. -
Create the middle ground dunes:
Using a mix of Yellow Ochre and White, paint gently sloping triangular shapes in the middle distance. These are the smaller dunes nestled between the red hills and the foreground. -
Adding dune shadows:
Mix a transparent glaze of Burnt Sienna and Raw Umber. Apply this thinly to the sides of the dunes that would be facing away from the light source to create subtle depth.
Atmospheric Depth
To make distant mountains look huge and far away, add more white to your paint mix. Lighter, bluer colors recede, while warmer, darker colors come forward.
Step 3: The Path and Vegetation
-
Define the path:
Mix a very light, almost white color with a hint of warm beige. Paint a wide path starting from the bottom center of the canvas, narrowing significantly as it travels upward toward the center, creating distinct perspective. -
Texture the path:
Use a dry brush with a slightly darker beige to streak lightly over the white path. This mimics tire tracks or footpaths worn into the sand. -
Planting the foreground shrubs:
Mix Sap Green (or mixing Blue/Yellow) with Raw Umber to get a dull, realistic desert green. Using a small round brush or a stippling motion, dab in the larger bushes on the left side of the path. -
Adding dry grass:
Mix Yellow Ochre with White. Use a small liner brush to flick upward strokes around the base of the green shrubs and scattered along the right side of the path to represent dry desert grasses. -
Detailing the mid-ground vegetation:
Switch to a smaller brush and add tiny dots and dashes of dark green and brown further back in the landscape. As objects get further away, they should become smaller and less detailed. -
Final highlights:
Add touches of pure Titanium White mixed with a little medium to the tips of the foreground grasses and the lightest parts of the path to enhance the bright, sun-bleached feeling. -
Varnish and seal:
Once fully dry (give it at least 24 hours), apply a matte or satin varnish to protect the painting and unify the sheen of the different paint layers.
Level Up: Texture Gel
Mix fine sand or a granular texture medium into your foreground paint. This adds literal grit to the path and dirt, making the desert floor feel real.
Step back and admire how the cool mountains contrast with the warm sands in your new landscape


7 Ocean, Wave, and Beach Acrylic Painting Ideas
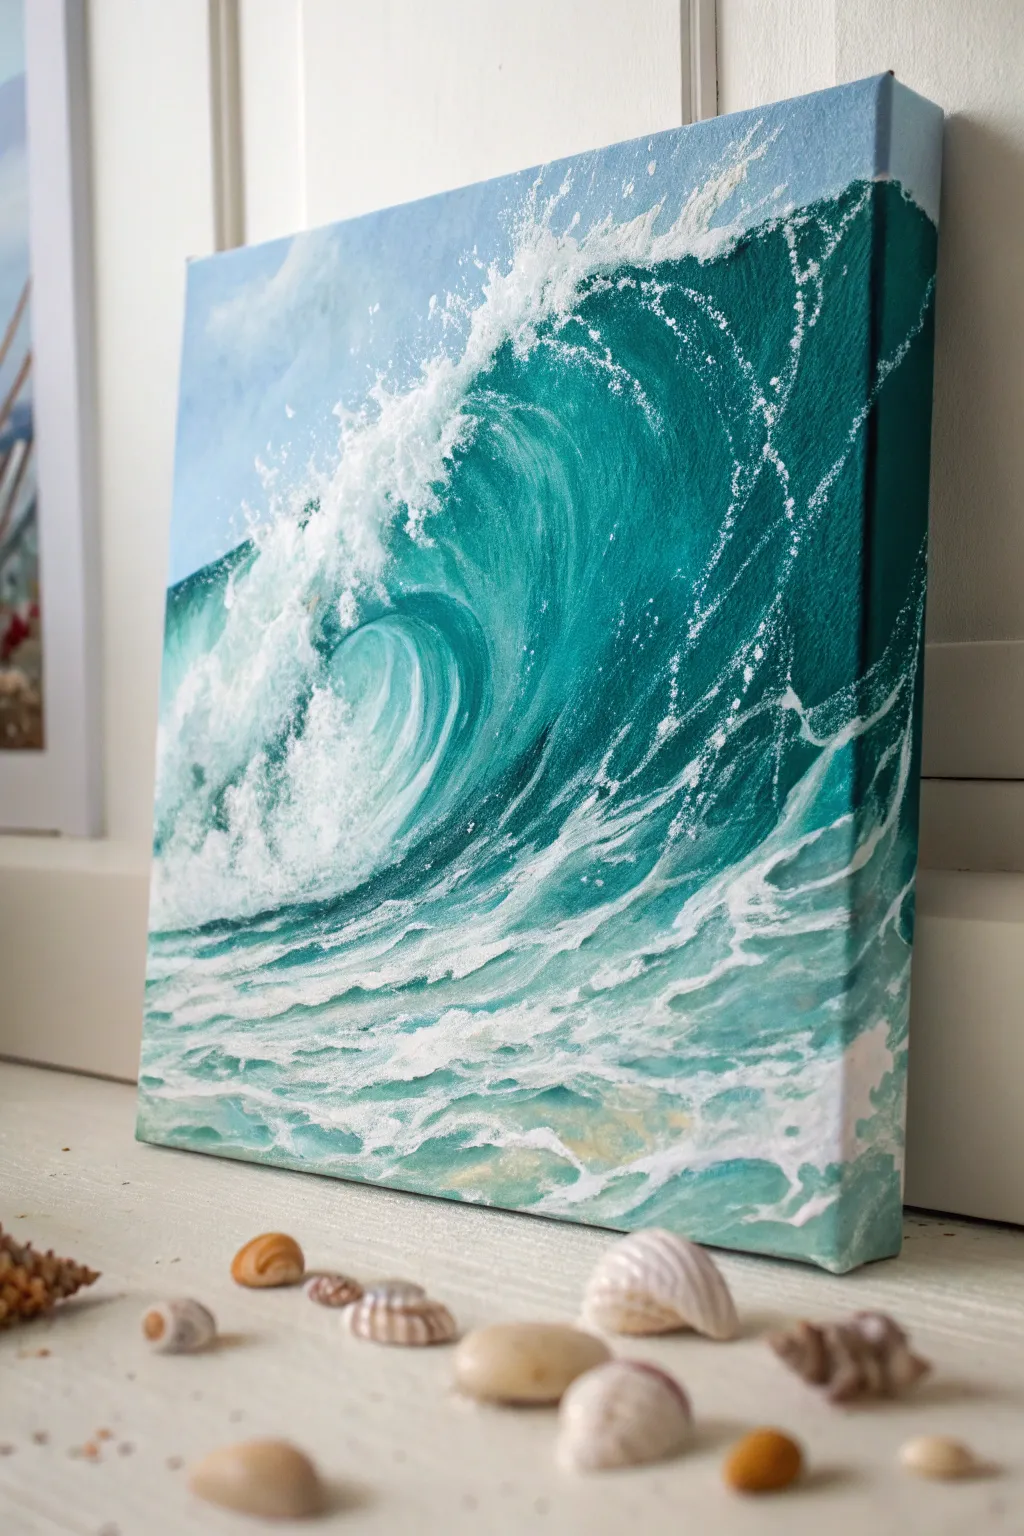
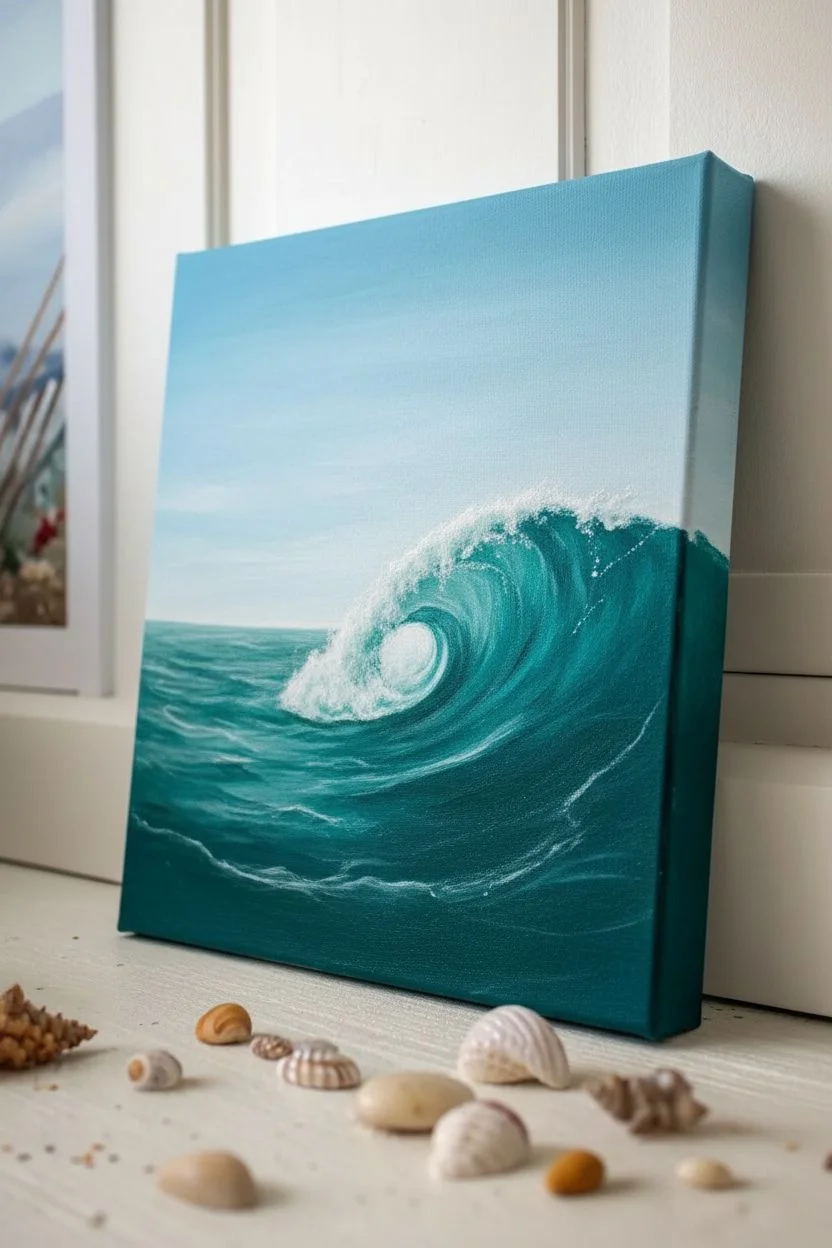
This project captures the dynamic power and translucent beauty of a curling ocean wave using rich teals and textured whites. By layering acrylics and building up impasto foam details, you’ll create a sense of depth and movement that feels like you could step right into the surf.
Step-by-Step Guide
Materials
- Square stretched canvas (e.g., 10×10 or 12×12 inches)
- Acrylic paints: Phthalo Blue, Phthalo Green, Titanium White, Raw Umber, and a hint of Yellow or Turquoise
- Modeling paste (optional, for extra foam texture)
- Flat brushes (large and medium)
- Filbert brushes (medium and small)
- Small round detail brush or rigger brush
- Fan brush (optional)
- Palette knife
- Water container and paper towels
- Palette for mixing
Step 1: Setting the Scene
-
Sky gradient:
Begin by determining your horizon line, placing it roughly one-third of the way down from the top edge. Mix Titanium White with a tiny speck of Phthalo Blue to create a very pale, airy sky blue. Paint the sky area, blending it to be slightly darker at the top and nearly white at the horizon. -
Base ocean color:
Mix a deep, dark teal using Phthalo Blue, Phthalo Green, and a touch of Raw Umber to desaturate it slightly. Cover the entire ocean area below the horizon with this dark mix to establish the deepest shadows of the water. -
Define the wave shape:
Using a medium filbert brush and a lighter turquoise mix (Phthalo Green + White), sketch the large C-shape of the curling wave. This doesn’t need to be perfect; you are just mapping out where the light hits the translucent water.
Step 2: Building Translucency and Depth
-
Adding the ‘eye’ of the wave:
The brightest, most translucent part of a wave is often right under the curling lip. Mix a glowing turquoise using Phthalo Green, a touch of Yellow, and White. Apply this to the inner curve of the wave, blending it softly into the darker base coat you applied earlier. -
Strengthening the shadows:
Reinforce the shadowed area right under the crashing crest. Use your darkest teal mix here to create high contrast against the bright turquoise eye. This contrast is what gives the wave its volume. -
Painting the foreground water:
For the flat water in the foreground, use horizontal strokes with a flat brush. Alternate between your dark teal and medium turquoise mixes to suggest subtle ripples and movement leading up to the main wave. -
Wrap the edges:
Don’t forget to extend your painting around the sides of the canvas. Continue the sky, horizon, and deep water colors onto the edges for a professional, gallery-ready finish.
Textured Splashes
Mix gloss gel medium or molding paste with your Titanium White for the final foam layer. It holds brush peaks perfectly, making the water look fizzy and three-dimensional.
Step 3: Creating the Crash and Foam
-
Initial foam layer:
Mix a light gray-blue (White + tiny dot of Blue + tiny dot of Raw Umber). Use an old, scruffy brush to stipple in the initial shape of the crashing white water. This acts as a shadow layer for the bright white foam to sit on top of. -
Mapping the spray:
Use a small round brush or a fan brush to flick varied specks of paint above the crest. This mimics the sea spray launching into the air as the wave breaks. -
Veining the water:
With a thin rigger brush and watered-down white paint, draw the delicate, webbing lines of foam that stretch across the face of the wave. These lines should follow the curve of the water, wrapping around the cylinder shape. -
Foreground sea foam:
Paint flattened, elongated ovals and irregular web patterns in the foreground water using a mixture of white and pale turquoise. These shapes represent the bubbly aftermath of previous waves.
Muddy Waters?
If your turquoise looks dull or muddy, you likely mixed orange or red into it by accident (perhaps via a brown). Keep brushes clean and used a specific ‘cool’ yellow like Lemon Yellow for mixing.
Step 4: Texturing and Highlighting
-
Thickening the whites:
I like to switch to heavy body white paint or mix regular acrylic with modeling paste for this step. Use a palette knife or a coarse brush to apply thick, erratic dabs of pure white to the crashing lip of the wave. -
creating directional splashes:
Ensure your thick white strokes follow the direction of the energy—up and over the crest, and crashing down into the trough. The texture should physically stand off the canvas. -
Refining the eye:
Add purely white highlights to the very edge of the curling lip where the sun catches the water before it breaks. This sharp line separates the smooth water from the chaos of the crash. -
Enhancing the foreground:
Add ridges of thick white paint to the foreground foam patterns you painted earlier. This impasto technique makes the sea foam look bubbly and aerated. -
Final spray details:
Load a stiff toothbrush or stiff bristle brush with slightly watered-down white paint. Run your thumb over the bristles to splatter fine mist over the crash zone for a realistic, wet look. -
Final dry brush adjustments:
Once the main layers are dry, lightly dry-brush a very pale mist of white over the transition area between the spray and the deep water to soften any harsh edges.
Step back and admire the energetic movement you’ve captured in your seascape


7 Easy Flower and Botanical Acrylic Painting Ideas
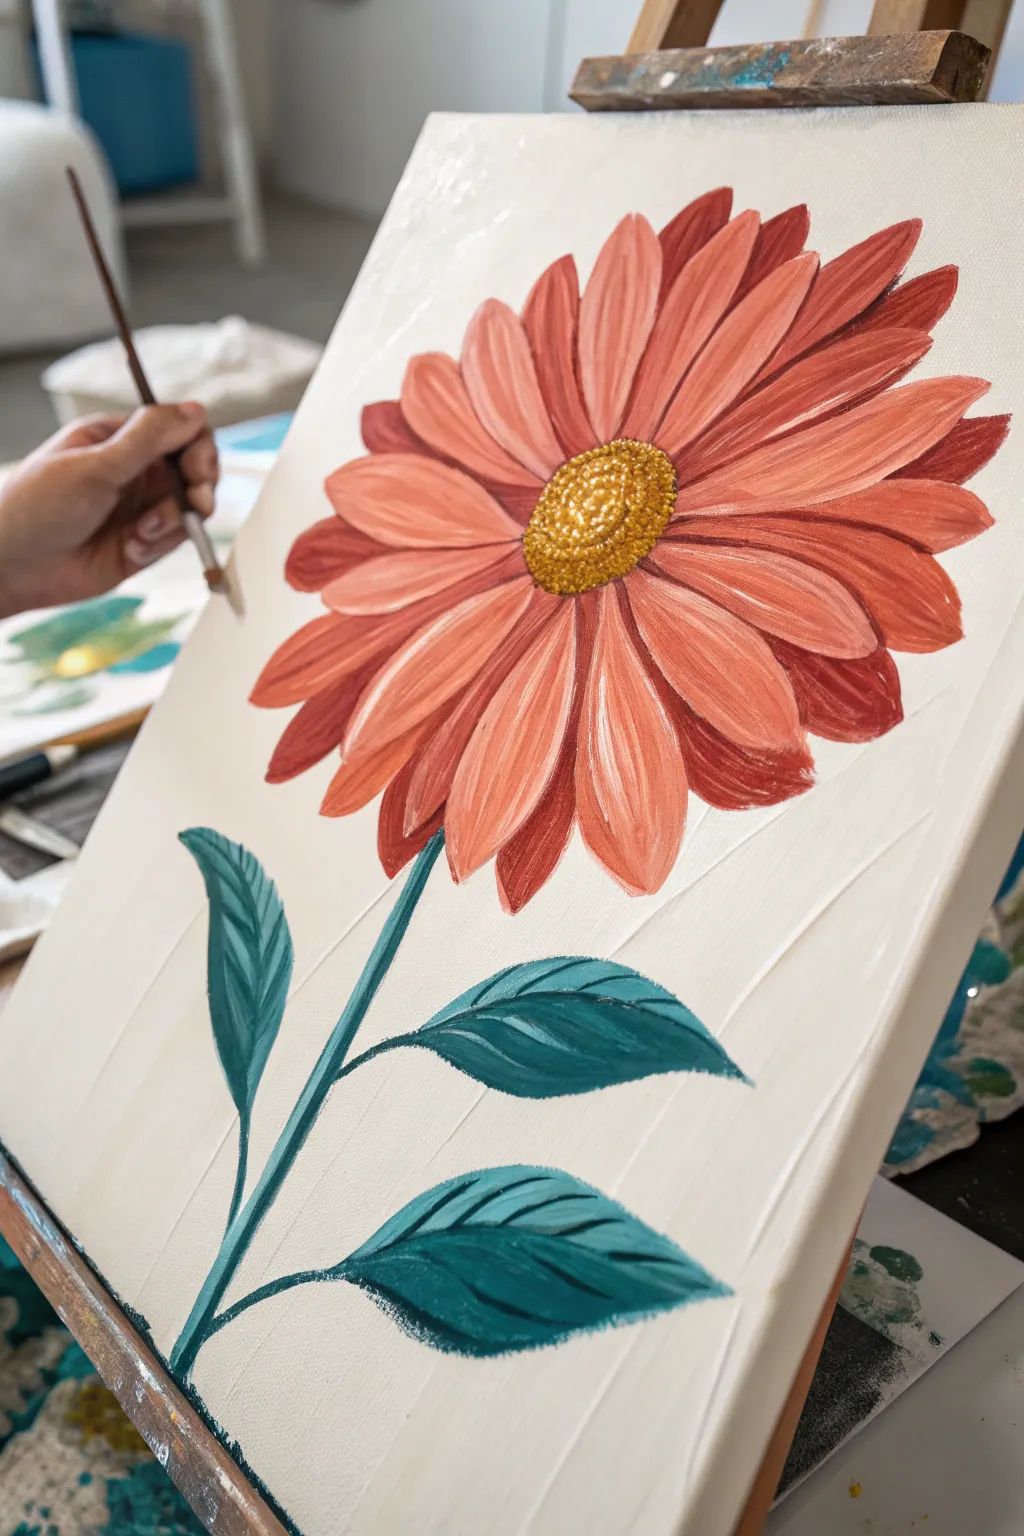

This vibrant acrylic painting captures the simple elegance of a Gerbera daisy with rich coral petals and deep teal foliage. The stylized, brushstroke-focused technique gives it a charming, illustrative quality that pops against a creamy white background.
Step-by-Step Tutorial
Materials
- Stretched canvas (11×14 or similar size)
- Acrylic paints: Titanium White, Burnt Sienna, Cadmium Red, Yellow Ochre, Cadmium Yellow, Phthalo Green, Burnt Umber
- Round brushes: sizes 6, 8, and a small liner brush
- Flat brush: size 10 (for background)
- Palette for mixing
- Cup of water and paper towels
- Pencil for sketching
Step 1: Preparation and Sketching
-
Prepare the background:
Start by mixing Titanium White with a tiny drop of Yellow Ochre or Burnt Umber to create a warm, creamy off-white. Use your large flat brush to coat the entire canvas evenly. Let this base layer dry completely before moving on. -
Sketch the layout:
Using a pencil, lightly draw a medium-sized circle in the upper center of the canvas for the flower head. Draw a smaller circle inside for the center. -
Add the stem and leaves:
Draw a slightly curved line extending from the bottom of the flower head down to the left corner. add two large, pointed oval shapes branching off the stem for leaves—one lower left, one higher right.
Double-Load for Depth
Load one side of your brush with dark coral and the other with light pink. Painting petals this way creates instant shading in a single stroke.
Step 2: Painting the Flower Head
-
Mix the base petal color:
Create a dark terra cotta shade by mixing Cadmium Red with Burnt Sienna and a touch of Burnt Umber. This will serve as the shadow layer for the petals. -
Paint the background petals:
Using a size 8 round brush, paint a ring of petals using the dark mix. These should fill the outer diameter of your sketch. Keep the strokes loose and slightly tapered at the tips. -
Mix the mid-tone coral:
While the first layer dries, mix a brighter coral color using Cadmium Red, a little Yellow Ochre, and Titanium White. -
Paint the main petals:
Apply a second layer of petals on top of and slightly between the darker ones. Start from the center circle and pull the brush outward, lifting pressure at the end to create a point. -
Add highlights:
Mix an even lighter salmon pink by adding more White to your coral mix. Paint thin, swift highlighting strokes down the center of the top-most petals to give them dimension and a rounded appearance. -
Paint the center base:
Fill the center circle with a mix of Yellow Ochre and Burnt Sienna. Let this dry. -
Texture the center:
Dip your small brush or the back end of a brush handle into thick Cadmium Yellow mixed with White. Dot this texture over the center circle, concentrating lighter dots in the middle for a domed effect.
Step 3: Leaves and Finishing Touches
-
Mix the foliage green:
Combine Phthalo Green with a touch of Burnt Umber and a tiny bit of White to get a deep, moody teal green. -
Paint the stem:
Using the size 6 round brush, trace your stem line with a steady hand. I find it helps to pull the brush toward your body for better control. -
Base coat the leaves:
Fill in the leaf shapes with your dark teal mix. Ensure the edges are crisp and pointed. -
Add leaf veins:
Mix a lighter version of the teal by adding more White and a dot of Yellow. Use your liner brush to paint the center vein and diagonal side veins on each leaf. -
Highlight the leaves:
Using the lighter teal mix, add small strokes between the veins to suggest the curve and texture of the leaf surface. -
Review and refine:
Step back and look at your composition. If any petal edges look messy, use your background cream color to carefully cut in and clean them up.
Add Metallic Foil
For a glamorous twist, use gold leaf glue on the flower center after painting, then press on gold foil for a sparkling, luxurious finish.
Enjoy the warmth this cheerful floral piece brings to your space
BRUSH GUIDE
The Right Brush for Every Stroke
From clean lines to bold texture — master brush choice, stroke control, and essential techniques.
Explore the Full Guide
7 Animal and Bird Acrylic Painting Ideas
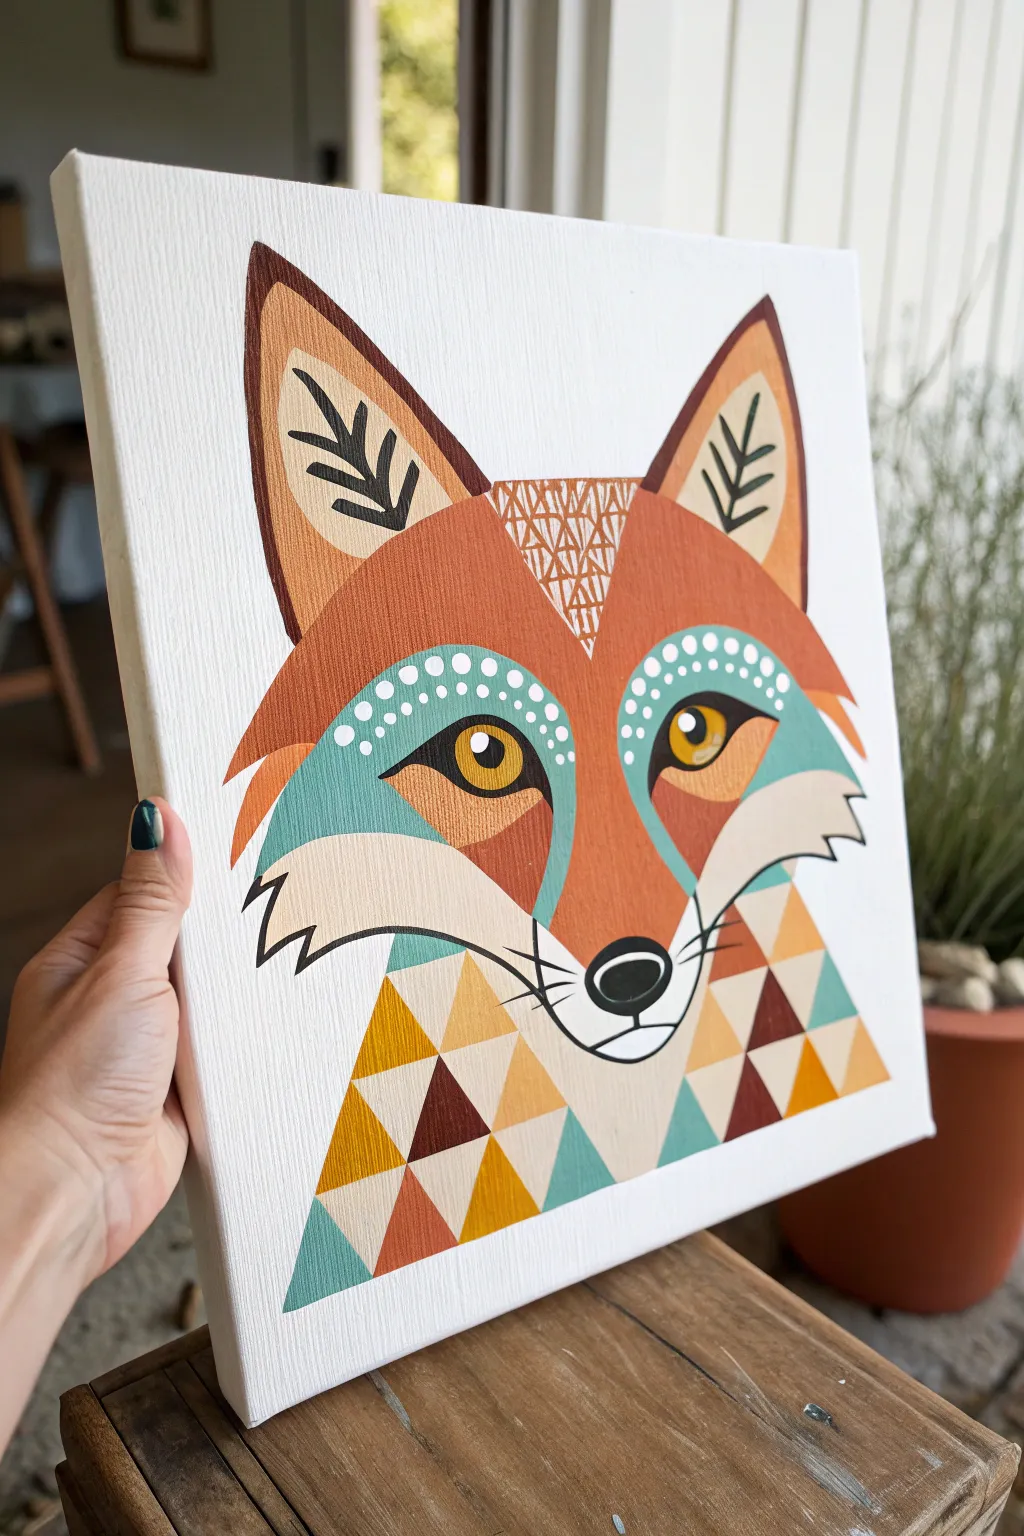
Capture the spirit of the forest with this stylized, geometric fox portrait that blends clean lines with warm, earthy tones. The design uses sharp triangles and decorative patterns to create a modern, folk-art inspired look that pops beautifully against a white background.
Detailed Instructions
Materials
- Square stretched canvas (approx. 10×10 or 12×12 inches)
- Acrylic paints: Burnt Sienna, Orange, Teal/Turquoise, Mustard Yellow, Dark Brown, Cream/Off-White, Black
- Flat brushes (various sizes for filling shapes)
- Fine liner brush (for details and outlines)
- Pencil and eraser
- Ruler
- Palette
- Water cup and paper towels
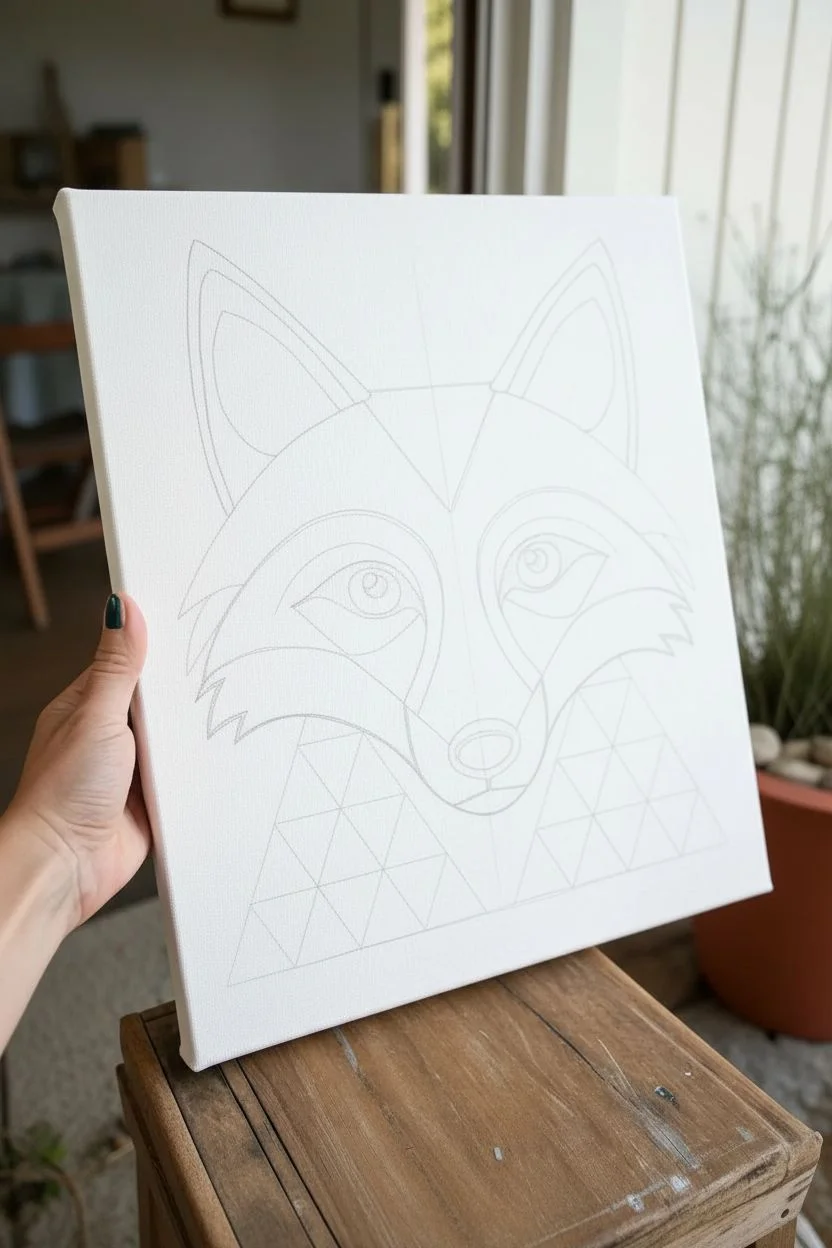
Step 1: Sketching the Geometry
-
Map out the head shape:
Begin by lightly sketching a large inverted triangle in the center of your canvas for the fox’s face. Leave enough room at the top for tall ears and at the bottom for the geometric neck detail. -
Add facial features:
Sketch two smaller triangles on top of the head for ears. Inside the face triangle, draw two almond shapes for eyes, angling them slightly downwards toward the nose. Mark out the cheek patches by drawing curved lines sweeping from the nose area out to the sides. -
Draft the neck pattern:
Below the fox’s chin, use a ruler to draw a large triangle shape that serves as the neck or chest. Divide this large triangle into a grid of smaller, interconnecting triangles to create the patchwork effect shown in the reference.
Wobbly Lines?
If you struggle with straight lines on the neck triangles, apply painter’s tape along the pencil lines. Paint over that section, let it dry, peel, and re-tape for the next section.
Step 2: Blocking in Color
-
Paint the main fur:
Mix a vibrant rusty orange using Burnt Sienna and Orange. Fill in the top focusing of the forehead, the outer ears, and the bridge of the nose. Keep your edges crisp. -
Fill the cheek patches:
Using a teal or turquoise shade, paint the decorative patches under the eyes. This cool tone contrasts beautifully with the warm orange fur. -
Add the cream accents:
Paint the lower cheeks (the ‘whiskers’ area), the inner ears, and the chin with a cream or off-white color. You might need two coats here to ensure the white canvas doesn’t show through. -
Paint the neck mosaic:
This is the fun part—fill the small triangles in the neck area with a variety of your palette colors. Alternate between mustard yellow, dark brown, cream, teal, and rust orange. Try not to let two of the same color touch.
Step 3: Adding Details and Patterns
-
Detail the eyes:
Paint the irises a striking mustard yellow. Once dry, add a black pupil and a tiny white highlight dot to bring the fox to life. Outline the eye shape with a thin black line. -
Create the forehead pattern:
Between the ears at the top of the head, paint a small triangular section. Use a fine liner brush and thinned brown or white paint to add a repeating geometric pattern, like small triangles or zig-zags. -
Decorate the cheeks:
Dip the handle end of a paintbrush into cream or white paint. Gently dot a row of spots along the upper curve of the teal cheek patches to create a decorative border. -
Add ear foliage:
Inside the cream sections of the ears, use black or dark brown paint to draw stylized leaf or branch shapes. Keep these simple and graphic.
Pro Tip: Consistency
Add a drop of water to your paint when doing the fine liner work (like the whiskers or ear patterns). Ink-like consistency flows smoother than thick paint.
Step 4: Final Touches
-
Paint the nose and snout:
Fill the nose shape with solid black, adding a small white highlight curve at the top. Use your liner brush to draw the mouth line and define the muzzle. -
Outline for crispness:
Using a very steady hand and a liner brush with black paint, go over the major dividing lines of the face. This separates the color blocks and gives clarity to the geometric style. -
Refine the edges:
Check the outer edges of your main shapes. If any paint has strayed, touch it up with white paint (for the background) or the appropriate color to ensure clean, sharp silhouettes.
Now step back and admire how a few simple shapes have come together to create a charming woodland friend
6 Trees, Forests, and Woodland Acrylic Painting Ideas
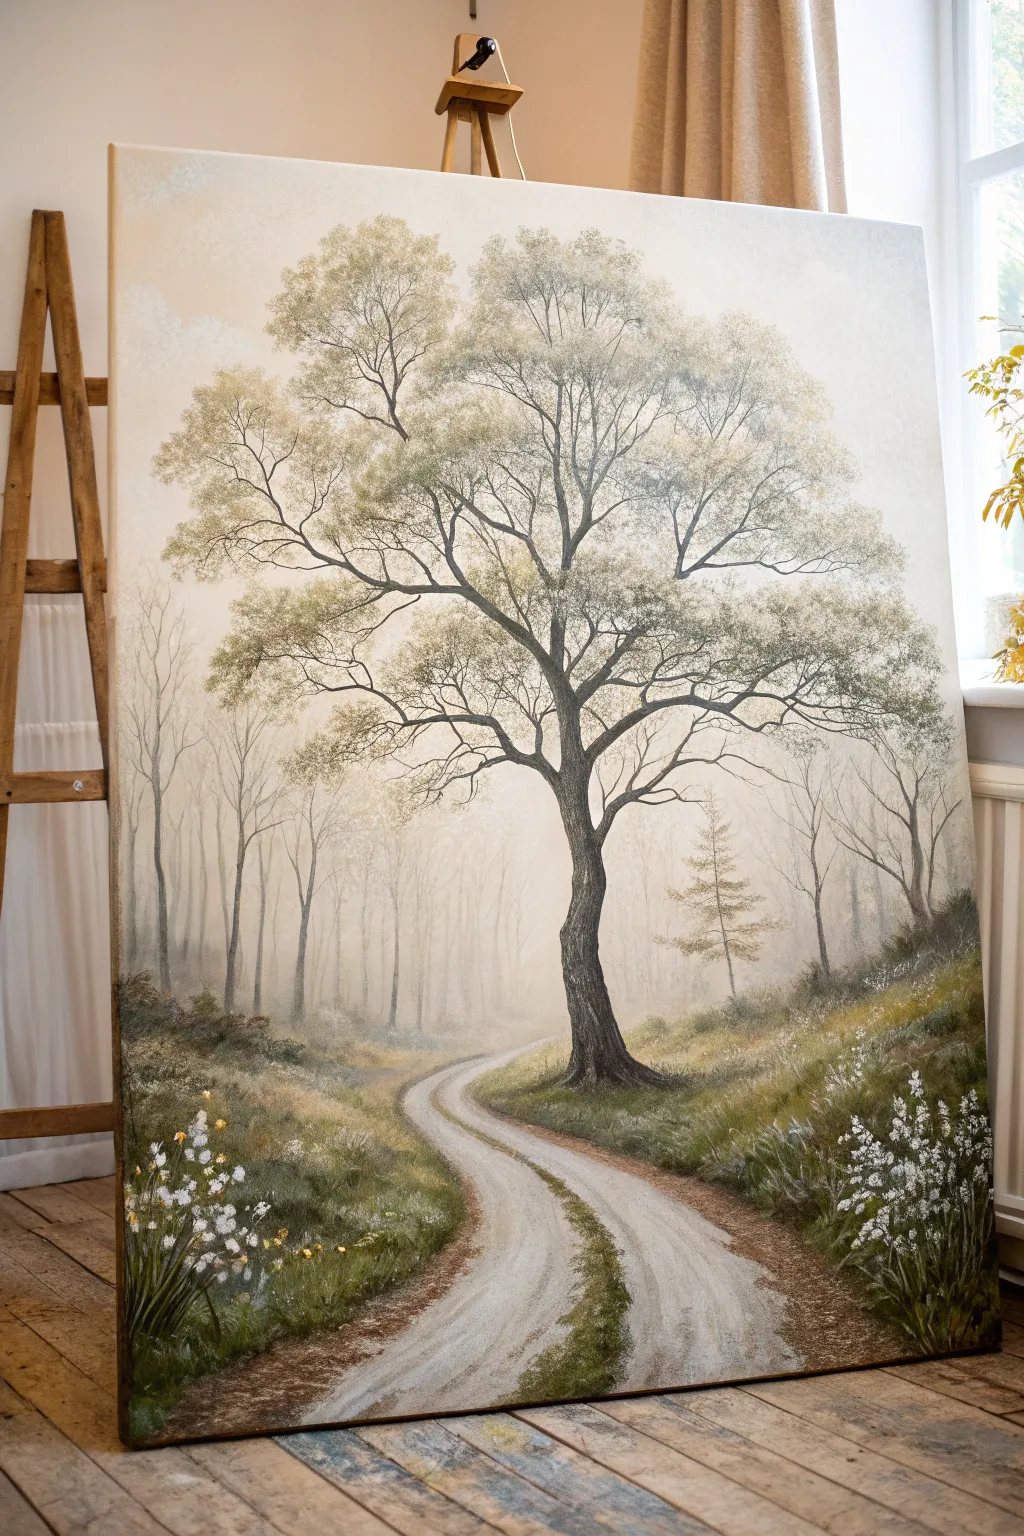
Capture the serene solitude of a foggy forest with this detailed landscape tutorial. You will learn to paint atmospheric distance, a winding dirt path, and a detailed central tree that stands as the focal point of the composition.
Step-by-Step Tutorial
Materials
- Large stretched canvas (at least 18×24 inches)
- Acrylic paints: Titanium White, Burnt Umber, Yellow Ochre, Sap Green, Payne’s Grey, Raw Sienna, Black
- Large flat brush (2 inch)
- Medium filbert brush
- Small round brush (size 2 or 4)
- Rigger or script liner brush
- Sea sponge (optional)
- Palette knife
- Water container and paper towels
- Acrylic glazing medium
Step 1: Setting the Atmospheric Background
-
Prime the Surface:
Begin by applying a thin coat of gesso if your canvas isn’t pre-primed. If it is, wipe it down with a slightly damp cloth to remove dust. -
Paint the Sky and Mist:
Mix a large amount of Titanium White with a tiny touch of Yellow Ochre and a drop of Payne’s Grey. Using your large flat brush, cover the top two-thirds of the canvas with this pale, creamy off-white color to establish a foggy atmosphere. -
Add Distant Trees:
While the background is still slightly tacky, mix a very pale grey tone using more white and a bit of Black. Using a watered-down consistency, paint faint vertical lines in the background to suggest distant tree trunks fading into the mist. -
Blend the Forest Floor:
Transition to the bottom third of the canvas by mixing White, a touch of Sap Green, and Raw Sienna. Use horizontal strokes to create the soft, blurry ground where the distant trees stand, blending it seamlessly into the misty sky color above. -
Establish the Mid-Ground Trees:
With a slightly darker grey-brown mix (still muted with white), sketch in the slender trees on the left and right sides. Although these are closer, keep them fairly transparent to maintain the foggy effect.
Muddy colors?
If your greens look too dull, stop mixing black into them for shadows. Instead, mix Sap Green with Burnt Umber or a deep Crimson to darken the tone while keeping the color rich.
Step 2: Creating the Path and Terrain
-
Draft the Path Layout:
Using a thinned Burnt Umber and a small round brush, lightly outline the winding S-curve of the path. Start narrow in the distance and widen significantly as it curves toward the bottom foreground. -
Base Coat the Grass:
Mix Sap Green with Burnt Umber and a little Yellow Ochre. Use a medium filbert brush to block in the grassy banks on either side of the path, using upward flicking motions to suggest texture. -
Paint the Dirt Path:
Fill in the path area with a mix of Titanium White and Raw Sienna. Add streaks of Burnt Umber while wet to simulate tire tracks, ruts, and shadows along the edges. -
Deepen the Shadows:
Mix a darker green using Sap Green and a touch of Black. Apply this to the base of the grassy banks and the corners of the canvas to create a vignette effect, drawing the eye toward the center. -
Add Texture to the Grass:
Using an old, splayed bristle brush or a sea sponge, stipple lighter shades of green and ochre onto the grassy hills to create the look of wild, uneven vegetation.
Step 3: The Majestic Focal Tree
-
Sketch the Trunk Structure:
Load a medium round brush with dark Burnt Umber mixed with Payne’s Grey. Paint the main trunk of the large central tree, starting thick at the base and twisting slightly as you move upward. -
Branch Out:
Extend the main branches outward and upward. Remember that tree limbs generally get thinner as they move away from the trunk. Use a ‘Y’ shape logic when splitting branches. -
Refine the Bark Texture:
Add dimension to the trunk by mixing a lighter grey-brown. Use a small brush or palette knife to gently scrape or paint highlight lines on the right side of the trunk, assuming light is coming from the right. -
Paint Fine Twigs:
Switch to your rigger or script liner brush with thinned dark paint (inky consistency). Add delicate, intricate twigs and smaller branches extending from the main limbs. -
Create the Foliage:
Mix a muted olive green using Sap Green, White, and a touch of Burnt Umber. Using a sponge or a stippling brush, lightly tap clusters of leaves onto the branches. Keep the foliage airy so the sky shows through. -
Highlight the Leaves:
Mix a paler yellow-green and stipple highlights onto the top edges of the leaf clusters where the light hits them.
Add a traveller
To add a story element, paint a tiny silhouette of a person walking deep in the distance on the path. Use a pale grey-blue color so they look far away in the fog.
Step 4: Final Details
-
Add Foreground Wildflowers:
Using a small detail brush and pure Titanium White, dot small clusters of flowers in the immediate foreground grass on the bottom right and left corners. -
Refine the Path:
Add a center strip of grass running down the middle of the dirt path using your green mix, simulating a rural two-track road. -
Final Glaze (Optional):
Once fully dry, you can apply a very thin glaze of glazing medium mixed with a tiny bit of Yellow Ochre over the whole painting to unify the colors and warm the light.
Step back and admire your peaceful forest walk.

PENCIL GUIDE
Understanding Pencil Grades from H to B
From first sketch to finished drawing — learn pencil grades, line control, and shading techniques.
Explore the Full Guide
6 Cloudy Skies and Weather Acrylic Painting Ideas
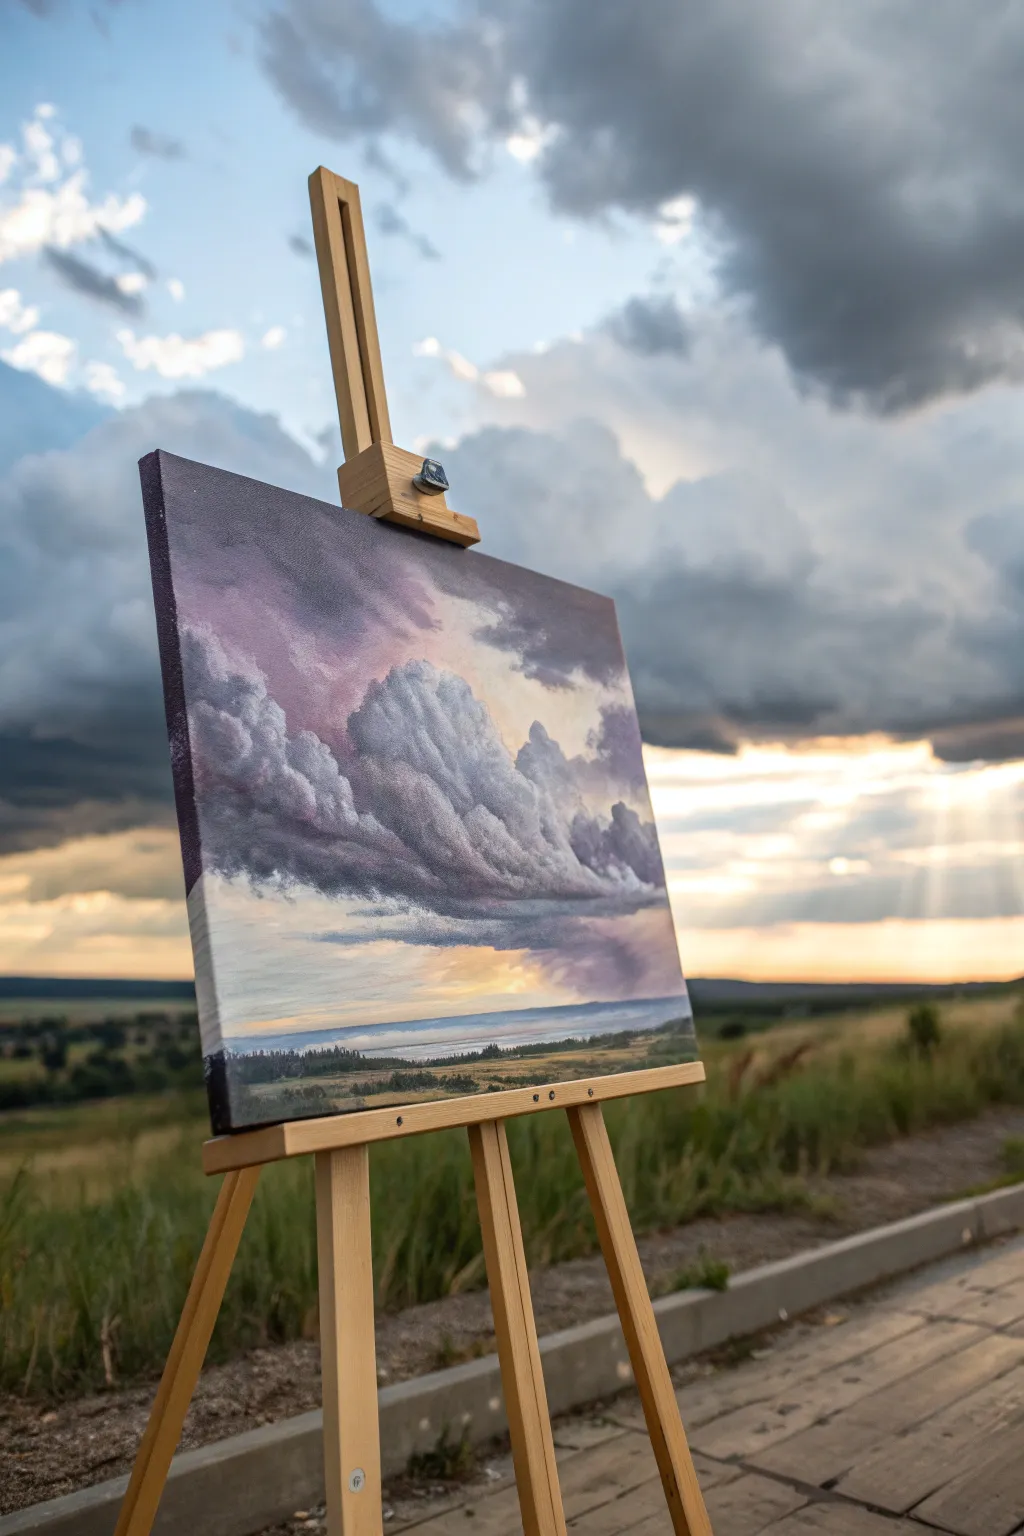
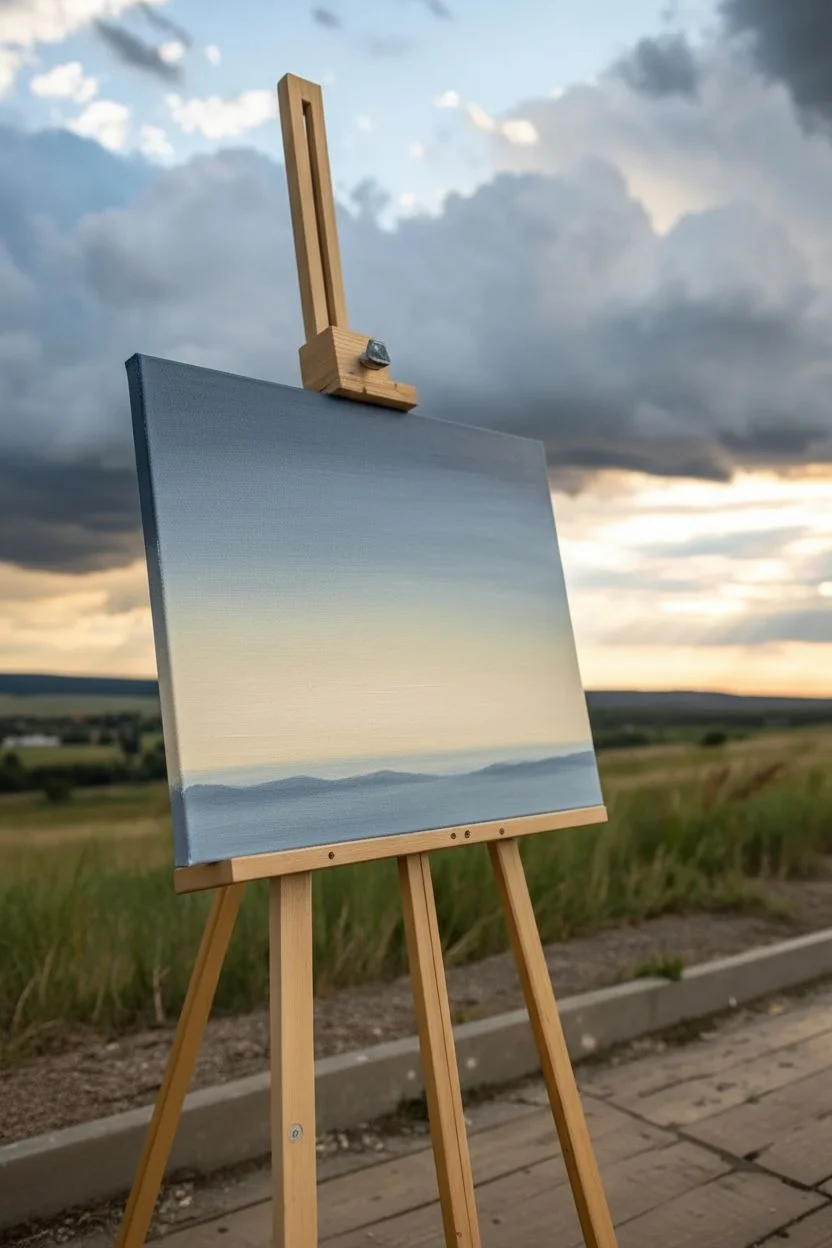
Capture the raw energy of a rolling storm with this atmospheric landscape study. This project focuses on building voluminous, heavy clouds using a moody palette of purples and greys against a warm horizon glow.
Detailed Instructions
Materials
- Canvas board or stretched canvas (16×20 inch recommended)
- Acrylic paints: Titanium White, Ultramarine Blue, Dioxazine Purple, Burnt Umber, Yellow Ochre, Cadmium Yellow Light, Payne’s Grey
- Large flat brush (1 inch)
- Medium filbert brush (size 6 or 8)
- Small round brush (size 2)
- Palette knife for mixing
- Water container and paper towels
- Easel (optional, but helpful for perspective)
Step 1: Setting the Atmosphere
-
Prime the sky gradient:
Begin by establishing the background sky tone. Mix Titanium White with a tiny touch of Yellow Ochre and Cadmium Yellow to create a soft, pale cream color. Apply this to the middle third of the canvas where the horizon light will be brightest. -
Paint the upper sky:
While the cream layer is still tacky, mix a muted slate blue using Ultramarine Blue, a touch of Burnt Umber to desaturate it, and White. Paint the top third of the canvas, blending it downwards into the cream section to create a soft transition. -
Establish the horizon line:
Determine your horizon line about one-quarter up from the bottom. Paint a distant, hazy blue-grey strip just above this line to represent far-off hills or atmospheric density, keeping edges soft.
Cloud Volume Secret
Think of clouds as 3D spheres, not flat shapes. Ensure the light source (top right) is consistent: highlight the top right of each puff and shadow the bottom left.
Step 2: Building the Cloud Structure
-
Mix the shadow color:
Create a deep, moody storm color by mixing Dioxazine Purple, Payne’s Grey, and a little Ultramarine Blue. This dark violet-grey will form the heavy undersides of the storm clouds. -
Block in cloud shapes:
Using a large flat brush or filbert, sketch out the main diagonal mass of the clouds. Start from the left side and sweep upwards toward the right, applying the dark shadow mix in broad, irregular patches to define the heavy bases. -
Add mid-tones:
Mix a lighter variation of your purple-grey by adding more White and a touch of the slate blue from the sky. Apply this above the dark bases, scumbling the paint in circular motions to suggest the fluffiness of cumulus clouds. -
Define the cloud peaks:
For the billowing tops where sunlight hits, mix Titanium White with a tiny hint of the cream sky color. Apply this to the upper edges of your cloud forms. Avoid pure white initially; keep it slightly warm to integrate with the light source. -
Blend the transitions:
With a clean, damp filbert brush, gently soften the edges between the dark bases, mid-tones, and light tops. Do not over-blend; you want to maintain the distinct ‘cauliflower’ texture of the clouds.
Step 3: Refining the Sky and Light
-
Deepen the contrast:
Go back into the darkest areas of the clouds—especially the undersides—with a concentrated mix of Payne’s Grey and Purple. This contrast makes the clouds look heavy and ominous. -
Create distinct layers:
Paint smaller, fragmented cloud shapes below the main mass using a medium grey. These ‘scud’ clouds should look wispy and detached, adding depth to the storm front. -
Enhance the highlights:
Using thick body paint, apply almost pure White to the very highest crests of the cloud formation. Use a dabbing motion to build physical texture (impasto) that catches the light.
Muddy colors?
If your purples and yellows turn brown when blending, let the first layer dry completely before glazing the second color over it, or wipe your brush frequently.
Step 4: Grounding the Scene
-
Block in the landscape:
For the land, mix Sap Green with Burnt Umber and a touch of Yellow Ochre to create a natural, earthy olive tone. Fill in the bottom quarter of the canvas. -
Add distant texture:
Mix a darker green-black using your green mix plus Payne’s Grey. With the small round brush, tap in tiny horizontal shapes along the distant horizon to suggest rows of trees or bushes. -
Suggest foreground details:
In the immediate foreground, use warmer tones—more Yellow Ochre and Burnt Sienna—to bring it forward. Use short, vertical brushstrokes to hint at tall grasses without painting individual blades. -
Balance the lighting:
If the land looks too dark, glaze a thin layer of the sky’s cream color over parts of the field to show where the sunlight is breaking through the clouds and hitting the ground.
Step back and admire how the heavy shadows contrast with the light to create a sky full of movement and drama
6 Night Sky and Galaxy Acrylic Painting Ideas
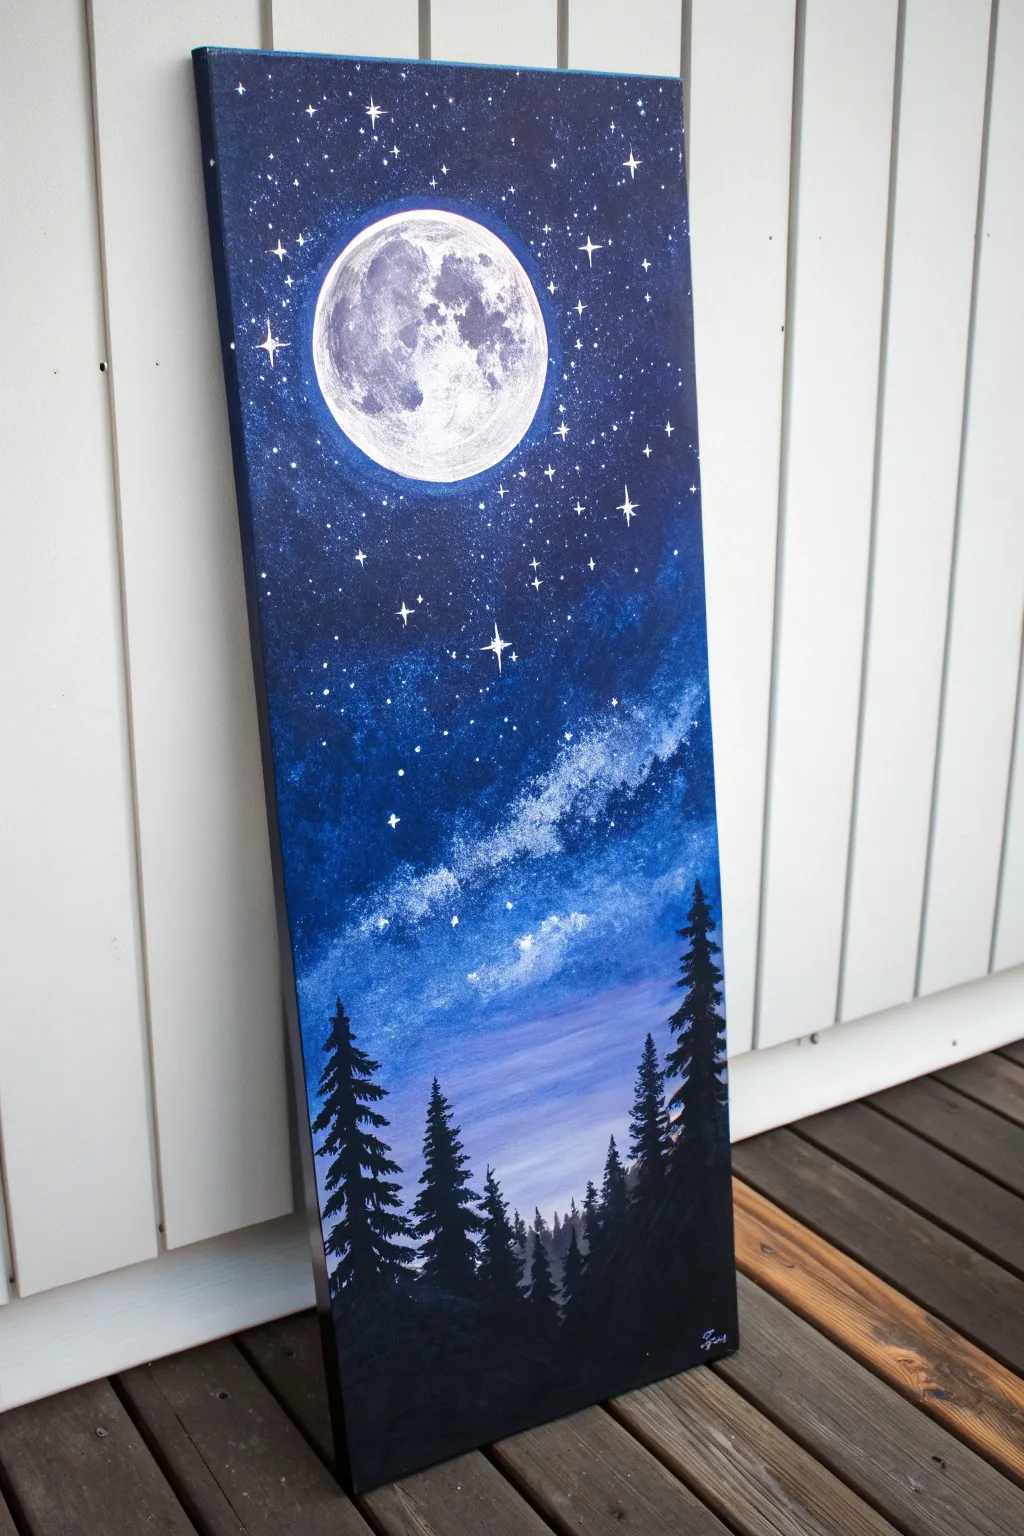
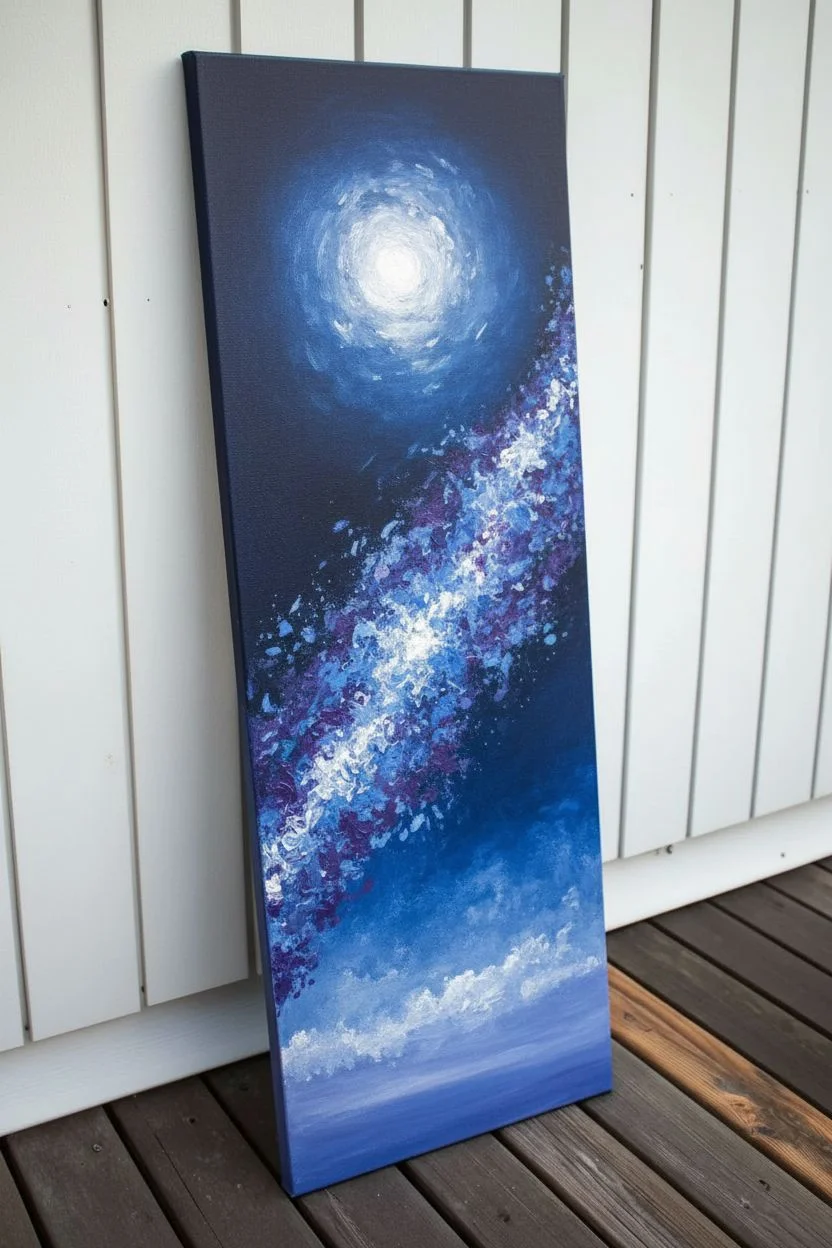
This striking vertical composition captures the magic of a clear night, featuring a luminous, detailed celestial body presiding over a misty galaxy and silhouetted pine forest. The blend of deep indigo and soft periwinkle creates a dreamlike atmosphere perfect for any space enthusiast.
Step-by-Step
Materials
- Long vertical canvas (e.g., 10×30 inches)
- Acrylic paints: Black, Titanium White, Prussian Blue, Ultramarine Blue, Dioxazine Purple, Light Blue
- Large flat brush or wash brush
- Medium round brush
- Small liner brush or detail brush
- Old toothbrush (for stars)
- Sponge or paper towel (for galaxy texture)
- Jar of water
- Palette
Step 1: Creating the Galaxy Background
-
Prime and base:
Start by painting the entire canvas with a very dark blue base, mixing Prussian Blue with a touch of Black. This provides a deep, rich foundation for the stars. -
Establish the light source:
While the base is slightly tacky or just dry, identify where your moon will go near the top. Paint a circular glow using Titanium White mixed with a tiny bit of Ultramarine Blue, blending it outwards into the dark background to create a diffuse halo effect. -
Layering the Milky Way:
Using a sponge or a crumpled paper towel, dab a mixture of Ultramarine Blue and Titanium White diagonally through the center of the canvas. Keep the texture uneven and cloud-like. -
Adding depth:
Sponge in brighter highlights using Light Blue and White concentrated in the center of your galaxy band. Then, use Dioxazine Purple near the edges of the galaxy cloud to create a celestial transition into the dark background. -
Creating the horizon glow:
Near the bottom quarter of the canvas, blend White, Light Blue, and a hint of Purple horizontally. This creates the ‘atmospheric perspective’ mist where the trees will eventually stand, making the black silhouettes pop.
Step 2: The Moon and Stars
-
Paint the moon shape:
Using a round brush and pure Titanium White, paint a solid, crisp circle in the center of your upper glow area. You may need two coats for opacity. -
Add moon texture:
Mix a light grey (White + tiny dot of Black). Use a relatively dry brush or sponge to dab irregular crater shapes onto the white moon. Focus darker grey areas on the left side and bottom to give it spherical dimension. -
Splattering stars:
Thin down some White paint with water until it’s ink-like. Dip an old toothbrush into it, point the bristles at the canvas, and flick them with your thumb to create a spray of fine stars. Concentrate more splatters along the milky way diagonal. -
Painting major stars:
Use your smallest liner brush to paint a few larger, cross-shaped ‘twinkle’ stars randomly in the open dark spaces. Add a tiny white dot in the center of each cross for extra brightness.
Star Splatter Mess?
If you splatter stars where you don’t want them (like on the black trees), simply paint over the mistake with black paint once the white dots dry.
Step 3: The Silhouetted Forest
-
Drafting the tree lines:
Load a medium round brush with pure Black. Paint vertical lines of varying heights starting from the very bottom of the canvas, extending up into the misty horizon glow. These serve as the trunks. -
Building tree shape:
Starting at the top of a trunk line, tap your brush side-to-side in a zig-zag motion, getting wider as you move down. This creates the classic pine tree shape. -
Varying the density:
Make the trees on the far left and right taller and denser, framing the scene. Keep the trees in the center slightly shorter or more sparse to allow the colorful horizon mist to show through. -
Refining branches:
Use a liner brush to add tiny, stray branches sticking out from the main tree shapes to make them look more organic and less like perfect triangles. -
Foreground fill:
Fill in the absolute bottom of the canvas with solid black to connect the base of all the trees, grounding the forest floor. -
Final touches:
If the moon needs more pop, add one final thin layer of bright white to the highlighted side. Sign your name in white or light blue in the bottom corner.
Moon Texture Trick
For realistic craters, use a small piece of natural sea sponge. The random holes in the sponge create organic lunar surface patterns instantly.
Hang this vertical beauty in a narrow wall space to bring a calming window into the cosmos into your home


6 Cozy Home and Window View Acrylic Painting Ideas
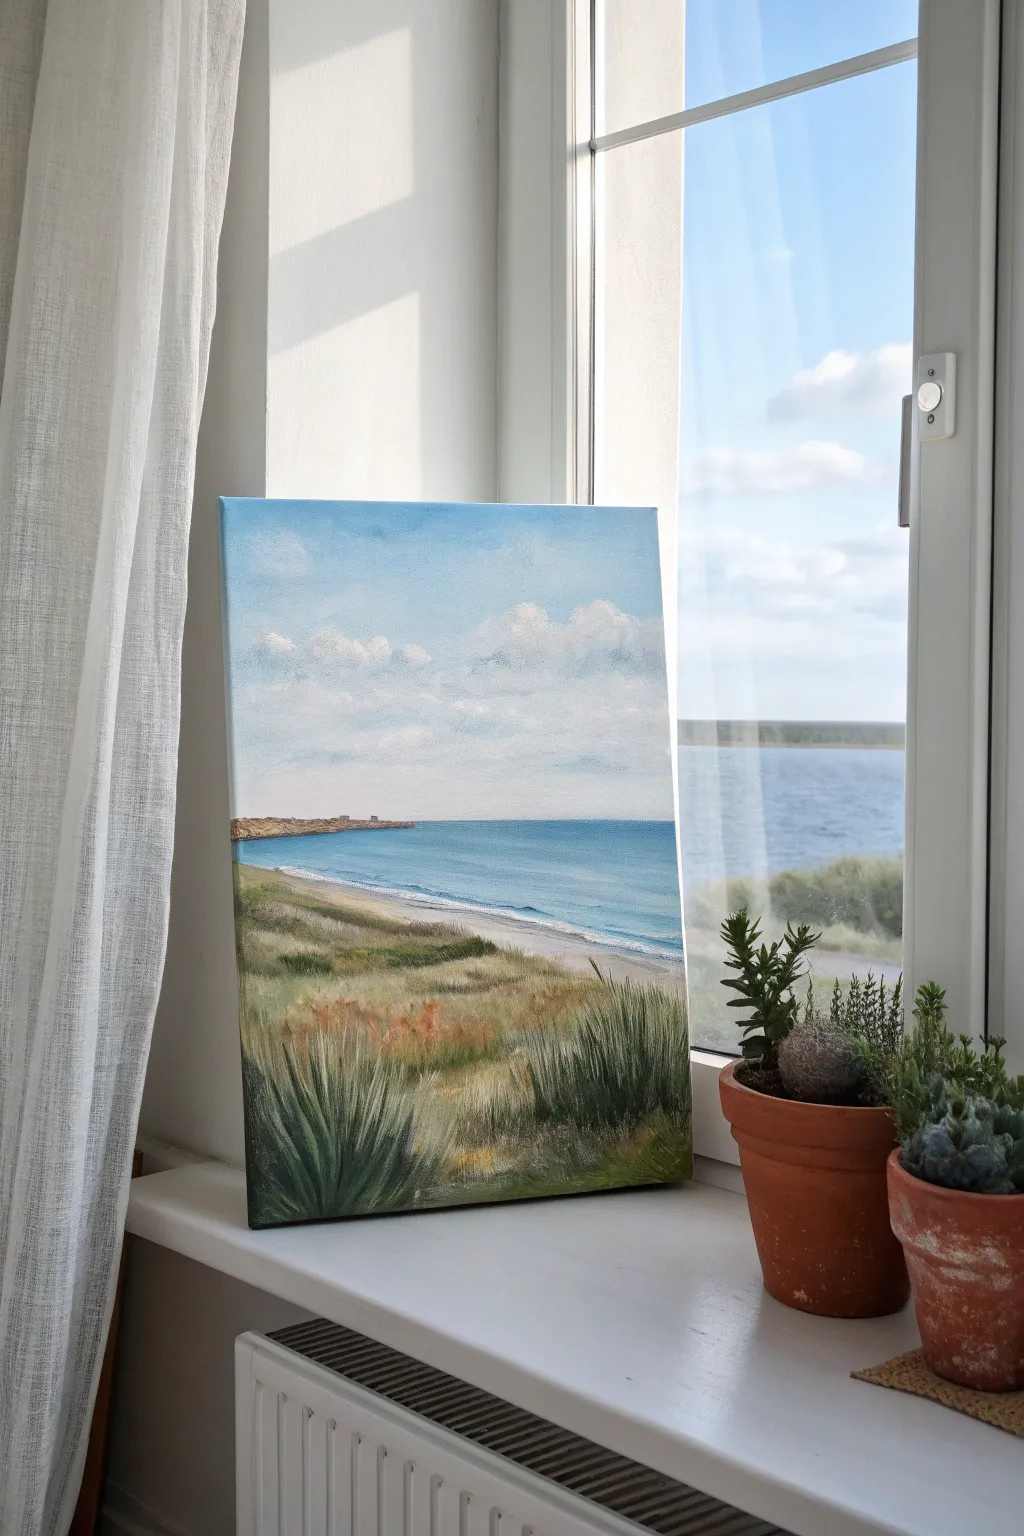
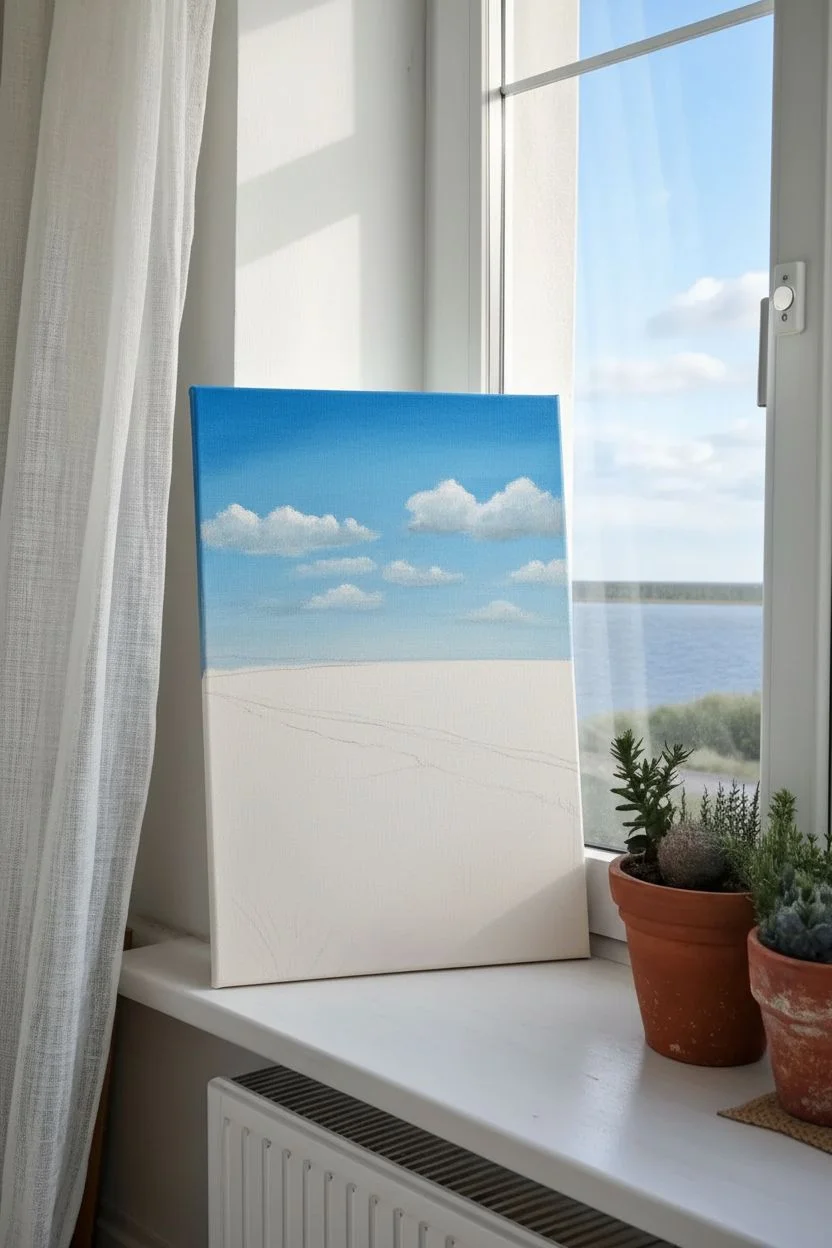
Capture the peaceful essence of a quiet shoreline with this realistic acrylic landscape. This tutorial guides you through layering soft skies, calm waters, and textural dune grasses to bring a slice of the beach into your home.
Step-by-Step
Materials
- Stretched canvas (approx. 12×16 inches or A3 size)
- Acrylic paints: Titanium White, Ultramarine Blue, Phthalo Blue, Cerulean Blue, Yellow Ochre, Burnt Sienna, Burnt Umber, Sap Green, Cadmium Yellow
- Large flat brush (1-inch) for sky and blocking in
- Medium filbert brush (size 6-8) for clouds and waves
- Small round brush (size 2-4) for details
- Fan brush (optional, for grass texture)
- Rigger or liner brush for fine grass blades
- Palette
- Water container
- Paper towels
Step 1: Planning and Sky
-
Establish the horizon:
Begin by lightly sketching a horizon line about one-third of the way up the canvas. This doesn’t need to be perfect, but ensure it’s straight. Sketch a gentle curve for the coastline starting from the left edge and sweeping down towards the bottom right. -
Mix the sky gradient:
Prepare a large amount of sky blue by mixing Titanium White with a touch of Cerulean Blue. The top of the sky should be a deeper blue, gradually fading to a very pale, almost white blue at the horizon. -
Paint the sky:
Using your large flat brush, start painting from the top of the canvas with the darker blue mix. As you move down, add more white to your brush without rinsing it fully, blending the colors directly on the canvas for a smooth gradient. Stop just above your horizon line. -
Fluffy clouds:
While the sky is still slightly tacky or dry, use a medium filbert brush loaded with Titanium White to dab in cloud shapes. Keep the tops rounded and fluffy, and let the bottoms be flatter and softer. I like to smudge the bottom edges with a dry finger to make them recede into the distance. -
Cloud shadows:
Mix a tiny amount of Ultramarine Blue and a speck of Burnt Sienna into White to create a soft grey. Apply this sparingly to the bottom undersides of the larger clouds to give them volume and weight.
Step 2: Ocean and Coastline
-
Distant headland:
Mix a muted brownish-grey using Burnt Sienna, Ultraviolet Blue, and White. Paint the distant landmass on the far left horizon. Keep the edges slightly soft to indicate atmospheric perspective. -
Deep water:
For the ocean, mix Phthalo Blue, a touch of Ultramarine, and White. The water nearest the horizon should be the darkest and deepest blue. Paint horizontally to mimic the flatness of the sea. -
Shallow water transition:
As you paint closer to the shore, mix in more White and a tiny bit of Yellow Ochre or Sap Green to create a turquoise tint. Seamlessly blend this into the deeper blue. -
Breaking waves:
Use a small brush with pure Titanium White to paint the thin, foamy line where the water meets the sand. Keep this line irregular and broken; water doesn’t rush up in a straight line.
Horizon Check
A crooked horizon ruins the illusion. Before varnishing, turn your painting upside down. It makes it much easier to spot if your water level is slanted.
Step 3: Dunes and Details
-
Sand base layer:
Mix Yellow Ochre, Titanium White, and a touch of Burnt Sienna for a warm sand color. Fill in the beach area and the base of the dunes. It’s okay if this looks flat initially; we will add texture later. -
Blocking the dunes:
Establish the grassy dune area in the foreground using a mix of Sap Green and Burnt Umber. Don’t paint individual blades yet; just block in the dark undertones where the grass will be thickest. -
Mid-tone grasses:
Using a fan brush or an old, splayed bristle brush, flick upward strokes using a mix of Sap Green and Yellow Ochre. Start from the bottom of the canvas and work your way up the dune to create layers of depth. -
Adding warmth to the dunes:
Introduce some Burnt Sienna and Cadmium Yellow into your green mix for the patches of dried, sun-baked grass. Dab this texture into the middle ground of the dunes to break up the green. -
Highlighting the grass:
Switch to your liner or rigger brush. Mix a pale yellow-green (Yellow, White, touch of Green) and paint individual long blades of grass in the immediate foreground. These should be crisp and distinct. -
Final foreground details:
Add a few clumps of darker, coarser grass in the bottom corners using a dark green mix (Phthalo Blue + Burnt Umber). This frames the view and draws the eye inward. -
Sparkle and finish:
Add tiny touches of white on the water for sparkle, and ensure the horizon line is clean and straight. Step back to check the overall contrast.
Add Life
Use a tiny brush to add two or three distant seagulls in the sky using simple ‘v’ shapes. Keep them small and gray rather than black for realism.
Now you have a serene window view that will bring calm to any room in your house
6 Beginner-Friendly Portrait and Silhouette Acrylic Painting Ideas
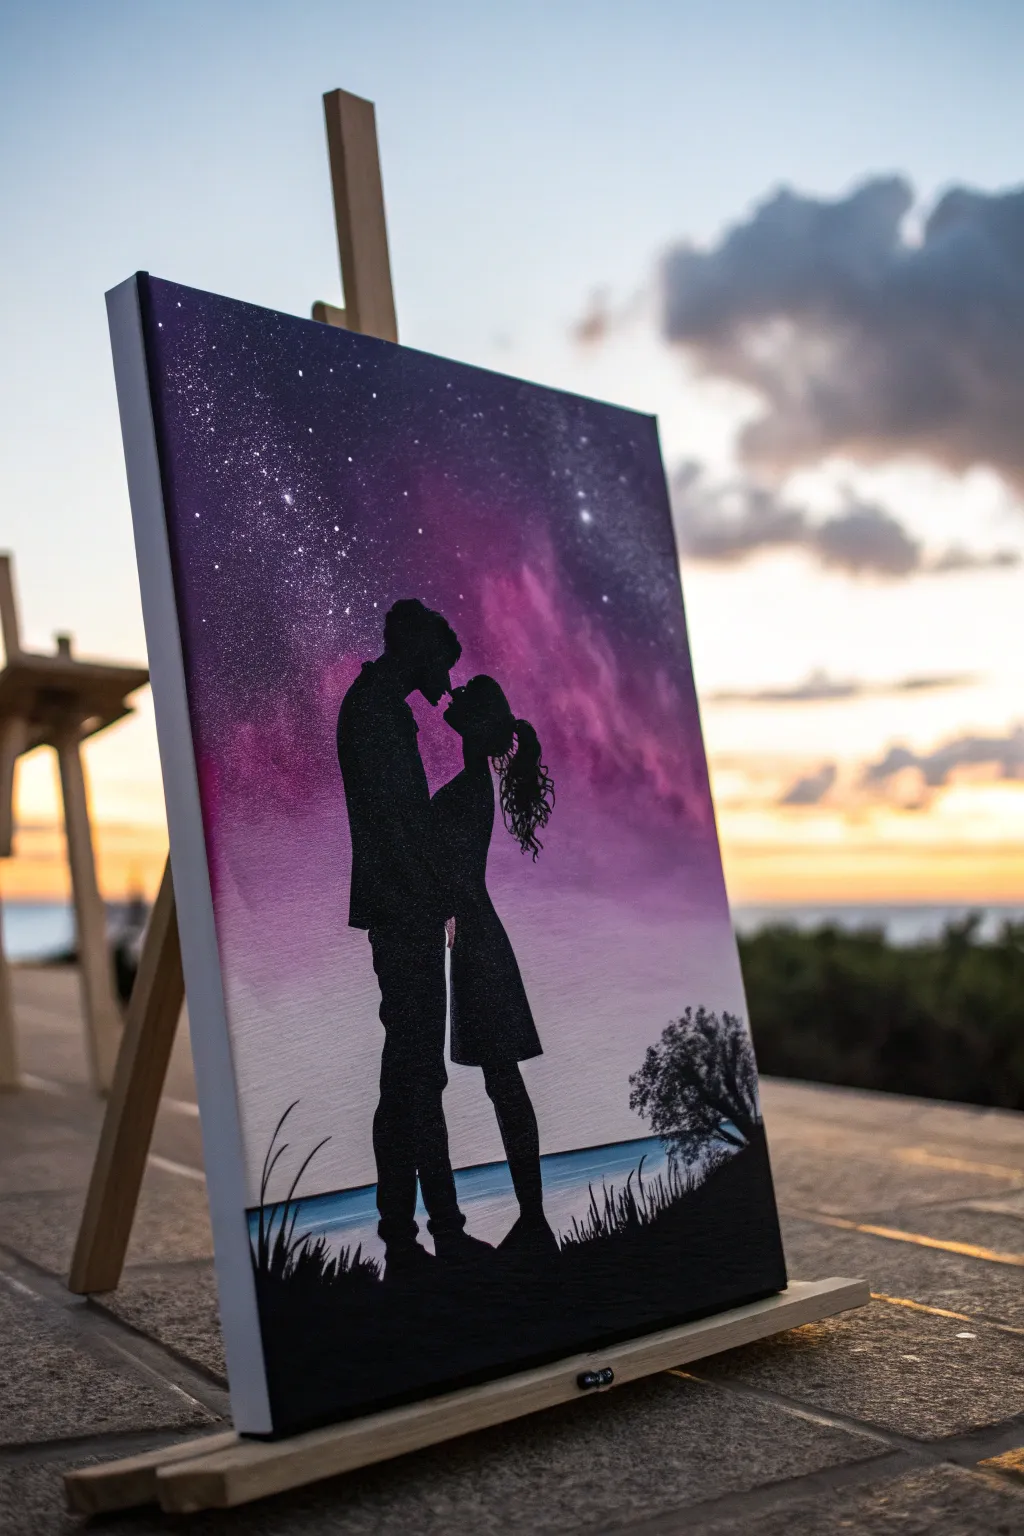
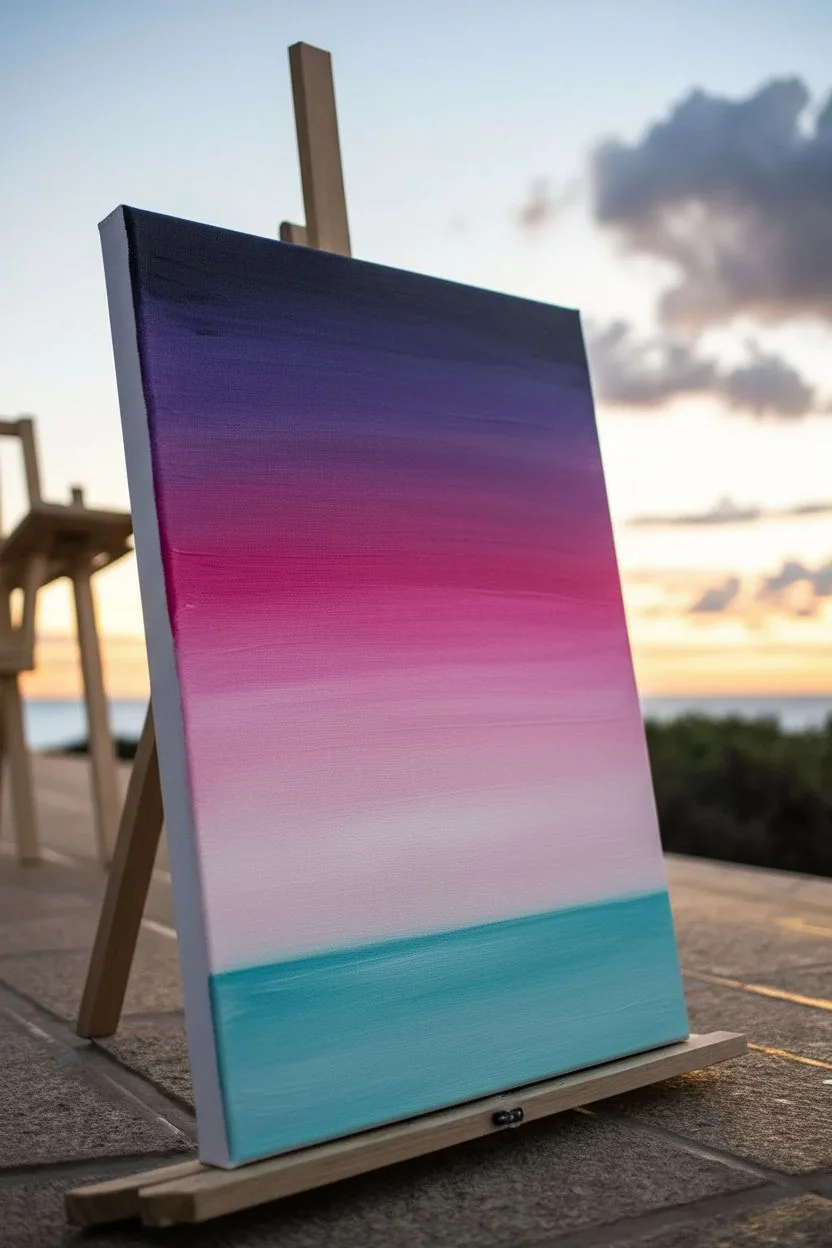
Capture the romance of a twilight embrace with this stunning silhouette painting that merges a vibrant galaxy sky with a peaceful seaside horizon. This beginner-friendly project relies on simple blending techniques to create a dramatic, professional-looking background that makes the black figures pop.
Step-by-Step
Materials
- Stretched canvas (e.g., 11×14 or 16×20 inches)
- Acrylic paints: Black, White, Deep Violet, Magenta/Pink, Navy Blue, Teal or Light Blue
- Large flat brush (for blending)
- Medium round brush
- Small fine liner brush (for details)
- Old toothbrush (for the stars)
- Pencil
- Water cup and palette
- Paper towels
Step 1: Creating the Galaxy Gradient
-
Prime the colors:
Squeeze out generous amounts of your Deep Violet, Magenta, and White onto your palette. You want the paint to be fluid but not watery to ensure smooth blending. -
Start the top section:
Using your large flat brush, apply the Deep Violet to the top third of the canvas. Use horizontal strokes, but don’t worry about being perfectly neat yet. -
Blend downward:
Without cleaning the brush entirely, dip into the Magenta. Start painting just below the violet section, blending upward where they meet so the purple transitions seamlessly into the pink. -
Lighten the horizon:
Clean your brush. Mix a little White with your Magenta to create a soft pastel pink. Apply this to the middle section, blending it up into the darker pink to create a glowing effect. -
Paint the water line:
Near the bottom quarter of the canvas, paint a horizontal strip of Teal or Light Blue. Blend the top edge slightly with the pale pink sky above it to suggest a hazy horizon line. -
Add deep space depth:
While the top purple layer is still slightly tacky, mix a tiny bit of Black or Navy Blue into your Violet. Dab this into the very top corners to create a vignette effect, drawing the eye toward the center.
Pro Tip: Hair Texture
For realistic curly hair, don’t paint solid blocks. Use a tiny liner brush and make small, looping scribbles on the classic silhouette edge to let the background sky peek through.
Step 2: Stars and Details
-
Create the stars:
Dilute a small amount of White paint with water until it has an ink-like consistency. Dip an old toothbrush into this mixture. -
Splatter the galaxy:
Hold the toothbrush over the dark purple/pink area of the canvas and run your thumb across the bristles to flick tiny specks of paint. Focus the density at the top. -
Add main stars:
Use your fine liner brush to dot a few larger, brighter stars in the darkest part of the sky for variety. Let the entire background dry completely before moving on.
Step 3: Painting the Silhouette
-
Sketch the outline:
Lightly sketch the outline of the couple using a pencil. If you aren’t confident in your drawing skills, you can print a silhouette image, cut it out, and trace it directly onto the canvas. -
Fill the figures:
Using the medium round brush and pure Black paint, carefully fill in the bodies of the couple. Ensure the paint is opaque; you may need a second coat once the first dries. -
Refine the edges:
Switch to your fine liner brush to paint the delicate details, such as the woman’s hair strands, the facial profiles, and the distinct shapes of their clothing. -
Ground the scene:
Paint the bottom strip of the canvas solid Black to represent the ground. Allow this area to be uneven and textured to simulate earth. -
Add vegetation:
Using the tip of your liner brush, flick upward from the black ground to create blades of grass. I like to vary the height and direction of these strokes to make them look natural. -
Paint the tree bush:
On the right side, just above the water line, dab a small, bushy tree silhouette using the tip of a round brush. Use a stippling motion (rapid dabbing) with black paint to mimic leafy texture. -
Final touches:
Check your silhouette for any light spots showing through the black and touch them up. Ensure the horizon line behind the legs is clean.
Troubleshooting: See-Thru Black
If your black silhouette looks streaky or grey after drying, don’t panic. Acrylics can be semi-transparent. Simply apply a second thin coat of black for a solid, crisp shadow look.
Step back and admire how that vibrant sky makes your romantic silhouette truly stand out.
6 Abstract Color Field and Shape Acrylic Painting Ideas
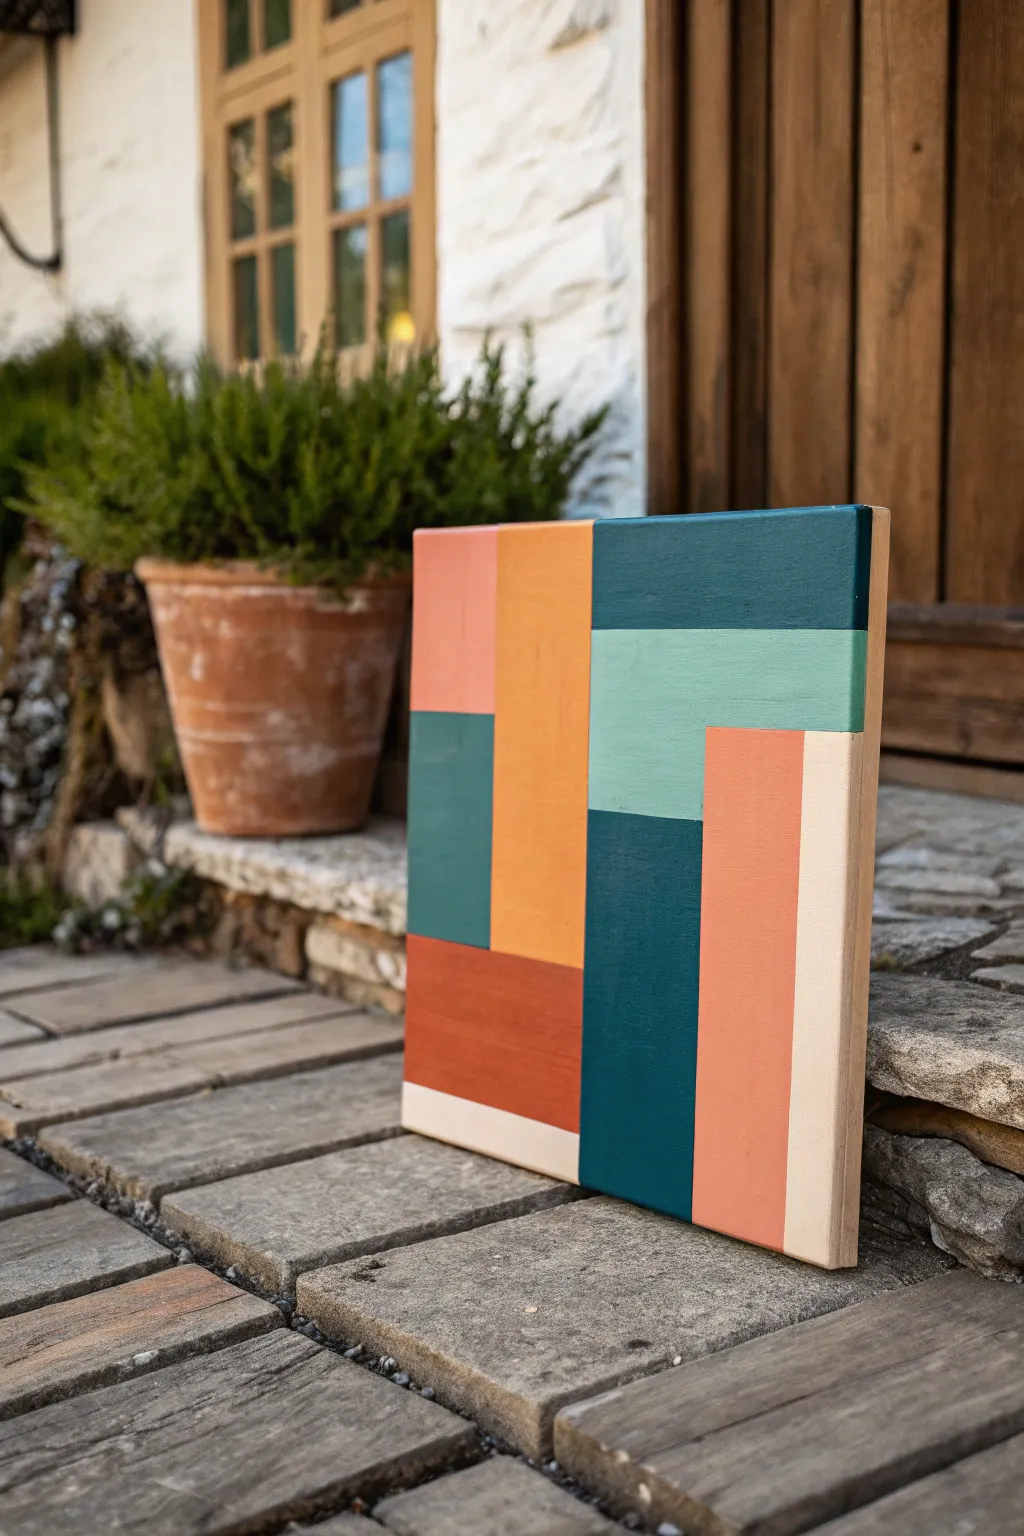

Create a stunning modern art piece using nothing but straight lines and a muted, earthy color palette. This project focuses on precision and clean edges to build an interlocking composition that feels balanced and architectural.
Step-by-Step Guide
Materials
- Cradled wood panel (approx. 12×12 or similar square ratio)
- Acrylic paints (terracotta, peach, teal, dark teal, mustard yellow, cream)
- White Gesso
- Painter’s tape or artist tape (low tack)
- Flat shader brushes (various sizes)
- Ruler or T-square
- Pencil
- Sandpaper (fine grit)
- Matte varnish
Step 1: Preparation & Layout
-
Prepare the surface:
Start by lightly sanding your wood panel to ensure a super smooth texture. Wipe away any dust with a tack cloth or damp paper towel. -
Prime the board:
Apply a coat of white gesso to the surface. This seals the wood and ensures your colors will pop rather than soaking into the grain. Let it dry completely. -
Plan your grid:
Using a ruler and pencil, lightly sketch your geometric design. Don’t press too hard; you want faint guidelines. Focus on creating L-shapes and rectangular blocks that fit together like Tetris pieces. -
Refine the lines:
Double-check your vertical and horizontal lines with a T-square or ruler to ensure everything is perfectly perfectly aligned.
Step 2: Painting the first set of blocks
-
Tape the first sections:
Select non-adjacent shapes to paint first. Apply painter’s tape along the pencil lines, pressing down firmly on the edges to prevent bleed-through. -
Seal the tape:
I like to brush a tiny amount of matte medium or white base paint along the tape edge first. This creates a barrier so your colored paint has a crisp, razor-sharp line. -
Mix your palette:
Prepare your colors. For this earthy look, mix raw sienna into your yellows for mustard, and add a touch of burnt umber to your teal for the darker sections. -
Apply the first colors:
Fill in the taped-off sections. Use a flat brush and paint in the direction of the wood grain or parallel to the tape for the smoothest finish. Apply two thin coats rather than one thick one. -
Remove tape carefully:
Peel off the tape while the paint is still slightly tacky, pulling it away from the painted area at a 45-degree angle.
Bleeding Lines?
If paint seeps under the tape, wait for it to dry fully. Then, gently scrape the excess with a craft knife or touch it up with the background color using a liner brush.
Step 3: Completing the composition
-
Let it dry:
Wait until the first sections are completely bone-dry before taping over them. This is crucial to avoid peeling up your fresh work. -
Tape remaining sections:
Apply tape over the dried painted areas to define the boundaries for the adjacent blank spaces. -
Paint adjacent blocks:
Fill in the remaining rectangles with your contrasting colors like the light peach, deep teal, and cream accents. -
Address the edges:
Don’t forget the sides of the panel. You can either wrap the design around the edges or paint them a solid neutral color for a clean, framed look. -
Final touch-ups:
Once all tape is removed, inspect your lines. Use a small liner brush and a steady hand to fix any tiny imperfections where colors meet. -
Seal the work:
Finish with a coat of matte varnish to unify the sheen of the different paint colors and protect your geometric masterpiece.
Add Texture
Mix a little modeling paste into one or two of the paint colors before applying. This adds a subtle 3D relief to specific blocks, giving the piece tactile depth.
Hang your new geometric panel in a well-lit spot to show off those crisp, satisfying lines
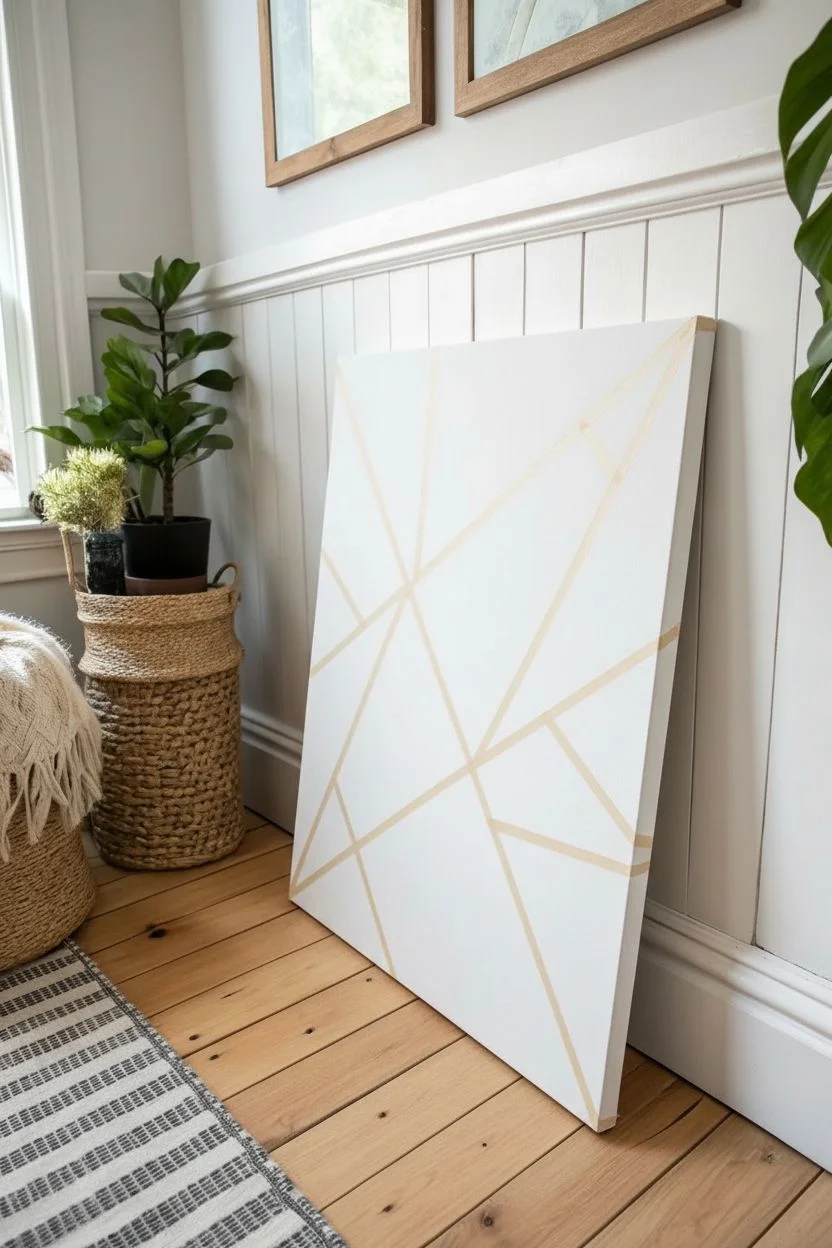
5 Clean-Line Geometric and Tape-Resist Acrylic Painting Ideas
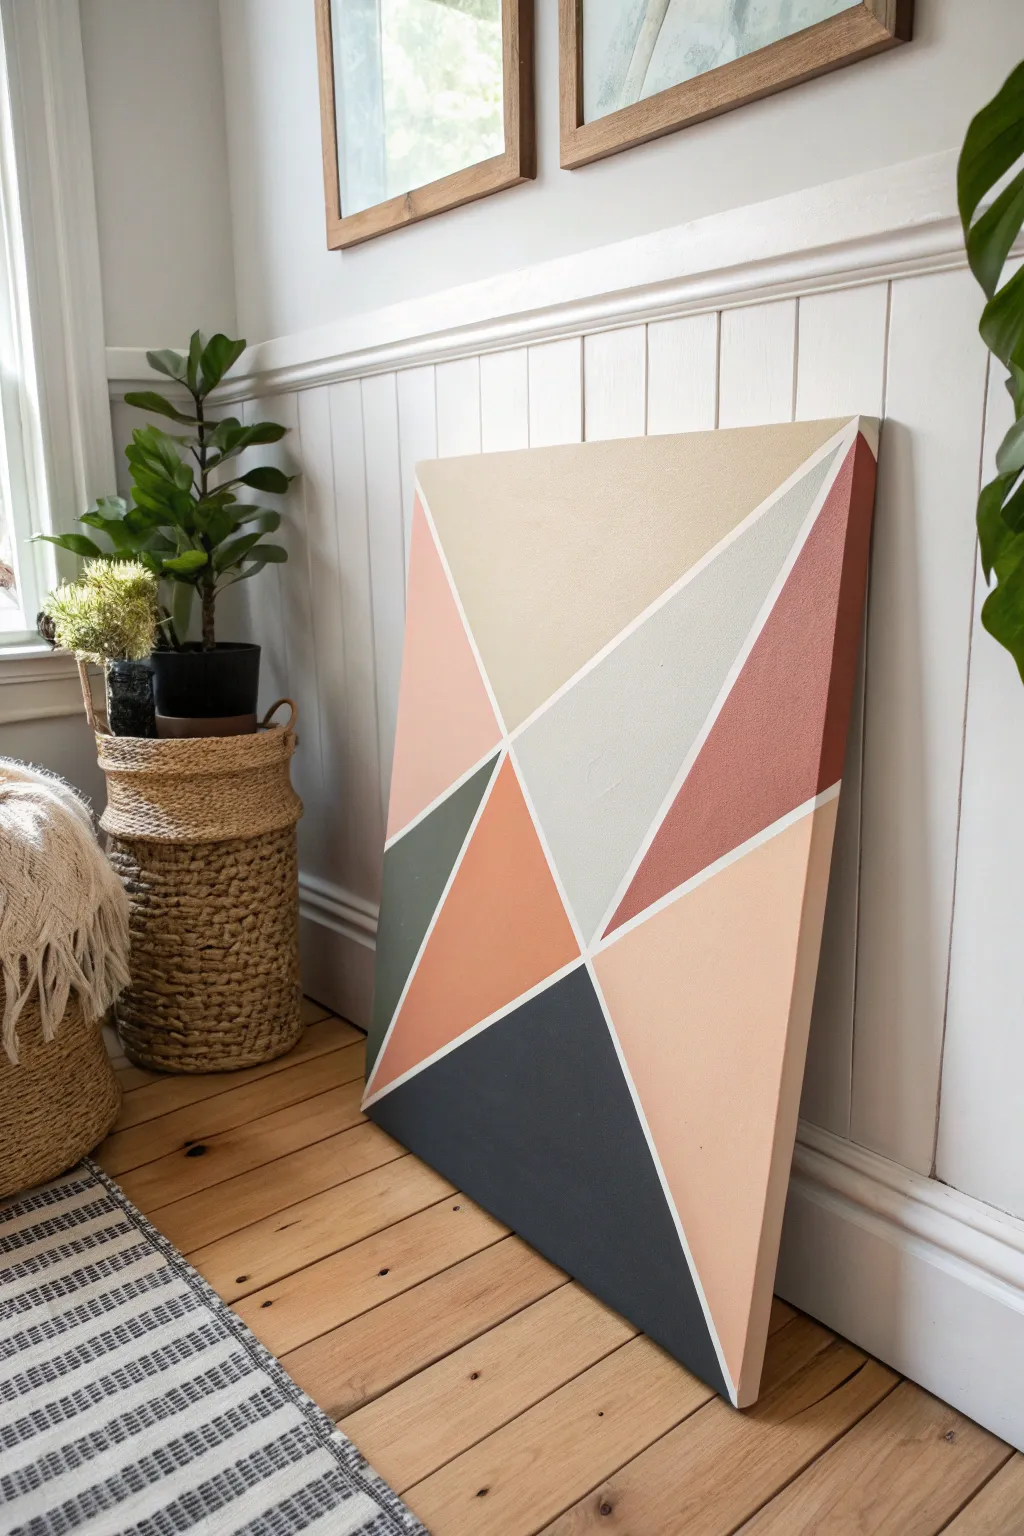
This striking geometric piece brings a touch of modern elegance to any room with its crisp white lines and soothing, earthy color palette. By using simple masking tape techniques, you can achieve professional-looking sharp edges and create a complex composition that feels both balanced and dynamic.
Step-by-Step Tutorial
Materials
- Large stretched canvas (24×30 inches or similar)
- Painter’s tape or masking tape (1/4 inch or 1/2 inch width)
- Acrylic paints (Titanium White, Mars Black, Burnt Sienna, Yellow Ochre, Raw Umber, Sage Green)
- Flat paintbrushes (various sizes, 1-inch and 2-inch)
- Palette or paper plates for mixing
- Ruler or straight edge (optional)
- Matte varnish (optional)
Step 1: Preparation and Design
-
Prime the canvas:
Begin by ensuring your canvas is clean and dust-free. If it isn’t pre-primed, apply two coats of white gesso. Let it dry completely. Painting the entire canvas with a base coat of Titanium White is crucial here; this white base will become the crisp lines you see in the final piece. -
Plan your lines:
Before taping, lightly visualize where you want your shapes to go. The design relies on intersecting triangles. You can sketch very faint pencil lines if you need a guide, or work intuitively with the tape. -
Apply the tape pattern:
This is the most critical step for the composition. Lay down strips of painter’s tape to create your geometric web. Start with one or two long diagonal lines that span the entire canvas to break up the space. -
Refine the shapes:
Add smaller intersecting tape lines to subdivide the larger areas into triangles and irregular quadrilaterals. Press the tape down firmly, running your fingernail or a credit card along the edges to seal them tight. -
Seal the tape edges:
To guarantee those razor-sharp lines, paint a thin layer of your base color (Titanium White) over the tape edges. This bleeds white paint under any gaps in the tape, sealing them so your colors won’t seep through later.
Tape Trouble?
If your tape tears the canvas or lifts previous paint layers, heat it briefly with a hair dryer on low before peeling. The warmth softens the adhesive for a gentle release.
Step 2: Mixing and Painting
-
Mix the color palette:
Prepare your colors. You’ll need five distinct shades: a deep charcoal black, a muted sage green, a warm terracotta (mix Burnt Sienna with a touch of White), a soft peach (more White with a dab of red/orange), and a creamy barely-there beige. -
Paint the largest section:
Start with the large top section. Load a wide flat brush with your creamy beige mix. Apply the paint in smooth, even strokes, working away from the tape edges towards the center of the shape. -
Apply the dark anchor:
Paint the bottom-most large triangle with your deep charcoal or soft black. I prefer mixing a tiny bit of dark blue into my black to give it depth rather than using it straight from the tube. This dark section anchors the visual weight of the painting. -
Fill the accent colors:
Move on to the terracotta/rust colored sections. Locate the large right-side triangle and the smaller central triangle. Paint these with solid, opaque coats. You may need a second coat for these richer colors to ensure full coverage. -
Add the cool tones:
Paint the green sections. One looks like a muted sage (center) and another is a darker, forest green (bottom left small triangle). Be careful not to accidentally paint over the tape into a neighboring section. -
Complete the palette:
Fill in the remaining shapes with your soft peach and light grey-green tones. Check for any unpainted spots of canvas texture showing through and touch them up.
Pro Tip
Mix a tiny amount of white into every color on your palette. This increases opacity and gives all colors a cohesive, chalky matte finish that looks very modern.
Step 3: Finishing Touches
-
Check for opacity:
Let the first layer of paint dry until it’s touch-dry. If any colors look streaky or transparent, apply a second coat. Consistency is key for that flat, modern look. -
The big reveal:
Wait until the paint is dry to the touch but not fully cured (usually about 1-2 hours). Carefully peel off the tape. Pull slowly at a 45-degree angle away from the painted area to ensure clean lines. -
Correct imperfections:
No matter how careful you are, slight bleeds happen. Use a small detail brush with Titanium White to tidy up any fuzzy edges on the white lines. Conversely, use the colored paint to fix any spots where the white line is too thick. -
Paint the sides:
Decide how to treat the edges of the canvas. You can extend the geometric shapes over the sides for a gallery-wrapped look or paint all four sides a solid white or black for a framed appearance. -
Varnish and protect:
Once the painting is completely dry (wait at least 24 hours), apply a coat of matte varnish. This will unify the sheen of the different paint colors and protect your hard work from dust.
Now you have a sophisticated piece of geometric art ready to lean casually against a wall or hang as a focal point in your living space


Have a question or want to share your own experience? I'd love to hear from you in the comments below!