
Small acrylic paintings are my favorite way to sneak in a little creativity without committing to a huge canvas or a long session. You can finish one in an evening, learn a new trick, and end up with something totally frame-worthy (or giftable).
Mini Sunset Gradient With Simple Silhouettes
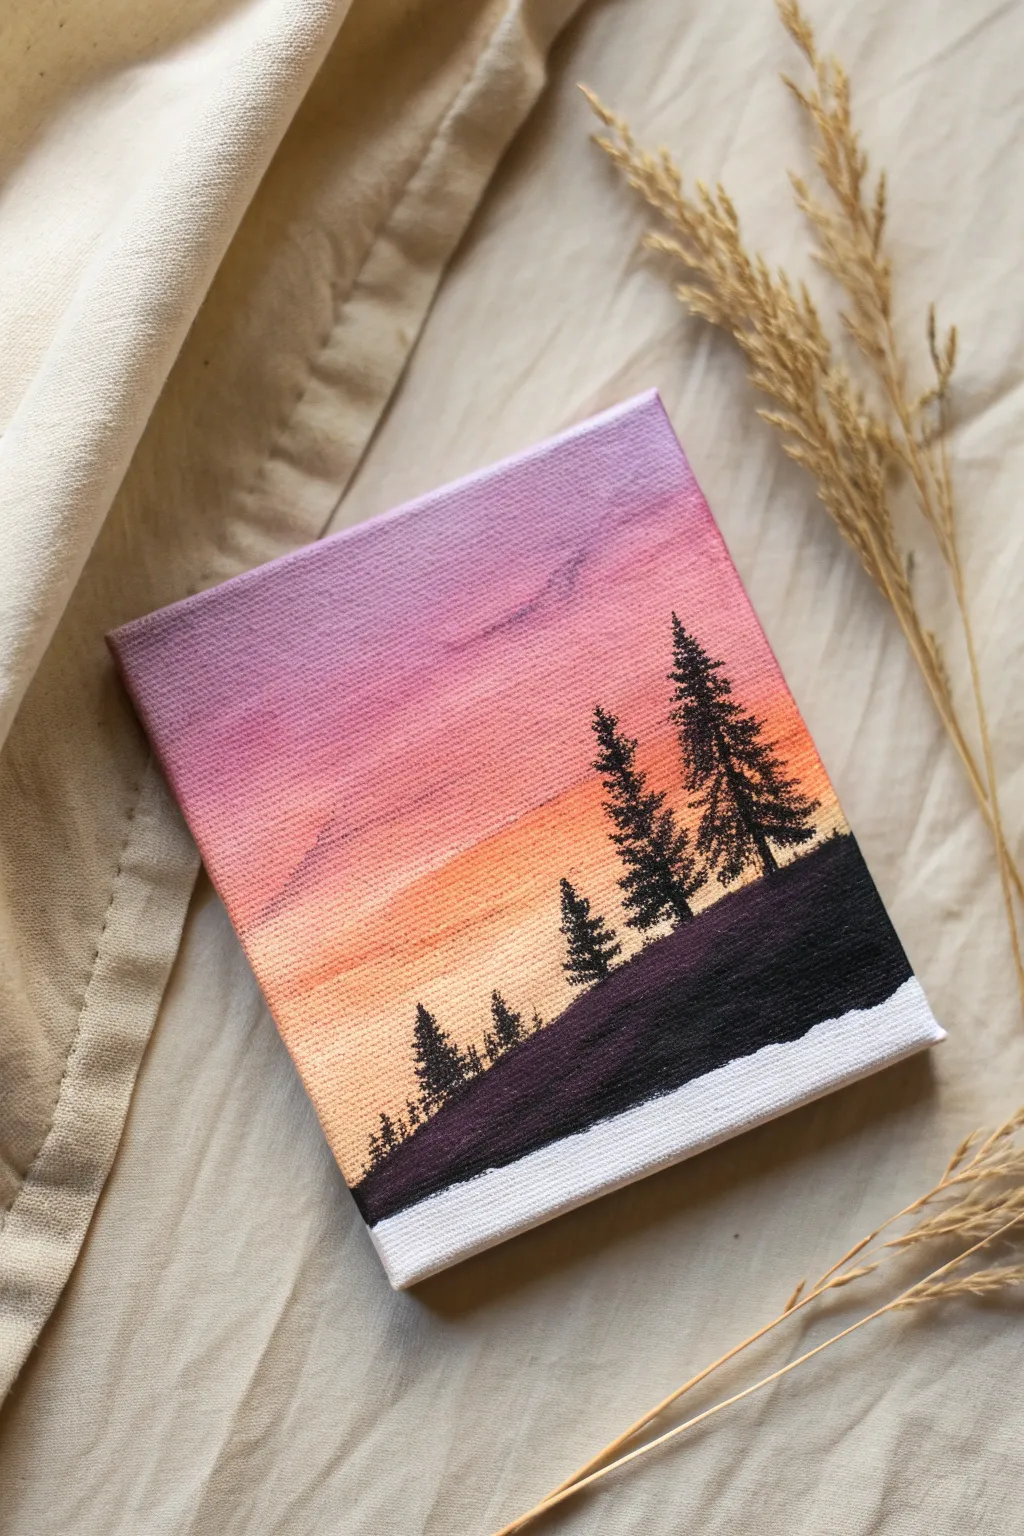
Capture the serene beauty of twilight with this pocket-sized landscape painting. You’ll master a smooth acrylic gradient blend that transitions from soft violet to warm gold, creating the perfect backdrop for striking pine silhouettes.
Step-by-Step
Materials
- Small square canvas (e.g., 4×4 or 6×6 inch)
- Acrylic paints: Violet, Magenta/Pink, Orange, Lemon Yellow, Black, Titanium White
- Flat shader brush (medium size)
- Small round detail brush (size 0 or 1)
- Masking tape or painter’s tape
- Palette for mixing paint
- Cup of water and paper towels
Step 1: Preparing the Canvas
-
Tape the Base:
Apply a strip of masking tape horizontally across the bottom edge of your canvas. This creates the crisp, clean white border seen in the reference image. -
Seal the Tape:
Run your fingernail or the back of a spoon firmly along the top edge of the tape to ensure a tight seal so no paint bleeds underneath.
Paint drying too fast?
Make blending easier by adding a drop of acrylic retarder or slow-drying medium to your paint. Mist the canvas lightly with water while blending.
Step 2: Creating the Sunset Gradient
-
Mix Your Violet:
On your palette, mix a touch of white into your violet paint to soften it slightly. It should look like a dusky evening sky. -
Start at the Top:
Using the flat brush, paint a horizontal band of the violet mixture across the top quarter of the canvas. -
Add the Pink Layer:
While the violet is still wet, rinse your brush and pick up the magenta or pink paint. Apply this directly below the violet band. -
Blend the Transition:
Gently stroke the brush back and forth where the violet and pink meet. I like to keep my brush slightly damp here to help the colors melt into each other seamlessly. -
Introduce the Orange:
Clean your brush again and apply a band of orange paint below the pink section, blending the overlap immediately just like you did before. -
Finish with Yellow:
Fill the remaining white space down to the tape line with bright lemon yellow paint. -
Final Gradient Blend:
Take a clean, dry brush and very lightly sweep it horizontally across the entire canvas from top to bottom to smooth out any harsh lines. -
Let it Dry:
Allow the background to dry completely. It must be dry to the touch before adding the silhouettes, or the black paint will turn muddy.
Step 3: Painting the Silhouettes
-
Outline the Hill:
Switch to your small round detail brush and load it with black paint. Paint a sloping, uneven line across the bottom third of the canvas to simulate a hillside. -
Fill the Ground:
Fill in the area below your hill line with solid black paint, covering everything down to the masking tape. -
Paint Tree Trunks:
draw a few vertical lines rising from the hill. Make your tallest tree on the right and add smaller ones descending to the left for perspective. -
Stipple the Foliage:
Using the very tip of your detail brush, tap tiny dots and dashes horizontally across the trunk lines. -
Shape the Trees:
Start with very narrow dashes at the top of the tree and gradually widen your strokes as you move down to create a triangular pine shape. -
Add Texture:
Don’t make the trees too solid; leave tiny gaps of sunset sky peeking through the branches to make them look realistic. -
Ground the Trees:
Thicken the base of the trees slightly where they meet the black hill so they feel firmly planted in the ground.
Make it starry
Before painting the trees, flick a stiff toothbrush dipped in watered-down white paint over the purple section for a starry night effect.
Step 4: Finishing Touches
-
Remove the Tape:
Once the black paint is mostly dry, carefully peel off the masking tape at a 45-degree angle to reveal the clean canvas edge. -
Touch Up:
If any paint bled under the tape, use a tiny bit of white paint or gesso to clean up the bottom edge.
Display your mini masterpiece on a small easel or shelf to add a pop of color to your room


Starry Night Sky With Paint Splatter Stars
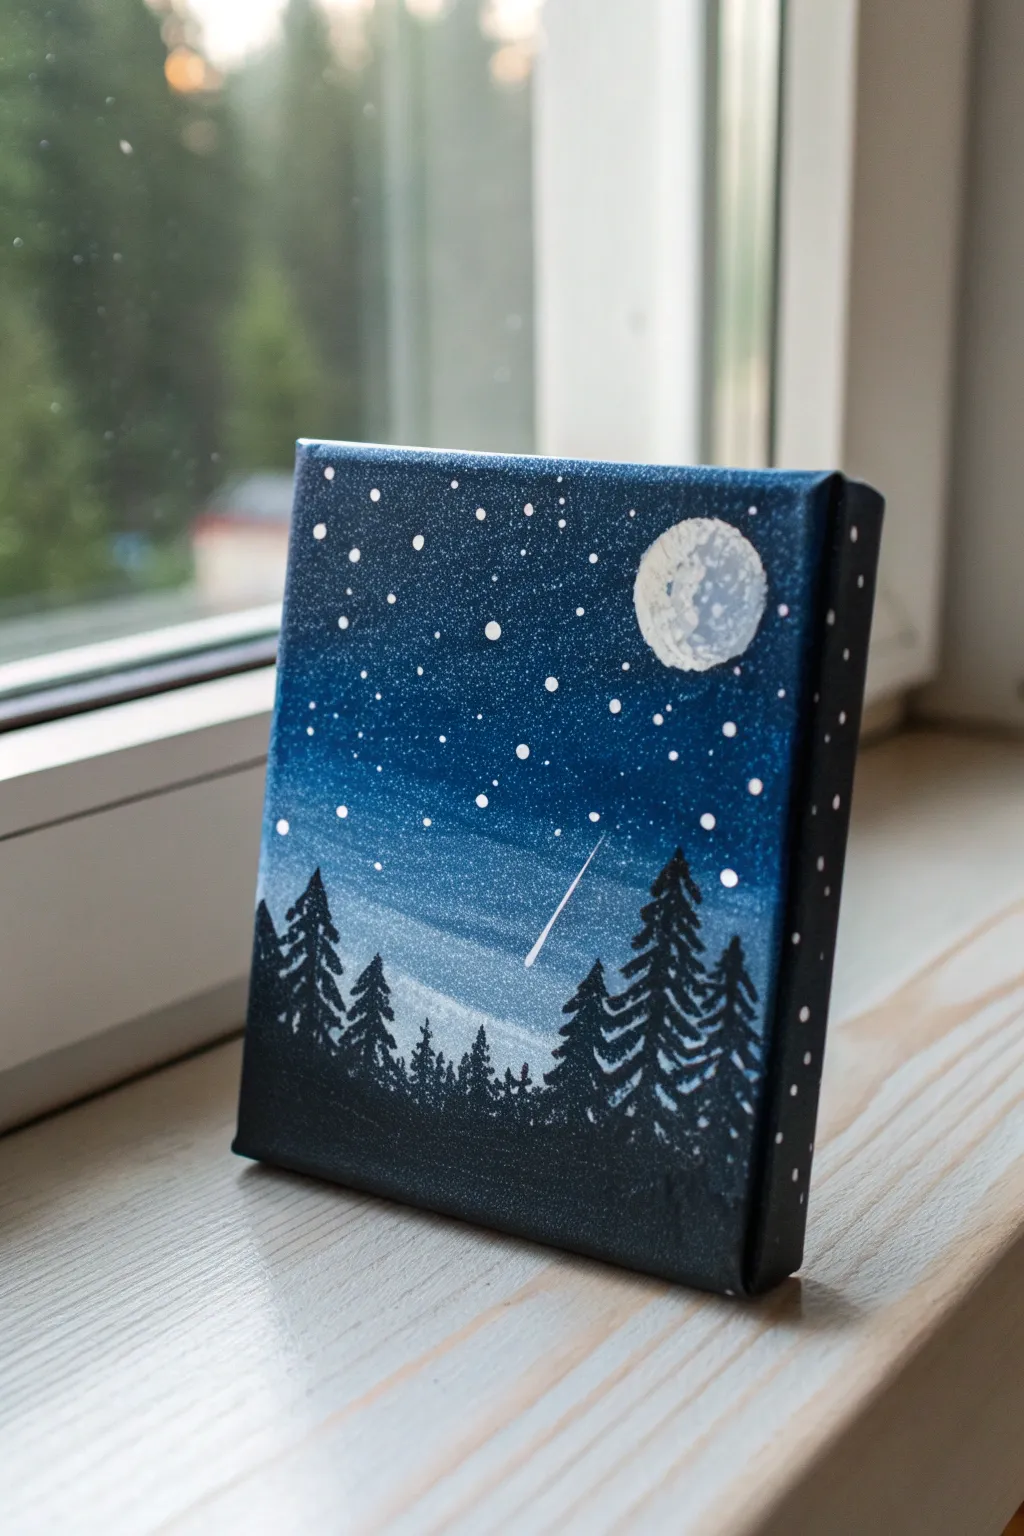

Capture the serene beauty of a crisp night sky on a tiny canvas perfect for a bookshelf or desk. This project features a deep blue gradient fading into the horizon, accented by a glowing moon and a single, striking shooting star.
How-To Guide
Materials
- Small square canvas (e.g., 4×4 or 5×5 inches)
- Acrylic paints: Navy Blue, Phthalo Blue (or a primary blue), Black, White
- Flat brush (roughly 1 inch or 3/4 inch)
- Small round detail brush (size 0 or 00)
- Old toothbrush (for spattering)
- Palette or mixing plate
- Water cup and paper towels
Step 1: Creating the Gradient Sky
-
Prepare your dark blue:
Start by mixing a deep midnight color. On your palette, combine a generous amount of Navy Blue with a touch of Black. You want it dark, but not pure black. -
Paint the top section:
Using your flat brush, apply this dark mixture to the top third of the canvas. Don’t forget to paint the top and side edges of the canvas with this color to give it a finished, gallery-wrapped look. -
Shift to medium blue:
Without cleaning your brush fully, pick up some of the brighter Phthalo Blue. Blend this just below the dark section, using horizontal strokes to mix the colors directly on the canvas. -
Lighten the horizon:
Now, wipe your brush on a paper towel to remove most of the dark paint. Pick up White and a tiny dot of blue. Paint the bottom third of the sky, blending upwards into the medium blue section to create a soft, hazy transition. -
Smooth the gradient:
While the paint is still wet, use long, gentle horizontal strokes across the entire canvas to smooth out any harsh lines between the color zones. Let this layer dry completely before moving on.
Splatter Control
Test your toothbrush splatter on a piece of scrap paper first. If the drops are too big, your paint is too watery; if nothing comes out, it’s too thick.
Step 2: Adding Starts and the Moon
-
Mix watery white:
Take a small amount of White paint and mix it with a few drops of water until it has the consistency of fluid ink or heavy cream. -
Splatter the stars:
Dip an old toothbrush into this watery mixture. Hold it over the canvas and run your thumb across the bristles to flick tiny specks of paint. Aim mostly for the darker upper section of the sky. -
Paint larger stars manually:
Grab your detail brush. Dip the very tip into pure White paint and gently dot a few specific, larger stars among the spray to add variety and depth. -
Form the moon base:
In the upper right quadrant, paint a solid white circle. It doesn’t need to be perfectly round; a little irregularity adds character. -
Texture the moon:
Mix a tiny whisper of grey (white with a pinprick of black). Dab this texture onto the white circle while it’s tacky to create craters and shadows, keeping the right side slightly brighter. -
Add the shooting star:
With your finest brush and thinned white paint, drag a quick, diagonal line starting thick and lifting off to a taper. Place it centrally but slightly lower than the moon.
Make It Glow
Mix a tiny drop of glow-in-the-dark acrylic medium with your white paint for the moon and stars to make the painting come alive when the lights go out.
Step 3: Silhouetting the Forest
-
Paint the ground layer:
Switch to pure Black paint. Use your flat brush to fill in the bottom half-inch of the canvas solidly, creating a dark ground for your trees to stand on. -
Start the tree trunks:
Using the detail brush, paint thin vertical lines rising from the ground. make some taller and some shorter to create a natural, uneven forest line. -
Add pine branches:
Starting at the top of a trunk, create small downward-sloping dabs or zig-zags. Widen your strokes as you move down the trunk to form the classic conical pine tree shape. -
Fill in the canopy:
I prefer to dab the brush repeatedly to create a dense, textured look for the foliage rather than painting individual needles. -
Create depth:
Paint a few smaller, shorter trees in the gaps between the larger ones to make the forest feel dense and distant. -
Extend to the edges:
Ensure you paint trees or continue the black ground color onto the side edges of the canvas, so the scene wraps around the object.
Place your finished mini-canvas on a windowsill to catch the light and enjoy your personal slice of the night sky


Simple Mountain Layers in Two or Three Values
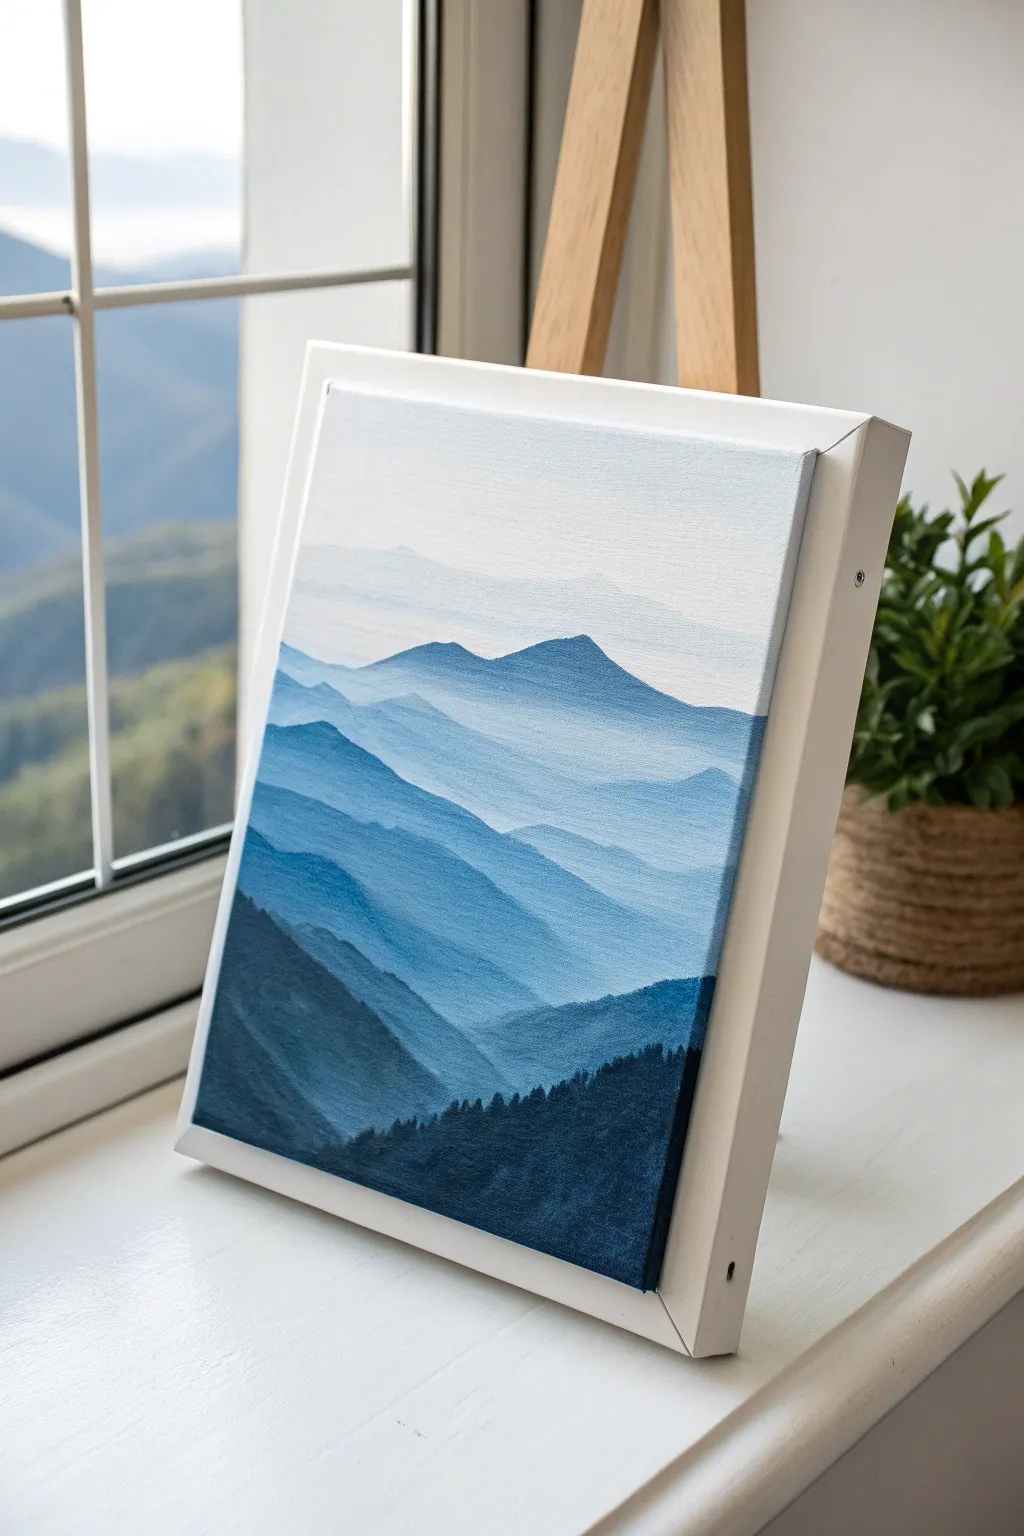
Capture the serene depth of a mountain range using nothing but shades of blue and white to create atmospheric perspective. This minimalist yet striking project teaches you how to layer colors from light to dark to build distance and immersion.
Step-by-Step
Materials
- Small square canvas (e.g., 8×8 or 10×10 inches)
- White floating frame (optional but recommended for the look shown)
- Acrylic paints: Phthalo Blue (or Prussian Blue) and Titanium White
- Flat shader brushes (medium and large sizes)
- Small round detail brush
- Palette or mixing plate
- Cup of water and paper towels
- Pencil (H or HB for light sketching)
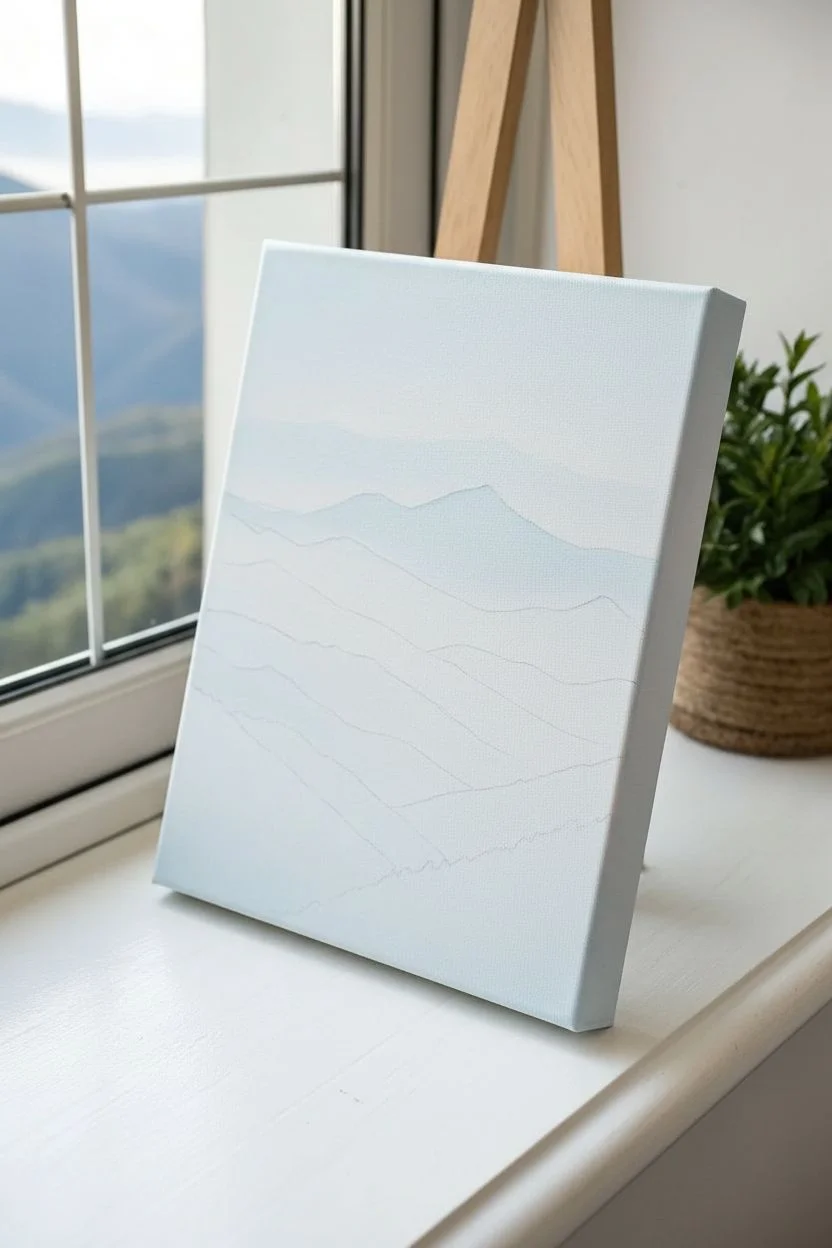
Step 1: Planning and Sky
-
Sketch the terrain lines:
Begin by lightly sketching roughly 5-7 wavy, horizontal lines across your canvas. These don’t need to be detailed; they are just guides for where your mountain ridges will sit. Make the top lines smoother and flatter, and the bottom lines more jagged and pronounced. -
Mix the sky color:
On your palette, take a large dollop of Titanium White and add the tiniest speck of blue. You want a very pale, almost-white blue for the sky. The key to this painting is subtle gradients, so start extremely light. -
Paint the background sky:
Using your largest flat brush, paint the entire sky area down to your first pencil line. If you want a soft look, you can add a little water to your brush to make the paint more translucent. -
Create the first distant ridge:
Add just a tiny bit more blue to your sky mixture. Paint the first strip of mountains right below the sky. The value difference should be very subtle, barely darker than the sky itself, pushing it far into the distance. -
Softening the edge:
While the paint is still wet, you can lightly sweep a clean, damp brush along the bottom edge of this first mountain layer to blur it slightly, enhancing the feeling of misty distance.
Atmospheric Perspective
Remember: objects get lighter and bluer the further away they are. Keep your top layers milky and pale, saving your full-strength pigment only for the very bottom.
Step 2: Building the Middle Ground
-
Deepen the blue mixture:
Add another small amount of blue to your existing puddle. Paint the next mountain shape down. Ensure you cover the pencil line completely so the ridge looks solid. -
Vary the ridge shape:
As you move down the canvas, make the mountain tops slightly more distinct. Use the edge of your flat brush to create gentle peaks and valleys rather than just a straight line. -
Layer three: Increasing contrast:
Mix a distinctly darker shade now—this is roughly a mid-tone blue. Paint the third layer of mountains. You should start seeing a clear progression from the pale top to the darkening center. -
Add texture to the mid-ground:
I like to dab the brush slightly while painting this layer rather than using smooth strokes. This subtle texture hints at forests or rough terrain without needing to paint individual trees yet. -
Correcting values:
Pause and look at your drying layers. Acrylics dry darker. If two layers look too similar, wait for them to dry, remix a slightly different shade, and repaint the lower one to ensure there is visible separation.
Level Up: Morning Mist
Before the layers dry completely, use a dry mop brush to lightly drag white paint between the ridges. This creates a realistic ‘fog’ effect settling in the valleys.
Step 3: Foreground and Details
-
Mix the foreground blue:
Create a deep, rich blue. If you are using Phthalo Blue, use it almost tailored straight from the tube, perhaps with just a touch of white to make it opaque. -
Paint the second-to-last layer:
Apply this dark blue to the mountain range just above the bottom. Make the silhouette jagged and interesting, as these features are ‘closer’ to the viewer. -
Prepare the darkest shade:
For the absolute bottom layer (the foreground), use pure blue. If your blue naturally looks transparent, mix in a tiny dot of black or dark brown to give it weight and solidity. -
Block in the foreground:
Fill in the entire bottom section with this darkest color. Ensure the paint is applied thickly enough that no canvas texture shows through. -
Switch to a detail brush:
While the foreground shape is established, take your small round brush to add the feeling of trees. You don’t need to paint full trees; just focus on the tops. -
Stipple the tree line:
Along the top edge of your dark foreground shape, use a vertical stippling motion (tiny up-and-down dabs). This creates a jagged ‘sawtooth’ effect that mimics the silhouette of pine trees against the lighter mountains behind them. -
Refining the silhouette:
Vary the height of your tree stipples. Group some higher ‘trees’ together and leave some areas lower to make the forest look natural and organic. -
Final assessment:
Step back five feet. Check if the gradient flows smoothly from light to dark. If the transition is jarring anywhere, you can apply a very watery glaze of blue over a too-light section to knock it back. -
Varnish and frame:
Once fully dry (give it at least 24 hours), apply a satin varnish to unify the sheen of the different layers. Place it in a white floating frame to make those blues really pop.
Now you have a tranquil mountain scene that draws the eye deep into the horizon.


Single Daisy or Wildflower on a Solid Background
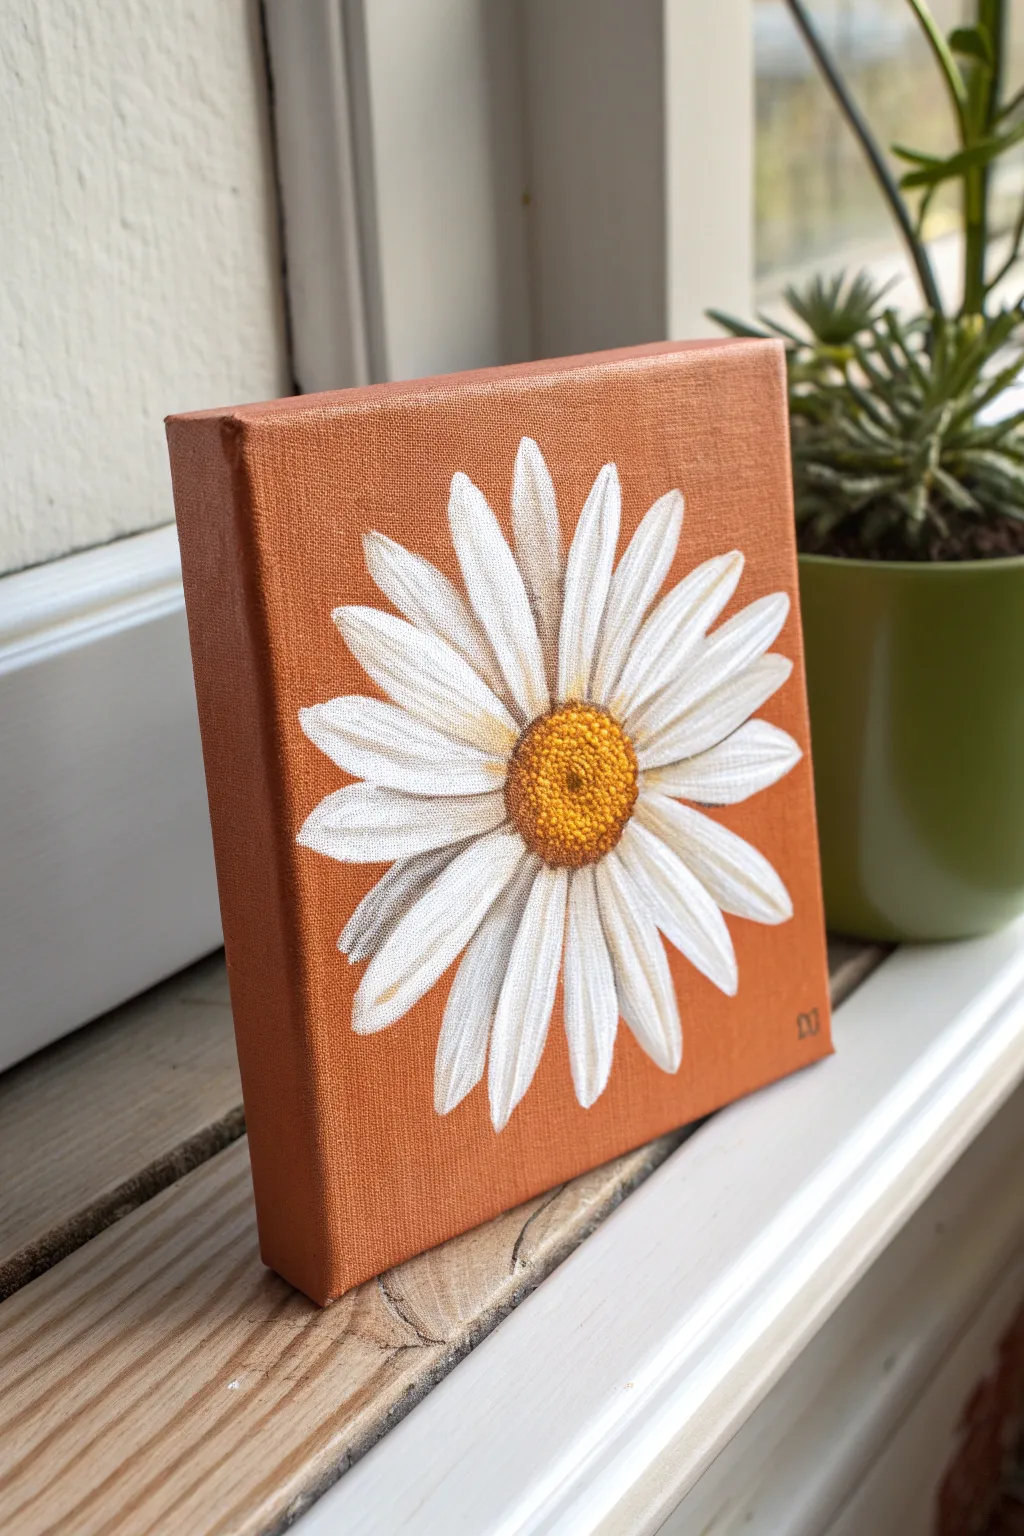
Capture the simple elegance of a single daisy with this beginner-friendly acrylic project. By placing a bright white flower against a warm, earthy terra cotta background, you create a striking contrast that feels both modern and organic.
Step-by-Step Tutorial
Materials
- Small square canvas (e.g., 6×6 inch)
- Acrylic paints: Titanium White, Burnt Sienna, Yellow Ochre, Cadmium Yellow, Raw Umber, Unbleached Titanium
- Flat brush (3/4 inch) for background
- Filbert brush (size 4 or 6) for petals
- Small round brush (size 0 or 1) for details
- Palette paper or mixing plate
- Cup of water and paper towels
- Chalk or pencil for sketching
Step 1: Setting the Background
-
Mix the Base Color:
Create a warm terra cotta shade by mixing Burnt Sienna with a touch of Titanium White and a tiny dot of Yellow Ochre. It should look like clay pot material. -
Apply the Base Coat:
Using your flat brush, paint the entire canvas surface with this mixture. Don’t forget to paint the sides of the canvas for a finished, gallery-wrap look. -
Let it Dry Thoroughly:
Allow this layer to dry completely. If the coverage looks streaky, apply a second coat of the terra cotta mix to ensure a solid, opaque background.
Fixing Translucent Petals
If your white paint looks too see-through against the dark background, mix a tiny bit of Titan Buff or Unbleached Titanium into the white. It covers better than pure Titanium White.
Step 2: Sketching the Flower
-
Mark the Center:
Once the background is dry, visualize where the flower center will be. It should be slightly below the physical center of the canvas to give the petals room to stretch upwards. -
Rough Outline:
Lightly sketch the flower shape using a piece of chalk or a white charcoal pencil. Draw a small circle for the center and loose, elongated oval shapes radiating outward for the petals.
Add a Dew Drop
Paint a tiny dark semi-circle on a petal, add a smaller light reflection inside it, and a bright white dot on the opposite side to create a realistic 3D water droplet.
Step 3: Painting the Petals
-
First White Layer:
Load your filbert brush with Titanium White. The rounded tip of a filbert is perfect for daisy petals. Paint each petal starting from the outer tip and pulling the stroke inward toward the center. -
Don’t Overwork It:
Let the paint streak a little; you don’t need solid white coverage yet. Shadows will add dimension later. -
Layering for Opacity:
Daisy petals are rarely perfectly flat. Once the first layer is tacky, add a second coat of white to the tips of the petals to make them pop against the dark background. -
Adding Shadow:
Mix a tiny amount of Raw Umber or gray into your white to create a very light shadow tone. Use this color on the lower petals or where one petal overlaps another, gently blending it out. -
Detailing Lines:
Using the small round brush and your shadow mix (or diluted Raw Umber), paint very thin, faint lines down the center of a few petals to suggest the natural ridges of the flower.
Step 4: Creating the Center
-
Base for the Eye:
Paint the center circle with a solid coat of Yellow Ochre. This acts as the mid-tone foundation for the texture. -
Adding Depth:
Mix a bit of Burnt Sienna with the Yellow Ochre. Stipple (tap vertically) this darker color around the bottom edge and sides of the center circle to create a spherical shadow. -
Highlighting Texture:
Mix Cadmium Yellow with a little white. Using the very tip of your small round brush, stipple tiny dots on the top and center of the yellow circle. This mimics the pollen texture. -
Final Contrast:
For the crispest look, add a few tiny dots of pure Titanium White on the very highest point of the yellow center to make it look glistening and dimensional.
Step 5: Final Touches
-
Clean Up Edges:
If any white paint went outside the lines, use your original background color and a small brush to touch up the edges around the petals. -
Sign It:
Add your initials or signature in the corner using a contrasting color like dark brown or white.
Place your finished canvas on a miniature easel or shelf to add a permanent touch of spring to your room
BRUSH GUIDE
The Right Brush for Every Stroke
From clean lines to bold texture — master brush choice, stroke control, and essential techniques.
Explore the Full Guide
Cute Cactus in a Tiny Pot
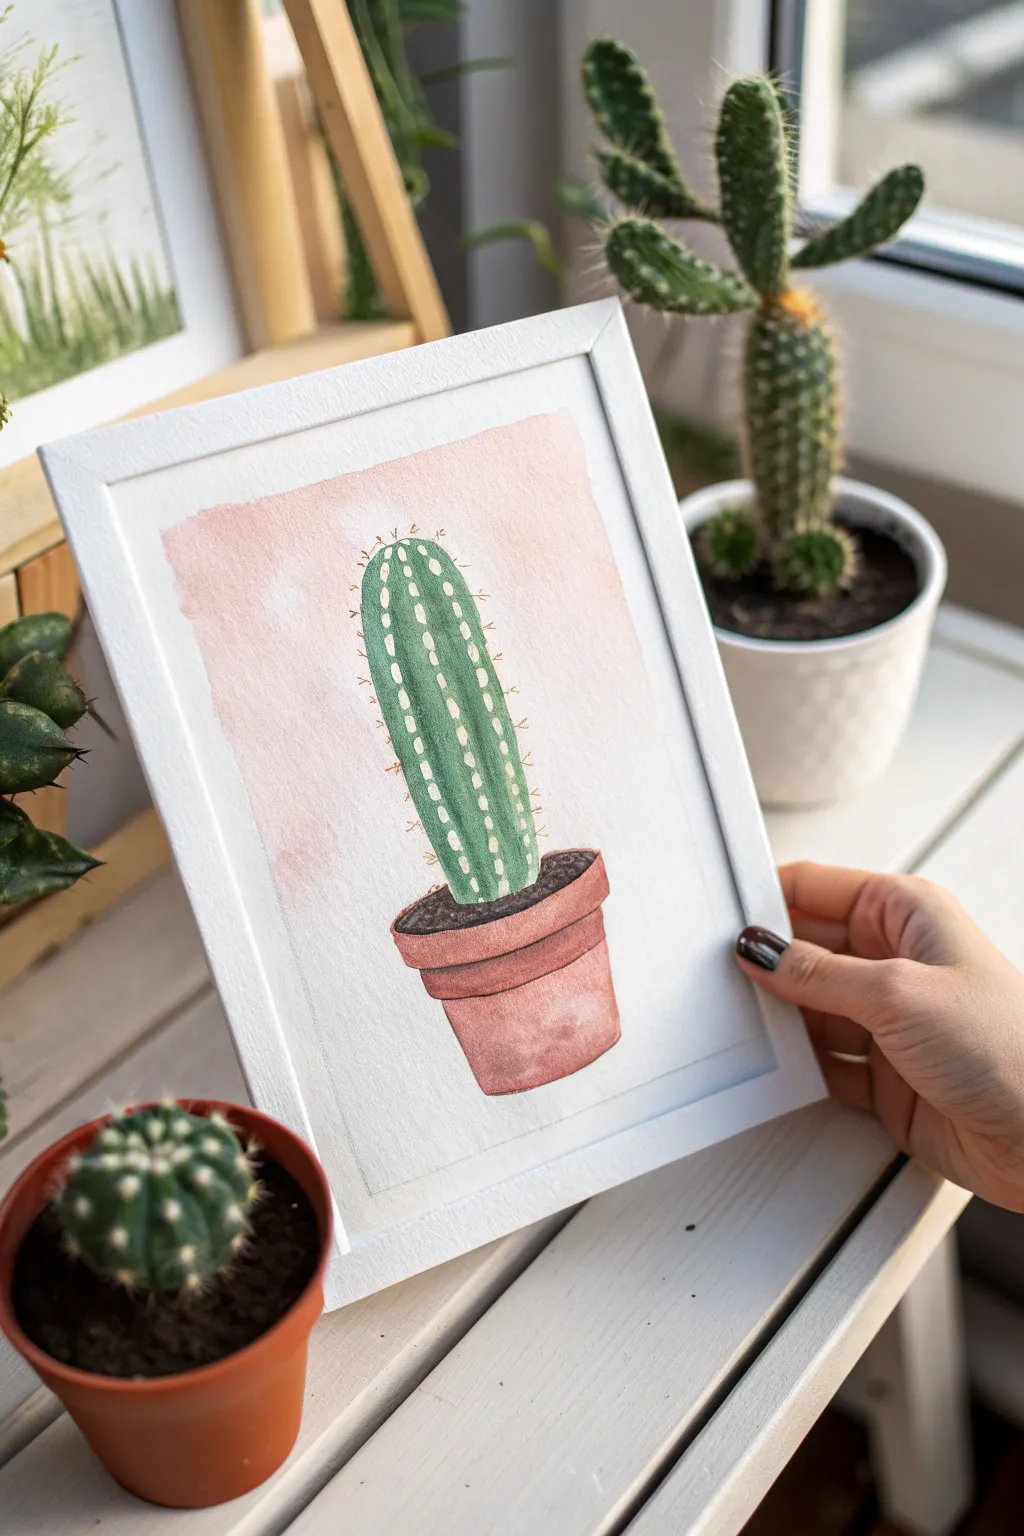
Brighten up any small corner with this charming painting of a tall cactus resting in a classic terracotta pot. The soft pink background wash gives it a warm, gentle vibe that perfectly contrasts with the vibrant green of the succulent.
How-To Guide
Materials
- Heavyweight watercolor paper or mixed media paper (A5 or 5×7 inch)
- Acrylic paints: Sap Green, White, Black, Burnt Sienna, Yellow Ochre, and a touch of Red/Pink
- Paintbrushes: Medium flat brush, small round brush, and a fine liner brush
- Pencil and eraser
- Water cup and paper towels
- Mixing palette
- Masking tape
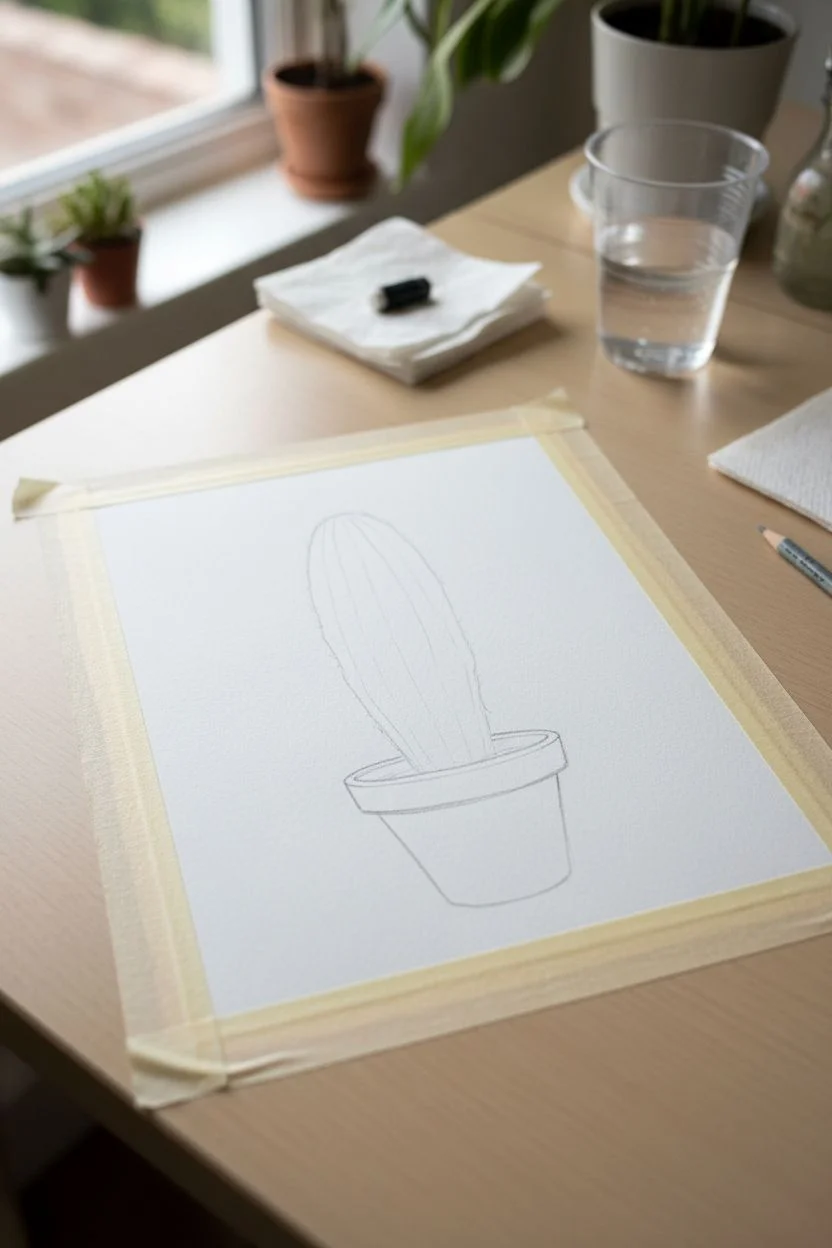
Step 1: Preparation & Sketching
-
Tape the edges:
Begin by taping down all four edges of your paper to your work surface. This creates that clean, crisp white border you see in the final piece and keeps the paper from buckling. -
Sketch the pot:
Lightly sketch the terracotta pot near the bottom center. Start with a simple oval for the opening, then draw a slightly wider rim around it. Angle the sides of the pot inward slightly as they go down. -
Outline the cactus:
Draw the cactus body rising from the pot. It should be a tall, elongated oval shape with a rounded top. Add faint vertical lines running up the length to mark the ribs of the cactus.
Water Control is Key
For the background wash, treat your acrylics like watercolors. Use 80% water to 20% paint. Test the transparency on a scrap paper first to ensure the pink looks soft and dreamy, not opaque.
Step 2: Painting the Background & Pot
-
Create a background wash:
Mix a tiny amount of red or pink acrylic with plenty of water to create a translucent wash. Use your medium flat brush to paint the background loosely, keeping the edges rough and organic rather than filling the whole rectangle perfectly. -
Base coat the pot:
Mix Burnt Sienna with a little White to get a soft terracotta color. Fill in the main body of the pot and the rim, careful not to paint over your cactus sketch. -
Add pot shadows:
While the terracotta color is still slightly tacky, mix a tiny bit of Black or Dark Brown into your Burnt Sienna. Paint this shadow color just under the rim of the pot and along the right side to give it roundness. -
Paint the soil:
Use dark brown or black to fill the small elliptical area inside the pot where the cactus emerges. Stipple the paint slightly to suggest a dirt texture.
Step 3: Painting the Cactus
-
Mix your greens:
Prepare a medium green shade using Sap Green and a touch of Yellow Ochre. You’ll also need a lighter version (mixed with White) and a darker version (mixed with a dot of Black). -
Fill the cactus body:
Paint the entire cactus shape with your medium green mixture. Ensure you get nice coverage, overlapping slightly with the soil area to ground the plant. -
Add vertical highlights:
Using the lighter green mix and a small round brush, paint vertical stripes following the ribs you sketched earlier. This creates the illusion of the cactus having a 3D, ribbed texture. -
Deepen the shadows:
With the darker green mix and a fine brush, paint thin lines in the valleys between the highlighted ribs. This contrast makes the highlights pop. -
Detail the areoles:
Mix a creamy off-white color. Using your finest brush or a dotting tool, place small, evenly spaced dots or short dashes down the center of each highlighted rib.
Wobbly Lines?
If your fine lines for the cactus ribs are too shaky, try thinning your paint with a flow medium or a drop of water. Ink-like consistency flows smoother than thick paint straight from the tube.
Step 4: Final Touches
-
Add the spines:
With a very fine liner brush and watered-down Yellow Ochre or light brown paint, flick tiny, short lines coming out from the white dots. These are your cactus spines. -
Refine the pot:
If the pot looks too flat, add a subtle highlight on the left side with a watered-down white-pink mix to match the light source. -
The reveal:
Wait until the painting is completely bone dry. Carefully peel away the masking tape at a 45-degree angle to reveal your crisp white borders.
Pop this little painting into a simple white frame and enjoy the desert vibes all year round
Tiny Birch Tree Trunks With Colorful Sky
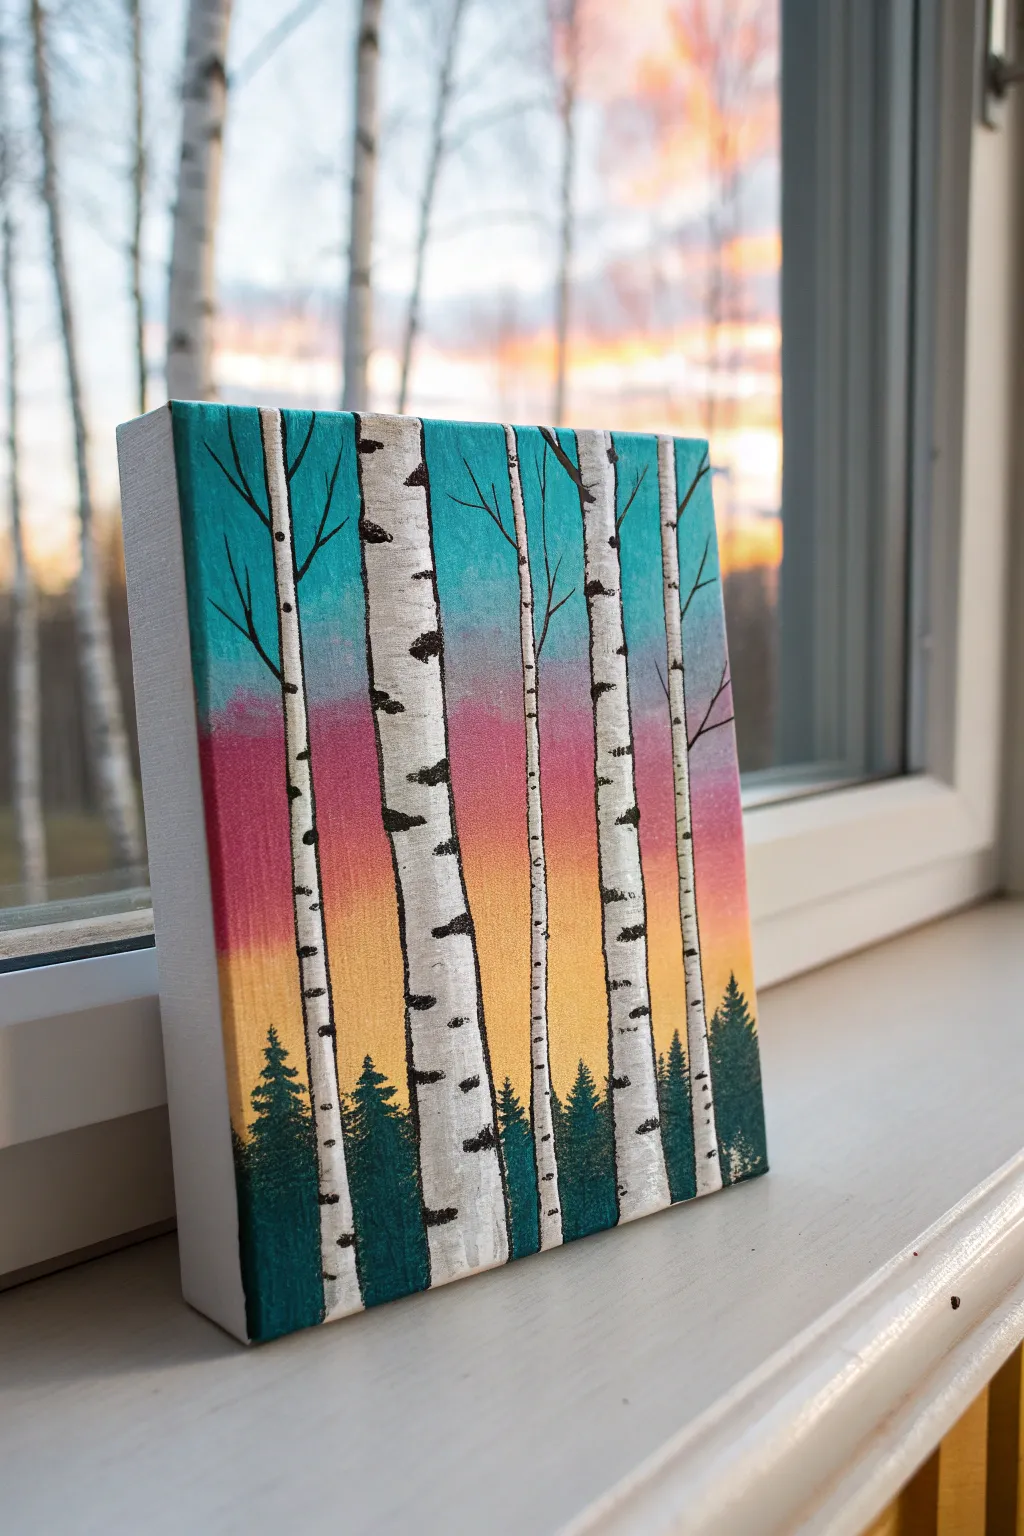
Capture the stark beauty of winter birch trees against a warm, gradient sunset in this small-scale acrylic project. The contrast between the bright, blended background and the crisp, white bark creates a window-like effect perfect for any bookshelf.
Step-by-Step
Materials
- Small square canvas (e.g., 6×6 or 8×8)
- Acrylic paints: Teal/Turquoise, Magenta/Pink, Orange, Yellow, White, Black, Dark Green
- Flat shader brush (medium width)
- Small round detail brush (size 0 or 1)
- Painter’s tape or wash tape (optional)
- Cup of water and paper towels
- Palette or paper plate
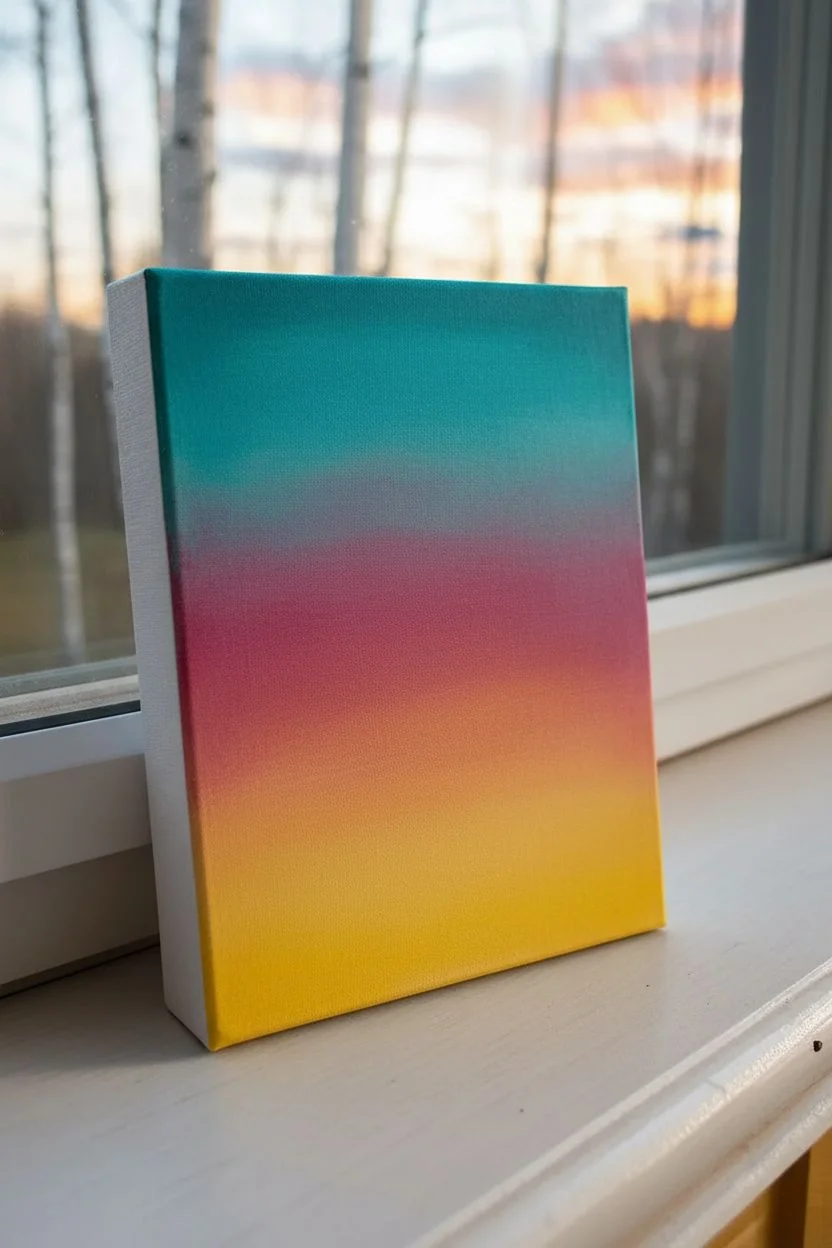
Step 1: Creating the Sunset Gradient
-
Prime the sky:
Begin by painting horizontal bands of color across the canvas using your flat brush. Start with teal at the very top third of the canvas. -
Add the middle tones:
While the teal is still slightly wet, paint a band of magenta or pink below it. Gently brush back and forth where the two colors meet to create a soft, purple-hued transition. -
Warm up the horizon:
Paint the next section with orange, blending it upward into the pink. Finally, add yellow at the bottom third, blending it seamlessly into the orange above it. -
Wrap the edges:
Don’t forget to extend your sky colors around the sides of the canvas for a polished, gallery-wrapped look. -
Let it dry completely:
Allow the background layer to dry fully. This is crucial because you don’t want the white of the trees to turn muddy by mixing with the wet sky.
Muddy Sky Fix
If your sky colors turn brown while blending, stop! Let the layer dry completely, then paint a fresh layer of the pure colors over the muddy spots.
Step 2: Painting the Foreground Forest
-
Mix a deep forest green:
Combine your dark green paint with a tiny dot of black to create a shadowy, deep forest evergreen color. -
Stipple the tree line:
Using the corner of your flat brush or a stiff round brush, tap the dark green paint along the bottom edge of the canvas. -
Form the pine trees:
Create uneven peaks of different heights to represent distant pine trees. Use a dabbing motion to mimic the texture of pine boughs, keeping the tops pointy and the bases wider. -
Dry the foreground:
Let this dark green layer dry completely before moving on to the birch trees.
Step 3: Drafting the Birch Trunks
-
Plan your placement:
Visualize where you want your birch trunks. In the example, there are four main trunks of varying thickness spaced irregularly for a natural look. -
Paint the white trunks:
Using a clean flat brush and pure titanium white, paint vertical stripes from the bottom edge all the way to the top edge. I find it helpful to vary the pressure to make some trunks slightly crooked or organic. -
Apply a second coat:
Birch bark is bright and opaque. Depending on your paint quality, you will likely need a second coat of white once the first is dry to fully cover the colorful background. -
Add the branches:
Switch to your smallest liner brush. With thinned white paint, draw very fine branches reaching upward and outward from the main trunks.
Add Metallic Touches
Mix a tiny bit of silver or pearl medium into your white paint for the birch bark. It makes the trees shimmer beautifully in natural light.
Step 4: Adding the Birch Details
-
Prepare the black paint:
Load your liner brush with black paint. You want the paint to flow smoothly, so add a drop of water if it feels too thick. -
Outline faintly:
Very lightly outline the sides of the white trunks with thin, broken black lines. Don’t make a solid cartoon outline; keep it scratchy and interrupted. -
Create the heavy markings:
Paint the characteristic horizontal birch markings (lenticels). Press your brush down flat against the trunk and flick it slightly inward toward the center of the tree. -
Vary the markings:
Make some black marks thick and dark, and others merely small dots or thin dashes. Group them randomly so the pattern doesn’t look like a ladder. -
Anchor the trees:
Add a little extra black shading at the very bottom of the trunks where they disappear into the dark green pine line to ground them in the scene. -
Final branch details:
Use the very tip of your detail brush to add tiny black connections where the white branches join the main trunk.
Place your finished canvas on a window sill to see how the painted sky interacts with the real light outside

PENCIL GUIDE
Understanding Pencil Grades from H to B
From first sketch to finished drawing — learn pencil grades, line control, and shading techniques.
Explore the Full Guide
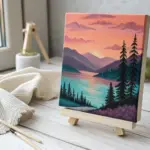
Little Sailboat on a Calm Lake
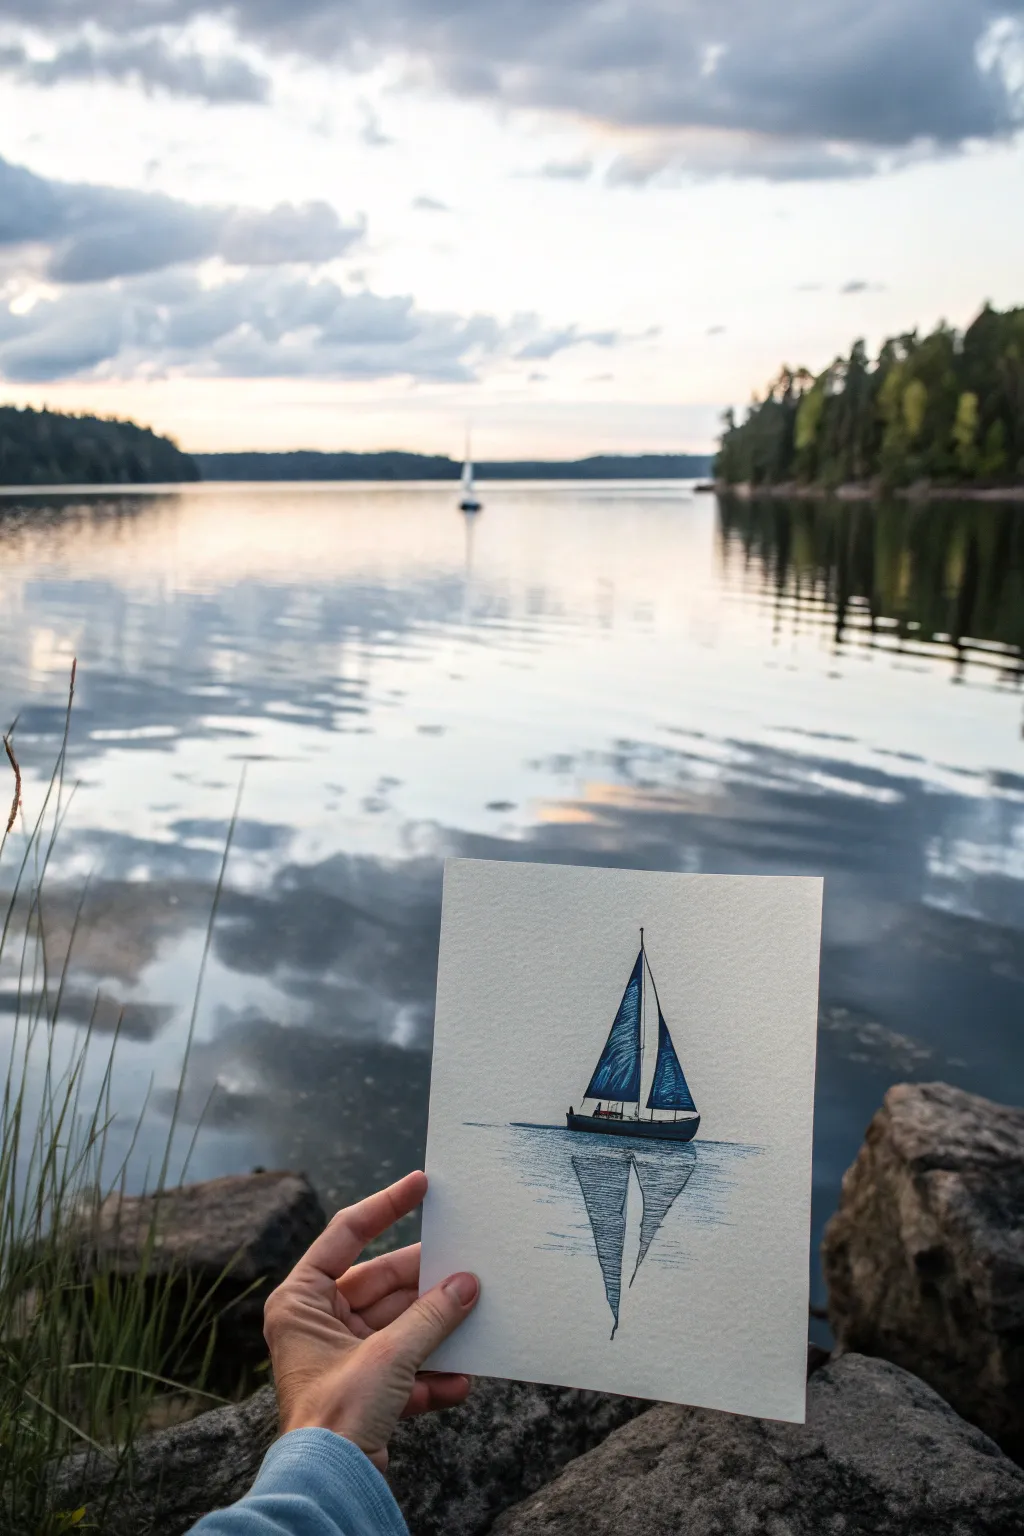
Capture the serenity of twilight on the water with this minimalist sailboat study. Using limited colors and sharp lines, you’ll create a striking contrast between the sturdy vessel and its rippling, elongated reflection.
Detailed Instructions
Materials
- Heavyweight watercolor or mixed media paper (cold press creates nice texture)
- Pencil (HB or 2B) for sketching
- Fine liner pen (black or dark grey, waterproof)
- Acrylic paints (Phthalo Blue, Ultramarine Blue, Black, White)
- Small flat brush (size 2 or 4)
- Fine detail brush (size 0 or 00)
- Ruler (optional)
- Palette for mixing
- Water cup and paper towels
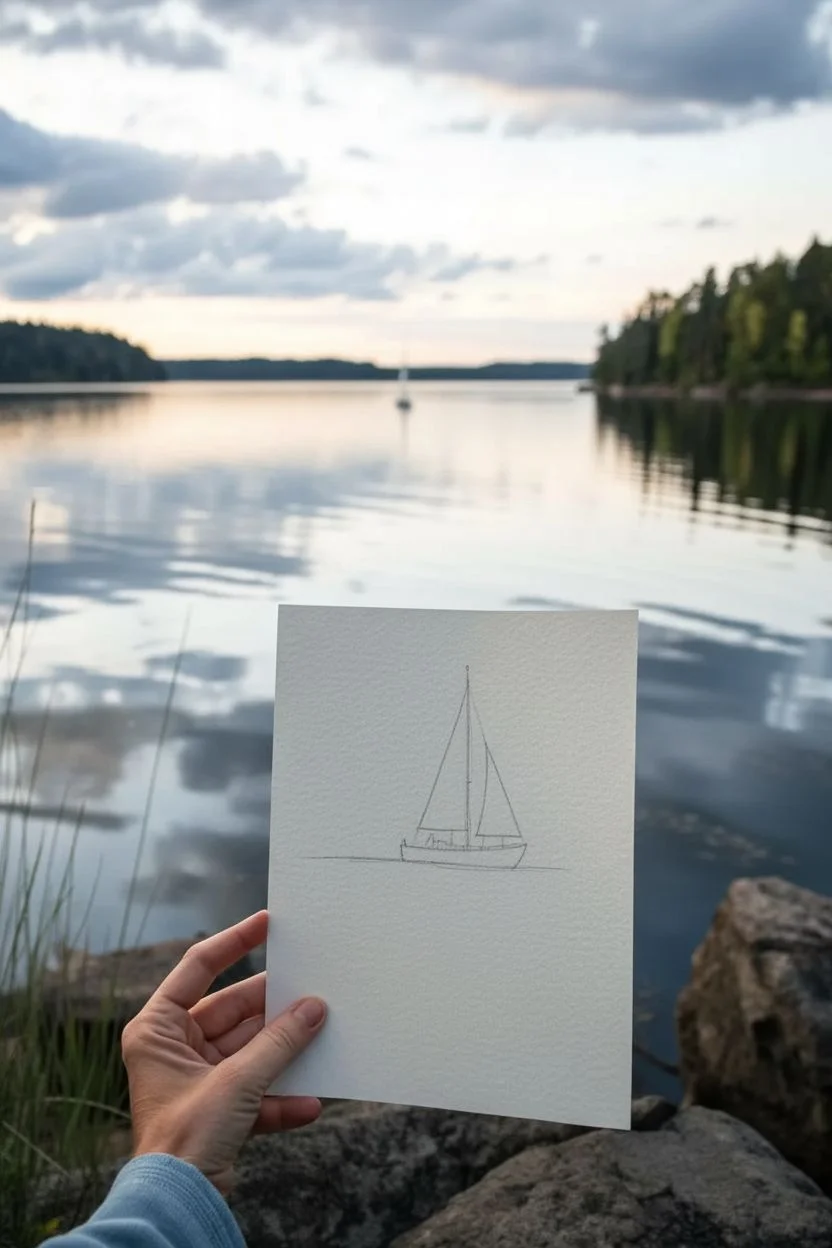
Step 1: Sketching the Vessel
-
Establish the horizon:
Begin by lightly marking a horizontal line roughly one-third of the way up from the bottom of your paper. This won’t be a hard line in the final painting, but it helps anchor the boat. -
Outline the hull:
Just above your imaginary water line, sketch a long, shallow curve for the hull of the boat. Keep it simple—a gentle curve on the bottom and a straighter line on top. -
Raise the mast:
Draw a straight vertical line rising from the center of the hull. Use a ruler if your hand is shaky, but a slightly organic line feels more natural. -
Define the sails:
Sketch two triangles for the sails. The main sail (behind the mast) should be larger and curve slightly outward as if catching a breeze. The jib (front sail) is smaller and triangular.
Dry Brush Magic
For the sails’ texture, wipe most paint off your brush onto a paper towel first. The remaining pigment will catch the paper’s tooth for a woven look.
Step 2: Painting the Sails and Hull
-
Mix your navy blue:
Combine Phthalo Blue with a touch of Black to create a deep, rich navy. You want a color that commands attention against the white paper. -
Fill the sails:
Using your small flat brush, paint the interior of the sails. Leave tiny slivers of white paper showing near the mast to suggest highlights or gaps in the fabric. -
Add texture to the sails:
While the blue is still slightly wet, dip a dry brush into a tiny bit of white or lighter blue. Drag it vertically through the sails to create a striated, fabric-like texture. -
Paint the hull:
Switch to the detail brush and fill in the hull with your darkest blue-black mixture. Be precise with the bottom edge where it meets the water. -
Add deck details:
With the very tip of your detail brush, add tiny specks or lines on the deck to suggest a person or cabin, perhaps using a drop of red or brown for a tiny contrast, though maintaining the monochrome look works beautifully too.
Sunset Glow
Dilute a tiny drop of orange or pink acrylic with lots of water to create a glaze. Wash it over the sky area for a soft, warm evening atmosphere.
Step 3: Creating the Reflection
-
Mirror the shape:
Lightly sketch the inverted shape of the boat and sails directly below the waterline. The reflection should be roughly the same height as the real boat. -
Start the reflection gradient:
Mix a slightly watered-down version of your sail blue. This transparency is key for the look of water. -
Paint the reflected sails:
Paint the inverted sails using horizontal strokes rather than vertical ones. This instantly reads as water ripples. Leave horizontal gaps of white paper between strokes. -
Deepen the center:
The reflection should be darkest directly beneath the hull. I like to layer a bit more pigment here to show the shadow’s depth. -
Extend the mast reflection:
Draw a squiggly line straight down through the reflection to represent the mast. It doesn’t need to be straight; let the water distort it.
Step 4: Refining Details
-
Add rigging lines:
Once the paint is fully dry, use your fine liner pen or the finest brush with watered-down black paint to add the thin rigging lines connecting the mast to the hull. -
Define the waterline:
Add a few very thin, horizontal lines extending outward from the base of the hull to seat the boat in the water. -
Enhance the ripples:
Use a dry brush with a tiny amount of dark blue to add faint horizontal scratches across the reflection area, softening the edges. -
Final assessment:
Step back and check the balance. If the reflection looks too solid, you can gently scuff it with a clean, damp brush or a white colored pencil to break it up.
Now you have a tranquil nautical scene ready to be framed or gifted to a sea lover
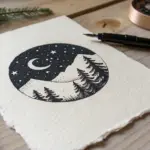
Minimal Moon and Cloud Study in Soft Neutrals
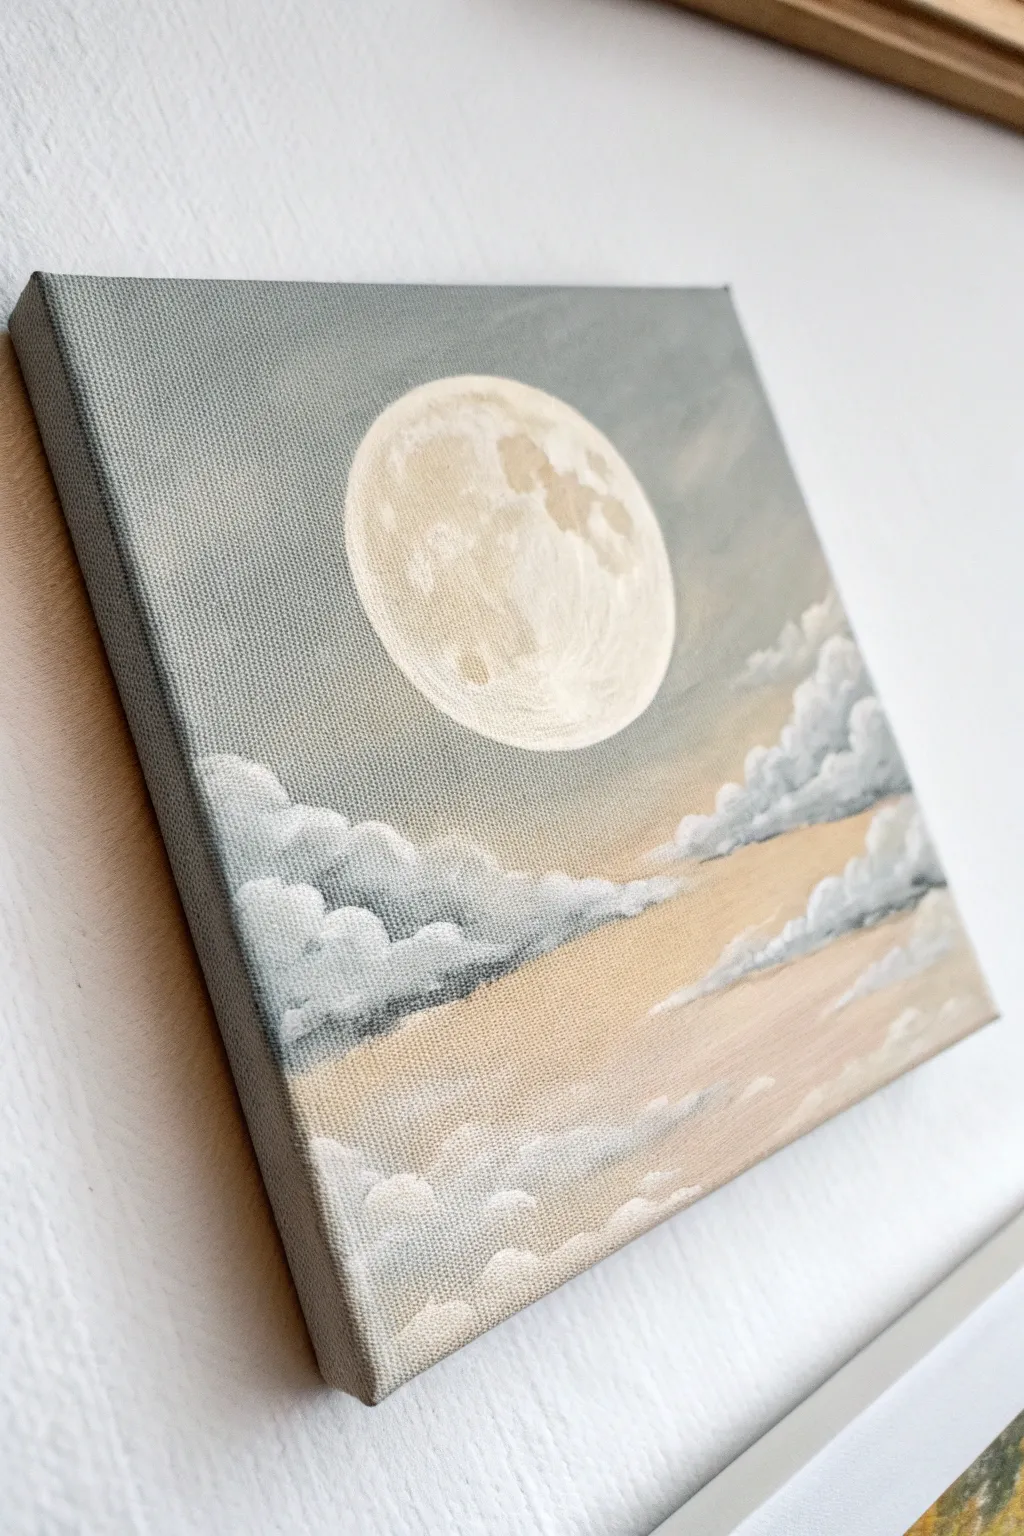
Capture the serene beauty of a full moon rising over soft clouds with this minimalist acrylic study. Using a muted palette of greys, creams, and warm beige tones, you’ll learn to create atmospheric depth and glowing light effects on a small canvas.
Step-by-Step
Materials
- Small square canvas (e.g., 6×6 or 8×8 inches)
- Acrylic paints: Titanium White, Mars Black, Unbleached Titanium (or Buff Titanium), Yellow Ochre, Ultramarine Blue
- Flat brush (3/4 inch) for background blocking
- Small round brush for moon details
- Filbert brush (medium) for clouds
- Palette knife or mixing plate
- Cup of water and paper towels
- Compass or circular object for tracing
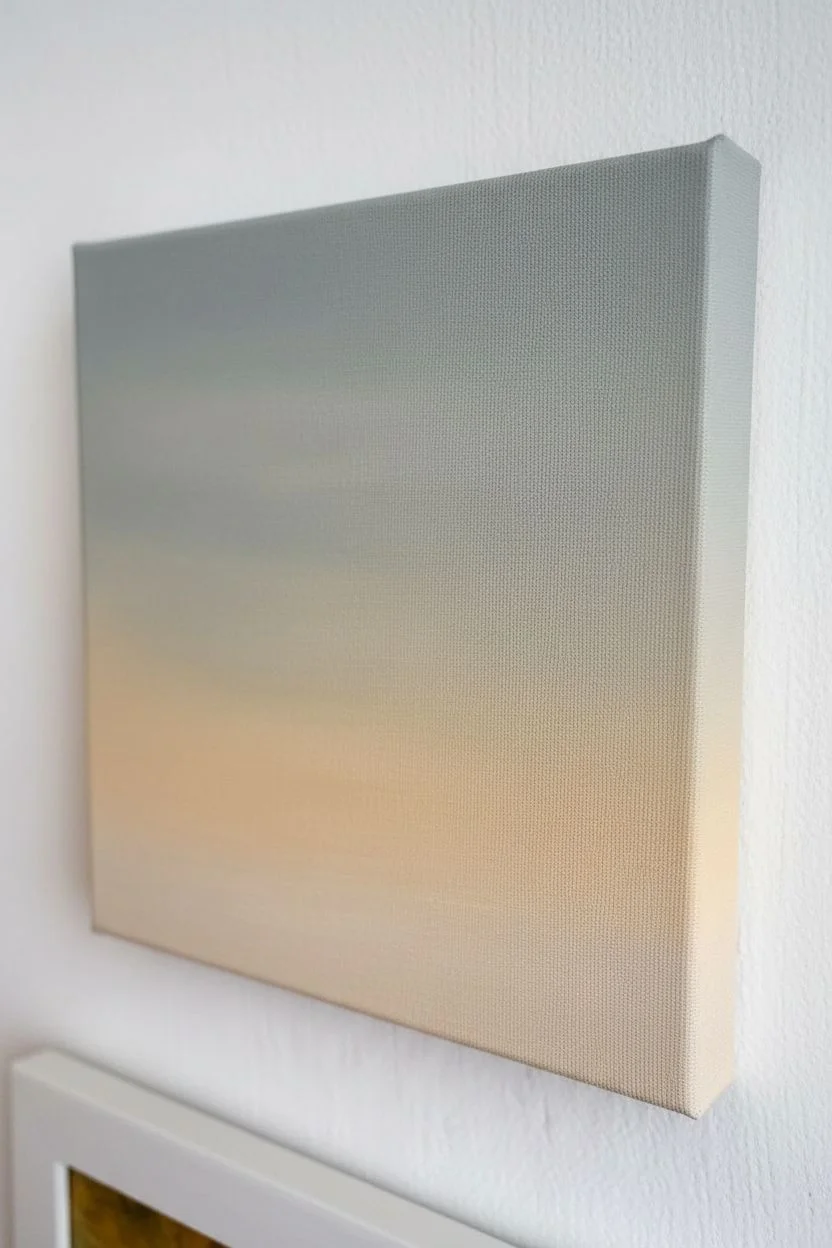
Step 1: The Atmospheric Gradient
-
Prepare the Gradient Mixes:
Begin by mixing two primary background shades on your palette. For the upper sky, create a muted grey-blue by mixing a touch of Ultramarine Blue and a tiny speck of Black into White. For the lower sky, mix a warm, sandy beige using White, Unbleached Titanium, and a dot of Yellow Ochre. -
Apply the Upper Sky:
Using your flat brush, paint the top third of the canvas with the grey-blue mix. Use long, horizontal strokes to ensure smooth coverage, reaching all the way to the edges. -
Apply the Lower Sky:
Clean your brush and apply the warm beige mix to the bottom third of the canvas. This warmth will suggest the glow of the atmosphere near the horizon. -
Blend the Transition:
While both paint sections are still slightly wet, mix the two colors together on your palette to create a transition shade. Apply this to the middle third of the canvas, blending upward into the grey and downward into the beige using gentle, sweeping strokes to create a seamless gradient. -
Paint the Edges:
Don’t forget to extend your gradient colors onto the sides of the canvas canvas for a finished, gallery-wrapped look.
Step 2: The Glowing Moon
-
Outline the Moon:
Once the background is completely dry to the touch, place your circular stencil or compass in the upper center of the canvas. Lightly trace the circle with a pencil or a brush with very thin paint. -
Base Coat the Moon:
Fill in the circle with a mix of Titanium White and a tiny drop of Unbleached Titanium. It shouldn’t be pure white, but a very creamy, off-white shade. -
Add Moon Texture:
While the moon base is still wet, mix a slightly darker shade using more Unbleached Titanium and a speck of grey. Dab this irregularly onto the moon’s surface, concentrating on the left side and bottom to mimic craters and lunar maria. -
Soften the Edges:
Clean your brush and wipe it almost dry. Very gently trace the outer edge of the moon to soften the line against the sky, making it appear to glow rather than look like a cutout sticker.
Tip: Dry Brushing
For the hazy cloud texture, wipe most of the paint off your brush before applying. This ‘dry brush’ technique creates soft, transparent edges perfect for vapor.
Step 3: Fluffy Cloud Layers
-
Mix Shadow Colors:
Prepare a shadow color for the clouds by mixing White, a touch of Ultramarine Blue, and Grey. It should be darker than your sky gradient but soft enough to look fluffy. -
Block in Cloud Shapes:
Using the Filbert brush, dab in the general shapes of the clouds starting from the bottom corners. Use a ‘scumbling’ motion—circular scrubbing movements—to create irregular, puffy edges. -
Create Depth:
Layer smaller cloud formations slightly higher up in the mid-ground, making them smaller and flatter as they recede into the distance. -
Add Cloud Highlights:
Mix a bright highlight color using mostly Titanium White with a tiny hint of the warm beige. Apply this to the top edges of your cloud shapes where the moonlight would hit them. -
Blend the Bottoms:
With a dry, clean brush, gently swipe the bottom edge of the clouds horizontally. This blurs them into the atmosphere, making them look floaty rather than solid rocks. -
Refine the Moon Highlights:
Return to the moon one last time with pure Titanium White. Add a few stark, bright dabs on the upper right side to enhance the spherical dimension. -
Final Adjustments:
Step back and look at the balance. Add a few wispy, translucent clouds overlapping the bottom of the moon if desired to push it further back into the space.
Level Up: Pearlescent Glow
Mix a tiny amount of iridescent medium or pearl white paint into your final moon highlights. It adds a magical shimmer that catches the light beautifully.
Allow your painting to dry fully before displaying your peaceful night sky scene


Planets on a Mini Galaxy Background
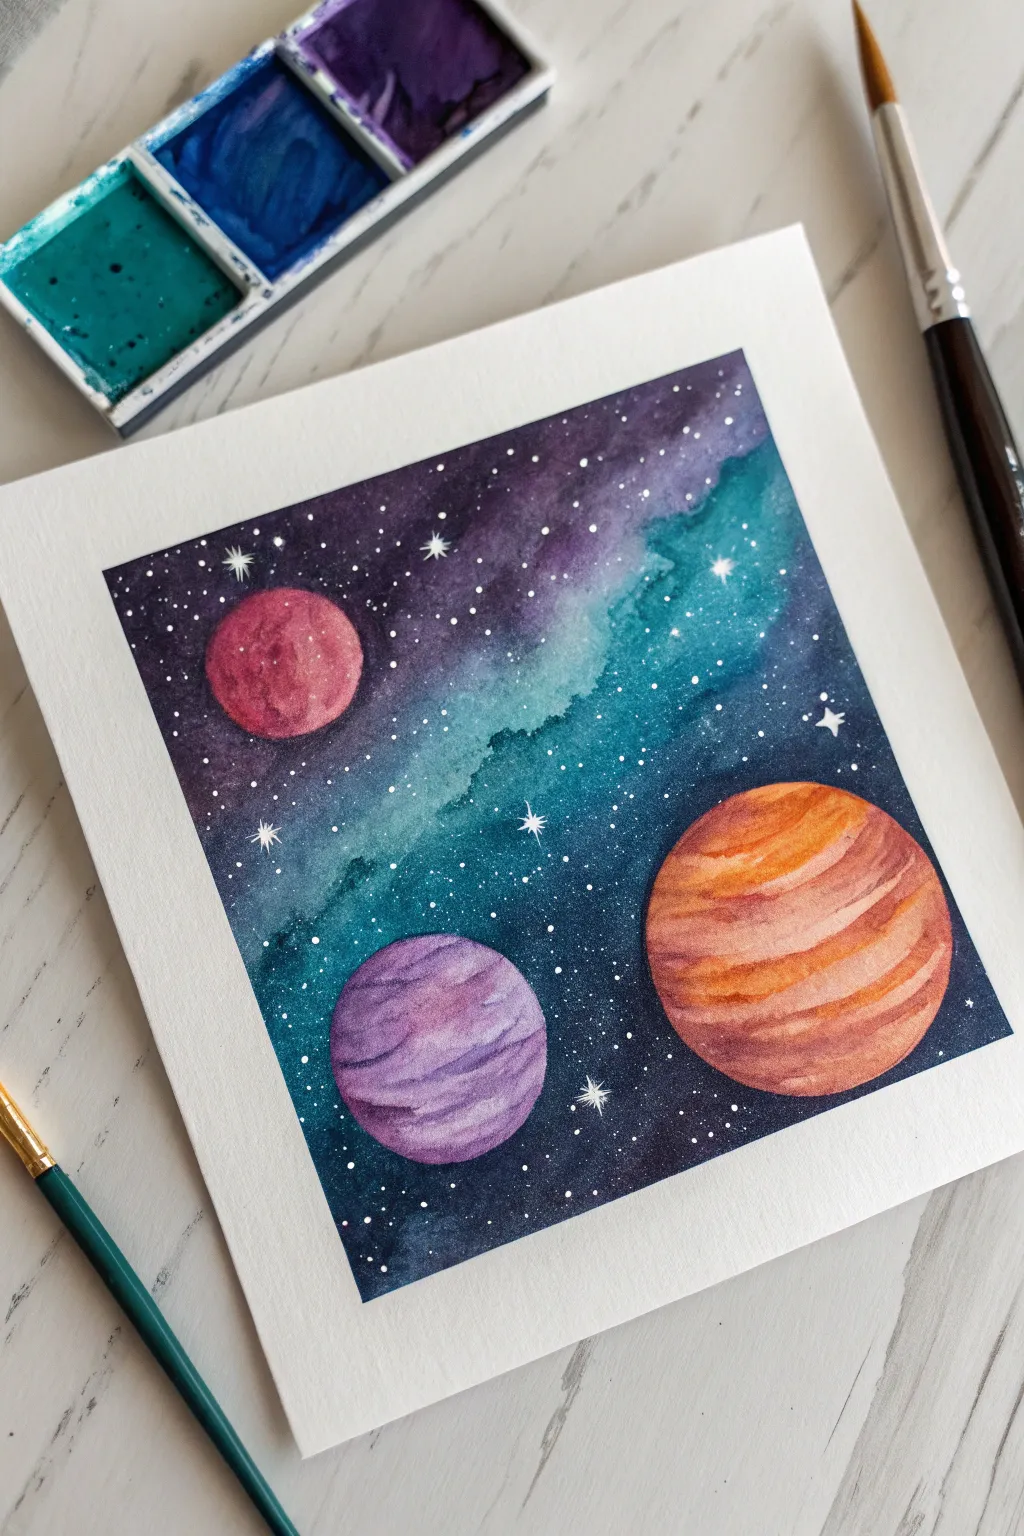
Capture the mysteries of the universe on a small scale with this vibrant watercolor galaxy painting featuring three distinct planets. The soft, bleeding colors of the nebula background contrast beautifully with the crisp details of the celestial bodies, creating a captivating piece of art.
Step-by-Step Guide
Materials
- Cold-press watercolor paper (approx. 5×5 inches)
- Watercolor paints (pan or tube): indigo, turquoise, purple, magenta, orange
- Painter’s tape or masking tape
- Round watercolor brushes (size 6 and size 2)
- White gouache or white gel pen
- Pencil and eraser
- Drawing compass or circle templates (bottle caps work too)
- Water cups and paper towels
- Hair dryer (optional for speeding up drying)
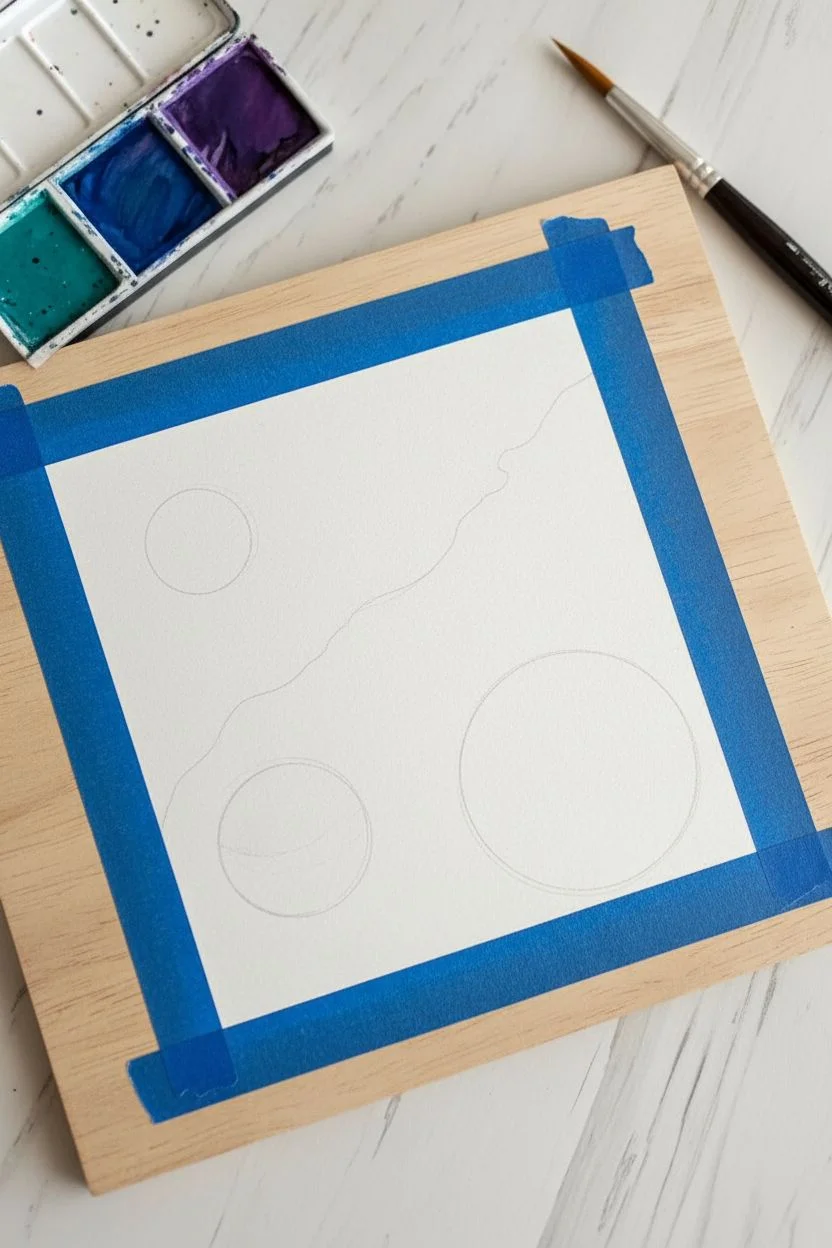
Step 1: Planning and Sketching
-
Define the boundaries:
Tape down all four edges of your watercolor paper to a board or table. This creates a crisp white border and prevents the paper from buckling when it gets wet. -
Sketch the planets:
Using a compass or circle templates, lightly draw three circles in a triangulated composition. Place the largest circle in the bottom right, a medium one in the bottom center-left, and the smallest in the top left. -
Mark the background flow:
Very lightly sketch a diagonal flowing line from the top right to bottom left to guide where your nebula colors will drift, separating the darker space from the colorful gas clouds.
Step 2: Painting the Galaxy Background
-
Apply the first wash:
Wet the entire background area with clean water, carefully painting around your pencil circles. You want the paper glistening but not swimming in puddles. -
Drop in the nebula colors:
While the paper is wet, load your brush with turquoise and teal. Touch it to the wet paper along that diagonal flow you sketched earlier, letting the pigment bloom naturally. -
Deepen space:
Immediately switch to a mix of indigo and deep purple. Apply this to the outer corners (top left and bottom right), allowing it to bleed slightly into the turquoise areas for a soft gradient. -
Intensify contrast:
While the paint is still damp, drop concentrated indigo or black into the very darkest corners to create depth. This high contrast makes the planets pop later. -
Dry completely:
Let this layer dry fully. The paper must be bone-dry before you start the planets to prevent colors from running.
Fixing Back-Runs
If you get ‘cauliflower’ blooms in your dark background, it means you added water to drying paint. Don’t fight it—these textures actually look great in galaxy art and add cosmic realism.
Step 3: Painting the Planets
-
Base coat the large planet:
For the large bottom-right planet, wet the circle with clean water. Paint stripes of orange and rust red, leaving the curves slightly rounded to suggest a sphere. -
Add planet texture:
While the large planet is still damp, lift out a few highlights with a thirsty (dry) brush to create distinct bands, mimicking Jupiter’s stripes. -
Paint the purple planet:
Move to the bottom-left circle. Paint it with shades of lavender and violet. Use horizontal strokes that curve slightly downward to emphasize its roundness. -
Add shadows:
Add a touch of darker purple to the bottom right edge of this planet to create a shadow side, reinforcing the 3D effect. -
Paint the red planet:
For the top-left planet, use a mix of magenta and red. This one can be more textured—dab the color on rather than stroking it to create a cratered look.
Crisp Edges
For perfectly round planets, use liquid masking fluid on the circles before painting the background. Rub it off once the background is dry to paint the planets inside.
Step 4: Stars and Details
-
Create the starfield:
Cover your painted planets with scrap paper to protect them. Load a brush with white gouache effectively watered down, then tap the handle against another brush to splatter tiny white stars over the dark background. -
Add focal stars:
Use a size 0 brush or a white gel pen to manually add a few larger, brighter stars. I like to add tiny cross-shapes to a few of these to make them ‘twinkle’. -
Refine planet shadows:
If the planets look too flat, glaze a very watery layer of black or indigo over the bottom-right crescent of each sphere once they are dry. -
The final reveal:
Wait until the painting is completely dry to the touch. Slowly peel away the painter’s tape at a 45-degree angle to reveal those satisfying crisp white edges.
You now have a window into a colorful universe ready for display
Cozy Campsite With Tent and Campfire Glow
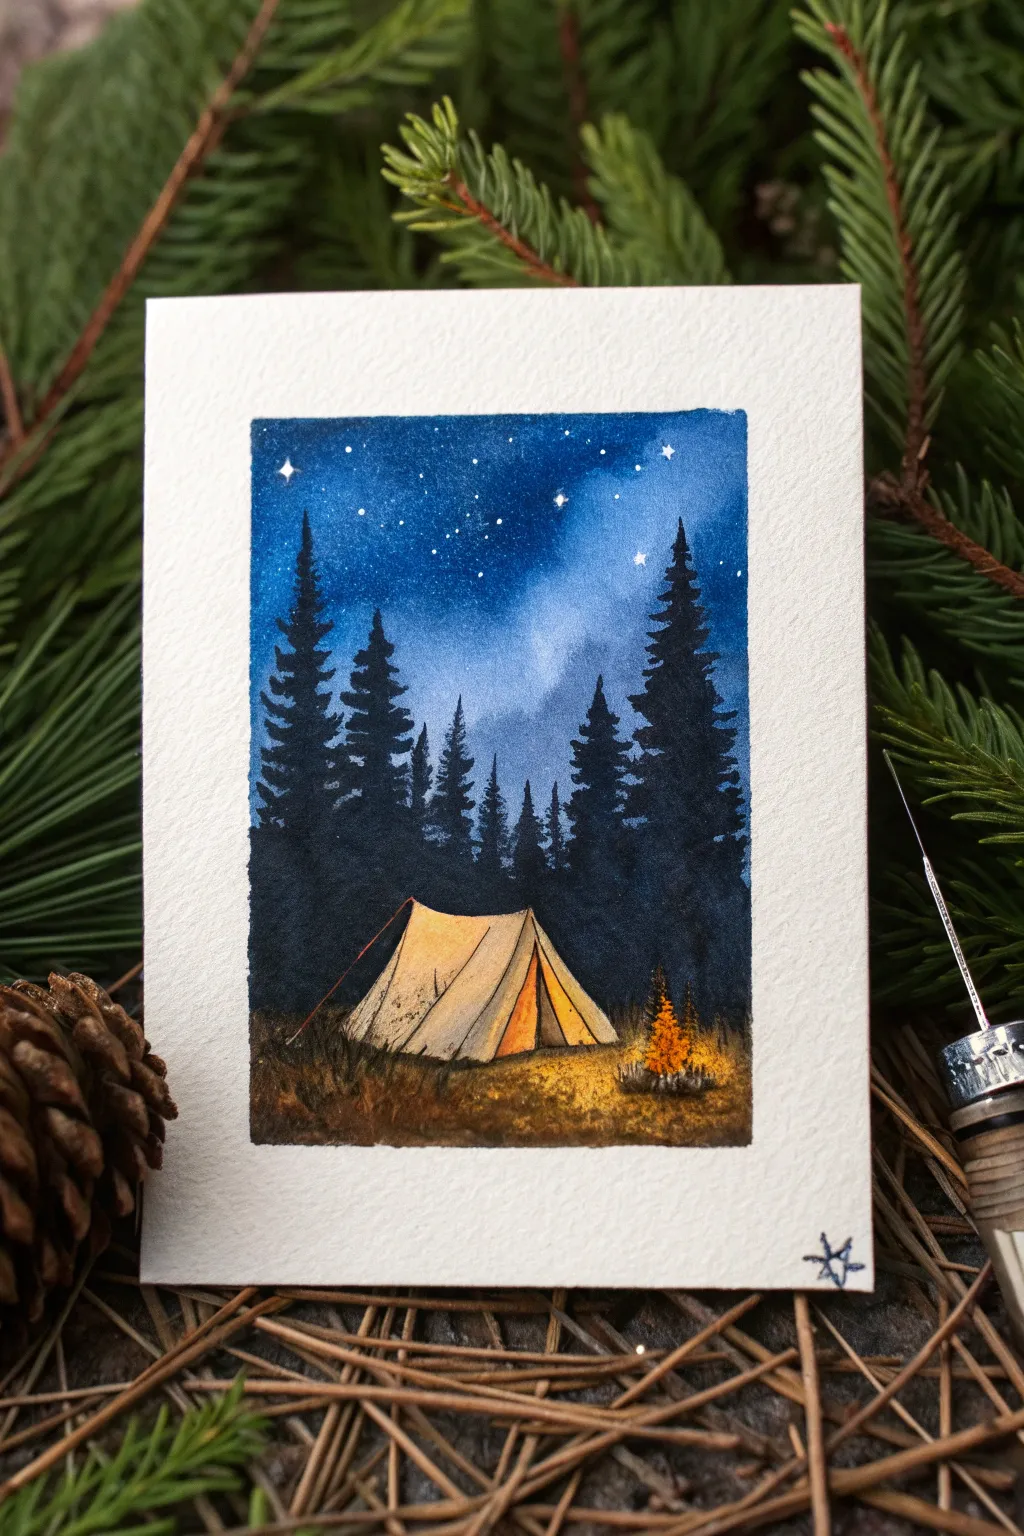
Capture the magic of an outdoor adventure with this charming miniature painting. Featuring a glowing tent nestled among silhouetted pines and a brilliant starry sky, this scene radiates warmth and tranquility.
How-To Guide
Materials
- Heavyweight watercolor paper or canvas paper (approx. 5×7 inches)
- Painter’s tape or masking tape
- Acrylic paints: Ultramarine Blue, Phthalo Blue, Black, White, Burnt Sienna, Yellow Ochre, Cadmium Orange, Cadmium Yellow
- Brushes: Small flat shader, small round brush, and a fine liner brush
- Palette for mixing
- Cup of water and paper towels
- Pencil for sketching
Step 1: Setting the Scene
-
Prepare the Surface:
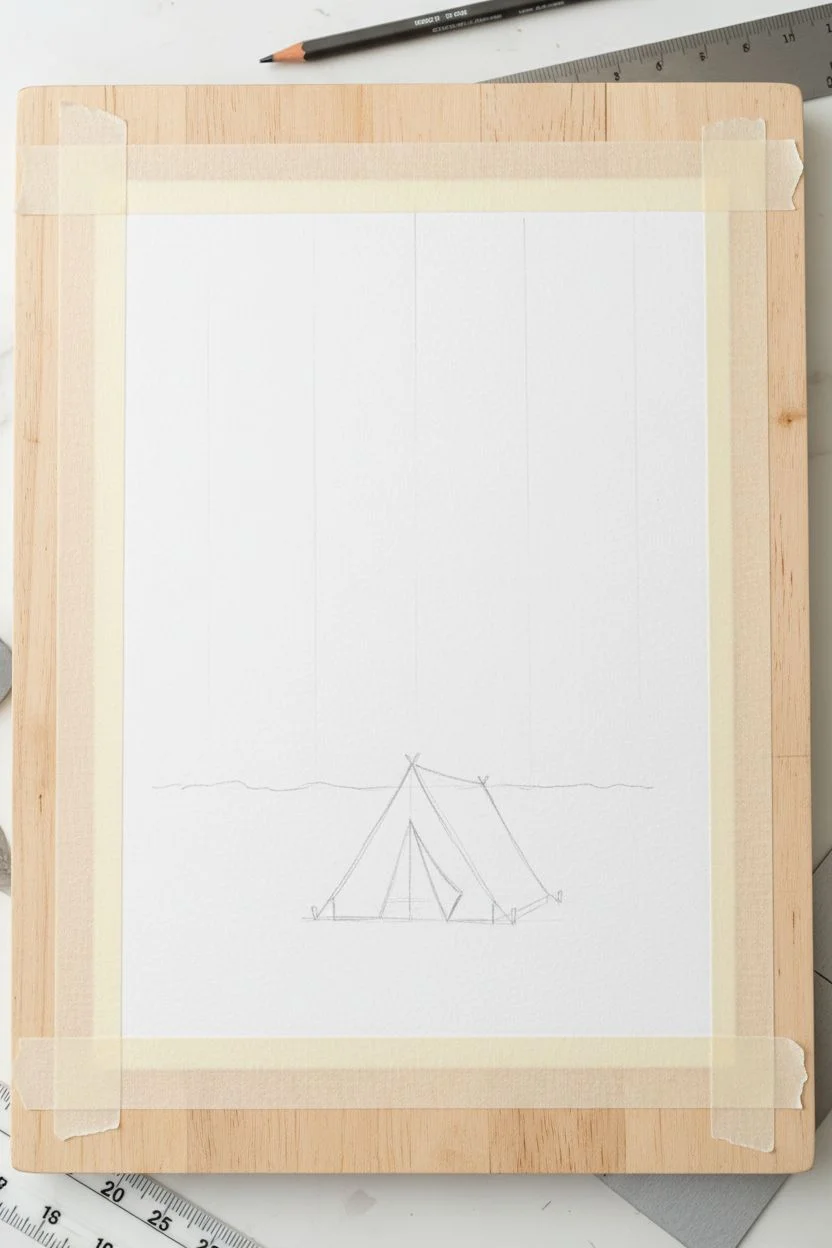
Begin by taping down the edges of your paper to a flat board or table. This creates that crisp, clean white border shown in the example and keeps your paper from buckling. A border of about half an inch works perfectly. -
Sketch the Elements:
Lightly sketch the main shapes with a pencil. Draw a simple triangular tent near the bottom center. Add a rough horizon line for the ground and faint vertical lines to mark where your tallest trees will stand.
Step 2: Painting the Night Sky
-
Base Sky Gradient:
Mix Ultramarine Blue with a touch of White to create a medium blue. Paint the upper two-thirds of the paper, starting darker at the top corners and getting lighter toward the horizon line. -
Add Depth:
While the paint is still wet, blend in some Phthalo Blue and a tiny dot of Black at the very top edge to create a deep, midnight look. I find blending downwards helps create a natural fade toward the treeline. -
Create the Milky Way:
Use a damp, clean brush to gently lift a diagonal swath of paint across the sky, or glaze a very watery white paint across the middle to suggest a faint, milky galaxy band. -
Starry Details:
Load a toothbrush or stiff brush with watered-down white paint and flick it over the sky area. For the larger, brighter stars, use your fine liner brush to dot specific spots, adding tiny cross shapes for extra twinkle.
Muddy colors?
If your tent glow looks dirty, let the dark background dry 100% before painting the yellow light. If they mix while wet, the yellow turns green or brown
Step 3: Silhouetted Forest
-
Mix Shadowy Green:
Mix a deep, dark color using Phthalo Blue, Black, and a touch of Burnt Sienna. You want a color that reads as a very dark forest green or midnight black. -
Paint Tree Shapes:
Using the tip of a round brush or liner, paint the pine trees. Start with a thin vertical line for the trunk, then use a stippling motion to dab branches outward, getting wider as you move down. -
Layer the Forest:
Create depth by painting some smaller, lighter trees in the background first, letting them dry, and then overlapping them with larger, darker trees in the foreground on the left and right sides. -
Ground Shadows:
Extend this dark color along the ground behind the tent to ground your forest, keeping the area directly around the tent lighter for the glow effect.
Level Up: Fire Specs
Once dry, use a toothpick dipped in neon orange or bright red to add tiny ‘sparks’ rising from the fire into the dark trees for extra magic
Step 4: Tent and Campfire Glow
-
Tent Base Color:
Mix Yellow Ochre with plenty of White for a creamy base color. Fill in the tent shape, making sure it stands out brightly against the dark forest background. -
Adding Warmth:
While the base is tacky, blend a little Cadmium Orange near the bottom right of the tent and the open flap area to reflect the fire’s light. -
Campfire Base:
Paint a small, irregular patch of Cadmium Yellow mixed with Orange on the ground slightly to the right of the tent. Use dabbing motions to simulate flickering flames. -
Intensify the Glow:
Glaze thin washes of watered-down yellow and orange onto the grass surrounding the fire and the side of the tent facing the flames. This establishes the light source. -
Tent Shadows:
Use a diluted mix of Brown and Blue to paint the shadow side of the tent (the left side) and the folds in the fabric. Keep lines thin and delicate. -
Campfire Details:
Add tiny touches of pure Orange and Red to the center of the fire. Use a fine brush to paint tiny dark brown logs at the base of the flames.
Step 5: Final Touches
-
Texture the Ground:
Mix Burnt Sienna with a little Black and use a dry-brush technique to add texture to the ground in the foreground. Flick the brush upward slightly to suggest tufts of grass catching the light. -
Highlighting:
Add a few tiny highlights of pure White to the brightest part of the fire and the tent edge nearest the flames. -
Guy Lines:
With your finest liner brush and thinned reddish-brown paint, carefully draw the thin ropes (guy lines) extending from the tent to the ground. -
Reveal:
Let the painting dry completely, then slowly peel away the tape at a 45-degree angle to reveal your crisp, professional border.
Frame your tiny masterpiece or gift it to a camping enthusiast to bring the outdoors inside
Streetlight Silhouette With a Glowing Halo
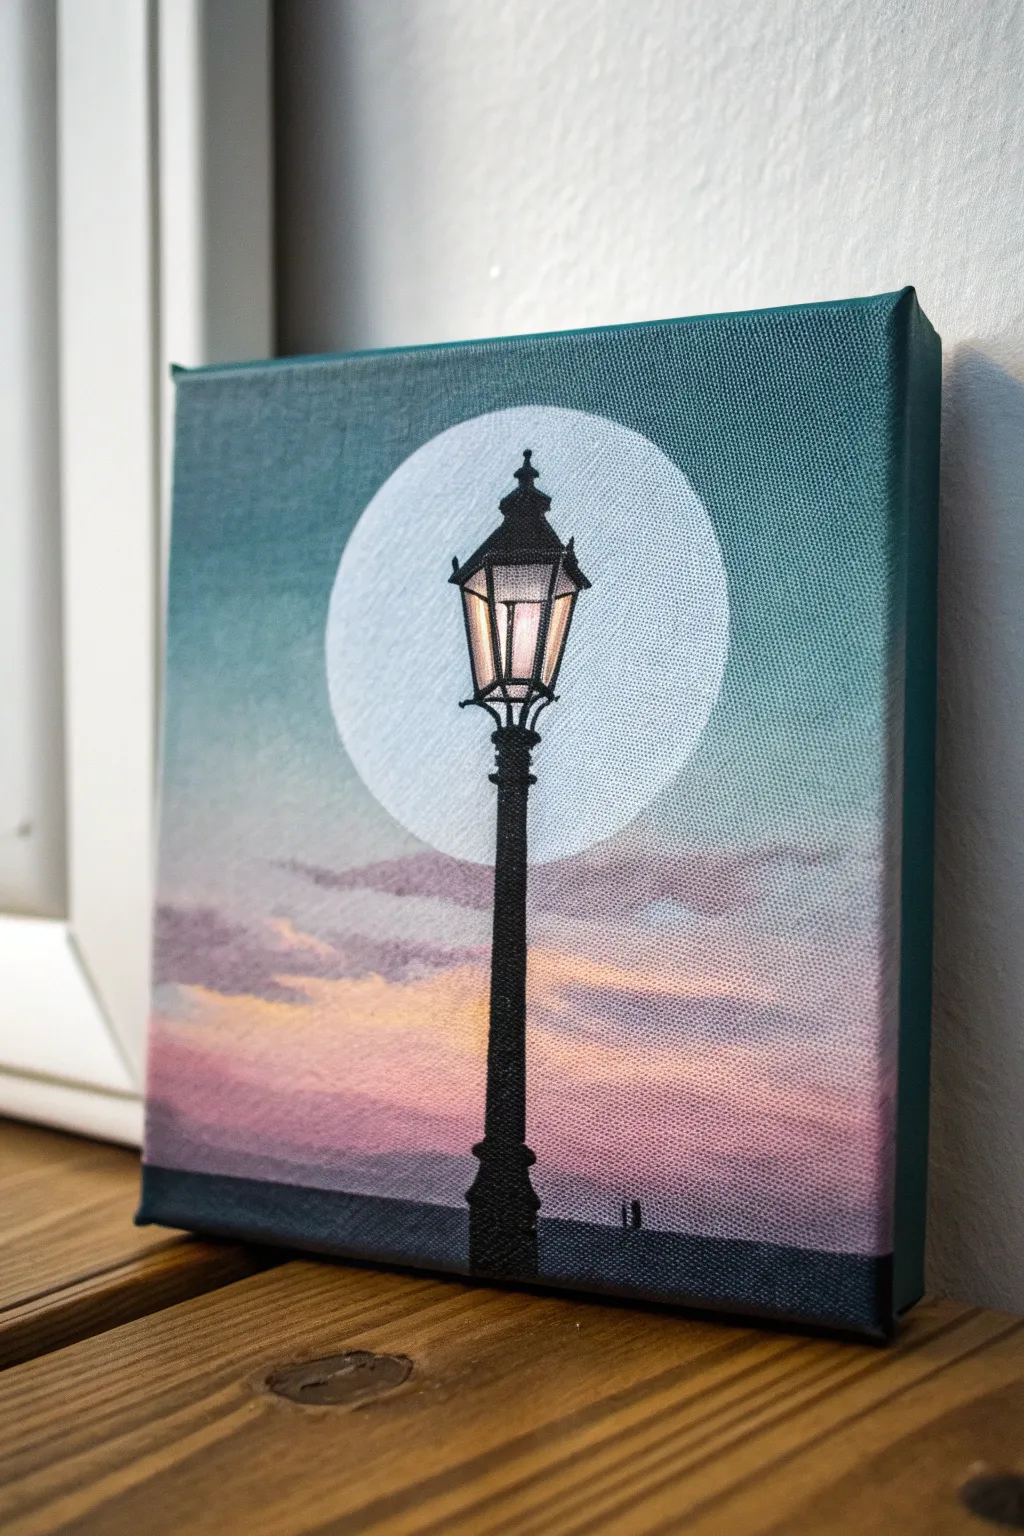
This captivating miniature painting centers around a striking streetlight silhouette set against a luminous full moon. The background features a dreamy gradient sky that transitions from deep teal to soft sunset pinks, creating a perfect mood for any small space.
Step-by-Step
Materials
- Small square canvas (e.g., 6 x 6 inches)
- Acrylic paints: Teal/Phthalo Green, White, Cadmium Yellow, Magenta/Pink, Black
- Flat brush (1-inch width)
- Small round detail brush (size 0 or 00)
- Medium filbert brush
- Compass or round object for tracing
- Pencil
- Palette for mixing
- Water cup and paper towels
Step 1: Creating the Gradient Sky
-
Prepare the canvas:
Start with a clean, dry canvas. If your canvas is raw, apply a coat of gesso first, but most store-bought canvases are pre-primed and ready to go. -
Mix the teal top color:
On your palette, mix a generous amount of teal or phthalo green with a touch of white to create a rich, medium teal tone. This will be the upper portion of your sky. -
Mix the pink bottom color:
Separately, mix magenta with white and a tiny dot of yellow to create a warm, sunset pink. You want this color to be soft but vibrant. -
Apply the teal section:
Using your flat brush, paint the top third of the canvas with horizontal strokes using the teal mixture. Bring the paint down towards the middle. -
Apply the pink section:
Clean your brush thoroughly. Paint the bottom third of the canvas with your pink mixture, brushing upwards toward the center. -
Blend the transition:
While both paint sections are still wet, use a clean, slightly damp brush to blend the area where they meet. Add a little white paint to the middle horizon line to create a hazy, cloud-like transition between the teal and pink. -
Paint the sides:
Don’t forget to extend your colors around the edges of the canvas for a polished, gallery-wrapped look. -
Add cloud texture:
Using the filbert brush and a mix of light purple (teal mixed with pink), gently dab in some horizontal cloud streaks near the bottom horizon while the background is tacky but not fully dry.
Uneven Moon Edges?
If your circle isn’t crisp, don’t worry. Wait for the white paint to dry, then use the background teal color to carefully ‘cut in’ and reshape the outer edge of the moon.
Step 2: The Moon and Lamp Post
-
Dry thoroughly:
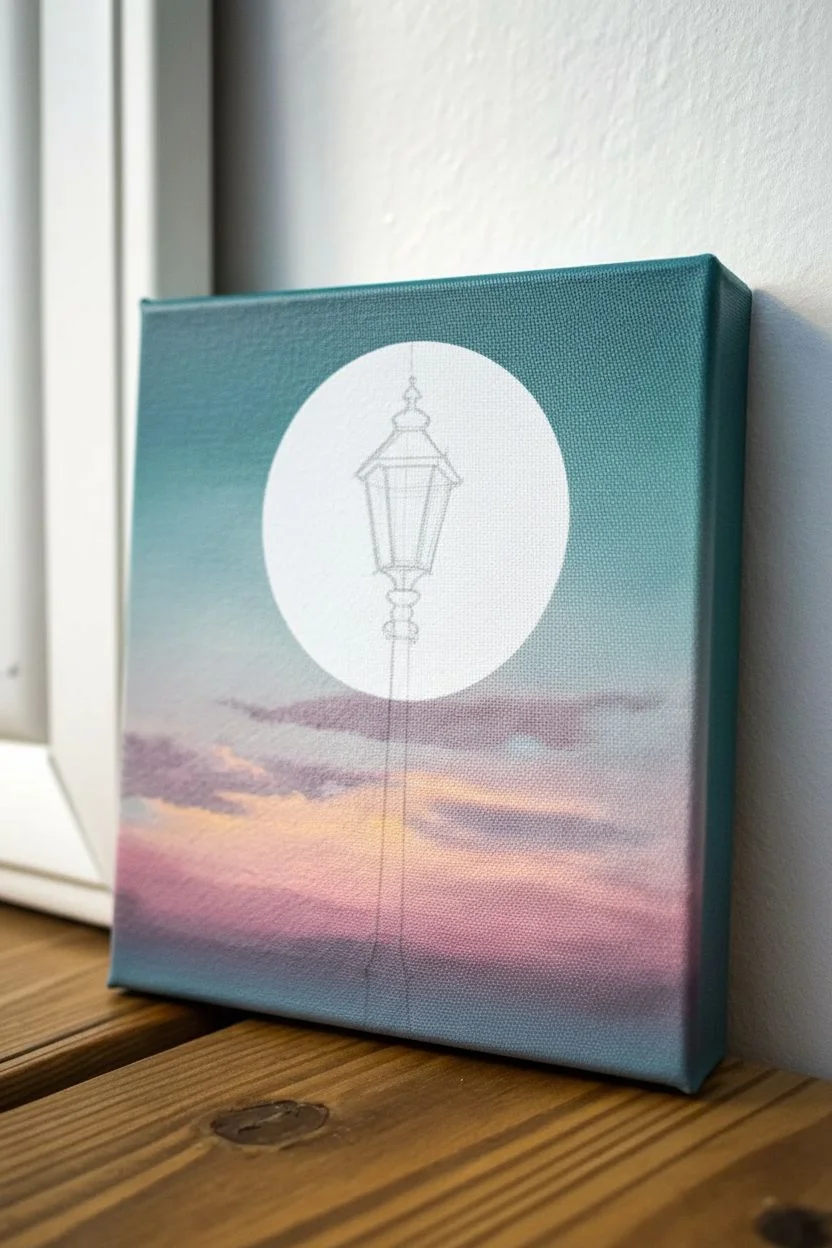
Allow the background gradient to dry completely. This is crucial so your pencil lines won’t digging into wet paint. -
Outline the moon:
Place a round object (like a jar lid) or use a compass to lightly draw a large circle in the upper center of the canvas. It should dominate the upper half. -
Paint the moon:
Fill in the circle with pure titanium white using a clean flat or filbert brush. You may need two thin coats to make it fully opaque against the teal background. -
Draft the lamp post:
Once the white moon is dry, lightly sketch the centerline of the lamp post vertically. Sketch the lantern shape so it sits directly in front of the moon. -
Paint the post silhouette:
Using black acrylic and your smallest detail brush, carefully paint the central pole. Start from the bottom and work your way up to steady your hand. -
Detail the lantern frame:
Outline the lantern head. Paint the top and bottom caps of the lantern black, leaving the ‘glass’ panels unpainted so the white moon shows through. -
Add the glass tint:
Mix a very watery wash of yellow and a tiny touch of orange. Glaze this transparently over the white moon sections inside the lantern frame to make it look like the light is on. -
Final black details:
Go back with your detail brush and crisp up the black lines of the lantern cage. Add the decorative spikes on top and the ornate details near the neck of the post. -
Ground the image:
At the very bottom edge, paint a dark horizon line in black or deep purple to represent the ground or distant shore. -
Tiny scenic details:
For a sense of scale, paint two minuscule vertical dashes on the distant horizon line to represent tiny figures standing in the distance.
Level Up: Texture
Mix a glossy varnish or glazing medium into the yellow paint for the lantern glass. This will give the light source a specialized sheen distinct from the matte background.
Hang this peaceful little scene in a cozy corner to add a touch of evening magic to your room
Birds on a Wire Against a Soft Gradient Sky
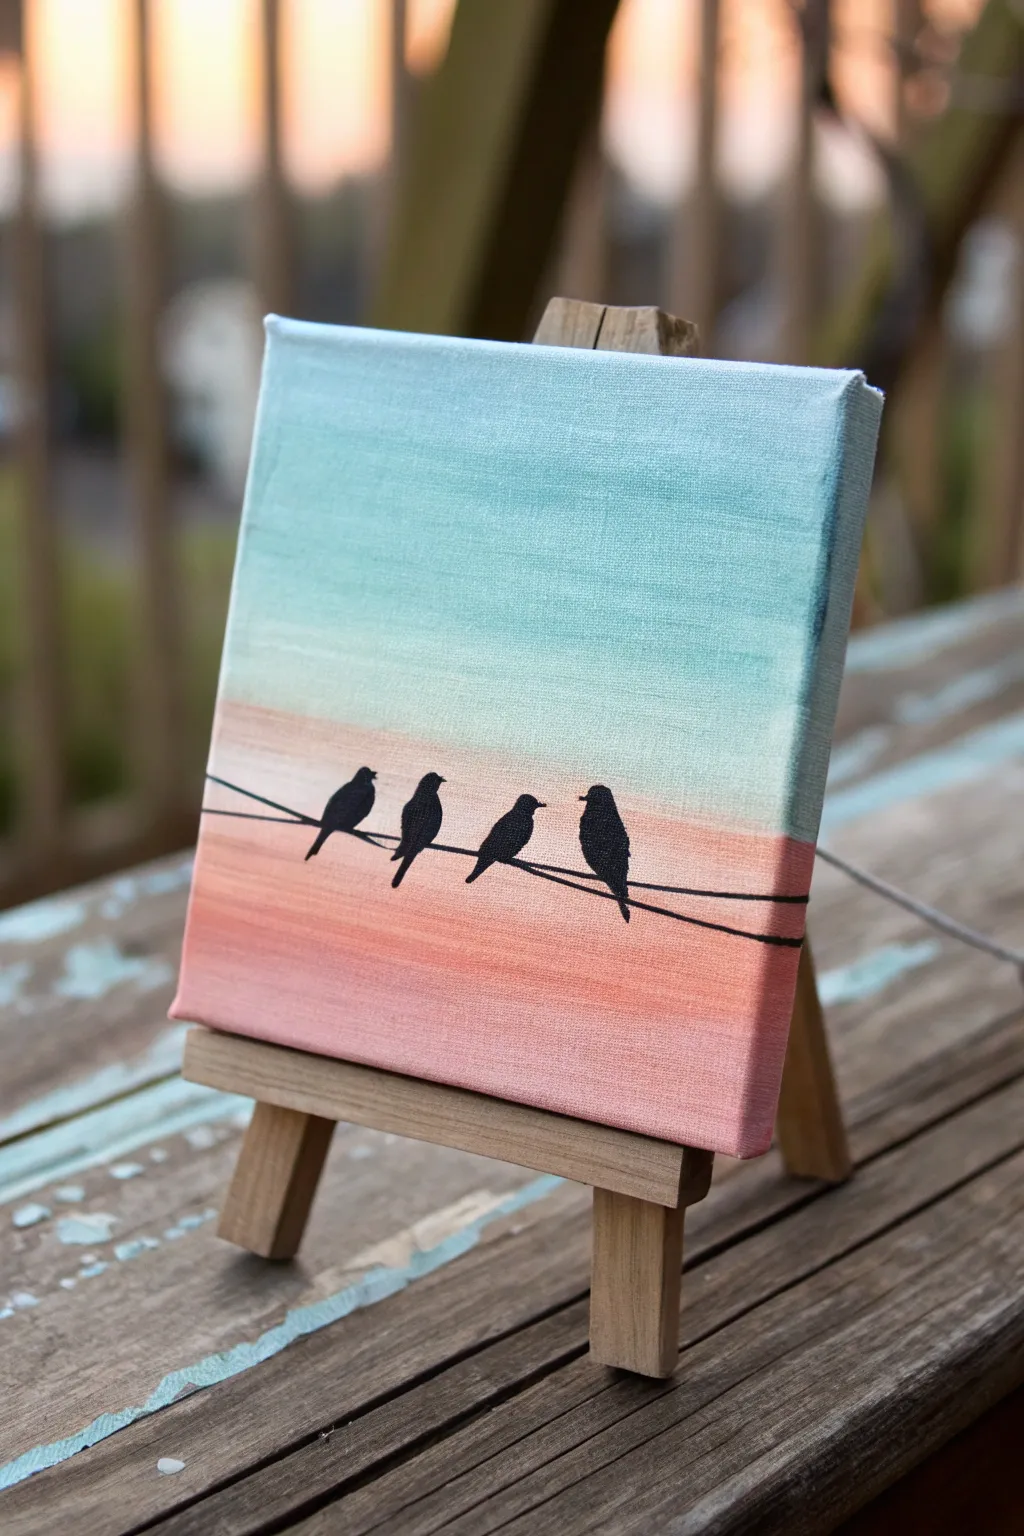
Capture the serene beauty of dusk with this beginner-friendly acrylic painting project. You’ll master a smooth two-tone blending technique to create a dreamy sky before adding charming silhouette details.
Step-by-Step Guide
Materials
- Small square canvas (e.g., 4×4 or 6×6 inches)
- Acrylic paints: Teal/Turquoise, Titanium White, Peach/Salmon Pink
- Flat shader brush (medium size)
- Small round detail brush (size 0 or 1)
- Black acrylic paint or a black paint pen
- Palette or paper plate
- Cup of water and paper towels
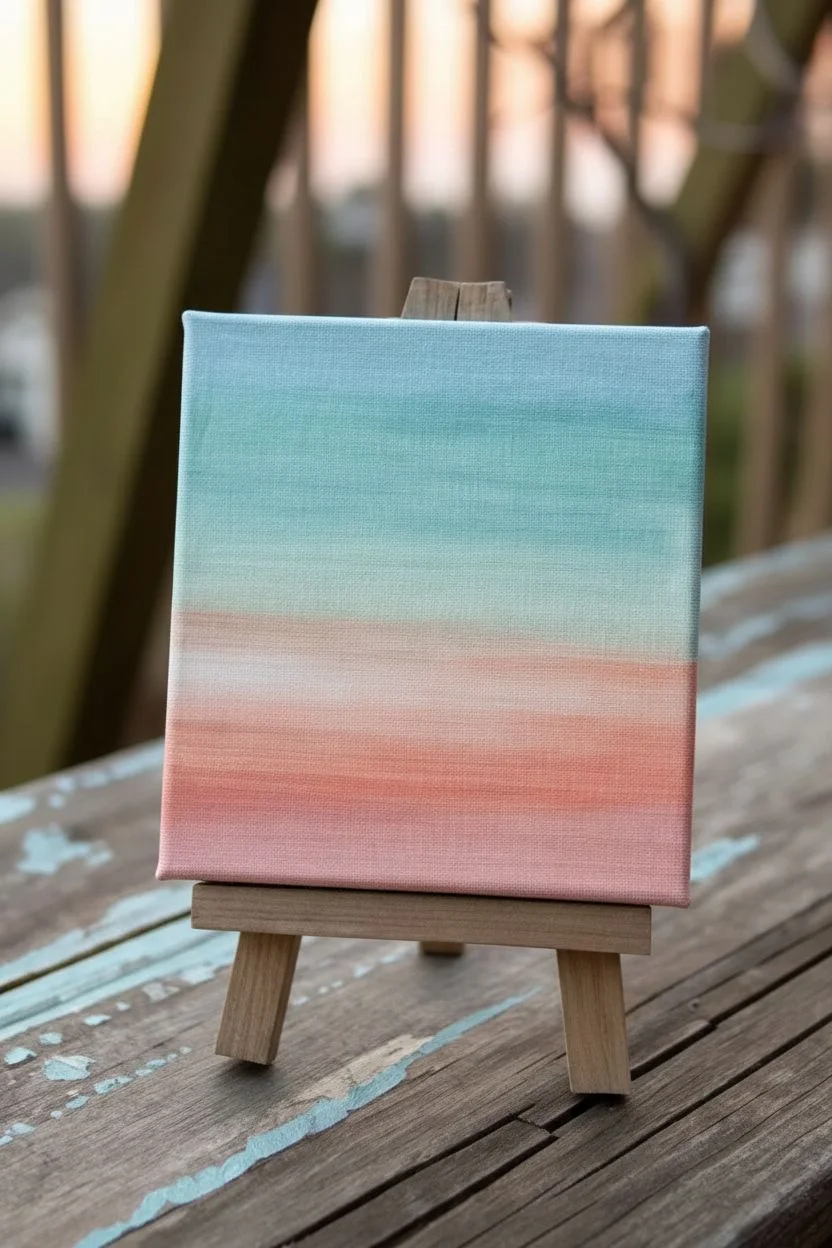
Step 1: Painting the Gradient Sky
-
Prepare your palette:
Squeeze out your teal, white, and peach paints onto your palette. You will want a generous amount of white to help with the blending process. -
Start the top section:
Using a slightly damp flat shader brush, pick up the teal paint. Apply horizontal strokes across the top third of the canvas, painting the edges of the canvas as well for a finished look. -
Add white for a transition:
Without cleaning your brush thoroughly, pick up a bit of white paint. Blend this into the lower part of the teal section, moving downward to the middle of the canvas to lighten the color gradually. -
Clean the brush:
Rinse your brush completely in water and dry it off on a paper towel. It’s crucial to have a clean brush before switching to the warm tone to avoid muddy colors. -
Paint the bottom section:
Pick up the peach or salmon pink paint with your clean brush. Apply horizontal strokes starting from the very bottom edge of the canvas, working your way up. -
Blend the middle:
As you reach the middle where the pale teal fades, mix a tiny amount of white into your peach paint. Gently brush back and forth where the two colors meet to create a soft, hazy transition. -
Refine the gradient:
If the transition looks harsh, use a clean, slightly dry brush to lightly ‘sweep’ horizontally across the meeting point of the colors to blur them together. -
Let it cure:
Allow the background to dry completely. This step is vital because if the background is wet, the black silhouettes we add next will bleed and lose their crisp edges.
Step 2: Adding the Birds on a Wire
-
Draw the wire:
Using thin black paint on your detail brush or a black paint pen, draw a slightly curved line across the lower third of the canvas. It doesn’t need to be perfectly straight; a little dip looks more natural. -
Add a second wire:
Draw a second line slightly below the first one, perhaps angling it differently so they cross or run parallel, adding depth to the composition. -
Outline the first bird body:
Choose a spot on the top wire. Paint a small, oval shape for the body of the first bird using your detail brush or paint pen. -
Add the head:
Paint a smaller circle on top of the oval for the head. Add a tiny triangle for the beak, pointing it left or right to give the bird some character. -
Create the tail:
Extend the bottom of the oval downward past the wire to create a tail. A simple tapered stroke works best here. -
Repeat for the flock:
Paint three more birds along the wire. Vary their sizes slightly and change the direction of their beaks—have two facing each other as if they are chatting. -
Refine the silhouettes:
Go back over your black shapes to ensure they are solid and opaque. Start in the center of the shape and push paint outward to smooth any rough edges. -
Connect the feet:
Make sure the bottom of the bird bodies clearly touch or slightly overlap the wire so they don’t look like they are floating above it. -
Final touches:
Check the edges of your canvas again. If any gradient paint is missing, touch it up, or paint the edges black for a framed appearance.
Keep It Smooth
Work quickly while blending the sky! Acrylics dry fast, so a slightly damp brush helps keep the paint movable for a smoother gradient.
Add Some Sparkle
Once the painting is totally dry, splatter tiny flecks of white paint over the top teal section to create subtle stars.
Place your finished mini-masterpiece on a small easel to brighten up a shelf or desk
Tiny Underwater Scene With Bubbles and Seaweed
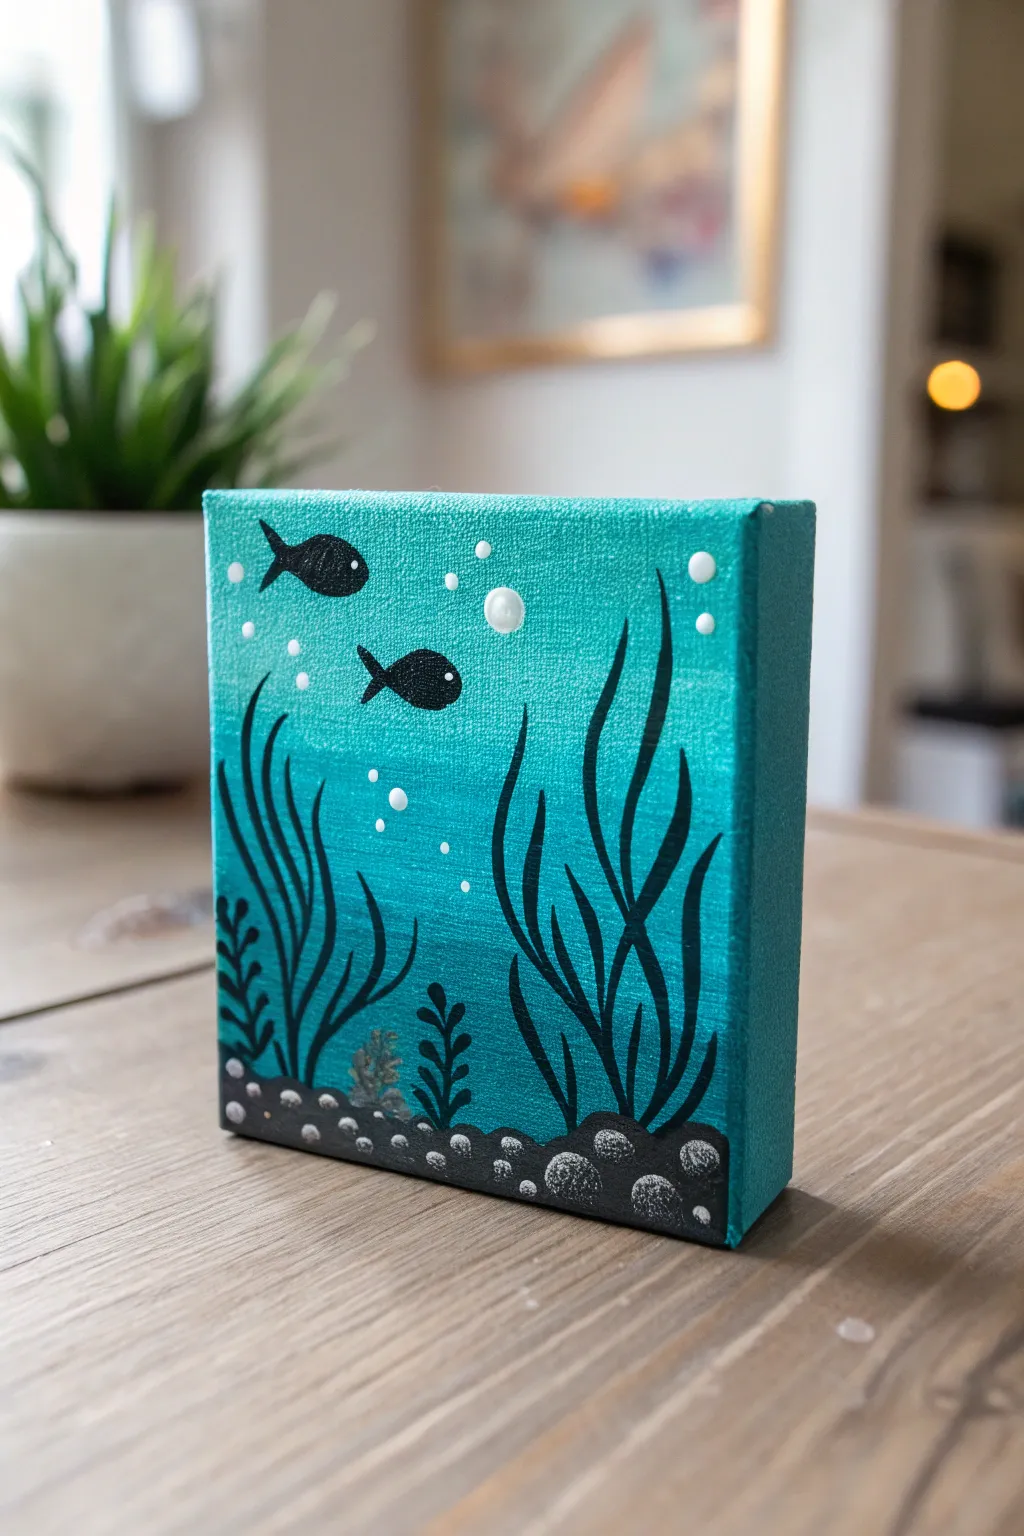
Dive into creativity with this charming miniature canvas that features a vibrant gradient ocean and playful silhouette sea life. This tiny underwater scene is perfect for beginners, using simple shapes and bold contrast to create a depth-filled aquatic world.
Step-by-Step Tutorial
Materials
- Small square canvas (e.g., 4×4 or 6×6 inches)
- Acrylic paints: Teal/Turquoise, White, Black
- Flat brush (medium width for background)
- Small round detail brush (size 0 or 1)
- Dotting tool or toothpick
- Palette or paper plate
- Cup of water and paper towels
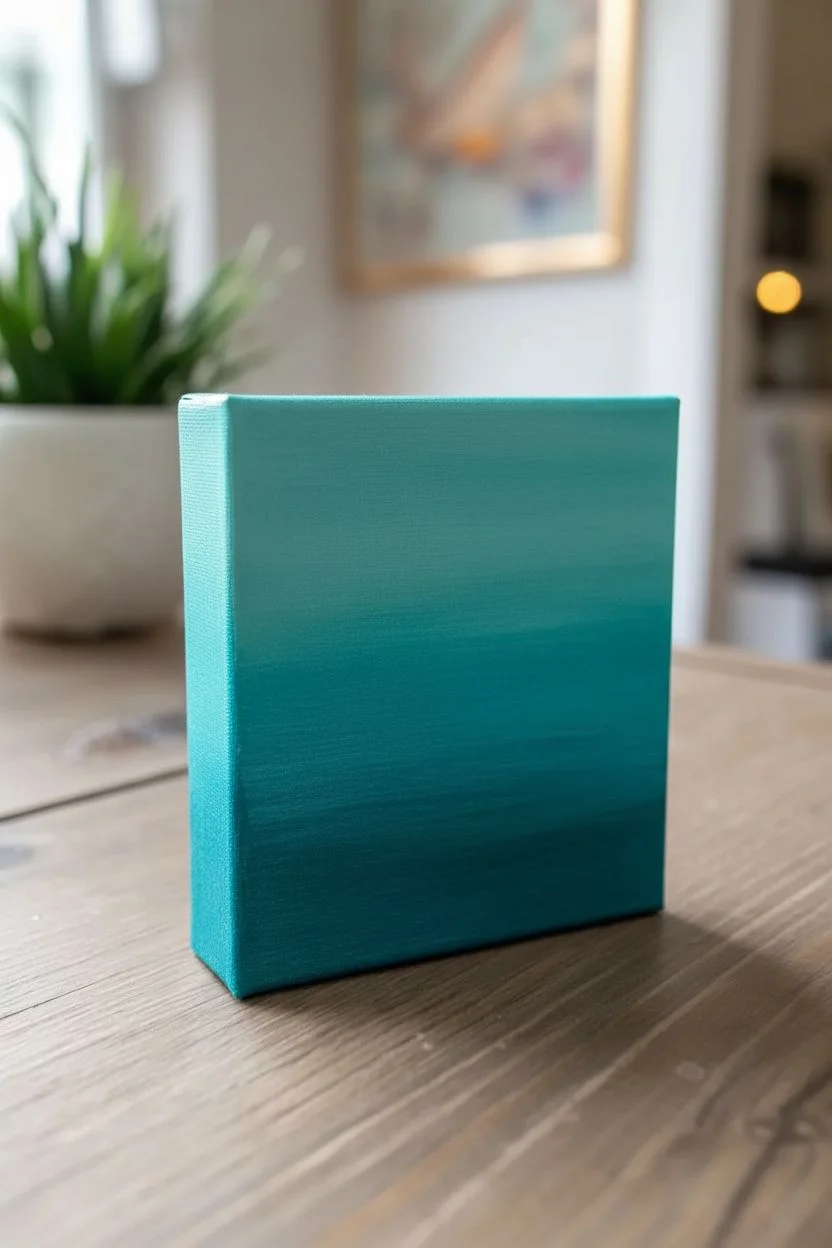
Step 1: Setting the Scene
-
Mix your base gradient:
Start by squeezing out a generous amount of teal and white paint onto your palette. You want three distinct shades: pure teal, a mid-tone mix, and a very light tint. -
Paint the bottom section:
Using your flat brush, apply the darkest pure teal across the bottom third of the canvas. Don’t worry about perfect smoothness yet; we are just laying down color. -
Blend upwards:
While the bottom paint is still wet, swipe your mid-tone mix across the middle section. Use horizontal strokes to gently blend the boundary where it meets the dark teal, creating a soft transition. -
Finish the gradient:
Apply the lightest teal mix to the top third of the canvas. Continue blending downward into the mid-tone section until you have a smooth ombre effect from light top to dark bottom. -
Paint the edges:
Since this is a gallery-wrapped style, I like to carry the gradient colors onto the sides of the canvas for a finished, professional look. Let the entire background dry completely before proceeding.
Uneven Gradient?
If your blend looks streaky, keep your brush slightly damp (not soaking) and work quickly. Acrylics dry fast, so blending must happen while both colors are wet.
Step 2: Creating the Seabed
-
Outline the rocky bottom:
Switch to black paint. Paint a wavy, uneven strip along the very bottom edge of the canvas face to represent the rocky floor. -
Fill the bottom edge:
Extend this black paint down to cover the bottom side edge of the canvas as well. -
Texture the rocks:
Once the black strip is dry, dip your smallest brush or a dotting tool into white paint. Add small, clustered C-shapes and dots along the black strip to simulate the texture of stones and pebbles.
Make it Shimmer
Mix a tiny drop of iridescent medium or glitter paint into your lightest teal color at the top to make the surface water look like it is catching real sunlight.
Step 3: Adding Life
-
Draft the seaweed stalks:
Using thin black paint and your liner brush, pull long, wavy lines upward from the rocky bottom. Vary the heights, making some reach almost to the top and others stay low. -
Thicken the foliage:
Go back over your initial seaweed lines, thickening them slightly at the base and tapering them to a fine point at the top. Add a few branching leaves to make them look organic. -
Paint the first fish:
Near the upper left, paint a small, solid black oval shape. Add a tiny triangle at the back for a tail to create a simple fish silhouette swimming left. -
Add a companion:
Paint a second, slightly smaller fish silhouette just below and to the right of the first one to create a sense of movement and scale. -
Create distinct leaf shapes:
Add a few shorter, fern-like plant silhouettes near the bottom center using quick, short brushstrokes on either side of a central stem.
Step 4: Bubbles and Details
-
Vary the bubble sizes:
Dip different sized ends of a dotting tool or brush handle into white paint. Place random dots rising from the seaweed and fish. -
Soften the bubbles:
For the larger bubbles, you can gently dab the center with a clean, dry brush or a finger before the paint dries to make them look translucent rather than solid white. -
Add fish details:
Using your finest brush or a toothpick, add a tiny white dot for the eye on each black fish. -
Final touches:
Step back and see if your composition is balanced. You can add a few tiny white speckles in the water to represent distant light catching particles.
Place your finished mini masterpiece on a small easel or shelf to enjoy a splash of ocean calm
Abstract Color Block Squares for Fast Paint Sessions
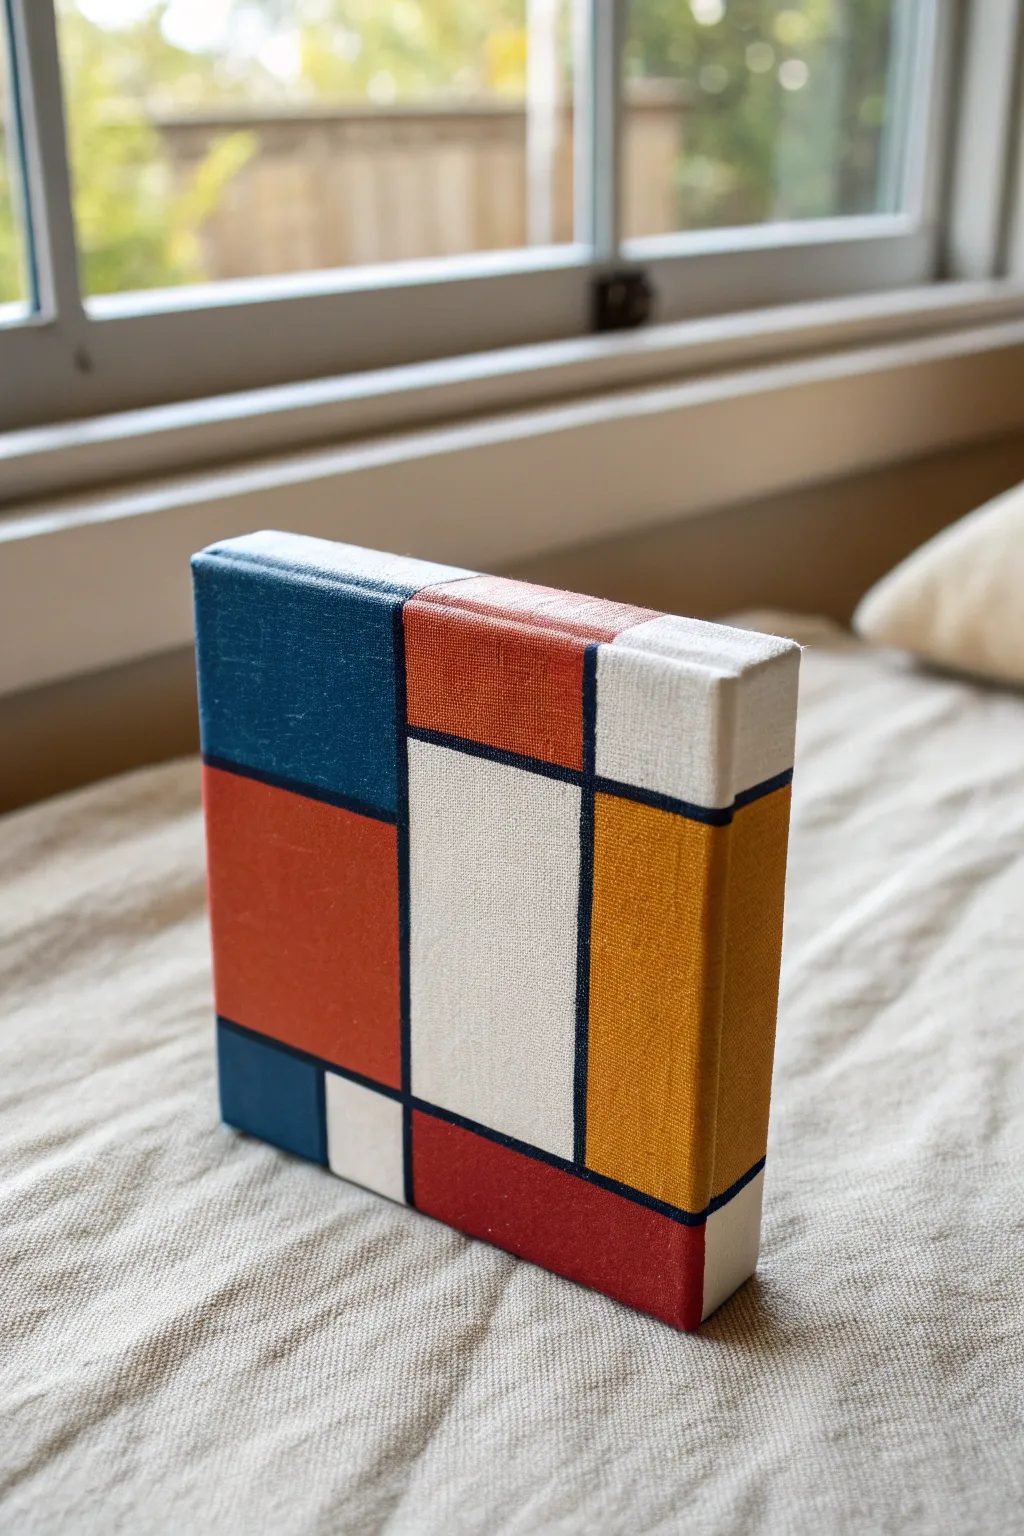
Channel the orderly beauty of De Stijl with this crisp, geometric canvas project. Using bold primary colors and strong black grid lines, you’ll create a striking modern art piece perfect for styling a bookshelf or desk.
Detailed Instructions
Materials
- Small square gallery-wrapped canvas (4×4 or 6×6 inch)
- Acrylic paints: Cadmium Red, Ultramarine Blue, Cadmium Yellow, Titanium White, Mars Black
- Flat shader brushes (sizes 4 and 8)
- Small round detail brush (size 0 or 1)
- Blue painter’s tape or drafting tape
- Ruler
- Pencil
- Palette
- Water cup
Step 1: Planning the Grid
-
Surface Preparation:
Start by ensuring your canvas is clean and taut. If the surface feels too rough, apply a quick coat of gesso and sand it lightly once dry for a smoother finish. -
Initial Wash:
Paint the entire canvas, including the sides, with a solid coat of Titanium White. This provides a bright base that will make your primary colors pop later. -
Mapping the Layout:
Using a ruler and a light pencil touch, draw a grid of rectangles and squares directly onto the dry white paint. Don’t worry about perfect symmetry; vary the sizes to create visual interest. -
Extending the Lines:
Ensure your pencil lines wrap around the sides of the canvas. This creates a sculptural, 3D object effect rather than just a flat image. -
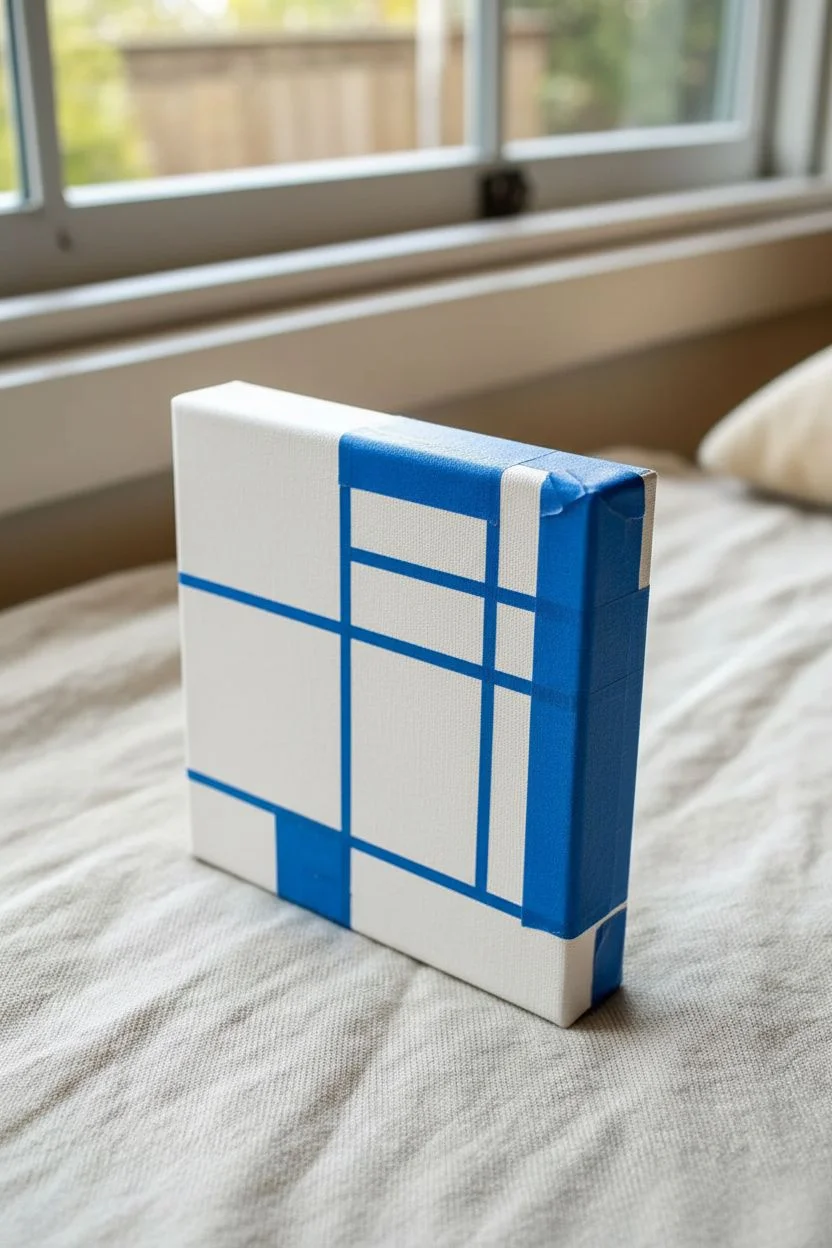
Taping the Lines:
Apply painter’s tape along your pencil lines to mark off the first set of black grid lines. Press the edges of the tape down firmly to prevent paint bleed.
Seal the Tape
Before painting black, brush a tiny bit of white paint over the tape edge. This seals the gap so any bleed is invisible white-on-white, keeping lines razor sharp.
Step 2: Painting the Grid
-
First Black Lines:
Load a flat shader brush with Mars Black. Paint the exposed channels between your tape strips. Use confident strokes to get opaque coverage. -
Remove and Dry:
Peel back the tape while the paint is still slightly tacky to keep edges crisp. Allow these lines to dry completely before moving to the intersecting lines. -
Cross Sections:
Re-tape the canvas to paint the perpendicular black lines. This two-stage taping process ensures your intersections remain sharp squares rather than messy blobs. -
Painting Intersections:
Fill in the new channels with black paint. I like to double-check the corners where lines meet to ensure full coverage. -
Final Tape Removal:
Remove the second round of tape carefully. You should now have a stark white canvas with a clean black grid structure. -
Touch Ups:
Use your small round detail brush to fix any small bleeds or uneven edges on the black lines before moving to color.
Step 3: Adding Color Blocks
-
Selecting Color locations:
Decide which rectangles will be colored. Aim for a balanced asymmetry—place a large red block in one corner and balance it with smaller blue or yellow blocks elsewhere. -
Applying The Red:
Fill your chosen large rectangle with Cadmium Red using a flat brush. Paint carefully up to the black edge without crossing over it. -
Applying The Blue:
Paint your selected blue sections with Ultramarine Blue. Since blue can be transparent, you may need a second coat once the first is dry to achieve full opacity. -
Applying The Yellow:
Fill the remaining color slots with Cadmium Yellow. This pigment is often streaky, so apply it in thin, even layers, allowing drying time in between. -
Side Continuation:
Don’t forget to carry the color blocks over the edges of the canvas to meet the back frame. This makes the finished piece look professional from every angle. -
Crisping the White:
If any color strayed into the white sections, use a clean brush and Titanium White to clean up the blocks, re-establishing that bright, blank space. -
Sealing the Work:
Once fully dry (give it at least 24 hours), apply a coat of gloss varnish to protect the paint and unify the sheen of the different pigments.
Go Textureless
For a truly industrial look, use a self-leveling pouring medium mixed into your acrylics. It removes brushstrokes for a flat, print-like finish.
Place your finished geometric study on a well-lit shelf to add a pop of modernist sophistication to your room
Mini Painting Series: Six Tiny Canvases That Connect
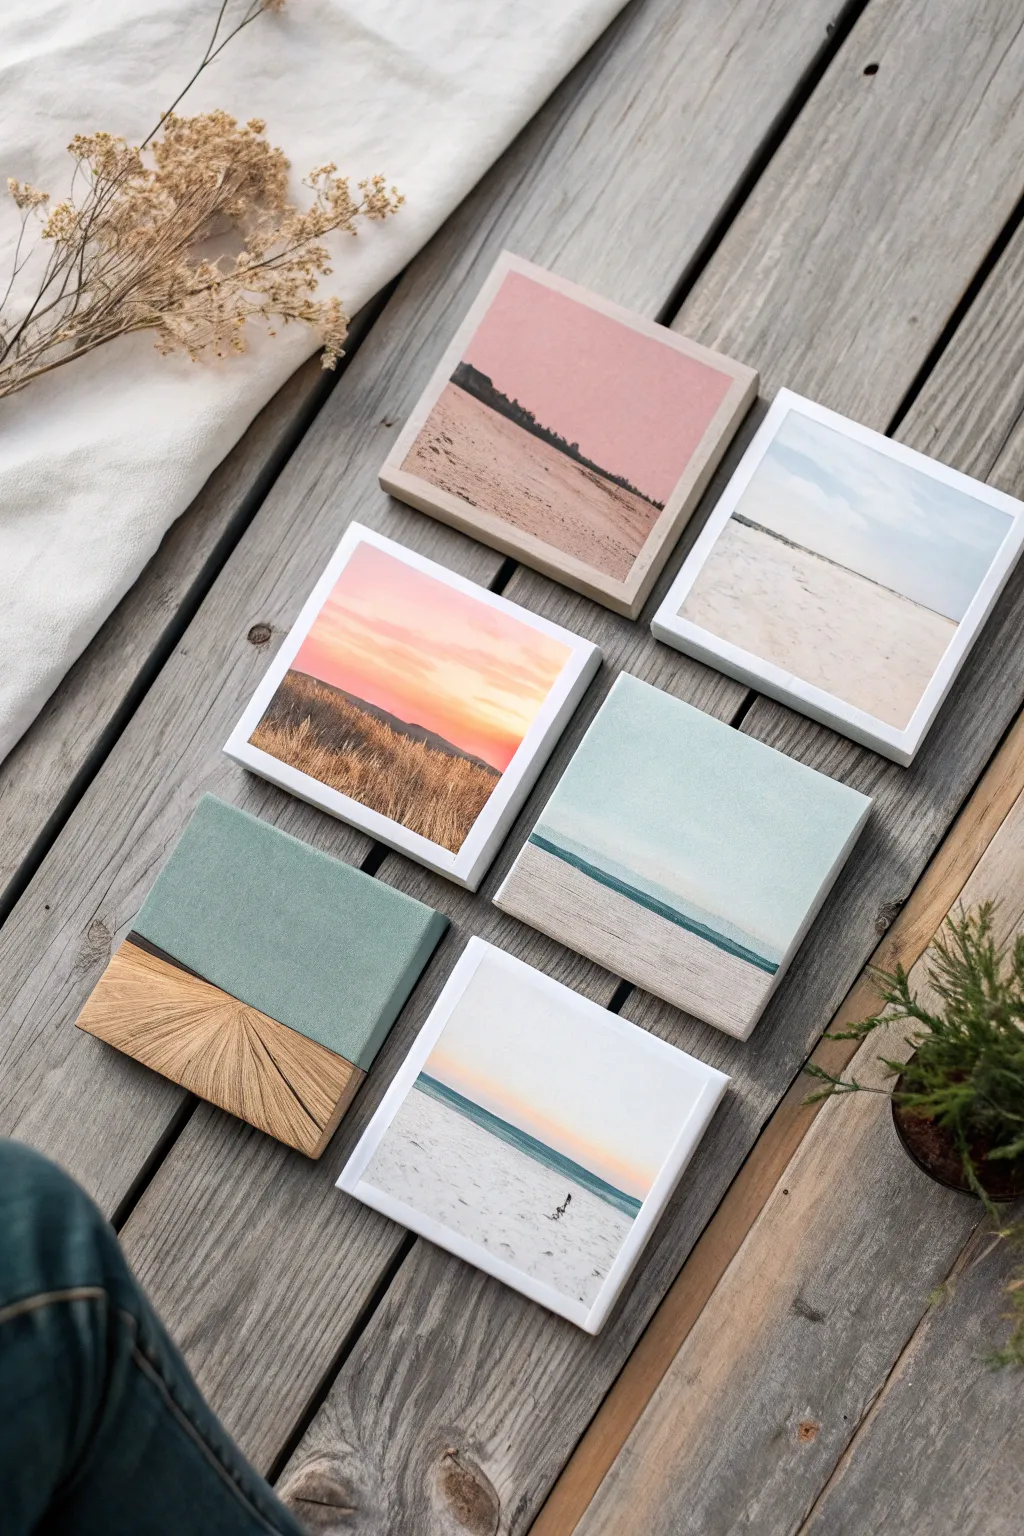
Capture the calm of the coast with this beautifully curated set of six miniature canvases. Mixing soft acrylic landscapes with one striking mixed-media piece creates a modern, cohesive gallery wall feel on a tiny scale.
How-To Guide
Materials
- 6 mini square canvases (approx. 4×4 inches)
- Acrylic paints: Titanium White, Unbleached Titanium, Ultramarine Blue, Burnt Sienna, Burnt Umber, Alizarin Crimson, Teal/Turquoise
- Assorted brushes: 1/2 inch flat brush, small round brush (size 2 or 4), liner brush
- Thin wood veneer sheet or balsa wood strips
- Craft knife and cutting mat
- Wood glue or strong craft glue
- Fine grit sandpaper
- Palette knife for mixing
- Gloss varnish (optional)
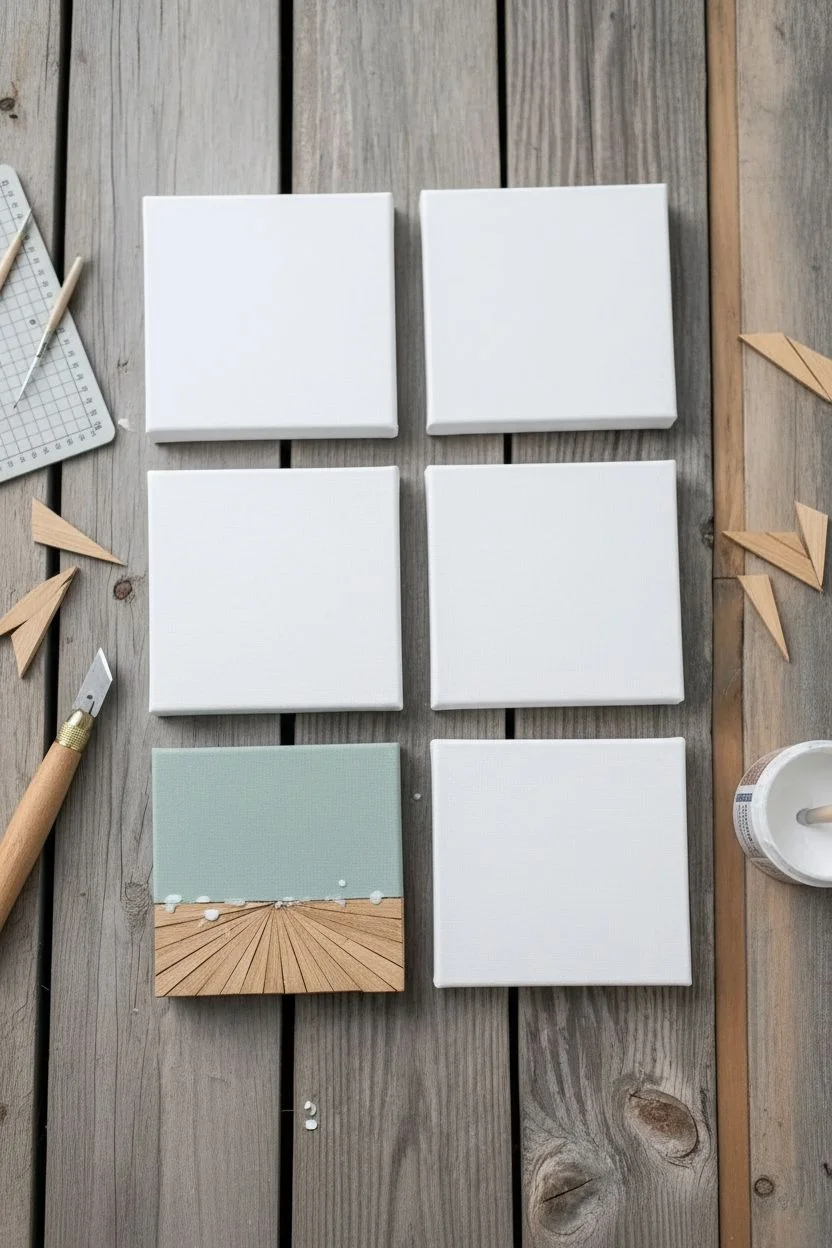
Step 1: Prepping the Collection
-
Prime the surfaces:
Even though your mini canvases likely came primed, adding a fresh coat of gesso creates a smoother texture for tiny details. Apply a thin layer to five of the six canvases. -
Design the wood-split canvas:
For the sixth unique canvas, mark a horizontal line about one-third up from the bottom. This lower section will be your wood texture. -
Cut the wood accents:
Using your craft knife, cut small slivers of wood veneer or balsa in triangular wedge shapes. These will radiate out from a central point to create a sunburst pattern. -
Assemble the textured base:
Glue the wood pieces onto the bottom third of that sixth canvas, ensuring they fit tightly together. Let this dry completely while you paint the others.
Step 2: Painting the Landscapes
-
Mix the sky palette:
Create a gradient base by mixing Titanium White with a tiny touch of Ultramarine Blue for clear skies, and White with Alizarin Crimson for soft pink sunsets. -
Paint the ‘Pink Sunset’ canvas:
On one canvas, paint the top two-thirds with your pink mix, fading it into white near the horizon line. Paint the bottom third a sandy beige (Unbleached Titanium plus a dot of Burnt Sienna). -
Detail the dune line:
Using a small round brush and Burnt Umber, tap in a dark, uneven line across the horizon of the pink canvas to represent distant dunes or vegetation. -
Create the ‘Golden Hour’ meadow:
For the second canvas, blend a vibrant orange-pink sky. Use a fan brush or an old dry brush with Burnt Sienna and yellow ochre to flick upward strokes in the foreground, creating tall dry grass textures. -
Paint the minimalist beach:
For the third canvas, keep it very high-key. Paint almost the entire surface white, blending a very faint blue line for the horizon about one-third from the top. -
Add subtle sand texture:
Dilute some Burnt Umber with water to make a glaze and splatter tiny speckles onto the bottom half of the minimalist beach canvas to mimic sand grain. -
Paint the ‘Blue Horizon’ duo:
For the fourth and fifth canvases, focus on the ocean. Paint a solid band of teal or turquoise across the middle. Blend white into the top for sky and beige into the bottom for sand. -
Refine the water’s edge:
Here I prefer to use a slightly dry flat brush with white paint to drag horizontal lines right where the blue meets the beige, creating the look of breaking foam.
Tape for crisp lines
Use low-tack painter’s tape or washi tape for the horizon lines. It ensures the separation between sky and sea is razor-sharp on such a small scale.
Step 3: Finishing the Wood-Split Piece
-
Paint the structured sky:
Returning to your wood-textured canvas, paint the upper smooth section with a solid, opaque coat of flat teal or sage green paint. This creates a bold block-color effect. -
Stain the wood:
Create a wash using water and Burnt Umber. Lightly brush this over the glued wood veneer pieces to bring out the grain and separate the slivers visually. -
Clean the edges:
Once all canvases are fully dry, paint the side edges of each canvas white (or a continuous color from the front) for a professional, finished gallery look. -
Seal the set:
Apply a coat of varnish to the five painted canvases to protect them. You can leave the wood section raw for a textural contrast.
Framing upgrade
Make tiny floating frames by gluing thin balsa wood strips around the outer edges of each finished canvas. Stain the wood a light oak for warmth.
Arrange your mini masterpieces in a grid or a line to bring a permanent vacation vibe to your desk or shelf


Have a question or want to share your own experience? I'd love to hear from you in the comments below!