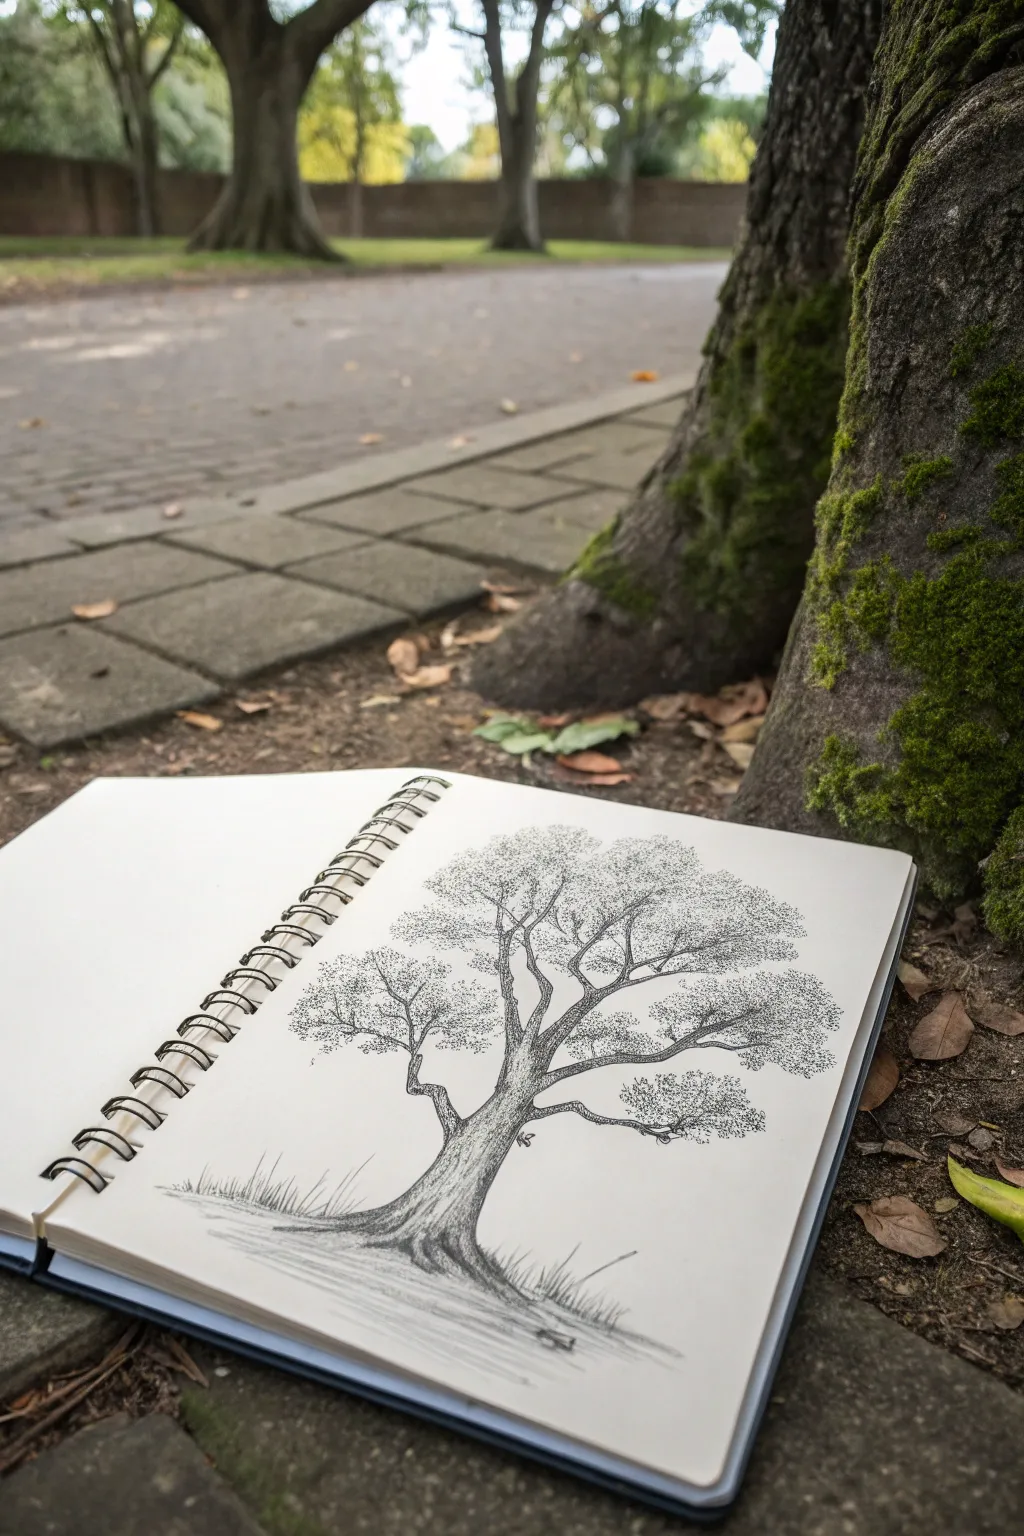
Trees are one of those subjects that look complicated… until you break them into a few simple shapes and textures. Here are my favorite tree drawing ideas to help you sketch everything from classic canopies to more playful, unexpected tree concepts.
Classic Deciduous Tree With a Rounded Canopy
Capture the enduring strength and delicate texture of nature with this detailed pen-and-ink study of a rounded deciduous tree. This project focuses on building realistic foliage through stippling and creating a grounded, textured trunk using directional shading.
Step-by-Step
Materials
- Spiral-bound sketchbook (smooth or vellum bristol paper recommended)
- H or HB graphite pencil (for sketching)
- Kneaded eraser
- Fine liner pens (sizes 0.05, 0.1, and 0.3mm)
- Ruler (optional for horizon line)
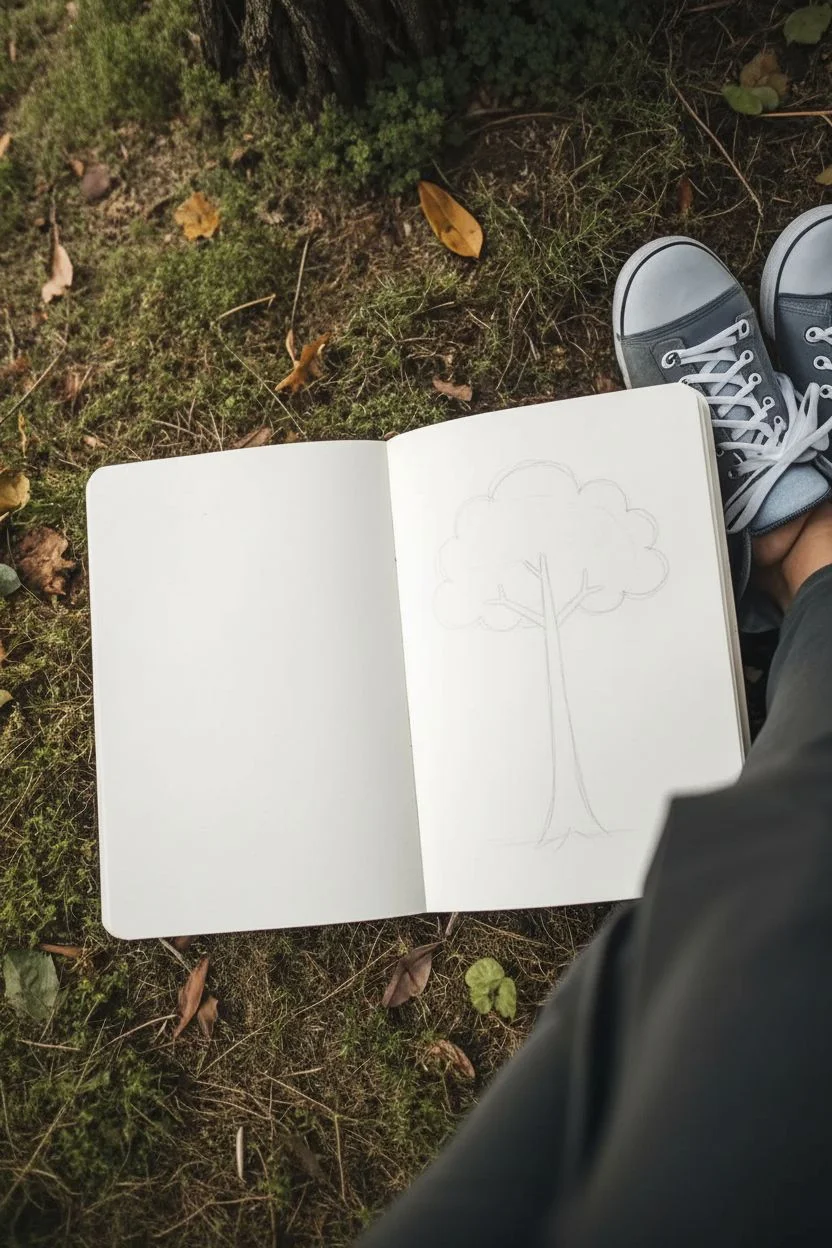
Step 1: Laying the Foundation
-
Establish the ground:
Begin with your graphite pencil. Draw a faint, slightly uneven horizontal line about a quarter of the way up from the bottom of the page to represent the ground level. -
Sketch the trunk shape:
Lightly sketch the main trunk rising from the center. Make the base wide where it meets the ground, tapering gradually as it goes up. -
Branch structure:
Split the main trunk into two or three large primary branches. From these, extend smaller secondary branches that reach outward and upward, forming a rough ‘Y’ shapes. -
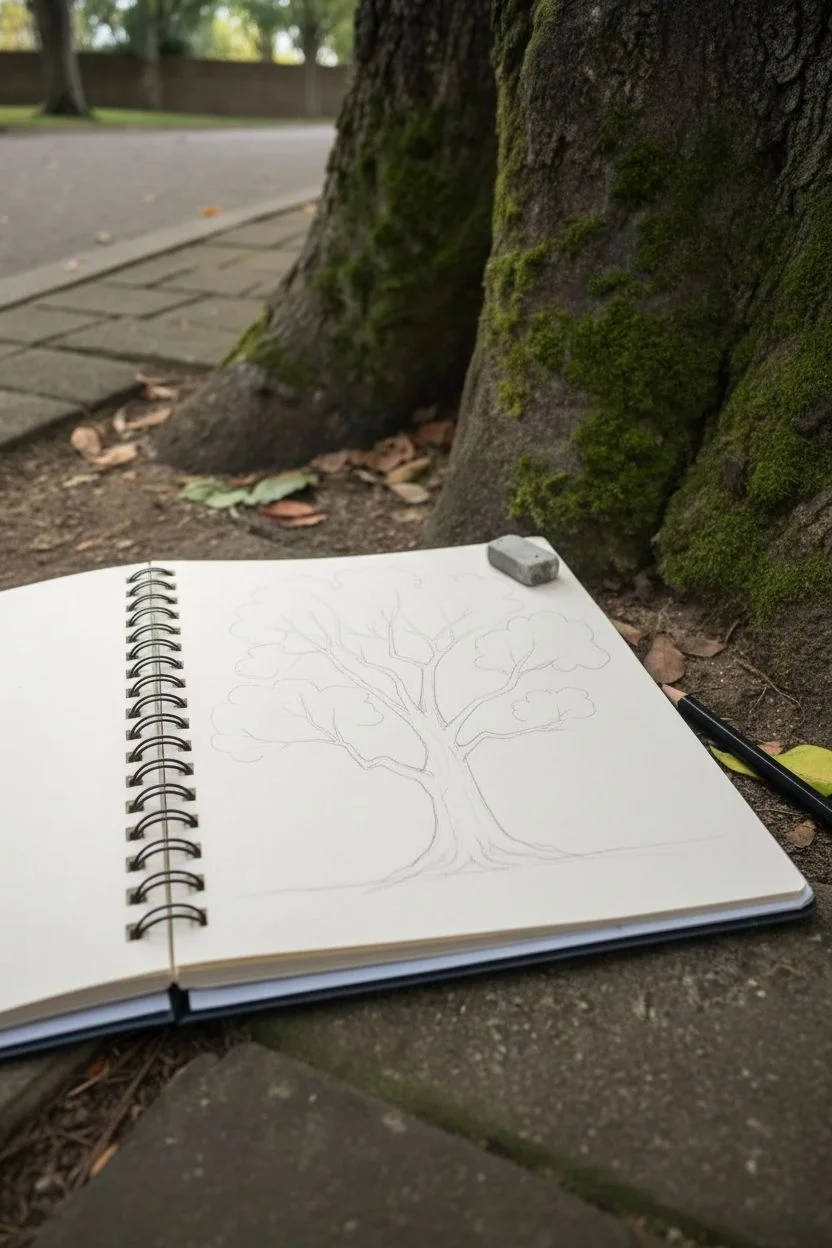
Map the canopy:
Instead of drawing individual leaves, verify the overall shape by lightly sketching cloud-like scalloped outlines where the main clusters of leaves will sit. This creates the rounded canopy structure.
Ink Smudging?
To prevent smearing your careful stippling, place a clean sheet of scrap paper under your drawing hand. This acts as a shield between your palm’s oils and the fresh ink.
Step 2: Inking the Structure
-
Outline the trunk:
Switch to your 0.1mm fine liner. Carefully go over your pencil lines for the trunk and main branches. Don’t make the lines perfectly smooth; a little wobble adds character to the bark. -
Add bark texture:
Using the 0.05mm pen, draw vertical contour lines that follow the curve of the tree. These lines should curve around the cylindrical shape of the trunk to give it volume. -
Deepen the shadows:
Identify a light source (masking the left side lighter, for example). Add denser hatching or cross-hatching on the shadowed side of the trunk and under the main branches. -
Root details:
At the base, extend a few root lines into the ground. Use short, flicking strokes to suggest grass growing up around the base of the roots.
Pro Tip: Vary the Dot
Hold the pen perpendicular to the paper. Angled strokes create tiny dashes instead of round dots, which changes the texture from leafy to grassy or furry.
Step 3: Creating Foliage with Stippling
-
Start the foliage clusters:
For the leaves, put away the solid lines. I prefer using the 0.05mm pen here. Begin stippling (making small dots) along the bottom curves of your pencil-sketched canopy clouds. -
Build density:
Concentrate your dots heavily at the bottom of each leaf cluster to create shadow and weight. This makes the foliage look three-dimensional rather than flat. -
Fade upward:
As you move toward the top of each leaf cluster, space the dots further apart. This simulates sunlight hitting the top of the leaves. -
Connect the clusters:
Ensure some branches are visible peeking through the gaps in the foliage. Draw tiny twigs connecting the floating leaf clusters to the main wood structure. -
Refine the canopy edge:
Use extremely sparse dots at the very outer edges of the canopy to create a soft, airy transition into the sky.
Step 4: Grounding and Final Touches
-
Texture the grass:
Use quick, upward flicking motions with your 0.1mm pen to create patches of grass along the horizon line and near the roots. -
Add a cast shadow:
Draw horizontal hatching lines on the ground extending from the base of the tree to the right (opposite your light source) to ground the object. -
Erase pencil marks:
Wait at least 10 minutes for the ink to fully dry. Gently use your kneaded eraser to lift all the underlying graphite sketches. -
Final assessment:
Step back and look at contrast. If the tree looks too pale, go back in with the 0.3mm pen and darken the deepest crevices in the bark for extra pop.
With practice, your stippling technique will become a meditative process that yields incredibly realistic results


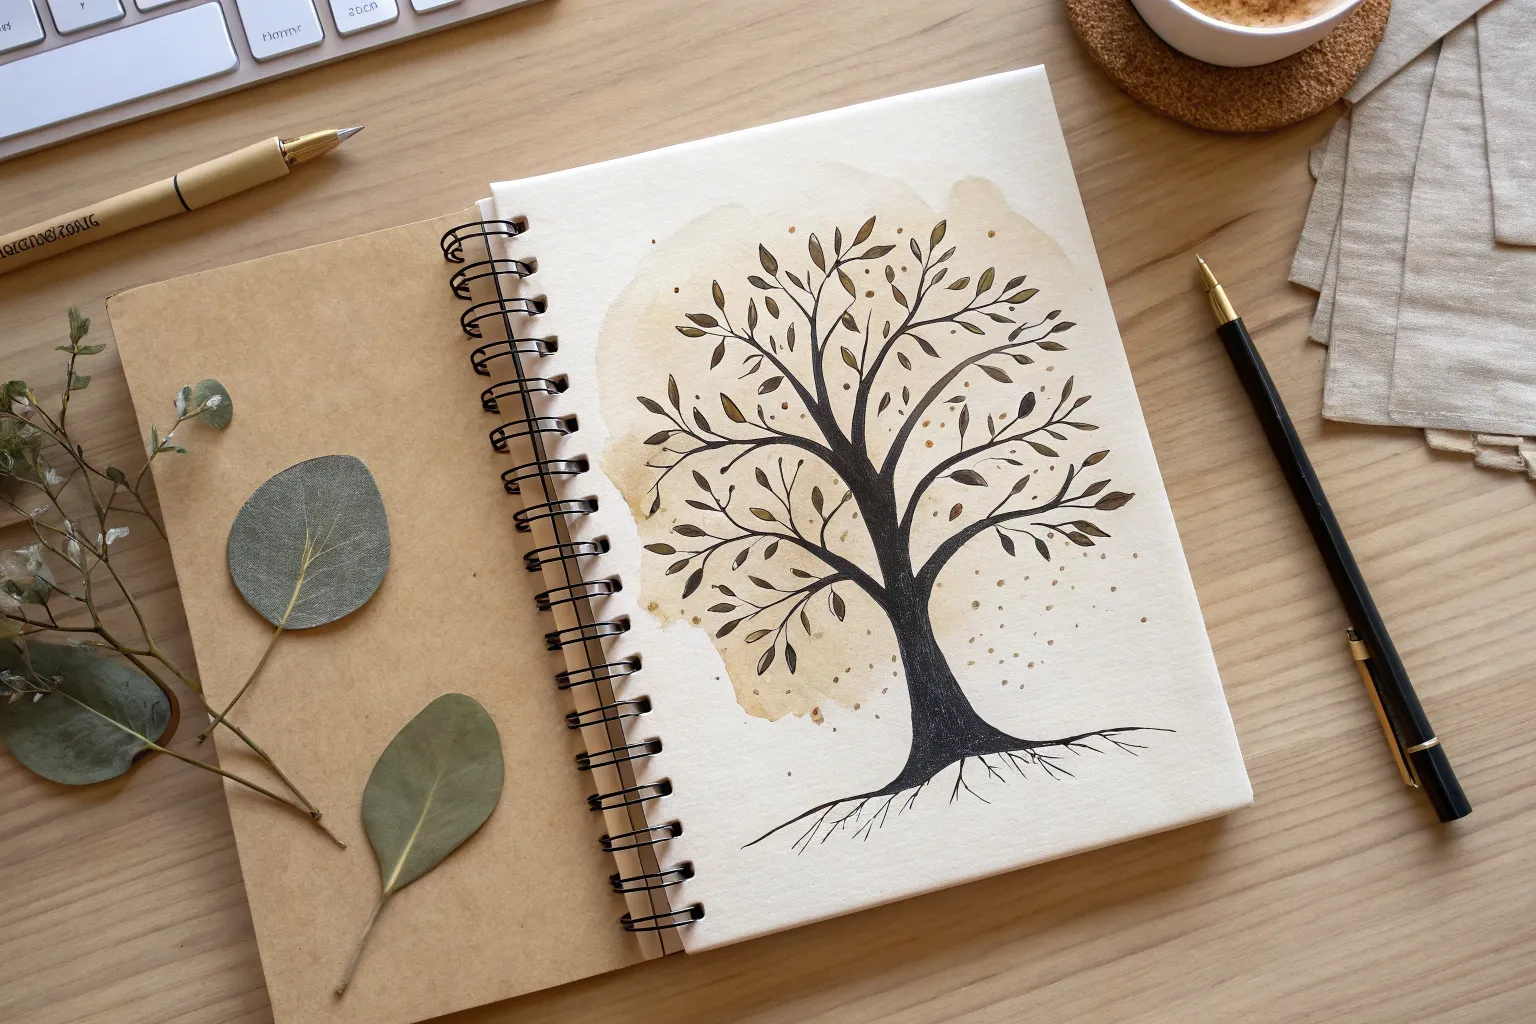
Cloud-Like Canopy Using Simple Scalloped Shapes
This charming tree sketch combines bold lines with playful, cloud-like shapes to create an approachable piece of art. It evokes a storybook style with its simple canopy and detailed trunk texture, perfect for relaxing sketchbook sessions.
Step-by-Step Tutorial
Materials
- White sketchbook or drawing paper
- Fine liner pen (0.5mm is ideal)
- Thicker marker or brush pen for outlines
- Pencil
- Eraser
Step 1: Drawing the Base Structure
-
Sketch the Trunk:
Start by lightly sketching a tall, slender trunk with your pencil. Make the base wider and curve the lines inward as you go up, creating a gentle taper. -
Add Main Branches:
At the top of the trunk, split your lines into two or three primary branches that reach outward like lifting arms. -
Outline the Canopy:
Visualize a large, puffy cloud sitting on top of your branches. Lightly sketch a rough oval or kidney bean shape to guide where your leaves will go.
Clean Lines
When drawing the scallops, try rotating your sketchbook as you go. It helps keep your wrist at a natural angle for smoother curves.
Step 2: Inking the Forms
-
Create the Scalloped Edge:
Switch to your thicker marker or brush pen. Trace over your canopy guide using connected ‘U’ shapes or scallops. Keep the curves bubbly and uniform. -
Close the Shape:
Continue these scallops all the way around until the canopy shape is completely enclosed. -
Ink the Trunk Outline:
Go back to the trunk and draw firm, clean lines over your pencil sketch. Extend the lines slightly at the base to suggest roots gripping the ground. -
Connect Branches:
Draw the branches extending up into the scalloped canopy. I like to stop the line abruptly once it hits the leaves to make it look like the foliage is overlapping the wood.
Add Color
Use watercolor or markers to fill the canopy. Try a light wash of green for the leaves and red dots for the fruit to make it pop.
Step 3: Adding Texture and Detail
-
Wood Grain Effect:
Using your finer 0.5mm pen now, draw long, vertical wavy lines running up the length of the trunk. -
Vary Line Length:
Don’t connect these texture lines from top to bottom perfectly; break them up to mimic natural bark patterns. -
Add Inner Canopy Details:
Inside the main scalloped shape, draw small, floating clusters of circles or tiny swirls. These represent fruit or bunches of leaves catching the light. -
Scatter the Details:
Keep these inner details sparse. Place a few near the edges and a couple in the center, but leave plenty of white space. -
Ground the Tree:
At the base of the trunk, use the thicker pen to draw small, bubbly bush shapes on either side. Use the same scalloped technique as the canopy. -
Fill the Bushes:
Use your fine pen to add texture to these ground bushes. You can use stippling (lots of dots) or tiny scribble loops to make them look dense. -
Erase Guidelines:
Once the ink is completely dry, gently erase all your initial pencil marks to leave a crisp, clean illustration.
Now you have a delightful, stylized tree ready to be the centerpiece of a forest scene


Easy Pine Tree Built From Stacked Triangles
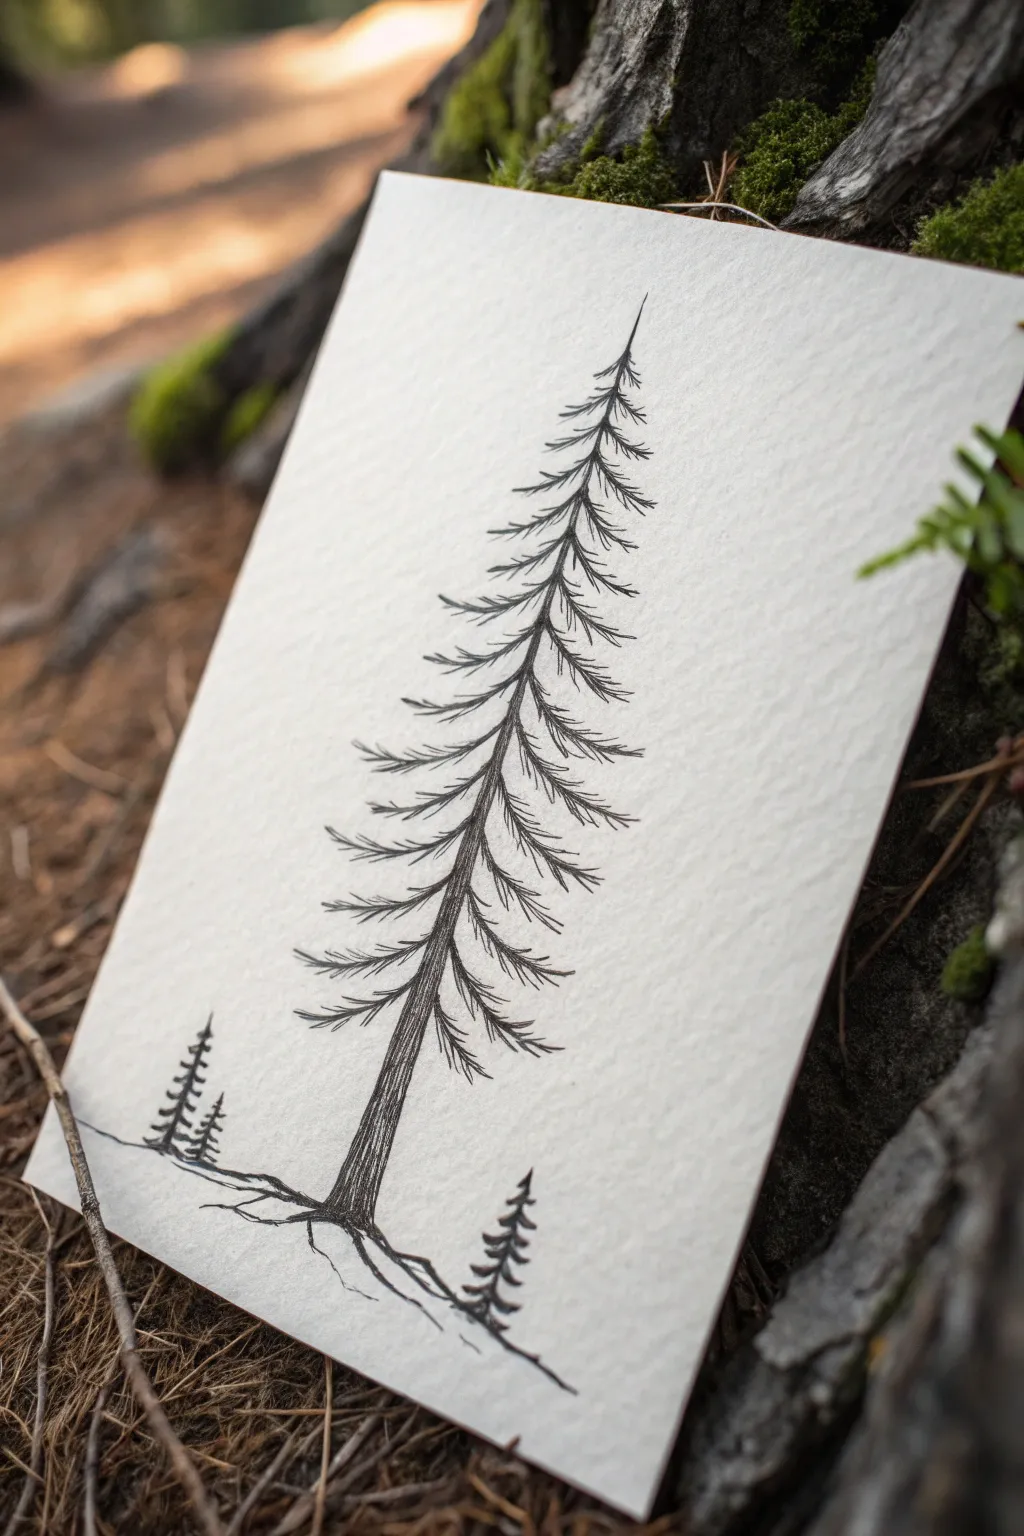
Capture the essence of a serene forest with this elegant pen and ink drawing of a towering pine. Using simple line work on textured paper creates a rustic, organic look that feels straight out of a nature journal.
Step-by-Step Guide
Materials
- Heavyweight textured paper (watercolor or mixed media)
- Fine liner pen (01 or 03 size)
- Thicker drawing pen (05 or 08 size)
- Pencil (HB or 2H)
- Kneaded eraser
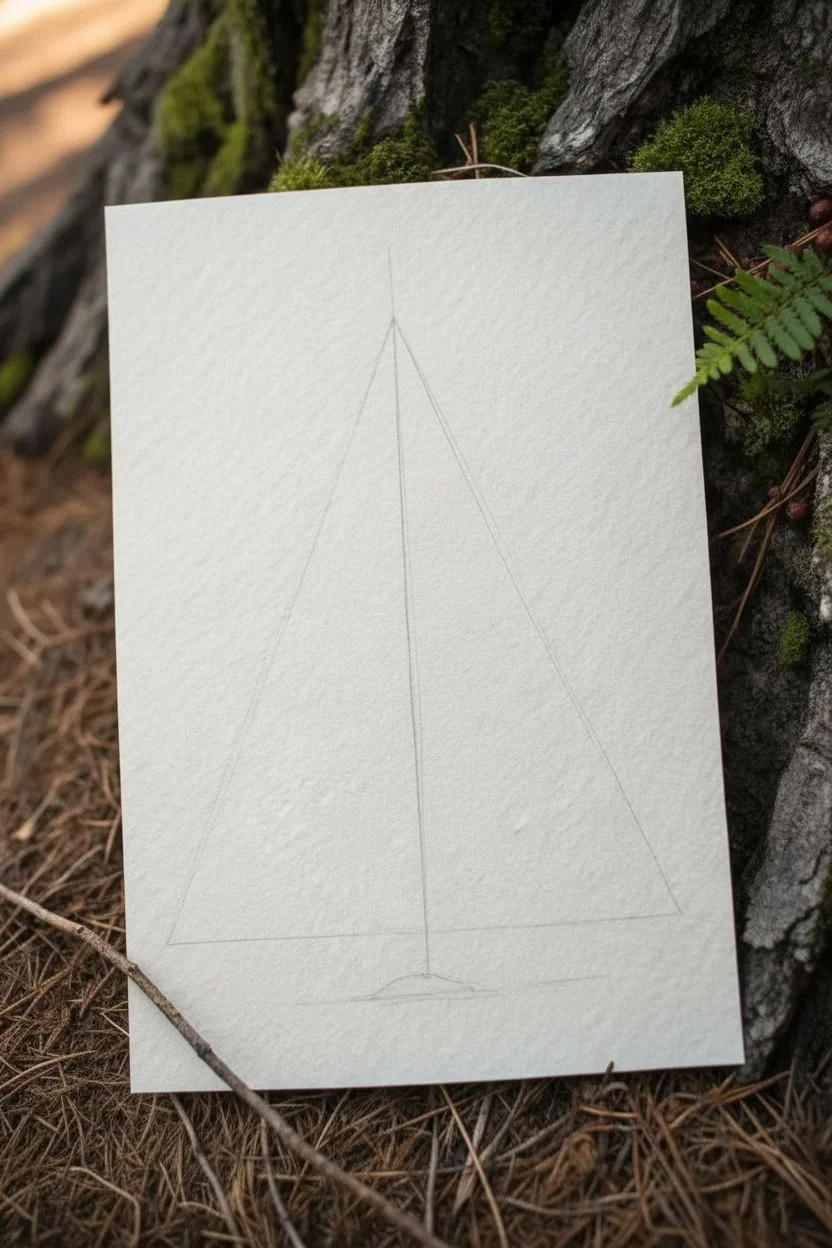
Step 1: Drafting the Skeleton
-
Mark the height:
Begin by lightly sketching a vertical line down the center of your paper with a pencil. This will serve as the trunk’s guide and ensure your tree stands tall and straight. -
Define the width:
Sketch a very faint triangle shape around your center line. The tip should be at the very top, and the base should be about one-third up from the bottom of your page, defining the tree’s overall conical shape. -
Ground the scene:
Draw an uneven horizontal line near the bottom of the page to represent the forest floor. Add a slight mound where the trunk meets the ground to give it a natural anchor.
Shake It Up
For realistic organic lines, hold your pen further back on the barrel and keep your wrist loose. A slightly jittery hand actually makes better bark texture.
Step 2: Inking the Trunk
-
Start the base:
Switch to your thicker pen (05 or 08). Draw the base of the trunk, flaring it out slightly where it enters the ground to suggest roots taking hold. -
Texture the bark:
Work your way up the trunk using vertical, slightly shaky lines. I like to leave small gaps between these lines to suggest highlights on the rough bark. -
Taper the top:
As you move higher, make the trunk progressively thinner. Near the top third, the trunk should become a single, delicate line.
Snowy Scene
Leave the tops of the branches completely white (no hatching lines) to create the illusion of snow resting on the boughs.
Step 3: Drawing the Branches
-
Top branches:
Using your finer pen (01 or 03), start at the very top. Draw short, downward-curving strokes that extend from the center line, creating a pointed tip for the tree. -
Establish direction:
As you move down, make the main branch lines longer. Most pine branches curve slightly downward due to gravity, then flip up just a tiny bit at the tips. -
Add the needles:
Instead of drawing individual needles, use quick, scribbly hatching marks along the tops and bottoms of your branch lines. Keep these marks loose to mimic fluffy foliage. -
Layering density:
Create density by drawing branches that overlap the trunk. Don’t be afraid to draw right over your trunk lines; this makes the tree look three-dimensional. -
Widen the bottom:
Check that the lowest branches extend out the furthest, following the faint triangle guide you sketched earlier. These branches should look heavier and thicker. -
Check for balance:
Step back and look at your tree’s silhouette. Add small filler strokes in any large gaps to ensure the foliage looks full but not solid black.
Step 4: Ground and Details
-
Ink the ground line:
Go over your pencil ground line with the fine pen. Keep the line jagged and uneven to represent rock or forest debris rather than smooth pavement. -
Add root details:
Extend a few lines from the trunk base into the ground to suggest roots spreading out beneath the soil. -
Draw mini trees:
On either side of the main tree, draw two tiny, simplified versions of the pine tree. Use simple zigzag motions for these to keep them in the background. -
Clean up:
Once the ink is completely dry, gently erase your pencil guidelines with the kneaded eraser. Be careful not to smudge the ink if it’s still fresh. -
Final touches:
Add a few tiny vertical dashes or dots on the ground near the tree base to simulate fallen pine needles or grass texture.
Enjoy the peaceful simplicity of your forest sketch


Palm Tree With Curved Fronds and a Slight Lean
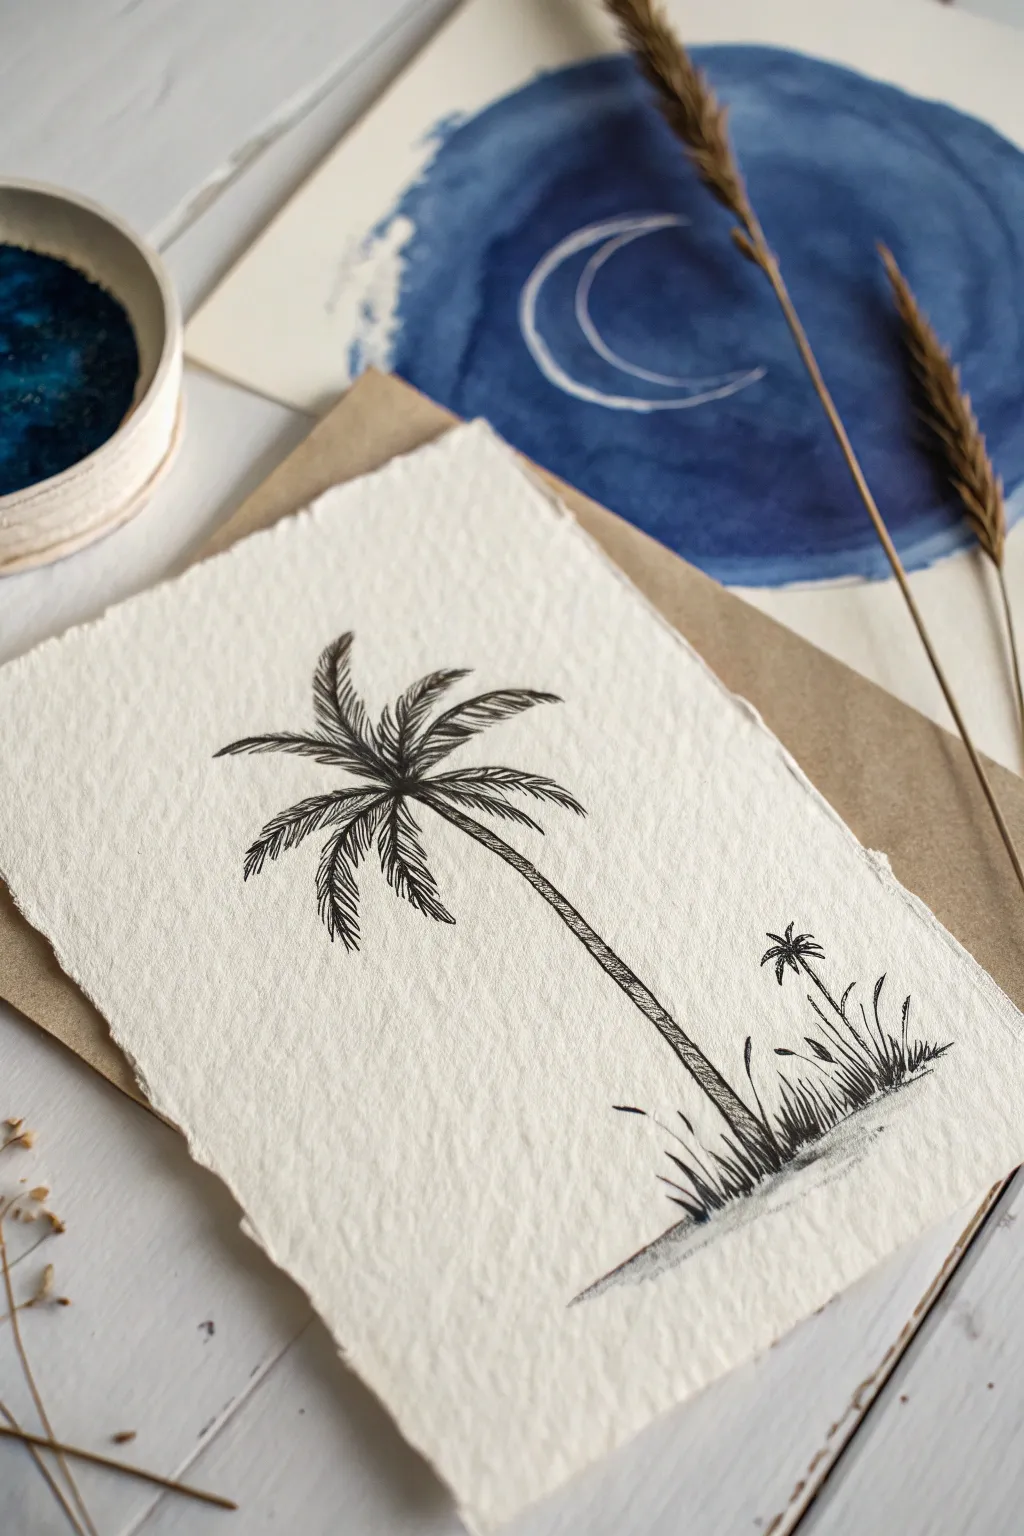
Capture the breezy elegance of a tropical shoreline with this minimalist ink drawing. Using high-contrast black ink on textured paper creates a striking, organic look perfect for framing or gifting.
Step-by-Step
Materials
- Heavyweight textured paper (cold press watercolor or handmade paper)
- Fine liner pens (sizes 0.1, 0.3, and 0.5)
- Pencil (HB or 2H for sketching)
- Kneaded eraser
- Ruler (optional)
- Deckle edge ruler or tearing tool (optional)
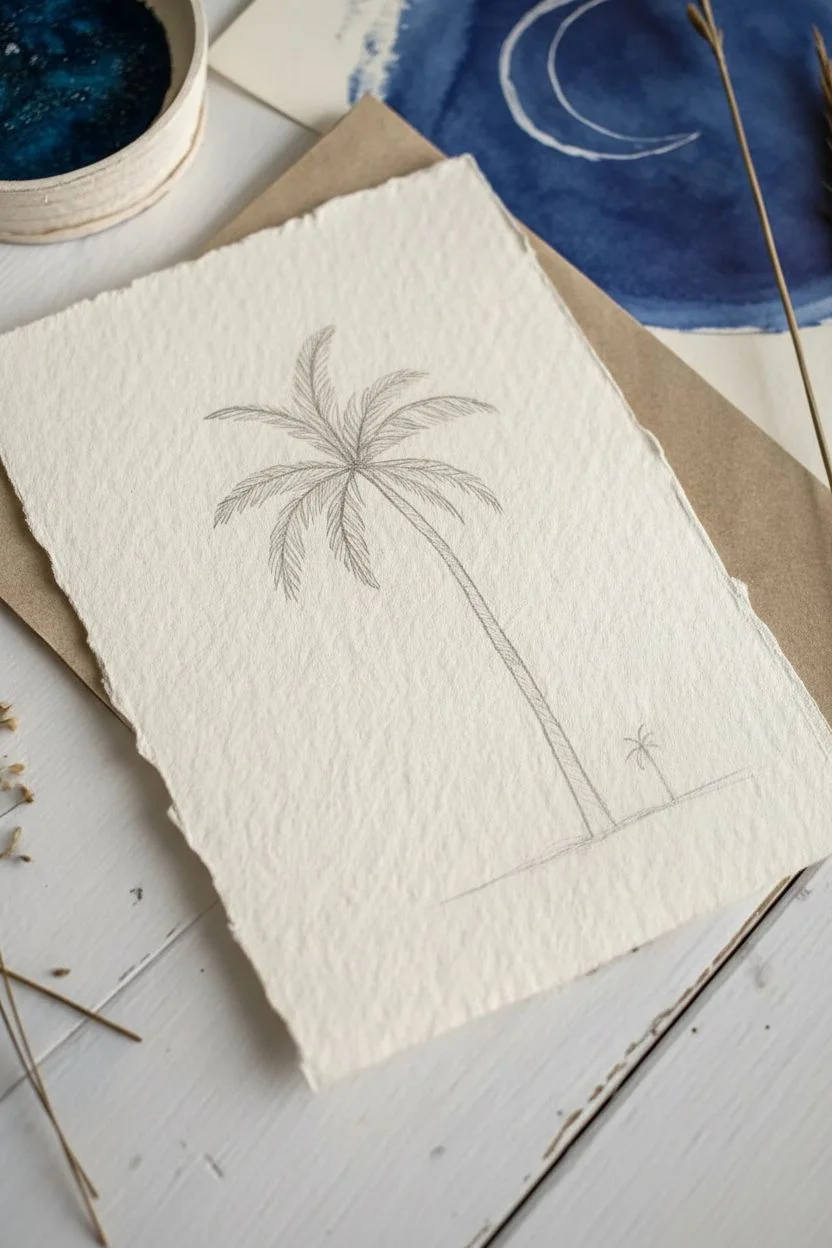
Step 1: Setting the Composition
-
Prepare your paper:
Start by tearing the edges of your heavy paper to create a rustic, deckled look. You can use a ruler to guide the tear or do it freehand for a more organic feel. -
Sketch the main trunk:
Lightly sketch a long, slender line using your pencil. Start from the bottom right quadrant and angle it diagonally toward the upper left center to establish that characteristic lean. -
Add trunk thickness:
Draw a second line parallel to your first one, tapering slightly as you go up. The trunk should be thickest at the base and become quite thin near the crown. -
Outline the fronds:
At the top of the trunk, sketch roughly seven or eight curved lines radiating outward. Make the top ones perkier and the lower ones drooping down heavily to mimic gravity. -
Placement of the small tree:
To the right of the main trunk’s base, sketch a very small, short vertical line for the baby palm tree. Keep it simple as this is a background element. -
Ground line:
Lightly mark a horizontal, slightly uneven line connecting the bases of both trees to ground them.
Ink Smearing?
Textured paper dries slowly! Place a clean scrap piece of paper under your drawing hand to prevent oils and friction from smudging your wet ink lines.
Step 2: Inking the Details
-
Texture the trunk:
Switch to a 0.3 pen. Instead of drawing straight outlines, use short, horizontal dashed lines across the width of the trunk to create the ringed bark texture typical of palms. -
Darken the shaded side:
Go back over the right side of the trunk with more dense hatching lines. This suggests a light source coming from the left and gives the tree volume. -
Draw the frond spines:
Using a 0.5 pen, carefully trace over your initial pencil spines for the leaves. Let the lines taper off into a fine point at the ends. -
Add the leaflets:
With your finest 0.1 pen, draw quick, repetitive strokes coming off the main spines. Angle them slightly toward the tip of the frond. I find it helps to flick the pen quickly to keep the ends sharp. -
Create density:
On the undersides of the curved fronds, pack the leaflet lines closer together. Leave the tops of the curvature slightly sparser to indicate where the light hits. -
Inking the small tree:
Ink the smaller palm using very simple, star-burst strokes. Since it’s further away or smaller, it needs much less detail—just a silhouette is sufficient.
Step 3: Grounding and Finishing
-
Add grassy texture:
At the base of the big tree, use upward flicking motions to create tall grasses. vary the height and angle so it doesn’t look like a picket fence. -
Connect the scene:
Extend these grassy flicks toward the smaller tree, creating a patch of vegetation that unites the two elements. -
Shadow work:
Add a few horizontal scribbles under the grass clumps to verify the ground plane and add weight to the bottom of the composition. -
Erase pencil marks:
Wait until the ink is completely dry—give it a few minutes to be safe. Gently roll your kneaded eraser over the drawing to lift all graphite guidelines. -
Final assessment:
Look at the overall balance. If the trunk looks too flat, add a few more textured dots or dashes on the shadowed side to increase the contrast.
Pro Tip: Leaf Flow
Don’t make the leaflets perfectly uniform. Make some criss-cross slightly or break patterns to mimic wind blowing through the leaves.
Place your finished drawing in a floating glass frame to show off those beautiful torn edges
BRUSH GUIDE
The Right Brush for Every Stroke
From clean lines to bold texture — master brush choice, stroke control, and essential techniques.
Explore the Full Guide
Windblown Tree With Branches Swept in One Direction
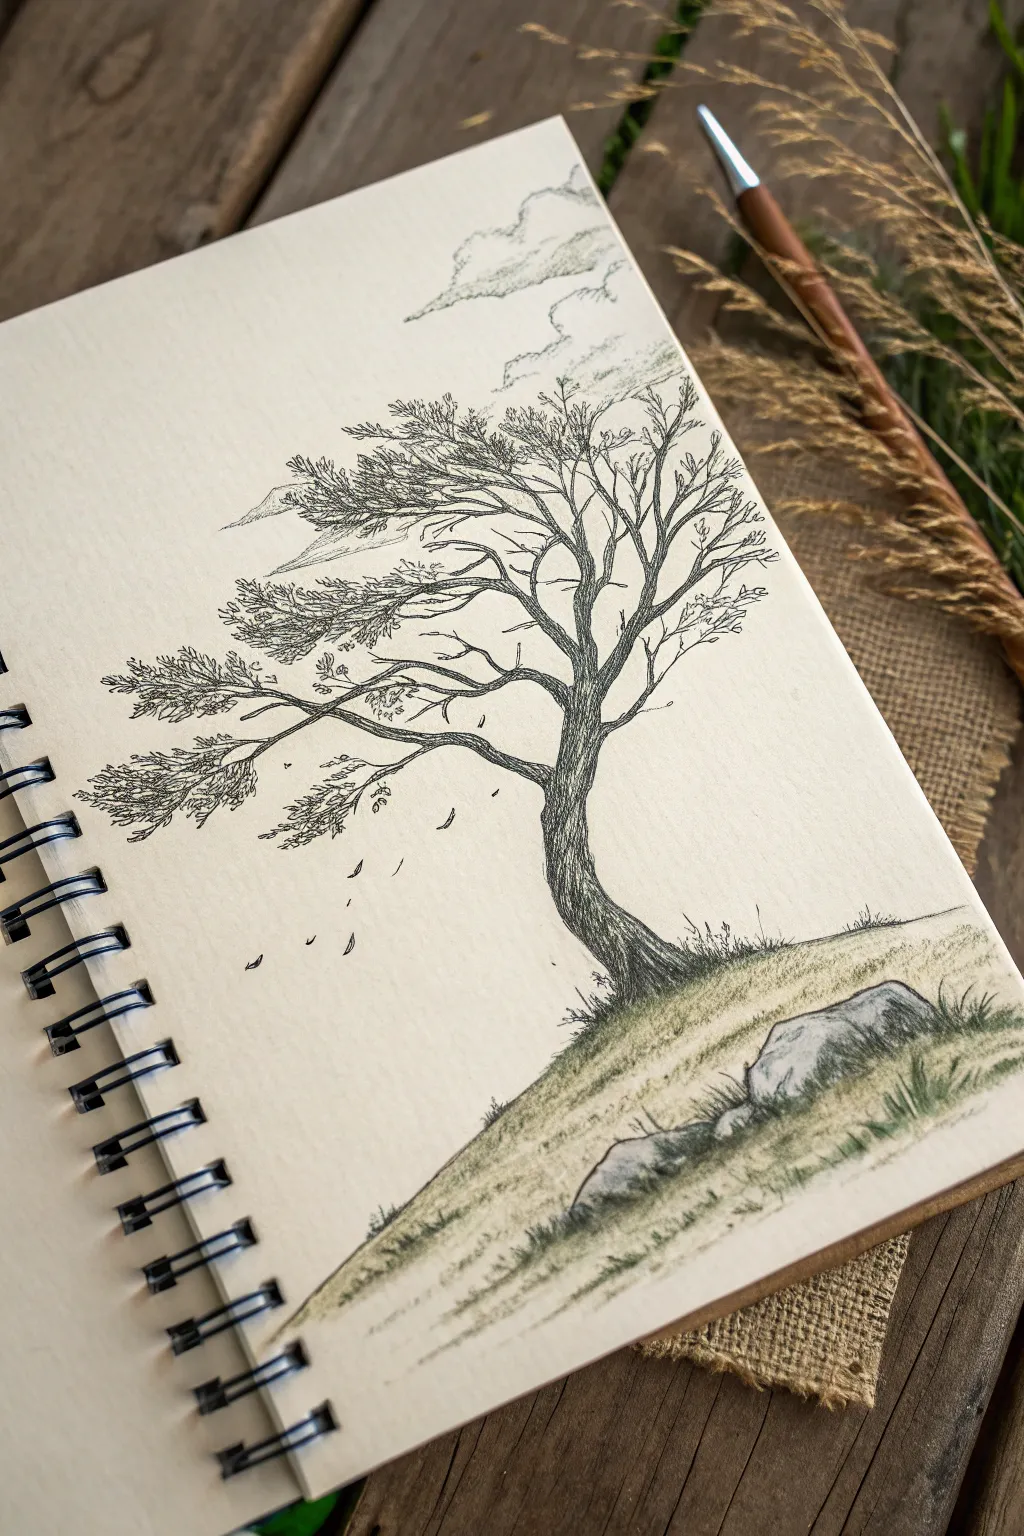
Capture the dramatic beauty of a tree battered by strong winds with this detailed pen and ink study. This project focuses on conveying motion through directional lines and creating texture with meticulous hatching.
How-To Guide
Materials
- Spiral-bound sketchbook (smooth or mixed media paper)
- Fine liner pens (sizes 005, 01, and 03)
- Light graphite pencil (HB or 2H)
- Kneaded eraser
- Faint green pastel pencil or light wash (optional for ground)
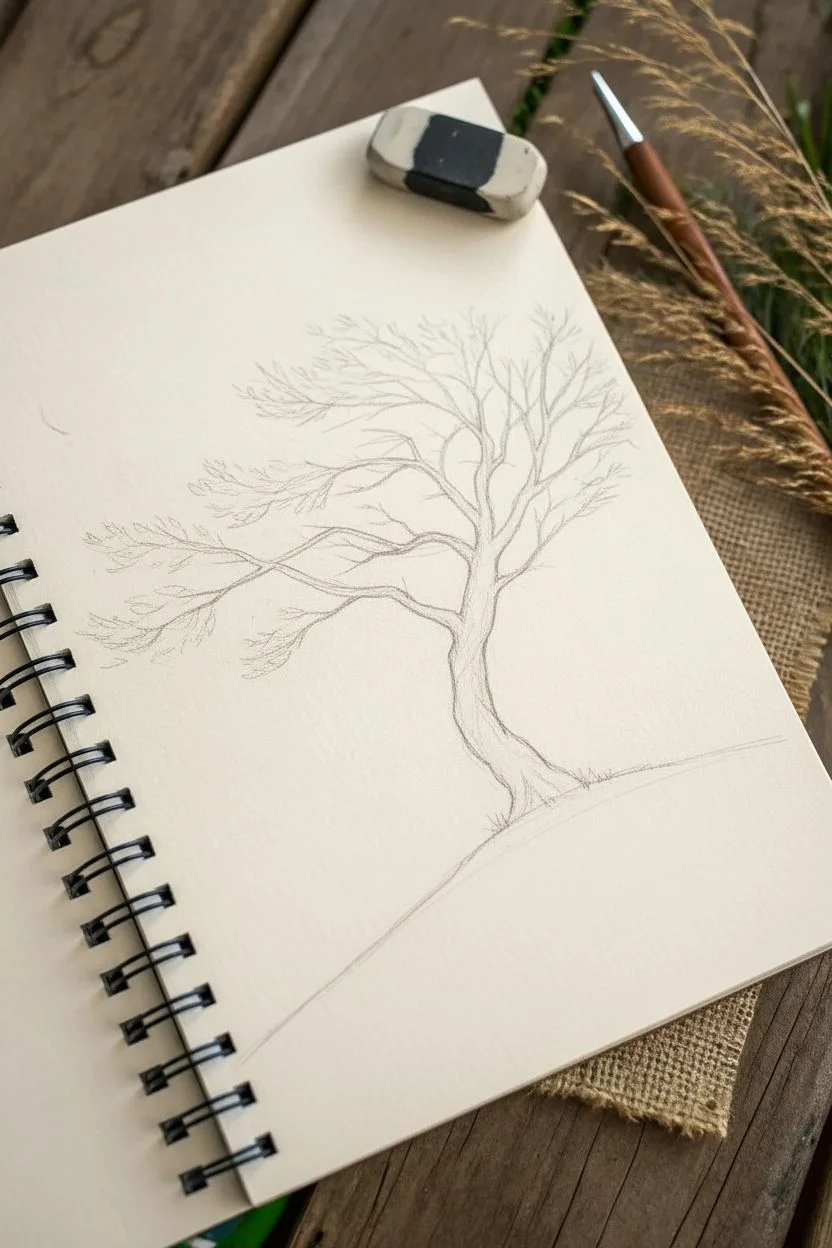
Step 1: Initial Sketching
-
Lay the Groundwork:
Start by lightly sketching a sloping hill line with your HB pencil. Place it in the bottom third of the page, angling it upwards from left to right to give the tree a perched, precarious feeling. -
Establish the Trunk:
Draw the main trunk line. Instead of making it straight, curve it significantly to the left to show the force of the wind. Make the base wider and taper it as it reaches the main branching point. -
Map Main Branches:
Sketch the primary branches radiating from the trunk. Crucially, force almost all the smaller offshoots to point towards the left side of the page, mimicking how wind shapes growth over time.
Ink Smearing?
If your hand drags ink across the page, place a scrap piece of paper under your drawing hand as a shield while you work on detailed areas.
Step 2: Inking the Trunk and Branches
-
Outline the Contour:
Switch to your 03 pen. Carefully trace the outline of your trunk, making the line slightly jagged and bumpy to suggest rough bark texture rather than a smooth pole. -
Texturing the Bark:
Using a 01 pen, fill the trunk with vertical contour lines. Follow the curve of the tree; these lines should wrap around the form. Add darker concentrations of lines on the right side of the trunk to create a shadow side. -
Building Branch Weight:
Thicken the main branches where they connect to the trunk. Use the 01 pen to draw twisted, gnarled lines along the branches, ensuring they gradually thin out as they extend outward. -
Adding Fine Twigs:
With your finest 005 pen, add delicate, wispy twigs at the ends of the branches. Keep these lines nervous and scratchy, reinforcing that windblown direction to the left.
Make it moody
Add more falling leaves and bend the grass strokes sharply to the left to increase the perceived wind speed from a breeze to a gale.
Step 3: Foliage and Atmosphere
-
Create Leaf Clusters:
Instead of drawing individual leaves, use a scribbling or stippling motion with the 01 pen to create flat, horizontal clusters of foliage on the left side of the branches. -
Suggest Wind Motion:
Ensure the leaf clusters look ‘stretched’ horizontally. Add a few loose leaves floating in the air to distance the tree from the background and emphasize the gusty weather. -
Background Clouds:
Very lightly sketch some cloud shapes in the upper right sky using a broken line technique. Keep the cloud bottoms flat and the tops fluffy but subdued. -
Distant Hills:
Draw faint, jagged outlines of distant mountains or hills behind the tree branches on the left. Keep these lines very thin (005 pen) so they recede into the distance.
Step 4: Ground Elements and Finishing Touches
-
Anchor the Tree:
At the base of the trunk, draw short, upward strokes to represent grass growing over the roots. Use the 03 pen here for darker contrast to ground the weight of the tree. -
Add Rocks:
Sketch a few jagged rocks on the slope. Shade the right side of the rocks heavily with cross-hatching to match the light source coming from the left. -
Texture the Hillside:
Use quick, short flicks of the pen to create patches of grass along the slope ridge. Don’t outline the whole hill; let the grass tufts define the edge. -
Optional Color Tint:
If you want the subtle look shown in the reference, lightly shade the grassy slope with a dull green pastel pencil or a very faint watercolor wash. I find smudging the pastel with a finger creates a nice soft texture. -
Final Cleanup:
Once the ink is completely dry (wait at least 15 minutes to be safe), gently erase all visible pencil guidelines with your kneaded eraser to leave a crisp, clean illustration.
Step back and admire the sense of movement you have captured in a static image
Bark Texture Study Using Simple Pencil Strokes
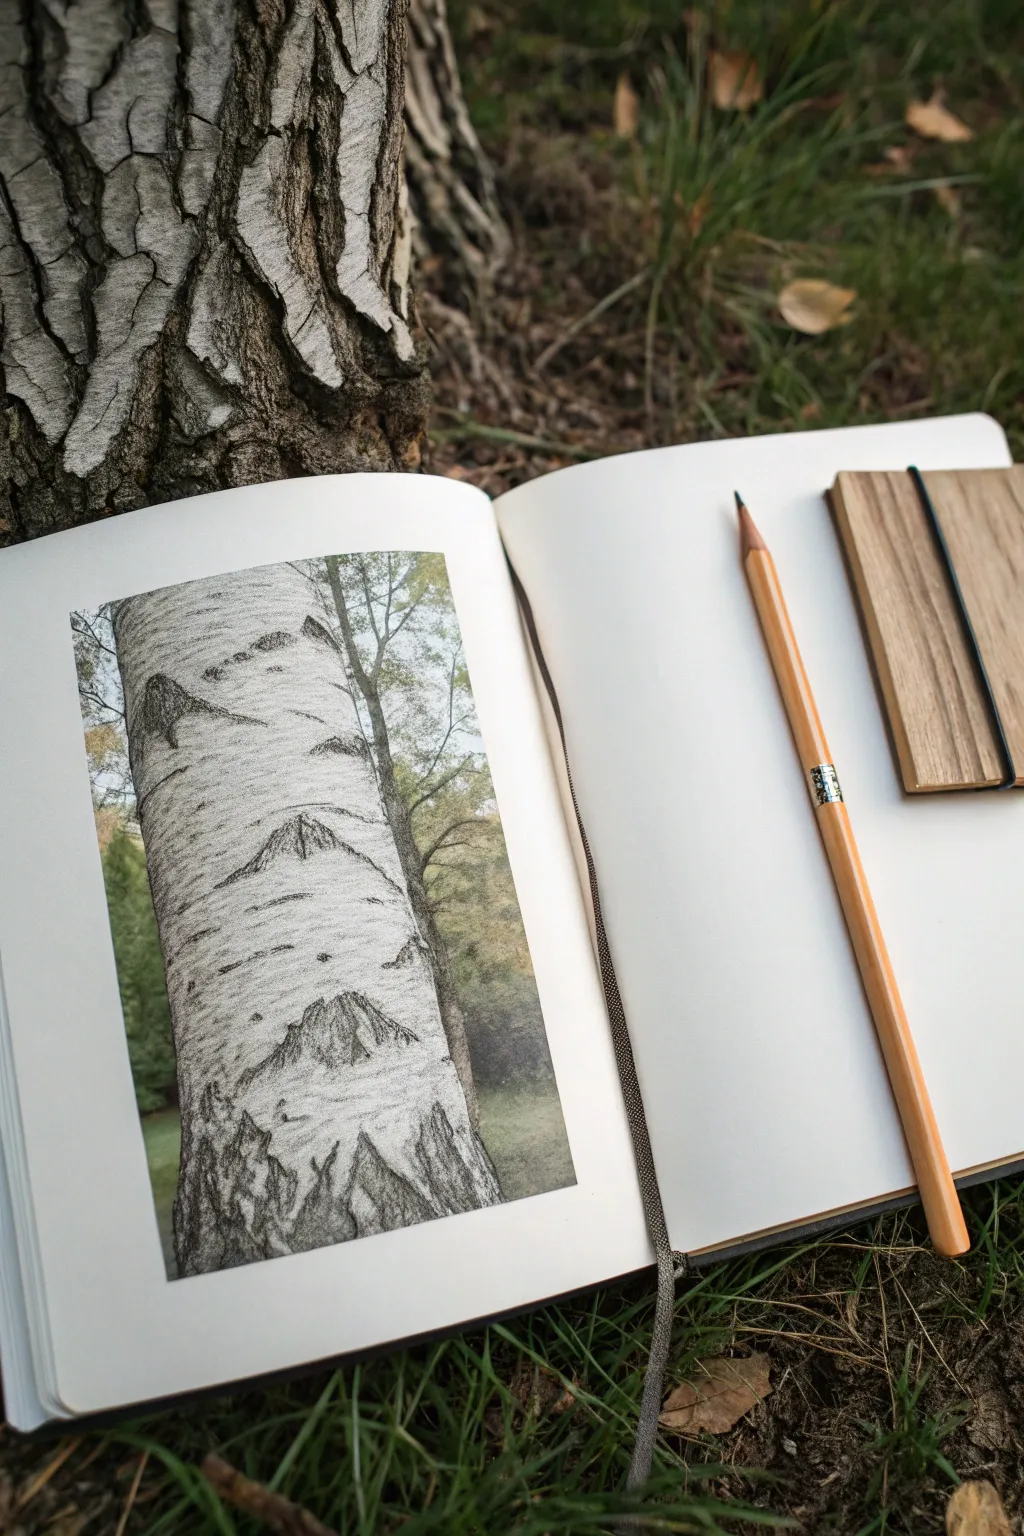
Capture the distinct, papery beauty of a birch tree in this focused pencil study. By layering simple strokes, you will recreate the iconic peeling white bark and contrasting dark lenticels found in nature.
Step-by-Step Guide
Materials
- Sketchbook with smooth or medium-tooth paper
- HB graphite pencil for initial outlines
- 2B and 4B graphite pencils for shading
- Fine-point mechanical pencil (optional for details)
- Kneaded eraser
- Blending stump or tortillon
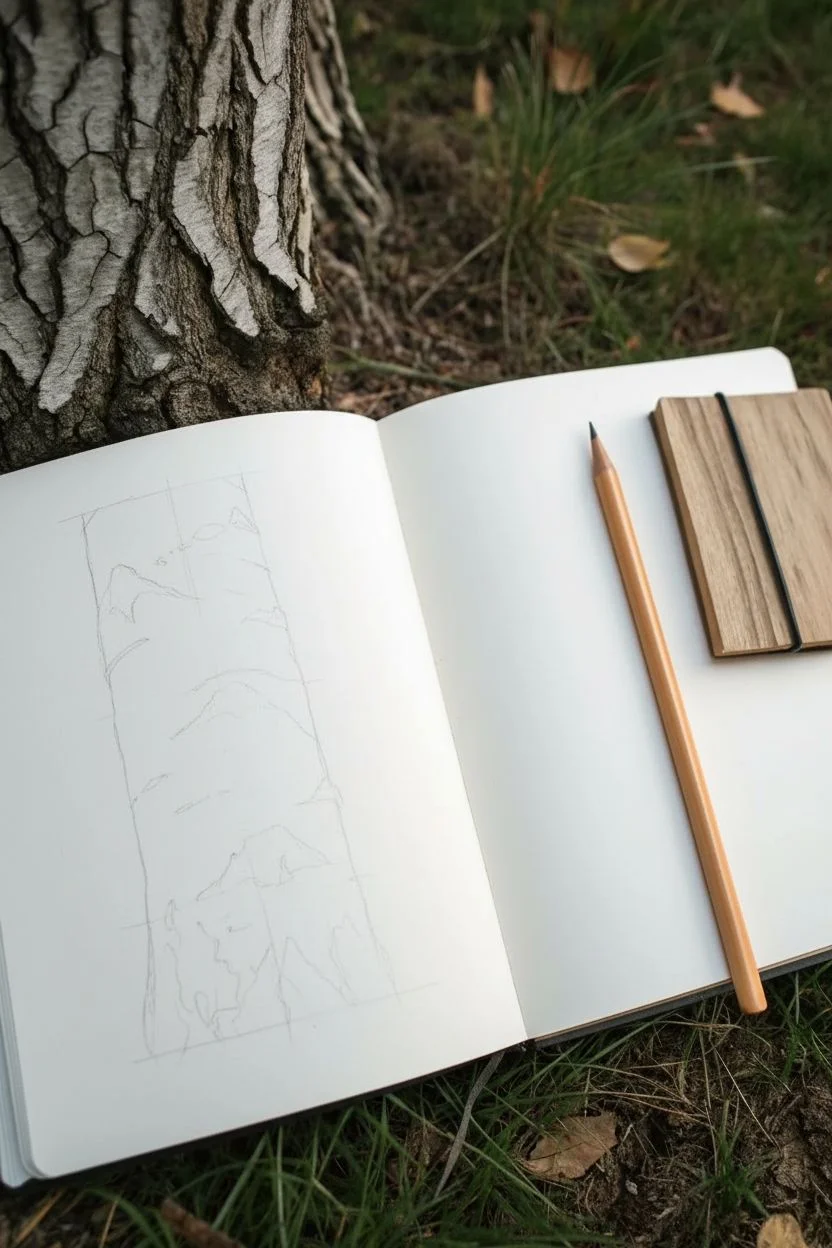
Step 1: Laying the Foundation
-
Establish the Trunk Shape:
Begin with your HB pencil, lightly sketching the vertical boundaries of the tree trunk. Don’t use a ruler; allow the lines to have natural, slight wobbles to mimic organic growth. -
Mark Main Features:
Look closely at your reference or the subject tree. Lightly map out the positions of the larger, dark triangular markings (lenticels) and any major knots or peeling sections. -
Suggest the Curvature:
Draw faint horizontal guidelines that wrap slightly around the trunk form. These curved lines will help you place texture later so the tree looks round rather than flat.
Step 2: Developing the Iconic Markings
-
Drafting the Eyes:
Switch to a 2B pencil. Begin defining the large, eye-shaped dark patches on the bark. These shapes often look like stretched diamonds or shallow triangles pointing upward. -
Darkening the Core:
Change to a 4B pencil to press harder into the center of these dark patches. The ‘eyebrow’ or top edge of these markings is usually the darkest point where the shadow is deepest. -
Feathering Edges:
At the bottom edges of the dark patches, flicker your pencil strokes downward. This creates a transition from the deep fissure to the smoother white bark below. -
Connecting Cracks:
Draw thin, erratic horizontal lines connecting some of the larger markings. These represent the paper-thin layers of bark that naturally split horizontally around the trunk.
Drawing looking flat?
Ensure your horizontal texture lines curve along the form. Lines that go straight across will flatten the image; curving them downward helps suggest a round cylinder.
Step 3: Building Texture and Volume
-
Shading the Cylinder:
Using the side of your 2B pencil, lightly shade the extreme left and right vertical edges of the trunk. This gradient shading gives the tree its cylindrical volume. -
Adding Peeling Bark:
Identify a few spots where the bark might be curling. Draw a small, thin rectangle that lifts off the surface, casting a tiny shadow underneath it with your 4B pencil. -
Creating Surface Noise:
The ‘white’ part of birch bark isn’t perfectly white. Use an HB pencil to add very subtle, random speckling and faint vertical grain lines throughout the light areas. -
Softening Transitions:
Take your blending stump and gently smudge the shading on the sides of the tree to smooth the roundness. Be careful not to smudge your crisp dark details too much. -
Refining High Contrast:
Go back in with your sharpest 4B or mechanical pencil. Reinforce the darkest cracks and the undersides of peeling strips to make the texture pop. -
Lifting Highlights:
Mold your kneaded eraser into a fine point. Dab or stroke it across the lightest sections of the bark to lift off graphite dust and create bright, crisp highlights on the curling edges.
Pro Tip: The Paper Effect
To make peeling bark look realistic, keep the uncurled edge extremely light (almost white) and place a sharp, dark shadow directly beneath the curl to lift it.
Step 4: Final Touches
-
Background Hints:
Lightly sketch a few thin branches or leaves in the background if desired, keeping them out of focus to ensure the main trunk effectively remains the center of attention. -
Grounding the Base:
Darken the texture significantly near the bottom of your drawing. Birch bark often becomes rougher, more cracked, and darker near the roots. -
Final Cleanup:
Erase any initial construction lines that are still visible and clean up the white space around your drawing to keep the presentation neat.
Close your sketchbook knowing you have captured the rugged elegance of the forest in graphite

PENCIL GUIDE
Understanding Pencil Grades from H to B
From first sketch to finished drawing — learn pencil grades, line control, and shading techniques.
Explore the Full Guide
Roots and Base Study That Actually Anchors the Tree
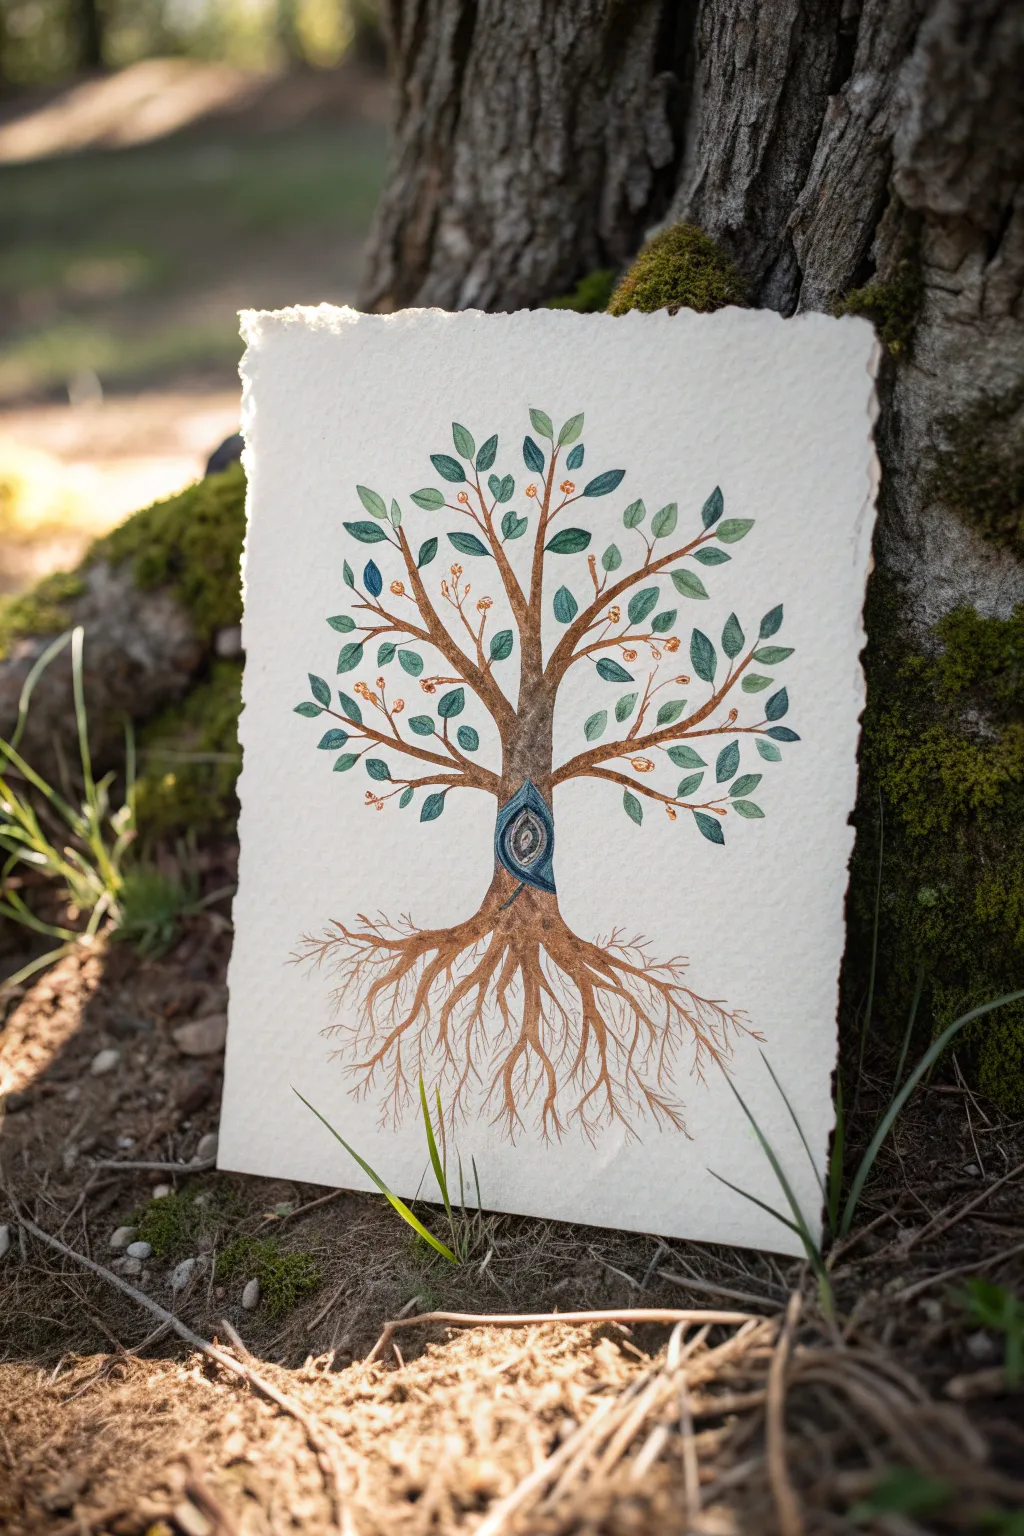

This tutorial guides you through creating a delicate, nature-inspired tree illustration that places special emphasis on a beautifully intricate root system. Using watercolor and fine liners on textured paper, you’ll learn to balance the airy canopy with a grounded, detailed base.
Detailed Instructions
Materials
- Heavyweight cold-press watercolor paper with deckled edges
- Watercolor paints (Browns: Burnt Umber, Sepia; Greens: Sap Green, Viridian; Blue: Indigo/Prussian Blue)
- Fine detail brushes (Size 0 and Size 2 round)
- Fine liner pen (Black or Sepia, 0.1mm)
- HB pencil and eraser
- Gold metallic watercolor or gouache (optional highlights)
- Paper towels and water jars
Step 1: Drafting the Skeleton
-
Sketch the trunk position:
Begin by lightly sketching a central vertical line to guide your trunk placement, ensuring the tree sits centrally on your paper with ample room at the bottom for the roots. -
Define the trunk shape:
Draw the main trunk, keeping it relatively straight but allowing it to widen slightly as it reaches the ground. In the center of the trunk, draw a small almond-shaped knot or hollow. -
Map out the branches:
Extend 3-4 main branches upwards from the top of the trunk. Let them split naturally into smaller twigs, creating a balanced, rounded canopy shape.
Natural Flow
When painting the finest roots, hold your brush by the very end of the handle. This reduces your control slightly, creating wiggly, erratic lines that look much more organic.
Step 2: Root System Details
-
Establish primary roots:
From the base of the trunk, sketch 4-5 thick main roots spreading outwards and downwards. They should curve gently, not look like stiff straight lines. -
Add secondary root tendrils:
Off of those main roots, draw thinner, spider-web-like lines that branch further down. These should fan out widely, mirroring the width of the canopy above. -
Create fine root hairs:
For the very ends of the roots, use extremely light, flicking pencil strokes to suggest the tiniest delicate fibers reaching into the imaginary soil.
Muddy Roots?
If your fine root lines are bleeding into each other, your brush is too wet. Blot the bristles on a paper towel before painting, so the consistency is more like ink than water.
Step 3: Painting the Structure
-
Base coat the trunk:
Mix a watery wash of Burnt Umber. Paint the trunk and the thickest parts of the main branches and roots. Keep this layer translucent to let the paper texture show through. -
Paint the tree hollow:
Using a dark blue like Indigo, carefully paint the almond-shaped hollow in the trunk. I like to leave a tiny sliver of white paper in the center or paint a lighter ring inside to give it depth. -
Darken the root connections:
While the base coat is still slightly damp, drop concentrated Sepia or darker brown into the area where the roots meet the trunk to create a shadow and sense of weight. -
Define the fine roots:
Switch to your Size 0 brush. Using a mix of Sepia and water, trace over your intricate root sketches. Use very little paint on the brush to keep the lines crisp and fine.
Step 4: Foliage and Accents
-
Paint the first leaves:
Mix a varied palette of greens—some bluish-green, some warmer sap green. Paint small, almond-shaped leaves scattered along your branch tips. -
Add color variation:
While painting leaves, occasionally dip your brush into a different green shade without rinsing it fully. This creates natural, subtle gradients within the foliage. -
Incorporate berries or buds:
If you have gold paint or a warm ochre, add tiny dots or small clusters near the leaves to represent berries or budding flowers. -
Add texture to the trunk:
Once the trunk is fully dry, use a -
Deepen the hollow:
Add a second layer of indigo or black to the outer rim of the tree hollow to make it pop against the brown bark.
Step 5: Final Touches
-
Refine with ink:
If you want sharper definition, take your fine liner pen and selectively outline parts of the roots and the underside of branches. Don’t outline everything; broken lines look more organic. -
Erase guidelines:
Wait until the painting is bone dry—touch it with the back of your hand to check. Gently erase any visible pencil marks, being careful around the delicate root tips.
Display your rooted tree study somewhere bright to appreciate the delicate details of the base
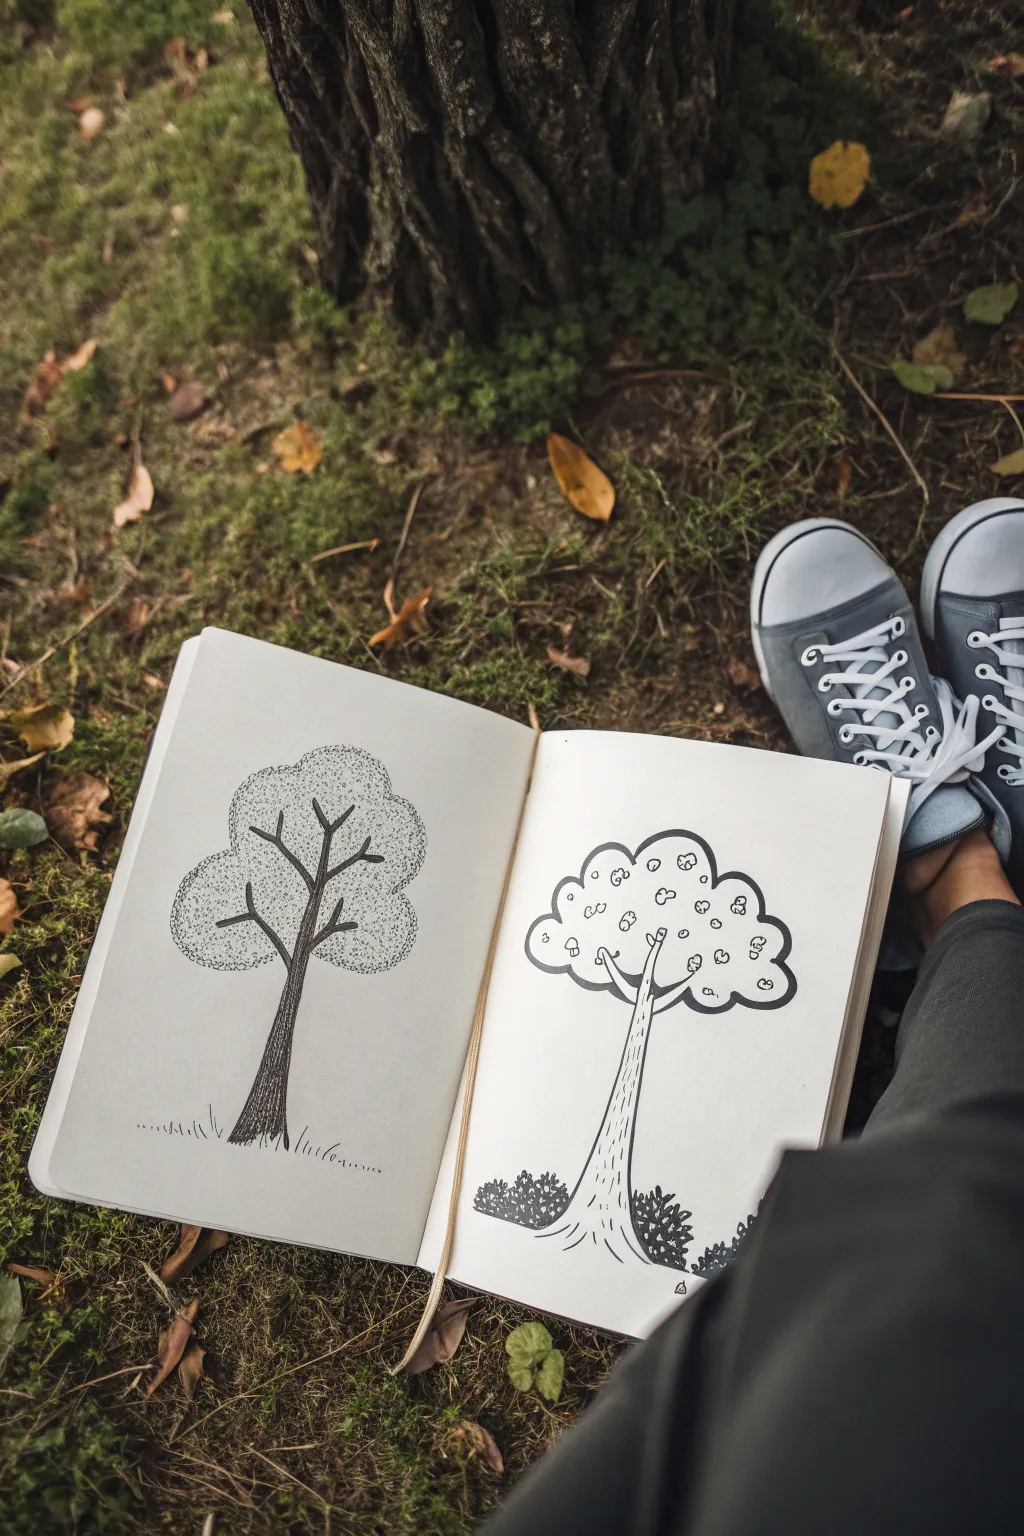
Variety Sheet of Tree Silhouettes (Six Quick Shapes)
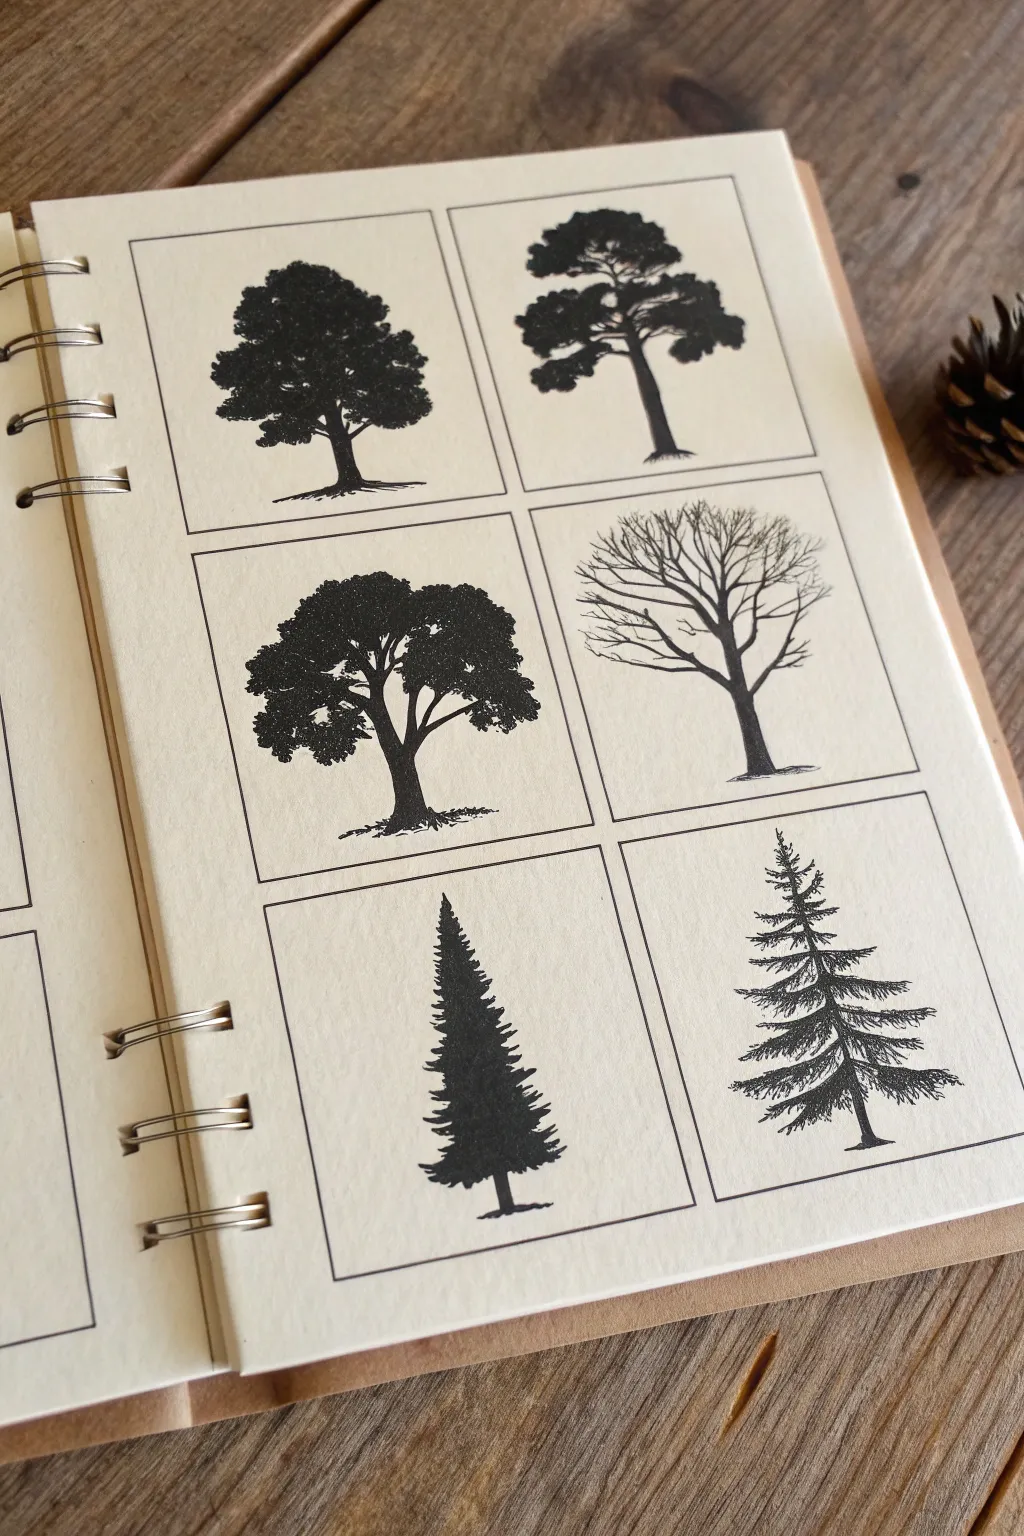
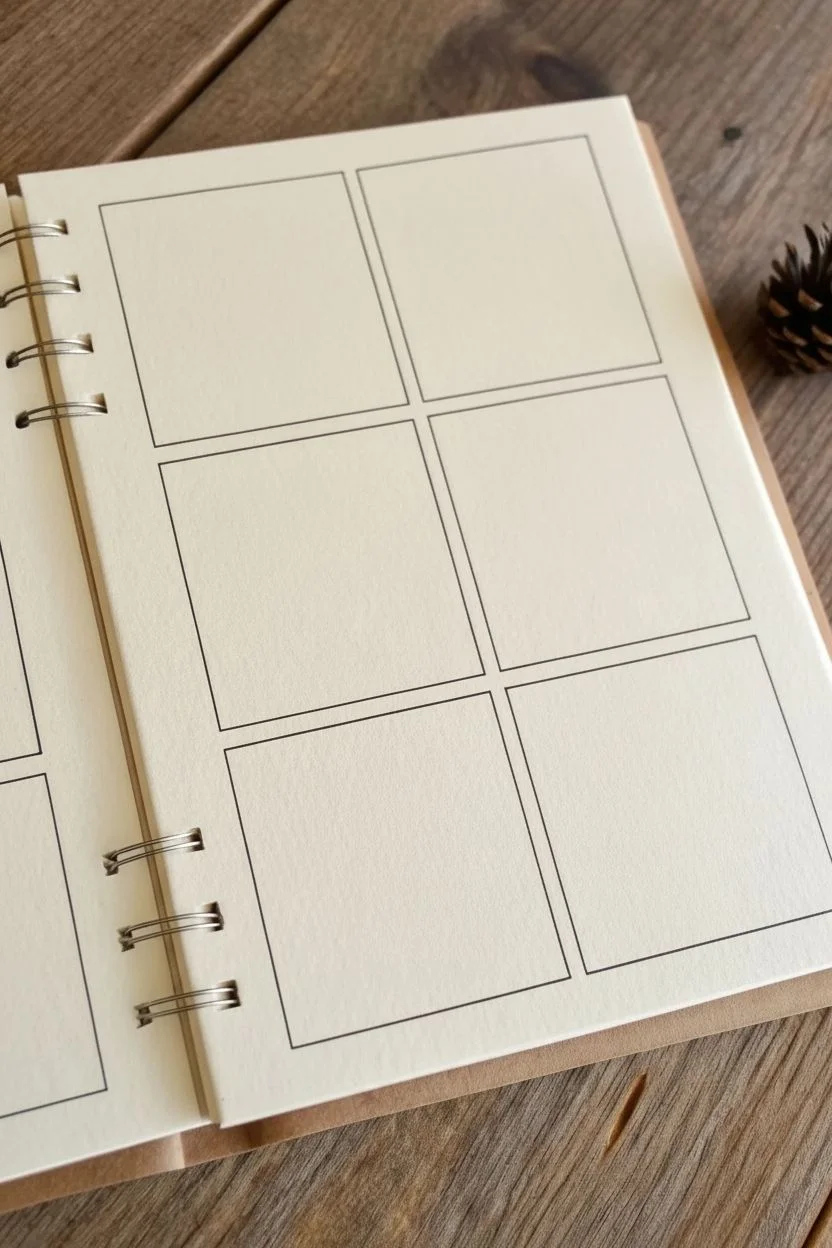
Practice capturing the distinctive character of different tree species with this structured study sheet. Using simple black ink on cream paper, you’ll create six unique botanical portraits ranging from dense, leafy canopies to bare winter branches and sharp evergreens.
Step-by-Step Tutorial
Materials
- Cream or off-white sketchbook paper (textured)
- Ruler
- Pencil (HB or H)
- Eraser
- Fine liner pens (0.1mm, 0.3mm, 0.5mm)
- Black brush pen or thick marker
Step 1: Setting Up the Grid
-
Measure margins:
Begin by deciding on the layout of your page. Leave a generous margin around the edges of the paper to frame your work nicely. Measure about 1 inch from the spiral binding and the outer edge. -
Draw the frames:
Using your ruler and a light pencil, draw six equal rectangular boxes in a 2×3 grid formation. Ensure there is consistent spacing between each box—aim for about a half-inch gap between them. -
Clean up lines:
Once your grid is laid out, trace over the pencil boxes with a 0.3mm fine liner for a crisp, permanent frame. Wait a moment for the ink to set, then gently erase the pencil guidelines.
Ink Smearing?
If your ruler drags ink while drawing frames, stick thin pennies or masking tape to the ruler’s underside. This lifts the edge off the paper just enough to prevent smudging.
Step 2: Drawing Deciduous Trees
-
Top Left: The Oak Silhouette:
Start with a sturdy, vertical trunk that widens slightly at the base. Use a thicker pen or brush pen to stipple clusters of leaves, creating a rounded, cloud-like canopy with irregular edges to suggest dense foliage. -
Top Right: The Pine Style:
Draw a tall, straight trunk. create distinct ‘platforms’ of foliage. Use horizontal, jagged strokes to form the needle clusters, leaving plenty of open space between the branches to show the trunk passing through. -
Middle Left: The Broad Canopy:
This tree features a short trunk that splits early into a ‘V’ shape. Draw thick main branches radiating outward. Fill the canopy with tight, detailed stippling or tiny scribbles to create a textured, heavy leaf look that feels different from the first oak. -
Middle Right: Winter Branches:
Switch to your finest 0.1mm pen. Draw a central trunk that splits repeatedly into thinner and thinner branches. Focus on the ‘Y’ splits, making the tips extremely delicate and hair-like, with no leaves attached.
Make It Vintage
Add scientific names in a cursive script underneath each box (like ‘Quercus’ or ‘Pinus’) to give your practice sheet the feel of an old botanical textbook.
Step 3: Drawing Evergreens
-
Bottom Left: Dense Fir:
Draw a faint vertical guide line for the trunk. Starting from the top, use downward-slanting, jagged strokes to build a solid triangular shape. Keep the silhouette dark and heavy, with jagged edges representing needle tips. -
Bottom Right: Detailed Spruce:
Unlike the dense fir, keep this one airy. Draw a visible central trunk line. Add sweeping, horizontal branches that curve slightly upward at the tips. Use quick, hatching marks for the needles rather than filling it in solid black.
Step 4: Final Touches
-
Grounding the trees:
Add a few horizontal scratchy lines or tiny tufts of grass at the very base of each trunk so the trees don’t look like they are floating in mid-air. -
Refining contrast:
Look over your dense silhouettes (like the oak and fir). If any white paper shows through where it shouldn’t, fill those gaps with your brush pen for a solid, high-contrast black. -
Erase all guides:
Do a final pass with your eraser to remove any remaining pencil sketches from under the ink, leaving a clean, graphic presentation.
Now you have a reference sheet of tree shapes ready for your next landscape sketch


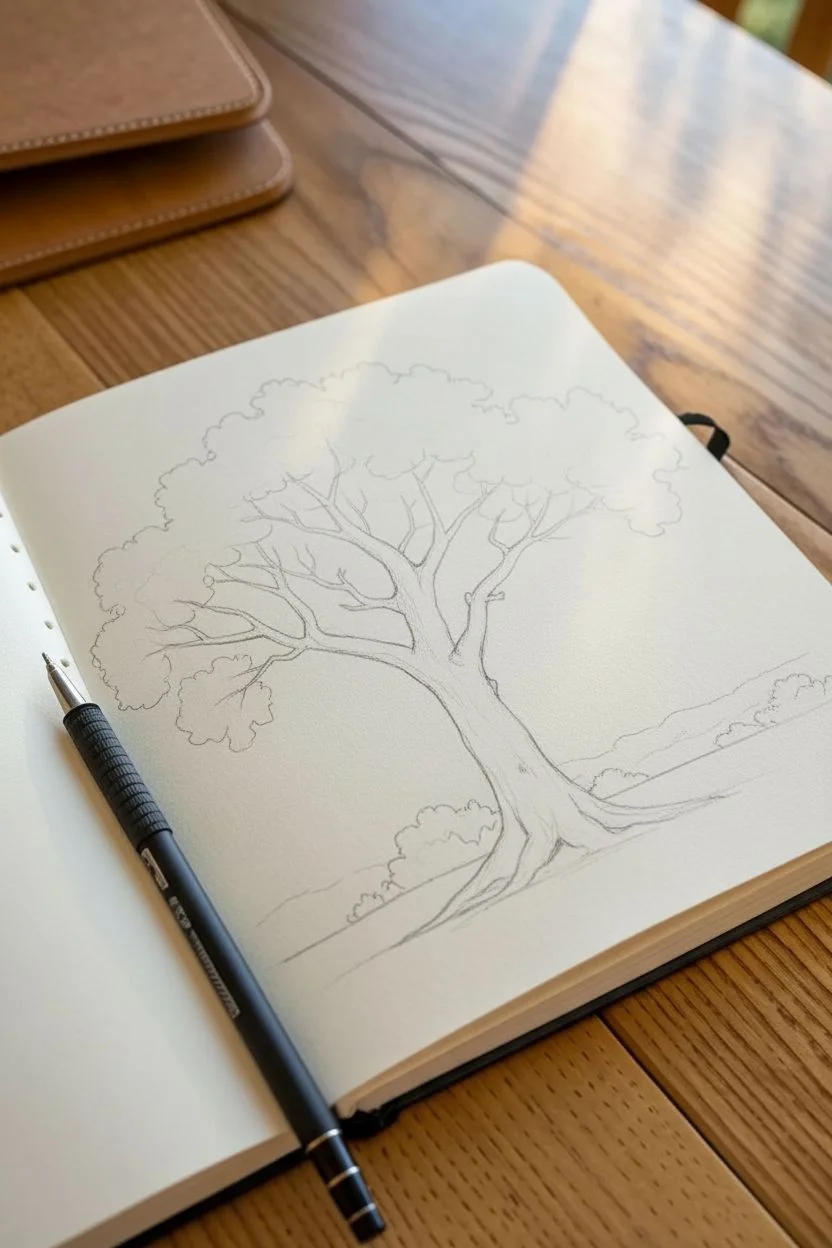
Flowering Tree Made From Clusters Instead of Individual Blossoms
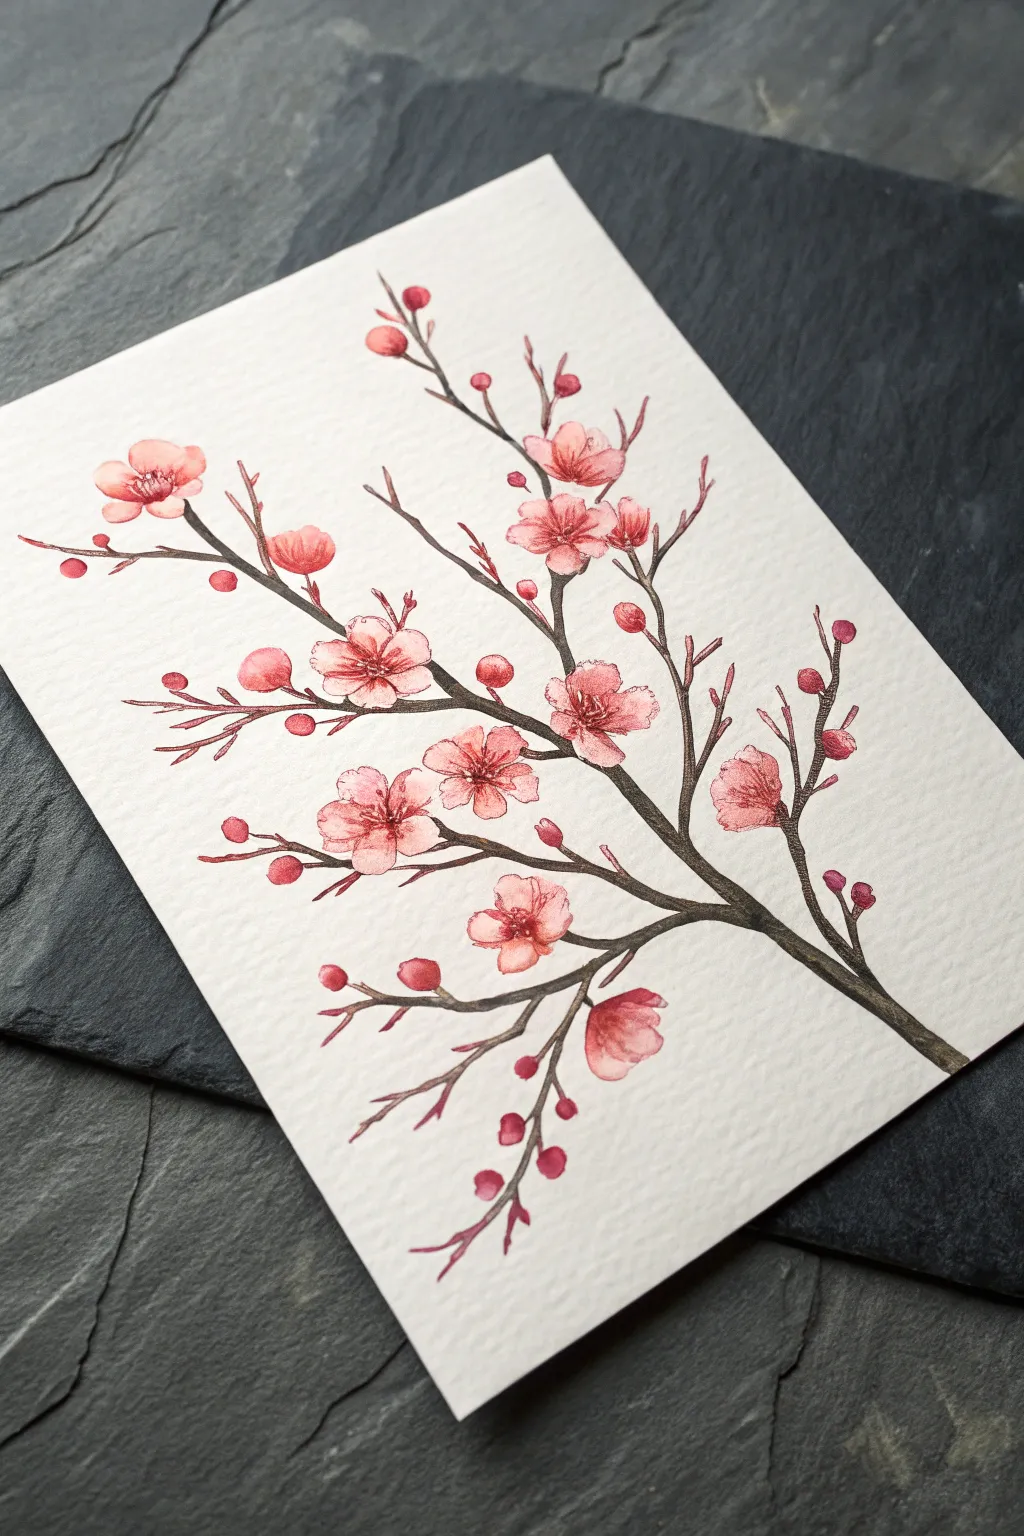
Capture the fleeting beauty of spring with this elegant watercolor study of a flowering branch. The painting features delicate pink blossoms and buds scattered across stark, twisting branches, creating a beautiful contrast between softness and structure.
Detailed Instructions
Materials
- Cold press watercolor paper (300 gsm)
- Watercolor paints (Alizarin Crimson, Burnt Umber, Paynes Gray, Sap Green)
- Round watercolor brushes (Size 2 and Size 0 or 00 for details)
- Pencil (HB or 2H)
- Kneaded eraser
- Clean water jar
- Paper towels
- Palette
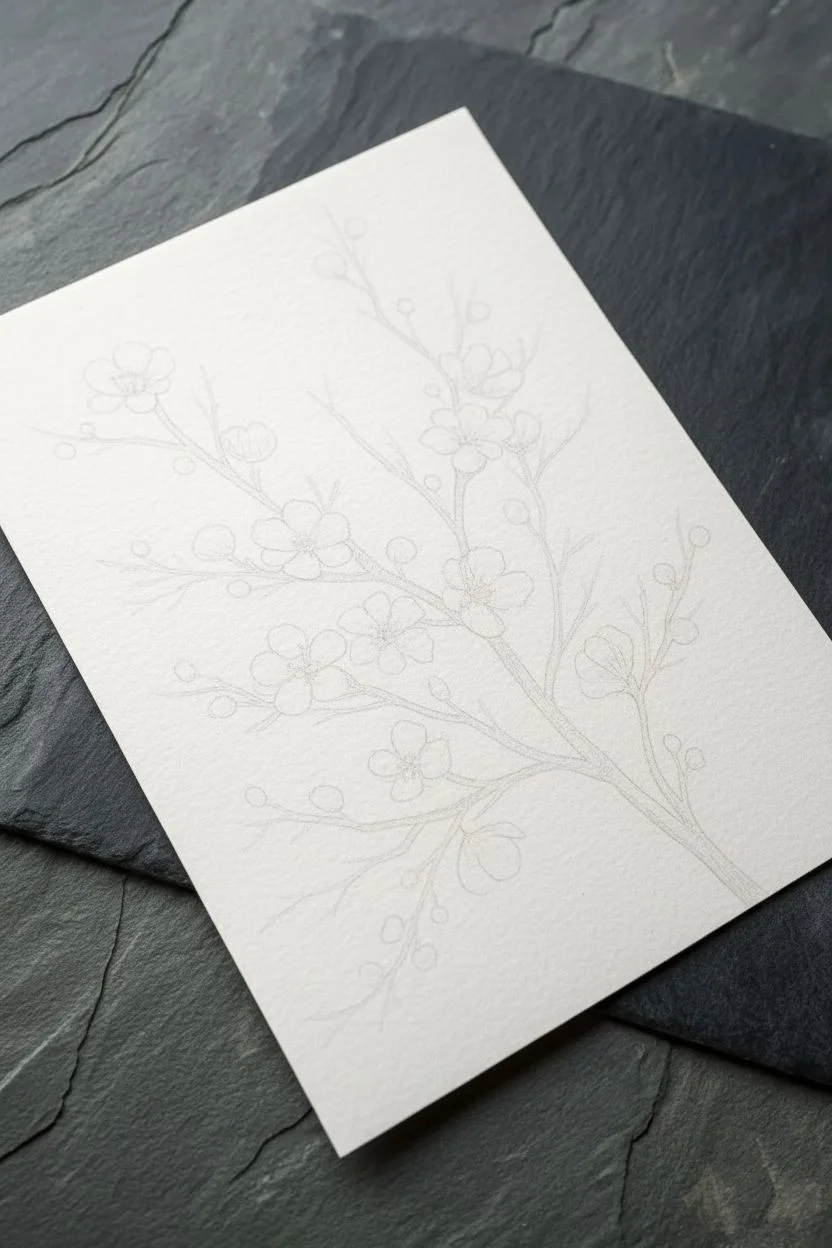
Step 1: Sketching the Structure
-
Map the main branch:
Begin by lightly sketching the main branch starting from the bottom right corner. Draw a gently curving line that extends diagonally upward towards the top left, thicker at the base and tapering as it moves up. -
Add secondary twigs:
Branch out from your main line with smaller, erratic twigs. Cherry blossom branches are naturally jagged and angular, so avoid perfect curves; instead, use slightly sharp angles where the twigs split off. -
Position the flowers:
Lightly sketch circles to indicate where your open blossoms will sit. Place them in clusters along the branches, ensuring some face forward while others angle away for a natural 3D look. -
Mark the buds:
Dot the ends of the finest twigs with small tear-drop shapes to represent closed buds. Vary their sizes, keeping the smallest ones at the very tips of the branches. -
Refine the sketch:
Go back over your flower circles and define five distinct petals for each. Keep the pencil lines extremely faint so they won’t show through the transparent watercolor later. Use a kneaded eraser to lift excess graphite.
Step 2: Painting the Blooms
-
Mix your pinks:
Prepare a watery wash of Alizarin Crimson on your palette. You want a very pale, translucent pink for the base layer of the petals. -
Base layer for petals:
Using a size 2 brush, fill in the petal shapes with the pale pink wash. Leave tiny slivers of white paper between some petals to define their edges without using outlines. -
Add depth to centers:
While the petals are still slightly damp, drop a more concentrated, slightly darker pink mixture into the very center of the flowers. Let the pigment bleed outward naturally to create a soft gradient. -
Paint the buds:
Use a medium-strength pink mix for the buds. Paint them as solid shapes, making the bottom of the bud slightly darker than the tip to suggest roundness. -
Define the petals:
Once the first layer is completely dry, use a slightly darker, more opaque pink mixture. Paint thin, delicate strokes near the center of the petals or along one edge to simulate folds and shadows. -
Add stamens:
Switch to your smallest brush (size 0 or 00). Mix a deep reddish-pink and paint tiny, fine lines radiating from the center of each open flower. Add tiny dots at the ends of these lines for the pollen.
Keeping it clean
Rest your hand on a clean scrap sheet of paper while painting detail work. This prevents the natural oils in your skin from transferring to the paper and stops you from smudging pencil lines.
Step 3: Defining the Branches
-
Mix the branch color:
Create a dark, woody hue by mixing Burnt Umber with a touch of Paynes Gray. The result should be a deep, cool brown that borders on charcoal. -
Paint the main stem:
Starting at the base, paint the thickest part of the branch. I find it helpful to lift the pressure on the brush as I move upward to naturally taper the line. -
Connect the flowers:
Carefully paint the smaller twigs, connecting them to the backs of the flowers. Be mindful not to paint over your pink petals; work around them carefully. -
Add branch texture:
While the brown paint is wet, drop in a tiny bit of darker Paynes Gray on the underside of the branches to create shadow and volume. -
Attach the buds:
Use extremely fine lines to connect the small pink buds to the main twigs. You can add tiny green-brown sepals at the base of the buds for extra realism if you wish. -
Final details:
Step back and assess your painting. If the branches look too flat, add a few dry-brush strokes of dark brown to suggest bark texture.
Bleeding colors?
If your pink flowers are bleeding into the brown branches, you are rushing the drying process. Ensure the flower petals are bone, completely dry before painting any branch section that touches them.
Allow your painting to dry flat completely before framing this serene piece of botanical art
Apple Tree With Simple Fruit Dots for Pop
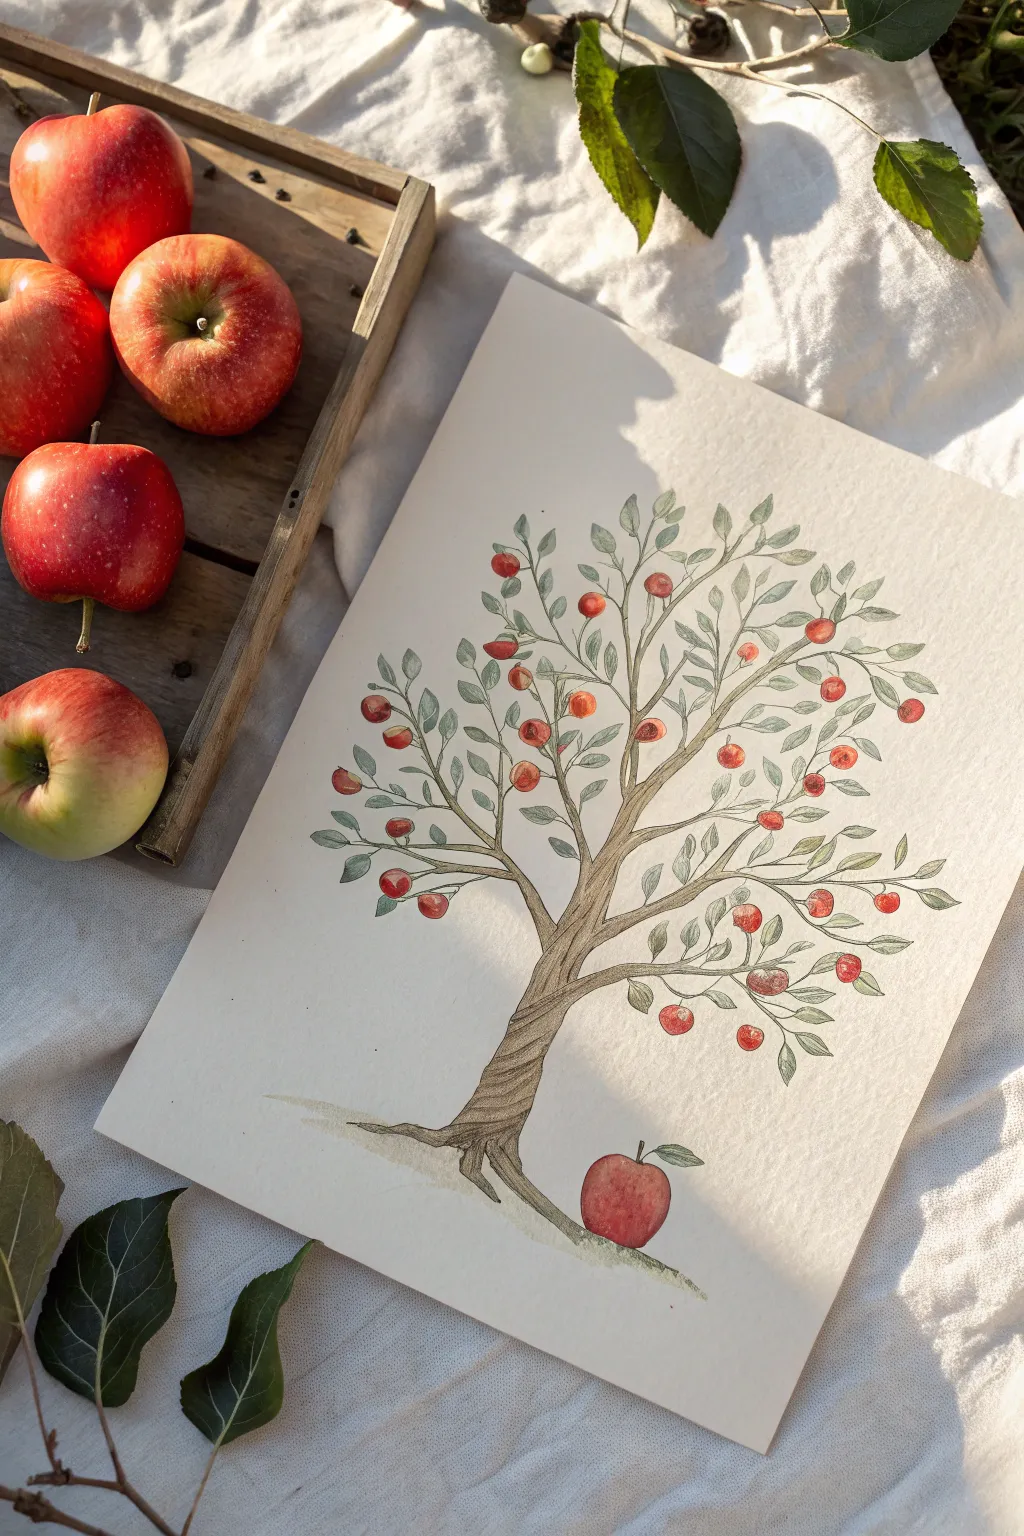
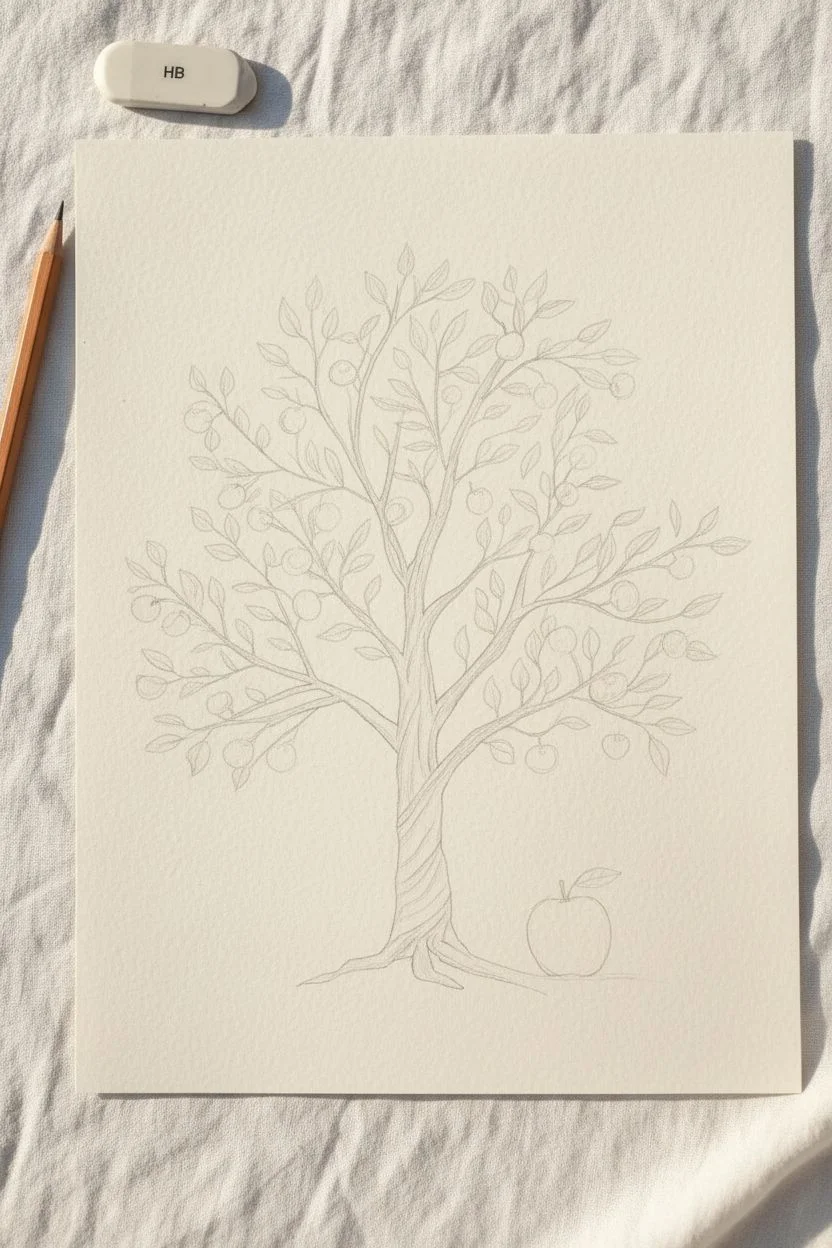
Capture the charm of an orchard with this delicate watercolor illustration, featuring a twisting trunk and bright pops of red fruit. This project balances detailed line work with loose, expressive color application for a style that feels both vintage and fresh.
Step-by-Step Guide
Materials
- Cold press watercolor paper (approx. 9×12 inches)
- Watercolor paints (Browns, Deep Greens, Bright Reds)
- Small round brush (size 2 or 4)
- Fine liner brush or micron pen (brown or black)
- Pencil (HB) and eraser
- Palette for mixing
- Jar of clean water
- Paper towel
Step 1: Sketching the Structure
-
Outline the Trunk:
Begin by lightly sketching the trunk of the tree. Draw it leaning slightly to the right with a twisted, gnarled texture. Let the base flare out into roots that ground the tree. -
Map the Branches:
Extend main branches outward from the top of the trunk. Keep your lines organic and slightly wavy, splitting them into thinner twigs as you move away from the center. -
Position the Apples:
Sketch small circles scattered throughout the canopy where you want your fruit to sit. Place one significantly larger apple resting on the ground near the roots for a playful sense of scale. -
Add Leaf Clusters:
Draw small, pointed oval shapes for leaves attached to the ends of the twigs. Group them in pairs or triplets around the apple placements to create fullness without clutter.
Step 2: Painting the Tree
-
Wash the Trunk:
Mix a diluted sepia or raw sienna. Apply a light wash over the trunk and branches. While it’s still damp, drop in a slightly darker brown along the shadowed edges (usually the left side) to create volume. -
Detail the Bark:
Once the base layer is dry, use your smallest brush with a concentrated dark brown to paint thin, twisting lines up the trunk. Follow the contour of the wood to simulate a spiraling bark texture. -
Paint the Leaves:
Mix a muted sage green. Carefully fill in the leaf shapes. I like to vary the water ratio slightly between leaves so some appear translucent and others more opaque, adding depth to the foliage. -
Leaf Veining:
After the green paint has fully dried, use a fine liner brush with a darker forest green to paint a central vein down the middle of each leaf.
Twisting Bark Trick
When painting bark lines, roll the brush slightly between your fingers as you pull the stroke. This creates natural breaks and variations in the line, mimicking real wood texture.
Step 3: Adding the Fruit
-
Base Color for Apples:
Load your brush with a bright crimson or cadmium red. Paint the small circular fruit in the tree. Leave a tiny speck of white paper unpainted on the upper right of each circle to act as a highlight. -
Shading the Fruit:
While the red is still slightly wet, touch the bottom left of each apple with a tiny amount of darker red or purple to give them roundness. -
The Grounded Apple:
Paint the large apple at the base using the same red tones. Use curved brushstrokes to follow the round form, deepening the color at the bottom and sides. -
Stem Details:
Using a fine brown line, connect the hanging apples to the branches with tiny stems. Add a stem and a single green leaf to the large apple on the ground.
Seasonal Shift
Change the season by swapping red apples for pink blossoms in spring, or turn the leaves orange and yellow for an autumn harvest version of this tree.
Step 4: Final Touches
-
Grounding Shadow:
Mix a very watery grey-brown wash. Apply a subtle horizontal shadow underneath the roots and the large apple so they don’t look like they are floating in space. -
Refining Lines:
Assess the drawing for any lost edges. You can use a brown fineliner or a very dry brush with dark paint to re-emphasize the twist of the trunk or the tips of the branches. -
Erase Sketches:
Wait until the painting is bone dry—touch it with the back of your hand to check. Gently erase any visible pencil lines that haven’t been covered by paint.
Now you have a charming botanical illustration ready to frame or gift to a nature lover
Treehouse Tucked Into the Branches
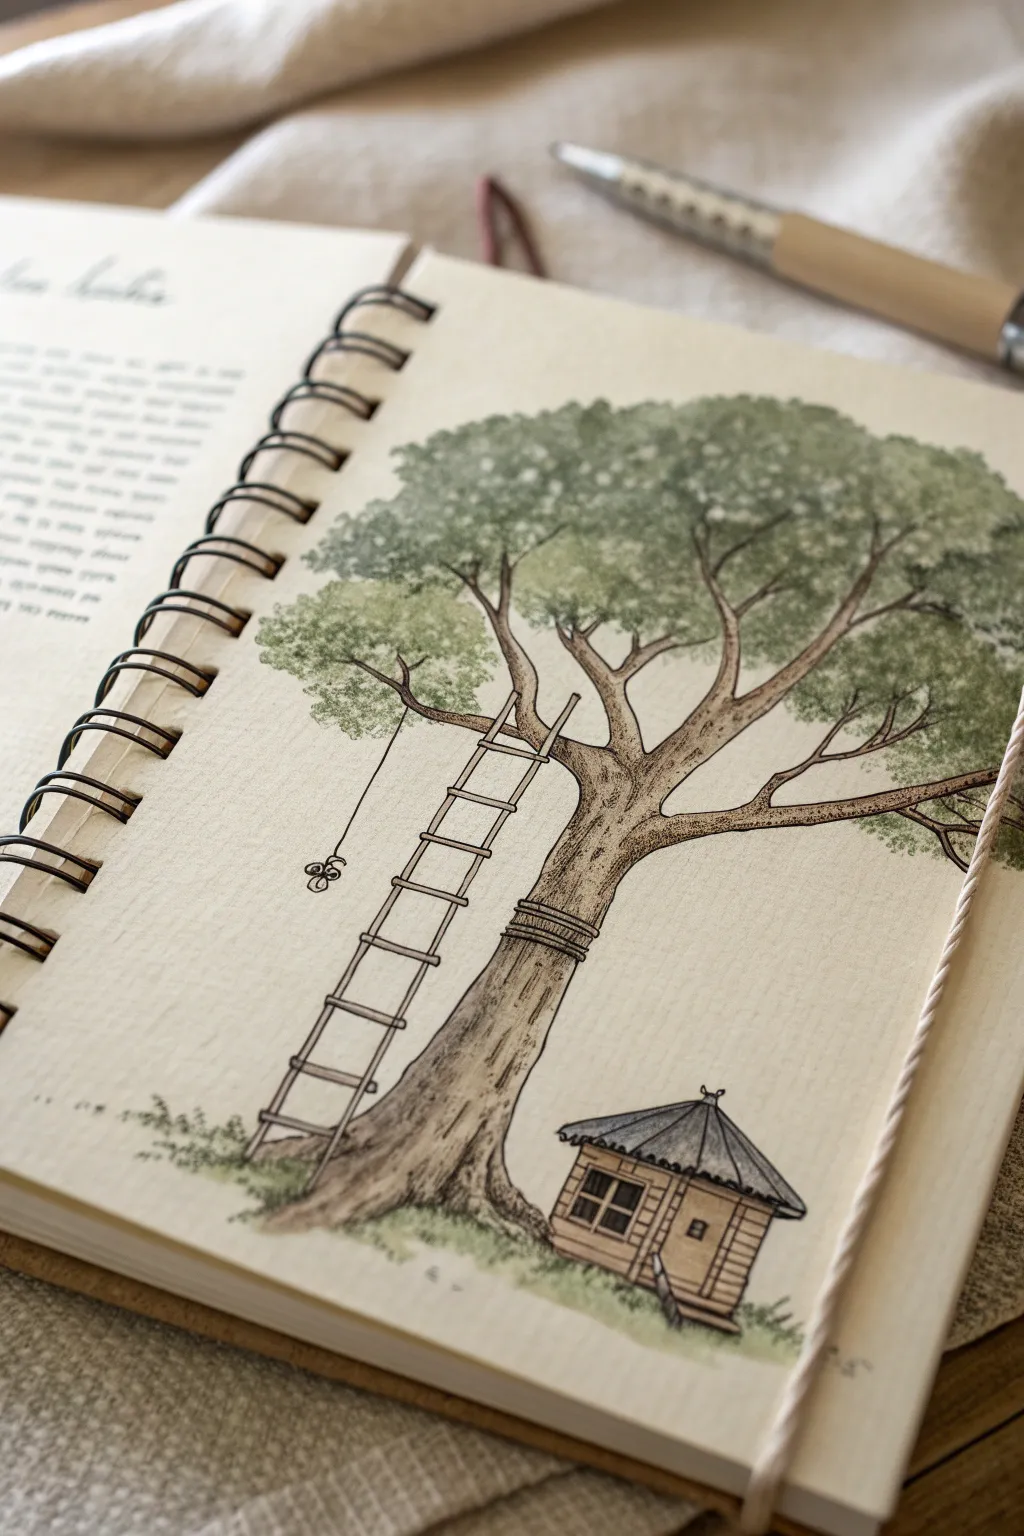
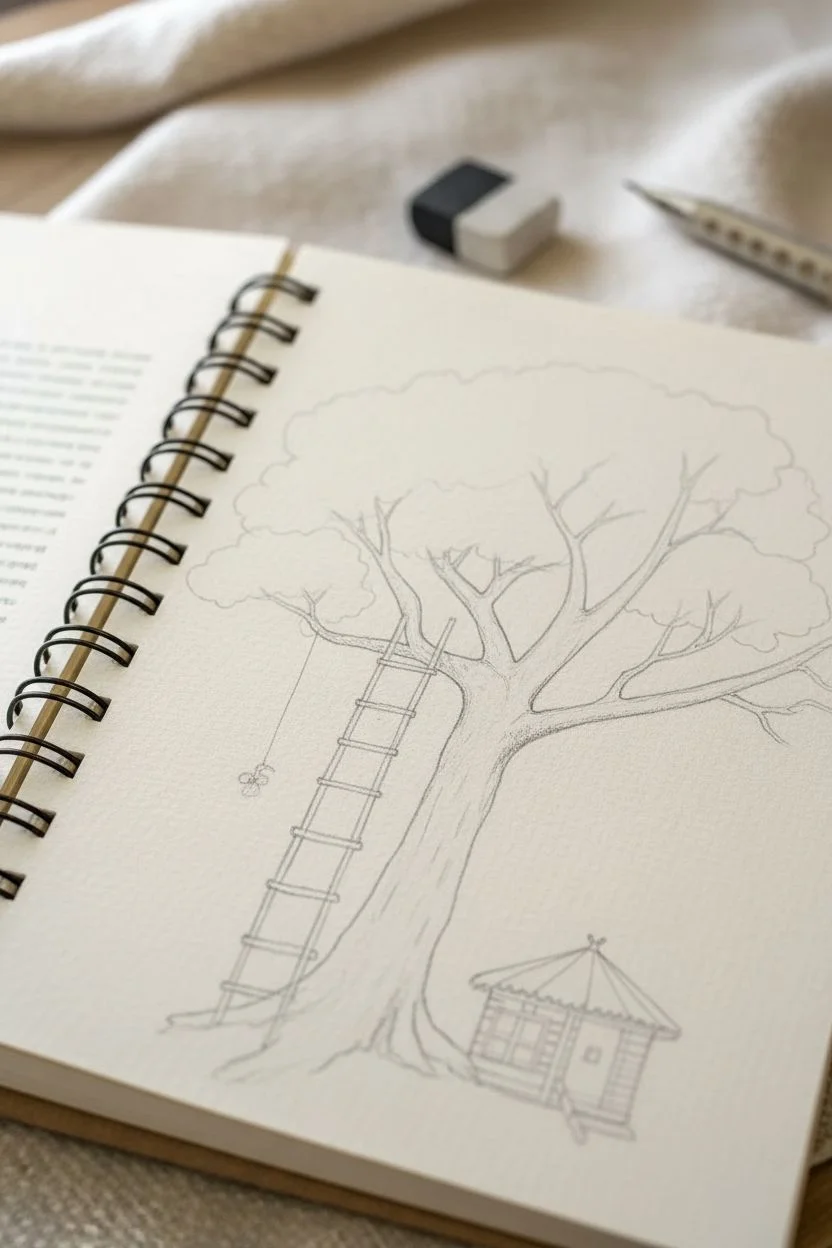
Capture the charm of a secret hideaway with this delicate ink and watercolor illustration. This sketch features a sturdy, textured tree trunk, a tiny cabin nestled at its base, and an inviting ladder reaching up into soft, green foliage.
Step-by-Step Guide
Materials
- Spiral-bound sketchbook (mixed media paper preferred)
- Fine liner pens (sizes 0.1, 0.3, and 0.5, black or sepia)
- Watercolor paints (pan set or tubes)
- Small round watercolor brush (size 2 or 4)
- HB pencil for initial sketching
- Kneadable eraser
- Water cup and paper towel
Step 1: Structural Sketching
-
Draft the trunk:
Start with your HB pencil. Draw a wide, curving trunk base that tapers gently as it rises. Let the trunk branch out into a ‘Y’ shape about two-thirds up the page, extending large boughs outward to the left and right. -
Position the cabin:
Sketch a small, rustic cabin at the bottom right of the tree base. Use the perspective of looking slightly down at its roof, giving it a peaked, tent-like roof and simple wooden siding. -
Add the ladder:
Draw two parallel lines leaning against the left side of the trunk, reaching from the ground up to the first main branch fork. Add evenly spaced rungs all the way up. -
Define the canopy:
Lightly outline the general shape of the foliage. Instead of a solid outline, use soft, cloud-like curves to suggest where the leaves will be, clustering them around the major branches.
Smudged Ink?
If your ink bleeds when painting, your pen might not be waterproof. Always test your pen on a scrap piece of paper with water before starting your main drawing.
Step 2: Inking the Details
-
Outline the bark:
Switch to a 0.3 or 0.5 fine liner. Trace your trunk lines with a slightly shaky, organic hand to simulate bark texture. Avoid perfectly straight lines; let the pen wander a bit. -
Texture the wood:
Using a 0.1 fine liner, add vertical hatching lines up the trunk. Focus these lines on the shadowed side (the left side here) to create roundness. I like to add a few knots and swirling grain lines for character. -
Detail the cabin:
Ink the cabin structure. Use horizontal lines for the siding and vertical strokes for the roof texture. Don’t forget the tiny window panes and the small door. -
Ink the ladder & swing:
Carefully ink the ladder rungs. From a lower left branch, draw a single vertical line dropping down for a rope swing, finishing with a small, knotted seat at the end. -
Erase pencil guides:
Wait until the ink is completely dry—give it a few minutes—then gently erase all your initial pencil marks with the kneadable eraser so the paper is clean for painting.
Pro Tip: Bark Texture
Vary your pen pressure when drawing bark lines. Heavier pressure on shadow sides and lighter, broken lines on highlighted areas creates instant volume.
Step 3: Watercolor Wash
-
Mix your browns:
Create a watery mix of burnt umber and a touch of sepia. It should be transparent. -
Paint the trunk:
Apply the brown wash to the tree trunk. While it’s wet, drop slightly darker pigment along the left edge and under the branch forks to enhance the 3D effect. -
Warm the cabin:
Use a warmer, reddish-brown or ochre tone for the cabin walls to differentiate it from the tree. Paint the roof a cool grey or slate blue. -
Create foliage greens:
Mix a sap green with a little olive. You want a natural, muted green rather than a bright emerald. -
Stipple the leaves:
Using the tip of your round brush, dab the green paint onto the paper in clusters. Keep the edges soft and irregular. Leave plenty of white space showing through the green to suggest light filtering through leaves. -
Add depth to canopy:
While the green is still damp, dab a slightly darker, cooler green into the lower parts of the leaf clusters to create shadow and volume. -
Ground the scene:
Swipe a very pale, watered-down green wash under the tree and cabin to ground them, suggesting grass without painting individual blades.
Close your sketchbook knowing you’ve created a peaceful little scene perfect for daydreaming
Circle-Framed Tree Drawing for a Clean, Finished Look
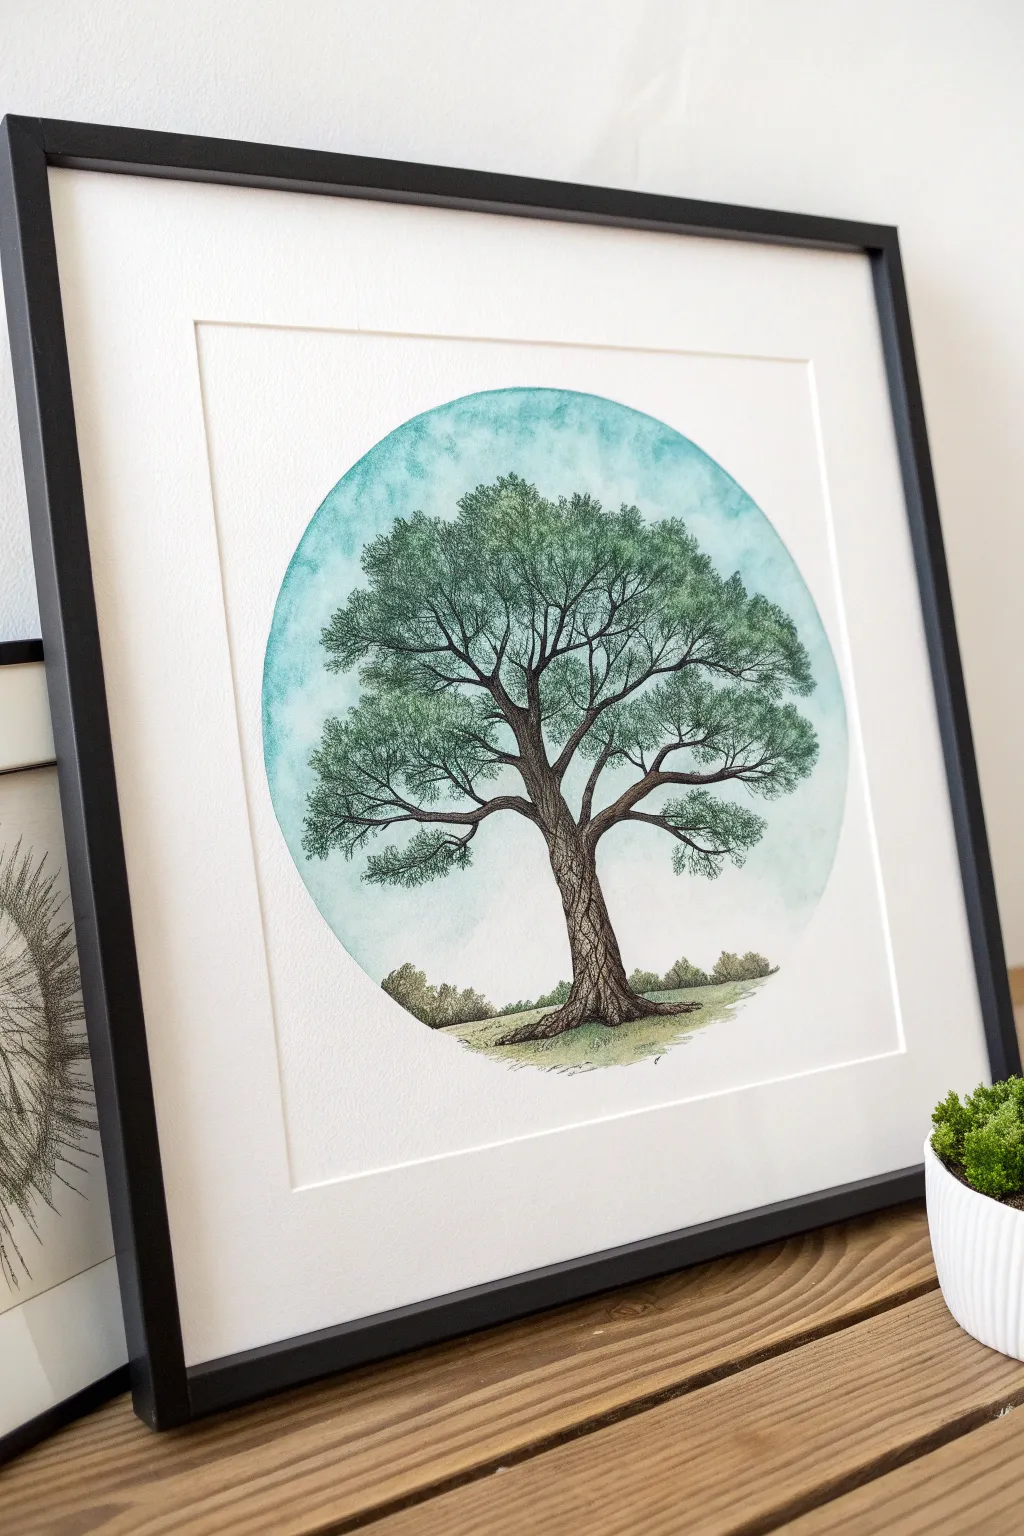
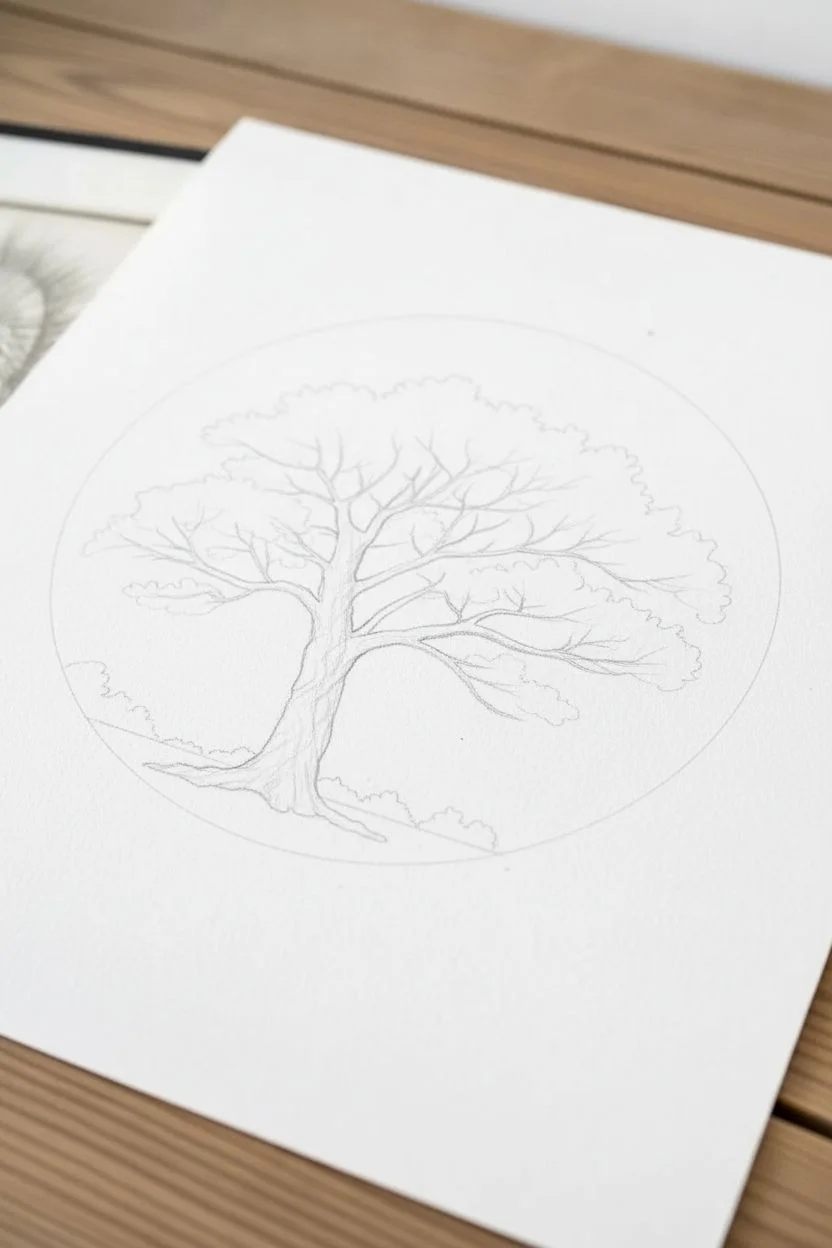
This elegant project combines precise pen work with soft watercolor textures to create a timeless tree illustration. The sharp circular border gives the piece a modern, professional finish that looks fantastic when framed and matted.
Detailed Instructions
Materials
- Cold press watercolor paper (minimum 140lb)
- Fine liner pens (0.05, 0.1, and 0.3 sizes, waterproof ink)
- Watercolor paints (Cerulean Blue, Sap Green, Burnt Umber, Yellow Ochre)
- Compass or a large circular object for tracing
- Pencil (HB or 2H)
- Kneadable eraser
- Round watercolor brushes (Size 4 and 8)
- Masking tape or painter’s tape
Step 1: Planning the Composition
-
Draw the circular boundary:
Begin by lightly tracing a large circle in the center of your paper using a compass or a bowl. This circle will contain your entire scene, so ensure it is centered and large enough to show detail. -
Sketch the tree trunk:
Using your pencil lightly, sketch the main trunk structure. Start slightly off-center at the bottom and create a gentle curve as the trunk rises, giving the tree a sense of movement and age. -
Establish main branches:
Branch out from the top of the trunk into three or four main limbs. Let them twist and turn naturally, rather than making them perfectly straight, to mimic the organic growth of an old oak or elm. -
Add foliage clusters:
Lightly outline cloud-like shapes around the branches to represent clusters of leaves. Don’t try to draw every leaf yet; just map out where the canopy will sit within the upper two-thirds of the circle. -
Ground the scene:
Draw a gently sloping horizon line near the bottom of the circle. Add implied distant bushes or smaller trees along this horizon to give the main tree scale and context.
Step 2: Inking the Details
-
Outline the trunk texture:
Switch to your 0.1 fine liner. Carefully go over your pencil lines for the trunk, but use broken, jagged lines rather than smooth strokes to suggest rough bark. -
Texturize the bark:
Fill the trunk with vertical, flowing lines that follow the contour of the tree. I like to add occasional knots or swirls to break up uniformity. Use the 0.05 pen for the finest cracks. -
Draw the branches:
Extend the ink work into the branches, tapering them as they reach outward. Ensure the connections where branches split look strong and thick, not flimsy. -
Create the foliage:
Instead of outlining the ‘cloud’ shapes you sketched, use a stippling or scribbling motion with the 0.05 pen to create the suggestion of leaves. Focus these marks on the bottom edges of the foliage clumps to create shadow and volume. -
Refine the foreground:
Use short, flicking vertical strokes at the base of the trunk to simulate grass. Ink the distant bushes with simple, rounded shapes, keeping them loose and less detailed than the main tree. -
Erase pencil marks:
Once you are certain the ink is completely dry (give it at least 10 minutes), gently rub your kneadable eraser over the entire drawing to remove the graphite guidelines.
Uneven Circle Edge?
If your paint bled outside the circle boundary, use opaque white gouache or a white gel pen to tidy up the edges and reclaim that perfect circular shape.
Step 3: Adding Color Washes
-
Prepare the sky wash:
Mix a watery puddle of Cerulean Blue. Carefully wet the sky area inside the circle with clean water first, avoiding the tree foliage. -
Paint the sky:
Drop the blue pigment into the wet paper. Let the paint bloom and flow naturally to create a cloud-like texture. Keep the color stronger near the top and fade it out as you reach the horizon. -
Paint the foliage base:
Mix a light Sap Green with a touch of Yellow Ochre. Apply this color loosely over the leaf clusters. Don’t worry about staying perfectly inside the ink lines; a little looseness adds charm. -
Deepen the canopy shadows:
While the green is still slightly damp, drop in a darker mix of Sap Green and a tiny bit of blue or brown into the lower parts of the leaf clusters to add volume. -
Color the trunk:
Use a diluted Burnt Umber for the trunk. Paint in vertical strokes, leaving small slivers of white paper showing through to act as highlights on the bark. -
Paint the ground:
Wash a mix of Yellow Ochre and Green over the grassy hill. Make it slightly darker right under the tree to ground it firmly in the landscape. -
Final touches:
Review your painting once dry. If the circular edge looks messy, you can carefully re-outline the main circle boundary with a pen or leave it soft for a painterly look.
Seasonal Shift
Change the mood by swapping greens for burnt orange and reds for an autumn version, or leave the branches bare and use cool grays for a winter scene.
Now step back and admire how a simple geometric frame transforms a nature sketch into a complete work of art
Pointillism Foliage Using Dots for Leaf Texture

Capture the dappled light and dense volume of a majestic tree using nothing but ink and patience. This project focuses on building up rich foliage textures through thousands of tiny dots, contrasting beautifully with the solid, grounded structure of the trunk.
How-To Guide
Materials
- High-quality sketchbook paper (smooth or vellum finish)
- Fine liner pens (sizes 0.05, 0.1, and 0.3mm)
- HB Graphite pencil
- Kneaded eraser
- Ruler (optional for horizon line)
Step 1: Structural Sketching
-
Establish the horizon:
Begin by lightly drawing a low horizon line with your pencil. This grounds your tree and gives the composition a sense of scale. -
Map the trunk:
Sketch the main trunk slightly off-center. Make the base wide and flared where roots grip the earth, tapering upward before splitting into major limbs. -
Design the branch architecture:
Draw the primary branches extending outward and upward. Keep them jagged and organic rather than perfectly straight, letting them thin out as they reach the canopy edge. -
Outline foliage clusters:
Instead of drawing individual leaves, lightly cloud-shape the main masses of foliage. Think of these as ‘clouds’ of leaves attached to the branch ends.
Step 2: Inking the Trunk
-
Define the silhouette:
Switch to a 0.1mm pen to outline the trunk and main branches. Use a broken, slightly jittery line to suggest rough bark texture rather than a smooth, perfect stroke. -
Texturing the bark:
Use short, curved contour lines that wrap around the form of the trunk. Concentrate these lines on the shadowed side (usually the right or bottom) to create volume. -
Deepening shadows:
With a 0.3mm pen, add darker cross-hatching at the base of the trunk and under the main branch splits. This adds weight and anchors the tree firmly to the ground.
Save Your Wrist
Stippling can be tiring! Instead of stiffly pecking at the paper, hold the pen loosely and use a gentle bouncing motion from your wrist, not your fingers.
Step 3: The Pointillism Foliage
-
Start the stippling:
Using your finest 0.05mm pen, begin placing dots within your pencil foliage clouds. Keep the dots relatively sparse at the very top edges where light hits. -
Build density zones:
Focus on the bottom underside of each foliage ‘cloud’. Pack your dots much closer together here. This gradient from dense dots (shadow) to sparse dots (light) creates the 3D effect. -
Connect the canopy:
Ensure some dot clusters overlap the branches you drew earlier. Real trees have leaves in front of branches, not just behind them. -
Refine the leaf texture:
I find it helpful to vary the pressure slightly. Continue layering dots until the darkest areas look almost solid black, giving the canopy deep, realistic contrast.
Level Up: Seasonal Shift
Leave more negative space between dot clusters to depict a winter tree with sparse leaves, or pack dots tightly for a lush, heavy summer canopy.
Step 4: Landscape and Details
-
Background shrubbery:
Draw smaller, low-lying bushes on the horizon line using a simple scribbly texture. Keep these much lighter and less detailed than the main tree to simulate atmospheric distance. -
Grounding grass:
Add short, vertical flicks of lines around the base of the roots. This simulates grass blades and helps integrate the tree into the landscape. -
Distant hills:
Draw a faint, continuous line behind the tree to suggest distant hills or mountains. Make this line very thin to push it into the background. -
Final clean up:
Once the ink is completely dry (wait at least 15 minutes to be safe), gently erase all your initial pencil guidelines with the kneaded eraser.
Enjoy the meditative rhythm of stippling as your tree slowly comes to life on the page


Have a question or want to share your own experience? I'd love to hear from you in the comments below!