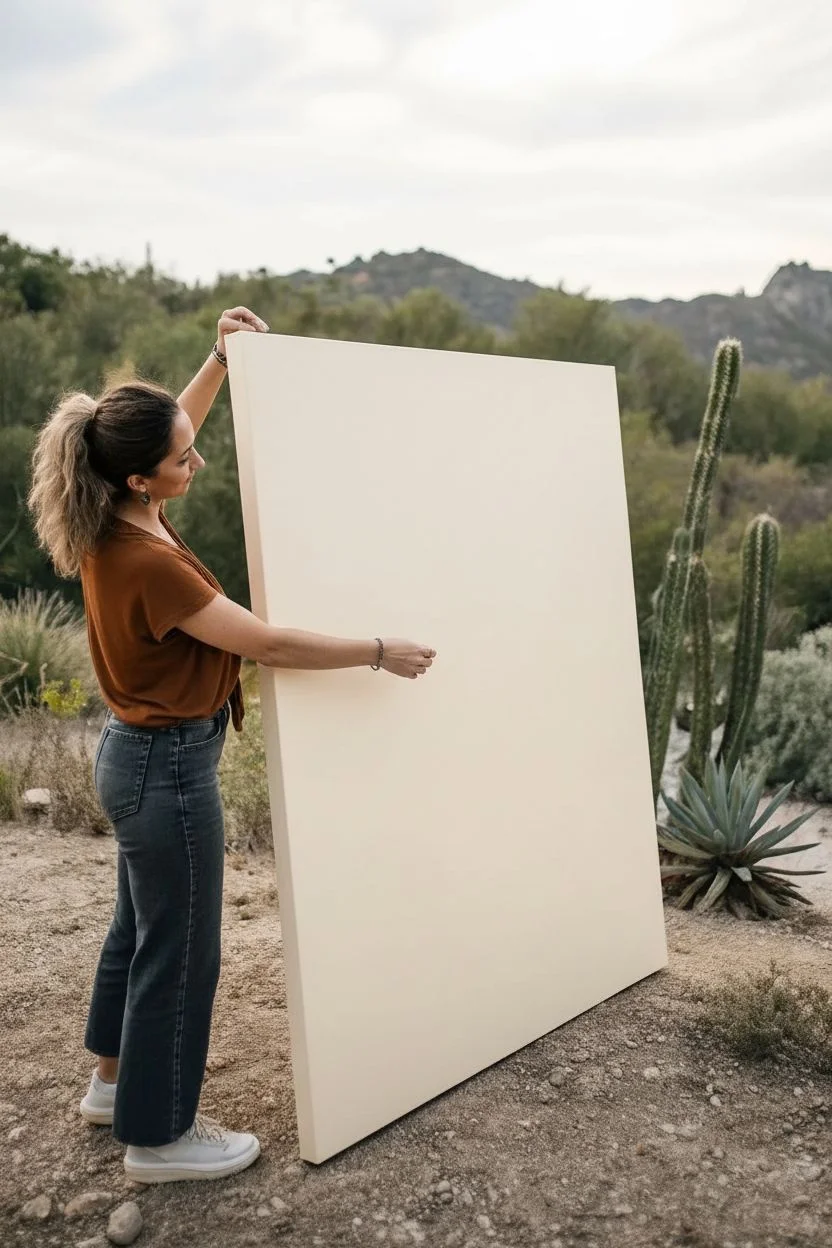
Whenever I need a fresh spark in the studio, I reach for a blank canvas and a simple plan that still looks totally “wow” when it’s done. These canvas painting ideas are the kind you can finish in a cozy afternoon—beginner-friendly, satisfying, and full of color.
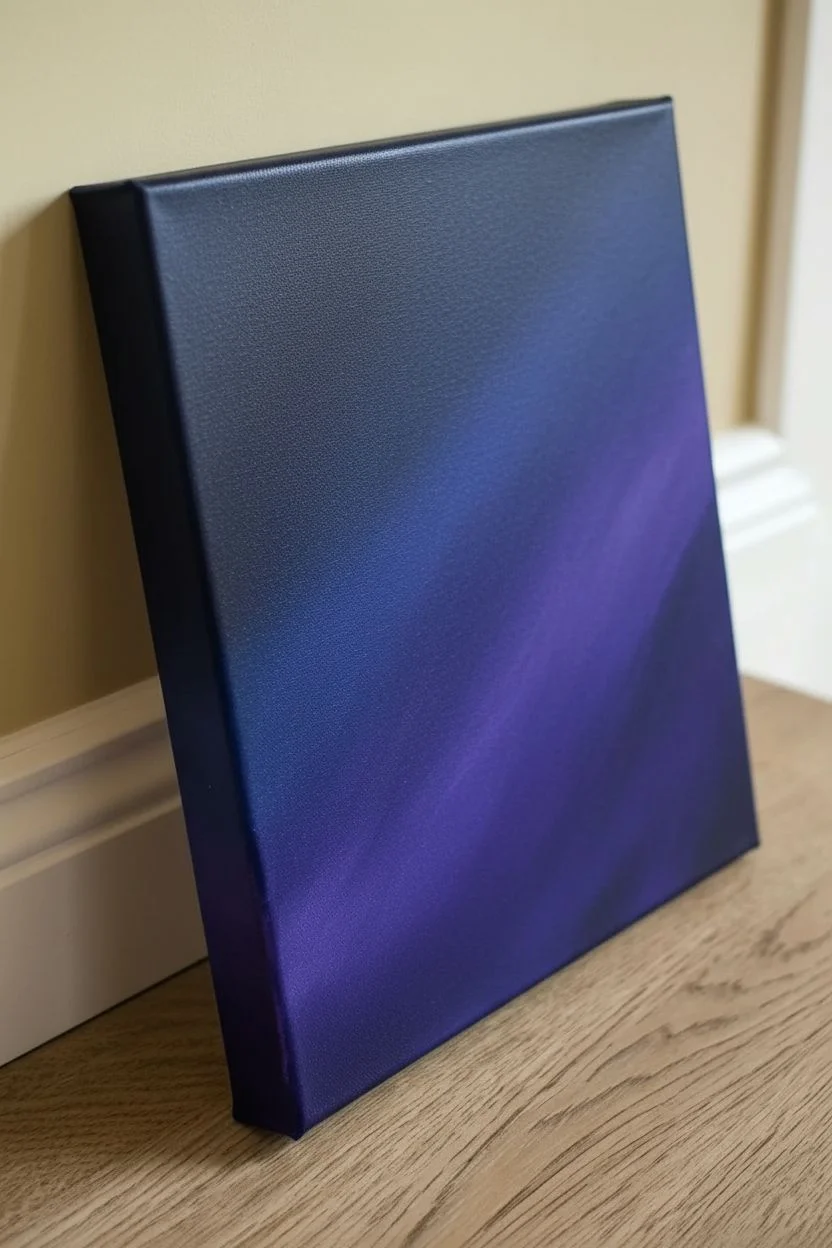
Classic Sunset Gradient Sky on Canvas
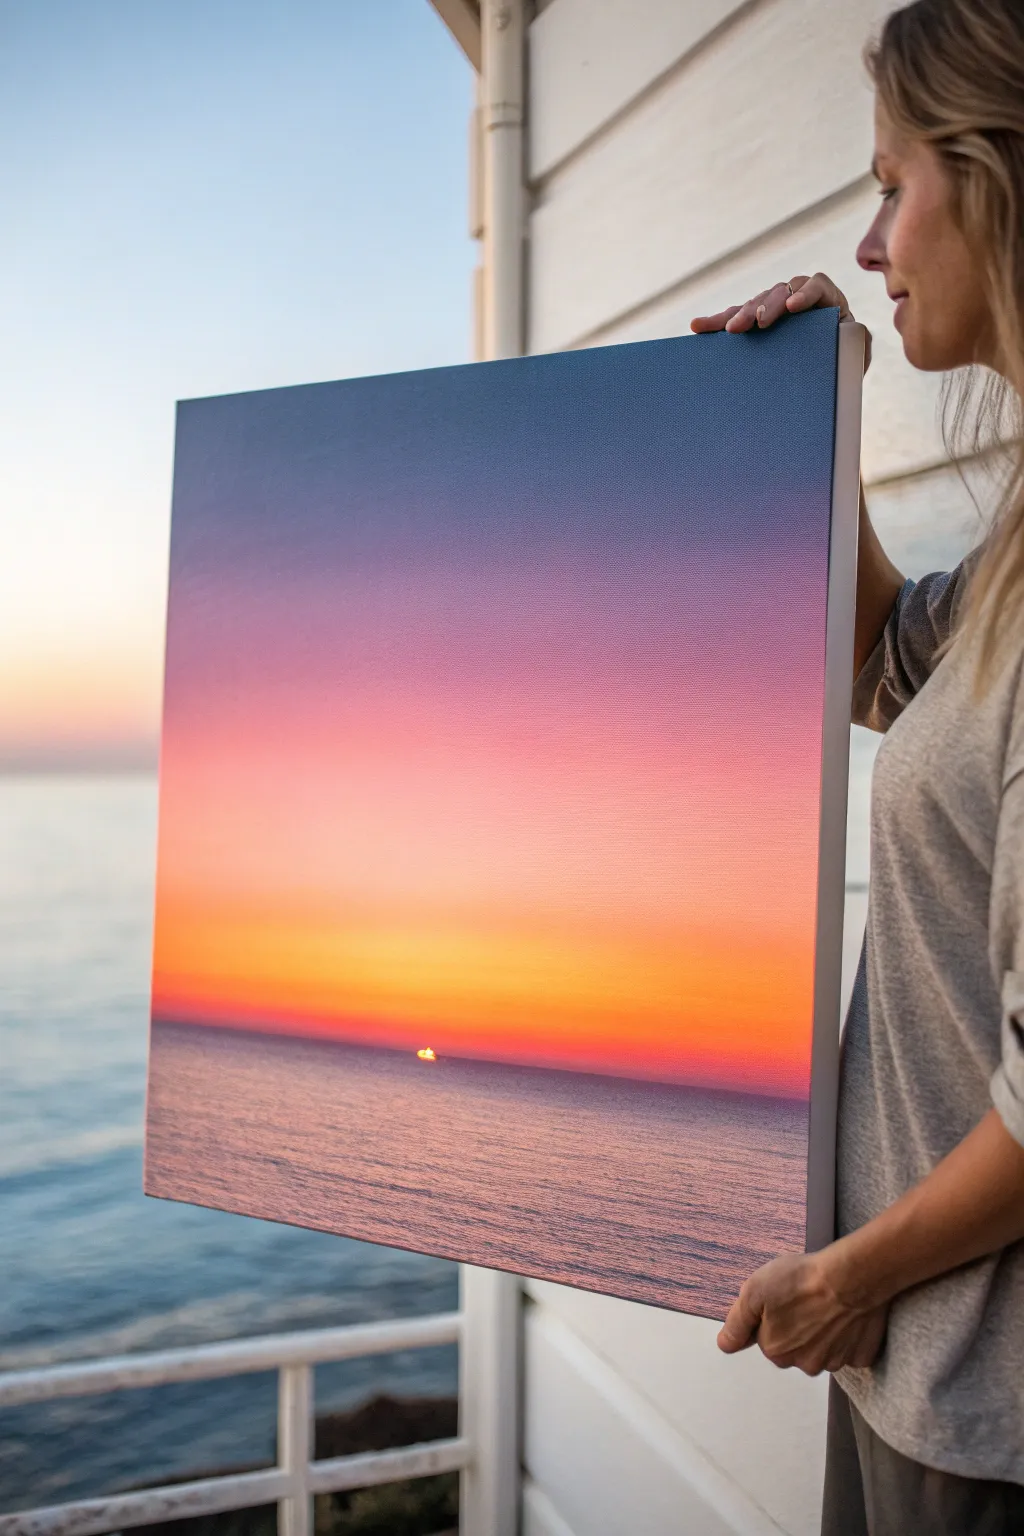
Capture the tranquil beauty of dusk with this stunning gradient painting. By blending acrylics seamlessly from deep indigo to warm peach, you’ll create a glowing horizon that seems to radiate light right off the canvas.
Detailed Instructions
Materials
- Large square canvas (e.g., 24×24 inches)
- Acrylic paints: Indigo/Navy Blue, Violet, Magenta, Peach/Coral, Cadmium Yellow, Titanium White
- Large flat wash brushes (2-3 inches wide)
- Medium flat brush (1 inch)
- Small liner brush
- Slow-drying medium or retarder
- Palette knife for mixing
- Water container and paper towels
- Painter’s tape or straight edge
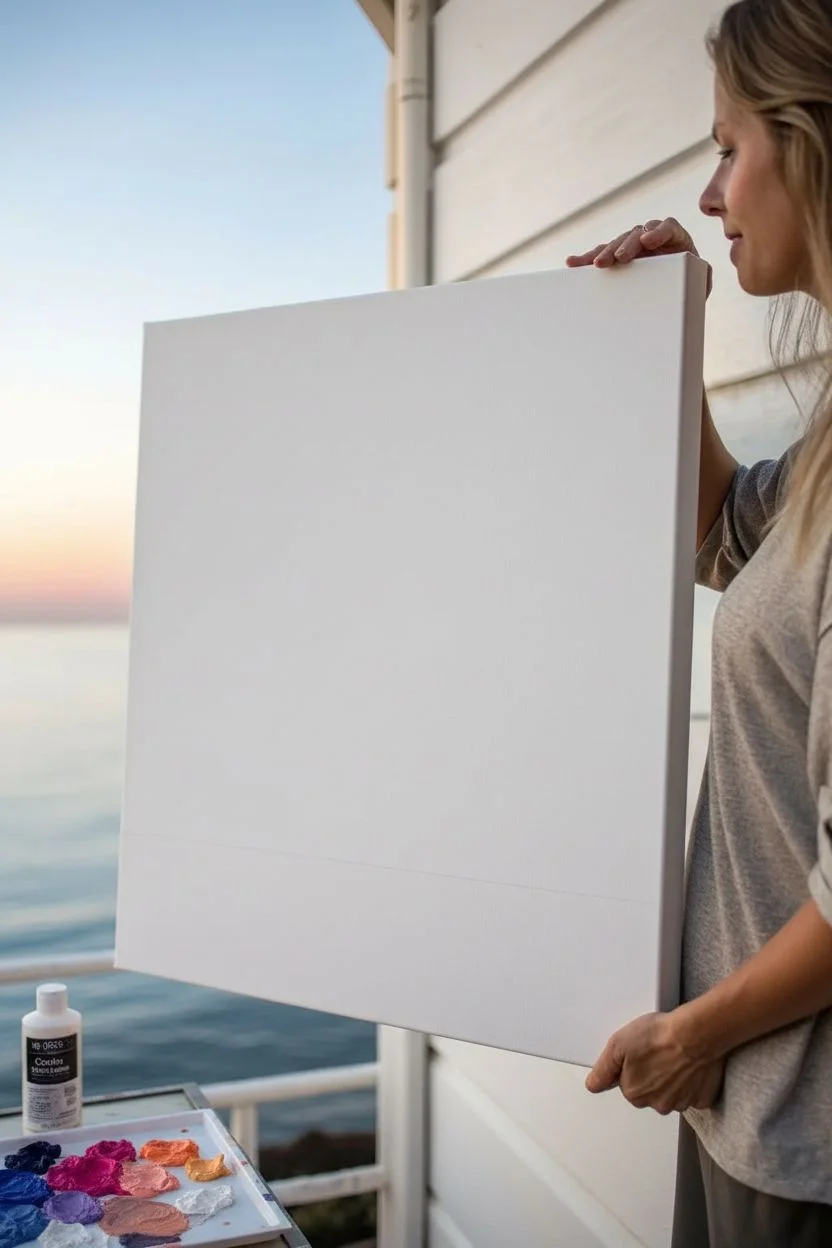
Step 1: Preparing the Sky Gradient
-
Prime the Surface:
Ensure your canvas is clean and ready. Apply a thin coat of Titanium White over the entire surface to help the subsequent colors pop and blend more smoothly, then let it dry completely. -
Map the Horizon:
Determine where your sea meets the sky. For this composition, place the horizon line fairly low, about one-fifth of the way from the bottom edge. Mark this lightly with a pencil or a strip of painter’s tape to keep it perfectly straight. -
Mix Your Gradient Palette:
Prepare your sky colors on the palette before you start painting, as speed is key for blending. Mix a deep indigo, a rich violet, a softer magenta, a warm peach, and a bright yellow-orange. Add a few drops of slow-drying medium to each pile to extend their open time.
Choppy Blending?
If your gradient looks stripey, your paint is drying too fast. Use a barely damp soft brush to lightly sweep horizontally over the transition zones to re-soften the edges.
Step 2: Painting the Sky
-
Apply the Darkest Top Layer:
Using your largest flat brush, apply the deep indigo across the very top strip of the canvas. Use long, horizontal strokes that go all the way from left to right. -
Introduce Violet:
Immediately below the indigo, apply a strip of the rich violet while the blue is still wet. Don’t worry about the perfect blend just yet; focus on getting the paint on the canvas. -
Blend the Upper Sky:
Wipe your brush slightly (don’t wash it fully) and gently work the area where the indigo and violet meet using soft, horizontal strokes back and forth until the line disappears. -
Transition to Pink:
Load a clean large brush with your magenta mix. Paint a wide band below the violet area, overlapping slightly with the purple above. -
Smooth the Mid-Tones:
Blend the magenta up into the violet. I find that using very light pressure—almost tickling the canvas—helps create that airbrushed look without dragging too much dark paint down. -
Add the Horizon Glow:
Near the horizon line (or tape), apply the peach and yellow-orange mixture. This should be the brightest part of the sky. -
Final Sky Blend:
Blend this warm light tone upward into the pink. Ensure the transition is seamless. Since acrylics dry fast, if the paint drags, mist it lightly with water.
Add Sparkle
Once fully dry, you can mix a tiny amount of iridescent medium or glitter glaze into the white reflection lines to make the water shimmer realistically in the light.
Step 3: Creating the Sea and Sun
-
Remove the Tape:
If you used tape for the horizon, peel it off gently now that the sky base is applied. Ensure the sky is dry before painting the water to avoid smudging. -
Base the Water:
Mix a muted version of your sky colors—mostly violet and indigo with a touch of the peach tone. Paint the water area with horizontal strokes, keeping the color darker at the bottom and slightly lighter near the horizon. -
Add Water Texture:
Using a smaller flat brush and slightly thinned paint (mixing in some white and peach), add thin, horizontal dashes across the water’s surface to simulate gentle ripples catching the light. -
Paint the Sun Sliver:
With your smallest liner brush and pure Titanium White mixed with a tiny dot of yellow, paint a small, intense semi-circle right on the horizon line. This is the sun just peeking out. -
Create the Reflection:
Directly below the sun, paint a vertical column of short, broken horizontal lines using the yellow-white mix. Make the lines wider near the horizon and narrower as they come toward the bottom. -
Final Adjustments:
Step back and check your horizon line. If it looks uneven, tidy it up carefully with the edge of a flat brush and your dark sea color.
Hang your masterpiece in a well-lit room to let that gradient glow set the mood


Simple Mountain Landscape Layers on Canvas
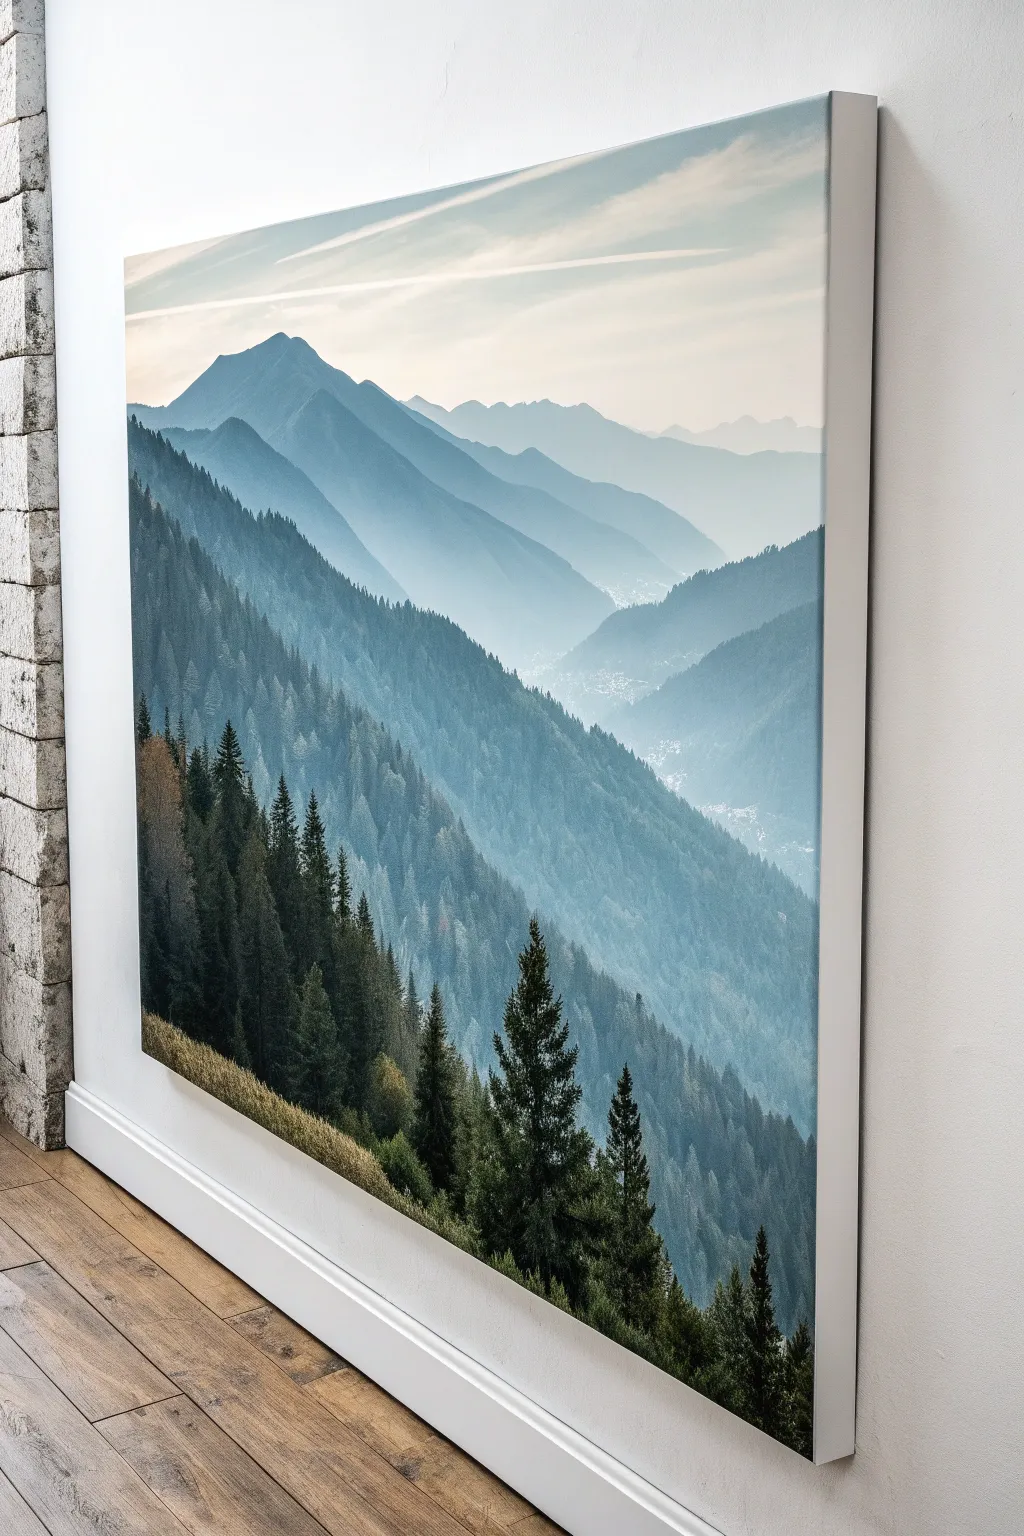
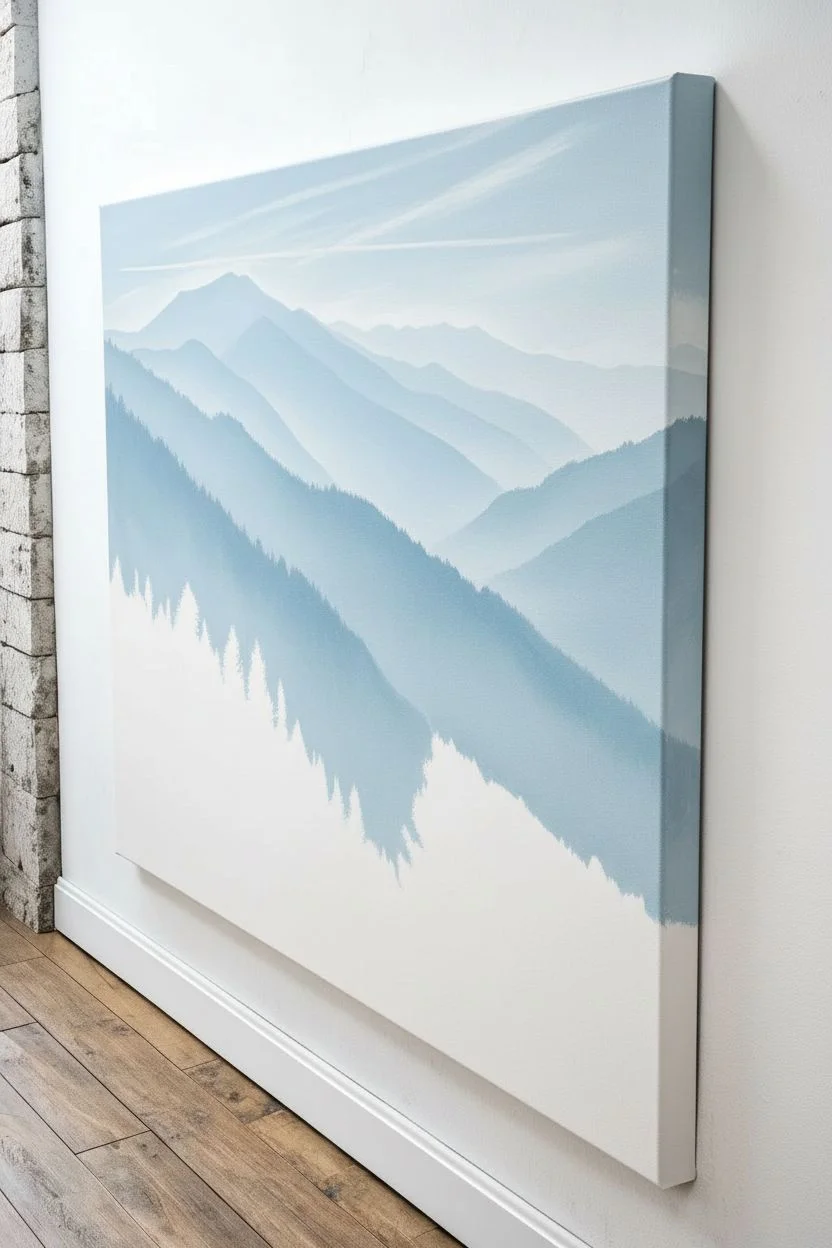
Capture the serene majesty of a high-altitude valley with this layered landscape painting. By mastering simple color gradients and silhouette techniques, you’ll create a stunning optical illusion of depth that draws the viewer straight into the misty distance.
Step-by-Step Guide
Materials
- Large vertical rectangular canvas (e.g., 24×36)
- Acrylic paints (primary blue, white, black, sap green, burnt umber)
- Wide flat brush (2-inch)
- Medium flat brush (1-inch)
- Small fan brush or angled shader
- Fine liner brush
- Palette and water cup
- Slow-drying medium (optional for blending)
Step 1: Sky and Background Peaks
-
Prime the backdrop:
Start with a clean white canvas. Mix a very large amount of titanium white with a tiny dot of blue to create the palest possible sky blue. Using your largest brush, paint the top third of the canvas in long, horizontal strokes. -
Add faint clouds:
While the sky is still slightly wet, sweep pure white in diagonal, streaky formations across the upper area to suggest high-altitude cirrus clouds. Soften the edges with a dry brush so they look wispy. -
Mix the furthest mountain color:
Create a pale, dusty blue-gray. Use plenty of white, a touch of blue, and a tiny bit of black. The color should be just barely darker than your sky. -
Paint the distant ridge:
About one-third down from the top, paint a jagged mountain ridge line. Fill in the shape below the line, fading it out into white as you move downward to create a misty valley floor effect. -
Layer the second ridge:
Mix a slightly darker, cooler blue. Paint a second mountain range slightly lower and overlapping the first one. Remember, objects get darker and more detailed as they get closer, so keep this layer still quite soft and hazy.
Atmospheric Artist Tip
To make the fog look real, dry-brush a tiny amount of pure white paint at the very base of each mountain layer before painting the next layer on top.
Step 2: Mid-Ground Valleys
-
Establish the valley depth:
For the middle ground, mix a slate blue tone. It needs to be distinct from the background layers but still muted. Paint a large, swooping slope coming in from the right side towards the center. -
Create the main left slope:
Mix a teal-gray (blue, small touch of green, white, and grey). Paint a large mountain slope entering from the left side, occupying a significant portion of the middle canvas. -
Suggest faraway forests:
Using a medium flat brush, tap vertical strokes along the ridge of this left slope. You aren’t painting individual trees yet, just the texture of a distant pine forest. The bottom of the slope should fade into a lighter mist color where it meets the valley floor. -
Add valley mist:
Between the mountain layers, scumble a thin glaze of watered-down white paint. This creates the ‘fog’ that settles in the valley and separates your mountain planes.
Step 3: Foreground Details
-
Mix the darkest greens:
For the immediate foreground slope on the bottom left, mix your darkest color appearing almost black: sap green, phthalo blue, and burnt umber. Do not use pure black; it looks unnatural. -
Block in the foreground hill:
Paint a steep diagonal line rising from the bottom right corner up towards the left. Fill the space below this line with your dark green mixture as a base layer. -
Texture the undergrowth:
Using an old, splayed bristle brush, stipple some ochre and light olive green along the very bottom edge to suggest grassy undergrowth or autumn foliage before the trees start. -
Start the pine trees:
Switch to a small fan brush or angled shader. Load it with your dark evergreen mix. Start painting vertical lines for tree trunks along the silhouette of the foreground slope. -
Add pine branches:
Using the corner of your brush, tap in branches starting narrow at the top of each trunk and getting wider towards the bottom. Focus on making irregular, organic shapes rather than perfect triangles. -
Refine the tree canopy:
Fill the entire bottom left section with these dense trees. Vary the heights—some should be tall sentinels poking high into the lighter mid-ground, while others remain lower in the pack. -
Highlight the nearest trees:
I find that adding a tiny touch of lighter sap green to the sun-facing side (the right side) of the closest few trees helps them pop forward from the dark mass. -
Check your values:
Step back from the canvas. Ensure there is a clear progression from the white/pale blue background to the deep, rich green foreground. If the transition is too abrupt, glaze a thin layer of the background color over the mid-ground to push it back.
Make It Yours
Add a tiny village in the distant misty valley using just a few specs of white and light gray paint to suggest rooftops peeking through the fog.
Give your masterpiece a final varnish once fully dry to deepen those beautiful dark foreground tones


Easy Ocean Wave Bands on Canvas
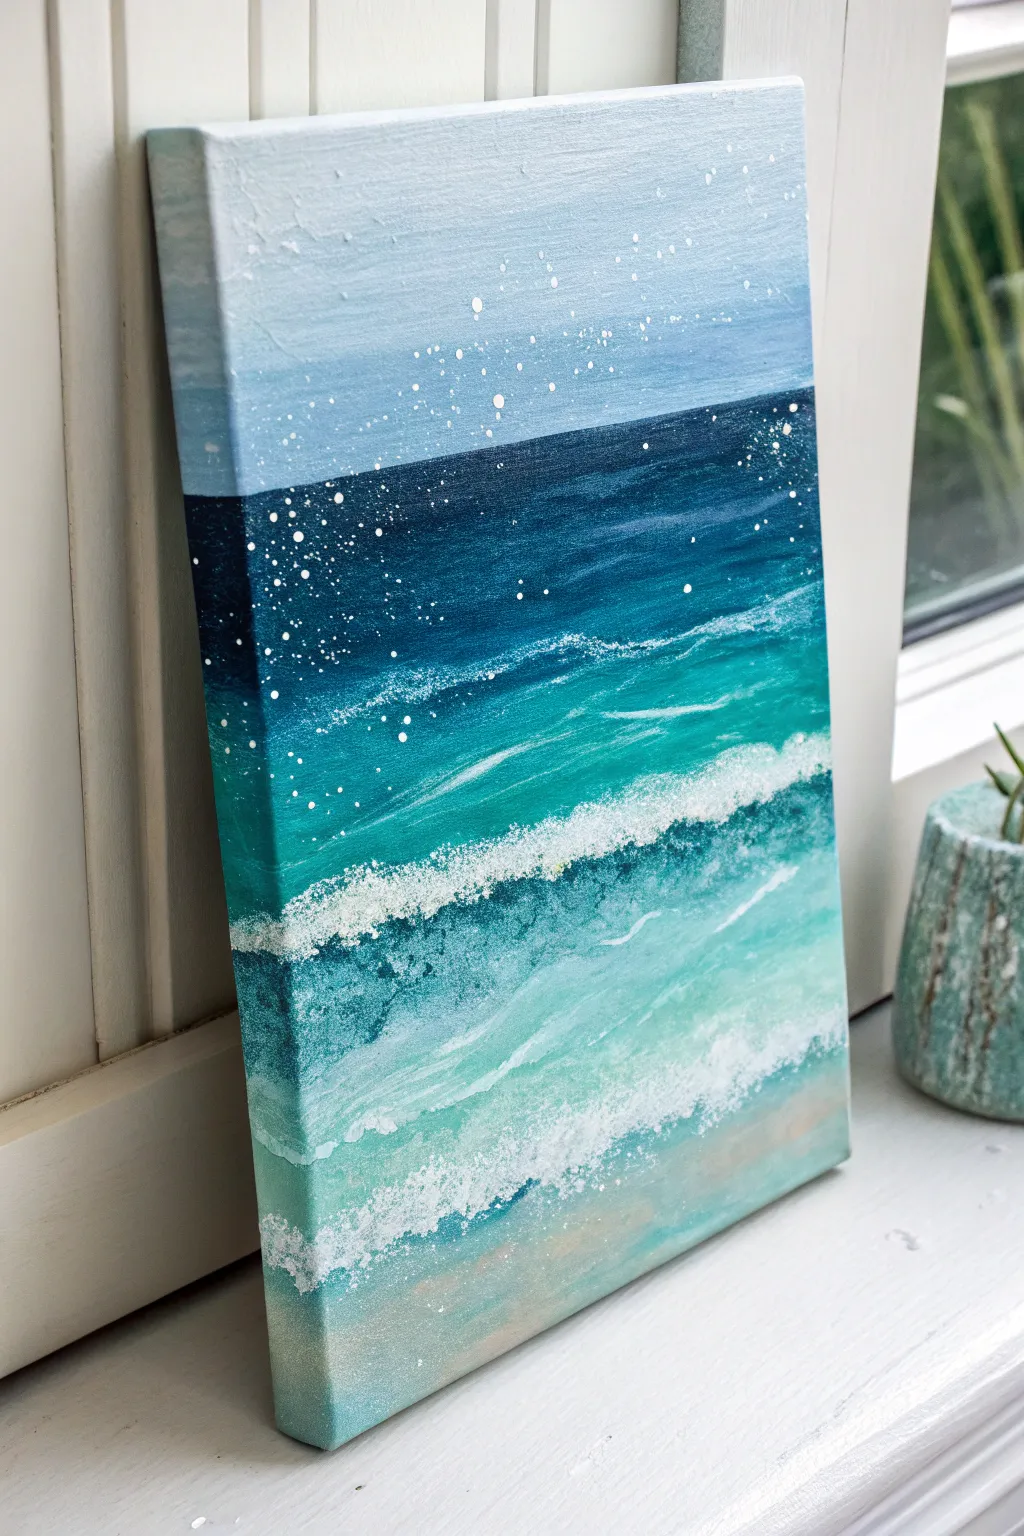
Capture the serene beauty of the coast with this layered ocean painting, featuring distinct bands of color that transition from deep sea to sandy shore. The vertical gradient and textured white splashes create a modern, almost abstract interpretation of waves crashing on a beach.
Detailed Instructions
Materials
- Stretched canvas (rectangular, vertical orientation)
- Acrylic paints (Titanium White, Phthalo Blue, Turquoise, Cerulean Blue, Black, Unbleached Titanium/Sand)
- Flat shader brushes (medium and large)
- Small round detail brush
- Old toothbrush (optional, for splattering)
- Palette or paper plate
- Cup of water
- Paper towels
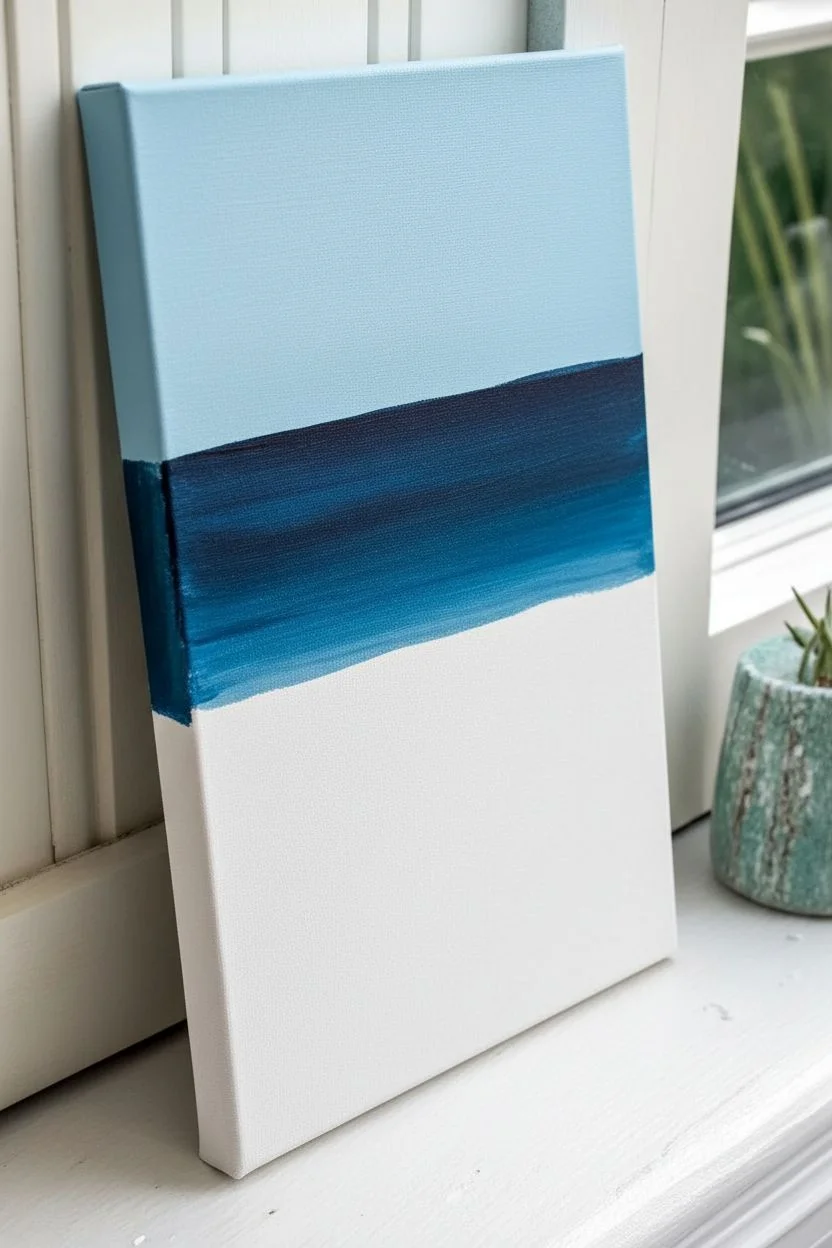
Step 1: Setting the Sky and Horizon
-
Mix the sky color:
Begin by mixing a very pale glue. Combine a generous amount of Titanium White with a tiny dot of Cerulean Blue. The goal is an airy, soft sky tone. -
Paint the top band:
Using a large flat brush, apply this pale blue mixture to the top third of your canvas. Use smooth horizontal strokes, ensuring you cover the top edge of the canvas as well for a finished look. -
Create the horizon line:
Clean your brush thoroughly. Mix a deep, dark navy by combining Phthalo Blue with a touch of Black. This needs to be the darkest value on your canvas. -
Apply the deep ocean band:
Paint a solid band of this dark navy directly below the sky, taking up about 1/5 of the canvas height. Don’t worry about blending perfectly into the sky just yet; a hard line creates a distinct horizon.
Step 2: Painting the Water Gradient
-
Mix a teal transition color:
For the middle section, mix Turquoise with a little Phthalo Blue. You want a rich jewel tone that bridges the gap between the dark horizon and the lighter shore. -
Paint the middle water:
Apply this teal mixture below the navy band. While the paint is still wet, use your brush to gently feather the edge where the teal meets the navy to soften the transition slightly. -
Add lighter turquoise waves:
Mix Turquoise with Titanium White to create a bright, tropical Caribbean blue. Paint the next band down, which will serve as the shallow water just before the waves break. -
Blend the water layers:
With a clean, slightly damp brush, gently sweep back and forth over the line between your dark teal and light turquoise bands. This creates the illusion of depth in the water.
Uneven Splatters?
If your paint ‘spray’ comes out in big blobs instead of mist, your paint is too thick. Add more water to your white mix and test on a paper towel first.
Step 3: The Shore and Foam
-
Paint the sand:
For the very bottom section, use Unbleached Titanium or mix White with a tiny touch of brown/ochre to get a sandy beige. Paint the bottom 1/5 of the canvas. -
Create a wash for the wet sand:
Dip your brush in water and pick up a tiny bit of the turquoise paint. Glaze this over the upper part of the sand section to make it look like wet sand underneath clear water. -
Start the wave foam:
Load a medium flat brush with pure Titanium White. Using a tapping or stippling motion (dabbing the brush up and down), create a thick, textured line of white foam between the teal water and the turquoise shallows. -
Add the shoreline foam:
Repeat the stippling technique where the light turquoise water meets the sand. Keep the edges ragged and uneven to look like natural sea foam. -
Feather the waves:
Wipe most of the paint off your brush. Gently drag the dry brush from the white foam lines backward into the water to create the look of movement and trailing foam.
Depth Perception
Make the foam lines at the top (horizon) thinner and the foam lines at the bottom (beach) thicker and more textured to create instant perspective.
Step 4: Details and Spray
-
Add subtle wave lines:
Using a small round brush and watered-down white paint, add very thin, wavy horizontal lines in the darker water sections to suggest ripples catching the light. -
Prepare for splattering:
Dilute a small puddle of white paint with water until it has the consistency of ink or heavy cream. This is crucial for getting good droplets. -
Adding the sea spray:
Dip an old toothbrush or stiff brush into the watery paint. Hold it near the canvas over the wave sections and flick the bristles with your thumb to spray tiny white dots. -
Control the spray density:
I prefer to concentrate the splatter mostly around the crashing wave lines and the dark horizon for contrast. You can protect the sky area with a piece of paper if you want to keep it clear. -
Final touches:
If any white dots land where you don’t want them, quickly wipe them away with a damp paper towel or q-tip before they dry.
Let the canvas dry completely before displaying your personal slice of the ocean on a shelf or wall


Loose Wildflower Bouquet on Canvas
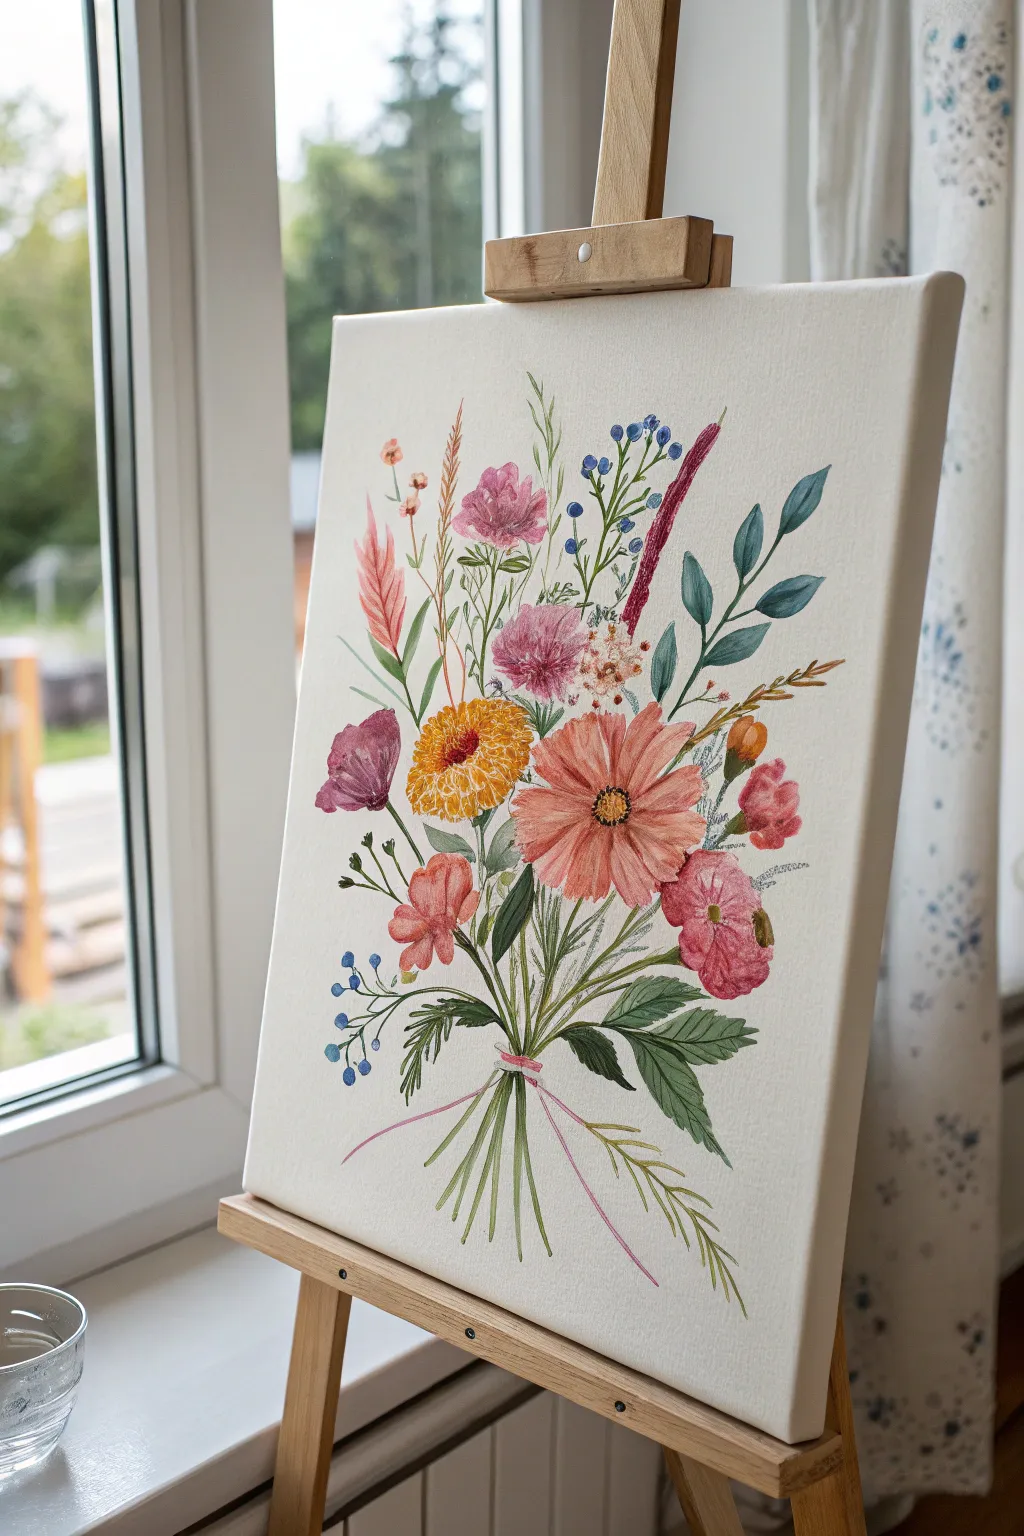
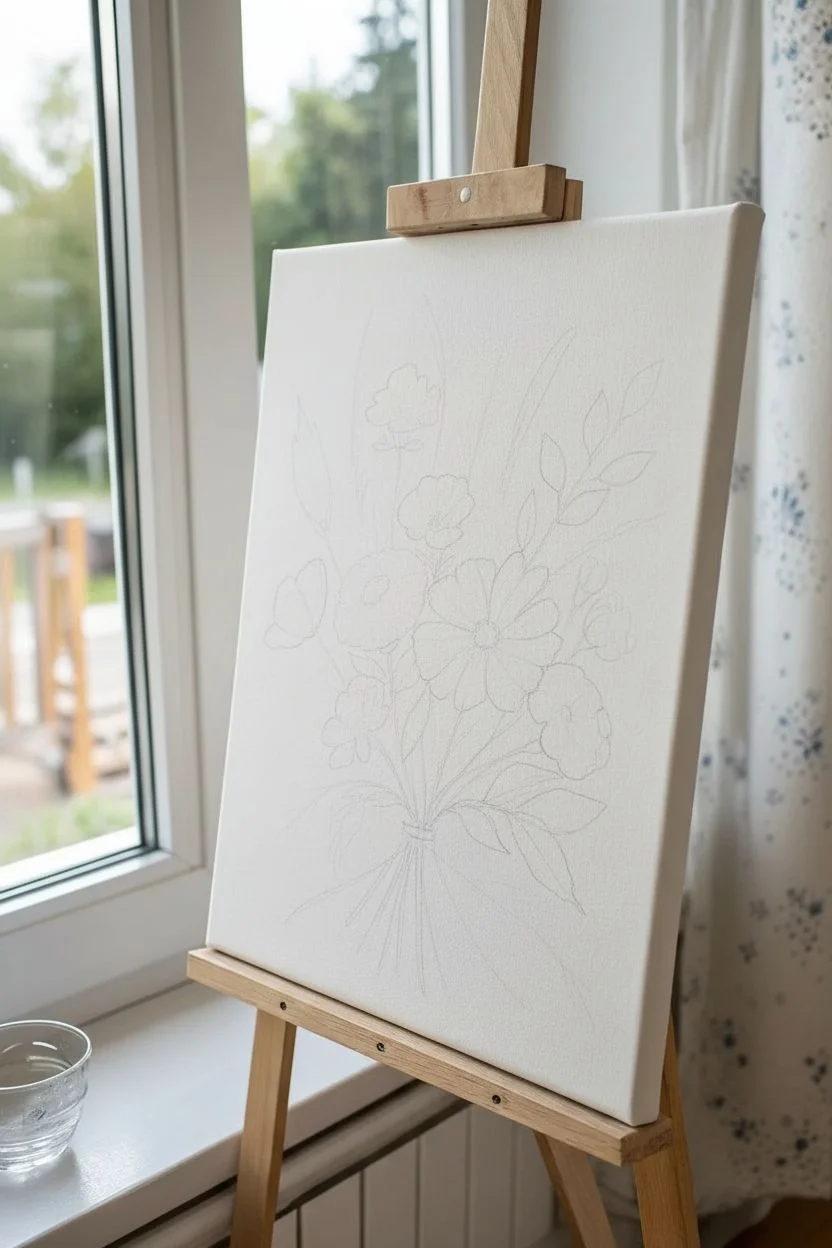
Capture the airy elegance of a summer garden with this loose, botanical-style painting. Using varied brushstrokes and a soft palette of pinks, oranges, and greens, you’ll build a charming wildflower bouquet tied straight from nature.
Step-by-Step Tutorial
Materials
- Stretched canvas (rectangular format, roughly 12×16 or similar)
- Acrylic paints (Titanium White, Sap Green, Olive Green, Phthalo Blue, Cadmium Yellow, Yellow Ochre, Alizarin Crimson, Cadmium Red, Burnt Sienna)
- Set of synthetic brushes (Round #2, #6, #8 for petals; Liner brush for stems/details)
- Palette or mixing plate
- Cup of water
- Paper towels
- Pencil for sketching
- Kneaded eraser
Step 1: Planning composition
-
Lightly sketching placement:
Begin by sketching the rough composition directly onto the canvas with a light pencil touch. Draw a faint central circle for the binding point where the stems meet, and lightly map out ovals where the largest flower heads will sit. -
Adding stem guidelines:
Draw loose, sweeping lines radiating correctly from that central binding point. Ensure your stems fan out upwards for the blooms and downwards for the cut ends, maintaining a natural, gathered look. -
Defining leaf shapes:
Sketch in the larger, broad leaves near the base and the elongated, eucalyptus-style leaves on the right side. Keep lines faint so they don’t show through lighter paint colors later.
Keep it fluid
Add a drop of water or acrylic medium to your paint for long stems. This helps the paint flow smoothly off the liner brush without breaking mid-stroke.
Step 2: Painting the blooms
-
Blocking in the large cosmos:
Mix a warm salmon pink using Titanium White, Alizarin Crimson, and a tiny touch of Yellow Ochre. Using a #8 round brush, paint long, teardrop-shaped petals for the large flower on the right, radiating from a distinct center. -
Creating the marigold:
For the yellow-orange flower on the left, mix Cadmium Yellow with a spot of Cadmium Red. Use a stippling motion (dabbing the brush tip) to create the fluffy, textured appearance of a marigold or zinnia, leaving the center slightly darker. -
Adding pink filler flowers:
Switch to a smaller #6 brush and mix a cooler pink. Paint the smaller, rounded blossoms near the top and bottom right. Keep your strokes loose and gentle, layering petals slightly to suggest volume. -
Painting the violet accent:
On the left side, paint the bell-shaped purple flower. Mix Phthalo Blue with Alizarin Crimson and White. Use downward strokes to mimic the drooping nature of the petals. -
Adding texture to centers:
Once the main petals feel tacky or dry, go back to the large salmon flower. Dot the center with Burnt Sienna and Black to create the pollen area. Add lighter yellow dots to the center of the marigold for dimension.
Make it yours
Swap the ribbon color to match your room’s decor, or extend the canvas size to add a painted mason jar or glass vase around the bottom stems.
Step 3: Greenery and foliage
-
Painting eucalyptus leaves:
Mix a blue-green shade using Sap Green, Phthalo Blue, and White. Paint the oval leaves on the right stem, starting with the tip and pressing down to widen the stroke, then lifting as you move toward the stem. -
Adding feathery elements:
Using a liner brush and a mix of Olive Green and White, paint the delicate, wispy grasses and thin stems that shoot up towards the top of the canvas. -
Creating broad lower leaves:
Mix a darker, rich green for the leaves at the base of the bouquet. Paint these with confident strokes to anchor the arrangement visually, adding lighter green veins while the paint is still wet for a soft blend. -
Introducing berry accents:
Use the back of your brush handle or a small round brush to dot clusters of blue berries on the left side. Connect them with very fine, dark green stems. -
Painting the maroon spike:
Mix a deep maroon/brown color and use short, dashed strokes to create the tall, fuzzy spike flower that leans slightly to the right.
Step 4: Stems and finishing details
-
Connecting the stems:
Using your liner brush and a mix of watery greens, paint the stems for all your flowers. Ensure every flower head connects logically to the central gathering point. -
Painting the lower stems:
Extend the green stems below the binding point. Vary the shades of green slightly—some fresher and lighter, some shadowy—to distinguish individual stalks. -
Adding the pink ribbon:
Mix a pale pink. Paint a simple horizontal band where the stems cross, and add two thin, flowing lines drifting downwards to represent the ribbon tails. -
Highlighting and refining:
I like to take a step back here to check the balance. Add touches of pure White to the tips of the pink petals and berry highlights to make them pop against the canvas. -
Final texture check:
Add tiny stray marks, dots, or thin lines around the bouquet to simulate pollen or floating seeds, giving the piece a loose, airy energy.
Allow your beautiful botanical piece to dry completely before hanging it in a bright spot to enjoy
BRUSH GUIDE
The Right Brush for Every Stroke
From clean lines to bold texture — master brush choice, stroke control, and essential techniques.
Explore the Full Guide
Cherry Blossom Tree Against a Soft Sky Canvas
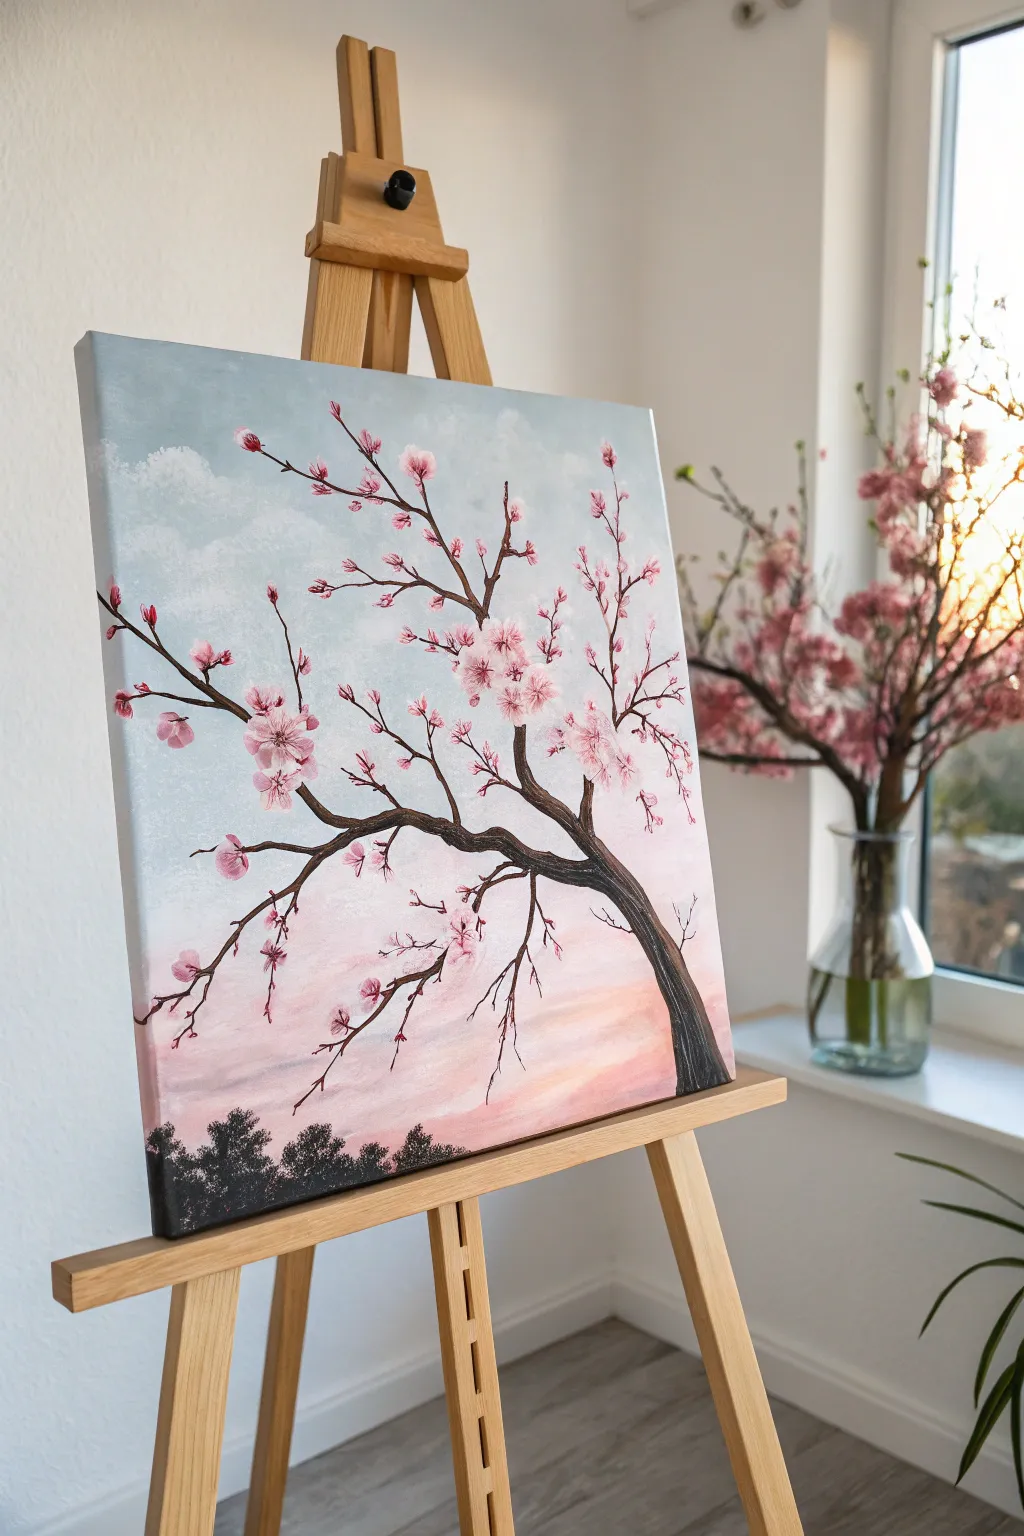
Capture the delicate beauty of spring with this serene painting of a cherry blossom tree reaching across a pastel sky. The soft gradient background creates a dreamy atmosphere, making the dark branches and vibrant pink flowers pop with life.
How-To Guide
Materials
- Stretched canvas (e.g., 16×20 inches)
- Acrylic paints: Titanium White, Light Blue, Phthalo Blue, Magenta/Rose, Black
- Large flat wash brush (1 inch or wider)
- Medium round brush (size 6 or 8)
- Small liner brush (size 0 or 1)
- Palette or paper plate
- Cup of water and paper towels
Step 1: Painting the Sky Gradient
-
Prepare the blue:
Start by mixing a lovely sky blue on your palette using Titanium White and a small dot of Light Blue. You want a very pale, airy color for the upper portion. -
Apply the top layer:
Using your large flat wash brush, paint horizontal strokes across the top third of the canvas. Ensure the paint is wet enough to blend later. -
Transition to pink:
Without cleaning your brush fully, pick up some white and a tiny hint of Magenta. Blend this directly into the bottom edge of the wet blue paint. -
Create the sunset glow:
Mix a stronger pale pink using White and Magenta. Paint this across the bottom third of the canvas, blending upwards into the previous transitional layer to create a smooth ombre effect. -
Add cloud whisks:
While the background is still slightly tacky, use a mostly dry brush with pure White to dab in soft, irregular cloud shapes on the left side. Soften the edges with a clean, dry finger. -
Dry completely:
Let this background layer dry fully before moving on. I like to use a hairdryer on a cool setting to speed this up.
Natural Lines
When painting branches, hold the brush by the very end of the handle. This reduces control slightly, creating more organic, erratic lines.
Step 2: Creating the Silhouette
-
Ground the scene:
Mix Black with a tiny touch of Blue. Using a medium round brush, stipple an uneven line of ‘bushes’ or distant trees across the very bottom edge of the canvas. -
Draft the main trunk:
Switch to a smaller round brush with slightly watered-down Black paint. Paint the main trunk starting from the lower right, curving gracefully upward toward the center left. -
Build the branches:
Extend smaller branches outward from the main trunk. Let your hand shake slightly as you pull the brush to create natural, organic-looking twists in the wood. -
Add fine twigs:
Using your finest liner brush and inky black paint, add delicate twigs to the ends of the branches. These should reach out in all directions, especially toward the upper right. -
Highlight the bark:
Mix a dark grey. Carefully add a few thin, broken lines along the right side of the main trunk to suggest light hitting the bark texture.
Step 3: Blooming the Branches
-
Mix blossom shades:
Prepare three piles of pink: a dark rose (Magenta), a medium pink (Magenta + White), and a very pale highlight pink (mostly White). -
Paint the base petals:
Using the medium round brush, dab clusters of five petals using the medium pink shade. Place these sporadically along the branches, focusing on branch intersections. -
Add depth to flowers:
Drop a tiny dot of the dark rose paint into the center of each flower cluster while the paint is wet. This creates the deep ‘throat’ of the bloom. -
Highlight the petals:
Clean your brush and pick up the palest pink. Add small strokes to the outer edges of the petals to make them look like they are catching sunlight. -
Create buds:
Use the liner brush and dark rose paint to add tiny, unclosed buds on the very tips of the thinnest twigs. -
Add falling petals:
Paint a few single petals floating in the air below the main branch to suggest a gentle breeze shaking the tree. -
Final flower details:
Once the flowers are dry, add tiny dots of dark crimson or brown in the very center of the open blooms for pistils.
Metallic Touch
Add a touch of metallic gold paint to the center of the largest flowers or brush it lightly over the cloud edges for a magical sunrise effect.
Now step back and enjoy the peaceful spring view you have brought indoors
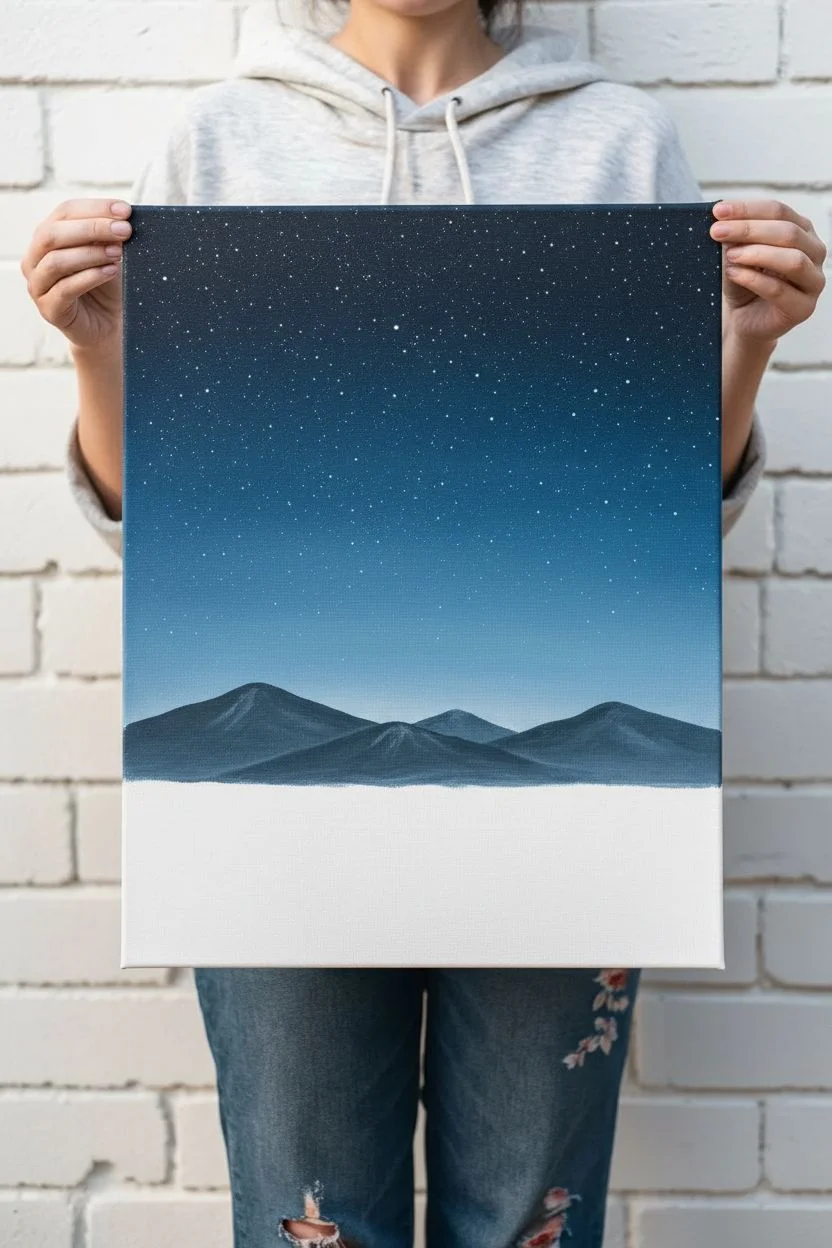
Starry Night Galaxy Blending on Canvas
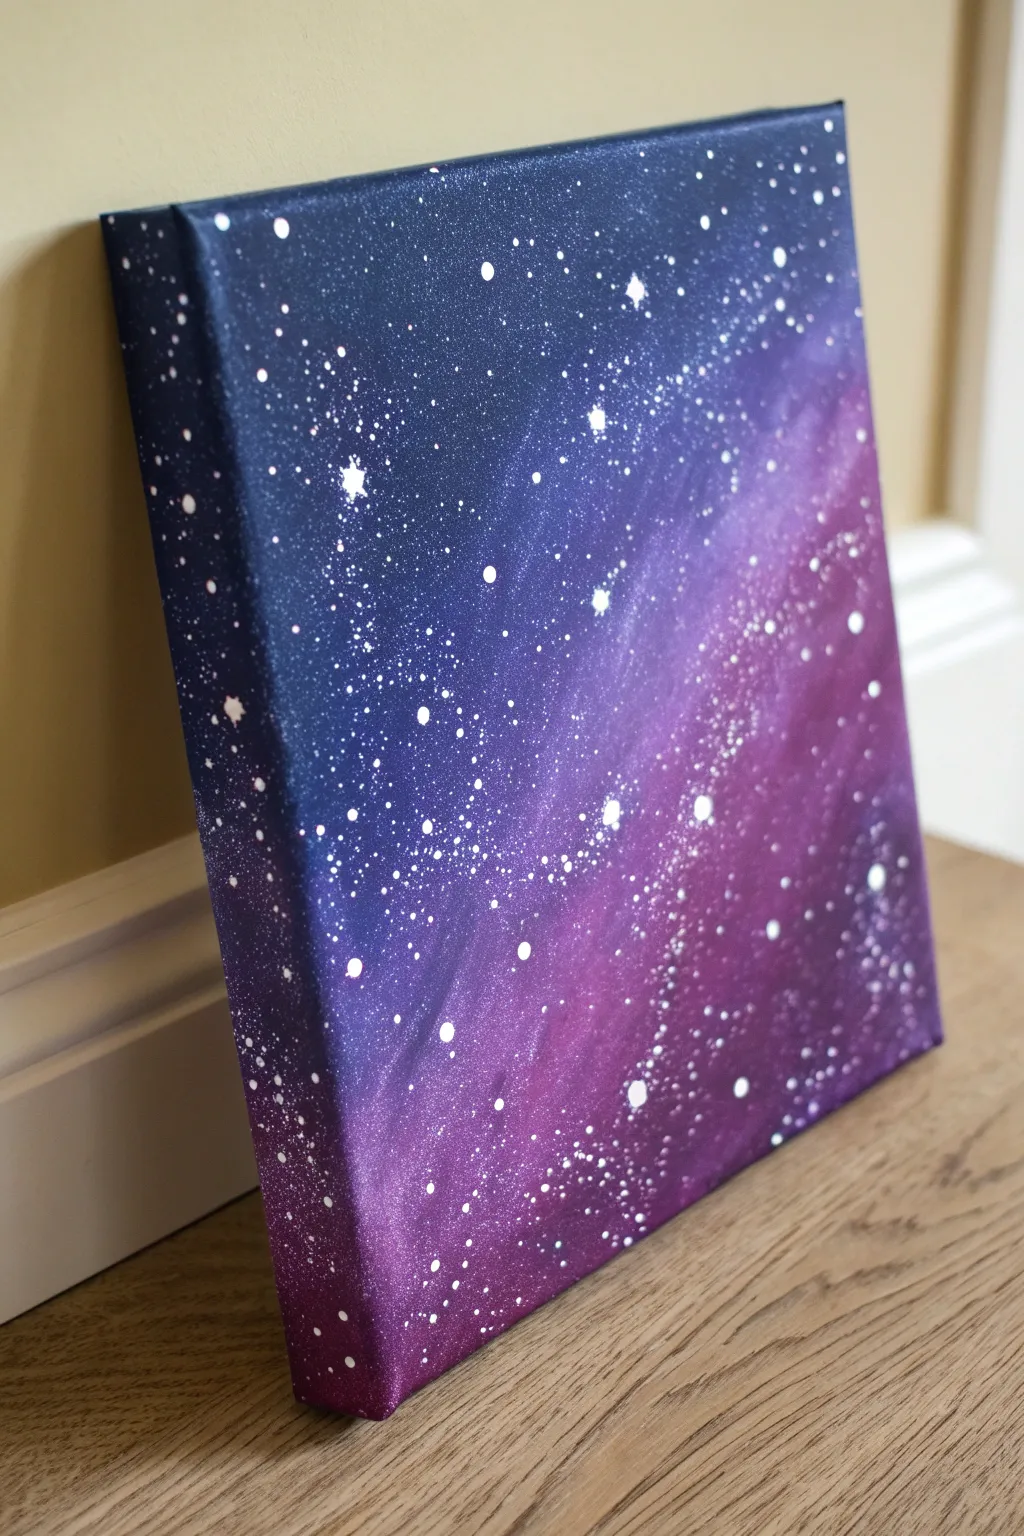
Capture the ethereal beauty of deep space with this moody, vibrant galaxy painting. Using simple blending techniques and splatter effects, you’ll transform a blank canvas into a stunning nebula of navy blues and rich purples.
Step-by-Step Guide
Materials
- Stretched canvas (gallery profile recommended)
- Acrylic paints (Phthalo Blue, Dioxazine Purple, Magenta, Black, Titanium White)
- Wide flat paintbrush (1-2 inch)
- Medium filbert brush or sponge
- Old toothbrush or stiff bristle brush
- Water cup
- Palette or paper plate
- Paper towels
- Plastic drop cloth or newspaper (for splatter protection)
Step 1: Setting the Background
-
Prepare the Base:
Begin by squeezing out generous amounts of your darkest blue (Phthalo Blue mixed with a tiny drop of Black) and your purple onto the palette. You want the paint to stay wet for blending, so don’t be shy with the amount. -
Apply the Darkest Corners:
Using the wide flat brush, paint the top left corner and the very bottom left edge with the dark navy mixture. Paint in long, diagonal strokes. -
Paint the Deep Purple:
Without cleaning your brush fully, pick up the Dioxazine Purple. Apply this to the bottom right corner and merge it upwards into the middle of the canvas. -
Create the Transition:
While the blue and purple sections are still wet, use your brush to gently stroke the area where they meet. Use light back-and-forth diagonal motions to blur the line so there is no harsh border. -
Paint the Edges:
Don’t forget the sides of the canvas! Wrap the dark blue and purple around the thick edges to match the front surface. This gives the piece a professional, finished look without needing a frame.
Too Many Blobs?
If you accidentally splatter a large blob of paint, don’t wipe it! Wait for it to dry completely, then paint over it with the background color before trying again.
Step 2: Creating the Nebula
-
Mix the Magenta Highlight:
Clean your brush. Mix a little Magenta with the purple to create a vibrant violet hue. -
Add the Color Streak:
Paint a diagonal swath of this lighter violet across the middle right section, cutting through the dark purple background. -
Blend the Nebula:
Using a clean, slightly damp filbert brush or sponge, gently tap or soft-blend the edges of this magenta streak into the surrounding dark purple. You want a soft, smoky effect rather than a solid stripe. -
Deepen the Contrast:
If your darks have dried too light, go back in with a second coat of navy blue in the top left corner to ensure maximum contrast against the stars later. -
Let it Dry:
Allow the entire background to dry completely. This is crucial; if it’s wet, the white stars will turn pink or light blue instead of staying crisp white.
Smoother Blends
Work quickly! Acrylics dry fast. If the paint gets tacky, lightly mist the canvas with water to keep the colors workable for smooth transitions.
Step 3: The Starfield
-
Prepare Splatter Paint:
Mix a small amount of Titanium White with water until it reaches the consistency of heavy cream or melted ice cream. It needs to be fluid but not transparent. -
Test the Splatter:
Load an old toothbrush with the thinned white paint. Test it on a piece of paper first by running your thumb across the bristles to flick the paint forward. -
Create Distant Stars:
Hold the toothbrush about 12 inches away from the canvas. Flick the bristles to create a fine mist of tiny stars across the entire painting, focusing slightly more density on the lighter magenta nebula area. -
Add Medium Stars:
Move the toothbrush closer to the canvas (about 6 inches) and give a few firmer flicks. This will create slightly larger, more distinct dots. -
Hand-Paint Major Stars:
Dip the handle end of a small paintbrush into pure, unthinned white paint. Dot a few specific stars onto the canvas to act as focal points. -
Create a Twinkle:
For the largest stars you just dotted, use a very fine liner brush to drag tiny lines outward from the center (up, down, left, right) to create a twinkling cross shape. -
Final Edge Check:
Ensure your splatter continued onto the painted sides of the canvas for continuity.
Now you have a piece of the universe hanging on your wall

PENCIL GUIDE
Understanding Pencil Grades from H to B
From first sketch to finished drawing — learn pencil grades, line control, and shading techniques.
Explore the Full Guide
Bold Black Silhouette Trees on a Colorful Canvas

Capture the serene beauty of twilight with this striking gradient landscape, featuring bold black pine trees against a vibrant sky. The contrast between the soft, blended background and the crisp silhouette foreground creates impressive depth that looks professional but is surprisingly beginner-friendly.
Step-by-Step
Materials
- Square stretched canvas (e.g., 10×10 or 12×12 inches)
- Acrylic paints: Magenta/Dark Pink, Orange, Teal/Turquoise, Titanium White, Mars Black
- Large flat brush (1-inch width)
- Medium flat brush
- Small round detail brush or liner brush
- Fan brush (optional, for texture)
- Palette or paper plate
- Cup of water and paper towels
Step 1: Creating the Gradient Sky
-
Prepare the canvas:
Start with a clean, dry canvas. Squeeze out generous amounts of your magenta, orange, white, and teal paints onto your palette. You want the colors ready to go so you can blend while the paint is still wet. -
Paint the top band:
Using your large flat brush, apply a bold horizontal strip of the dark magenta across the very top 3-4 inches of the canvas. Use confident side-to-side strokes to get smooth coverage. -
Start the transition:
Without cleaning your brush fully, pick up some orange paint. Blend this directly below the magenta, overlapping the two colors slightly. The residue on the brush will help create a natural reddish-orange transition zone. -
Blend downward:
Rinse your brush thoroughly. Mix a bit of orange with a touch of white to soften it. Apply this peach-like color below the pure orange band, working your way down to just below the middle of the canvas. -
Introduce the mist:
Clean your brush again. Now, pick up the teal paint and mix it with plenty of white to create a very pale, misty blue-green. Apply this at the bottom third of the canvas. -
Finalize the gradient:
While the paint is still slightly tacky, use long, smooth horizontal brush strokes from the very top to the bottom to smooth out any harsh lines between the colors. Wipe your brush on a paper towel between sections if it picks up too much dark pigment. -
Dry thoroughly:
This step is crucial. Let the background dry completely—for at least 20-30 minutes—before moving to the next phase to ensure the black paint stays crisp.
Gradient Not Smooth?
If your sky colors aren’t blending well, your acrylics might be drying too fast. Mist a tiny bit of water onto the canvas or use a slow-drying medium to keep the paint workable longer.
Step 2: Painting the Distant Forest
-
Mix a muted tone:
To create depth, we need a ‘ghost’ forest layer in the background. Mix a small amount of black into your teal/white mixture to make a grayish-blue-green color. -
Paint distant shapes:
Using a smaller flat brush, dab in varying heights of tree shapes along the bottom band of the canvas. These should look hazy and indistinct. -
Soften the edges:
You don’t want sharp details here. If the edges look too crisp, dry-brush a tiny bit of the background mist color over them to make them recede into the distance.
Step 3: Adding the Foreground Silhouettes
-
Establish the trunks:
Switch to your black paint and a small round brush. Decide where your main trees will stand. Paint thin, vertical lines for the trunks, varying their heights and spacing. I usually like to place the tallest tree slightly off-center for better composition. -
Start the branches:
Starting at the very top of your first trunk, make tiny, short dabbing strokes to create the pointed tip of the pine tree. -
Widen as you descend:
Work your way down the trunk, making your horizontal strokes slightly wider as you go. Use a zig-zag motion or tapping motion to mimic pine needles. -
Create asymmetry:
Nature isn’t perfect, so don’t make the branches perfectly symmetrical. extend some branches further out on one side than the other to make the tree look realistic. -
Fill the bottom:
As you reach the bottom of the canvas, the trees should be dense and dark. Let the branches overlap with neighboring trees to create a solid forest floor silhouette. -
Add variance:
Paint the smaller trees in between the large ones using the same technique. Vary the pressure on your brush to get different textures. -
Paint the ground:
Use the black paint to fill in the very bottom edge of the canvas completely solid, grounding your trees so they aren’t floating. -
Final touches:
Step back and look at your painting. If any branches look too sparse, go back in with the tip of your small brush and add tiny stray branches or ‘leaves’ to fill the gaps.
Starry Night Twist
Before painting the black trees, use an old toothbrush dipped in watered-down white paint to flick tiny ‘stars’ across the purple and pink sections of the sky for a magical galaxy effect.
Hang your finished canvas where it can catch the light and show off those vibrant sunset hues
Cute Animal Face Mini Canvas Painting
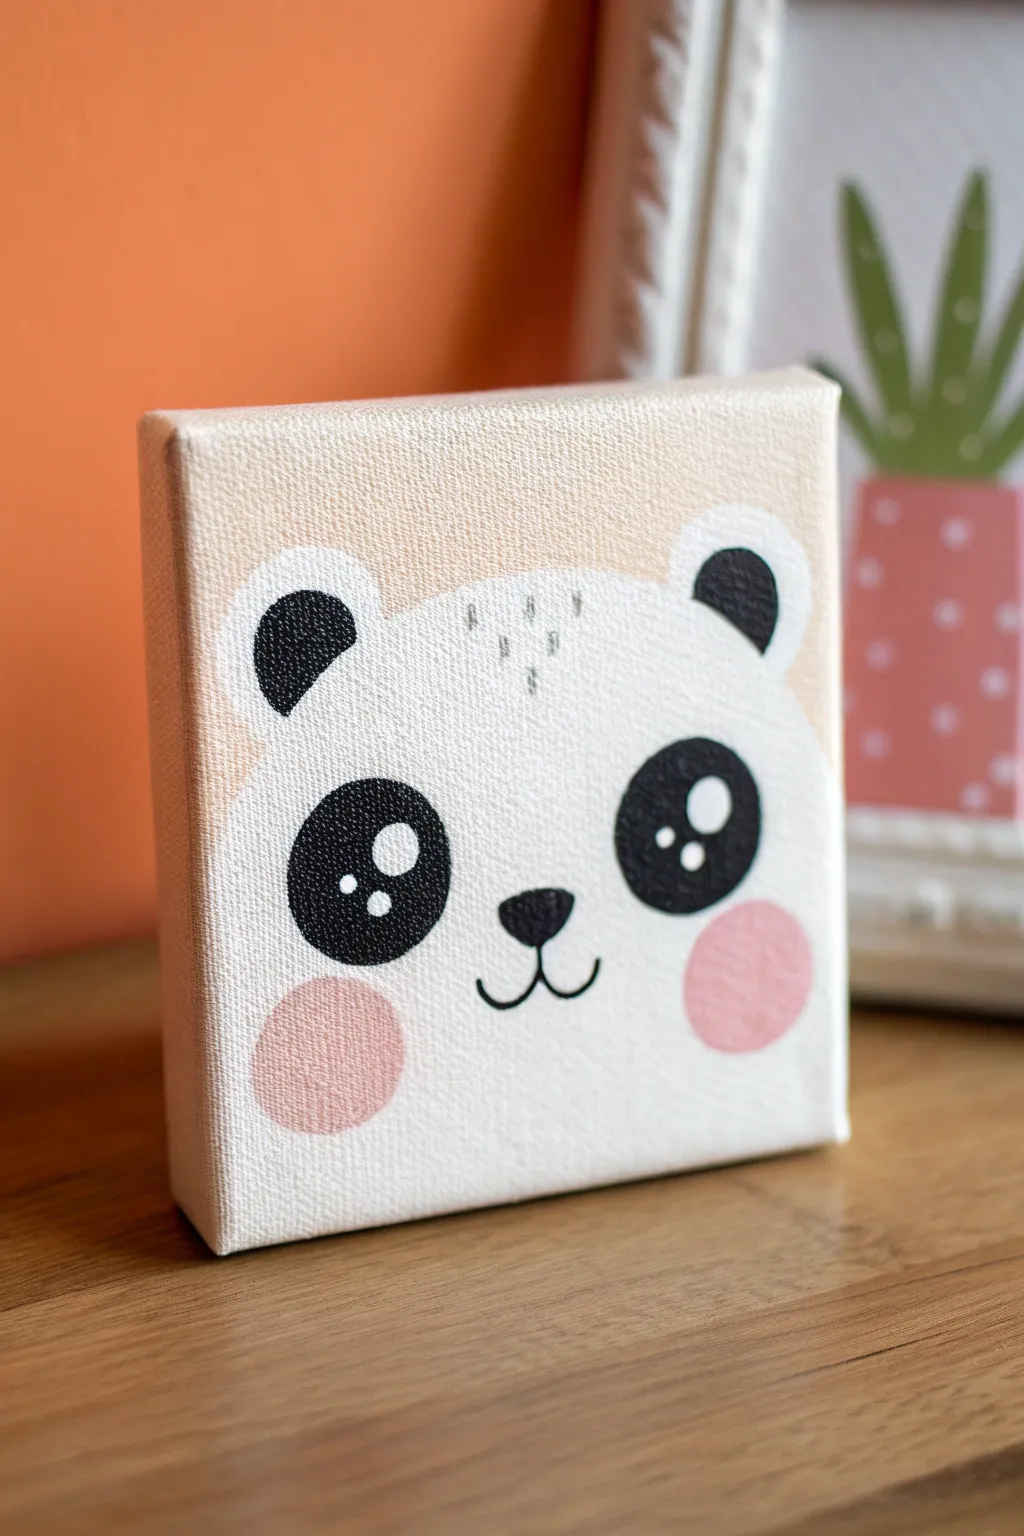
This adorable mini canvas project features a minimalist panda face with sweet rosy cheeks that is impossible to resist. Using simple shapes and a soft color palette, you’ll transform a tiny square of canvas into a charming piece of nursery or desk decor.
How-To Guide
Materials
- Mini square canvas (approx. 4×4 or 6×6 inches)
- Acrylic paints: Titanium White, Mars Black, Beige/Cream, and Pale Pink
- Flat brush (medium size for background)
- Round brush (size 4 for shapes)
- Fine detail brush (size 0 or 00 for lines)
- Pencil and eraser
- Palette or paper plate
- Water cup and paper towels
Step 1: Setting the Scene
-
Base coat application:
Begin by covering the entire front and sides of your mini canvas with a solid coat of beige or cream paint. This warm neutral tone provides a cozy backdrop for the white panda face. -
Allow to dry:
Let the background layer dry completely. If the canvas texture is still showing through too much, apply a second coat for full opacity. -
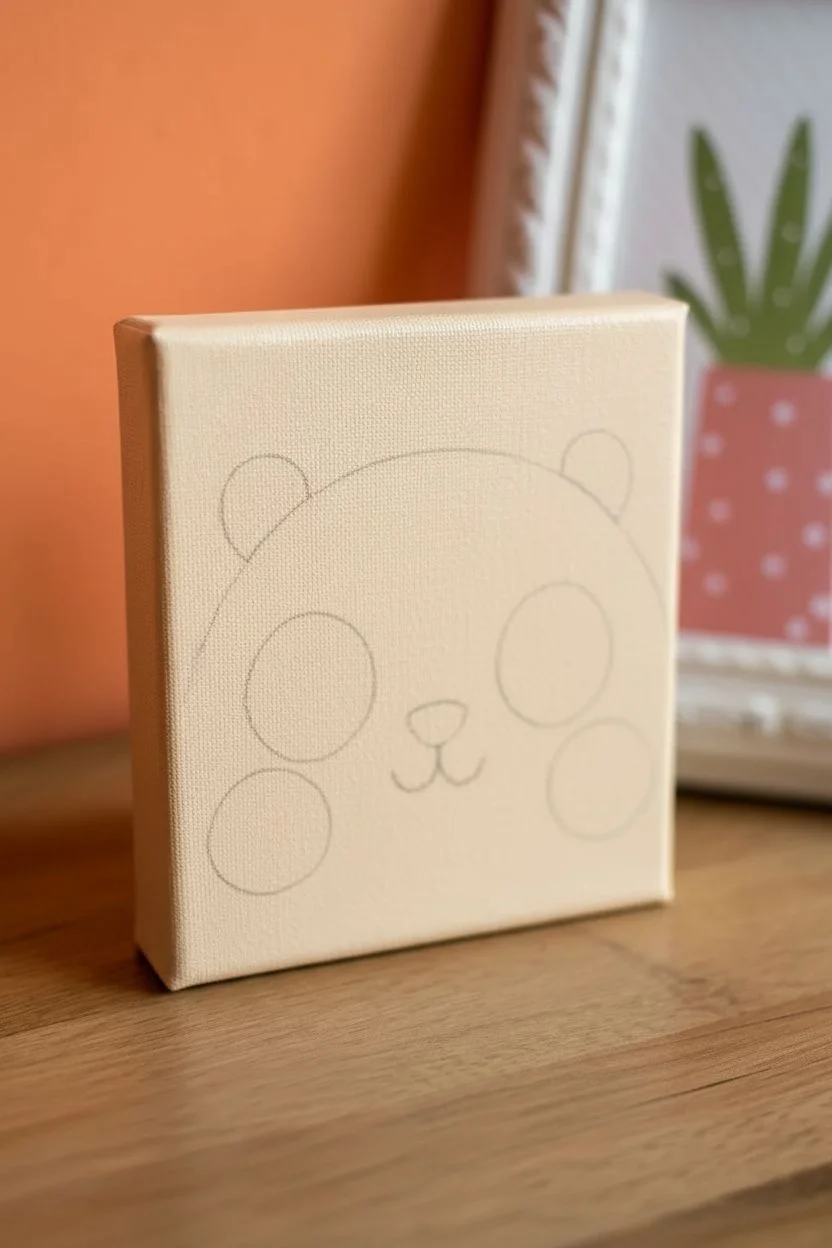
Drafting the design:
Using a pencil, very lightly sketch the outline of the panda’s head. Aim for a wide, flattened oval shape that starts from the bottom edge and curves up, leaving the top corners of the beige background visible. -
Marking features:
Sketch two semi-circles for ears on top of the head. Then, mark position circles for the eyes, the rosy cheeks, and the small snout area to ensure symmetry before painting.
Step 2: Building the Face
-
Painting the head:
Fill in your large head shape and the outer ear shapes with Titanium White. Use your round brush to get smooth curved edges against the beige background. -
Layering white:
White acrylic often needs help covering darker colors or raw canvas. Apply a second or third thin coat of white until the result is bright and consistent. -
Adding the cheeks:
Mix a soft pale pink or use a pre-mixed shade. Paint two perfect circles on the lower sides of the face for the blush. I like to keep these quite large to maximize the cuteness factor. -
Inner ear details:
Using black paint, fill in the smaller semi-circles inside the white ear shapes. Leave a rim of white around the outside edge to define the ear.
Circle Mastery
Struggling to paint perfect circles for the eyes or cheeks? Find a bottle cap or large marker lid of the right size, dip the rim in paint, and stamp the outline lightly.
Step 3: Bringing It to Life
-
Painting the eyes:
Switch to black paint and fill in the large oval eye shapes you sketched earlier. Ensure the edges are crisp and the ovals are tilted slightly inward toward the nose. -
Adding catchlights:
Once the black eye paint is tacky or dry, dip the handle end of a brush into white paint. Dot a large highlight in the upper right of each eye. -
Secondary highlights:
Using a smaller tool or a toothpick, add a second, tinier white dot diagonally below the first one for extra sparkle. -
The nose:
Paint a small, upside-down rounded triangle for the nose using black paint right between the eyes, just slightly lower. -
The mouth:
With your finest detail brush and thinned black paint (add a drop of water to improve flow), draw a small vertical line down from the nose. -
Curving the smile:
From the bottom of that vertical line, sweep two small curves outward to the left and right to create the classic ‘w’ mouth shape. -
Fur texture:
Using a very dry brush with a tiny amount of grey or thinned black paint, make three or four tiny, dashed vertical marks on the forehead area to suggest fur texture. -
Final touches:
Check your edges. If the beige background needs a touch-up where it meets the white fur, carefully tidy it up now. -
Varnish:
Once completely dry (wait at least an hour), apply a coat of matte spray varnish to protect your mini masterpiece.
Make it a Trio
Create a gallery wall series by painting a fox on an orange background and a bear on blue, keeping the style consistent.
Now you have a sweet little companion to brighten up any small corner of your home


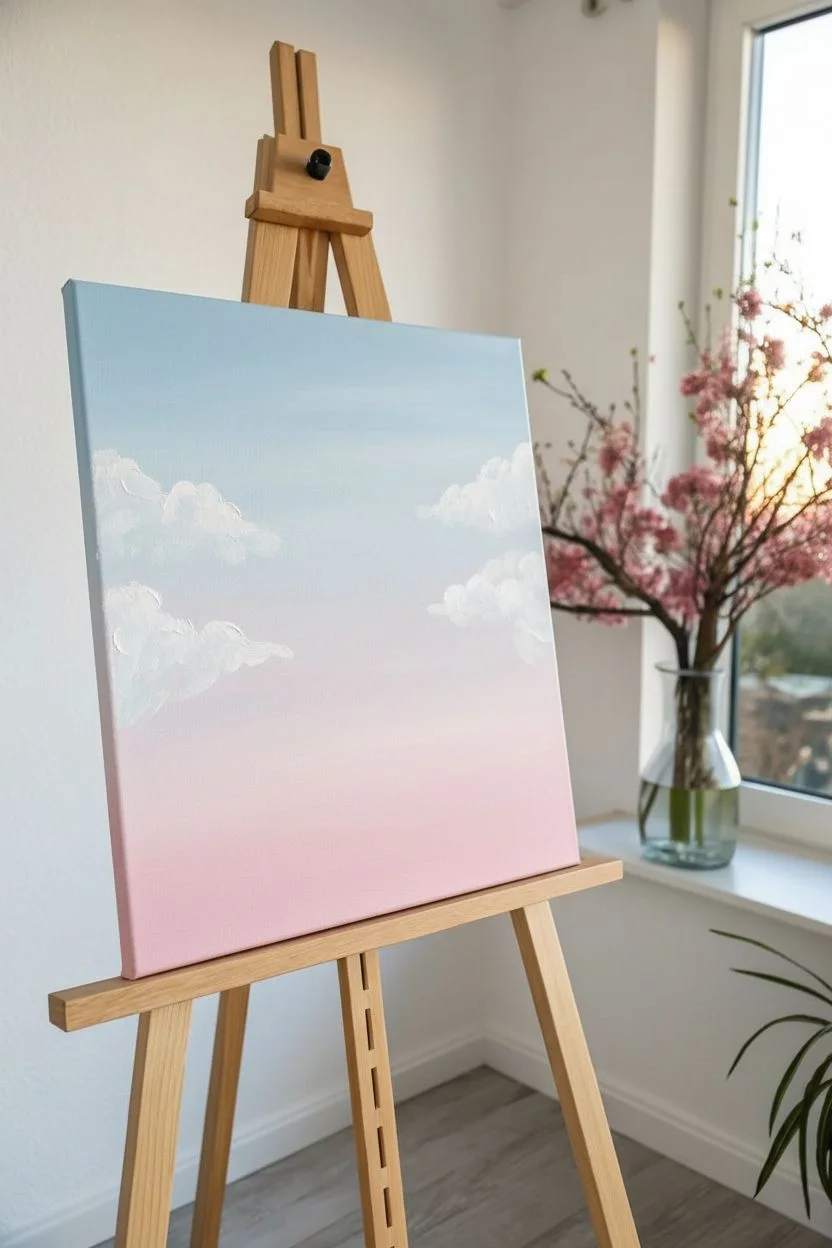
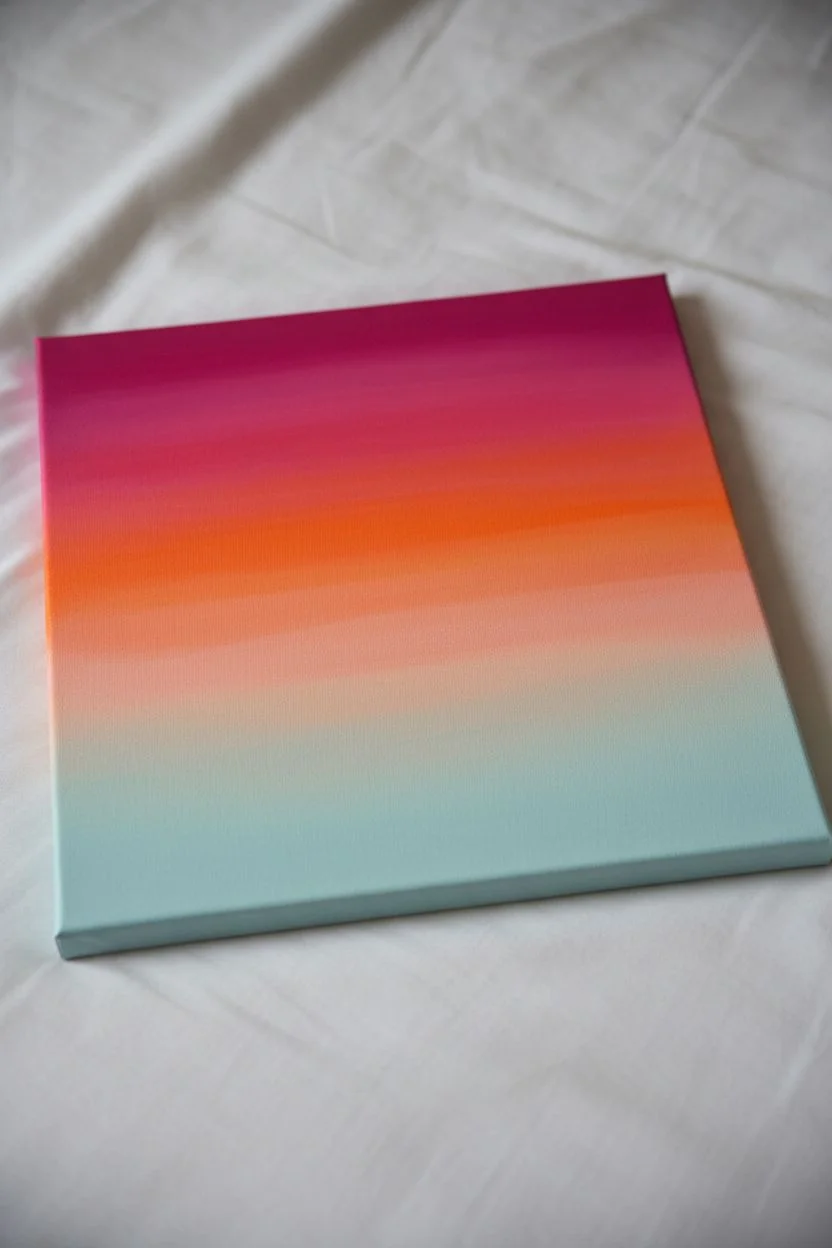
Abstract Color Washes on Canvas Like a Dreamy Sky
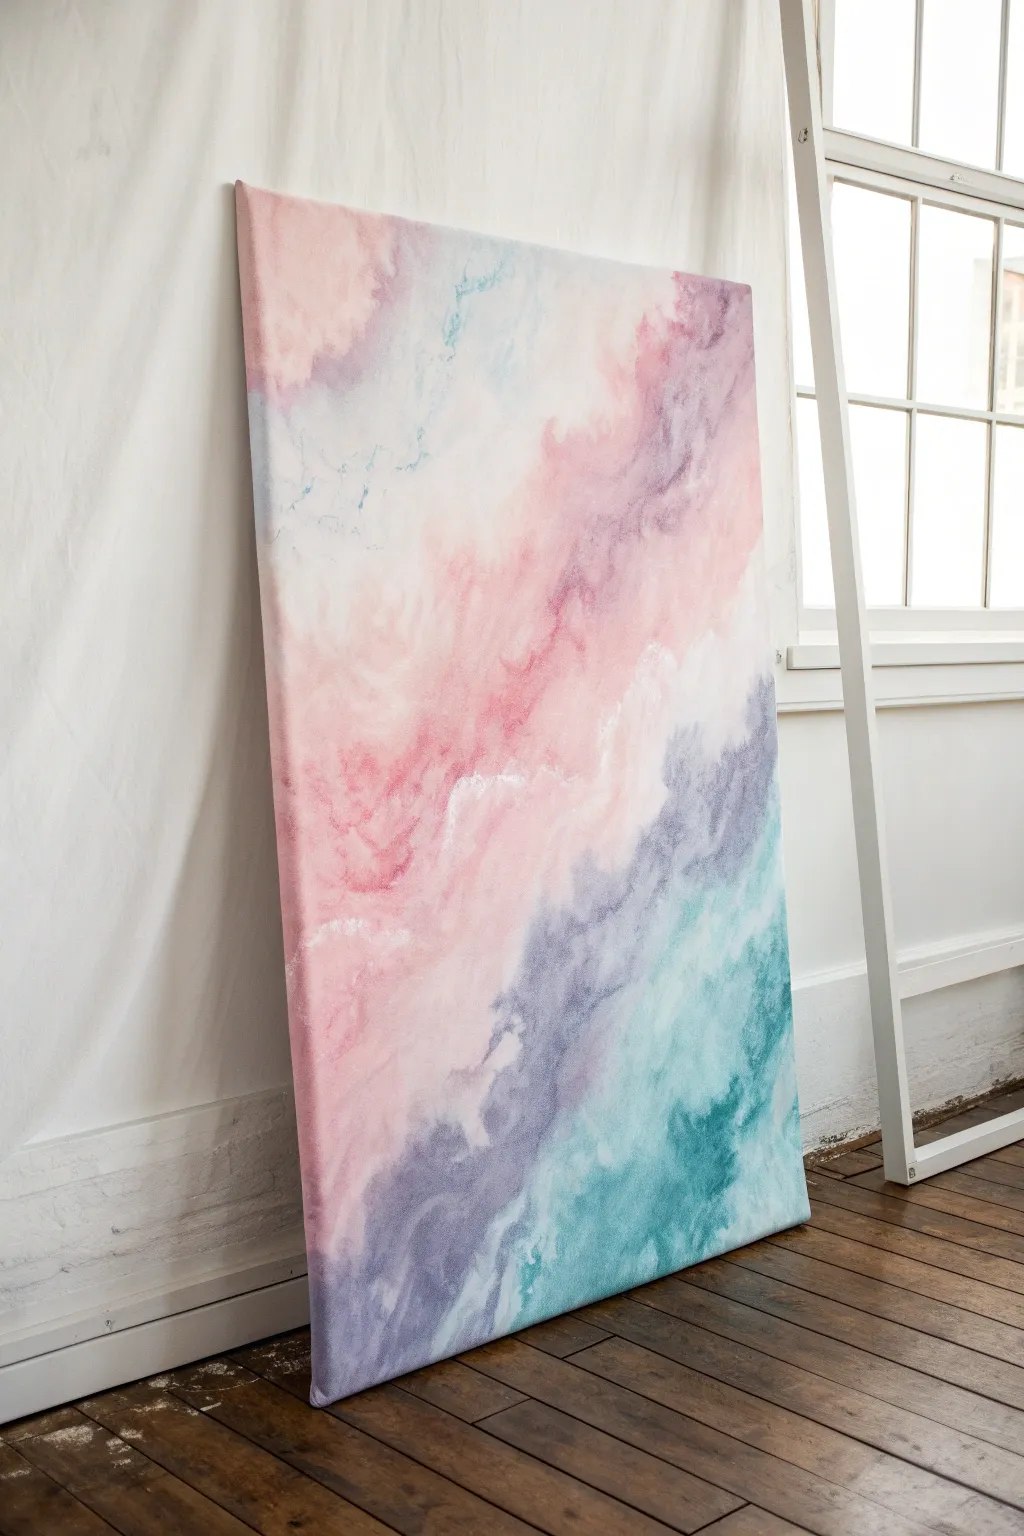
This dreamy canvas features soft, rolling washes of pink, lavender, and teal that mimic a fantastical sky. The technique uses diluted acrylics to create fluid, cloud-like transitions that feel gentle and atmospheric.
Step-by-Step Guide
Materials
- Large stretched canvas (24×36 or larger recommended)
- Titanium White acrylic paint
- Magenta or rose pink acrylic paint
- Violet or purple acrylic paint
- Teal or turquoise acrylic paint
- Acrylic flow improver or pouring medium
- Water spray bottle (fine mist)
- Wide flat wash brush (2-3 inches)
- Medium round brush
- Plastic cups for mixing paints
- Paper towels or soft rag
- Drop cloth
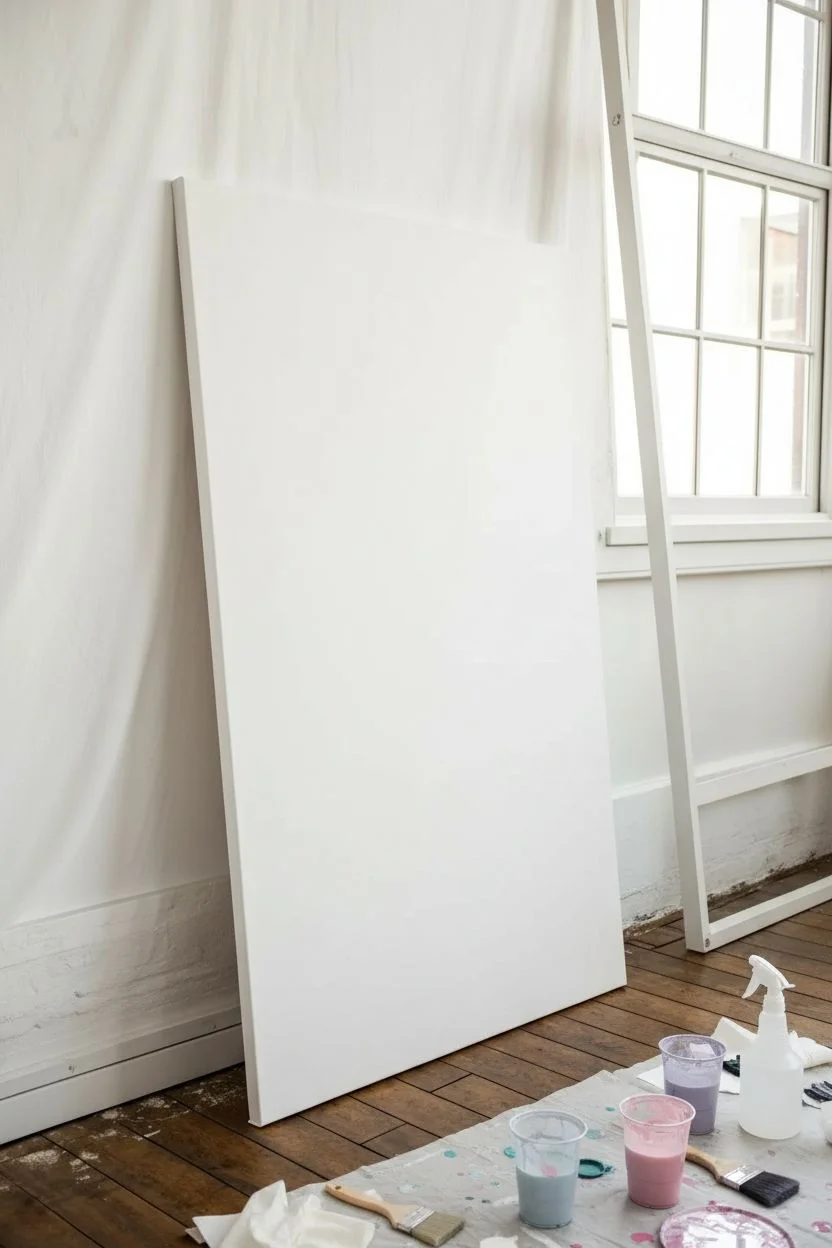
Step 1: Preparation and Base Layer
-
Prepare your workspace:
Lay down your drop cloth to protect the floor or table. This project involves fluid paint, so ensure your surface is level if you are working flat, or protect the wall and floor if working vertically. -
Prime the canvas:
Even if your canvas is pre-primed, apply a fresh, solid coat of Titanium White over the entire surface. This ensures a consistent, bright background that will help your translucent colors glow. -
Mix your washes:
In separate cups, mix your pink, purple, and teal paints with water and a few drops of flow improver. You want a consistency similar to heavy cream or melted ice cream—fluid enough to move but pigmented enough to show color. -
Create a white wash:
Mix a larger batch of white paint with water and flow improver. This will be used to soften edges and blend colors on the canvas.
Too much water?
If puddies form, don’t wipe them! Use the corner of a dry paper towel to gently wick away excess liquid without disturbing the pigment underneath.
Step 2: Applying the Colors
-
Start with the teal corner:
Begin at the bottom right corner with your teal mixture. Apply the paint in a diagonal organic shape, leaving the edges rough and uneven rather than straight. -
Introduce the purple transition:
While the teal is still wet, pick up your purple mixture. Paint diagonally adjacent to the teal, allowing the colors to touch and mingle slightly. I like to use a clean, damp brush to gently feather the border where they meet. -
Add the pink focal area:
Move towards the center and upper left of the canvas with the pink mixture. This should preserve the diagonal flow. Apply it generously in the middle section, letting it dominate the central visual space. -
Soften edges with white:
Dip your wide brush into the white wash mixture. Brush over the areas where the colored sections meet the empty white canvas at the top left, blending the color out until it fades seamlessly into the background.
Add some sparkle
Mix a tiny amount of iridescent medium or pearl white paint into your final white wash for a shimmering finish that catches natural light.
Step 3: Refining and Texturing
-
Mist and manipulate:
Take your water spray bottle and gently mist the areas where colors overlap. Gravity will encourage slight drips and organic bleeding, enhancing the watercolor effect. -
Blot for cloud texture:
Crumple a paper towel and gently blot at the wet paint in the pink and purple sections. Lift off small amounts of pigment to reveal the white beneath, creating soft, cloud-like highlights. -
Intensify shadows:
Go back in with slightly less diluted purple and teal paint. Dab these stronger colors into the deeper parts of the clouds (like the bottom edge of the purple band) to add depth and volume. -
Create vein-like details:
Using a smaller round brush dipped in diluted teal or purple, gently drag thin, wandering lines through the lighter areas. These mimic the delicate fracturing sometimes seen in marble or storm clouds. -
Blend the veins:
Before the fine lines dry completely, lightly pat them with a dry brush or rag to soften them, ensuring they look like part of the vapor rather than hard stripes. -
Check the composition:
Step back and look at the overall balance. If the transition between pink and purple feels too harsh, apply a thin glaze of the white wash over the harsh line to unify them. -
Final misting:
Give one last very light mist to any areas that look too ‘painted’ or brush-stroked, encouraging the pigments to settle naturally. -
Let it dry completely:
Allow the painting to dry undisturbed for at least 24 hours. Because of the water content, drying flat is often safer to prevent unwanted heavy drips.
Hang your new artwork near a window where natural light can enhance its dreamy translucency
Tape-Resist Geometric Canvas Painting
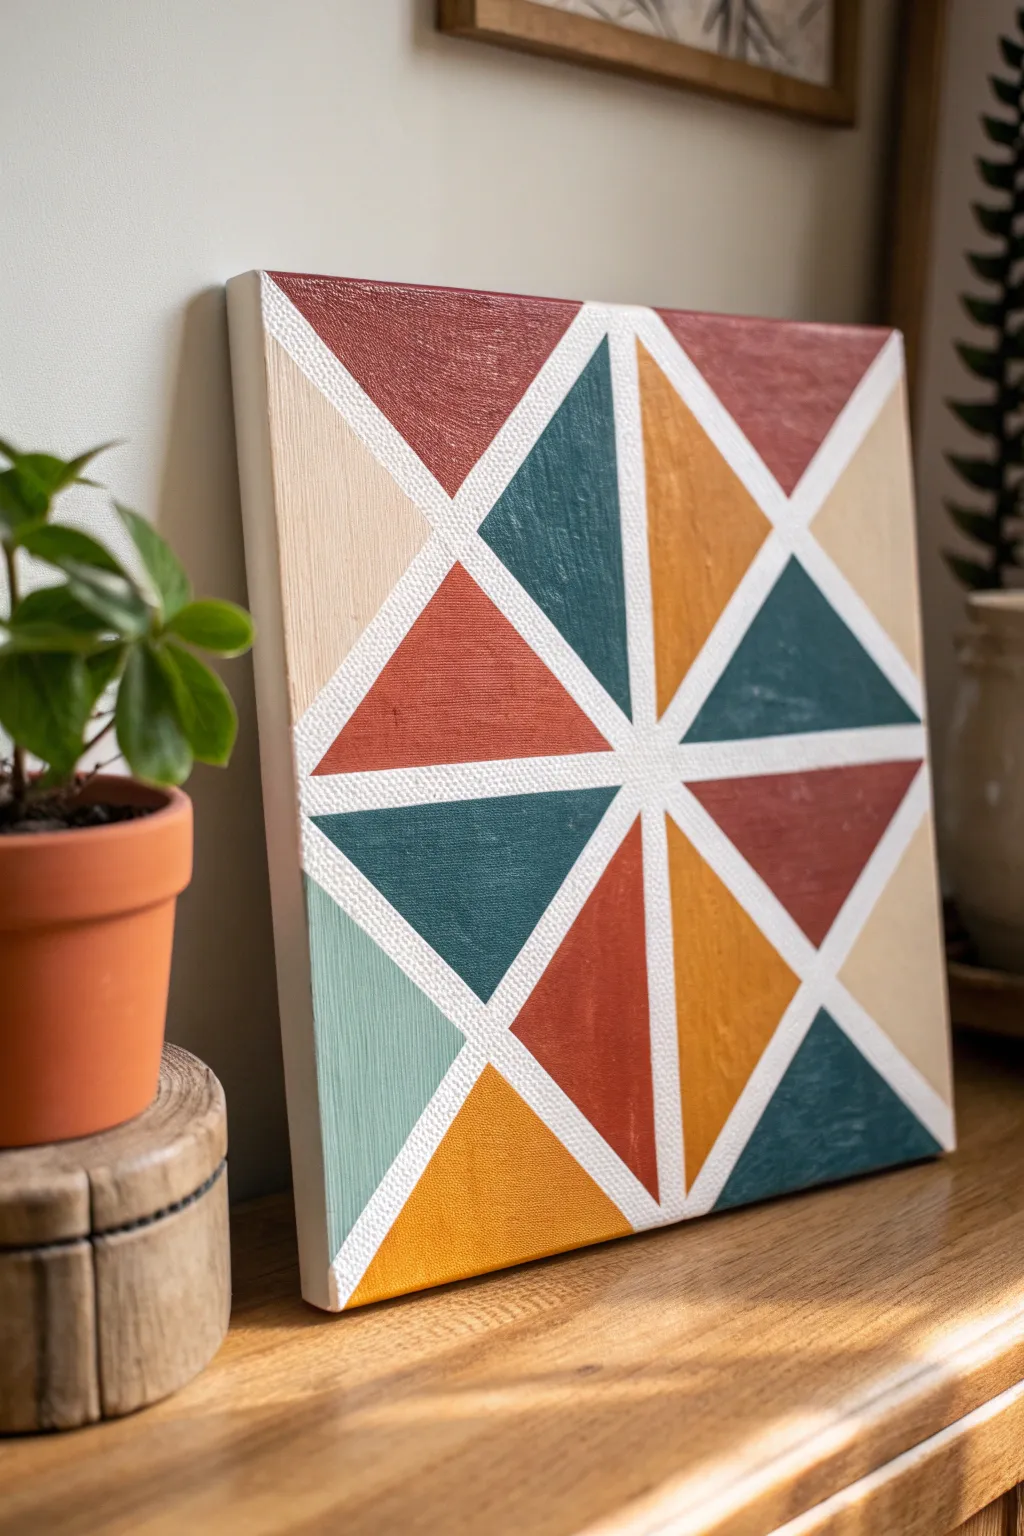
Achieve crisp lines and a trendy aesthetic with this approachable tape-resist canvas project. The warmth of burnt orange, mustard yellow, and teal combined with sharp white negative space creates a striking modern piece perfect for any shelf.
How-To Guide
Materials
- Square stretched canvas (approx. 12×12 inches)
- Painter’s tape or masking tape (approx. 0.5 inch width)
- Acrylic paints (Burnt Sienna/Rust, Mustard Yellow, Deep Teal, Beige/Cream, Pale Sage Green)
- Flat paint brushes (various sizes)
- White acrylic paint (optional, for touch-ups)
- Ruler
- Pencil
- Palette or paper plate
- Cup of water and paper towels
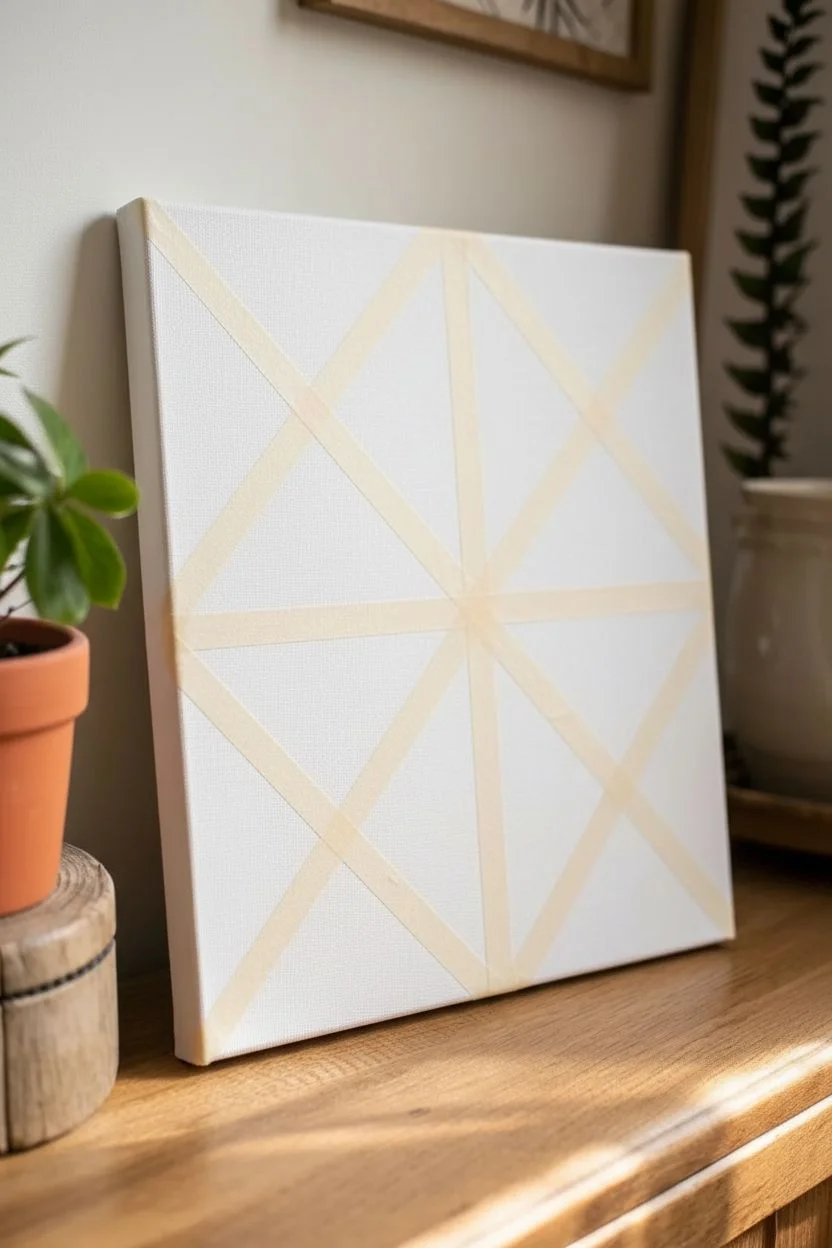
Step 1: Planning and Taping
-
Prime the Surface:
Even if your canvas is pre-primed, giving it a quick coat of white acrylic paint ensures the base is uniform and bright. Let this layer dry completely before moving on. -
Mark the Center:
Using your ruler and pencil, lightly find the exact center of the square canvas. Draw a very faint vertical line and a horizontal line through the center to act as your guides. -
Apply the Main Cross:
Place a strip of painter’s tape directly over your vertical pencil line, centering the tape on the mark. Repeat this for the horizontal line. This creates four equal quadrants. -
Add Diagonal Lines:
Run two long strips of tape diagonally from corner to corner, intersecting perfectly in the middle. You should now have a starburst pattern dividing the canvas into eight large triangles. -
Create Inner Triangles:
To create the specific pattern seen in the image, add additional tape strips that connect the midpoints of the outer edges to the center. This subdivides the larger sections into two distinct triangles each. -
Seal the Edges:
Run a fingernail or the edge of a credit card firmly along every edge of the tape. This is a crucial step to prevent paint from bleeding underneath the tape and ruining your crisp lines.
Bleeding Lines?
Before applying color, paint a thin layer of white (or your base color) over the tape edges. This seals the tape, so if anything bleeds, it’s clear paint, keeping the lines sharp.
Step 2: Painting the Sections
-
Plan Your Palette:
Squeeze your paint colors onto the palette. I find it helpful to look at the reference photo to map out which triangle gets which color to ensure a balanced composition. -
Start with Teal:
Identify the four sections designated for the deep teal color. Using a flat brush, fill these triangles, stroking away from the tape edges toward the center of the shape to minimize seep-through. -
Apply Burnt Sienna:
Wash your brush thoroughly and move on to the rust-colored triangles. Apply an even coat, ensuring you cover the canvas texture fully. -
Fill in Mustard Tones:
Paint the mustard yellow sections. Since yellow can sometimes be translucent, you might need a slightly thicker application here. -
Add Neutral Touches:
Paint the remaining sections with your beige and pale sage green colors. These lighter tones balance the heavier, darker colors. -
Paint the Canvas Sides:
Don’t forget the edges! Extend the color of each adjacent triangle down the side of the canvas for a professional, gallery-wrapped look. -
Second Coat:
Once the first layer is touch-dry, inspect your work. Apply a second coat to any colors that look streaky or uneven to get that solid, opaque finish.
Add Texture
Mix a small amount of baking soda or modeling paste into your acrylic paints. This adds a matte, slightly gritty texture that mimics the look of raw pottery or plaster.
Step 3: The Reveal
-
Timing is Key:
Wait until the paint is mostly dry but still slightly tacky to the touch. If the paint is fully hard, it might chip when the tape is pulled. -
Peel the Tape:
Select an end of the tape and peel it back slowly at a sharp 45-degree angle. Proceed gently to reveal the crisp white lines underneath. -
Fix Imperfections:
If a little paint bled through, don’t worry. Use a small detail brush and white paint to tidy up the lines once the colors are fully dry.
Now you have a striking piece of wall decor that looks far more complex than it actually was to create
Palette Knife Texture Peaks on Canvas
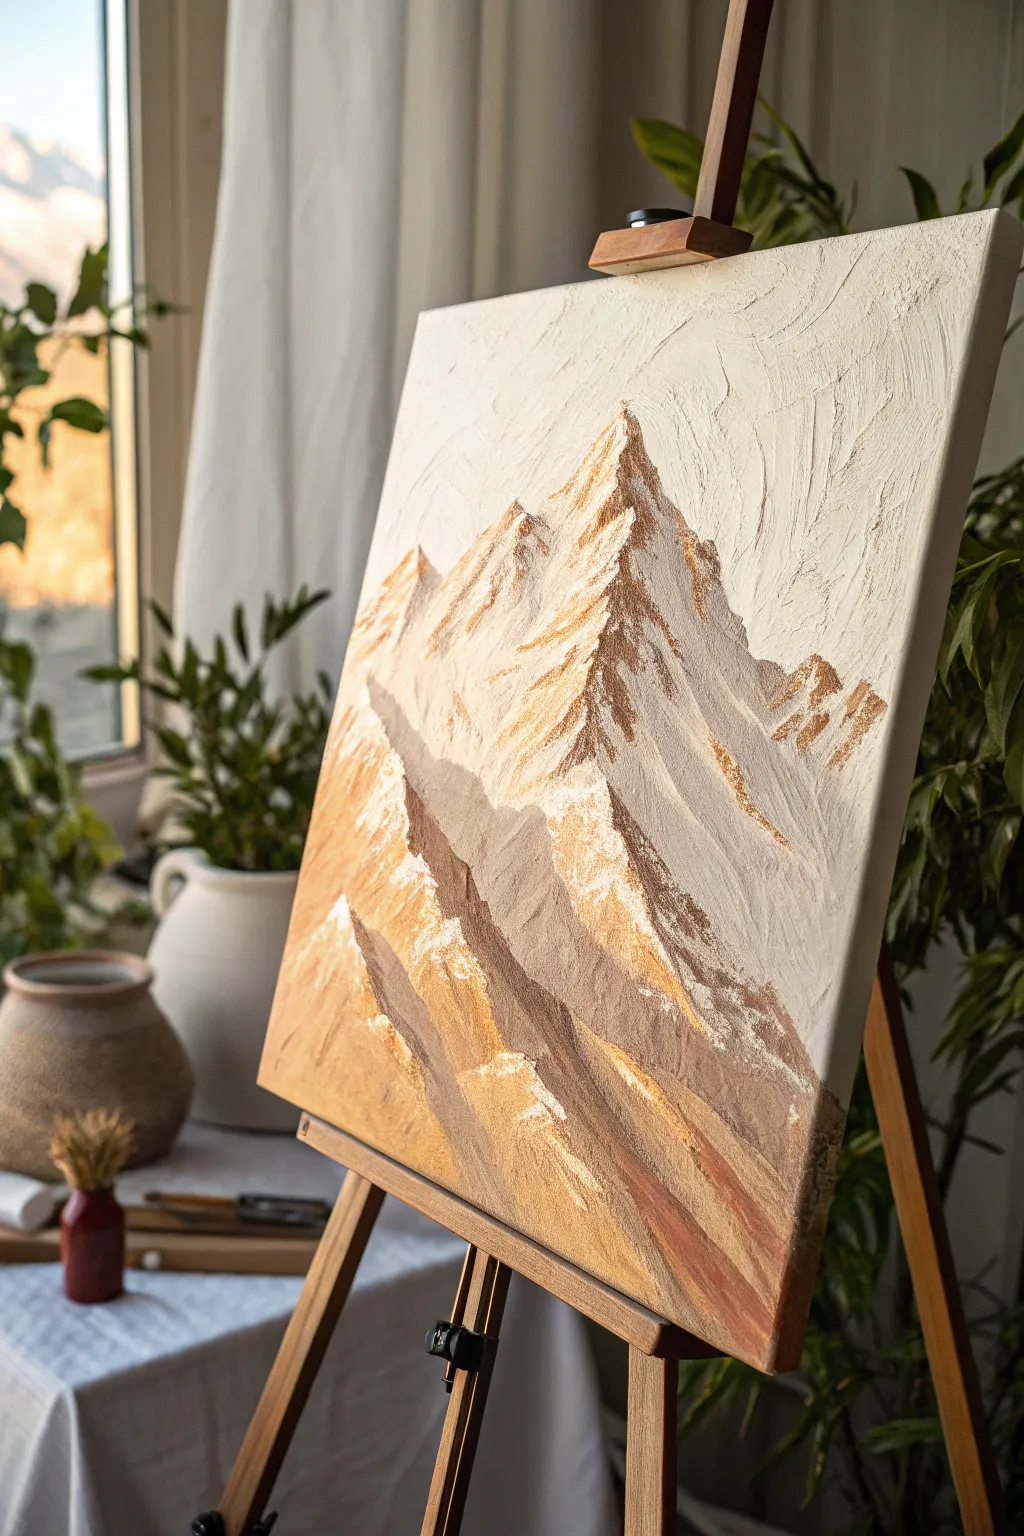

Create a stunning, three-dimensional mountain landscape using heavy texture paste and warm, metallic tones. This project focuses on building dramatic peaks directly on the canvas, capturing the rugged beauty of high-altitude terrain with rich golds and earthy browns.
Detailed Instructions
Materials
- Stretched canvas (rectangular or square)
- White modeling paste or texture medium
- Heavy body acrylic paints (Titanium White, Burnt Umber, Raw Sienna, Gold Metallic)
- Set of palette knives (including a large diamond shape and a thin trowel)
- Gesso (optional, for priming)
- Pencil for sketching
- Spray bottle with water (optional)
Step 1: Building the Foundation
-
Surface Preparation:
Ensure your stretched canvas is clean and taut. If the surface feels too smooth, apply a thin coat of gesso to give it some ‘tooth,’ which helps the heavy modeling paste adhere better. Let this base layer dry completely before moving on. -
Outlining the Ranges:
Using a light pencil, sketch the outline of your mountain ranges. Don’t worry about tiny details; just map out three distinct ridge lines. Start with a large, dominant peak slightly off-center, a secondary range in the middle ground, and a lower, broader range in the foreground. -
Applying the Texture Base:
Scoop a generous amount of white modeling paste onto the canvas using a large palette knife. Focus on the main mountain peak first. Spread the paste thickest at the ridge lines and scrape it thinner as you move down the slopes. -
Sculpting the Ridges:
With the edge of your palette knife, carve into the wet paste to create the sharp spines of the mountains. Pull the knife downward and outward in jagged motions to mimic the look of rock faces and eroded slopes. I like to twist my wrist slightly here to create random, organic breaks in the texture. -
Creating Texture Contrast:
For the shadowed sides of the mountains, use the flat side of the knife to create smoother, but still uneven, planes. For the sun-hit faces, dap and pull the knife away to create rough, craggy peaks that will catch the light later. -
Layering the Foreground:
Repeat the texturing process for the lower mountain ranges. Ensure the texture here slightly overlaps the base of the mountains behind them to create a sense of depth and distance. -
The Great Dry:
This step requires patience. Allow the modeling paste to dry completely. Since the application is thick, this could take 24 hours. The paste must be rock hard before any paint touches it to prevent cracking.
Clean Knife, Sharp Lines
Wipe your palette knife clean with a paper towel between every single color application. Dried acrylic builds up fast and destroys the fine, sharp edges needed for crisp mountain ridges.
Step 2: Painting the Landscape
-
Base Coat Application:
Mix a large amount of Titanium White with a tiny touch of Raw Sienna to create a warm, creamy off-white. Apply this over the entire textured area using a wide brush, working the paint into all the deep crevices of the dried paste. -
Shadow Mapping:
On your palette, mix Burnt Umber with a little water to create a semi-transparent glaze. Identify the ‘shadow side’ of your mountains (usually the right side of the peaks). Lightly brush this glaze into the textured valleys of the shadow side. -
Deepening Shadows:
Using a smaller palette knife, pick up undiluted Burnt Umber. Gently scrape this dark color down the shadowed ridges. Allow the knife to skip over the low points, depositing paint only on the raised texture to enhance the 3D effect. -
Mid-Tone Transition:
Mix Raw Sienna with a bit of Gold Metallic. Apply this color to the transition areas between the deep shadows and the bright peaks. Use a dry-brush technique or the flat side of a clean palette knife to drag the color lightly across the surface. -
Applying Metallic Highlights:
Load a clean palette knife with pure Gold Metallic paint. Target the sun-facing ridges of the mountains (the left side). Apply the paint with a light touch, letting the metallic sheen catch on the highest points of the texture. -
Adding Snow and Light:
Take pure Titanium White on the tip of a small knife. Add final highlights to the very tips of the peaks and the highest ridges on the sunlit side. This brings back the stark contrast and makes the mountains pop against the background. -
Atmospheric Sky:
For the sky area remaining around the peaks, mix a very pale cream using White and the tiniest speck of Raw Sienna. Paint this area with swirling, textured strokes using a clean knife or stiff brush to suggest turbulent wind or clouds around the summit. -
Integrating the Edges:
Ensure the bottom edge of the painting feels grounded. You can darken the very bottom foreground with a mix of Burnt Umber and Gold to suggest the earth closer to the viewer. -
Final Assessment:
Step back and look at the painting from a distance. If the shadows look too harsh, dry-brush a little of your base cream color over them to soften. Let the painting dry completely.
Luxe Finish
Mix a fine metallic powder or gold leaf flakes into your clear varnish for the final coat. This adds a subtle, shimmering haze that makes the entire mountain range glow in sunlight.
Hang your textured masterpiece in a spot with good lighting to let the shadows and metallic highlights truly come to life
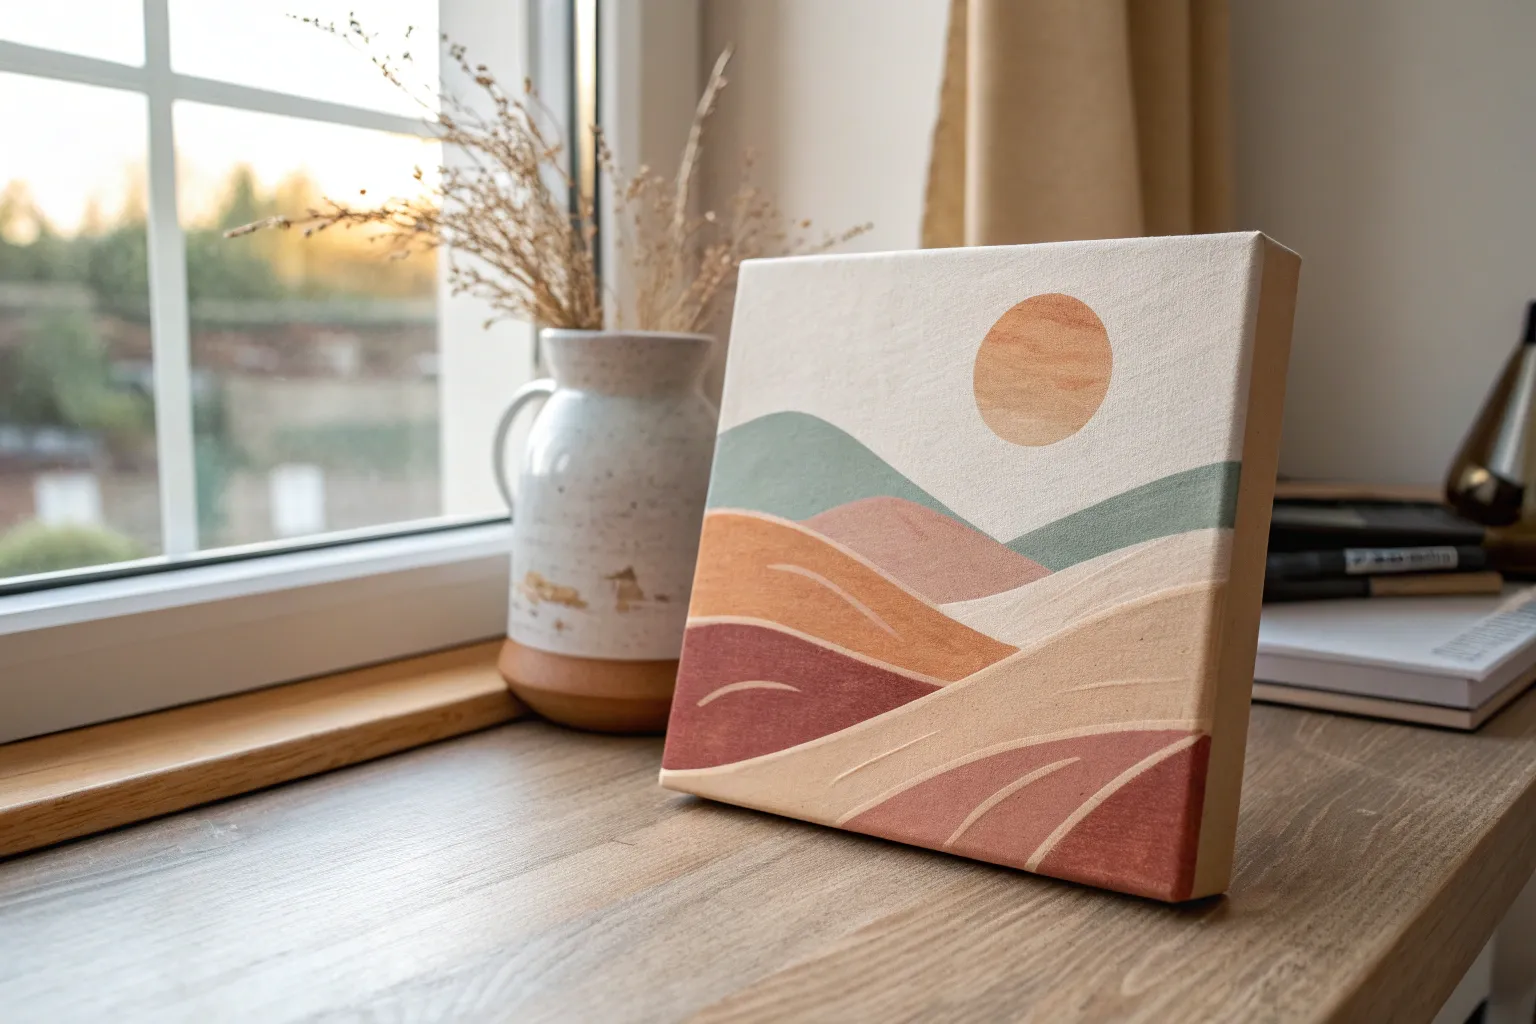
Tiny Canvas Series in a Matching Color Palette
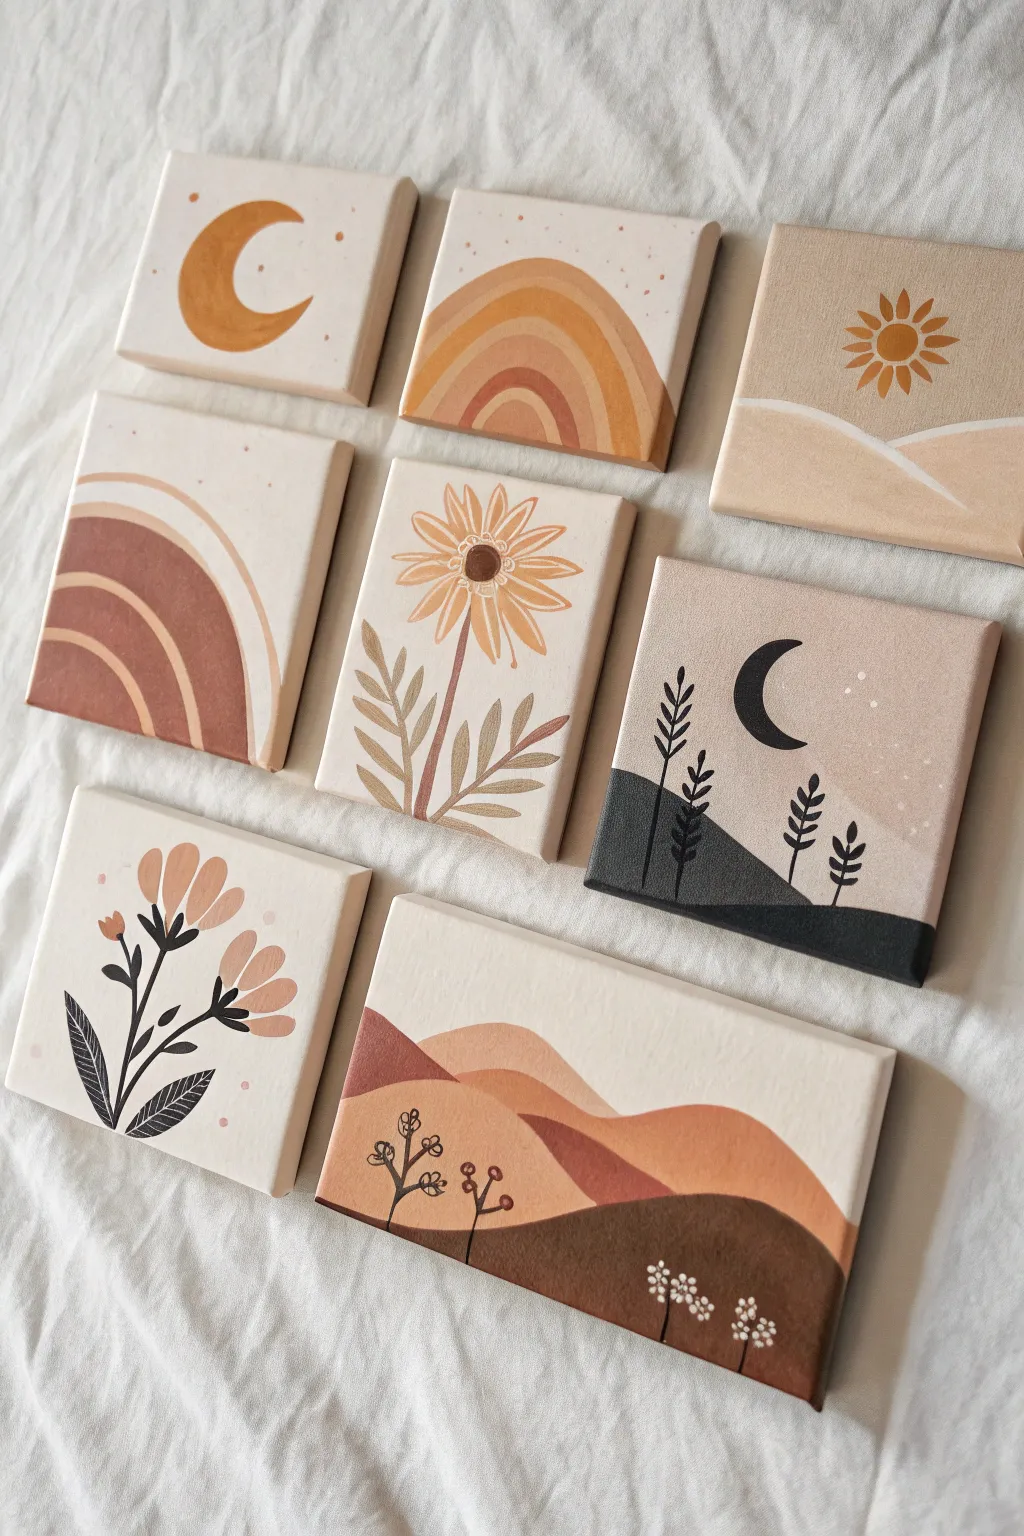
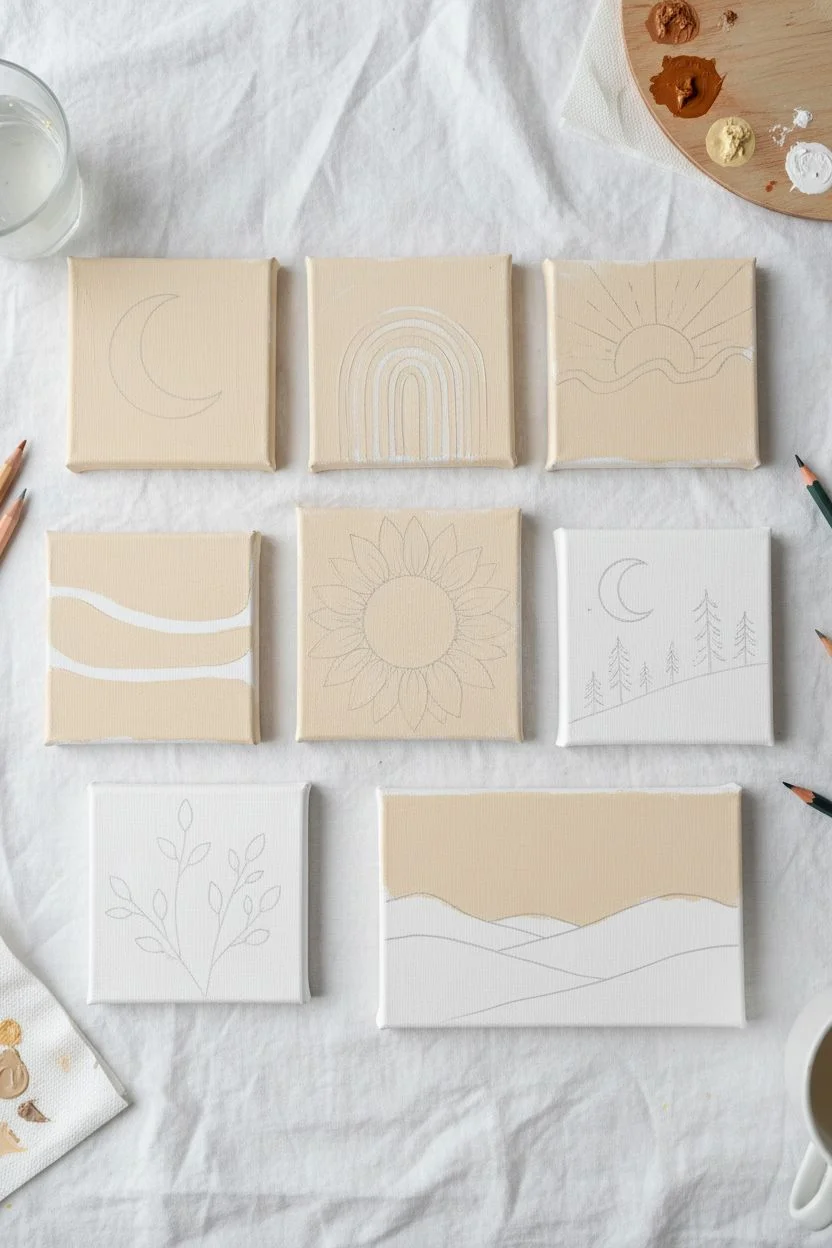
Create a stunning gallery wall on a miniature scale with this series of eight coordinating mini canvases featuring earthy tones, celestial motifs, and botanical sketches. Using a warm palette of terracotta, beige, cream, and charcoal, these small artworks come together to form a cohesive and trendy bohemian aesthetic perfect for any nook.
Step-by-Step Tutorial
Materials
- 8 mini stretched canvases (approx. 4×4 inches)
- Acrylic paints: Burnt Sienna, Yellow Ochre, Titanium White, Mars Black, Unbleached Titanium (Beige)
- Flat shader brushes (small and medium)
- Round liner brush (size 0 or 00 for details)
- Pencil for sketching
- Palette or mixing plate
- Cup of water and paper towels
Step 1: Planning & Base Coats
-
Prepare the Palette:
Begin by mixing your core colors. Create a spectrum of earthy tones: a deep terracotta (burnt sienna mixed with a touch of black), a soft peach (burnt sienna plus lots of white), a warm mustard (yellow ochre with a dot of burnt sienna), and a creamy beige base tone. -
Base Coating:
Paint the background of six of your canvases with a solid coat of creamy beige or unbleached titanium. For the remaining two (the night scene and the landscape), you can leave them white for now or do a preliminary gradient if you feel confident. -
Sketching Designs:
Once the base coats are bone dry, lightly sketch your designs. Plan for variety: three canvases for celestial/abstract shapes (sun, moon, rainbow), three for botanicals, and two for landscapes.
Step 2: Painting The Celestial & Abstract Trios
-
The Golden Crescent:
On the top-left canvas, paint a simple crescent moon shape using your mustard yellow mix. Add a few tiny dots around it as ‘stars’ using the tip of your liner brush in terracotta. -
The Boho Rainbow:
For the top-middle canvas, paint concentric arches. Start with a small inner arch in dark terracotta, followed by a lighter peach arch, and finally a large outer arch in mustard. Keep lines smooth but organic. -
The Minimal Sun:
On the top-right canvas, paint a sunburst. Use the mustard tone for the center circle and small, leaf-like rays radiating outward. Add a soft white wavy line near the bottom to suggest a rolling hill. -
The Arc Abstract:
For the middle-left canvas, replicate the rainbow feel but position it coming from the side. Use thick bands of dark terracotta, medium rust, and a thin line of white for contrast.
Clean Lines
Shaky hands? Use painter’s tape or a circle stencil (like the rim of a small cup) to get perfectly crisp lines on your rainbows and suns, then fill them in.
Step 3: Floral Details
-
The Center Sunflower:
For the central canvas, paint a large sunflower. Use a dark brown for the center and pale yellow/cream for the long, thin petals. Add a stem and symmetrical leaves in a muted sage or brown tone. -
The Black Floral:
On the bottom-left canvas, switch to your fine liner brush and black paint. Paint a stylized plant with three main stems featuring oval leaves and small flower buds. Add soft peach dots around the black leaves for a pop of color.
Go 3D
Mix a little baking soda or modeling paste into your paint for the rainbow arches to add actual texture and relief, giving the art a tactile, high-end feel.
Step 4: Landscapes & Night Scenes
-
The Night Scene:
For the middle-right canvas, paint a sloping hill in dark charcoal or black at the bottom. Above it, use a beige-to-pink gradient for the sky. Paint a black crescent moon and stylized black pine trees silhouette against the sky. -
The Large Landscape:
The bottom-right canvas is a rectangular landscape. Paint rolling hills in layers: start with the furthest hill in light peach, moving to medium terracotta, and finishing with the closest hill in dark brown. Let each layer dry before painting the next one in front. -
Landscape Details:
Once the landscape layers are dry, use your finest brush to add delicate white flower silhouettes on the darkest foreground hill and simple black stick-flowers on the lighter hills.
Step 5: Finishing Touches
-
Clean Up:
Check the edges of your canvases. I prefer to paint the sides of each canvas in the same color as the background for a wrapped, professional look. -
Final Dots:
Add any final tiny dots or ‘stars’ to balance the compositions. Use white or black dots sparingly to fill empty negative space. -
Varnish:
Allow the collection to cure for 24 hours. Apply a matte varnish to protect the paint and unify the sheen across all eight pieces.
Arrange your finished mini-masterpieces in a grid or an organic cluster to bring warmth to your room
Repeating Pattern Canvas With Wavy Lines and Fills
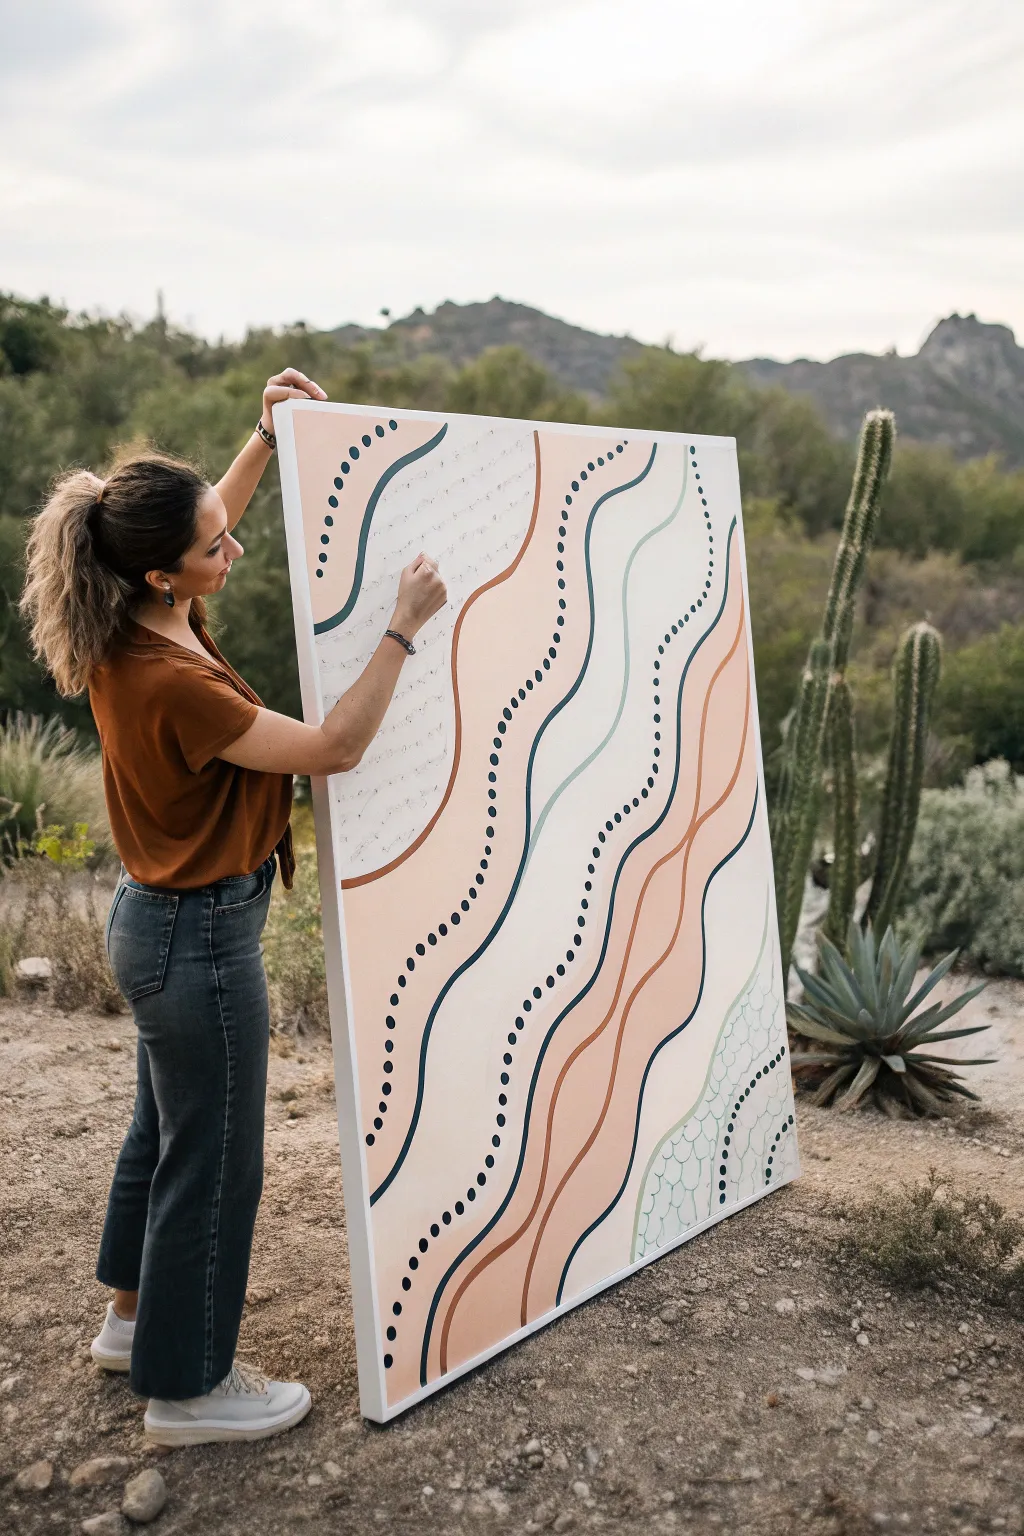
Capture the spirit of the desert with this large-scale abstract painting featuring organic, flowing lines and rhythmic dots. The soothing palette of terracotta, teal, and cream creates a modern bohemian statement piece perfect for a living room or bedroom.
Step-by-Step Guide
Materials
- Large stretched canvas (e.g., 36″ x 48″ or similar proportion)
- Acrylic paints: Cream/Off-white, Terracotta/Rust, Dark Teal/Navy, Sage Green, Black or Dark Grey
- Assorted paintbrushes: Large flat brush (2-3 inch), medium filbert brush, small round detail brush
- Pencil and eraser
- Easel (optional, but helpful for large canvases)
- Palette or paper plates for mixing
- Water cup and paper towels
- Ruler (optional for spacing checks)
Step 1: Base Preparation
-
Prime the surface:
Begin by painting your entire canvas with a generous coat of cream or off-white acrylic paint. This ensures a consistent, warm background tone rather than the stark white of raw gesso. -
Let it dry fully:
Allow the background layer to dry completely. If the coverage looks streaky, apply a second coat and wait for it to cure before moving on.
Step 2: Sketching the Layout
-
Draft the major waves:
Using a pencil, lightly sketch large, vertical wavy lines spanning from the top to the bottom of the canvas. Vary the width between lines to create organic sections; avoid making them perfectly parallel. -
Outline color zones:
Decide which ‘lanes’ created by your waves will be filled with solid color and which will remain as negative space or hold dot patterns. Mark these zones lightly with a tiny ‘x’ or color initial so you don’t get confused later. -
Sketch the scale texture:
In the bottom right corner (and potentially other small sections), sketch a loose, scaly grid pattern to add textural variety to the composition.
Steady Hand Pro Tip
For smooth long lines, dilute your fluid acrylics slightly with water or flow improver. This helps the paint glide off the brush without dragging or skipping.
Step 3: Painting Solids and Lines
-
Fill the terracotta waves:
Mix a warm terracotta or rust orange hue. Using a medium filbert brush for smooth edges, fill in the broad wavy sections you designated for this color. -
Paint the solid lines:
Switch to your dark teal or navy paint. Carefully paint the thin, solid wavy lines that act as borders or standalone accents. A long liner brush or a steady hand with a small round brush works best here. -
Add accent colors:
If your design includes lighter accents like the sage green wave shown, paint those sections now. I find that doing the lighter colors after the dark lines helps me gauge the balance better. -
Refine the edges:
Once the solid shapes are dry, go back with your background cream color to clean up any wobbly edges where the paint may have strayed outside your pencil guides.
Wobbly Lines?
Don’t stress over perfect curves. If a line gets too thick or wobbly, let it dry, then ‘cut in’ with your background cream color to reshape the edge.
Step 4: Adding Details and Patterns
-
Create the dotted chains:
Using the dark teal or black paint and a small round brush, create strings of dots that follow the curve of your waves. Keep the spacing consistent and the dot sizes relatively uniform. -
Vary dot sizes:
For visual interest, you can make some dotted lines thicker than others. Simply press down slightly harder on your brush or use a larger brush size for the bolder dotted waves. -
Paint the scale pattern:
Using a fine detail brush and your sage green or light teal, trace over the scaly grid pattern you sketched earlier in the corner zone. -
Add texture marks:
In the larger cream negative spaces, add subtle texture pattern. Use a very light grey or diluted tan to make tiny, dashed marks or small ‘v’ shapes that mimic fabric or sand texture.
Step 5: Finishing Touches
-
Erase visible guides:
Check the canvas for any remaining visible pencil marks. Gently erase them, being careful not to rub off any paint. -
Touch up the background:
If your eraser left any smudges, or if you spot uneven patches, do a final round of touch-ups with your cream background color. -
Paint the edges:
Don’t forget the sides of the canvas. Continue the lines over the edge for a gallery-wrap look, or simply paint the edges a solid color like the terracotta or cream to frame the piece cleanly. -
Seal the artwork:
Once the painting is fully cured (give it at least 24 hours), apply a clear acrylic varnish to protect the surface from dust and UV light.
Hang your new masterpiece in a well-lit spot to bring a touch of earthy warmth to your home
Acrylic Pour Canvas With Swirls and Cells
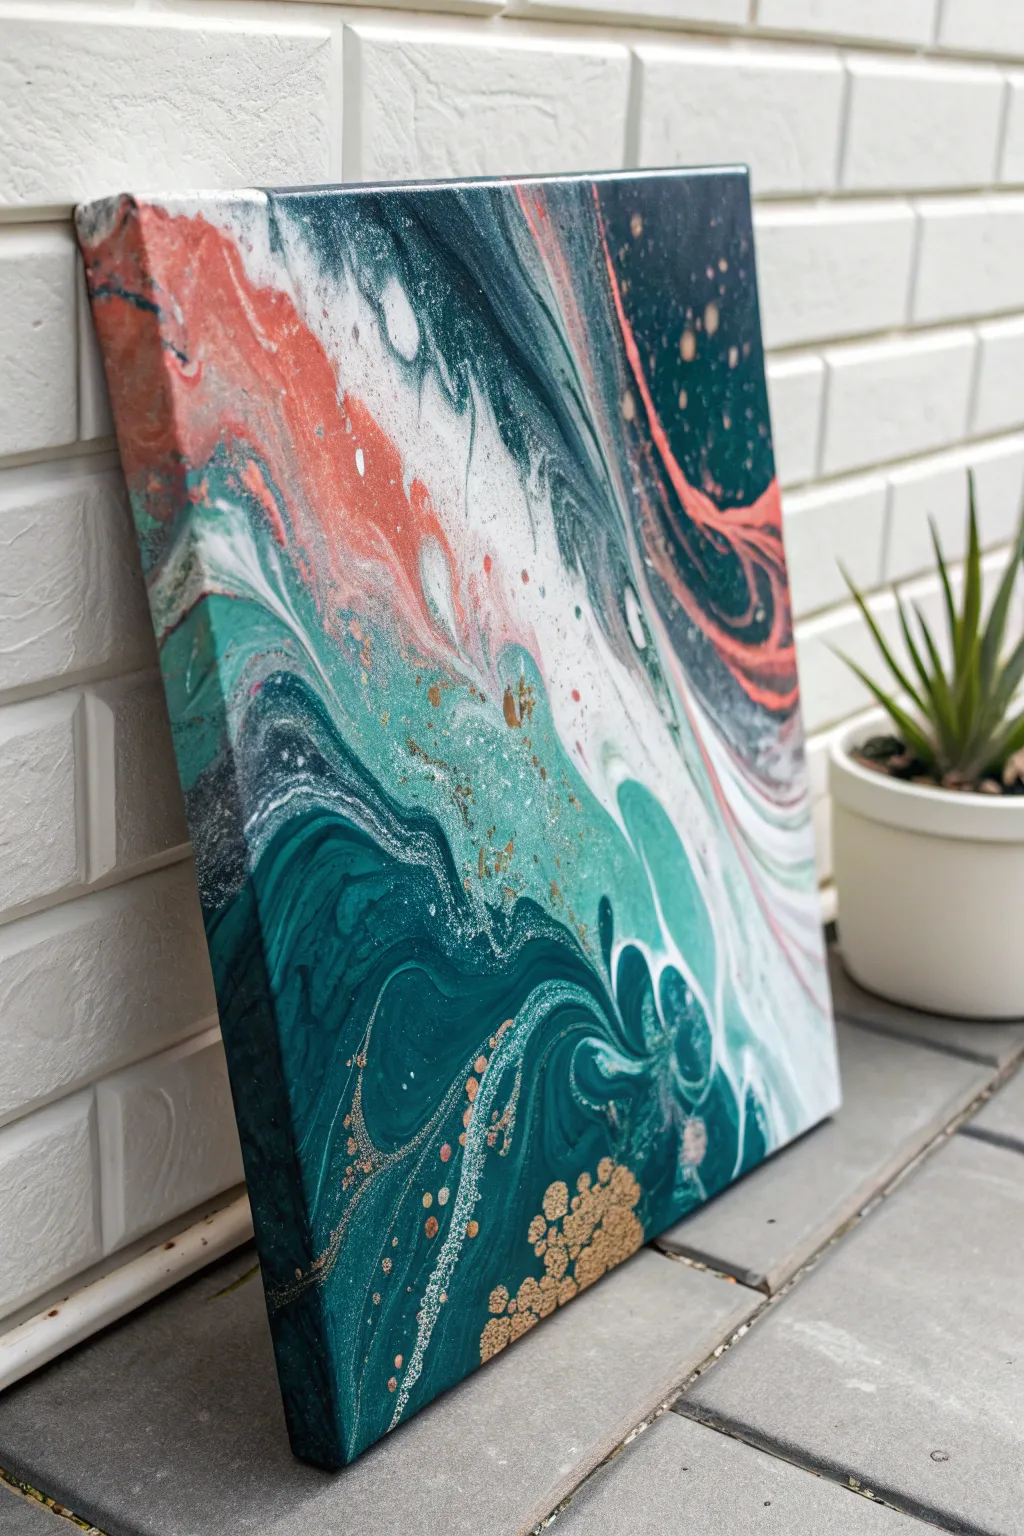

Dive into the mesmerizing world of acrylic pouring with this sophisticated color palette of deep emerald, soft coral, and shimmering gold. The result is a glossy, marble-like finish that brings a modern and organic energy to any space.
How-To Guide
Materials
- Stretched canvas (12×12 or 16×20 inches recommended)
- Acrylic paints (Emerald Green, Teal, Coral/Salmon Pink, Titanium White, Metallic Gold)
- Acrylic pouring medium (such as Floetrol or Liquitex)
- Silicone treadmill oil or dimethicone (for cell creation)
- Plastic cups (one for each color)
- Wooden craft sticks for stirring
- Water
- Gloves and workspace protection (drop cloth or trash bags)
- Hairdryer or heat gun (optional)
- High-gloss varnish (for finishing)
Step 1: Preparation & Mixing
-
Prepare the workspace:
Acrylic pouring is enjoyable but messy. Cover your entire table and floor area with a drop cloth or plastic bags. Elevate your canvas on four upside-down cups to allow paint to drip off the edges freely. -
Mix your pouring medium:
In your plastic cups, mix each acrylic paint color with the pouring medium. A standard ratio is 1 part paint to 2 parts medium, but check your specific product’s instructions. -
Adjust consistency:
Stir gently until the mixture is smooth. Add tiny drops of water if needed until the consistency feels like warm honey—it should flow off the stick in a continuous stream without breaking. -
Add silicone for cells:
Add 2-3 drops of silicone oil into the teal, emerald, and coral cups only. Leave the white and gold without oil to create solid dividers between the cells. Stir the silicone in just slightly; over-stirring will make the cells too small.
Step 2: The Pour Techniques
-
Lay the foundation:
Pour a small puddle of white paint onto the center of the canvas and spread it thinly across the surface to help the other colors glide. -
Create a dirty pour cup:
Take a separate large empty cup. Layer your colors one by one into this single cup. I like to start with white, then teal, gold, coral, and emerald, repeating until the cup is full. Don’t stir. -
Pour the ribbon:
Slowly pour the contents of the ‘dirty cup’ onto the canvas in a diagonal or sweeping motion. You can use small circular movements as you pour to create those initial swirls. -
Tilt the canvas:
Gently lift the canvas and tilt it slowly from side to side. Encourage the paint to stretch and flow over the edges. Watch how the emerald and coral interact. -
Add negative space:
If the design feels too crowded, pour a fresh line of white paint along one edge or through a section and tilt again to incorporate it, creating a visual break.
Muddy Colors?
If your colors are turning brown or gray, you’re likely over-tilting or over-stirring. Stop manipulating the canvas sooner to restart distinct color separation.
Step 3: Refining & Finishing
-
Enhance the cells:
If you want more defined cells (those circular bubbles), quickly pass a heat gun or torch over the surface. Keep it moving constantly to pop air bubbles and bring the silicone to the surface. -
Add gold accents:
While the paint is still wet, you can drizzle very thin lines of the gold mixture over the darker emerald sections for extra shimmer. -
Check the edges:
Use your finger or a palette knife to touch up the sides of the canvas with dripping paint, ensuring the entire gallery edge is covered. -
Let it cure:
Place the canvas in a dust-free area to dry. It needs to stay perfectly level. Drying usually takes 24 to 48 hours depending on humidity. -
Clean surface:
Once fully dry, wipe the surface gently with a cloth and a tiny bit of dish soap to remove any oily silicone residue before sealing. -
Seal the artwork:
Apply two or three coats of high-gloss varnish to protect the paint and make those deep teals and golds truly pop.
Glitter Finish
Mix fine gold glitter into your varnish or sprinkle it wet on the gold paint sections to make the metallic veins sparkle in the light.
Enjoy the organic beauty of your new abstract masterpiece as it brings color to your room
Surreal Whale Tail in the Sky Canvas Painting
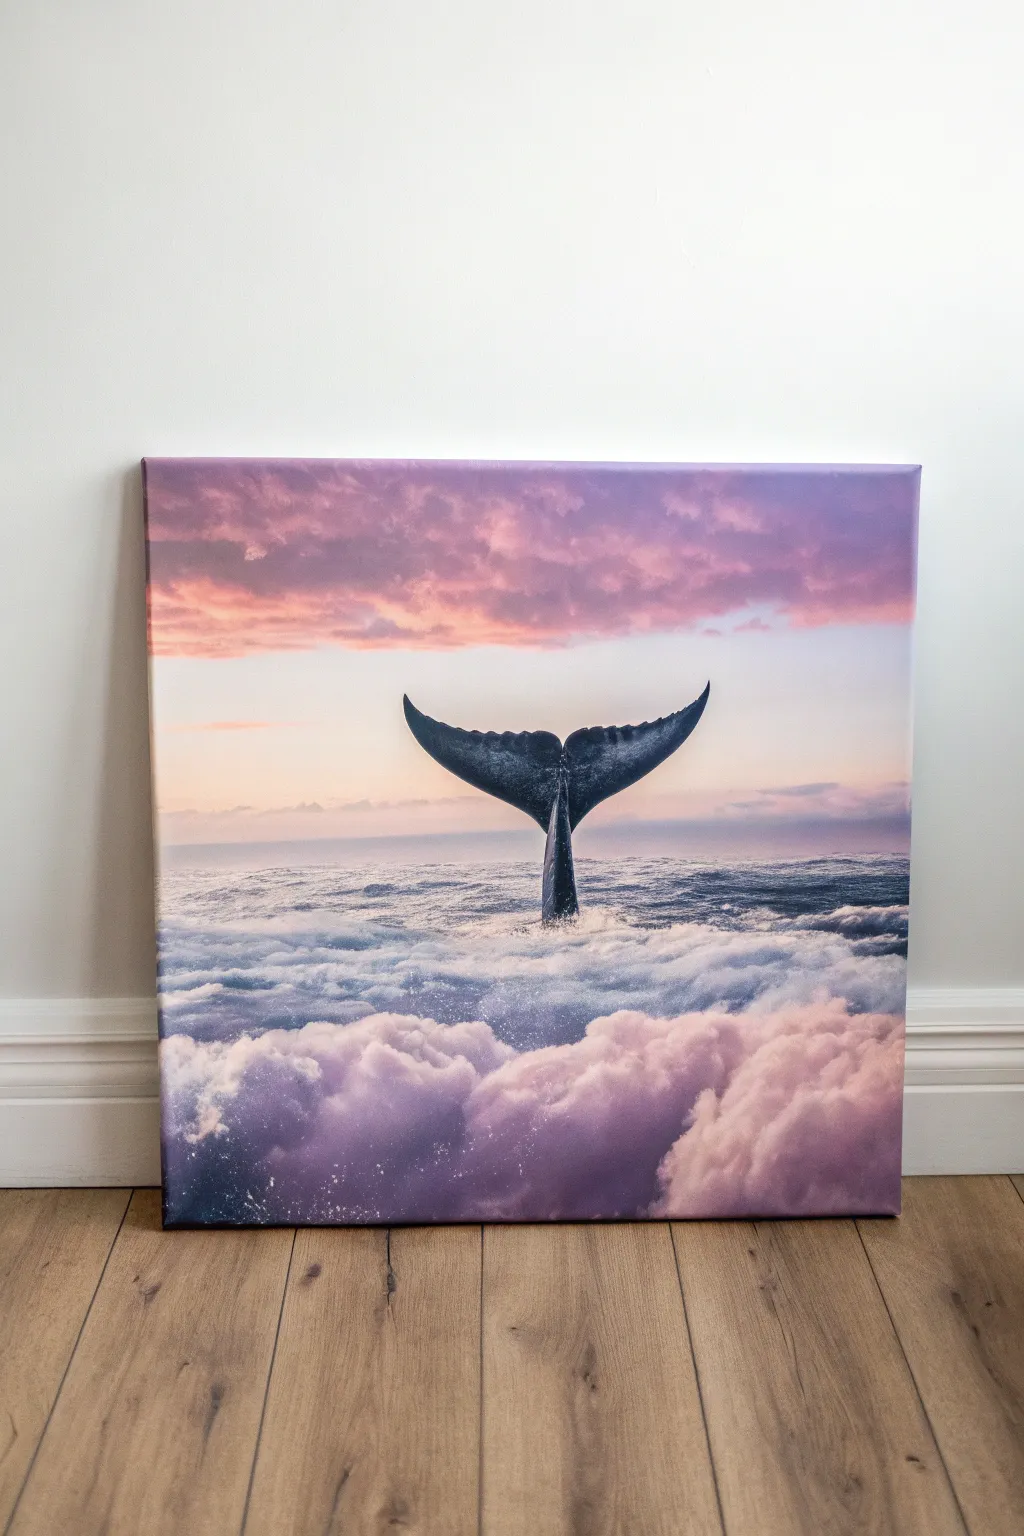

Blend the calm of the ocean with the wonder of the sky in this surreal acrylic painting. By merging a sunset palette with fluffy cloud textures, you’ll create a dreamlike scene where a majestic whale tail breaks the surface of a cloud-sea.
Step-by-Step
Materials
- Stretched canvas (e.g., 16×20 inches)
- Acrylic paints (Titanium White, Payne’s Gray, Ultramarine Blue, Alizarin Crimson, Cadmium Yellow, Burnt Umber)
- Assorted brushes (large flat wash, medium filbert, small round detail)
- Sea sponge or crumpled paper towel
- Palette knife
- Water cup and paper towels
- Slow-drying medium or retarder (optional)
Step 1: Setting the Sky Gradient
-
Prepare the canvas:
Start with a clean, white canvas. If you want a smoother surface for the clouds later, apply a quick coat of gesso and sand it lightly once dry. -
Mix the sunset colors:
On your palette, prepare three main puddles: a deep violet using Ultramarine Blue and a touch of Alizarin Crimson, a soft pink using White and Crimson, and a pale buttery yellow using White and just a hint of Cadmium Yellow. -
Paint the upper sky:
Using a large flat brush, apply the violet mixture to the top third of the canvas. Use horizontal strokes to ensure even coverage. -
Blend downwards:
While the violet is still wet, introduce the soft pink immediately below it. Work the brush back and forth where the colors meet to create a seamless transition. -
Complete the horizon:
Finish the sky gradient by blending the pale yellow into the bottom of the pink section, fading it almost to white near the center horizon line. Let this base layer dry completely.
Cloud Edges Too Sharp?
If your clouds look too stiff, use a clean, slightly damp brush to blur the edges while the paint is still wet. A circular ‘scrubbing’ motion works best.
Step 2: Creating the Cloud Ocean
-
Block in the cloud shapes:
Mix a light lavender-grey using White, a speck of Payne’s Gray, and a touch of Crimson. Using a filbert brush, scumble in the large, billowy shapes of the clouds at the bottom third of the canvas. -
Add depth and shadows:
Deepen your lavender mix with more Payne’s Gray. Paint the undersides of the clouds and the areas between the billows to create volume and separation. -
Highlight the tops:
Mix a warm highlight color using White and a tiny bit of the sunset pink. Apply this to the top rounded edges of the clouds where the sunset light would hit them. -
Create the distant waves:
For the middle ground where the sky meets the clouds, use smaller, flatter strokes with a blue-grey tone to mimic the look of distant ocean waves turning into mist. -
Soften the edges:
Take a clean, dry soft brush or a sponge and gently tap the edges of your clouds to make them look fluffy and airy rather than hard-edged.
Step 3: Painting the Whale Tail
-
Draft the outline:
Using a small round brush and watery grey paint, lightly sketch the shape of the whale fluke in the center. It should look like a wide embrace, curving upward at the tips. -
Fill the base color:
Mix a dark, almost black tone using Ultramarine Blue and Burnt Umber. Fill in the entire silhouette of the tail, ensuring it feels solid against the light background. -
Add texture and form:
Mix a medium blue-grey. I like to use a small flat brush here to add vertical streaks down the center of the tail and along the horizontal ridges, suggesting the wet, rubbery skin texture. -
Define the highlights:
Using a lighter greyish-white, paint the very edges of the fluke tips and the spine line to make the tail look three-dimensional and wet. -
Blend the base:
At the point where the tail meets the clouds, use the cloud colors to paint over the very bottom of the tail slightly, making it look like it’s emerging from the mist.
Pro Tip: Atmospheric Glazing
Once the tail is dry, apply a very thin, watery glaze of the sky’s pink color over the shadowy side of the tail to tie the subject into the lighting environment.
Step 4: Final Atmosphere
-
Add water droplets:
Dilute some titanium white paint with water until it’sinky. Load a stiff brush or toothbrush and flick it lightly around the base of the tail to simulate splashing water spray. -
Enhance sky clouds:
Go back to the upper sky and use a dry sponge with a bit of pink paint to dab in faint, wispy clouds near the top to mirror the texture below. -
Final highlights:
Add the brightest pure white highlights to the absolute peaks of the bottom clouds and the wettest points of the whale tail. -
Varnish:
Once the painting is fully cured (usually a few days for thin acrylics), apply a satin or gloss varnish to deepen the darks and protect the surface.
Step back and enjoy the peaceful, dreamlike quality of your new masterpiece
Cozy Campsite Under Stars Canvas Painting
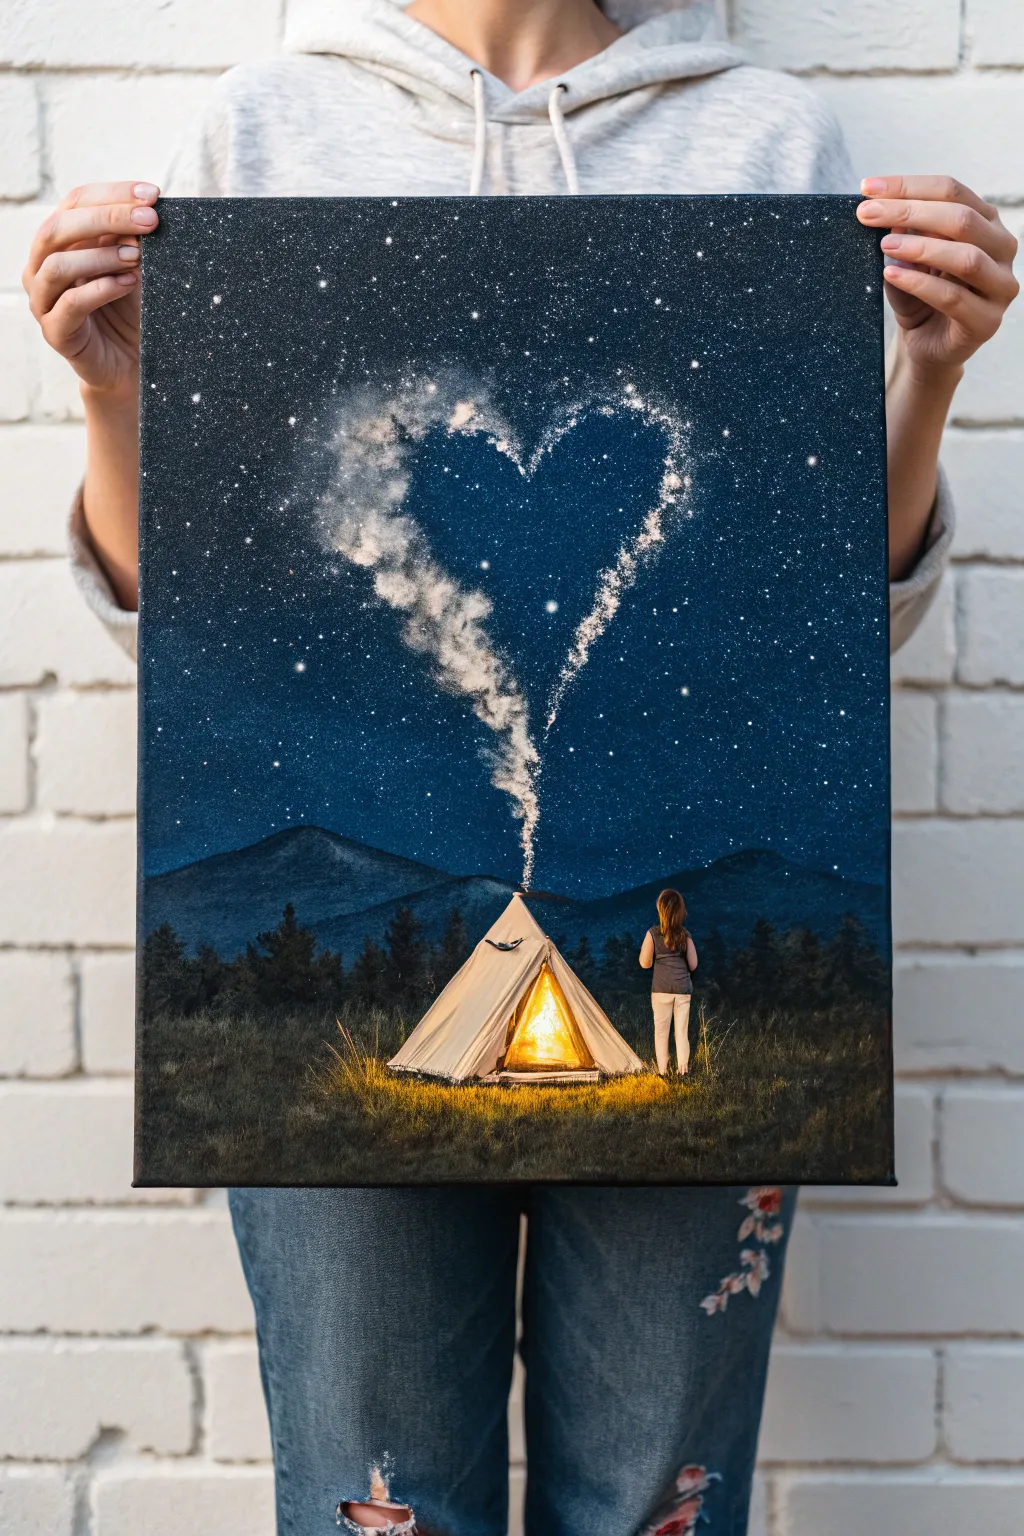
This enchanting canvas captures the magic of a night under the stars, featuring a glowing teepee and a whimsical heart-shaped smoke plume rising into the galaxy. Perfect for nature lovers, this piece combines cozy warm lighting with cool, starry blues for a stunning contrast.
How-To Guide
Materials
- Stretched canvas (e.g., 16×20 inch)
- Acrylic paints: Carbon Black, Phthalo Blue (or Prussian Blue), Titanium White, Burnt Umber, Cadmium Yellow, Cadmium Orange, Sap Green
- Large flat brush (1-inch)
- Medium flat brush
- Small round detail brush
- Fan brush (optional, for trees)
- Old toothbrush (for stars)
- Palette for mixing
- Pencil for sketching
- Cup of water and paper towels
Step 1: Setting the Night Scene
-
Establish the horizon:
Start by sketching a very faint horizon line about one-third of the way up from the bottom of your canvas to separate the ground from the sky. -
Paint the gradient sky:
Mix a deep, dark blue using Phthalo Blue and a touch of Black. Apply this to the very top of the canvas. As you work your way down, gradually mix in tiny amounts of White and more Blue to create a fade, stopping just before the horizon line. -
Create the distant mountains:
Mix a muted dark blue-grey color. Paint undulating shapes above the horizon line to form the mountains. I like to keep the edges slightly soft to push them into the distance. -
Add the starry background:
Allow the sky to dry completely. Dilute a small amount of Titanium White paint with water until it’s ink-like. Load an old toothbrush, hold it over the canvas, and flick the bristles to spray tiny stars across the blue sky.
Step 2: Painting the Foreground
-
Block in the ground:
Using a dark mix of Burnt Umber, Black, and Sap Green, stipple paint onto the bottom third of the canvas. Use a dabbing motion to simulate the texture of rough grass. -
Add the background trees:
Mix Black with a little Sap Green. Using a fan brush or a rough flat brush, dab vertical, jagged shapes along the base of the mountains to create a silhouette of a pine forest. -
Sketch the focal points:
Once the background is dry, use a pencil to lightly outline the triangle shape of the tent and the small silhouette figure of the woman standing to the right. -
Paint the tent base:
Fill in the tent shape with a light beige or off-white color. It doesn’t need to be solid; a little streakiness adds fabric texture.
Smoke Too Solid?
If your smoke looks too much like a solid white line, dip a clean, damp brush into water and gently scrub the edges to soften and disperse the paint into a mist.
Step 3: Creating the Glow and Smoke
-
Ignite the fire within:
Paint the intense glow inside the tent opening using Cadmium Yellow at the center, blending out to Cadmium Orange at the edges. This implies a warm fire inside. -
Reflect the light:
Dry brush a little Yellow and Orange onto the grass immediately surrounding the tent base to show the firelight spilling onto the ground. -
Paint the figure:
Fill in the woman’s silhouette. Use dark grey for the shirt and light beige for the pants, adding subtle highlights on the side facing the tent to show reflection. -
Start the smoke trail:
Mix a very translucent wash of Titanium White. Starting from the tent’s peak, paint a thin, winding line going upward. -
Form the heart:
Expand that smoke line into a large heart shape in the sky. Use a dry brush or your finger to smudge the white paint, creating a cloudy, smoky texture rather than a solid line. -
Add dimension to the smoke:
On the inside edge of the heart shape, dab a slightly brighter white to create volume, giving the smoke a 3D effect against the dark sky. -
Final highlights:
Add a few larger, deliberate stars (using a small round brush) inside and around the heart shape to make it sparkle.
Add Personal Touch
Make it meaningful by painting two small silhouettes instead of one, or add a small dog sitting by the tent entrance for a personalized camping scene.
Now step back and admire the cozy atmosphere you have created on canvas


Have a question or want to share your own experience? I'd love to hear from you in the comments below!