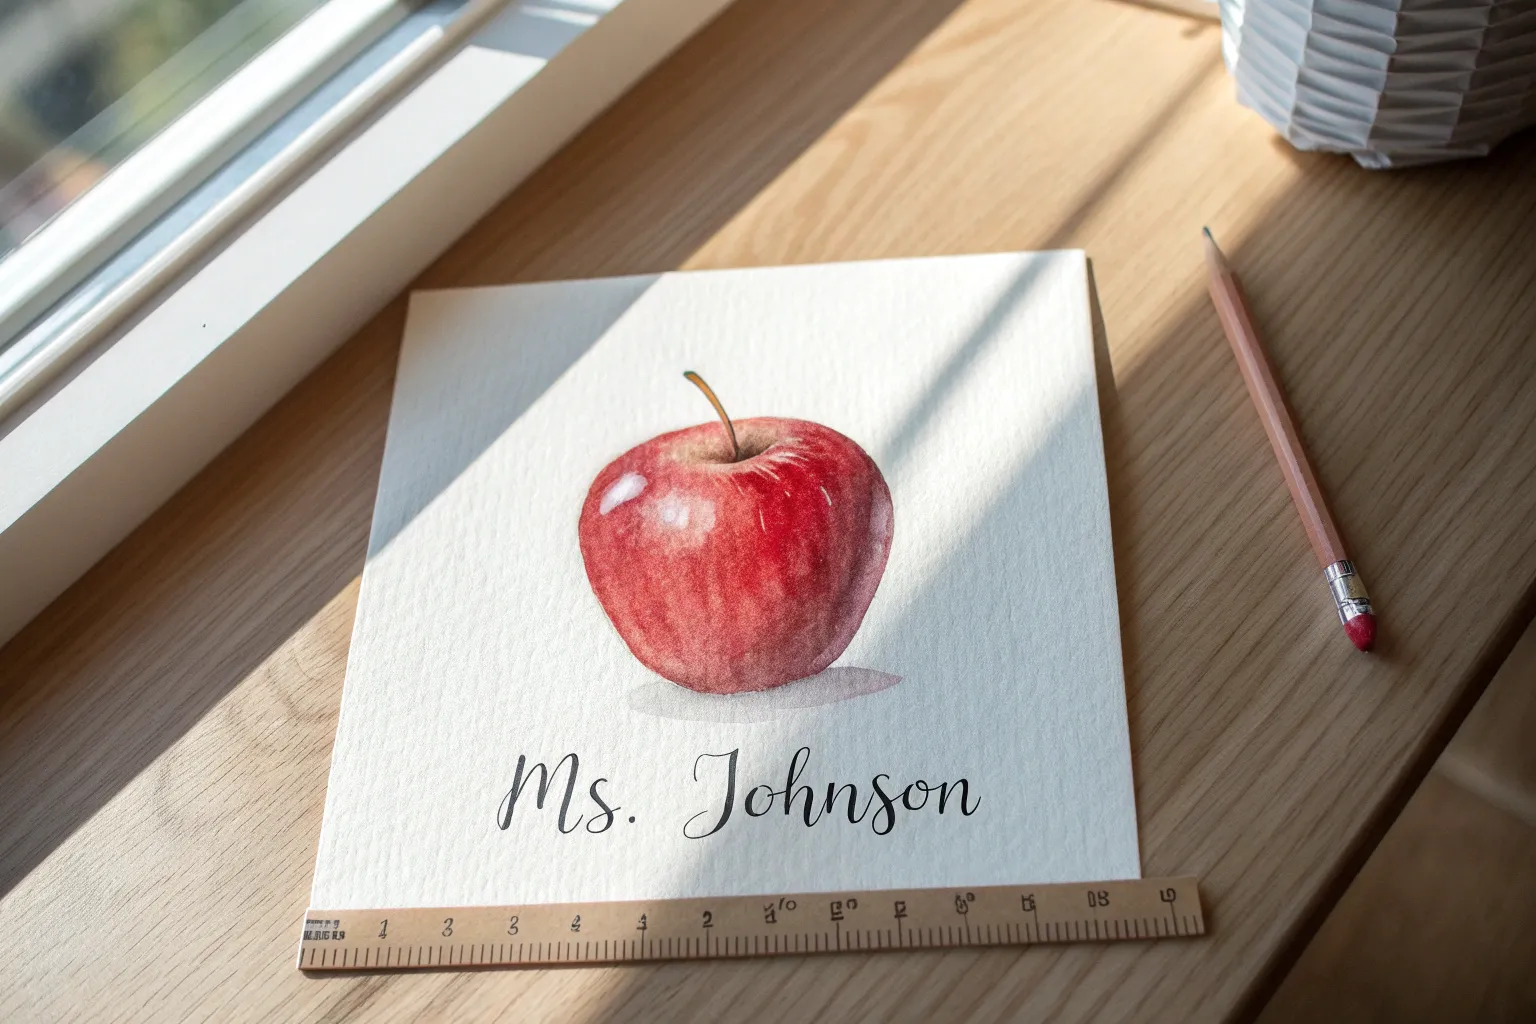
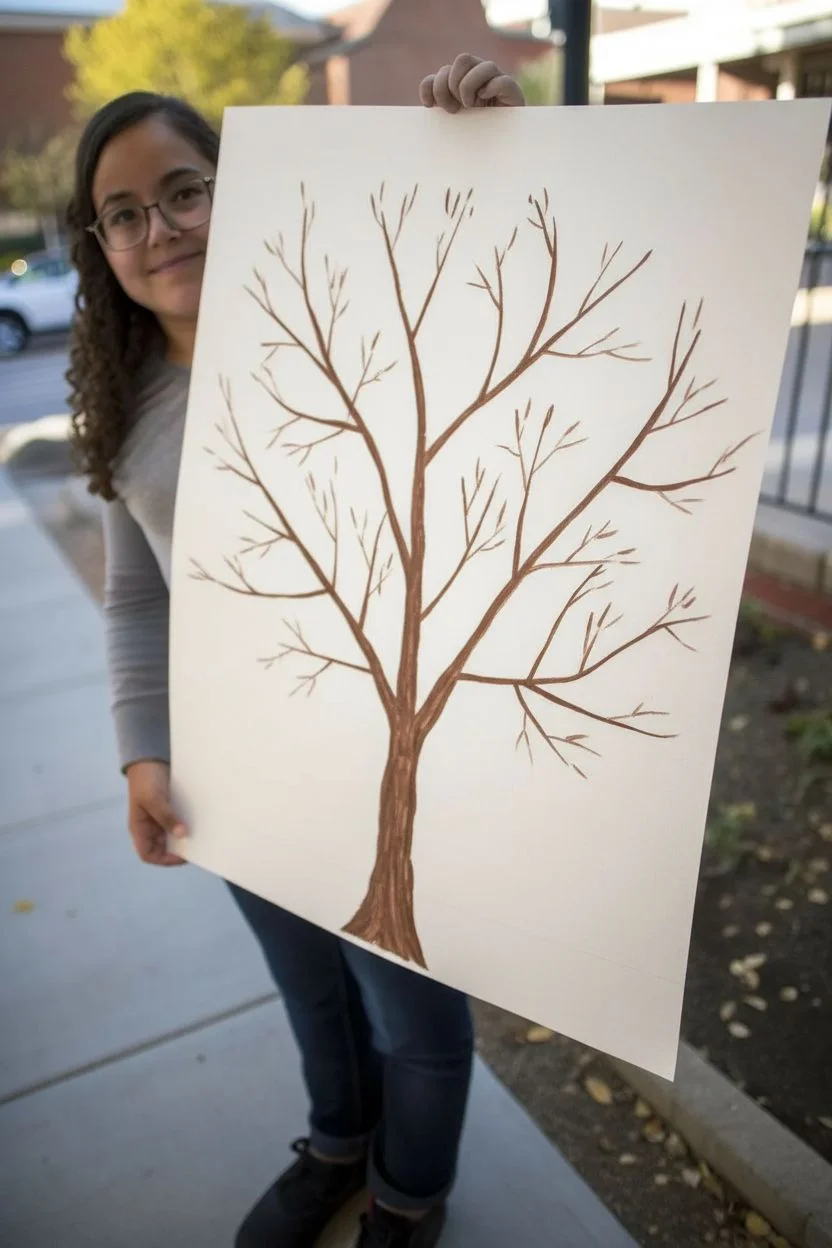
If you’re looking for teacher painting ideas that feel personal (not cheesy) and still totally doable, I’ve got you. These are the kinds of paintings that look adorable on a classroom desk, by the door, or on a shelf—and they’re basically built for heartfelt thank-yous.
Classic Apple Thank-You Canvas
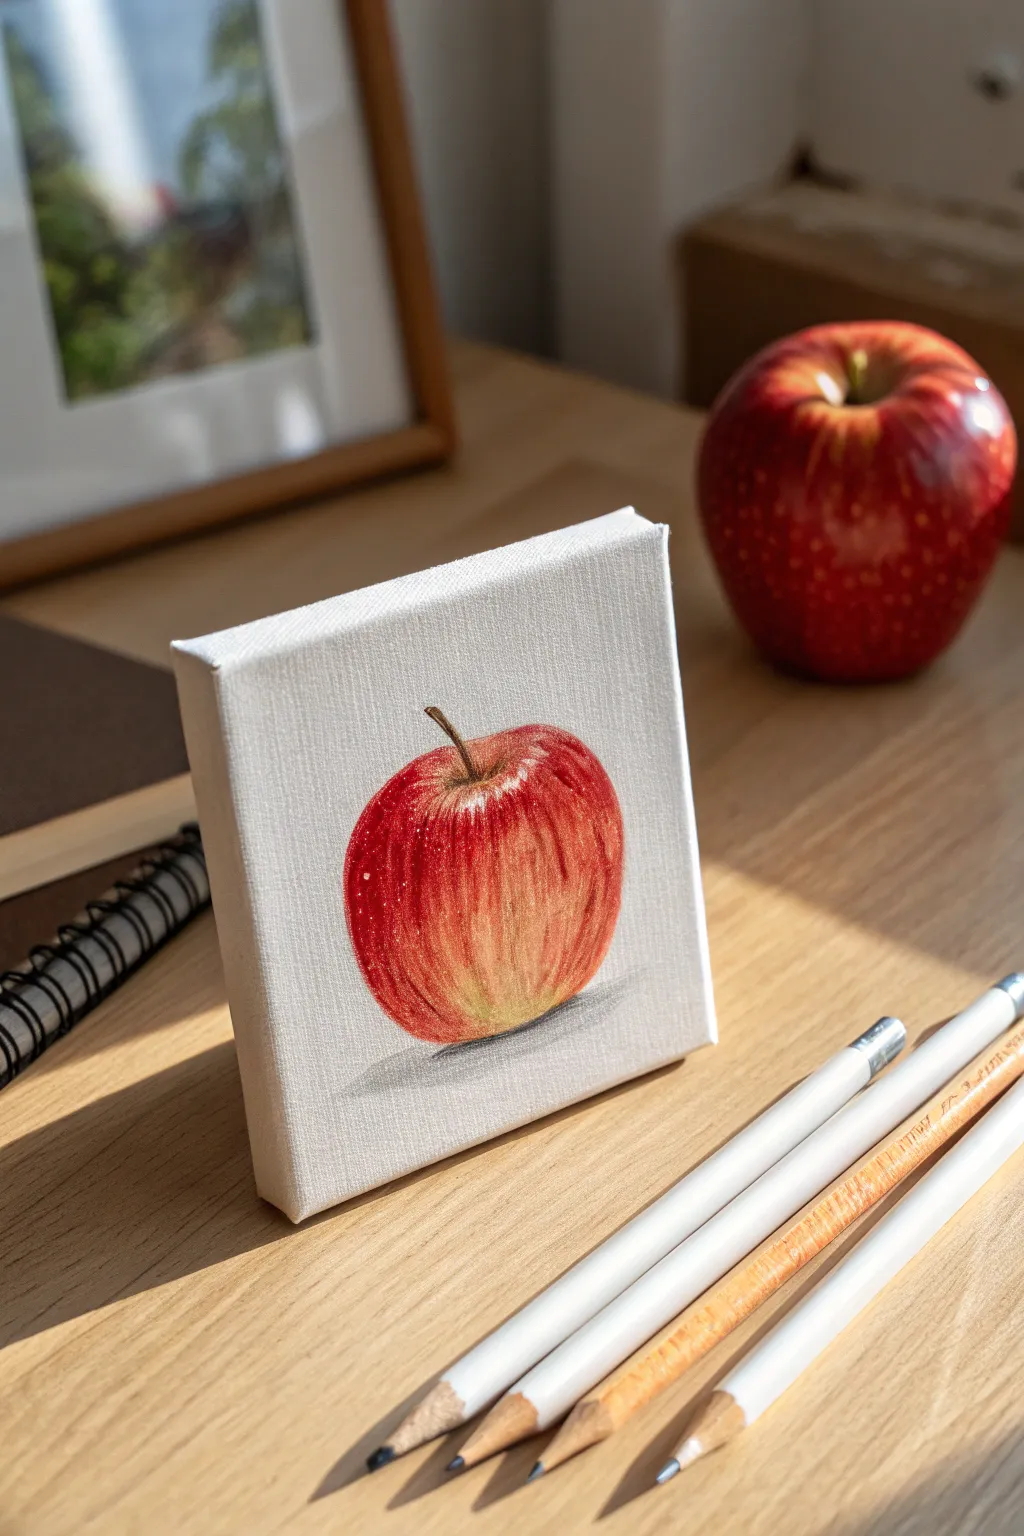
Capture the timeless symbol of gratitude with this surprisingly achievable mini canvas project. Using mixed media techniques, you’ll build layers of color to create a realistic, dimensional apple that makes a perfect heartfelt gift for a favorite teacher.
Detailed Instructions
Materials
- Small square canvas (e.g., 4×4 or 5×5 inch)
- Graphite pencil (HB or 2B)
- Colored pencils (wax or oil-based essential: deep red, orange-red, yellow, brown, white, black, dark gray)
- Acrylic matte medium or clear gesso (optional, for surface prep)
- Eraser
- Real red apple (for reference)
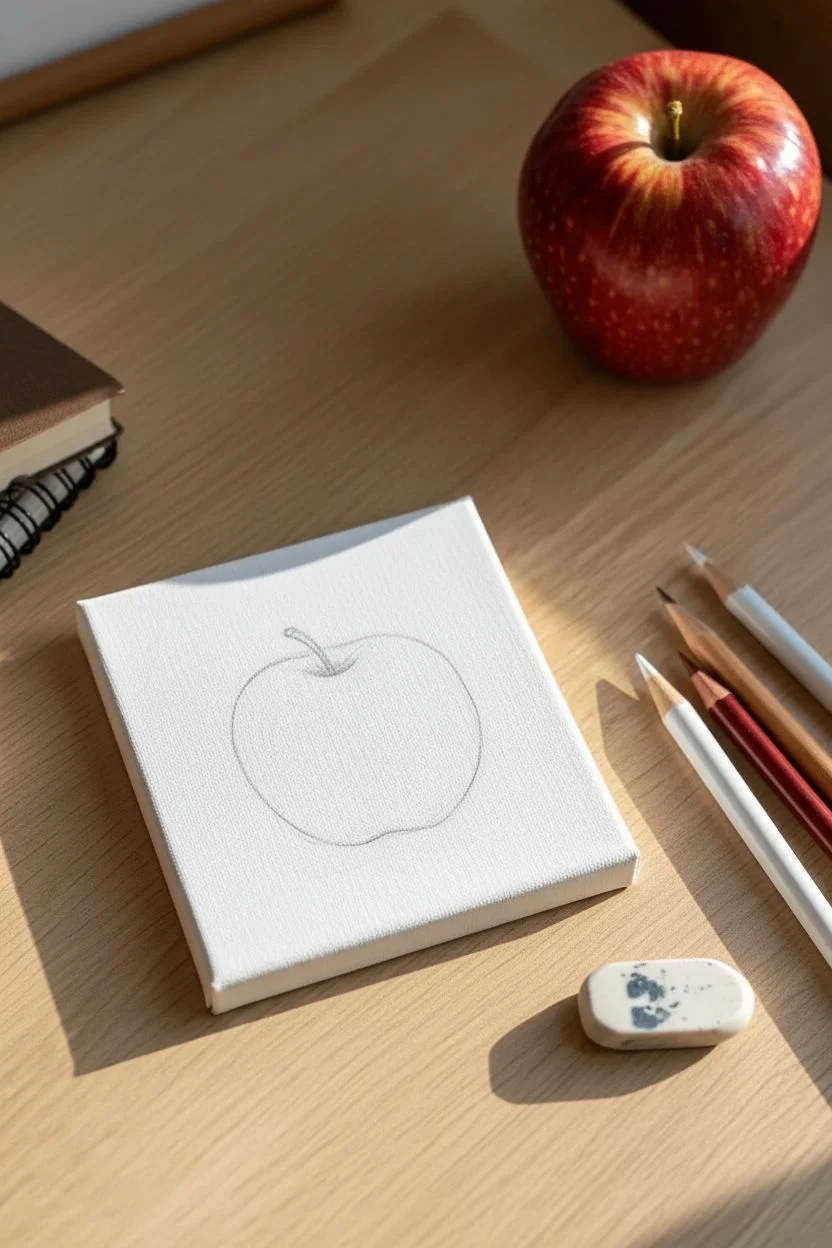
Step 1: Preparation & Sketching
-
Canvas Prep:
Since standard canvas texture can be rough for colored pencils, consider applying a thin coat of clear gesso or matte medium first. Let it dry completely to create a slightly smoother tooth for your pencils. -
Outline the Shape:
Using your graphite pencil very lightly, draw a simple circle in the center of the canvas. It doesn’t need to be perfect; apples are organic shapes. -
Refine the Contour:
Flatten the bottom of your circle slightly so the apple sits naturally. Dip the top center downwards to create the indentation where the stem will grow. -
Add the Stem:
Draw the stem emerging from that top dip. Make it slightly curved and thicker at the base, tapering as it goes up. -
Clean Up:
Erase any heavy graphite lines until they are barely visible ghosts. This prevents the graphite from muddying your bright apple colors later.
Fixing Waxy Buildup
If colors stop layering because the surface is too waxy (bloom), lightly spray with a workable fixative, let dry, and continue adding fresh layers.
Step 2: Layering Colors
-
Base Yellow Layer:
Apples often have a yellow undertone. Lightly shade the entire apple shape with your yellow pencil, pressing gently to preserve the tooth of the canvas. -
Initial Red Mapping:
Take your orange-red pencil and begin marking the main red areas. Leave a specific spot on the upper left side lighter or yellow for the highlight. -
Building Texture:
Switch to your deep red pencil. Instead of coloring flatly, use vertical, slightly curved strokes that follow the round form of the apple. This mimics the natural striations of the skin. -
Deepening Shadows:
Identify the shadow side (usually opposite your light source). Layer darker reds and a touch of brown here to create volume. -
Refining the Highlight:
I like to go back in with the white pencil around the highlight area to blend the yellow and red edges smoothly, creating a glossy look.
Make It Personal
Use a fine-tip permanent marker to write a tiny ‘Thank You’ or the teacher’s name along the curve of the cast shadow for a custom touch.
Step 3: Details & Finishing
-
Stem Work:
Color the stem with brown. Add a tiny line of black on the shadowed side of the stem and a touch of yellow on the lit side for dimension. -
Stem Indentation:
Darken the area where the stem meets the apple with deep red and a tiny bit of black to show depth in that crevice. -
Adding Speckles:
Use a sharp yellow or white pencil to add tiny, scattered dots across the red skin, mimicking the natural lentils found on apples. -
Cast Shadow:
Using a dark gray pencil, lightly shade underneath the apple. Keep the shadow darkest right where the fruit touches the surface and fade it out as it moves away. -
Final Polish:
Assess your contrast. If the apple looks flat, deepen the darkest red areas one last time. If using wax-based pencils, give it a light buff with a tissue to bring out a shine.
Place this little masterpiece on a tiny easel for a gift presentation that feels both classic and personal


Personalized Teacher Name Classroom Sign
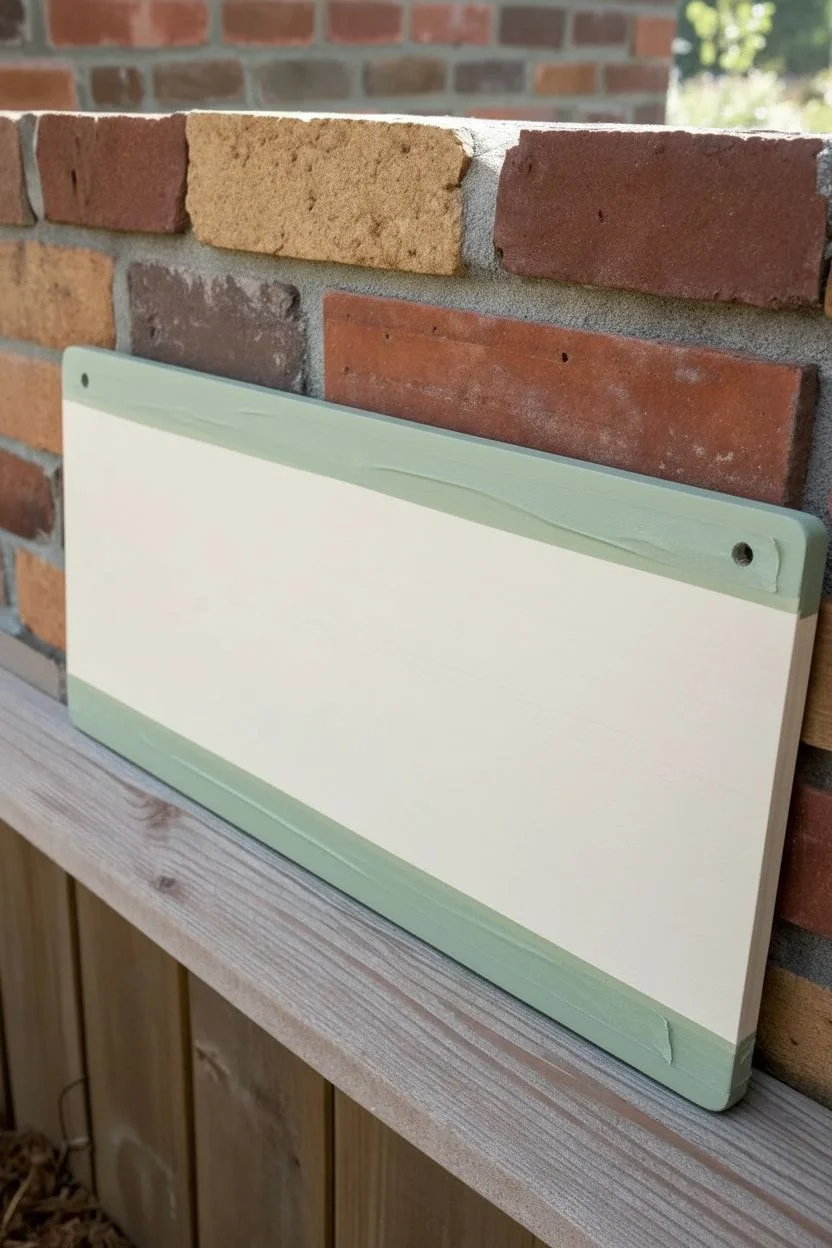
Welcome students with warmth using this charming, hand-painted wooden sign. Featuring soft sage greens and playful school-themed doodles, this hanging plaque adds a personalized touch to any learning environment.
Step-by-Step Tutorial
Materials
- Rectangular wooden plaque (approx. 12″ x 6″)
- Sandpaper (220 grit)
- Acrylic craft paints: Cream/Off-white, Sage Green, Terracotta, Teal, Grey, Pale Yellow
- Paintbrushes: 1-inch flat brush, small round detail brush (size 0 or 1), flat angle brush
- Painters tape or masking tape
- Jute twine
- Drill with small bit (if plaque lacks holes)
- Pencil and eraser
- Matte finish sealer/varnish
- Carbon transfer paper (optional)
Step 1: Preparation & Base Coat
-
Prep the surface:
Begin by lightly sanding your wooden plaque to ensure a smooth painting surface. Wipe away any dust with a damp cloth or tack cloth. -
Paint the background:
Using a wide flat brush, apply a coat of cream or off-white acrylic paint to the entire front surface of the wood. Let it dry completely. -
Second coat:
Apply a second coat of the cream paint for opaque, solid coverage. If the wood grain still shows through, a third thin coat might be necessary. -
Tape the borders:
Once the base is bone-dry, apply painter’s tape horizontally across the sign, leaving about a 1-inch gap at both the top and bottom edges exposed. Press the tape edges down firmly to prevent bleeding. -
Paint the sage borders:
Paint the exposed top and bottom strips with a soft sage green. Peel the tape away carefully while the paint is still slightly wet to achieve a crisp line.
Step 2: Adding Details & Typography
-
Create the polka dot border:
Dip the non-brush end of a paintbrush handle into cream paint. Stamp dots along the inner edge of the sage green borders, spacing them evenly. Do this for both the top and bottom strips. -
Sketch the layout:
Lightly sketch the word ‘CLASSROOM’ in the center using a pencil. I find it helpful to mark the center point first and work outward to keep the text balanced. -
Add decorative elements:
Sketch the small icons: a notepad on the far left, scissors (or tongs) near the middle, and a cluster of supplies (apple, pencils, books) on the bottom right. -
Paint the lettering:
Using a small number 1 liner brush and teal paint, carefully trace over your pencil letters. Keep the stroke width consistent for a clean, modern look. -
Refine the text:
Add small decorative underlines below the text: two parallel lines with a small heart in the center using terracotta red and teal.
Bleeding Lines?
If green paint bled under the tape, wait for it to dry completely. Then, use a small flat brush with the cream base color to carefully touch up and straighten the edge.
Step 3: Painting the Illustrations
-
Base coat the icons:
Block in the shapes of your doodles. Use grey for metal tools, terracotta for the apple, and pastel colors for the books and pencils. -
Add texture to the apple:
Once the terracotta apple shape is dry, use a tiny dotting tool or toothpick to add small cream speckles for texture. -
Outline the doodles:
Mix a very dark grey or teal paint with a drop of water to make it inky. Use your finest brush to outline the books, apple, and scissors to make them pop against the cream background. -
Final decorative touches:
Paint a small green leaf on the apple and add subtle white highlights to the scissors and books to simulate shine. -
Erase guidelines:
Check the sign carefully. Once the paint is 100% dry, gently erase any visible pencil marks from your initial sketch.
Make It Personal
Instead of the generic ‘CLASSROOM,’ paint the specific teacher’s name (e.g., ‘Mrs. Smith’s Room’) in the center for a truly custom gift.
Step 4: Assembly & Finishing
-
Seal the artwork:
Protect your hard work by applying a layer of clear matte varnish over the entire face of the sign. This prevents fading and makes it easier to dust later. -
Prepare for hanging:
If your plaque didn’t come with pre-drilled holes, drill two small holes in the top corners now. -
String the twine:
Cut a length of jute twine (about 18 inches). Thread the ends through the holes from front to back. -
Secure the knots:
Tie sturdy double knots on the back side of the sign to secure the twine. Trim any excess tail.
Now your custom sign is ready to brighten up the school day


Fingerprint Apple Orchard From the Class
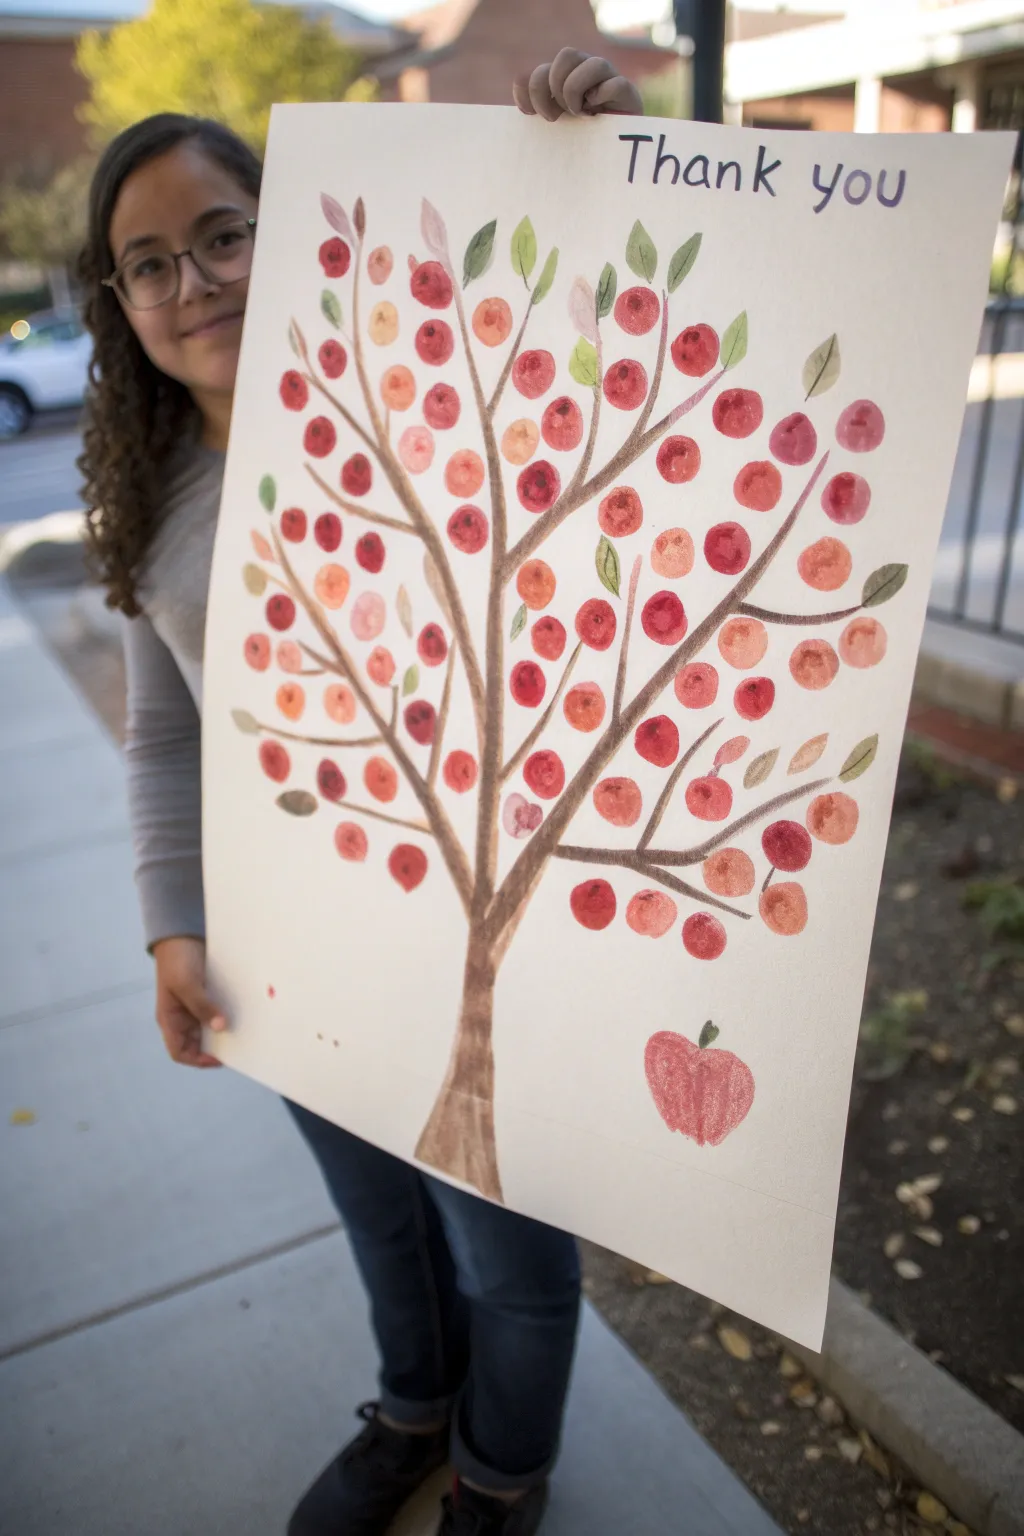
This heartwarming project transforms simple fingerprints into a lush apple tree, making it a perfect collaborative gift for teachers or loved ones. The result is a vibrant, textured piece of art that serves as a beautiful keepsake of a group’s gratitude.
How-To Guide
Materials
- Large white poster board or heavy cardstock
- Brown acrylic or tempera paint
- Red, orange, and pink washable ink pads or poster paint
- Green acrylic or tempera paint
- Medium flat paintbrush
- Small round paintbrush
- Paper plate or palette
- Pencil
- Black permanent marker or paint pen
- Wet wipes (essential for messy fingers)
Step 1: Painting the Tree Structure
-
Sketch the trunk:
Start by lightly sketching the outline of a tree trunk and branches with a pencil. aim for a sturdy base that tapers as it goes up, branching out to fill the center of the poster board. -
Paint the trunk:
Using brown paint and a medium flat brush, fill in the trunk. Start from the bottom and use long, vertical strokes to mimic the texture of bark. -
Add main branches:
Extend the brown paint upwards to create the primary branches. Taper your brush strokes so the branches get thinner as they reach away from the trunk. -
Detail the twigs:
Switch to a small round paintbrush to add finer twigs and secondary branches coming off the main ones. This creates more spots for your ‘apples’ to hang. -
Let the structure dry:
Allow the brown paint to dry completely. This step is crucial so you don’t smudge the dark paint into the lighter colors later.
Clean Prints Only
To avoid muddy colors, have participants wipe their finger completely clean before switching from red to green or lighter colors.
Step 2: Creating the Fingerprint Apples
-
Set up your palette:
Squeeze small dollops of red, orange, and pink paint onto a paper plate, or open your ink pads. Having a variety of shades adds depth and interest to the canopy. -
The first apple:
Dip an index finger or thumb into the red paint or ink pad. Press it firmly onto the paper near the end of a branch. -
Fill the tree:
Continue adding fingerprints all over the branches. I like to alternate colors randomly to create a natural, varied look. -
Layering for fullness:
Don’t be afraid to let some fingerprints overlap slightly or sit close to the brown branches. This makes the tree look full and abundant. -
The fallen apple:
Include a special touch by creating a larger apple at the base of the tree. This can be painted with a brush or made by pressing multiple fingerprints together in a heart-like shape. -
Clean up quickly:
Keep those wet wipes handy so participants can clean their fingers immediately between color changes or after finishing their contribution.
Step 3: Adding Leaves and Final Details
-
Paint the leaves:
Using green paint and a small round brush, paint simple almond shapes near the apples and along the branches. -
Vary the leaf tones:
You can mix a little yellow or white into your green paint for some leaves to create highlights and variety in the foliage. -
Stem details:
Paint a tiny brown stem on the large apple at the bottom using the very tip of your small brush. -
Add a leaf to the bottom apple:
Give the fallen apple a single green leaf to tie it visually to the rest of the tree. -
Write the message:
Once the paint is fully dry, use a black marker or paint pen to write ‘Thank you’ or another message clearly at the top of the poster. -
Signatures (Optional):
If this is a class gift, have each student sign their name near their fingerprint apple with a fine-tip pen for a personal touch.
Add Dimension
Once the fingerprints are dry, use a white paint pen to add tiny curved reflection highlight marks on each ‘apple’ for a shiny 3D effect.
This collaborative masterpiece is now ready to be gifted and displayed with pride


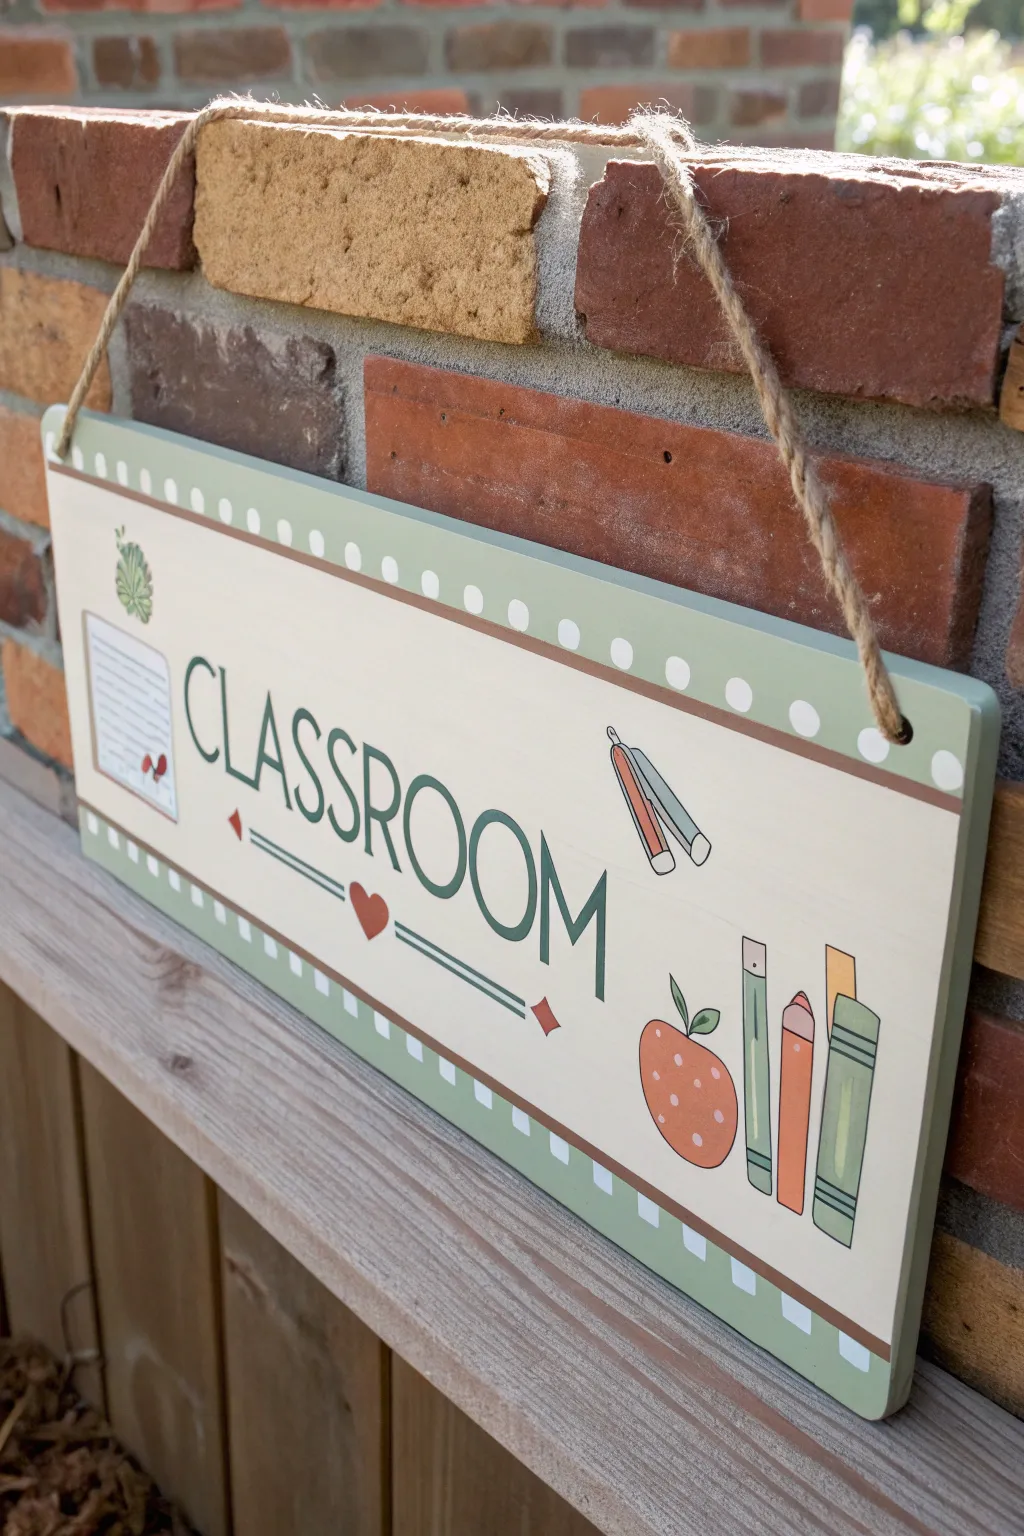
Painted Classroom Door Sign With Seasonal Swaps

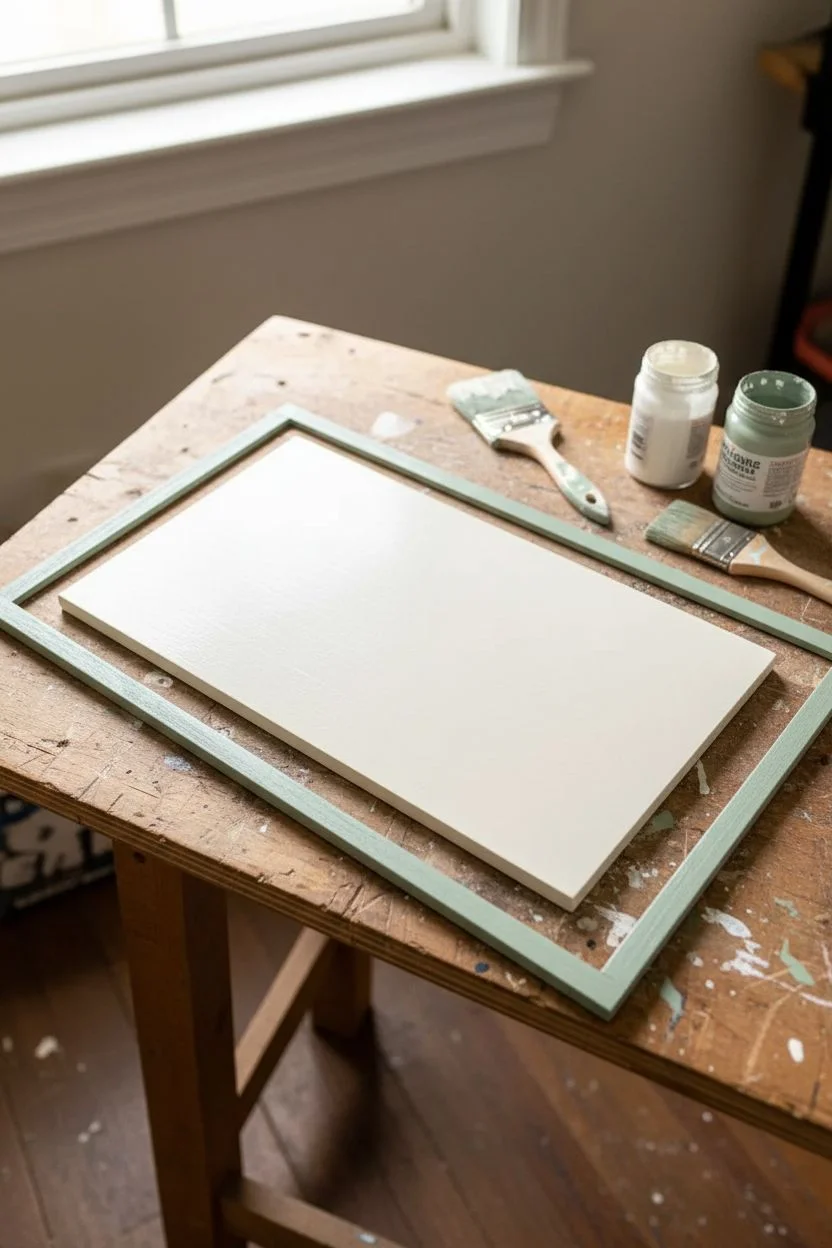
Bring the cozy warmth of fall to your school hallway with this charming wooden door hanger. Featuring a soft sage green frame and delicate botanical illustrations, it offers a welcoming entrance for students and visitors alike.
Step-by-Step Tutorial
Materials
- Rectangular wooden plaque (approx. 6×12 inches)
- Thin wooden trim or lath strips (for the frame)
- Sage green acrylic paint (chalk finish works well)
- White or cream acrylic paint
- Assorted acrylic paints (terracotta, burgundy, olive green, brown, muted gold)
- Fine detail paintbrushes (sizes 0 and 2)
- Medium flat paintbrush
- Letter stencils or transfer paper
- Wood glue or pin nailer
- Thick jute twine
- Hot glue gun
- Matte clear sealant spray
Step 1: Preparation & Base Coat
-
Sand the surface:
Begin by lightly sanding your main wooden plaque to ensure a smooth painting surface. Wipe away any dust with a tack cloth or slightly damp rag. -
Apply the background:
Using your medium flat brush, paint the entire face of the board with a creamy white acrylic paint. You will likely need two coats to get solid, opaque coverage; let the first coat dry completely before adding the second. -
Prepare the frame strips:
Measure and cut your wooden trim strips to create a frame around your board. I like to mitre the corners at 45 degrees for a cleaner look, but simple butt joints work too. -
Paint the frame:
Paint your cut trim pieces separately using the sage green paint. Painting them before attaching ensures you won’t accidentally get green paint on your fresh white background. Set them aside to dry.
Step 2: Painting the Design
-
Mark the borders:
Once the white background is fully dry, use a ruler to lightly pencil two horizontal lines about 1.5 inches from the top and bottom edges. This central band will house your text. -
Paint the dividing lines:
Using a steady hand and a small round brush (or a paint pen if you prefer), trace over your pencil lines with a warm terracotta or copper color to create a border for the lettering area. -
Draft the text:
Position your letter stencils or use transfer paper to map out the word ‘CLASSROOM’ in the center section. Ensure the letters are vertically elongated and evenly spaced. -
Paint the letters:
Fill in your lettering using dark brown paint and a fine detail brush. Take your time with the thin serif lines on the letters to keep them crisp. -
Block in foliage shapes:
In the top and bottom white sections, start painting basic leaf shapes. Use olive green for rounded leaves, terracotta for maple leaves, and brown for pinecones. -
Add berries and stems:
Use your smallest brush to drag thin brown lines for twigs and stems connecting the leaves. Dot small clusters of burgundy red at the ends of some stems to create berries. -
Layer details:
Once the base shapes are dry, go back in to add veins on the leaves and texture on the pinecones using a lighter shade of each respective color.
Clean Lines Pro-Tip
For the horizontal border lines, apply strips of painter’s tape to guide your brush. Peel the tape away slowly while the paint is still slightly wet to ensure a razor-sharp edge.
Step 3: Assembly & Finishing
-
Seal the artwork:
Before attaching the frame, spray the painted board with a matte clear sealant. This protects the detailed leaf work and prevents smudging during handling. -
Attach the frame:
Apply a thin bead of wood glue to the back of your sage green frame pieces and press them onto the edges of the board. Clamp them in place or use a pin nailer for extra security. -
Prepare the hanger:
Cut a length of thick jute twine, approximately 18 to 24 inches long, depending on how low you want the sign to hang. -
Secure the twine:
Flip the sign over. Use a generous amount of hot glue (or a staple gun for heavy-duty hold) to attach the ends of the twine to the top back corners of the frame. -
Create the knot:
Find the center point of your twine loop and tie a simple overhand knot. This adds a rustic touch and helps the sign center itself on a door hook.
Make It Seasonal
Instead of painting the leaves directly on the board, paint the background white and use velcro dots to attach seasonal wood cutouts. Swap leaves for snowflakes in winter!
Now your classroom entrance has a lovely hand-painted touch that celebrates the season
BRUSH GUIDE
The Right Brush for Every Stroke
From clean lines to bold texture — master brush choice, stroke control, and essential techniques.
Explore the Full Guide
Sunflowers-as-Students Teacher Growth Painting

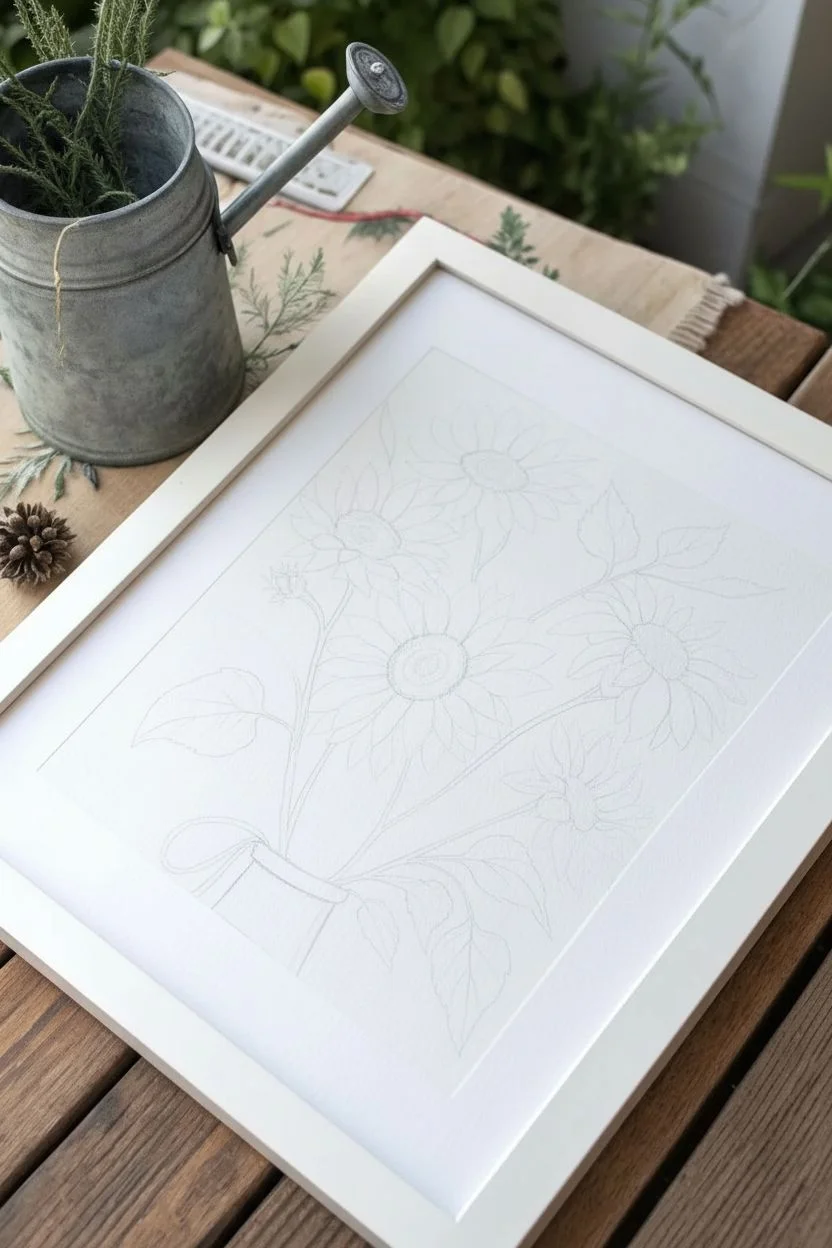
This watercolor project symbolizes growth and potential, featuring a vibrant cluster of sunflowers bursting from a simple pot. The varying shades of yellow and burnt orange create a warm, inviting composition perfect for a classroom or home office.
How-To Guide
Materials
- Cold press watercolor paper (140lb/300gsm)
- Watercolor paints (Cadmium Yellow, Yellow Ochre, Burnt Sienna, Burnt Umber, Sap Green, Hooker’s Green)
- Round watercolor brushes (Size 4, 8, and a finer liner brush)
- Pencil (HB) and soft eraser
- Clean water jar and paper towels
- White or light wood frame (8×10 or similar)
Step 1: Sketching the Composition
-
Establish the Base:
Begin by lightly sketching the pot at the bottom left center. Draw a simple cylindrical shape with a slight angle, adding a small rim at the top and a little loop handle on the left side. -
Map the Flower Heads:
Lightly sketch five circles to serve as placeholders for the main sunflowers. Place one high in the center, one slightly left, a large central focal flower, one to the right, and a smaller one tucking in low on the right. -
Add Stems and Leaves:
Connect your flower circles to the pot with long, gently curved lines for stems. Sketch large, jagged leaf shapes branching out, particularly on the left and right sides to balance the composition.
Pro Tip: Texture Trick
sprinkle a tiny pinch of salt onto the wet centers of the sunflowers. Brush it off when dry to create a perfect seed-like texture without painting every dot.
Step 2: Painting the Blooms
-
First Layer of Yellows:
Load your size 8 brush with a watery mix of Cadmium Yellow. Paint the petals of the top and left flowers, leaving small white gaps between them for definition. Keep the edges precise but the insides fluid. -
Adding Warmth:
For the large central flower and the right-side bloom, mix Yellow Ochre with a touch of Burnt Sienna. Paint these petals with this warmer, deeper orange-yellow tone to create visual hierarchy. -
Deepening the Colors:
While the petals are still slightly damp, drop in touches of concentrated orange or rust color at the base of the petals (closest to the center) to add depth and shadow. -
Painting the Centers:
Once the petals are dry, paint the round centers using Burnt Umber. While wet, dab in a tiny bit of dark blue or black in the very middle to create a concave effect. -
Petal Textures:
Get your size 4 brush. When the petals are fully dry, use a slightly darker version of your petal color to paint fine lines radiating from the center outwards on each petal to simulate texture.
Level Up: Personalize It
Write the names of your students or fellow teachers on the individual leaves using a fine-point archival ink pen for a meaningful class gift.
Step 3: Greenery and Pot
-
Base Green Layer:
Mix a light Sap Green. Fill in the leaf shapes and stems. I find that keeping this first layer quite pale allows for better shading later. -
Leaf Details:
Using Hooker’s Green or a darker mixed green, paint the veins on the leaves. Add shading to the undersides of the leaves and where the stems overlap. -
Painting the Pot:
Color the pot with a wash of Burnt Sienna. Let it dry, then add a second darker layer on the right side and under the rim to create a 3D cylindrical form. -
The Rope Handle:
Use a fine liner brush and light brown paint to outline the loop handle, adding small diagonal dashes to mimic the twisted texture of rope or twine.
Step 4: Final Details
-
Refining Edges:
Check your edges. If any petals or leaves look too soft, use the liner brush with a slightly darker pigment to sharpen the outline very subtly. -
The Center Bud:
Don’t forget the small green bud on the left. Paint the sepals green and just a peek of yellow emerging from the top. -
Finishing Touches:
Erase any visible pencil marks once the painting is completely bone dry. Sign your name near the pot base. -
Framing:
Place your finished artwork into a white frame with a mat to replicate the clean, gallery-style look of the inspiration image.
Now you have a stunning botanical tribute to growth ready to brighten any wall
Painted Classroom Map of Memories for a Teacher
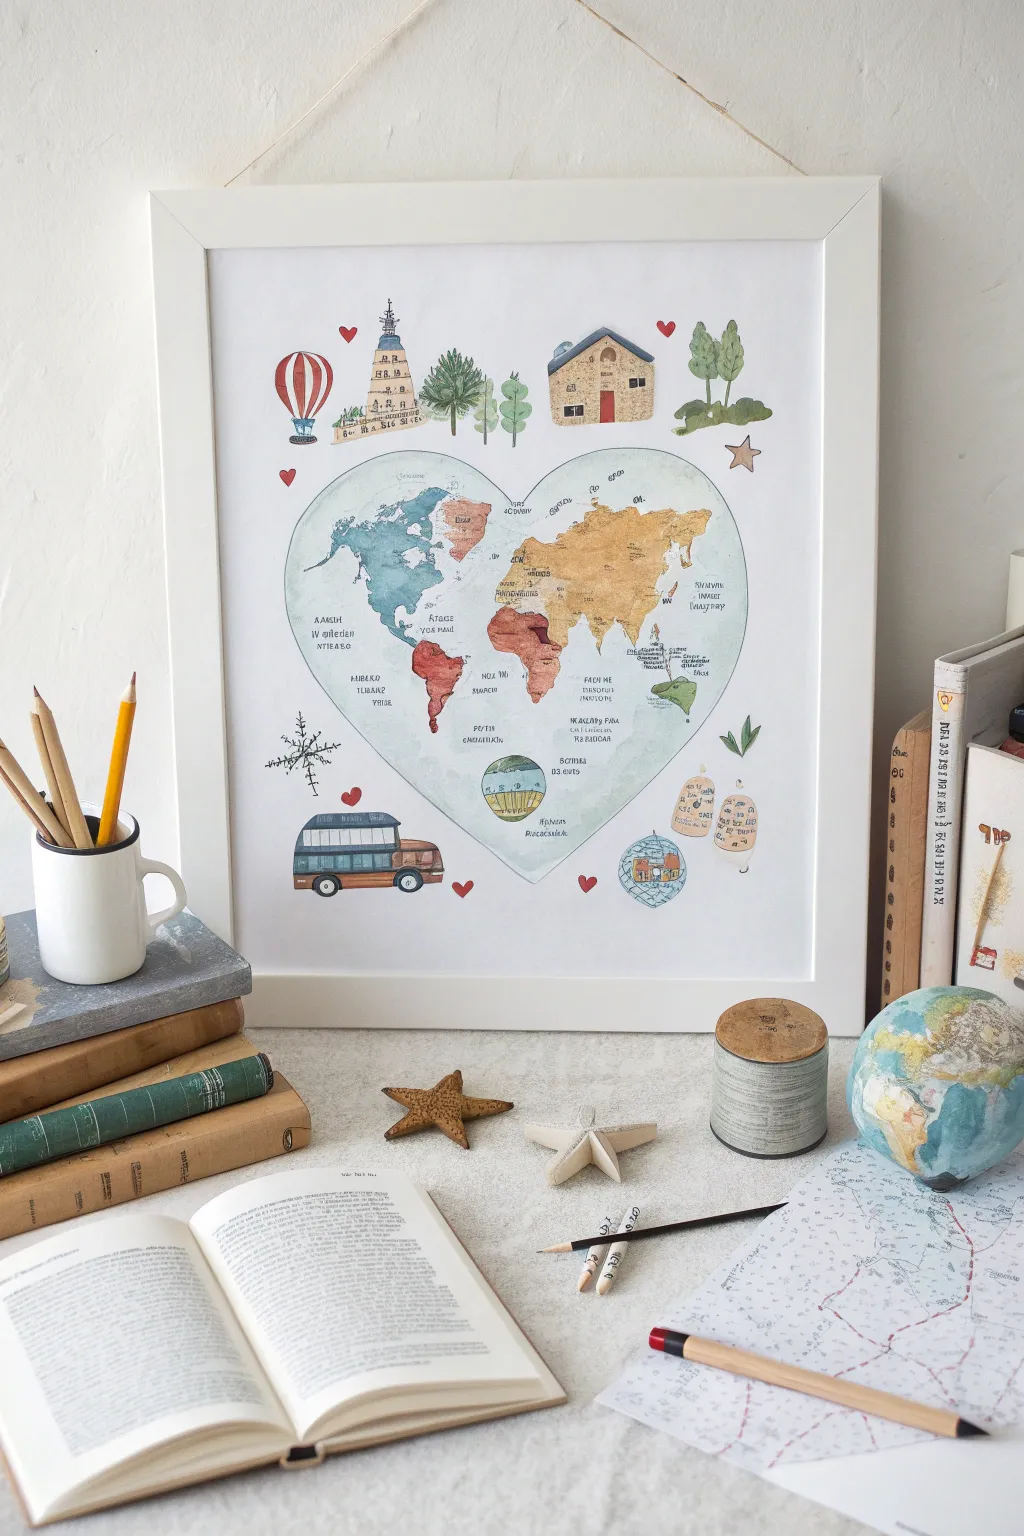
Celebrate a teacher’s global impact with this charming watercolor-style illustration, featuring a heart-shaped world map surrounded by whimsical travel icons. Using soft washes and delicate ink lines, you’ll create a sentimental piece perfect for any classroom wall.
Detailed Instructions
Materials
- Hot press watercolor paper (A3 or 11×14 inches)
- Pencil (HB) and eraser
- Watercolor paint set (earth tones, blues, red)
- Fine liner pens (black, 0.1mm and 0.3mm)
- Round watercolor brushes (size 2, 4, and 6)
- Mixing palette
- Heart-shaped stencil (optional) or compass
- White or light wood frame
Step 1: Drafting the Composition
-
Outline the heart:
Begin by finding the center of your paper. Lightly sketch a large, symmetrical heart shape using your pencil. This will serve as the container for your world map, so ensure it’s large enough to hold detail. -
Sketch the continents:
Inside the heart, lightly draw the outlines of the continents. Don’t worry about perfect geographical accuracy; the goal is a recognizable stylization that fits snugly within the heart’s curves. Distort the landmasses slightly near the edges to conform to the heart shape. -
Add surrounding elements:
Around the central heart, sketch the playful illustrated elements. Draw a hot air balloon on the top left, a lighthouse or tower, some trees, a stone house, and a vintage bus at the bottom left. Keep your pencil pressure very light so lines can be erased later. -
Include decorative details:
Fill in the remaining white space with smaller motifs like tiny hearts, a star, a compass rose, and simplified luggage tags. These balance the composition.
Smudged Ink?
Watercolor paper has texture that traps ink. Wait at least 20 minutes after painting before inking. If ink smudges, dab gently with a clean tissue; do not rub.
Step 2: Painting the Elements
-
Base wash for the heart:
Mix a very dilute, pale blue wash. Apply this to the ocean areas inside the heart shape, carefully painting around the continents. Keep the wash wet to avoid hard edges within the water area. -
Color the continents:
Once the blue is dry, paint the landmasses using distinct colors to separate regions. Use a muted teal for North America, a warm terracotta for South America, ochre for Asia, and a reddish-brown for Africa. Let the colors pool slightly for a textured, watercolor look. -
Paint the icons:
Moving to the outer illustrations, paint them with semi-realistic but soft colors. Use stripes of red and white for the hot air balloon, grey-blues for the bus windows, and natural greens for the trees. I find that leaving tiny slivers of white paper unpainted adds a nice sparkle to these small objects. -
Add warmth:
Paint the small floating hearts with a vibrant red to make them pop against the white background. Color the house roof and luggage tags with warm beige or tan hues.
Step 3: Inking and Finishing
-
Outline continent details:
After ensure the paint is completely bone-dry, take your 0.1mm fine liner. Gently trace the continent outlines with a broken, sketchy line rather than a solid heavy one. This keeps the aesthetic delicate. -
Inscribe text:
Add handwritten text over the map regions. You can write the names of continents, or personal messages like ‘Adventure’ or specific dates. Use a loose, casual print style. -
Define the illustrations:
Ink the surrounding drawings using the 0.3mm pen for main outlines and the 0.1mm for details like window panes on the bus or bricks on the lighthouse. Add cross-hatching to the trees for texture. -
Add final embellishments:
Draw dashed lines connecting different parts of the map or trailing behind the hot air balloon to simulate travel routes. -
Erase and frame:
Gently erase any remaining visible pencil marks. Once the paper is clean, mount your artwork in a simple white frame to let the colors stand out.
Personalize the Map
Instead of generic continent names, write the names of students in the class on the regions where their families are from, or mark places the teacher has traveled to.
Hang this thoughtful tribute where it can inspire wanderlust and appreciation every day


Have a question or want to share your own experience? I'd love to hear from you in the comments below!