
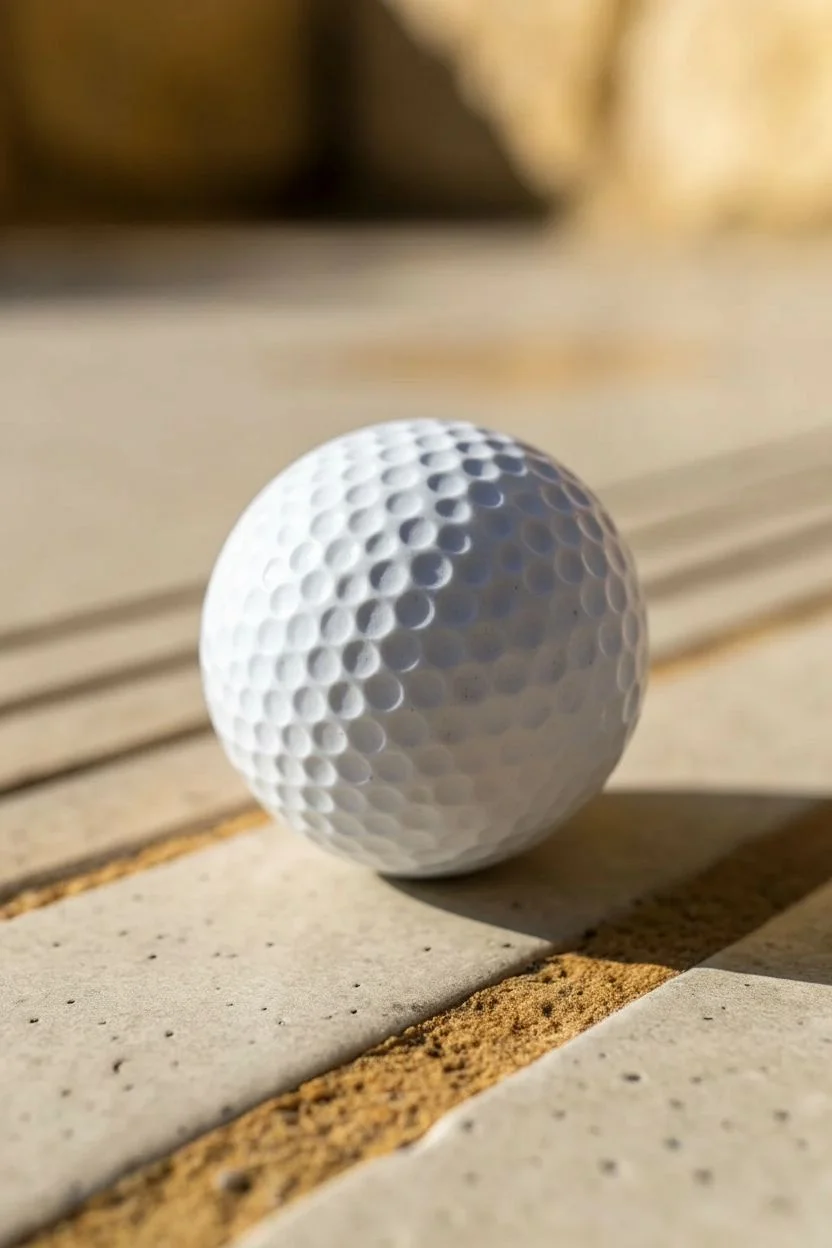
A plain white golf ball is basically a tiny, dimpled sketchbook waiting for your personal mark. These golf ball drawing ideas are all about quick, doable designs that look crisp on that bumpy surface and stay easy to recognize at a glance.
One Bold Stripe Around the Equator
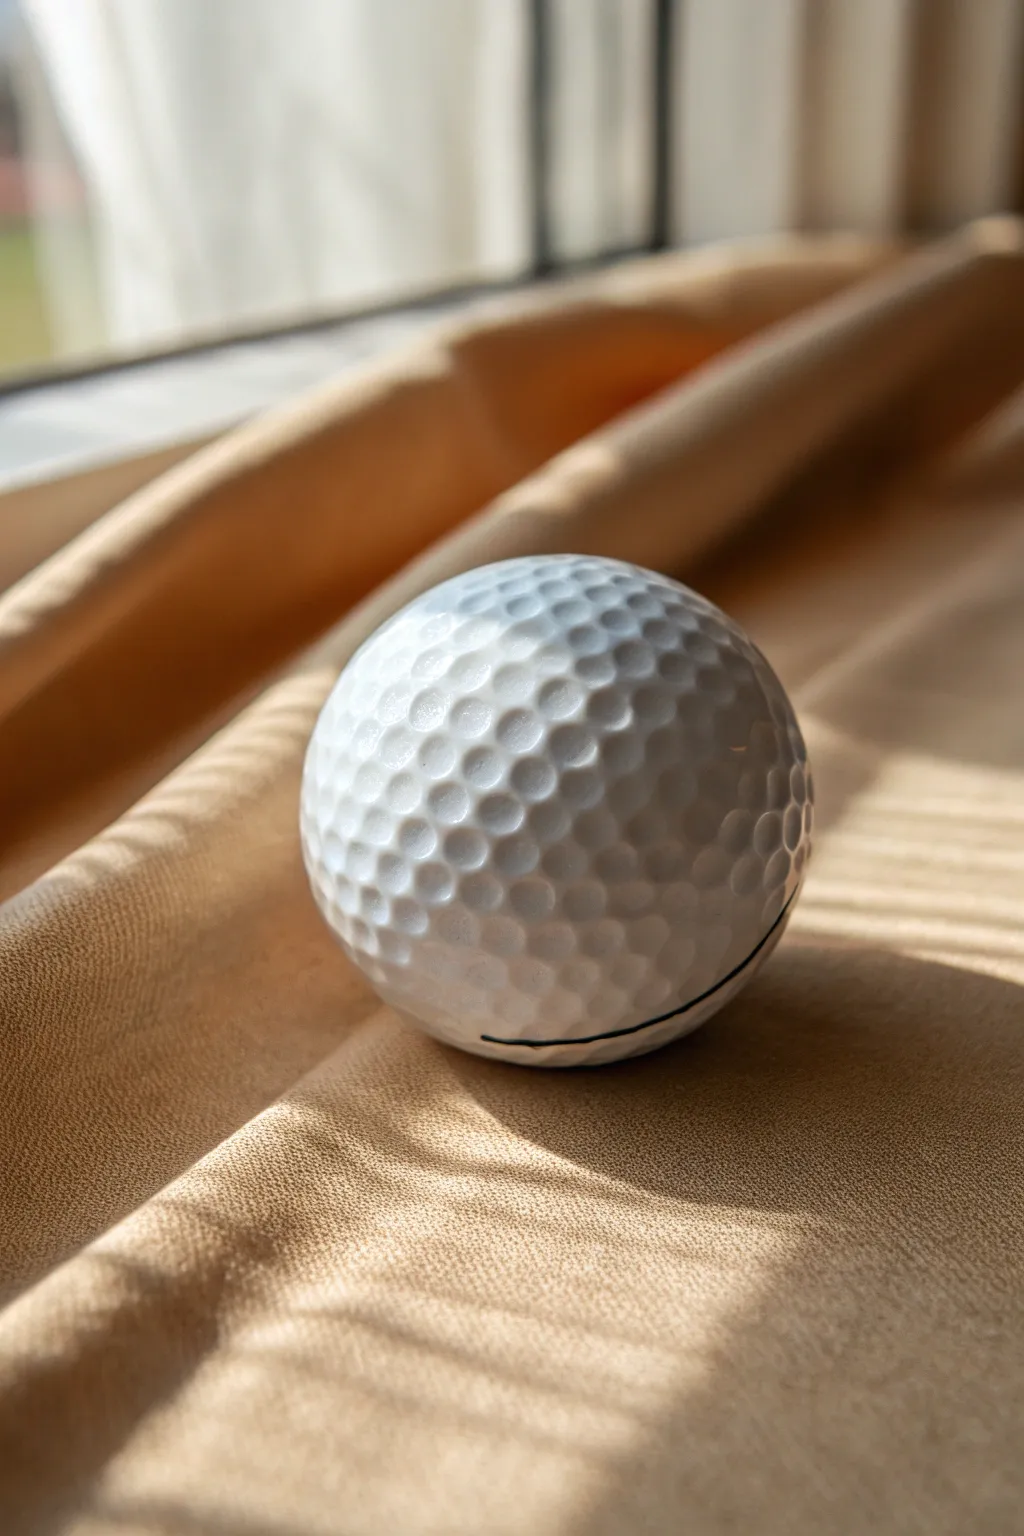
Achieve a sleek and professional look on your golf ball with a single, perfectly executed black stripe. This understated design not only looks sharp but also serves as a practical alignment aid for putting.
How-To Guide
Materials
- Clean white golf ball
- Fine-point permanent marker in black (Sharpie Ultra Fine or similar)
- Golf ball alignment tool (plastic cup style or stencil clip)
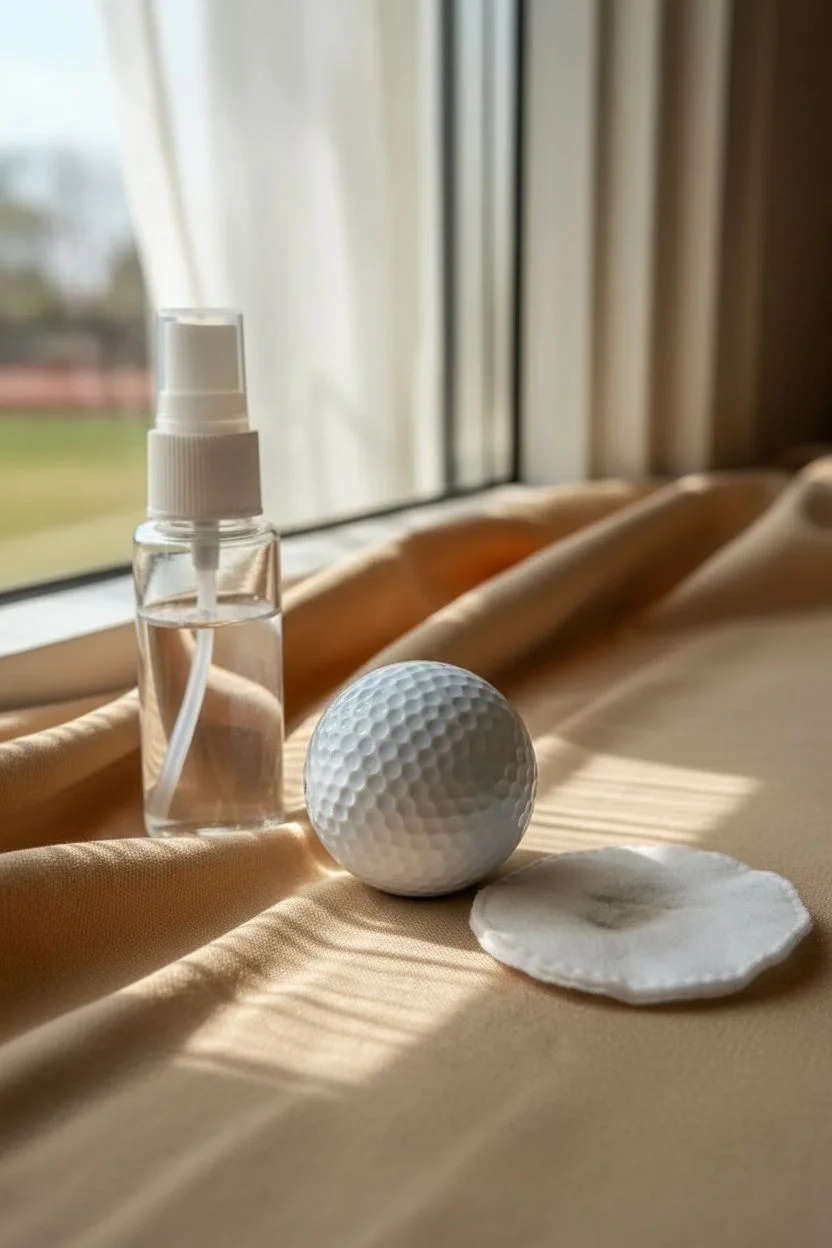
- Rubbing alcohol
- Cotton pad or paper towel
- Masking tape (optional for securing the tool)
Step 1: Preparation and Setup
-
Clean the surface:
Before you begin marking, wipe the entire golf ball down with a cotton pad soaked in rubbing alcohol. This removes manufacturing oils or invisible debris that could cause ink to skip or bleed. -
Dry completely:
Allow the alcohol to evaporate fully for about 30 seconds. A bone-dry surface ensures the crispest possible line. -
Inspect the ball:
Look closely at the dimple pattern. Most golf balls have a faintly visible seam where the two halves join. This natural seam is often the best path for your line to follow for symmetry.
Step 2: Drawing the Line
-
Position the alignment aid:
Snap your plastic alignment tool onto the ball. Rotate the ball inside the tool until the central slit aligns perfectly with the seam you identified earlier. -
Secure the hold:
Grip the tool and ball firmly with your non-dominant hand. If you struggle with slippage, a small piece of masking tape can temporarily hold the ball still against the plastic frame. -
Prime the marker:
Make a quick test mark on a piece of scrap paper to ensure the ink is flowing smoothly and the tip isn’t dried out. -
Start the stroke:
Place the marker tip gently into the start of the alignment slit. Use a light touch; pressing too hard can push ink into the dimples and cause bleeding. -
Draw half the circle:
I find it easier to draw from the center of the slit outwards to the left, and then go back to the center and draw outwards to the right. This prevents ink buildup at the ends. -
Rotate and reposition:
Carefully remove the tool once the ink is touch-dry (about 10 seconds). Rotate the ball 180 degrees to expose the unmarked side. -
Realign the tool:
Snap the tool back on, taking great care to line up the slit exactly with the ends of the line you just drew. -
Complete the loop:
Draw the second half of the line, connecting the endpoints. Move slowly as you approach the connections to ensure a seamless bond.
Dimple Mastery
Don’t drag the pen quickly. “Walk” the tip slowly over the dimples. If you go too fast, the pen tip skips the depressions, leaving a dotted rather than solid look.
Step 3: Finishing Touches
-
Check for gaps:
Remove the tool and inspect the full circumference. If the line skipped over a particularly deep dimple, carefully dab the marker tip into that specific spot to fill it. -
Let it cure:
Set the ball in a safe place where it won’t roll. Let the ink cure for at least 5 minutes before handling or putting it back in your bag to prevent smudging. -
Seal (Optional):
If you play in wet conditions often, a very light dab of clear nail polish over the line can weatherproof your design, though usually, permanent marker holds up well on its own.
Dual-Tone Effect
Add a second, thinner line in a contrasting color like red or neon blue right next to the black stripe. This creates a high-visibility ‘railroad’ track effect.
Now you have a perfectly marked ball ready for the green
Two-Tone Split With a Clean Divider Line
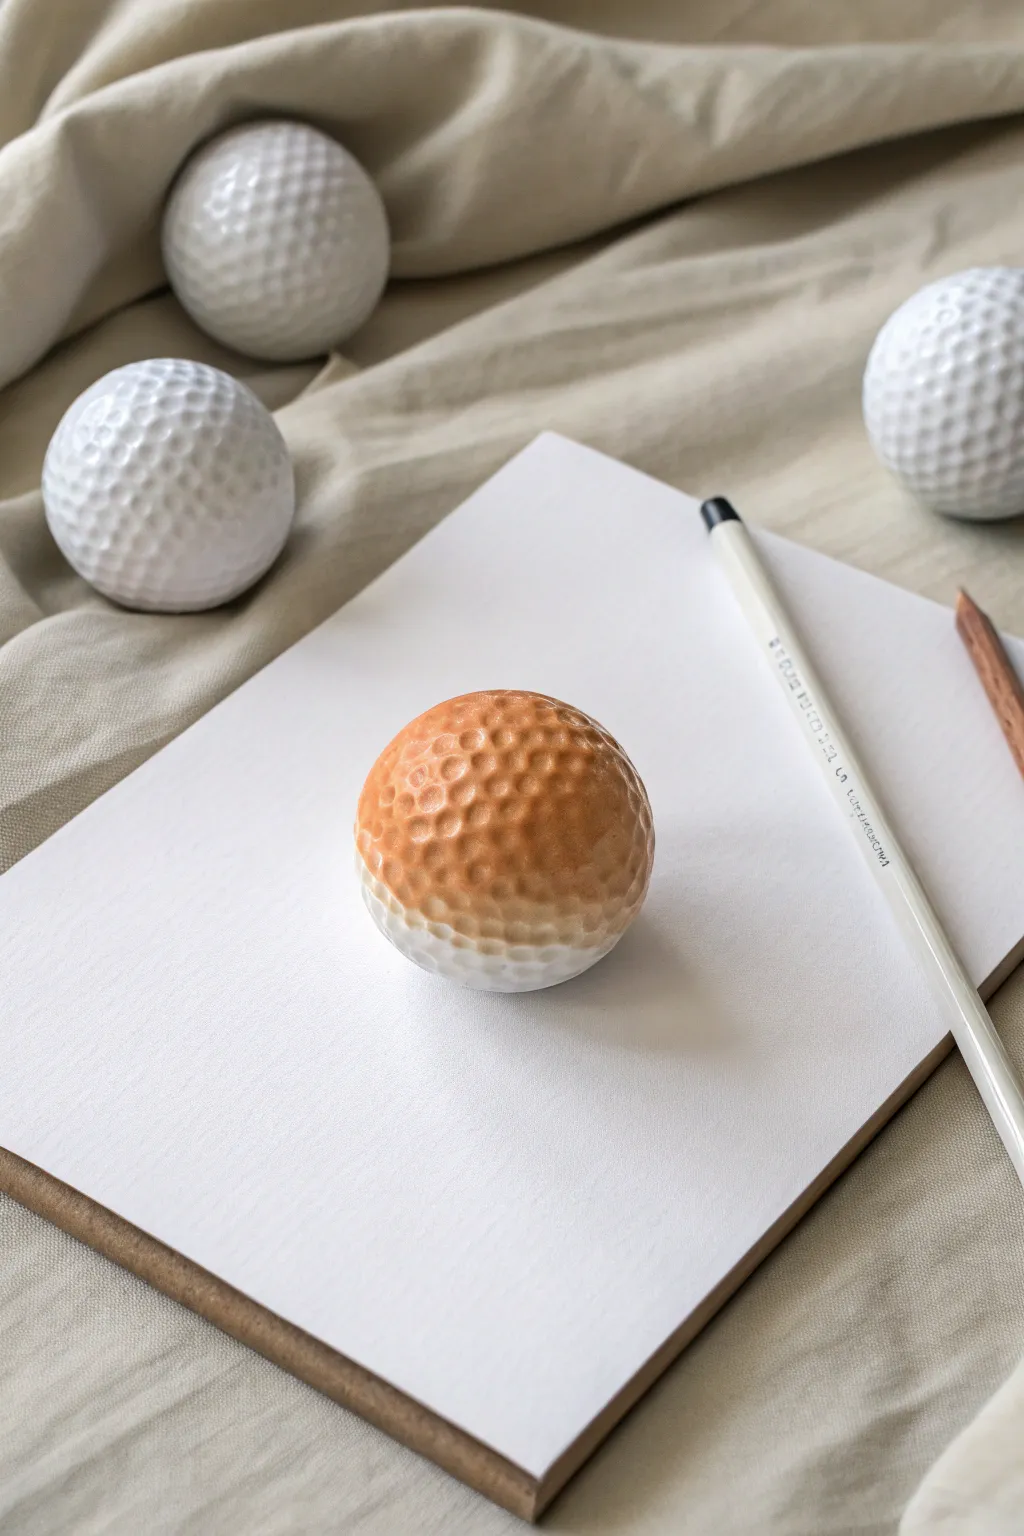
Master the art of texture and light with this striking study of a golf ball split by shadow and color. This project creates a hyper-realistic illusion where the ball seems to pop right off the page, transitioning from a warm, sunlit orange to a crisp white underside.
Step-by-Step Guide
Materials
- High-quality sketchbook paper (smooth or vellum finish)
- Graphite pencil (HB or H)
- Colored pencils (Burnt Sienna, Orange, Cream/Beige, White, Warm Grey)
- Circle template or compass
- Kneaded eraser
- Pencil sharpener
- Creating the Outline
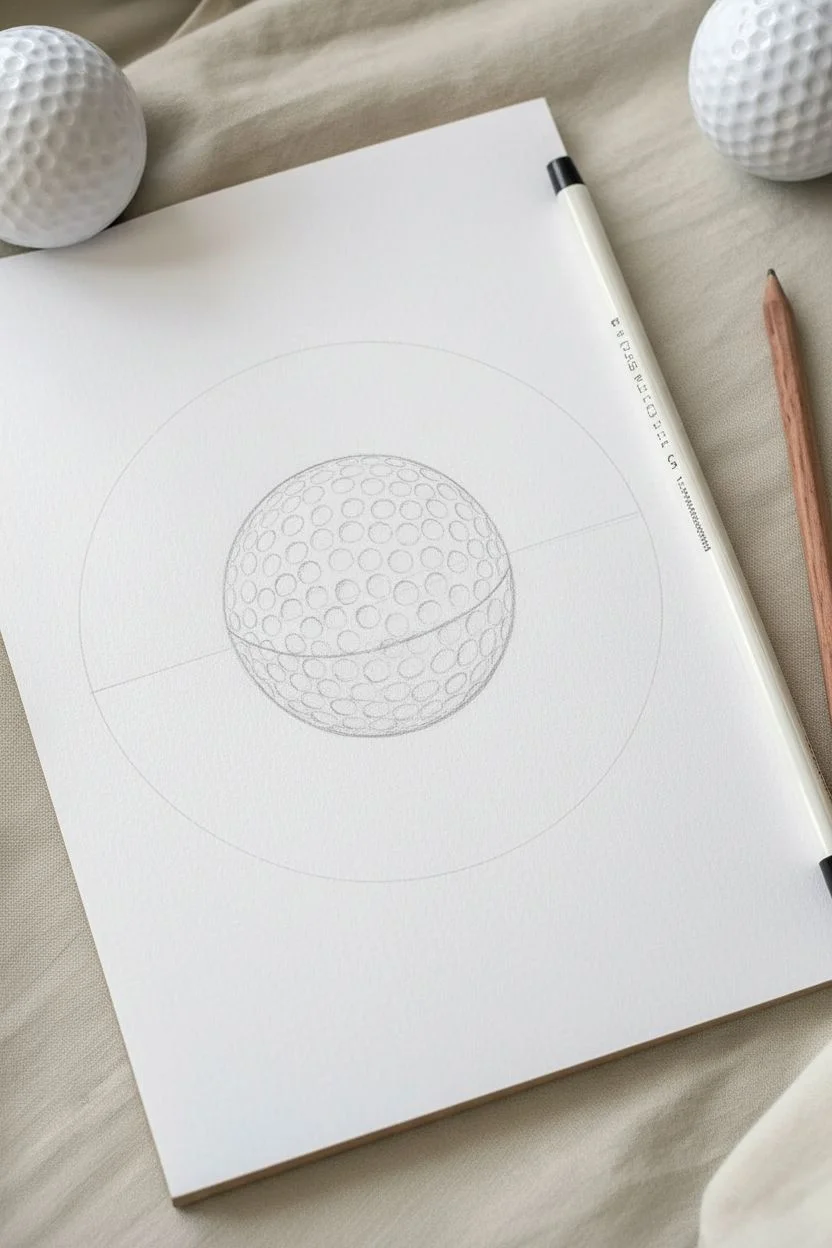
Step 1: Laying the Foundation
-
Draw the perimeter:
Begin by lightly tracing a perfect circle using your template or compass in the center of your page. Keep this line barely visible, just enough to guide your coloring later. -
Map the separation line:
Lightly sketch a curved line horizontally across the lower third of the circle. This doesn’t need to be a hard edge yet, but it will mark where the warm orange tone fades into the white bottom section. -
Plot the dimples:
Start sketching the dimple pattern. Draw small, distorted circles or hexagons. Remember that dimples in the center look rounder, while those near the edges appear flatter and more elliptical due to perspective.
Dimple Distortion
Dimples shouldn’t all be perfect circles. Squish them into narrow ovals near the edges of the ball to create accurate spherical perspective.
Step 2: Coloring the Orange Section
-
Base layer application:
Take your burnt sienna pencil and gently shade the upper two-thirds of the ball. Don’t press hard yet; you want a soft, even wash of color to establish the shape. -
Define the shadows:
Using a slightly sharper point, darken the inside curves of each dimple on the orange side. The shadow should generally fall on the upper-left side of each dimple if your light source is coming from the top right. -
Layering warmth:
Go over the burnt sienna with a brighter orange pencil. This adds the sun-baked glow. Apply more pressure near the right side of the ball to suggest the core shadow area before the highlight. -
Highlighting the ridges:
Use your cream or beige pencil to color the raised ridges *between* the dimples. This contrast creates the physical texture. I prefer to use small, circular strokes here to blend the edges. -
Deepening the dimples:
Return to the dimple interiors with a dark brown or very sharp burnt sienna to punch up the deepest shadows. This makes the texture look tactile and distinct.
Step 3: The White Lower Section
-
Subtle grey shading:
Switch to a warm grey pencil for the bottom third. Shade the dimples very lightly, mimicking the pattern you established above but with much less intensity. -
Creating the gradient:
Where the orange meets the white, use a white pencil to burnish (blend forcefully) the transition. Drag the white pencil up slightly into the orange to create a frosted, faded look where the colors meet. -
Reflected light:
Leave the very bottom edge of the ball almost pure white paper, but subtle grey shading just above it helps anchor the ball’s roundness.
Pro Tip: Burnishing
Use a colorless blender or white pencil over the orange section at the end. It pushes the pigment into the paper grain for a paint-like finish.
Step 4: Final Touches and Realism
-
Cast shadow placement:
To make the ball sit on the paper, carefully draw a cast shadow underneath it using your warm grey pencil. The shadow should be darkest right where the ball touches the paper. -
Softening the shadow edges:
Fade the shadow out as it moves away from the ball. A soft gradient here is crucial for the 3D illusion. -
Highlight enhancement:
Use a white gel pen or a very sharp white colored pencil to add tiny specular highlights to the upper rim of the orange dimples. This mimics moisture or a glossy coating catching the light. -
Cleaning up:
Use your kneaded eraser to tap away any stray graphite lines from your initial sketch that might still be showing through the lighter areas. -
Border definition:
If the edges look too fuzzy, sharpen your pencil and give the outer perimeter a clean, crisp line, but keep it thin to maintain realism.
Step back and admire how your simple circle has transformed into a dimensional object with weight and texture


Polka Dot Cluster for Quick Identification
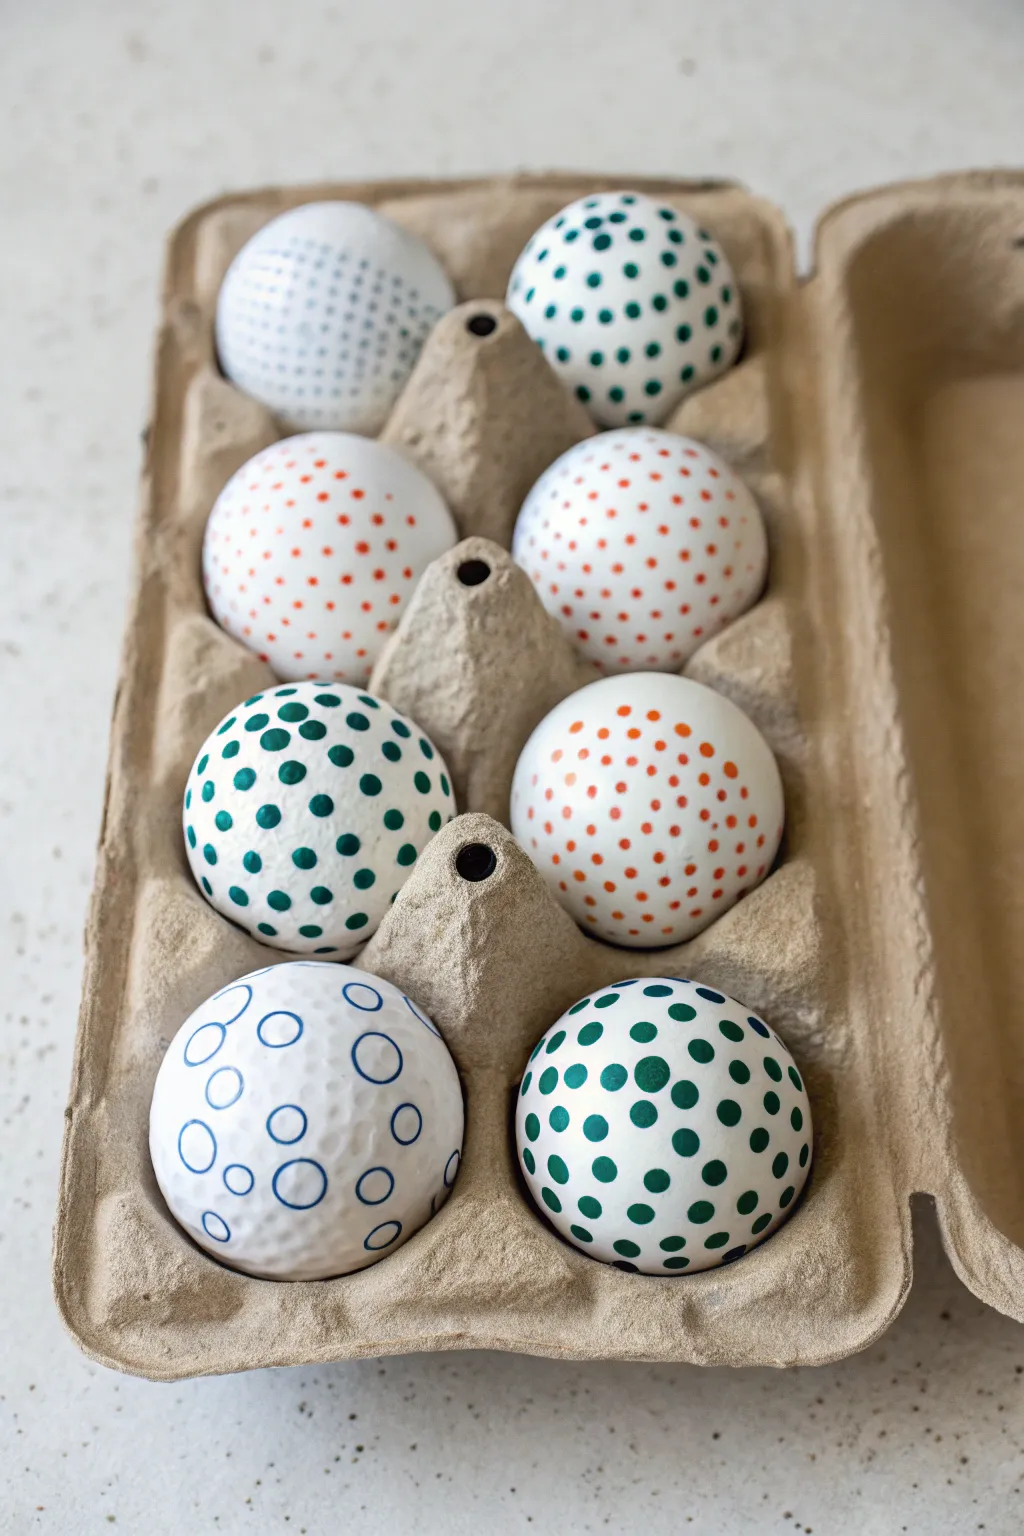
Customize your golf game with these vibrant, easy-to-spot patterns that transform plain white balls into personalized markers. This project uses simple groupings of dots and circles in varying sizes to create a distinct look that stands out on the green.
Detailed Instructions
Materials
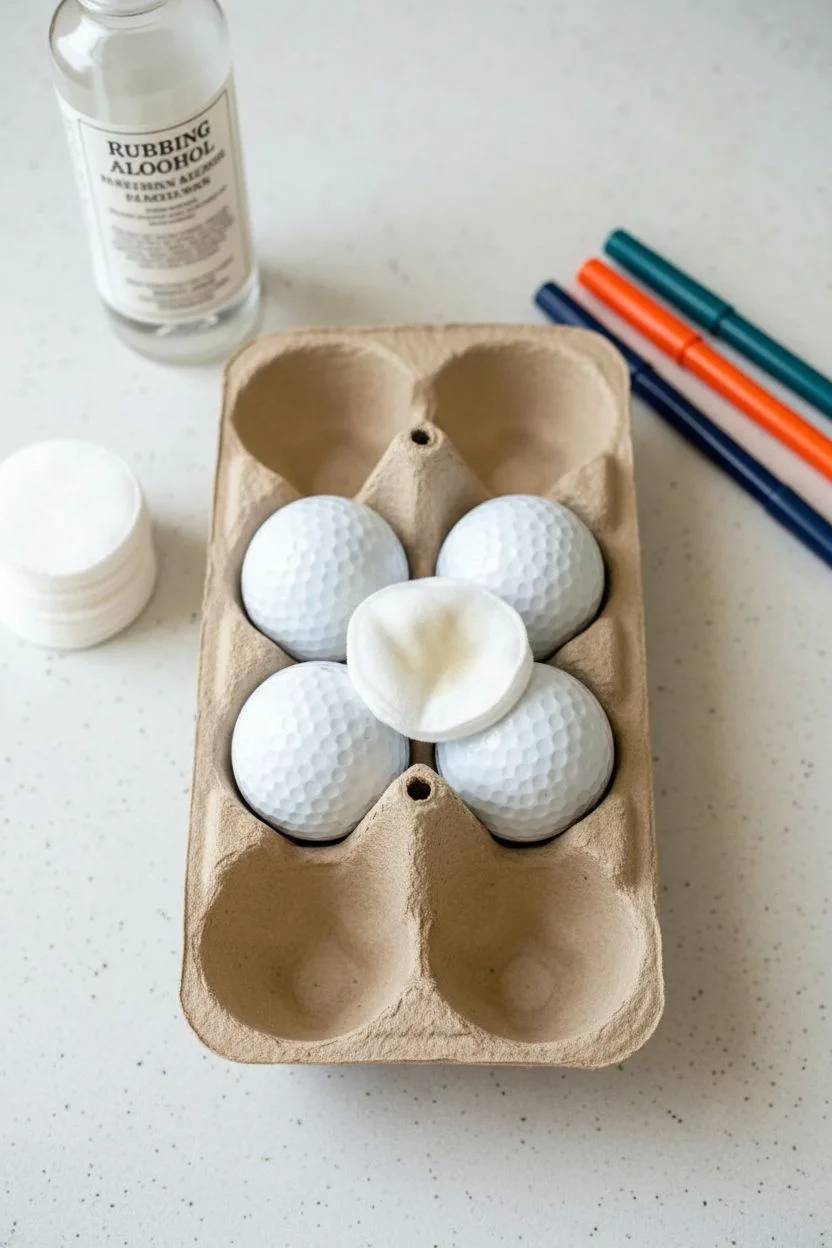
- Standard white golf balls (clean and dry)
- Permanent markers (Sharpie or oil-based paint pens in teal/green, orange, and blue)
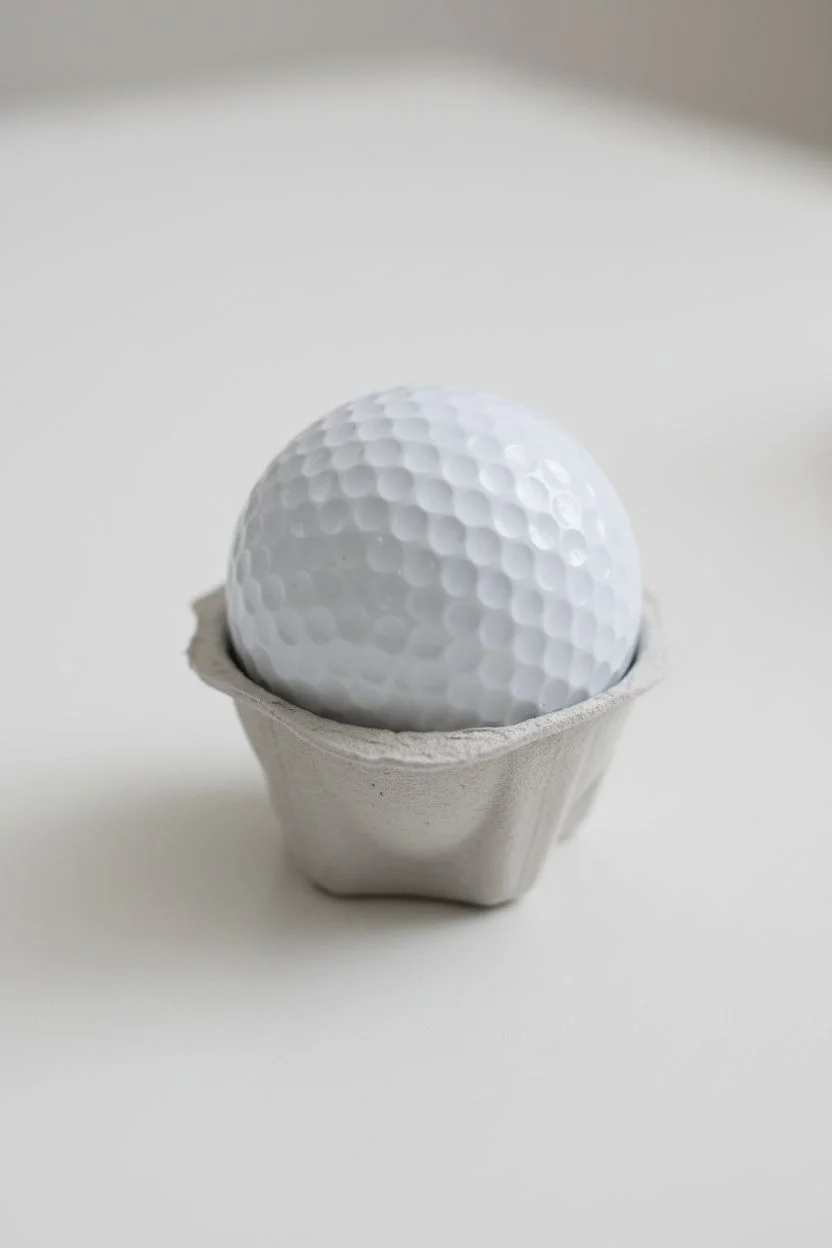
- Egg carton (for drying and stability)
- Rubbing alcohol and cotton pads (for prep)
- Clear spray sealant (optional, for durability)
Step 1: Preparation & Planning
-
Clean the Surface:
Before uncapping any markers, wipe down each golf ball thoroughly with rubbing alcohol on a cotton pad. This removes invisible oils or factory coatings that might cause the ink to smear or not adhere properly. -
Set Up Your Workstation:
Place your clean golf balls into the egg carton. This acts as a perfect stabilizer, holding the round balls steady while you draw on the top surface without needing to touch wet ink. -
Choose Your Palette:
For this set, we are working with three distinct colors: a bright orange, a deep teal or forest green, and a classic navy blue. Select fine-point markers for the delicate dots and medium-point markers for the larger circles.
Step 2: Design 1: Micro-Dot Grids
-
Start the Blue Grid:
Take a fine-point blue marker. Choose one dimple on the ball as your center point. Place a small, precise dot right in the middle of that dimple. -
Expand the Pattern:
Identify the six surrounding dimples and place dots in each of them. Continue expanding outward in concentric hexagon shapes, dotting every single dimple within your chosen cluster area. -
Vary the Spacing:
For the green version of this pattern, try spacing the dots slightly further apart, skipping every other dimple to create a looser grid texture compared to the tight blue cluster.
Dimple Theory
Use the ball’s dimples as a grid! Placing dots inside the depressions protects the ink from grass abrasion better than drawing on the high ridges.
Step 3: Design 2: Scattered Confetti Points
-
Switch to Orange:
Using an orange fine-tip marker, begin placing dots randomly rather than following the dimple grid strictly. Aim for a ‘sprinkle’ effect where dots are close but not uniform. -
Build Density:
Concentrate more dots in the center of your design area and let them feather out towards the edges, creating a gradient of density. This looks like a burst of confetti. -
Create a Matching Pair:
Repeat this scattered confetti style with a teal or dark green marker on a separate ball. I find it helps to rotate the ball slightly in the carton to ensure the cluster looks organic from different angles.
Ink Smearing?
If the marker smears instantly, the ball likely has a glossy factory coating. Wipe it firmly with acetone (nail polish remover) to slightly roughen the surface.
Step 4: Design 3: Bold Polka Dots
-
Draw Defined Circles:
Switch to a medium-point marker in dark teal or forest green. Instead of tiny pinpricks, draw fully filled-in circles that span across the ridges of the dimples. -
Fill Them In:
Ensure each dot is solid and opaque. Because the surface is uneven, you may need to dab the marker tip gently to get ink into the deeper parts of the dimple. -
Space Evenly:
Leave about a quarter-inch of white space between these larger dots so the pattern breathes. Aim for a consistent distribution over one hemisphere of the ball. -
Repeat with Orange:
create a companion ball using the orange marker, following the same spacing rules but perhaps making the dots slightly smaller for variety.
Step 5: Design 4: Open Circles
-
Outline Only:
For the final design style, use a blue fine-point marker. Draw circles that are roughly the size of a pencil eraser, but leave the centers empty. -
Overlap Slightly:
Don’t worry about perfect spacing here; allow the circles to sit near each other casually. The contrast of the thin blue line against the white ball makes this pattern very sharp. -
Dry and Seal:
Let all designs dry for at least 15 minutes. If you want them to last through rough bunker shots, light apply a clear matte spray sealant over the decorated areas.
Pack your newly customized set into your golf bag and enjoy spotting your ball with ease on the next fairway


Tiny Stars and Mini Sparkles

Transform a standard golf ball into a tiny piece of starlit art with this delicate monochrome design. The combination of hollow stars, solid dots, and tiny open circles creates a whimsical pattern that looks sophisticated yet is incredibly simple to execute.
Step-by-Step Guide
Materials
- Clean, white golf ball
- Rubbing alcohol
- Cotton pad or paper towel
- Ultra-fine point permanent marker (black)
- Pencil (optional for sketching)
- Clear spray sealant (matte or glossy)
Step 1: Preparation
-
Start with a clean slate:
Before drawing anything, take your cotton pad and dampen it with rubbing alcohol. Wipe the entire surface of the golf ball to remove any oils, dirt, or invisible factory coatings. -
Let it dry completely:
Wait about 5 minutes for the alcohol to completely evaporate. A perfectly dry surface ensures your ink won’t feather or smudge during application. -
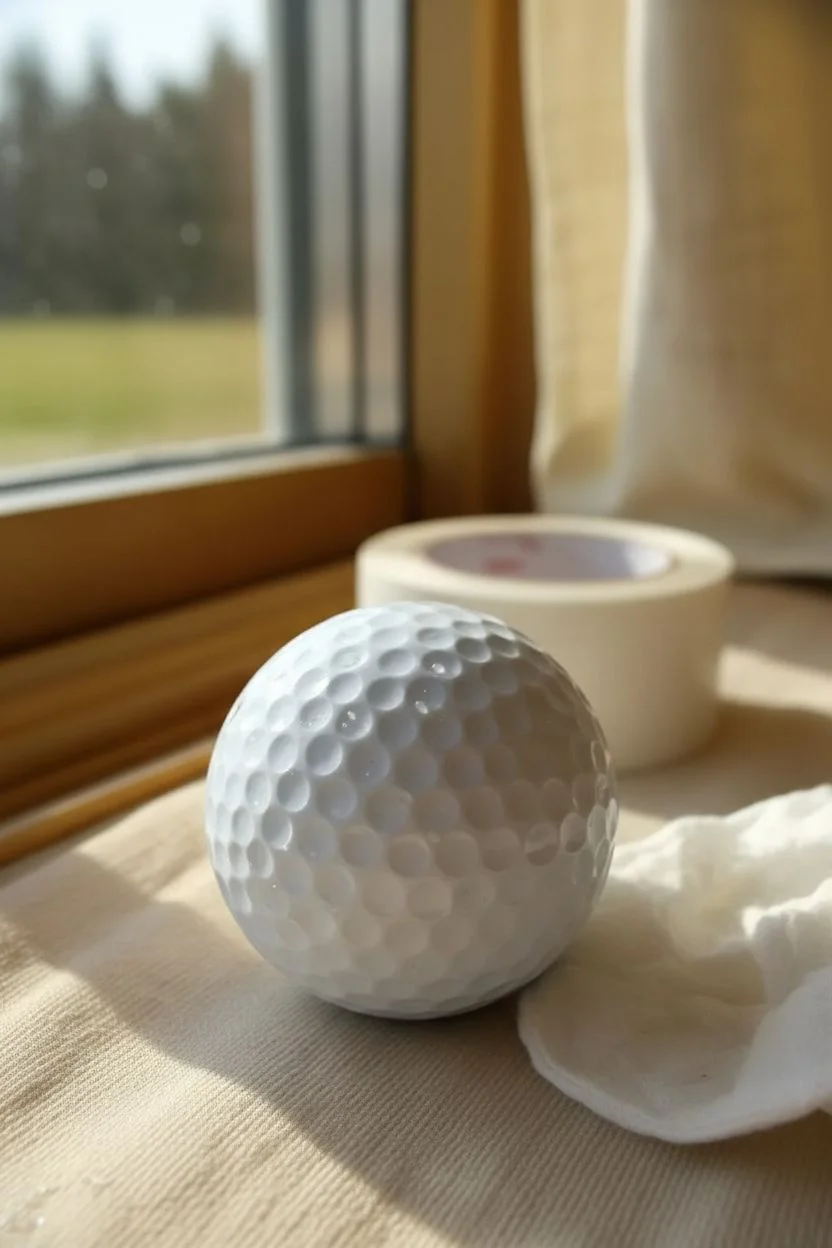
Secure your workspace:
Since golf balls roll easily, create a small nest using a roll of tape or an egg cup to hold the ball steady while you work on the top section.
Step 2: Drawing the Stars
-
Begin the primary pattern:
Start by drawing your first five-pointed star. Draw this freehand with the ultra-fine marker, keeping the lines thin and delicate. Don’t worry about perfect symmetry; a slightly hand-drawn look adds charm. -
Space them out:
Rotate the ball slightly and add a second star about an inch away from the first. I like to vary the rotation of the stars so they aren’t all pointing up. -
Continue the star field:
Work your way around the entire ball, placing large open stars randomly. Aim for loose spacing so the design doesn’t feel cluttered. -
Add variance:
Draw a few smaller four-pointed stars or ‘sparkles’ (a simple cross shape) in some of the larger gaps between the main stars.
Dimple Advantage
Use the golf ball’s texture to your advantage. Drawing inside the depressed dimples protects the ink from abrasion if the ball rolls.
Step 3: Adding Details
-
Create open circle accents:
Look for empty dimples on the surface. Carefully trace the rim of selected dimples to create perfect, small open circles. These act like tiny bubbles or planets. -
Distribute the circles:
Scatter these circle accents evenly around the stars, ensuring no two elements are touching. -
Fill in with micro-dots:
Using the very tip of your marker, place tiny, singular dots in the negative spaces. Think of these as distant stars in the background. -
Draw mini asterisks:
Find a few spots that still look too empty and draw tiny asterisks (three intersecting lines) for a different texture of sparkle. -
Review the balance:
Hold the ball at arm’s length and spin it slowly. Look for any bald patches where the white space feels too heavy. -
Fill the gaps:
Add one or two more tiny dots or a small cross in those empty areas to balance the composition.
Ink Smudging?
If your lines bleed, your hand moisture might be the cause. Wear a latex glove or hold the ball with a tissue while drawing.
Step 4: Finishing Touches
-
Allow ink to cure:
Set the ball aside in a safe spot for at least 30 minutes. Even though permanent marker dries instantly to the touch, it needs time to fully bond with the plastic surface. -
Prepare for sealing:
Move to a well-ventilated area, preferably outdoors. Set the ball on a piece of cardboard or scrap paper. -
Apply the sealant:
Hold the clear spray sealant about 12 inches away and apply a very light mist coat. Do not spray heavily or the ink might run. -
Rotate and repeat:
Once the first side is dry to the touch (usually 15-20 minutes), rotate the ball and mist the underside. -
Final cure:
Let the sealant cure for 24 hours before handling extensively or displaying.
Now you have a shimmering piece of celestial decor ready to be displayed on a desk or gifted to a golf enthusiast

PENCIL GUIDE
Understanding Pencil Grades from H to B
From first sketch to finished drawing — learn pencil grades, line control, and shading techniques.
Explore the Full Guide
Little Hearts Repeated in a Ring
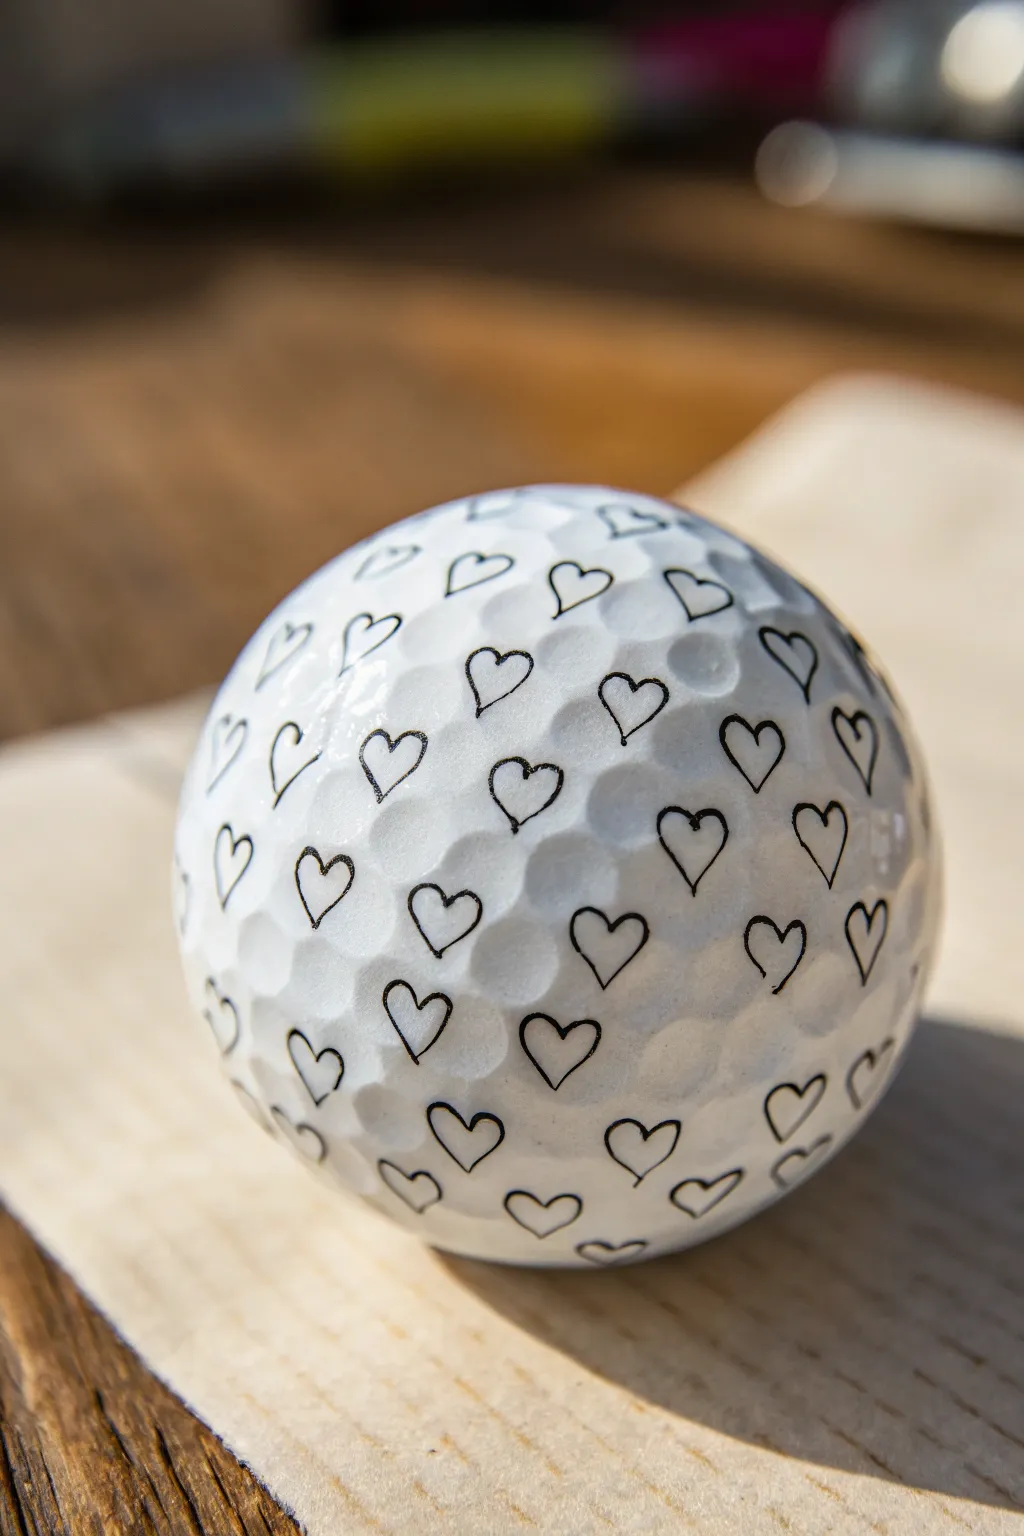

Transform a plain golf ball into a sweet token of affection with this simple yet striking repeating heart pattern. The minimalist black ink on white dimples creates a modern look perfect for gifts or distinctive course markers.
How-To Guide
Materials
- Clean white golf ball
- Ultra-fine point permanent marker (black)
- Rubbing alcohol
- Cotton pad or paper towel
- Small cup or egg cup (for holding the ball)
Step 1: Cleaning and Prep
-
Clean surface:
Before uncapping your pen, wipe the entire surface of the golf ball with a cotton pad soaked in rubbing alcohol. -
Remove oils:
This step is crucial because even invisible finger oils can prevent permanent ink from adhering properly or cause it to bead up. -
Dry thoroughly:
Let the alcohol evaporate completely for about 30 seconds to ensure a bone-dry canvas. -
Stabilize the ball:
Place the golf ball in an egg cup or the mouth of a small bottle so it doesn’t roll away while you work on the top section.
Ink Troubleshooting
If the ink beads up or looks faint, the surface is too waxy. Lightly buff the ball with a fine-grit sanding sponge to give the marker more ‘tooth’ to grab onto.
Step 2: Drawing the Primary Ring
-
Find the equator:
Visualize a center line or ‘equator’ going around the middle of the ball. -
Draw the first heart:
Draw your first small heart outlined in black directly on this imaginary line. Keep it about 1/4 inch tall. -
Mind the dimples:
I find it helpful to let the pen tip ride the ridges of the dimples rather than fighting them; allows for a smoother line. -
Complete the belt:
Continue drawing hearts around this middle belt, spacing them evenly apart. Aim for about a pinky-width of space between each heart. -
Check spacing:
Rotate the ball as you go to ensure the ring meets up neatly at the end.
Color Pop
Once the black outline is fully dry, fill the inside of every third heart with red or pink permanent ink for a cute accent that stands out on the green.
Step 3: Filling the Pattern
-
Start the second row:
Begin a new row of hearts above your first ring. -
Offset the hearts:
Position these new hearts in the gaps between the hearts on the row below, creating a staggered or ‘brickwork’ pattern. -
Adjust orientation:
Keep the points of the hearts facing downward towards the bottom of the ball, maintaining uniform direction. -
Continue upward:
Work your way toward the top pole of the ball, adding concentric rings until you run out of space. -
Flip and repeat:
Turn the ball over in your holder to expose the empty bottom half. -
Match the direction:
Continue the pattern on this side. Ensure the hearts are still oriented correctly relative to the top half. -
Fill gaps:
Examine the ball for any uneven empty spaces and add small hearts where necessary to balance the density.
Step 4: Setting the Ink
-
Let it cure:
Allow the ball to sit untouched for at least 15 minutes to let the ink fully bond with the glossy surface. -
Avoid smudging:
Be careful when handling it initially, as permanent marker can still smear on non-porous surfaces if touched too soon.
Now you have a charming, personalized ball ready for your next round of golf
Lucky Clover and Simple Charm Symbols
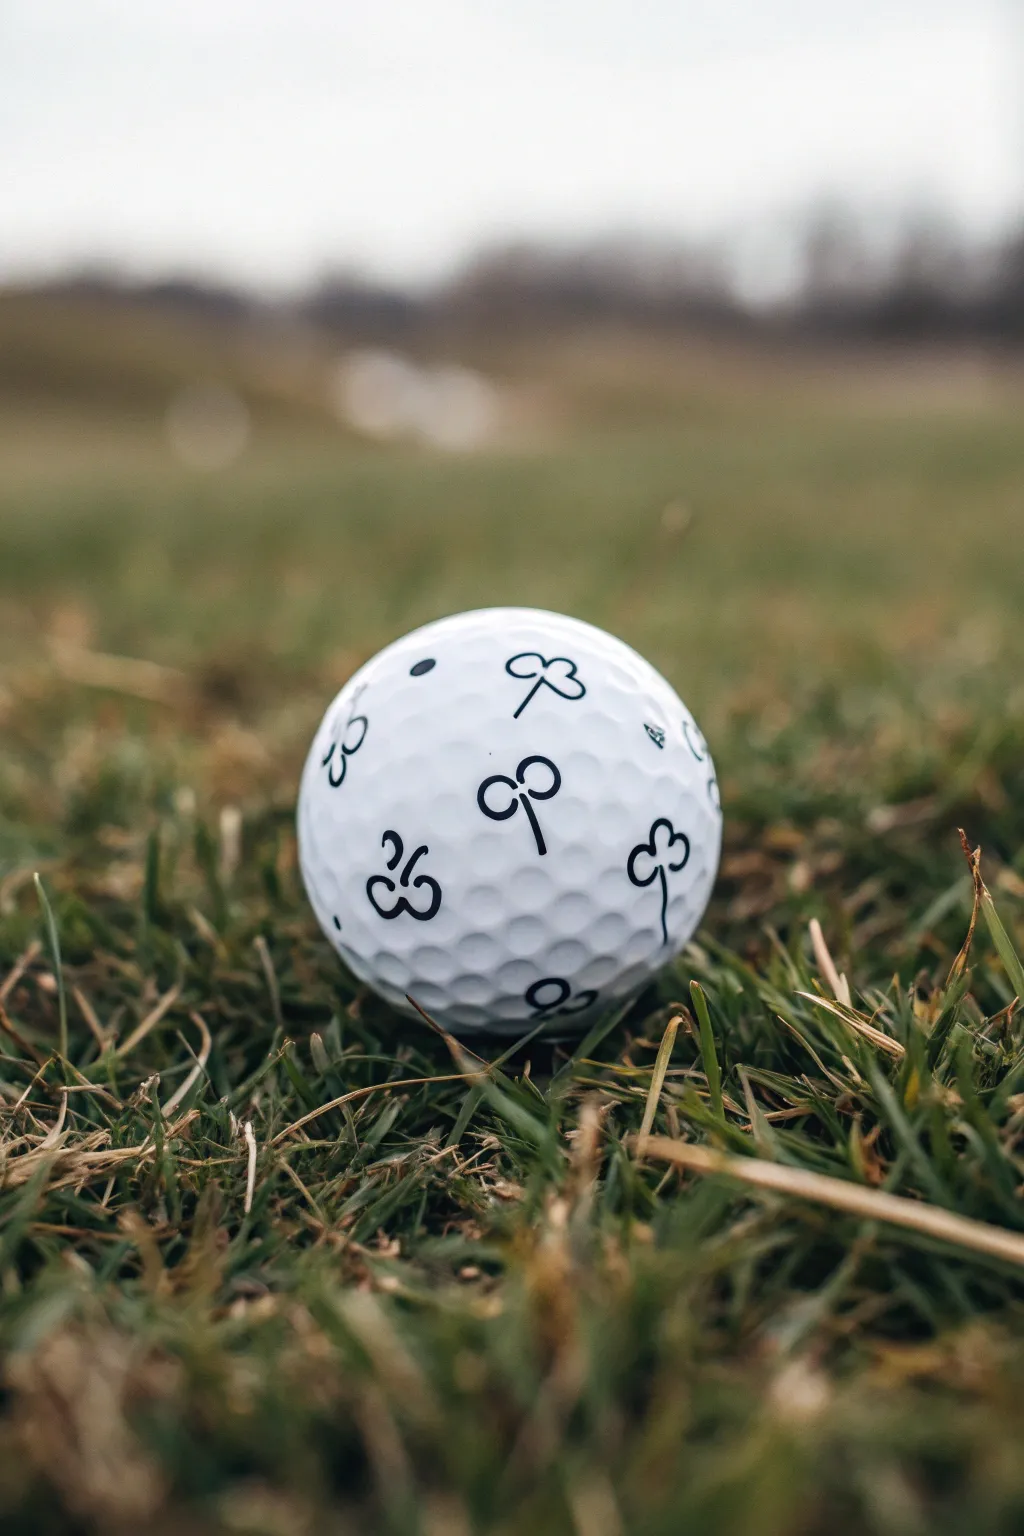
Transform a standard white golf ball into a lucky charm with this elegant, minimalist pattern. Using fine-point markers, you’ll create scattered, stylized clover-like symbols that add a touch of personality to your game without being overwhelming.
Step-by-Step Tutorial
Materials
- Clean white golf ball
- Ultra-fine point permanent marker (black)
- Rubbing alcohol
- Cotton pad or cloth
- Paper towel
- Clear golf ball sealant (optional)
Step 1: Preparation
-
Clean the Surface:
Before drawing, it is crucial to remove any factory oils or dirt from the golf ball. Dampen a cotton pad with rubbing alcohol and wipe the entire surface of the ball thoroughly. -
Dry Completely:
Let the alcohol evaporate fully. The ball should feel dry and matte to the touch, ensuring the ink adheres properly without smudging. -
Test Your Marker:
scribble on a piece of scrap paper or an old practice ball first to ensure your permanent marker is flowing smoothly and isn’t dried out.
Dimple navigation
Use a light hand when crossing dimples. Pressing too hard can snag the nib or cause ink to pool in the recesses.
Step 2: Drawing the Symbols
-
Start with a Central Loop:
Pick a spot on the ball to begin your first symbol. Draw a small, open loop—think of it like an upside-down teardrop or a balloon shape. -
Add the Side Loops:
From the base of that first loop, draw a second loop extending to the left, and a third extending to the right. Try to keep them roughly the same size to form a clover head. -
Draw the Stem:
Starting from the center point where all three loops meet, draw a slightly curved line extending downwards. This forms the stem of your clover. -
Vary the Shapes:
For visual interest, I like to make some symbols distinctly three-lobed (clovers) and others just two-lobed, resembling simple bows or keys. Draw a two-lobed version by simply omitting the top loop and just drawing the left and right ones connected to a stem. -
Rotate the Ball:
Turn the golf ball slightly in your hand to reveal a blank area. You want to scatter these symbols randomly rather than in neat rows. -
Spacing is Key:
Draw your next symbol about half an inch away from the first. Leave enough white space between them so the design breathes and looks elegant rather than cluttered. -
Adjust Orientation:
Don’t draw all the stems pointing down. Rotate your wrist or the ball so that the clovers are oriented in various directions, tumbling across the surface. -
Handle Dimples:
When drawing over the dimples, move your pen slowly. The ink can sometimes skip in the depressions, so you may need to gently retrace lines to make them solid black. -
Fill the Surface:
Continue this process until the visible face of the ball is covered. Generally, about 5-6 symbols fit comfortably on one ‘face’ before you need to turn it significantly. -
Add Tiny Accents:
If you see a large empty gap that feels too small for a full clover, simply place a single small dot or a tiny circle to balance the negative space. -
Let Ink Set:
Once you’ve covered the entire ball, place it carefully on a paper towel. Avoid touching the fresh ink for at least 5-10 minutes to prevent accidental thumbprints.
Make it lucky
Hide a single four-leaf clover somewhere in the pattern as a secret lucky charm for when you’re on the putting green.
Step 3: Finishing Up
-
Inspect for Gaps:
Look over your design one last time. If any lines look faint due to the dimples, carefully darken them with a second pass of the marker. -
Optional Sealing:
If you plan to play with this ball frequently, apply a light coat of clear sealant spray to protect the design from grass stains and impact. -
Final Cure:
Allow the ball to cure overnight before putting it into play to ensure maximum durability for your new artwork.
Now you have a custom, stylish ball that is easy to identify on the fairway
BRUSH GUIDE
The Right Brush for Every Stroke
From clean lines to bold texture — master brush choice, stroke control, and essential techniques.
Explore the Full Guide
Easy Daisy Petals That Follow the Dimples
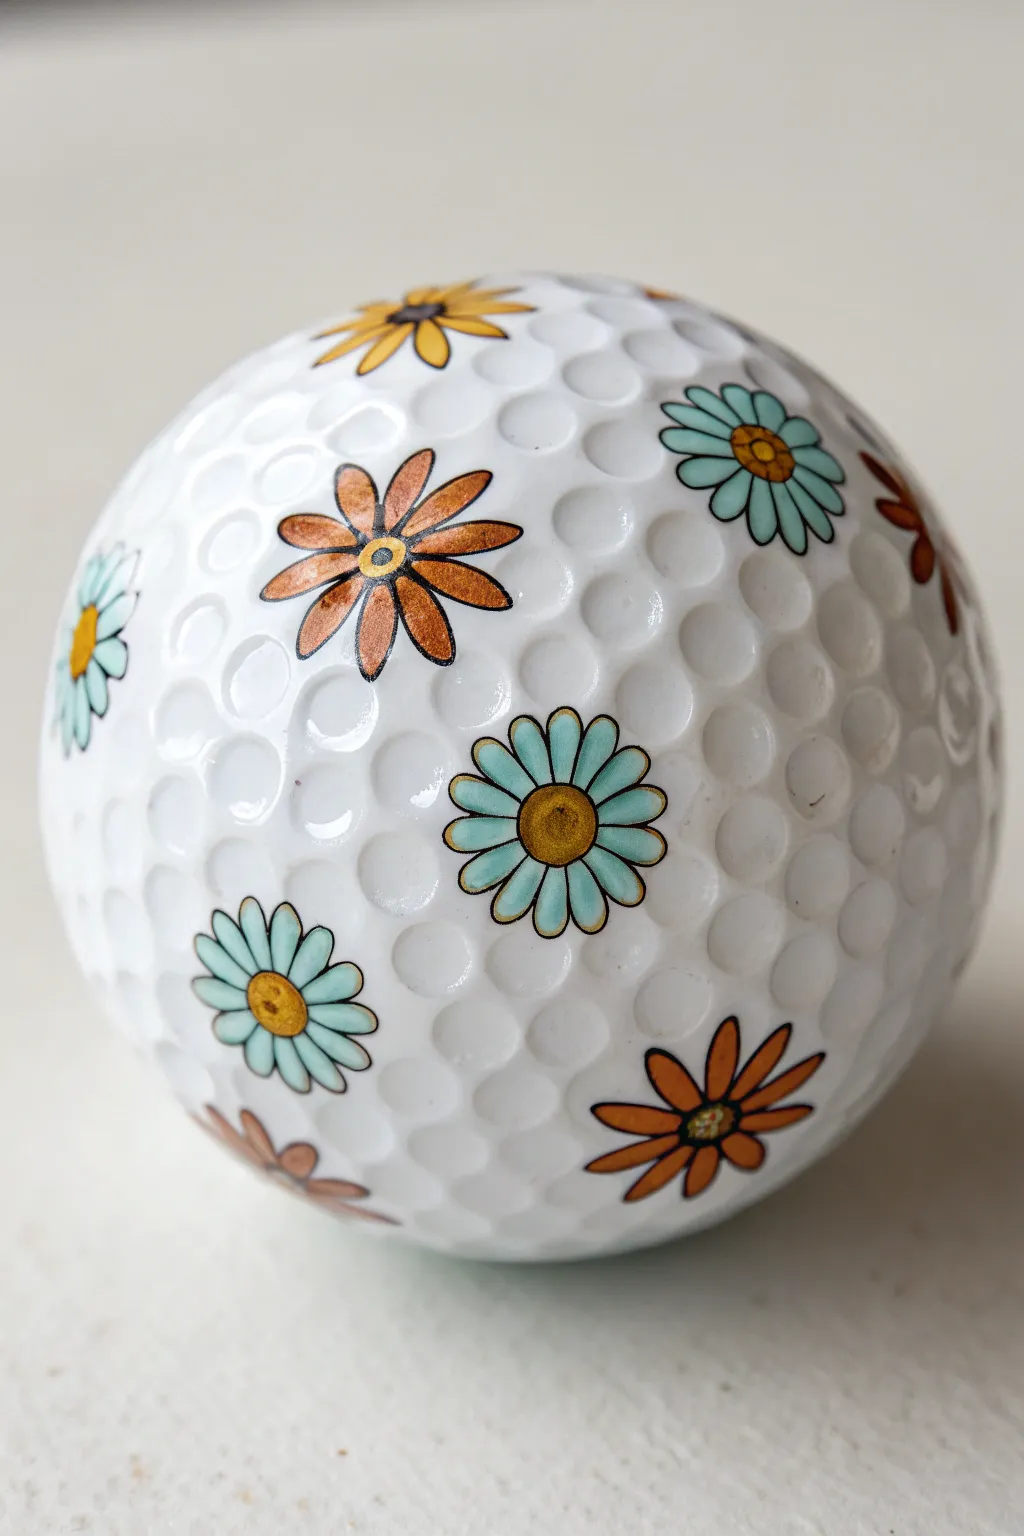
Transform a plain white golf ball into a miniature blooming garden using the ball’s natural texture as a guide. This charming design features scattered daisies in retro shades of teal and terracotta, with petals that seem to float perfectly around the dimples.
Step-by-Step Guide
Materials
- Clean, white golf ball
- Rubbing alcohol
- Cotton pad or cloth
- Ultra-fine tip permanent marker (black)
- Fine tip paint pens or permanent markers (light teal/aqua)
- Fine tip paint pens or permanent markers (terracotta/burnt orange)
- Fine tip paint pens or permanent markers (golden yellow)
- Clear acrylic sealant spray (gloss finish)
Step 1: Preparation & Planning
-
Clean the surface:
Before you begin drawing, wipe the entire surface of the golf ball with rubbing alcohol and a cotton pad. This removes any manufacturing oils or finger grease, ensuring your ink adheres properly without smearing. -
Secure the ball:
Place the golf ball in a small cup, an egg carton, or a lump of mounting putty to keep it steady while you work. This prevents it from rolling away mid-stroke. -
Visualize the layout:
Look closely at the dimple pattern. Notice how the dimples form natural geometric grids. You want to space your flowers out so they don’t crowd each other, using the dimples to help gauge distance.
Step 2: Drawing the Flower Centers
-
Choose your spots:
Select 6 to 8 random spots around the ball where your flowers will sit. Imagine a triangle or diamond pattern to keep them evenly distributed. -
Outline the centers:
Using your ultra-fine black marker, draw small circles for the flower centers. I find that centering these directly over a single dimple often makes the petal symmetry easier later. -
Fill with gold:
Take your golden yellow marker and carefully fill in the circles you just drew. Let this ink dry for a moment so the colors don’t bleed into the black outline. -
Add center details:
Once the yellow is dry, use the black marker again to add a tiny dot or a small ‘C’ curve inside the yellow center to give it a little depth and dimension.
Ink Pooling in Dimples?
If ink pools in the dimples, don’t wipe it! Dab the excess gently with the corner of a paper towel to absorb it without smearing your lines.
Step 3: Petal Drafting
-
Start the first flower:
Choose one center to start with. With the black marker, draw the petals radiating outward. Aim for a classic daisy shape with rounded tips. -
Use the terrain:
When drawing petals, let your pen glide over the ridges between dimples. The texture can actually help guide your hand to make evenly spaced petals. -
Check petal count:
Try to fit about 8 to 10 petals per flower. Don’t worry if they aren’t perfectly identical; a little variation adds to the hand-drawn charm. -
Alternate your motifs:
Move to the next flower center. Decide if this one will be a teal flower or an orange one, but for now, just complete all the black outlines for every flower on the ball.
Make It 3D
Add a tiny dot of white puff paint or a glued rhinestone to the very center of each flower for texture that stands out against the dimples.
Step 4: Adding Color
-
Color the teal blooms:
Select about half of your outlined flowers to be teal. Carefully fill in each petal with your light teal marker. Use light, feathery strokes to avid pooling ink in the dimples. -
Color the orange blooms:
Switch to your terracotta or burnt orange marker art pen. Fill in the remaining flowers. The contrast between the cool blue and warm orange gives a lovely retro vibe. -
Add edge flowers:
Inspect the empty spaces between your main flowers. If there’s a large gap, draw a partial flower peeking in from the ‘side’ or bottom to fill visual voids. -
Touch up outlines:
After coloring, you might find some black lines have faded or been covered. Go back over the petal outlines with your black marker to make them crisp and bold again.
Step 5: Sealing the Artwork
-
Final drying time:
Let the ball sit for at least 30 minutes. Golf ball surfaces are non-porous, so ink takes longer to fully set than it does on paper. -
Apply first coat:
In a well-ventilated area, hold the spray sealant about 12 inches away and give the ball a very light misting. A heavy coat might cause the ink to run. -
Rotate and spray:
Once the first side is dry to the touch, rotate the ball and mist the other side. Repeat this until the entire ball has a protective gloss layer.
Your floral golf ball is now ready for the fairway or perfect for a decorative desk display
Cute Face Using the Ball as a Head
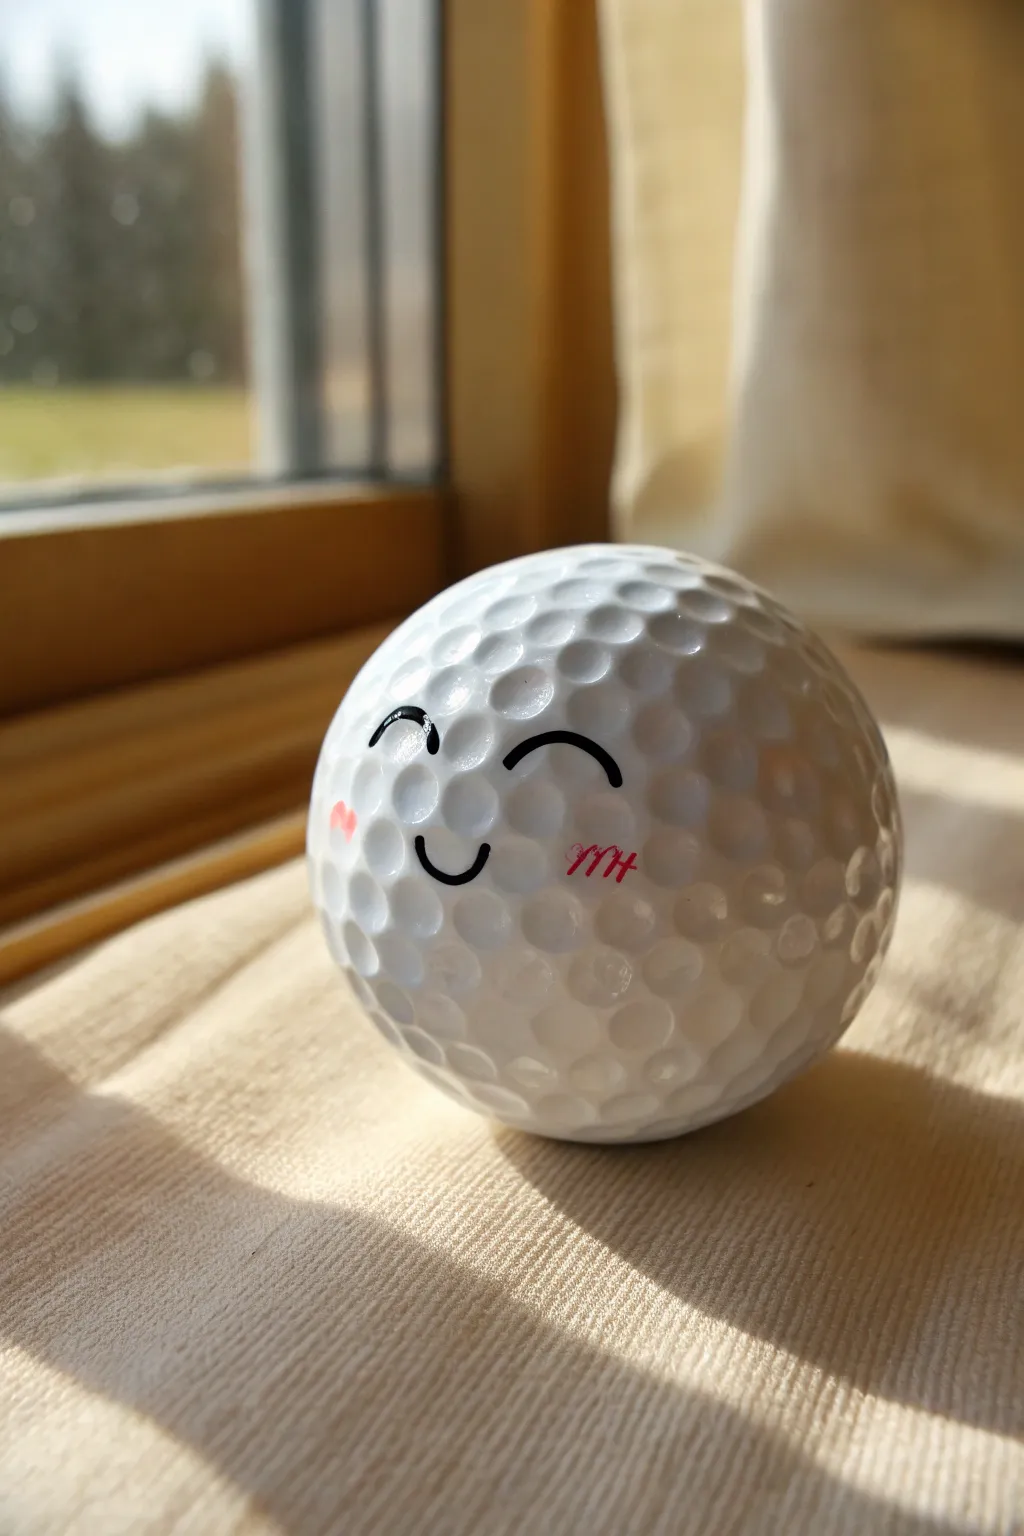
Transform a plain white golf ball into a cheerful little character with just a few simple strokes. This adorable winking face adds a touch of whimsy and personality to an otherwise standard piece of sports equipment.
Step-by-Step Tutorial
Materials
- Clean white golf ball
- Rubbing alcohol
- Cotton pad or paper towel
- Fine-point black permanent marker or paint pen
- Pink permanent marker or fine-point paint pen
- Clear acrylic sealant spray (optional)
- Small cup or roll of tape (to hold the ball steady)
Step 1: Preparation
-
Clean the surface:
Before thinking about drawing, the ball needs to be pristine. Dampen a cotton pad with rubbing alcohol and thoroughly wipe down the entire surface of the golf ball to remove any manufacturing oils, dirt, or fingerprints. -
Dry completely:
Allow the alcohol to evaporate completely. This usually takes just a few seconds, but ensuring the surface is dry is crucial for the marker ink to adhere properly without bleeding. -
Stabilize your canvas:
Golf balls love to roll away. Place the ball inside a small cup or rest it inside a roll of tape so the side you want to draw on is facing upwards and steady.
Bleeding Ink?
If the marker bleeds into the dimples, switch to an oil-based paint pen instead of a standard permanent marker. The thicker paint sits on top of the surface better.
Step 2: Drawing the Eyes
-
Plan placement:
Visualize where the face will sit. The dimples can make straight lines tricky, so I find it helpful to look for a slightly smoother grouping of dimples for the main features. -
Draw the winking eye:
Start on the right side. Using your fine-point black marker, draw a smooth arc curving upwards, resembling a rainbow shape. This forms the closed, winking eye. -
Thicken the line:
Go over the winking eye arc once more to give it a bold, confident look. The line should be consistent in thickness. -
Draw the open eye:
Move to the left side, leaving a small gap for the nose area. Draw a similar upward arc, but this time, add a tiny vertical tick mark at the outer corner to suggest a happy, squinting open eye. -
Check symmetry:
Take a moment to step back and ensure both eye arcs are roughly at the same height on the ball’s curve.
Add a Body
Glue the finished head onto a golf tee painted like a little shirt to turn your winking ball into a standing figurine for your desk.
Step 3: Adding the Smile
-
Position the mouth:
Locate the center point below the two eyes. You want the mouth to sit slightly lower to give the face a cute, proportionate look. -
Draw the smile curve:
Create a small, U-shaped curve. Keep it relatively small and centered between the eyes for that sweet ‘kawaii’ aesthetic. -
Refine the expression:
Ensure the ends of the smile curve up just slightly to emphasize the happiness of the character.
Step 4: Blush and Finish
-
Add first blush mark:
Switch to your pink marker. On the left cheek, draw two tiny, angled dash marks or a very small heart shape right next to the open eye. -
Add second blush mark:
On the right cheek, under the winking eye, draw three small diagonal hatch lines (like ‘///’) to create a textured blush effect. -
Let ink set:
Don’t touch the face immediately. Give the ink at least 15 minutes to dry completely so standard handling doesn’t smudge your work. -
Seal (Optional):
If you plan to keep this as a decoration or gift, spray a light coat of clear acrylic sealant over the face to protect the drawing from fading or rubbing off over time.
Now you have a cheerful little desk companion to brighten your day.


Geometric Chevron or Herringbone Band
Transform a standard golf ball into a piece of geometric art with this striking tribal-inspired design. The high-contrast black ink against the white dimpled surface creates a modern, sophisticated look that is deceptively simple to achieve.
Step-by-Step
Materials
- Clean white golf ball
- Fine-point permanent marker (black)
- Ultra-fine point permanent marker (black)
- Flexible measuring tape or strip of paper
- Pencil
- Eraser
- Rubber band (optional)
Step 1: Preparation and Guidelines
-
Clean surface:
Begin by wiping down your golf ball with a damp cloth or a little rubbing alcohol to remove any oils or manufacturing residue. This ensures your marker ink adheres perfectly without skipping. -
Establish the center:
Locate the seam or the natural equator of the ball. If your ball doesn’t have a visible seam, eyeball the center line. -
Draw parallel guides:
Using a pencil, lightly sketch two parallel lines around the circumference of the ball to create a distinct band. I find using a rubber band as a stencil helps keep these lines straight over the curved surface. -
Space the band:
Aim for a band width of approximately half an inch. This gives you enough room for the detailed pattern inside without overwhelming the sphere. -
Add the bottom band:
Repeat the process near the bottom pole of the ball to create a second, smaller decorative ring. Lightly sketch these boundary lines in pencil as well.
Smudge Prevention
Since golf ball surfaces are non-porous, ink stays wet longer. Work on one section at a time and rotate the ball carefully to avoid touching wet areas with your palm.
Step 2: Creating the Chevron Pattern
-
Ink the boundaries:
Take your fine-point permanent marker and carefully trace over your pencil guidelines for the main center band. Move slowly to maintain a consistent line weight despite the dimpled texture. -
Mark zig-zag points:
Inside the band, use your pencil to mark evenly spaced dots along the top and bottom interior edges. These dots will be the peaks and valleys of your zig-zag. -
connect geometric peaks:
With the ultra-fine marker, connect the dots to form a continuous zig-zag line running through the center of the band. Try to make the angles sharp and consistent. -
Double the line:
Draw a second zig-zag line slightly below the first one, mirroring its path perfectly. This creates a parallel ‘V’ shape. -
Draw inner details:
Inside every downward-pointing ‘V’ shape, draw a smaller, floating ‘v’ character. This adds the intricate tribal detail seen in the reference. -
Add directional accents:
In the triangular spaces pointing upward, draw a small horizontal dash or caret mark. This creates a nice rhythm of alternating shapes.
Add Some Color
Once the black outline is dry, use fine-point colored permanent markers to fill in the triangles or the space between the parallel lines for a pop of neon or metallic hue.
Step 3: Finishing Touches
-
Repeat on lower band:
Move to the smaller bottom band you sketched earlier. Ink the boundary lines first, just like the main section. -
Simplify if needed:
Because the bottom band is curved more sharply, you might want to simplify the pattern slightly, perhaps just doing the double zig-zag without the extra internal details. -
Let it cure:
Allow the ink to dry completely for at least 15 minutes. The dimples can sometimes pool ink, so give it extra time to avoid smudging. -
Erase guidelines:
Once fully dry, gently erase any visible pencil marks. Be gentle so you don’t inadvertently scrub off the permanent marker. -
Check for gaps:
Inspect your lines. If the pen skipped over a deep dimple, carefully touch up the line with the very tip of your ultra-fine marker. -
Seal (optional):
If you plan to display this outdoors or handle it frequently, apply a light coat of clear matte fixative spray to protect the design.
Now you have a uniquely patterned sphere that looks great in a decorative bowl or as a gift for a golf enthusiast
Optical Spiral That Makes the Ball Look Like It’s Moving
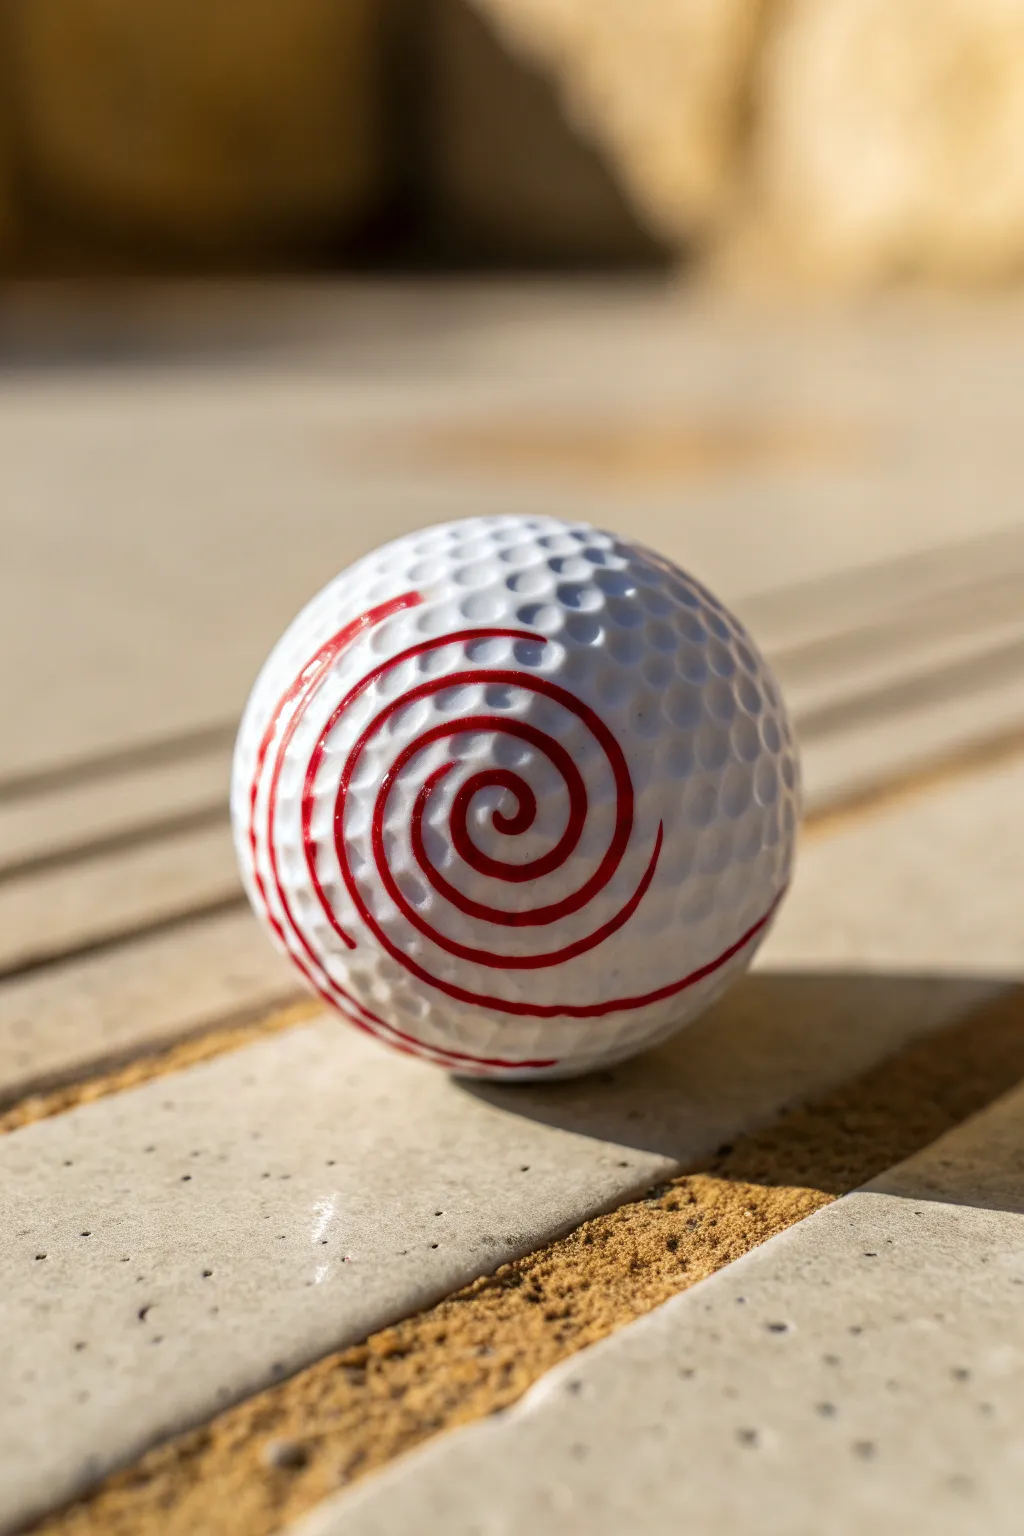
Transform a standard golf ball into a kinetic illusion with this deceptively simple red spiral design. When putt or spun, the continuous line creates a mesmerizing effect that makes the ball appear to tunnel inwards as it rolls across the green.
Detailed Instructions
Materials
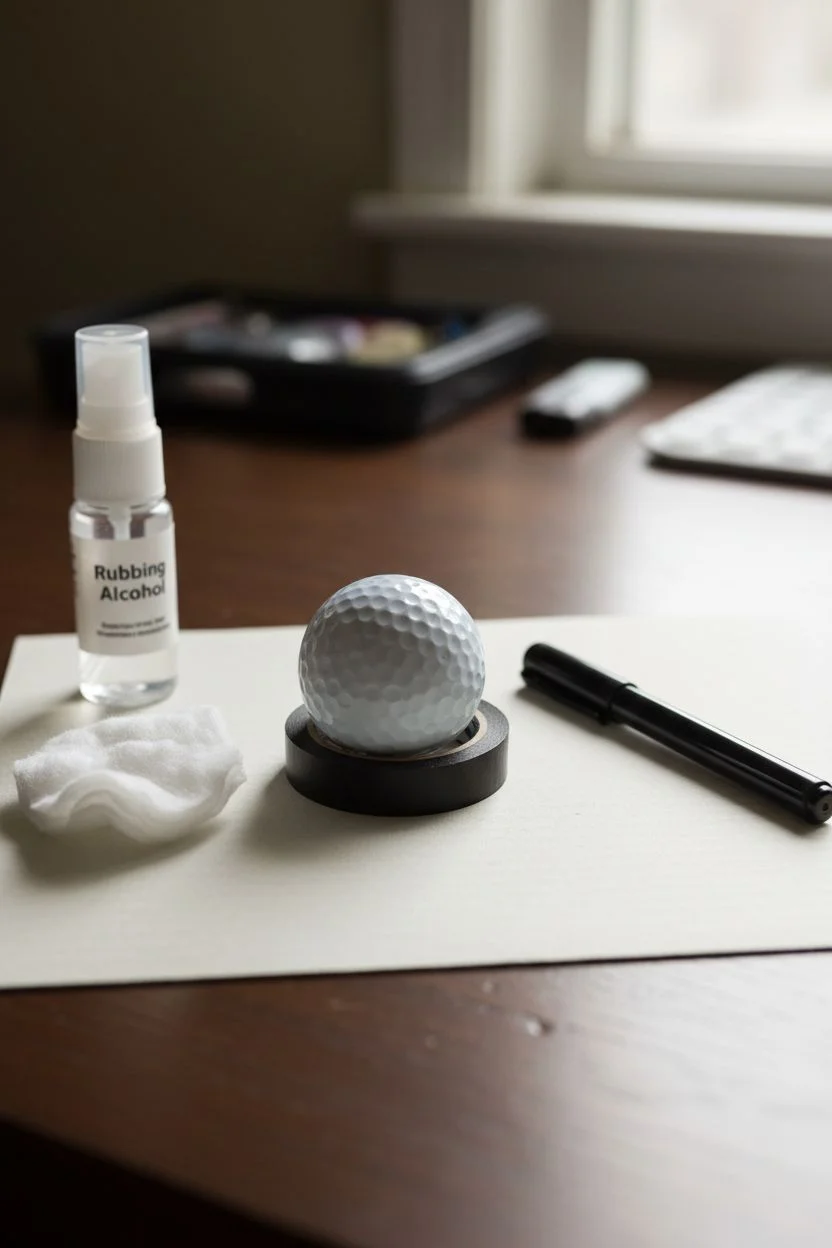
- Clean white golf ball
- Fine-point permanent marker (red)
- Rubbing alcohol
- Cotton pad or paper towel
- Pencil (optional for drafting)
- Small cup or roll of tape (to hold ball)
Step 1: Preparation
-
Clean surface:
Begin by thoroughly wiping down your golf ball with a cotton pad soaked in rubbing alcohol. This removes unseen oils or manufacturing residues that can cause permanent ink to skip or smear. -
Dry completely:
Let the alcohol evaporate fully for about a minute. The surface needs to be bone-dry to ensure the marker lines remain crisp and stick to the glossy coating. -
Stabilize the ball:
Place the ball inside the rim of a small cup or on a roll of tape. This keeps it steady so you aren’t fighting gravity while trying to draw precise curves.
Step 2: Drafting the Center
-
Identify the pole:
Locate a clear ‘pole’ regarding the dimple pattern—a spot where the dimples seem to radiate from, or simply choose a smooth spot between dimples as your absolute center. -
Start the coil:
Using your red fine-point marker, place a small dot right at that center point. This will be the anchor for your entire spiral. -
First curve:
Slowly draw a tight C-shape around the center dot. Keep this initial curve very small, barely larger than the dot itself. -
Expand outward:
Continue the line, wrapping it around the C-shape to complete the first full loop. The gap between the lines should be quite narrow at this stage.
Dimple Mastery
Draw ‘over’ the dimples, not ‘into’ them. Hold the pen at a shallow angle so the side of the nib bridges the gap across the dimple.
Step 3: Drawing the Spiral
-
Consistent spacing:
As you continue spiraling outward, aim to keep the white space between your red lines consistent. I find it helpful to focus on the white gap rather than the red line itself to keep spacing even. -
Navigating dimples:
The pen tip will naturally want to dip into the dimples. Go slowly here; let the pen glide gently over the depressions rather than pushing hard into them, which helps keep the line straighter. -
Rotate the ball:
Don’t twist your wrist into uncomfortable angles. Rotate the ball itself within your holder every quarter-turn or so to keep your drawing hand in a comfortable, stable position. -
Widen gently:
As the spiral grows larger, allow the lines to naturally become slightly thicker or the spacing to breathe a tiny bit more, mirroring the expansion of the sphere. -
Maintain pressure:
Keep a light, even pressure on the marker. Pressing too hard can cause the ink to pool in the dimples, creating blotches instead of clean lines. -
Check symmetry:
Pause occasionally and look at the ball from directly above the center point. Ensure the spiral looks round and isn’t becoming an oval. -
Approaching the equator:
Continue the pattern until you cover about a third to a half of the ball’s visible face. You don’t need to wrap the entire ball; the visual effect works best when focused on one large hemisphere.
Dual-Tone Effect
Draw a thin black line right next to the red one. This high-contrast shadow creates a 3D effect when the ball is spinning fast.
Step 4: Finishing and Sealing
-
Trailing off:
When you are satisfied with the size of the spiral, don’t just stop abruptly. Taper the pressure slightly at the end of the line so it fades out or tucks neatly near a dimple edge. -
Clean edges:
Inspect your lines for any slips or jagged spots caused by the dimples. You can carefully thicken the line in those specific spots to hide slight imperfections. -
Drying time:
Let the ball sit untouched for at least 10 minutes. Even permanent marker can smudge on a glossy golf ball if touched too soon. -
Test spin:
Once fully dry, give the ball a spin on a table. If the spiral looks wobbly, you can add a little weight to the thinner lines to balance the visual weight.
Now you have a custom ball that is not only easy to identify on the course but looks incredible in motion
Tiny Scene: Micro Landscape Wrapped Around the Ball
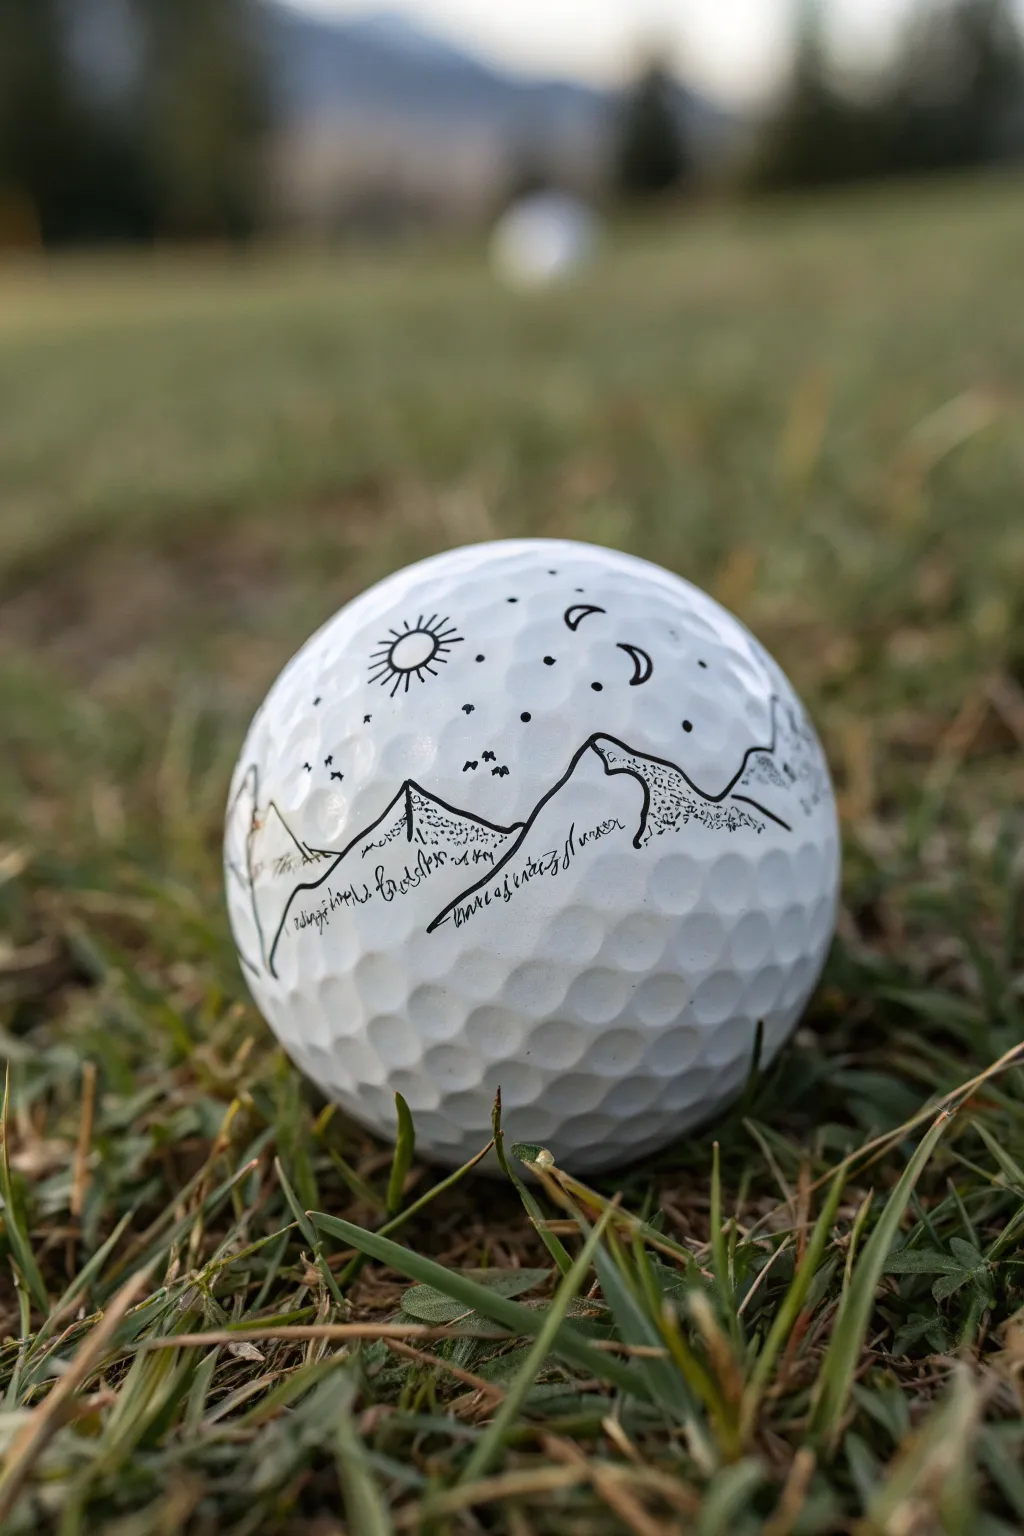
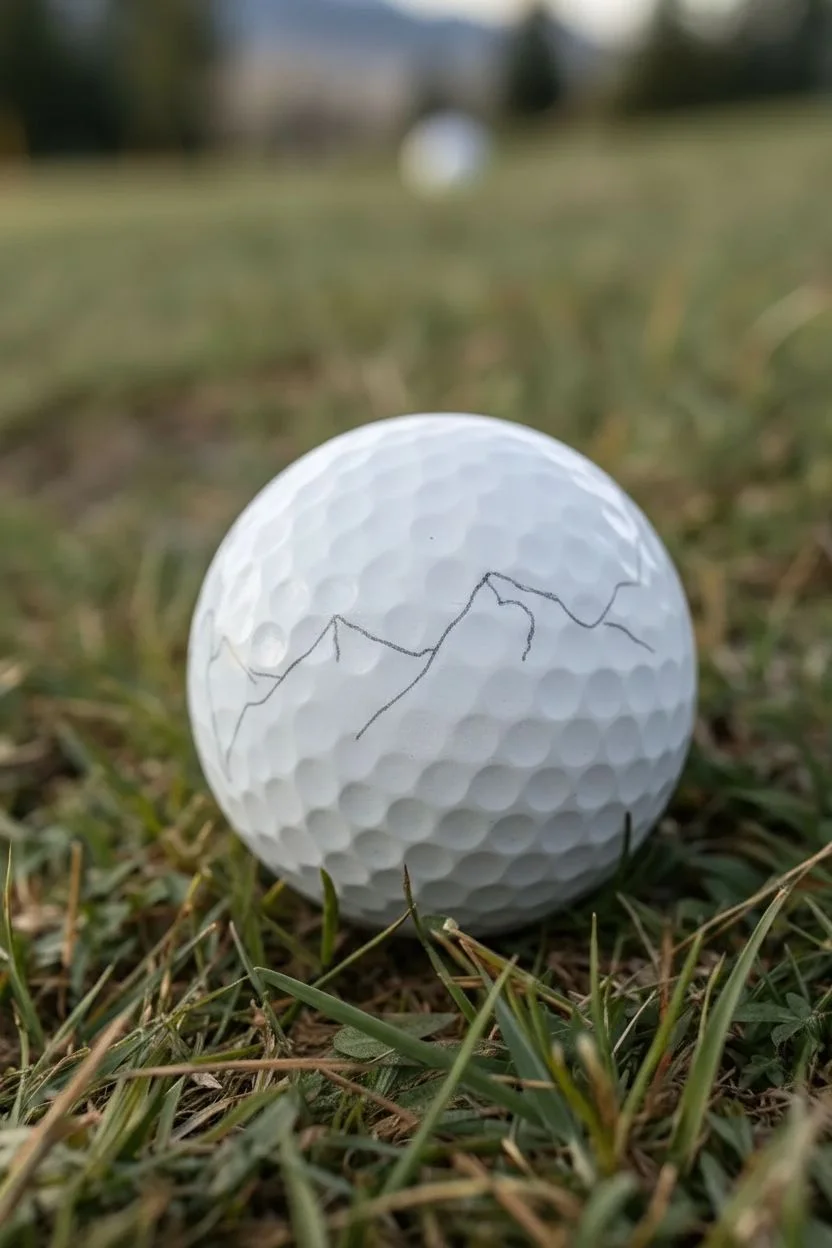
Transform a standard golf ball into a tiny, spinning world with this continuous line drawing of a tranquil mountain landscape. Using simple black ink, you’ll wrap rugged peaks, celestial bodies, and soaring birds around the ball’s dimpled surface for a surprisingly detailed micro-mural.
How-To Guide
Materials
- White golf ball (clean and dry)
- Ultra-fine tip permanent marker (black, like a Sharpie or micron pen)
- Fine tip permanent marker (black, for filling)
- Rubbing alcohol and cotton pad (for cleaning)
- Pencil (optional, for drafting)
Step 1: Preparation and Planning
-
Clean the canvas:
Before you make a mark, wipe the entire golf ball down with rubbing alcohol on a cotton pad. This removes any invisible oils or factory coatings that might cause the ink to skip or smear. -
Visualize the horizon:
Hold the ball and imagine a ‘equator’ line running around the middle. You want your mountain range to sit roughly along this imaginary line, though it doesn’t need to be perfectly straight. -
Drafting lightly (optional):
If you’re nervous about committing to ink immediately, lightly sketch the main peaks with a pencil. The graphite won’t stick perfectly to the plastic, but it gives you a faint guide to follow.
Smudge Alert
Ink doesn’t soak into plastic quickly. If you smudge a line, quickly dip a Q-tip in rubbing alcohol to erase the mistake. Wipe dry before redrawing.
Step 2: Drawing the Landscape
-
Draw the first peak:
Using your ultra-fine marker, start with a large, jagged triangle shape for your main mountain. Let the line wobble slightly as you draw over the dimples; these imperfections actually make the mountain look more rocky and natural. -
Extend the range:
Continue drawing jagged lines extending from either side of your first peak. Vary the heights—make some tall and sharp, others low and rolling. Rotate the ball in your hand as you go. -
Connect the loop:
Keep drawing untill your line wraps all the way around the ball and meets back where you started. It’s okay if the connection point isn’t seamless; you can add a small foothill to hide the join. -
Add texture to the slopes:
On the right side of your peaks, add stippling (lots of little dots) or small scratchy hatch marks. This implies shadow and gives the mountains dimension. -
Darken the shadows:
For deeper contrast, I like to go back in with the fine tip marker and solidify some of the darkest crevices on the shadow side of the mountains. -
Create the foothills:
At the base of your mountains, draw a fluid, wavy line that mimics rolling hills or a river. Add some scribbled, loose text-like lines here to suggest ancient script or flowing water without writing actual words.
Step 3: Adding the Sky
-
Draw the sun:
Pick a spot in the ‘sky’ area above a valley between peaks. Draw a small circle, then add radiating lines for rays. Keep the lines short and distinct. -
Add the moon phases:
Rotate the ball slightly. Draw a crescent moon shape nearby. You can even draw a few phases—a crescent and a half-moon—to create a sense of time passing. -
Scatter the birds:
Draw tiny ‘v’ or ‘m’ shapes in groups of two or three to represent birds flying in the distance. Keep them small so the mountains look massive in comparison. -
Fill the stars:
Dot the remaining empty sky space with single points of ink for stars. Don’t overdo it; leave some negative white space to let the design breathe. -
Let it cure:
Set the ball down carefully and let the ink dry for at least 15 minutes. The slick surface means ink sits on top longer than on paper.
Color Pop
Once the black ink is fully dry, use colored permanent markers to add a single accent color—like blue for the river or gold for the sun rays.
Now you have a miniature alpine adventure ready for display or a very stylish round of golf


Have a question or want to share your own experience? I'd love to hear from you in the comments below!