When I’m stuck for inspiration, painting an animal instantly gives me a clear shape, a mood, and a story to chase. Here are 21 animal painting ideas—from cozy pet portraits to bold wildlife silhouettes—you can tweak to match your style.
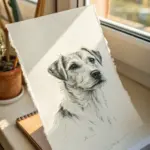
Classic Dog Portrait with Shiny Eyes
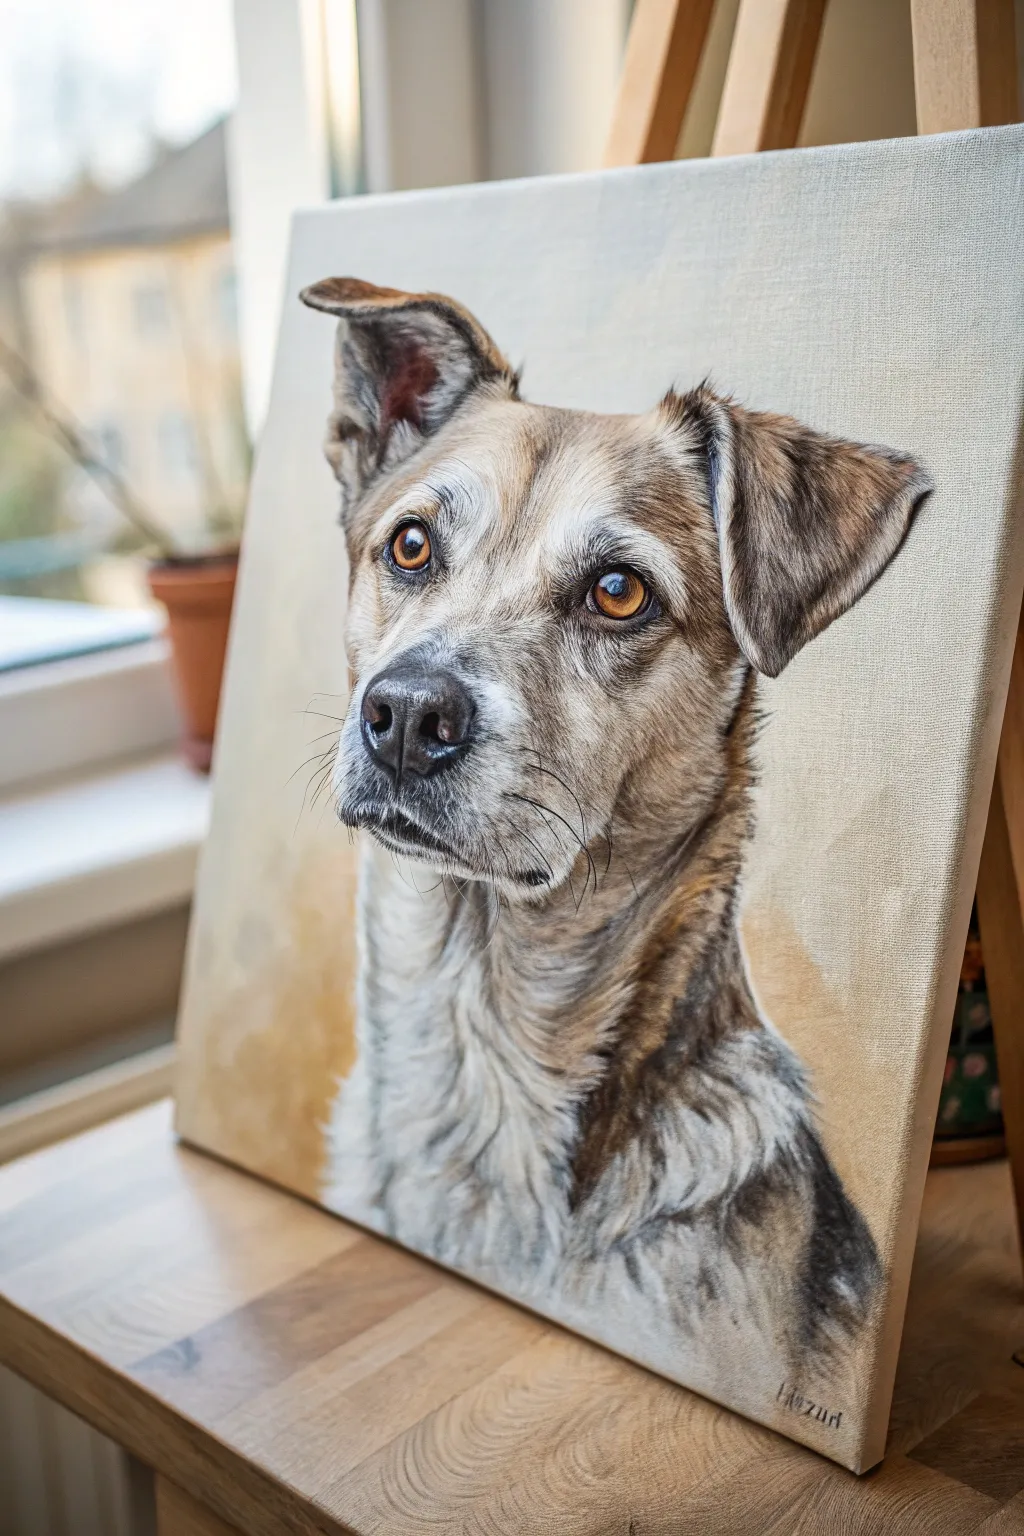
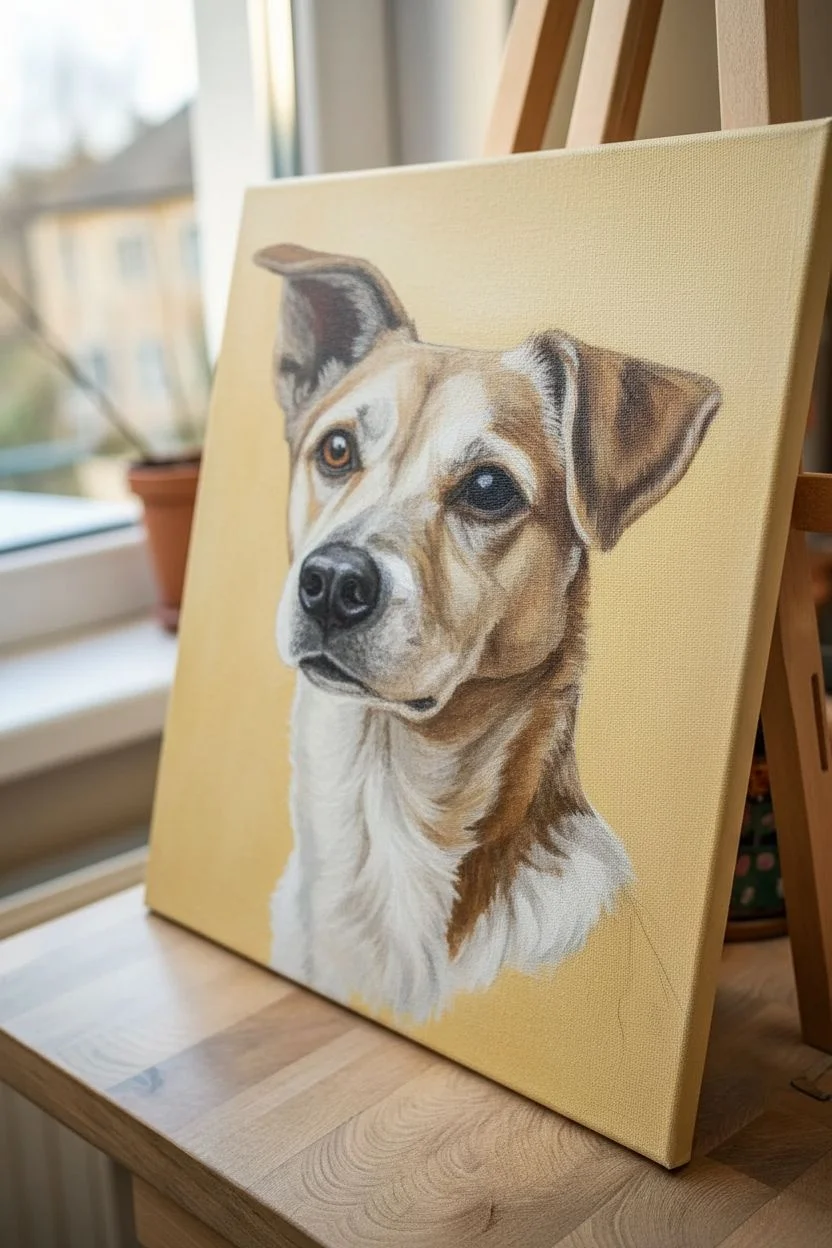
Capture the loyal spirit of a beloved canine companion with this realistic acrylic portrait technique. By focusing on layering fur textures and highlighting the eyes, you will create a piece that feels like it’s looking right back at you.
How-To Guide
Materials
- Square stretched canvas (approx. 16×16 or 20×20 inches)
- Acrylic paints (Titanium White, Burnt Umber, Yellow Ochre, Burnt Sienna, Mars Black, Raw Sienna)
- Assorted synthetic brushes (sizes 8 flat, 4 filbert, and 0 or 00 liner brush)
- Slow-drying medium or retarder
- Palette and palette knife
- Water container and paper towels
- Reference photo of the dog
- Graphite transfer paper or charcoal pencil
Step 1: Sketch and Base Layer
-
Prepare the canvas:
Start by applying a very thin wash of Yellow Ochre and Titanium White across the entire canvas to kill the stark white. This provides a warm undertone that will glow through the fur later. -
Transfer the outline:
Using your reference photo, lightly sketch the dog’s main features onto the canvas. Pay special attention to the position of the eyes, the triangular shape of the ears, and the snout’s alignment. If you aren’t confident freehanding, use graphite transfer paper. -
Block in darks:
Mix Mars Black with a touch of Burnt Umber. Using the size 8 flat brush, block in the darkest areas: the pupils, the nostrils, the inside shadows of the ears, and the dark patch on the shoulder. -
Block in mid-tones:
Create a mixture of Burnt Sienna and Raw Sienna. Paint the general shapes of the brown fur on the face, ears, and neck. Don’t worry about individual hairs yet; just focus on mapping the color zones. -
Block in lights:
Mix Titanium White with a tiny dot of Burnt Umber to make a creamy off-white. Fill in the snout area, the chest, and the lighter patches around the eyes.
Eyes Looking Dull?
If eyes lack life, darken the upper eyelid shadow significantly. This high contrast makes the white reflection ‘pop’ much brighter.
Step 2: Building Fur Texture
-
Start the fur layers:
Switch to your size 4 filbert brush. Mix a medium brown tone and begin flicking the brush in the direction of hair growth. Start from the back of the neck and work forward. -
Refine the ear texture:
The ears have soft, velvety fur. Use a dry-brush technique with Burnt Umber to gently scumble darkness into the ear crevices, then layer lighter brown strokes on the tips and edges. -
Detail the snout:
The muzzle area needs shorter, stiffer-looking strokes. Use a gray-brown mix (White + Umber + Black) to stipple small dots around the nose where the whiskers will eventually go. -
Create depth in the neck:
The neck fur is longer and shaggiest. Use long, sweeping strokes of White and Raw Sienna, allowing them to overlap the darker shoulder area to create volume. -
Paint the nose leather:
Paint the nose with a dark charcoal gray, not pure black. While wet, dab in a slightly lighter gray on the textured top part of the nose to suggest the ‘pebbled’ surface.
Step 3: The Eyes and Fine Details
-
Base the iris:
Paint the iris with a rich Burnt Sienna. While it’s still wet, I like to blend in a little Yellow Ochre at the bottom curve of the iris to simulate light catching the translucent eye. -
Deepen the pupil:
Re-establish the pupil with pure Mars Black. Ensure the edge is sharp but not cartoonish. -
Add the reflection:
This is crucial for the ‘shiny’ look. Place a crisp, small dot of pure Titanium White in the upper quadrant of the pupil, overlapping slightly into the iris. Add a secondary, fainter reflection on the opposite side if your reference shows it. -
Liner brush fur details:
Switch to your 0 liner brush. Mix your paint with a little water or flow medium to make it inky. Paint individual ‘hero hairs’—the fine, bright white hairs on the eyebrows, chin, and ear edges. -
Add whiskers:
With the same inky mixture and a steady hand, pull quick, confident strokes for the whiskers. Press down at the root and flick up to taper the end. -
Final background adjustments:
Clean up the background around the dog’s head. A soft wash of cream or beige helps push the subject forward. -
Sign and seal:
Add your signature in the corner with a small brush. Once fully dry (give it 24 hours), apply a satin varnish to unify the sheen of the different paint layers.
Rigger Brush Magic
For ultra-fine whiskers, try a ‘rigger’ brush instead of a standard liner. Its long bristles hold more paint for uninterrupted lines.
Enjoy the process of bringing this soulful character to life on your canvas


Cozy Cat Nap Study in Soft Watercolor
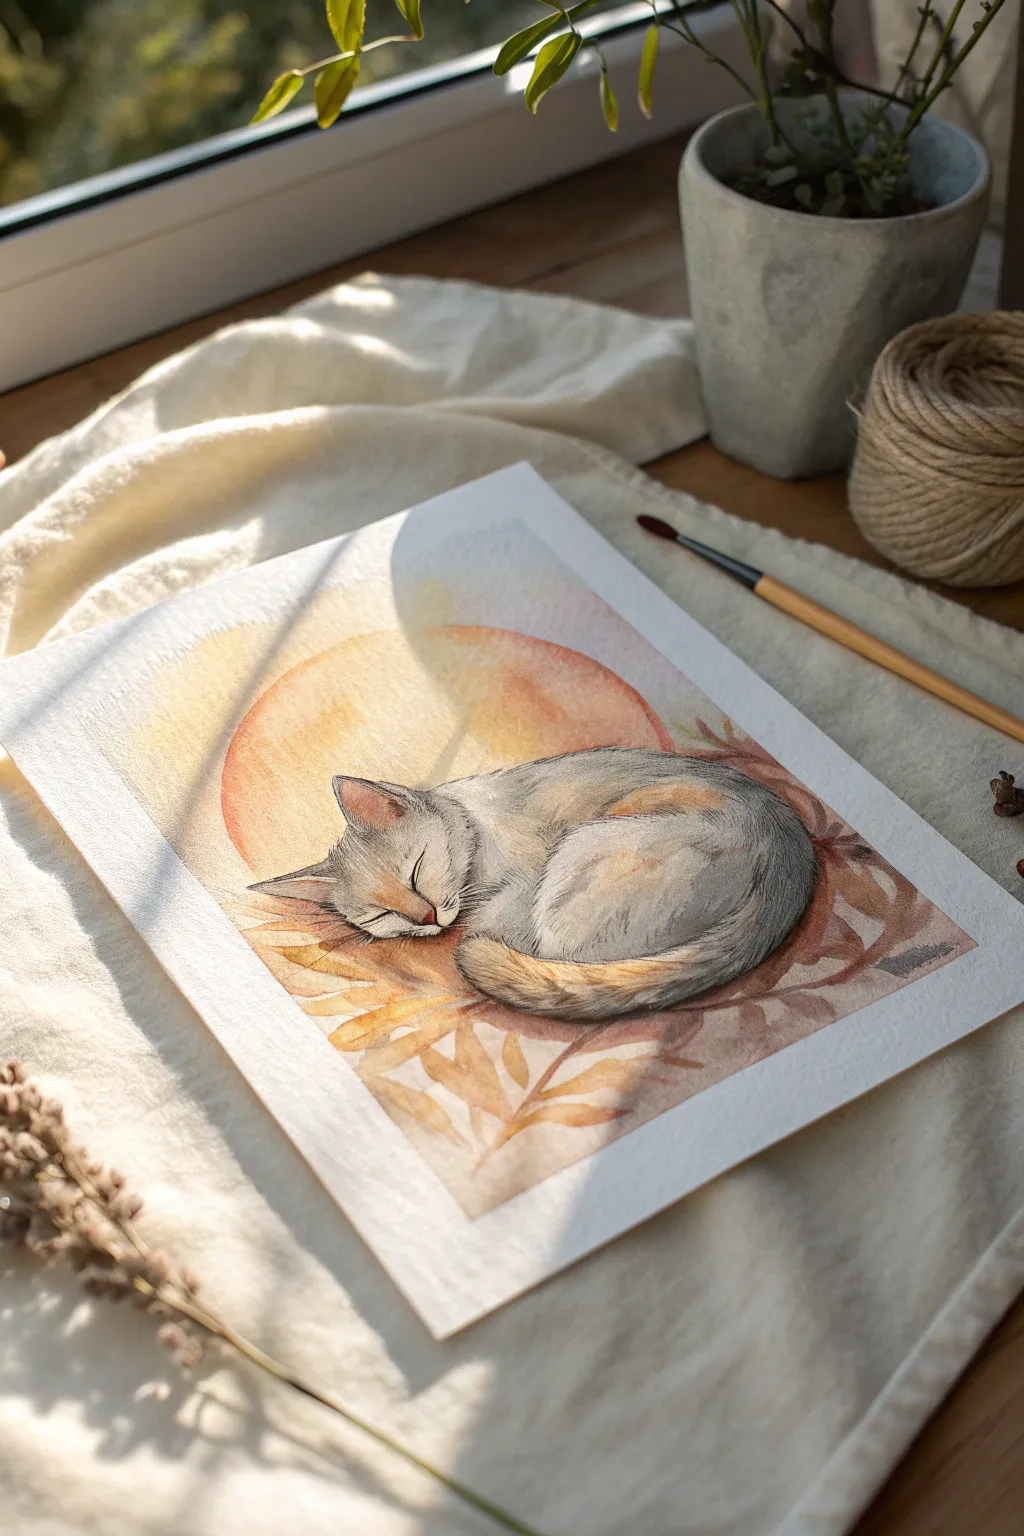
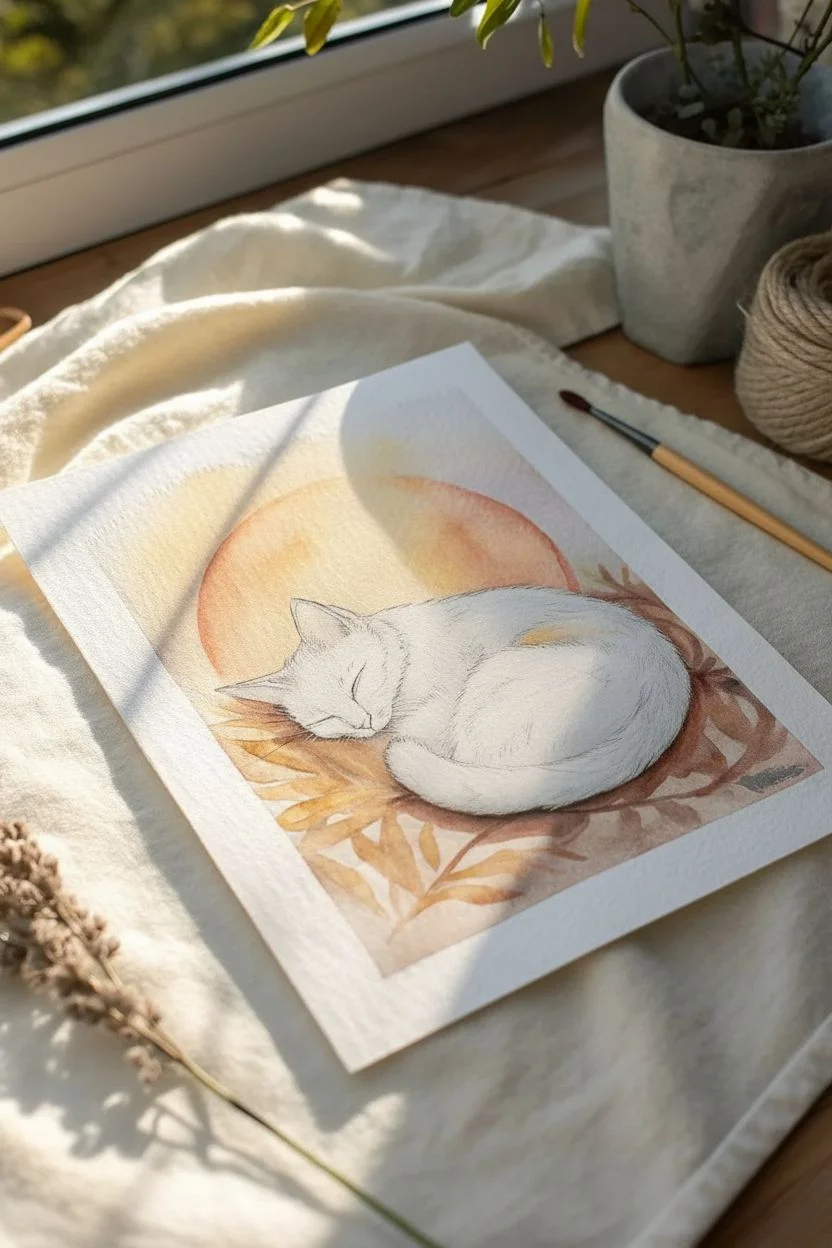
Capture the serenity of a sleeping cat bathed in warm sunlight with this gentle watercolor project. Using a limited palette of greys, ochres, and siennas, you will learn to build soft fur textures and luminous backgrounds.
Step-by-Step Guide
Materials
- Cold-press watercolor paper (300 gsm)
- Watercolor paints (Payne’s Grey, Yellow Ochre, Burnt Sienna, Burnt Umber)
- Round synthetic brushes (sizes 2, 6, and 10)
- Pencil (HB) and kneadable eraser
- Masking fluid (optional)
- Paper towels
- Two jars of water
Step 1: Sketching and Background
-
Outline the Sleeper:
Begin with a light pencil sketch. Draw a kidney-bean shape for the cat’s curled body, tucking the head near the tail. Focus on the main curves rather than individual hairs. -
Define the Features:
Refine the sketch by adding the triangular ears, the closed eye slit, and the nose. Keep your pencil pressure very light so the graphite doesn’t muddy the watercolor later. -
Map the Background:
Lightly sketch a large circle behind the cat to represent the sun or a warm glow, and add faint outlines of leaves or petals framing the bottom curve of the animal. -
First Wash: The Sun:
With your size 10 brush, wet the circular area behind the cat with clean water. Drop in diluted Yellow Ochre, letting it bloom softly. Add touches of Burnt Sienna near the edges for warmth. -
Define the Foliage:
While the background is still damp but not soaking, paint the leaf shapes using a mix of Burnt Sienna and a tiny touch of Burnt Umber. Let these shapes bleed slightly into the background for a soft-focus effect.
Step 2: Painting the Cat
-
Base Layer for Fur:
Wait for the background to dry completely. Wet the cat’s body with clean water. Apply a very pale wash of Payne’s Grey, leaving white paper dry for the highlights on the spine, hip, and cheek. -
Warm Undertones:
While the grey wash is still wet, drop tiny amounts of Yellow Ochre onto the flank and near the ears to reflect the warm sunlight onto the fur. -
Building Shadow Shapes:
Once the initial layer creates a soft dampness, strengthen your grey mix. Paint the darker shadow areas: under the chin, beneath the tail, and where the legs tuck into the body. -
Let it Dry:
Allow this layer to dry completely. This is crucial before starting the texture work to avoid a blurry mess. -
Creating Fur Texture:
Switch to your size 2 brush. Using a ‘dry brush’ technique with minimal water, make short, directional strokes along the curve of the back and tail to simulate fur. -
Deepening Shadows:
Mix a stronger Payne’s Grey with a little Burnt Umber. Apply this into the deepest crevices—specifically the crease where the tail meets the body and the inner ear.
Soft Edges Secret
To keep the cat looking fluffy, avoid hard outlines. If an edge looks too sharp, run a clean, damp brush along it to soften the paint before it dries.
Step 3: Refining Details
-
Facial Features:
Carefully paint the nose with a dilute Burnt Sienna. Use a fine tip with dark grey to define the eye slit and the mouth line. -
Ear Details:
Add a wash of pinkish-brown (Burnt Sienna mixed with lots of water) to the inner ear, then use the small brush to mimic the fluffy hair inside the ear. -
Whisker Work:
For whiskers, you can either lift color carefully with a damp brush or use a tiny bit of white gouache or a gel pen if you didn’t use masking fluid earlier. -
Grounding Shadows:
Paint a cast shadow underneath the cat using a cool grey mix. Soften the edges of this shadow with a clean, damp brush so it fades into the paper. -
Final Contrast Check:
Step back and look at your contrast. If the fur looks too flat, add another layer of individual hair strokes in the shadowed areas to deepen the form.
Muddy Fur Fix
If your greys turn muddy, you’re likely overworking wet paper. Start a new layer only when the paper is bone dry to keep colors crisp and distinct.
Once dry, gently erase any remaining pencil marks to reveal your peaceful, sun-warmed companion.


Sweet Panda on a Bold Background
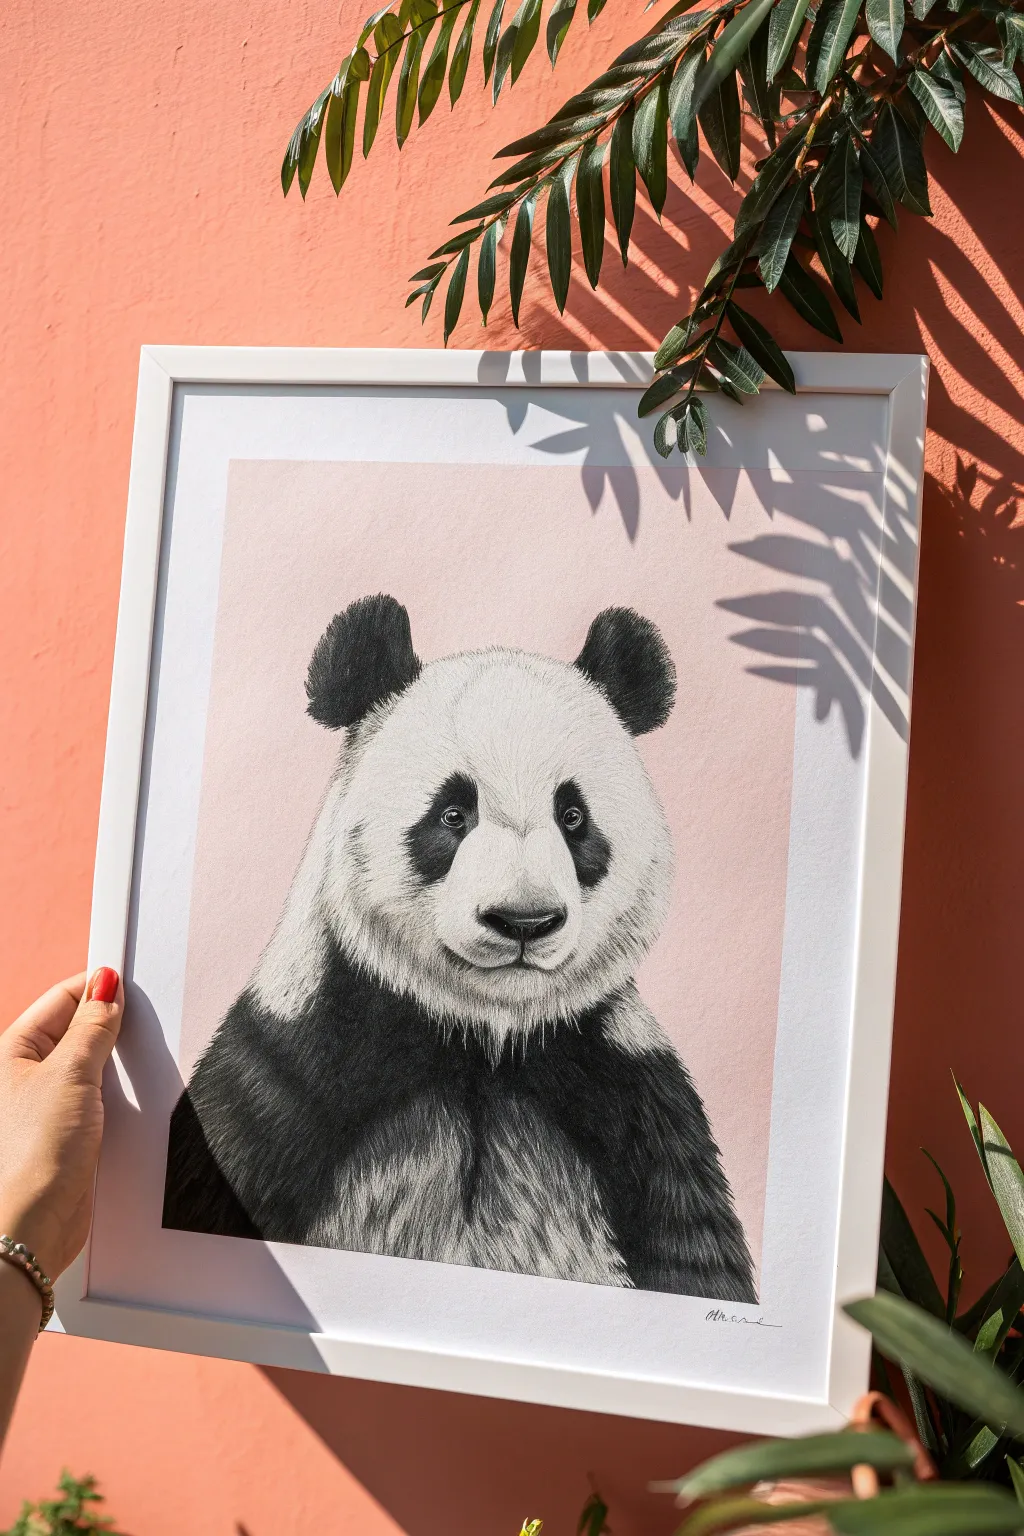
Capture the calm spirit of a panda in this high-contrast drawing, where soft fur textures meet striking black-and-white patterns. Set against a delicate blush pink background, the panda’s intense gaze makes this a perfect statement piece for any modern gallery wall.
Step-by-Step
Materials
- High-quality pastel paper (blush pink or peach tone)
- Charcoal pencils (soft, medium, hard)
- White pastel pencil or white charcoal pencil
- Compressed charcoal stick
- Kneaded eraser
- Tombow Mono Zero eraser (for fine details)
- Blending stumps (tortillons)
- Soft synthetic brush (for sweeping away dust)
- Workable fixative spray
- White picture frame with mount
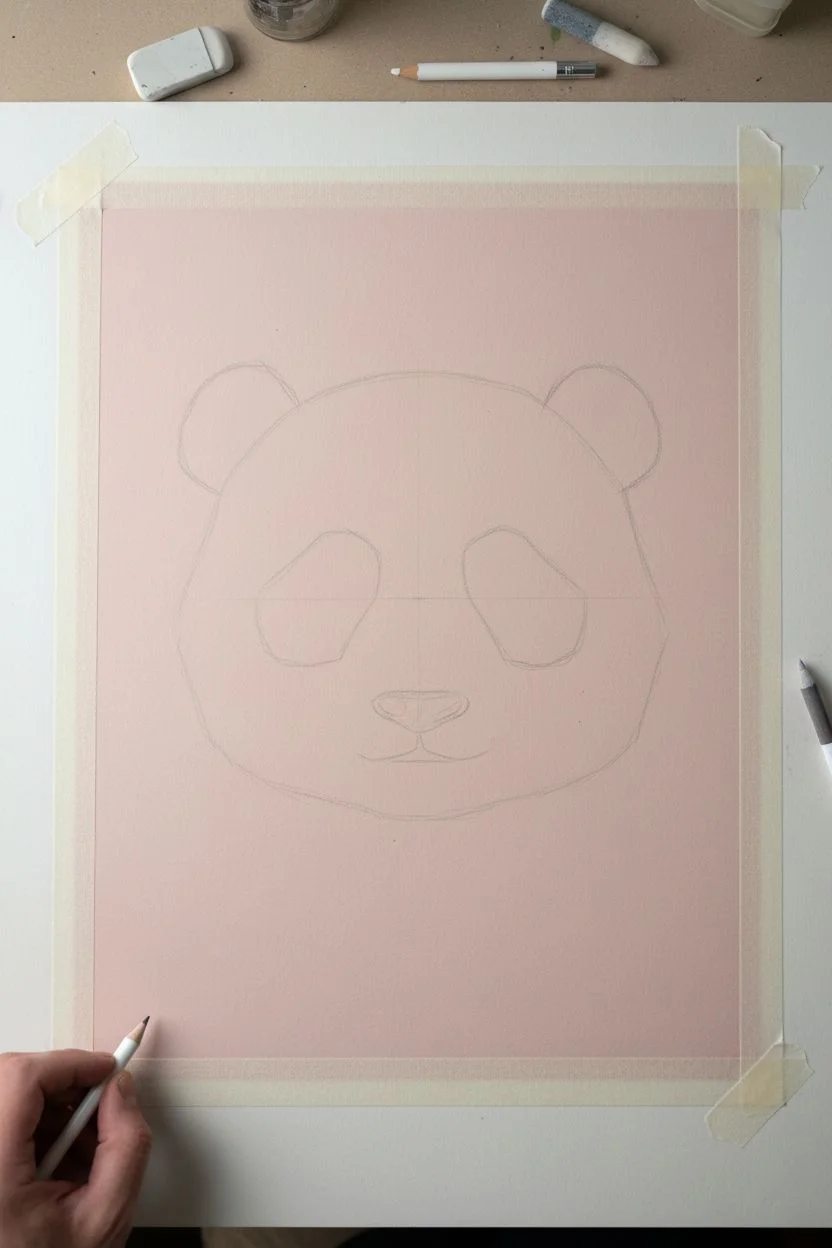
Step 1: Sketching the Structure
-
Prepare your surface:
Begin by securing your pink pastel paper to a drawing board with masking tape. This prevents the paper from shifting or buckling while you work and creates a clean border. -
Map out the basic shapes:
Using a hard charcoal pencil with a very light hand, envelope the main shape of the panda’s head. Think of it as a slightly flattened circle for the head and two smaller rounded shapes for the ears. -
Establish the features:
Lightly draw a horizontal guideline slightly below the center of the face for the eyes. Sketch the distinct teardrop-shaped black patches around the eyes, ensuring they slant slightly downwards towards the nose. -
Refine the muzzle:
Draw the nose shape—an inverted triangle with rounded corners—and the mouth line below it. Keep your lines faint so they disappear into the fur later.
Smudge Patrol
Place a scrap sheet of paper under your drawing hand. Charcoal dust travels easily! This barrier prevents your palm from dragging dark streaks across your pristine pink background.
Step 2: Creating Depth with Charcoal
-
Block in the darkest areas:
Using a broad stick of compressed charcoal or a soft charcoal pencil, fill in the ears and the neck area. Don’t worry about fur texture yet; just establish a solid, deep black foundation. -
Darken the eye patches:
Switch to a medium charcoal pencil to fill in the eye patches. Leave the actual eyeballs paper-white for now so you don’t lose them in the darkness. -
Draw the eyes:
Carefully draw the pupils using your sharpest charcoal pencil. Leave a tiny speck of the pink paper showing for the highlight, or add it later with white pastel. This spark is crucial for lifelike expression. -
Initial blending:
Take a blending stump and gently smudge the charcoal blocks you’ve laid down. This pushes the pigment into the paper tooth and creates a smooth base for the fur layers.
Step 3: Developing Fur Texture
-
Start the transition zones:
Where the black fur meets white fur (like around the neck and ears), use a medium charcoal pencil to make short, flicking strokes outward. This breaks up the hard edges. -
Build the white fur:
Take your white pastel pencil. Starting from the nose bridge, stroke outwards following the direction of hair growth. Keep your pencil extremely sharp to get individual hairs rather than thick lines. -
Layering for volume:
Apply the white strokes densely on the forehead and cheeks, allowing the pink paper to show through slightly in shadowed areas to create natural depth without using grey. -
Detailing the muzzle:
Use short, stippling strokes with the white pencil around the nose and mouth. I find clear, directional strokes here help define the roundness of the snout. -
Refining the blacks:
Go back into your black areas with a sharp charcoal pencil. Add directional fur strokes over your blended base coat to make the black fur look fluffy rather than flat. -
Adding whiskers:
Look for the whisker spots on the muzzle. Use a very sharp black pencil to add tiny dots, and perhaps a few very faint, long whiskers if desired, though pandas have subtle whiskers.
Pro Tip: Fur Direction
Always draw strokes in the direction the hair grows. On a panda, fur radiates outward from the center of the face. Changing stroke direction creates the illusion of 3D form.
Step 4: Final Touches & Framing
-
Check contrast:
Stand back and squint at your drawing. Determine if the darks are dark enough. If the charcoal looks grey, layer more compressed charcoal carefully. -
Clean up highlights:
Use your Mono Zero eraser to lift out any stray charcoal dust from the white fur areas. Re-apply bright white pastel highlights to the tops of the ears and the wetness of the nose. -
Fixative spray:
Once satisfied, take the drawing to a well-ventilated area and spray a light coat of workable fixative to prevent the charcoal from smudging. -
Frame your work:
Place the artwork behind a white mount and frame. The ample white space of the mount will help isolate the pink background and make the panda pop.
Now you have a striking, soulful portrait ready to bring a touch of wildlife serenity to your space


Playful Pig with Simple Acrylic Shading
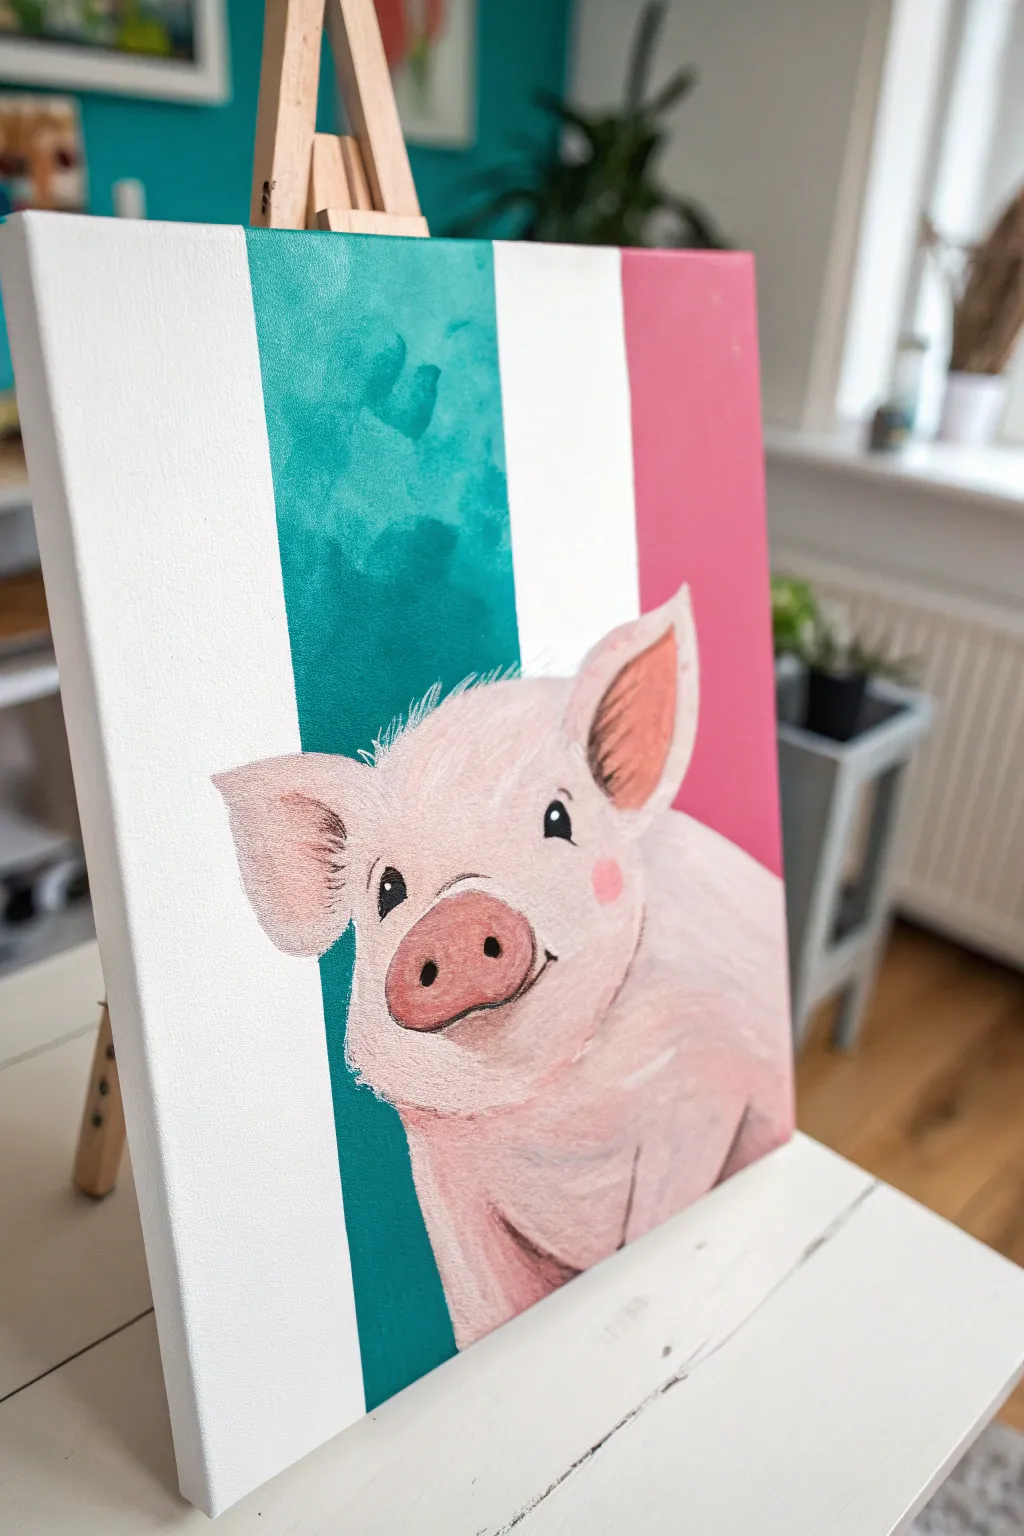
Brighten up any room with this charming acrylic painting featuring a cheerful pig against a bold, striped background. The combination of clean, geometric lines with the soft, organic shading of the animal creates a delightful, modern contrast.
Step-by-Step Tutorial
Materials
- Rectangular stretched canvas (e.g., 11×14 inches)
- Painter’s tape or masking tape (1 inch width)
- Acrylic paints: Titanium White, Mars Black, Rose Pink, Deep Turquoise or Teal, Burnt Sienna
- Paintbrushes: Flat brush (1 inch), medium filbert brush for shading, small round detail brush
- Pencil and eraser
- Palette for mixing
- Water cup and paper towels
Step 1: Setting the Scene
-
Prepare the background:
Start by ensuring your canvas is clean. We want distinct vertical stripes, so divide your canvas width into four equal sections using a pencil and ruler. Lightly mark vertical lines from top to bottom. -
Mask the white stripes:
To keep your white areas crisp, place strips of painter’s tape over the sections that will remain white. Specifically, cover the first stripe (far left) and the third stripe. Press the edges of the tape down firmly to prevent paint seepage. -
Paint the teal stripe:
Mix a vibrant teal using Deep Turquoise and a touch of Titanium White to adjust the opacity. Use your 1-inch flat brush to paint the second vertical section. Don’t worry about being perfectly smooth; a little texture adds character, just like in the example photo. -
Paint the pink stripe:
Rinse your brush thoroughly. Paint the fourth section (far right) with a solid Rose Pink. This should be a mid-tone pink, not too pale, to balance against the teal. -
Reveal the stripes:
Once the paint is touch-dry (usually about 15-20 minutes), carefully peel off the painter’s tape. You should now have a clean pattern of White, Teal, White, Pink. If any paint bled under the tape, tidy up the edges with a small brush and Titanium White.
Tape Technique
Before painting over tape, paint a thin layer of the *base* color (white) over the tape edge first. This seals the tape so your colored paint won’t bleed underneath.
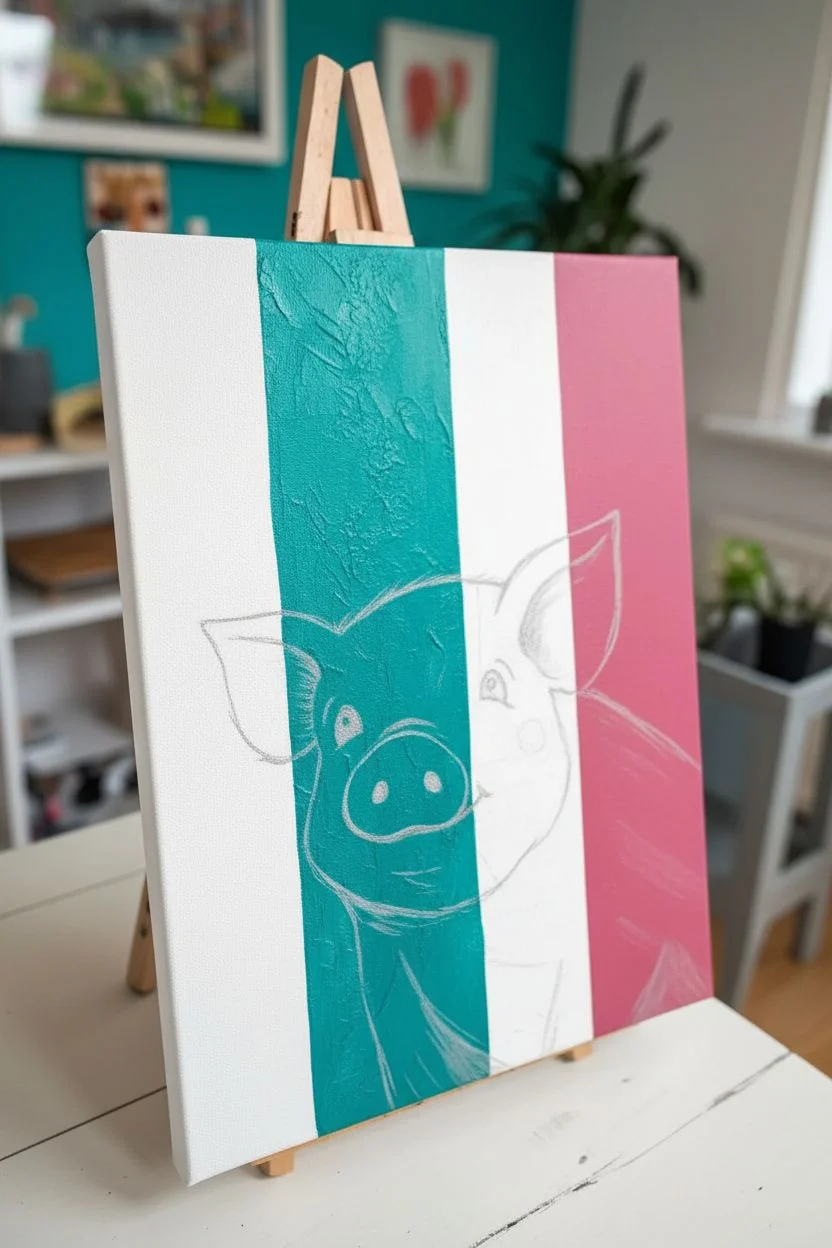
Step 2: Sketching the Pig
-
Outline the head shape:
Using a light pencil, sketch the outline of the pig’s head in the lower center of the canvas. The head should overlap the teal, white, and pink stripes. Draw a large, slightly squashed oval for the main head shape. -
Add the ears:
Sketch two triangle-shaped ears. The left ear should flop slightly outward, while the right ear can point up more perkily. Make sure they feel connected to the head, not just stuck on top. -
Place facial features:
Mark the position of the eyes wide apart. Between and slightly below them, draw a rounded oval for the snout. Add a gentle curve for the smiling mouth line under the snout.
Make It Yours
Change the pig’s expression by altering the eyebrows! Slanting them inwards creates determination, while arching them high makes the pig look surprised.
Step 3: Painting the Piggy
-
Base coat the pig:
Mix a very pale pink using a large amount of Titanium White and a tiny drop of Rose Pink. Fill in the entire pig shape with this base color. It’s okay if the background stripes show through slightly for now; we will build layers. -
Define the snout:
Mix a slightly darker, warmer pink by adding a speck of Burnt Sienna to your pink mix. Use the filbert brush to paint the oval snout. While the paint is wet, blend a lighter highlight onto the top curve of the nose for dimension. -
Shade the ears:
Use the same warmer pink mix for the inner ears. I like to keep the outer edges of the ears the lighter base color to create a sense of depth. -
Add facial shadows:
With a diluted version of your darker pink, glaze gentle shadows under the chin, around the base of the ears, and slightly around the eyes. Use soft, curved strokes to mimic the roundness of the face. -
Paint the nostrils:
Using your small round brush and dark grey (mix Black with a little White), paint remaining two oval shapes inside the snout for nostrils. Keep them small at first; you can always enlarge them. -
Create the eyes:
Paint the eyes solidly black. Once dry, add a tiny dot of pure Titanium White to the upper right corner of each pupil. This ‘catchlight’ brings the character to life instantly. -
Add rosy cheeks:
Mix a soft, translucent pink (you can use water to thin the paint) and dab a small circle on the cheek area just below the eye. Blend the edges outward so it looks like a natural flush. -
Highlighting fur texture:
Using a dry brush with very little white paint on it, flick small, short strokes along the top of the head and the edges of the ears. This creates a fuzzy, hair-like texture. -
Final outlines:
To separate the pig from the background, use a very thin brush and a watery grey-brown paint to loosely outline parts of the pig—specifically the ears and jawline. Keep the line broken and organic, not a solid cartoon outline.
Let your painting dry completely before displaying this cheerful artwork on your wall or shelf
BRUSH GUIDE
The Right Brush for Every Stroke
From clean lines to bold texture — master brush choice, stroke control, and essential techniques.
Explore the Full Guide
Majestic Horse Head in Charcoal and White
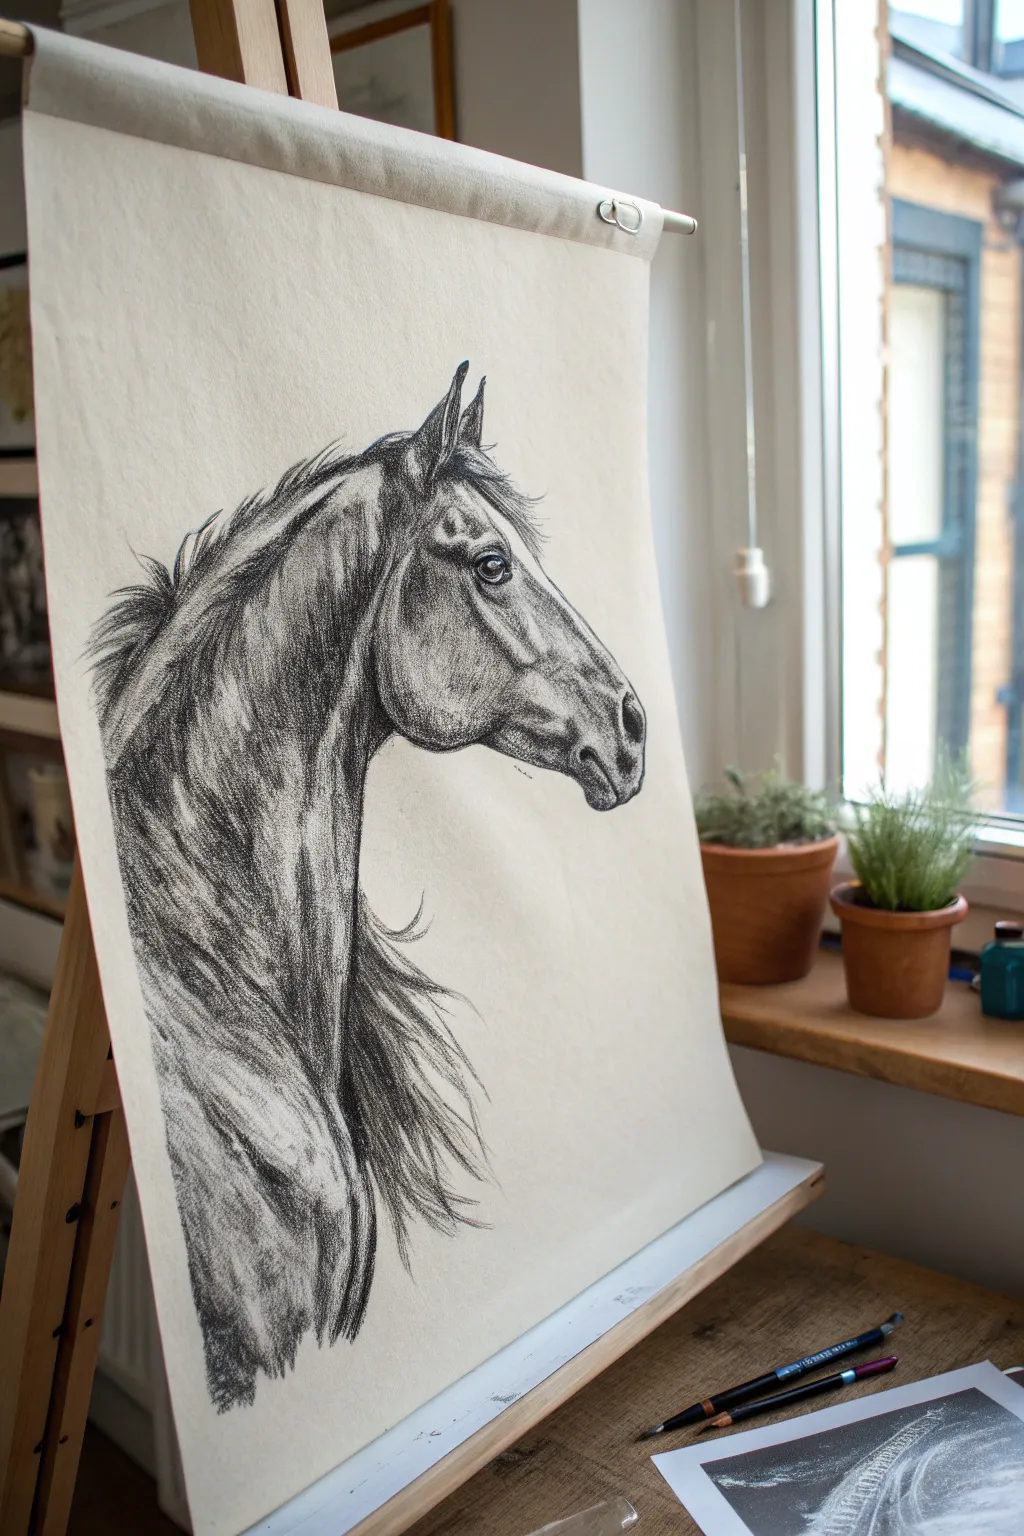
Capture the strength and elegance of a horse in profile with this striking charcoal study on toned paper. By utilizing the paper’s natural warmth as a mid-tone, you can focus on building deep shadows and popping highlights for a truly three-dimensional effect.
Step-by-Step
Materials
- Large sheet of cream or off-white toned drawing paper (approx. A2 size)
- Willow charcoal sticks (thick)
- Charcoal pencils (soft, medium, and hard grades)
- White pastel pencil or white charcoal pencil
- Kneaded eraser
- Blending stump or tortillon
- Workable fixative spray
- Drafting tape or clip for mounting paper
- Easel or drawing board
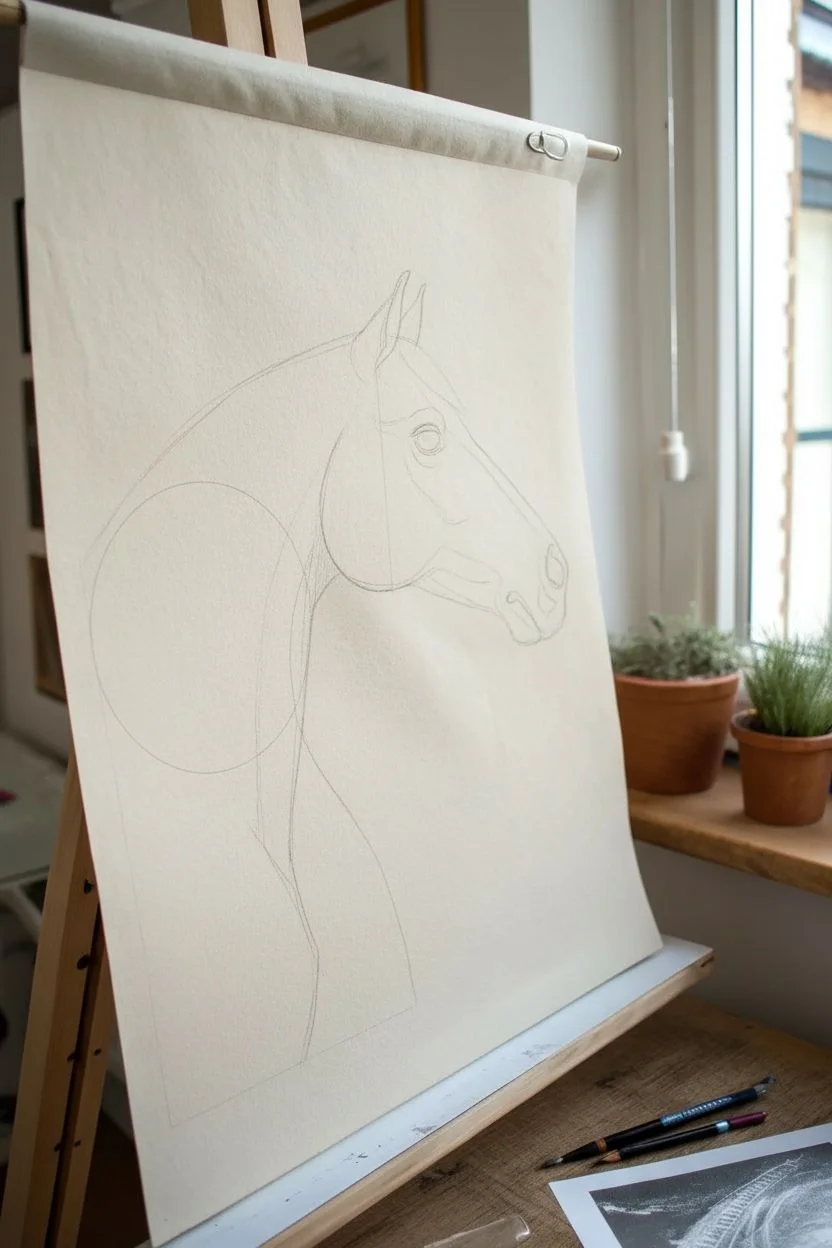
Step 1: Structural Foundation
-
Map the proportions:
Begin by lightly sketching the basic geometric shapes of the horse’s head using a harder charcoal pencil. Use a circle for the cheek (masseter muscle) area and a tapering rectangle for the muzzle to establish the profile view. -
Refine the outline:
Connect your shapes to form the continuous contour of the horse’s neck, jawline, and nose. Pay close attention to the slope of the nose bridge and the distinct curve of the nostril. -
Placement of features:
Mark the position of the eye, setting it high on the head, and sketch the ear ears pricked forward. Ensure the neck creates a strong, arching line that flows down from behind the ears.
Muddy Greys?
If your white and black charcoal mix into a dull grey, stop! Use a clean eraser to lift the black charcoal completely off the paper before applying the white pencil to that spot.
Step 2: Building the Dark Tones
-
Lay down base shadows:
Using a thick stick of willow charcoal, broadly shade in the darkest areas: the deep hollow of the neck, underneath the jawline, and the darker patches of the mane. -
smudge for softness:
Take a blending stump or simply use your fingers to gently rub the charcoal into the paper grain. This creates a soft, grey underpainting that suggests the muscle structure without harsh lines. -
Define muscle groups:
Switch to a medium charcoal pencil to carve out the specific anatomy. Darken the area behind the cheekbone and the grooves along the neck to make the muscles look rounded and powerful. -
Detailing the eye:
The eye is the soul of the portrait. Use a soft, sharp charcoal pencil to darken the pupil and iris, leaving a tiny spot of paper bare for the catchlight, or lift it out later with an eraser. -
Sculpting the muzzle:
Darken the nostril significantly, as this is usually the blackest point on the face. Shade around the mouth and chin, using lighter pressure to show the velvety texture of the nose.
Step 3: Texture and Form
-
Creating the mane:
Use quick, sweeping strokes with the side of your charcoal stick to suggest the flow of the mane. Don’t draw every hair; instead, look for clumps and waves of shadow. -
Refining the neck muscles:
Deepen the shadows in the ‘valleys’ between neck muscles. I find that cross-hatching slightly here adds a nice texture that mimics short coated fur. -
Mid-tone adjustments:
Use your kneaded eraser to lift off charcoal in areas that became too dark. Tap the eraser specifically on the cheekbone and the bulge of the neck to reclaim the paper’s color as a mid-tone highlight.
Expressive Background
Instead of leaving the background plain, rub a little charcoal dust around the back of the neck and smudge it outward to create a dreamy, atmospheric vignette effect.
Step 4: Highlights and Final Touches
-
Introduce white charcoal:
This is where the magic happens. Take your white charcoal or pastel pencil and apply highlights to the top of the neck, above the eye, and along the bridge of the nose. -
Highlight the mane:
Add a few sharp, white strokes to the mane, particularly where the light would catch the top strands. This separates the mane from the neck. -
Enhance the eye wetness:
add a crisp touch of white to the lower lid and the catchlight in the eye to give it a glossy, realistic appearance. -
Veins and fine details:
If you want extra realism, lightly sketch subtle veins on the muzzle using a sharp hard charcoal pencil, then highlight the top edge of the vein with a thin white line. -
Clean and fix:
Use the clean edge of an eraser to tidy up the background around the profile outline. Once satisfied, spray with fixative to prevent the dust from smudging.
Step back and admire the powerful form emerging from the paper, ready to be framed or displayed on the easel.
Tiger Eye Extreme Close-Up
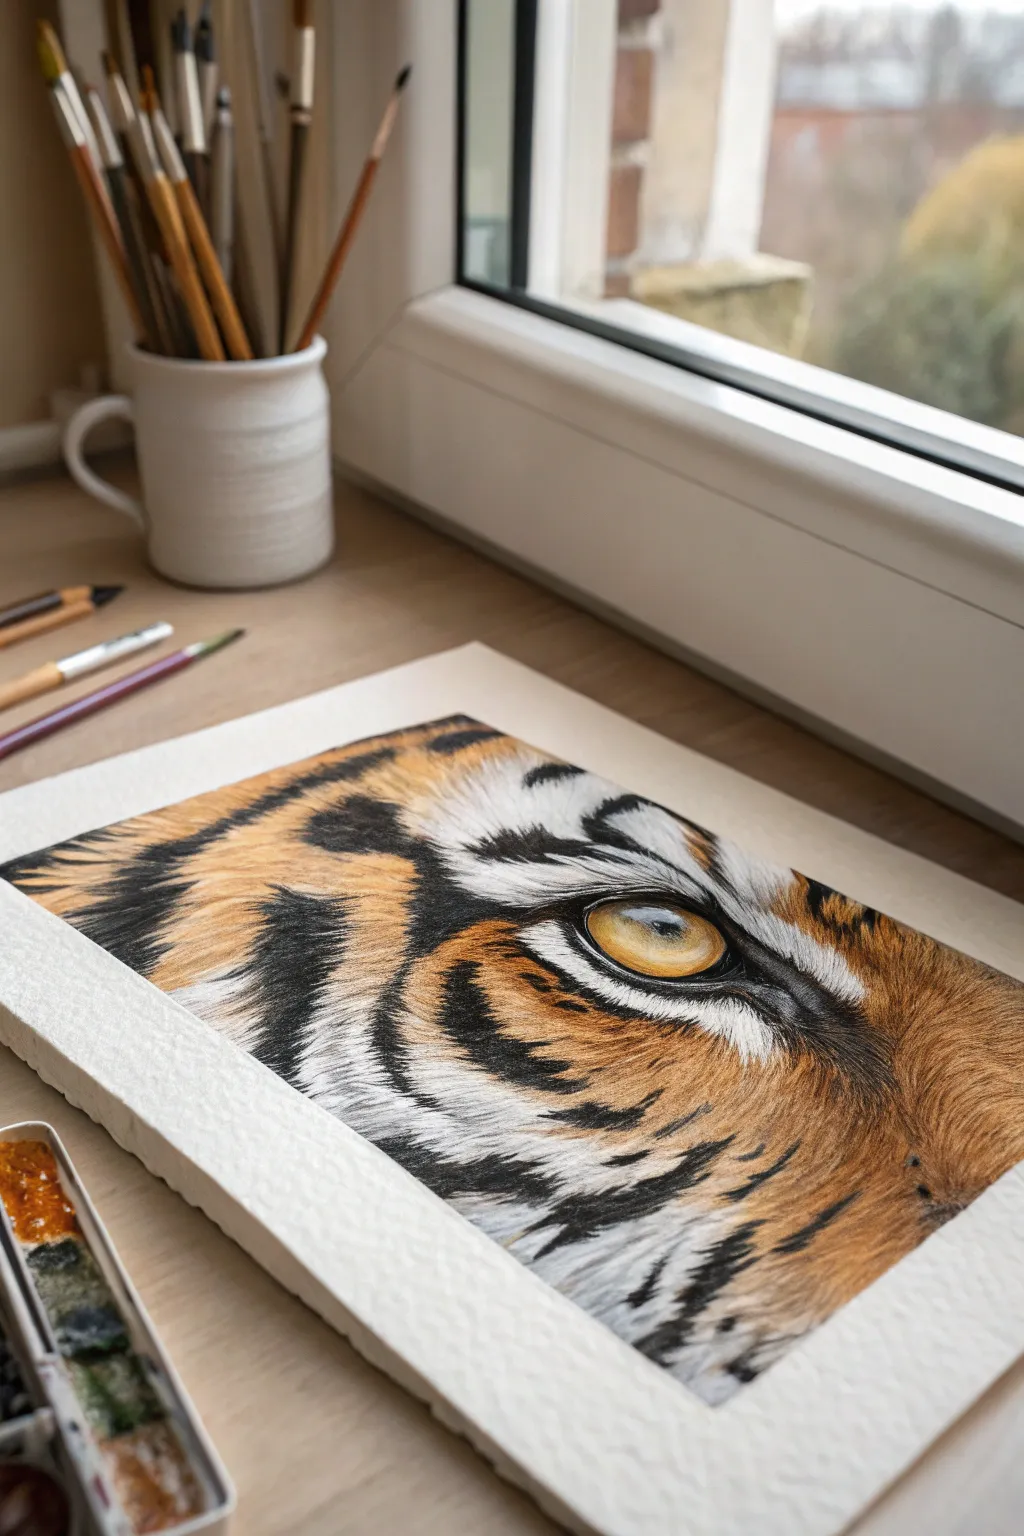
Capture the intense, golden focus of a tiger using detailed watercolor techniques on textured paper. This project focuses on building layers of fur and achieving a glassy, reflective quality in the eye for striking realism.
Step-by-Step Guide
Materials
- Heavyweight cold-press watercolor paper (300gsm or higher)
- Watercolor paints (burnt sienna, yellow ochre, cadmium yellow, ivory black, burnt umber, ultramarine blue)
- White gouache or white gel pen for highlights
- Round brushes (sizes 2, 4, and 6) and a fine liner brush (size 0 or 00)
- Masking tape
- Pencil (HB or 2H) for sketching
- Two jars of water
- Paper towels
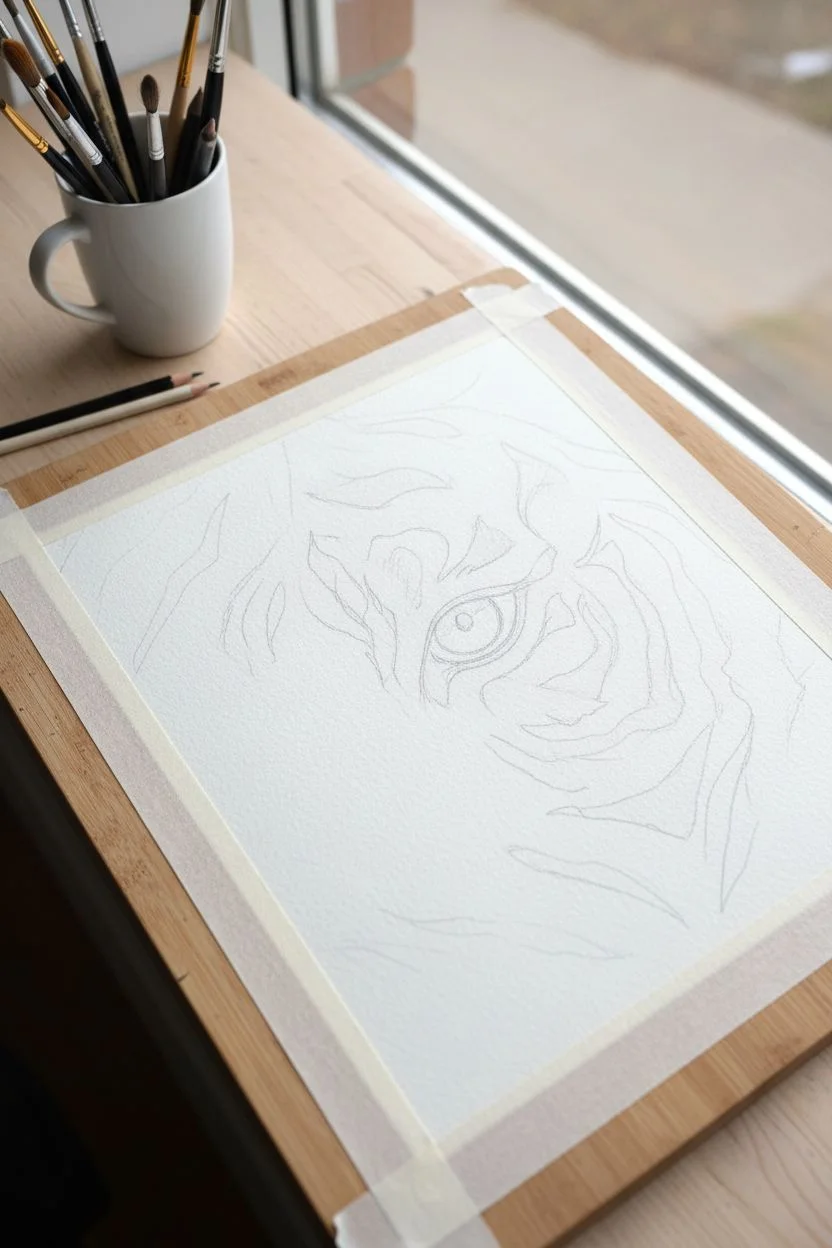
Step 1: Preparation & Sketching
-
Paper Setup:
Tape your watercolor paper down to a board on all four sides. This prevents buckling when we add water and creates that clean, crisp white border seen in the final piece. -
Drafting the Eye:
Lightly sketch the outline of the eye using an HB or 2H pencil. Focus on the almond shape and the tear duct area. Don’t press too hard; you want the lines to disappear under the paint. -
Mapping the Fur:
Sketch the directional flow of the fur. You don’t need to draw every hair, just indicate the main clusters and the distinctive zebra-like stripes, radiating away from the eye.
Step 2: Painting the Eye
-
The Golden Base:
Mix a watery wash of cadmium yellow and yellow ochre. Apply this to the iris area, carefully avoiding a small circle for the brightest highlight—leave this pure white paper. -
Adding Depth:
While the base is still slightly damp, drop in small amounts of burnt sienna around the outer edges of the iris and near the pupil to create a rounded, 3D form. -
The Pupil:
Once dry, paint the pupil using ivory black. Soften the edges slightly where it meets the gold iris so it doesn’t look like a sticker. -
Shadows and Details:
Mix a diluted black or dark grey and paint the shadow cast by the upper eyelid onto the iris. This is crucial for making the eye look recessed.
Fur Flow Pro Tip
Rotate your paper constantly while painting fur. Pulling the brush stroke toward you gives you better control over the tapered ‘hair’ end than pushing away.
Step 3: Building Fur Texture
-
Underpainting:
Apply a very pale wash of yellow ochre over the fur areas. This kills the stark white of the paper and gives the fur a warm undertone. Let this bone dry. -
Mid-Tones:
Using a size 4 brush, start flicking in burnt sienna strokes. Follow your sketch lines religiously to mimic the growth direction of the hair. -
The Black Stripes:
Mix a dense black. I prefer mixing burnt umber and ultramarine blue for a rich, lively dark rather than straight tube black. Paint the stripes using confident, jagged strokes that taper at the ends. -
Layering Fur:
Switch to your smaller size 2 brush. Add shorter, finer strokes of burnt umber and sienna between the black stripes to create density. -
The White Fur:
For the white areas (above the eye and cheek), use a very dilute grey-blue wash to suggest shadow between tufts of white fur, leaving the paper white for the tips.
Level Up: Glossy Look
Mix a tiny amount ofGum Arabic into the paint used for the eyeball. It dries with a slight sheen, making the eye look naturally wet compared to the matte fur.
Step 4: Fine Details & Highlights
-
Micro-Detailing:
Take your 00 liner brush. With a fairly dry mixture of dark brown, add individual hairs overlapping the edges of the eye and the black stripes to break up any hard lines. -
Eyelid Rim:
Paint the rim of the eyelid with a dark, wet mixture. Ensure it looks wet by leaving tiny microscopic gaps of white paper or adding white dots later. -
Gouache Whiskers:
Using white gouache with a liner brush, flick in fine white hairs over the dark stripes and near the tear duct. This layering creates incredible depth. -
Final Highlight:
Enhance the highlight in the eye with a touch of white gouache or a gel pen if the paper white wasn’t preserved perfectly. This brings the tiger to life.
Peel off the tape to reveal your clean edges and admire the fierce intensity of your work

PENCIL GUIDE
Understanding Pencil Grades from H to B
From first sketch to finished drawing — learn pencil grades, line control, and shading techniques.
Explore the Full Guide
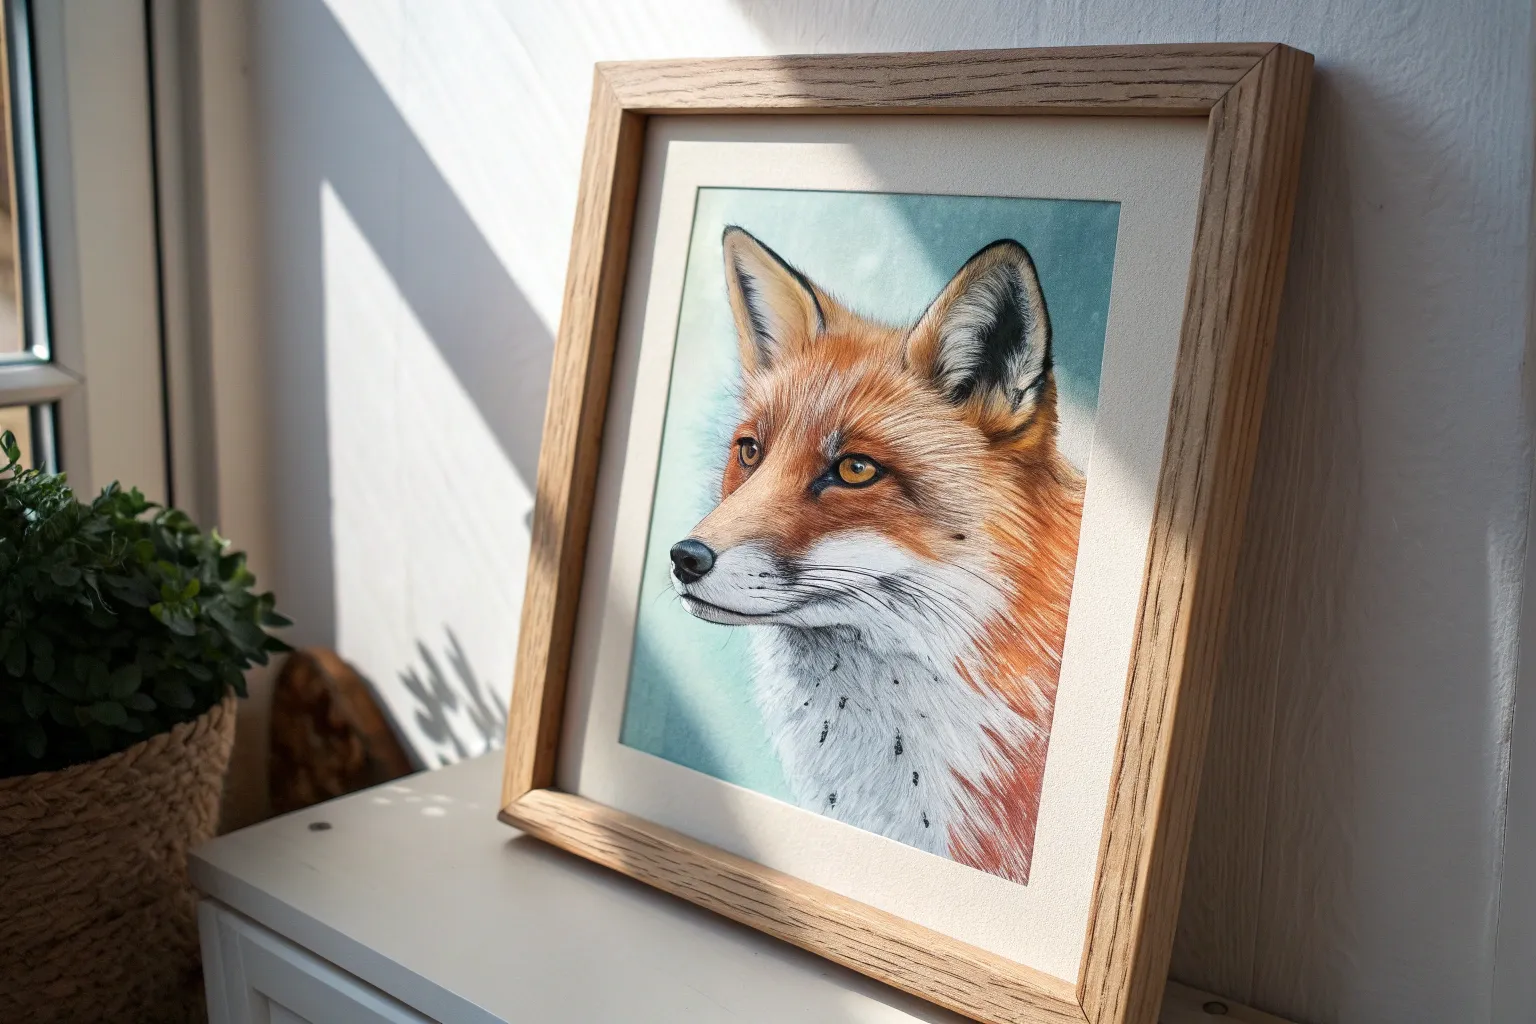
Fox Face with Fluffy Fur Texture
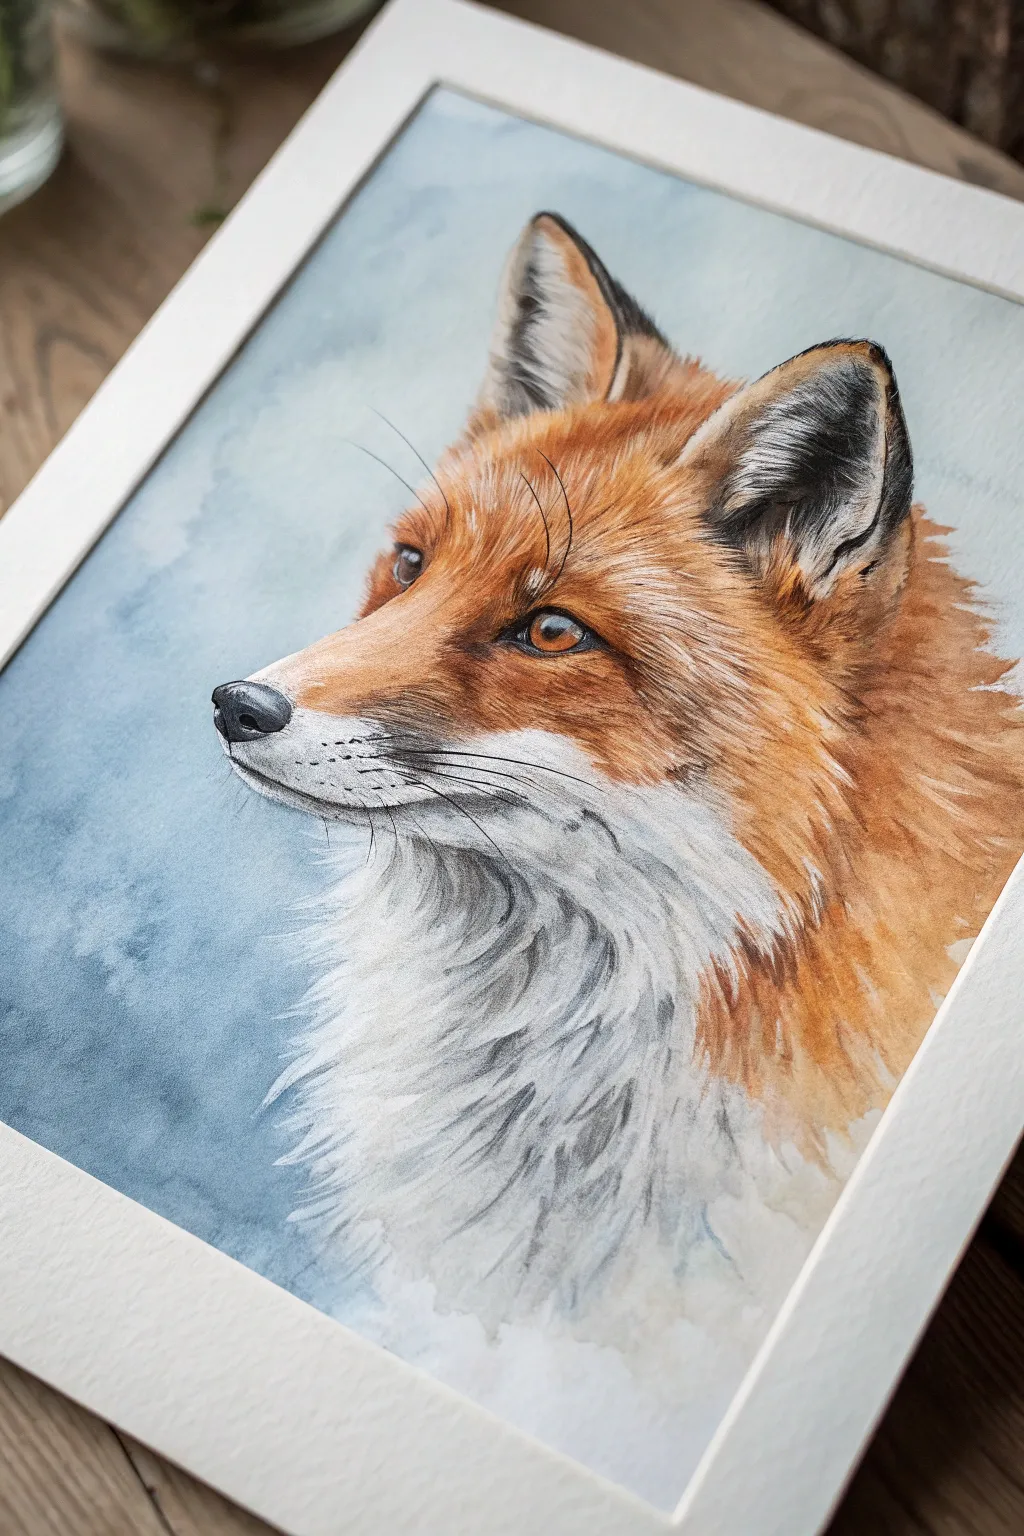
Capture the clever gaze of a red fox in this detailed watercolor project. You’ll layer warm oranges and cool greys to build realistic fur texture, finishing with striking amber eyes that bring the animal to life.
Detailed Instructions
Materials
- Cold press watercolor paper (300 gsm)
- Watercolor paints (Burnt Sienna, Yellow Ochre, Burnt Umber, Payne’s Grey, Indigo, Alizarin Crimson)
- Round brushes (sizes 2, 6, and 10)
- Fine liner brush (size 0 or 00)
- White gouache or white gel pen
- Masking fluid (optional)
- Pencil (HB or H) and kneaded eraser
- Two jars of water
- Paper towels
- Painter’s tape and drawing board
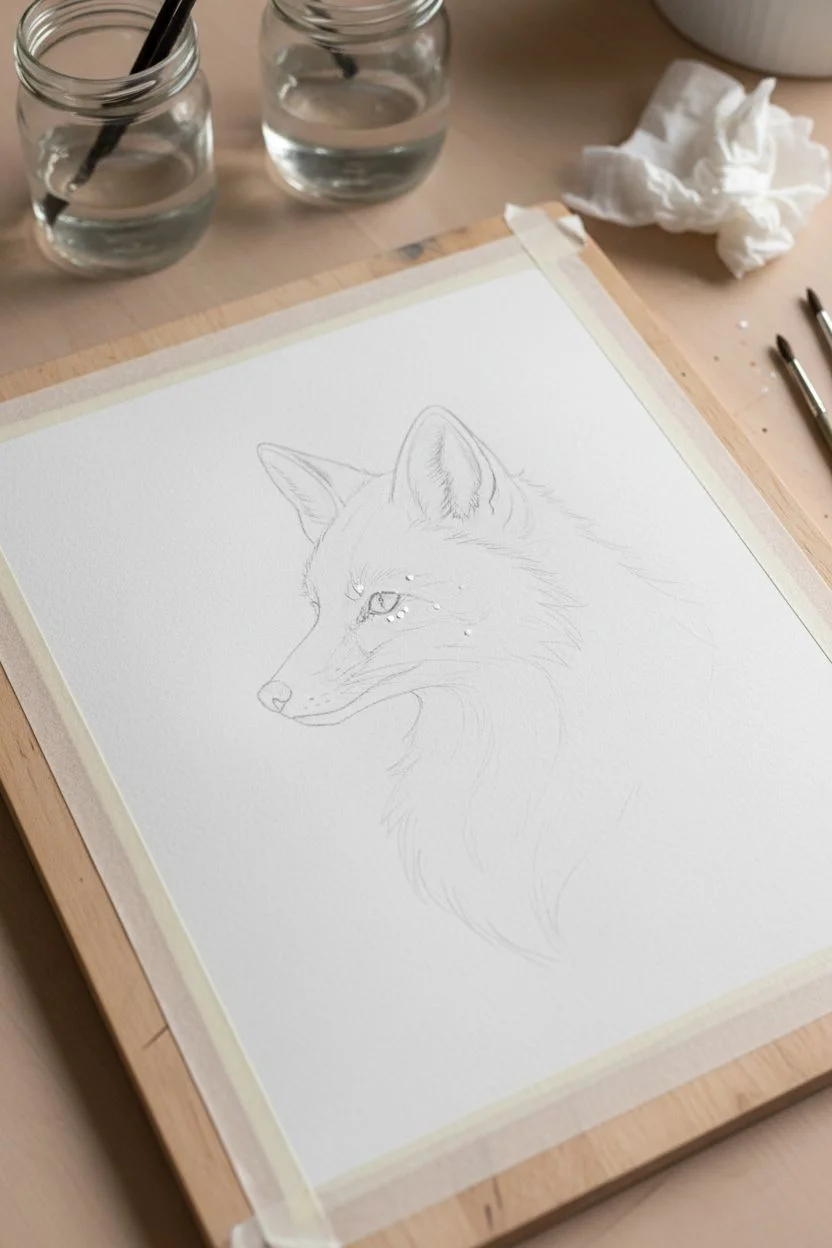
Step 1: Preparation & Sketching
-
Secure the paper:
Tape your watercolor paper down to a board on all four sides. This ensures a clean white border and prevents buckling when we apply the wet background. -
Outline the fox:
Lightly sketch the profile of the fox. Focus on the triangular shape of the ears, the slope of the snout, and the curve of the thick neck fur. Keep lines faint so they don’t show through the paint. -
Protect highlights:
If you are using masking fluid, apply small dots to the whiskers and the reflections in the eye. Let this dry completely before touching it with a brush.
Step 2: The Background Wash
-
Wet the background:
Using clean water and a large round brush, wet the area around the fox, being careful not to spill water into the fox’s outline. -
Apply cool tones:
Drop in a watery mix of Indigo and Payne’s Grey. Let the pigment bloom naturally to create a soft, out-of-focus background effect. Keep it lighter near the fox’s face to create contrast. -
Let it dry:
Wait for the paper to be bone dry before starting on the fox itself. This prevents the orange fur from bleeding into your nice blue sky.
Brush Control Pro Tip
For realistic fur, hold your brush near the end of the handle. Use quick, flicking motions with your wrist, lifting the brush at the end of each stroke to create tapered hair tips.
Step 3: Layering the Fur
-
Base orange layer:
Mix Yellow Ochre with a touch of Burnt Sienna. Apply a light wash over the face and upper neck area, avoiding the white chest and muzzle. -
Building warmth:
While the first layer is damp, drop in a more saturated Burnt Sienna on the top of the head and the back of the neck to deepen the color. -
Ear details:
Paint the outer edges of the ears with the dark orange mix. For the inner ear, use a very pale, watery grey wash to suggest shadow without making it too dark. -
Shadows on white fur:
For the chest and white muzzle area, don’t use pure white. Instead, use a very diluted mix of Indigo and Payne’s Grey to paint the shadow shapes, leaving the paper white for the brightest highlights.
Muddy Fur Fix
If your oranges and grey shadows start mixing into brown mud, stop immediately. Let the paper dry completely before adding another layer. Wet-on-dry layering keeps colors crisp.
Step 4: Creating Texture
-
Directional strokes:
Using a size 2 brush and a thicker mix of Burnt Sienna and Burnt Umber, start painting individual fur flicks. Always follow the direction the fur grows—away from the nose and down the neck. -
Darker accents:
Mix Burnt Umber with a little Indigo for a near-black tone. Add definition to the tips of the ears and the dark patch where the whiskers will go. -
Chest fur texture:
Switch to a grey mix. Use jagged, sweeping strokes to create the feeling of the long, fluffy white fur on the chest, overlapping the orange fur slightly to blend the two zones. -
The nose:
Paint the nose with a strong black-grey mix. Leave a tiny sliver of white paper at the top edge for a highlight, which makes the nose look wet.
Step 5: Facial Features
-
Painting the eye:
Fill the iris with a glowing Yellow Ochre mixed with a tiny bit of Burnt Sienna. Once dry, add the pupil with concentrated black pigment. -
Eye definition:
Outline the eye with a dark liner brush, adding a ‘tear duct’ shape at the front corner for realism. -
Deepening contrast:
I like to go back in with my darkest brown mix to deepen the shadows right under the jawline and inside the ear crevices. This makes the form pop.
Step 6: Final Details
-
Whisker work:
Remove the masking fluid if you used it. If not, use white gouache or a gel pen to draw long, confident whiskers sweeping back from the muzzle. -
Fine hairs:
Add tiny white hairs inside the ears and along the spine using your fine liner and gouache. This creates that soft, backlit effect. -
Remove tape:
Peel the tape away slowly at a 45-degree angle to reveal your crisp white border.
Now you have a striking fox portrait ready to be framed and displayed.
Elephant Silhouette on a Sunset Savannah
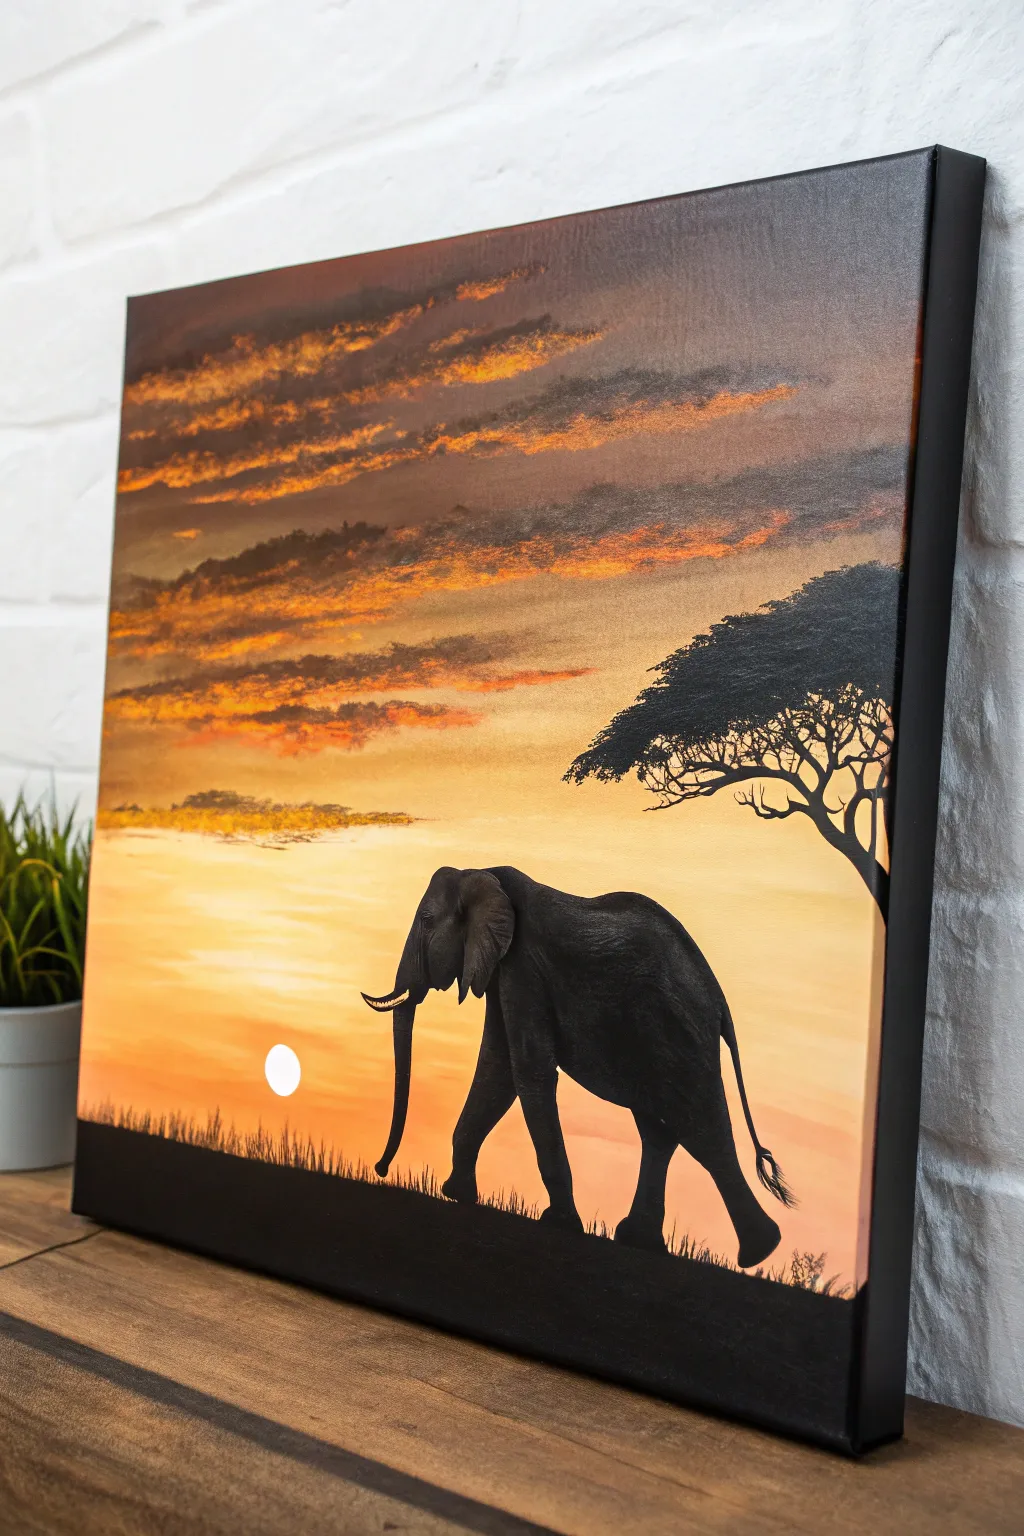
Capture the serene majesty of the African plains with this stunning acrylic painting featuring a warm, glowing sunset and a detailed elephant silhouette. This project focuses on mastering soft sky gradients and creating crisp, high-contrast silhouettes to bring a sense of depth and tranquility to your walls.
Step-by-Step
Materials
- Rectangular stretched canvas (e.g., 16×20 inches)
- Acrylic paints: Titanium White, Cadmium Yellow, Orange, Burnt Sienna, Burnt Umber, Mars Black
- Gesso (optional, for priming)
- Large flat brush (1-2 inch) for blending backgrounds
- Medium filbert brush for clouds
- Small round brush (size 0-2) for silhouette details
- Water cup and paper towels
- Palette or mixing plate
- White chalk or a watercolour pencil
- Reference photo of an elephant walking
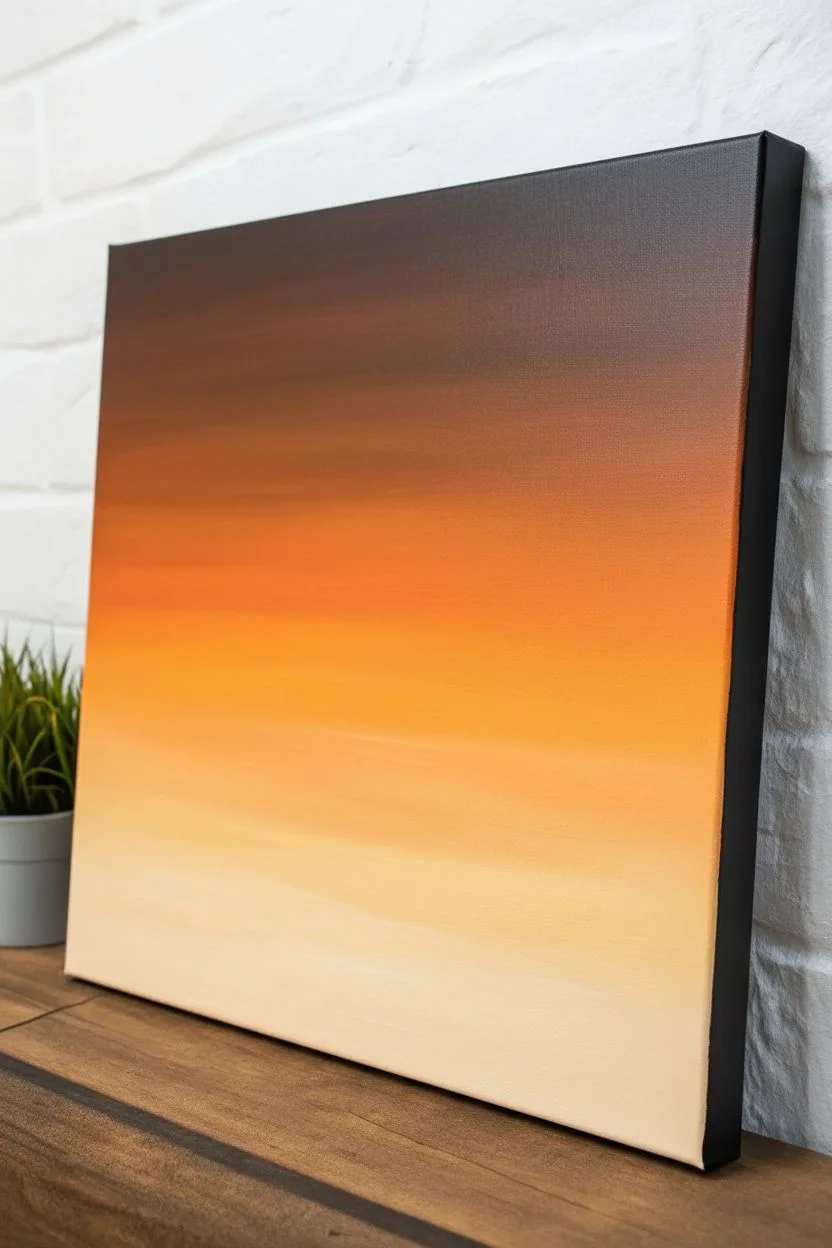
Step 1: Painting the Sunset Gradient
-
Prime the canvas:
If your canvas isn’t pre-primed, apply a coat of white gesso to ensure a smooth surface for blending. Let this dry completely before starting. -
Lay down the horizon light:
Load your large flat brush with Titanium White and a touch of Cadmium Yellow. Paint a horizontal band across the lower middle section of the canvas where the sun will eventually be closest to the horizon. -
Blend upward into orange:
Without washing your brush, pick up some Orange paint. Blend this into the yellow section moving upward, using long horizontal strokes to create a seamless transition. -
Add the upper sky darkness:
Mix Burnt Sienna with a tiny dot of Burnt Umber to create a dusky upper sky tone. Paint the top third of the canvas with this darker mix. -
Smooth the transitions:
I like to use a clean, slightly damp brush to go back over the ‘seams’ between the colors, lightly sweeping back and forth until the gradient looks buttery smooth from dark brown at the top to pale yellow at the bottom.
Gradient Pro-Tip
Keep a spray bottle of water nearby. A light misting keeps acrylics wet longer, giving you more time to achieve that perfect, seamless ombré blend in the sky.
Step 2: Adding Clouds and Sun
-
Form the cloud shapes:
Switch to your medium filbert brush and mix a dark grey using Burnt Umber and a touch of Black. Dab in irregular, horizontal cloud formations across the upper and middle sections of the sky. -
Highlight the clouds:
Before the dark paint dries fully, take a little orange mixed with yellow and lightly scumble it onto the bottom edges of the clouds. This mimics the setting sun catching the underside of the vapour. -
Paint the sun:
Locate a spot low on the horizon on the left side. Using pure Titanium White (or a very pale yellow), paint a crisp, small circle. This works best if the background paint is dry so the white stays bright. -
Let it dry completely:
Allow the entire background layer to dry for at least 30 minutes. The silhouette step requires a solid, dry base to avoid muddying the sharp black lines.
Level Up: Texture
Mix a little sand or modeling paste into your black paint for the ground area. This adds gritty, realistic earth texture that contrasts beautifully with the smooth sky.
Step 3: Creating the Silhouettes
-
Sketch the layout:
Use a piece of white chalk to lightly outline the ground level, the acacia tree on the right, and the elephant shape in the center. Chalk is easy to wipe away if you make a mistake. -
Fill the ground:
Using Mars Black and a flat brush, paint the solid bottom strip of the ground. Keep the top edge slightly uneven to suggest terrain. -
Paint the tree trunk:
With the small round brush and black paint, follow your chalk guide to paint the twisting trunk of the acacia tree. Make the branches taper off into finer lines as they reach outward. -
Stipple the tree canopy:
Use an old, scruffy brush or dab with the tip of your filbert brush to create the foliage of the tree. Use a tapping motion to create a textured, leafy silhouette that looks dense but natural. -
Outline the elephant:
Carefully outline the elephant’s body using your fine round brush. Pay close attention to the curve of the trunk, the tusks, and the back arch. -
Fill in the elephant:
Once the outline is secure, fill the body with solid black. Ensure the paint is opaque; you may need a second coat once the first dries to eliminate brush strokes. -
Detail the tusks:
Mix a tiny amount of white with a drop of yellow and brown to get an ivory colour. Carefully paint two thin curved lines for the tusks against the black silhouette. -
Add grass texture:
Turn your detailed ground brush vertically and flick upward quickly along the horizon line of the ground. This creates the illusion of tall savannah grass silhouetted against the light. -
Final touches:
Erase any remaining chalk lines with a damp cotton bud once the black paint is totally dry. Check your edges and sharpen any fuzzy lines on the elephant’s trunk or tail.
Now step back and admire the warmth of your personal African savannah sunset


Giraffes at Dusk with Long-Shadow Shapes
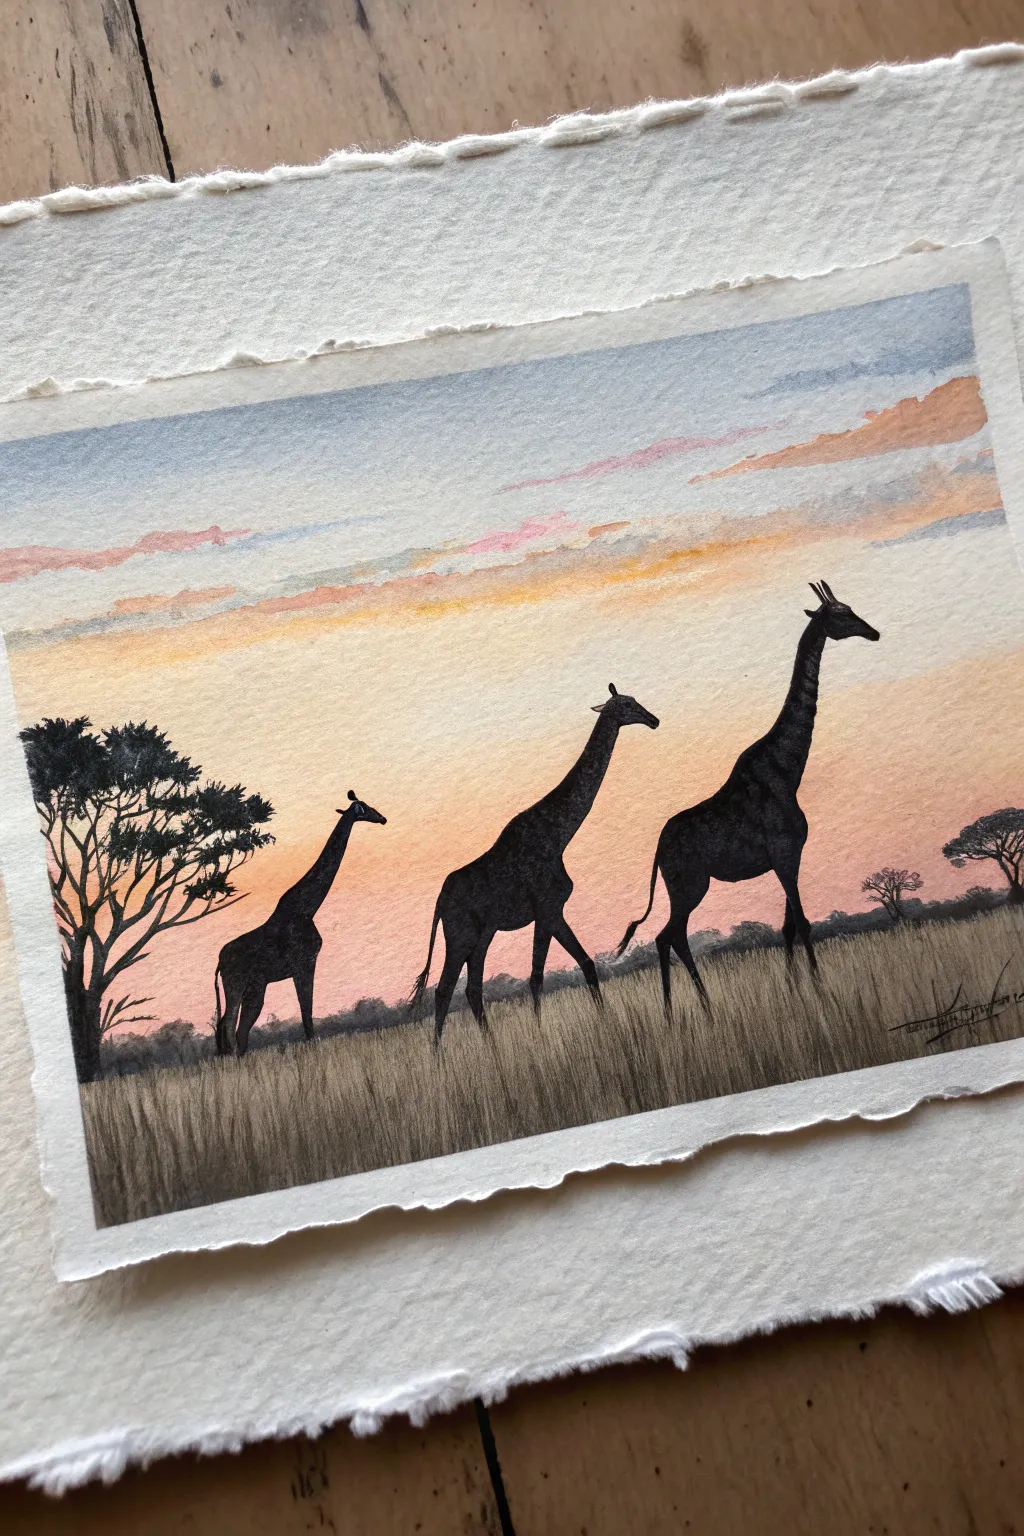
Capture the serene beauty of the African savannah with this striking watercolor project. By combining a soft, blended sunset wash with crisp black silhouettes, you’ll create a scene full of depth and warm atmosphere.
Step-by-Step Tutorial
Materials
- Cold press watercolor paper (deckled edge preferred for that rustic look)
- Watercolor paints (Cerulean Blue, Rose Madder/Alizarin Crimson, Cadmium Yellow, Payne’s Gray)
- Black waterproof ink or intense black watercolor
- Flat wash brush (3/4 inch or 1 inch)
- Round brushes (sizes 4 and 8)
- Fine liner or rigger brush (size 0 or 00)
- Masking tape
- Paper towels
- Jar of clean water
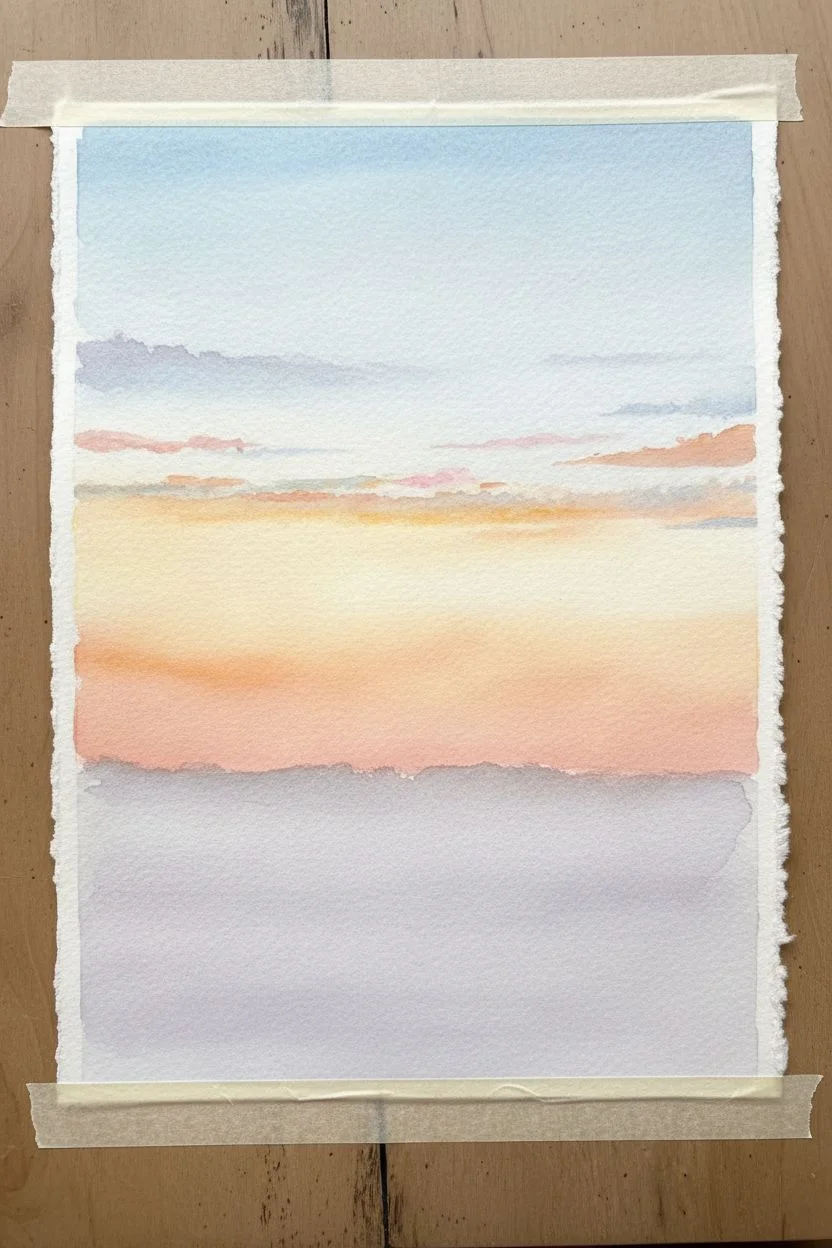
Step 1: Painting the Sky
-
Prepare the paper:
Since we want to preserve that beautiful deckled edge shown in the reference, tape your paper down to a board from the back using loops of masking tape, rather than taping over the front edges. -
Wet the surface:
Using your large flat brush and clean water, dampen the entire sky area of the paper, stopping about two inches from the bottom edge. The paper should feature a glossy sheen but no puddles. -
Apply the blue sky:
Load your brush with a diluted wash of Cerulean Blue. Paint a horizontal band across the top third of the paper. Because the paper is wet, the bottom edge of this blue strip should soften naturally. -
Introduce the clouds:
While the blue is still wet, mix a soft purple-grey using a tiny bit of Rose Madder and blue. Dab in horizontal, irregular streaks just below the blue sky to suggest distant cloud formations. -
Add warmth:
Clean your brush thoroughly. Pick up a mix of Rose Madder and Cadmium Yellow to create a soft peach color. Paint this across the middle of the paper, letting it gently touch and blend with the cloud layer above. -
Paint the horizon glow:
Switch to pure, diluted Cadmium Yellow for the area just above the horizon line. I find it helpful to overlap this slightly with the peach tone to create a seamless transition from cool sky to warm sunset. -
Create the distant haze:
For the very bottom strip (the ‘ground’ area), mix a very pale purple-grey wash. Apply this below the yellow, letting it blend upward slightly to create the look of distant atmospheric haze. -
Let it dry:
This step is crucial. Allow the background wash to dry completely. The paper must be bone dry before you start the silhouettes, or the black ink will bleed into the sky.
Clean Edges Pro-Tip
For the sharpest silhouettes, use India Ink instead of watercolor paint. It’s more opaque, dries waterproof, and won’t lift if you accidentally brush over it while adding grass.
Step 2: Creating the Silhouettes
-
Sketch the outlines:
Lightly sketch the three giraffes using a pencil. Place the largest one on the right, a medium one in the center, and the smallest on the left to create a balanced composition. Sketch the outline of the acacia tree on the far left as well. -
Outline the giraffes:
Switch to your size 4 round brush and black ink (or highly pigmented black watercolor). Carefully trace the outline of the first giraffe, paying attention to the ossicones (horns) and the shape of the snout. -
Fill in the forms:
Fill in the body of the giraffe solid black. As you move down the legs, switch to a smaller brush to keep the lines crisp and delicate. -
Paint the other giraffes:
Repeat the process for the middle and left giraffes. Ensure their feet are grounded on roughly the same horizontal plane to maintain perspective. -
Add the tree trunk:
For the acacia tree on the left, use the tip of your round brush to paint a thick, gnarled trunk that splits into several main branches. -
Detail the foliage:
Use a dry-brush technique for the tree canopy. Dab a brush with relatively dry paint onto the paper to create the texture of leaves without painting individual leaves. -
Add distant trees:
Using a very diluted grey-black, paint tiny, faint tree shapes on the horizon line behind the giraffes. This adds incredible depth to the landscape.
Step 3: Foreground Textures
-
Paint the base grass:
Using a dilute wash of black (so it appears dark grey), paint a solid strip at the very bottom of the page to anchoring the scene. -
Flick the tall grass:
Take your rigger or liner brush and load it with opaque black ink. Using quick, upward flicking motions, create individual blades of grass rising from the bottom edge. -
Vary density and height:
Make some grass blades longer than others, overlapping the giraffes’ legs slightly. This places the animals ‘in’ the landscape rather than floating on top of it. -
Final touches:
Check your silhouettes. If the black has dried looking faded or uneven, apply a second coat to ensure the shapes are dark and striking against the colorful sunset.
Level Up: Texture
Add subtle texture to the giraffes’ bodies by lifting out tiny spots of black paint with a damp brush while it’s semi-dry, hinting at their reticulated patterns.
Now you have a serene safari scene that beautifully captures the quiet drama of the golden hour
Sea Turtle Gliding Through Layered Blues
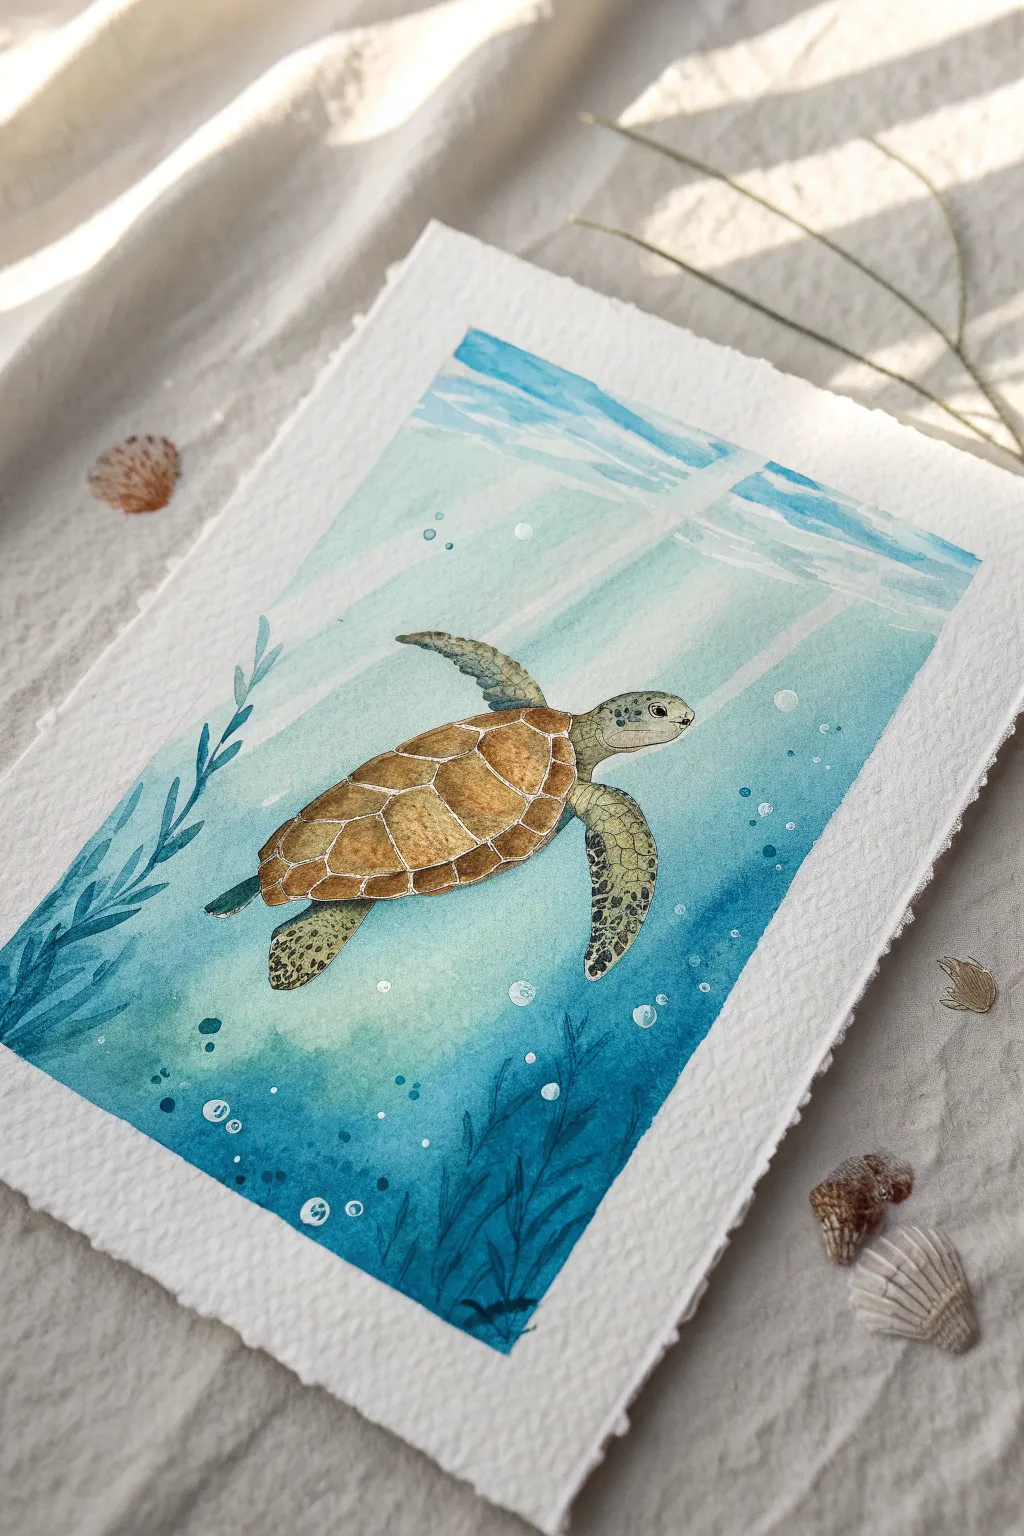
Capture the serenity of the ocean depths with this luminous watercolor painting of a sea turtle. You will use glazing techniques to build rich, turquoise waters and detailed brushwork to bring the gentle giant’s shell and skin to life.
How-To Guide
Materials
- Cold press watercolor paper (300 gsm or heavier), preferably with deckled edges
- Watercolor paints (Phthalo Blue, Turquoise, Hookers Green, Burnt Sienna, Yellow Ochre, Paynes Gray, White Gouache or white ink)
- Round brushes (sizes 2, 6, and 10)
- Masking fluid (optional but recommended for bubbles)
- Pencil (HB) and kneaded eraser
- Two jars of water
- Paper towels
- Palette
- Painter’s tape or a board
Step 1: Planning and Initial Washes
-
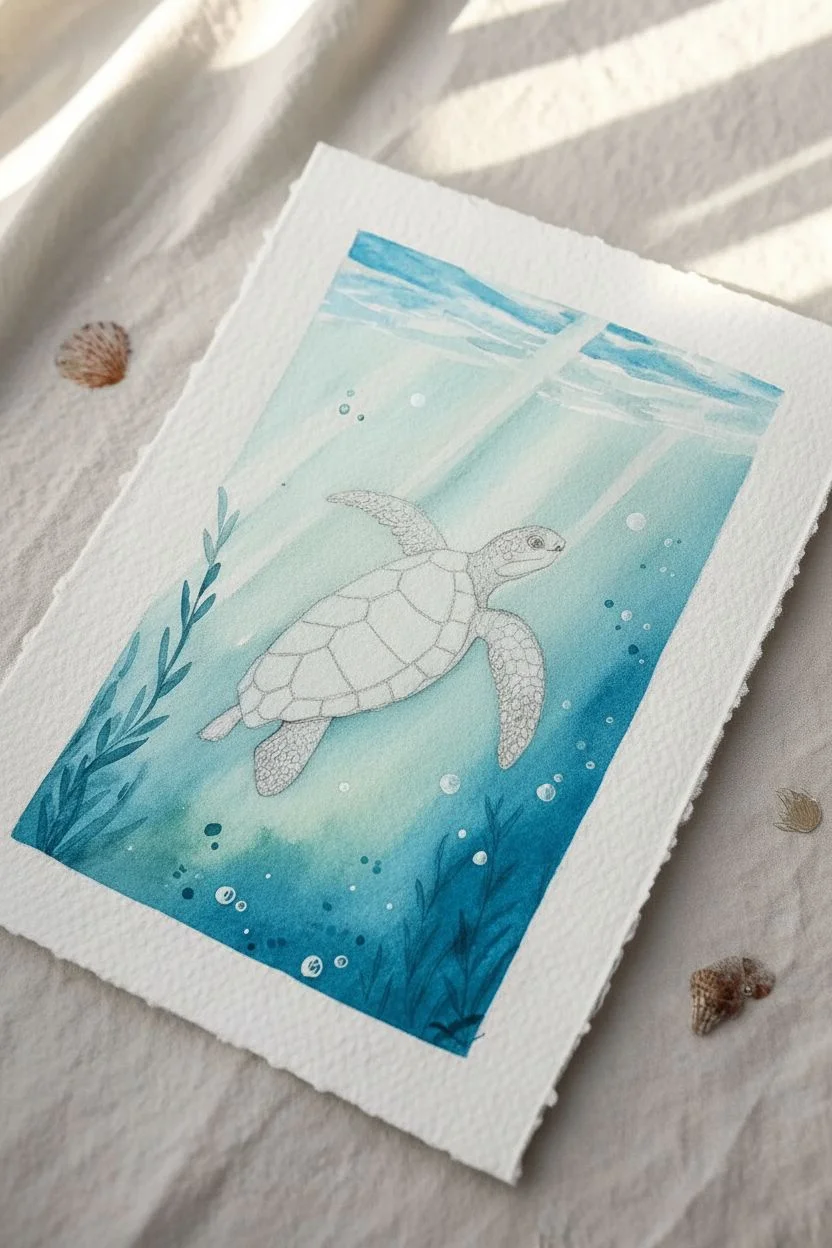
Sketching the Composition:
Begin by lightly sketching the outline of the turtle in the center of your paper. Draw the shell’s scutes (the plate shapes) carefully, as well as the head and flippers. Add faint lines for the seaweed at the bottom corners. -
Refining Lines:
Use a kneaded eraser to lift off excess graphite so your lines are visible but very faint. Watercolor is transparent, and heavy pencil marks are difficult to hide later. -
Masking Highlights (Optional):
If you are using masking fluid, apply small dots for the bubbles rising around the turtle and a few tiny distinct highlights on the shell. Let this dry completely before painting. -
Wet-on-Wet Background:
Wet the entire paper around the turtle with clean water, avoiding the turtle shape itself. While the paper is glistening, drop in a light wash of Turquoise and very diluted Phthalo Blue. Keep the top of the painting significantly lighter to mimic sunlight filtering down. -
Creating Depth:
While the paper is still damp, add stronger concentrations of Phthalo Blue and a touch of Hookers Green towards the bottom corners. This creates the illusion of deep water. Allow the paint to bleed naturally. -
Painting Sun Rays:
Before the background dries completely, use a clean, damp brush to ‘lift’ diagonal streaks of paint from the top right corner downward across the blue wash. This negative painting technique creates soft sunbeams.
Clean Edges Pro-Tip
For those distinct white dividing lines on the shell, use a white gel pen after the paint dries if you struggle with brush control. It’s much easier than painting around thin negative spaces.
Step 2: Painting the Turtle
-
Base Layer for Shell:
Once the background is bone dry, mix a warm wash of Yellow Ochre and lightly fill in the shell scutes. Leave tiny gaps of white paper between the plates to define the structure. -
Skin Tones:
Paint the flippers and head with a pale, watery mix of Green and a tiny dot of Burnt Sienna. This serves as the underpainting for the detailed skin texture later. -
Defining the Shell:
Mix Burnt Sienna with a little Paynes Gray to create a rich brown. Using a size 2 brush, paint the interior of each shell plate, keeping the color darker on one side to show curvature and leaving the Yellow Ochre visible as a highlight. -
Adding Skin Texture:
Using a concentrated mix of Hookers Green and Paynes Gray, paint small, irregular polygon shapes on the flippers and head. These scales should be larger on the flipper edges and smaller near the body. -
Facial Details:
With your smallest brush and a dark mix of Paynes Gray, carefully paint the eye, leaving a tiny speck of white paper for the glint of life. Add the nostril and the line occurring where the beak meets the face.
Step 3: Atmospheric Details
-
Painting Seaweed:
Mix a cool, dark blue-green. Paint fluid, wavy lines rising from the bottom corners to represent seaweed. Vary the pressure on your brush to create thick and thin swaying leaves. -
Creating Bubbles:
If you didn’t use masking fluid, mix a small amount of white gouache or opaque white watercolor. Paint small, hollow circles and dots rising from the turtle. If you used masking fluid, rub it off gently now. -
Highlighting Bubbles:
To make the bubbles look 3D, add a tiny shadow crescent on the bottom right of each bubble using a diluted blue, and a sharp white highlight on the top left. -
Enhancing Light Rays:
I like to strengthen the light rays at this stage. Use a very watery white gouache to glaze over the path of the sunbeams, making them slightly more distinct against the deeper blue water. -
Final Touches:
Review the contrast. If the shell needs more pop, deepen the crevices between the scutes with a dark brown mix. Add a few very faint blue glazes over the distant seaweed to push it into the background.
Level Up: Salt Texture
While the background blue wash is still wet, sprinkle a pinch of table salt near the bottom. As it dries, the salt pushes pigment away, creating incredible sandy, starry textures in the deep water.
Step back and admire the underwater tranquility you have captured on paper
Peacock Feather Fan with Jewel Tones
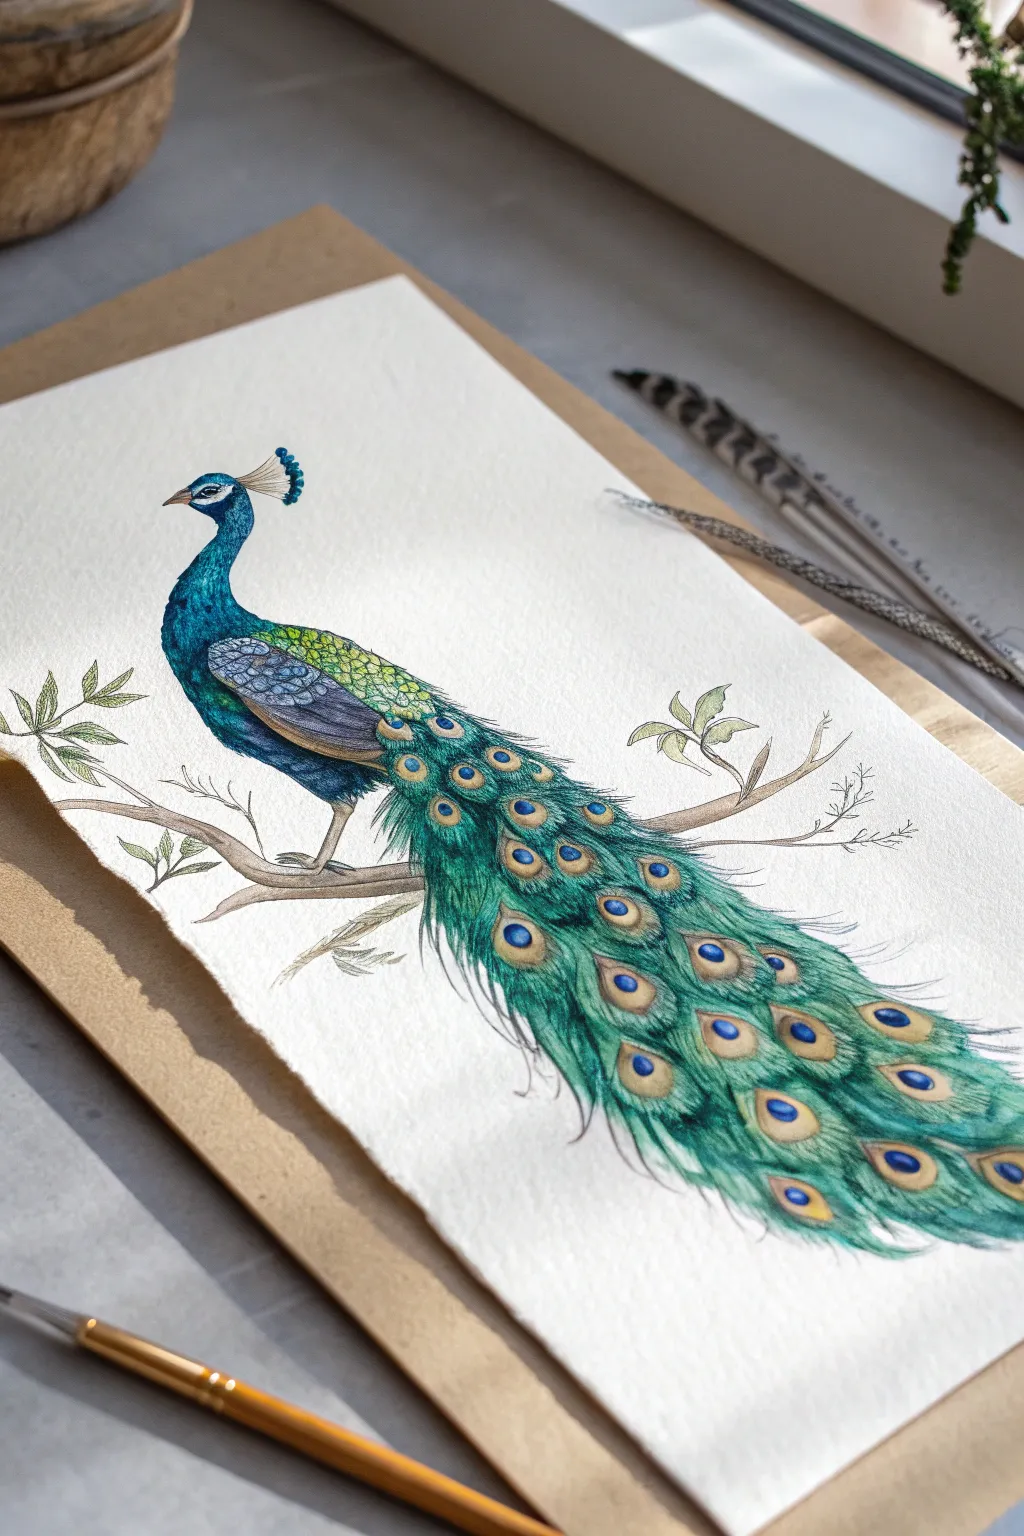
This stunning watercolour project captures the regal beauty of a peacock with a focus on deep jewel tones and intricate feather patterns. You’ll layer translucent washes to build depth before adding fine, opaque details that bring the iridescent feathers to life.
Detailed Instructions
Materials
- Cold press watercolor paper (300 gsm)
- Watercolor paints (Phthalo Blue, Sap Green, Viridian, Burnt Umber, Yellow Ochre, Indigo)
- White Gouache or opaque white gel pen
- Pencil (HB or H) for sketching
- Kneaded eraser
- Round brushes (Sizes 4, 2, and 00 for details)
- Mixing palette
- Paper towels and water jars
Step 1: Sketching the Form
-
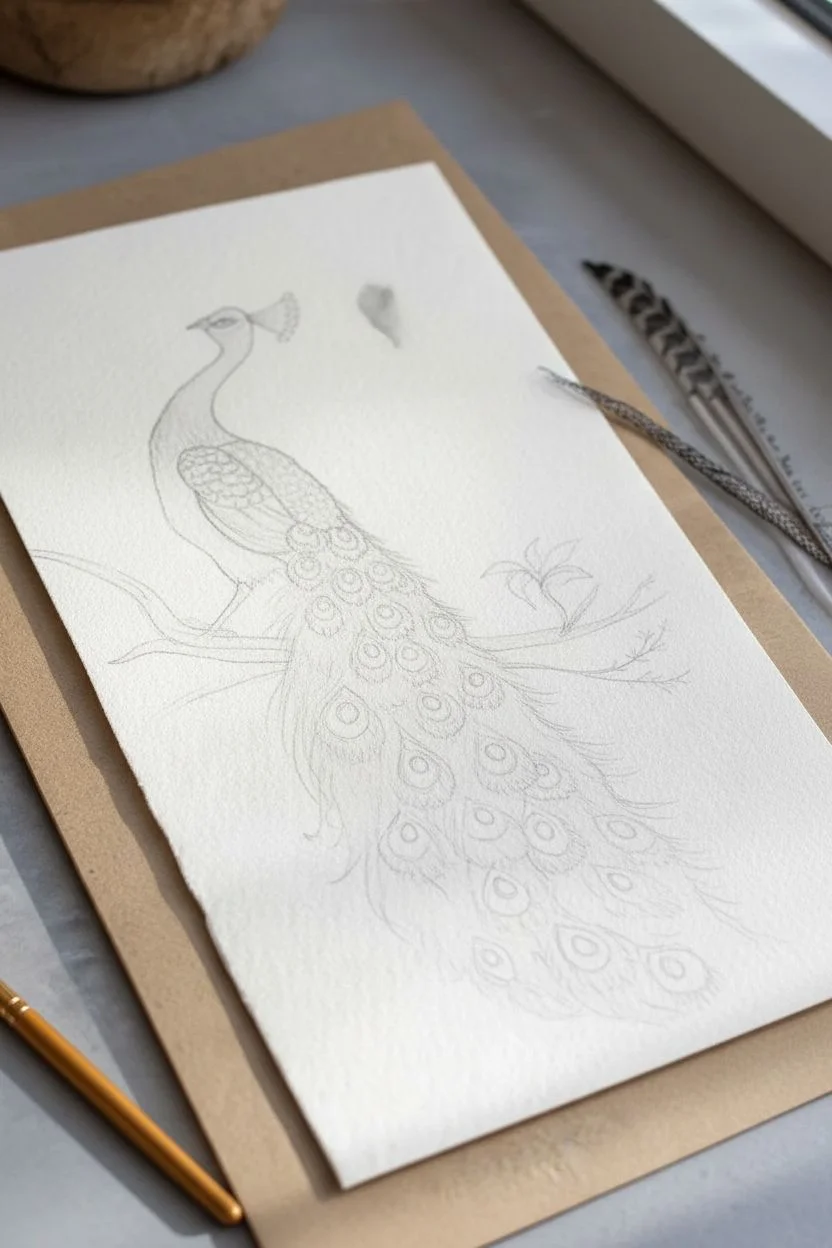
Map the body shape:
Begin with a light pencil sketch. Draw a small oval for the head, a graceful S-curve for the long neck, and a larger oval for the body. Extend a long, flowing shape downwards for the tail feathers. -
Refine the outline:
Connect your shapes to create the peacock’s silhouette. Add the beak, the crest on the head, and sketch the branch underneath the feet. Keep your pencil pressure very light so graphite doesn’t smudge into the paint later. -
Detail the feathers:
Lightly draw the ‘eyes’ of the tail feathers. Scatter them down the train, starting smaller near the body and getting larger towards the bottom. Erase any unnecessary construction lines with your kneaded eraser.
Muddy Colors?
If your greens look dull, stop mixing brown into them. Use pure yellows and blues to mix greens, and ensure layers are fully dry before glazing to prevent lifting previous paint.
Step 2: Layering the Blues and Greens
-
Paint the neck base:
Mix a vibrant Phthalo Blue with a touch of Indigo. Using your size 4 brush, apply a wet-on-dry wash to the head and neck, leaving a tiny ring of white around the eye area. -
Transition to the back:
While the blue neck is still slightly damp, introduce a mix of Viridian and Sap Green for the scales on the back. Let the colors bleed slightly where they meet the blue neck for a natural gradient. -
Paint the wing coverts:
For the folded wing, use a diluted wash of Burnt Umber mixed with blue to create a slate-grey tone. Paint distinct scale-like shapes here, allowing them to dry individually to keep sharp edges. -
Establish the tail wash:
Apply a very pale, watery wash of Sap Green and Yellow Ochre over the entire tail area. This provides a warm undertone for the brilliant green feathers to sit on top of.
Metallic Magic
Use metallic watercolor pans or iridescent medium mixed with your greens and blues. This makes the peacock’s tail shimmer realistically when the light hits the paper.
Step 3: Detailed Feather Work
-
Define the eye spots:
Once the base is bone dry, use your size 2 brush to paint the center of each tail ‘eye’ with deep Indigo deeply saturated. Surround this with a ring of bright turquoise (Phthalo Blue + Viridian). -
Add the bronze rings:
Mix Yellow Ochre with a tiny bit of Burnt Umber. Carefully paint the outer ring around the blue and turquoise centers of the eye spots. -
Create the feather barbs:
Switch to your size 00 fine liner brush. Reload with a rich Sap Green/Viridian mix. Using quick, flicking motions, draw the individual hair-like barbs radiating outward from each eye spot. I find it helps to rotate the paper to keep the strokes fluid. -
Deepen the shadows:
Go back in with your darkest Indigo mix. Add tiny shadows underneath the layered feathers on the back and wing to make them look three-dimensional.
Step 4: Final Flourishes
-
Paint the crest:
With your smallest brush, paint the delicate stems of the head crest, topping each with a tiny fan of bright blue. -
Render the branch:
Paint the branch using Burnt Umber. While wet, drop in a little Indigo on the bottom edge for shadow. Add a few simple green leaves branching off using single brush strokes. -
Add white highlights:
Use white gouache or a gel pen to add the distinctive white patch around the eye and a tiny specular highlight on the black pupil. -
Enhance texturing:
Finally, add very fine white or pale blue lines on the neck plumage to suggest individual feathers catching the light, and sharpen any edges on the tail that look too soft.
Step back and admire the vibrant iridescence of your finished peacock study
Small Bird at Sunset in Simple Silhouette
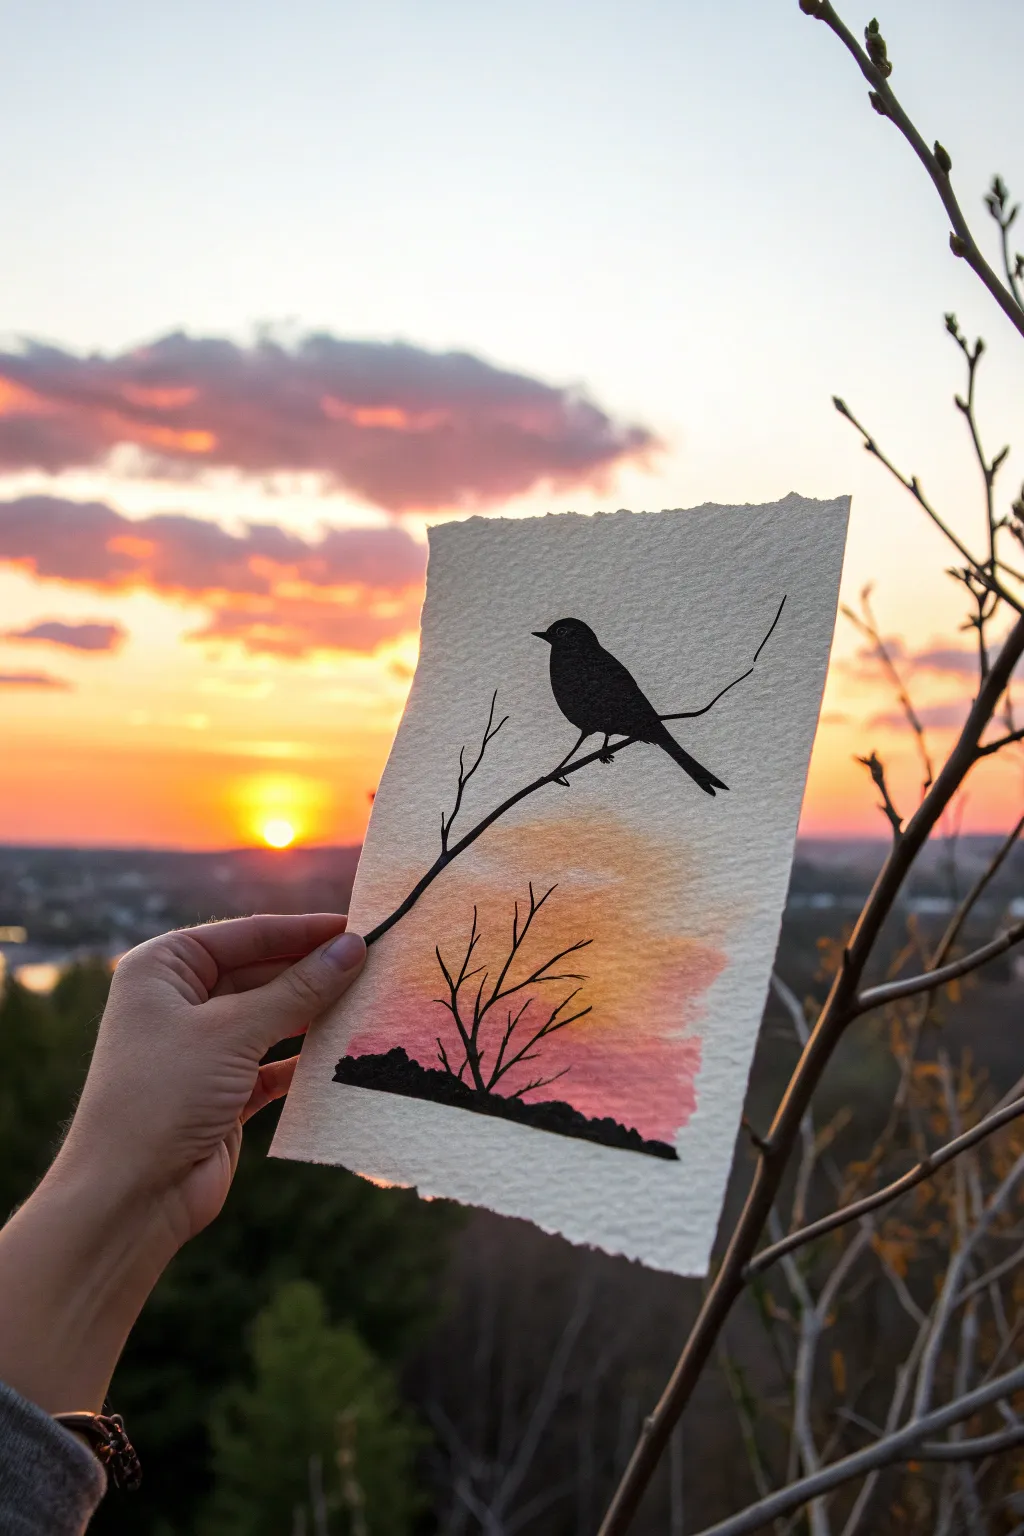
Capture the serene beauty of twilight with this mixed-media project that combines a soft, glowing watercolor wash with the crisp contrast of black ink. The textured paper adds a rustic charm, making the silhouette of the bird pop dramatically against the warm gradient sky.
Step-by-Step Guide
Materials
- Cold press watercolor paper (300gsm/140lb)
- Watercolor paints (Yellow Ochre, Cadmium Orange, Alizarin Crimson)
- Black waterproof ink or black gouache
- Fine liner pen (black, waterproof, sizes 03 and 05)
- Round watercolor brush (size 6 or 8)
- Small round detail brush (size 0 or 1)
- Painters tape or masking tape
- Jar of clean water
- Paper towels
- Pencil (HB or 2B)
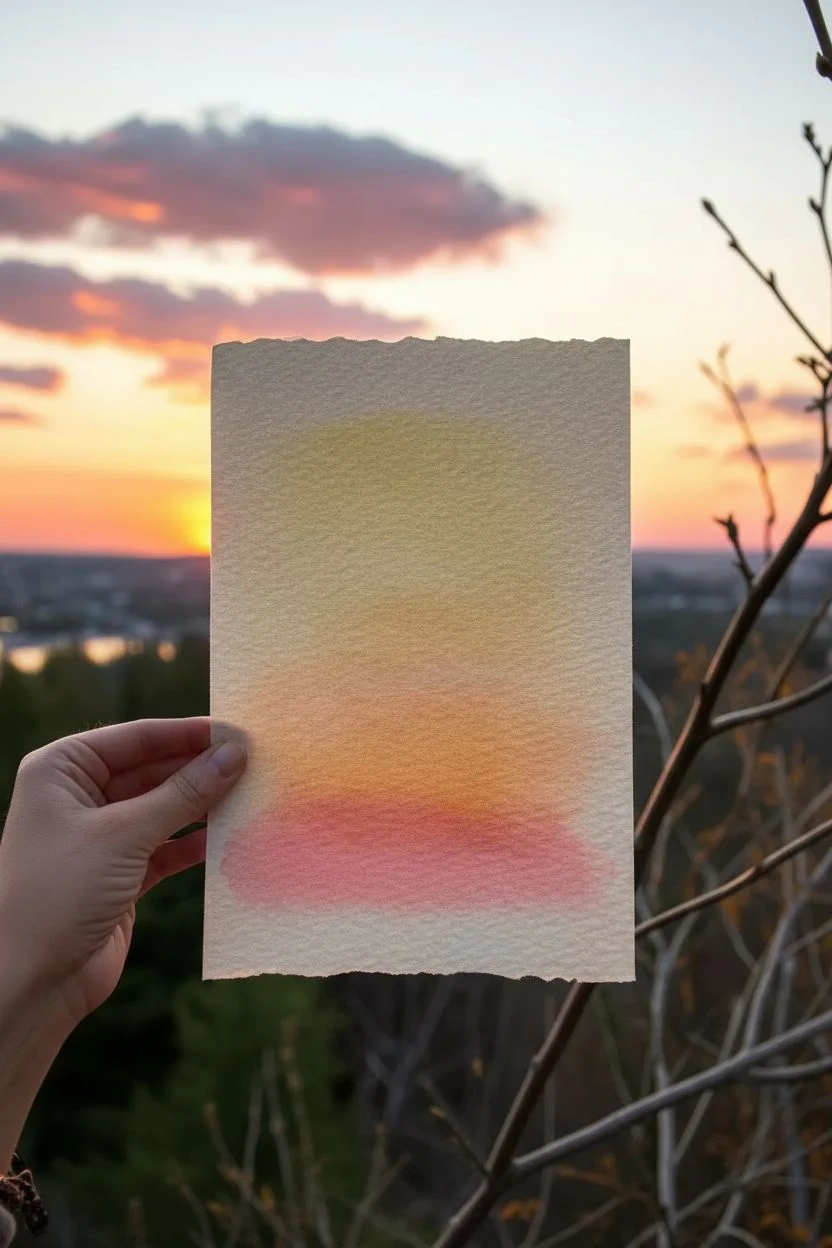
Step 1: Creating the Sunset Wash
-
Paper Preparation:
Tear a rectangular piece of heavy watercolor paper by hand rather than cutting it. This creates raw, deckled edges that give the piece an organic, handcrafted feel. -
Base Water Application:
Using your larger round brush and clean water, lightly wet the bottom two-thirds of the paper where the sky will be painted. The paper should be damp and glistening, but not soaking wet with puddles. -
Adding the Horizon Glow:
Load your brush with a diluted Yellow Ochre or warm yellow. Gently touch the brush to the paper about a third of the way up from the bottom, letting the color bleed naturally downward and outward. -
Building the Warmth:
While the yellow is still wet, introduce a band of diluted Cadmium Orange just below the yellow, blending them softly where they meet. The wet-on-wet technique will handle most of the mixing for you. -
Deepening the Twilight:
Mix a small amount of Alizarin Crimson with the orange to create a sunset pink. Apply this to the lowest section of the sky wash, getting closer to where the ground will be. I like to keep this layer slightly transparent. -
Softening Edges:
Clean your brush, dry it slightly on a paper towel, and gently feather out the top edge of the yellow paint so it fades seamlessly into the unpainted white paper at the top. -
Drying Time:
Let this sunset gradient dry completely. It must be bone dry before you add any ink, otherwise the black lines will bleed into fuzzy spiderwebs.
Bleeding Lines?
If your black ink starts spreading into the color, stop immediately! The underlying wash isn’t dry enough. Use a hairdryer on low heat to ensure the paper is bone dry before continuing.
Step 2: Drafting and Inking the Silhouette
-
Sketching the Composition:
Using an HB pencil, very lightly sketch the main diagonal branch stretching from the bottom left upwards to the right. Then, sketch the simple outline of the bird perched on the upper third of the branch. -
Refining the Shape:
Refine the bird’s shape; ensure it has a round body, a long tail extending downward, and a small, pointed beak. Add the smaller, spindly bush branches near the bottom. -
Inking the Branch:
Switch to your fine liner pen or a small brush loaded with black ink. Carefully trace the main diagonal branch. Vary the pressure to make the branch slightly thicker at the base and thinner at the tip. -
Filling the Bird:
Outline the bird with your fine liner first to establish crisp edges. Then, switch to the small round brush and black ink (or gouache) to fill in the body with solid, opaque black color. -
Drawing the Legs:
Use the thinnest fine liner (0.1 or 03) to draw the tiny, delicate legs gripping the branch. These should be very fine lines to avoid looking clunky. -
Painting the Foreground:
At the very bottom of the paper, paint an irregular, bumpy black horizon line to represent distant ground or foliage. This grounds the composition. -
Adding Lower Branches:
From the black foreground, pull up several thin, jagged lines using the fine liner to create the silhouette of a bare bush. Let these overlap the pink section of your sunset wash. -
Final Details:
Check for any tiny gaps in the black silhouettes and fill them in. If needed, extend the tip of the main branch slightly for better balance.
Pro Tip: Texture
For the bottom ground silhouette, try dabbing the ink with a dry, stiff brush or a sponge instead of painting smoothly. This creates a foliage-like texture.
Hold your finished piece up against a window or light source to see the colors truly glow, just like a real sunset
Koi Fish in a Circular Pond Composition
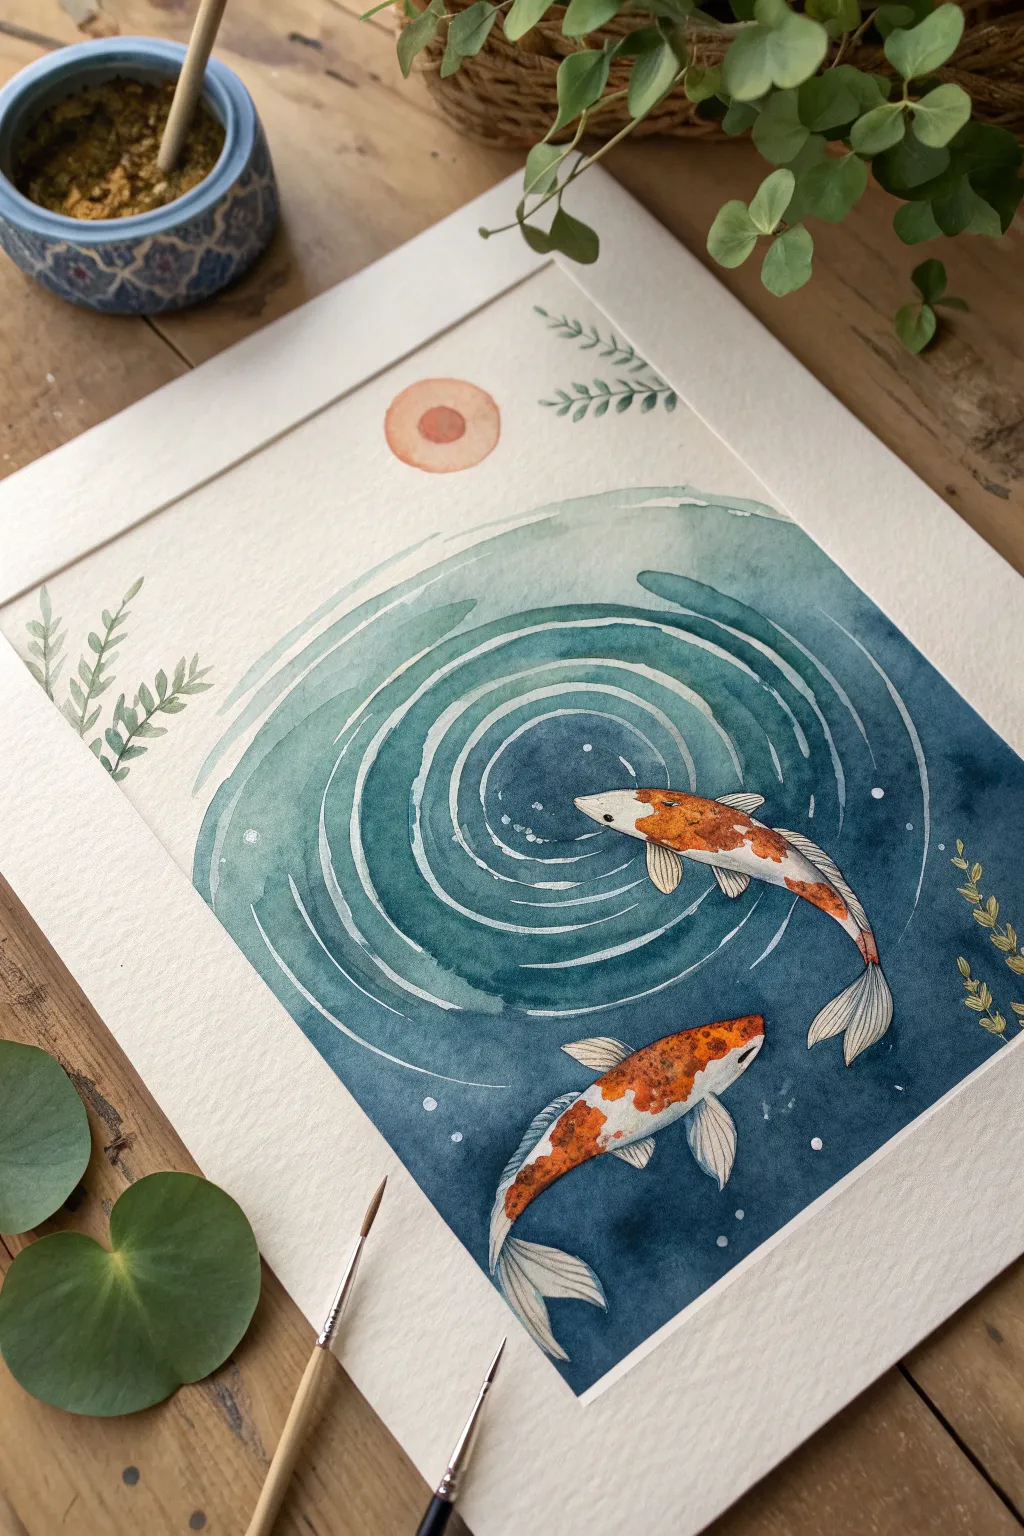
This serene watercolor composition features two vibrant koi fish swimming through deep blue ripples, balanced by delicate greenery and a warm sun motif. The circular water design creates a calming focal point, perfect for practicing wet-on-wet techniques and geometric masking.
Step-by-Step Tutorial
Materials
- Cold press watercolor paper (300 gsm)
- Pencil and compass (or circle template)
- Watercolor paints (Indigo, Prussian Blue, Burnt Sienna, Cadmium Orange, Sap Green)
- White gouache or white gel pen
- Round brushes (Sizes 2, 6, and 10)
- Masking fluid (optional)
- Painter’s tape
- Two jars of water
- Paper towels
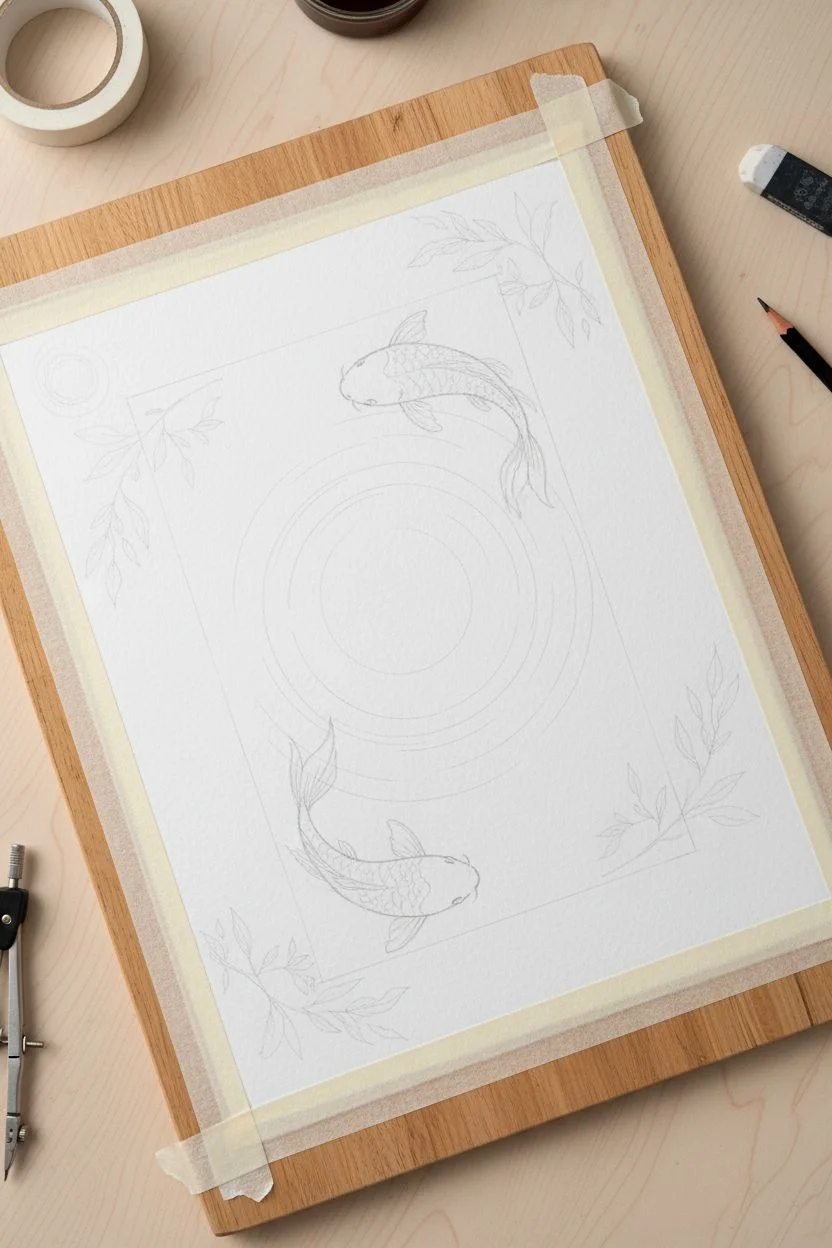
Step 1: Sketching the Layout
-
Tape your paper:
Begin by taping the edges of your watercolor paper to a board to prevent warping and create a clean white border. -
Draw the boundary:
Lightly sketch a large square or rectangle in the center where the water will be contained. The painting uses a contained shape with white space around it, rather than filling the whole page. -
Mark the ripples:
Use a compass to draw a central circle for the ripple origin. Lightly sketch several concentric circles radiating outward to guide your painting later, keeping the lines very faint. -
Sketch the koi:
Sketch two koi fish swimming in a circular motion around the center ripple. One should face right (top) and the other left (bottom), creating a harmonious flow. -
Add floating elements:
Draw the small circular sun near the top left corner and light outlines of the leafy branches in the corners and along the water’s edge.
Step 2: Painting the Water
-
Masking (Optional):
If you struggle with painting around shapes, apply masking fluid over the koi fish and the thin white ripple lines. Let it dry completely. -
Base wash:
Mix a watery wash of teal or light turquoise. Apply this to the entire water area, starting lighter at the top left and getting gradually stronger towards the bottom right. -
Deepening the blues:
While the paper is still slightly damp, drop in stronger indigo and Prussian blue into the lower right corner and the ‘deep’ parts of the ripples to create depth. -
Defining the ripples:
Switch to a size 6 brush. Using a thick mix of indigo, paint the dark bands of the ripples, carefully leaving thin negative spaces (the white paper) between the dark blue bands to represent the wave crests. -
Softening edges:
Use a clean, damp brush to soften the outer edges of the ripples so they fade gently into the lighter water background.
Fixing Muddy Water
If your blues look cloudy, stop! Let the layer dry 100% before adding more color. Glazing over damp paper causes muddiness. Patience preserves the transparency.
Step 3: Bringing the Koi to Life
-
Base coat for fish:
Once the water is bone dry (remove masking fluid if used), paint the bodies of the koi with a very light wash of white or pale cream, leaving the paper white for the brightest spots. -
Adding orange patches:
Load your brush with Cadmium Orange and Burnt Sienna. Dab irregular patches of color onto the fish backs, letting the colors bleed slightly for a natural, organic look. -
Defining scales:
When the orange paint is dry, use a fine liner brush and a diluted brown to add tiny texture marks suggesting scales on the colored patches. -
Fins and tails:
Use a very watery grey wash for the translucent fins and tails. Add fine lines with a size 2 brush to show the ribbing in the fins. -
Facial details:
Dot the eyes with black or dark brown paint and add tiny lines for the whiskers.
Add Gold Accents
For a magical touch, re-trace the white ripple lines or the fish scales with metallic gold watercolor paint. It catches the light beautifuly.
Step 4: Final Details
-
Painting the sun:
Paint the circular sun element with a soft wash of terracotta or muted red. I like to leave a tiny inner circle slightly lighter to give it dimension. -
Adding foliage:
Using Sap Green mixed with a touch of grey, paint the delicate leaves on the left and top edges. Keep the strokes loose and simple. -
Leaf details:
Add the darker seaweed-like strands peaking into the water on the right side using a deeper green mix. -
Highlights and sparkles:
Using white gouache or a gel pen, add tiny dots to the water to represent bubbles and crisp up the white ripple lines if paint bled over them. -
Finishing touches:
Erase any remaining pencil lines once everything is completely dry, then carefully peel off the tape.
Step back and enjoy the calming rhythm of your painted water garden
Crowded Wildlife Group Portrait in One Frame
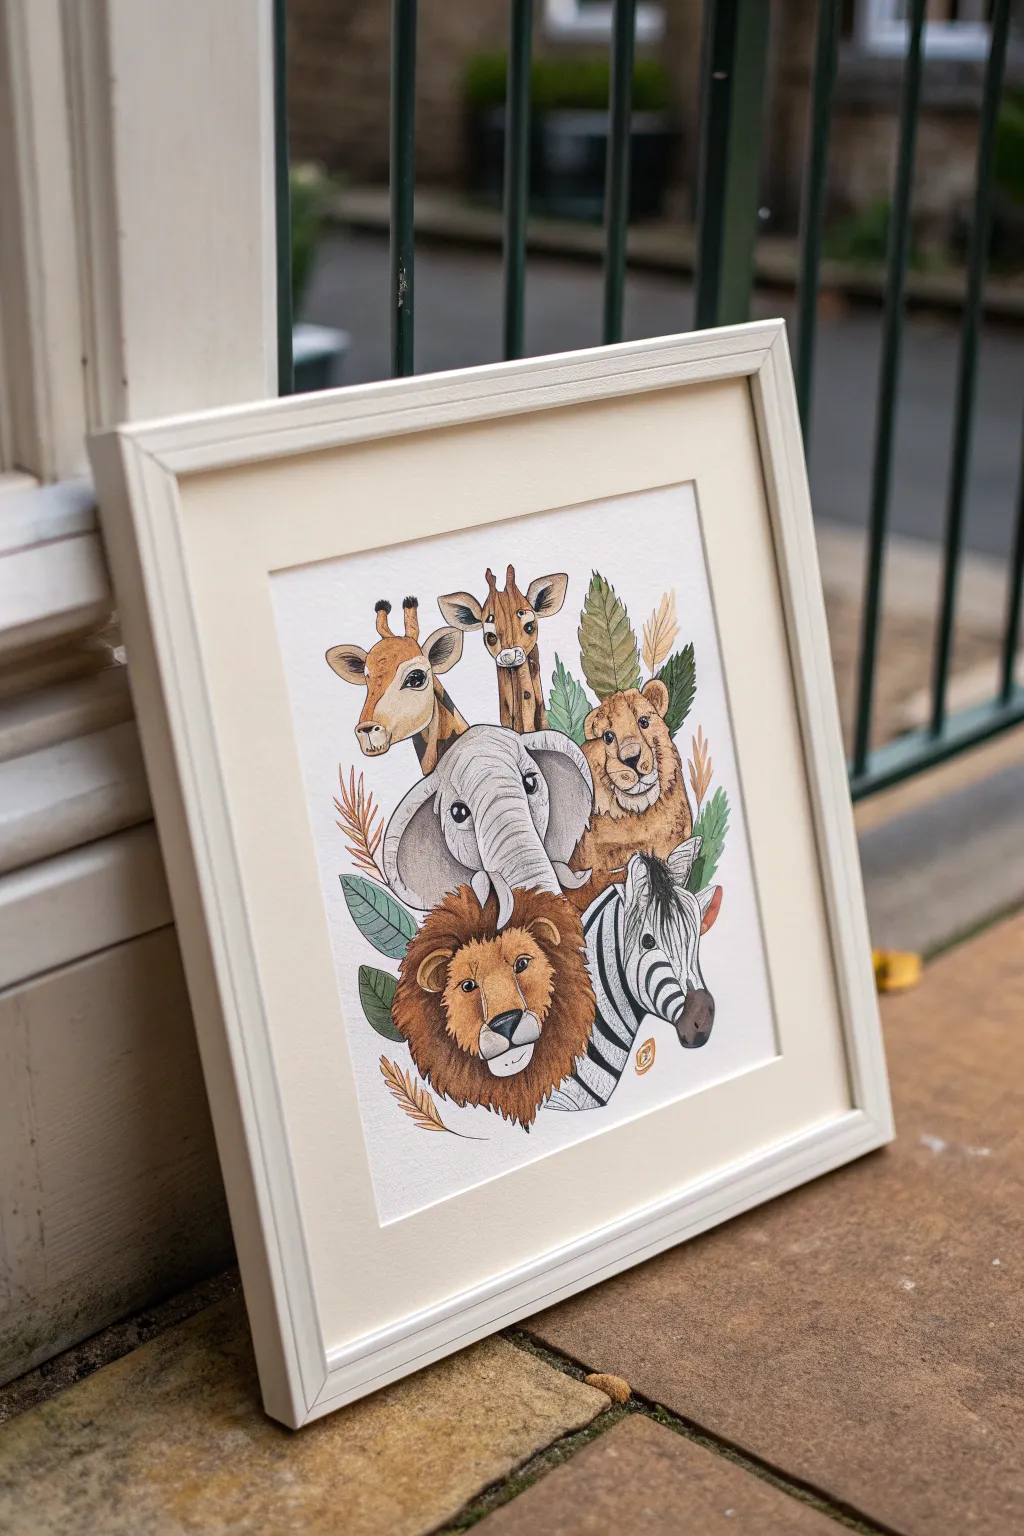
Bring the wild into your home with this charming group portrait featuring six savannah friends nestled together. The illustration combines gentle watercolor washes with crisp ink detailing to create a piece that feels both classic and playful.
Detailed Instructions
Materials
- Hot press watercolor paper (A3 or A4)
- Watercolor paint set (focus on ochre, browns, greys)
- Fine liner pens (black, sizes 0.1 and 0.3)
- Pencil (HB) and eraser
- Round watercolor brushes (sizes 2, 4, and 6)
- White gel pen for highlights
- Cream mount board
- Light wood or white frame
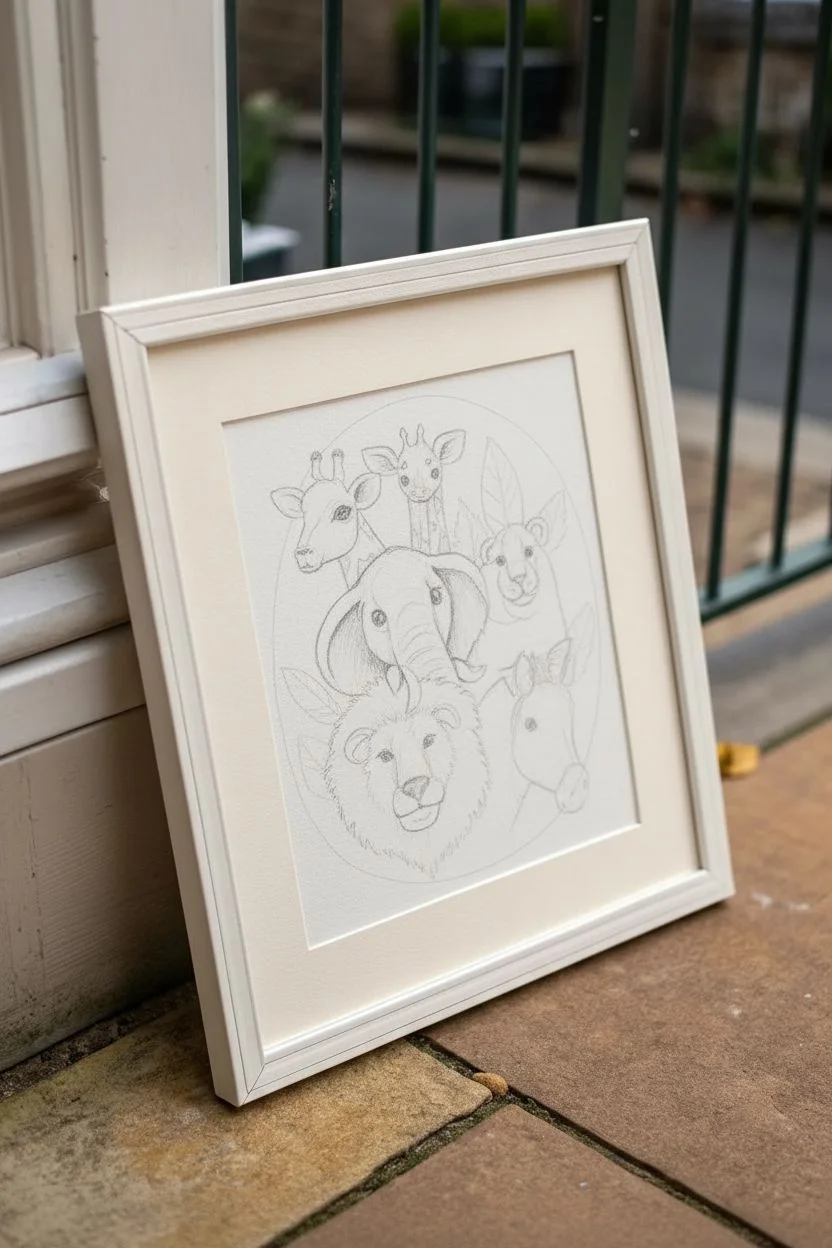
Step 1: Drafting the Composition
-
Plan the Arrangement:
Start by lightly sketching a loose oval shape in the center of your paper. This will be the boundary for your animal cluster. Place the elephant head slightly left of center as the anchor, then sketch simple circles to position the lion below, the zebra to the right, and the taller giraffes near the top. -
Sketch the Elephant:
Refine the elephant’s shape first, drawing large, floppy ears and a central trunk that curves slightly to the right. Keep the eyes wide and gentle. -
Shape the Lion and Zebra:
Below the elephant, outline the lion’s glorious mane, ensuring it fluffs out broadly. To the right, tuck in the zebra’s head, positioning it so it looks like it’s peeking out from behind the lion. -
Add the Tall Friends:
Sketch two giraffes at the top. Draw the main one on the left with its distinctive ossicones (horns) and large ears. Add a smaller, younger giraffe head peeking over from behind. Fill the remaining gap on the right with a friendly lioness or cheetah cub. -
Incorporate Foliage:
Fill the awkward negative spaces between the animal heads with simple botanical elements. Sketch broad jungle leaves behind the zebra and feathery grasses near the lion’s mane to tie the group together.
Step 2: Inking and Definition
-
Initial Outline:
Using a 0.1 fine liner, carefully trace over your pencil lines. Use broken, flicking strokes for furry areas like the lion’s mane and smoother lines for the elephant’s skin. -
Erase Guidelines:
Wait at least 15 minutes for the ink to fully cure, then gently erase all visible pencil marks to leave a clean coloring surface.
Eye Placement Pro-Tip
Draw eyes slightly larger and wider apart than in real life. This specific proportion is the secret to achieving that sweet, ‘baby animal’ look.
Step 3: Watercolor Application
-
Base Washes:
Mix a watery grey and apply a light wash to the elephant and zebra (leaving stripes white for now). Use a diluted yellow ochre for the lion, giraffe, and cub. Keep these layers very pale. -
Layering Fur Tones:
Once the base is dry, use a size 4 brush to dab darker caramel and brown tones onto the giraffe spots and the lion’s mane. I find that working wet-on-dry here gives better control over the fur textures. -
Zebra Stripes:
Carefully paint the zebra’s black stripes using a small detailed brush or a very dark grey paint mixture. Remember to curb the stripes around the contours of the face to suggest volume. -
Depth and Shadows:
Mix a watery purple-grey to add shadows. Paint this under the elephant’s ears, beneath chins, and where animals overlap to push those areas back and make the faces pop forward. -
Painting Foliage:
Paint the leaves in muted greens and olives. Vary the saturation so they don’t distract from the animals but frame them nicely.
Level Up: 3D Elements
After framing, glue small, real dried flowers or pressed leaves onto the mount board corners for a mixed-media botanical effect.
Step 4: Final Touches
-
Defining Features:
Re-affirm the eyes with solid black ink or paint, leaving a tiny white dot for the reflection. This sparks life into the characters immediately. -
Texture Details:
Use the 0.3 pen to add texture details: wrinkles on the elephant’s trunk, whiskers on the cats, and fine hairs in the lion’s mane. -
Highlighting:
Use a white gel pen to add highlights to the noses and eyes, and to clean up any edges on the zebra stripes. -
Mounting:
Once completely dry, center your painting behind a cream mount board. The off-white border softens the transition to the frame. -
Framing:
Place the mounted art into a light wood or white frame to maintain that airy, nursery-friendly aesthetic.
Hang your assembled masterpiece and enjoy the friendly faces looking back at you
Deer Double Exposure Landscape Silhouette
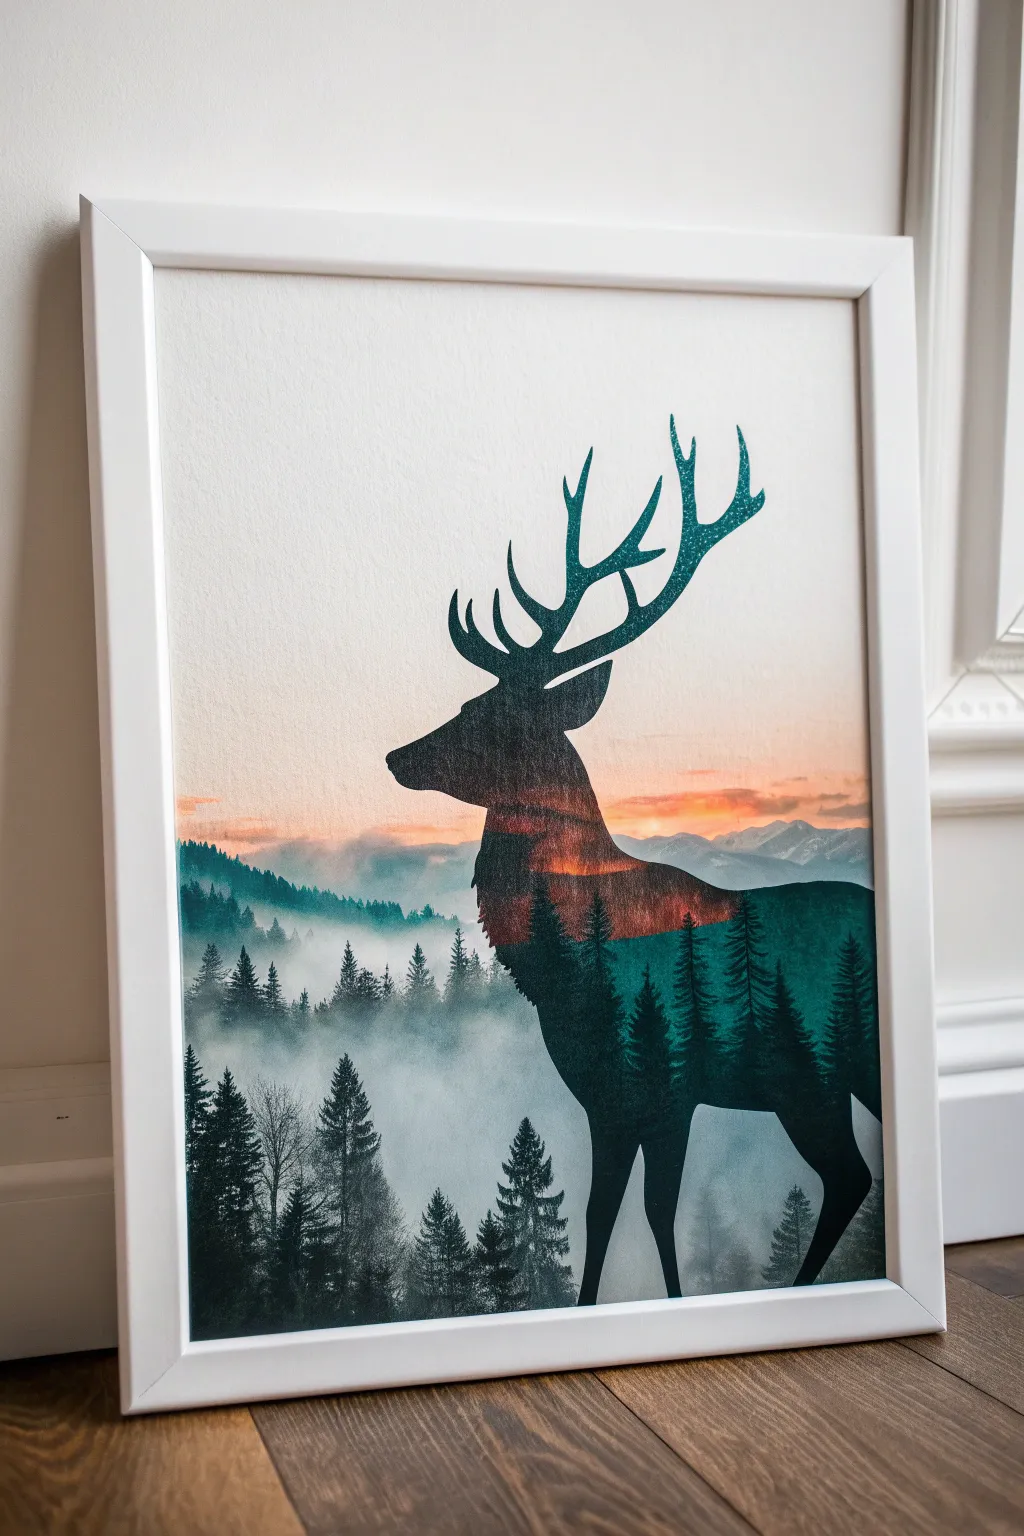
Capture the serene beauty of the wilderness by blending a crisp deer silhouette with a breathtaking sunset landscape. This double exposure painting technique layers a mountain vista inside the animal’s form while resting against a foggy forest backdrop, creating a stunning piece of modern wall art.
How-To Guide
Materials
- Heavyweight watercolor paper or mixed media paper (A3 or A4)
- Acrylic paints: Black, Phthalo Green, Prussian Blue, Titanium White, Orange, Cadmium Yellow, Burnt Sienna
- Masking fluid or masking tape
- Pencil and eraser
- Deer silhouette template (printed)
- Flat shader brushes (large and medium)
- Round detail brushes (size 0 and 2)
- Palette knife or old credit card for mixing
- Fan brush (optional for trees)
- White frame for finishing
Step 1: Setting the Scene
-
Prepare the Paper:
Begin by taping your heavyweight watercolor paper to a board to prevent buckling. Ensure the surface is clean and free of dust. -
Trace the Silhouette:
Print out a deer profile you love. Lightly sketch or transfer the outline onto your paper using a pencil. Keep your lines faint so they don’t show through later. -
Mask the Deer:
Carefully apply masking fluid specifically inside the deer shape. Let this dry completely; it will protect the inner area while we paint the foggy background.
Clean Lines
If paint bleeds under your masking fluid, wait for it to fully dry, then carefully touch up the edge with opaque white acrylic paint or a white gel pen.
Step 2: The Foggy Forest Background
-
Mix the Mist:
On your palette, mix Titanium White with a tiny dot of Prussian Blue and Phthalo Green to create a very pale, milky teal. This will be the base fog. -
Paint the Sky:
Using a large flat brush, apply a smooth gradient from the top down, keeping the top nearly white and transitioning into the misty teal towards the bottom third. -
Add Distant Trees:
Mix a slightly darker teal-grey. Using a medium round brush, dab in hazy, indistinct tree shapes along the horizon line, just visible through the ‘fog’. -
Paint the Foreground Forest:
Mix a deep forest green using Phthalo Green and black. With a size 2 round brush, paint crisp pine trees at the very bottom of the paper, letting them fade upward into the mist. -
Blend the Layers:
While the paint is still slightly damp, soften the tops of the foreground trees with a dry brush to enhance the misty effect. Let the entire background dry completely.
Add Stardust
For a magical touch, flick a toothbrush loaded with diluted white paint over the dark parts of the deer’s body to create rising stars or fireflies.
Step 3: The Double Exposure Landscape
-
Remove the Mask:
Gently rub away the masking fluid to reveal the pristine white deer shape. Use a clean eraser to remove any leftover residue. -
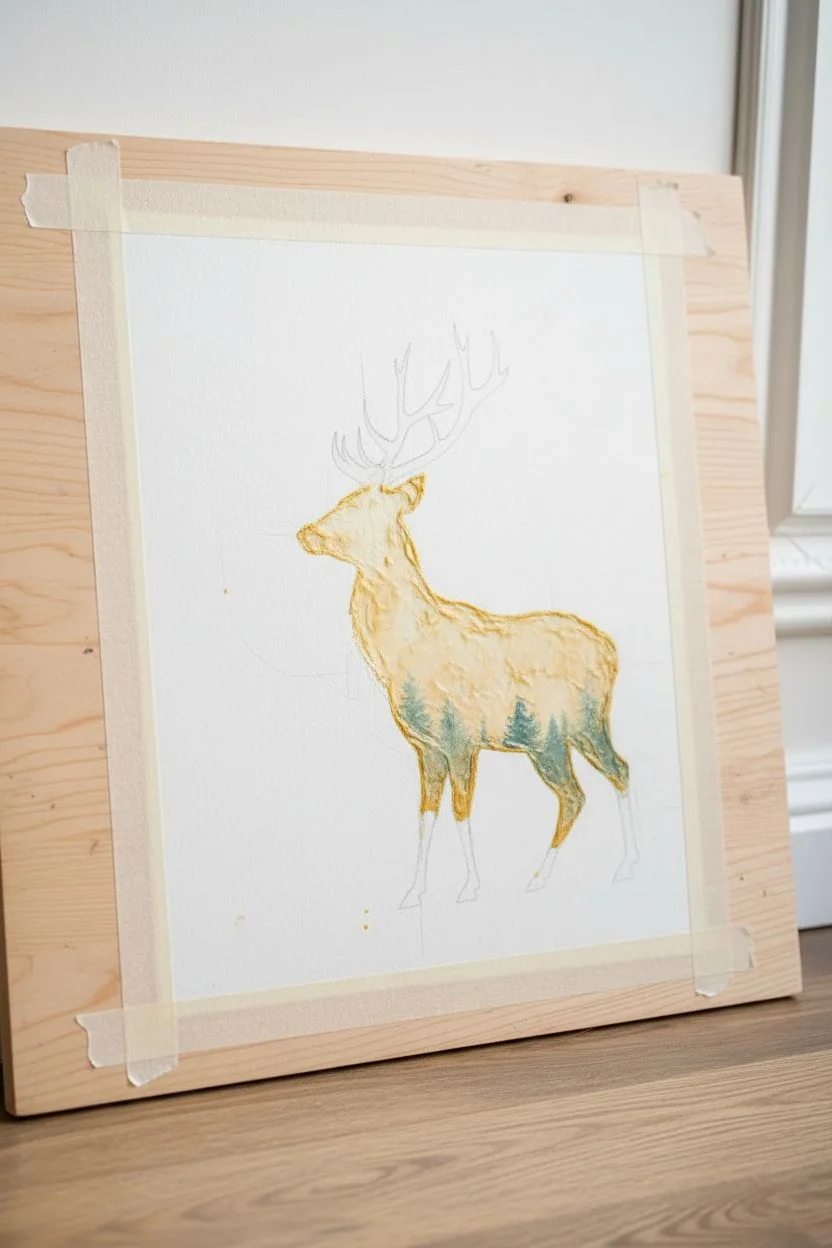
Paint the Sunset Sky:
Inside the deer’s chest and neck area, paint a sunset gradient. Start with yellow near the bottom, blending into orange and then a soft mauve towards the head. I like to keep this blend fairly wet for a smooth transition. -
Add Mountain Layers:
Using a light blue-grey mix, paint distant mountain ridges across the deer’s mid-section, overlapping the sunset sky slightly. -
Create Depth:
Mix a darker purple-grey and paint a second, closer range of mountains below the first one. Ensure these stay strictly within the pencil outline of the deer. -
Establish the Water Line:
Paint a horizontal band of deep teal below the mountains to represent a lake or shadowed valley, acting as a base for the foreground trees.
Step 4: Details and Final Silhouette
-
Paint Internal Trees:
Load a fine brush with solid black paint. Paint detailed pine tree silhouettes inside the deer’s body, starting from the ‘water line’ and extending up into the sunset sky. -
Fill the Legs and Antlers:
For the deer’s legs, head, and antlers that aren’t part of the landscape scene, fill them in with solid black or very dark teal. Use your smallest brush for the tine tips. -
Connect the Elements:
Carefully blend the bottom of your internal landscape into the solid black of the legs. The trees should look like they are growing out of the darkness of the deer’s lower body. -
Refine Edges:
Go over the outer perimeter of the deer with a steady hand and black paint to ensure the silhouette is razor-sharp against the misty background. -
Final Inspection:
Check for any white gaps between the background and the deer. Let dry completely before removing the tape. -
Frame and Display:
Place your dried artwork into a clean white frame to make the colors pop and mimic the gallery look like the reference photo.
Step back and admire how the wild landscape lives within the spirit of the deer in your beautiful new painting
Wolf Howl with Mountains Inside the Form
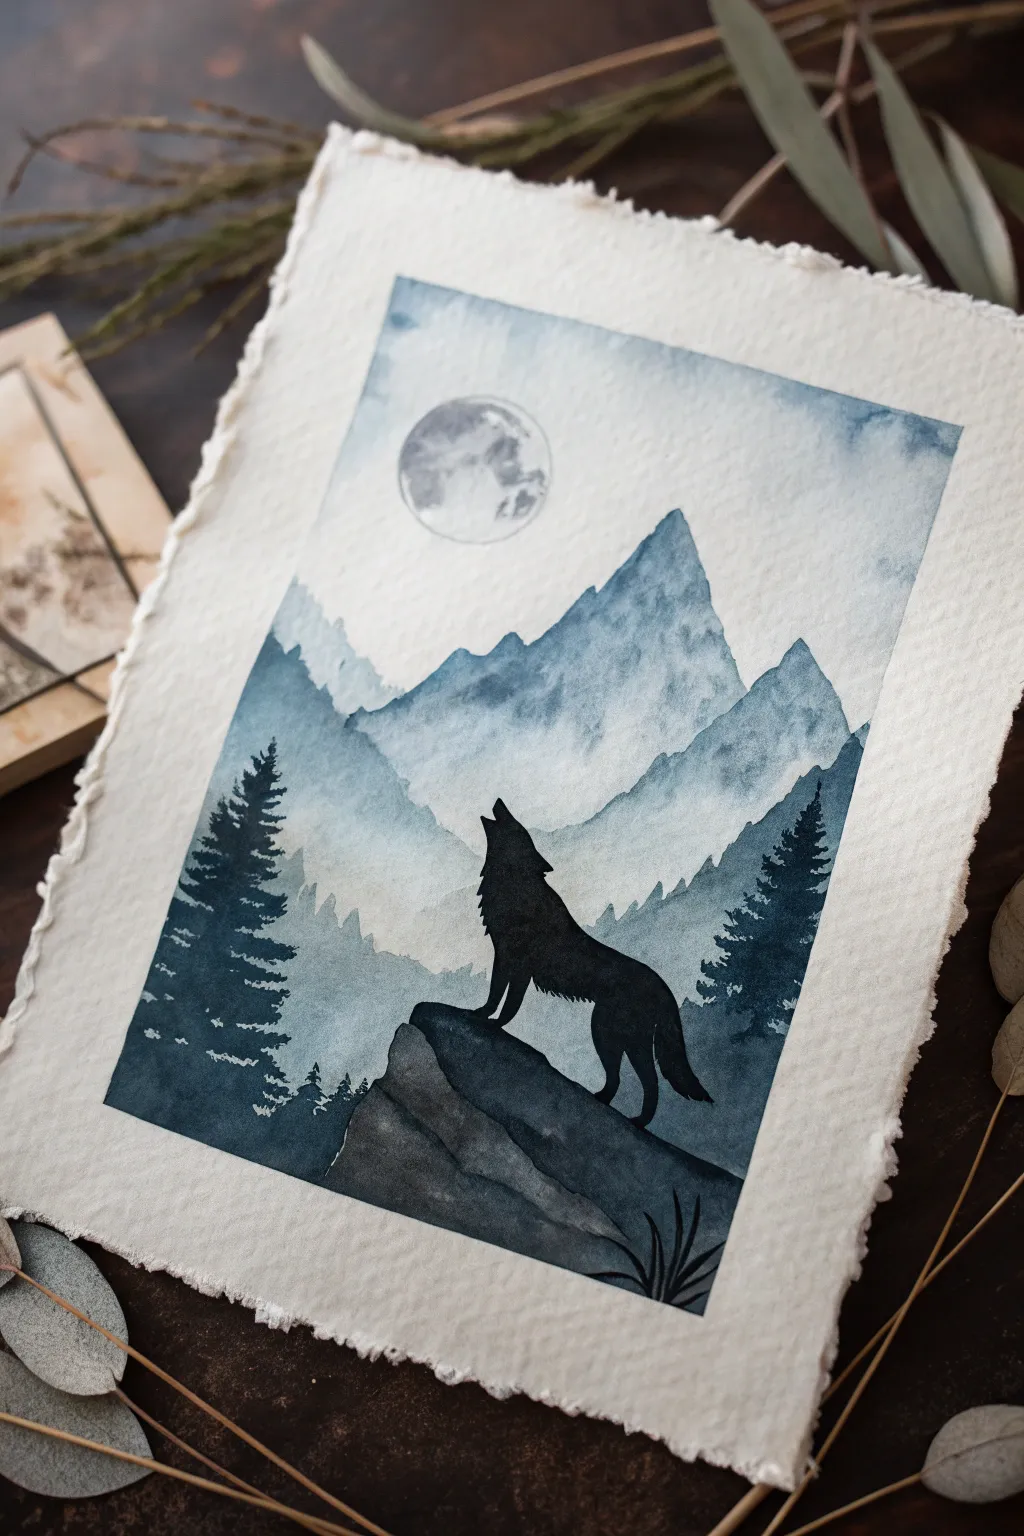
This evocative project captures the wild spirit of a howling wolf set against misty mountain peaks, using only shades of blue and black. The monochromatic watercolor technique creates depth and atmosphere while keeping the process approachable for beginners.
Step-by-Step Guide
Materials
- Cold Press Watercolor Paper (approx. 300 gsm)
- Masking Tape (or Washi tape)
- Pencil (HB or lighter)
- Tracing Paper (optional)
- Black Fineliner Pen (waterproof, optional)
- Watercolor Paints: Paynes Gray, Indigo, Lamp Black
- Brushes: Large Flat Wash, Round #8, Round #2 (for details)
- White Gouache or White Gel Pen
- Paper Towels
- Jar of Water
- Hairdryer (optional, to speed up drying)
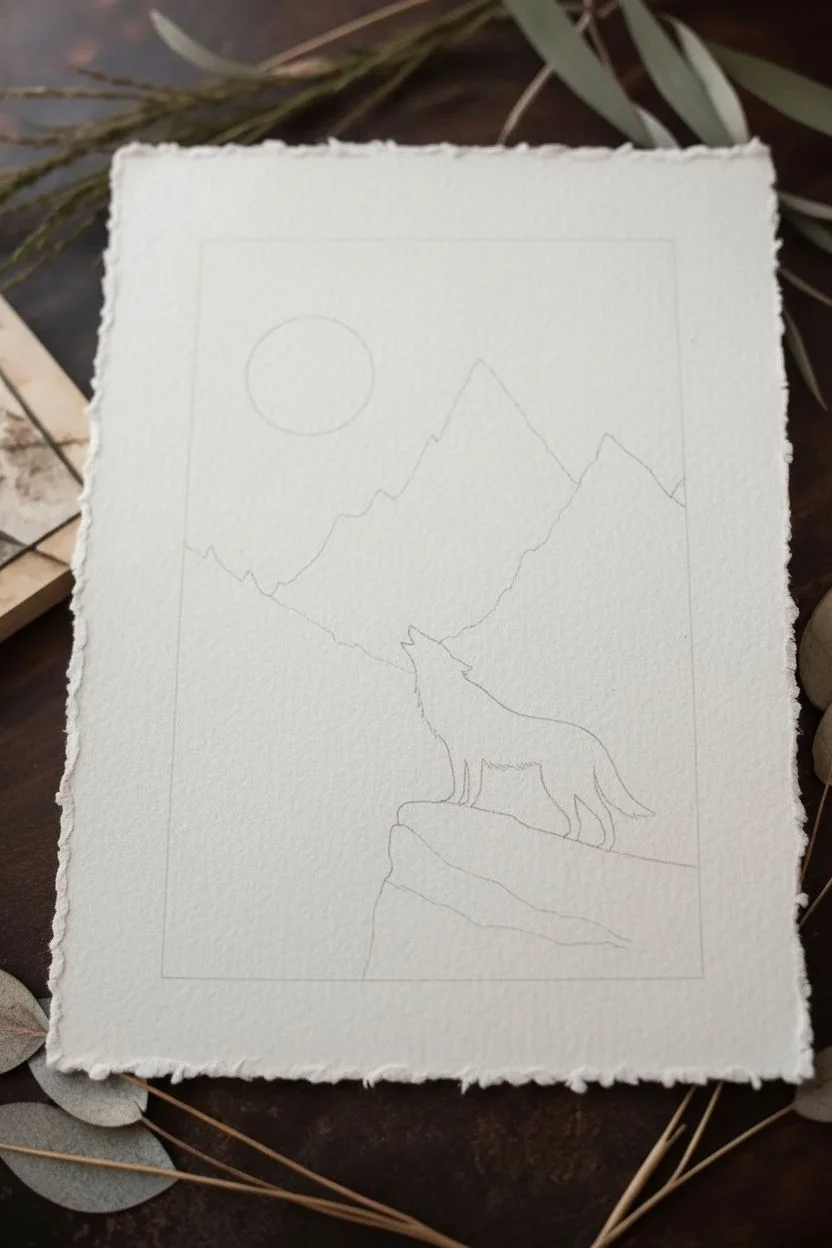
Step 1: Preparation & Sketching
-
Prepare the Paper:
Begin by ripping the edges of your watercolor paper if you want that rustic, deckled edge look shown in the image. Otherwise, you can simply tape the edges of a standard sheet down to your work surface to prevent buckling. -
Sketch the Rectangle:
Lightly draw a defined rectangle in the center of your paper using a ruler. This will form the boundary of your scene, so keep your lines faint but visible. -
Outline the Wolf and Rock:
Sketch the silhouette of the howling wolf standing on a jagged rock formation near the bottom center. Focus on the pose—head thrown back, legs braced—rather than internal details, as this will be a silhouette. -
Sketch the Mountains:
Draw three distinct layers of mountain ranges behind the wolf. The closest range should be low, the middle range jagged and higher, and the furthest peak the tallest and softest. -
Place the Moon:
Add a circle for the moon in the top left sky area. You can trace a coin or small lid to get a perfect shape.
Step 2: Painting the Background
-
Wet-on-Wet Sky:
With a clean brush, wet the sky area inside your rectangle, carefully painting around the moon circle. The paper should be glisten, not puddle. -
Add Sky Color:
While the paper is wet, drop in a very diluted wash of Indigo or Paynes Gray. Let the color flow naturally to create a cloudy texture, concentrating slightly darker pigment near the top corners. -
Paint the Moon:
Once the sky is barely damp, paint the moon with a very pale grey wash. While wet, dab in slightly darker grey spots to mimic craters. -
First Mountain Layer:
Ensure the sky is completely dry. Mix a light, watery blue-grey. Paint the furthest, tallest mountain peak. Use plenty of water so the color remains transparent and fades as it goes down the mountain face.
Clean Edges Trick
Use masking tape around your drawn rectangle before you start painting. This protects the paper outside constraints and peels away to reveal perfect, crisp borders.
Step 3: Mid-Ground & Atmosphere
-
Layering Mountains:
Wait for the previous layer to dry. Create a slightly darker mix of your blue (Indigo). Paint the second, middle layer of mountains, overlapping the first. -
Creating Mist:
As you paint the bottom of this middle mountain layer, dip your brush in clean water and soften the bottom edge. This creates a misty, foggy effect where it meets the treeline below. -
Painting the Treeline:
Mix a darker Payne’s Gray. Paint the closest mountain layer that sits just behind the wolf. Use the tip of your brush to tap in tiny jagged vertical strokes along the ridge to suggest distant pine trees. -
Side Trees:
Using a smaller round brush and a concentrated dark blue-black mixture, paint the silhouetted pine trees on the far left and right edges. Keep the edges ragged to look like pine needles.
Level Up: Galaxy Sky
Instead of a pale grey sky, try a deep galaxy wash. Use concentrated indigo and violet, then splatter white gouache for stars to make the scene nocturnal.
Step 4: Foreground Silhouettes
-
Fill the Wolf:
Mix your darkest black (Lamp Black). Carefully fill in the silhouette of the wolf. Use a small detail brush for the fur texture on the neck and tail to keep it looking fluffy rather than smooth. -
Anchor the Rock:
I usually switch back to a medium round brush here. Paint the large rock formation underneath the wolf using a mix of black and dark grey. Vary the tone slightly to show the jagged texture of the stone. -
Add Foreground Details:
With your blackest paint, add a few blades of grass or wild plants poking up from the bottom right corner of the rectangle to frame the scene. -
Refine Edges:
If you struggle with straight lines, you can use a ruler and a waterproof black pen to trace the rectangular border for a crisp finish. -
Final Highlights:
Once absolutely everything is bone dry, use white gouache or a white gel pen to add tiny stars in the sky or highlight the edge of the moon if needed.
Peeling off the tape to reveal those sharp edges against the misty mountains is the most satisfying part of this process
Rainbow Zebra Stripes with Drips and Splashes
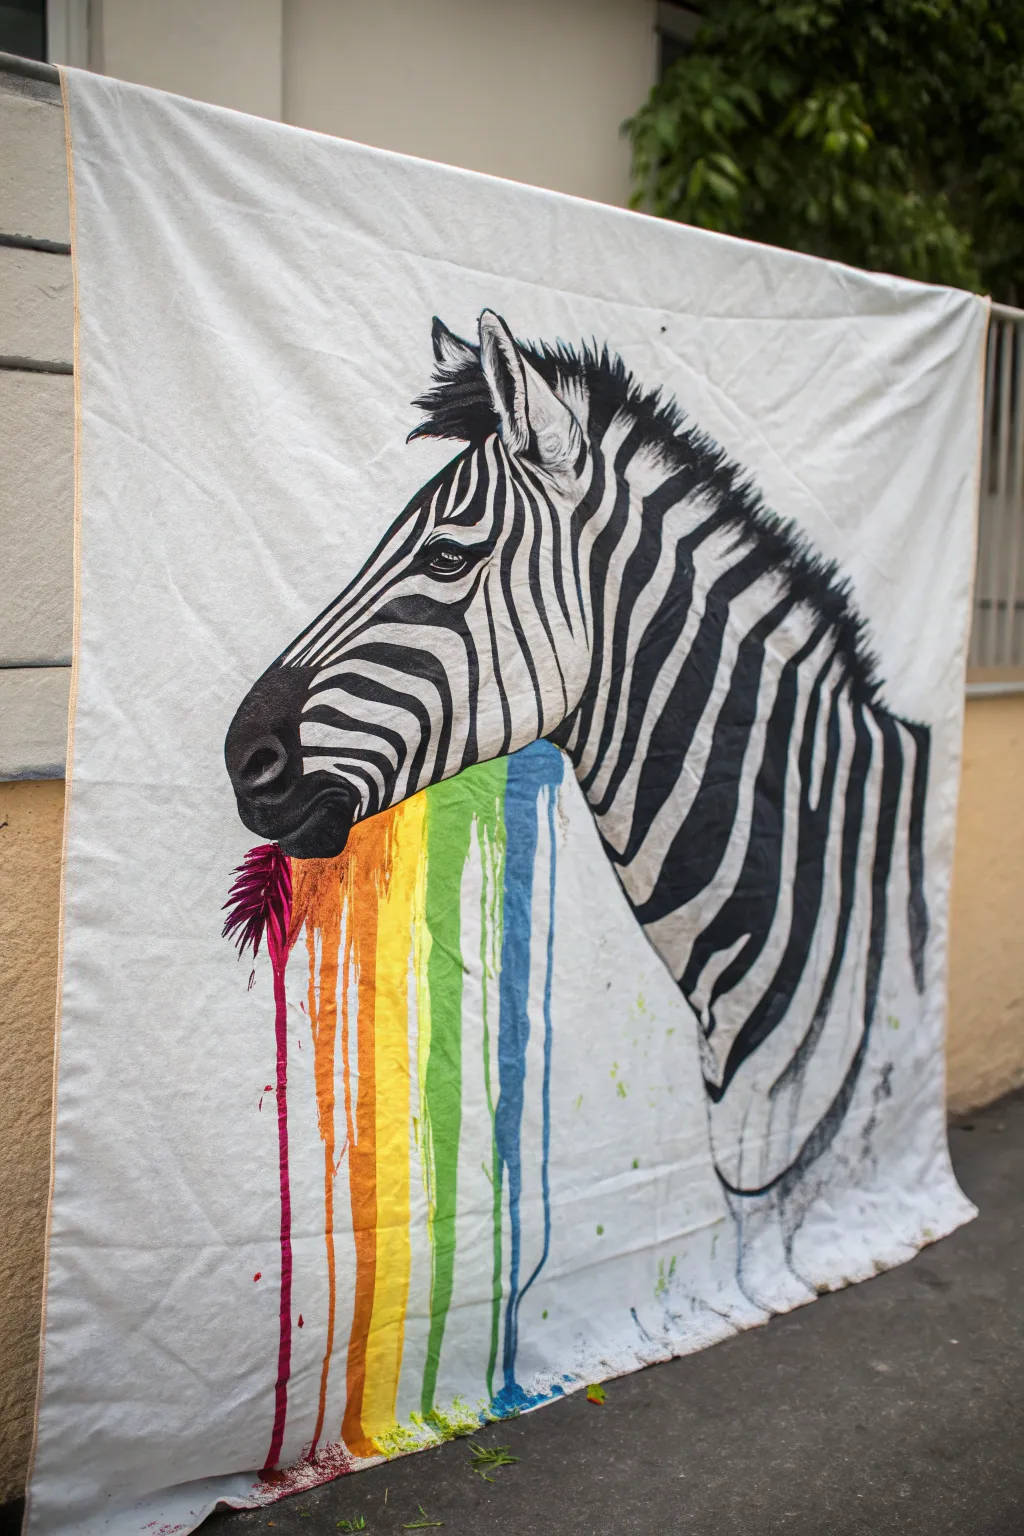
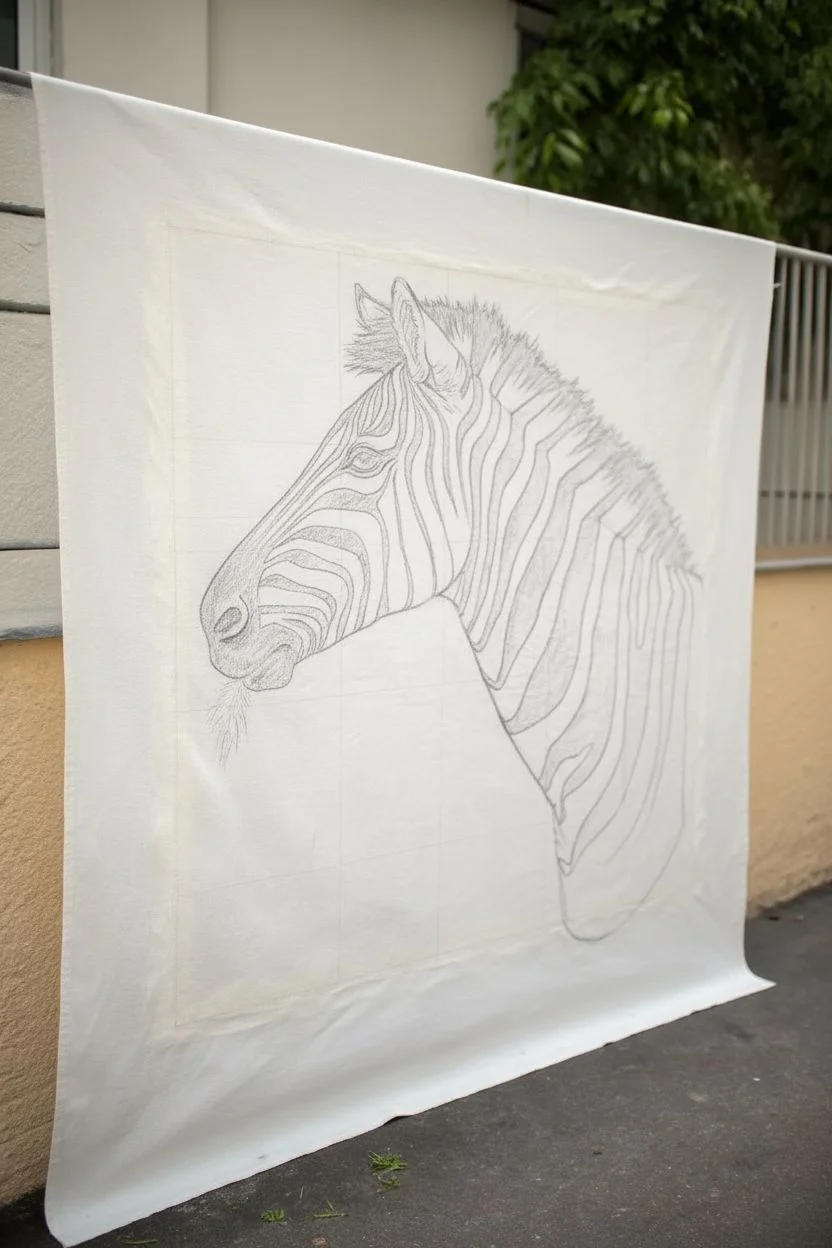
This striking project combines realistic wildlife portraiture with a bold, surrealist splash of color. By contrasting a carefully rendered black-and-white zebra against vibrant, gravity-assisted rainbow drips, you create a piece that is equal parts sophisticated and playful.
Step-by-Step
Materials
- Large unprimed canvas or cotton drop cloth (approx. 4×5 feet)
- Gesso (white primer)
- Black acrylic paint
- White acrylic paint
- Fluid acrylics or fabric paints (pink, orange, yellow, lime green, blue)
- Pencils (HB and 4B)
- Eraser
- Assorted brushes: large flat brush, medium filbert, and fine liner
- Spray bottle with water
- Easel or wall space to hang the canvas vertically
- Drop cloth for floor protection
- Reference photo of a zebra profile
Step 1: Preparation and Sketching
-
Prepare the Surface:
This project works best on a loose, unstretched canvas for a casual tapestry look. Start by priming the center area where the head will be with a thin layer of white gesso to ensure the paint adheres well, but leave the edges raw if you like that texture. -
Grid the Design:
Because accurate proportions are key for the zebra face, lightly draw a grid over your reference photo and a corresponding light grid on your canvas to help map out the features. -
Sketch the Outline:
Using an HB pencil, sketch the outline of the zebra’s head, neck, and ears. Pay close attention to the angle of the snout and the curve of the neck. -
Map the Stripes:
Lightly draw the stripe patterns. Remember that stripes wrap around the animal’s form; they aren’t flat lines. They should curve over the cheekbones and neck muscles. -
Refine the Mouth:
Sketch the mouth slightly open. This is crucial because it acts as the source point for the rainbow drips later.
Step 2: Painting the Zebra
-
Block in Darks:
Using a medium flat brush and black acrylic, begin filling in the zebra’s black stripes. Work from the ears down to the neck to avoid smudging your sketch. -
Create Texture:
Don’t paint the black areas as solid blocks. Use short, flickering brushstrokes at the edges of the stripes to mimic the texture of fur meeting the white coat. -
Detail the Eye:
Switch to a fine liner brush for the eye. Paint the pupil black but leave a tiny white highlight to give the animal life and focus. -
Shade the White Areas:
Mix a very light grey using a lot of white and a tiny dot of black. Use this to add subtle shadows under the jawline and around the nose to give the head three-dimensional volume. -
Paint the Snout:
The nose area is completely black but needs dimension. Use dark grey to highlight the nostril rim and the texture of the muzzle skin. -
Refine the Mane:
Use a stiff brush to paint the mane. Use upward, bristly strokes to create the spiky hair texture along the back of the neck. -
Final Black Touches:
Go over your deep blacks one last time to ensure opacity, particularly around the mouth where it will meet the bright colors.
Stopping the Flow
If drips run too fast, use a hair dryer on a low, cool setting directed at the stream to freeze it in place instantly. Blot excess pooling at the bottom with a paper towel.
Step 3: The Rainbow Drips
-
Setup for Drips:
This is the fun, messy part. Ensure your canvas is hanging vertically. Place a drop cloth heavily underneath the bottom edge of the canvas to catch runoff. -
Mix Fluid Paints:
Prepare your colored paints. If you are using standard acrylics, mix them with water or a flow medium until they have the consistency of heavy cream or melted ice cream. -
Apply the Pink:
Start at the back edge of the ‘vomit’ stream (closest to the zebra’s chest) with the jagged pink shape. Paint the initial burst shape with a brush, then load it with watery paint to let a thin drip run down. -
Layering Colors:
Working outward from the pink, apply strips of orange, yellow, green, and blue right at the mouth area. I find painting distinct vertical stripes first gives you control before the dripping starts. -
Initiate the Drips:
Using a spray bottle or a very wet brush, add water to the bottom of your painted color stripes. Let gravity pull the pigment down the canvas. -
Control the Flow:
If a drip is going astray, quickly wipe it or guide it with a clean, wet brush. Encourage the colors to bleed slightly into each other at the top, but keep the long drip lines relatively distinct. -
Add Splatters:
Dip a stiff bright brush into your green or blue paint and flick the bristles to create tiny splashes around the drips for an energetic, messy feel. -
Dry and Set:
Leave the canvas hanging vertically until completely dry (likely overnight) to prevent the drips from pooling weirdly if laid flat too soon.
Pro Tip: Gravity Assist
For natural-looking drips, don’t just paint a line. Load a brush with watered-down paint, press it to the canvas at the mouth, and let the paint physically run down on its own.
Hang your quirky masterpiece in a spot with good lighting to let those rainbow colors really pop against the monochromatic zebra
Impressionist Bird with Chunky Brushwork
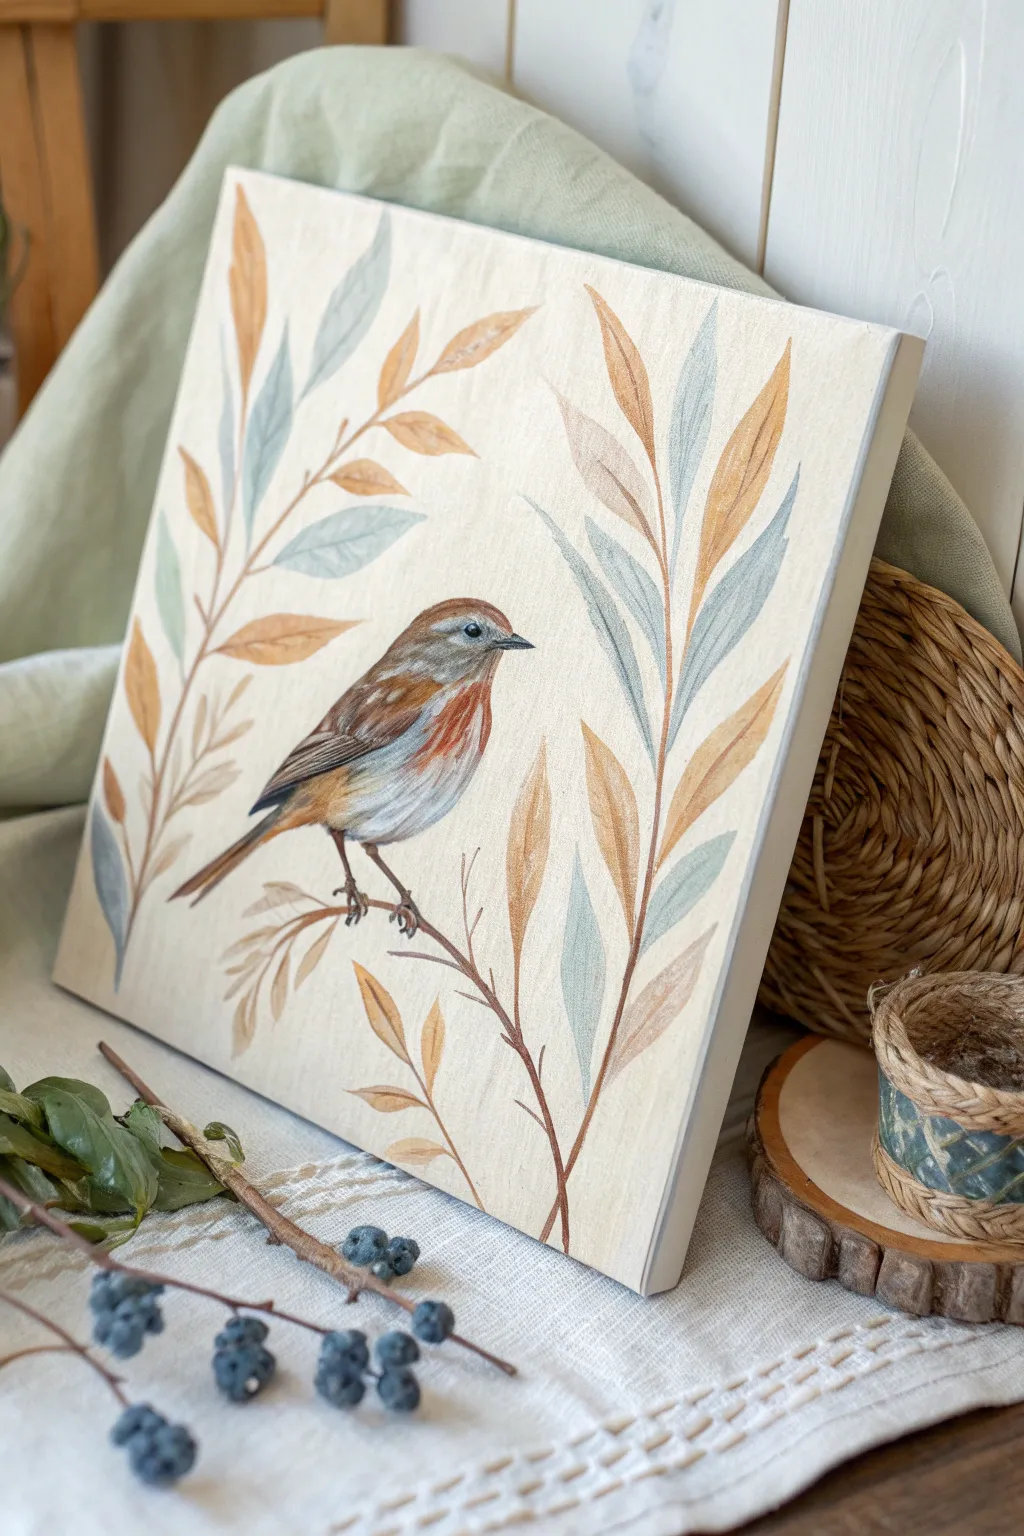
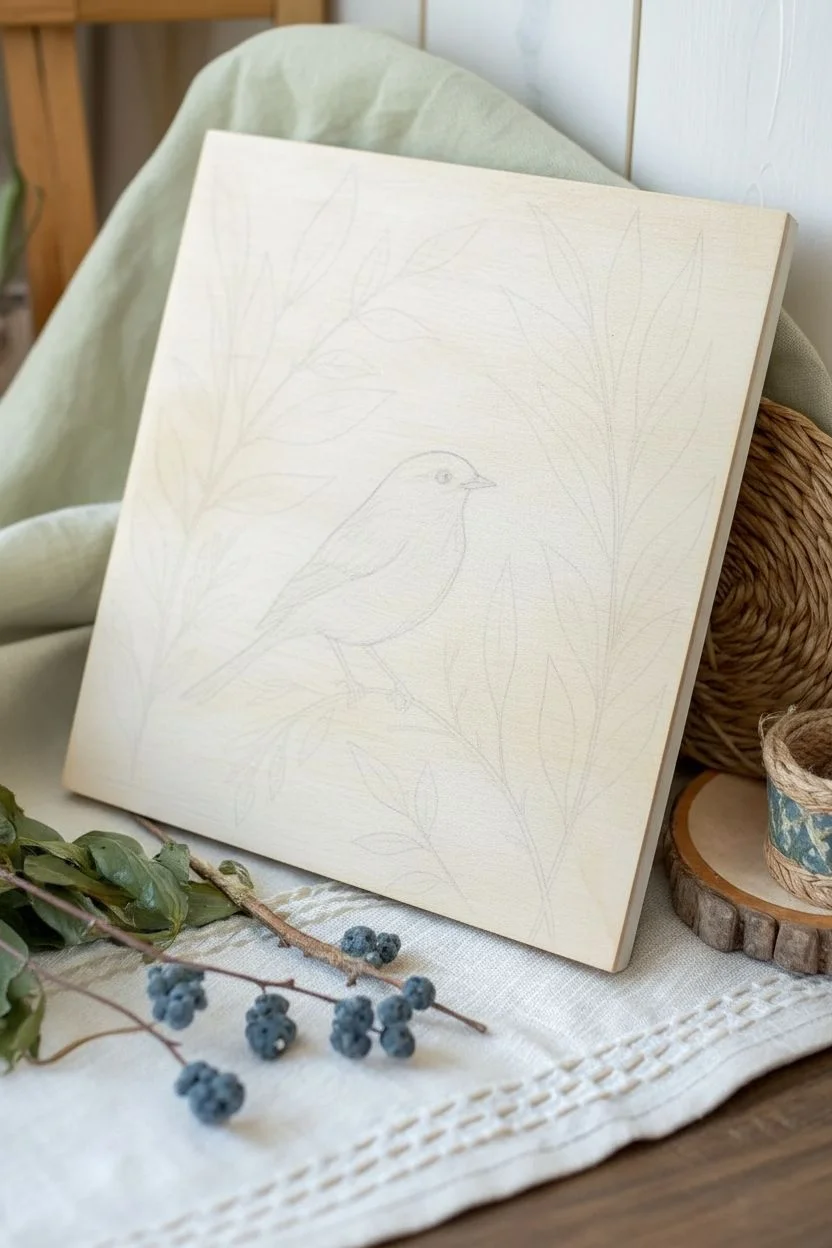
Capture the serene beauty of nature with this delicate painting of a sparrow perched among stylized foliage. Using opaque paints on a wood panel creates a lovely, matte texture that emphasizes the earthy tones and gentle brushstrokes.
Step-by-Step Tutorial
Materials
- Square wood painting panel (cradled or flat, approx. 8×8 or 10×10 inches)
- Acrylic gouache or matte acrylic paints (burnt sienna, yellow ochre, slate blue, titanium white, burnt umber, sage green)
- Synthetic brushes: medium flat brush, small round brush (#2 or #4), and a liner brush
- Fine-grit sandpaper
- Pencil and eraser
- Palette and water cup
- Paper towels
Step 1: Preparation & Sketching
-
Surface Prep:
Begin by lightly sanding your wood panel to ensure a smooth painting surface. Wipe away any dust with a slightly damp cloth. If the wood is very absorbent, you can apply a clear gesso or a wood sealer, but leaving the raw wood grain visible through the paint adds a nice organic touch. -
Base Tone:
Mix a very watery wash of white and a tiny drop of yellow ochre. Apply this over the entire face of the panel to brighten the wood without completely hiding the grain. Let this layer dry completely. -
Guidelines:
Using a light pencil, sketch the main curve of the branch starting from the bottom center and reaching upwards. Add the simple leaf shapes branching out symmetrically on either side. -
Bird Placement:
Draw the bird perched on the central branch. Focus on the oval shape of the body and the circular head. Keep the details minimal for now, just marking the beak, wing position, and tail.
Brushstroke Texture
Don’t over-blend! Let your brushstrokes sit side-by-side to create a slightly illustrative, ‘chunky’ feel rather than a photorealistic blend.
Step 2: Painting the Foliage
-
Mixing Leaf Colors:
Prepare two main mixtures on your palette: a warm golden-orange (yellow ochre + burnt sienna + white) and a cool slate blue (blue + a touch of burnt umber + white + sage green). Aim for soft, muted pastels rather than bright primary colors. -
Base Leaf Layers:
Using a round brush, paint the leaves. Alternate between your warm orange mix and your cool blue mix to create a balanced pattern. Paint with confident strokes, starting at the stem and sweeping out to the tip. -
Adding Veins:
While the leaf paint is still slightly workable or just dry, use a liner brush with a slightly darker version of the leaf color to paint a central vein. Keep these lines swift and organic. -
Stem Work:
Mix burnt umber with a little white to create a soft brown. Use the tip of your round brush or a liner brush to paint the main stems and branches connecting the leaves.
Fixing Opacity
If your paint looks streaky on the wood, let the first layer dry completely and apply a second coat rather than glooping on thick wet paint.
Step 3: Painting the Bird
-
Color Blocking:
Block in the bird’s areas with base colors. Use a reddish-brown for the head cap and wing patch, a slate grey for the wings, and a creamy white mixed with a touch of grey for the belly. -
Chest Detail:
I like to feather the edges where colors meet. On the chest, create a transition from the reddish-brown neck to the white belly by using short, downward brushstrokes that mimic fluffy down feathers. -
Wing Definition:
Mix a darker grey-brown. With your smallest brush, paint the flight feathers on the wing using thin, parallel lines. Add a few highlights with a light grey to show separation. -
Facial Features:
Use a small dot of black or dark umber for the eye, adding a tiny white reflection dot once dry. Paint the beak dark grey. Add a subtle grey stripe extending back from the eye to the neck. -
Legs and Claws:
Using the dark brown mix, paint the thin legs and claws gripping the branch. Ensure the claws wrap visually around the stem by breaking the line slightly where the wood would be in front.
Step 4: Final Touches
-
Refining Edges:
Check the edges of your leaves. If you want a more styled look, you can add very faint outlines or texture marks with a slightly drier brush. -
Background Integration:
If the background feels too empty, mix a very transparent glaze of your background color and gently brush around the bird to soften any harsh pencil lines you couldn’t erase. -
Varnish:
Once the painting is fully cured (give it at least 24 hours), apply a spray matte varnish. This protects the work without adding a glossy sheen that would distract from the natural aesthetic.
Hang your finished piece in a cozy corner to bring a touch of the outdoors inside
Whimsical Ostrich with Exaggerated Expression
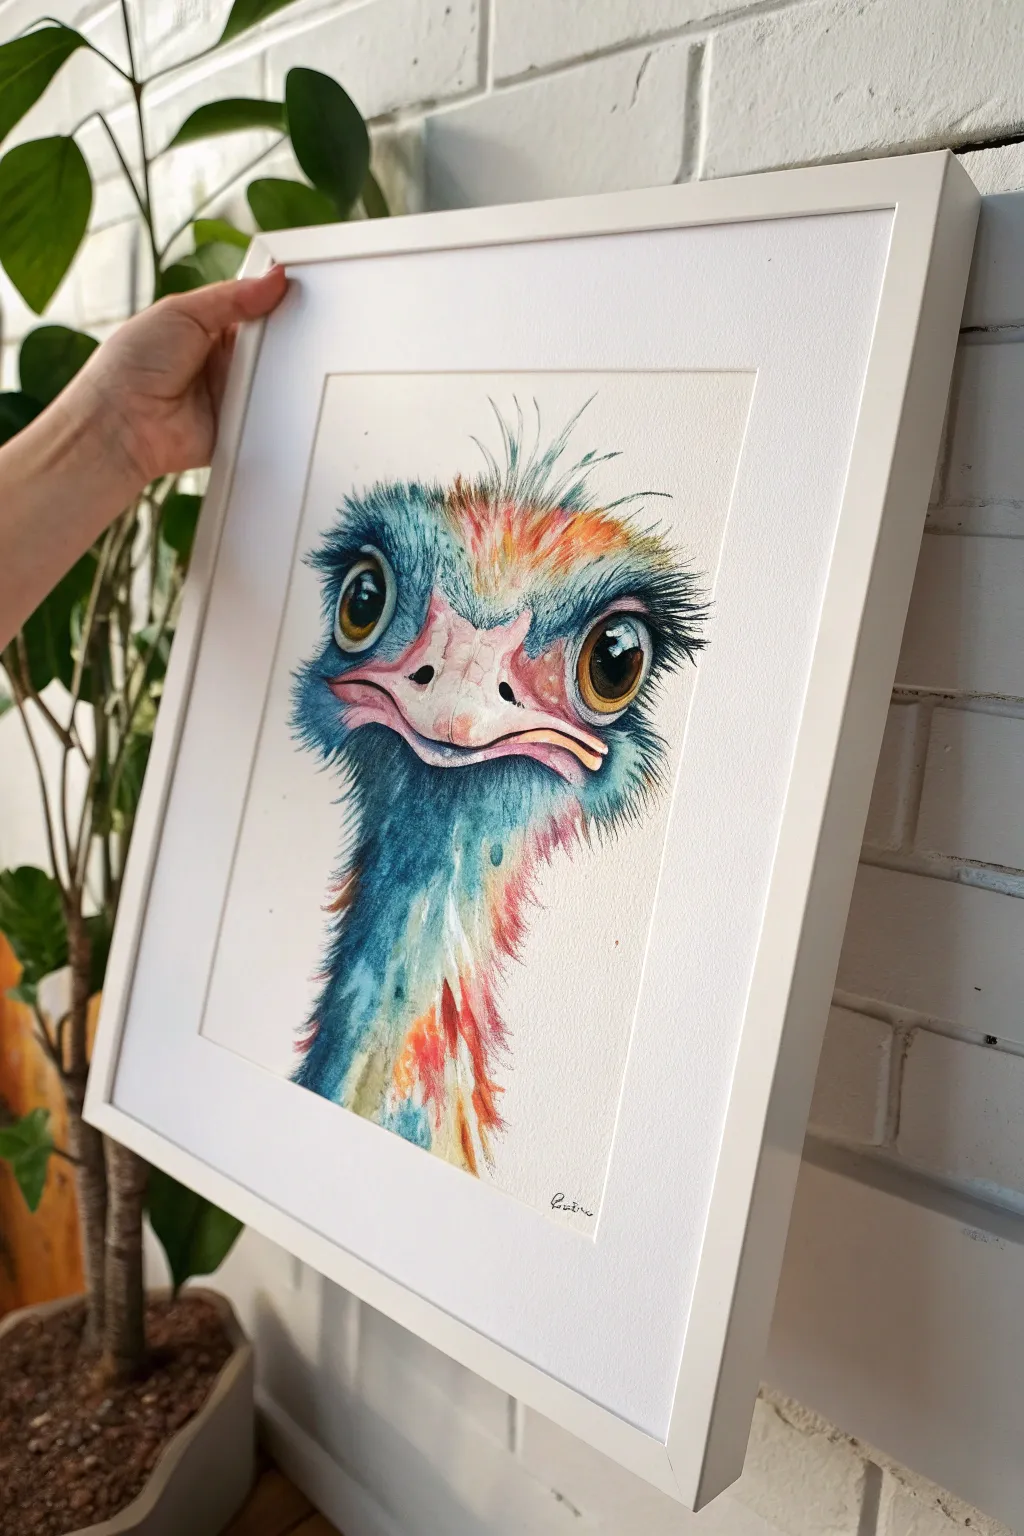
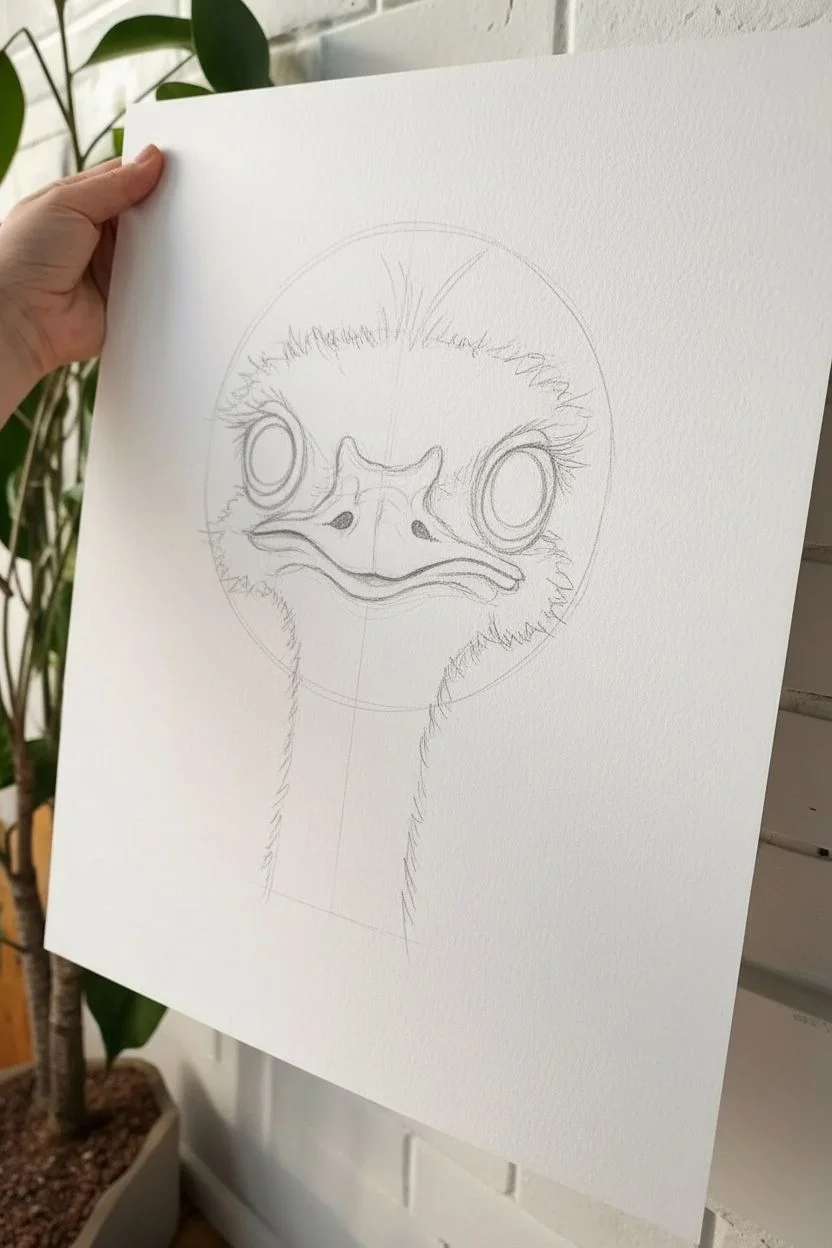
Capture the quirky personality of an ostrich with this vibrant watercolor portrait featuring exaggerated eyes and a colorful, spiky plumage. The wet-on-wet technique blends blues, oranges, and pinks to create a soft yet energetic texture that brings this bird’s comical expression to life.
Step-by-Step Guide
Materials
- Cold press watercolor paper (300 gsm)
- Pencil (HB) and kneadable eraser
- Watercolor paints (phthalo blue, indigo, cadmium orange, rose madder, burnt sienna)
- Round watercolor brushes (size 4, size 8, and size 0 for details)
- White gouache or white gel pen
- Masking fluid (optional)
- Clean water and paper towels
Step 1: Sketching the Character
-
Map the proportions:
Begin by lightly sketching a large oval for the head in the center of your paper. Draw a long, slightly curved neck extending downwards. -
Define the beak:
Add the beak directly in the middle of the oval. Make it wide and slightly downturned at the corners to emphasize the comical expression, with distinct nostril indents. -
Position the eyes:
Draw two large, round circles for the eyes on either side of the beak. These should be oversized relative to the head to create that whimsical look. -
Refine the outline:
Gently erase your guide shapes and refine the final outline. Sketch jagged, loose lines around the head and neck to indicate where the fluffy feathers will go.
Step 2: Painting the Eye-Catching Features
-
Underpainting the beak:
Mix a very dilute wash of rose madder and burnt sienna. Apply this pale pinkish tone to the beak area, leaving tiny slivers of white paper for highlights near the nostrils. -
Painting the irises:
Wet the inside of the eye circles (avoiding a small highlight circle). Drop in burnt sienna, then touch the edges with indigo while wet to create depth and roundness. -
Deepening the expression:
Once the eyes are dry, use a size 4 brush with concentrated indigo or black to paint the pupils. Leave a crisp white highlight to give the bird a spark of life. -
Define the eyelids:
Use a mix of orange and rose to paint the wrinkled skin around the eyes and the connection to the beak. Keep the edges soft so it blends into the future feathers.
Fixing Muddy Colors
If the orange and blue mix into a dull grey on the neck, let the blue layer dry completely first. Then, glaze the orange over the top for a vibrant, transparent optical mix.
Step 3: Creating Feathery Textures
-
Wet the head area:
Using clean water, wet the area around the eyes and the top of the head. You want the paper damp but not swimming in puddles. -
Apply the base blues:
Load a size 8 brush with phthalo blue. Touch the wet paper around the cheeks and neck, letting the paint bloom outward to create a soft, fuzzy base. -
Injecting warmth:
While the blue is still slightly damp, drop in cadmium orange and rose madder on the top of the head and the lower neck. Allow these colors to bleed slightly into the blue for a multicolor effect. -
Building neck volume:
Darken the mix with indigo and paint the shadow side of the neck. Use vertical strokes that follow the curve of the neck to suggest length and form. -
Create spiky details:
Switch to a damp brush or a dry brush technique. Pull pigment from the wet central areas outward in quick, flicking motions to create spiky, wispy feathers on the edges.
Pro Tip: Eye Sparkle
For the most realistic eyes, preserve the white of the paper instead of using white paint later. The natural paper brightness gives a deeper, more translucent glow to the gaze.
Step 4: Final Details and Highlights
-
Refining the beak:
Add a darker glaze of burnt sienna under the beak line to separate the upper and lower mandibles. This shadow adds dimension to the mouth. -
Adding eyelashes:
With your size 0 brush and thick dark paint, draw long, exaggerated eyelashes extending from the outer corners of the eyes. -
Enhancing contrast:
Use concentrated blue-black paint to deepen the darkest areas of the feathers, specifically right under the chin and around the eyes, to make the colors pop. -
Final highlights:
If your white paper highlights got lost, use a touch of white gouache or a gel pen to reinstate the sparkle in the eyes and the shine on the beak. -
Whisker details:
Add a few stray, fine hair lines on the top of the head using a rigger brush or the very tip of your smallest round brush for that messy hair day look.
Frame your quirky ostrich in a simple white frame to let the vibrant colors and expression really stand out on the wall
Minimalist Animal Line Painting with One Bold Accent
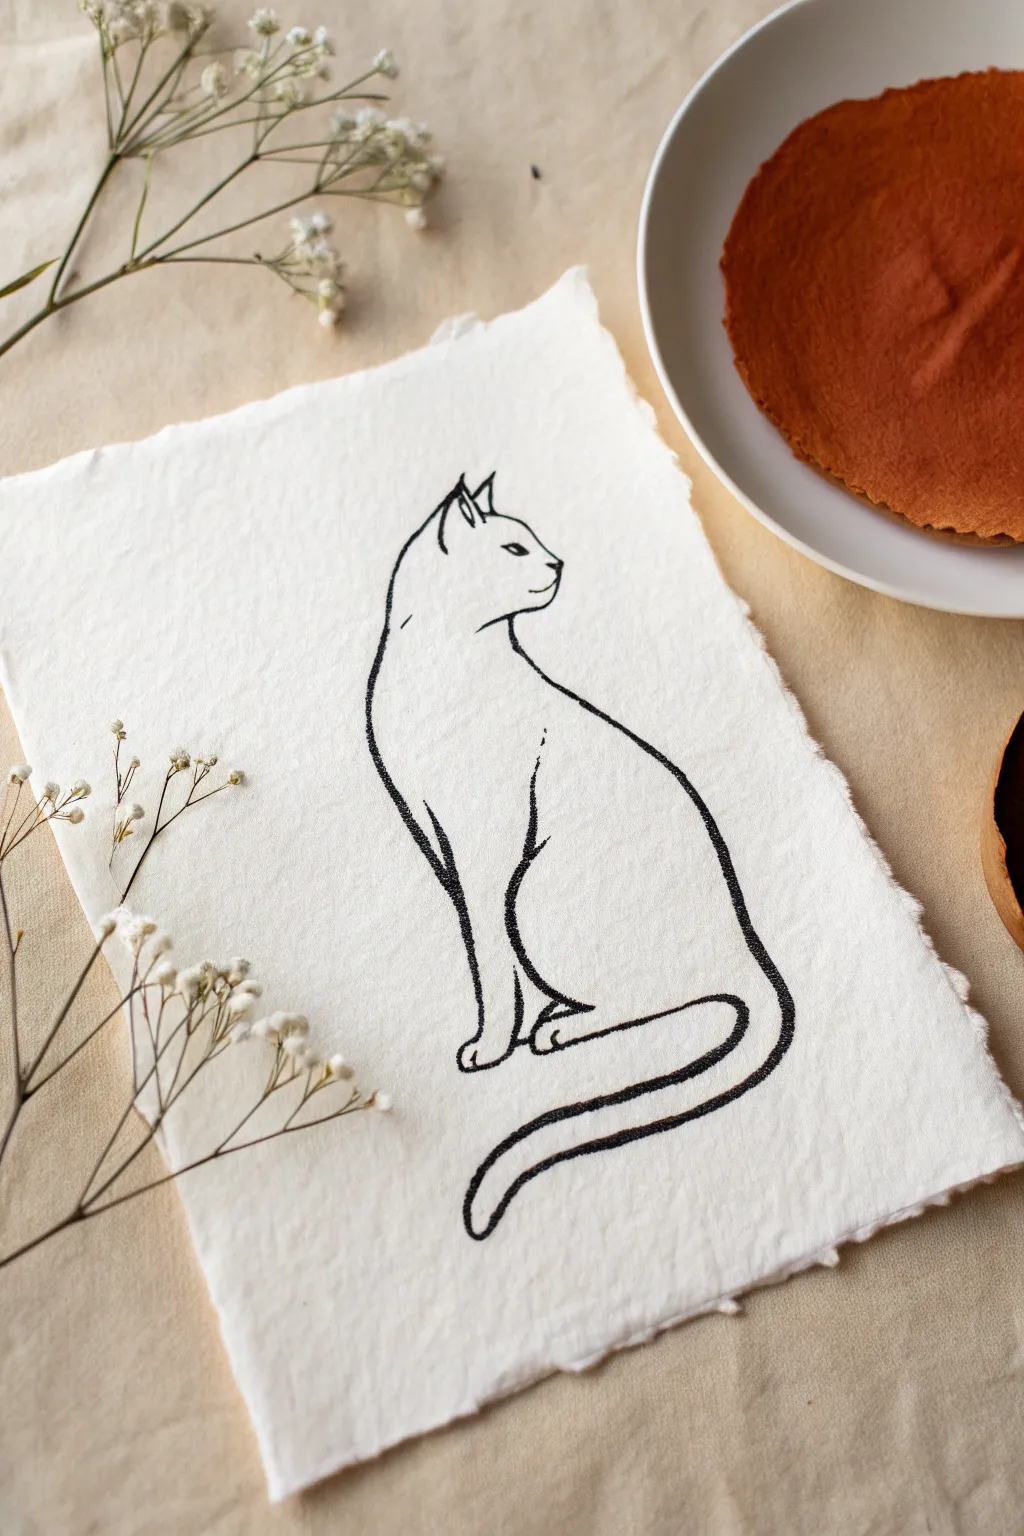
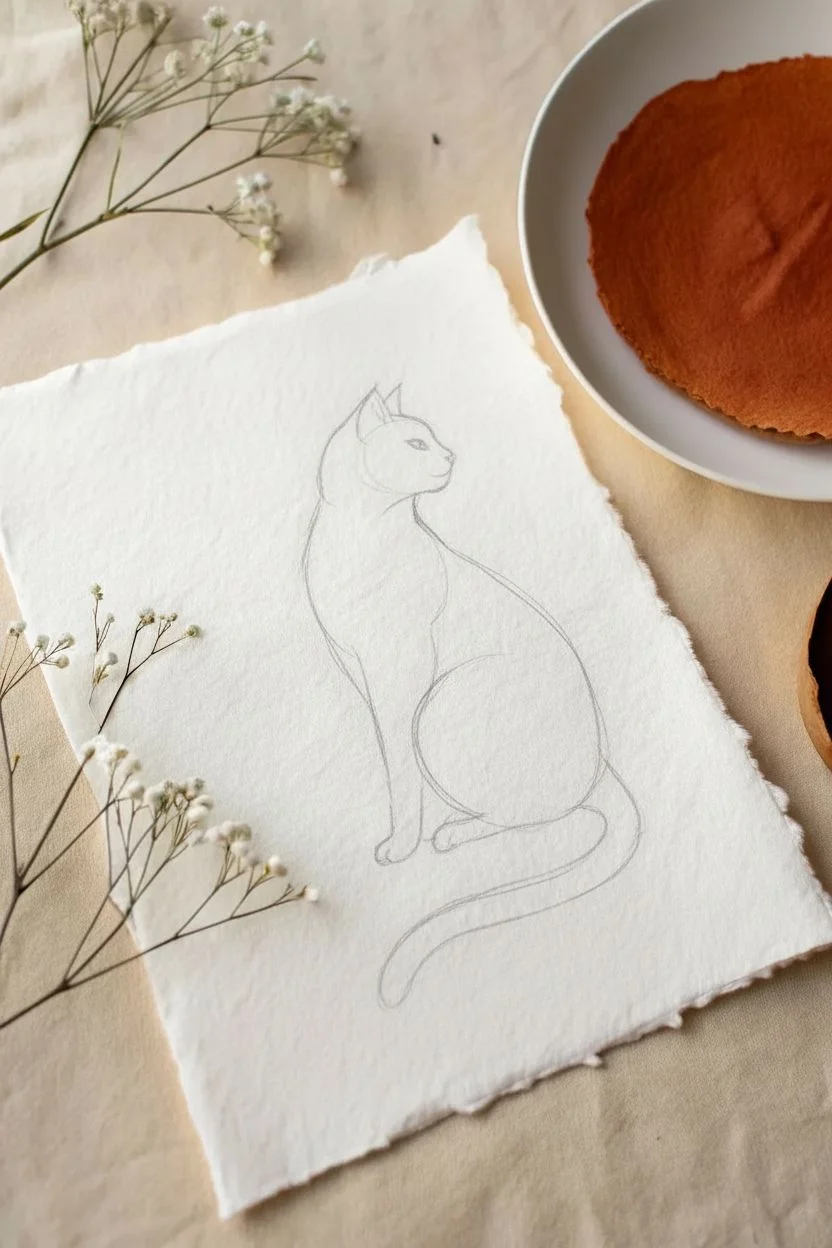
This elegant project relies on the beauty of simplicity, featuring a single, fluid black line drawing of a cat sitting poised and observant. The textural quality of handmade cotton rag paper elevates the minimalist sketch into a piece of fine art.
Detailed Instructions
Materials
- Handmade white cotton rag paper (deckled edge)
- Black India ink or archival pigment liner (0.5mm or 0.8mm)
- Small round watercolor brush (size 1 or 2)
- Pencil (HB or 2H)
- Kneadable eraser
- Reference photo of a sitting cat
- Paper towel
Step 1: Preparation and Sketching
-
Select your paper:
Choose a sheet of heavy, handmade cotton rag paper. The rough texture and deckled edges are crucial for achieving the organic, vintage look shown in the example. -
Analyze the pose:
Study the reference image. Notice the continuous curve from the ear down the spine to the tail. The cat is seated with a long, elegant back and its tail wrapping around the front paws. -
Lightly block shapes:
Using an HB pencil with a very light hand, draw a loose oval for the body and a smaller circle for the head to establish proportions. Keep these lines barely visible so they don’t damage the paper surface. -
Refine the outline:
Sketch the specific contours of the cat. Focus on the sharp triangles of the ears, the subtle curve of the chest, and the long, sweeping tail. -
Identify line variation:
Mark lightly where you want thicker lines—usually on the shadowed side of the cat (the back and bottom of the tail)—and where lines should be thinner or broken. -
Check the composition:
Ensure the drawing sits centrally on the paper with enough breathing room around the edges to highlight the deckled border.
Step 2: Inking the Design
-
Prepare your ink:
If using dip pen or brush and India ink, shake the bottle gently. If using a pigment liner, ensure the tip is flowing smoothly on a scrap piece of paper. -
Start with the ears:
Begin at the top with the delicate details of the ears and head. Use lighter pressure here to keep the lines crisp and fine. -
Draw the spine:
Create the long back line. As you move down the spine, apply slightly more pressure or re-trace the line to thicken it, suggesting weight and shadow. -
Suggest texture:
Instead of a perfectly solid line, allow the texture of the rag paper to break the ink slightly in some areas. I find this creates a beautiful, organic ‘fur’ effect without drawing individual hairs. -
Define the legs:
Draw the front leg as a simple vertical stroke. Keep the paws minimal; mere suggestions of toes are better than detailed claws for this style. -
Anchor the figure:
Thicken the line significantly where the cat’s bottom meets the ground and along the underside of the tail. This ‘grounds’ the figure. -
Complete the tail:
Draw the tail with a sweeping motion, creating a hook shape that wraps towards the front. Make this line bold and confident.
Mastering Rag Paper
Rag paper is very thirsty. Move your brush or pen a bit slower than usual to allow the ink to soak into the deep fibers for a solid black line.
Step 3: Finishing Touches
-
Add facial details:
carefully place the eye and a tiny line for the mouth. Keep the eye simple—a small almond shape is sufficient. -
Let it dry completely:
India ink can take longer to dry on absorbent rag paper. Wait at least 15-20 minutes before touching it. -
Erase pencil marks:
Gently dab—do not scrub—with a kneadable eraser to lift any visible graphite guidelines. Scrubbing can ruin the paper’s soft texture. -
Optional accent:
Review your work. If any lines look too thin or weak, carefully go over them one last time to darken the black.
Add a Splash of Gold
Make the piece pop by painting a simple circle of gold leaf or metallic watercolor behind the cat’s head like a halo or moon.
Once dry, display your artwork in a floating frame to show off those beautiful deckled edges


Have a question or want to share your own experience? I'd love to hear from you in the comments below!