When I’m craving that satisfying mix of color, calm, and a little adventure, I reach for acrylic paint and build a landscape from the sky down. Here are my favorite acrylic landscape painting ideas—starting with the classics you probably want to try first, then drifting into the fun, unexpected stuff.
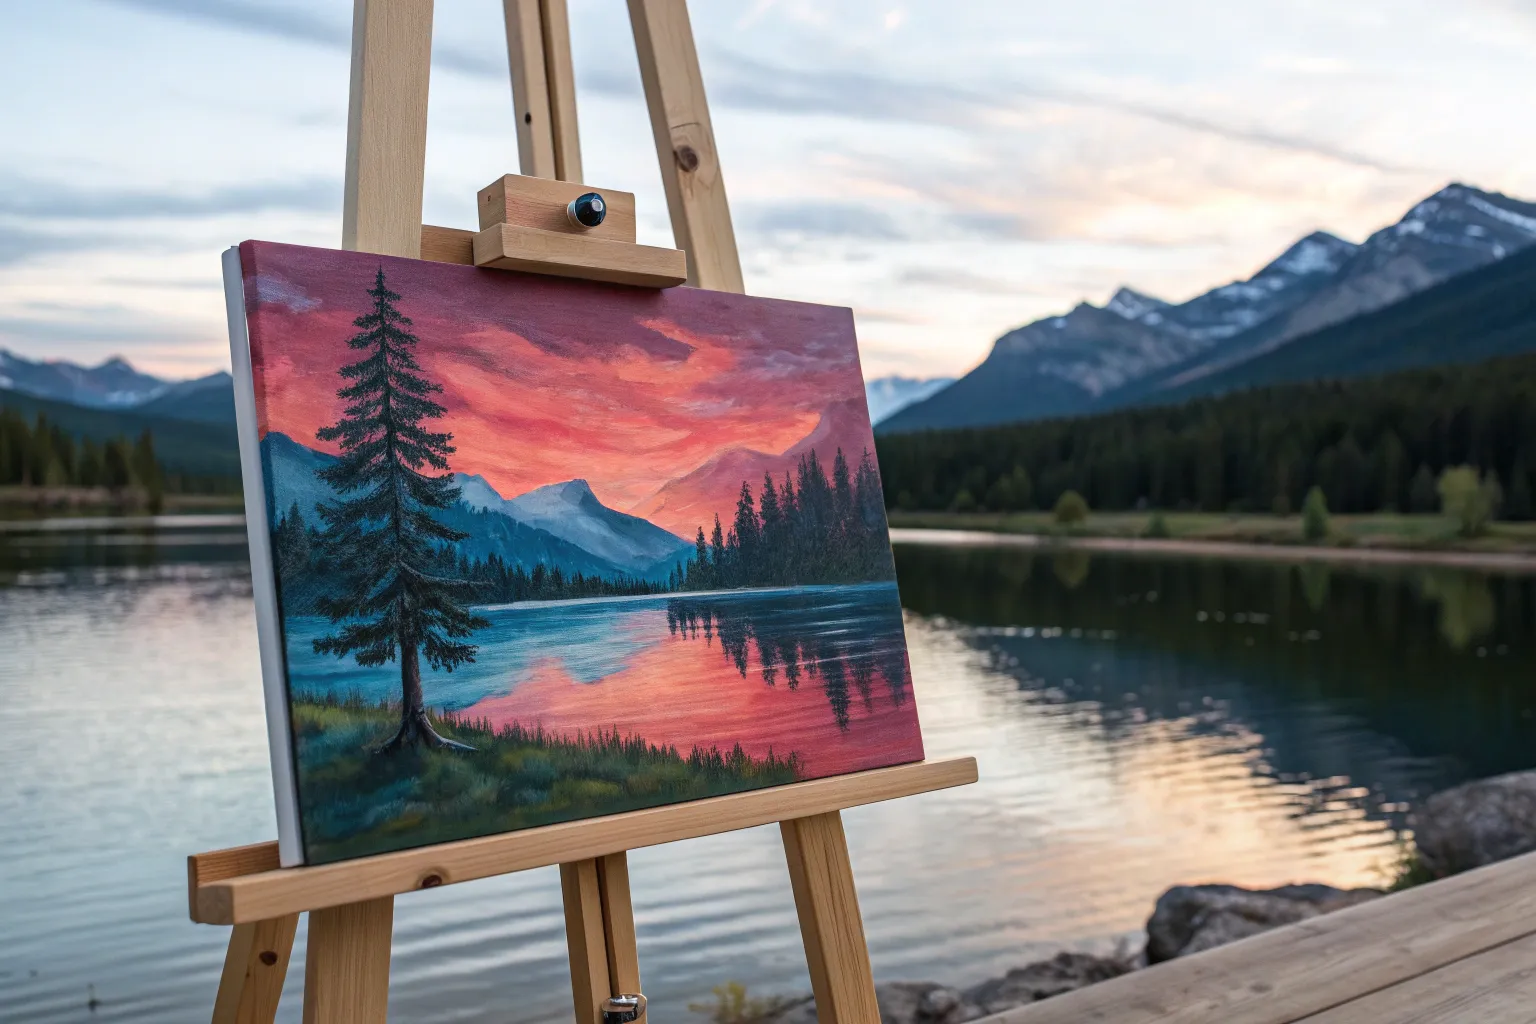
Mountain Lake Reflections in Acrylic

Capture the serene beauty of twilight mountains and mirrored waters with this acrylic landscape project. You’ll master smooth sky gradients and crisp reflections to bring this peaceful mountain vista to your canvas.
Step-by-Step Tutorial
Materials
- Square canvas (12×12 or similar)
- Acrylic paints: Titanium White, Phthalo Blue, Dioxazine Purple, Alizarin Crimson, Cadmium Yellow, Burnt Umber, Mars Black
- Large flat wash brush (1-2 inch)
- Medium flat brush
- Small round brush
- Fan brush
- Palette knife
- Water container and palette
Step 1: Painting the Sky Gradient
-
Prime the sky:
Begin by covering the top two-thirds of your canvas with a thin, even coat of Titanium White mixed with a tiny drop of Phthalo Blue. This base helps your gradient colors blend smoothly. -
Mix your twilight palette:
Prepare three piles of color on your palette: a soft light blue (White + Phthalo Blue), a warm peach (White + Cadmium Yellow + tiny touch of Crimson), and a dusty lavender (White + Purple + Crimson). -
Apply the warm horizon:
Using your large flat brush, paint horizontal strokes of the peach mixture across the middle of the canvas, just above where your mountains will sit. Blend it upwards while the paint is wet. -
Blend the upper sky:
Clean your brush, pick up the light blue mixture, and paint the very top of the canvas. Working quickly, blend this blue down into the lavender, and then blend the lavender down into the peach horizon. Use long, horizontal strokes for a seamless transition. -
Add cloud streaks:
While the sky is still slightly tacky, mix a brighter pink-orange. Use the corner of your medium flat brush to sweep in diagonal, wispy clouds stretching from the left side toward the center.
Smoother Blending
Keep a misting bottle handy. A light spritz of water directly on the canvas keeps acrylics wet longer, allowing for those buttery smooth sky transitions without dry brush marks.
Step 2: Constructing the Mountains
-
Outline the peaks:
Mix Phthalo Blue with a touch of Burnt Umber and White to create a distant mountain grey-blue. Use a small round brush to sketch the jagged outline of the two main peaks. -
Block in mountain shapes:
Fill in the mountain shapes with your grey-blue mixture. The color should be flat for now; we will add dimension next. -
Highlight the sunlit slopes:
Identify the light source coming from the sunset. Mix White with a tiny bit of your mountain base color. Use a palette knife or small flat brush to ‘pull’ this lighter paint down the left-facing slopes of the peaks to mimic snow and structure. -
Deepen the shadows:
Mix a darker version of your mountain color (more Blue and Umber). Lightly glaze the right-facing slopes to create form and depth. -
Paint the tree line foundation:
Mix a dark green using Phthalo Blue, Cadmium Yellow, and a touch of Black. Paint a solid horizontal band at the base of the mountains to establish the distant forest. -
Detail individual trees:
Switch to a fan brush or a small liner brush. Tap vertically along the top edge of your forest band to create the illusion of pine tree tops silhouetted against the mountains.
Step 3: Creating the Lake Reflection
-
Mirror the sky:
The water acts as a mirror. Replicate your sky gradient upside down in the bottom third of the canvas. Start with the peach color right below the tree line and fade into the blue/lavender tones at the bottom edge. -
Reflect the mountains:
Using your mountain grey-blue mix (thinned slightly with water), paint the inverted shape of the mountains directly below the real ones. Keep the edges softer and less detailed than the actual mountains. -
Reflect the tree line:
Add the dark green reflection of the forest. Pull the paint downwards vertically with a dry brush to create the distortion of water. -
Add surface ripples:
Once the reflection layer is dry, dilute some Titanium White. Use a fine liner brush to paint very thin, horizontal lines across the water surface to suggest gentle ripples disrupting the reflection.
Golden Hour Glow
Glaze a tiny amount of transparent yellow or orange over the sunlit side of the mountains and the corresponding water reflection to intensify the sunset warmth.
Step 4: Foreground Details
-
Lay the rocky shore:
In the bottom right corner, paint a dark, irregular area using a mix of Burnt Umber and Black. This serves as the foreground shoreline. -
Define individual rocks:
Mix a mid-tone grey-brown. Paint rounded shapes within the dark shoreline area. I prefer to vary the sizes to make the rocks look natural and random. -
Highlight the rocks:
Add a touch of the warm peach sky color to your grey mix. Dab highlights on the top surfaces of the rocks where the sunset light would hit them. -
Final touches:
Add a few vertical dark lines on the far right edge to suggest tall grasses or reeds in the immediate foreground, anchoring the composition.
Step back and enjoy the tranquil depth you’ve created in your mountain landscape


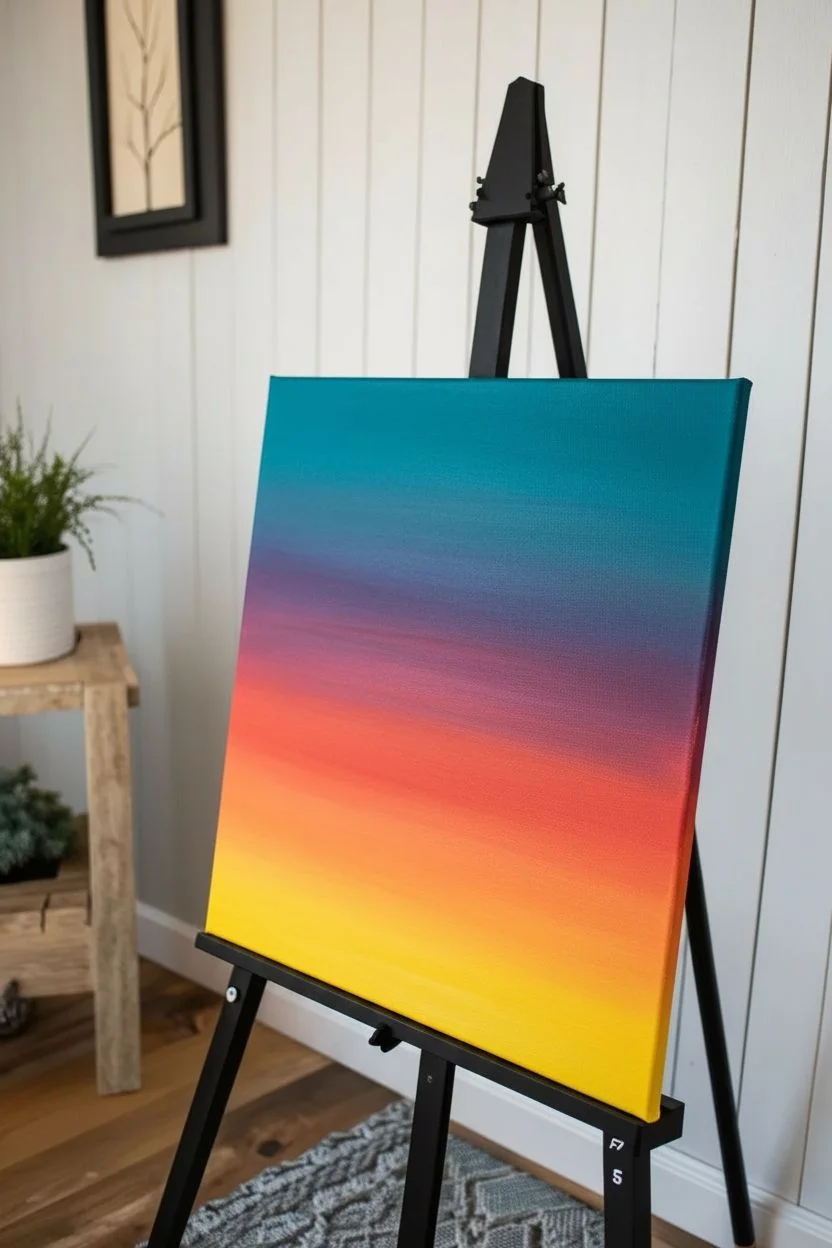
Bold Sunset Sky Over a Simple Horizon
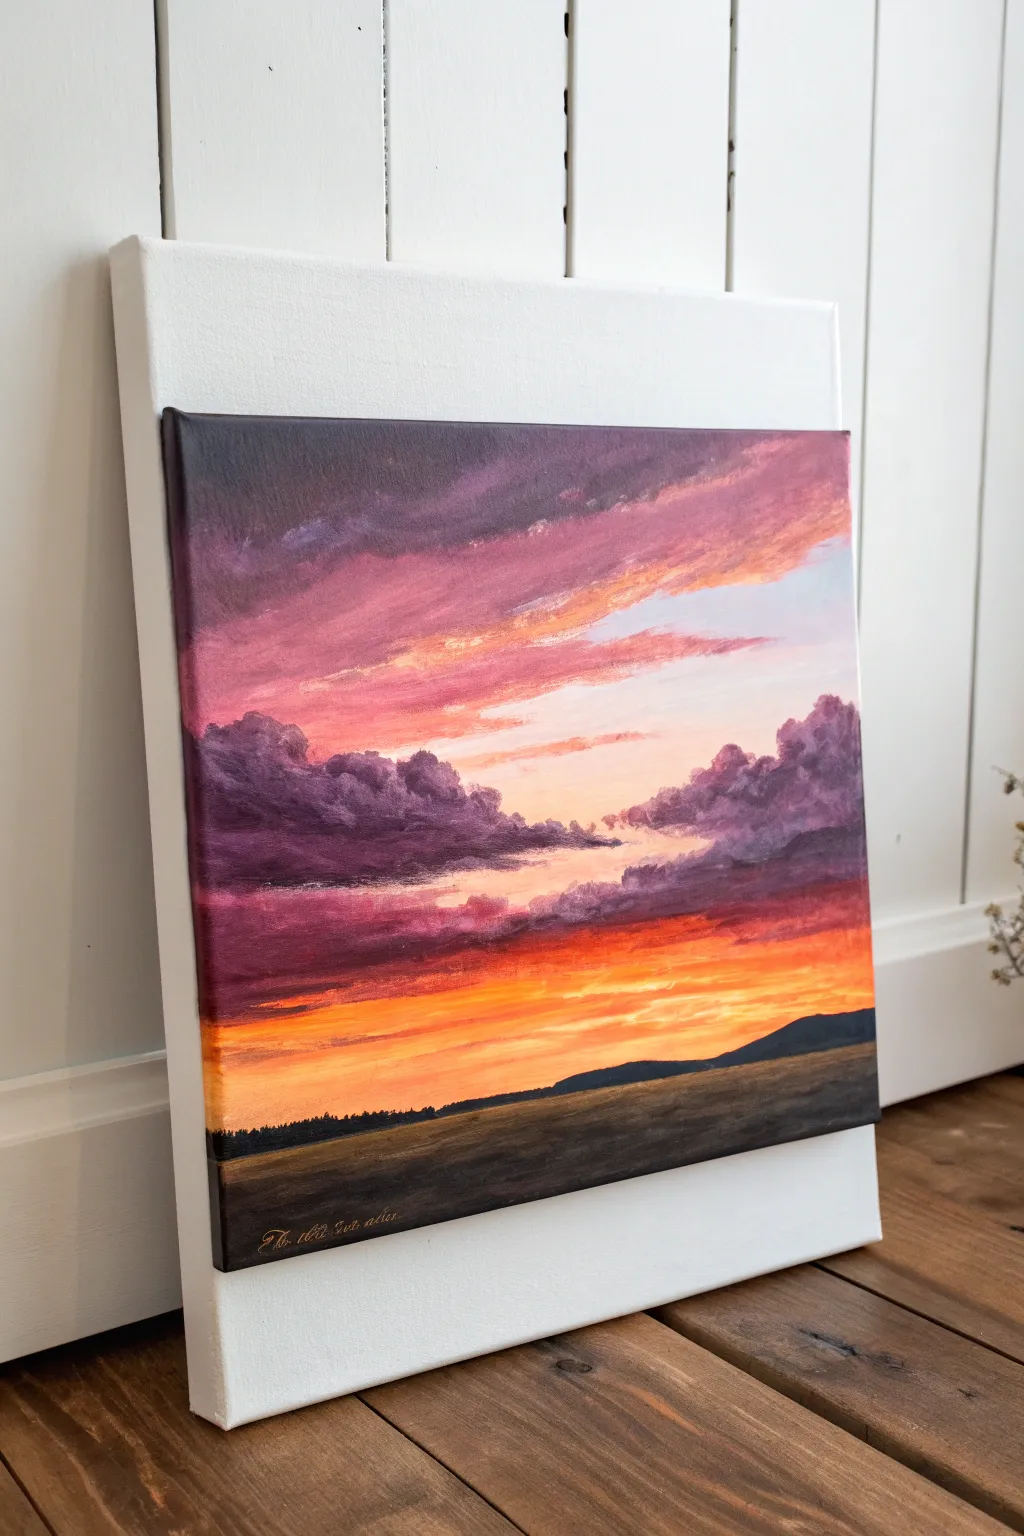
Capture the fleeting magic of twilight with this vibrant acrylic landscape. This tutorial focuses on building a dramatic gradient sky filled with textured clouds, contrasted against a stark, silhouetted foreground.
Step-by-Step
Materials
- Stretched canvas (e.g., 12×12 or similar square ratio)
- Acrylic paints: Cadmium Yellow, Cadmium Orange, Alizarin Crimson, Dioxazine Purple, Ultramarine Blue, Titanium White, Mars Black, Burnt Umber
- Large flat brush (1-inch) for blending
- Medium filbert brush for clouds
- Small round brush for details
- Palette knife (optional for mixing)
- Palette
- Water cup and paper towels
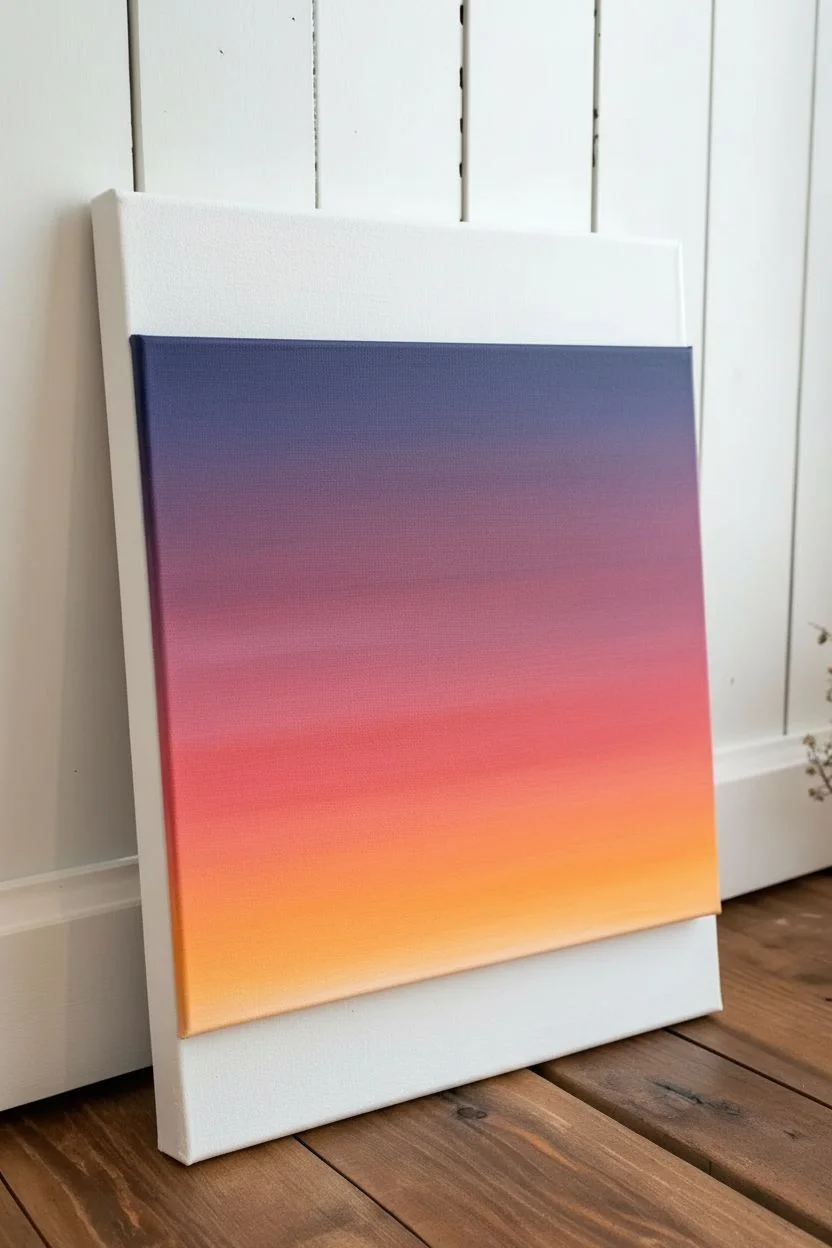
Step 1: Setting the Gradient Base
-
Prepare the canvas:
Start by lightly dampening your canvas with a clean, wet brush. This helps the acrylics blend more smoothly and increases your working time before the paint dries. -
Mix your colors:
Prepare three piles of paint: a deep purple (Purple + a touch of Blue), a vibrant crimson (Crimson + slight Orange), and a glowing orange-yellow (Orange + Yellow + White). -
Paint the top section:
Using the large flat brush, apply horizontal strokes of the deep purple mix across the top third of the canvas. Don’t worry about perfect coverage yet; we want a moody base. -
Apply the middle band:
Clean your brush and pick up the crimson pink mix. Paint the middle section, slightly overlapping the wet purple edge above to create a soft, blurred transition. -
Create the horizon glow:
Fill the bottom third with your orange-yellow mix. Blend this upward into the pink, using long, smooth horizontal strokes until you have a seamless gradient from dark top to bright bottom. -
Let it dry completely:
Allow this base layer to dry fully. If you try to paint clouds over wet paint now, you might muddy the vibrant background colors.
Muddy Clouds?
If your clouds turn grey/brown while blending, stop! Let the background dry 100% first. Use a light touch; don’t over-mix on the canvas.
Step 2: Sculpting the Clouds
-
Mix shadow colors:
Create a dark, stormy grey-purple for the cloud shadows. Mix Dioxazine Purple with a little Ultramarine Blue and a tiny amount of Black. -
Block in cloud shapes:
Using a filbert brush, tap in the main cloud masses on the left and right sides. Keep the edges irregular and fluffy. These should sit in the middle ‘pink’ zone of your sky providing contrast. -
Add upper highlights:
Mix a light, pinkish-lavender color (White + Crimson + tiny dot of Purple). Gently tap this onto the tops of your dark clouds to show where the light hits them. -
Paint wispy upper clouds:
With a cleaner brush, streak some diagonal, sweeping clouds in the upper purple section using a medium pink tone. These should look like stretched cotton candy. -
Add lower cloud highlights:
For the clouds closer to the horizon, mix a warm orange-pink. Highlight the undersides of the dark cloud masses to reflect the glowing sun below.
Level Up: Glazing
Once fully dry, apply a verified thin glaze of gloss medium mixed with clear orange paint over the horizon line to make the glow ultra-intense.
Step 3: Refining the Light
-
Intensify the horizon:
I like to go back in with pure Cadmium Yellow and White to brighten the area just above the horizon line. This makes the sunset look blindingly bright. -
Create sun rays:
Using a dry brush with very little yellow-white paint, lightly drag horizontal streaks across the lower sky to simulate light cutting through thin atmosphere.
Step 4: The Foreground
-
Mix the ground color:
Mix Mars Black with Burnt Umber to create a warm, deep darkness. Avoid using pure black, as it can look lifeless. -
Paint the distant hills:
About a quarter of the way up from the bottom, paint a sloping hill line on the right side. Keep the top edge sharp against the bright sky. -
Fill the field:
Fill the entire bottom section with your dark brown-black mix. Use horizontal strokes to suggest the flatness of the field. -
Add subtle texture:
Mix a slightly lighter brown (add a touch of White or Yellow to your dark mix). Lightly glaze the foreground field to suggest dry grass catching the last light, but keep it very dark overall. -
Detail the treeline:
Use the small round brush or the edge of a flat brush to tap tiny vertical lines along the distant horizon on the left. These represent a faraway forest silhouette. -
Final touches:
Assess the painting. If the foreground needs to be darker to contrast the sky, add another coat of the dark mix once dry. Sign your name in gold or light yellow in the corner.
Step back and enjoy the warmth of your permanent sunset


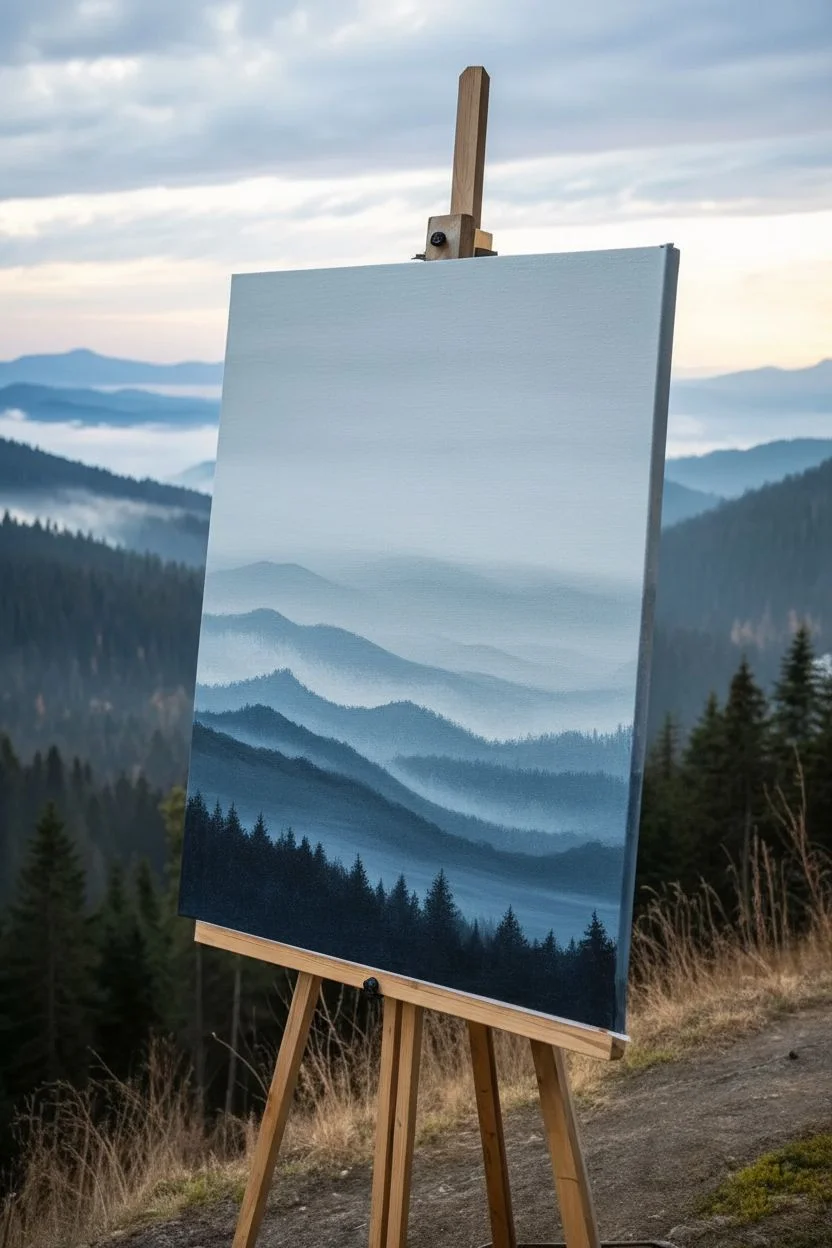
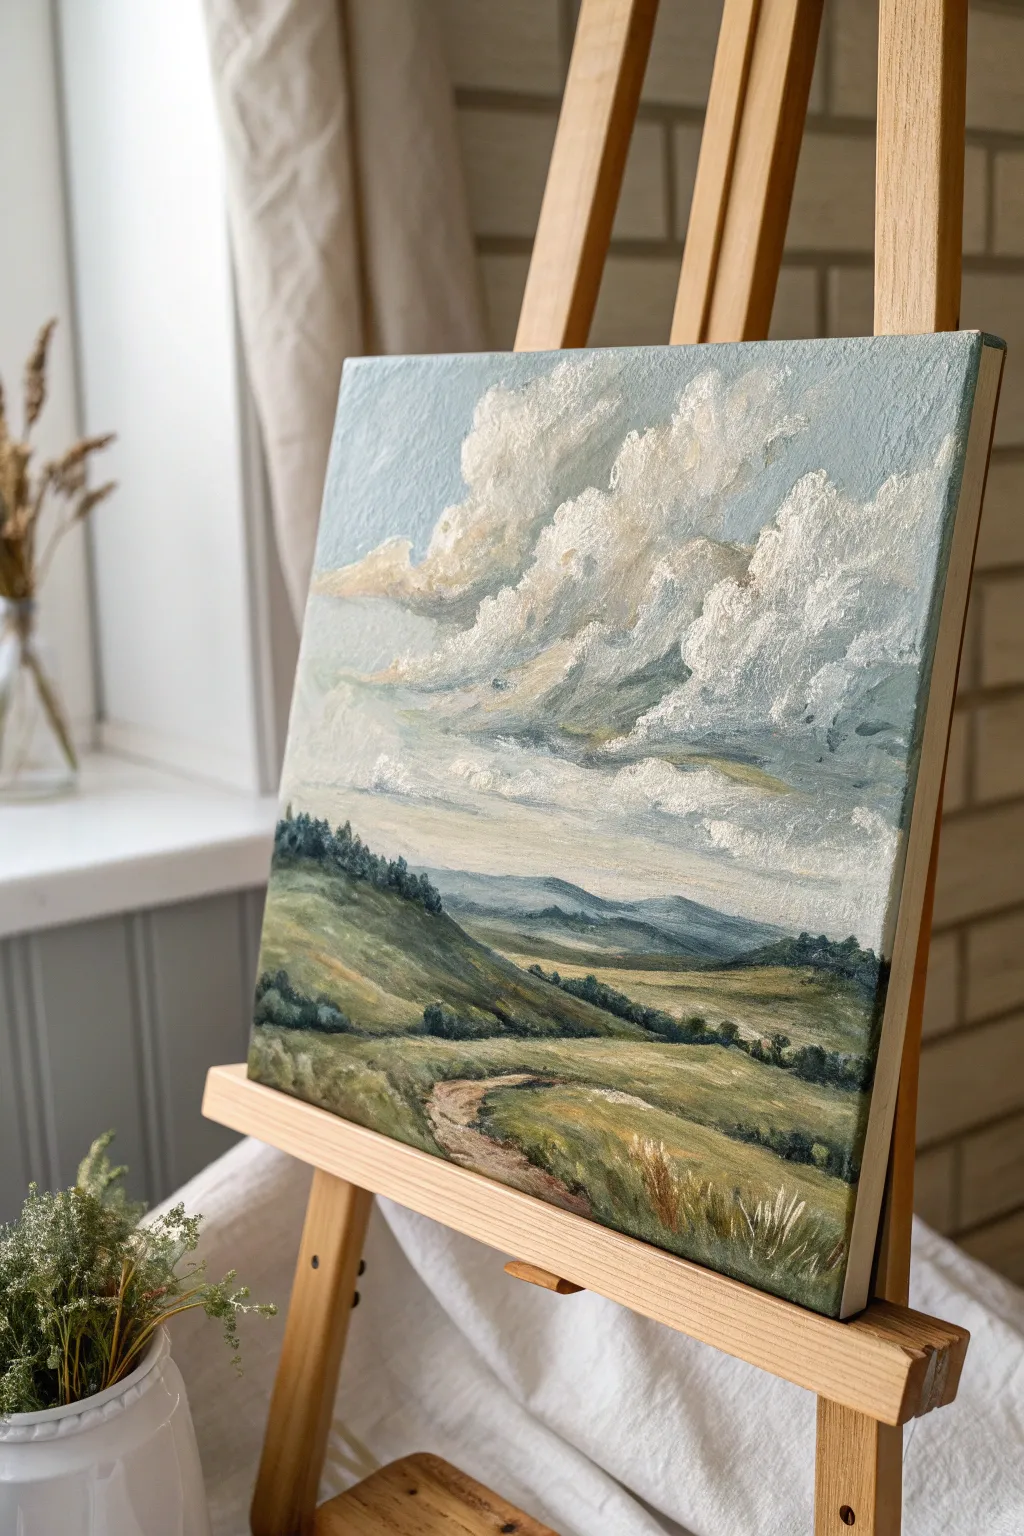
Rolling Hills With Layered Atmospheric Perspective
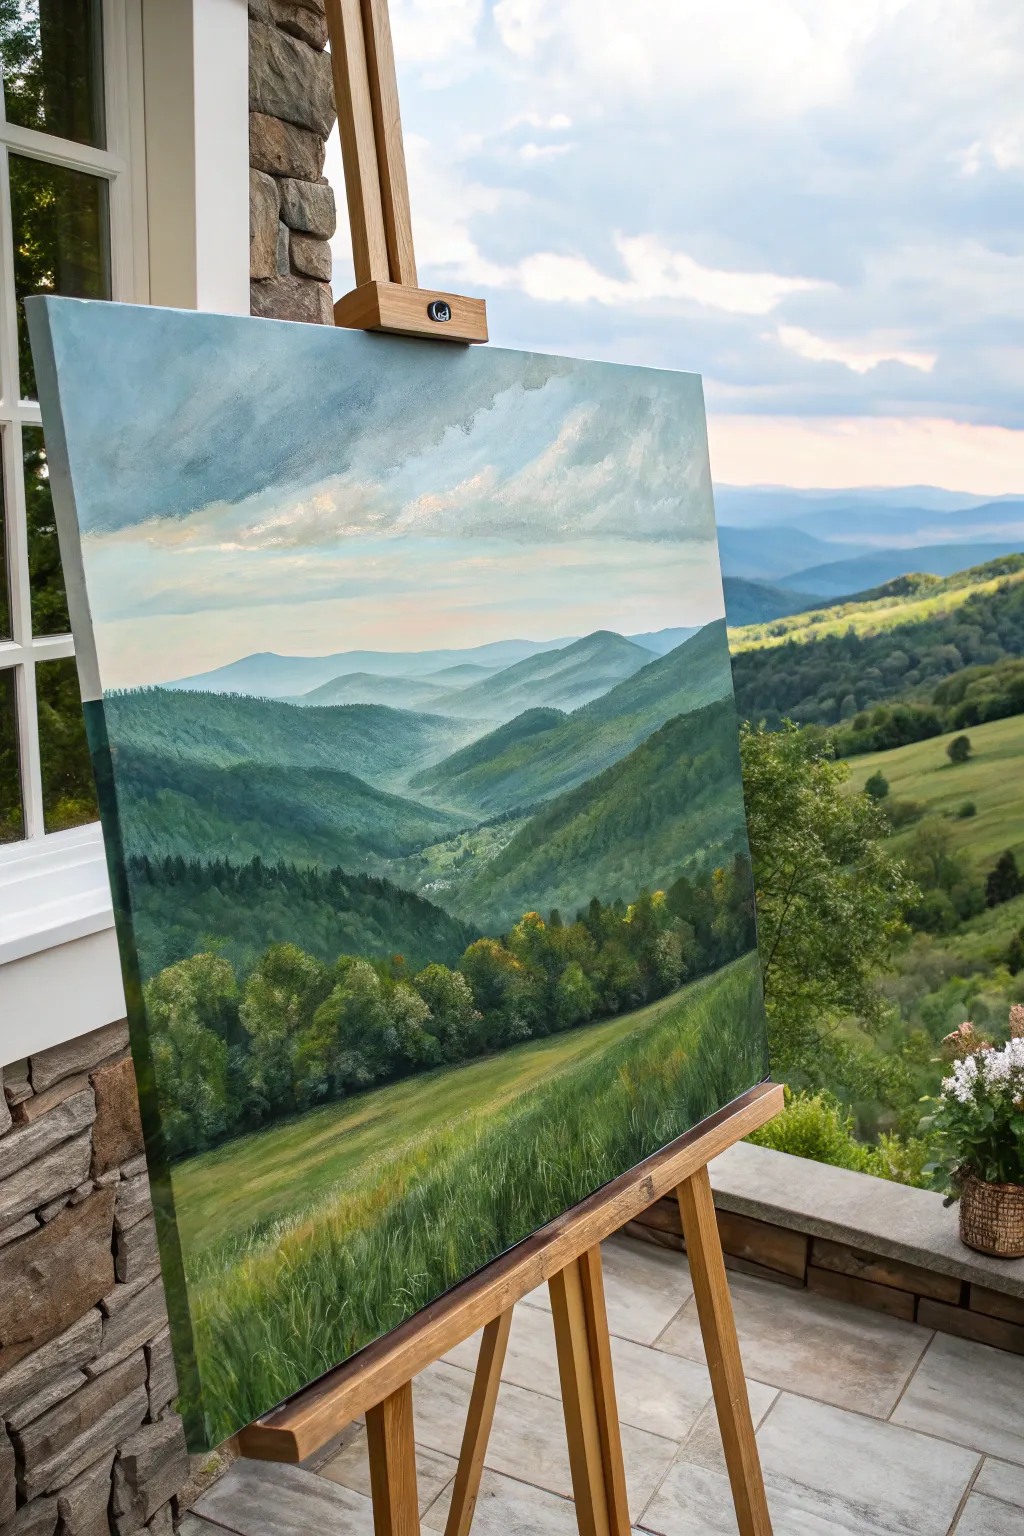
Capture the breathtaking depth of a mountain valley with this tutorial on atmospheric perspective. By carefully layering acrylics from distant, hazy blues to rich, vibrant greens, you’ll create a serene landscape that draws the viewer’s eye straight into the horizon.
Step-by-Step Guide
Materials
- Large stretched canvas (e.g., 24×30 inches)
- Heavy body acrylic paints: Titanium White, Ultramarine Blue, Phthalo Blue, Sap Green, Cadmium Yellow, Burnt Umber, Payne’s Gray
- Large flat brush (2-inch) for sky and blocking
- Medium filbert brush (size 6-8) for hills
- Small round brush (size 2) for details
- Large fan brush for grasses
- Palette knife for mixing
- Slow-drying medium or retarder
- Water container and rags
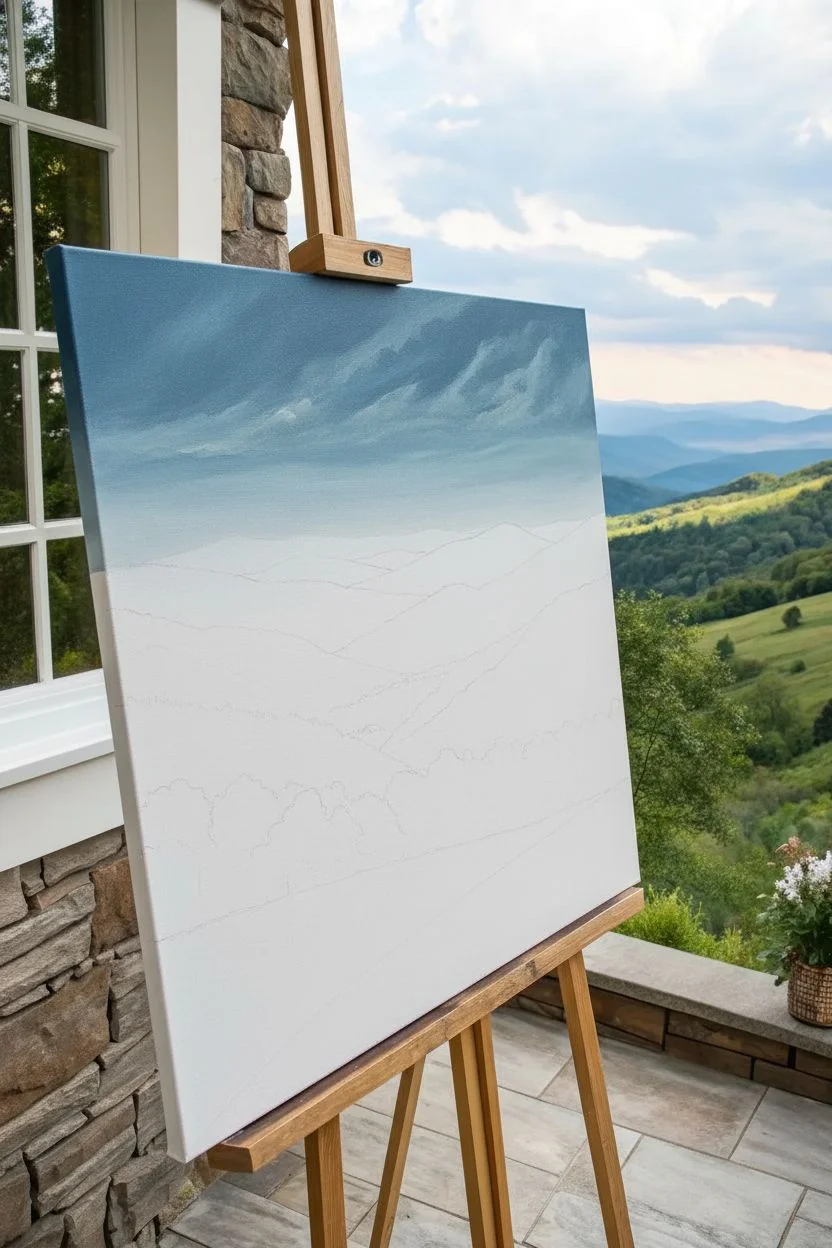
Step 1: Setting the Scene
-
Prime the Surface:
Begin with a white gessoed canvas. If you prefer a warmer undertone to peek through the greens later, apply a very thin wash of watered-down Burnt Sienna and let it dry completely. -
Sketch the Horizon:
Using a diluted mixture of Payne’s Gray and a small round brush, lightly map out your composition. Mark the horizon line about two-thirds up the canvas, sketching the V-shape of the valley and the overlapping lines of the mountain ridges. -
Paint the Sky Gradient:
Mix Titanium White with a tiny touch of Phthalo Blue. Start at the horizon line with this very pale blue. As you work upward, gradually add more blue and a hint of Payne’s Gray to darken the sky towards the top. -
Add Cloud Structures:
While the sky is still slightly tacky, mix a soft grey using White and a speck of Burnt Umber. Use a worn filbert brush to scumble in lifting diagonal cloud shapes, keeping the edges soft to suggest movement.
Step 2: Distant Mountains
-
Mix Atmospheric Blue:
For the furthest mountains, atmospheric perspective dictates they be the lightest and bluest. Mix a large amount of Titanium White with a small amount of Ultramarine Blue and a tiny dot of black or grey. -
Paint the Furthest Ridge:
Apply this pale blue mixture to the most distant mountain range. Keep the edges relatively soft; hard edges kill the illusion of depth at this distance. -
Darken the Next Layer:
For the next ridge forward, add slightly more Blue and a touch of Sap Green to your mixture. It should still be quite pale and cool, but distinct from the layer behind it. -
Create the Haze:
To enhance the misty effect shown in the valley floor, take a dry brush with a very small amount of Zinc White (or watered-down Titanium White) and lightly glaze the bottom edge of these distant mountains where they meet the valley.
Misty Valley Hack
To get that foggy look in the deep valley without overworking it, apply a very thin glaze of Titanium White mixed with glazing liquid over the dried valley floor area.
Step 3: Middle Ground Hills
-
Increase Saturation:
As you move to the middle hills (the dramatic V-shape), mix Sap Green, Ultramarine Blue, and White. These hills should look greener but still have a cool, bluish cast. -
Define the Ridges:
Use a flat brush to paint the slopes. Observe how the light hits the left side of the valley; add a little yellow to your green mix for the sun-facing slopes, and use a deeper blue-green for the shadowed areas. -
Add Texture:
Before the paint dries, stipple the tops of these middle ridges with a smaller brush to suggest dense distant tree lines. Don’t paint individual trees yet; just suggest texture.
Scale Reference
Add tiny hints of brown or grey rectangles in the middle-distance valley floor to suggest farmhouses. This instantly gives your mountains massive scale.
Step 4: Foreground Detail
-
Mix Foreground Greens:
For the closest hills and the tree line, mix your darkest, richest greens using Sap Green and Burnt Umber, possibly adding a touch of Phthalo Blue for deep shadows. -
Paint the Tree Line:
Create the dark band of trees separating the pasture from the hills. Use a filbert brush to dab in dark shapes, varying the heights to look natural. -
Highlight the Canopy:
Mix Cadmium Yellow with Sap Green and a touch of White. Stipple this highlight color onto the top-right portions of your tree shapes to suggest sunlight catching the leaves. -
Lay the Pasture Base:
Paint the large foreground slope with a warm, grassy green. Use long, diagonal strokes that follow the slope of the hill down toward the right. -
Texture the Grass:
I like to use a fan brush here. Load it with a lighter yellow-green and flick it upward gently across the foreground to create the look of tall grasses swaying. -
Final Highlights:
Add a few very bright, thin strokes of pale yellow-white in the immediate foreground grass to create distinct blades catching the light.
Step back and admire the illusion of vast distance you have created on a flat surface


Wildflower Meadow With Loose, Dabbed Brushwork
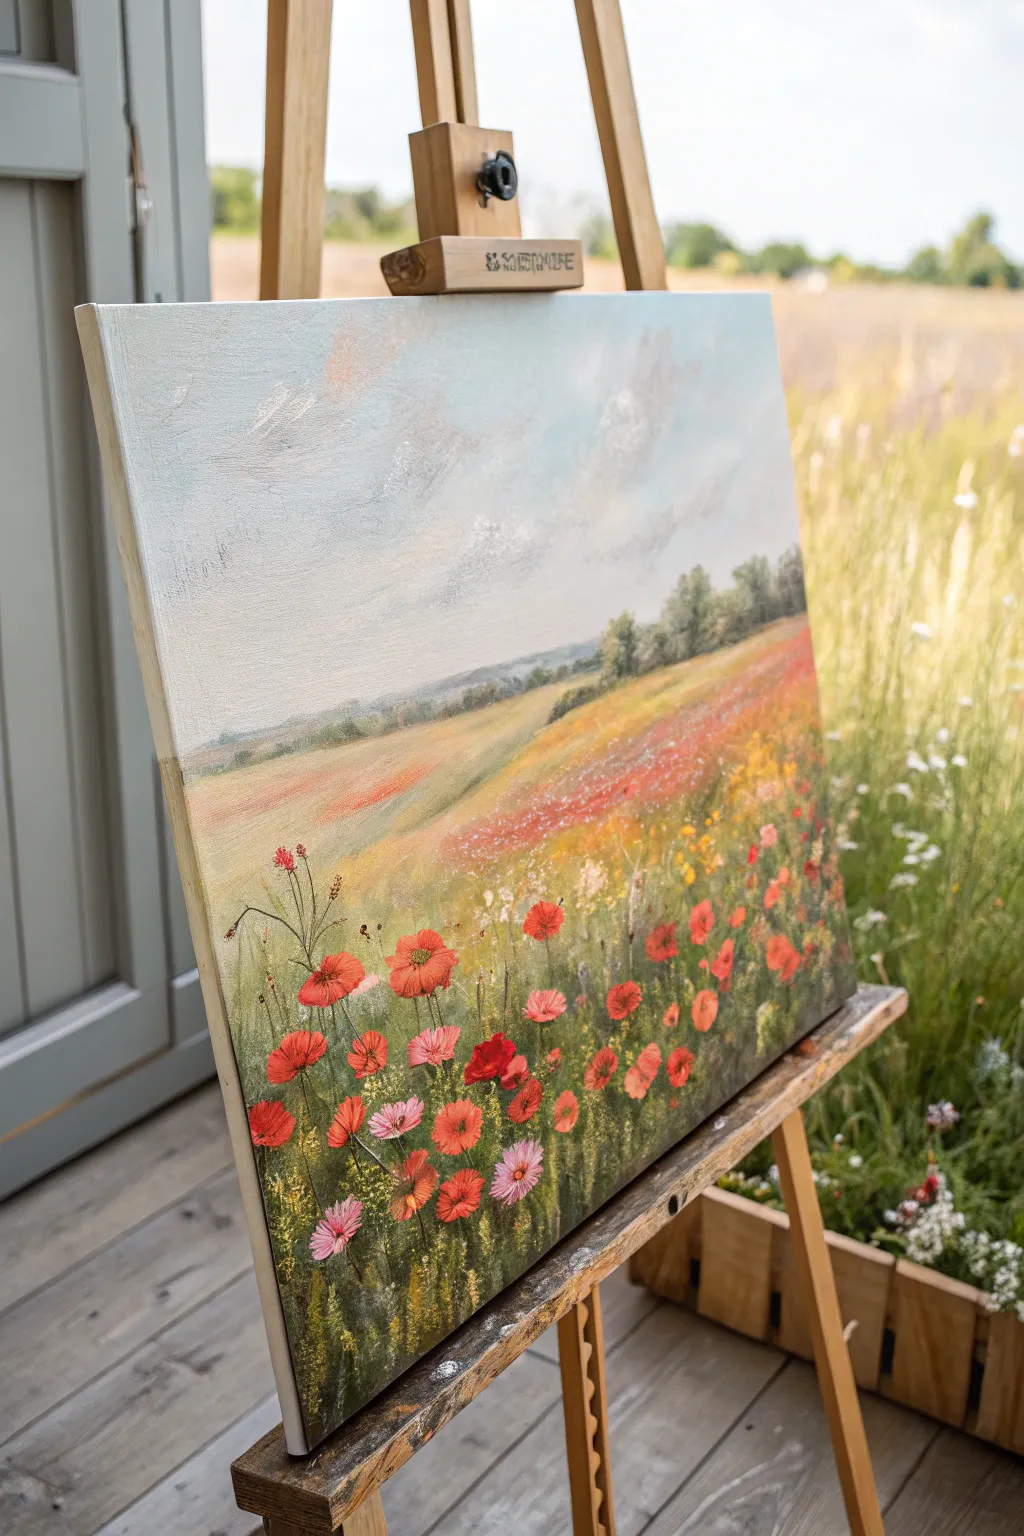
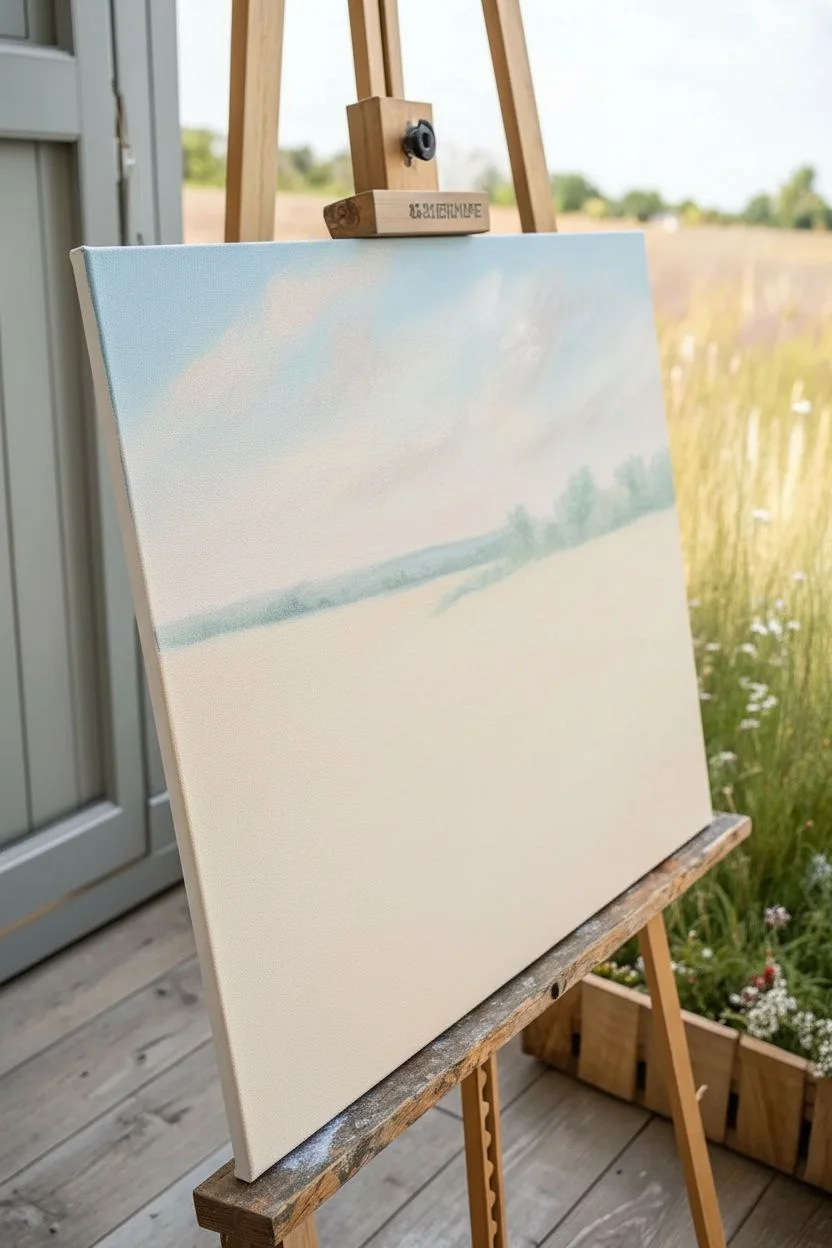
Capture the serene beauty of a sun-drenched meadow with this vibrant acrylic landscape. You will learn to build depth by transitioning from soft, atmospheric skies to a highly textured foreground teeming with life.
Step-by-Step
Materials
- Stretched canvas (e.g., 16×20 inches)
- Acrylic paints: Titanium White, Cerulean Blue, Ultramarine Blue, Hooker’s Green, Sap Green, Cadmium Yellow, Yellow Ochre, Cadmium Red, Alizarin Crimson, Burnt Sienna
- Large flat brush (for sky)
- Medium filbert brush (for hills)
- Small round brush (size 1-2)
- Rigger or liner brush
- Palette knife (optional for texture)
- Water cup and paper towels
- Easel
Step 1: Setting the Sky and Horizon
-
Prime the Surface:
Even if your canvas is pre-primed, apply a thin coat of white gesso mixed with a tiny drop of Yellow Ochre. This warmth will peek through later layers, giving the painting an inner glow. -
Paint the Sky Gradient:
Mix Titanium White with a touch of Cerulean Blue. Starting at the top left corner, brush in sweeping, horizontal strokes. As you move down towards the horizon, gradually add more white and a hint of warm pink (white + tiny bit of Alizarin Crimson) to create a hazy atmosphere. -
Create Soft Clouds:
While the sky is still slightly damp, use a clean, dry filbert brush to scumble in soft white cloud suggestions. Keep the edges blurry; we want them to feel distant and drifty rather than crisp. -
Establish the Horizon Line:
About one-third of the way up the canvas, paint a faint, bluish-green line for the distant hills. Mix Ultramarine Blue, white, and a touch of Sap Green. Keep this layer muted and cool-toned to push it into the background.
Muddy Greens?
If your greens look too artificial, mix in a tiny bit of red paint. Red is the complement to green, so it will tone down the saturation and make the foliage look more natural and earthy.
Step 2: Building the Middle Ground
-
Block in the Rolling Hills:
Mix Yellow Ochre, Sap Green, and White. Paint the sweeping curve of the meadow that slopes down from right to left. Use broad, confident strokes that follow the contour of the land. -
Add Distant Texture:
On the distant hills, dab in small touches of darker green (Hooker’s Green + Blue) to suggest faraway trees or hedgerows. Keep these shapes indistinct. -
Hint at Far Flowers:
Across the middle ground hill, stipple tiny dots of diluted Cadmium Red and Yellow Ochre. These shouldn’t look like individual flowers yet, just a wash of color suggesting a blooming field far away. -
Deepen the Shadow Areas:
Where the hills dip or near the tree line, glaze a thin layer of Burnt Sienna mixed with green to add volume and shadow to the landscape.
Step 3: The Foreground Meadow
-
Lay the Green Foundation:
For the bottom third of the canvas, mix a rich, dark green using Sap Green and a touch of Red (to neutralize it). Paint vertical, flicking strokes upward to simulate long grasses. -
Create Grass Variety:
Load a rigger brush with lighter greens (Sap Green + Yellow) and flick more grass blades over the dark background. Vary the direction slightly to make it look natural and wind-blown. -
Position the Major Poppies:
Using a bright Cadmium Red, paint the largest poppy heads in the immediate foreground. Use a small filbert brush to press and lift, creating petal shapes that look open and cup-like. -
Paint Secondary Flowers:
Mix some whites and pinks for variety. Add smaller wildflowers—daisies or pink cosmos—interspersed among the red poppies. Group them in odd numbers for a more organic composition. -
Add Flower Centers:
Once the red paint is dry, use a small round brush with dark brown or black to dot the centers of the poppies. Give some centers a tiny highlight of white to make them look wet or shiny. -
Connect with Stems:
Use your thinnest liner brush and a fluid mix of light green to paint thin, wavy stems connecting the flower heads to the grass below. -
add Final Sparkles:
Splatter or carefully dot pure Lemon Yellow and White in the foreground to represent pollen, small buds, or light catching on dew drops.
Depth Perception
Remember: atmospheric perspective makes distant objects cooler and paler. Keep your bright reds and dark greens strictly in the foreground to maintain the illusion of deep space.
Step back and admire your peaceful meadow scene, inviting the viewer to take a walk through the tall grass.
BRUSH GUIDE
The Right Brush for Every Stroke
From clean lines to bold texture — master brush choice, stroke control, and essential techniques.
Explore the Full Guide
Birch Tree Grove With Simple Bark Marks

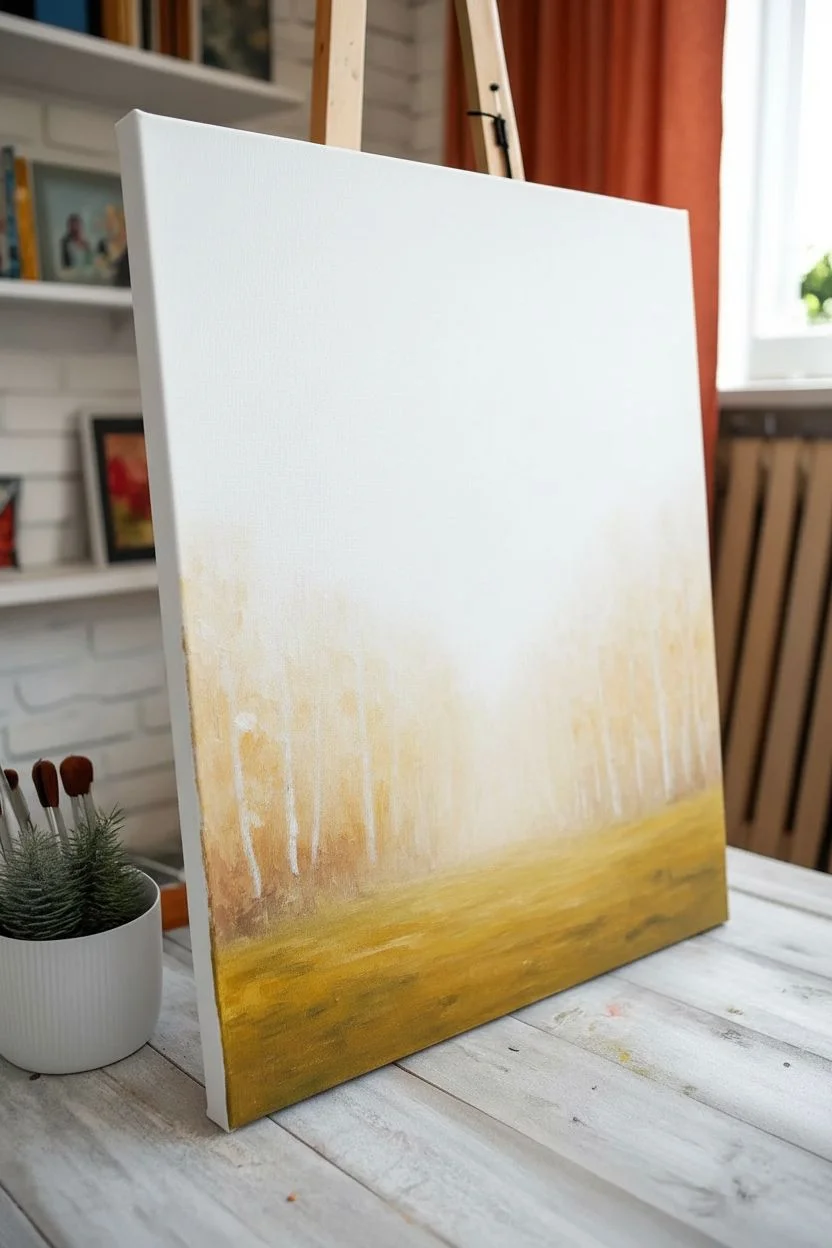
Capture the stark elegance of white birch trees against a misty autumn backdrop in this acrylic landscape project. The focus is on creating depth through atmospheric perspective and mastering the distinctive markings that give birch bark its character.
Step-by-Step Guide
Materials
- Stretched canvas (rectangular, portrait orientation)
- Acrylic paints: Titanium White, Mars Black, Burnt Umber, Yellow Ochre, Cadmium Orange, Sap Green, Paynes Grey
- Flat brushes (Large 1-inch, Medium 1/2-inch)
- Round brushes (Size 4, Size 0 or liner brush)
- Palette knife (optional for texture)
- Painter’s tape or stencil (optional for straight trunks)
- Water cup and paper towels
- Palette
Step 1: Setting the Atmosphere
-
Prime the background:
Begin by painting the entire upper two-thirds of the canvas with a solid coat of Titanium White. This establishes the misty, bright atmosphere typical of a birch forest. -
Block in the ground:
Mix Yellow Ochre, Burnt Umber, and a touch of Sap Green. Using a large flat brush, paint the bottom third of the canvas to create the forest floor base layer. -
Create distant foliage:
Whiles the white sky is still slightly tacky, mix a very pale, diluted wash of Yellow Ochre and Cadmium Orange. Use a dry brush technique to scumble this color softly just above the horizon line, creating the illusion of distant, foggy autumn trees. -
Deepen the background trees:
Add a bit more pigment to your orange and ochre mix. Tap in varied vertical shapes behind where your main trees will stand, suggesting a dense wood further back without defining individual trunks yet.
Uneven Tree Trunks?
If you struggle painting straight lines freehand, use low-tack painter’s tape to mask off the sides of your birch trees before painting them white. Remove gently while paint is wet.
Step 2: Structuring the Grove
-
Sketch the main trunks:
Using a pencil or a brush with very watery gray paint, lightly outline the positions of your birch trees. Place the thickest, most prominent tree in the left foreground, and stagger others at varying distances to create depth. -
Paint the trunks white:
Fill in your tree outlines with pure Titanium White. You will need 2-3 coats to ensure they are opaque and stand out brightly against the background washes. Let each coat dry fully. -
Add subtle shading:
Mix a tiny amount of Paynes Grey with White to make a very light cool gray. Paint a thin vertical stripe along the right side of each trunk (assuming light comes from the left) to give the cylindrical form roundness. -
Define the path:
Mix Burnt Umber and White to create a light brown dirt color. Where the grass meets the trees on the right side, paint a curving path that narrows as it recedes into the background.
Step 3: The Birch Bark Details
-
Start the bark markings:
Load a small round brush or the edge of a small flat brush with Mars Black. Starting on the shadowed side (right) of the main trunk, create horizontal, slightly curved dashes that wrap around the form. -
Vary the markings:
Make the black marks varied—some should be thin lines, others thick triangular wedges or ‘eye’ shapes. The marks should be denser near the bottom of the tree and sparser as you go up. -
Create texture:
For a more natural look, use a fairly dry brush for these black marks. Allow the paint to break slightly, revealing the white bark underneath, simulating the peeling, papery texture of birch. -
Detail the distant trees:
Repeat the marking process on the smaller, more distant trees. Use a thinner brush and less black paint here; keep the markings lighter and less detailed to push these trees further into the background. -
Paint delicate branches:
Switch to your liner brush or size 0 round brush. With thinned black paint, pull fine lines outward and upward from the main trunks to create bare branches reaching into the white sky.
Add Golden Leaves
Use a sea sponge dipped in yellow and orange paint to gently dab clusters of leaves onto the upper branches, creating a canopy rather than bare winter trees.
Step 4: Ground Cover and Finish
-
Texture the grass:
Load a medium brush with various shades of Yellow Ochre, Burnt Umber, and raw Cadmium Orange. Use vertical flicking motions to paint blades of tall grass at the base of the trees. -
Root the trees:
Ensure the grass overlaps the very bottom of the white trunks. This ‘roots’ the trees into the ground so they don’t look like they are floating. -
Add path details:
Add darker brown shadows along the edges of the path and lighter highlights in the center to suggest trodden dirt. -
Final highlights:
Add tiny dabs of white or very light yellow to the tops of the grass blades in the foreground for a sun-kissed look.
Step back and admire how the stark black and white trunks pop against the soft autumnal haze you created
Pine Trees and Mist Layers for Depth
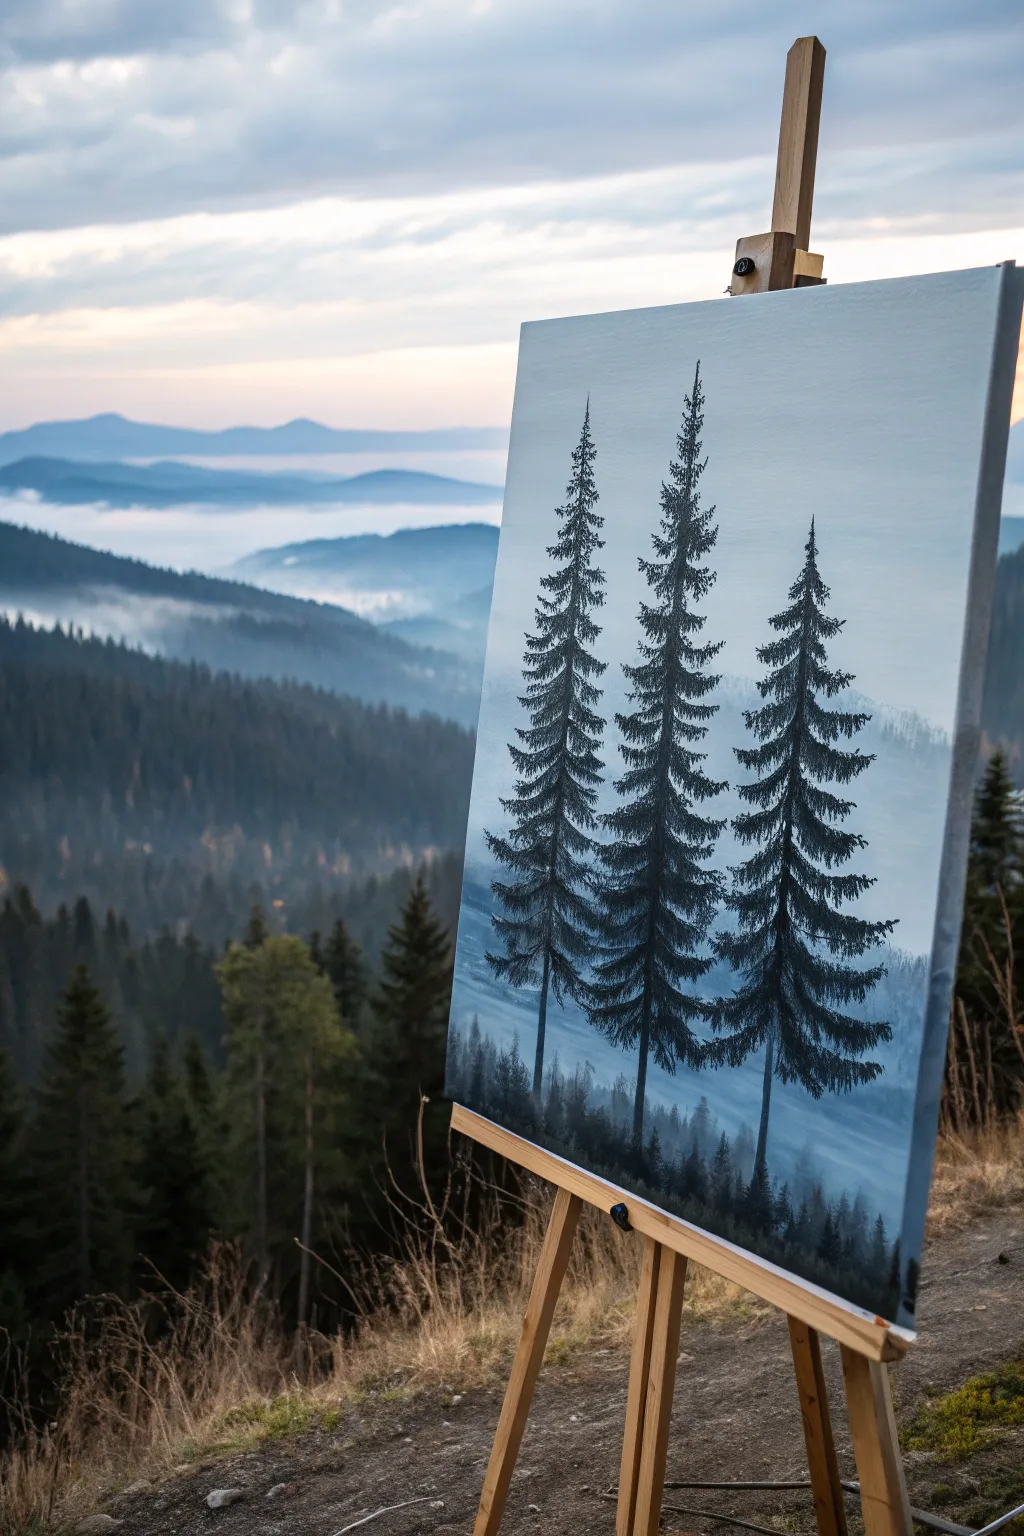
Capture the serene grandeur of high-altitude pines standing guard over a foggy valley. This acrylic landscape relies on atmospheric perspective, using fading blue layers to create incredible depth behind three striking foreground trees.
Step-by-Step Tutorial
Materials
- Stretched canvas (e.g., 16×20 inches)
- Acrylic paints: Titanium White, Mars Black, Phthalo Blue, Ultramarine Blue, Burnt Umber
- Large flat wash brush (1-2 inch)
- Medium filbert brush
- Small round detail brush (size 0 or 1)
- Small fan brush (optional)
- Palette and water container
- Paper towels
- Easel (optional but helpful)
Step 1: Setting the Scene
-
Prime the sky:
Begin by mixing a large amount of Titanium White with the tiniest touch of Phthalo Blue. Using your large flat wash brush, cover the top two-thirds of the canvas with this very pale, cool white-blue to establish the hazy sky. -
Blend the horizon:
While the sky is still slightly wet, mix a slightly darker, grayish-blue using white, a touch of Ultramarine, and a speck of black. Paint a horizontal band where your mountains will begin, blending it upwards into the pale sky to create a soft, foggy transition. -
Paint the distant mountains:
Create a new mix of Ultramarine Blue and white, keeping it quite light but distinct from the sky. With a medium filbert brush, paint the undulating silhouette of the farthest mountain range. Keep the edges soft; hard lines destroy the illusion of distance. -
Create the middle ground:
Mix a slightly darker, cooler blue by adding a touch more blue and a hint of Burnt Umber to your previous mix. Paint a second layer of mountains below the first, overlapping them to show depth. -
Add the fog layers:
Use a clean, dry brush with a tiny amount of pure Titanium White. Gently scumble (dry brush) horizontally between the mountain layers to create the look of mist settling in the valleys. -
Form the foreground hills:
For the closest hill darker landmass at the bottom, mix Phthalo Blue, Black, and a little Burnt Umber. Block in the bottom third of the canvas with this deep, shadowy tone, creating an uneven, organic ridge line.
Branch Variation Pro-Tip
Don’t make your pine trees perfect triangles. Break the symmetry by deliberately leaving uneven gaps or making one side of the tree slightly fuller than the other for realism.
Step 2: The Sentinel Trees
-
Map the trunks:
Allow the background to dry completely. Using your small round brush and a fluid mix of Mars Black and a touch of Burnt Umber, paint three vertical lines. Make the center line the longest to anchor the composition, with flanking trees slightly varied in height. -
Start the tree tops:
Switch to a small filbert or a detail brush. Starting at the very tip of the center tree, dab small, downward-sloping strokes to create the narrow, pointy crown of the pine. -
Build the upper branches:
Work your way down the trunk. Use a ‘stamping’ motion with the tip of the brush, creating branches that extend slightly further out as you descend. Leave gaps between branches so the misty background peeks through. -
Thicken the foliage:
As you reach the middle of the tree, switch to a slightly larger brush if needed. Press harder to make the branches denser and wider. Ideally, I like to curve these distinct branches slightly downward to mimic the weight of old growth pines. -
Detail the needles:
For a realistic texture, use just the very tip of a round brush or a small fan brush loaded with almost pure black paint. Tap rapidly along the main branches to suggest clusters of pine needles. -
Complete the trio:
Repeat this process for the left and right trees. Ensure each tree has a unique personality—maybe one has a slightly crooked top or a gap in its branches—to avoid them looking like identical stamps. -
Ground the trees:
At the base of the trunks, blend the black paint into the dark foreground hill you painted earlier. Add small, vertical flicking strokes upwards at the base to suggest tall grasses or smaller saplings growing in the shadows. -
Add subtle highlights:
Mix a dark charcoal grey (Black + White). Lightly brush this onto the right side of the tree trunks and just the tops of a few prominent branches to suggest a soft, diffused light source coming from the left. -
Final mist check:
If the trees feel too ‘stuck on,’ glaze a very watery, transparent layer of white paint over the very bottom of the tree trunks to make them look like they are receding into the low-hanging fog.
Fixing Muddy Mountains
If your mountain layers are blending together into one gray blob, wait for one layer to dry completely before painting the next one in front of it to keep the ridgelines crisp.
Step back and admire how a few simple layers of blue and grey have transformed your canvas into a deep, atmospheric mountain range

PENCIL GUIDE
Understanding Pencil Grades from H to B
From first sketch to finished drawing — learn pencil grades, line control, and shading techniques.
Explore the Full Guide
Snowy Mountains With Cool Shadows and Bright Highlights
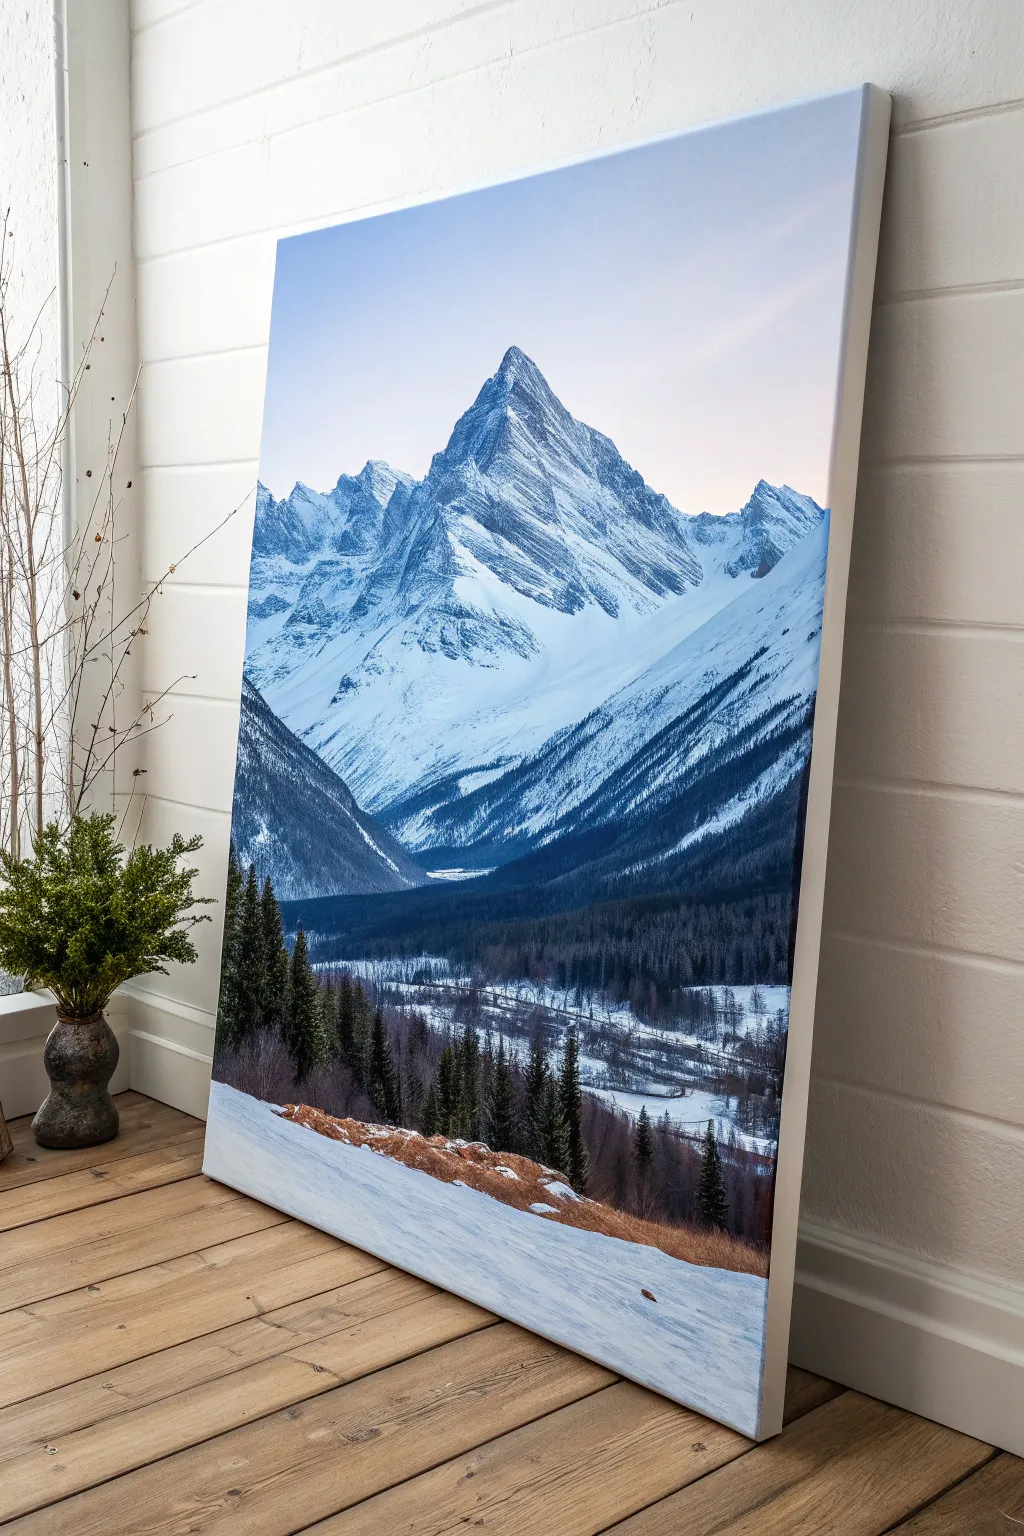
Capture the crisp, cold grandeur of a mountain peak at dawn with this large-scale acrylic project. By focusing on the interplay between deep indigo shadows and brilliant titanium white snow, you will create a stunning sense of depth and atmospheric perspective.
Step-by-Step
Materials
- Large vertical stretched canvas (e.g., 24×36 inches)
- Acrylic paints: Titanium White, Ultramarine Blue, Phthalo Blue, Mars Black, Burnt Umber, Burnt Sienna, Payne’s Grey
- Large flat brush (2-inch)
- Medium filbert brush
- Small round detail brush
- Palette knife
- Water container and rags
- Easel
Step 1: Setting the Atmospheric Stage
-
Create the Sky Gradient:
Begin by dampening the upper third of your canvas slightly. Mix a very pale wash of Ultramarine Blue and Titanium White. Apply this to the very top, blending downward into pure Titanium White near where the mountain peak will sit, creating a soft, hazy morning glow. -
Sketch the Composition:
Using a thinned mixture of dilute Payne’s Grey and a small round brush, lightly outline the main triangular shape of the central mountain peak. Mark out the diagonal lines of the valley slopes that lead the eye inward. -
Block in Shadow Shapes:
Identify the light source coming from the right. Mix Phthalo Blue with a touch of Mars Black and White to create a mid-tone cool blue. Paint the entire shadow side (left faces) of the mountain and the distant valley floor with this cool flat color.
Step 2: Sculpting the Mountain
-
Establish the Darkest Values:
Deepen your blue mixture with more Payne’s Grey and a hint of Burnt Umber. Use a flat brush to lay in the deep crevices and rocky ridges on the mountain face that receive the least light. -
Add Exposed Rock:
Mix a dark charcoal grey using Mars Black and white. Using the edge of a palette knife or a flat brush, drag this color downwards in jagged, vertical strokes to simulate exposed cliff faces amidst the snow. -
Apply the High White Snow:
Load your palette knife or a clean stiff brush with thick artistic-grade Titanium White. Apply this to the right-facing slopes. Don’t overblend; let the texture of the paint mimic the roughness of snow clinging to rock. -
Soften the Distance:
For the lower mountain ranges in the background, mix more white into your shadow blue. Paint these shapes with softer edges to push them further back into the distance, reinforcing atmospheric perspective.
Muddy Shadows?
If your shadows look dirty rather than cool, you likely used too much black. Remix using Ultramarine Blue and Burnt Umber instead; this creates a rich, vibrant dark tone that retains depth.
Step 3: The Deep Valley and Forests
-
Paint the Forest Base:
For the dense forest sweeping across the middle ground, mix a very dark green using Phthalo Blue, Mars Black, and a touch of Burnt Sienna. Block in this dark band horizontally across the valley. -
Create Tree Texture:
Using an old, splayed bristle brush or a fan brush turned vertically, tap into the dark forest band to create the jagged tops of thousands of distant pine trees. -
Valley Floor Details:
Mix a light blue-grey to represent the snowy valley floor. Paint horizontal streaks through the dark forest area to suggest a frozen river or clearing cutting through the woods. -
Enhance Valley Shadows:
Glaze a thin, watery layer of Ultramarine Blue over the shadowed parts of the valley floor to unify the cool temperature of the shaded snow.
Add a Frosty Finish
Once the painting is fully dry, dry-brush a tiny amount of Iridescent Pearl medium over the sunlit snow peaks. This adds a subtle shimmer that mimics ice crystals catching the light.
Step 4: Foreground Elements
-
Foreground Snow Bank:
Paint the immediate foreground slope with Titanium White, but differentiate it from the mountain by adding the slightest touch of Burnt Sienna to warm it up, as if it’s closer to the viewer. -
Paint Near Trees:
Switch to a small filbert brush. Paint several distinct, dark evergreen trees on the left and right sides of the foreground. Use a mix of Black and Green, keeping the edges engaging and organic. -
Add Earthy Tones:
I like to break up the cool palette here by mixing Burnt Sienna and Burnt Umber. Paint rough patches of dried grass or exposed earth peeking through the snow on the foreground ridge. -
Detail the Branches:
Use your smallest liner brush with thinned dark paint to add fine, dead branches or trunks to the foreground thicket area on the bottom right. -
Final Highlights:
Add pure white highlights to the tips of the nearest trees and the ridges of the foreground snow to make them pop against the darker valley behind.
Step back and admire how the cool shadows make those snowy peaks feel incredibly bright and majestic
Desert Sky and Distant Mesas With Warm Earth Tones
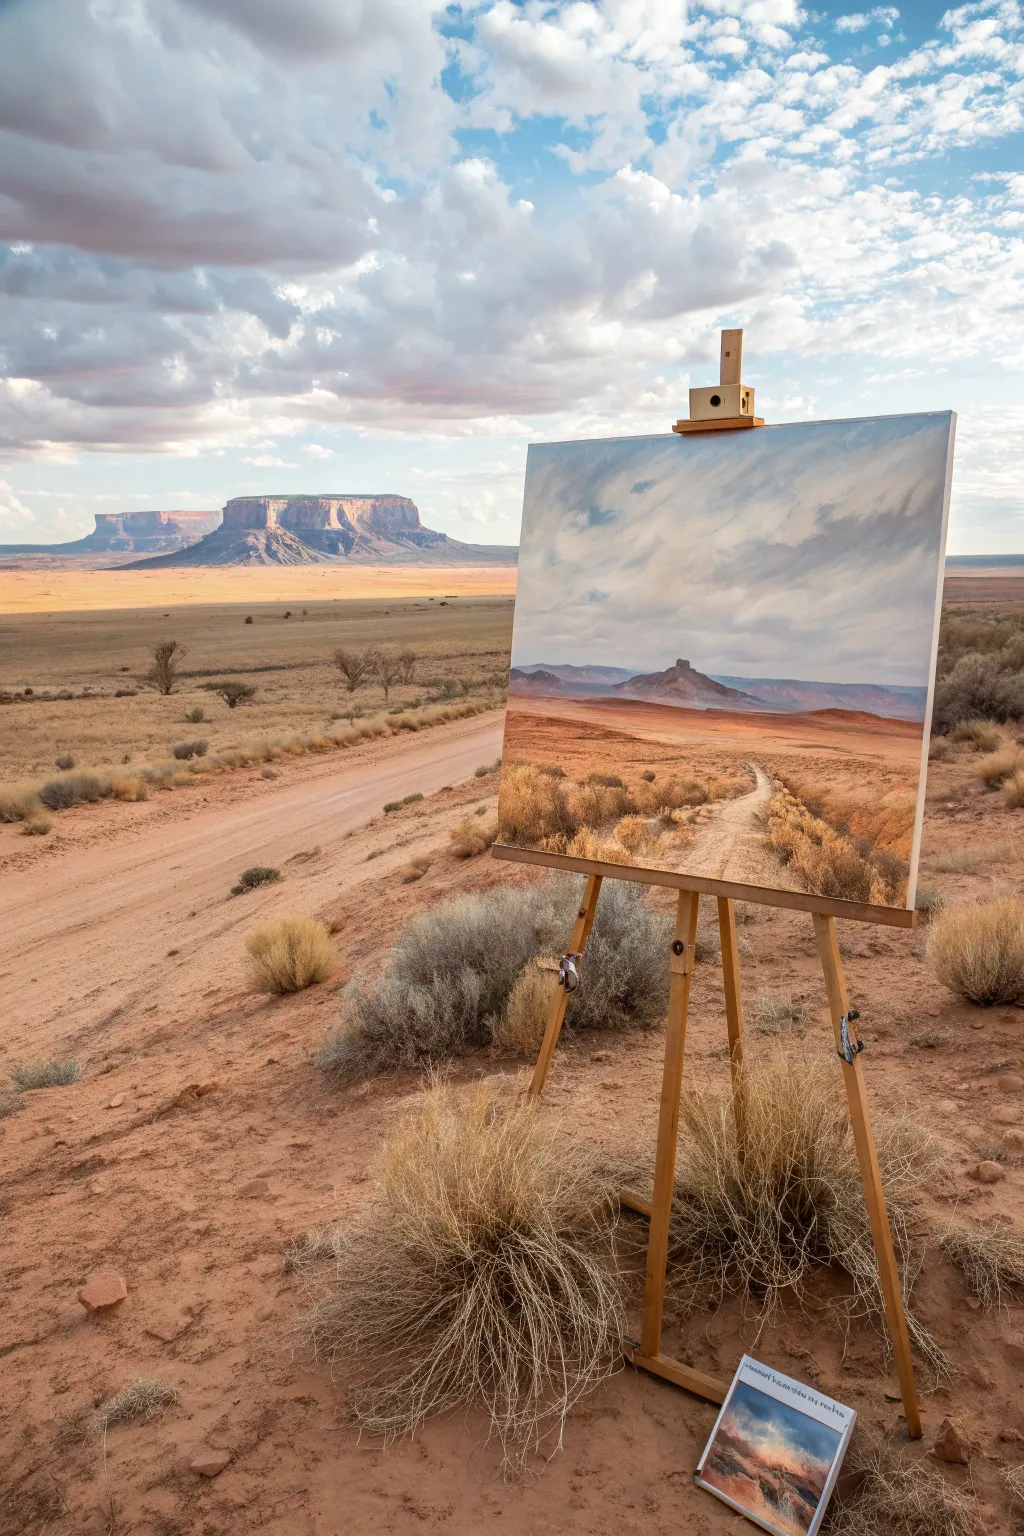
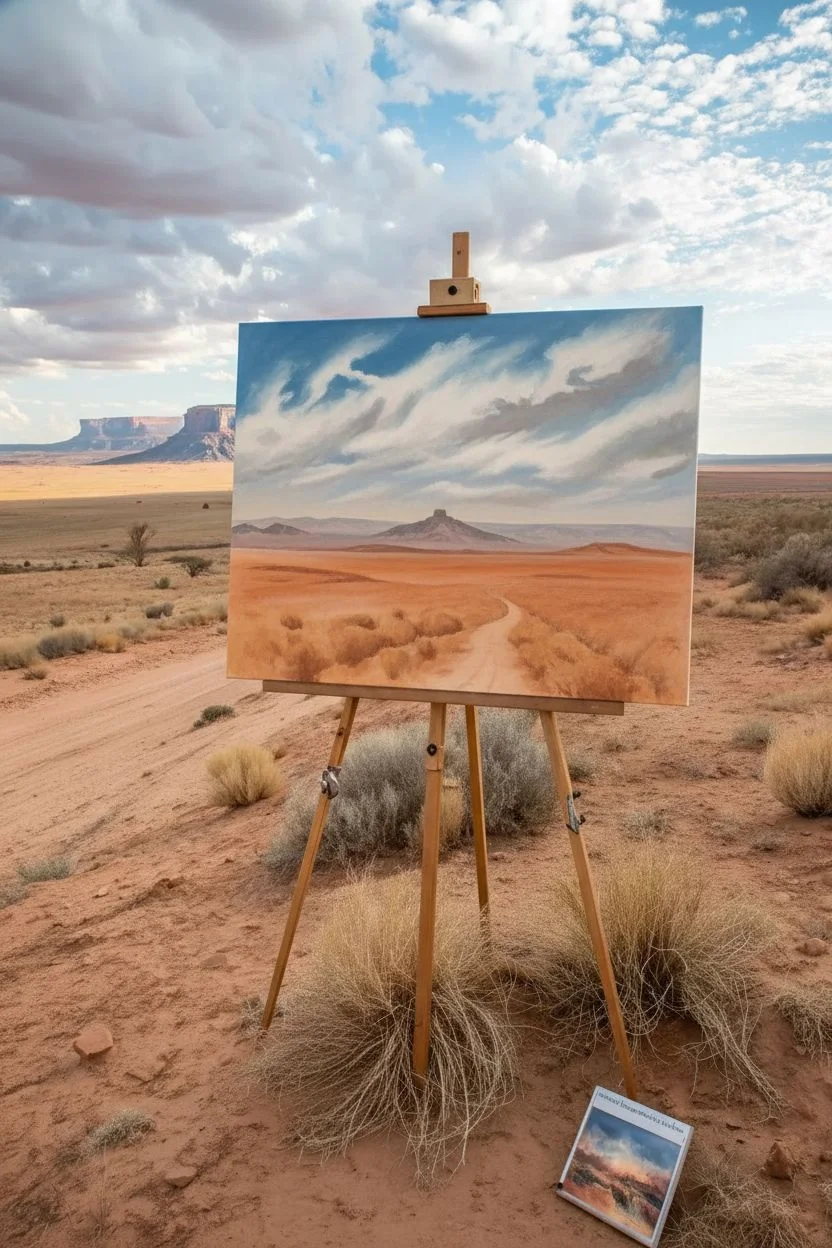
Capture the expansive solitude of the American Southwest with this vibrant acrylic landscape. You will learn to layer warm sandy ochres and cool atmospheric blues to create a scene that feels as vast as the real thing, balancing detailed foreground textures with distant, hazy mountains.
Step-by-Step Guide
Materials
- Stretched canvas (16×20 or 18×24 inches)
- Acrylic paints: Titanium White, Ultramarine Blue, Burnt Sienna, Yellow Ochre, Cadmium Red Medium, Raw Umber, Alizarin Crimson
- Large flat brush (1-2 inch) for sky
- Medium filbert brush (size 6 or 8)
- Small round brush (size 2)
- Fan brush (optional, for grasses)
- Palette knife
- Water container and paper towels
Step 1: The Sky and Horizon
-
Prime the canvas:
Before diving into details, tone your entire canvas with a wash of watered-down Burnt Sienna. This warm undertone will peek through later layers, giving the painting that characteristic desert heat. -
Establish the horizon line:
Using a pencil or a brush with diluted Raw Umber, sketch a low horizon line about one-third of the way up the canvas. Sketch the basic triangular shape of the distant mesa and the winding path leading toward it. -
Mix the sky gradient:
Create a gradient for the sky. Mix Titanium White with a touch of Ultramarine Blue for the upper corners, transitioning to almost pure White mixed with a tiny speck of Yellow Ochre near the horizon to simulate atmospheric glow. -
Paint the clouds:
While the sky is still slightly tacky, use your large brush to sweep in diagonal cloud formations. Use a mix of White and the tiniest bit of Raw Umber for the shadow sides of the clouds, keeping the strokes loose and energetic to mimic wind movement. -
Add cloud highlights:
With pure Titanium White on a loaded brush, scumble in the bright tops of the clouds. Soften the bottom edges of the clouds into the sky color to create distance and volume.
Step 2: The Middle Ground Mesa
-
Block in the distant mountains:
Mix Ultramarine Blue with Alizarin Crimson and plenty of White to get a cool, purple-grey tone. Paint the silhouette of the distant mesa and background hills. The color needs to be much cooler and paler than you think to push it into the distance. -
Paint the central butte:
For the prominent central rock feature, darken your mountain mix slightly with a touch more Blue and Burnt Sienna. Paint the shape firmly, ensuring the edges are soft enough to look atmospheric but distinct enough to serve as a focal point. -
Create the canyon floor base:
Mix Yellow Ochre, Burnt Sienna, and White. Apply this mid-tone terra cotta color horizontally across the middle ground, right below the mountains, to establish the flat plains. -
Add atmospheric haze:
Glaze a very thin, watery layer of your sky blue color over the very bottom of the distant mountains where they meet the ground. This separates the planes and adds depth.
Atmospheric Perspective
Remember: colors get cooler (bluer) and paler as they get further away. Only use your bright reds and deep darks in the bottom third of the canvas to create real depth.
Step 3: Foreground and Details
-
Paint the dirt path:
Mix a light sandy beige using White, Yellow Ochre, and a dot of Raw Umber. Paint the path starting narrow at the mid-ground and widening significantly as it reaches the bottom edge of the canvas. -
Add texture to the road:
While the path is wet, steak in slightly darker lines of Raw Umber to suggest tire tracks or ruts in the dirt. I like to keep these strokes loose to imply movement. -
Establish the foreground earth:
Fill in the remaining foreground areas on either side of the path with a warmer, more saturated mix of Burnt Sienna and Cadmium Red. This stronger color brings the foreground closer to the viewer. -
Create shadows:
Using a mix of Burnt Sienna and Ultramarine Blue, paint horizontal shadow shapes across the foreground. These suggest uneven terrain and dips in the land. -
Block in sagebrush clumps:
Using a dark mix of Raw Umber and Ultramarine Blue, dab in irregular, rounded shapes to represent the shadows of the sagebrush bushes along the path and in the foreground. -
Highlight the vegetation:
Mix Yellow Ochre with a little White and Blue to make a muted, dry green-gold. Use a fan brush or the side of a filbert to stipple lighter foliage on top of your dark sagebrush bases. -
Add dry grass texture:
Switch to your smallest round brush or a rigger brush. With thinned-down Yellow Ochre and White, flick quick, upward strokes in the immediate foreground to create individual stalks of dry grass. -
Final adjustments:
Step back from the painting. Strengthen the contrast if needed—adding a few crisp dark accents in the nearest bushes or brightening the white of the path where the sun hits it most directly.
Make It Golden
To simulate ‘Golden Hour’ light, apply a very thin glaze of transparent Yellow Ochre or Gold acrylic medium over the entire dried landscape (but not the sky) for a warm sunset glow.
Now you have a stunning desert vista that radiates warmth and invites the viewer to walk down that dusty road


Coastal Cliffs With Crashing Water Texture
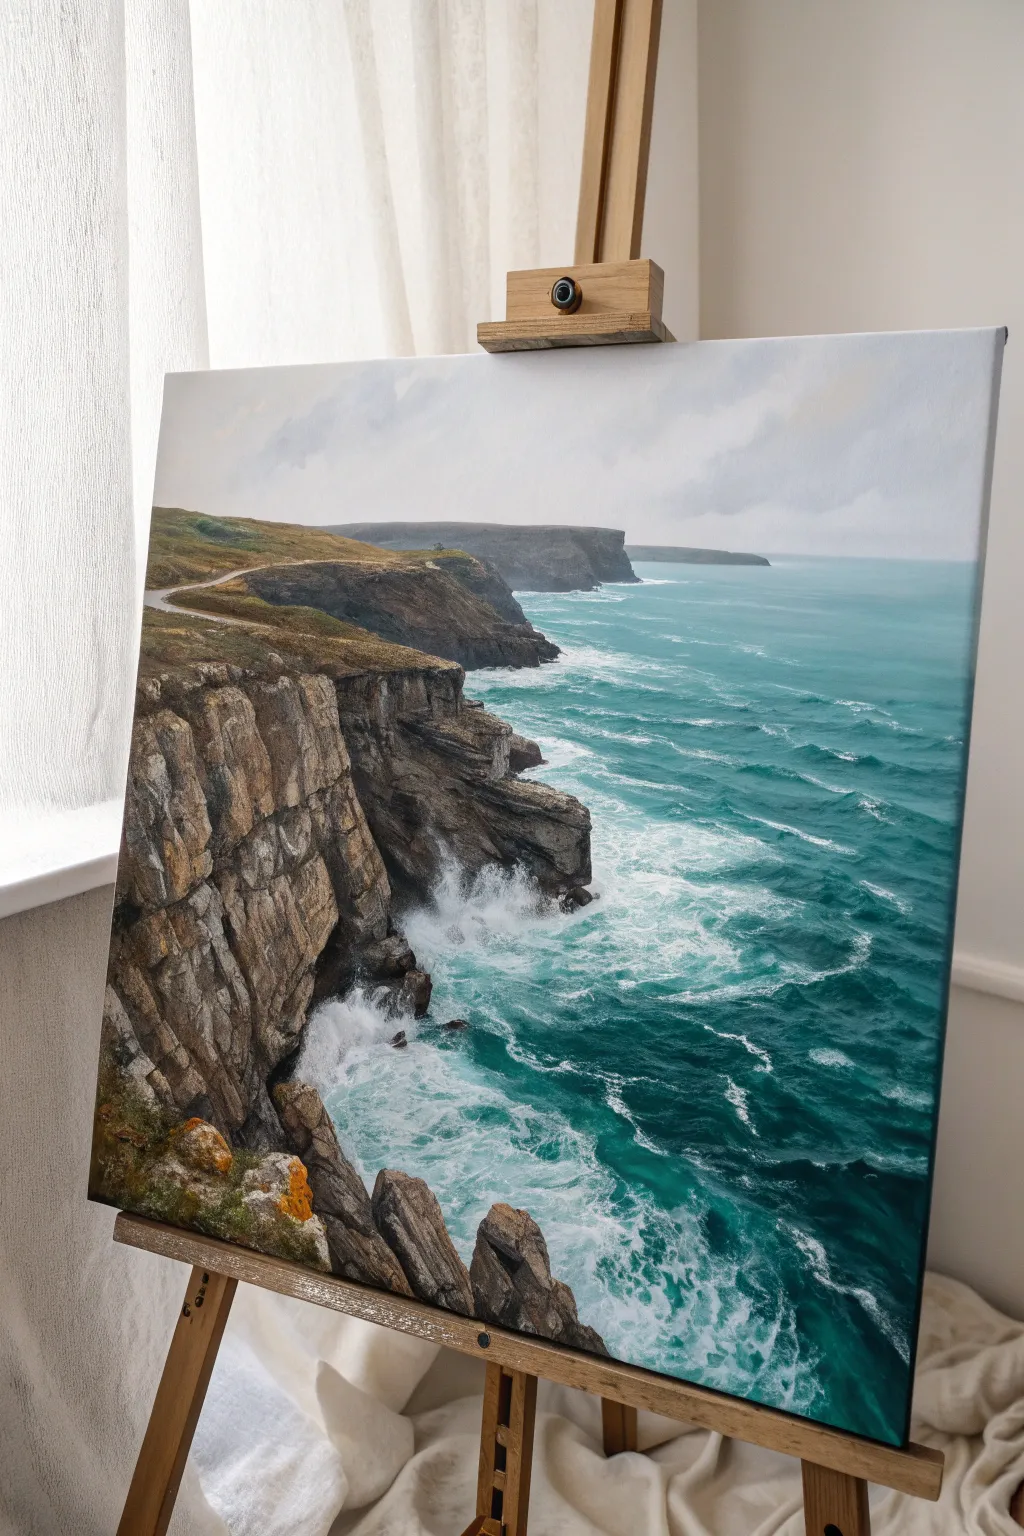
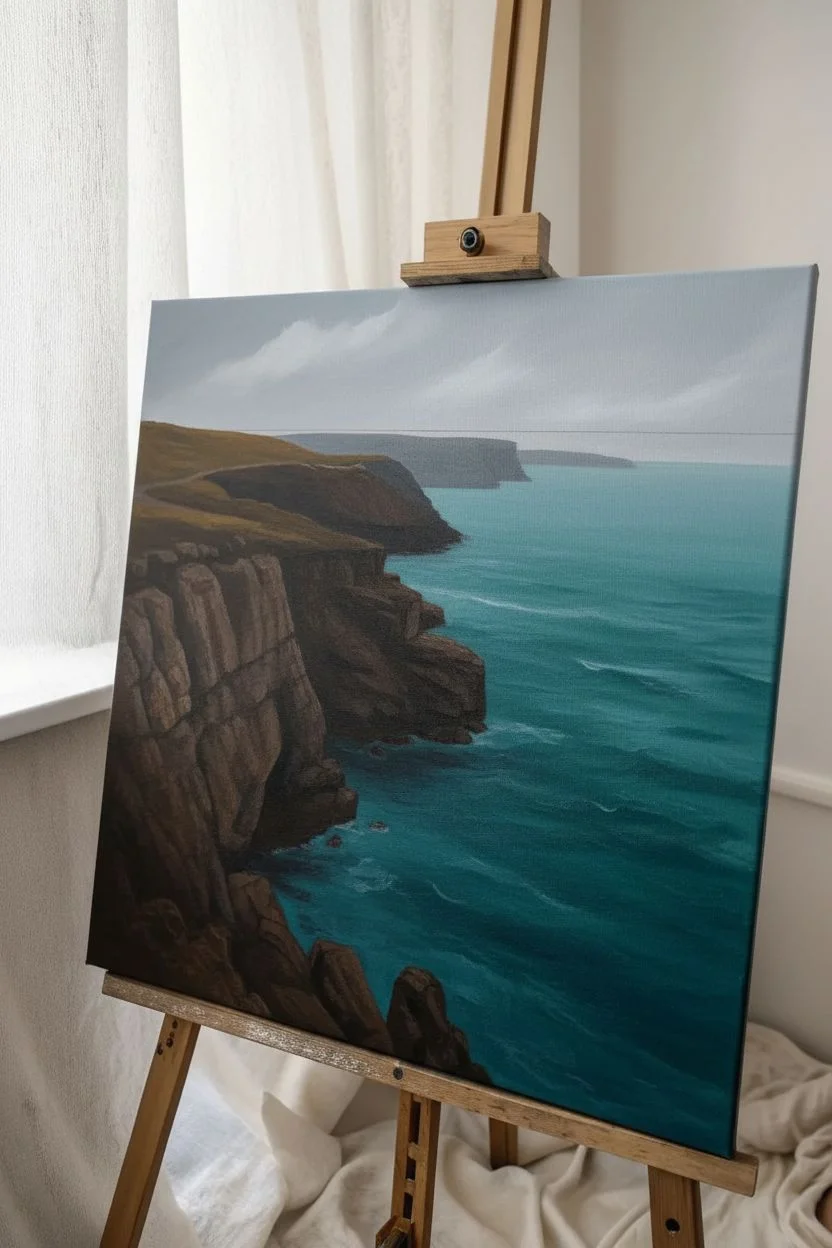
Capture the raw power of the ocean meeting the land with this tutorial on painting a dramatic coastal scene. You will learn to layer rugged rock textures against the vibrant, churning teal of turbulent seawater.
Step-by-Step Tutorial
Materials
- Stretched canvas (e.g., 16×20 inches)
- Acrylic paints: Titanium White, Mars Black, Burnt Umber, Yellow Ochre, Phthalo Blue (Green Shade), Phthalo Green, Cerulean Blue, Raw Sienna
- Paintbrushes: Large flat brush (1 inch), medium filbert (size 6), small round brush (size 2), liner brush
- Palette knife
- Water cup and paper towels
- Easel
- Mixing palette
Step 1: Setting the Scene
-
Sketch the composition:
Using a diluted mixture of Burnt Umber and water, lightly sketch the horizon line about one-third down from the top. Outline the jagged cliff edge on the left side, curving it inwards towards the center, and mark the distant headlands. -
Block in the sky:
Mix Titanium White with a tiny touch of Mars Black and Cerulean Blue to create a pale cool grey. Paint the entire sky area with horizontal strokes, keeping it lighter near the horizon and slightly darker at the top corners. -
Add soft clouds:
While the sky is still slightly damp, blend in hints of white to create soft, diffuse cloud formations. Keep the edges blurry to suggest an overcast, misty day. -
Base coat the ocean:
Mix Phthalo Blue, Phthalo Green, and White to create a deep turquoise. Apply this to the water area, making the color darker and bluer in the foreground and lighter, more muted towards the distant horizon. -
Base coat the cliffs:
Mix Burnt Umber and Mars Black to create a dark base tone. Block in the entire cliff structure on the left and the distant landmasses. Don’t worry about texture yet; just cover the canvas.
Handling the Palette Knife
For realistic rock faces, don’t press hard. Allow the knife to skip over the canvas weave. This ‘broken color’ effect mimics natural geological textures perfectly without overworking.
Step 2: Building Rock Texture
-
Establish cliff planes:
Once the dark base is dry, mix Burnt Umber with a little White. Using a flat brush, paint blocky vertical shapes to define the protruding faces of the cliffs. -
Add warmth to the rocks:
Mix Yellow Ochre and Raw Sienna. Dry brush this color lightly over the sun-facing parts of the cliffs, particularly the top edges and the jagged outcrops, to create earthy warmth. -
Create deep shadows:
Revisit your dark brown/black mix. Use a small round brush to deepen the crevices, cracks, and overhangs in the rock face, emphasizing the vertical stratification of the stone. -
Highlight the stone:
Mix a light grey-beige using White, a touch of Umber, and Black. Use a palette knife to scrape this color gently over the rough texture of the paint, catching the raised areas to simulate weathered stone. -
Paint the grassy top:
Mix Sap Green (or Phthalo Green + Yellow Ochre) with Burnt Umber. Stipple this onto the flat tops of the cliffs to suggest sparse coastal grass. Add touches of Yellow Ochre for dried patches.
Level Up: Glazing Time
Once the water is fully dry, apply a very thin glaze of Phthalo Green mixed with glazing medium over the turquoise sections. It adds incredible depth and a ‘wet’ look to the ocean.
Step 3: Painting the Water Motion
-
Add distant waves:
Mix a lighter turquoise shade. Use a small horizontal stroke to paint the distant swells and whitecaps near the horizon line. -
Create the heavy swell:
In the foreground water, use Phthalo Green mixed with White to paint lighter, translucent areas where the waves are rising before they break. -
Paint the crashing foam:
Using pure Titanium White on a worn filbert brush or a fan brush, stipple the area where the water hits the rocks. Creating a messy, irregular texture here is key to making the splash look explosive. -
Detail the sea surface:
With a liner brush and watered-down white paint, create the spider-web pattern of sea foam (lace) riding on top of the turquoise swells. -
Refine the contact points:
I like to glaze a thin layer of dark blue-green right at the base of the white foam to make the white ‘pop’ and look brighter by contrast. -
Add motion blur:
Dry brush a little mist or spray rising up the cliff face near the impact zone using a very dry brush and a tiny amount of white paint.
Step 4: Final Touches
-
Enhance foreground details:
On the closest rocks at the bottom left, dab pure Yellow Ochre and bright Orange to represent lichens growing on the stone. -
Final highlights:
Add the brightest white highlights to the crests of the waves and the wettest parts of the rocks. -
Review contrast:
Step back and check if your distant cliffs are lighter and bluer (atmospheric perspective) than the foreground cliffs. Glaze them with a thin blue wash if they look too sharp.
Allow your masterpiece to dry completely before varnishing to protect those vibrant ocean hues.
Starry Night Mountains With Splatter Stars
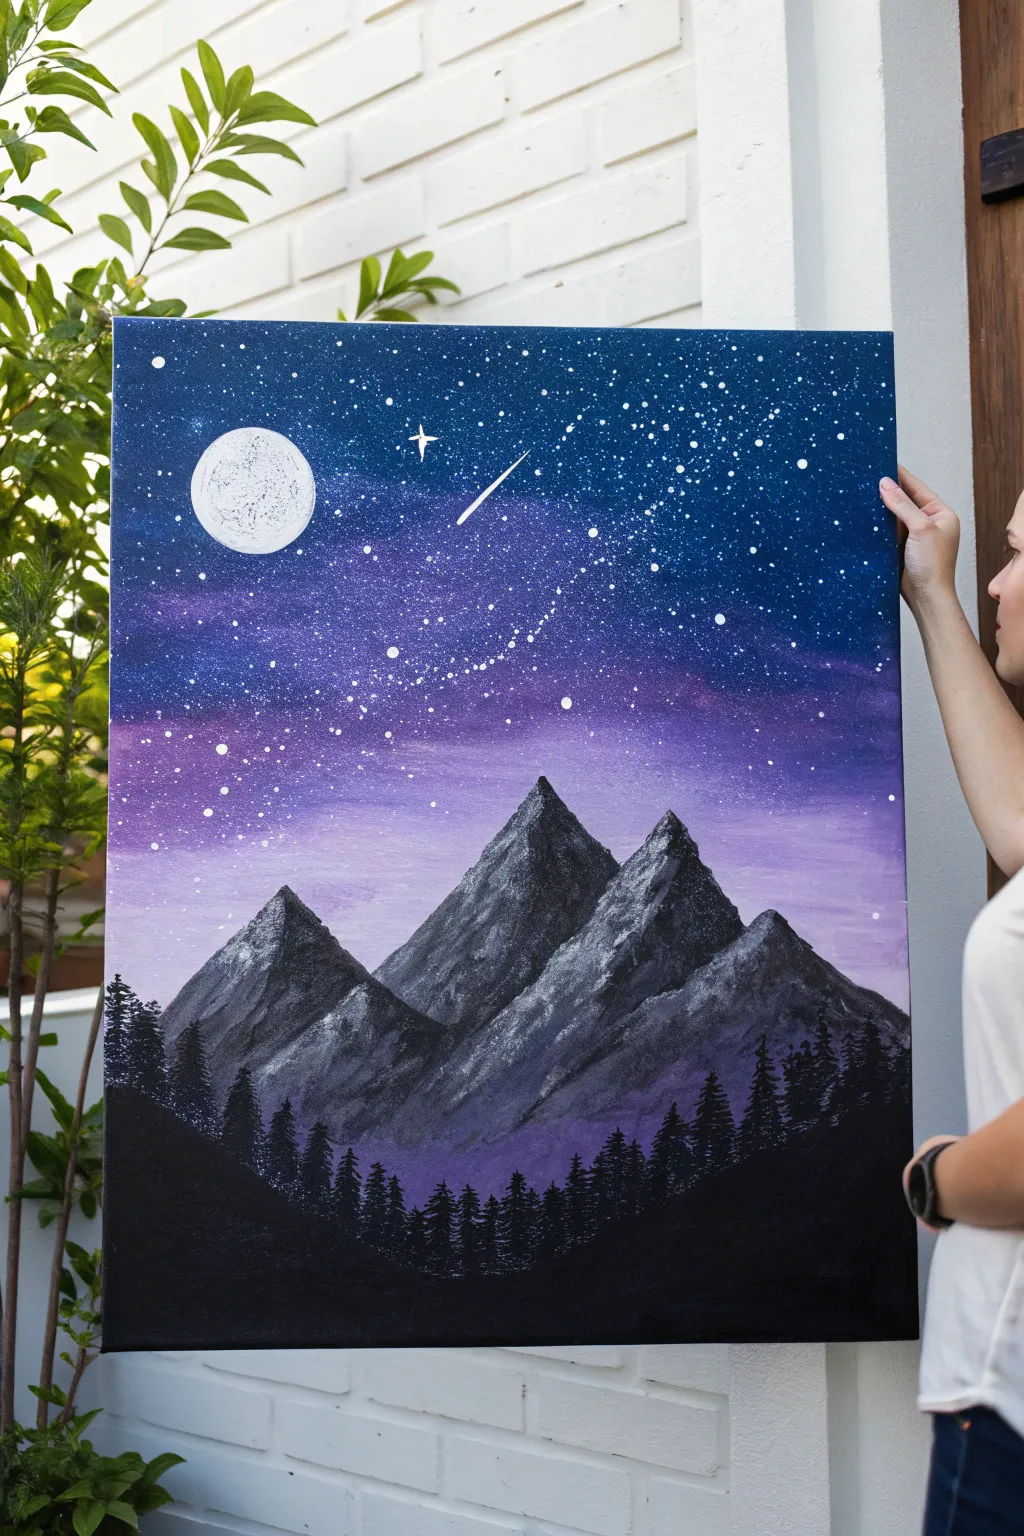
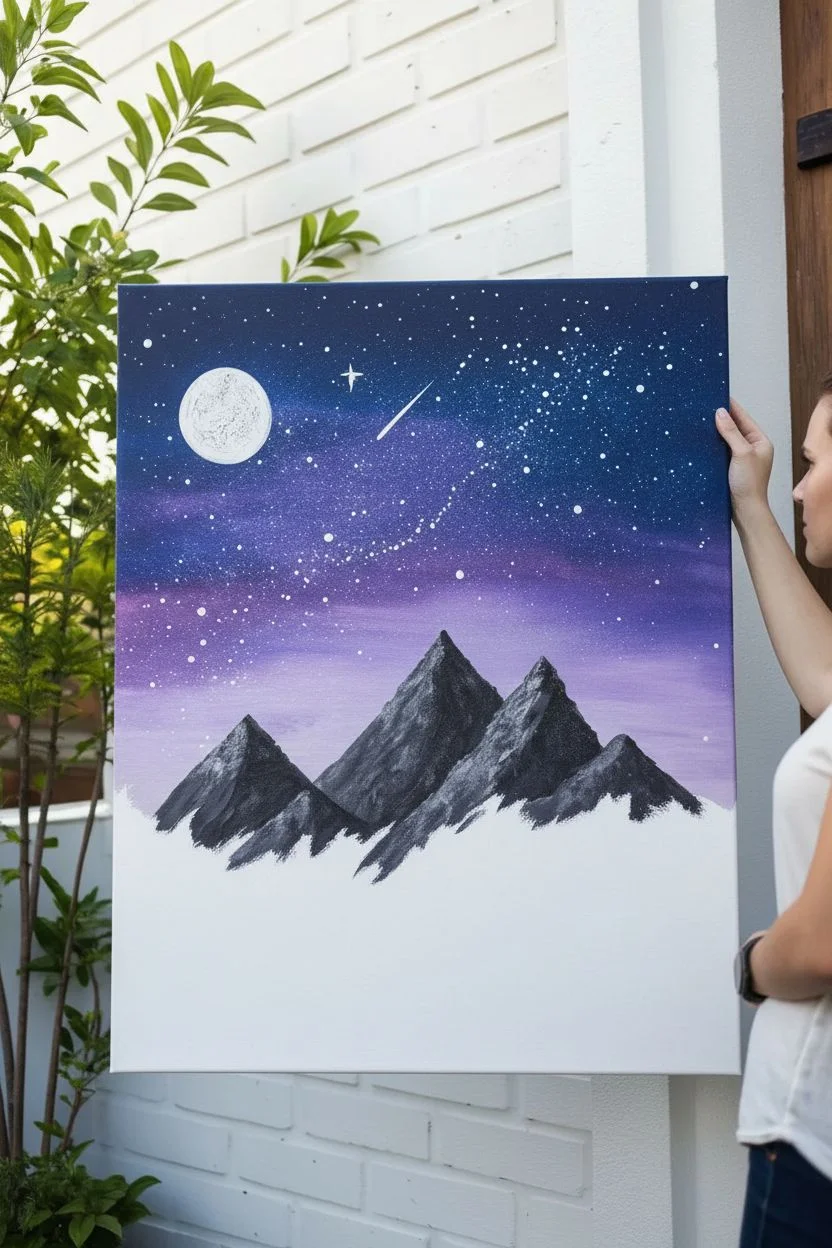
Capture the magic of a clear midnight sky with this vibrant acrylic piece, featuring deep galaxy blues blending into soft purples. The sharp, snow-capped peaks provide a striking contrast against the celestial background, while splatter stars add a sense of infinite depth.
Step-by-Step Tutorial
Materials
- Stretched canvas (e.g., 18×24 inches)
- Acrylic paints: Phthalo Blue, Dioxazine Purple, Titanium White, Mars Black
- Large flat brush or sponge brush
- Medium flat brush
- Small round detail brush
- Palette knife
- Old toothbrush (for splattering)
- Cup of water and paper towels
- Circular object or compass (for the moon)
- Palette or paper plate
Step 1: The Celestial Sky
-
Base Gradient:
Begin by applying Phthalo Blue at the very top of your canvas, painting horizontally. As you move about one-third down, start mixing in Dioxazine Purple to create a transition. Keep the bottom third of the sky primarily purple, lightening it slightly with a touch of Titanium White near the horizon line where the mountains will sit. -
Blending:
While the paint is still wet, use a clean, slightly damp brush to smooth out the transition lines between the blue and purple sections. You want a seamless gradient that mimics the atmosphere. -
Creating the Milky Way:
Mix a very small amount of white with purple and a lot of water to create a translucent glaze. Diagonally sponge or brush a faint, cloudy band across the middle of the sky to suggest the Milky Way. Keep this extremely subtle. -
Splatter Stars:
Thin down some Titanium White paint with water until it reaches an inky consistency. Dip an old toothbrush into this mixture. Hold it over the canvas and run your thumb across the bristles to spray fine mist-like stars across the dark blue section. -
Larger Stars:
Use a small round brush or a dotting tool to manually place slightly larger, brighter white dots randomly throughout the sky. Focus a few clusters near the Milky Way band. -
The Moon and Shooting Star:
Paint a solid white circle in the upper left quadrant. You can trace a lid if you need a perfect circle. Once dried, dab a tiny bit of grey texture onto it with a sponge for craters. Add a shooting star with a quick, tapered flick of white paint.
Step 2: Majestic Mountains
-
Mountain Outlines:
Using black paint, outline three large, jagged triangular shapes for your primary mountain range. The central peak should be the highest. Fill these shapes in completely with a dark grey-black mixture (mix black with a tiny bit of white) to create a solid silhouette. -
Highlighting – Right Side:
Imagine the light source is coming from the moon on the left. This means the right faces of the mountains will catch the light. Mix Titanium White with a very small touch of blue. -
Palette Knife Technique:
Load a small roll of the white-blue paint onto the edge of your palette knife. Gently drag the knife down the right-hand slopes of the mountains. Let the paint ‘break’ over the canvas texture so the dark underlayer shows through, creating a rocky, snowy effect. -
Shadowing – Left Side:
For the shadowed left sides of the peaks, use a dark grey or deep purple-grey mixture on your palette knife. Apply this to the left slopes, blending slightly where it meets the highlighted ridge. -
Atmospheric Mist:
I like to take a dry brush with a tiny amount of the purple sky color and gently scumble it at the very base of the mountains. This pushes them back into the distance and creates a misty separation.
Star Splatter Mess?
If your stars are looking more like blobs, your paint is likely too thick. Add water drop by drop until it flows like ink. Test on paper first to check the spray pattern.
Step 3: The Pine Forest
-
Tree Line Silhouette:
Load a small flat brush or fan brush with pure Mars Black. Along the very bottom of the canvas, paint a solid, undulating hill shape that rises up on the sides to frame the composition. -
Painting Individual Trees:
Switch to a small detail brush or the edge of a flat brush. Paint vertical lines protruding from the black hill to serve as tree trunks. -
Adding Foliage:
Use a tapping motion to add branches to these trunks. Start at the top of each trunk with tiny taps, getting wider as you move down to create the classic conical pine tree shape. -
Creating Density:
Fill the bottom area with dense tree silhouettes. Ensure the trees vary in height, with some taller ones piercing up towards the base of the mountains to create depth and scale. -
Final Touches:
Add a few extra bright white ‘sparkle’ stars with a thin liner brush, making a small cross shape for the brightest ones, ensuring one sits near the shooting star for balance.
Snow Texture Trick
Don’t press hard with the palette knife. Hold it loosely and let it graze the surface. The less pressure you apply, the better the ‘breaking’ effect for realistic rock texture.
Step back and admire your personal window into a peaceful, starry wilderness night
Foggy Morning Field With Soft Edges and Scumbling
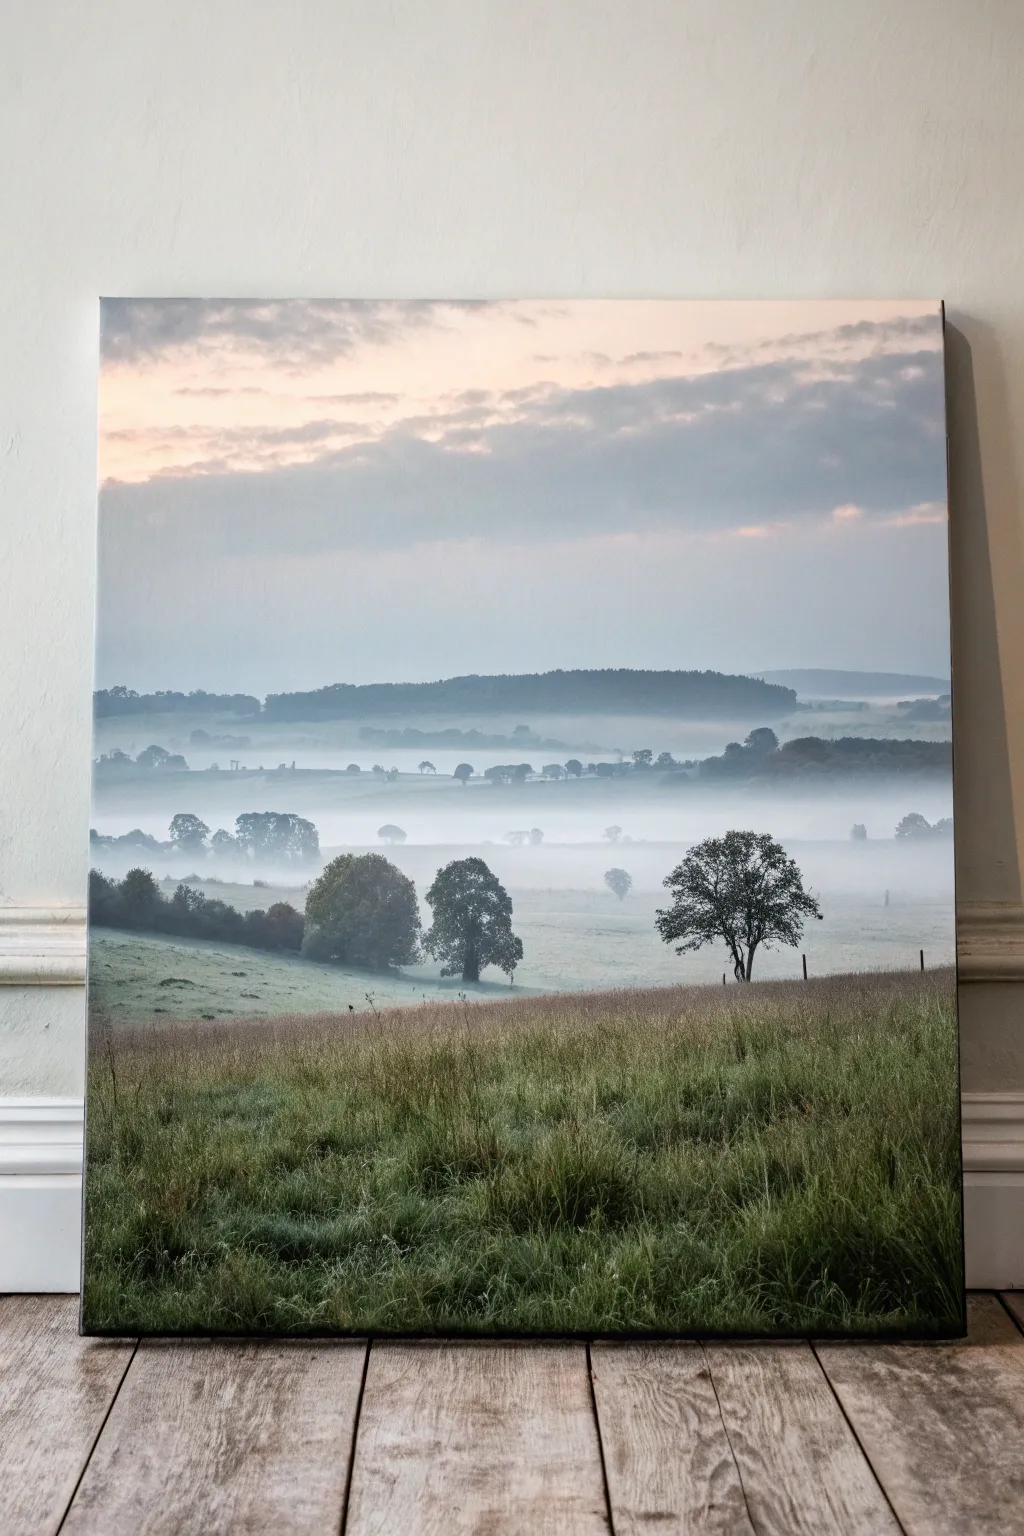
Capture the serene stillness of dawn with this atmospheric landscape that emphasizes depth through layers of mist. By using soft edges and scumbling techniques, you’ll create a realistic recession from the detailed foreground grasses to the ghostly distant hills.
Step-by-Step Guide
Materials
- Stretched canvas (e.g., 18×24 inches)
- Acrylic paints: Titanium White, Payne’s Grey, Hooker’s Green, Burnt Umber, Cerulean Blue, Cadmium Yellow Light
- Large flat brush (2 inch) for sky
- Medium filbert brush
- Small round brush (size 1 or 2) for details
- Fan brush (optional, for grass)
- Palette knife
- Water container and paper towels
- Slow-drying medium or retarder
Step 1: Setting the Sky and Atmosphere
-
Prime the canvas:
Begin with a white primed canvas. If you want a slightly warmer undertone to peek through, apply a very thin, watery wash of Burnt Umber and wipe it back almost completely with a cloth so it’s barely visible. -
Mix the sky gradient:
Prepare a pale mix of Titanium White with a tiny touch of Cerulean Blue and Payne’s Grey for the upper sky. For the horizon line, mix Titanium White with a hint of Cadmium Yellow Light and Burnt Umber to create a warm, peach-grey tone. -
Paint the sky:
Using your large flat brush, apply the blue-grey mix at the top and the warm peach-grey at the bottom. Blend them wet-on-wet in the middle third of the canvas to create a seamless transition. -
Add soft clouds:
While the sky is still slightly tacky, scumble in subtle cloud forms using a dry brush with a mix of Payne’s Grey and White. Keep the edges very soft; you want them to feel like vapour, not solid objects.
Mastering the Scumble
To get that perfect foggy look, designate one stiff bristle brush as your ‘scumbling brush.’ Keep it completely dry (no water!) and use very little paint, rubbing it in circles to create soft fuzziness.
Step 2: Layering the Distant Hills
-
Mix the distant hill color:
Create a blue-grey color using Payne’s Grey, White, and a dot of Cerulean Blue. This layer needs to be very pale to suggest atmospheric perspective. -
Paint the furthest ridge:
Block in the shape of the furthest hill range. It should be barely darker than the sky itself. Keep the bottom edge uneven and fade it out with rapid, horizontal brushstrokes to simulate fog rising from the valley. -
Create the middle ground hills:
Mix a slightly darker, greener grey (add a touch of Hooker’s Green to your grey mix). Paint the next layer of hills below the first, overlapping them. Again, use a dry brush to scumble the bottom edge into a misty white zone. -
Establish the fog banks:
Take a clean, dry medium brush with pure Titanium White (or white with a tiny touch of glazing medium). Lightly scumble horizontal bands of mist between the hill layers. This separates the planes of the landscape.
Step 3: Building the Middle Ground Landscape
-
Mix the meadow greens:
For the rolling fields in the middle distance, mix Hooker’s Green with White and a little Burnt Umber to desaturate it. The green should look cool and muted, not vibrant. -
Paint the sloping fields:
Block in the grassy slopes on the left and right. Use horizontal strokes that slightly curve to follow the contour of the land. -
Add distant trees:
Using a small round brush and a dark grey-green mix, paint the clusters of trees sitting on the ridge lines. Keep these shapes simple—just silhouettes without internal detail. -
Soften the tree bases:
Immediately after painting the distant trees, take a clean, slightly damp plain brush and gently blur the bottom of the tree trunks so they look like they are sitting in the grass rather than floating.
Muddy Colors?
If your fog looks dirty rather than misty, let the underlying hill layer dry completely before adding the white scumble on top. Wet-on-wet mixing here often leads to grey mud instead of transparent mist.
Step 4: Foreground Detail and Texture
-
Block in the foreground base:
Mix a darker, richer green using Hooker’s Green and Burnt Umber. Paint the bottom third of the canvas solid to establish the nearest field. It should be significantly darker than the mist-covered hills. -
Start the grass texture:
Using an old, splayed bristle brush or a fan brush, flick distinct grass blades upwards using lighter variations of your green mix (add Yellow and White). -
Paint the focal trees:
Mix a dark, almost black-green for the prominent trees on the right and left. Paint their trunks and branches first with a fine liner brush, then stipple the leaves using a scruffy round brush. -
Add light to grass tips:
The light source is coming from the background sky. I find it effective to mix a pale yellow-green and highlight just the very tips of the foreground grasses to show the dew catching the morning light. -
Create foreground depth:
Add some darker Burnt Umber shadows near the bottom edge of the canvas to anchor the painting. This extreme contrast helps push the foggy background even further away. -
Final mist glaze:
Once everything is fully dry, you can apply an extremely thin glaze of watery white paint over specific areas of the middle ground if you feel they need to look ‘foggier’ or less distinct.
Step back and admire how the layers of mist create a sense of vast, quiet distance in your landscape
Golden Hour Landscape With Long Shadow Shapes

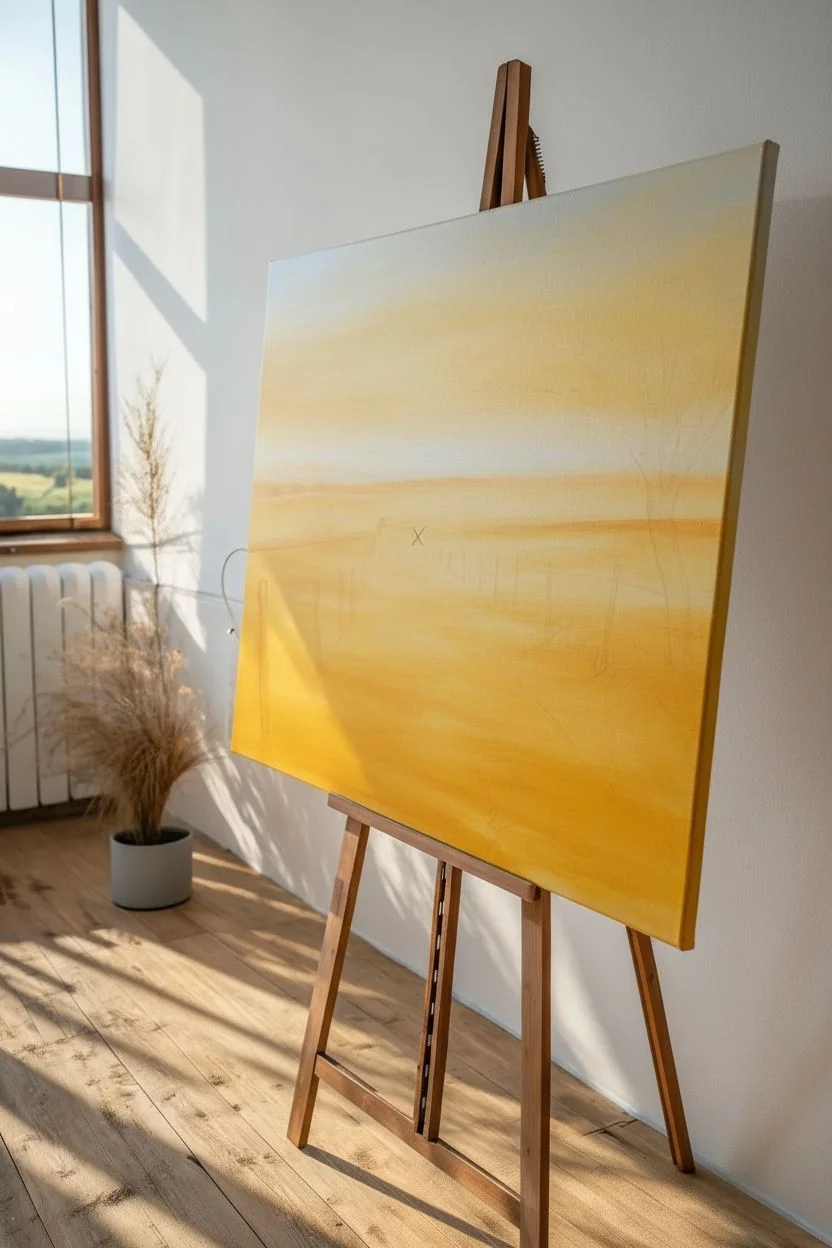
Capture the warmth of a setting sun as it bathes a rural dirt path in golden light. This acrylic painting focuses on atmospheric perspective, long dramatic shadows, and the intricate textures of dry summer grass.
Step-by-Step Tutorial
Materials
- Stretched canvas (18×24 inches or similar)
- Acrylic paints: Titanium White, Burnt Umber, Yellow Ochre, Cadmium Yellow, Burnt Sienna, Sap Green, Ultramarine Blue, Mars Black
- Large flat brush (1-2 inch) for blending
- Medium filbert brush
- Small round detail brush (size 0 or 1)
- Fan brush (optional)
- Palette knife
- Water cup and paper towels
- Slow-drying medium or retarder (highly recommended)
Step 1: Setting the Scene
-
Prime with warmth:
Begin by covering the entire canvas with a thin wash of Yellow Ochre mixed with a touch of Titanium White. This establishes a warm undertone that will glow through subsequent layers, essential for that golden hour feel. -
Sketch the composition:
Using a small round brush and watery Burnt Sienna, lightly sketch the horizon line about one-third down from the top. Mark the vanishing point for the path slightly off-center to the left, and outline the large tree shape on the right. -
Block in the sky gradient:
Mix Titanium White with a tiny dot of Burnt Sienna for the horizon. As you move upward, transition into a mix of Yellow Ochre and White, and finally a very pale, muted blue-gray (White + tiny touch of Ultramarine/Burnt Umber) at the very top corners. -
Blend the sky:
While the sky paint is still wet, use a large clean brush to smooth the transitions. Use horizontal strokes to ensure a seamless gradient from the glowing horizon to the cooler upper sky.
Sunlight Secret
Mix a tiny amount of neon orange or glaze medium into your sun-facing highlights. It artificially boosts the ‘glow’ effect against the muted background.
Step 2: Creating Depth
-
Paint the distant hills:
Mix a hazy purple-grey using Ultramarine Blue, Burnt Sienna, and plenty of White. Paint the distant rolling hills on the horizon. They should be low contrast to push them into the background. -
Establish the middle ground:
For the fields just below the hills, use Yellow Ochre mixed with Titanium White. Keep the strokes horizontal and smooth to suggest distant flat land. -
Block in the dirt path:
Mix Burnt Sienna, White, and a touch of Yellow Ochre. Paint the path starting narrow at the vanishing point and widening significantly as it reaches the bottom of the canvas. -
Add path texture:
While the path is tacky, streak in lighter variations (more White) and darker shadows (more Burnt Sienna) to mimic ruts and tire tracks in the dirt.
Muddy Colors?
If your shadows look dull, avoid mixing black with yellow. Instead, darken your yellows with purple or brown to keep the shadows rich and warm.
Step 3: The Golden Fields
-
Underpainting the grass:
Fill the field areas on either side of the path with a solid coat of Yellow Ochre mixed with Burnt Sienna. Let this layer dry completely. -
Layering grass texture:
Using a fan brush or an old, splayed bristle brush, tap and flick vertical strokes over the fields. Use lighter tints (Yellow Ochre + White) closer to the foreground to simulate individual stalks caught in the light. -
Adding the shadows:
This is crucial for the golden hour look. Mix Burnt Umber with a touch of Purple (Blue + Red). Paint long, horizontal shadows stretching across the path and fields coming from the right side, mimicking the cast from the trees and fence posts.
Step 4: The Foreground Tree
-
Paint the trunk:
Using Burnt Umber and Mars Black, paint the thick trunk of the tree on the right. Give the bark texture by highlighting the left edge (where the sun hits) with a mix of Burnt Sienna and White. -
Form the canopy:
Stipple the leaves using a medium filbert or hog bristle brush. Start with the darkest value (Sap Green + Burnt Umber) to create the dense silhouette of the tree against the bright sky. -
Highlight the foliage:
Mix Sap Green with Cadmium Yellow and a touch of White. Stipple these highlights onto the left edges of the leaf clumps where the sun would catch them. Leave the core of the tree dark. -
Add sun flare:
I like to take a tiny bit of pure Titanium White and glaze it right where the sun peeks through the branches to create a blinding light effect.
Step 5: Details & Fence
-
Install fence posts:
With your smallest round brush and dark brown paint, add vertical fence posts along the path. Remember perspective: posts should get smaller and closer together as they recede. -
String the wire:
Use a liner brush with thinned dark grey paint to draw very fine lines connecting the fence posts. A shaky hand actually helps make the wire look old and slack. -
Foreground grasses:
Detail some tall, distinct weeds and grass blades in the immediate foreground bottom corners using a liner brush and light yellow-white paint to frame the path. -
Final shadow deepening:
Glaze a thin transparent layer of Burnt Umber over the shadow areas on the path to enrich the contrast without losing the texture underneath.
Step back and admire how the light guides the eye down that dusty country road
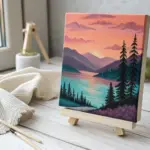
Silhouette Foreground Trees Against a Glowing Sky
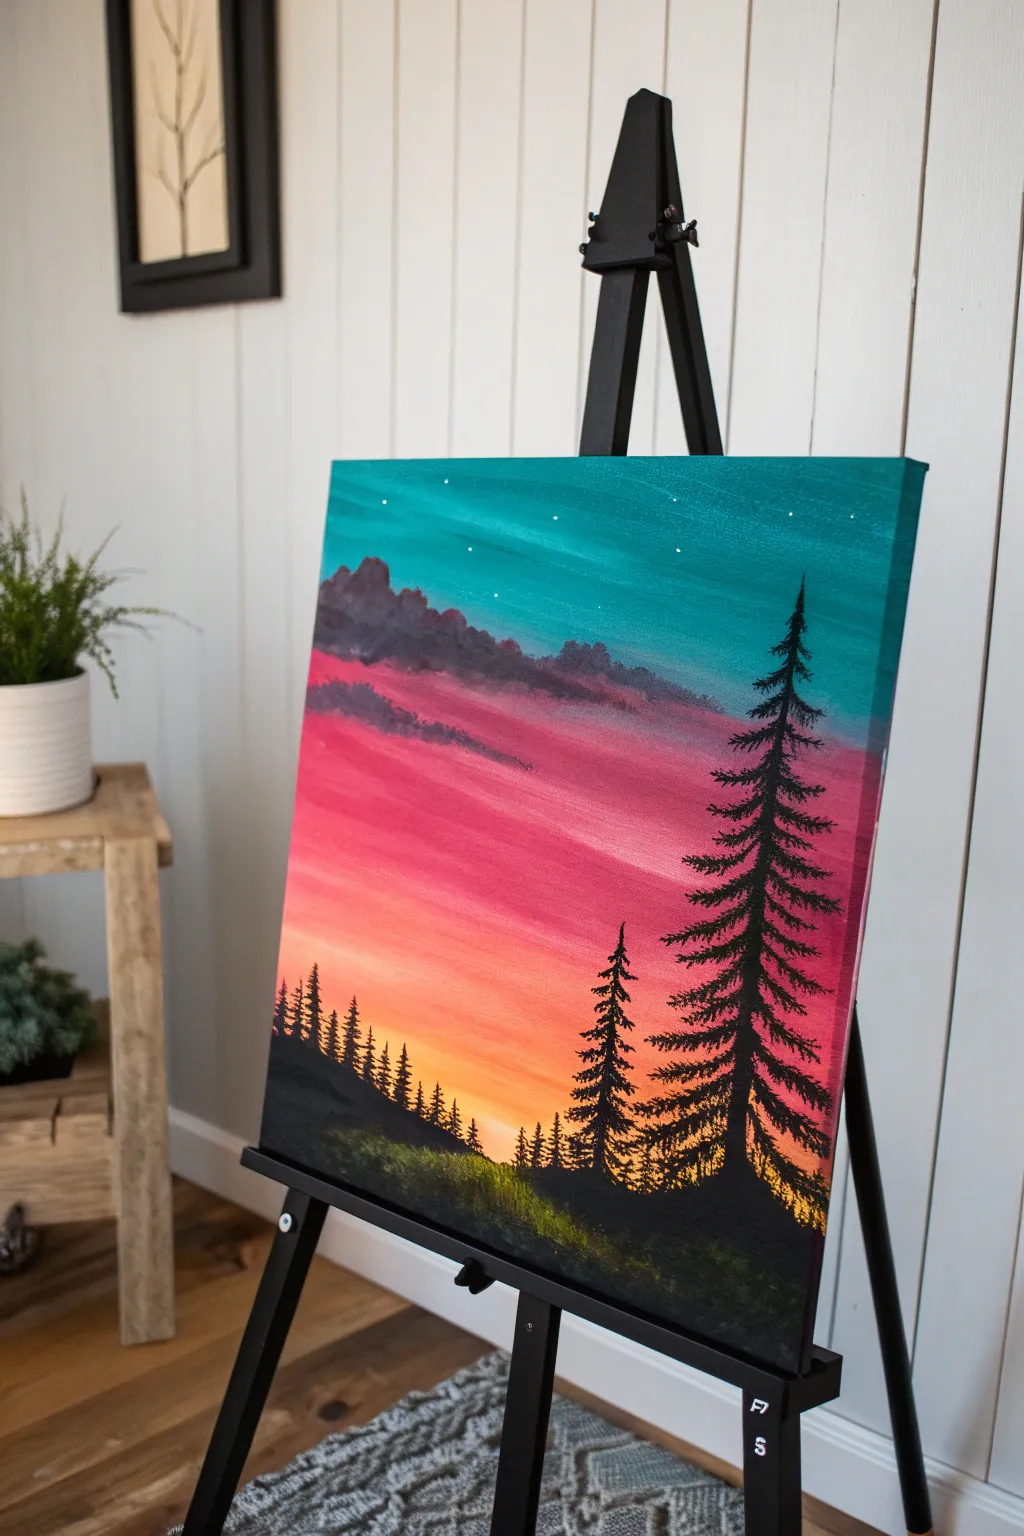
Capture the magic of twilight with this striking acrylic landscape featuring silhouetted pines against a vibrant, glowing sky. By mastering the art of gradient blending, you will create a luminous backdrop that makes your dark foreground trees pop with dramatic contrast.
Step-by-Step
Materials
- Canvas (stretched gallery wrap or board)
- Acrylic paints: Turquoise/Teal, Magenta/Dark Pink, Orange, Cadmium Yellow, Phthalo Blue (for mixing), Titanium White, Mars Black
- Paintbrushes: 1-inch flat wash brush, medium filbert brush, liner brush or rigger brush, fan brush (optional)
- Cup of water
- Palette paper or plate
- Paper towels
- Easel
Step 1: Painting the Sky Gradient
-
Prepare your palette:
Squeeze out generous amounts of your sky colors: Turquoise, Magenta, Orange, Yellow, and White. Keep the Black separate for later. A crucial part of this project is having your paint ready to go so you can blend while it’s still wet. -
Start with turquoise:
Using your 1-inch flat wash brush, load up the turquoise paint. Start at the very top edge of the canvas and paint horizontal strokes across the top quarter. For a smoother look, you can mix a tiny touch of white into the turquoise to make it opaque and creamy. -
Transition to pink:
As you move down the canvas, clean your brush slightly (but not completely) and pick up the magenta. Blend this into the bottom edge of the wet turquoise to create a soft purple transition area before painting a pure pink band across the middle. -
Add the orange glow:
Wipe your brush clean. Pick up the orange paint and apply it directly beneath the pink. Use long, horizontal back-and-forth strokes where the colors meet to blur the line, creating a seamless gradient. -
Finish with yellow light:
Near the bottom third of the sky area (leaving room for the ground), blend in your bright yellow. This represents the last light of the sun and should be the brightest part of your gradient. If the colors get muddy, clean your brush thoroughly before applying the yellow. -
Let it dry completely:
Allow the background to dry fully before moving on. This is essential so your clouds don’t accidentally smear into the sunset colors. A hairdryer can speed this up if you’re eager to continue.
Pro Tip: Perfect Pines
Use an old, frayed fan brush turned vertically to tap in your pine tree branches. The split bristles naturally mimic needle textures better than a standard round brush.
Step 2: Adding Clouds and Stars
-
Mix a cloud color:
Mix a deep purple shade using magenta, a tiny touch of Phthalo blue, and a little white. The goal is a dusty, twilight purple that stands out against the teal but isn’t as harsh as black. -
Dab in cloud shapes:
Using a medium filbert brush, gently dab this purple mixture across the transition line where the teal meets the pink. Use a light, tapping motion to create fluffy, organic shapes rather than hard lines. -
Shadow the clouds:
While the purple is wet, add a tiny bit of darker purple (or a speck of black mixed in) to the bottom edges of the clouds to give them volume and weight. -
Highlight the clouds:
Clean your brush and pick up a tiny bit of pink or light peach. Gently dry-brush the tops of the clouds where they would catch the setting sunlight. -
Add stars:
Once the sky is dry, dip the very tip of a liner brush (or use a toothpick) into fluid white paint. Carefully dot a few stars into the teal section at the top. Keep them random and sparse for realism.
Level Up: Reflection
Instead of a grassy hill, paint water at the bottom! Reflect your sky colors upside down, then add horizontal black lines to ripple the tree reflection.
Step 3: Creating the Silhouette Foreground
-
Paint the hill:
Load a medium brush with Mars Black. Paint a sloping hill at the bottom of the canvas. It doesn’t need to be perfectly smooth; a slightly bumpy texture mimics uneven ground. -
Start the main tree trunk:
Switch to a liner or rigger brush. Choose a spot on the right side for your focal tree. Paint a vertical line straight up into the teal sky, making it very thin at the top and slightly thicker as it reaches the ground. -
Add pine branches:
Starting at the top of your tree line, use the tip of your brush to tap small, downward-slanting lines. As you move down the tree, widen your strokes to make the branches broader and heavier near the base. -
Texturize the branches:
Don’t make the branches too perfect. Use a zig-zag motion and occasional ‘holes’ in the foliage to let the sunset peek through. This adds character to your silhouette. -
Paint the smaller trees:
Create a secondary, smaller pine tree closer to the center, and a line of distant, tiny treelines on the left side of the hill. These should be less detailed, suggesting distance. -
Add ground texture:
Mix a tiny bit of yellow and green into your black (or use a very dark green) and dab it gently along the top ridge of your black hill. This creates the illusion of grass catching the last bit of light. -
Final touches:
Check your edges. If the black paint looks too thin or transparent in spots, add a second coat to ensure a solid, deep silhouette contrast.
Step back and admire the tranquil evening scene you have brought to life.
Palette Knife Acrylic Landscape With Chunky Texture
Capture the breezy movement of a summer day with this textured landscape study. Using thick applications of heavy body acrylics and palette knives creates a satisfying, tangible depth in the cumulus clouds and grassy fields.
Step-by-Step Guide
Materials
- Square stretched canvas (approx. 12×12 inches)
- Heavy body acrylic paints
- Colors: Titanium White, Ultramarine Blue, Phthalo Blue, Yellow Ochre, Burnt Sienna, Sap Green, Cadmium Yellow Medium
- Modeling paste (optional, for extra texture)
- Set of palette knives (including a large trowel shape and a small detail knife)
- Flat synthetic brushes (sizes 8 and 12)
- Rags or paper towels
- Palette surface
Step 1: Setting the Atmosphere
-
Prime the surface:
Begin by applying a thin, slightly watered-down wash of Titanium White and a tiny drop of Yellow Ochre across the canvas to break the stark white. Let this dry completely before proceeding. -
Mix the sky gradient:
Create a pale, muted blue using Titanium White, a small amount of Phthalo Blue, and a touch of Ultramarine. Prepare a second, slightly darker version of this mix. -
Block in the sky:
Use a large flat brush to sweep the lighter blue mix across the top two-thirds of the, blending into an even paler, nearly white horizon line. Don’t worry about perfect smoothness; some brushwork adds character.
Muddy colors?
If your clouds look grey instead of fluffy, clean your palette knife completely between every single stroke. White paint picks up pollution easily
Step 2: Sculpting the Clouds
-
Build the cloud base:
Mix Titanium White with a small amount of modeling paste if you have it. Using a trowel-shaped palette knife, scrape large, irregular shapes across the upper right diagonal of the sky. -
Add cloud shadows:
Mix a soft grey-violet using White, a touch of Ultramarine, and the tiniest speck of Burnt Sienna. With the edge of your knife, dab this shadow color onto the bottom edges of your white cloud shapes. -
Highlight the peaks:
Load your knife with pure Titanium White. Gently drag the paint over the top edges of the clouds so it catches on the canvas texture, creating thick, fluffy highlights that stand off the surface. -
Create movement:
Use a dry brush to feather out the trailing left edges of the clouds slightly, suggesting wind movement, while keeping the top right edges crisp and textured.
Glazing Depth
Once fully dry, apply a very thin glaze of transparent yellow over the grassy areas to unite the greens and give the scene a warm, sunny glow
Step 3: Laying the Land
-
Underpaint the hills:
Mix Sap Green with varying amounts of Yellow Ochre and a touch of Burnt Sienna for a warm, earthy olive tone. Block in the rolling hill shape in the foreground with a brush. -
Paint the distant mountains:
Combine your leftover sky blue with a little Sap Green and White to create a hazy mountain color. Paint the distant ridge line softly, ensuring edges are somewhat blurred to push them into the background. -
Establish the middle ground:
Mix a lighter olive green. With your palette knife, apply broad, horizontal strokes across the valley floor, layering over the bottom of the mountain range to create depth. -
Define the path:
Mix Burnt Sienna, White, and a dot of Yellow Ochre. Scrape this mixture in a curving S-shape leading from the bottom center into the mid-ground, mimicking a dirt track.
Step 4: Adding Texture and Detail
-
Texture the foreground hill:
I like to switch back to the palette knife here for the grassy texture. Mix Sap Green and Cadmium Yellow. Drag the knife upwards in short bursts on the foreground hill to simulate tall grasses catching the light. -
Add contrasting shadows:
Mix Sap Green with a little Phthalo Blue for a deep, cool shadow green. Use the small detail knife or the edge of a flat brush to place dark clumps of trees and shrubs along the ridge lines and valley dips. -
Highlight the path:
Take a pale beige mix and drag it lightly over the dirt path area, letting the darker underpainting show through to create the look of uneven, rocky ground. -
Final grassy details:
Using the edge of a clean credit card or a very sharp knife edge, scratch into the wet paint in the immediate foreground to create thin, crisp lines of dry grass. -
Sunlight touches:
Add final touches of pure yellow-white mix on the tops of the closest grassy mound and the highest points of the cloud formations to make the lighting pop.
Step back and admire the breezy atmosphere you have captured on canvas
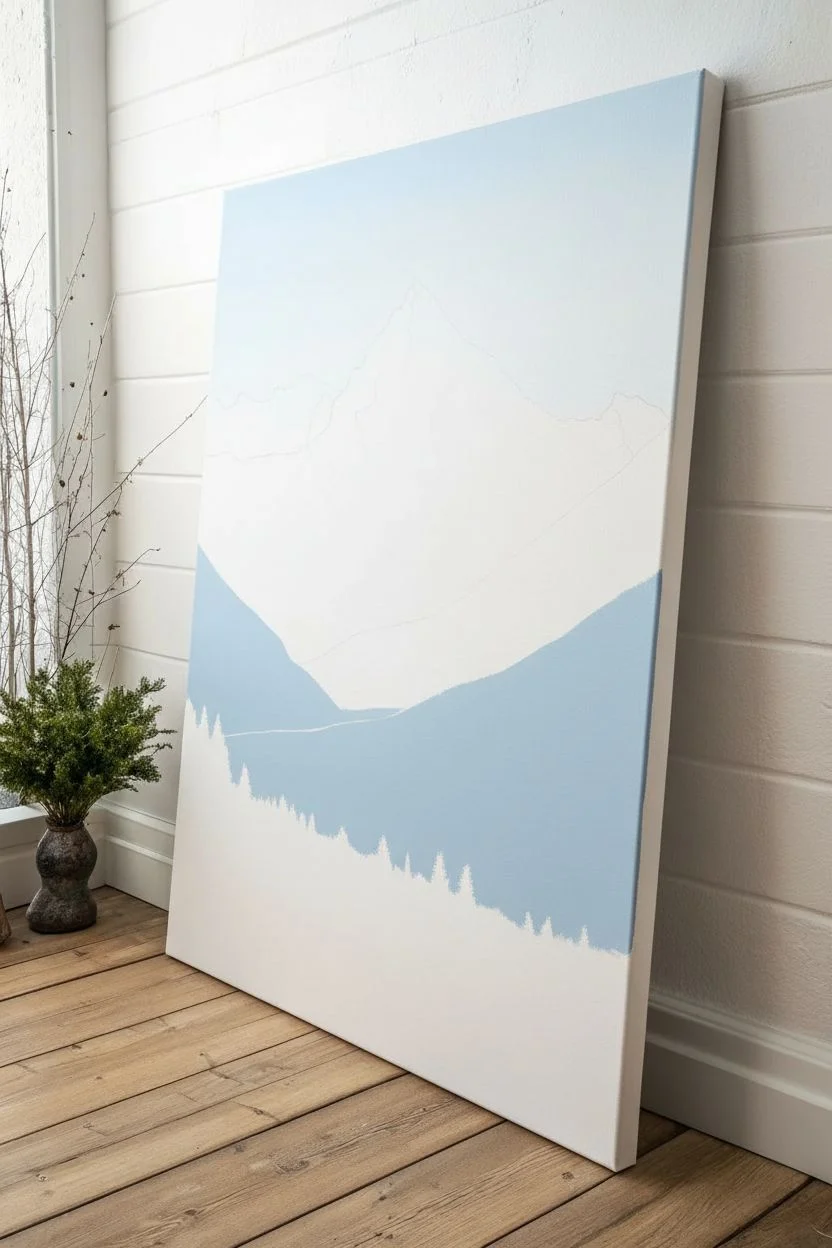
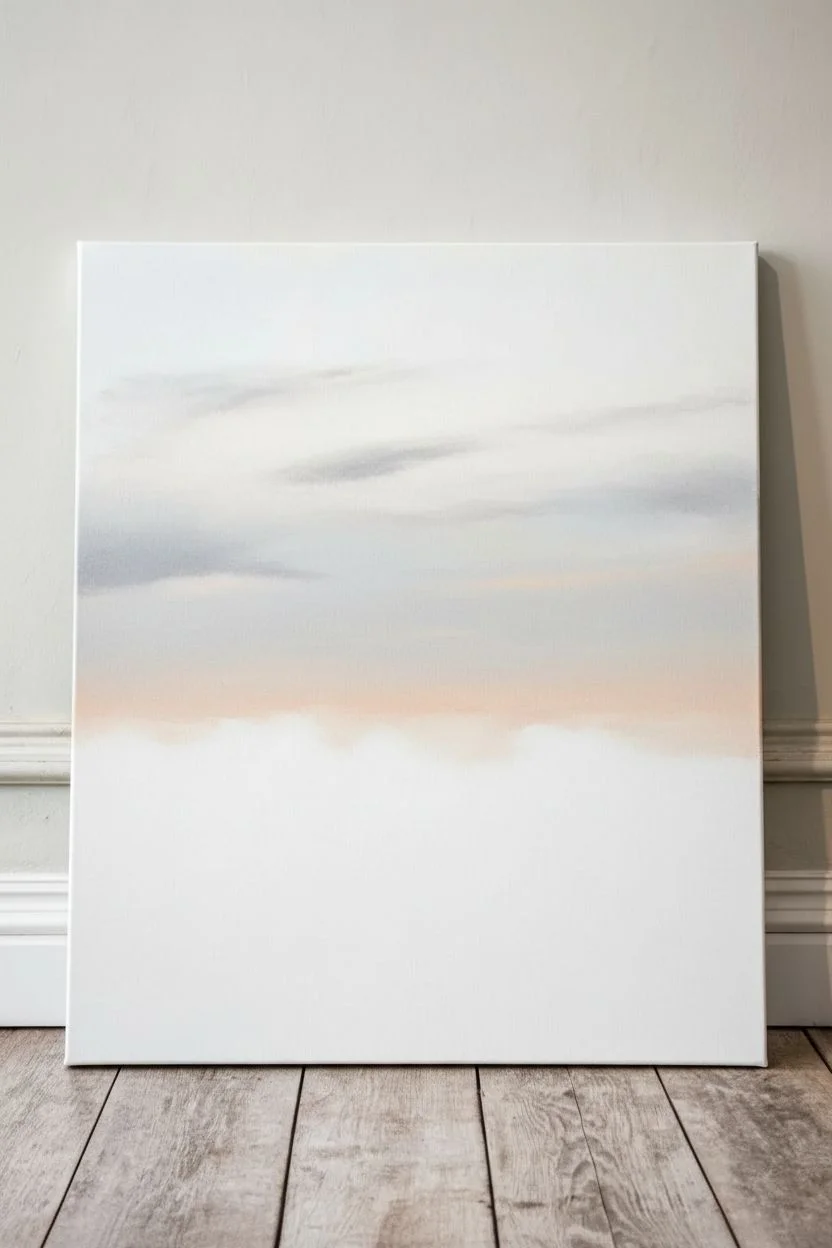
Limited-Palette Landscape in Two to Three Colors
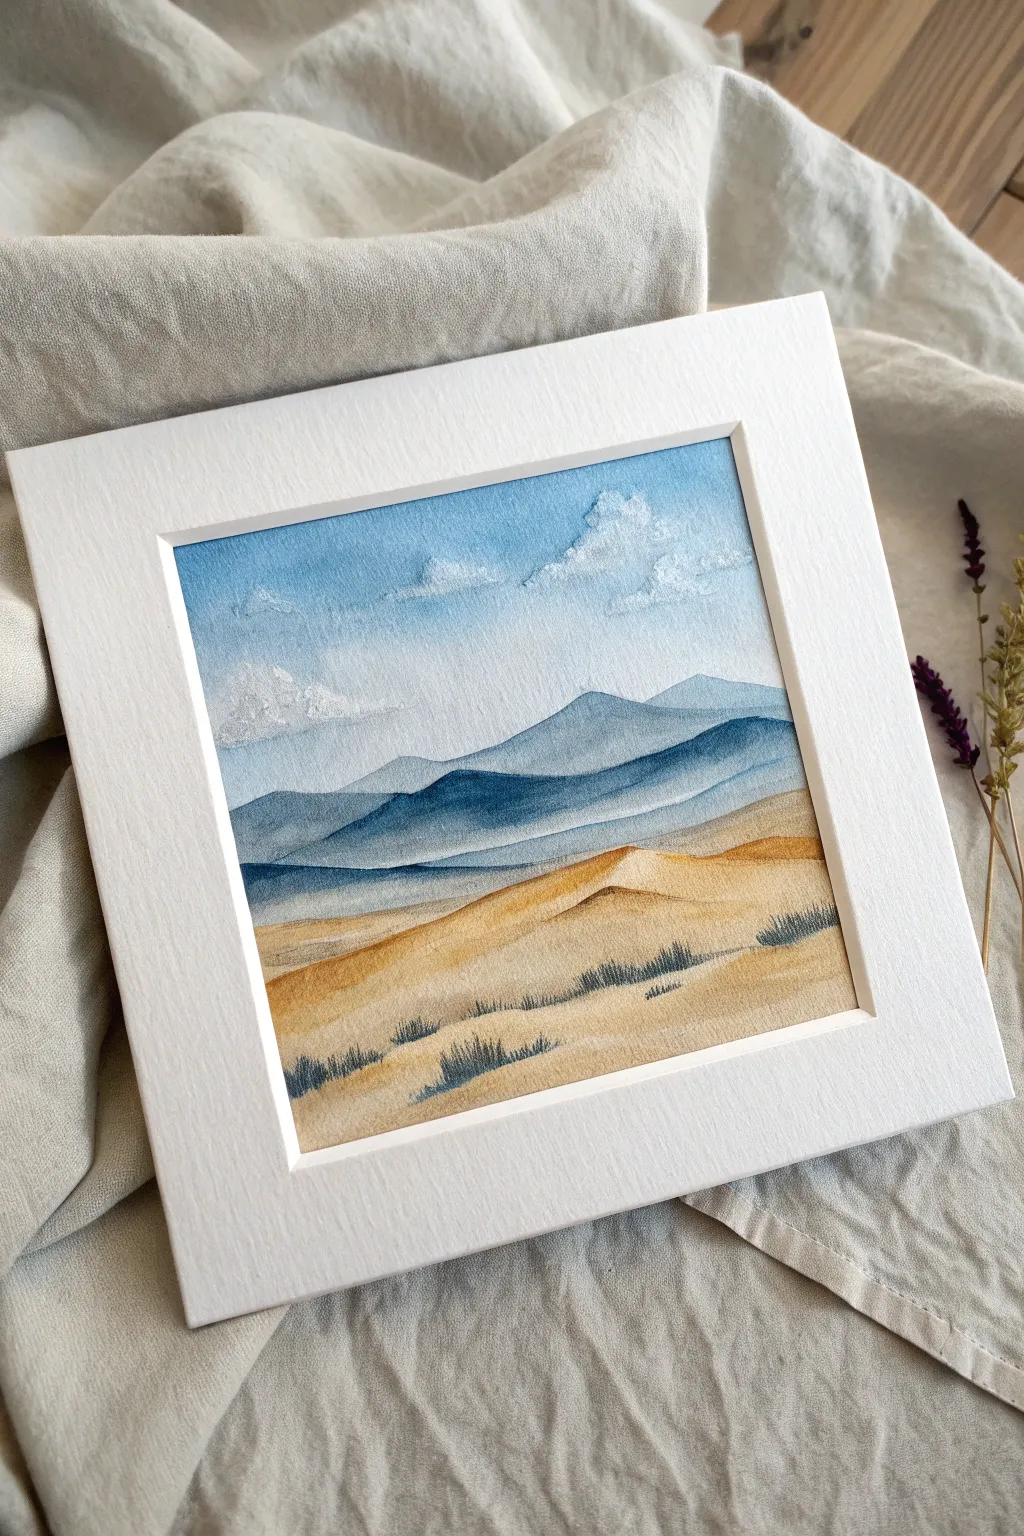
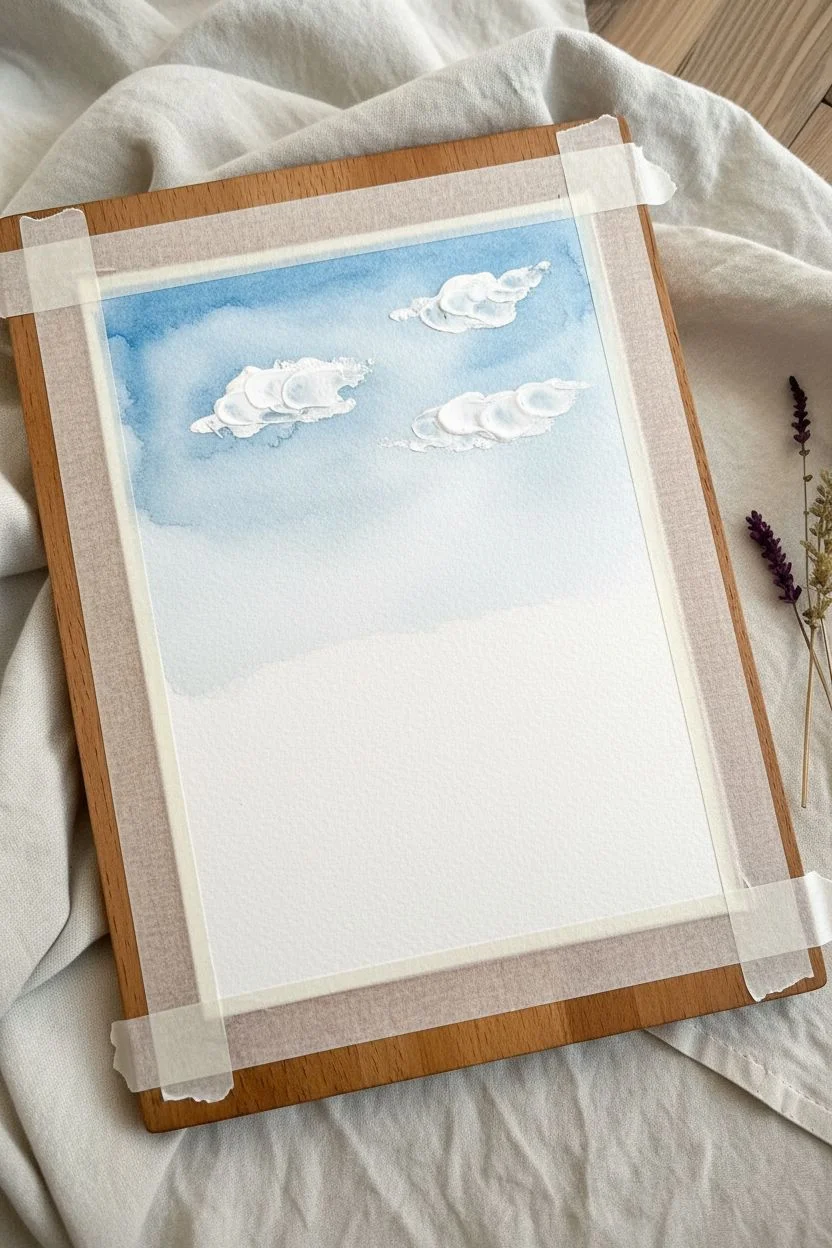
This serene landscape captures the stark beauty of rolling sand dunes meeting distant blue mountains, all achieved with a minimal color palette. The soft washes create a sense of distance and atmosphere, while textured white clouds add a delightful tactile element to the sky.
How-To Guide
Materials
- High-quality watercolor paper or mixed media paper (at least 300gsm)
- Acrylic paints: Ultramarine Blue, Burnt Sienna or Yellow Ochre, Titanium White
- Flat brush (1/2 inch) for washes
- Round brush (size 4 or 6) for details
- Small palette knife or stiff bristle brush for clouds
- Masking tape
- Jar of water
- Palette
- Paper towel
- Pre-cut mat board (white)
Step 1: Setting the Scene & Sky
-
Prepare your surface:
Cut your paper to size, ensuring it fits your mat opening. Tape down the edges securely to a board using masking tape to prevent buckling during wet washes and create a clean border. -
Mix a sky gradient:
Create a very dilute wash of Ultramarine Blue mixed with plenty of water and a tiny touch of Titanium White. You want a translucent, airy blue. -
Paint the upper sky:
Using your flat brush, apply the blue wash horizontally across the top third of the paper. Let the color fade as you move downward, keeping the horizon line almost white. -
Add cloud texture:
While the sky is drying, mix thick Titanium White acrylic with just a hint of shading color if desired. Using a palette knife or a stiff brush, dab this heavy paint onto the upper sky to form fluffy, dimensional clouds. The texture should stand out physically against the flat wash.
Bleeding Edges?
If paint bleeds under your tape, the tape wasn’t pressed down firmly enough. Fix it by painting over the bleed with white acrylic after it’s dry.
Step 2: Layering the Mountains
-
Mix the distant mountain color:
Create a pale blue-grey by mixing Ultramarine Blue with a lot of water and a tiny speck of Burnt Sienna to desaturate it. It should be slightly darker than your sky. -
Paint the furthest range:
Paint a faint, undulating mountain shape right at the horizon line. Keep the bottom edge soft by blending it out with a damp brush. -
Mix the middle range color:
Add a bit more blue to your mix for the next layer. Wait until the first range is dry, then paint a second range of mountains slightly lower and overlapping the first. -
Paint the foreground peaks:
Use a darker, more saturated mix of Ultramarine Blue for the closest mountain range. Paint this shape with distinct peaks and valleys, allowing the paint to settle darkly in the crevices. -
Create atmospheric perspective:
While the foreground mountain paint is still wet, gently dilute the bottom edge with water so it fades into nothingness before reaching the sand area.
Pro Tip: Texture
For extra rocky texture on the dunes or mountains, sprinkle a tiny pinch of salt onto the wet paint. Brush it off once dry for a speckled effect.
Step 3: Sculpting the Dunes
-
Mix the sand base tone:
Mix Yellow Ochre (or Burnt Sienna with plenty of White) to get a warm, sandy hue. Dilute this into a watery consistency similar to your sky wash. -
Apply the first dune wash:
Paint the bottom third of the paper with this warm mix. Use sweeping, curved strokes to mimic the rolling shape of dunes. -
Define the dune crests:
Once the base is dry, mix a slightly stronger version of your sand color. Paint curving lines to represent the tops of the dunes, leaving the sunlit sides paler. -
Add shadows:
Mix a tiny bit of your mountain blue into the sand color to create a cool shadow tone. Apply this lightly to the bottom-left side of the dune curves to create volume.
Step 4: Final Details
-
Mix the vegetation color:
Combine Ultramarine Blue with your Yellow Ochre/Burnt Sienna to create a muted, dark grey-green. It should be fairly opaque. -
Paint grass tufts:
Switch to your small round brush or a rigger brush. Use quick, upward flicking motions to paint clusters of dry grass along the dune ridges. -
Vary the grass sizes:
Make the tufts in the foreground larger and darker, and the ones further back smaller and fainter to enhance the sense of depth. -
Add final highlights:
If needed, use pure Titanium White to touch up the brightest highlights on the cloud tops or the very crest of the nearest dune. -
Remove the tape:
Wait until the painting is completely bone dry. Then, gently peel the tape away at a 45-degree angle to reveal your crisp edges. -
Mount artwork:
Place your white mat board over the painting, center it nicely, and secure it from the back with tape.
Step back and admire how much depth you achieved with just a few colors and careful layering
Abstract Color-Block Acrylic Landscape With Big Shapes
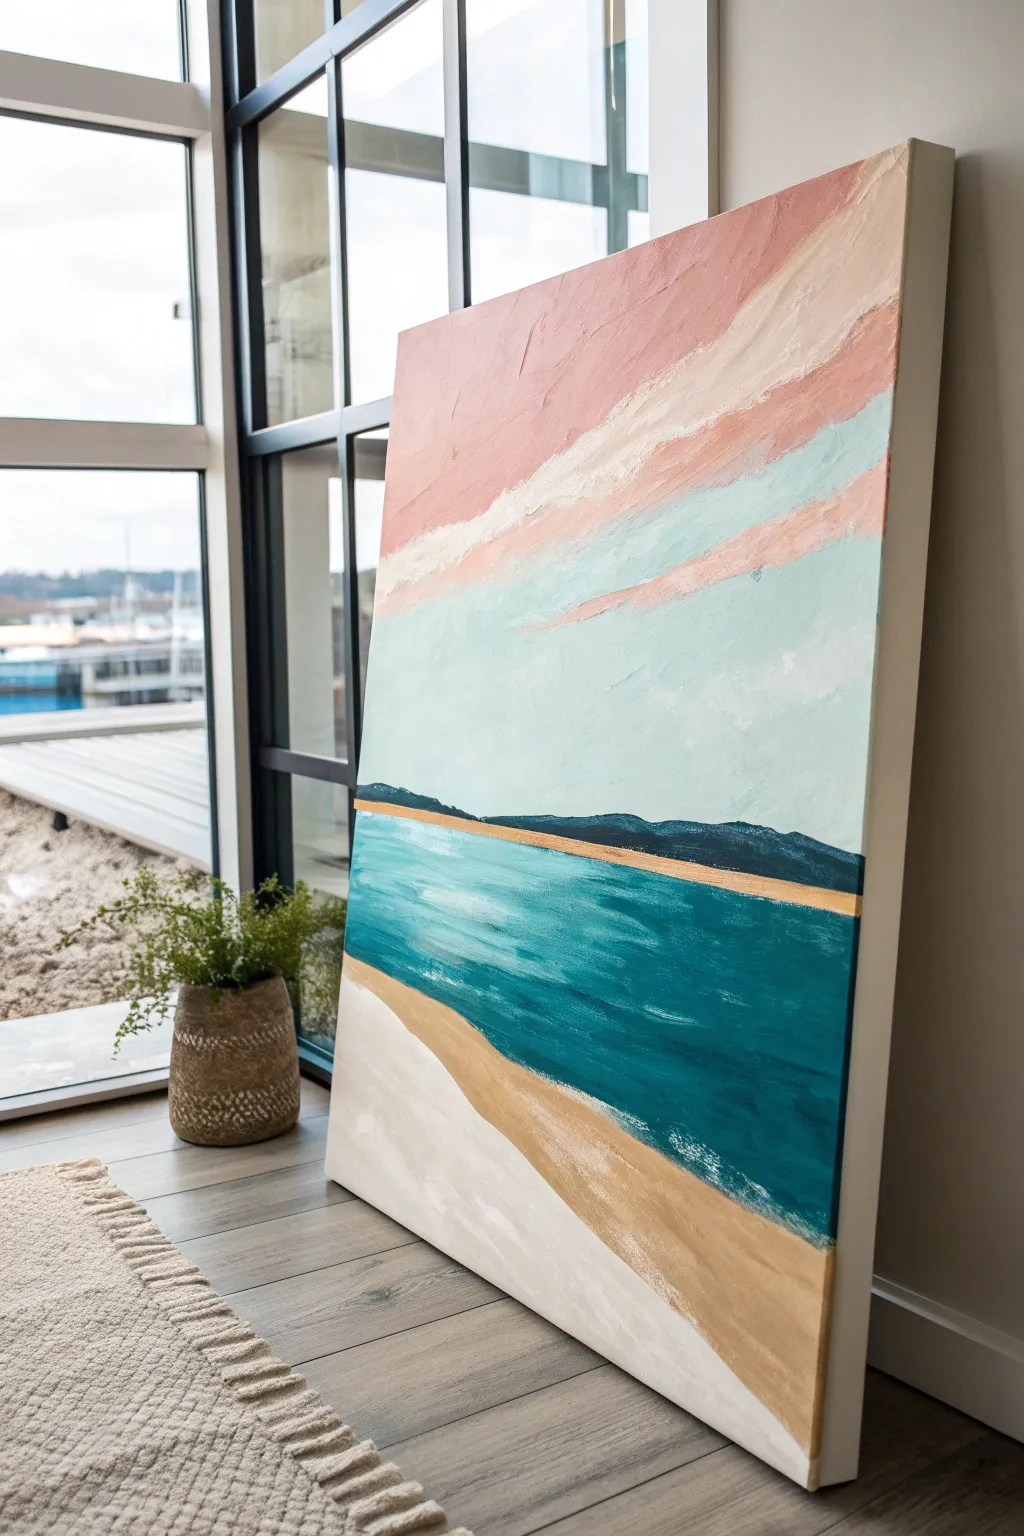
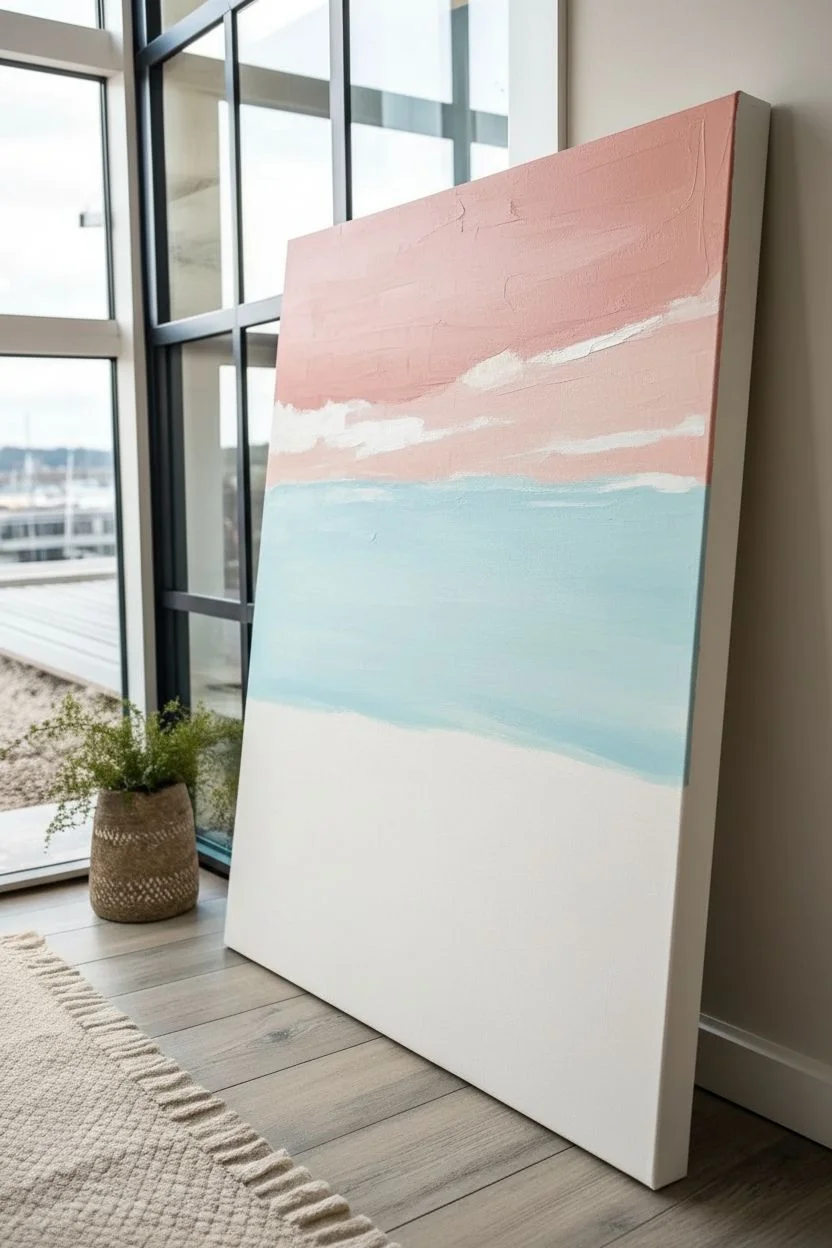
This abstract landscape captures the serene beauty of a coastal sunset using bold, sweeping blocks of color and rich texture. With its soothing palette of teal, dusty pink, and sandy beige, this project is perfect for practicing layering and creating depth through simple shapes.
Detailed Instructions
Materials
- Large stretched canvas painting (e.g., 24×36 inches)
- Acrylic paints (Titanium White, Unbleached Titanium/Beige, Turquoise Deep, Phthalo Blue, Mars Black, Rose Madder or Dusty Pink, Light Blue)
- Wide flat brush (2-3 inches) for background layers
- Medium filbert brush for horizon details
- Palette knife (optional, for texture)
- Painter’s tape (optional, for straight horizon)
- Water cup and paper towels
- easel or drop cloth
Step 1: Setting the Sky
-
Map out your zones:
Before you start painting, lightly visualize or sketch four main horizontal zones on your canvas: the top third for pink/white clouds, the middle for the light blue sky, a thin band for the dark horizon, and the bottom half for the water and beach. -
Mix the sky blue:
Create a very pale blue by mixing a large amount of Titanium White with just a dot of Light Blue. Use your wide flat brush to paint the middle section of the canvas, ensuring the paint is opaque enough to cover the weave. -
Add the upper clouds:
Mix a dusty pink shade using Rose Madder and White. Apply this to the top section of the canvas using broad, angled strokes that sweep from the top corner downwards. -
Blend the transition:
While the paint is still slightly wet, use white paint on your brush to create soft, streaky clouds between the pink and blue sections. I like to drag the brush horizontally with a loose wrist to mimic wind-swept movement.
Uneven Horizon Lines?
If your hand is shaky, apply a strip of painter’s tape across the canvas where you want the horizon. Paint over it, let it dry slightly, and peel it off for a crisp, straight line.
Step 2: Painting the Horizon & Ocean
-
Establish the horizon line:
Mix Phthalo Blue with a touch of Mars Black to create a deep navy color. Paint a thin, uneven strip across the middle of the canvas to represent distant hills or mountains. -
Create the distant shore:
Right below the dark navy line, add a very thin strip of your sandy beige color (Unbleached Titanium) to suggest a distant shoreline. -
Mix the main ocean color:
Combine Turquoise Deep with a little White to get a rich teal. Start painting directly under the sandy shoreline strip, filling a large section down towards the bottom left corner. -
Add ocean depth:
Dip your dirty teal brush into a bit more Phthalo Blue and streak it into the deeper parts of the water for variety. -
Create whitecaps:
Using a dry brush technique with pure White paint, lightly whisk horizontal strokes across the teal water to suggest gentle waves and light reflection.
Step 3: The Beach Foreground
-
Paint the wet sand:
Mix Unbleached Titanium with a tiny drop of brown or ochre for a darker, wet sand color. Paint a wide, diagonal band starting from the bottom right and sweeping up towards the left, meeting the water. -
Add the dry white sand:
Fill the remaining bottom left corner with a mix of Titanium White and a tiny touch of beige. This represents the pristine, dry sand nearest to the viewer. -
Blend the shoreline:
Where the water meets the sand, use a clean, slightly damp brush to soften the edge. You can also dab a little white paint here to look like sea foam washing up. -
Refine the textures:
Step back and look at your composition. If some areas look too flat, use a palette knife or a coarse brush to dab on thicker paint, adding texture to the clouds or the foamy shoreline. -
Final touches:
Check your edges. Since this is a gallery-wrapped canvas, you may want to carry the colors around the sides for a professional finish. Let the entire piece dry completely for 24 hours.
Add Metallic Shimmer
Mix a tiny amount of gold acrylic paint into the beige sand color or glaze it over the dry sand dunes. It simulates sunlight hitting the beach beautifully.
Hang this large-scale piece in a bright room to bring a permanent vacation vibe to your space
Mixed-Media Acrylic Landscape With Collaged Texture

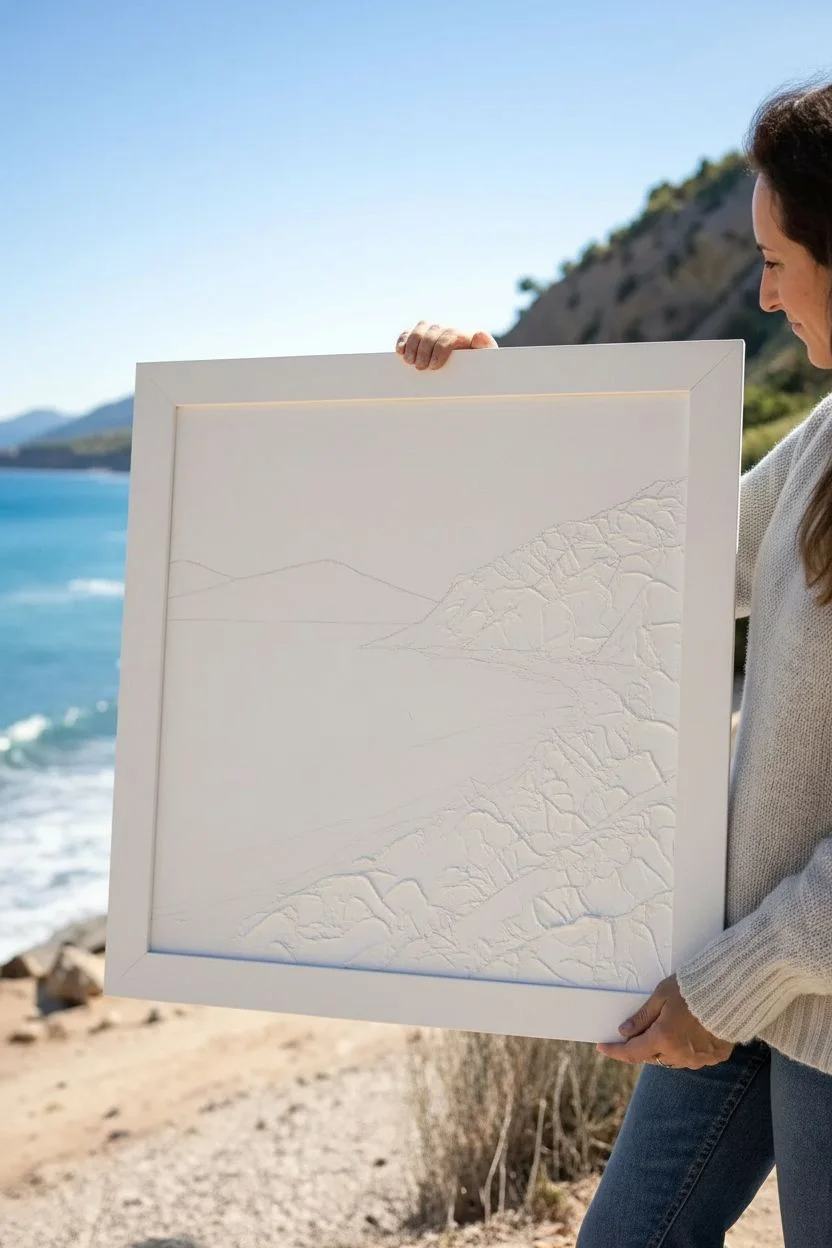
Capture the raw beauty of a rugged coastline with this textural mixed-media painting. By combining acrylics with collage elements, you’ll build physical depth that mimics crashing waves and craggy rock faces.
Step-by-Step
Materials
- Stretched canvas or canvas board (approx. 16×20 inches or square)
- Heavy body acrylic paints (Phthalo Blue, Ultramarine Blue, Titanium White, Burnt Sienna, Yellow Ochre, Cadmium Red, Sap Green, Hooker’s Green)
- Texture paste or heavy modeling gel
- Tissue paper or torn watercolor paper scraps
- Matte medium or Mod Podge
- Palette knives (variety of shapes)
- Flat brushes (1-inch and 1/2-inch)
- Round detail brush
- Sea sponge (optional)
- White or colorless gesso
Step 1: Building the Foundation
-
Establish the horizon:
Begin by sketching a light pencil line for your horizon about one-third of the way down the canvas. Sketch the diagonal slope of the cliffs coming from the right side down to the bottom left. -
Collage the texture:
Tear pieces of tissue paper or thick watercolor paper into irregular shapes. Apply matte medium to the canvas area where the cliffs and foreground slope will be, then press the paper into it, wrinkling it intentionally to create rock-like ridges. -
Add wave texture:
Use a palette knife to spread modeling paste or heavy gel into the water area, particularly where the white waves will eventually crash near the shore. Peak the paste slightly to mimic foamy water. -
Seal the surface:
Once your glue and paste are fully dry (this may take a few hours), cover the entire collage area with a thin coat of gesso to ensure the paint adheres evenly to the different materials.
Collage Shortcut
Don’t have texture paste? Mix acrylic paint with baking soda or sand to create a gritty, thick mortar ideal for painting rocks and sand.
Step 2: Blocking in Color
-
Paint the sky:
Mix Titanium White with a touch of Phthalo Blue. Paint the sky area, starting darker at the top and fading to a very pale blue near the distant mountains. -
Basecoat the sea:
Using a wide flat brush, apply a deep blue mix (Ultramarine and Phthalo) to the deeper water on the left. As you move toward the shore, blend in some Hooker’s Green and White to create a turquoise shallow water hue. -
Underpaint the cliffs:
Wash a thin layer of Burnt Sienna over the textured cliff area. Let the paint settle into the crevices of your collage paper to emphasize the cracks and rocky shapes. -
Define the beach:
Mix Yellow Ochre with plenty of White and a tiny dot of Burnt Sienna. Paint the sandy strip between the water and the cliffs.
Add Realism
Sprinkle actual fine sand into the wet paint on the beach section to create an authentic, gritty texture that catches the light.
Step 3: Layering and Detailing
-
Enhance the cliff colors:
Dry brush streaks of Cadmium Red mixed with Burnt Sienna onto the raised ridges of the cliffs. Leave the darker underpainting visible in the recesses for shadow. -
Create distant mountains:
Paint the far triangular mountain using a grey-blue or muted earth tone. Keep edges slightly soft to push it into the background distance. -
Develop water movement:
Use a smaller flat brush to add horizontal streaks of lighter turquoise and white in the water. Focus on the transition zone where the deep blue meets the shallow green. -
Add churning waves:
Load a palette knife with pure Titanium White. Drag it loosely over the texture paste ridges you created earlier in the water to create crisp, bright seafoam. -
Detail the shorebreak:
Where the water meets the sand, scumble white paint to soften the edge, creating the look of gentle foam washing up the beach.
Step 4: Vegetation and Atmosphere
-
Stipple the foliage base:
Mix Sap Green with a little deep blue or black. Use an old, splayed brush or sponge to dab dark patches of vegetation onto the lower cliffs and foreground slope. -
Highlight the greenery:
Add yellow to your green mix. Lightly dab this lighter green onto the tops of your bushes where the ‘sun’ would hit them, giving the foliage volume. -
Atmospheric clouds:
Use a dry brush or even your fingertip to swirl faint, wispy white clouds into the sky. Keep them transparent so the blue shows through slightly. -
Final adjustments:
Step back and look for contrast. Darken the deep water if needed, or add a few final opaque white highlights to the crashing waves for sparkle.
Now you have a dynamic seascape full of tangible texture to hang on your wall


Have a question or want to share your own experience? I'd love to hear from you in the comments below!