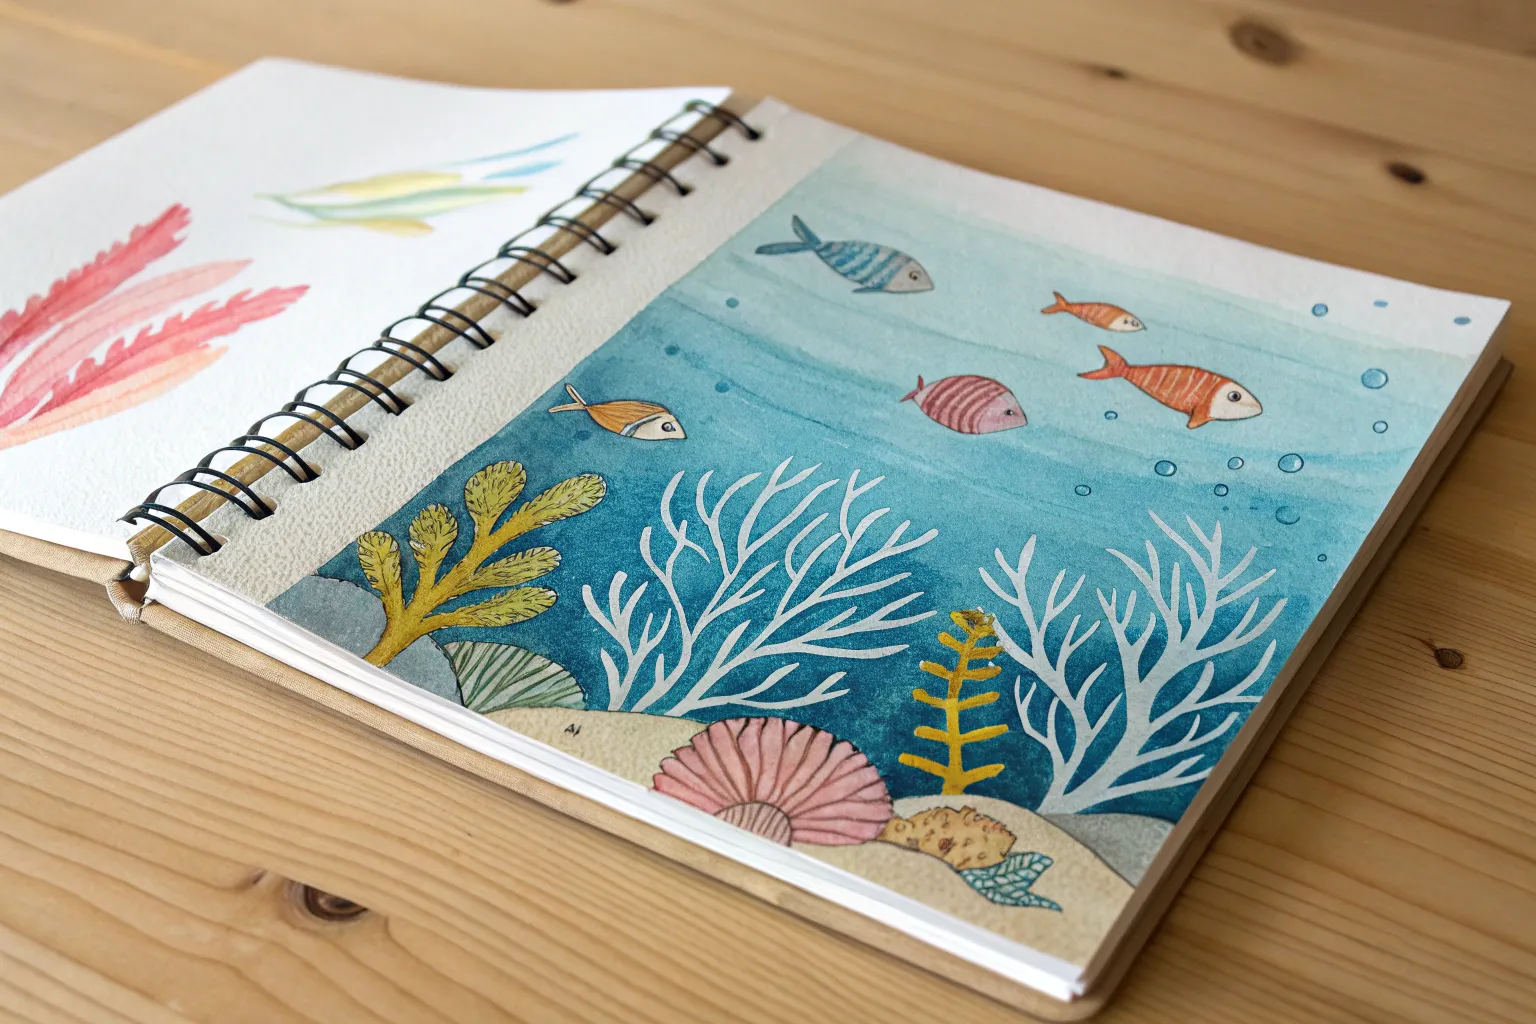
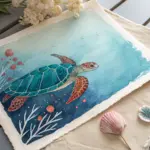
If you’re craving a relaxing sketch session, underwater drawing is one of the easiest ways to build a full scene fast. I’m sharing beginner-friendly ideas that lean on simple shapes, quick textures, and those little ocean details that instantly say “under the sea.”
Simple Shape Fish With Pattern Stripes

Using simple shapes and contrasting textures, this project captures a whimsical underwater scene directly in your sketchbook. The combination of clean ink lines and torn kraft paper creates a lovely mixed-media effect that feels both organic and modern.
Step-by-Step
Materials
- Sketchbook with heavy cream paper
- Kraft paper (brown packing paper)
- Dark blue ink pad
- Clear stamp blocks (for circle stamps)
- Circle stamps (various sizes)
- Dark blue fine liner pen
- Dark blue brush pen or marker
- Light blue-grey marker or watercolor pencil
- Glue stick
- Scissors
Step 1: Setting the Scene
-
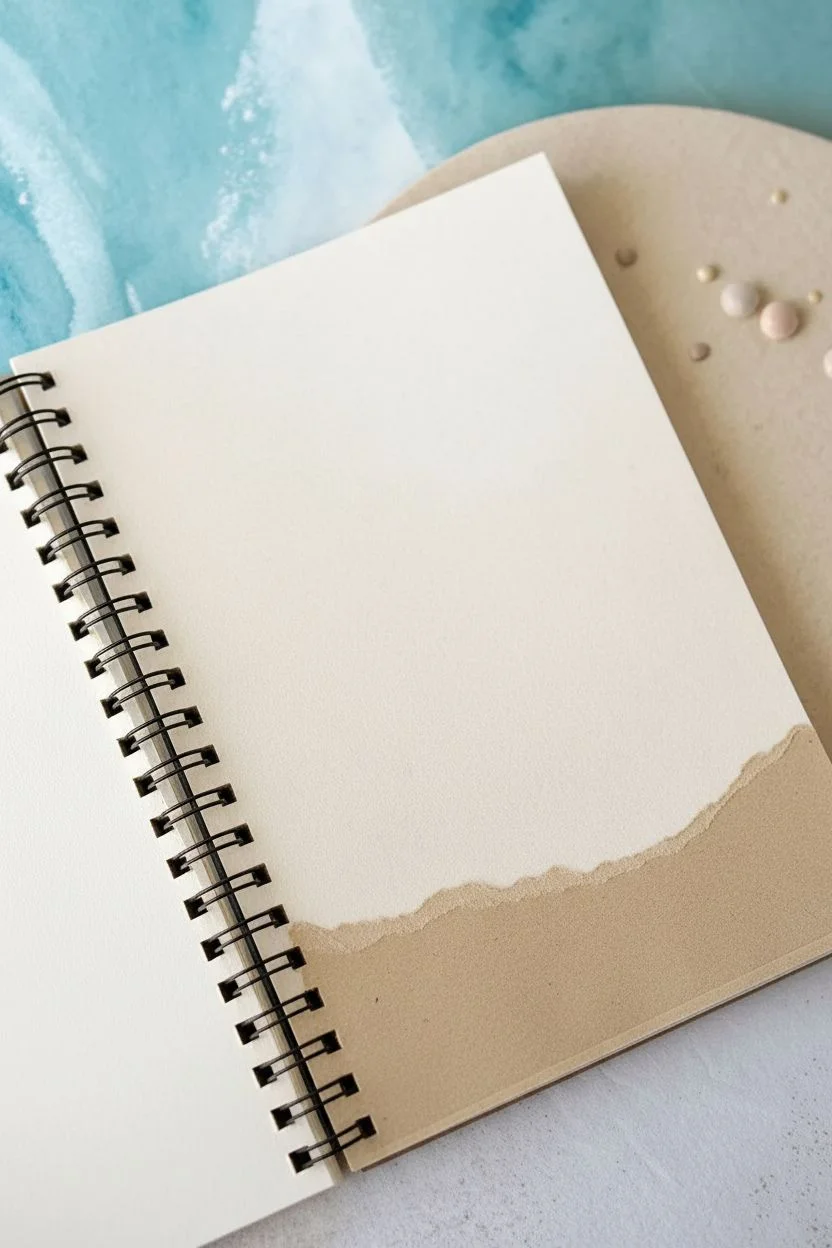
Prepare the sandy bottom:
Begin by tearing a strip of kraft paper. You want a rough, uneven top edge to mimic undulating sand dunes, so tear it quickly and freely rather than cutting it straight. -
Check the fit:
Place your torn kraft paper at the bottom of your sketchbook page to see how it looks. It should cover the bottom inch or two of the page. Trim the bottom and side edges straight with scissors to match the page dimensions if needed. -
Glue the sand:
Apply a generous amount of glue stick to the back of the kraft paper strip. Press it firmly onto the bottom of your page, smoothing it out from the center to the edges to avoid wrinkles.
Stamp Improvisation
No circle stamps? Dip the rim of a marker cap, a glue stick lid, or a straw into ink to stamp perfect hollow circles, then color them in lightly.
Step 2: Drawing the Fish
-
Outline the body:
In the center of the page, above the sand, draw a simple oval shape with pointed ends using your dark blue fine liner. This classic lemon shape forms the fish’s body. -
Add the head and tail:
Draw a curved line vertically near the front of the oval to separate the head. Then, sketch a simple triangular tail fin at the back, splitting it slightly in the middle for detail. -
Create the stripes:
Draw wide, vertical bands across the fish’s body. These should curve slightly with the shape of the body to give the fish some volume rather than looking completely flat. -
Draw the fins:
Add a small dorsal fin on top and a pectoral fin on the side using triangular shapes. Add lines inside these fins to suggest structure. -
Fill the dark stripes:
Using your dark blue brush pen or marker, color in every other stripe on the body. I also like to fill in the main parts of the tail and fins, leaving thin white lines for definition. -
Add facial details:
Draw a small circle for the eye with a tiny dot in the center. Add a small ‘V’ shape for the mouth at the very front tip.
Step 3: Bubbles and Background
-
Stamp the bubbles:
Take your circle stamps and tap them lightly onto your dark blue ink pad. Stamp a cluster of bubbles rising from the fish’s mouth area toward the top of the page. -
Vary the sizes:
Use different sized stamps for visual interest. If you don’t have stamps, you can carefully hand-draw perfect circles and fill them with a textured, slightly faded blue marker. -
Fill the bubbles:
The bubbles in the example have a textured, slightly uneven fill. If drawing by hand, use a circular scribbling motion or a dry marker to replicate that stamped ink texture. -
Draw sea grass:
Using a lighter grey-blue marker or pencil, draw simple stems rising from the brown ‘sand’. Add small, leaf-like strokes on either side of the stems. -
Add floating particles:
Dot your fine liner pen randomly around the page to create tiny specks. This subtle detail fills the empty space and makes the water look active. -
Final touches:
Check your heavy black lines on the fish. If the marker bled or looks weak, go over the outlines one last time with your fine liner for a crisp finish.
Add Depth
Use a white gel pen to add tiny highlights to the top of the bubbles and the fish’s eye. This small sheen makes the scene look wet and lively.
Now you have a charming mixed-media ocean scene that combines texture and bold pattern.

Jellyfish With Wavy Tentacles
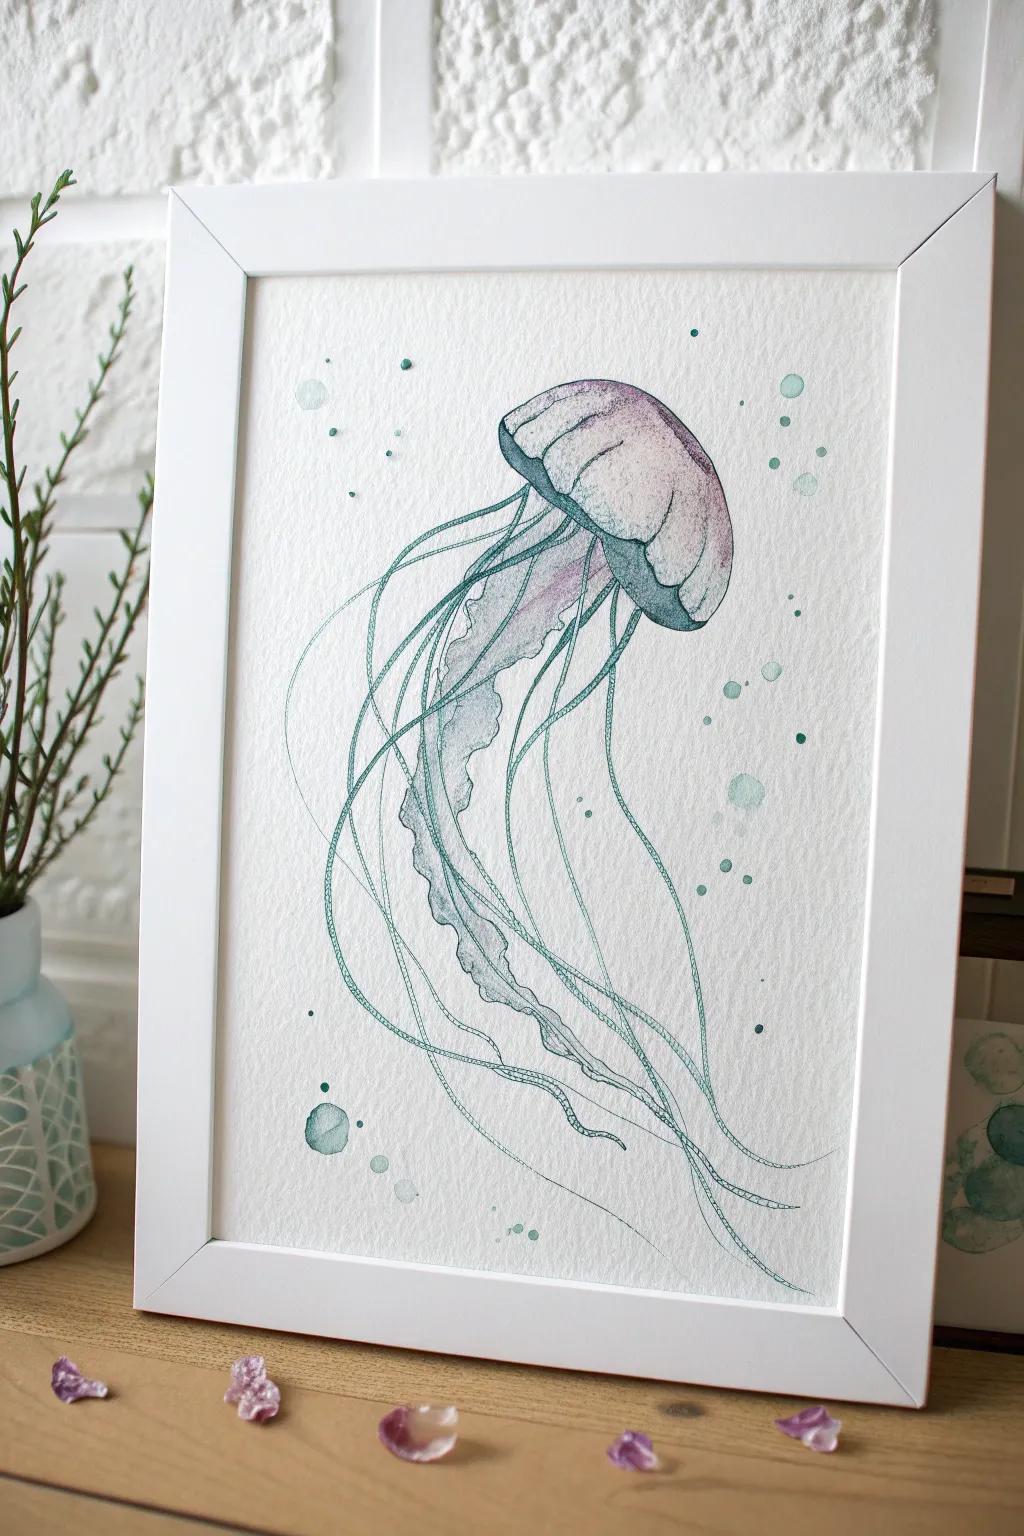

Capture the graceful movement of the deep sea with this delicate mixed-media jellyfish illustration. Combining soft watercolor washes in teal and violet with precise ink detailing creates a stunning, airy effect perfect for coastal decor.
Step-by-Step Tutorial
Materials
- Cold-pressed watercolor paper (300gsm)
- Watercolor paints (teal, turquoise, violet/purple)
- Fine liner or waterproof archival ink pen (0.1mm and 0.3mm, teal or grey)
- Round watercolor brushes (size 4 and size 0 or 1)
- Pencil (HB)
- Kneadable eraser
- Clean water and paper towels
- White gel pen (optional for highlights)
Step 1: Sketching the Form
-
Outline the bell:
Start by lightly sketching a mushroom-shaped cap for the main body of the jellyfish. Keep the top rounded and the bottom edge slightly scalloped or wavy. -
Define the rim:
Draw a second curved line just beneath the scallops of the cap to create the rim of the bell, giving the shape some three-dimensional volume. -
Map the tentacles:
Lightly draw long, flowing S-curves extending downwards from the center of the bell. Let these lines cross over each other gently to suggest movement in the water. -
Sketch the oral arms:
Add a thicker, frillier central mass hanging directly from the bell’s center; these are the oral arms. Make the edges ragged and uneven compared to the smooth outer tentacles.
Color Harmony Tip
To unite the piece, mix a tiny amount of your violet paint into the teal shadow areas. This shared pigment makes the disparate colors feel cohesive.
Step 2: Watercolor Washes
-
Wet-on-wet bell base:
With clean water, dampen the inside of the jellyfish bell outline. While wet, drop in a very pale wash of violet near the top and right side. -
Add teal gradients:
While the violet is still damp, introduce a soft teal color to the left side and the rim of the bell. Let the colors bleed naturally into each other where they meet. -
Paint the oral arms:
Using a translucent wash of teal, paint the frilly central arms. Add slightly more pigment to the folds and edges to create shadows, keeping the center lighter. -
Create background bubbles:
Mix a watery turquoise solution. Load your brush and gently splatter a few drops around the paper. For larger bubbles, paint small circles of clean water and drop pigment into them. -
Dry completely:
Allow the paper to dry fully before moving on to ink. If the paper is damp, your pen lines will bleed and lose their crispness.
Step 3: Inking Guidelines
-
Outline the bell:
Using your 0.3mm fine liner (a dark teal or grey works beautifully), trace the outline of the jellyfish bell. Break the line occasionally to keep the look organic. -
Texture the bell:
Add gentle vertical curved lines across the bell to show its rounded form. Use stippling (tiny dots) near the bottom rim to create shading and texture. -
Detail the frills:
Switch to a finer 0.1mm pen to outline the central frilly arms. Use quick, jagged strokes to emphasize their ruffled, delicate texture.
Add Some Sparkle
After the ink is dry, use metallic watercolor or a glitter pen to trace just one edge of the bell and a few tentacles for a magical, bioluminescent glow.
Step 4: Tentacles and Finishing
-
Draw main tentacles:
With a steady hand, draw the long, trailing tentacles following your pencil sketches. Draw two parallel lines very close together for each tentacle to give them weight, rather than a single stick figure line. -
Add segmentation:
Inside the parallel tentacle lines, add tiny horizontal dashes or segments. This small detail mimics the anatomy of real jellyfish tentacles. -
Vary line weight:
Go back over certain curves of the tentacles with a slightly thicker line to simulate shadows where the tentacles twist away from the light. -
Enhance the bubbles:
If your watercolor bubbles have dried too light, outline a few of them loosely with your fine pen or add a tiny dot of ink floating nearby. -
Erase pencil marks:
Once you are certain the ink is completely dry, gently run your kneadable eraser over the entire drawing to lift any remaining graphite guidelines.
Frame your ethereal creature in a simple white frame to let the delicate colors truly shine


Coral Reef Made From Easy Blobs and Tubes
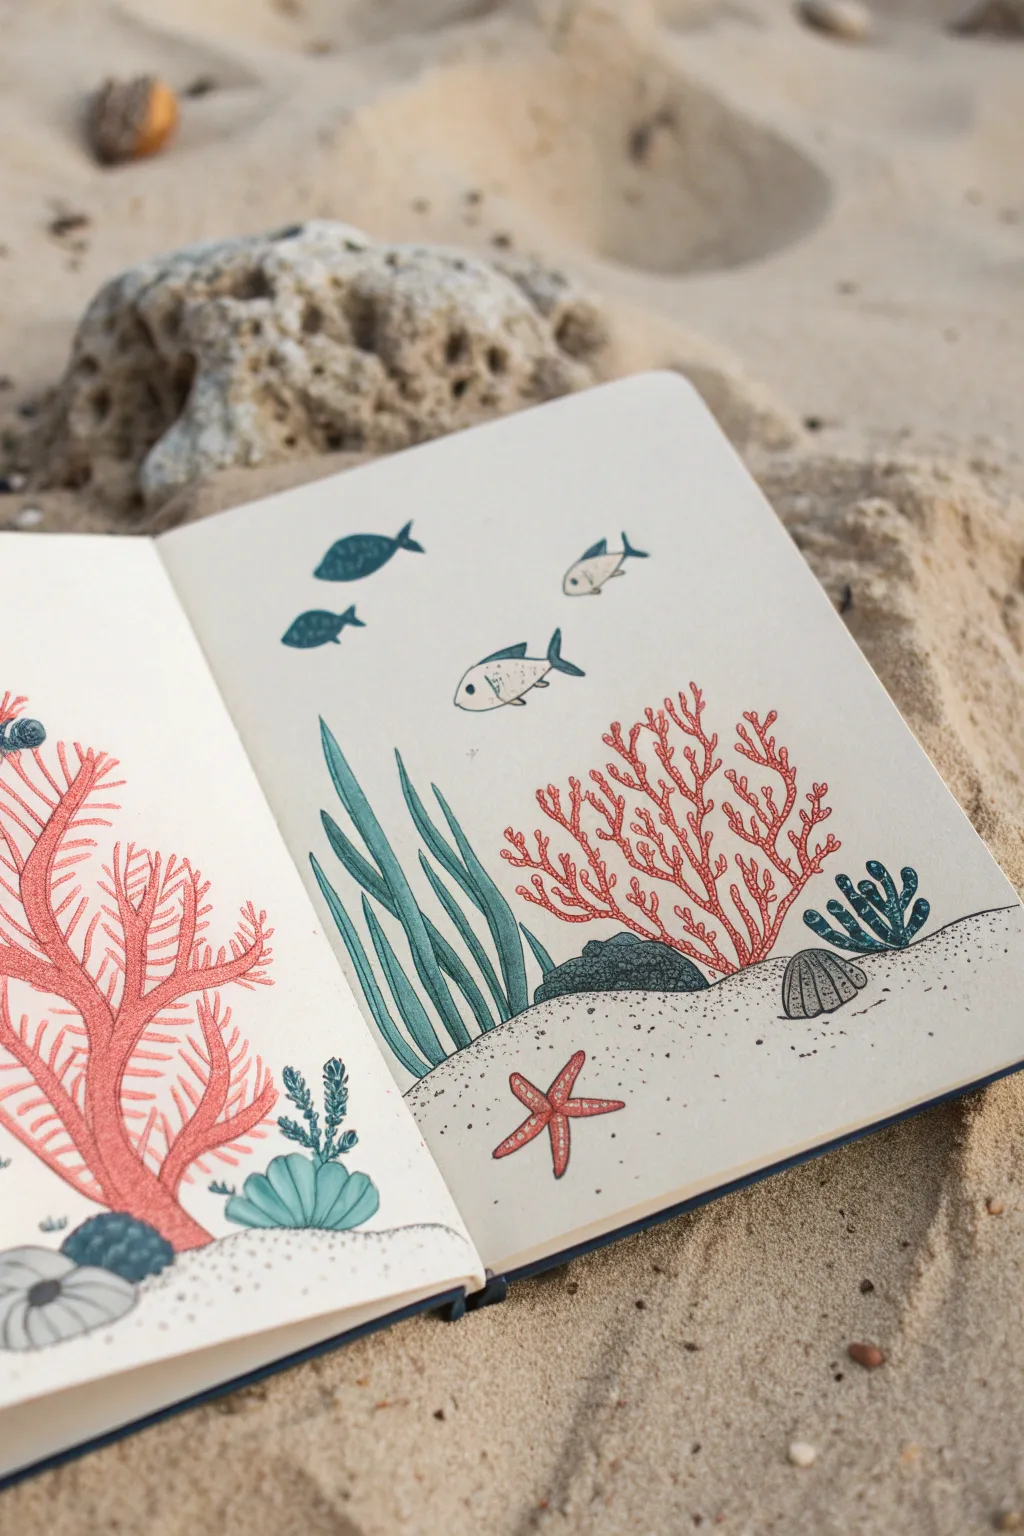
Capture the magic of the ocean floor with this charming underwater sketchbook spread, featuring vibrant corals and playful fish. This project uses simple lines and bold colors to create a whimsical reef scene that looks perfect resting on the sand.
How-To Guide
Materials
- Sketchbook with cream or off-white paper
- Pencil (HB or 2B)
- Eraser
- Fine liner pens (Black, 0.3mm and 0.5mm)
- Colored pencils or alcohol markers (Coral pink, Teal green, Slate blue, Grey)
- White gel pen (optional for highlights)
Step 1: Setting the Scene
-
Establish the seabed:
Begin on the right-hand page by lightly sketching a gentle, curving horizon line across the bottom third of the paper to represent the sandy ocean floor. Continue this line onto the left page to connect the spread. -
Add texture to the sand:
Using your fine liner, stipple small dots below the horizon line. Concentrate the dots near the line and fade them out as you move lower to create depth and texture.
Ink Smearing?
If your fine liner runs when you color over it, switch the order: color with pencils first, then add your ink outlines on top for crisp definition.
Step 2: Drawing the Flora & Fauna
-
Sketch the right-page coral:
On the right page, draw a large, branching coral structure rooted in the sand. Use organic, wobbly Y-shapes that extend upward and outward. -
Add seaweed blades:
To the left of the coral on the right page, sketch three or four tall, waving blades of seagrass. Keep the tips pointed and the bases slightly wider. -
Draw the fish:
Sketch three simple fish swimming above the flora. I like to make the top fish solid silhouettes and the middle one a line drawing for variety. -
Place the starfish and shell:
Draw a five-pointed starfish resting on the sand near the center fold. Add a small, rounded scallop shell to the right of the red coral. -
Create the left-page coral:
On the left page, draw a large, dominant fan coral that fills the lower half. Use the same branching Y-technique but make the branches thicker and more dense. -
Add seabed details:
Sketch a few rounded rocks or sea urchins at the base of the left-page coral to anchor the composition.
Step 3: Inking and Coloring
-
Outline the fish:
Go over your fish sketches with a black fine liner. Fill in the two upper fish completely with a dark blue or slate color, leaving the middle fish as an outline. -
Ink the coral outlines:
Trace the main coral structures with a steady hand. For the red corals, use a colored fine liner if you have one, or stick to black for a high-contrast look. -
Color the red coral:
Use a coral pink or salmon colored pencil to fill in the branching corals. Apply slight pressure variation to create a sense of roundness in the branches. -
Color the seaweed:
Fill in the tall seagrass blades with a teal or muted green. Use vertical strokes to mimic the direction of growth. -
Detail the fish:
If you left the middle fish hollow, use a grey or light blue to add subtle shading to its belly and tail. -
Color the starfish:
Color the starfish with a reddish-orange hue. I find that adding a tiny white dot in the center of the starfish with a gel pen makes it pop. -
Shade the rocks and shells:
Color the rocks and distinct shells in grey or slate blue tones. Add small hatch marks to the shell for texture. -
Final connection:
Ensure the sandy bottom line connects smoothly across the binding of the sketchbook, reinforcing that it is one continuous scene. -
Enhance details:
Add tiny circles or bubbles rising from the fish or coral to give the water some life. -
Clean up:
Wait for all ink to dry completely to avoid smudging, then gently erase any visible pencil marks.
Add Sparkle
Use a metallic gold or silver pen to add tiny dots to the fish scales or the sand for a magical, shimmering underwater effect.
Now you have a tranquil ocean snapshot preserved in your sketchbook.

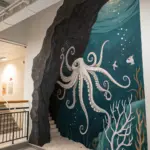

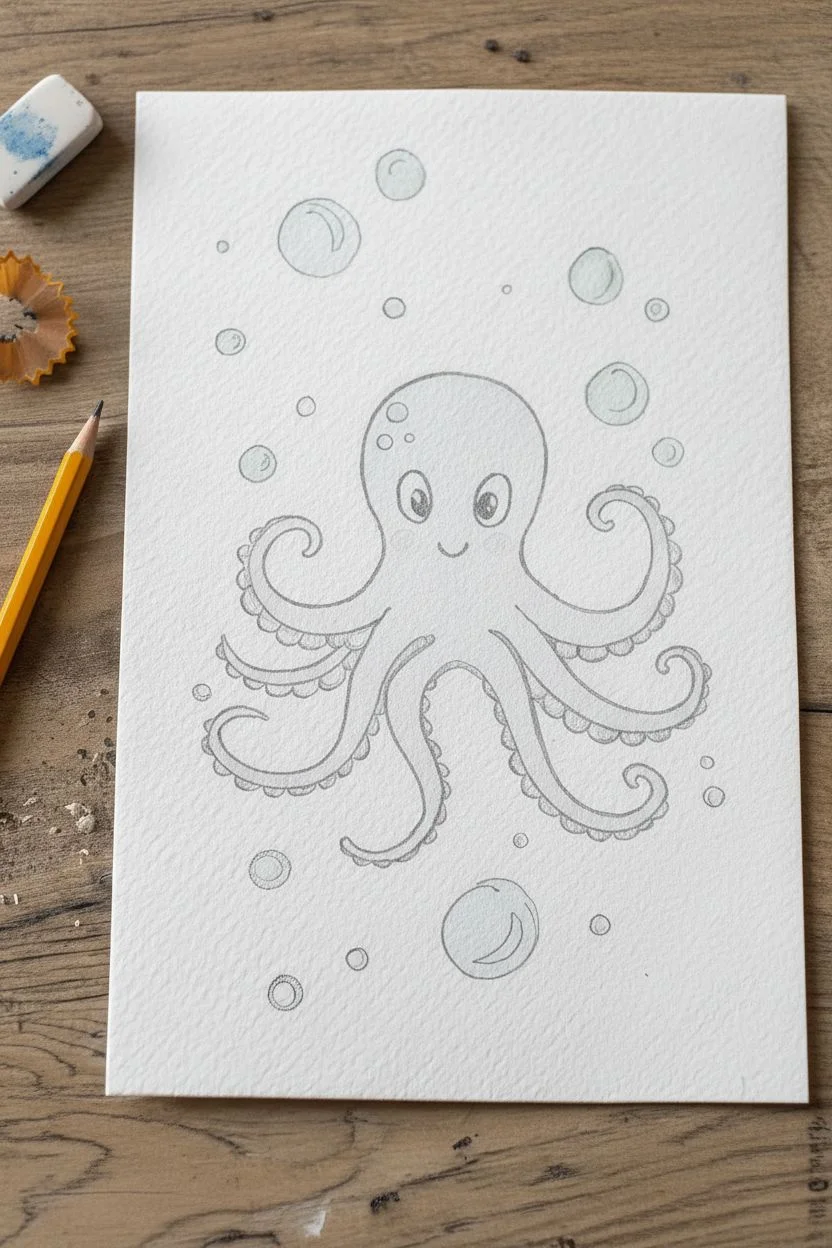
Cute Octopus With Big Eyes and Simple Suction Cups
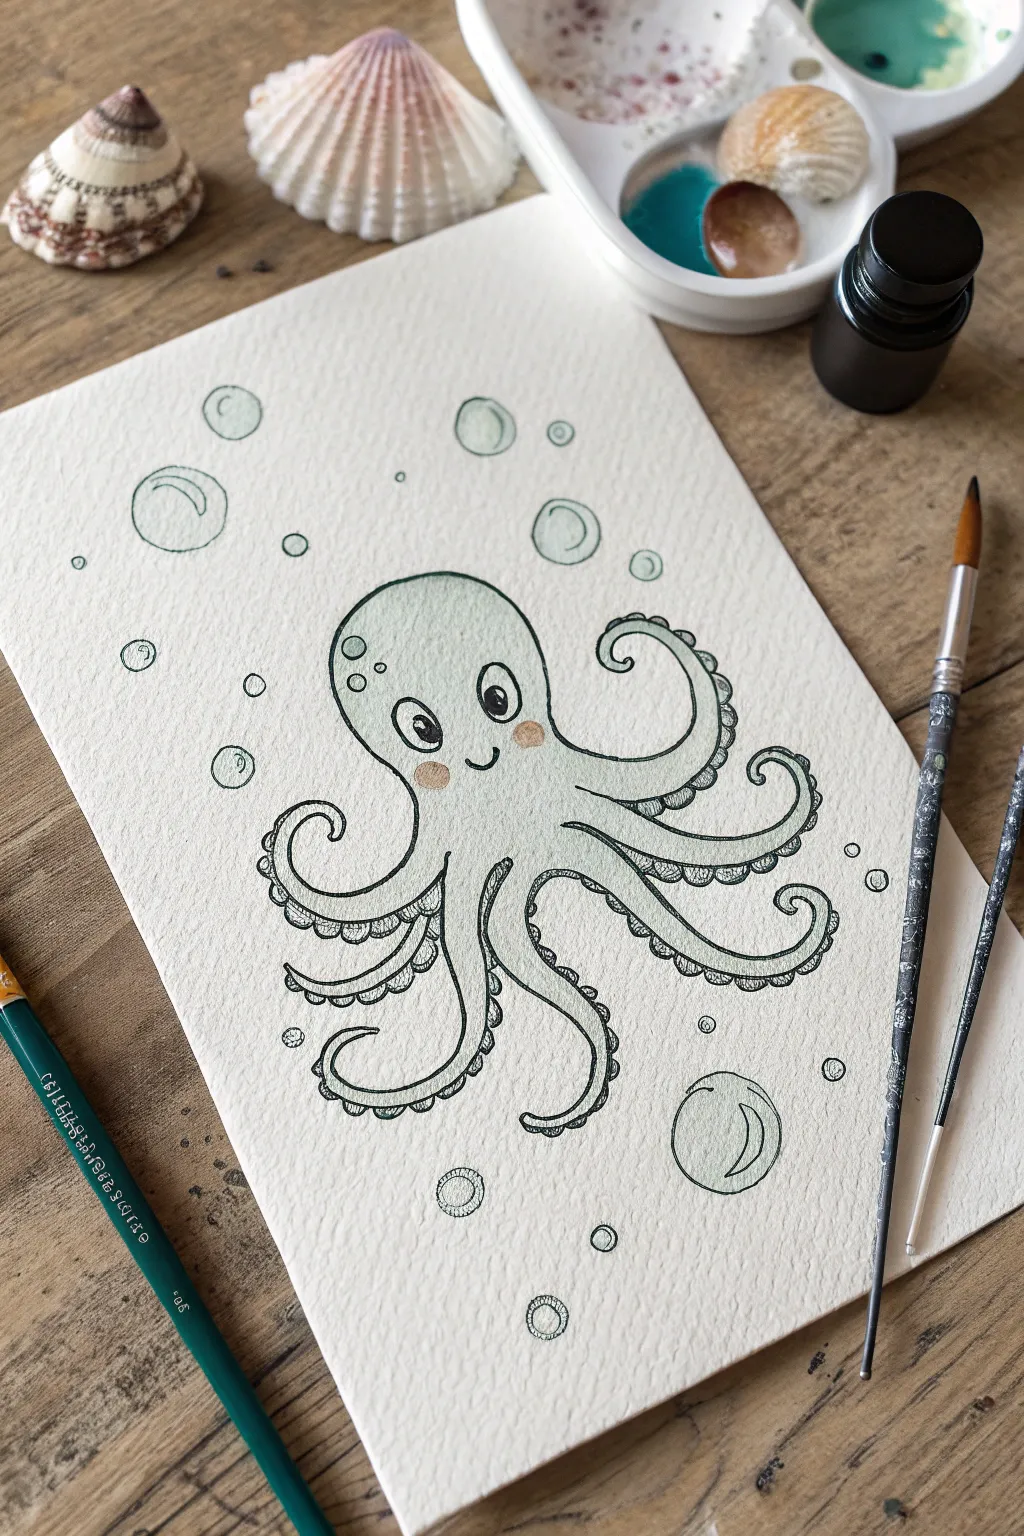
This adorable octopus illustration combines crisp ink lines with soft watercolor washes for a charming effect. Its gentle green hue and rosy cheeks make it a sweet addition to any sketchbook or nautical-themed room.
Step-by-Step
Materials
- Cold press watercolor paper (textured)
- Pencil (HB or H)
- Eraser
- Waterproof fine liner pen (black, 0.3mm or 0.5mm)
- Watercolor paints (sage green, teal, blush pink)
- Round watercolor brush (size 4 or 6)
- Detail brush (size 0 or 1)
- Jar of water
- Paper towels
Step 1: Sketching the Shape
-
Outline the head:
Start with a light pencil sketch. Draw a large, rounded inverted ‘U’ shape in the center of your paper. This will be the main body and head of your octopus. -
Add the first tentacles:
From the bottom of the head, sketch two curving tentacles that flow outwards to the left and right. Keep the lines smooth and fluid. -
Fill in the remaining arms:
Draw four to six more tentacles filling the space between the first two. Vary their poses—have some curling up and others draping down to create movement. -
Sketch the face:
Place two large oval eyes low on the head. Inside each, draw a smaller circle for the pupil and a tiny circle for a highlight. Add a small, curved smile right between the eyes. -
Add bubble accents:
Scatter circles of various sizes around the octopus to represent bubbles. Group some bubbles together for a more natural look. -
Detail the suction cups:
Along the underside of each tentacle, lightly sketch small half-circles to indicate where the suction cups will go.
Ink Confidence
Jittery hand? Don’t try to draw a tentacle in one slow stroke. Moves your arm, not just your wrist, and commit to the curve with a faster, confident motion for smoother lines.
Step 2: Inking the Lines
-
Trace the main outline:
Using your waterproof fine liner, carefully trace over your pencil lines for the head and tentacles. Keep your hand steady for clean curves. -
Ink the face:
Fill in the pupils with solid black ink, leaving the tiny highlight circle white. Trace the smile and the outer shape of the eyes. -
Defined suction cups:
Go over the suction cups with your pen. I like to add a tiny dot or second inner curve to a few of them to give them depth. -
Add bubble details:
Ink the bubbles. To make them look reflective, don’t close the circle completely, or add a small crescent moon shape inside the larger bubbles. -
Erase simple lines:
Wait at least 5-10 minutes for the ink to dry completely. Once safe, gently erase all visible pencil marks.
Step 3: Adding Color
-
Prepare the green wash:
Dilute a sage green or light teal watercolor paint with plenty of water. You want a very transparent, light value. -
Paint the body:
Using the round brush, apply the light green wash over the entire octopus body. Work quickly to keep the wash even. -
Tint the bubbles:
With the same dirty water or a very faint touch of teal, lightly tint the inside of the bubbles. Keep this extremely subtle. -
Rosy cheeks:
While the face is still slightly damp (but not soaking), dab a tiny amount of diluted blush pink onto the cheek area below the eyes for a soft blend. -
Deepen the shadows:
Mix a slightly darker version of your green. Use the detail brush to paint the underside of the tentacles where the suction cups are, creating a two-tone effect. -
Final spots:
If you added decorative spots to the head (like on the left side), paint them with the darker green mix or a contrasting teal.
Ocean Sparkle
Once the paint is totally dry, use a white gel pen to add extra highlights to the top of the head and the wettest part of the bubbles for a glossy, wet look.
Now you have a friendly sea creature ready to float on your wall or in your journal
BRUSH GUIDE
The Right Brush for Every Stroke
From clean lines to bold texture — master brush choice, stroke control, and essential techniques.
Explore the Full Guide
Wavy Seaweed Forest With Hidden Fish
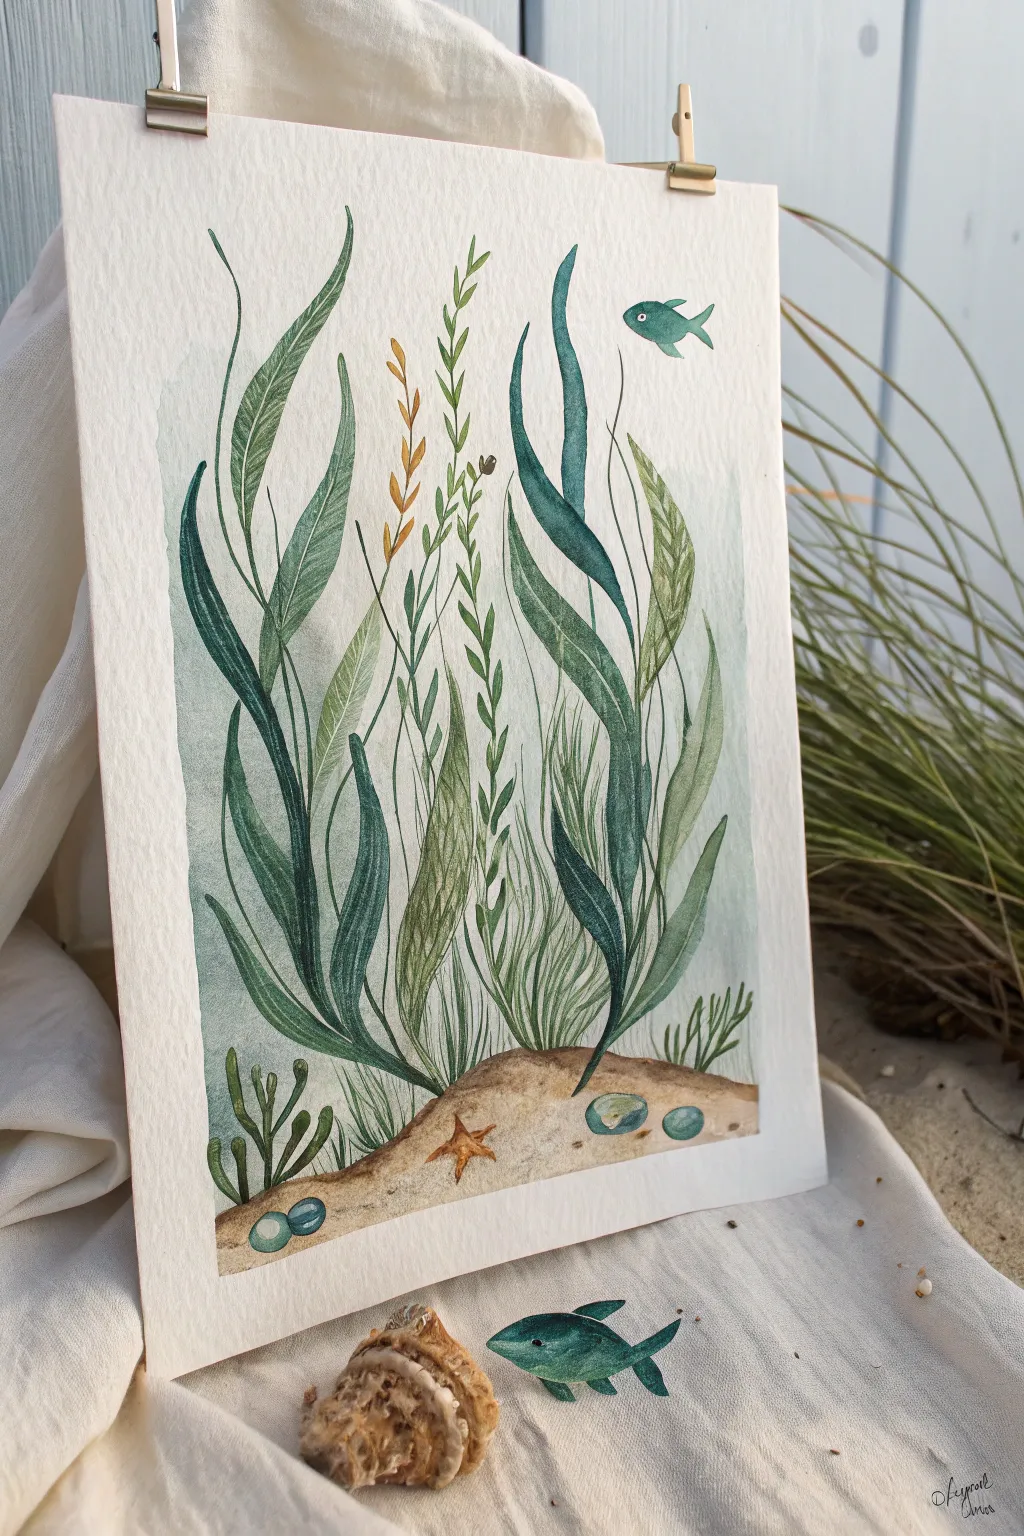
Dive into this serene underwater scene that uses flowing lines and cool watercolor tones to create a sense of movement. The composition features tall, dancing seaweed fronds and a few hidden sea creatures resting on a sandy ocean floor.
Detailed Instructions
Materials
- Cold-pressed watercolor paper (300 gsm recommended)
- Watercolor paints (Emerald Green, Phthalo Blue, Yellow Ochre, Burnt Sienna, Payne’s Grey)
- Round watercolor brushes (sizes 2, 4, and 6)
- Pencil (HB or lighter)
- Kneaded eraser
- Jar of clean water
- Paper towels
- Masking tape or clips
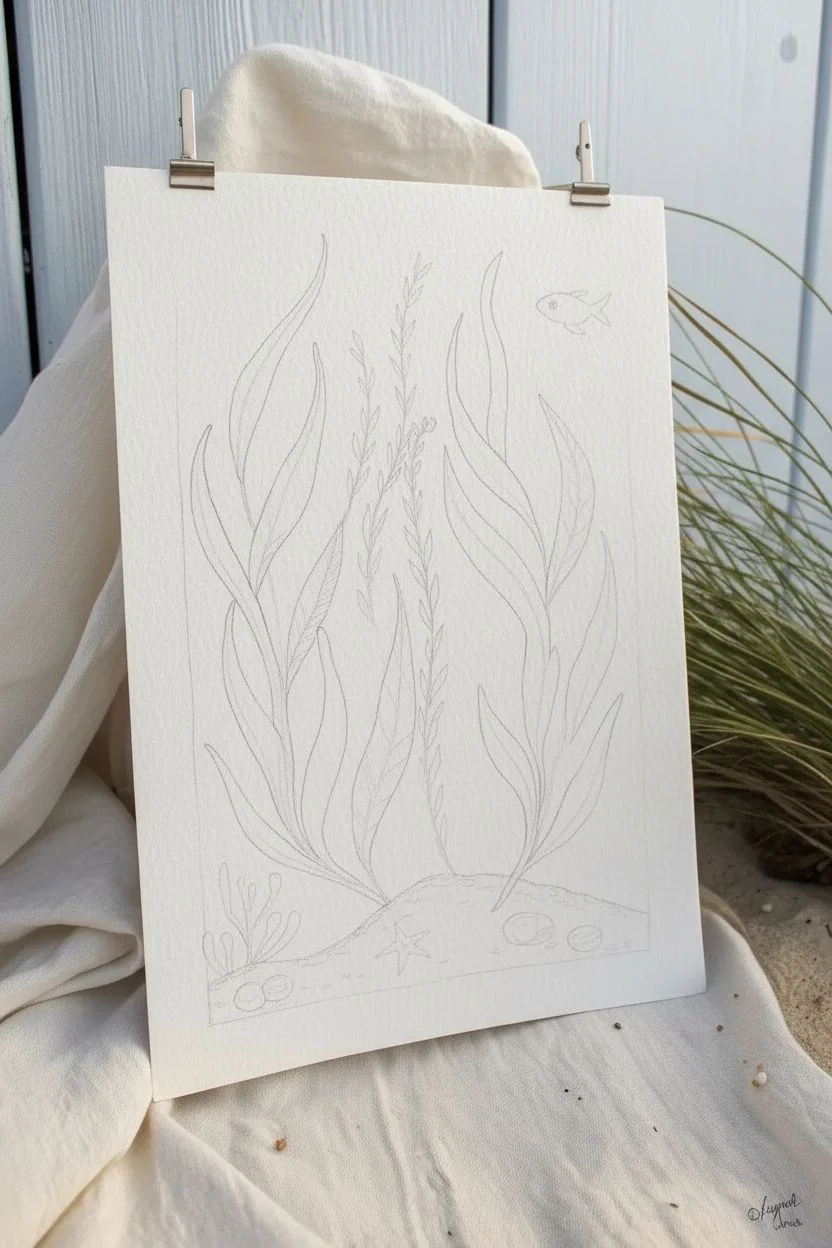
Step 1: Sketching the Layout
-
Prepare your surface:
Begin by securing your watercolor paper to a board using clips or masking tape. This prevents the paper from buckling when we add water washes later. -
Outline the seabed:
Lightly sketch a gentle, wavy hill at the very bottom of the page to represent the sandy ocean floor. Keep the line organic rather than perfectly straight. -
Draft the main kelp strands:
Draw three to four main vertical lines that swoop and curve upwards from the seabed. These will form the spines of your largest seaweed leaves. Make them varied in height and curvature. -
Add leaf shapes:
Flesh out the seaweed by drawing long, twisting ribbon shapes around your initial spines. For variety, add a thinner, more feathery plant stem in the center. -
Sketch the inhabitants:
Draw small, simple fish silhouettes swimming near the top right and lying on the sand. Add a small starfish shape nestled in the sand and a few round pebbles.
Bleeding Edges?
If your seaweed green bleeds into the blue background, the background wasn’t fully dry. Let layers dry completely or use a hairdryer on a low setting between phases.
Step 2: Painting the Background & Floor
-
Wash the water background:
Mix a very dilute wash of Phthalo Blue with plenty of water. Paint the area behind the seaweed, starting darker at the bottom and fading to almost clear water at the top. Let this dry completely before moving on. -
Base layer for the sand:
For the seabed, mix Yellow Ochre with a tiny touch of Burnt Sienna. Apply a light wash across the bottom hill shape. -
Texture the sand:
While the sand layer is still slightly damp, drop in concentrated dots of Burnt Sienna or brown paint. This wet-in-wet technique creates a natural, sandy texture.
Step 3: Detailing the Vegetation
-
Paint the large kelp fronds:
Mix a deep Emerald Green with a touch of blue. Using your size 6 brush, fill in the large seaweed shapes. Vary the pressure on your brush to create thick and thin strokes that mimic the twisting leaves. -
Add darker shadows:
While the green paint is still wet, drop a darker green (mixed with a little Payne’s Grey) into the lower sections of the leaves and where the leaves ‘twist’ away from the light. -
Paint the feathery plant:
Using a thinner size 2 brush and a lighter yellow-green mix, paint the central plant. Use short, rhythmic dabs along the stem to create small leaves. -
Add the golden weed:
Paint the secondary, smaller plant using a Yellow Ochre mix. This provides a nice warm contrast to the cool greens and blues. -
Create background depth:
Mix a very pale gray-green wash. Paint shadow shapes of seaweed behind your main plants. These should look faint and distant, adding depth to the forest.
Add Real Texture
Sprinkle a tiny pinch of table salt onto the wet sandy bottom paint. When it dries and you brush it off, it creates a stunning, realistic gritty sand texture.
Step 4: Finishing Touches
-
Paint the stones and starfish:
Color in the pebbles with a blue-grey mix, leaving a tiny spot of white paper for a highlight. Paint the starfish with a rich Burnt Sienna. -
Color the fish:
Paint the swimming fish using your blue-green mix. I often make the bottom of the fish slightly darker to give it form. -
Small seabed details:
Using your smallest brush, paint tiny tufts of grass or small coral shapes on the seabed in the bottom left corner to balance the composition. -
Add the fish eye:
Once the fish is totally dry, use a tiny dot of white gouache or a white gel pen to add the eye. Add a tiny black pupil in the center for focus. -
Final leaf veins:
If you want extra detail, use a colored pencil or a very dry brush with dark green paint to add subtle vein lines to the large dried seaweed leaves.
Now you have a tranquil underwater snapshot ready to frame or give as a thoughtful gift
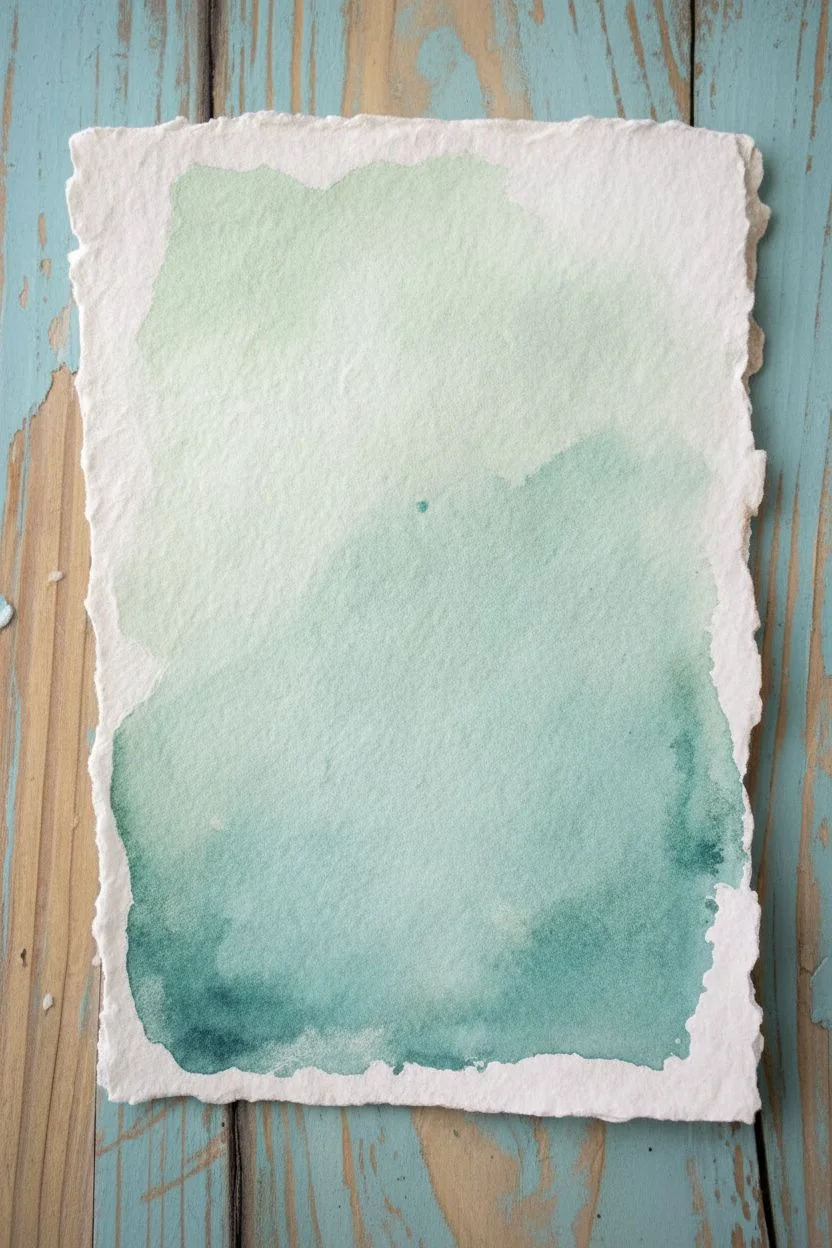
Underwater Bubbles and Light Rays Background
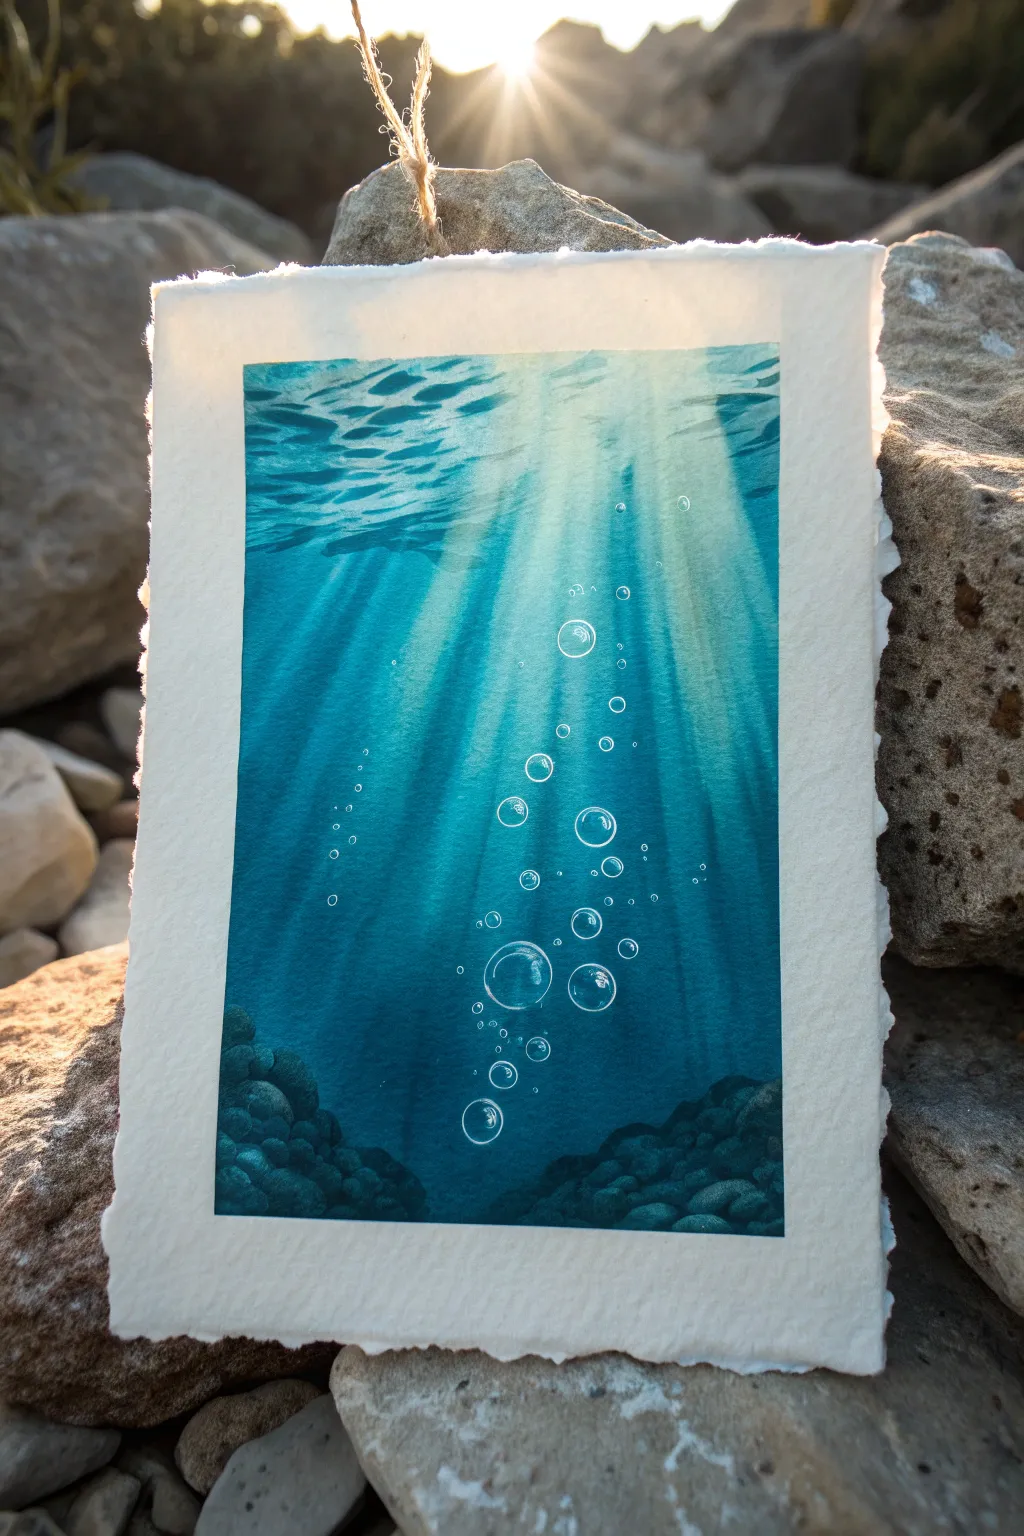
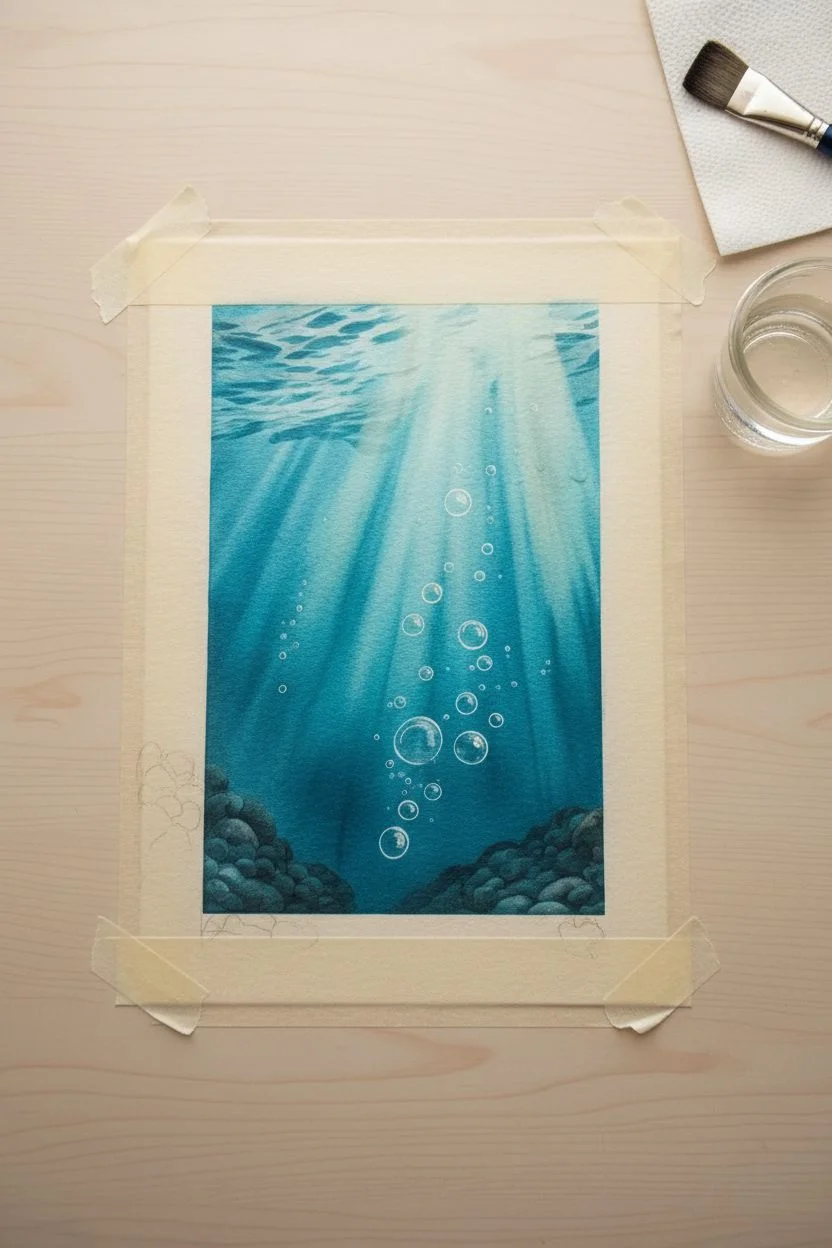
Capture the serene beauty of light piercing through deep water in this watercolor study. Using distinct rays of light and delicate bubbles, you’ll create a sense of depth that feels both calm and immersive.
Step-by-Step Guide
Materials
- Cold press watercolor paper (deckled edge optional)
- Masking tape
- Watercolor paints (Turquoise, Phthalo Blue, Indigo, Prussian Blue)
- White gouache or white gel pen
- Medium flat brush
- Small round detail brush (size 0 or 1)
- Jar of clean water
- Paper towel
- Pencil and eraser
Step 1: Setting the Scene
-
Tape the edges:
Secure your watercolor paper to a board or table with masking tape. This creates the crisp white border seen in the example. -
Light pencil sketch:
Very lightly sketch the position of the rocky formations at the bottom corners. Avoid drawing the water rays or bubbles; those will be painted organically. -
Wet the paper:
Using your flat brush and clean water, dampen the entire rectangular area inside the tape. It should be glistening but not forming puddles.
Step 2: Creating the gradient
-
First wash:
Start with a light Turquoise wash at the top, fading into the wet paper. As you move down, switch to Phthalo Blue. -
Deepen the hues:
While the paper is still damp, drop in stronger blues. Use Prussian Blue or Indigo near the bottom and sides to create a natural vignette effect. -
Initial light rays:
While the paint is wet, use a clean, slightly damp flat brush to ‘lift’ paint away in diagonal streaks starting from the top center. Wipe your brush on a paper towel after each lift to keep the rays bright. -
Let it dry completely:
Allow this base layer to dry fully. The paper must be bone dry before the next step to keep the light rays sharp.
Lifting Paint Trick
If your light rays aren’t bright enough, use a stiff brush and clean water to scrub gentle lines, then blot immediately with a tissue to remove pigment.
Step 3: Refining Light and Dark
-
Paint around the rays:
Mix a darker, more saturated blue (Indigo). Paint the negative space between your light rays, making the water appear darker as it gets further from the light source. -
Softening edges:
Before these dark streaks dry, use a damp brush to soften distinct edges, so the light rays look diffused rather than rigid. -
Layering depth:
Repeat the process of darkening the deep water areas, especially towards the bottom. I find that building up 2-3 transparent layers gives the best ‘deep ocean’ feeling.
Make it Sparkle
Mix a tiny amount of iridescent medium or pearlescent watercolor into your white gouache for the bubbles to make them shimmer in the light.
Step 4: Details and Finish
-
Painting the rocks:
Using a mix of Indigo and a touch of black or brown, paint the rocky silhouettes at the bottom. Use a dappling motion to suggest rough texture. -
Adding rock highlights:
While the rocks are drying, add tiny touches of lighter blue on the top edges where the light rays would hit them. -
Drafting bubbles:
Once the background is completely dry, you can lightly sketch circles of varying sizes rising from the center. -
Painting bubbles:
Use white gouache or a white gel pen. Draw thin, crisp outlines for the bubbles. Vary the line weight—make one side of the bubble slightly thicker to show reflection. -
Bubble highlights:
Add a small dot or curve of white inside each bubble to represent the specular highlight. -
Tiny particles:
Add very small dots of white throughout the light rays to represent swimming plankton or dust caught in the light. -
Surface ripples:
At the very top edge, paint wavy horizontal white lines to suggest the water’s surface seeing the sun. -
Reveal:
Wait for everything to dry fully, then carefully peel away the masking tape at a 45-degree angle to reveal your clean edges.
Hang your finished piece near a window to let the natural light enhance your underwater scene

PENCIL GUIDE
Understanding Pencil Grades from H to B
From first sketch to finished drawing — learn pencil grades, line control, and shading techniques.
Explore the Full Guide
Sea Anemone With Finger-Like Tentacles
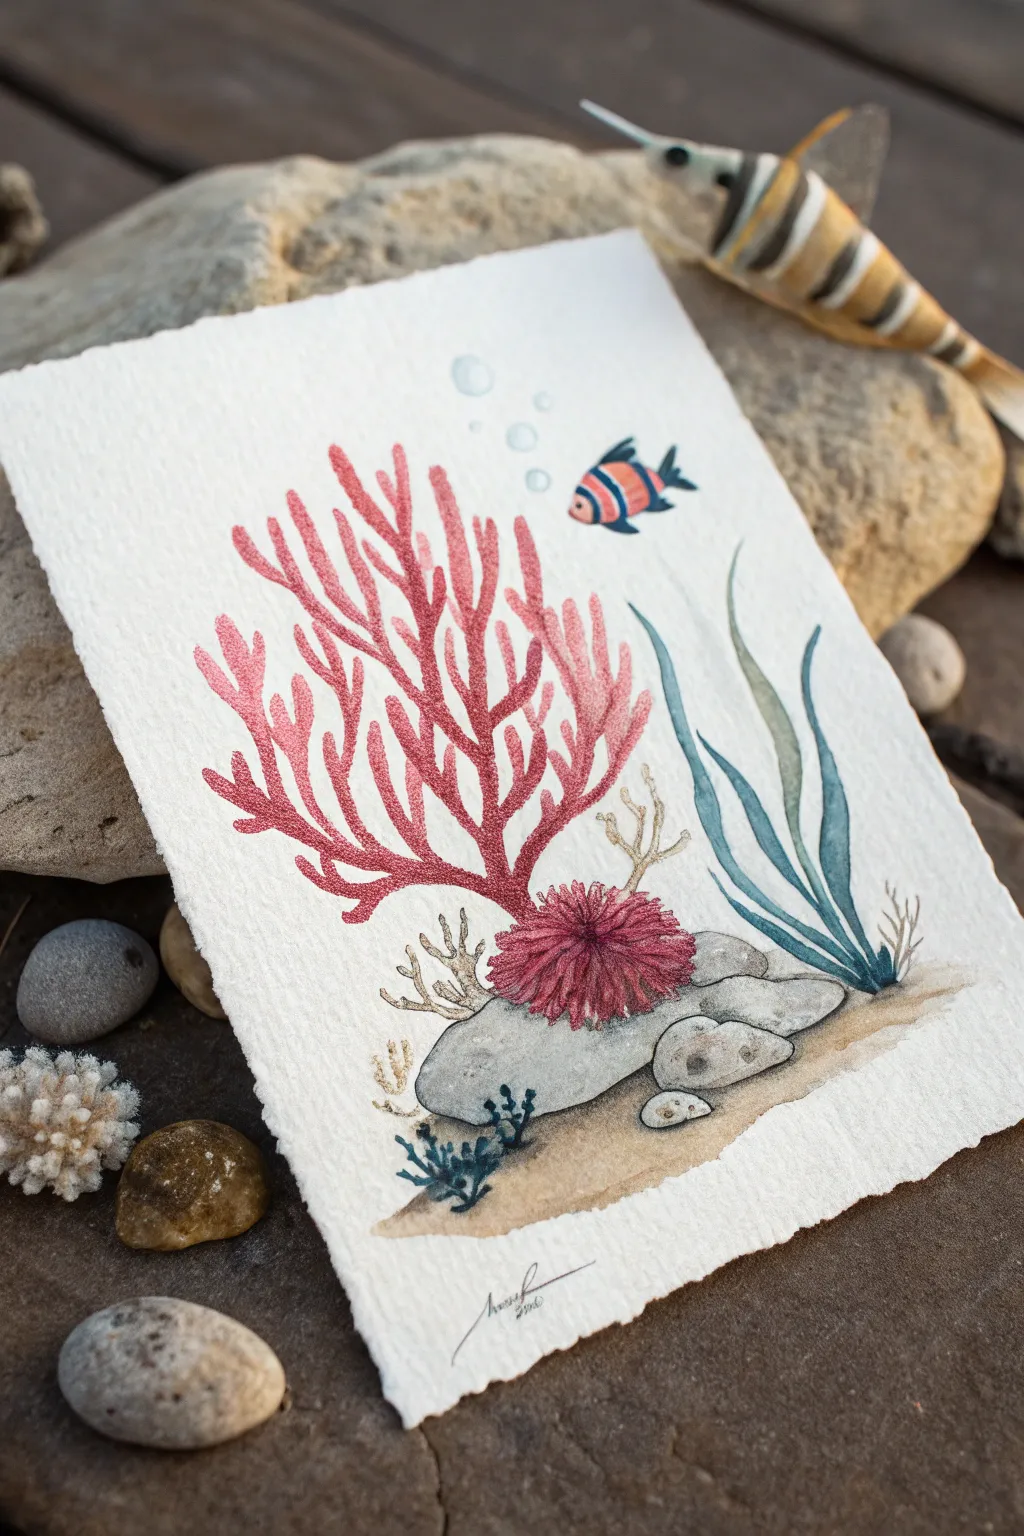
This charming watercolor painting captures the delicate beauty of a coral reef with vibrant pinks and calming blues. The composition features a prominent sea fan and anemone resting on rocks, accompanied by flowing seagrass and a tiny swimming fish.
Step-by-Step
Materials
- Cold-press watercolor paper (300gsm with deckled edges preferred)
- Watercolor paints (Coral Pink, Alizarin Crimson, Cerulean Blue, Sap Green, Paine’s Grey, Yellow Ochre, Burnt Sienna)
- Round watercolor brushes (Size 2, 4, and 0 for details)
- Pencil (HB or H)
- Kneaded eraser
- Jar of clean water
- Paper towel
- Palette for mixing
- Fine liner pen (optional, for signature)
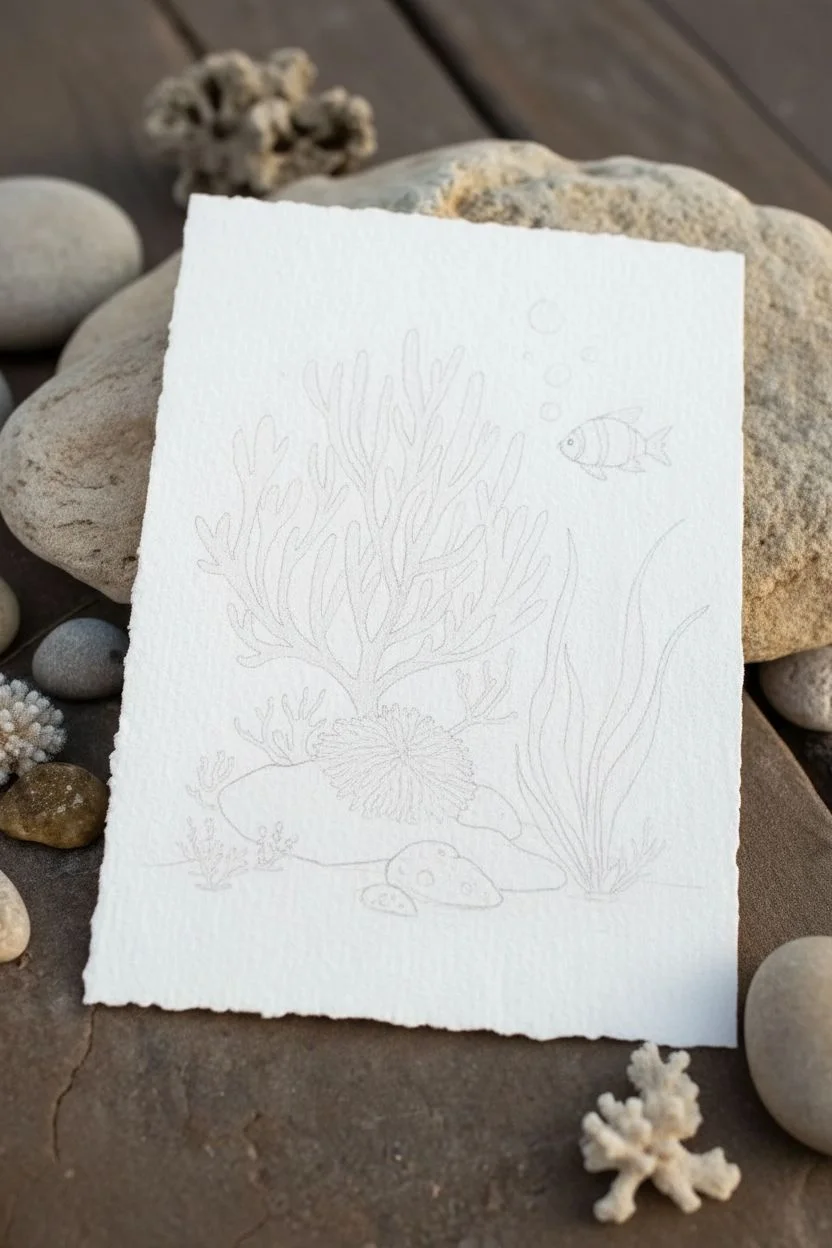
Step 1: Sketching the Composition
-
Outline the seabed:
Begin by lightly sketching the sandy bottom area about a quarter of the way up the page. Draw imperfect ovals to represent the main rocks where the coral will sit. -
Sketch the main coral:
From the top of the central rock, draw the branching structure of the sea fan. Keep the lines light and organic, allowing them to fan out upwards like a tree. -
Add the sea anemone:
At the base of the sea fan, sketch a rounded, spiky shape to represent the anemone. It should look like a small burst or pom-pom sitting directly on the rock. -
Draw seagrass and fish:
To the right, draw three or four wavy, ribbon-like lines for the seagrass stretching upwards. Finally, add the simple outline of a small fish near the top right and some tiny bubbles.
Wet-on-Wet Magic
For soft, rounded rocks, wet the rock shape with clean water first, then touch your grey paint to the center. The color will bloom outward naturally.
Step 2: Painting the Coral and Anemone
-
Base layer for the sea fan:
Mix a watery wash of Coral Pink. Paint the entire branching structure of the sea fan. Don’t worry about perfect evenness; the variations add texture. -
Add shadow and depth:
While the pink is still slightly damp, drop in a mix of Alizarin Crimson near the base of the branches and where they overlap to create natural shadows. -
Paint the sea anemone:
Use a slightly more concentrated mix of Alizarin Crimson for the anemone. Use short, outward strokes from the center to mimic its tentacles, leaving tiny white gaps for highlights. -
Mixing the seagrass greens:
Create a cool green by mixing Sap Green with a touch of Cerulean Blue. Paint the seagrass ribbons, letting the color be more translucent at the tips. -
Shadowing the seagrass:
Add a second layer of darker green (mix in a tiny bit of Paine’s Grey) to the bottom sections of the seagrass ribbons to anchor them visually.
Make it Sparkle
Once fully dry, add tiny dots of metallic gold watercolor or gel pen to the sand and fish scales for a magical, sun-dappled underwater effect.
Step 3: Rocks and Sandy Bottom
-
Painting the rocks:
Mix a very watery Paine’s Grey. Wash over the rock shapes. While wet, drop in slightly darker spots to create a stony texture. -
Create the sand:
Mix Yellow Ochre with a touch of Burnt Sienna and lots of water. Paint the sandy area beneath the rocks, letting it fade out softly at the bottom edge. -
Adding texture to the sand:
Once the sand wash is dry, use a dry brush with slightly darker brown paint to dab small specks or pebbles into the sand for a gritty look.
Step 4: Details & Finishing Touches
-
Paint the fish:
Using a size 0 brush, carefully paint orange stripes on the fish, leaving white stripes in between. Add a tiny dot of black for the eye and outline the fins in blue-black. -
Add bubbles:
Paint the bubbles with a very faint wash of blue. Keep the centers white to make them look transparent. -
Enhance the coral texture:
I like to go back with my smallest brush and add tiny dots or lines of pure red-pink on the sea fan branches to give them a rough, coral-like texture. -
Small filler weeds:
Paint small, dark blue-green weed sprigs at the very bottom left and right of the rocks to balance the composition.
Now you have a serene little piece of the ocean preserved on paper.
Manta Ray Gliding Over a Reef
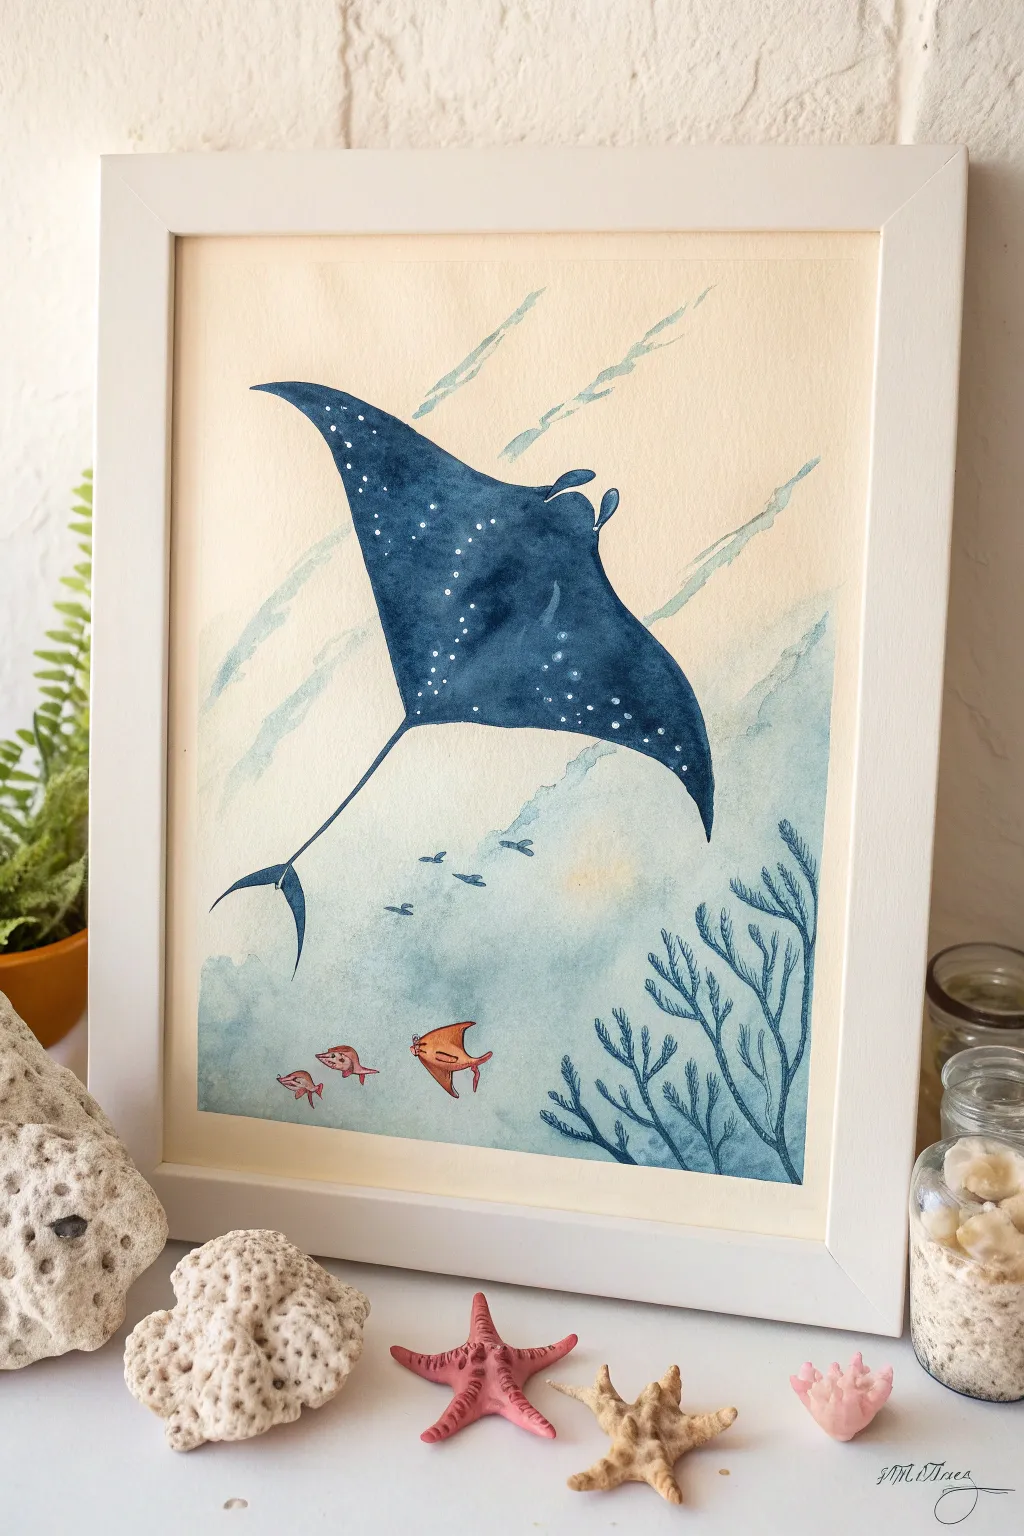
Capture the serene beauty of a manta ray gliding through sunlit waters with this elegant watercolor project. The deep indigo tones of the ray contrast beautifully against a soft, sunlight-filtered ocean background and delicate reef details.
Detailed Instructions
Materials
- Cold press watercolor paper (approx. 140lb/300gsm)
- Watercolor paints (Indigo, Payne’s Grey, Turquoise, Burnt Sienna, Scarlet Lake)
- White gouache or white gel pen
- Round watercolor brushes (sizes 2, 6, and 10)
- Pencil (HB) and kneadable eraser
- Painter’s tape or masking tape
- Clean water jars and paper towels
- Masking fluid (optional)
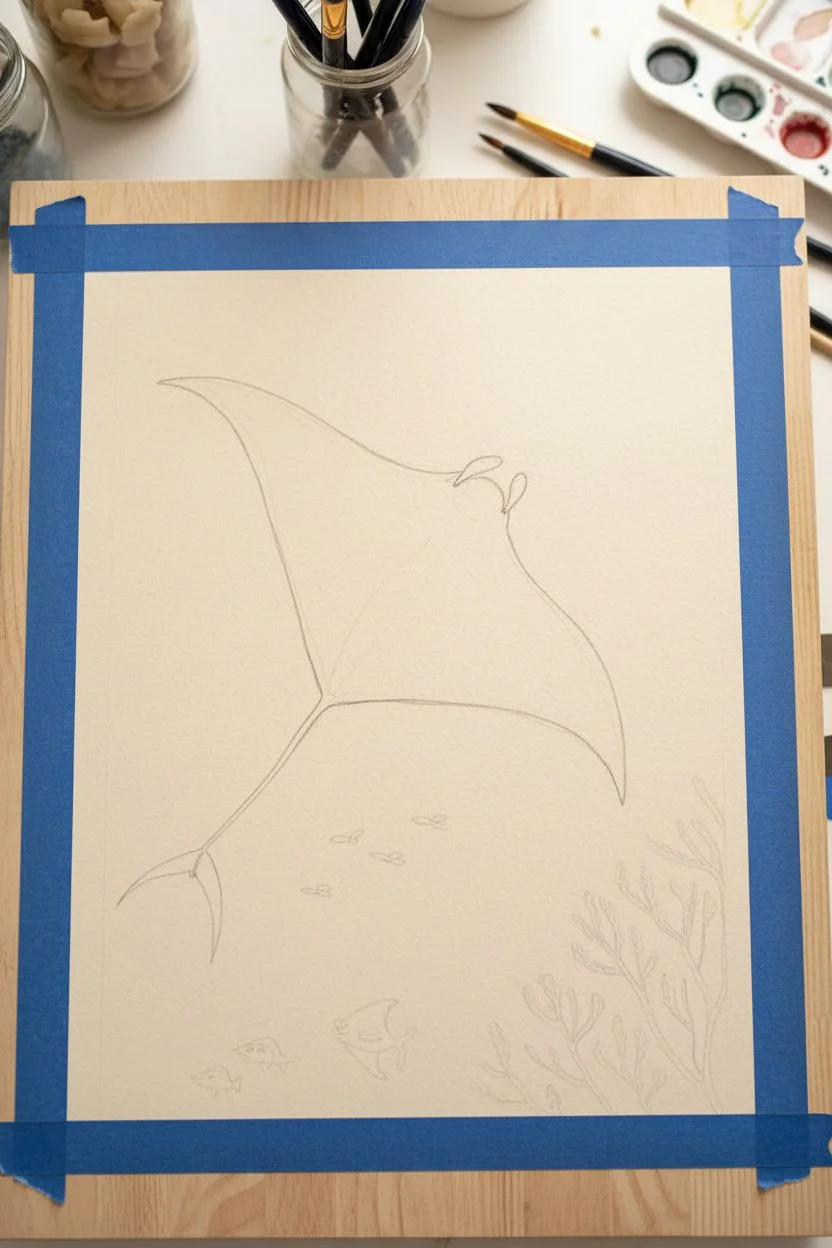
Step 1: Sketching the Layout
-
Secure the Paper:
Begin by taping your watercolor paper to a board or table. This prevents buckling and creates a neat border if you paint all the way to the edge. -
Draft the Ray:
Using an HB pencil, lightly sketch the large diamond shape of the manta ray. Angle it diagonally across the upper half of the page so it looks like it’s swimming upward. -
Refine the Wings:
Soften the points of the diamond into gentle curves for the pectoral fins. Add the cephalic lobes (the two small horns near the mouth) and the long, thin tail extending downward. -
Sketch the Surroundings:
Lightly draw the waving seaweed shapes in the bottom right corner and place three small fish shapes near the bottom left for scale.
Bleeding Lines?
If your ray’s blue paint bleeds into the background, the paper was too wet. Let it dry fully, then use white gouache to tidy up the messy edge.
Step 2: Painting the Ocean Background
-
Wet-on-Wet Technique:
Use your largest brush to wet the entire paper with clean water, avoiding the inside of the manta ray shape if you aren’t using masking fluid. -
Apply the Wash:
Mix a very dilute wash of Turquoise and Payne’s Grey. Drop this color onto the wet paper, keeping it darker at the bottom and lighter at the top to suggest sunlight filtering down. -
Create Light Beams:
While the background is still damp, lift out pigment using a clean, thirsty brush in diagonal strokes. This creates the illusion of sun rays cutting through the water. -
Let it Dry:
Allow the background layer to dry completely. The paper should feel room temperature to the touch, not cool or damp.
Step 3: Painting the Manta Ray
-
First Layer of Blue:
Mix a rich Indigo with a touch of Turquoise. paint the entire body of the ray, keeping the wash fairly uniform but slightly more watery near the center. -
Deepening Shadows:
While the first layer is still slightly damp, drop concentrated Indigo or Payne’s Grey along the spine and the trailing edges of the fins to create volume. -
Refining Edges:
Use your size 2 brush to crisp up the edges of the tail and the cephalic lobes. The silhouette should be sharp against the lighter water background. -
Dry Before Detail:
Let this dark layer dry thoroughly. If you try to add the white spots too soon, they will bleed into the blue.
Make it Sparkle
Add a tiny amount of iridescent medium to your white gouache for the manta ray’s spots. They will shimmer subtly when viewing the art from different angles.
Step 4: Reef and Details
-
Painting the Coral:
Mix a medium-strength blue-grey using Payne’s Grey and a tiny bit of the background turquoise. Paint the branching coral shapes in the bottom right corner, using jagged, organic strokes. -
Adding the Fish:
Paint the three small fish near the bottom using a mix of Burnt Sienna and Scarlet Lake. This warm pop of color balances the cool blue tones. -
Distant School:
With a very dilute grey-blue, paint tiny silhouettes of a distant school of fish in the middle ground. They should look faint and far away. -
Stippling the Ray:
Using white gouache or a gel pen, add the signature white spots to the manta ray’s back. Concentrate them near the spine and shoulder areas, letting them fade out toward the fin tips. -
Final Highlights:
Add tiny white highlights to the little orange fish and perhaps a few sparkles in the water beams to finish the piece.
Once framed, this calm underwater scene brings a lovely sense of peace to any room


Shipwreck Outline With Seaweed Growing Through It
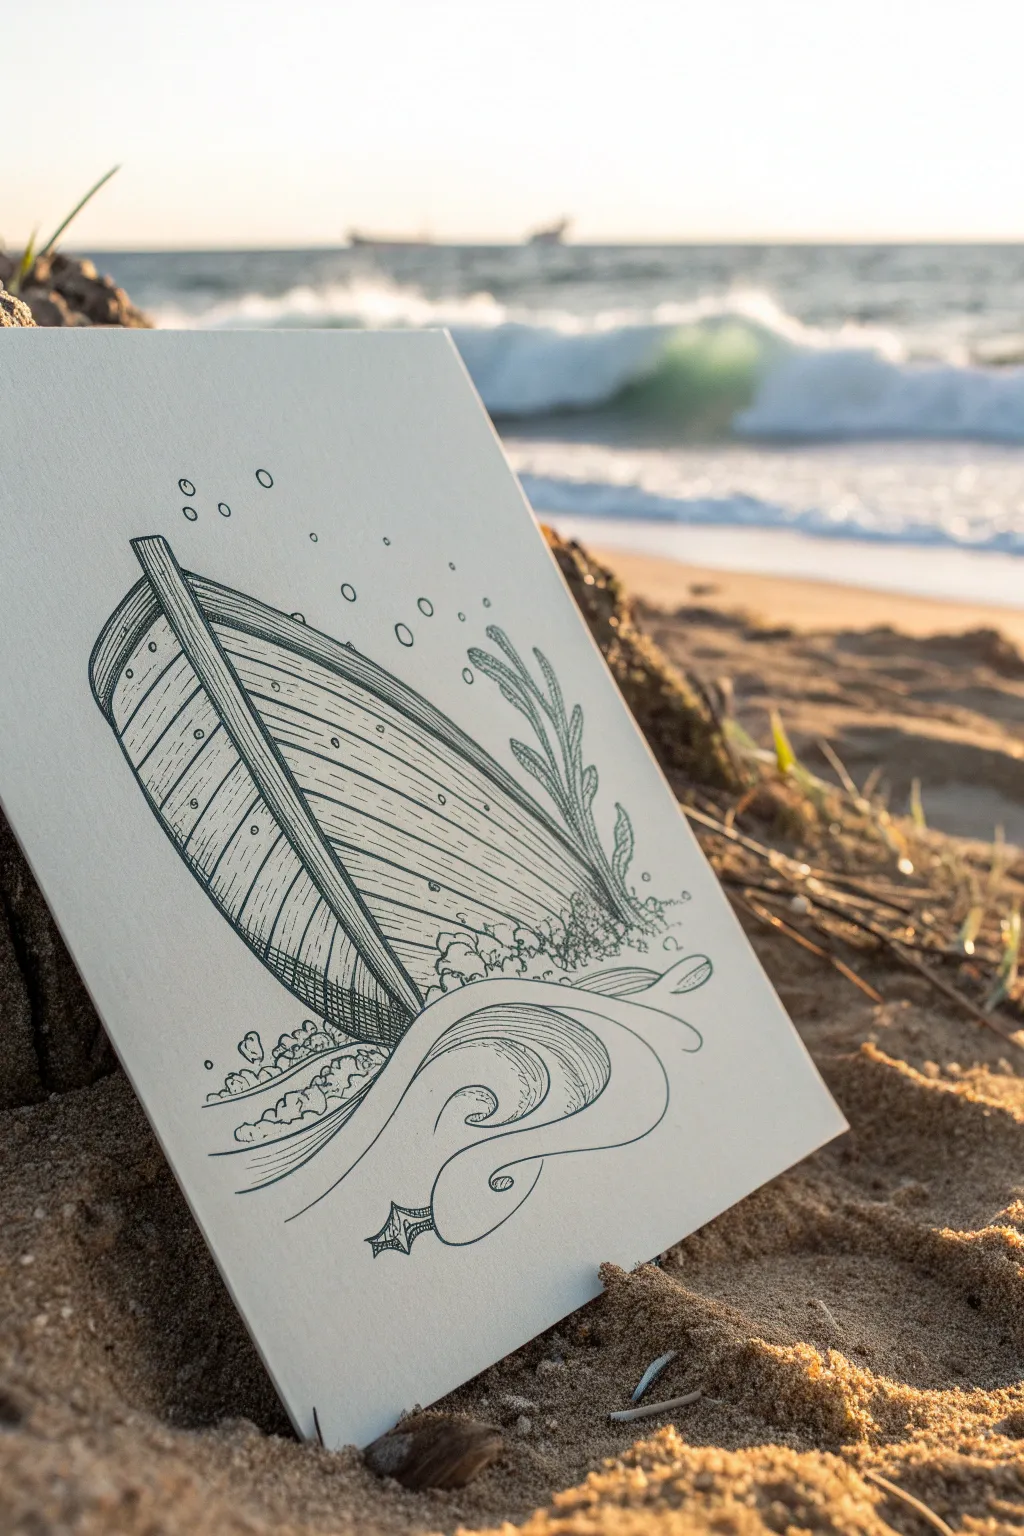
This project captures the quiet mystery of a shipwreck using clean, precise line work and illustrative shading textures. The result is a striking monochromatic piece that relies on wood grain patterns and fluid shapes to guide the viewer’s eye.
Step-by-Step
Materials
- Heavyweight drawing paper or mixed media paper (smooth texture preferred)
- Pencil (HB or 2B)
- Soft eraser
- Fine liner pens (sizes 0.1, 0.3, and 0.5)
- Ruler (optional)
Step 1: Drafting the Outline
-
Establish the hull shape:
Begin with a pencil to lightly sketch the main body of the boat. Draw a curved, elongated U-shape tilted diagonally across the paper to suggest it is resting or sinking. -
Add the center keel structure:
Sketch a thick, prominent strip running down the center-left of the boat. This acts as the keel or spine, dividing the visible planks on the left side from the main hull on the right. -
Sketch the planks:
Lightly draw curved lines parallel to the hull’s shape on both sides of the keel. Ensure the lines on the right side curve slightly upward to give the boat dimension and roundness. -
Outline the seabed elements:
At the bottom right, sketch a fluid, ribbon-like wave shape that curls upward. This adds a surreal, flowing element to the base. -
Add nature details:
Draw faint outlines of seaweed strands moving upwards from the right side of the boat and sketch clusters of rocks or coral near the bottom where the boat meets the wave.
Step 2: Inking the Structure
-
Define the main lines:
Using a 0.5 fine liner, trace over the main outline of the boat, the keel, and the primary plank dividers. Keep your hand steady to create smooth, continuous curves. -
Ink the seaweed:
Switch to a 0.3 pen to outline the seaweed leaves. Keep the lines slightly organic and less rigid than the boat’s wood structure. -
Detail the planks:
With the 0.3 pen, go back into the wooden planks. Add small imperfections, knots, and nail holes (tiny circles) along the seams to make the wood look aged. -
Clean up the draft:
Once the main structural ink is dry, gently erase the visible pencil guidelines relative to the boat’s hull so you have a clean surface for texturing.
Pro Tip: Line Weight
Use the 0.5 pen strictly for outer contours and the 0.1 pen for inner textures. This hierarchy prevents the drawing from looking flat.
Step 3: Texturing and Shading
-
Create wood grain:
Using your finest 0.1 pen, draw thin, broken lines inside each plank. Follow the curve of the plank carefully to reinforce the 3D form. -
Add shadow hatching:
Identify the shadowed areas, particularly near the bottom of the hull and under the seaweed. Use fine diagonal hatching lines to deepen these areas without coloring them in solid black. -
Texture the keel:
I like to use vertical hatching lines on the central keel strip to differentiate its texture from the horizontal planks around it. -
Develop the seabed rocks:
Ink the rocks and coral at the base with bumpy, irregular lines. Use stippling (dots) or small scumbling scribbles to give them a rough, porous texture. -
Define the stylized wave:
Ink the flowing wave shape at the bottom. Fill the inner curve of the wave with long, flowing parallel lines that follow the innovative swoop of the shape. -
Add atmosphere:
Draw scattered circles arising from the boat to represent air bubbles floating to the surface. Vary their sizes, keeping larger bubbles closer to the boat. -
Final erase and review:
Wait several minutes to ensure all ink is completely set. Do a final thorough pass with your eraser to remove any remaining graphite shadows or smudge marks.
Level Up: Watercolor Wash
Once fully inked (with waterproof pens), apply a very pale wash of blue-green watercolor over the entire scene for an underwater tint.
Now you have a serene, illustrative piece ready to be framed or gifted to an ocean lover
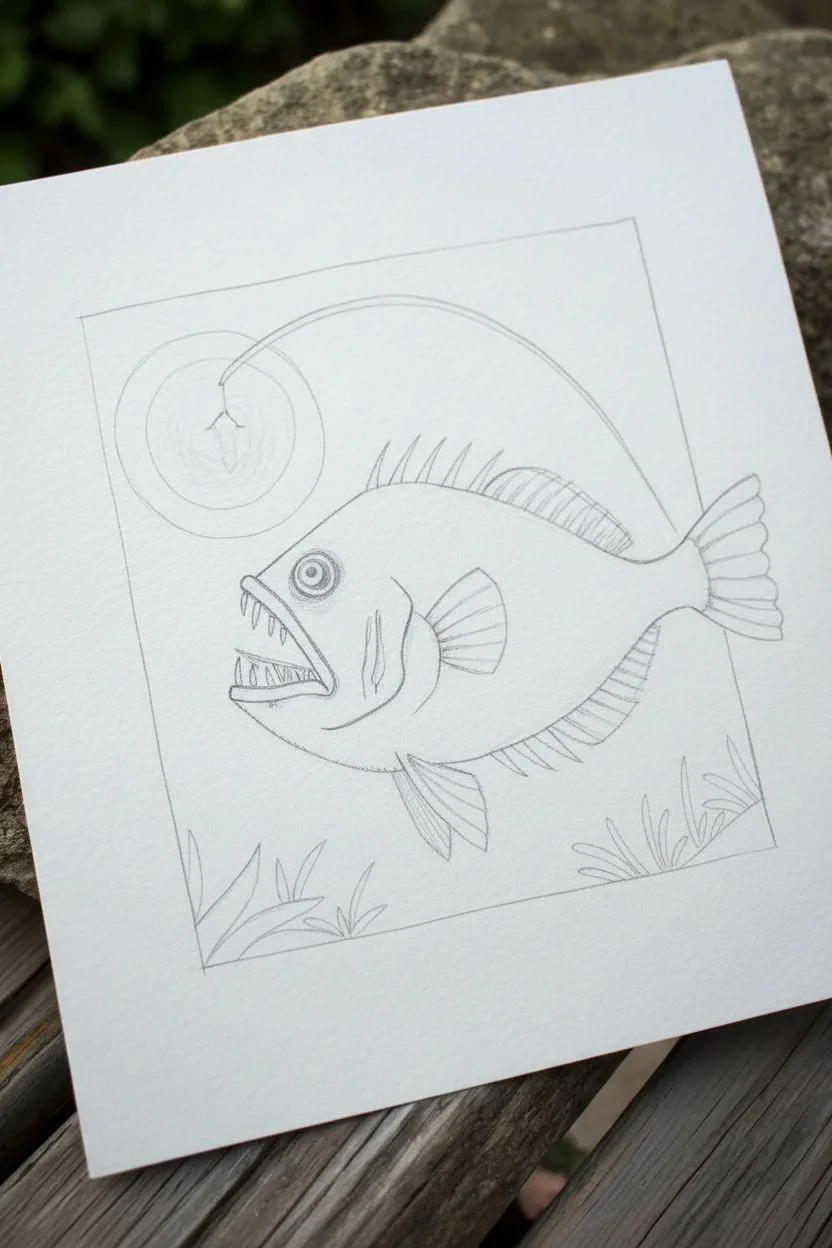
Deep-Sea Lantern Fish With a Glowing Dot
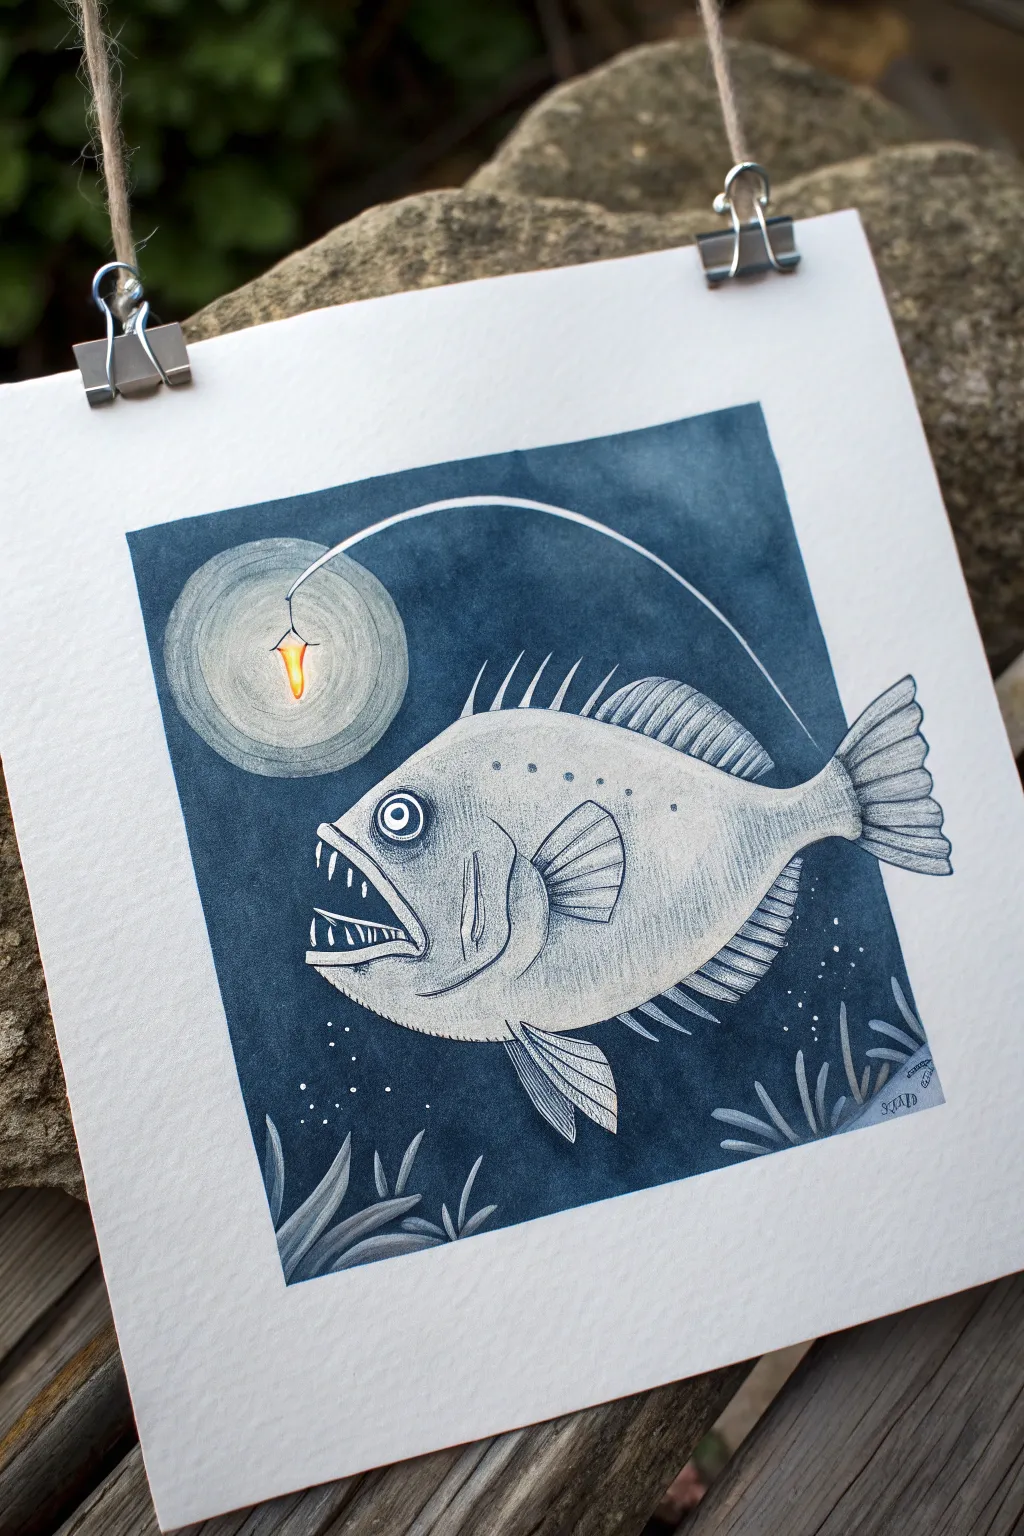
Dive into the abyss with this striking mixed media piece that captures the eerie beauty of a deep-sea anglerfish. You’ll combine watercolor washes with crisp ink details and a touch of vibrancy to create a glowing lure that pops against the dark water.
Detailed Instructions
Materials
- Thick watercolor paper (cold press, at least 140lb)
- Pencil and eraser
- Waterproof fine liner pens (black, sizes 01 and 05)
- Indigo or Payne’s Gray watercolor paint
- White gel pen or white gouache
- Orange and yellow colored pencils or watercolor markers
- Paintbrushes (flat wash brush, small detail round brush)
- Masking fluid (optional, but helpful)
- Ruler (for the border)
Step 1: Sketching the Depths
-
Frame the scene:
Begin by lightly drawing a square frame in the center of your paper. This negative space border is crucial for the ‘specimen’ look of the final piece. -
Outline the fish:
Sketch the oval body of the fish. It should be chubby and somewhat round, occupying the lower right two-thirds of the square. -
Add the lure:
Draw the signature bioluminescent lure (the esca) extending from the forehead on a long, thin stalk that curves gracefully over the fish’s face. -
Define the features:
Sketch a large, staring eye with a small pupil and a frowning mouth filled with jagged, needle-like teeth. Add the dorsal fin spikes along the back and the pectoral and tail fins. -
Mark the glow:
Lightly draw a circle around the lure to indicate where the light will radiate. This area needs to stay lighter than the surrounding water.
Step 2: Inking the Details
-
Outline the main form:
Using a waterproof 0.5mm pen, carefully trace your pencil lines for the fish’s body and fins. Leave the lure tip and the glow circle un-inked for now. -
Add texture with stippling:
Switch to a finer 0.1mm pen. Create texture on the fish’s skin using small dots (stippling), concentrating them on the upper back and lower belly to suggest roundness. -
Create fin details:
Draw fine, parallel lines within the fins to show their structure. Make the lines slightly broken or wavy to give them an organic, watery feel. -
Enhance the shadows:
Use hatching lines under the gill flap and around the eye socket to create depth. Ensure the teeth look sharp and jagged.
Uneven Wash?
If your background dries with unwanted ‘blooms’ or watermarks, wait for it to dry fully, then lightly cross-hatch over the uneven areas with a dark blue pencil to smooth the texture.
Step 3: Orchestrating the Wash
-
Mask the white areas:
If you have masking fluid, apply it carefully over the fish, the lure stalk, and the central bright spot of the lure. If you don’t have masking fluid, you will need to paint carefully around these shapes. -
Prepare the indigo wash:
Mix a deep, saturated puddle of Indigo or Payne’s Gray watercolor. You want a color that looks almost black but retains a blue undertone. -
Paint the background:
Start applying the dark wash inside your square frame. As you approach the circle around the lure, dilute your paint with water to create a gradient, fading from dark blue to almost clear water. -
Add depth to the abyss:
While the wash is still wet, drop more concentrated dark pigment into the corners and bottom of the square to make the water feel bottomless. Let this layer dry completely. -
Reveal the fish:
Once the paper is bone dry, gently rub away the masking fluid to reveal the crisp white paper underneath.
Glow Up
To make the lure really shine, smudge a tiny bit of white pastel or chalk right in the center of the orange flame. The matte powder creates a soft, diffusing light effect.
Step 4: Final Illumination
-
Color the lure:
Use a bright yellow pencil or marker for the center of the lure, blending into orange at the edges. This small pop of warm color is essential against the cool blue. -
Define the glow circle:
Use a very diluted grey wash or a light grey pencil to gently shade the ‘halo’ around the light, keeping it subtle so it looks like illuminated murky water. -
Shade the body:
Lightly shade the fish’s body with a very pale grey wash or pencil to give it volume, keeping the belly lighter than the back. -
Add foreground vegetation:
Using your dark wash or a grey marker, paint simple, leaf-like shapes at the bottom of the frame to suggest underwater plants. I like to keep these monochromatic. -
Highlight with white:
Use a white gel pen to add tiny bubbles rising from the depths and to sharpen the highlights on the eye and teeth.
Hang your finished piece by the corners to let this little deep-sea dweller light up your wall
Mermaid Silhouette With Flowing Hair and Tail

Capture the elegance of the deep sea with this striking mixed-media project featuring a bold mermaid silhouette against a soft, aquatic background. The contrast between the crisp black form and the loose watercolor wash creates a sophisticated look on beautifully textured handmade paper.
Step-by-Step
Materials
- Heavyweight handmade cotton paper (deckle edge recommended for texture)
- Watercolor paints (ocean blue, teal, light green)
- Black waterproof India ink or black gouache paint
- Soft watercolor brush (round, size 8 or 10)
- Fine detail brush (round, size 0 or 1)
- Pencil and eraser
- Jar of clean water
- Paper towels
- White gel pen or acrylic paint (optional for bubbles)
Step 1: Creating the Ocean Wash
-
Prep your paper:
Start by taping down your handmade paper slightly if it’s prone to curling, though thick cotton rag paper often lays flat on its own. Ensure your work surface is clean and dry. -
Mix your ocean palette:
On your palette, prepare a watery mix of teal, a soft seafoam green, and a deeper ocean blue. You want these colors to be quite diluted for a misty effect. -
Apply clean water:
Using your large soft brush, paint a rectangular area of clean water onto the center of the paper, leaving a generous unpainted border around the rough edges. -
Drop in color:
While the paper is still wet, touch your brush loaded with the teal and green mixes onto the wet area. Let the colors bleed and merge naturally. -
Create depth:
Add touches of the darker blue near the bottom corners of the wash area to suggest the deeper ocean depths, blending it upwards into the lighter greens. -
Lift for texture:
If a spot gets too puddle-heavy, dab it gently with the corner of a paper towel to lift some pigment. This creates soft cloud-like variations in the water. -
Dry completely:
Let this background layer dry thoroughly. I usually wait at least 30 minutes or use a hairdryer on a low setting, as painting ink over damp paper will cause fuzzy edges.
Fixing Fuzzy Edges
If your black ink bleeds into the background, the paper was likely still damp. Wait for it to dry, then use white gouache to carefully ‘erase’ and sharpen the edge.
Step 2: Drawing the Silhouette
-
Sketch the posture:
Lightly sketch the mermaid’s pose with a pencil. Start with a simple ‘S’ curve to define the flow of her spine and tail, which gives the figure dynamic movement. -
Refine the outline:
Flesh out the silhouette, adding the profile of her face, flowing hair, and the curve of her arms. Keep the pencil lines very faint so they are easy to cover later. -
Add nature details:
Sketch a few simple seaweed strands rising from the bottom right corner, curving slightly as if swayed by a current.
Level Up: Metallic Scales
Once the black silhouette is dry, use a metallic gold pen to draw tiny scallop patterns on the tail for shimmering scales that catch the light.
Step 3: Inking the Figure
-
Outline carefully:
Using your fine detail brush and black India ink (or gouache), carefully trace the outline of the mermaid’s face and upper body. Keep your hand steady and slow. -
Fill the body:
Switch to a slightly larger brush to fill in the main body and tail section. Ensure the black is solid and opaque; you may need a second coat if it looks streaky. -
Detail the hair:
Paint the hair in flowing, wavy clumps. Use the very tip of your fine brush to flick out stray strands for a realistic, underwater floating effect. -
Paint the fin:
For the tail fin, leave tiny slivers of the background visible between the fin segments if you like, or paint it solid. Make the tips of the fins taper to sharp, elegant points. -
Paint the seaweed:
Use the fine brush to paint the seaweed leaves you sketched earlier. Vary the pressure on your brush to make the leaves thick in the middle and thin at the ends.
Step 4: Finishing Touches
-
Create bubbles:
Once the black ink is 100% dry, you can add bubbles. I prefer using a diluted white acrylic or a white gel pen to draw small circles around the mermaid and rising from the seaweed. -
Add darker specks:
Dip a stiff brush or toothbrush into diluted teal or grey paint and gently flick it over the background to create tiny ‘particulate’ textures in the water. -
Erase pencil marks:
Check closely for any visible pencil lines around the silhouette. Gently erase them only after you are certain the ink is completely bone dry to avoid smudging.
Frame your aquatic masterpiece in a floating glass frame to show off the beautiful deckled edges of the paper
Two-Color Underwater Doodle Scene
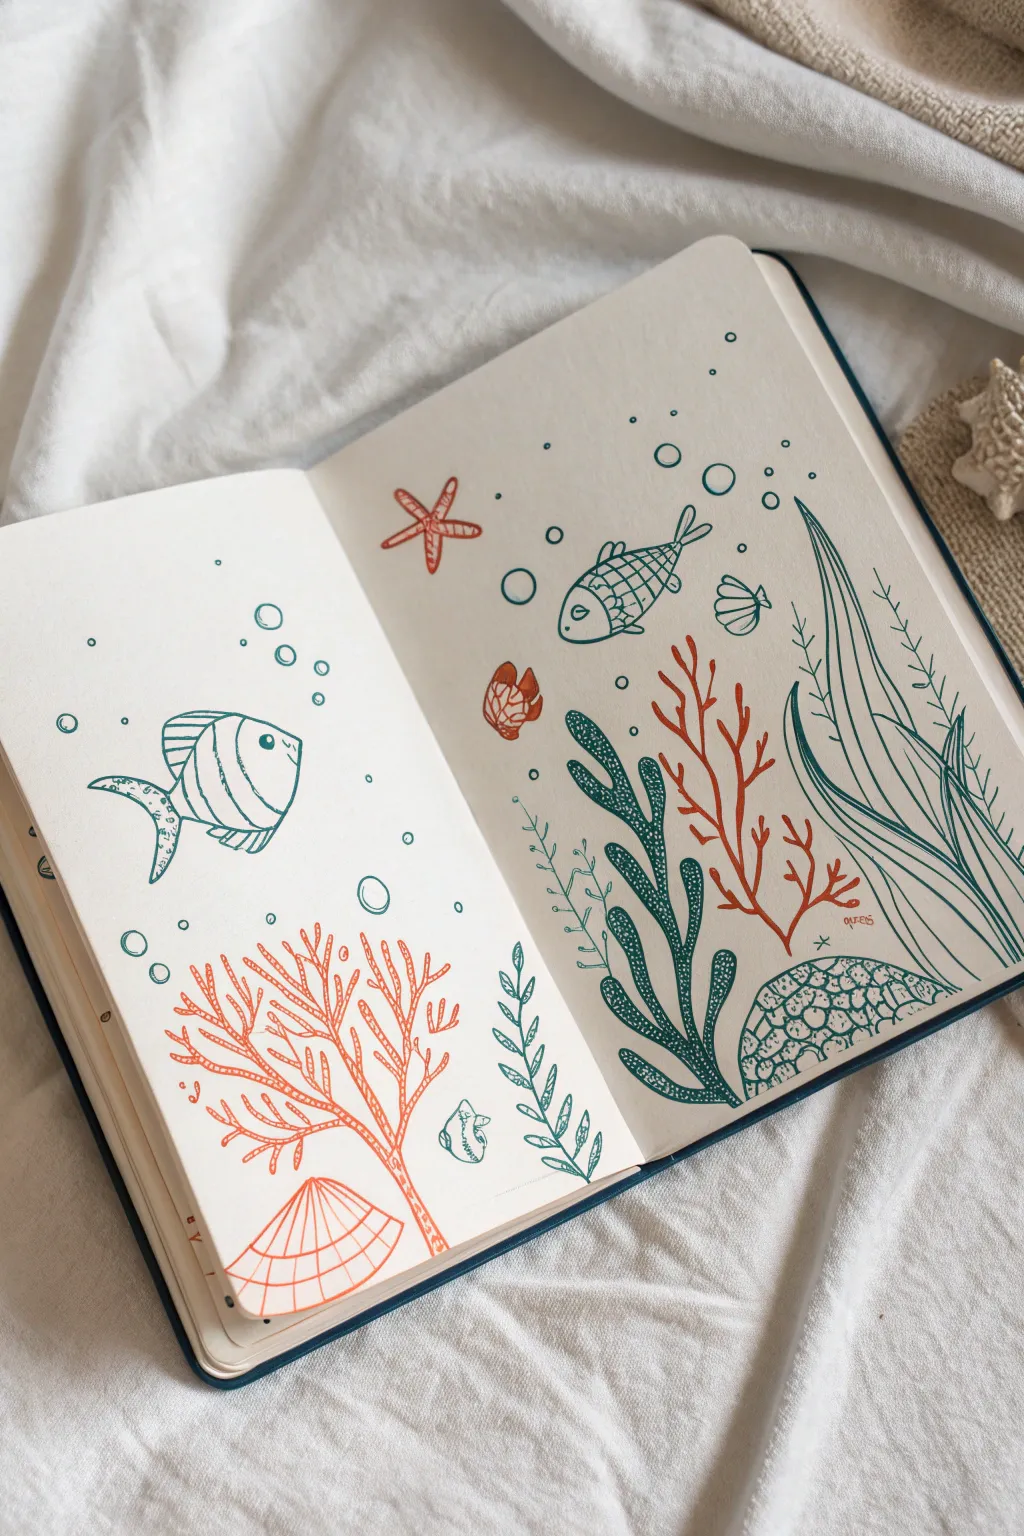
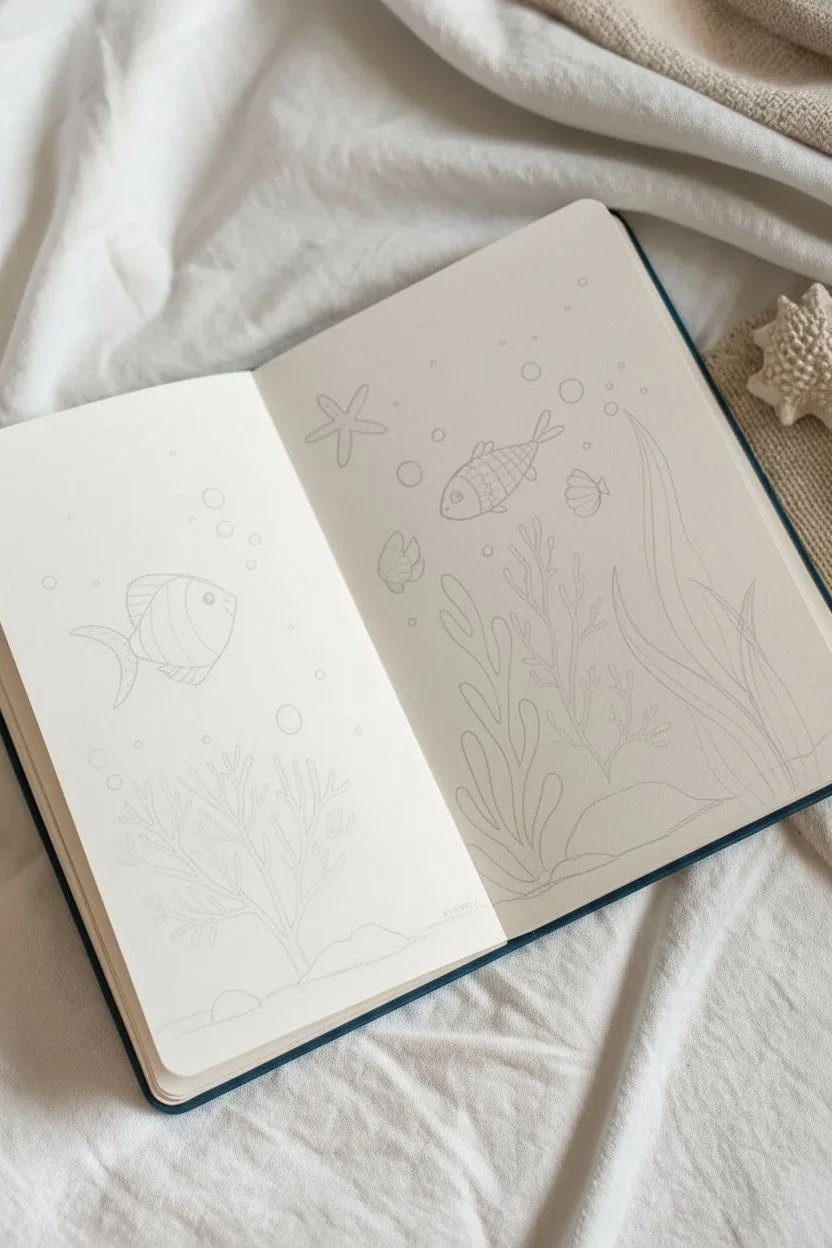
Dive into this minimalist underwater spread that uses just two complementary ink colors to create a playful ocean scene. With simple line work and repetitive patterns, you’ll fill a sketchbook spread with charming sea creatures and bubbling currents.
How-To Guide
Materials
- A5 sketchbook or bullet journal (smooth paper recommended)
- Teal or dark green fineliner pen (0.5mm)
- Rust orange or coral fineliner pen (0.5mm)
- Pencil for sketching
- Soft eraser
Step 1: Setting the Scene
-
Rough layout:
Begin by lightly sketching the main elements with a pencil across both pages. On the left page, mark out a large fan coral at the bottom and a single fish floating above it. On the right page, plan for seaweed rising from the bottom right corner, a few scattered fish, and a starfish near the top left. -
Define the ground:
Lightly sketch a few rounded mounds at the very bottom of both pages to represent the sea floor or rocks anchoring your plants.
Pro Tip: Consistent Patterns
Stick to 2-3 fill patterns (stripes, dots, cross-hatch) for all elements. Limiting your textures makes the whole spread feel cohesive.
Step 2: Drawing the Coral & Plants
-
Create the orange fan coral:
On the left page, use your orange pen to draw the large fan coral. Start with a central stem and branch out symmetrically. Draw the outlines of the branches, keeping them somewhat thick and organic. -
Add texture to the fan:
Inside the main branches of the orange fan coral, add tiny dots or short lines to give it texture. At the base, draw a shell-like mound with a grid pattern. -
Draw the tall seaweed:
Switch to your teal pen. On the right page, draw long, flowing blades of grass originating from the bottom right corner. Let them curve gracefully towards the top of the page. Add a central vein line to the wider blades for definition. -
Add the leafy kelp:
Still using teal, draw a darker, thicker seaweed plant in the bottom middle of the right page. Make these leaves darker and more solid, perhaps by doubling your lines or coloring them in solidly, to create contrast against the thin blades. -
Inking the seaweed details:
For the thick teal kelp, leave small white highlights or dot patterns inside the leaves to prevent them from looking like flat blobs.
Step 3: Adding Sea Creatures
-
Draw the left-page fish:
Using the teal pen, ink the outline of the fish on the left page. Give it a round body and a distinctive striped pattern. Draw vertical curved lines for the stripes. -
Detailing the striped fish:
Add a small dot for the eye and tiny scales on the fins. I find stippling the tail fin adds a nice texture difference. -
Draw the main fish on the right:
On the upper middle of the right page, draw another fish using the teal pen. Give this one a cross-hatch or diamond pattern on its body for variety. -
Add the starfish:
Switch to orange. Near the top left of the right page (near the spine), draw a simple five-pointed starfish. Fill it with a few lines or leave it open, but outline it boldly. -
Orange deep-sea plant:
Draw a branching coral structure on the right page using the orange pen. Place it between the teal kelp and the tall grass. Use wavy, spindly lines to make it look distinct from the other plants.
Level Up: Watercolor Wash
After inking with waterproof pens, paint a very pale blue watercolor wash over the entire background for an instant oceanic vibe.
Step 4: Finishing Touches
-
Add accent shells:
Scatter a few small shells around the bottom. Draw a small conch shell in teal on the left page near the fan coral, and a small clam shell near the cross-hatched fish on the right. -
Draw bubbles:
Using the teal pen, draw circles of varying sizes rising from the fish and plants. Cluster them in groups of two or three to simulate movement in the water. -
Fill the gaps:
Look for empty spaces. Add small sprigs of seaweed (like the tiny vine-like ones near the spine) or extra tiny bubbles (small dots) to balance the composition. -
Erase pencil marks:
Wait until the ink is completely dry to avoid smudging. Gently erase all your underlying pencil sketches to reveal the clean, two-tone artwork.
Now you have a serene underwater spread ready to fill with your daily notes or leaving as is for pure visual enjoyment


Have a question or want to share your own experience? I'd love to hear from you in the comments below!