When you’re brainstorming painting ideas for boys, it helps to lean into bold shapes, big motion, and themes that feel adventurous. I’m sharing my go-to projects that look cool on a wall but still feel totally doable at the kitchen table or in my studio.
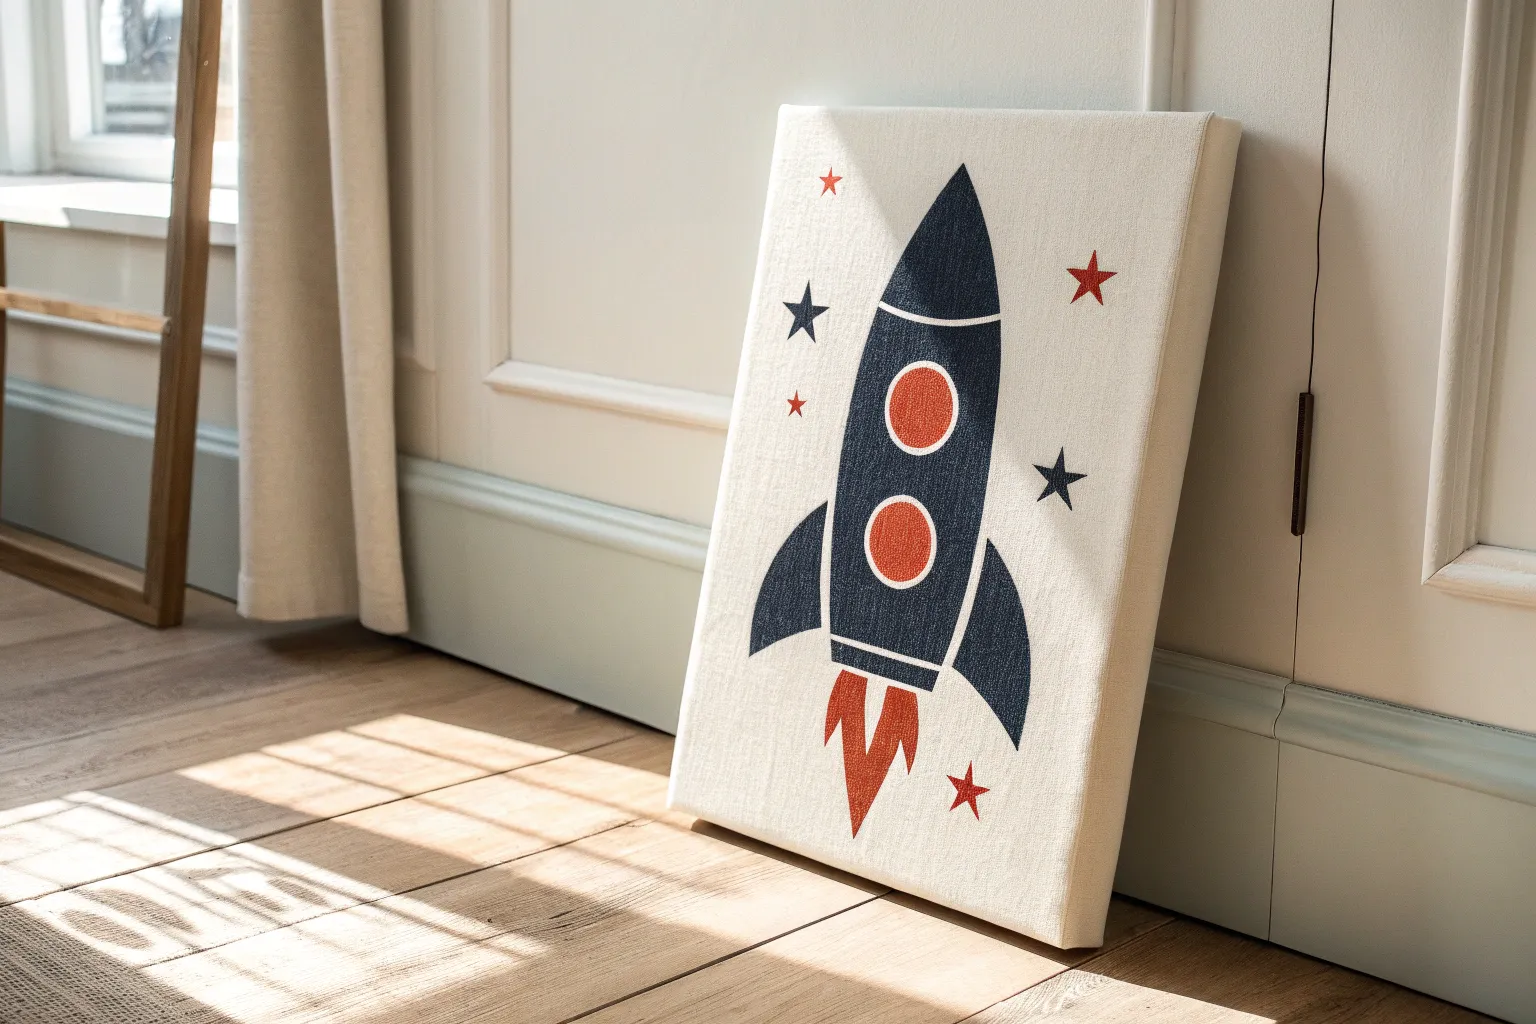
Rocket Blastoff Over a Planet Horizon
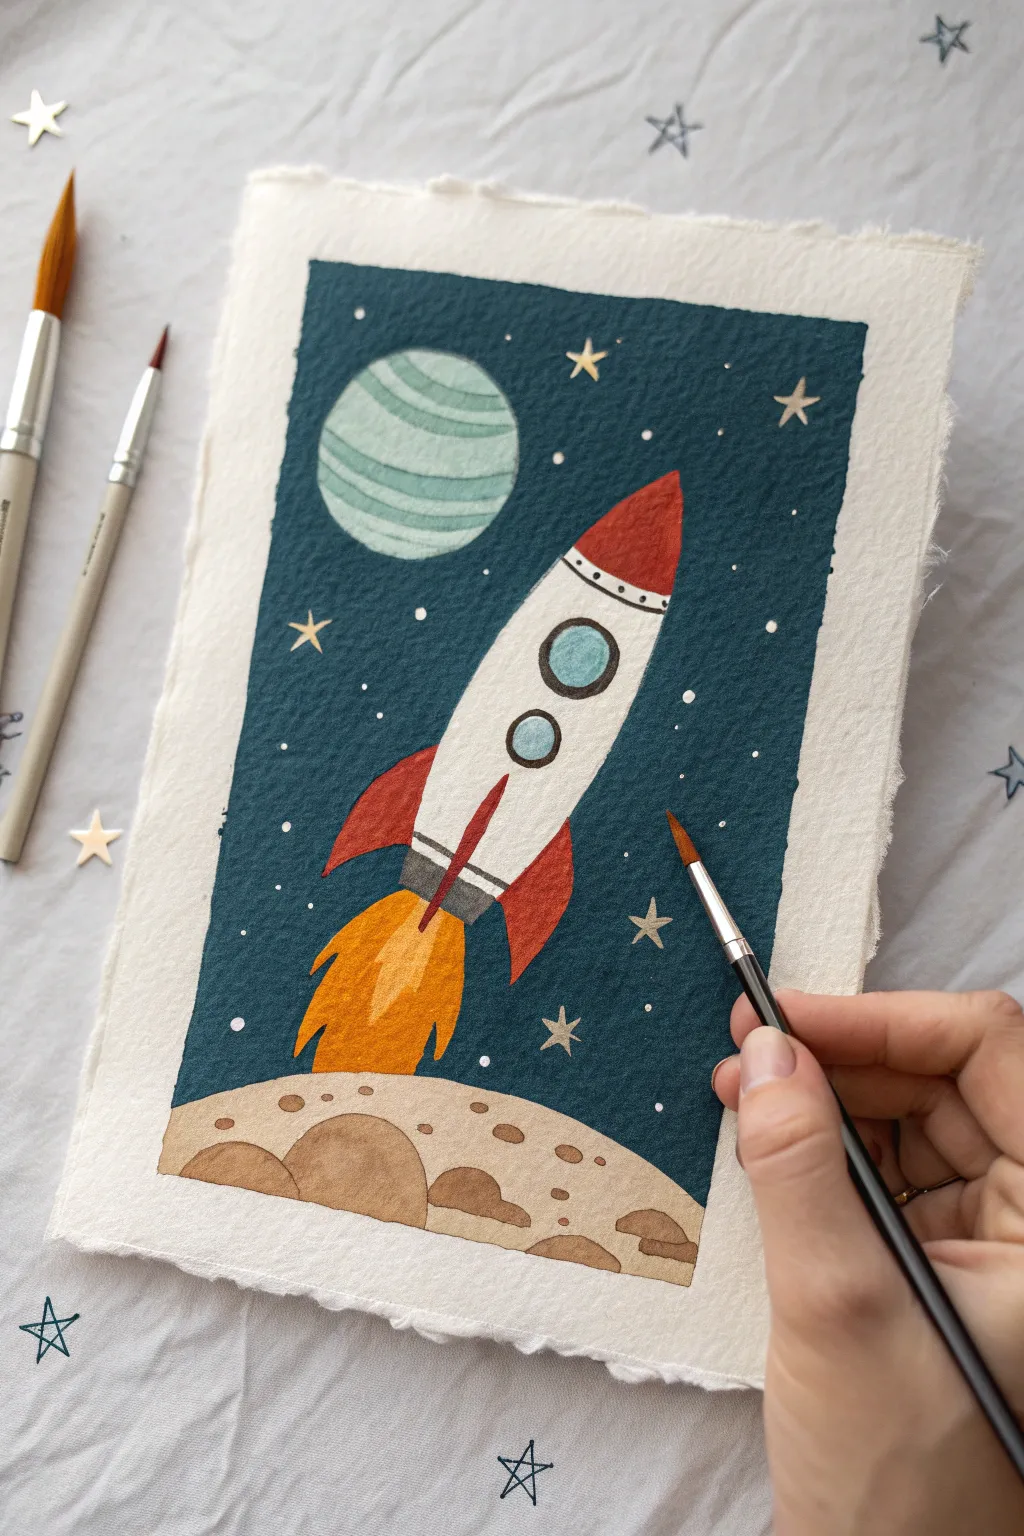
Capture the thrill of space exploration with this vibrant rocket ship painting, featuring a stylized spacecraft soaring above dusty planetary craters. The design uses bold, opaque colors against a deep starry background, perfect for adding a touch of adventure to a bedroom wall.
Step-by-Step
Materials
- Cold press watercolor paper (deckle edge optional)
- Gouache or opaque watercolor paints (deep teal, white, red, yellow, orange, beige/tan, grey, light blue)
- Round synthetic brushes (sizes 2, 4, and 0 for details)
- Pencil and eraser
- Painter’s tape or masking fluid (optional)
- Palette for mixing
- Clean water
Step 1: Sketching the Scene
-
Define the boundaries:
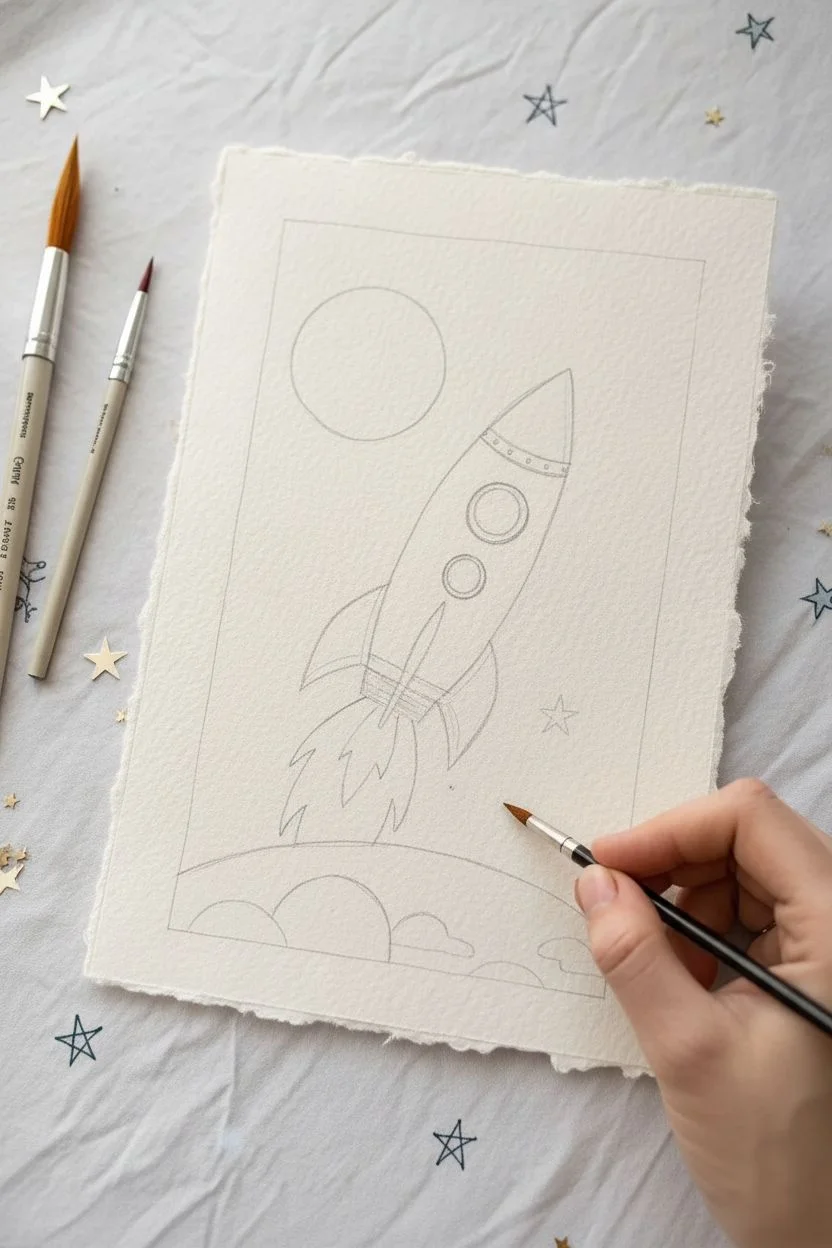
Start by lightly marking a rectangular border on your paper, leaving about an inch of white space around the edges to frame your composition. This creates a clean, professional look once finished. -
Draw the horizon:
Sketch a curved line across the bottom quarter of the rectangle to represent the planet’s surface. Make it slightly uneven to suggest rocky terrain rather than a perfectly smooth arc. -
Outline the rocket:
In the center of the sky area, draw a long, cigar-shaped oval for the rocket body, tilted slightly to the right. Add a pointed nose cone at the top and three fin shapes at the bottom—two on the sides and one central fin. -
Add details and planet:
Draw two circular windows on the rocket body and detail lines near the nose and tail. In the upper left corner of the sky, sketch a large circle for a distant planet.
Step 2: Painting the Background
-
Mix the space color:
Create a deep, rich space color by mixing dark teal with a touch of black or indigo. You want a color that is dark enough to make the stars pop but more interesting than plain black. -
Fill the sky:
Using a size 4 brush, carefully paint around your pencil sketches of the rocket, distant planet, and horizon ground. Fill the rest of the rectangular background with your deep teal mix, keeping the edges of the rectangle as neat as possible. -
Let it dry:
Allow the background layer to dry completely. If the paper feels cold to the touch, it’s still wet.
Clean Edges?
If you struggle painting straight edges for the rectangular border, use low-tack painter’s tape to mask off the area before you start painting the background
Step 3: The Rocket & Planets
-
Base coat the rocket:
Paint the main body of the rocket with opaque white gouache. You may need two coats to ensure it covers the paper fully and looks solid. -
Add the red accents:
Mix a bright, classic red. Paint the nose cone and the three fins at the base of the rocket. Use the tip of your brush to get crisp points on the fins. -
Paint the distant planet:
Mix a soft, pale mint green or light blue. Fill in the circle for the distant planet in the upper left. Once dry, use a slightly darker shade of the same color to paint horizontal stripes across it for texture. -
Detail the windows:
Paint the inside of the circular windows with a light blue. Once dry, outline them with a dark grey or black line using your size 0 detail brush.
Make it Shine
Mix a tiny amount of metallic gold or silver watercolor into your paint for the stars or the rocket trim to give the artwork a magical, shimmering finish
Step 4: Ground & Flames
-
Paint the surface:
Mix a beige or sandy tan color and fill in the bottom horizon area. Let this base layer dry fully. -
Add craters and rocks:
Using a slightly darker brown, paint irregular semi-circles and blobs along the bottom to look like rocks and crater edges. Add small dots and specks for texture. -
Ignite the engines:
Mix a vibrant yellow-orange. Paint a jagged, flame shape coming from the bottom of the rocket. I like to layer a lighter yellow in the center of the flame while the paint is still slightly damp to create a glowing gradient effect.
Step 5: Final Touches
-
Outline and refine:
Using a very fine liner brush and black or dark grey paint, carefully outline the rocket body, the fins, and add the separation lines between the nose cone and the body. -
Connect the fins:
Paint the small struts connecting the fins to the rocket body in dark grey. -
Create the stars:
Dip a small brush or a toothpick into white paint. Dot tiny stars scattered across the dark teal background. For larger stars, paint small five-pointed shapes or starbursts.
Now you have a dynamic space scene ready to inspire dreams of interstellar travel


Shark Attack Silhouette in Choppy Water

Capture the raw power of the ocean with this dramatic seascape featuring rolling waves, ominous grey clouds, and a striking shark fin silhouette. This acrylic painting balances moody atmospheric skies with vibrant teal waters, making it a perfect statement piece for an adventurous bedroom theme.
How-To Guide
Materials
- Square stretched canvas (e.g., 10×10 or 12×12 inch)
- Acrylic paints: Titanium White, Mars Black, Phthalo Blue, Ultramarine Blue, Teal or Turquoise
- Set of brushes: 1-inch flat wash brush, medium filbert brush, small round detail brush
- Palette knife (optional but helpful for texture)
- Cup of water and paper towels
- Mixing palette
- Painter’s tape or masking tape
Step 1: Setting the Scene
-
Tape the borders:
Begin by applying painter’s tape around all four edges of your canvas to create a crisp, clean white border. Press the edges of the tape down firmly to prevent paint from seeping underneath. -
Establish the horizon:
Decide on your horizon line. For this composition, place it slightly above the center of the canvas. Use a pencil to lightly mark where the sky ends and the ocean begins. -
Paint a gray base sky:
Mix Titanium White with a tiny touch of Mars Black to create a light gray. Using your large flat brush, paint the entire sky area with horizontal strokes to establish a moody base layer.
Foam Texture Trick
Use a small piece of natural sea sponge instead of a brush to dab on the white sea foam. It creates random, organic patterns that look exactly like aerated water.
Step 2: Stormy Skies
-
Add dark cloud masses:
While the base is still slightly tacky, mix a darker charcoal gray (add more Black and a touch of Ultramarine Blue). Use a medium filbert brush to scumble in large, irregular cloud shapes, focusing the darkest areas near the top of the canvas. -
Highlight the cloud tops:
Load a clean brush with pure Titanium White. Gently tap the tops of your gray clouds to create fluffy, illuminated edges. Use a circular motion to blend the bottom of the white into the gray, creating volume and depth. -
Refine the background:
Add a few horizontal streaks of lighter gray near the horizon line to suggest distant, fading clouds. Let the sky section dry completely before moving to the water.
Step 3: The Deep Blue Sea
-
Block in the horizon water:
Mix Ultramarine Blue with a little Phthalo Blue and white. Paint a dark, straight strip of water right against the horizon line. -
Create the main wave transition:
For the middle section of the water, mix Phthalo Blue with Teal. Start painting below the horizon strip, gradually adding more white to your mix as you move downward to create the glowing, translucent effect of the wave face. -
Paint the wave trough:
At the very bottom left corner, use a darker mix of Phthalo Blue and Black to represent the deep shadow of the water trough before the next wave rises. -
Detail the wave movement:
Using a smaller brush or the edge of a flat brush, add thin, sweeping curves of lighter turquoise and white through the main teal section. Follow the curve of the wave to show the water’s momentum.
Make it Sparkle
Mix a tiny amount of iridescent medium or silver glitter glue into the white paint used for the wave crests. This catches the light and makes the water look wet.
Step 4: Sea Foam and Spray
-
Add the crashing crest:
Load a worn-out or stiff bristle brush with thick Titanium White. Dab and stipple paint along the top edge of your main teal wave to create the foamy crest where the water is breaking. -
Create the foreground foam:
Apply a generous amount of white paint to the bottom right area using a tapping motion. This creates the chaotic, churning foam where the wave has already crashed. I like to let the texture build up a bit here so it looks 3D. -
Connect the foam:
Drag small lines of white from the foamy crest down the face of the wave, mimicking the water trickling down the glass-like surface.
Step 5: The Predator
-
Outline the fin:
Once the water is mostly dry, mix pure Mars Black with a tiny drop of brown or blue for depth. Use a small round brush to carefully outline the triangular shape of the shark fin emerging from the foreground foam. -
Fill the silhouette:
Fill in the fin shape with your black mixture. Keep the edges sharp, especially the curved back edge. -
Add wet highlights:
Mix a dark gray and add thin, subtle vertical strikes on the fin to make it look wet and shiny, reflecting the light. -
Splash around the fin:
Use your detail brush with white paint to add tiny dots and splashes around the base of the fin, embedding it into the churning water so it doesn’t look like a sticker floating on top. -
Reveal the painting:
Once your masterpiece is fully dry, slowly peel away the painter’s tape at a 45-degree angle to reveal your clean, professional edges.
Hang this thrilling seascape on the wall and enjoy the cool, aquatic vibes it brings to the room


Dinosaur Profile With Texture Scales
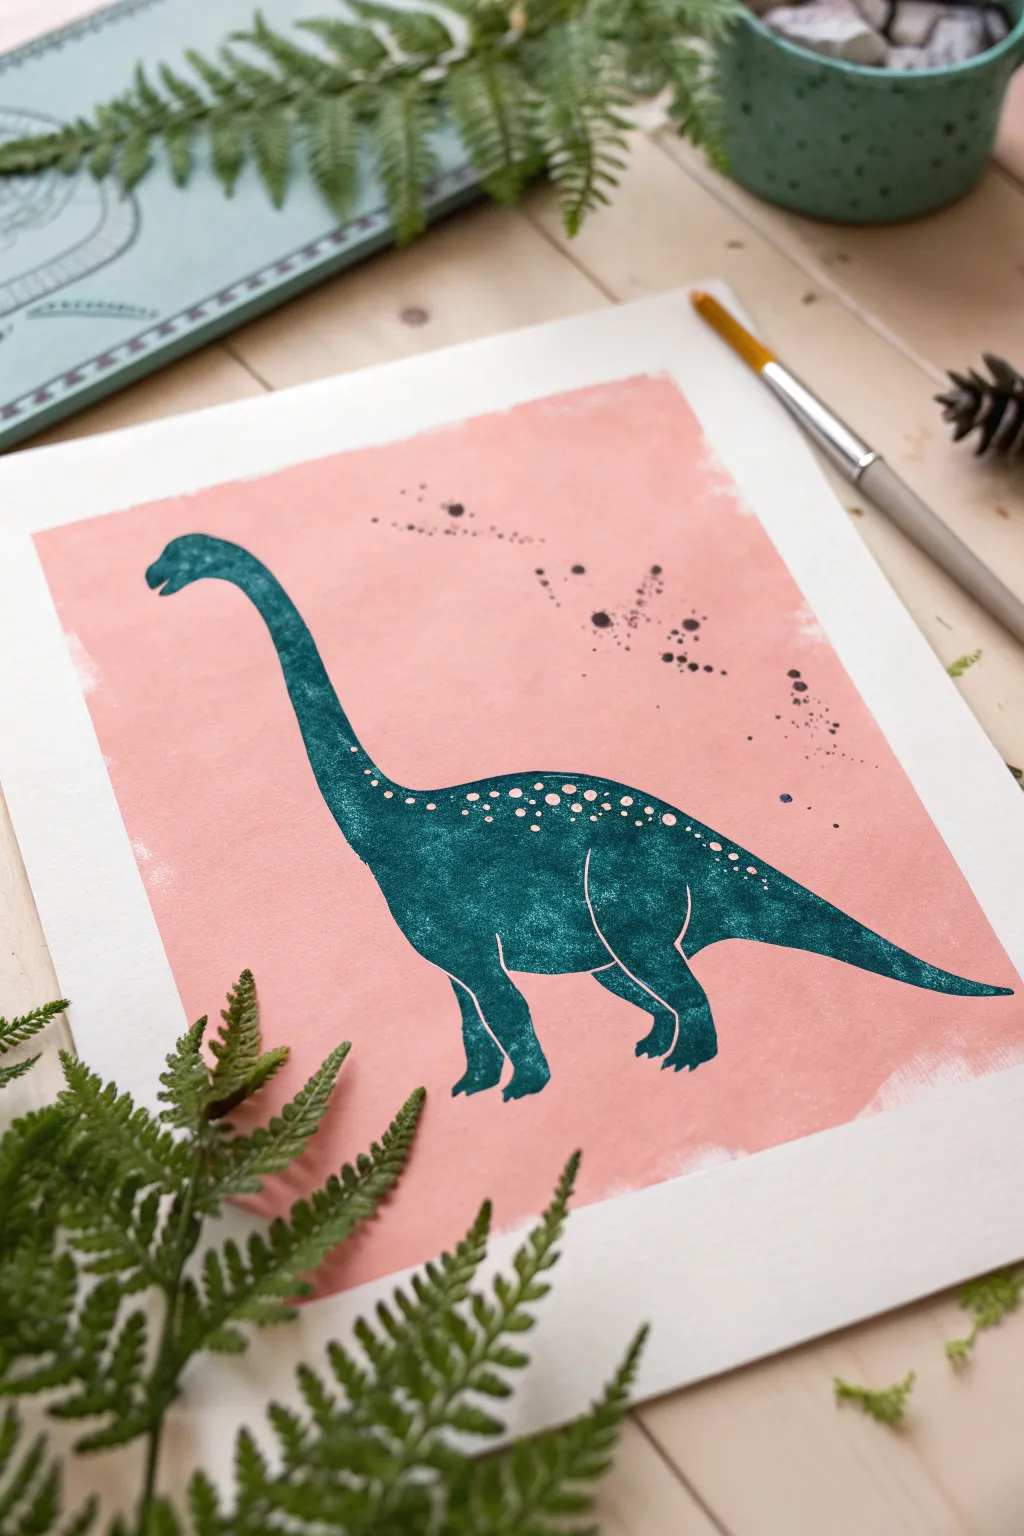
This charming art project captures the gentle nature of a long-necked dinosaur using a bold silhouette against a soft pink background. The standout feature is the clever use of splatters and spots to create the illusion of reptilian skin texture without needing to paint individual scales.
Step-by-Step Tutorial
Materials
- Heavyweight watercolor paper or mixed media paper
- Painter’s tape or masking tape
- Acrylic paint (salmon pink, dark teal/blue-green, white)
- Medium flat paintbrush
- Small round detail brush
- Pencil
- Old toothbrush (optional for texture)
- Paper towels
- Water cup
Step 1: Setting the Background
-
Prepare the paper border:
Start by deciding on the size of your painted area. While you can tape off the edges for a crisp line, the example uses a freehand painted edge for a more organic feel. If you want that rough, painterly border, simply leave the paper untaped. -
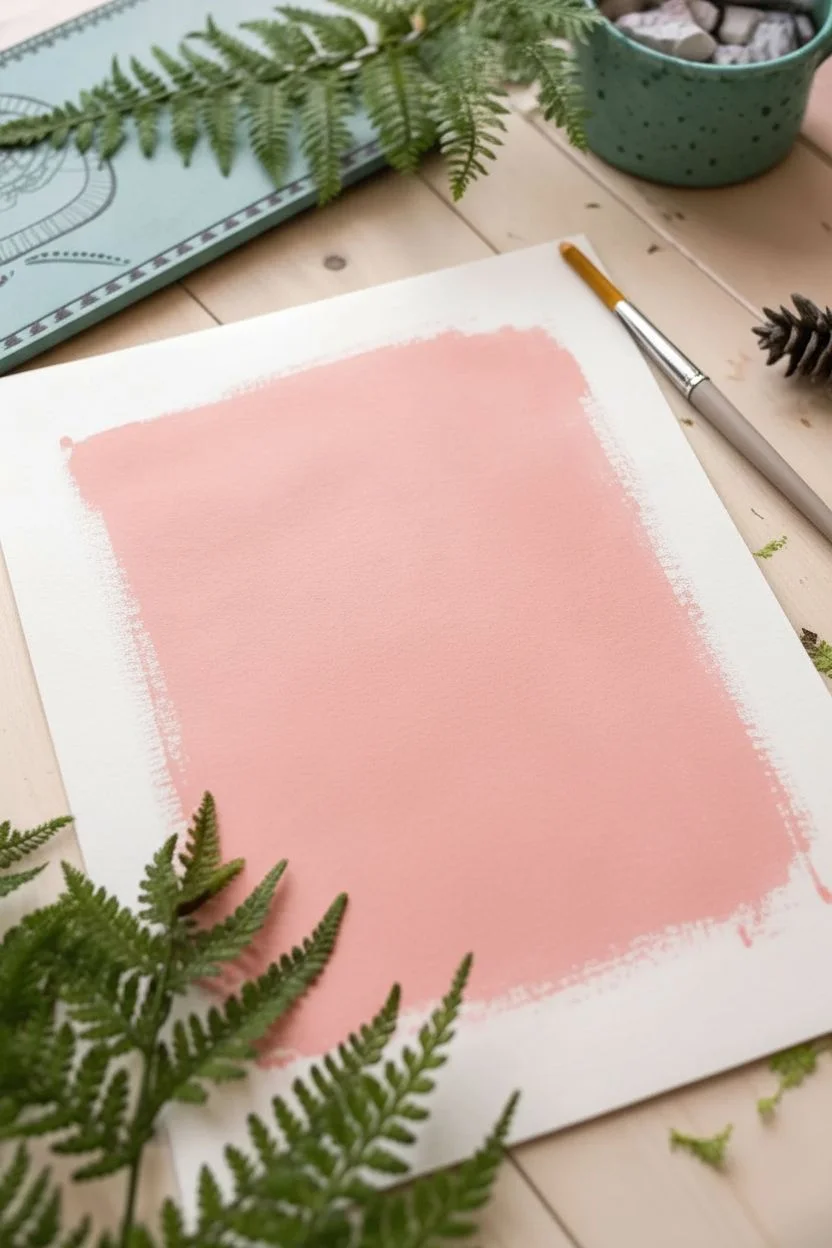
Mix the background color:
Mix a soft salmon pink color using red, a touch of yellow, and plenty of white acrylic paint. You want a warm, earthy pink rather than a hot pink. -
Paint a color block:
Using your flat brush, paint a large rectangle in the center of your paper. Don’t worry about making the edges perfectly straight; slightly uneven brushstrokes at the perimeter add character to the piece. -
Dry completely:
This step is crucial. Let the pink background dry 100% before moving on. If it’s cool to the touch, it’s still wet. I often use a hair dryer on a low setting to speed this up.
Don’t Rush the Dry
If you try painting the teal dinosaur while the pink background is damp, the colors will muddy together. Ensure the pink layer is bone-dry before sketching or painting the dino.
Step 2: Creating the Dinosaur Silhouette
-
Sketch the outline:
Once the background is dry, use a pencil to lightly sketch the dinosaur’s silhouette. Start with a long, curving neck on the left, an oval body in the center, and a tapering tail extending to the right. -
Refine the legs:
Draw four sturdy legs. The front legs should be slightly straighter, while the back legs have a bit more curve at the thigh. Keep the feet simple and blocky. -
Mix the dinosaur color:
Create a deep, rich teal color. Mix dark blue with a little bit of green and a tiny drop of black to deepen it. This color needs to be opaque enough to cover the pink background. -
Paint the outline:
Using a smaller brush, carefully paint along the pencil lines you drew to create a crisp edge for your dinosaur silhouette. -
Fill in the shape:
Switch to a slightly larger brush to fill in the body of the dinosaur with your teal paint. Apply the paint relatively smoothly, but a little texture is okay. -
Add definition lines:
While the paint is wet or using a slightly lighter teal mix, paint thin curved lines to separate the legs from the body and define the hip area. This creates a sense of depth in the flat silhouette.
Step 3: Adding Texture and Details
-
Create the spots:
Mix a lighter version of your teal color (or use plain white for high contrast). Using the very tip of your smallest brush or the handle end of a paintbrush, dot small spots along the spine and back of the dinosaur. -
Vary dot sizes:
Make the dots larger near the center of the back and smaller as they trail down the tail and up the neck. -
Prepare the splatter paint:
Take some of your dark teal paint and water it down slightly until it has the consistency of ink or heavy cream. -
Splatter texture:
Dip an old toothbrush or a stiff bristled brush into the watery paint. Hold it over the neck area and background, then run your thumb across the bristles to flick tiny speckles onto the paper. -
Control the spray:
Add only a few splatters mostly concentrated around the dinosaur’s head and upper back, allowing some distinct droplets to land on the pink background to mimic dirt or atmosphere. -
Add facial detail:
Use your smallest brush to carefully paint an open mouth shape on the head profile. You can also add a tiny dot for an eye if you wish, though a simple silhouette works beautifully. -
Final touches:
Assess your edges. If any pink shows through the teal where it shouldn’t, add a second coat to the dinosaur’s body for a solid, opaque look.
Jurassic Flora
Once finished, use a dark green gouache or marker to draw simple fern silhouettes or tall grass blades overlapping the bottom of the dinosaur’s legs to ground it in a scene.
Once the final splatters are dry, frame your artwork to showcase this modern take on a prehistoric giant


Construction Vehicles in Blocky Shapes
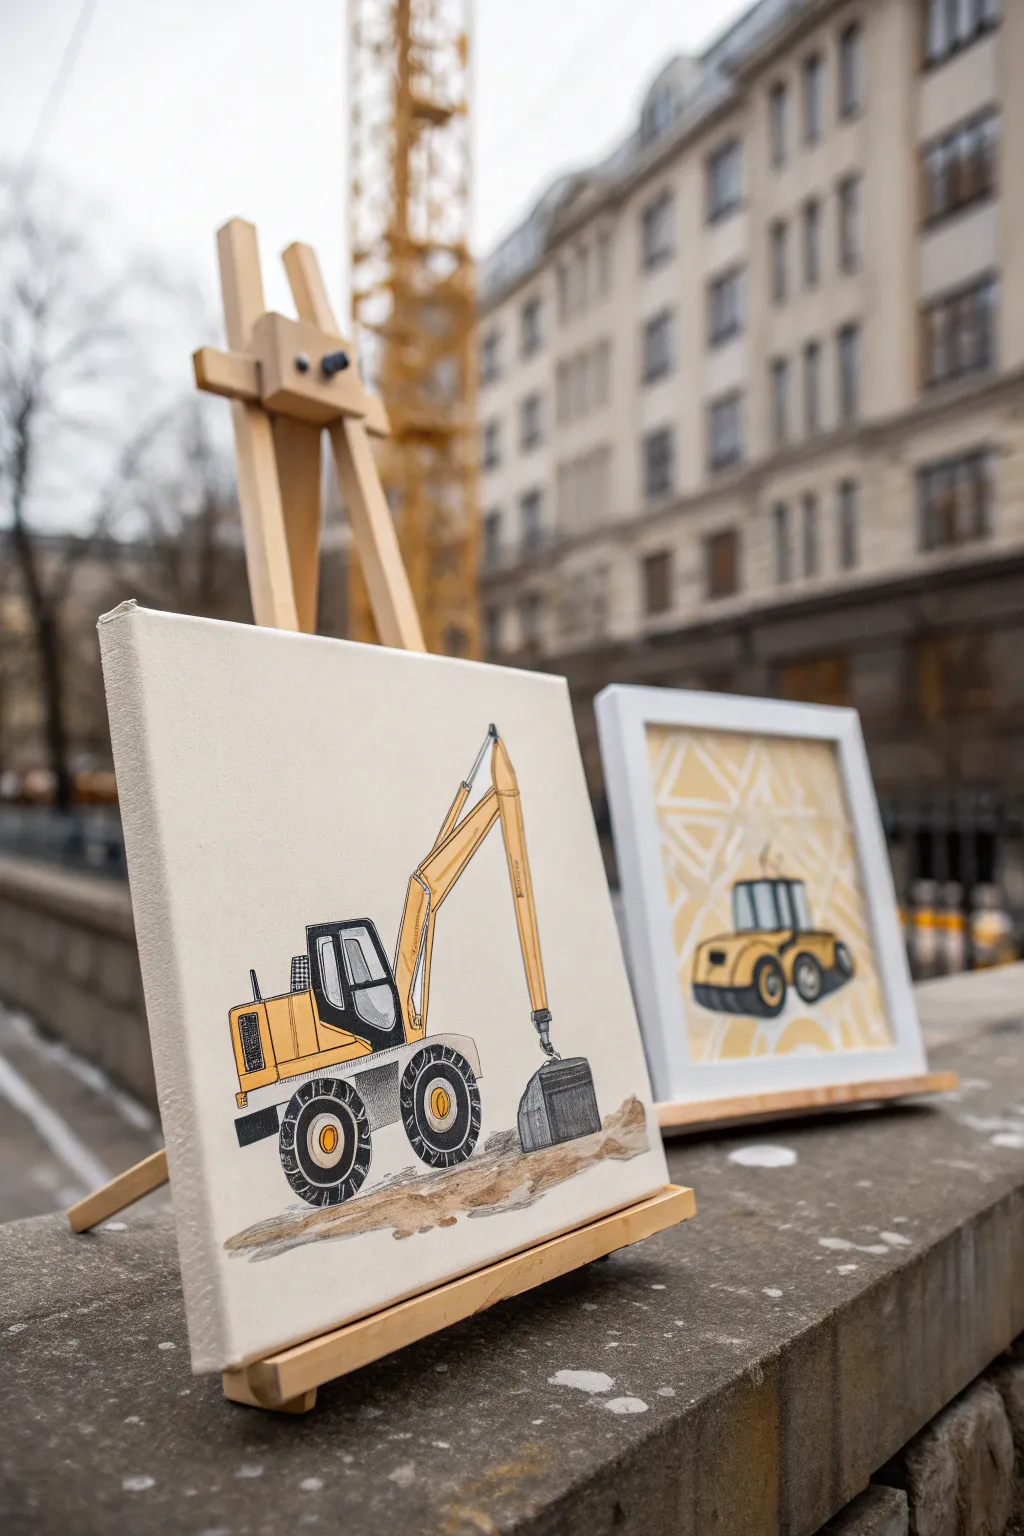
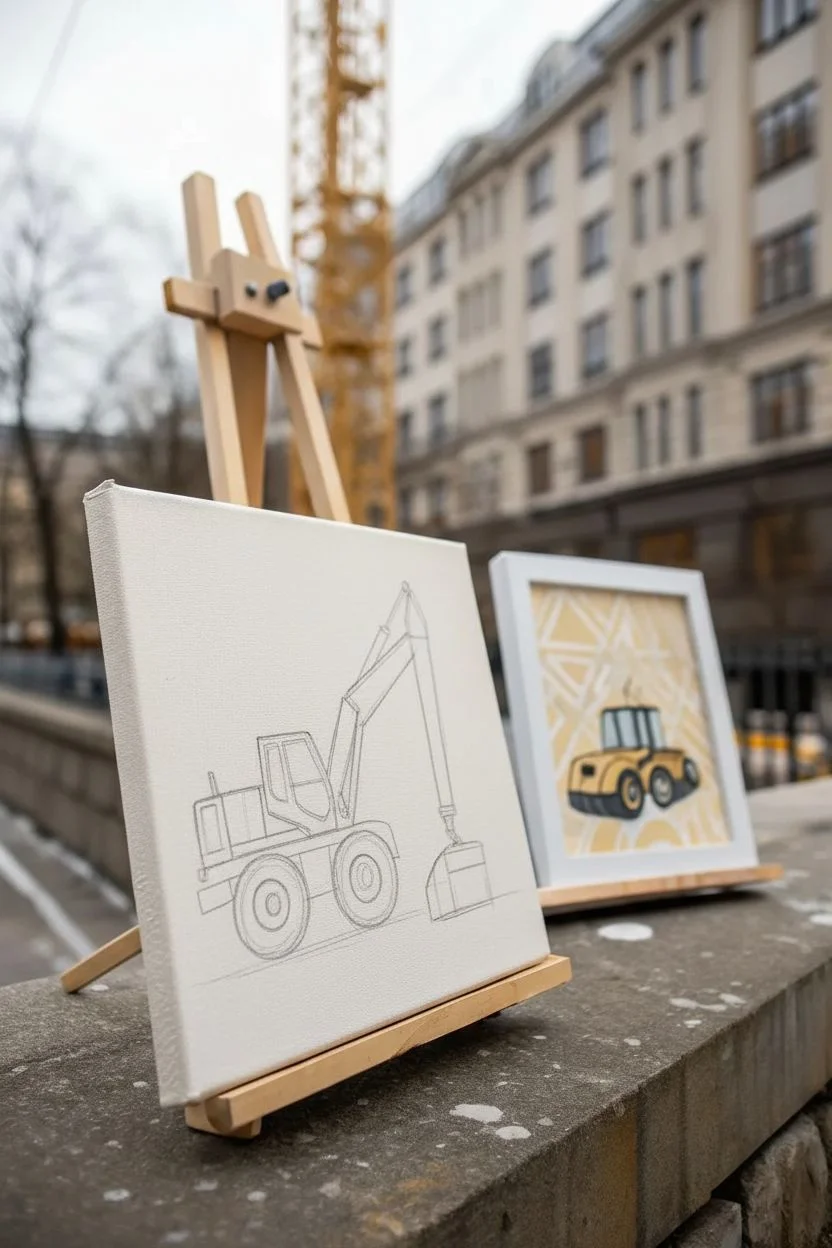
This project transforms simple construction equipment into a clean, modern piece of art perfect for a child’s room. The technique focuses on strong lines, blocky shapes, and a limited color palette to create a striking excavator that feels both illustrative and architectural.
Step-by-Step Tutorial
Materials
- Small square canvas (8×8 or 10×10 inches)
- Pencil (HB or 2B)
- Eraser
- Ruler
- Yellow ochre / Mustard yellow acrylic paint
- Black acrylic paint or black paint marker (fine and medium tip)
- Grey acrylic paint (light and dark shades)
- White acrylic paint
- Small flat brushes
- Fine liner brush
- Palette or paper plate
Step 1: Drafting the Outline
-
Start with the base:
Begin by sketching the wheels. Draw two large circles near the bottom of the canvas, spacing them apart slightly. Imagine where the ground line will be. -
Build the body block:
Above the wheels, sketch a rectangular box for the chassis. Keep your lines straight and angular, avoiding too many curves to maintain that ‘blocky’ style. -
Add the cabin:
Draw the operator’s cabin as a taller, upright rectangle on top of the chassis. Add a slanted line for the front windshield to give it that classic excavator profile. -
Sketch the boom arm:
Extend a long, segmented arm from the body. Think of it as two long rectangles connected by a joint. This arm should reach upwards and then angle down towards the ground. -
Draw the bucket:
At the end of the arm, sketch a bucket shape resting on the ‘ground.’ It should look like a C-shape or scoop facing the vehicle.
Step 2: Applying Color
-
Paint the yellow body:
Using your yellow ochre or mustard paint, fill in the main body, the engine compartment, and the boom arm. Use a flat brush to keep the edges crisp. -
Second coat:
Yellow can sometimes be transparent, so once the first layer is dry, I usually add a second coat to ensure the color is solid and vibrant. -
Fill the grey areas:
Paint the bucket, the wheel hubs, and the undercarriage area with grey paint. You can use lighter grey for the bucket to make it stand out against the darker ground later. -
Paint the windows:
Fill in the cabin windows with a very light grey or white mixed with a tiny drop of blue for a glass effect. -
Groundwork:
Mix a loose, watery brown or tan color. Painted roughly under the wheels and bucket to create a dirt mound. Don’t worry about being neat here; a messy texture looks like real dirt.
Clean Lines Hack
If you struggle with steady hands for the long hydraulic arm, use painter’s tape or a ruler edge to guide your marker or brush for perfectly straight lines.
Step 3: Detailing & Outlining
-
Outline the main shapes:
Once the paint is completely dry, use a black paint marker or a fine liner brush with black paint to outline every major shape. This is what gives the artwork its ‘illustration’ look. -
Detail the tires:
Paint the tires black, leaving the grey hubs visible. Once dry, use a white paint pen or thin brush to add tread detail patterns on the black rubber. -
Add mechanical details:
Draw small circles for bolts at the joints of the arm. Add distinct lines on the vehicle body for doors and engine vents. -
Define the cabin:
Thicken the outline around the cabin frame. You can add a small black rectangle for a side mirror. -
Texture the bucket:
Add horizontal lines across the grey bucket to imply ridges or metal texture. -
Final dirt touches:
Use a dry brush technique with darker brown or grey to scuff up the dirt pile, adding depth and shadow under the bucket.
Level-Up: 3D Elements
Glue real sand or tiny craft pebbles onto the painted dirt pile before sealing. It adds an awesome tactile texture that makes the excavation scene pop.
Hang this bright yellow machine on the wall and admire your solid construction work
BRUSH GUIDE
The Right Brush for Every Stroke
From clean lines to bold texture — master brush choice, stroke control, and essential techniques.
Explore the Full Guide
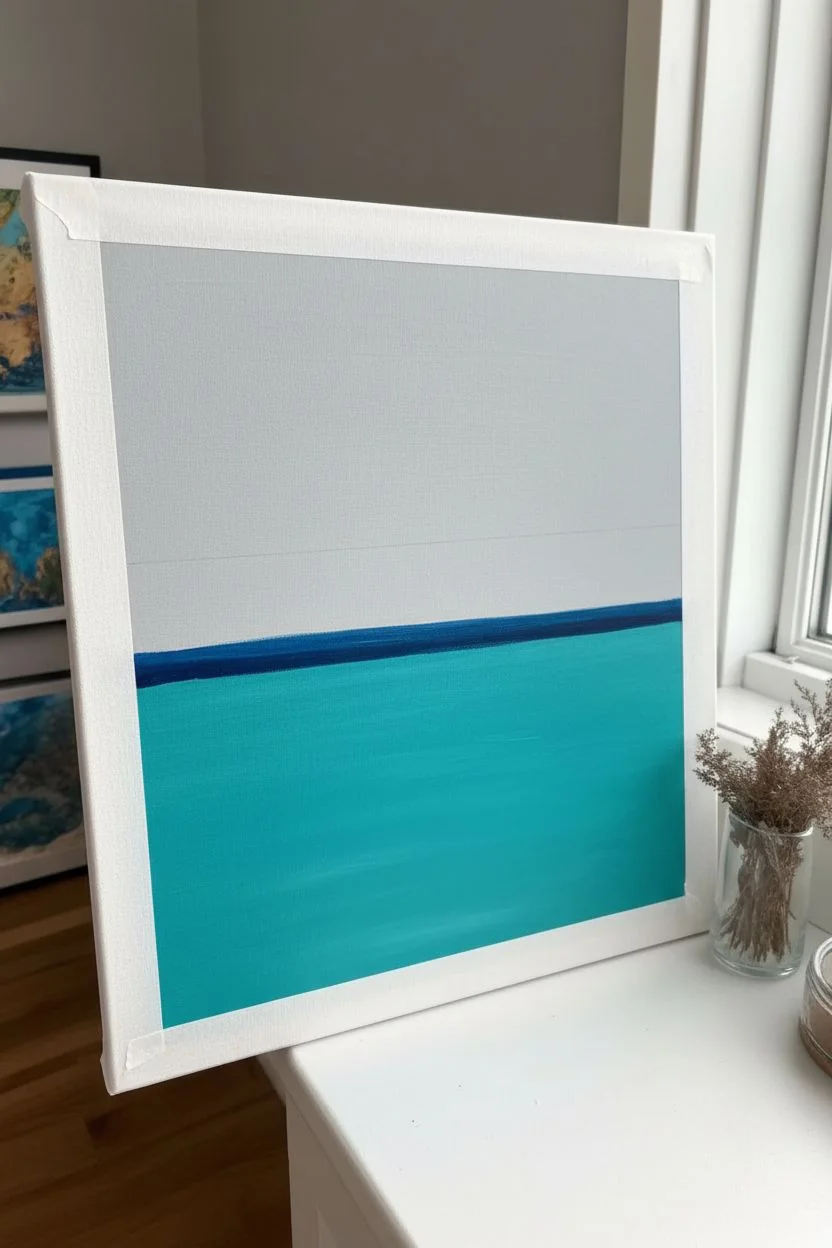
Geometric Accent Pattern in Cool Colors
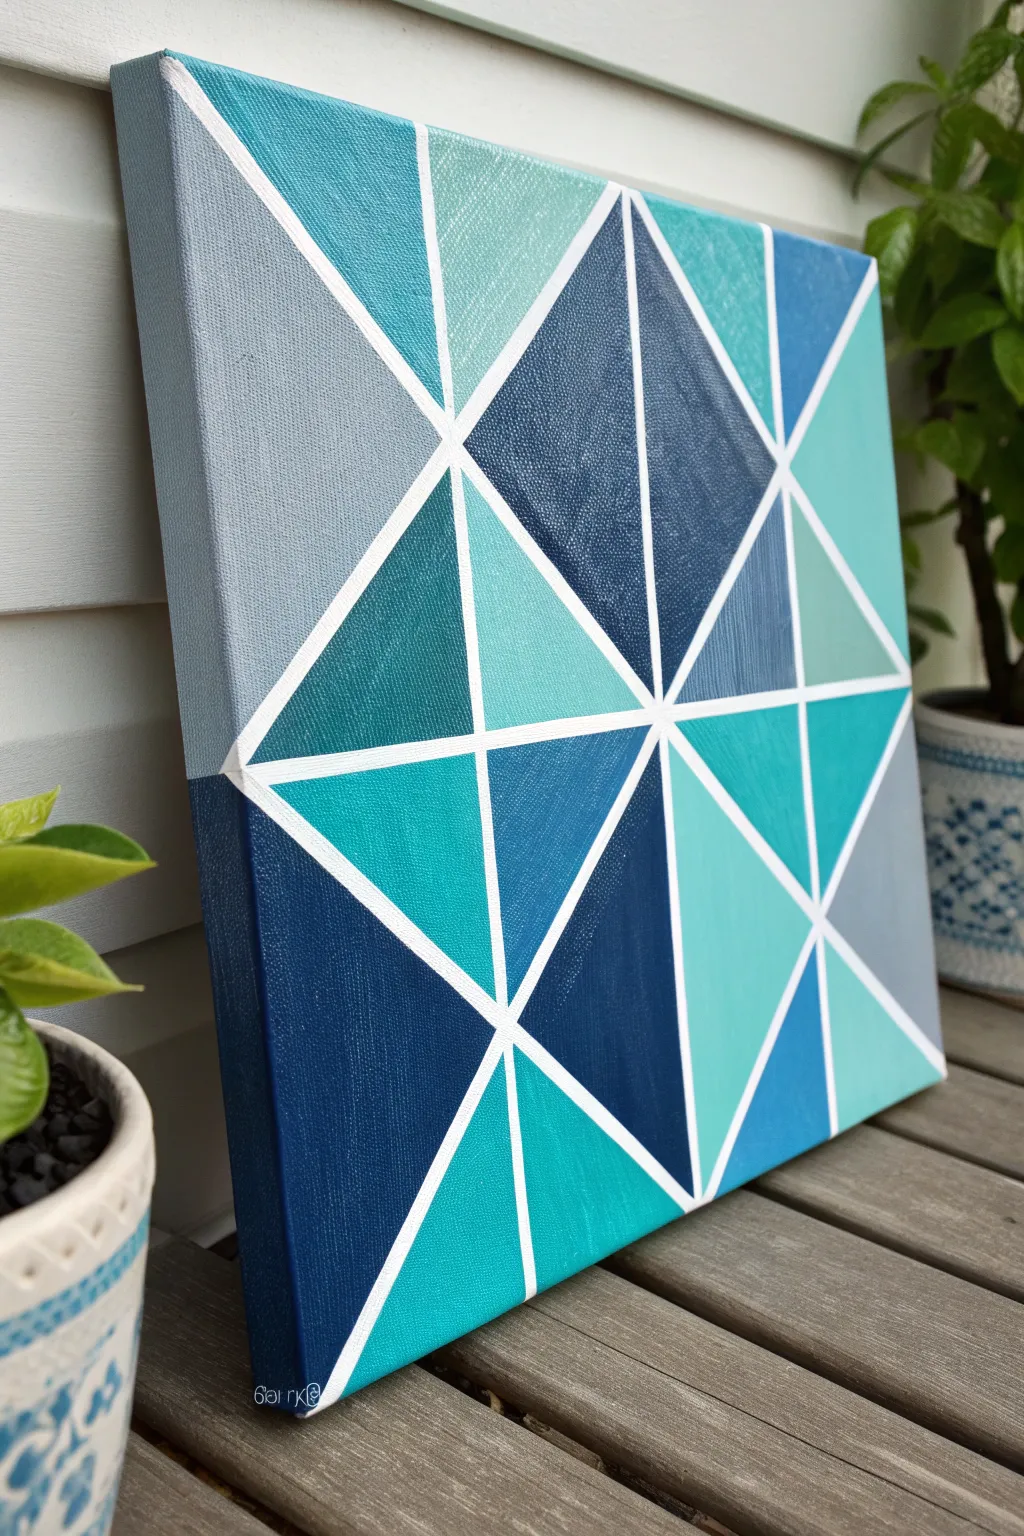
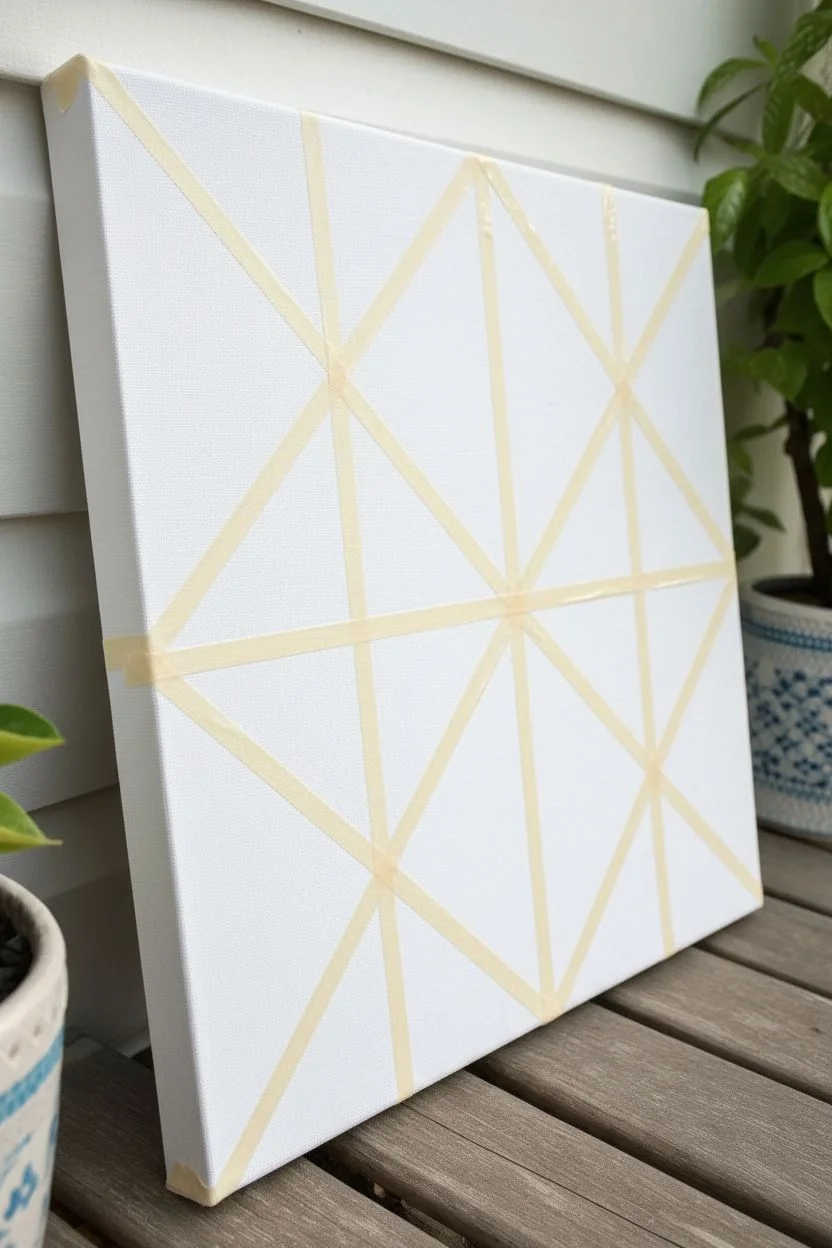
This striking geometric accent piece uses a modern mosaic of cool triangles to create distinct visual interest. The sharp white lines contrasting with shades of teal, navy, and sky blue make it a perfect, clean-cut addition to a boy’s bedroom or play area.
Detailed Instructions
Materials
- Square canvas (12×12 or similar size)
- Painter’s tape or masking tape (1/4 inch width is ideal)
- Acrylic paints (Navy blue, Royal blue, Teal, Turquoise, Grey, White)
- Flat paintbrushes (medium and small)
- Palette or paper plate for mixing
- Cup of water
- Paper towels
- Hairdryer (optional, for faster drying)
Step 1: Planning the Pattern
-
Prepare the canvas:
Start with a clean, dry canvas. If you want the separating lines to be bright white, you can give the entire canvas a quick base coat of white acrylic paint first. Let it dry completely before moving on. -
Apply the first tape lines:
Take your painter’s tape and stretch long strips across the canvas from edge to edge. Create a few large intersecting lines first, forming big triangles or quadrilaterals. Press the tape down firmly, running your fingernail along the edges to seal them. -
Subdivide the shapes:
Add more strips of tape to divide the larger shapes into smaller triangles. Don’t worry about perfect symmetry; the random, shattered glass look is what we’re aiming for. Ensure every piece of tape crosses another line or goes off the edge of the canvas. -
Seal the edges:
This is a little trick I swear by: paint a thin layer of white paint (or clear matte medium) over the tape edges. This seals the tape and prevents colored paint from bleeding underneath, ensuring those lines stay crisp.
Step 2: Painting the Triangles
-
Plan your color distribution:
Look at the palette of cool colors you have assembled. You want to avoid placing two identical colors right next to each other. Mentally map out where your darkest navy and lightest greys will go to balance the composition. -
Mix custom shades:
To get that rich variety seen in the photo, mix your paints. Add a touch of white to your teal to make a mint shade, or a dot of black to the blue for a deep midnight tone. Aim for at least 5-6 distinct colors. -
Start with the darkest color:
Select a few triangles to act as your anchors and paint them with the navy blue. Use a flat brush and paint away from the tape edges toward the center of the shape to minimize bleeding. -
Fill in mid-tones:
Switch to your teal and royal blue shades. Fill in scattered triangles across the canvas, rinsing and drying your brush thoroughly between color changes. -
Apply the light accents:
Finally, paint the remaining empty triangles with your lightest greys, pale blues, and minty greens. These lighter shades add dimension and brightness to the overall piece. -
Paint the sides:
Don’t forget the edges of the canvas! Extend the color of each triangle down over the side of the canvas frame for a professional, gallery-wrapped finish. -
Second coat:
Some lighter colors might be slightly transparent. If you can see the canvas texture too clearly, apply a second coat once the first is dry to touch.
Bleed-Proof Lines
Before adding color, paint over your tape lines with your base white color. This seals the tape gaps so any seepage is white-on-white, leaving clean edges.
Step 3: The Reveal
-
Drying time:
Let the painting sit until the paint is almost completely dry but still slightly tacky. If using a hairdryer, keep it on a low setting and keep it moving. -
Peel the tape:
Slowly peel back the tape at a sharp 45-degree angle. Pulling slowly is key here. If the paint is fully hardened, it might chip, which is why peeling while slightly tacky is safer. -
Touch ups:
Inspect your white lines. If any paint did manage to bleed through, wait for everything to be totally dry, then use a tiny detail brush and white paint to carefully clean up the line.
Metallic Accent
Swap one of the grey or light blue shades for a metallic silver or gold paint. When the light hits the canvas, those specific triangles will shimmer.
Hang this modern masterpiece on the wall to instantly add a sophisticated splash of color to the room
Camouflage Color Mixing Challenge
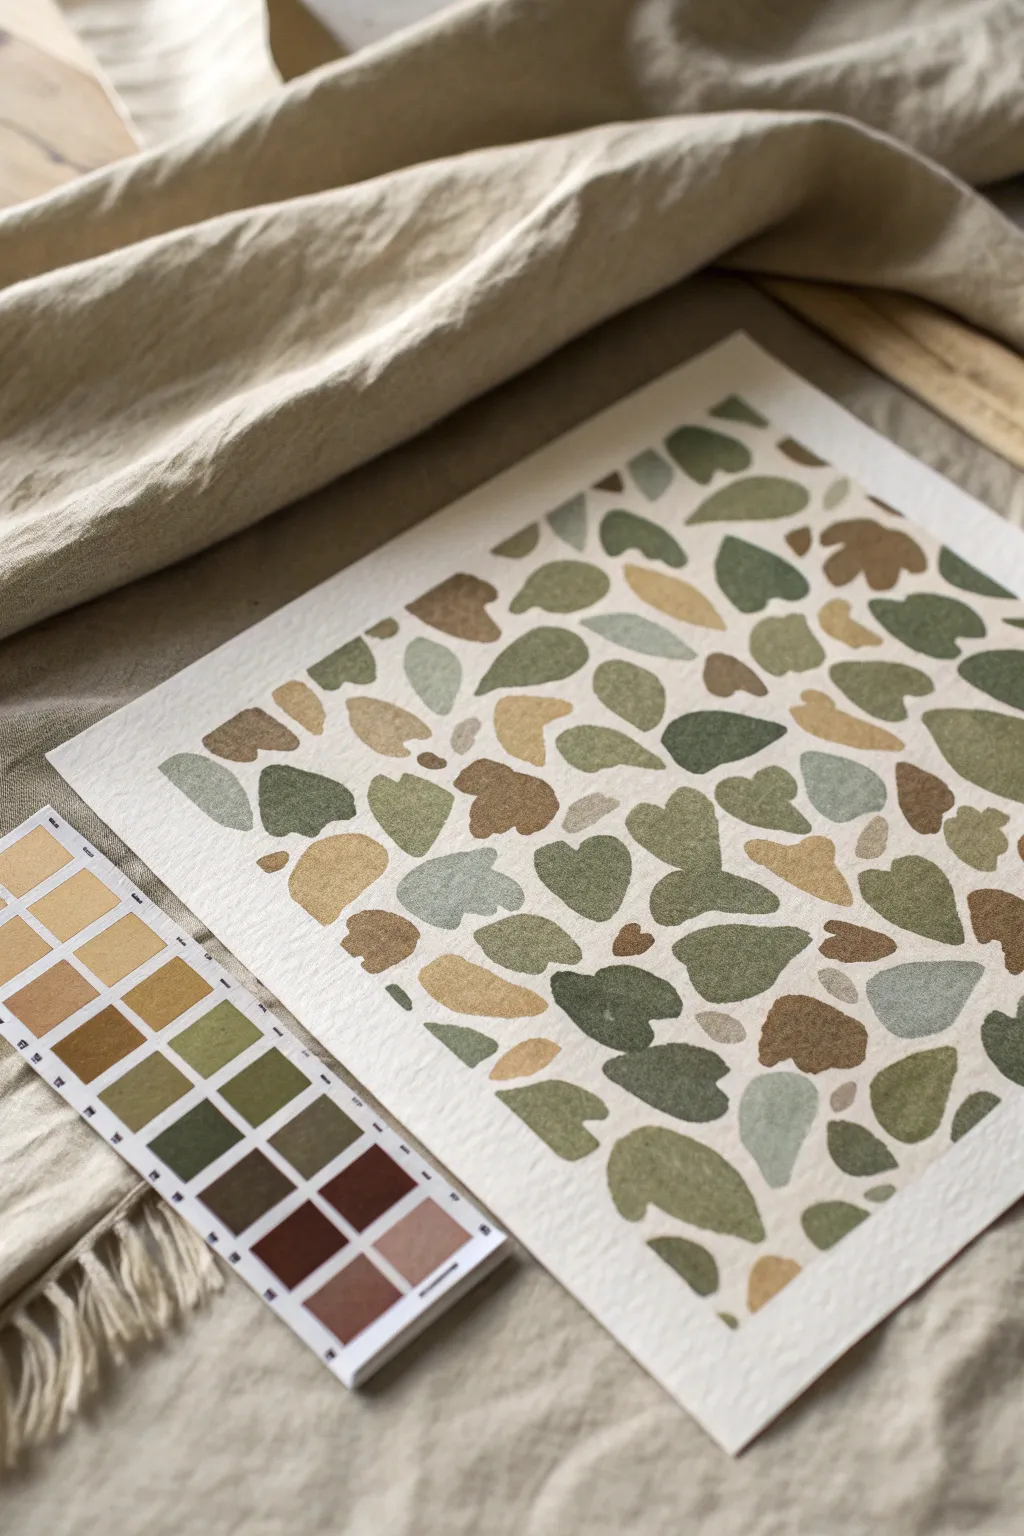
This abstract camouflage study transforms simple organic shapes into a sophisticated pattern using a muted, earthy palette. It is a fantastic exercise for exploring the subtle variations between olive greens, warm rusts, and cool grays.
Step-by-Step Guide
Materials
- Heavyweight watercolor paper (300gsm cold press recommended)
- Watercolor or gouache paints
- Mixing palette
- Round pointed brushes (sizes 4 and 6)
- Pencil (HB)
- Eraser
- Paper towels
- Masking tape (optional)
Step 1: Color Exploration
-
Prepare your palette:
Before putting brush to paper, designate space on your palette for three main color families: greens, browns/rusts, and grey-blues. -
Mix your base green:
Create a foundational olive green by mixing sap green with a touch of burnt sienna or yellow ochre to dull its brightness. -
Create green variations:
From that base olive, mix two variations: one lighter (add more water or white gouache) and one deeper (add a touch of raw umber). -
Mix warm earth tones:
Prepare a rusty brown and a sandy beige. Burnt sienna is a great starting point; mix it with yellow ochre for the sand tone and a tiny bit of red for the rust. -
Mix the cool element:
To balance the warmth, create a soft slate grey or muted blue-grey. Mixing ultramarine blue with a little burnt umber and white works beautifully here. -
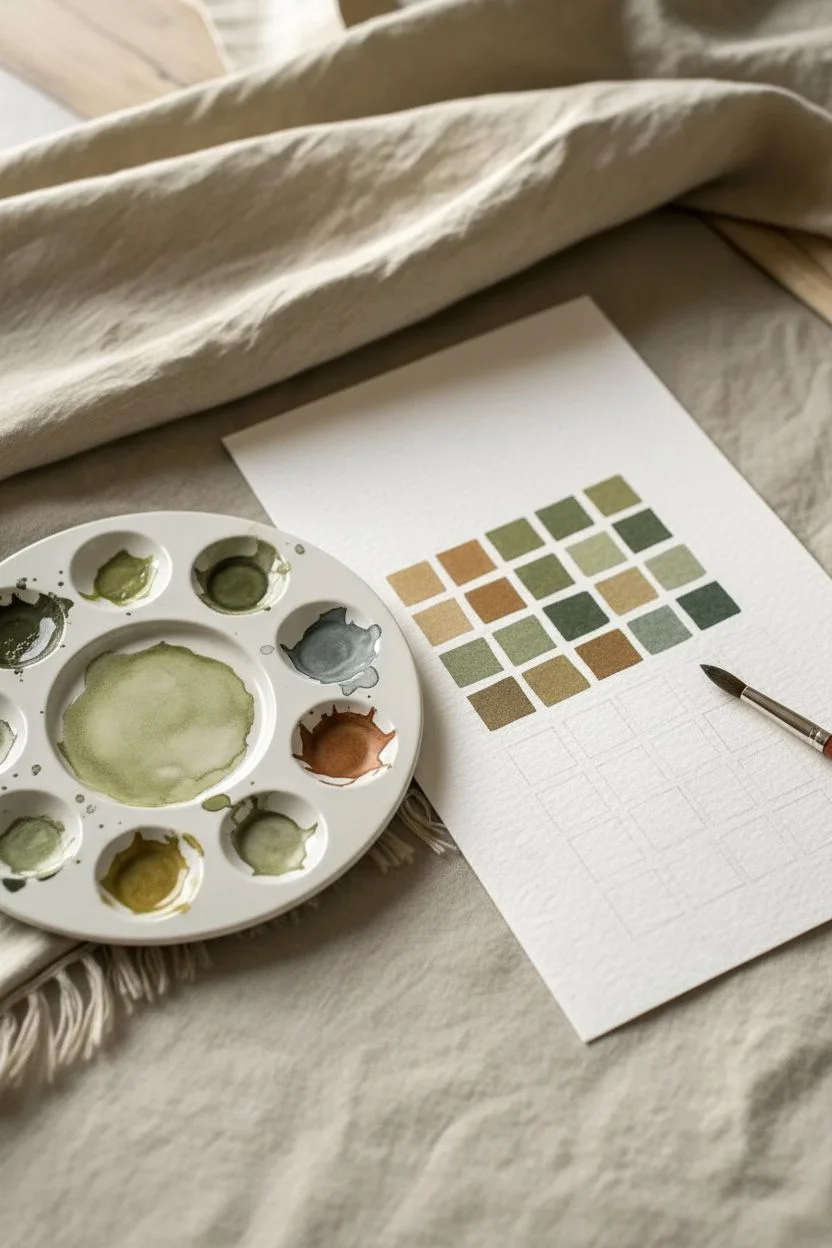
Test your swatch:
On a scrap piece of paper, paint small squares of all your mixed colors side-by-side to ensure they look harmonious together before starting key artwork.
Bleeding Edges?
If your shapes are running into each other, your paint is too wet or you aren’t waiting long enough between adjacent shapes. Let one color dry completely before painting a neighbor.
Step 2: Painting the Pattern
-
Plan the composition:
Lightly sketch a square boundary on your watercolor paper if you want clean margins, or plan to let the design float in the center. -
Start with the largest shapes:
Dip your #6 round brush into your darkest olive green. Paint scattered organic shapes—think of them as smooth river stones or falling leaves—randomly across the page. -
Add the warm tones:
While the greens dry, switch to your rust and sand colors. Paint medium-sized irregular blobs in the negative spaces between the green shapes. -
Rotate the paper:
I find it helpful to physically turn the paper periodically to ensure the distribution of color feels balanced and not heavy on one side. -
Incorporate the grey accents:
Using the #4 brush, add the slate grey shapes. These act as a visual ‘breather’ among the warm and earthy tones. -
Fill the gaps:
Look for large white spaces and fill them with smaller shapes using your lighter green variation. Keep the edges of your shapes crisp. -
Mind the spacing:
Try to keep a relatively consistent amount of white space (the ‘grout’ lines) between each shape. They shouldn’t touch, but they should nestle close together. -
Review and refine:
Step back and squint at the painting. If a specific area looks too empty, add a tiny pebble shape in a contrasting color. -
Let it dry completely:
Allow the paint to fully set. The colors will often dry slightly lighter than they appear when wet.
Natural Edges
For the torn paper look shown in the photo, fold your paper repeatedly along the desired edge and carefully rip it against a metal ruler instead of cutting with scissors.
Once dry, you can frame this abstract camo piece to add a modern, earthy touch to any room

PENCIL GUIDE
Understanding Pencil Grades from H to B
From first sketch to finished drawing — learn pencil grades, line control, and shading techniques.
Explore the Full Guide
Space Helmet Portrait Without a Face
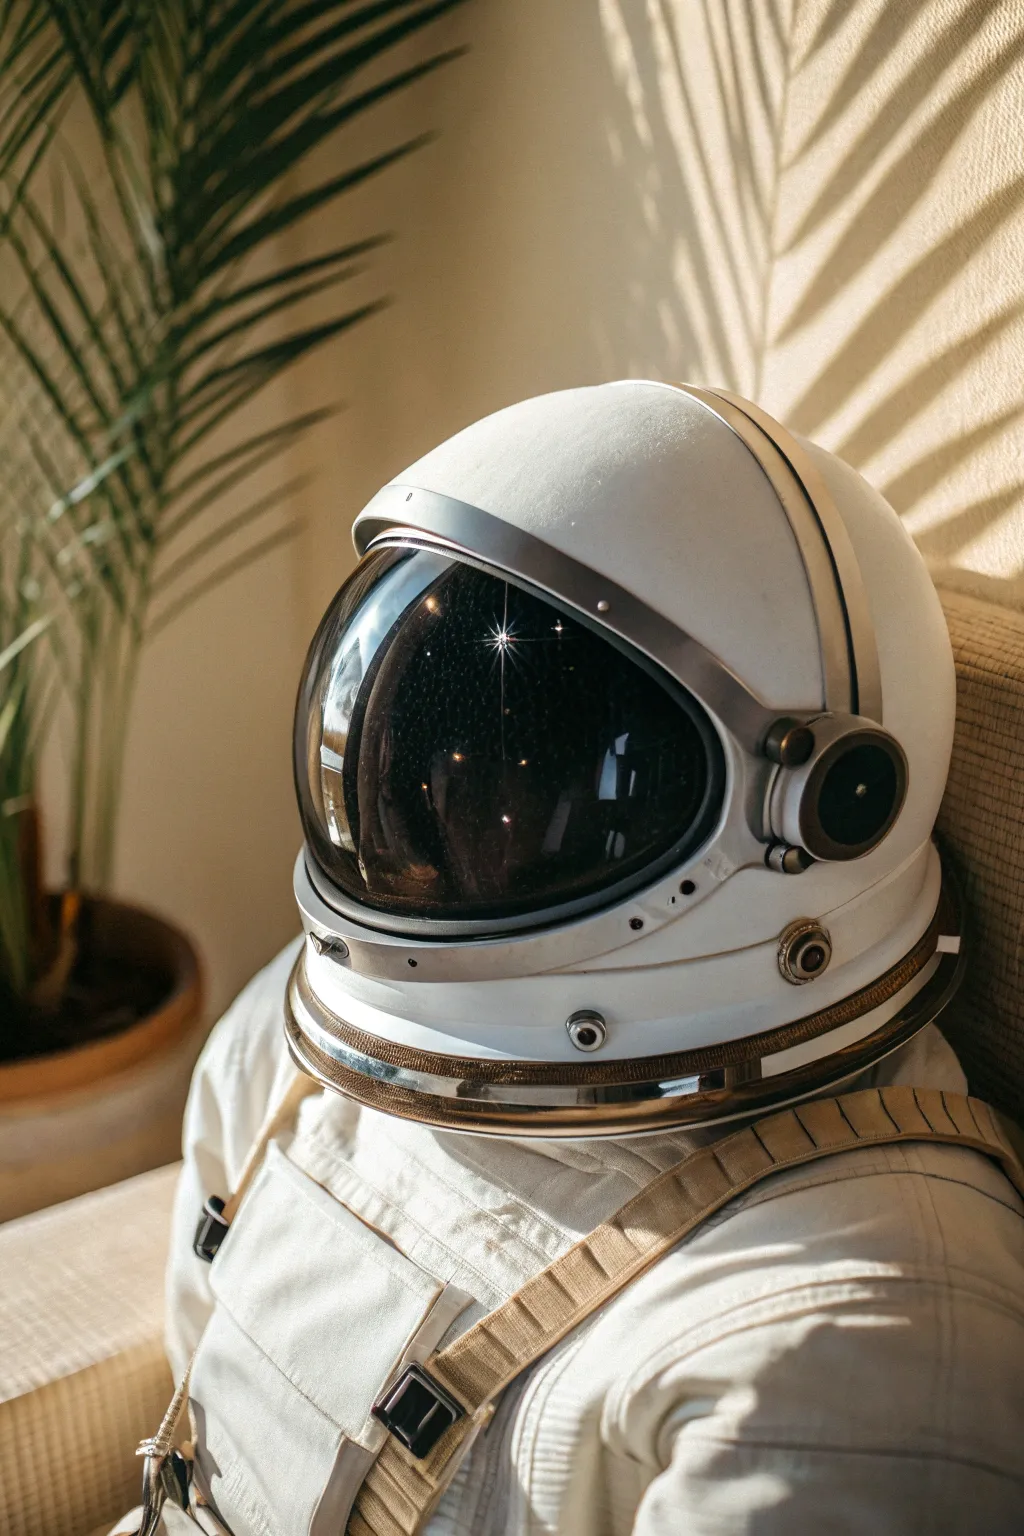
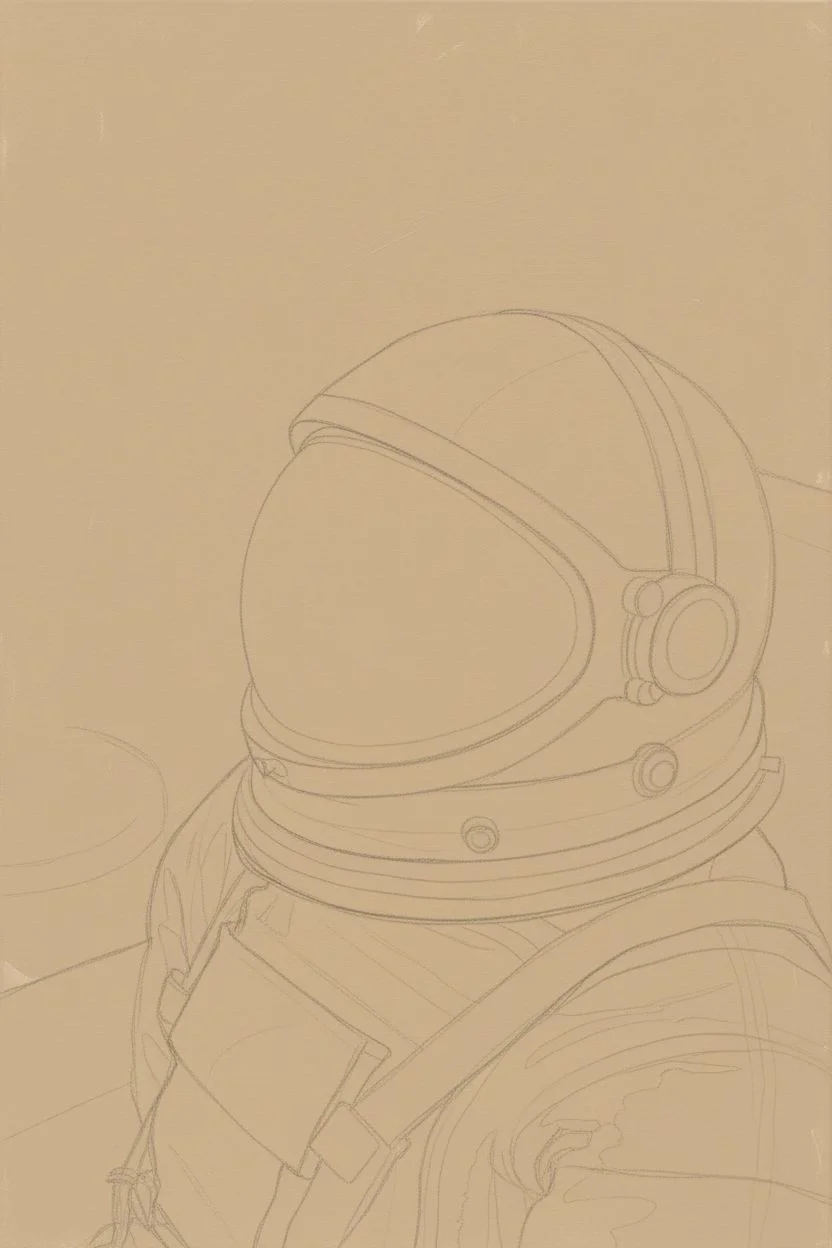
Capture the enigmatic allure of space exploration right in your living room with this realistic acrylic painting. By focusing on light, reflection, and shadow, you’ll create a striking visual of a lonely astronaut that feels both grounded and otherworldly.
Detailed Instructions
Materials
- High-quality canvas (16×20 or similar)
- Acrylic paints: Titanium White, Mars Black, Burnt Umber, Yellow Ochre, Ultramarine Blue, Phthalo Green
- Various brushes: large flat brush, medium filbert, fine liner brush
- Palette knife
- Slow-drying medium or retarder
- Water container and paper towels
- Soft charcoal pencil
- Masking tape
Step 1: Setting the Scene
-
Sketch basic forms:
Begin by lightly sketching the large spherical shape of the helmet in the center-right of your canvas. Don’t worry about perfect circles yet; just get the mass and placement correct relative to the background. -
Outline the suit:
Draw the shoulders and chest straps below the helmet. The suit has a bulky, fabric quality, so use loose, slightly curved lines to indicate folds and thickness rather than stiff straight lines. -
Block in background:
Mix a warm beige using White, Yellow Ochre, and a touch of Burnt Umber. Using a large flat brush, cover the entire background wall area, working around the helmet shape.
Glass Effect Secret
To make the visor look truly like glass, keep your darkest blacks pitch black. High contrast between the dark void and the sharp white reflections creates the illusion of a polished surface.
Step 2: Shadows and Plant Life
-
Paint palm shadows:
While the background is still slightly tacky, mix a darker, semi-transparent grey-brown. Paint the diagonal, striated shadows on the wall to mimic palm fronds. Keep the edges soft to suggest distance. -
Add the actual plant:
On the left side, paint the physical palm leaves using Phthalo Green mixed with Burnt Umber for deep shadows. Use a medium filbert brush to create the long, sweeping leaf shapes, layering lighter greens on top for highlights. -
Deepen the plant pot:
Paint the blurred pot in the lower left corner using Burnt Umber and a touch of Black. Since it’s out of focus, keep your brushstrokes loose and avoid sharp edges.
Step 3: The Helmet & Visor
-
Base coat the helmet:
Paint the main helmet shell with Titanium White mixed with a tiny drop of Yellow Ochre to warm it up. It shouldn’t be stark white; it needs to reflect the room’s warm lighting. -
Fill the visor:
Paint the large visor area with a deep, solid black. This will serve as the base for the complex reflections we will add later. -
Create metallic rims:
Mix a slate grey for the metal band connecting the visor to the helmet. Add a metallic shine by placing a sharp strip of pure white highlight along the top edge of this rim to show curvature. -
Paint the ear cup:
Detail the circular ‘ear’ mechanism on the side using dark greys and blacks. Use a fine liner brush to add the small circles and mechanical details that give the helmet its technical look. -
Add visor reflections:
This is the crucial step. Scumble extremely thin layers of white and light blue onto the black visor to create the ‘glass’ look. Add a bright, star-like glint near the top center to represent a strong light source reflection.
Make It Personal
Customize the visor reflection! Instead of abstract lights, paint a tiny reflection of a specific room, a landscape, or even a silhouette of a person looking at the astronaut.
Step 4: The Spacesuit
-
Texturize the suit fabric:
Paint the suit body using an off-white mixture. To create the heavy canvas texture, use a dry-brush technique with a slightly darker grey to drag across the surface, highlighting the weave. -
Detail the straps:
Paint the harness straps running over the shoulders using Yellow Ochre mixed with White. Add small, dark rectangular buckles using a fine brush and black paint. -
Add fabric folds:
I like to use a watered-down grey wash to paint the deep creases in the arm and chest area. This gives volume to the suit so it doesn’t look flat. -
Highlight the stitching:
Using your finest liner brush and pure white, add subtle stitching lines along the edges of the straps and pockets. These tiny details sell the realism.
Step 5: Final Atmosphere
-
Cast shadows:
Paint a soft shadow on the shoulder and chest directly under the helmet to ground it. Use a cool grey to contrast with the warm room light. -
Color correction:
Glaze a very thin layer of Yellow Ochre over the sunlit parts of the helmet and wall to unify the lighting and enhance the ‘golden hour’ feeling. -
Final highlights:
Add the brightest white highlights to the top of the helmet dome and the metal neck ring to make them pop against the matte background.
Step back and admire the quiet, cinematic atmosphere you have created with just paint and patience
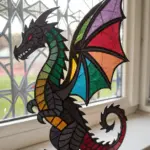
Dragon Eye and Scales in Extreme Close-Up
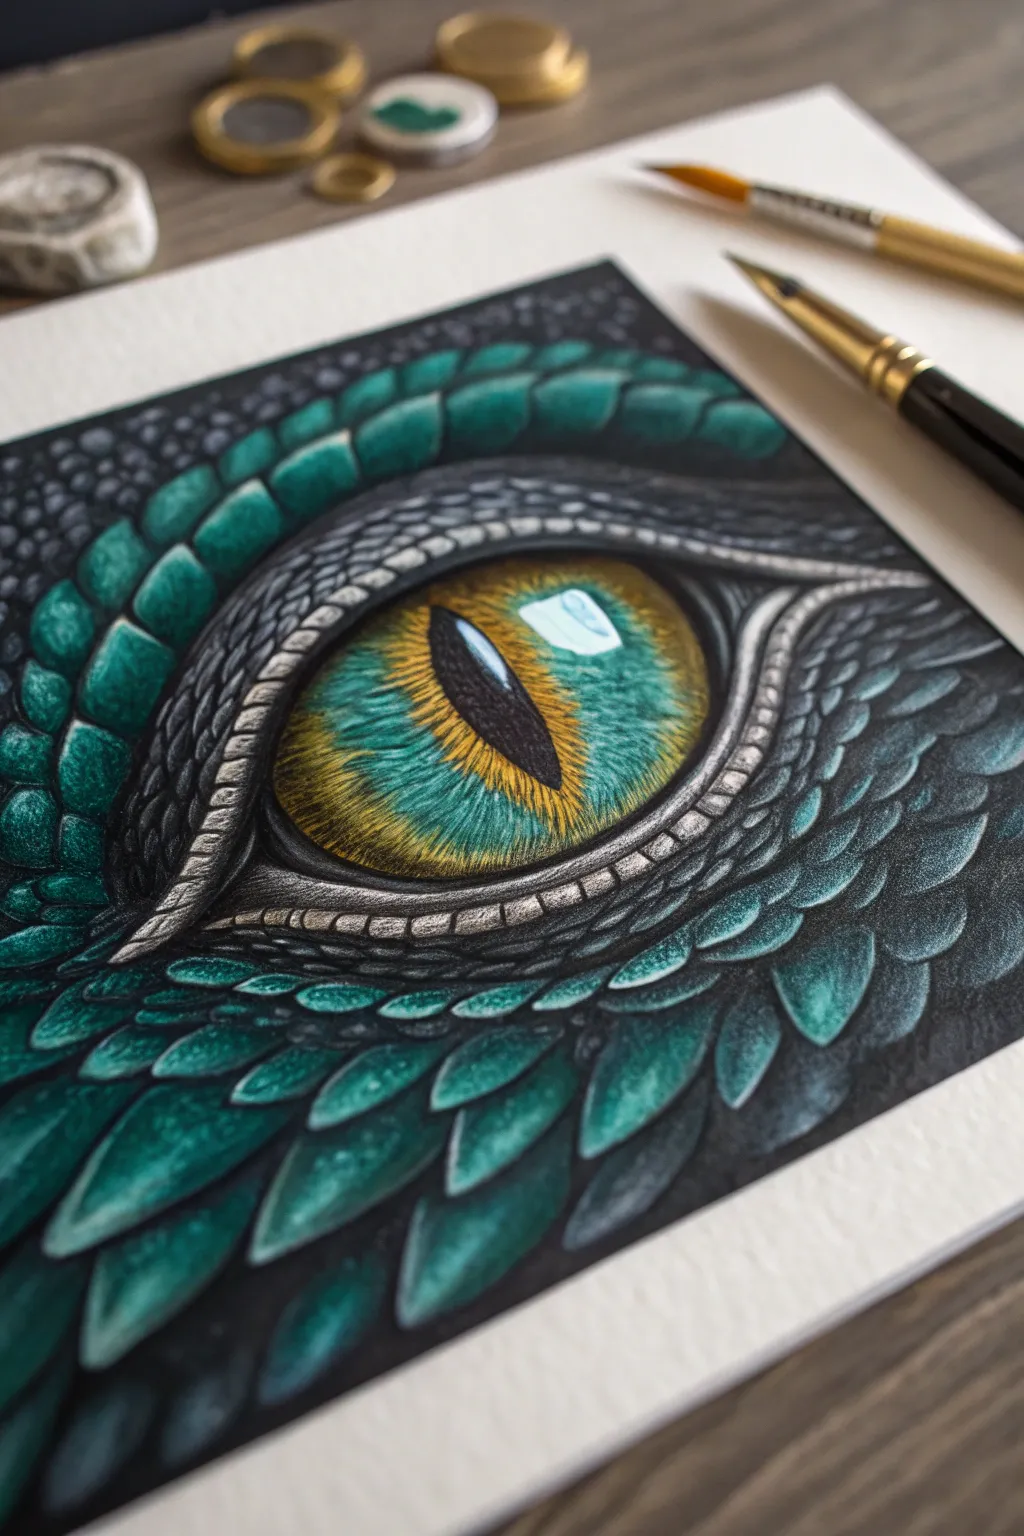
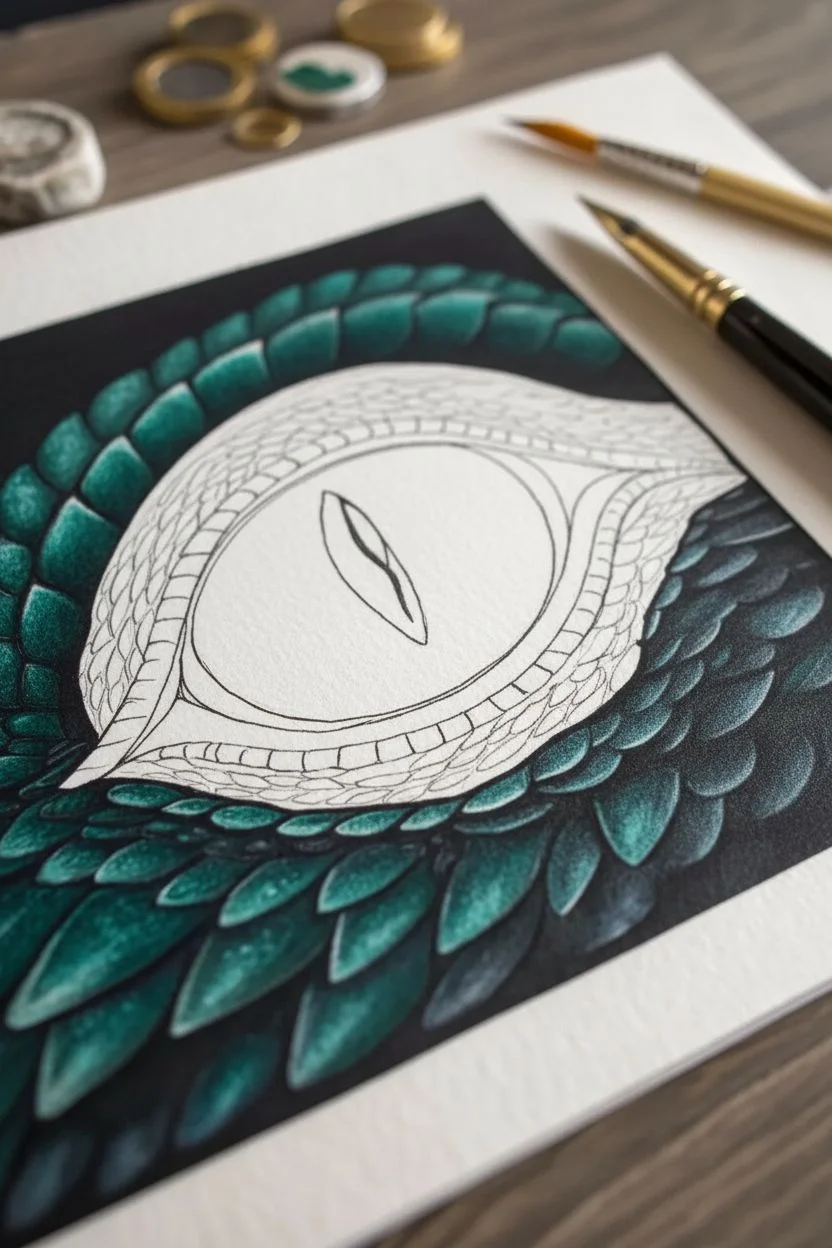
Capture the intense power of a mythical beast with this extreme close-up of a dragon’s eye. This project focuses on layering teal scales and a piercing golden iris to create a sense of depth and realism.
Step-by-Step Tutorial
Materials
- Thick, high-quality watercolor paper or mixed media paper
- Pencil and eraser for sketching
- Black waterproof fine liner pen (01 or 03 size)
- Black alcohol marker or India ink
- Colored pencils (teal, dark green, black, yellow, ochre, white)
- White gel pen or opaque white gouache
- Small round brushes (size 0 and 2)
- Soft cloth or tissue
Step 1: Sketching and Outlining
-
Map the Composition:
Begin by drawing a large almond shape in the center of your paper for the eye. Leave plenty of room around the edges for the surrounding scales. -
Define the Pupil:
Sketch a sharp, vertical slit for the pupil right in the middle of the iris, tapering to points at the top and bottom. -
Scale Placement:
Lightly sketch the scales radiating outward. Near the eye duct, make them smaller and more pebble-like; as they move further away, draw them larger and more overlapping, like shingles on a roof. -
Solid Black Background:
Carefully color the spaces between the scales and the outer corners of the drawing with a black alcohol marker or black ink. This high contrast immediately makes the colors pop.
Step 2: Building the Iris
-
Base Layer:
Using a yellow colored pencil, fill the entire iris area, avoiding the black pupil. Keep your strokes light but consistent. -
Adding Depth:
Layer an ochre or light brown pencil radiating outward from the pupil and inward from the eye’s edge. This creates a glowing effect in the center. -
Textural Details:
Use a sharp black or dark brown pencil to draw tiny, irregular lines stretching from the pupil towards the outer rim, mimicking the complex muscle filaments of an eye. -
Cool Shadows:
Lightly glaze a touch of teal or blue pencil over the edges of the iris where it meets the eyelids to create a rounded, glassy shadow.
Smudgy Pencils?
If your hand smudges the pencil work, place a clean scrap sheet of paper under your drawing hand. This acts as a shield and keeps your vibrant colors crisp.
Step 3: Scales and Highlights
-
Teal Base Tone:
Fill in each scale with a medium teal colored pencil. Press firmly to get a smooth, waxy application that covers the paper grain. -
Shading for Volume:
With a black or dark green pencil, shade the bottom distinct edge of each scale where it tucks under another. I usually curve these shading lines to make the scales look domed. -
Rim Lighting:
Leave the very top edge of each scale lighter, or use an eraser to lift some pigment, creating a highlight that suggests a light source from above. -
Eye Rim Texture:
Around the immediate rim of the eye, use small, stippled dots of grey and white to create a rough, leathery texture distinct from the smooth scales. -
The Window reflection:
Using white gouache or a gel pen, paint a distinct, rectangular reflection on the upper part of the iris. This ‘catchlight’ is crucial for making the eye look wet and alive. -
Final Highlights:
Add tiny specular highlights to the tops of the most prominent scales using the white gel pen to enhance the wet, reptilian look.
Make it Metallic
Use metallic gold or silver paint for the iris highlights or scale edges. When the light hits the drawing, the dragon will seem to magically shimmer.
Step back and admire the intense, ancient gaze looking back at you from the paper


Underwater Submarine With Bubble Trails
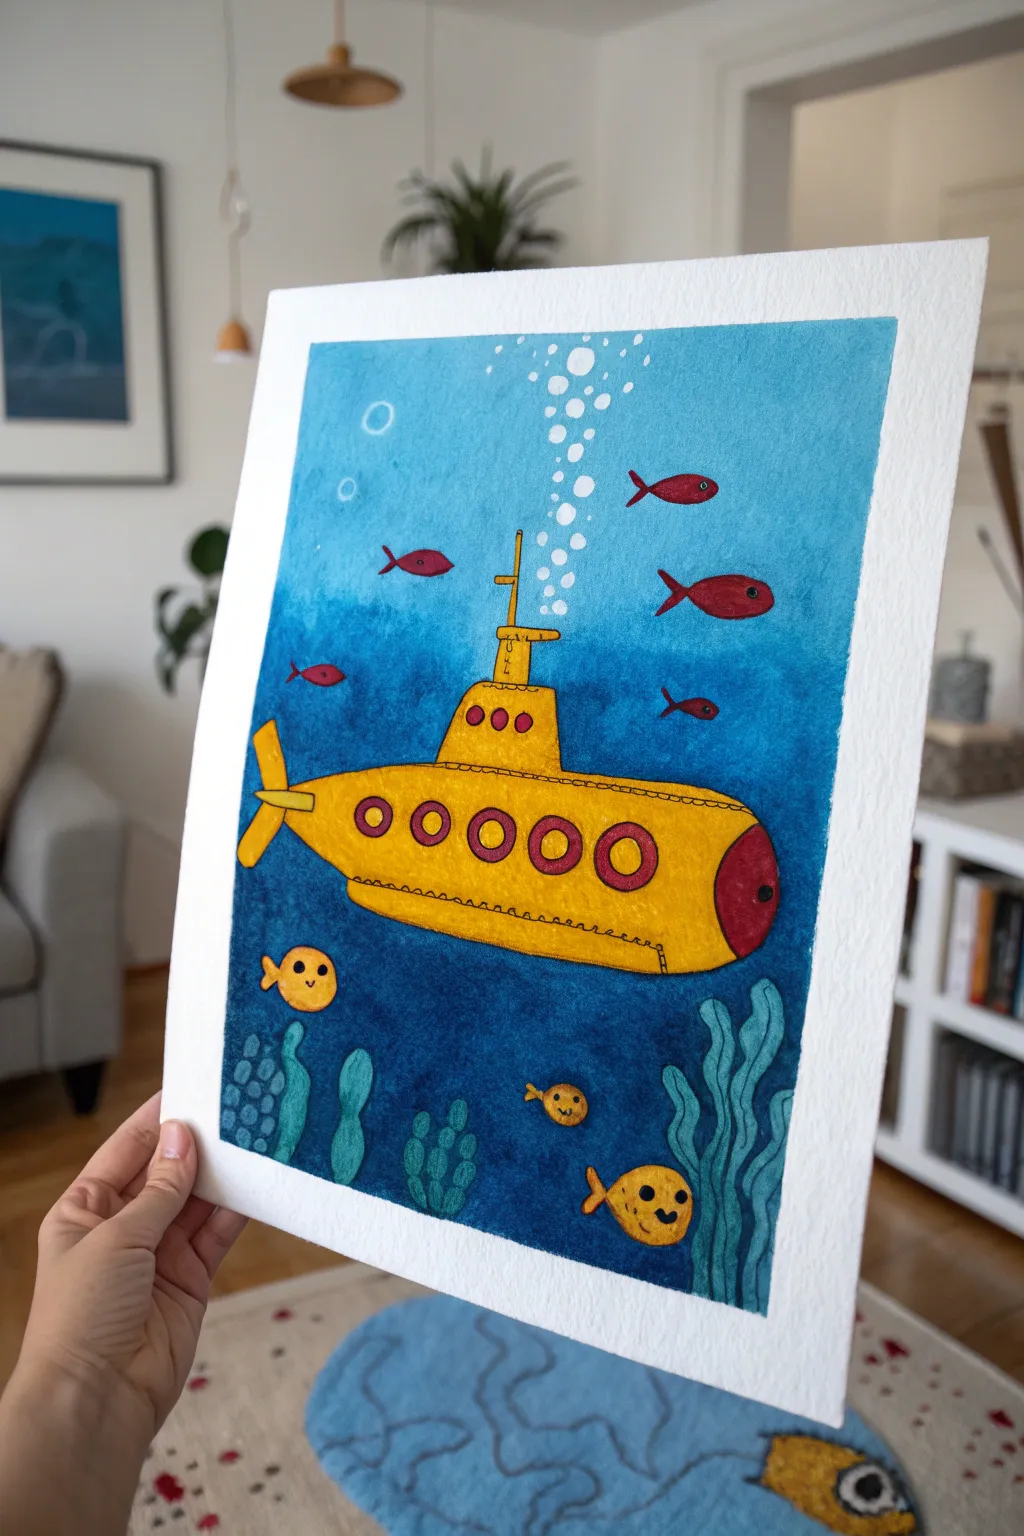
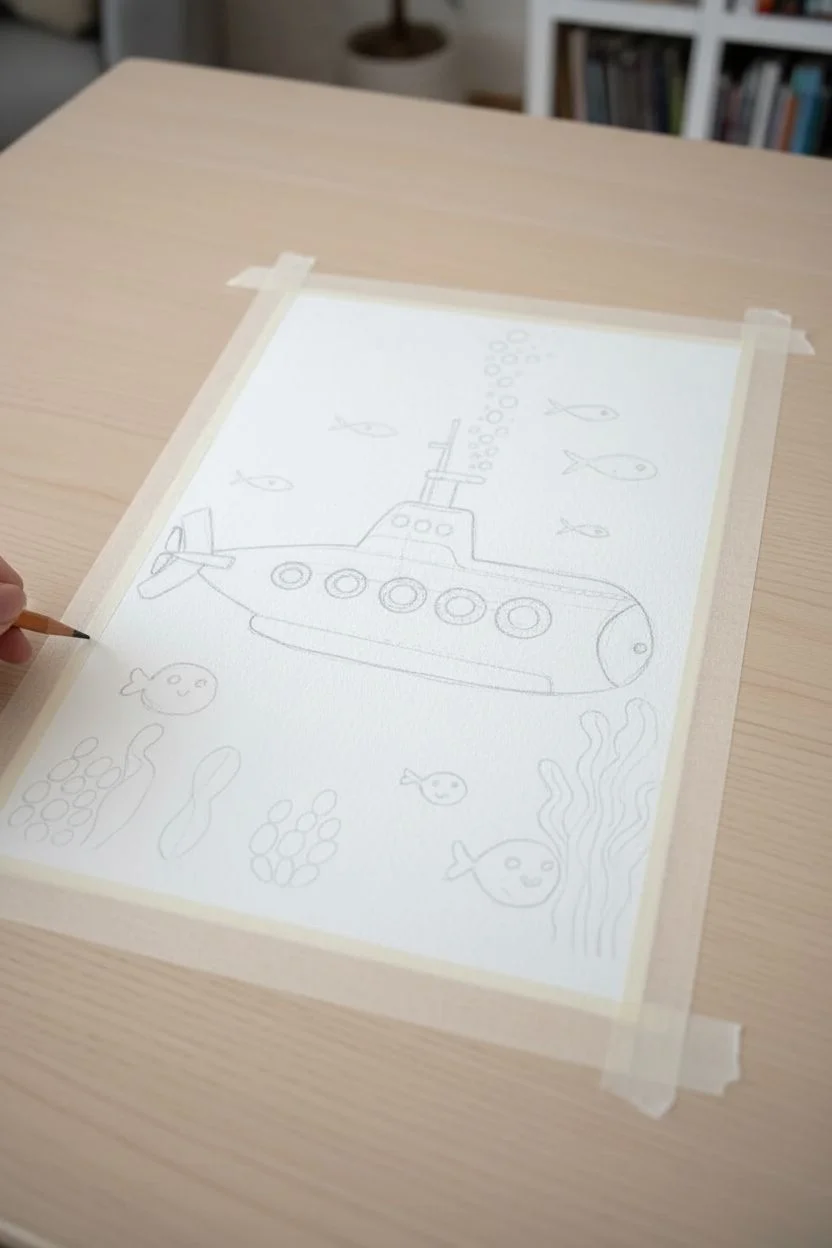
Dive deep into creativity with this charming underwater scene featuring a bright yellow submarine exploring the ocean depths. Using a mix of wet-on-wet and precise detailing, you’ll create a vibrant gradient background teeming with friendly sea life.
How-To Guide
Materials
- Heavyweight cold-press watercolor paper
- Painter’s tape or masking tape
- Watercolor paints (Phthalo Blue, Ultramarine Blue, Turquoise)
- Gouache or acrylic paints (Yellow, Red, Orange, Black, White)
- Round brushes (sizes 8 for wash, 4 and 0 for details)
- Pencil and eraser
- White gel pen or fine liner
- Two jars of water
- Paper towels
Step 1: Sketching the Scene
-
Secure the paper:
Begin by taping down all four edges of your watercolor paper to a hard board or table. This creates that crisp white border and prevents the paper from buckling under the heavy washes. -
Outline the submarine:
Lightly sketch a large, elongated pill shape in the center of the paper. Add the periscope tower on top and the propeller structure at the back. -
Add underwater details:
Draw the circular portholes along the side of the sub. Sketch wavy seaweed shapes swirling up from the bottom corners and place a few simple fish shapes around the submarine.
Bleeding Lines?
If blue paint bleeds into your yellow sub sketching lines, don’t panic. Gently lift the mistake with a clean, damp paper towel, or cover it later with opaque gouache for the sub.
Step 2: Painting the Ocean Depth
-
Prepare the wash:
Mix a large amount of watery blue paint. I prefer mixing Phthalo Blue with a touch of Turquoise for the upper lighter water, and Ultramarine with a hint of black or purple for the deep bottom water. -
Wet the background:
Isolate the background area by painting clean water around the submarine and seaweed sketches. Be careful not to get water inside your main shapes. -
Apply the gradient:
Start at the top with your lighter blue mix, painting horizontally across the wet paper. As you move down, gradually load your brush with the darker blue mix to create a smooth transition into the deep ocean floor. -
Let it cure:
Allow this background layer to dry completely. If the paper feels cool to the touch, it’s still damp inside.
Make it Sparkle
Mix a tiny pinch of silver glitter or metallic watercolor into the bubble stream for a magical, shimmering effect when the light hits the painting.
Step 3: The Yellow Submarine
-
Base coat:
Switch to your gouache or opaque acrylics. Paint the main body of the submarine with a bright, sunny yellow. The opacity helps it pop against any blue that might have bled over the lines. -
Red accents:
Fill in the circular porthole centers with red paint. Also, paint the front nose cone and the small swimming fish in a similar shade of red. -
Adding texture:
Once the yellow base is dry, mix a slightly darker, orange-yellow tone. Use this to add subtle shading to the bottom of the submarine to give it a rounded, 3D appearance.
Step 4: Sea Life and Finishing Touches
-
Painting the plants:
Using a teal or blue-green shade, carefully paint the seaweed strands at the bottom. Use the tip of your brush to pull the wavy lines upward. -
Friendly faces:
Paint the smaller, circular fish near the bottom yellow with small orange touches for their fins. Give them tiny smiles with a thin black liner once dry. -
Outline work:
Use a fine brush with black paint or a waterproof black pen to outline the submarine, portholes, and define the rivets or seams along the hull. -
Rising bubbles:
Dip a clean brush or a Q-tip into white gouache. Dot a trail of bubbles rising from the submarine’s tower, making them smaller near the source and larger as they float up. -
Highlights:
Add tiny white reflection dots to the red portholes and the fish eyes to bring them to life. -
The reveal:
Wait until everything is bone dry, then slowly peel away the masking tape at a 45-degree angle to reveal your clean edges.
Hang this cheerful seascape on the wall and enjoy the splash of color it adds to the room
Ninja Silhouette Against a Moonlit Skyline

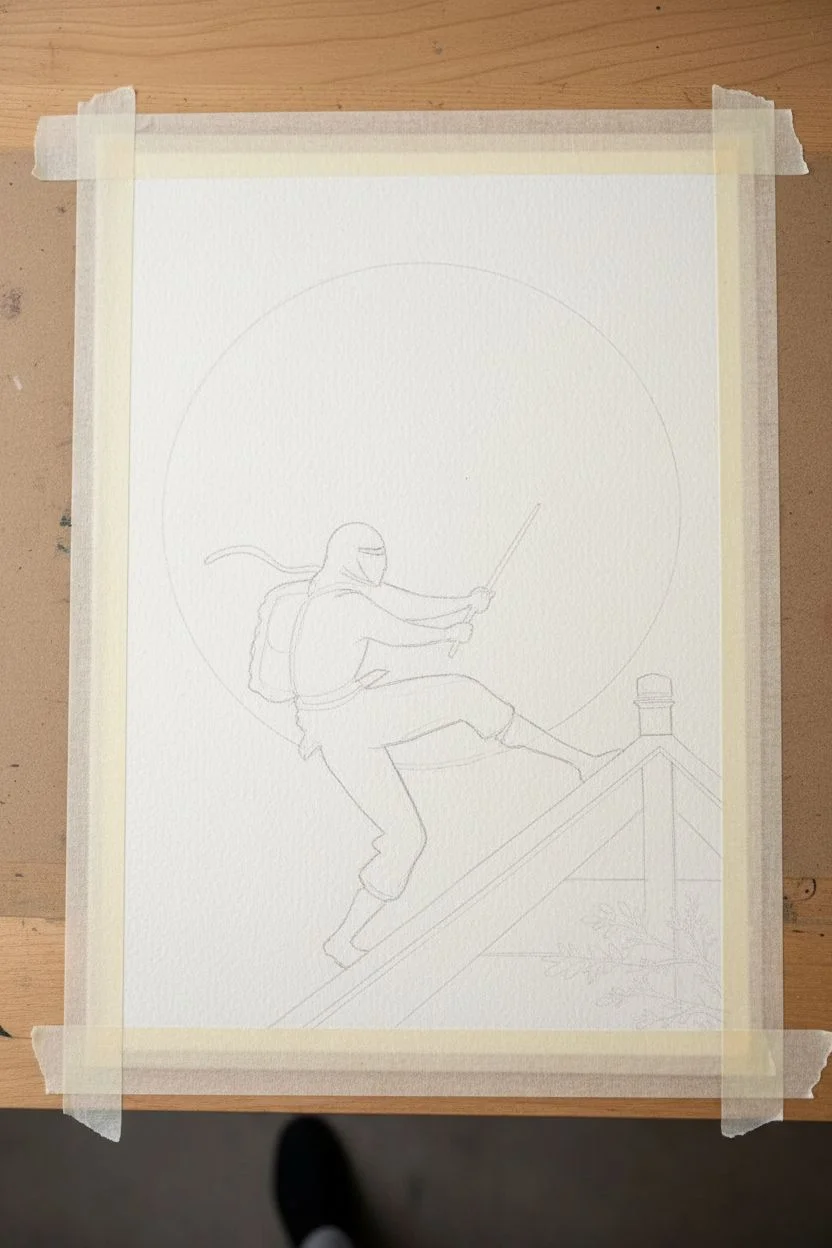
Capture the stealth and mystery of a ninja with this striking painting, featuring a bold silhouette set against an oversized, luminous moon. The contrast between the dark blue night sky, the bright celestial body, and the black character creates a dynamic and exciting composition perfect for a bedroom wall.
Step-by-Step
Materials
- Heavyweight watercolor or mixed media paper (at least 300gsm)
- Masking tape
- Compass or a large circular object (like a dinner plate)
- Pencil and eraser
- Gouache or acrylic paints (Dark Blue, Black, White, Yellow Ochre/Cream)
- Flat shader brushes (medium and large)
- Small round detail brush (size 0 or 1)
- Palette for mixing
- Cup of water and paper towels
Step 1: Setting the Scene
-
Prepare the canvas:
Tape down all four edges of your paper to a flat board or table using masking tape. This creates a crisp white border later and prevents the paper from buckling when wet. -
Outline the moon:
Using a compass or by tracing around a large plate, draw a large circle in the center of the paper. Leave enough room at the bottom for the rooftop and at the top for the sky. -
Sketch the silhouette:
Lightly sketch the ninja’s pose inside the moon area, depicting a leaping or crouching action. Add the slanted roofline below the feet and a chimney or vent detail on the right side. -
Draft the branches:
Very faintly sketch a few leafy branches encroaching from the bottom right corner to add depth to the foreground.
Uneven Moon Edge?
If your circle edge gets messy while painting the blue sky, wait for it to dry. Then, use a white gel pen or paint marker to re-trace the circle’s edge to clean it up.
Step 2: Painting the Sky and Moon
-
Mix the night sky color:
Create a deep, midnight blue by mixing dark blue with a tiny touch of black. You want a rich, matte color that feels like late night. -
Fill the background:
Carefully paint the area outside the moon circle with your dark blue mix. Use a flat brush to get close to the pencil line, keeping a steady hand to maintain a perfect curve. -
Paint the moon base:
Mix a creamy off-white using white and a tiny dot of yellow ochre. Fill in the entire moon circle, painting right over your ninja sketch (you should still be able to see the pencil lines through the light paint). -
Add lunar texture:
While the moon is dry, mix a very pale grey. Using a fairly dry brush, dab subtle cloud-like shapes near the top center of the moon to simulate craters or passing clouds. -
Create the stars:
Once the blue sky is completely dry, use a small detail brush or a toothpick to dot tiny specks of white paint into the blue area for distant stars.
Pro Tip: Better Black
For the flattest, darkest silhouette, use black India ink or high-flow acrylic instead of heavy body tube acrylic. It flows smoother and leaves fewer brushstrokes.
Step 3: The Ninja and Rooftop
-
Block in the roof:
Mix a dark navy-grey color (slightly lighter than the sky but darker than the moon) and paint the main triangular shape of the roof. -
Detail the roof architecture:
Use fluid black paint to add the structural lines of the roof: the thick outline along the top edge and the vertical beams underneath. -
Paint the chimney:
Fill in the small chimney shape on the roof ridge with black, leaving a tiny sliver of grey highlight on top if you want extra dimension. -
Start the ninja silhouette:
Switch to your smallest round brush and pure black paint. Begin outlining the ninja’s body, starting with the head and the flowing headband ties. -
Fill the body:
Fill in the rest of the ninja’s body with solid black. Pay attention to the negative space between the arms and legs to keep the action pose readable. -
Add the weapon:
Carefully paint the straight line of the staff or sword. Using a ruler can help guide your hand here if you are worried about making it straight. -
Paint the birds:
Using the tip of your smallest brush, paint three small, V-shaped silhouettes near the center-right of the moon to represent distant birds. -
Add foreground foliage:
Paint the silhouette of the tree branches in the bottom right corner using black paint. Keep the leaves jagged and organic to contrast with the straight roof lines.
Step 4: Final Touches
-
Highlight the ninja (optional):
If I feel the figure looks too flat, I sometimes mix a white or pale yellow wash and add a very thin rim light along the edge of the ninja’s leg and arm where the moon hits them. -
Check for opacity:
Look for any patchy areas in the large black or blue sections. Apply a second coat if needed to get a solid, opaque look. -
Reveal the border:
Wait until the painting is 100% bone dry. Then, slowly peel away the masking tape at a 45-degree angle to reveal your clean white edges.
Hang this masterpiece high up on a wall to give the illusion of your ninja watching over the room from above
Action Paint Experiment: Splatter Goals for Boys’ Room Art
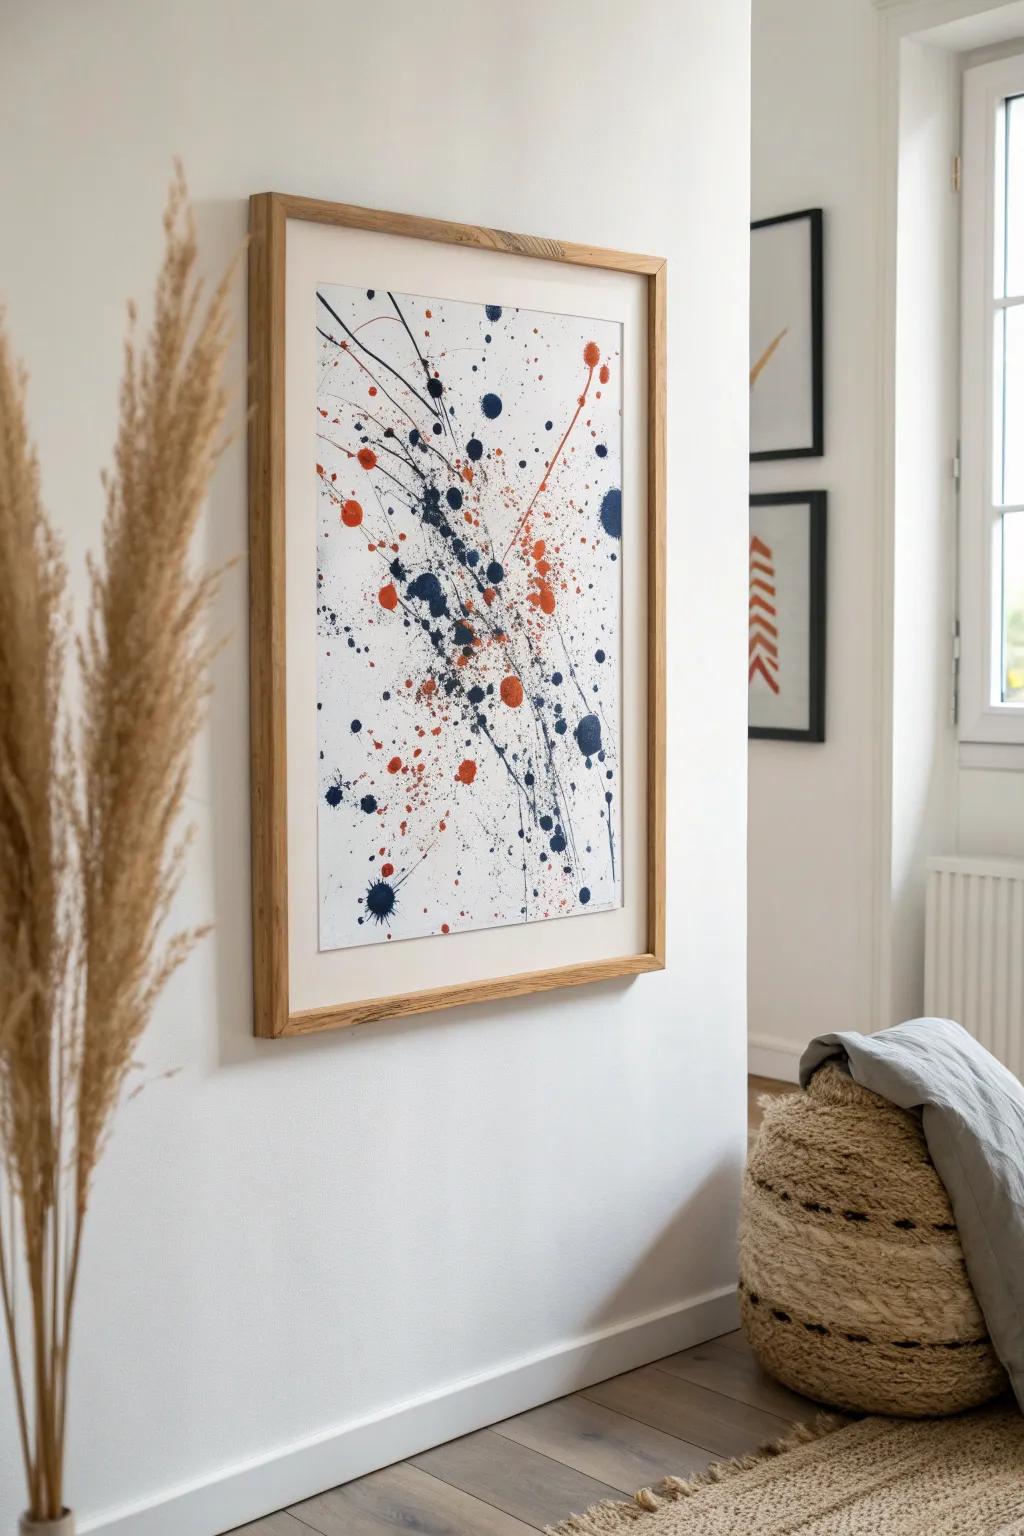
Bring dynamic energy to a boy’s room with this bold action painting featuring striking navy blue and terracotta orange splatters. This project embraces the chaos of creativity, resulting in a modern, gallery-worthy piece that feels both playful and sophisticated.
Step-by-Step Guide
Materials
- Heavyweight watercolor paper or mixed media paper (A2 or 16×20 size)
- High-flow acrylic paints or ink (Navy Blue, Terracotta Orange)
- Small plastic cups or palette wells
- Various paintbrushes (stiff bristle brushes and old toothbrushes work best)
- Drop cloth, cardboard, or plastic sheeting
- Water for thinning paint
- Painter’s tape
- Large wooden frame with mat board
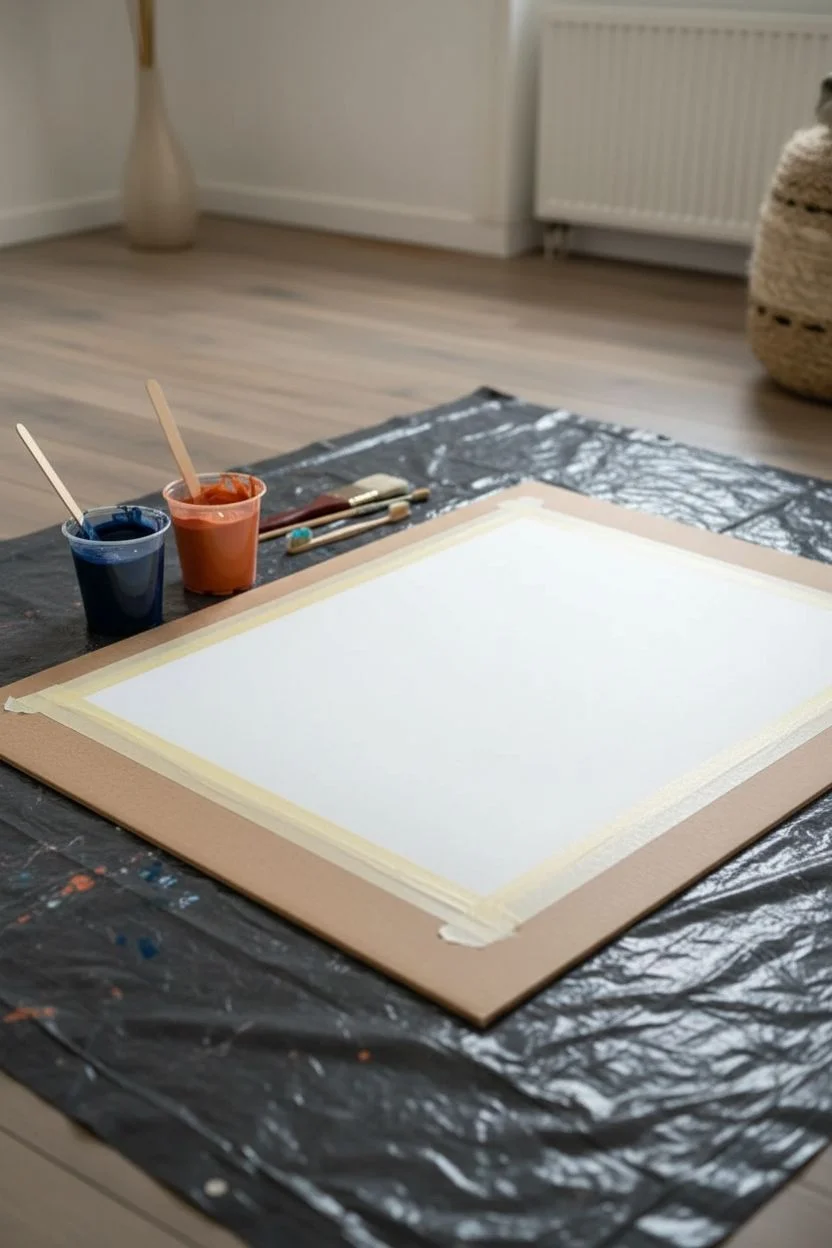
Step 1: Setting the Stage
-
Prep the workspace:
This project is messy by design. Lay down a generous amount of drop cloth or plastic sheeting on the floor or a large table. In warm weather, I prefer doing this outside on the grass to minimize cleanup stress. -
Secure the paper:
Tape your large sheet of watercolor paper down to a piece of cardboard or your covered table using painter’s tape. This prevents the paper from curling when it gets wet and keeps it stationary during the action. -
Mix your navy paint:
Squeeze a generous amount of navy blue acrylic paint into a cup. Add water gradually, stirring until it reaches the consistency of heavy cream or melted ice cream. It needs to be fluid enough to fly off a brush but pigmented enough to look opaque. -
Prepare the orange paint:
Repeat the thinning process with your terracotta orange paint in a separate cup. Test the flow by dripping a little back into the cup; it should run smoothly off the mixing stick.
Uneven Splatters?
If your paint lands in blobs rather than streaks, add a few more drops of water. The paint must be fluid to travel through the air effectively.
Step 2: The Action Phase
-
Create directional lines:
Dip a medium-sized brush into the navy mixture. Instead of tapping it, use a swift flicking motion with your wrist to send long, thin streaks of paint across the paper. Aim for a diagonal composition from bottom-left to top-right to create movement. -
Add heavy drips:
Load a larger round brush heavily with navy paint. Hold it over the paper and give it a sharp shake downward to create larger, rounder splatters amidst the thin lines. -
Introduce the contrast:
While the blue is still wet, switch to your orange paint. Using the same flicking motion, cast orange lines that intersect with the blue ones. The colors may bleed slightly where they touch, adding interesting texture. -
Vary the impact:
Stand at different distances from the paper. Flinging paint from higher up creates smaller, more dispersed dots, while throwing it from close range creates intense, saturated splotches. -
Fine misting:
Dip an old toothbrush into the navy paint. Run your thumb across the bristles to spray a fine mist of tiny speckles across the empty white spaces. This adds depth and connects the larger splatters visuals. -
Controlled dripping:
If you want specific large dots, load a brush and let gravity do the work. Simply hold the brush still over a spot and let a single drop fall perfectly onto the paper. -
Assess the balance:
Step back and look at the composition. Ensure there is a good mix of both colors and a pleasing balance between negative white space and painted areas. It shouldn’t look too crowded. -
Stop sooner than later:
Resist the urge to keep going. It is very easy to overwork splatter art. Once you have a dynamic flow of color, put the brushes down.
Step 3: Finishing and Framing
-
Allow to dry completely:
Leave the painting exactly where it is to dry flat. Moving it while wet might cause the drips to run and ruin your directional composition. This can take several hours depending on how thick the globules of paint are. -
Press perfectly flat:
Once fully dry, the paper might be slightly buckled from the moisture. Create a sandwich with clean paper and heavy books to press it flat overnight. -
Select a frame:
Choose a frame with a natural wood finish, like light oak, to complement the organic energy of the splatter. A large white mat is essential to give the artwork breathing room. -
Mount the artwork:
Center your artwork behind the mat opening. Use acid-free artist tape to secure the paper to the back of the mat board on the top edge only, allowing the paper to hang naturally. -
Hang safely:
Place the artwork in the frame, secure the backing, and hang it securely on the wall, preferably away from direct sunlight to preserve the vibrant navy and orange hues.
Level Up: Metallic Pop
Add a third layer of sparse gold or copper ink splatters after the main colors dry. It adds a subtle shimmer that catches the light beautifully.
Step back and admire the energetic burst of color you have added to the room


Have a question or want to share your own experience? I'd love to hear from you in the comments below!