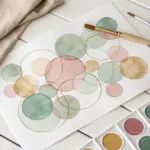
Whenever I’m craving something happy and low-pressure, I reach for watercolor and paint the tiniest, sweetest subjects I can think of. Here are my go-to cute watercolor ideas that feel playful, beginner-friendly, and perfect for filling a sketchbook page fast.
Chubby Kitties With Simple Round Shapes
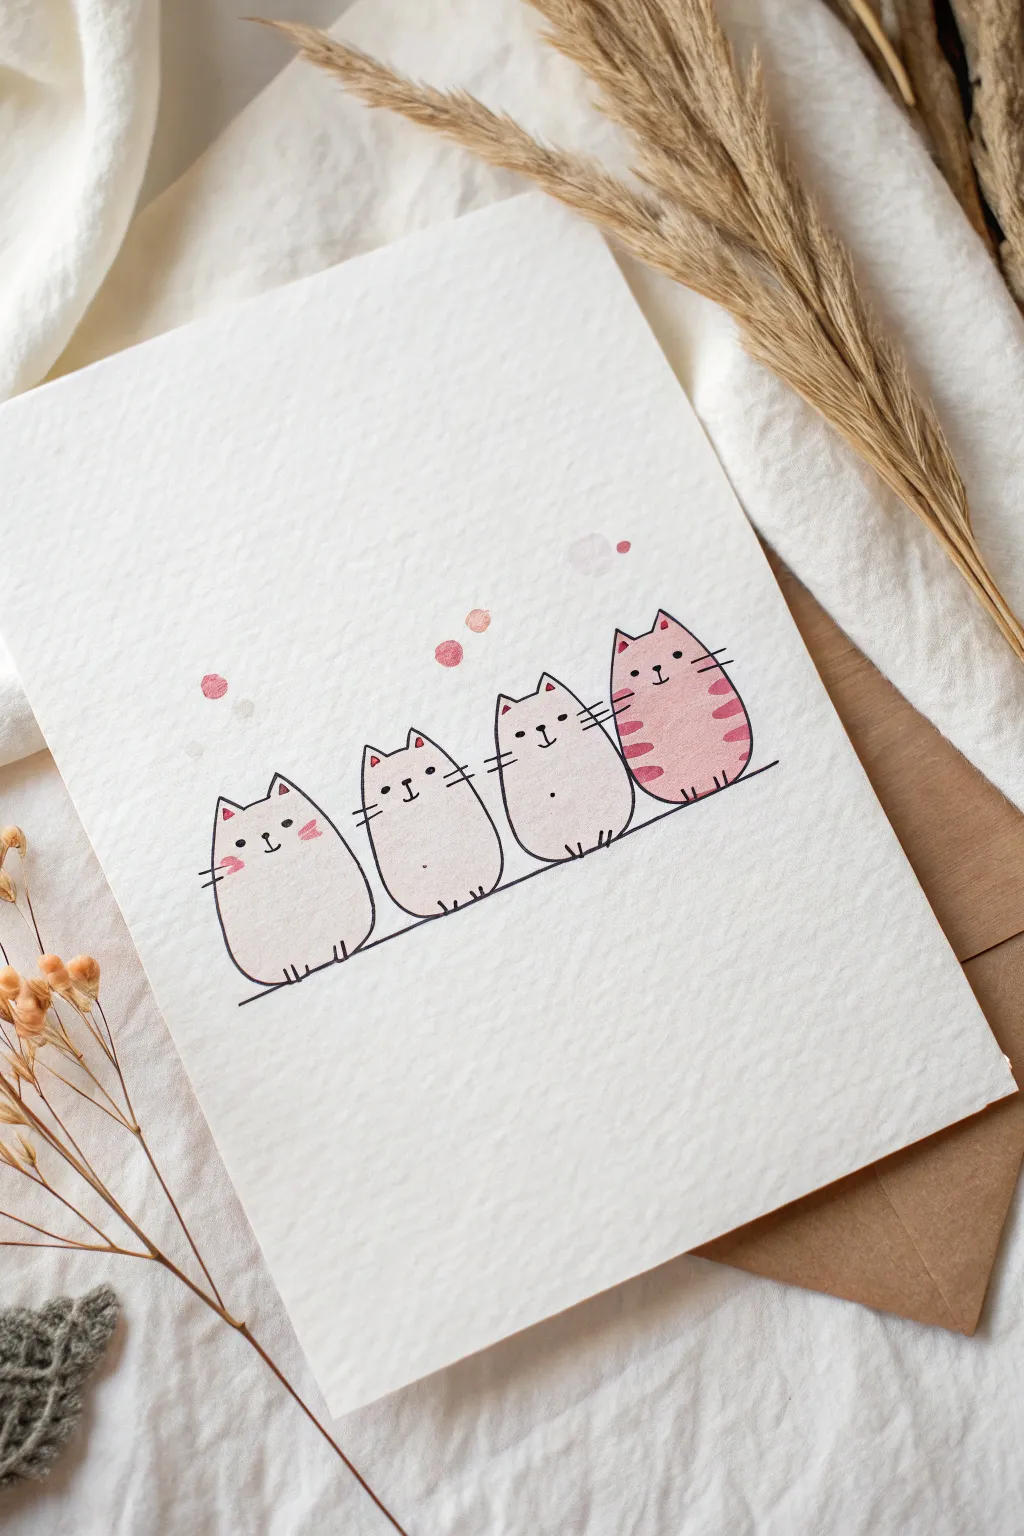
This adorable project features four delightfully chubby cats perched in a row, blending simple geometric shapes with soft watercolor washes. It’s a perfect beginner-friendly exercise in creating character through minimalism and subtle color variations.
Step-by-Step
Materials
- Cold press watercolor paper (A5 size recommended)
- Fine liner pen (0.3mm or 0.5mm, waterproof/archival black ink)
- Watercolor paints (shades of pink, blush, and a tiny bit of grey)
- Round watercolor brush (size 4 or 6)
- Pencil and eraser
- Clean water and paper towel
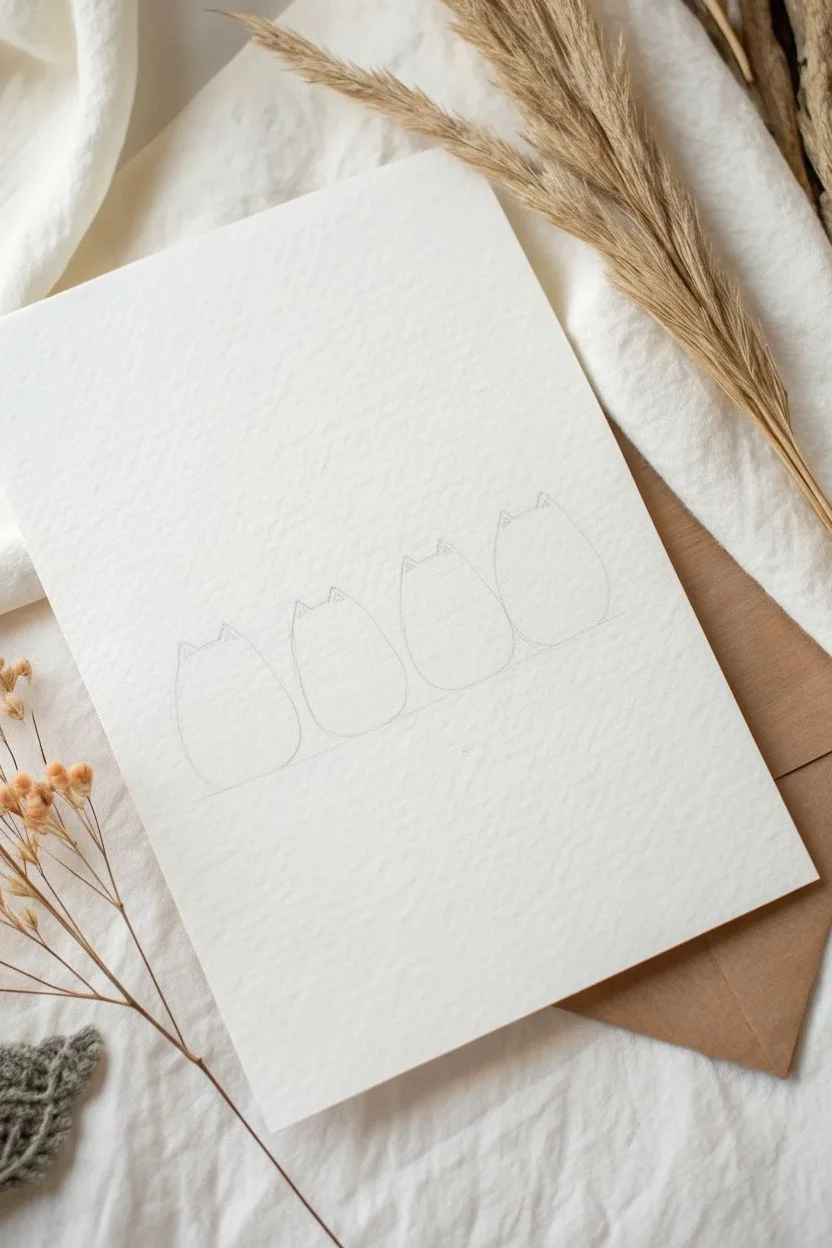
Step 1: Sketching the Shapes
-
Draw the base line:
Start by lightly sketching a horizontal line across the lower third of your paper using a pencil. This doesn’t need to be perfectly straight; a slight gentle curve adds charm. -
Outline the bodies:
On top of the line, draw four rounded, egg-like shapes sitting side-by-side. Make them chubby and bottom-heavy, ensuring they slightly touch or overlap just a tiny bit. -
Add the ears:
Top each rounded body with two small, triangular ears. Keep them relatively small compared to the bodies to emphasize the roundness of the cats. -
Refine the sketch:
Once you’re happy with the positioning, lightly erase the pencil lines until they are barely visible, serving as a faint guide for your ink.
Loose & Lively
Don’t try to stay perfectly inside the lines. Letting the watercolor spill slightly outside the ink creates a charming, handmade illustration style.
Step 2: Inking the Characters
-
Trace the outlines:
Using your waterproof fine liner, carefully trace the outline of the first cat on the left. Leave the horizontal base line for last. -
Draw the faces:
Place two small dots for eyes wide apart on the face. Add a tiny ‘Y’ shape or a small triangle for the nose and mouth centered between them. -
Add whiskers:
Flick two or three short lines outward from the cheeks for whiskers. Vary the angle slightly for each cat to give them individual personalities. -
Detail the paws:
At the bottom of each cat, draw two tiny ‘U’ shapes or little nubs resting on the main line to represent their front paws. -
Ink the rest:
Repeat this process for all four cats. Finally, draw the horizontal line beneath them, connecting their paws and extending off to the sides. -
Erase pencil marks:
Wait a few minutes to ensure the ink is completely dry, then gently erase any remaining pencil guidelines.
Pattern Play
Give each cat a different pattern! Try grey patches for a calico, orange stripes for a tabby, or dip the paws in dark grey for a “tuxedo” cat look.
Step 3: Painting with Watercolor
-
Mix a pale wash:
Dilute a small amount of pink or blush paint with plenty of water to create a very transparent, pale wash. -
Paint the first three cats:
Gently fill in the bodies of the first three cats with this pale wash. I find it helpful to leave the center of their bellies white or almost dry to create a highlighted, rounded look. -
Add blush:
While the paper is still slightly damp, dab a tiny dot of concentrated pink on the cheeks of the first cat for a blushing effect. -
Paint the fourth cat:
For the cat on the far right, use a stronger, more saturated pink mix. Fill the entire body shape solidly. -
Create stripes:
Once the pink cat is slightly dry (but not bone dry), use a darker berry or red shade to paint small curved stripes on its sides and top of the head. -
Color the ears and noses:
Using a small brush tip, add tiny touches of pink inside the ears and on the noses of all four cats. -
Add atmosphere with splatters:
Load your brush with watery pink paint and gently tap the handle against your finger to create soft splatters floating above the cats. -
Paint larger dots:
Manually paint a few larger, soft circles of pink and grey floating among the splatters to create a bubbly, whimsical background.
Allow the entire piece to dry completely before framing your new feline friends


Baby Bunnies With Blush Cheeks
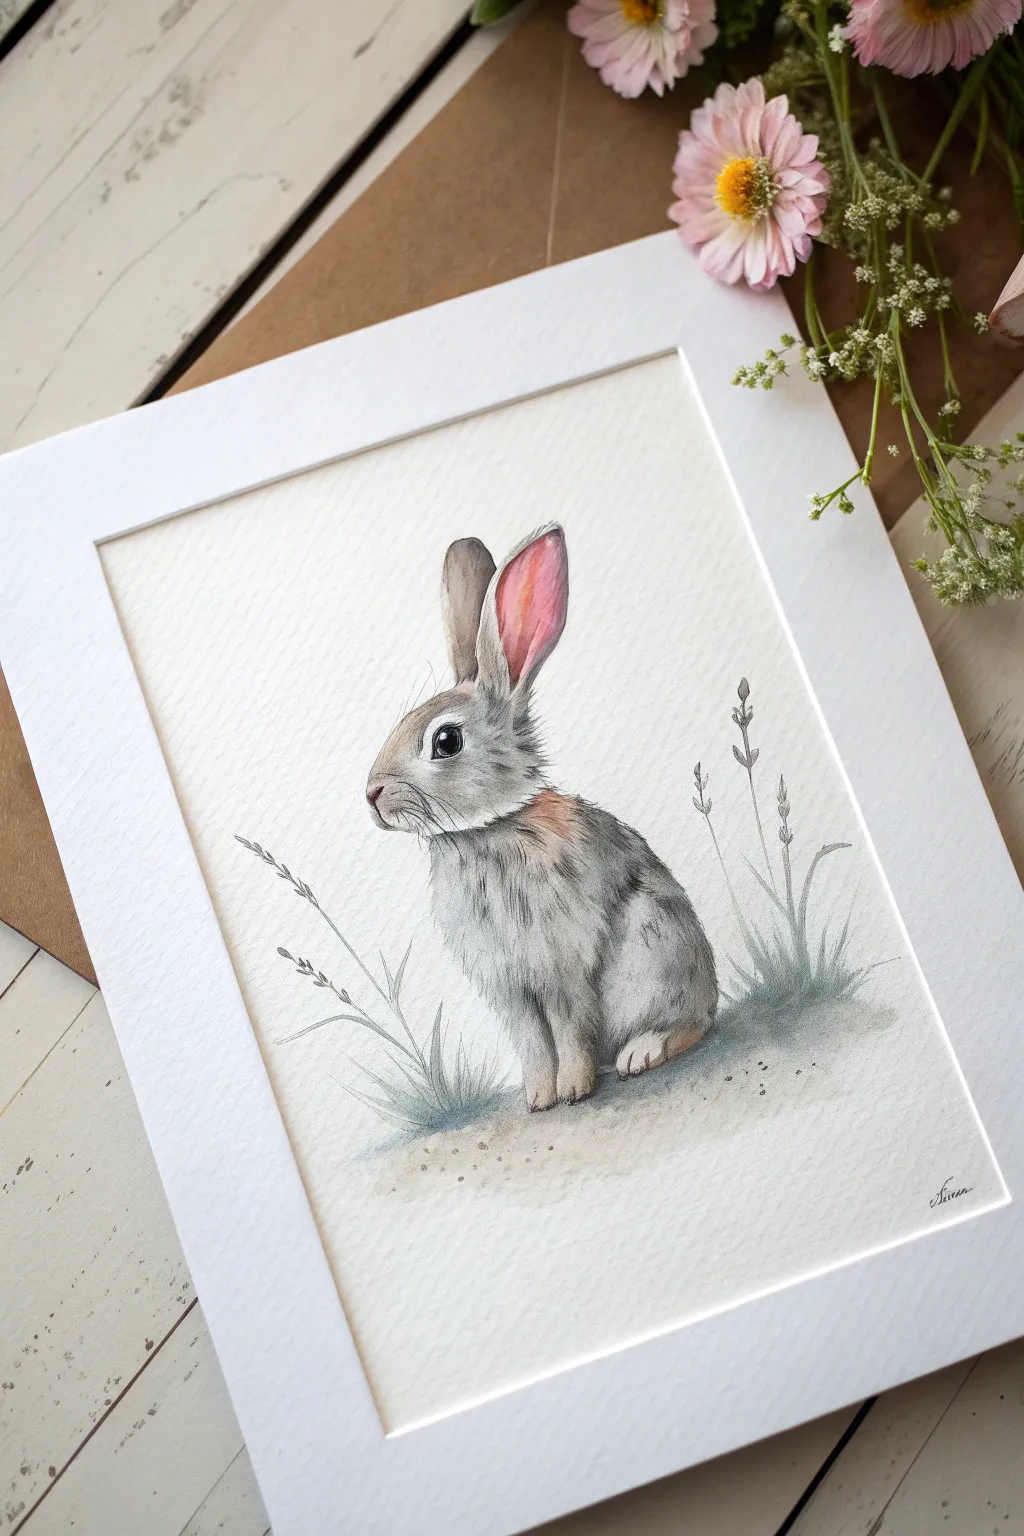
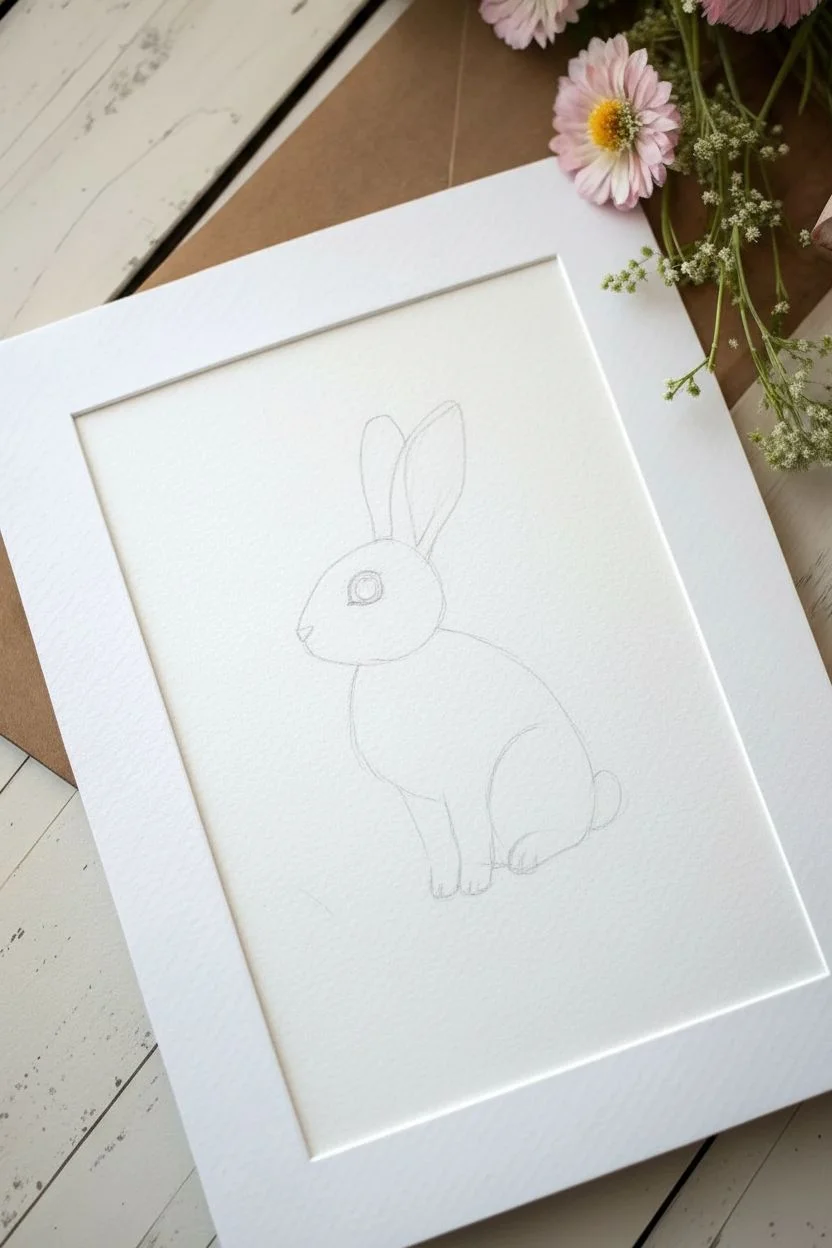
Capture the gentle spirit of a baby bunny with this delicate watercolor tutorial. You’ll layer soft greys and warm pinks to create fluffy fur textures and a lively, sparkling eye.
Detailed Instructions
Materials
- Cold press watercolor paper (300 gsm)
- H or HB pencil for sketching
- Kneaded eraser
- Watercolor paints: Paynes Grey, Burnt Umber, Alizarin Crimson, Yellow Ochre
- Small round brushes (Size 0, 2, and 4)
- Fine liner brush for whiskers
- White gouache or gel pen
- Palette for mixing
- Two jars of water
- Paper towels
Step 1: Sketching the Form
-
Basic Shapes:
Start very lightly with your H pencil. Draw an oval for the body and a slightly smaller circle for the head, connecting them with a gentle slope for the neck. -
Ears and Face:
Add two long ear shapes extending upwards. Since the bunny is in profile, the front ear should be slightly more prominent. Sketch the curve of the nose and the jaw. -
Position the Eye:
Place a large, round eye clearly on the side of the head. Leave a tiny circle inside blank for the highlight—this is crucial for making the bunny look alive. -
Refining the Outline:
Gently erase your initial construction lines with a kneaded eraser until they are barely visible, leaving just a faint guide for your painting.
Step 2: First Washes
-
Inner Ear Glow:
Mix a very watery wash of Alizarin Crimson with a tiny touch of Yellow Ochre. Paint the inside of the tall ear, keeping the edges soft. -
Base Grey Tone:
Prepare a watery mix of Paynes Grey. Apply a very light wash over the main body and head, avoiding the white belly area and the area around the eye. -
Adding Warmth:
While the grey is still slightly damp, drop in a small amount of diluted Burnt Umber or Yellow Ochre near the neck and shoulder to suggest warm undertones in the fur. -
Initial Drying:
Let this first layer dry completely. This prevents the subsequent detailed fur strokes from bleeding and becoming muddy.
Fur Direction Tip
Always paint fur strokes in the direction the hair grows. On the nose, strokes go outward; on the back, they flow down and back.
Step 3: Building Fur & Texture
-
Short Strokes:
Switch to your size 2 brush. Using a slightly more concentrated Paynes Grey, start making short, directional strokes to mimic fur. Follow the curve of the bunny’s body. -
Deepening Shadows:
Add darker fur strokes around the base of the ears, under the chin, and where the legs meet the body. This creates dimension and volume. -
Detailed Eye:
Using your smallest brush and a thick mix of Paynes Grey and Burnt Umber (almost black), carefully paint the eye, preserving that tiny white highlight you sketched earlier. -
Softening Edges:
If any fur strokes look too harsh, take a clean, slightly damp brush and gently feather the edges to soften them back into the underlayer.
Seasonal Variation
Change the background elements for seasons: paint tiny wildflowers for spring or fallen leaves for autumn instead of plain grass.
Step 4: Final Touches
-
Grounding the Bunny:
Mix a dull green-grey and paint simple, upward strokes near the bunny’s feet to represent grass. Add a light wash of brown underneath for the dirt. -
Tall Grasses:
Use the tip of a fine brush to pull out a few thin, taller stems of grass or wheat on either side of the bunny to frame the composition. -
Whiskers:
With a fine liner brush and very diluted grey or white gouache, add long, sweeping whiskers extending from the muzzle. Quick, confident strokes work best here. -
Highlight Polish:
Finally, if your eye highlight got lost, add a tiny dot of white gouache or use a white gel pen to bring the sparkle back.
Step back and admire the soft, lifelike texture you’ve created in your bunny portrait


Little Birds on a Wire in Candy Colors
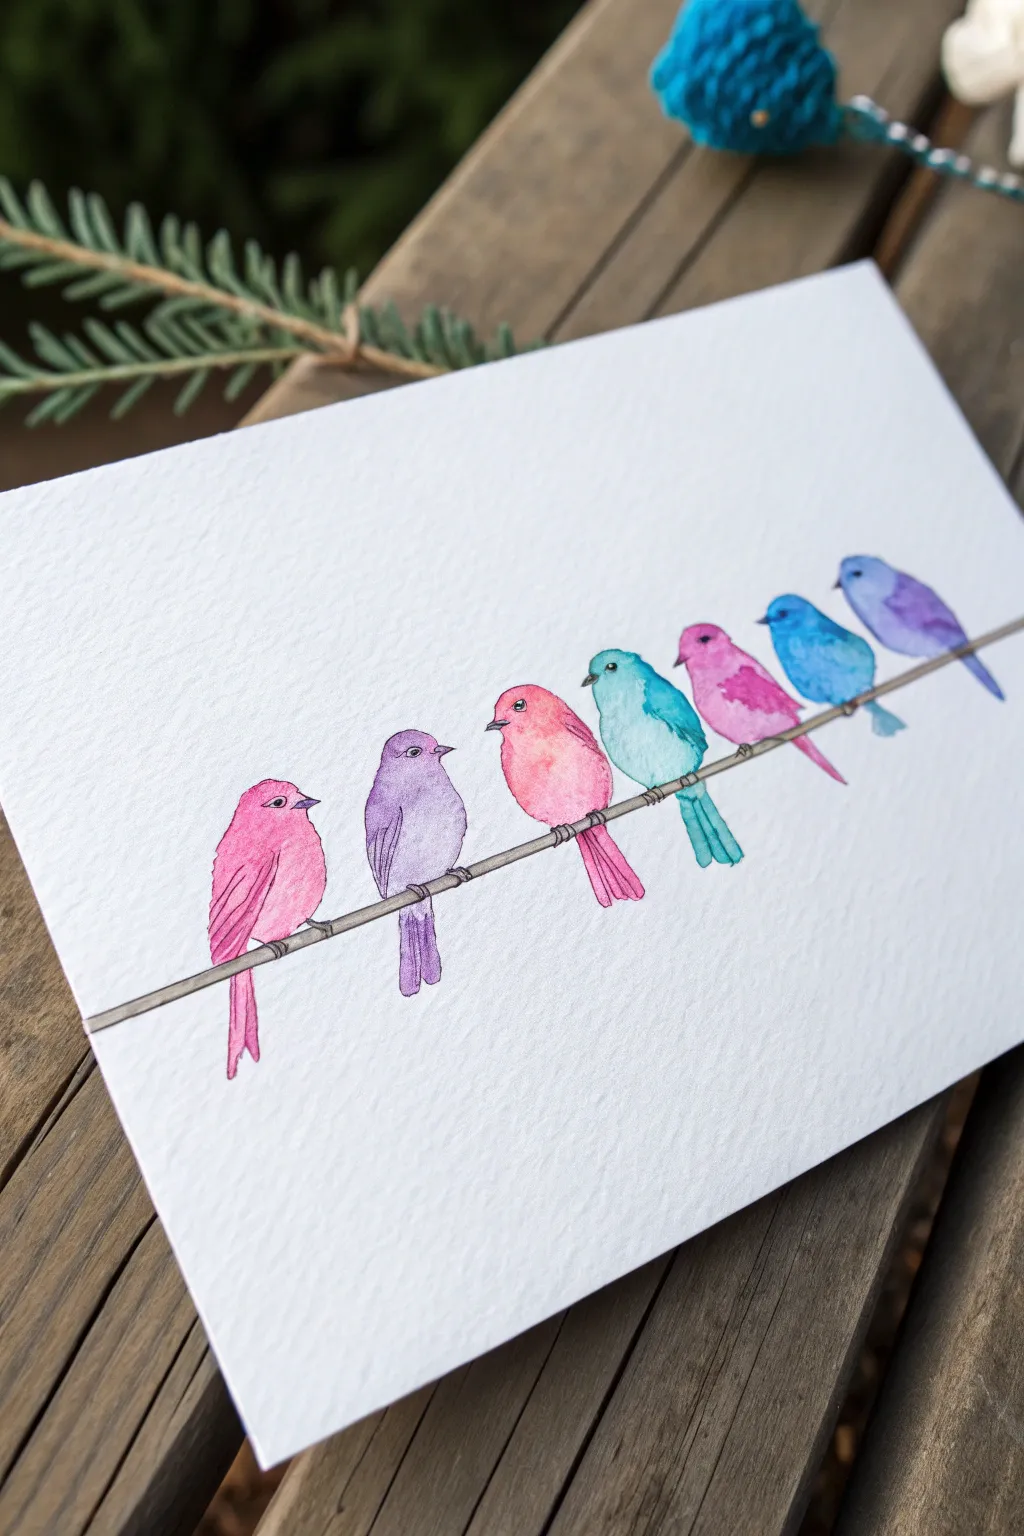

Brighten up your sketchbook with this cheerful row of seven colorful birds perched on a simple wire. The loose, vibrant watercolor washes combined with delicate ink outlines create a charmingly simple illustration perfect for greeting cards or wall art.
Step-by-Step Guide
Materials
- Cold press watercolor paper (300 gsm)
- Watercolor paints (pink, purple, red-pink, teal, magenta, blue, violet)
- Round watercolor brushes (size 4 and size 0 or 1 for details)
- Fine tip black waterproof pen or multiliner (0.1 or 0.3mm)
- Pencil and eraser
- Ruler
- Jar of water and paper towels
Step 1: Sketching the Composition
-
Draw the wire:
Use a ruler to lightly draw a straight horizontal line across the lower third of your paper. Make sure it spans roughly three-quarters of the page width to leave room for framing. -
Mark bird positions:
Lightly mark seven evenly spaced spots along the line where your birds will sit. These marks will be the center of each bird’s body. -
Outline the bird shapes:
Sketch simple, rounded bird shapes at each mark. Think of them as soft ovals or teardrops with heads. Vary their poses slightly—have the first one facing right, the second left, the third right, and so on, creating a conversational look.
Wet-on-Dry Magic
For crisp edges but soft interiors, paint on dry paper. If you want more blending, pre-wet the bird shape with clean water first.
Step 2: Painting the Birds
-
Paint the first bird (Pink):
Load your brush with a bright, watery pink. Fill in the first bird shape on the far left. Keep the wash fairly wet so the color pools slightly, giving it that classic watercolor texture. -
Paint the second bird (Purple):
Clean your brush and pick up a soft lavender or purple. Paint the second bird. If the birds are touching, wait for the first one to dry slightly so the colors don’t bleed into each other too much, unless you want that effect. -
Paint a reddish-pink bird:
For the third bird, mix a warmer red-pink tone. Apply the paint loosely, perhaps dropping a tiny bit of concentrated pigment near the belly for shading while the paint is still wet. -
Paint the teal bird:
Move to the fourth bird with a vibrant teal or turquoise color. This cool tone breaks up the warm pinks nicely. Ensure the edges are somewhat crisp but the interior color varies in transparency. -
Paint the magenta bird:
Use a bold magenta or fuchsia for the fifth bird. I like to leave a tiny sliver of white paper unpainted near the top of the head or wing to act as a natural highlight. -
Paint the blue bird:
For the sixth bird, choose a bright sky blue or cobalt. Paint the body shape carefully, tapering down for the tail feathers. -
Paint the last bird (Violet):
Finish the row with a violet or blue-purple bird on the far right. Let all the paint dry completely before moving to the next step. The paper must be bone-dry to prevent ink from bleeding.
Step 3: Adding Details
-
Ink the eyes and beaks:
Using your fine black pen, draw small circular eyes. Leave a tiny white dot in the center of the eye for a sparkle, or fill it black and use a white gel pen later. Add small triangle beaks pointing in the direction the bird is facing. -
Outline the wings:
Draw simple wing shapes on the side of each bird’s body. Use broken or sketchy lines to suggest feathers rather than a solid, heavy outline. -
Add tail feathers:
Ink the tail feathers extending below the wire. You can follow the painted shape or draw slightly outside the lines for a whimsical, imperfect look. -
Draw the feet:
Add tiny stick legs and claws gripping the pencil line you drew earlier. Make sure the claws wrap slightly around the line. -
Define the wire:
Trace over your pencil line with the pen to create the final wire. You can double the line slightly to give the wire thickness. -
Erase pencil marks:
Wait about 5-10 minutes to ensure the ink is totally set, then gently erase any visible pencil sketch lines for a clean finish.
Make It Sparkle
Once dry, use a metallic gold or silver pen to add tiny decorative dots or patterns on the wings for a magical touch.
Now you have a vibrant flock ready to brighten up any room or bring a smile to a friend


Tiny Goldfish With Bubble Trails
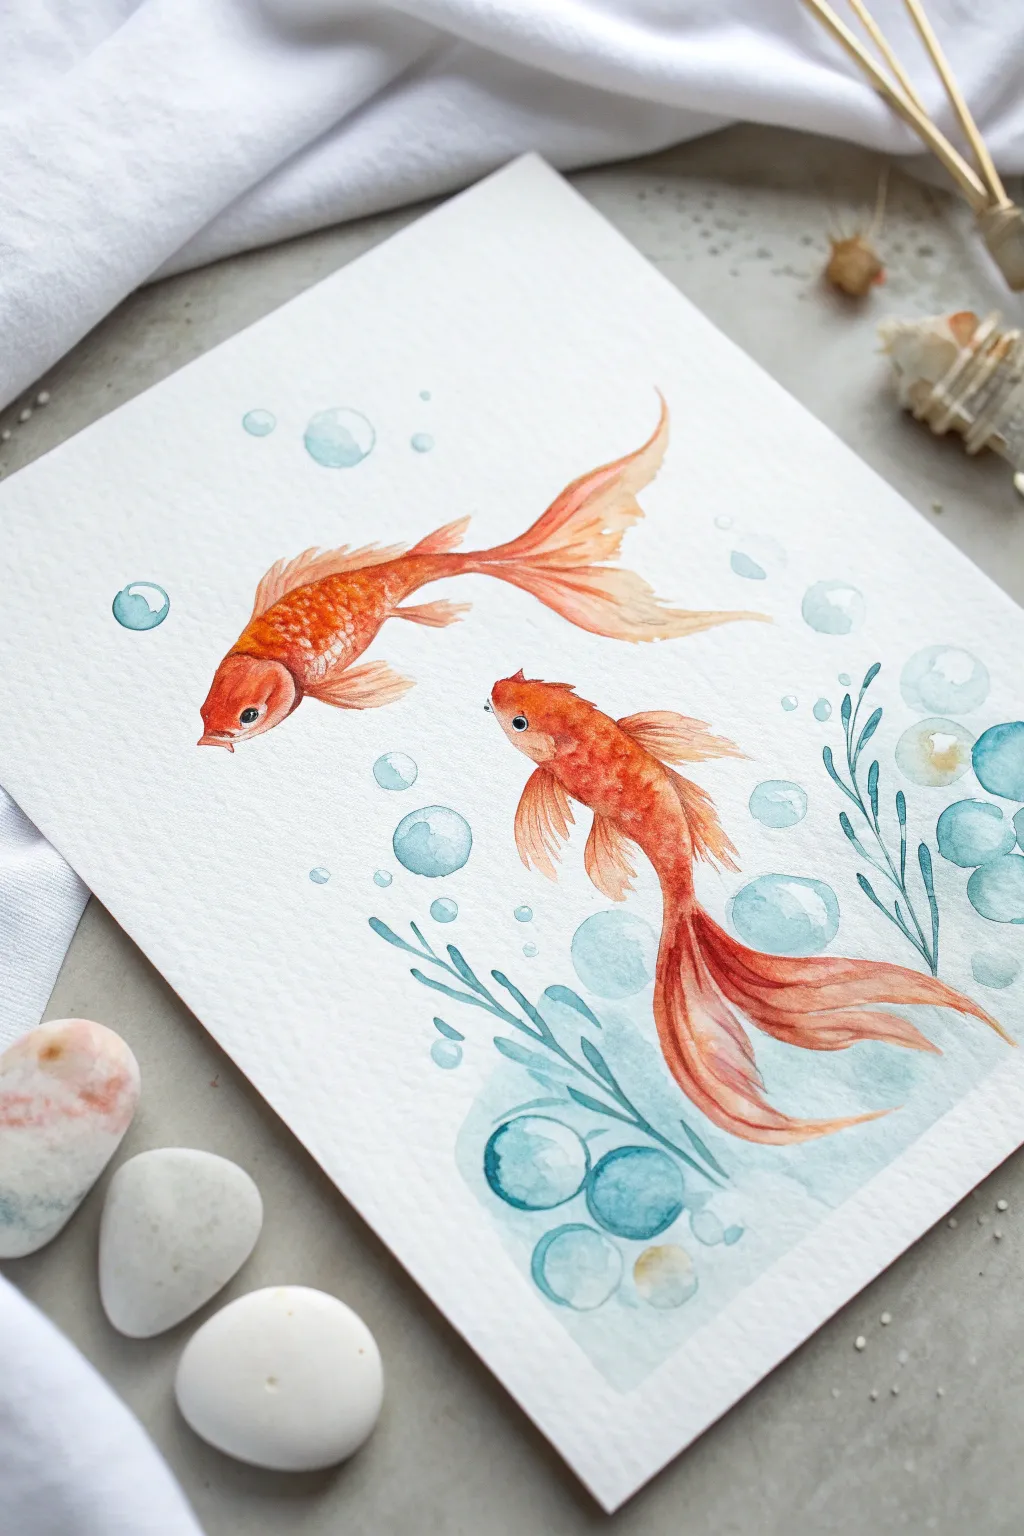
This charming project captures the delicate movement of two goldfish swimming amidst rising bubbles. The transparent watercolor layers create a soft, ethereal look that makes the fish seem weightless on the page.
Detailed Instructions
Materials
- Cold press watercolor paper (300 gsm)
- Watercolor paints (Vermilion, Yellow Ochre, Burnt Sienna, Prussian Blue, Turquoise)
- Round watercolor brushes (Size 2, 4, and 6)
- Pencil (HB or 2H)
- Kneaded eraser
- Clean water jar
- Paper towels
- White gouache or gel pen (optional for highlights)
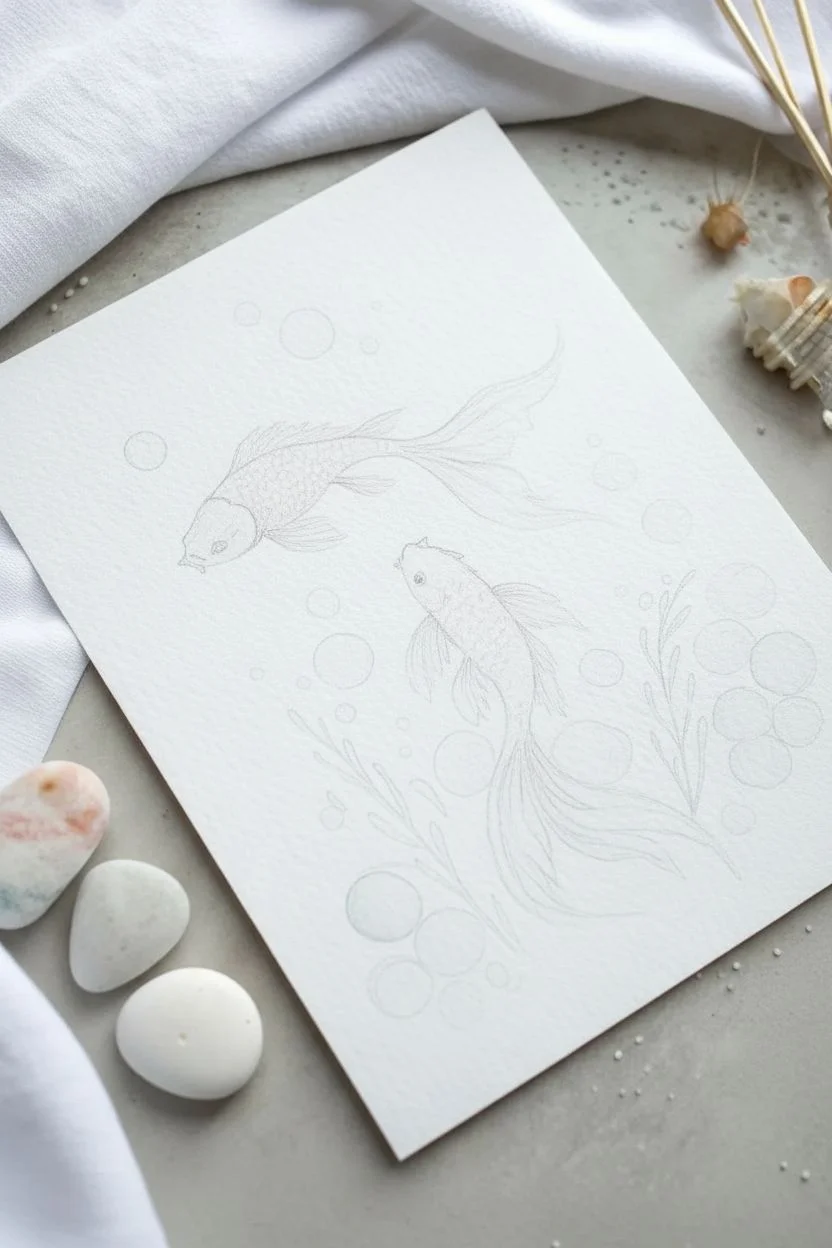
Step 1: Sketching the Composition
-
Outline the fish:
Start by lightly sketching the bodies of the two goldfish. Place one higher on the left facing downward, and the second lower on the right facing upward to create a dynamic flow. -
Add flowing fins:
Sketch long, sweeping tail fins and delicate dorsal fins. Keep your pencil lines very faint so they won’t show through the transparent paint later. -
Place the bubbles:
Draw various circles of different sizes floating around the fish. Cluster some near the bottom right to suggest aquatic plants or air stones, and scatter others towards the top. -
Sketch the plants:
Lightly draw simple, wavy lines for the aquatic plants rising from the bottom right corner, weaving them behind the lower fish’s tail.
Muddy colors?
If your orange and blue areas touch while wet, they’ll turn brown. Ensure the fish are fully bone-dry before painting any blue water or bubbles near them.
Step 2: Painting the Goldfish
-
First wash:
Mix a watery blend of Vermilion and Yellow Ochre. Using the size 6 brush, apply a light wash over the fish bodies, avoiding the eye area. -
Building saturation:
While the first layer is still slightly damp, drop in concentrated Vermilion along the top ridge of the fish backs and near the gills to create volume. -
Painting the fins:
Switch to a size 4 brush. Use a very pale, diluted orange mix for the fins. Pull the paint outward in long strokes, leaving some white paper peeking through to suggest transparency. -
Deepening shadows:
Once dry, mix a touch of Burnt Sienna with your orange. Paint small, scale-like strokes on the main body to add texture, focusing on the darker upper back areas. -
Defining the eyes:
Use a small size 2 brush and dark gray or black paint to carefully fill in the pupils. Leave a tiny speck of white paper for the catchlight, or add it later with white gouache.
Add some shimmer
Mix a tiny amount of iridescent medium or gold watercolor paint into the final layer on the scales for a fish that truly glimmers in the light.
Step 3: Creating the Aquatic Atmosphere
-
Painting bubbles:
Mix a watery Turquoise or light Prussian Blue. Paint the bubbles, keeping the centers pale or white and darkening just the edges to make them look spherical. -
Adding reflections:
While the bubbles are wet, lift a tiny bit of pigment from the top left of each circle with a dry brush to create a highlight. -
Painting the plants:
Using a mix of Prussian Blue and a touch of green, paint the aquatic plant strands. Vary the pressure on your brush to make the leaves taper elegantly. -
Soft background wash:
At the very bottom right, apply a very faint wash of blue around the plant stems and bubbles to ground the scene, softening the edges with clean water so it fades into the white paper.
Step 4: Final Details
-
Strengthening fins:
Use a rigger brush or the tip of your size 2 brush with darker orange to draw fine lines within the fins, following the curve of the tail movement. -
Highlighting bubbles:
If your bubble highlights got lost, add tiny dots of white gouache to the top curve of the largest bubbles for extra shine. -
Adding texture to the sea floor:
Drop faint touches of yellow or brown into the wet blue wash at the bottom to suggest sand or pebbles without drawing distinct shapes. -
Final assessment:
Check the balance of the composition. If the water looks too empty, add a few tiny, faint blue dots to represent distant bubbles.
Once dry, your graceful goldfish are ready to bring a sense of calm to any space they inhabit
BRUSH GUIDE
The Right Brush for Every Stroke
From clean lines to bold texture — master brush choice, stroke control, and essential techniques.
Explore the Full Guide
Pastel Jellyfish With Flowing Tentacles
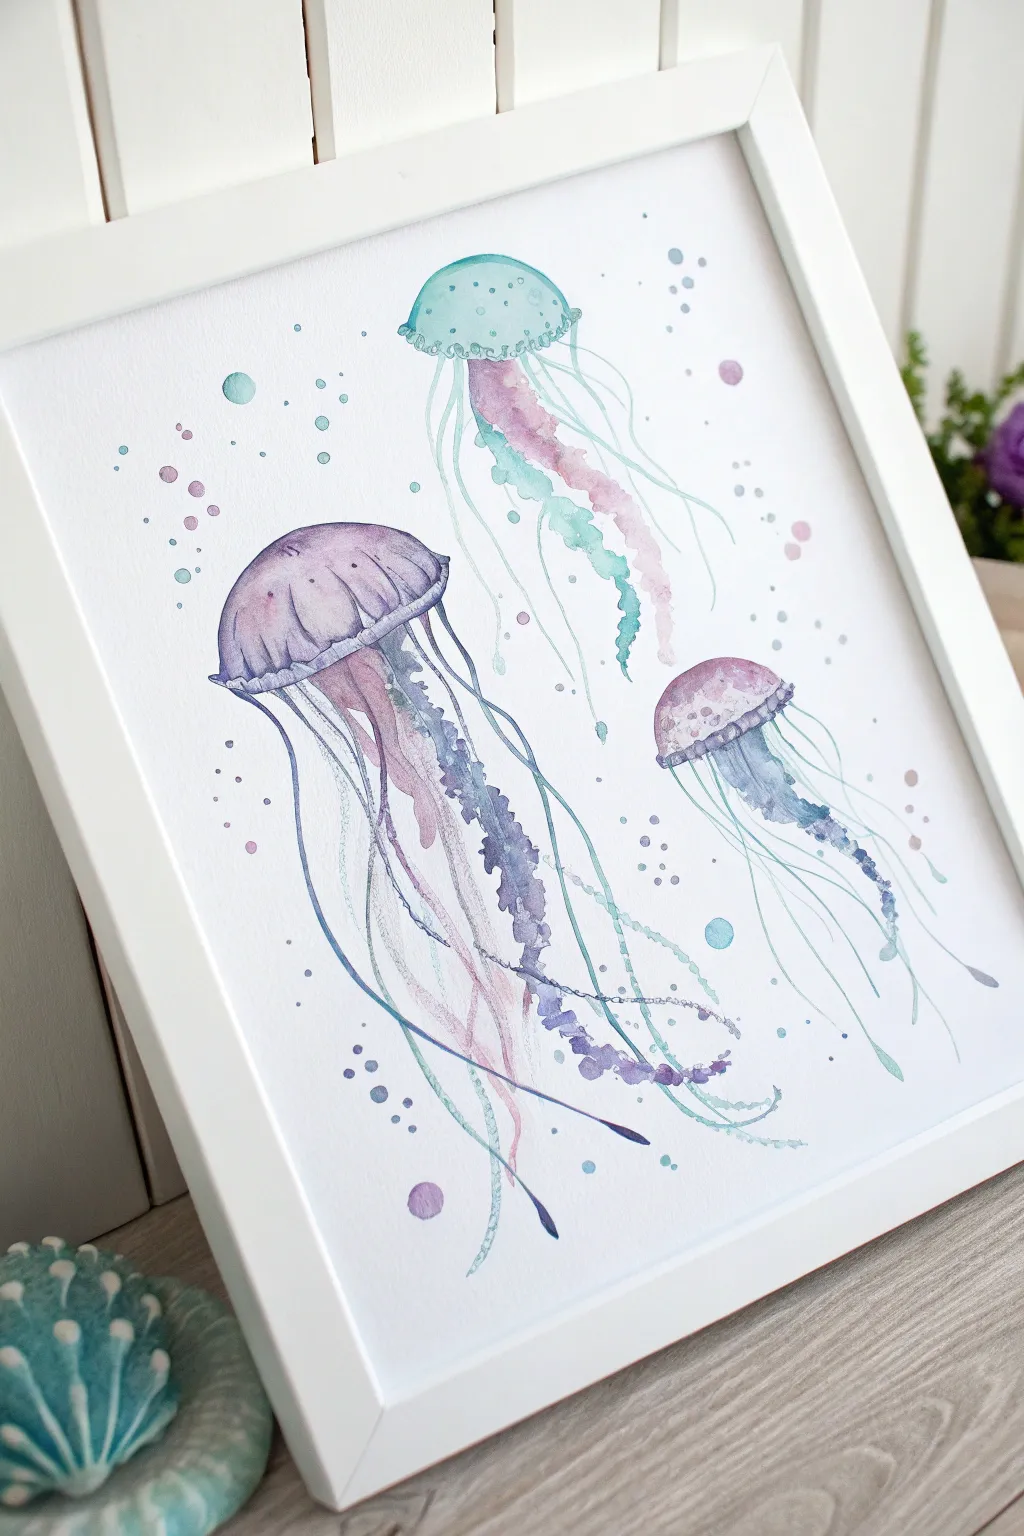
Capture the graceful drift of the ocean with this delicate trio of pastel jellyfish. Using soft gradients of lavender, mint, and seafoam green, you’ll create buoyant shapes and intricately flowing tentacles that seem to dance across the paper.
Step-by-Step Tutorial
Materials
- Cold press watercolor paper (300 gsm)
- Watercolor paints (Purple, Teal/Turquoise, Magenta/Pink)
- Round watercolor brushes (Size 6 for bodies, Size 0 or 1 for fine lines)
- Clean water and two jars
- Paper towels
- Pencil (HB) and kneadable eraser
- Palette for mixing
- White gel pen (optional for highlights)
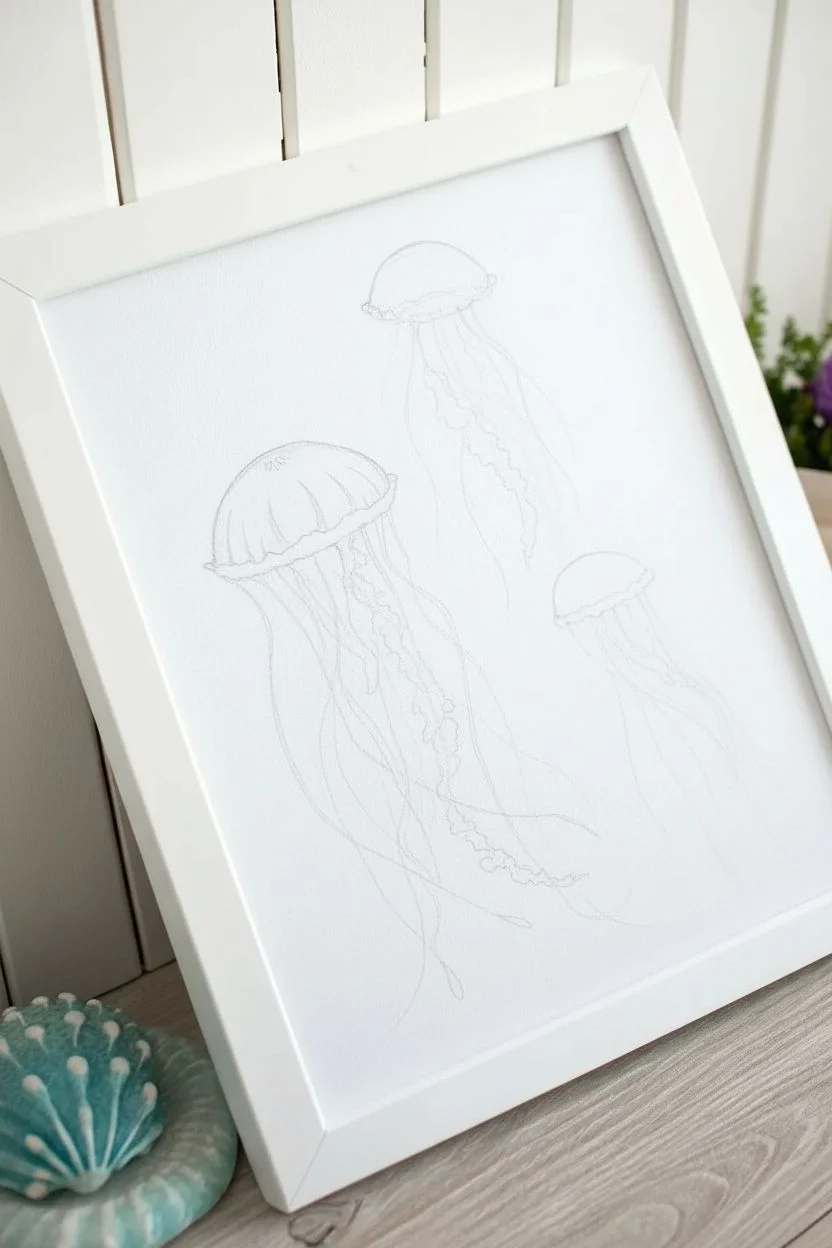
Step 1: Sketching the Composition
-
Position the bodies:
Begin by deeply examining the placement of the three jellyfish. Lightly sketch three semi-circle or mushroom cap shapes: a medium one at the top center, a large dominant one on the left, and a smaller one on the right. -
Add the ruffles:
At the base of each ‘mushroom cap’, sketch a wavy, ruffled edge. This is where the tentacles will eventually emerge, giving the creatures their organic, skirt-like appearance. -
Map the flow:
Very faintly draw guide lines for where the long tentacles will flow. Let them curve and overlap slightly to create a sense of movement, but keep these pencil lines minimal so they don’t show through the paint.
Bleeding edges?
If your tentacles are blurring into big blobs, your paper is too wet. Let the layer dry completely before painting intersecting lines to keep them crisp.
Step 2: Painting the Jellyfish Bells
-
Top jellyfish wash:
Start with the top center jellyfish. Pre-wet the bell shape with clean water until it glistens. Drop in a watery mix of teal or mint green at the top, letting it fade into a very pale pink near the ruffled bottom edge. -
Main jellyfish gradient:
Move to the large purple jellyfish on the left. Using the wet-on-wet technique again, paint the bell with a soft lavender. While wet, drop slightly more concentrated purple near the top curve and the bottom rim to create volume. -
Small jellyfish hues:
Paint the small right-hand jellyfish using a blend of pink and violet. Keep the center of the bell lighter, almost white, to make it look translucent and glowing. -
Detailing the bells:
Once the base washes are damp but not soaking, use a smaller brush to add vertical curved lines on the bells. These rib-like lines should follow the contour of the shape to emphasize roundness.
Pro Tip: Gravity
Paint the long tentacles while tilting your board or paper upright. Gravity will help pull the water downwards, creating naturally straight yet wavering lines.
Step 3: Creating the Tentacles
-
The oral arms:
Start with the thicker, ruffled tentacles (oral arms) in the center of the mass. For the top teal jellyfish, use a mix of pink and teal strokes that squiggle downwards. Load your brush with pigment and press down and lift up rhythmically to create varied thickness. -
Main tentacles:
For the large purple jellyfish, paint thick, ribbon-like tentacles in the center using a deeper purple and shadowed blue mix. Allow the paint to pool slightly in the curves of the ribbon for texture. -
Fine stinging filaments:
Switch to your size 0 or 1 liner brush. This is the patience phase. Paint long, extremely thin lines extending from the rim of the bells. I find it helps to hold the brush loosely at the end of the handle to keep the lines shaky and organic. -
Color transitions:
As you drag these thin lines down, change colors on your brush—dip into blue, then purple, then pink—so the tentacles act like gradients as they descend. -
Overlapping layers:
Wait for the first set of tentacles to dry completely before painting new ones that cross over them. This prevents bleeding and creates specialized depth. -
Dotted textures:
On the thicker ribbon tentacles, especially on the large purple jelly, dab tiny dots of darker pigment while the section is still damp to simulate the bumpy texture of stinging cells.
Step 4: Atmospheric Details
-
Bubble clusters:
Mix watery puddles of your main colors (teal, lavender, pink). Paint ample circles of varying sizes floating around the jellyfish to mimic rising bubbles. -
Bubble depth:
While the bubbles are wet, lift a tiny spot of pigment from the center of each with a thirsty (clean, damp) brush or paper towel corner to make them look transparent. -
Splatter texture:
Load a medium brush with fairly wet paint and gently tap it against another brush handle over the paper. This creates tiny micro-droplets that energize the water around the creatures. -
Final highlights:
If you lost some of the bright whites on the bells, use a white gel pen or a touch of white gouache to add small shine marks on the highest points of the bells and the bubbles.
Now step back and admire how your colors drift together, creating a serene underwater scene ready to be framed
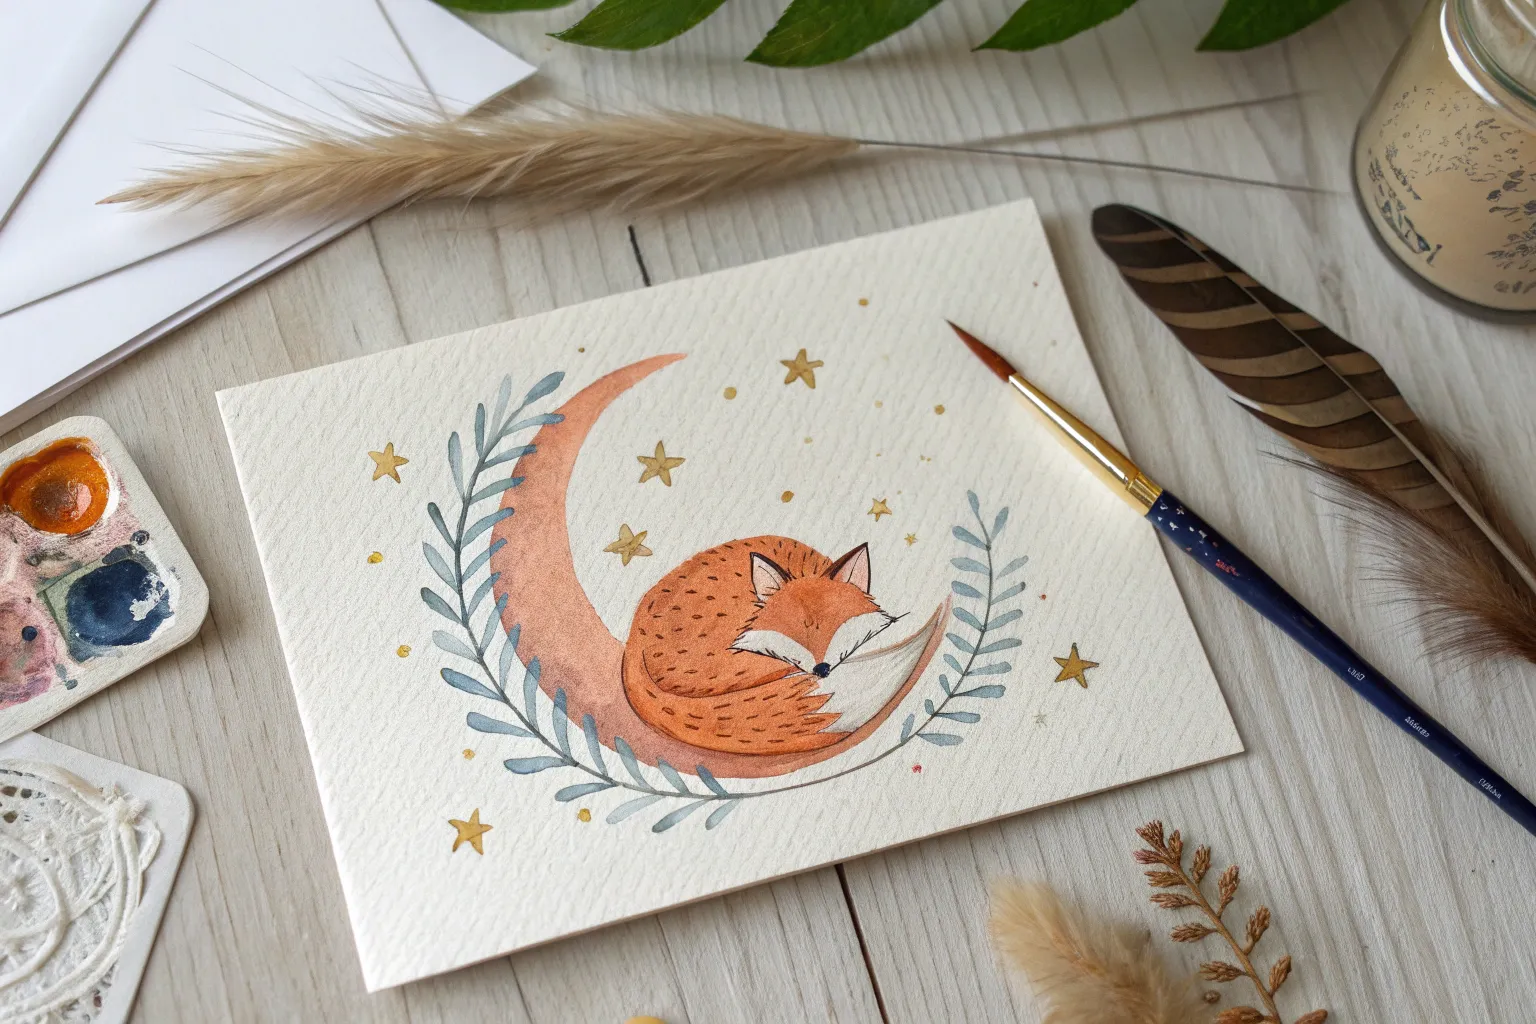
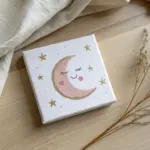
Mini Night Skies With Crescent Moons and Stars
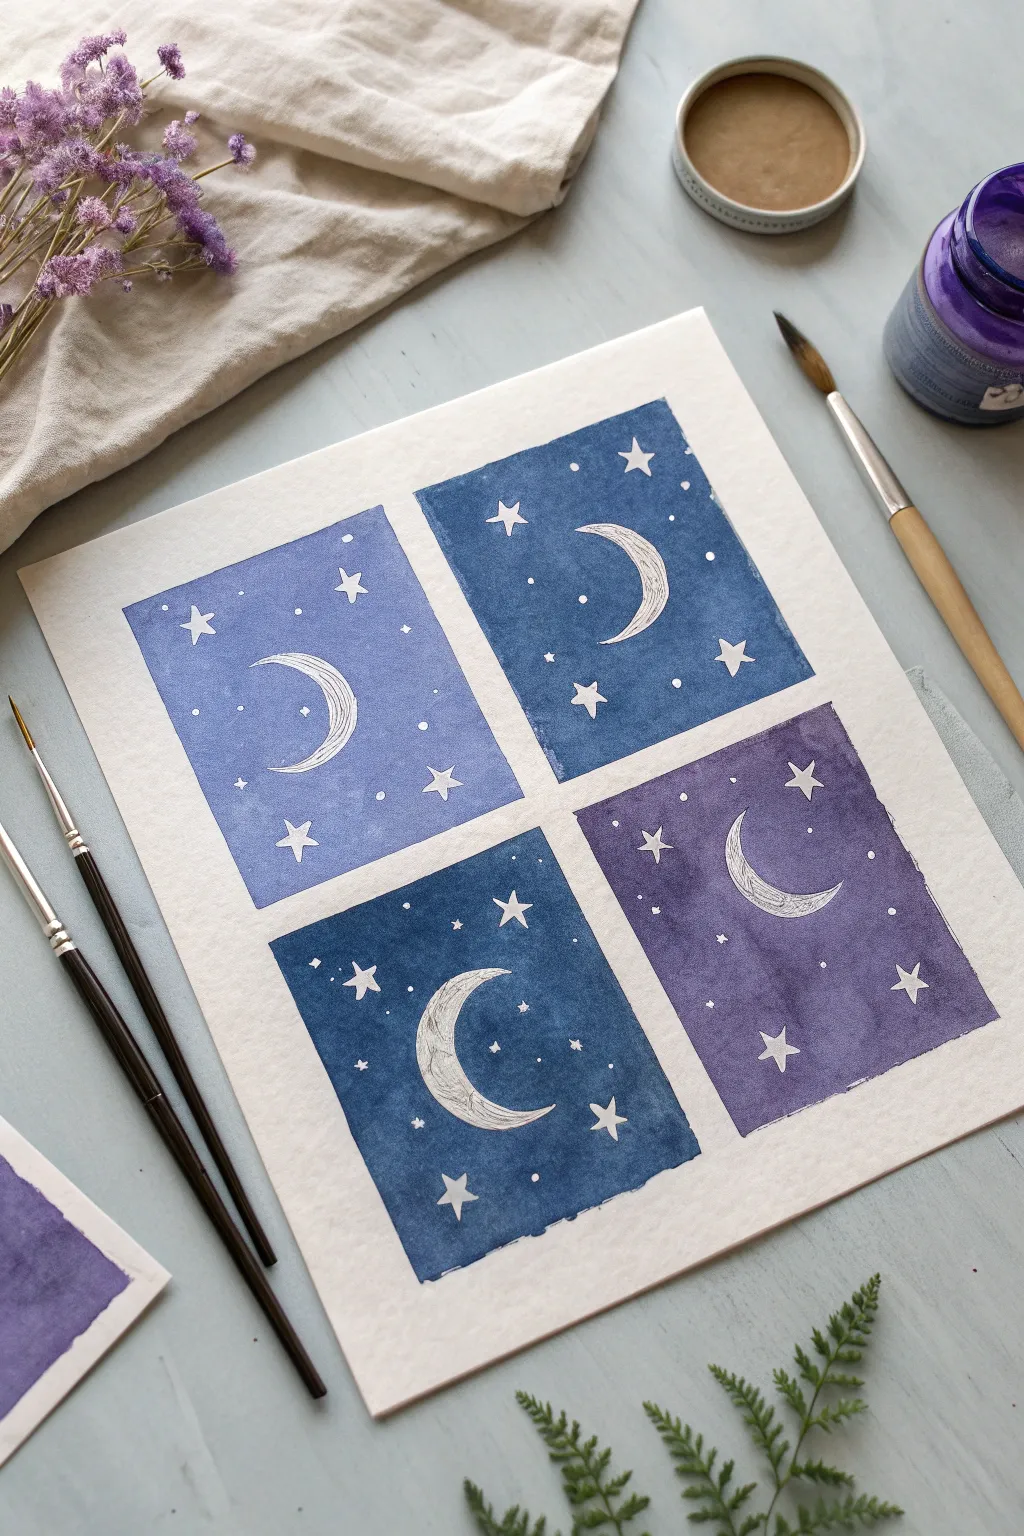
These charming rectangular vignettes capture the serene beauty of a starry night in four distinct shades of blue and purple. Simple white details pop against the watercolor wash, creating a magical celestial effect perfect for beginners.
Step-by-Step
Materials
- Cold press watercolor paper (minimum 140lb/300gsm)
- Watercolor paints or inks (Indo blue, violet, navy, indigo)
- White gouache or white gel pen
- Painter’s tape or washi tape
- Flat shader brush (size 6 or 8)
- Small round detail brush (size 0 or 1)
- Pencil and eraser
- Ruler
- Jar of clean water
- Paper towel
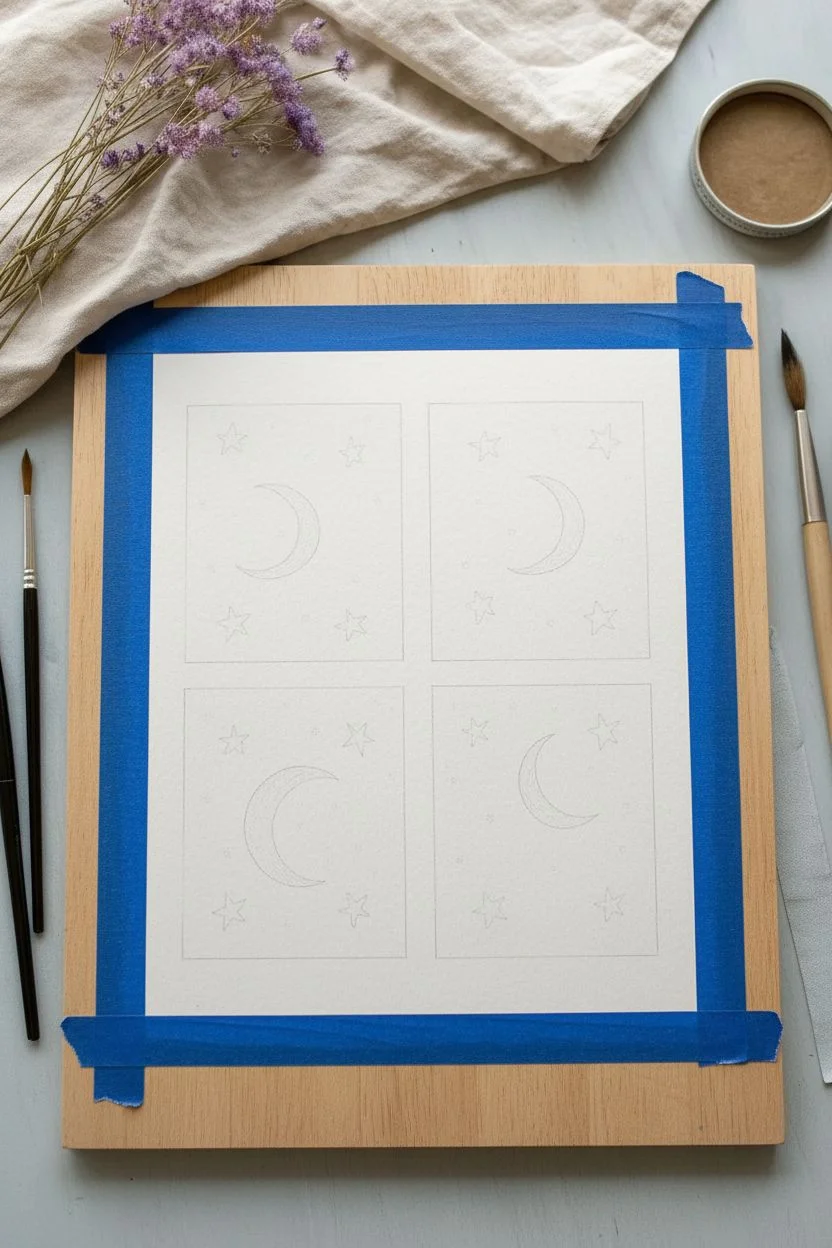
Step 1: Preparation and Sketching
-
Frame the panels:
Begin by taping down your paper to a hard board to prevent buckling. Using a ruler and pencil, lightly draw four equal-sized rectangles arranged in a 2×2 grid. Leave a nice margin of white space between them. -
Masking edges:
Carefully apply painter’s tape around the outside edges of your pencil rectangles. This ensures crisp, clean lines for your finished boxes. If you want perfectly sharp internal borders, you can mask those too, though painting carefully freehand usually works for small squares. -
Pencil the moons:
Within each rectangle, lightly sketch the outline of a crescent moon. Vary the orientation slightly for visual interest—perhaps tilt one upwards and another sideways. -
Plan the stars:
Dot in where you want your largest stars to go. You don’t need to draw every point, just mark their positions so you don’t accidentally paint dark colors over these focal points if you plan on lifting color later.
Step 2: Painting the Night Skies
-
Mix your first wash:
Start with the top-left panel. Mix a soft periwinkle blue using a touch of violet and ultramarine with plenty of water. You want this to be the lightest of the four panels. -
Paint around the moon:
Using your flat shader brush, fill the rectangle with the periwinkle wash. Be very careful to paint *around* the crescent moon shape, leaving the white paper exposed. Painting wet-on-dry gives you more control here. -
Second panel: Deep Blue:
For the top-right panel, mix a classic navy or prussian blue. Paint this rectangle, again carefully avoiding the moon shape. The contrast between the dark paint and white paper should be stark. -
Third panel: Indigo:
Move to the bottom-left. Create a deep, moody indigo mix—almost black-blue. Fill the rectangle, ensuring the wash is even and smooth. I find a slightly larger brush helps prevent streakiness in these darker colors. -
Fourth panel: Violet:
For the final bottom-right panel, use a rich purple or violet shade. Paint around the moon as before. Let all four panels dry completely before moving to the next step.
Uneven Background?
If your background dries with “blooms” or watermarks, don’t restart. Use a damp brush to gently smooth it out, or embrace the texture as clouds in your night sky.
Step 3: Adding Celestial Details
-
Detailing the moons:
Once the background is bone dry, take your smallest detail brush or a fine-tip pen. Inside the white crescent shapes, draw thin, scratchy lines following the curve of the moon to give it texture and dimension. -
Painting large stars:
Using opaque white gouache (or a white gel pen for easier control), draw five-pointed stars scattered throughout the sky. Place largest stars where you planned them earlier. -
Adding brightness:
Ensure the white paint is thick enough to cover the dark background. You may need a second coat of gouache on the darker indigo and violet panels to make sure the stars pop. -
Tiny starlight:
Fill the empty spaces with tiny white dots. Vary the size of these dots—some mere pinpricks, others slightly larger circular points—to create the illusion of distant galaxies. -
Moon craters:
Add a few tiny, irregular circles or dots inside the texture of the moons using a very diluted grey or just a black pen with a very light hand to suggest craters. -
Clean up:
Allow the white details to dry completely. Gently erase any visible pencil marks around the borders. -
The reveal:
Slowly peel away the painter’s tape at a 45-degree angle to reveal your crisp, clean edges. This is always the most satisfying part.
Crisp Moon Edges
For perfectly white moons, use liquid masking fluid on the moon shapes before painting the background washes. Rub it off once the paint is totally dry.
Now you have a stunning set of celestial miniatures ready to be framed or used as a greeting card

PENCIL GUIDE
Understanding Pencil Grades from H to B
From first sketch to finished drawing — learn pencil grades, line control, and shading techniques.
Explore the Full Guide
Sunset Gradient Hearts With Clean Tape Borders
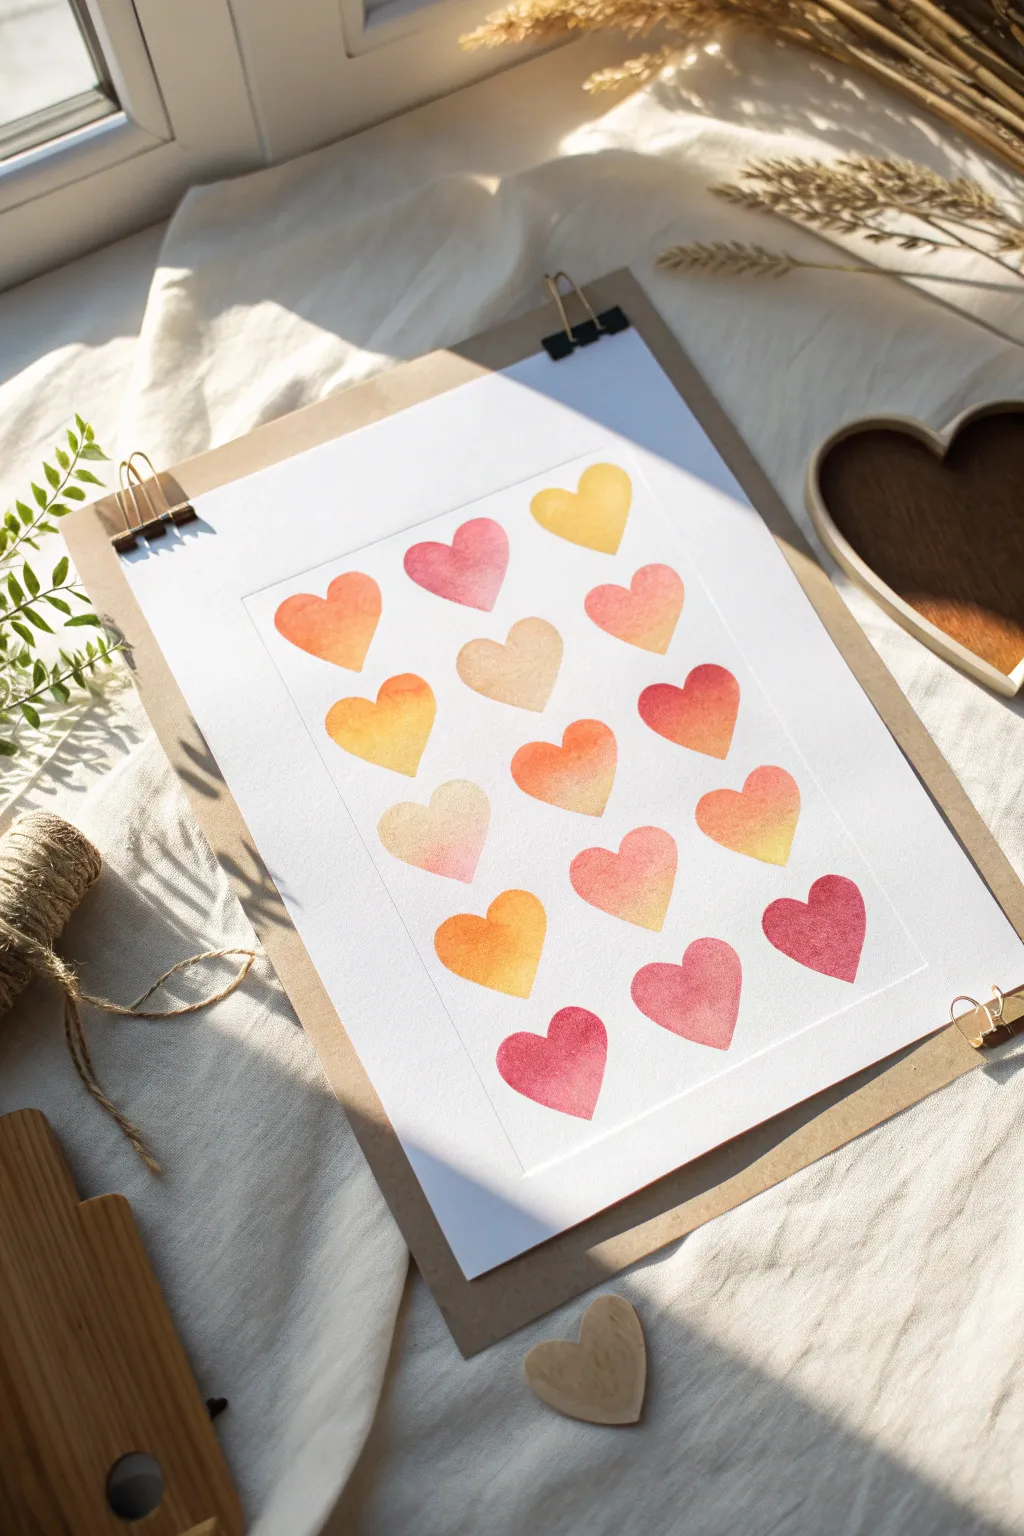

Capture the warmth of a setting sun with this structured yet soft watercolor project. Using a simple masking technique and a warm color palette, you’ll create a grid of hearts that glow with beautiful ombre transitions from yellow to deep pink.
How-To Guide
Materials
- Cold press watercolor paper (approx. A4 or 9×12 inches)
- Artist tape or gentle masking tape
- Watercolor paints (Yellow ochre, orange, vermilion, alizarin crimson/rose)
- Round watercolor brush (size 6 or 8)
- Pencil (HB or lighter)
- Ruler
- Jar of clean water
- Paper towels
- Backing board or clipboard
Step 1: Preparation & Layout
-
Tape the paper:
Begin by securing your watercolor paper to a sturdy backing board using artist tape or masking tape. Focus on creating a clean, straight rectangle in the center of your page, leaving a wide white margin around the outside. -
Check the seal:
Run your fingernail or a bone folder along the inner edge of the tape to ensure a tight seal. This prevents paint from bleeding under the tape and guarantees that crisp border finish. -
Measure the grid:
Inside your taped rectangle, lightly use a ruler to mark out a grid layout for your hearts. You’ll need 3 columns and 5 rows. Make tiny tick marks rather than full lines to keep the paper clean. -
Sketch the hearts:
Using a very light touch with your pencil, sketch a heart shape in each grid space. Aim for a uniform size and shape, but don’t worry about perfection; small variations add charm.
Clean Lines
For ultra-crisp hearts, finish the dried painting by outlining each heart with a very fine 0.1 waterproof archival ink pen in brown or sepia.
Step 2: Mixing the Sunset Palette
-
Prepare your colors:
On your palette, prepare four distinct puddles of paint: a sunny yellow or ochre, a bright orange, a warm red, and a deep pink or berry tone. Add enough water so they are fluid but still vibrant. -
Test the gradients:
On a scrap piece of paper, practice blending two colors together wet-on-wet. Try yellow into orange, or orange into pink, to get a feel for how they flow before starting on the main piece.
Step 3: Painting the Hearts
-
Start the first heart:
Dip your brush into the yellow paint and fill the top half of the first heart in the top left corner. -
Blend the gradient:
While the yellow is still wet, quickly rinse your brush, pick up a touch of orange, and paint the bottom half of the heart. Let the colors meet in the middle and bleed slightly. -
Continue the row:
Move to the next heart in the row. Vary the colors slightly – perhaps make this one mostly pink with a bit of red at the bottom. The goal is to have every heart feature a two-tone gradient. -
Work diagonally:
I find it helpful to vary the color placement randomly. Don’t make all top hearts yellow; mix it up so the entire sheet looks like a scattered sunset. Use yellow-orange for some, orange-red for others, and red-pink for the rest. -
Managing moisture:
If a puddle forms on a heart, dry your brush on a paper towel and touch the tip to the puddle to lift the excess water. This prevents ‘cauliflower’ blooms as it dries. -
Complete the grid:
Continue filling all 15 hearts. Ensure you stay within your pencil lines to keep the shapes recognizable, but let the watercolor do its magic inside the shapes. -
Let it dry completely:
Allow the painting to dry undisturbed. Watercolors dry lighter, so don’t be alarmed if the vibrancy settles down a bit.
Salt Texture
While the paint is still wet on the hearts, sprinkle a few grains of table salt into the center. Brush it off when dry for a cool starry texture.
Step 4: Finishing Touches
-
Erase guidelines:
Once the paint is bone dry (touch the paper to be sure it’s room temperature, not cool), gently erase any visible pencil marks around the hearts. -
Peel the tape:
Slowly peel away the masking tape. Pull the tape away from the paper at a 45-degree angle to prevent tearing the paper surface. -
Flatten if needed:
If the paper has buckled slightly from the water, place the finished (dry) artwork under a heavy book overnight to flatten it out.
Hang your new artwork near a window to let the natural light enhance those warm sunset hues
Smiling Clouds With Soft Rainbows
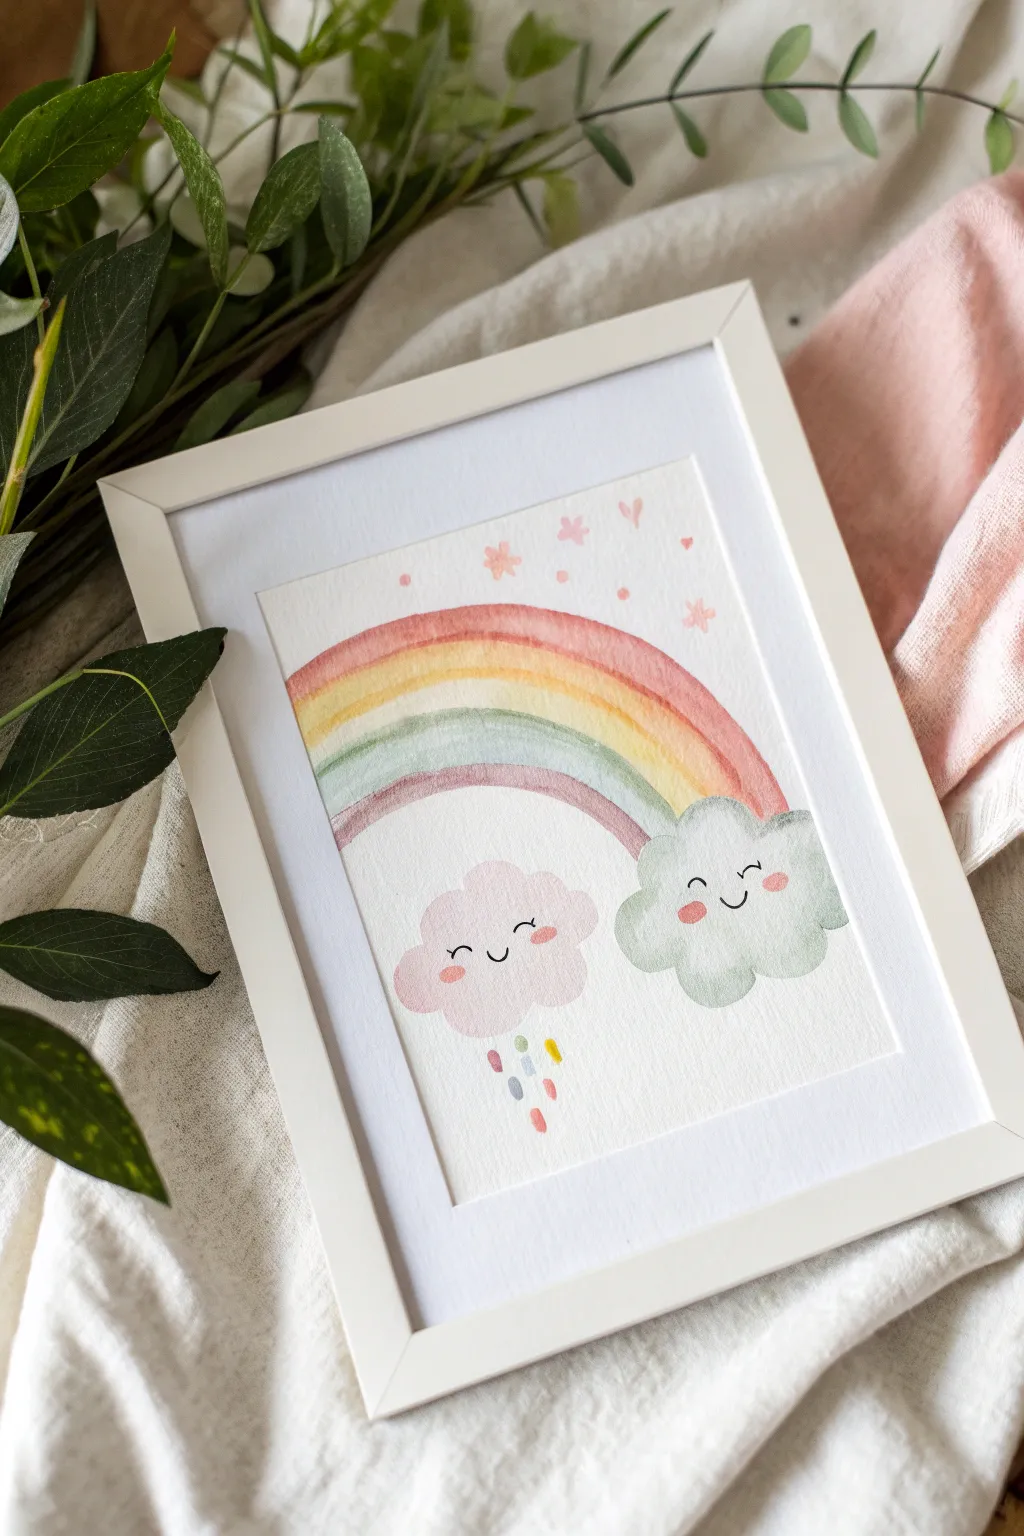
Bring a little joy to your walls with this whimsical watercolor scene featuring two cheerful clouds nestled beneath a soft, pastel rainbow. The gentle color palette and adorable facial expressions make this a perfect piece for a nursery or a thoughtful handmade gift.
Detailed Instructions
Materials
- Cold press watercolor paper (300 gsm)
- Watercolor paints (pastel pink, soft red, peach, pale yellow, sage green/light teal, light purple)
- Round watercolor brushes (size 6 for washes, size 2 for details)
- Black fine-liner pen (waterproof) or very fine black paint
- Clean water jar
- Paper towels
- Palette for mixing
Step 1: Painting the Clouds
-
Sketch the shapes:
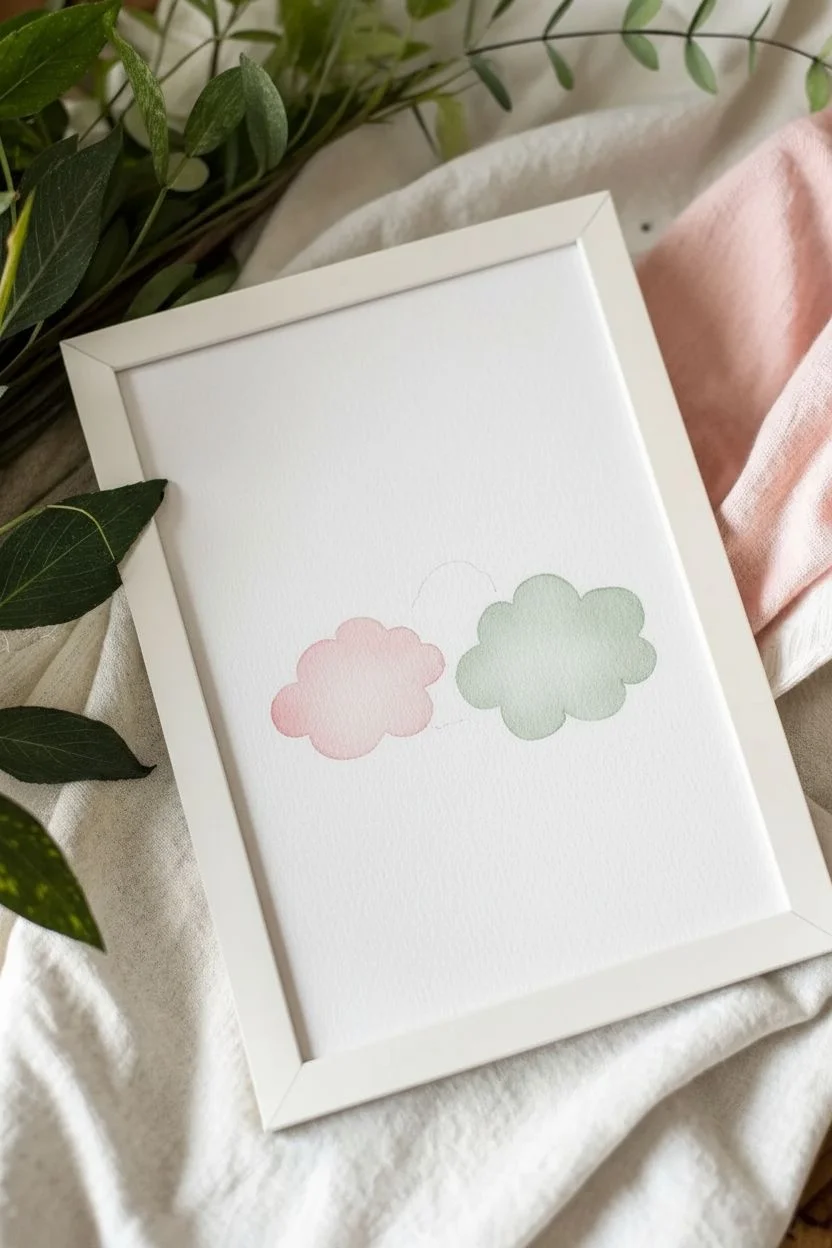
Begin by lightly sketching the outline of two fluffy clouds at the bottom third of your paper. Place one slightly to the left and a larger one on the right, ensuring they overlap slightly in the middle so they feel connected. -
Mix a soft pink:
On your palette, dilute a small amount of pink or red paint with plenty of water. You want a very pale, ‘baby pink’ wash for the left cloud. -
Fill the pink cloud:
Using your size 6 brush, fill in the left cloud shape. While the paint is still wet, you can drop in a tiny bit more pigment around the edges to create soft depth, keeping the center lighter. -
Mix a murky green-grey:
For the right cloud, mix a sage green with a tiny touch of grey or brown to desaturate it. Like the pink, keep this mixture quite watery and transparent. -
Paint the second cloud:
Carefully paint the right-hand cloud with your green-grey mix. If the pink cloud is still wet where they touch, leave a hair-thin gap of white paper between them to prevent the colors from bleeding into a muddy mess.
Step 2: Creating the Rainbow
-
Plan the arch:
Lightly sketch the rainbow arch emerging from behind the clouds. It should swoop comfortably over both characters without feeling cramped at the top of the page. -
The red band:
Load your brush with a soft red or coral color. Paint the outermost stripe of the rainbow in a single, confident stroke if possible. If you need to reload, try to blend the seam quickly. -
The yellow band:
Clean your brush thoroughly. Pick up a warm yellow or ochre. Paint the next stripe inward, allowing it to just barely touch the red stripe while both are wet for a gentle, dreamy bleed. -
The green band:
Continue inward with your sage green mix. Follow the curve carefully. A slight wobble adds hand-painted charm, so don’t stress about geometric perfection. -
The inner purple band:
Finish the rainbow with a muted purple inner arch. Let the rainbow stripes enhance the composition by leading the eye down to the clouds.
Muddy Clouds?
If your cloud colors keep bleeding into each other where they overlap, paint one cloud, let it dry completely with a hairdryer, and then paint the second one overlapping it.
Step 3: Details & Whimsy
-
Paint the raindrops:
Underneath the pink cloud, paint four or five small, vertical dashes using various colors from your rainbow palette—some pink, some yellow, some blue-grey. -
Add floating shapes:
In the sky area around the rainbow, paint tiny scattered hearts, stars, and dots using pink and coral paint. Vary the saturation so some are bold and others faint. -
Let it dry completely:
Before adding faces, the paper must be bone dry. If it feels cool to the touch, it’s still wet. I usually wait about 20 minutes here to be safe. -
Draw the eyes:
Using your fine black pen or size 2 brush with black paint, draw curved U-shapes for closed, smiling eyes on both clouds. Position them relatively low on the cloud bodies for a cuter look. -
Add the mouths:
Draw a small, simple smile between the eyes. Keep the lines thin and delicate. -
Rosy cheeks:
Dip your small brush into concentrated pink paint (minimal water). Dab small ovals onto the clouds just outside the smile lines to give them blushing cheeks.
Wet-on-Dry Texture
For rougher paper texture like the photo, use slightly less water in your brush (a damp brush rather than a soaking one) so the grain of the paper shows through the strokes.
Frame your cheerful creation in a simple white frame or mat to make those pastel colors really pop


Tiny Houses Inside Everyday Objects
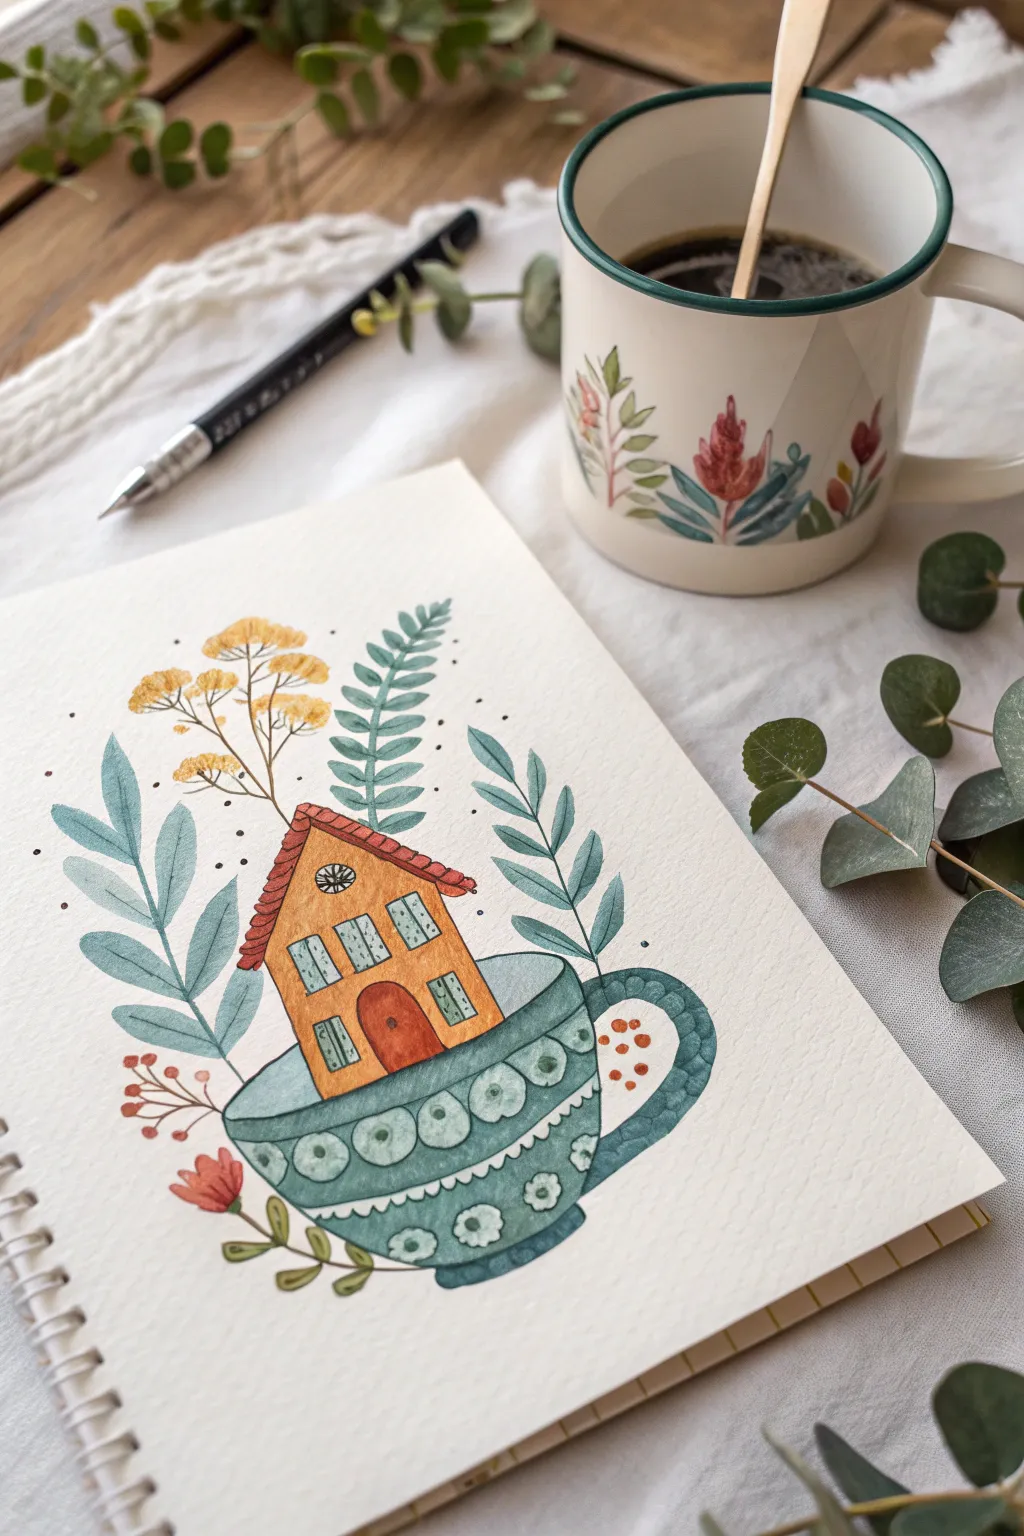
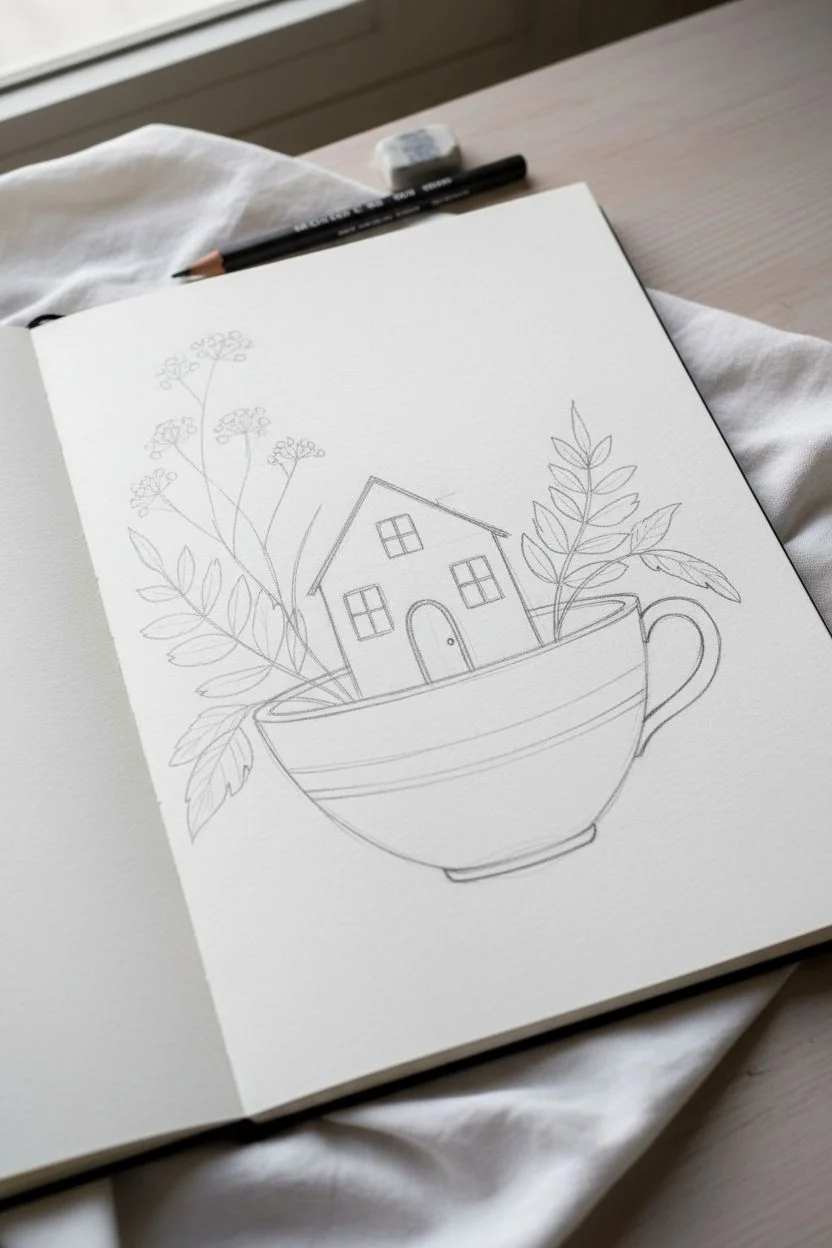
Whisk yourself away to a world of whimsy with this charming watercolor illustration of a tiny house nestled comfortably inside a vintage teacup. The design combines cozy botanical elements with folk-art inspired patterns, creating a heartwarming scene perfect for greeting cards or sketchbook Sundays.
Step-by-Step Guide
Materials
- Cold press watercolor paper (300gsm)
- Pencil (HB or 2B) and kneaded eraser
- Fine liner pen (0.1mm and 0.3mm waterproof)
- Watercolor paints (burnt sienna, yellow ochre, sap green, indigo, teal)
- Small round brushes (size 2 and size 4)
- White gel pen or gouache
Step 1: Sketching the Foundation
-
Outline the teacup shape:
Begin by lightly sketching the main bowl of the tea cup in the lower center of your page. Draw a wide, shallow U-shape, then add a slightly curved ellipse for the rim. Don’t worry about perfect symmetry; a little wobble adds hand-drawn charm. -
Add the handle and details:
Sketch a C-shaped handle on the right side. Lightly draw two horizontal bands across the cup’s body where the decorative patterns will go later. -
Draft the tiny house:
Rising from inside the cup, draw a simple house shape. The base should be hidden by the cup’s rim. Add a peaked roof and sketch out the placement for a central arched door and four rectangular windows. -
Position the botanicals:
Draw flowing stems extending outwards from behind the house and cup. Place large fern-like leaves on the left and right, and delicate dried flower stalks rising from the top left.
Ink Confidence
If your hand shakes while inking, try pulling the pen toward your body rather than pushing it away. This gives you more control over the line stability.
Step 2: Inking the Design
-
Ink the main outlines:
Using your 0.3mm waterproof fine liner, carefully trace over your pencil lines. Use a confident, consistent stroke for the cup and house structure. -
Detail the textures:
Switch to the finer 0.1mm pen. Add wood grain texture to the door, tiny tiles or shingles on the roof, and the decorative circles and scallops on the teacup bands. -
Add nature details:
Ink the stems and leaves. For the yellow flowers, use small stippling dots rather than hard outlines to keep them looking fluffy. Once the ink is totally dry, gently erase all pencil marks.
Step 3: Painting the Scene
-
Wash the house walls:
Dilute some Yellow Ochre to a milky consistency and paint the walls of the house. While it’s still damp, drop a tiny bit of Burnt Sienna near the edges for a shadowed effect. -
Roof and door colors:
Mix a warm, reddish-brown using Burnt Sienna and a touch of red. Paint the roof and the front door carefully, leaving the window panes white for now. -
Base layer for the cup:
Create a vintage teal color by mixing Viridian Green with a touch of Indigo and plenty of water. Paint the main body of the cup and handle, steering clear of the decorative bands you drew earlier. -
Painting the greenery:
Using Sap Green mixed with a little drop of teal for harmony, paint the large leaves on either side of the house. I like to vary the saturation, making some leaves darker than others. -
Floral accents:
Use clean Yellow Ochre for the flower heads at the top left. For the berries near the bottom, use the same reddish-brown mix from the roof to tie the color palette together.
Seasonal Switch
Change the roof to white for winter snow, or paint the leaves in orange and crimsons for an autumn version of this cozy cottage.
Step 4: Pattern and Finish
-
Developing the cup patterns:
Once the cup’s base layer is dry, use a slightly darker, less watered-down teal to paint the decorative bands and the interior of the pattern circles. -
Window details:
Paint the window shutters with a pale wash of the teal color. If you want the windows to look lit from within, add a very pale yellow wash to the panes. -
Adding depth:
Mix a dark grey-blue using Indigo and Burnt Umber. Apply thin shadows underneath the rim of the cup, under the roof overhang, and where the leaves overlap the cup. -
Final highlights:
Using a white gel pen or opaque white gouache, add tiny highlights to the berries, the center of the cup’s decorative circles, and the shiny part of the handle. -
Splatter and specks:
Dip your smallest brush in dark paint and tap it against another brush handle to create tiny speckles around the foliage for a magical, organic texture.
Now step back and admire your charming little dwelling, ready to brighten up any sketchbook page
Silhouette Critters Against a Candy-Color Sky
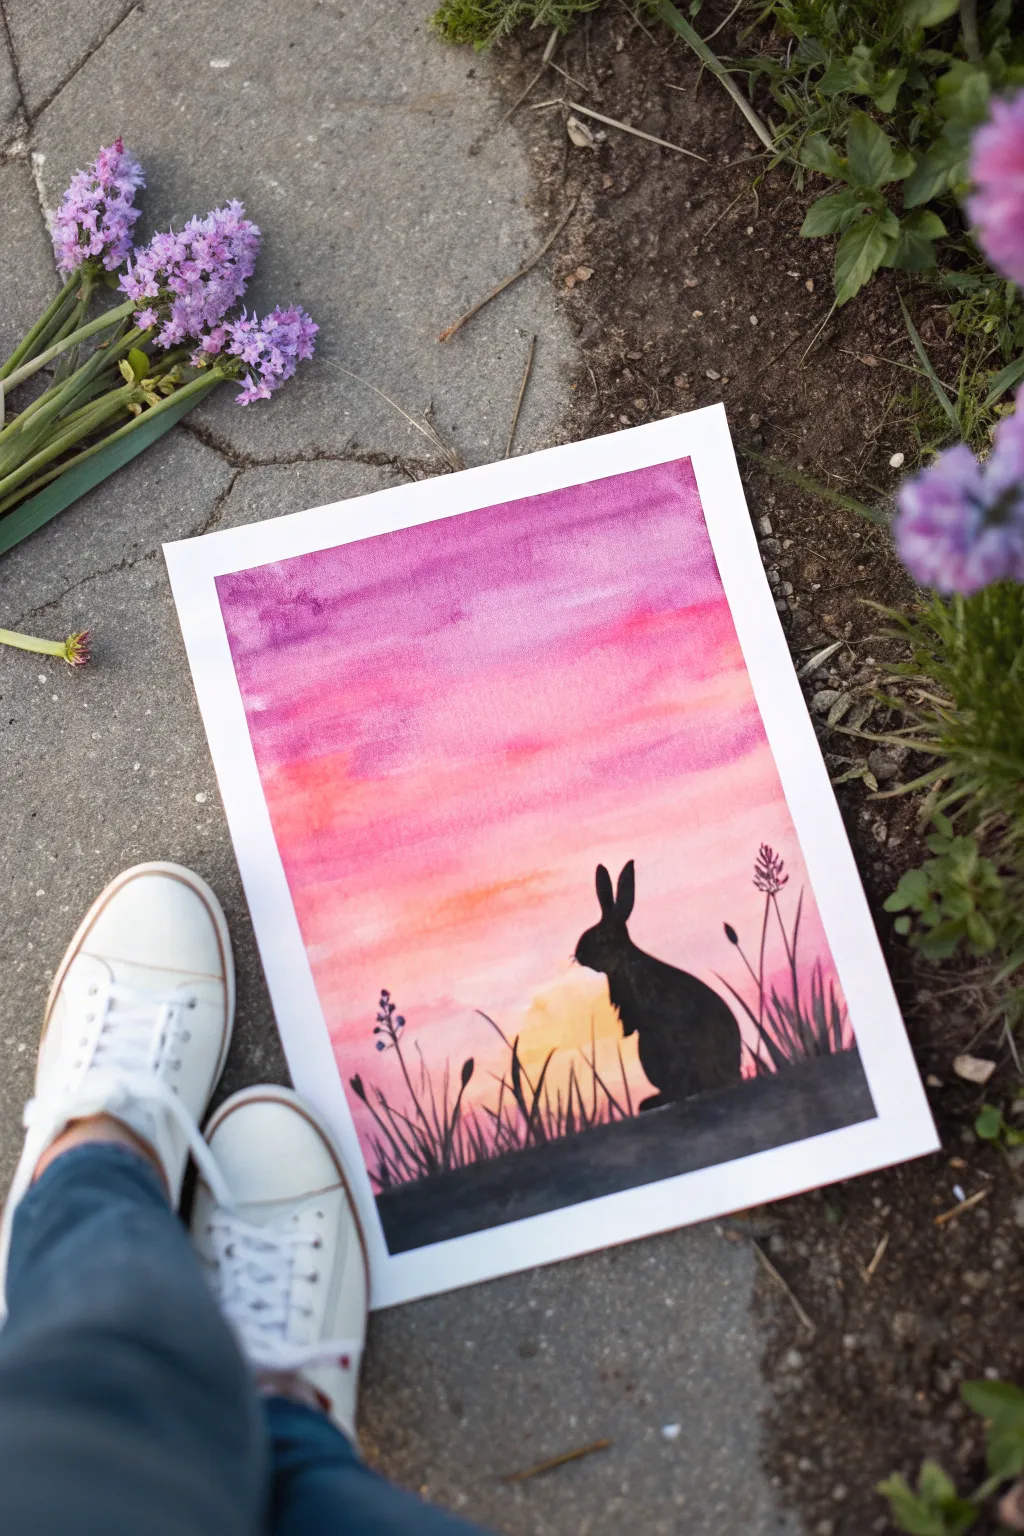
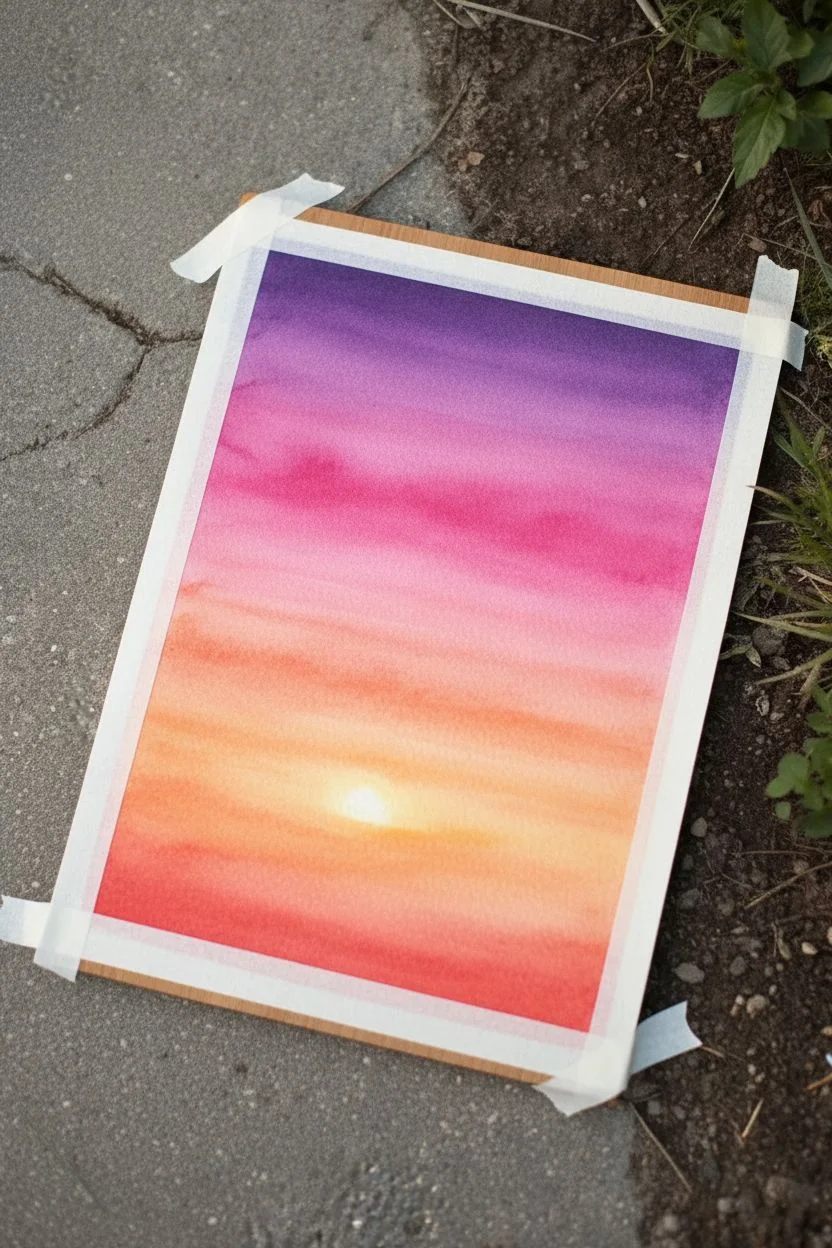
Capture the stillness of nature with this striking silhouette painting that plays with light and shadow. You’ll create a vibrant, candy-colored gradient sky that acts as the perfect backdrop for a simple, charming bunny figure.
Step-by-Step Tutorial
Materials
- Watercolor paper (cold press, 300gsm)
- Masking tape
- Liquid watercolor paints (purple, magenta, warm orange, yellow)
- Black ink or gouache
- Large flat wash brush
- Small round detail brush (size 0 or 1)
- Medium round brush (size 4 or 6)
- Pencil for sketching
- Cup of clean water
- Paper towels
Step 1: Painting the Sky
-
Tape it down:
Secure your watercolor paper to a board or table on all four sides with masking tape. This creates a crisp white border and keeps the paper from buckling when it gets wet. -
Wet the paper:
Using your large wash brush and clean water, apply an even coat of water across the entire paper surface. You want it shiny and damp, but not dripping with puddles. -
Start with purple:
Load your brush with a deep purple hue. Apply broad horizontal strokes across the top third of the paper, letting the wet surface soften the edges as you go. -
Blend in magenta:
Rinse your brush slightly and pick up a vibrant magenta or pink. Paint directly below the purple, allowing the two colors to bleed together naturally where they meet. -
Add the warmth:
Switch to a warm orange tone. Continue painting downwards, blending it into the bottom edge of the pink section to create a seamless transition. -
Create the sun glow:
For the horizon line, use a soft yellow. Paint this at the bottom but leave a small, circular area slightly lighter or almost white near the center-right to suggest the setting sun. -
Let it dry completely:
This is crucial. The paper must be bone-dry before you add the silhouette, otherwise the black ink will bleed into your beautiful sky. A hair dryer on a low setting can speed this up.
Step 2: Adding the Silhouette
-
Sketch the outline:
Lightly sketch the outline of the rabbit and the rolling ground with a pencil. Keep the rabbit shape simple—focus on the ears and rounded back. -
Paint the ground:
Using black ink or gouache and a medium round brush, fill in the solid ground at the very bottom. Keep the top edge slightly uneven to mimic soil and grass. -
Outline the bunny:
Switch to your smaller detail brush. Carefully trace the outline of your pencil sketch with black ink, ensuring sharp, clean edges. -
Fill the shape:
Once the outline is secure, fill in the body of the rabbit with solid black. Ensure the coverage is opaque so no sky color shows through. -
Add grass blades:
Using the very tip of your detail brush, flick quick, upward strokes starting from the ground layer. Vary the height and angle of these marks to look like wild grass. -
Paint flower stalks:
Paint a few taller, thinner lines rising above the grass. Add small dots or clusters at the tips to represent wildflowers or seed heads in silhouette. -
Refine the details:
Check your rabbit’s ears and paws. Use the smallest brush to sharpen any points or smooth out any curves that look a bit wobbly. -
Reveal the border:
Once the black ink is fully dry, slowly peel away the masking tape at a 45-degree angle to reveal your clean white frame.
Bleeding Lines?
If your black silhouette creates spiderwebs, the sky wasn’t dry enough. Wait longer next time, or use a hair dryer to ensure the paper is warm to the touch before inking.
Make It Magical
Once the sky is dry but before painting the bunny, flick white gouache or acrylic onto the purple section with a toothbrush to create a starry evening sky.
Now you have a striking piece of art that perfectly captures the quiet beauty of twilight

Have a question or want to share your own experience? I'd love to hear from you in the comments below!