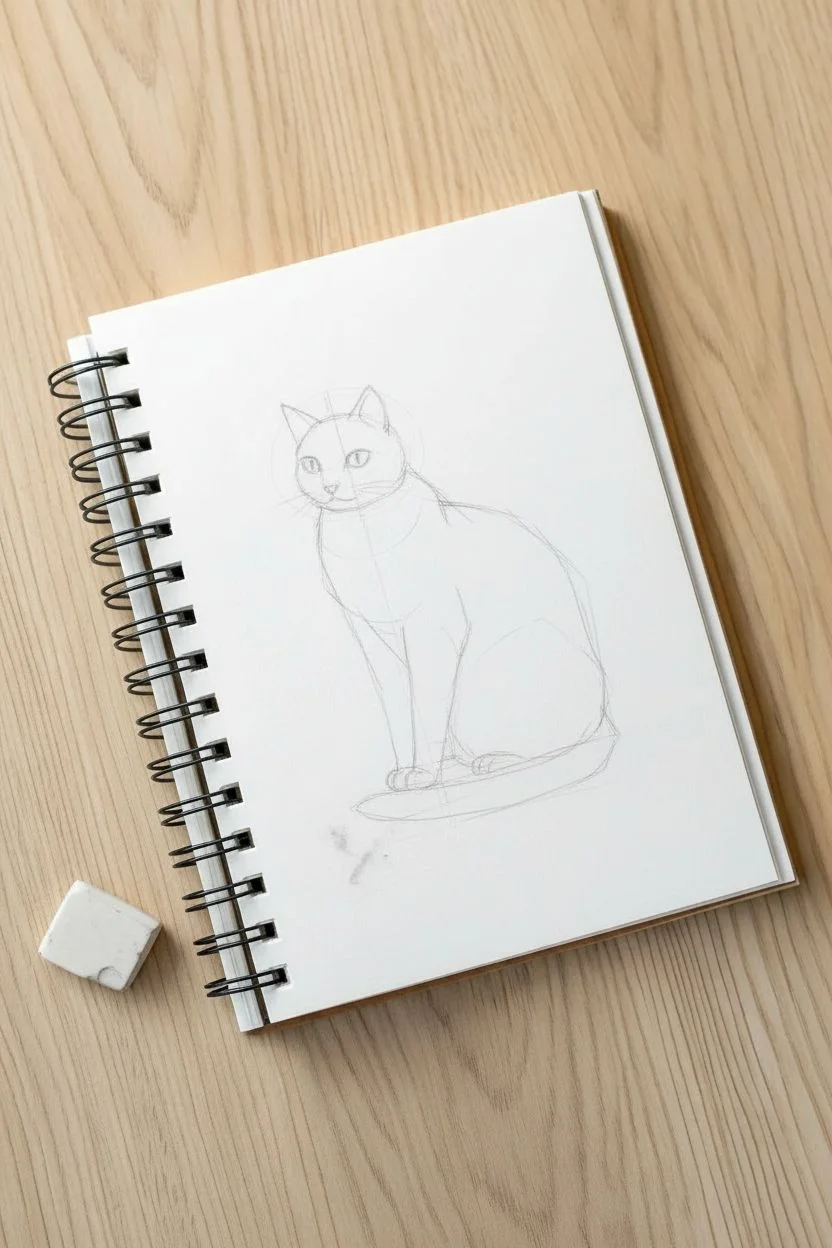
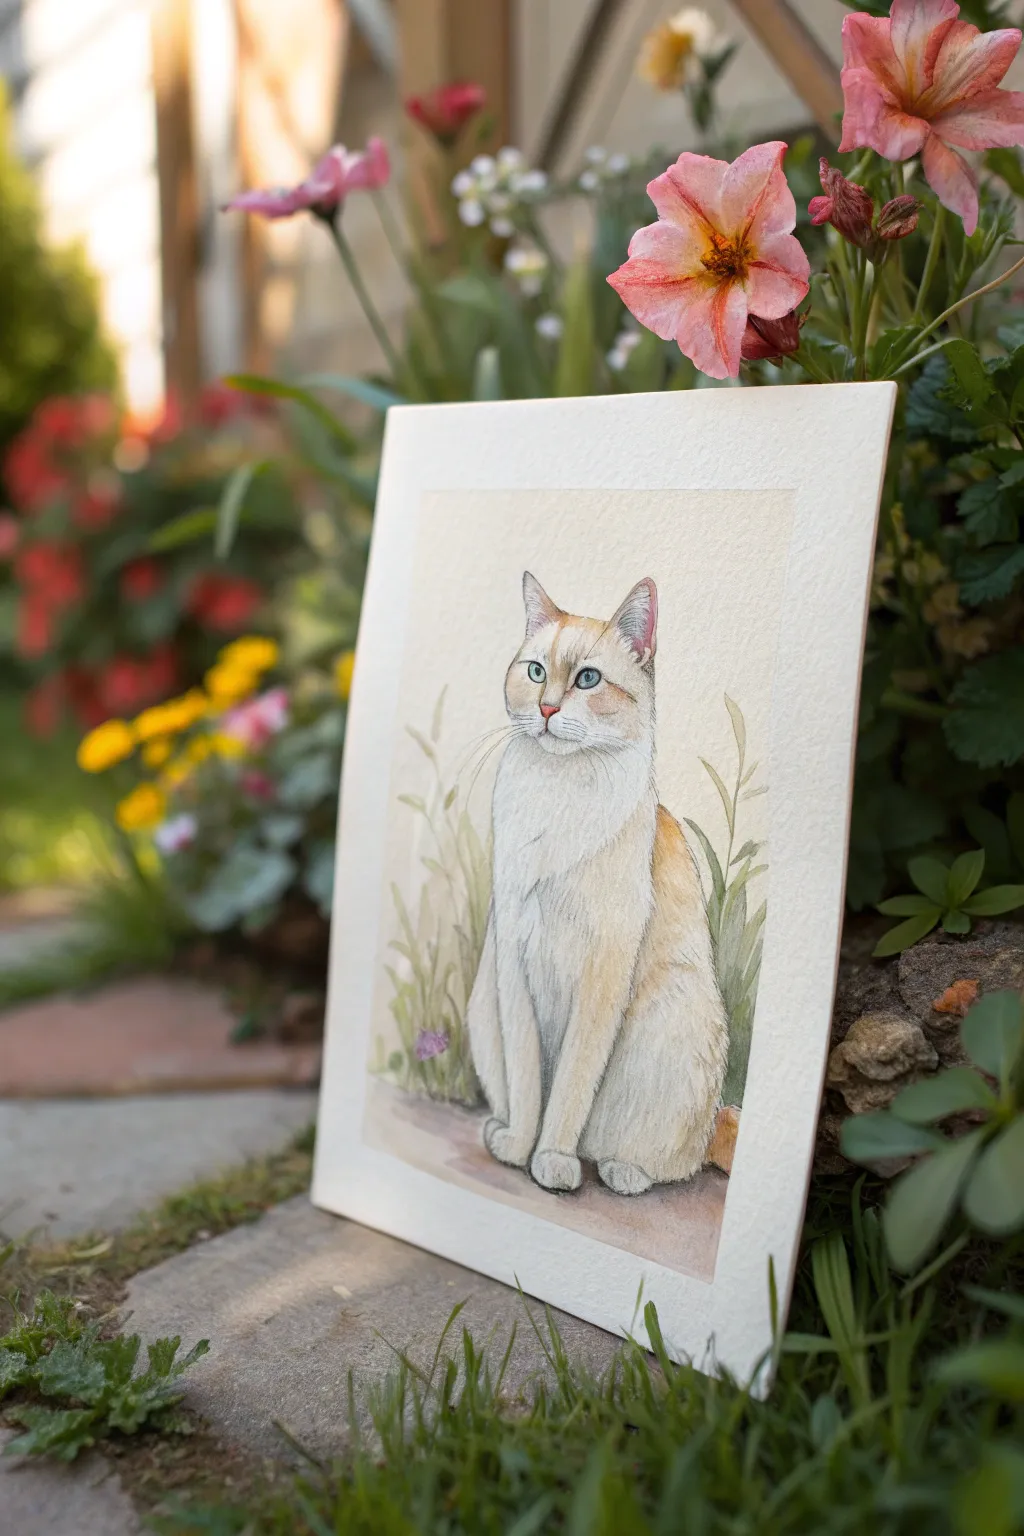
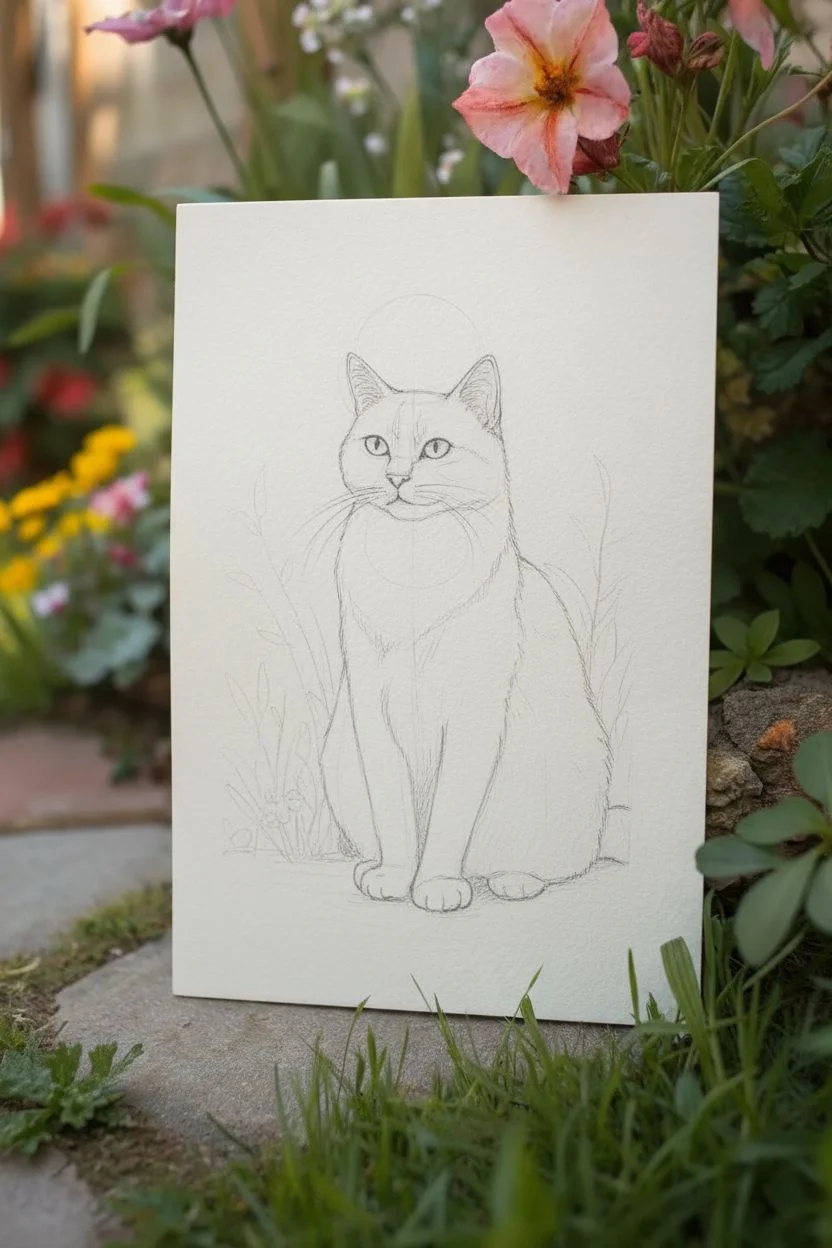
Cats are basically built for art inspiration: elegant shapes, big moods, and endless personality. Here are my favorite cat painting ideas—from super simple silhouettes to playful, unexpected compositions you can really make your own.
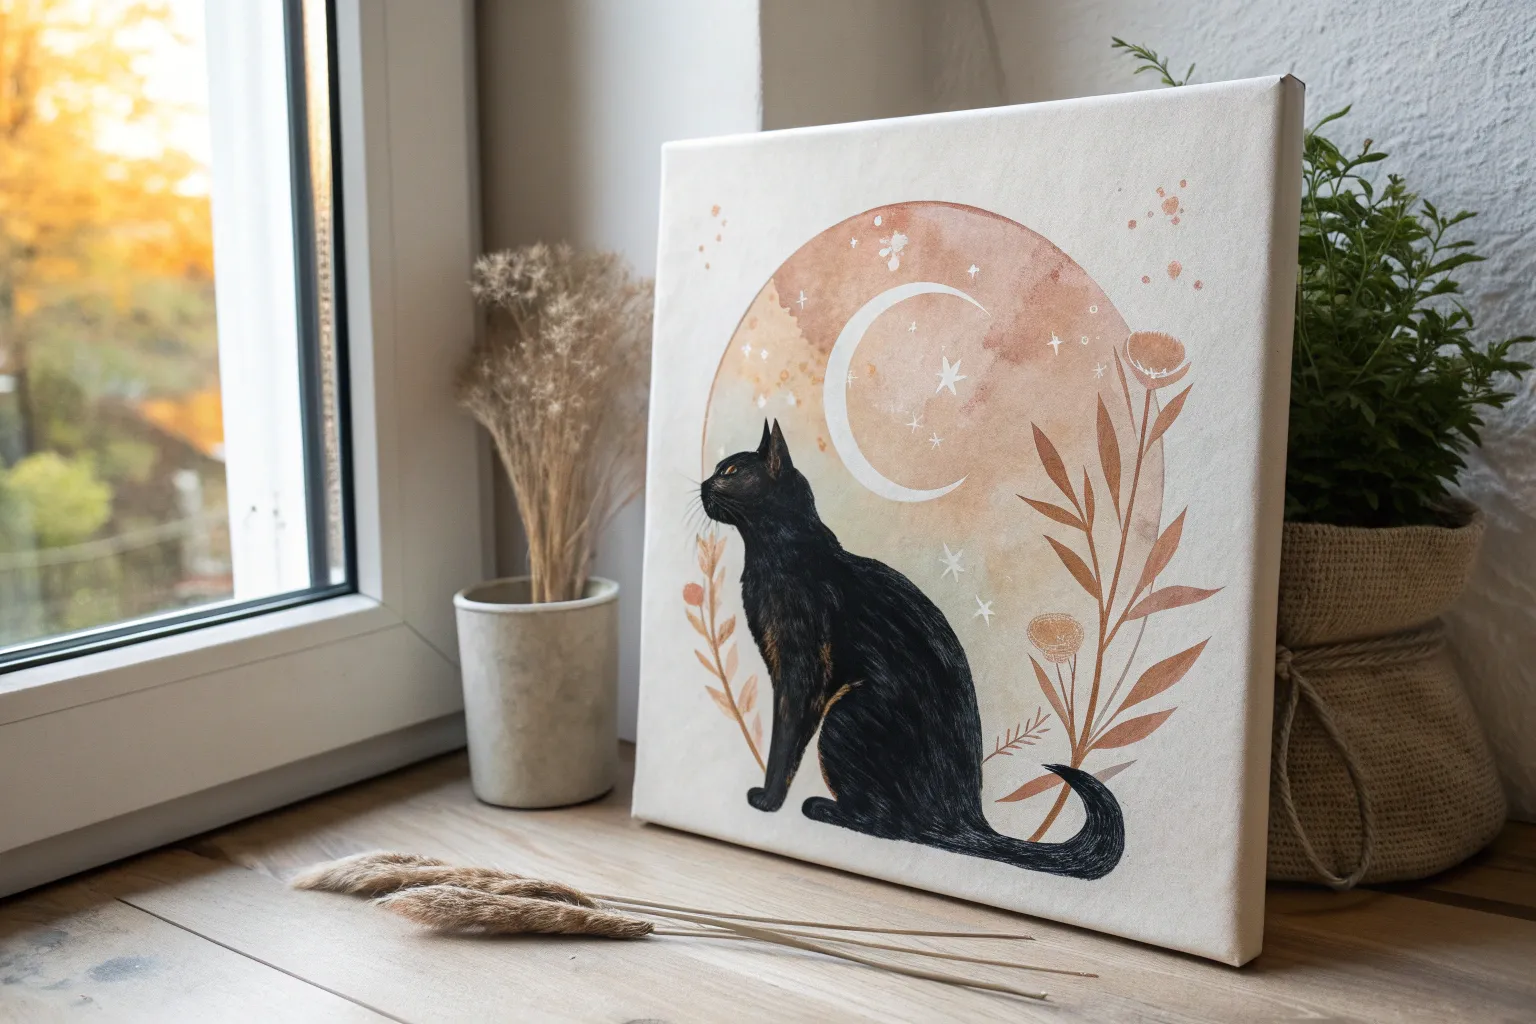
Simple Black Cat Silhouette Against a Full Moon

This serene scene captures the quiet mystery of a black cat gazing at a luminous full moon. Using unprimed canvas fabric gives the piece a wonderful texture and a rustic, handmade feel with its frayed edges.
Detailed Instructions
Materials
- Unprimed canvas fabric or canvas panel (approx. 9×12 inches)
- Acrylic or Gouache paints (Dark Blue, Prussian Blue, Black, Titanium White, Cream)
- Flat shader brushes (medium and large)
- Fine detail brush (liner brush)
- Circular object for tracing (plate or bowl)
- Pencil
- Palette for mixing
- Water cup and paper towels
- Masking tape (optional)
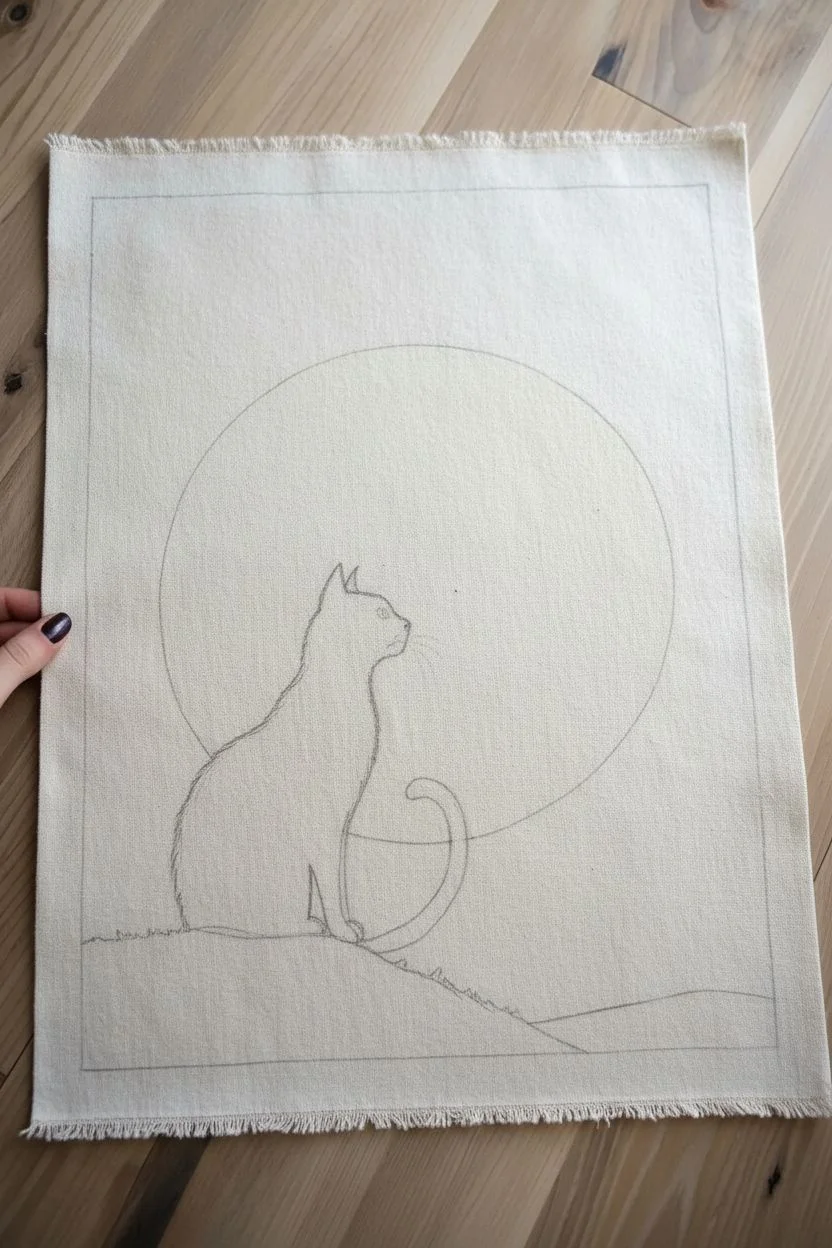
Step 1: Preparation and Sketching
-
Prepare the canvas:
Cut your canvas fabric to size if it came from a roll. Leave about an inch of extra space around your intended painting border to create the frayed edge effect later. -
Border definition:
Using a pencil and a ruler (or straight edge), lightly mark the rectangular boundary where the painting will stop. This creates that clean ‘framed’ look within the fabric. -
Outline the moon:
Place your circular object near the center of the composition, slightly offset towards the top. Ideally, choose a size that dominates the frame but leaves plenty of room for the sky. -
Trace the circle:
Lightly trace around your circular object with a pencil to establish the perfect moon shape. -
Sketch the cat and hill:
Draw a sloping hill at the bottom of the frame. Then, sketch the silhouette of the cat sitting on the hill, placing the head so it overlaps with the moon circle.
Clean Edges Trick
Use masking tape along the four outer borders of your rectangle before painting. Peel it off when the paint is half-dry for perfectly straight lines.
Step 2: Painting the Sky and Moon
-
Mix the background blue:
On your palette, mix a deep stormy blue using Dark Blue and a touch of Black. You want a gradient effect, so prepare a slightly lighter blue as well by adding a tiny bit of White. -
Paint the upper sky:
Start painting the area outside the moon circle. Use your darkest blue at the very top corners of the rectangle. -
Create the gradient:
As you work your way down towards the horizon, blend in the lighter blue tones. The sky should be darker at the top and gradually become lighter near the hill. -
Cut in the edges:
Use a smaller flat brush to carefully paint up to the pencil line of your moon and the straight rectangular borders. Keeping these edges crisp is key to the finished look. -
Base coat the moon:
Mix Titanium White with just a drop of Cream or Yellow Ochre to get a warm, moonlight color. Paint the entire circle, being careful not to paint over your cat sketch. -
Add moon texture:
While the moon is still slightly damp, mix a very pale grey-blue. Dab this gently in irregular patches on the moon’s surface to mimic craters and shadows. Blend the edges of these patches so they are soft.
Level Up: Glow Effect
Before painting the black cat, dry-brush a very faint halo of white around where the cat’s outline will be. This makes the silhouette pop against the moon.
Step 3: The Silhouette and Details
-
Paint the hill:
Load a medium brush with pure Black. Fill in the hill area at the bottom, creating a solid, opaque foundation. -
Fill the cat silhouette:
Switch to a smaller round brush. Carefully fill in the cat shape with black paint. I find it helpful to outline the shape first and then fill the center. -
Adding fur texture:
Once the black base is dry, mix a dark charcoal grey (Black + tiny bit of White). Using a very dry brush, gently flick tiny strokes along the cat’s back and chest to suggest fur texture. -
Details on the cat:
Use your finest liner brush and yellow-orange paint to add the small slit of the eye. Add tiny white whiskers extending from the muzzle over the moon background. -
Paint the stars:
Using a liner brush or the tip of a toothpick, dot tiny white stars throughout the blue sky. Vary the sizes slightly for a natural look. -
Add twinkle stars:
Select 3 or 4 of your larger white dots. With the liner brush, draw a small cross through them, pulling the lines outward to create a ‘twinkle’ effect. -
Fray the edges:
Once the painting is fully dry, gently pull the horizontal threads from the unpainted canvas border to create a soft, frayed fringe around the artwork.
Hang your new masterpiece using wooden magnetic poster rails or frame it to enjoy the peaceful night scene


Cat on a Tree Branch in a Night Sky Scene
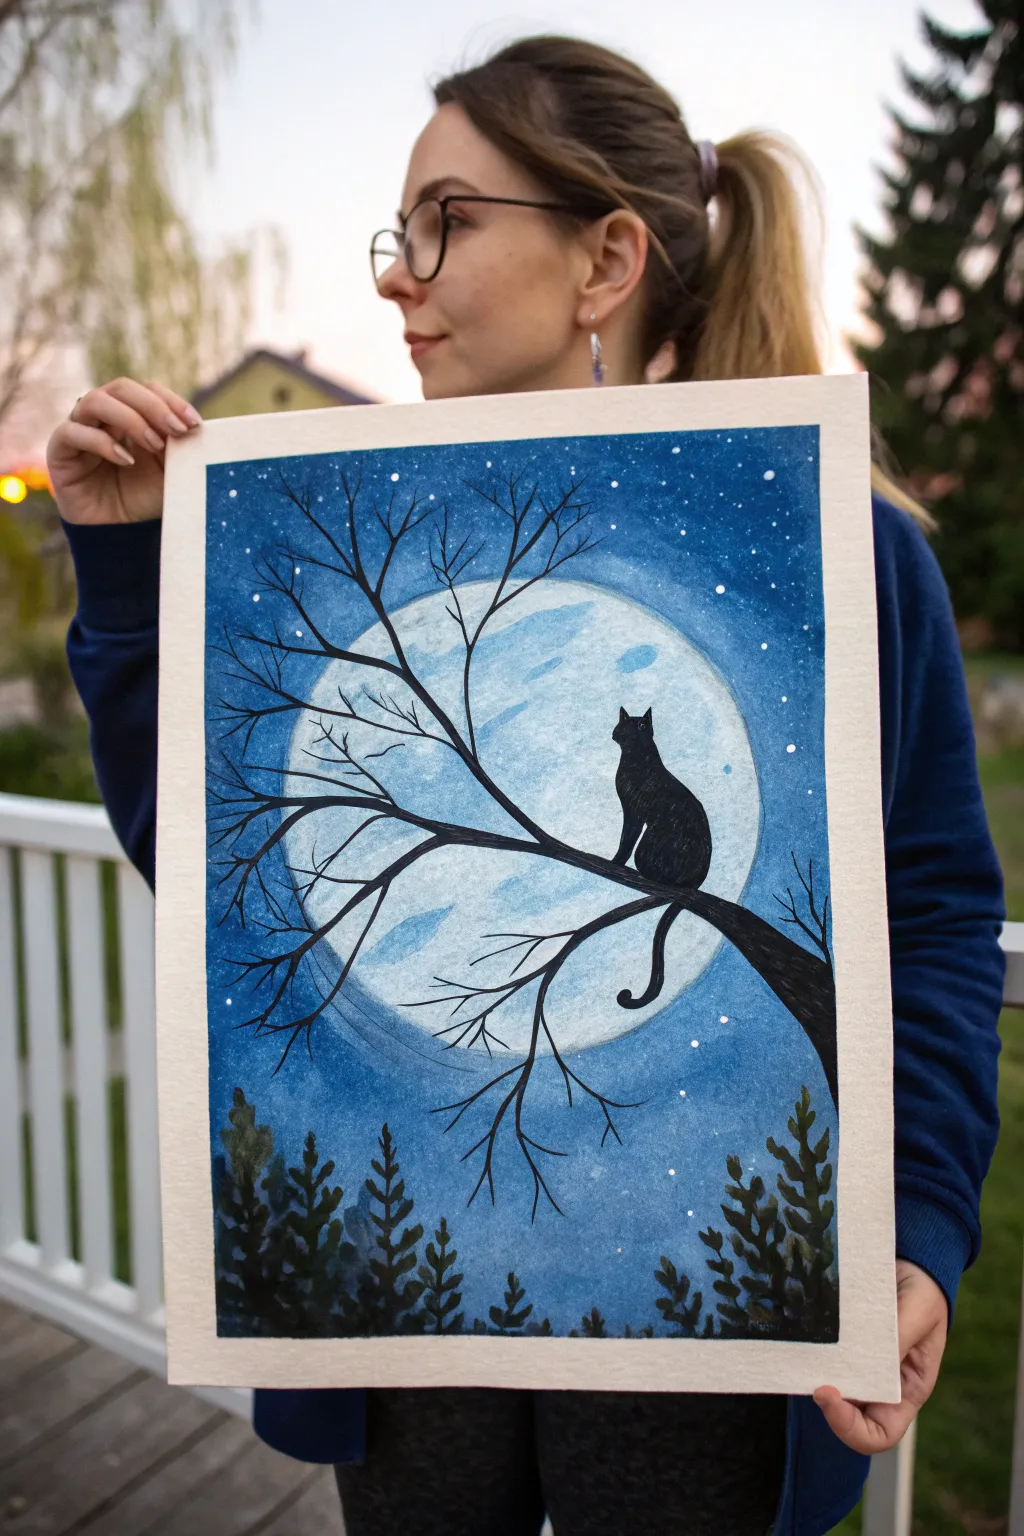
Capture the mystic beauty of a black cat gazing at a luminous full moon with this striking watercolor and gouache project. The contrast between the deep indigo sky and the glowing moon creates a magical atmosphere perfect for any wall.
Step-by-Step
Materials
- Cold press watercolor paper (A3 or A4 size)
- Painter’s tape or masking tape
- Drawing pencil and eraser
- Compass or a large circular object (like a bowl) for tracing
- Watercolor paints (Indigo, Prussian Blue, Black)
- White Gouache or white acrylic paint
- Round watercolor brushes (sizes 8, 4, and 0 for details)
- Small flat brush
- Cup of water and paper towels
- Salt (optional for texture)
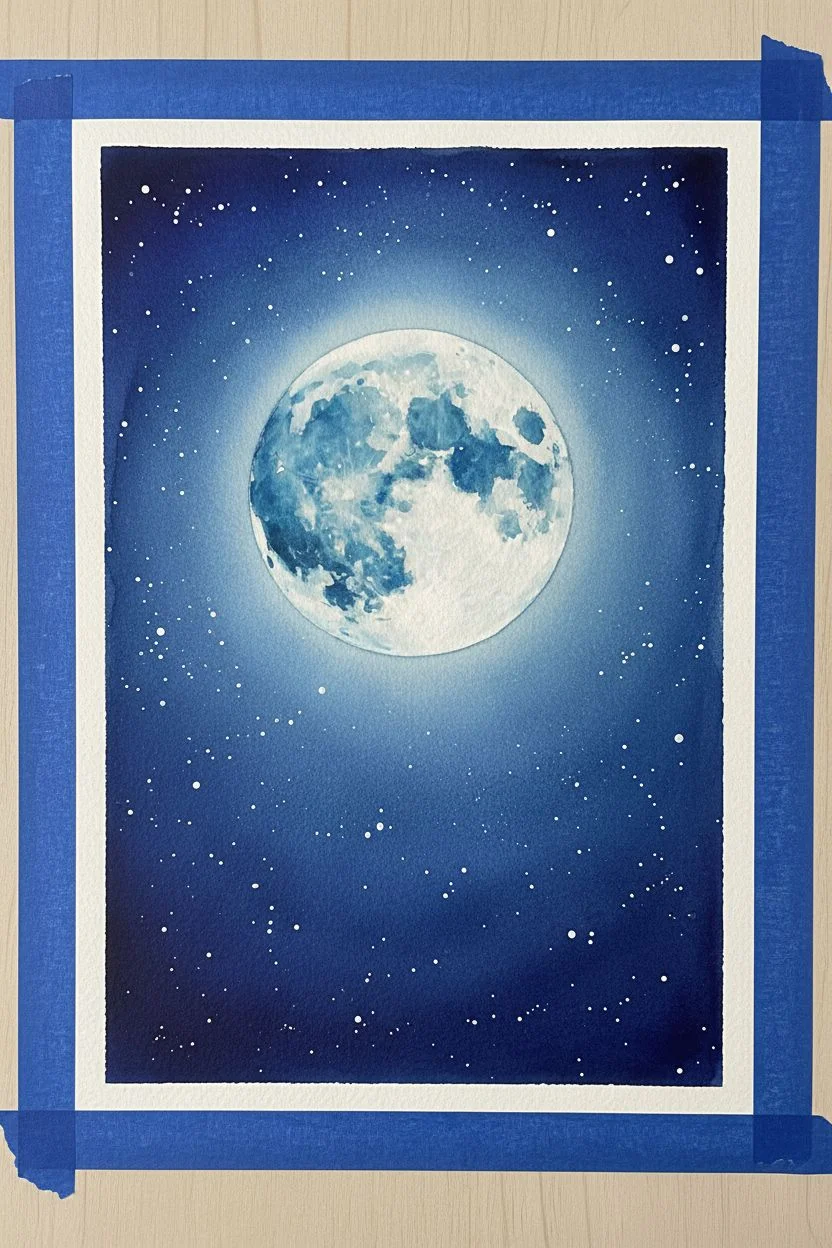
Step 1: Setting the Scene: The Moon and Sky
-
Secure your paper:
Tape down all four edges of your watercolor paper to a hard board or table. This prevents buckling when the paper gets wet and creates that crisp, professional white border seen in the final piece. -
Draft the moon:
Using a compass or a large bowl, lightly trace a large circle in the center-upper portion of your paper. Keep the pencil lines faint so they don’t show through the paint later. -
Wet the moon area:
Dip your clean brush into water and wet the inside of the circle you just drew. You want an even sheen, but not puddles. This prepares the paper for the ‘wet-on-wet’ technique. -
Paint the moon’s surface:
Load a brush with a very diluted, watery blue (like Cerulean or watered-down Prussian Blue). Dab it randomly onto the wet circle, leaving some areas white to mimic lunar craters. -
Paint the night sky background:
While the moon dries, wet the entire area outside the circle. Prepare a rich mix of Indigo and Prussian Blue. Start painting from the top corners, making the color darkest at the edges and slightly lighter as you approach the moon’s rim. -
Blend the atmosphere:
Carefully paint around the moon’s edge. You can soften this edge slightly with a damp brush if you want a glowing effect, or keep it crisp for a graphic look. -
Create the stars:
Once the blue sky is completely dry, mix white gouache with a little water until it’s the consistency of heavy cream. Load a stiff brush or toothbrush and flick the bristles to splatter tiny white stars across the blue sky. -
Add larger stars manually:
Using a size 0 detail brush and your white gouache, manually dot a few slightly larger stars in the sky to create depth and variety in your constellations.
Step 2: The Silhouette Foreground
-
Draft the branch and cat:
Lightly sketch the main tree branch extending from the right side across the moon. Then, sketch the outline of the cat sitting on the branch. Focus on the shape: pointed ears, a curved back, and a tail dropping down. -
Paint the forest floor:
Mix a deep black or very dark green-black. At the very bottom of the paper, paint irregular shapes to represent the tops of pine trees. Use a dabbing motion to create the texture of pine needles. -
Build the tree layers:
Make the trees on the bottom edge varied in height. Some should be short, others taller, creating an uneven, natural horizon line of foliage. -
Paint the main branch:
Switch to your black paint (or thick black gouache for opacity). Fill in the large branch stretching across the moon, making the base thick where it enters the frame and tapering it as it reaches outward. -
Add smaller twigs:
Using your finest liner brush, pull thin, spindly twigs out from the main branch. Let them cross over the moon’s face to add intricate detail against the bright background. I find that unsteady hands actually make more realistic branches here. -
Paint the cat silhouette:
Carefully fill in the cat’s outline with solid black. Ensure the edges are smooth and sharp so the cat reads clearly against the moon. -
Detail the tail:
Paint the tail hanging down below the branch. Give it a gentle curve, perhaps hooked slightly at the end, to suggest a relaxed posture. -
Final touches:
Look for any gaps in your black coverage and apply a second coat if necessary to make the silhouette completely opaque. -
Reveal the border:
Once the painting is 100% bone dry, slowly peel away the painter’s tape at a 45-degree angle to reveal your clean white edges.
Pro Tip: Glowing Moon
While the moon paint is still wet, drop in tiny hints of clean water. This pushes the pigment away and creates natural ‘craters’ and texture without needing to paint them manually.
Level Up: Metallic Magic
Use metallic silver watercolor or ink for the stars instead of white. When the light hits your painting from different angles, the night sky will actually twinkle.
Hang your finished masterpiece in a spot where it can remind you of quiet, starry nights


Cozy Cat on a Windowsill With Soft Light
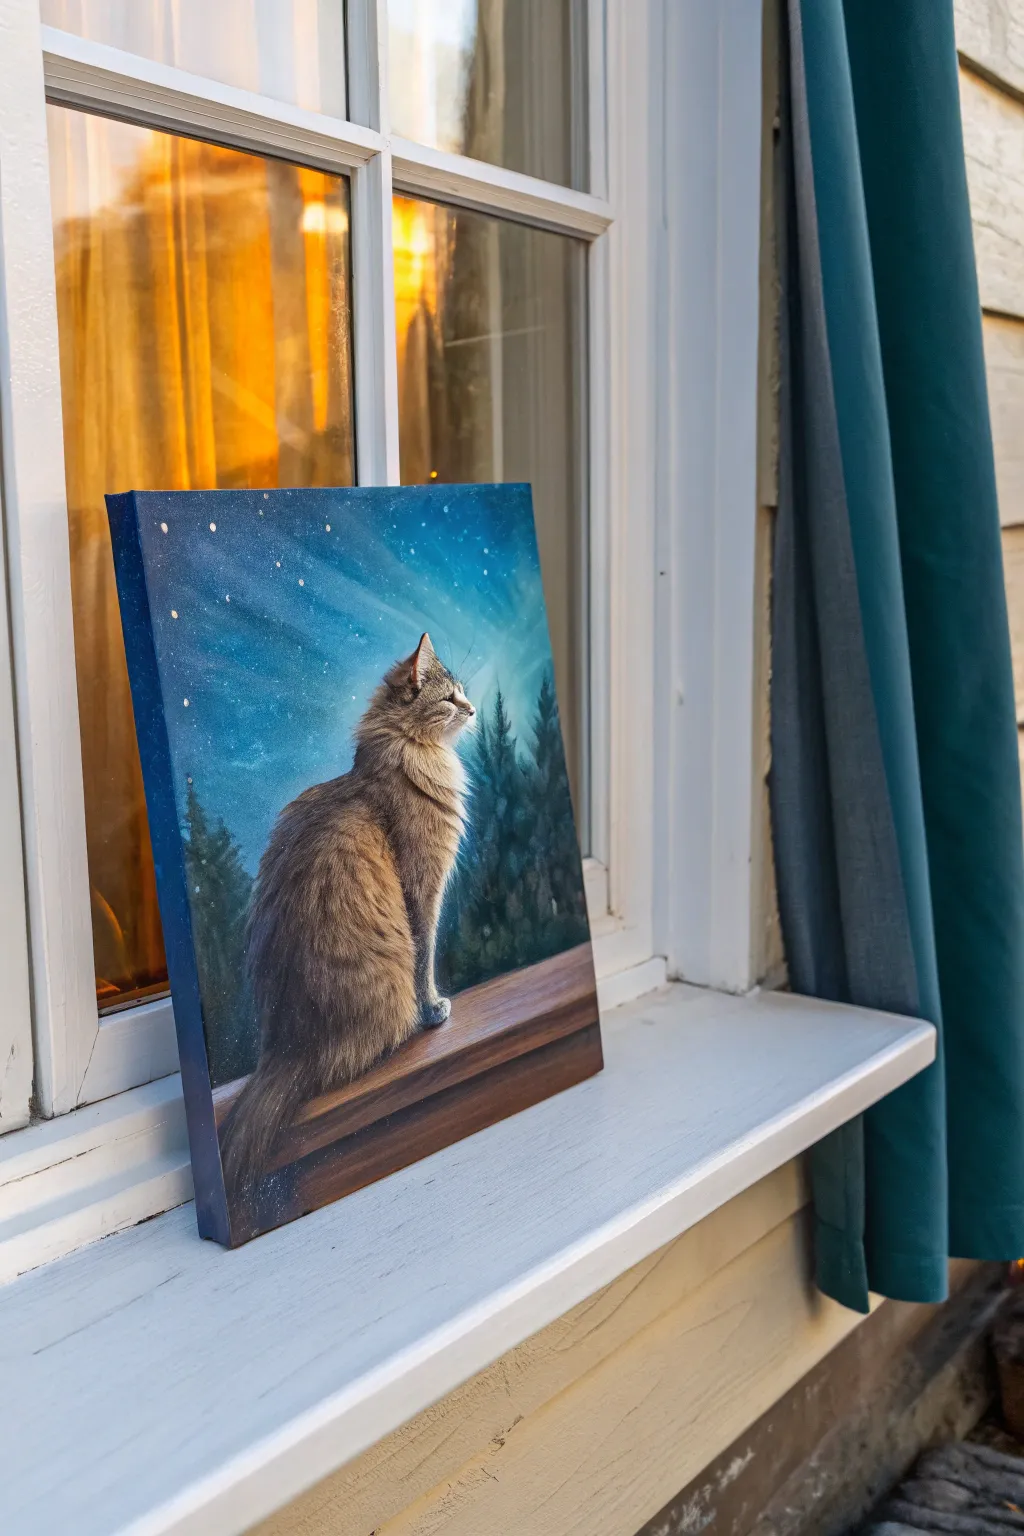
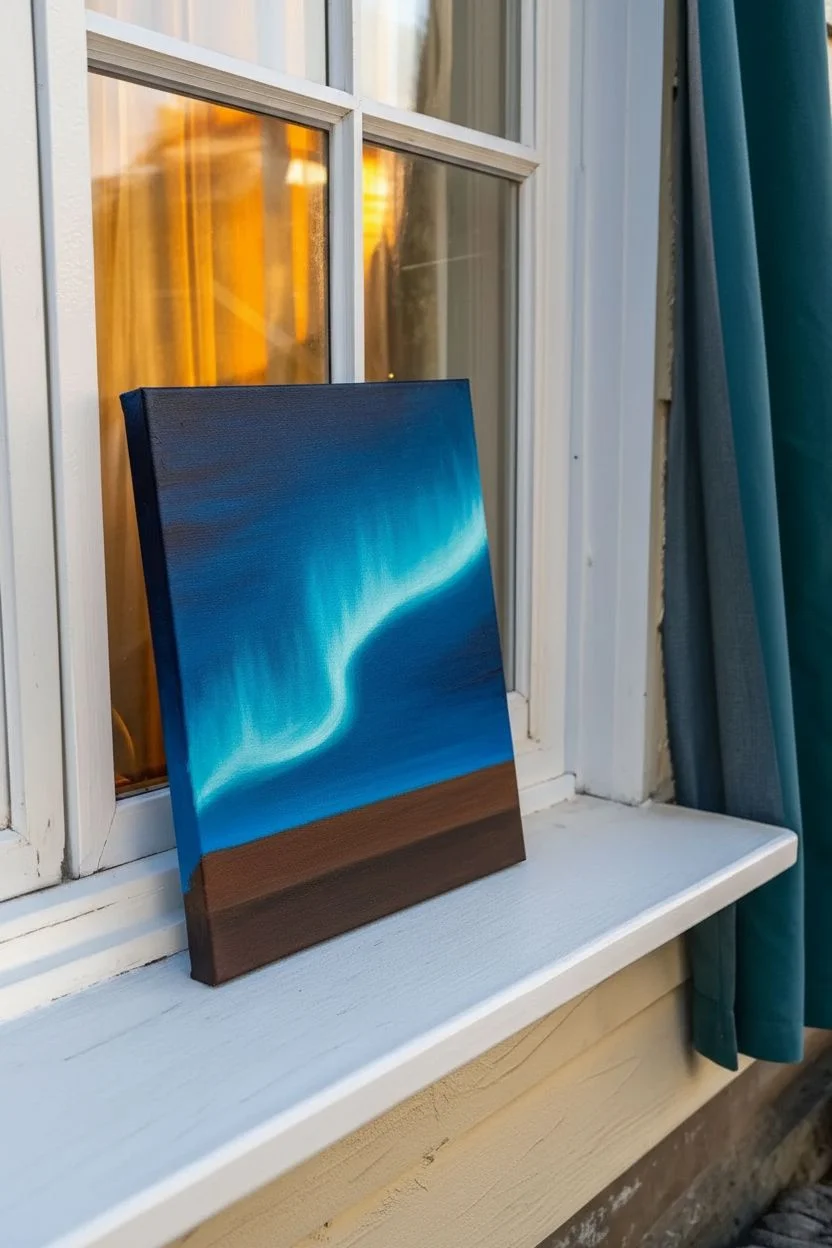
Capture the magic of a quiet evening with this serene acrylic painting featuring a fluffy cat gazing into a starry, aurora-filled sky. The contrast between the warm fur tones and the cool, mystical blues of the background makes for a truly captivating piece.
Detailed Instructions
Materials
- Square stretched canvas (approx. 12×12 inches)
- Acrylic paints: Phthalo Blue, Ultramarine Blue, Titanium White, Burnt Umber, Yellow Ochre, Raw Sienna, Black
- Flat brushes (Large and Medium)
- Small round detail brush (Size 0 or 1)
- Fan brush (optional, for trees)
- Old toothbrush (for stars)
- Palette and water cup
- Paper towels
- Chalk or pencil for sketching
Step 1: Setting the Scene
-
Prime the background:
Start by mixing Phthalo Blue with a touch of Black to create a deep midnight blue. Cover the upper two-thirds of the canvas with this dark shade, using horizontal and slightly diagonal strokes. -
Create the aurora glow:
While the dark blue is still slightly wet, mix Phthalo Blue with Titanium White to make a bright cyan. Blend this into the center area, sweeping upwards diagonally to create the effect of light streaming across the sky. -
Add deep space depth:
Darken the top corners further with a very dark blue-black mixture to create a vignette effect, drawing the eye toward the lighter center. -
Establish the wooden ledge:
For the bottom third, mix Burnt Umber with a tiny bit of Black. Paint a horizontal block at the bottom for the ledge the cat sits on, ensuring a straight horizon line.
Step 2: The Forest & Stars
-
Paint distant trees:
Mix a dark green-black using your blue and a little yellow or pre-mixed green with black. Use a medium flat brush or a fan brush held vertically to tap in the shapes of pine trees along the horizon line, letting them fade into the blue background. -
Splatter the stars:
Dilute a small amount of Titanium White with water until it’s inky. Load an old toothbrush and gently flick the bristles with your thumb to spray tiny stars across the blue sky. -
Add major stars:
Use your smallest round brush to carefully dot in a few larger, brighter stars to create variety in the night sky. -
Highlights on the ledge:
Mix Burnt Umber with Raw Sienna. Add horizontal streaks along the top edge of the wooden ledge to show where the starlight hits the wood, giving it dimension.
Fixing Muddy Fur
If fur layers look muddy, let the paint dry completely between colors. Crisp fur needs dry underlayers so the new strokes sit on top rather than blending in.
Step 3: Painting the Cat
-
Sketch the silhouette:
Once the background is completely dry, use a piece of chalk or a light pencil to outline the cat’s sitting posture. Focus on the triangular shape of the ears and the curve of the back. -
Base coat the fur:
Block in the cat’s shape with a solid coat of a mid-tone grey-brown mixture (Burnt Umber plus White and a touch of Blue). -
Build the dark fur:
Using a small flat brush, apply strokes of dark brown and black to the shadowed areas: the tail, the lower back, and behind the ears. Follow the direction of fur growth. -
Add mid-tone texture:
Mix Yellow Ochre and Raw Sienna. Apply short, flicking brushstrokes around the neck, back, and flank to simulate the tabby pattern and fluffy texture. -
Highlight the fluff:
I like to use a nearly dry small brush for this part. Mix Titanium White with a tiny bit of Yellow Ochre and gently flick highlights onto the chest ruff, ear tufts, and the edge of the profile facing the light. -
Detail the face:
Switch to your smallest liner brush. Carefully paint the nose, the closed eye slit, and use long, sweeping strokes for the whiskers extending into the dark sky. -
Ground the figure:
Add a dark shadow directly underneath the cat’s bottom and paws on the ledge to make sure it looks like it is sitting heavily on the surface, not floating. -
Final glow:
Add a very thin glaze of white or pale yellow along the outer edge of the cat’s fur on the right side to reflect the aurora light.
Add Magic Dust
Mix a tiny pinch of iridescent glitter or mica powder into your white paint when flicking stars. This creates a subtle shimmer that changes as you walk by.
Place your finished canvas on a shelf or windowsill where natural light can enhance those mystical blues


Sleepy Curled-Up Cat From a Top View


Capture the serenity of a sleeping cat with this delicate watercolor and ink tutorial. You’ll learn how to build up soft fur textures and warm orange tones to create a peaceful, heartwarming illustration on textured paper.
Step-by-Step Guide
Materials
- Cold press watercolor paper (deckle edge preferred)
- Pencil (HB or H)
- Kneaded eraser
- Watercolors: Yellow Ochre, Burnt Sienna, Burnt Umber, Paynes Grey
- Fine liner pen (brown or sepia, waterproof, 0.1mm or 0.05mm)
- Round watercolor brushes (sizes 2 and 4)
- Clean water and paper towels
- White gouache or gel pen (optional)
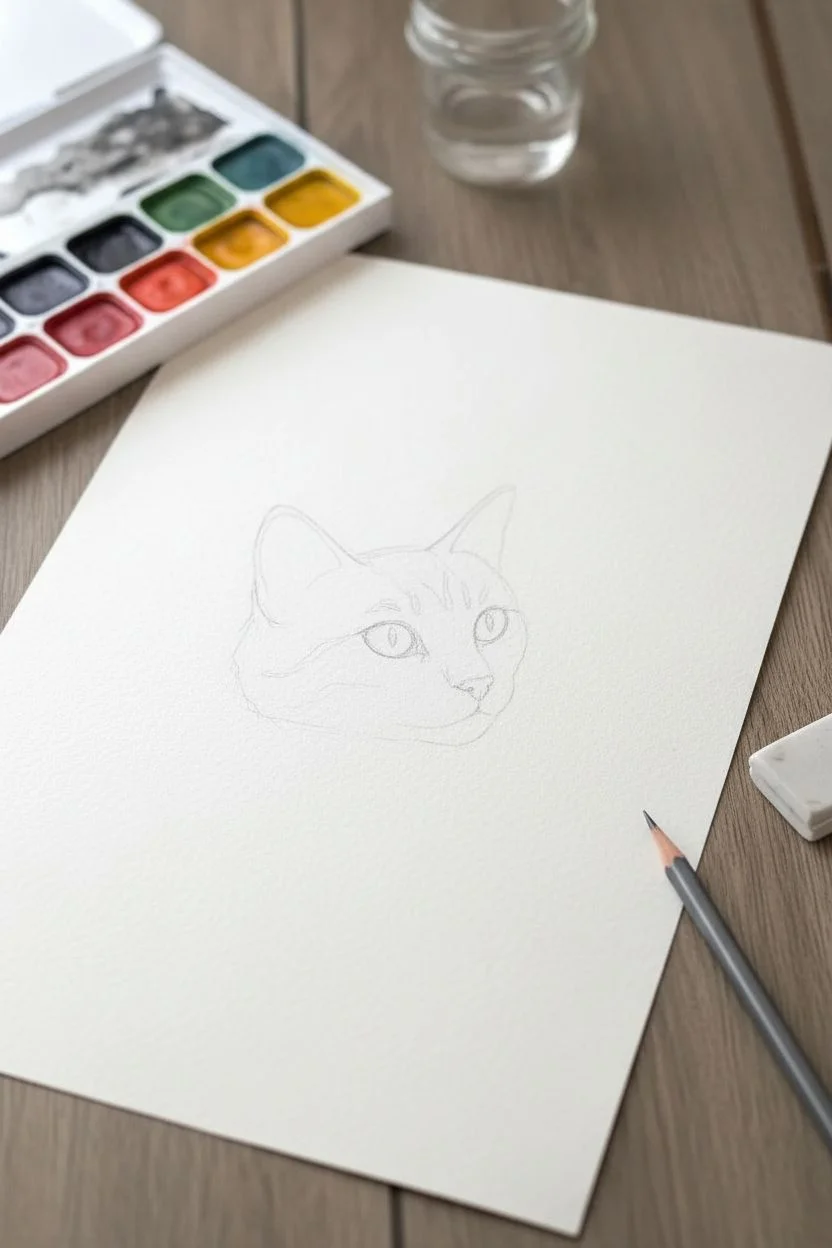
Step 1: Sketching the Form
-
Map basic shapes:
Start by lightly sketching a large oval shape for the cat’s body. Within this oval, mark a smaller circle for the head tucked into the curve, and a sweeping curve for the tail wrapping around the body. -
Refine the outline:
Using your reference, refine the outline to show the specific anatomy. Draw the triangular ears flattened slightly against the head, the curve of the spine, and the paws tucked underneath the chin. -
Add facial details:
Lightly pencil in the closed eyes (two small crescents), the nose, and the mouth line. Keep your pencil pressure very light so graphite doesn’t smudge into the paint later. -
Clean up the sketch:
Roll your kneaded eraser over the entire drawing to lift up excess graphite, leaving just a faint ghost image to guide your painting.
Natural Fur Texture
When painting stripes, lift your brush at the end of each stroke. This leaves a tapered point that looks much more like real hair than a blunt line.
Step 2: Washing in Color
-
First wash:
Mix a very watery puddle of Yellow Ochre with a touch of Burnt Sienna. Apply an even, pale wash over the entire cat body, avoiding only the white muzzle and chest area. -
Define shadows:
While the first layer is still slightly damp, drop a slightly stronger mix of Burnt Sienna into the shadowed areas: under the chin, beneath the tail, and along the spine’s curve. -
Let it dry completely:
Wait for the paper to be bone dry before proceeding. If the paper feels cool to the touch, it’s still wet. -
Painting the stripes:
Using a size 2 brush and a concentrated mix of Burnt Sienna, paint the tabby stripes. Use short, broken strokes rather than solid lines to mimic the texture of fur. Curve the stripes around the body’s form to create volume. -
Deepening the tones:
Add Burnt Umber to your orange mix for the darkest stripes on the tail tip and the markings on the forehead. -
Inner ear detail:
Mix a very dilute pinkish-brown (Burnt Sienna + water) and paint the insides of the ears.
Step 3: Inking and Texture
-
Outline with ink:
Take your brown fine liner pen. Instead of drawing a continuous solid line, use short, flicking strokes to outline the cat. This creates the illusion of a fuzzy coat. -
Detail the face:
Carefully ink the eyes, nose, and mouth. Add tiny dots on the muzzle where the whiskers will go. -
Reinforce the stripes:
Use the pen to add extremely fine hatching lines over the painted stripes. Follow the direction of the fur growth—generally flowing from the head down the spine and wrapping around the limbs. -
Adding whiskers:
With a quick, confident motion, draw thin whiskers extending from the muzzle. You can use your pen or, for a softer look, a very sharp pencil or white gel pen. -
Grounding the subject:
Mix a very watery, pale gray (Paynes Grey + lots of water). Paint a subtle, irregular shadow puddle underneath the cat’s body to ground it so it doesn’t look like it’s floating. -
Final highlights:
Create tiny, bright highlights using white gouache or a gel pen on the tips of the ears or select strands of fur to make the texture pop.
Background Ambiance
Splash a few tiny droplets of diluted coffee or tea around the cat to give the piece a cozy, vintage sketchbook aesthetic.
Now you have a charming, peaceful little cat that looks ready to purr perfectly on your desk
BRUSH GUIDE
The Right Brush for Every Stroke
From clean lines to bold texture — master brush choice, stroke control, and essential techniques.
Explore the Full Guide
Tabby Stripes Practice With a Sitting Cat Pose
Capture the calm elegance of a ginger cat using a mix of watercolor washes and fine liner details in this sketchbook study. This project focuses on building realistic fur texture through layered stripes and soft shadows.
Step-by-Step
Materials
- Heavyweight sketchbook paper (min 160gsm) or watercolor paper
- HB pencil for sketching
- Kneadable eraser
- Watercolor paints (Yellow Ochre, Burnt Sienna, Burnt Umber, Payne’s Grey, Cerulean Blue)
- Small round brushes (size 2 and 4)
- Fine liner pens (Black or Sepia, 0.1mm and 0.3mm)
- White gel pen or gouache (optional)
Step 1: Sketching the Form
-
Basic shapes:
Begin by lightly sketching the main masses of the cat using your HB pencil. Draw a circle for the head and an elongated oval for the body, angling it slightly downwards to represent the seated posture. -
Refining the outline:
Connect the shapes to form the neck and back. Add triangular shapes for the ears and sketch the tail wrapping around the front paws. Keep your lines loose and faint so they are easy to erase later. -
Facial features:
Mark the center line of the face to help align the eyes. Sketch almond-shaped eyes, a small triangular nose, and the mouth line. Ensure the ears are positioned high on the head, swivelled slightly forward.
Step 2: Watercolor Base Layers
-
Initial wash:
Mix a very dilute wash of Yellow Ochre. Paint the entire body of the cat, excluding the white chest patch, muzzle, and paws. Keep this layer wet and light to establish the base tone of the fur. -
Adding warmth:
While the first layer is still slightly damp, drop in stronger Burnt Sienna on the darker areas like the back, the top of the head, and the tail. Let the colors bleed naturally for a soft transition. -
Eye color:
Paint the irises with a very pale wash of Cerulean Blue or a light green mix, leaving a tiny speck of white paper for the highlight in each eye. -
Shadows and depth:
Mix a faint grey using Payne’s Grey and a lot of water. Apply this to the white chest area and under the chin to create rounded volume without making the fur look dirty. Let the painting dry completely.
Fur Direction Tip
Always paint and draw strokes in the direction the fur grows. On the face, lines radiate from the nose; on the body, they flow back toward the tail.
Step 3: Detailing the Texture
-
Defining the stripes:
Using a size 2 brush and a mix of Burnt Sienna and Burnt Umber, carefully paint the tabby stripes. Focus on the ‘M’ shape on the forehead, the rings around the tail, and the broken stripes along the flank. -
Fur texture on the back:
Instead of solid lines, use short, flicking brushstrokes to mimic individual hairs along the cat’s back. Follow the curvature of the spine to make the body look three-dimensional. -
Face details:
Darken the nose with a touch of pinkish-brown. Outline the eyes carefully with a dark brown mix, adding the pupils. I find that focusing on the precision of the eyes really brings the character to life. -
Refining the white fur:
Use a nearly dry brush with faint grey to add texture to the white chest ruff, suggesting clumps of fur rather than a smooth surface.
Eye Pop Effect
Make the eyes shine by darkening the upper eyelid with a slightly thicker black line. This mimics the shadow the lid casts on the eye.
Step 4: Inking and Finishing Touches
-
Outline work:
Once the paint is bone dry, use a 0.1mm fine liner to selectively outline the cat. Use broken, jagged lines to suggest fur rather than a solid, heavy outline. -
Deepening contrasts:
Use the pen to add cross-hatching or stippling in the darkest shadow areas, particularly where the legs meet the body and under the tail. -
Whiskers:
With a steady hand, draw the whiskers using quick, confident strokes. You can use your fine liner for dark whiskers or a white gel pen if you want them to stand out against a darker background. -
Grounding shadow:
Mix a watery grey-blue wash and paint a simple cast shadow underneath the cat’s bottom and tail. This grounds the figure so it doesn’t look like it’s floating in space. -
Final assessment:
Step back and check your values. If the eyes need more sparkle, add a tiny dot of white gouache or gel pen to the highlights.
Enjoy the process of watching your simple sketch transform into a lifelike feline companion
Playful Kitten With Oversized Features
Capture the irresistible charm of a kitten by focusing on exaggerated features like large, glassy eyes and oversize ears. This tutorial guides you through creating a stylized, heartwarming watercolor portrait with crisp details and soft, furry textures.
Step-by-Step Guide
Materials
- Cold press watercolor paper (300 gsm)
- Pencil (HB or 2H)
- Watercolors: Yellow Ochre, Burnt Sienna, Burnt Umber, Ivory Black, Sap Green, Alizarin Crimson
- White gouache or white gel pen
- Round brushes (sizes 2, 4, and 00 for details)
- Clean water and paper towels
- Pencil sharpener and kneaded eraser
Step 1: Sketching Boundaries
-
Map the head shape:
Start with a light pencil sketch. Draw a large, slightly flattened oval for the head. It should be oversized relative to the body to establish that ‘chibi’ or cartoonish cute style. -
Place the giant eyes:
Draw two very large circles in the lower half of the face. They should be spaced slightly apart but dominate the facial features. Leave room for a tiny triangle nose between them. -
Add oversized ears:
Sketch two large triangles on top of the head. Curve the outer lines slightly to give them a natural shape, and ensure the inner ear lines show depth. -
Draft the small body:
Draw a compact, teardrop-shaped body below the head. Keep the paws tucked in neatly at the bottom to emphasize a seated posture. I prefer to keep the toes simple rounded shapes at this stage.
Step 2: Base Washes
-
First fur layer:
Mix a very watery wash of Yellow Ochre. Apply this loosely over the head and body, avoiding the eyes, nose, and the white chest patch. -
Define the white patch:
While the ochre is wet later, you can soften the edges where it meets the white chest area with a clean, damp brush to create a blurred transition. -
Inner ear tones:
Mix a very dilute Alizarin Crimson with a touch of Burnt Sienna. Paint the insides of the ears, letting the color fade as it moves toward the furry edges. -
Eye base color:
Apply a wash of Sap Green (or teal) to the irises. Leave a distinct, crisp white circle in each eye for the highlight reflection—this is crucial for the ‘glassy’ look.
Muddied Fur?
If your fur strokes are blending into a blob, your paper is too wet. Let the layer bone-dry completely before adding the next set of distinct hair strokes.
Step 3: Building Fur & Texture
-
Striping the forehead:
Using a size 2 brush and a mix of Burnt Sienna and Burnt Umber, paint the classic ‘M’ shape on the forehead. Use short, flicking strokes to mimic hair growth directions. -
Cheek stripes:
Continue these short, flicking strokes on the cheeks, curving outward from the eyes. Keep the strokes lighter near the whiskers area. -
Body fur texture:
Switch to Burnt Umber. Add darker fur texture to the sides of the body and the paws, leaving the center of the chest lighter to show volume. -
Deepening the eyes:
Mix a dark green-black. Paint the large pupils in the center of the irises and outline the outer rim of the iris. Carefully blend this dark rim inward slightly. -
Nose details:
Paint the small nose triangle with a slightly stronger pink mix. Add two tiny dots for nostrils.
Eye Focus Pro Tip
For maximum cuteness, make the pupils (the black center) huge. The larger the pupil relative to the iris color, the more innocent and kitten-like the expression will be.
Step 4: Fine Details
-
Defining the paws:
Use a size 00 brush with dark brown to outline the individual toes on the paws. Keep these lines delicate. -
Whiskers and eye liner:
With an extremely fine brush or a fine liner pen, draw thin, sweeping black lines for the whiskers. Add a thin black outline around the eyes to make them pop. -
Highlight reinforcements:
If your saved white spots in the eyes got messy, use white gouache now to add a crisp, bright reflection dot. This brings the character to life. -
Ear tufts:
Add wispy white strokes (using gouache or gel pen) inside the ears to create those fluffy, long ear hairs. -
Grounding shadow:
Mix a watery cool grey or diluted brown. Paint a soft, amorphous shadow directly underneath the kitten so it doesn’t look like it’s floating.
Now step back and admire your adorable, wide-eyed creation before framing it

PENCIL GUIDE
Understanding Pencil Grades from H to B
From first sketch to finished drawing — learn pencil grades, line control, and shading techniques.
Explore the Full Guide
Cat on a Fence With a Curly Tail Silhouette
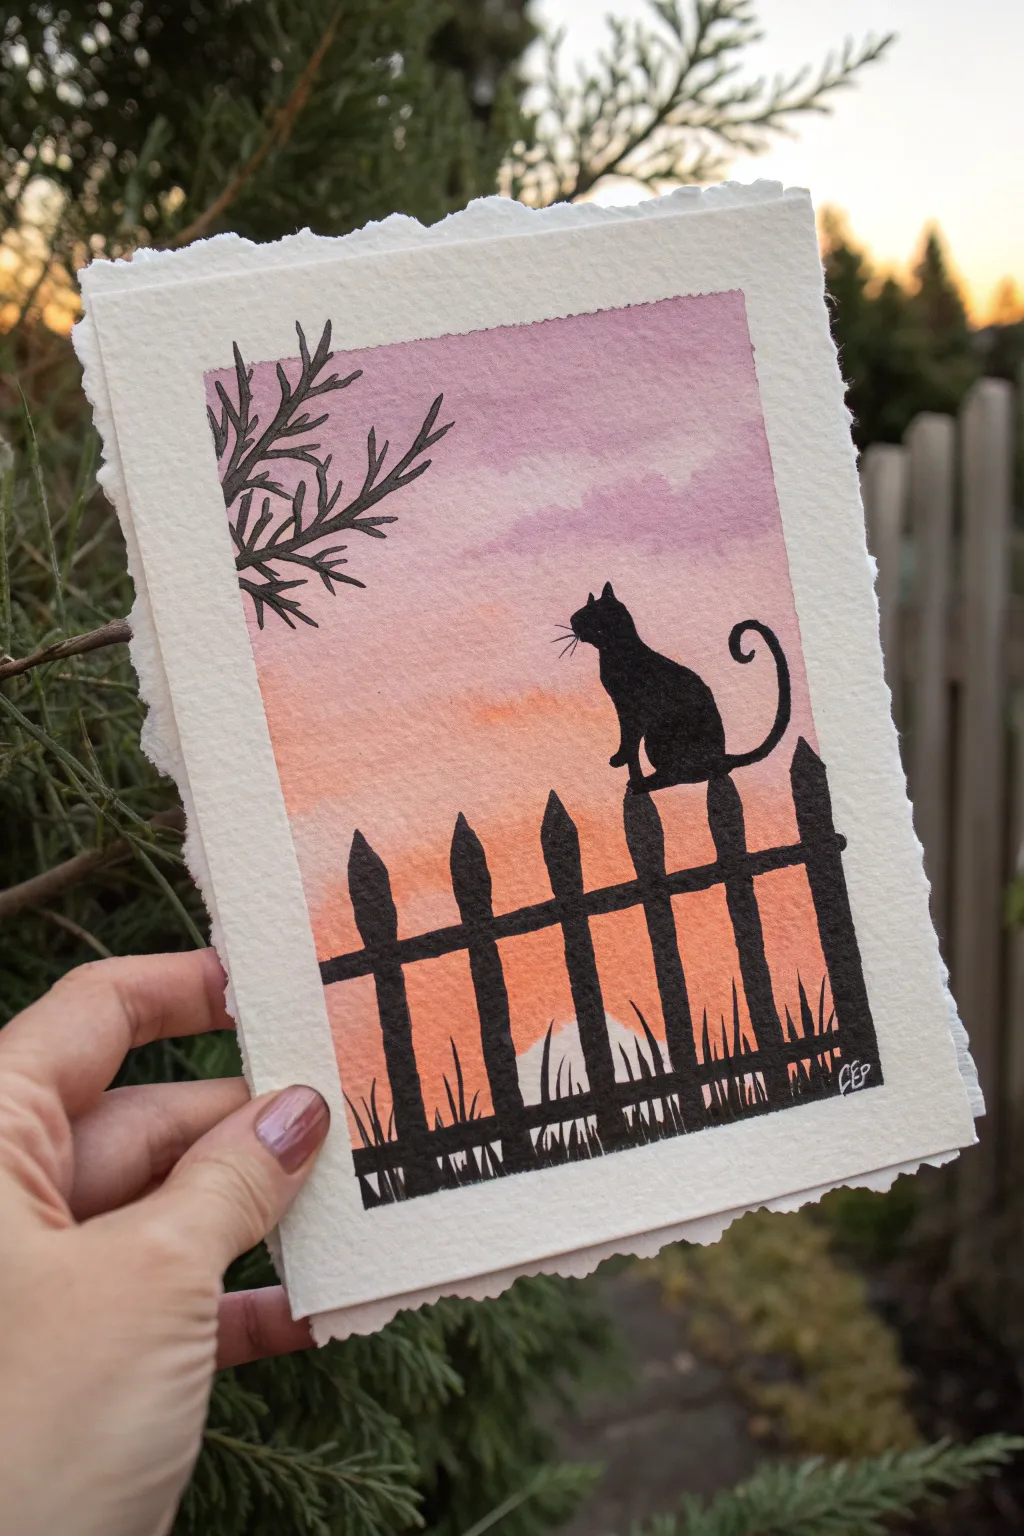
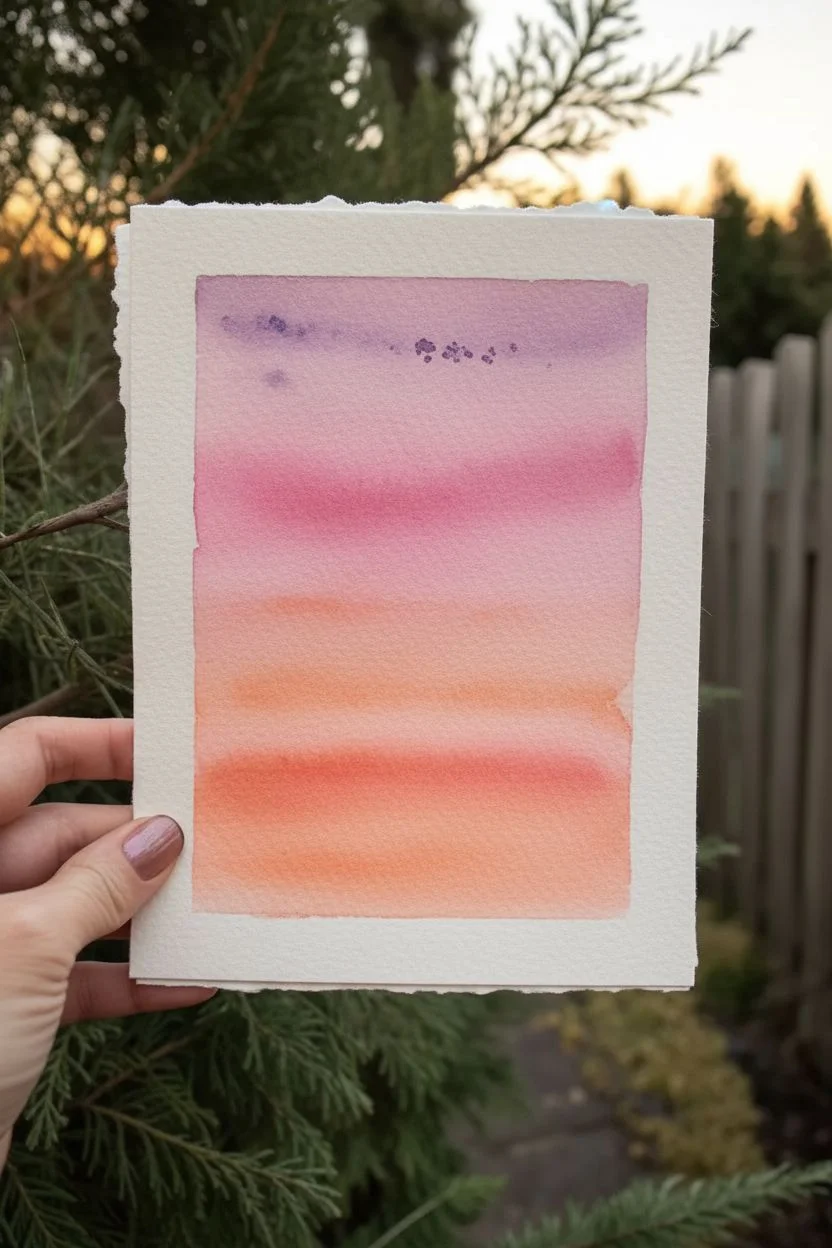
Capture the peaceful solitude of a cat watching the sunset with this striking silhouette painting. The contrast between the vibrant ink-black subject and the soft, washed-out sky creates an atmospheric mood perfect for a greeting card or framed art.
How-To Guide
Materials
- Cold press watercolor paper (deckled edge optional)
- Watercolor paints (shades of pink, purple, and orange)
- Black waterproof ink or black gouache
- Flat wash brush (1/2 inch or 3/4 inch)
- Small round detail brush (size 0 or 1)
- Pencil and eraser
- Clean water and paper towel
- Masking tape (optional)
Step 1: Painting the Sky Background
-
Prepare your workspace:
If your paper doesn’t have deckled edges and you want that look, you can carefully tear the edges against a ruler. Otherwise, tape your paper down to a board to prevent warping. -
Apply a clean water wash:
Using your large flat brush, wet the entire rectangular area where the sky will be with clean water. You want the paper to be shiny but not forming puddles. -
Start with the orange horizon:
Load your brush with a watered-down orange. Touch it to the bottom third of the wet paper, letting the color bloom upward naturally. -
Add the middle tones:
Pick up a soft pink or magenta color. Apply this just above the orange, allowing the wet edges to touch and blend on their own without overworking them. -
Paint the upper sky:
Finally, use a soft purple or lavender for the top section. Paint horizontal strokes across the top, blending slightly downward into the pink layer. -
Create cloud textures:
While the paint is still damp, you can dab just a little concentrated purple pigment into the upper sky to suggest soft clouds. Let the water do the work of softening the edges. -
Let it dry completely:
This is crucial—wait until the paper is bone dry. If it feels cool to the touch, it’s still wet. You can use a hairdryer on a low setting to speed this up.
Uneven Wash?
If your sky dries with hard lines or “cauliflowers,” re-wet the entire sky area gently with clear water and verify your brush is clean before dropping in more pigment to smooth it out.
Step 2: Drawing the Silhouette
-
Sketch the fence line:
Lightly draw a horizontal rail about a quarter of the way up from the bottom. Then, mark vertical lines for your fence pickets, spacing them somewhat evenly but keeping it organic. -
Outline the cat:
Position the cat sitting on one of the fence posts. Draw a simple pear shape for the body, a smaller circle for the head, and two triangles for ears. -
Detail the tail and branches:
Sketch a long, curling tail swooping down and back up. In the upper left corner, lightly sketch a few branches reaching into the frame.
Step 3: Inking the Details
-
Fill the fence posts:
Switch to your black ink or gouache and a small brush. Carefully fill in the fence pickets first to get a feel for the flow of the paint. Make the tops pointed or rounded based on your sketch. -
Paint the horizontal rails:
Connect the pickets with two horizontal rails. Don’t worry if lines aren’t perfectly straight; a little wobble adds rustic charm. -
Create the grass:
At the very bottom, use quick, upward flicking motions to create blades of grass growing up around the base of the fence. Vary the height and direction for realism. -
Fill in the cat:
Carefully paint the cat’s silhouette. Use the very tip of your small brush to sharpen the ears and ensure the curve of the back looks smooth. -
Add the curly tail:
Paint the tail in a single, confident stroke if possible. It should curve down from the body and loop back up playfully. -
Add delicate whiskers:
I usually hold my breath for this part—using your finest brush tip, add three or four extremely thin lines extending from the cat’s muzzle. -
Paint the tree branches:
Move to the top left corner and paint the silhouette branches. Keep them thin and jagged, tapering to fine points at the ends. -
Final touches:
Check for any white spots within your black areas and fill them in. Sign your initials in the corner with a white gel pen or simply leave space in the black grass to scratch them out.
Add a Moon
Before the sky dries, lift out a small circle of paint using a clean, thirsty brush or a paper towel to create a soft, glowing moon behind the silhouette.
Now you have a serene twilight scene ready to be gifted or displayed
Watercolor Splash Cat Face for a Modern Look
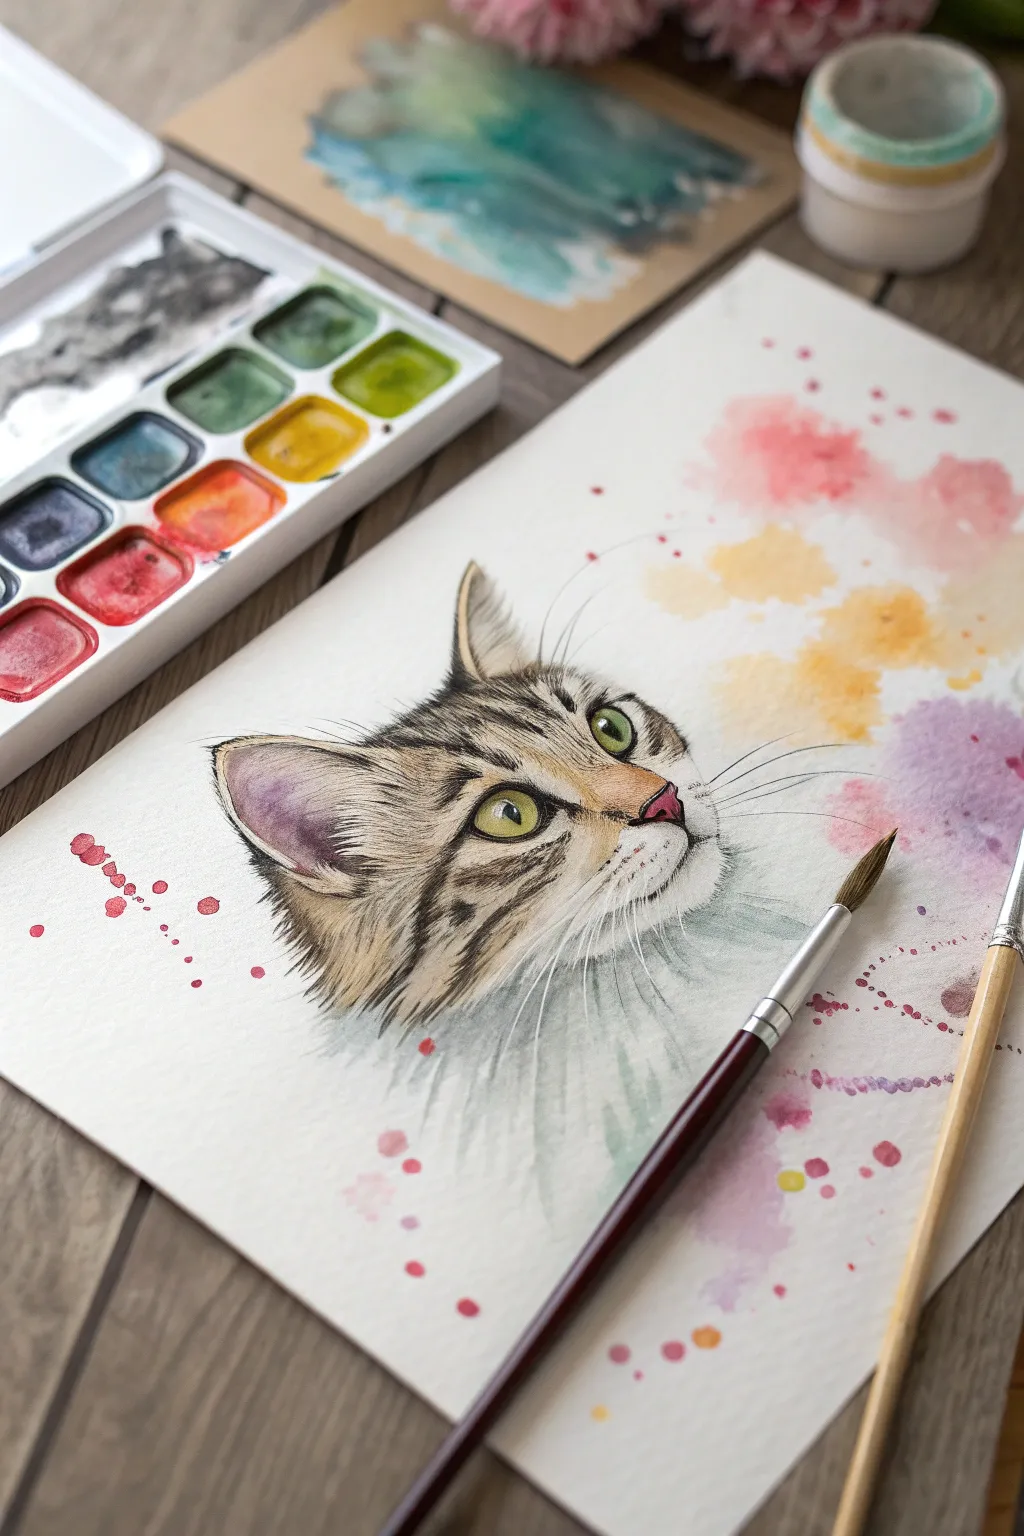
Blend realism with abstract whimsy in this striking cat portrait that pairs a detailed feline face with loose, colorful watercolor splashes. This modern style captures the intensity of the cat’s gaze while keeping the overall composition light, airy, and full of movement.
Detailed Instructions
Materials
- Cold press watercolor paper (300 gsm)
- Watercolor paints (pan set preferred for easy color access)
- Fine liner brush or detailed round brush (size 0 or 1)
- Medium round brush (size 6 or 8)
- Large soft brush for splashes
- Pencil (HB or H for light sketching)
- Kneaded eraser
- Clean water jar
- Paper towels
Step 1: Planning and Sketching
-
Establish the composition:
Visualize where the cat’s head will sit. Position the face slightly off-center to the left to allow room for the splashes on the right side. Keep the composition open and breathable. -
Lightly sketch the outline:
Using your HB pencil, draw the basic shape of the cat’s head. Focus heavily on the triangular ears and the almond shape of the eyes, but keep your lines incredibly faint so they disappear under the paint later. -
Define the markings:
Map out the tabby stripes on the forehead (the classic ‘M’ shape) and the cheeks. Don’t shade these yet; just outline where the dark fur will go versus the light fur. -
Refine the eyes:
Draw the pupils and the irises carefully. Mark a small circle overlap on the pupil for the highlight now so you don’t accidentally paint over it later—this white spec is crucial for a lively look.
Step 2: Painting the Eyes and Nose
-
Base layer for the eyes:
Mix a bright olive green with a touch of yellow. Apply a translucent wash to both irises, carefully avoiding the white highlight you marked earlier. -
Deepen the eye color:
Once the base is damp (not soaking), drop a darker forest green or sepia into the upper rim of the iris. This creates a natural shadow from the eyelid. -
Paint the nose:
Use a diluted rose or alizarin crimson for the nose leather. While it’s wet, touch the bottom edges with a slightly darker purple-pink to give it dimension and curve. -
Define the pupils:
With your smallest brush and concentrated black or Payne’s Gray, fill in the slit pupils. Ensure the edges are sharp against the green iris.
Muddy Splashes?
If your abstract splashes are turning brown, you likely mixed complementary colors (like purple and yellow) while they were too wet. Let one color dry slightly before dropping the next nearby.
Step 3: Painting the Fur Detail
-
Golden base tones:
Mix a watery yellow-ochre or raw sienna. Apply this lightly to the bridge of the nose, around the eyes, and on the lower ears to create the glowing undercoat. -
Establish the stripes:
Using a size 1 brush and a mix of sepia and black, start painting specific fur strokes. Follow the direction of hair growth, flicking the brush outward to keep the lines tapered and hair-like. -
Layering the forehead:
Work on the forehead stripes. I prefer to lay down short, dense strokes here, allowing some of the paper white or ochre wash to peek through between the dark hairs. -
Ear details:
For the inner ears, use a very watery violet-pink. Add long, sweeping white gouache or lift out paint later for the long ear furnishings (hairs), but for now, darken the outer rims with your brown-black mix. -
Cheek and whisker pads:
Keep the whisker pads mostly white with just faint grey shading at the bottom. Use small dots to mark where the whiskers will eventually originate.
Level Up: Salt Texture
While the abstract color splashes are still wet, sprinkle a pinch of table salt onto the pigment. Let it dry completely and brush it off to reveal unique starburst textures.
Step 4: The Splash Effect
-
Wet the splash area:
Take your clean, large brush and wet the paper area to the right and top of the cat’s head. Don’t touch the painted fur yet; leave a tiny gap. -
Drop in color:
Load your brush with juicy, watered-down pigments—pink, yellow, and purple. Touch the wet paper and watch the colors bloom and merge naturally. -
Creating the splatter:
Load a medium brush with fairly wet paint. Tap the handle against another brush or your finger to fling droplets onto the paper around the watercolor blooms. Vary the colors for a confetti-like effect. -
Softening the cat’s edge:
With a clean, damp brush, gently touch the bottom left edge of the cat’s neck fur. Drag a little of that grey/brown pigment out into the white paper to make the neck look like it’s fading away.
Step 5: Final Details
-
Adding whiskers:
Once the face is completely dry, use your finest liner brush and thin black paint (or white gouache for contrast) to sweep long, confident whiskers from the pads. -
Final eye contrast:
Outline the eyes with a very thin black line to make them pop against the fur. Deepen the tear duct area with a touch of dark pink.
Step back and admire how the precise details of the face contrast beautifully with the free-flowing energy of the background


Floral Garden Cat With Loose Impressionistic Strokes
Capture the poised elegance of a feline friend amidst nature with this delicate watercolor and ink project. By combining soft, creamy washes with precise line work, you will create a charming portrait that feels both realistic and illustratively sweet.
Detailed Instructions
Materials
- Cold press watercolor paper (300 gsm)
- H or HB pencil for initial sketching
- Waterproof fine liner pens (sepia or dark grey, 0.1 and 0.3mm)
- Watercolor paints: Burnt Sienna, Yellow Ochre, Paynes Grey, Sap Green, Alizarin Crimson, and a touch of Ultramarine Blue
- Round watercolor brushes (sizes 2, 4, and 6)
- Kneaded eraser
- Two jars of water
- Paper towels
Step 1: Sketching the Posture
-
Basic Shapes:
Start with a light H pencil to block in the main forms. Draw a vertical oval for the chest and body, and a slightly smaller circle on top for the head. Add a triangle for each ear, keeping them alert and upright. -
Refining the Face:
Establish the eyeline about halfway down the face circle. Sketch the almond-shaped eyes, a small triangular nose, and the muzzle area. Pay attention to the spacing; the eyes should be wide-set to give that piercing gaze. -
Defining the Body:
Connect the head to the body with a smooth neck line. Outline the front legs, making them straight and tall, sitting close together. Curve the back line down to suggest the haunches and tail wrapped around the base. -
Surrounding Flora:
Lightly sketch tall, grassy elements flanking the cat. You don’t need detailed flowers, just the suggestion of stems and leaves to frame the subject without overpowering it.
Step 2: Applying the Watercolor
-
The Eyes:
Using your size 2 brush, drop a very pale blue-green mix into the irises. While damp, add a tiny dot of darker blue at the top for shadow, leaving a small white speck for the highlight. -
Base Fur Tones:
Mix a very watery wash of Yellow Ochre and a tiny bit of Burnt Sienna. Apply this cream color to the ears, the top of the head, and the colored patches on the back. Leave the chest and muzzle white. -
Shadowing White Fur:
White fur isn’t actually white in painting. Mix a very diluted grey using Paynes Grey and plenty of water. Gently paint the shadowed areas: under the chin, the side of the chest, and between the front legs. -
Deepening the Fur:
Once the first cream layer is dry, add a second, slightly more saturated layer of orange-brown (Burnt Sienna) to the ears and the darker patches on the back to build dimension. Use short, flicking strokes to suggest fur texture. -
Nose and Ears:
Mix a soft pink using Alizarin Crimson and white gouache or lots of water. Dab this onto the nose leather and the inside of the ears. It should look soft and flush. -
The Background Wash:
Wet the background area around the cat with clean water. Drop in a very faint wash of Ochre or pale yellow to warm up the scene, keeping it abstract and out of focus. -
Painting the Greenery:
Using Sap Green and your size 4 brush, paint the stems and leaves you sketched earlier. Keep the paint fluid and transparent; we want these to look like soft garden whispers, not heavy plants.
Pro Tip: Eye Sparkle
If you accidentally painted over the eye highlight, use a tiny dot of white gouache or a white gel pen at the very end to bring the life back into the cat’s gaze.
Step 3: Inking and Details
-
The Outline:
Wait until the paper is completely bone dry. Take your 0.1mm waterproof pen (sepia works beautifully for a softer look than black) and trace your pencil lines. Don’t make a solid continuous line; use broken, wispy strokes to mimic fur. -
Facial Features:
Switch to a 0.3mm pen for the eyes to give them clear definition. Outline the nose and mouth carefully. Add small dots on the muzzle where the whiskers will go. -
Adding Whiskers:
This requires a steady hand. Use quick, confident flicks with your finest pen to draw the whiskers extending from the muzzle and above the eyes. Long and curved looks best. -
Grounding Shadow:
Mix a stronger grey-purple wash. Paint a cast shadow underneath the cat’s paws and bottom to firmly plant the figure on the ground so it doesn’t look like it’s floating. -
Fur Texture:
I like to go back in with a slightly dry brush and some darker cream paint to add tiny fur texture strokes on the chest and cheeks, blending the painted areas with the white paper. -
Final Erasure:
Once you are 100% sure the ink and paint are dry, gently run your kneaded eraser over the piece to lift any visible graphite sketch lines, leaving only your fresh ink and paint.
Level Up: Pattern Swap
Customize the painting by changing the coat pattern to match your own pet. Use grey washes for a tabby or solid black ink for a tuxedo cat.
Step back and admire the gentle personality you’ve captured in this garden portrait.
Backlit Cat With a Rim-Light Glow Effect

This elegant painting features a sleek black cat silhouette set against a luminous golden orb, capturing a moment of quiet mystery. The texture of the handmade paper and the gentle wash background give the piece a warm, vintage illustration feel.
Step-by-Step Tutorial
Materials
- Heavyweight cold-press watercolor paper or handmade cotton rag paper (rough texture preferred)
- Masking tape
- Watercolor paints (Black, Yellow Ochre, Cadmium Yellow, Raw Umber)
- Black gouache or waterproof India ink (for the cat)
- Round watercolor brushes (sizes 2, 6, and 10)
- Pencil and eraser
- Compass or round object for tracing (about 3-4 inches diameter)
- Clean water and paper towels
Step 1: Preparation and Sketching
-
Define the frame:
Start by deciding the size of your painting area. Using masking tape, tape off a rectangular border on your sheet of textured paper. This creates the crisp, clean edge visible in the final piece and keeps the paper flat while you paint. -
Outline the orb:
Lightly trace a perfect circle in the upper center of your taped-off area using a compass or a round object like a jar lid. Position it so the cat’s head will eventually overlap the bottom left quadrant of this circle. -
Sketch the silhouette:
With a very light touch, sketch the cat’s profile. Drawing the curve of the back first helps establish the posture. Ensure the head and ears overlap the circle sketch, while the tail curves elegantly towards the bottom right. Keep the lines faint so they don’t show through the yellow wash later.
Fixing Bleeds
If black paint bleeds into the yellow, wait for it to dry fully. Then, re-paint the yellow edge with thick, opaque gouache to cover the mistake.
Step 2: Painting the Background
-
Mix the background wash:
Prepare a very dilute mixture of Yellow Ochre with plenty of water. You want a pale, creamy tone that looks almost like aged parchment. Test it on a scrap piece of paper first to ensure it isn’t too dark. -
Apply the first wash:
Using your largest brush, paint the entire rectangular area inside your tape, painting carefully *around* the cat sketch but painting *over* the circle area for now. This creates a uniform base tone. -
Wait for drying:
Allow this base layer to dry completely. The paper should feel cool to the touch but not damp. If you rush this step, your subsequent colors might bleed. -
Paint the golden orb:
Load a size 6 brush with a brighter Cadmium Yellow mixed with a touch of Yellow Ochre. Carefully fill in the circle shape you sketched earlier. The paint should be more opaque here to stand out against the pale background background. -
Soften the orb edge:
While the yellow circle is still wet, you can leave the edges crisp or soften them slightly for a glowing effect. The example shows a fairly defined edge with slight texture from the paper.
Step 3: The Black Cat
-
Outline with black:
Switch to your opaque black medium—either black gouache or India ink. Using a small size 2 brush, carefully outline the cat’s shape. Pay special attention to the ears and the curve of the neck where it overlaps the yellow sun. -
Fill the silhouette:
Once the outline is secure, switch to a slightly larger brush (size 6) to fill in the body. Gouache is excellent here because it dries to a matte, velvety finish that absorbs light, making the silhouette look deep and solid. -
Refine the tail:
Paint the tail with a fluid, confident stroke. The tail in the example has a distinctive ‘J’ curve. Ensure the width of the tail tapers naturally towards the tip. -
Add the eye detail:
Once the black paint is completely dry, use a tiny amount of yellow or pale green gouache (or a white gel pen tinted yellow) to paint the small almond shape of the eye. Add a tiny vertical slit for the pupil if you have a steady hand. -
Add unexpected texture:
I sometimes like to use a nearly-dry brush to dab a tiny bit of texture onto the black fur area if it looks too flat, but a solid block of color works perfectly for this graphic style.
Make It Shimmer
Mix a tiny amount of gold mica powder or metallic watercolor into your yellow paint for the sun circle to give the artwork a magical shine.
Step 4: Ground and Finishing
-
Mix the shadow color:
Create a watery mix of Raw Umber and a tiny touch of black. You want a transparent grey-brown that suggests a shadow rather than solid ground. -
Paint the ground shadow:
Paint a horizontal, uneven strip beneath the cat using distinct horizontal brushstrokes. Let the strokes overlap slightly to create varied opacity, mimicking a rough floor or wall texture. -
Connect shadow and subject:
Ensure the shadow paint touches the bottom paws and the curve of the tail so the cat feels grounded, not floating. The shadow should extend to the edges of your taped border. -
Reveal the edges:
Once everything is bone dry—give it an extra hour to be safe—slowly peel away the masking tape. Pull the tape away from the painting at a 45-degree angle to prevent tearing the paper.
Frame your new masterpiece in a simple wooden frame to complement the natural tones
Patterned Cat With Decorative Fur Designs
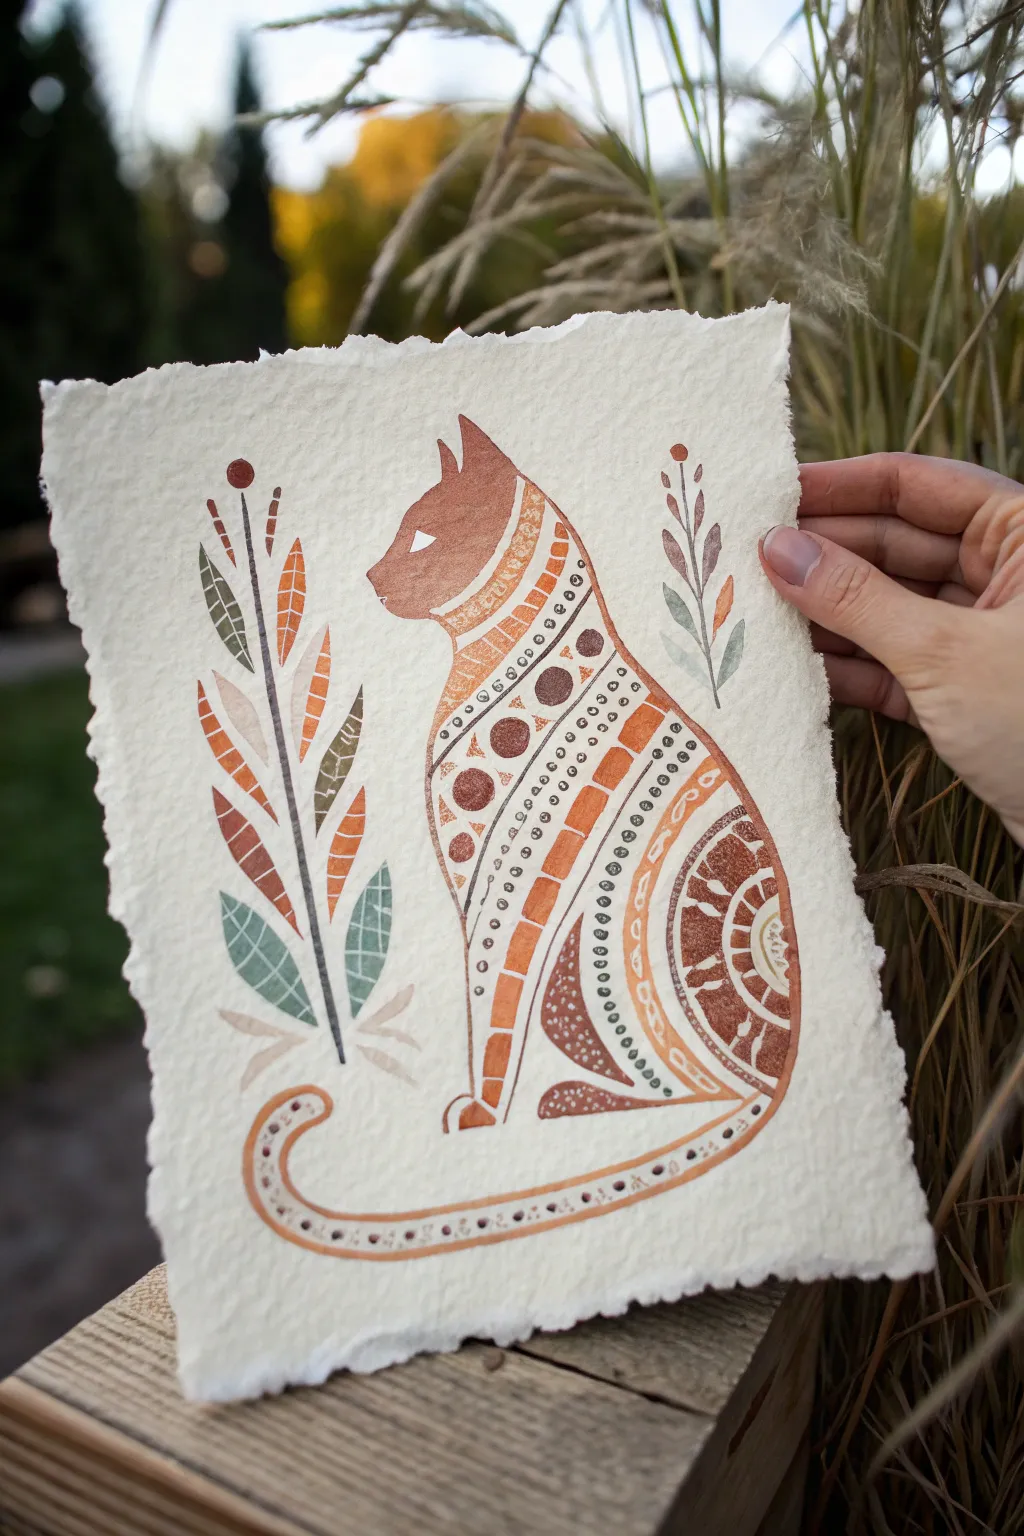
This charming illustration features a stylized cat filled with intricate geometric patterns in warm, earthy tones. Rendered on textured, handmade paper, the design evokes a cozy, folk-art feel perfect for home decor.
Step-by-Step
Materials
- Heavyweight, handmade paper with deckled edges (cotton rag or watercolor paper)
- Gouache paints (burnt sienna, raw umber, sage green, cream, terracotta)
- Fine detail brushes (sizes 00, 0, and 2)
- Pencil (HB or H)
- Kneaded eraser
- Mixing palette
- Ruler (optional)
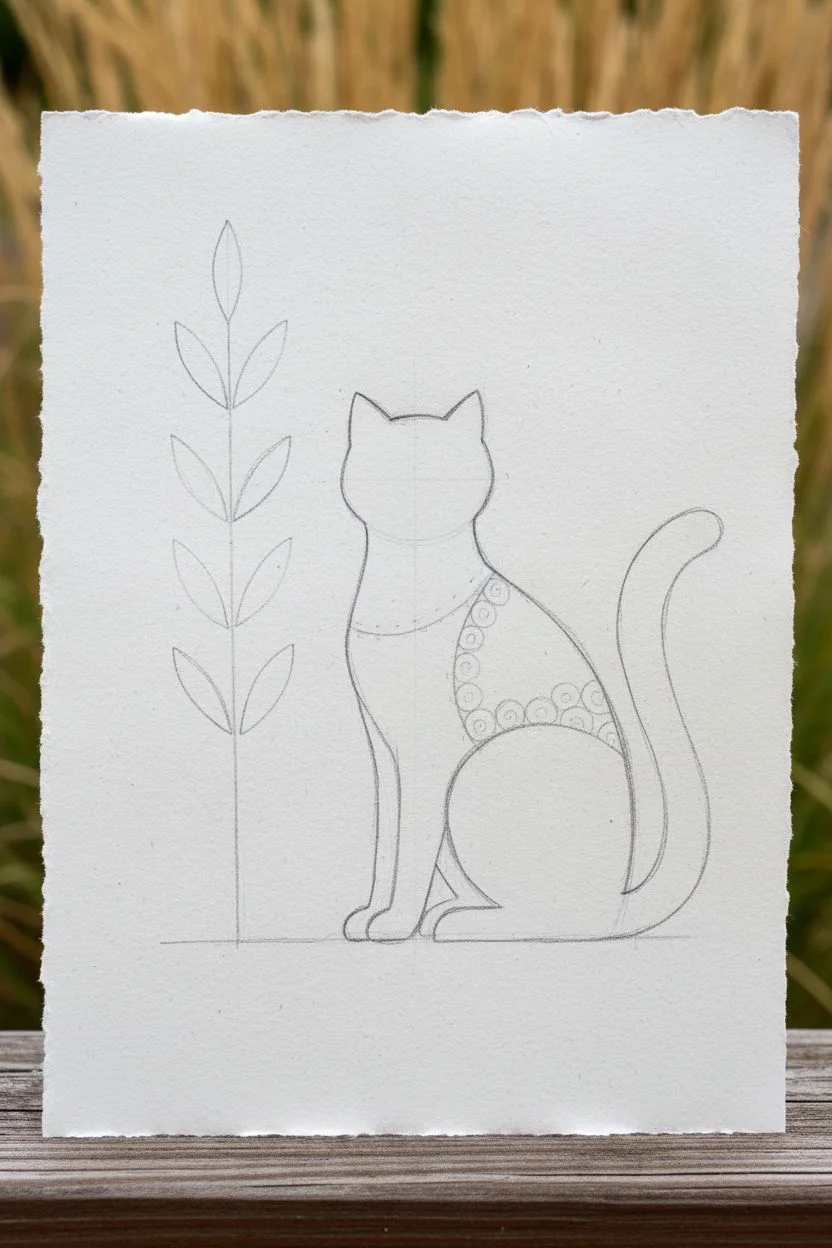
Step 1: Sketching the Outline
-
Establish the paper orientation:
Position your handmade paper vertically. The deckled edges add a lot of character, so leave a generous margin of negative space around the edges. -
Draw the cat’s silhouette:
Lightly sketch the basic silhouette of a sitting cat. Focus on a smooth curve for the back, pointed ears, and a long tail that curves under the body and sweeps upward. -
Add the decorative plant:
To the left of the cat, sketch a tall, vertical stem with pairs of leaves rising upwards. Keep the leaves simple and almond-shaped. -
Plan the internal bands:
Inside the cat’s body, draw light guidelines to separate the different patterned sections. These curved lines should follow the contour of the cat’s back, creating distinctive zones for your designs.
Step 2: Painting the Base Colors
-
Paint the head and ears:
Mix a solid burnt sienna or reddish-brown gouache. Fill in the cat’s head and ears, leaving a small, diamond-shaped unpainted area for the eye to keep it bright white. -
Fill the decorative bands:
Select alternating bands on the cat’s body to fill with solid color. Use the burnt sienna for the neck area and the large circular motif on the haunch. Keep the paint varied in opacity to mimic a print texture. -
Paint the leaves:
For the plant, use a muted sage green for the lower leaves and transition to warmer autumn tones—rust and brown—for the upper leaves. This gradient adds visual interest. -
Define the tail:
Paint the outline of the tail using thin lines of reddish-brown, leaving the center of the tail empty for now to add patterns later.
Pro Tip: Texture Trick
To mimic the block-print look in the photo, apply your gouache slightly dry (less water). This creates a ‘scumbled’ texture where the rough paper tooth shows through.
Step 3: Adding Patterns and Details
-
Create the neck detail:
Once the head is dry, use a cream or diluted white gouache to paint small dots and lines on the colored neck band, creating a collar effect. -
Paint the dot rows:
Using a dark brown or raw umber, paint precise rows of small dots following the curved guidelines of the body. vary the size of the dots between rows for variety. -
Add the checkered band:
In the central band of the body, paint rectangular blocks of terracotta orange, separated by thin vertical cream spaces. This creates a bold, geometric spine. -
Detail the haunch circle:
Inside the large circular shape on the rear leg, use cream paint to add radiating lines and small triangles, looking somewhat like a sunburst or flower. -
Decorate the tail:
Fill the empty center of the tail with small dots and short dashes in dark brown. I find that following the curve of the tail with your brush strokes helps the flow. -
Refine the plant stem:
With your finest brush and dark brown paint, draw the central stem of the plant, connecting all the floating leaves with a confident, thin line. -
Add leaf veins:
Paint delicate white or cream veins on the colored leaves to give them texture and tie them visually to the patterned cat. -
Final touches:
Review your painting for any gaps. Add tiny accent dots around the plant or near the cat’s paws to balance the composition.
Level Up: Gold Accents
Once the painting is completely dry, re-trace specific details—like the sunburst on the haunch or the cat’s eye—with metallic gold watercolor for a subtle shimmer.
Allow the piece to dry completely before framing it floating in a shadow box to show off those beautiful paper edges
Negative Space Cat Using Masked Shapes
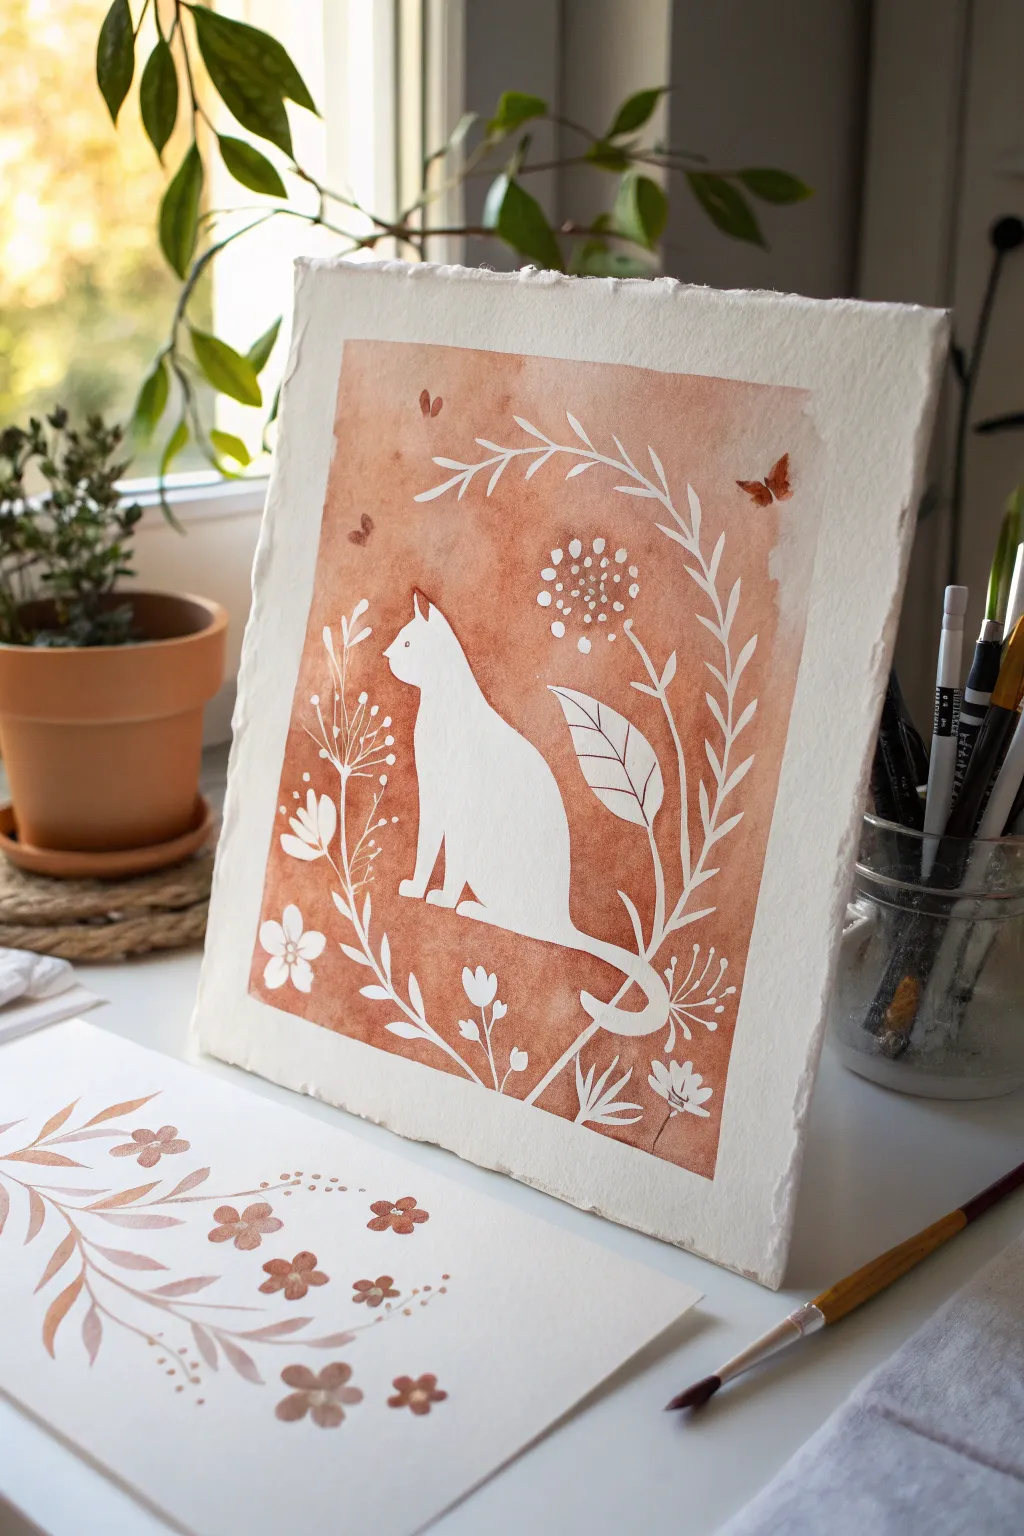
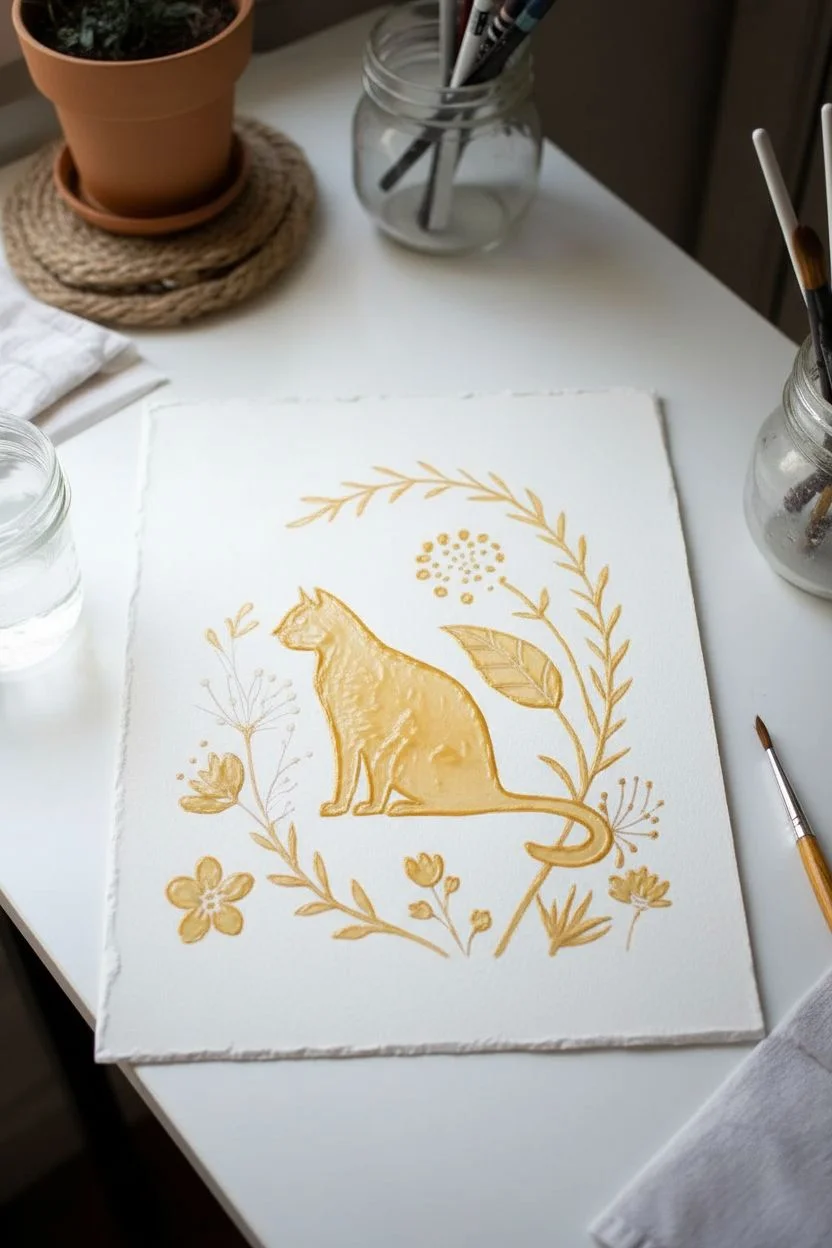
Capture the serene simplicity of a feline silhouette amidst delicate foliage using the magic of masking fluid. This project creates a striking contrast between pristine white paper and a warm, terracotta watercolor wash.
How-To Guide
Materials
- Cold press watercolor paper (rough edge preferred)
- Masking fluid (drawing gum)
- Fine detail brush or nib pen (for masking)
- Watercolor paints (terracotta or burnt sienna)
- Large flat or mop brush
- Pencil and eraser
- Clean water and jar
- Paper towels
- Rubber pick-up tool (or finger)
Step 1: Planning and Masking
-
Sketch the outline:
Begin by lightly sketching your composition on the paper. Draw a simple, seated cat profile in the center. Don’t press too hard with the pencil, as you’ll want these lines to disappear later. -
Add botanical elements:
Around the cat, sketch a curved, wreath-like arrangement of leaves and stems. Varied shapes like small round berries, fern-like fronds, and simple petal flowers create visual interest. -
Prepare for masking:
Ensure your paper is completely dry and clean before opening your masking fluid. Pro tip: Dip your brush in soapy water before dipping it into the masking fluid to protect the bristles. -
Fill the cat silhouette:
Carefully paint the entire interior of the cat shape with masking fluid. Be generous enough to cover the paper texture, but avoid big globs that take forever to dry. -
Mask the foliage:
Using a finer brush or an applicator tool, trace over your botanical sketches with the masking fluid. Include the delicate stems, leaves, and the floating butterfly shapes near the top. -
Allow to cure:
Let the masking fluid dry completely. It should turn yellowish or transparent and feel firm to the touch. Do not rush this step, or you risk tearing the paper later.
Step 2: Applying the Wash
-
Mix your color:
Create a generous puddle of terracotta or rust-colored watercolor. You want a consistent, medium-strength mix—not too watery, but fluid enough to spread easily. -
Paint the background:
Using your large brush, apply the wash over the entire paper, painting right over your masked areas. I prefer to work quickly to avoid harsh drying lines in the background. -
Vary the saturation:
While the paint is wet, drop in slightly more concentrated pigment in random areas to create that lovely, mottled watercolor texture seen in the reference. -
Refine the edges:
Paint loosely near the edges of the paper to leave a rough, organic border, but ensure the color fully surrounds your masked designs. -
Full dry time:
Allow the paint to dry completely. The paper must be bone dry before you attempt to remove the mask. Using a hairdryer on a low setting can speed this up.
Tearing Paper?
If the paper tears when lifting the mask, the paper wasn’t dry enough or the fluid was left on too long (over 24hrs). Ensure bone-dry paper before removing.
Step 3: The Reveal
-
Remove the mask:
Once dry, gently rub the masking fluid away. Use a rubber pick-up square or your clean finger, rubbing in small circles to lift the latex from the paper. -
Clean up lines:
After all the masking is removed, you will see the stark white paper underneath. Use a clean eraser to gently remove any visible pencil sketches that remain. -
Add detail:
Using a very small brush and the same terracotta paint, add tiny details back onto the white areas. Paint the cat’s eye, nose, and ear definition. -
Enhance the botanicals:
Add small veins to the larger leaves or centers to the flowers using the paint color to integrate the white shapes with the background. -
Final touches:
If needed, use opaque white gouache to tidy up any edges where paint might have snuck under the mask, ensuring the silhouette remains crisp.
Soap Saver
Coat your brush bristles with dish soap before dipping into masking fluid. It creates a barrier that prevents the fluid from ruining your brush forever.
Display your charming silhouette art in a simple frame or on a mini-easel to bring a touch of warmth to your desk
Dreamy Galaxy Cat With Stars in the Fur
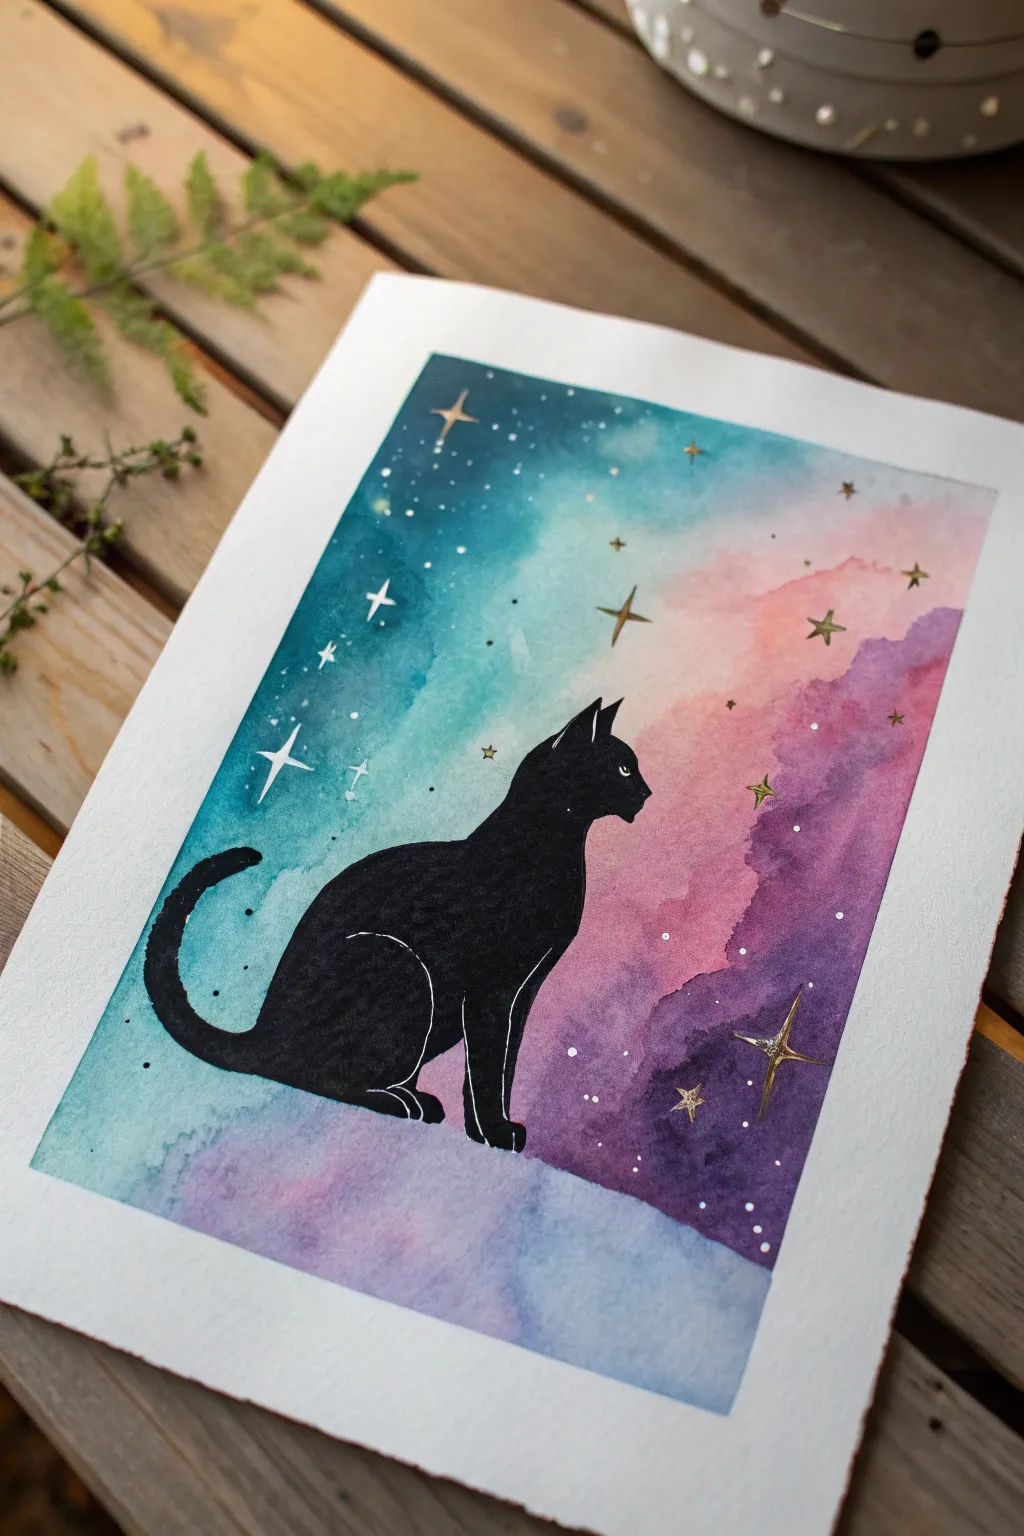

Capture the mystic connection between felines and the cosmos with this stunning watercolor piece. You’ll layer vibrant teal, pink, and purple washes to create a nebula effect, serving as a dramatic backdrop for a sleek black cat silhouette gazing into the stars.
Step-by-Step Tutorial
Materials
- Cold press watercolor paper (300 gsm recommended)
- Watercolor paints (teal/turquoise, magenta/pink, purple, indigo)
- Black gouache or acrylic paint (for the cat)
- Gold metallic paint or gold gel pen
- White gel pen or opaque white gouache
- Masking tape
- Round brushes (sizes 6 and 2)
- Pencil and eraser
- Clean water
Step 1: Setting the Scene
-
Secure the paper:
Begin by taping down all four edges of your watercolor paper to a hard board or table. This creates a clean white border and prevents the paper from buckling when we add water. -
Draft the silhouette:
Lightly sketch the outline of the cat sitting in profile. Focus on the smooth curve of the back and the alert ears. Don’t worry about details inside the shape; we just need the boundary. -
Define the ground:
Sketch a soft, rolling line beneath the cat’s paws to represent the ground or cloud bank it is resting on.
Clean Edges Tip
When painting the black cat, use a ‘rigger’ or liner brush for the very edges of the silhouette. Its long bristles hold more paint and help create smoother continuous lines than a standard round brush.
Step 2: Painting the Galaxy Sky
-
Wet the sky area:
Using your larger clean brush, apply a glaze of clean water to the entire sky area, carefully painting around the cat sketch. The paper should be glistening but not forming puddles. -
Drop in the teal:
Load your brush with a vibrant teal or turquoise. Touch it to the upper left corner and let the color bloom into the wet paper, fading it out as you move toward the center. -
Add pink softness:
While the paper is still damp, introduce a soft pink or magenta on the right side. Allow it to touch the edge of the blue gently; they will mix to form a soft purple transition. -
Deepen with purple:
Add a rich purple tone to the lower right area and behind the cat’s back. This creates depth and enhances the galaxy feel. -
Paint the ground:
For the ground area beneath the cat, use a very diluted wash of purple and blue. Keep this area much lighter and softer than the sky to anchor the composition. -
Let it dry completely:
Wait for the background to be bone dry. If the paper is cool to the touch, it’s still damp. I usually grab a cup of tea while waiting for this crucial step.
Step 3: The Cosmic Cat
-
Fill the silhouette:
Switch to your smaller brush and black gouache or acrylic. Carefully fill in the cat sketch, ensuring the edges are crisp and opaque. The solid black needs to stand out boldly against the soft watercolor. -
Add definition:
Once the black paint is dry, use a very fine white gel pen or thin white paint to add a tiny outline to the top of the thigh and the chest. This ‘rim light’ separates the cat’s legs from its body. -
The eye detail:
Paint a tiny almond shape for the eye in white or pale yellow. Add a microscopic vertical slit for the pupil to bring the cat to life.
Add Magic
For a true nebula effect, sprinkle a tiny pinch of salt onto the wet watercolor sky. Brush it off once dry to leave behind beautiful, starry textures in the paint.
Step 4: Starlight Embellishments
-
Scatter small stars:
Dip a stiff brush or toothbrush into white gouache and flick the bristles to create a spray of tiny mist-like stars across the darker parts of the sky. -
Draw larger stars:
Using your white gel pen, draw specific four-pointed stars or cross shapes in the open teal and pink areas to balance the composition. -
Add gold accents:
Take your metallic gold paint or pen and draw focused, four-pointed stars. Place the largest gold star near the bottom right to act as a focal point. -
Highlight the galaxy:
Add a few tiny gold dots mixed in with the white stars for a magical shimmer. -
Reveal the border:
Once everything is fully dry, slowly peel away the masking tape at a 45-degree angle to reveal your crisp white edges.
Now you have a celestial feline guardian ready to display on your wall


Have a question or want to share your own experience? I'd love to hear from you in the comments below!