A plain tea cup is basically a tiny curved canvas just waiting for your brush. These tea cup painting ideas will help you go from “blank and boring” to personalized tea cup art you’ll actually want to use (or gift).
Classic Floral Tea Cup Wraparound
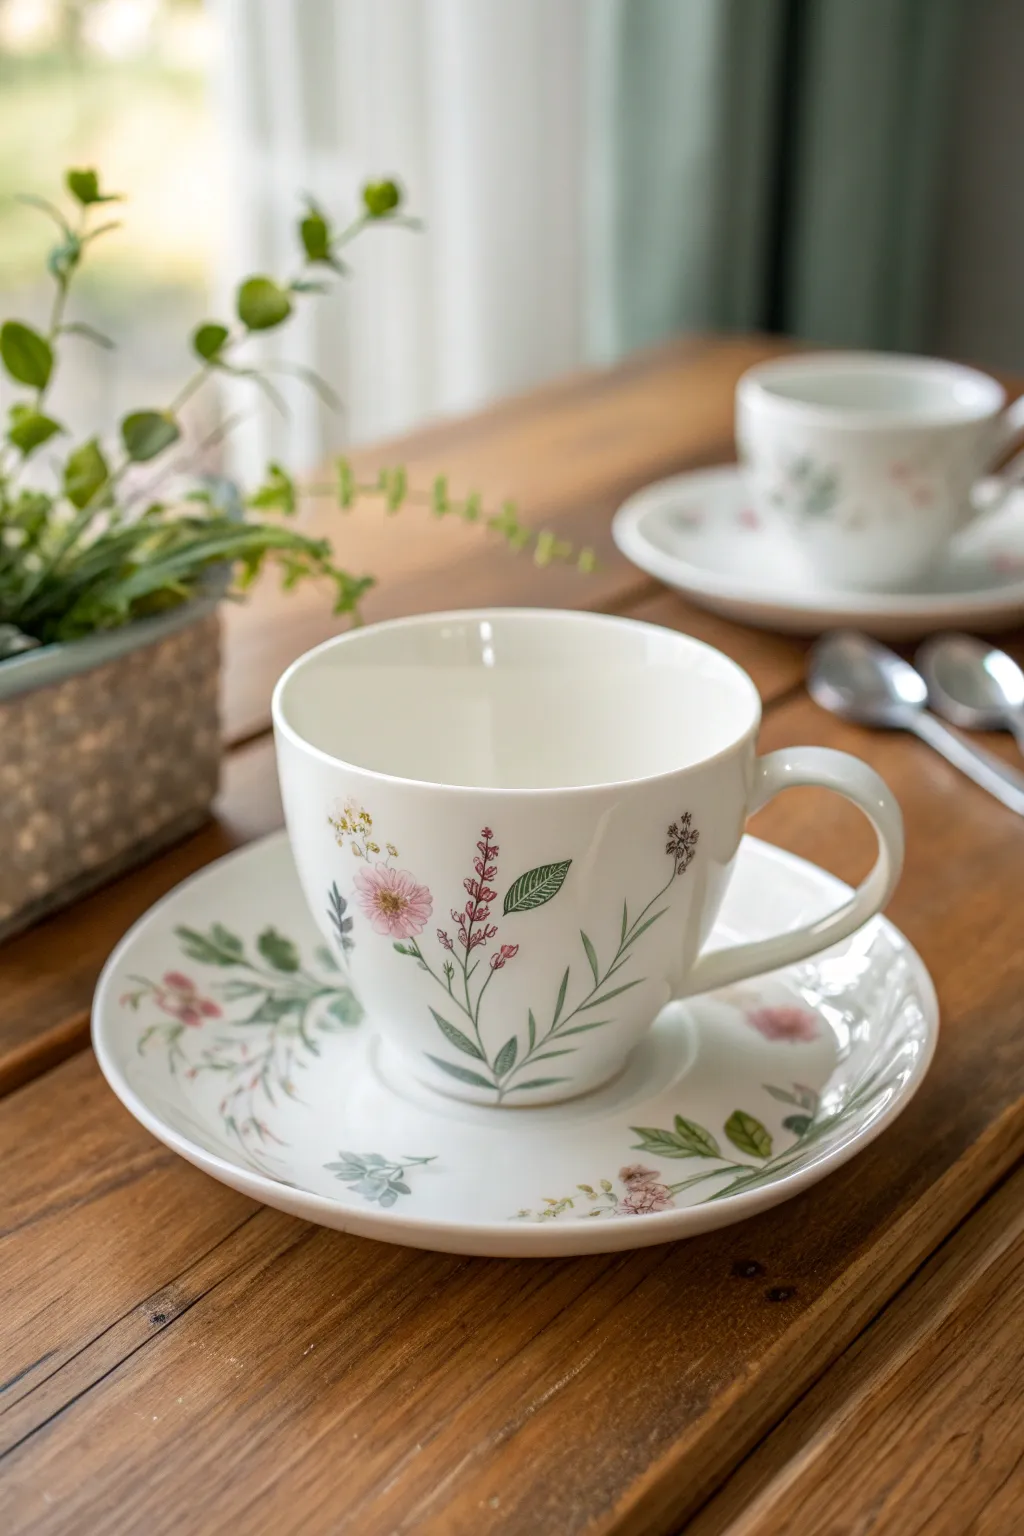
Transform a plain white tea set into an enchanting garden scene with this classic floral wraparound design. This project captures the vintage charm of botanical illustrations with delicate stems of sage, pink wildflowers, and graceful leafy fronds dancing across porcelain.
Step-by-Step
Materials
- Plain white ceramic tea cup and saucer
- Ceramic paints (porcelain paint) in: Sage Green, Forest Green, Dusty Pink, Mauve/Lavender, Deep Brown, and White
- Fine detail brushes (sizes 0/0 and 1)
- Small flat brush (size 2)
- Rubbing alcohol and cotton pads
- Palette for mixing
- Water container and paper towels
- Oven (for baking the finished piece)
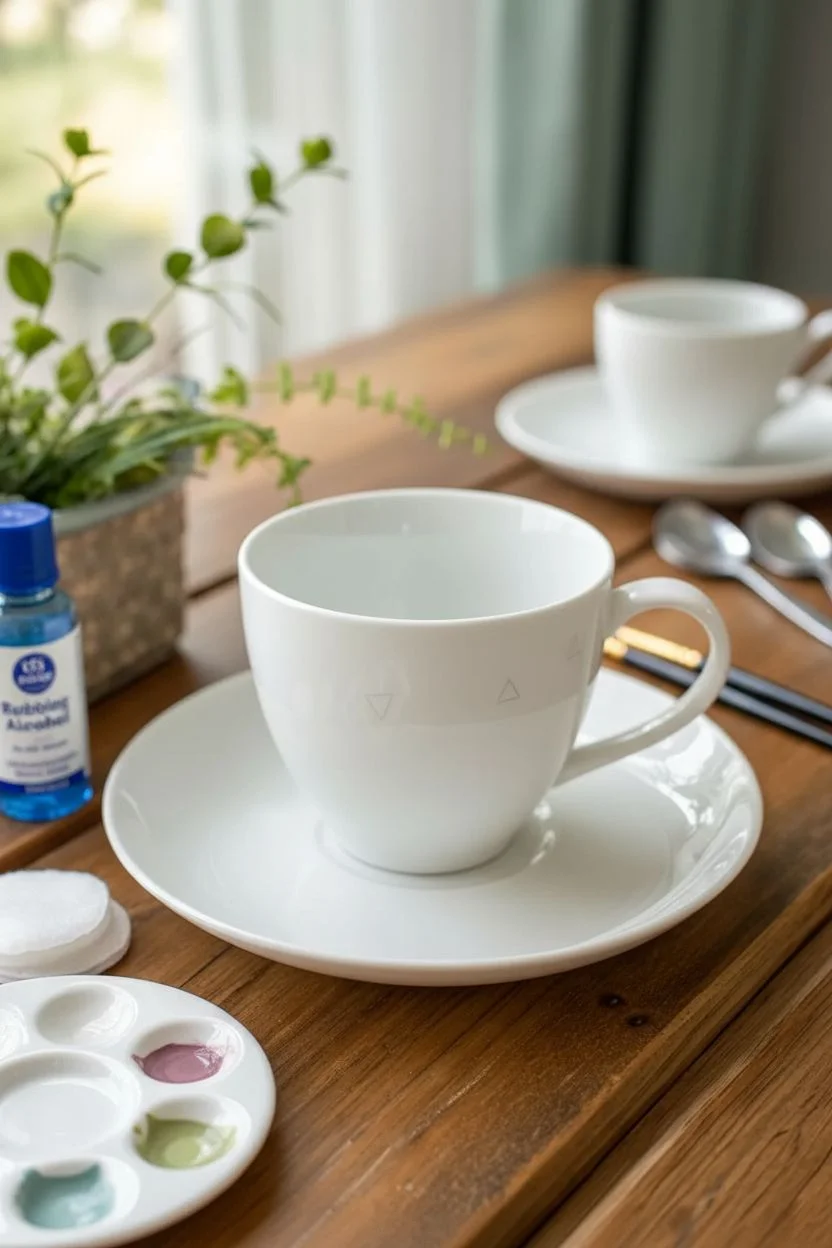
Step 1: Preparation & Layout
-
Start with a clean slate:
Before dipping your brush, thoroughly wipe down both the cup and saucer with rubbing alcohol on a cotton pad. This step is crucial because it removes any unseen oils or fingerprints that prevent the paint from adhering properly to the glaze. -
Plan your garden:
Visualize three main floral clusters around the cup. These will be your focal points. I find it helpful to mentally mark a triangle arrangement so the design looks balanced from every angle.
Step 2: Painting the Greenery
-
Mix your greens:
On your palette, create a custom green by mixing Sage Green with a tiny dot of White to soften it. Prepare a second, darker shade by mixing Forest Green with a touch of Deep Brown for the stems. -
Anchor the stems:
Using your finest detail brush (0/0) and the darker stem mixture, paint thin, sweeping lines starting from the base of the cup upwards. Allow them to curve naturally, like wild grass blowing in a gentle breeze. -
Add main leaves:
Switch to the size 1 brush. Load it with the lighter Sage mix. Press down gently and lift up quickly to create tapered leaves branching off your main stems. Vary the pressure to get different leaf widths. -
Layering leaf details:
Once the initial sage leaves are dry to the touch, use the fine liner brush and the dark Forest Green mix to add tiny central veins or cross-hatching details to a few select leaves for depth. -
Saucer coordination:
Repeat this foliage process on the saucer. Instead of centering it, wander the vines along the outer rim so they peek out nicely when the cup sits in place.
Brushwork Secret
For the finest lines, roll your wet brush tip on the palette to sharpen it into a needle point before touching the porcelain.
Step 3: Blooming Details
-
Create the pink wildflowers:
Mix Dusty Pink with a hint of water or medium to make it translucent. On the main stems, paint small, five-petaled flowers. Keep them loose; they don’t need to be biologically perfect. -
Adding lavender sprigs:
Using the Mauve paint, create tall, vertical clusters of tiny dots near the tops of your thinner stems. Stipple the brush gently to mimic the texture of lavender or salvia buds. -
Highlighting the blooms:
Dip just the very tip of your detail brush into White paint. Add miniscule dots to the centers of your pink flowers and the tips of the mauve buds to make them look like they are catching the light. -
Delicate filler flowers:
Mix a very pale yellow-white. Add clusters of tiny dots floating near the leaves to represent baby’s breath or wildflower pollen, filling in any empty negative spaces. -
Dark accents:
Use the Deep Brown paint sparingly to add tiny seed pods or dried botanical elements. These dark accents ground the design and give it that vintage illustration look.
Gilded Edge
Once baked and cooled, add a rim of metallic gold ceramic paint to the lip of the cup and saucer for an elegant, high-tea finish.
Step 4: Finishing Touches
-
Let it cure:
Allow the paint to air dry completely for at least 24 hours. The surface must be bone dry before heat setting to prevent bubbling. -
Baking the design:
Place your cold teacup into a cold oven. Turn the heat to 300°F (150°C) and bake for 35 minutes (or follow your specific paint manufacturer’s instructions). Letting it heat up with the oven prevents cracking. -
Cooling down:
Turn the oven off and leave the door closed. Let the ceramic pieces cool down completely inside the oven before removing them.
Now you have a timeless piece of art perfect for your quiet morning tea moments


Cherry Blossom Branch Around the Rim
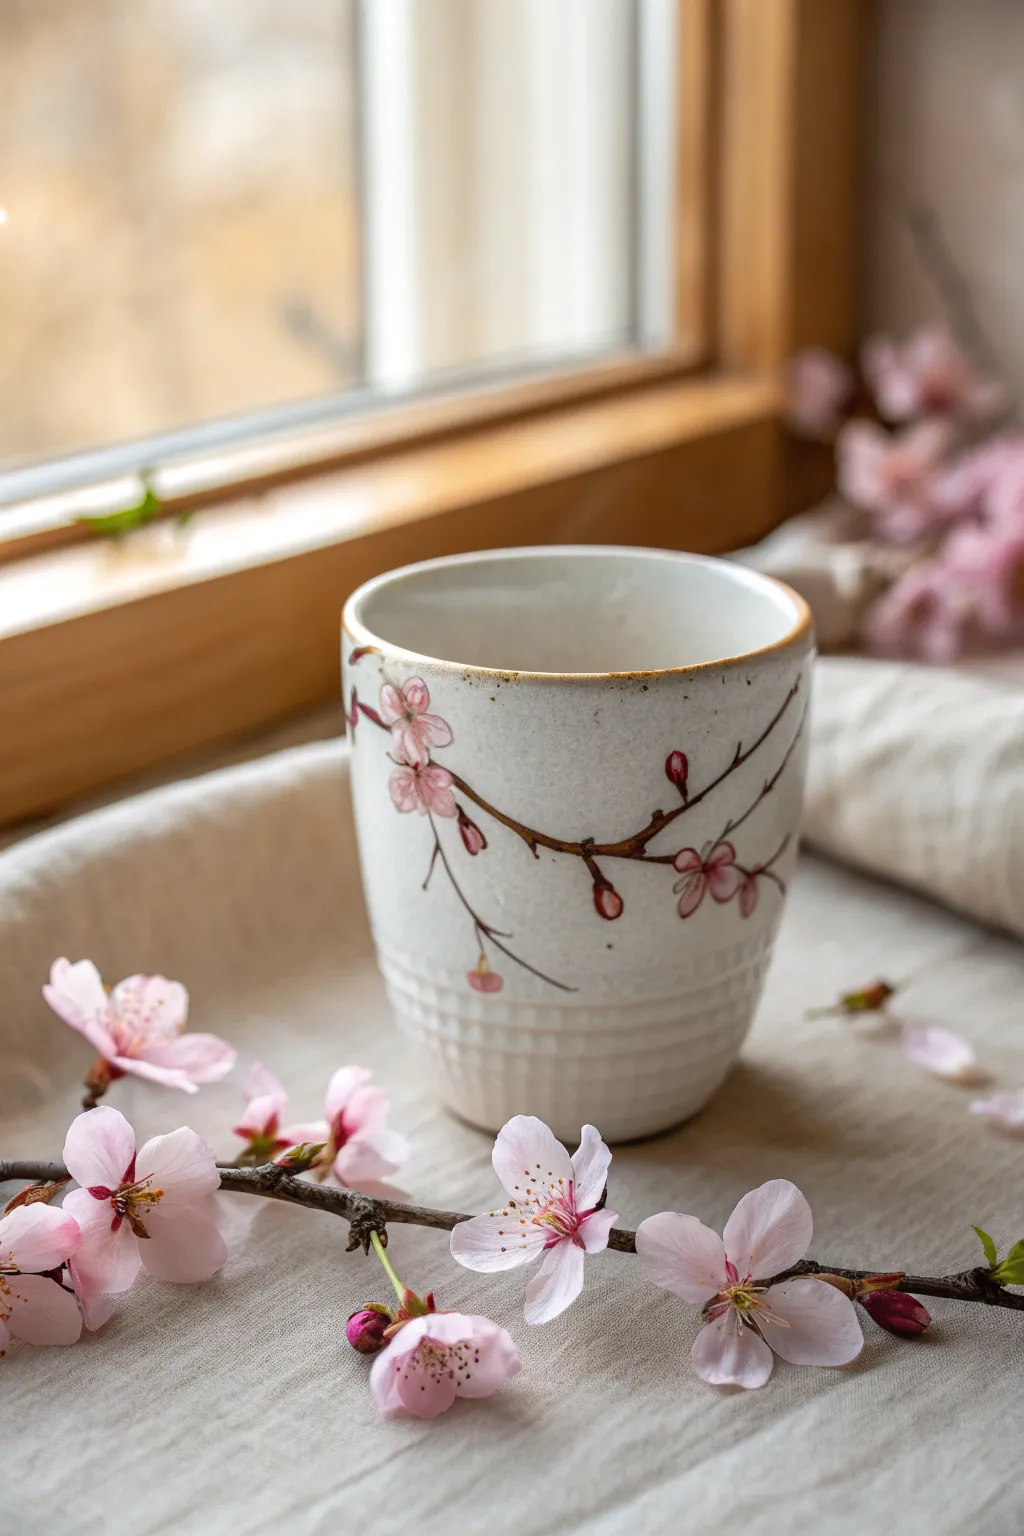
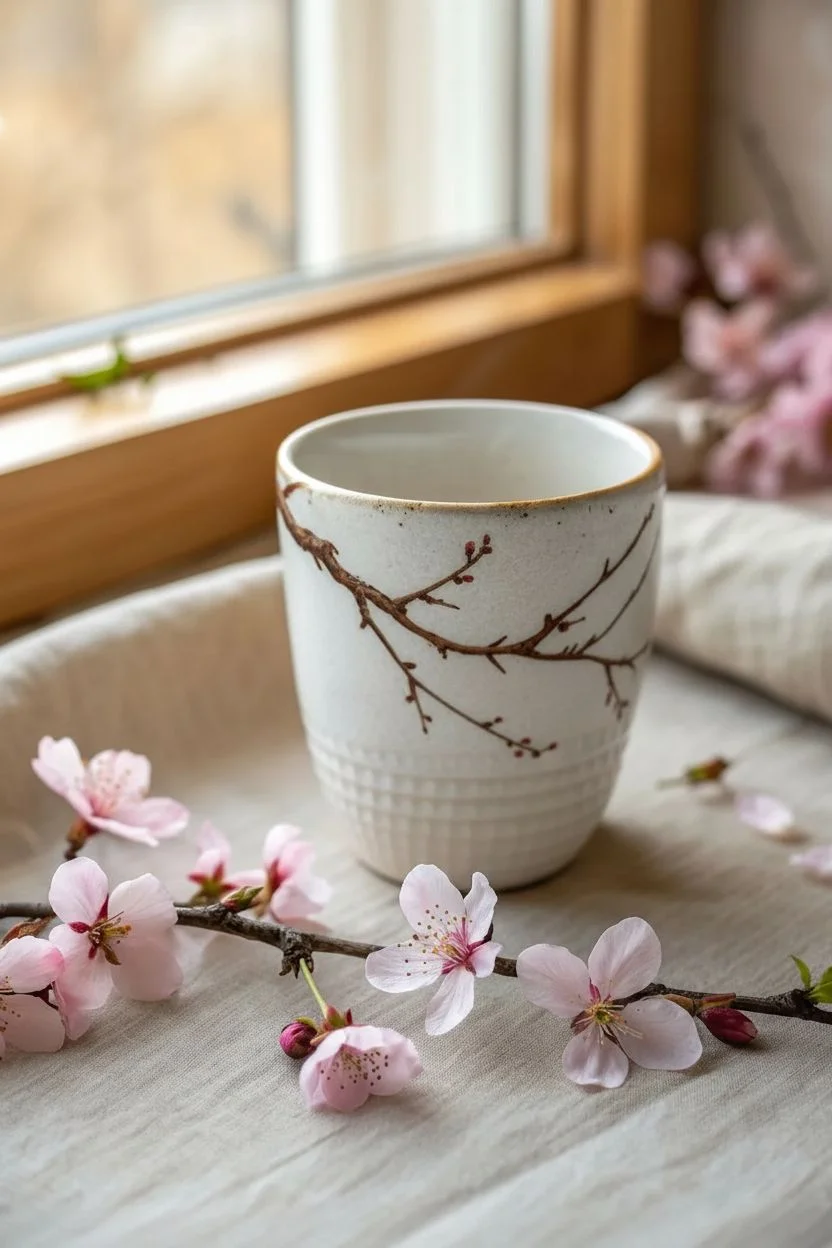
Transform a plain ceramic cup into a serene piece of spring art with this cherry blossom design. The winding brown branches and soft pink petals create a gentle, organic look that wraps elegantly around the cup’s surface.
Step-by-Step Guide
Materials
- White or cream ceramic tea cup (preferably with a slight texture)
- Ceramic or porcelain paints (Dark Brown, Soft Pink, White, Deep Red)
- Fine liner brush (size 0 or 00)
- Small round brush (size 1 or 2)
- Rubbing alcohol and cotton pads
- Paper palette or small plate for mixing
- Oven (for curing, if required by your paint)
Step 1: Preparation & Base Branch
-
Clean surface:
Begin by wiping down your ceramic cup thoroughly with rubbing alcohol on a cotton pad. This removes any oils or fingerprints that might prevent the paint from adhering properly. -
Mix branch color:
On your palette, mix a small amount of dark brown paint. If the brown is too flat, add a tiny touch of black or deep red to give it richness. -
Outline main branch:
Using your fine liner brush, paint a main branch line starting from one side of the cup and extending horizontally. Let the line undulate naturally rather than trying to make it perfectly straight. -
Add texture to branch:
The branch shouldn’t be a solid, smooth line. Use short, disjointed strokes to create a slightly gnarled, bark-like texture. -
Paint offshoot twigs:
From the main branch, extend thinner, smaller twigs upwards and downwards. Keep these lines very delicate and tapered at the ends. -
Create branch nodes:
Where the twigs split from the main branch, slightly thicken the joint with a tiny dab of paint to mimic the natural knots found on cherry trees.
Natural Imperfection
Don’t stress about shaky hands; slight wobbles actually make the branches look more realistic and organic, just like real wood bark.
Step 2: Painting the Blossoms
-
Mix petal colors:
Prepare two shades of pink: a very pale, watery pink (mix pink with white) for the petals, and a slightly deeper pink for shading. -
Lay down petal shapes:
Dip your small round brush into the pale pink. Press the brush gently onto the cup surface near the twig ends to form five-petal flower shapes. The petals don’t need to be uniform. -
Add buds:
Scatter some small, oval-shaped buds along the branches. These should be tighter and smaller than the open flowers, painted with a slightly more saturated pink. -
Layering the centers:
Once the pale base layer is tacky or dry, take the deeper pink shade and add a tiny dot or gentle stroke at the very center of each open flower to give it depth. -
Highlighting:
I like to add the tiniest fleck of white paint to the upper edges of a few petals. This simulates light catching the delicate blossom edges.
Step 3: Details & Curing
-
Connect flowers:
Use the brown liner brush again to ensure every flower and bud is visually connected to a branch with a tiny stem. -
Add sepals:
For the closed buds, paint very small deep red or brownish-red lines at their base to create the sepals holding the bud closed. -
Rim detail:
Referencing the original image, carefully paint a thin, uneven line of brownish-gold or diluted brown along the very rim of the cup to frame the design. -
Final drying:
Allow the paint to dry completely according to the manufacturer’s instructions. This usually takes 24 hours. -
Bake to cure:
Place the cup in a cold oven, set the temperature to the paint manufacturer’s recommendation (usually around 300°F/150°C), bake for 30-40 minutes, and let it cool completely inside the oven.
Falling Petals
Paint 2-3 single petals drifting detached near the bottom of the cup design to suggest a gentle breeze blowing through the blossoms.
Enjoy your beautiful new cup with your morning tea, knowing the delicate artwork will last for years to come


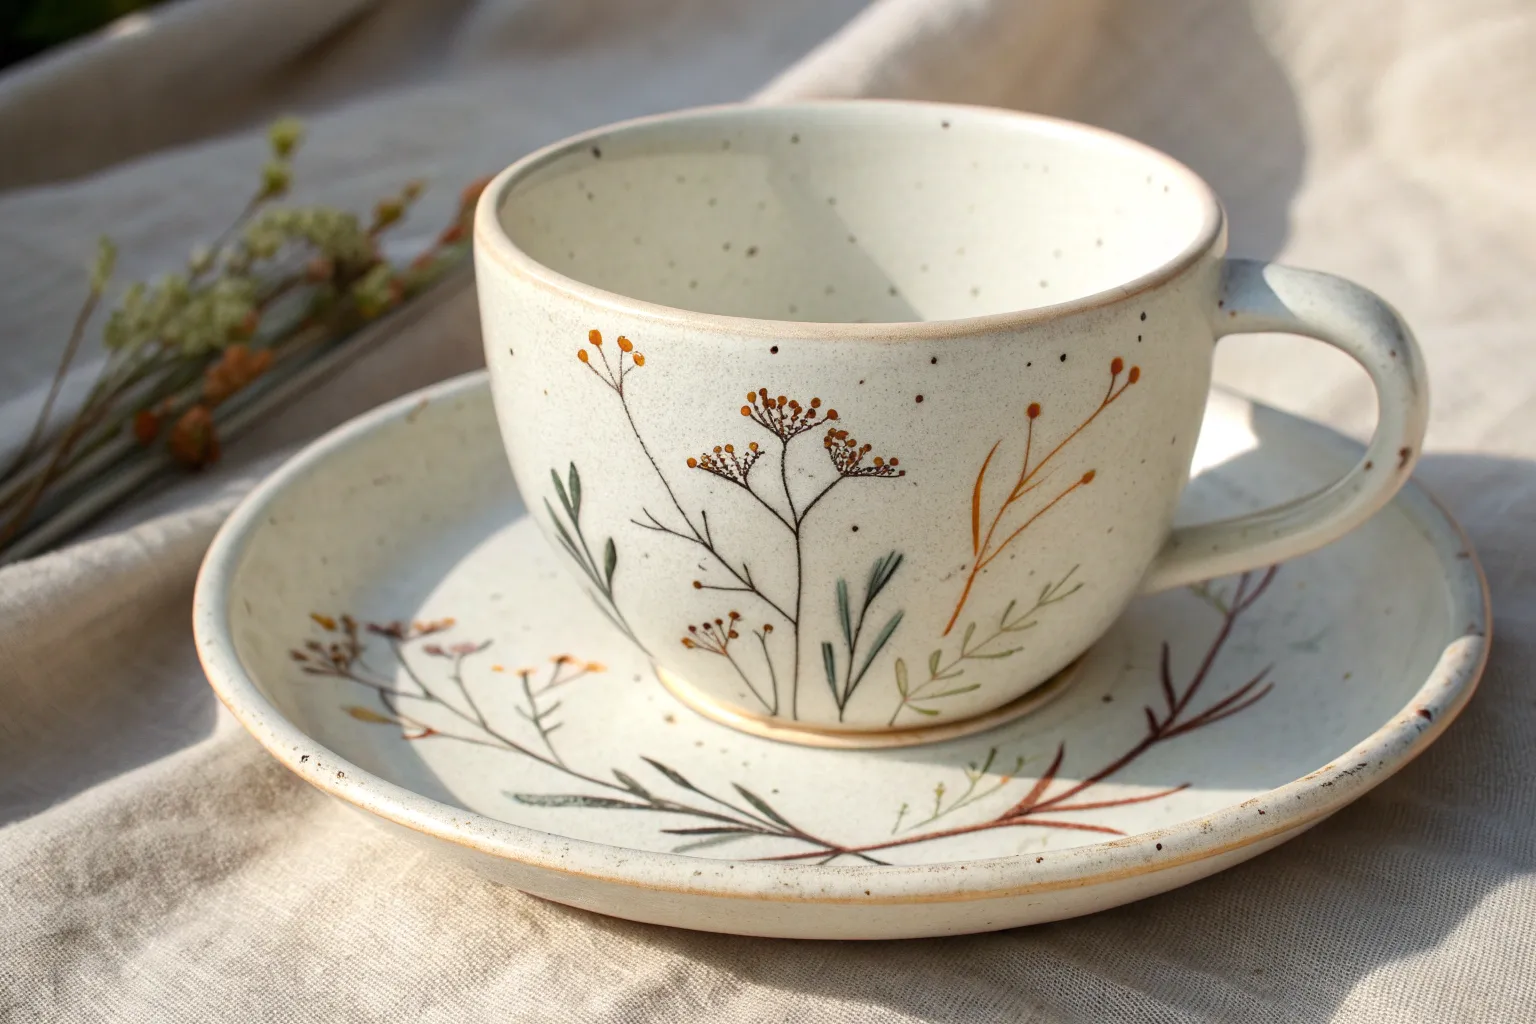
Simple Polka Dots With a Clean Color Palette
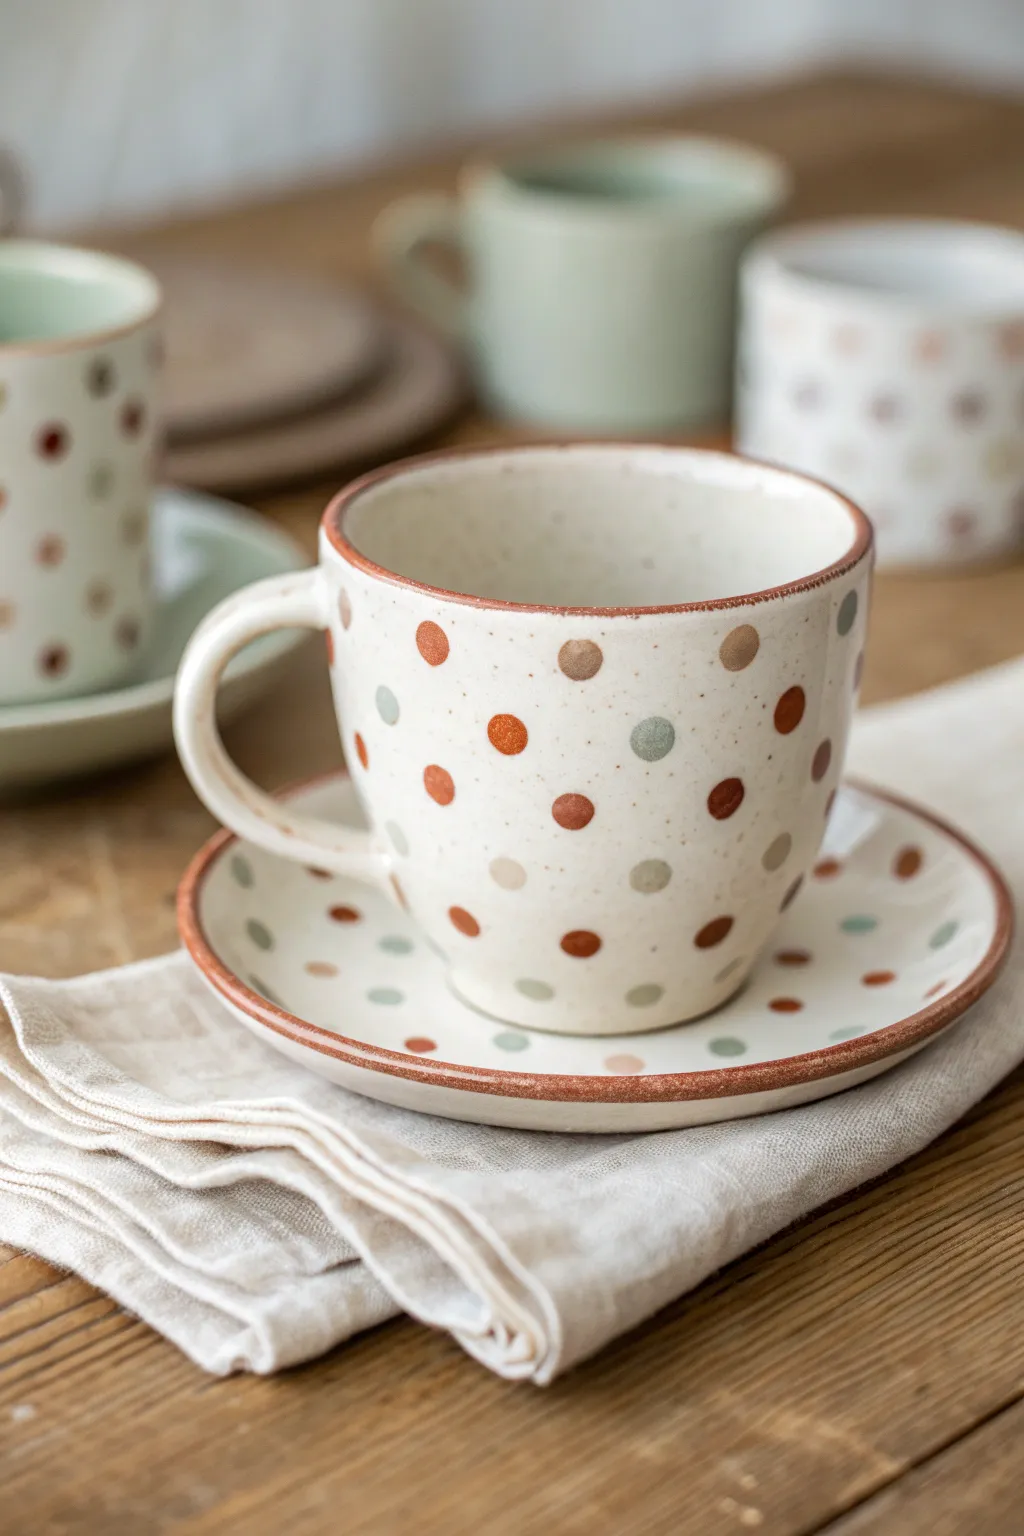
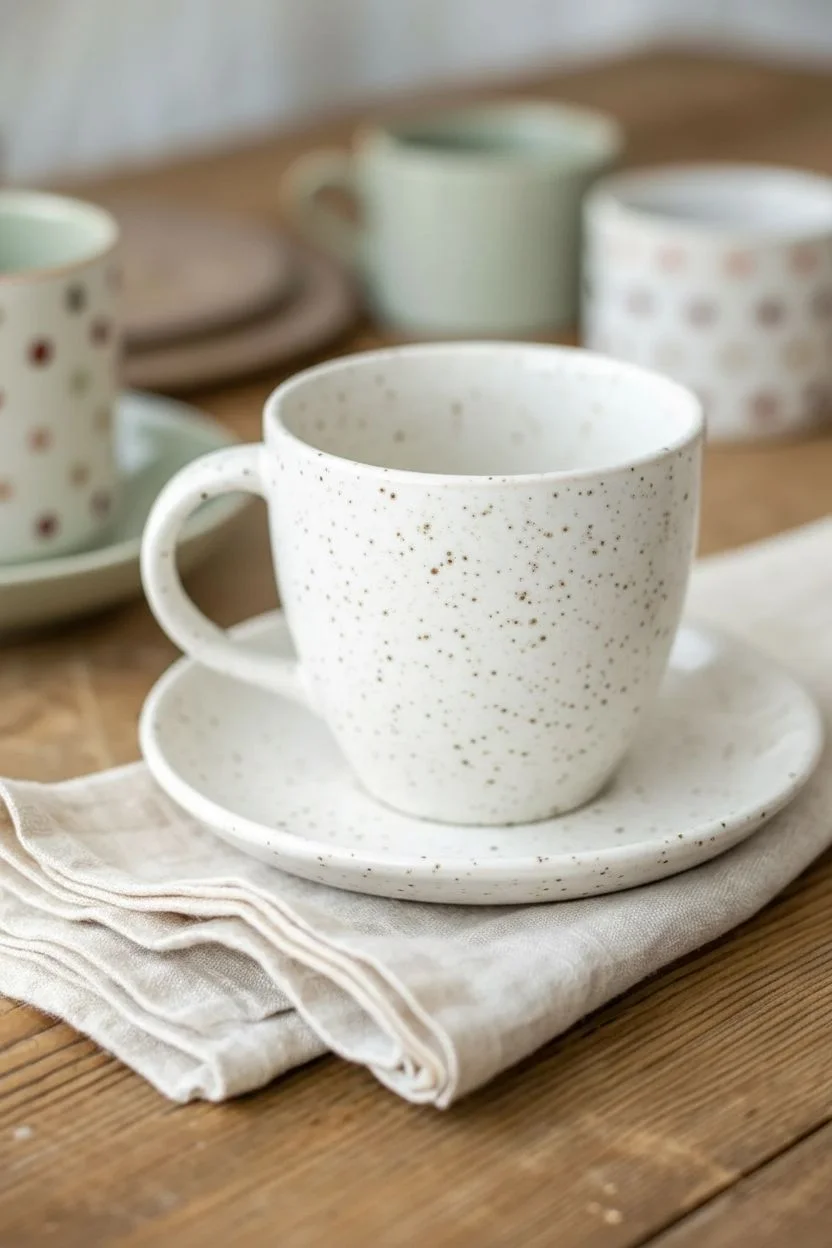
Transform a plain ceramic mug into a cozy, rustic piece using a simple dotting technique and a warm, nature-inspired palette. The charm of this design lies in its imperfect, hand-painted feel and the subtle speckled background that mimics stoneware clay.
Detailed Instructions
Materials
- Plain white or cream ceramic cup and saucer
- Ceramic paints (Rust/Terracotta, Sage Green, Chocolate Brown, Beige)
- Speckle paint or watered-down gray/brown paint for splattering
- Round foam pouncers or dowels (various small sizes)
- Fine detail liner brush
- Old toothbrush (for speckling)
- Glazed ceramic surface conditioner (alcohol or rubbing alcohol)
- Palette or paper plate
- Paper towels
- Oven (for curing, if using bake-on paints)
Step 1: Preparation & Base
-
Clean the Surface:
Before laying down any color, wipe your ceramic cup and saucer thoroughly with rubbing alcohol. This removes invisible oils or fingerprints that prevent paint adhesion. -
Create the Speckled Effect:
To mimic the stoneware clay look in the photo, dilute a tiny drop of brown or dark gray paint with water on your palette until it is very fluid. -
Splatter Techniqe:
Dip an old toothbrush into this watery mix. Hold it a few inches from the cup and run your thumb across the bristles to flick tiny speckles onto the surface. Rotate the cup to get even, random coverage. -
Dry the Base:
Allow the speckles to dry completely. Since the layer is thin, 10 to 15 minutes should be sufficient.
Dotting Tool Hack
Don’t have foam pouncers? Use the flat end of a chopstick, a pencil eraser, or the handle end of a paintbrush to stamp perfect circles.
Step 2: Painting the Polka Dots
-
Prepare Your Palette:
Dispense nickel-sized amounts of your Rust, Sage Green, Chocolate Brown, and Beige paints onto your palette. -
Start with Rust:
Dip a small round foam pouncer or the flat end of a pencil into the Rust paint. Press gently onto the cup to create your first set of dots. Space them out generously to leave room for other colors. -
Add Green Tones:
Using a clean tool of similar size, add the Sage Green dots in the empty spaces. Keep the spacing somewhat random but balanced. -
Layer in Neutrals:
Fill in remaining gaps with the Beige and Chocolate Brown dots. Variation is key here; don’t worry if some dots are slightly closer together than others. -
Repeat on the Saucer:
Apply the same dot pattern to the saucer face. Ensure the colors are distributed similarly to match the cup. -
Refining Shapes:
If any dots look too thin or uneven, I like to go back with a small brush and carefully add a second coat to make the color opaque.
Step 3: Detailing & Finishing
-
Mix the Rim Color:
Thicken your Rust paint slightly if needed, or use it straight from the tube for the rim detail. -
Paint the Cup Rim:
Load a fine detail liner brush with Rust paint. Hold the brush steady and slowly rotate the cup or saucer to paint a thin, uneven line along the very edge of the rim. -
Paint the Saucer Rim:
Repeat the rim painting process on the outer edge of the saucer. A slightly wobbly line actually adds to the handmade pottery aesthetic shown in the photo. -
Clean Up Edges:
Check for any unwanted smudges. Use a damp cotton swab to wipe away mistakes while the paint is still wet. -
Dry Time:
Let the paint dry for at least 24 hours. Refer to your specific paint brand’s instructions for the exact duration. -
Curing Process:
Most ceramic paints require baking to become dishwasher safe. Place the cold mug in a cold oven, heat to the recommended temperature (usually 300°F–325°F), bake for 30 minutes, and let it cool inside the oven.
Drips on Curved Surfaces
If paint runs down the side of the mug, your load was too heavy. Wipe immediately with a wet Q-tip and reload your tool with less paint.
Now you have a charming, custom-painted tea set perfect for your morning routine


Mandala Dot Art Medallion on One Side
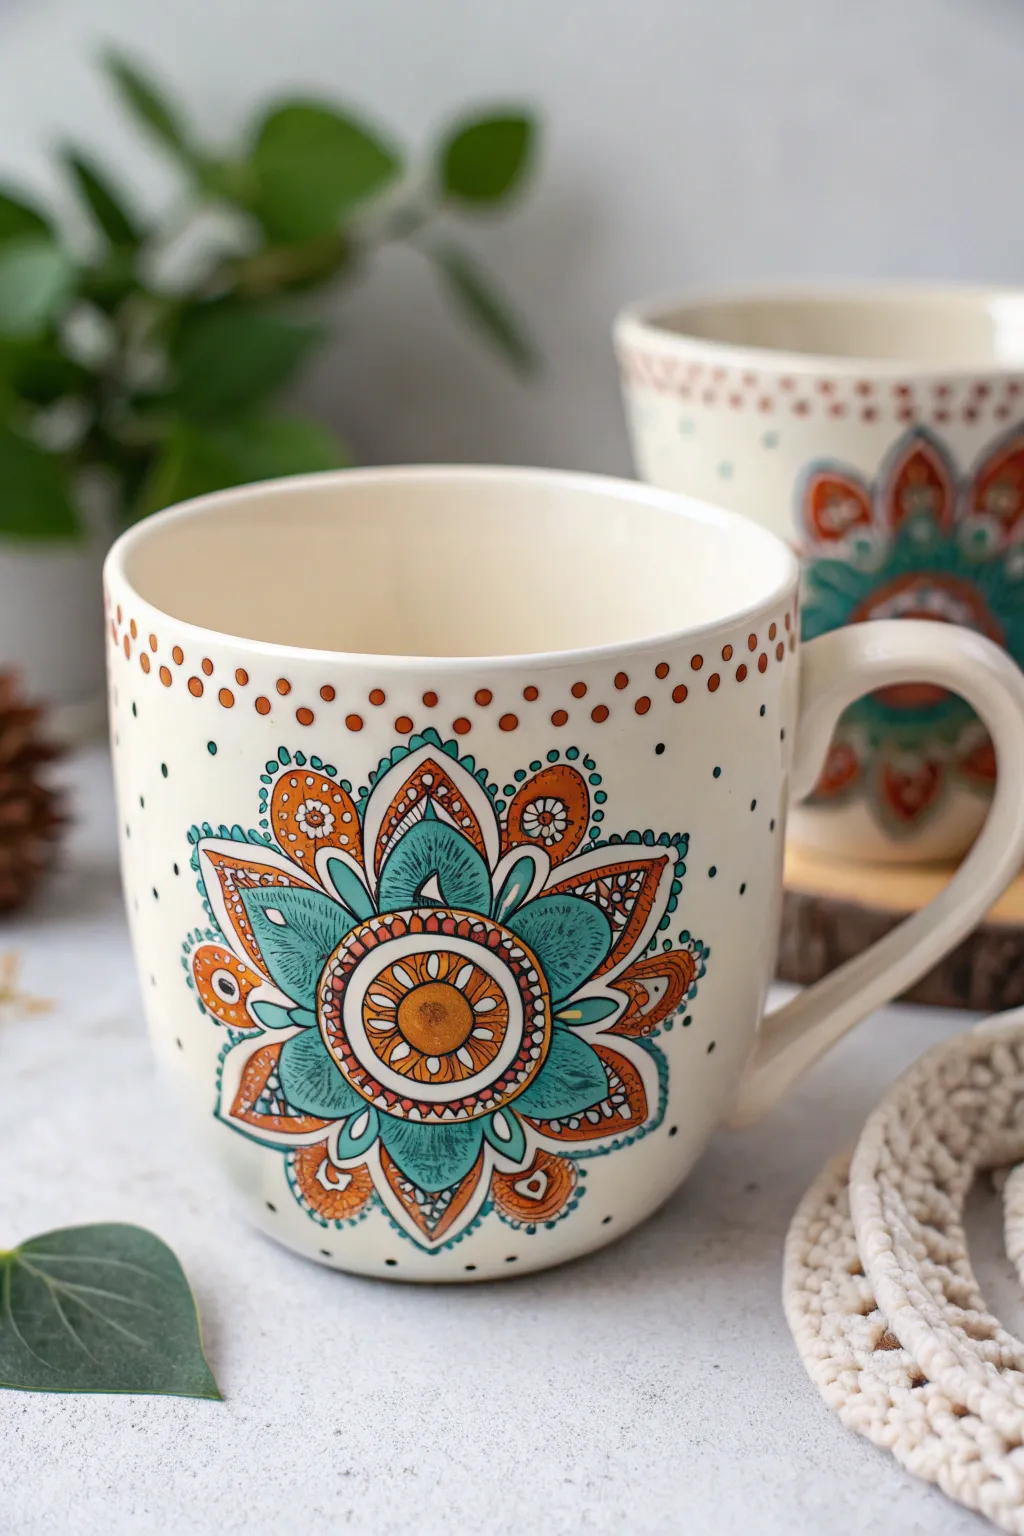
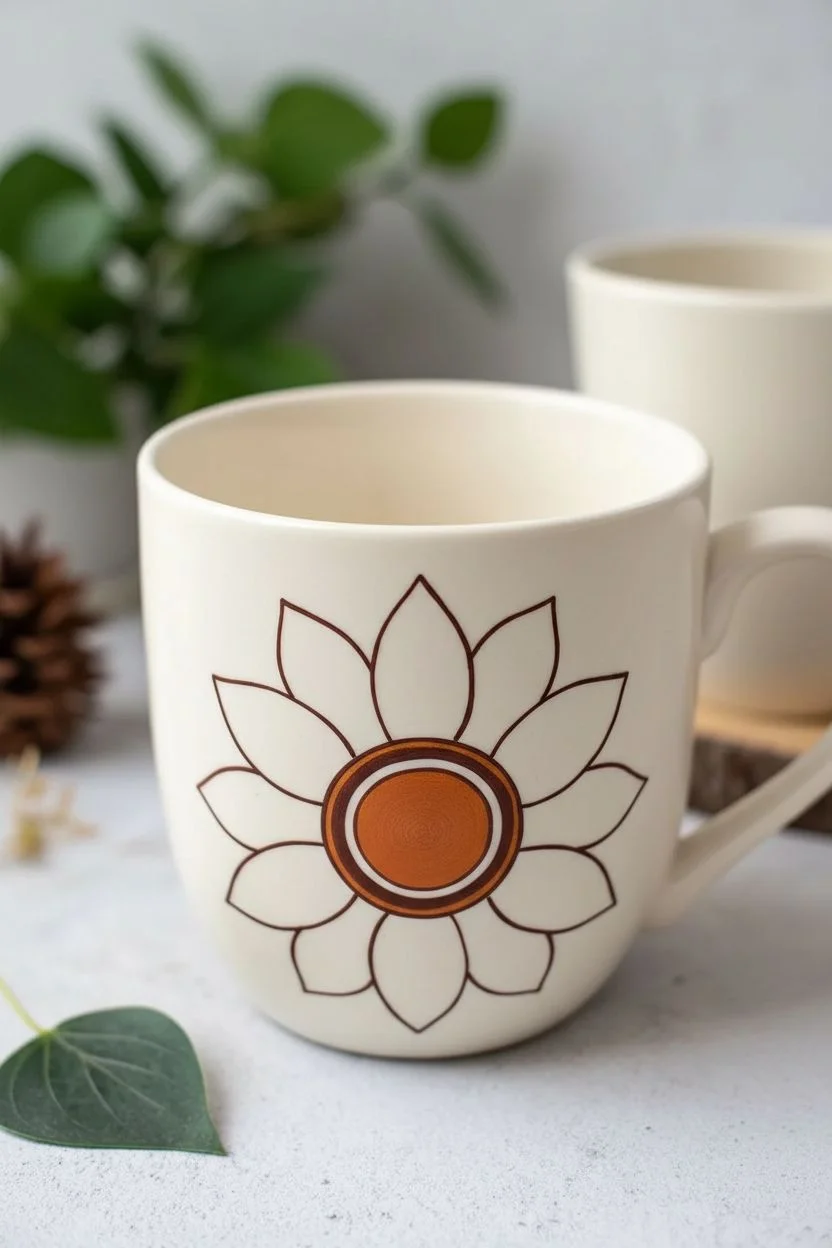
Transform a plain ceramic mug into a piece of functional art with this vibrant mandala medallion design. Featuring a soothing palette of teal, burnt orange, and earthy browns, this project combines precise dot work with flowing floral shapes for a stunning finish.
Step-by-Step
Materials
- Plain ceramic mug (cream or off-white)
- Pebeo Porcelaine 150 paints (or similar ceramic acrylics): Turquoise, Burnt Orange, Dark Brown, White, Gold
- Fine liner brush (size 00 or 000)
- Small round brush (size 1 or 2)
- Dotting tools (various sizes)
- Rubbing alcohol and cotton pads
- Pencil (optional)
- Paper towel
- Oven (for curing)
Step 1: Preparation & Base Outline
-
Clean surface:
Before passing a single brushstroke, wipe down the entire outer surface of your mug with rubbing alcohol. This removes oils and fingerprints, ensuring the paint adheres perfectly. -
Mark center:
Locate the center of the mug’s side where you want the medallion. You can lightly mark a small cross with a pencil to guide your initial circle placement. -
Paint center circle:
Using your small round brush and Burnt Orange mixed with a touch of Gold, paint a solid circle about the size of a dime in the center. -
First ring outline:
Load your fine liner brush with thinned Dark Brown paint. Carefully outline the orange center circle. Keep your hand steady by resting your pinky on the mug surface. -
Create the petal framework:
Sketch the main eight petals radiating from the center circle using the fine liner and Dark Brown paint. These should be almond-shaped and evenly spaced, extending about an inch outward.
Steady Hand Trick
Rest your pinky finger on the mug while painting fine lines. It acts as an anchor, reducing shakiness and giving you much better control over curves.
Step 2: Filling & Coloring
-
Fill primary petals:
Switch to the Turquoise paint. Fill in the eight almond-shaped petals you just outlined, but leave a small gap near the outline so the brown border remains visible and crisp. -
Add secondary petals:
Between each turquoise petal, paint a smaller, pointed ‘V’ shape or secondary petal using Burnt Orange. These fill the gaps and create a starburst effect. -
Layering details:
Once the turquoise is dry to the touch, use the liner brush and Dark Brown paint to draw internal lines or veins inside the turquoise petals for added texture. -
Outer flourish outlines:
Draw a larger, more ornate layer of petal shapes surrounding the entire design using the Dark Brown liner. These should be wider and encompass the inner work. -
Fill outer flourishes:
Fill these larger outer shapes with a mix of colors—tips in Burnt Orange and bodies in white or pale cream to create contrast against the mug’s base color.
Level Up: Handle Detail
Don’t stop at the bowl! Continue the dotted pattern down the spine of the mug handle for a fully cohesive, 360-degree design.
Step 3: Dot Work & Finishing Touches
-
Center medallion dots:
Dip a small dotting tool into White paint. Add a ring of tiny, precise dots inside the dark brown ring surrounding the very center orange circle. -
Petal decoration:
Add decorative dots to the orange secondary petals. I like to place a single, distinct white dot at the base of each orange section. -
Rim border dots:
Moving to the top rim of the mug, apply a row of Burnt Orange dots. Use a medium-sized dotting tool and space them evenly, about half a centimeter down from the lip. -
Second border row:
Create a second row of smaller dots just below the first rim row using the same Burnt Orange color, staggering them between the upper dots. -
Scattered accents:
Using the smallest end of your dotting tool and Dark Teal paint, add tiny scattered dots around the main medallion to soften the edges of the design. -
Highlighting center:
Add a final touch of Gold paint to the very center of the medallion to catch the light. -
Dry and cure:
Allow the mug to air dry for at least 24 hours. Follow the manufacturer’s instructions for your specific paint to bake the mug in a home oven, which usually involves baking at 300°F (150°C) for 35 minutes to make it dishwasher resistant.
Enjoy sipping your morning tea from a beautiful mug that is uniquely yours
BRUSH GUIDE
The Right Brush for Every Stroke
From clean lines to bold texture — master brush choice, stroke control, and essential techniques.
Explore the Full Guide
Soft Watercolor Wash Gradient Tea Cup
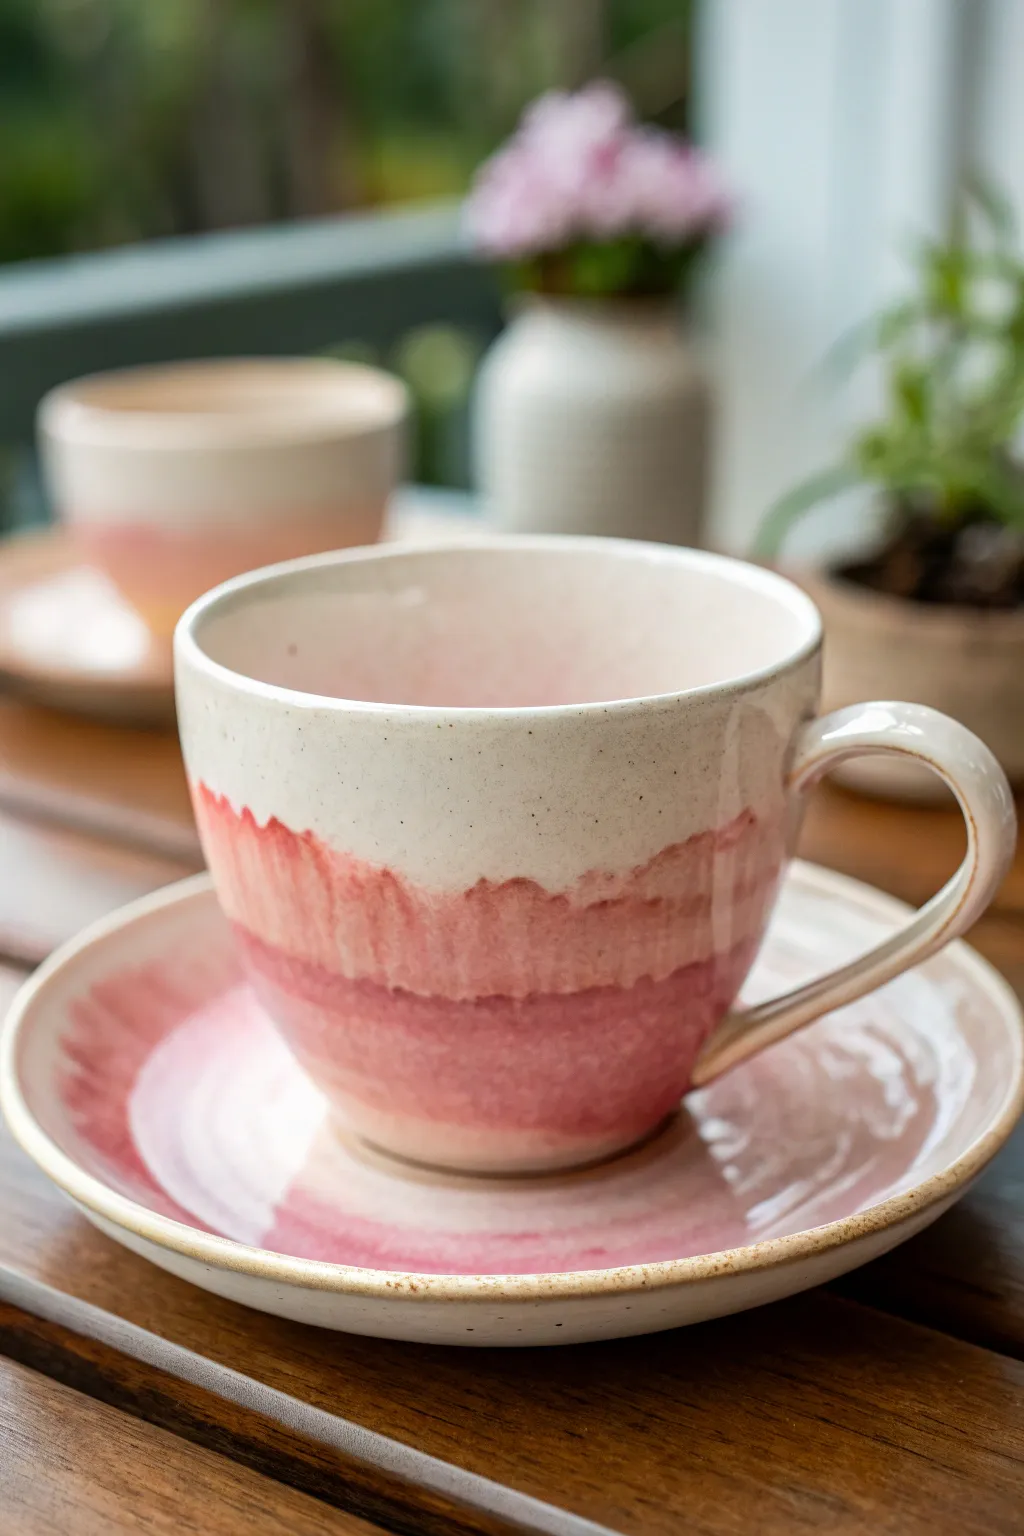
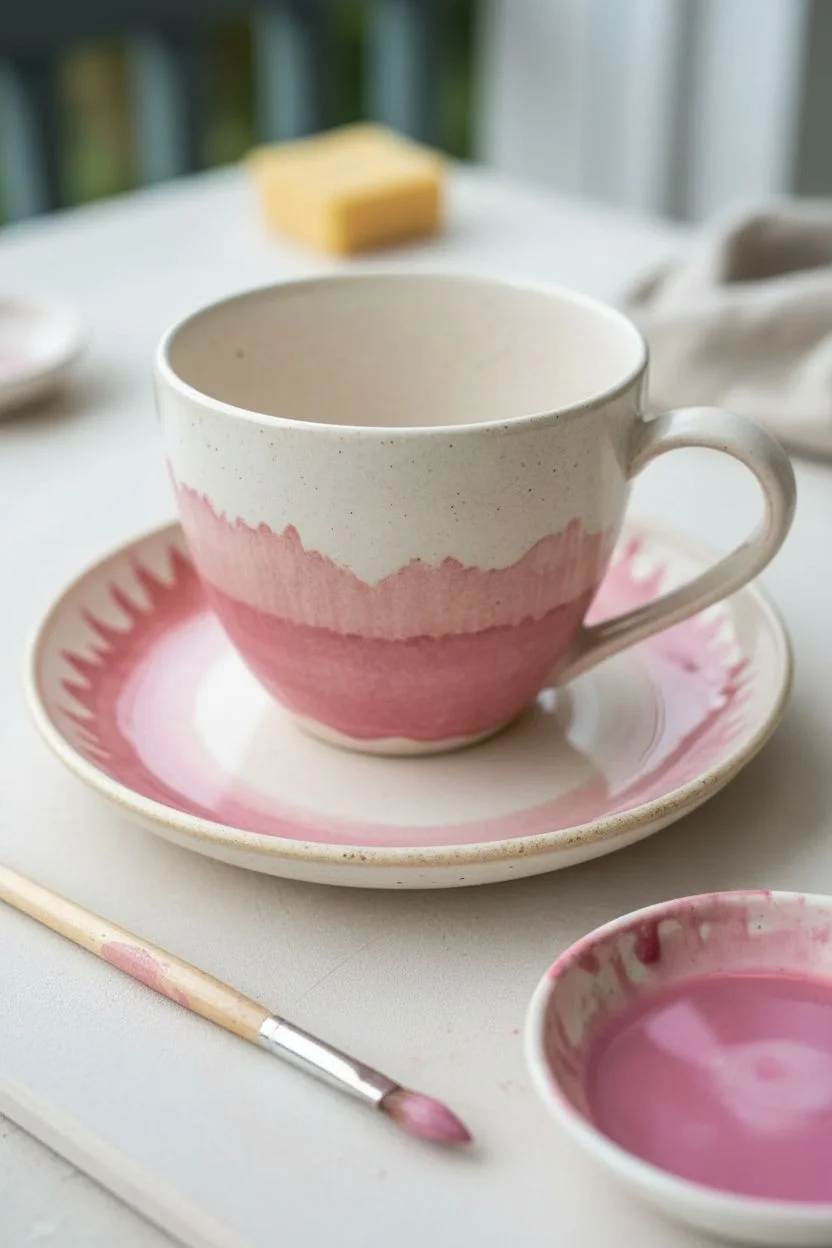
Transform plain bisque ware into elegant, boutique-style ceramics with this soft watercolor gradient technique. Using thinned glazes or underglazes creates a dreamy, organic wash of pink that fades beautifully into the natural cream of the clay.
Step-by-Step Guide
Materials
- Bisque-fired ceramic cup and saucer (speckled clay body recommended)
- Pink underglaze or ceramic glaze (food safe)
- Clear dipping or brushing glaze (food safe)
- Soft synthetic watercolor brushes (flat and round)
- Small container for water
- Sponge
- Palette or small dish for mixing
- Clean cloth or towel
Step 1: Preparation and Base
-
Clean surface:
Begin by wiping down your bisque-fired cup and saucer with a slightly damp sponge. This removes any dust or oils from handling that might resist the glaze application. -
Mix the wash:
In your palette, mix a small amount of pink underglaze with water. You are looking for a consistency similar to skim milk or watercolor paint—thin enough to drip slightly but pigmented enough to show color. -
Soak the brush:
Fully load a soft, medium-sized round brush with your watered-down pink mixture. The brush should be dripping wet to achieve that loose, organic watercolor effect.
Step 2: Painting the Gradient
-
First wash layer:
Starting at the bottom third of the cup, apply a generous horizontal stroke of the watery pink mixture. Don’t aim for a straight line; let the natural movement of the brush dictate the edge. -
Create the fade:
Immediately dip your brush into clean water and gently drag the top edge of your painted line upward. This pulls the pigment up slightly, creating a soft, feathered edge rather than a hard line. -
Intensify the base:
While the first layer is still damp, pick up more concentrated (less watered-down) pink underglaze. Dab this into the very bottom curve of the cup to create depth and a stronger gradient at the base. -
The saucer rim:
For the saucer, apply the watery pink mix along the outer rim. Use jagged, inward strokes that mimic the uneven line on the cup, letting the color pool naturally in the slight recesses of the plate. -
Saucer center:
Add a very sheer wash to the center well of the saucer where the cup sits. This ties the two pieces together without overwhelming the design. -
Drying time:
Allow the underglaze application to dry completely. Because it’s a watery application, it may feel cool to the touch longer than standard glaze; give it at least 20-30 minutes.
Uneven Drips?
If the watercolor edge looks too harsh, simply re-wet the area with a clean, damp brush and gently ‘scrub’ the edge to soften and blur the pigment.
Step 3: Finishing and Firing
-
Speckle check:
If your clay body isn’t naturally speckled, you can lightly flick a stiff brush dipped in diluted brown underglaze over the piece to mimic the stoneware look shown in the photo. -
Glaze preparation:
Stir your clear food-safe glaze thoroughly. If brushing, ensure it’s a smooth consistency; if dipping, ensure it’s mixed well to avoid streaks. -
Clear coat application:
Apply the clear glaze over the entire interior and exterior of the cup and the top of the saucer. I find that brushing on three thin, even coats often gives more control than dipping for this delicate look. -
Wipe the foot:
Use a damp sponge to meticulously wipe any clear glaze off the very bottom foot ring of both the cup and saucer. This prevents them from fusing to the kiln shelf during firing. -
Final inspection:
Check for any pinholes or missed spots in your clear glaze layer. Smooth them out gently with your finger if found. -
Firing:
Fire the pieces in a kiln according to the instructions for your specific clay and glaze combination (typically Cone 5 or 6 for stoneware).
Organic Texture
Don’t try to be perfect. The beauty of this design lies in the wobbly, uneven hesitation lines where the color fades into the white clay.
Enjoy your lovely new handmade ceramics with a warm drink or gift them to a friend who appreciates artisanal charm
Modern Geometric Bands Using Tape
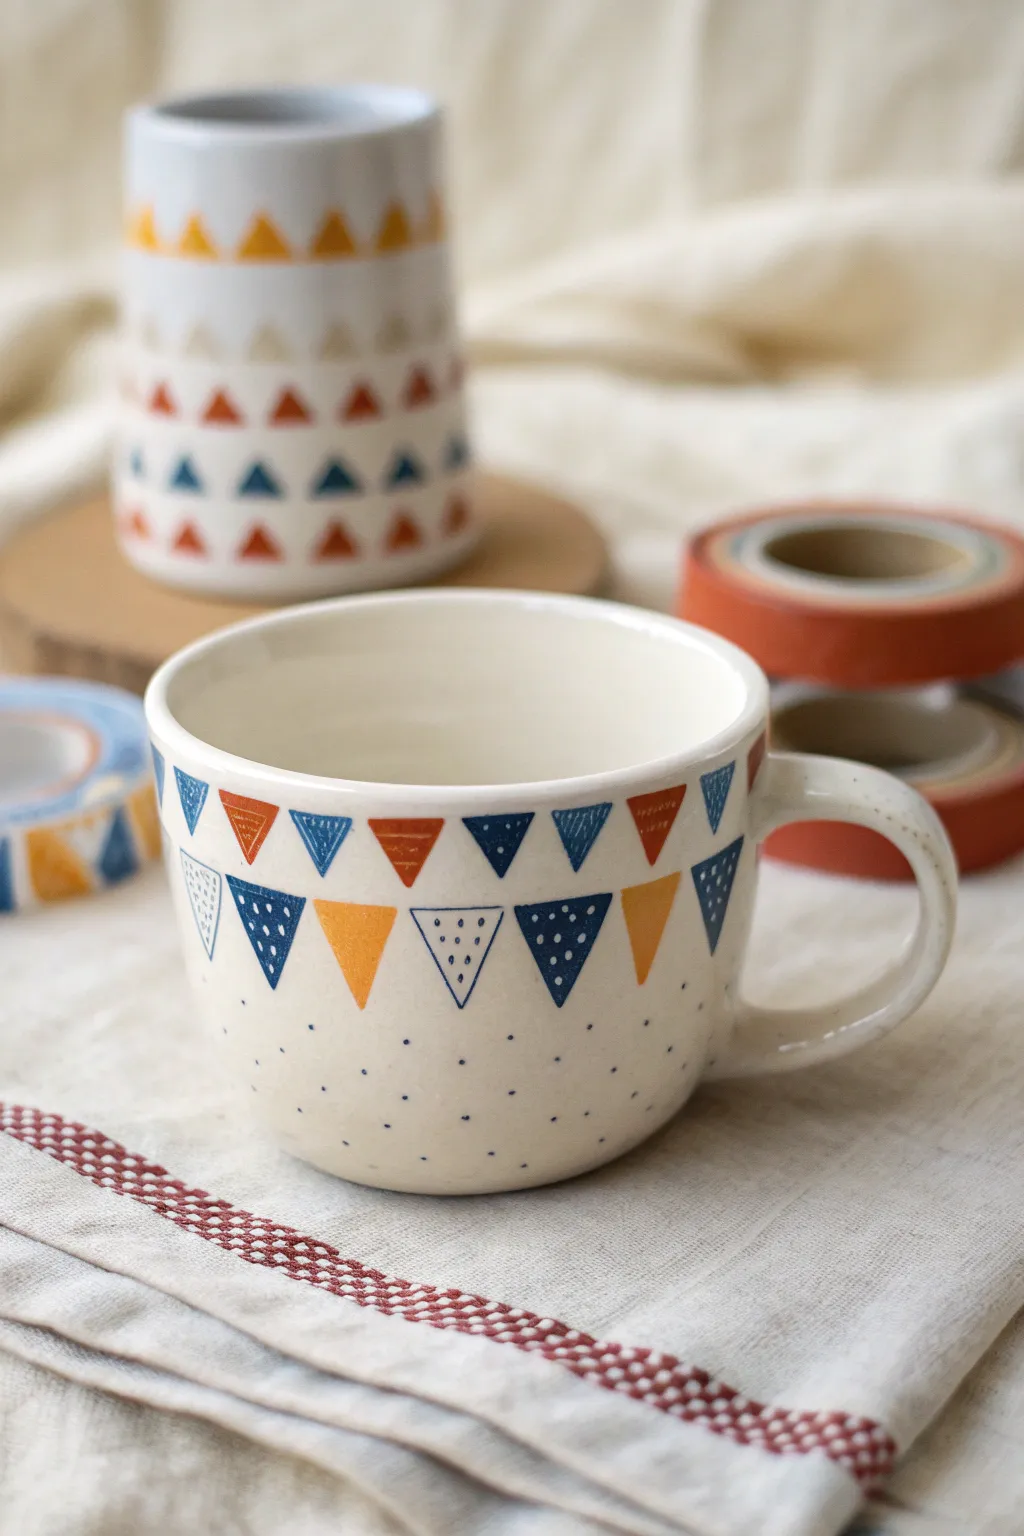
Transform a plain ceramic mug into a festive piece of everyday art with this charming bunting design. The hand-painted triangles and delicate polka dots create a playful, folk-art aesthetic that feels warm and inviting.
Step-by-Step Tutorial
Materials
- Plain white ceramic mug (smooth surface)
- Porcelain paints (navy blue, burnt orange, mustard yellow, light blue)
- Fine round paintbrush (size 0 or 1)
- Ultra-fine detailing brush (size 000)
- Rubbing alcohol and cotton pads
- Paper palette or small mixing dish
- Oven (for curing, if required by paint type)
- Graphite paper (optional for tracing guide lines)
Step 1: Preparation & Planning
-
Clean the Surface:
Before applying any paint, wipe the entire outer surface of the mug with rubbing alcohol. This removes unseen oils or fingerprints that could prevent the porcelain paint from adhering properly. -
Establish the Rim Line:
Visualize a line about half an inch below the rim. If you don’t trust your freehand skills, you can lightly mark a guide line using a soft pencil, which will burn off during baking or wash off later. -
Map the Triangle Points:
To ensure even spacing, make tiny, faint dots around the circumference where the top corners of your triangles will sit. Space them roughly 1 inch apart.
Wobbly Lines?
Don’t panic if your triangles aren’t geometrically perfect. The imperfect, hand-painted look is central to the charm of folk art styles. Just keep your brush steady.
Step 2: The Top Tier
-
Paint the Inverted Triangles:
Using your size 1 brush and navy blue paint, paint a series of inverted triangles hanging from your imaginary line. The point should face downwards. Alternate these with burnt orange triangles. -
Create the Alternating Pattern:
Continue around the mug, but introduce variety. Instead of a solid fill, I like to outline some triangles and fill others completely. For the outlined blue triangles, leave the centers empty for now. -
Second Row Placement:
Begin a second row of triangles nestled below the gaps of the first row. Use mustard yellow and navy blue here. These should also point downwards, creating a staggered bunting effect. -
Fill and Texture:
Go back to the empty outlined triangles from the first step. Use your ultra-fine brush to add tiny dots or hatch marks inside them using white or a lighter shade of blue if you have it, or simply leave the negative space. -
Add Decorative Details:
Inside the solid navy triangles, use the detail brush to add three small white dots in a vertical line or a simple horizontal stripe near the top.
Paint Consistency
If your porcelain paint feels too thick or drags, mix in a tiny drop of paint thinner or medium specifically designed for ceramic paints to improve flow.
Step 3: The Dotted Field
-
Prepare the Detail Brush:
Load your smallest brush (size 000) or a dotting tool with the navy blue paint. Ensure the paint isn’t too thick so the dots remain crisp. -
Start the Dot Pattern:
Begin placing tiny dots in the empty white space below the triangle rows. Start closer to the triangles and gradually space them out as you move down the mug. -
Vary the Density:
Ideally, the dots should look denser near the geometric pattern and fade out as they reach the bottom curve of the mug, creating a falling snow effect. -
Check for Consistency:
Rotate the mug to ensure the dot distribution feels balanced all the way around. Add a stray dot here and there to fill any obvious voids.
Step 4: Finishing Touches
-
Clean Up Edges:
Use a damp cotton bud or a toothpick to gently scrape away any paint that went outside your desired triangle lines before it fully sets. -
Allow to Dry:
Let the mug sit undisturbed for at least 24 hours. The paint needs to be fully dry to the touch before the curing process begins. -
Bake to Cure:
Place the mug in a cool oven, then set the temperature to 300°F (150°C) or according to your specific paint instructions. Bake for 30–35 minutes. -
Cool Down:
Turn the oven off and leave the mug inside to cool down gradually with the oven door closed. This prevents thermal shock cracks.
Enjoy your morning coffee in a customized mug that feels as cozy as the drink inside

PENCIL GUIDE
Understanding Pencil Grades from H to B
From first sketch to finished drawing — learn pencil grades, line control, and shading techniques.
Explore the Full Guide
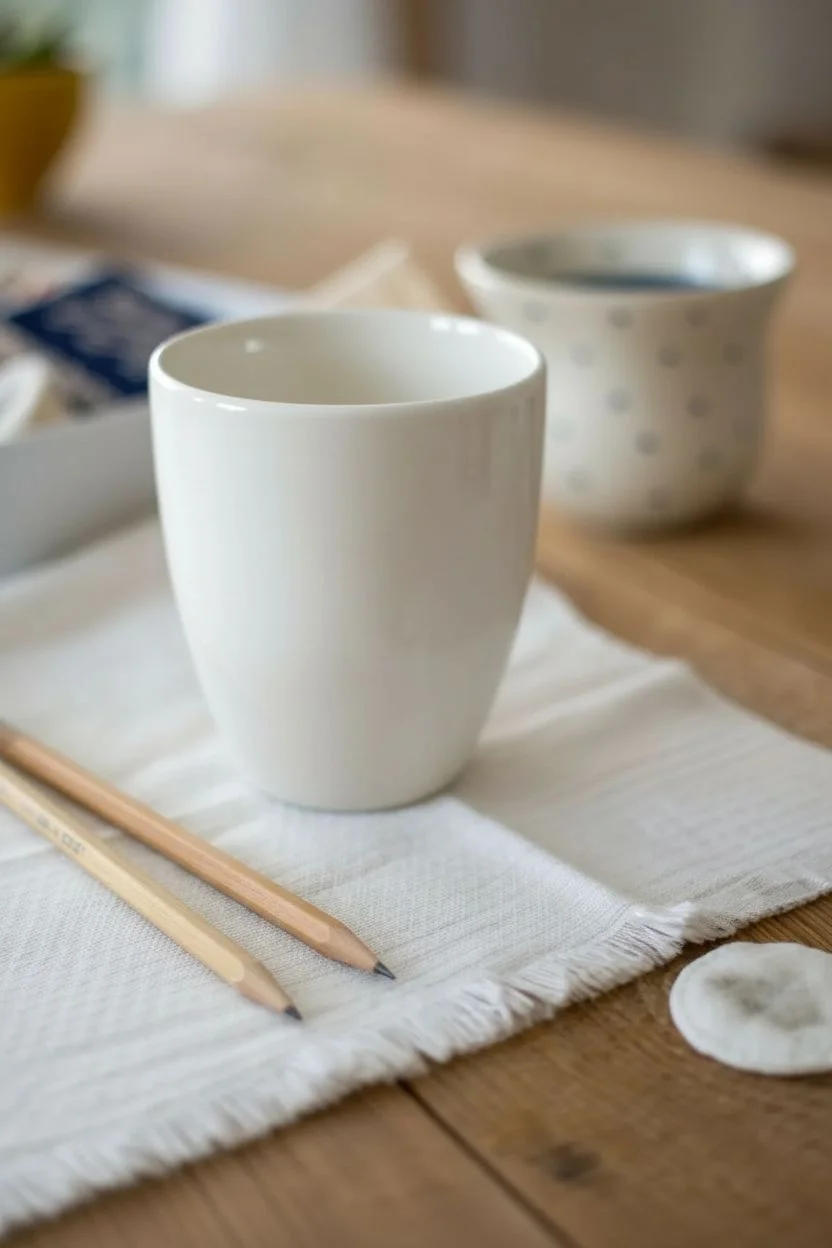
Loose Botanical Line Art in Black
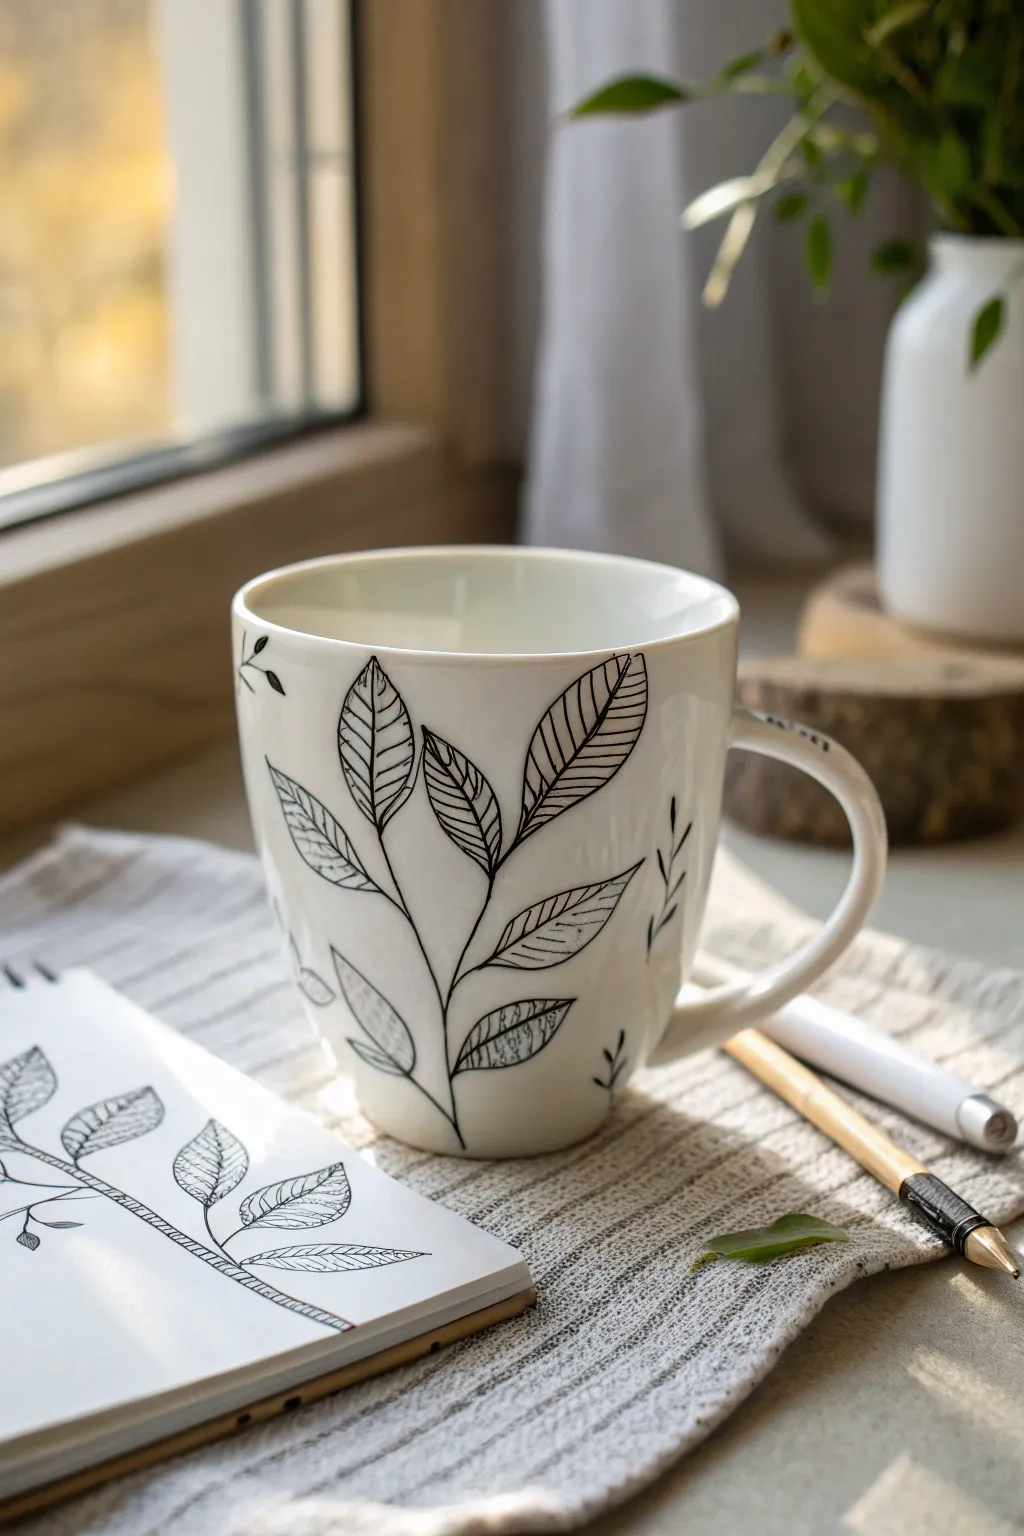
Capture the delicate beauty of nature with this minimalist mug design that mimics the loose, expressive strokes of a sketchbook. Using just a porcelain pen and a steady hand, you can transform plain white teaware into a modern botanical showpiece.
Step-by-Step
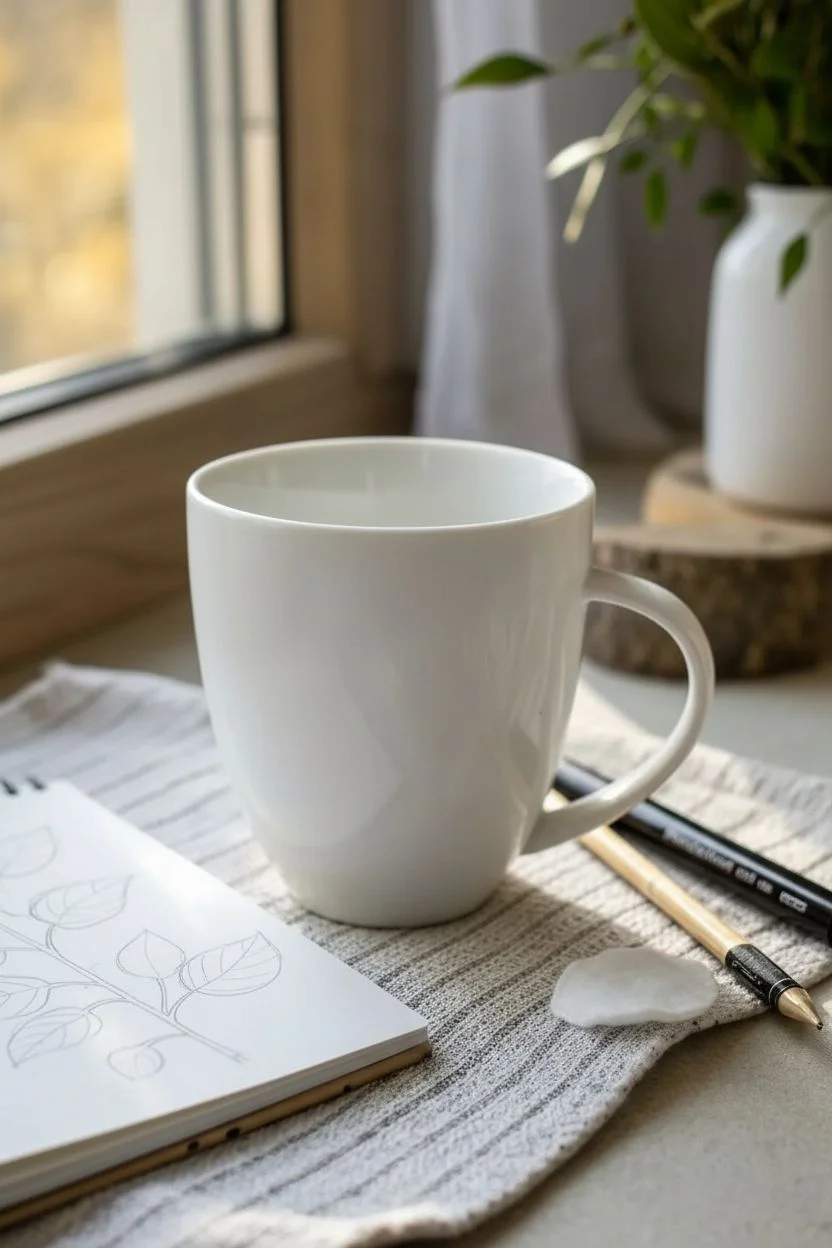
Materials
- White ceramic mug (clean and dry)
- Black porcelain marker or pebeo porcelaine 150 pen (fine tip, 0.7mm recommended)
- Rubbing alcohol and cotton pads
- Sketchbook and pencil (for drafting)
- Cotton swabs (for corrections)
- Oven (for curing)
Step 1: Preparation and Planning
-
Surface Prep:
Begin by thoroughly washing your mug with warm soapy water to remove any factory grease or dust. -
Degreasing:
Once dried, wipe the entire outer surface with rubbing alcohol on a cotton pad. This ensures the best possible adhesion for the ink. -
Avoid Touching:
From this point forward, try to handle the mug by the handle or the inside rim only, avoiding the painting surface with your fingers as oils can repel the ink. -
Drafting on Paper:
Grab your sketchbook and practice the design first. I like to sketch a few varying leaf shapes—some broad and ovate, others slender—to find a composition that feels natural and flowing. -
Flow Check:
Shake your porcelain pen well and press the tip on a scrap piece of paper until the black ink flows smoothly and consistently.
Shake It Up
Store your porcelain markers horizontally when not in use. Before drawing, shake vigorously and depress the nib on paper to prevent ink blobs on your mug.
Step 2: Drawing the Stem Structure
-
The Main Stem:
Start near the bottom of the mug. Draw a single, slightly curved vertical line extending upwards towards the rim to act as the central stem. -
Adding Branches:
Branch off from the main stem with shorter, thinner curved lines on alternating sides. Keep them fluid rather than rigid straight lines. -
Varying Angles:
Ensure that the branches extend at slightly different angles to mimic the organic growth pattern found in nature.
Step 3: Detailing the Leaves
-
Leaf Outlines:
At the end of each branch, draw a pointed oval shape for the leaf body. Don’t worry if the lines aren’t perfectly closed; small gaps add to the ‘sketched’ aesthetic. -
Central Veins:
Draw a line down the center of each leaf, connecting from the branch to just near the leaf’s tip. -
Venation Detail:
Add the smaller veins by drawing quick, diagonal hatching lines inside the leaf shapes. Keep these loose—they don’t need to match perfectly on both sides of the central vein. -
Adding Variety:
Consider leaving one or two leaves with less detail or slightly different hatching density to create visual interest. -
Filler Foliage:
If there are large empty spaces, add tiny independent sprigs or small floating leaves near the handle or the base to balance the composition. -
Making Corrections:
If a line goes astray while the ink is wet, quickly wipe it away with a damp cotton swab or a little rubbing alcohol.
Mix Your Media
Try adding a wash of watercolor-style paint behind the leaves. Use diluted porcelain paint in soothing greens or earthy browns for a soft splash of color.
Step 4: Curing and Finishing
-
Drying Time:
Let the mug sit undisturbed for at least 24 hours to allow the ink to dry completely on the surface. -
Oven Setup:
Place the mug into a cold oven. Do not preheat, as sudden temperature changes can crack the ceramic. -
Baking:
Set the temperature to 300°F (150°C) or the specific temperature recommended on your marker’s packaging. Bake for approximately 30-35 minutes. -
Cooling Down:
Turn the oven off and leave the mug inside until the oven has completely cooled down to room temperature. -
Final Wash:
Once cool, give the mug a gentle hand wash before its first use.
Enjoy your morning brew in a custom piece that feels like a page torn from an artist’s sketchbook
Tiny Tea Leaf and Herb Illustrations
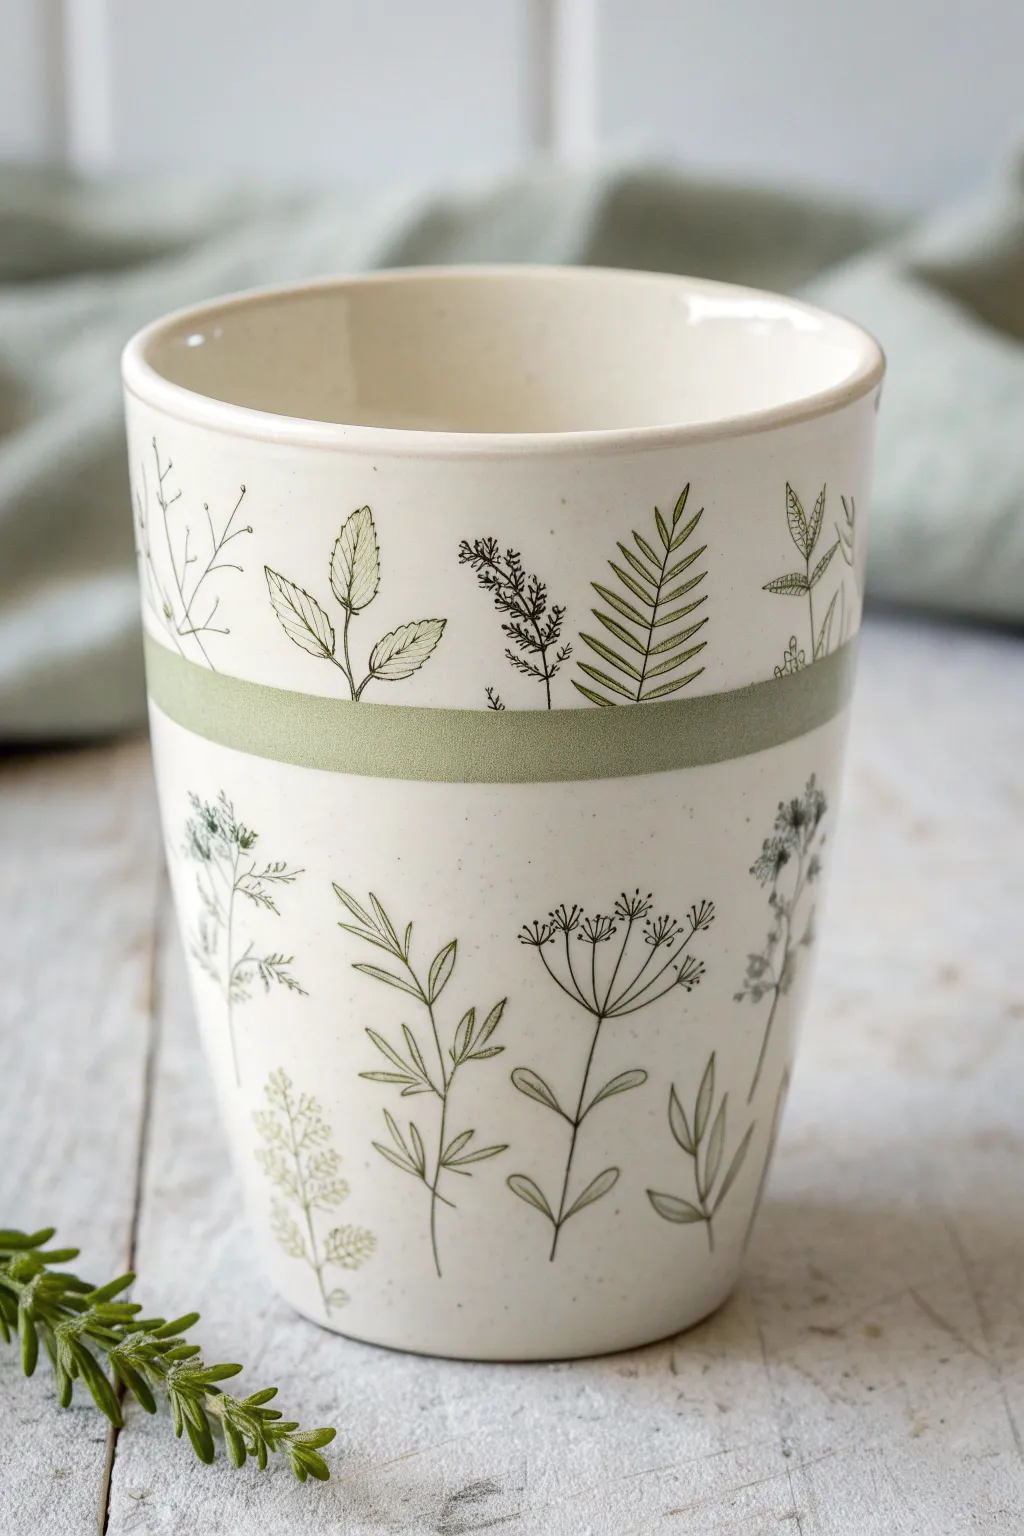
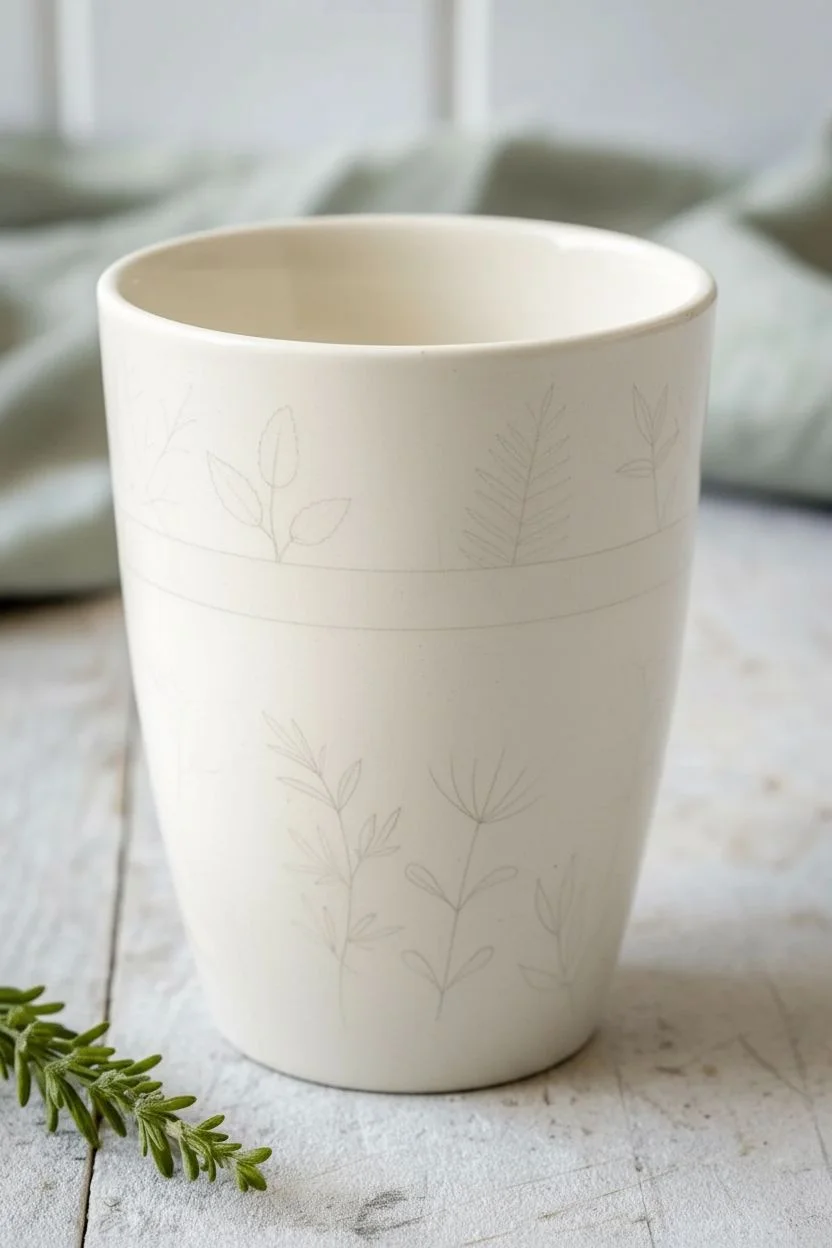
Transform a plain ceramic tumbler into a serene garden piece with delicate line work and soothing greens. This project combines simple leaf motifs with a calming sage stripe for a look that feels both organic and modern.
Detailed Instructions
Materials
- Blank ceramic cup or tumbler (preferably cream or off-white)
- Porcelain paint pens (fine tip, dark green/black)
- Porcelain paint (sage green)
- Flat shader paintbrush (medium width)
- Rubbing alcohol and cotton pads
- Paper towels
- Pencil (optional)
- Oven (for curing, if required by paint type)
Step 1: Preparation and Planning
-
Clean the Surface:
Before you start, wipe down the entire exterior of the cup with rubbing alcohol on a cotton pad. This removes invisible oils or fingerprints that could prevent the paint from adhering properly. -
Visualizing the Layout:
Visualize where the horizontal band will go. It sits just above the midpoint of the cup. You can lightly mark this guideline with a pencil if you need help keeping it straight. -
Sketching Motifs (Optional):
If you’re nervous about freehanding, lightly sketch your botanical shapes with a pencil. Don’t worry about details yet; just place simple stems to space them out evenly.
Clean Lines Hack
Use painter’s tape or washi tape to mask off the area for the sage green stripe. This guarantees perfectly straight edges without needing a steady hand.
Step 2: The Sage Green Band
-
Loading the Brush:
Dip your flat shader brush into the sage green porcelain paint. Ensure the bristles are evenly coated but not dripping. -
Painting the Stripe:
Hold the brush steady against the cup surface where you want the band. Rotate the cup slowly with your other hand rather than moving the brush; this helps create a continuous, even line about half an inch thick. -
Smoothing Edges:
If the edges look a bit rough, standard Q-tips dipped in alcohol are perfect for cleaning up any wobbles while the paint is still wet. -
First Drying Phase:
Allow this green band to dry completely before moving on to the illustrations. This usually takes about an hour, depending on your paint brand, to avoid smudging your work.
Add Subtle Color
Water down a tiny bit of the sage green paint and use it to fill in just a few of the leaves for a soft, watercolor-style tint.
Step 3: Botanical Illustrations
-
Prime the Pen:
Shake your fine-tip porcelain paint pen well and depress the nib on a scrap piece of paper until the ink flows smoothly. -
Starting the Top Section:
Begin illustrating the space above the green band. Draw varied leaf shapes—some like small ferns, others like rounded mint leaves—ensuring the stems seem to ‘grow’ out of the green stripe. -
Fern Details:
For the fern motif, draw a central curved line first. Then, add quick, short dashes on either side, angling them slightly upward to mimic feathery fronds. -
Mint and Basil Leaves:
Create broader leaves by drawing teardrop outlines. Inside these shapes, draw a central vein and tiny diagonal lines for texture, keeping the touch light. -
Adding Contrast:
Include darker, denser plants like the seeded darker sprig shown in the image to break up the lighter line work. I find that varying the visual weight of the plants makes the design more dynamic. -
Moving to the Bottom:
Once the top is smudge-safe, move to the area below the band. These plants should be larger and taller, with their stems disappearing off the bottom edge of the cup. -
Dill and Fennel:
Draw tall, thin stalks that branch out into umbrella shapes. At the ends of the ‘spokes’, add tiny dots or asterisks to represent delicate flowers. -
Leafy Sprout:
Draw long, vertical stems with pairs of pointed leaves extending outward. Keep the leaves simple and open, avoiding heavy shading. -
Rosemary Textures:
For a rosemary look, draw a main stem with many small, needle-like leaves clustered closely together. This adds a nice textural variety compared to the broad leaves. -
Final Review:
Check around the cup for any large empty spaces. Fill gaps with tiny floating seeds or small sprigs to balance the composition.
Step 4: Finishing Touches
-
Curing Process:
Let the cup dry for at least 24 hours. Afterward, bake the cup in your home oven according to the specific instructions on your paint or pen packaging to make the design dishwasher safe. -
Cooling Down:
Leave the cup in the oven to cool down gradually after baking. Removing it too quickly can cause the ceramic to crack due to thermal shock.
Enjoy sipping your favorite brew from your new, hand-painted garden cup


Tea Time Quote in Hand-Lettered Script

Elevate your daily brew with this straightforward yet charming hand-lettered mug project. Using porcelain pens for a crisp finish, you’ll create a cozy ‘tea time’ inscription featuring beautiful fluid script and a sweet heart accent.
Step-by-Step Guide
Materials
- White porcelain or ceramic mug (clean and smooth surface)
- Blue porcelain brush pen or marker (medium tip)
- Pink or dusty rose porcelain pen (fine tip)
- Rubbing alcohol and cotton pads
- Paper towel
- Pencil (optional for sketching)
- Oven (for curing)
Step 1: Preparation and Sketching
-
Surface Prep:
Begin by thoroughly cleaning your mug with warm soapy water to remove any manufacturing oils or dust. -
Degrease the Area:
Wipe the front of the mug where you intend to write with rubbing alcohol on a cotton pad. This ensures the ink adheres perfectly to the glaze. -
Plan Your Layout:
Visualize the placement of the text. You want ‘tea’ centered above ‘time’ in the middle of the mug’s face. If you’re nervous, lightly sketch guidelines with a soft pencil, but keep them faint as they can smudge.
Step 2: Lettering the Script
-
Prime the Pen:
Shake your blue porcelain marker well. Press the tip gently onto a scrap piece of paper to get the ink flowing smoothly before touching the mug. -
Start the ‘t’:
Beginning with the word ‘tea’, draw the vertical line of the ‘t’ first. Keep your pressure even. -
Cross the ‘t’:
Add the crossbar to the ‘t’. Extend the right side of the crossbar into a gentle wave that curves slightly upward, creating a decorative flourish. -
Form the ‘e’:
Letter the ‘e’ right next to the ‘t’. Try to keep the bottom of the letters aligned on an invisible baseline. -
Finish the First Word:
Draw the ‘a’, letting the tail of the letter curl up slightly at the end. -
Begin the Bottom Line:
Move to the second line for the word ‘time’. Start the second ‘t’ so its vertical stem sits roughly between the ‘t’ and ‘e’ of the line above. -
Add Flow to ‘time’:
Continue writing ‘ime’ in a connected, cursive style. Focus on keeping the loops of the ‘m’ rounded and consistent in size. -
Connect the Flourishes:
Extend the crossbar of the bottom ‘t’ just like the top one, perhaps curving it slightly to nestle under the word ‘tea’ for visual balance. -
Review and Correct:
Take a step back. If any lines look shaky, you can quickly wipe them away with a damp paper towel or cotton swab while the ink is still wet and try again.
Oops, Shaky Hand?
Keep a Q-tip dipped in rubbing alcohol nearby. It acts like a precision eraser for wet ink, letting you clean up wobbly edges instantly without restarting.
Step 3: Adding Accents and Curing
-
Draw the Heart:
Switch to your pink or dusty rose fine-tip pen. Draw a small, simple heart outline to the right of the word ‘time’, slightly elevated. -
Let it Dry:
Allow the design to air dry completely. I prefer to leave it for at least 24 hours to ensure the pigment settles before baking. -
Bake to Set:
Place the mug into a cold oven. Set the temperature to the manufacturer’s recommendation for your specific pen brand (usually around 300°F/150°C). -
Curing Time:
Bake for the directed time (typically 30-35 minutes). Turn the oven off and let the mug cool down completely inside the oven to prevent cracking.
Pro Tip: Faux Calligraphy
To get that elegant brush-lettering verify, go back over your downstrokes (the lines where you pulled the pen down) and thicken them slightly.
Once baked, your lovely custom mug is ready for your favorite herbal blend or coffee break
Rainy Day Raindrops and Cloud Motif
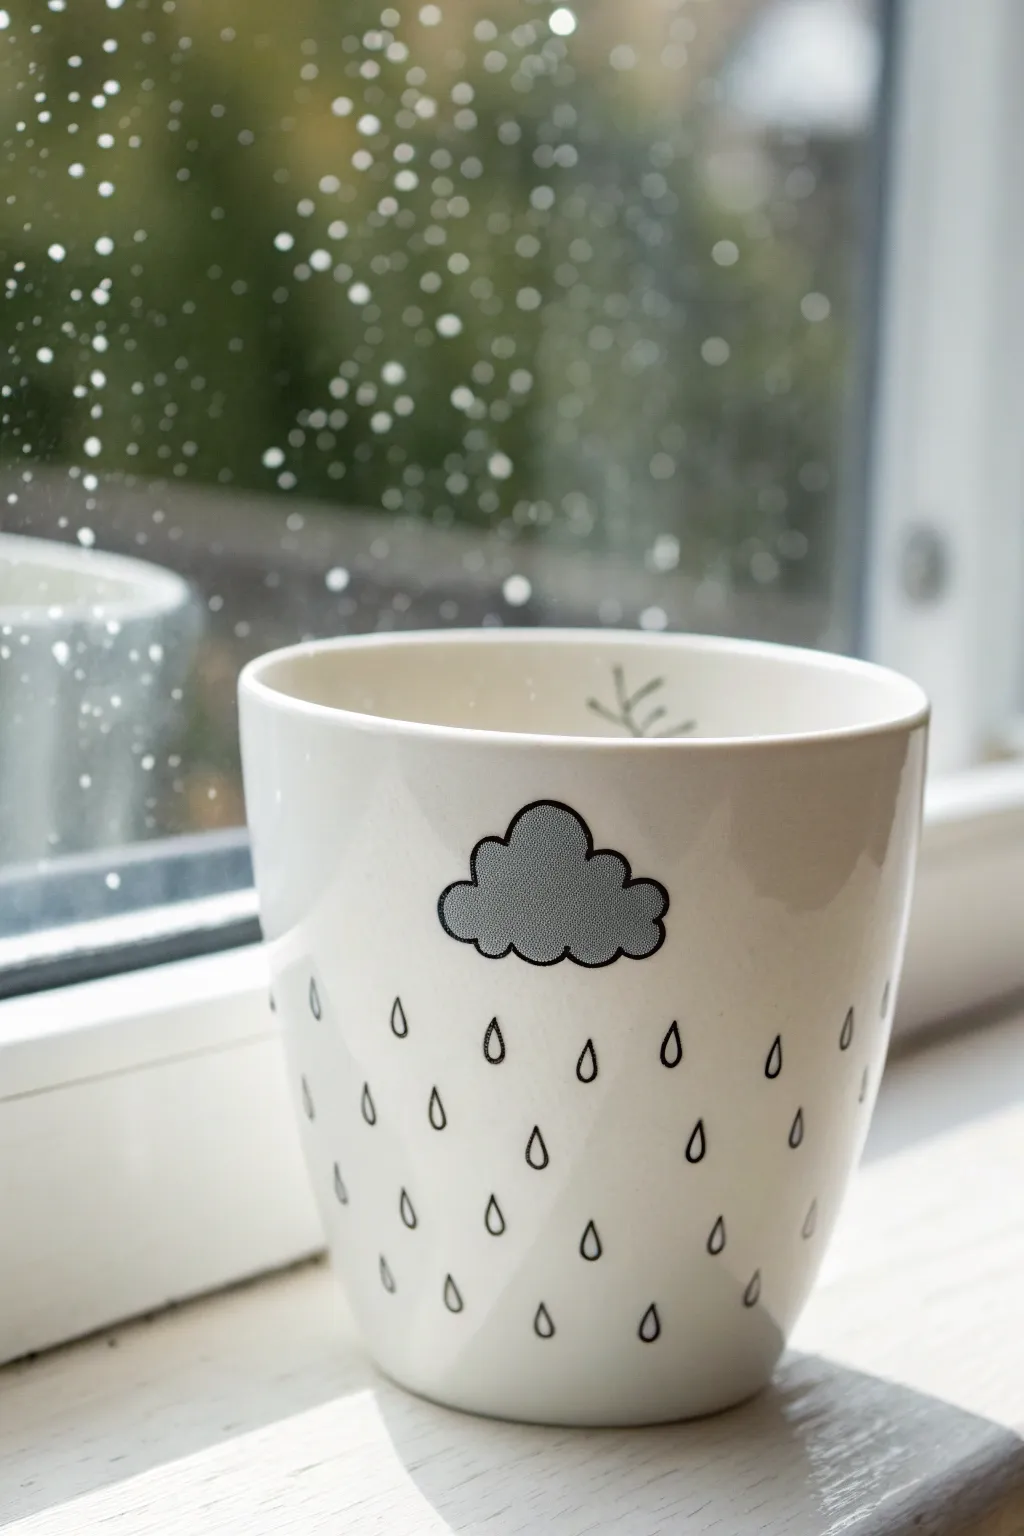
Capture the cozy feeling of a rainy afternoon with this charmingly simple painted mug design. Featuring a singular gray cloud and cascading raindrop outlines, this minimalist project turns plain porcelain into the perfect vessel for your favorite tea.
Step-by-Step Tutorial
Materials
- Plain white porcelain mug (cleaned and dried)
- Pebeo Porcelaine 150 paint (Anthracite Grey or similar)
- Pebeo Porcelaine 150 paint (Black for outlining)
- Pebeo Porcelaine 150 marker (Fine tip, Black) – optional but recommended
- Small round paintbrush (size 2 or 4)
- Very fine detail paintbrush (size 0 or 00) or paint pen
- Rubbing alcohol and cotton pads
- Paper plate or palette
- Oven (for baking/curing)
Step 1: Preparation & Planning
-
Clean the Surface:
Before you start painting, it is crucial to remove any oils or fingerprints from the mug. Wipe the entire outer surface thoroughly with rubbing alcohol and a cotton pad, then let it air dry completely without touching the painting area again. -
Plan the Layout:
Visualize where you want your main cloud to sit. It should be centered on one side of the mug, roughly one inch down from the rim to allow for lip clearance while sipping.
Use A Marker
For the black outlines, a porcelain paint pen is vastly easier than a brush. It gives you control like a permanent marker but is dishwasher safe after baking.
Step 2: Painting the Cloud
-
Mix Your Gray:
If you don’t have a pre-mixed gray ceramic paint, mix a tiny dot of black into white on your palette until you achieve a medium, storm-cloud gray. You want it opaque enough to cover the white ceramic. -
Paint the Cloud Shape:
Using your small round brush, paint a simple, fluffy cloud shape. Think about connecting three or four rounded humps along the top and a slightly flatter, bumpy line along the bottom. -
Smooth the Edges:
While the paint is wet, gently smooth out any thick ridges of paint. You want a flat, even application so it cures properly later. Let this gray base layer dry for at least one hour or until it is dry to the touch. -
Outline the Cloud:
Once the gray is dry, use a fine-tip porcelain paint marker or your size 00 brush with black paint to carefully outline the entire cloud shape. Keep your hand steady and rest your pinky on the mug for stability.
Step 3: Adding the Raindrops
-
Start the Top Row:
Begin painting your raindrops directly under the cloud. I find it easiest to work in rows to keep the spacing even. Use the fine detail brush or marker to draw small, open teardrop shapes. -
Stagger the Drops:
Work your way down the mug, staggering the position of the drops in each subsequent row. The drops in row two should sit in the empty spaces between the drops in row one. -
Vary the Shapes Slightly:
Don’t worry about making every raindrop identical. Small variations in the teardrop shape add to the hand-drawn, whimsical charm of the piece. -
Fill the Bottom:
Continue the pattern until you reach about half an inch from the bottom of the mug. Leave this bottom rim clear to prevent wear and tear. -
Optional Detail:
If you look closely at the inspiration image, there is a tiny doodle on the inside rim. Add a small twig or leaf shape just inside the top of the mug for a hidden surprise.
Rainbow Rain
Make it a cheerful storm by painting each raindrop outline in a different pastel color, turning the dreary weather into a colorful shower.
Step 4: Curing the Design
-
Air Dry First:
Let your finished mug sit for at least 24 hours. This allows the water in the paint to evaporate, ensuring the paint doesn’t bubble during the baking process. -
Prepare the Oven:
Place the mug into a cold oven. Do not preheat the oven, as the sudden temperature change can crack the ceramic. -
Bake the Mug:
Set the temperature to 300°F (150°C) or whatever specific temperature your paint brand recommends. Once the oven hits that temperature, bake for 35 minutes. -
Cool Down:
Turn the oven off and leave the mug inside to cool down gradually with the oven door closed. Remove it only when the oven is completely cold.
Enjoy sipping your favorite warm drink while watching the real rain fall outside
Galaxy Night Sky Tea Cup With Star Splatter
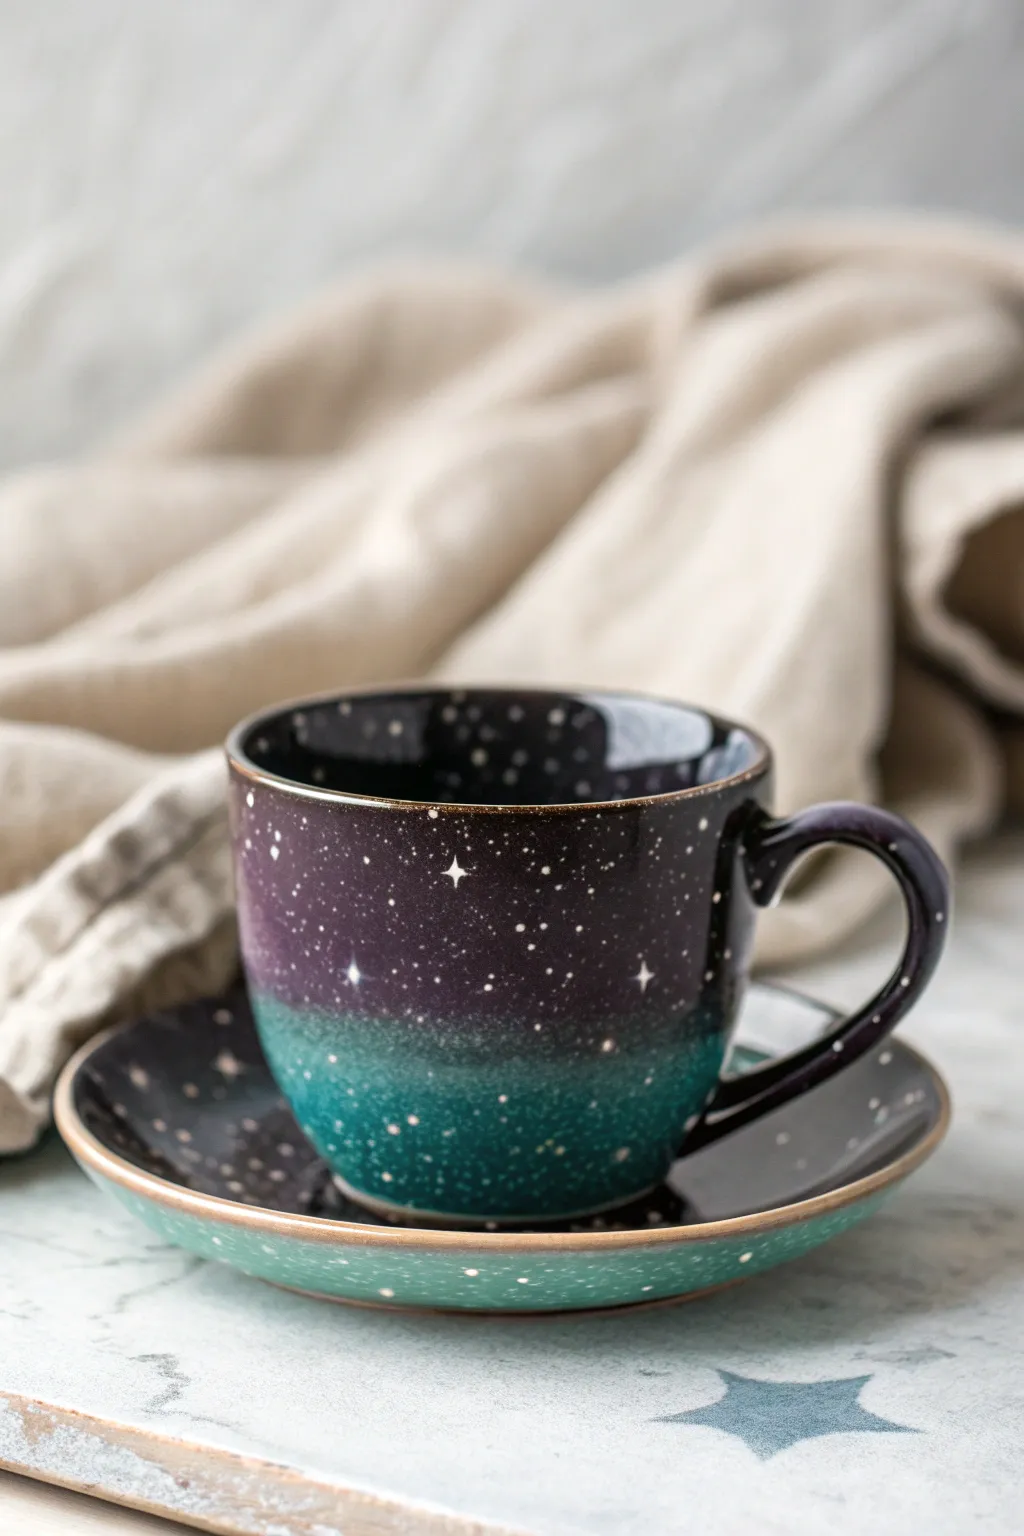
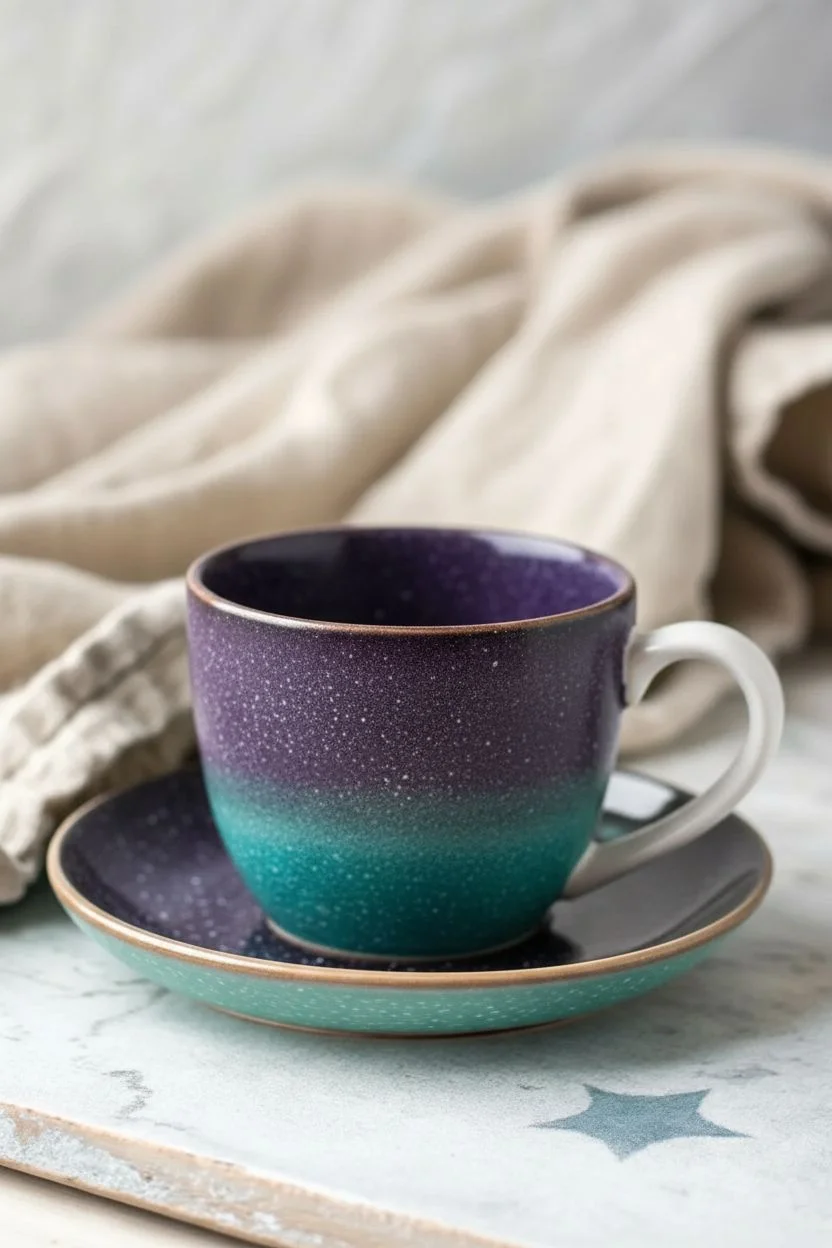
Capture the ethereal beauty of deep space on your morning teacup with this mesmerizing galaxy gradient project. Using blending techniques and careful splattering, you’ll create a seamless transition from deep cosmic purple to nebulous teal, finished with a dusting of starlight.
Detailed Instructions
Materials
- Plain ceramic tea cup and saucer (white or light colored)
- Ceramic or porcelain paints (Deep Violet, Black, Teal/Turquoise, White)
- Small sponges or sponge daubers
- Soft synthetic paint brushes (flat shader and fine liner)
- Q-tips or rubbing alcohol (for cleaning)
- Old toothbrush (for splashing)
- Palette or paper plate
- Paper towels
- Oven (for curing, check paint instructions)
Step 1: Preparation & Base Coat
-
Clean surface:
Begin by thoroughly cleaning the cup and saucer with rubbing alcohol to remove any oils or fingerprints. This ensures the paint adheres properly and doesn’t peel later. -
Plan the gradient:
Visualize the gradient line on your cup. For this look, we want the top two-thirds to be the dark night sky, fading into the teal horizon at the bottom third. -
Mix the dark base:
On your palette, mix a Deep Violet with a touch of Black. You want a very dark, midnight purple—almost black, but with that rich undertone. -
Sponge the top section:
Dip a sponge dauber into the dark mixture. Dab off excess paint on a paper towel, then start stippling the paint onto the top rim and moving downward, covering about half the cup’s height. Don’t create a hard line at the bottom; let it be irregular.
Problem: Paint pulling up?
If sponging lifts the previous layer, the paint is too tacky. Stop and let it dry fully, or you’re pressing too hard. Use a lighter ‘dabbing’ motion.
Step 2: Creating the Transition
-
Apply the teal:
Using a fresh sponge, pick up your Teal or Turquoise paint. Start applying it at the absolute base of the cup and work your way upward toward the purple section. -
Blend the middle:
Where the purple and teal meet, use a clean, slightly damp sponge to gently tap over the boundary. This creates a foggy, seamless transition rather than a stripe. I find light tapping works better than dragging. -
Paint the saucer:
Repeat this gradient process on the saucer. Paint the center dark purple/black (where the cup sits) and sponge the teal radiating outward toward the rim, or create a solid dark saucer with a teal rim if you prefer contrast. -
Rim detail:
For that rustic, finished look seen in the photo, run a very thin line of bronze or metallic brown paint along the very rim of the cup and the edge of the saucer using a steady hand and a fine liner brush. -
Dry layer one:
Let this base gradient dry completely according to your paint manufacturer’s instructions before starting the stars. Wet paint will cause the stars to bleed.
Pro Tip: Depth effect
For realistic depth, mix a tiny drop of teal into the white for some of your stars. It makes them look further away than the bright white ones.
Step 3: Starlight & Finishing
-
Prepare the splatter:
Thin down a small amount of white ceramic paint with a tiny drop of water. It needs to be fluid enough to flick, but not so watery that it runs. -
Test the consistency:
Dip an old toothbrush into the thinned white paint. Test it on a piece of cardboard first by running your thumb across the bristles to flick the paint. -
Create the star field:
Gently flick the toothbrush bristles to spray fine white speckles across the purple and teal sections of the cup and saucer. Vary your distance slightly to get different sized dots. -
Paint major stars:
Using your finest liner brush and undiluted white paint, hand-paint a few four-pointed stars. Draw a tiny cross, then gently curve the lines inward to make them look like twinkling light. -
Add bright spots:
Use the tip of a paintbrush handle or a dotting tool to add a few larger, distinct round dots among the spray to represent closer planets or bright stars. -
Clean up:
If any paint got onto the inside of the cup or areas you wanted to keep white (like the handle, if desired), wipe it away immediately with a damp Q-tip. -
Cure the piece:
Allow the paint to air dry for at least 24 hours. Once dry, bake the ceramic in a non-preheated oven according to the specific times and temperatures listed on your paint bottle to make it dishwasher safe.
Now you have a stunning piece of the galaxy to enjoy with your favorite warm brew
Marbled Tea Cup Look With Swirled Color
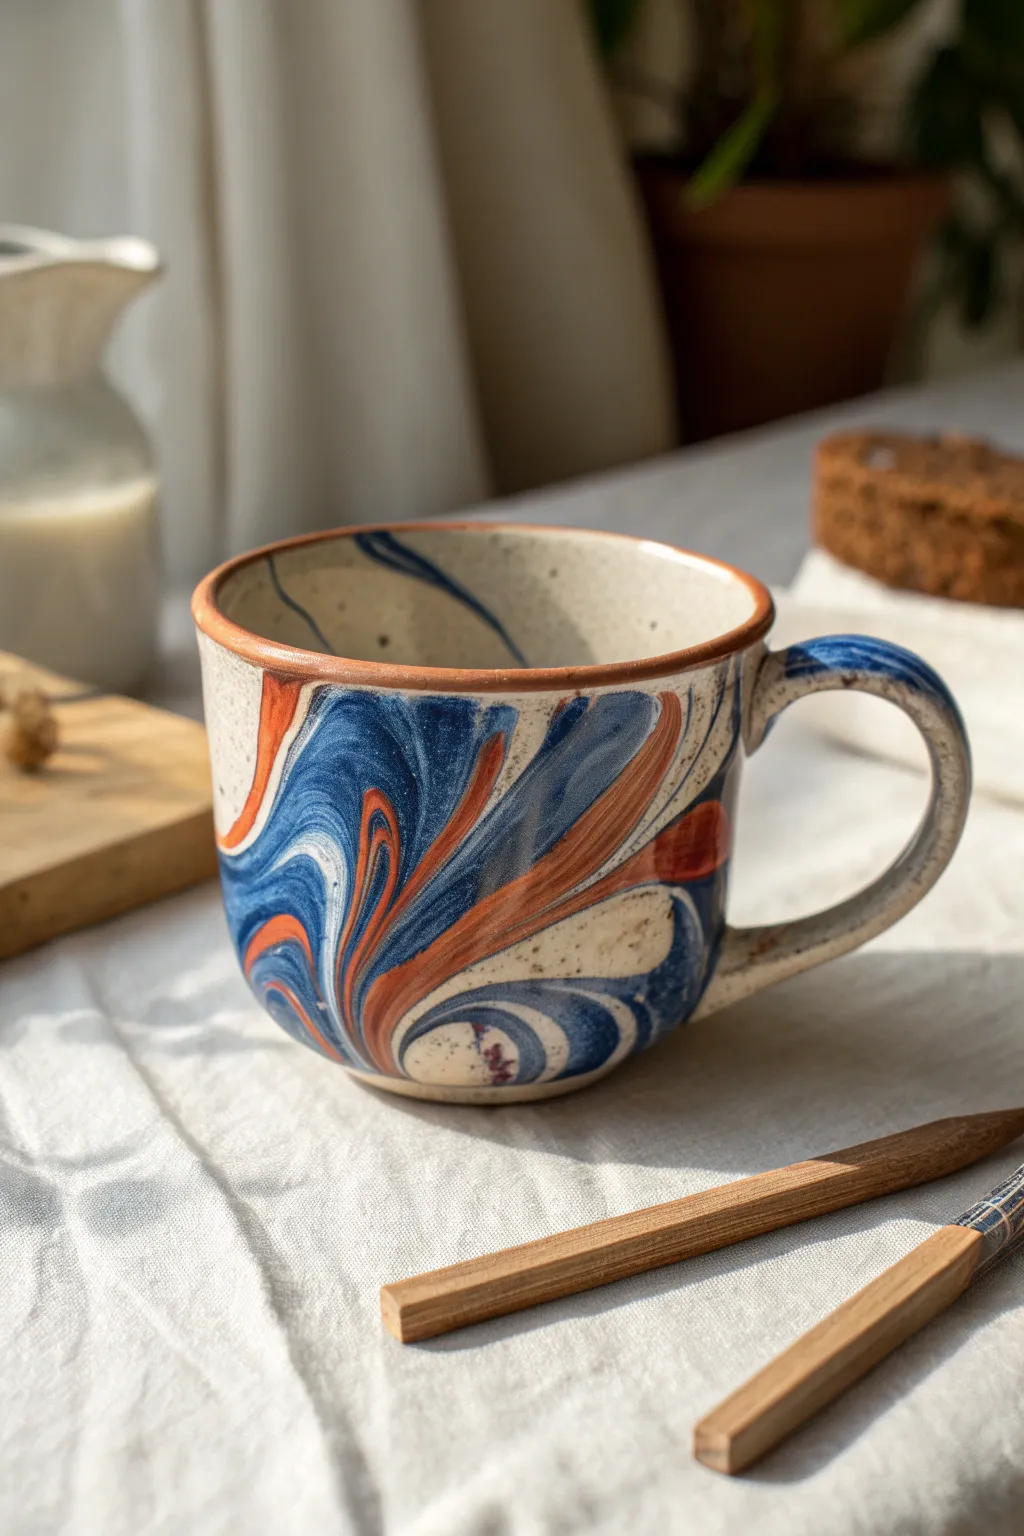
Transform a plain ceramic mug into a piece of functional art with this stunning marbled effect featuring swirls of deep indigo and rust orange. This technique mimics the sophisticated look of nerikomi pottery, creating fluid, organic patterns that make every sip feel special.
Detailed Instructions
Materials
- Plain cream or off-white ceramic mug (glazed)
- Pebeo Porcelaine 150 paints (or similar bake-able ceramic paint) in Navy Blue, Burnt Orange, and White
- Marbling medium or clear pouring medium compatible with acrylics
- Large plastic container (deep enough to dip the mug)
- Wooden skewers or toothpicks
- Painter’s tape
- Isopropyl alcohol and cotton pads
- Paper towels
- Oven (for curing)
Step 1: Preparation
-
Clean the Surface:
Before starting, wipe down the entire exterior of your mug with isopropyl alcohol on a cotton pad. This removes any oils or fingerprints that might prevent the paint from adhering properly. -
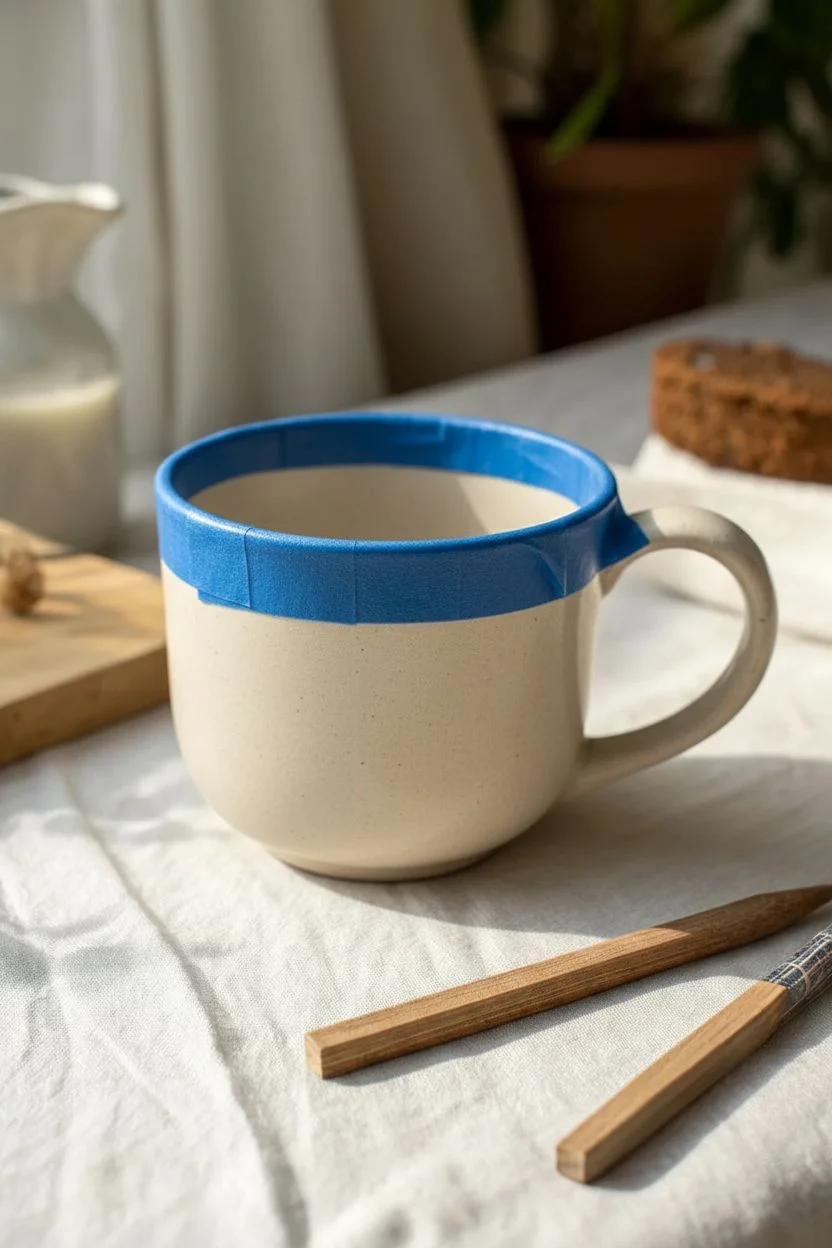
Mask the Rim:
Apply a strip of painter’s tape around the very top rim of the mug. We want to keep the area where your lips touch free of paint for safety and comfort. -
Protect the Handle:
If you want to keep the handle plain, wrap it in tape now. However, for the look in the photo, leave the handle exposed so it picks up the marbled pattern too.
Paint Sinking?
If your paint drops sink to the bottom instead of floating, your mixture is too heavy. Add a tiny bit more water or marbling medium to lighten the specific gravity of the paint.
Step 2: Creating the Marble Bath
-
Prepare the Container:
Fill your large plastic container with water. The temperature should be lukewarm—too cold and the paint might seize up too quickly. -
Mix Paints:
In small separate cups, mix your porcelain paints with a few drops of water or marbling medium to thin them slightly. You want a consistency similar to whole milk so it floats easily. -
Drop the Blue:
Gently drip your Navy Blue paint onto the surface of the water. Do this randomly around the center of the container. -
Add the Accent Color:
Immediately follow with drops of Burnt Orange directly into or next to the blue patches. The colors should begin to interact and spread. -
Create the Swirls:
Take a wooden skewer and very gently drag it through the floating paint. Use a figure-eight motion or simple S-curves to marble the colors together without over-mixing them into a muddy brown.
Pro Tip: Speckled Finish
To get that speckled clay look seen in the photo, flick a toothbrush loaded with slightly watered-down brown paint over the dried mug before baking it.
Step 3: Dipping and Finishing
-
The Dip:
Hold the mug firmly by the inside rim (or use a makeshift handle made of tape). Slowly dip the mug into the water at a 45-degree angle, rotating it slightly as you submerge it to catch the pattern on all sides. -
Remove and Shake:
Pull the mug out quickly and give it a very gentle shake to remove excess water droplets. Keep it inverted for a moment to let drips fall away from the rim. -
Clean Up Drafts:
While the paint is still wet, use a damp Q-tip or a brush dipped in alcohol to clean up any smudges on the bottom or near the rim tape that you don’t want. -
Remove Tape:
Carefully peel off the painter’s tape while the paint is still tacky but not fully dry. This ensures a crisp, clean line at the rim. -
Hand-Paint Details:
To mimic the specific look in the photo, take a fine liner brush with the Burnt Orange paint and manually touch up the very edge of the rim where the tape was, creating a solid colored lip. -
Initial Drying:
Let the mug dry completely for at least 24 hours. This is crucial—if moisture is trapped underneath, the paint will bubble in the oven. -
Bake to Cure:
Place the mug in a cold oven. Set the temperature to 300°F (150°C) or according to your paint manufacturer’s instructions. Once it hits temperature, bake for 35 minutes. -
Cool Down:
Turn the oven off and leave the mug inside until the oven has completely cooled down. Removing it too early can cause the ceramic to crack due to thermal shock.
Once cooled, your custom marbled mug is ready for your favorite morning brew or to be gifted to a lucky friend
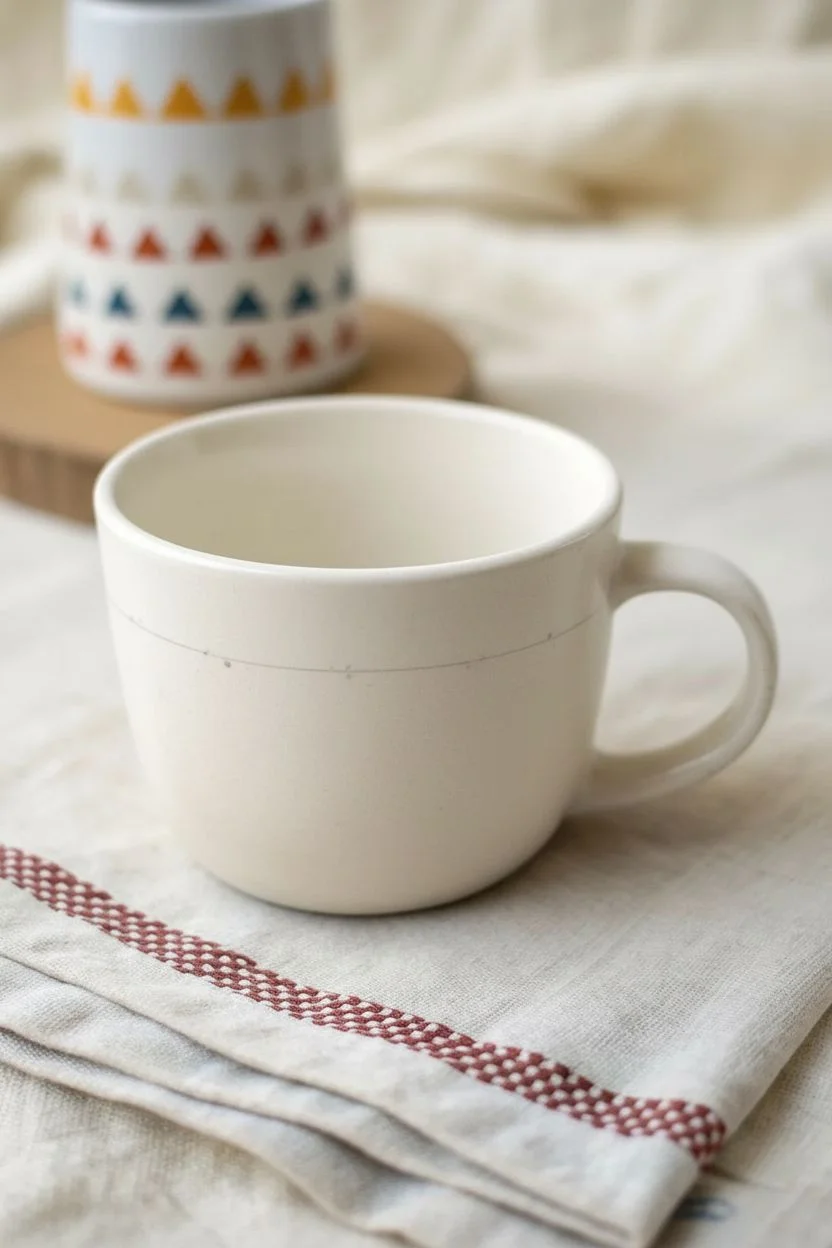
Mix-and-Match Tea Cup Set With Coordinated Patterns
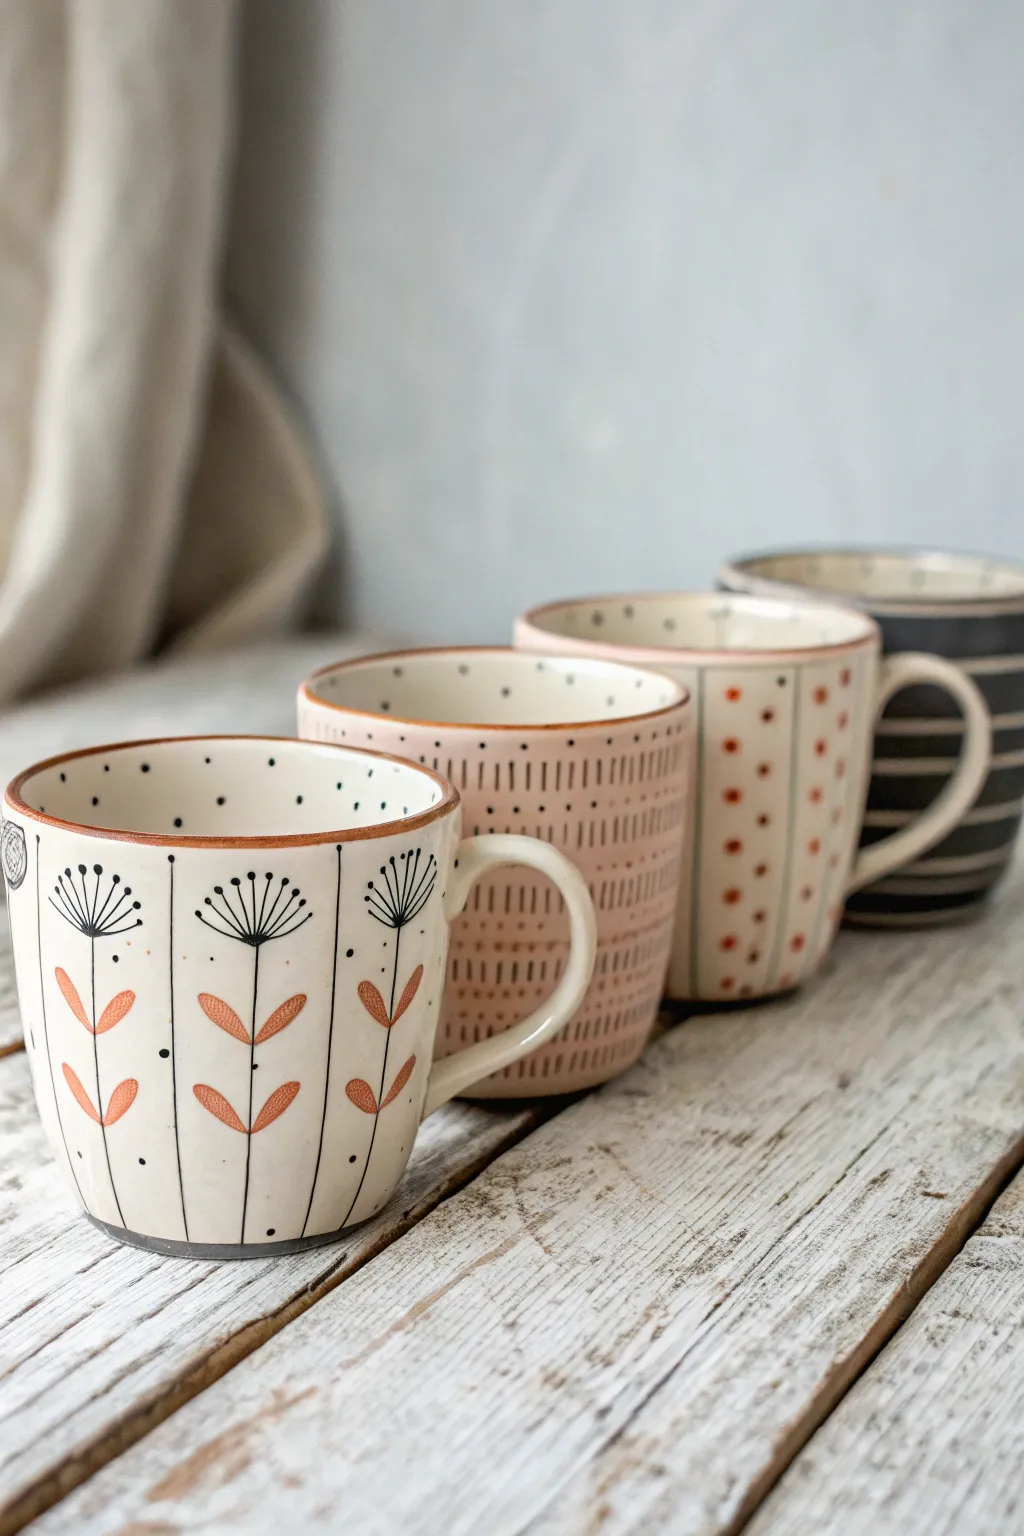
Create a stunning set of mismatched yet harmonious tea cups using simple geometric and floral motifs on a neutral base. This project focuses on balance and rhythm, combining dandelion silhouettes, vertical dashes, and playful dots in a warm, rustic color palette.
Step-by-Step Tutorial
Materials
- 4 plain ceramic mugs (cream or off-white, matte finish preferred)
- Ceramic paint or porcelain markers (black/dark grey)
- Ceramic paint (terracotta/rust orange)
- Fine liner brush (size 0 or 00)
- Round detail brush (size 2)
- Rubbing alcohol and cotton pads
- Paper towels
- Oven (for curing, if required by your paint type)
- Pencil (optional)
Step 1: Preparation & Base Work
-
Clean the surfaces:
Before creating any art, wipe down the exterior of all four mugs thoroughly with rubbing alcohol on a cotton pad. This removes invisible oils from your fingers that can prevent paint from adhering properly. -
Plan the palette:
Ensure you have your two main colors ready: a deep charcoal or black for line work and a warm terracotta orange for accents. Keeping to this strict two-color limit is the secret to making different patterns look like a unified set.
Steady Hand Trick
Rest your pinky finger on the mug surface while painting stripes. It acts as a stabilizer and fulcrum, giving you much cleaner, straighter lines.
Step 2: Mug 1: The Dandelion Field
-
Draw vertical guides:
Using your fine liner brush and black paint, paint thin, straight vertical lines from the top rim to the bottom edge. Space them about 1.5 inches apart around the entire mug. -
Add the stems:
In the center of the space between your vertical lines, paint a shorter vertical line that stops about an inch from the top rim. These will be your flower stems. -
Paint flower heads:
At the top of each stem, use quick, radiating strokes to create a semi-circle burst shape, mimicking a dandelion or seed head. Add tiny dots at the end of some strokes for texture. -
Add leaves:
Switch to the terracotta paint. Along the stem, paint small heart-shaped or teardrop leaves in pairs. Keep the strokes loose and organic rather than perfectly symmetrical. -
Detail the background:
Use the very tip of your brush to add random, tiny black dots in the negative space around the flower heads to add depth.
Step 3: Mug 2: The Dashed Texture
-
Create a wash (optional):
If you want the background slightly warmer like the second mug in the photo, dilute a tiny drop of terracotta paint with water and wash it over the mug, wiping most of it off for a stained look. Let this dry completely. -
Start the dash rows:
Using the terracotta paint and a detail brush, paint vertical rows of short dashes. The key here is imperfection; vary the length slightly to maintain a hand-drawn feel. -
Build the pattern:
Continue these rows around the mug. I find it helpful to rotate the mug on a lazy Susan or plate to keep my hand steady while working all the way around. -
Add defining lines:
Between every 3-4 rows of dashes, use your black paint to create a thin, solid vertical divider line to break up the visual texture.
Mix Up The Colors
Try swapping the palette: paint the mug solid terracotta first, then add cream or white patterns on top for a bold, inverted variation of this set.
Step 4: Mug 3: Dots & Stripes
-
Paint vertical stripes:
Using black paint, draw vertical lines around the mug, but space them widely—about 1 inch apart. -
Add colorful dots:
Dip the handle end of a paintbrush into your terracotta paint. Stamp a column of vertical dots right in the center of the white space between your black lines. -
Intersperse smaller dots:
Using a fine brush or a toothpick, add much smaller black dots between the large terracotta ones to create a dynamic rhythm. -
Rim detail:
This mug looks great with a defined rim. Carefully paint a thin terracotta line along the very top edge of the cup.
Step 5: Mug 4: Horizontal Stripes
-
Establish the horizon:
Unlike the others, this pattern is horizontal. Start by painting a black line around the circumference near the top. Rotating the mug while holding the brush still is easier than moving the brush. -
Fill the rest:
Continue painting parallel horizontal lines down the mug. If you feel confident, vary the thickness—make the top few thin and the bottom ones slightly thicker. -
Finishing touches:
Once all mugs are painted, check for stray smudges and clean them with a damp Q-tip before the paint sets fully. -
Cure the set:
Follow your paint manufacturer’s instructions for curing through baking. Usually, this involves placing mugs in a cold oven, heating to 300-350°F, and baking for 30 minutes before cooling inside the oven.
Enjoy using your perfectly imperfect hand-painted tea set for your next morning brew


Have a question or want to share your own experience? I'd love to hear from you in the comments below!