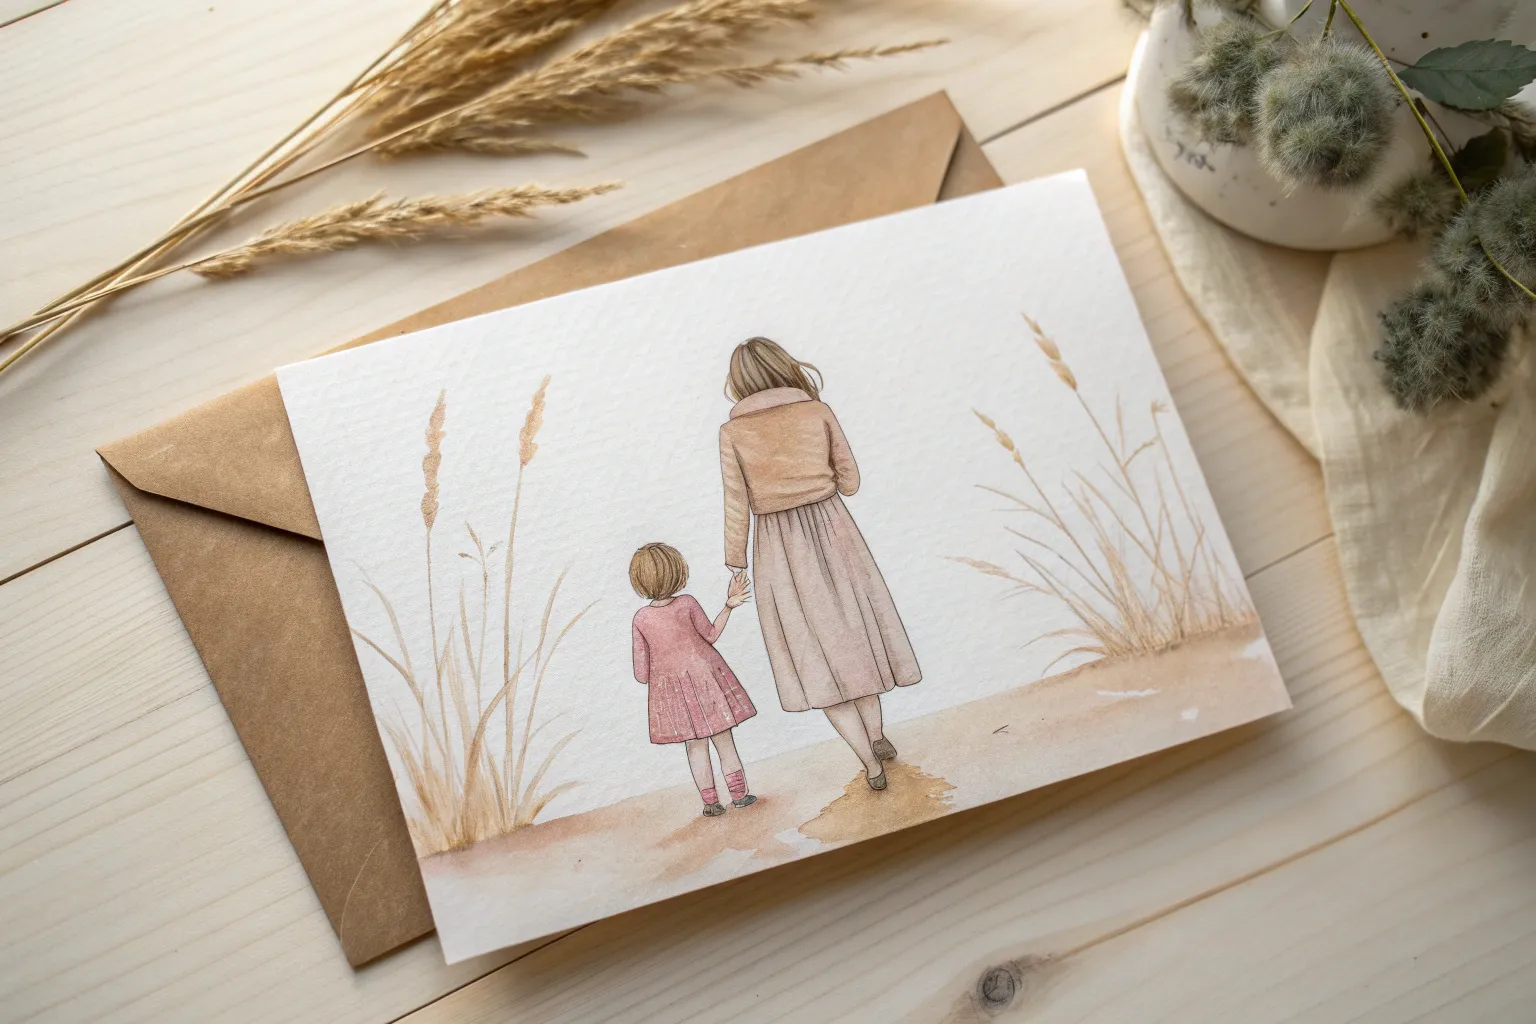
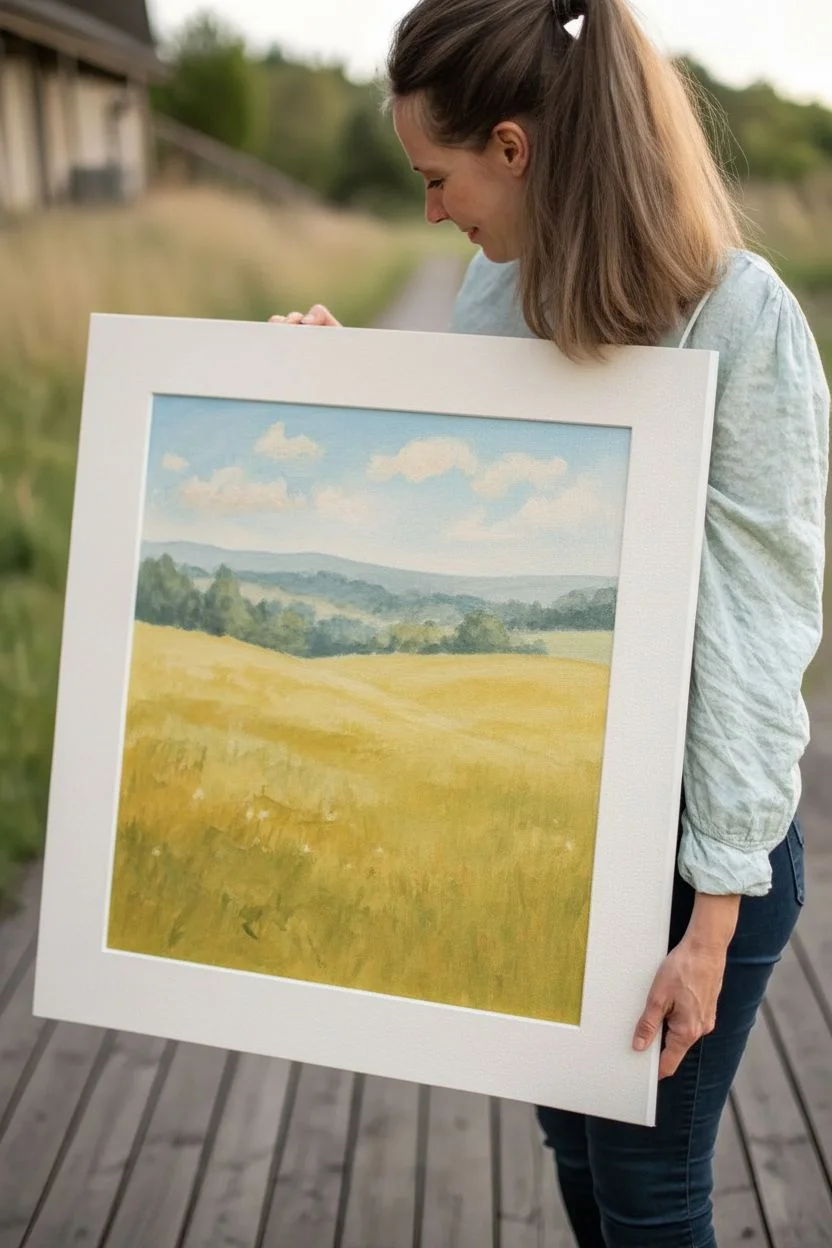
Some of the sweetest paintings aren’t about perfect technique—they’re about capturing that mother-daughter bond in a way that feels true to you two. Here are my favorite mother daughter painting ideas that create real connection while still being totally doable, even if you’re both beginners.
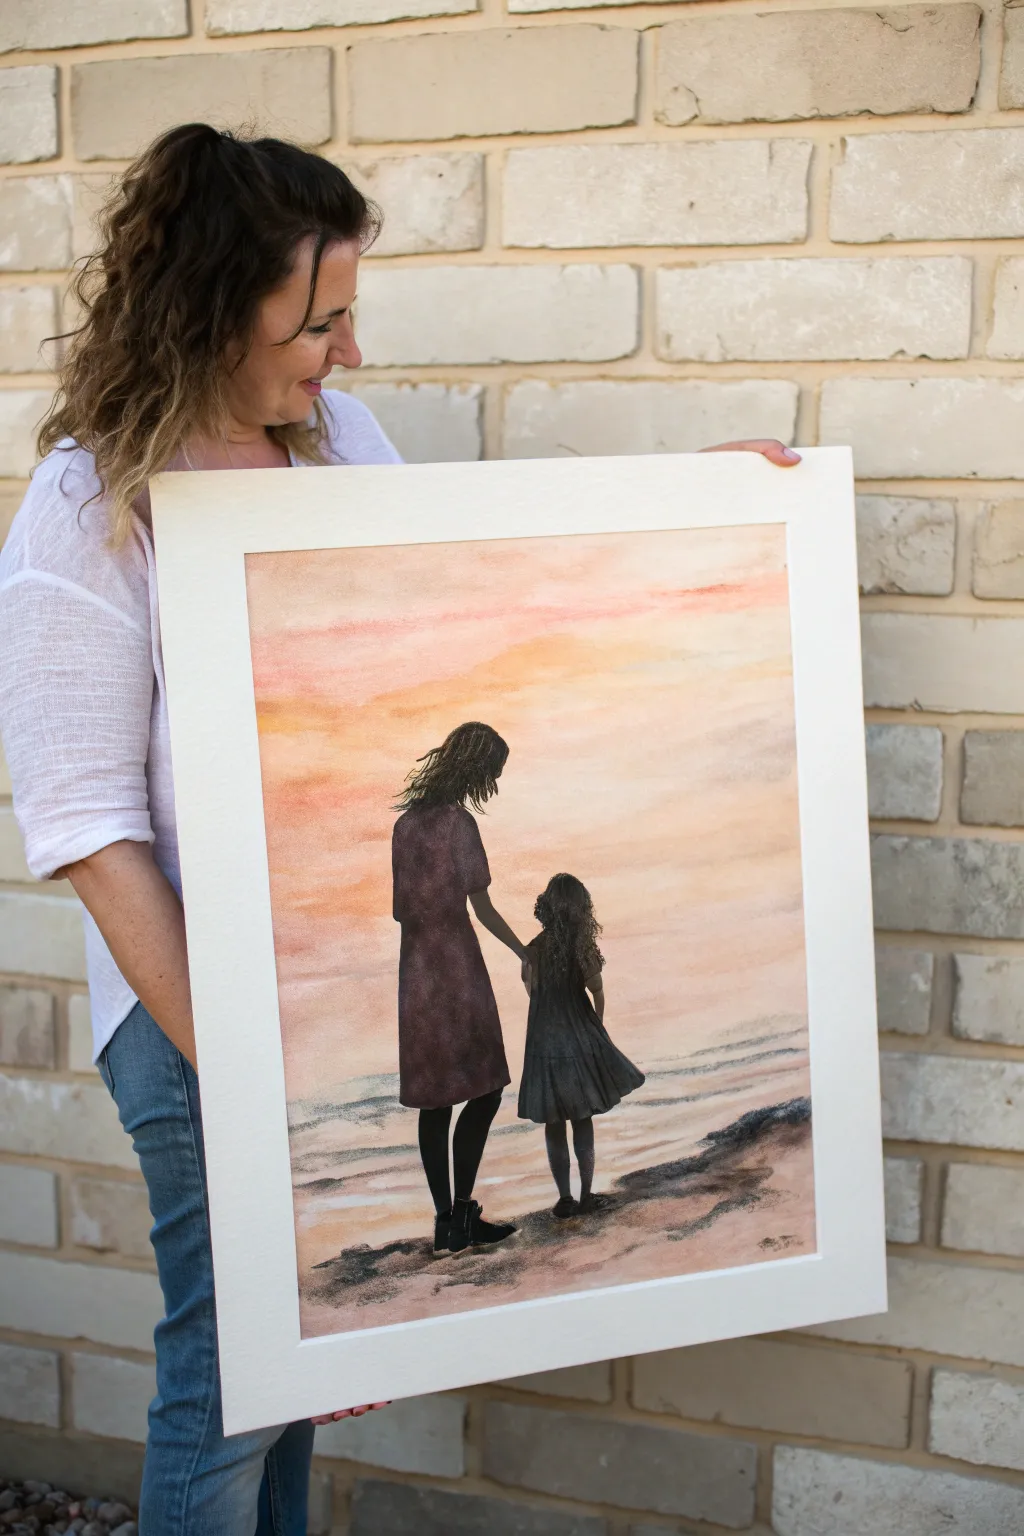
Sunset Silhouette Holding Hands
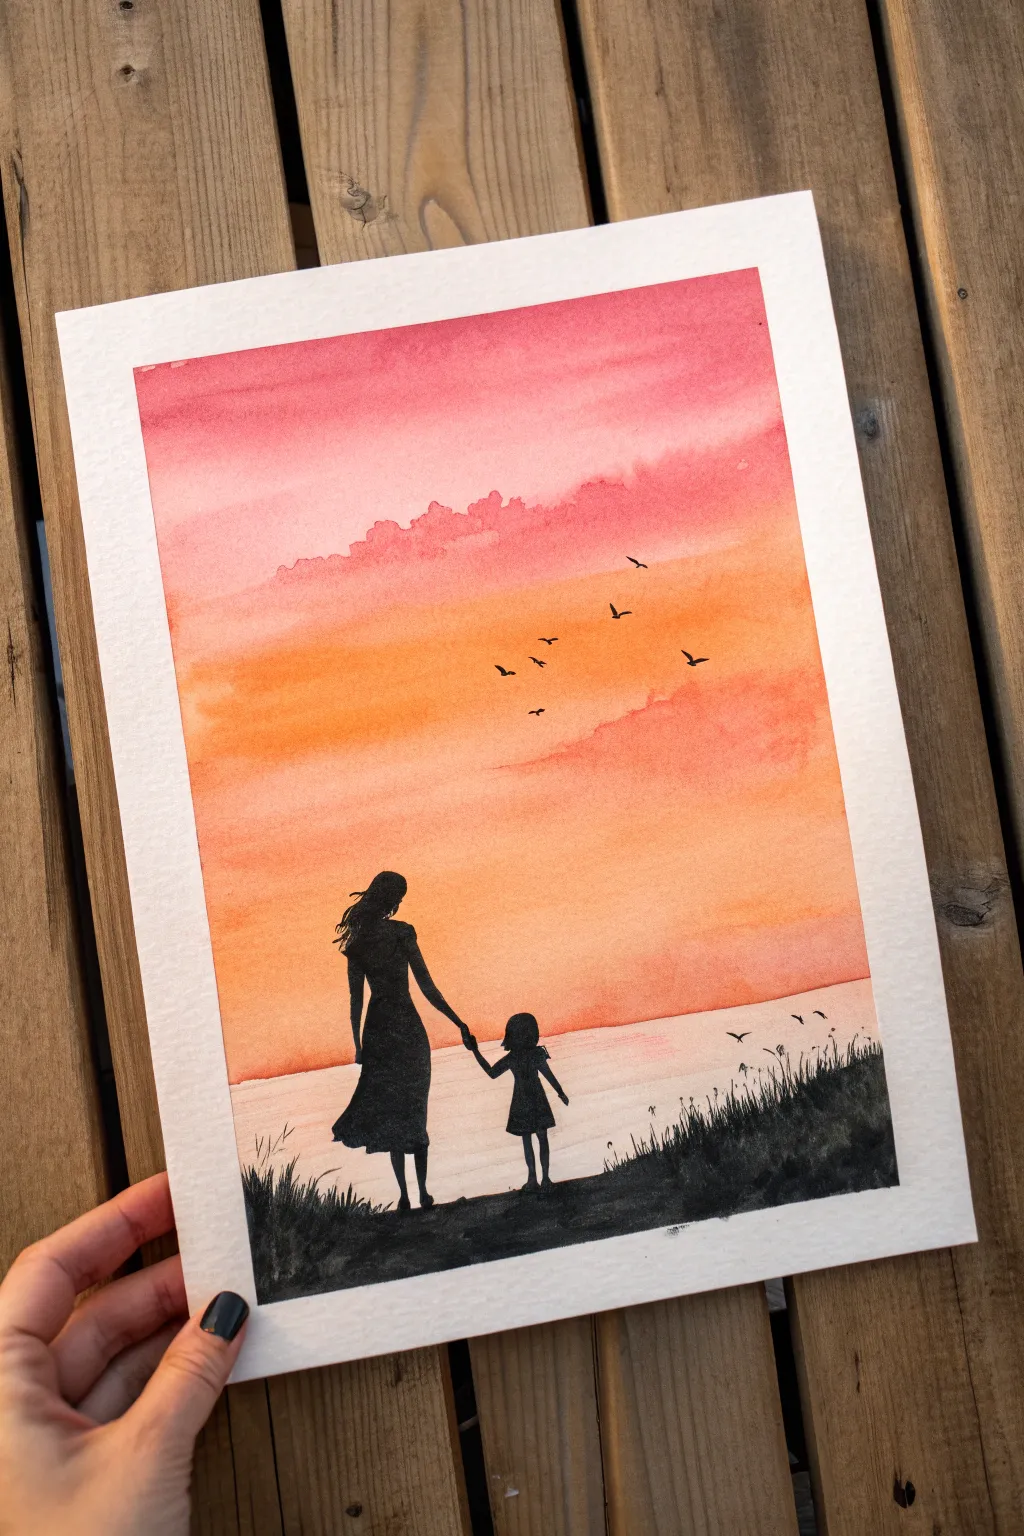
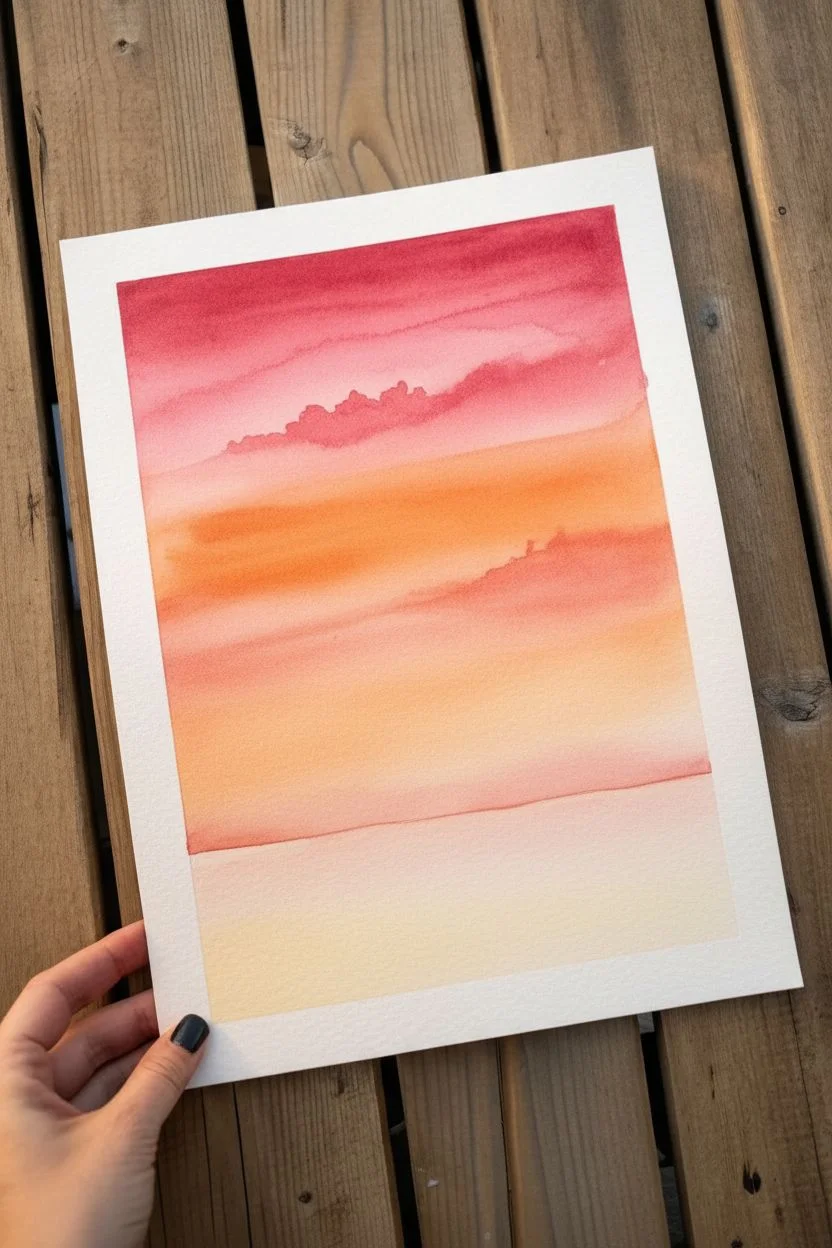
Capture the tender bond between parent and child with this vibrant watercolor silhouette painting. This project combines a simple, striking wet-on-wet sunset wash with bold black figures to create a timeless keepsake.
Step-by-Step
Materials
- Cold press watercolor paper (300 gsm)
- Masking tape or painter’s tape
- Watercolor paints (Red, Orange, Yellow)
- Black paint (gouache or acrylic works best for opacity)
- Large flat brush or mop brush
- Medium round brush
- Small detail brush (size 0 or 00)
- Pencil and eraser
- Palette for mixing
- Jar of clean water
- Paper towels
Step 1: Preparing the Sky
-
Secure the paper:
Begin by taping down all four edges of your watercolor paper to a board or table. Press the tape down firmly to ensure crisp, clean borders later. -
Wet the surface:
Using your large brush and clean water, apply an even coat of water to the upper two-thirds of the paper. You want the paper glistening but not swimming in puddles. -
Apply the top red layer:
Load your brush with a watery mix of red or crimson. Paint horizontal strokes at the very top of the wet area, letting the color bleed naturally downward. -
Blend into orange:
Clean your brush slightly, pick up a vivid orange, and paint horizontal strokes just below the red. Allow the red and orange to meet and merge on the paper for a soft gradient. -
Add the yellow horizon:
Finish the sky by brushing a bright, warm yellow below the orange section. Bring this yellow down to where you want the horizon line to be, fading it out slightly at the bottom. -
Create soft clouds:
While the sky is still damp, dab a little concentrated red-orange paint into the upper sky area using the tip of a round brush. This creates subtle, fluffy texture for distant clouds. -
Paint the water reflection:
Leave a small horizontal gap or very pale wash for the horizon line itself. Below this, paint a lighter, more diluted wash of the sunset colors (pale pinks and yellows) to represent the water reflecting the sky. -
Let it dry completely:
Wait for the entire background to feel dry to the touch. If the paper is cold, it’s still damp. I like to use a hairdryer on a low setting to speed this up.
Uneven Wash?
If you get ‘cauliflower’ blooms in your sky, it means you added water to drying paint. Next time, work faster while the paper is uniformly wet.
Step 2: Painting the Silhouettes
-
Sketch the outline:
Lightly sketch the outlines of the mother and daughter figures using a pencil. Focus on the pose—holding hands and walking—without worrying about internal details. -
Outline the ground:
Draw an uneven, sloping line near the bottom of the page for the grassy bank where the figures will stand. -
Block in the figures:
Switch to your black gouache or acrylic. Using a medium round brush, carefully fill in the bodies of the mother and daughter. Ensure the black is completely opaque. -
Refine the edges:
Use your smallest detail brush to sharpen the edges of the silhouettes. Pay special attention to the hair blowing in the wind and the connection of their hands. -
Paint the dress movement:
Add small flicks or curves at the hem of the mother’s dress and the child’s skirt to suggest movement and wind direction. -
Fill the foreground:
Paint the entire bottom ground area solid black. This anchors the figures and provides a strong contrast against the light water reflection. -
Add grass texture:
Using the tip of your detail brush, flick quick, upward strokes along the top edge of the black ground to create the look of tall grass and wildflowers. -
Paint the birds:
With the detail brush and black paint, add a flock of small ‘V’ shapes in the sky. Vary their sizes and angles to make the flock look natural and distant. -
Final reveal:
Once the black paint is fully dry, slowly peel off the masking tape at a 45-degree angle to reveal your clean white border.
Make it Personal
Customize the silhouette to match your family! Add a dog, change the hair length, or add a second child to make the scene truly yours.
Frame your beautiful silhouette art to cherish this glowing moment forever


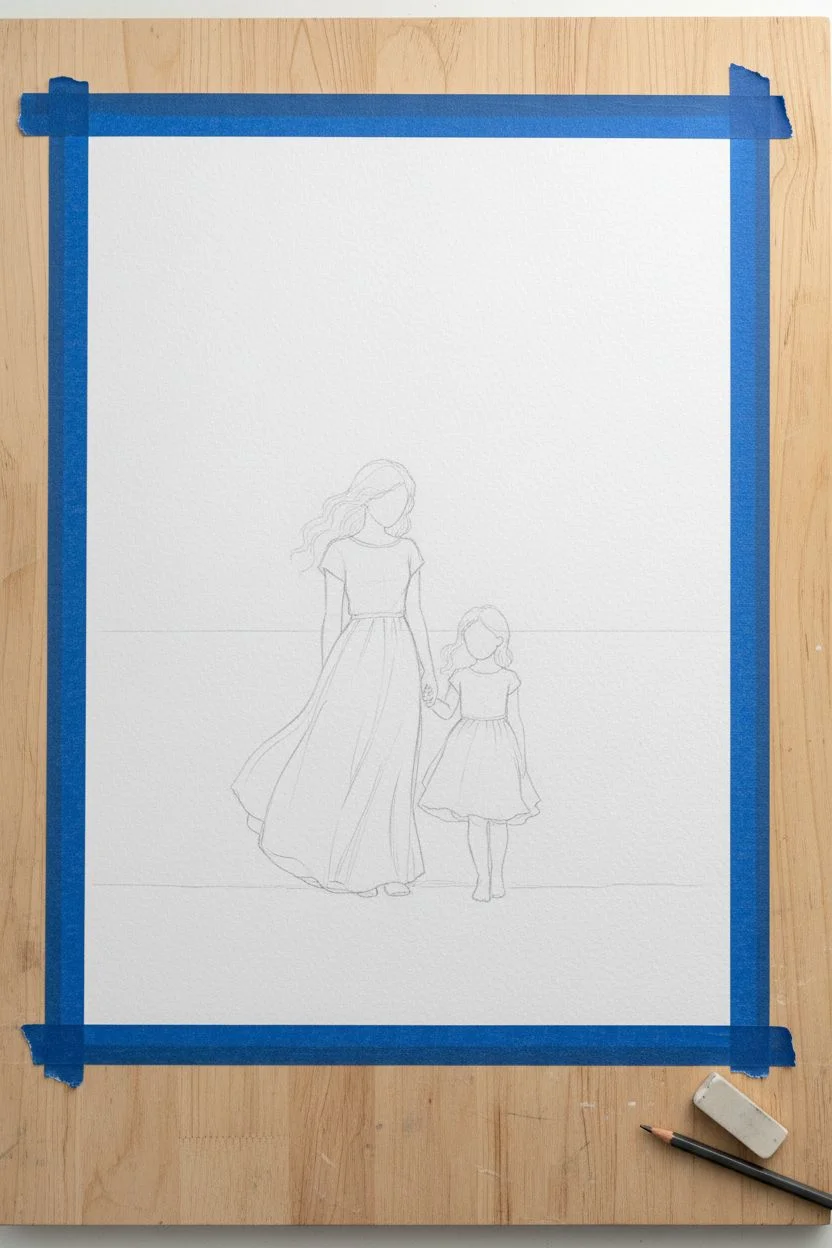
Matching Dresses in a Wildflower Field
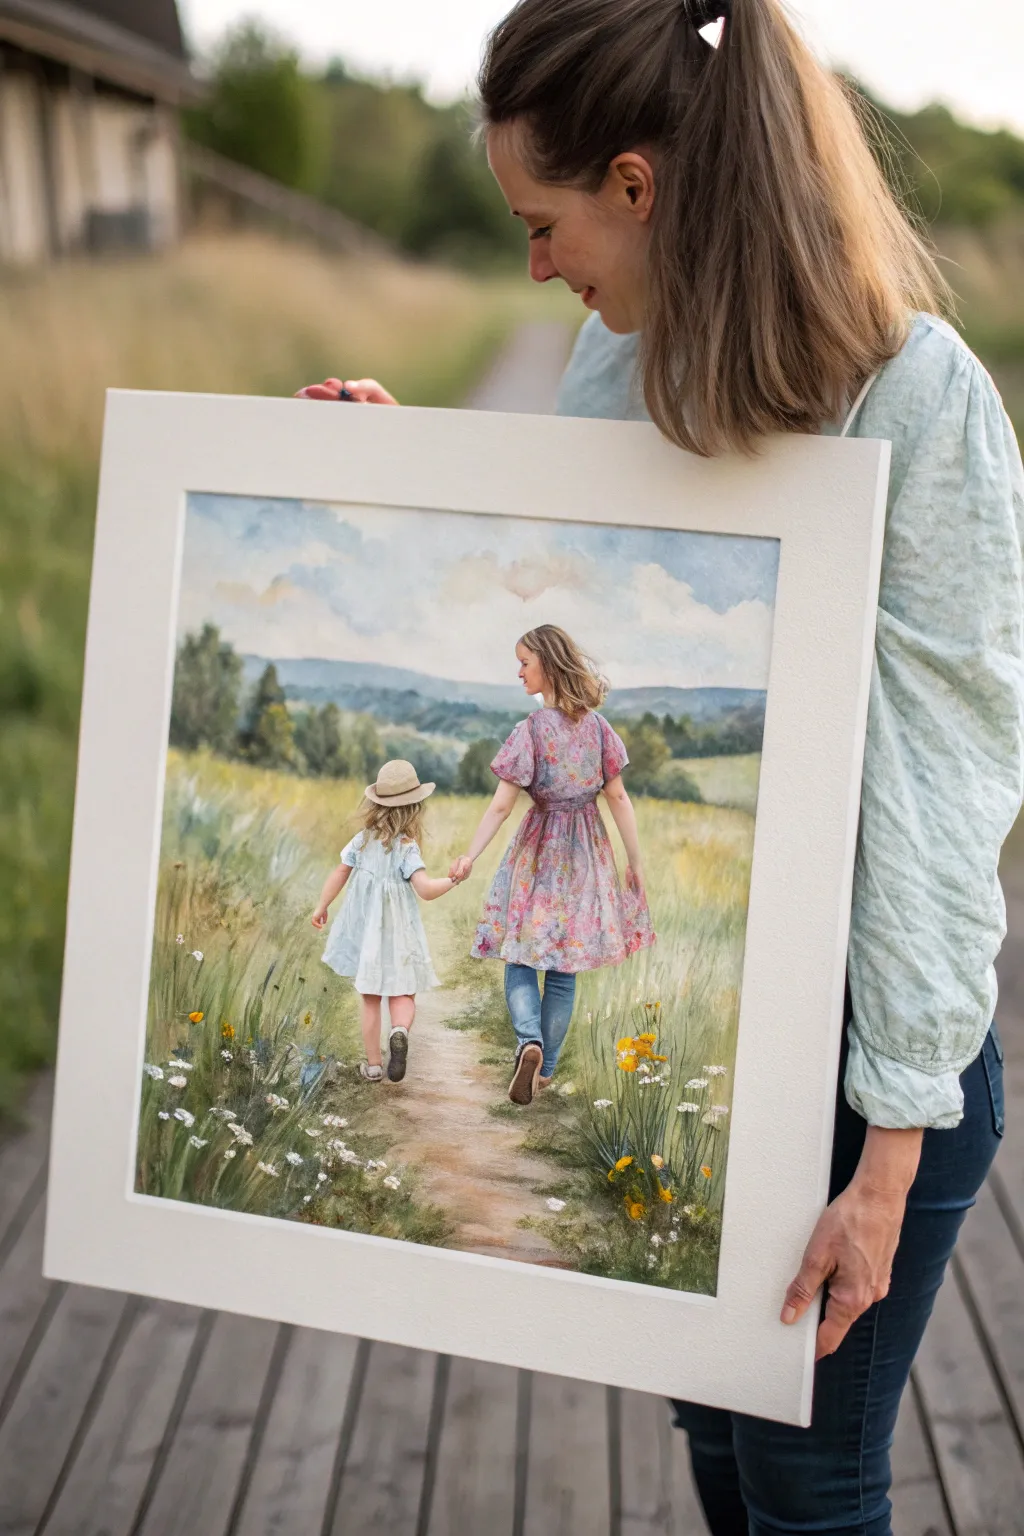
Capture the tender bond of motherhood with this painterly acrylic landscape featuring a mother and daughter strolling through tall grass. The soft, dreamy atmosphere is achieved through layers of scumbling and careful brushwork, creating a timeless keepsake.
Step-by-Step
Materials
- Heavyweight acrylic paper or stretched canvas (16×20 inch recommended)
- Acrylic paints: Titanium White, Cerulean Blue, Ultramarine Blue, Yellow Ochre, Burnt Sienna, Sap Green, Alizarin Crimson, Purple
- Flat brushes (1 inch, 1/2 inch)
- Filbert brushes (sizes 4 and 8)
- Round detail brush (size 0 or 1)
- Palette knife for mixing
- Graphite transfer paper (optional)
- Reference photo of subjects walking away
Step 1: Setting the Scene
-
Prepare the Background:
Start by mixing Cerulean Blue with plenty of Titanium White to create a pale azure sky. Using your large flat brush, sweep the color horizontally across the top third of the canvas. -
Add Cloud Formations:
While the blue is still tacky, mix a touch of unbleached titanium or warm white. Use a scrubbing motion with a worn filbert brush to create soft, fluffy cloud shapes, keeping the edges blurry for a dreamy effect. -
Establish the Horizon:
Mix a muted bluish-green for the distant hills using Ultramarine Blue, Sap Green, and a tiny dot of Burnt Sienna to desaturate it. Paint a rolling horizon line right below the sky, ensuring the color is lighter and cooler than your foreground greens to create atmospheric depth. -
Block in the Field:
Underpaint the grassy field with a wash of Yellow Ochre and Sap Green. Don’t worry about grass blades yet; just cover the canvas with a warm, uneven base tone that suggests sunlight hitting a meadow.
Step 2: Painting the Subjects
-
Sketch the Figures:
Once the background is dry, use a light pencil or transfer paper to outline the mother and daughter. Position them slightly off-center walking into the distance to draw the viewer’s eye inward. -
Base Tone Skin:
Mix a basic skin tone using White, Yellow Ochre, and a speck of Red. Block in the visible legs and arms. Keep it simple for now; shadows come later. -
Paint the Mother’s Curls:
For the hair, start with a dark brown base. Once dry, dry-brush lighter honey and blonde tones on top, following the curve of the waves to show movement and light. -
Render the Dresses:
Block in the dresses with their main local colors. For the mother’s floral dress, start with a soft pink-purple base. For the child, use a pale cool blue. -
Floral Pattern Details:
Using your smallest round brush, stipple tiny dots of pink, darker purple, and white onto the mother’s dress to suggest a floral print without painting every single petal. Allow the base color to show through. -
Child’s Dress Texture:
Add vertical folds to the child’s blue dress using a slightly darker grey-blue mix. Keep the highlights crisp white on the shoulders where the sun hits. -
Denim and Shoes:
Paint the mother’s jeans with Ultramarine and White. Add darker blue creases behind the knees. Dark brown blocks work for the shoes; just suggest the shape rather than detailing laces.
Muddy Greens?
If your field looks too brown, stop mixing all colors on the palette. Let the yellow and blue mix partially on the canvas itself for vibrant, organic variation.
Step 3: Foreground and Details
-
Layer the Grass:
Switch to your medium filbert brush. Mix various shades of green—some lime, some olive, some deep forest. Use upward flicking strokes to create the texture of tall grass surrounding the path. -
Create the Path:
Mix Burnt Sienna, White, and a little Purple for a dusty dirt path color. Paint horizontal strokes for the ground plane, blending the edges into the grass so the path looks overgrown. -
Add Wildflowers:
Load a small brush with thick paint (impasto style). Dot white daisies, yellow buttercups, and tiny bluebells into the foreground grass. Group them in clusters rather than scattering them evenly. -
Refine the Connection:
Carefully paint the clasped hands. This is the focal point, so ensure there is a small shadow between the fingers to show the grip is secure and tender. -
Final Highlights:
Add the brightest highlights last: a rim of light on the child’s hat, the edges of the mother’s hair, and the tips of the closest grass blades. -
Varnish and Frame:
Allow the painting to cure for at least 24 hours (or longer for thick acrylics). Apply a satin varnish to unify the sheen, then mount it in a wide white mat and frame to match the reference look.
Make It Yours
Customize the season! Change the green grass to warm golds and browns for autumn, and swap the wildflowers for fallen leaves on the path.
Hang this beautiful tribute to motherhood in a sunny spot where the light can catch the textures of the tall grass


Forehead-to-Forehead Close-Up Portrait

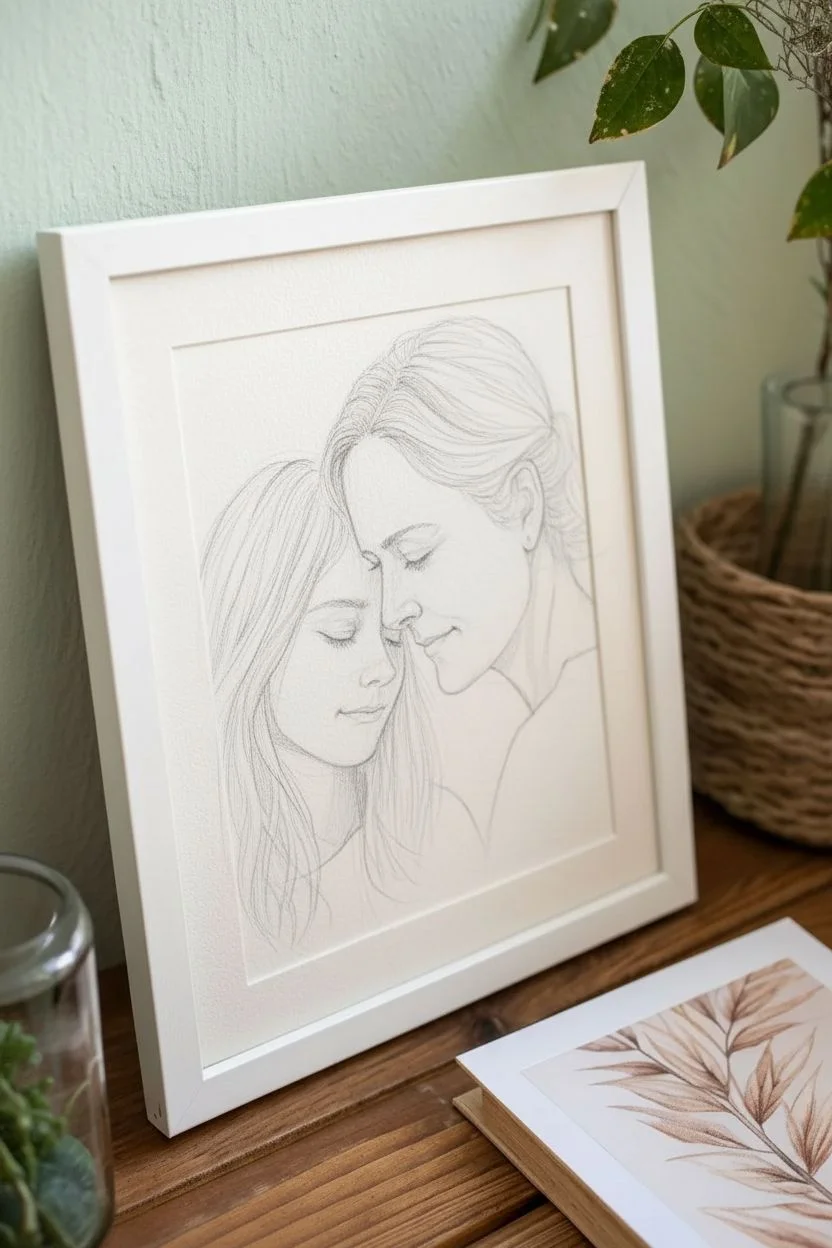
Capture the tender connection between mother and daughter with this delicate watercolor portrait. The soft washes and fine details emphasize the peaceful intimacy of their forehead-to-forehead pose, making it a timeless keepsake.
How-To Guide
Materials
- Hot press watercolor paper (300 gsm)
- HB and 2B graphite pencils
- Kneaded eraser
- Watercolor paints (skin tones: Yellow ochre, Alizarin crimson, Burnt sienna, Ultramarine blue)
- Round brushes (sizes 2, 4, and 8)
- Fine detail brush (size 0 or 00)
- Masking fluid (optional)
- Two jars of water
- Paper towels
- White or light wood frame with mount
Step 1: Sketching the Connection
-
Reference preparation:
Begin by selecting a high-quality reference photo where the subjects are comfortably resting their foreheads together. Crop the image to focus tightly on the faces, cutting off just below the shoulders and near the top of the heads to create intimacy. -
Basic contours:
Using an HB pencil, lightly sketch the main outlines. Focus heavily on the negative space between their faces—the area between their noses and lips—to ensure the proportions are correct relationally. -
Refining features:
Sketch the closed eyes with gentle, downward-curving lines. Avoid drawing individual eyelashes yet; just mark the lash line. Define the jawlines and the connection point where the foreheads touch. -
Planning hair flow:
Draw the major shapes of the hair, noting where the strands curve and separate. Keep these lines fluid and loose, as watercolor works best when not confined by heavy graphite borders. -
Clean up:
Roll your kneaded eraser gently over the entire sketch to lift excess graphite. You want ‘ghost lines’ that are just visible enough to guide your paint but won’t show through the final layers.
Fixing Muddy Skin
If skin tones look muddy, you likely over-mixed or didn’t let layers dry. Let it dry completely, then try lifting the mud with a clean, damp stiff brush before reglazing.
Step 2: Layering Skin Tones
-
Base wash:
Mix a very watery wash of Yellow Ochre and a touch of Alizarin Crimson. I like to apply this pale tea-colored mix over the entire face area, avoiding the hair, to establish a warm undertone. -
Building shadows:
While the paper is still slightly damp, drop in a slightly cooler mix (add a tiny bit of Ultramarine to your skin, base) into the shadow areas: eye sockets, under the nose, and beneath the jawline. This creates soft, diffused shadows. -
Blushing cheeks:
Mix a clearer pink using Alizarin Crimson and plenty of water. Glaze this onto the cheeks and the tip of the nose for a healthy glow, softening the edges with a clean, damp brush. -
Defining features:
Once the previous layers are bone dry, use a size 2 brush and a mix of Burnt Sienna and Alizarin to carefully paint the lips. Keep the upper lip slightly darker than the lower lip. -
Eyelids and creases:
Deepen the creases of the closed eyelids with a darker skin tone mix. Use a confident, sweeping stroke to emulate the curve of the eyeball beneath the lid.
Step 3: The Hair and Finishing Details
-
Underpainting hair:
Identify the lightest highlight color of the hair (pale yellow for the daughter, light brown for the mother). Wash these colors in broad strokes, leaving the paper white for the brightest shine. -
Adding texture:
Using a size 4 brush, layer mid-tones in the direction of hair growth. For the daughter, use strokes of raw sienna; for the mother, introduce burnt umber. -
Deepening strands:
Switch to your fine detail brush. Paint individual dark hairs in the shadowed areas (behind ears, near the neck) to create volume. Don’t paint every single hair; suggestive strokes are more effective. -
Clothing washes:
Keep the clothing simple to maintain focus on the faces. A loose, watery wash of pink or white (using negative space) works beautifully. Let the paint fade out at the bottom edges. -
The final touches:
With your smallest brush and a dark brown mix (paints are better than black here), define the eyelashes and eyebrow hairs. Add final dark accents to the nostrils and corners of the mouth. -
Framing:
Once fully dry, erase any remaining pencil marks carefully. Mount the painting in a white frame with a cream mat to complement the soft watercolor aesthetic.
Add Soft Texture
Sprinkle a tiny bit of salt on the wet hair wash while it is still damp. Brush it off once dry to create a unique, organic texture that mimics highlights.
Hang this warm, intimate portrait in a family space where it can serve as a gentle reminder of your bond


Mother and Daughter Under a Big Moon

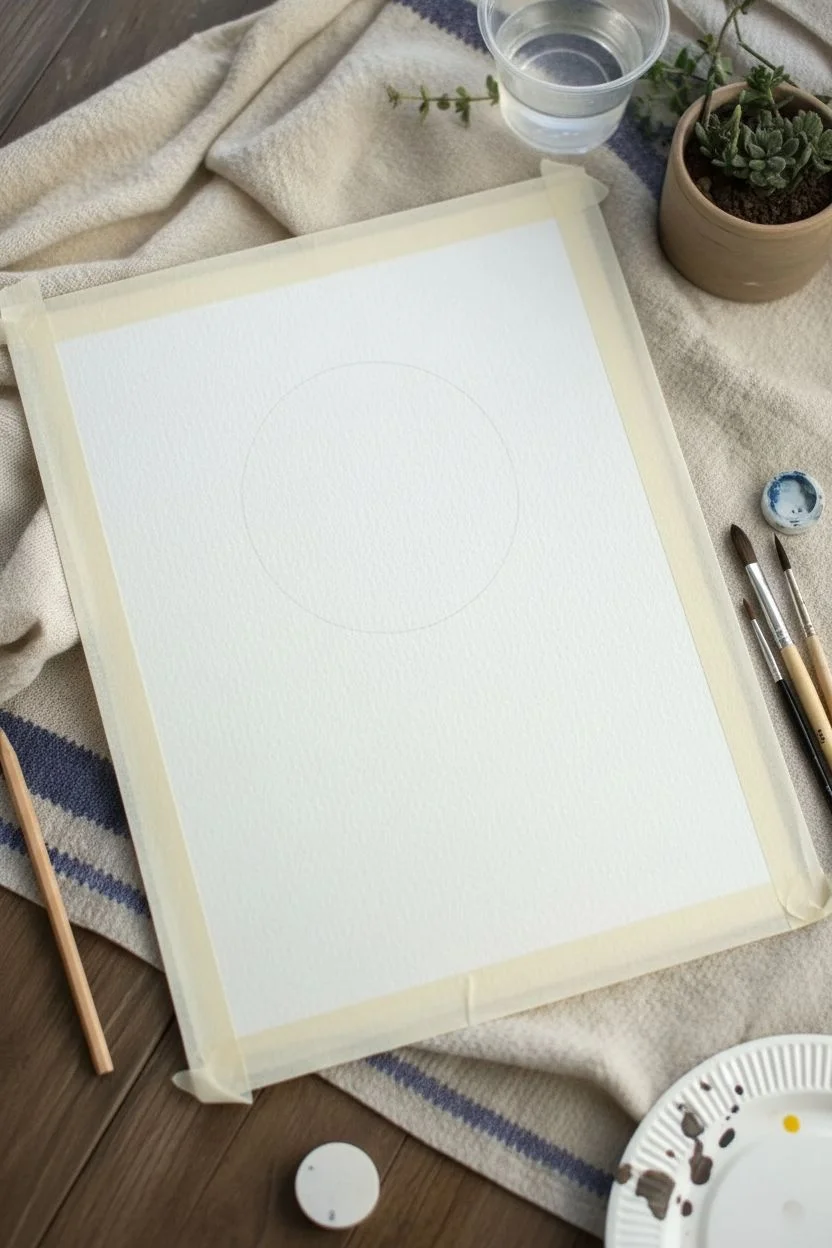
Capture the magic of a quiet night moment with this beautiful watercolor painting featuring a massive, textured moon. The striking contrast between the luminous night sky and the dark silhouettes creates a heartwarming scene perfect for celebrating the mother-daughter bond.
Step-by-Step Guide
Materials
- Cold press watercolor paper (140lb/300gsm is ideal)
- Painter’s tape or masking tape
- Watercolor paints (Indigo, Prussian Blue, Violet, Magenta, Black)
- White gouache or white ink
- Flat wash brush (large)
- Round brushes (size 4, size 8)
- Small detail brush (size 0 or 00)
- Paper plate or round object for tracing (optional)
- Pencil and eraser
- Clean water and paper towels
Step 1: Setting the Scene
-
Tape the Edges:
Begin by taping down all four edges of your watercolor paper to a hard board. This creates that crisp white border seen in the final piece and prevents the paper from buckling heavily when wet. -
Mask the Moon:
Decide on the size of your moon. You can lightly trace a circular object with a pencil, or freehand it if you’re confident. The most crucial part is keeping this area pure white for now. You can carefully paint clear water around the outside of the pencil line, or use masking fluid to protect the circle if you have it.
Step 2: Creating the Night Sky
-
Wet-on-Wet Base:
Wet the entire sky area (everything outside the moon circle) with clean water. The paper should be glisten but not have puddles. -
Layering Blues:
Start at the top corners with your deepest blue, like Indigo or Prussian Blue. Use a large brush to drop the color in and let it bloom downwards. -
Adding the Glow:
As you move closer to the moon, switch to a lighter blue. Leave a tiny halo of unpainted white paper right next to the moon’s pencil line to create a natural glow effect. -
Transition to Purple:
For the lower sky, while the paper is still damp, introduce a violet or purple hue. Blend this gently up into the blue, and let it fade into a soft magenta or lighter purple near the horizon line. -
Let it Dry:
Wait for this background layer to dry completely. The paper must be bone-dry before moving to the next steps to prevent colors from muddying. -
Deepening the Cosmos:
Once dry, re-wet just the upper dark blue sections and add another layer of concentrated Indigo to intensify the night sky look. -
Splatter the Stars:
Cover the moon area with a scrap of paper. Load a brush with white gouache or white ink, and tap the handle against another brush to spray tiny white specks across the purple and blue sky. I like to add a few larger stars manually with a detail brush.
Moon Texture Trick
Sprinkle a tiny pinch of table salt onto the wet grey paint of the moon. As it dries, the salt pushes pigment away, creating perfect natural-looking craters.
Step 3: Painting the Moon
-
Base Texture:
Now, tackle the moon. Wet the white circle with clean water. Drop in very diluted grey-blue paint in random patches, leaving plenty of white space. -
Creating Craters:
While the moon is still damp, dab in slightly darker grey paint in curved shapes to mimic craters and lunar seas (maria). Keep the edges soft. -
Highlighting:
Use a clean, damp brush (thirsty brush) to lift out some pigment if it gets too dark. You want a subtle, textured look rather than a solid color.
Level Up: Fireflies
Dot tiny spots of yellow gouache in the grass or low purple sky to look like fireflies. Add a faint wash around them for a glowing effect.
Step 4: Silhouettes and Foreground
-
Horizon Line:
Mix a very dark grey or black paint. Don’t use straight black from a tube; mix in some blue or purple to harmonize with the sky. Paint a sloping hill at the bottom. -
Sketch the Figures:
Lightly sketch the outline of the mother and child sitting side-by-side. Focus on their posture—looking up and leaning slightly towards each other. -
Fill the Silhouettes:
Using your black mix and a size 4 round brush, carefully fill in the figures. Ensure the edges are crisp against the background wash. -
Defining Hair:
For the hair, use the very tip of your detail brush to flick tiny strands outward, giving the impression of a gentle breeze blowing their hair back. -
Adding Trees:
On the left side, paint a tall, bare tree stretching up towards the sky. Use shaky, uneven strokes for the branches to make them look organic. -
Distant Pines:
Add small, jagged pine tree shapes along the horizon line on both sides. These should be much smaller than the main tree to show distance. -
Grass Texture:
Along the top edge of the hill, use quick upward flicks with a dry brush to suggest grass blades catching the moonlight. -
Final Reveal:
Once absolutely everything is dry, slowly peel away the painter’s tape at a 45-degree angle to reveal your clean edges.
This serene painting is a wonderful way to capture a quiet moment of connection on paper
BRUSH GUIDE
The Right Brush for Every Stroke
From clean lines to bold texture — master brush choice, stroke control, and essential techniques.
Explore the Full Guide
Shared Memory Scene: A Favorite Day Together
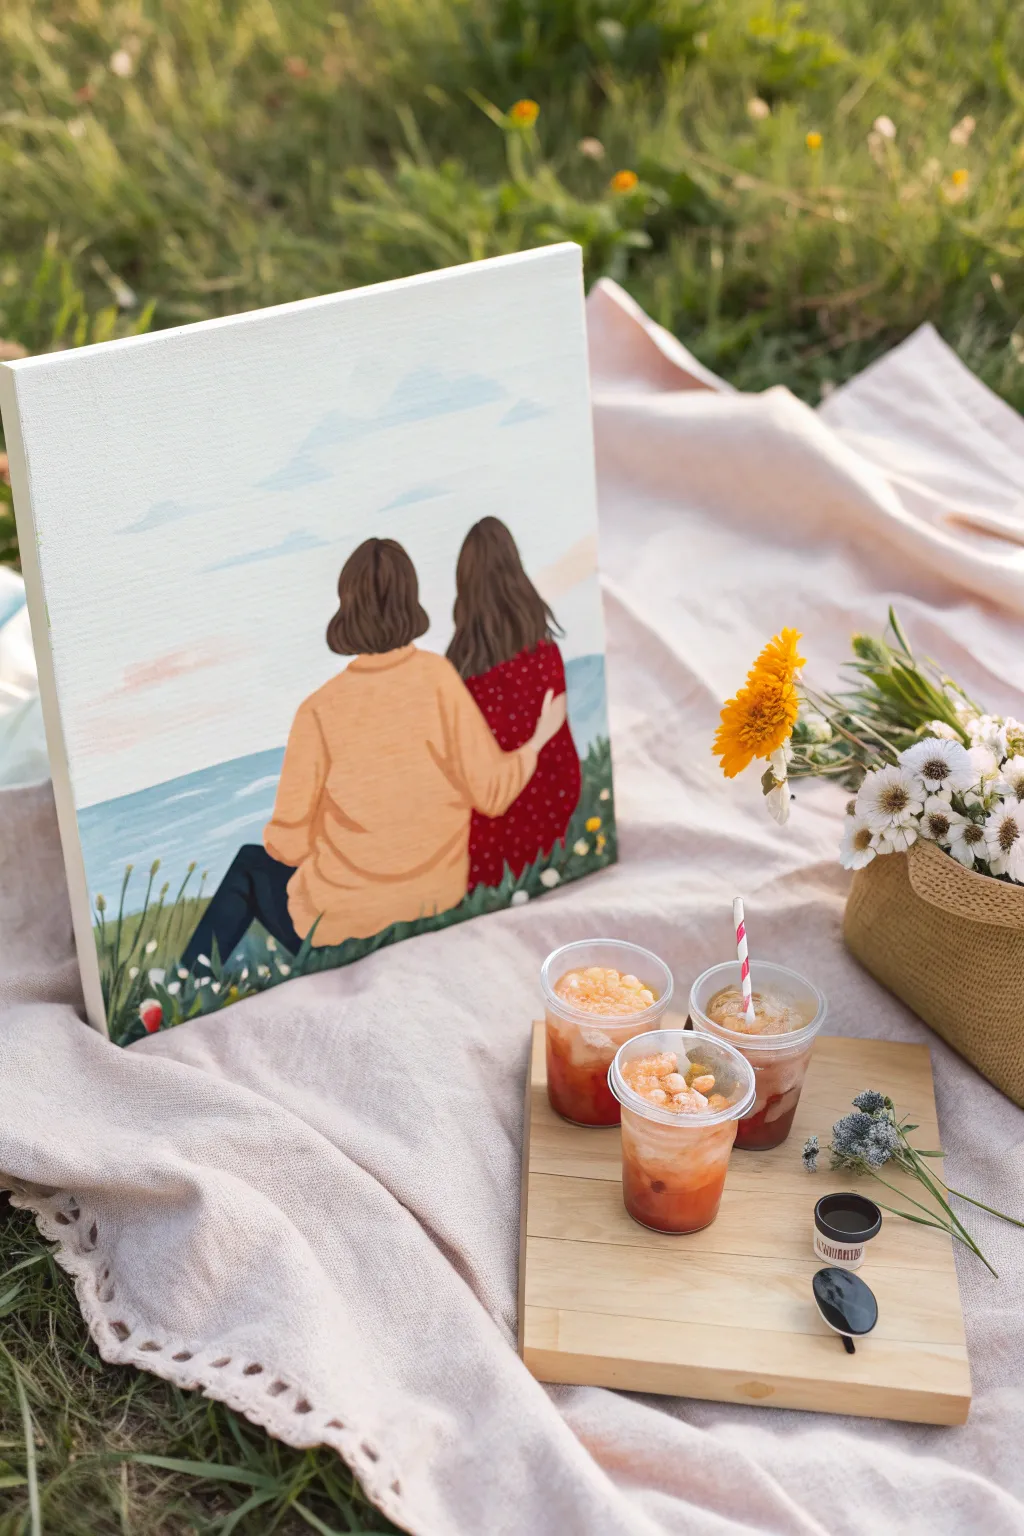
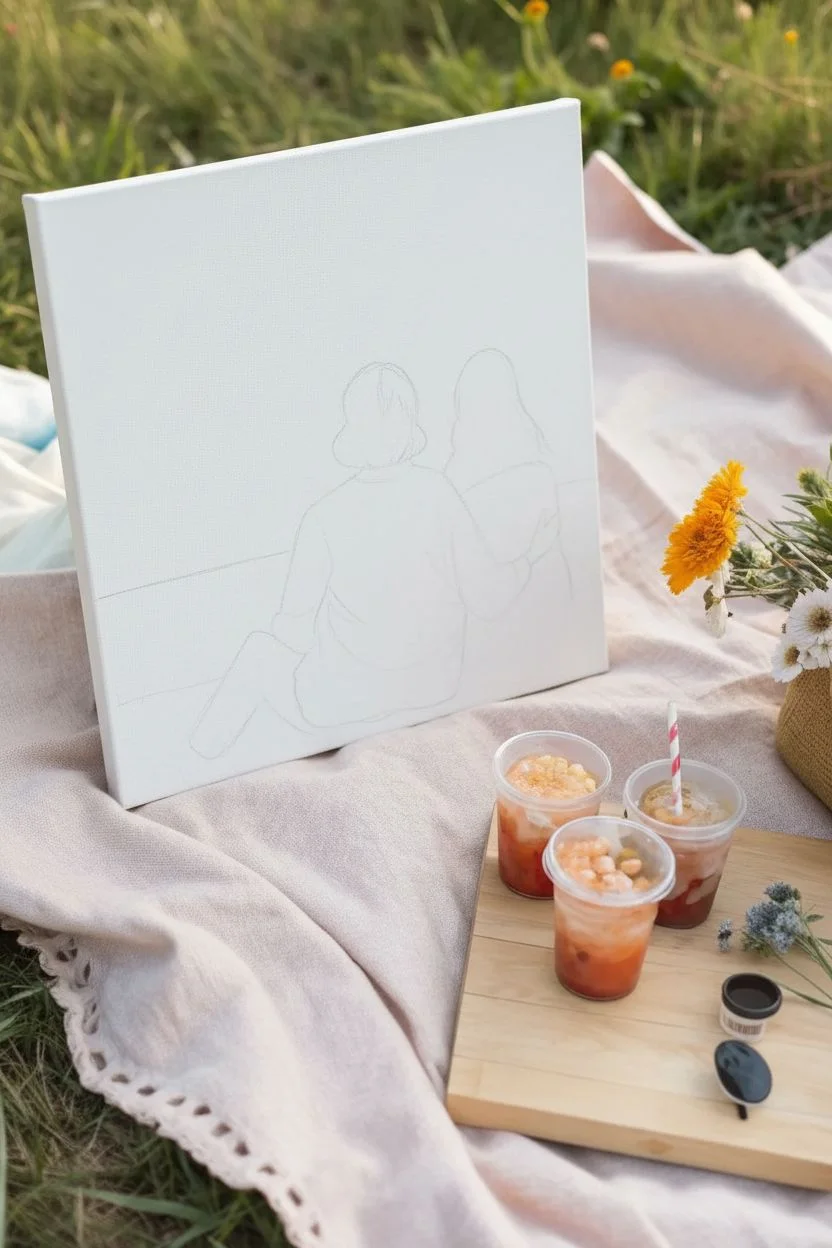
Capture a tender moment of togetherness with this serene acrylic painting featuring two figures looking out toward the horizon. The simple composition and back-facing poses make this an accessible project for capturing likeness without the pressure of painting detailed facial features.
How-To Guide
Materials
- Stretched canvas (square or rectangular, approx. 12×12 or 11×14)
- Acrylic paints (Titanium White, Sky Blue, Phthalo Blue, Yellow Ochre, Burnt Sienna, Cadmium Red, Hooker’s Green, Black)
- Pencil and eraser for sketching
- Flat brushes (various sizes: large for sky, medium for clothes)
- Round detail brushes (size 0 and 2)
- Palette or mixing plate
- Water cup and paper towels
Step 1: Planning and Sketching
-
Establish the horizon:
Lightly draw a horizontal line across your canvas, positioning it slightly lower than the middle create a spacious sky area. -
Outline the figures:
Sketch the two figures in the center foreground. Focus on simple shapes first—ovals for heads and rounded triangles for the torsos. Overlap the arms slightly to show connection. -
Add contextual details:
Sketch a gentle slope for the grassy hill they are sitting on, and lightly mark where the hair falls on their shoulders.
Step 2: The Background Layer
-
Paint the sky gradient:
Mix a large amount of Titanium White with a touch of Sky Blue. Start at the top of the canvas and brush horizontally, gradually adding more white as you move down toward the horizon to create atmospheric perspective. -
Add soft clouds:
While the sky is still slightly tacky, mix a pale grey-blue and dab in loose, horizontal cloud shapes. Keep the edges soft and blended. -
Paint the water:
Use a darker blue mix (Phthalo Blue and White) for the ocean. Paint in horizontal strokes, making the color slightly deeper near the bottom of the water section and lighter near the horizon line. -
Base coat the grass:
Mix Hooker’s Green with a little Yellow Ochre and White for a natural grass base. Fill in the hill area below the figures, working around their silhouette.
Oops! Uneven horizon?
If your ocean line looks tilted, lay a piece of masking tape across the dry sky area to create a perfectly straight guide. Paint the water up to the tape, let dry, and peel.
Step 3: Painting the Figures
-
Block in the flesh tones:
Mix Burnt Sienna and White (add yellow if needed) to create a skin tone. Paint the necks and any visible ear areas. It doesn’t need to be perfect since hair will cover the edges. -
Paint the orange sweater:
Mix Yellow Ochre with a touch of Cadmium Red and White to get a soft cantaloupe or muted orange. Fill in the sweater of the left figure, using curved strokes to suggest the volume of the back and arms. -
Paint the red dress:
For the right figure, use Cadmium Red mixed with a tiny bit of Burnt Sienna to tone it down. Paint the dress shape solid red for now. -
Add the jeans:
Paint the legs of the left figure with a dark blue (Phthalo Blue plus a touch of Black). Define the bent knee shape clearly. -
Detail the hair:
Using a medium round brush, paint the hair. For the left figure, use a mix of Burnt Sienna and Black for a dark brown bob. For the right figure, use a lighter brown, painting long, wavy strokes.
Level Up: Golden Hour
Glaze a very watered-down layer of yellow or pale pink over the horizon line and the edges of the figures to simulate a warm, glowing sunset lighting effect.
Step 4: Details and Definition
-
Add sweater texture:
Mix a slightly darker shade of your orange (add more red/brown). Use a small brush to paint thin, curved lines on the sweater to indicate folds and fabric movement. -
Create the polka dots:
Dip the back end of a small paintbrush or use a fine detail brush with white paint to carefully dot the pattern onto the red dress. -
Define the hair strands:
I find that mixing a lighter version of the hair color and adding just a few highlights near the crown and ends makes the hair look much more realistic and shiny. -
Refine the grass:
Use a liner brush or the edge of a flat brush with varying shades of green to flick upward blades of grass along the bottom edge and horizon of the hill. -
Add floral touches:
Dot in small white, yellow, or red flowers among the grass blades near the bottom corners to frame the subjects.
Step back and admire your peaceful scene, capturing a quiet moment shared between generations
Mixed Media: Soft Washes Plus Bold Palette-Knife Texture
Capture the tender connection between mother and daughter with this mixed-media piece that balances the softness of a sunset sky with the grounded strength of silhouette figures. By combining fluid watercolor washes for the background with heavier acrylic or oil pastel textures for the subjects, you’ll create a piece full of emotion and atmosphere.
Step-by-Step Guide
Materials
- Large sheet of cold-press watercolor paper (at least 18×24 inches)
- Watercolor paints (shades of peach, coral, soft yellow, and light blue)
- Black acrylic paint or black gesso
- Large flat wash brush (1-2 inch)
- Medium round brush (size 8 or 10)
- Palette knife (small, diamond-shaped)
- Painter’s tape or masking tape
- Pencil for sketching
- Jar of water and paper towels
- Optional: White acrylic ink for highlights
Step 1: Setting the Scene
-
Secure Your Paper:
Begin by taping down the edges of your watercolor paper to a sturdy board or work surface. This prevents the paper from buckling when you apply the wet washes for the sky. -
Establish the Horizon:
Lightly draw a horizontal line about one-third of the way up from the bottom of the paper. This will separate your sky from the shoreline and water. -
Sketch the Figures:
Using a light hand, sketch the outline of the mother and daughter standing side-by-side. Focus on their posture—head tilted slightly down or forward—and the connection of their holding hands. Don’t worry about facial details; these will be silhouettes.
Hair Movement Tip
When painting the hair, use a “dry brush” technique with very little paint to create wispy, flyaway strands that look like they are blowing in the wind.
Step 2: Creating the Sky and Sea
-
Prepare the Sky Colors:
Mix a watery wash of soft peach and coral on your palette. You want these colors to be transparent and airy to represent the fading light. -
Paint the Sky Gradient:
Start at the top of the paper, applying the peach wash in broad horizontal strokes. As you move down toward the horizon, blend in a touch of soft yellow. Keep the strokes loose and fluid. -
Adding Cloud Suggestions:
While the sky is still damp, dab in faint streaks of a slightly darker coral or diluted purple to suggest wispy clouds. Let the colors bleed naturally for a soft effect. -
Paint the Water:
For the water section below the horizon, use a mix of light blue and grey. Apply this in horizontal strokes as well, leaving small gaps of white paper to mimic the glimmer of light on the waves. -
Define the Shoreline:
Near the bottom edge, mix a sandy beige with a touch of brown. Paint the beach area where the figures stand, blending it gently into the water line. Let the entire background dry completely before moving on.
Step 3: Painting the Silhouettes
-
Block in the Mother:
Switch to your black acrylic paint. Using a medium round brush, carefully fill in the shape of the mother’s dress. Use smooth, vertical strokes to suggest the fabric draping down. -
Block in the Child:
Next, fill in the child’s dress. Pay attention to the flare of the skirt to give it a bit of movement, as if caught in a gentle sea breeze. -
Detailing Hair and Limbs:
Switch to a smaller brush for the finer details. Paint the legs and feet in solid black, grounding them on the sand. Carefully paint the hair, using quick, flicking strokes at the ends to show texture and wind direction. -
Connecting the Figures:
Paint the arms and the clasped hands. Ensure the connection point looks natural and firm, symbolizing their bond.
Texture Play
Mix sand or fine grit into your acrylic paint for the beach area. This creates real, physical texture on the paper that mimics the actual shoreline.
Step 4: Adding Texture and Depth
-
Introduce the Palette Knife:
Now for the mixed media element. Pick up a small amount of heavy-body black paint (or mix acrylic with a gel medium) on your palette knife. -
Texture the Dresses:
Gently scrape the palette knife over the painted dresses. I like to drag it downward to create a slightly raised, rough texture that contrasts beautifully with the smooth watercolor sky. -
Enhance the Shore:
Use the palette knife with a dark brown or grey mix to add rough texture to the sand around their feet. This simulates pebbles or wet sand and adds visual weight to the bottom of the composition. -
Highlighting Awareness:
If parts of the dress look too flat, dry brush a tiny amount of dark grey or deep purple over the black texture to suggest folds catching the faint light. -
Final Touches:
Review the horizon line. If the paint bled too much, sharpen the water line with a steady hand and a small brush with a slightly darker blue. -
Signing Off:
Once everything is fully dry, remove the tape carefully. Sign your work in the corner, perhaps using a metallic pen for a subtle shimmer against the sand.
Frame your completed masterpiece in a wide white mat to let those soft sunset colors truly breathe

PENCIL GUIDE
Understanding Pencil Grades from H to B
From first sketch to finished drawing — learn pencil grades, line control, and shading techniques.
Explore the Full Guide
Negative Space Silhouette Made From Floral Shapes
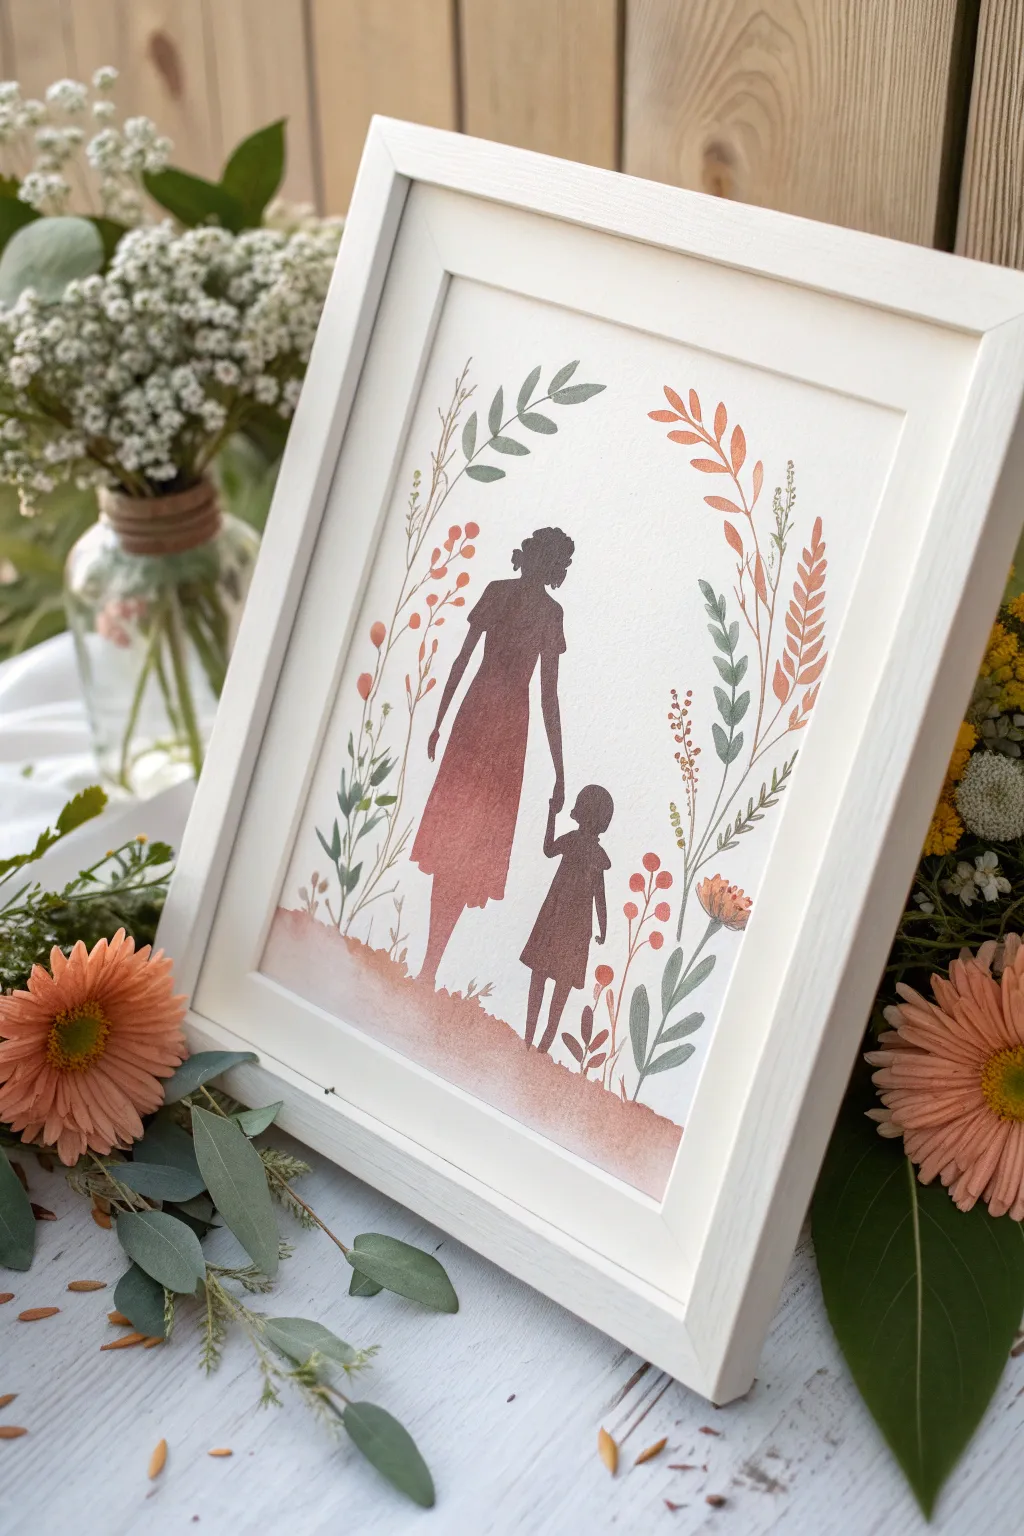
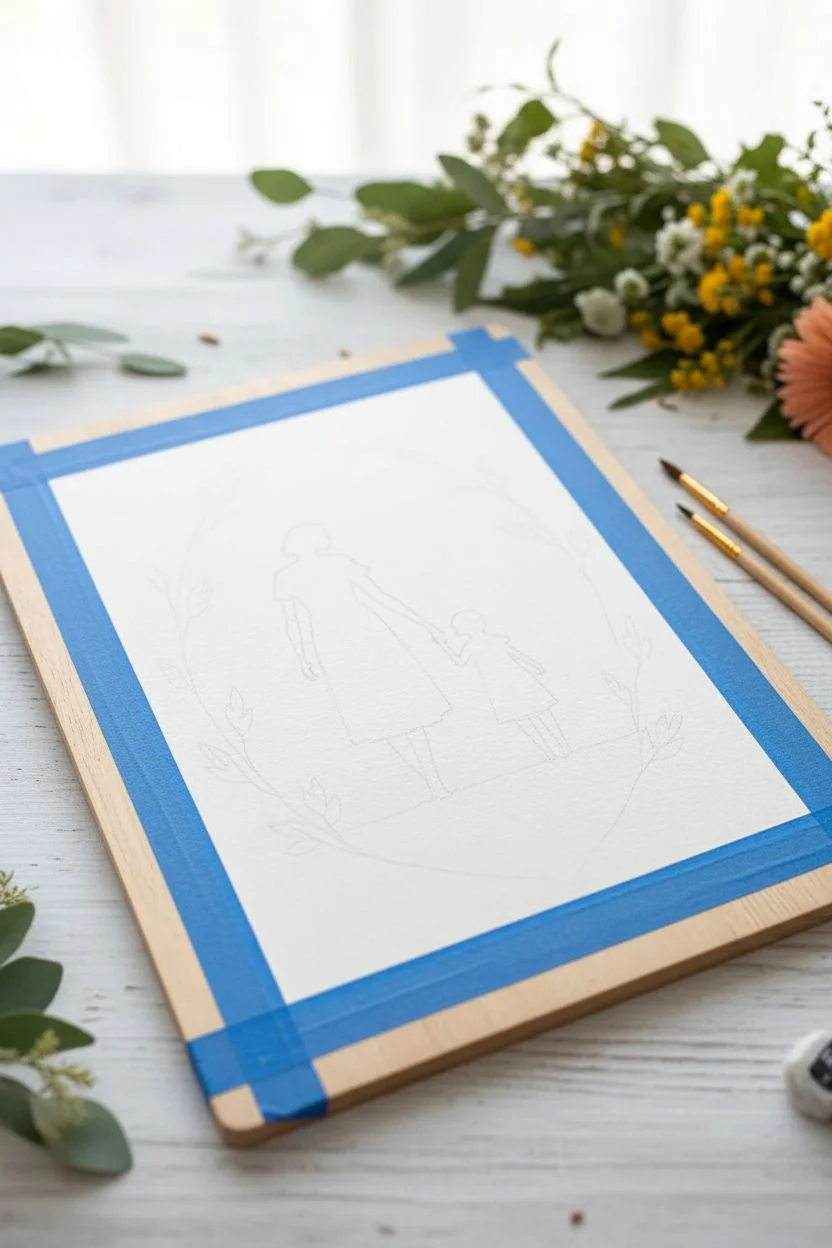
Create a sentimental keepsake with this watercolor project that frames a tender mother-daughter silhouette within a delicate botanical arch. Using warm, earthy tones like rust, sage, and ochre, you’ll paint soft floral details that gently enclose the central figures.
Step-by-Step Guide
Materials
- Cold press watercolor paper (300 gsm)
- Watercolor paints (Rust/Burnt Sienna, Sage Green, Olive, Ochre)
- Round watercolor brushes (Size 2 and Size 6)
- Pencil and eraser
- Tracing paper or lightbox
- Masking fluid
- Silhouette reference photo
- Painter’s tape and board
- White or light wood frame (8×10 or similar)
Step 1: Preparation & Sketching
-
Tape down your paper:
Secure your watercolor paper to a board using painter’s tape on all four sides. This prevents the paper from buckling when it gets wet and creates a clean border. -
Prepare your reference:
Find a side-profile photo of a mother and daughter holding hands or create a composite. Print this out to the size you want for your final artwork. -
Trace the silhouette:
Using a lightbox or window, lightly trace the outline of the figures onto the center of your watercolor paper. Keep your pencil lines extremely faint so they don’t show through the final paint. -
Sketch the floral arch:
Lightly sketch curved stems rising up the left and right sides of the figures. These don’t need to be detailed leaves yet, just guide lines for where your plants will grow.
Step 2: Painting the Silhouette
-
Mix your silhouette color:
Create a warm, reddish-brown hue by mixing Burnt Sienna with a touch of red or orange. You want a solid, earthy clay color. -
Apply masking fluid (Optional):
If you are worried about painting the florals too close to the figures, you can cover your pencil sketch with masking fluid now and let it dry completely. However, careful brushwork works just fine without it. -
Paint the gradient wash:
Wet the inside of the silhouette shape with clean water first. Drop your mixed brown paint into the top area (the mother’s dress and head) and let it flow downward. -
Fade the bottom:
As you move toward the feet and the ground, dilute your paint with more water. This creates the soft, faded look at the bottom where the figures blend into the ‘ground’ area. -
Define the edges:
While the paint is still damp but not skimming, use your Size 2 brush to crisp up the edges of the hair buns, hands, and dress hems. Let this layer dry completely before moving on.
Bleeding Lines?
If your silhouette paint bleeds into the background, your brush is too wet. Blot it on a paper towel so it’s damp, not dripping, which gives you more control over the edges.
Step 3: Creating the Floral Frame
-
Mix your greens:
Prepare two shades of green on your palette: a muted sage green and a darker olive green. This variety adds depth to the wreath. -
Paint the main stems:
Using the Size 2 brush and the olive mix, paint thin, curving lines following your initial pencil guides on the left and right. -
Add sage leaves:
Switch to your Size 6 brush. Load it with sage green and use a ‘press and lift’ motion to create almond-shaped leaves along the stems. Vary the direction so they look natural. -
Introduce warm accents:
Clean your brush and pick up some of the rust/clay color you used for the silhouette. Paint fern-like fronds or small sprigs intermingled with the greenery. -
Add detail flowers:
Using the tip of your small brush, dot in tiny spherical buds or small petal shapes near the tops of the stems using ochre or a diluted red-orange. -
Ground the scene:
Mix a very watery wash of the rust color. Paint a loose, uneven strip across the bottom of the paper, overlapping slightly with the feet to ground the figures. -
Review balances:
Step back and look at the composition. If one side looks too empty, add a small floating leaf or a few extra dots of color to balance the frame.
Make it Personal
Customize the silhouette by adjusting the hair to match the real subjects—add a ponytail, curly hair texture, or a specific dress shape to make it truly unique.
Step 4: Finishing Touches
-
Erase guidelines:
Once the painting is 100% bone dry (if the paper feels cool, it’s still wet), gently erase any visible pencil marks around the floral elements. -
Remove tape:
Peel the painter’s tape away slowly at a 45-degree angle, pulling away from the artwork to ensure clean edges and no tears. -
Frame the piece:
Place your dried artwork into a white or light natural wood frame to complement the organic, earthy color palette.
Hang this warm, loving portrait in a nursery or living room to celebrate the bond of motherhood


Have a question or want to share your own experience? I'd love to hear from you in the comments below!