If you’ve ever stared at a big blank wall and thought, “One painting isn’t enough,” a 3 painting set is your best friend. I love how a triptych instantly makes a space feel pulled together—like you designed the whole room around a single color palette.
Classic Continuous Landscape Triptych

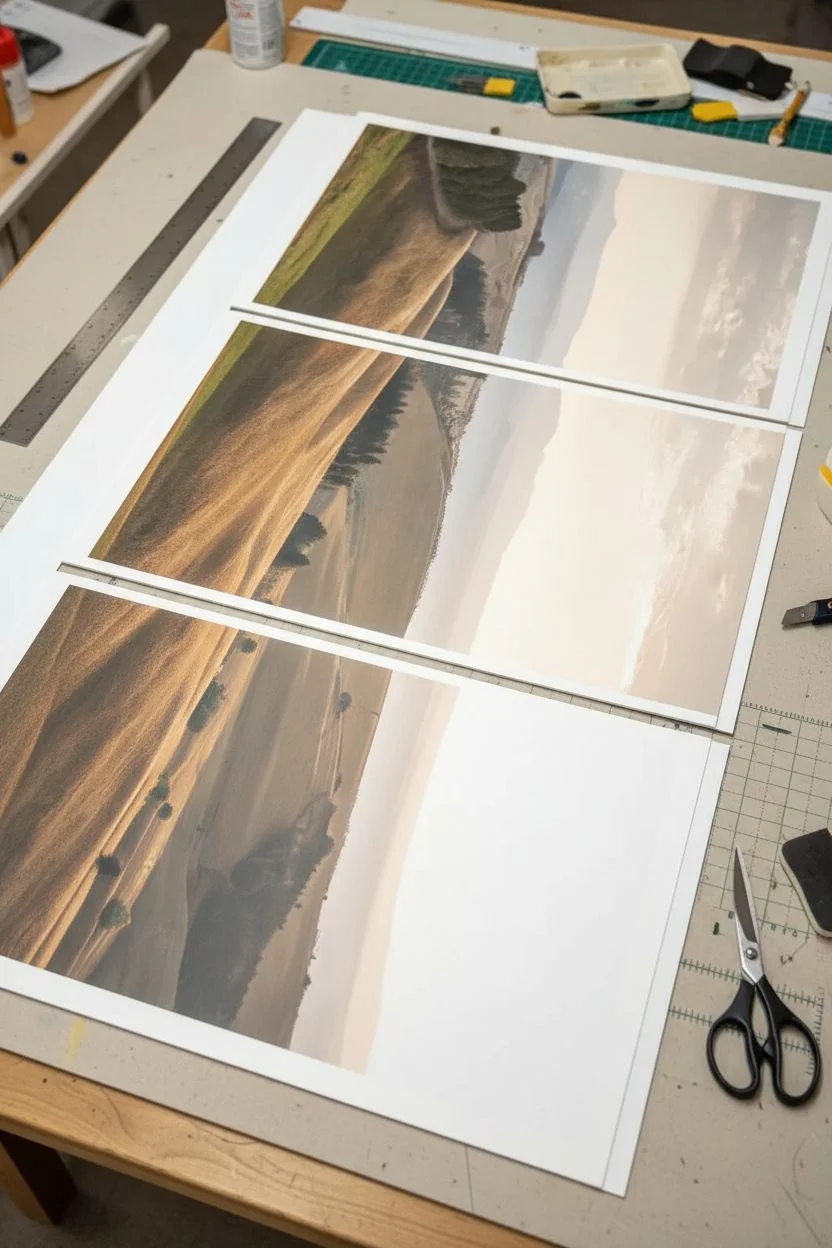
Bring the serene warmth of Tuscany or the California coast into your living room with this stunning continuous landscape project. By splitting a single panoramic image across three large canvases, you create a high-end gallery look that feels expansive and cohesive.
Step-by-Step
Materials
- High-resolution landscape photo (digital file)
- Three large gallery-wrapped canvases (e.g., 24×36 inches each)
- Matte Mod Podge or acrylic gel medium
- Foam brushes
- Large format printer service or engineering prints
- Scissors and X-Acto knife
- Spray bottle with water
- Self-healing cutting mat
- Measuring tape
- Smoothing tool or old credit card
Step 1: Planning and Preparation
-
Select your image:
Choose a high-resolution landscape photo with a strong horizon line. The image needs to be panoramic or croppable to a wide aspect ratio to span across all three canvases continuously. -
Calculate dimensions:
Measure your wall space and decide on the gap size between panels (usually 2-3 inches). Ensure your digital image resolution is high enough to be printed at the full combined width of your three canvases. -
Digital slicing:
Using photo editing software, crop your image into three equal vertical sections. It is crucial to account for the canvas wrap depth if you want the image to wrap around the edges; add 1.5 to 2 inches of ‘bleed’ area to every side of each digital slice. -
Print the panels:
Send your files to a large-format printer. Ask for engineering prints on standard paper if you plan to mount them with medium, or large photo prints if you are simply framing them. For this tutorial, we are mounting paper prints to canvas for a textured, painterly look. -
Prepare the workspace:
Lay down a drop cloth or old sheet. Set up your three canvases side-by-side on a flat surface to visualize the final flow and ensure your prints align perfectly before gluing.
Wrinkle Rescue
If paper wrinkles while gluing, lift it gently and re-smooth. If it’s already dry, prick the bubble with a needle and press down with a little fresh adhesive.
Step 2: Mounting the Artwork
-
Trim the prints:
Place your prints on a self-healing mat. Use an X-Acto knife to trim away any white borders, leaving just the image area that corresponds to the canvas face plus the side wrapping amount. -
Apply base adhesive:
Working on the first canvas, apply a generous, even layer of Mod Podge or gel medium to the front face of the canvas using a foam brush. I like to work quickly here so the glue doesn’t skin over. -
Position the print:
Carefully align the paper print onto the wet canvas face. Start from the center and gently press it down, ensuring the image is centered so enough paper hangs off the edges for wrapping. -
Smooth out bubbles:
Use a smoothing tool or a credit card to press the paper firmly into the canvas texture. Work from the center outward to push out any trapped air bubbles and ensure a strong bond. -
Wrap the edges:
Apply adhesive to the side edges of the canvas. Tightly fold the overhanging paper down over the sides, treating it like gift wrap. Use a little extra medium on the corners to keep them crisp and flat. -
Repeat for all panels:
Follow the same mounting process for the remaining two canvases. Periodically place them next to each other to double-check that the horizon lines still match up beautifully.
Faux Oil Paint
Mix a tiny drop of clear glazing medium with heavy body gel. Apply thickly with a palette knife over key details like trees to create authentic 3D brushstrokes.
Step 3: Sealing and Finishing
-
Apply a texture coat:
Once the base layer is dry, brush a layer of Mod Podge or clear acrylic gel over the *top* of the image. Use brush strokes that follow the contours of the hills to mimic the look of a real painting. -
Let it cure:
Allow the texture coat to dry completely for at least 24 hours. The milky white appearance will vanish as it dries, leaving a clear, textured finish. -
Install hanging hardware:
Flip the canvases over and attach sawtooth hangers or D-rings to the back frame. Measure precisely to ensure all three will hang at the exact same height. -
Mark the wall:
Using a level and pencil, mark the spots for your nails. Remember to leave that predetermined 2-3 inch gap between each canvas so the landscape flows naturally across the break. -
Hang and adjust:
Place the canvases on the wall. Step back to verify the horizon line is straight and continuous across the gaps, adjusting the tilt slightly if needed.
Now you have a breathtaking vista that visually expands your room and serves as a peaceful focal point


Misty Mountain Range in Three Panels
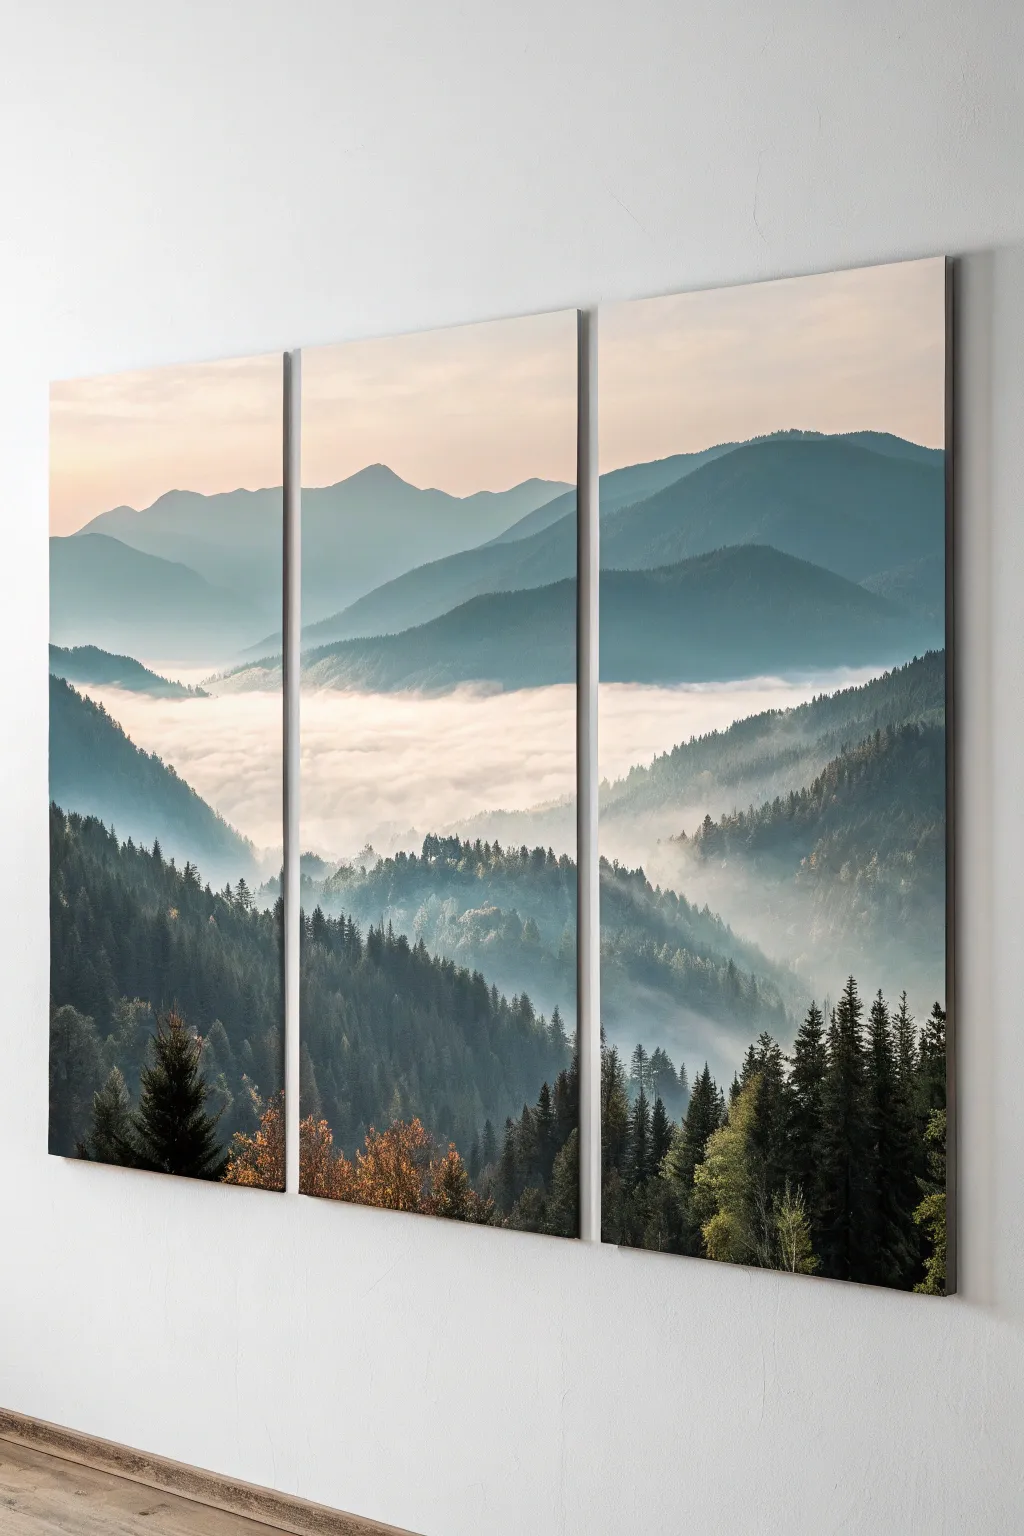
Bring the serene majesty of a high-altitude sunrise into your living room with this three-panel misty mountain landscape. Using acrylic blending techniques and soft layering, you will create depth and atmosphere that spans across a stunning triptych display.
Detailed Instructions
Materials
- Three equal-sized canvases (e.g., 16×24 inches each)
- Acrylic paints: Titanium White, Phthalo Blue, Mars Black, Sap Green, Burnt Umber, a touch of Alizarin Crimson, and Yellow Ochre
- Large flat brushes (2-inch and 1-inch)
- Medium round brushes (size 6 or 8)
- Fan brush (optional, for trees)
- Small detail brush (size 0 or 1)
- Slow-drying medium or retarder
- Misting spray bottle with water
- Palette
- Masking tape (optional for edges)
Step 1: Preparation and Sky
-
Align the canvases:
Lay your three canvases side-by-side on your workspace with a small gap between them, exactly as they will hang on the wall. This ensures your horizon lines and mountain slopes will flow seamlessly from one panel to the next. -
Mix the sky colors:
Prepare a soft gradient on your palette. Mix a large amount of Titanium White with a tiny speck of Yellow Ochre and Alizarin Crimson for the warm horizon glow. Separately, mix White with a very small amount of Phthalo Blue and grey for the upper sky. -
Paint the upper sky:
Starting at the very top of all three canvases, apply the cool grey-blue mix using a large flat brush. Work horizontally across all three panels as if they were one surface. -
Blend the horizon:
While the top is still wet, introduce the warming peach/pink tone near the middle-upper section. Use clean, horizontal strokes to blend this upward into the blue, creating a soft sunrise transition.
Misty Edges
If your fog looks too like solid white paint, use a dry, clean brush to gently swirl the edges while the paint is still wet. This softens the transition into the background color.
Step 2: Distant Mountains & Mist
-
First mountain layer:
Mix a very pale blue-grey (mostly White with a touch of Phthalo Blue and Black). Paint the most distant silhouette of peaks across the panels, keeping the edges soft. These should look like shadows in the mist. -
Creating the fog bank:
Below this first mountain range, apply a wash of pure White mixed with clear glazing medium or water. Scumble or swirl the brush gently to create the look of rising steam or clouds settling in the valleys. -
Second mountain layer:
Darken your blue-grey mix slightly. Paint a second range of mountains below the clouds, ensuring the top edge is distinct but the bottom fades out into white paint to simulate more mist at their base. -
Adding atmospheric perspective:
Continue this pattern of ‘darken mix, paint peak, fade bottom’ for 2-3 more layers. Each layer should get progressively darker and slightly greener (add a pinprick of Sap Green) as you move down the canvas.
Canvas Wrap
Paint the artwork extending onto the sides (edges) of the canvases. This ‘gallery wrap’ style means you won’t need frames, and the landscape looks endless from any angle.
Step 3: Foreground Details
-
Mix the forest green:
For the closest hills, mix a deep, rich color using Sap Green, Phthalo Blue, and Mars Black. It should look nearly black but have a green undertone. -
Block in the foreground hills:
On the bottom third of the canvases, paint the solid shapes of the nearest slopes. Make sure the slope lines carry accurately across the gaps between the canvases. -
Texture the left slope:
On the left panel, use a round brush or fan brush held vertically to tap in the texture of distant pine trees along the ridge line. Keep these small and indistinct. -
Paint the hero trees:
On the bottom right panel and the bottom of the center panel, switch to a detail brush. Paint vertical lines for trunks, then use a stippling motion to add pine boughs. I like to keep the tops sharp and the bottoms fuller. -
Highlight the foliage:
Mix a slightly lighter olive green (Sap Green + Yellow Ochre). Gently tap this onto the sunny side (left side) of your foreground trees to give them dimension. -
Add autumn touches:
If you want the subtle fall look from the image, mix Burnt Umber with Orange. Stipple a few small deciduous bushes amongst the dark pines in the immediate bottom foreground. -
Final mist glazing:
Once everything is fully dry, take a clean brush with a very watery white glaze. Lightly sweep over any areas where the mist needs to look thicker, specifically where the tree line meets the cloud layer.
Step back and admire how your three panels merge into one breathtaking mountain vista


Ocean Horizon Fade Set
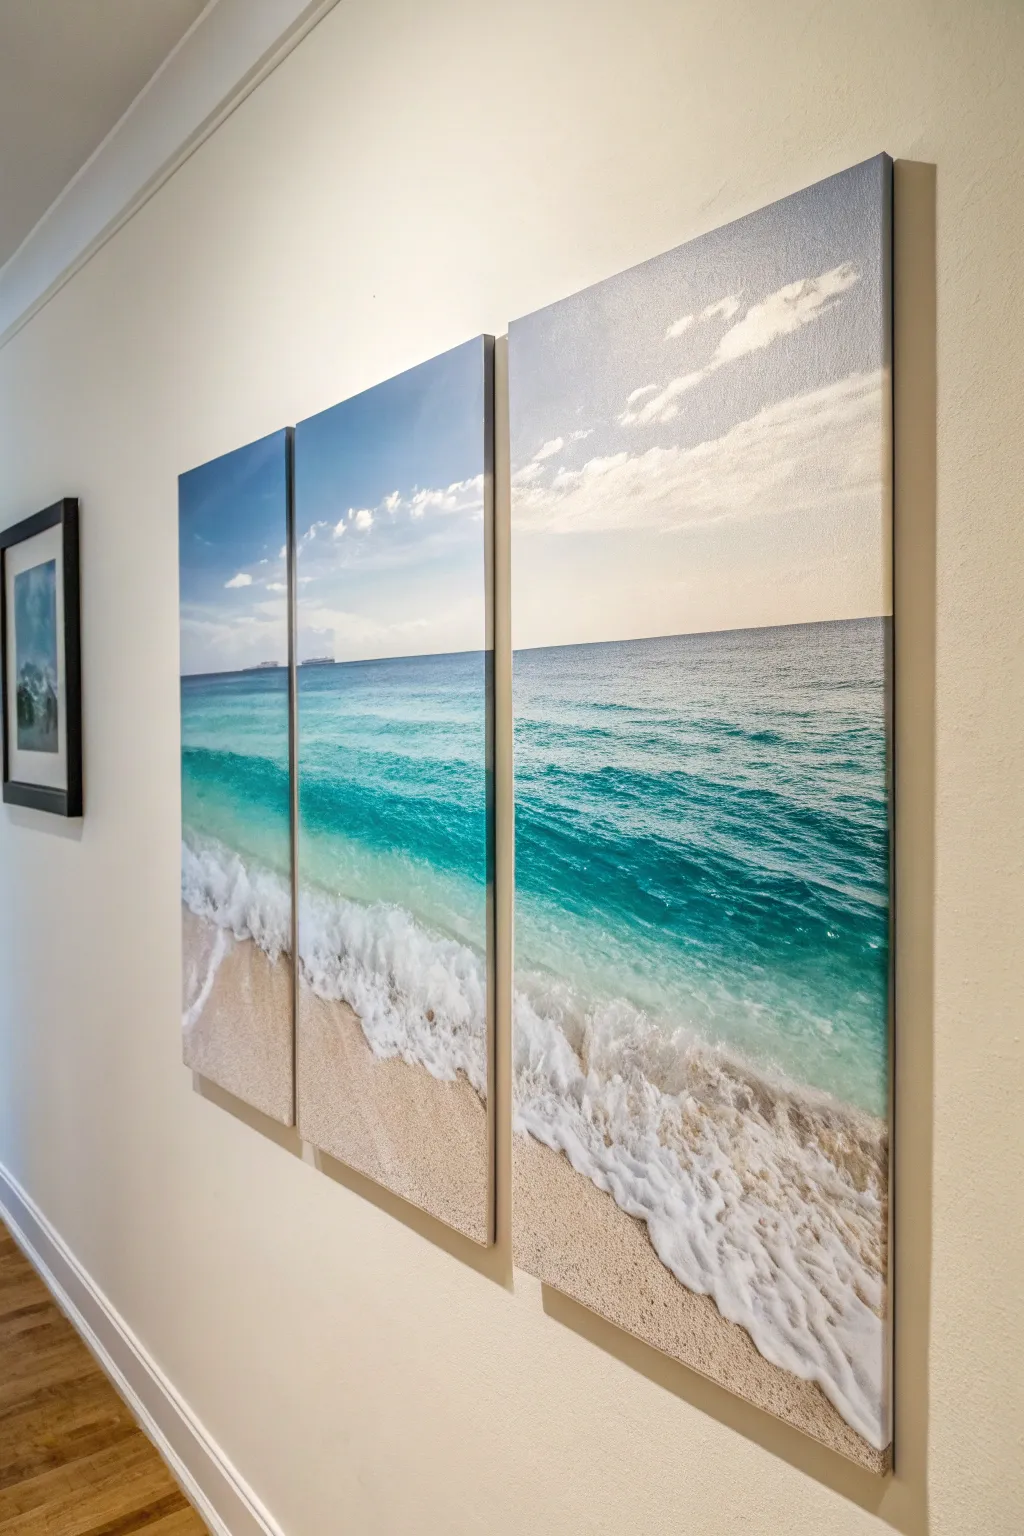
Bring the calming rhythm of the tide into your home with this stunning three-panel canvas set. This project captures the seamless transition from sun-warmed sand to the infinite blue horizon, creating a window to the ocean right on your wall.
Step-by-Step
Materials
- Three gallery-wrapped canvases (tall rectangular format, e.g., 12×24 or similar)
- Acrylic paints: Titanium White, Ultramarine Blue, Phthalo Turquoise, Raw Sienna, Burnt Umber, Unbleached Titanium
- Large flat wash brush (2-3 inch)
- Medium filbert brush (size 8-10)
- Small round brush (size 2-4)
- Palette or large mixing plate
- Water container and paper towels
- Ease or wall space to hang canvases side-by-side
- Sea sponge (natural)
- Painter’s tape or masking tape
- Matte or satin varnish (optional for finishing)
Step 1: Preparation & Sky
-
Arrange the canvases:
Place your three canvases side-by-side on your easel or workspace. It is crucial to paint them simultaneously as if they are one large surface to ensure the horizon line and wave patterns flow perfectly across gaps. -
Mask the horizon:
Decide on your horizon line, placing it slightly above the vertical center. Apply a strip of painter’s tape straight across all three canvases to protect the water area while you paint the sky. -
Mix the sky gradient:
On your palette, prepare a gradient mix. Start with Titanium White and a tiny touch of Ultramarine Blue for the horizon area, transitioning to a deeper blue as you move upward. -
Paint the upper sky:
Using the large flat wash brush, apply the deeper blue mix to the top third of the canvases. Use long, horizontal strokes that span across the gaps between canvases to maintain continuity. -
Blend the fade down:
Clean your brush slightly and pick up the lighter horizon mix. With wet-on-wet technique, blend this color up into the darker blue, creating a soft, hazy transition as you approach the tape. -
Add soft clouds:
While the sky is still slightly damp, mix distinct white with a hint of warm grey. Use a filbert brush or a piece of sponge to dab in soft, stretched-out cloud formations, angling them slightly inward to create perspective.
Clean Edges Pro-Tip
Paint the sides of your gallery-wrapped canvases! Continue the image onto the sides for a professional finish, or paint them a solid neutral color if you plan to frame them later.
Step 2: The Ocean
-
Establish the water base:
Remove the tape once the sky is dry. Mix Phthalo Turquoise with Titanium White for the distant water. Paint a crisp, straight line against the sky, darkening the teal color slightly as you move closer to the foreground. -
Deep water texture:
For the mid-ground waves, use a medium filbert brush with a darker turquoise mix. Add short, horizontal strokes to mimic the surface ripple of the ocean, varying the opacity to show depth. -
The shallow gradient:
As you approach the bottom third (the shoreline), mix a significant amount of white into your turquoise. The water here should be very translucent, almost revealing the sand color underneath.
Level Up: Texture
Mix heavy gel medium or modeling paste into your white paint for the sea foam. This builds actual physical texture on the canvas, making the crashing waves pop out in 3D relief.
Step 3: Sand & Foam
-
Paint the sand:
Mix Unbleached Titanium with a touch of Raw Sienna. Paint the bottom section of the canvases, curving the shoreline slightly so it recedes on the left and advances on the right. -
Add sandy texture:
Using an old, stiff brush or a sponge, stipple a mix of Burnt Umber and white over the sand area to create a grainy texture. I like to concentrate darker speckles near the bottom edge for visual weight. -
Create the main wave:
Load your filbert brush with pure Titanium White. Paint the main crashing wave right where the turquoise water meets the sand, using a rolling motion to suggest the water tumbling over. -
Sea foam details:
Mix white with a tiny amount of water to make it fluid. Using a small round brush, scribble intricate, lacy patterns extending from the wave onto the sand, mimicking the retreating foam. -
Shadows and depth:
Underneath the white crashing wave, add a thin glaze of dark turquoise or diluted grey. This shadow lifts the foam off the surface, giving the water volume and realism. -
Final blending check:
Step back and look at the image as a whole. Ensure the foam lines and horizon carry convincingly from one canvas to the next. Touch up the edges of the canvas where the image wraps around.
Hang your masterpieces with about two inches of space between them to complete this refreshing coastal look


Modern Botanical Leaves Trio
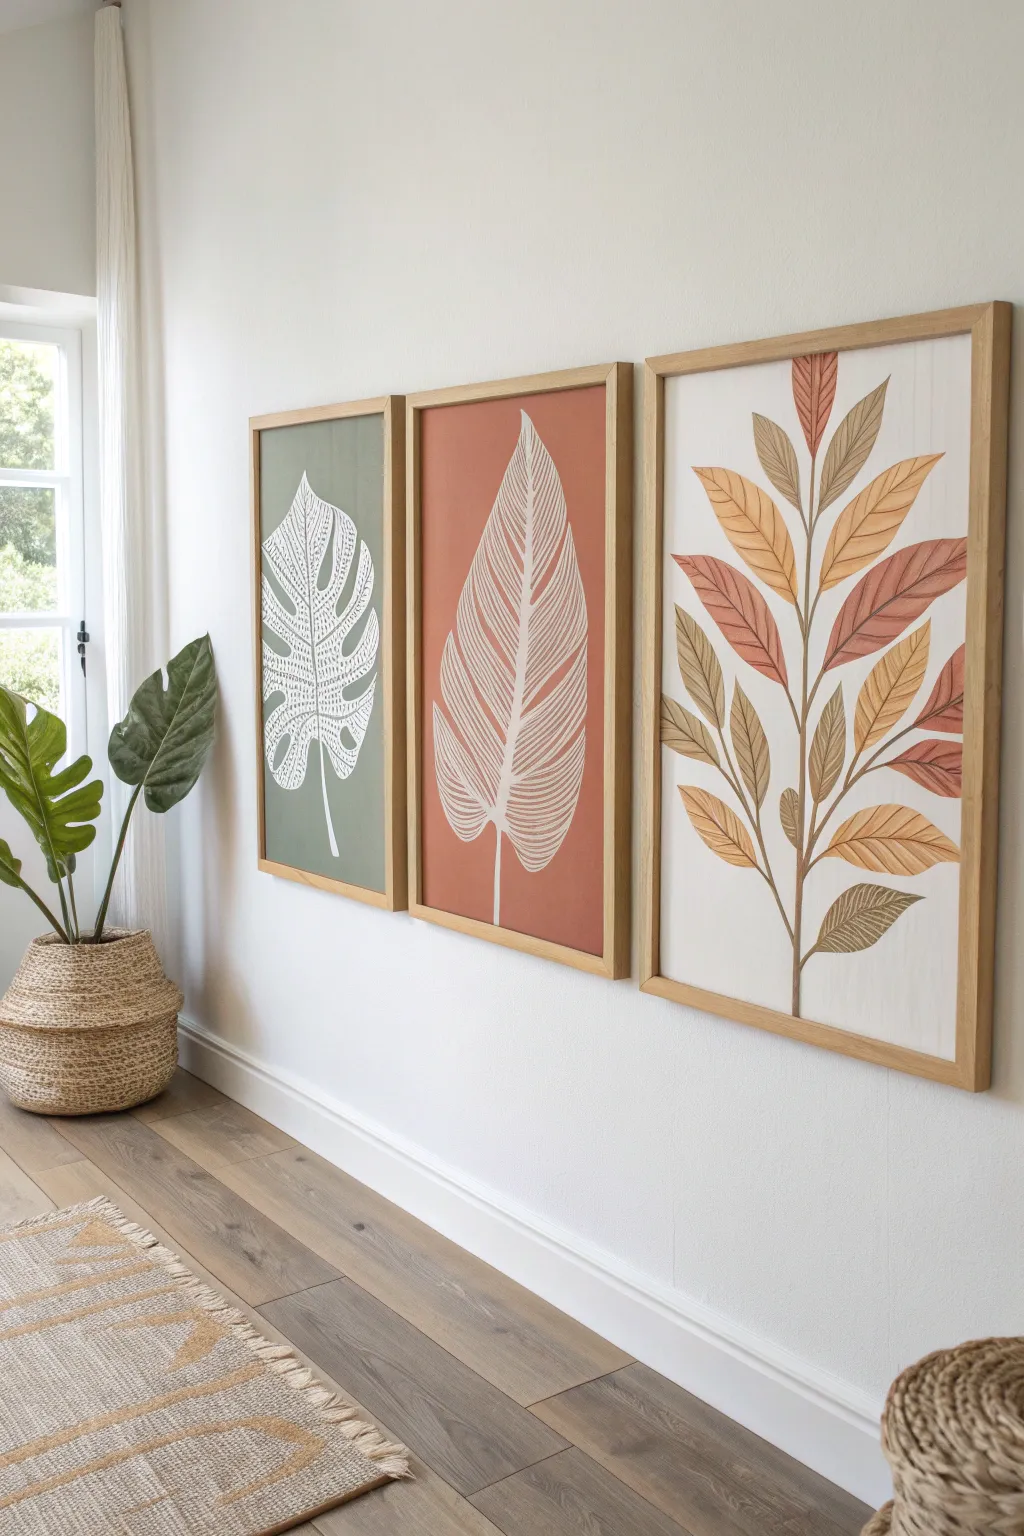
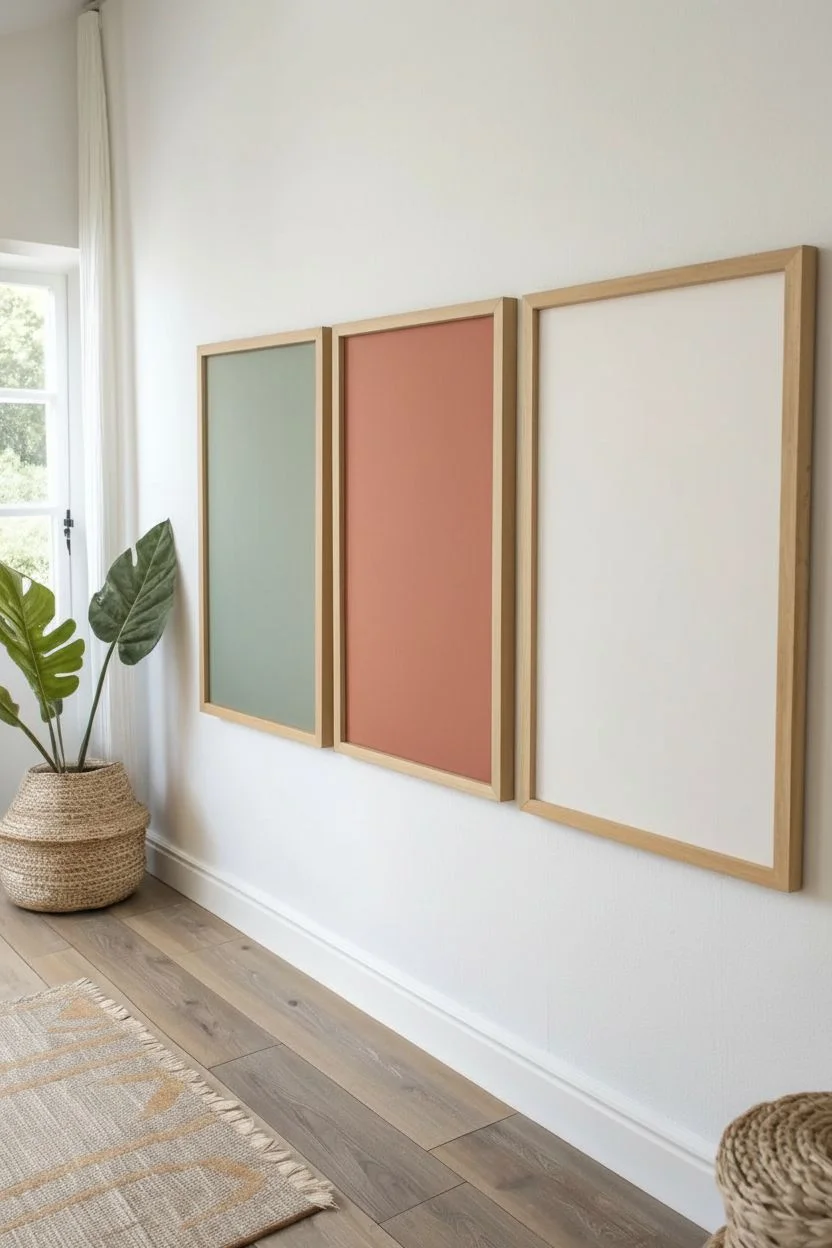
Bring the outdoors in with this sophisticated set of three botanical panels. Featuring an earthy palette of sage green, terracotta, and warm beige, these pieces combine bold silhouettes with delicate line work for a modern organic feel.
How-To Guide
Materials
- 3 wooden canvases or canvas panels (16×24 inches recommended)
- Acrylic paints: sage green, terracotta, warm white, cream, ochre, soft brown
- Flat shader brushes (medium and large)
- Fine liner brush (size 0 or 1)
- Pencil and eraser
- Ruler
- Painter’s tape
- 3 light wood floating frames
Step 1: Preparing the Backgrounds
-
Prime the surface:
Start by ensuring your wooden panels are clean and smooth. If they are raw wood, apply a coat of gesso to prime them; this prevents the wood from soaking up too much paint. -
Mix the sage green:
For the left panel, mix a muted sage green. You want a flat, matte finish, so apply the paint using a wide flat brush in long, even strokes. -
Apply the green base:
Cover the entire first panel with the sage mixture. You’ll likely need two coats to get a solid, opaque color without streaks. Let it dry completely between layers. -
Create the terracotta hue:
For the center panel, mix a warm, earthy terracotta color. Paint the entire surface just as you did with the green panel, ensuring full coverage. -
Paint the third backdrop:
The right panel uses a clean, warm white background. Paint this panel thoroughly. I find that white often requires three thin coats to look truly professional and solid.
Uneven Background?
If your background paint looks streaky, sand it very lightly with fine-grit sandpaper between coats. This knocks down ridges effectively.
Step 2: Sketching the Silhouettes
-
Outline the Monstera:
On the dry sage panel, lightly sketch a large Monstera leaf shape using a pencil. Center it vertically, leaving equal space at the top and bottom. -
Draft the Banana Leaf:
Move to the terracotta panel. Sketch a tall, elongated oval shape that points upward—resembling a stylized banana or bird of paradise leaf. -
Sketch the Branch:
On the white panel, draw a central vertical stem. Add branches extending outwards on both sides, sketching simple almond shapes for the leaves attached to them.
Step 3: Painting the Details
-
Fill the Monstera:
Using your fine liner brush and white paint, carefully trace over your Monstera sketch. Instead of filling it in solid, draw the veins first, then use stippling or hatching to create texture within the leaf shape. -
Detail the center leaf:
On the terracotta panel, use a creamy beige color. Paint the central spine of the leaf first. Then, paint close, parallel lines curving outward from the spine to the leaf’s edge to mimic veins. -
Paint the multi-colored branch:
For the third panel, you’ll use a palette of ochre, brown, and soft terracotta. Paint the central stem brown first. -
Fill the third panel’s leaves:
Paint the individual leaves on this branch using alternating colors—some ochre, some terracotta, some brown. Keep the paint application flat and smooth. -
Add vein details:
Once the colored leaves on the third panel are dry, use a slightly darker shade than the leaf color (or a fine brown line) to paint a central vein and delicate side veins on each leaf.
Add Gold Accents
For a glamorous twist, use metallic gold paint for the veins on the white panel or the stippling on the sage Monstera leaf.
Step 4: Assembly and Framing
-
Check for consistency:
Step back and look at all three panels. Touch up any background scuffs with your original base colors and ensure lines are crisp. -
Seal the artwork:
Apply a matte varnish over all three paintings. This unifies the sheen and protects the acrylic from dust and UV light. -
Frame the trio:
Place your finished panels into light wood floating frames. Secure them from the back according to the frame instructions.
Hang your new trio with equal spacing between frames to complete this gallery-worthy look
BRUSH GUIDE
The Right Brush for Every Stroke
From clean lines to bold texture — master brush choice, stroke control, and essential techniques.
Explore the Full Guide
Abstract Floral “Bloom” Collection Set
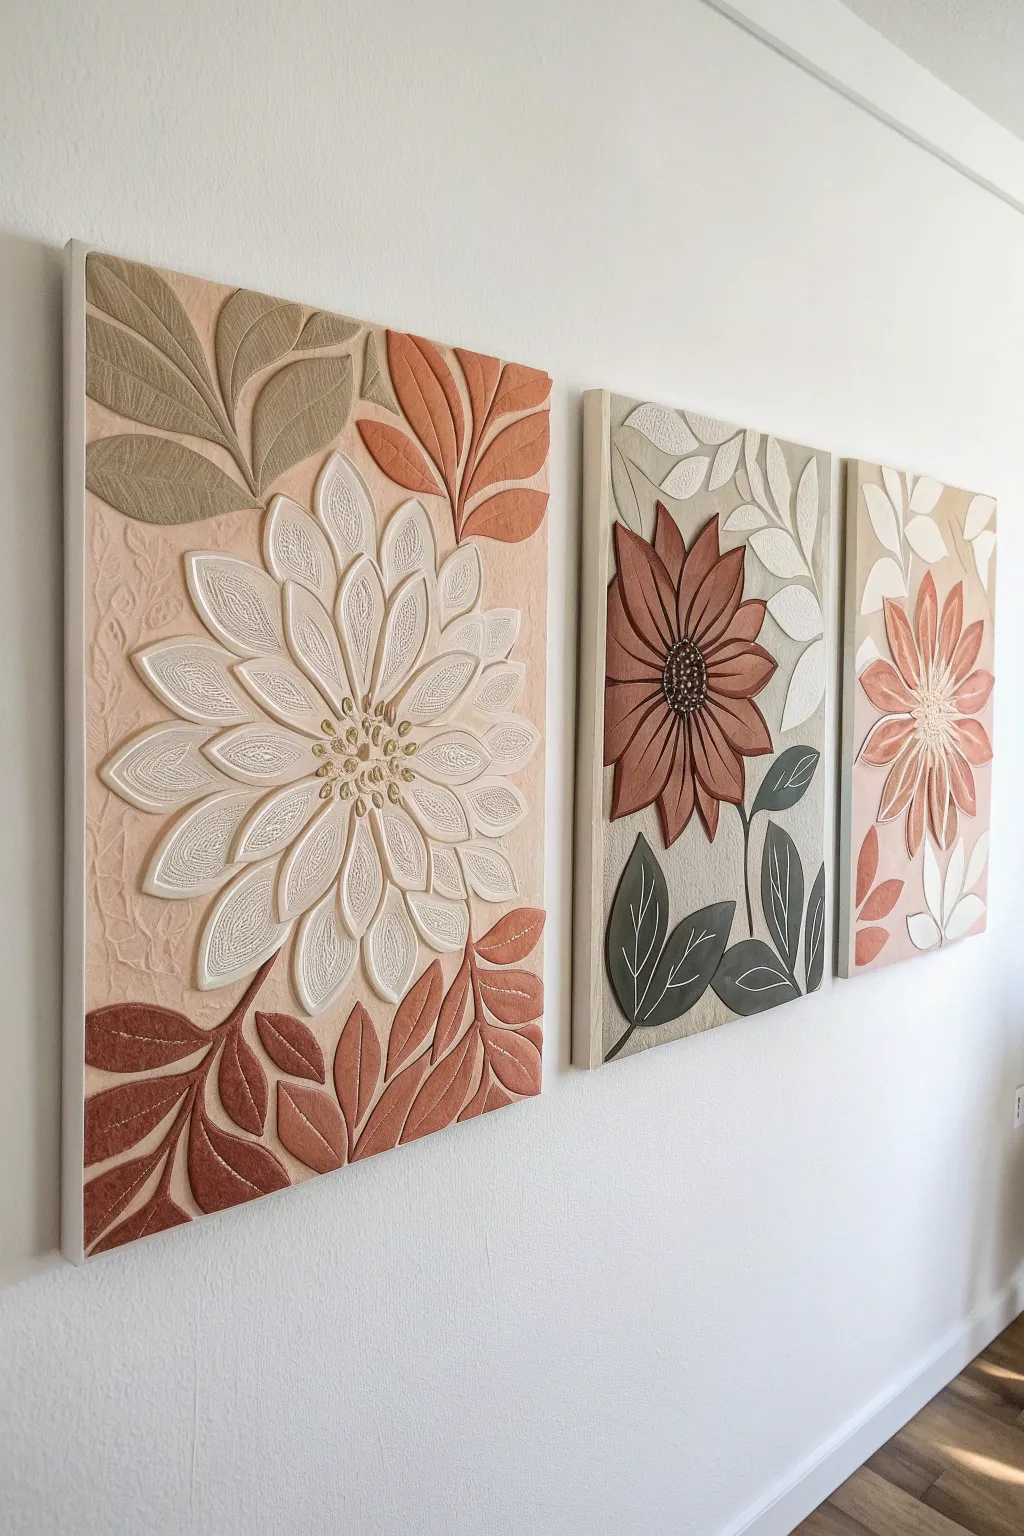
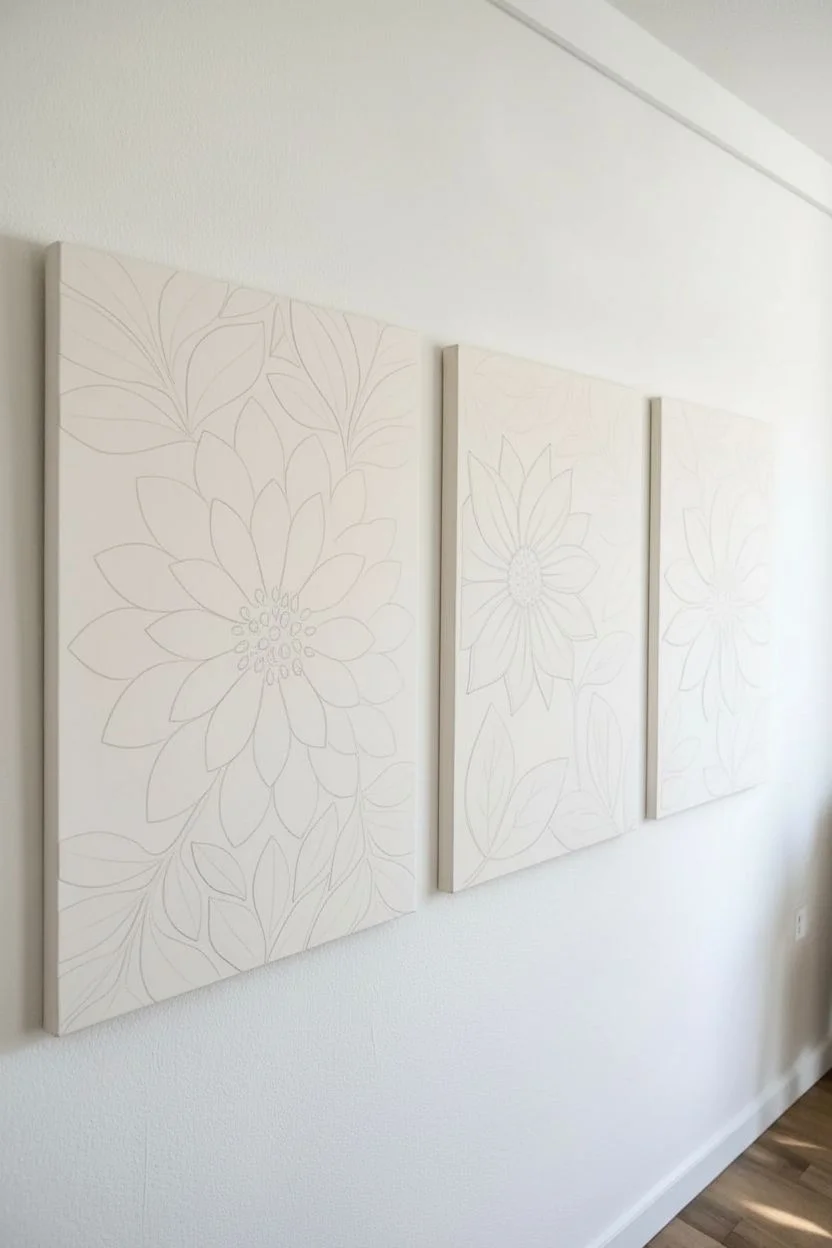
Transform flat canvases into three-dimensional floral masterpieces with this tactile relief art project. Using modeling paste and a palette knife, you’ll sculpt oversized blooms and leaves that literally pop off the surface, finished in a warm, earthy color palette.
Step-by-Step Tutorial
Materials
- 3 Stretched canvases (rectangular, varying sizes if desired)
- White modeling paste or heavy texture gel
- Palette knives (assorted shapes, including a pointed one)
- Piping bag with round tips (optional, for precise lines)
- Acrylic paints: Cream, terra cotta/rust, sage green, deep forest green, and beige
- Paintbrushes (flat and filbert sizes)
- Pencil
- Sandpaper (fine grit)
- Matte varnish spray
Step 1: Preparation & Sketching
-
Prime the surface:
Ensure your canvases are clean and dust-free. If they aren’t pre-primed, apply a coat of gesso to create a smooth base for your sketching and paste application. -
Sketch the composition:
Using a pencil, lightly draw your floral designs onto each canvas. For the left panel, draw one large, central bloom with radiating petals. For the middle, draw a medium flower offset to the left. For the right panel, draw a smaller flower on the right side. Add large, sweeping leaves to fill the negative space. -
Plan the relief:
Decide which elements will be raised. In this design, the petals and leaves are the primary sculpted elements, while the background remains relatively flat.
Smooth Operator
Dip your palette knife in water occasionally while sculpting. The moisture prevents the paste from dragging and helps create ultra-smooth petal surfaces.
Step 2: Sculpting the Relief
-
Apply base paste layer:
Scoop a generous amount of modeling paste onto your palette. Using a small palette knife, begin filling in the petal shapes. Apply the paste approximately 1/8 to 1/4 inch thick. I find it easiest to work on one flower at a time so the paste doesn’t dry out. -
Sculpt leaf veins:
While the paste on the leaves is still wet but slightly firm, use the edge of your palette knife or a sculpting tool to carve deep lines for the veins. This subtractive method creates crisp, realistic indentations. -
Pipe details (optional):
For the very fine lines inside the flower petals or the flower centers, you can fill a piping bag with slightly thinned modeling paste. Pipe the delicate interior outlines and stamen details directly onto the canvas for raised precision. -
Define petal edges:
Use a clean, damp brush or a small knife to sharpen the edges of your petals. You want distinct separation between each petal so they don’t merge into a single blob. -
Texture the centers:
For the flower centers, dab the paste with a stiff bristle brush or a sponge to create a rough, seeded texture. -
Allow to cure:
This is the most critical patience test. Let the relief dry completely. Depending on the thickness of your paste and humidity, this can take 24 to 48 hours. The paste must be hard to the touch. -
Sand imperfections:
Once fully cured, gently sand any unwanted sharp peaks or rough blobs with fine-grit sandpaper to smooth the surface before painting.
Step 3: Painting & Finishing
-
Base coat the flowers:
Mix a creamy off-white shade. Paint the raised petals of the large left flower and parts of the right flower. Use a smaller brush to get into the crevices without filling the vein lines you carved. -
Add earthy tones:
Mix a terra cotta or rust color. Apply this to the lower leaves of the first canvas and the petals of the middle flower. Use a slightly watered-down mix to let the texture show through. -
Paint the foliage:
Use sage green for the upper leaves on the first panel and lighter leaves on the second. Switch to a deep forest green for the bottom leaves of the middle panel to create contrast and depth. -
Detail the centers:
Using a fine brush, carefully dab dark brown or black paint into the textured centers of the flowers. You can add tiny dots of gold or cream on top for highlights. -
Refine the background:
Paint the flat negative space around your relief work. A soft beige or peach tone works well to unify the set. Keep the paint application smooth to contrast with the textured flowers. -
Dry brush highlights:
Dip a dry brush into a lighter shade of your base colors (e.g., light pink on the rust petals). Lightly drag it over the raised ridges of the petals and leaves to accentuate the 3D effect. -
Seal the artwork:
Finish by spraying a thin coat of matte varnish over all three canvases. This protects the textured paste from dust and seals the acrylic paint.
Crack Control
If thick paste cracks while drying, don’t panic. Mix a small amount of fresh paste with a drop of water and fill the crack like spackle, then sand smooth once dry.
Hang your trio together to create a stunning, gallery-worthy focal point in your room
Golden Accent Triptych With Metallic Details
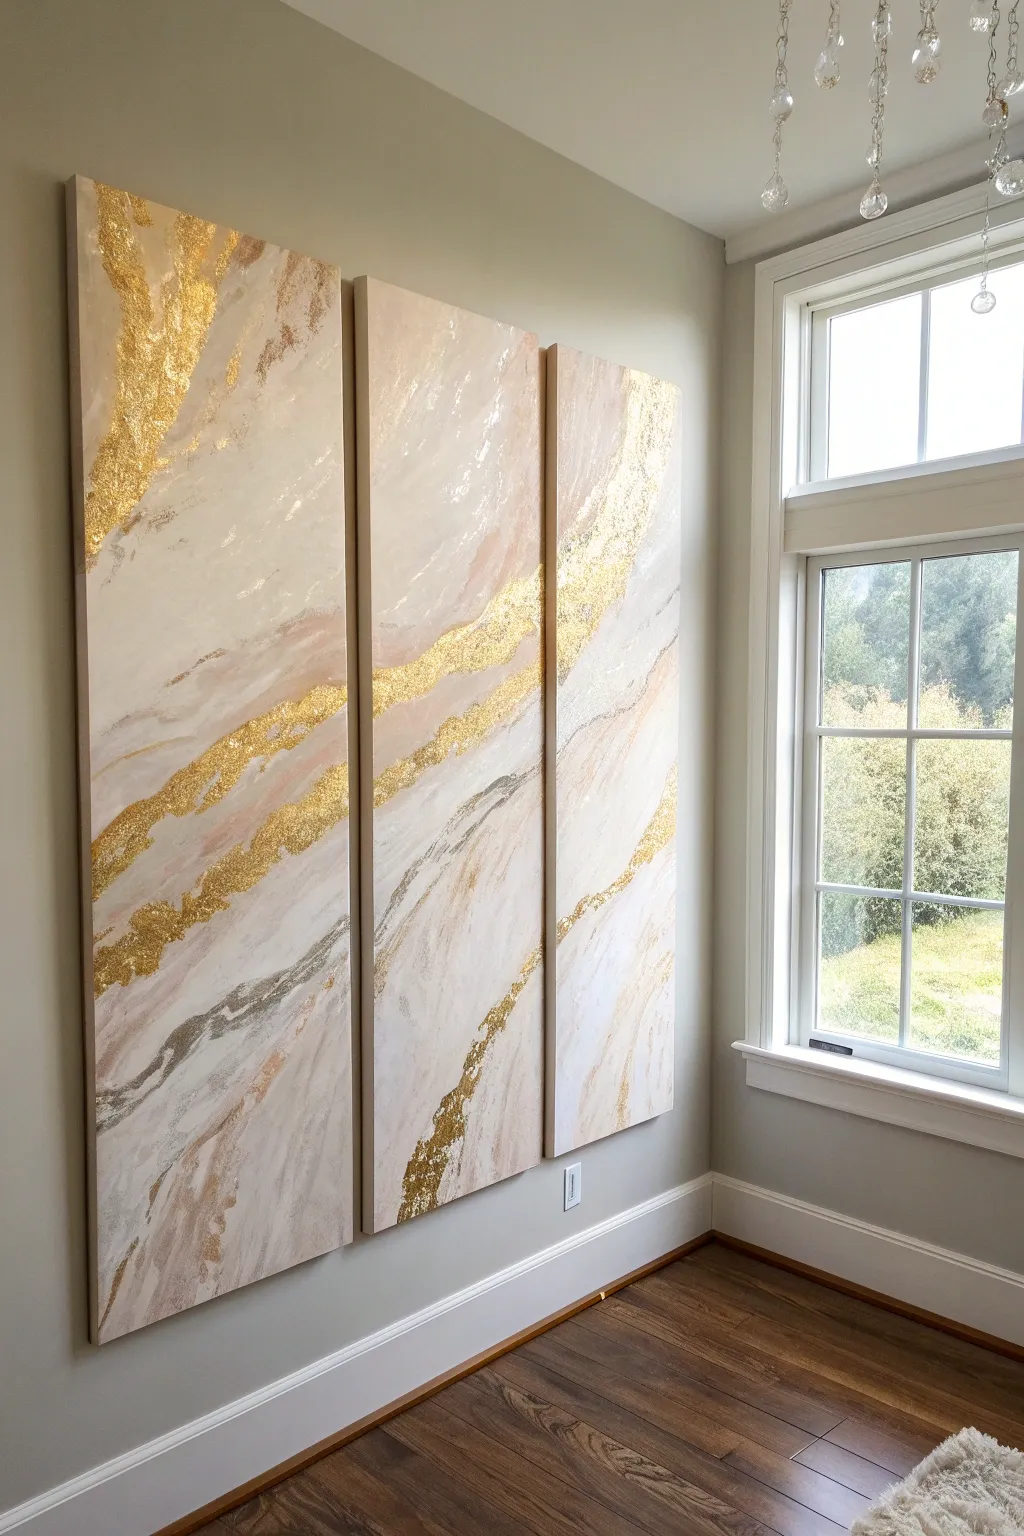
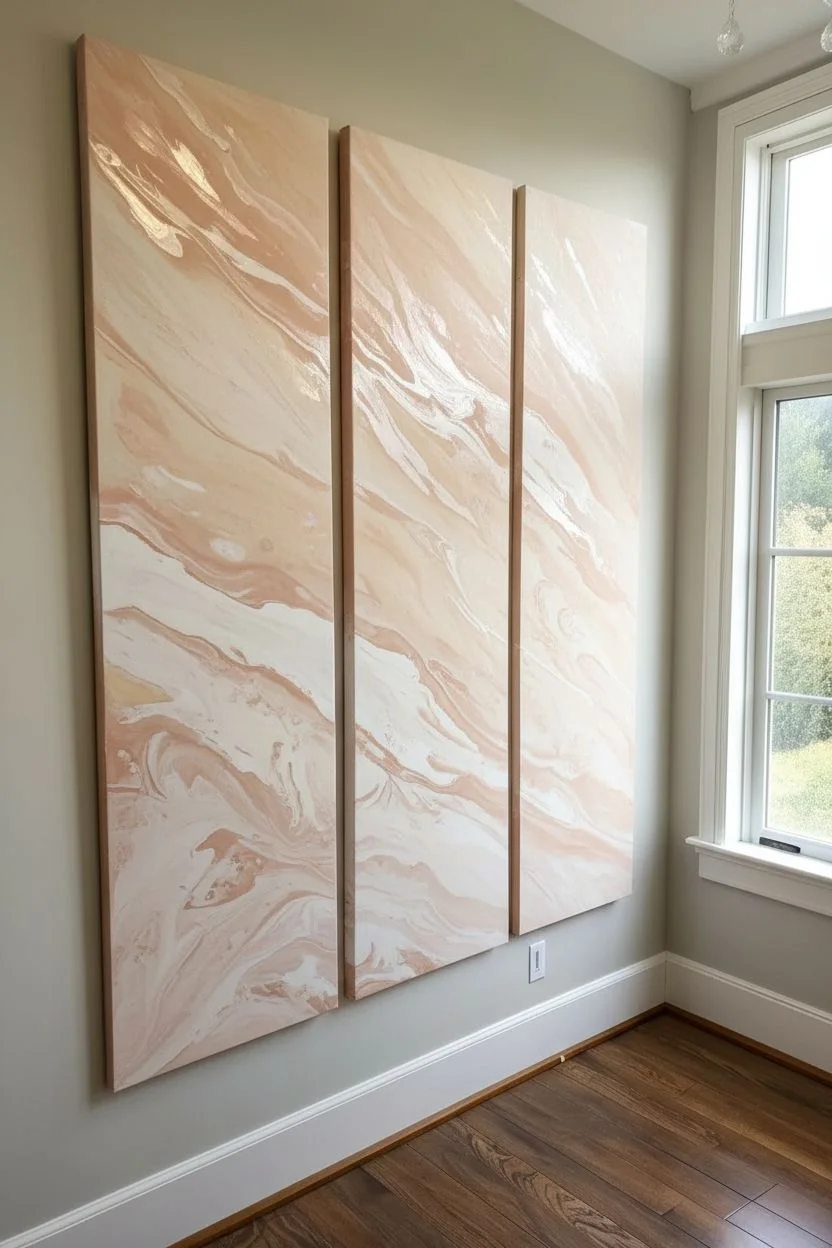
Transform three large canvases into a statement wall feature with this luxurious fluid-style abstract art. Combining soft blush and cream tones with striking gold leaf veins creates an elegant, high-end marble effect that spans seamlessly across multiple panels.
Step-by-Step
Materials
- 3 Large gallery-wrapped canvases (18×48 or similar)
- Acrylic paints (Titanium White, Unbleached Titanium, Blush Pink, Paynes Grey)
- Pouring medium or Floetrol
- Gold leaf sheets or metallic gold flakes
- Gold leaf adhesive size
- Soft gilding brush and hake brush
- Gloss varnish or resin (optional for finish)
- Palette knives
- Plastic drop cloth
- Water spray bottle
Step 1: Preparation & Base Layout
-
Set the Stage:
Lay down your plastic drop cloth in a well-ventilated area. Arrange your three canvases side-by-side on a flat surface or easels, leaving a small gap (about 1-2 inches) between them. This spacing mimics how they will hang on the wall and ensures your design flows continuously. -
Mix Your Base Colors:
Prepare four separate mixing cups. Mix Titanium White with a generous amount of pouring medium to create a fluid, creamy consistency. Create a second mix with Unbleached Titanium for a warmer off-white, a third with a very pale Blush Pink, and a fourth with a diluted Grey for the veins. -
Apply the White Foundation:
Using a large brush or by pouring directly, cover roughly 70% of all three canvases with the Titanium White mixture. Don’t worry about perfect coverage yet; thick, uneven application adds to the organic marble feel.
Pro Tip: Texture Depth
Mix a little modeling paste into your diagonal white veins before painting. This raises the ‘stone’ slightly, making the gold leaf settle into the valleys for 3D drama.
Step 2: Creating the Marble Flow
-
Add Warm Undertones:
While the white is still wet, pour ribbons of the Unbleached Titanium and Blush Pink mixtures diagonally across the canvases. Think about massive geological shifts; let the lines travel from the bottom left of the first canvas all the way to the top right of the third canvas. -
Blend for Softness:
Mist the canvas lightly with your water spray bottle to encourage the paints to move. Use a clean, dry hake brush or a large palette knife to gently swipe and swirl the colors together. You want soft, smoky transitions, not hard lines. -
Establish the Grey Veins:
Take your grey mix and dragging a thin line of paint along the edges of your pink and cream sections. Use the tip of a palette knife to feather these grey edges out into the white, simulating natural stone fissures. -
Check the Continuity:
Step back and look at the triptych as a whole. Ensure that where a vein exits the right side of the first canvas, it picks up visually on the left side of the second canvas. I find it helpful to physically align them closer for a moment to check the flow. -
Dry Time:
Allow the acrylic layer to dry completely. This can take 24-48 hours depending on the thickness of the paint application. The surface must be bone dry before gilding.
Step 3: Gilding the Accents
-
Map the Gold Veins:
Identify the darkest crevices and the most prominent diagonal flows in your dried painting. These areas will serve as the riverbeds for your gold leaf. -
Apply Adhesive:
Brush the gold leaf adhesive size onto these specific areas. Apply it somewhat thickly and irregularly to give the gold texture. Let the adhesive sit until it becomes tacky (usually 15-30 minutes), turning from milky to clear. -
Lay the Gold:
Gently press sheets of gold leaf or sprinkle lush amounts of gold flakes onto the tacky adhesive. Don’t press it flat immediately; crinkles add lovely dimension. -
Burnish the Gold:
Once the gold is covering the adhesive, use a soft, dry brush to rub over the gilded areas in small circular motions. This ‘burnishing’ removes the excess loose leaf and polishes the gold that remains attached. -
Clean Up Edges:
Use a stiffer brush to knock away any tiny flakes clinging to non-adhesive areas. You want sharp, distinct shimmering rivers, not a dusting of glitter.
Troubleshooting: Peeling Gold?
If gold leaf lifts off too easily, your adhesive likely dried too much before application. Re-apply a thin layer of size, wait for peak tackiness, and try again.
Step 4: Finishing Touches
-
Seal the Artwork:
To protect the gold leaf from tarnishing and give the piece a unified sheen, apply a coat of gloss varnish. For a glass-like finish similar to real polished stone, you could opt for a resin topcoat here. -
Paint the Sides:
Don’t forget the edges of your gallery-wrapped canvas. Paint them a solid off-white or continue the marble pattern over the side for a truly professional look. -
Hang and Align:
When installing, use a level to ensure the horizon lines of your pattern match up perfectly. Leave about 2 inches between panels to let the wall color breathe through the design.
Step back and admire how the light catches those golden rivers across your panoramic masterpiece

PENCIL GUIDE
Understanding Pencil Grades from H to B
From first sketch to finished drawing — learn pencil grades, line control, and shading techniques.
Explore the Full Guide
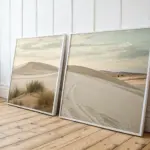
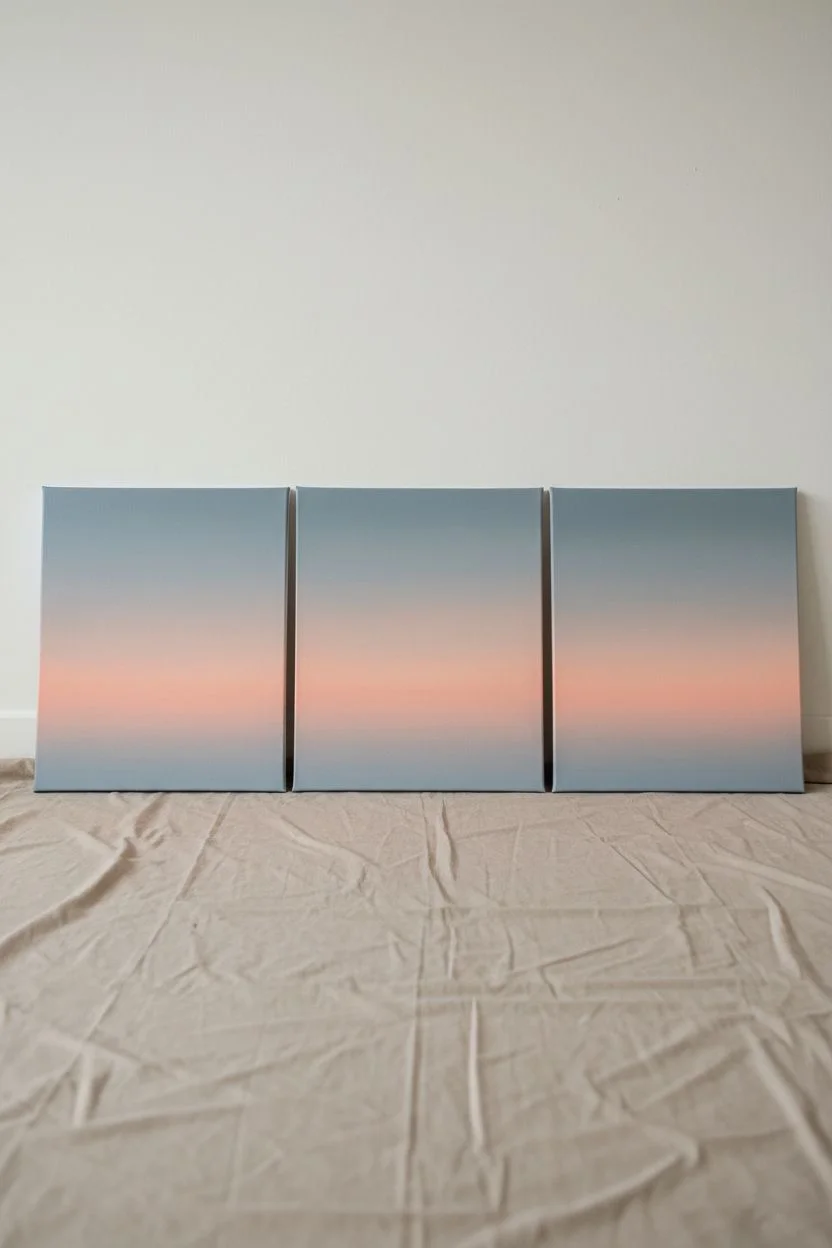
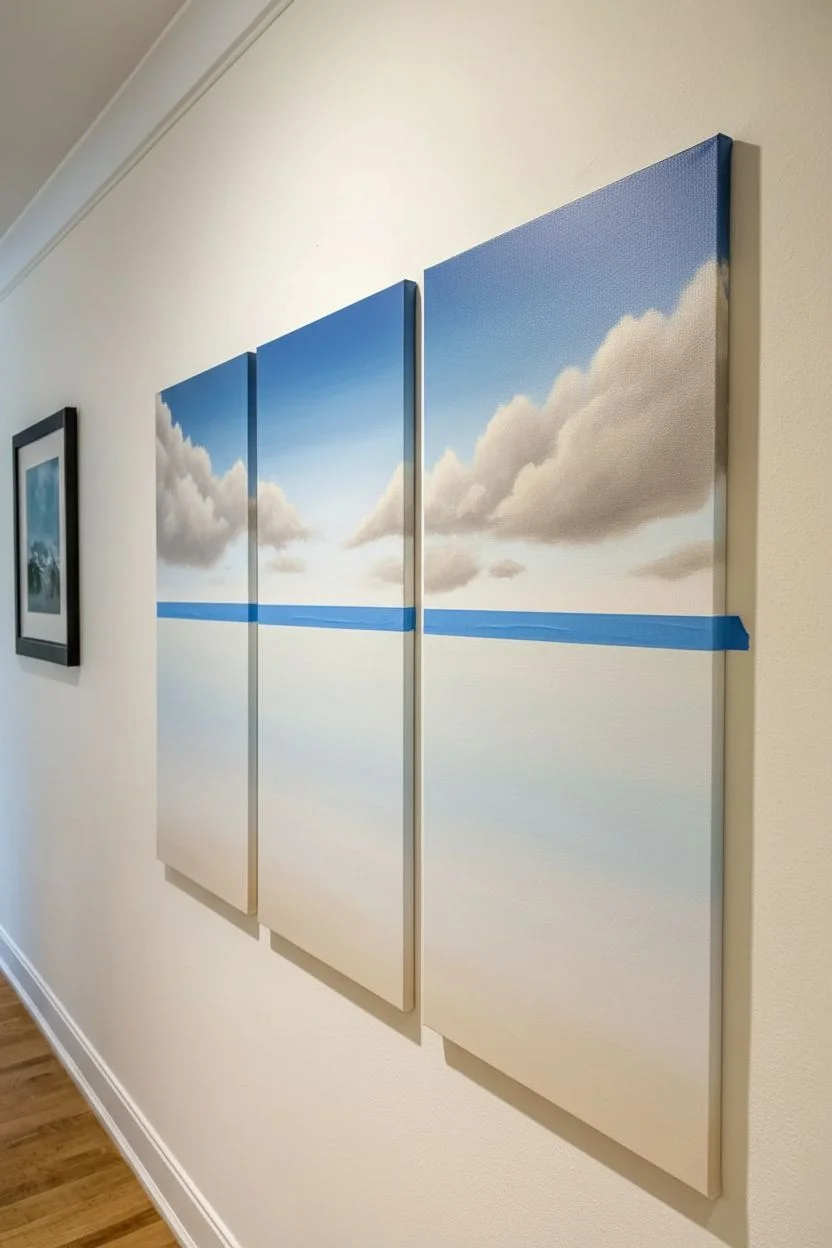
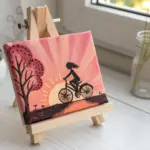
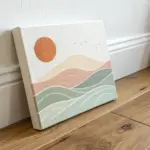
Soft Gradient Ombré Three-Piece Set

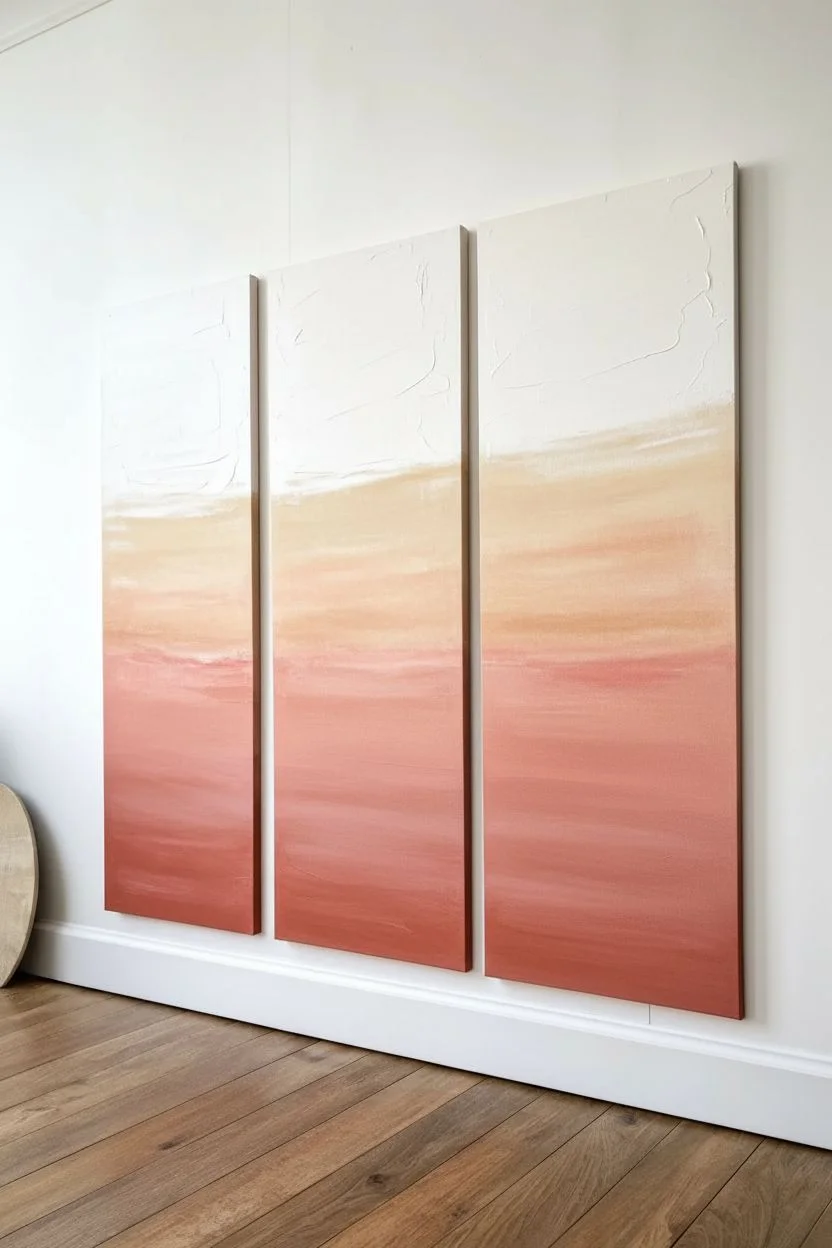
Capture the ethereal beauty of a sunrise with this serene three-piece canvas set. Using a soft blending technique, you’ll create a seamless gradient that flows from creamy white skies into warm sandy tones and deep terracotta horizons.
Step-by-Step Tutorial
Materials
- 3 large rectangular stretched canvases (same size)
- Acrylic paints (Titanium White, Unbleached Titanium/Cream, Yellow Ochre, Burnt Sienna, Alizarin Crimson, Terra Verte or a tiny bit of Raw Umber)
- Large flat paintbrushes (2-3 inches wide)
- Medium filbert brush for details
- Palette knife
- Water spray bottle (mister)
- Large palette or paper plates
- Soft rags or paper towels
- Easels or drop cloth for floor working
Step 1: Preparation and Base Layout
-
Set the Stage:
Arrange your three canvases side-by-side on your easels or flat on a protected floor. It is crucial to paint all three simultaneously to ensure the horizon lines and color transitions match perfectly across the gap. -
Mix the Sky Tone:
Prepare a large amount of Titanium White mixed with a very small touch of Unbleached Titanium. You want a creamy, warm white rather than a stark, cold white. -
Mix the Mid-Tones:
Create your transition color by mixing Yellow Ochre with Titanium White and a dot of Burnt Sienna. This should be a pale, sandy beige color. -
Mix the Horizon Colors:
Prepare your deepest colors for the bottom third. Mix Alizarin Crimson with Burnt Sienna and White to create a dusty rose. Create a second, darker pile adding a touch more Burnt Sienna for the earthy terracotta base.
Mist for Magic
Keep a spray bottle of water handy. A fine mist over the canvas keeps acrylics wet longer, allowing for the ultra-smooth, cloud-like blending seen in this style.
Step 2: Creating the Gradient
-
Apply the Sky:
Using your largest flat brush, apply the creamy white mixture to the top third of all three canvases. Use long, horizontal strokes. -
Add the Middle Layer:
While the white is still tacky, start applying the sandy beige mix to the middle section. Bring it up slightly into the white area. -
Blend the Transition:
Wipe your brush clean (but don’t wash it fully). Use the damp brush to sweep back and forth where the white and beige meet. If the paint feels too dry, give it a very light spritz with your water mister to encourage blending. -
Apply the Base Colors:
Paint the bottom third with your dusty rose mixture. Allow this color to become more saturated and darker as you move toward the very bottom edge of the canvases. -
Deepen the Ombré:
At the lowest point of the canvas, blend in your darker terracotta/Burnt Sienna mix to anchor the composition visually.
Add Metallic Warmth
Mix a tiny amount of gold fluid acrylic into the sandy beige layer. It won’t be sparkly, but it will give the painting a warm, inner glow when the light hits it.
Step 3: Texturing and Refining
-
Create Texture:
Once the base gradient is dry, mix a slightly lighter version of your sandy color. Use a dry brush technique to scumble this horizontally across the middle section to mimic wispy clouds or distant waves. -
Define the Horizon:
Mix a small amount of Burnt Sienna with a tiny bit of darker brown. Use a palette knife or the edge of a flat brush to create a very subtle, broken line where the ‘sea’ meets the ‘sky’ in the pink section. -
Soften the Edges:
I like to take a clean, dry rag and gently dab at any brushstrokes that look too harsh, particularly in the white upper section. This creates that foggy, atmospheric look. -
Add Color Variation:
Introduce subtle streaks of Titanium White into the pink bottom section to simulate light reflecting on water or texture in the landscape. -
Review Distance:
Step back about six feet. Check that the bands of color flow logically from the left canvas, through the center, to the right canvas. Correct any mismatched lines.
Step 4: Finishing Touches
-
Paint the Sides:
Don’t forget the edges of the canvases. Continue the gradient colors around the sides for a professional, gallery-wrapped finish. -
Final Glazing:
Optional: Mix a tiny amount of white with a lot of glazing medium. Apply a very thin, transparent veil over the transition areas to make the gradient even smoother. -
Seal the Work:
Allow the paintings to dry for at least 24-48 hours. Protect your work with a coat of matte or satin varnish to unify the sheen and protect the colors.
Hang your new triptych with about 2-3 inches of space between each panel to complete the modern gallery look
Dancer Motion Sequence in Three Panels
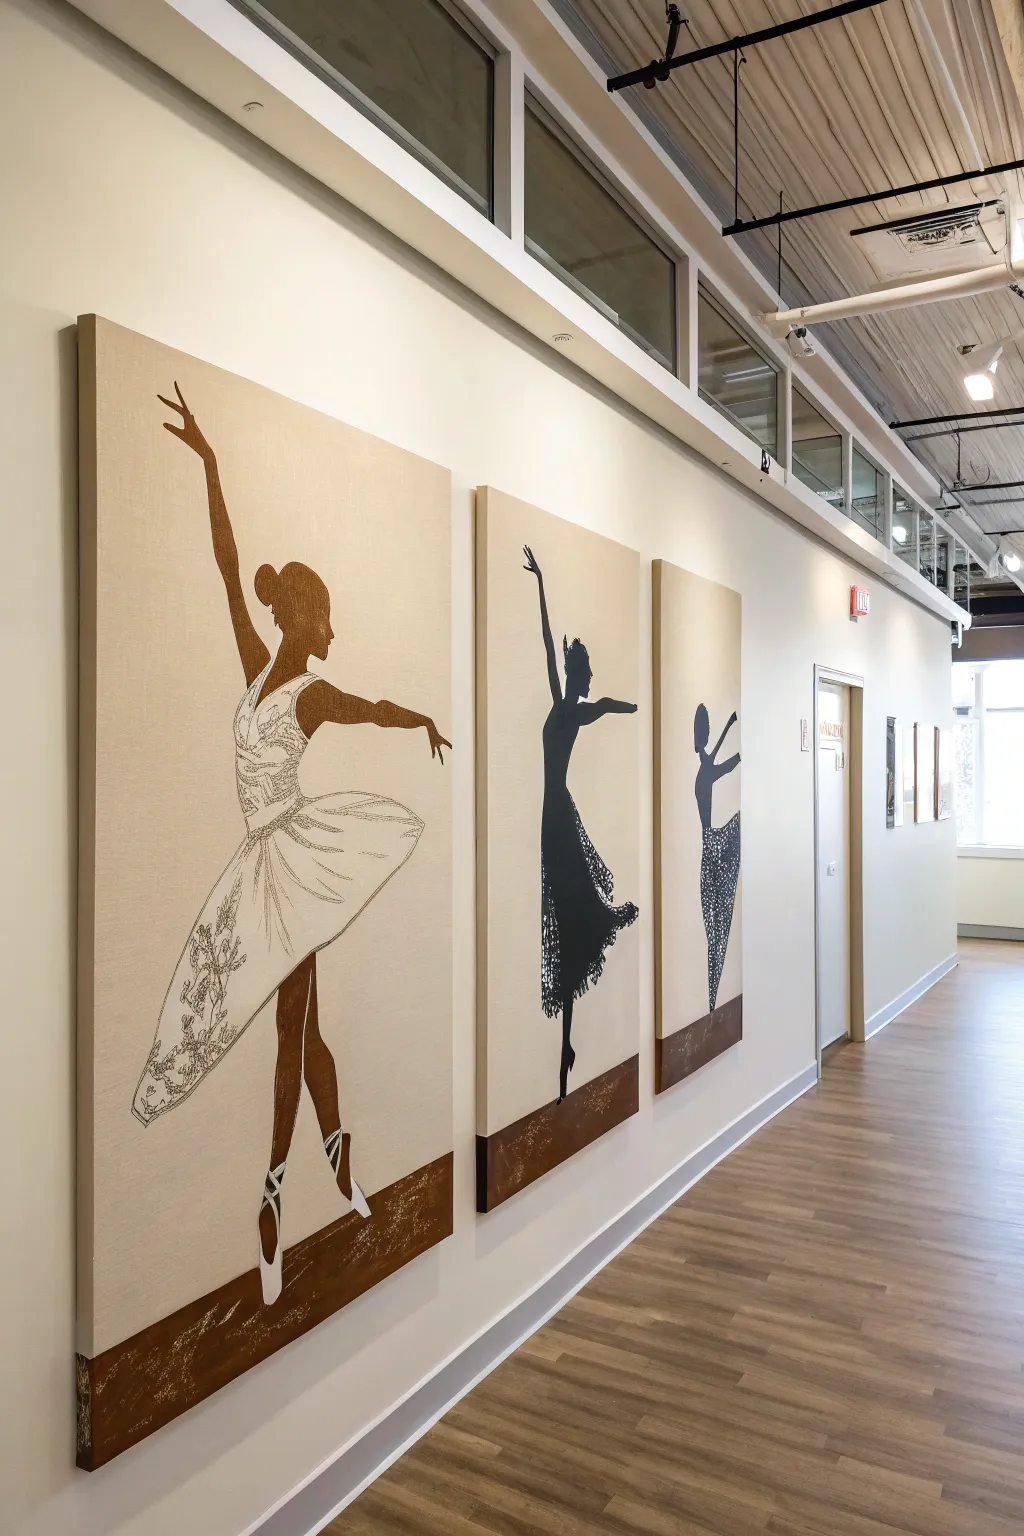
Capture the elegance of dance with this sophisticated triptych, featuring three ballerinas in progressive poses. By combining solid silhouette blocking with delicate line work, you’ll create a gallery-worthy display that adds movement and rhythm to any hallway.
How-To Guide
Materials
- 3 large vertical canvases (e.g., 24×48 inches)
- Beige or oatmeal-colored acrylic gesso (or regular white gesso mixed with raw sienna)
- Dark brown/burnt umber heavy body acrylic paint
- Carbon black acrylic paint
- White paint marker (fine tip, 0.7mm or 1mm)
- Black paint marker (fine tip)
- Wide flat brush (2-3 inch) for background
- Medium filbert brush for silhouettes
- Graphite transfer paper
- Painter’s tape
- Reference photos of dancers
- Ruler or straight edge
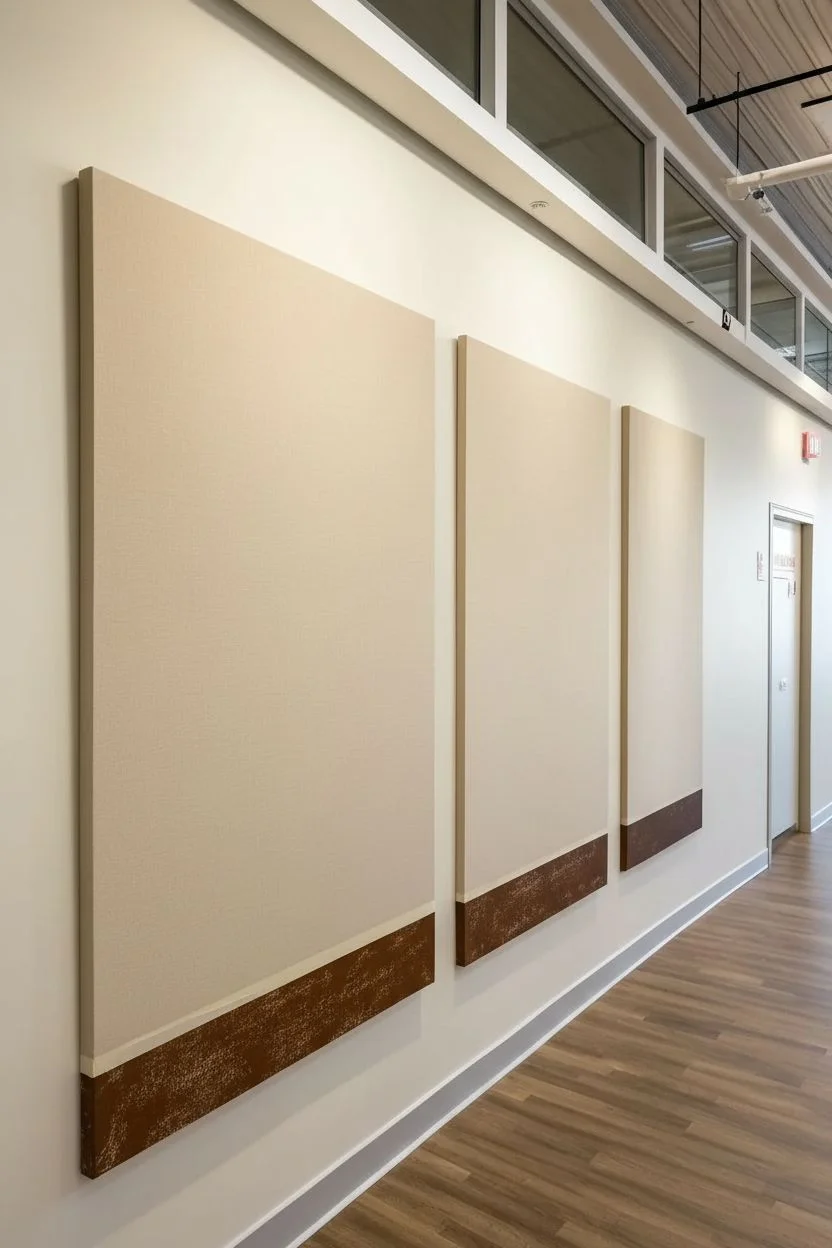
Step 1: Preparing the Canvases
-
Base coat application:
Begin by coating all three canvases with your chosen neutral tone. I prefer mixing a touch of raw sienna into white gesso to get that warm, organic oatmeal color seen in the photo. Apply two even coats, creating a smooth surface for the detailed work later. -
Define the ground line:
Once the background is completely dry, measure about 6-8 inches up from the bottom edge on each canvas. Use a long ruler and a pencil to mark a horizontal line across all three panels to ensure the ‘floor’ matches perfectly when hung. -
Masking the floor:
Apply painter’s tape just above your pencil line. Press the edges down firmly to prevent bleed-through. -
Painting the base:
Fill the bottom section with a dark brown or burnt umber acrylic paint. Use a stiff brush to stipple or dab the paint slightly, giving the floor a textured, grounded appearance rather than a flat block of color.
Clean Lines
If your hands are shaky, rest your wrist on a mahl stick or clean dry ruler spanning across the canvas. This keeps your hand steady for intricate lace details without smudging wet paint.
Step 2: Designing the Figures
-
Sourcing references:
Find three images of dancers in varying poses: one in a classic arabesque or standing pose, and two in more fluid, outstretched movements. -
Scaling the sketches:
Print your reference images large enough to fill the vertical space of your canvases. If you aren’t confident drawing freehand, this is where you can use a projector or the grid method to scale them up. -
Transferring outlines:
Place graphite transfer paper between your blown-up printout and the canvas. Trace the outline of the dancers, ensuring their feet land realistically on or near your painted floor line.
Metallic Accent
For a glamorous twist, swap the white paint marker for a gold or silver leafing pen. The metallic sheen will catch the light and make the tutu details pop against the matte background.
Step 3: Painting the Silhouettes
-
Panel 1: The Sepia Dancer:
For the first canvas (left), mix a warm brown tone similar to the floor color but slightly lighter. Paint the dancer’s body (arms, torso, legs) completely solid. -
Panel 2 & 3: The Black Silhouettes:
For the middle and right canvases, switch to carbon black acrylic. Paint these figures as solid silhouettes, carefully following the contours of the arms and extended legs. -
Detailing the skirts (Panels 2 & 3):
On the black silhouette figures, use a smaller brush to create rough, textured edges for the tutus. Don’t make them solid blocks; dab the brush to simulate tulle fabric fading out. -
Adding texture to black skirts:
Once the black paint is dry, use your white paint marker to draw intricate lace or netting patterns over the skirt area of the black silhouettes. Use small loops, scribbles, and cross-hatching to create a semi-transparent fabric look.
Step 4: The White Line Work
-
Sketching the main tutu:
Return to the first canvas (the brown figure). This one features a ‘negative space’ style dress. Using the white paint marker, draw the detailed outline of the tutu directly over the beige background. -
Filling the floral details:
Inside the outline of the main tutu, draw delicate floral patterns, leaves, and vine motifs. Vary the pressure of the marker to get thick and thin lines. -
Bodice work:
Continue the white line art up into the torso area of the brown figure, drawing the structure of the bodice and straps. This creates a beautiful contrast where the white lines overlap the painted brown skin. -
Shoes and ribbons:
On the first canvas, use the white marker to draw the ballet slippers and the ribbons wrapping up the ankles. Fill in the tips of the shoes with solid white for that classic satin pointe shoe look.
Step 5: Final Touches
-
Refining edges:
Inspect the edges of your painted silhouettes. If any lines look shaky, clean them up with a small liner brush and the appropriate paint color. -
Connecting to the floor:
Remove the painter’s tape from the floor line. To integrate the dancers, paint slight shadows or reflections under their feet using a thinned wash of the floor color. -
Sealing the work:
Protect your detailed marker work by applying a layer of matte varnish over the entire canvas. Spray varnish is best here to avoid smearing the marker lines.
Hang your new masterpiece with equal spacing between panels to let the movement flow across your wall


Night Sky Nebula Set
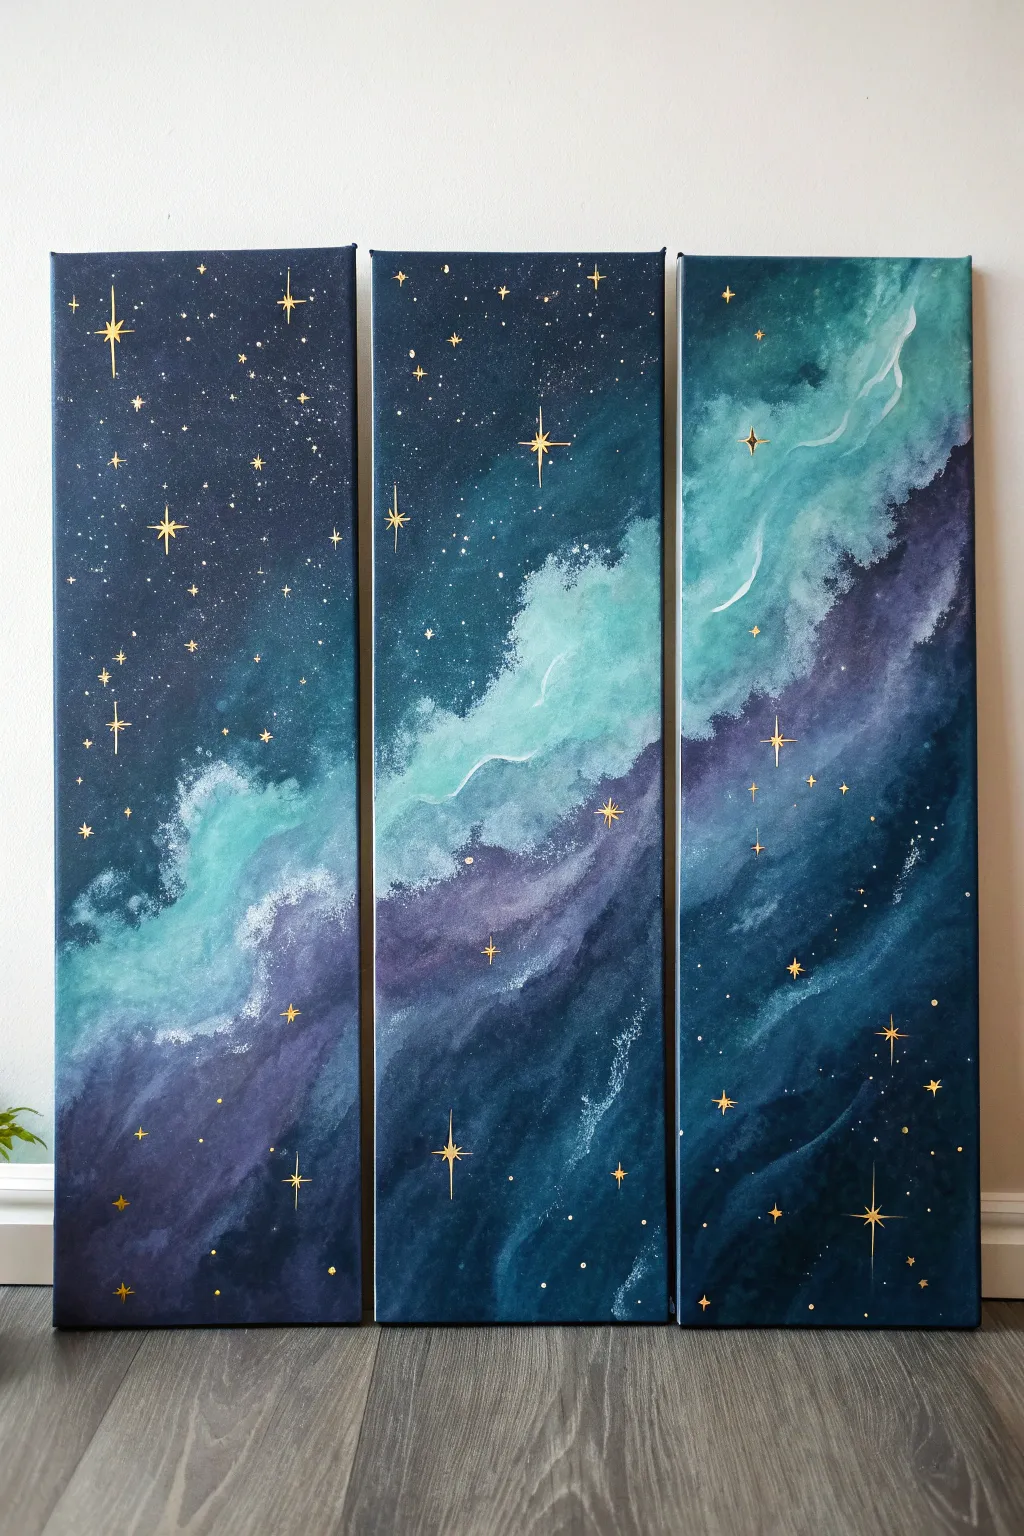
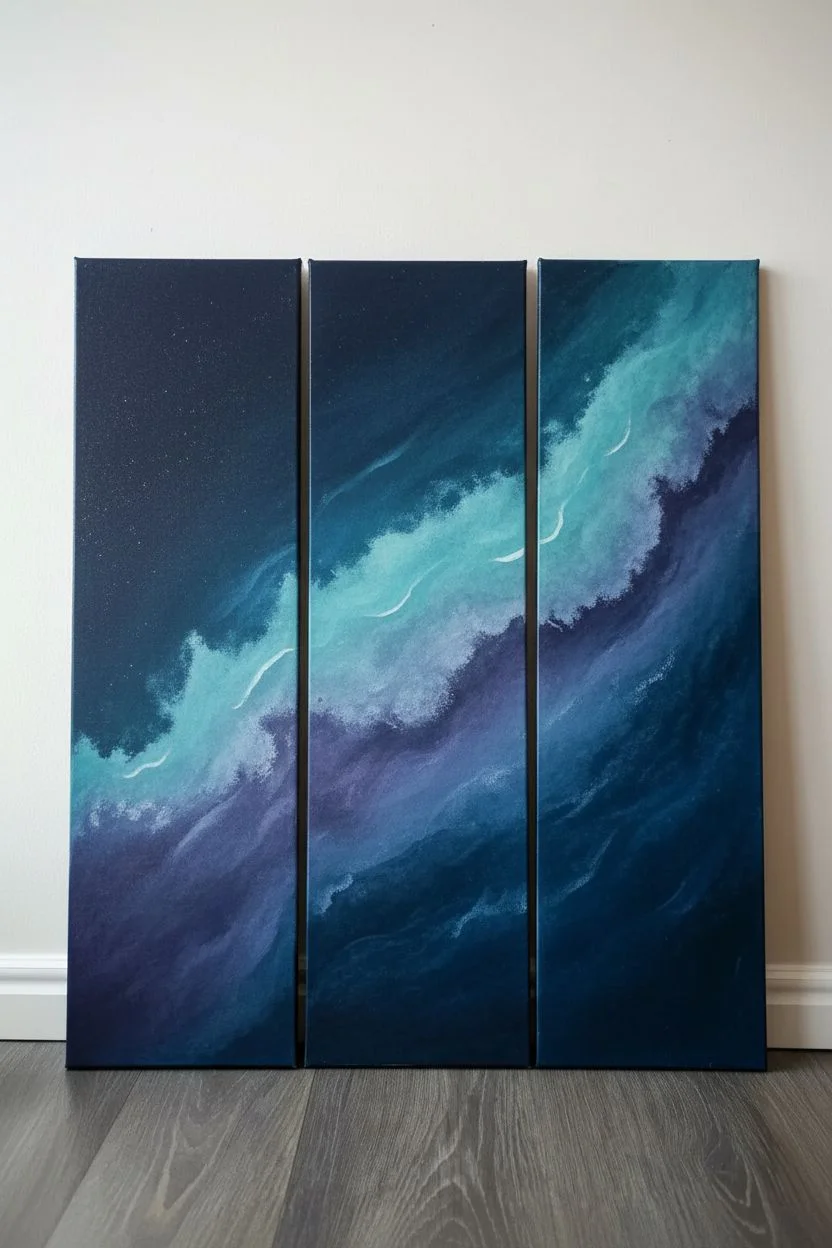
Transform three blank canvases into a stunning cosmic window with this triptych painting project. Deep indigo skies blend effortlessly into teal and purple nebulae, all accented by striking metallic gold stars that catch the light.
How-To Guide
Materials
- 3 long rectangular canvases (e.g., 10×30 inch)
- Acrylic paints: Prussian Blue, Phthalo Blue, Dioxazine Purple, Teal or Turquoise, Titanium White, Carbon Black
- Metallic Gold acrylic paint or gold paint pen
- Large flat brush (2 inch) for background
- Medium round brush for blending
- Small liner brush or detail brush
- Sponge (natural sea sponge preferred) for textures
- Cup of water and paper towels
- Palette or mixing plate
- Old toothbrush (optional for spatter)
Step 1: Setting the Atmosphere
-
Prepare the Canvases:
Line up your three canvases side-by-side with a small gap between them. You want to paint across them as if they are one single large surface to ensure the nebula flow is continuous. -
Mix the Deep Space Base:
Create a dark, rich color by mixing Prussian Blue with a touch of Carbon Black and a little Dioxazine Purple. This shouldn’t be pure black, but a very deep, midnight blue. -
Apply the Background:
Using your large flat brush, cover the top third of the left canvas and the bottom third of the right canvas with your dark mix. Paint the corners and edges thoroughly. This creates the ‘void’ of space surrounding the nebula. -
Initial Blending:
While the dark paint is still wet, mix a slightly lighter shade using Phthalo Blue and Dioxazine Purple. Blend this into the edges of your dark areas, moving inward toward the center of the triptych.
Nebula Softness
Work wet-on-wet for the smoothest clouds. Keep a spray bottle of water handy to lightly mist the canvas if the acrylics start drying too fast while you blend.
Step 2: Painting the Nebula
-
Establish the Nebula Path:
Mix Teal with a little Titanium White to create a milky turquoise. Using a medium brush, paint a diagonal sweeping motion from the bottom-left canvas, up through the middle, ending near the top-right. This is the backbone of your gas cloud. -
Softening Edges:
Use a damp (not dripping) large brush or a sponge to gently tap along the edges of your teal streak. You want to blur the line where the teal meets the dark blue background to create a gaseous, soft look. -
Layering Colors:
Introduce Dioxazine Purple right next to the teal sections, particularly on the ‘shadow side’ of the nebula (the lower edge in this composition). Blend it slightly into the dark background and the teal to create a transition zone. -
Creating Cloud Texture:
Dip a natural sea sponge into a mix of Titanium White and a tiny drop of Teal. Lightly dab this onto the brightest parts of your nebula—specifically the center of the teal band. Rotate the sponge as you press to avoid repetitive patterns. -
Whispy Details:
Using a smaller round brush with watered-down white paint, add fine, wispy tendrils coming off the main nebula cloud. These should look like thin smoke trails drifting into the deep blue areas. -
Deepening Shadows:
Go back with your dark Prussian Blue/Black mix to refine the outer edges. If your nebula became too wide, you can ‘cut in’ with the dark paint to reshape the clouds.
Starry Depth
Before adding gold stars, dilute some black paint into a transparent glaze and wash over the distant white spattered stars. This pushes them into the background for 3D depth.
Step 3: The Golden Cosmos
-
Dry Time:
Allow the background and nebula layers to dry completely. The gold paint needs a stable, dry surface to shine properly and not turn muddy. -
Spattering Stars:
Mix a small amount of white paint with water until it’s the consistency of ink. Dip an old toothbrush or stiff brush in it and flick the bristles to create a field of tiny, distant stars across all three canvases. -
Painting Major Stars:
Switch to your metallic gold paint and a fine liner brush. Identify 5-7 spots for your largest ‘hero’ stars. Paint a small dot, then carefully pull four long, thin lines outward to create a cross shape. -
Refining Points:
For the hero stars, ensure the vertical line is longer than the horizontal one. I like to taper the clear ends of the lines to a needle-point sharpness so they look like they are gleaming. -
Medium Gold Accents:
Paint slightly smaller four-point stars scattered randomly, focusing more density within the dark blue areas rather than the bright nebula. -
Tiny Gold Clusters:
Use the tip of your liner brush (or a dotting tool) to add tiny gold dots throughout the sky. Group some together in clusters of three or four to mimic constellations. -
Nebula Highlights:
If you want extra magic, add very faint, thin lines of gold tracing the ‘ridge’ of the nebula clouds, mimicking catching the starlight.
Hang your panels with about an inch of spacing between them to let the eye bridge the gap across your new galaxy
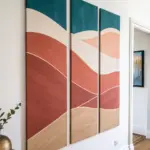
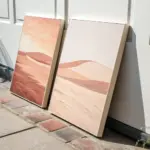
Desert Bloom Color Story Triptych
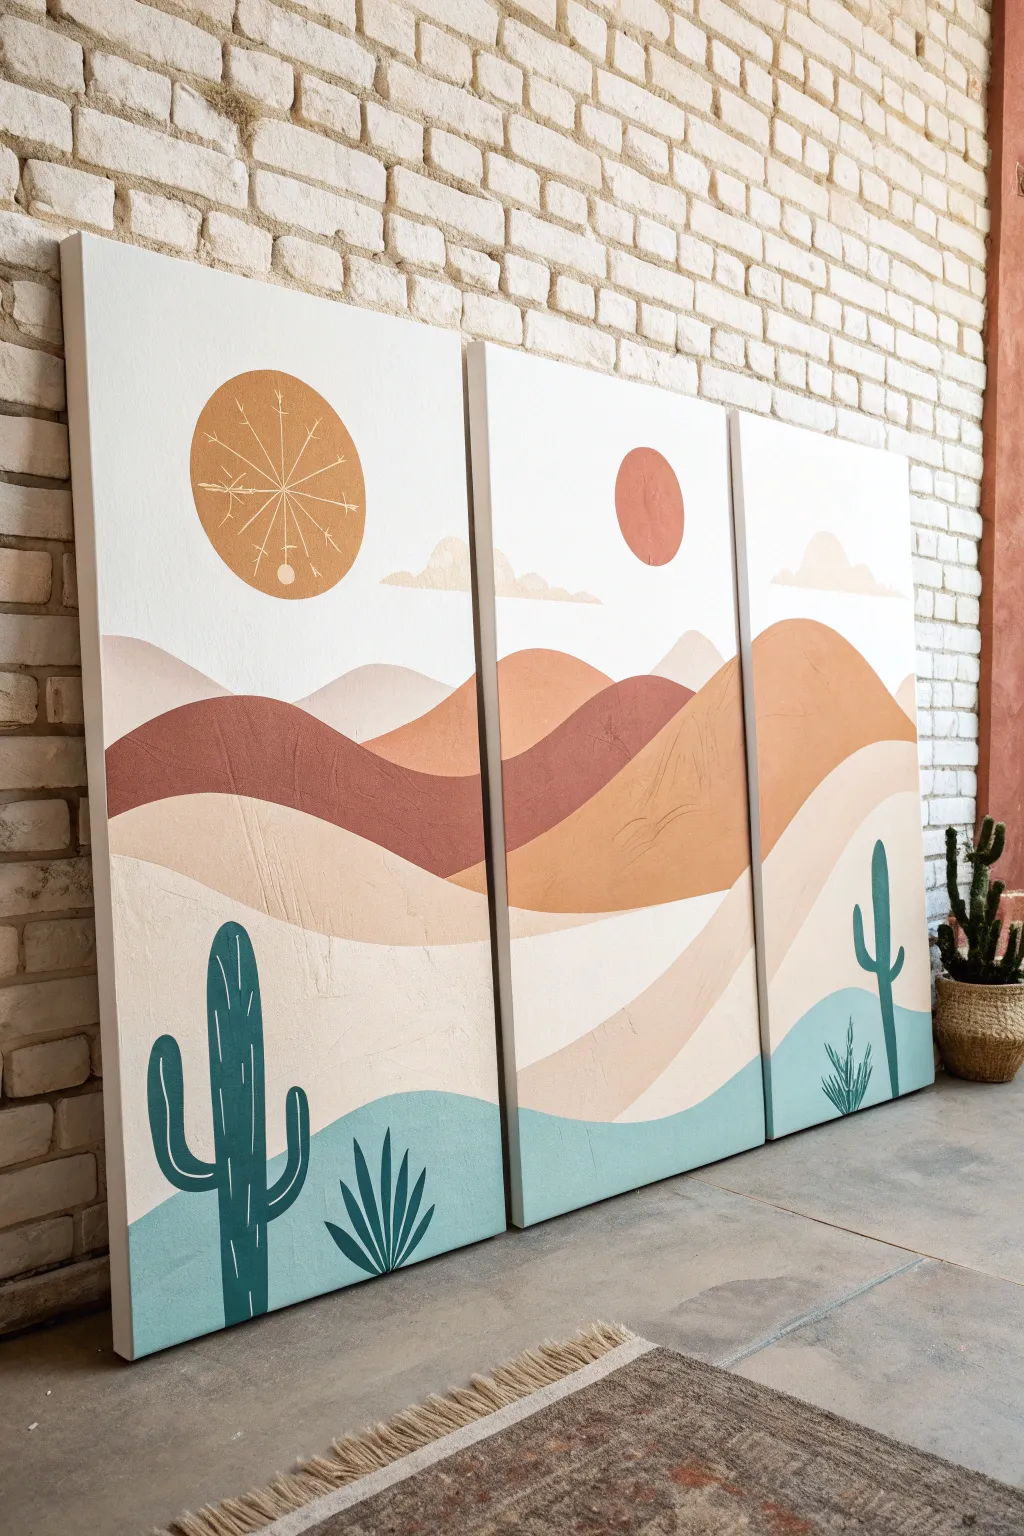
Bring the warmth of the southwest into your home with this stunning three-panel canvas set. Featuring rolling dunes, stylized cacti, and geometric sun motifs in a soothing palette of terracotta, sage, and cream, this triptych creates a seamless landscape that flows across your wall.
Step-by-Step Guide
Materials
- 3 large stretched canvases (e.g., 24×36 inches each)
- Acrylic paints: Burnt Sienna, Yellow Ochre, Titanium White, Teal/Turquoise, Sage Green, Deep Green
- Large flat paintbrushes (2-3 inch) for backgrounds
- Medium filbert brushes for hills
- Small round detail brush
- Pencil and eraser
- Ruler or straight edge
- Palette or paper plates
- Cup of water and paper towels
- Painting masking tape (optional)
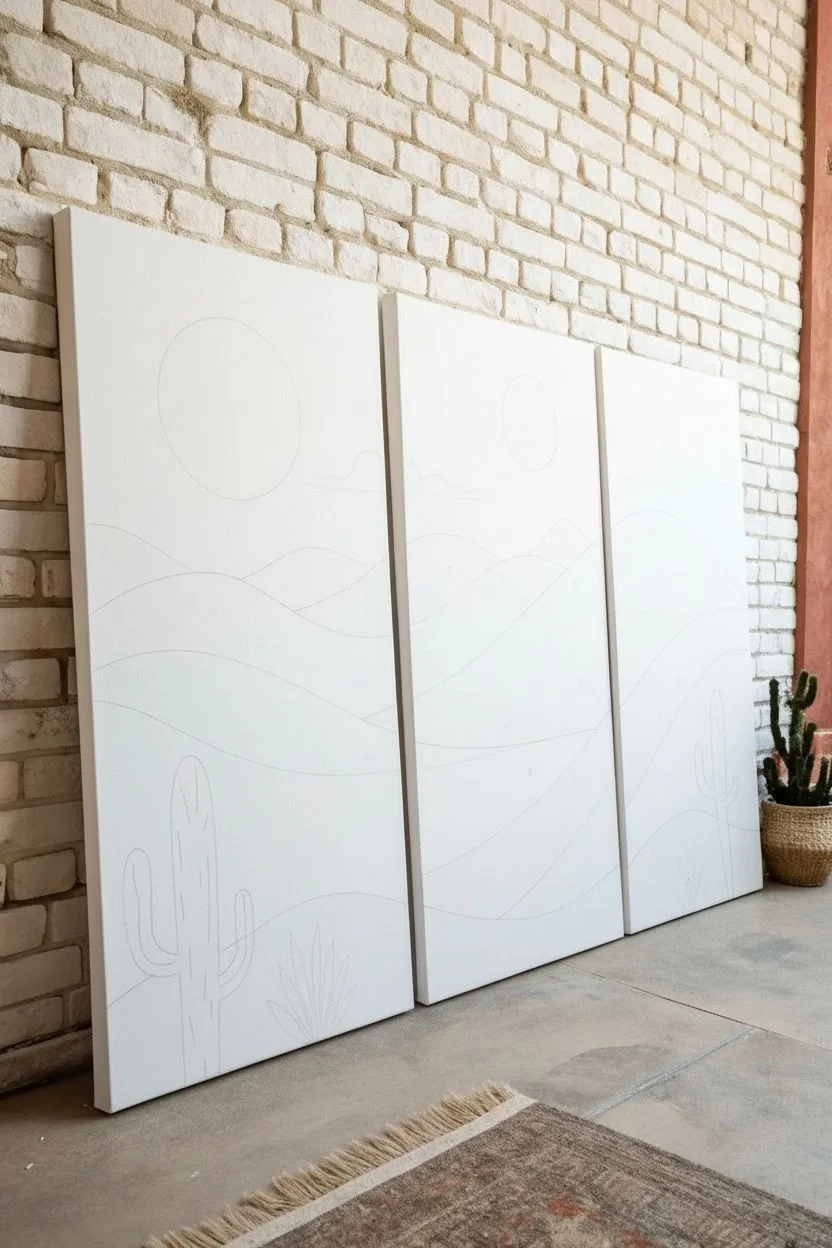
Step 1: Planning the Landscape
-
Prepare your canvas connection:
Lay your three canvases side-by-side on a flat surface or floor, leaving a tiny gap between them. This is crucial because the design needs to flow continuously from one panel to the next. -
Sketch the horizon lines:
Using a pencil, lightly sketch the wavy lines of the sand dunes. Start from the left canvas, cross over to the middle, and finish on the right, ensuring the lines match up perfectly at the edges. -
Outline the celestial bodies:
Draw the large circle for the decorative sun on the top half of the left canvas. On the middle canvas, sketch a smaller, solid circle for the second sun or moon element. -
Add landscape details:
Sketch the large saguaro cactus on the bottom left panel, making sure its arms are clearly defined. Draw a smaller cactus on the far right panel and a few spiky agave plants near the bottom. -
Mark color zones:
I find it helpful to lightly label each section with a letter code (like ‘T’ for terracotta, ‘C’ for cream) so you don’t lose track of your color plan once you start painting.
Wobbly Lines?
If your hand isn’t steady for the long dune lines, use a long strip of flexible cardboard as a guide, or lightly mask the curves with painting tape (press edges firm!).
Step 2: Blocking in the Color
-
Mix your sky color:
Create a large amount of creamy white paint with just a hint of yellow ochre for warmth. Use a large flat brush to paint the sky area on all three panels, cutting carefully around your sun and hill sketches. -
Paint the furthest dunes:
Mix Burnt Sienna with a little white to create a soft, muted terracotta. Paint the top-most layer of hills across the panels. Let the paint dry completely before moving to the next layer. -
Deepen the middle tones:
For the middle range of hills, use pure Burnt Sienna or mix in a touch of red for a bolder rust color. Apply this to the central band of dunes, creating a nice contrast with the lighter hills behind them. -
Create the foreground sand:
Mix a light beige using White and Yellow Ochre. Fill in the lower sand sections, sweeping your brush horizontally to mimic the texture of the desert floor. -
Paint the bottom ground:
For the very bottom section where the plants sit, mix a soft teal or mint green. This unexpected pop of cool color balances the warm earth tones above.
Add Subtle Texture
Mix a teaspoon of baking soda or modeling paste into your acrylic paint for the dunes. It creates a gritty, sandy texture that looks amazing when light hits the canvas.
Step 3: Details & Definition
-
Paint the celestial circles:
Fill in the large circle on the left canvas with a gold-ochre mix. Paint the smaller circle on the middle canvas with a reddish-rust tone. -
Add the sunburst texture:
Once the large gold sun is dry, use a thin round brush and cream paint to add the geometric lines, arrows, and dots inside the circle. A ruler can help keep the main radial lines straight. -
Fill in the large cactus:
Paint the large saguaro on the left panel using a deep teal or forest green. Use two coats if necessary to get an opaque, solid finish. -
Detail the cacti:
Using a lighter version of your green (mix in some white), paint thin vertical lines or small dashes on the cactus bodies to represent the ribs and needles. -
Finish with agave plants:
Paint the spiky agave plants using a dark green. Use a flicking motion with your brush to get sharp, tapered tips on the leaves. -
Paint the clouds:
Using a very pale beige or dirty white, paint simple, rounded cloud shapes near the horizon line on the middle and right panels. -
Final touch-ups:
Step back and look at the triptych as a whole. Paint the side edges of the canvas to match the adjacent colors—this ‘gallery wrap’ style gives it a professional look without a frame.
Hang your new masterpiece with about an inch of space between each panel and enjoy the desert vibes
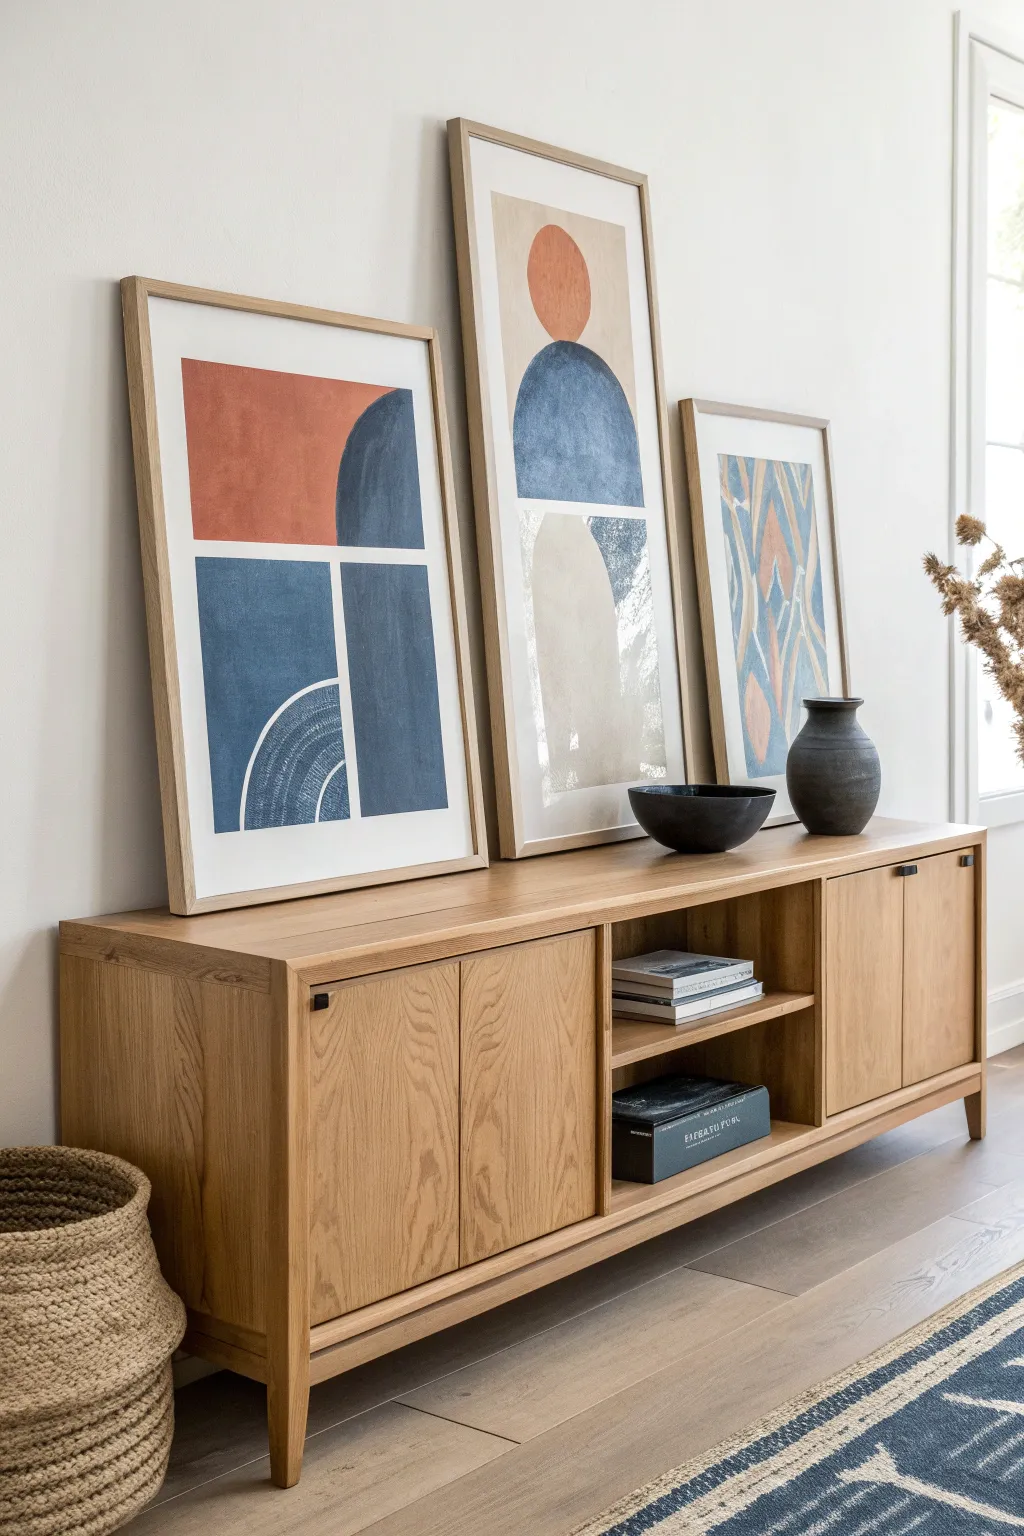
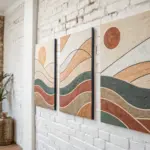
Leaning Gallery-Style Three-Piece Set (No Holes Needed)

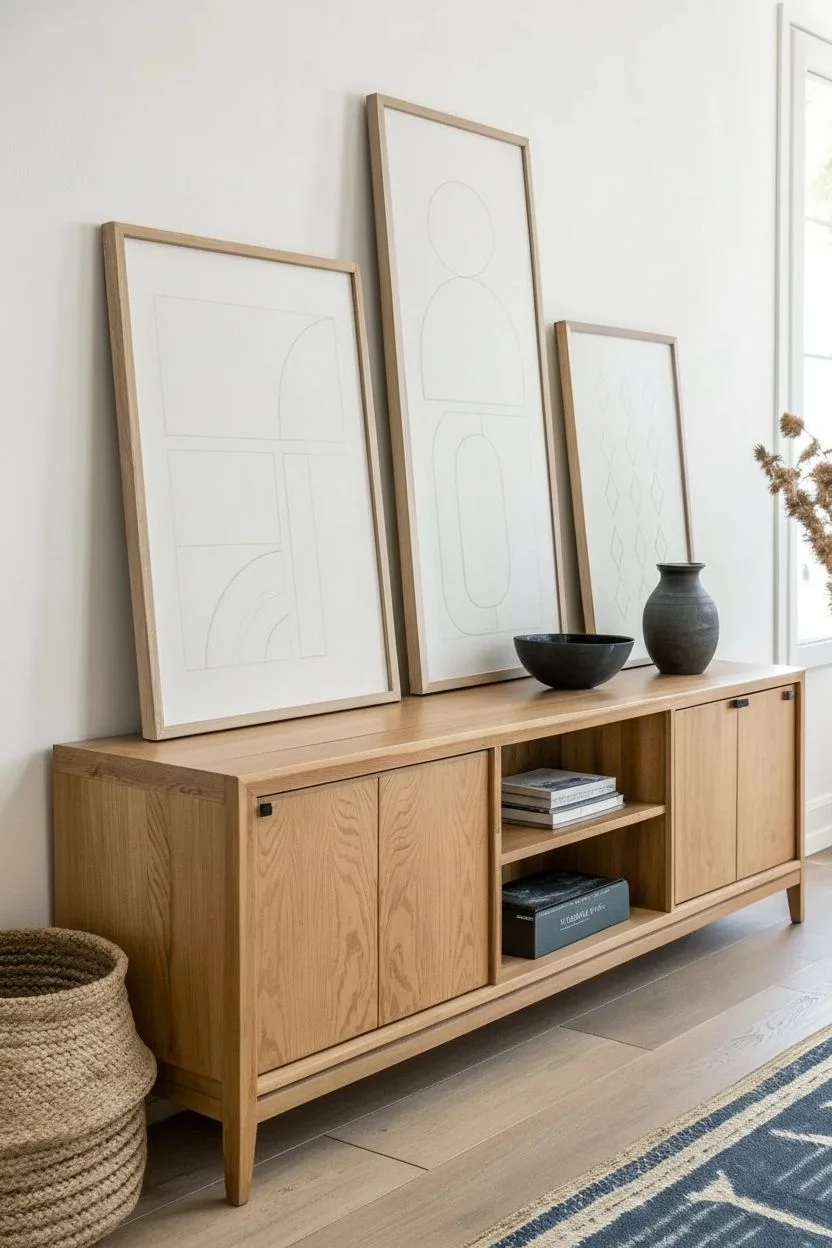
Embrace the relaxed elegance of a gallery wall without picking up a hammer by creating this cohesive set of three abstract geometric paintings. Featuring bold terracotta and deep navy shapes against warm neutrals, these large-scale pieces are designed to lean casually for an effortlessly curated look.
How-To Guide
Materials
- 3 large wood frames (e.g., 24×36 inches) with light finish
- Heavyweight watercolor paper or mixed media paper rolls (to fit frames)
- Acrylic paints: Burnt Sienna, Navy Blue, Titanium White, Unbleached Titanium (Cream), Warm Grey
- Flat synthetic brushes (1-inch and 2-inch widths)
- Round brush (size 6 or 8) for soft edges
- Painter’s tape or masking tape
- Pencil and eraser
- Ruler or T-square
- Paper plate or palette
- Water cups and paper towels
Step 1: Planning and Preparation
-
Prepare the paper:
Cut your paper to fit exactly inside your frames. If using a roll, you might need to weigh down the corners overnight so the sheets lie flat before you begin painting. -
Sketch the layout:
On a scrap piece of paper, plan the three compositions. The first (left) features stacked blocks and arches; the second (center) uses a circle above a semi-circle and an organic shape; the third (right) is a repeating pattern of arches and diamonds. This balance ensures they look good together. -
Scale up the designs:
Lightly sketch the shapes onto your large paper sheets using a pencil. For the straight lines in the first painting, use your ruler to ensure crisp boundaries. For the circles and arches, you can trace a large round object or use a string-and-pencil compass technique.
Master the Texture
For that matte, plastered look seen in the photo, mix a teaspoon of baking soda into your acrylic paint. It adds a gritty, stone-like texture that absorbs light beautifully.
Step 2: Painting the Left Piece (Color Blocks)
-
Tape the boundaries:
Apply painter’s tape along the straight pencil lines to separate the top and bottom sections. This ensures crisp, hard edges between the color blocks. -
Paint the top blocks:
Mix a vibrant Terracotta using Burnt Sienna and a touch of Titanium White. Paint the top left rectangle. For the adjacent top right shape, mix a deep Navy Blue and carefully paint the curved arch shape freehand to keep it organic. -
Fill the bottom section:
Once the top is dry, remove the tape and re-tape if necessary to protect the painted areas. Fill the bottom left large rectangle with the Navy Blue. Leave the vertical strip on the right and the horizontal divider white or paint them with Unbleached Titanium for a softer look. -
Add detail work:
using a smaller round brush and white paint (or a light blue-grey), carefully paint the concentric arch lines inside the bottom navy rectangle. These don’t need to be perfect; a hand-painted look adds character here.
Step 3: Painting the Center Piece (Totem Shapes)
-
Create the background:
This piece has a lot of negative space. You can leave the paper bare, or for a richer texture, apply a wash of very watered-down Unbleached Titanium over the whole sheet first. -
Paint the sun:
Using your Terracotta mix, paint the solid circle near the top of the paper. Use your flat brush to fill the center and the round brush to smooth out the edges. -
Add the central arch:
Paint the large semi-circle arch directly below the sun using a textured application of the Navy Blue. I like to dry-brush the edges slightly here to give it a weathered, stone-like appearance. -
Anchor the composition:
For the bottom shape, mix a warm beige-grey using Warm Grey and Cream. Paint the tall, organic U-shape at the bottom. Keep this layer semi-transparent or streaky to contrast with the solid blue above.
Warped Paper Fix
If your large paper buckles from the wet paint, wait for it to dry fully, then place it face down under a clean towel and iron it on a low, dry setting to flatten it out.
Step 4: Painting the Right Piece (Pattern)
-
Draft the pattern grid:
This piece is more intricate. lightly measure out vertical columns to help guide your repeating diamond and chevron shapes. -
Apply the base colors:
Using the Navy Blue and Terracotta, paint alternating vertical chevron strokes. Think of these as elongated leaves or ikat fabric patterns rather than perfect geometry. -
Overlay textures:
Once the base shapes are dry, take your flat brush with a little Titanium White and dry-brush over parts of the blue and orange to create a woven, distressed fabric look. -
Final assembly:
Allow all three paintings to dry completely (at least 24 hours). Place them into the frames, secure the backings, and arrange them on your credenza, leaning the center one slightly in front of the others for depth.
Step back and admire how these modern shapes bring warmth and structure to your space without damaging a single wall


Have a question or want to share your own experience? I'd love to hear from you in the comments below!