
A plain lunch bag is basically a mini canvas, and the best part is you don’t need fancy skills to make it adorable. Here are my favorite easy lunch bag drawings that look great fast, even on wrinkly kraft paper bags.
Smiley Face With A Little Pep Talk

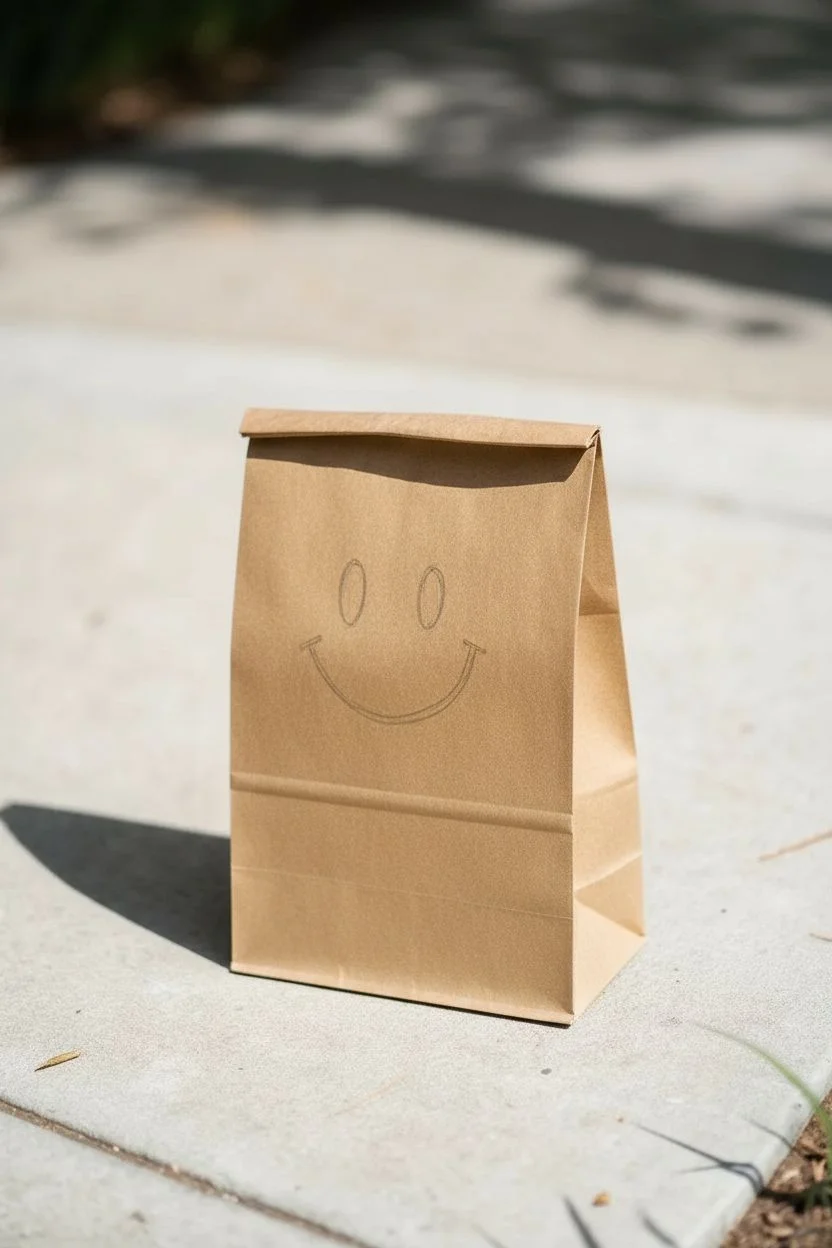
Brighten up the midday slump with this remarkably simple yet effective lunch bag design. Featuring a bold, oversized smiley face and clean lettering, this quick project transforms a standard brown bag into a cheerful greeting.
Step-by-Step
Materials
- Standard brown paper lunch bag
- Thick black permanent marker (chisel tip preferred for bold lines)
- Finer tip black marker (for lettering)
- Pencil (optional for sketching)
- Eraser (optional)
- Ruler or straight edge
Step 1: Setting the Stage
-
Flatten and prep:
Start by taking a crisp, new brown paper lunch bag. Keep the bag folded flat as it comes out of the package—you actually want to draw on it while it’s collapsed rather than opened up. -
Identify the drawing zone:
Locate the main rectangular area of the bag face. Notice the natural horizontal crease near the bottom where the bag folds flat; this crease will be your dividing line between the face and the text. -
Sketch placement (optional):
If you are nervous about freehanding with permanent ink, lightly sketch two vertical ovals for eyes and a wide U-shape for the mouth using a pencil. Keep the pressure very light so you don’t dent the paper.
Bleed-Through Blues?
To prevent ink form soaking through to the back of the bag, slide a scrap piece of cardboard or stiff cardstock inside the bag before you start drawing.
Step 2: Drawing the Face
-
Draw the left eye:
Using your thick black marker, draw a tall, vertical oval for the left eye. It should be positioned in the upper third of the bag’s main face. -
Fill the eye:
Color in the oval completely with the black marker. Ensuring solid coverage without streaks makes the design pop. -
Draw the right eye:
Draw a matching vertical oval on the right side. Try to keep the spacing even between them for a balanced look. -
Start the smile curve:
For the mouth, start your marker line on the left side, slightly below the level of the eyes but wider out. Draw a deep, swooping curve that dips down toward the center of the bag. -
Complete the smile:
Bring the curve back up to the right side, ending symmetrically with your starting point. This creates the bottom line of the smile. -
Add the upper lip line:
Connect the two ends of your curve with another slightly curved line on top. This creates a crescent moon shape for the mouth rather than just a single line. -
Add corner accents:
Draw tiny, short vertical tick marks at the very corners of the mouth (where the upper and lower curves meet). This gives the smiley face its classic, slightly rugged charm.
Step 3: Lettering the Message
-
Locate the text area:
Look at the horizontal fold line near the bottom of the bag. You will be writing your text in the space directly below this crease but above the very bottom edge. -
Switch markers:
If you have a slightly finer tip marker, switch to it now for cleaner lettering. If not, just use the tip of your chisel marker carefully. -
Pencil guidelines:
I find it helpful to lightly pencil a baseline so the words don’t drift uphill or downhill. -
Write ‘Inked’:
Write the words “BROWN PAPER LUNCH” in all capital letters. Use a simple, sans-serif print that looks slightly handwritten but neat. -
Letter sizing:
Keep the letters roughly the same height. The text should span almost the full width of the bag, aligning roughly with the width of the smile above it. -
Erase guidelines:
Once the ink is completely dry (give it about a minute so it doesn’t smear), gently erase any visible pencil marks. -
Final check:
Open the bag gently to make sure the ink hasn’t bled through to the other side, and check that the smile still looks good when the bag stands upright.
Pro Tip: Custom Fonts
Mix up the fonts! Try a bubble letter style for the word “LUNCH” to make it stand out even more, or use a thin fine-liner to add shadow lines to your text.
Enjoy sending someone off with a smile on their face and a lunch in their hand


Big Heart With Simple Pattern Fill
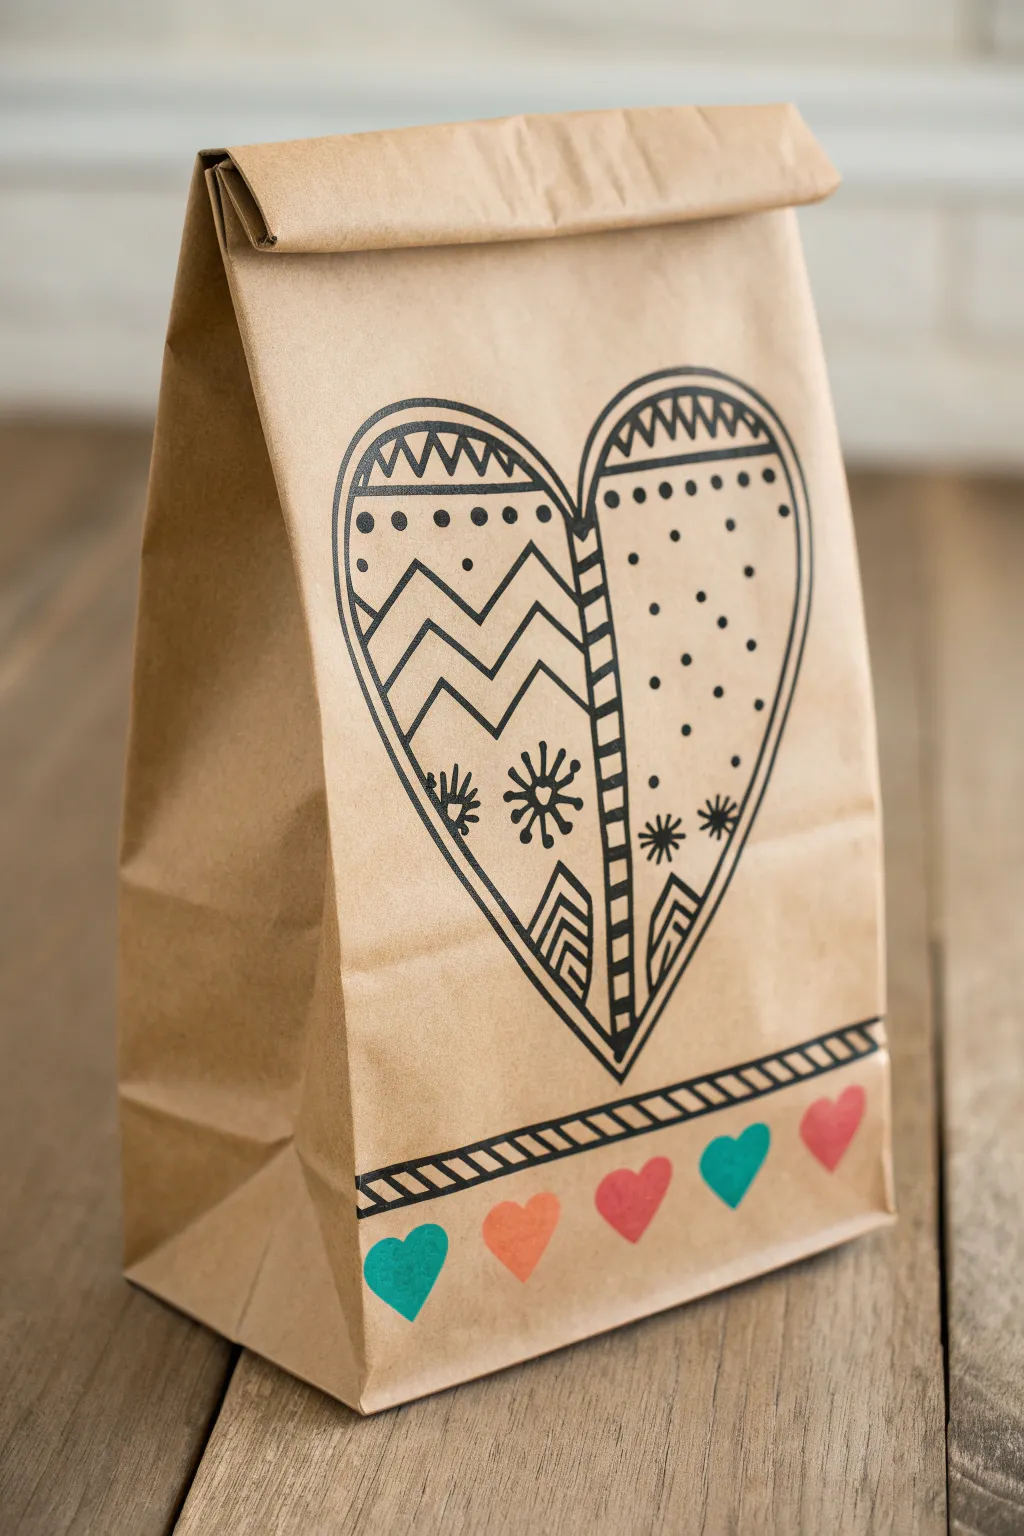
Turn a plain brown paper lunch sack into a charming gift bag or special lunch treat with this doodle-inspired design. The bold black patterns contract beautifully with the rustic kraft paper, while small pops of color add a sweet finish.
Step-by-Step Tutorial
Materials
- Standard brown paper lunch bag
- Thick black permanent marker (chisel tip or broad nub)
- Fine point black permanent marker
- Pencil
- Eraser
- Colored markers or paint pens (teal, coral, red)
- Ruler (optional)
Step 1: Setting the Foundation
-
Flatten and Prep:
Begin by laying your brown paper bag completely flat on your work surface. Smooth out any wrinkles and ensure the folded bottom flap is facing away from you, so flush side is ready for drawing. -
Sketch the Big Heart:
Using a pencil, lightly sketch a large heart in the center of the bag. Aim for it to take up about two-thirds of the vertical space, leaving room at the top for folding and at the bottom for the border. -
Add Inner Borders:
Inside your pencil heart, sketch a second heart outline about a quarter-inch inward to create a double-line border. Draw a vertical line straight down the center to split the heart in two. -
Define the Heart Outline:
Take your thick black marker and trace over your main heart outline. Go over the outer line, the inner line, and the central vertical dividing line to make them bold and prominent.
Ink Bleeding?
Paper bags are porous. Place a piece of scrap cardstock inside the bag before drawing to prevent the marker ink from soaking through to the back side.
Step 2: Patterning the Heart
-
Create the Top Zig-Zags:
In the top curves (lobes) of the heart, draw a horizontal line across both sides. Fill the space above this line with a simple zig-zag pattern using your finer black marker. -
Draw the Divider Detail:
Add detail to the central vertical line by drawing small horizontal dashes all the way down it, turning it into a ladder-like visual divider. I like to switch to the fine point marker for this to keep it crisp. -
Section the Left Side:
On the left half of the heart, stick to geometric shapes. Draw two large zig-zag lines (chevrons) across the middle section. -
Add Left Side Details:
Above the chevrons, add a row of solid black dots. Below the chevrons, draw two small ‘sunburst’ or snowflake shapes and fill the bottom tip with a few vertical stripes. -
Section the Right Side:
For the right half, we’ll keep it airier. Draw a line near the top curve to mirror the left side’s structure. -
Stipple the Right Side:
Fill the large empty space on the right with scattered dots. Vary their positions randomly, but keep them somewhat evenly spaced. Add two small starbursts near the bottom to balance the design. -
Fill the Bottom Right Tip:
In the very bottom point of the right side, draw a small triangle shape and fill it with vertical lines, mirroring the bottom left corner.
Step 3: Border and Color Accents
-
Sketch the Lower Border:
About an inch or two below the bottom tip of the heart, use your pencil to draw two parallel horizontal lines across the entire width of the bag. -
Fill the Decorative Strip:
Trace the horizontal lines with your thick marker. Inside the strip, draw diagonal hatch marks all the way across to create a ‘rope’ effect. -
Position the Mini Hearts:
Pencil in five small, evenly spaced hearts closer to the bottom edge of the bag, underneath your decorative strip. -
Color the Mini Hearts:
Using your colored markers or paint pens, fill in these small hearts. Alternate the colors—for example, teal, coral, red, teal, coral—to create a fun rhythm. -
Erase and Finish:
Wait a few minutes to ensure all ink is totally dry. Gently erase any visible pencil sketch lines, being careful not to crumple the paper bag.
Symmetry Hack
Cut a heart shape out of scrap paper and trace around it lightly with pencil. This guarantees your main heart shape is perfectly symmetrical before you start inking.
Now your custom-designed bag is ready to be filled with a delicious lunch or a thoughtful gift


Simple Cat Face In A Circle
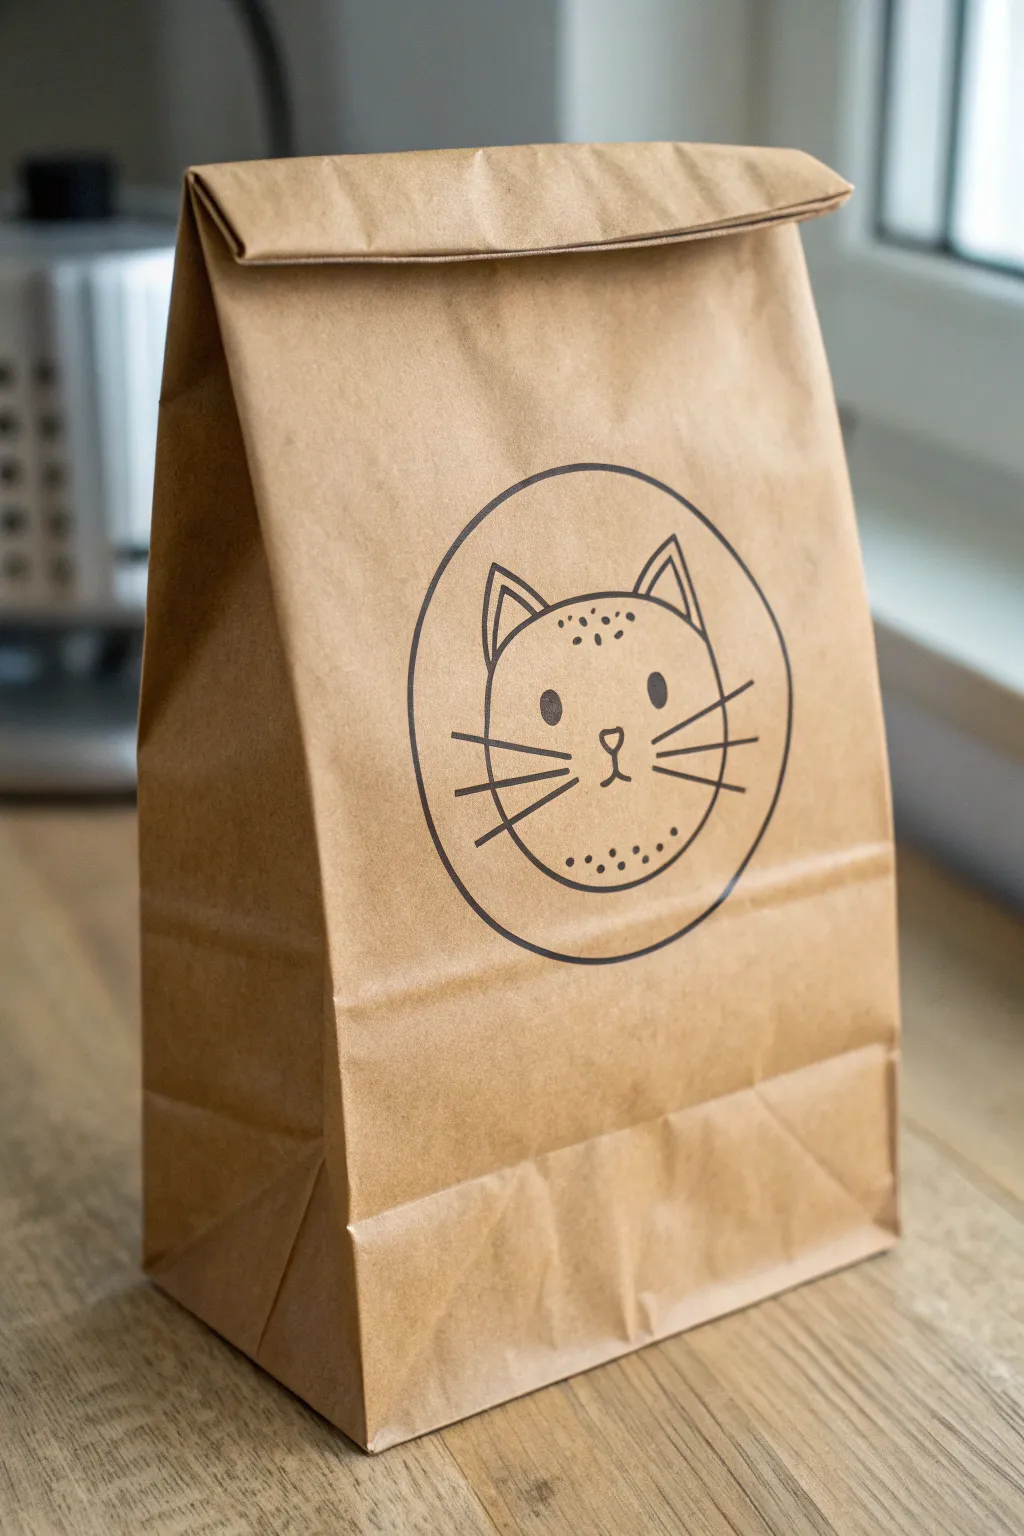
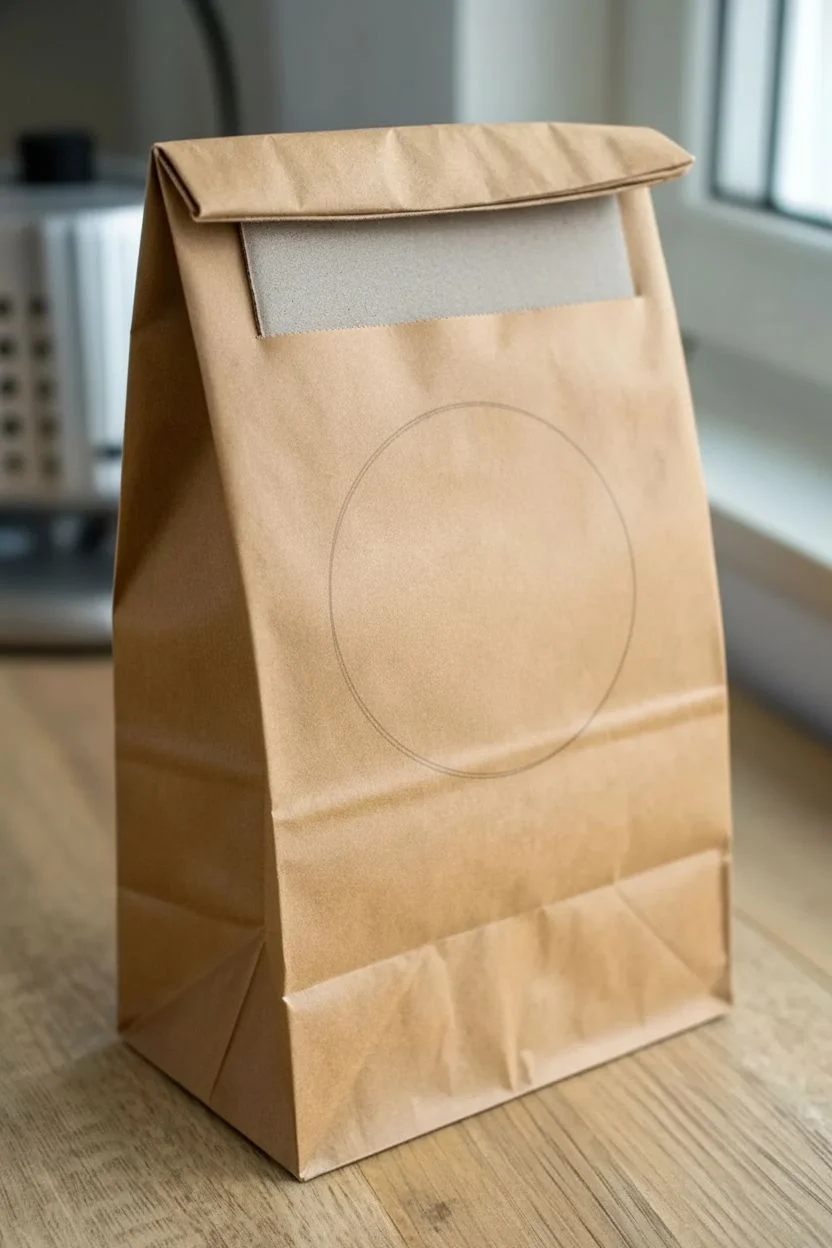
Turn a plain brown lunch sack into a charming statement piece with just a few simple lines. This minimalist cat design inside a circle is effortless to draw but adds a sophisticated touch to your daily meal packaging.
How-To Guide
Materials
- Standard brown paper lunch bag
- Pencil (HB or 2B)
- Black permanent marker (medium tip or fine tip Sharpie)
- Circular object for tracing (approximately 3-4 inches diameter, like a large mug or bowl rim)
- Eraser
- Piece of scrap cardboard (to fit inside the bag)
Step 1: Preparation
-
Flatten the Bag:
Lay your brown paper lunch bag on a flat, hard surface. Smooth out any major wrinkles with your hand to ensure a clean drawing area. -
Insert a Barrier:
Slide a piece of scrap cardboard inside the bag. This is crucial because permanent marker ink can easily bleed through the paper layers, and this prevents the drawing from staining the back of the bag or your table. -
Position Your Circle:
Place your circular object in the center of the bag’s main panel. Aim for the optical center, leaving enough room at the top for the fold, but keeping it visible when the bag is standing.
Clean Lines Pro Tip
Rather than trying to draw the circle in one continuous motion, use short, connecting strokes or rotate the paper bag itself while keeping your hand stationary.
Step 2: Drafting the Design
-
Trace the Circle:
Using your pencil, lightly trace around the circular object. Keep your pressure very light so any mistakes can be easily erased later. -
Sketch the Head Shape:
Inside the circle, sketch a slightly flattened oval shape for the cat’s head. The bottom of this oval should almost touch the bottom curve of the circle you just drew. -
Add the Ears:
Draw two triangles on top of the head oval. They should be relatively large and pointy. Sketch smaller triangles inside each ear to create depth. -
Place the Features:
Mark the center of the face for the nose. Draw a small, inverted triangle for the nose and two solid oval dots for the eyes, spaced widely apart. -
Draw the Mouth and Whiskers:
From the bottom of the nose triangle, draw a small vertical line, then curve it outward to the left and right to make the mouth. Sketch three long whiskers extending from each cheek, crossing over the outline of the face. -
Add Texture Details:
Lightly pencil in a few dots on the forehead and the chin area to suggest fur texture.
Step 3: Inking and Finishing
-
Outline the Frame:
Switch to your black permanent marker. Carefully trace over the large outer circle first. Rotate the bag as you draw if it helps you maintain a steady curve. -
Ink the Cat Outline:
Trace the outline of the cat’s head and the main triangle shapes of the ears. -
Define the Inner Ears:
Draw the inner ear triangles. Notice in the example image, the inner lines don’t perfectly connect at the corners—leaving small gaps gives it a relaxed, sketchy style. -
Fill the Eyes:
Color in the eye ovals completely black, leaving no white spots. -
Detail the Nose and Mouth:
Trace the small nose triangle and the mouth lines. Keep these lines slightly thinner if your marker allows for line variation. -
Draw the Whiskers:
Using quick, confident strokes, draw the three whiskers on each side. Drawing away from the face usually results in a sharper, cleaner line. -
Add the freckles:
Dot the forehead and chin area with the tip of your marker. I find that varying the pressure slightly makes some dots larger than others for a natural look. -
Erase Sketches:
Wait at least 2-3 minutes to ensure the ink is completely dry. Then, gently erase all visible pencil lines. -
Final Fold:
Remove the cardboard insert. Fold the top of the bag down twice to see how your finished artwork sits on the package.
Level Up Your Kitty
Use a white gel pen to add tiny highlights inside the black eyes or to add a few white whiskers over the black lines for a pop of dimension.
Now you have a custom-illustrated bag that makes lunch feel just a little more special


Puppy With Floppy Ears And A Bone
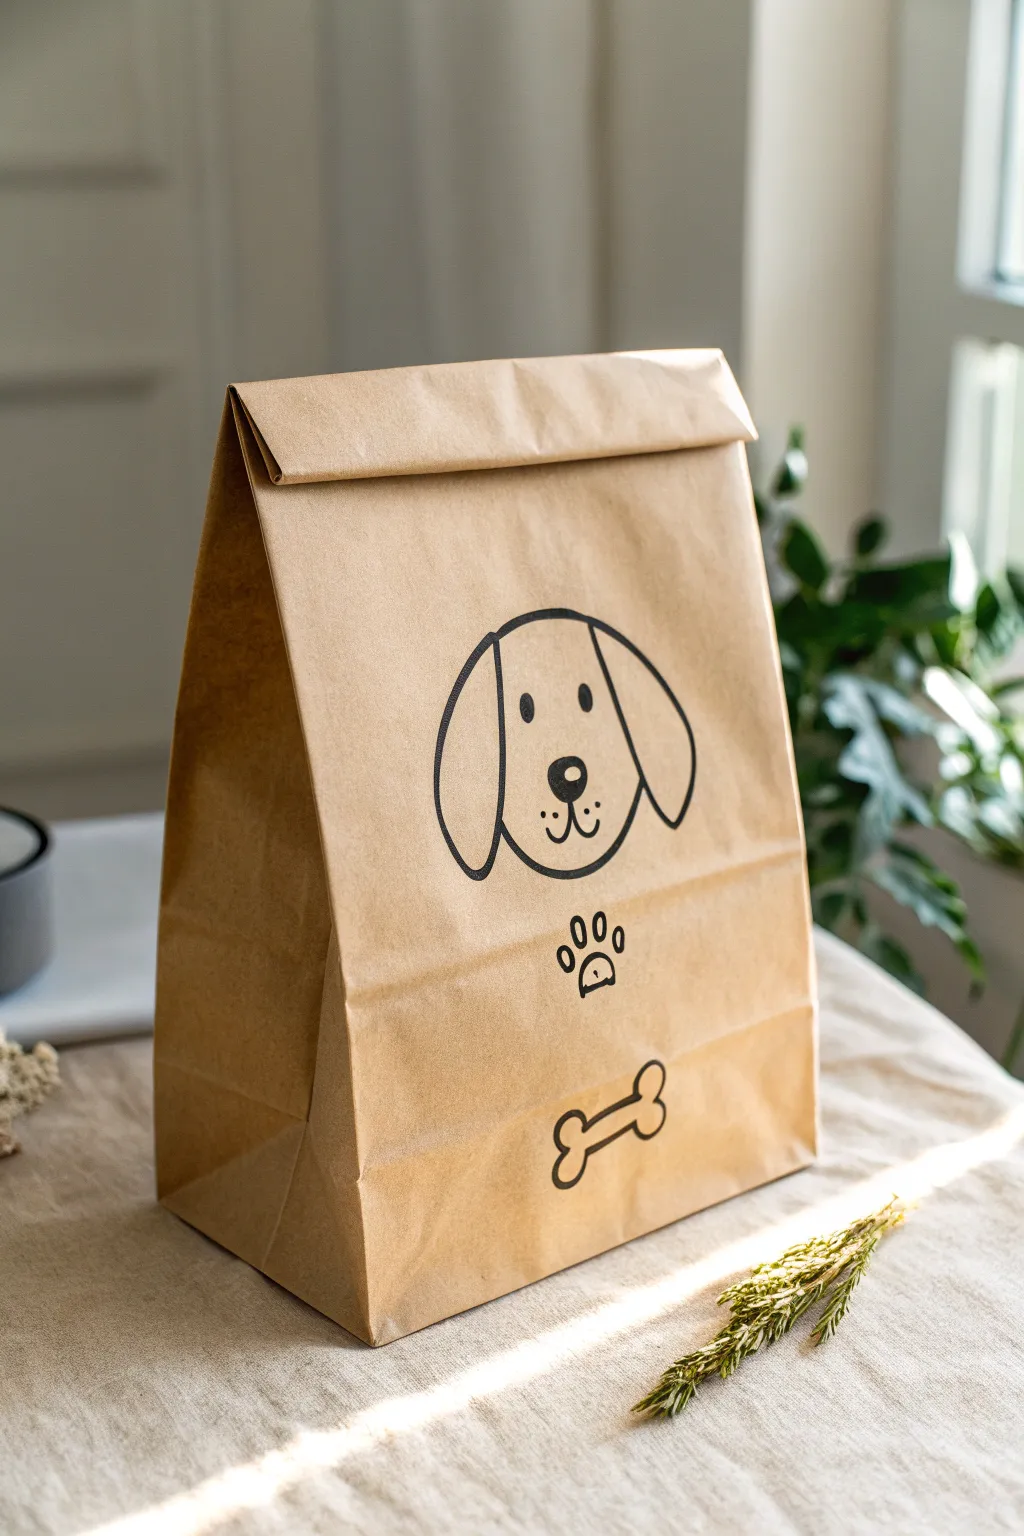
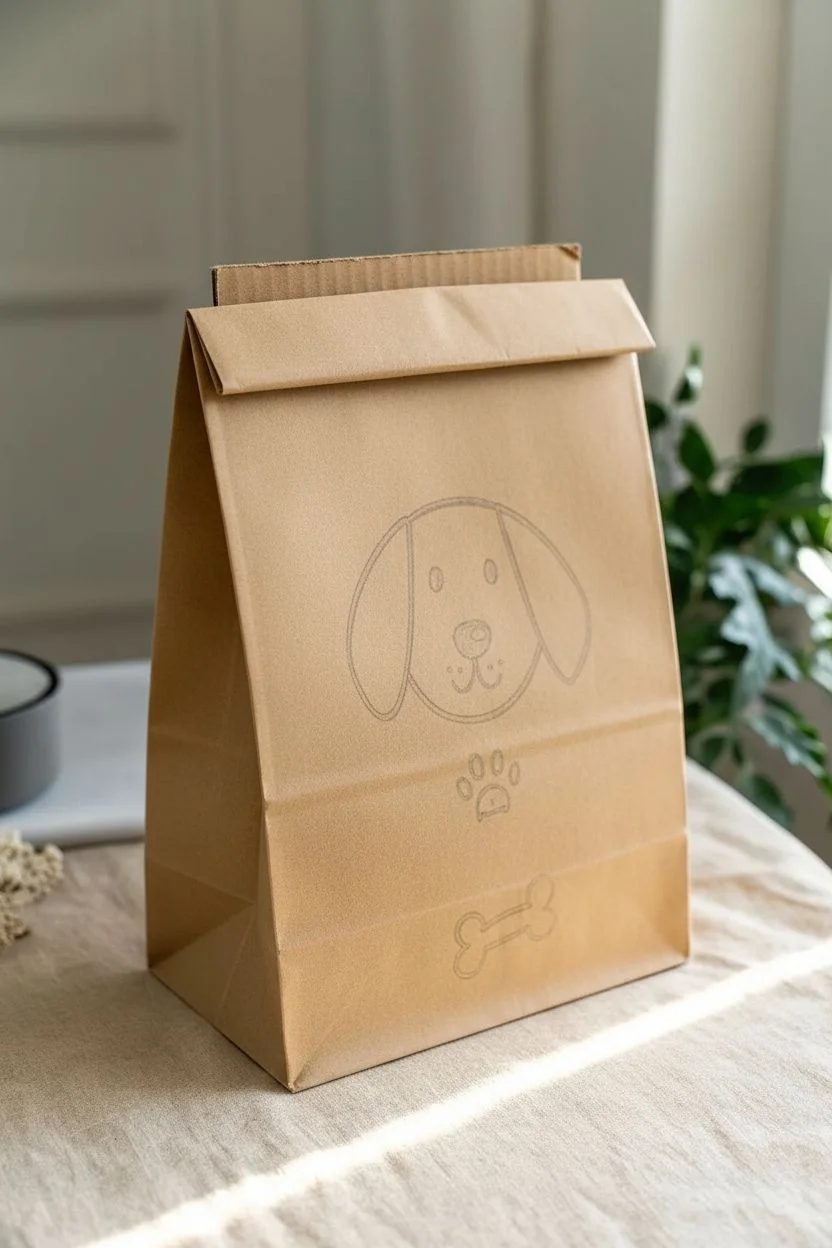
Turn a plain brown paper bag into an adorable lunchtime companion with this simple line drawing. Using bold black strokes, you’ll create a charming puppy face complete with floppy ears and a little bone treat.
Step-by-Step
Materials
- Standard brown paper lunch bag
- Black permanent marker (fine or medium tip)
- Pencil (HB or H)
- Eraser
- Piece of cardboard or thick paper (to fit inside the bag)
Step 1: Preparation and Sketching
-
Flatten the bag:
Lay your brown paper bag flat on a clean table. Smooth out any major wrinkles with your hand, paying attention to the center panel where you will be drawing. -
Insert the scratching guard:
Standard lunch bags are thin, and markers can bleed through. Slide a piece of cardboard or folded thick paper inside the bag to protect the back side from ink seeping through. -
Sketch the forehead:
Using your pencil very lightly, start the puppy’s head by drawing a gentle, curved arch near the upper middle of the bag. This will be the top of the skull. -
Outline the face shape:
Continue the curve downward on both sides to form a U-shape, creating the bottom of the puppy’s muzzle. Keep the line smooth and rounded. -
Add the floppy ears:
Draw two long, oval-shaped loops attached to the sides of the head. Let them droop down lower than the chin line to give that cute ‘floppy’ look. -
Place the facial features:
Sketch two small vertical ovals for eyes. Below them, draw a slightly larger upside-down triangle with rounded corners for the nose. -
Draw the mouth:
From the bottom tip of the nose, draw a small vertical line down, then curve it outwards to the left and right to make the little smile. -
Add the accessories:
About two inches below the face, sketch a paw print using a central rounded triangle pad and three or four toes. Below that, near the bottom third of the bag, outline a simple dog bone shape.
Placement Pro Tip
Keep your drawing centered in the bottom 2/3 of the bag. Leaving the top third empty ensures the puppy’s face remains fully visible even after folding the bag shut for lunch.
Step 2: Inking the Design
-
Select your marker:
Choose a black permanent marker. A medium tip works best for the outer lines to make them stand out against the brown paper. -
Trace the head shape:
Carefully trace over your pencil lines for the top of the head and the sides. Move your hand steadily to avoid shaky lines. -
Ink the ears:
Follow the ear outlines next. I find it helpful to rotate the bag slightly if the angle feels awkward for your wrist. -
Fill in the features:
Trace the eyes and fill them in completely with black ink. Do the same for the nose, leaving a tiny white ‘highlight’ dot uncolored if you want extra character. -
Finish the face details:
Go over the mouth lines. Add three tiny dots on each side of the muzzle, right near the smile lines, to suggest whiskers. -
Ink the paw print:
Trace the paw print outline. You can choose to leave it as an outline like the photo, or fill it in solid black for a bolder look. -
Trace the bone:
Go over the bone shape at the bottom. Keep the lines connected and fluid. -
Erase guidelines:
Wait at least a full minute for the ink to dry completely. Gently erase any visible pencil sketch lines so the artwork looks clean and professional. -
Fold the top:
Once finished, fold the top of the bag down about an inch or two to cremate the closure, ensuring the fold doesn’t cut through your puppy’s ears.
Preventing Ink Bleed
If your marker starts feathering into the paper grain, switch to a finer tip pen or draw slightly faster. Slow strokes allow the paper to absorb more ink, causing fuzzy edges.
Now you have a custom lunch bag that is sure to bring a smile during a midday break
BRUSH GUIDE
The Right Brush for Every Stroke
From clean lines to bold texture — master brush choice, stroke control, and essential techniques.
Explore the Full Guide
Owl On A Branch With Big Eyes
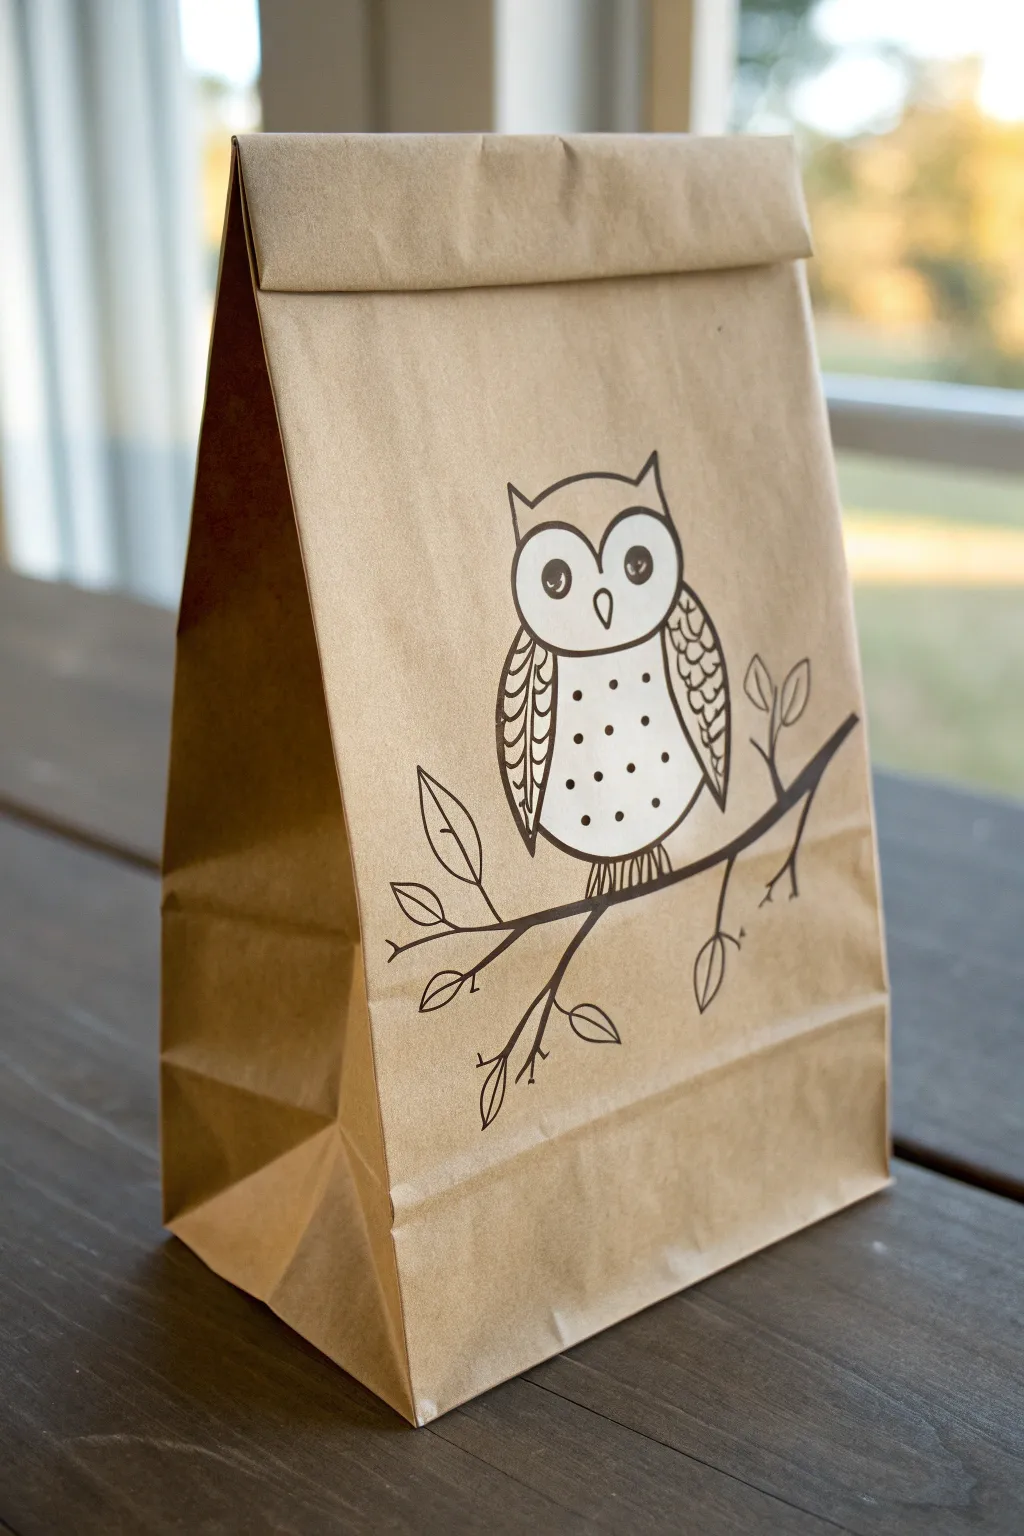
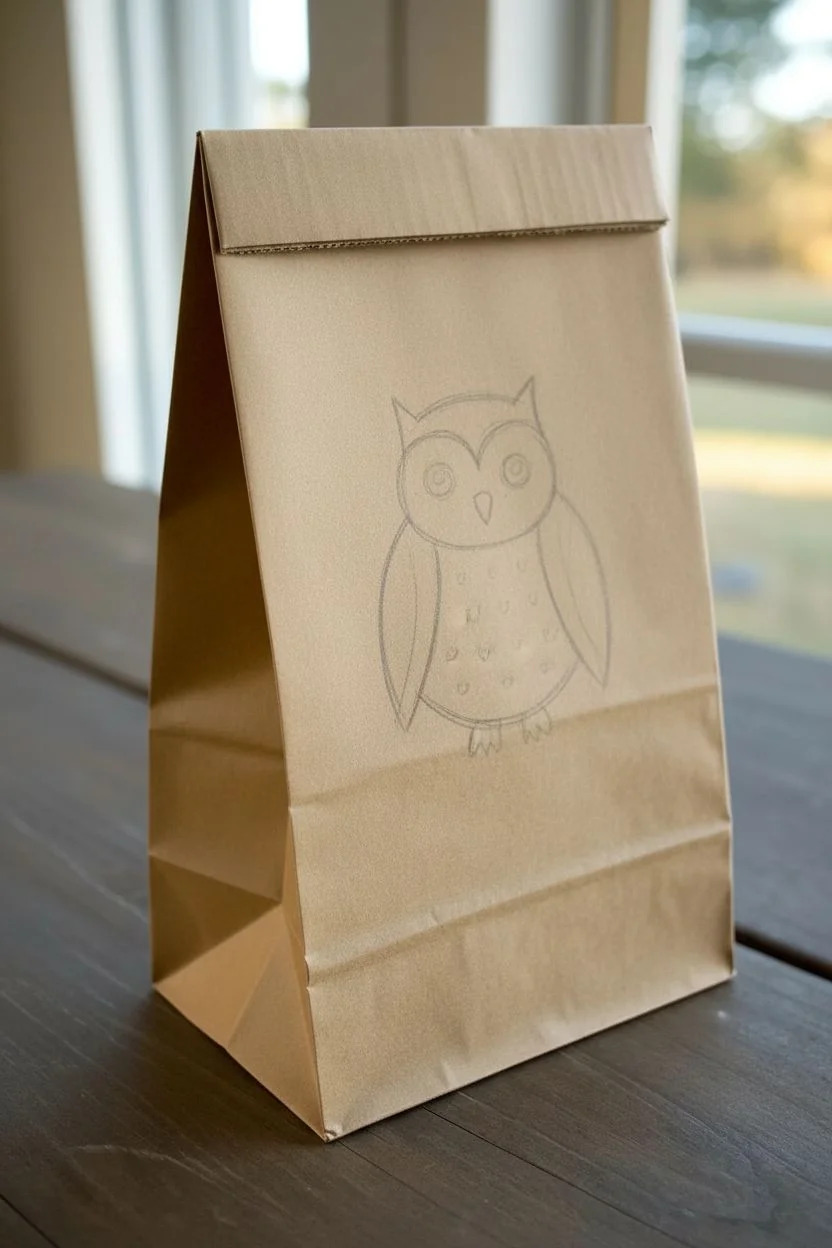
Transform a plain brown paper sack into a whimsical woodland scene with this simple line drawing. The contrast of bold black ink against the kraft paper creates a charmingly rustic look perfect for school lunches or party favors.
How-To Guide
Materials
- Standard brown paper lunch bag
- Pencil
- Eraser
- Fine-point black permanent marker or drawing pen
- Thicker black marker (optional, for filling eyes)
- Scrap piece of cardboard
Step 1: Preparation & Basic Shapes
-
Prep your surface:
Before starting, slide a piece of scrap cardboard inside the bag. This provides a stable drawing surface and prevents any ink from bleeding through to the other side. -
Flatten the bag:
Ensure the bag is completely flat, focusing the drawing area on the lower two-thirds of the front panel to leave room for folding the top later. -
Sketch the head shape:
Using your pencil lightly, draw a curved line for the top of the owl’s head. It should dip slightly in the middle to create two subtle ear tufts on the sides. -
Complete the body outline:
From the ear tufts, draw a large U-shape downward to form the body. The owl should look like a rounded oval with ears. -
Outline the wings:
Inside the body oval, draw two long, curved lines on the left and right sides that mimic the curve of the body, creating the folded wings.
Smudge Alert
Paper bags are porous and ink can smudge easily if touched while wet. Place a clean sheet of paper under your hand as a ‘bridge’ while you draw to protect your work.
Step 2: Drawing the Face & Details
-
Create the eye mask:
Draw the distinct heart-shaped ‘mask’ for the face. Start from the center of the forehead, curve down around where the eyes will go, and meet back in the middle near the beak area. -
Add the big eyes:
Draw two large circles inside the mask area. Inside each circle, draw a smaller circle near the top right to represent the highlight or reflection. -
Draw the beak:
Place a small, upside-down teardrop shape right between the eyes for the beak. -
Detail the feathers:
On the owl’s belly, draw small, scattered dots for texture. For the wings, draw scalloped or ‘U’ shaped scales repeating down the length of the wing. -
Sketch the branch:
Draw a long, slightly wavy line passing horizontally under the owl. Add a second line below it to give the branch thickness. -
Add nature elements:
Extend a few smaller twigs off the main branch. Draw simple leaf shapes—pointed ovals with a center line—attaching to these twigs. -
Draw the talons:
Add small, vertical lines extending from the bottom of the owl over the branch to show the feet gripping the wood.
Step 3: Inking & Finishing
-
Trace the main lines:
Take your fine-point black marker and carefully trace over your pencil lines. I find it helpful to start from the top and work down to avoid smudging. -
Fill in the eyes:
Color in the pupils (the large part of the eye) solid black, leaving the small highlight circles completely white. This gives the owl life. -
Inking the texture:
Go over the belly dots and the scalloped wing feathers. Keep your hand steady to maintain clean, crisp lines. -
Define the branch:
Ink the branch and leaves. You can thicken the lines slightly where the branch forks to add a bit of visual weight. -
Erase pencil marks:
Wait at least 5 minutes for the ink to dry completely. Gently use your eraser to remove any visible pencil sketches underneath the ink. -
Final check:
Look for any broken lines or areas that need a touch more ink, especially around the outer contour of the owl to make it pop against the brown paper.
Level Up: White Gel Pen
Use a white gel pen to add extra highlights to the eyes or to fill in the belly dots. The white ink pops incredibly well against the kraft paper background.
Now you have a custom-designed lunch bag that is sure to make lunchtime a little more special
Butterfly With Symmetrical Wing Shapes
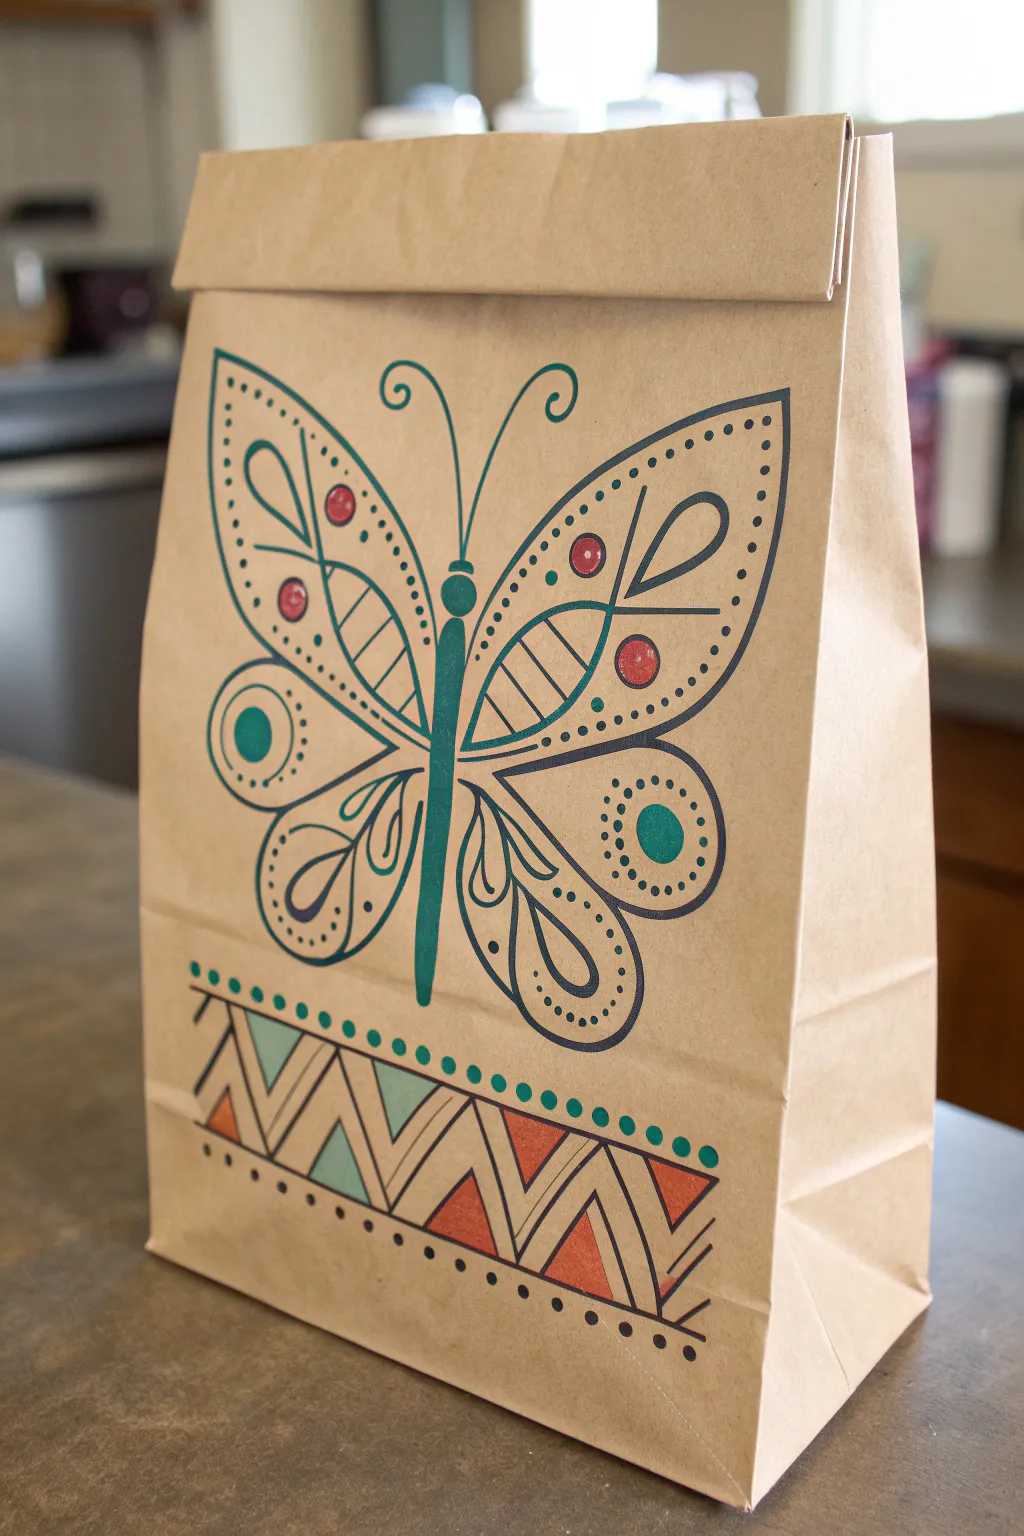
Transform a plain brown paper lunch bag into a charming accessory with a stylized butterfly design. Using simple geometric shapes and a limited color palette of teal, red, and navy, this project creates a clean, symmetrical look reminiscent of Scandinavian folk art.
Step-by-Step
Materials
- Standard brown paper lunch bag
- Pencil
- Fine-point permanent marker (black or dark navy)
- Teal paint marker or acrylic paint
- Orange-red paint marker or acrylic paint
- Ruler
- Circle stencil (optional)
Step 1: Preparation and Layout
-
Flatten the workspace:
Begin by laying your paper bag completely flat on a smooth surface. If the bag is wrinkled, you might want to smooth it out with your hands, but avoid ironing as the glue might melt. -
Mark the center:
Using a ruler, lightly find the vertical center of the bag front. Sketch a very faint vertical line with your pencil to help keep the butterfly body and wings symmetrical. -
Fold the top:
Fold the top of the bag down about 1.5 inches to establish your upper boundary. You want your drawing to sit below this fold so it’s fully visible when the bag is closed.
Bleed-Through Blues
Markers often bleed through paper bags. Slide a piece of scrap cardboard inside the bag before drawing to protect the back side from ink transfer.
Step 2: Drawing the Butterfly Body
-
Sketch the thorax:
Draw a long, slender teardrop shape right on your center line. The top should be slightly wider than the bottom, tapering to a dull point. -
Add the head:
Draw a small circle directly on top of the body shape for the head. Add two sweeping, curved lines extending outward and curling at the ends for the antennae. -
Color the body:
Fill in the entire body and head shape with your teal marker or paint. Leave the antennae as single distinct lines.
Step 3: Creating the Upper Wings
-
Outline the top wing shape:
Starting from the butterfly’s shoulder, draw a large, rounded triangular shape extending outward and upward. Repeat on the other side, trying to keep them mirror images. -
Add internal wing details:
Draw a teardrop shape inside the upper wing, pointing toward the body. Add a horizontal line bisecting the wing area, creating compartments for your patterns. -
Draw the ‘stained glass’ segments:
Within the lower section of the top wing, draw three small curved lines to create segments. I find using a fine-point pen here helps keep these details crisp. -
Dot the perimeter:
Along the top edge of the upper wings, add a row of small dots that follow the curve of the wing. This adds that essential folk-art texture.
Symmetry Hack
Draw one half of the butterfly on scrap paper, cut it out, and trace it on both sides of the centerline for perfectly symmetrical wings.
Step 4: Drafting the Lower Wings
-
Outline the bottom wing shape:
Draw a smaller, more rounded lobe shape extending from the lower middle of the body. These should look like soft flower petals. -
Add circular accents:
Inside the lower wing, near the outer edge, draw a prominent circle. You can trace a small button or coin if you struggle with freehand circles. -
Detail the inner wing:
Draw a teardrop shape closer to the body, similar to the one in the top wing but curved downward. Add sweeping lines around it to echo the wing’s outer shape. -
Add decorative dots:
Just like the top wings, adding a series of dots around the large circle or along the wing edge ties the design together.
Step 5: Geometric Border
-
Draw parallel lines:
About two inches from the bottom of the bag, use your ruler to draw two parallel horizontal lines across the width, spaced about an inch apart. -
Create the zigzag:
Inside these parallel lines, draw a continuous zigzag line to create a row of triangles pointing up and down. -
Add the dot border:
Draw a row of dots just above the top line and just below the bottom line of your border. I usually alternate colors here if creating a multi-colored look, or stick to dark blue for consistency.
Step 6: Coloring and Inking
-
Apply the teal accents:
Use your teal marker to fill in the large circles on the lower wings and alternating triangles in the bottom border. -
Add touches of red:
Color small accent circles within the upper wings and the opposing triangles in the bottom border with your orange-red marker. This pop of warmth balances the cool teal. -
Finalize outlines:
Go over all your pencil lines with the dark navy or black marker. Ensure line weights are consistent, thickening the main wing outlines slightly for emphasis. -
Erase guidelines:
Once the ink is completely dry—give it a good ten minutes to be safe—gently erase any visible pencil marks, especially that center guide line.
Now you have a custom, artistic lunch bag that is almost too pretty to throw away

PENCIL GUIDE
Understanding Pencil Grades from H to B
From first sketch to finished drawing — learn pencil grades, line control, and shading techniques.
Explore the Full Guide
Flower Bouquet Made From Five-Petal Doodles
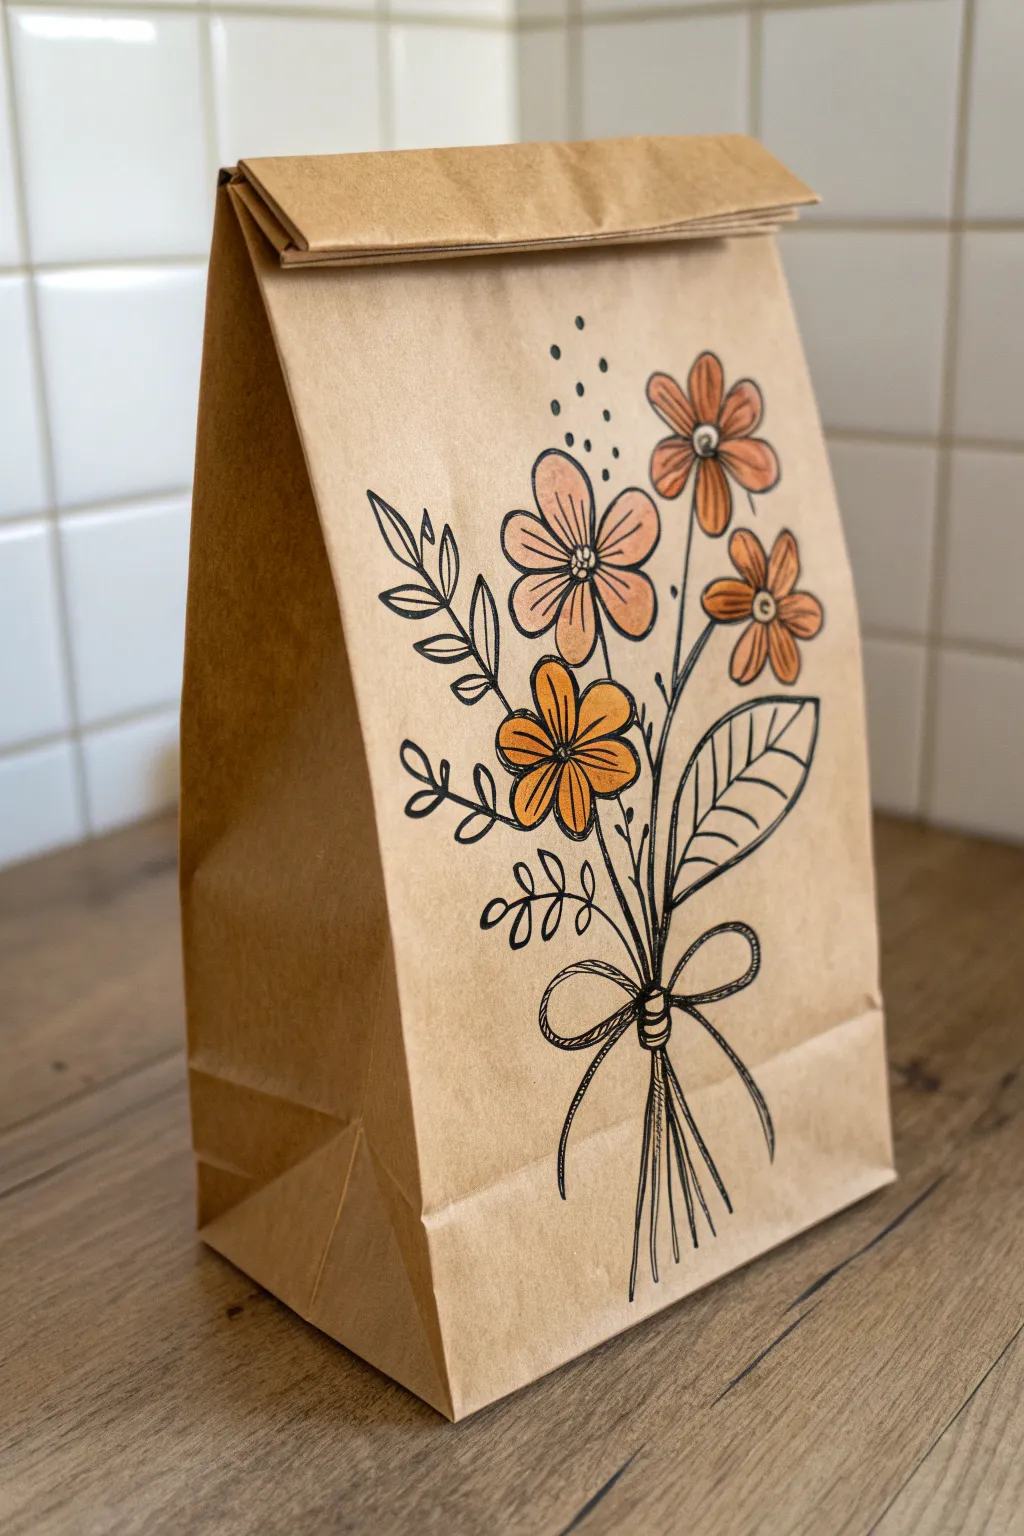
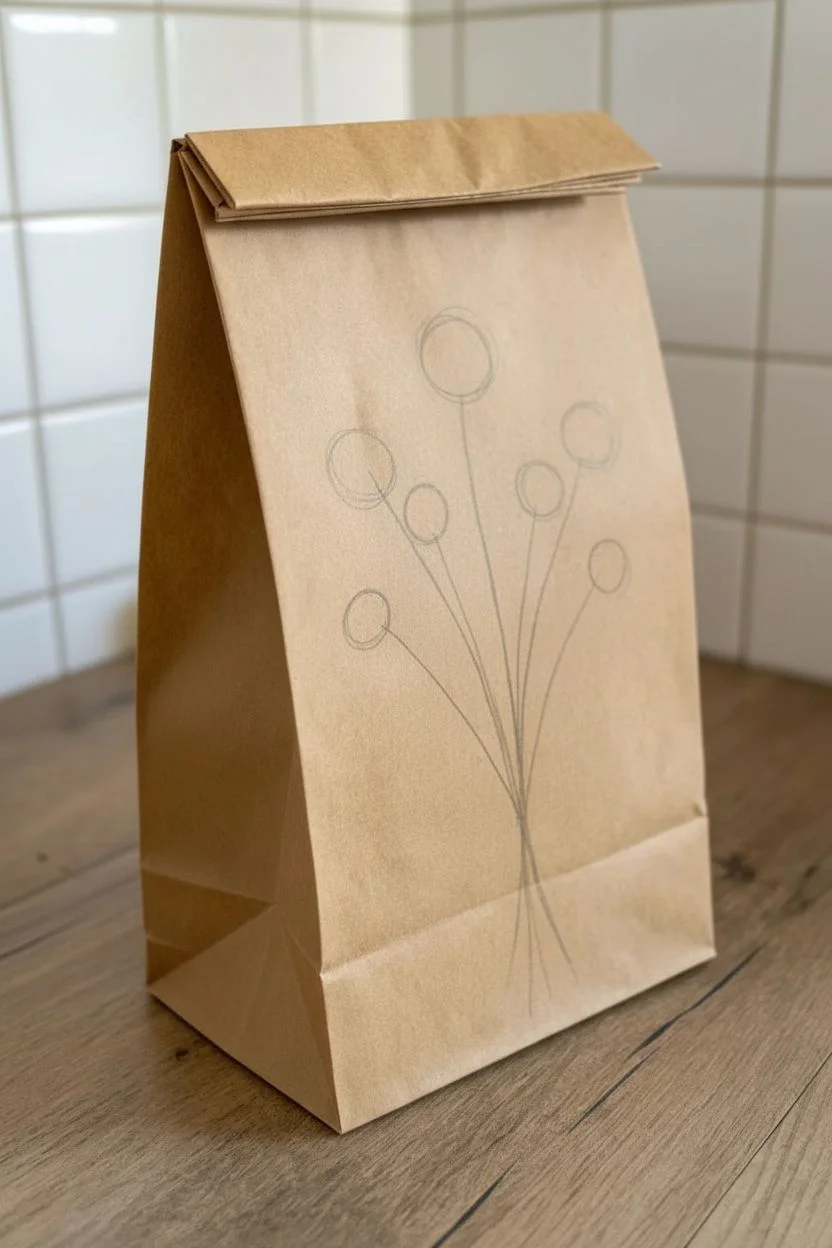
Transform a plain brown lunch sack into a charming gift bag with this rustic floral illustration. Using simple black ink outlines and warm, muted markers, you’ll create a lovely hand-drawn bouquet that feels both personal and artistic.
How-To Guide
Materials
- Brown paper lunch bag
- Black fine-liner pen (0.5mm or 0.8mm)
- Black brush pen or thicker marker (optional for bold lines)
- Peach or light orange marker
- Burnt orange or terracotta marker
- Pencil
- Eraser
Step 1: Sketching the Layout
-
Prepare the bag:
Ideally, draw on the bag before you open it or fill it. Press the bag flat on a hard surface to ensure your lines stay smooth. If the bag has a deep crease down the center, try to position your main flowers slightly to the side of it. -
Draft the stems:
Using a pencil, lightly sketch a central gathering point near the bottom third of the bag. Draw five to six curved lines radiating upward from this point to act as your stems. -
Draw flower circles:
At the top of four of your stems, lightly sketch circles to mark where the flower heads will go. Vary their heights so they look natural and not too uniform.
Ink Bleeding?
Paper bags are porous. If your marker feathers, switch to a ballpoint pen for drawing outlines, or use colored pencils instead of markers for the fill.
Step 2: Inking the Flowers
-
Draw the center disks:
Switch to your black fine-liner. Draw a small circle in the middle of your first flower sketch. Add a tiny dot or grid pattern inside for texture. -
Create the first petals:
Draw five simple, rounded petals radiating from the center disk. Don’t worry about perfect symmetry—wobbly lines add to the hand-drawn charm. -
Complete the blooms:
Repeat this process for the other three guide circles. Try rotating the orientation of the petals slightly for each flower so they don’t look like carbon copies. -
Add defining details:
Draw tiny lines flicking outward from the center of each flower into the petals. This gives the blooms a bit of depth and dimension.
Step 3: Leaves and Stems
-
Ink the main stems:
Trace over your pencil stem lines with the black pen, bringing them all down to meet at the gathering point you marked earlier. -
Add leafy branches:
On the left side, draw a stem with small, football-shaped leaves growing in pairs. I like to keep these simple and open, without coloring them in. -
Draw the large leaf:
On the right side, draw one large, broad leaf with a central vein and diagonal veins branching off. This balances the composition against the smaller leaves on the left. -
Include filler sprigs:
Add a few smaller, twig-like sprigs with tiny loops or teardrop shapes for leaves near the bottom of the bouquet to fill in empty space. -
Add decorative dots:
Above the flowers, dab your pen to create a scattering of small black dots. This ‘pollen’ effect draws the eye upward and adds a whimsical touch.
Level Up
Use a white gel pen to add tiny highlights on the colored petals or to draw extra white dots in the background for a pop of contrast.
Step 4: The Bow and Color
-
Draw the knot:
Where the stems meet, draw a small, rounded rectangle or oval with a few horizontal lines inside it to represent the knot of a string or ribbon. -
Add the loops:
Draw two large, floppy loops extending from the knot. Keep the lines loose and curved. -
Finish the ribbon tails:
Draw two long, wavy tails hanging down from the knot. Alongside them, extend the straight lines of the flower stems downwards to show the bottom of the bouquet. -
Erase guidelines:
Wait about a minute for the ink to fully set, then gently erase your initial pencil sketches. -
Color the petals:
Take your terracotta marker and color in two of the flowers completely. Use the lighter peach marker for the other two. To keep the rustic look, it’s okay if you leave tiny slivers of the brown paper showing near the edges.
Fold the top of your bag down twice to complete the rustic packaging look
Leaf Garland Border Around The Edges
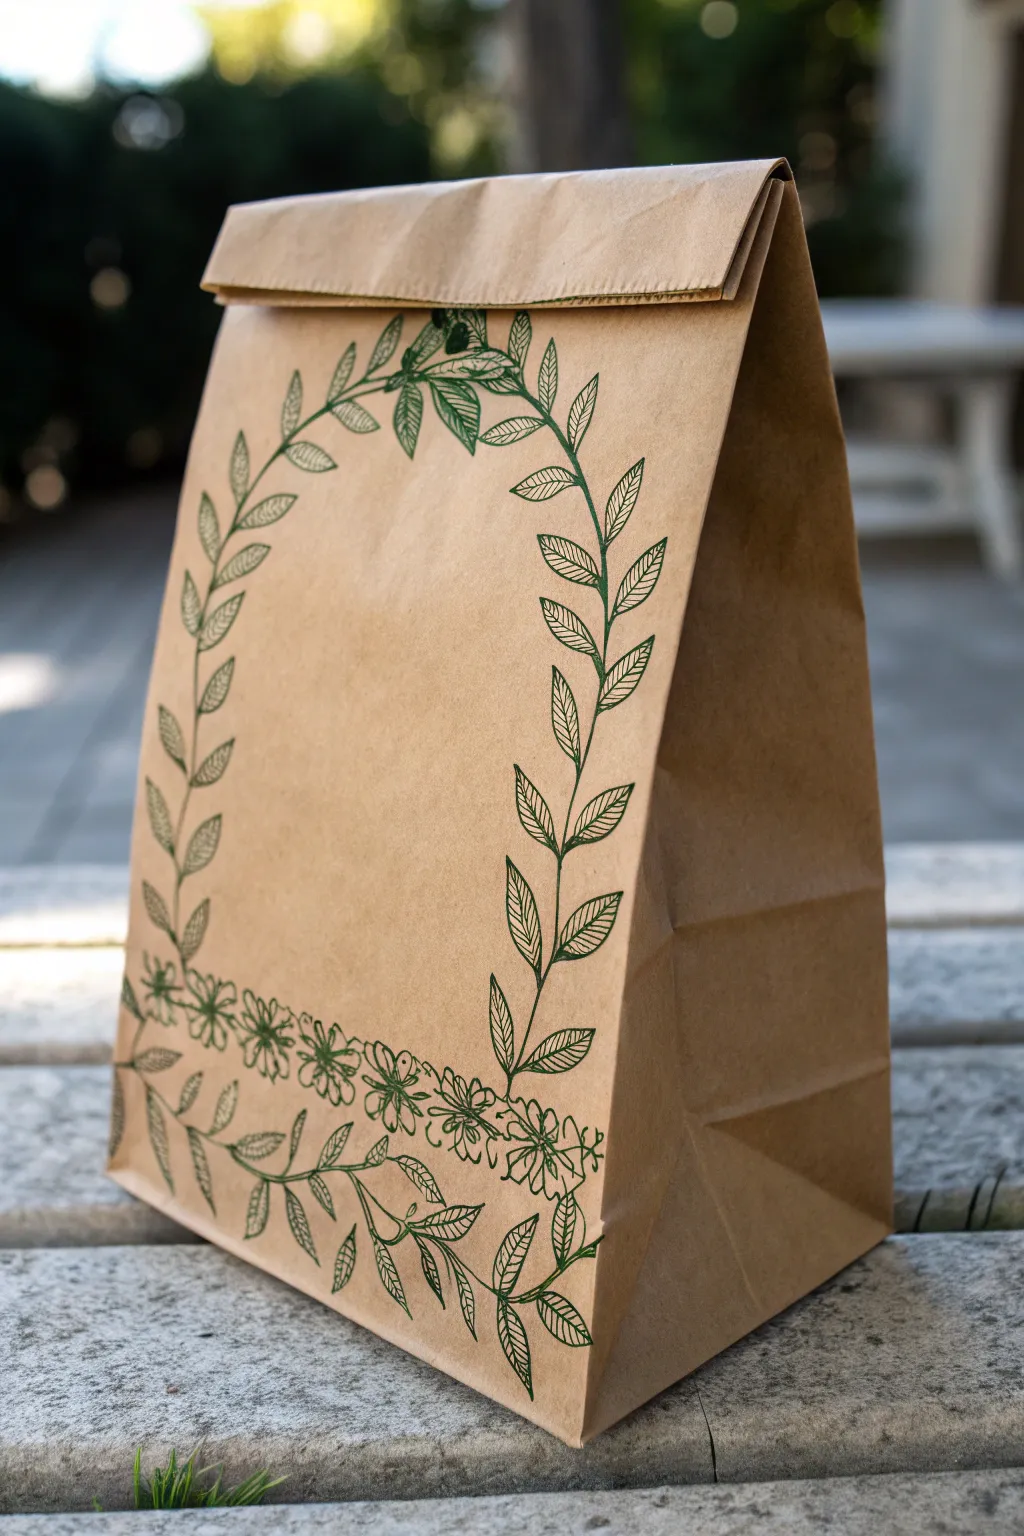
Transform a plain brown paper lunch bag into a charming gift or meal carrier with this simple botanical drawing. Using just a single green marker or pen, you’ll create an elegant frame of vines and dainty flowers that looks far more intricate than it actually is.
Step-by-Step
Materials
- Standard brown paper lunch bag
- Fine-point green marker or gel pen (dark green)
- Pencil (optional, for sketching)
- Eraser (optional)
- Ruler
Step 1: Preparation & Layout
-
Flatten the bag:
Start by laying your brown paper bag completely flat on a hard table surface. Ensure the bottom flap is folded down firmly so you have a smooth canvas. -
Mark the floral band:
Using a pencil and ruler, lightly mark a horizontal line about 2 inches up from the bottom edge of the bag. This will serve as the guideline for your row of flowers. -
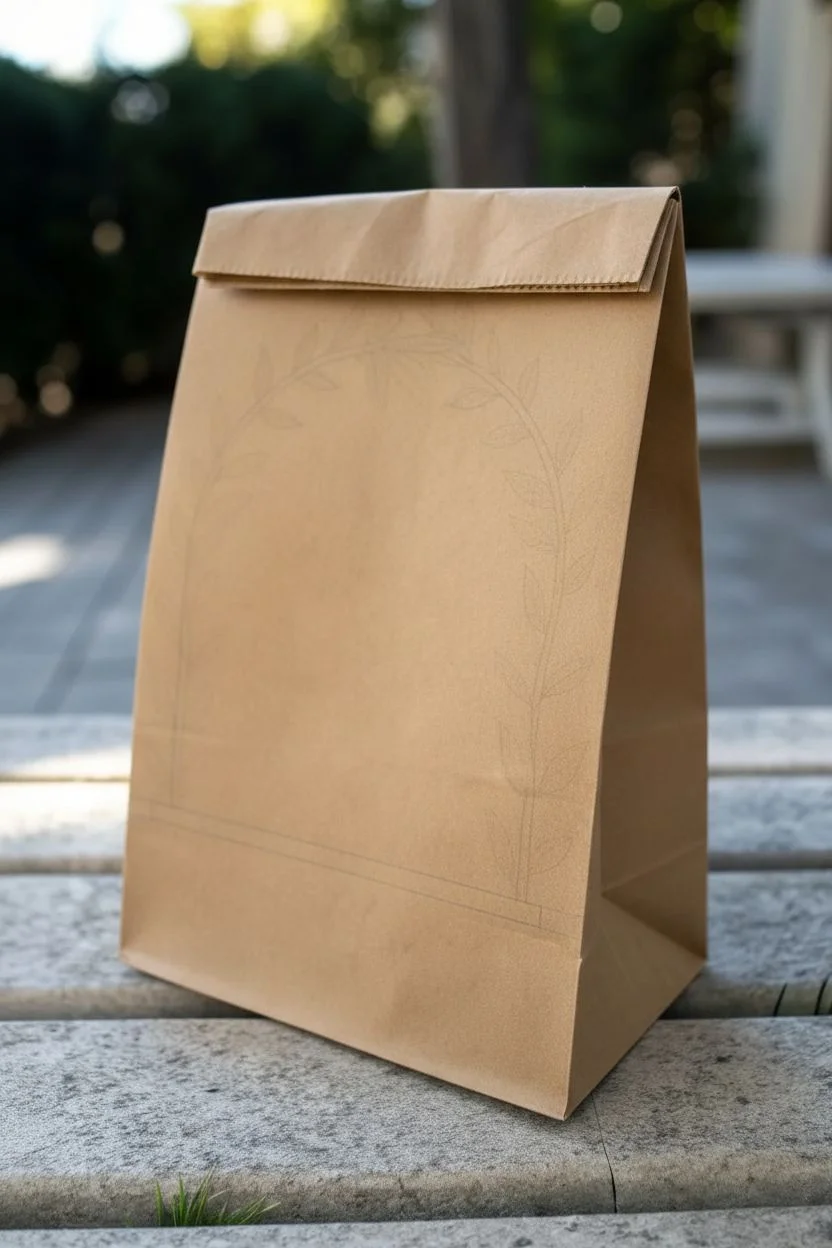
Sketch the arch guide:
Lightly sketch a large, inverted U-shape that starts at your floral line and curves up towards the very top fold of the bag. This defines the main garland shape.
Ink Confidence
Don’t worry about perfect symmetry. Nature is irregular! Varying leaf sizes and spacing makes the botanical drawing look more organic and authentic.
Step 2: Drawing the Main Garland
-
Ink the main stems:
Take your green fine-point marker and trace over your penciled U-shape. Make the line slightly wavy rather than perfectly straight to mimic a natural vine texture. -
Start the leaves:
Beginning at the bottom left of the arch, draw small, almond-shaped leaves extending outward from the stem. Angle them upwards slightly. -
Add leaf details:
Inside each leaf, draw a central vein line and tiny diagonal lines branching off it. This vein detail gives the drawing its classic botanical illustration look. -
Work your way up:
Continue adding leaves in pairs or alternating sides as you move up the left side of the arch. -
Connect at the top:
When you reach the top center of the bag (where the fold is), curve the vines inward so they meet or overlap slightly with a few central leaves. -
Complete the right side:
Repeat the leaf process down the right side of the arch, mirroring the direction of the leaves so they still embrace the center space.
Level Up: Name Tag
Use the empty space inside the leafy arch to write a message or name in calligraphy. Use a thick black marker for high contrast against the kraft paper.
Step 3: Adding the Floral Border
-
Draw flower centers:
Along the horizontal pencil line you drew earlier, make small dots or tiny circles spaced about a half-inch apart to mark the center of each flower. -
Create petals:
Draw five or six simple loop petals around each center dot. Keep them loose and sketchy rather than perfect geometric circles. -
Connect the blooms:
Draw tiny, short lines or leaves between the flowers to make it look like a continuous chain or garland. -
Detail the flowers:
Add a few tiny dots inside the petals near the center for shading and texture.
Step 4: The Bottom Vine
-
Draw the lower stem:
Draw a wavy horizontal vine underneath the row of flowers, roughly an inch from the very bottom edge of the bag. -
Add lower leaves:
Draw larger leaves on this bottom vine, spacing them out a bit more than the upper arch. Let them droop slightly for a relaxed feel. -
Connect to the flowers:
Draw thin, tendril-like lines extending upward from this bottom vine to touch the floral border, integrating the design. -
Erase guidelines:
Wait 2-3 minutes to ensure the ink is totally dry, then gently erase any visible pencil marks. -
Fold the top:
Fold the top of the bag down along the existing crease to see how the top of your leafy arch meets the fold.
Now your lunch bag is ready to brighten someone’s day with a touch of hand-drawn nature


One-Line Continuous Lunch Bag Face
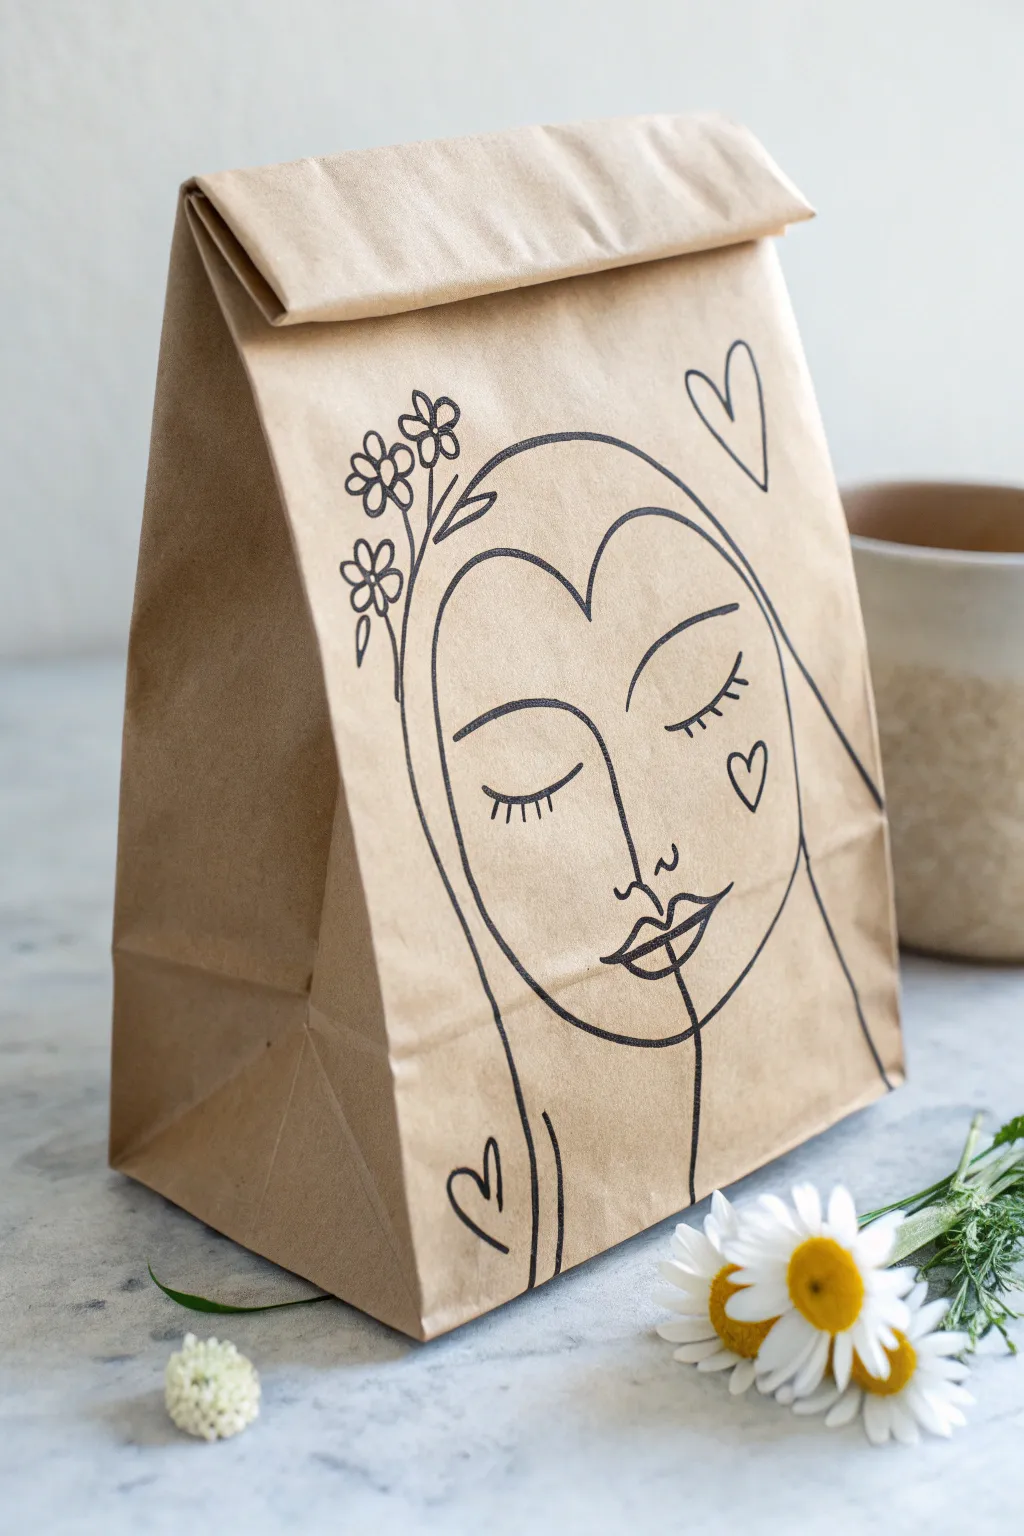
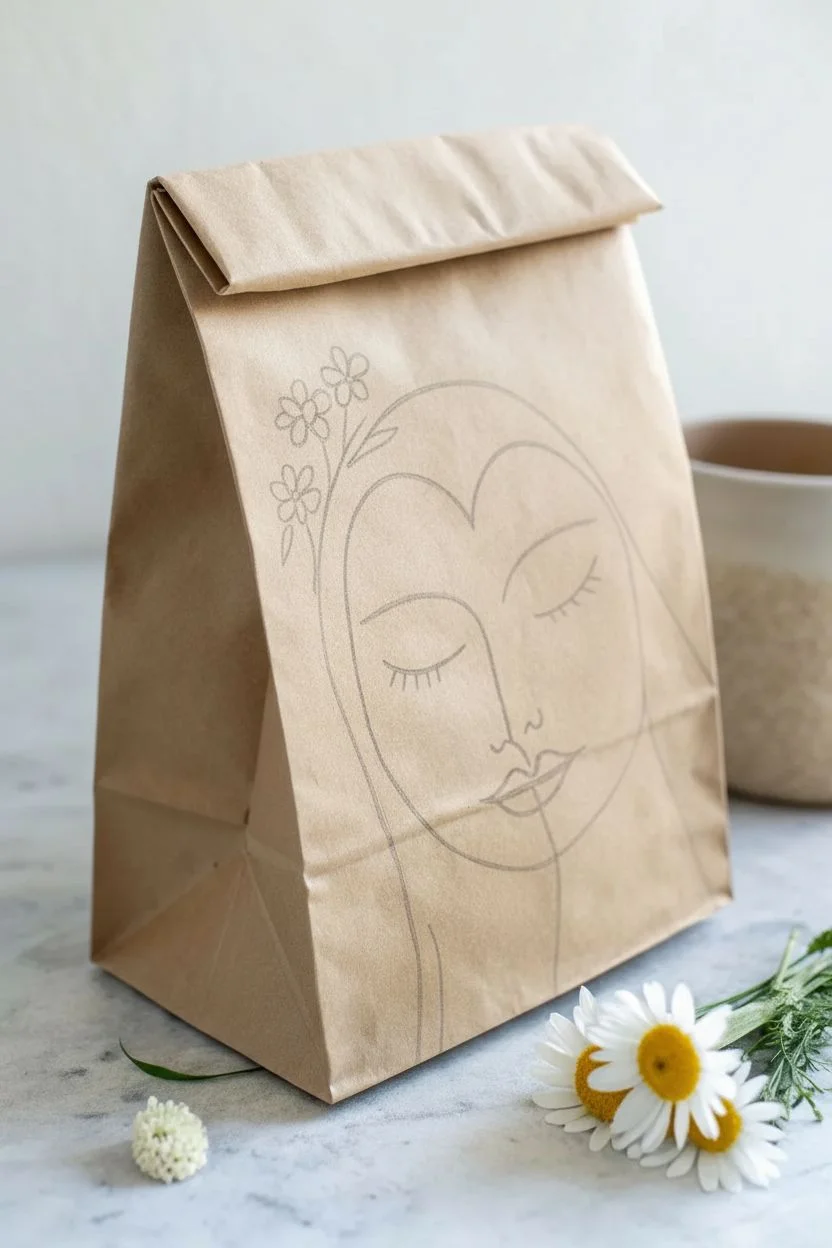
Transform a plain brown paper lunch sack into a piece of art with this elegant, minimalist face design. Using just a single black marker, you can create a stylish, continuous-line inspired illustration featuring floral details and sweet heart accents.
How-To Guide
Materials
- Standard brown paper lunch bag
- Black permanent marker (fine or medium point)
- Pencil (HB or lighter)
- Eraser
- Scrap piece of cardboard or stiff paper
Step 1: Preparation and Sketching
-
Prepare the surface:
Start by flattening your paper bag on a smooth table. Carefully slide a piece of scrap cardboard inside the bag; this is a crucial step to prevent any ink from bleeding through to the back side when you start drawing. -
Fold the top:
Fold the top inch or so of the bag down just as you would when packing a lunch. This helps you visualize the actual drawing space so your design doesn’t get hidden in the crease later. -
Sketch the face outline:
Using a pencil very lightly, draw a large ‘U’ shape in the center of the bag for the jawline. At the top of the U, connect the sides with a dipping ‘M’ shape or heart top to form the hairline. -
Add facial features:
Sketch two closed semi-circles for eyelids about halfway down the face. Add a small ‘L’ shape for the nose and simple lips below that. Don’t worry about perfection; the charm is in the hand-drawn feel. -
Draft the floral accents:
On the upper left side of the head (your left), sketch a few simple stems rising up. Add small five-petal flowers to the tips of these stems.
Step 2: Inking the Design
-
Trace the main face shape:
Take your black permanent marker and begin tracing over your pencil lines. Start with the main outline of the face and hair, keeping your hand steady but fluid to mimic a continuous line style. -
Detail the eyes:
Ink the curved eyelids. Below each lid, draw 5-6 short, straight vertical lines to create the eyelashes. This simple detail instantly adds a peaceful expression. -
Define the nose and mouth:
Trace the nose line. When you reach the lips, outline the top and bottom lip shapes, and draw a straight horizontal line through the middle to separate them. -
Extend the center line:
From the center of the bottom lip, draw a single vertical line straight down to the chin line. This adds a modern, abstract touch to the portrait. -
Ink the flowers:
Carefully trace your floral sketches on the left. Outline the stems first, then the petals. I find it helpful to rotate the bag slightly as I draw the petals to keep my hand in a comfortable position. -
Add hair details:
Draw a long, curved line on either side of the face, extending from the top of the head down to the bottom of the bag, mimicking long hair framing the face.
Uneven Ink Flow?
Paper bags have texture that can snag marker tips. Use a felt-tip pen rather than a ballpoint, and move your hand a bit slower than usual to saturate the paper fully.
Step 3: Final Touches
-
Draw the hearts:
Add a small heart on the cheek (right side), a larger floating heart near the top right, and another small heart near the bottom left hair strand. -
Let the ink set:
Allow the marker ink to dry completely for at least two to three minutes. Brown paper bags can be surprisingly absorbent, and you don’t want to smudge the lines. -
Erase pencil marks:
Once the ink is fully dry, gently run your eraser over the entire design to remove any visible graphite sketches. -
Check line weight:
Look over your drawing. If you want the outer face shape to stand out more, re-trace just that line a second time to thicken it up slightly compared to the finer internal details. -
Remove insert:
Finally, slide the cardboard scrap out of the bag. Your custom lunch sack is now ready to be filled.
Add a Pop of Color
Make the design standout by coloring just the lips red or the flowers yellow. A tiny bit of white gel pen on the eyelids also adds a great highlight.
Now you have a charming, personalized lunch bag that is sure to brighten up anyone’s midday meal
Bold Black Outline With White Highlight Accents
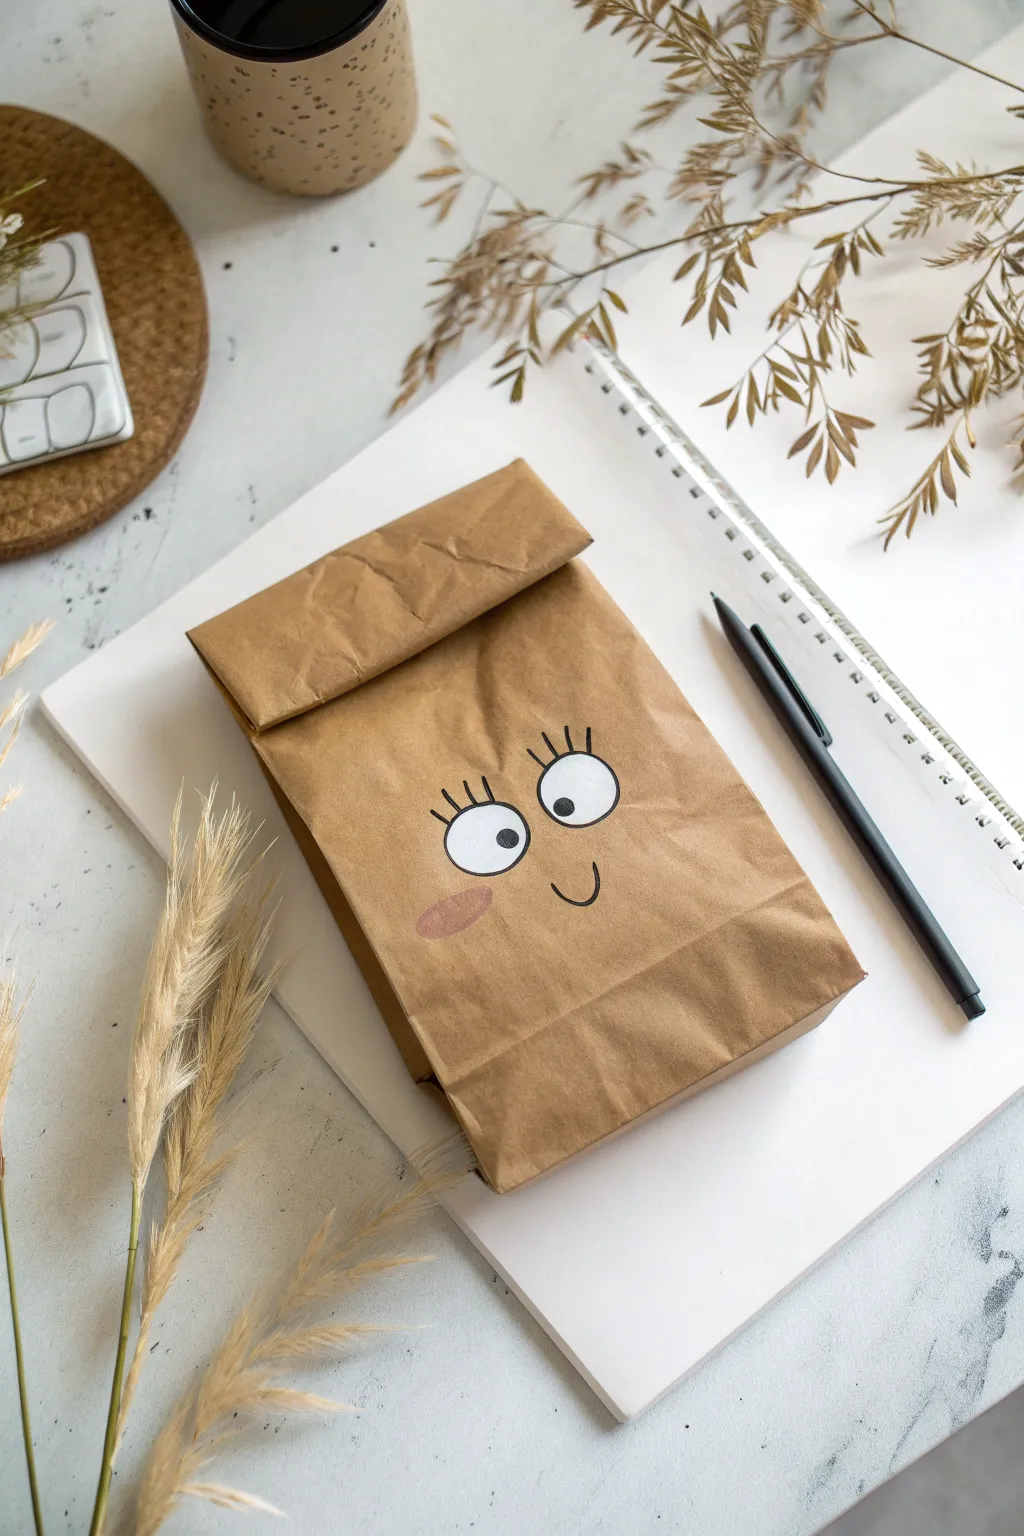
Transform a plain brown paper lunch bag into a charming character with just a few simple strokes and some paint. This project uses bold black outlines and crisp white highlights to create an expressive face that pops right off the kraft paper texture.
Step-by-Step
Materials
- Standard brown paper lunch bag
- White acrylic paint or a white Posca paint marker (medium tip)
- Black permanent marker or black Posca paint marker (fine and medium tips)
- Pencil (optional for sketching)
- Small paintbrush (if using acrylic paint)
- Pink crayon or pastel (optional for blush)
Step 1: Preparation
-
Flatten the Bag:
Lay your brown paper lunch bag flat on a hard surface. Smooth out any major wrinkles with your hand, ensuring the bottom flap is folded underneath so you have a clean working area on the front face. -
Determine Placement:
Visualize where the fold will be when the bag is closed. You want the face to sit centered in the lower two-thirds of the bag so the top fold doesn’t obscure the eyes. I usually aim for the middle of the available rectangular space.
Step 2: Drawing the Base Features
-
Sketch the Eyes:
Using a pencil very lightly, sketch two large circles side-by-side. They don’t need to be perfect circles; slightly oval shapes add character. Make sure they are touching or very close together. -
Add the Mouth Guide:
Lightly mark a small, curved ‘U’ shape centered below the eyes. Keep it simple and small for that cute, minimalist look. -
Fill the Whites:
Using your white acrylic paint or white paint marker, fill in the two eye circles completely. If you are using paint, apply a thin, even layer. -
Let it Dry:
Allow the white paint to dry completely. Kraft paper absorbs moisture quickly, so this shouldn’t take long. If the white looks translucent, apply a second coat for opacity.
Paint Soaking In?
If the white paint sinks into the porous paper and looks dull, apply a dab of white gesso first as a primer, or simply layer a second coat of white paint after the first is dry.
Step 3: Adding Details
-
Outline the Eyes:
Once the white paint is bone dry, take your medium-tip black marker and carefully trace around the edge of the white circles to create a crisp outline. -
Draw the Pupils:
Decide where your character is looking. Draw two medium-sized black dots inside the white circles. Placing them slightly off-center (like looking to the left) gives the bag a playful personality. -
Add Eyelashes:
Using a finer tip black marker, draw three or four short, vertical lines straight up from the top edge of each eye outline. Vary the lengths slightly for a natural look. -
Draw the Smile:
Trace over your pencil guide for the mouth with the black marker. Make a simple, curved line to create a happy smirk. -
Add a Blush (Optional):
For an extra touch of sweetness, use a pink crayon or pastel to gently color a small oval cheek on one or both sides of the face, just below the eye line.
Add Accessories
Give your bag more personality by drawing glasses around the eyes, adding a drawn-on bow tie, or gluing on real craft googly eyes for 3D movement.
Step 4: Finishing Touches
-
Clean Up:
Erase any visible pencil marks that weren’t covered by the marker or paint. -
Fold the Top:
To complete the look as shown in the photo, fold the top opening of the bag down twice to simulate a packed lunch. Crease it sharply to hold the shape. -
Crumple Texture:
Gently scrunch the bag slightly in a few places if you want that lived-in, rustic texture shown in the reference image, but be careful not to crack the paint on the eyes.
Now you have a cheerful lunch companion ready to brighten up your midday break


Have a question or want to share your own experience? I'd love to hear from you in the comments below!