Wooden snowflakes are basically the perfect blank canvas—simple shapes that can turn into anything from classic winter charm to bold modern art. Grab your favorite paints and let’s make those plain cutouts look like they fell straight out of a snowy daydream.
Classic White Snowflake With Icy Blue Shading
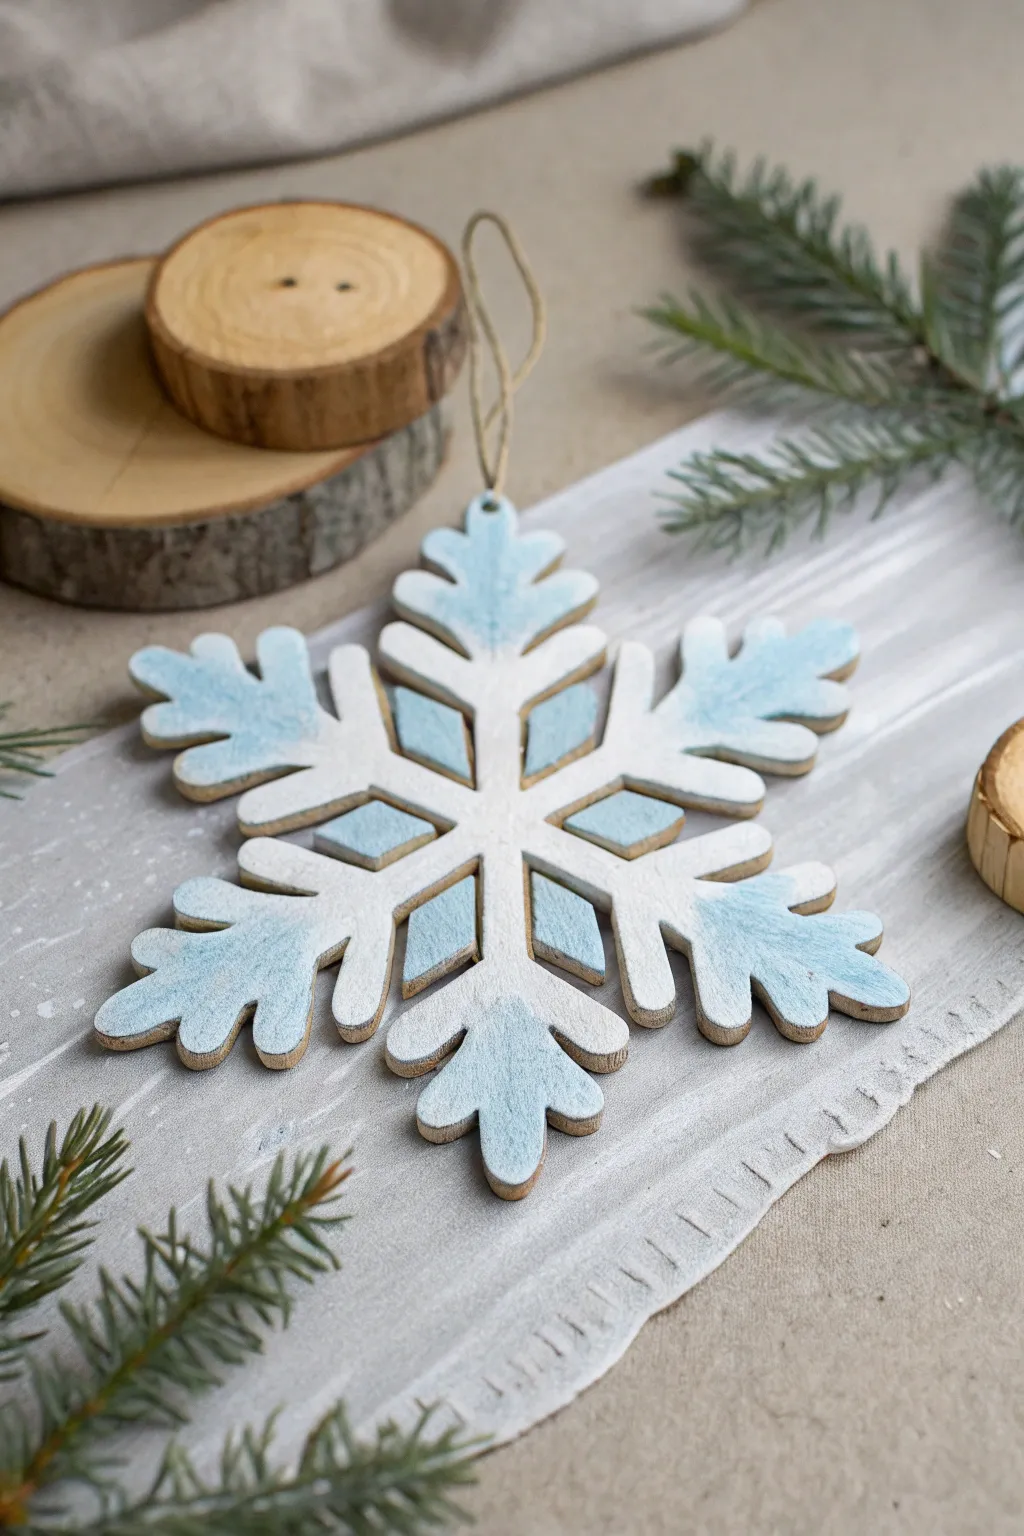
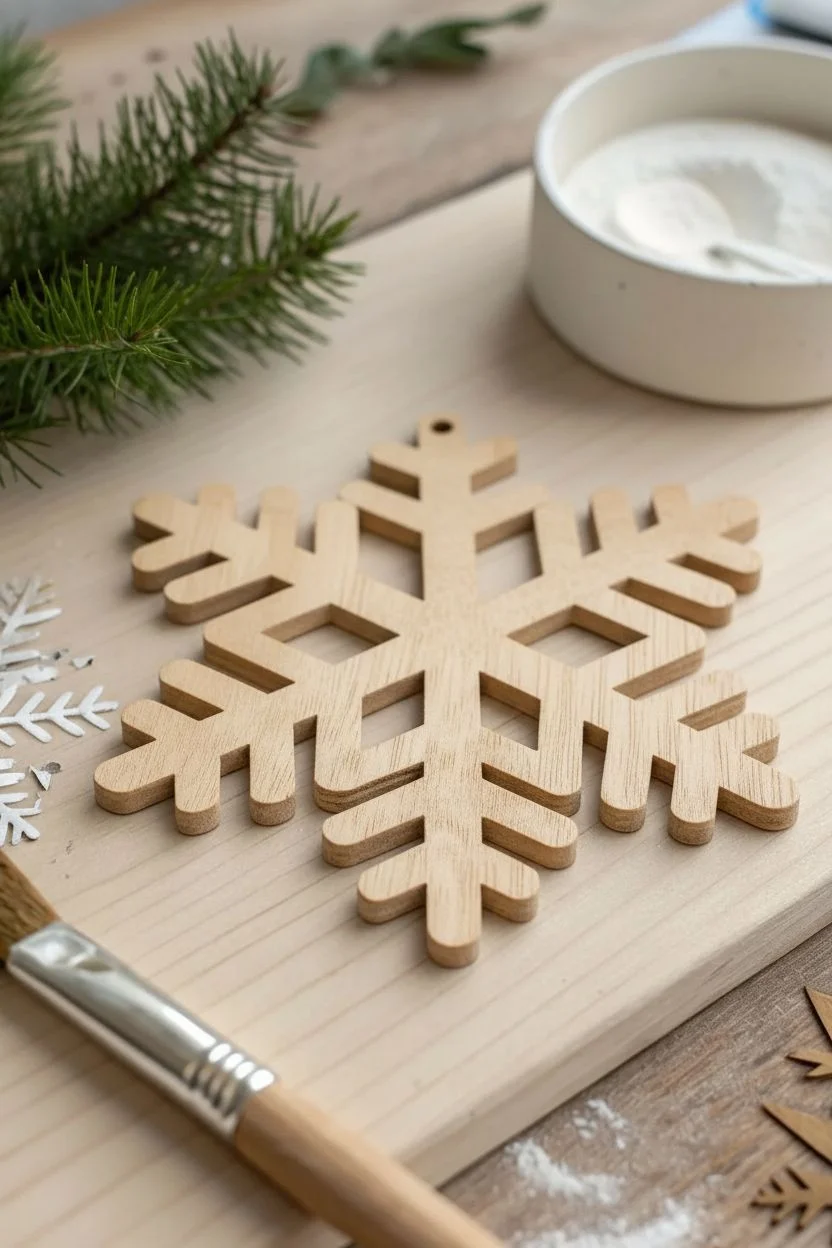
Capture the chill of winter with this elegant two-tone snowflake design. By blending stark white with a soft, gradient blue, you can create a frosted effect that looks stunning against evergreen branches.
Step-by-Step Tutorial
Materials
- Unfinished wooden snowflake ornament (laser cut)
- White acrylic craft paint (matte)
- Light icy blue acrylic craft paint
- Small flat shader brush
- Small round detail brush
- Clean water cup
- Paper towels
- Jute twine or ribbon for hanging
- Fine-grit sandpaper (optional)
Step 1: Preparation and Base Coat
-
Prepare the wood:
Inspect your wooden snowflake for any rough edges or laser-cut splinters. If you find any, gently smooth them away with a small piece of fine-grit sandpaper to ensure a professional finish. -
Dust debris:
Wipe the snowflake down with a dry paper towel or cloth to remove any sawdust. A clean surface is crucial for the white paint to adhere smoothly. -
Apply initial white base:
Using your flat shader brush, apply a solid coat of matte white paint to the entire front surface of the snowflake. Don’t worry about the sides just yet; focus on getting an opaque layer on the face. -
Paint the edges (optional):
Decide if you want a cleaner look or a rustic ‘burnt edge’ look. For a cleaner look, use your small brush to paint the dark, laser-cut sides white. For the rustic look shown in the image, leave the dark edges unpainted. -
Second coat:
Once the first layer is dry to the touch, apply a second coat of white. This ensures the wood grain doesn’t show through too strongly and provides a crisp canvas for the blue shading.
Pro Tip: Dry Brushing
For a frostier look, wipe most of the blue paint off your brush onto a paper towel before applying. This ‘dry brush’ technique deposits color only on the raised wood texture.
Step 2: Adding the Icy Gradient
-
Prepare the blue wash:
On your palette, mix a small drop of water into your light blue acrylic paint. You want a consistency slightly thinner than heavy cream so it blends easily but isn’t dripping wet. -
Start at the tips:
Dip your clean flat brush into the blue paint. Start at the very outer tips of the snowflake arms and stroke inward toward the center. -
Feather the paint:
As you move closer to the center of the snowflake arm, lift pressure off the brush. This feathering technique helps create the soft fade where the blue meets the white. -
Inner diamond accents:
Switch to your small round detail brush. Carefully paint the inner diamond shapes located between the main arms. Fill these solidly with the light blue paint. -
Refine the gradient:
While the blue on the tips is still slightly tacky, I like to take a clean, slightly damp brush and lightly sweep over the transition line between blue and white to blur any harsh edges. -
Dry and assess:
Let the paint dry completely. If the blue looks too faded, add a second layer just at the very tips to deepen the contrast.
Troubleshooting: Harsh Lines
If your blue-to-white transition looks like a solid stripe, re-wet it slightly with a damp brush and add a tiny dot of white paint to the border to soften the blend.
Step 3: Finishing Touches
-
Protect the surface (optional):
If this ornament will be handled often or packed away in boxes, apply a clear matte sealer spray over the top to prevent chipping. -
Thread the hanger:
Cut a 6-inch length of jute twine. Thread one end through the pre-drilled hole at the top of the snowflake. -
Secure the loop:
Tie a secure overhand knot at the ends of the twine to create a rustic hanging loop that complements the natural wood tones of the edges.
Now your frosty creation is ready to hang on the tree or garnish a special gift package


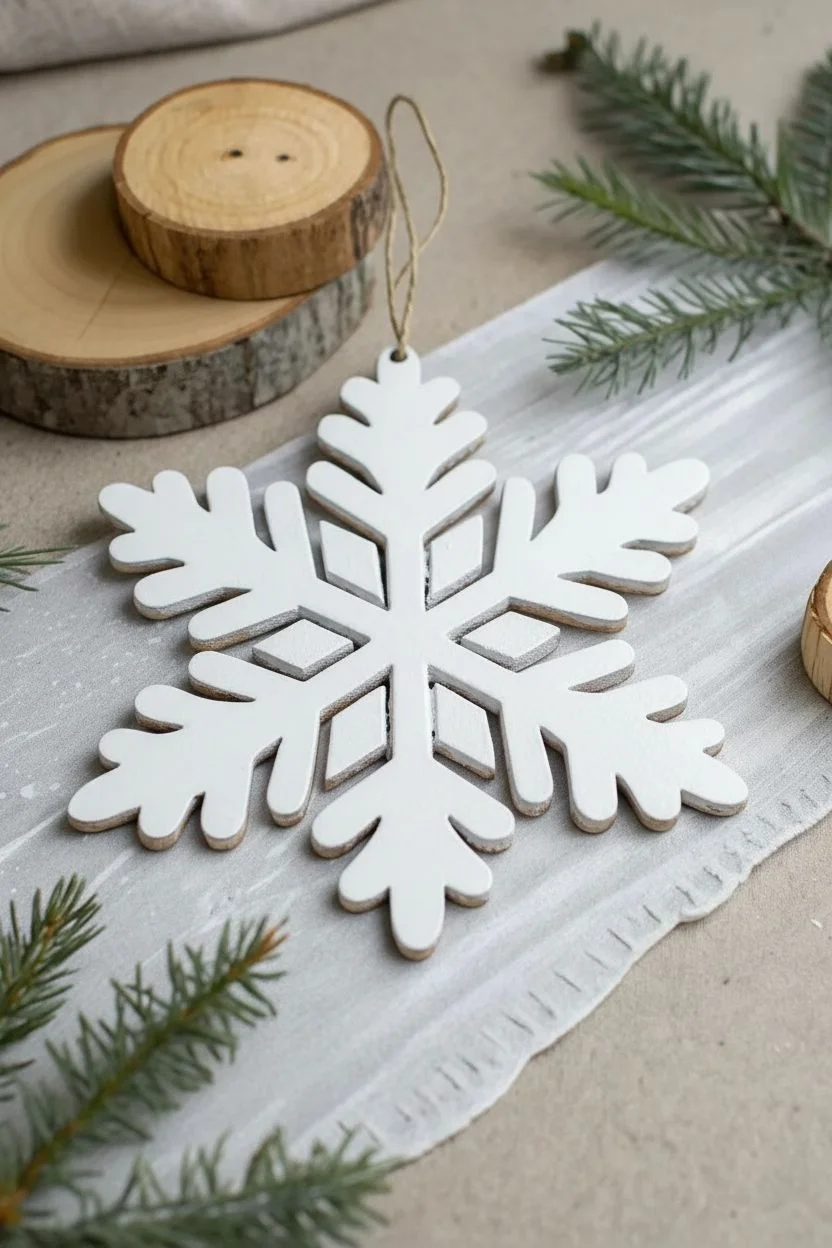
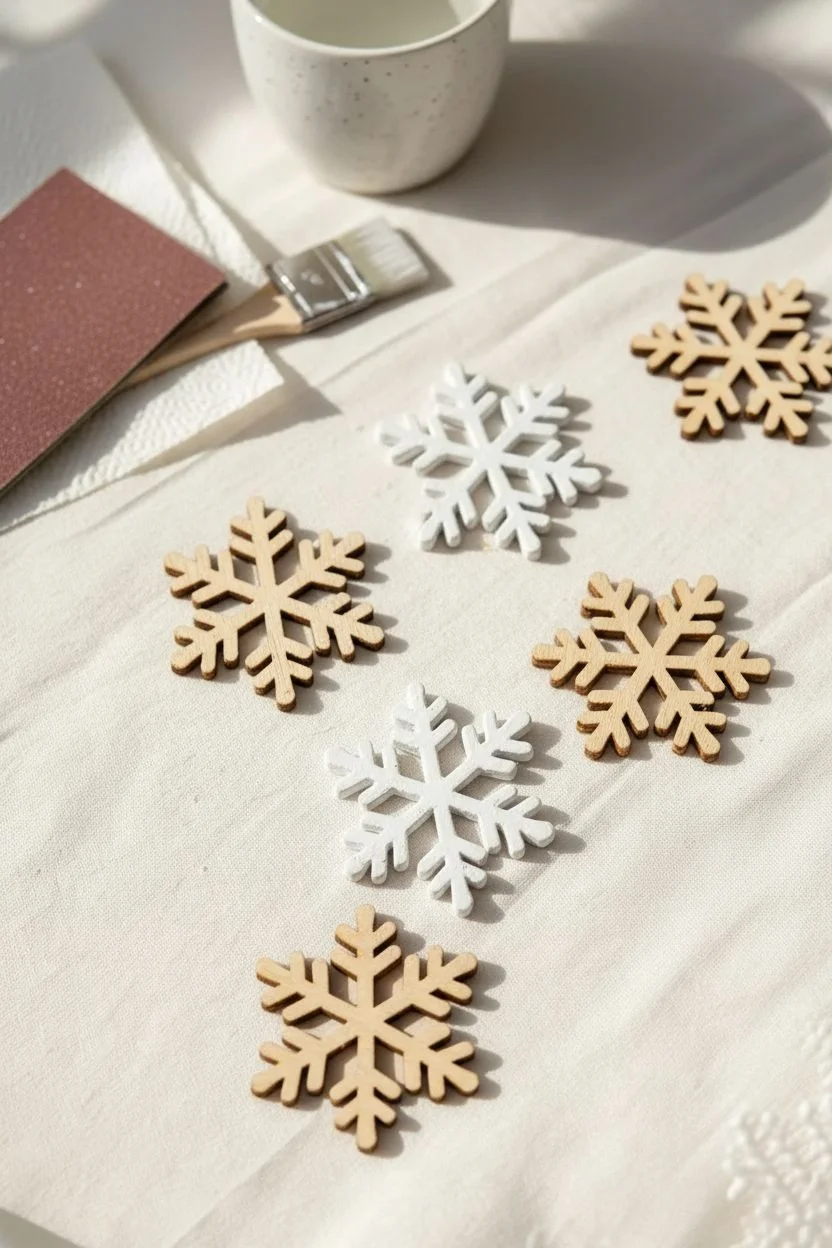
Dry-Brushed Edges for Frosted Wooden Snowflakes
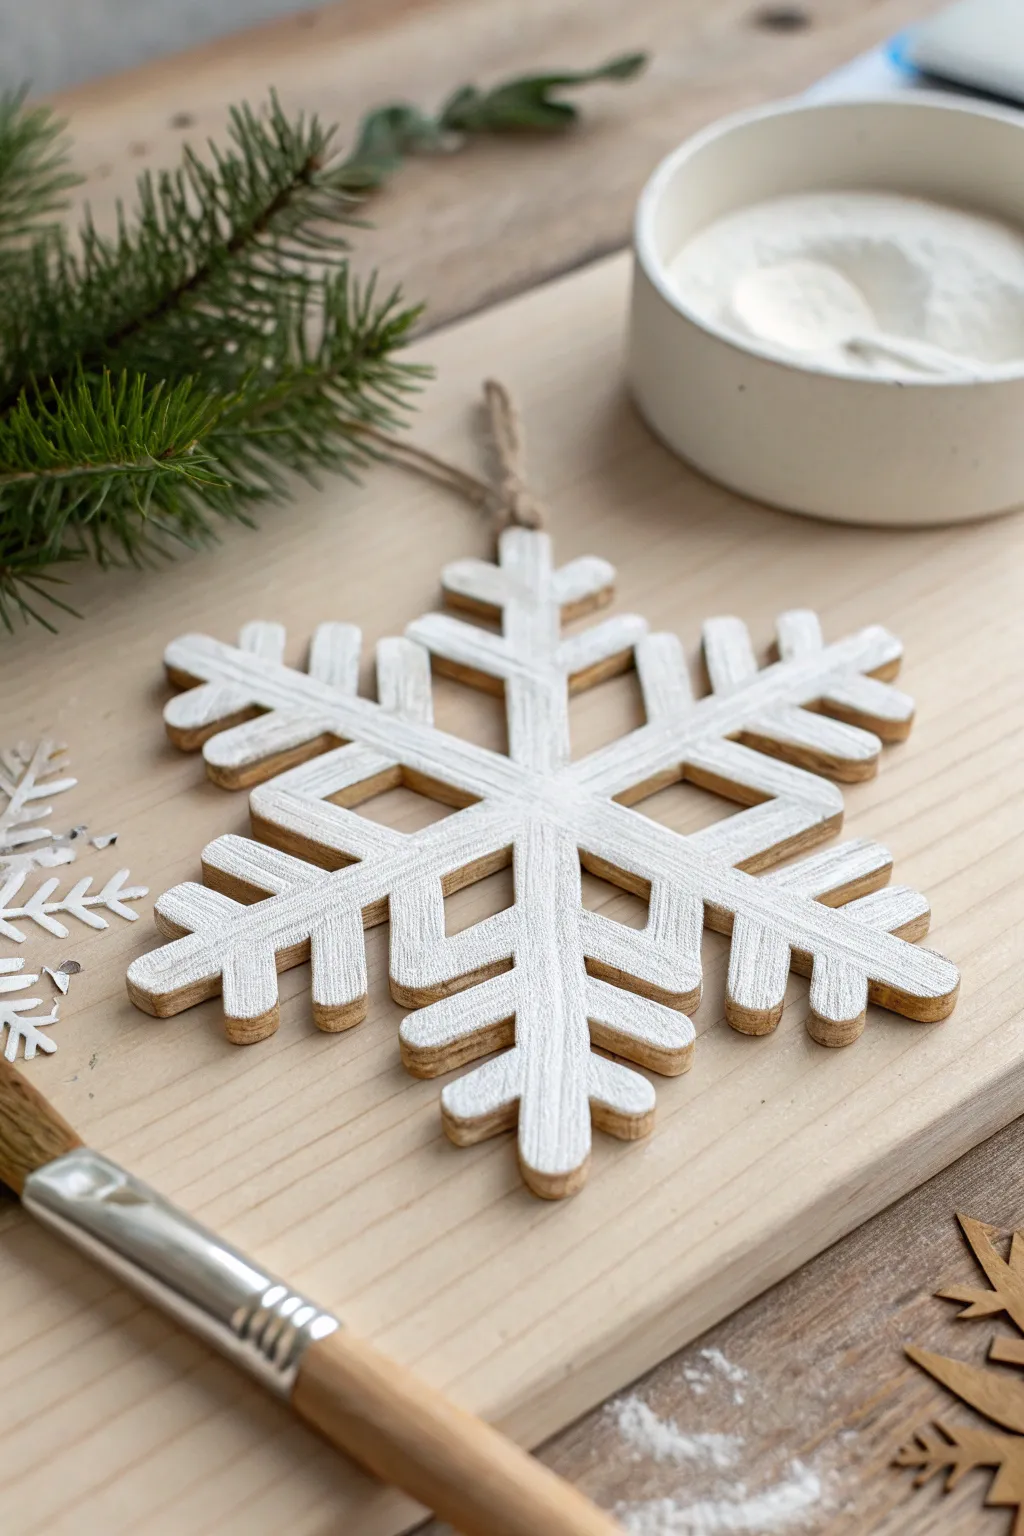
Capture the delicate beauty of a winter morning with this rustic painting project. By dry-brushing white paint onto raw wood, you achieve a wonderfully textured, snow-kissed finish that lets the natural grain peek through.
Step-by-Step
Materials
- Unfinished wooden snowflake cutout (large, approx. 6-8 inches)
- White matte acrylic paint or chalk paint
- Flat bristle paintbrush (medium size)
- Small round detail brush (optional, for touch-ups)
- Paper plate or palette
- Paper towels
- Fine-grit sandpaper (220 grit)
- Jute twine or rustic ribbon for hanging
Step 1: Preparation
-
Examine the Surface:
Before painting, take a close look at your wooden snowflake. Check for any rough splinters or uneven edges from the cutting process. -
Smooth the Edges:
Lightly sand the edges and the top face of the snowflake using 220-grit sandpaper. You want it smooth to the touch, but don’t polish it too much—a little texture helps grip the paint. -
Clean and Dust:
Wipe the entire snowflake down with a dry cloth or a tack cloth to remove every speck of sawdust. Dust is the enemy of a clean finish. -
Protective Setup:
Lay down butcher paper or a protective mat on your work surface to catch any stray paint bristles or drips.
Step 2: Painting Technique
-
Load the Brush:
Squeeze a small amount of white acrylic paint onto your palette. Dip just the tip of your flat bristle brush into the paint. -
Offload Excess Paint:
This is crucial: dab the brush firmly onto a paper towel repeatedly until almost no paint is coming off. The bristles should feel nearly dry. -
Initial Dry Brushing:
Start near the center of the snowflake. Drag your brush lightly across the grain of the wood. You are aiming for scratchy streaks, not a solid coat. -
Working Outward:
Continue dry brushing towards the tips of the snowflake arms. I like to vary my pressure slightly here to create natural-looking unevenness like real frost. -
Build the Layers:
Once the first light pass is done, reload your brush (remembering to offload on the towel again) and add a second layer, focusing on the higher points of the wood texture. -
Highlighting the Edges:
Turn your brush perpendicular to the snowflake arms. Lightly feather the paint across the edges to make them stand out brighter against the wood tone. -
Check the Side Profile:
Inspect the thick side edges of the cutout. You can leave these raw for contrast or lightly dust them with the dry brush to continue the frosty theme.
Choosing the Right Brush
Use a stiff-bristled brush (like hog hair) rather than a soft synthetic one. Stiff bristles create those beautiful, scratchy ridges essential for the frost effect.
Step 3: Finishing Touches
-
Evaluate Coverage:
Step back and look at the snowflake. Does it look too wood-heavy? Add a touch more white. Too white? Lightly sand it back to reveal the grain. -
Clear any Globs:
If paint pooled in any of the interior corners or cutouts, use a clean, dry detail brush to sweep it away before it dries completely. -
Drying Time:
Let the snowflake sit undisturbed for about 20-30 minutes. Since the paint layers are so thin, it will dry very quickly. -
Prepare the Hanger:
Cut a length of jute twine, approximately 8 inches long. Fold it in half to create a loop. -
Attach the Loop:
Thread the loop end through the hole at the top of the snowflake (or through an opening in the design), then pull the loose ends through the loop to create a lark’s head knot. -
Secure the Knot:
Tighten the knot gently against the wood so it sits securely at the top point of the ornament.
Sparkle Upgrade
While the white paint is wet, lightly sprinkle fine iridescent glitter over the tips. It catches the light just like fresh ice crystals.
Now you have a charming, winter-ready decoration that brings a cozy woodland feel to your home


Modern Monochrome Snowflake in Black, White, and Gray
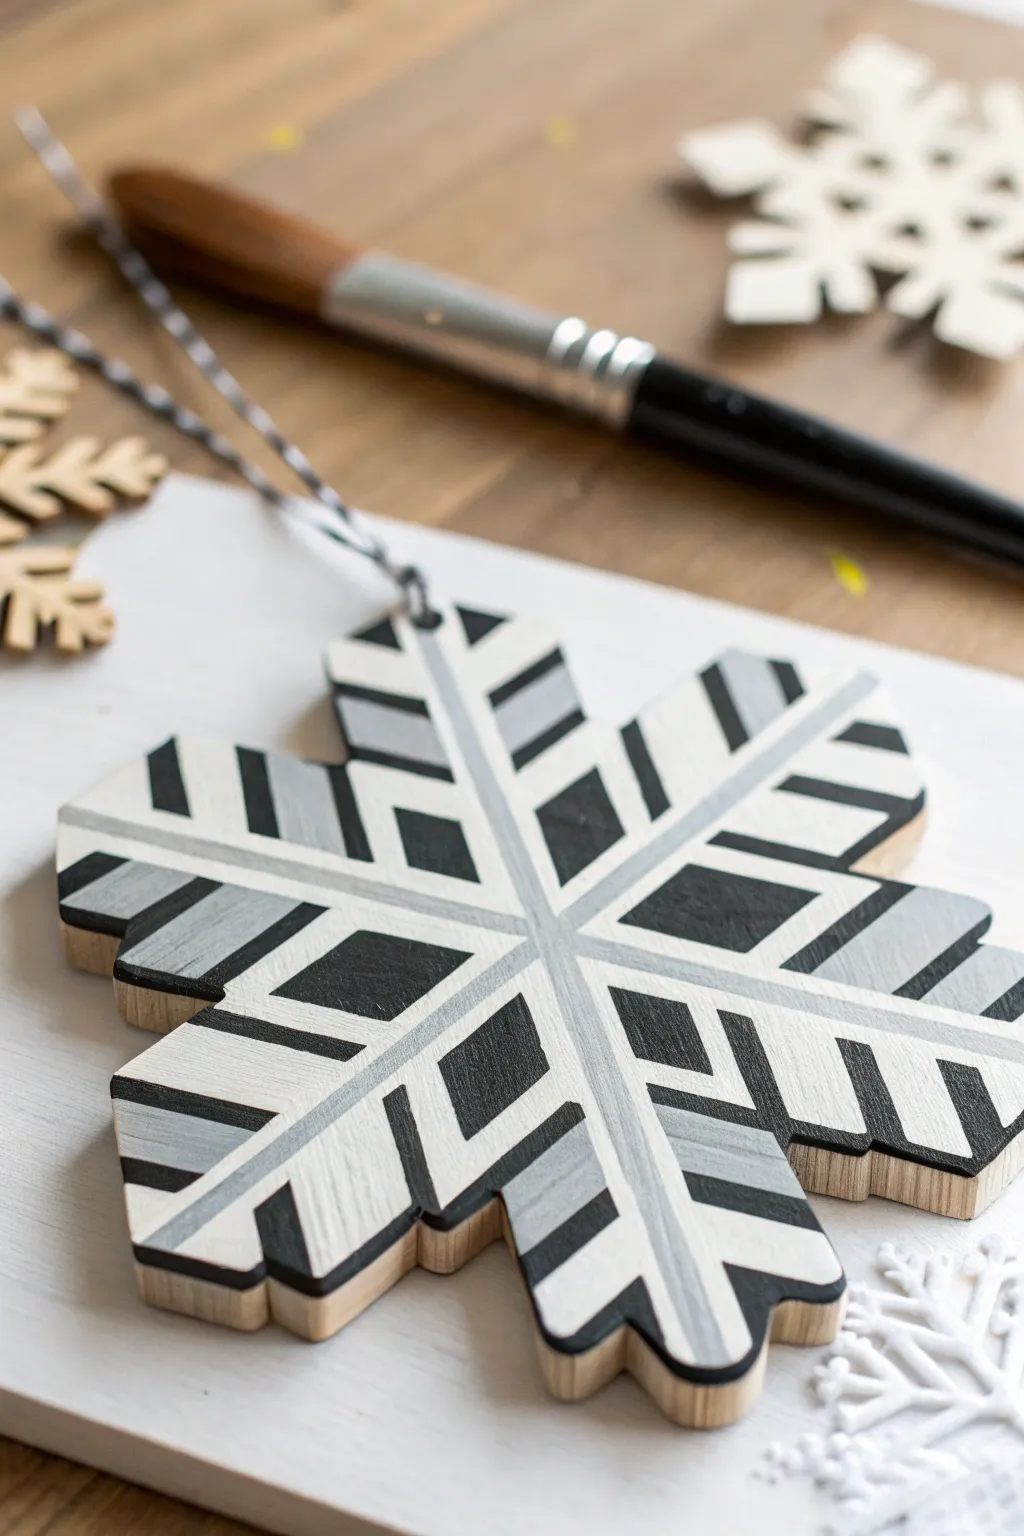

Bring a touch of modern sophistication to your holiday decor with this striking black, white, and gray snowflake. The crisp lines and high-contrast palette transform a simple wooden blank into a contemporary geometric statement piece.
Step-by-Step Tutorial
Materials
- Unfinished wooden snowflake ornament (thick, approx. 4 inches)
- Acrylic craft paint: Matte Black
- Acrylic craft paint: Titanium White
- Acrylic craft paint: Cool Gray (or mix black and white)
- Flat shader brush (size 4 or 6)
- Small round detail brush (size 0 or 1)
- Painter’s tape or masking tape (optional but helpful)
- Ruler
- Pencil
- Black and white baker’s twine for hanging
- Palette or small dish for mixing
- Water cup and paper towels
Step 1: Preparation and Base Coat
-
Sand the surface:
Before painting, lightly sand your wooden snowflake if there are any rough splinters or uneven edges. Wipe away the dust with a barely damp cloth or a dry paper towel to ensure a smooth painting surface. -
Apply the white base:
Using your larger flat brush, coat the entire top surface of the snowflake with Titanium White acrylic paint. This primer layer ensures your colors pop later. -
Check for coverage:
Wood tends to soak up the first layer of paint. If the wood grain is still visible after the first coat dries (about 10-15 minutes), apply a second thin coat of white for a solid, opaque background.
Step 2: Mapping the Design
-
Mark the center lines:
Once the white base is completely dry, use a ruler and pencil to lightly draw a straight line down the center of each snowflake arm, connecting them all in the middle. These will become your gray center stripes later. -
Sketch the chevron pattern:
Lightly sketch the angled geometric shapes on each arm. The pattern consists of V-shapes or chevrons radiating outward. Don’t press too hard with the pencil; you just need faint guidelines to know where to paint black versus gray. -
Plan your palette:
Looking at the reference, notice the alternating pattern. Decide which sections will be solid black, which will stay white, and which will be gray. I designate the center spine as gray, and alternating angled blocks as black.
Clean Lines Hack
For ultra-crisp edges without a steady hand, cut tiny strips of painter’s tape or washi tape to mask off the areas you want to keep white.
Step 3: Painting the Geometric Blocks
-
Paint the center spine:
Mix a medium cool gray on your palette. Use a steady hand and your flat brush to paint the straight lines running down the center of every arm. This anchors the design. -
Fill the black sections:
Switch to Matte Black. Carefully fill in the specific geometric blocks you mapped out. Start from the center and work your way out to the tips to avoid smudging your work with your hand. -
Refine the edges:
Use your smallest detail brush to sharpen the corners of the black shapes. The crispness of these lines is what gives the ornament its modern look. -
Add gray accents:
If your pattern includes gray blocks alongside the black ones (as seen in the outer tips of the reference), fill those in now using the same gray mix you used for the center spine. -
Clean up stray marks:
If painting freehand resulted in any wobbly lines, use a clean detail brush with a little Titanium White to touch up the negative space between the colored blocks.
Make It Sparkle
Mix a tiny pinch of fine silver glitter into your gray paint before applying it to the center stripe for a subtle, frosty shimmer.
Step 4: Finishing Details
-
Paint the edges:
Decide if you want to leave the thick wooden edge natural or paint it. Painting the vertical edges black creates a bold frame, while leaving them natural (as shown) adds warmth. -
Let it cure:
Allow the snowflake to dry completely for at least one hour. Acrylics dry fast to the touch, but a full cure prevents the paint from peeling if it scrapes against pine needles. -
Attach the hanger:
Cut a 6-inch length of black and white baker’s twine. Thread it through the hole at the top of one of the snowflake arms. -
Secure the knot:
Tie the ends of the twine securely. You can hide the knot by pulling it down near the hole or leave it at the top for a more rustic look.
Now you have a sleek, modern ornament ready to add a graphic pop to your tree or gift wrapping


Metallic Snowflake Paint Finish for Shiny Dimension
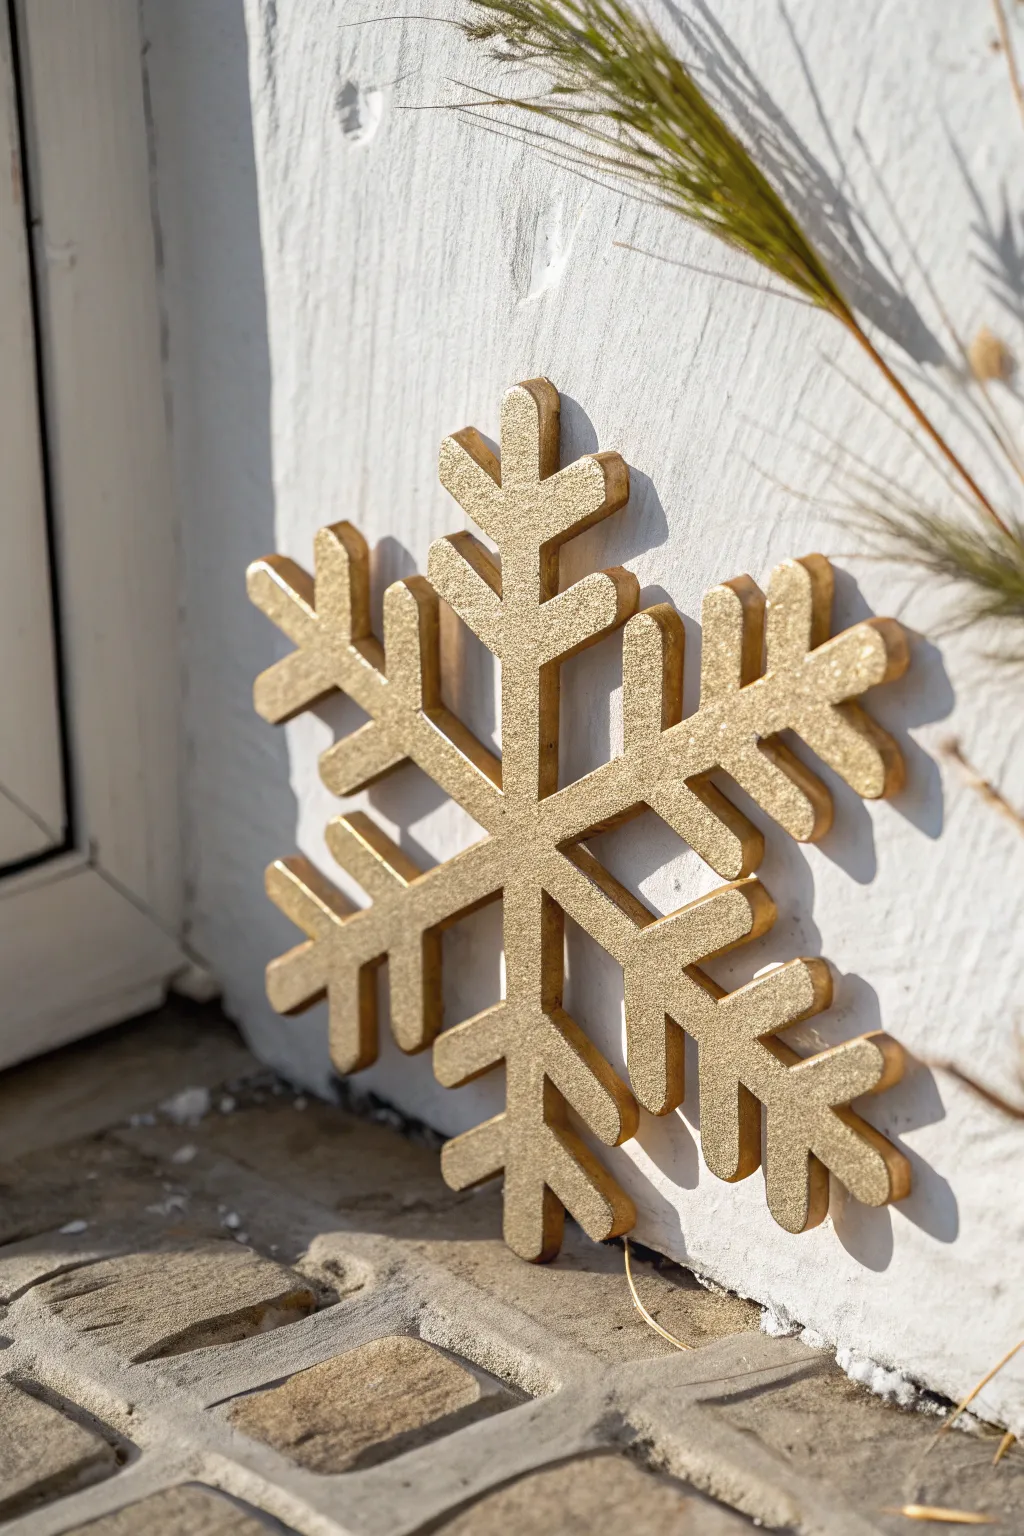

Transform a plain wooden snowflake cutout into a sophisticated, high-end holiday decoration using simple metallic paints. This project creates a stunning faux-metal finish that catches the light beautifully, adding a touch of warm elegance to your seasonal decor.
How-To Guide
Materials
- Unfinished wooden or MDF snowflake cutout (about 1/2 inch to 1 inch thick)
- Fine-grit sandpaper (220-grit)
- Tack cloth or slightly damp rag
- White acrylic primer or gesso
- Metallic gold acrylic paint (rich gold or antique gold)
- Champagne or light gold fine glitter paint (optional topcoat)
- Medium flat synthetic paintbrush
- Small detail paintbrush
- Clear acrylic sealer spray (satin or gloss finish)
- Disposable plate or palette
- Drop cloth or newspapers
Step 1: Preparation and Priming
-
Sand the surface:
Begin by lightly sanding the entire surface of your wooden snowflake. Pay special attention to the cut edges, which are often rough on pre-cut wood shapes. -
Clean the dust:
Wipe away all the sanding dust properly using a tack cloth or a slightly damp rag to ensure the paint adheres smoothly. -
Apply the first coat of primer:
Squeeze a dollop of white primer onto your palette. Using your flat brush, apply an even coat to the face of the snowflake. I find priming is crucial here because raw wood tends to soak up metallic paint, making it look dull. -
Prime the edges:
Switch to your smaller brush or turn the flat brush on its side to work the primer into all the interior nooks and intricate edges of the snowflake design. -
Let it dry:
Allow the primer to dry completely according to the bottle instructions, usually about 20-30 minutes. -
Sand lightly again:
Once dry, run your sandpaper very gently over the primed surface to knock down any raised wood grain or brush strokes. -
Apply second primer coat:
Add a second thin coat of white primer to ensure a solid, opaque base. This bright white background will help the gold paint pop later.
Rough Edges?
If the inner cutouts are too tight to sand, use an emery board or a nail file. These fit perfectly into small crevices to smooth out rough MDF fibers.
Step 2: Applying the Metallic Finish
-
Mix your metallic paint:
Give your metallic gold paint a good shake or stir to ensure the mica particles are evenly distributed. -
Paint the edges first:
Start by painting the intricate inner edges and outer rim of the snowflake using your small detail brush. It’s easier to catch drips on the flat surface now than to fix edges later. -
Paint the face:
Using the medium flat brush, apply the gold paint to the front flat surface using long, even strokes. Try to brush in the direction of the snowflake arms. -
Dry and repeat:
Let this first metallic coat dry to the touch. It will likely look streaky, but don’t worry—metallics usually need layers. -
Apply second gold coat:
Apply a second coat of gold paint. Use a soft hand to avoid dragging the previous layer of paint. -
Check for coverage:
Inspect your snowflake in good lighting. If you still see white showing through, apply a third thin coat.
Step 3: Adding Dimension and Sealing
-
Add a shimmer topcoat:
For that extra sparkle seen in the photo, brush on a very thin layer of champagne or fine glitter glaze over the dry gold paint. This adds depth without hiding the metallic color. -
Stipple for texture:
While the shimmer coat is wet, gently dab (stipple) the surface with the tip of a dry brush to create a subtle texture that mimics cast metal. -
Let dry fully:
Allow the snowflake to cure completely, ideally for a few hours. -
Seal the project:
Take the snowflake outside or to a well-ventilated area and spray it with a clear acrylic sealer. A satin finish works best to protect the paint without making it look like plastic.
Make It Vintage
After the gold dries, dry-brush a tiny amount of dark brown or bronze paint on the edges. This creates an aged, antique brass look instantly.
Once fully dry, your gleaming snowflake is ready to lean on a mantel or hang as a festive focal point
BRUSH GUIDE
The Right Brush for Every Stroke
From clean lines to bold texture — master brush choice, stroke control, and essential techniques.
Explore the Full Guide
Ombre Wooden Snowflake From Deep Blue to White
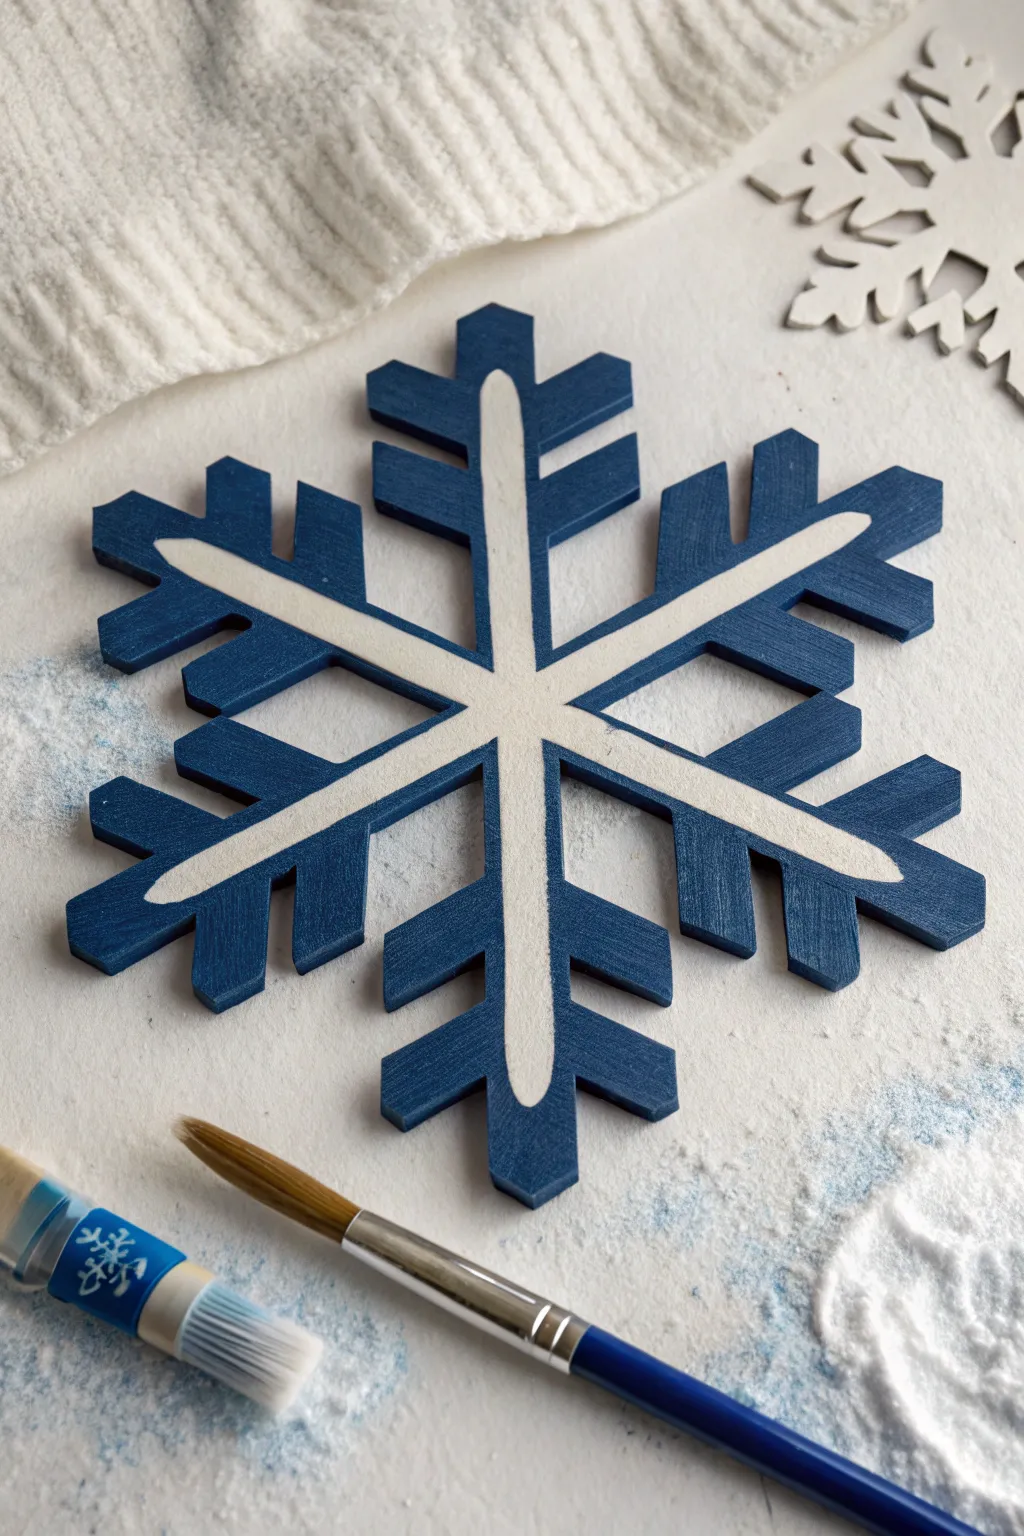
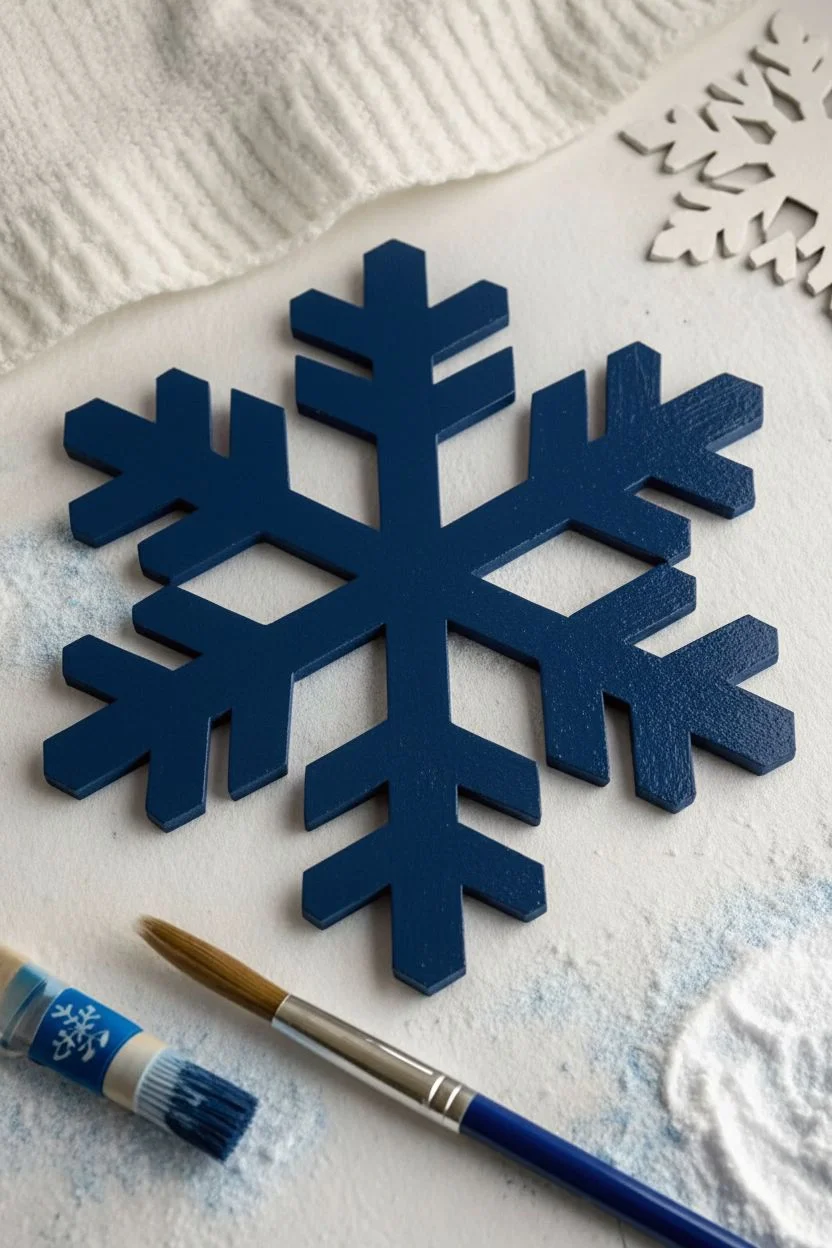
This striking wooden snowflake project relies on clean lines and bold contrast rather than a subtle fade. The deep navy blue edges framing a stark white starburst center create a modern, graphic look perfect for winter decor.
Step-by-Step Tutorial
Materials
- Wooden snowflake cutout (raw wood)
- Deep navy blue acrylic paint
- Titanium white acrylic paint
- Small flat brush (for edges)
- Fine detail liner brush or round brush (size 0 or 1)
- Pencil (optional)
- Painter’s tape or a straight edge (optional, for steady hands)
- Matte finish sealant spray
Step 1: Preparation & Base Coat
-
Sand the Wood:
Before you even open the paint, run a piece of fine-grit sandpaper over your wooden snowflake. You want to remove any splinters or rough patches, especially on the top surface where your precise lines will go. -
Wipe Clean:
Use a tack cloth or a slightly damp paper towel to remove all the sawdust. Dust creates bumps in paint, ruining the smooth finish we’re aiming for. -
Plan the Design:
Study the snowflake’s geography. This design highlights the central intersection and the primary spokes. Visualize where the white center line will stop and the blue branches will begin.
Step 2: Painting the Deep Blue
-
Start with the Edges:
Load your small flat brush with the deep navy blue paint. Begin by painting the vertical sides (the thickness) of the wood first. This prevents globs of paint from pooling on the top surface later. -
Paint the Top Spokes:
Now, move to the top face of the snowflake. Paint the entire surface blue initially *except* for the very center if you want to save white paint, though covering it all in blue first is fine too if your white is opaque enough. I prefer to paint the outer branches completely blue. -
Apply a Second Coat:
Deep blues can be streaky. Once the first coat is dry to the touch (usually 15 minutes), apply a second coat to ensure a rich, solid navy color. -
Let it Dry Fully:
This is crucial. The blue paint must be 100% dry before you attempt to layer the white on top, otherwise, they will mix into a muddy light blue.
Uneven Lines?
If you struggle with steady lines, lightly draw your white starburst with a white charcoal pencil or chalk first. It wipes off easily if you make a mistake.
Step 3: Creating the White Starburst
-
Load the Detail Brush:
Switch to your fine liner or round detail brush. Dip it into the titanium white paint. You want the paint to be fluid but not watery; add a tiny drop of water if it feels too thick. -
Mark the Center:
Start exactly in the middle of the snowflake. Paint a small dot or circle to anchor your design. -
Draw the Primary Lines:
Carefully drag your brush from the center point outward along the main axis of a spoke. Stop the line just before you reach the very tip of the spoke. -
Widen the Lines:
Go back over that initial white line to thicken it slightly. You want a distinct white stripe that sits comfortably in the middle of the blue wood, leaving a border of blue visible on both sides. -
Create the Star Points:
Repeat this for all six main spokes. Try to keep the width of the white line consistent on each arm. -
Refine the Rounds:
At the tip of each white line (near the end of the spoke), curve the brush stroke to create a soft, rounded end rather than a sharp square stop. -
Sharpen Edges:
If your hand shook a little, don’t worry. Once the white is dry, you can take a tiny bit of blue on your smallest brush and touch up the borders to make the lines crisp again. -
Check Opacity:
White over dark blue often needs two coats. Let the first white layer dry, then retrace your steps with a second layer for a bright, opaque pop.
Add Some Sparkle
While the white paint is still wet, sprinkle a pinch of ultra-fine iridescent glitter just on the white sections. It simulates fresh frost against the dark blue.
Step 4: Finishing Touches
-
Inspect the Sides:
Check the edges of the wood one last time. Did any white paint drip down? Touch up with blue if needed. -
Seal the Project:
Once absolutely everything is dry (give it an hour or two), take it to a well-ventilated area. Spray a light coat of matte sealant over the snowflake to protect the paint and give it a professional, finished sheen.
Hang your finished snowflake where the light can catch that crisp contrast between the snow-white center and the midnight blue background
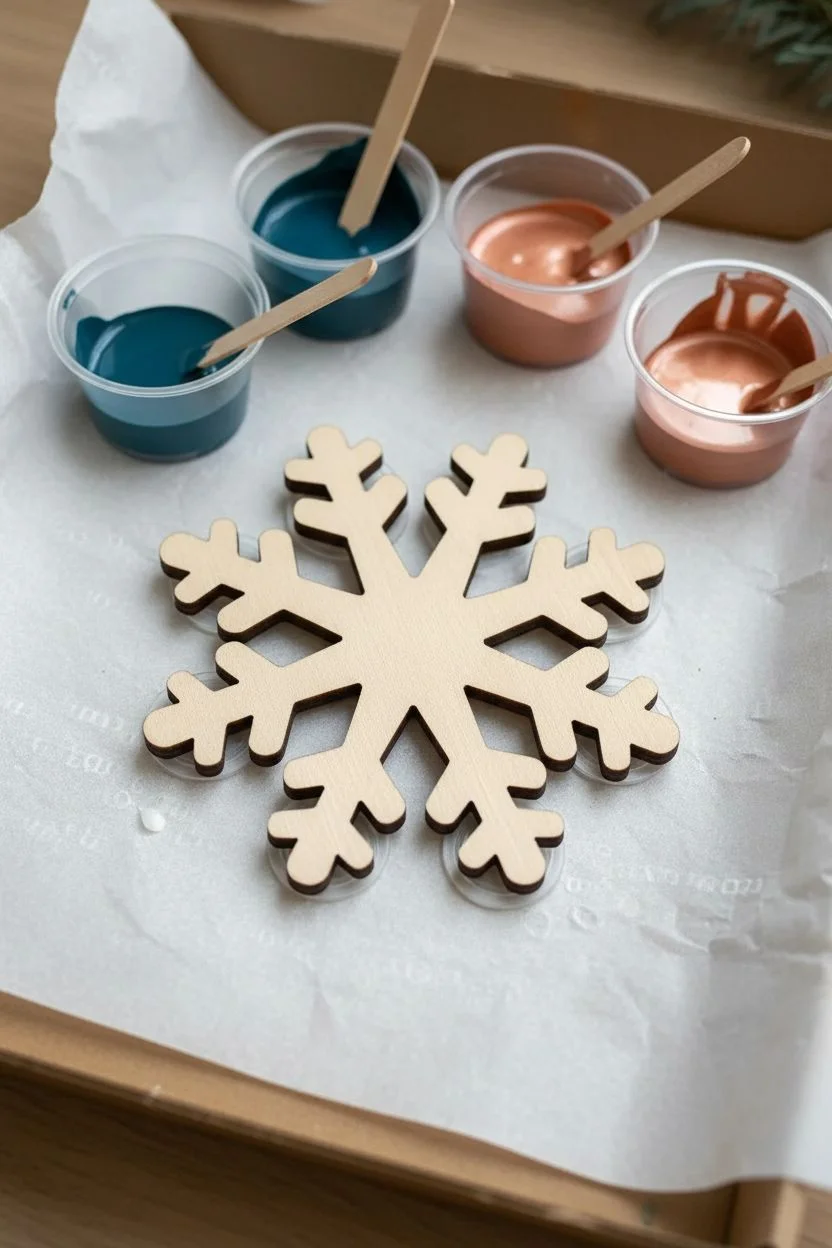
Candy Pastel Snowflakes for Soft Winter Color
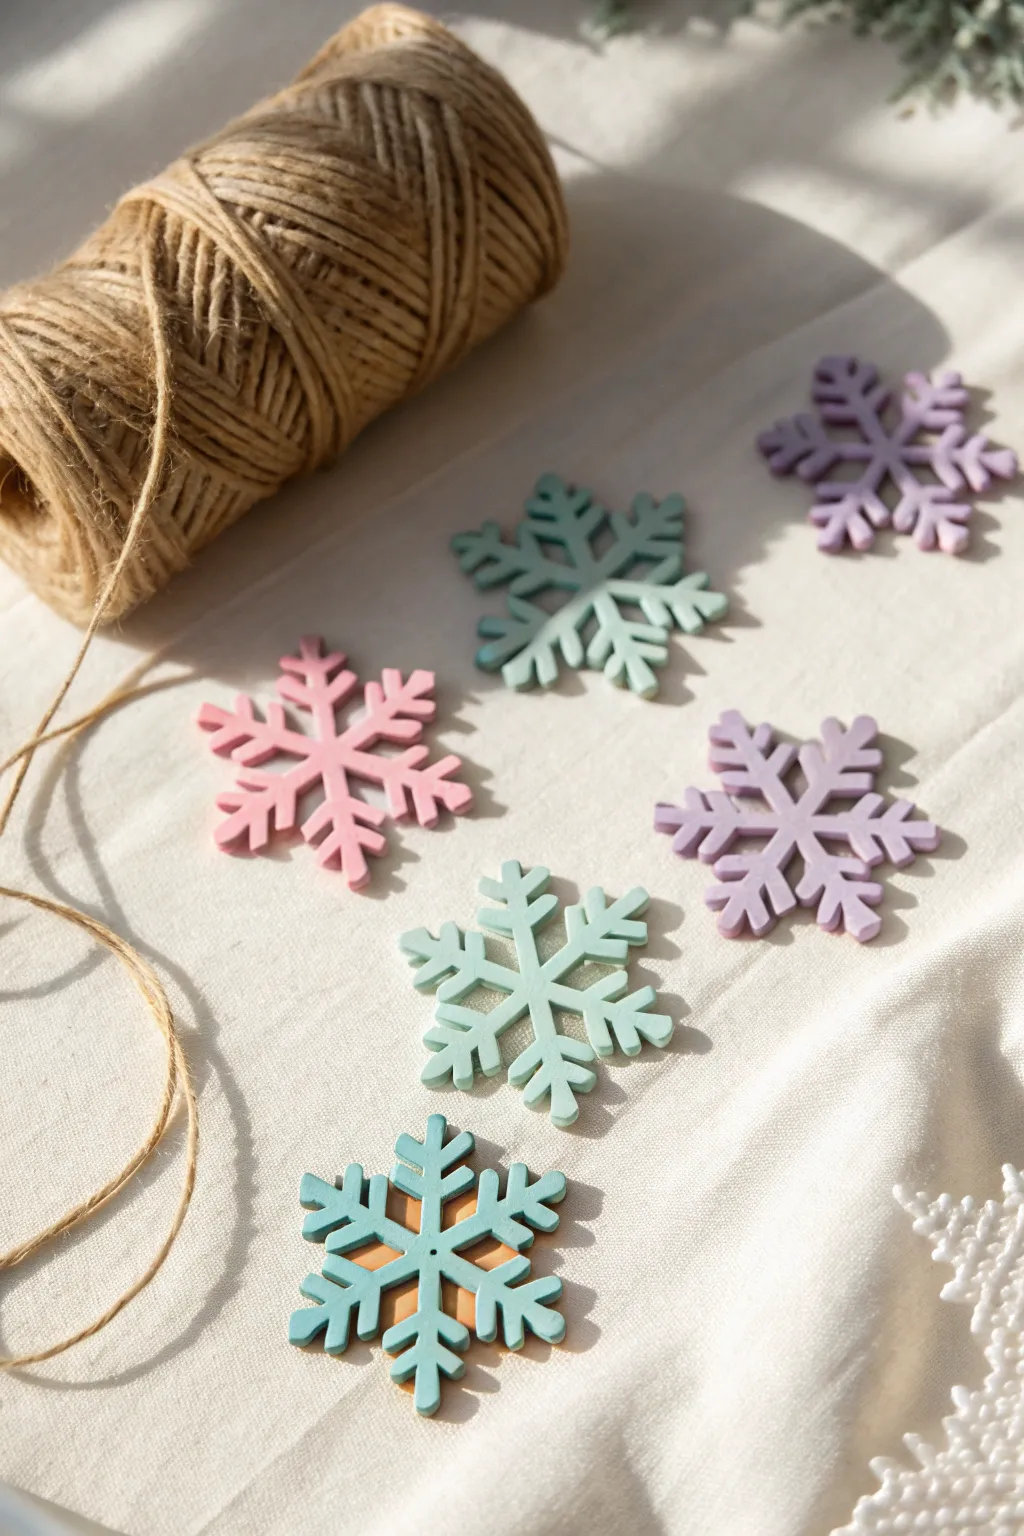
Bring a whisper of softness to your winter decor with these charming wooden snowflakes painted in dreamy candy-colored pastels. The matte finish and gentle hues create a soothing, modern alternative to traditional traditional red and green holiday palettes.
Step-by-Step Guide
Materials
- Unfinished wooden snowflake cutouts (approx. 2-3 inches wide)
- Acrylic craft paints (pastel pink, lavender, mint green, soft teal)
- Small flat synthetic paintbrush
- Fine-grit sandpaper (220 grit)
- White acrylic paint (for priming)
- Jute twine or string for hanging
- Paper plate or palette
- Matte spray sealant (optional)
- Paper towels and water cup
Step 1: Preparation
-
Sand the surfaces:
Begin by lightly sanding your wooden snowflake cutouts. Pay special attention to the edges and the intricate cut-out spaces where splinters often hide. -
Wipe clean:
Use a dry cloth or paper towel to remove all sanding dust. It is crucial the surface is completely clean so the paint adheres smoothly. -
Apply a base coat:
Paint a thin layer of white acrylic paint over the entire front surface of the snowflake. This acts as a primer and ensures your pastel colors will pop rather than soaking into the darker wood grain. -
Let it dry:
Allow the white base coat to dry completely to the touch before moving on to colors.
Uneven Coverage?
If the wood grain still shows through after two coats, dab paint on rather than brushing. This ‘stippling’ technique deposits more pigment into the wood texture.
Step 2: Painting
-
Mix custom pastels:
If you don’t have pre-mixed pastels, mix your standard acrylics with a generous amount of white paint. Aim for a ‘candy’ look—soft lilac, baby pink, and minty teal. -
Paint the first coat:
Using a small flat brush, apply your first color to one of the snowflakes. Use long, smooth strokes from the center outward to avoid pooling paint in the detail holes. -
Address the sides:
Don’t forget the edges! Carefully dab paint into the nooks and crannies of the laser-cut sides. I find a slightly smaller detail brush works best for these tight spots. -
Repeat for all colors:
Continue painting the rest of your batch, alternating between your pink, lavender, and mint shades to create a balanced set. -
Dry and assess:
Let the first coat dry fully. Wooden shapes are porous, so the first coat might look streaky or uneven. -
Apply second coat:
Apply a second coat of the pastel paint to ensure solid, opaque coverage. This layer will give you that smooth, matte finish seen in the completed project.
Add Sparkle
While the second coat is wet, sprinkle ultra-fine iridescent glitter over the paint. It adds a frosty shimmer without overpowering the soft pastel colors.
Step 3: Finishing Touches
-
Check for drips:
While the paint is still wet, inspect the edges and punch-out holes for any paint drips or webbing and smooth them out with a clean, damp brush. -
Let cure:
Allow the snowflakes to dry completely, preferably overnight, to ensure the paint hardens fully. -
Seal (Optional):
For durability, lightly mist the finished pieces with a matte spray sealant. Avoid glossy sprays if you want to maintain the soft, velvety look. -
String them up:
Cut lengths of jute twine about 6 inches long. -
Attach the hanger:
Thread the twine through one of the snowflake’s top loops or holes. Tie a simple overhand knot at the ends to create a rustic hanging loop.
These gentle pastel snowflakes are ready to tie onto gifts or hang on your tree for a cozy touch

PENCIL GUIDE
Understanding Pencil Grades from H to B
From first sketch to finished drawing — learn pencil grades, line control, and shading techniques.
Explore the Full Guide
Neon Pop Snowflakes for Bold Nontraditional Decor
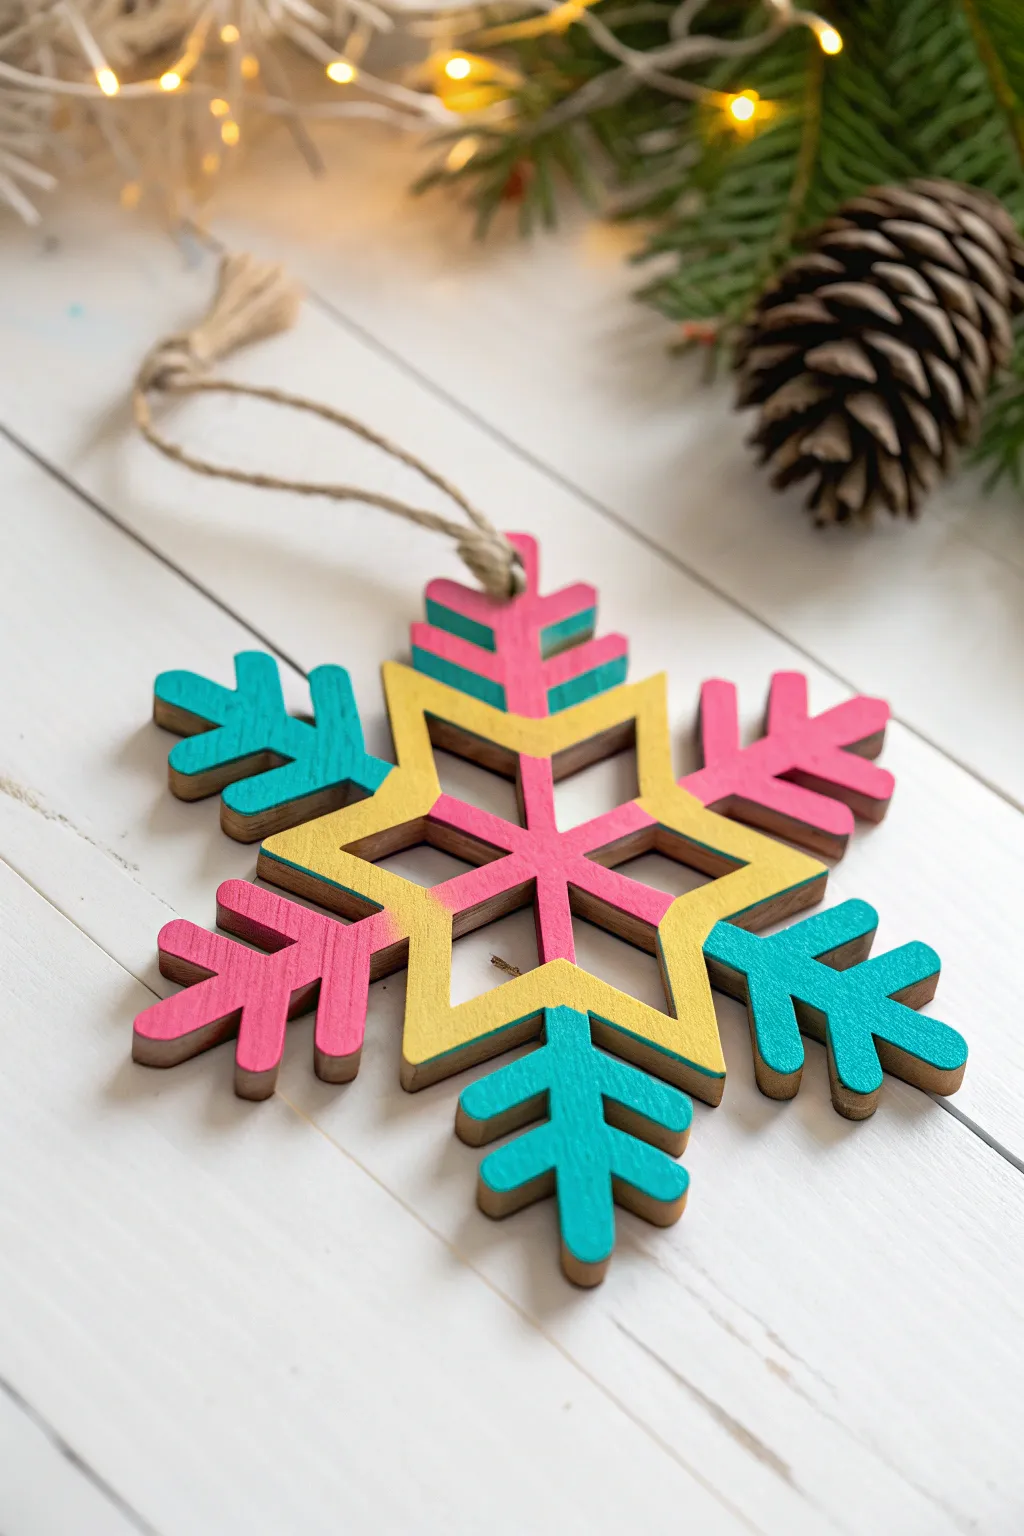
Brighten up your holiday tree with this vibrant twist on classic winter decor. This tutorial guides you through painting a wooden snowflake cutout in bold electric pink, turquoise, and yellow for a standout, modern look.
Detailed Instructions
Materials
- Wooden snowflake cutout (laser-cut style with open segments)
- Acrylic craft paints: Neon Pink, Turquoise/Teal, Bright Yellow
- Small flat shader brush (size 2 or 4)
- Fine liner brush (size 0 or 00)
- Jute twine or rustic string
- Scissors
- Paper plate or palette
- Cup of water and paper towels
- Clear matte or satin varnish (optional)
Step 1: Preparation and Base Planning
-
Clean surface:
Begin by wiping down your wooden snowflake with a dry cloth to remove any sawdust or laser-cutting residue. If there are rough edges, give them a quick swipe with fine-grit sandpaper. -
Map your colors:
Study the symmetry of your snowflake. Notice it has a central star shape and six radiating arms. Decide which segments will be pink, yellow, or turquoise to create a balanced pattern. -
Pour paints:
Squeeze a dime-sized amount of neon pink, turquoise, and bright yellow onto your palette. I like to keep them slightly separated so they don’t mix accidentally.
Clean Lines Secret
Use a small piece of painter’s tape or wash tape to mask off sections if you have trouble keeping a steady hand on the geometric lines.
Step 2: Painting the Center Star
-
Yellow start:
Load your small flat brush with bright yellow paint. Carefully paint slightly less than half of the central star shape, focusing on two opposing points of the star. -
Continue the pattern:
Paint the other four points of the central star outline in yellow as well. Keep your strokes smooth and try not to let paint drip into the cutout holes. -
Pink accents:
Switch to a clean brush or wash your current one thoroughly. Using neon pink, paint the inner cross-bars that connect the center of the star. This creates an inner ‘flower’ effect. -
Touch up inner edges:
Use your fine liner brush to carefully neaten the edges where the pink meets the yellow. Clean lines here make the geometric shape pop.
Glitter Upgrade
While the second coat of paint is still wet, sprinkle ultra-fine iridescent glitter on just the turquoise sections for an icy, frosted effect.
Step 3: Painting the Arms
-
Turquoise branches:
Select two opposing arms of the snowflake. Using the flat brush and turquoise paint, cover the entire surface, including the small ‘branches’ coming off the main stem. -
Pink branches:
Move clockwise to the next arm. Paint this entire arm using the neon pink acrylic. Repeat this on the arm directly opposite it to maintain symmetry. -
Remaining turquoise:
Paint the final pair of opposing arms in turquoise. You should now have an alternating pattern: turquoise, pink, turquoise, pink, turquoise, pink (spiraling around). -
Check the sides:
Inspect the dark, laser-cut edges of the wood. Decide if you want to leave them natural brown for contrast or paint them to match the top face. Natural edges often look cleaner.
Step 4: Finishing Touches
-
Second coat:
Neon paints can sometimes be translucent. Once the first layer is dry to the touch (about 10-15 minutes), apply a second coat to ensure the colors are solid and opaque. -
Protect the finish:
Allow the paint to dry completely. If you want extra durability, lightly brush on a coat of clear matte or satin varnish over the entire front surface. -
Prepare the hanger:
Cut a 6-inch length of rustic jute twine. This natural texture contrasts beautifully with the modern neon colors. -
Thread the loop:
Locate the hole at the top of one of the snowflake arms. Thread one end of the twine through the hole. -
Secure the knot:
Bring the ends of the twine together and tie a simple overhand knot near the ends to create a secure loop for hanging.
Now hang your modern masterpiece on the tree and enjoy the pop of color
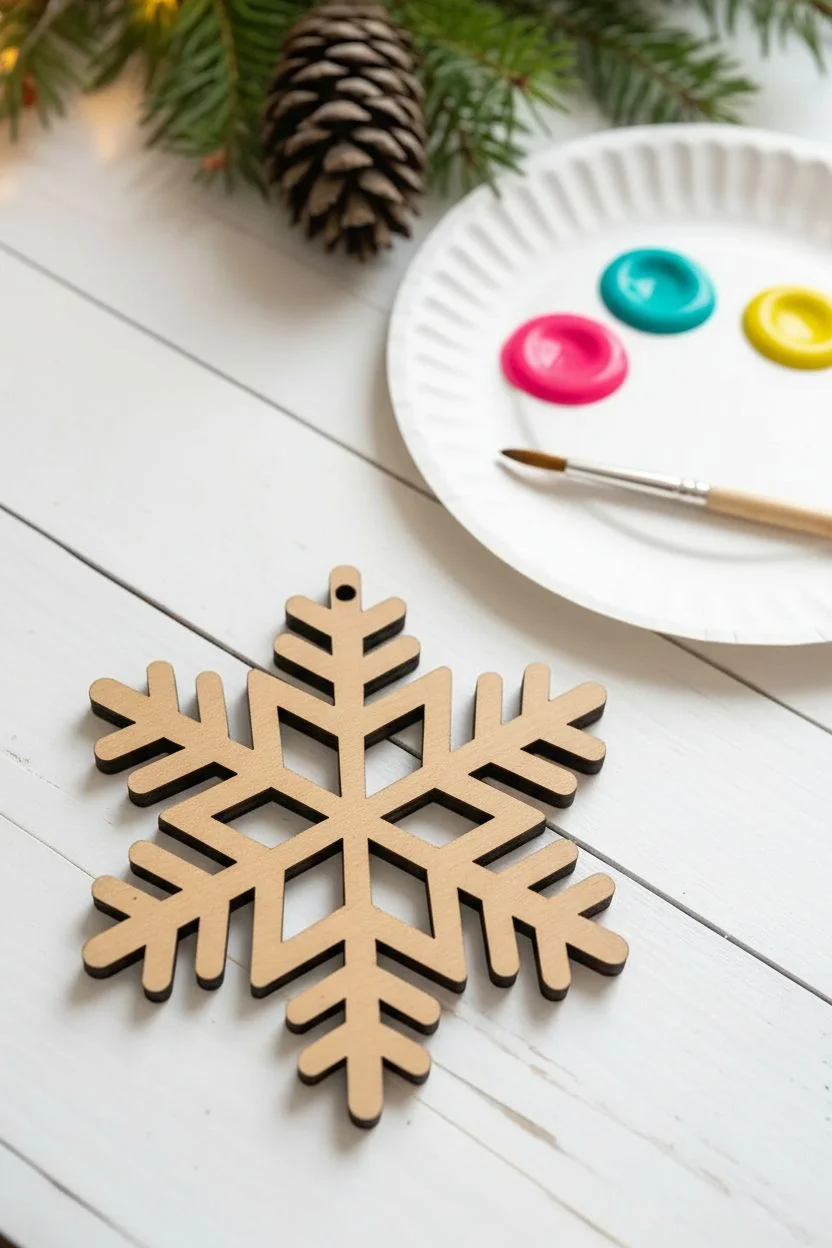
Polka Dot Snowflake Pattern With Dotting Tool Details
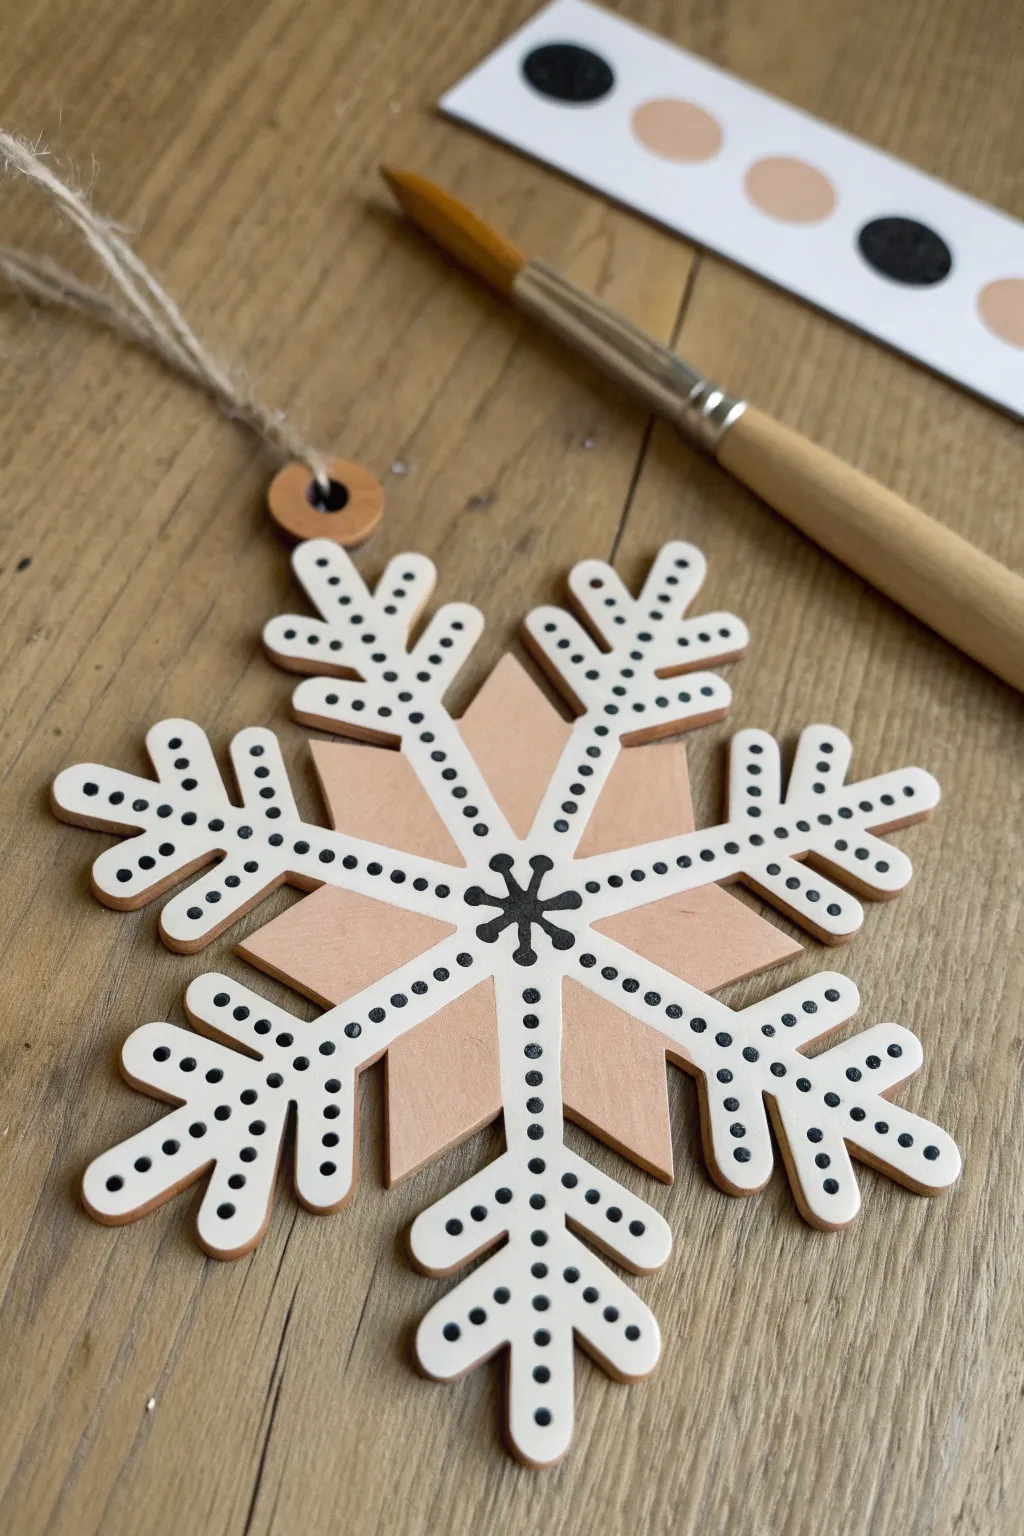
Embrace a minimalist aesthetic with this handcrafted ornament that combines natural wood tones with crisp white details. The striking black polka dot pattern adds a playful, modern touch to the traditional snowflake shape, making it perfect for a contemporary holiday display.
Step-by-Step Guide
Materials
- Unfinished wooden snowflake cutout (laser-cut)
- Acrylic paint: White
- Acrylic paint: Black
- Acrylic paint: Light beige or peach (or mix white with a tiny bit of orange/brown)
- Small flat paintbrush
- Fine detail paintbrush or dotting tool
- Jute twine or string
- Painter’s tape or masking tape
- Palette or small plate for mixing
- Water cup and paper towels
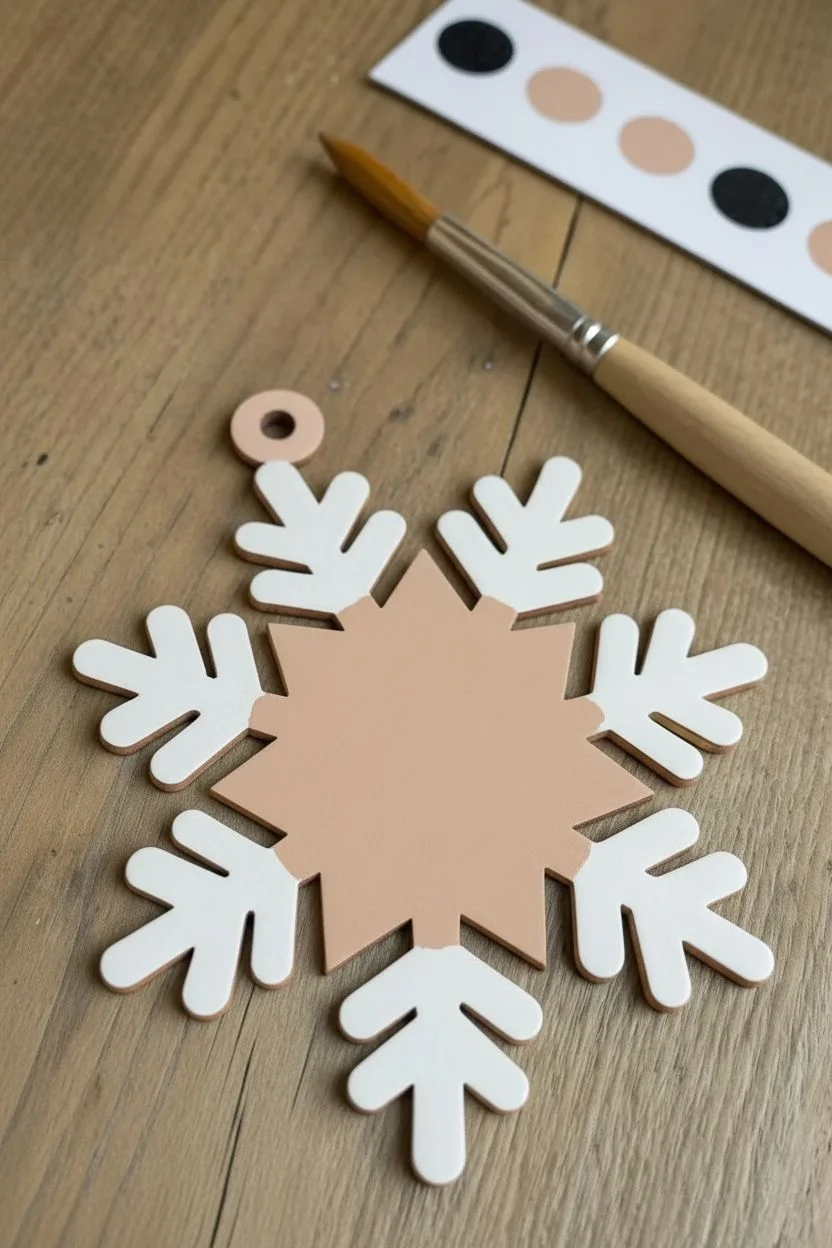
Step 1: Base Preparation
-
Tape the center:
Begin by deciding which areas will remain natural wood or be painted beige. In this design, the central star shape is a soft beige. If you want crisp lines, apply tiny pieces of painter’s tape to mask off the snowflake arms, leaving the center exposed. -
Paint the center star:
Using your light beige or peach acrylic paint, carefully fill in the central star shape of the snowflake. Apply a thin, even coat. -
Let it dry:
Allow the beige center to dry completely. This usually takes about 10-15 minutes. While you wait, wash your brush thoroughly. -
Base coat the arms:
Once the center is dry, paint the six extending arms of the snowflake with white acrylic paint. You can paint right up to the edge of the beige center. -
Refine the edges:
Use a steady hand and a small brush to ensure the line where the white arms meet the beige center is sharp and clean. I find it helpful to rotate the snowflake as I work to get the best angle. -
Paint the loop:
Don’t forget the small loop at the top for hanging. Paint the flat face of this loop with your beige color to match the center, leaving the hole clear. -
Second coat:
White paint on wood often needs a second layer for full opacity. Apply another coat to the white arms once the first is dry to ensure a solid, bright finish.
Dotting Tool Hack
Don’t have a dotting tool? Use the flat head of a nail, a toothpick, or the end of a paintbrush handle. Test on scrap paper first to check the size.
Step 2: Detailing the Pattern
-
Prepare black paint:
Put a small dollop of black acrylic paint on your palette. If it feels too thick, add a tiny drop of water to improve the flow for dotting. -
Create the central asterisk:
Using a very fine detail brush, paint a simple six-pointed asterisk or star shape right in the middle of the beige center. The lines should align with the direction of the snowflake arms. -
Thicken the asterisk tips:
Go back over the tips of your black asterisk and round them out slightly so they look like tiny teardrops pointing inward. -
Start the main spine dots:
Dip your dotting tool (or the non-brush end of a paintbrush) into the black paint. Start at the base of a white arm, near the center, and create a line of dots running up the main spine of the arm. -
Spacing matters:
Try to keep the dots evenly spaced. You should fit about 8-10 dots along the main spine depending on the size of your snowflake. -
Dot the side branches:
Move to the smaller branches extending off the main arm. Add 2-3 smaller dots on each of these little jagged edges. -
Repeat around the circle:
Work your way around each of the six arms, repeating the dotting pattern. Reload your tool frequently to keep the dots consistent in size. -
Check for consistency:
Step back and look at the overall pattern. If any dots look too faint, carefully dab a little more paint on top once the bottom layer is tacky. -
Dry fully:
Set the ornament aside in a safe spot where it won’t be bumped. Let the black craft paint cure completely for at least an hour.
Step 3: Final Assembly
-
Cut the twine:
Cut a piece of jute twine or string, approximately 6 to 8 inches long. -
Attach the hanger:
Thread the twine through the painted loop at the top of the snowflake. Tie a secure knot at the ends to create a loop for hanging.
Make It Sparkle
While the black dots are still wet, sprinkle a tiny pinch of ultra-fine iridescent glitter over them. It adds a subtle frost effect without overpowering the design.
Now your stylish, neutral-toned snowflake is ready to add a modern rustic charm to your holiday decor


Geometric Linework Snowflake Using Tape-Resist Shapes
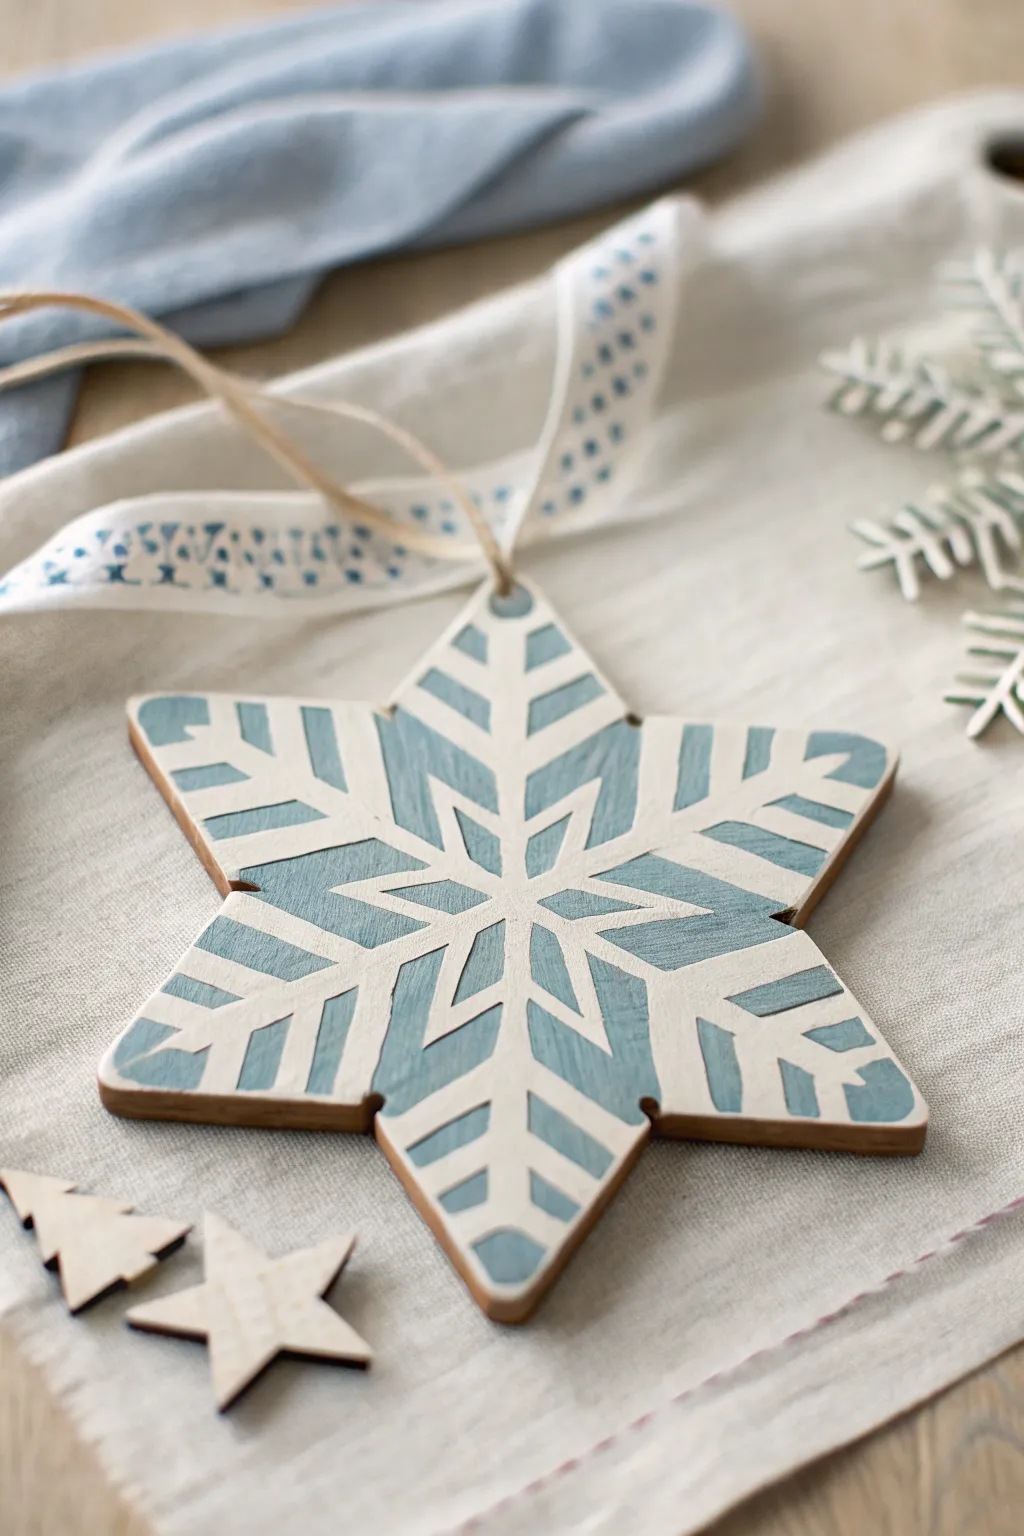
Create a stunning, modern winter ornament using simple masking techniques and a crisp color palette. This project transforms a plain wooden star into an intricate geometric snowflake design with sharp lines and a soft, Scandinavian-inspired blue finish.
Step-by-Step
Materials
- Large wooden star or hexagon cutout (unfinished)
- Painter’s tape or thin masking tape (1/4 inch or narrower is ideal)
- White acrylic paint (matte finish)
- Muted blue-grey acrylic paint (like a slate or dusty blue)
- Flat shader brush (medium size)
- Detail round brush (small)
- Craft knife (X-Acto style)
- Fine-grit sandpaper (220 grit)
- Clear matte sealer (spray or brush-on)
- Natural twine
- Patterned ribbon (blue and white)
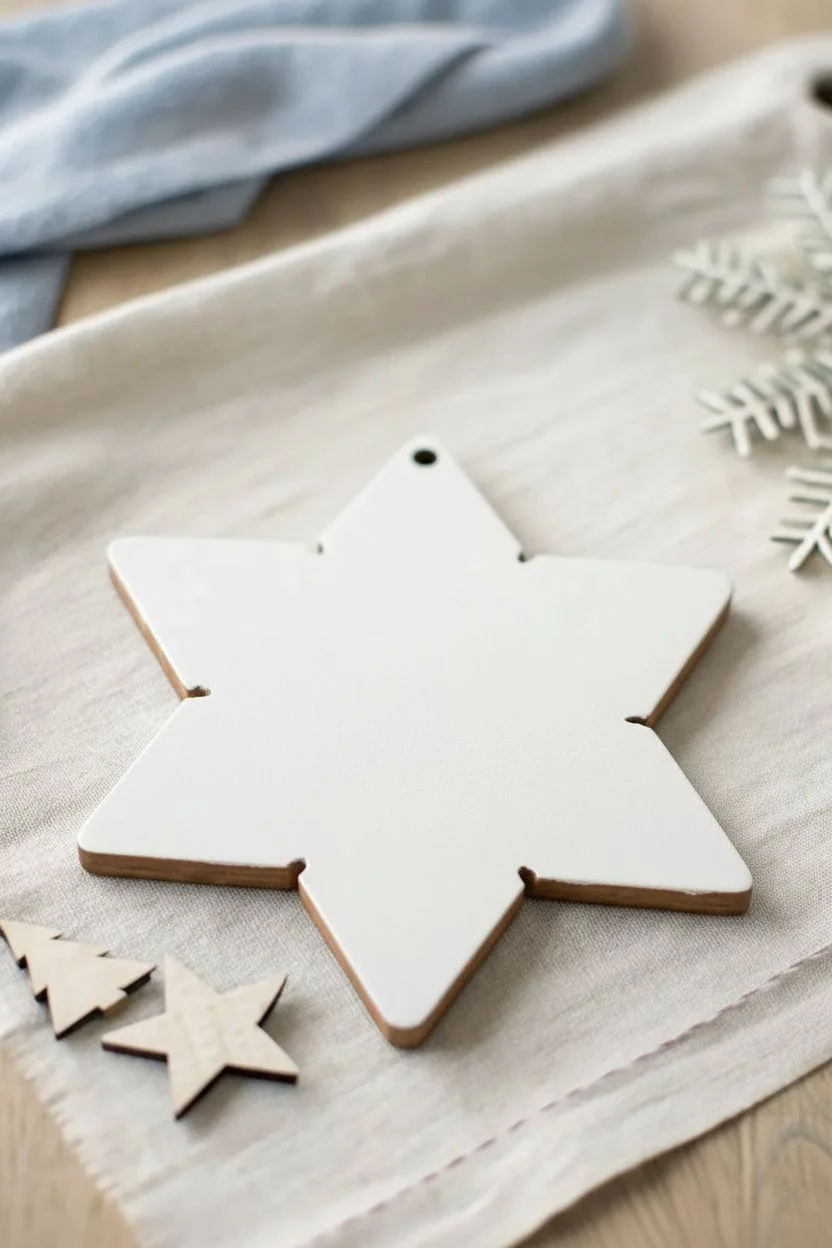
Step 1: Preparation & Base Coat
-
Sand the Wood:
Begin by lightly sanding your wooden blank, paying special attention to the edges and points. You want a smooth surface so the paint adheres evenly and the tape seals perfectly later on. -
Clean the Surface:
Wipe away all sanding dust with a slightly damp cloth or a tack cloth. Any remaining dust will prevent your tape from sticking properly. -
Apply the Base Color:
Paint the entire front surface of the wood with your white acrylic paint. This will become the sharp geometric lines in the final design. -
Add a Second Coat:
Once dry, apply a second coat of white to ensure full, opaque coverage. I find that thin, even layers dry faster and look smoother than one thick gloppy layer. -
Full Drying Time:
Let the white base coat dry completely. This is crucial—if the paint is even slightly tacky, the tape will peel it up in the next phase.
Step 2: Creating the Mask
-
Mark the Cener:
Lightly mark the absolute center of your star with a pencil to guide your tape placement. -
Create the Main Spokes:
Place thin strips of masking tape extending from the center point out to the tip of each star point. These primary lines mimic the main structure of a snowflake. -
Add Diagonal Spokes:
Place shorter strips of tape extending from the center out toward the V-shaped valleys between the star points. -
Form the Arrows:
Cut small pieces of tape to create the ‘V’ or arrow shapes along the main spokes. You can stick a long piece of tape to a cutting mat, slice it into uniform angled pieces with your craft knife, and then transfer them to the wood. -
Seal the Edges:
Press down firmly on all tape edges with your fingernail or a burnishing tool. This prevents the blue paint from bleeding underneath.
Crisp Line Pro-Tip
Before painting the blue layer, brush a tiny amount of white paint over the tape edges. This seals the gap with the base color, ensuring perfect lines.
Step 3: Painting the Contrast
-
Apply Blue Paint:
Using your flat brush, paint the slate blue color over the entire surface, covering both the exposed white areas and the tape. -
Brush Technique:
Try to brush away from the tape edges rather than pushing paint under them. Start from the center of a masked area and stroke outward. -
Second Contrast Layer:
Apply a second coat of blue if necessary to achieve a solid, rich color without streaks. -
Remove Tape While Damp:
Here is the trick: carefully peel off the tape while the final coat of blue paint is still slightly damp, not fully dry. This helps keep the paint from chipping at the edges. -
Use the Craft Knife:
Use the tip of your craft knife to gently lift the corners of the tape strips without scratching the white base underneath.
Level Up: Glitter Details
Mix a pinch of fine iridescent glitter into your white paint or topcoat to make the ‘snow’ parts of the design sparkle under the tree lights.
Step 4: Finishing Touches
-
Touch Ups:
If any blue paint bled through, use your small detail brush and a tiny bit of white paint to clean up the lines once everything is dry. -
Seal the Ornament:
Apply a coat of clear matte sealer to protect the finish and give the ornament a unified sheen. -
Drill a Hole:
Drill a small hole near the top point of the star if your wooden blank didn’t come with one pre-drilled. -
Attach the Twine:
Thread a loop of natural twine through the hole for the primary hanger. -
Add Ribbon Accent:
Tie a length of decorative blue and white patterned ribbon to the base of the twine loop for an extra festive flair.
Hang your beautiful geometric snowflake on the tree and enjoy the crisp winter charm it adds to your decor
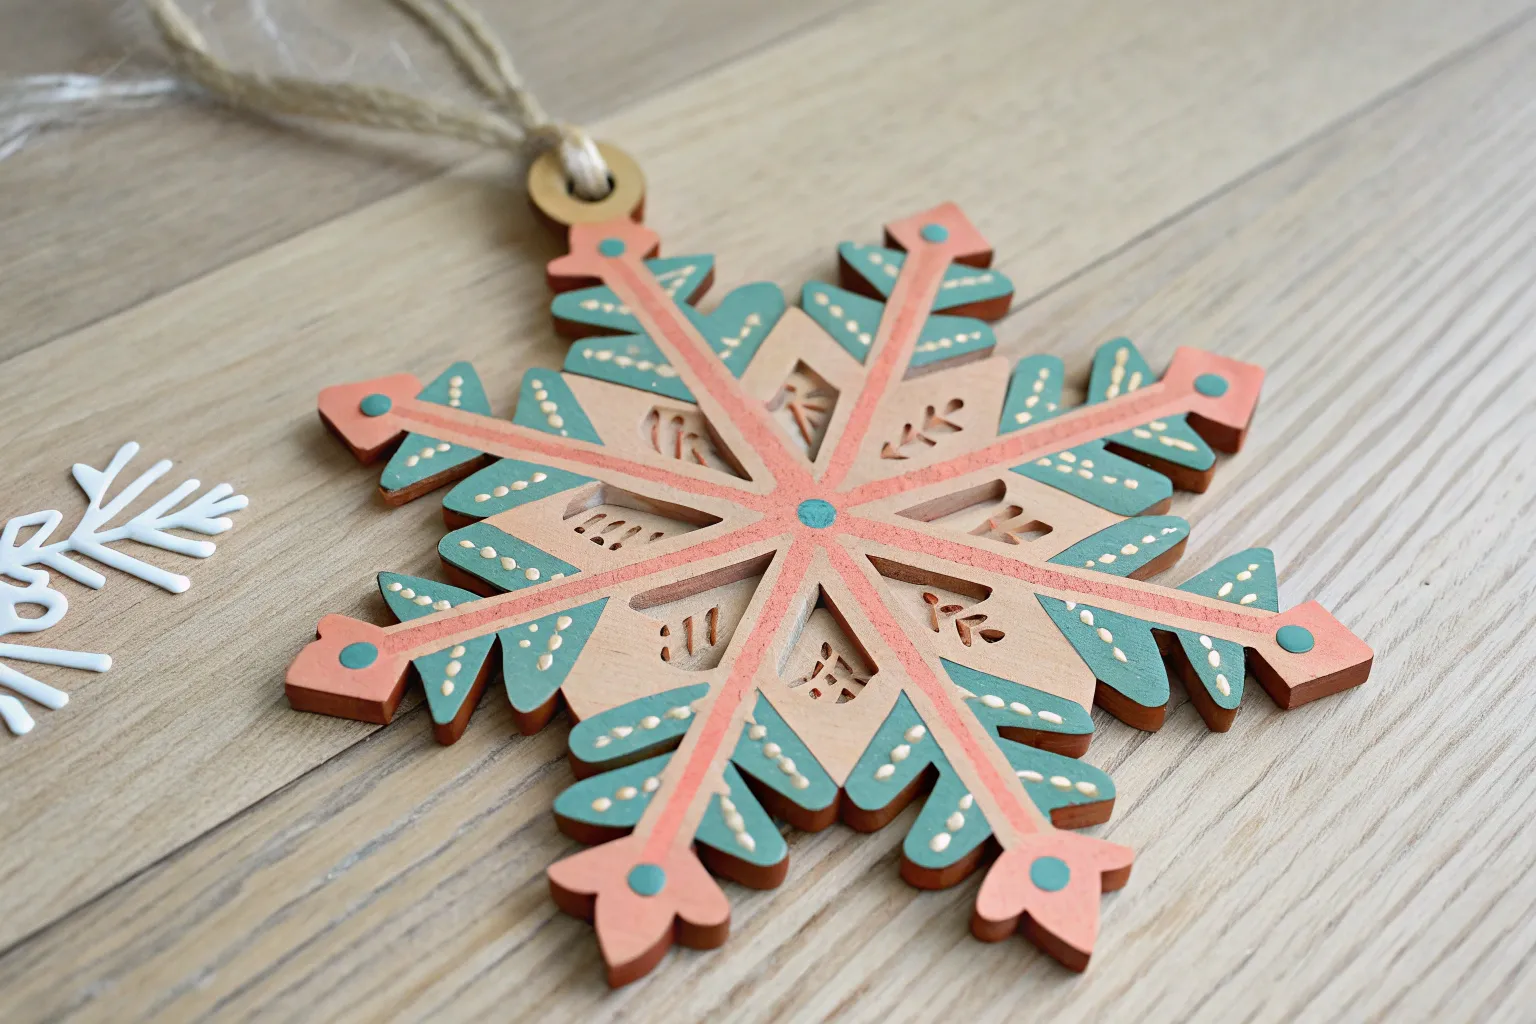
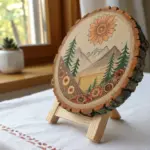
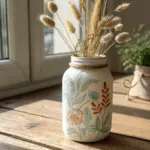
Scandinavian Folk Pattern Snowflakes With Simple Motifs
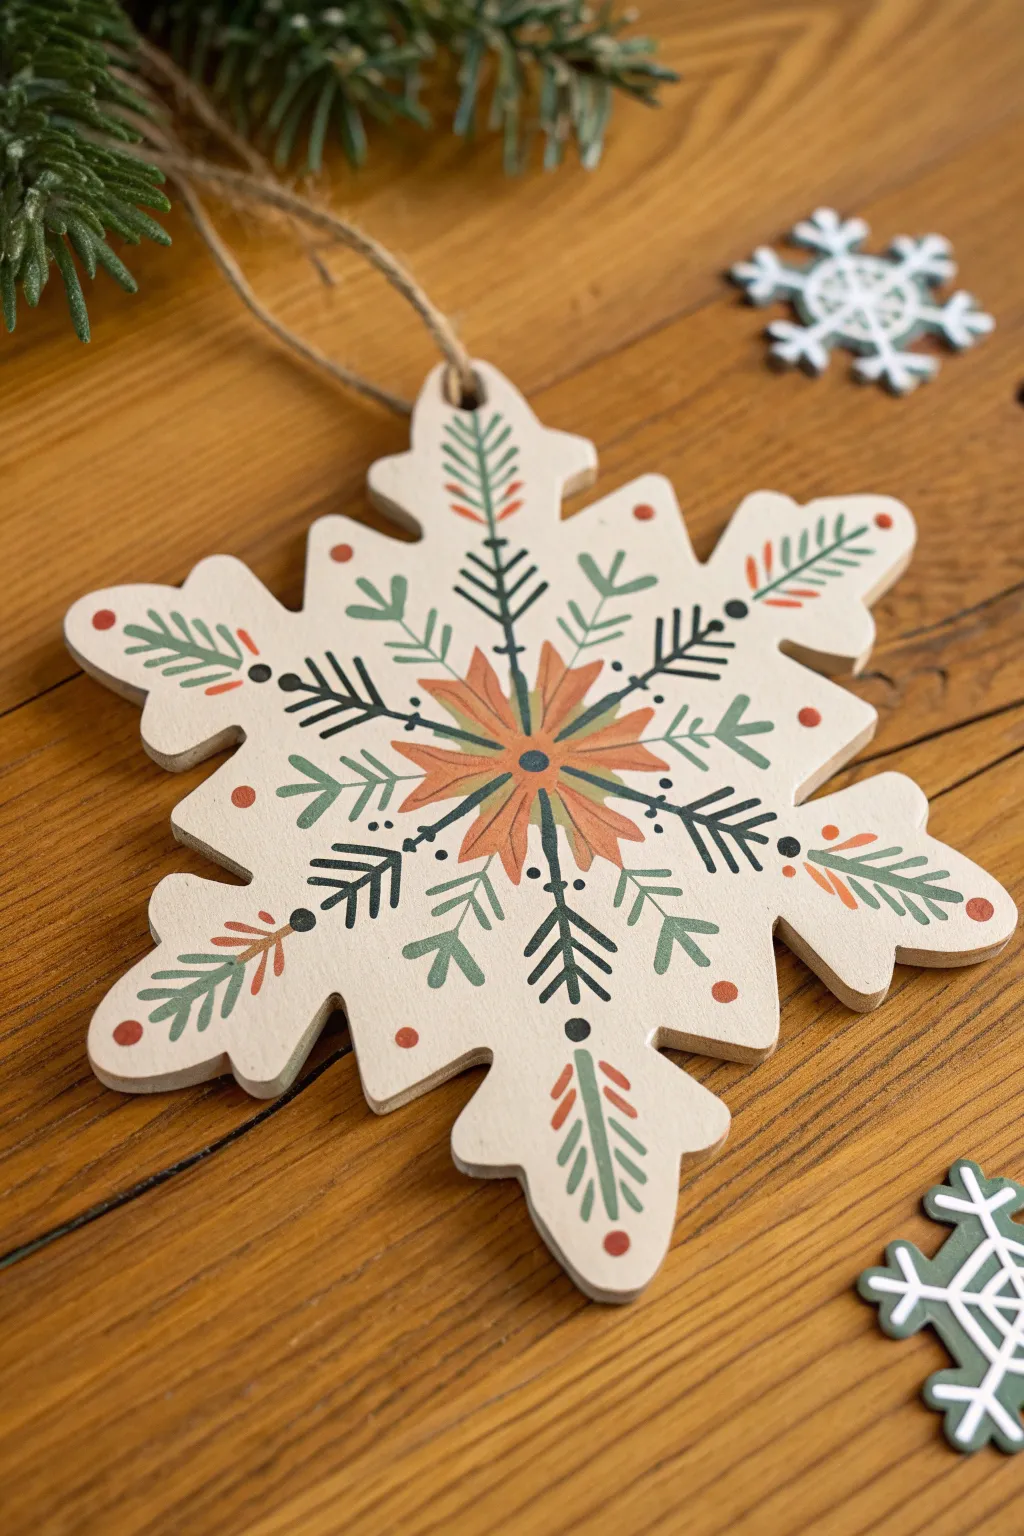
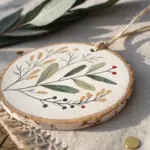
Embrace the cozy simplicity of Scandinavian design with this hand-painted wooden snowflake. Featuring delicate foliage motifs in earthy greens and rust oranges, this ornament brings a touch of rustic elegance to your holiday decor.
Step-by-Step Guide
Materials
- Large wooden snowflake cutout (unfinished)
- Acrylic paints: Cream/Off-white, Sage Green, Forest Green, Rust/Burnt Orange, Black
- Fine detail brushes (sizes 0 and 00)
- Small flat brush (size 4 or 6)
- Matte finish sealer or varnish
- Jute twine for hanging
- Pencil and eraser
- Palette for mixing
Step 1: Base Preparation
-
Sand the Wood:
Begin by lightly sanding your wooden snowflake cutout with fine-grit sandpaper to remove any rough edges or splinters. Wipe away the dust with a barely damp cloth. -
Apply the Base Coat:
Using your flat brush, apply a smooth, even coat of cream or off-white acrylic paint to the front surface. You want this to look slightly washed, so if the paint is thick, thin it with a drop of water. Let it dry completely.
Symmetry Hack
Work radially to keep things even. Instead of finishing one whole arm, paint the same element (e.g., the center line) on all six arms before moving to the next detail.
Step 2: Central Flower Motif
-
Mark the Center:
Lightly mark the absolute center of the snowflake with a pencil dot to guide your symmetry. -
Paint the Center Dot:
Dip the handle end of a paintbrush into deep forest green paint and stamp a perfect circle right over your pencil mark. -
Create the Petals:
Load a size 0 brush with rust orange paint. Paint six elongated, petal-like shapes radiating from the center dot, extending outward about an inch. -
Add Inner Details:
Once the orange petals are dry, switch to forest green. Paint a thin line down the center of each petal to create a vein.
Step 3: Radiating Foliage
-
Paint Primary Stems:
Using black paint and your finest brush, draw six straight lines radiating from the center, positioned between the orange petals. These should extend about halfway to the edge of the snowflake. -
Add Pine Needles:
Along these black stems, paint small, angled dashes on both sides to resemble pine branches. Keep your strokes quick and tapers for a natural look. -
Create Secondary Sprigs:
In the spaces between the pine branches, paint lighter sage green stems that branch out into ‘V’ shapes like small fern fronds. -
Embellish the Base:
At the base of these sage sprigs, add tiny black dots for visual weight.
Rustic Texture
For a more weathered look, lightly sand the edges of the snowflake after the paint dries but before sealing to reveal a bit of raw wood.
Step 4: Outer Arm Details
-
End Sprigs:
Located on the six main tips of the snowflake, paint a small sprig. Use sage green for the stem and ‘V’ shape needles, but accent the very tips with tiny rust orange dashes. -
Add Berry Accents:
Using the handle of your brush again, dip into the rust orange paint. Place a small dot at the very tip of each snowflake arm. -
Inner Dots:
Add a second set of rust orange dots closer to the center, positioned inside the negative space ‘V’s of the snowflake arms. -
Black Accent Dots:
To finish the pattern, place tiny black dots at the junction points where the outer sprigs meet the main body of the snowflake. This adds tailored definition to the design.
Step 5: Finishing Touches
-
Erase Guidelines:
Once you are absolutely certain all paint is bone dry, gently erase any visible pencil marks. -
Seal the Artwork:
Apply a coat of matte varnish over the painted surface. I find a matte finish preserves the rustic, folk-art feel better than gloss. -
Attach the Hanger:
Cut a length of jute twine, thread it through the hole at the top of the snowflake, and knot it securely to create a loop.
Hang your beautiful folk art snowflake on the tree or use it as a special gift topper this holiday season
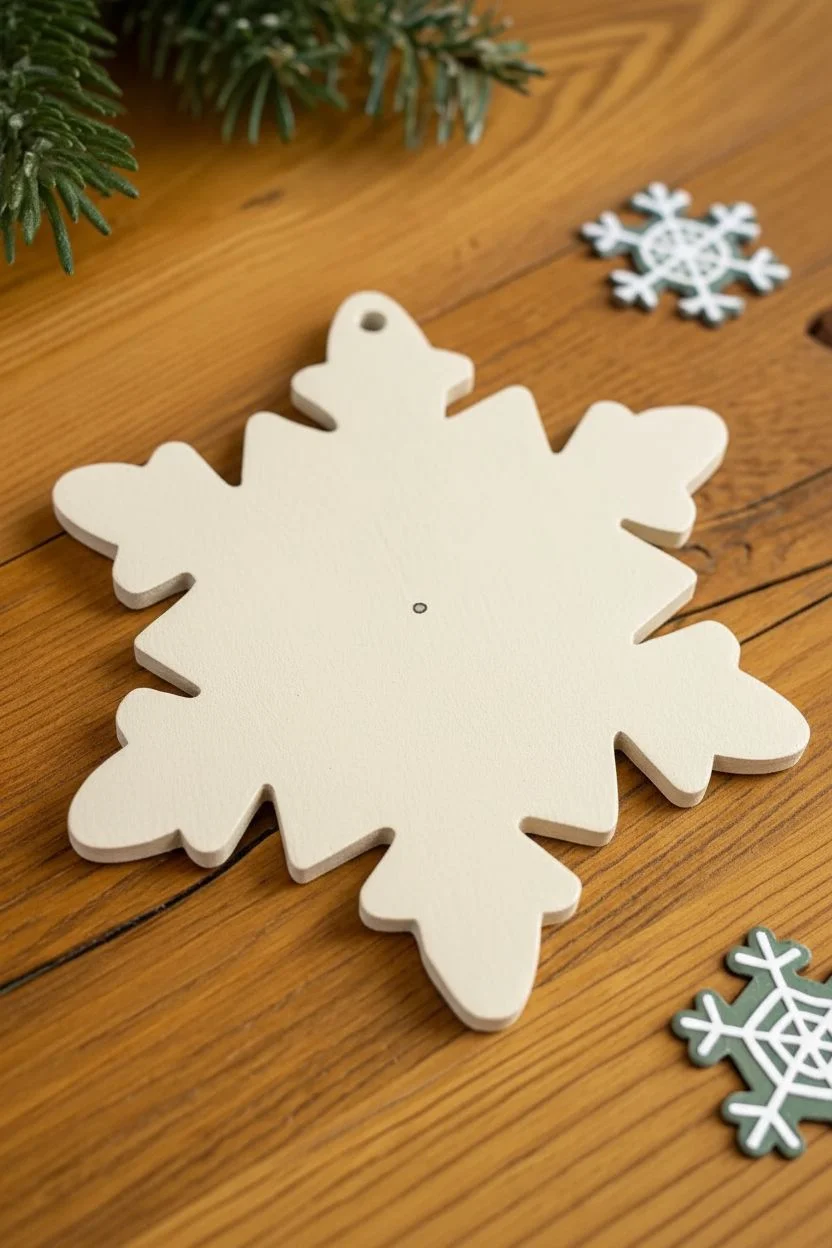
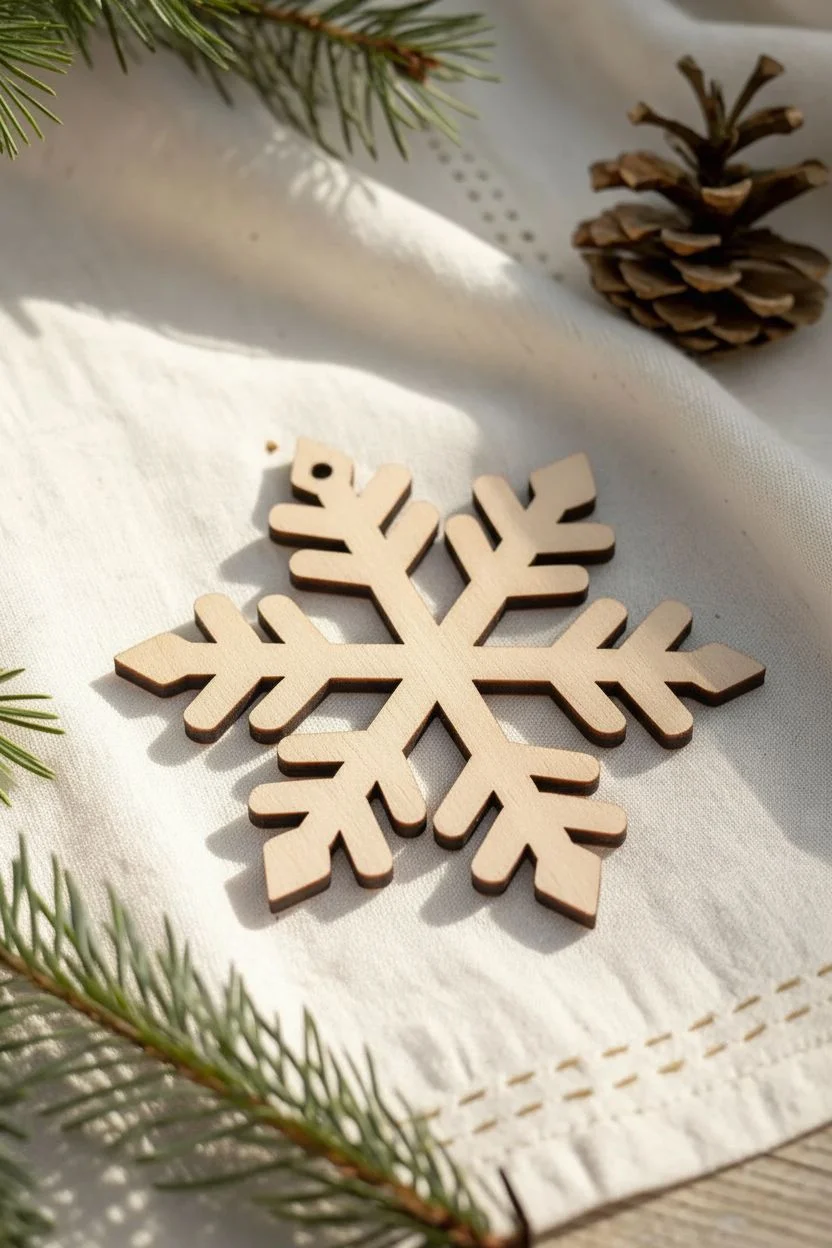
Raised Puffy Paint Snowflake Lines for Embossed Texture
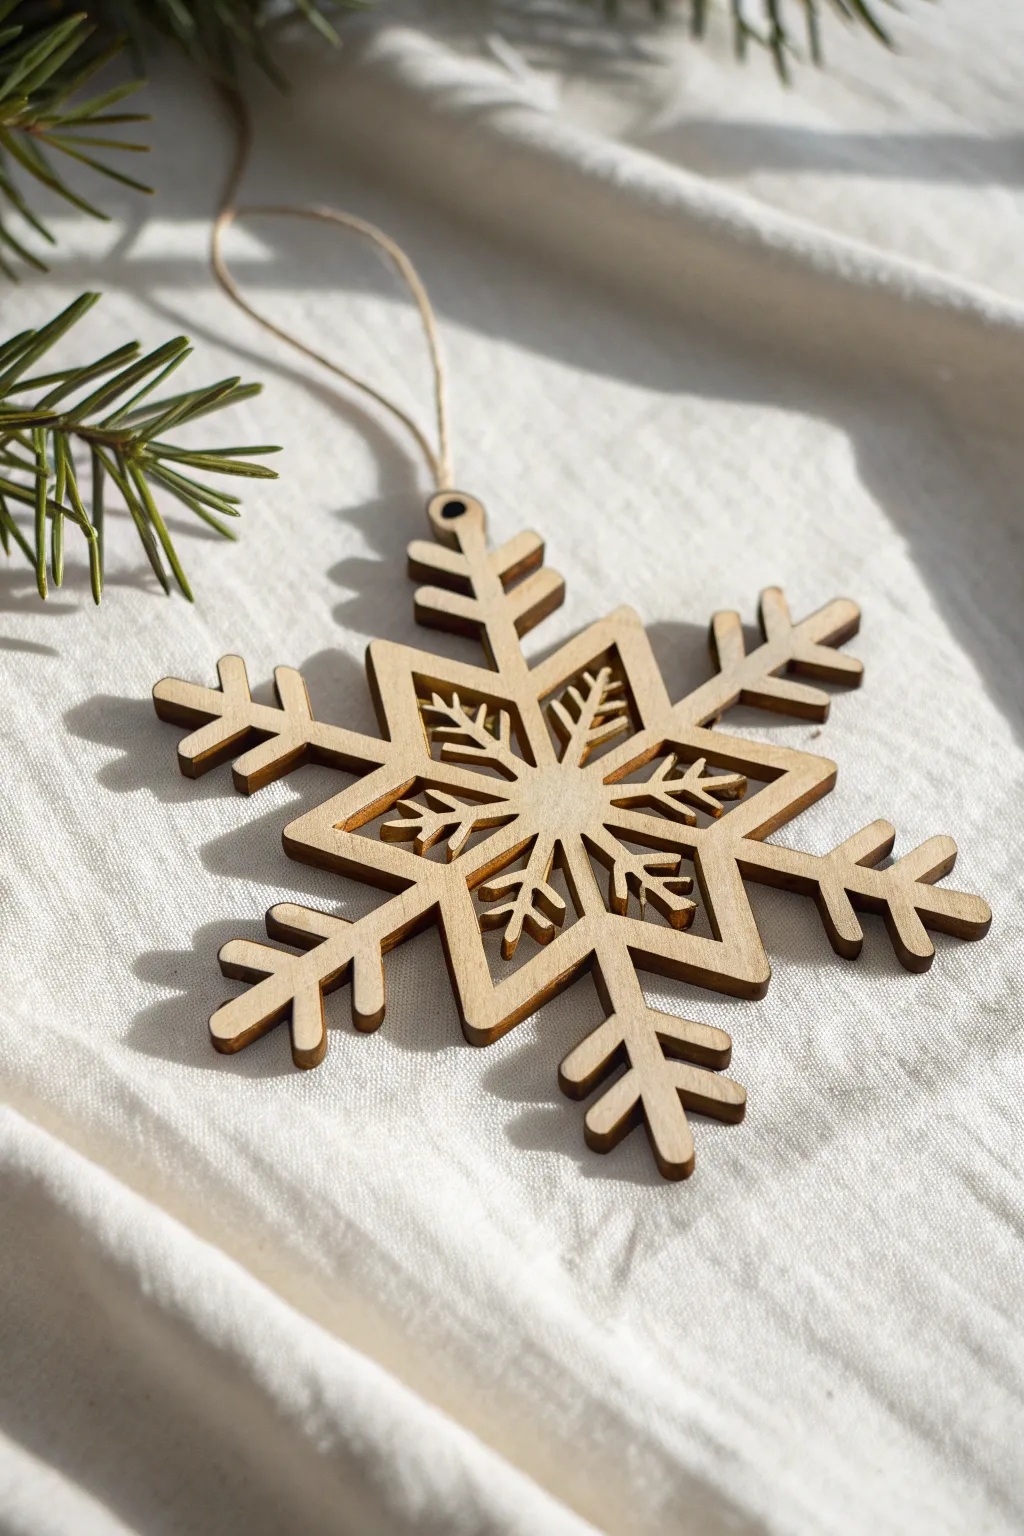
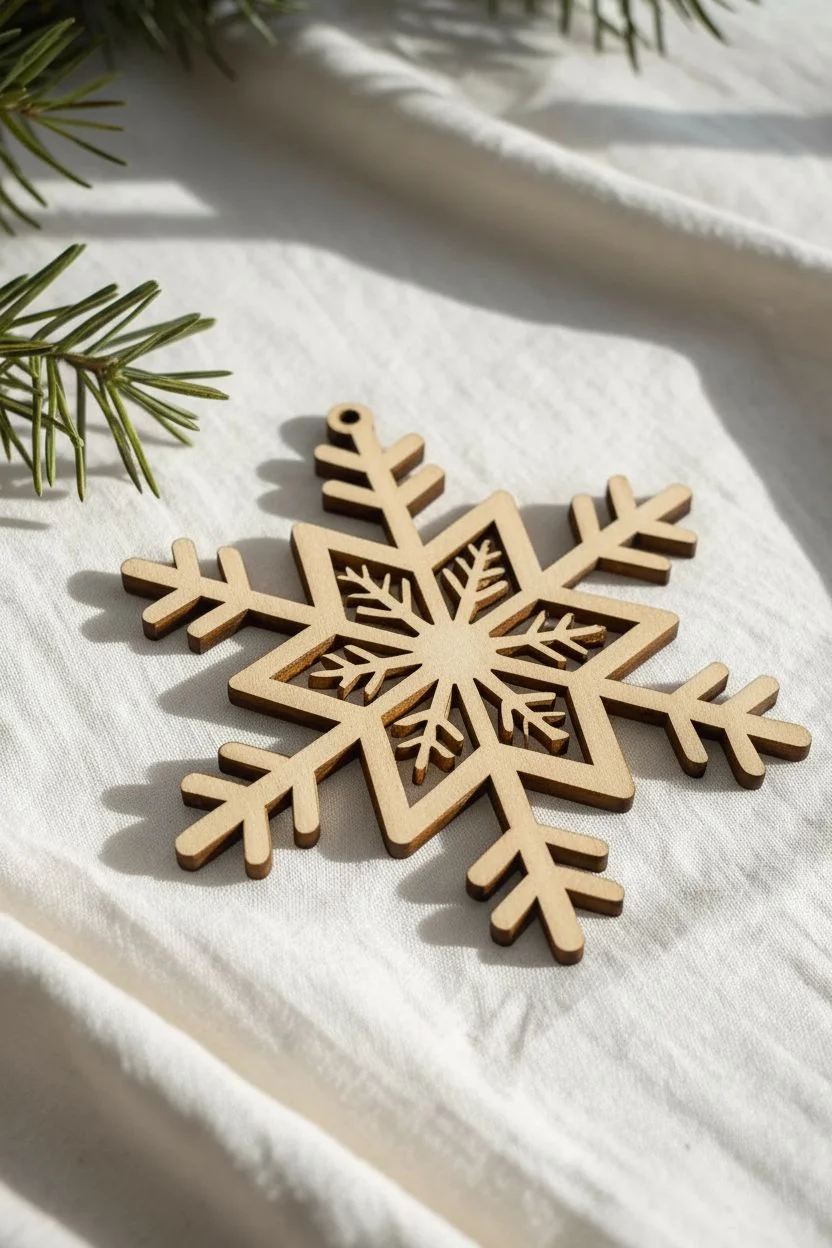
Before adding any texture or paint, starting with a clean, high-quality wooden base is essential for a rustic, Scandinavian-inspired look. This tutorial guides you through prepping and stringing a laser-cut snowflake to showcase its natural wooden warmth before you begin any embellishments.
Step-by-Step Guide
Materials
- Unfinished laser-cut wooden snowflake ornament (approx. 3-4 inches)
- Fine-grit sandpaper (220-400 grit)
- Natural jute twine or hemp cord (thin gauge)
- Scissors
- Tack cloth or soft brush
- Clear matte sealer (optional)
Step 1: Preparation and Cleaning
-
Inspect the ornament:
Begin by examining your wooden snowflake for any rough edges or splinters left from the manufacturing process. Laser-cut wood often has browned edges; decide if you want to keep this dark contrast or sand it away. -
Light sanding:
Take a small piece of fine-grit sandpaper (around 220 grit) and very gently buff the flat surfaces of the snowflake. You don’t want to remove material, just smooth the grain. -
Refining the edges:
If there are tiny burrs inside the intricate geometric cutouts, fold your sandpaper into a sharp point or use a small needle file to carefully remove them without snapping the delicate arms of the snowflake. -
Remove dust:
Wood dust can ruin paint adhesion or sealer application later. Wipe the entire ornament down thoroughly with a tack cloth or use a soft, dry paintbrush to sweep dust out of the inner corners. -
Optional sealing:
If you plan to leave the wood natural as shown in the photo, applying a thin coat of clear matte sealer now will protect it from oils on your hands and keep the wood grain looking crisp.
Burn Mark Hack
Laser cuts leave dark burn marks on edges. If you dislike this look, a quick wipe with a vinegar-soaked cloth can help lighten the char marks significantly.
Step 2: Stringing the Ornament
-
Measure the twine:
Cut a piece of thin natural jute twine or hemp cord. I find that a length of about 8 to 10 inches works perfectly for a standard hanging loop. -
Identify the hanging point:
Locate the small circular hole specifically designed for hanging, usually situated at the tip of one of the main snowflake arms. -
Thread the loop:
Fold your piece of twine in half to create a loop at one end and two loose tails at the other. Thread the loop end through the hole from front to back. -
Secure with a lark’s head knot:
Pull the loop through about an inch, then pass the two loose tails through that loop. Gently tighten the twine so it cinches securely against the wood. -
Alternative knotting:
If the hole is too small for a lark’s head knot, simply thread one end of the twine through the hole and bring both ends together. -
Tie the ends:
Bring the two loose ends of the twine together and tie a varied overhand knot near the very end to close the loop. -
Trim excess:
Snip off any extra twine sticking out of the knot for a tidy finish, leaving just a tiny bit of fray for that rustic charm. -
Position the knot:
Slide the loop around so the knot sits at the top, opposite the snowflake, ensuring it hangs straight when suspended.
Step 3: Final Touches
-
Final inspection:
Check the orientation of the wood grain one last time to ensure the ‘face’ of the ornament is the side with the cleanest cuts and nicest grain pattern. -
Ready for embellishment:
Your snowflake is now fully prepped. You can hang it as is for a minimalist look, or proceed to adding the puffy paint texture mentioned in the article article.
Fragile Wood Alert
If a delicate arm snaps while sanding, don’t panic. A tiny dab of wood glue and painter’s tape to hold it while drying will fix it almost invisibly.
Now you have a beautifully prepped canvas ready for your embossed texture techniques
Marbled Pour-Paint Snowflakes With Swirly Color Ribbons
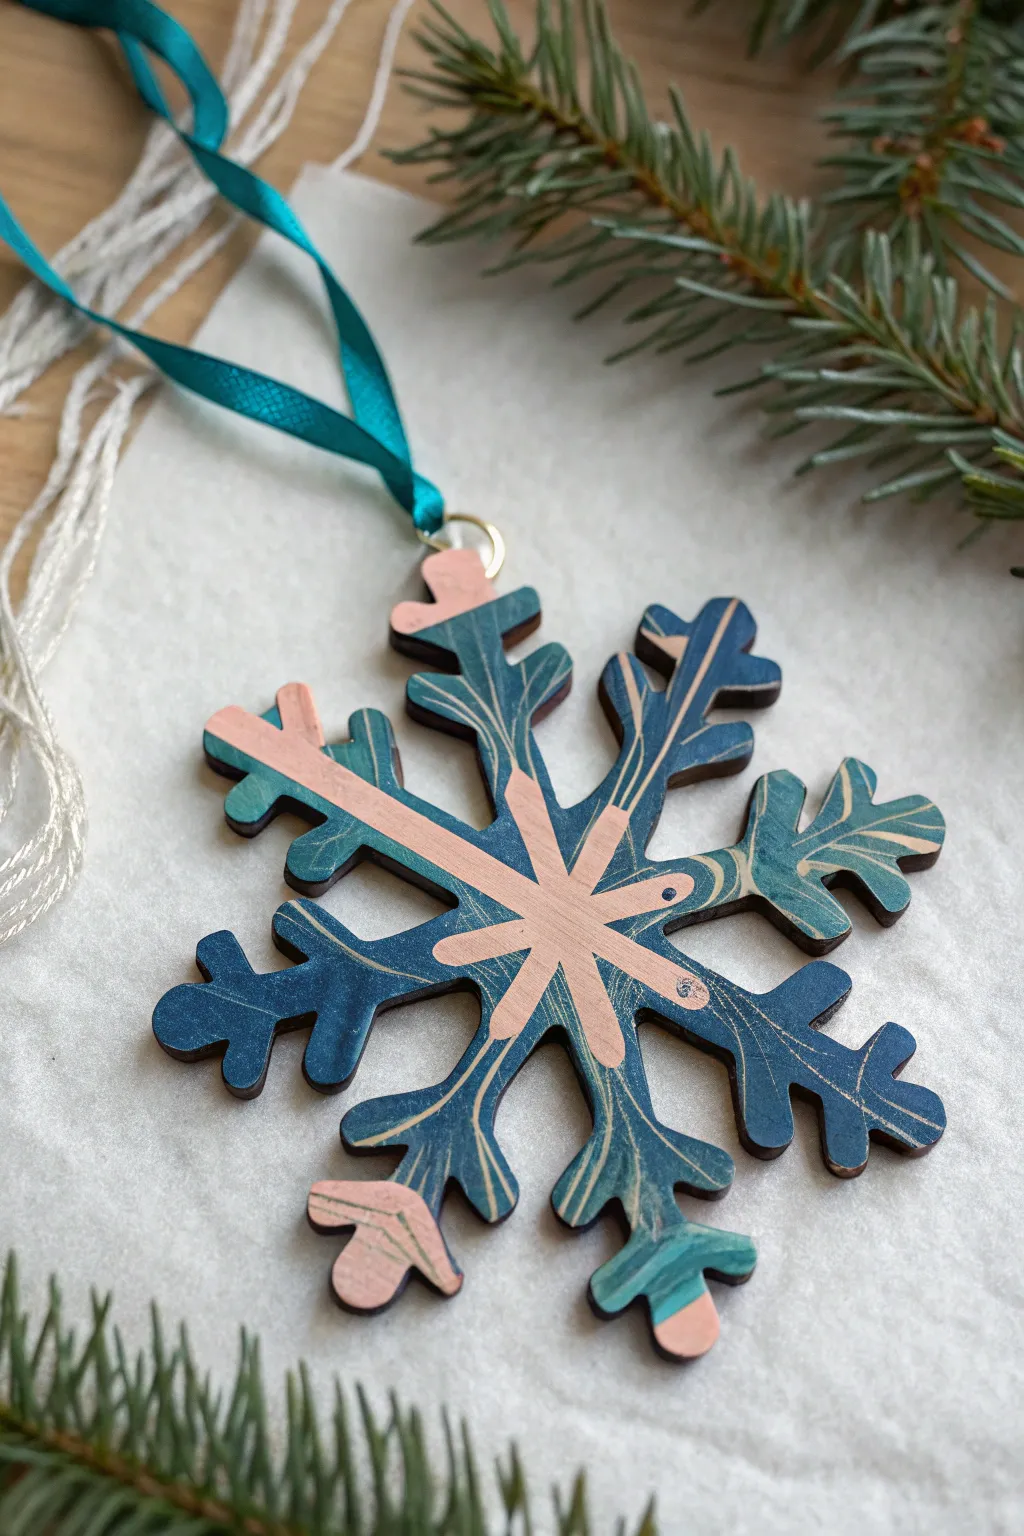
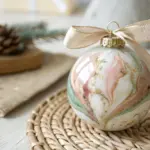
Transform a plain wooden cutout into a sophisticated ornament featuring mesmerizing swirls of deep teal, soft peach, and metallic copper. This marbled pour-paint technique ensures every snowflake is a unique piece of modern holiday art.
Detailed Instructions
Materials
- Unfinished wooden snowflake cutout (approx. 4-5 inches)
- Acrylic pour paints (Dark Teal, Light Teal, Metallic Copper, Soft Peach)
- Pouring medium
- Small plastic cups and stir sticks
- Drip tray or cardboard box
- Disposable gloves
- Small eye hook (if snowflake lacks a hole)
- Teal satin ribbon
- High-gloss varnish or sealant spray
Step 1: Preparing the Paint and Surface
-
Surface Prep:
Lightly sand the wooden snowflake to remove any rough edges or splinters. Wipe it clean with a dry tack cloth to ensure the surface is dust-free. -
Work Station:
Set up your workspace by placing a drip tray or a cardboard box lined with plastic on a flat surface. Elevate the snowflake off the surface using small overturned cups or bottle caps. -
Mixing Mediums:
If you aren’t using pre-mixed pouring paints, mix your standard acrylics with a pouring medium. Aim for a ratio of about 1 part paint to 1 part medium, stirring until you reach the consistency of warm honey. -
Color Selection:
Prepare four distinct cups: Dark Teal, Light Teal, Metallic Copper, and Soft Peach. The copper adds that lovely shimmer seen in the finished piece.
Cell Creation Tip
Add 1-2 drops of silicone oil to your pour cup before pouring. This reacts with the paint for extra bubble-like cells.
Step 2: Creating the Dirty Pour
-
The Pour Cup:
Grab a clean, empty cup to act as your ‘dirty pour’ vessel. Pour a small amount of the Dark Teal into the bottom. -
Layering Colors:
Gently layer the other colors on top of the teal. Do not stir! Pour the Metallic Copper next, followed by the Soft Peach, and then the Light Teal. -
Repeat Layering:
The specific pattern shown relies on contrast, so repeat the layering process until the cup is about half full, ensuring the metallic copper is sandwiched between the solid colors. -
The Flip or Pour:
You can either quickly flip the cup onto the center of the wooden snowflake or slowly pour the mixture in a circular motion directly onto the center.
Step 3: Marbling and Tilting
-
Initial Spread:
Lift the cup if you used the flip method. Watch as the paint begins to pool and spread outward. -
Manipulating the Flow:
Gently pick up the snowflake (wearing gloves, of course). Tilt it slowly to the left, then the right, guiding the paint to flow towards the tips of the snowflake arms. -
Creating Striations:
To achieve the long, thin lines visible in the example, tilt the snowflake at steeper angles briefly. This stretches the paint swirls into elegant ribbons rather than circular blobs. -
Coverage Check:
Ensure the paint flows over the edges to coat the sides. Use a small tool or your gloved finger to touch up any bare corners on the intricate tips. -
Drying Phase:
Place the snowflake back on the elevated props. Let it dry undisturbed for at least 24 to 48 hours. I find that patience here prevents cracking.
Level Up: Double Sided
Once the first side is fully cured (wait 3 days!), flip it over and repeat the pour process on the back for a 360-degree finish.
Step 4: Finishing Touches
-
Sealing:
Once fully cured and dry to the touch, apply a high-gloss spray varnish. This protects the paint and makes the copper metallic pop. -
Hardware Installation:
If your snowflake doesn’t have a pre-drilled hole, carefully screw a small gold or brass eye hook into the top arm. -
Ribbon Attachment:
Cut a length of teal satin ribbon, approximately 8 inches long. Thread it through the eye hook or hole. -
Knotting:
bring the ends of the ribbon together and tie a secure knot at the end to create a hanging loop.
Hang your stunning marbled creation on the tree where the lights can catch those metallic copper accents
Galaxy Night Sky Snowflakes With Speckled Stars

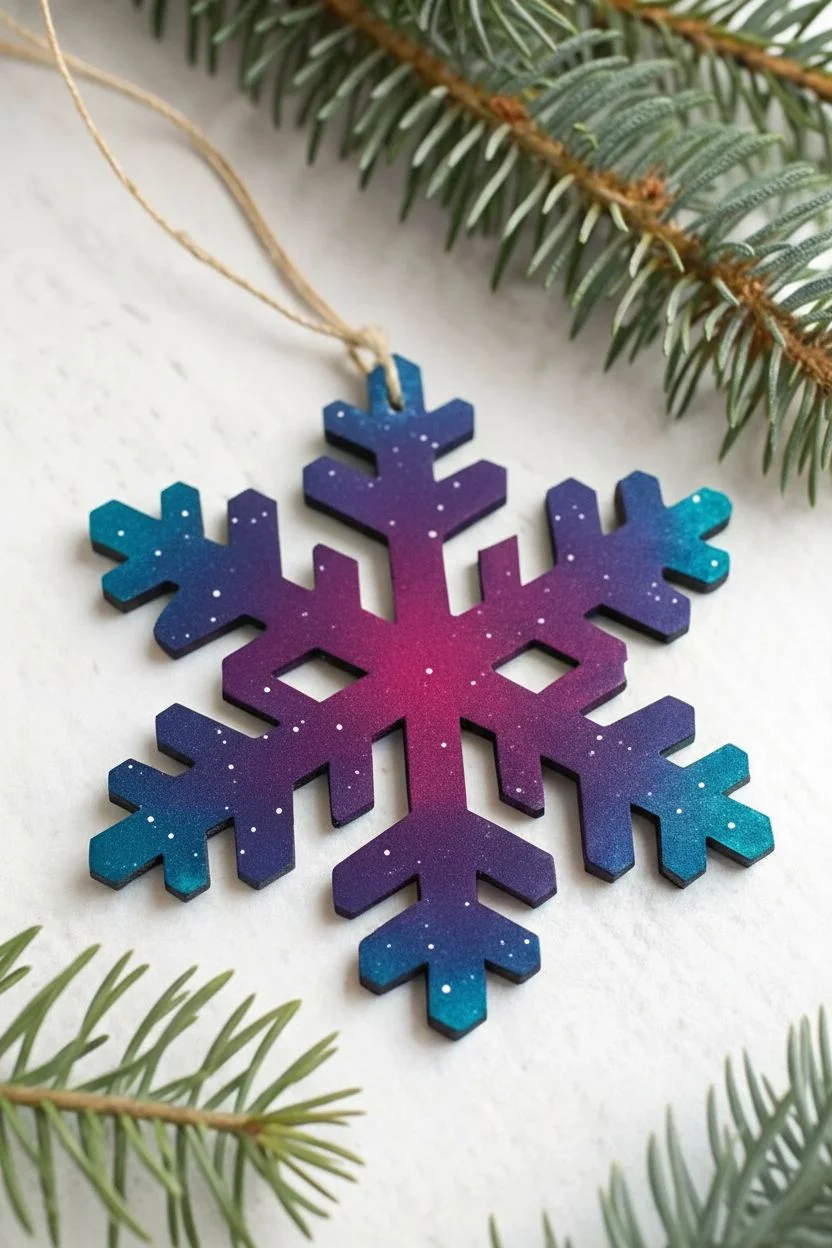
Transform a plain wooden ornament into a stunning miniature nebula with this galaxy painting technique. By blending deep violets, rich indigos, and bright teals, you’ll create a captivating night sky effect that looks far more complex than it actually is.
Step-by-Step
Materials
- Unfinished wooden snowflake ornament (laser cut)
- Acrylic paints: Magenta or Deep Pink, Deep Violet/Purple, Navy Blue, Teal or Turquoise, White
- Small makeup sponges or sponge daubers
- Fine detail paintbrush (size 0 or 00)
- Old toothbrush or stiff bristle brush
- Palette or paper plate
- Jute twine or ribbon for hanging
- Water cup and paper towels
- Spray sealer (glossy or matte, optional)
Step 1: Base Gradient
-
Prepare the wood:
Ensure your wooden snowflake is clean and free of dust. If the wood is very rough, give it a quick sanding with fine-grit sandpaper, but most laser-cut pieces are ready to go immediately. -
Start the center:
Squeeze a small amount of magenta or deep pink paint onto your palette. Dip a small sponge dauber into the paint and dab off the excess on a paper towel so it’s not gloppy. -
Apply the core color:
Gently sponge the pink color into the very center of the snowflake, fading it out slightly as you move away from the middle intersection. -
Blend the mid-tones:
Load a fresh area of your sponge (or a new sponge) with deep violet paint. Sponge this color in a ring around the pink center, overlapping the edges slightly to create a seamless purple transition. -
Deepen the galaxy:
Switch to navy blue paint. Apply this to the main branches of the snowflake, blending it into the violet section but leaving the very tips of the snowflake bare. -
Add the glowing tips:
Finally, use teal or turquoise paint for the outermost tips of the snowflake arms. Sponge this color on and blend it backward into the navy blue to create a glowing effect at the edges. -
Refine the blend:
If the transition lines look too harsh, go back with a slightly damp sponge with a tiny bit of the previous color and dab gently over the seam to soften the gradient. -
Let it dry:
Allow the ombre base coat to dry completely. Acrylics dry fast on wood, so this should only take about 10-15 minutes.
Step 2: Stars and Details
-
Mix the stars:
Create a watery mixture of white acrylic paint. You want a consistency similar to heavy cream or milk—fluid enough to splatter but opaque enough to show up against the dark background. -
Splatter technique:
Dip an old toothbrush or a stiff bristle brush into the watered-down white paint. Hold it over the snowflake and run your thumb across the bristles to flick tiny droplets onto the surface. -
Add prominent stars:
Take your fine detail brush and dip it into undiluted white paint. touching the tip gently to the wood to add a few larger, deliberate dots among the splatters to represent closer stars. -
Paint the central burst:
Using the same fine brush, paint a very thin ‘X’ through the center of the snowflake, followed by a vertical line, creating a simple six-point starburst right in the middle over the pink area. -
Highlight the starburst:
I like to extend the lines of the central starburst just slightly past the center intersection to make it look like it’s glowing from within. -
Dry and seal:
Let the white details dry fully. Once dry, you can spray the ornament with a clear acrylic sealer to protect the paint and add a nice sheen. -
Attach the hanger:
Cut a length of jute twine, thread it through the hanger hole at the top of the snowflake, and tie a secure knot to finish your ornament.
Sponge Savvy
Cut wedge-shaped makeup sponges into smaller pieces. The sharp edges help you get paint into the tight laser-cut corners without making a mess.
Cosmic Glitter
While the paint is still wet, sprinkle a tiny pinch of ultra-fine holographic glitter over the wettest areas for a true shimmering stardust effect.
Now you have a piece of the cosmos ready to hang on your tree or gift to a friend
Transparent Stain-Look Wash That Keeps the Wood Grain Visible

This elegant technique transforms plain unfinished wood into a warm, vintage-style ornament without hiding the natural grain. By creating a custom metallic wash, you achieve a soft, diffused copper glow that looks like an expensive stain but is surprisingly simple to make.
Step-by-Step Tutorial
Materials
- Unfinished wooden snowflake cutout
- Copper acrylic paint (metallic)
- Brown acrylic paint (burnt umber or similar)
- Water
- Small mixing cup or palette
- Soft flat paintbrush (medium size)
- Clean cotton rag or paper towel
- Fine-grit sandpaper (220 grit)
- Natural jute twine or hemp cord
- Scissors
Step 1: Preparation & Sanding
-
Inspect the Wood:
Begin by examining your wooden snowflake for any rough edges or splinters. Since we are using a wash, imperfections in the wood surface will show through, so starting with a smooth base is crucial. -
Light Sanding:
Gently rub the entire surface, including the edges, with fine-grit sandpaper. You don’t need to remove material, just buff it enough to ensure the fibers are smooth and ready to accept the liquid wash evenly. -
Dust Removal:
Wipe the snowflake down thoroughly with a dry cloth or tack cloth to remove all sawdust. Any leftover dust will create clumps in your paint wash.
Natural Texture Hack
Work with the wood grain, not against it. If your snowflake has a strong grain pattern, wiping firmly across it can highlight the texture, making the dye settle into the grooves.
Step 2: Creating the Metallic Wash
-
Base Color Mixing:
In your mixing cup, squeeze out a dime-sized amount of metallic copper acrylic paint. Add a tiny drop of brown paint to deepen the tone—this prevents the copper from looking too bright and orange. -
Adding Water:
Slowly add water to your paint mixture. Aim for a ratio of about 1 part paint to 3 parts water. You want a consistency that looks like milky tea, not thick cream. -
Testing the Consistency:
Test your wash on a scrap piece of wood or the back of the ornament. If it’s too opaque, add more water; if it’s too watery and doesn’t leave color, add a touch more metallic paint.
Step 3: Applying the Wash
-
First Application:
Dip your brush into the wash and apply it generously to the face of the snowflake. Work quickly so the liquid doesn’t dry in patches. It will look very wet and possibly too dark at first. -
Wipe Back:
Immediately after applying the wet wash, take your clean rag and gently wipe away the excess liquid. I find that wiping in the direction of the wood grain gives the most natural, stained appearance. -
Check the Edges:
Don’t forget the intricate laser-cut edges. Dab your brush into the crevices to ensure the dark burnt edges blend slightly with your copper tone, or leave them dark for contrast. -
Assess and Layer:
Let the first coat dry for about five minutes. If you want a richer metallic sheen, repeat the brush-and-wipe process for a second layer. The beauty of a wash is that you can build intensity slowly. -
Back Side:
Once the front is dry to the touch, flip the snowflake over and repeat the wash process on the back so the ornament looks finished from all angles. -
Final Drying:
Allow the snowflake to dry completely, ideally for at least an hour. The wood will absorb the moisture and the color will settle into a matte, natural finish.
Too uneven?
If the wash dries patchy or blotchy, lightly dampen your rag with clean water and rub the area to reactivate the paint and smooth it out before it fully cures.
Step 4: Finishing Touches
-
Buffing (Optional):
For a subtle sheen, take a clean, dry cloth and buff the dry surface vigorously. This burnishes the wood fibers and brings out a little more of the metallic sparkle. -
Cut the Twine:
Cut a piece of natural jute twine about 8 to 10 inches long. This organic texture complements the rustic wood finish perfectly. -
Thread the Loop:
Fold the twine in half to create a loop. Push the folded end through the hole at the top of the snowflake. -
Secure the Knot:
Pull the loose ends of the twine through the loop you just pushed through the hole (a lark’s head knot) and pull tight to secure it. -
Tie the Ends:
Tie the two loose ends together in a simple overhand knot to create the hanging loop, trimming any excess fraying if desired.
Hang your finished ornament near a light source to catch the subtle copper glimmer as it turns
Layered Snowflake Cluster Wall Art With Coordinated Colors
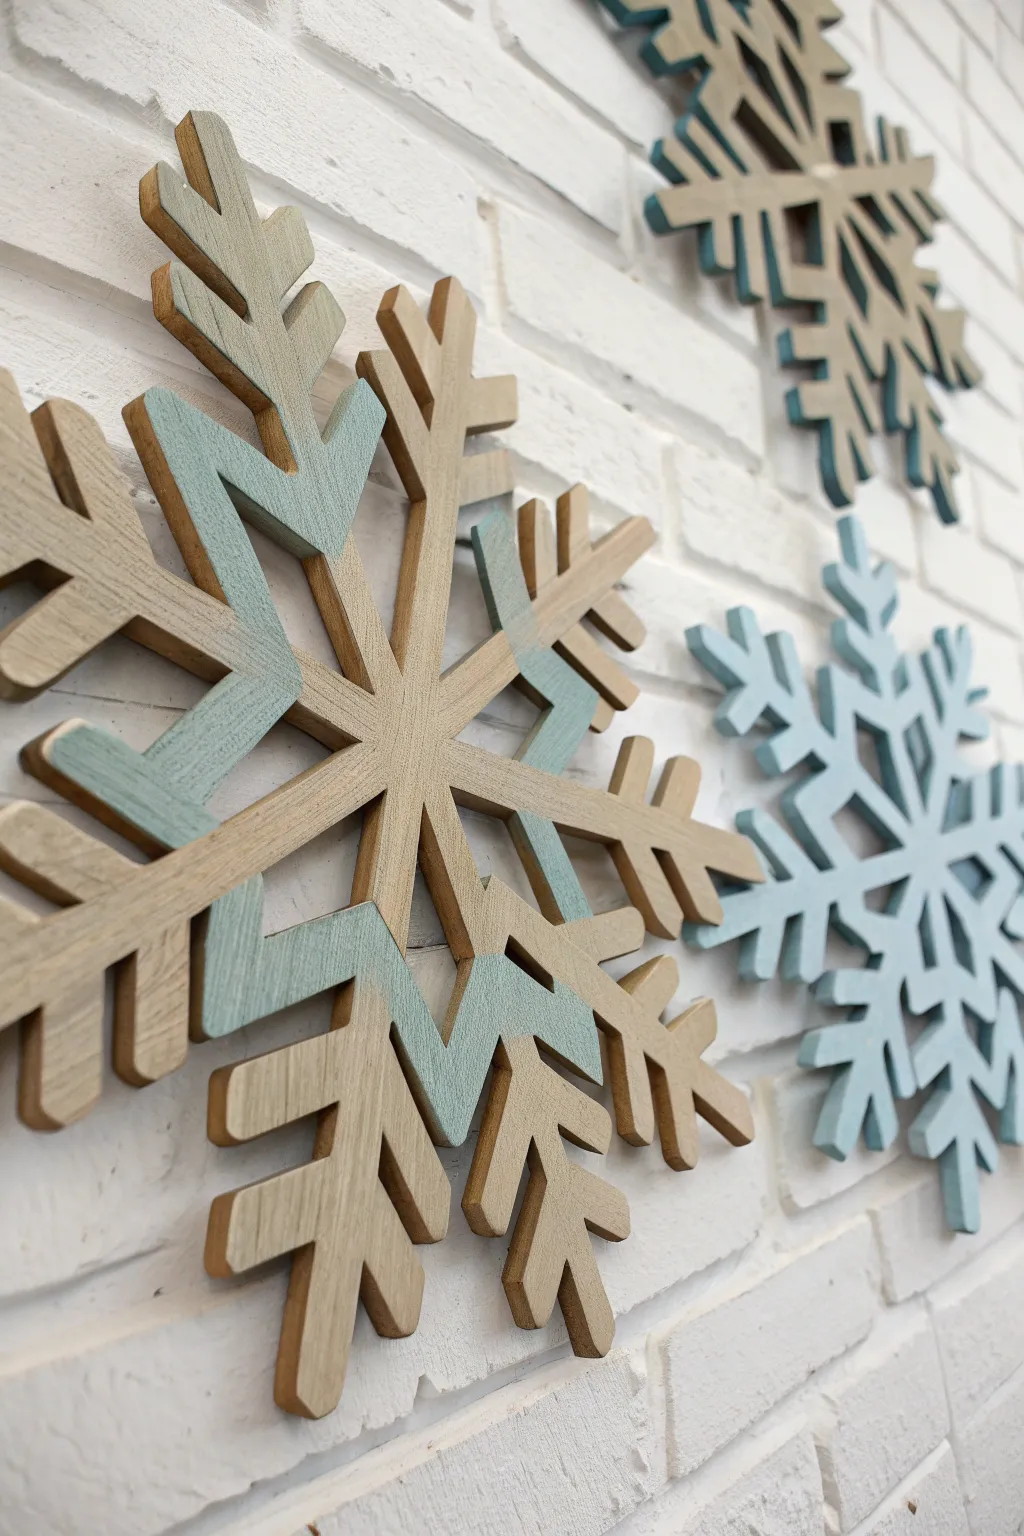
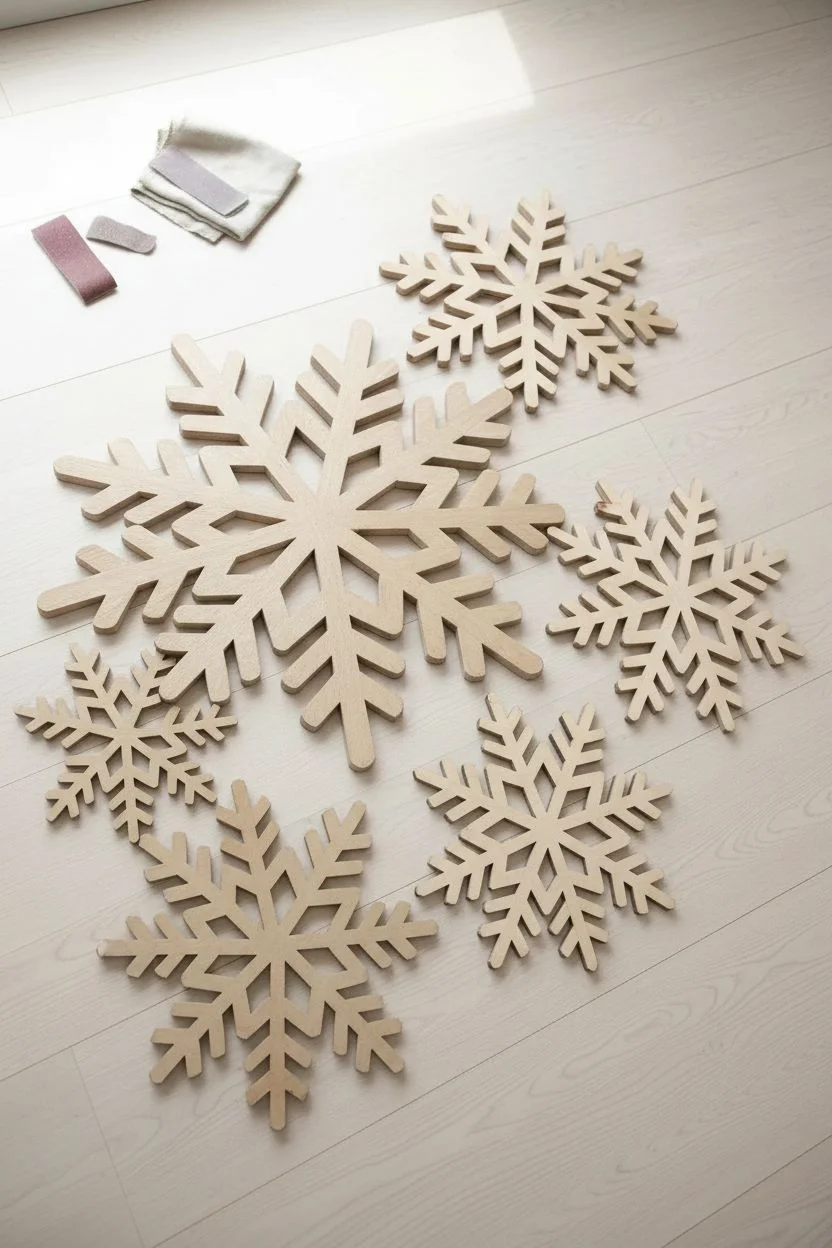
Transform a plain wall into a wintry wonderland with these oversized, dimensional wooden snowflakes. By mixing natural wood tones with soft, muted blues and teals, you can achieve a sophisticated, Scandinavian-inspired look that feels festive yet modern.
Step-by-Step Guide
Materials
- Large laser-cut wooden snowflakes (approx. 12-18 inches)
- Medium laser-cut wooden snowflakes (approx. 8-10 inches)
- Painter’s tape or stencil tape
- Chalk paint or matte acrylic paint (Light Sage, Muted Teal, Dusty Blue)
- Small flat paintbrushes (various sizes)
- Medium-grit sandpaper
- Adhesive mounting strips (Command strips) or small picture nails
- Matte clear sealant spray (optional)
- Ruler
Step 1: Preparation & Planning
-
Prep the Surface:
Begin by lightly sanding the wooden snowflakes with medium-grit sandpaper to remove any rough edges or laser-burn marks. Wipe them down with a dry cloth to ensure they are dust-free for better paint adhesion. -
Plan Your Palette:
Choose a cohesive color palette of 2-3 shades. For the look in the photo, select a light sage green, a muted teal, and a dusty blue. Keep one or two snowflakes entirely natural for contrast. -
Mock Up the Layout:
Before painting, lay your snowflakes on the floor to decide on the arrangement. Try clustering them so their arms slightly overlap or interlock visually, creating a dynamic composition.
Step 2: Painting Techniques
-
Partial Painting Strategy:
For the large focal snowflake, apply painter’s tape to block off specific sections. Create a ‘zigzag’ pattern on the inner arms, masking off the center star and the outer tips to leave them natural wood. -
Apply the First Color:
Using a small flat brush, paint the exposed section of the large snowflake with your light sage green paint. Use minimal paint on the brush to prevent bleeding under the tape, painting away from the tape edge. -
Painting the Solid Snowflakes:
Take a medium-sized snowflake and paint the entire surface a solid dusty blue. Apply two thin coats rather than one thick coat for a smooth, matte finish, letting it dry for 20 minutes between coats. -
Detailing the Edges:
For the solid painted snowflakes, don’t forget to paint the intricate inner edges and laser-cut holes. A very small detail brush works best here to get into those tight corners. -
Creating the Shadow Effect:
To mimic the depth seen in the photo, paint the edges (the thickness of the wood) of the partially painted snowflake in a darker shade, like the teal, or leave them dark from the laser cut if preferred. -
Remove Tape Carefully:
Once the paint is dry to the touch but not fully cured (about 30 minutes), carefully peel back the painter’s tape at a 45-degree angle to reveal crisp, clean lines against the raw wood. -
The Third Snowflake:
Select another large snowflake for the background layer. Paint the outer rim or specific geometric details in the muted teal color, leaving the majority of the structure natural wood to balance the composition.
Bleeding Lines?
If paint bleeds under your tape, wait for it to dry completely. Then, use an X-Acto knife to gently scrape away the excess paint, revealing the clean wood underneath.
Step 3: Finishing & Mounting
-
Distress for Texture:
Once all paint is completely dry, take fine sandpaper and very lightly scuff the painted edges. This exposes a tiny bit of wood and gives the piece a soft, rustic character. -
Seal the Wood:
If you want to protect the finish, spray a light coat of matte clear sealant over the snowflakes. I find this helps keep the raw wood sections from yellowing over time. -
Install the First Layer:
Begin mounting your art by placing the rearmost snowflake against the wall first. Use adhesive mounting strips on the back of the center hub and largest arms for a secure hold. -
Create Depth:
For the foreground snowflake, use double-stacked adhesive strips or small foam spacers. This pushes the snowflake slightly off the wall, creating beautiful natural shadows that enhance the 3D effect. -
Final Adjustments:
Step back and check the spacing. Ensure the arms of the different snowflakes interlock visually without actually touching, creating a layered ‘floating’ appearance.
Pro Tip: Wood Tone
If your raw wood looks too pale, apply a very diluted wash of brown watercolor paint to stain it slightly darker before adding your colored sections.
Now you have a stunning, modern winter display that brings texture and warmth to your home decor
Name or Date Snowflake Keepsakes With Hand-Painted Lettering
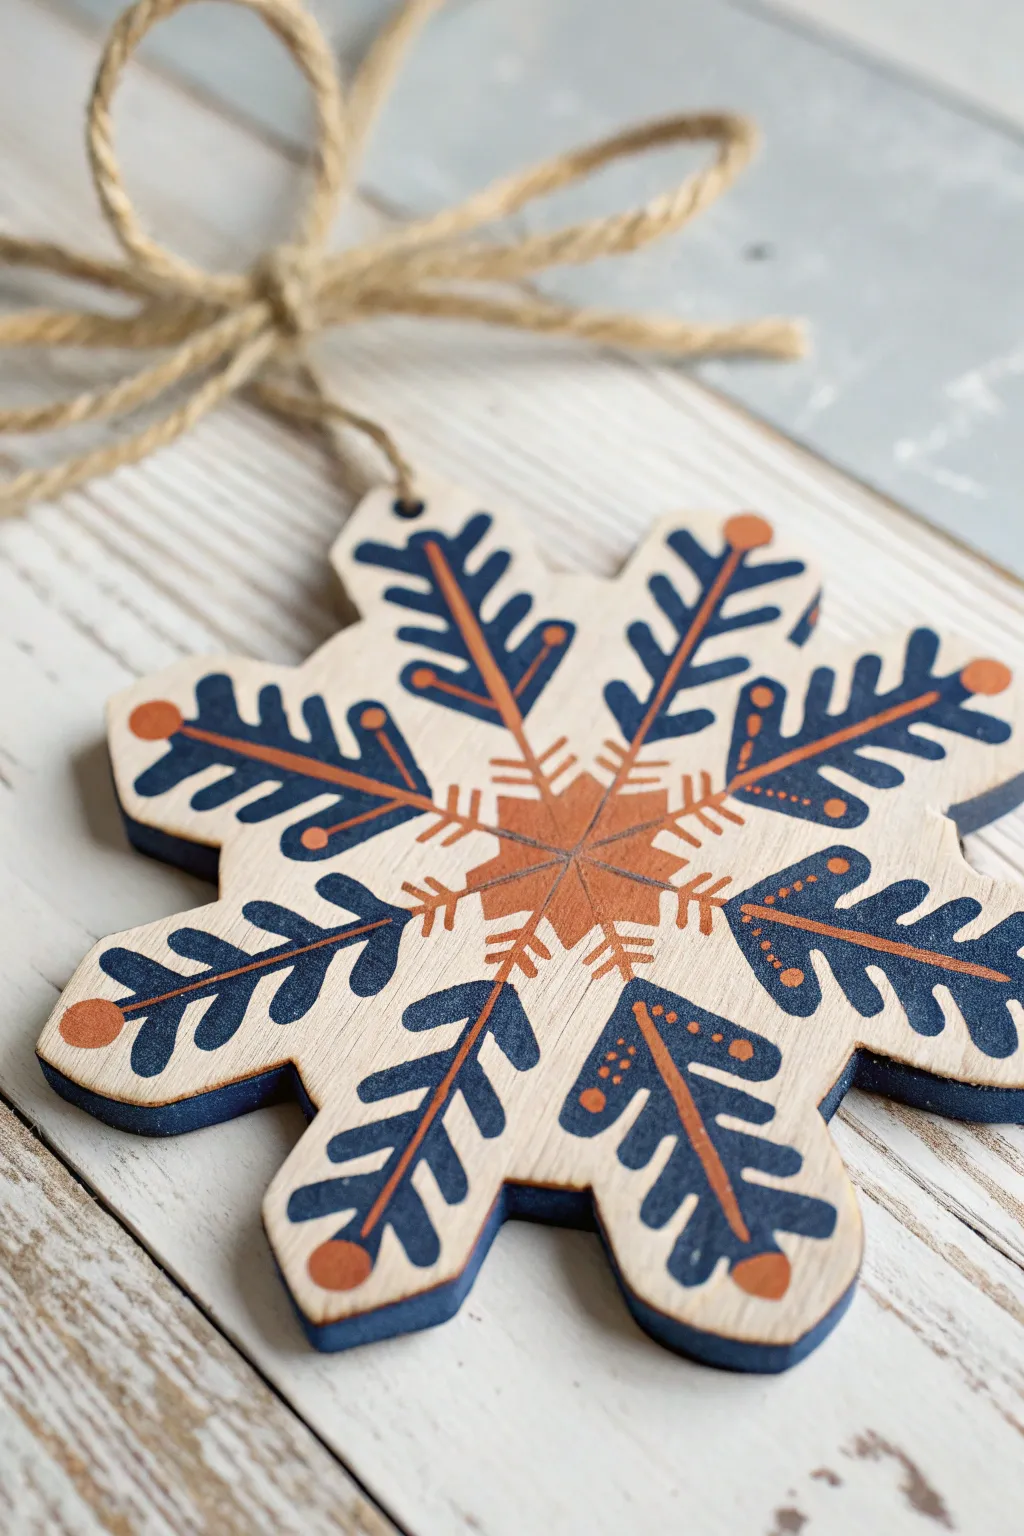
Capture the charm of traditional Scandinavian design with this hand-painted wooden snowflake ornament. The combination of deep navy blue and warm terra cotta orange against natural wood creates a timeless, cozy aesthetic perfect for rustic holiday decor.
Detailed Instructions
Materials
- Unfinished wooden snowflake cutout (approx. 4-5 inches)
- Acrylic paint: Navy Blue or Midnight Blue
- Acrylic paint: Terra Cotta or Burnt Orange
- Small round paintbrush (size 0 or 1)
- Fine liner brush (size 00 or 10/0)
- Jute twine for hanging
- Pencil with a dull point
- Clear matte varnish or sealant
- Palette or small dish for mixing
- Cup of water and paper towels
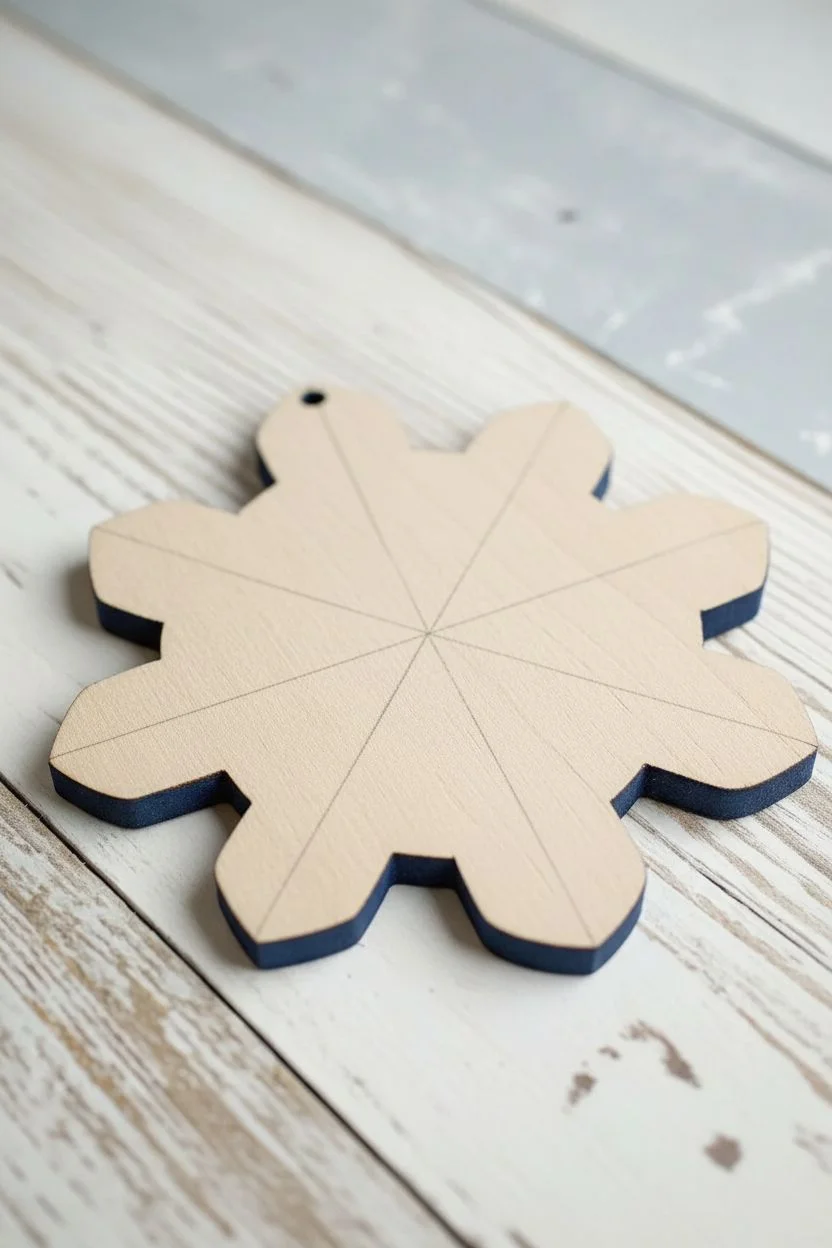
Step 1: Preparation & Base Design
-
Prepare the surface:
Begin with a clean, smooth wooden snowflake. If there are any rough splinters on the edges, lightly sand them with fine-grit sandpaper and wipe away the dust. -
Sketch center guidelines:
Using a pencil with a very light touch, mark the absolute center of the snowflake. Lightly draw straight lines radiating from the center down the middle of each snowflake arm to act as your guides for the stems. -
Paint the edges:
Load your round brush with Navy Blue paint. Carefully paint along the thickness (the side edges) of the wooden cutout. This creates a finished look and frames the front design nicely.
Fixing Wobbly Lines
If your center lines aren’t straight, wait for the paint to dry completely. Gently scrape the error away with an X-Acto knife or craft blade, sand lightly, and try again.
Step 2: Painting the Foliage
-
Start the main branches:
Switch to your fine liner brush and load it with Terra Cotta paint. Paint a thin line directly over your pencil guide on each arm, stopping about a half-inch from the tip of the wood. -
Create the center star:
At the very center where all stems meet, paint a small, solid starburst shape using the Terra Cotta paint to anchor the design. -
Add the blue leaves:
Dip your clean round brush into Navy Blue. Starting near the center of one arm, paint small, angled strokes outward from the orange stem. Press down and lift up to create a leaf shape that tapers at the end. -
Complete the leaf pattern:
Continue painting these blue leaves along both sides of every orange stem. Aim for about 3-4 pairs of leaves per arm. I try to keep them symmetrical, but slight variations add to the hand-painted charm. -
Let the first layer dry:
Allow the blue leaves and orange stems to dry completely to the touch, which usually takes about 10-15 minutes depending on paint thickness.
Step 3: Adding Details & Finishing
-
Add stem extensions:
Using the liner brush and Terra Cotta paint again, draw tiny lines connecting the blue leaves back to the main orange stem if any gaps remain. -
Paint the tips:
On the very end of each wooden arm, paint a single, solid Terra Cotta circle or dot. This balances the color distribution. -
Add fine details:
With the finest point of your liner brush and Terra Cotta paint, add three tiny dots or small dashes near the ends of the blue leaves on the outer edges of the snowflake for extra texture. -
Enhance the center:
Add small v-shaped lines or ‘hatching’ marks in Terra Cotta coming out from the center starburst, filling the negative space between the main arms. -
Seal the artwork:
Once all paint is thoroughly dry (give it at least an hour), apply a thin coat of clear matte varnish over the entire front and edges to protect the paint from scratching. -
Attach the hanger:
Cut a 10-inch length of jute twine. Thread one end through the pre-drilled hole at the top of the snowflake. -
Knot the loop:
Bring the ends of the twine together and tie a simple overhand knot. Rotate the twine so the knot is hidden near the back or tie a decorative bow at the top as shown in the inspiration image.
Brushing Technique
For perfect leaf shapes, use the ‘press and lift’ method. Touch the tip to the wood, press the belly of the brush down to widen the stroke, then lift while dragging to form a point.
Now you have a beautiful, folk-art inspired ornament ready to hang on the evergreen


Have a question or want to share your own experience? I'd love to hear from you in the comments below!