Painting on a black canvas is like stepping into a dark theater—every highlight you add instantly feels dramatic and alive. If you’ve ever wanted that bold, moody, high-contrast look without overthinking it, these ideas will get you started fast.
Starry Night Sky With White Splatter on a Black Background
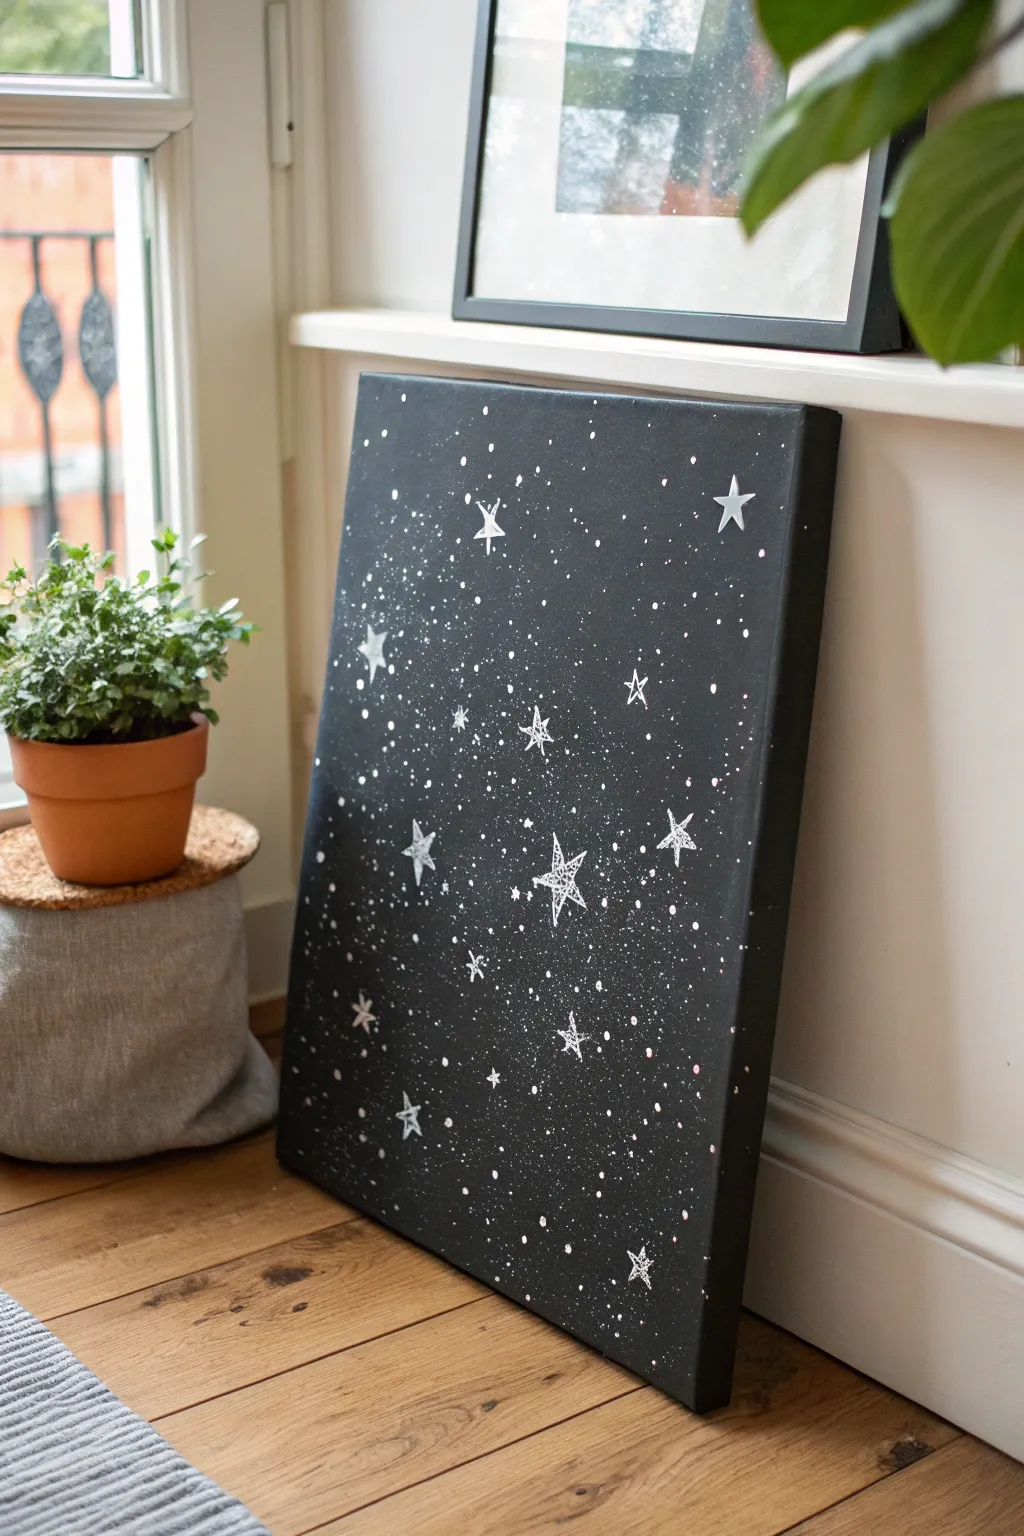
Bring the magic of a clear, starry night into your home with this striking monochrome art piece. This project combines the meditative process of hand-drawing stars with the fun, messy technique of paint splattering to create depth and texture against a deep black void.
Step-by-Step Guide
Materials
- Rectangular stretched canvas (medium size, e.g., 18×24 inches)
- Black acrylic paint (matte finish recommended)
- White paint marker (fine to medium tip)
- White acrylic paint (fluid or high-flow works best)
- Large flat paintbrush
- Old toothbrush or stiff bristle brush
- Pencil
- Cup of water
- Paper towels or drop cloth
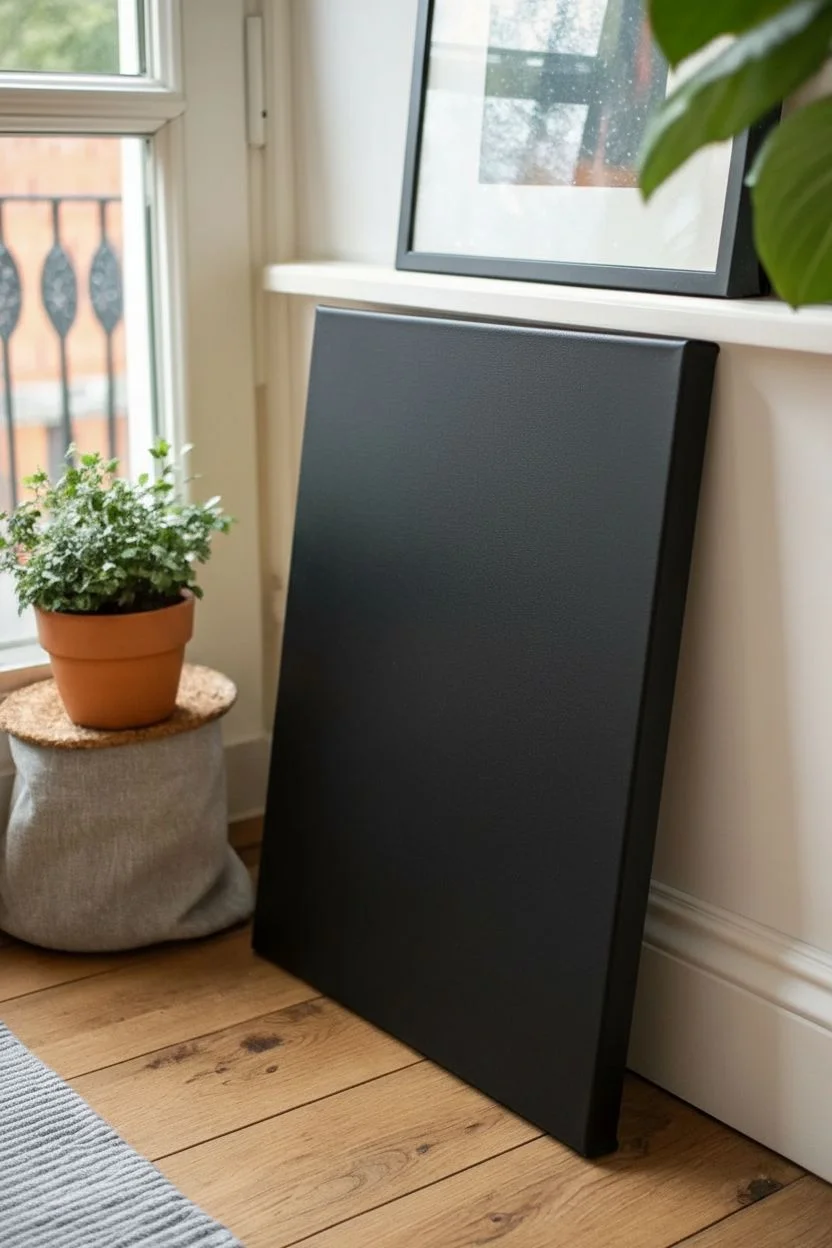
Step 1: Preparing the Void
-
Prepare your workspace:
Lay down a drop cloth or old newspapers to protect your floor and table. This project involves splattering later on, so cover a wide area. -
Base coat application:
Using the large flat paintbrush, apply an even coat of black acrylic paint across the entire canvas. -
Don’t forget the edges:
Paint the sides of the canvas as well so the artwork looks finished even without a frame. -
Second coat:
Once the first layer is dry to the touch, apply a second coat of black paint to ensure full, opaque coverage with no white canvas showing through. -
Full drying time:
Allow the canvas to dry completely before moving on to the stars. This usually takes about an hour, depending on the thickness of your paint.
Star Shaping Tip
Don’t worry about symmetry. A slightly crooked or asymmetrical star often looks more artistic and less like a stencil.
Step 2: Drawing the Constellations
-
Prime the marker:
Shake your white paint marker well and press the tip onto a scrap piece of paper to get the paint flowing smoothly. -
Draw primary stars:
Start by drawing a few larger, five-pointed stars scattered randomly across the canvas. Keep the style loose and sketchy rather than geometrically perfect. -
Add secondary stars:
Fill in the gaps with slightly smaller stars. Vary the rotation of each star so they don’t all look uniform. -
Create distinct shapes:
Mix up your star shapes. Draw some as classic 5-point stars, others as 4-point diamonds, and even a few 6-point sparks. -
Sketchy fill technique:
For the larger stars, scribble inside the shape with the marker. It shouldn’t be a solid fill; the scribbly texture adds a nice hand-drawn charm. -
Tiny distant stars:
Use the very tip of the marker to dot tiny singular points of light in the empty black spaces between your main stars.
Step 3: Splattering the Galaxy
-
Prepare splatter paint:
Mix a small amount of white acrylic paint with a few drops of water. You want a consistency similar to heavy cream or melted ice cream. -
Load the brush:
Dip an old toothbrush or a stiff bristle brush into the watered-down white paint. -
Test the splatter:
I always test the splatter on a piece of cardboard first to ensure big globs don’t fall off. -
Create the milky way:
Hold the brush over the canvas and use your thumb to flick the bristles, spraying a fine mist of white dots onto the black surface. -
Concentrate areas:
Focus the splattering more heavily in diagonal bands or clusters to mimic the natural density of a galaxy. -
Add larger droplets:
For variety, tap the handle of a loaded paintbrush against another brush handle over the canvas to create slightly larger, rounder drops. -
Final drying:
Let the entire piece sit undisturbed until the white splatter is completely dry.
Blob Control
If you accidentally drip a large blob of white paint, don’t wipe it! Let it dry, paint over it with black, and try again.
Hang your new celestial masterpiece near a window or in a cozy corner to add a touch of infinite wonder to your room


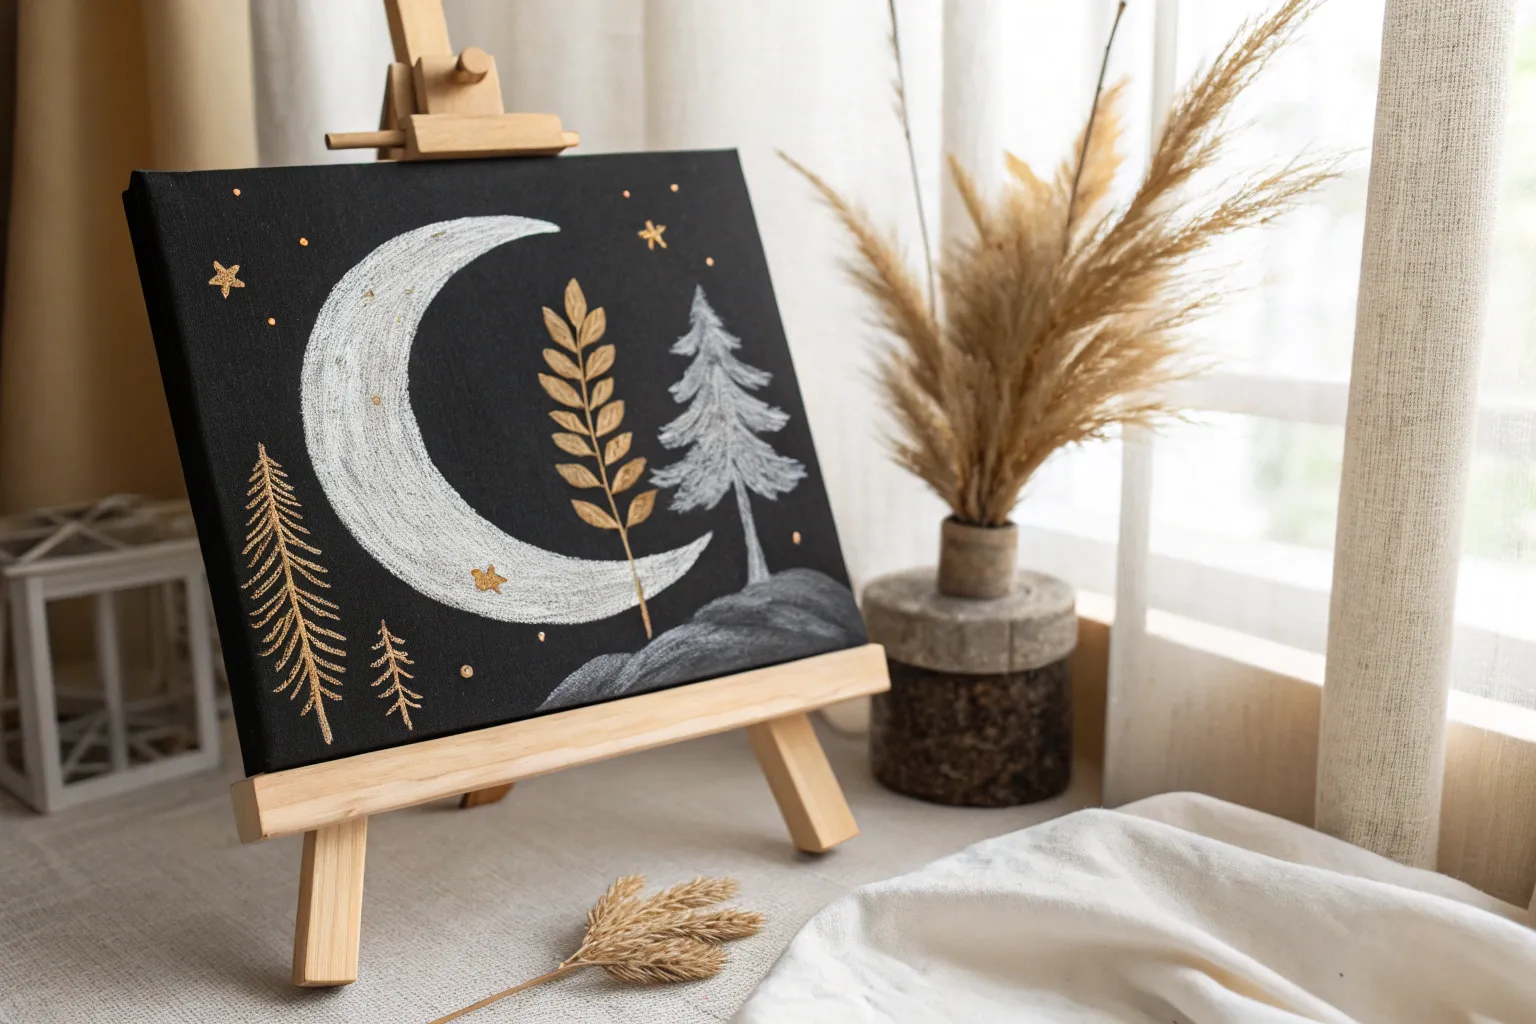
Big Full Moon and Rippling Water on a Black Canvas

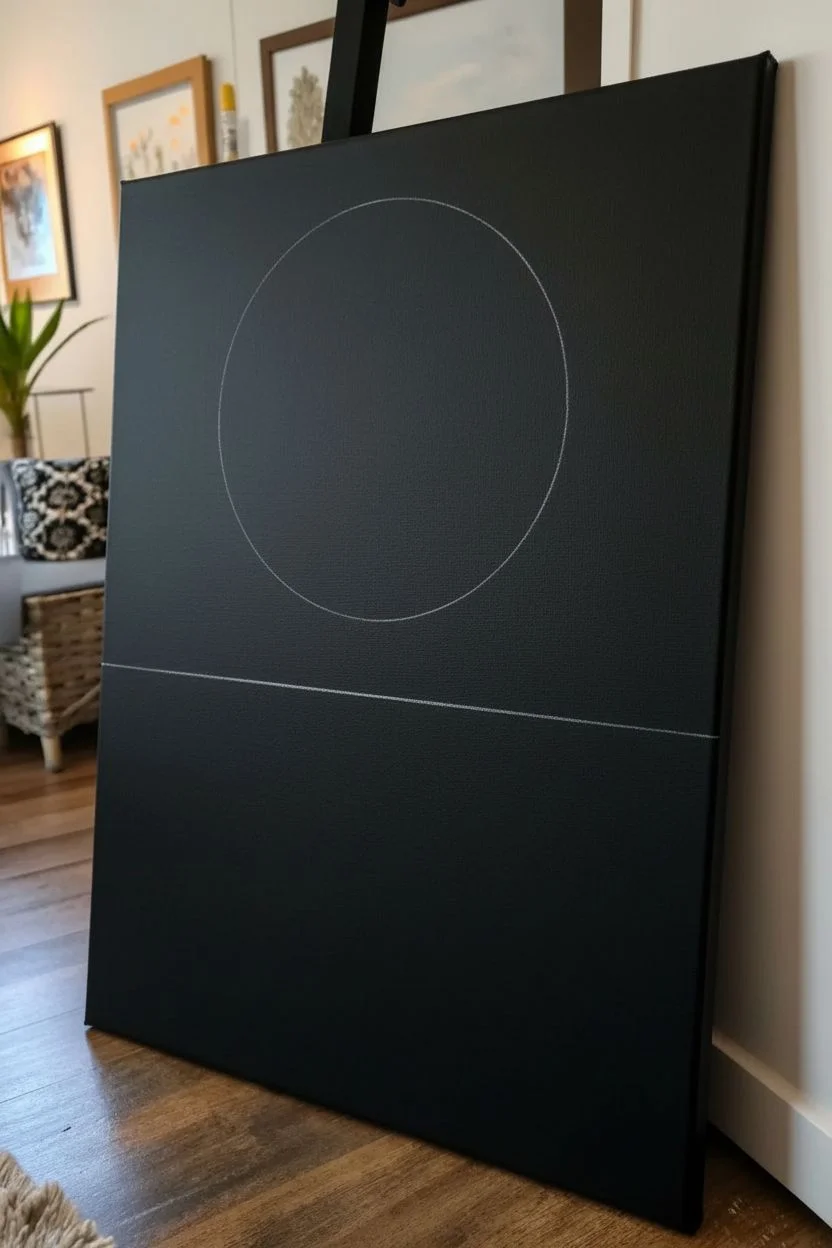
Capture the serene beauty of a full moon rising over the ocean with this dramatic black canvas study. The stark background makes the titanium white pop, creating an illuminated night scene that feels both deeply peaceful and striking.
How-To Guide
Materials
- Rectangular stretched black canvas (or white canvas painted black)
- Acrylic paints: Titanium White, Mars Black, Raw Umber, Yellow Ochre
- Large flat brush (1-2 inch)
- Medium round brush
- Small detail brush (0 or 00)
- Old toothbrush or stiff bristle brush
- Fan brush
- Round object for tracing (plate or bowl) or a compass
- White charcoal pencil or chalk
- Palette and water cup
- Paper towels
Step 1: Setting the Scene
-
Prepare the Void:
If your canvas isn’t already black, cover the entire surface with Mars Black acrylic paint. Use a large flat brush for smooth, even strokes. Let it dry completely before moving on. -
Outlining the Moon:
Position your round object (like a dinner plate) in the upper center of the canvas. It should dominate the top third. Trace the circle lightly using a white charcoal pencil or chalk. -
Establishing the Horizon:
Measure a straight horizon line about one-third of the way up from the bottom edge. Use a ruler and your charcoal pencil to ensure it’s straight, as water lies flat.
Moon Looks Flat?
Add more contrast! Deepen your dark greys in the crater ‘seas’ and use pure, unmixed white only for the highest ridges. High contrast equals high dimension.
Step 2: Painting the Moon
-
Base Illumination:
Mix a small amount of Yellow Ochre with plenty of Titanium White to create a warm, creamy off-white. Fill in the entire moon circle, but keep the paint somewhat thin so the black canvas subtly influences the tone. -
Mapping the Craters:
While the base is tacky, mix Raw Umber with a touch of Mars Black and a lot of water to create a transparent glaze. Stipple this dark mixture onto the moon in blotchy, irregular shapes to mimic the lunar maria (seas). -
Adding Texture:
Take a fairly dry round brush with pure Titanium White. Dab and scumble over the lighter areas of the moon to create crater ridges and highlands. The texture is key here; don’t blend it smooth. -
Softening the Edges:
I like to take a clean, slightly damp brush and gently run it along the very outer rim of the moon to soften the transition against the black sky, giving it a slight glow. -
Highlight Brightest Points:
Add thick, opaque dots of pure white on the right side of the crater ridges. This creates the illusion of sunlight hitting the uneven lunar surface.
Make it Mystical
Add a very faint, transparent glaze of Phthalo Blue or Purple over the black sky area (avoiding the moon) to give the night atmosphere a deep, cool tone.
Step 3: Creating the Sky
-
Starry Fields:
Dilute a bit of Titanium White with water until it’s inky. Load an old toothbrush or stiff bristle brush. -
Splatter Technique:
Hold the brush over the sky portion (mask off the water area with paper if you’re nervous) and flick the bristles with your thumb to spray tiny stars. Concentrate a few clusters near the corners.
Step 4: Reflecting on the Water
-
Central Pillar of Light:
Using a fan brush loaded with Titanium White, create the central reflection column directly under the moon. Hold the brush horizontally and use short, back-and-forth zigzag motions. -
Tapering the Glow:
Make the reflection widest at the bottom of the canvas and slightly narrower as it approaches the horizon line. Let the black canvas show through between your strokes. -
Creating Wave Movement:
Switch to a smaller round brush for the outer ripples. Paint thin, horizontal lines extending outward from the central light column, fading them out as they move away from the center. -
Adding Depth with Grey:
Mix a light grey (White + tiny dot of Black). Paint very thin lines underneath your brightest white wave crests. This creates a shadow effect for the water ripples. -
Horizon Definition:
Ensure the horizon line itself isn’t a solid white line. Break it up slightly with faint ripples to show the water is moving all the way to the edge of vision. -
Foreground Highlights:
For the water closest to the bottom viewer, use thicker paint and bolder strokes. This simulates the crests of larger waves catching the intense moonlight. -
Final Adjustments:
Step back five feet. If the water looks too disjointed, use a dry, soft brush to lightly sweep horizontally across the reflection to blur the edges just a tiny bit.
Hang your lunar creation in a dimly lit room and watch how the white paint seems to actually glow in the dark


Tree Line Silhouette Against a Soft Sunset Glow
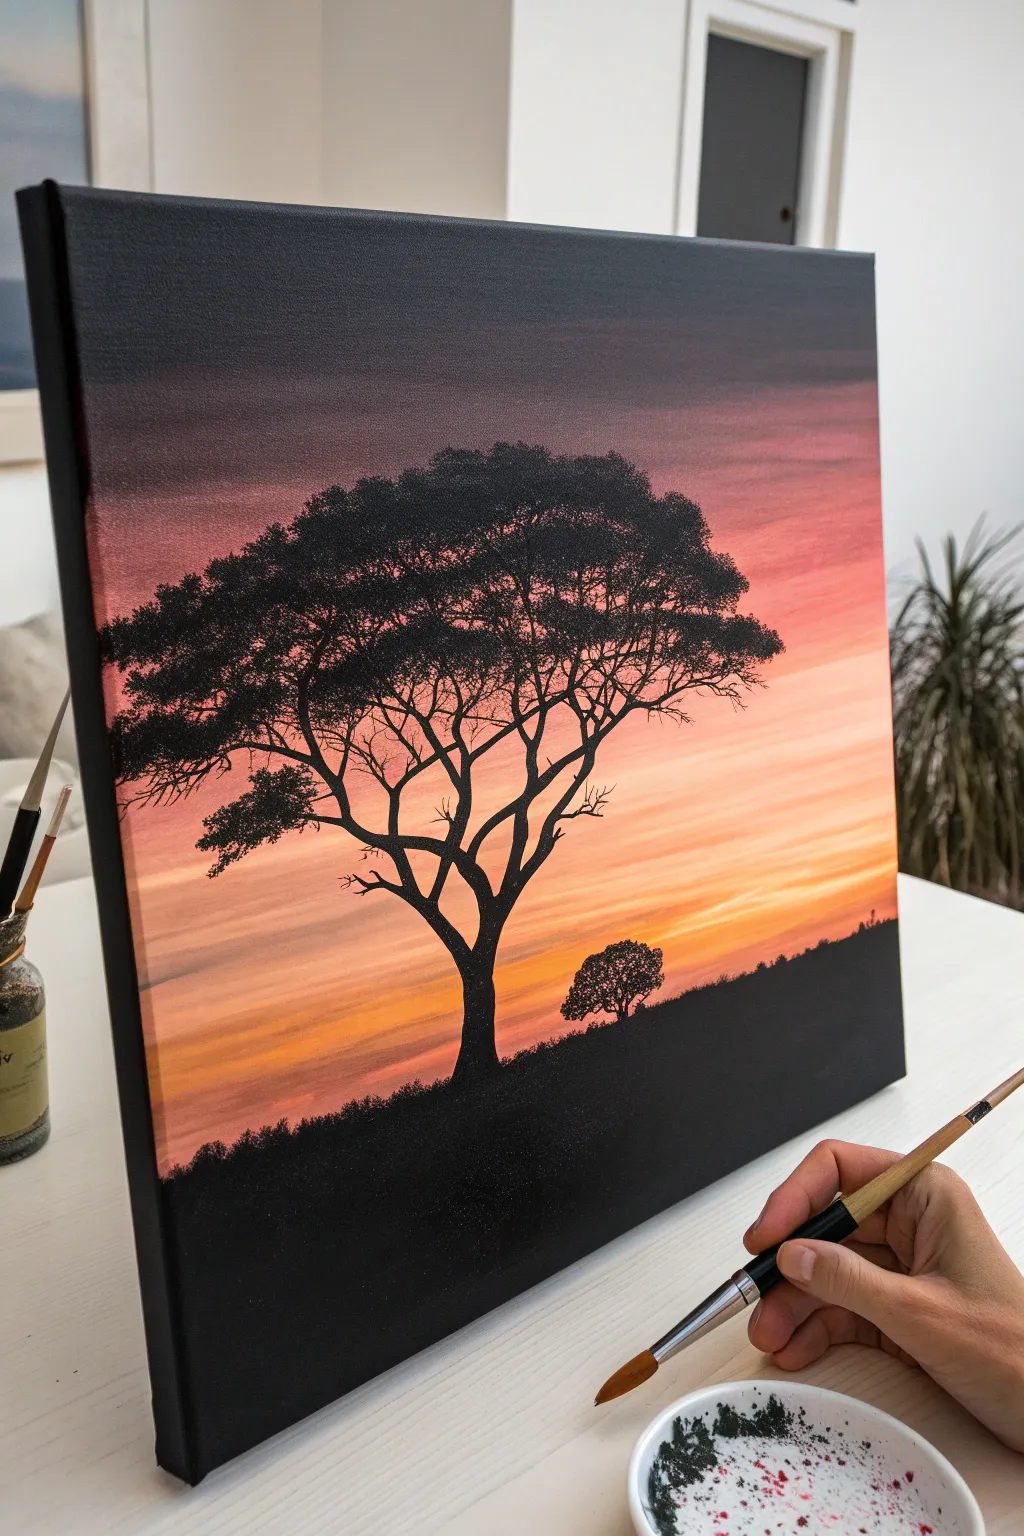
Capture the serene beauty of the savannah with this striking silhouette painting. By blending a warm, glowing gradient background and layering stark black details on top, you’ll create a high-contrast piece that looks professional yet is surprisingly approachable for beginners.
Step-by-Step
Materials
- Stretched canvas (square or rectangular)
- Acrylic paints (Titanium White, Cadmium Yellow, Orange, Alizarin Crimson, Dioxazine Purple, Mars Black)
- Large flat brush (for background blending)
- Medium filbert brush
- Small round detail brush (size 0 or 1)
- Palette or paper plate
- Cup of water and paper towels
- Pencil (optional)
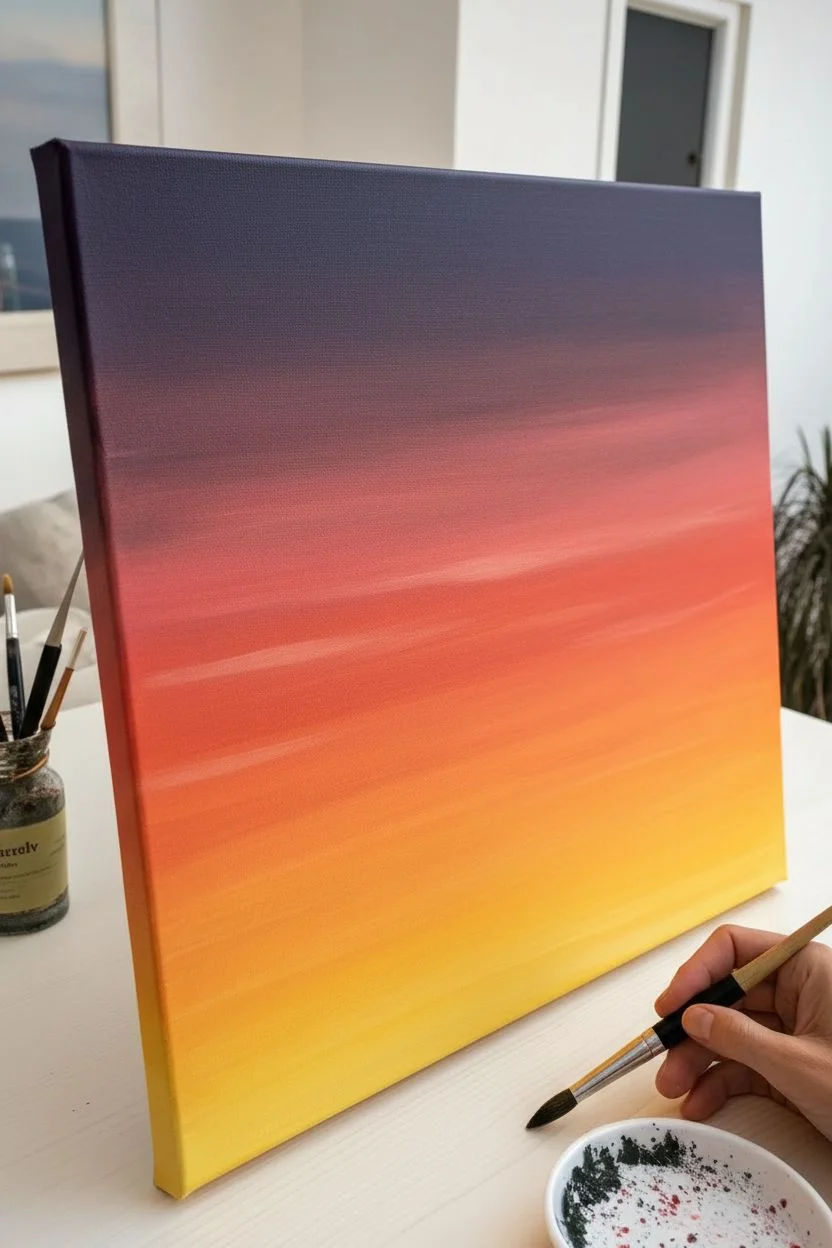
Step 1: Painting the Sunset Sky
-
Prepare the canvas:
Start with a clean, dry canvas. If you want an ultra-smooth finish for your sky, you can apply a thin coat of gesso first and sand it lightly once dry, though standard pre-primed canvas works perfectly fine. -
Mix the horizon color:
On your palette, mix a bright, warm yellow using Cadmium Yellow and a touch of Titanium White. This will go at the lowest part of the sky, just above where your ground line will be. -
Apply the yellow layer:
Using your large flat brush, paint horizontal strokes across the bottom third of the canvas. Keep the paint wet and fluid to help with blending later. -
Transition to orange:
Without cleaning your brush thoroughly, pick up some Orange paint. Apply this directly above the yellow section, using long horizontal strokes. Allow the wet yellow on the canvas and the fresh orange to mix slightly on the brush for a seamless gradient. -
Add pink and red tones:
Move higher up the canvas with Alizarin Crimson mixed with a little white to create a pinkish hue. Paint this above the orange band, again blending the edges where the colors meet by brushing back and forth gently. -
Create the dark upper sky:
For the top section, mix Dioxazine Purple with a tiny bit of Mars Black to de-saturate it slightly. Apply this to the very top of the canvas, blending it down into the pink/red layer. -
Refine the blend:
With a clean, dry flat brush, very lightly sweep horizontally across the entire sky to smooth out visible brushstrokes and soften the transitions between color bands. I find that wiping the brush on a towel between passes keeps the colors from getting muddy. -
Add cloud streaks:
While the background is still slightly tacky or just dry, mix a soft peach color. Use the edge of a flat brush to drag thin, wispy horizontal lines across the orange and pink sections to suggest distant clouds. -
Let it dry completely:
Ensure the background is 100% dry before moving to the black silhouette. This is crucial to prevent the black paint from smearing into your beautiful sky.
Muddy Sky Fix
If your sky colors turn brown while blending, stop! Let the paint dry completely. Then, re-apply the pure colors (yellow or pink) over the dried muddy area to restore vibrancy.
Step 2: Creating the Silhouette
-
Establish the ground line:
Load a medium brush with Mars Black. Paint a solid horizon line across the bottom of the canvas. It doesn’t need to be perfectly straight; adding slight bumps creates a natural grassy terrain look. -
Sketch the tree shape:
If you’re nervous about freehanding, lightly sketch the main trunk and primary branches with a pencil. Aim for the classic umbrella shape of an acacia tree. -
Paint the trunk:
Switch to your medium filbert brush and paint the main trunk in solid black. Make the base wider and taper it as it goes up, splitting into two or three main large branches. -
Branch out:
Using a smaller round brush, extend the main branches outward. Remember that tree branches generally get thinner the further they grow from the trunk. Let them curve and twist naturally. -
Add the canopy structure:
Continue splitting branches into smaller and smaller forks. The canopy should be wide and somewhat flat on top. Don’t worry about perfect symmetry; nature is wonderfully irregular. -
Stipple the foliage:
To create the leaves, switch to an old, scruffy brush or use the tip of your round brush. Load it with black paint and use a tapping or stippling motion to create clusters of leaves along the upper branches. -
Create density:
Stipple more densely near the center of the leafy clusters and leave tiny gaps near the edges so the sunset sky peeks through. This ‘sky holes’ effect adds realism. -
Add a smaller tree:
For depth, paint a much smaller tree silhouette in the distance on the right side. Keep the details simple—just a small trunk and a rounded, bushy top. -
Details on the ground:
Use your smallest detail brush to flick tiny vertical strokes upwards along the black horizon line. This simulates tall grass growing on the savannah. -
Final touches:
Check for any light spots in your black paint and apply a second coat if needed to make the silhouette opaque and solid. Sign your name in black in the corner or scratch it into the wet paint.
Tiny Details Hack
Can’t get sharp, thin branches? Use a liquid ink marker or a black paint pen for the tiniest twigs. It gives you more control than a brush.
Step back and admire the warmth of your handmade sunset scene


Birds on a Wire in White-on-Black Minimal Style
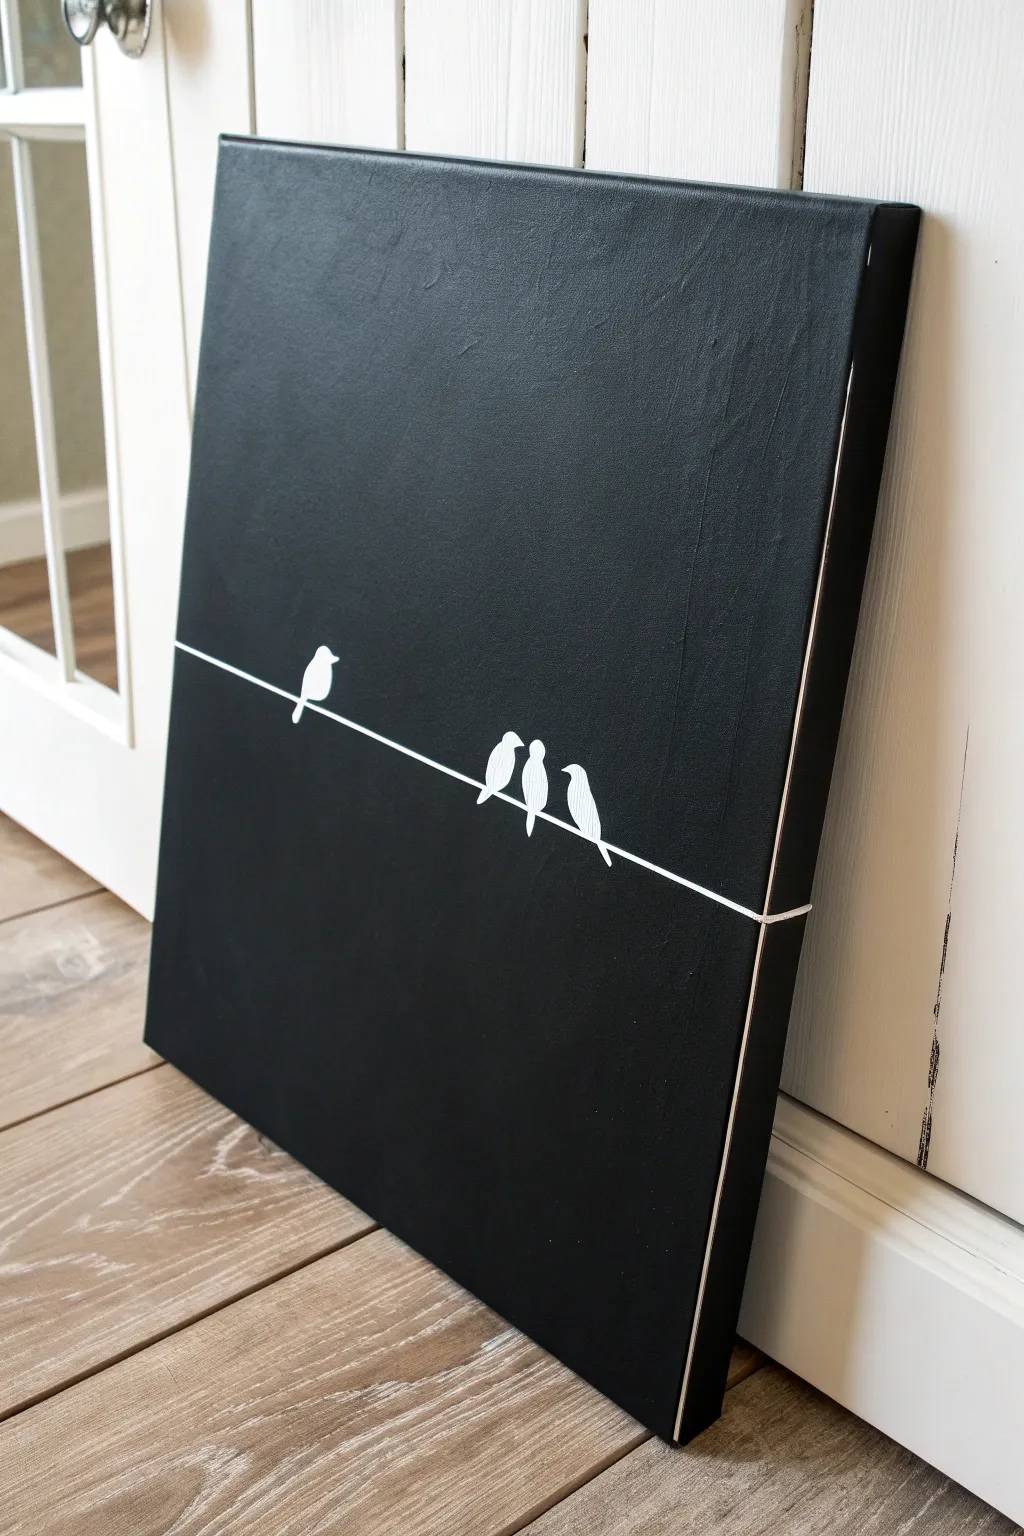
Capture the stark beauty of silhouettes with this striking white-on-black canvas project. This piece relies on clean lines and negative space to create a modern, peaceful scene that fits perfectly in any room seeking a touch of whimsy.
How-To Guide
Materials
- Stretched canvas (rectangular, e.g., 16×20 inches)
- Black acrylic paint (matte or satin finish)
- White acrylic paint (high opacity)
- Wide flat paintbrush or foam brush
- Fine detail paintbrush (liner or round size 0/1)
- White chalk or white pastel pencil
- Ruler or straight edge
- Painter’s tape (optional)
- String or yarn (optional used as a guideline)
Step 1: Setting the Dark Foundation
-
Prepare the workspace:
Lay down newspaper or a protective cloth on your work surface. Since you will be covering the entire canvas in black, ensure the edges of your table are protected from drips. -
Base coat application:
Using your wide flat brush or foam brush, apply a generous layer of black acrylic paint to the canvas. Work in long, vertical strokes to minimize texture. -
Don’t forget the edges:
Paint the sides (and even a bit of the back edge) of the canvas. This gallery-wrap style gives the piece a finished look without needing a frame later. -
Second coat for depth:
Allow the first layer to dry completely. Apply a second coat of black paint, this time brushing horizontally. This cross-hatching technique ensures solid coverage so no white canvas shows through. -
Full drying time:
Let the black background dry thoroughly before moving on. If the paint is even slightly wet, the white details will turn gray and muddy.
Clean Lines
If your white paint looks streaky, don’t overwork it while wet. Let it fully dry, then add another thin layer. Several thin coats are smoother than one thick glob.
Step 2: Stringing the Wire
-
Determine the placement:
Visually divide your canvas into thirds. The wire should sit roughly along the bottom third line, dipping slightly to create a natural slack look. -
Draft the line:
Use a white pastel pencil or chalk to lightly sketch the wire. I like to make the line slightly diagonal or curved rather than perfectly straight to add visual interest. -
Paint the wire:
Load your fine liner brush with white paint. Thin the paint slightly with a drop of water to help it flow smoothly. Carefully retrace your chalk line with a steady hand. -
Refine the thickness:
Go over the line a second time if needed to make the white opaque. Keep the line thin and consistent; a shaky hand actually adds a bit of organic charm here.
Step 3: Adding the Silhouettes
-
Sketch the birds:
Using your chalk, sketch four simple bird shapes sitting on the wire. Place one solitary bird on the left side and a group of three huddled together on the right side. -
Focus on shapes:
Think of the birds as simple teardrop shapes with tails. Vary their posture slightly—have one looking up, one looking down, or one leaning slightly. -
Fill the first bird:
Start with the solitary bird on the left. Outline the shape with your fine brush and white paint, then fill in the center. -
Paint the trio:
Move to the group on the right. Paint the outlines first to ensure they are distinct from one another, leaving a hairline of black space between them if possible, or letting them merge into a cluster. -
Add tails and beaks:
With the very tip of your liner brush, add tiny triangles for beaks and extend the paint slightly below the wire to create tail feathers. -
Opacity check:
White paint on black often needs two or three coats. Let the first layer dry, then re-apply paint to the birds until they are bright, solid white.
Make It Yours
Try painting the wire and birds in gold or silver metallic paint for a chic, luxurious look, or add a tiny red heart above the single bird for a pop of color.
Step 4: Finishing Touches
-
Clean up guidelines:
Once the white paint is 100% dry, take a damp cloth or a clean eraser and gently wipe away any visible chalk marks. -
Touch up the black:
If you slipped and got white paint where it shouldn’t be, use a small brush with black paint to ‘erase’ the mistake and sharpen the edges of your birds. -
Seal the work (optional):
Consider applying a clear matte varnish spray over the entire piece to protect the paint and unify the sheen.
Hang your new monochromatic masterpiece where the striking contrast can draw the eye and start a conversation
BRUSH GUIDE
The Right Brush for Every Stroke
From clean lines to bold texture — master brush choice, stroke control, and essential techniques.
Explore the Full Guide
Misty Mountains With Pale Highlights on a Black Background
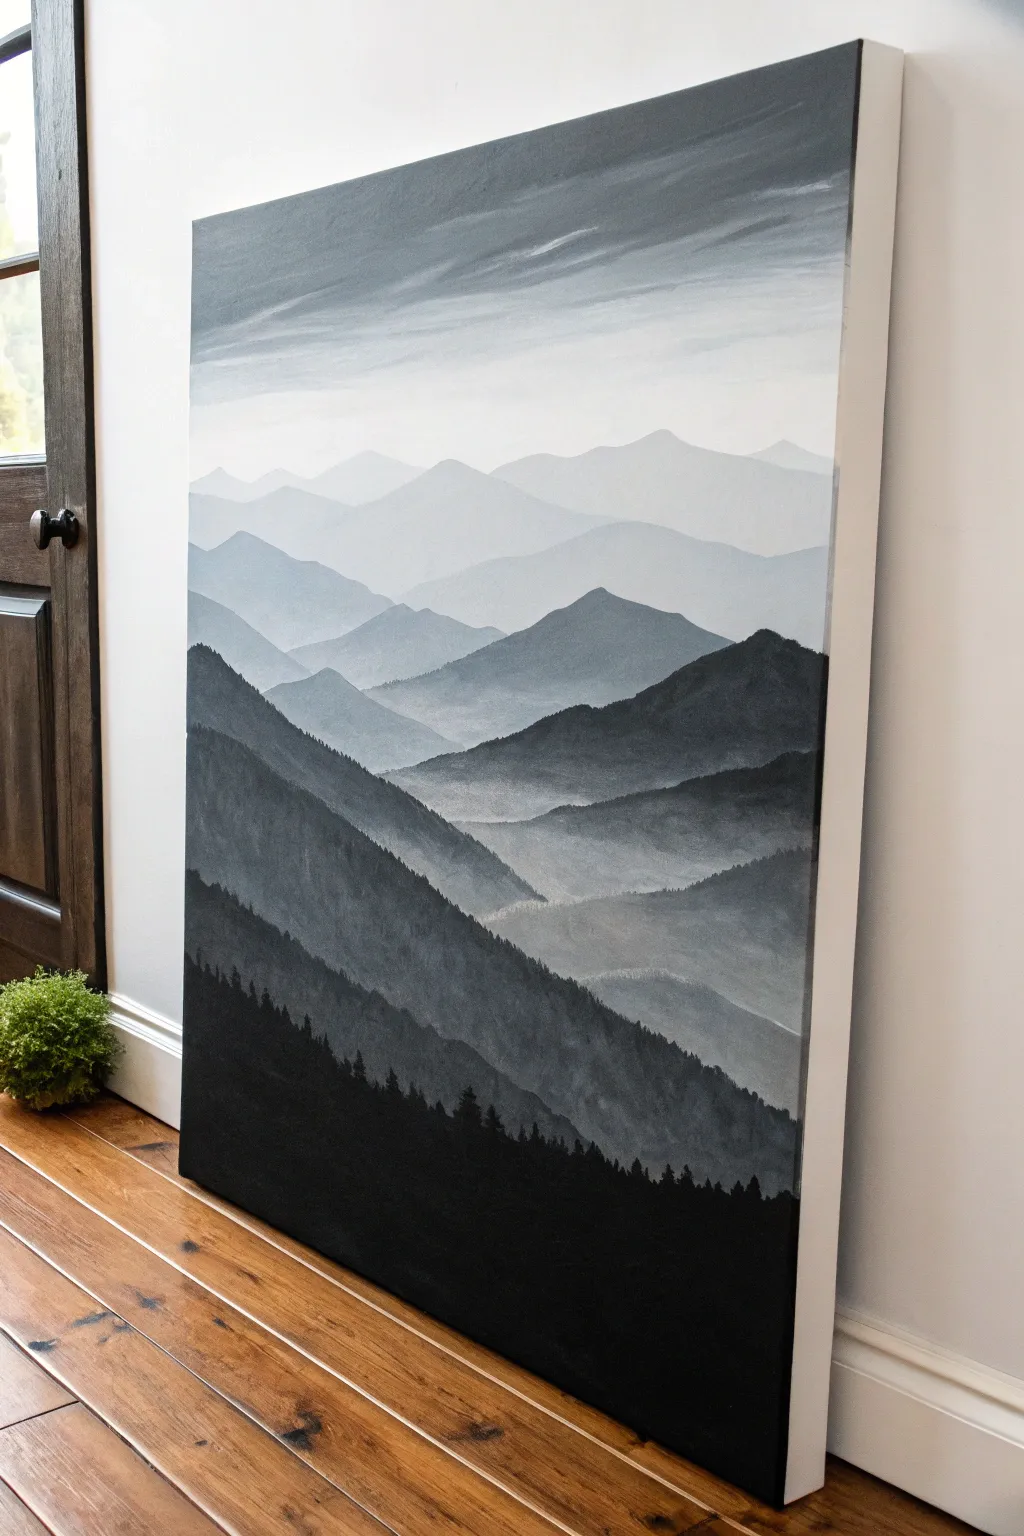

This atmospheric vertical painting captures the serene depth of a mountain range fading into the distance. By mastering a simple gradient of five to seven shades of gray, you’ll create a striking piece of wall art that feels both modern and timeless.
Step-by-Step Tutorial
Materials
- Large rectangular canvas (vertical orientation)
- Black acrylic paint
- Titanium white acrylic paint
- Large flat brush (2-3 inch) for background
- Medium angled brush for mountain shapes
- Small round brush for tree details
- Palette or disposable plates for mixing
- Cup of water
- Paper towels
- Easel (optional but helpful for vertical pieces)
Step 1: Preparation & Sky
-
Prepare your palette:
Begin by squeezing out a generous amount of white and black paint on opposite sides of your palette. You will need more white than you think for the subtle upper gradients. -
Mix the sky tone:
Create a very light gray mix—almost white. Paint the top 20% of the canvas with horizontal strokes, blending slightly darker streaks near the very top edge to suggest cloud cover. -
Create the atmospheric fade:
While the sky is still wet, blend pure white into the lower section of the sky area. This creates the ‘haze’ that the furthest mountains will disappear into.
Mist Master
Keep a separate dry merging brush handy. After painting a mountain, immediately drag the dry brush along the bottom edge to create instant, effortless fog.
Step 2: Distant Ranges
-
Mix the lightest mountain shade:
Mix a pale gray that is just barely darker than your sky. It needs to be distinct enough to see the shape, but faint enough to look miles away. -
Paint the first ridge:
Using your angled brush, paint a jagged, uneven line across the canvas, roughly a quarter of the way down. Fill in the area below this line with your pale gray, fading it out with a little water as you go down. -
Add the second layer:
Mix a slightly darker gray. Paint the next mountain range below the first, overlapping it. Ensure the peaks of this new layer don’t align perfectly with the ones behind it. -
Create the mist effect:
At the base of this second mountain layer, before the paint dries, use a clean, slightly damp brush to blur the bottom edge. This replicates the look of mist settling in the valleys.
Step 3: Mid-Ground Mountains
-
Deepen the values:
For the next two layers, you need a true medium gray and a dark charcoal gray. These ranges should be larger and have more defined slopes than the distant ones. -
Paint the slopes:
Paint the medium gray range first. Start creating diagonal slopes that enter from the sides of the canvas, guiding the viewer’s eye toward the center. -
Add texture:
While painting these darker gray mountains, use a rougher, drier brush stroke in some areas. This mimics the texture of rock faces or dense forests without painting individual details. -
Layer the charcoal range:
Below the medium gray, add a dark charcoal layer. This should occupy nearly the varied middle section of the canvas. Keep the valleys misty by blending the bottom edges with white or light gray glazing.
Depth Perception
Make the distant mountains smoother and flatter. As you move to the foreground, make your brushstrokes rougher to simulate seeing more texture up close.
Step 4: Foreground & Details
-
Mix the darkest shade:
Squeeze out fresh black paint. You can use it pure or mix in a tiny dot of blue if you want a cooler tone, but pure black works perfectly for high contrast. -
Construct the foreground slope:
Paint a large, dominating mountain slope starting from the bottom left corner, rising steeply upwards. Fill this shape in completely with solid black. -
Add the tree line:
Switch to your small round brush. Along the top ridge of this black foreground slope, dab mostly vertical, tiny strokes to create the silhouette of pine trees. -
Refine the silhouettes:
I like to vary the height of these trees significantly—some should be tall distinct pines, while others are just small bumps on the ridge. -
Final touches:
Step back and look at your gradients. If any ‘mist’ areas look too abrupt, you can apply a very watery wash of white paint over the dried valley areas to soften the transition. -
Paint the edges:
Don’t forget to paint the sides of your canvas black or gray so the artwork looks finished even without a frame.
Hang your new masterpiece in a well-lit spot where the subtle gradients can really shine
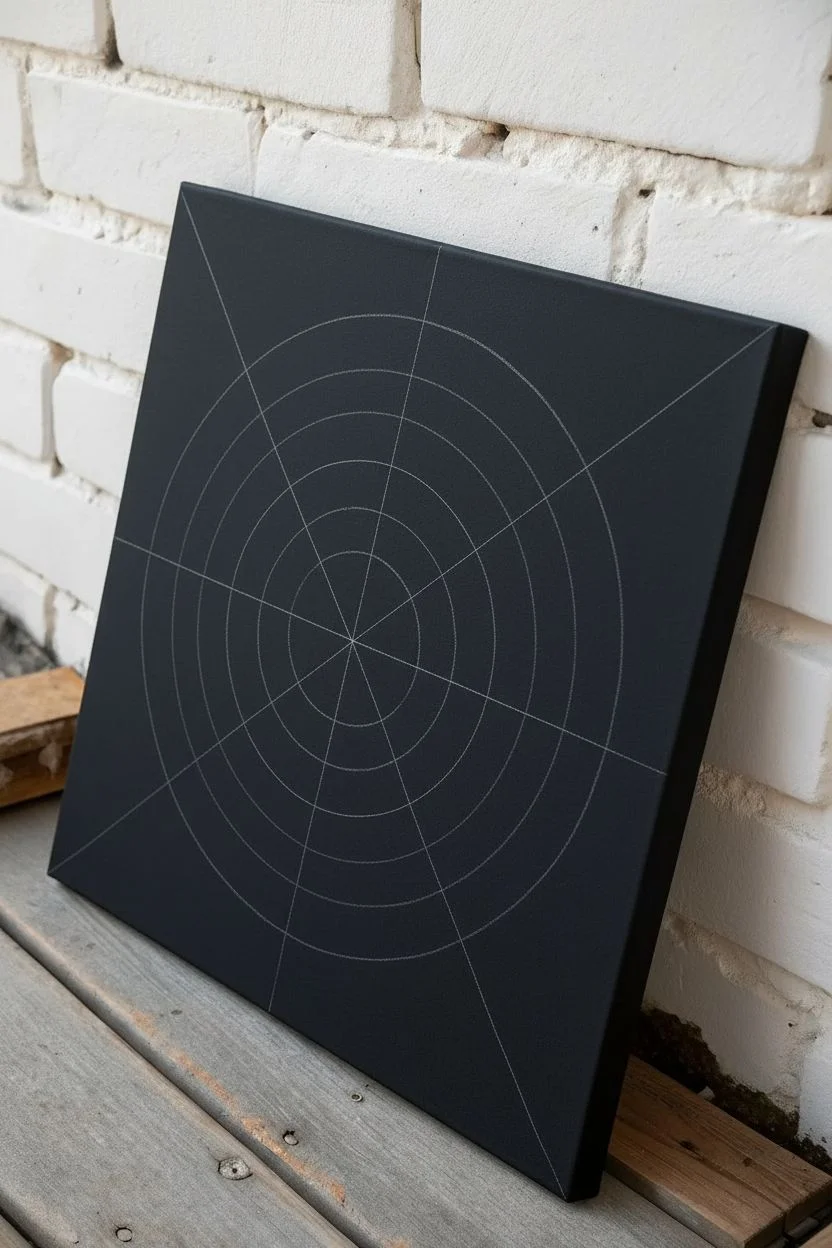
Simple Galaxy Swirl With Two or Three Bright Colors
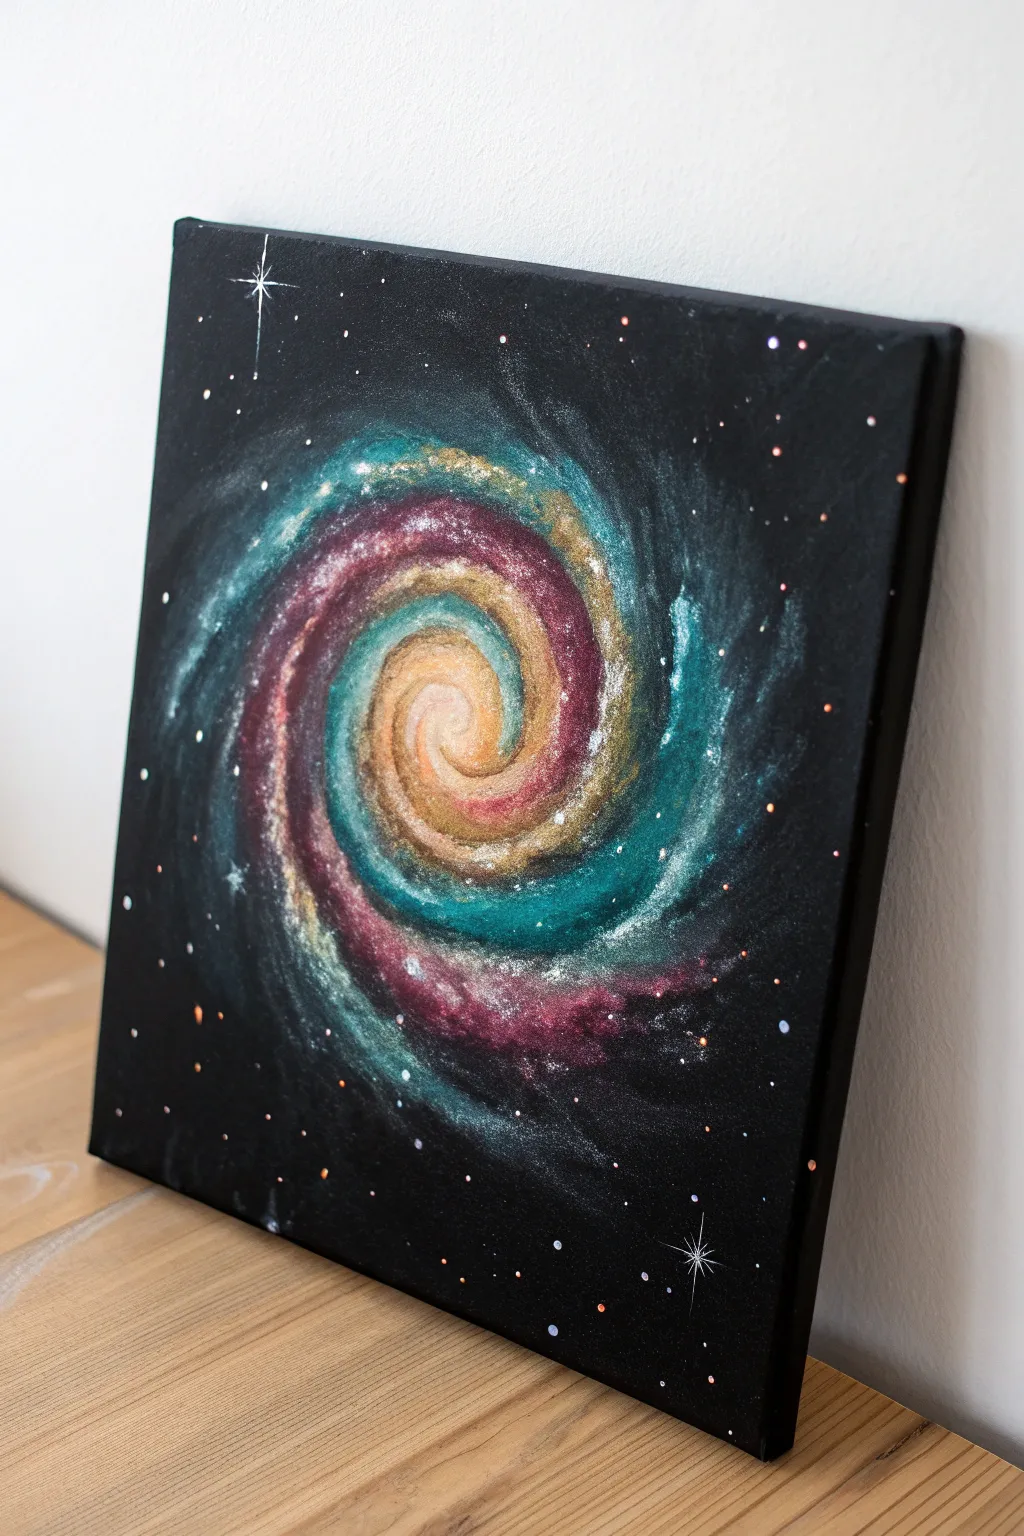
Capture the magic of deep space with this mesmerizing galaxy swirl painting. Using a black canvas as your base, you’ll layer shimmering blues, purples, and golds to create a depth-defying spiral that pops right off the darkness.
Step-by-Step Tutorial
Materials
- Square stretched canvas (black primed, or primed black yourself)
- Acrylic paints: Titanium White, Phthalo Turquoise (or Teal), Magenta (or Deep Violet), and Metallic Gold
- Soft synthetic brushes: 1-inch flat brush, medium filbert brush, and a fine liner brush
- Old toothbrush (optional for stars)
- Palette or paper plate
- Water cup and paper towels
- Sponge or stiff bristle brush (optional for texture)
Step 1: Setting the Background
-
Prepare the Surface:
If your canvas isn’t already black, cover the entire surface with a coat of black acrylic paint. Ensure you paint the sides as well for a finished look without a frame. Let this base layer dry completely before moving on. -
Plan the Spiral:
Visualize where the center of your galaxy will be. It helps to lightly tap your brush in the very center to mark the core, though you don’t need to sketch anything out; this organic shape is best done freehand.
Step 2: Building the Core
-
Start the Glow:
Mix a tiny amount of Titanium White with your Metallic Gold to create a pale, luminous center color. Using your filbert brush, paint a small, slightly elongated oval in the center. -
First Spiral Arm:
With the gold mixture still on your brush, gently pull the paint outwards from the center in a curving motion. Let the stroke fade out naturally as you move away from the core. -
Layering Warm Tones:
Clean your brush and pick up some pure Metallic Gold. Paint over the outer edges of your pale center, blending slightly inward to create a soft transition from bright white-gold to rich gold.
Muddy Colors?
If your turquoise and magenta turn grey where they touch, let the first color dry completely before applying the second nearby. Layering dry paint prevents muddy mixing.
Step 3: Adding Color Arms
-
Introduce Magenta:
Load your brush with Magenta (or Deep Violet). Start a new spiral arm originating just outside the gold center. Curve it around the core, overlapping slightly with the gold to create a blended, reddish-bronze transition area. -
Extend the Purple:
Continue dragging the Magenta outwards. Use a dry-brush technique here—wipe most of the paint off your brush first—so the black canvas shows through the texture, making the gas clouds look wispy. -
Apply Turquoise:
Clean your brush thoroughly. Pick up your Phthalo Turquoise or Teal. Start this arm on the opposite side of the center from the magenta arm, curving it tightly around the gold core. -
Blend the Meeting Points:
Where the turquoise tail meets the magenta tail, allow them to brush against each other. Don’t over-mix, or you’ll get mud; just let the dry brush textures sit side-by-side to imply layers of gas and dust. -
Highlighting the Arms:
Mix a little Titanium White into your Turquoise to make a pale cyan. Lightly dab this highlight color on the ‘top’ edge of the turquoise arm to give it volume and make it look 3D. -
Enhancing the Purple:
Do the same for the magenta section by mixing a touch of white with the purple paint. Apply these highlights sparingly to the thickest parts of the spiral arms.
Make It Depth-Defying
Keep the center of the spiral very bright and opaque, and the outer arms progressively more transparent and ‘dry.’ This contrast creates the illusion of deep space.
Step 4: Creating Stardust
-
Texture the edges:
Using a very dry brush or a small sponge with a tiny bit of white paint, lightly tap around the very edges of your spiral arms. This creates the ‘dust’ look of distant stars dissolving into the darkness. -
Adding Bright Stars:
Dip the handle end of a paintbrush into pure white paint. Dot random stars around the black background. Vary the pressure to create different sized dots. -
Creating the Star Field:
For the cluster of tiny stars, water down white paint slightly. Load an old toothbrush or stiff brush, and flick the bristles with your thumb to spray a fine mist of white specks over the galaxy and background. -
Gold and Bronze Stars:
Repeat the dotting process (using the brush handle) with your Metallic Gold paint. Place a few of these special colored stars in the outer corners for variety. -
Painting the Flares:
Choose one or two larger white stars to turn into ‘flares.’ Using your finest liner brush, paint a thin vertical line and a horizontal line crossing through the dot to create a cross shape.
Now step back and admire the vibrant nebula you have brought to life

PENCIL GUIDE
Understanding Pencil Grades from H to B
From first sketch to finished drawing — learn pencil grades, line control, and shading techniques.
Explore the Full Guide
Glowing Butterfly With a Soft Neon Effect on Black
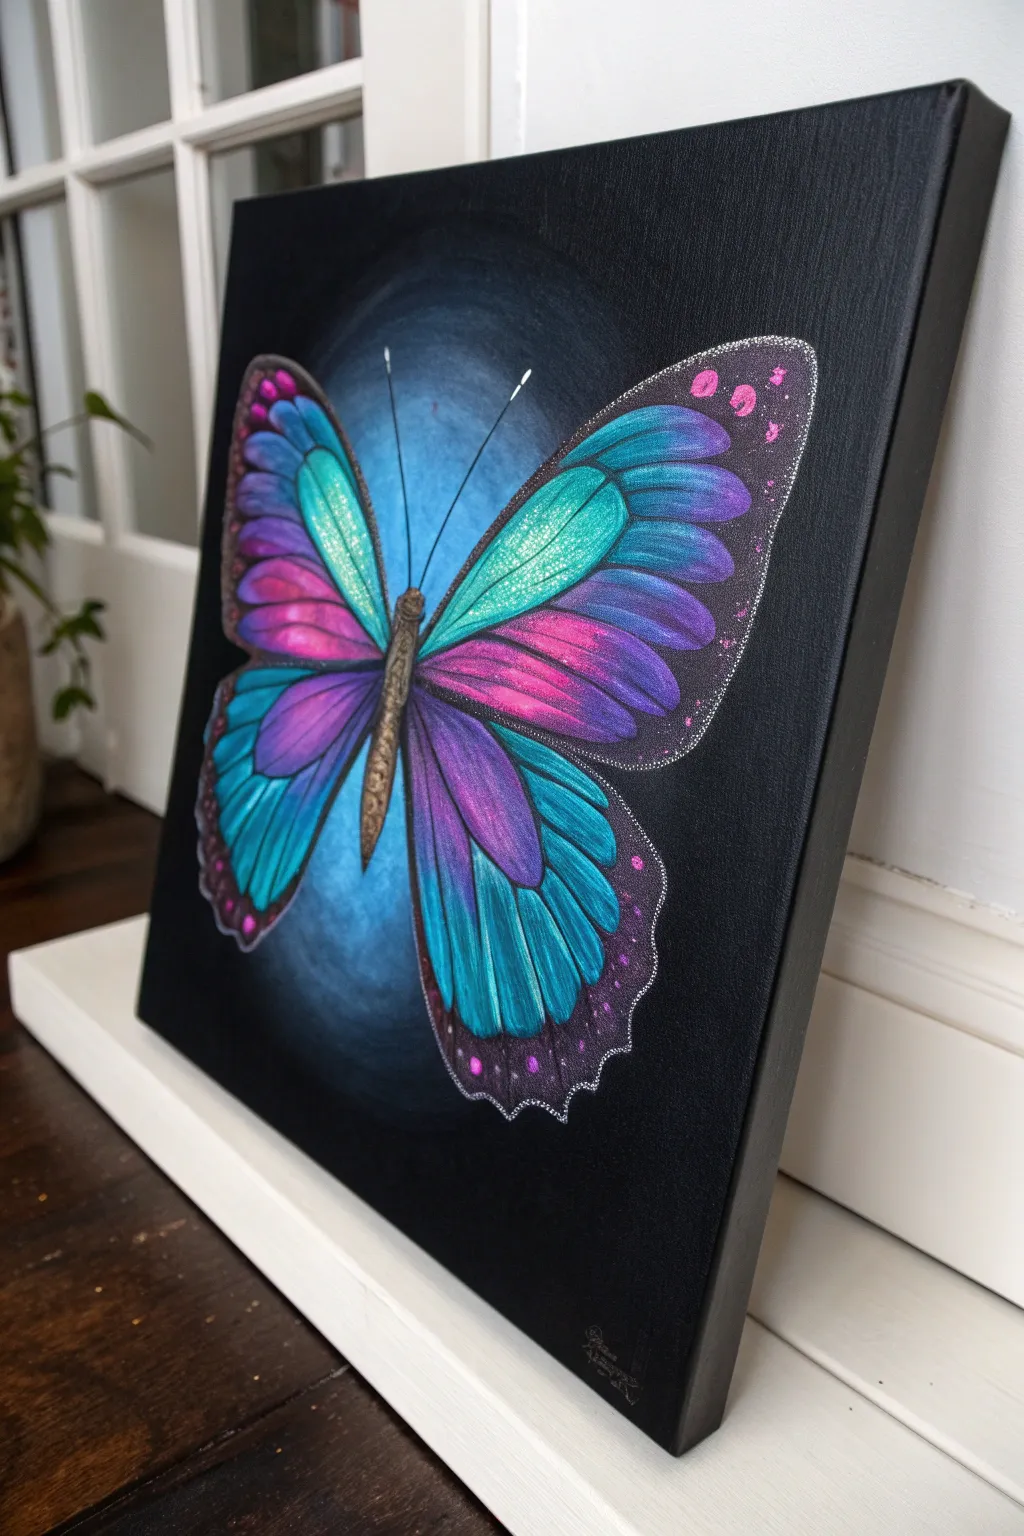
This stunning painting captures the magic of a butterfly glowing against a deep void. Using a black canvas as your base creates immediate drama, making the vibrant teals, violets, and pinks pop with an almost electric luminosity.
How-To Guide
Materials
- Black stretched canvas (square format, e.g., 12×12 or 16×16 inches)
- Acrylic paints: Titanium White, Phthalo Blue, Turquoise, Deep Violet, Neon Pink, Black
- Iridescent or glitter medium (clear or silver)
- Large blending brush or soft sponge
- Round synthetic brushes (sizes 4, 2, and 00 for details)
- White gel pen or fine white Posca marker (optional but helpful for dots)
- Palette for mixing paint
- Jar of water and paper towels
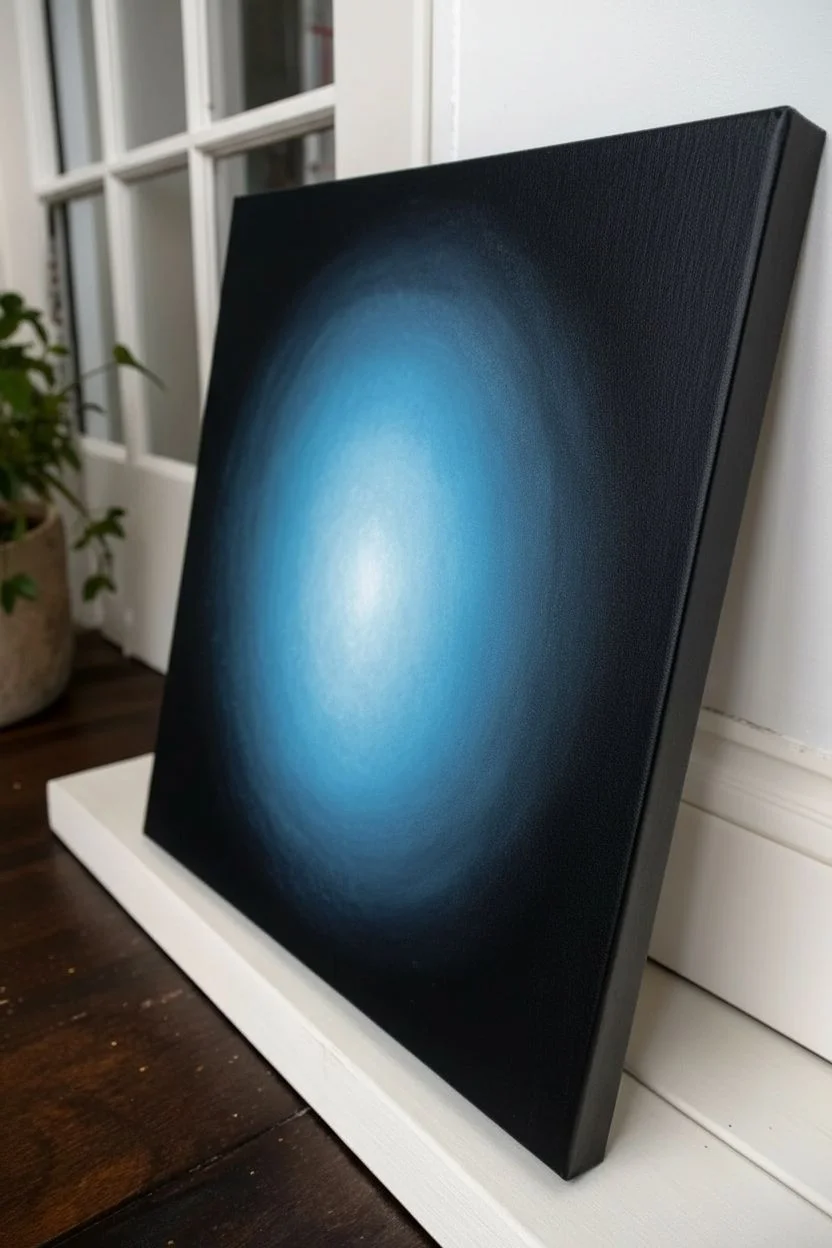
Step 1: The Glowing Backdrop
-
Prepare the glow zone:
Since we are starting with a black canvas, we need to create the soft light source first. Mix a small amount of Phthalo Blue with Titanium White to make a muted sky blue. -
Apply the background haze:
In the center of the canvas, use a dry blending brush or sponge to lightly dab this blue mixture in an oval shape. Feather the edges outwards so it fades seamlessly into the black canvas. -
Intensify the center:
While the first layer is slightly tacky, add a bit more white to your blue mix and brighten just the very center of the oval. This creates the ‘backlighting’ effect that will shine through the wings.
Step 2: Sketching and Base Layers
-
Draft the outline:
Using a white chalk pencil or very watered-down white paint on a thin brush, lightly sketch the butterfly’s shape over the blue glow. Draw a slender body and four large wing sections. -
Block in white underpainting:
Colors won’t show up vividly straight onto black. Paint the main sections of the wings (where you want the brightest colors) with a thin layer of Titanium White. Avoid the veins; let the black canvas show through for those. -
Paint the body:
Mix a dark grey-brown and paint the thorax and abdomen. Use a size 2 brush to dab small texture marks in a lighter tan color to make it look fuzzy.
Fixing “Muddy” Wings
If blending turquoise and pink creates a brown smudge, let the first color dry completely. Apply the second color as a sheer glaze over the top instead of wet-blending.
Step 3: Applying Vibrant Color
-
Start with teal:
On your palette, have your Turquoise ready. Paint the upper sections of fresh white underpainting with the turquoise, blending it downwards. -
Blend in the violet:
While the turquoise is wet, apply Deep Violet to the lower sections of the wings. Where the turquoise and violet meet, blend them gently to create a deep indigo transition. -
Add neon pink highlights:
Using your Neon Pink, paint streaks into the middle of the wings, particularly on the lower wings. Blend this into the violet for a radiant, unmatched glow. -
Detail the wing edges:
The outer edges of the wings should remain darker. You can mix a bit of black into your violet to darken the very tips of the wings, ensuring they fade into the background.
Level Up: 3D Effect
Use ‘puff paint’ or dimensional fabric paint for the white dots on the edges. This creates actual raised texture that you can feel, adding amazing tactile detail.
Step 4: Intricate Details & Sparkle
-
Define the veins:
Go back in with pure black paint and a size 00 fine liner brush. sharpen the lines between the colorful wing segments to make them crisp and distinct. -
Create the dotted border:
This is the signature step. Using a detail brush dipped in white (or a white gel pen), create a delicate line of tiny dots along the entire outer perimeter of the wings. -
Inner wing dots:
Add a secondary row of even tinier white dots just inside the first row. I find this double-dotted line mimics the microscopic scales found on real butterfly wings. -
Pink speckles:
Dip a small brush into your neon pink and add larger, decorative spots near the outer tips of the wings for extra pattern interest. -
Add glitter accents:
Once the paint is fully dry, brush a thin layer of iridescent glitter medium over the teal and pink sections of the wings. This gives it that shimmery, magical texture. -
Final antennae:
With your finest brush and white paint, draw two long, curved antennae extending from the head. Add a tiny dot at the very tip of each.
Hang your luminous creation in a spot with low light to watch it truly shine
White Daisies With Layered Petals That Pop on a Black Canvas
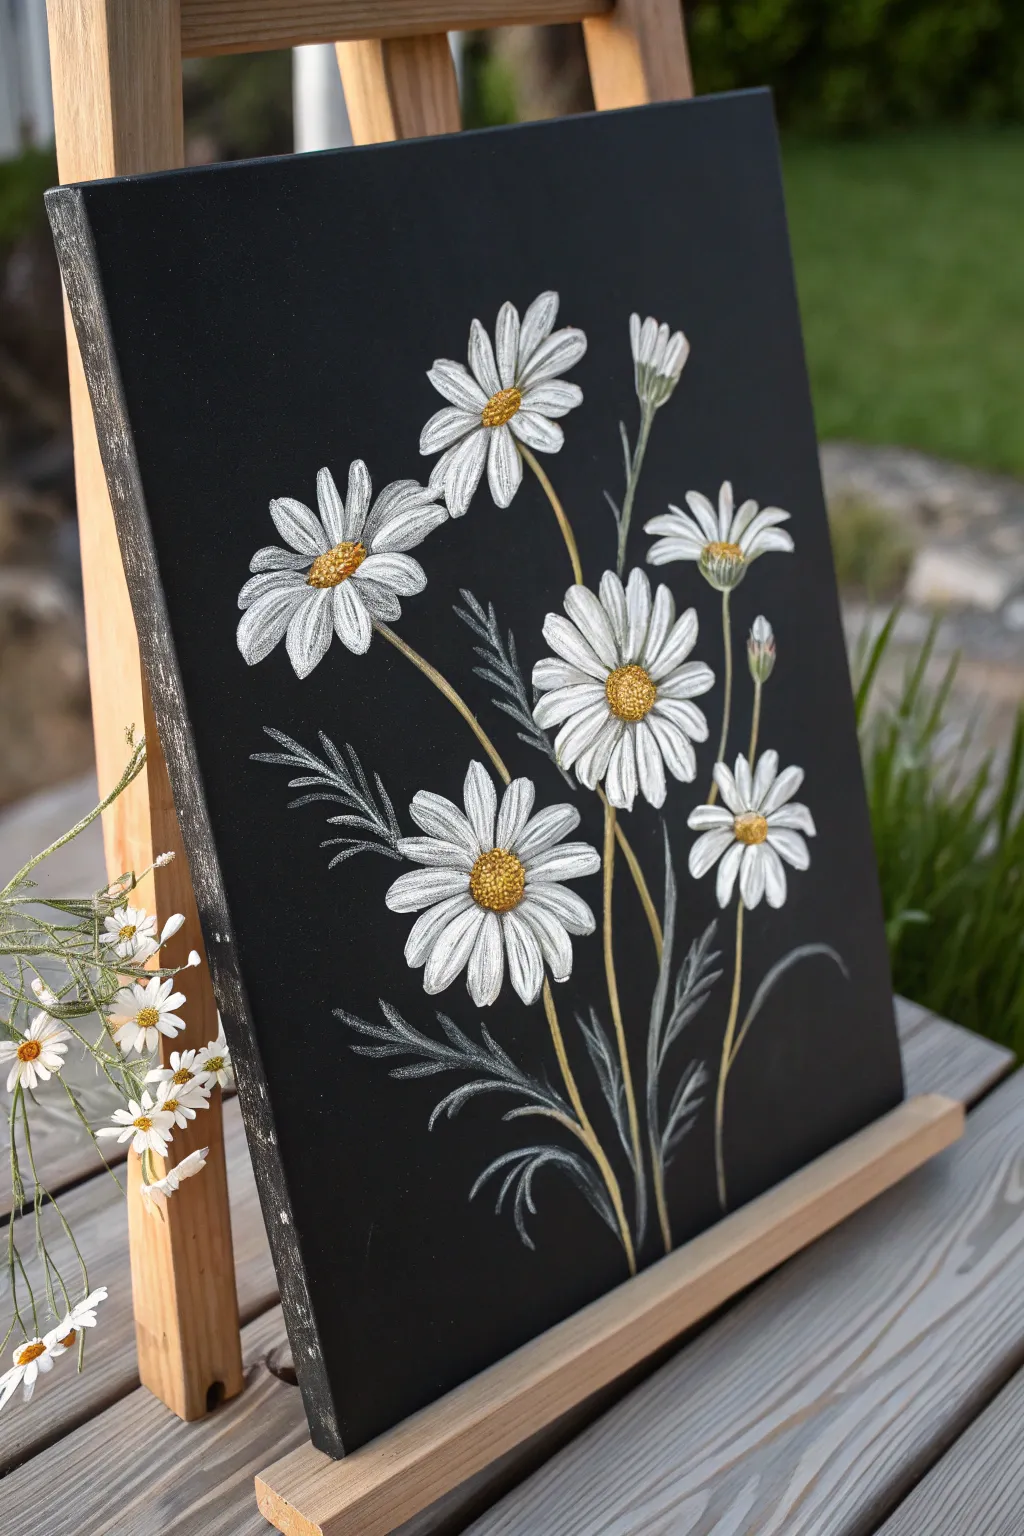
This elegant painting project uses high contrast to make simple white florals seemingly leap off the canvas. By layering translucent whites and adding textured golden centers, you’ll create a sophisticated botanical piece that looks beautiful in any room.
Step-by-Step Tutorial
Materials
- Primes black canvas (medium grain, approx. 12×16 inch)
- Titanium White acrylic paint
- Yellow Ochre acrylic paint
- Cadmium Yellow acrylic paint
- Burnt Umber acrylic paint
- Sap Green or Olive Green acrylic paint
- White charcoal pencil or chalk
- Filbert brushes (sizes 4 and 6)
- Small round detail brush (size 0 or 1)
- Palette knife or texture medium (optional for centers)
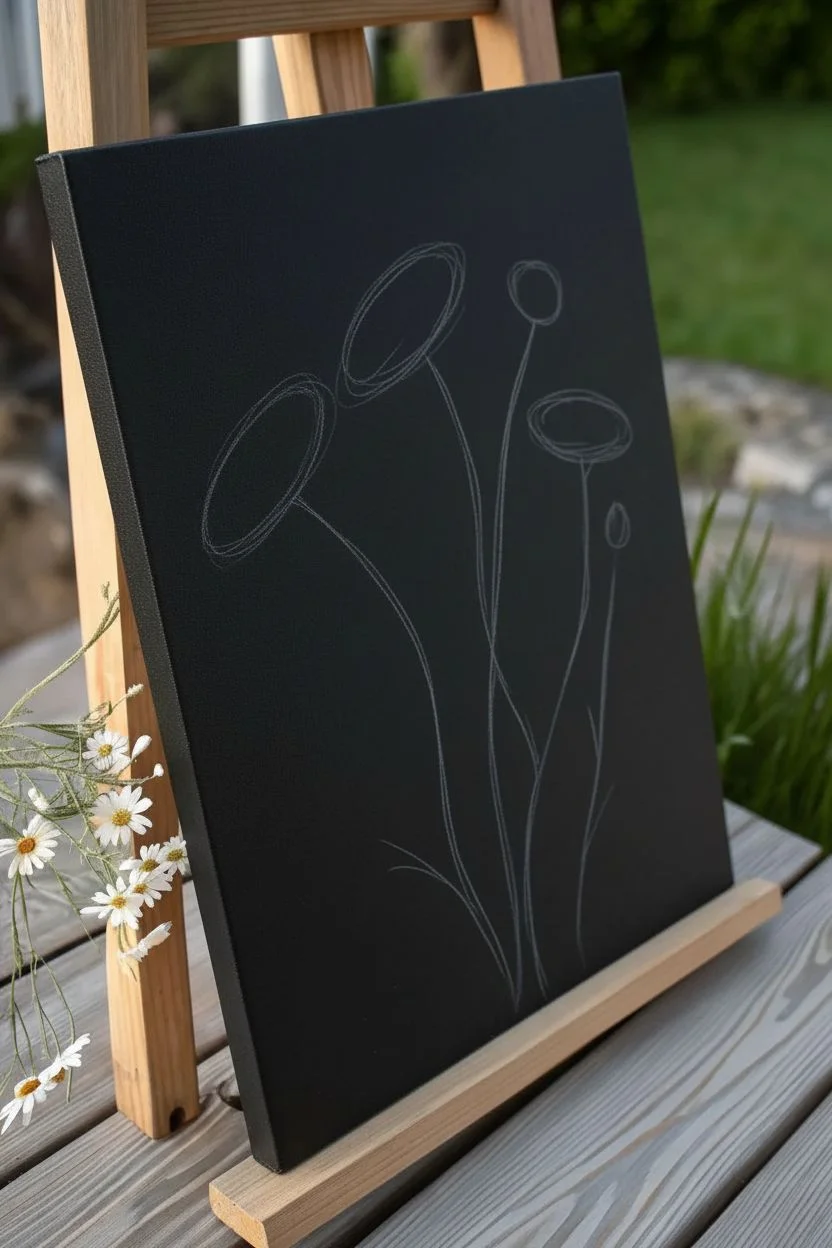
Step 1: Preparation and Sketching
-
Prepare the Background:
If your canvas isn’t already black, apply two coats of black gesso or matte black acrylic paint. Allow it to dry completely until the surface is uniform and opaque. -
Map the Composition:
Using a white charcoal pencil or a piece of chalk, lightly sketch the layout of your stems. Draw long, sweeping curves originating from the bottom center, fanning out as they rise. -
Place the Flower Heads:
At the top of each stem line, sketch rough ovals to indicate where the flower heads will sit. Vary the angles—some facing forward, some tilting up, and include a few smaller, unopened buds for variety.
Paint Transparency?
If your white looks grey against the black canvas, don’t pile it on thick all at once. Apply thin layers, letting each dry fully. 2-3 thin coats yield a brighter white than one thick glob.
Step 2: Developing the Stems and Leaves
-
Mix the Stem Color:
Create a muted green by mixing Sap Green with a touch of White and a tiny bit of Yellow Ochre. You want a subtle color that doesn’t compete too much with the bright petals. -
Paint the Main Stems:
Using a size 1 round brush, carefully trace over your sketch lines. Keep the paint relatively thin so the lines remain delicate. -
Adding Fern-like Foliage:
Near the base and mid-section of the stems, paint feathery, fern-like leaves. Use quick, flicking strokes with the tip of your brush in a slightly lighter grey-green shade to create movement. -
Create Depth in Foliage:
Go back over some of the lower leaves with a very diluted white or light grey wash. This ghost-like effect pushes some leaves into the background, adding atmospheric depth.
Pro Tip: Texture Pop
Mix a small amount of textured impasto gel or modeling paste into your yellow paint for the flower centers. This physical bump makes the pollen look incredibly realistic.
Step 3: Painting the Petals
-
Base Layer of Petals:
Load a size 4 filbert brush with Titanium White. Starting from the outside edge of a flower oval, pull the brush inward toward the center. -
Petal Direction:
Lift the brush slightly as you reach the center to taper the stroke. Arrange the petals radially around the center space. -
Transparency Control:
I prefer to let the first layer be slightly translucent, allowing a hint of the black background to show through. This acts as a natural shadow for the petals. -
Adding the Second Layer:
Once the first layer is dry, apply a second coat of thick Titanium White on the tips and upper halves of the petals. This creates a highlight that makes the flowers pop. -
Detailing Petal Texture:
Use your smallest liner brush with slightly watered-down grey (white with a dot of black) to paint tiny lines down the center of a few petals, giving them slight ridges and realism.
Step 4: The Golden Centers
-
Base Color for Centers:
Mix Yellow Ochre with a tiny bit of Burnt Umber. using the round brush, dab this darker yellow mix into the center of each open daisy. -
Creating Texture:
Instead of painting a flat circle, use a stippling motion (rapid dotting) with the tip of your brush. This mimics the pollen-heavy texture of the flower disk. -
Adding Highlights:
Mix Cadmium Yellow with a little White. Stipple this brighter color onto the top-left side of each center sphere to indicate a light source. -
Deepening Shadows:
Stipple pure Burnt Umber on the bottom-right edge of the yellow centers to give them a 3D, spherical appearance. -
Final Cleanup:
Use a damp cotton swab or a brush with black paint to tidy up any edges where white paint may have strayed too far onto the background.
Hang your new high-contrast floral piece in a spot with good lighting to let those bright whites really shine


Bright Tulips With Deep Shadows for High Contrast
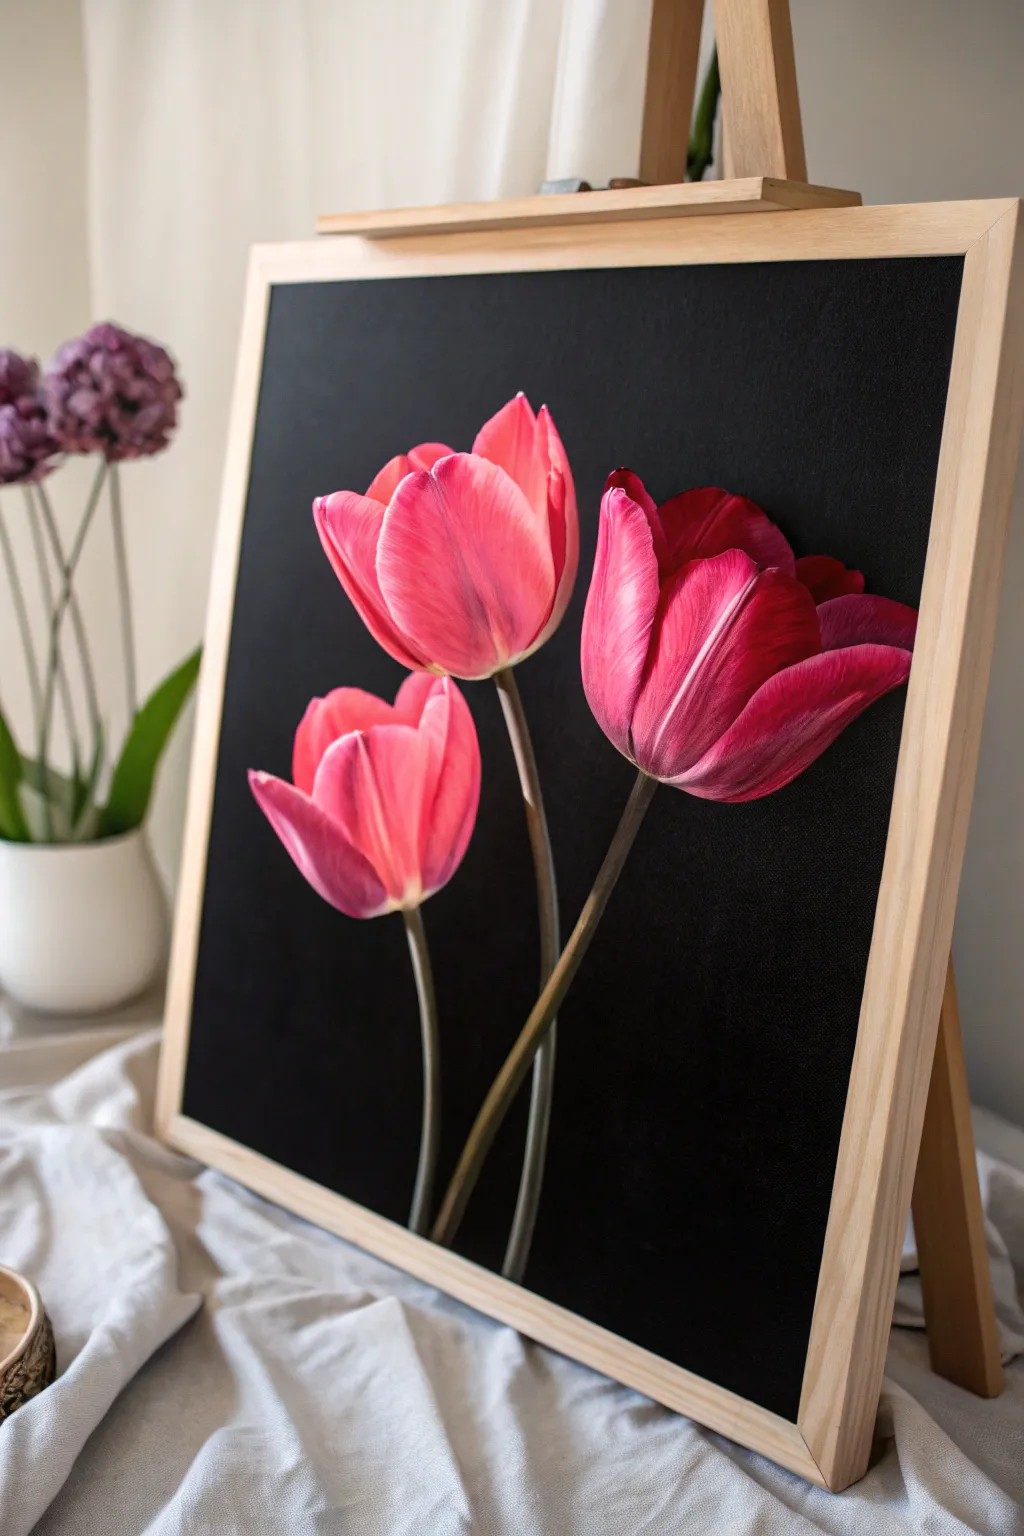
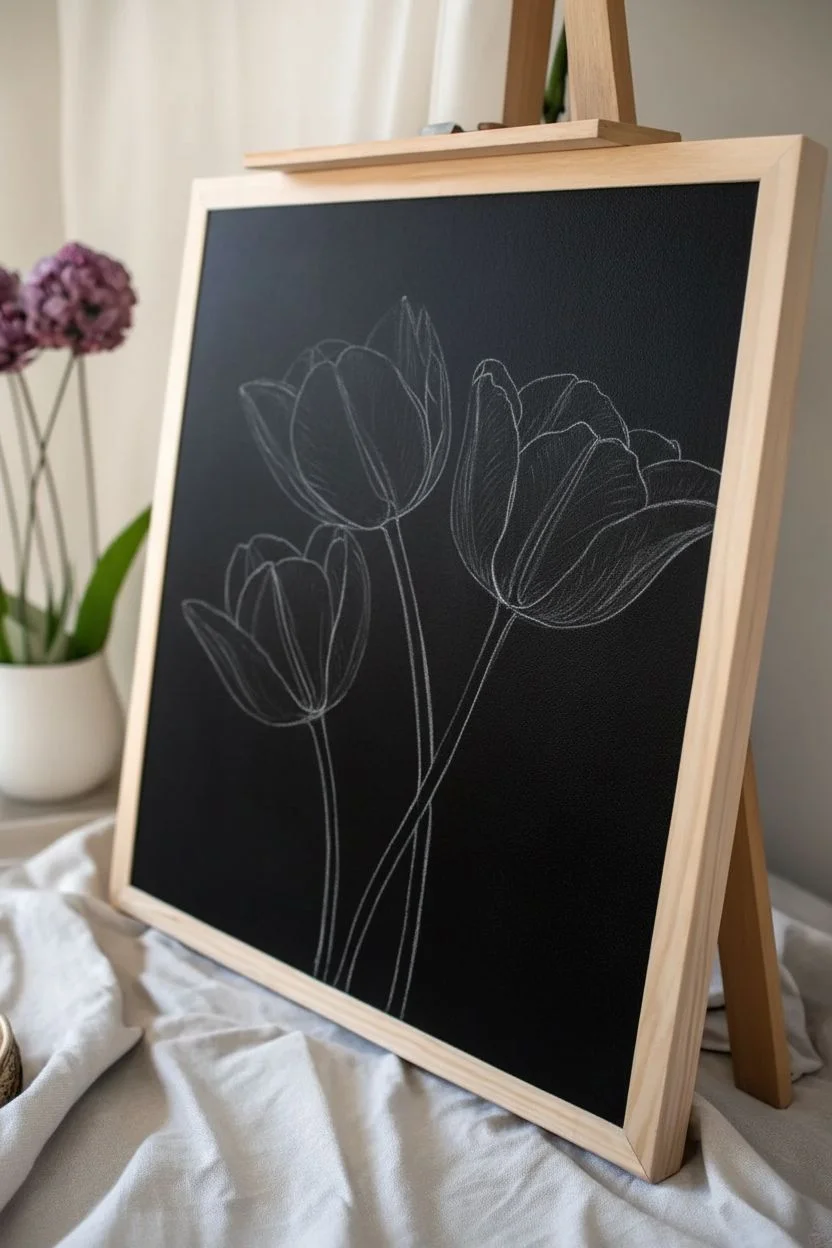
Capture the drama of chiaroscuro with this striking painting of three vibrant tulips emerging from a pitch-black void. The intense contrast between the deep background and the translucent pink petals creates a modern, sophisticated floral study.
Detailed Instructions
Materials
- Square canvas or canvas board (approx. 16×16 or 20×20 inches)
- Black gesso or high-coverage matte black acrylic paint
- Heavy body acrylic paints (Alizarin Crimson, Cadmium Red, Titanium White, Magenta, Hooker’s Green, Burnt Umber)
- Flat synthetic brushes (1-inch and 1/2-inch)
- Filbert brushes (sizes 4 and 8) for petal curves
- Small round detail brush (size 1 or 2)
- Chalk or a white charcoal pencil
- Slow-drying medium or retarder (optional, for blending)
Step 1: Preparation & Background
-
Prime the Surface:
Begin by coating your entire canvas with black gesso or matte black acrylic paint. Apply two coats if necessary to ensure a solid, velvety darkness with no canvas weave showing through. -
Sketch the Composition:
Once the black background is bone dry, lightly sketch the outlines of your three tulips using white chalk or a white charcoal pencil. Draw one central bud facing mostly forward, one lower bud angled left, and a larger, more open bloom on the right. -
Outline the Stems:
Draw long, slender stems that curve gracefully from the bottom center, leading up to each flower head. I like to keep the stems intersecting slightly near the base to create a natural bouquet gathering point.
Step 2: Blocking in Color
-
Base Coat the Petals:
Mix a mid-tone pink using Magenta, a touch of Cadmium Red, and Titanium White. Fill in the petal shapes with this solid color, ignoring the shadows and highlights for now. -
Base Coat the Stems:
Mix Hooker’s Green with a little Burnt Umber to create a deep, shadow-green. Paint the stems with a flat brush, ensuring crisp edges against the black background. -
Establish Shadows:
While the pink base is still tacky (or using a retarder), mix Alizarin Crimson with a tiny dot of black or purple. Apply this dark mix to the base of the petals and the areas where petals overlap. -
Define Petal Separation:
Use your dark crimson mix to paint distinct lines separating the individual petals. This is crucial for the tulip on the right, which shows the interior of the cup.
Fixing “Flat” Looking Flowers
If petals look 2D, you lack contrast. Don’t be afraid to use nearly white paint for tips and nearly black-purple for bases. The bigger the range, the deeper the curve.
Step 3: Refining & Detailing
-
Add Mid-tone Variation:
Mix a pure, bright red (Cadmium Red) with a little Magenta. Glaze this over the center of the petals to give them a rich, saturated glow that bridges the dark shadows and the coming highlights. -
Create Veining Texture:
Switch to your small filbert brush. Mix a lighter pink (White + Magenta) and gently stroke upwards from the base of the petal to the tip, following the curve of the flower to mimic natural striations. -
Highlight the Edges:
Using a small round brush and nearly pure Titanium White with just a whisper of pink, paint the very edges of the petals. Highlighting the rims makes them look thin and delicate. -
Blend the Stems:
Add a touch of yellow-green to your stem color. Paint a thin highlight down the right side of each stem to suggest a light source coming from the right, giving the stems a cylindrical volume. -
Intensify the Black:
If you painted over the edges during the color phase, use your matte black paint to carefully cut back in around the flowers. This ‘cutting in’ sharpens the silhouette and makes the colors pop.
Level Up: Velvet Texture
Use a specialized ‘blackest black’ acrylic paint (like Black 3.0 or similar) for the background. It absorbs 99% of light, making the flowers look like they are floating in space.
Step 4: Final Touches
-
Enhance Translucency:
For a glowing effect, mix a very thin glaze of bright orange-red and apply it where the light hits the petals most directly. This simulates sunlight passing through the flower. -
Deepen the Contrast:
Look at the deepest crevices between petals. If they look washed out, apply a final glaze of pure Alizarin Crimson or even a dark purple to maximize depth. -
Clean Up Chalk Lines:
Once the paint is completely dry, use a damp cloth to gently wipe away any visible white charcoal or chalk sketch lines from the black background. -
Varnish (Optional):
Finish with a satin or gloss varnish only on the flowers and stems, leaving the background matte. This creates a beautiful textural contrast.
Step back and admire how the dark negative space transforms simple floral shapes into a dramatic piece of fine art
Single Feather Study in Soft Grays and White Highlights
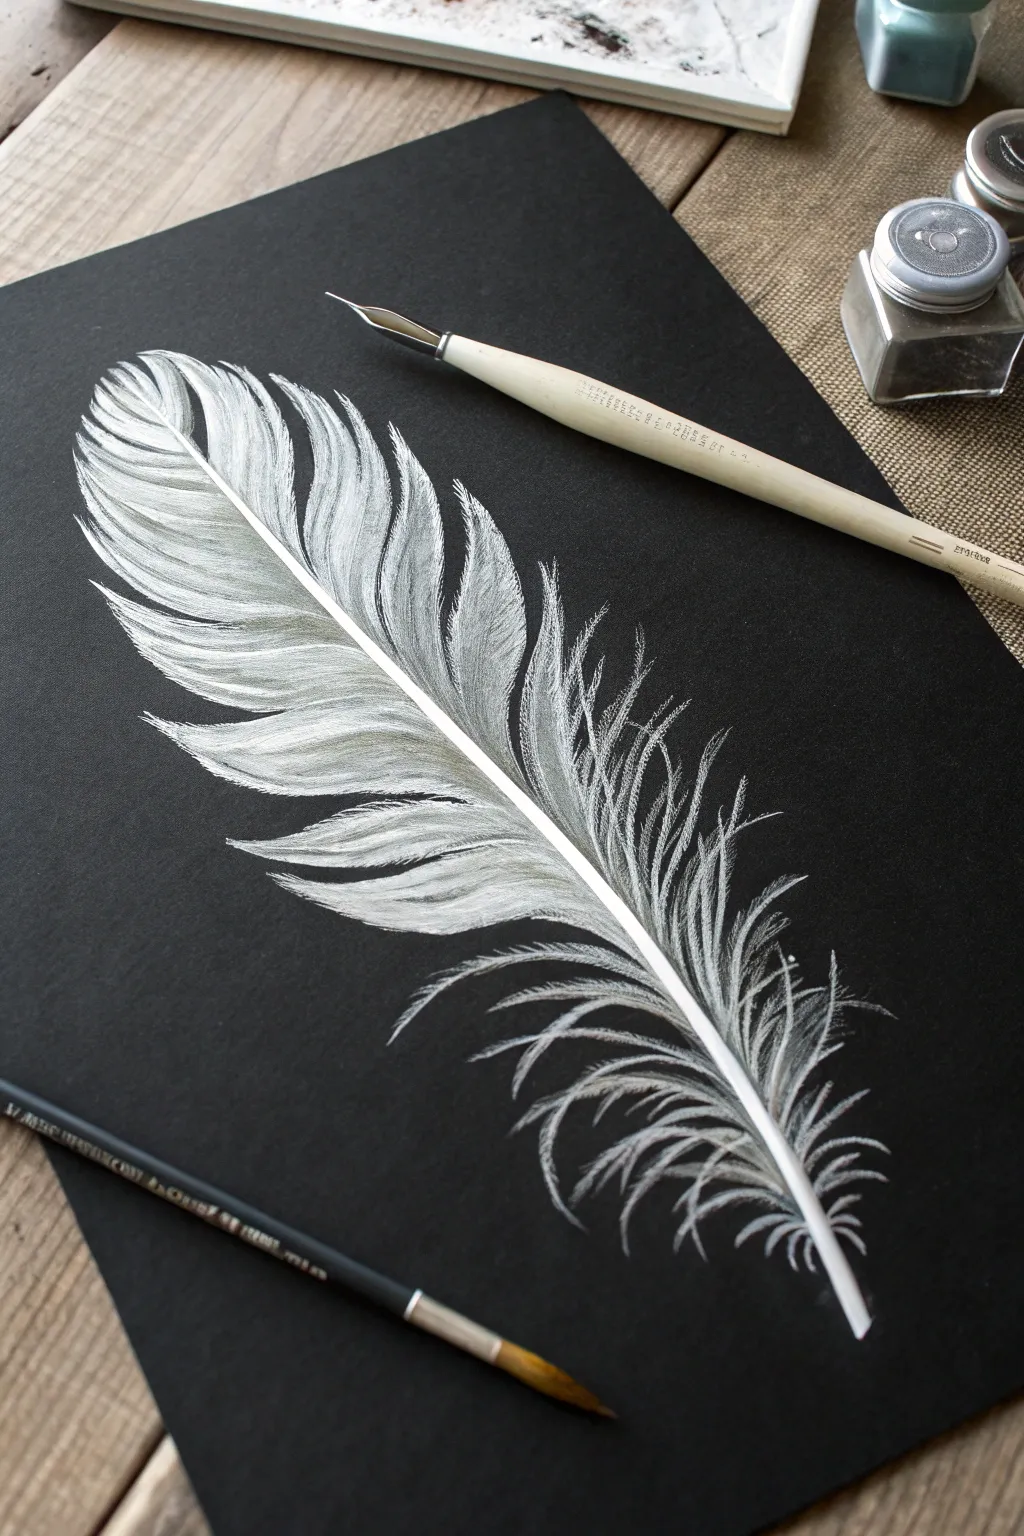

Capture the delicate softness of a single feather against a stark black background using white ink and fine brushwork. this projected creates a stunning high-contrast study that emphasizes texture and light.
Step-by-Step Guide
Materials
- High-quality black cardstock or mixed media paper
- White acrylic ink or opaque white gouache
- Dip pen with a fine nib
- Small round paintbrush (size 0 or 00)
- Pencil for sketching
- Water container and palette
Step 1: Planning and Structure
-
Observe the curve:
Begin by lightly sketching the central shaft (rachis) of the feather with a graphite pencil. Give it a gentle, organic curve rather than a straight line to make it look natural. -
Outline the shape:
Sketch the faint perimeter of the feather’s vane. Don’t make a solid outline; instead, use light, broken dashes to suggest where the feather barbs will end. -
Prepare your ink:
Shake your white acrylic ink well or mix your gouache to a creamy, milk-like consistency. It needs to flow smoothly from a nib but remain opaque on black paper.
Step 2: Inking the Spine
-
Draw the shaft:
Using your dip pen or a very fine detail brush, paint the central shaft. Start thicker at the base (quill) and let it taper incredibly thin towards the tip. -
Establish the light source:
Decide which side of the shaft catches the light. Add a second layer of white specifically to that highlighted edge to make the quill look round and dimensional.
Ink Flow Issues?
If the ink beads up on the black paper, the paper might have a coating. Try lightly wiping the surface with a damp cloth or adding a tiny drop of ox gall to your ink.
Step 3: Building the Vane
-
Initial barb strokes:
Switch to your fine dip pen nib. Start at the bottom of the feather and draw individual lines pulling outward from the center shaft. -
Varying pressure:
Apply more pressure at the shaft and lift the pen quickly as you move outward to create a tapered, wispy end to each barb. -
Create separation:
Notice the natural splits in a feather. Leave distinct triangular gaps between some sections of barbs to simulate these interruptions in the vane. -
Layering for density:
Once the first layer of lines is dry, go back over the ‘thicker’ parts of the feather with new strokes. I like to overlap them slightly to create a brighter white where the feather is denser. -
Softening the edges:
For the upper part of the feather, use very minimal ink. The lines should be whisper-thin and slightly more chaotic to show softness.
Add a Color Pop
Once the white is dry, glaze over it with a transparent watercolor wash (like teal or violet). The white ink will make the color glow against the black.
Step 4: Adding Downy Texture
-
The messy base:
At the very bottom of the quill, create the ‘afterfeather’ or downy section. These lines shouldn’t be parallel; let them curl, crisscross, and float freely. -
Dry brush technique:
Using a nearly dry brush with a tiny amount of white paint, gently drag it over the middle sections of the feather to create a soft, gray haze between the sharp white lines. -
Stray hairs:
Add tiny, stray filaments breaking away from the main shape. These imperfections make the drawing look realistic rather than like a rigid diagram.
Step 5: Final Highlights
-
Brightest whites:
Look at your reference image and identify the brightest points. Use undiluted white ink to touch up the shaft and the central curves of the barbs. -
Clean up:
If any pencil lines are still visible, gently erase them once you are absolutely certain the ink is bone dry.
Frame your feather study in a floating glass frame to enhance the sleek, modern aesthetic
Minimal Line Art Portrait With White Paint on Black
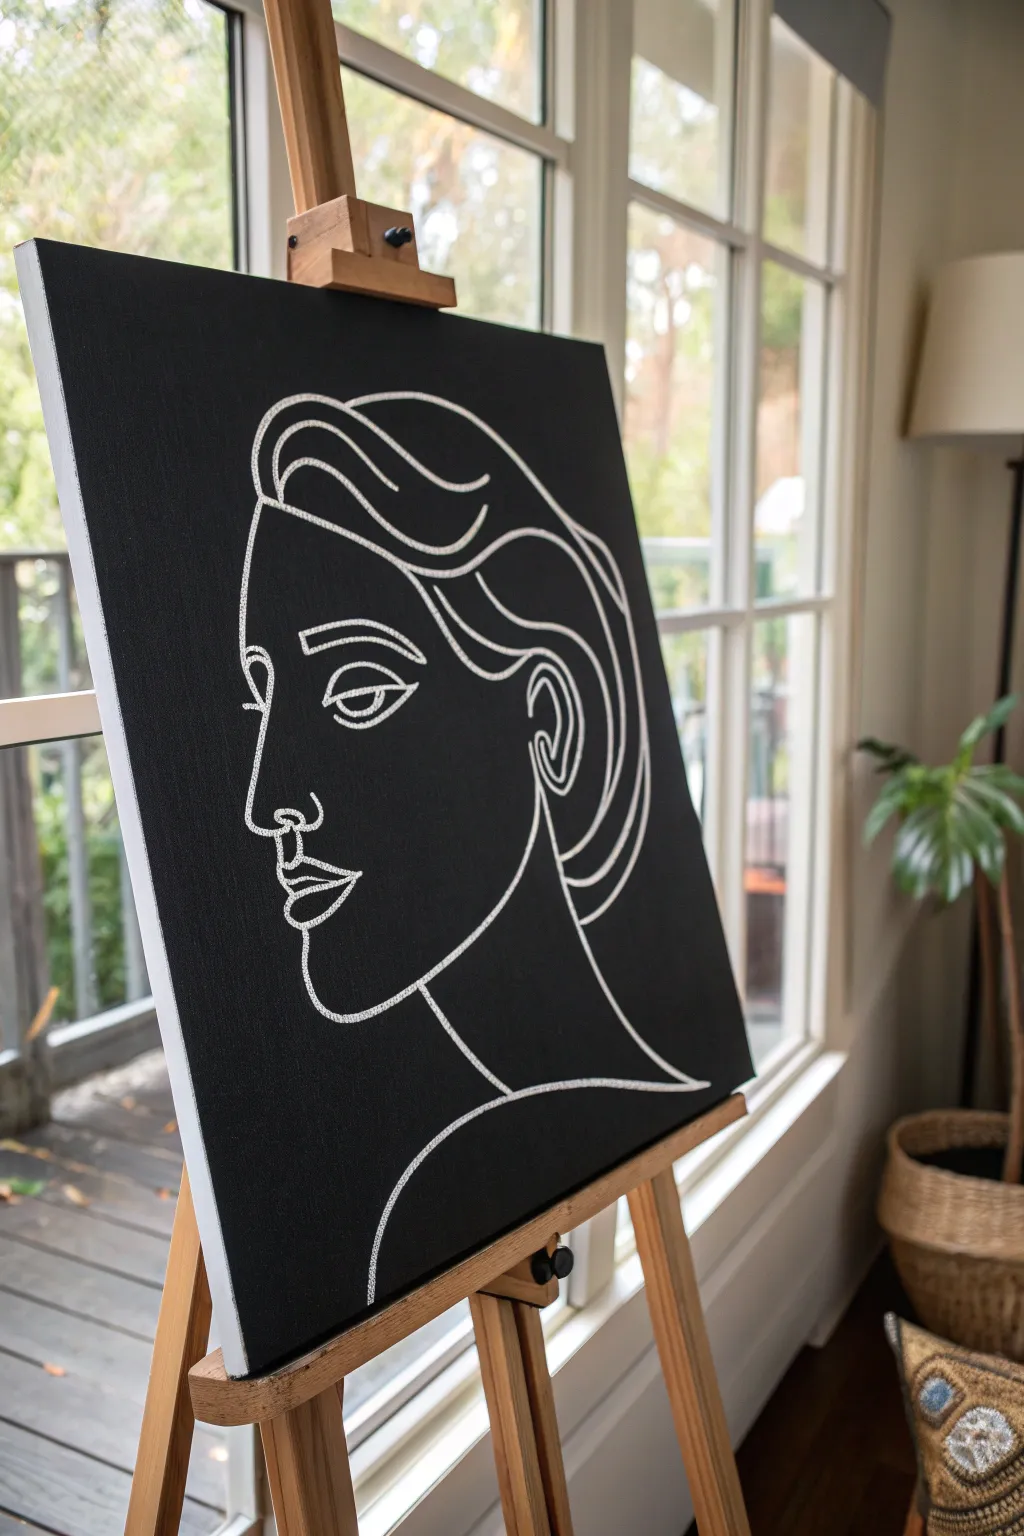
This striking project creates a bold statement piece by reversing the traditional drawing process, using crisp white lines against a deep black background. The result is a modern, minimalist portrait that looks sophisticated but relies on simple, confident strokes.
Step-by-Step Guide
Materials
- Stretched canvas (16×20 inches or larger)
- Black acrylic paint (matte or satin finish)
- Wide flat paintbrush or foam roller
- Chalk or white charcoal pencil
- White acrylic paint (high opacity/heavy body)
- Fine round paintbrush (size 1 or 2) OR white acrylic paint marker
- Sketch paper and pencil
- Paper towels
- Cup of water
Step 1: Preparing the Canvas
-
Base coat application:
Begin by coating your canvas entirely with black acrylic paint. I prefer using a foam roller for this step to eliminate brushstrokes and create a perfectly smooth, matte surface. -
Check for coverage:
Hold the canvas up to the light to check for thin spots. Apply a second coat if necessary to ensure a solid, opaque black background. -
Side attention:
Don’t forget to paint the sides of the canvas black as well, giving the artwork a professional, gallery-wrapped finish without needing a frame. -
Complete drying:
Allow the base coat to dry completely. This is crucial; if the black is even slightly wet, your white lines will turn gray and muddy.
Pro Tip: Fluid Flow
Add ‘flow medium’ to your white acrylic paint instead of water. This improves the paint’s fluidity for long lines without diluting the pigment opacity.
Step 2: Planning the Design
-
Sketching on paper:
Practice your continuous line drawing on scrap paper first. Focus on the profile of a face, simplifying features into flowing curves rather than detailed anatomy. -
Transferring the concept:
Once satisfied with a design, lightly sketch the outline onto the dry black canvas using a piece of chalk or a white charcoal pencil. -
adjusting the composition:
Step back and look at your chalk lines. Since chalk wipes off easily with a damp cloth, take this opportunity to resize or reposition the face until it fills the space perfectly. -
Refining the curves:
Clean up your sketch lines so you have a single, definitive guide to follow. Avoid ‘hairy’ or scratchy sketch lines that might confuse your painting process.
Troubleshooting: Shaky Hands
If you struggle with steady lines, rest your painting hand on a ‘mahl stick’ or a long ruler bridged across the canvas to keep your palm off the wet surface.
Step 3: Painting the Lines
-
Selecting the tool:
Decide between a fine round brush or a paint marker. A paint marker offers easier control for beginners, while a brush provides a more organic, painterly texture. -
Loading the white:
If using a brush, thin your heavy body white paint slightly with a drop of water. It should be the consistency of heavy cream to flow smoothly without breaking. -
Starting the profile:
Begin at the forehead or nose, painting over your chalk lines with a steady hand. Apply consistent pressure to keep the line width uniform. -
Handling the eyes:
Paint the eye details with care, ensuring the lines don’t bleed together. The eye is the focal point, so keep these lines crisp. -
Creating the hair:
Extend the lines for the hair in long, sweeping motions. Don’t worry if your hand wobbles slightly; these imperfections add character to the piece. -
Connecting the neck:
Draw the neck and shoulder line, anchoring the floating head to the bottom of the canvas composition. -
Second pass:
Once the first layer of white is dry, you might notice the black showing through. Go over the lines a second time to achieve that bright, popping white contrast.
Step 4: Finishing Touches
-
Cleaning up sketches:
Wait until the white paint is bone dry. Take a slightly damp cloth or cotton swab and gently wipe away any visible chalk guidelines. -
Touch-ups:
If you accidentally smudged white paint where it shouldn’t be, use a small brush with black paint to ‘erase’ the mistake. -
Sealing (Optional):
For longevity, you can apply a clear matte spray varnish lightly over the entire piece to protect the surface from dust.
Hang your new minimalist masterpiece in a spot with good lighting to let the high contrast really shine
Metallic Paint Constellations and Moon Phases on a Black Sky
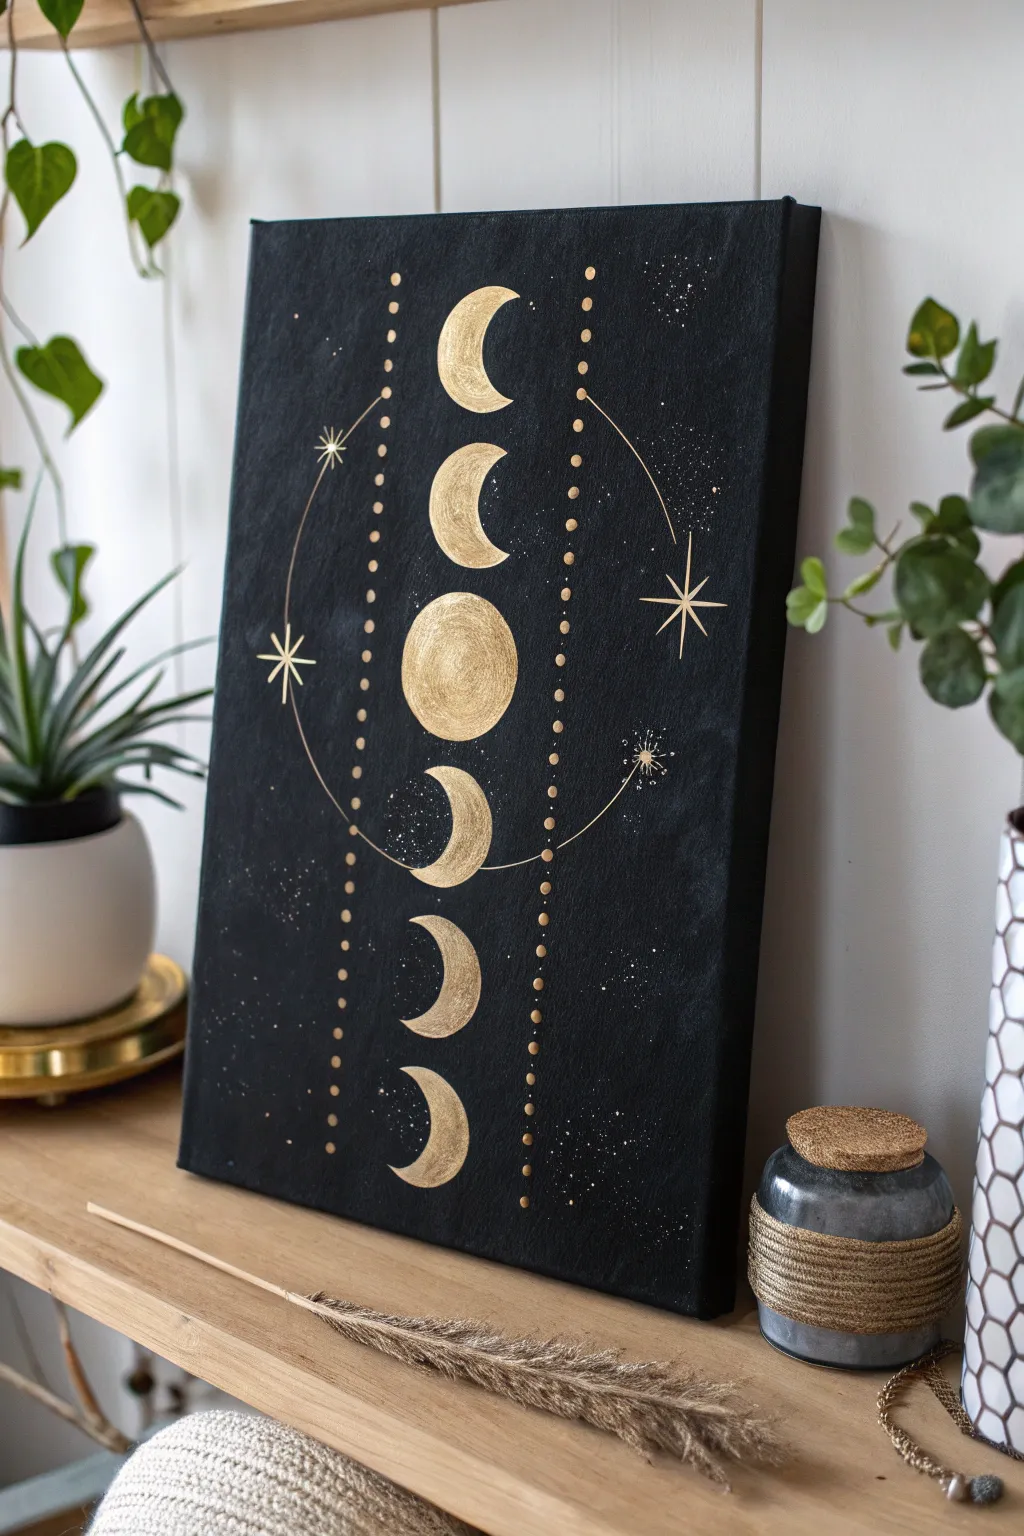
Capture the mystic elegance of the cosmos with this stunning black and gold moon phase painting. The stark contrast between the deep matte black background and the shimmering metallic gold creates a sophisticated focal point for any room.
Detailed Instructions
Materials
- Stretched canvas (rectangular, e.g., 12×16 or 16×20 inches)
- Black acrylic paint (matte finish)
- Metallic gold acrylic paint
- Flat paintbrush (medium size for background)
- Small round brushes (sizes 0, 1, and 2 for details)
- Compass or round objects for tracing circles
- Ruler
- White or yellow chalk/pastel pencil for sketching
- Palette or small dish
- Jar of water and paper towels
Step 1: Setting the Night Sky
-
Prepare the canvas:
Start by wiping down your canvas to ensure it is free of dust. Place it on a protected work surface. -
Apply the base coat:
Using your medium flat brush, apply a generous layer of matte black acrylic paint across the entire face of the canvas. Ensure you cover the white texture completely. -
Paint the edges:
Don’t forget to paint the sides of the canvas black for a professional, gallery-wrapped look. -
Check for coverage and dry:
Let the first coat dry completely. If you can still see the white canvas texture or streaks, apply a second coat of black to achieve a deep, opaque void.
Step 2: Drafting the Celestial Map
-
Find the center:
Use a ruler to lightly mark a vertical line down the exact center of the canvas with your chalk or pastel pencil. This will keep your moons aligned. -
Outline the central full moon:
Using a compass or a small round object (like a jar lid), trace a circle in the very center of your vertical guide line. -
Sketch the moon phases:
Above and below the central circle, sketch equal-sized crescents and gibbous shapes. You should fit about three distinct phases above and three below the center moon. -
Add the orbital ring:
Using a large compass or by tracing a large dinner plate, lightly draw a thin, large circle centered on the full moon that intersects with the surrounding empty space. -
Mark vertical dot guides:
Use your ruler to mark two straight vertical lines on either side of the moon phases where you will eventually paint the decorative dots.
Uneven Circles?
If freehanding moon curves is hard, cut a circle from cardstock. Use it as a stencil, sliding it slightly left or right to trace perfect crescent slivers.
Step 3: Gilding the Moons
-
Fill the full moon:
Dip a small round brush into the metallic gold paint. Fill in the central circle, using a slightly textured, dabbing motion to mimic the cratered surface of the moon. -
Paint the crescents:
Carefully paint the crescent shapes above and below. Keep your edges sharp. For the waning and waxing shapes, I like to feather the inner curve slightly to suggest shadow. -
Create texture:
Add a second layer of gold to parts of the moons once the first is dry. Vary the thickness to catch the light differently, enhancing the 3D effect.
Pro Tip: Glowing Effect
Mix a tiny drop of gold into a lot of glaze medium. Paint a sheer halo around the central moon to make it look like it’s glowing against the darkness.
Step 4: Adding Stars and Details
-
Paint the decorative dots:
Along your vertical guidelines, paint a series of small gold dots. Try to keep the spacing consistent, but vary the size slightly between small and medium. -
Line the orbital ring:
Using your finest brush (size 0) and very thinned gold paint, carefully trace over the large circle guide. A steady hand is key here; break the line occasionally if needed for style. -
Create the large stars:
Paint a few prominent four-pointed stars (the ‘north star’ shape) on the orbital ring on the left and right sides. Start with a cross, then curve the inner corners inward. -
Splatter the galaxy:
Dilute a small amount of gold paint with water. Load an old brush or toothbrush, and gently flick the bristles to spray fine mist—or ‘stars’—across the background. -
Hand-paint tiny stars:
To fill empty voids, manually dot tiny pin-prick stars with the tip of your smallest brush, clustering them slightly for a natural look. -
Clean up guidelines:
Once the gold paint is 100% dry, gently wipe away any visible chalk or pencil marks with a damp cloth or cotton swab.
Hang your piece in a spot that catches natural daylight to see the metallic elements truly shine
Dot Mandala in Bright or Black-and-Gold Patterns
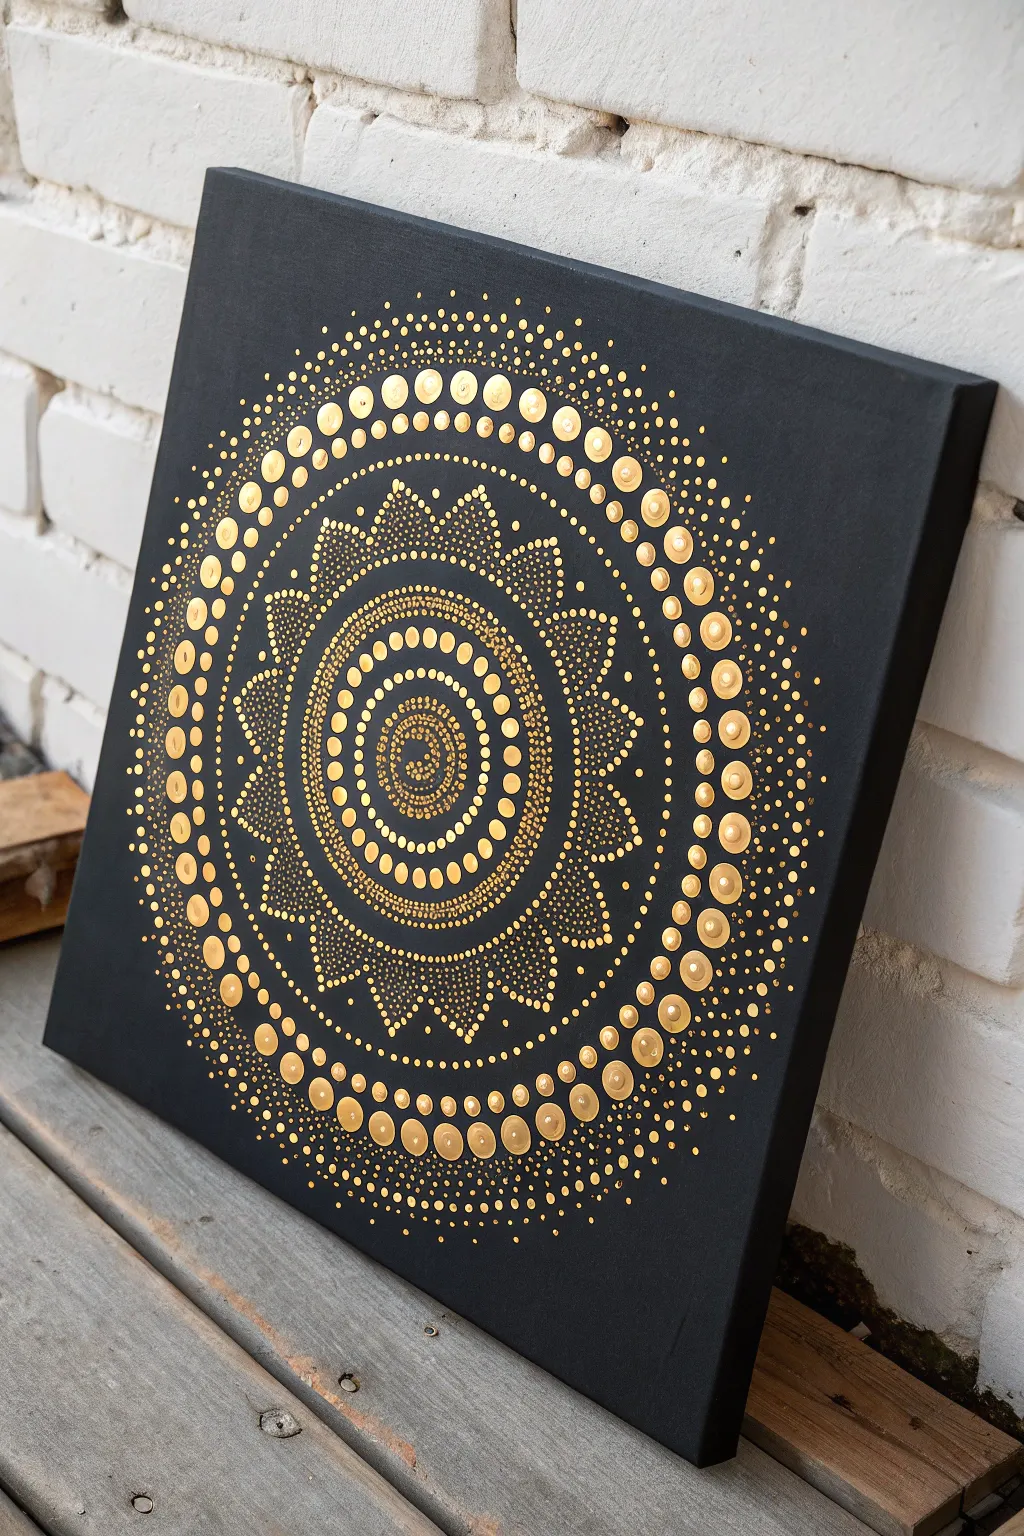
Contrast is everything in this elegant project, where shimmering gold acrylic pops against a deep matte black background. This mandala uses varying dot sizes to create a mesmerizing, radiating pattern that looks far more complex than it actually is.
Step-by-Step
Materials
- Square stretched canvas (approx. 12×12 or 16×16 inches)
- Black acrylic paint (matte finish recommended)
- Metallic gold acrylic paint (high opacity)
- Flat paintbrush (for the background)
- Dotting tools (set of various sizes usually ranging from 1mm to 10mm)
- White chalk pencil or compass
- Ruler
- Palette or small plate
- Damp cloth or paper towels
Step 1: Setting the Stage
-
Prepare the canvas:
Begin by painting your entire canvas with the black matte acrylic paint. Don’t forget to paint the edges for a finished look. You may need two coats to ensure a solid, opaque black coverage without any white showing through. -
Let it cure:
Allow the black base coat to dry completely. This is crucial—if the base is even slightly tacky, your gold dots might sink or mix with the black. -
Find the center:
Using a ruler, lightly mark an ‘X’ from corner to corner with a white chalk pencil to find the exact center of the canvas. -
Draft the grid:
Use a compass to draw several faint concentric circles radiating from your center point. These guidelines will help keep your pattern symmetrical as you work outward, but don’t worry about measuring perfectly; they are just visual aids.
Paint Consistency Pro-Tip
For perfectly round dots that don’t leave ‘peaks,’ mix a tiny drop of pouring medium or water into your gold acrylic. The consistency should resemble runny yogurt.
Step 2: The Central Core
-
The first dot:
Dip your largest dotting tool into the gold paint. I like to load the tool generously so the paint forms a nice dome. Place one large dot directly on your center mark. -
First ring:
Switch to a much smaller tool. Dot a tight ring of small gold dots immediately surrounding the central large dot, keeping them evenly spaced. -
Creating the spiral illusion:
Move outward slightly. Using a medium-small tool, create a dense circle of dots. To mimic the texture in the photo, create 2-3 concentric rings very close together here, varying the dot size slightly to build visual density. -
Defining the inner border:
Create a distinct ring using medium-sized dots. Leave a tiny bit of negative space between this ring and the dense center cluster to help define the sections.
Step 3: Building the Petals
-
Set the anchor points:
Using a larger tool, place 8 to 12 evenly spaced dots around your current perimeter. Imagine these as the ‘tips’ of a star or flower shape. -
Connect the peaks:
Using a very fine dotting tool (or a toothpick), walk the dots down from these ‘anchor’ dots back toward the center ring. This creates triangular ‘petal’ shapes composed of tiny dots. -
Filling the valleys:
In the V-shapes between these petals, add a small cluster of medium dots to fill the negative space without overcrowding the design. -
Second petal layer:
Repeat the petal process on a larger scale. Place new anchor dots further out (aligned between the previous petals) and walk tiny dots down the sides to create a second, larger starburst layer.
Oops, a smudge!
Did a dot smear? Don’t wipe it while wet! Let it dry completely, then paint over the mistake with your black base color. It works like an eraser.
Step 4: The Outer Radiance
-
Large outer ring:
Switch to your largest available dotting tool again. Place a ring of bold, heavy gold dots around the entire design. While looking at the example, notice how these largest dots anchor the visual weight of the piece. -
Top-dotting technique:
Once those large dots are partially dry, you can employ a ‘top dot’ technique if you want extra dimension. Place a smaller, lighter gold (or mixed with white) dot on top of the large dry ones. The reference image uses solid gold, but this adds a nice highlight. -
The expansive aura:
Surround the large ring with thousands of tiny, fine dots. This ‘stardust’ effect softens the hard edge of the mandala. Use your smallest tool and stipple quickly and lightly. -
Clean up:
Once the paint is 100% dry (give it overnight), use a damp cotton swab or cloth to gently wipe away the white chalk guidelines.
Hang your new masterpiece in a well-lit spot to watch the gold shimmer change throughout the day
Abstract Color Orbs Smudged Into a Black Background
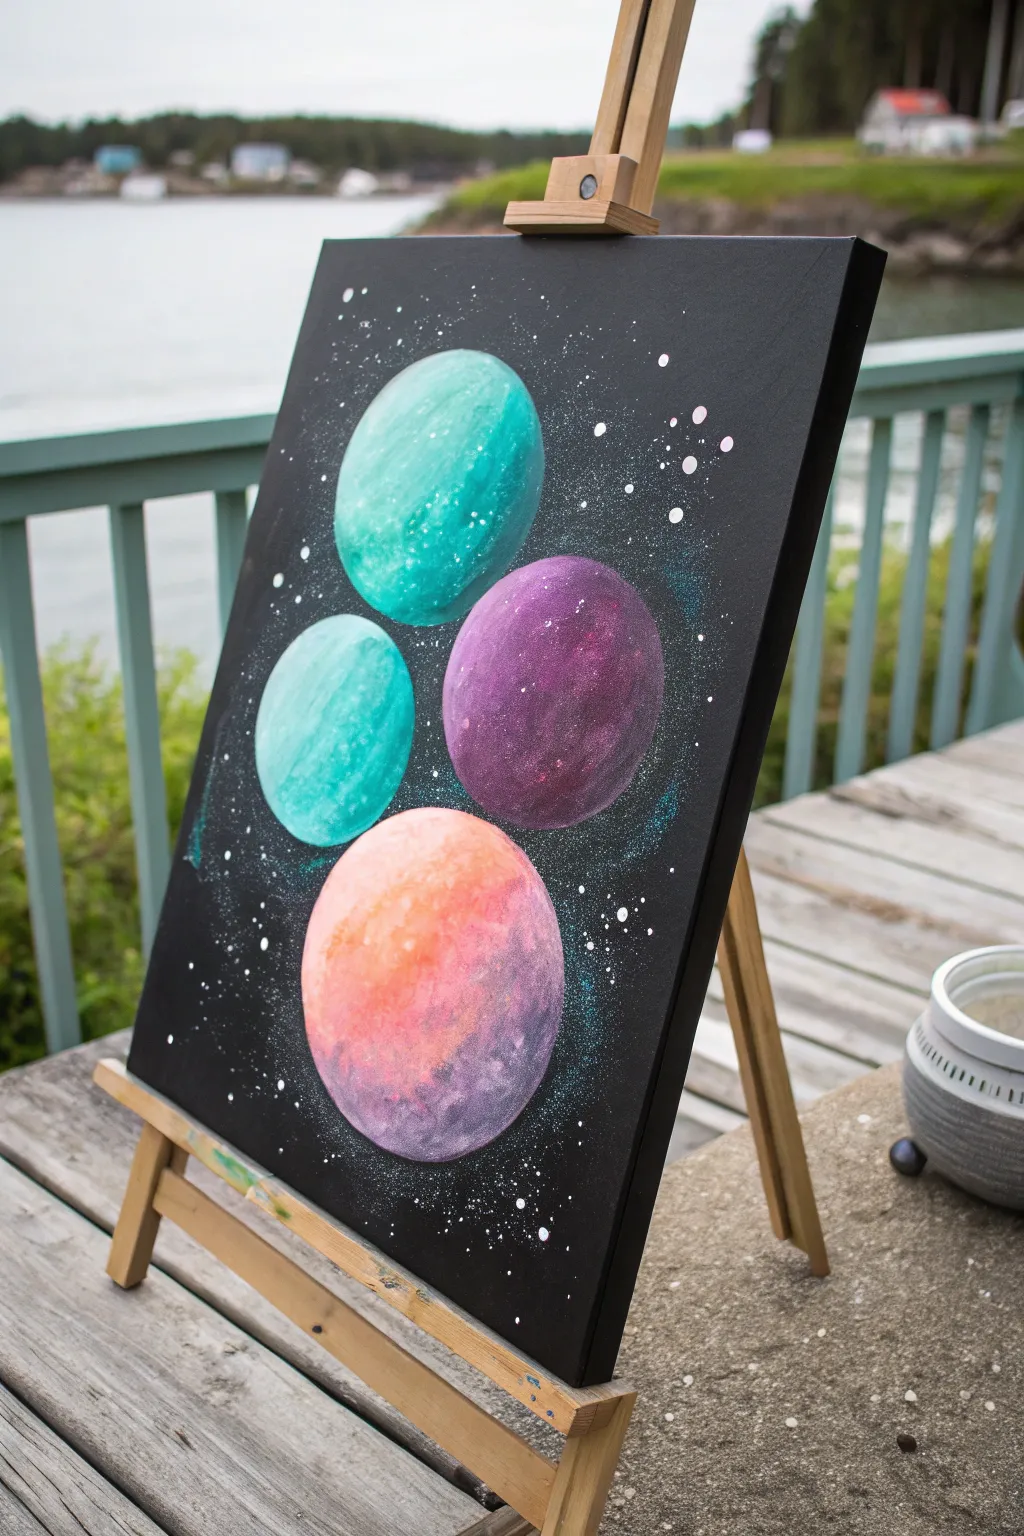
Transport your viewer to deep space with these vibrant, textured planetary orbs floating against a stark black void. This acrylic painting balances soft, blended gradients with crisp splatter stars for a striking celestial effect.
Step-by-Step Tutorial
Materials
- Stretched canvas (16×20 inches or similar)
- Black acrylic paint (matte base)
- Titanium white acrylic paint
- Teal/Turquoise acrylic paint
- Purple/Violet acrylic paint
- Magenta acrylic paint
- Orange acrylic paint
- Circular stencils (e.g., bowls, lids, or compass)
- White colored pencil or chalk
- Large flat brush or foam brush
- Medium filbert brush
- Detail round brush
- Old toothbrush (for stars)
- Spray bottle with water (optional)
- Kitchen sponge or sea sponge
Step 1: Setting the Void
-
Prime the Surface:
Begin by covering your entire canvas with a solid coat of black acrylic paint. Use a large flat brush or a foam brush to ensure smooth, even coverage. -
Double Check Opacity:
Once the first coat is touch-dry, inspect it for any white canvas showing through. Apply a second coat if necessary to achieve a deep, opaque void. -
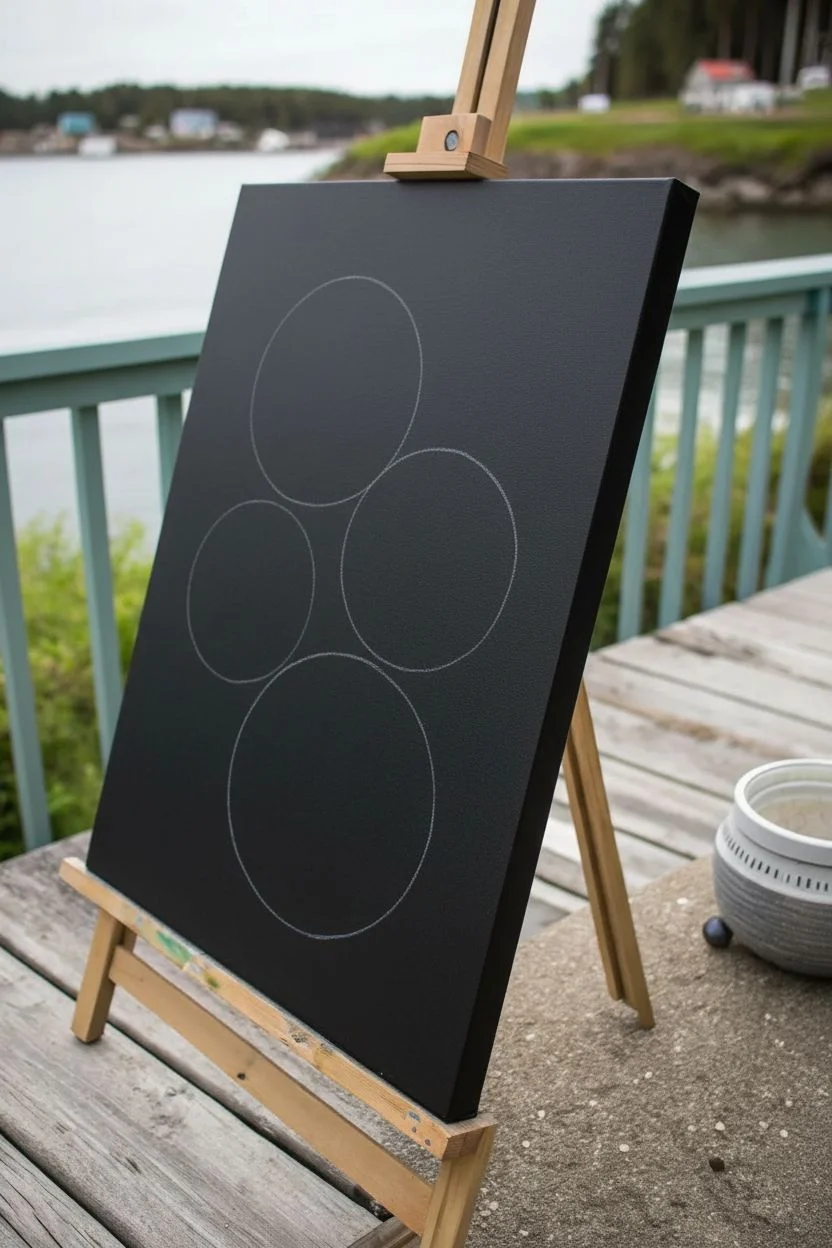
Plan the Composition:
Once the black background is fully completely dry, arrange your circular objects (bowls or lids) on the canvas to find a balanced layout. The reference image uses three large circles and one smaller one in a loose cluster. -
Trace the Outlines:
Lightly trace around your chosen circles using a white colored pencil or chalk. Keep the lines faint so they are easy to cover later.
Step 2: Painting the Planets
-
Base Coat the Teal Planet:
Start with the top-most planet. Mix teal with a touch of white and paint the entire circle. Don’t worry about shading yet; just get the color down. -
Add Dimension to Teal:
While the paint is still wet, blend pure teal on the shadowed side (bottom right) and a lighter teal-white mix on the light side (top left). Use a sponge to dab the paint for a cratered texture. -
Create the Second Blue Orb:
Moving to the smaller circle on the left, repeat the process using a slightly lighter turquoise mix. Keep the light source consistent, highlighting the top-left curve. -
Base Coat the Purple Planet:
For the middle-right planet, apply a base of deep purple. I find mixing a tiny bit of black into the shadow side immediately gives it weight. -
Highlight the Purple:
Mix magenta and white into your purple. Use your sponge or a dry filbert brush to stipple this lighter color onto the top-left area, blending it softly into the dark purple base. -
Paint the Orange-Pink Planet:
For the bottom planet, start with a gradient. Paint the top half with a mix of orange and pink, and the bottom half with a mix of pink and purple. -
Blend the Warm Planet:
Use a clean, slightly damp brush to blur the line where the orange and purple sections meet on the bottom planet, creating a sunset-like transition. -
Refine Edges:
Use a small round brush with black paint to clean up the outer edges of your circles if you painted outside the lines.
Sponge Tactics
Use a natural sea sponge rather than a synthetic kitchen sponge. The irregular holes create much more realistic craters and planetary textures.
Step 3: Atmosphere and Stars
-
Add Atmospheric Glow:
Create a ‘dry brush’ effect by wiping most of the paint off a brush. Lightly scuff a bit of teal or purple dust around the immediate outside of the matching planets to simulate a glowing atmosphere. -
Prepare the Splatter:
Dilute a small amount of white paint with water until it reaches an ink-like consistency. It needs to be fluid enough to fly off bristles easily. -
Create Distant Stars:
Dip an old toothbrush into this watery white paint. Hold it over the canvas and run your thumb across the bristles to spray fine mist—or ‘distant stars’—across the black background. -
Masking Planets:
Be careful not to splatter too much white over your colorful planets. You can loosely cover them with paper towels or your original tracing bowls while splattering. -
Add Major Stars:
Use a fine detail brush or the end of a paintbrush handle dipped in pure white paint to dot larger, brighter stars mainly around the cluster of planets. -
Final Highlights:
Add tiny, crisp white highlights to the brightest part of each planet (top left) to make them look shiny and three-dimensional.
Level Up: Galactic Rings
Use the edge of a flat card or palette knife with white paint to swipe a thin, straight line across one planet, creating a Saturn-like ring system.
Step back and admire your personal galaxy as the vibrant colors pop against the darkness
Experimental Pull Techniques on a Black Canvas (String or Drag Marks)
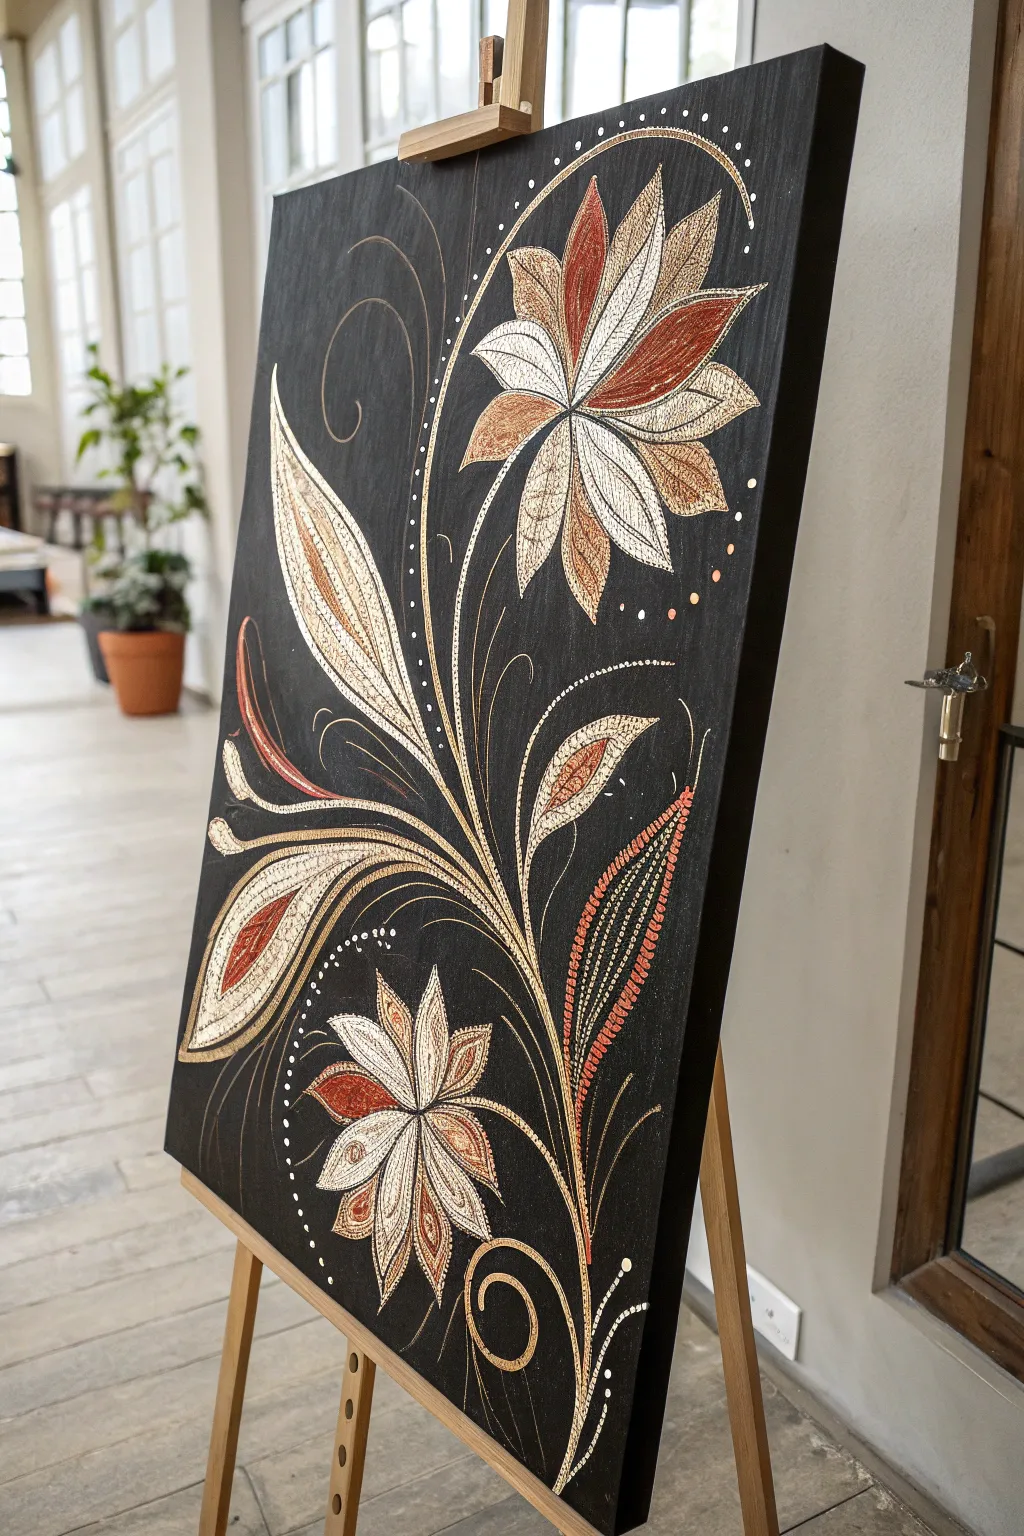

This striking artwork uses the contrast of a deep black canvas to make metallic and earthy tones pop in an intricate floral design. By combining traditional brushwork with drag or string-pull techniques, you can achieve delicate, vein-like textures that give the petals and leaves a unique, organic movement.
Step-by-Step
Materials
- Large rectangular canvas (around 24×36 inches)
- Black gesso or high-quality black acrylic paint
- Wide flat brush for the background
- Cotton crochet string or thin yarn (various lengths)
- Acrylic paints: Metallic gold, copper, rust red, cream, and white
- Shallow disposable plates or trays for paint dipping
- Fine liner brush (size 0 or 00) for detailing
- White or metallic paint marker (fine tip)
- Tweezers (optional, for handling messy string)
- Clear varnish (gloss or satin)
Step 1: Preparing the Contrasting Base
-
Prime the Surface:
Begin by coating your entire canvas with black gesso. Even if the canvas came pre-primed black, a fresh coat ensures a deep, matte, velvety finish that will make the metallic paints shine. -
Check for Coverage:
Inspect the canvas under bright light to ensure no white specks remain. Apply a second coat if necessary and let it dry completely, ideally overnight, to prevent new paint from muddying the background. -
Plan the Composition:
Using a white chalk pencil or a very faint touch of white charcoal, sketch the main curved stem line flowing from the bottom right to the top left. Mark lightly where three main flower heads and larger leaves will sit.
Step 2: Creating the String-Pulled Petals
-
Prepare Your Strings:
Cut several pieces of cotton string. You’ll need shorter pieces (about 6-8 inches) for the flower petals and longer pieces (10-12 inches) for the large sweeping leaves. -
Mix Your Palette:
pour puddles of your metallic gold, copper, rust, and cream paints onto separate shallow plates. You want the paint to be fluid but not watery—add a drop of pouring medium if it feels too thick. -
Load the String:
Take a short string and submerge intricate sections of it into the cream paint, followed by a quick dip in the gold. I like to leave the last two inches clean to use as a handle. -
Position the Petal:
Lay the paint-soaked string onto the canvas in a loop shape where a single petal belongs. The loop should mimic the outline of the petal. -
The Pull Technique:
Gently but swiftly pull the string down towards the geometric center of the flower. As you pull, the string will drag the paint, creating the beautiful, veined texture seen in the reference. -
Finish the First Flower:
Repeat this process for each petal on the top flower, alternating paint colors between cream/gold mixes and rust/copper mixes to create depth and variety. -
Create the Lower Flowers:
Move to the bottom two floral clusters. Use the same loop-and-pull method, but perhaps use slightly more copper and rust tones here to visually ground the bottom of the composition.
Muddy Colors?
If your petal colors are turning grey or brown, wipe the string completely clean between every single pull. Using fresh string for different color families (warm vs. cool) also prevents muddying.
Step 3: Structure and Embellishment
-
Paint the Main Stem:
Load a fine liner brush with gold paint. Trace your initial chalk line to create the main sweeping stem that connects all your floral elements. Vary the pressure to make the line thick and thin. -
Add Large Leaves:
For the large, sweeping leaves on the left, use the longer strings. Lay them in an elongated curve shape and pull downwards and inwards toward the stem to create that long, feathery texture. -
Refine Petal Edges:
Once the string pulls are dry, use your fine liner brush and cream paint to delicately outline the edges of the petals. This defines the shapes against the black background where the drag marks might have faded. -
Fill in Gaps:
If some petals look too sparse, you don’t need to re-string. Simply use a dry brush with a tiny bit of metallic paint to manually add streaks that mimic the string-pull look.
Level Up: 3D Texture
Mix a texture paste or modeling gel into your white base paint before dipping the string. The pulled designs will dry raised, adding a touchable, relief sculpture element to the canvas.
Step 4: Detailing and Dots
-
Add Decorative Swirls:
Using a gold or white pen (or your liner brush), add freehand swirls extending from the main stem into the empty black space. These should be thin and graceful, like tendrils. -
Dot Work:
Dip the non-brush end of a paintbrush handle into white paint. Dot gently along the curves of the swirls and the main stem. Vary the size of the dots by re-dipping frequently for large dots, or dotting multiple times for fading trails. -
Create the Fern Detail:
On the right side of the main stem, paint a small fern-like frond using short, repetitive dashes of rust and copper paint. -
Highlighting:
Add tiny flecks of pure white to the tips of the petals and leaves. This simulates light catching the texture and brings the flowers forward. -
Final Varnish:
Allow the painting to cure for at least 24 hours. Gently wipe away any remaining chalk marks with a damp cloth, then seal the work with a gloss varnish to protect the delicate paint ridges.
Hang your stunning black floral canvas in a well-lit area to let those metallic accents truly shimmer.


Have a question or want to share your own experience? I'd love to hear from you in the comments below!